HOLIDAY DONATION DRIVE - SUPPORT MSW - DO YOUR PART TO KEEP THIS GREAT FORUM GOING! (Only 24 donations so far out of 49,000 members - C'mon guys!)
×


Paul Le Wol
-
Posts
1,018 -
Joined
-
Last visited
Content Type
Profiles
Forums
Gallery
Events
Everything posted by Paul Le Wol
-
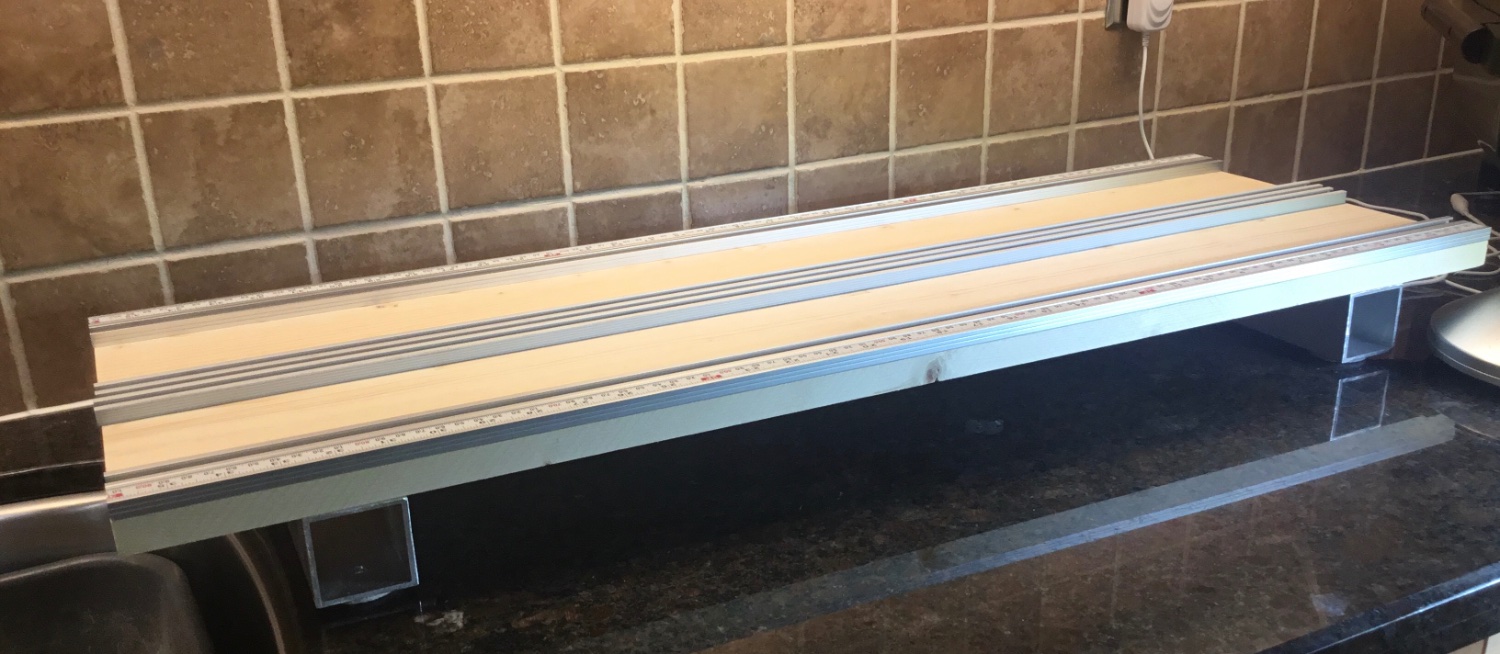
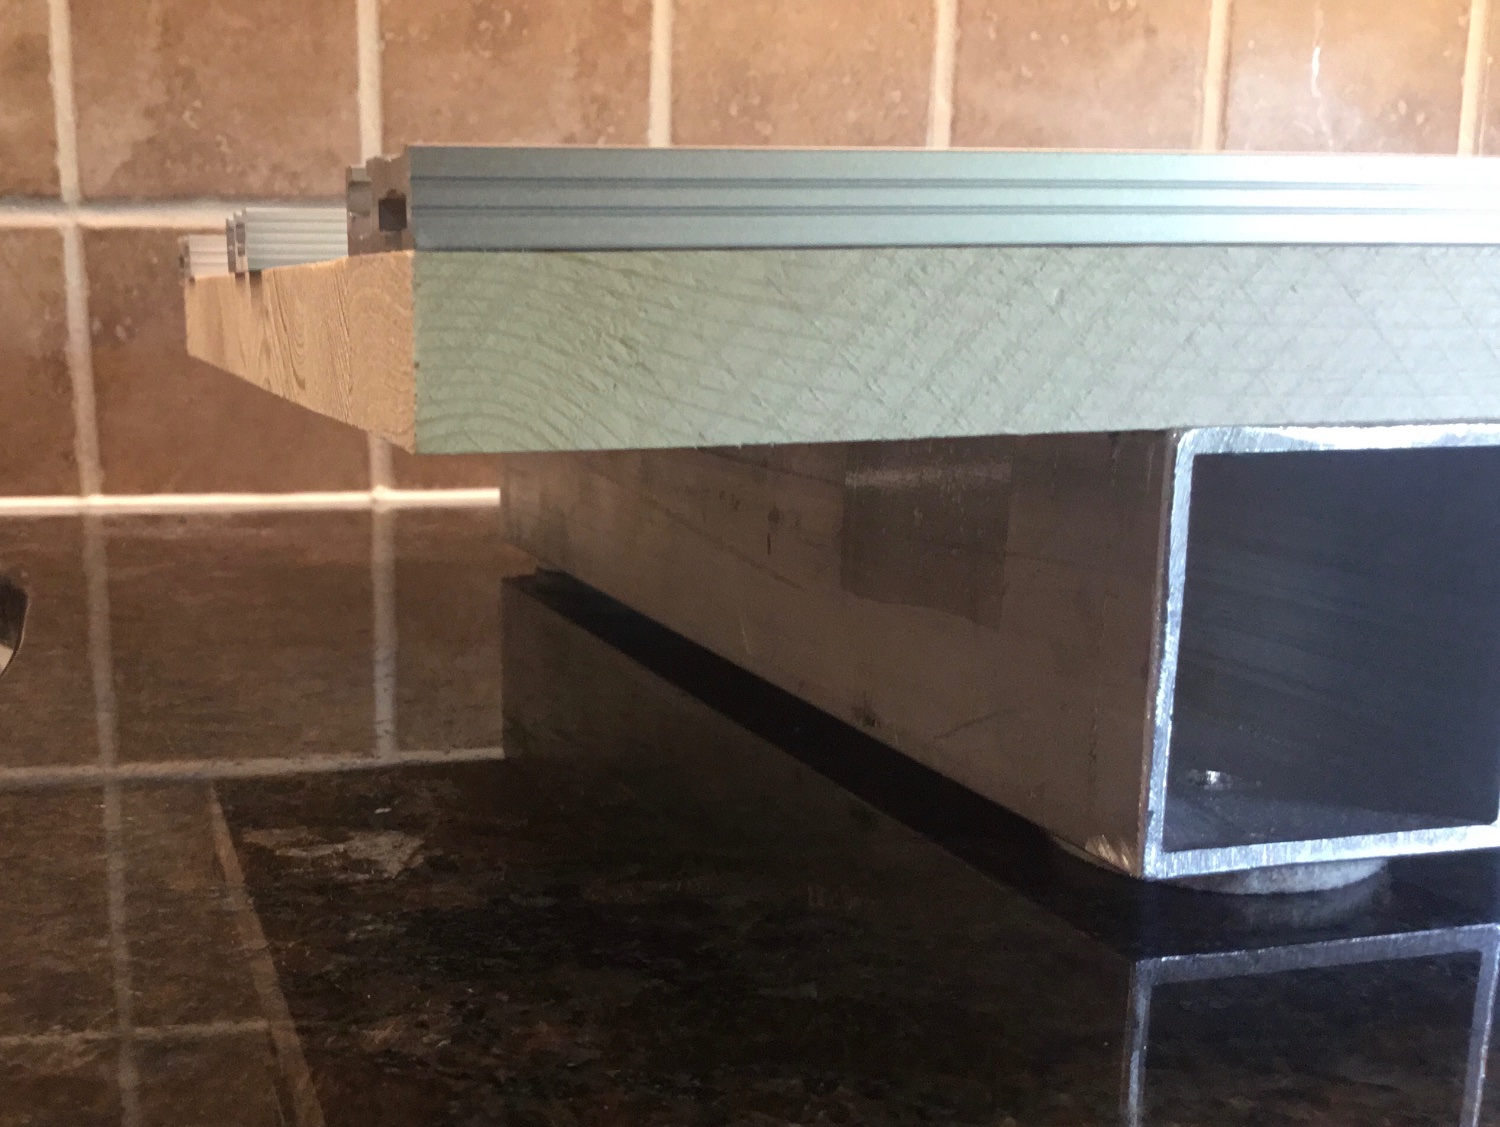
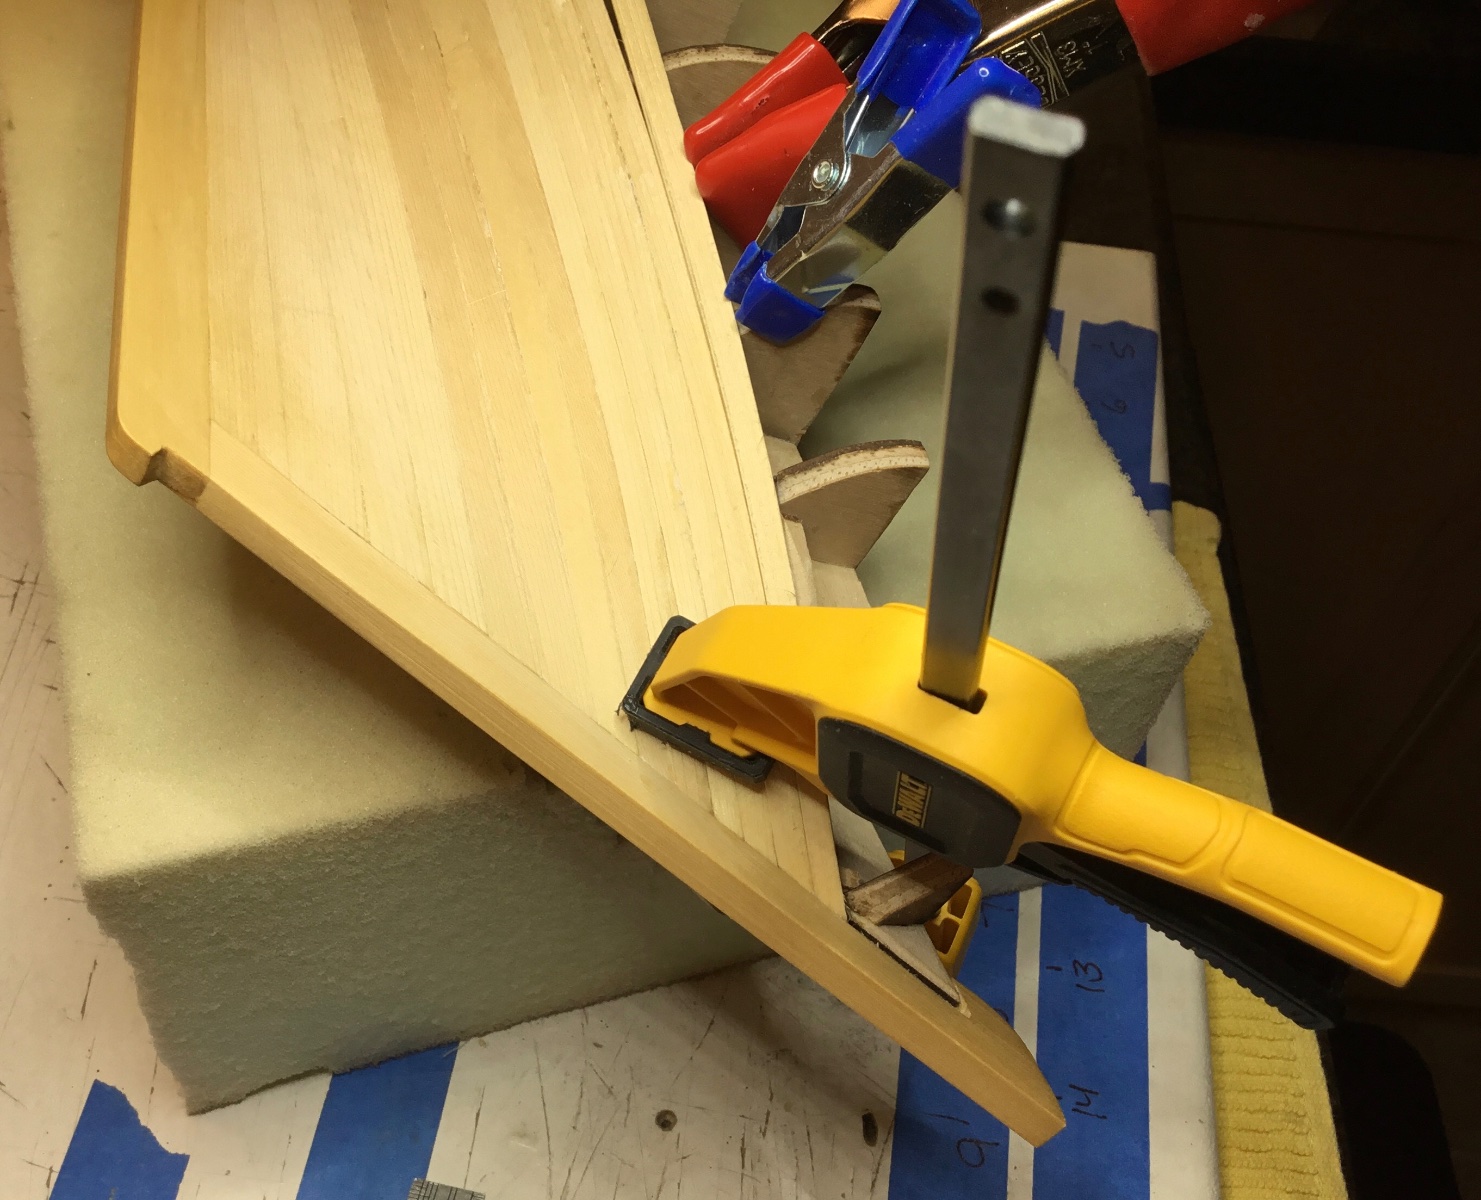
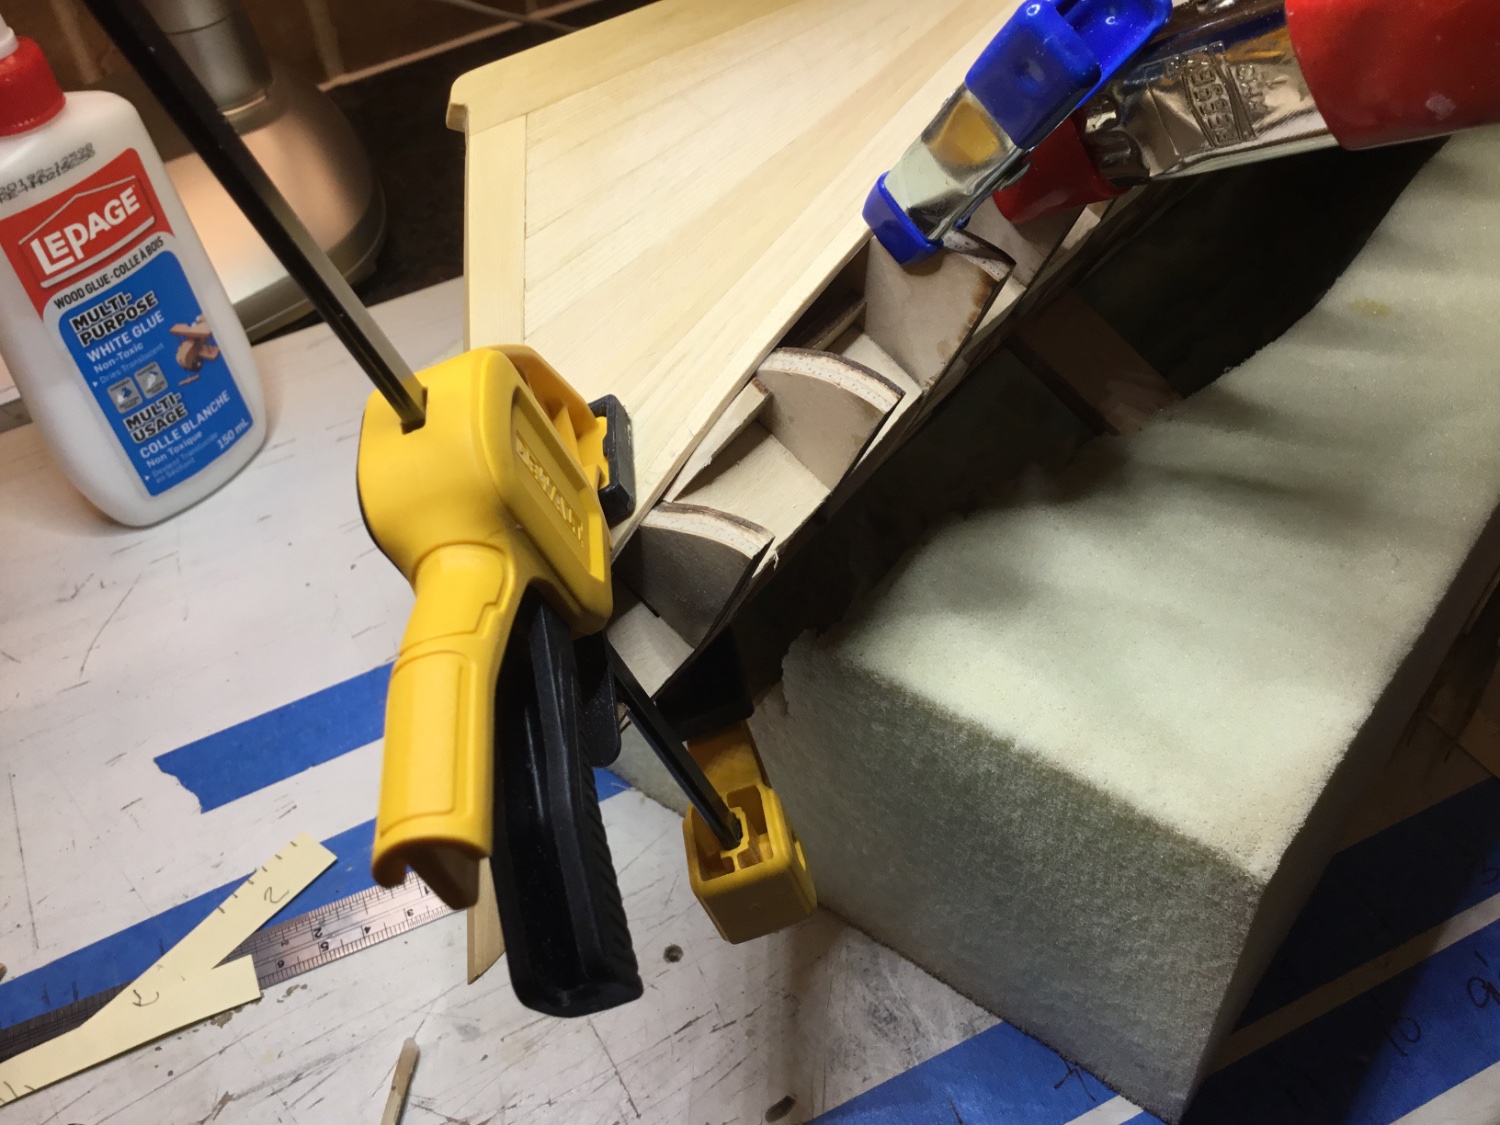
Hey Chris, you could buy a 4’ x 4’ sheet of half inch ply, cut it into 16” x 48” pieces and glue the pieces together so that the wows cancel each other out. I’ve had pretty good luck with that in the past. Last year I picked up what Home Depot calls a project panel. They are made of 3/4 inch 1” x 2” pieces glued together. I bought one that is 12” x 36” and it is still straight. Here’s a few pictures of it


-
Hi newbee, I am following with great interest the mods that you are making to your Golden Hind. Regarding the issues you are having with text and images, the only suggestion I have is that you make sure your cursor is positioned where you want to insert the text or image. I’ve had success by ensuring that after entering text or inserting an image I hit enter a couple of times to move the cursor down to the position where I want the next set of text or image to be placed. That way you don’t end up with text beside the image or somewhere else that you don’t want it. Moving the cursor down a couple of places will also give you a space between the images which makes them easier to differentiate from one another. Hope that’s of some help
-
Hi hamilton, thank you so much. I’ve seen a couple of pinky builds online where they stray from the plans and although the Glad Tidings hull doesn’t really look like any of the work boats in Chapelle’s book, I think it can still be passed off as a fishing boat 🙂
-
Thank you SkiBee, I appreciate your comment very much.
-
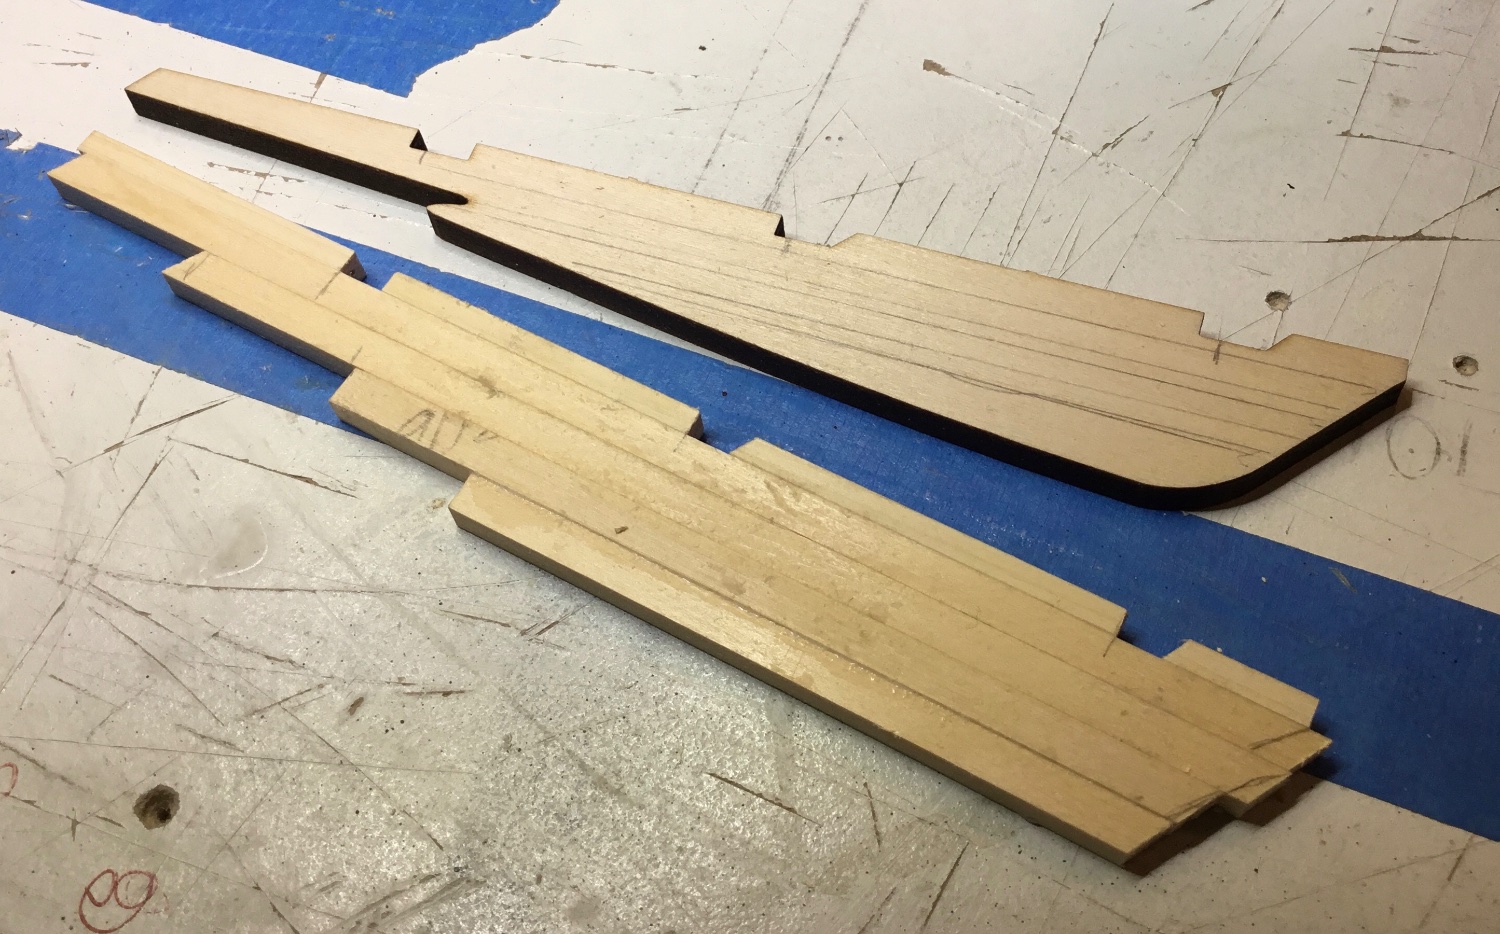
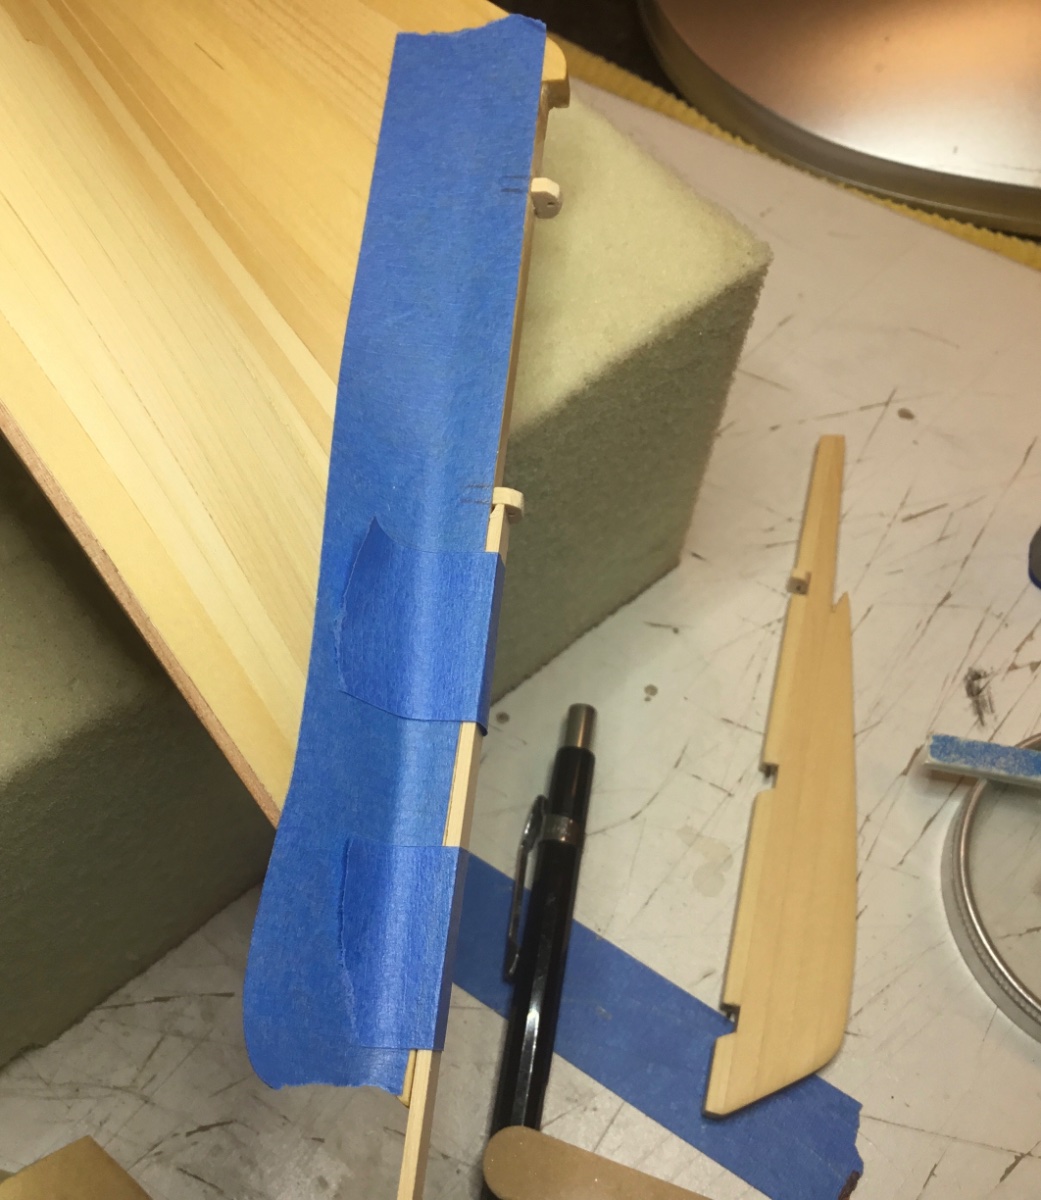
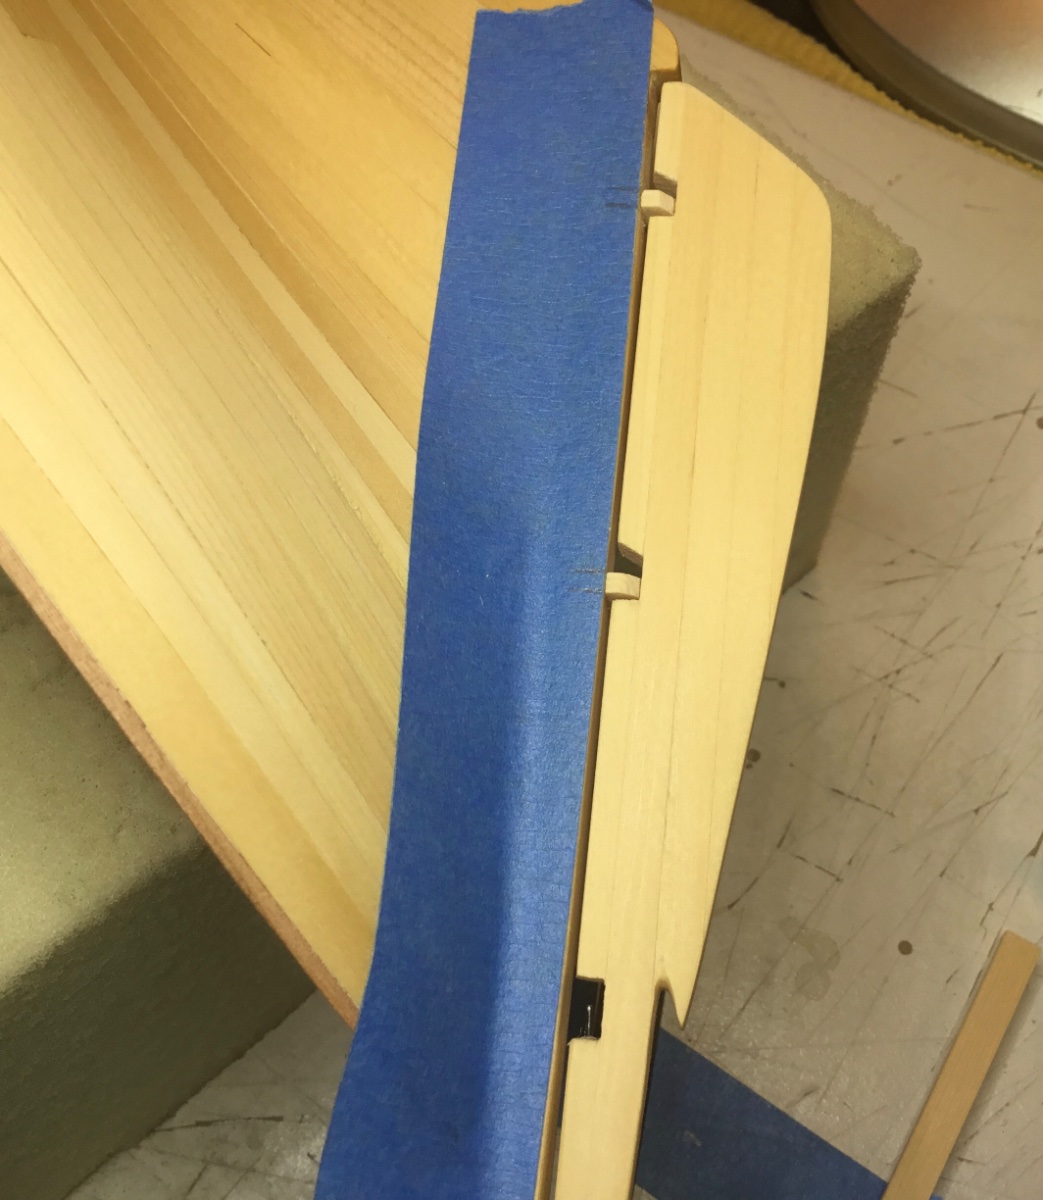
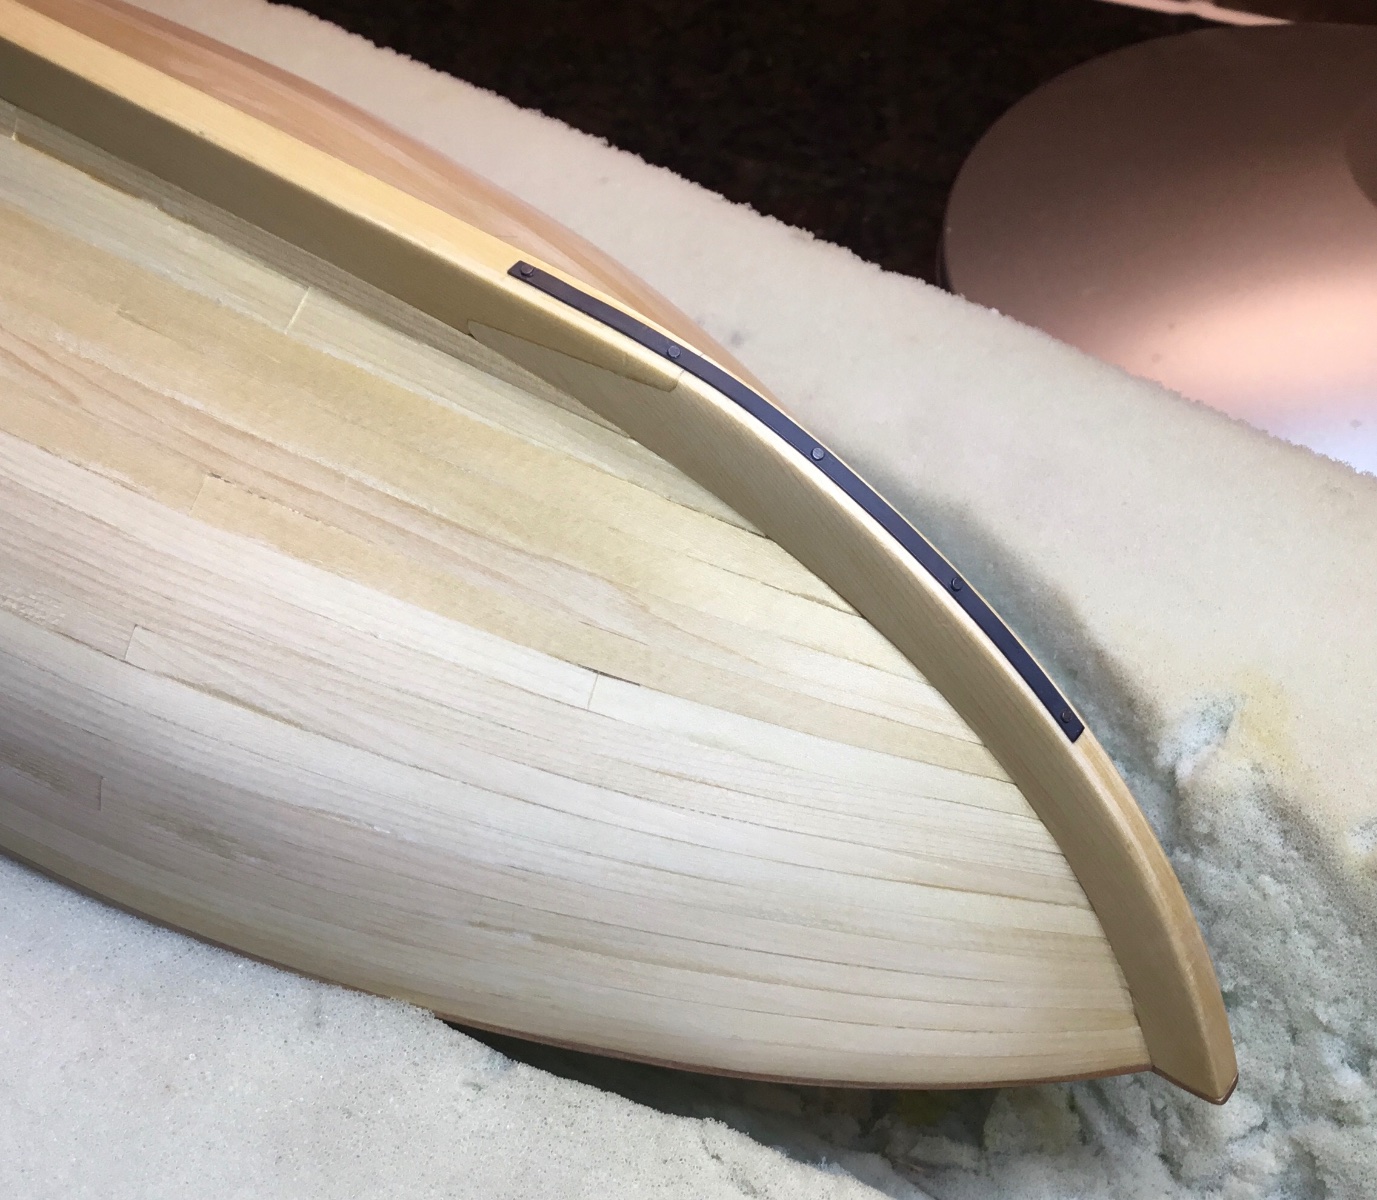
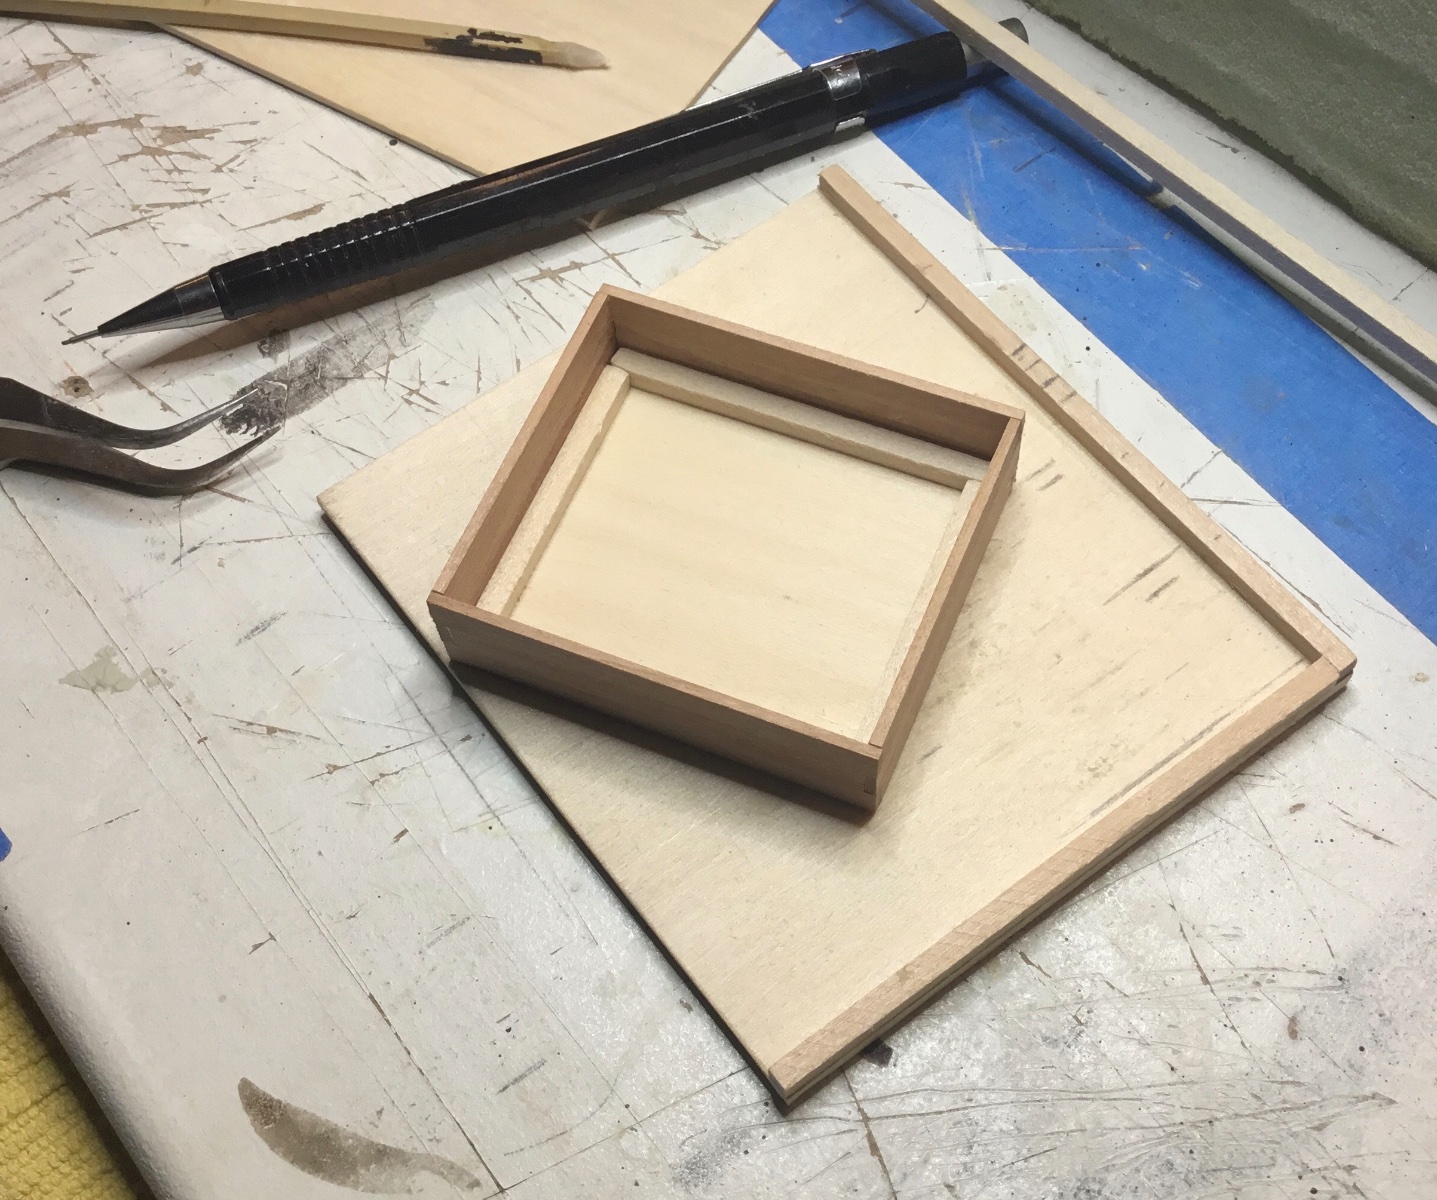
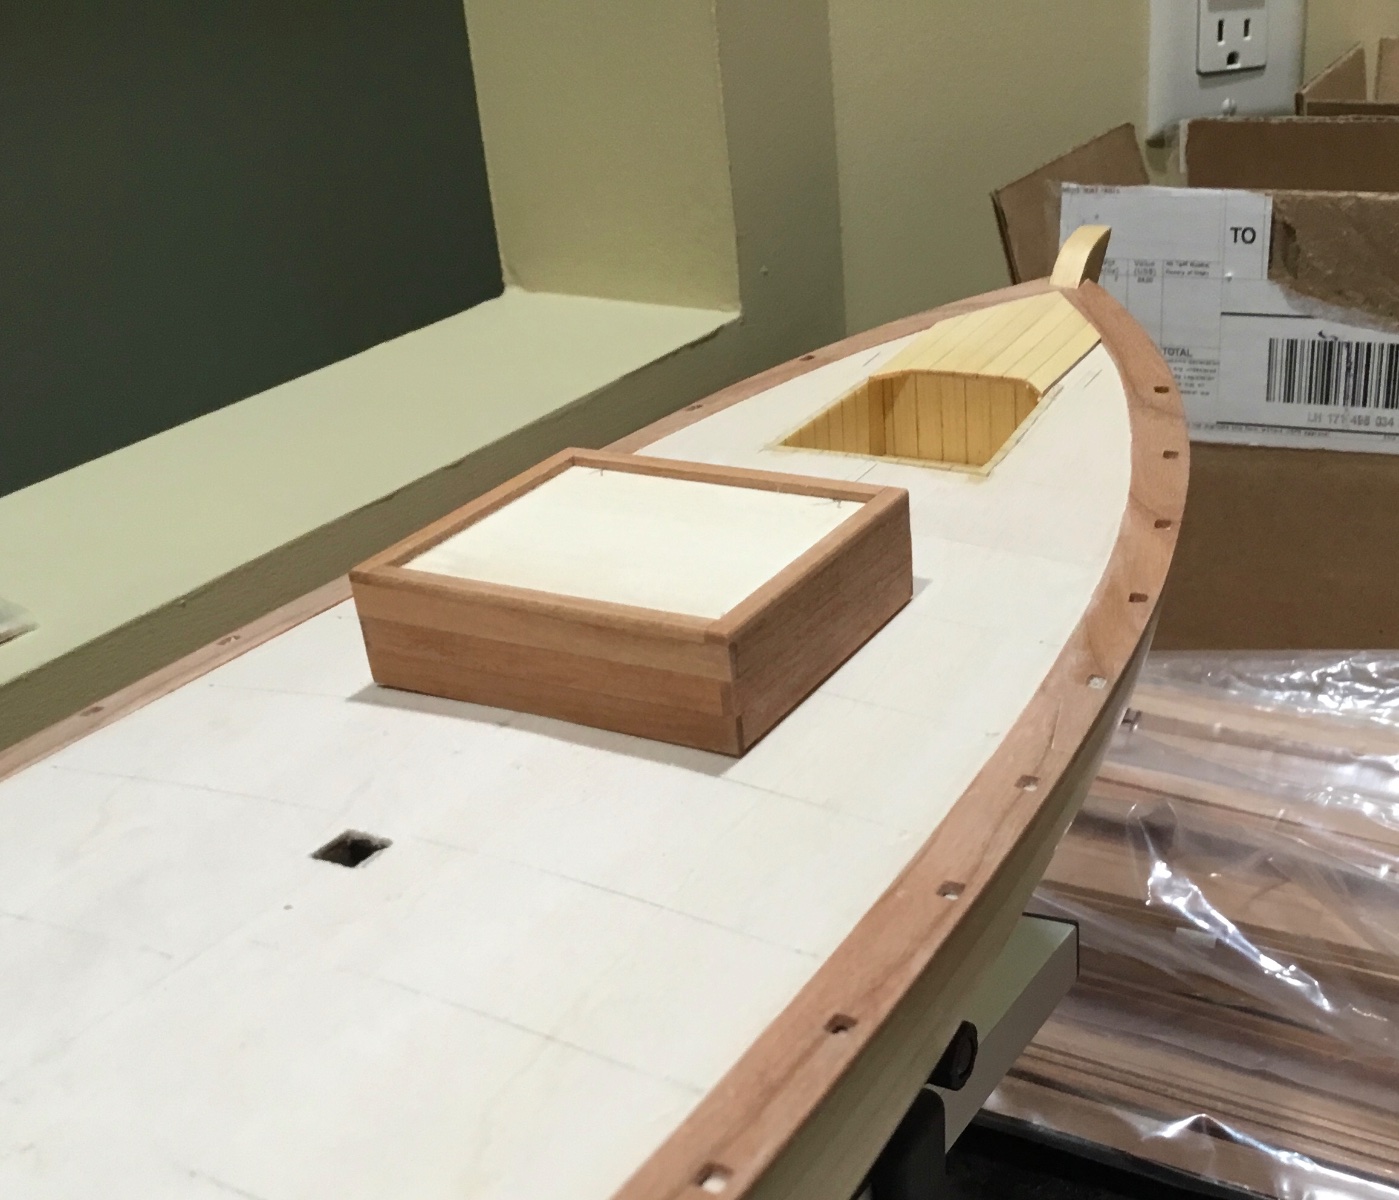
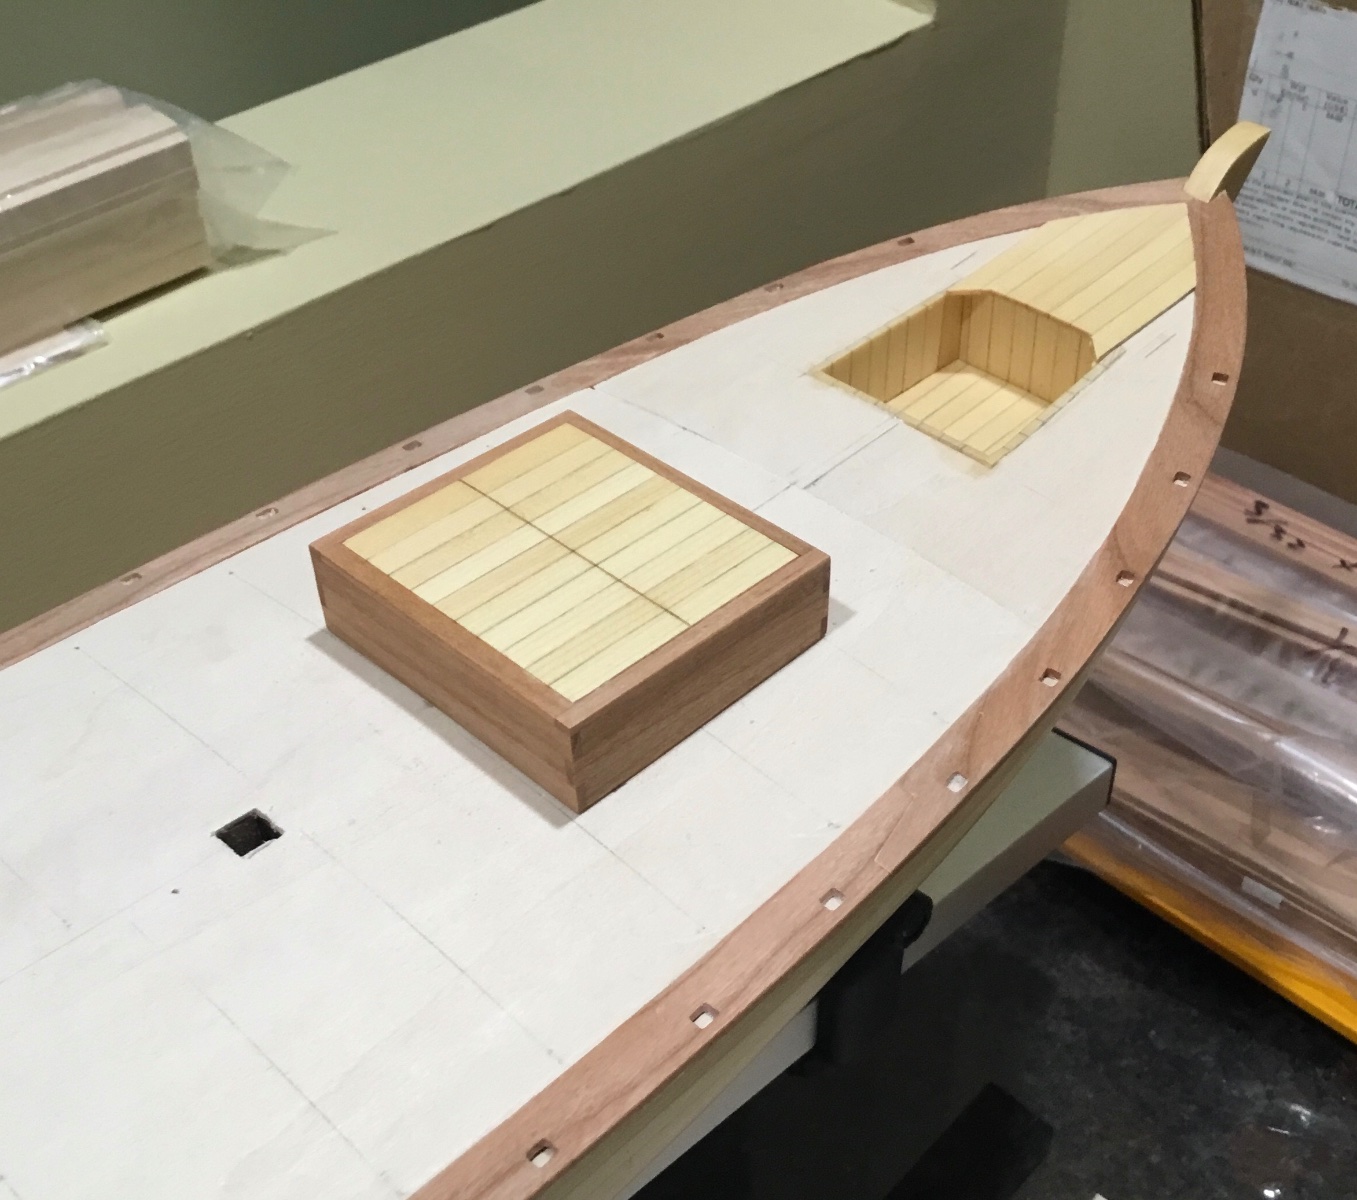
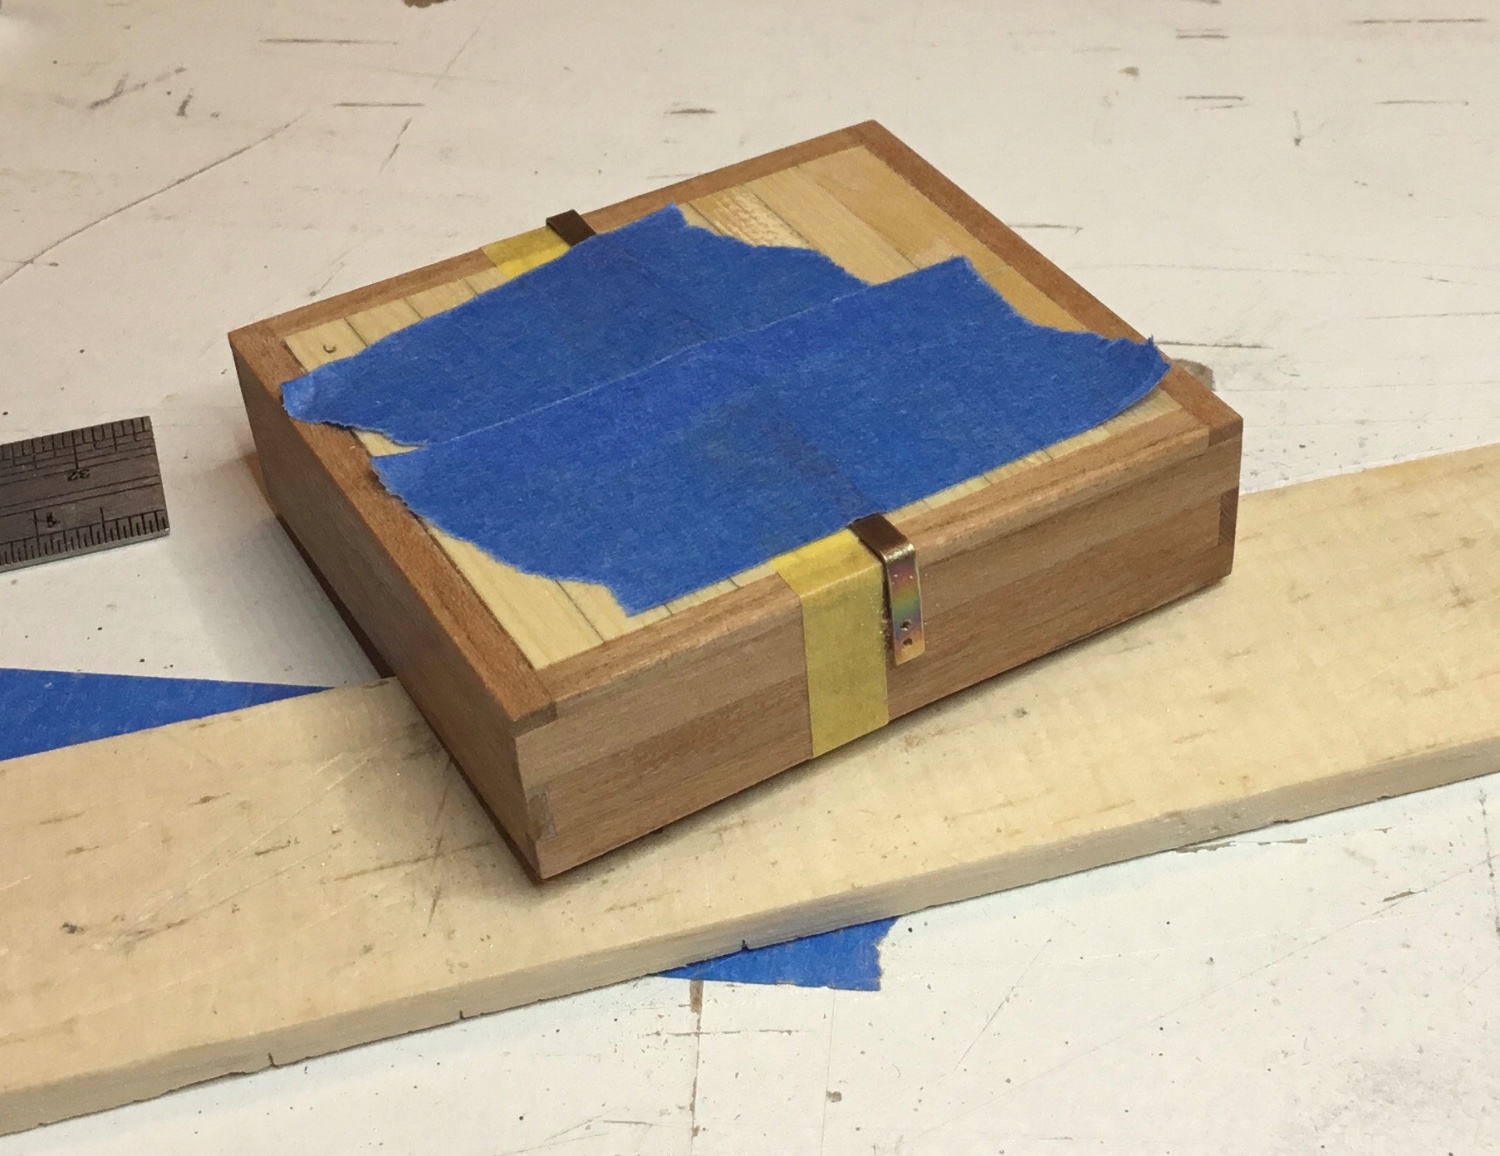
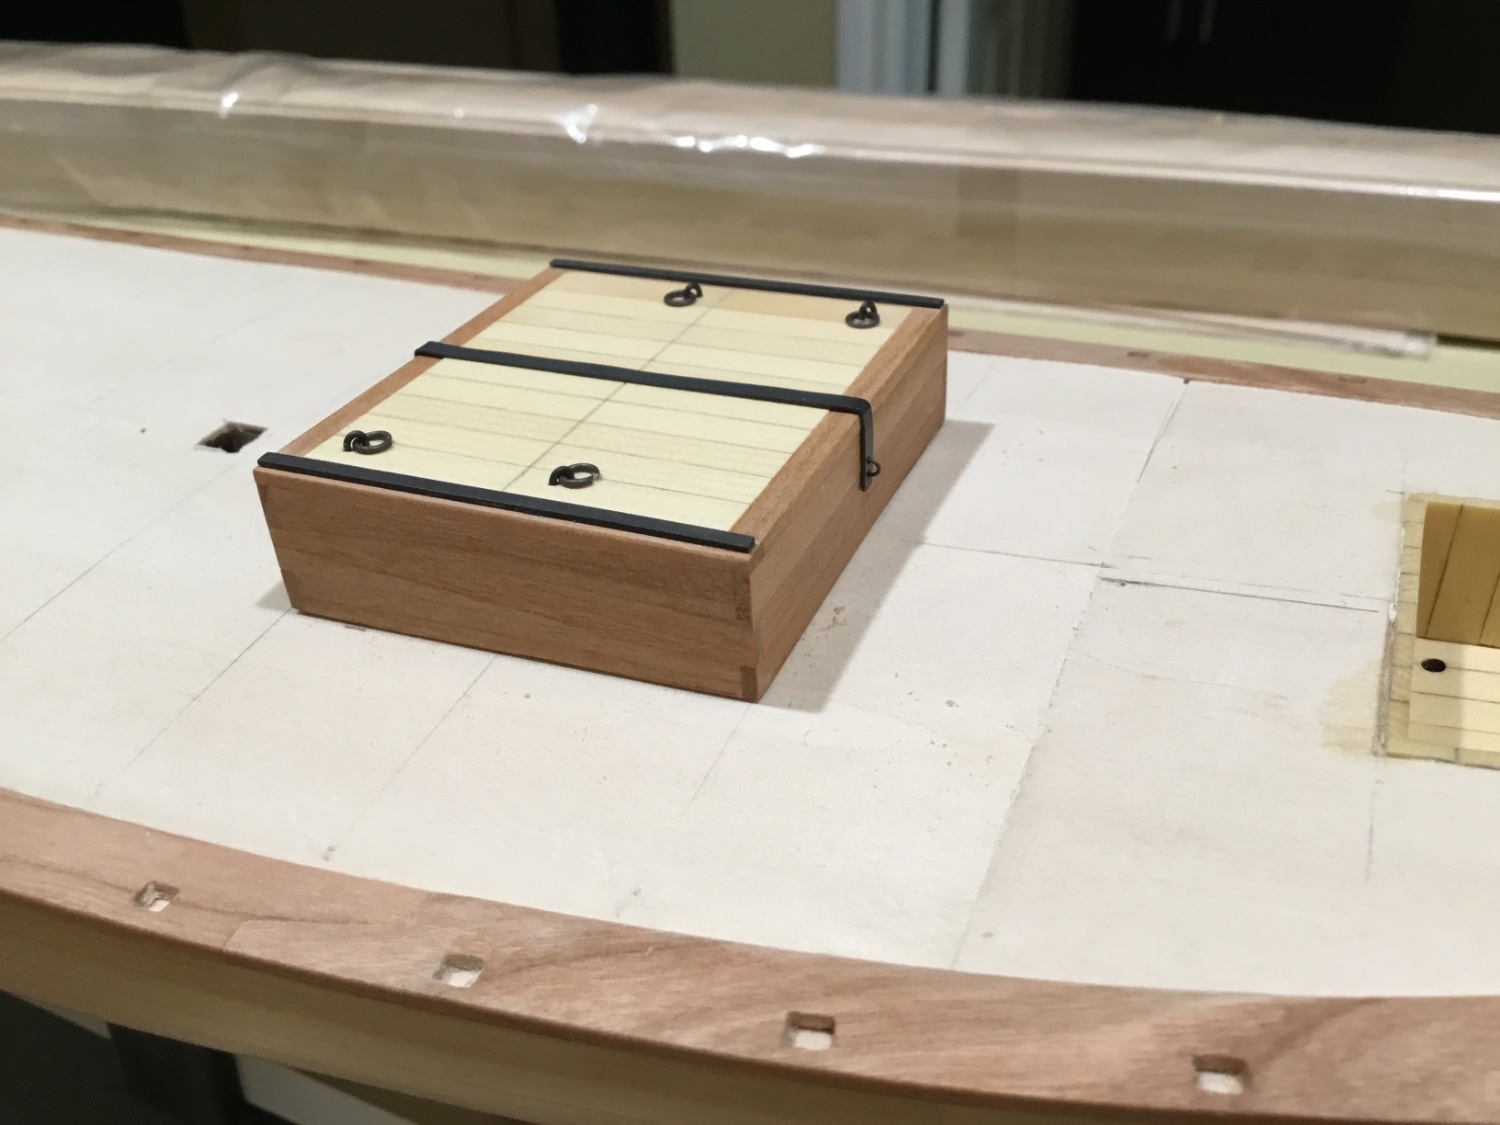
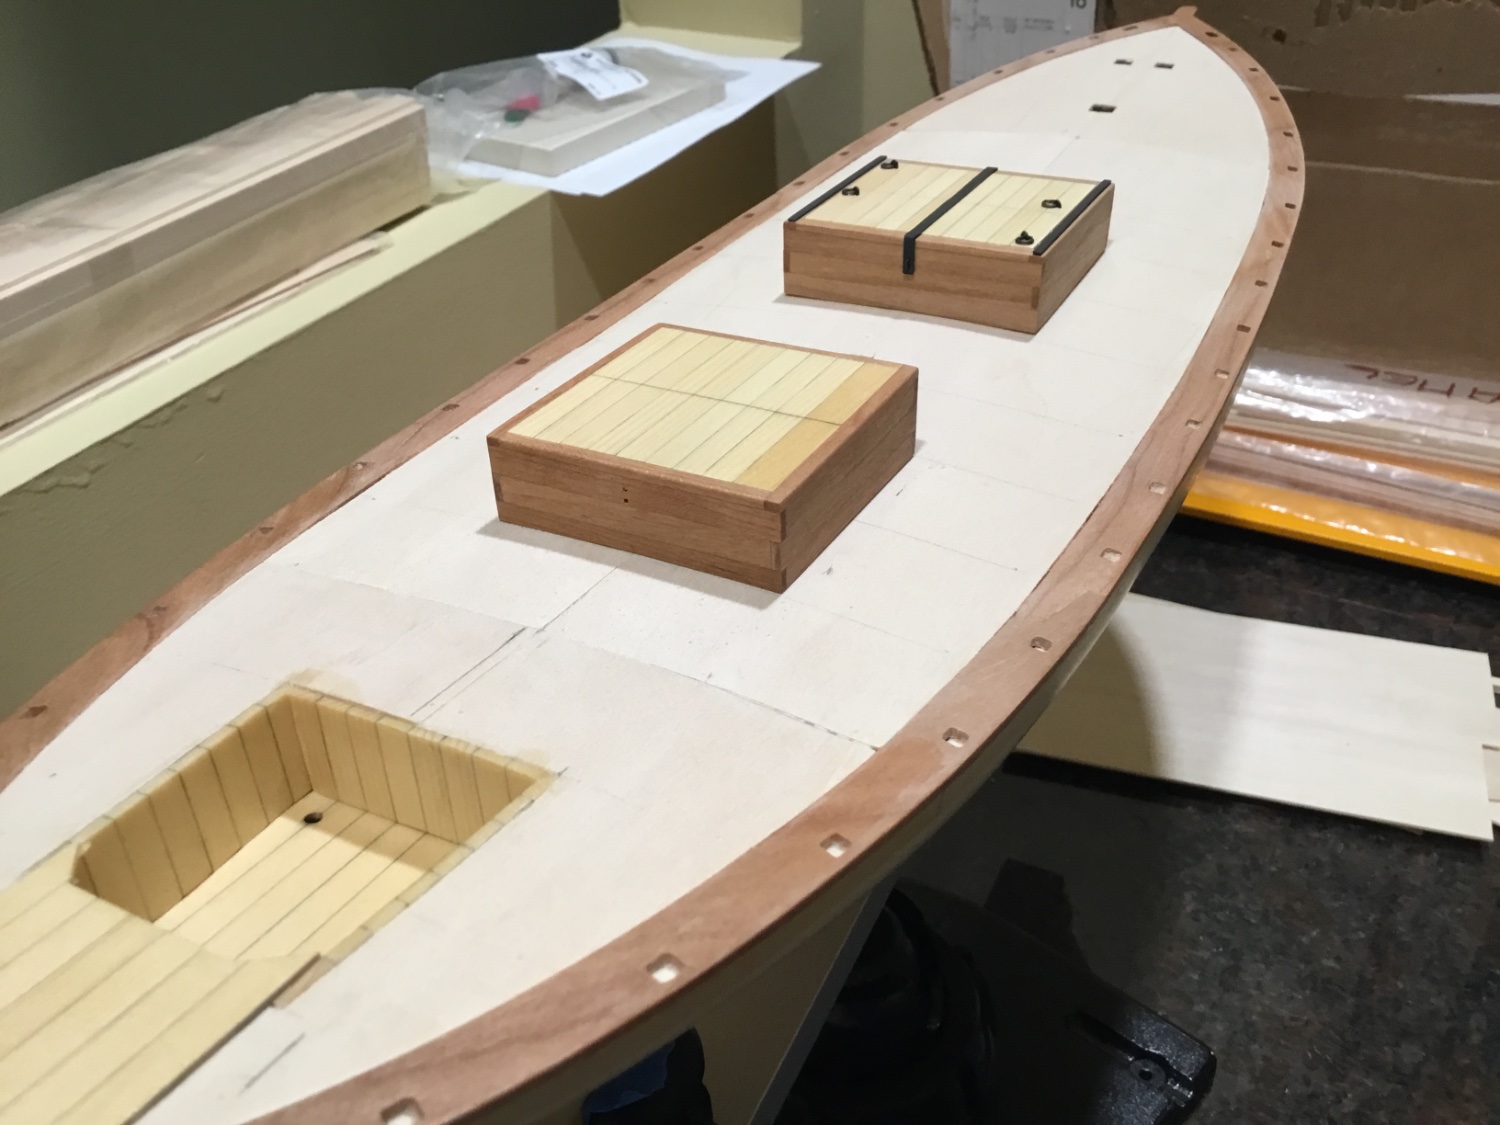
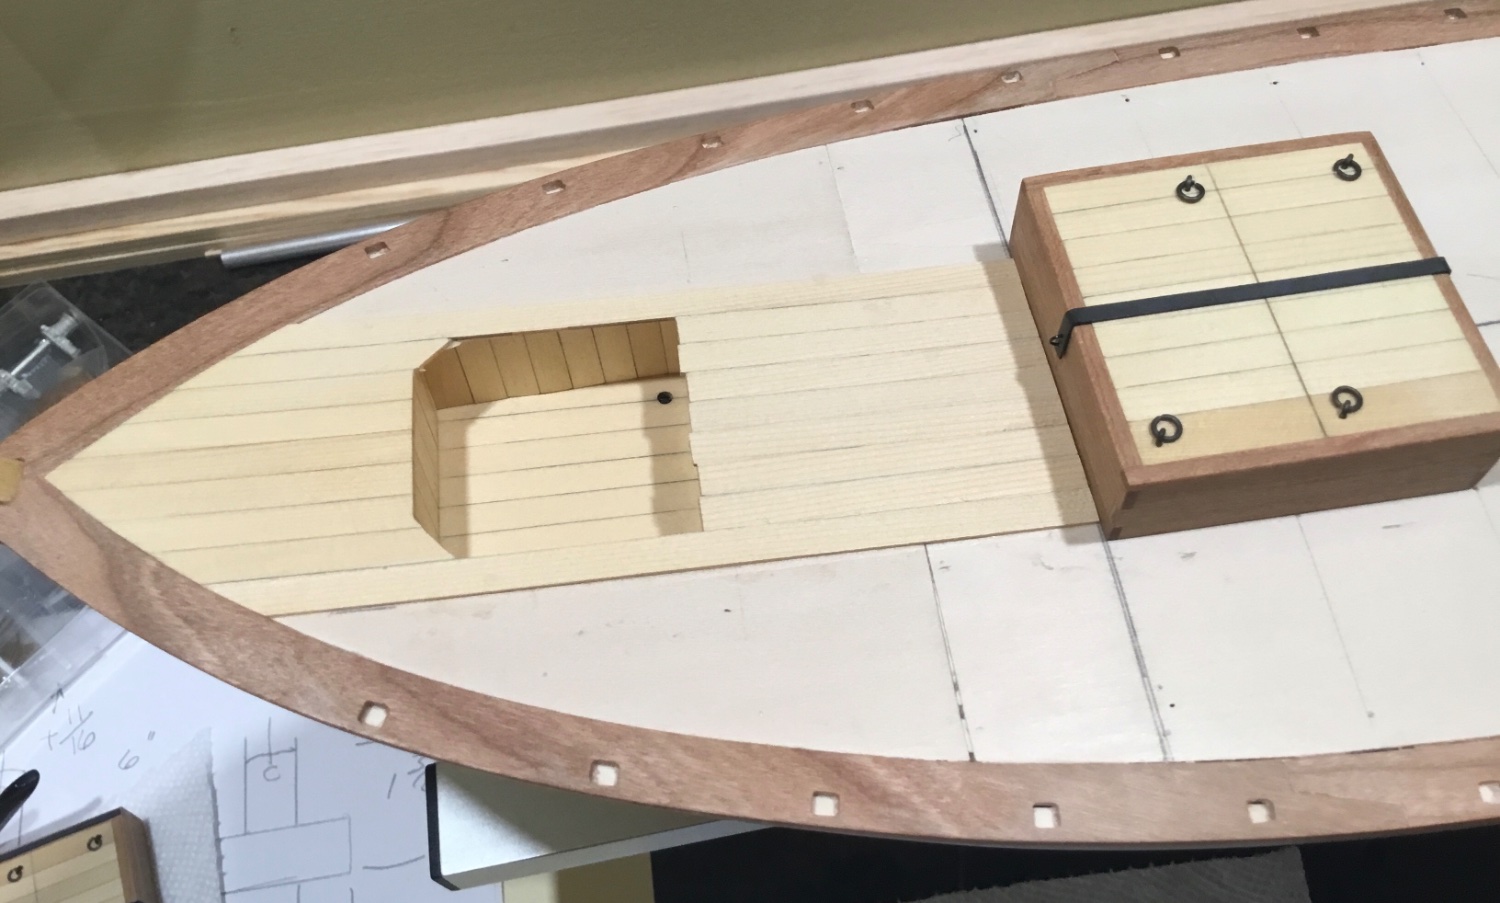
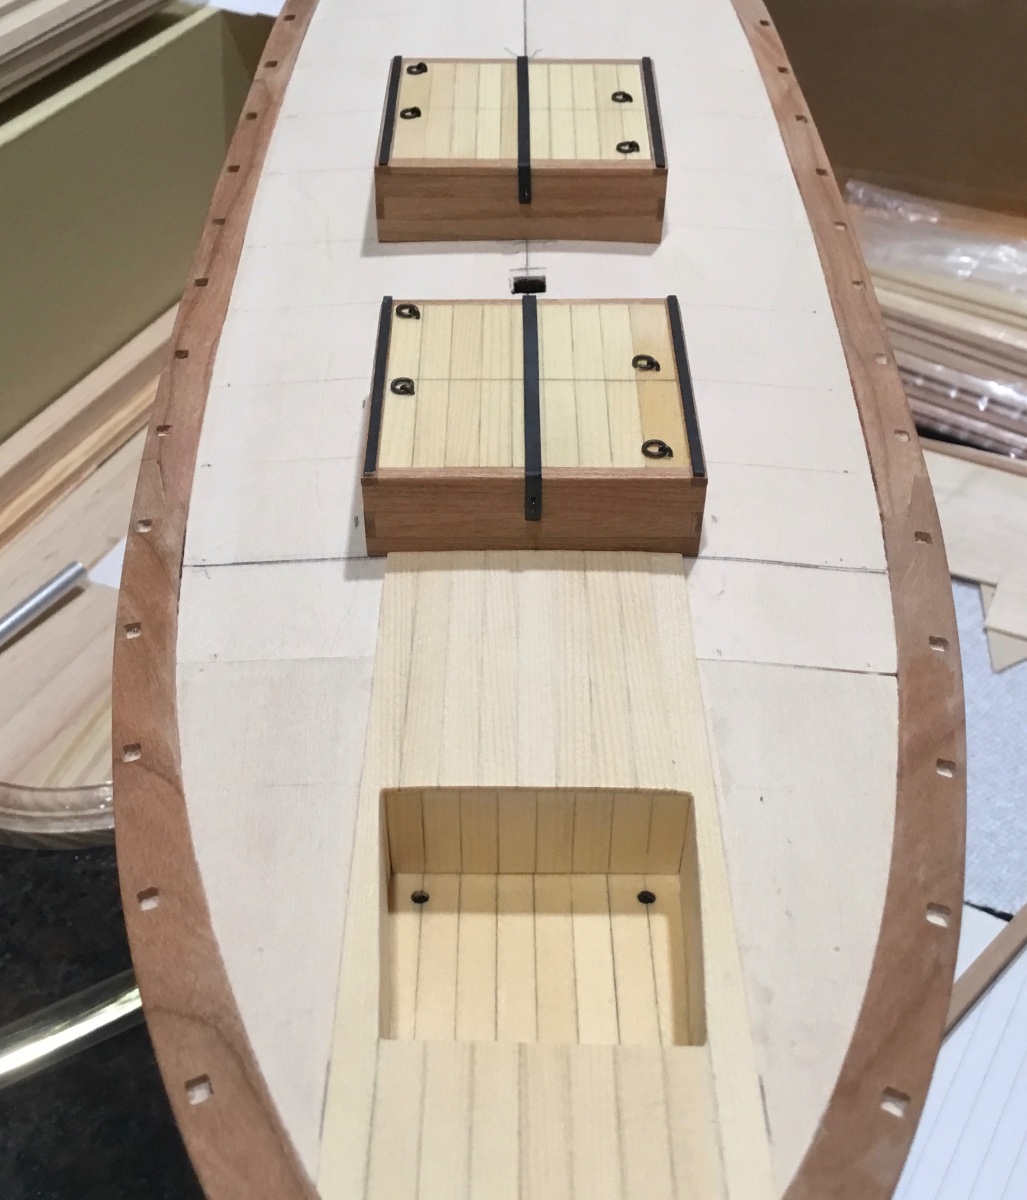
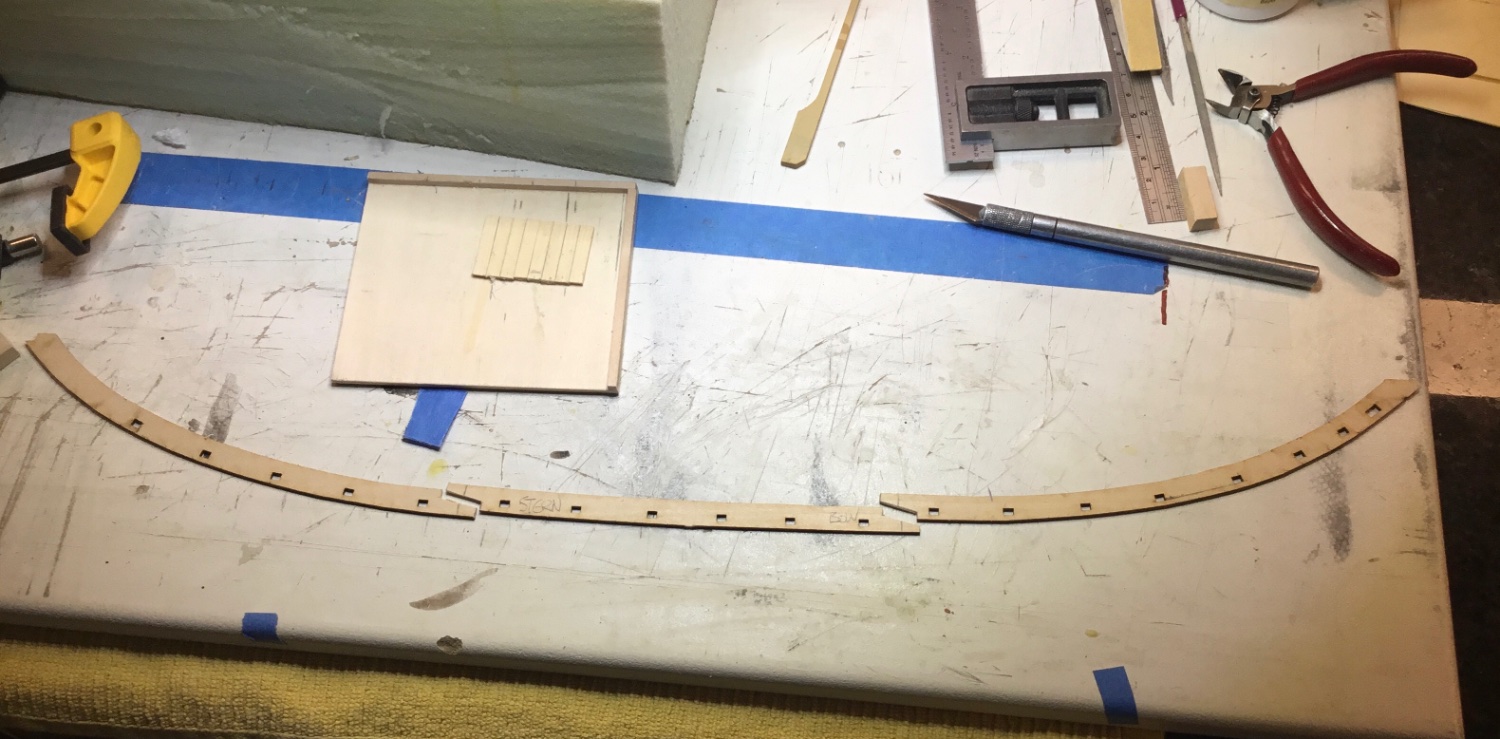
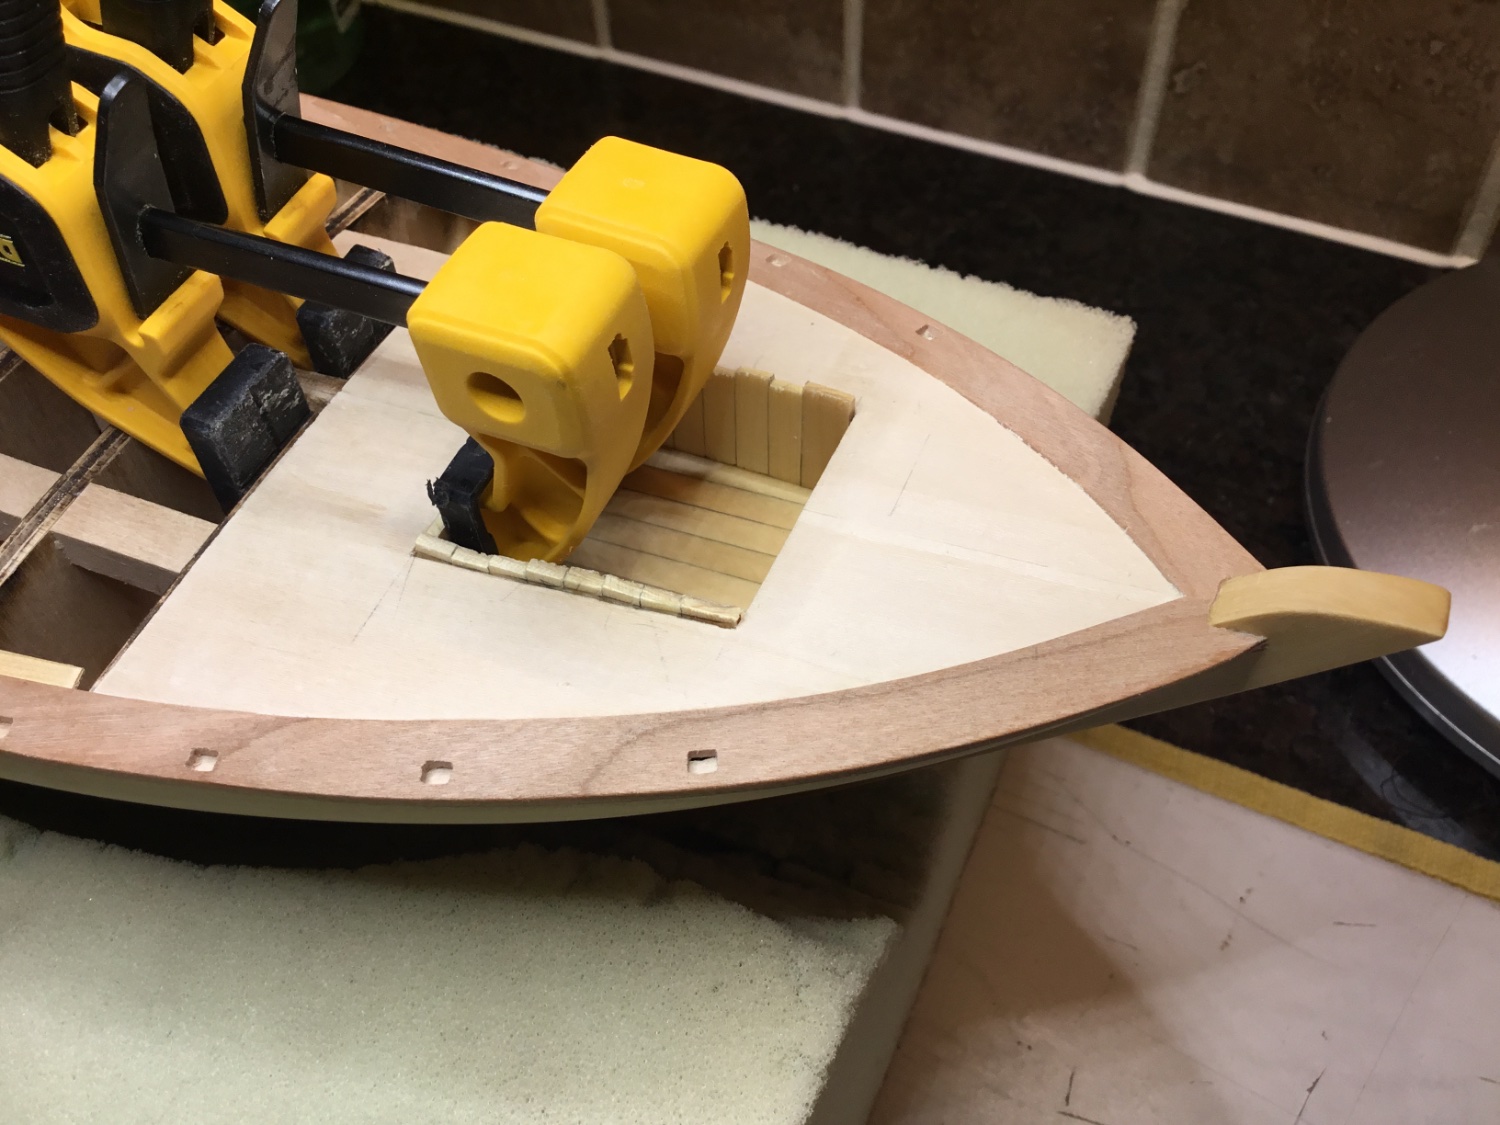
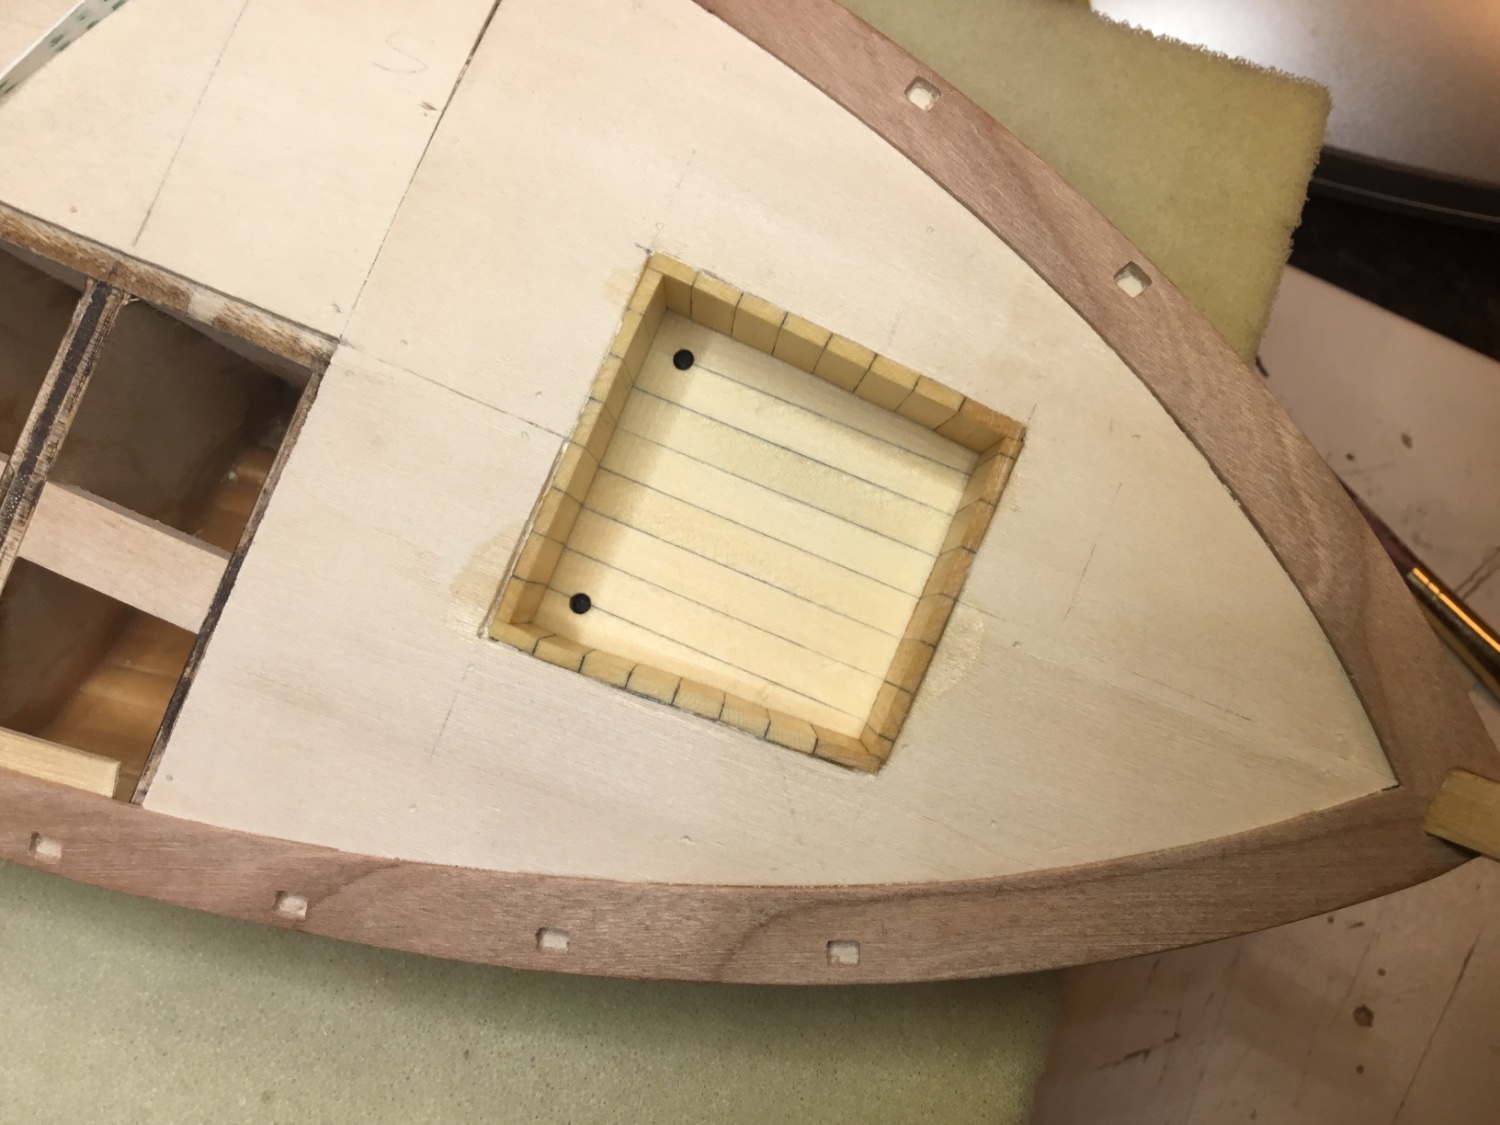
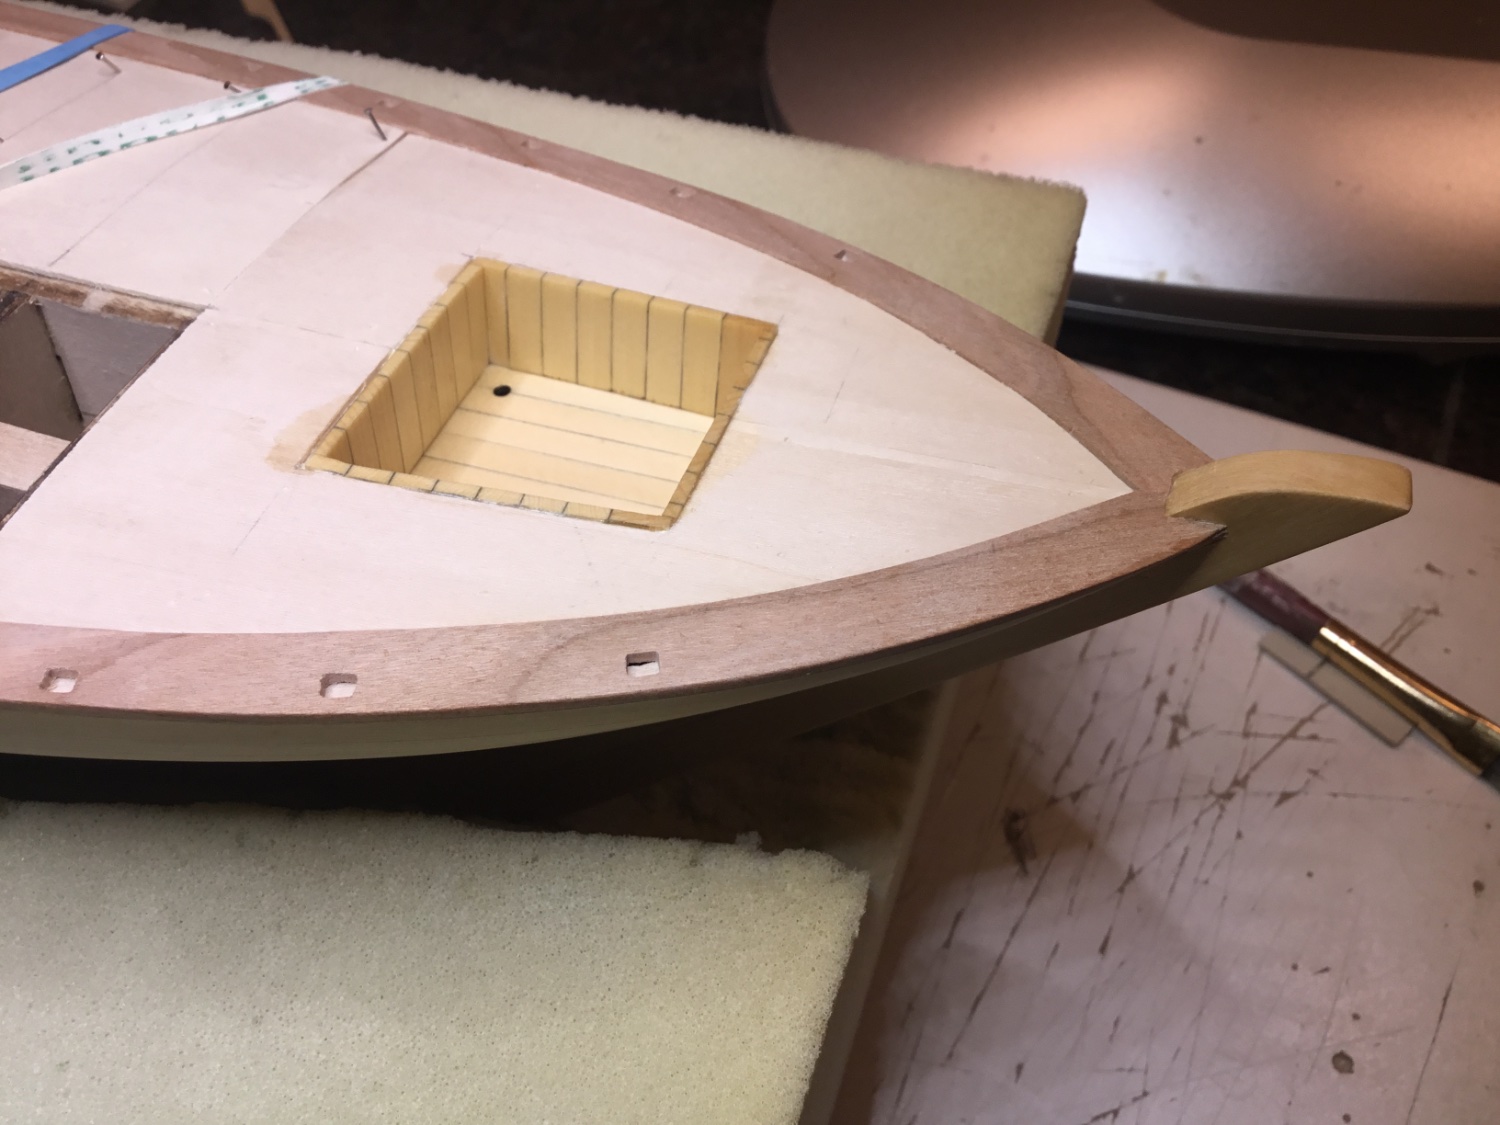
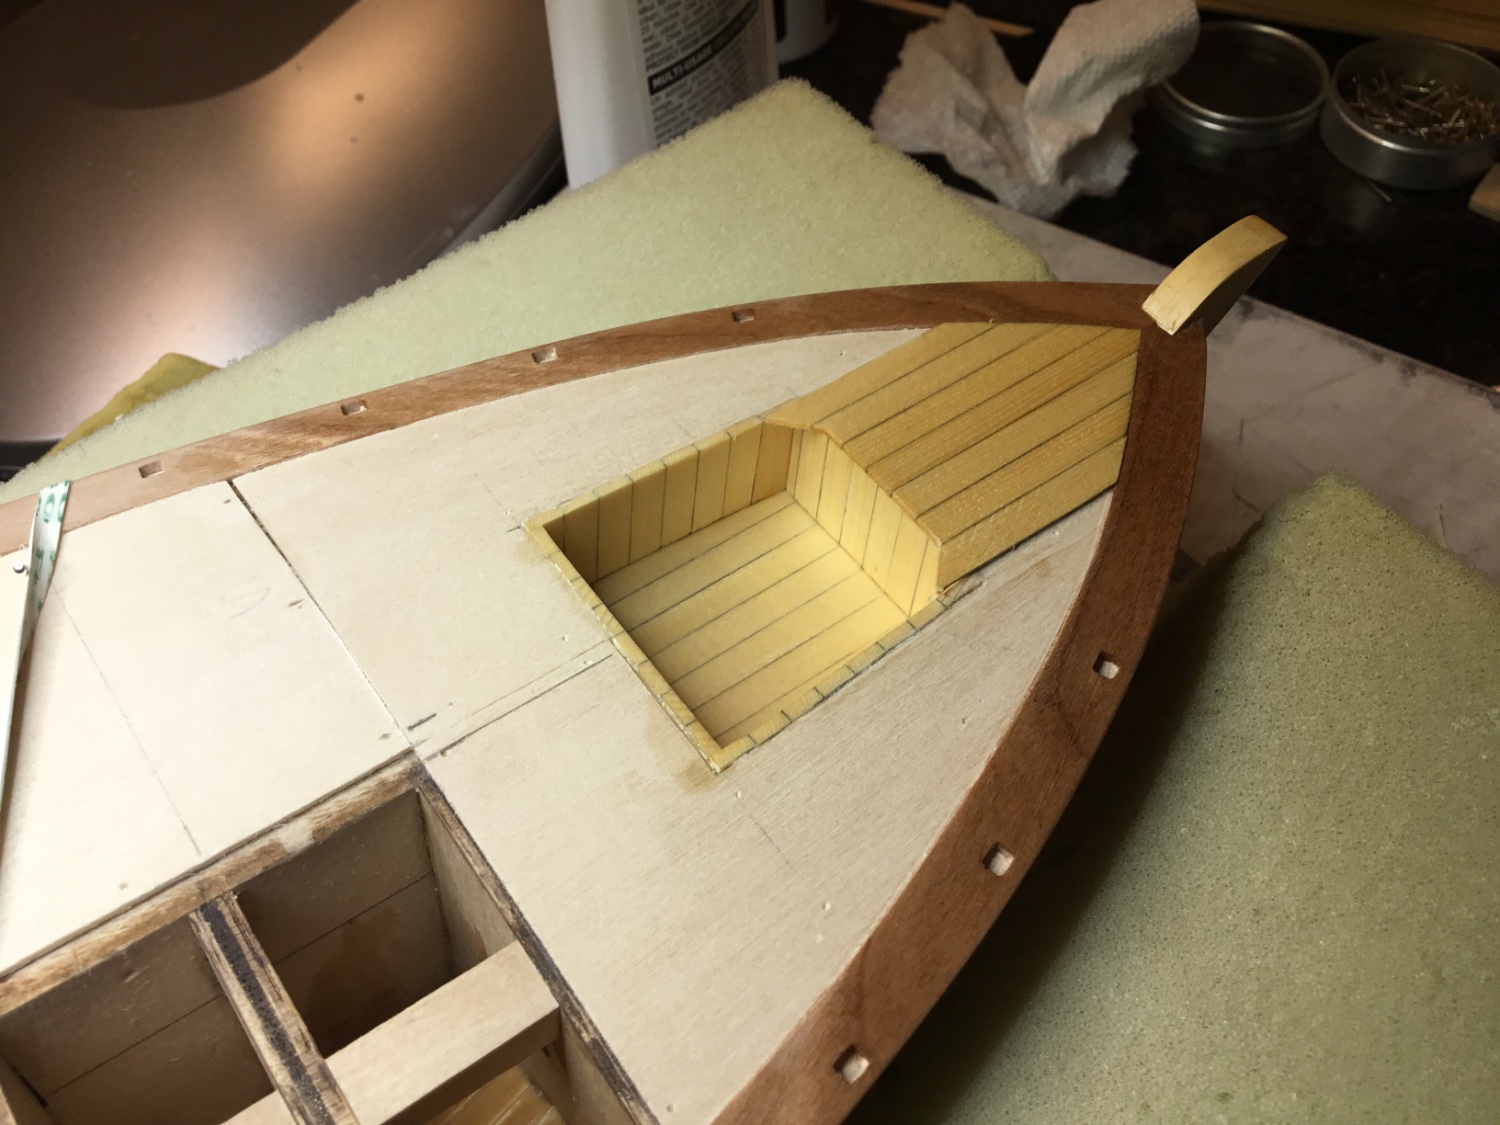
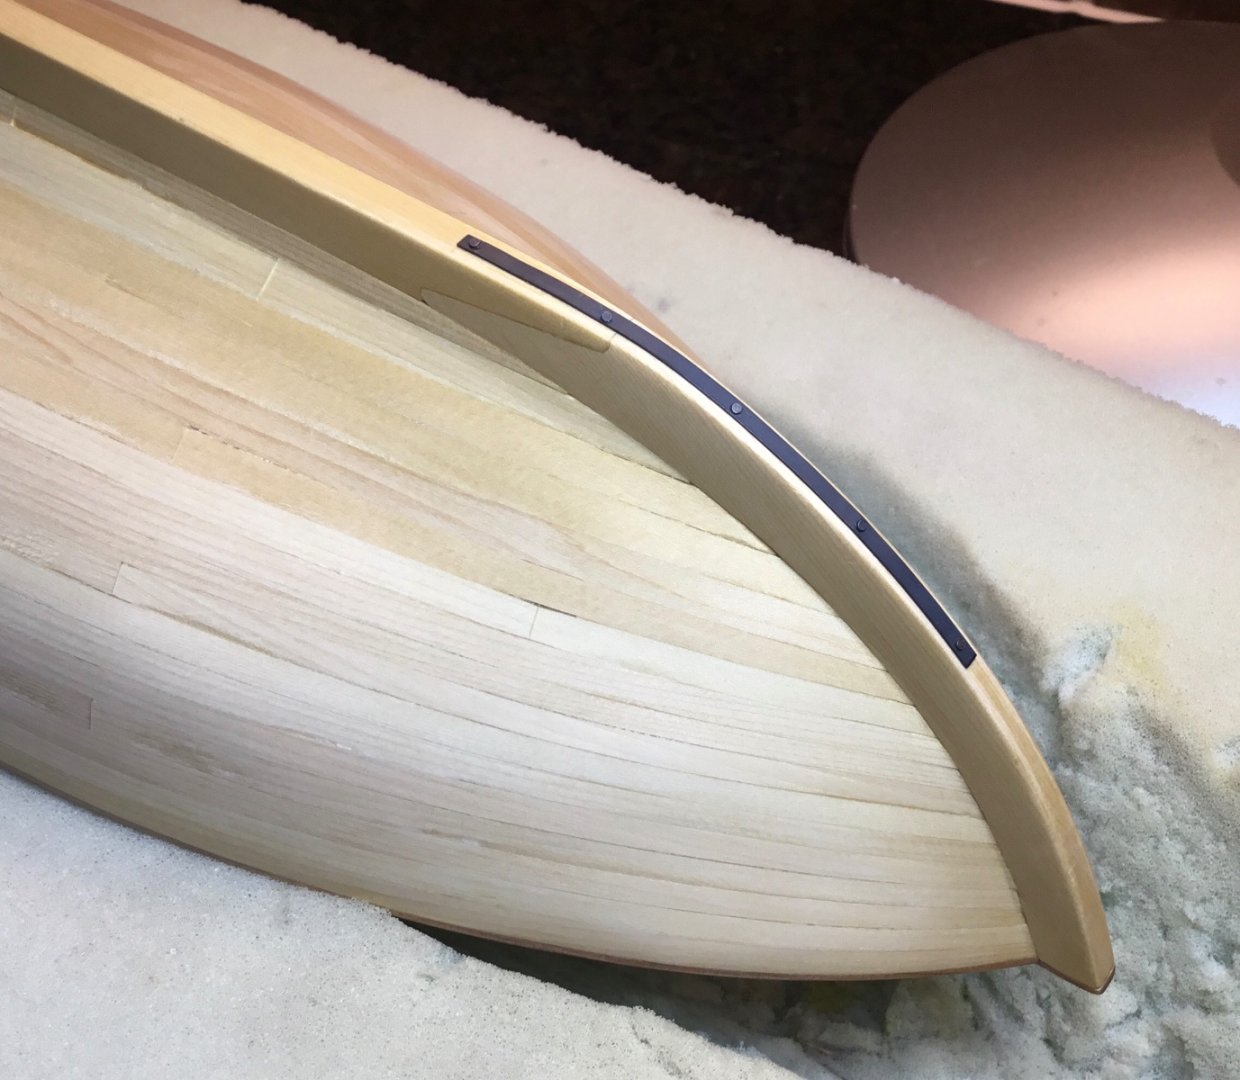
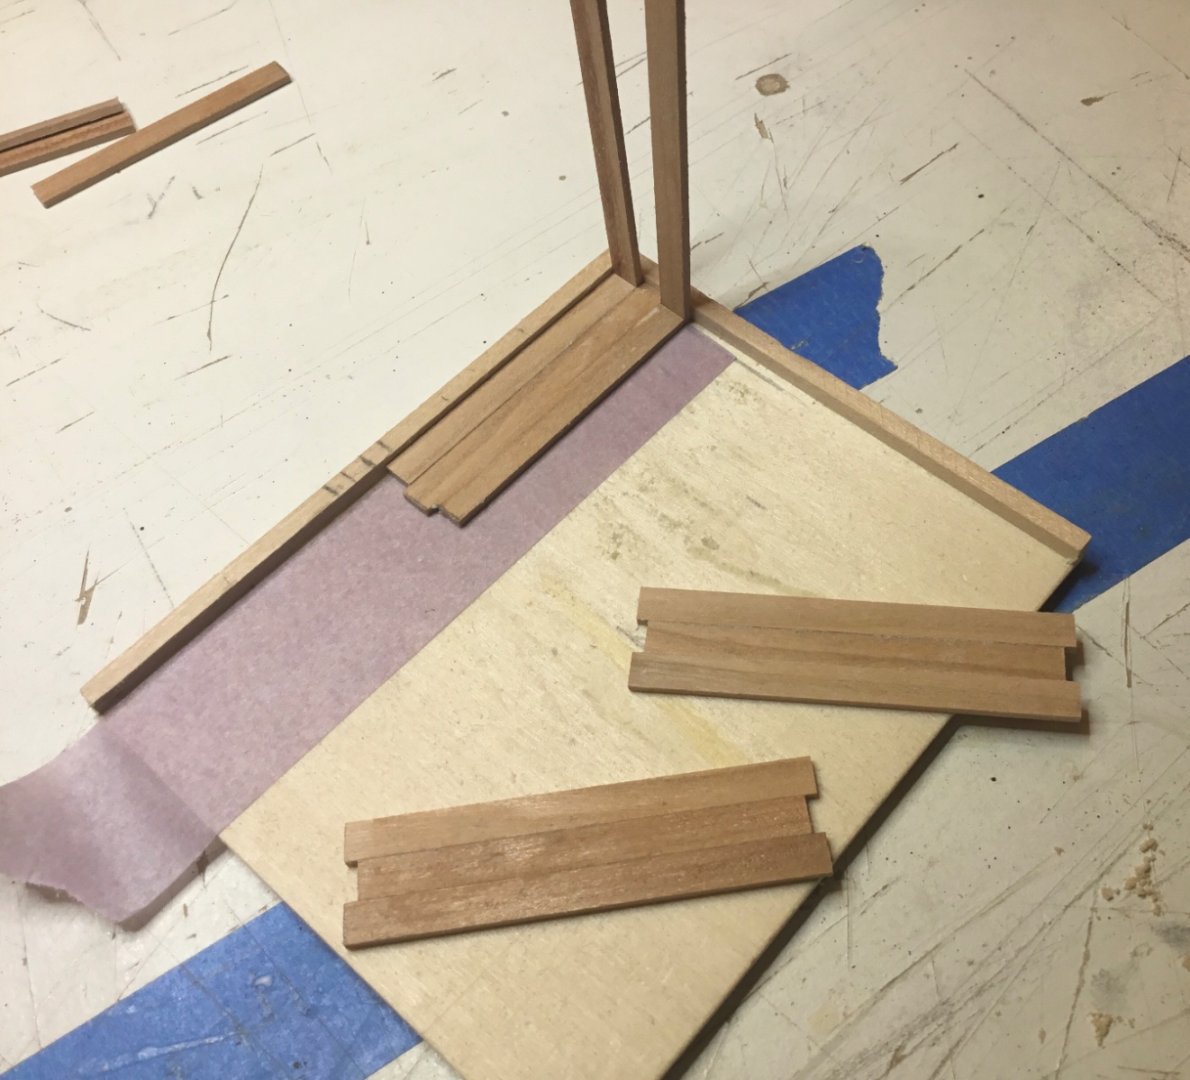
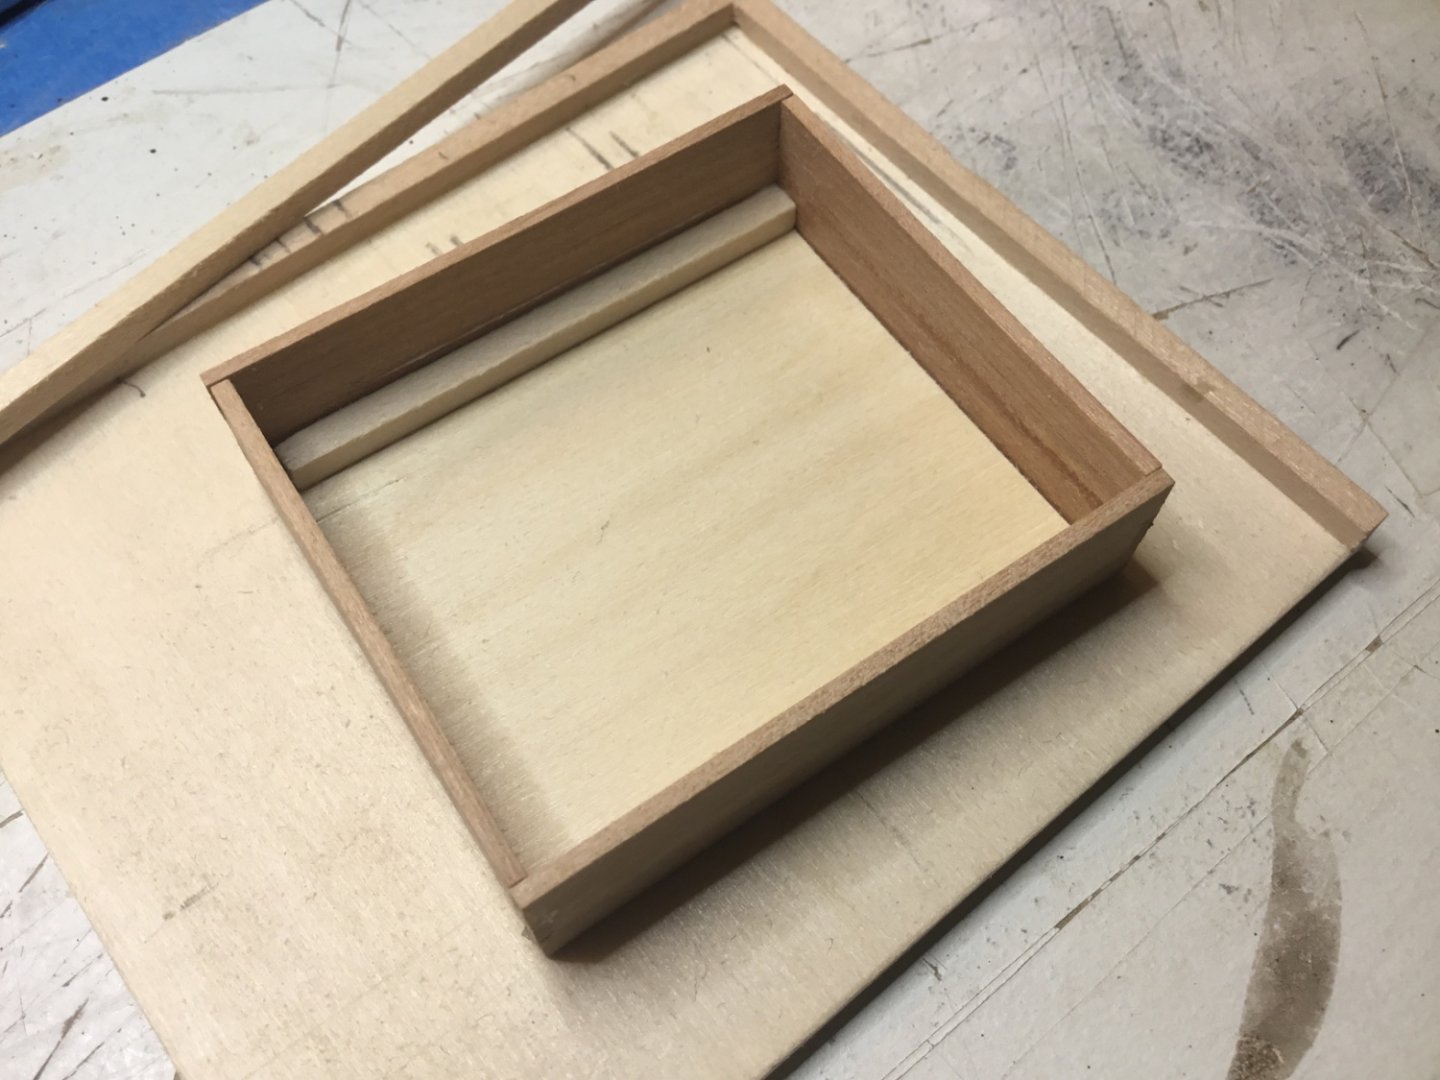
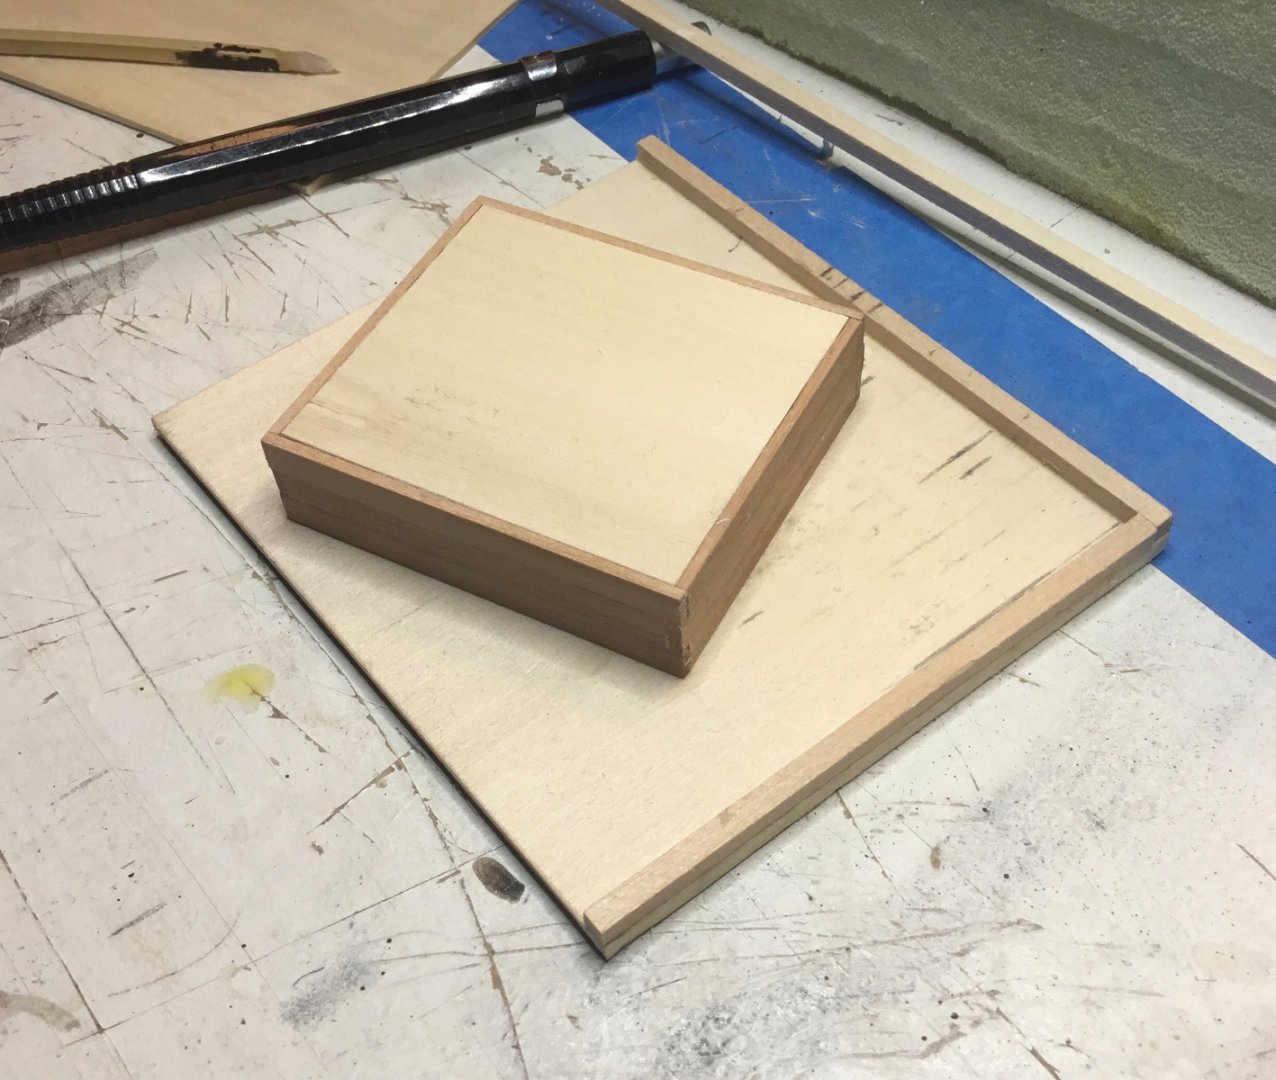
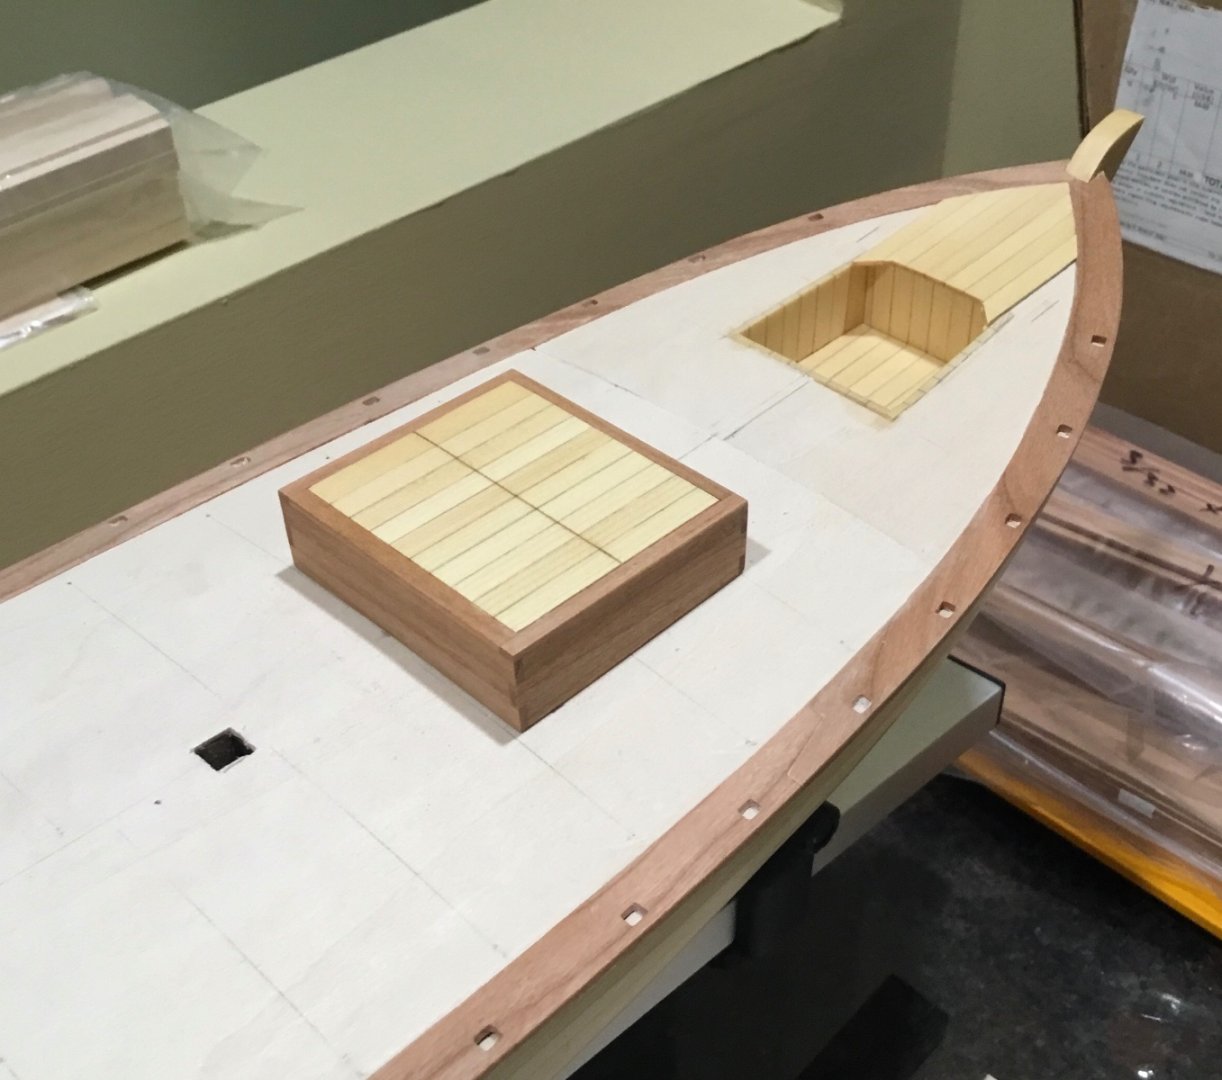
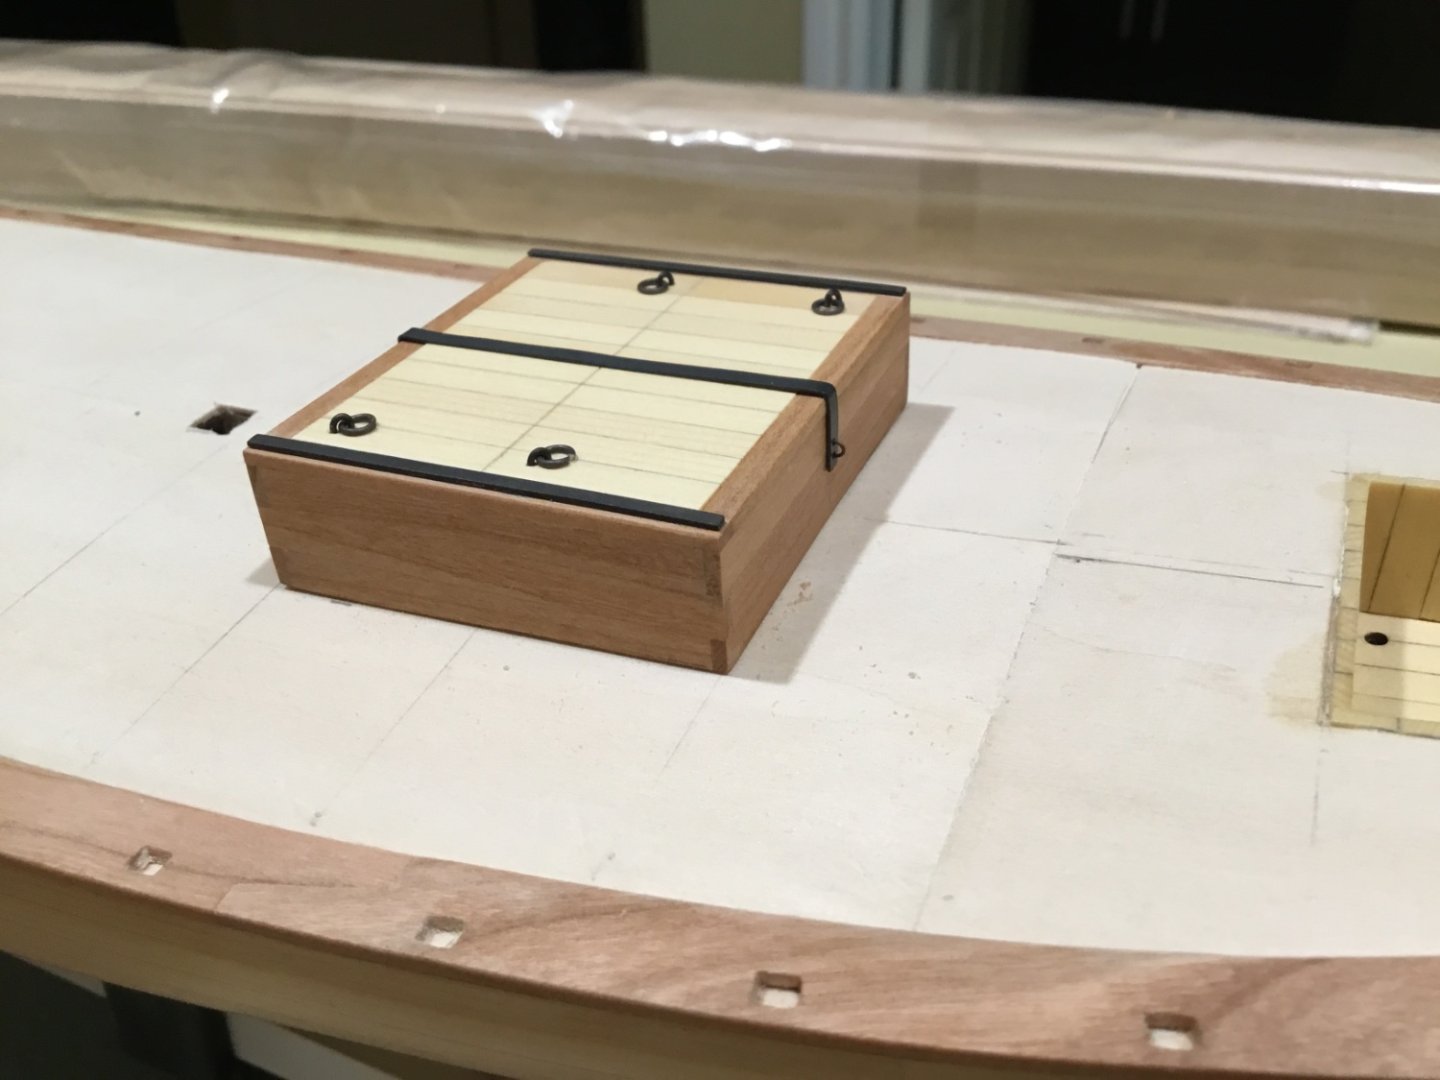
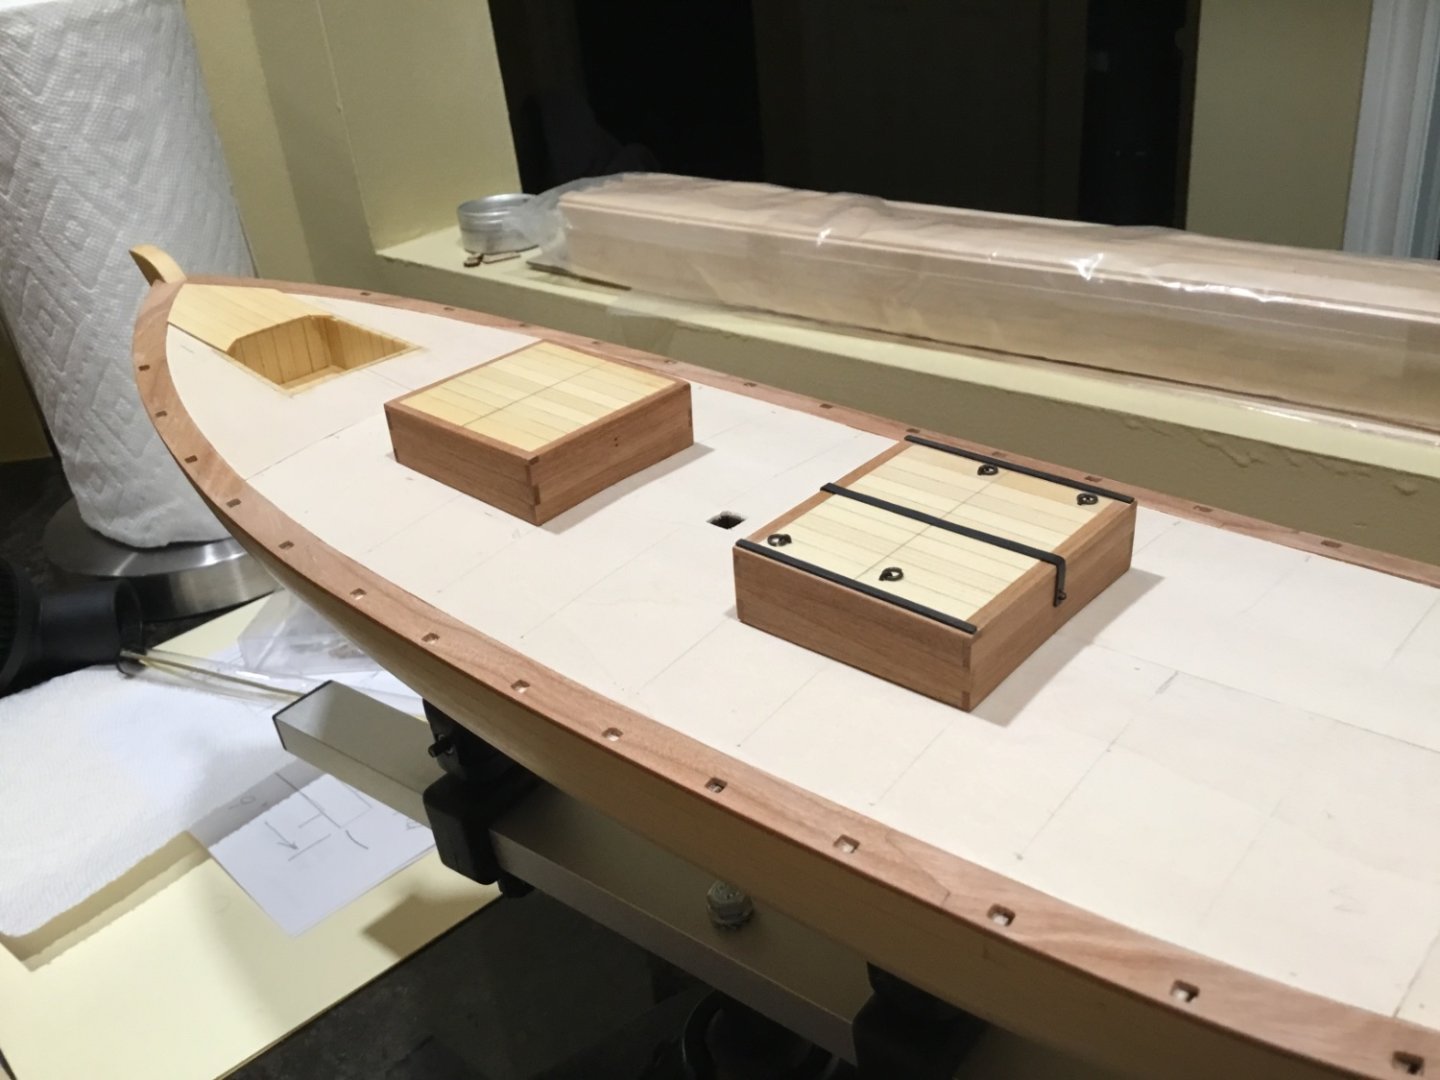
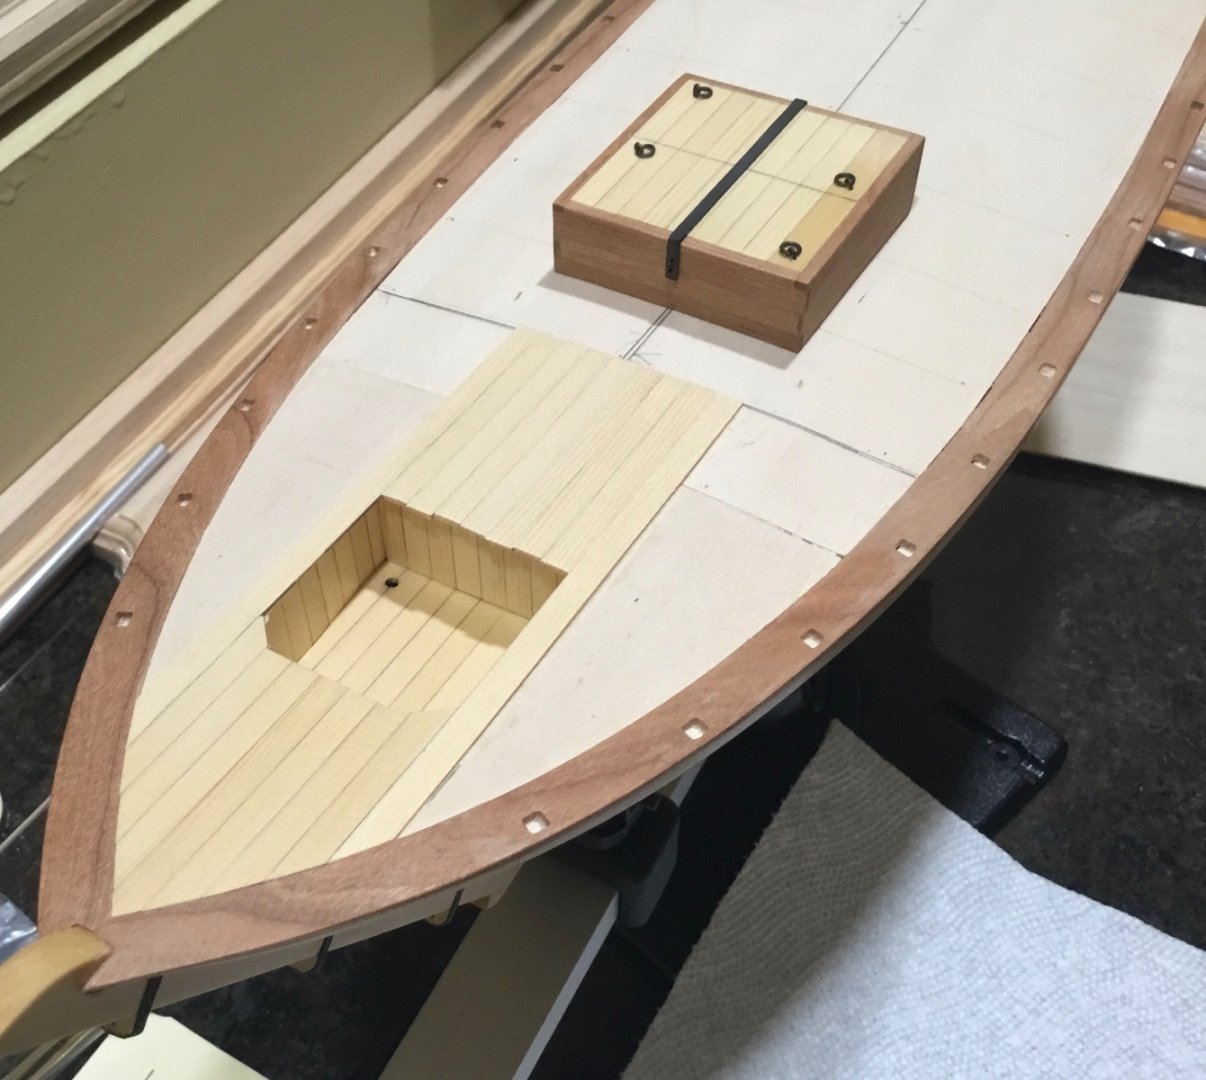
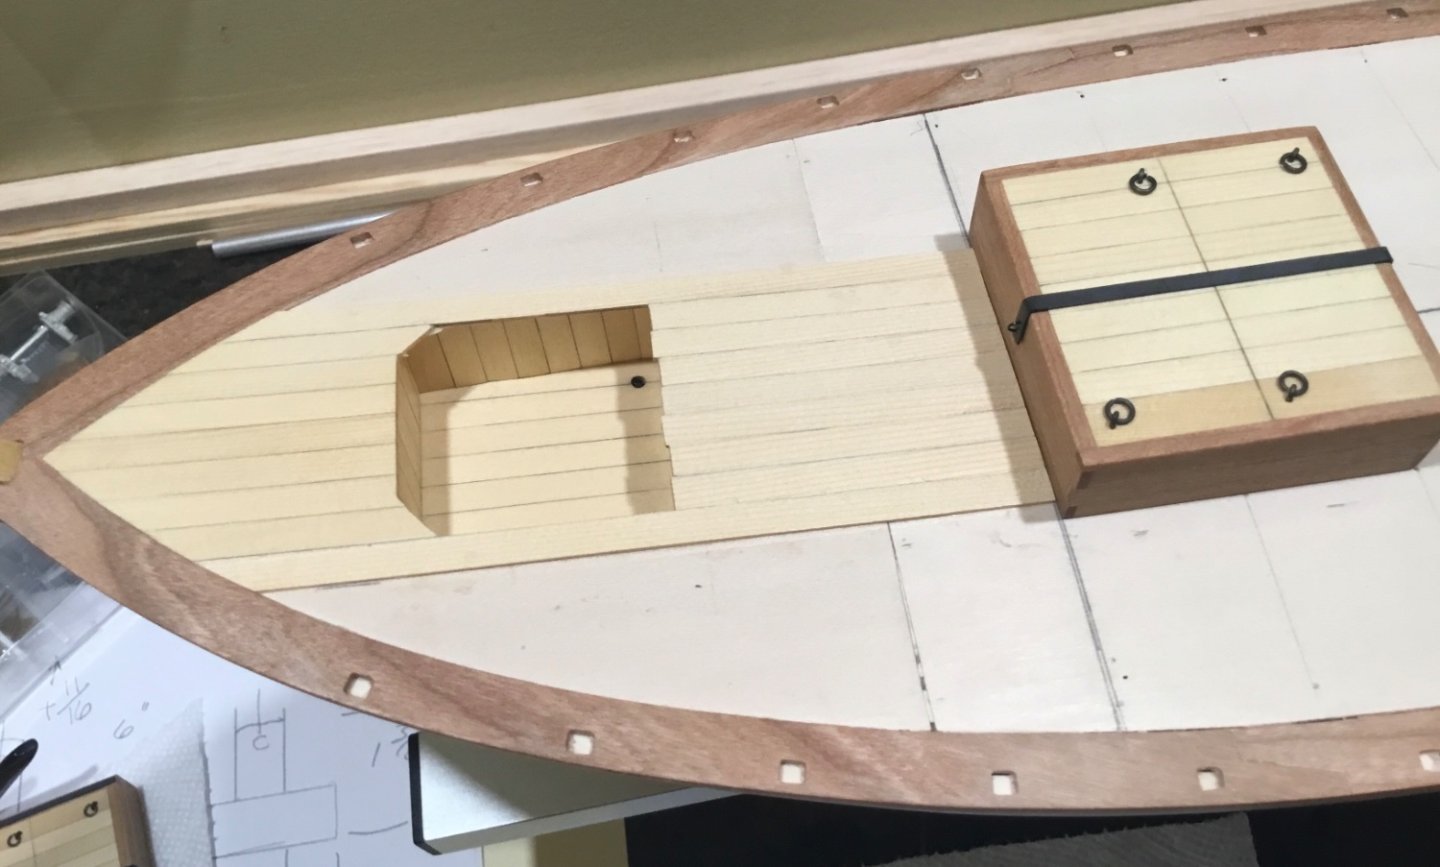
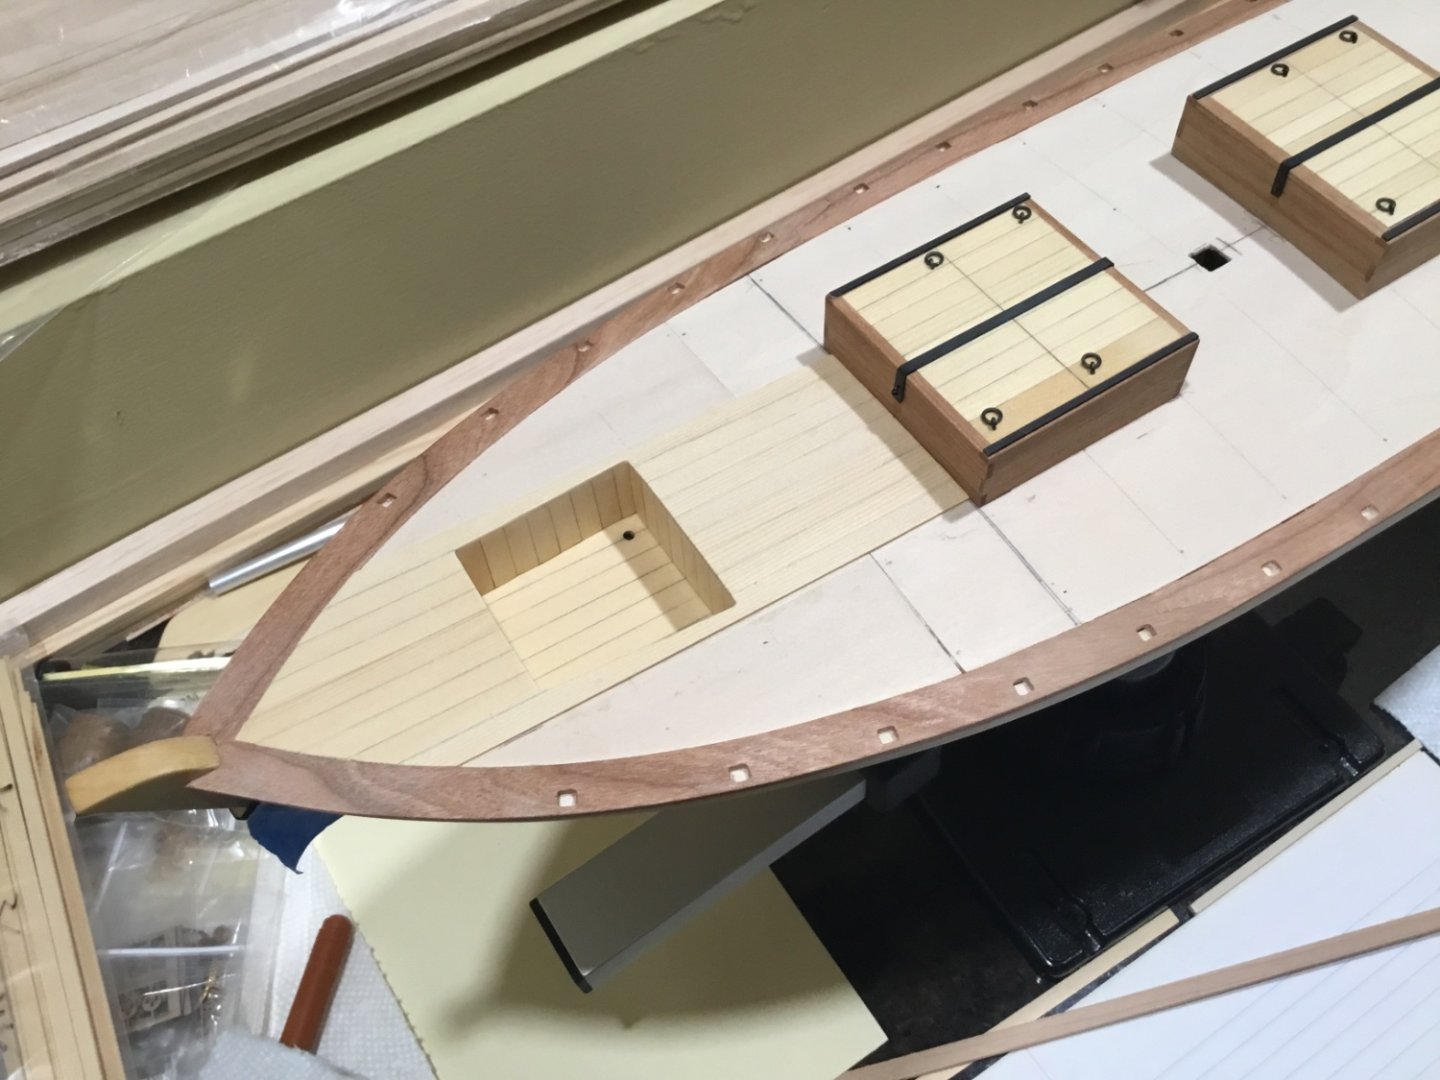
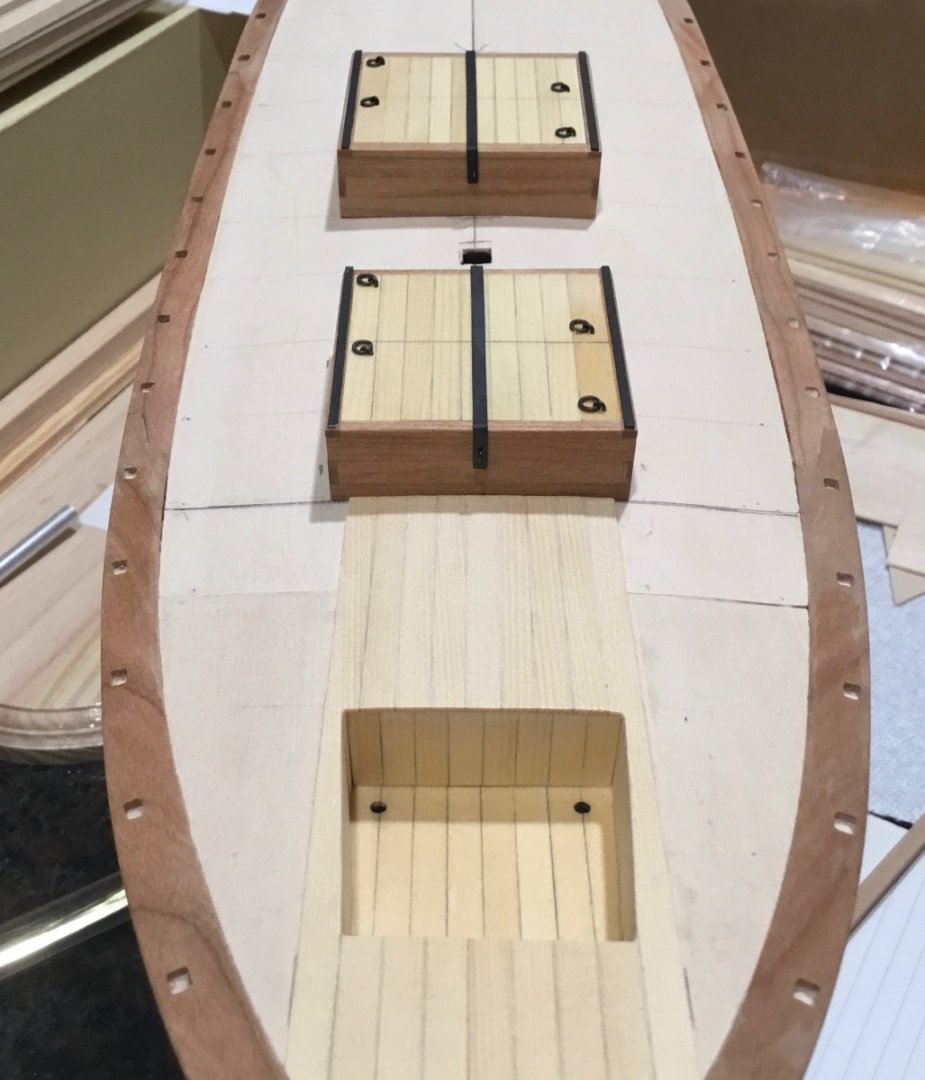
Hi Everyone, thank you for dropping by and for the Likes. They are very appreciated. Before starting the deck and furnishings I decided to make a new rudder out of AYCedar using the kit supplied rudder as a template. The pieces of 1/8” x 1/8” strip have holes drilled in them for the pintle pins so that the pintles are integrated into the rudder. The pintle straps will be applied later. The gudgeon straps are made from left over laser board. The iron bar pinned to the stem is blackened 3/32” brass strip. Now it’s time to make the hatches. The frames are made from 3/16” x 1/16” cherry. I’m roughly using examples found in Chapelle’s book American Fishing Schooners. A piece of 1/16” basswood sheet is used to support the covers and it is supported by 1/8” x 1/8” strips. The covers are glued together, squared, and a line is scored down the center to suggest that there are two halves. The strap that holds down the covers is supposed to have a hinged hasp at one end. Both ends fit over a staple. The bar should be slotted where it fits over the staple but I just drilled two holes so that the staple would hold the bar in place. No glue is used to hold down the bar. The iron bars that run down both sides of the frame are made from Cedar strip sanded down to .5mm . They look thicker but that’s as thin as I could get it. Did not want to try and glue brass strip along there. Then a bit more planking was applied to the deck and sanded around the cockpit. The cabin and more deck planking will be next. See you next time


- 72 replies
-
- 12
-

-

-
- Glad Tidings
- Model Shipways
- (and 1 more)
-
Hey Dsmith, congratulations on finishing your Glad Tidings. Marvelous job. Love your sails.
-
Beautiful ship Henrik, I wish you well.
-
Timber-framed outdoor kitchen - Cathead - 1:1 scale
Paul Le Wol replied to Cathead's topic in Non-ship/categorised builds
Beautiful cook house Eric. I think I can already smell that brisket smoking -
Hey Mango, maybe you could upload a couple more photos for people to get a look from different angles. Could it be that there is too much bend in that plank? Just throwing it out there. Perhaps try different amounts of bend to see how it affects the way the plank sits against the bulkhead
-
Hi Cisco, great looking scarf joints. Definitely going to have to give your Q-tip idea a try.
-
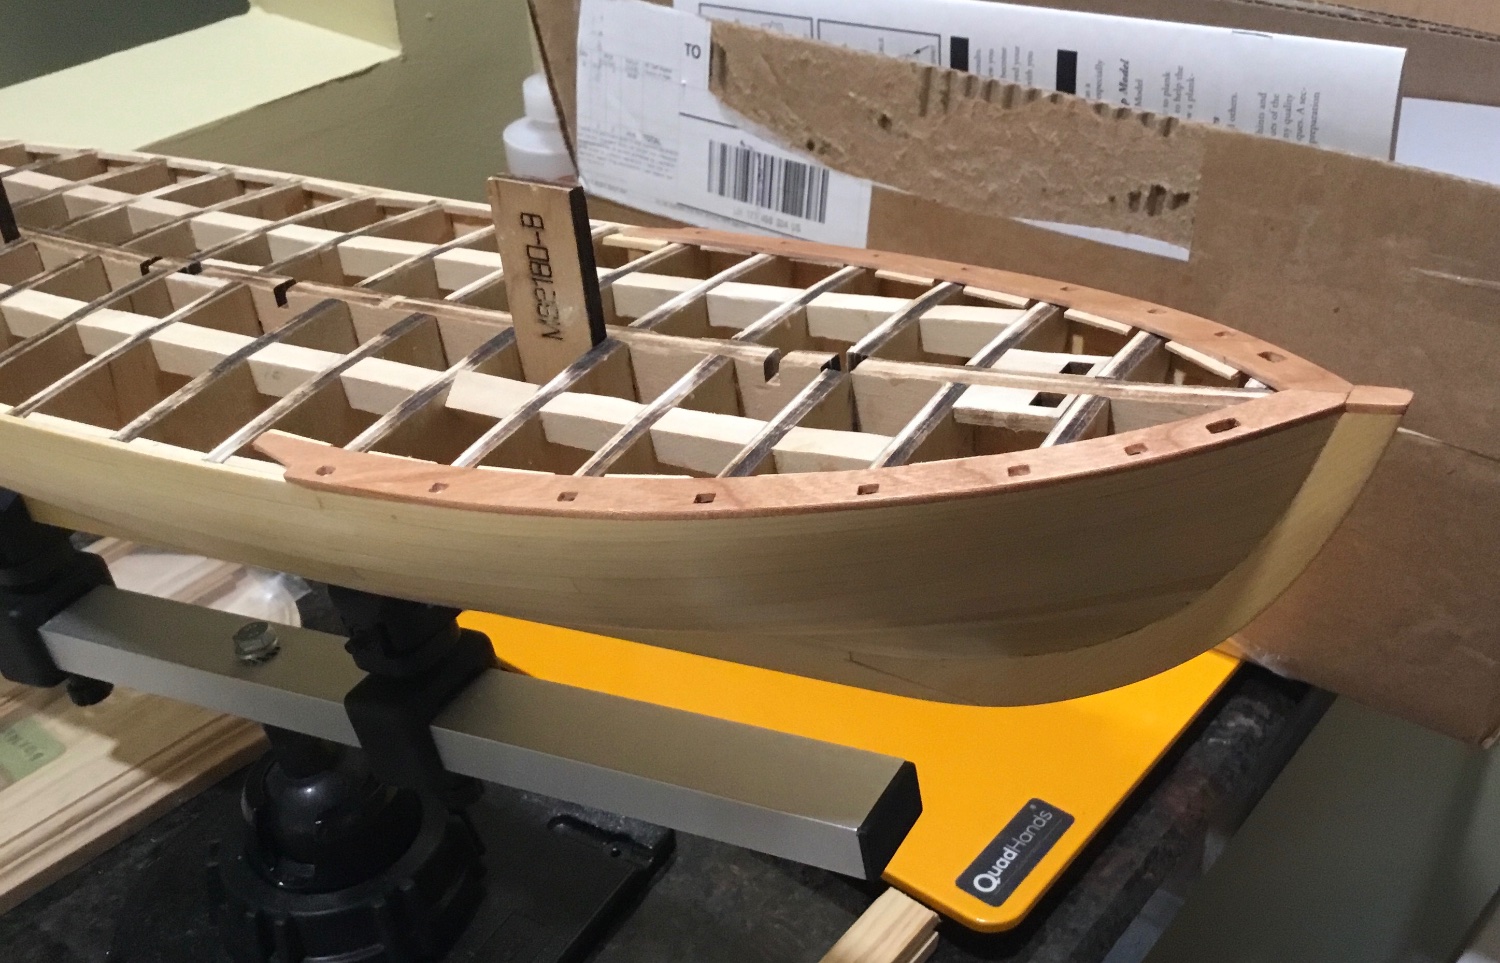
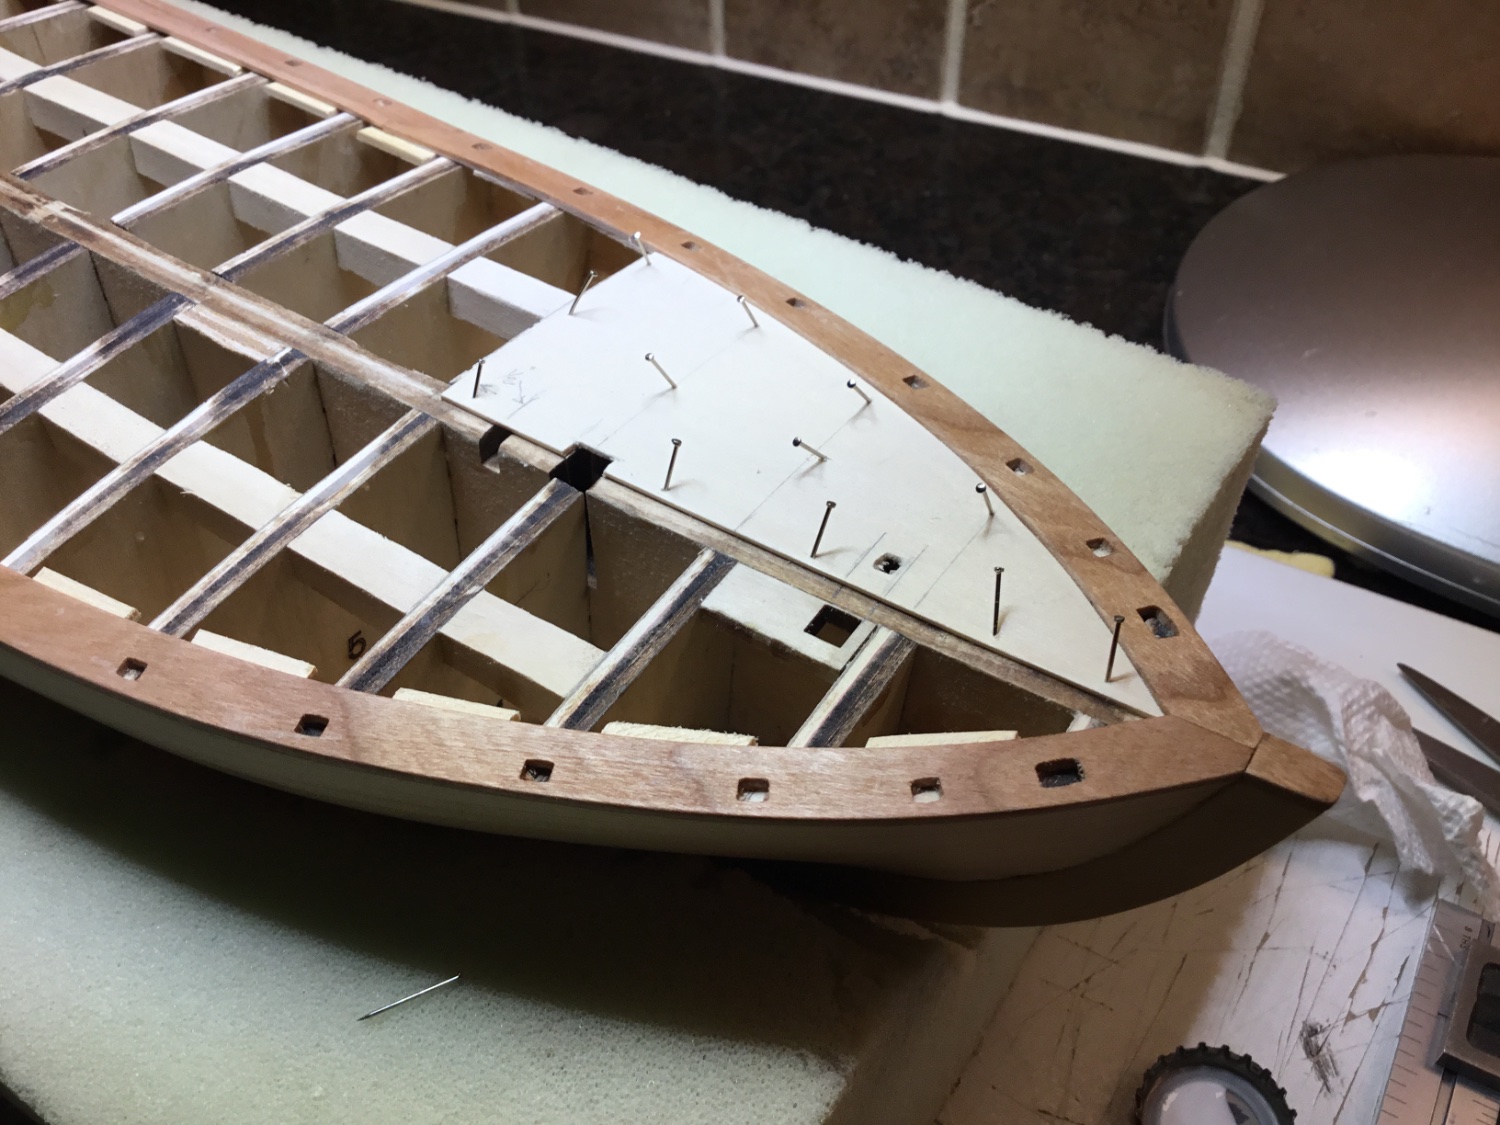
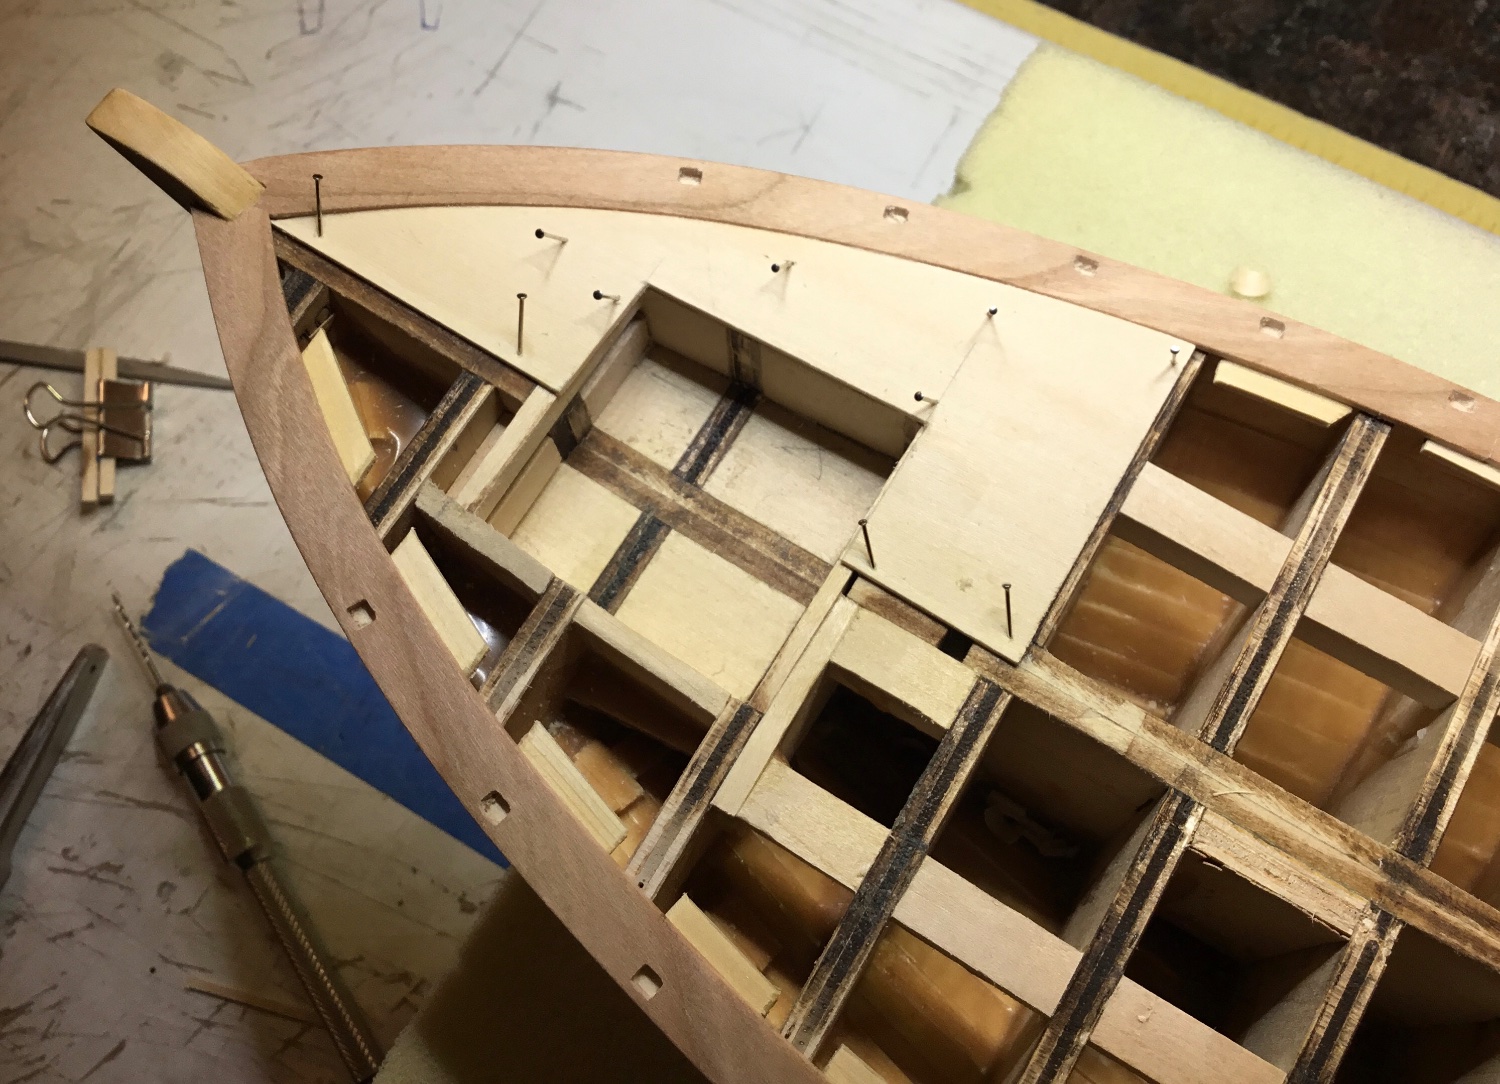
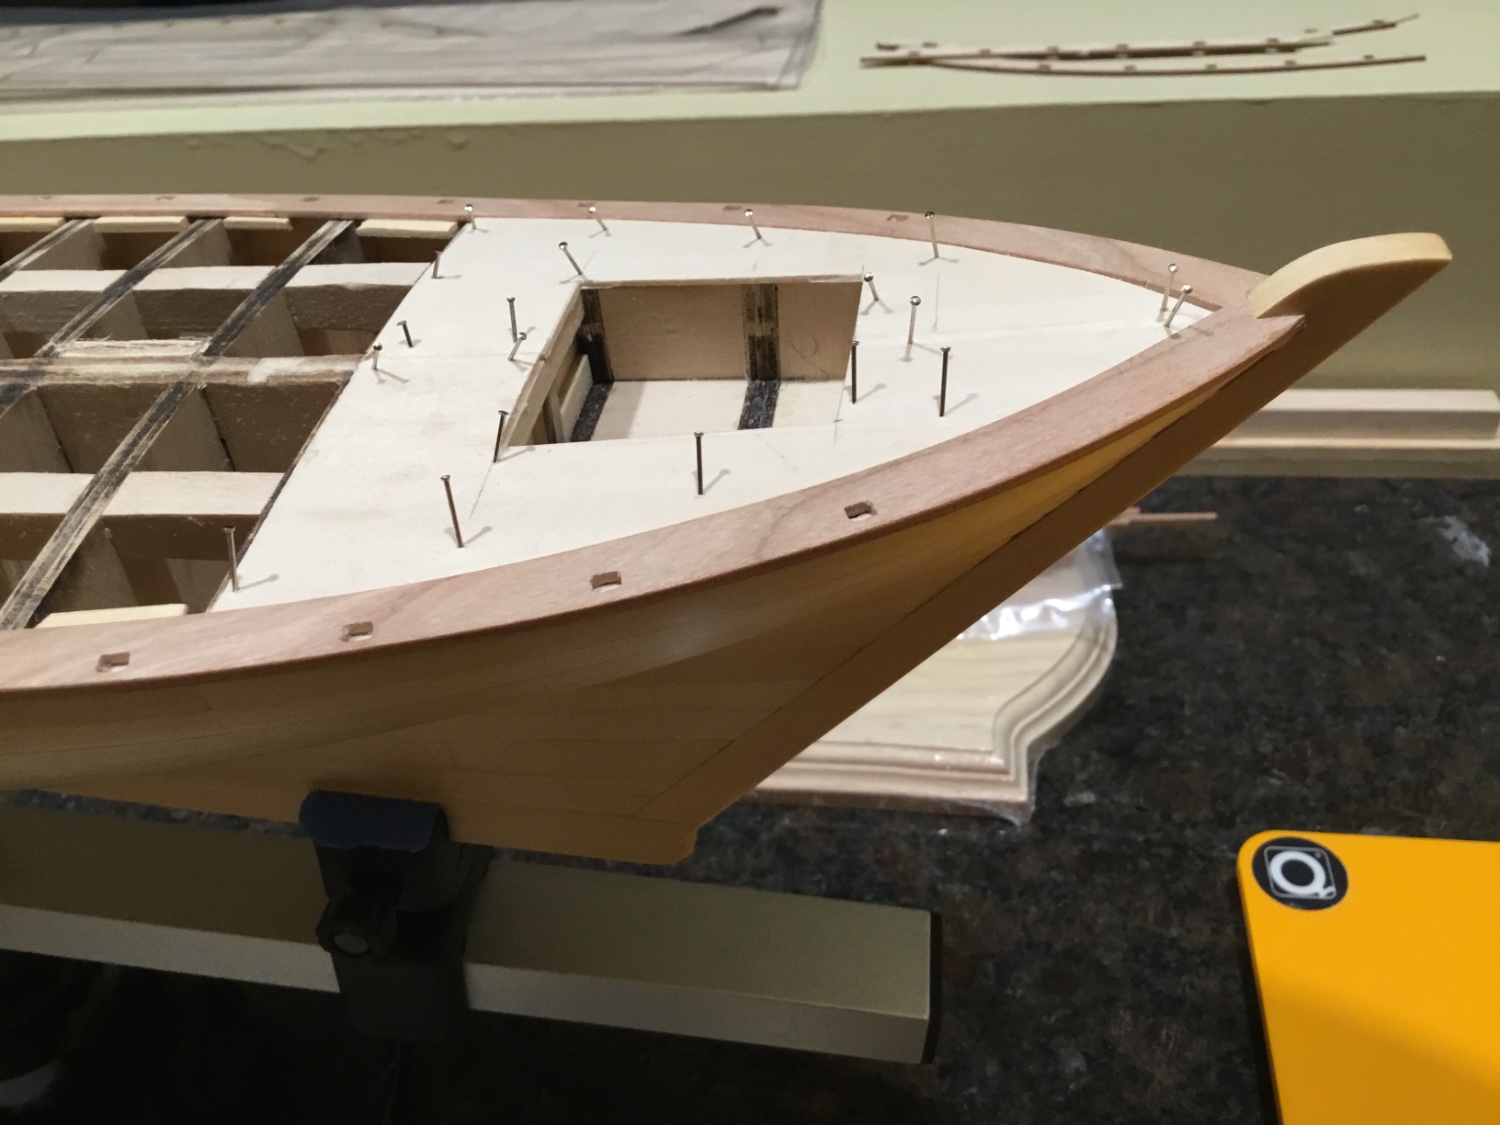
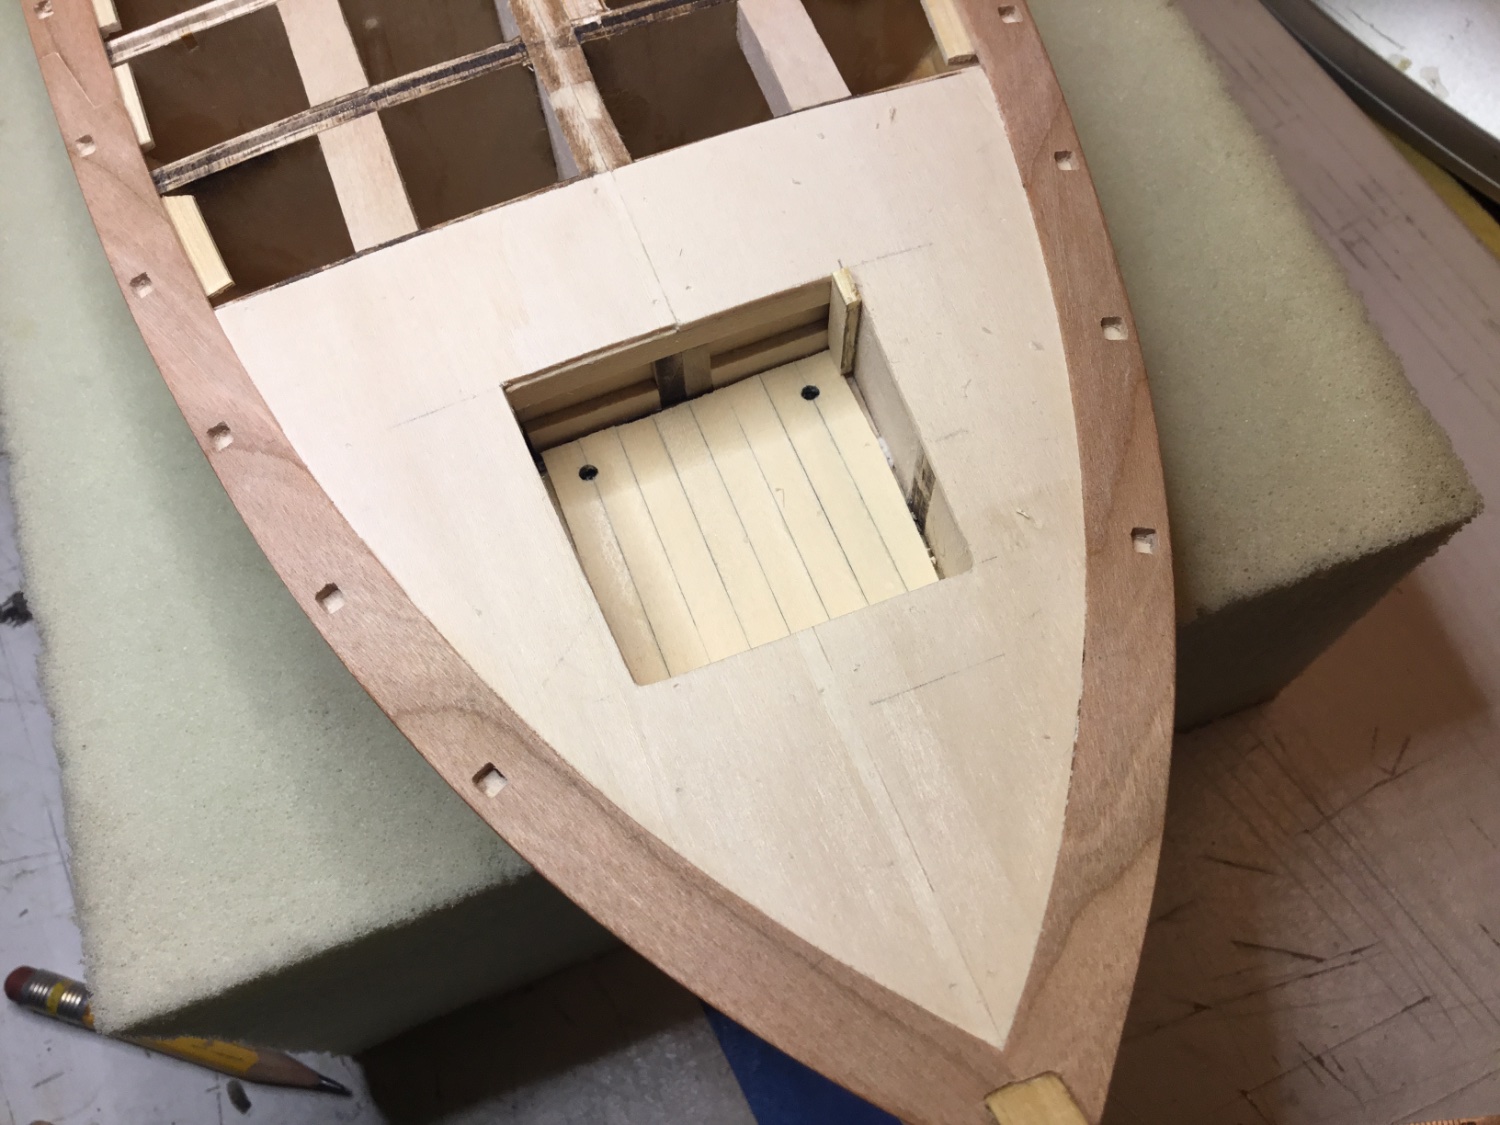
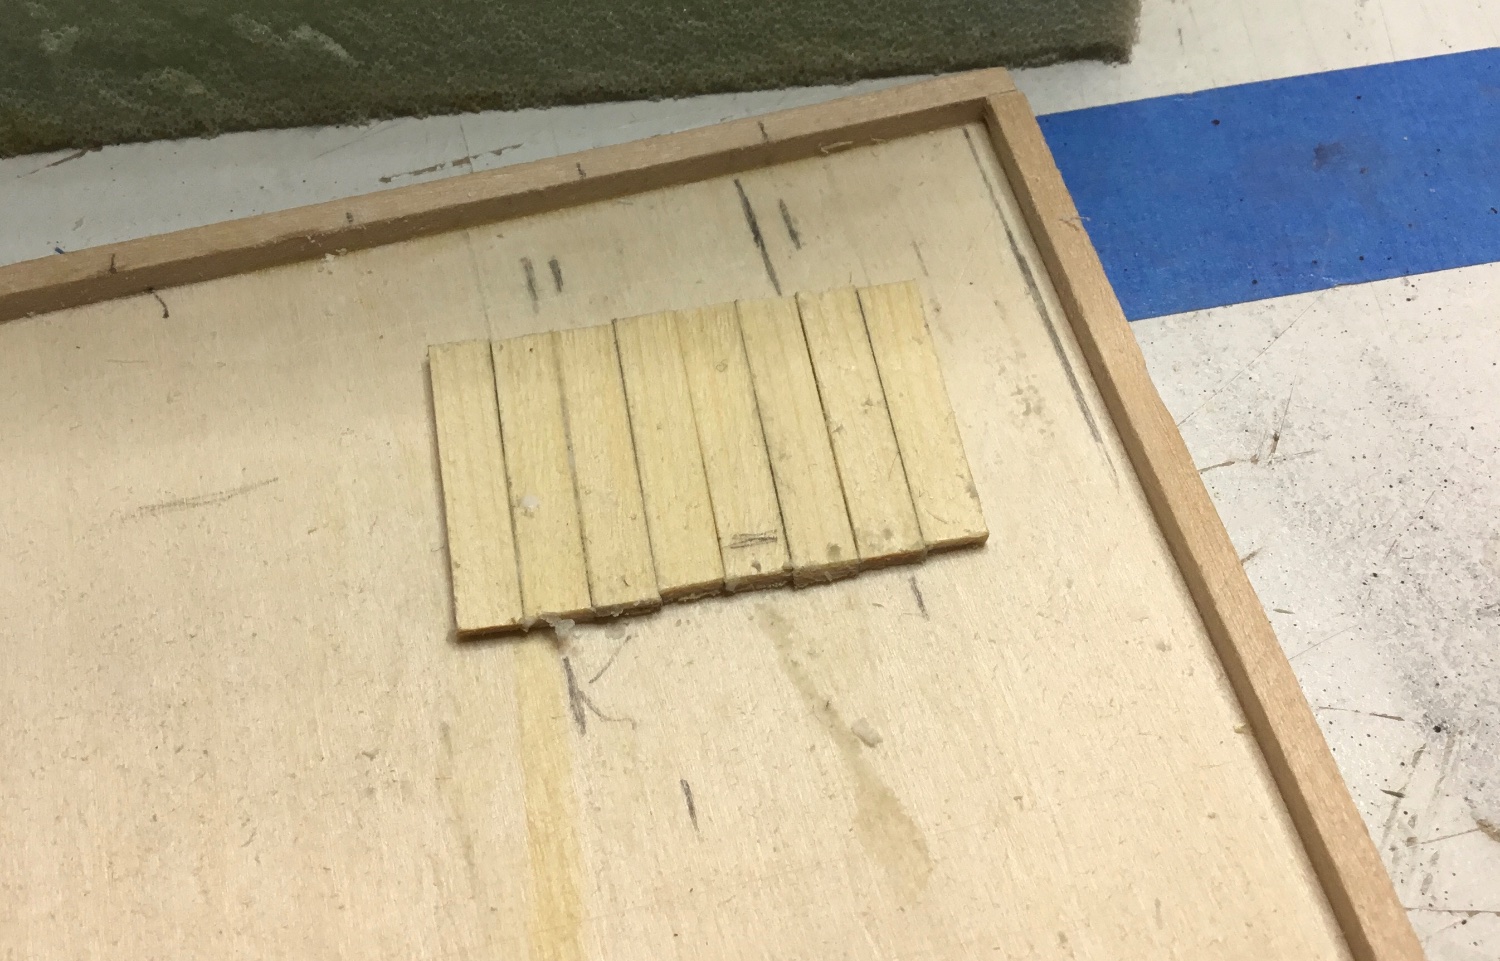
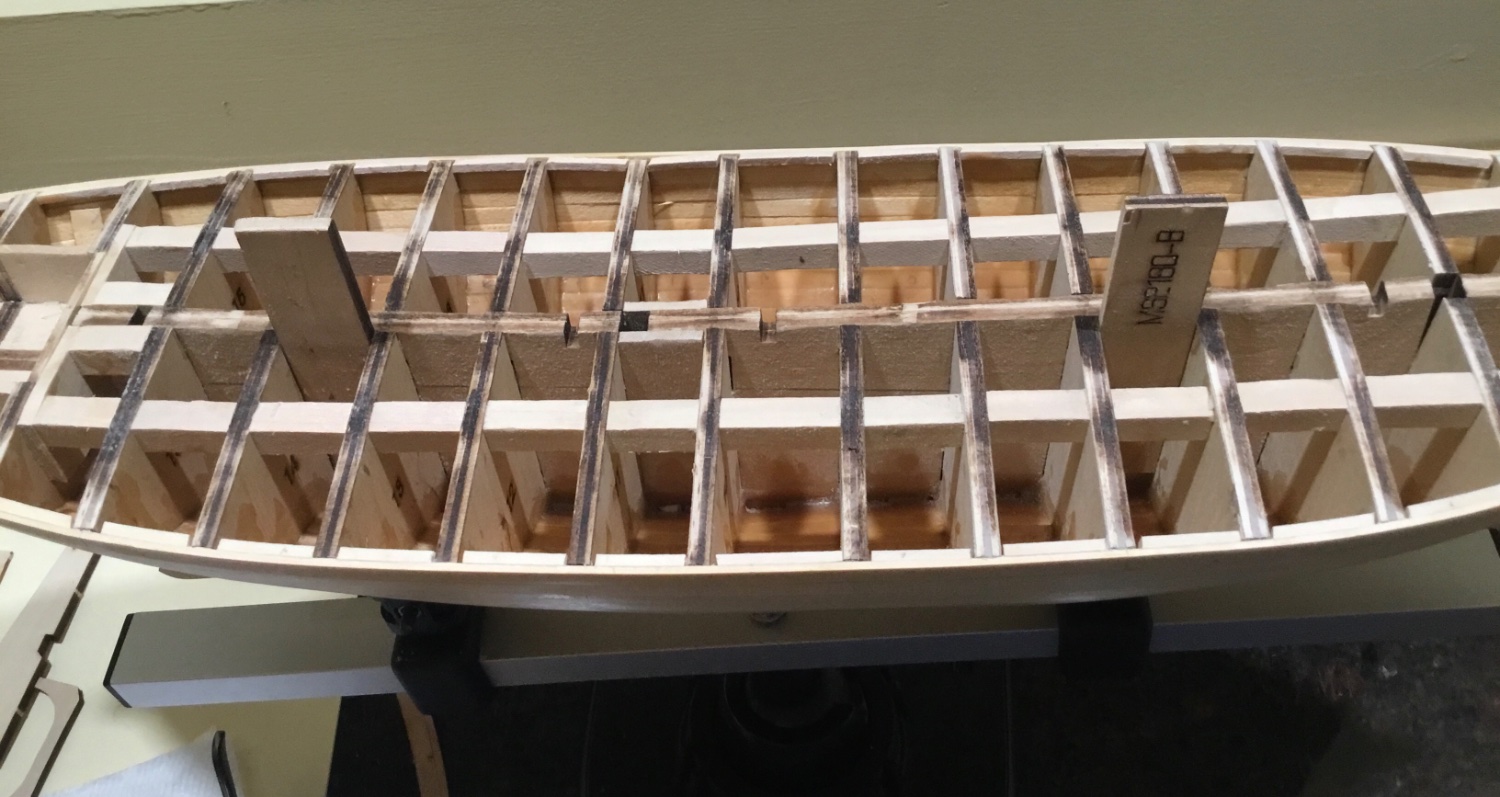
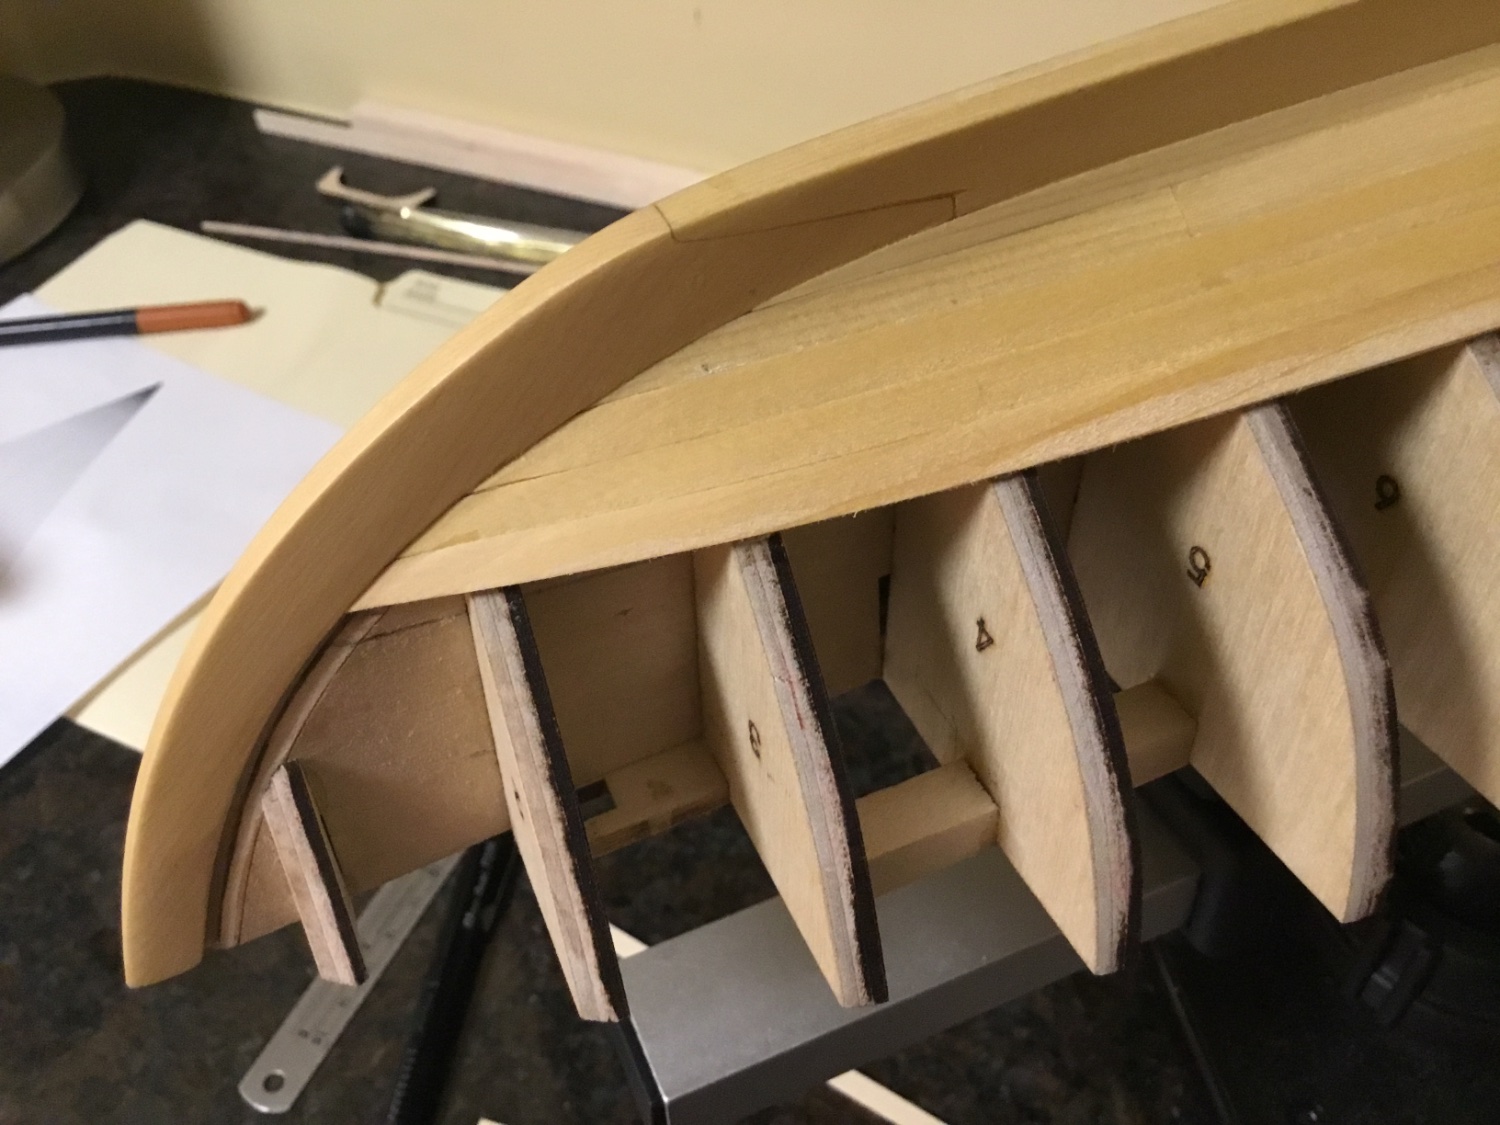
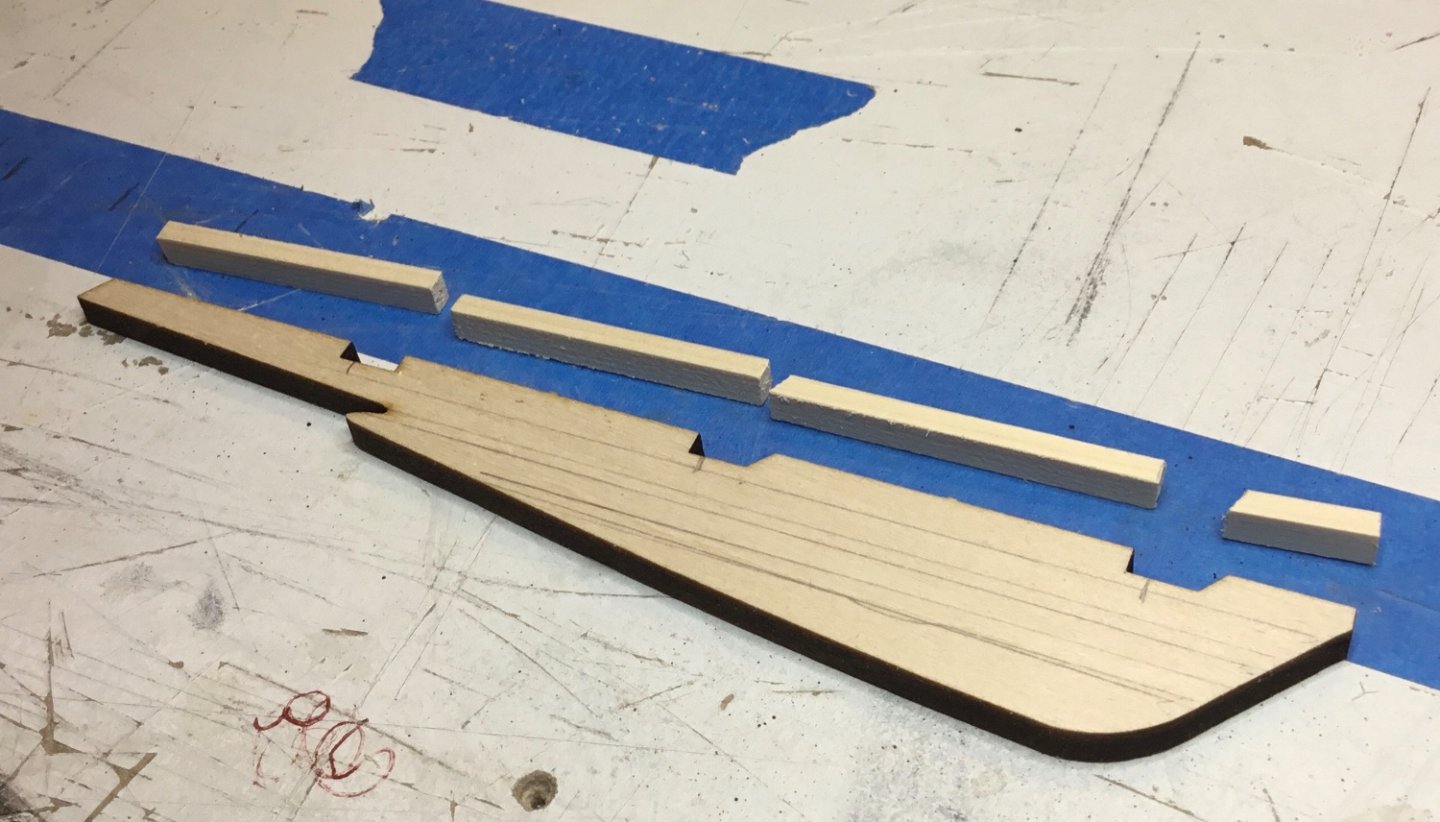
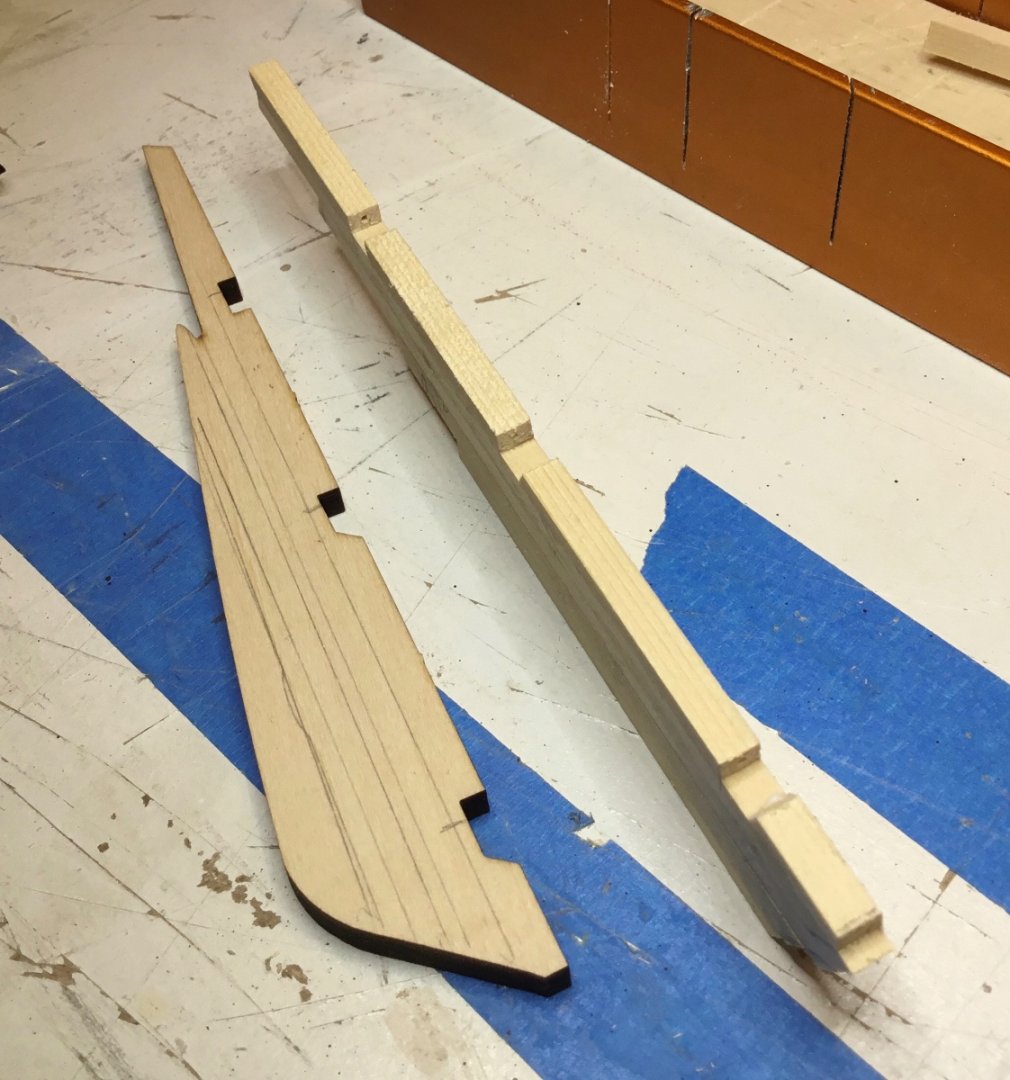
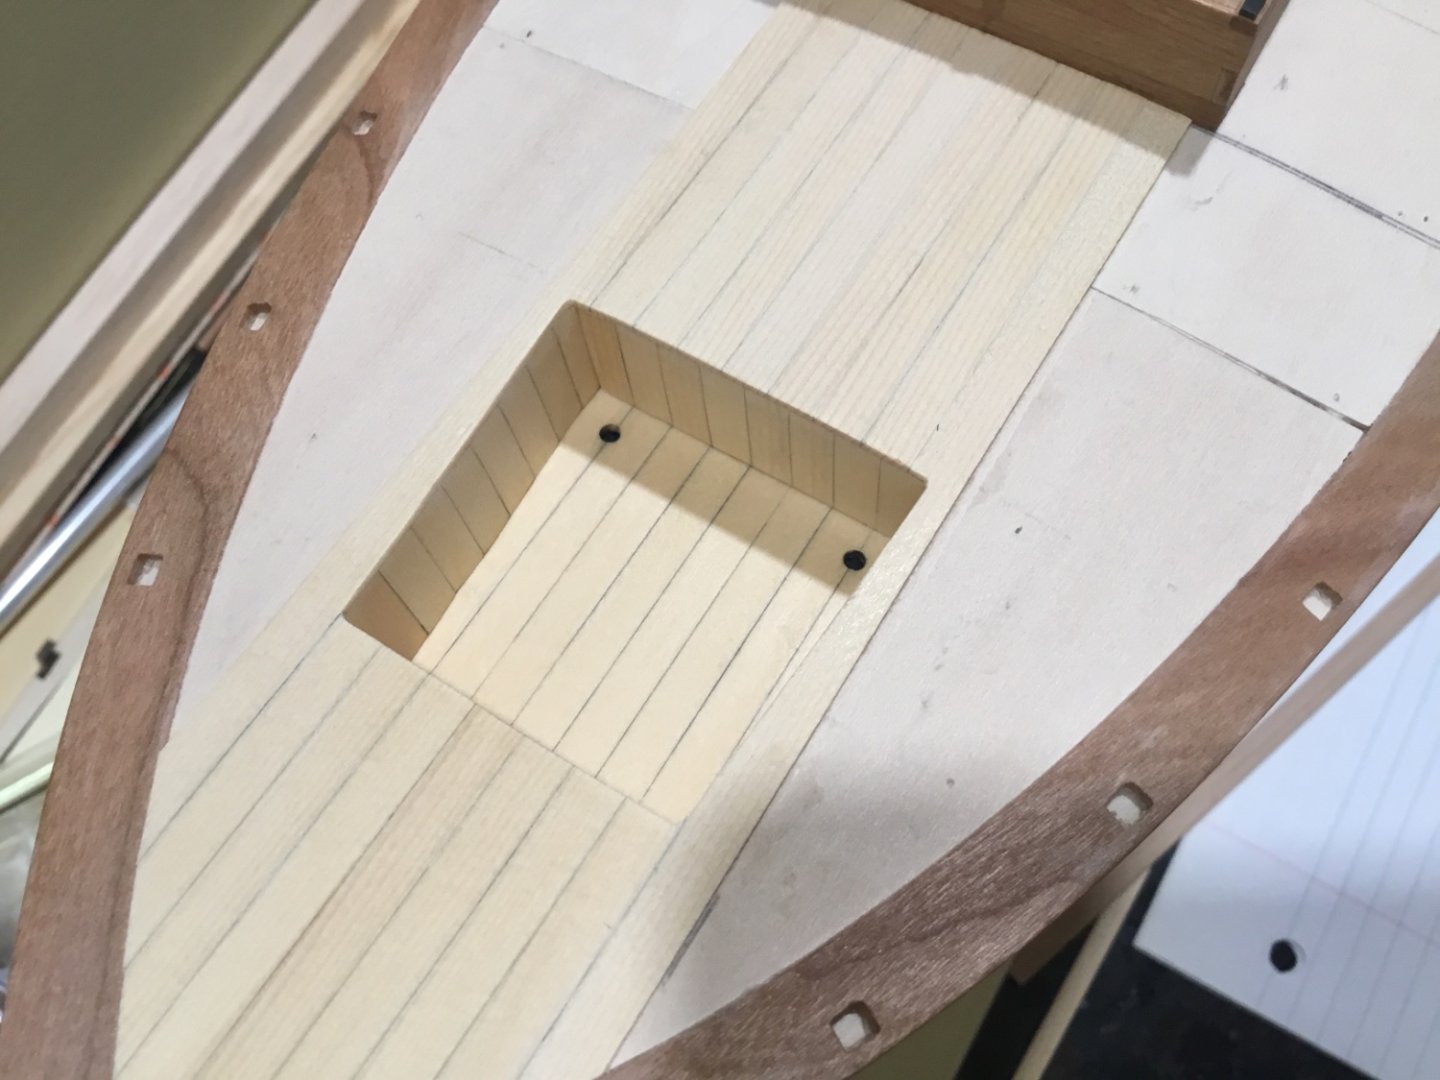
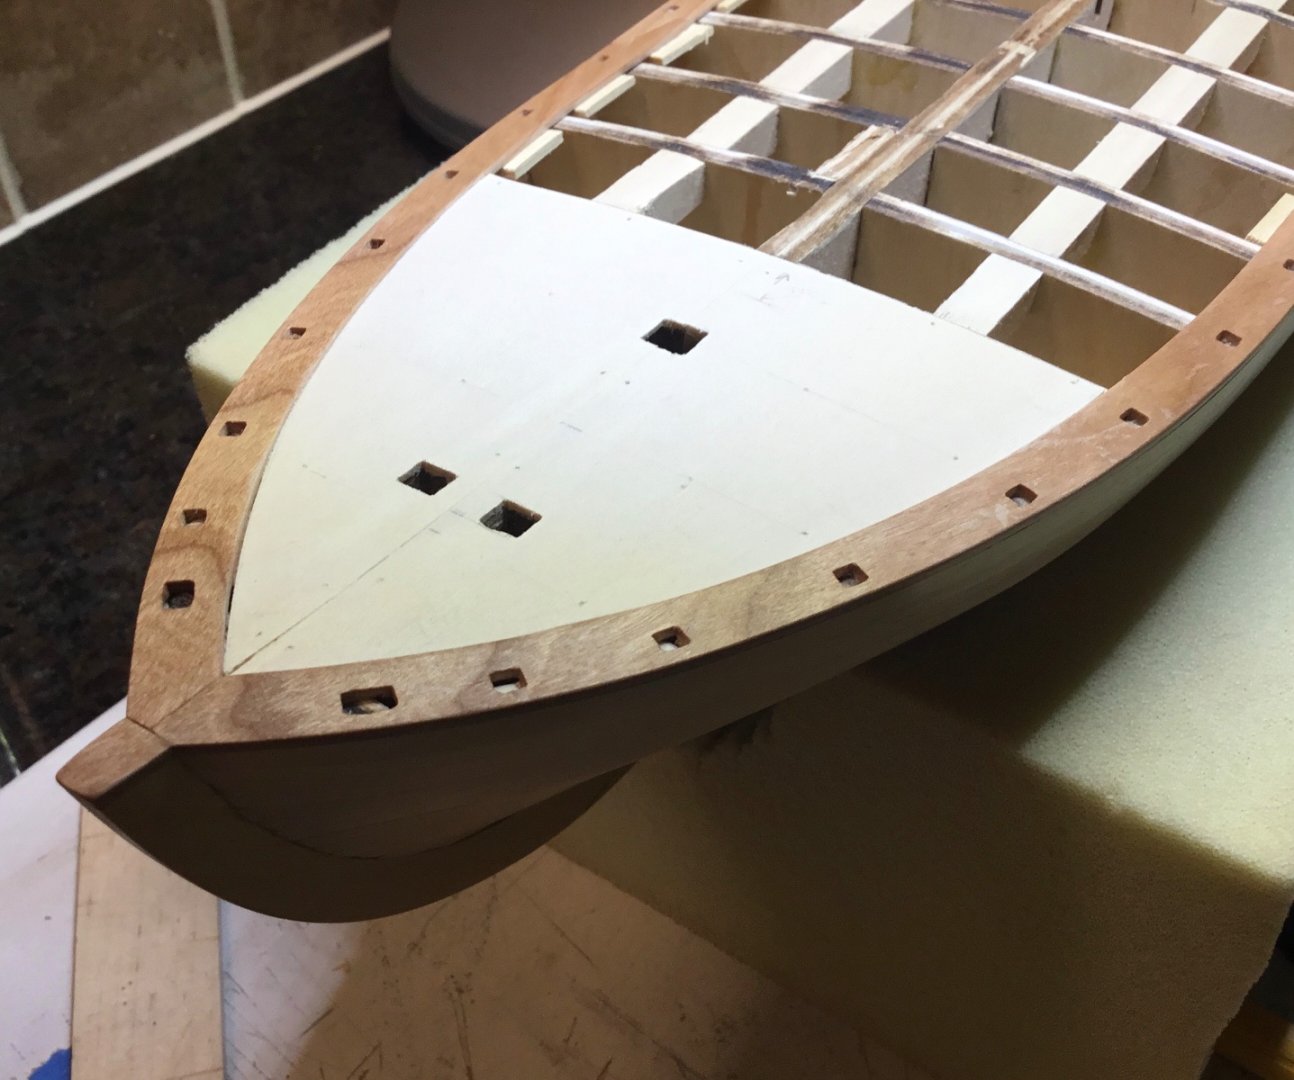
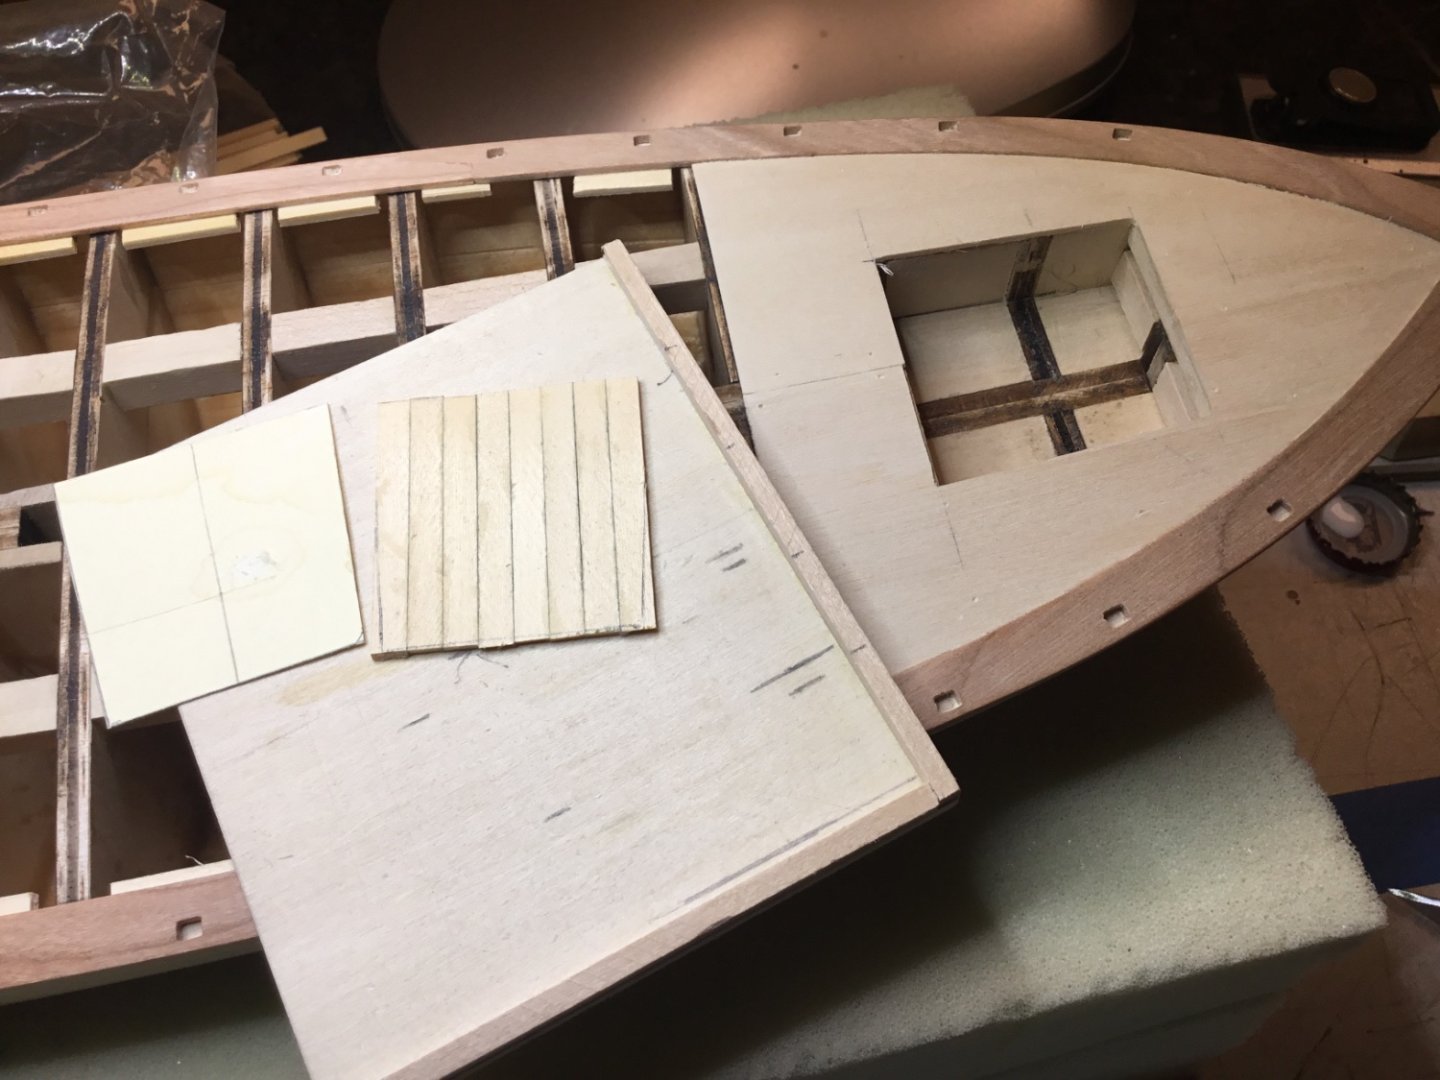
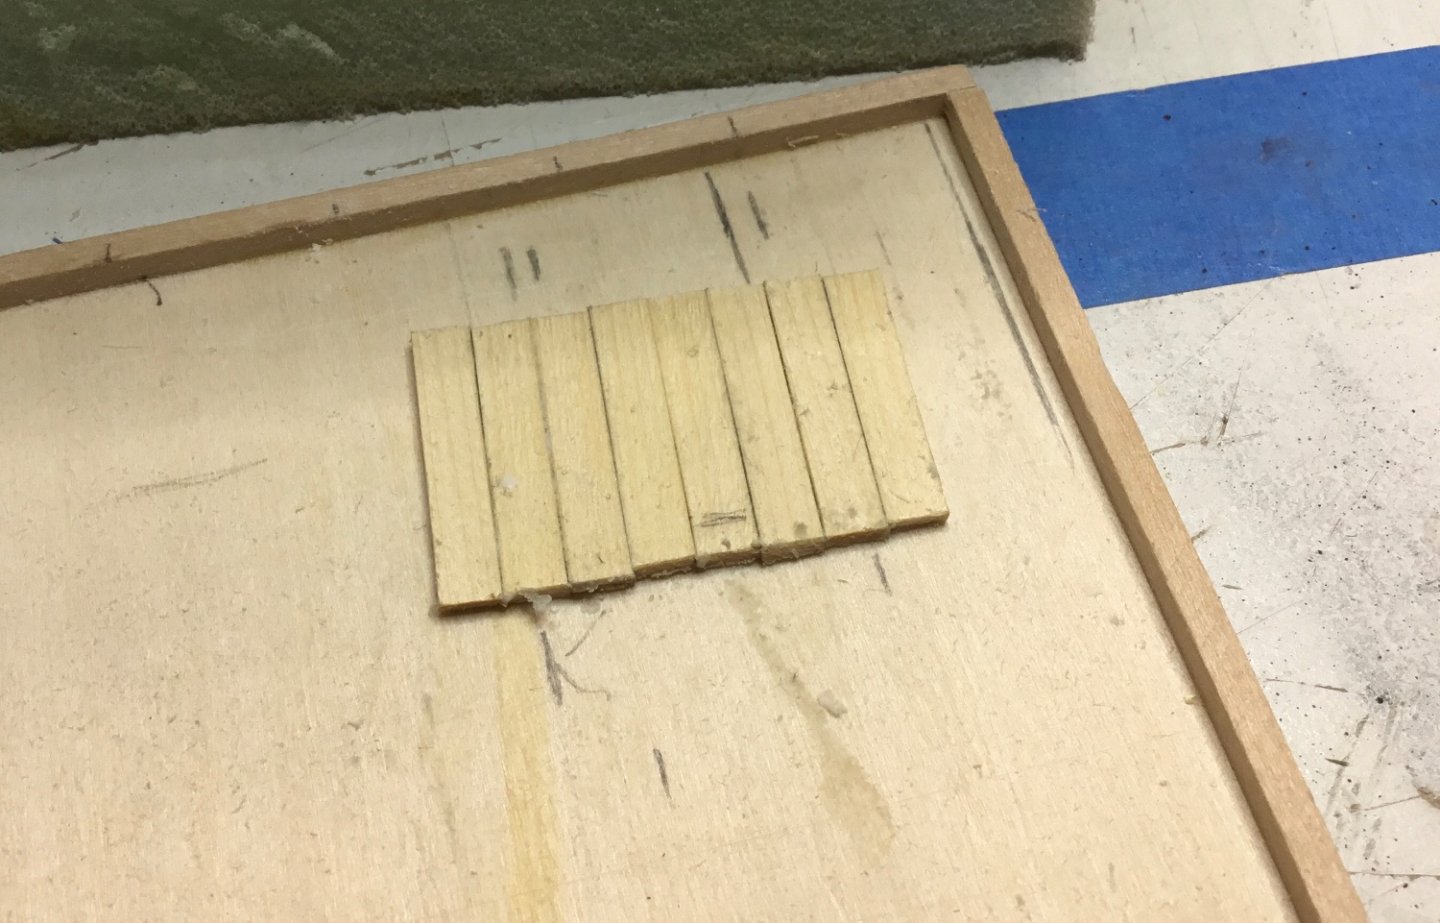
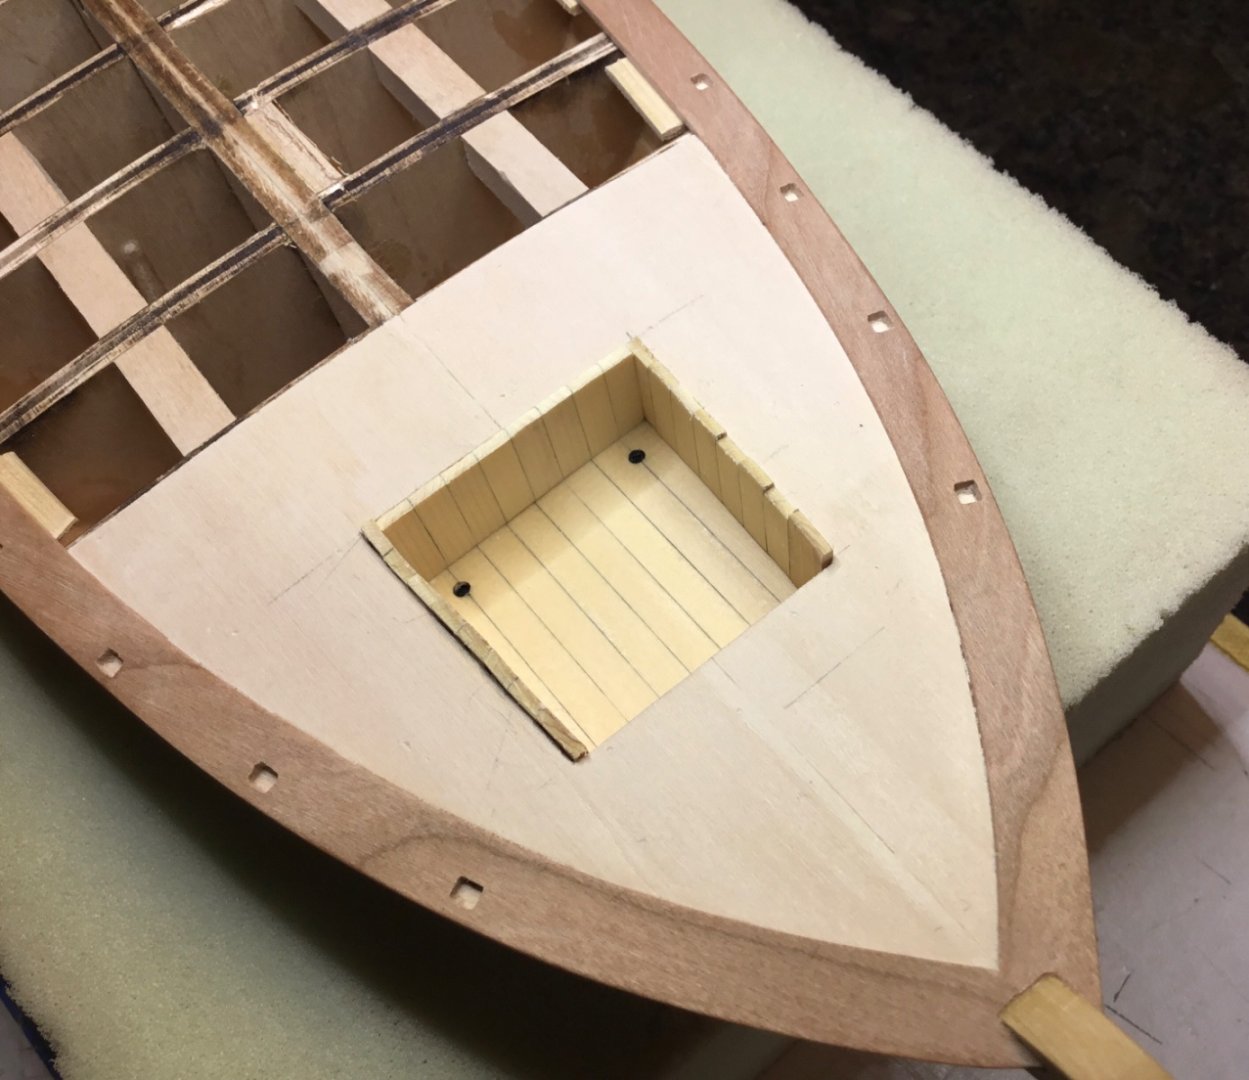
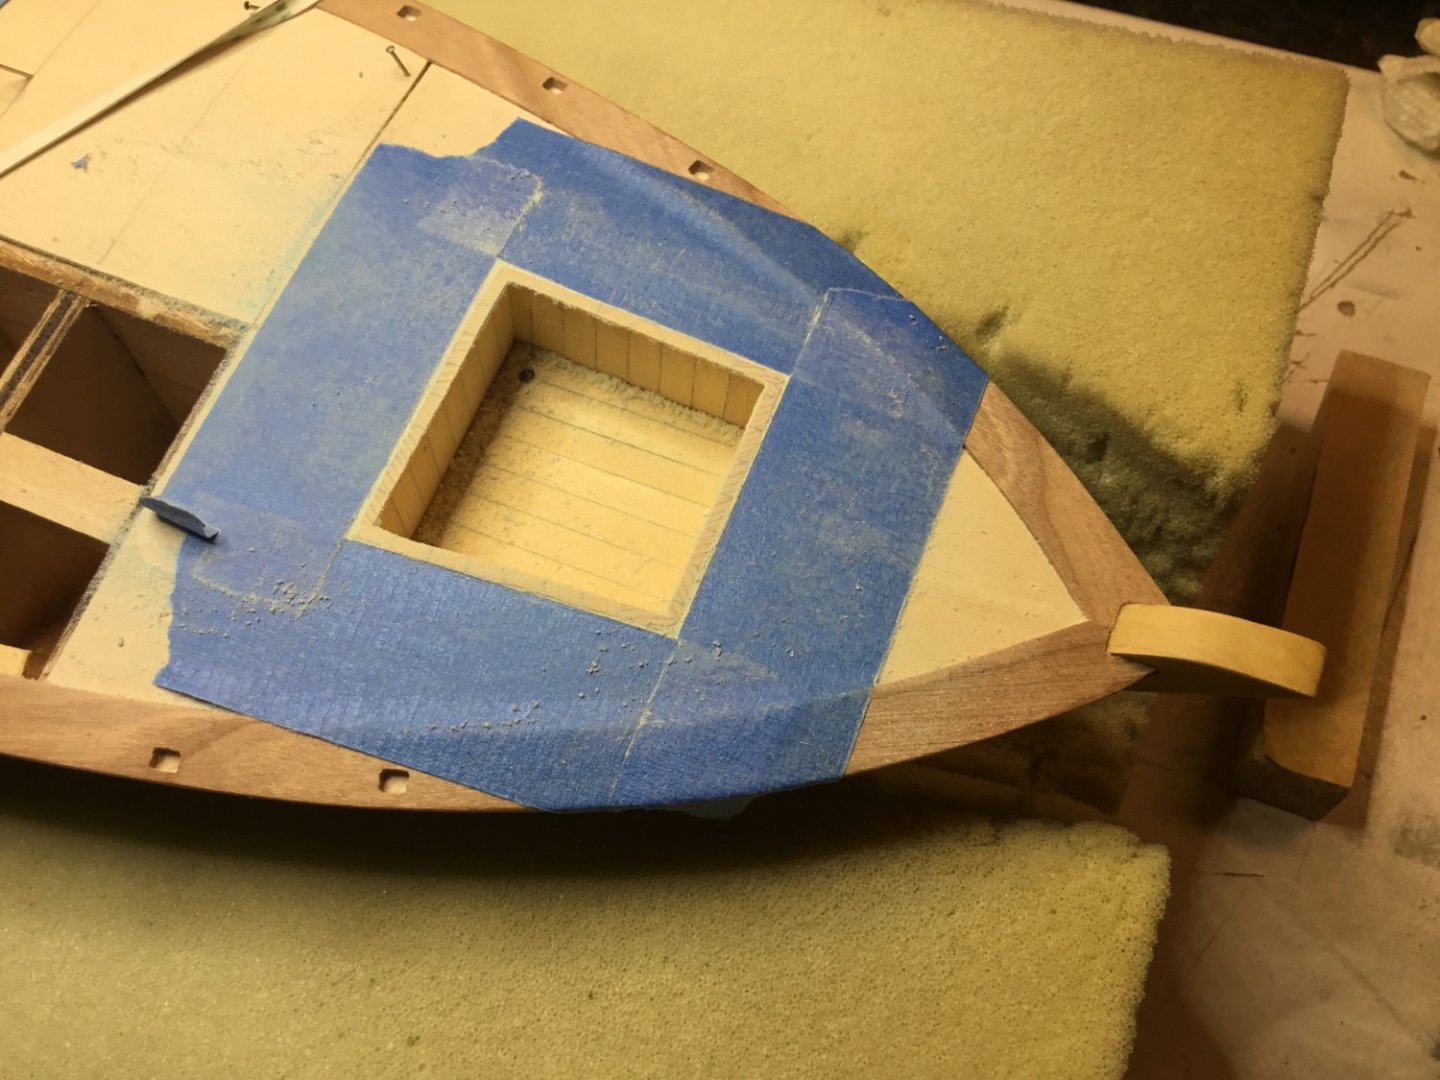
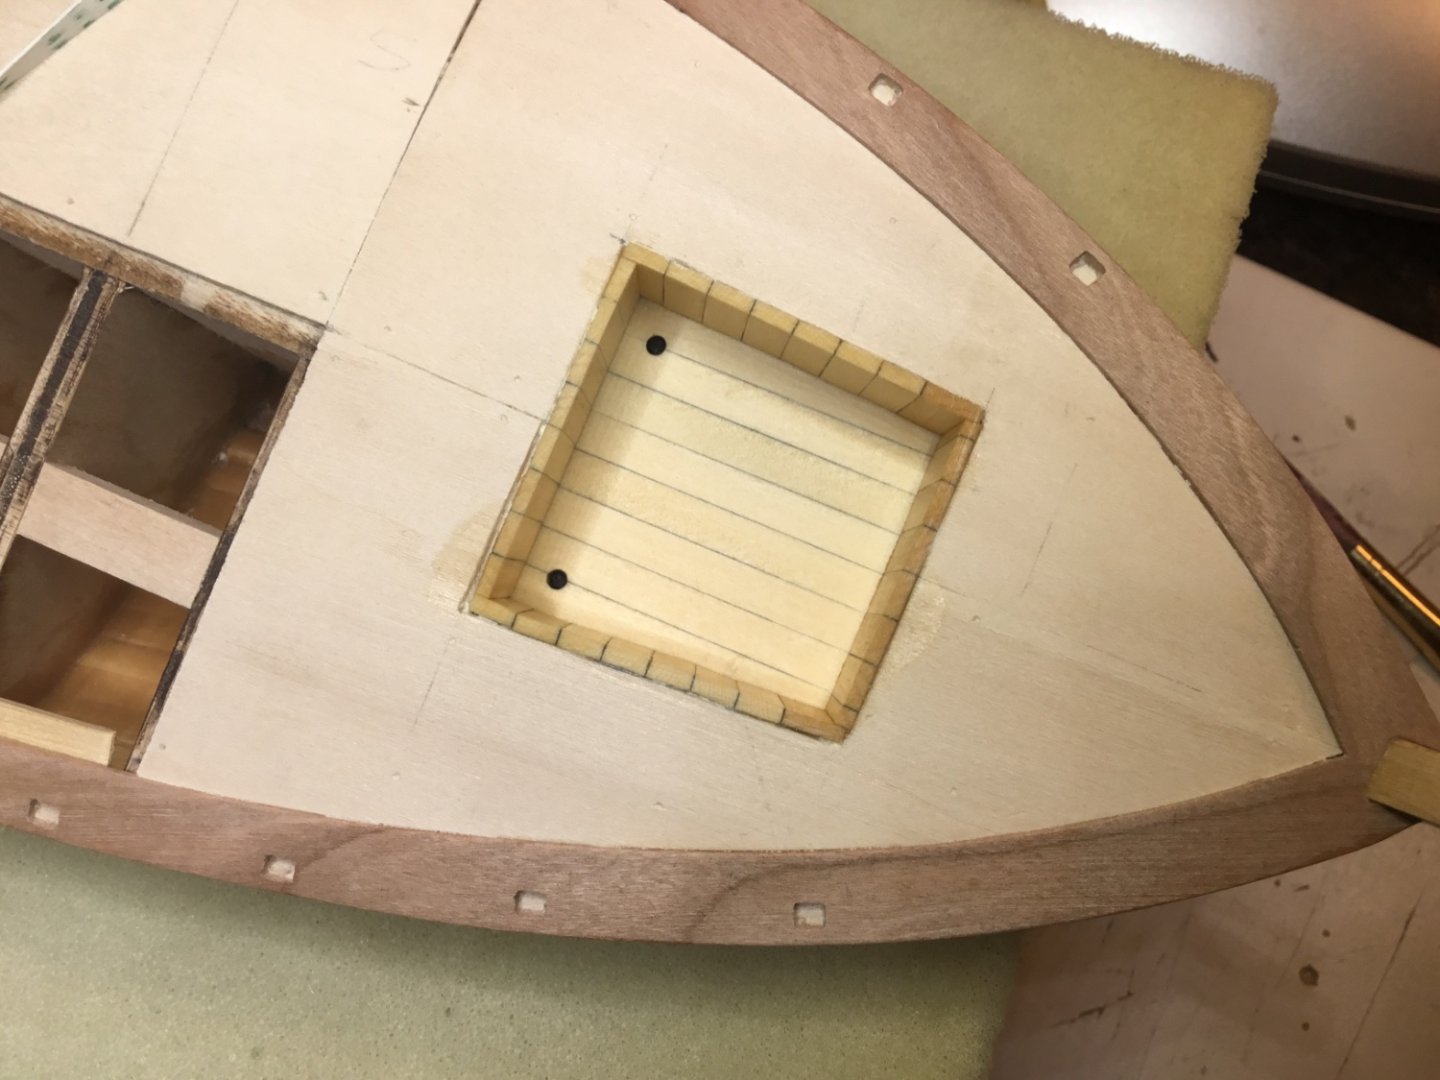
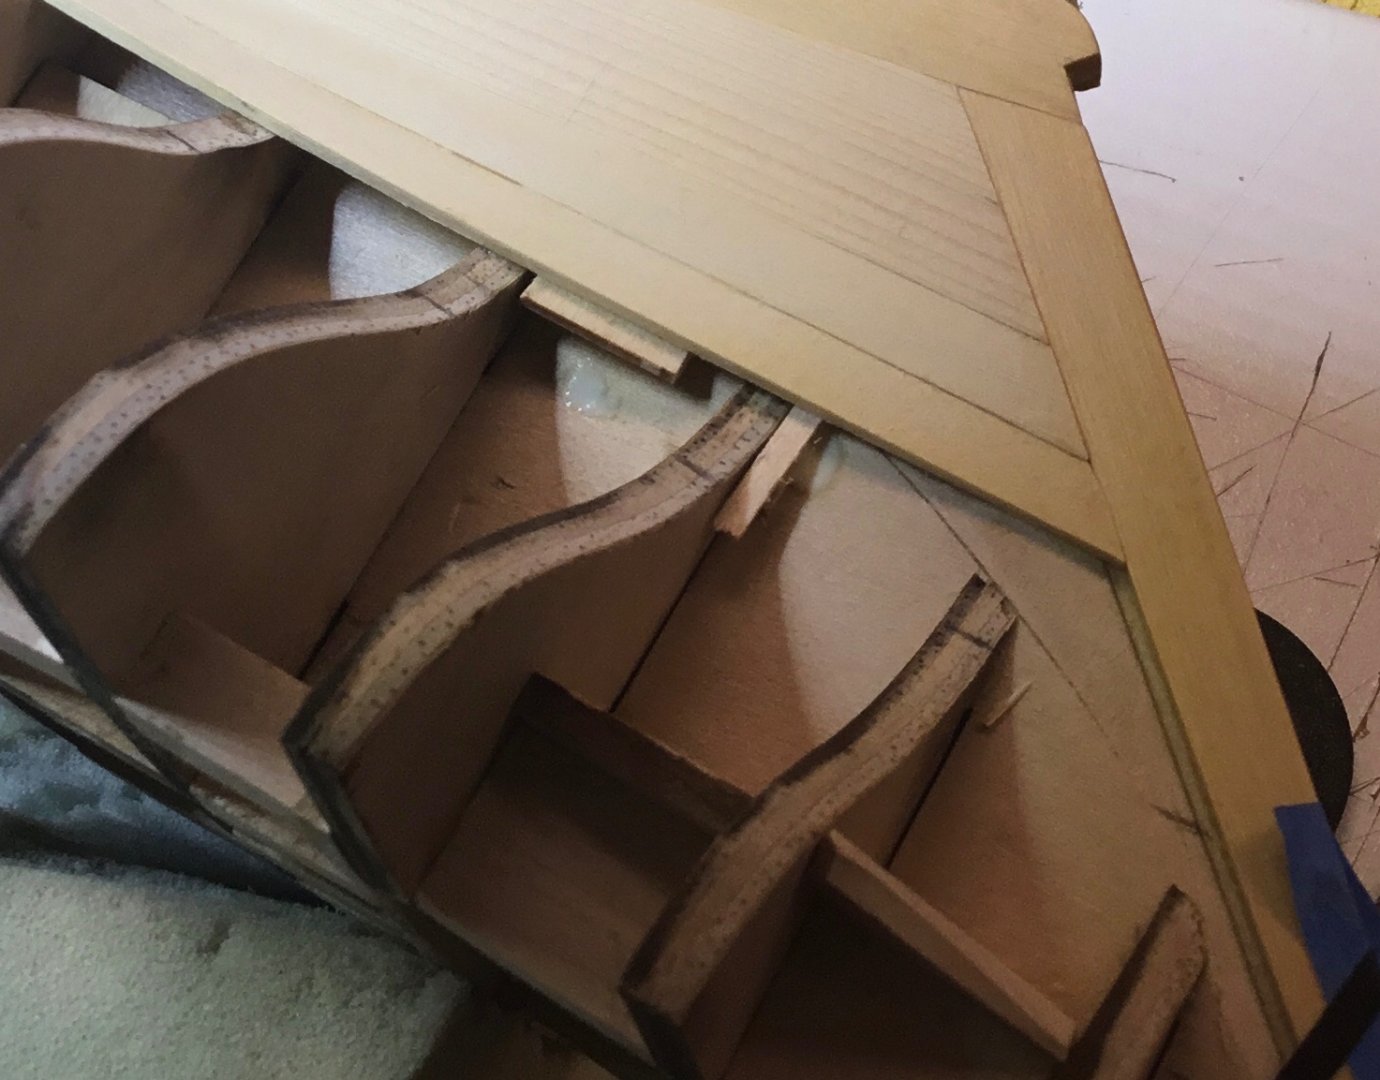
Hi Everyone, thank you very much for your wonderful comments and likes. At the end of the last post I had just started making new planksheers out of cherry. The kit supplied planksheer was cut into three pieces and used as a template. A piece of cherry was added to the top of the stem to bring it up to the correct height. Pieces of scrap 1/16” x 1/4” strips were glued to the planhsheer between the bulkheads to support the 1/32” basswood sub deck. I had enough basswood sheet to do part of the sub deck so I installed a bit at both ends. While waiting for more basswood the floor and the walls of the cockpit where made. Glued strips of wood together for the floor and used a template to get the proper dimensions. I was looking at shipphotographer’s excellent Glad Tidings build log and Bob Cleek noted that normally these vessels would have two drains in the cockpit as opposed to one so that’s what I went with. The strips of wood on the port and starboard walls were installed individually because of the angle. The other walls were made the same way as the floor. Got some more 1/32” sheet and continued with the sub deck. And of course had to install some planking just to break things up. Next come the hatches. Hope to see you next time.


- 72 replies
-
- 10
-
-
- Glad Tidings
- Model Shipways
- (and 1 more)
-
Hi Nils, very nice sails. I really like looking at your photos. There’s always so much to discover in them.
-
Hi Ian, thank you very much. This boat is a lot of fun.
-
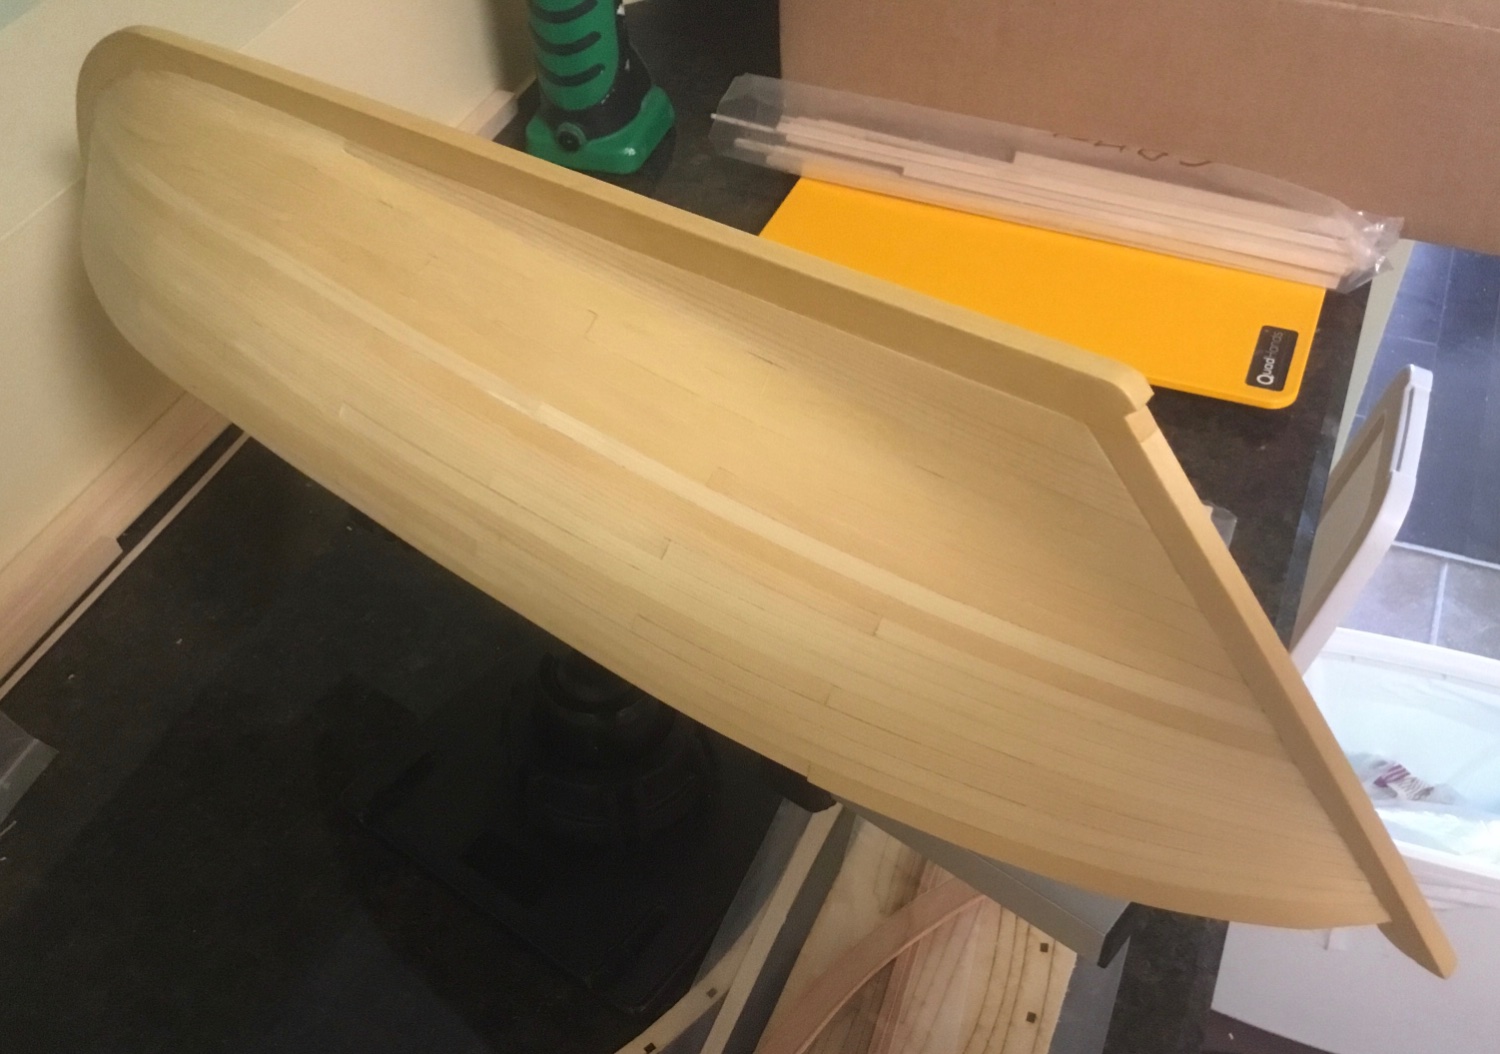
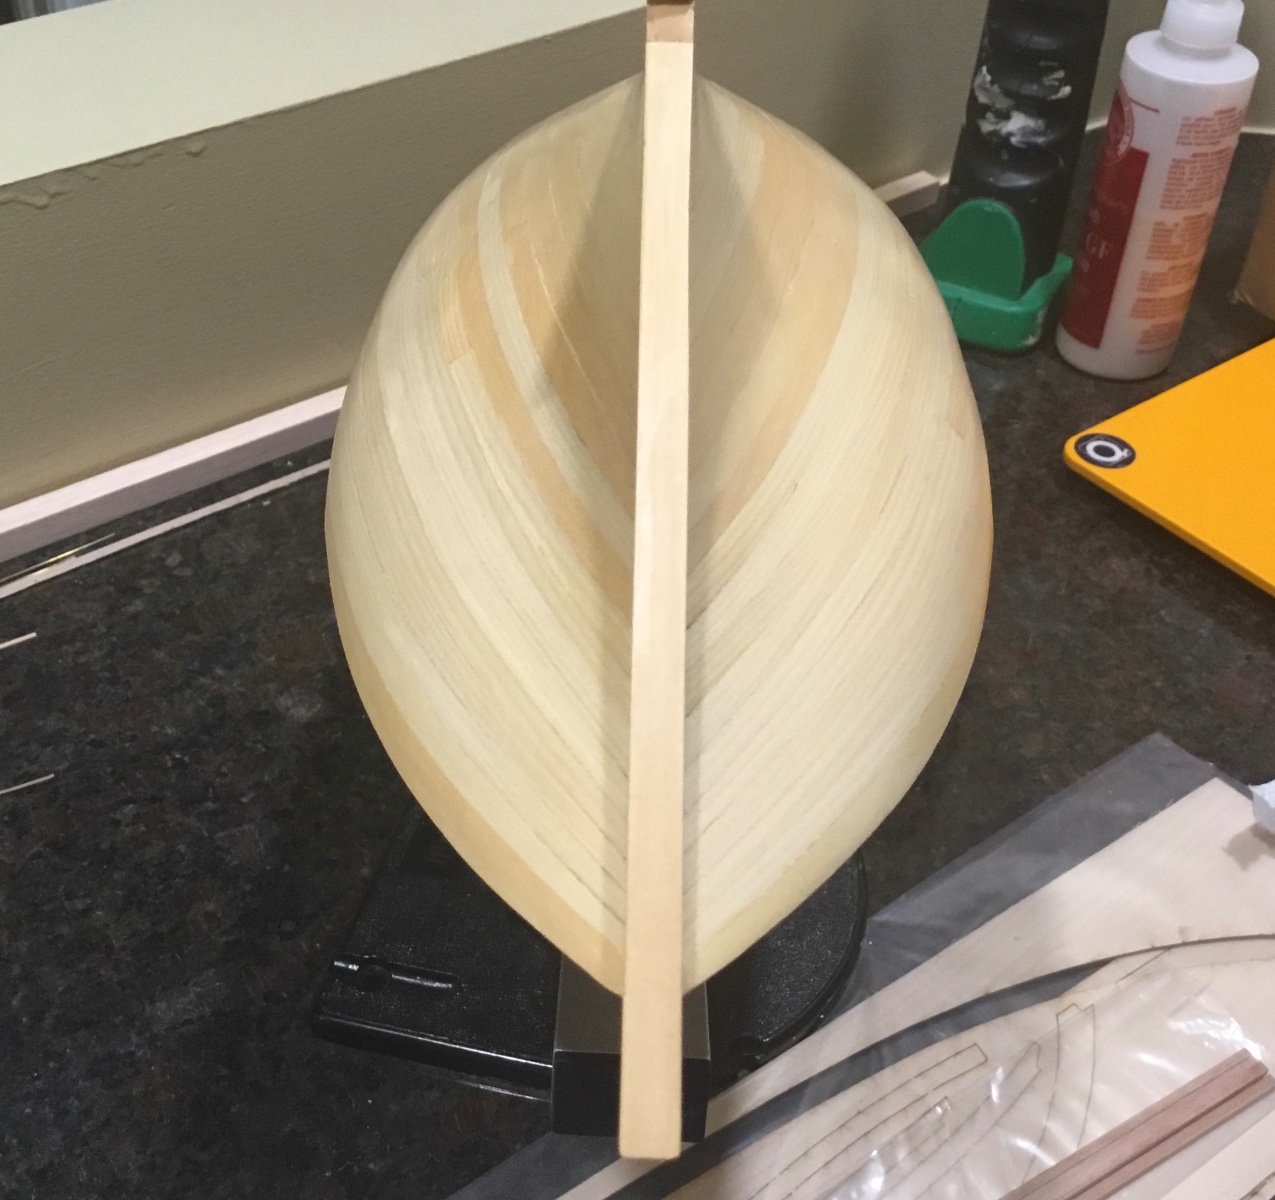
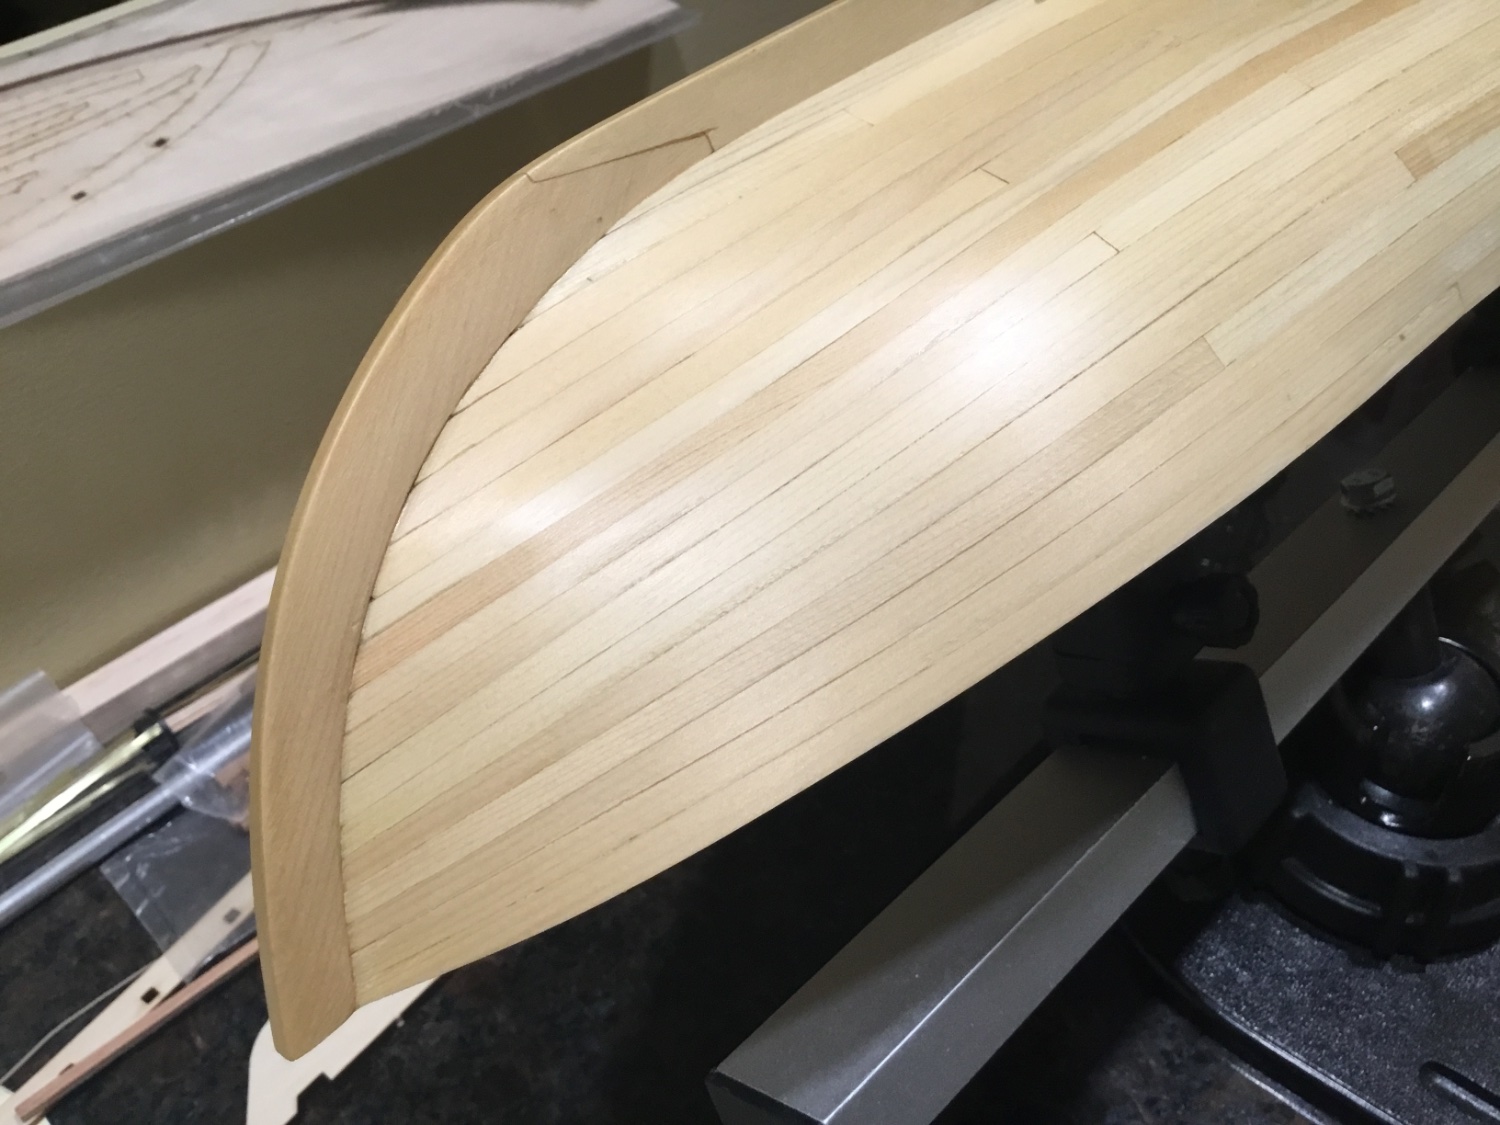
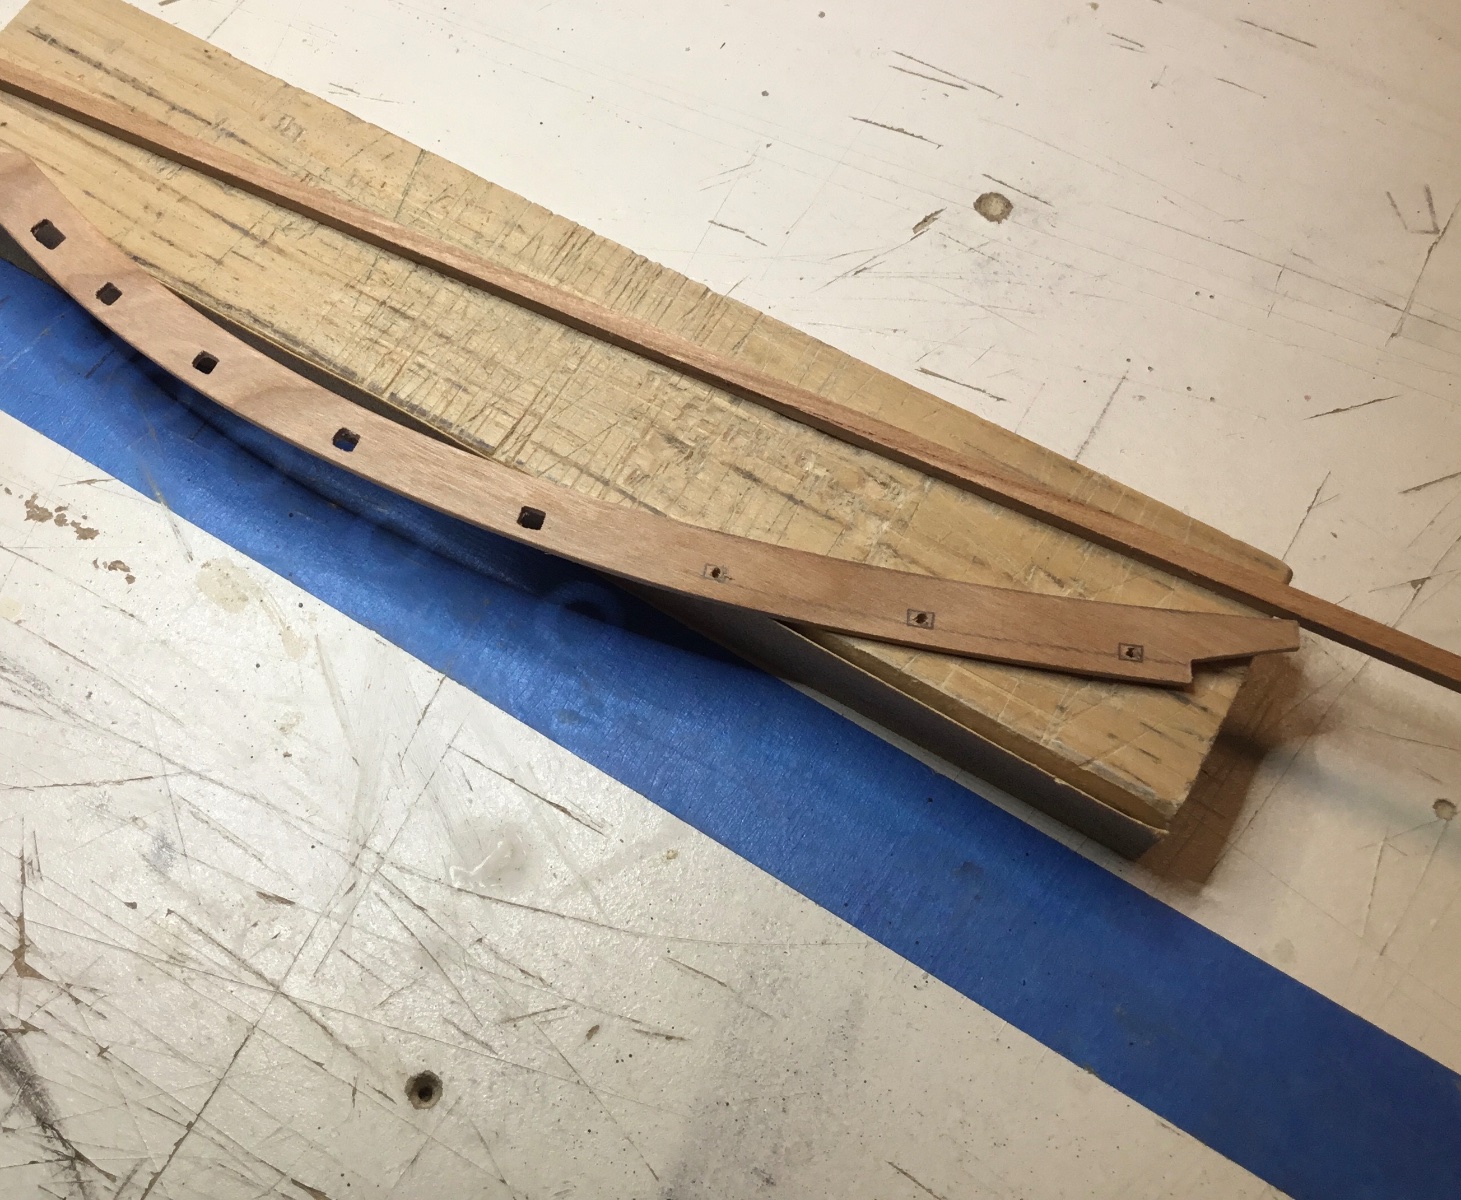
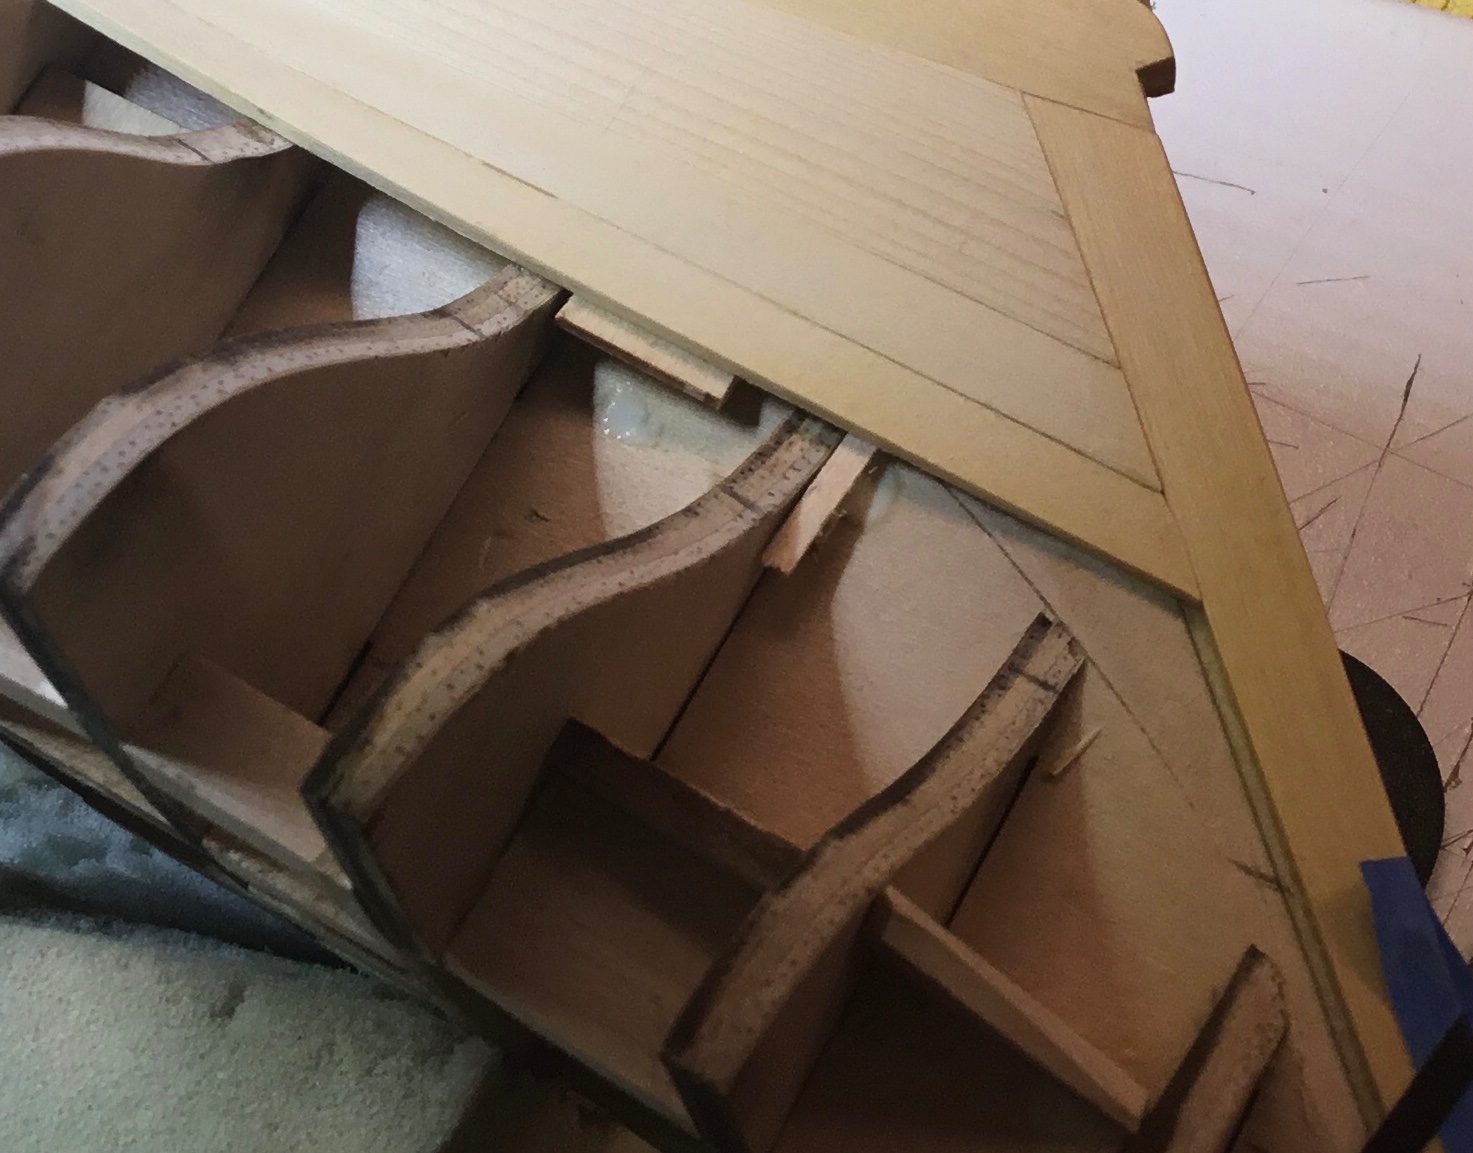
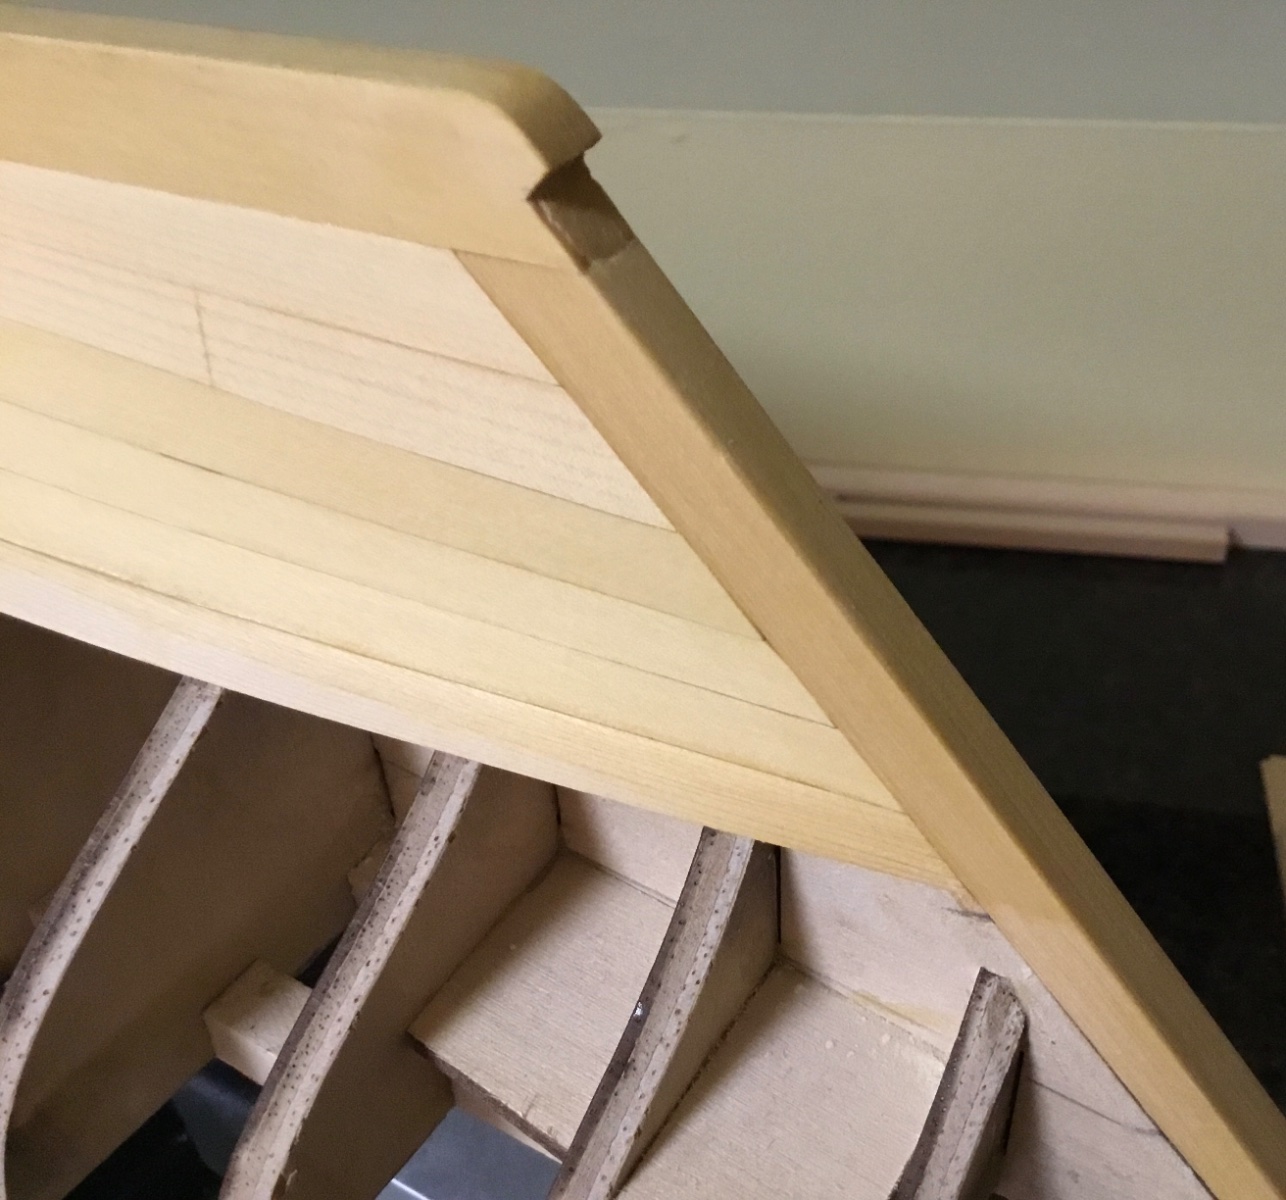
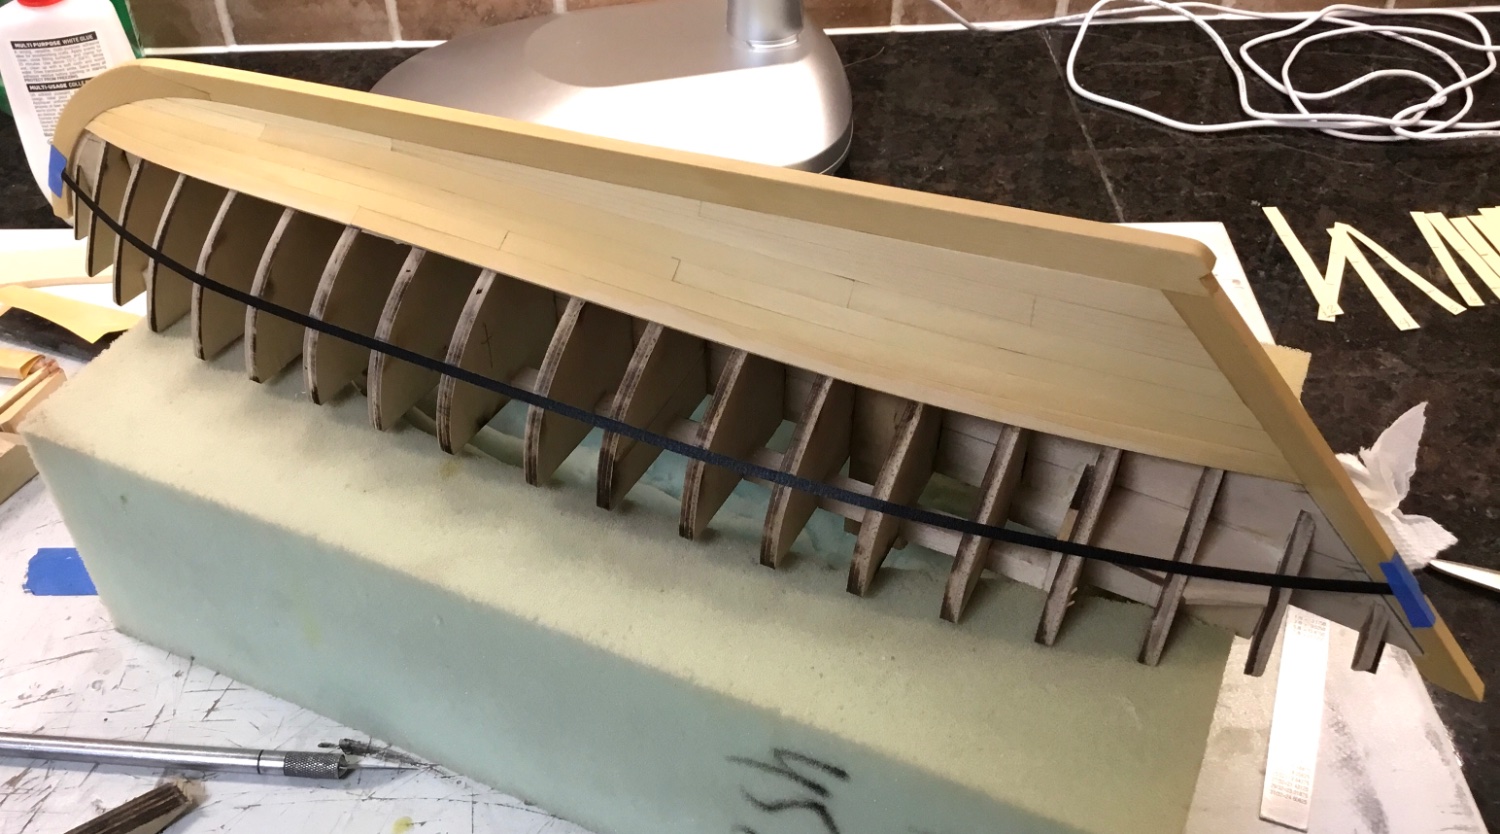
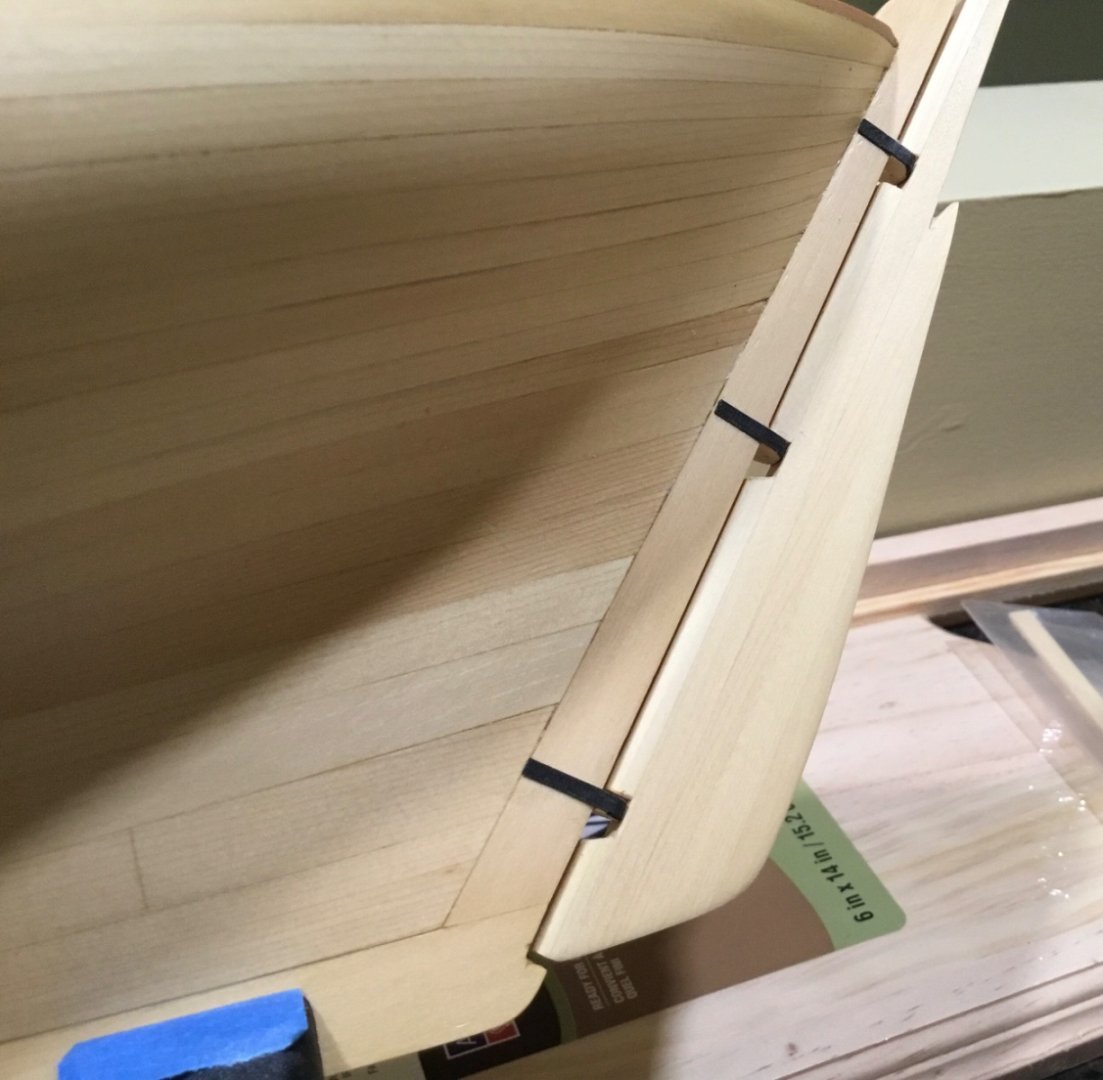
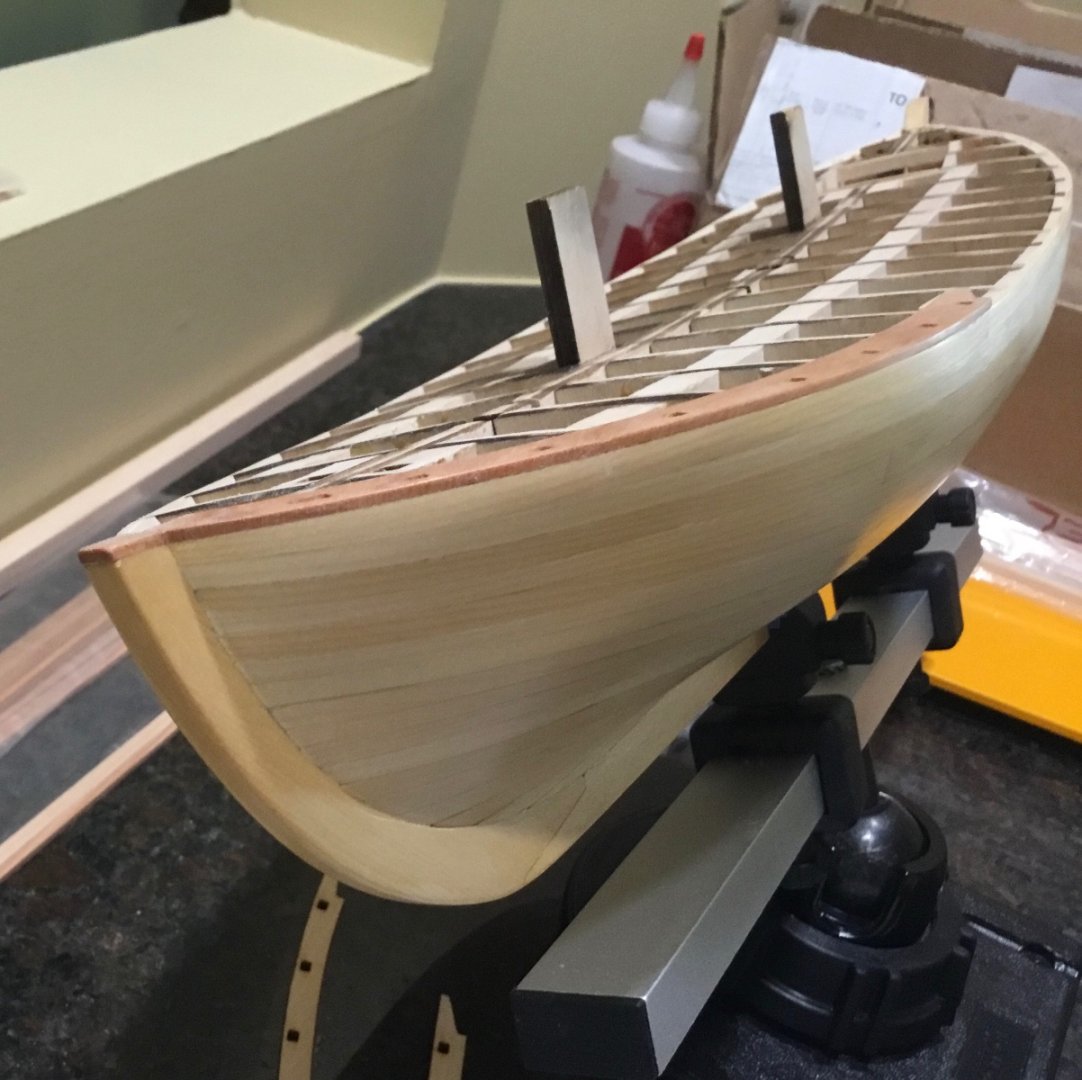
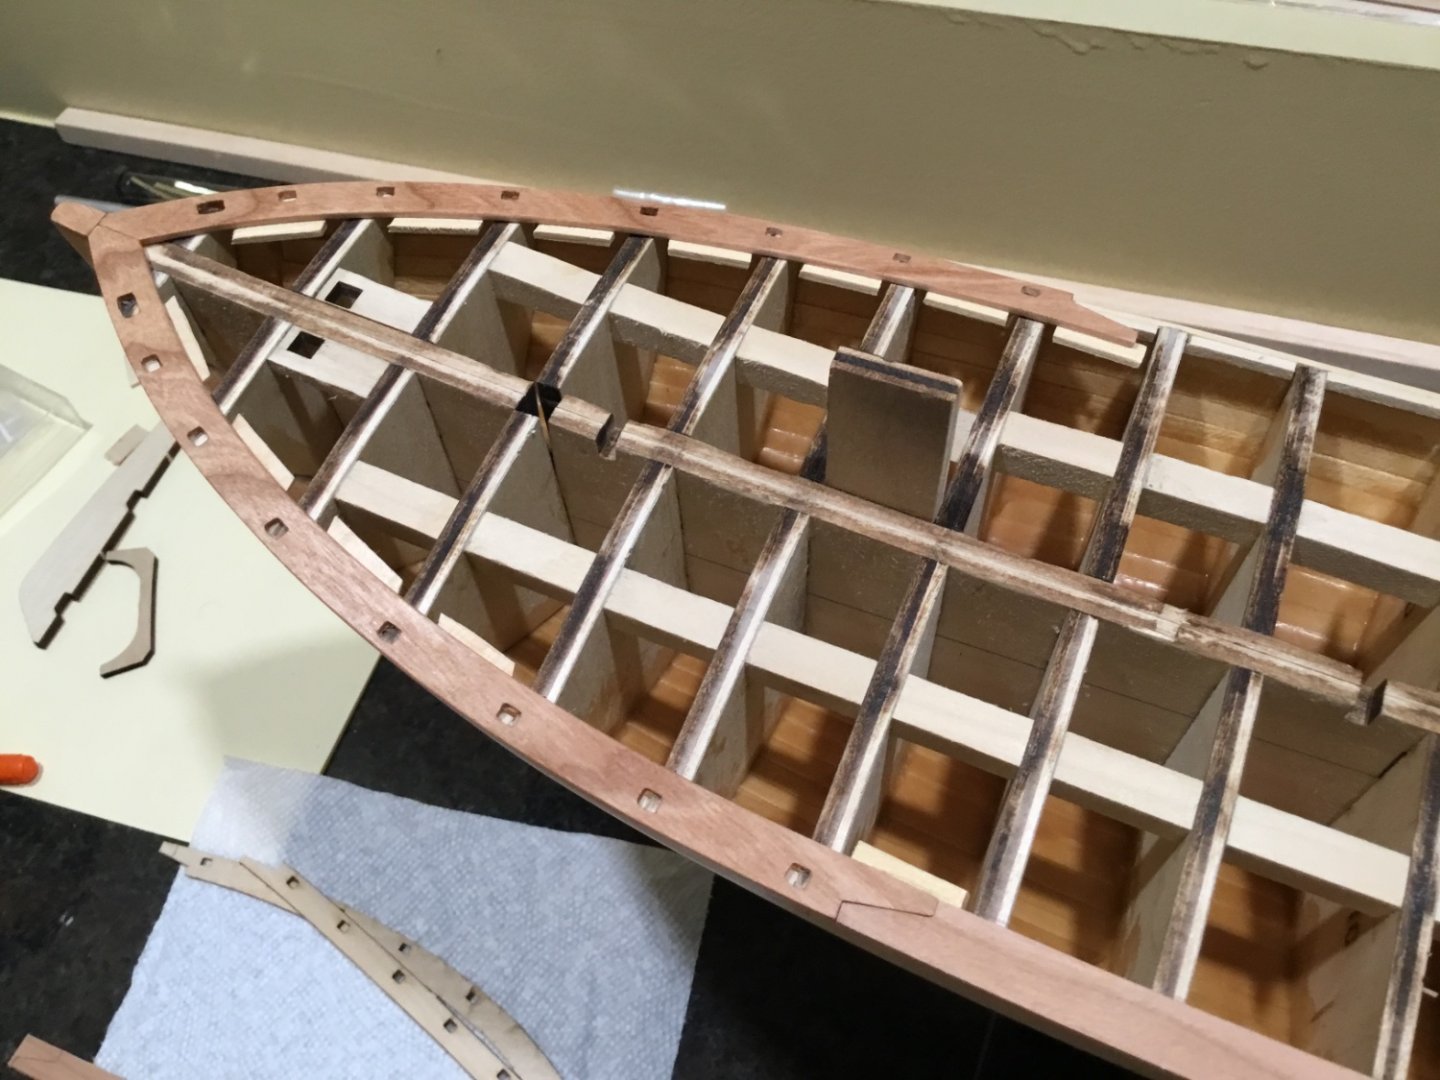
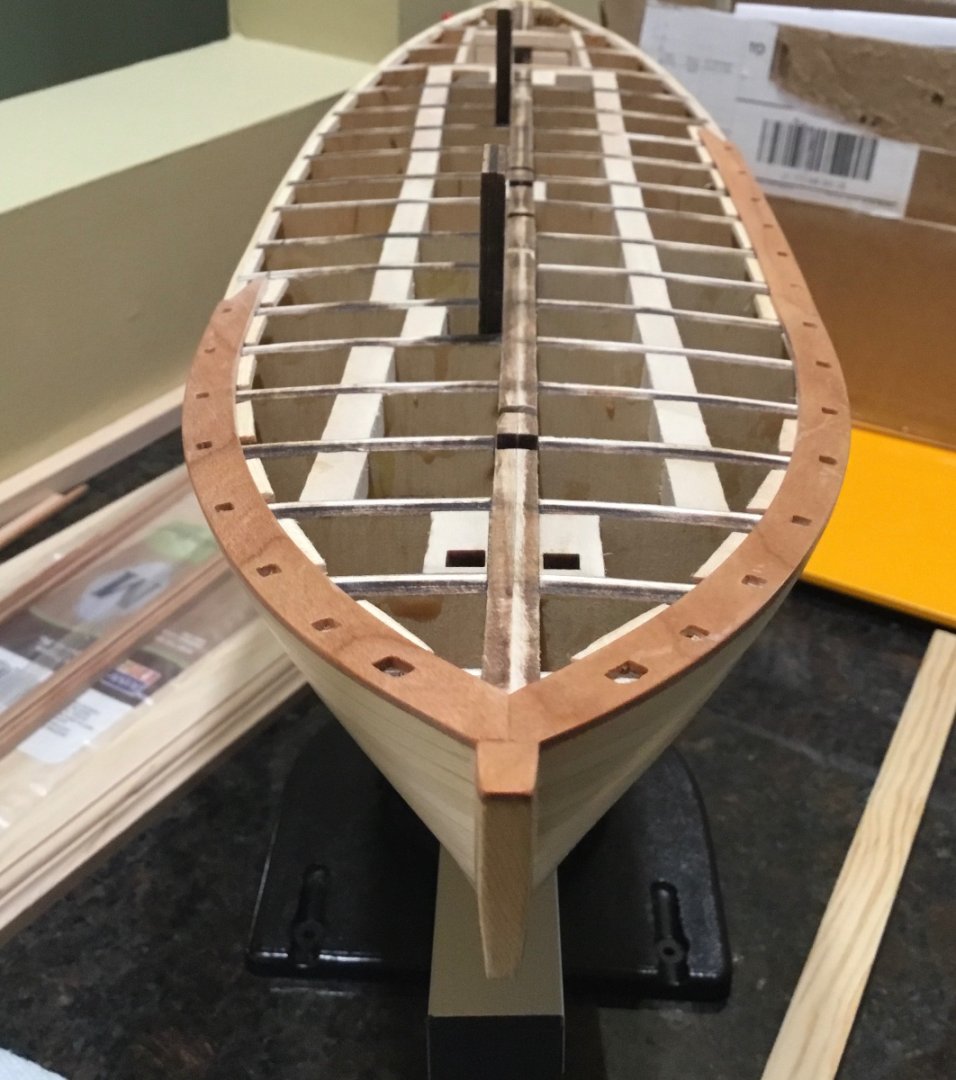
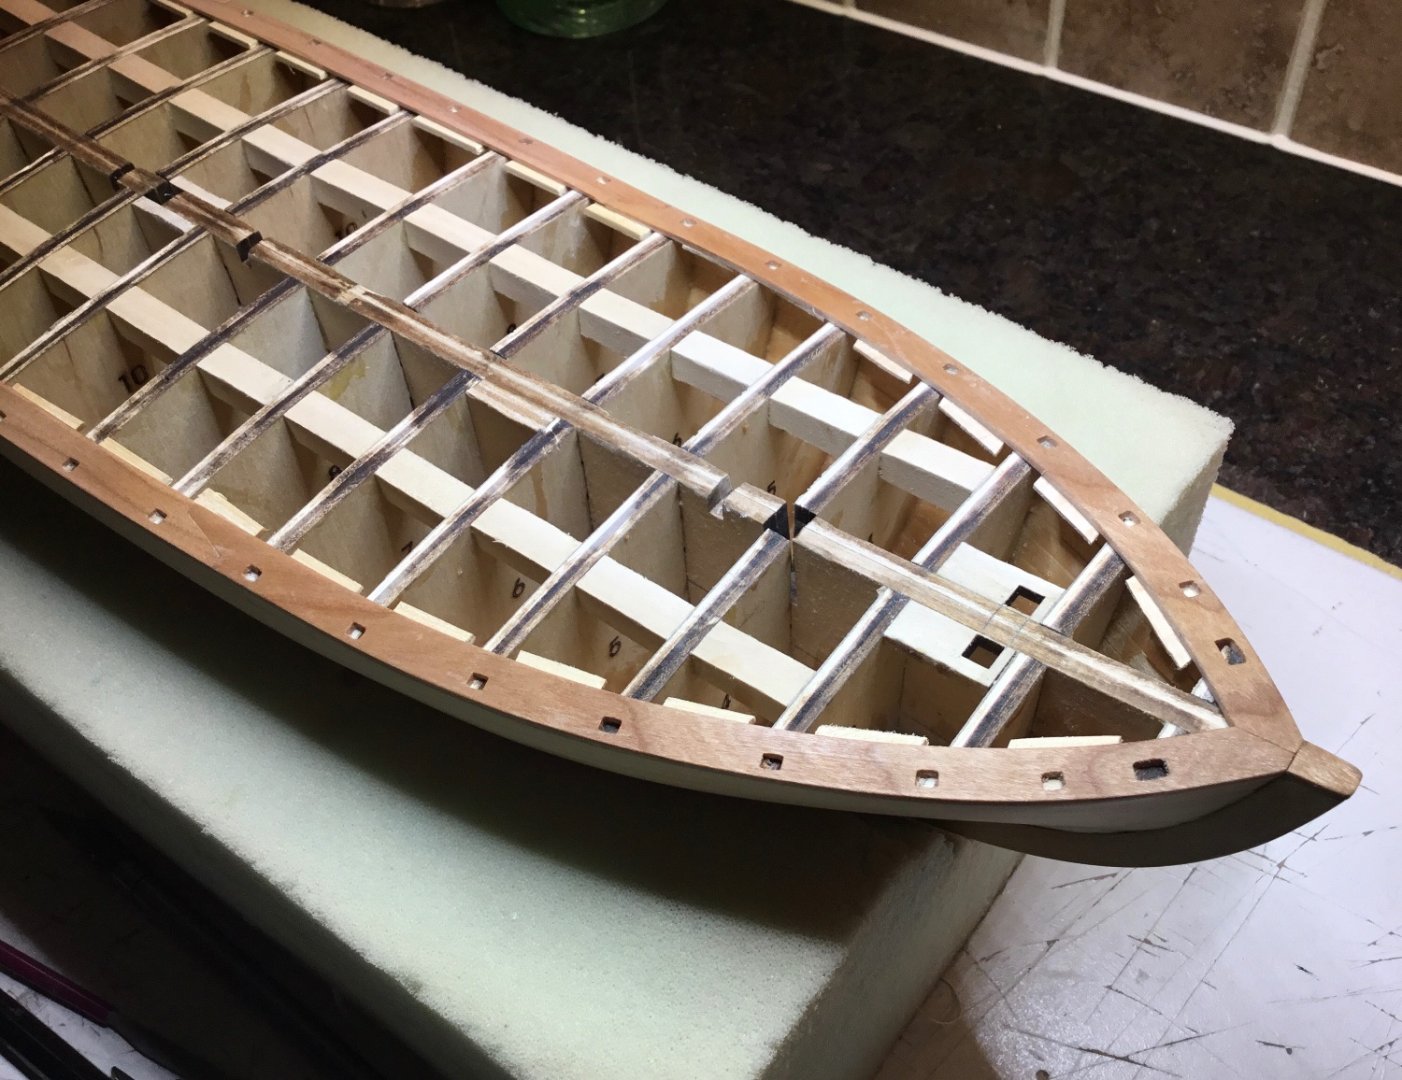
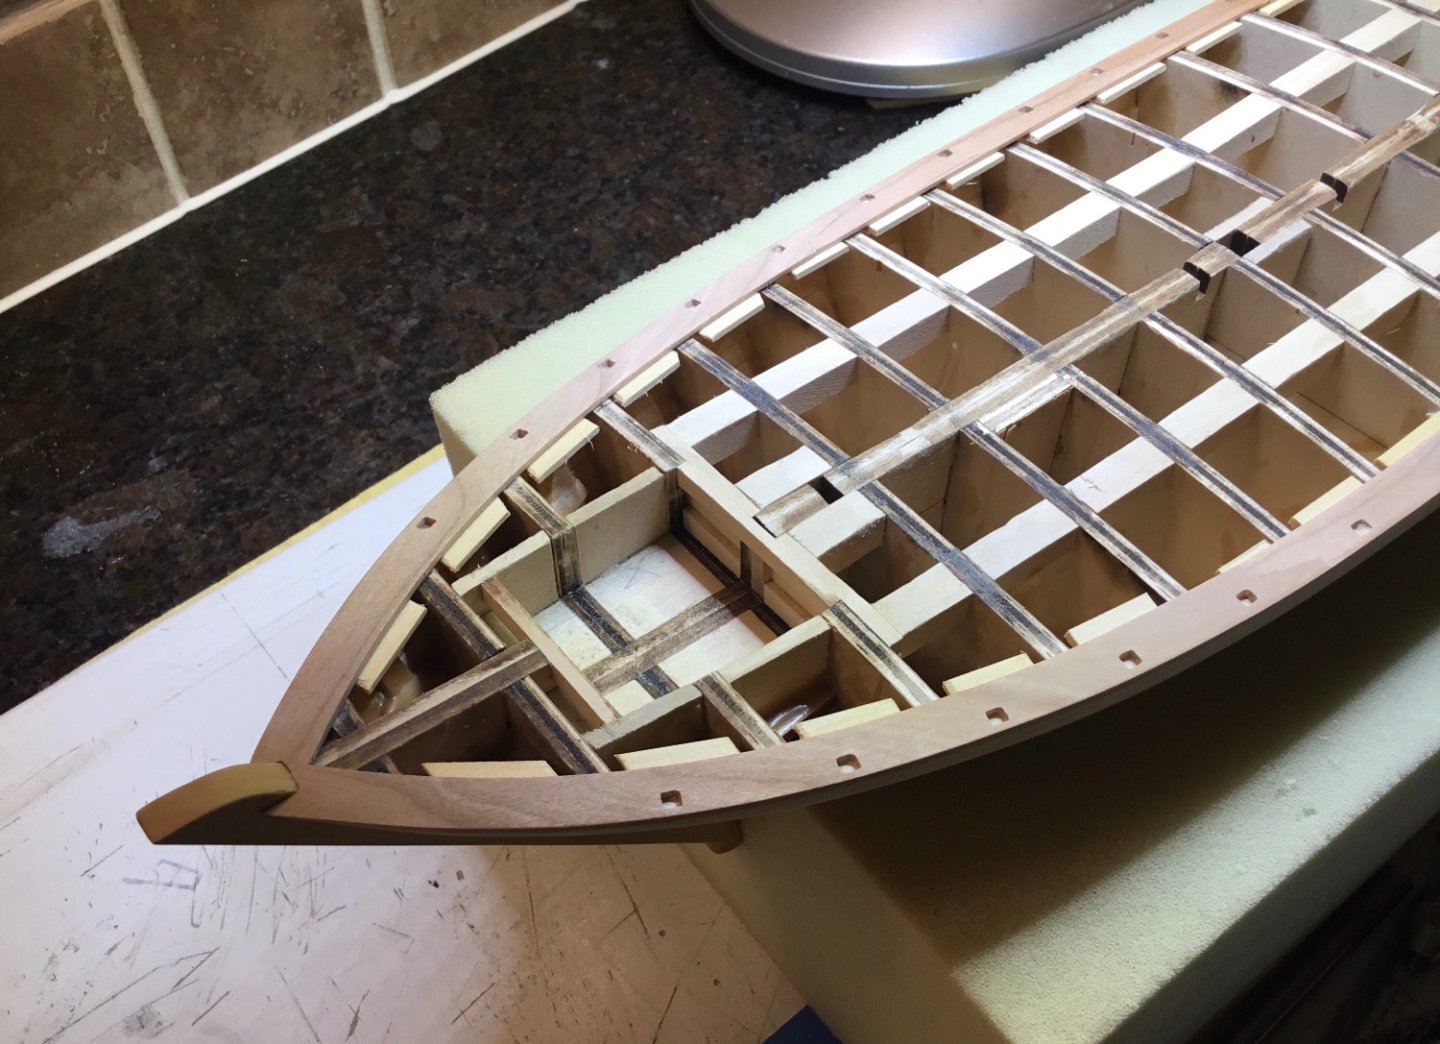
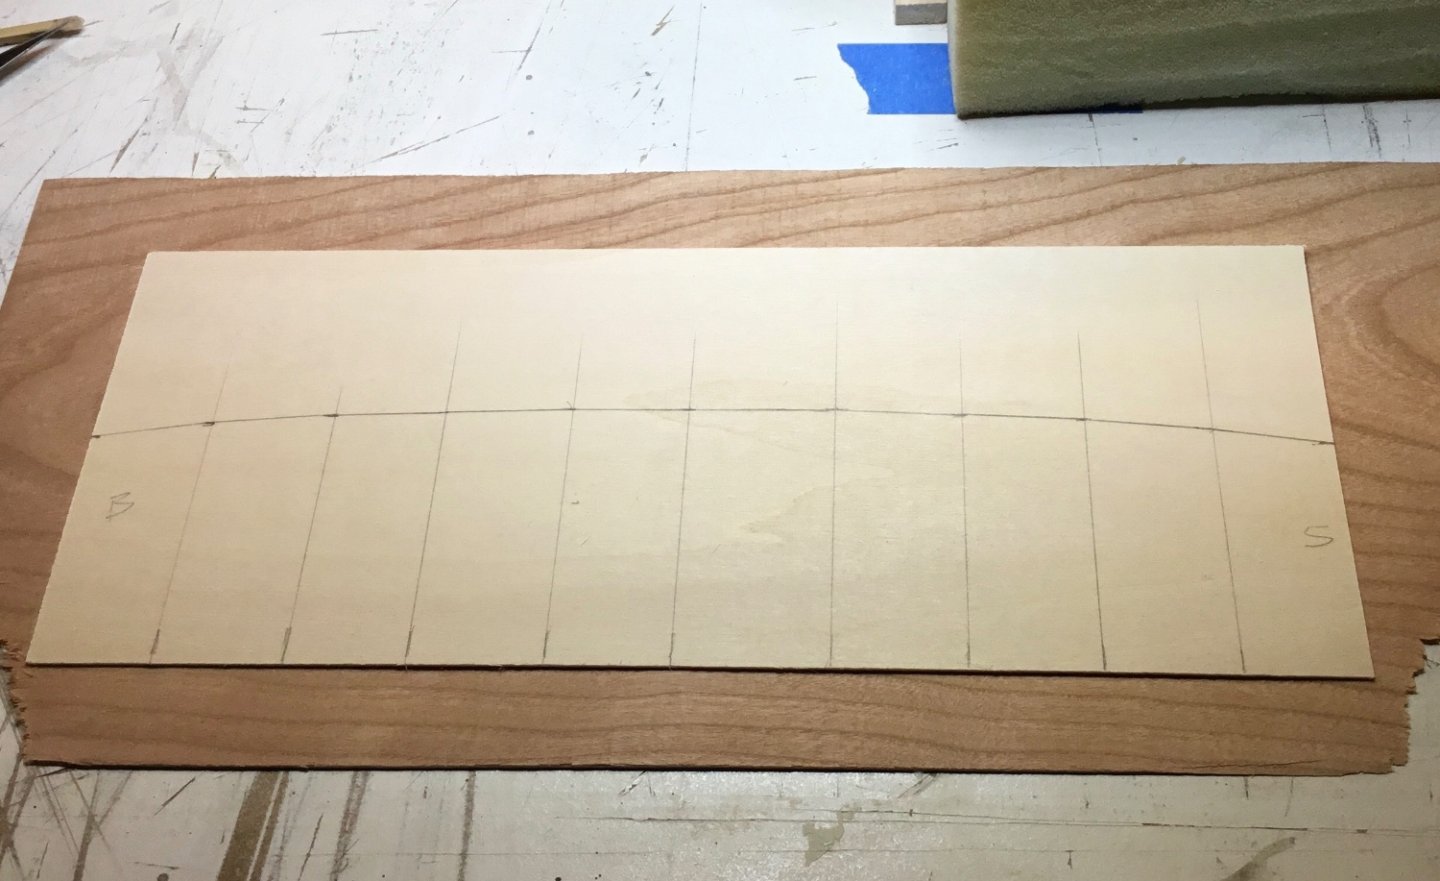
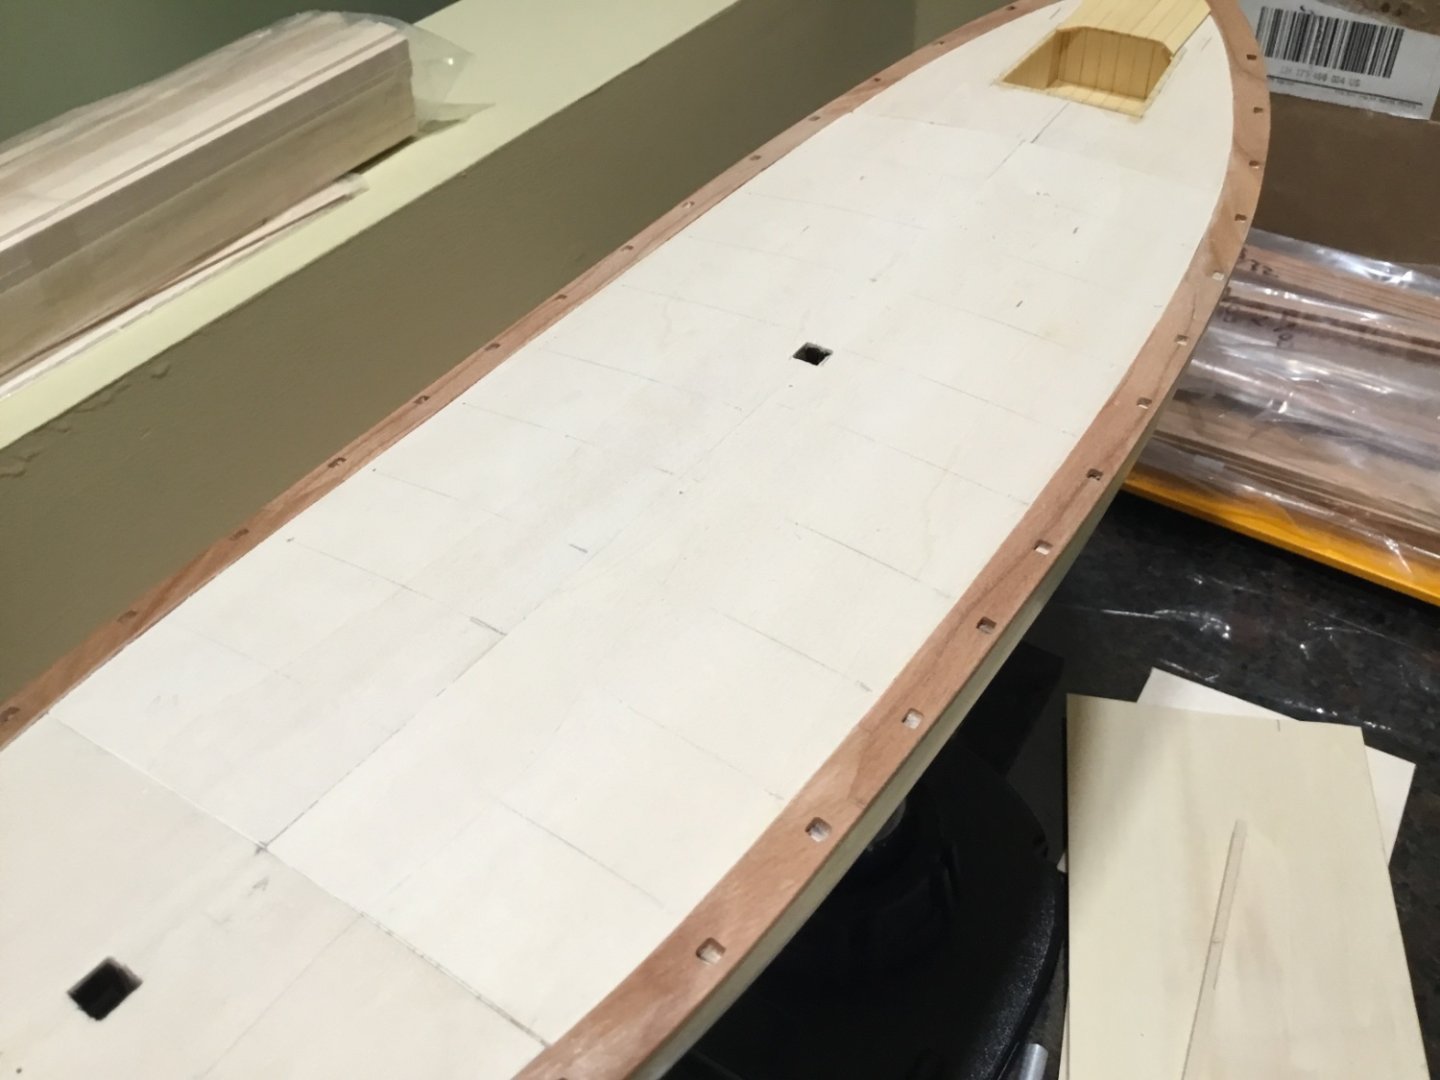
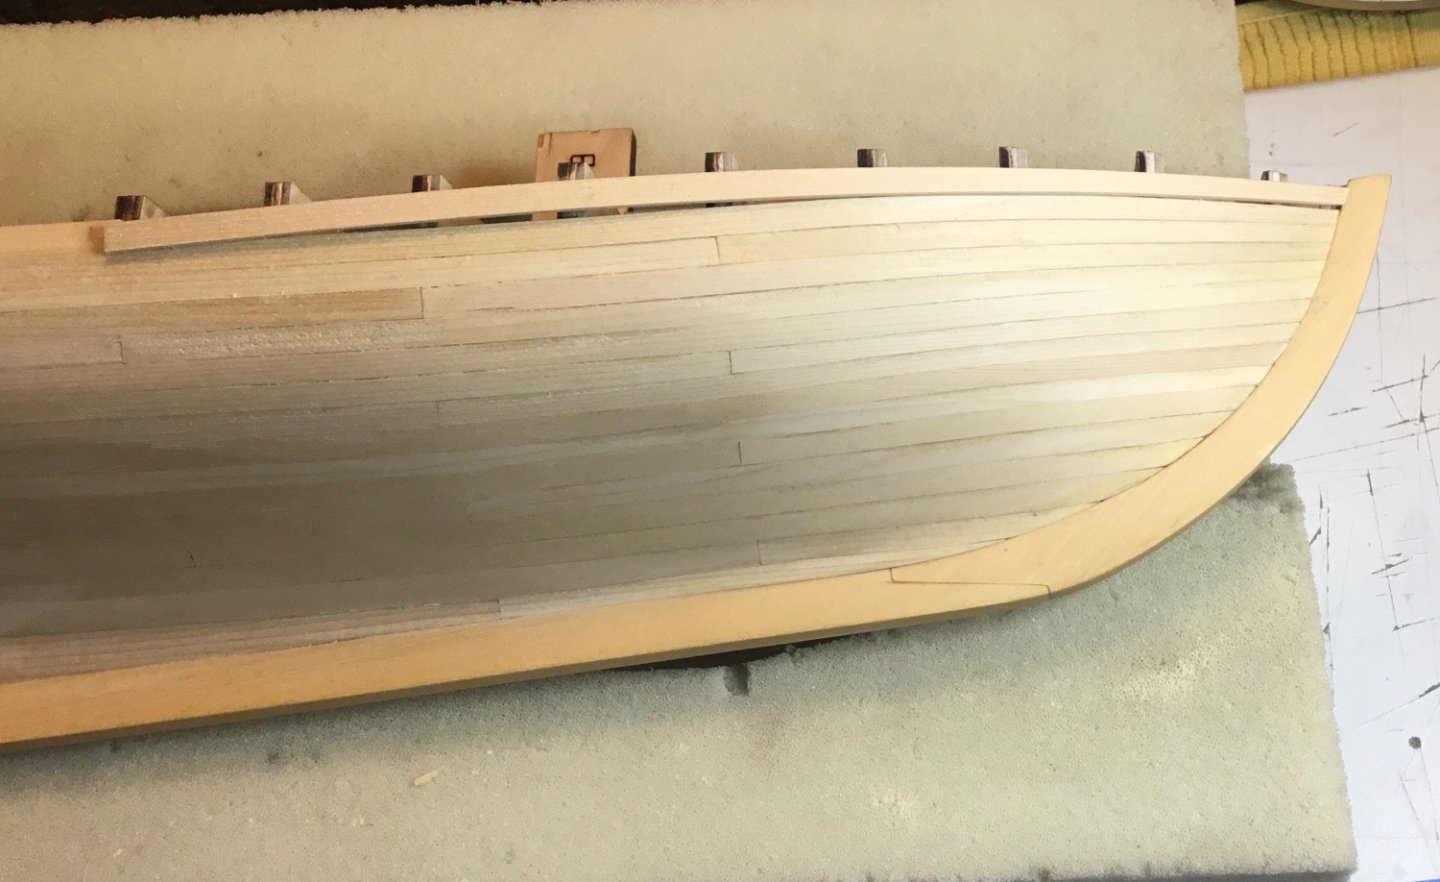
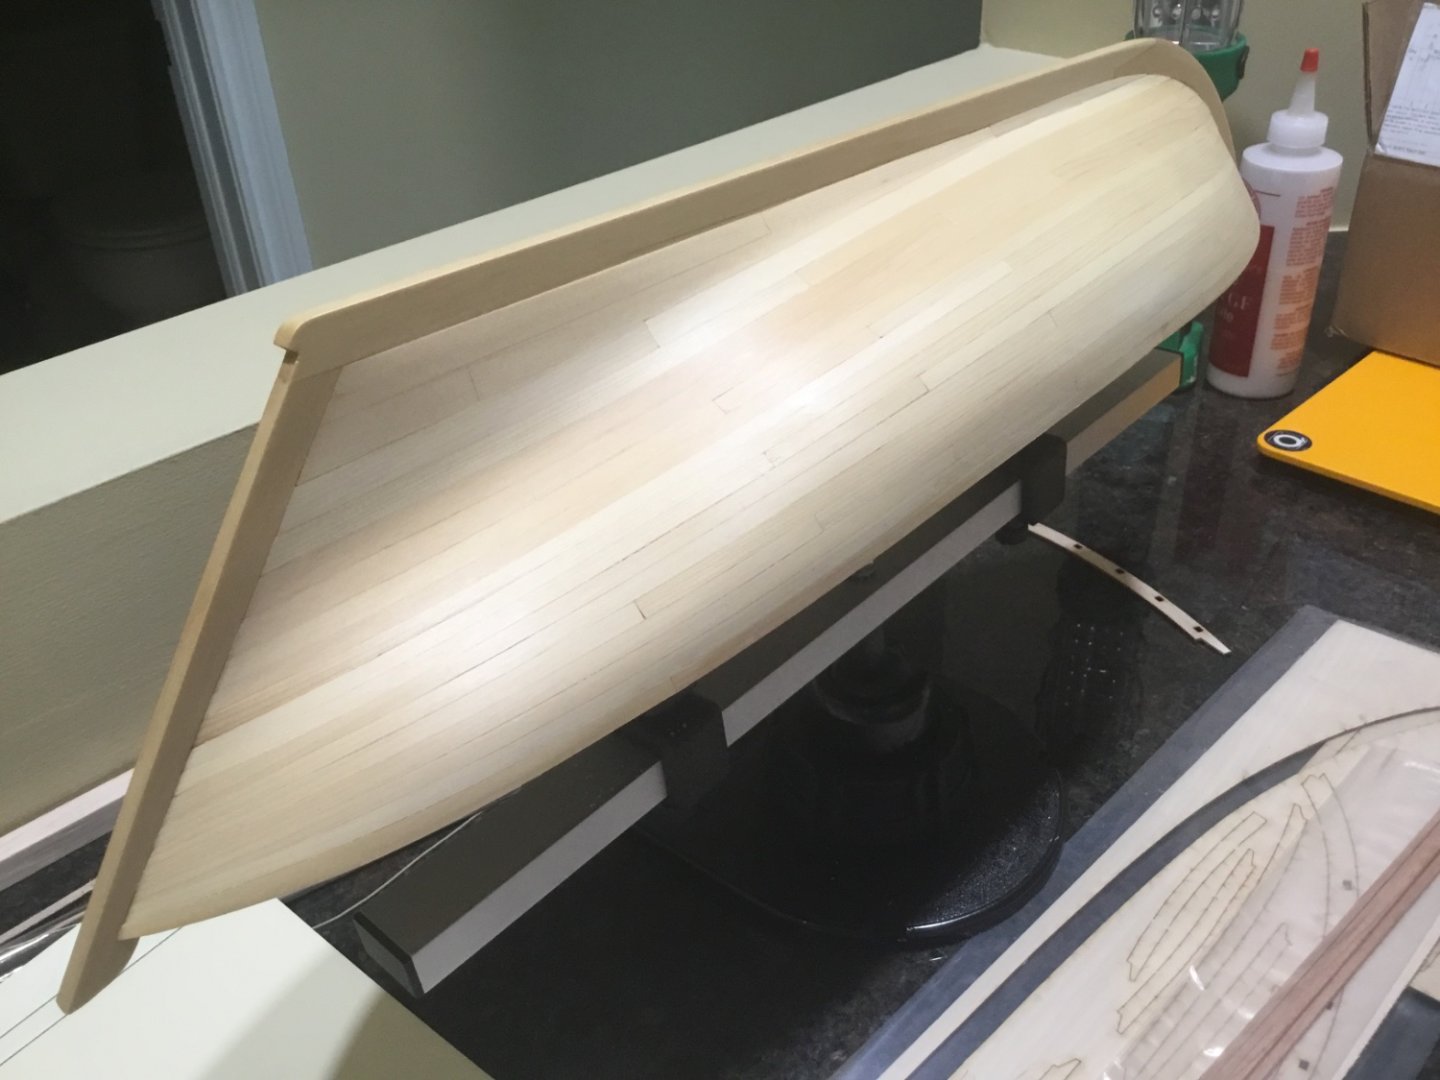
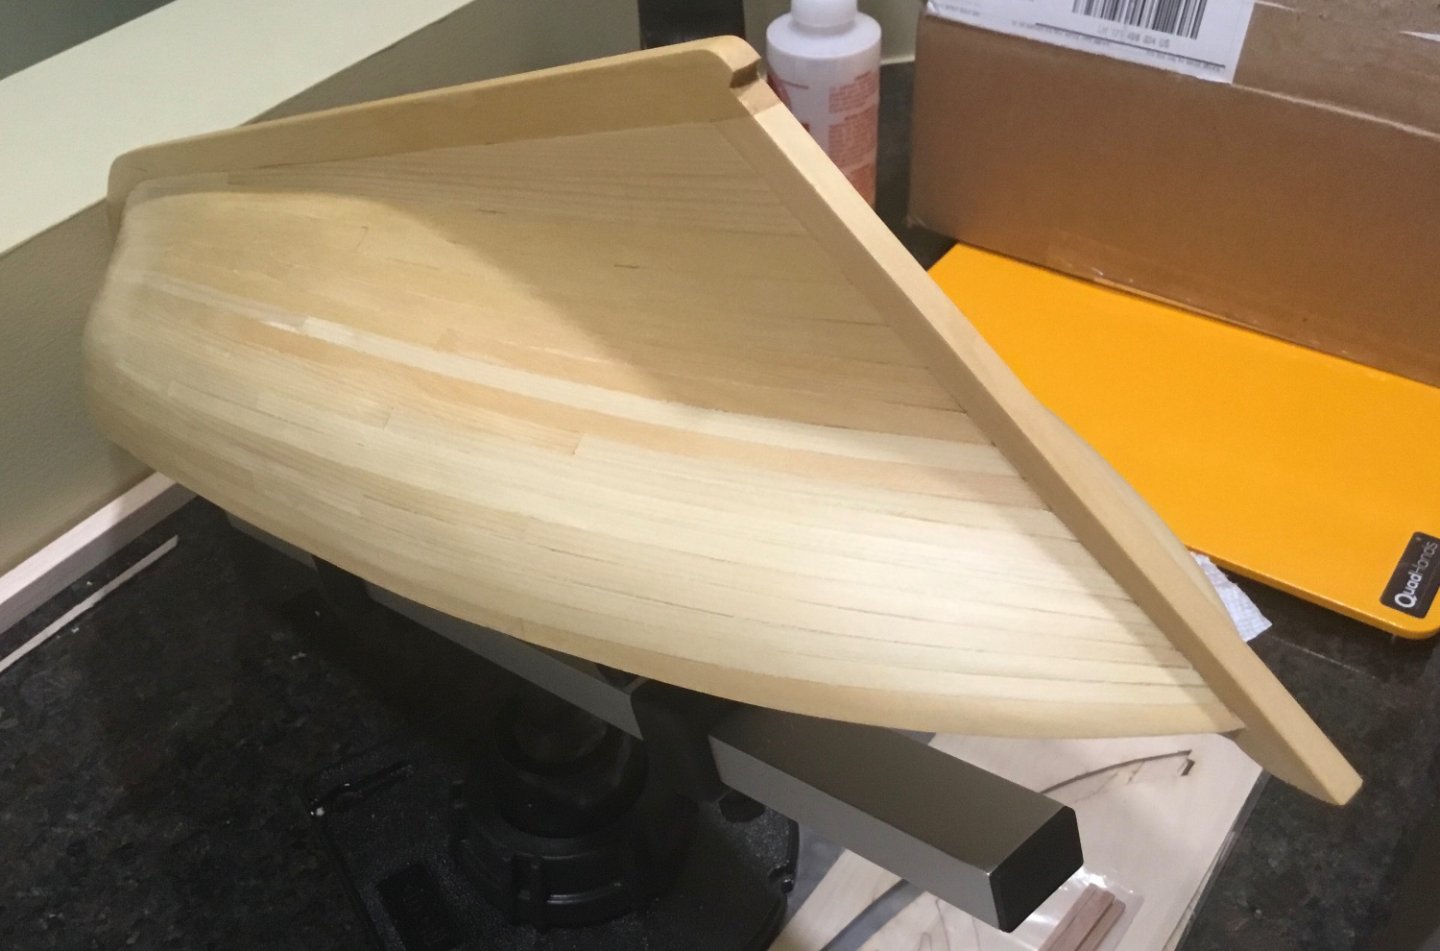
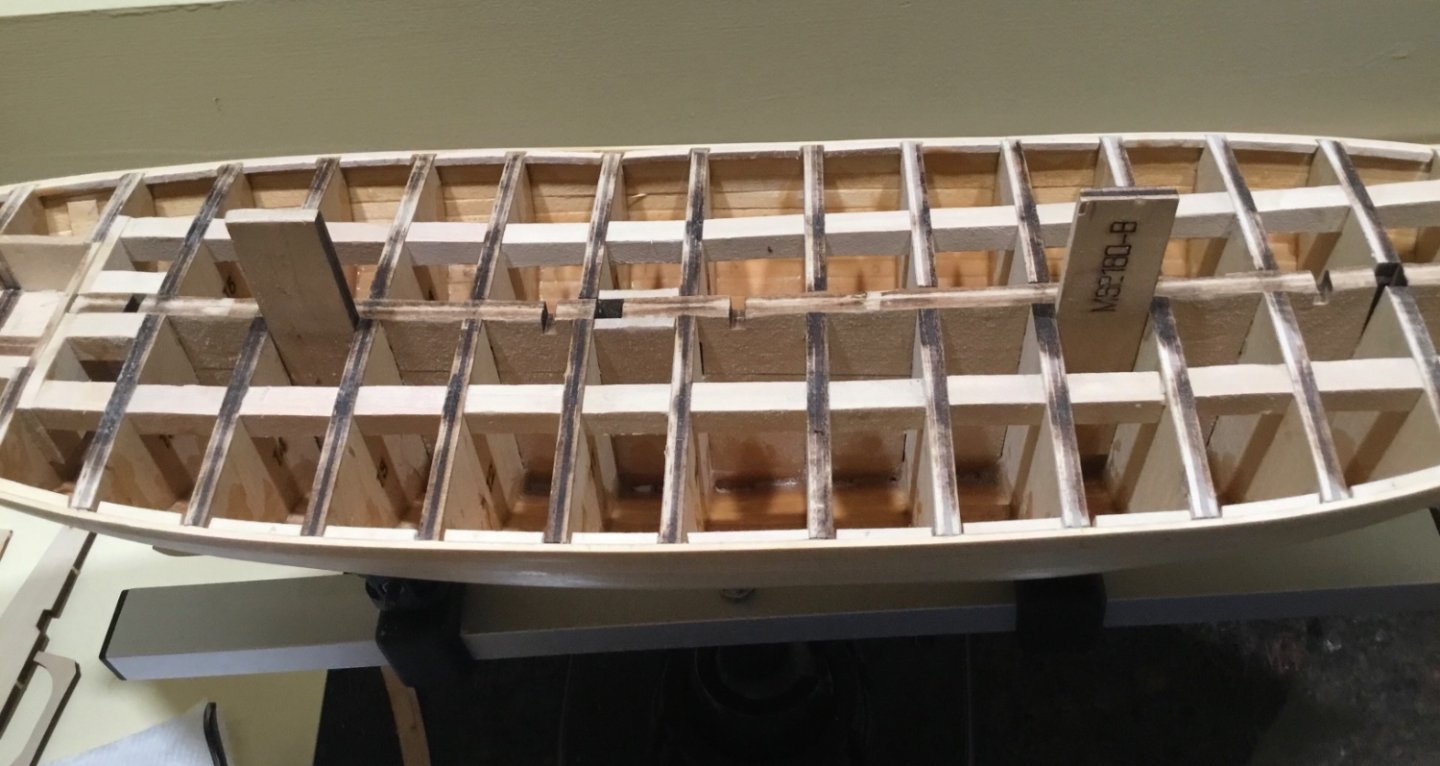
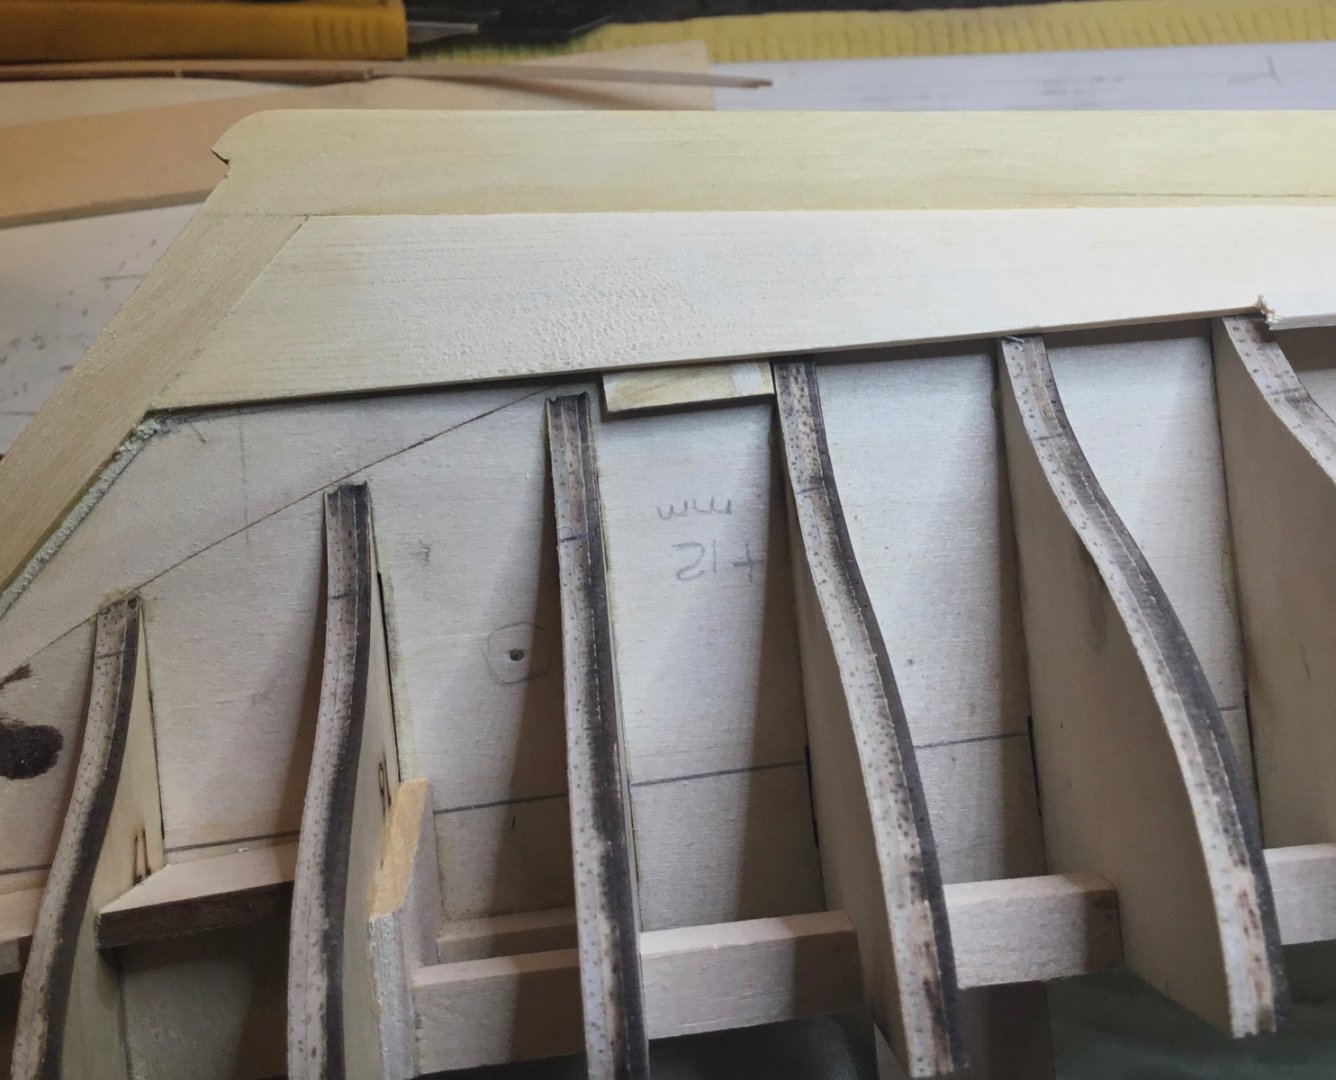
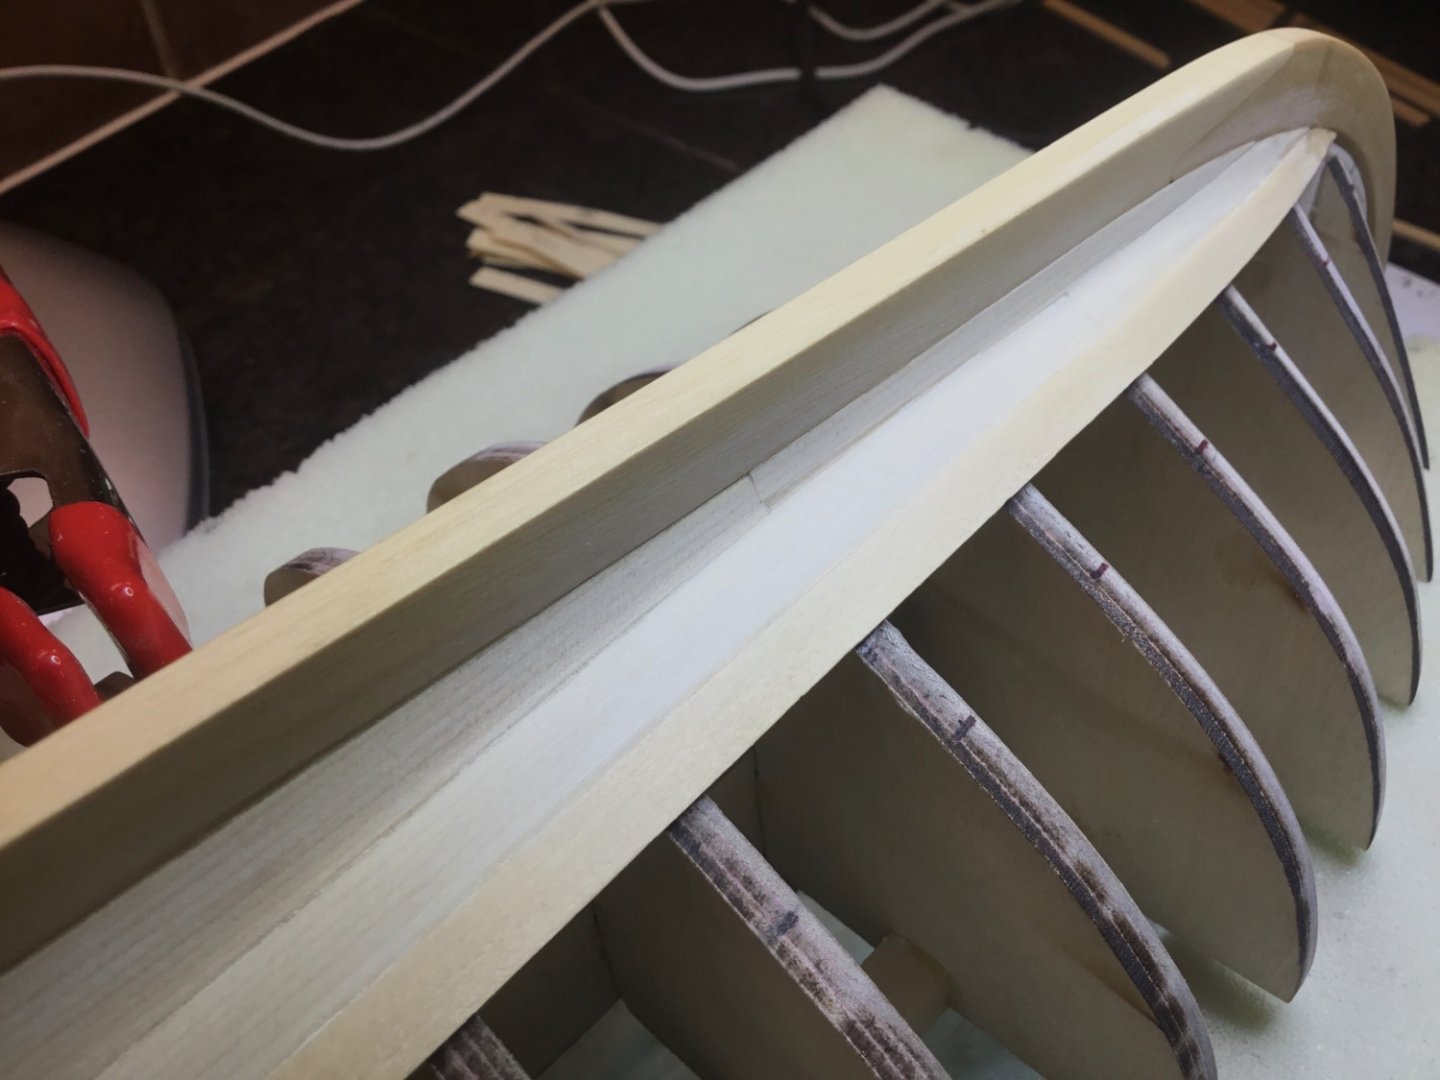
Hi Everyone, the planking has been completed on the pinky. Most of Belt B consisted of 1/4” planks . When I got to Belt A, I changed to 3/16” planks in order to have six strakes. The sheer strake had to have a 1/4” plank at the stern. All of the strakes were pretty much the same , tapering at both ends. No edge bending was used. The planks were tapered and then held under a running tap just enough to wet them. Then I put a curve in them using finger pressure for five or ten minutes. The planks at the stern needed a twist along their length. By that time they had dried enough to glue them in place. For some reason I would always start at the stern post and work towards midship and then do the same at the stem. All of the strakes have either two or three planks. The joints that are close to the stem and the stern are going to be faked. I would usually do one or two strakes a day and then do some sanding with 180 grit paper just so there wouldn’t be too much sanding after it was finished. This is after one big sanding. Then two big standings. There’s a couple of things that I messed up by using the 1/16” strip of wood to make the rabbet. I should have maybe taken a 1/16th of an inch off the bulkhead former to compensate for it. The stem should have been made to be level with the top of the planksheer. The planksheer ends up being 1/8” short along it’s length. Not worried about the planksheer length because they are being remade out of cherry. Got a nice order of cherry from Joe at Modeler’s Sawmill. Also added some 3/32 x 3/32 pieces of basswood strip between the bulkheads to help with the gluing of the planksheer. Next is making lots of square holes for the stanchions. See you next time.


- 72 replies
-
- 9
-
-
-
- Glad Tidings
- Model Shipways
- (and 1 more)
-
Hi Eric, thank you very much. My aim is to try and get the planking nice enough so that it can be seen under the brushed on paint. Happy to see that you are starting a new build and log.
- 72 replies
-
- 1
-
-
- Glad Tidings
- Model Shipways
- (and 1 more)
-
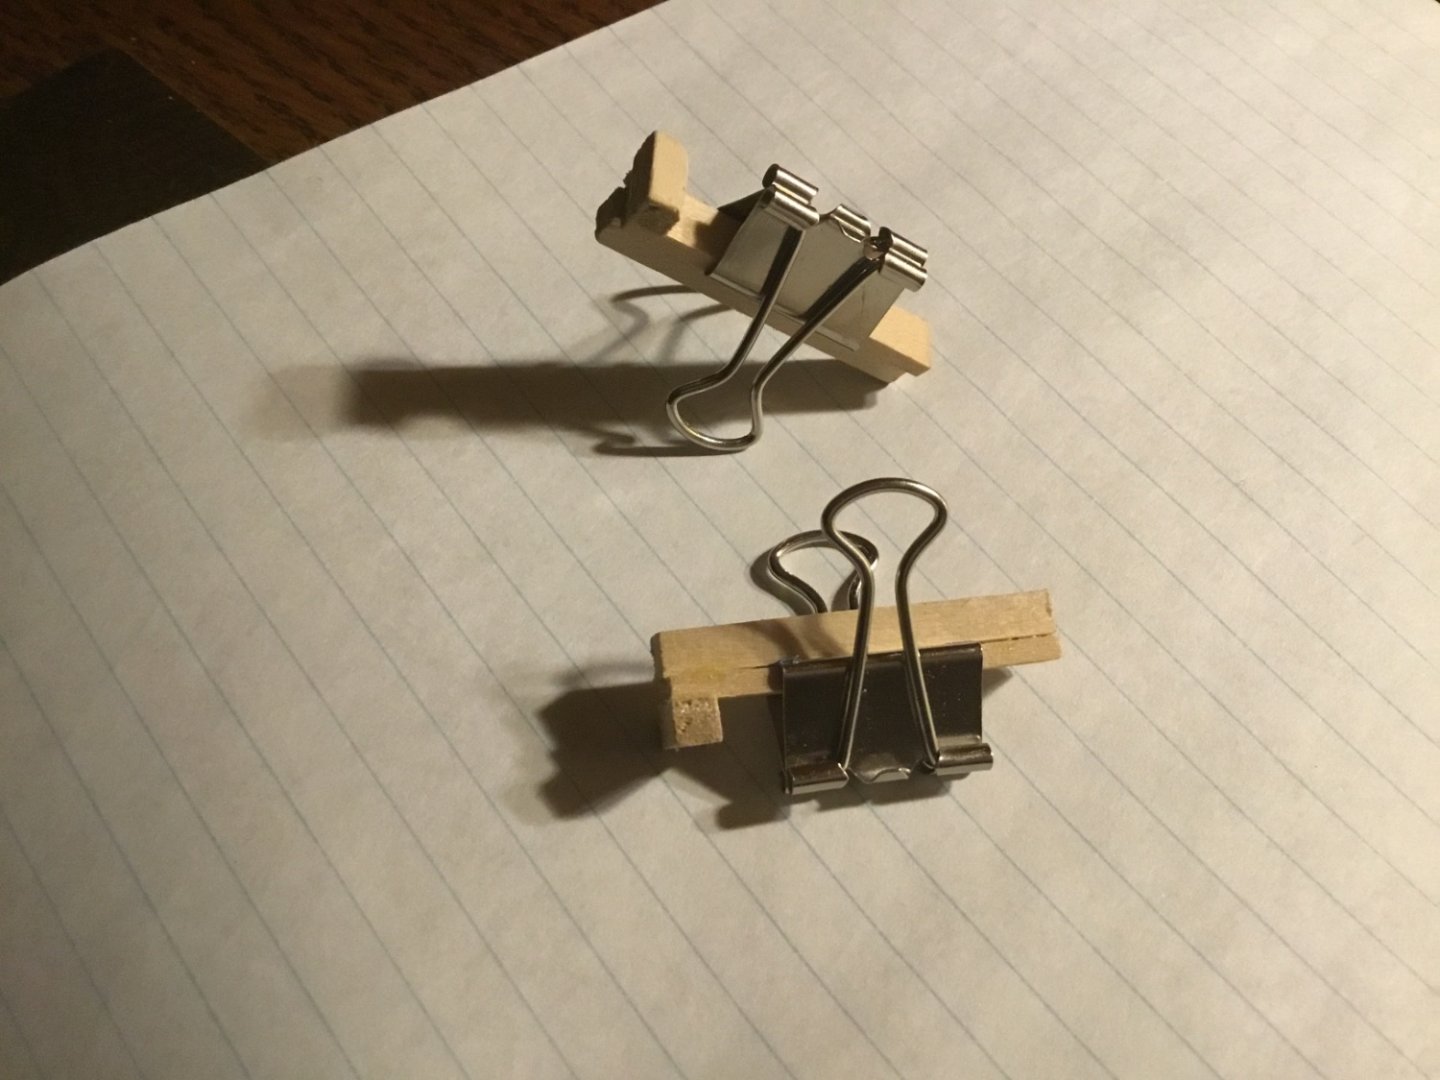
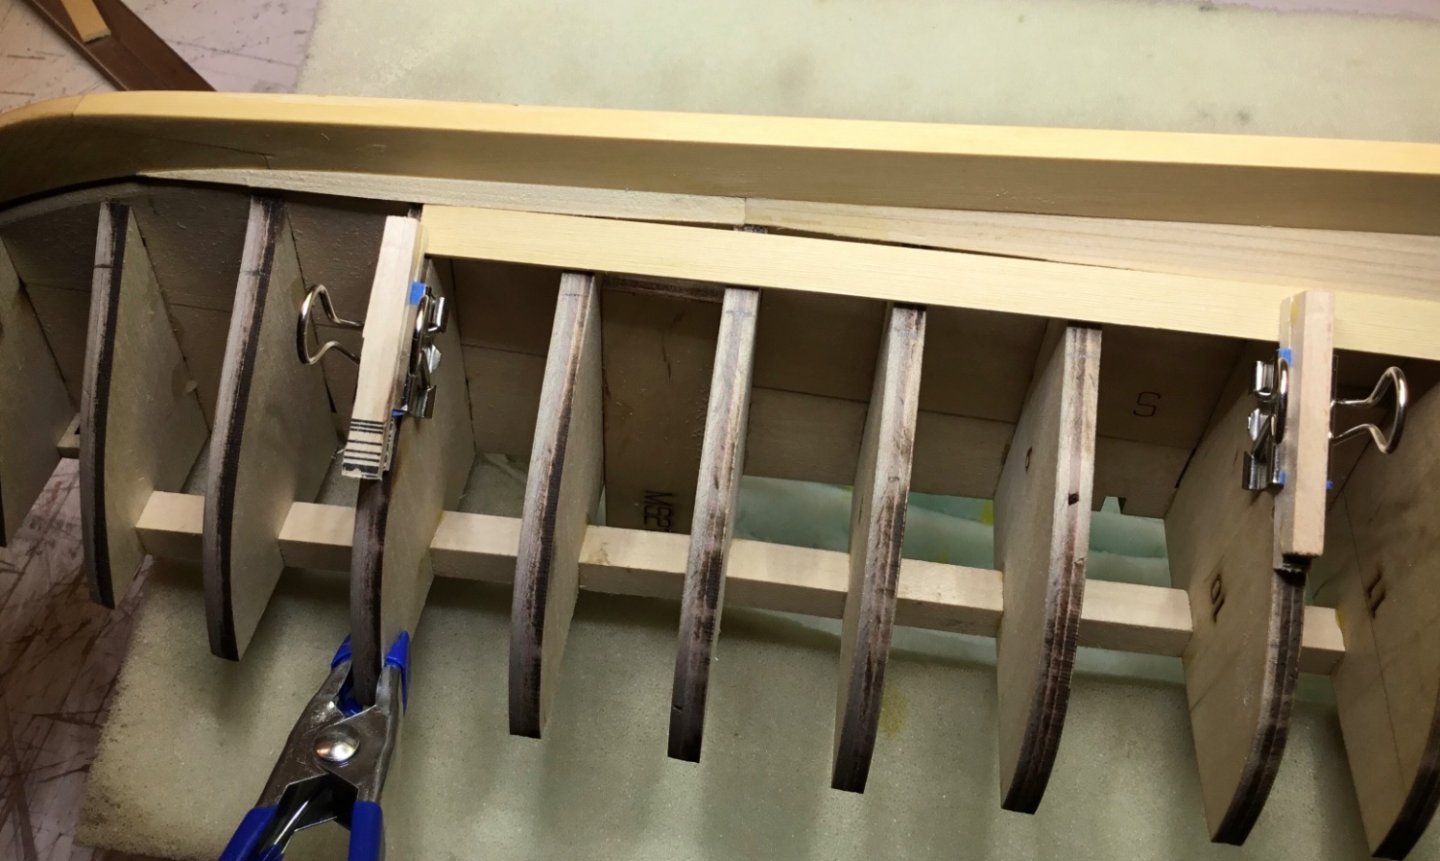
Hi Cisco, I forgot to mention the binder clamps. I glued two strips of wood together at the ends on both sides of the clamp. They weren’t very effective clamping this 1/16” cedar so I just use them for light duty holding.
- 72 replies
-
- 2
-
-
- Glad Tidings
- Model Shipways
- (and 1 more)
-
Hi Ian, thank you very much
-
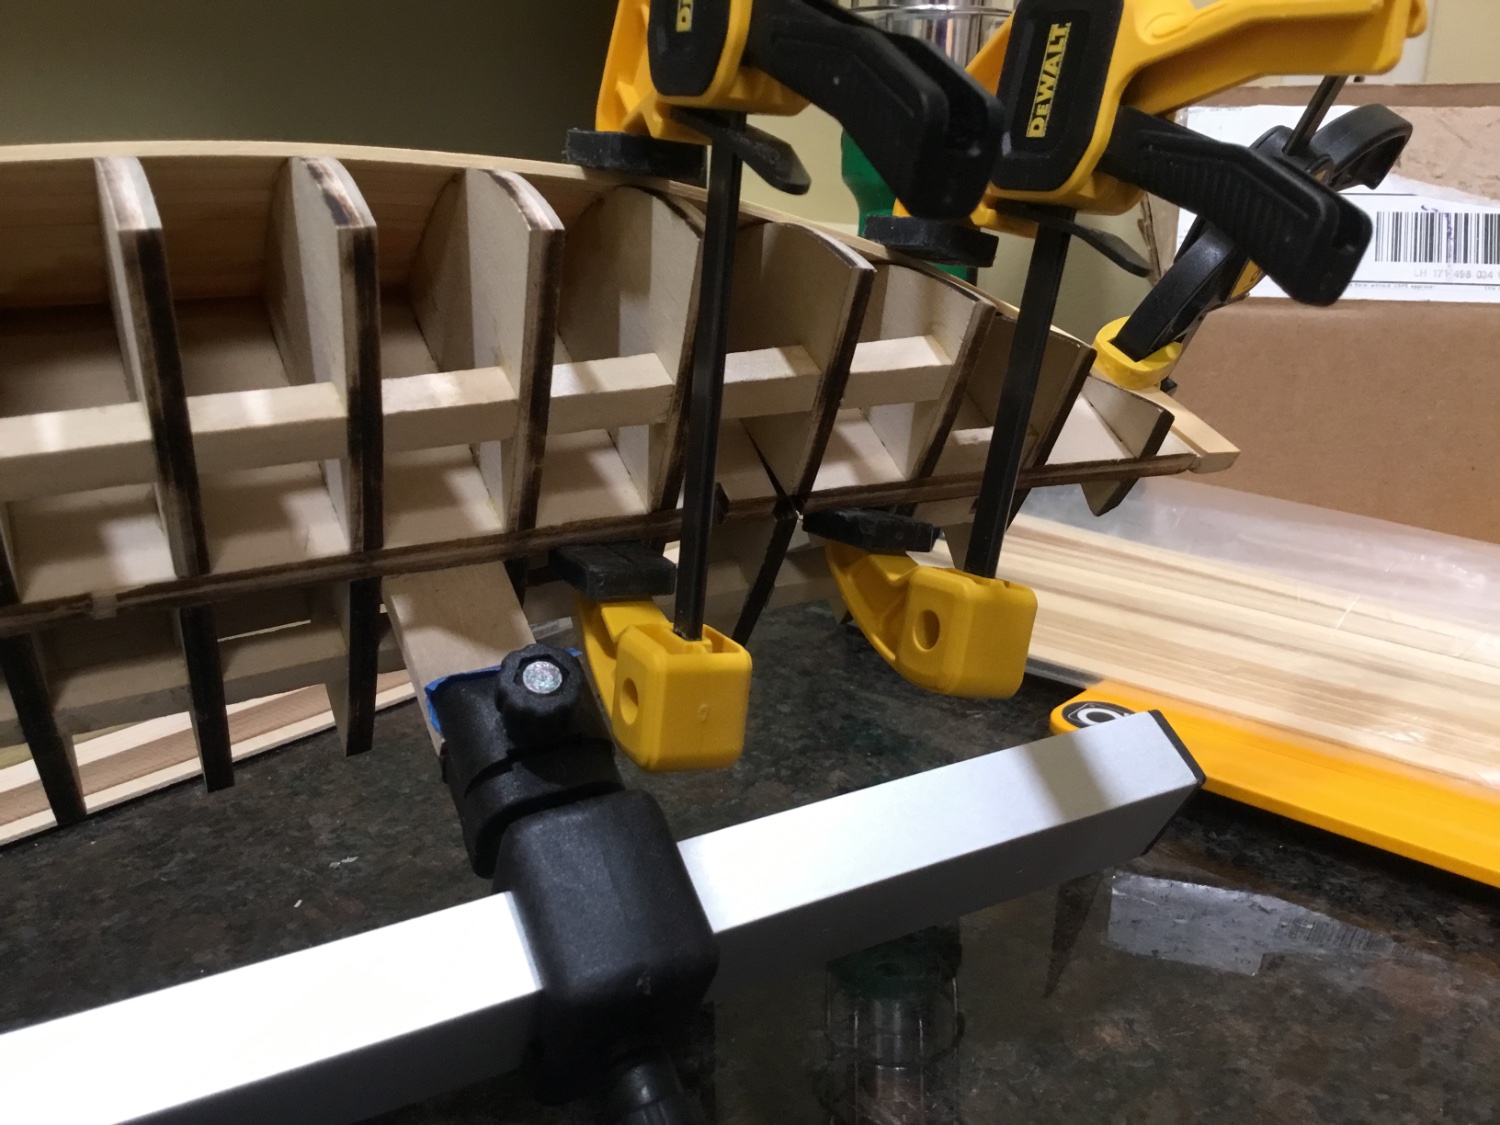
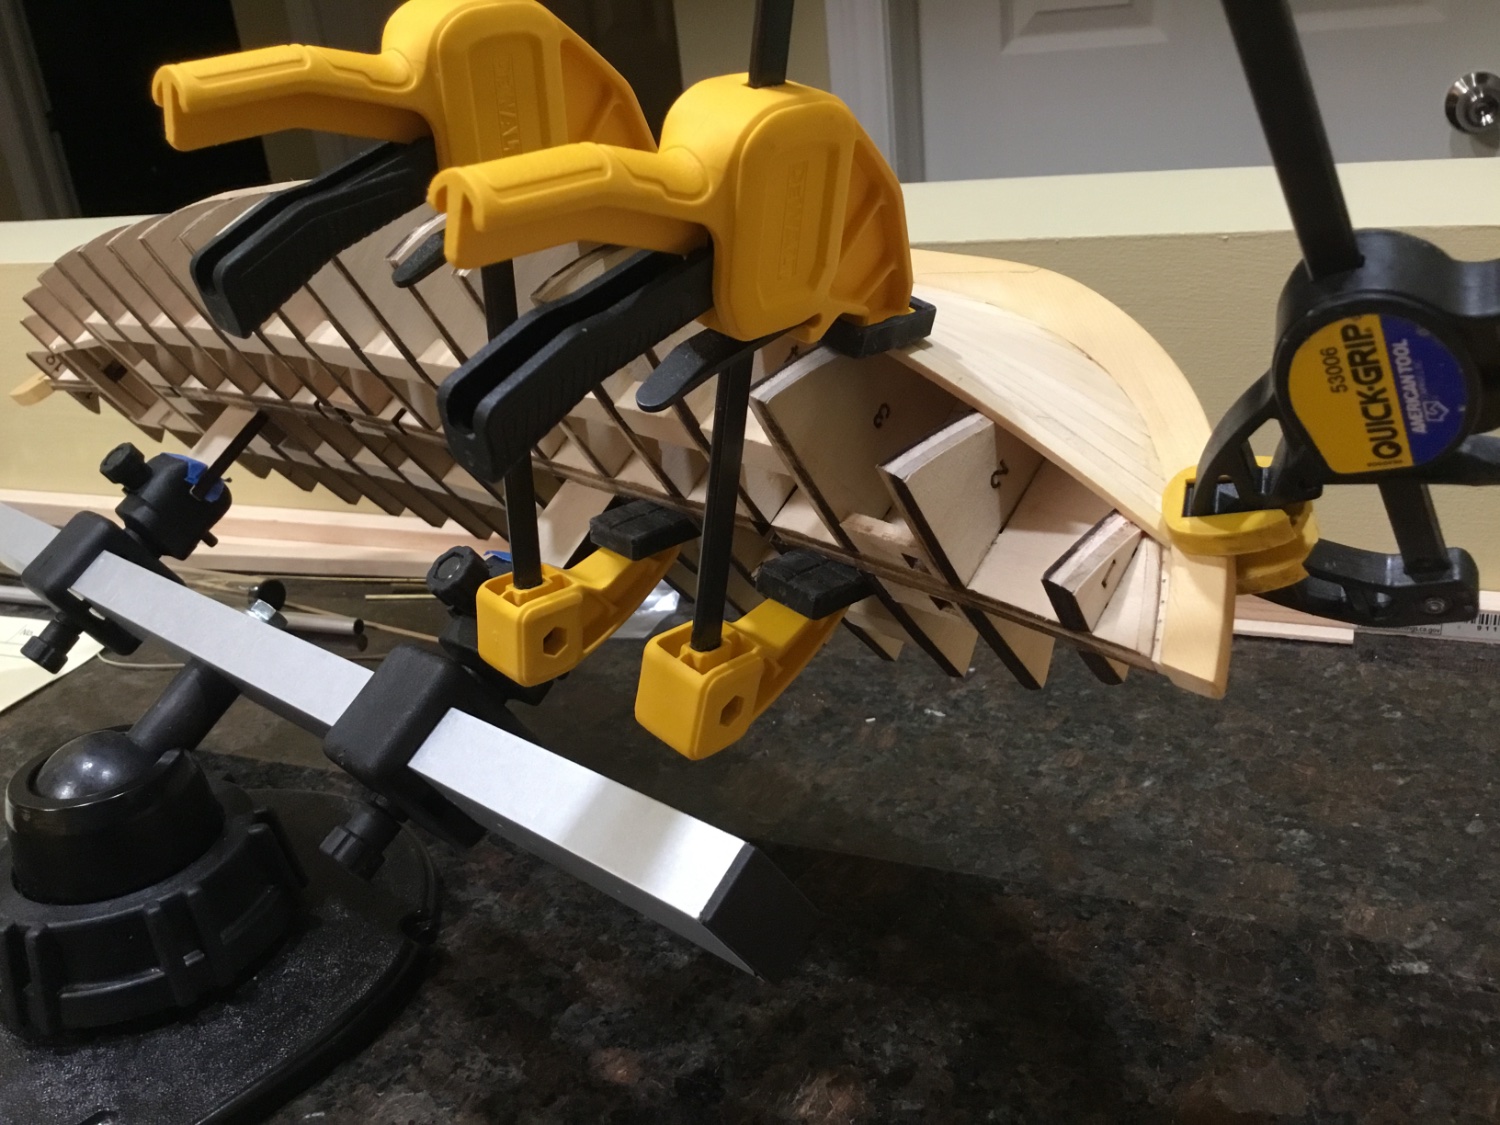
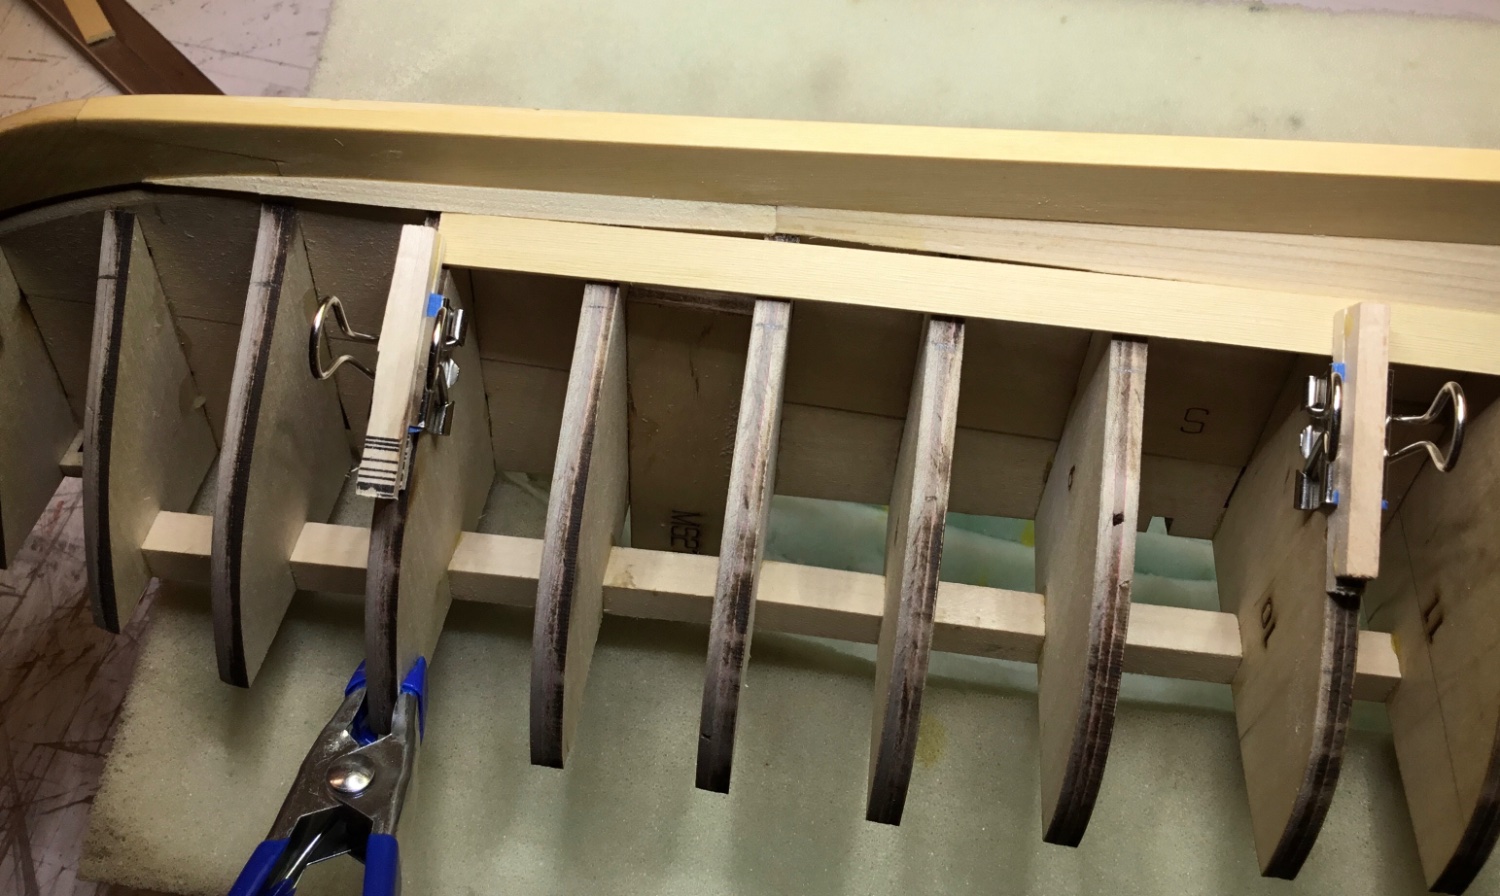
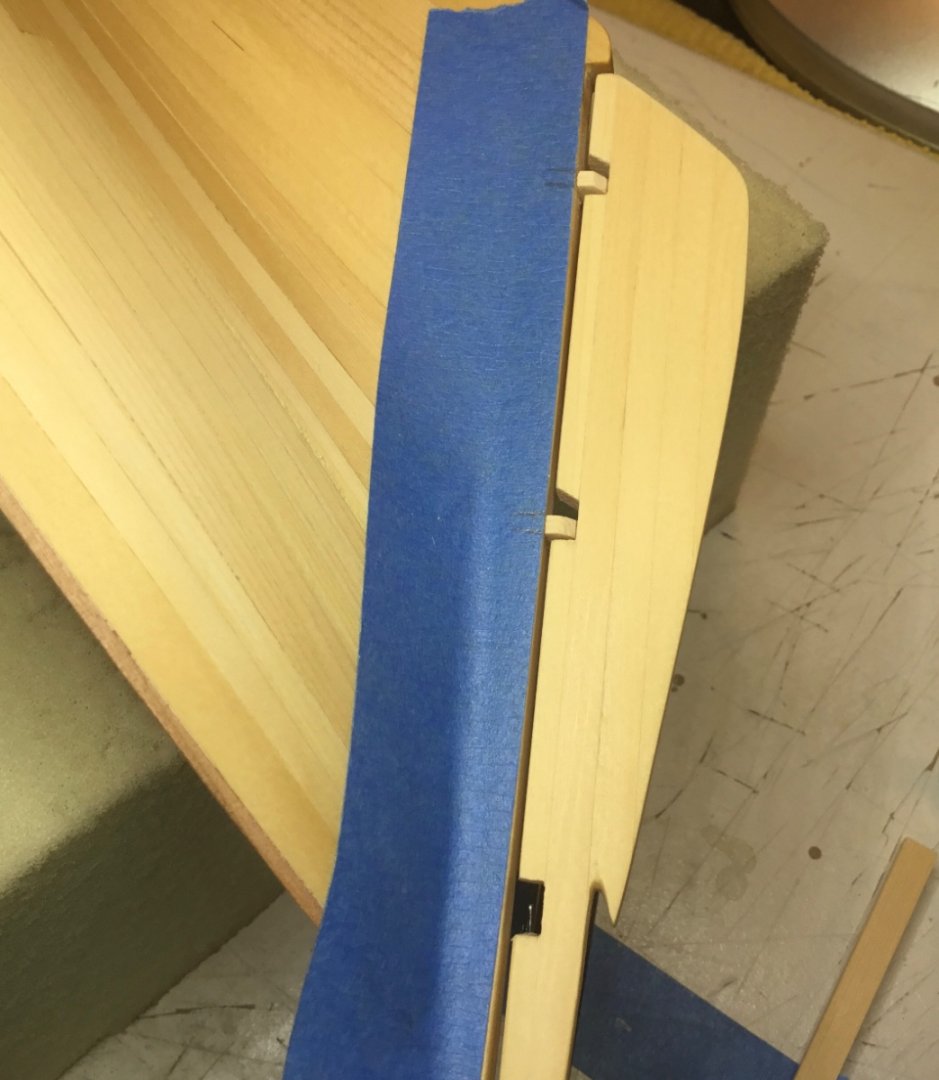
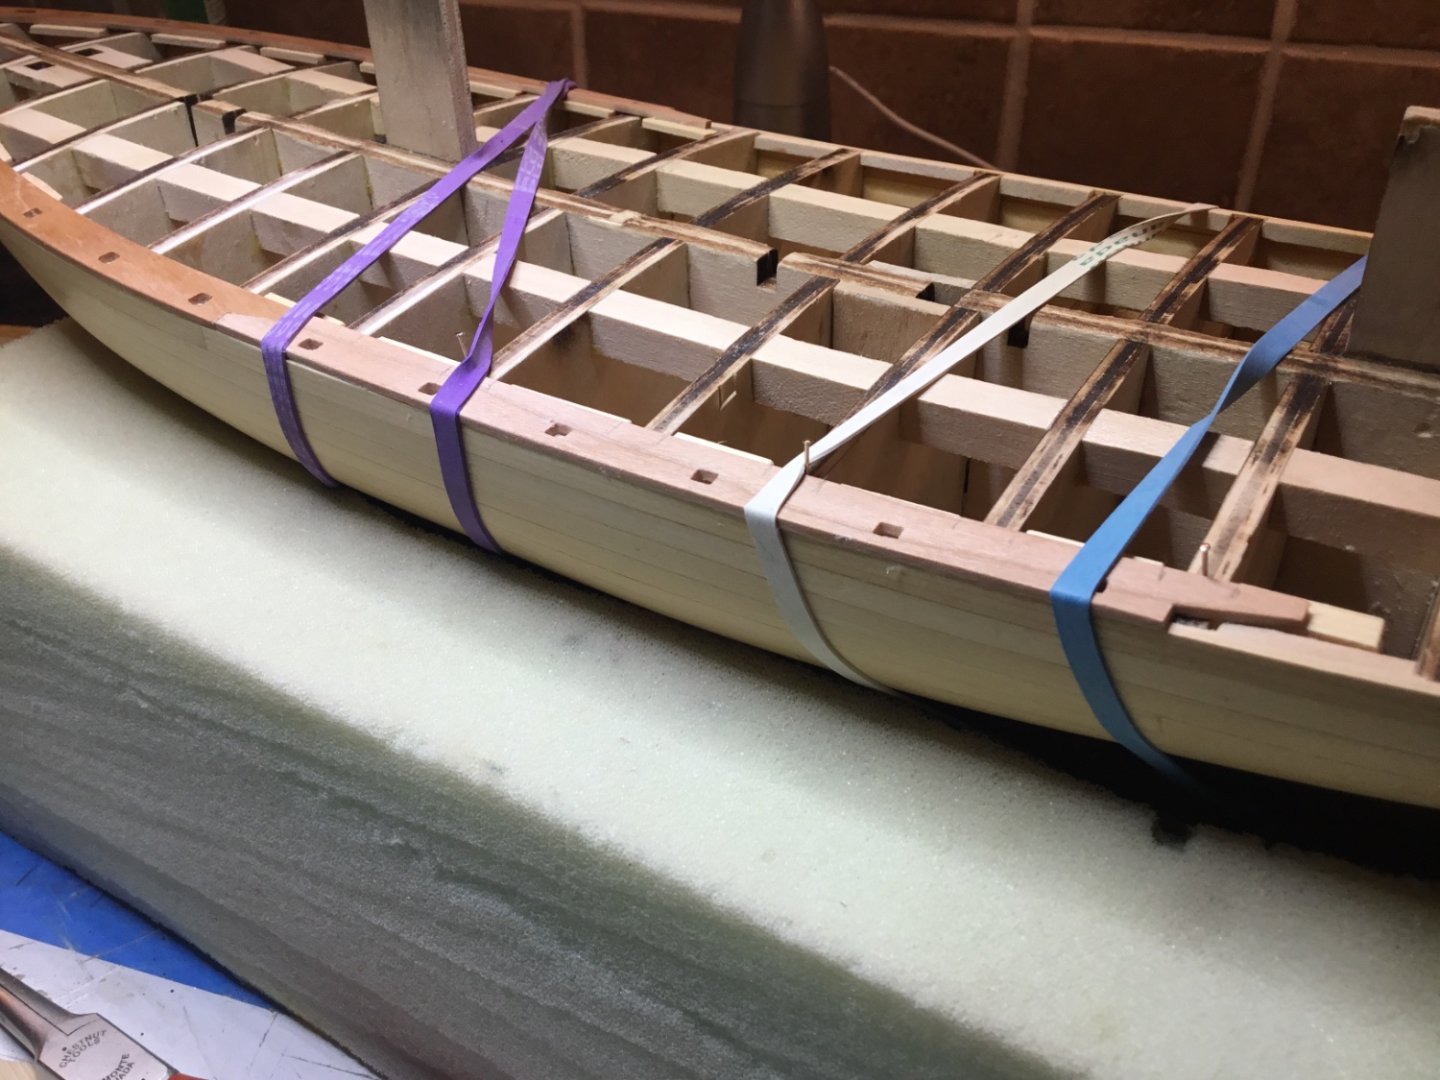
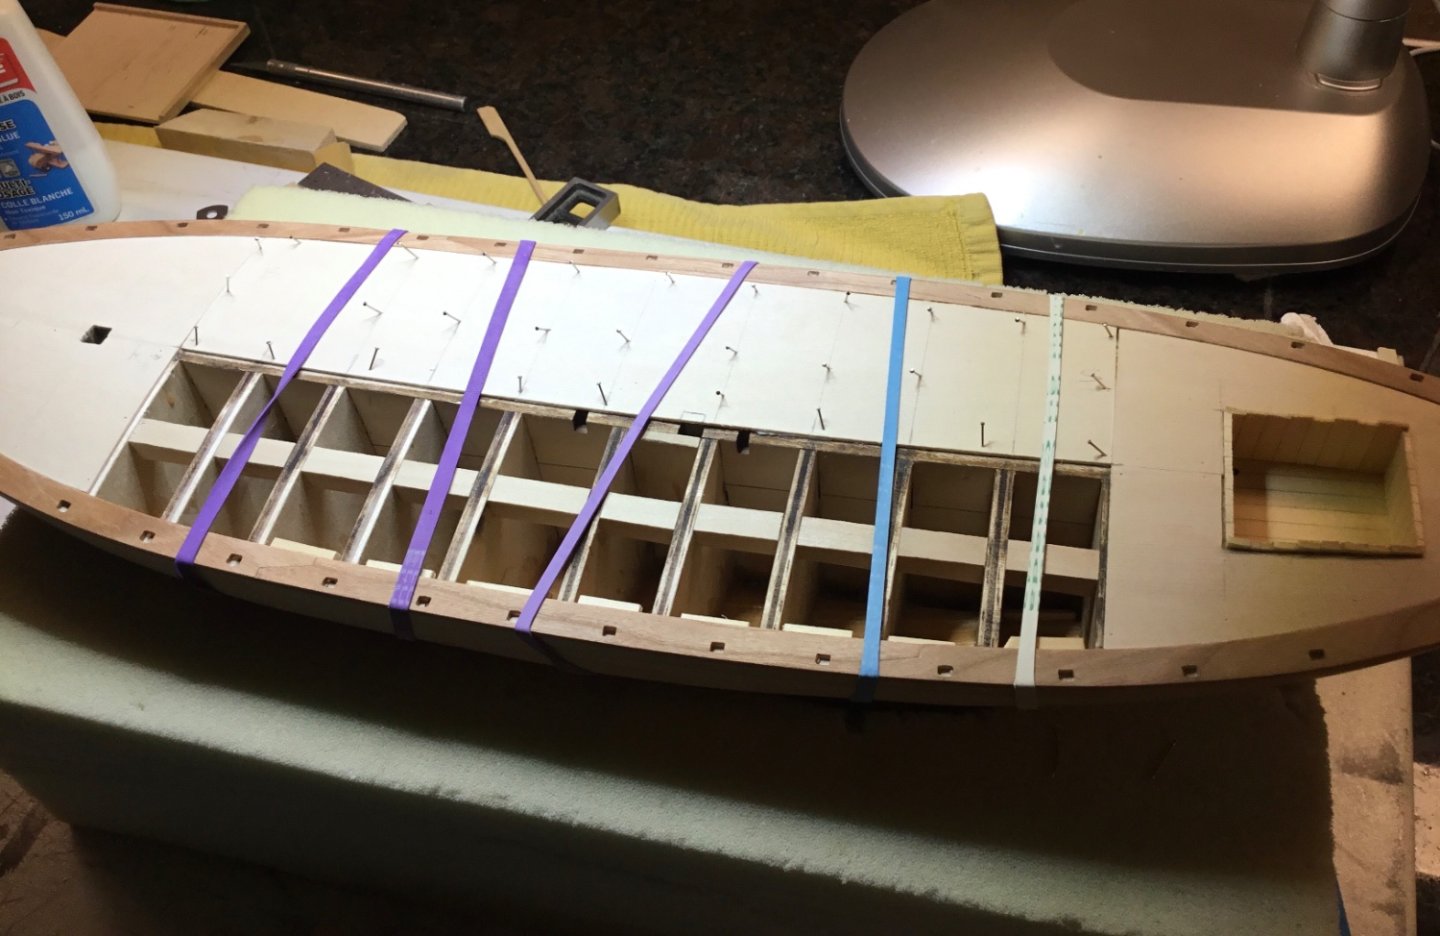
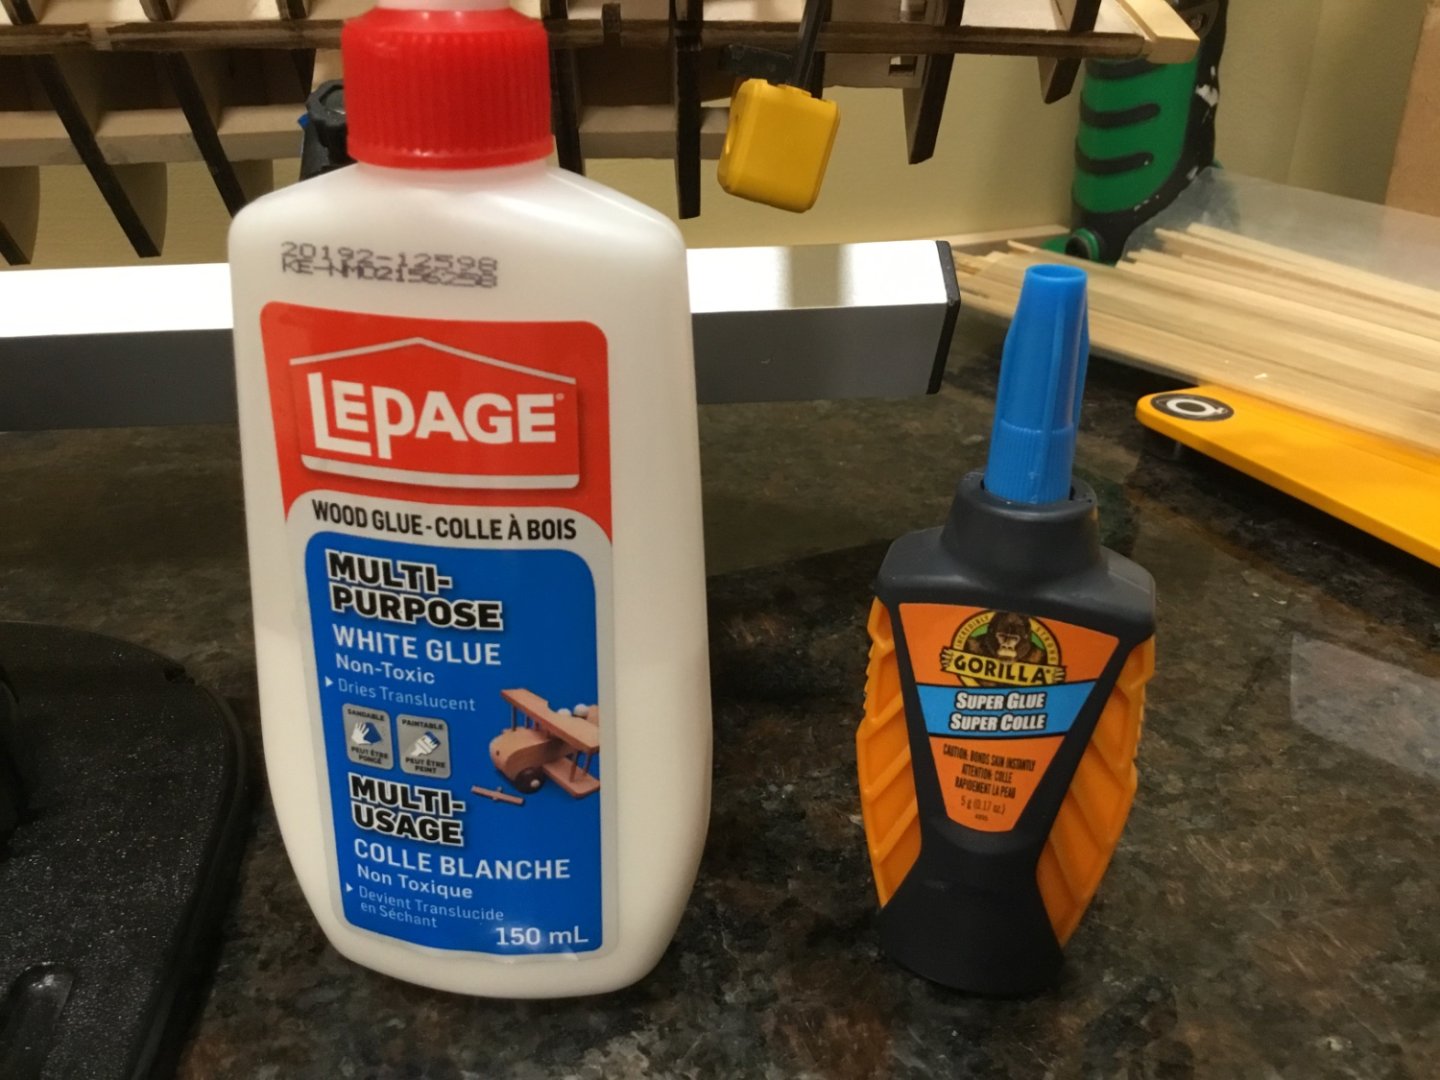
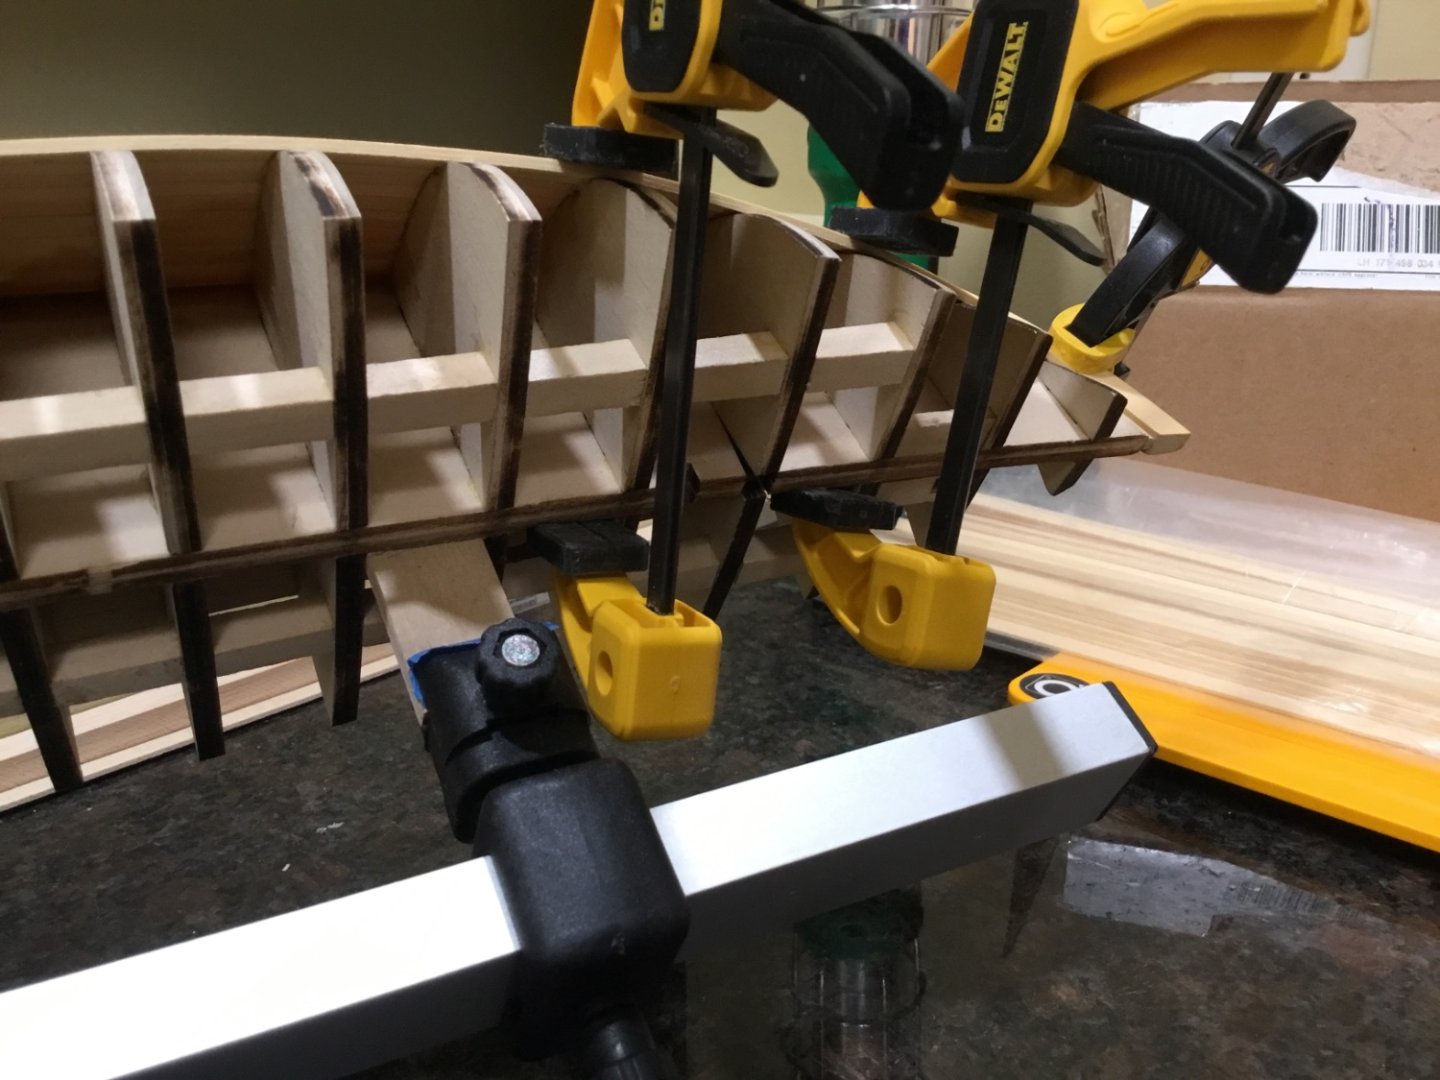
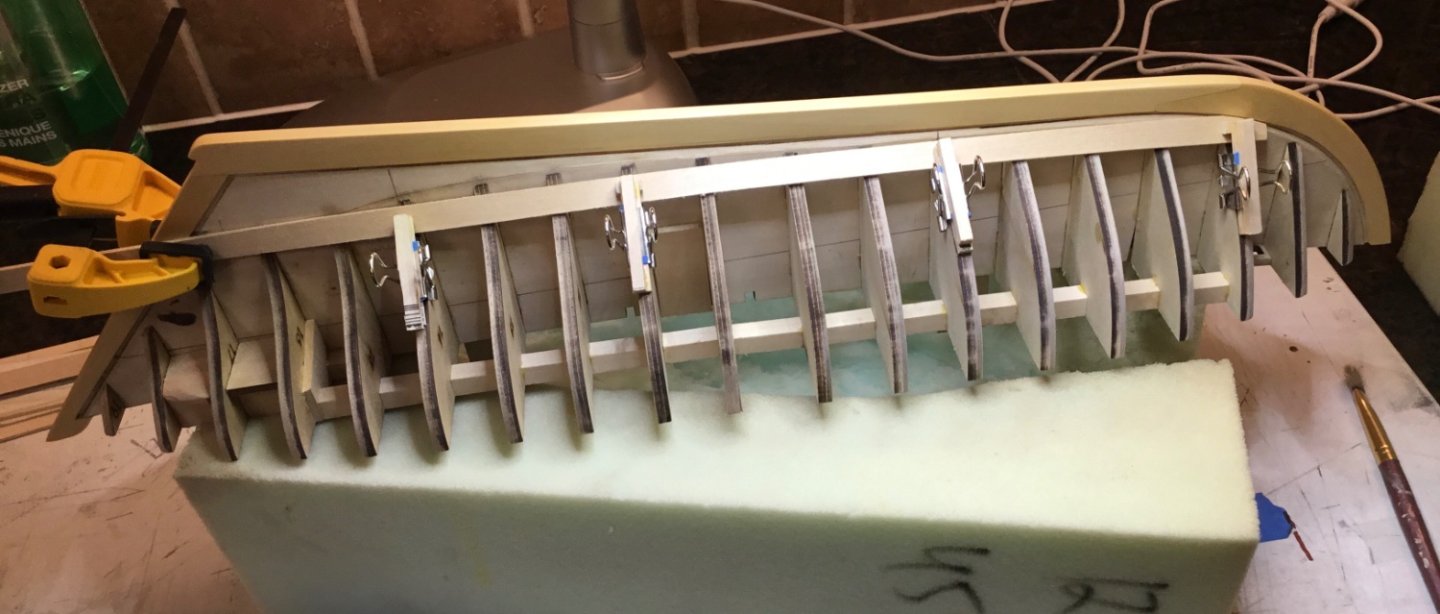
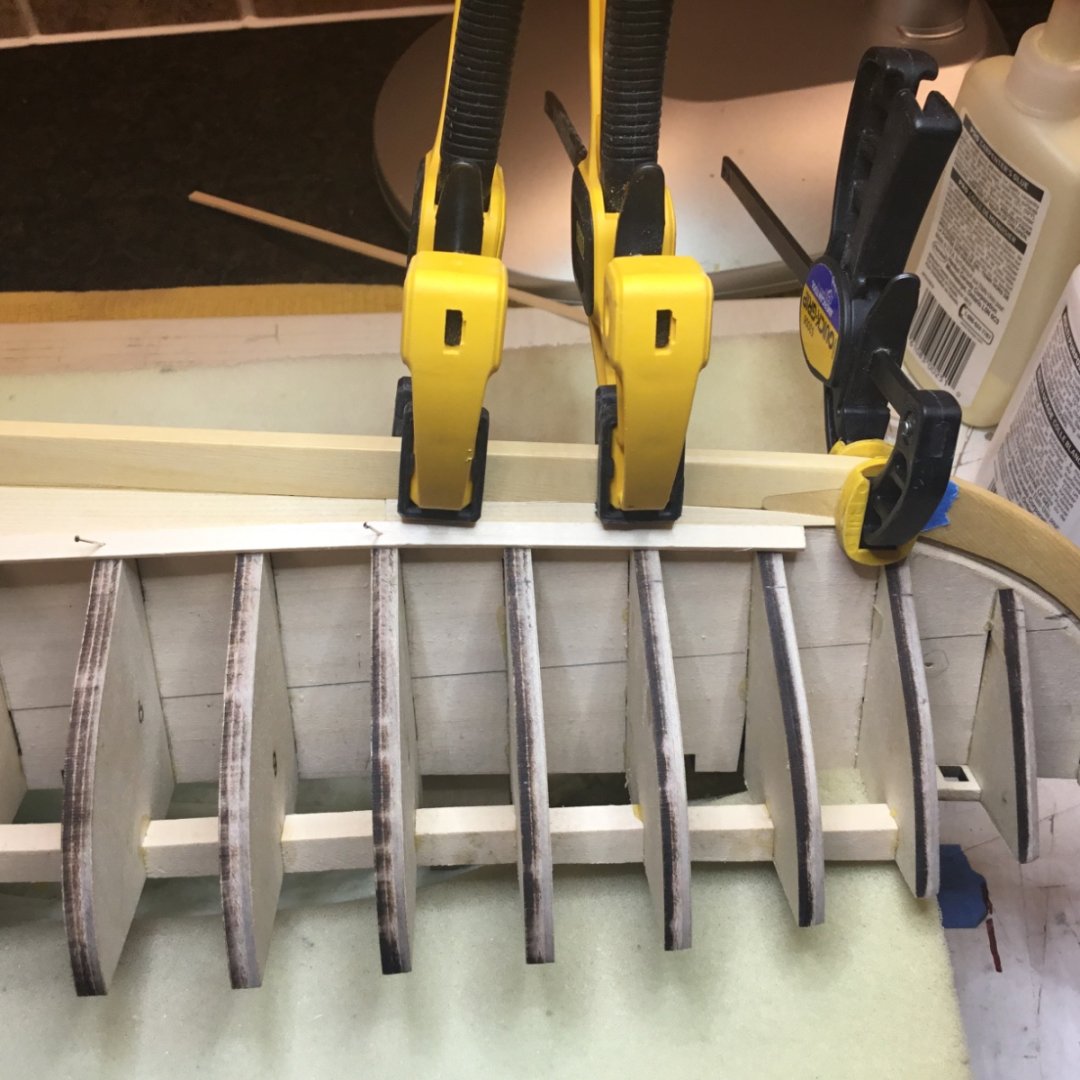
Hi Cisco, I‘be been using the small quick clamps. I only have three of them so I should get another pair. Probably should get a pair of Dewalts and a pair of the American Tools clamps which are smaller and get into tighter places. Used white pva where the garboard entered the rabbet. After that I used white pva to edge glue the planks and CA to glue the planks to the bulkheads. Also use CA where the planks enter the rabbet at the stem and the stern post. I‘ve been gluing three or four bulkheads at a time and clamping for ten minutes until the CA sets up. Here’s a couple of photos. Just finished Belt B today. I’ll post some “action “ shots when I start Belt A.

- 72 replies
-
- 4
-
-
- Glad Tidings
- Model Shipways
- (and 1 more)
-
Hi mnl, you are correct, I made too many assumptions.
-
Hi Dsmith, your pinky is looking great. I just started my pinky journey but when I get to the metalwork I think I’m going to try that low temperature soldering paste. Seen lots of people use it and like it
-
hamilton, you built a beautiful Pinky. I’ll be referencing your build log often
- 72 replies
-
- 1
-
-
- Glad Tidings
- Model Shipways
- (and 1 more)
-
Hi hamilton, thank you. I agree, the planking expansion is a very nice feature to have. The rest of the plans and documentation are very thorough. Actually the whole kit is very nicely made
-
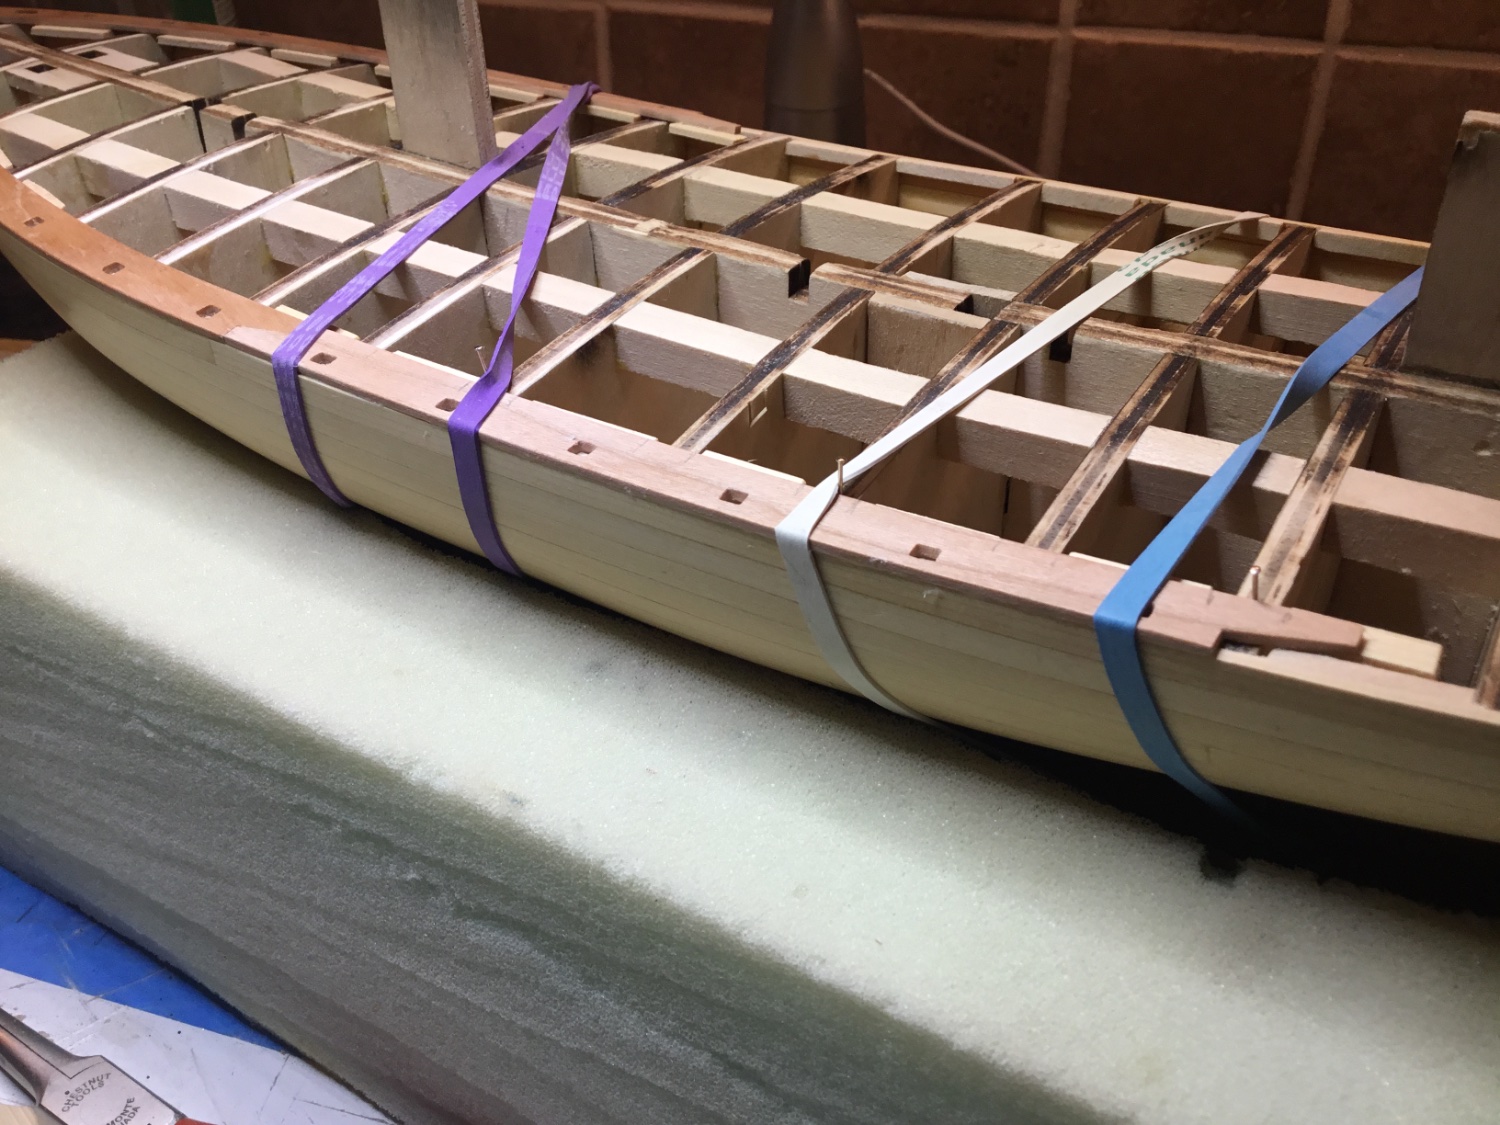
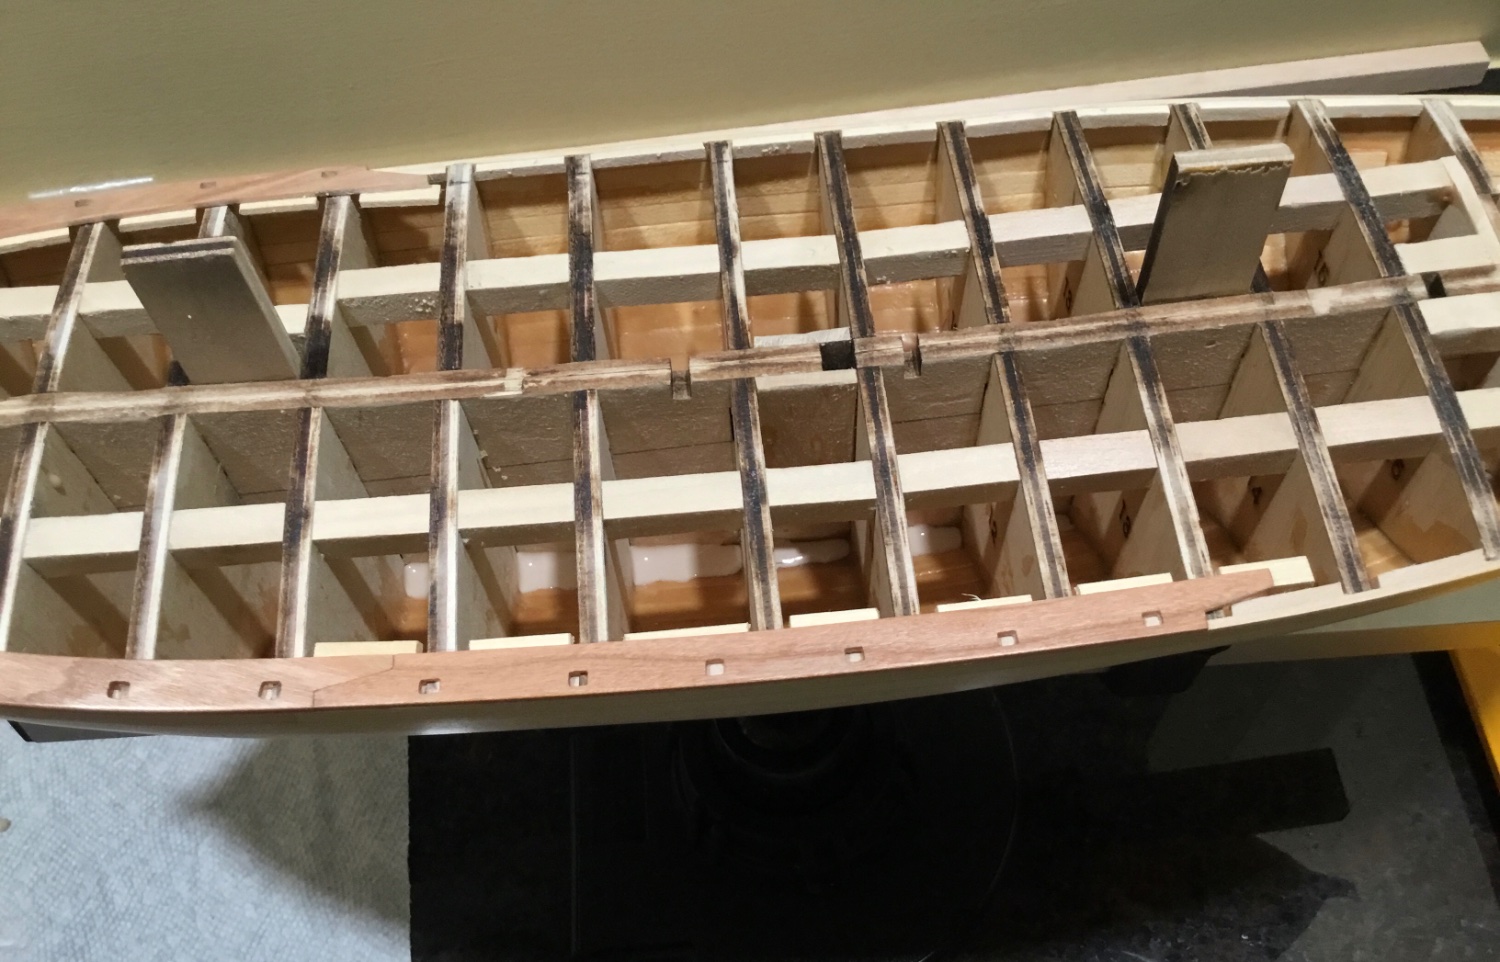
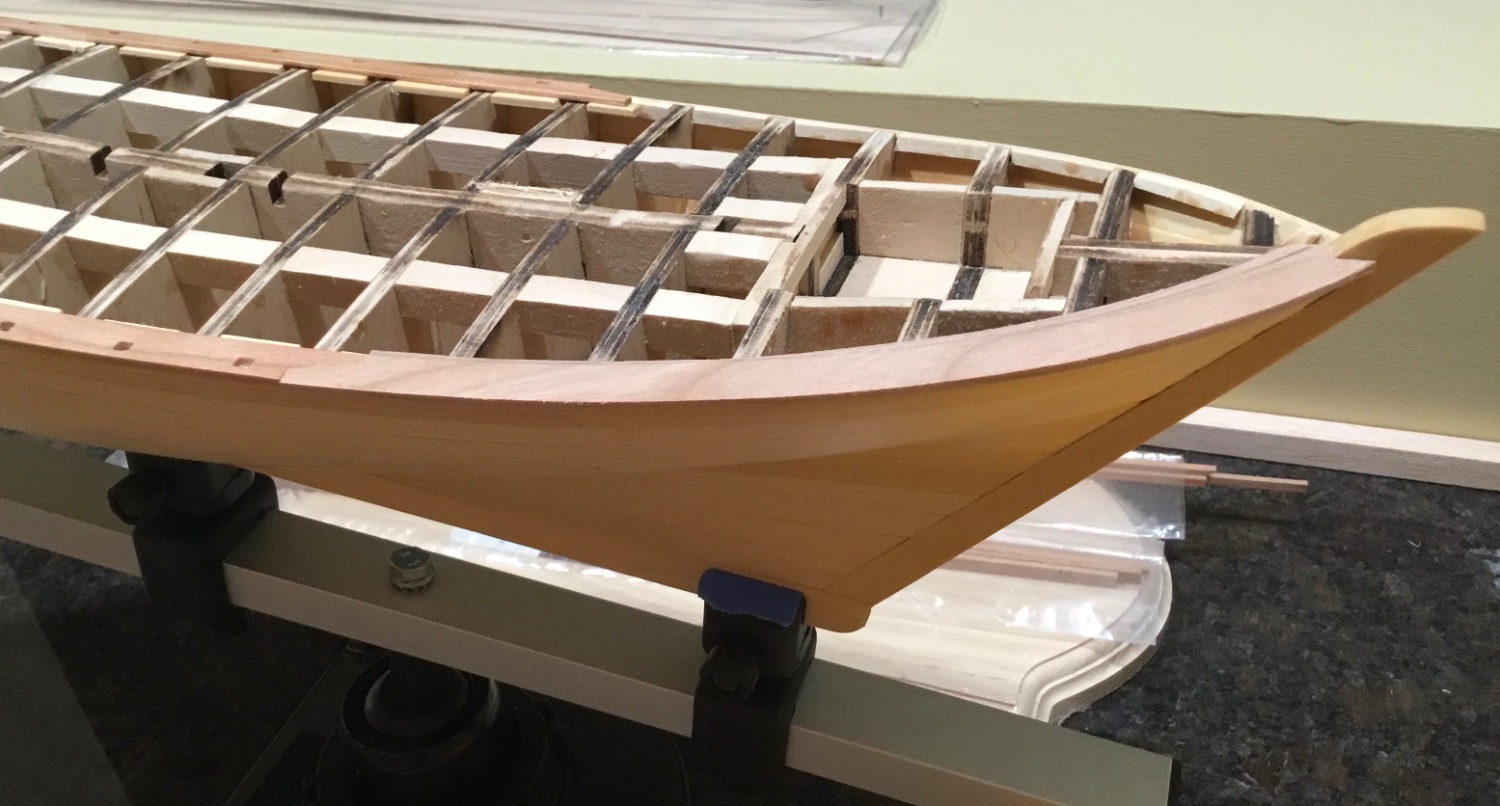
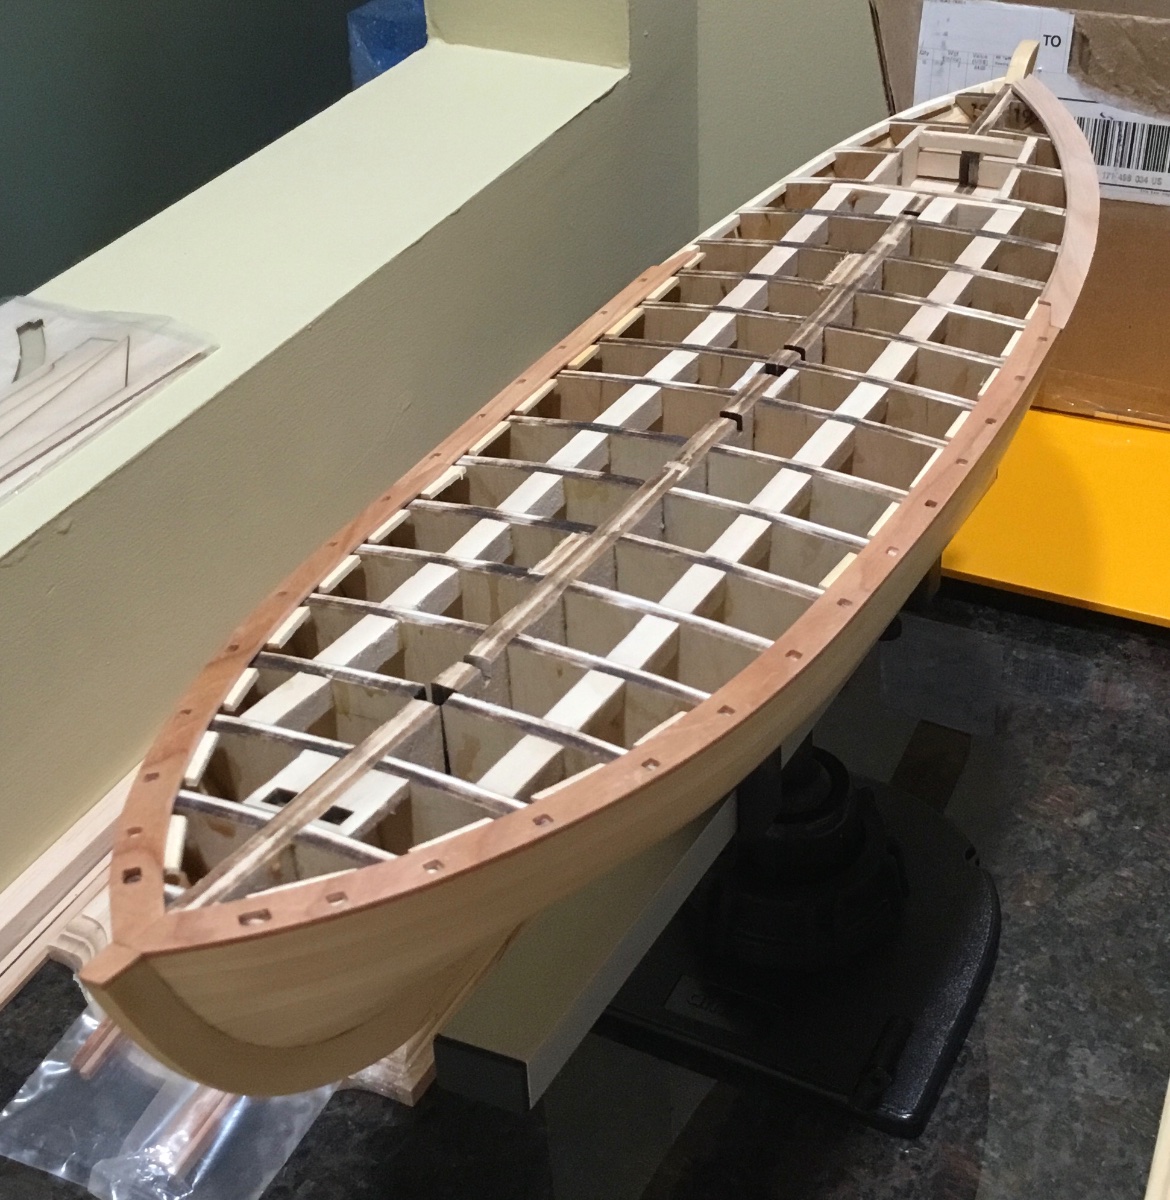
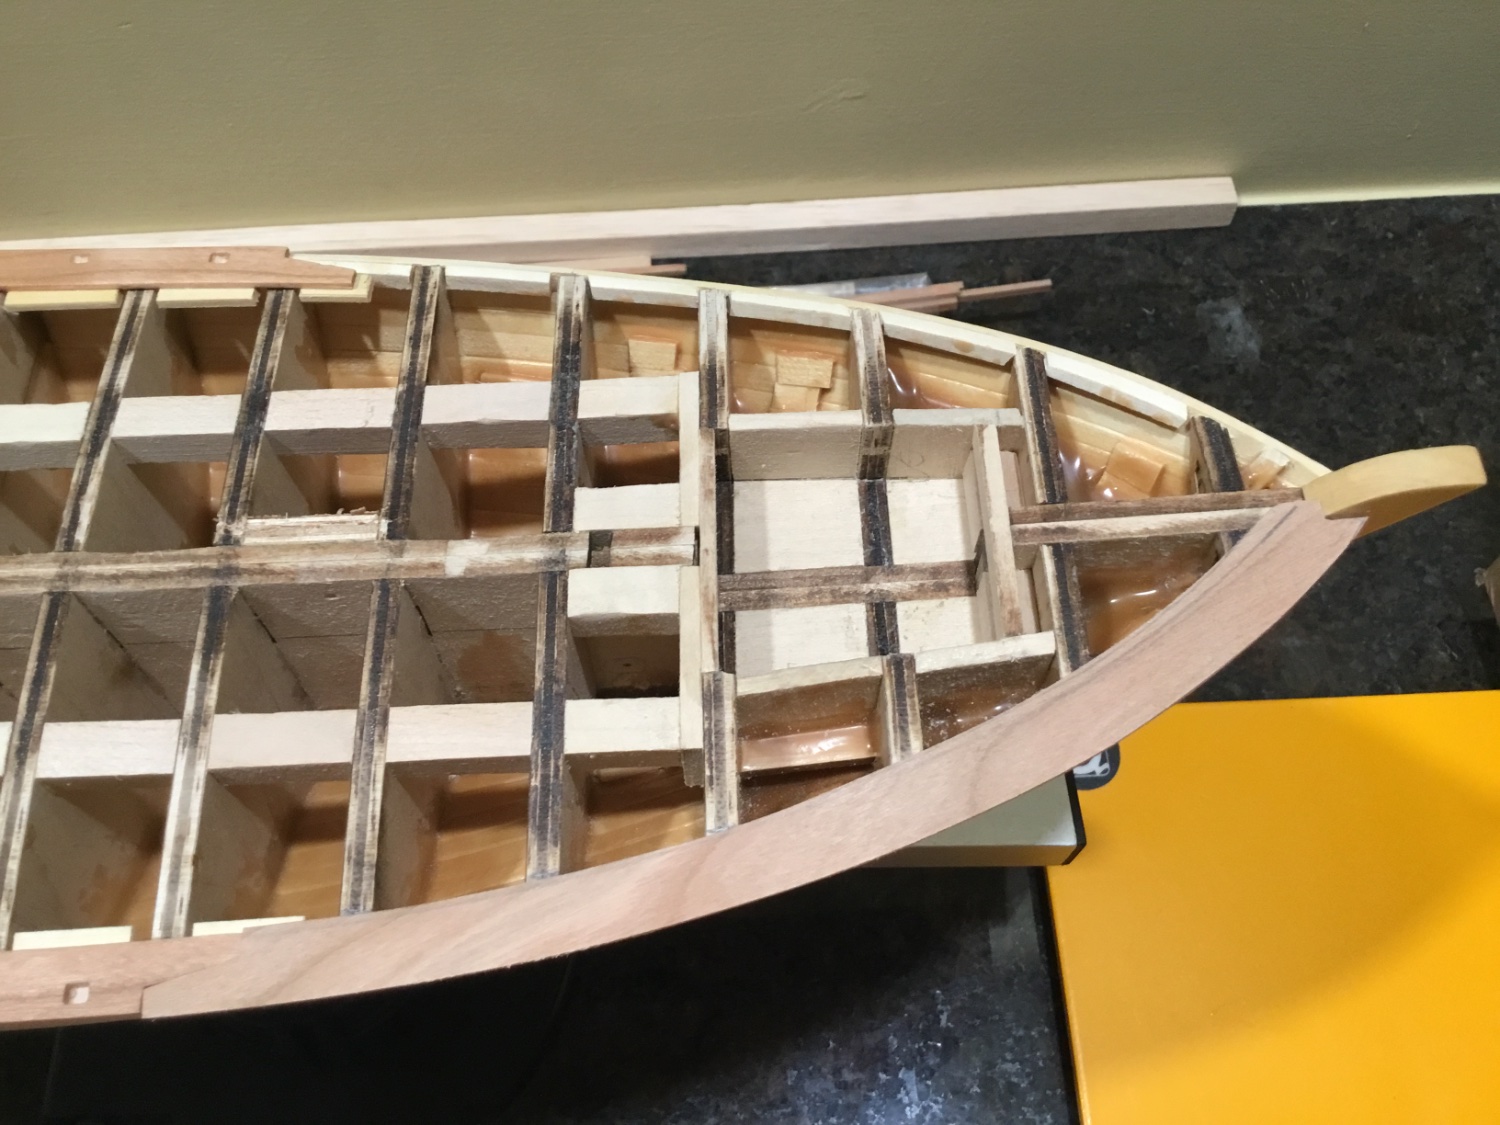
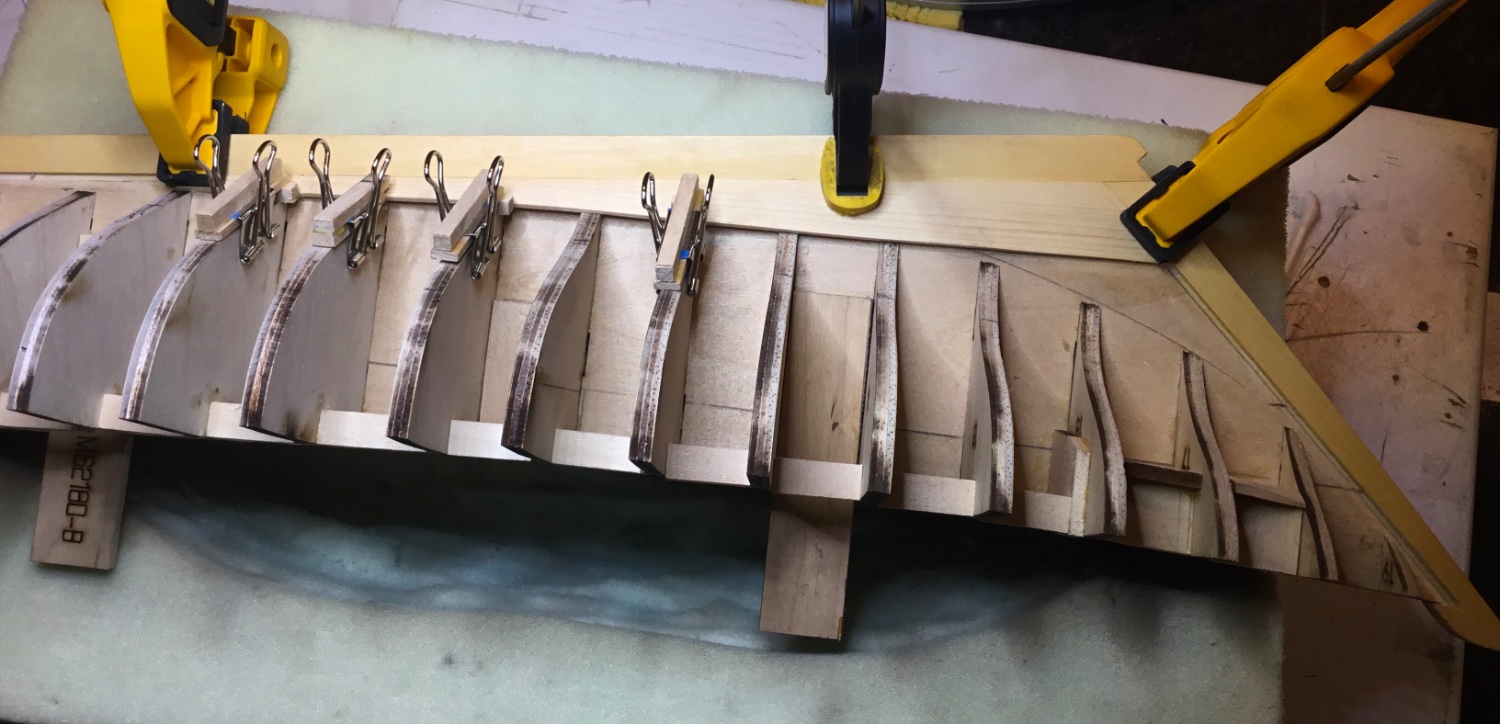
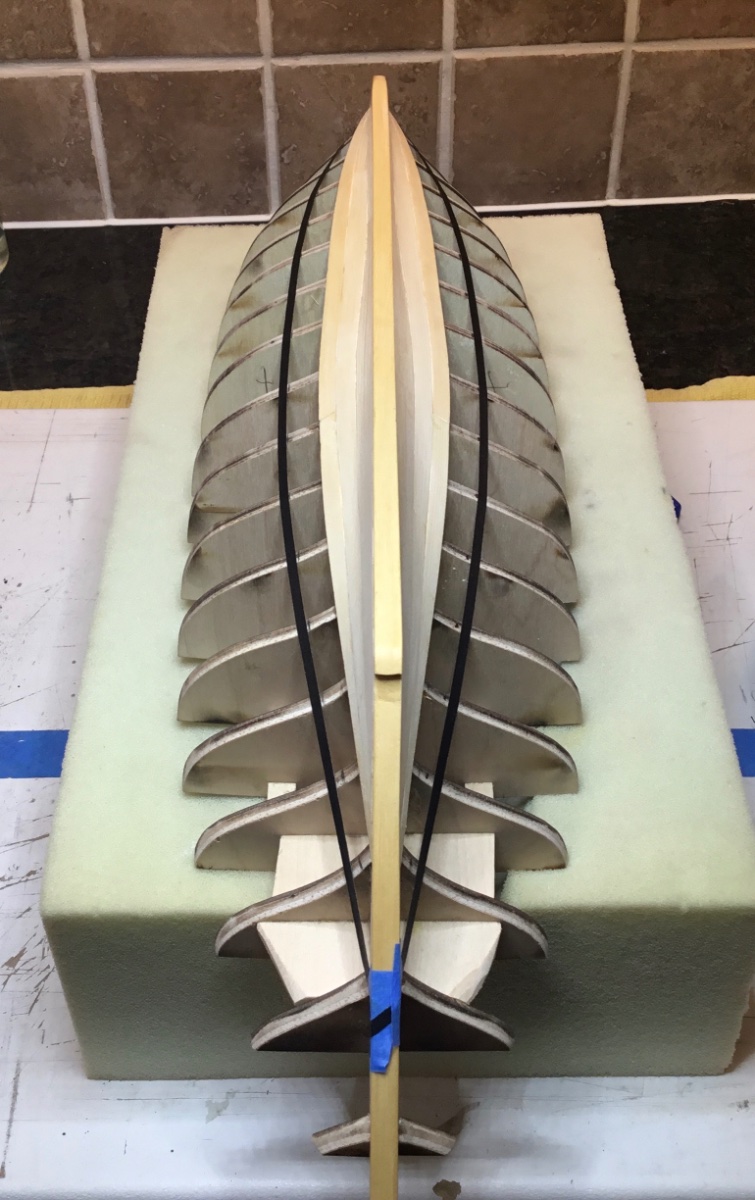
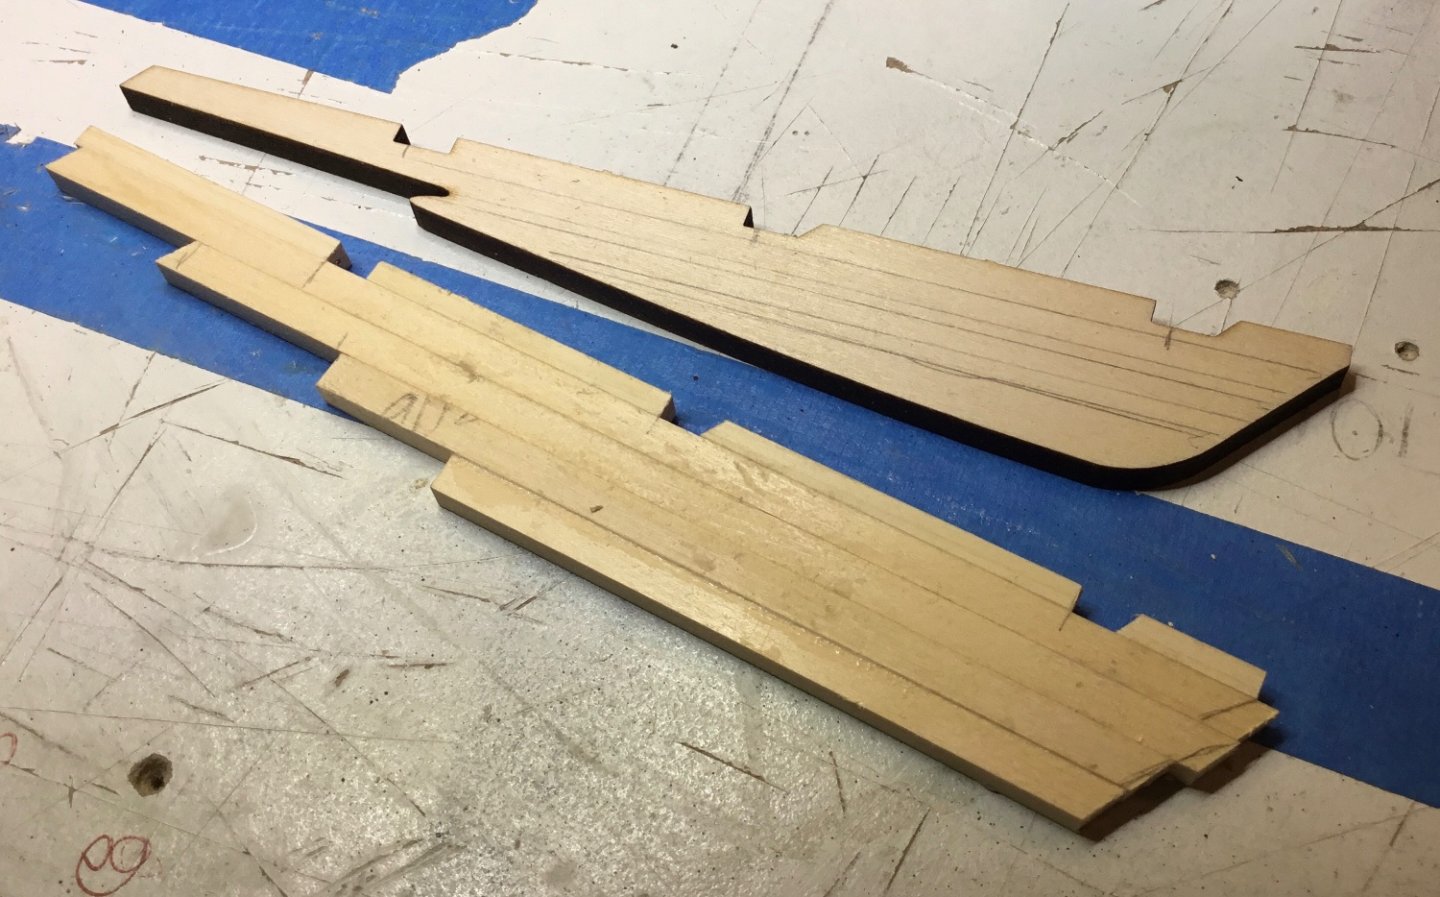
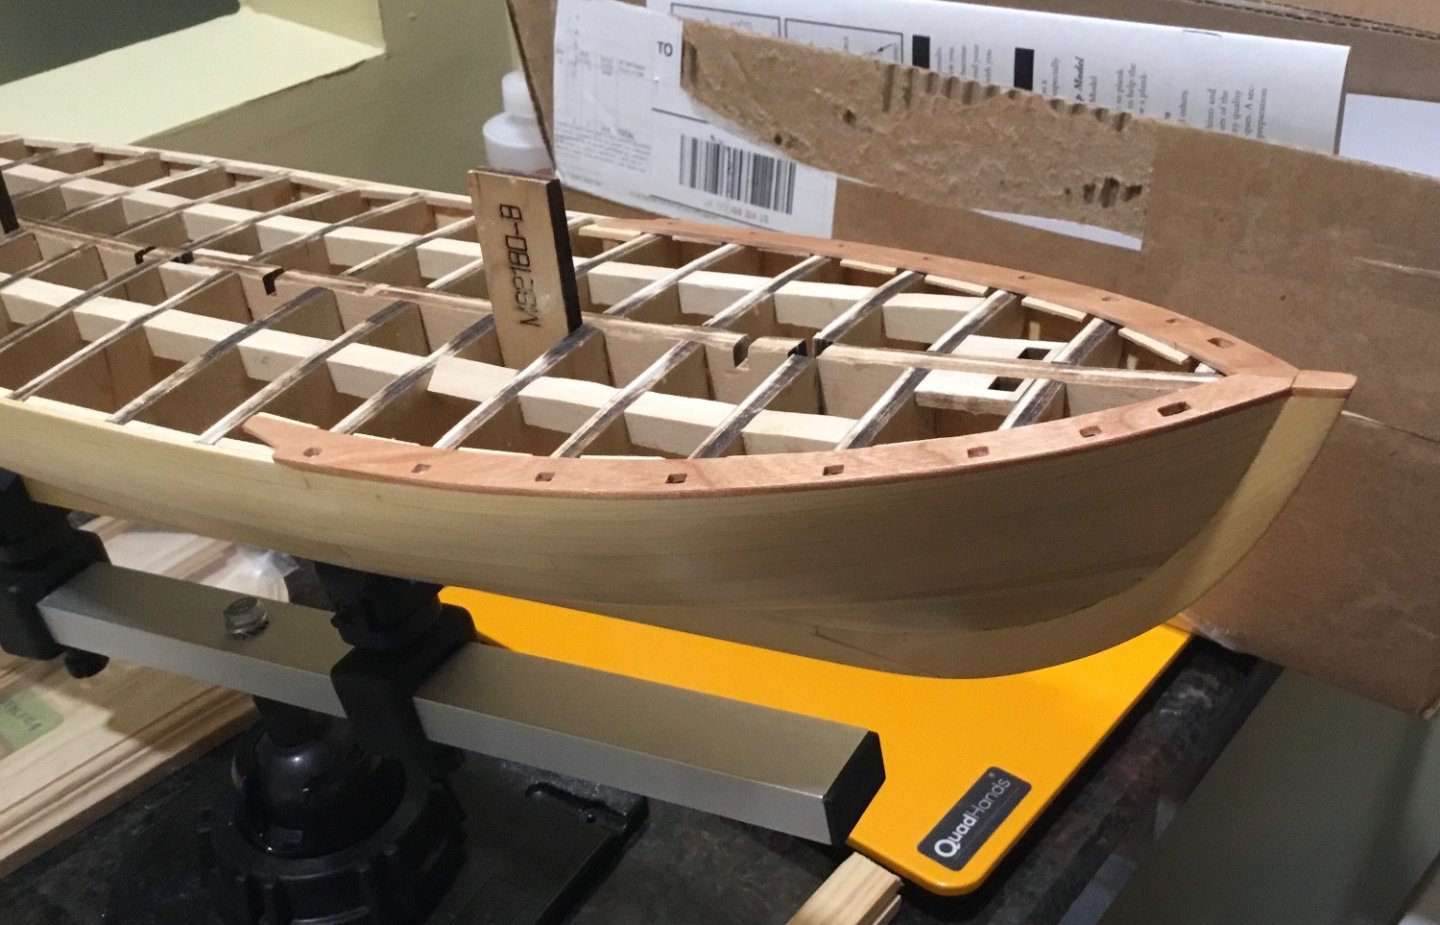
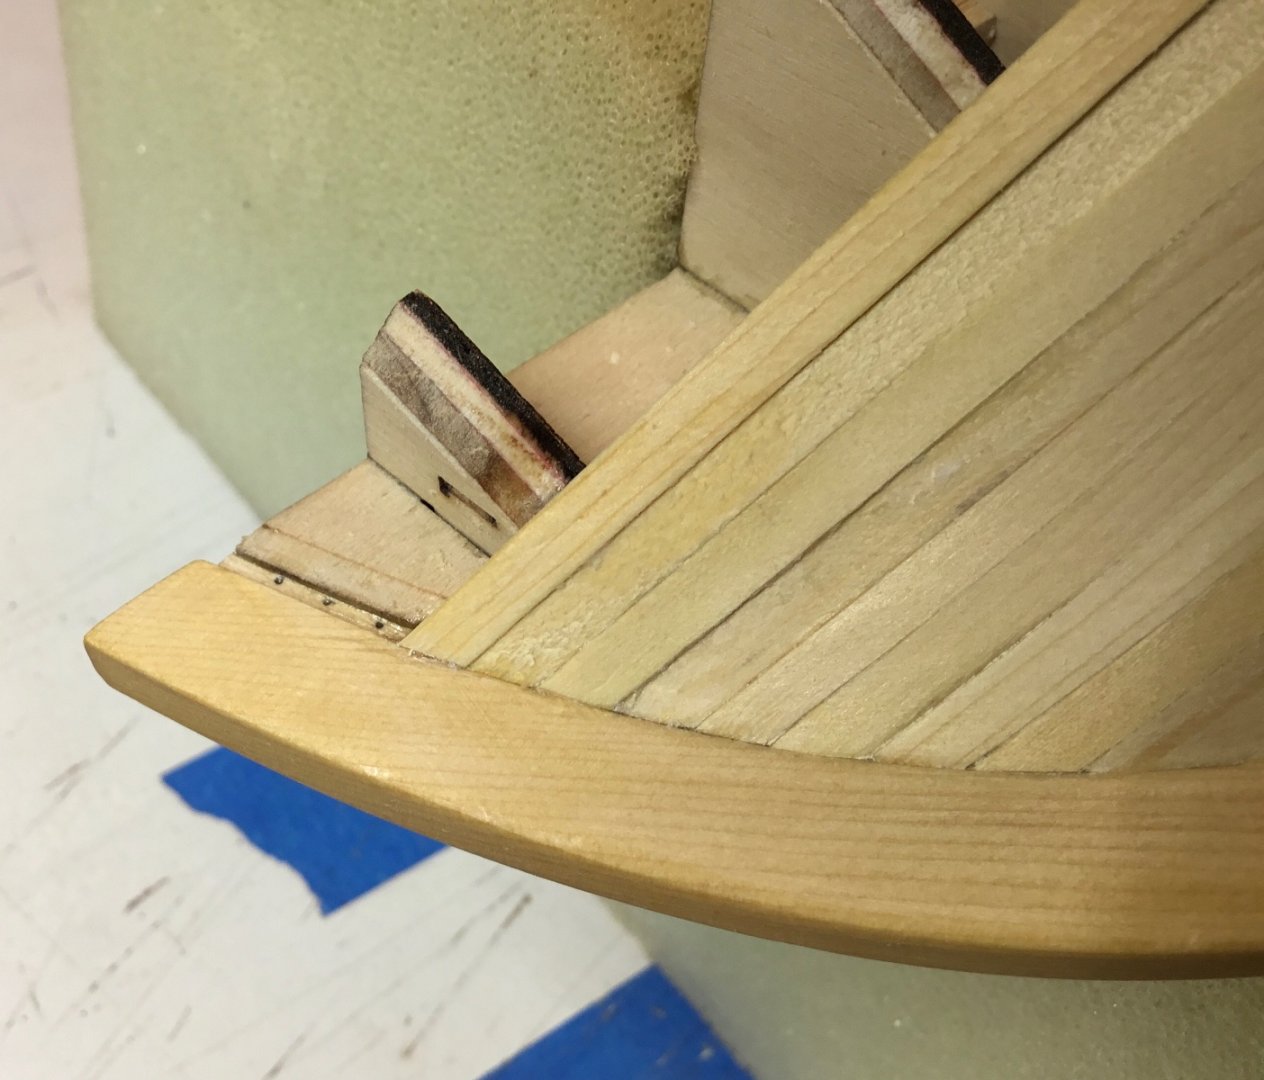
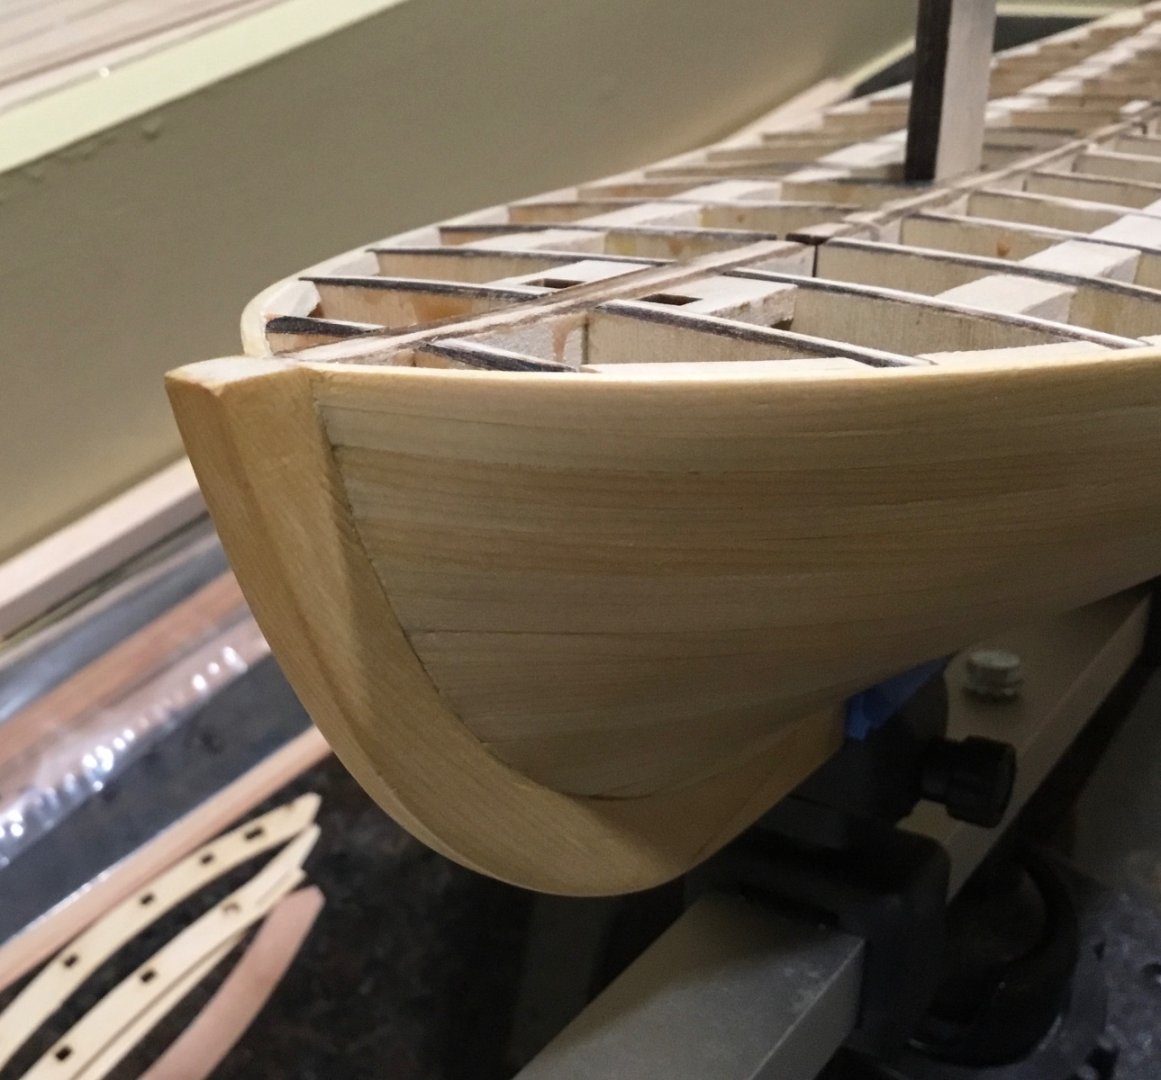
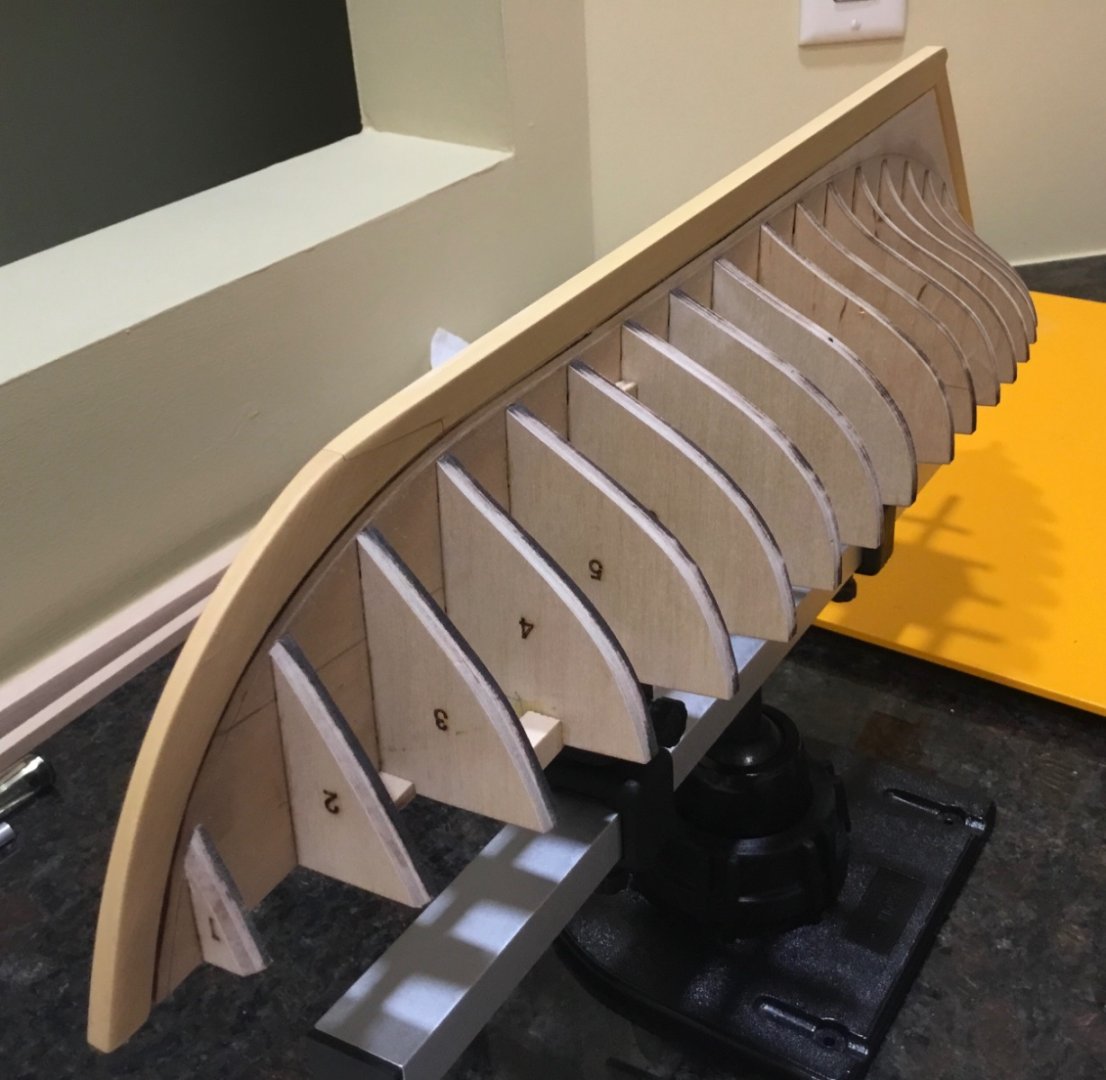
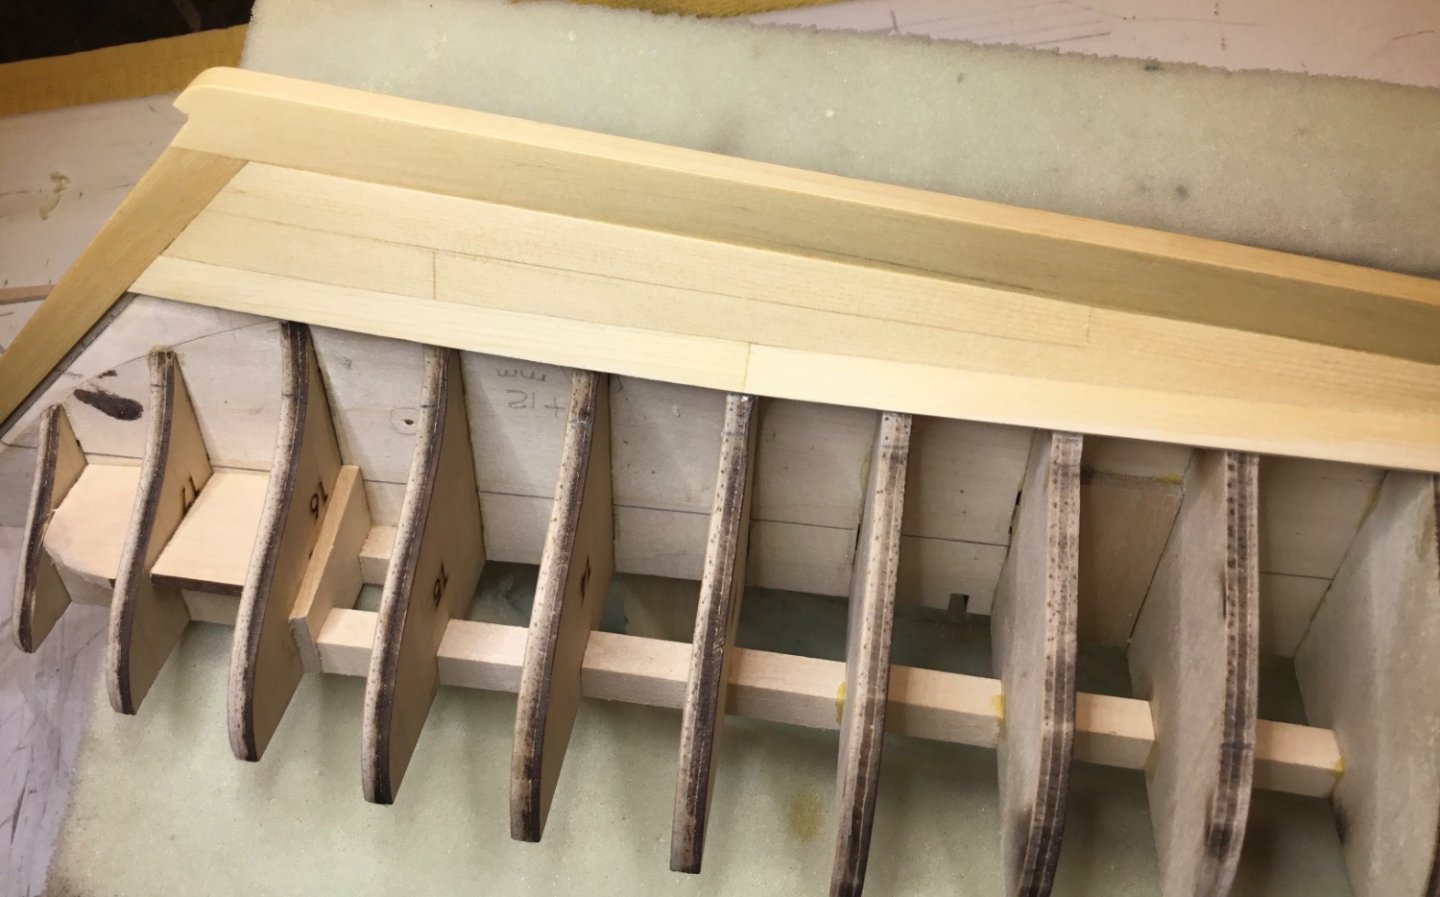
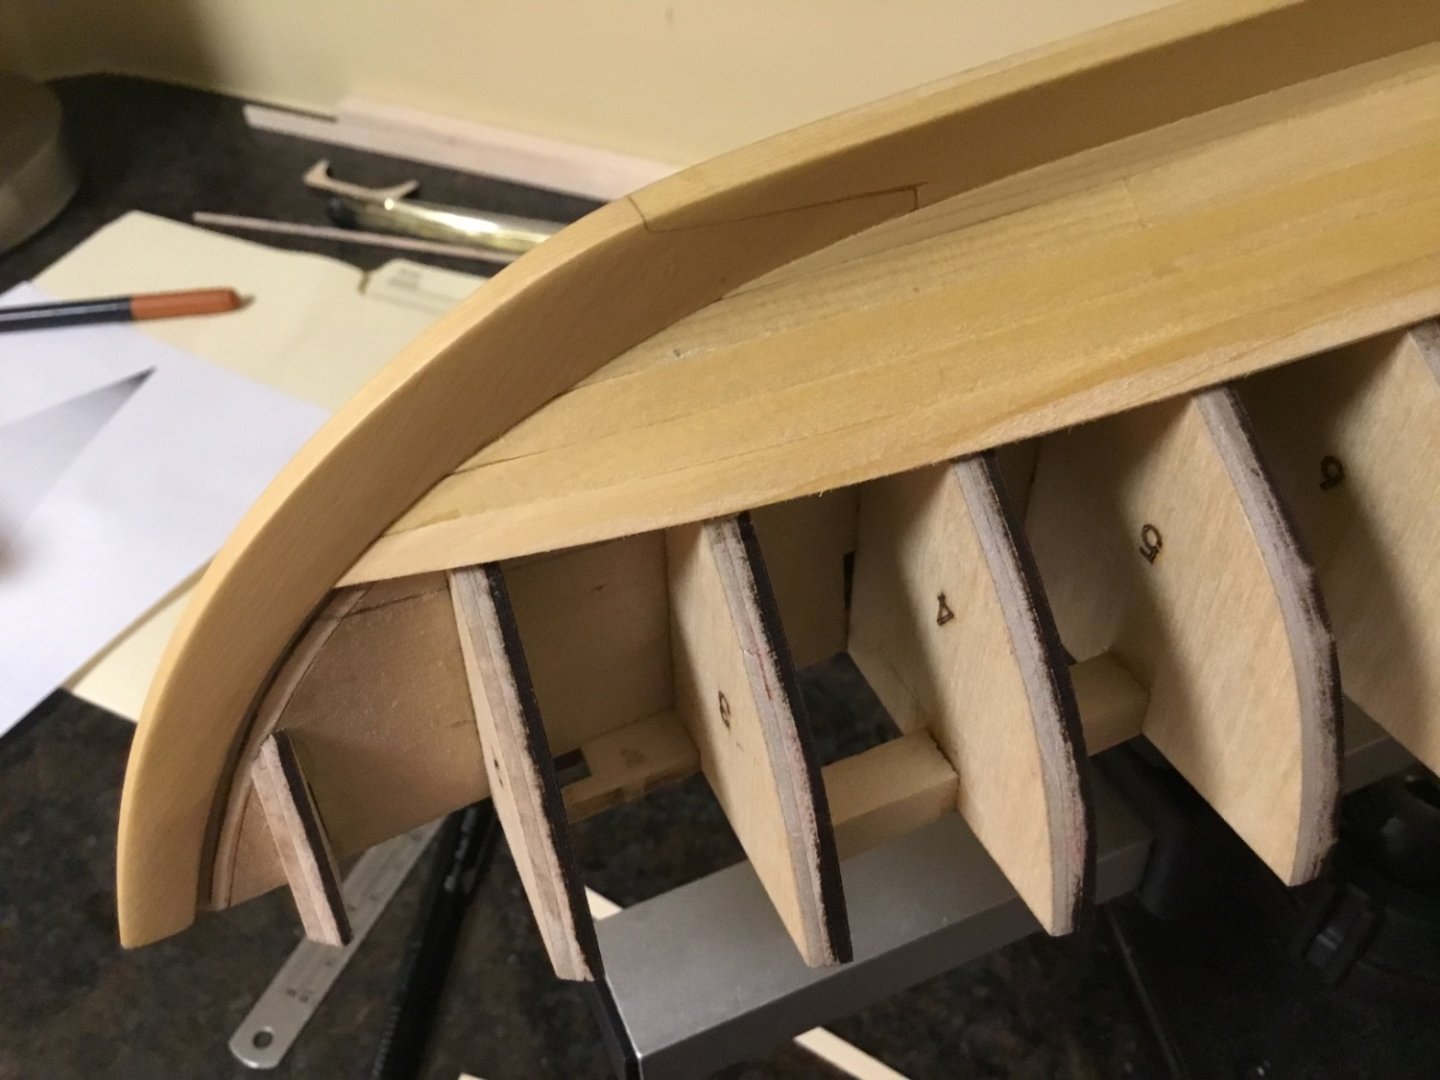
Hi Everyone, The Pinky is ready to plank.The planking will be 1/16” x 1/4”. The directions suggest that you can make the wide section of the garboard and the steeler out of one piece of sheet so that’s what I did. Laid a strip of wood along the hull where the broad strake would sit in order to get an idea of how far forward the garboard would run and to get some dimensions. This is where my first oops occurs. I sanded the garboard so that it sat in the rabbet at the stern post and along the keel. I took measurements at the stern post and at bulkhead number 7. Joined the two points with a straight line and cut. This is what I ended up with. Both sides are the same so I it wasn’t a sanding error. Should have taken measurements at each bulkhead. The next strake needed some finessing to fill the gap. Been gluing scraps of wood to the backside of planks at the stern where the planks twist to keep them on the same plane. The planking looks like it’s back on track so I lined off the hull where belt C ends and used tick strips to measure the remaining two strakes in that belt. Belt C is finished so I lined off the hull for Belts B and A That is where the build is at as of today. See you next time.


- 72 replies
-
- 8
-
-
- Glad Tidings
- Model Shipways
- (and 1 more)