HOLIDAY DONATION DRIVE - SUPPORT MSW - DO YOUR PART TO KEEP THIS GREAT FORUM GOING! (Only 13 donations so far - C'mon guys!)
×


Barbossa
-
Posts
509 -
Joined
-
Last visited
Content Type
Profiles
Forums
Gallery
Events
Everything posted by Barbossa
-
 Thanks for showing interest, Aldo Somewhere on the bookshelves there's a monography of the French frigate La Vénus ( J. Boudriot ) You never know... but on the other hand, building an own ship from scratch is a dream that many of us kitbuilders share, I guess...
 -
hi Bruno, It was about time I payed you a visit. I rarely visit the scratchbuilding-side : it is rather confrontational and it clearly shows I still have a lot to learn , if ever I want to build a ship all by myself ( which is a dream many kit builders share, I guess ). Never mind : you're doing a great job on her. What technique did you use for the treenails ?
-
Hi Davyboy, many thanks for your input. I'm a bit late to respond, but family life got a bit between me and shipbuilding. This is probably not by the book, but I'll settle also by bending iron wire around the deadeyes and thus creating a loop. As you can see underneath and refering to previous posts it was only while completing the main channel that I realised the loops were far to big as they are to receive a 0,8 mm wire to connect with the chainplates. See the pic : the left one is OK So very little progress here. Once those channels completed and other hull-side fittings done, I'll post some pics of an (almost) completed hull.
-
Thanks Pierre for your encouraging comments, much appreciated. Back to this channel & chainplate problem. I've decided to go for the "scratch" solution. The first attempt seemed satisfactory (at first sight). But sometimes a helicopter sight might cause you to reconsider. I created those loops by bending the iron wire around a toothpick and only while assembling the deadeyes on the main channel, I realised they were far too big, I obtained a much better result by bending the wire around a large needle. No harm done but back to start and I'll have to remove lots of iron wire from 30 deadeyes. Still I wonder : there are a few Jotika/Caldercraft buildlogs running on this forum. How do you deal with this ? Bonjour Offencer, Just went on the net doing some research regarding "La Recouvrance" This is a wonderful project and now I realise the city of Brest has all reason to be proud to be represented with such a beautiful ambassador. Perhaps you should start a buildlog. I'm looking forward to it.
-
Wonderful work, Andy I'm also more inclined to tackle the shrouds "stage by stage" instead of assembling the masts at first. As I'm a bit anxious that you might tight the ropes as such that the mast might bend in an unappropriate direction. I am aware that many other members have a different opinion about this matter, but I think this approach ables you to "compensate" if necessary.
-
Hi Andy, it appears you were quicker to respond Aftermarket pieces are indeed the safest way to resolve this problem. The more is : when it comes to problemsolving by using the "do-it-yourself-method" for several identical pieces, there is a major requirement : the search uniformity.
-
Continuation


-
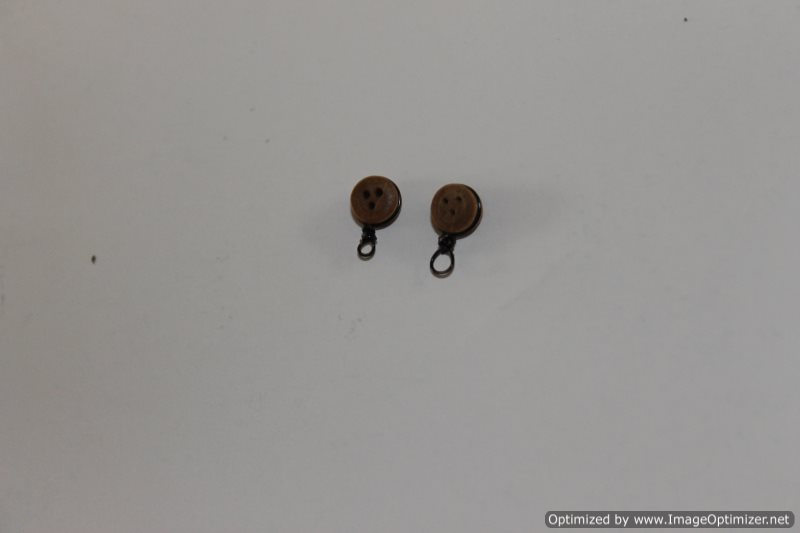
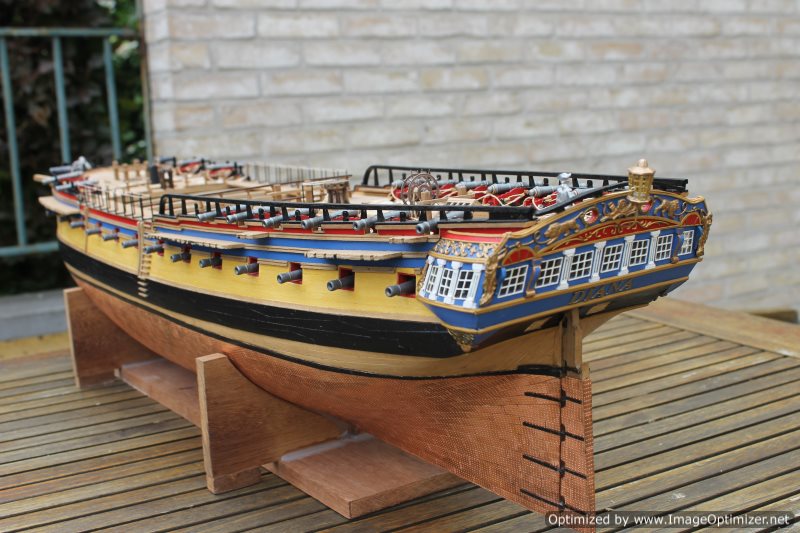
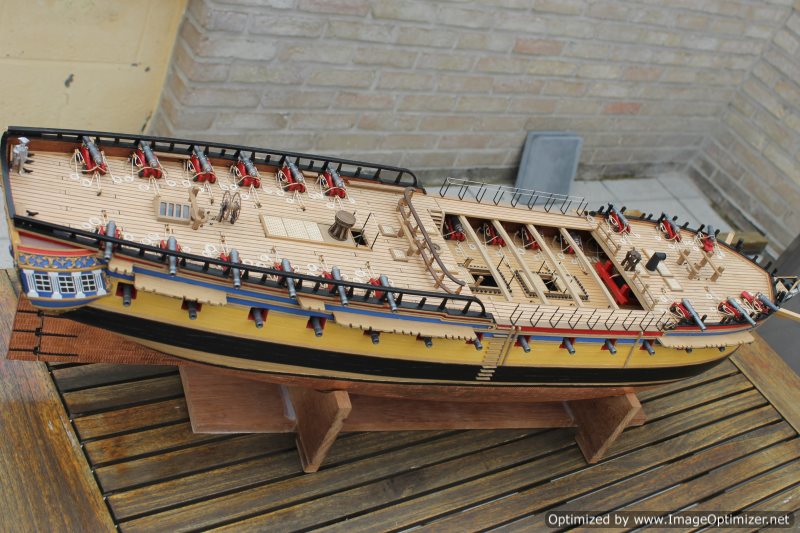
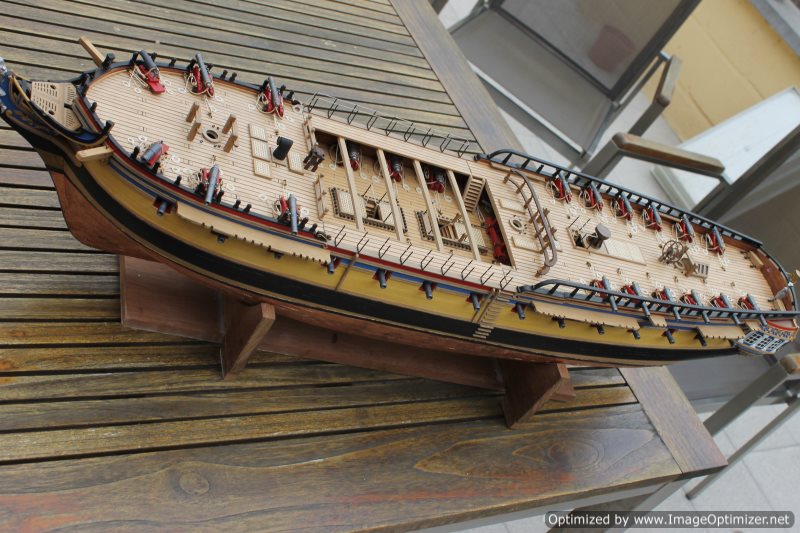
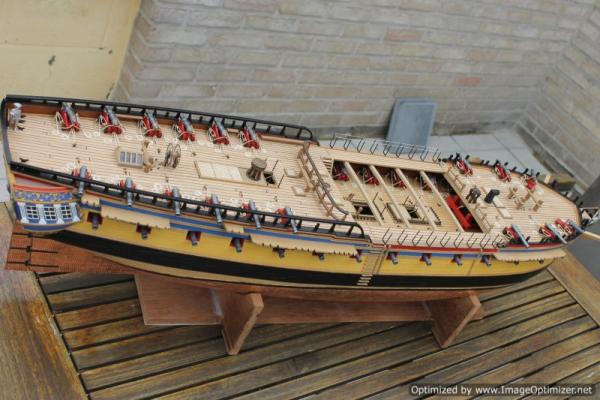
Channels and chainplates Something odd : there’s a kind of an incision in the deadeyestrops (p. 305). The extremity is to receive a brass wire that connects the deadeyestrop with the lower chainplate (p. 259) . Due to the incision I fear some trouble when it shall come to tighten the shrouds. I presume Jotika / Caldercraft uses this same principle in other kits. How do other members cope with this ? Anyway, here’s an alternative : I’ve bended some iron wire around the deadeye and created some kind of loop. As the edge of the channel is to be covered with a wooden strip this alteration shall be hardly visible. As my iron wire is only half as thick as the original deadeyestrop, I’ve bended it twice around the deadeye, although for the small deadeyes once seems enough. Underneath some pics to make my point Also some good news : me ship , sorry, book came in, very recommendable indeed !


-
Hello, BE, Aldo and Ferit Thanks for your comments : it was the classical look and /or wooden aspect I was looking for. And I'll make no alterations to it. As depicted in a previous post, I used Acrylicos Vallejo paints for this job. A collegue of mine has more interest in WW II airplanes and confirms the good quality of this brand. Anyone shared other (be it good or bad ) experiences with this brand ?
-
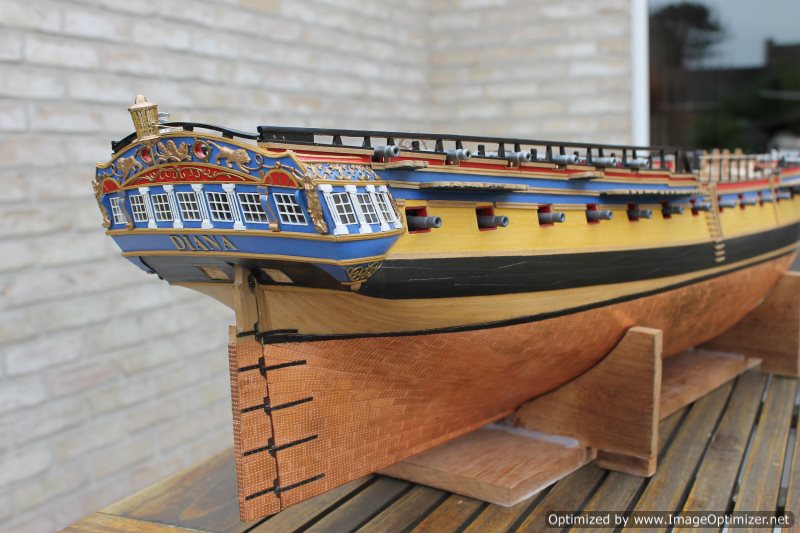
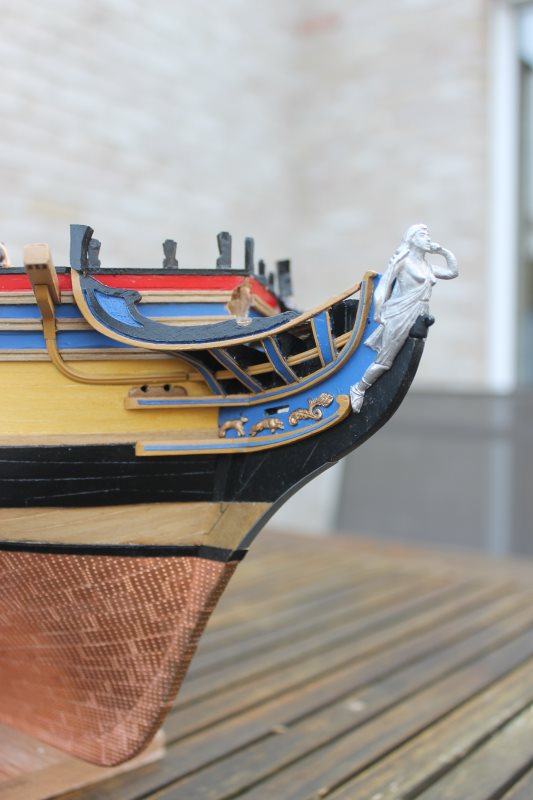
Hello Anja, Sjors & Mobbsie HMS Diana is a recommendable kit, I wonder if Jotika is willing to improve those copper sheets ? Are those supplied in the Agamemnon box identical ? Thanks for the encouraging comments, although I haven't entirely made my mind up yet about the figurehead. it is still dry fit and if I were to add some color I do not want this part to be to flashy. Decisions.... The more reason to follow your sound advice, Mobbsie Cheers !

-
continuation


-
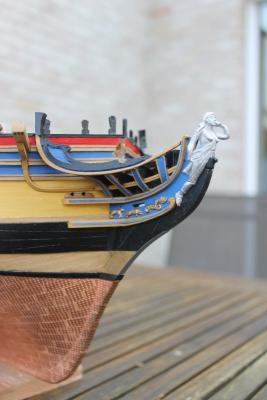
Little update due to extreme weather conditions (>30°celsius), even holding a paintbrush makes me sweat. However… we waited that long for this summer. The figurehead : I wanted to obtain an effect just as it was carved out of the wood, perhaps an extra layer of satin varnish ? The figurehead is still dry fit. The figurehead received one layer of white foundation and one layer of goldbrown In the meantime a little experiment for the gunports : I’ve cut out of some sparewood a port with the same dimensions and fixed a rectangular smaller piece out of a 0,5 mm sheet and overpainted it with a glossy red color, the fored holes are to receive the eyebolts at both sides.The upper side from the gunports is made from the same yellow wooden strips as applied to the hull ( above the wales) Oh yes :regarding "the sailing frigate", Amazon told me it is on its way to be continued


-
Hi Ron, I've already checked about it's availability. Amazon.de, offers 3 copies. There's just enough space aside J.Boudriot's "La frégatte - Marine de France" on my bookshelf Many thanks for your input. I'm afraid, I'll also have to think seriously about a display-case...for some reason I wonder about mrs. Barbossa's opinions....
-
Hi Ray, Whenever you’ll get to the fitting of the top deck, just a word of caution. There are 2 sorts of cavel cleats ( parts 114& 115 ) . The “open bulwark”-version might require to shorten the latter and the horizontal one seems necessary in the belaying plan. At least , if my understanding is correct. As you can see -in combination with the eyebolts for the rigging of the guns- it’s a bit narrow in that area.
-
Hello Mort, Many thanks for your input. The idea of including swivel guns is great and very tempting for more than one reason. Therefore I'd like to refer to B.E.'s HMS Pegasus superb buildlog : the swivel guns supplied in the box are to be replaced by something more suitable. And as I have this "Peggy" on the shelf and both Diana and Pegasus are in the 1/64 scale... Besides, I’m looking for some extra 3mm blocks. "The sailing Frigate" appears to be an essential book as so many MSW-members refer to and quote from it. Time to spent some money (again), so it appears .
-
Hi Timmo, Just went through your buildlog and the effort you made regarding the ornament rails shows that your future Diana will be just as nice as mine. I guess it still comes down to that basic rule : I always try to imagine every different episode as a separate project. But on the other hand I'd like to quote Mobbsie : sometimes you have to call it a day. I've tried to make a lamp from scratch : you really don't want to see this.
-
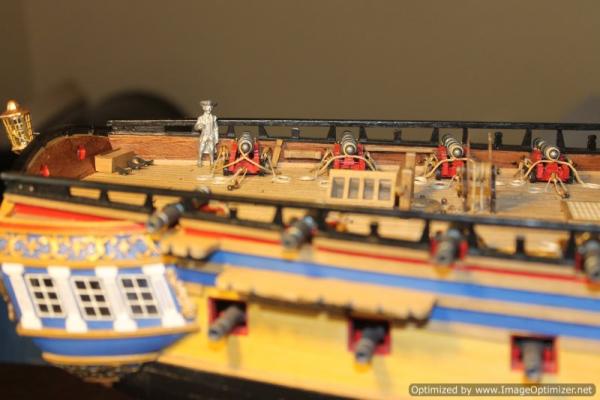
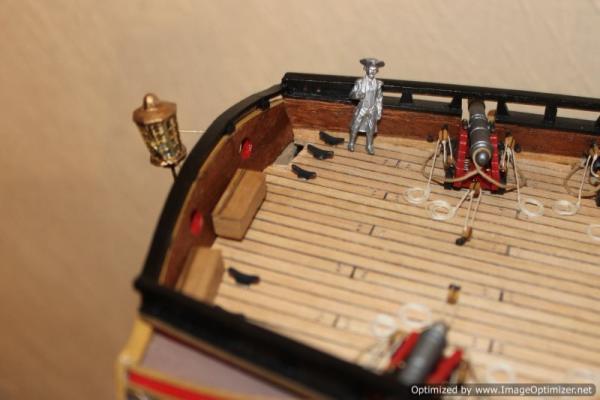
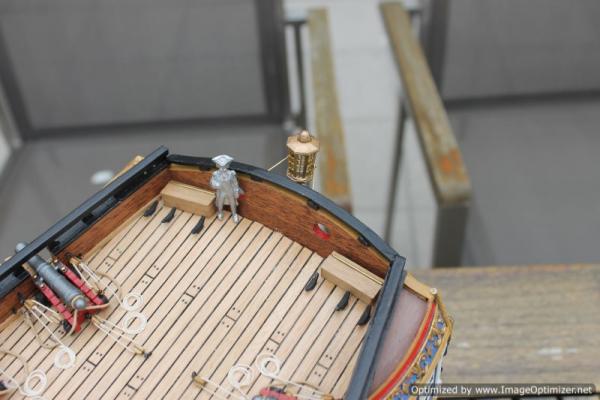
hello, many thanks and greetings to you all Anja & Sjors, BE , Ray, Kevin. This input encourages me as I'm moving slowly and little by little towards the mast & rigging part of this build, I just my might need this support, I'm afraid. B.E. : regarding the figure head : you've read my mind. As this cast build figure is still dry fit , it is time for some experiments Ray : a quite rightly query. I have this kind of gooze that you can easily find in hobby and craftsmen stores and will also try this option in dry fit modus. Although I wonder -for easthetical reasons- if this option might decrease the elegance of the open bulwarks. So this remains to be seen. Something different now : perhaps you noticed the cupboards intended for flags or whatever stuff, underneath the real practical reason : it comes in handy if you want to remove dust, wooden parts from the inside of your stern gallery windows. So these parts are also to remain dry fit.

-
that's all folks !
-
continuation


-
Hi Anja, I've secured the lamp with some extra (self-made) eyelets. Hammock cranes (only midships in this build) are done and furthermore I made sure that the lads on my ship could not break their backs by falling down the stairs. Another thing is puzzling my mind since a long time : how about the color of the figurehead in the bow section ? I've seen intersting approaches on "the net" , however I'm more inclined to give this a more "wood-look-a-like" touch but how and which coat to apply on this cast figure ? Any suggestions ? Anyway, here's the actual status to be continued

-
HMS SERAPIS by PMG - Aeropiccola
Barbossa replied to PMG's topic in - Kit build logs for subjects built from 1751 - 1800
Hello Pierre, very sound advice from Mobbsie, I would do the same and purchase through Caldercraft or similar. I've met my own limitations quite a few times in my current build and I even plan to start a topic under " General discussion" called : "Silly ideas, what was I thinking". It is about how I tried to avoid fixing the supplied cannonballs around the gratings. Thought I had a plan B for this but it went totally wrong. -
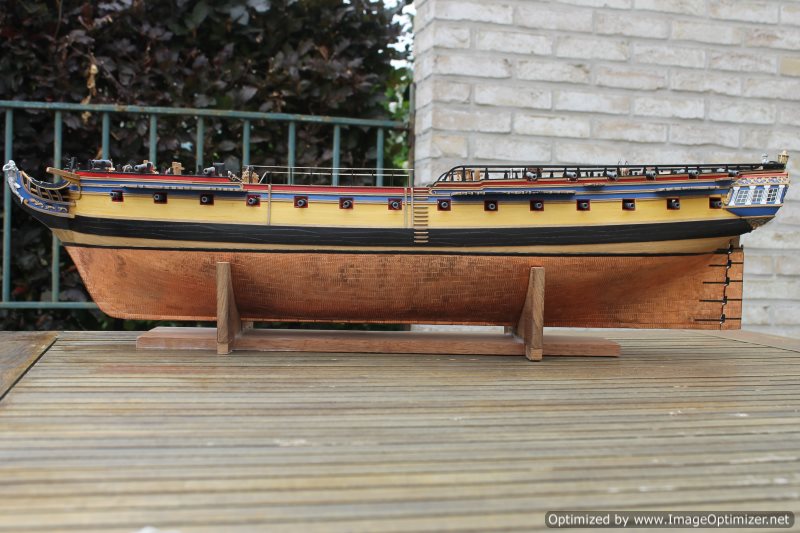
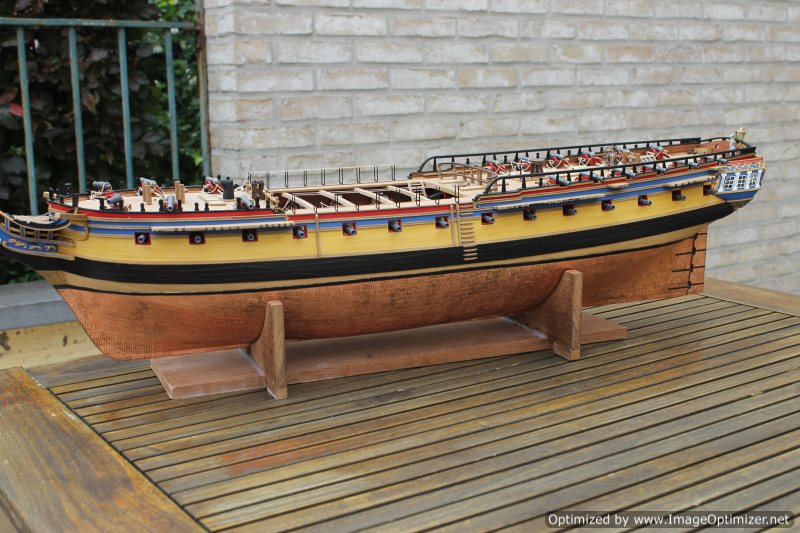
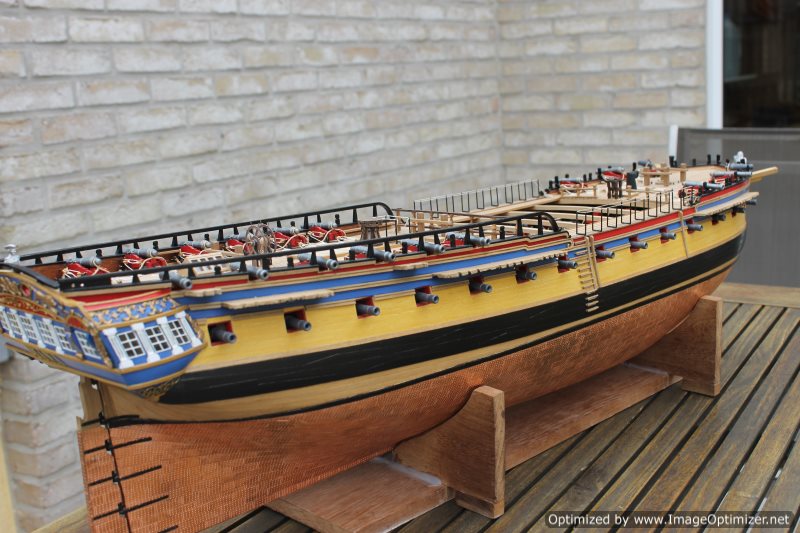
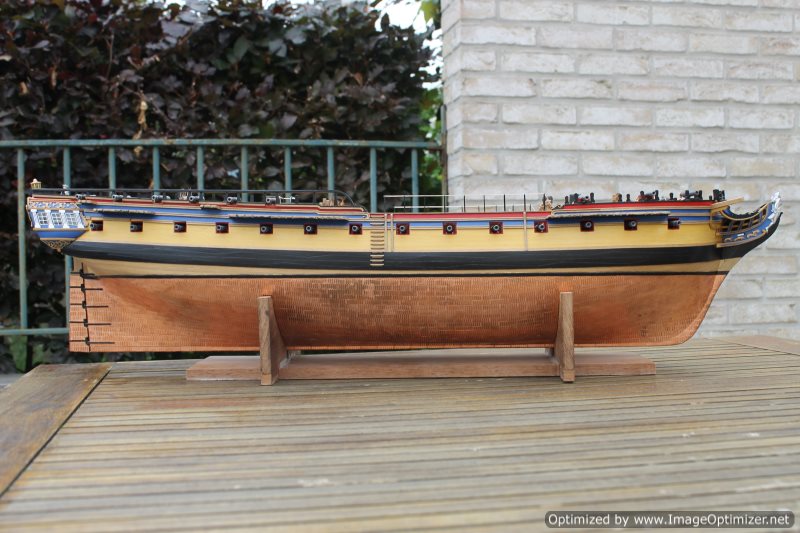
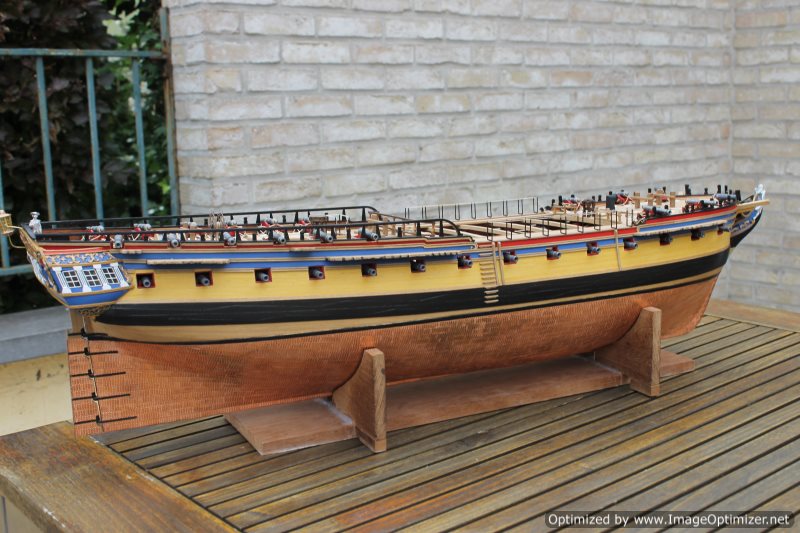
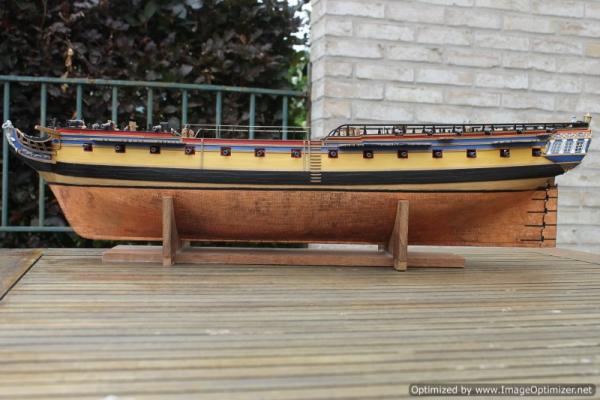
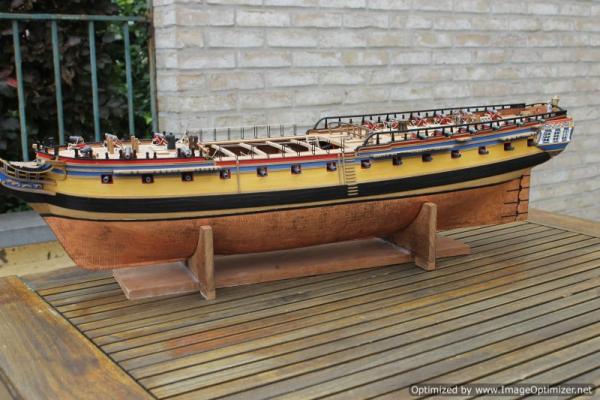
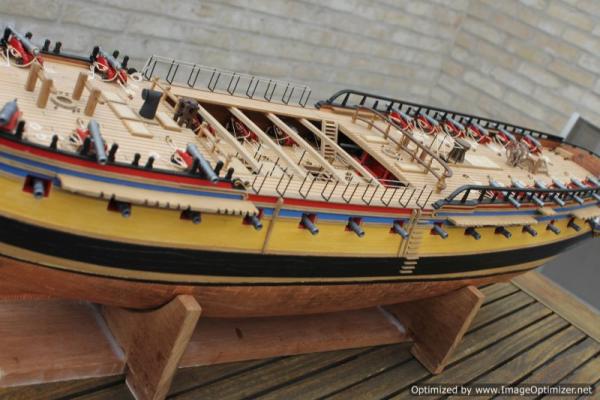
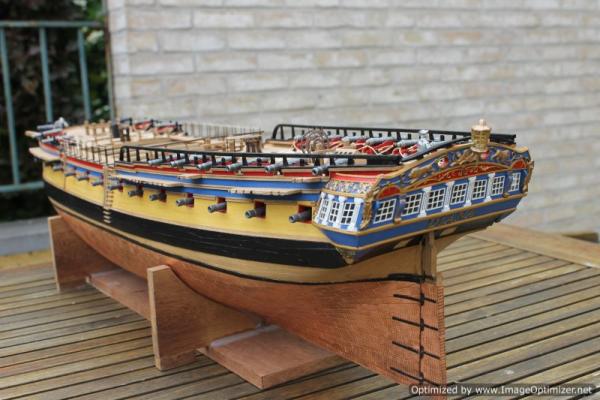
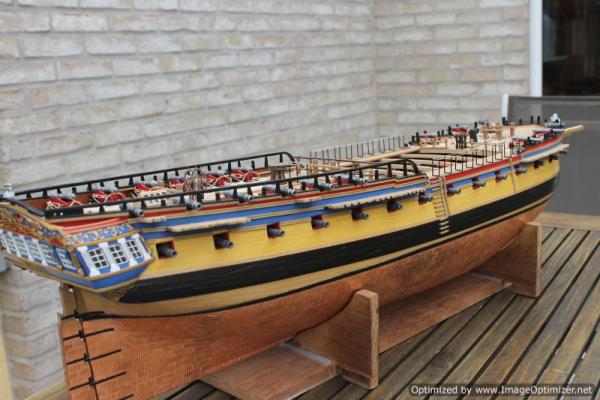
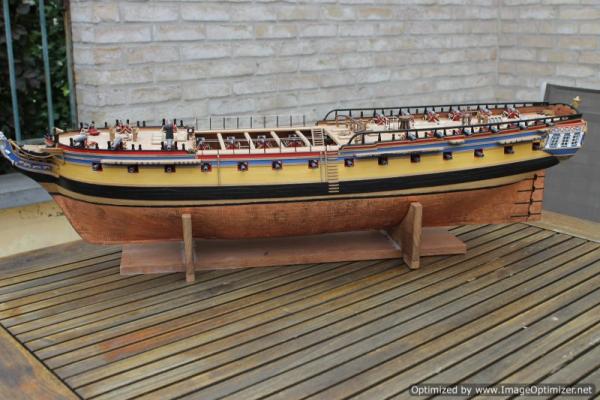
Hi Nick, To quote other members " a warm welcome at MSW" Now referring to your question ; I don't know about the Netherlands but in Belgium , special retailshops dedicated to modelling are becoming scarce in the " internet-era". However : I purchased 50 yellow-looking wood strips (1x4 mm) through such a shop a few years ago, and I hope they're still in business. I used them for my Diana and I'm quite happy with it. here's a recent pic at close range

-
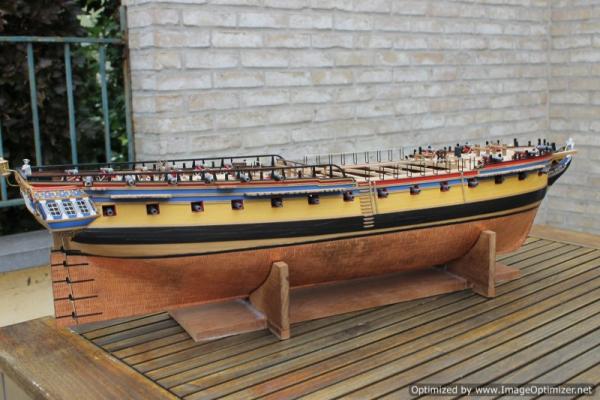
Hi Mobbsie, Transoms at period ships are always "to handle with care and precaution". HMS Diana required some adjustments too. I'm confident you'll recover this just fine. Very nice job on the coppering.
- 1,279 replies
-
- 1
-

-
- agamemnon
- caldercraft
- (and 1 more)
-
Hi Timothy, Just went trough your log and this is quite amazing.(the build as well as the story of your professional life) So, another build to follow. Enjoy your holidays, Sir !
-
Hello Timothy, Thank you for your kind words. You're always welcome, Sir The lamp is fixed now and the large hammock cranes (midships) were already painted in matt black. Hope to install this next week.( so pics are to be expected ! ) There are also small hammock cranes , intended for the quarterdeck bulwark, but this will not suit on my open bulwark, I'm afraid.