
CAd My Fingers
-
Posts
589 -
Joined
-
Last visited
Content Type
Profiles
Forums
Gallery
Events
Everything posted by CAd My Fingers
-

Mystery Gun: Anyone know what this is?
CAd My Fingers replied to dcicero's topic in Nautical/Naval History
You're welcome, Jud--yep, the gun was before my time too! While weapons themselves weren't what we focused on when I was in EOD, we knew and understood them well enough to be general menaces to GMs/GMGs, AOs, and mortar/artillery crews--lol. The ordnance, explosives, and etc. were really our bailiwick. Yep, smaller bore guns usually fired fixed ammo though in the early days it wasn't uncommon for large field artillery pieces to use fixed ammo too (some of the brass cases from World War 1 are amazing to see--saw some stunning examples in France a few years back). It's been a few moons since I researched an older weapons system, and it was nice to see a few of the key unclass pubs on the web and share them! Jay -
Mystery Gun: Anyone know what this is?
CAd My Fingers replied to dcicero's topic in Nautical/Naval History
Hi Dan, Based on my 20+ years of experience as an US Explosive Ordnance Disposal technician, I'd say it's a World War 1 through 1940s era Navy 4" / 50. The gun was used on a variety of vessels during that period (guns as opposed to artillery, generally have more elongated rifling and thus fire flatter trajectories and were used on both shore and ships, to include submarine deck guns). Although a weapons system may be date stamped, that stamp does not limit the system to being used strictly during that time frame--that's why I gave a wide time span above. Here's a link to Wikipedia that has some info. on 4" / 50s: http://en.wikipedia.org/wiki/4%22/50_caliber_gun And here's a NAVWEPS link: http://www.navweaps.com/Weapons/WNUS_4-50_mk9_pics.htm Here's the cross ref from the MK XII Mod 1 carriage to the gun: Historic Naval Ships Visitors Guide - Gun Mount and Turret Catalog.pdf If the scout does some digging on the shells used in the gun (he'll need to find out the MK numbers and, as applicable, the Mod number(s) used in the piece; general info. won't be as easy to cross reference / research), he can likely find out detailed specifics on shells (the correct term is "projectiles," our slang term in EOD was "projo," which my spell check hates ) in the projo chapter (Ch. 1, 4" projos) of OP 1664: http://www.hnsa.org/doc/ordnance/index.htm As an afterthought, here's the detailed info. on 4" / 50s from NAVWEPS: http://www.navweaps.com/Weapons/WNUS_4-50_mk9.htm Cheers, Jay -
Perfect Robbyn--glad I could lend a hand!
-
Chris, my copy arrived last night and you're spot on, and I'm in total agreement with you--it's a phenomenal work to say the least! Needless to say, I didn't get to bed until way late last night! And if your wife did get you Frolich, mmmm buddy you're in for a treat--it's a stunningly excellent work (that one that has also kept me up into the wee hours)! As a supplement to Frolich's book, here's a link to his website: http://modelisme.arsenal.free.fr/artdumodelisme/indexgb.html Cheers, Jay
-
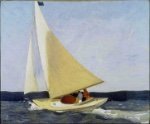
Robbyn, things are looking great! About the gaff: Run your halyard through the top hole and then down to the pin. Imagine a pulley wheel is in-between the top and bottom holes: if you run the line through the bottom hole, it will, or could, jam the pulley wheel from turning plus mess up the leverage; therefore, you don't want to run your line back through the bottom hole. While I don't have a pic. of a sheave to post for you, here's a good approximation for the visual: Hope that helps! Jay
-
Thank you for posting and sharing with us!
-
Deadeye straps
CAd My Fingers replied to stelios's topic in Metal Work, Soldering and Metal Fittings
Sam, those are looking really nice--well done! Jay -
Robbyn, your metal work is looking great, along with the build--very nice! Don't blame you for dry docking your SFII for a while--not only the parts issues but the kit in general sounds...like time for a break. After my AL build, I knew I'd never do another one of their kits because of the issues I encountered--many were similar to yours. Guess that was part of the learning process, too! Jay
-
Deadeye straps
CAd My Fingers replied to stelios's topic in Metal Work, Soldering and Metal Fittings
Stelios, thank you so much for posting a photo of the pliers you use! Using those type of pliers makes great sense--now I fully understand your technique! I will try those on the next straps I make, as it looks much easier than making jigs or etc., and the pliers should give the perfect crimp. I also use a paste similar to what you're using, and you're right, it's very easy to use! Sam, if you need a source for it, let me know and I'll post the supplier's info. It's a little expensive, but it goes a long way and works great! Like Stelios, I got my info from Russ' excellent tutorial! Cheers, Jay -
Robbyn if you're planning on upgrading your Syren blocks, maybe it has enough dbl blocks that are the right size for your SFII (here's link for the conversions http://mdmetric.com/tech/cvtcht.htm )? Jay
-
Deadeye straps
CAd My Fingers replied to stelios's topic in Metal Work, Soldering and Metal Fittings
Sam, thanks for the photo--it does look like the round nose pliers did a nice job! Jay -
Happy Birthday, Kester! I hope you had a wonderful day filled with celebration! Best wishes, Jay
-
Tim, she's looking really good--nice to see some chips fly, too! You were sort of in my neck of the woods--Mesa Verde is a wonderful place, and this is a good time to visit (cooler weather). I'm glad you had a wonderful holiday! Jay
-
Deadeye straps
CAd My Fingers replied to stelios's topic in Metal Work, Soldering and Metal Fittings
Sam, I didn't see it at 1st--was thinking of how I used to use them as intended for installing/removing circlips--but ones with long nose posts would be able to do what Stelios described...methinks I'll be digging my circlip pliers out and giving this a try! Jay -
Deadeye straps
CAd My Fingers replied to stelios's topic in Metal Work, Soldering and Metal Fittings
Thanks, Sam--yep, that makes sense. Just couldn't see circlip pliers working out... Jay -
Your windlass looks really great, Gregor; likewise, I like your chimney and mast step--very nice! Silver soldering isn't as daunting as it may look/seem (Russ wrote a good tutorial in the downloads section)--the hardest thing sometimes is figuring out how to make a small, fiddly piece. Jay
-
Need help with Revell U.S.S. Constitution
CAd My Fingers replied to Kimberley's topic in Plastic model kits
Sounds like things are coming along well with the rigging, Kimberley--good to hear! Crochet hooks and other similar items make great rigging tools--your arts and crafts background is definitely paying off for you! Jay -
Very nice, Brent--your stand looks great and adds beautiful character to your build! Jay
-
Deadeye straps
CAd My Fingers replied to stelios's topic in Metal Work, Soldering and Metal Fittings
Stelios, I like your method--very nice! However, I'm a confused about the circlip pliers. Could you post a photo of the ones you're using, please? The type of circlip pliers I'm familiar with have 2 posts at their tips--like the picture below--so I'm having a hard time seeing how this type of pliers can make such nice ovals! Cheers, Jay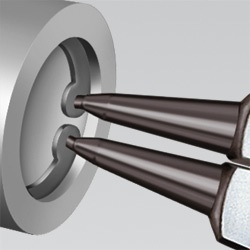
-
Need help with Revell U.S.S. Constitution
CAd My Fingers replied to Kimberley's topic in Plastic model kits
You're welcome. Your arts and crafts background will be a big help! There's a lot to learn with ship building--I'm also learning a ton, too. Plus, this is a great community of teachers--there are incredibly talented people with a wealth of knowledge here on the forum! I think that's one of the big reasons why I enjoy the hobby as much as I do. Jay -
Need help with Revell U.S.S. Constitution
CAd My Fingers replied to Kimberley's topic in Plastic model kits
GS-hypo, watered down fabric glue, and etc. are good choices for your knots. CA (superglue) can create a number of problems, so most builders avoid using it. Also 100% synthetic string is a bear to work with--it slips, stretches, is hard to tie or make coils with, and so forth. DMC brand thread is one of many nice choices--you'll likely get some different input here. Chuck P., MSW admin and owner of the Syren Model Ship Co. (link on forum contents page), sells very nice rigging line--highly recommend it! Also before you rig, pre-stretch the line you plan to use. There are many ways you can do this (I tie heavy wrenches to both ends of the line I'm going to use and then drape it over a coat hook high on a door for a day or two). Also, a 3rd hand or two are also very helpful and worth the money (http://www.amazon.com/Third-Hand-Soldering-Tools-Magnifier-Loupes/dp/B000VB6HSM). Hope that helps, Kimberley! Jay -
Need help with Revell U.S.S. Constitution
CAd My Fingers replied to Kimberley's topic in Plastic model kits
Hi Kimberly and welcome aboard! Here's a great animated knot tying web site--many are actually videos--that will show you exactly how to tie the knots... http://www.animatedknots.com/knotlist.php?LogoImage=LogoGrog.jpg&Website=www.animatedknots.com Good luck on your build! Jay -
I very much enjoyed reading everyone's thoughts on the plans, hearing about your research, and trading ideas! My plans just arrived today from the NMM, so will study them closely in relation to everything we've been talking about. Gregor, I read the same about some of the Sherbourne plans recently--some may have been training ones; I just can't remember where I read that to cite the source (old age... ). I'll also be looking at some of those other 1763 plans a bit closer now that I'm ready to move forward with my build. I also agree that plans don't have to be followed with total faith. I'm sure the ship's look, fittings, and etc. were changed over the course of their active lives (I know many ship captains would change a ship's rigging to suit their tastes). I also suspect many beginner kits (at least the kits by good companies like Caldercraft, Amati, and etc.) get some modification by designers so that they are easier builds for new builders--sort of make sense. In the end, they're our builds, so we can do what makes us happy and makes a nice model! My only big complaint with kits is when they design them with bad mistakes and not fix those problems--it makes building them very difficult. I ran into this with an Artesania Latina kit--many things were just very messed up with the kit's basic design so that building it was very difficult, as a result I'll never build another one of their kits again. Sumner, that's a beautiful view you have! Guess I could deal with that altitude on beautiful days! Wow, 3 elevators...I won't complain about my ride times anymore..lol! Jay
- 57 replies
-
- 1
-

-
- caldercraft
- cutter
- (and 4 more)
-
Essex - Process and corrections to the new Model Expo Kit
CAd My Fingers replied to samueljr's topic in Wood ship model kits
Sam, I think we both feel the same about sails...in their non plural form they are a 4 letter word! LOL! Jay -
Essex - Process and corrections to the new Model Expo Kit
CAd My Fingers replied to samueljr's topic in Wood ship model kits
Sam I've been quietly following most of this about the Essex for a while now. Kudos to you and ME for seeking a positive resolution--it speaks volumes on both your and ME's commitment to, and integrity in, providing builders with quality products! Thank you for all of your diligent and conscientious work! And just to lighten things up a little, do you think you'll later do some sails for the Essex? Jay