


SUBaron
-
Posts
197 -
Joined
-
Last visited
Content Type
Profiles
Forums
Gallery
Events
Posts posted by SUBaron
-
-
@Louie da fly Steven - I picked up an 1844 French Violin and it looks and sounds beautiful (though no special case!). After a year and a half of lessons, I’m finally able play some nice basic music. Having to relearn music theory is tougher than I had expected, but I’m managing. I also realized that to play the violin is really learning two parts - the violin and the bow. The bow is the toughest. I hope you consider picking it up again - it’s very rewarding. If you have the patience and abilities acquired to build model ships, I think you’ll pick up the fiddle quicker than you might expect. Good luck!
- Tomasz B, hollowneck, Keith Black and 1 other
-
 4
4
-
On 3/4/2022 at 2:22 PM, Azzoun said:
No worries bud - we meet every first Thursday, I'm trying to keep the website updated for upcoming events. You coming to the Northeast Conference in New London?
@AzzounHey there, no, likely not. I'm still working and have limited leave to use. As much as I'd love to go, I'm 95% sure I'd be over-ruled by my all female crew. I'm still a bit stuck with Disney type vacations for a few more years, though the youngest is showing interest in Caribbean (and region) Islands finally, which makes me very happy 🙂
- Tomasz B, mtaylor, hollowneck and 2 others
-
5
-
...sorry, once again, my pictures posted at different angles than they were taken and stored. This is the first time this has occurred. I'm not sure why or how to rectify it.
-
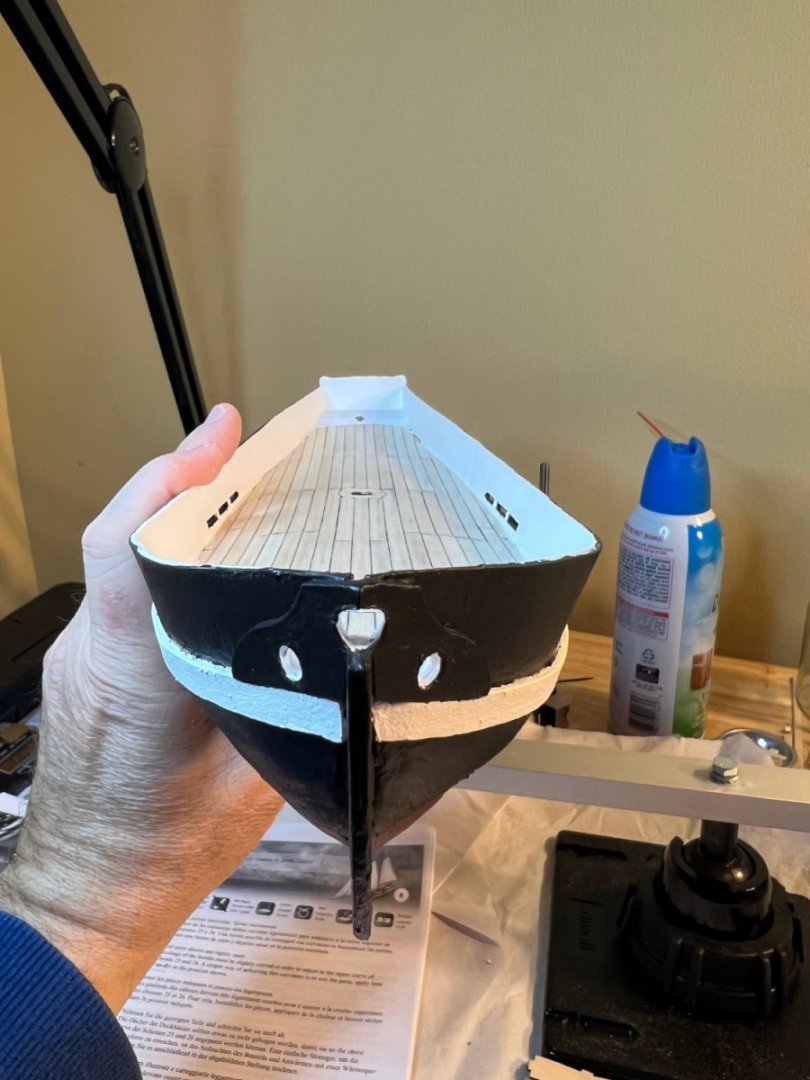
I painted the lower decks. This model didn't include an actual lower level, instead opting for painting the deck to give the appearance of a hold when viewed through the hatches. This is a disappointment, but something I didn't realize until well after I began my model. I'm guessing AL opted to shave some features in favor of profit. Understandable, but had I known, I'd have paid more for the detailed version with an actual hold.
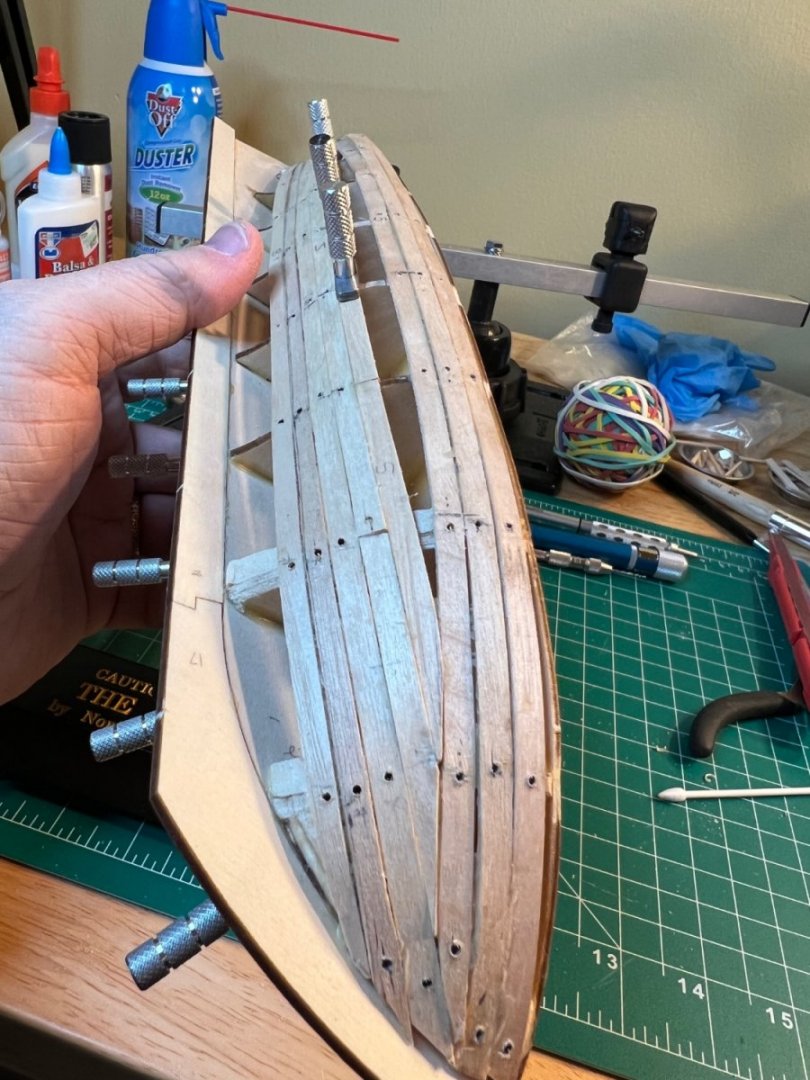
I also added the bulwark stays. Compared to everything else, this was akin to riding the teacups at an amusement park. It was easy, no snags (yet😁)


- Keith Black and Paul Le Wol
-
2
-
I'm not sure why some of my pictures posted at the wrong view. I wasn't able to "turn" them during editing. Can anyone share how this is done? Thanks!
- Scotty W and Keith Black
-
2
-
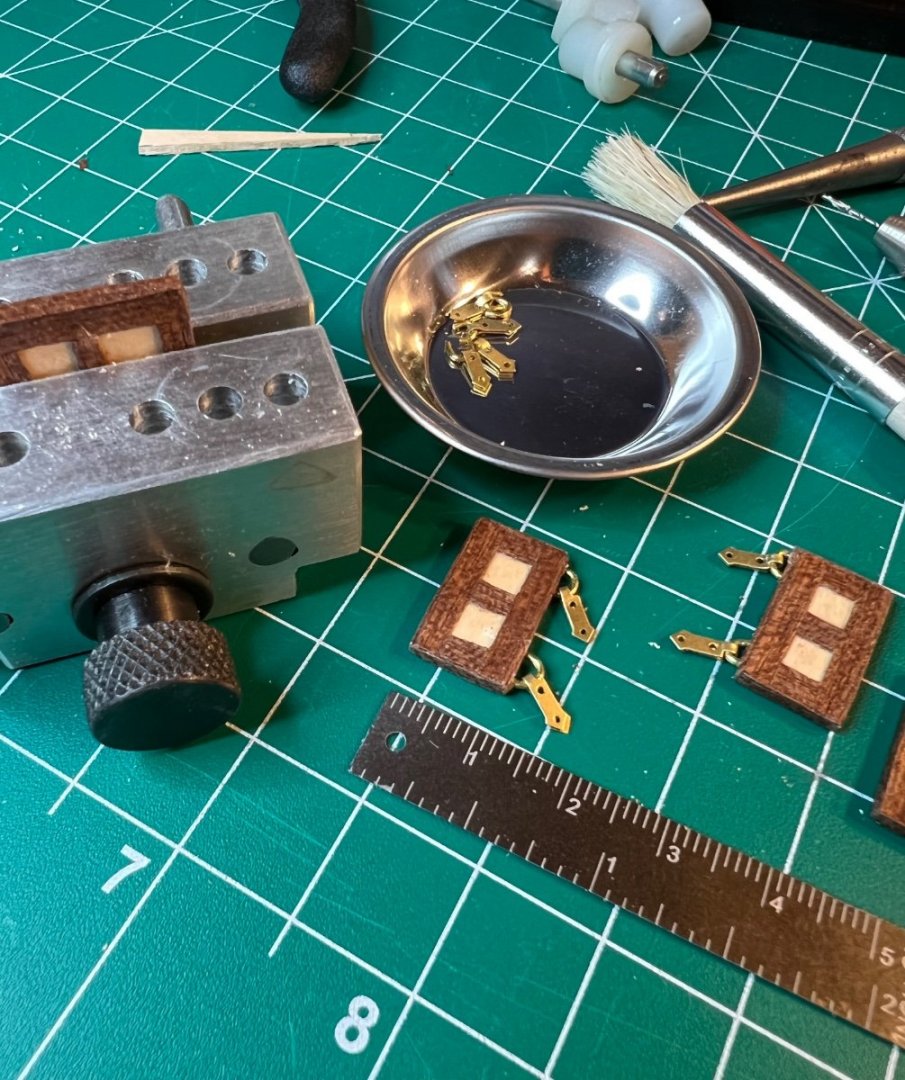
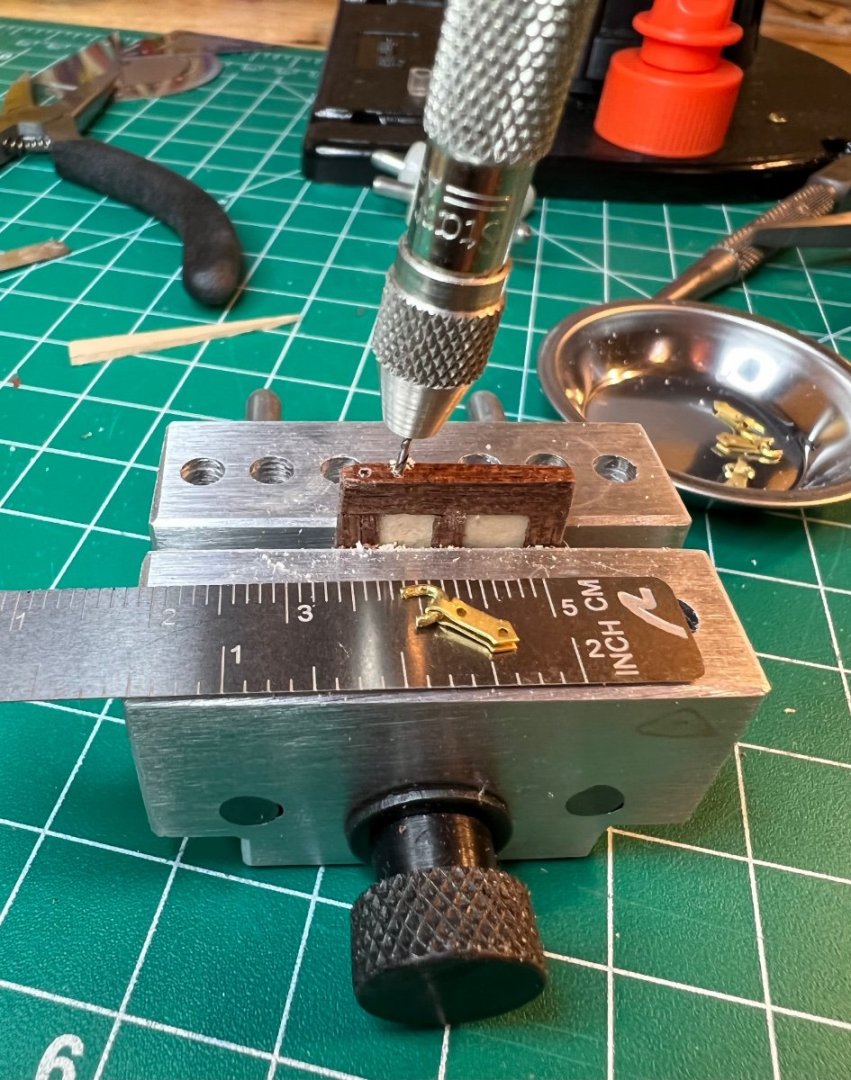
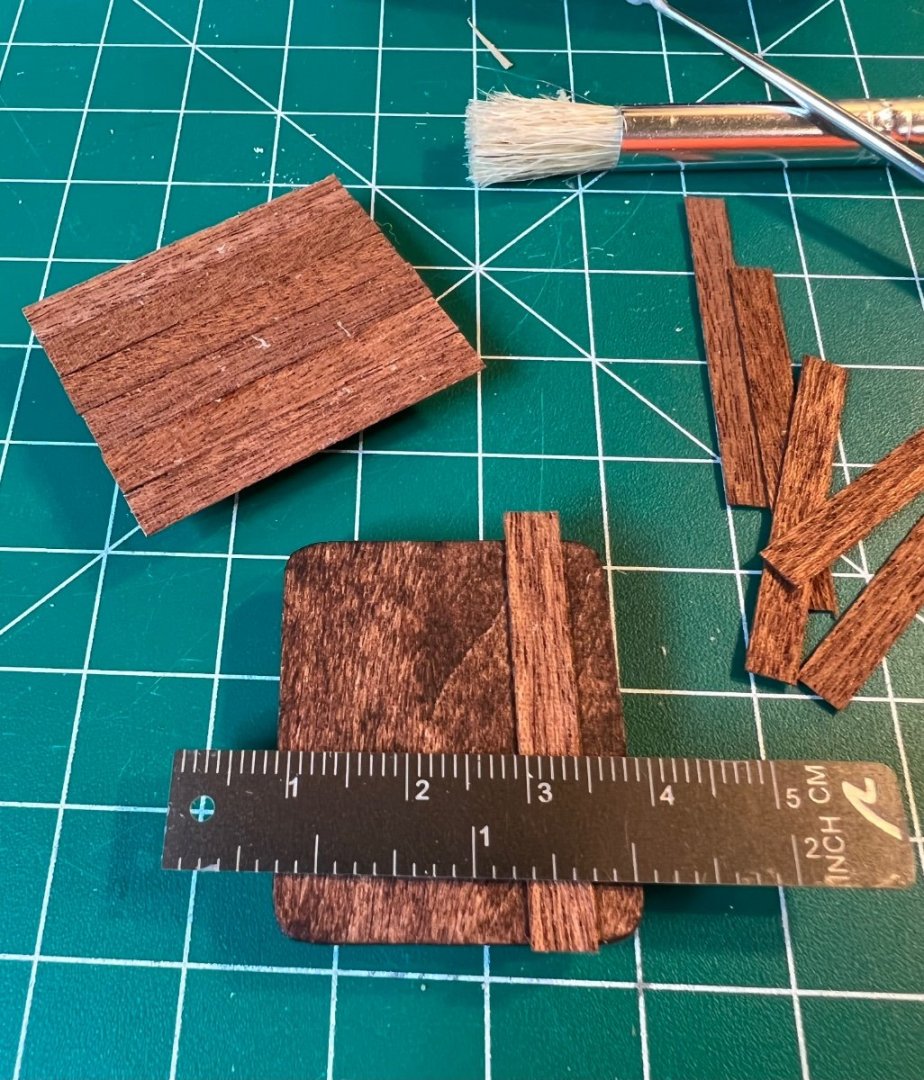
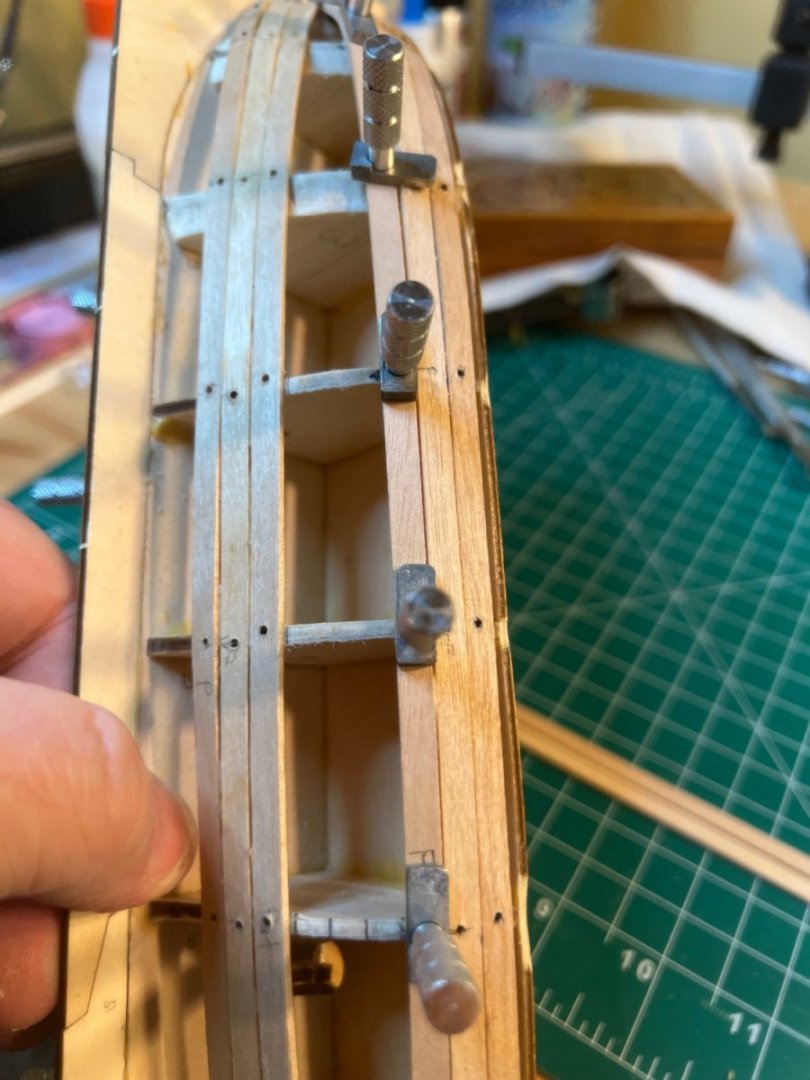
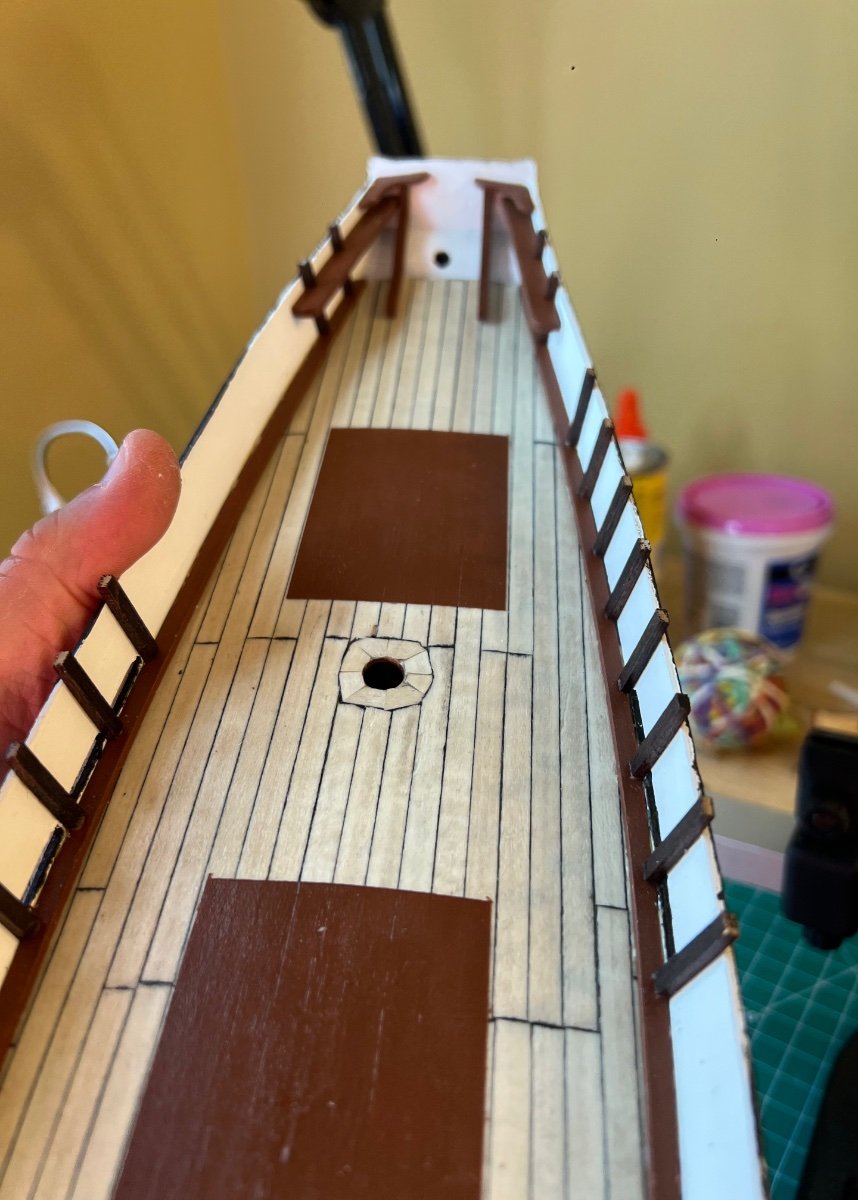
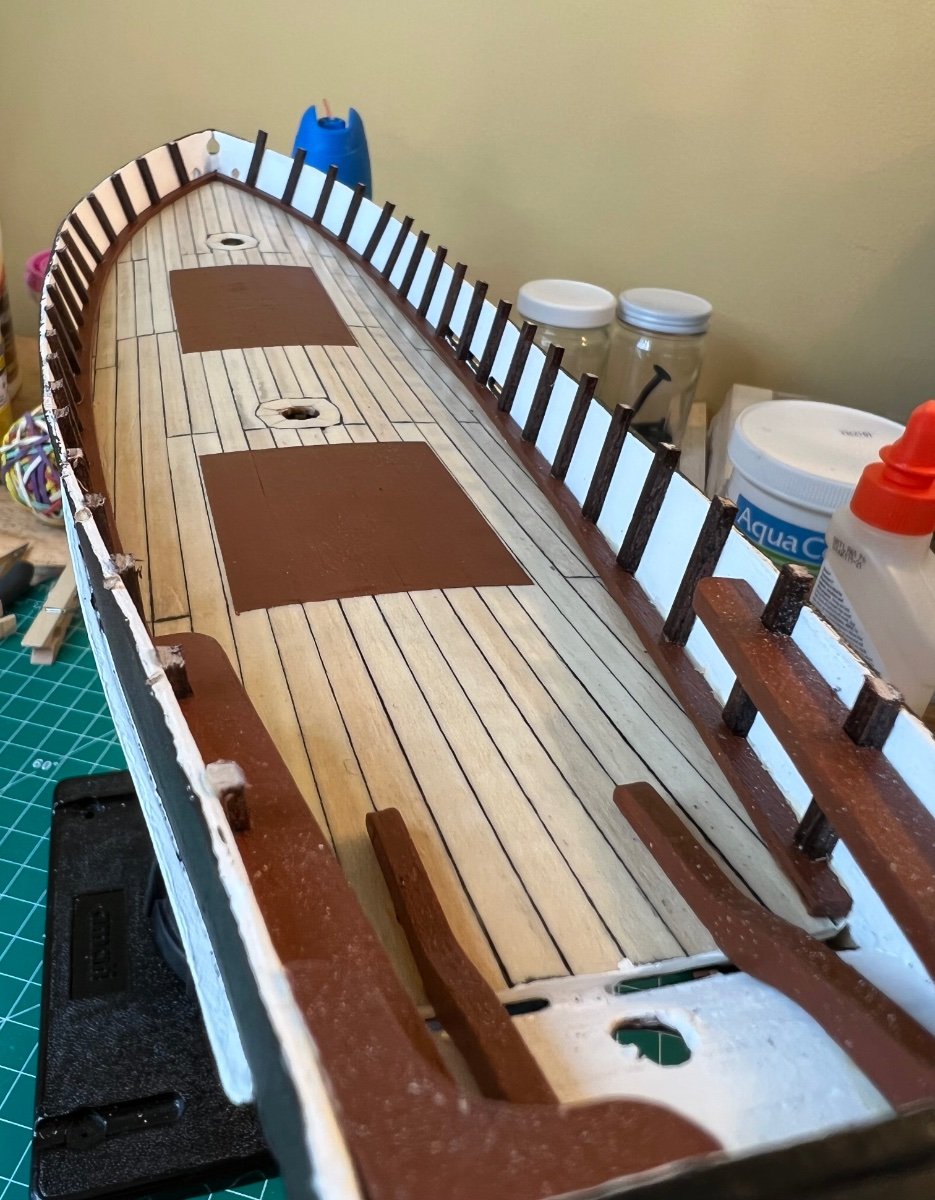
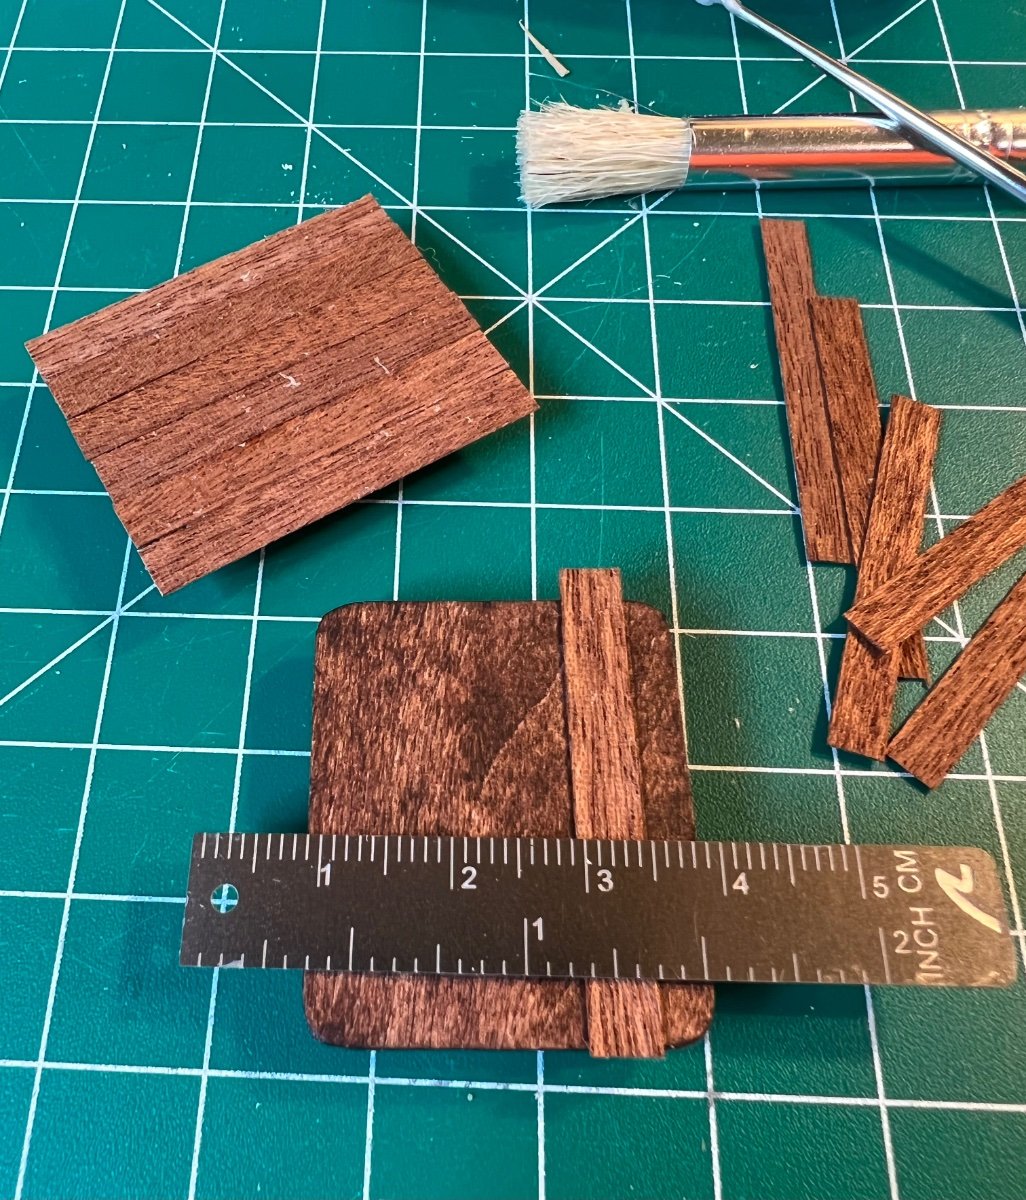
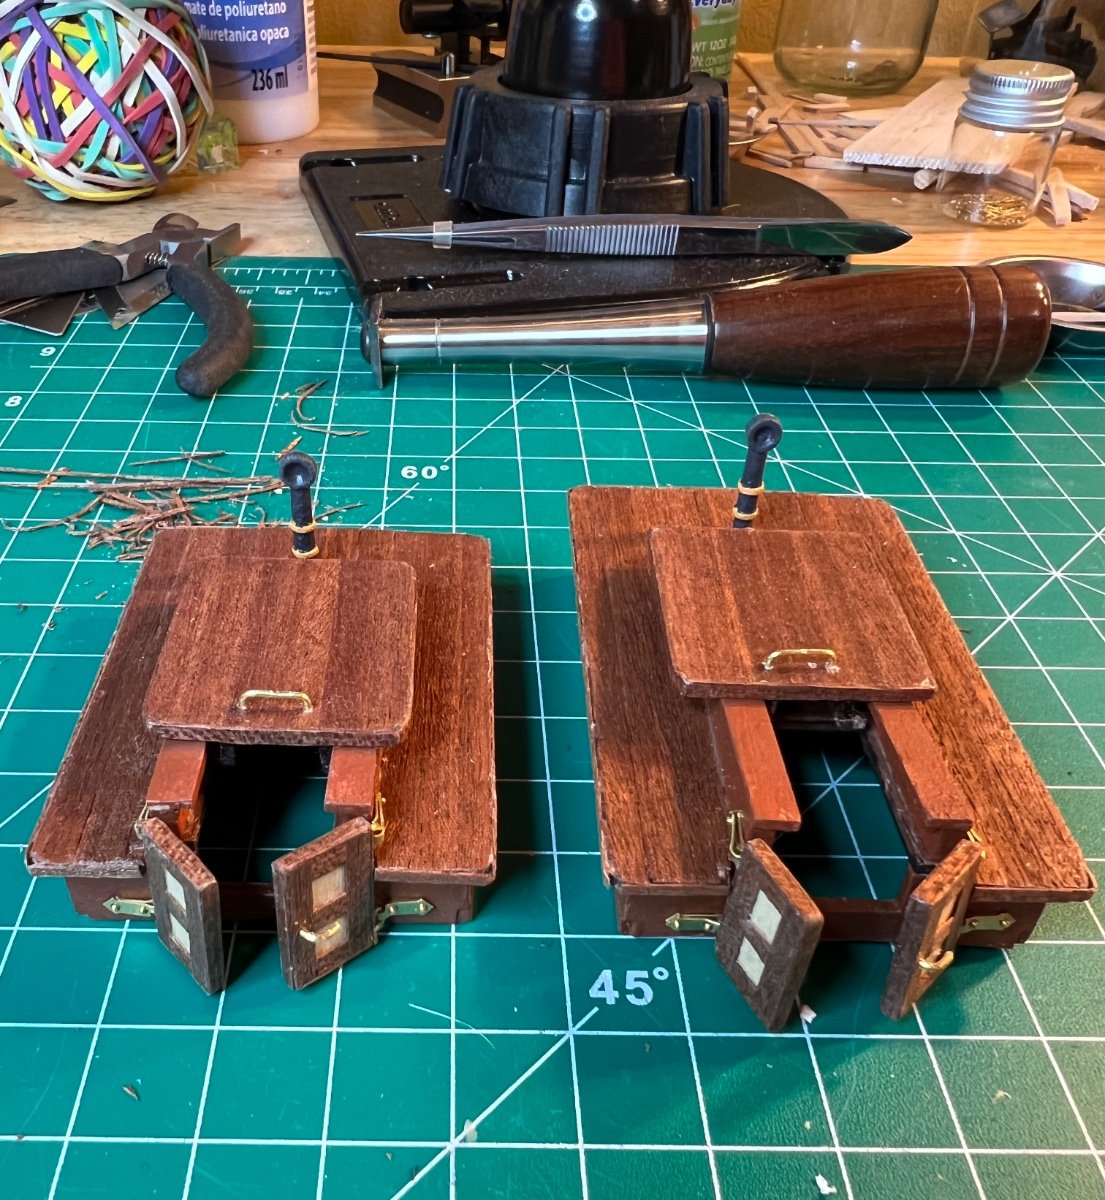
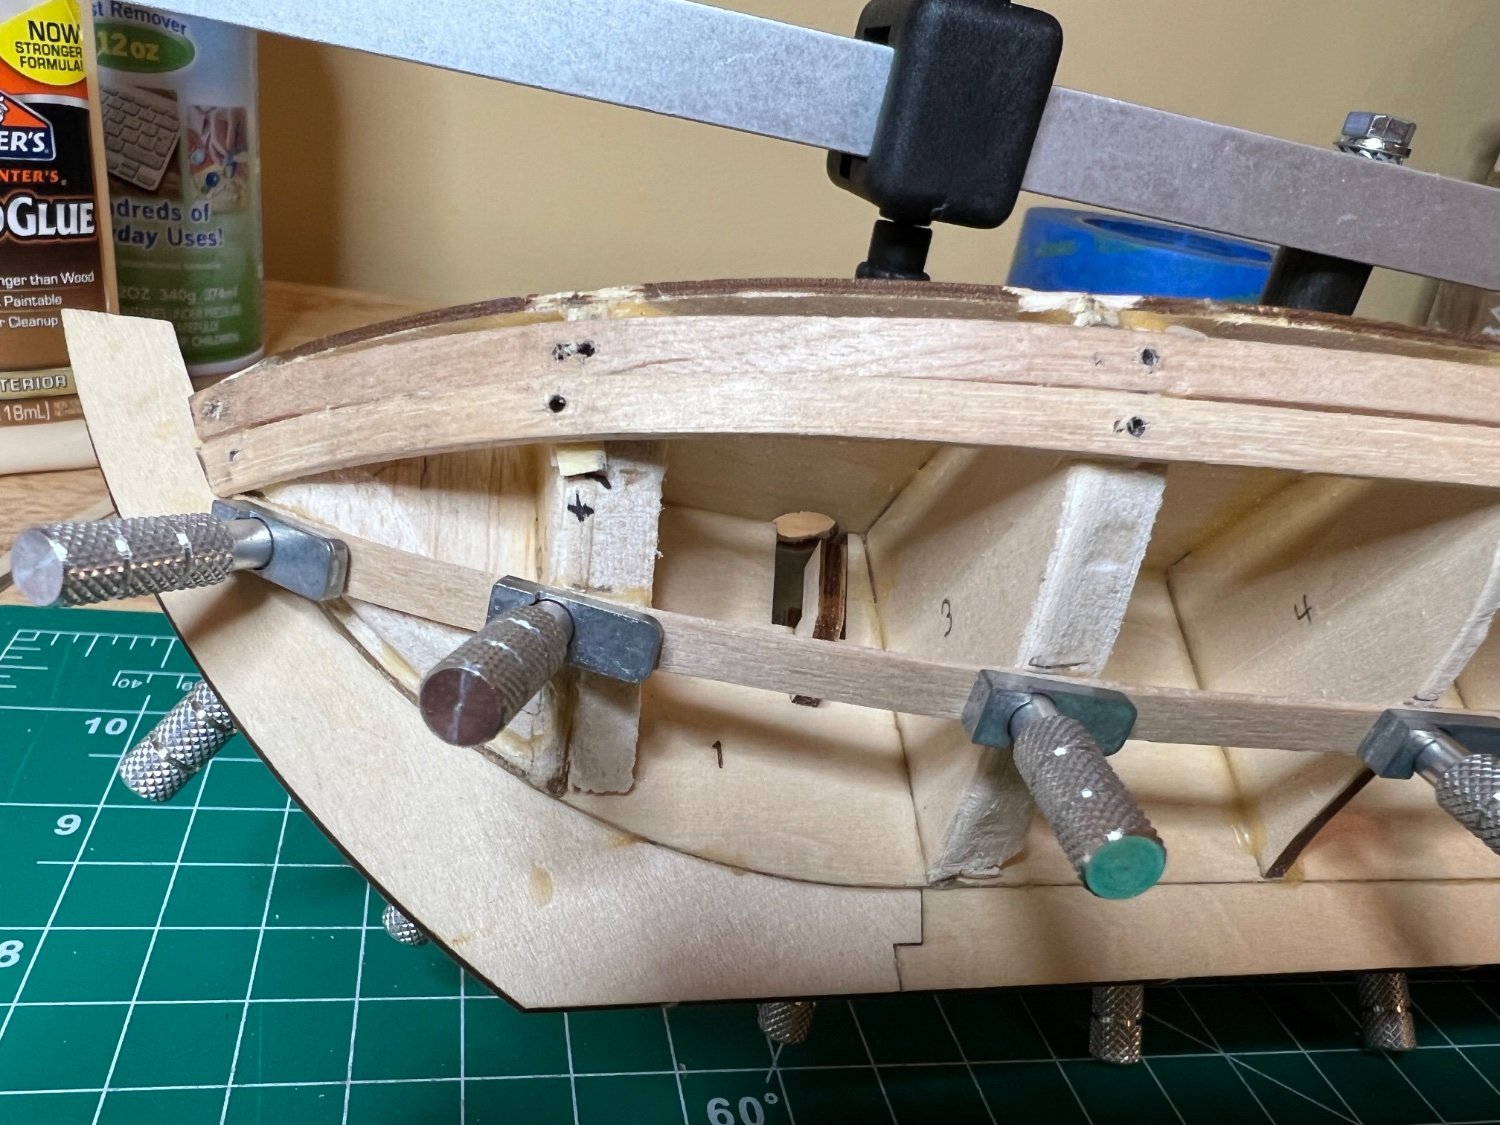
The hatches and hinges presented some difficulty, mainly from inexperience. I neglected to bend my thin veneer strips on the "roof" edges of the hatches. I ended up with right angled corners and thought I might be able to sand my way to a nice curved corner. That wasn't the case. I considered redoing the edges, but was concerned that I'd pull the hinges out of the hatch doors in the process, so let things be. My actual top hatch covers came out better.

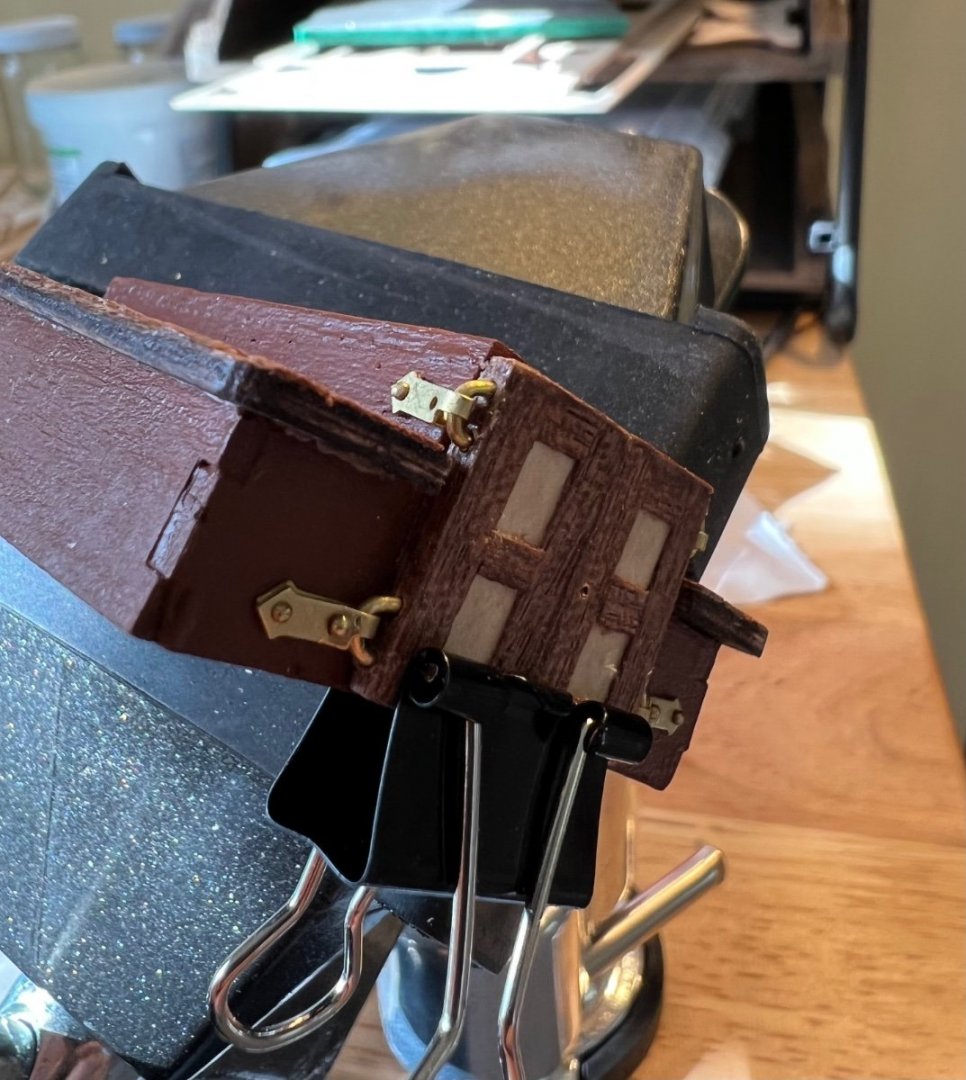
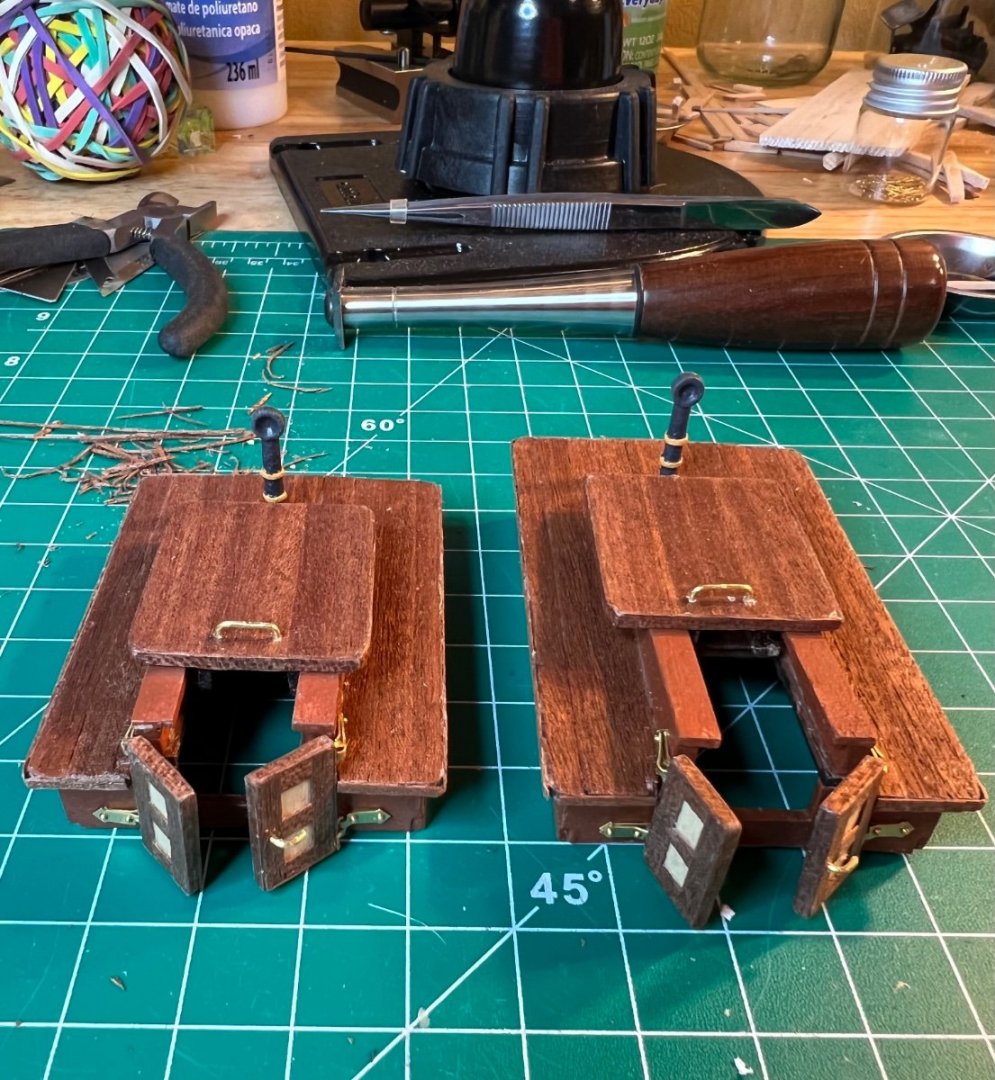
- Scotty W and Keith Black
-
2
-
39 minutes ago, Paul Le Wol said:
Hey SUBaron, great build log. I like that you’re overcoming the challenges and having fun at the same time. It is going to turn out beautifully.
Thank You Paul! Yes, I quickly learned that the "secret" to this hobby is to face each challenges as a unique problem solving opportunity, going from one challenge to the next. It's a satisfying endeavor and I'm really enjoying it. My father purchased the USS Constitution for me for Christmas. It was backordered and just arrived. It's sitting within eyesight of my hobby table. That is one heck of a beast. The kit is heavy and the sheer number of parts is almost unbelievable. I'm very happy I began with the Swift as an introduction, and can't wait to see the end result. I'm working on the hatches now. The hinges are my challenge du jour 😃

- Paul Le Wol and Keith Black
-
2
-
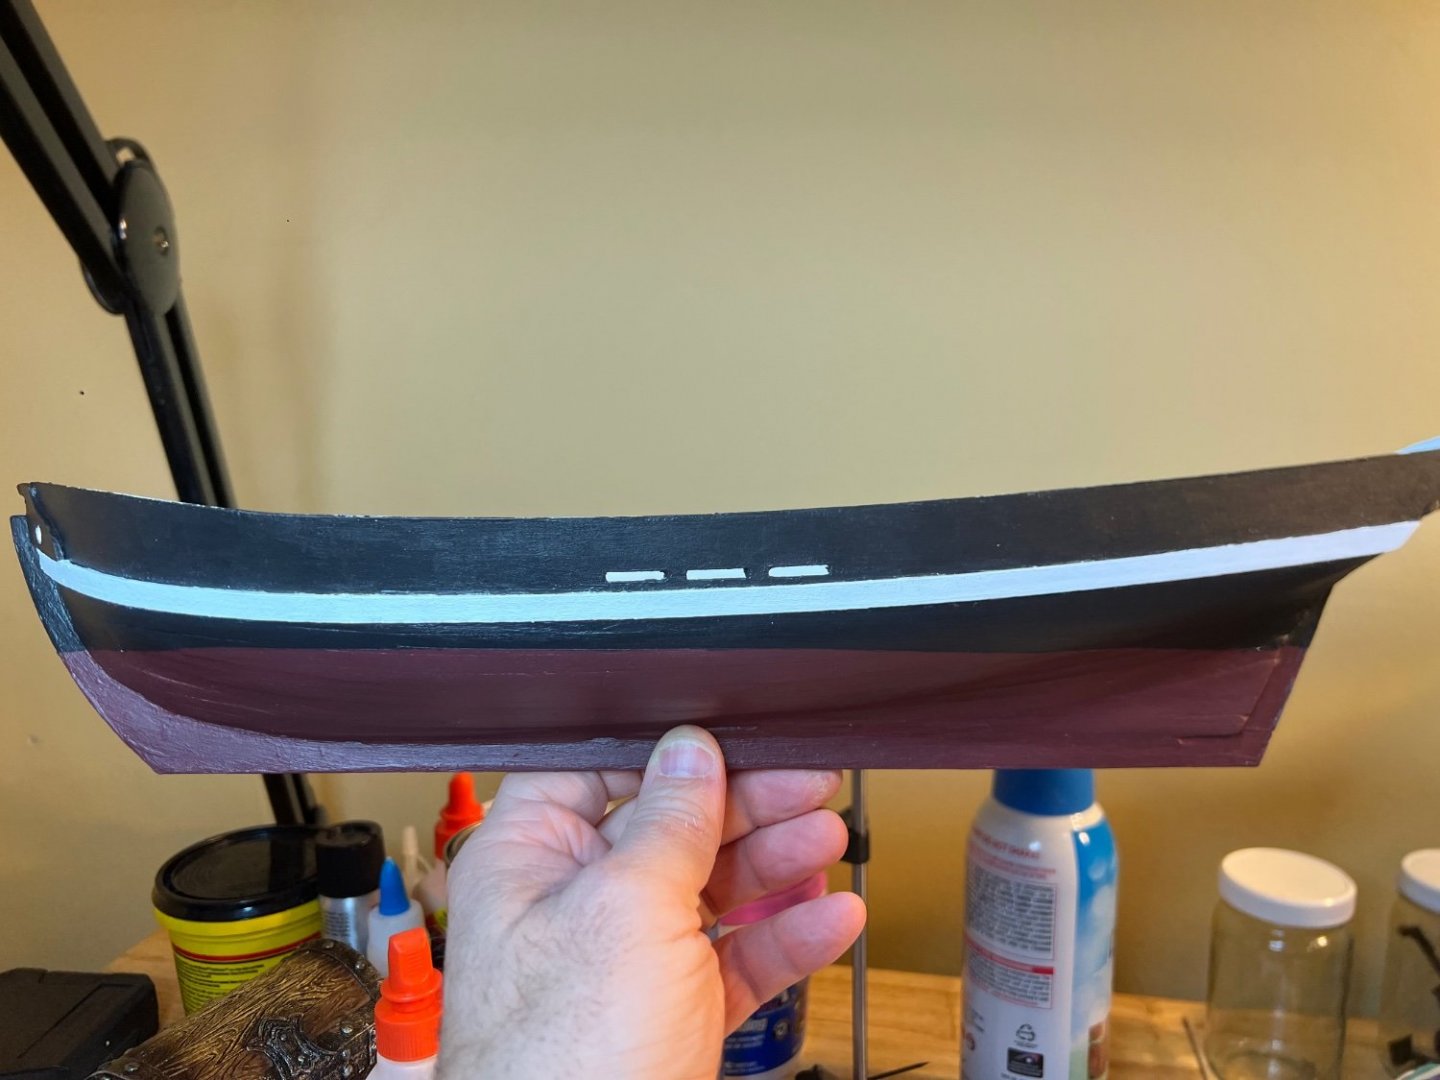
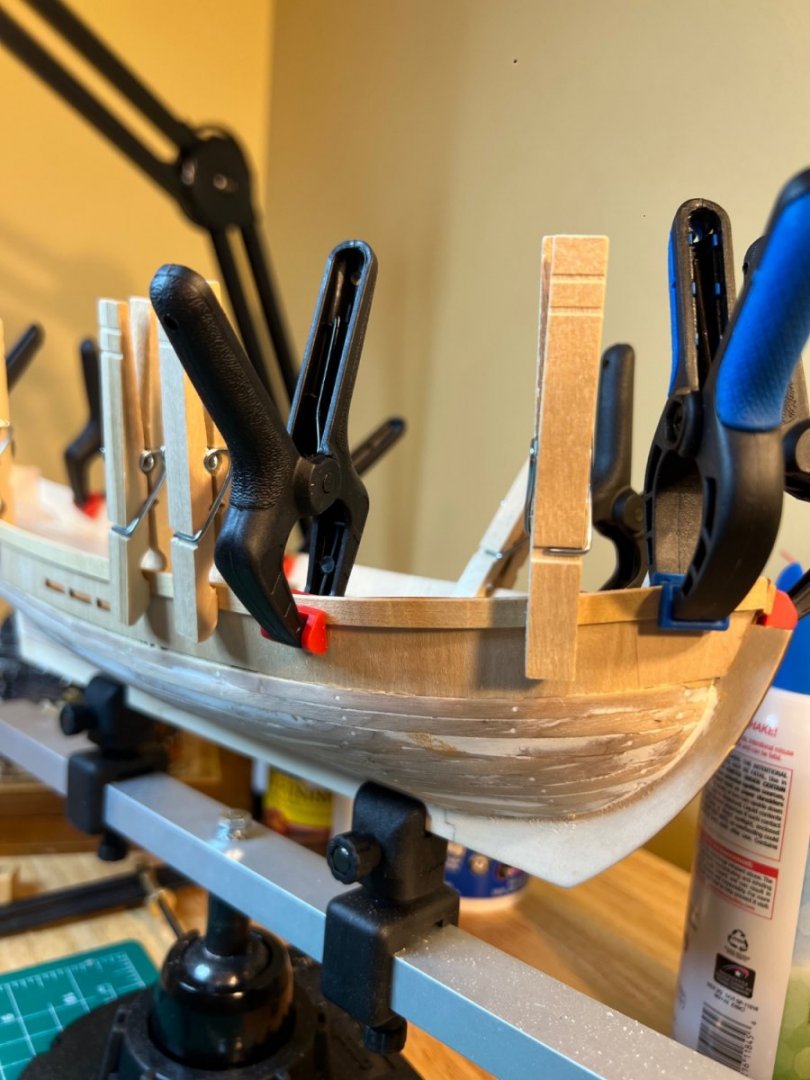
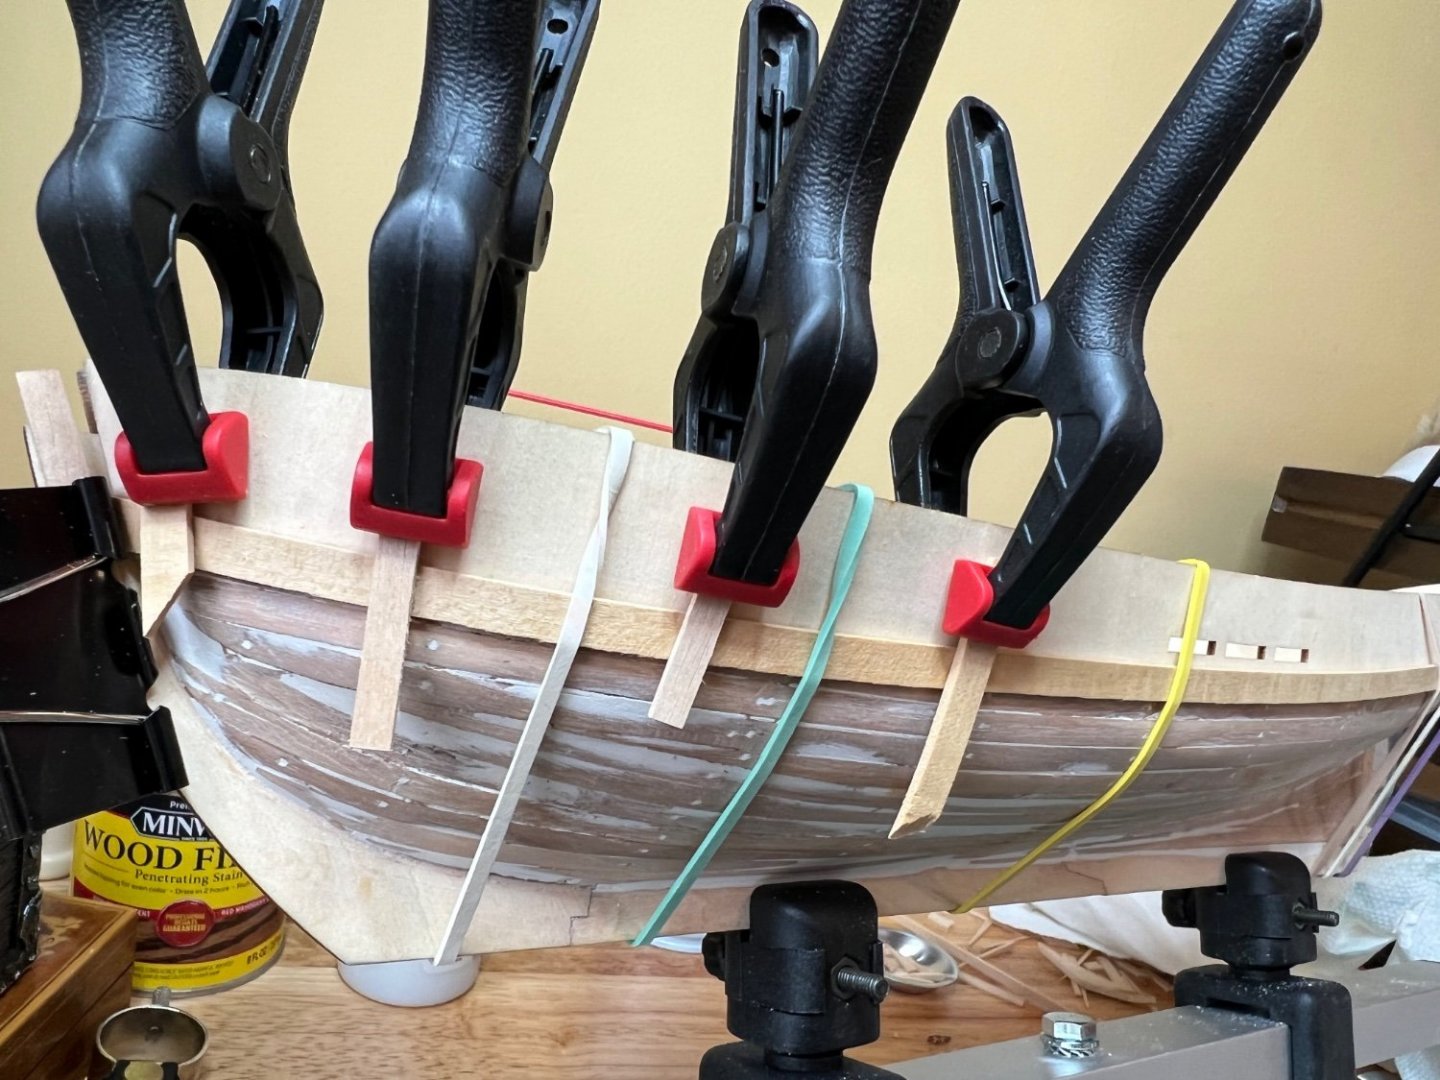
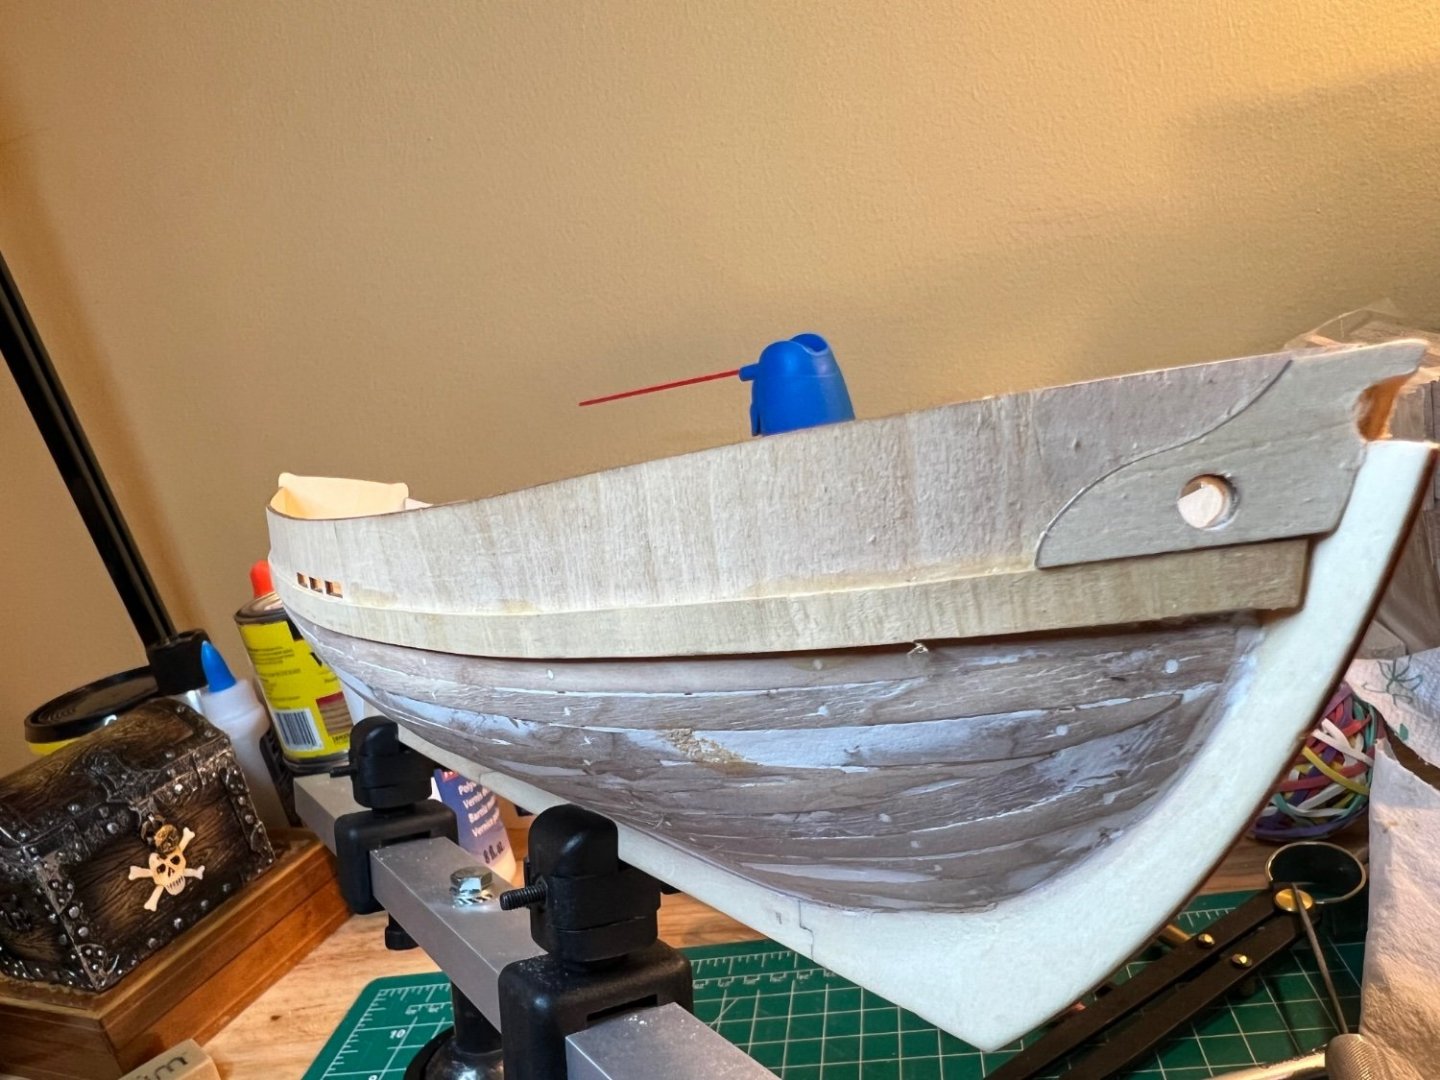
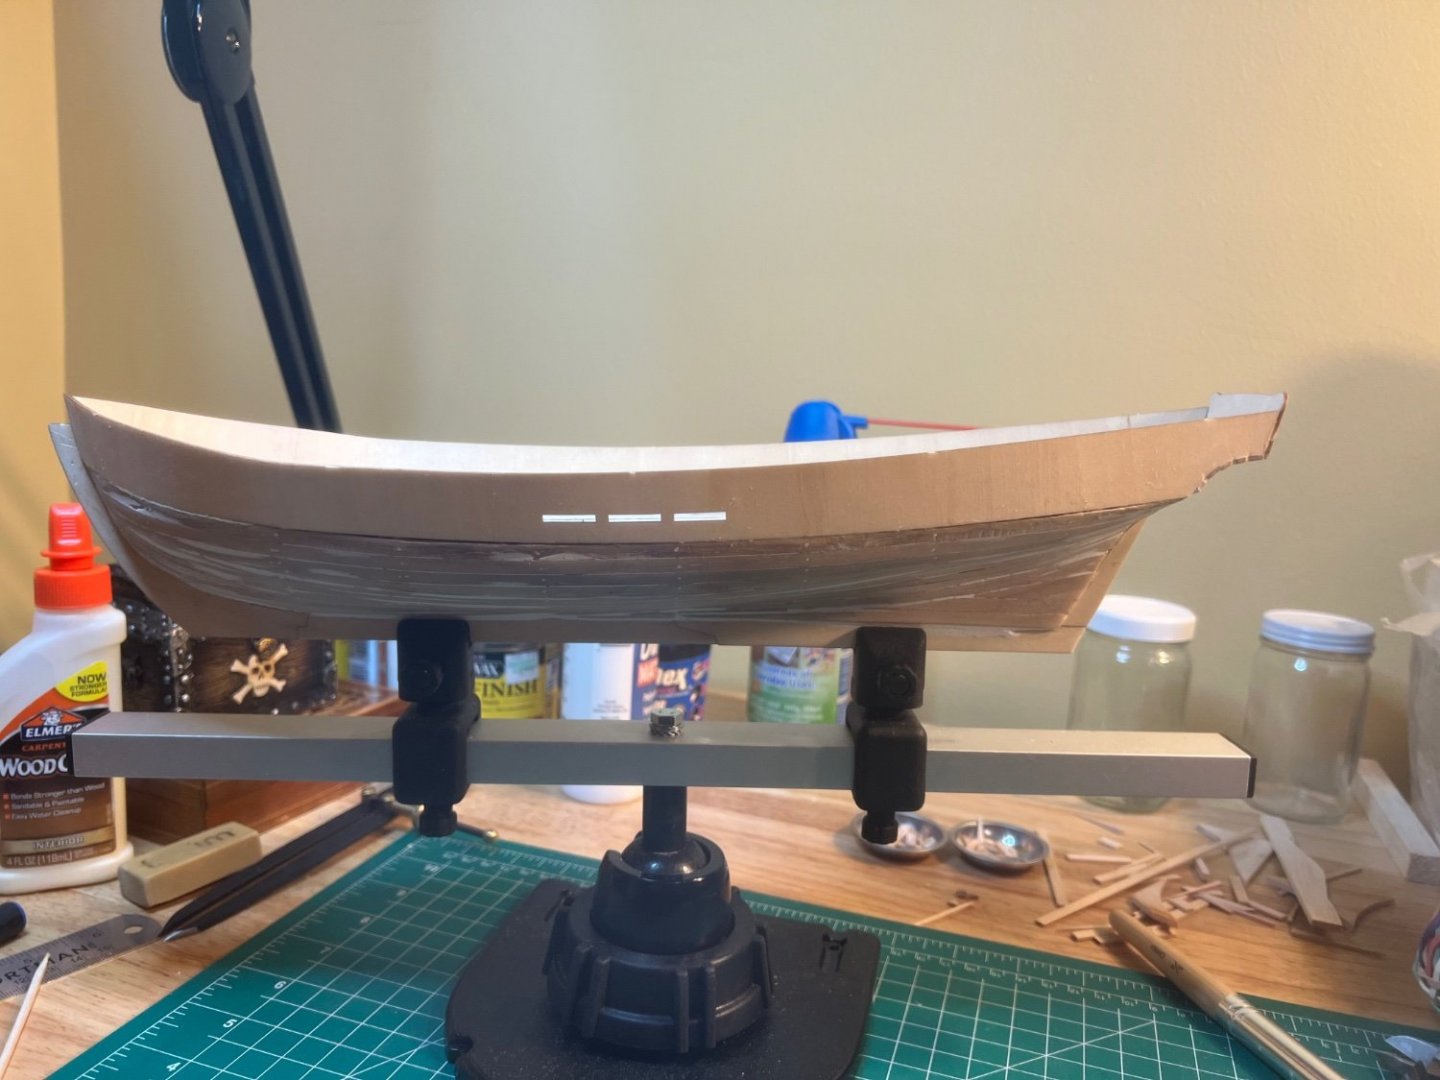
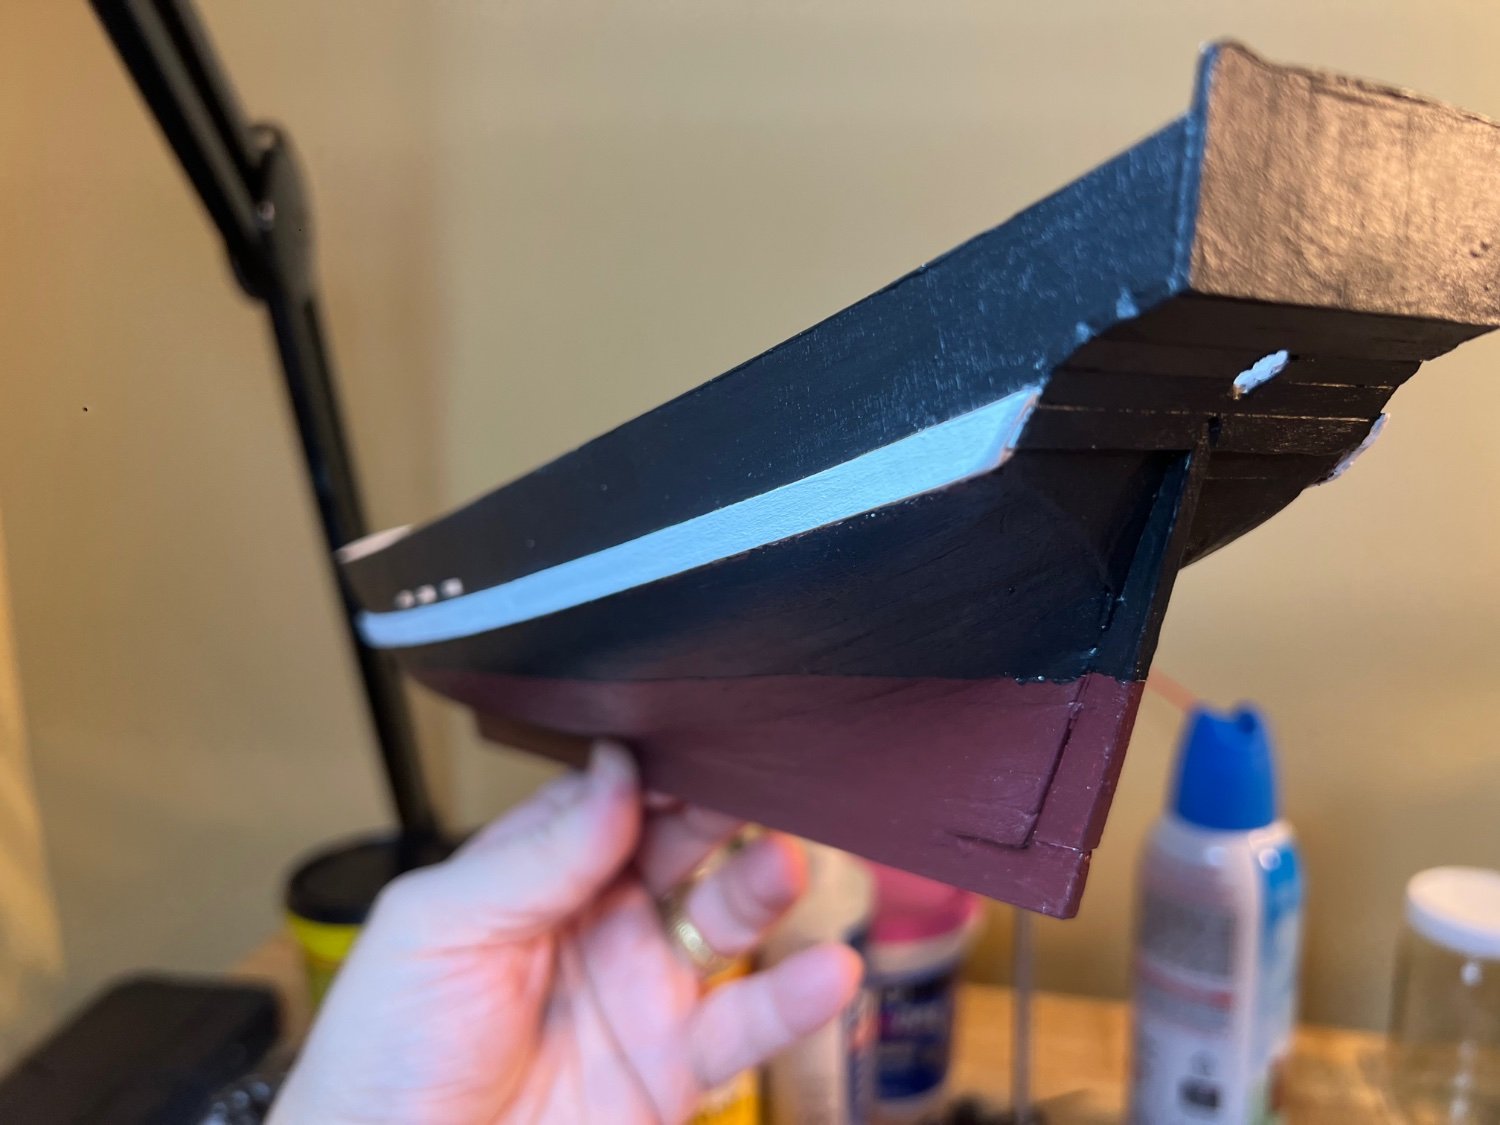
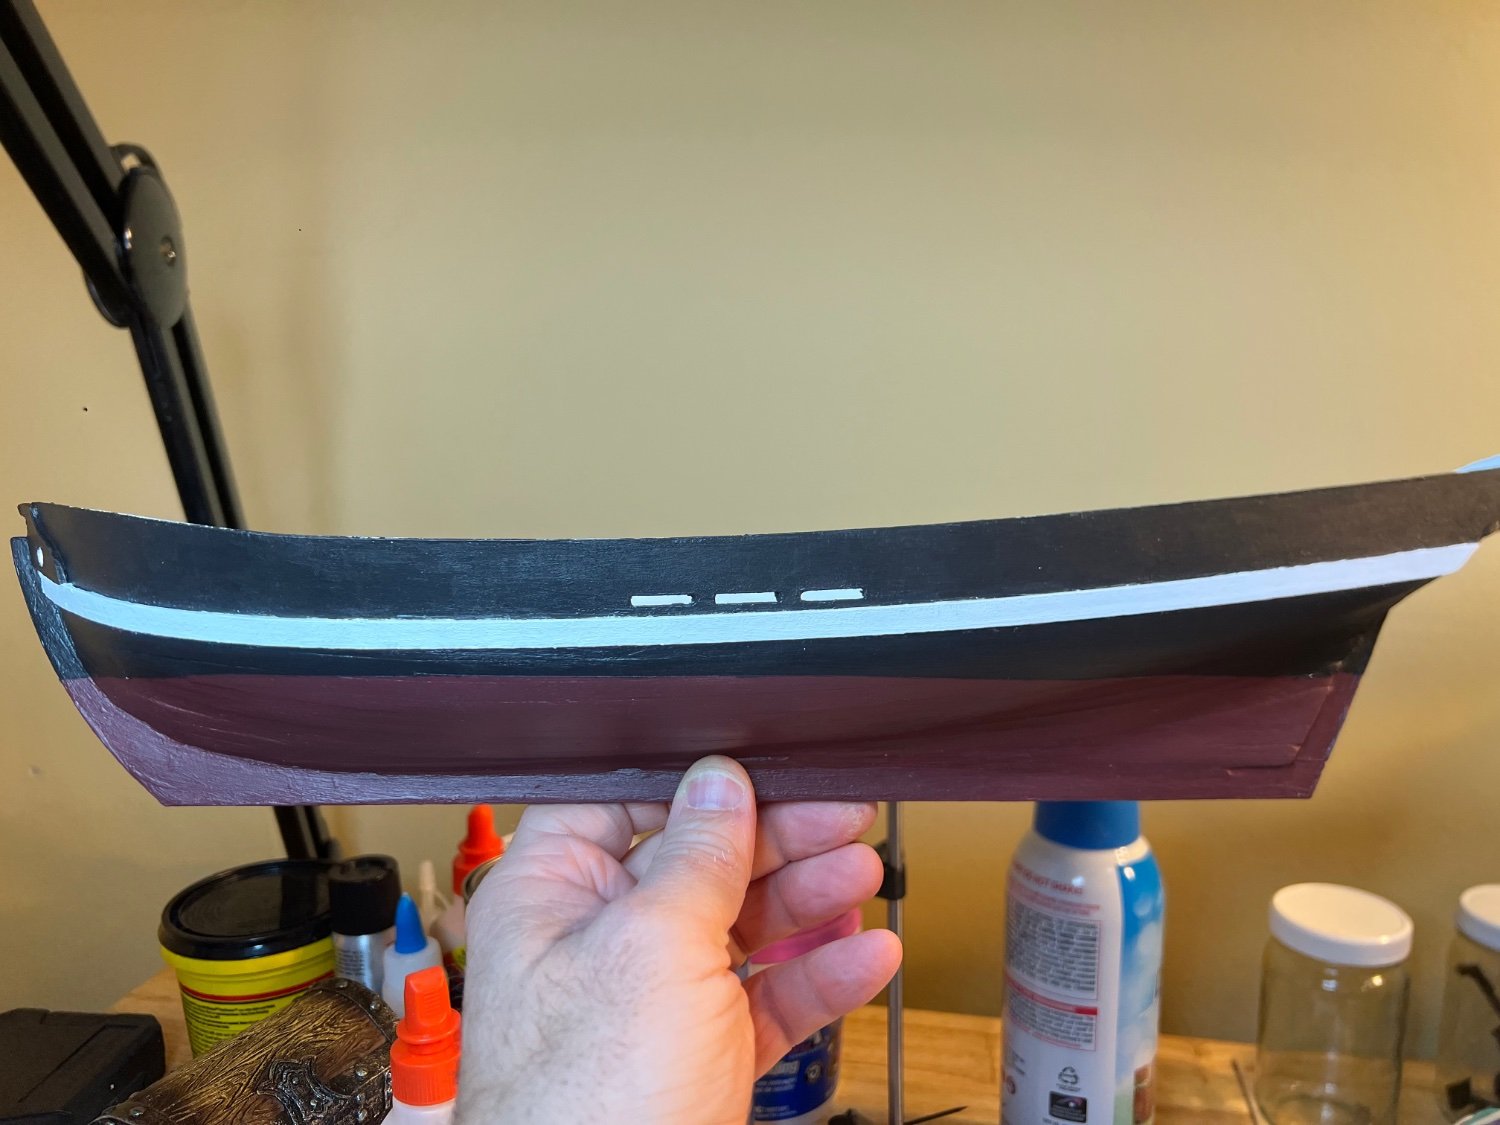
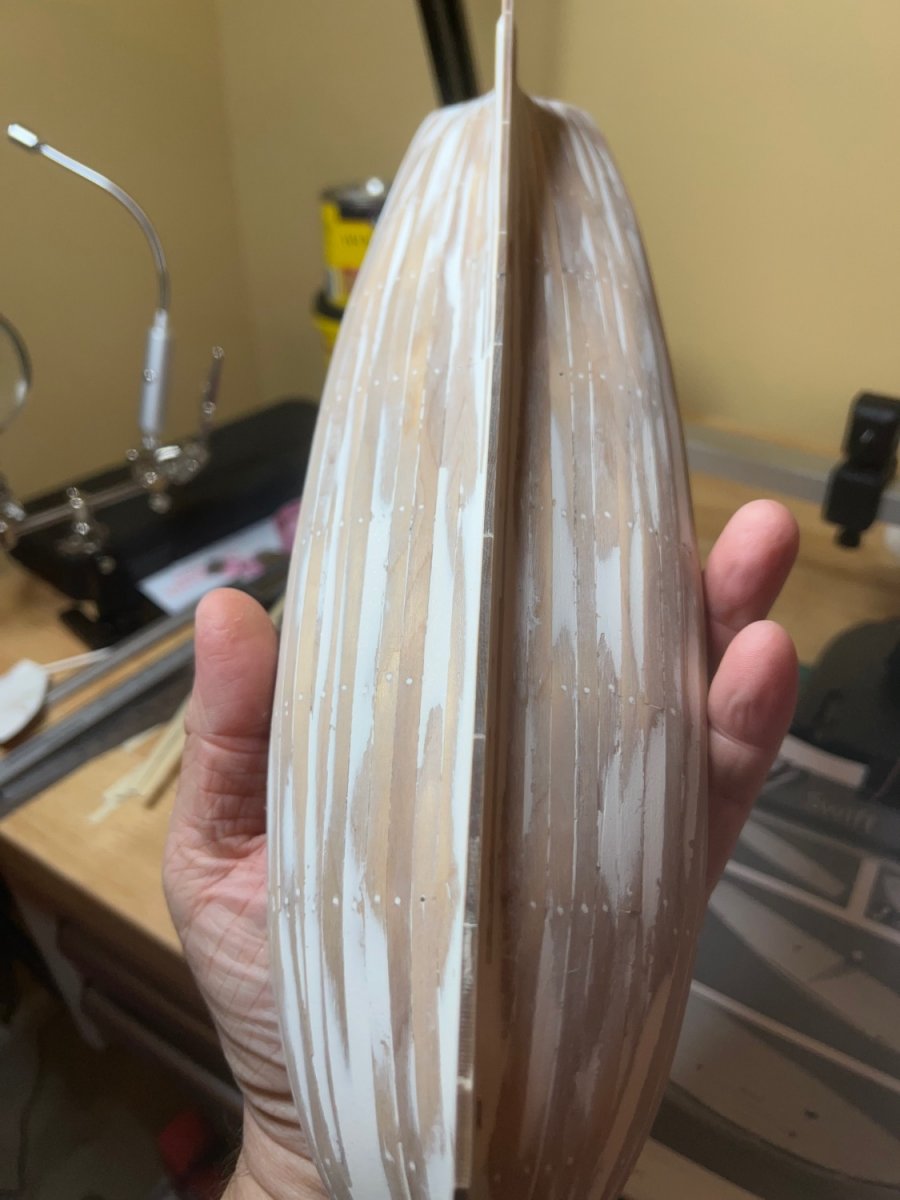
Painting!😀 Painting was fun and didn't present too many challenges other than a steady hand. Prepping was much more challenging. I had a heck of a time with the prepping tape sticking to the rubbing strakes. I knew that the upper and lower parts of the strake, though offering a very small surface area, needed to have clean paint lines as they are highly visible. I had some difficulty utilizing the waterline tracer. The tool came with a sharp stylus, but after all the hours spent shaping and sanding, I couldn't get myself to actually scratch the hull 😁 I purchased the surface gage because supposedly you could utilize a pencil. The hole was far too small for any pencils in my house, so I could either drill out the hole in the gage or whittle a pencil. I chose the latter (I shaped a little golf card scoring pencil). Prep taping the water line was challenging. Although my waterlines weren't completely symmetric, in the end I was satisfied with the paint job (and relieved that the slightly misshapen bow (due to the rubber bands) was not very noticeable).


-
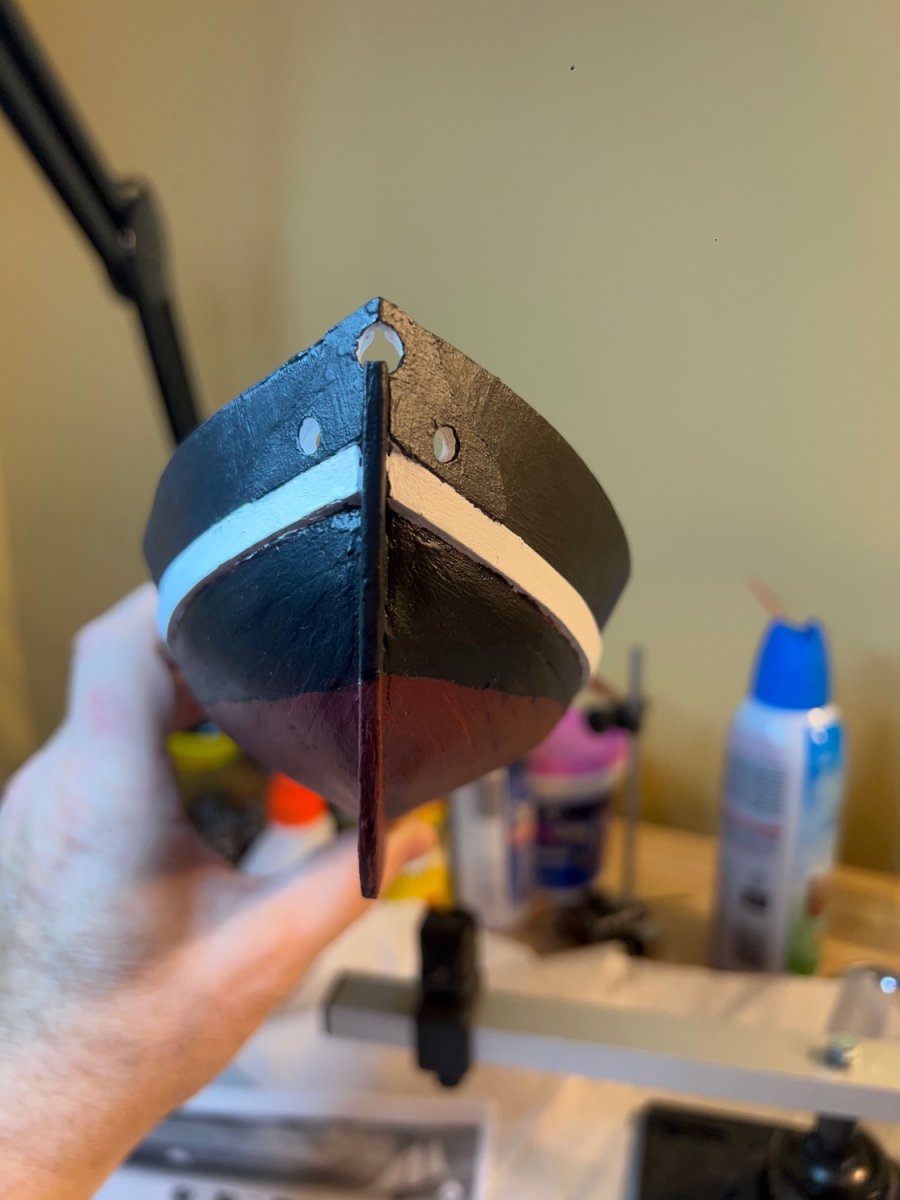
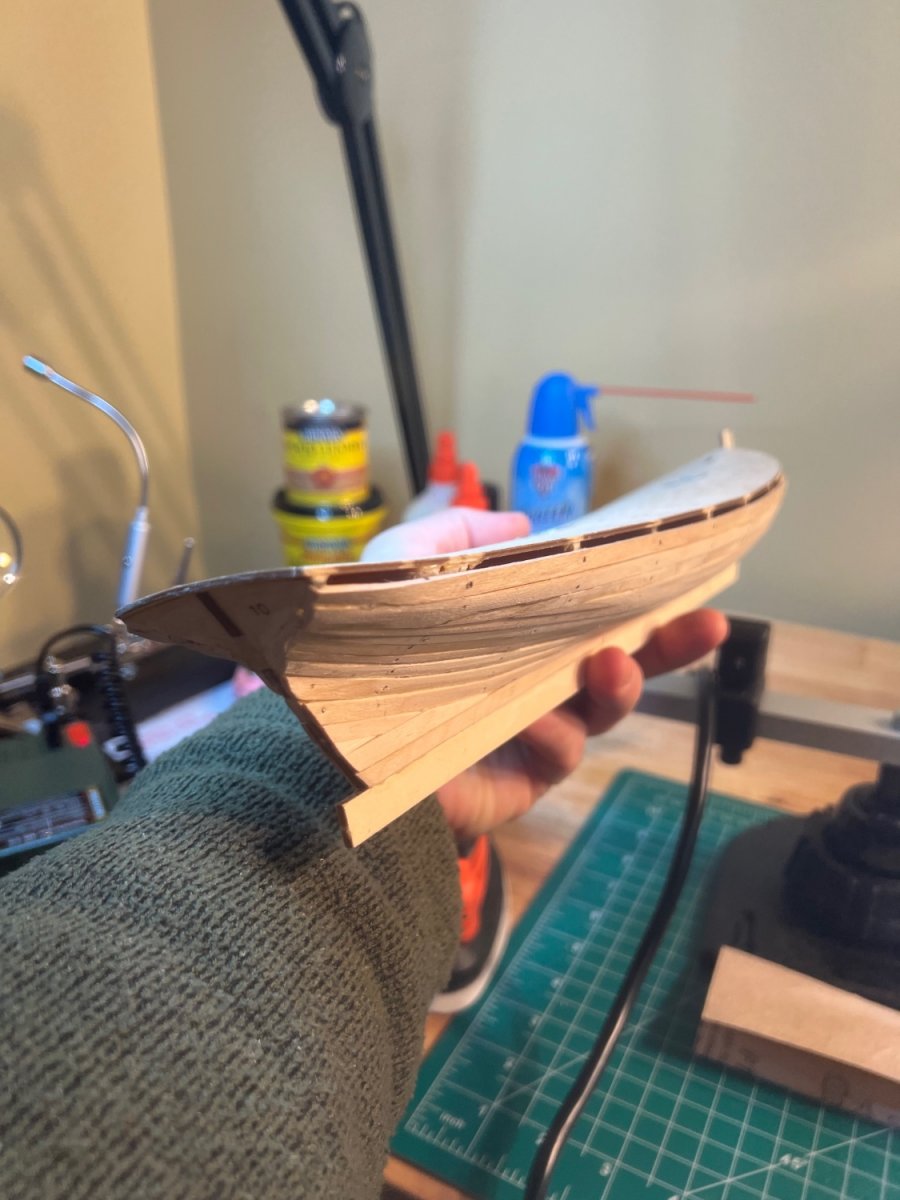
The rubbing Strakes were next. These were surprisingly stubborn. I actually snapped one as I attempted to bend it with my fingers. Fortunately, a spare was provided. I didn't have any clamps that would work due to the hull shape and the location of the strakes being lower than the deck, so I utilized some scrap planks to provide leverage. In the first picture below, the strakes are not actually in place, but being held overnight to shape. The anchor hawesholes as well as the 6mm Bowsprit hole were a delicate procedure. I started off predrilling the holes with one of my smallest bits in my pin vice, and slowly increased them to a 6mm bit (progressing through about 8 bits). At about 4+mm, the bits were too large for my Starrett pin vice set, so I used a pair of plyers and slowly turned the larger bits utilizing very minimal motion. I almost cracked/snapped the bowsprit hole several times. The 2 ornamental bow parts needed several hours worth of sanding and beveling so that they could meet at an angle with as much surface area as possible for the glue. I knew that they would need to withstand the strain of being drilled, so spent extra time getting them just right. Several times I reached for the glue, then put it back and went back to sanding/forming.

- Keith Black, Scotty W and Paul Le Wol
-
3
-
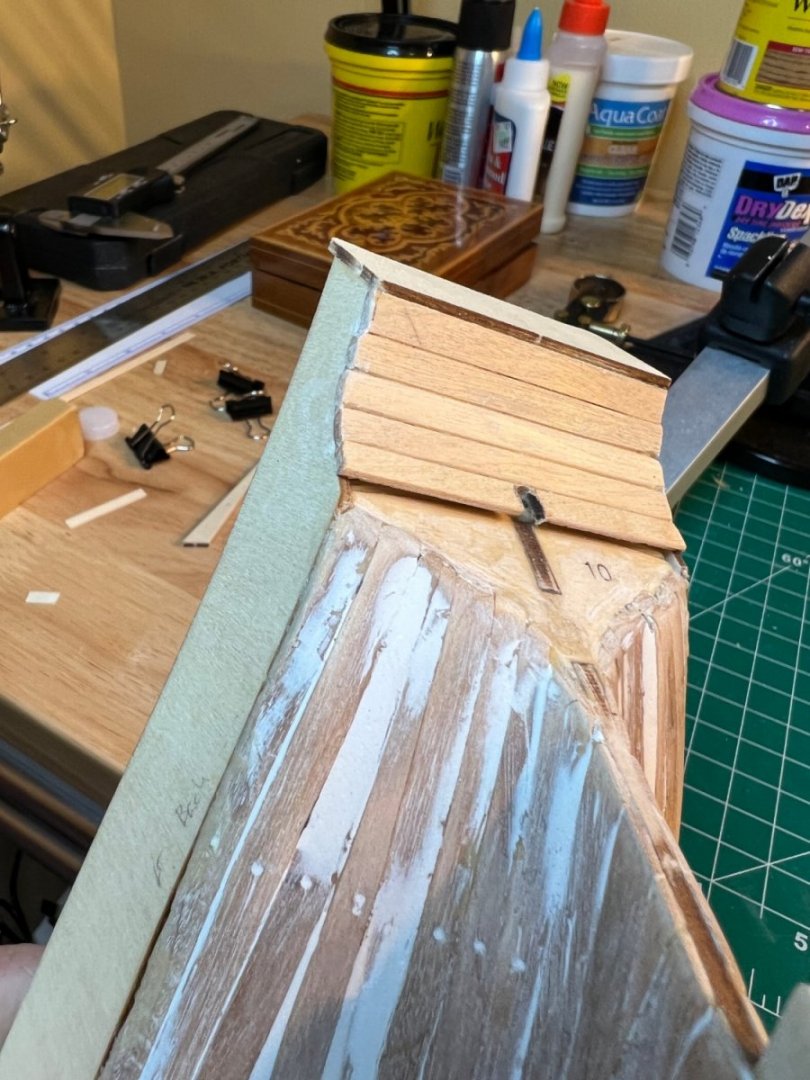
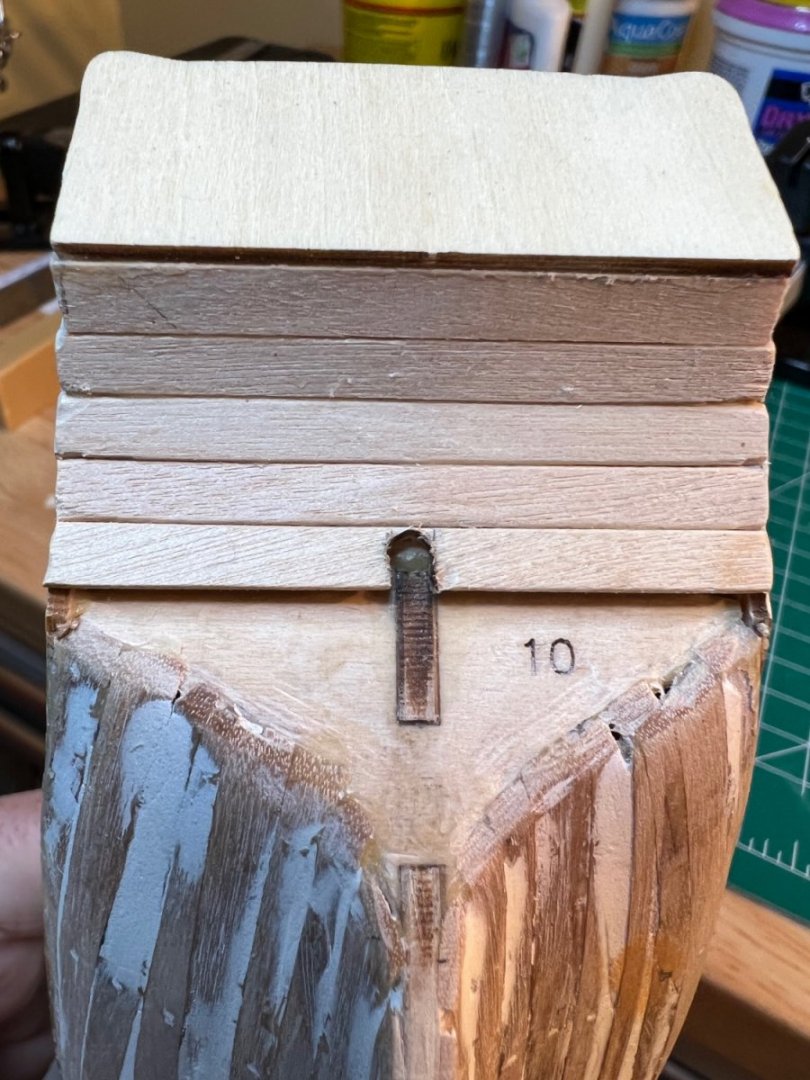
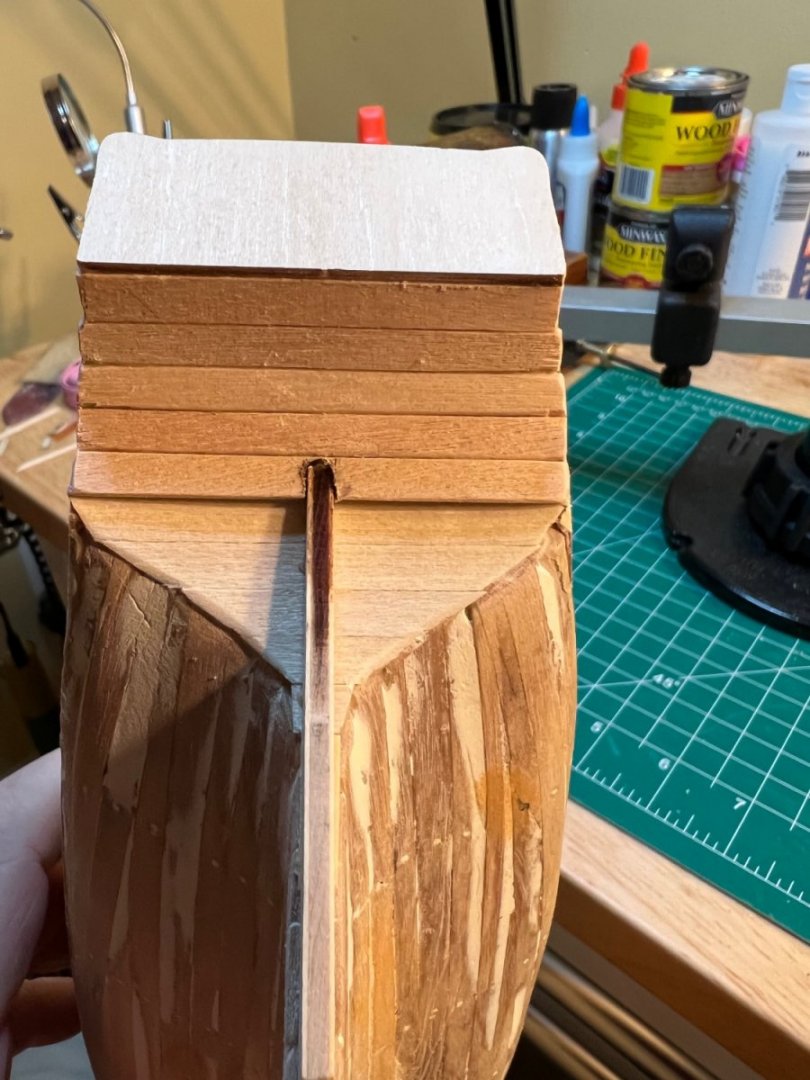
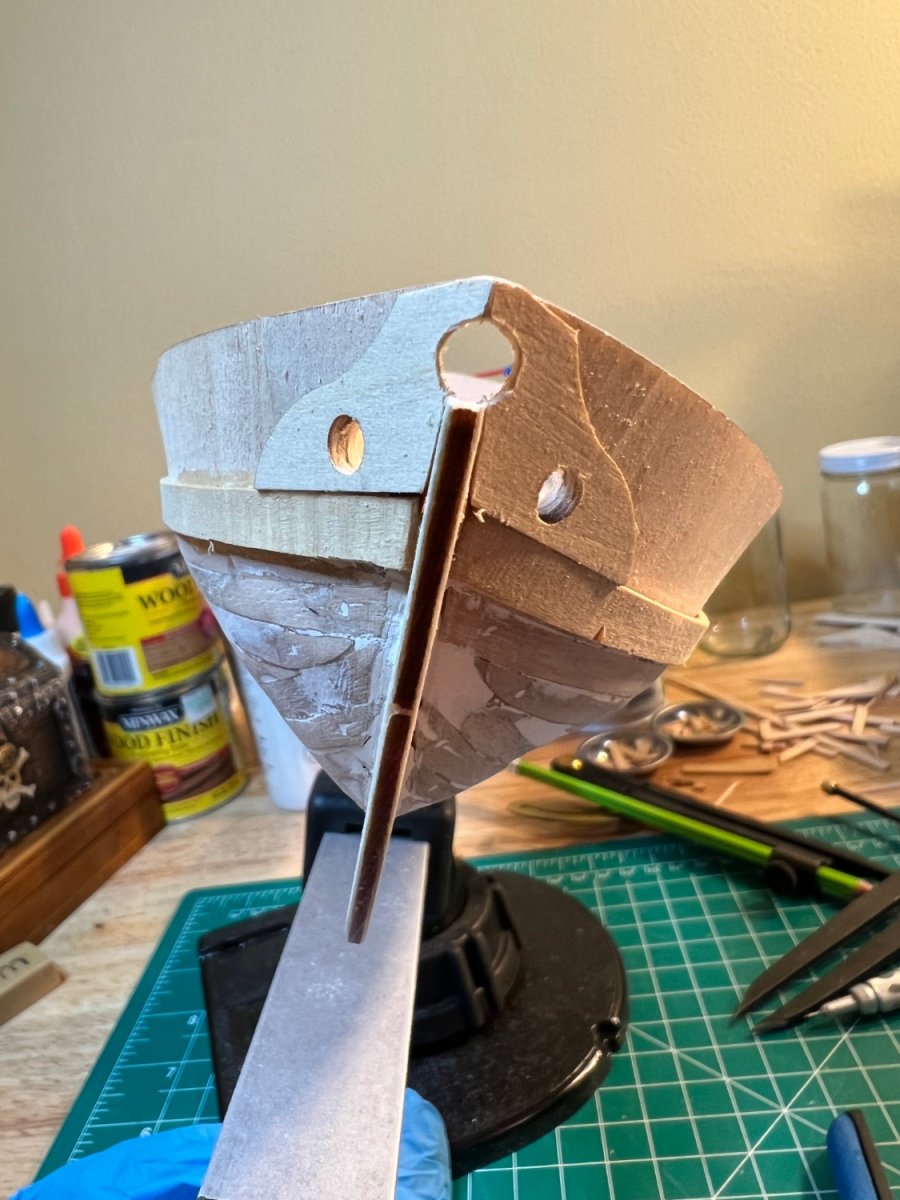
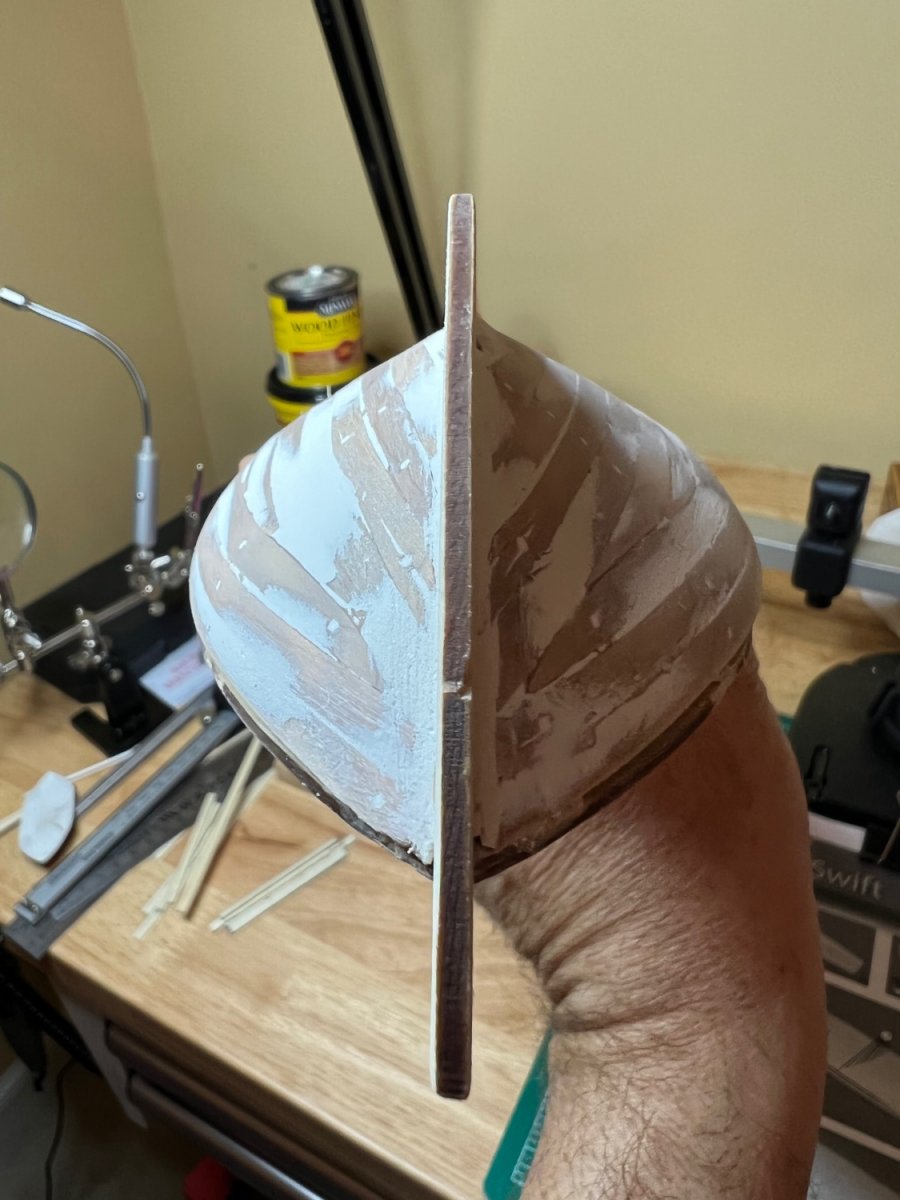
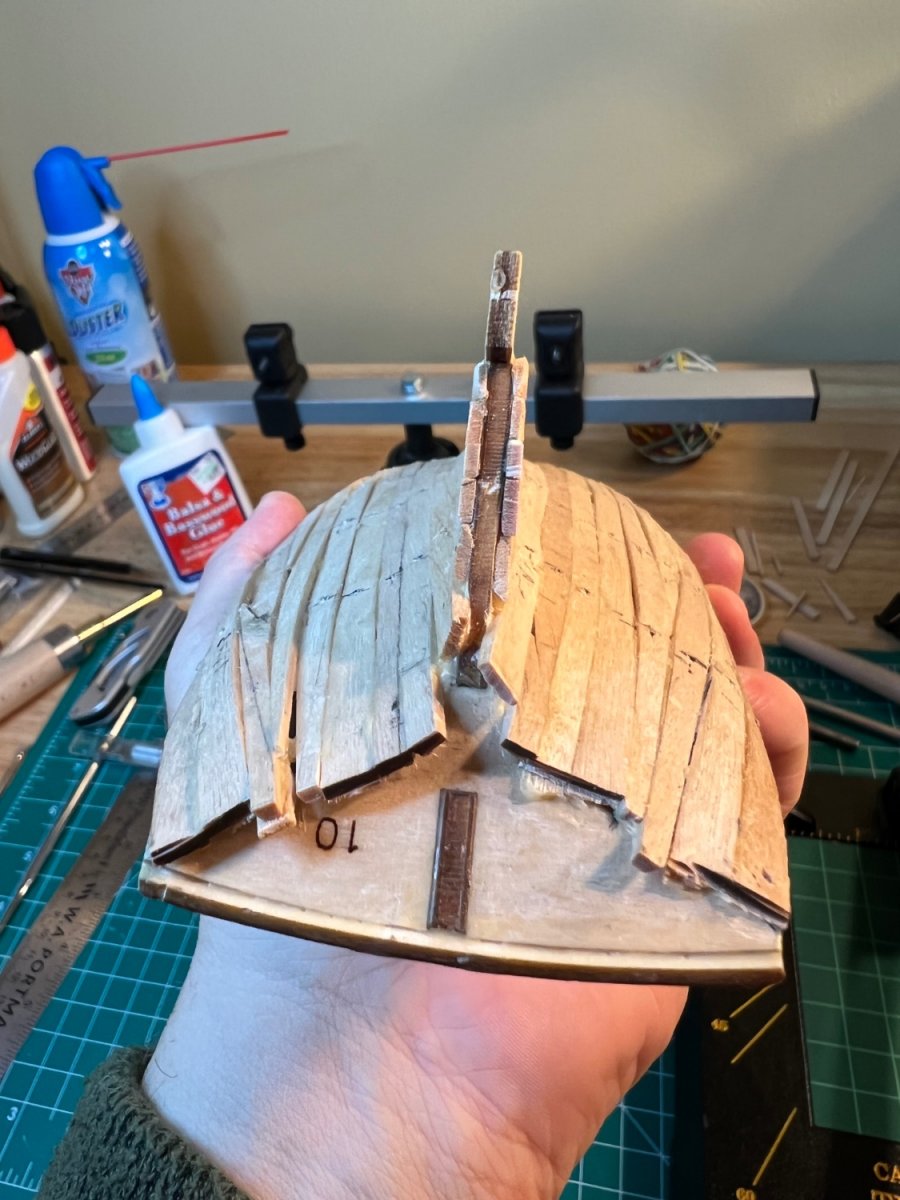
I was slightly out of order. Prior to the transom, the 2 bow sections (as referred to in the instructions) had to be attached to the top plank. They were difficult to attach. It took several hours of sanding, scraping, cutting and bending. Additionally there was no way to clamp the sections, so I needed to utilize rubber bands. Unfortunately, the wood was still wet from my shaping, and the rubber bands, being left on overnight, slightly deformed the front end of the bow.
- Scotty W and Keith Black
-
2
-
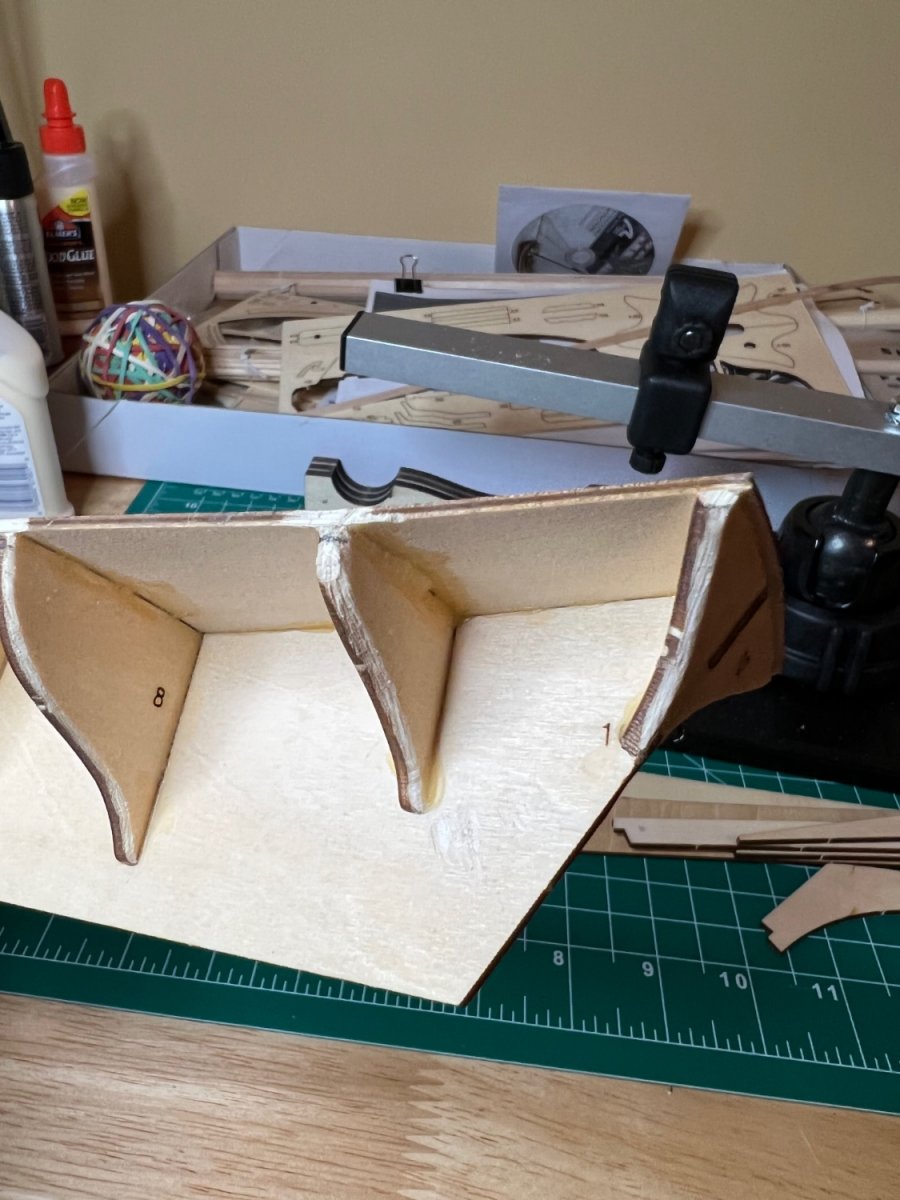
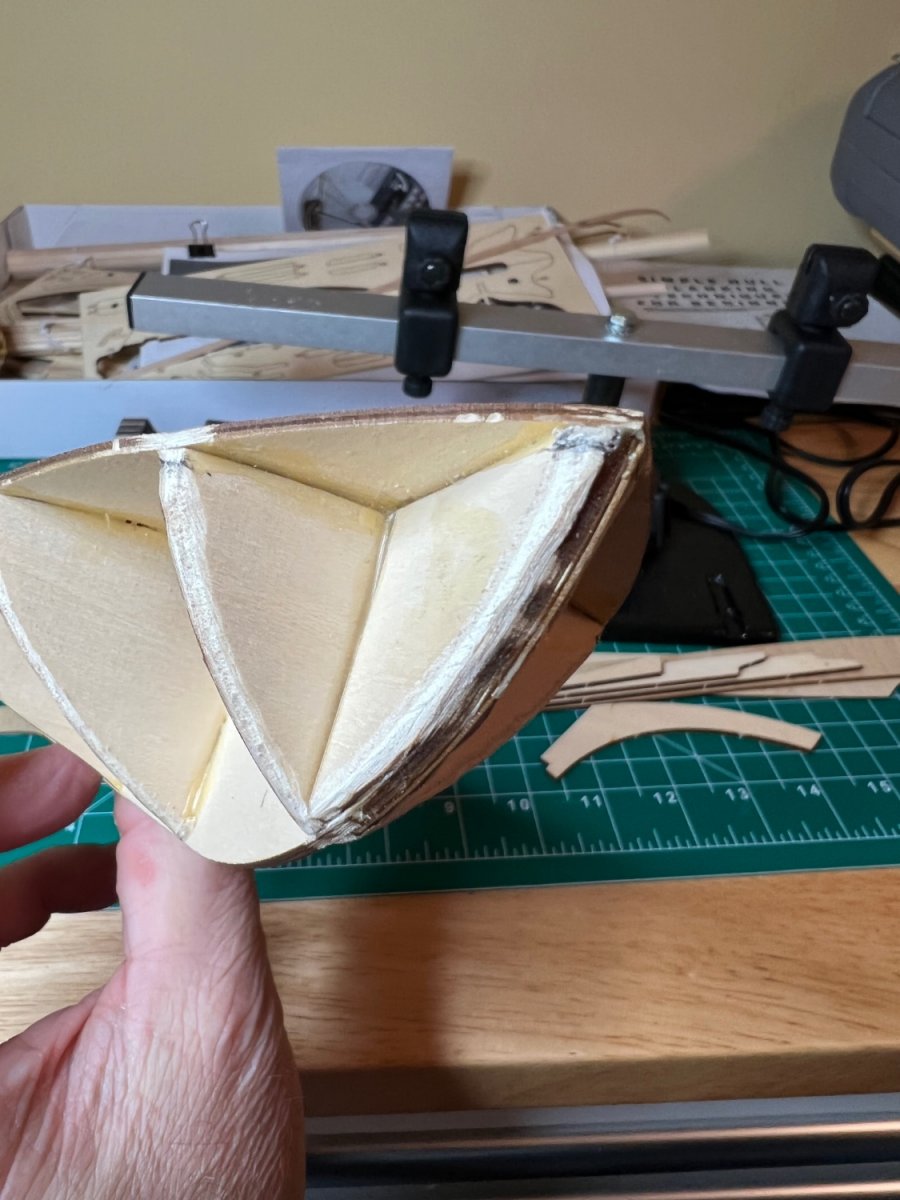
Next - the lower stern wall and transom. This was fairly straight forward. I beveled the edges, providing a somewhat pleasing look, as opposed to the harsher look of 90 degree angled corners. The end piece (not sure of the name) that affixes to the keel and makes up an attachment point for the rudder was confusing, mainly because of the unclear instructions and pictures. I couldn't tell if a space was intentionally left for the stern wall planking to go under it, or if was to be fitted flush, with the planks cut and shaped around it. I chose to leave the space, plank under it, and add a vertical shim to eliminate any extra space. I did this knowing I'd be painting the model and nobody with eyes older than 30 would notice 🙃
- Keith Black and Scotty W
-
2
-
On 2/23/2022 at 11:25 AM, Azzoun said:
Hi Baron,
Welcome to MSW, you've taken up a very rewarding hobby with good people! Maybe you'll consider checking out the Philadelphia Ship Model Society, we meet on the first Thursday of the month at the Independent Seaport Museum at 7p. Our next meeting is on 3/3. There will be individuals there who would be happy to assist and discuss your goals! www.philadelphiashipmodelsociety.com Maybe we'll see you there!
Joshua
Sorry I missed it. My boss took off early this afternoon and graciously left a few of his deliverables for me to complete. I hope to catch a meeting. Thanks again for the info and invitation.
cheers!
- Tomasz B, Keith Black and mtaylor
-
1
-
 2
2
-
Fyi - I started my build log under Swift 1805. Pictures included.
- mtaylor, Keith Black and Tomasz B
-
3
-
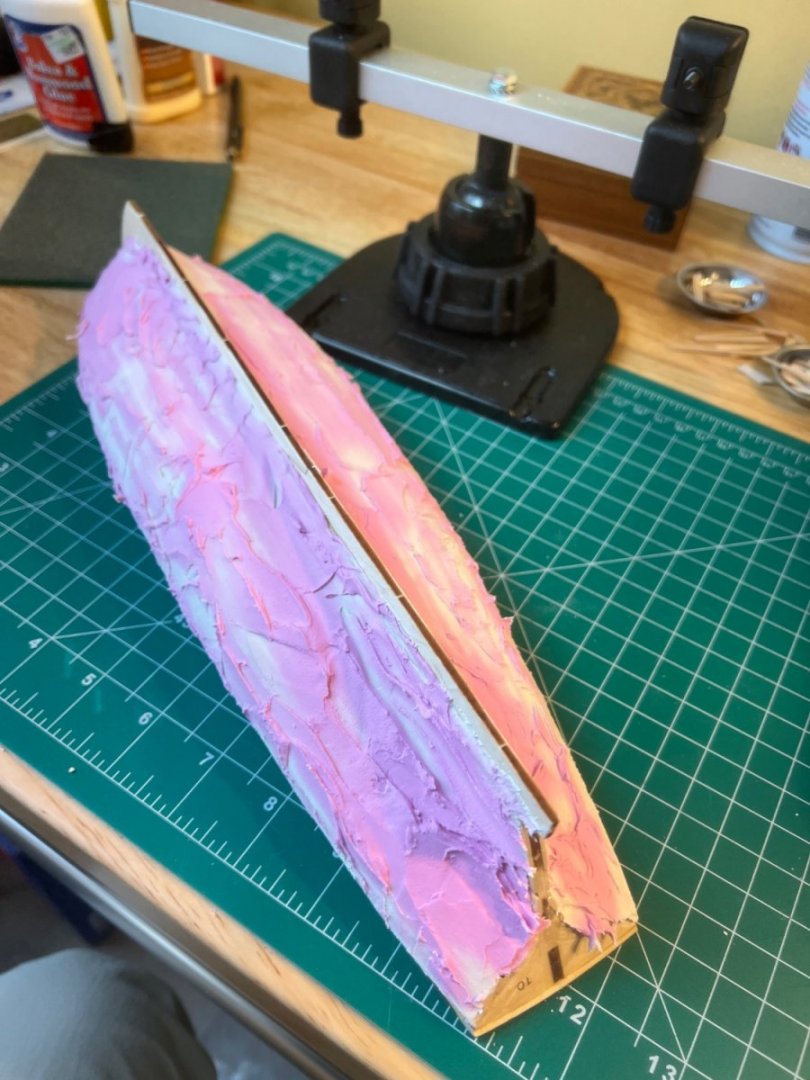
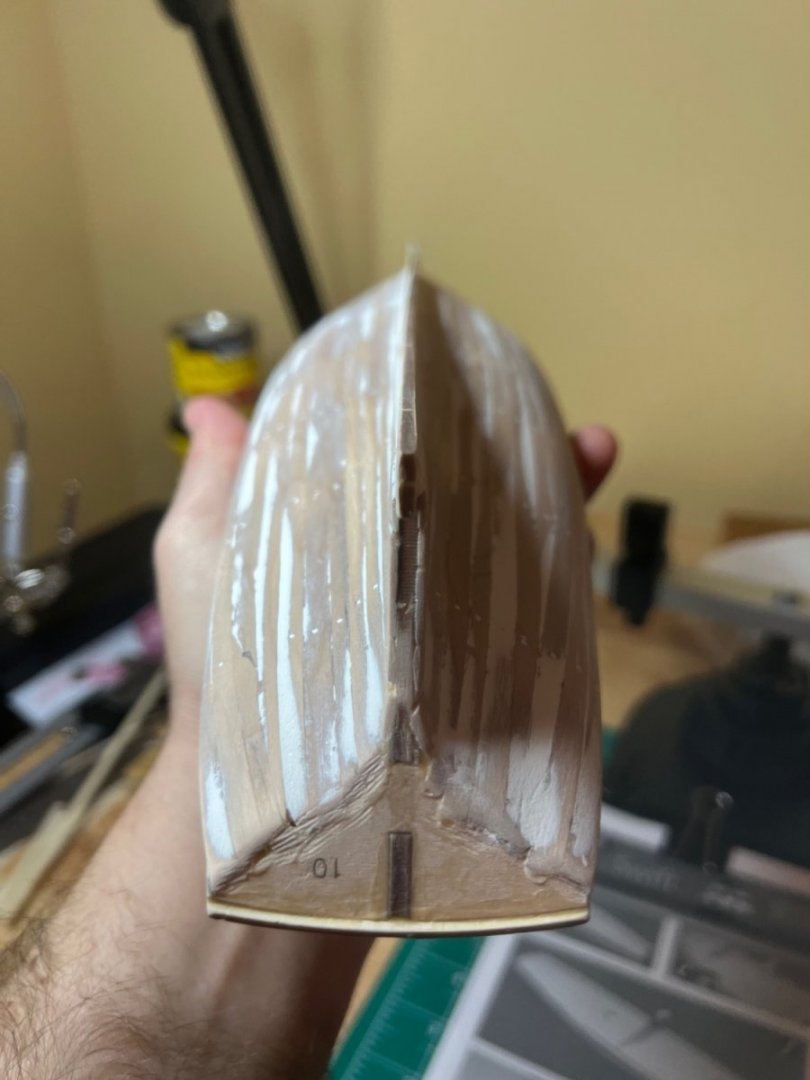
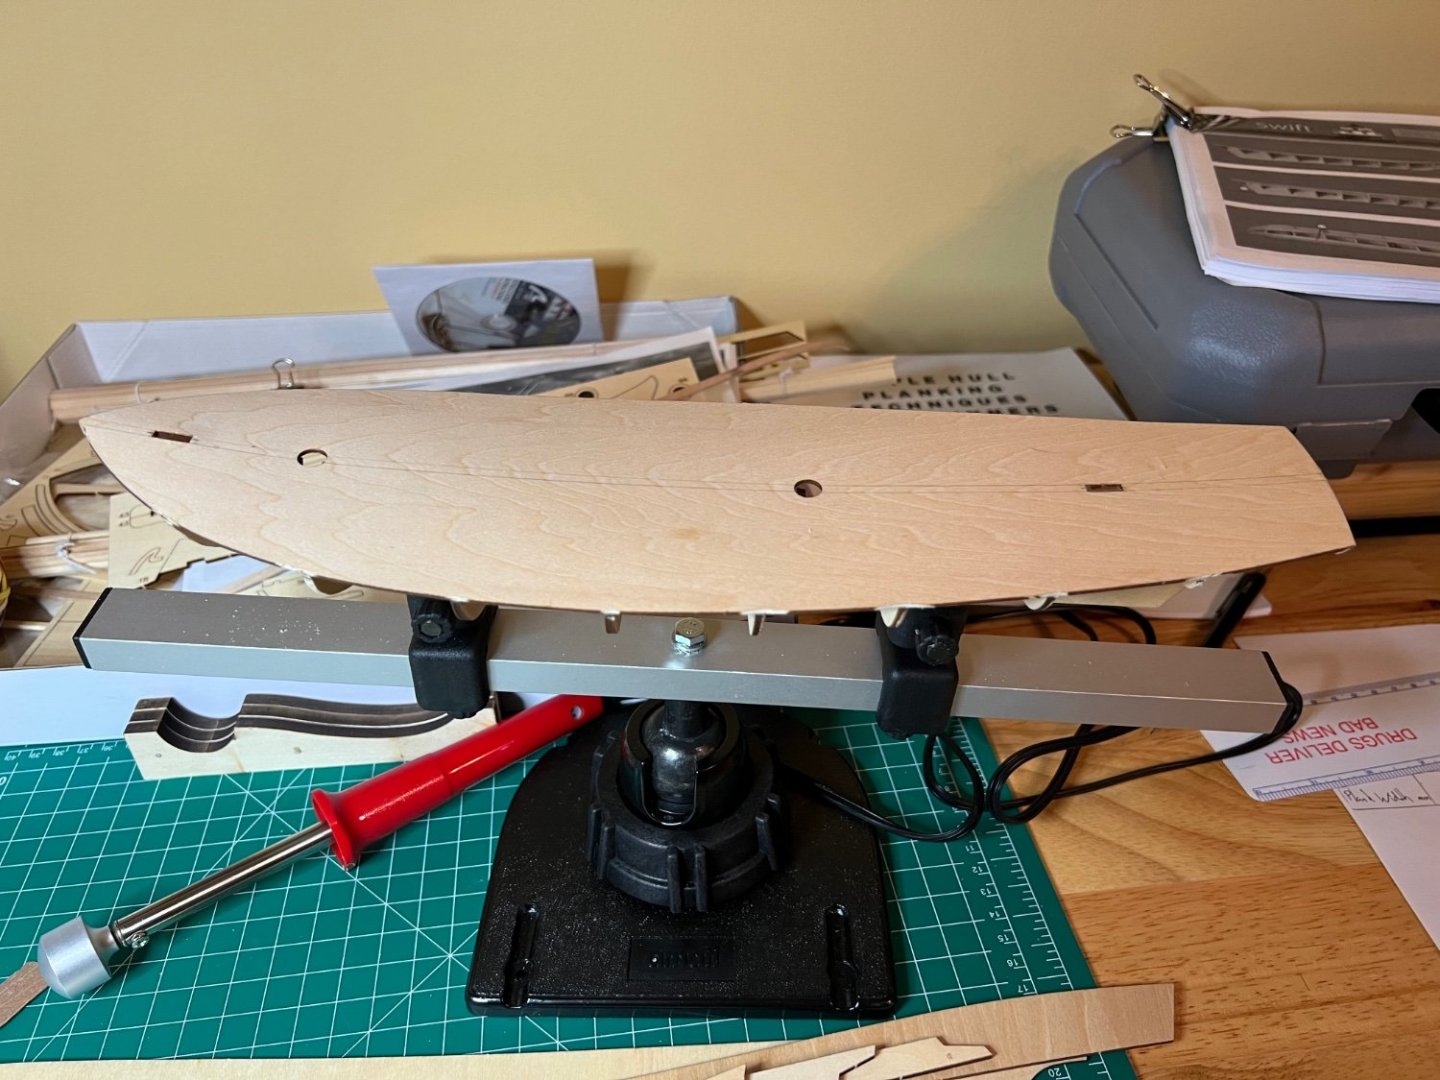
Prepping the hull for painting was fun after spending weeks planking. I was able to sand out many of the imperfections and used a combination of spackle and wood filler for the trouble areas. I read several suggestions that said to spackle the entire hull. That was an unnecessary undertaking. My daughter it looked like I frosted the hull 😀 I ended up sanding off about 95% if it all. And probably more after the first coat of primer.


- CiscoH, Scotty W, Bob Fraser and 1 other
-
4
-
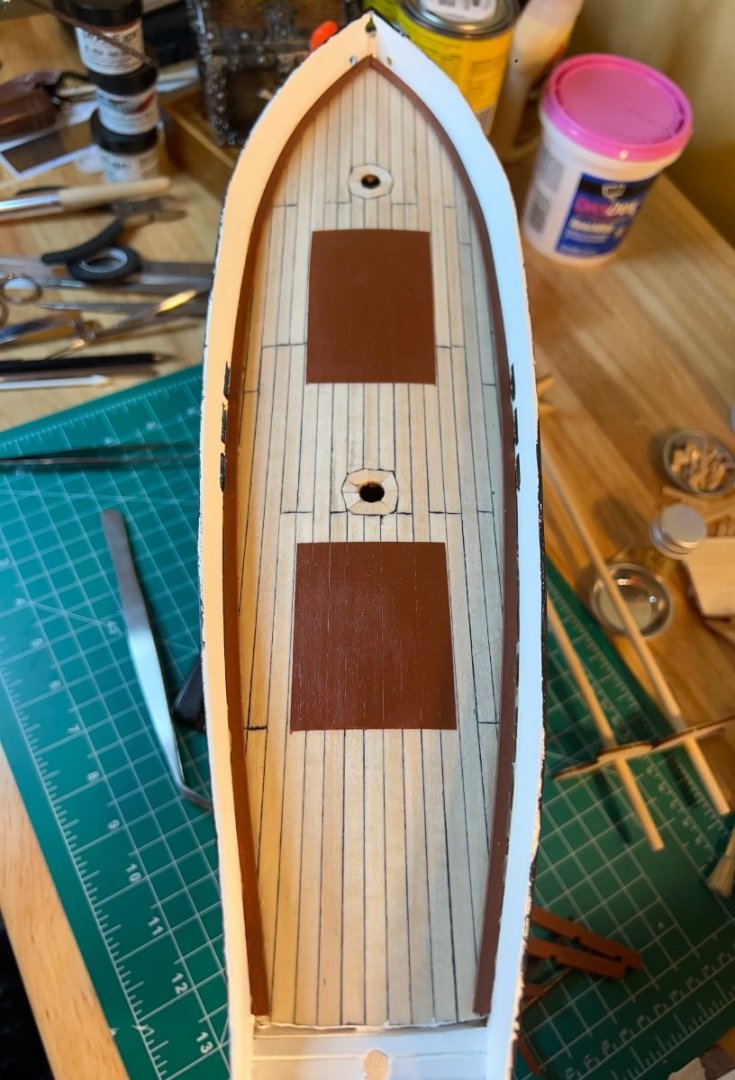
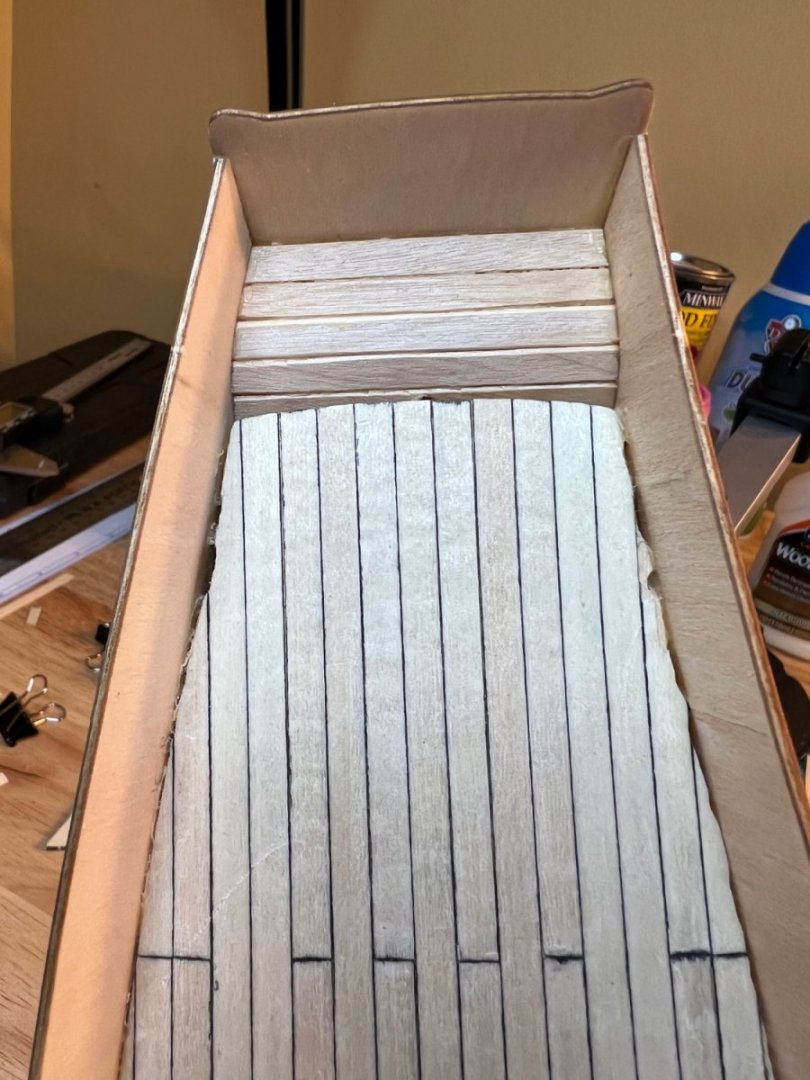
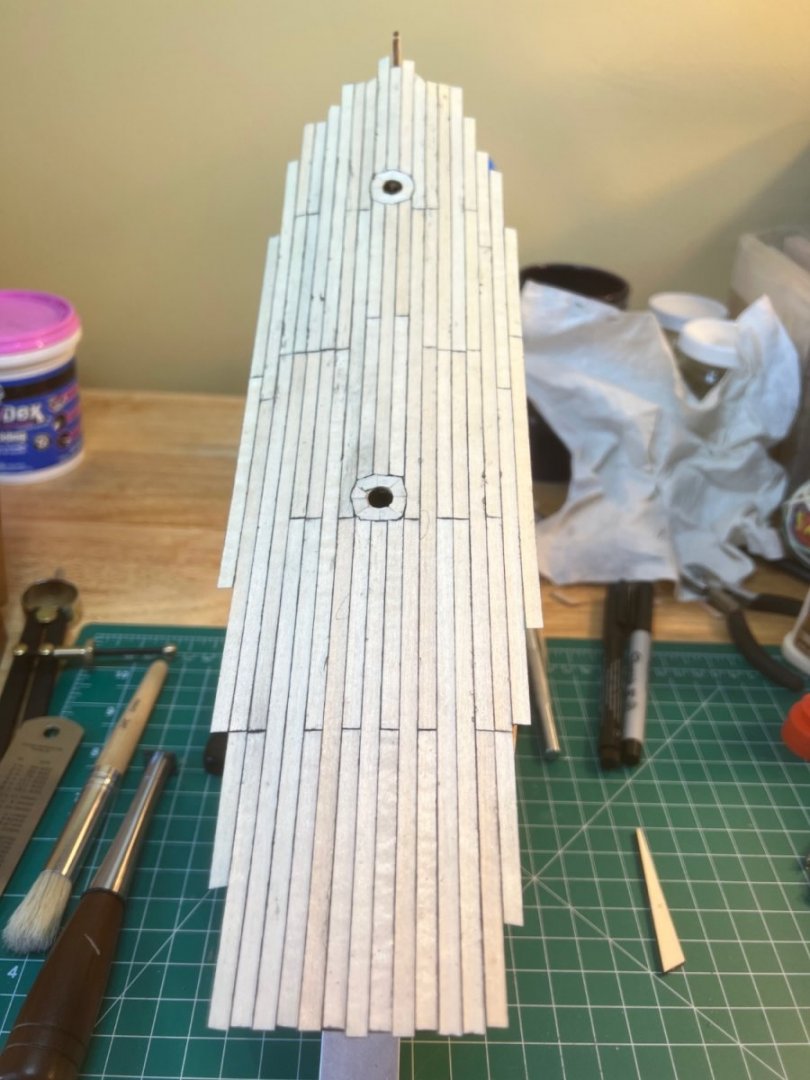
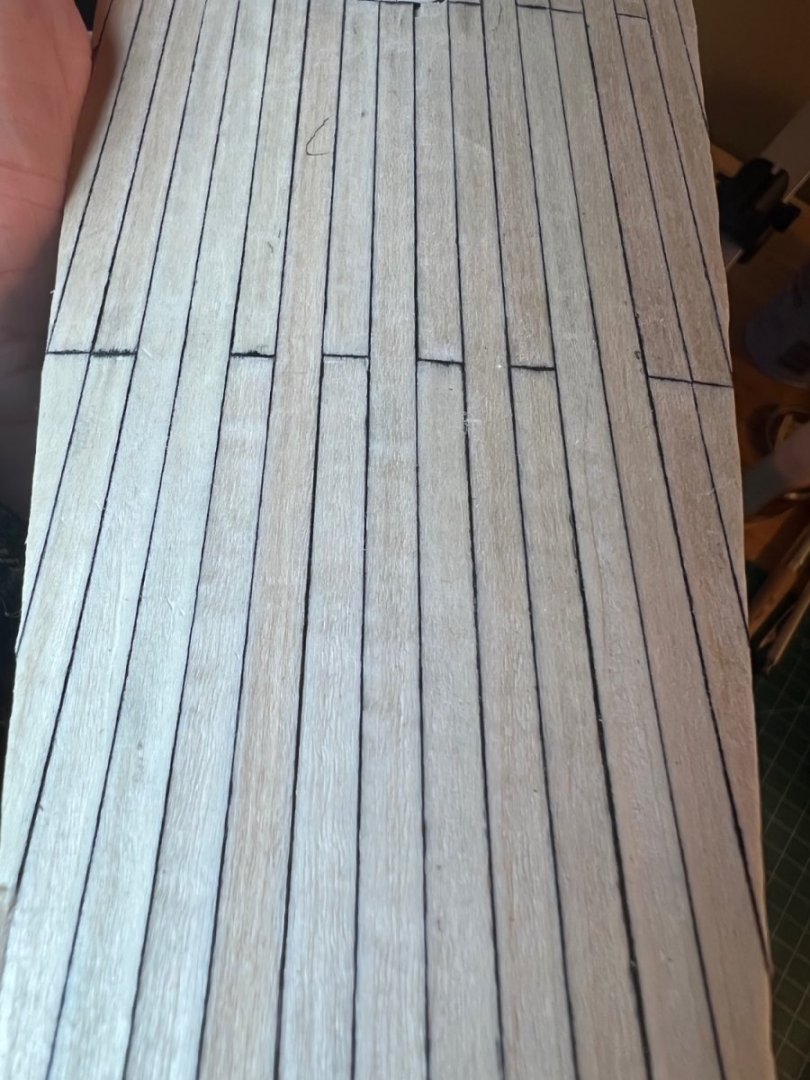
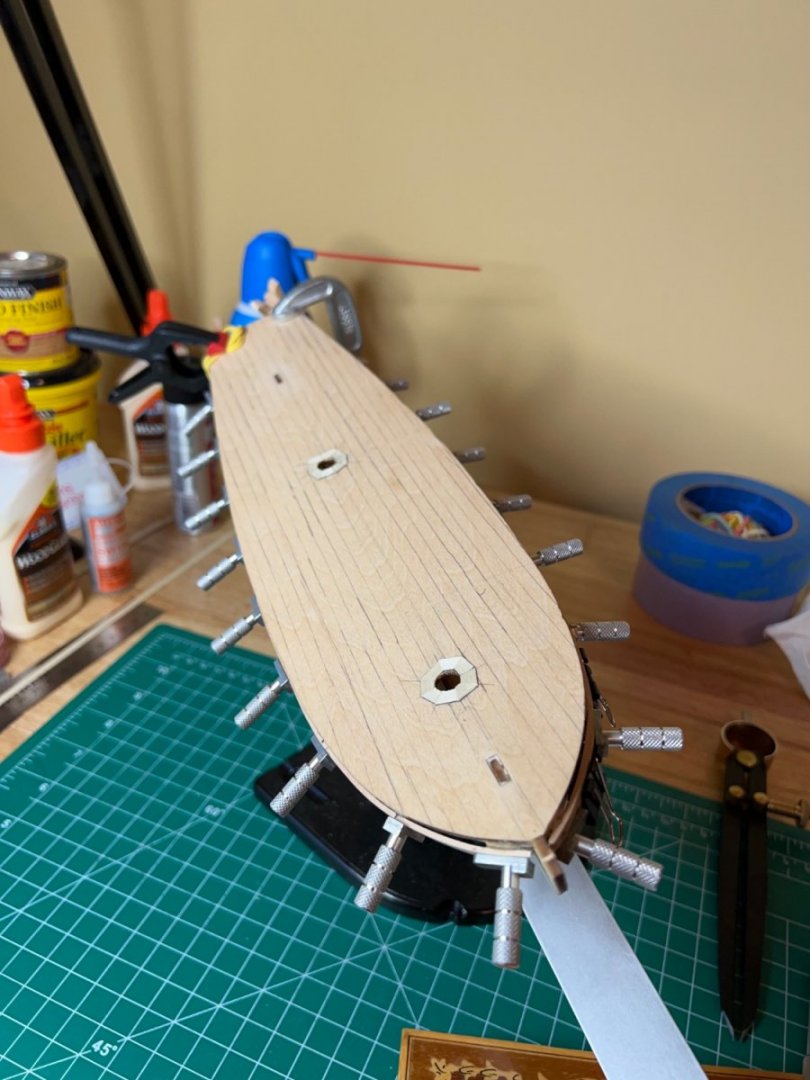
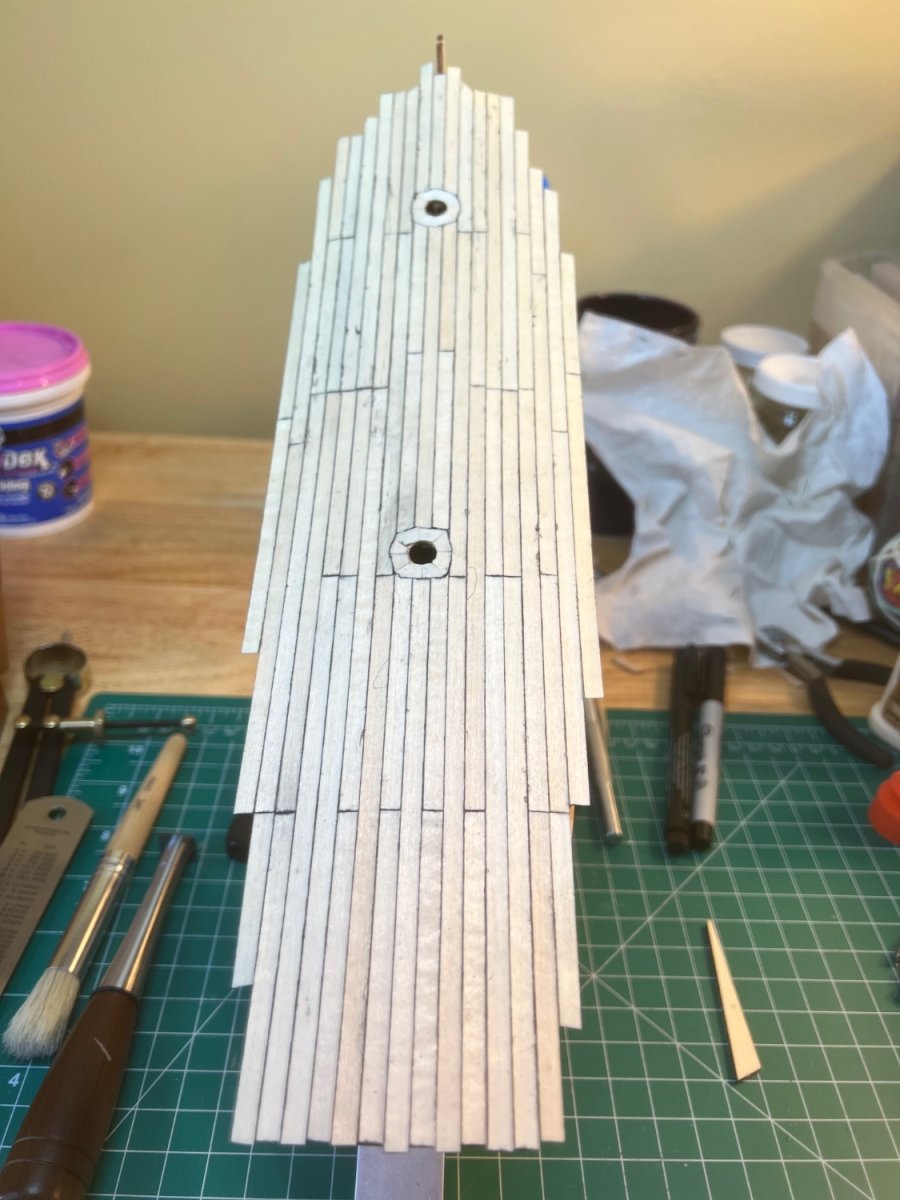
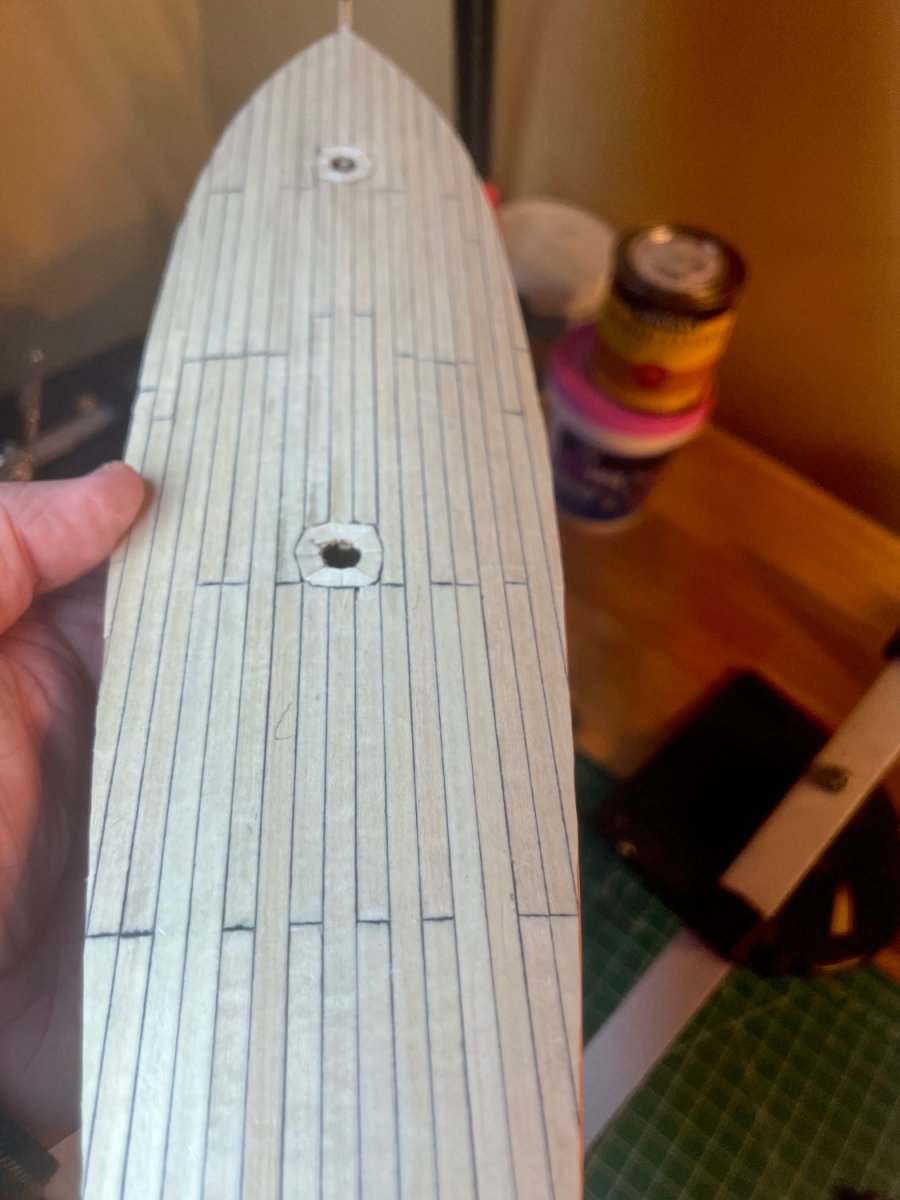
The false deck was a challenge. After spending a small fortune on clamps, I found that I couldn't get any to hold. I finally ended up using about 75 rubber bands off of a cheap rubber band ball. I was convinced the deck would crack, but at one point I just had to give it a go. I enjoyed deck planking, but as with the prior section, should've spend more time planning. I chose to outline my planks with India ink, and cut them to form. I made a mistake with bunching the seams. Once I did it, I mirrored it on the other side of the center line to keep a uniform look. It was bad enough that I considered ripping it all up and starting over, but the wood glue is a fairly permanent bond. I'm still a bit bummed about it.
After Action Review:
* I should've planned better.
* Upon realizing my initial mistake with the matching seams, I should've left that as a one-off mistake instead of doubling down in the name of symmetry.
* I'm glad I tried planking around the main mast holes. Next time it'll be better.
* Instead of "lightly sanding" the deck, I utilized a quality scraper. It was a joy to work with and I found myself becoming a scraping junky. The scraper removed the India ink smudges and paint splotches that squirted out after pressing on the planks. I think it left the deck "caulk" with a nice look.
* I like the look of the flat (non gloss) varnish.

- Scotty W and Keith Black
-
2
-
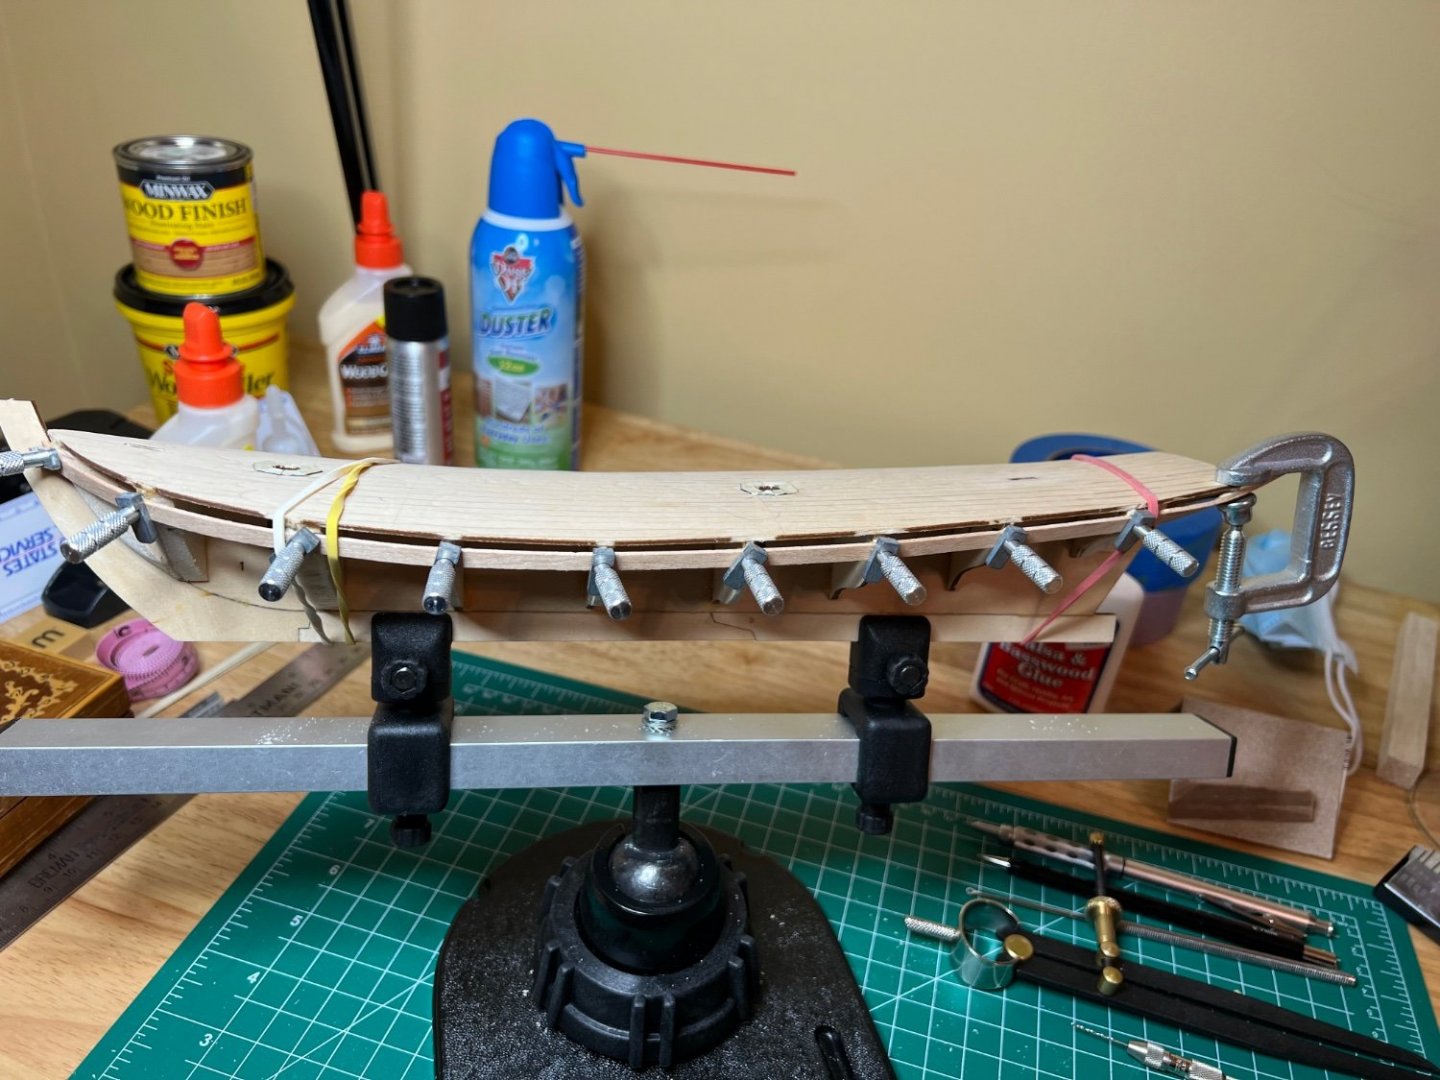
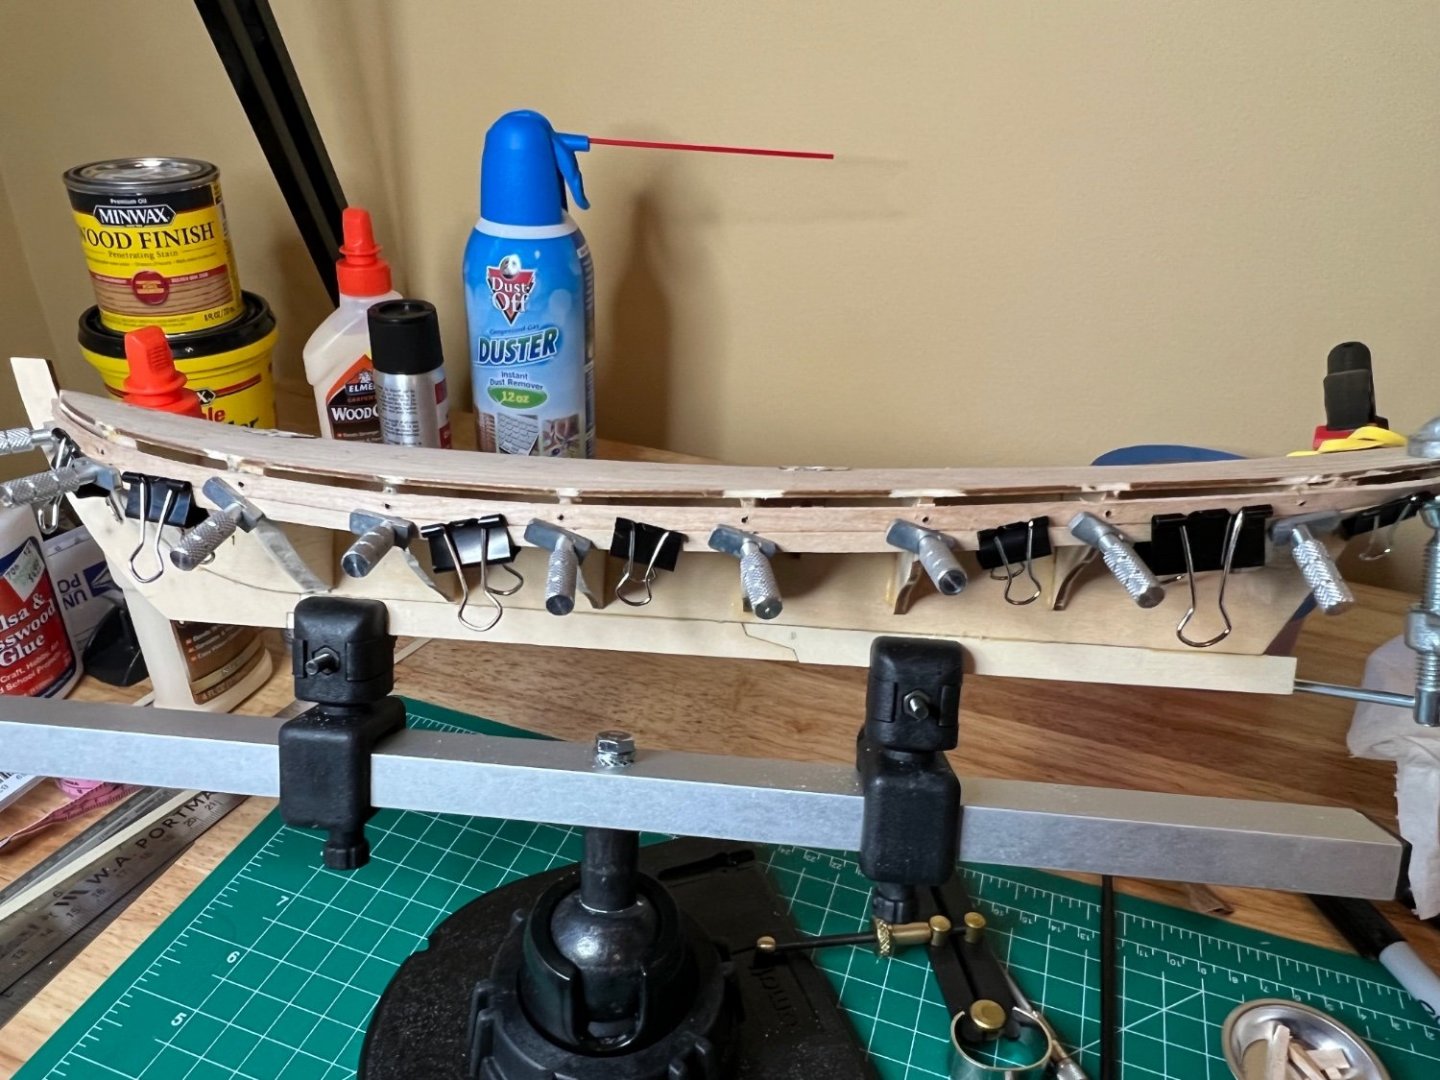
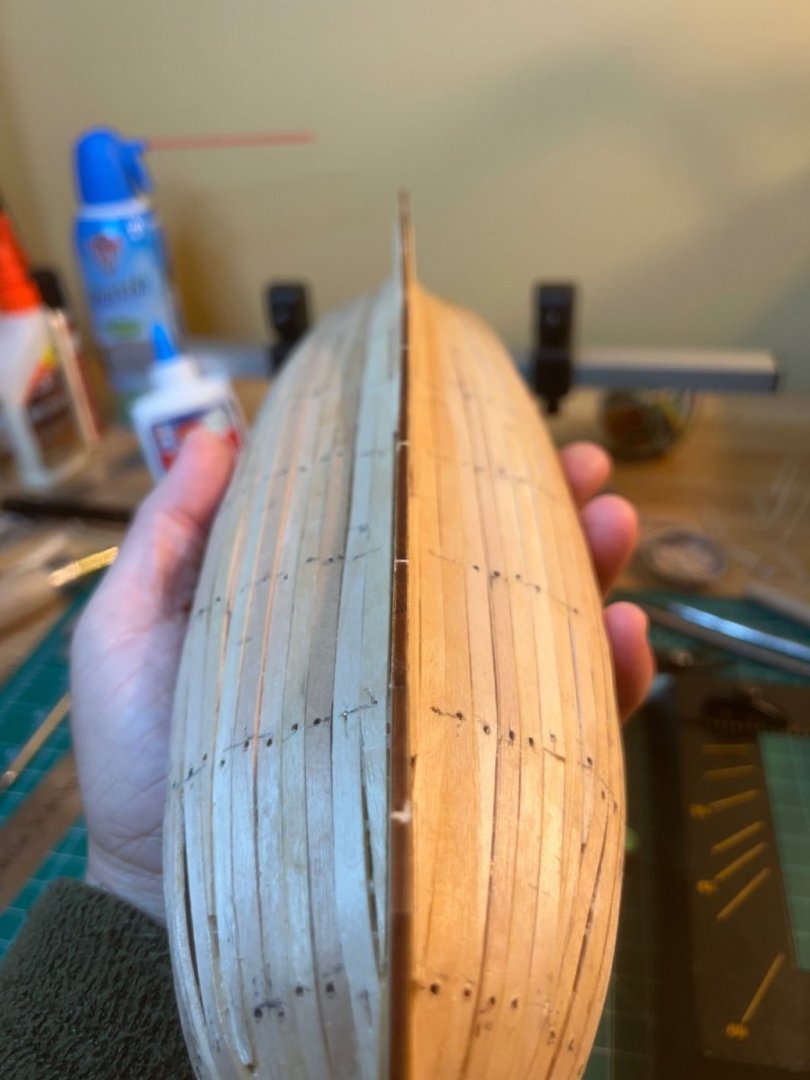
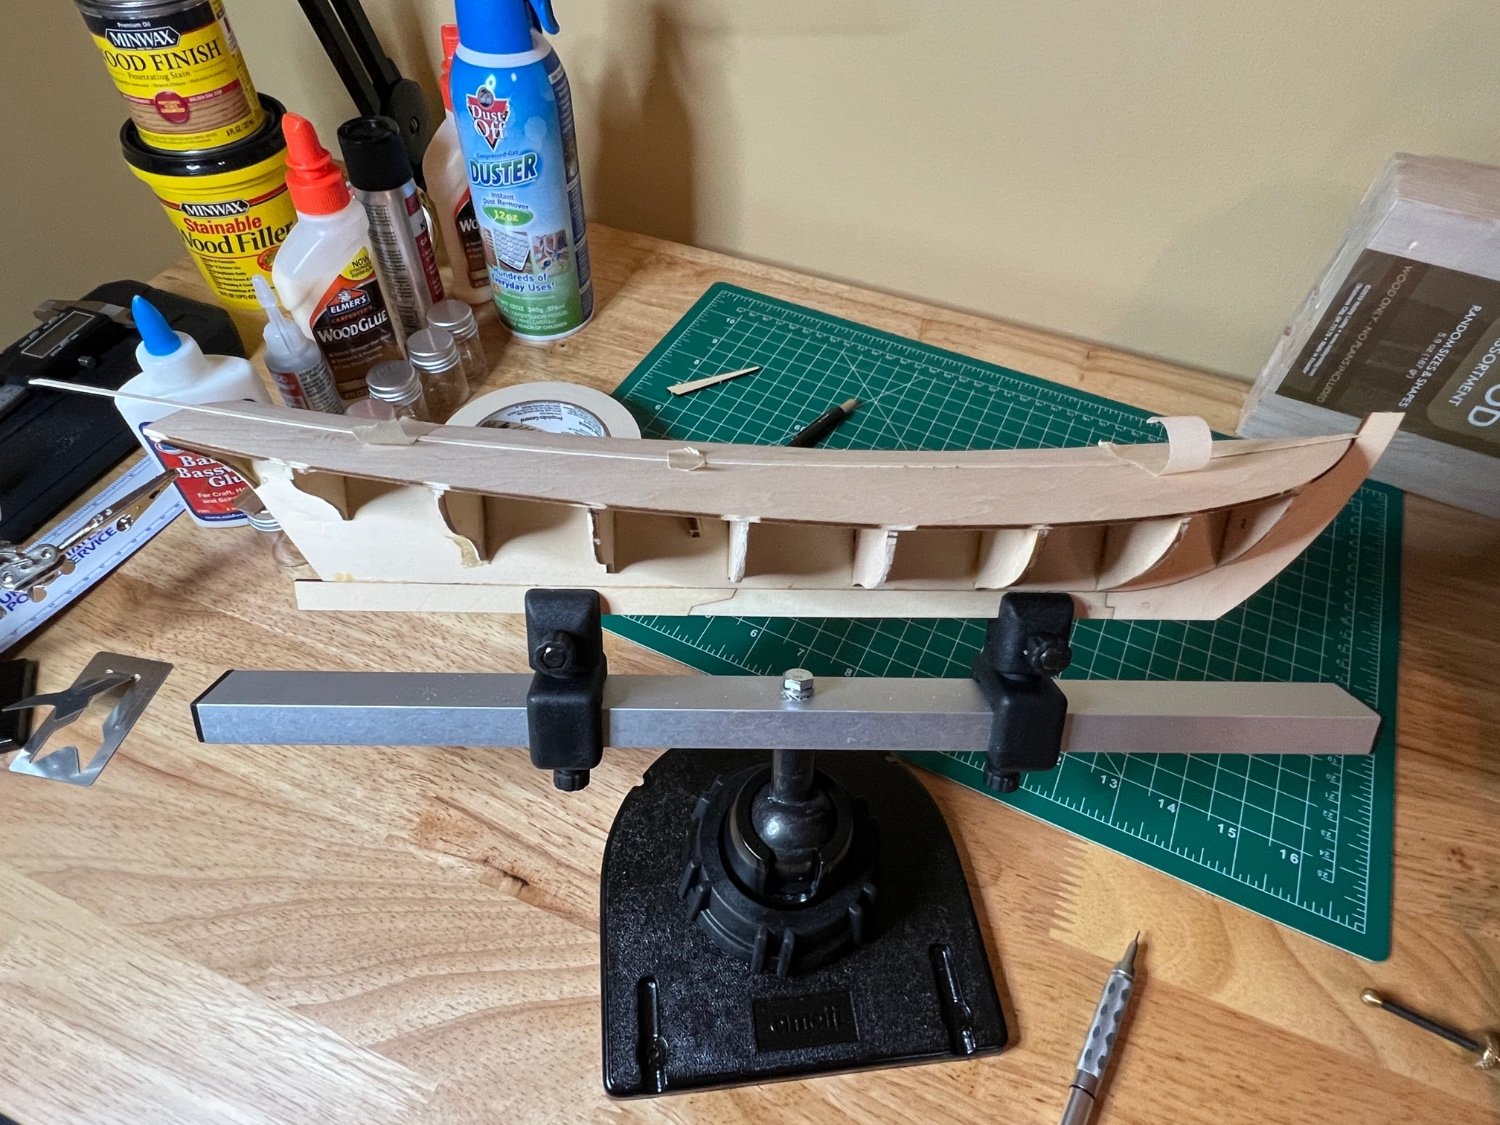
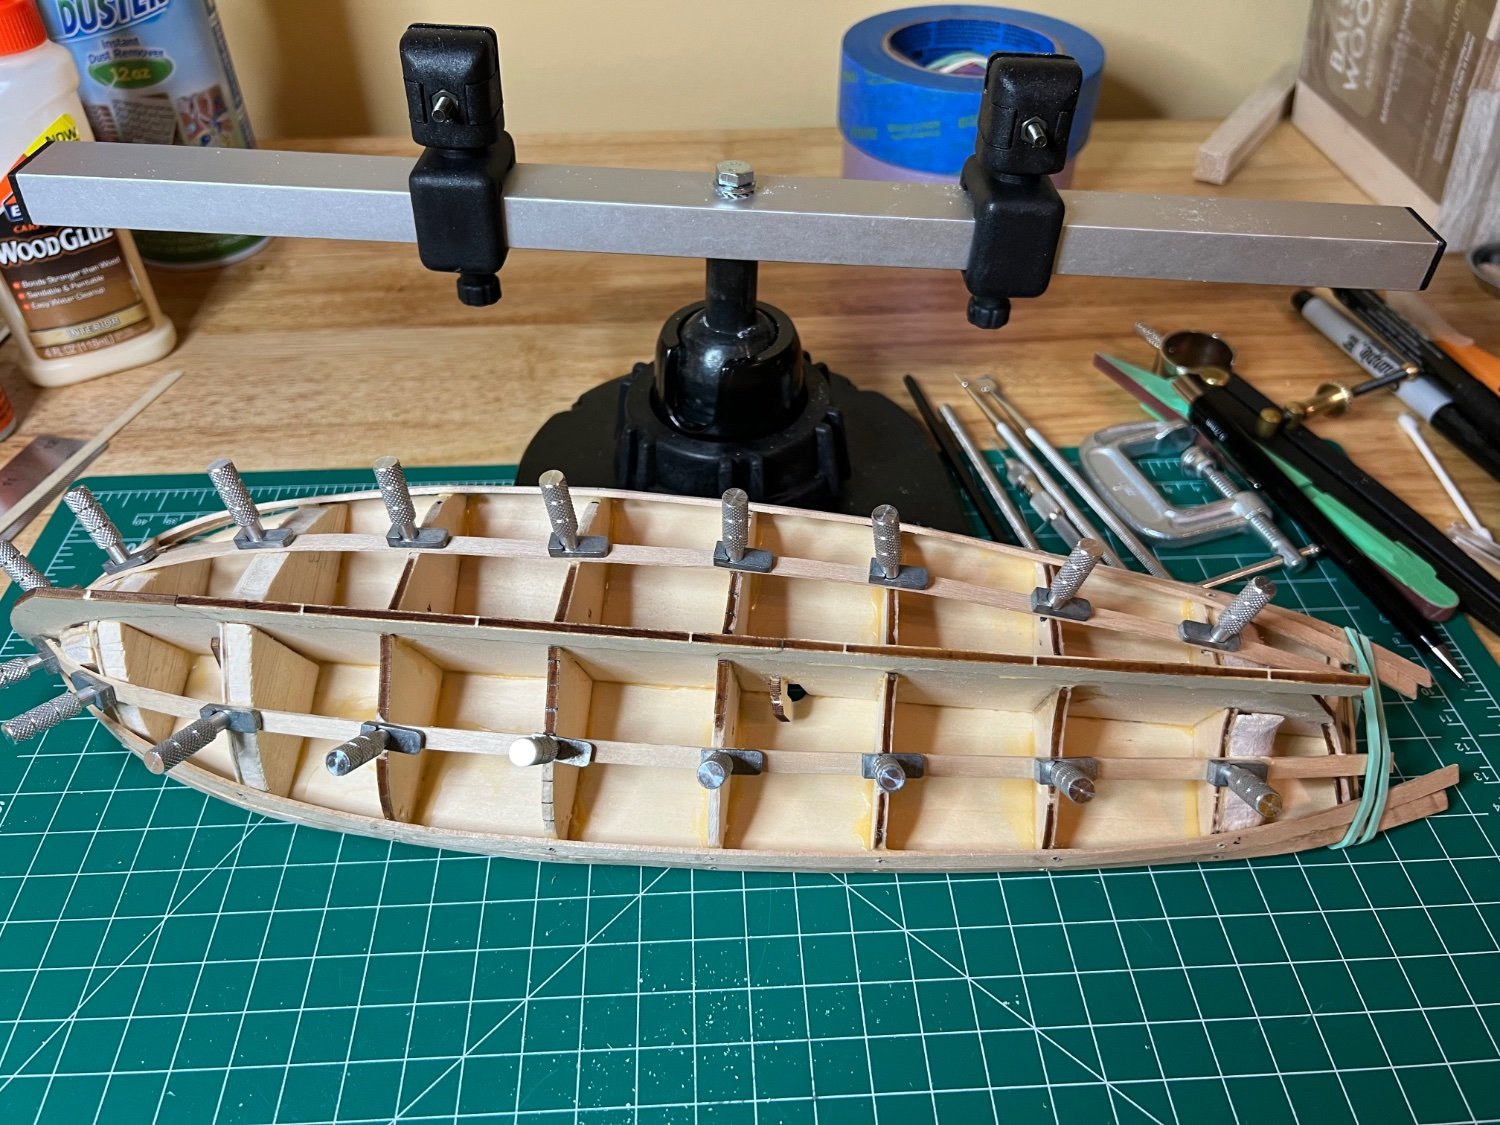
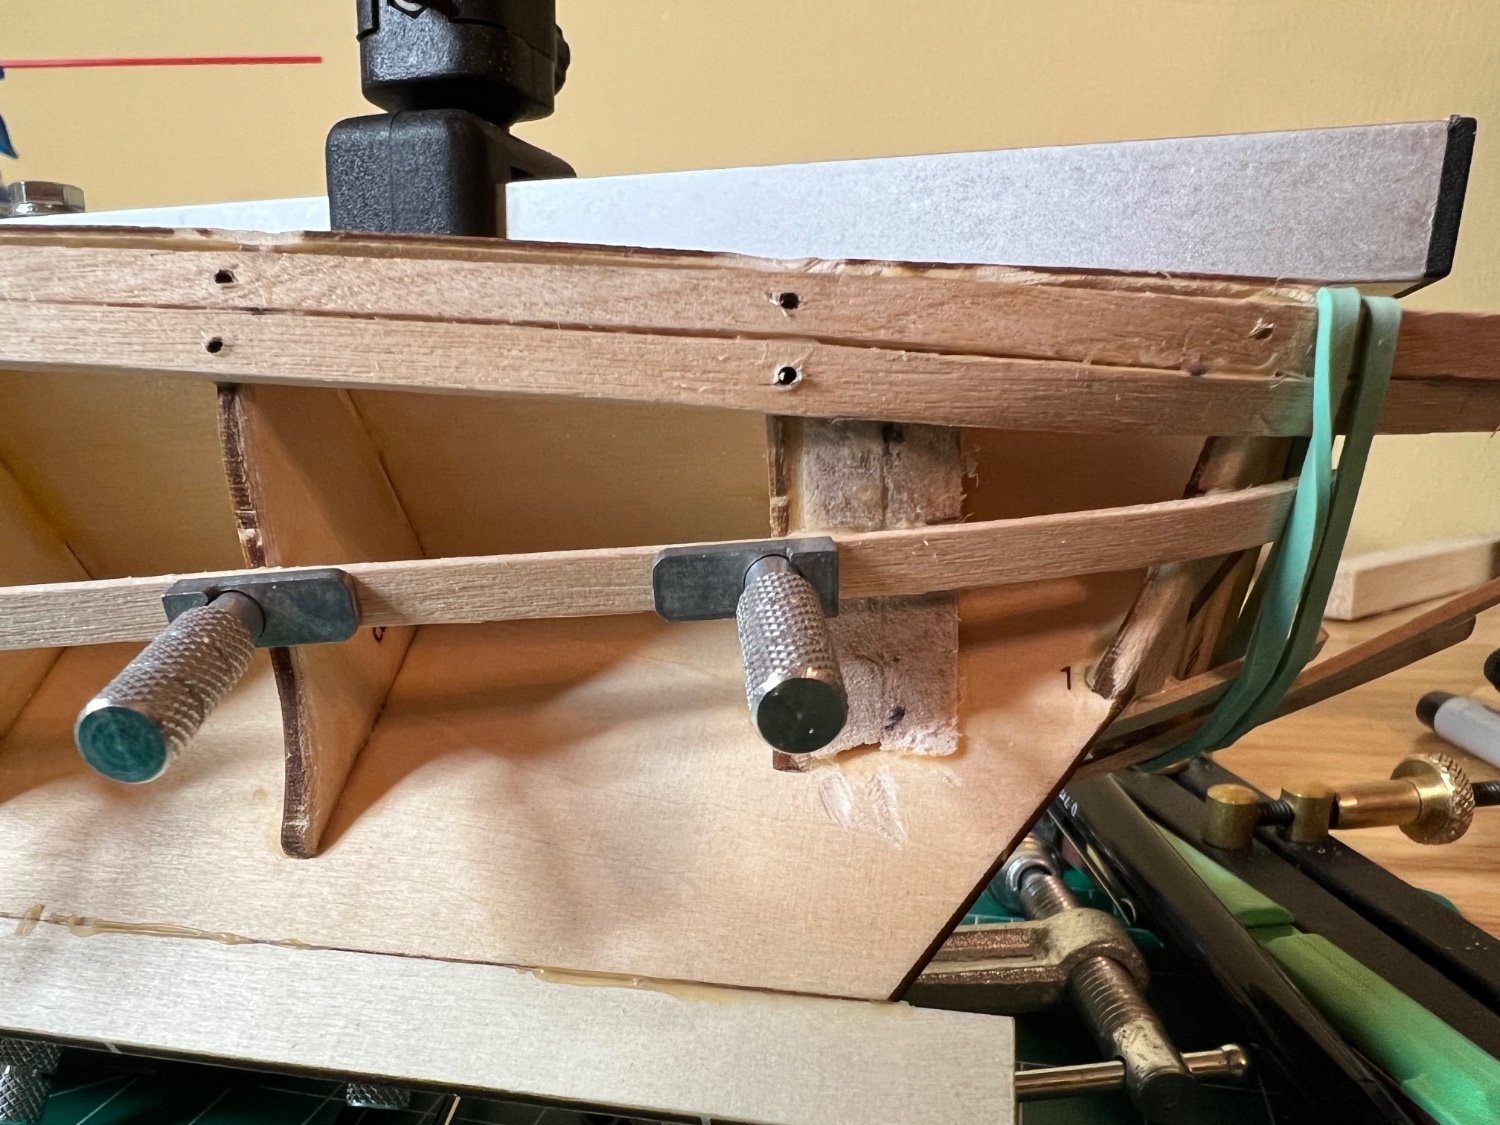
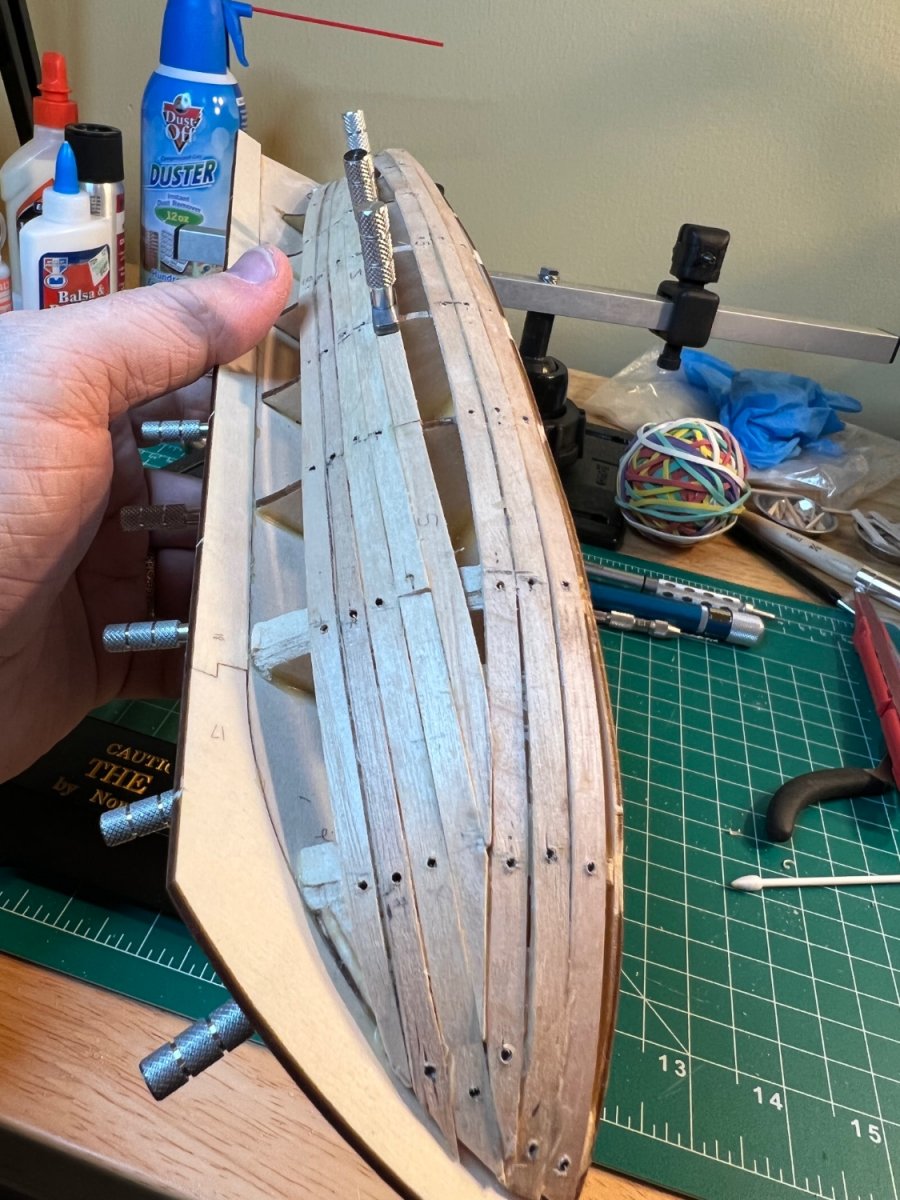
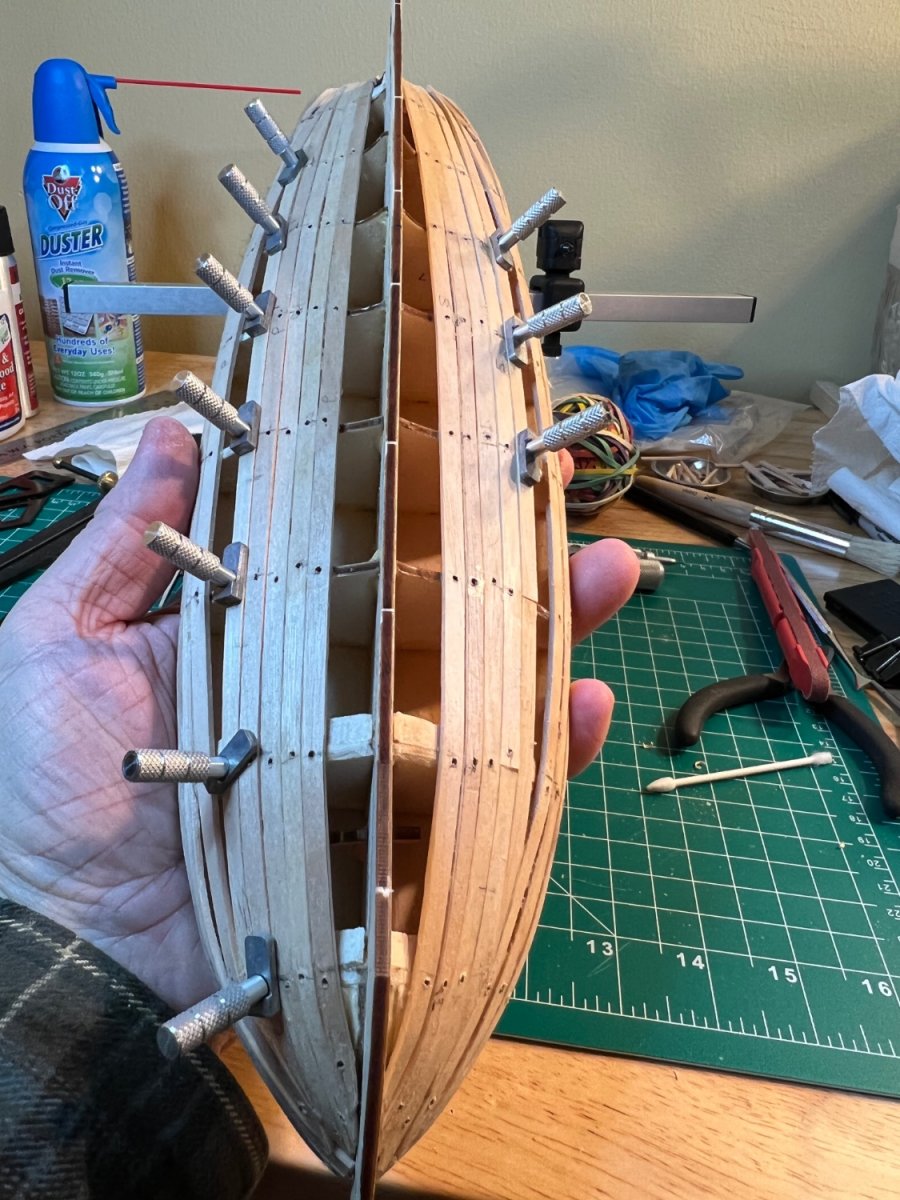
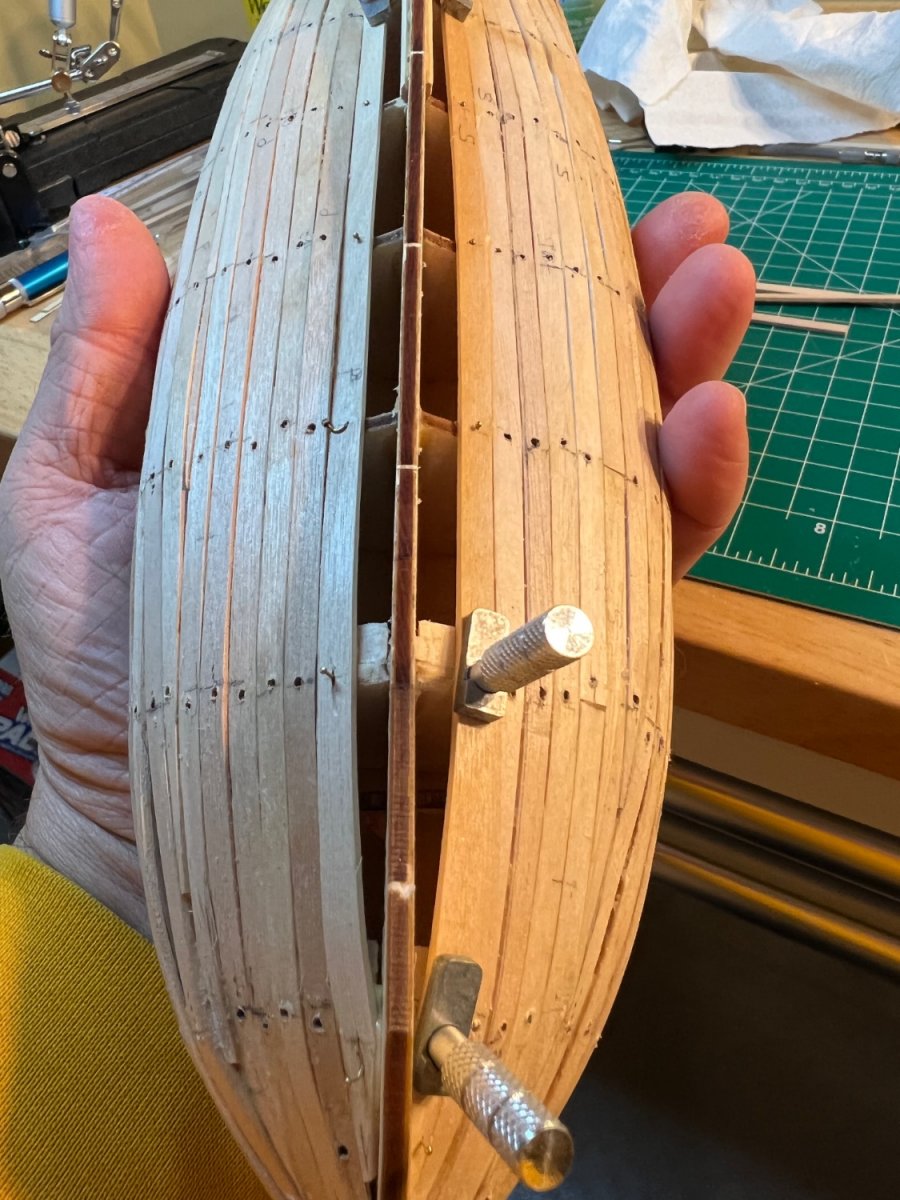
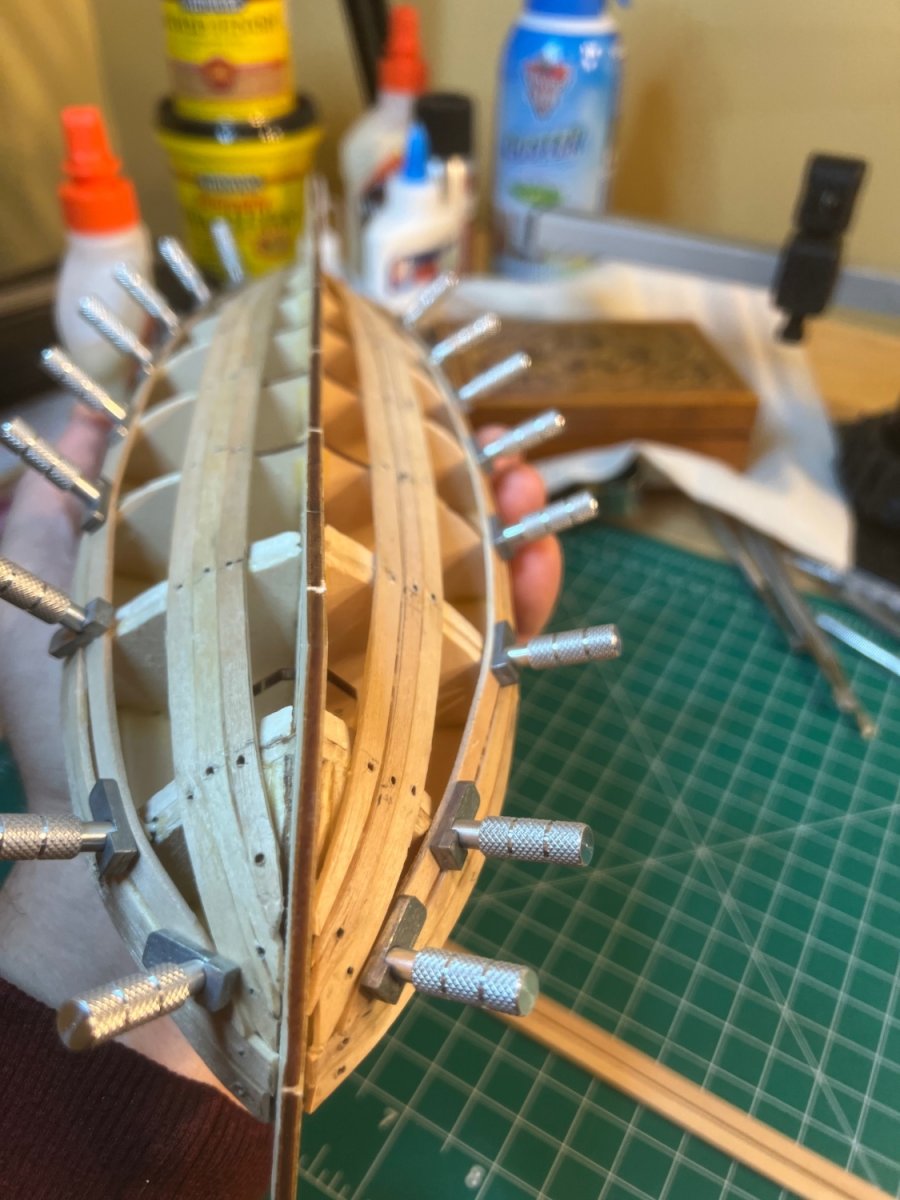
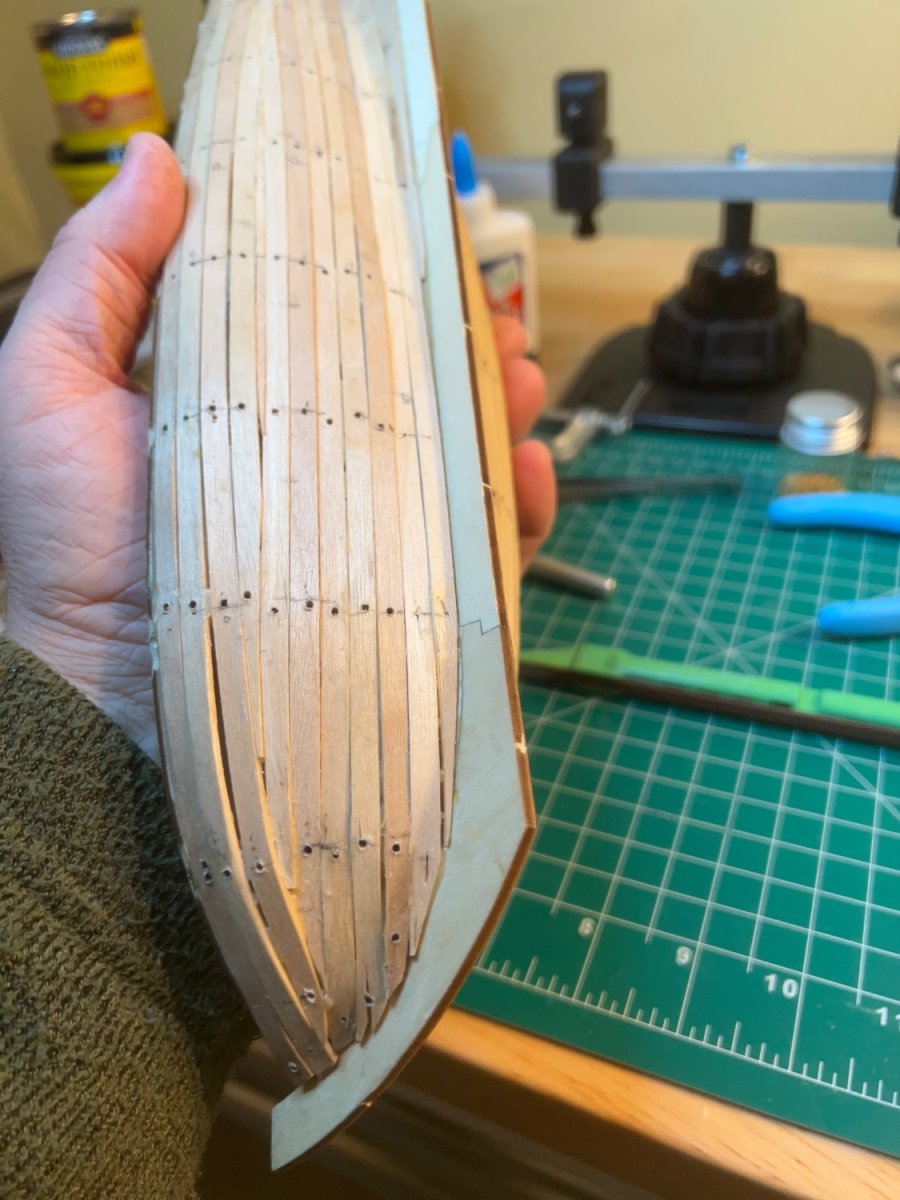
I had a love/hate relationship with planking. I was concerned from the get-go about the tight quarters in both the bow and stern, especially leading up to the fantail (where there's a nice twist to be accounted for). I made some errors with my fairing, that I think was actually more of an issue with the planking. As you can see above in the first frame, I added a shim. I ended up with a bunch of those. I found that I had to tailor each plank individually (on both sides). Every single plank was unique and had its own special story to tell (some better than others). Planking somewhat frustrated me, and I needed to see progress somewhere else, so I prematurely attached the Keel. This caused me problems when planning and executing the garboard and its partner planks. Also, the balsa wood fillers were exceptionally easy to work with, but offered little purchase for tight planks that needed a nail or screw.
I knew that this was meant to be a painted hull, so I wasn't very concerned about dropping planks. However, I did set a goal to keep tight fitting and wanted to utilize as little filler as possible. I used wood glue instead of CA - the planking screws you see in the above picture were invaluable. I pre-drilled the holes and those babies held firm and could be rotated to provide additional "Hold", up down, left or right.
My after action review -
* I should've spent more time planning my planking.
* I should've bought the planking clamps right away.
* I shouldn't have added the Keel prematurely.
* I should've tried to utilize the "fan" template. I discovered it early, but thought, blah, I don't need that. I did.
* I should've beveled more plank edges. I started too late.
* I should've marked more things. I measured and bent planks but mixed up my ports and starboards. Glued them upside down, you name it. I beveled the wrong edges, then ended up beveling the entire plank. And on.
* I should've utilized my vice more when using my mini planer. There were some close calls with the fingers.
* You can't have enough tools.
* I found that using the plank bender (I used the "solder" style bender) was fun, but also that I have an aptitude for bending the wood with my fingers. Just getting the wood wet - I had a natural feel for the breaking point and was able to bend and twist many hull planks without breaking any. I did utilize the bender for the more radical bends.
* Sometimes wine helps, sometimes it doesn't. Drinking and clamping generally don't mix. Bourbon is out.
* I should've spent more time planning my planking.


- Keith Black, Scotty W, CiscoH and 1 other
-
4
-
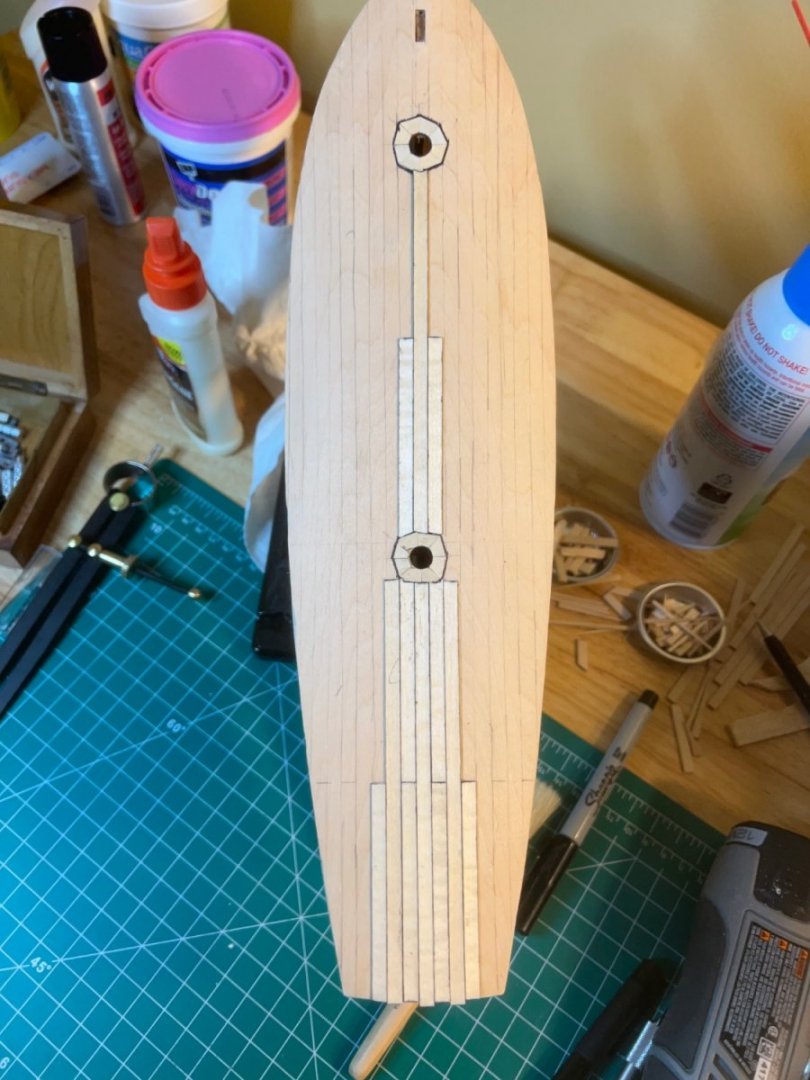
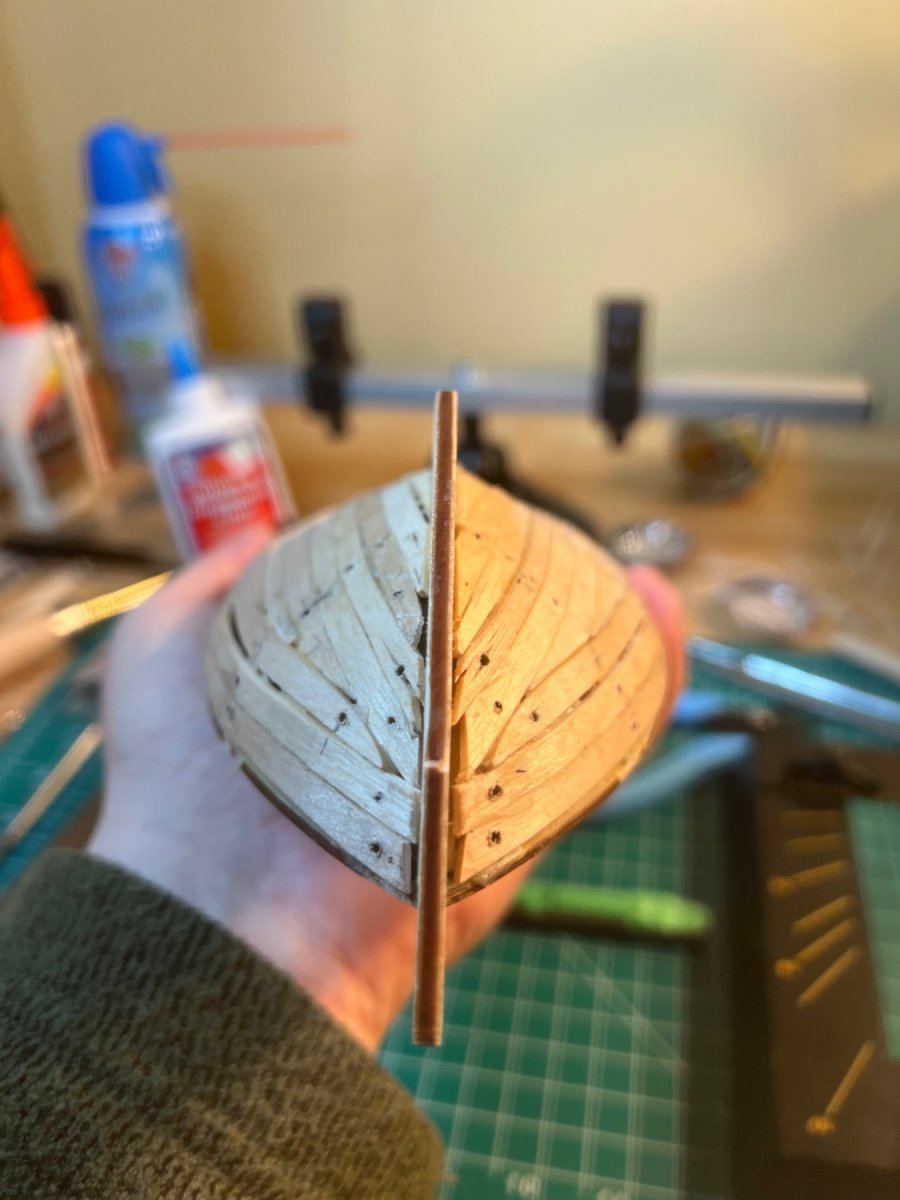
The initial framing (sanding, squaring, etc.) was straight forward. Once I began fairing the hull, I saw that the bow and stern section framing would need some more contact space for the planks. AL provided a single additional bow frame, but more was necessary, so I formed some from balsa wood, using the outer "shell" of the laser cut parts as a blueprint. The stern of this Swift is tight, and caused me most of my difficulties.


- Scotty W, Keith Black and Seventynet
-
3
-
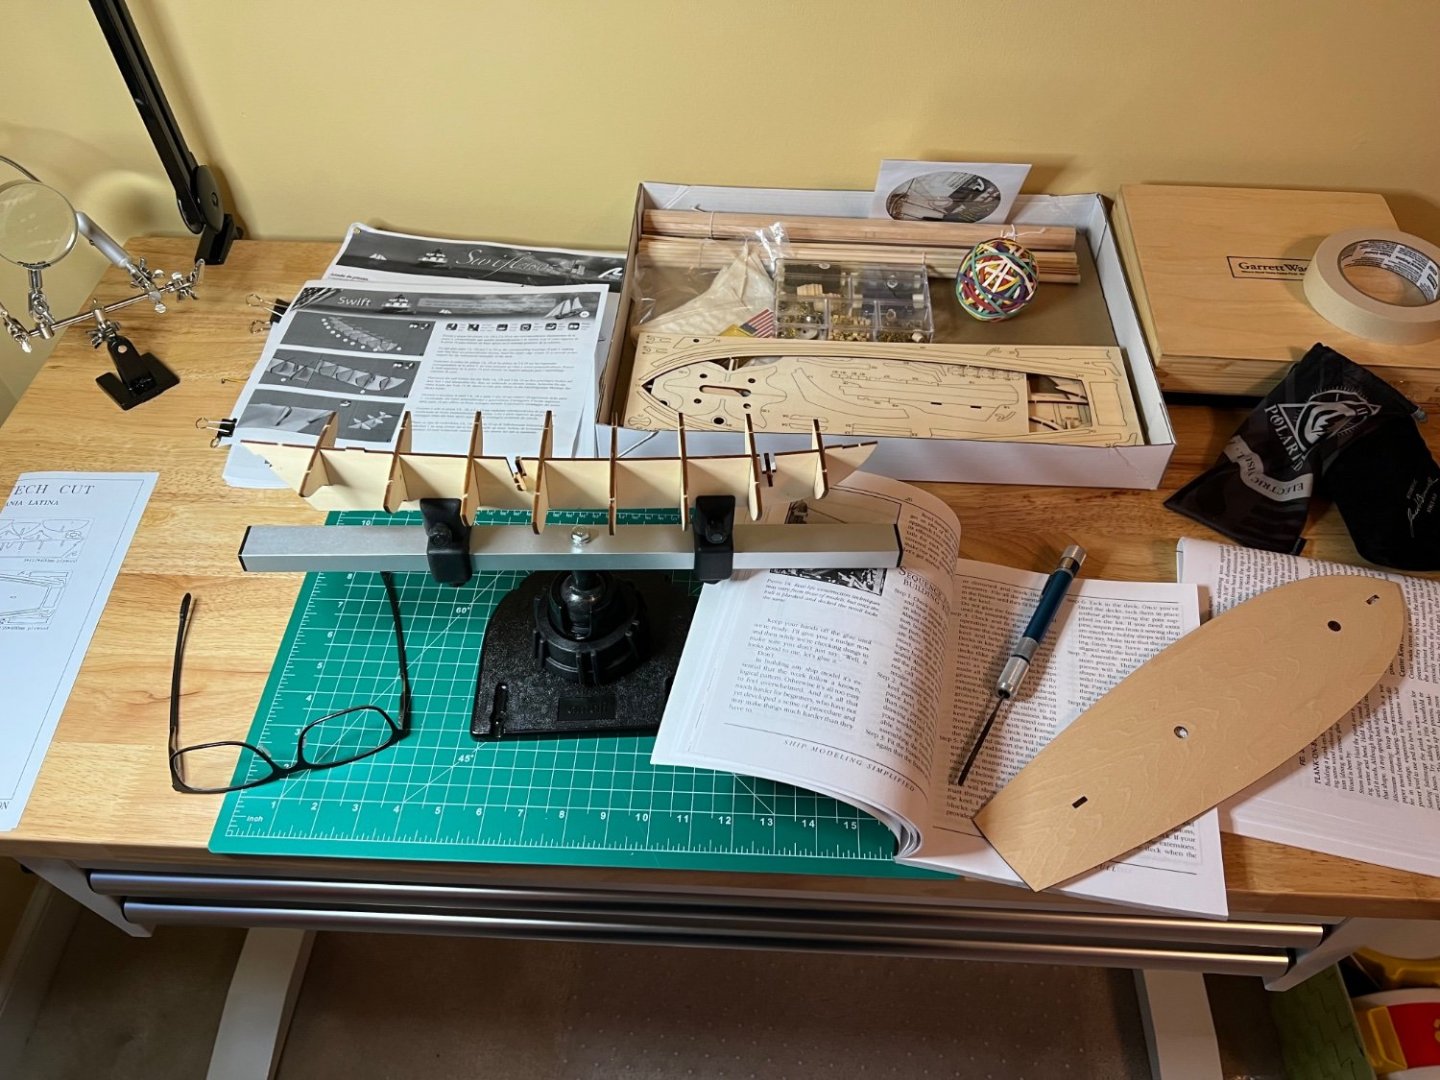
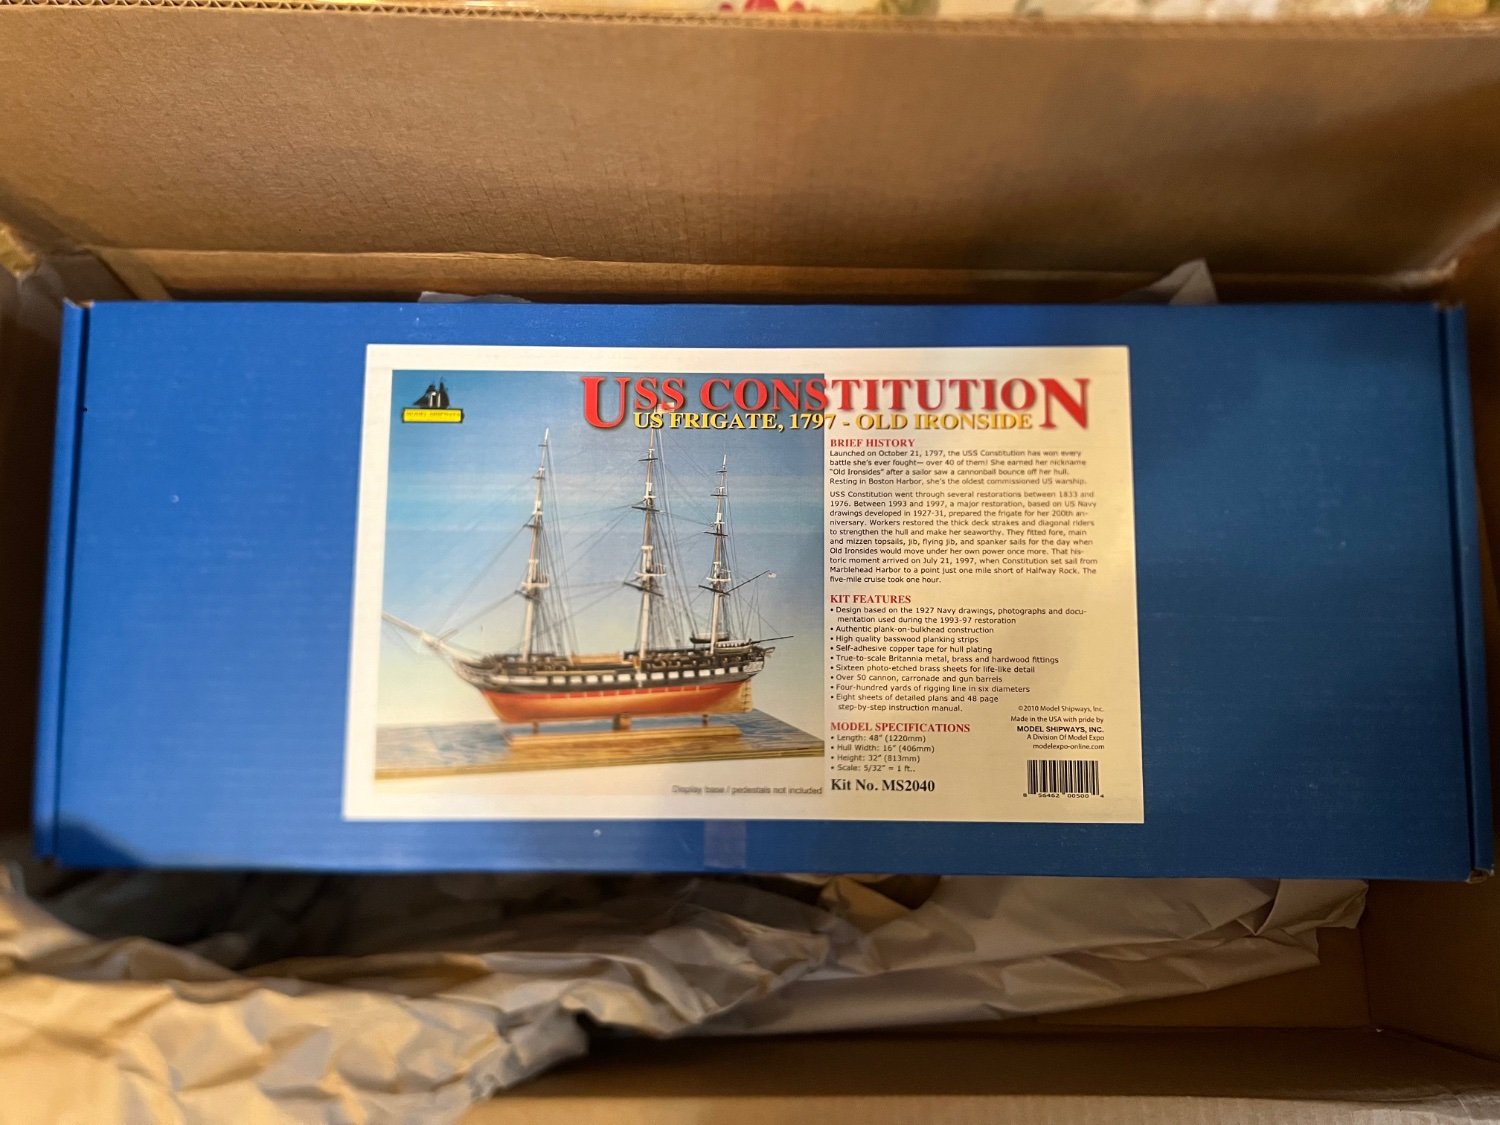
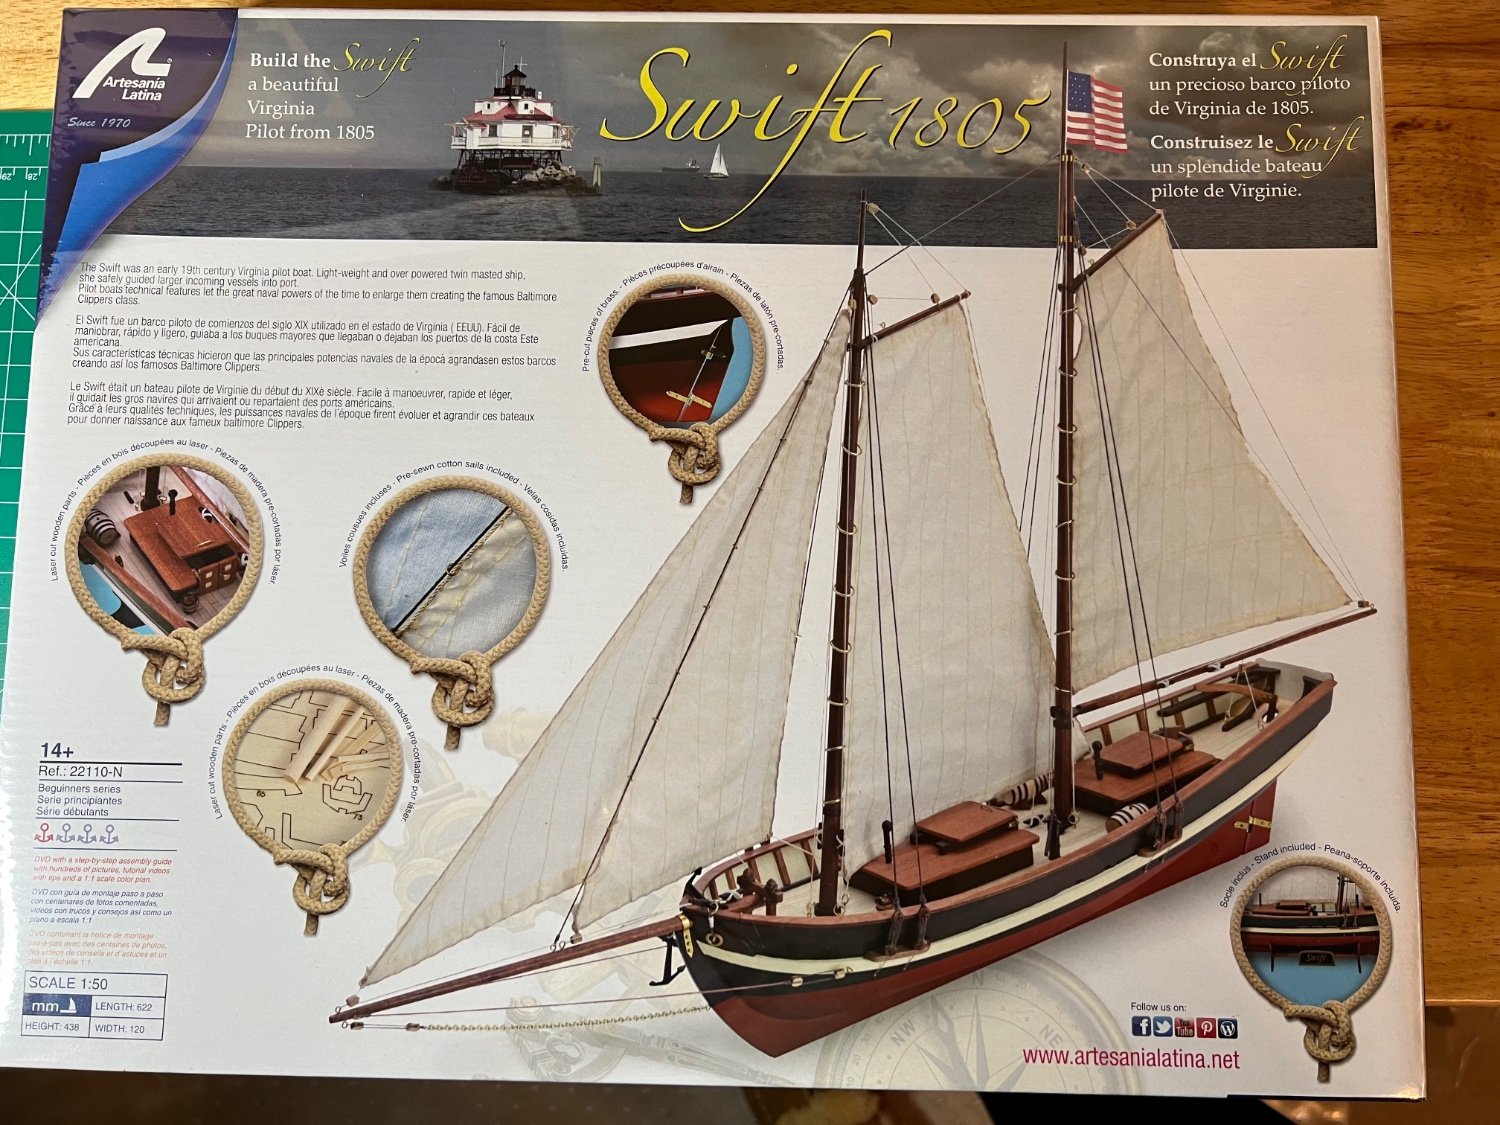
Welcome MSW to my Swift log. This is my first wooden ship model. My only other model ship was the USS Arizona, which suffered an inglorious fate by an M-80 after being stepped on (by my sister I think, but she never fessed up). I'm no Amish furniture craftsman, but I know my way around tools well enough to jump into this hobby. My first attempt was going to be the USS Constitution - 1:76 (MS2040). Fortunately it was backordered (Christmas gift from my pop). After previewing the 80 or so pages of instructions, I thought it prudent to start with something a bit easier. I chose the Swift 1805. So here we are.
Initial thoughts:
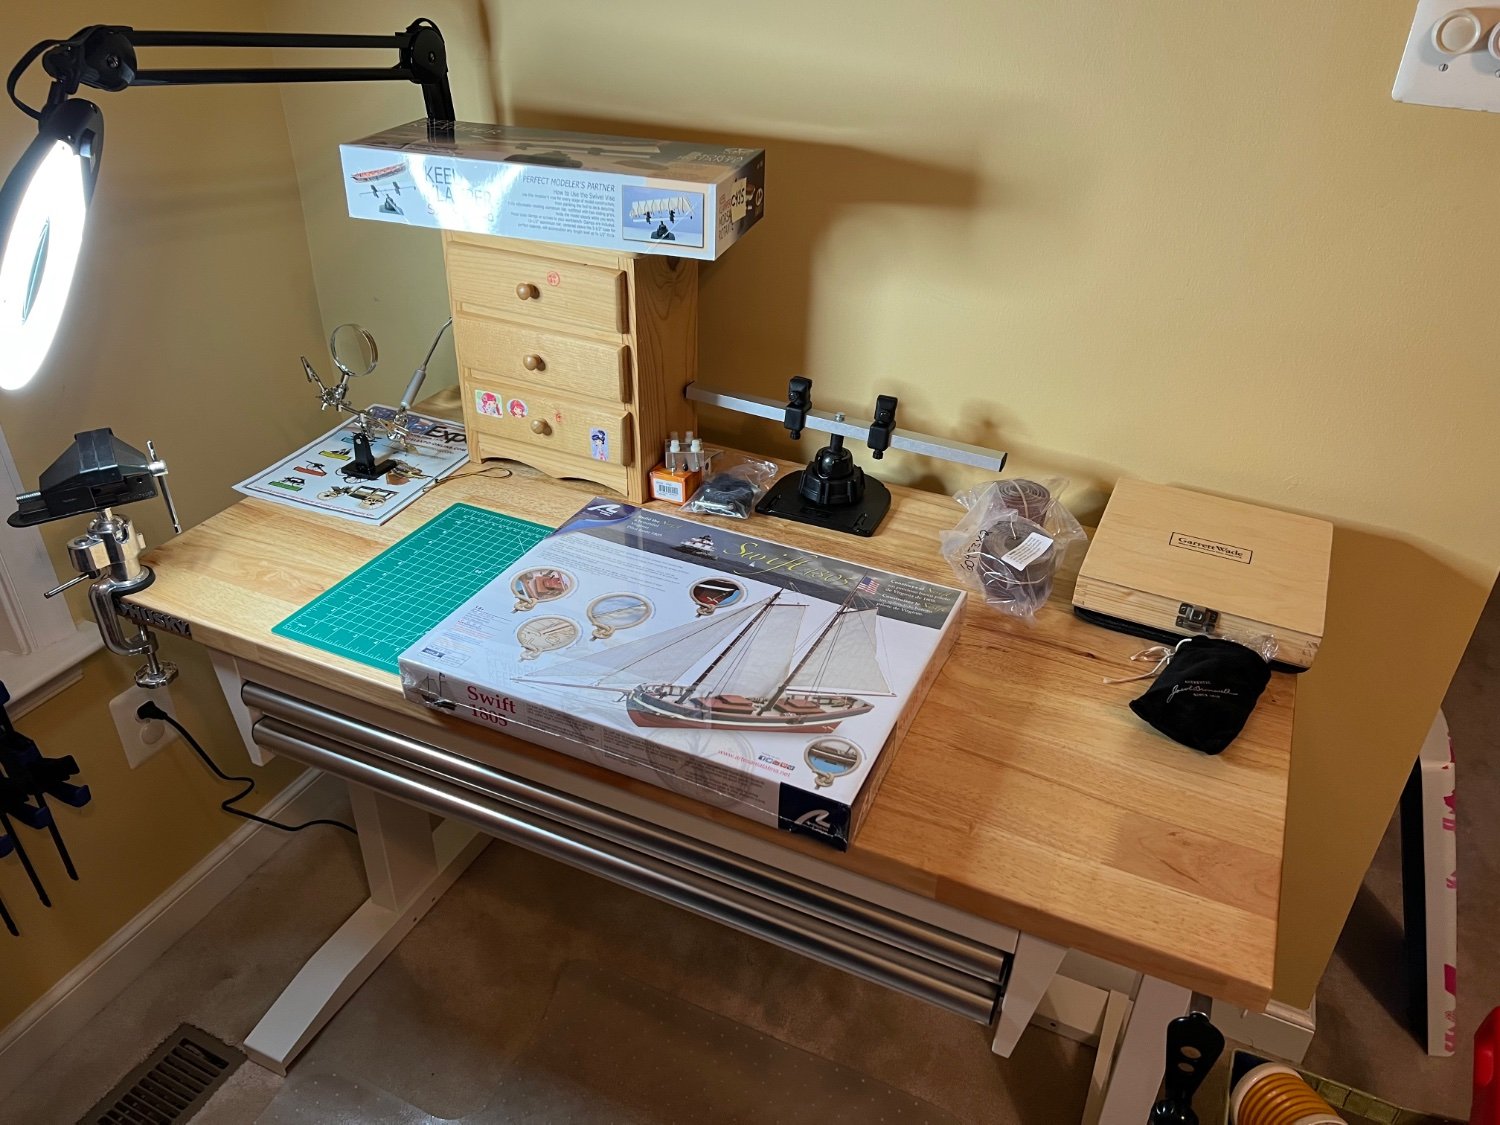
Upside: Upon opening the package, I was surprised (and a bit relieved) to see a good mix of "laser cut" wood, along with a bunch of neatly tied lumber and well packaged miscellaneous parts made of metal, wood, or string/line, and pre-cut sails. I say relieved because, being new to this hobby, those parts are less intimidating than seeing neatly bundled stacks of wood in various forms. The parts were all present and in good shape (no excessive warping), seemingly detailed instructions existed, as did a DVD (!). I've found that there are several versions of this model. This one does not have the 2nd lower false deck.
Downside: The DVD and instructions. The instructions and other videos (tips on painting, shaping the masts, etc) were available on a DVD. It's probably expected that wooden ship kits would be lagging with technology - especially given that this kit was a 2016 version (it's actually pretty cool how timeless the actual models are). I had to dig up an old family laptop that had a DVD drive, to print the instructions (that presented it's own set of issues). Once printed, the instructions appeared to be very robust, until I realized that rather than extensive details, I had about 2 or three ambiguous sentences presented in about 20 different languages (the Italian to English translator was no master linguist). The illustrations were also a bit lacking (for a beginner).
General Build Thoughts:
I didn't think I'd create a build log, because of the time (I barely have enough time to work on the Swift), but I'm trying as I can. As I start this log, I'm currently working on creating the door hinges (completed the planking of the hull and deck, and the first of the hatches, pics to be uploaded).
As I progress with Swift, I've found that the instructions were typically just vague enough to somewhat confuse me, but left enough general direction for completion via a YouTube search, or a great online group, like this one. I also have come across some instruction errors (for example, the parts needed for the hatch cover). However, they've been easy to spot and remedy, and it seems there are enough spares provided (with planking and bundled wood).
The Swift is not hard, but presents a lot of challenges which are exacerbated by its scale (small) and shape (curvy). A lot of my build was slowed by lacking the appropriate tools. I was quick to order things I needed but many were on back order. Being a big believer in the right tool for the job, waiting for backorder fulfillment stalled my build significantly at first - I never realized how many different clamps were available 🙂
I find this hobby to be a problem solving effort. Each section is akin to a new problem in need of a solution. The tools, keel, bulwarks, fairing, planking, painting, hatches, hinges... all take some time to asses, plan and solve. At first I found it to be a bit of PIA, but I find myself enjoying the problem solving aspect more and more. I often find myself running out to my girls upon completing a particularly fun/tricky build ("check out this planking!"). They are polite and make believe they enjoy it too 🙂
[I'll update my build periodically (I'm not retired and have young kids). I'll catch up my log with my build and plan to complete both].


- CiscoH, Artesania Latina, Scotty W and 2 others
-
5
-
Wow! That sounds like fun. Thanks for the information.
- Robp1025, Keith Black and mtaylor
-
3
-
13 hours ago, Dave_E said:
Hi SUB, welcome aboard! Good decision! Lots of learning and help to be had from this forum, good choice! Start a build log, I think that's how you'll get the most help. 👍
Thanks Dave - I plan to but have limited time to model, so I find that logging gets shelved.
-
Hi MSW community - what a great resource! Like many folks, I used to build plastic models when I was young. Unlike many, I then ended up blowing most of them up with M-80s. Many years later I have a daughter who loves Legos, and as we've built more and more advanced Lego kits (recently finished a Star Wars X-Wing), I found myself looking for more of a challenge. It also happened to be a good time for new indoor hobby with my COVID driven full time telework (took up the violin last year).
I initially decided to jump into the deep end of the pool with Model Shipways' USS Constitution (MS2040). After previewing the 80+ pages of instruction (after I had already ordered the model), I changed my strategy and decided that an appetizer was probably needed before tackling Old Ironsides. I chose the Aretsania Latina, 1805 Swift. I started mid December, and just completed planking both the hull and deck. MSW has been an indispensable resource, and I plan to add my own ship log in the hopes that I can help someone else, if for even a minute detail they can't quite get.
Fortunately, Constitution is on back-order, because this little Swift is taking longer than anticipated. Between work, family, sports, other hobbies, life.., progress has been a bit slow. Both modeling and the violin present interesting challenges, and have some surprising similarities, such as patience and attention to detail. I'm very happy to have come across this resource at the beginning of my build. Too bad MSW doesn't have a violin forum 🙂
Cheers!


New Member - Philly area.
in New member Introductions
Posted
@Louie da fly I do recall that scene - I’ll have to watch that again. It’s been many years and I’ll see that scene in an entirely different light! Thanks