rudybob
-
Posts
216 -
Joined
-
Last visited
Content Type
Profiles
Forums
Gallery
Events
Everything posted by rudybob
-
 I have pretty much caught up on my second attempt to where on my first attempt I gave up because it was so bad. The bow filler pieces have been installed and will dry overnight. I can begin to fair tomorrow. I am going to bend a plank, see how it lies and fair accordingly. Well, My last scheme didn't work :-) The problem with the first model was multifaceted which all led to the planks not lying proper and Lord knows what else They still won't but I am planking it anyhow for experience.
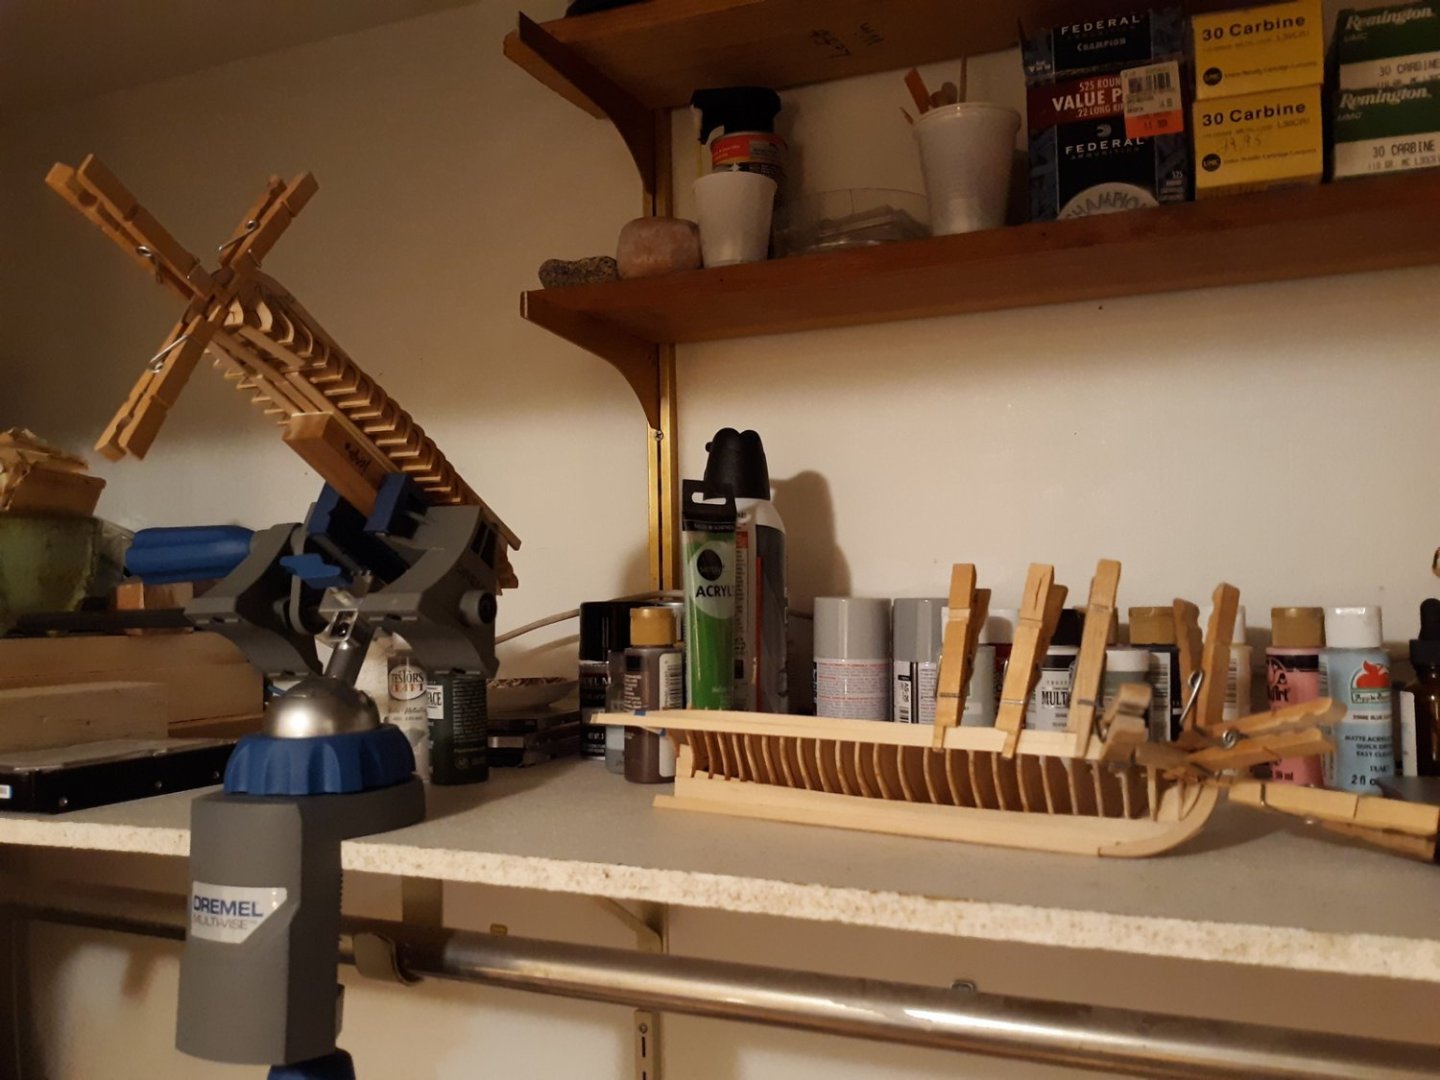
-
40 years ago I walked out of an Organic Chemistry final exam. A guy from class asked me if I figured out the originating roadmap compound. Before I could speak he told me it was: 1,2,3,4,butyl Butyl Hydroxy Butyl etc etc etc. I told him that could be it but I got cyclohexane. Working on this I think I am making it into 1,2,3,4,butyl Butyl Hydroxy Butyl etc etc etc. when it's just cyclohexane. Complete a step before moving to the next
-
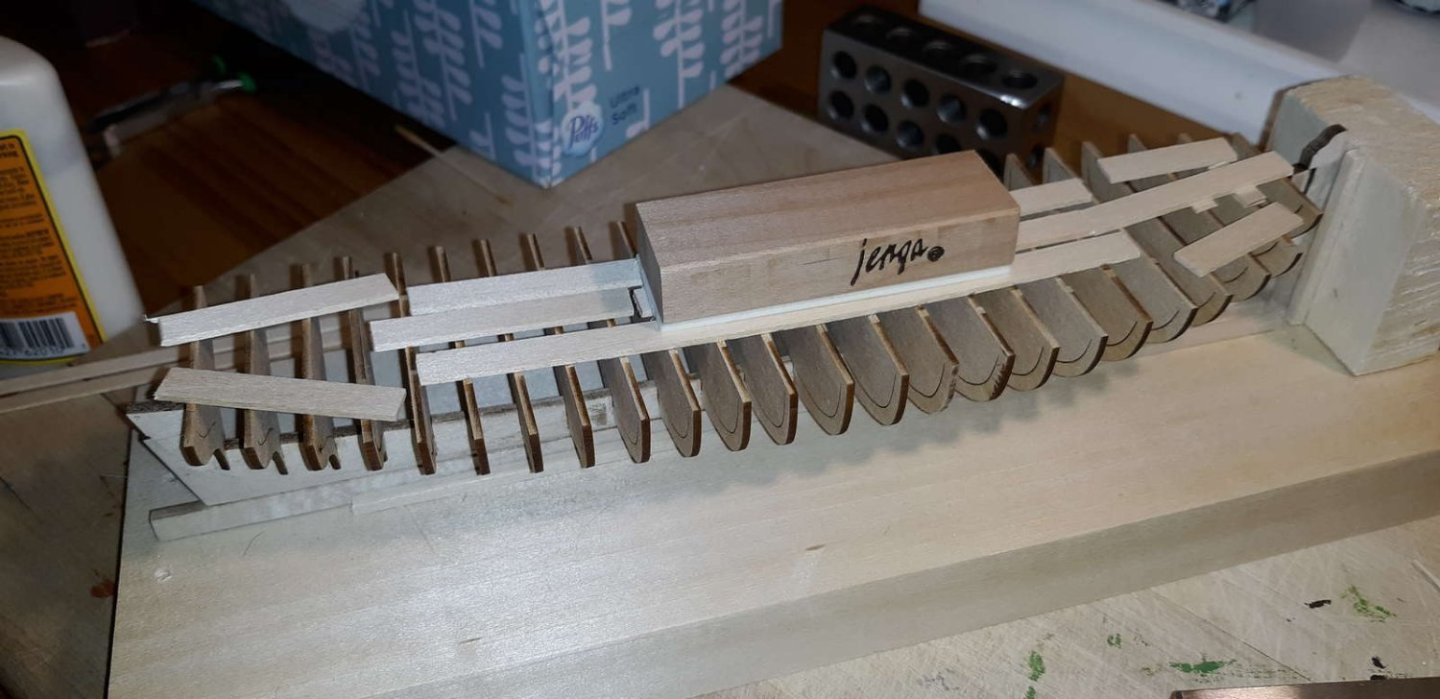
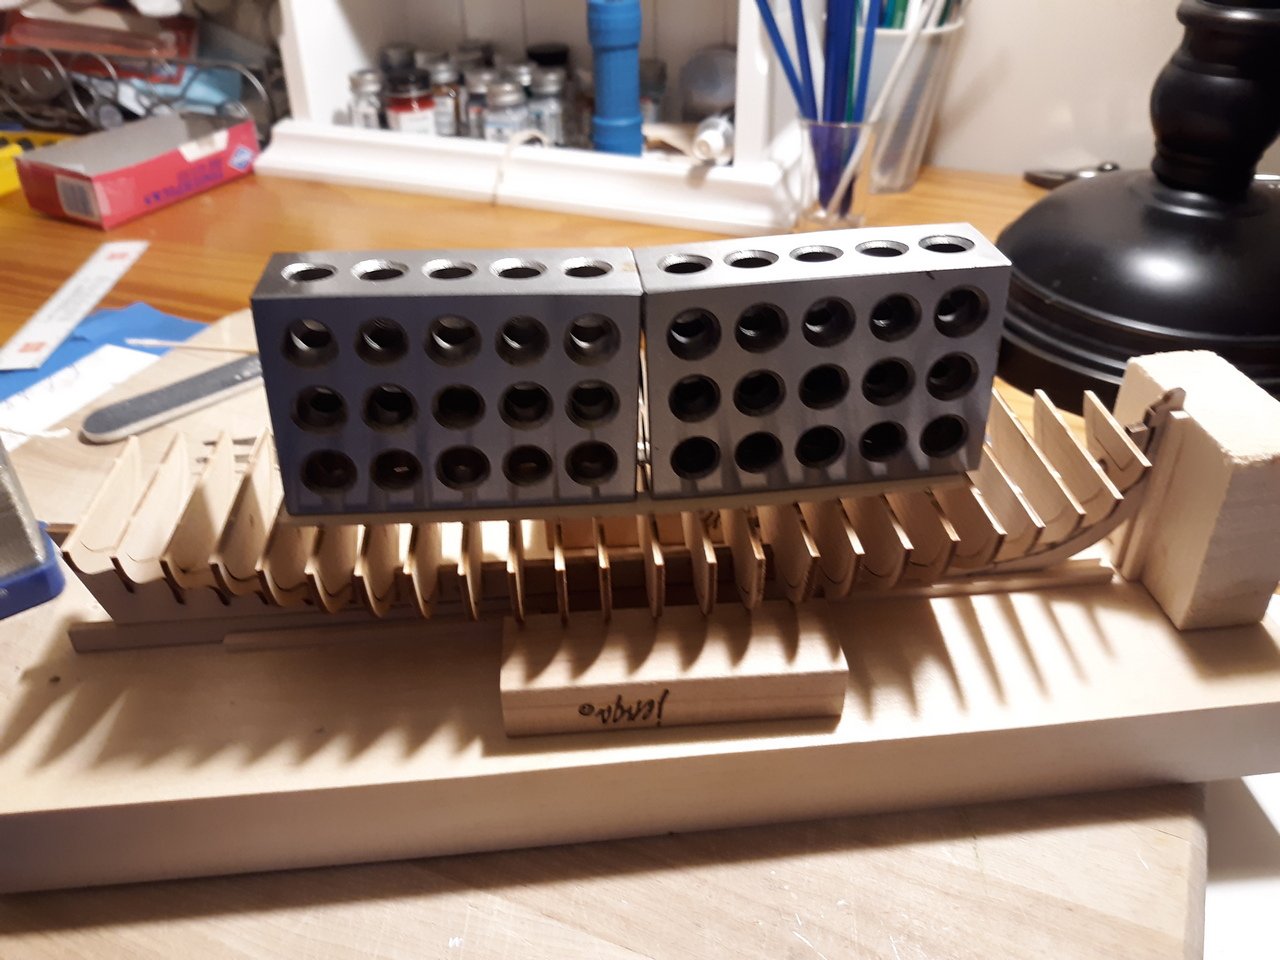
I have the bulkheads braced. I wanted a good connection between the braces and the bulkheads. This time there aren't any that just look like they are connected. I left space along the outer edge for when I need to clamp. I will undoubtedly add more and different bracers when needed but I wasn't going to guess where I would need them. I will add them when I know. The Jenga is stuck using double sided 3M foam tape. Skinny tape would not hold. This may not either but it will be good for now because I am going to work on ticking. I even bought some index cards. All previous materials I have tried for ticking didn't serve me well. The bulkheads are so darn thin it really makes it more difficult. I am working something out in my head to ease my pain. I want the bulkheads ticked before I fair. Sure some marks will get erased but I want the practice on a flat surface as opposed to a curved surface to get the tick marks down. They can be redrawn if need be.

-
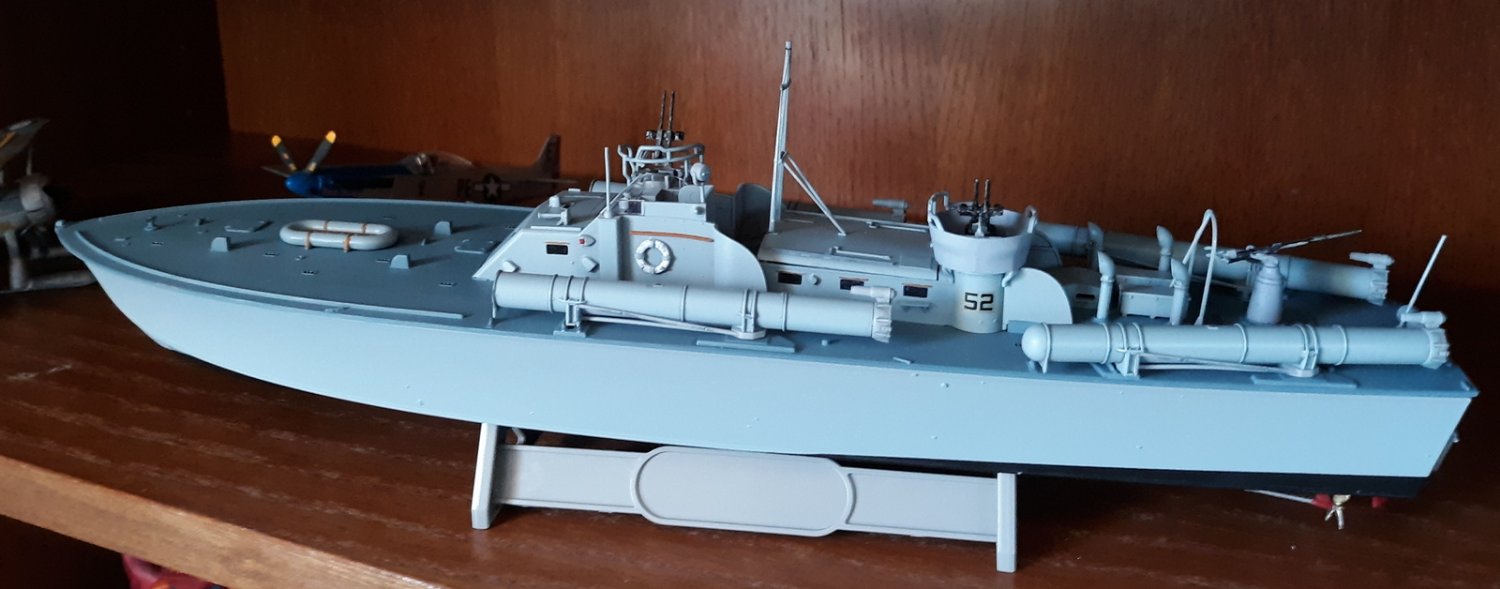
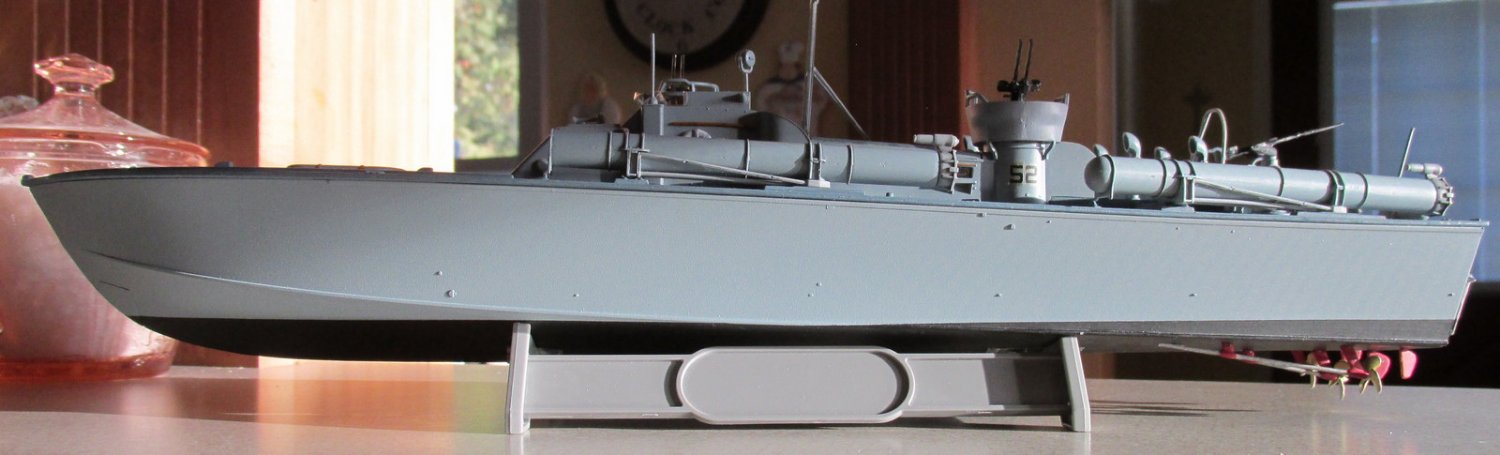
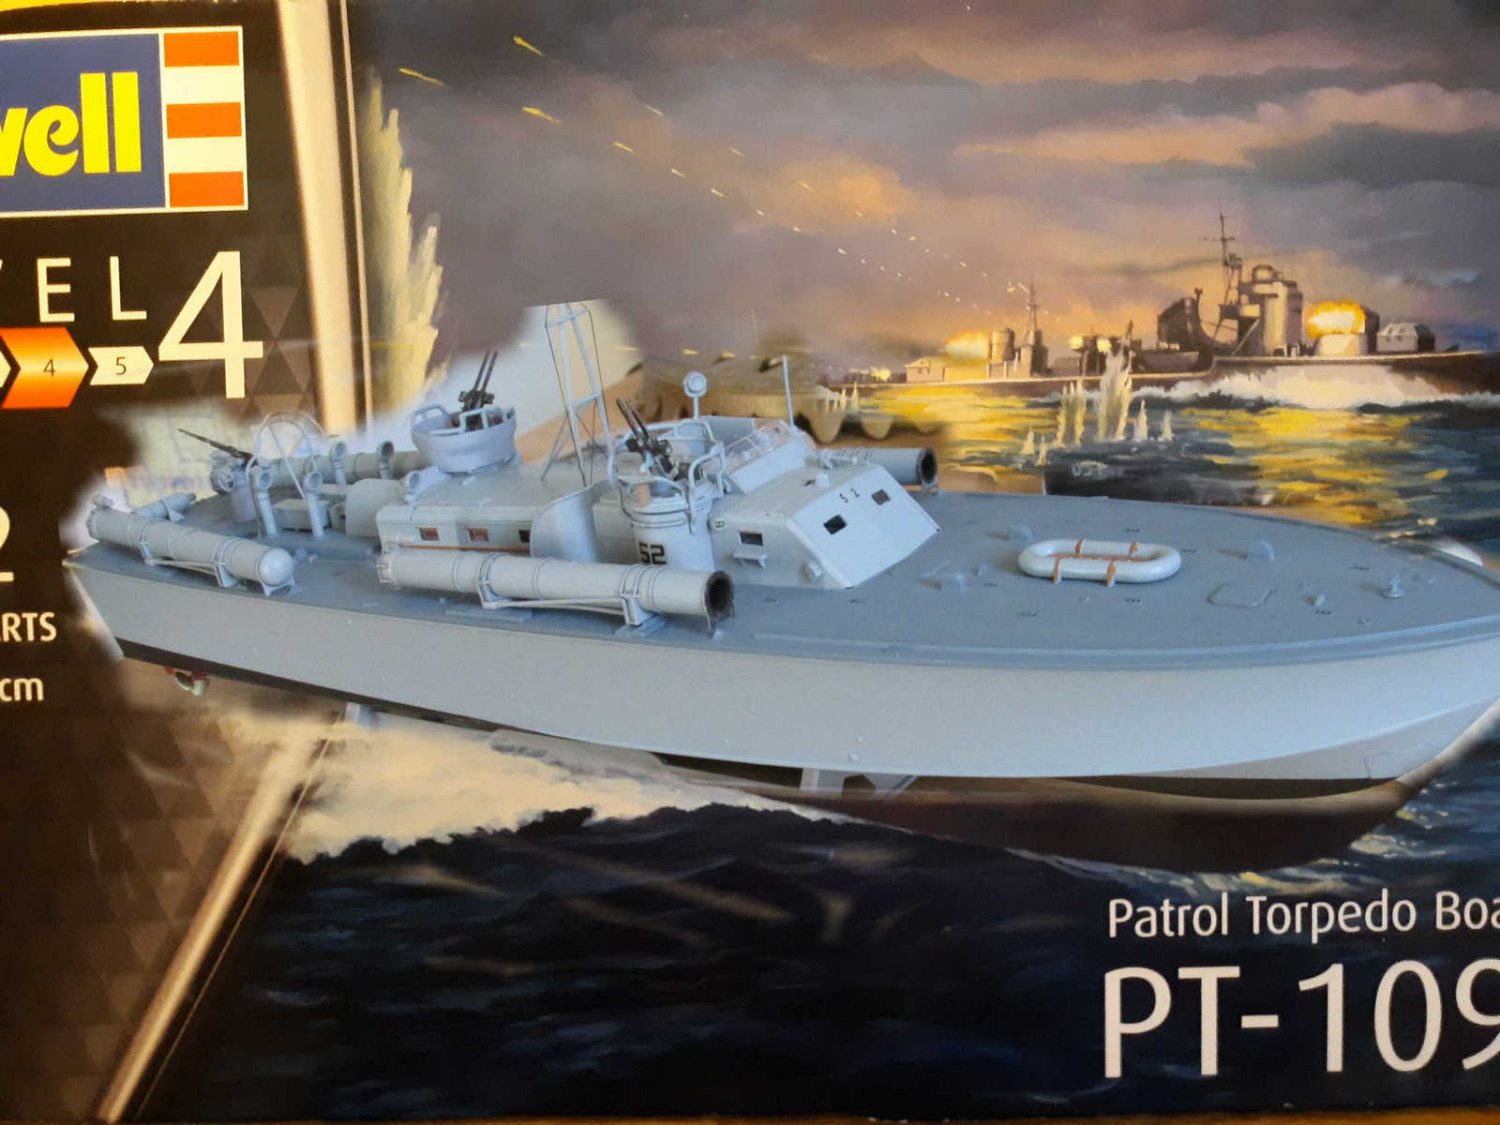
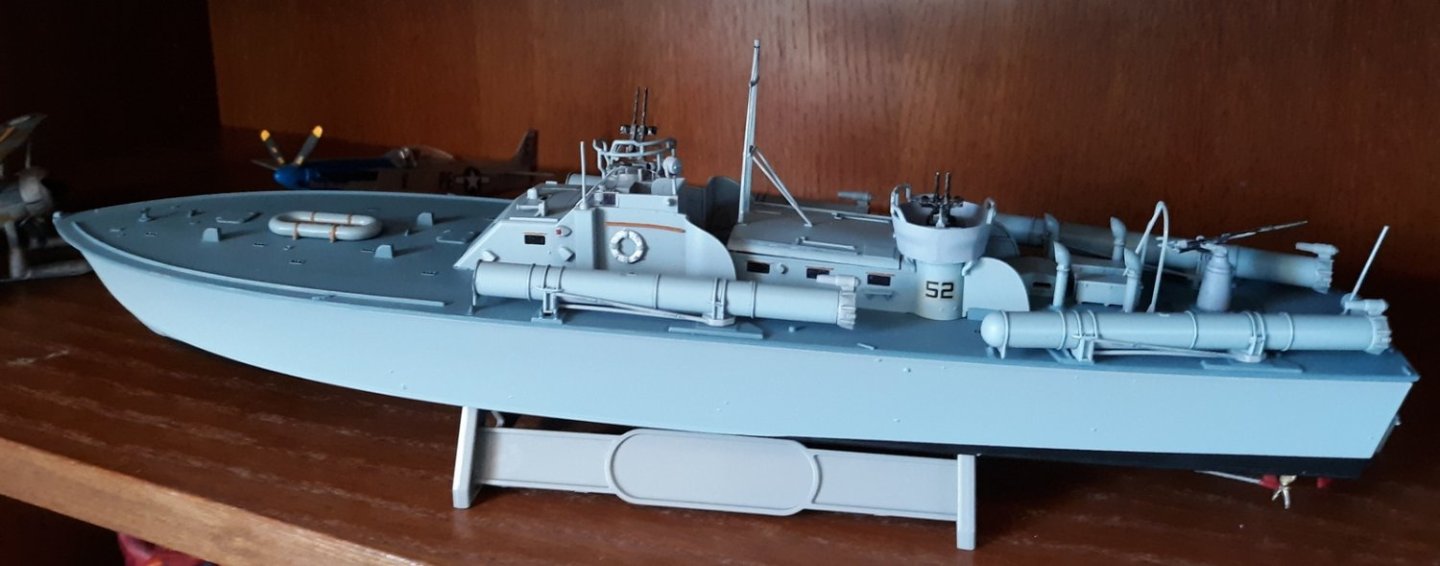
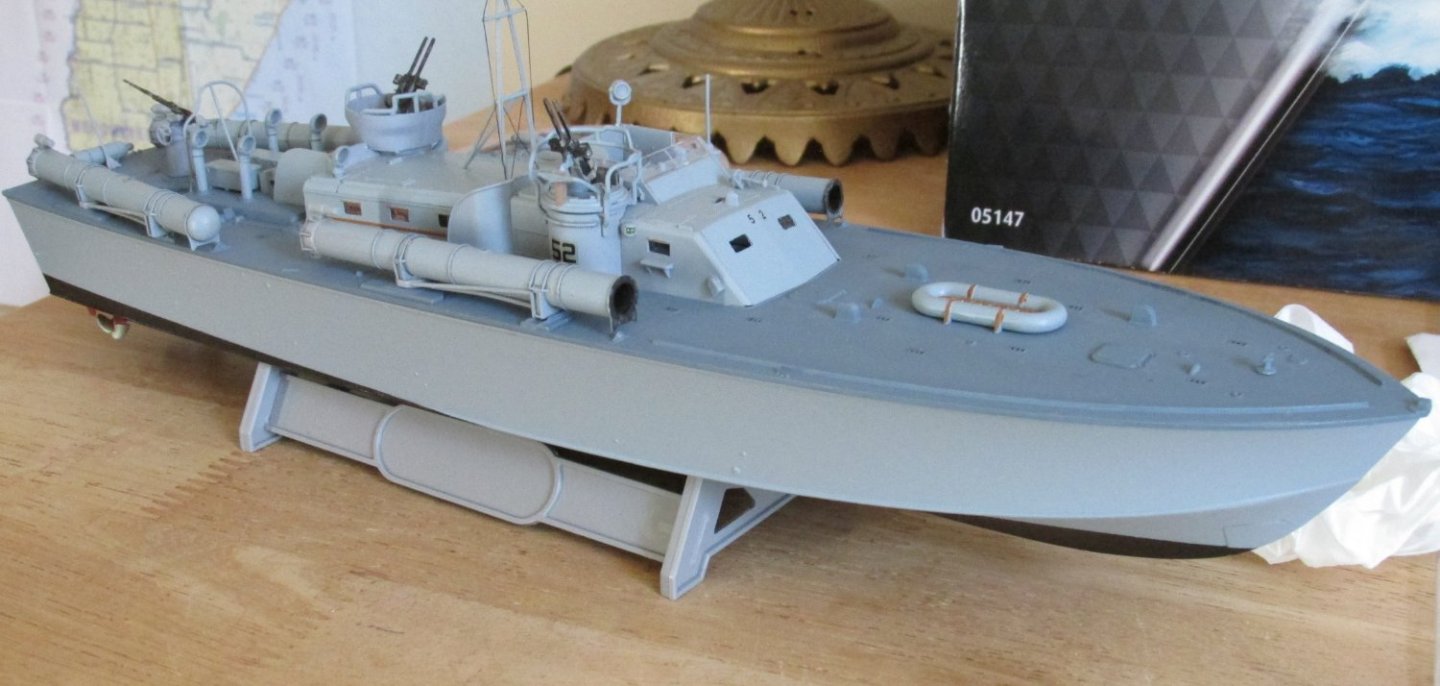
I finished this build at the end of November and had no time to write a log. All went well except a piece fell off the transom that I was unable to find. I even ripped open a vacuum bag and did a thorough search. I like the color scheme, waterline and rigging. I went through my box of decals and found enough matching 5's and 2's to make 52 twice. Eventually I will paint and label the stand. I may have mentioned that my fit matches the fits of many of the models guys displayed so I am not too bummed about somethings not lining up as I would have liked. Overall a satisfying build


-
After seven and 1/2 months and I am back to it. I will do the bulkhead bracing a step or two at a time until I am satisfied with the firmness. My previous attempt taught me to brace in shorter well glued lengths that need conform to those adjoining bulkheads that are of the approximate same height. i.e. more well placed is better than fewer longer runs. This should only take me a day or two.
-
Could have done a little better but not much. I see some other areas that need attention

-
The arcs do not match. Which meant I had gaps on both sides that needed filling. I use Perfect Plastic Putty. The next snap will be after sanding and painting. I'm looking forward to the result.

-
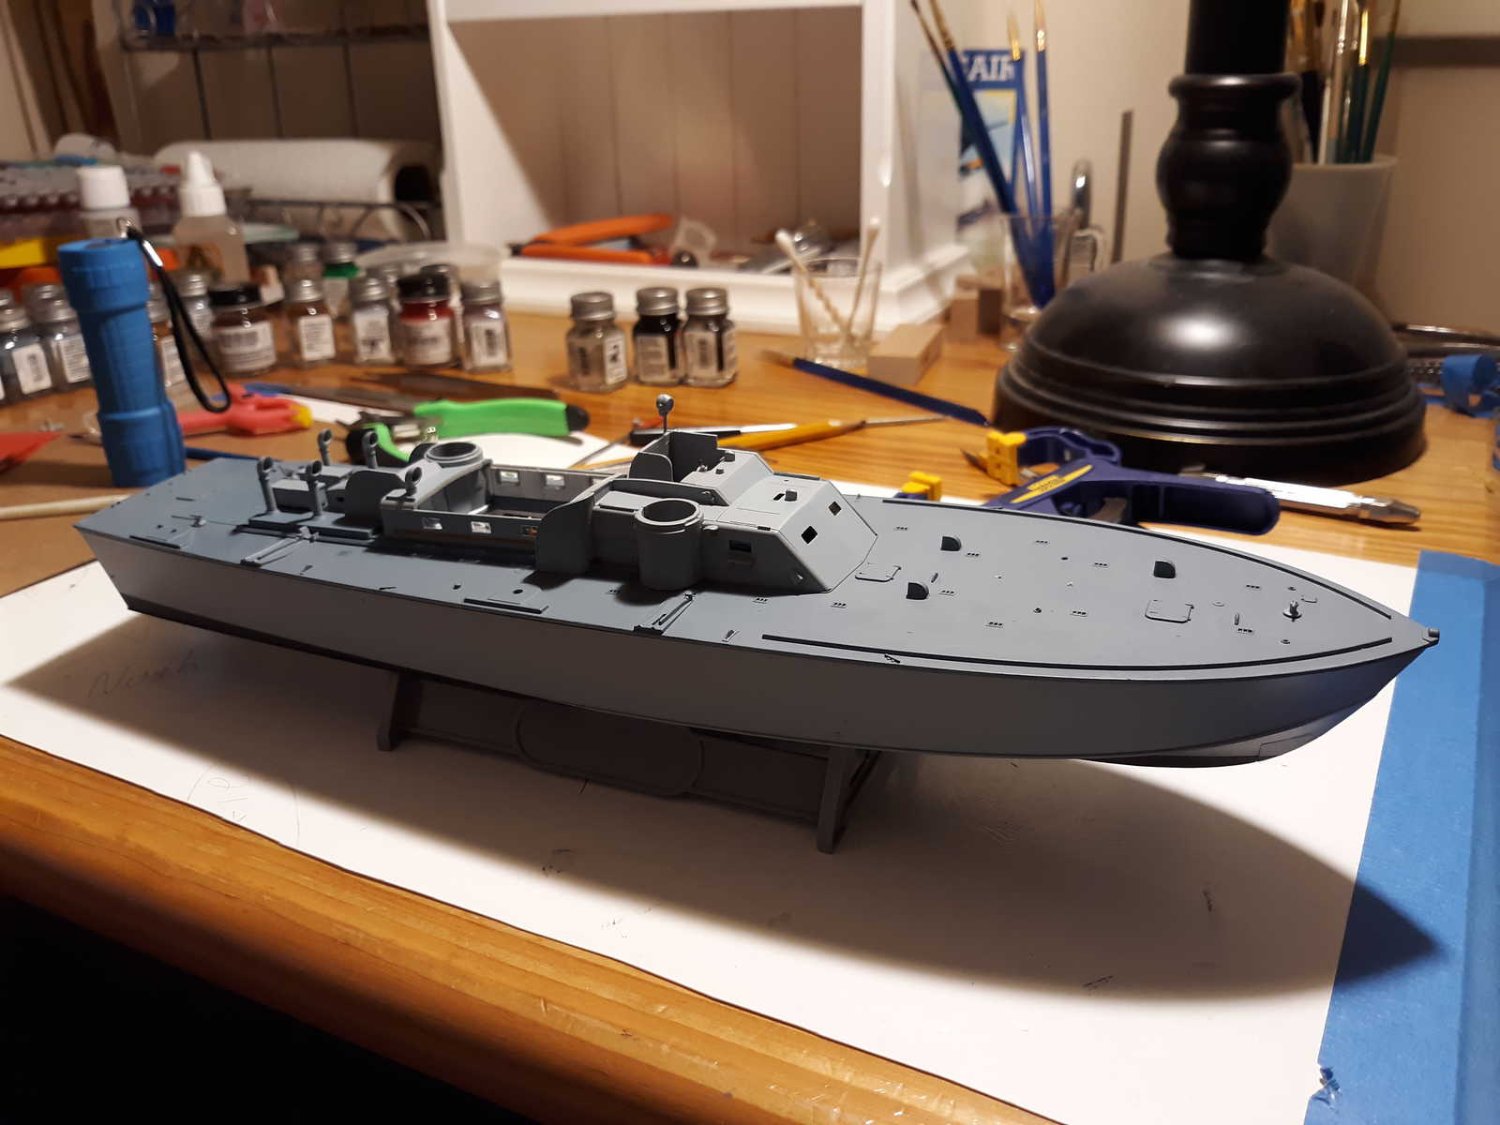
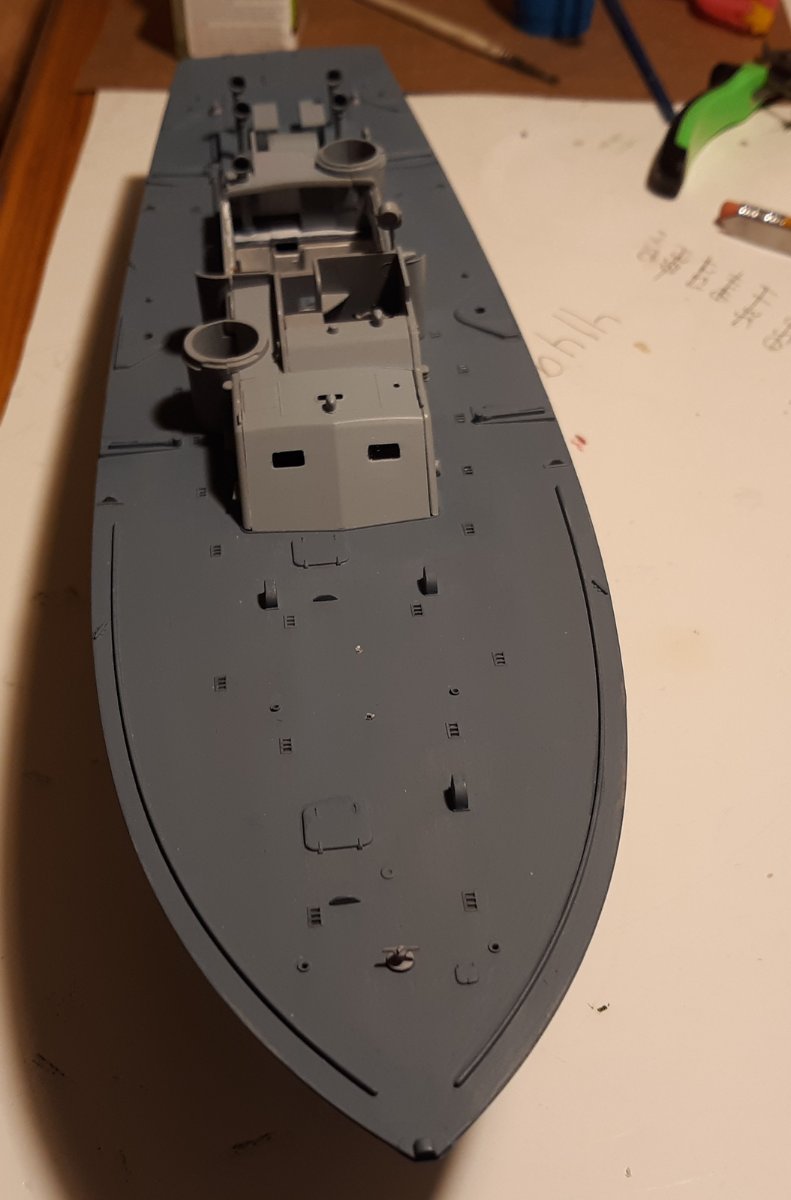
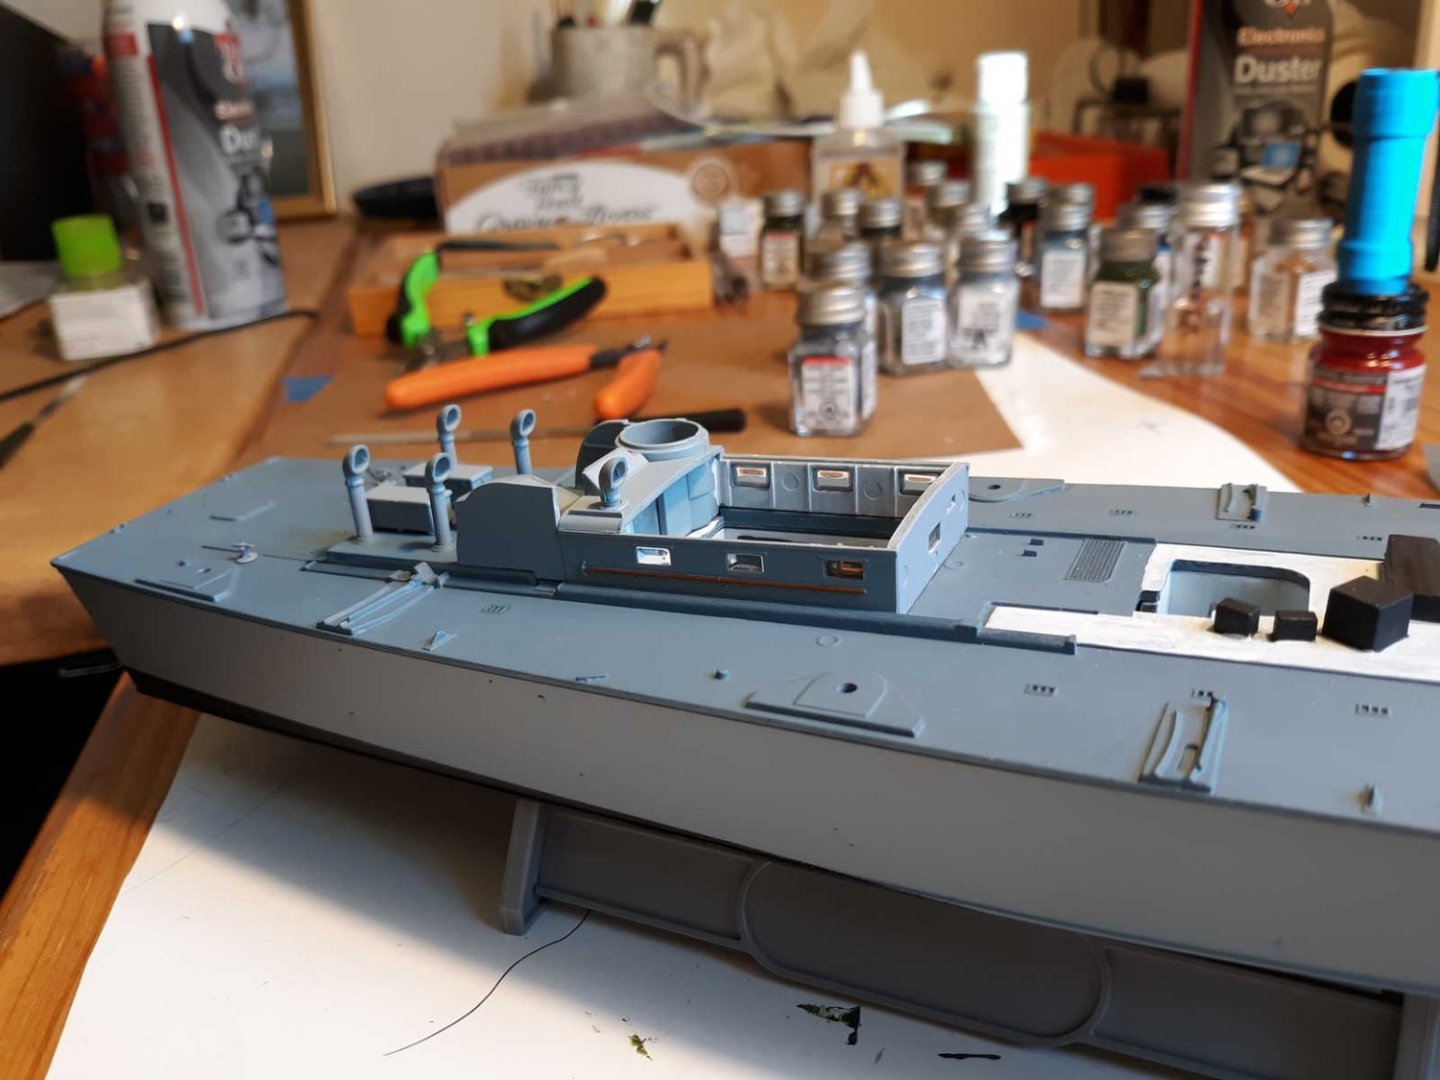
I was/am concerned about the fit of the pieces. There is an excellent video on youtube of a finished Revell PT 109 and I can see from his final work that his less then satisfactory fits match my bad fits. This fellow has a higher skill than me so that slakes me some as far as my fitting efforts. As much as I could, I dry fit. The aft deck covers both needed way more sanding then should have been necessary. If those weren't a great fit I shouldn't have expected better fits for the more intricate pieces but I did. I can't blame all the gaps on the molding. I know my weaknesses all to well. Each piece it important but some more than others. Those pieces would be the ones glued that must be built off of. They looked straight to me so I went with it. Mostly things are OK but some are not. This wouldn't be as big a problem if I had not painted almost everything first. Some gaps I won't bother with but I am going to sand and fill the front of the cabin where the sides come up and I may do some on top. Matching the paint will be a problem though. I have but a few squirts left from my rattle can AND I will need to mask which I don't enjoy but it may be the only thing for it. The deck is somewhat blotchy but I can't imagine a non scuffed deck on a working boat. I think I will have this done is less than a week unless the turrets drive me nuts.


-
I admire perfection attempts because I can't. Good Job!!
-
It's the little things. The build is advancing rapidly now that 98% of paint is done. I might have built the boat, filled the cracks and painted it all gray but I could not. I like painting as much as the build and want it to represent me whoever that is today. As I fit the pieces I see where I need to make things better but I can't always so it's a flaw. I was in the mood to post but don't have the time to critique what I have done. Time for town and a walk with my boy Ollie
-
I have looked and looked. I would really like a photo/drawing of green pointer area of a PT boat. Thanks

-
I like it already
-
Thanks I appreciate this The turrets base is not fitting well and a small leg wasn't injected.
-
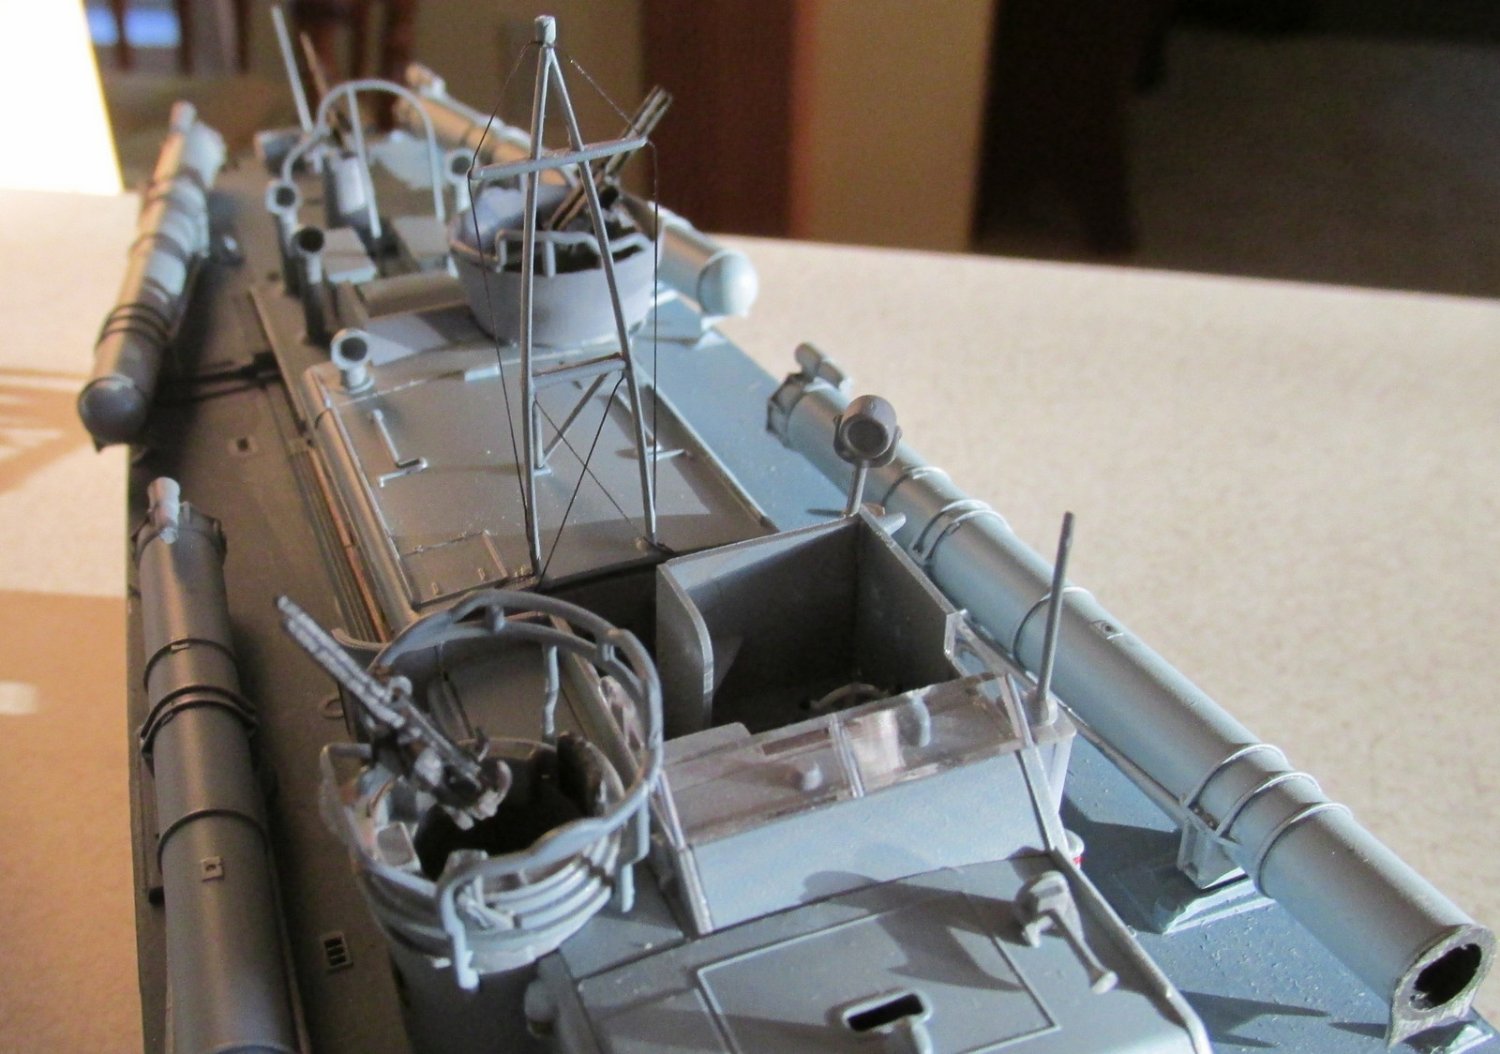
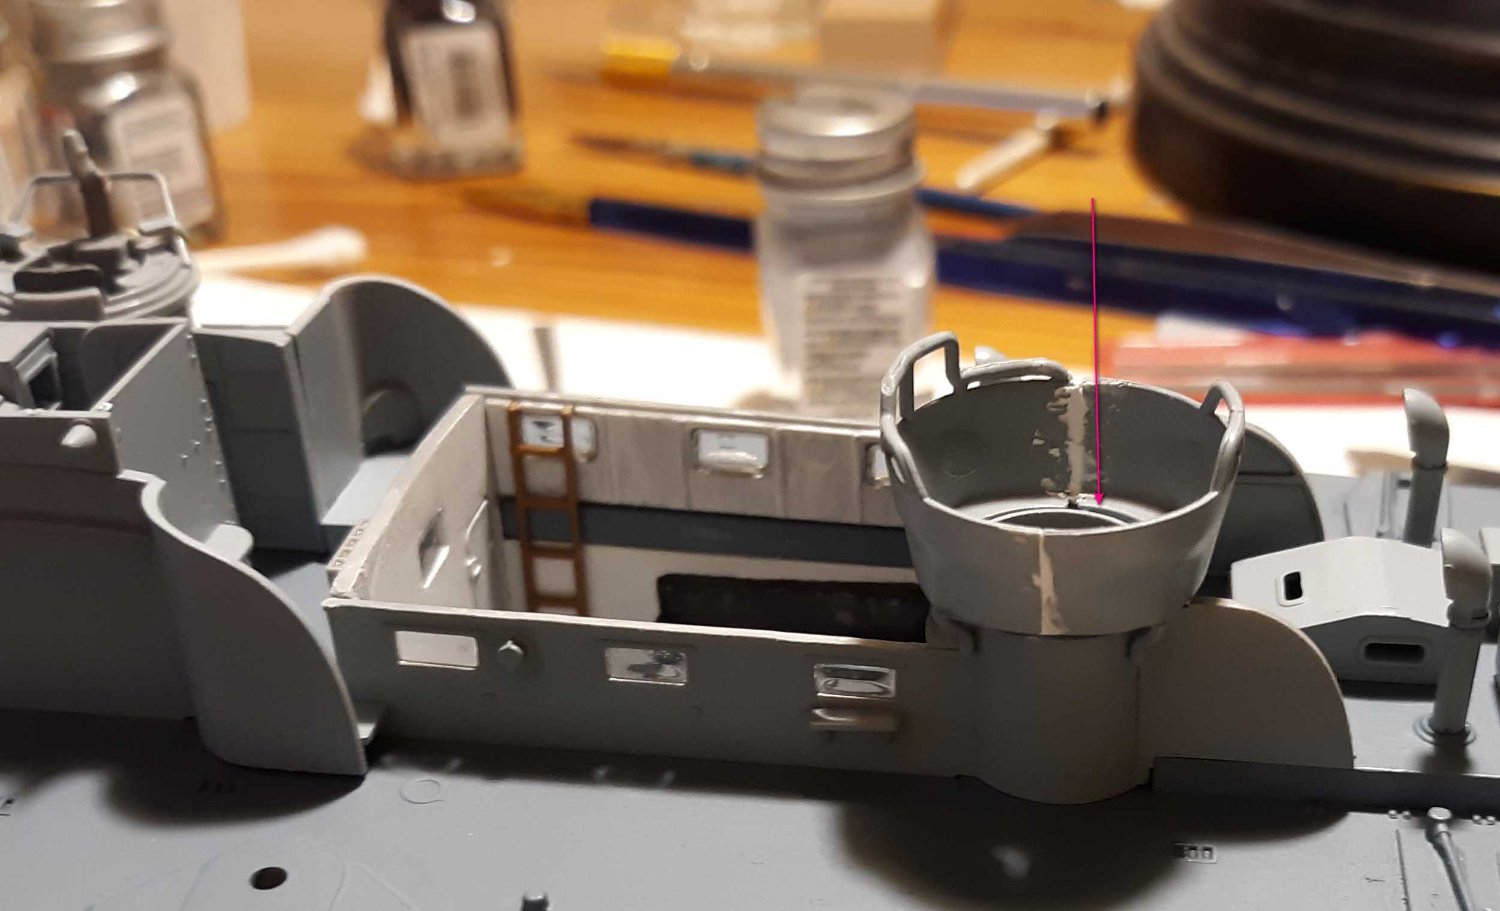
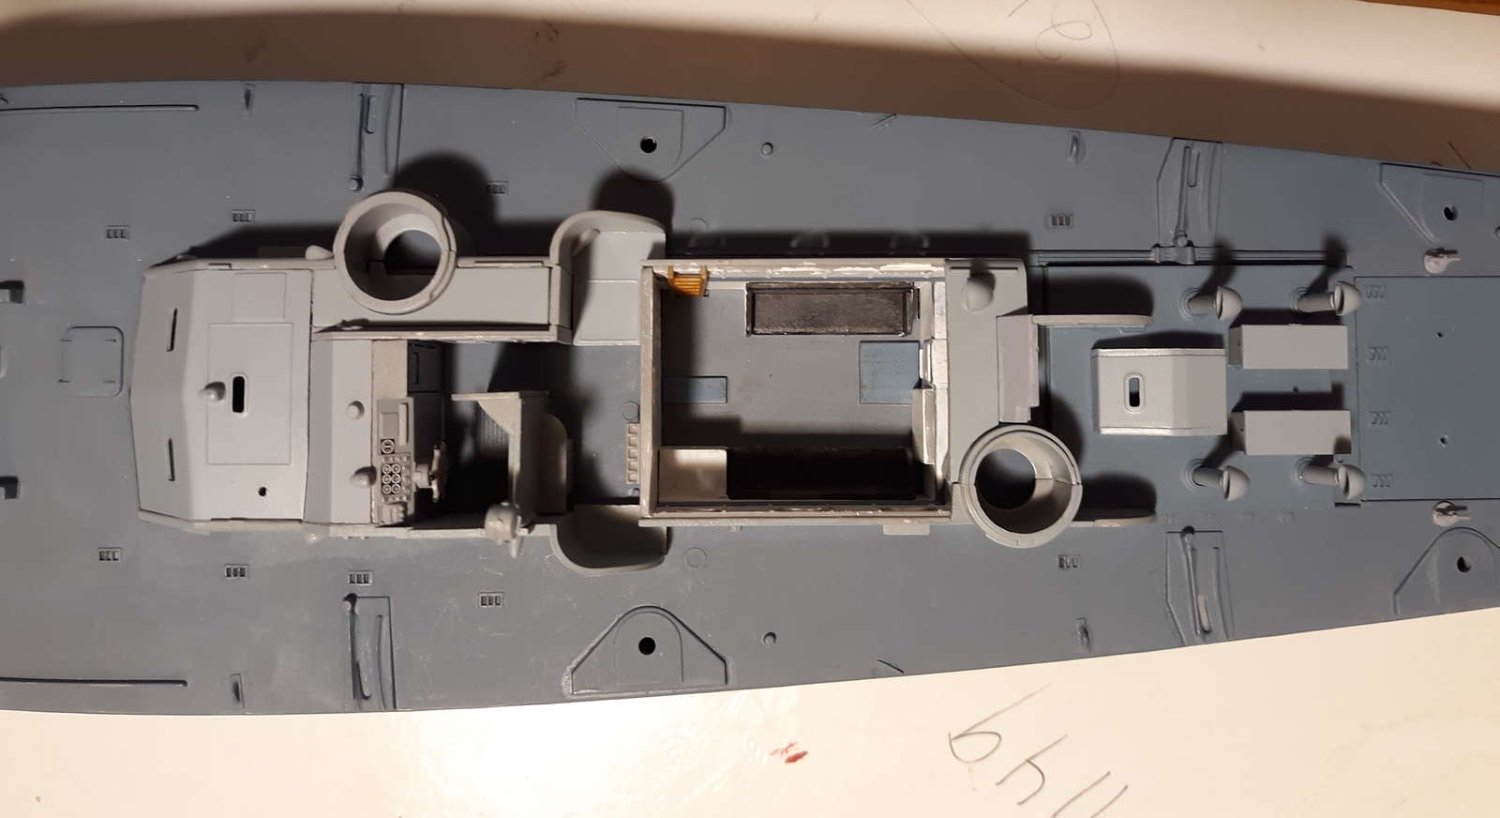
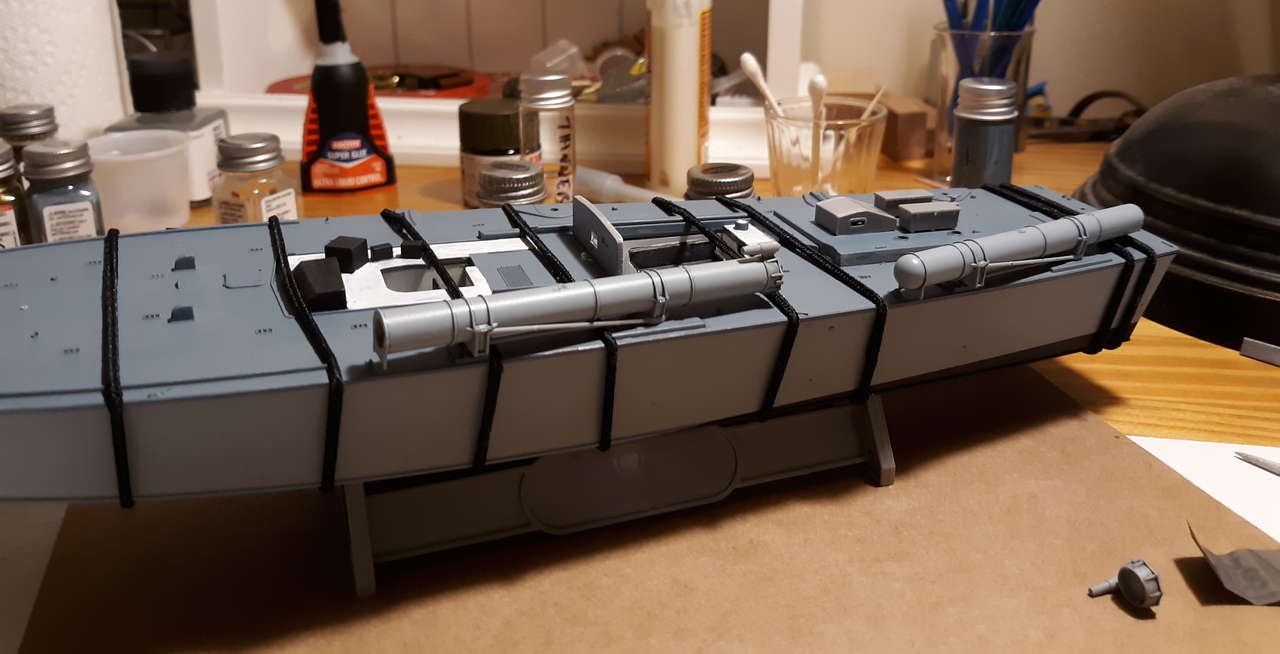
A lot has been happening and something I felt noteworthy with the PT boat build happened just now. I cut the end off a torpedo. The torpedoes have been my focus lately. I read some wiki PT boat overviews and that led me to more in depth torpedo research. The data found indicates two methods of launch: shot from a tube or pushed over the side. I wanted to know which my build used and I could not tell if these were shot or rolled simply from the included kit torpedoes. Early on, PT boats used the Mark 8 torpedo shot out of Mark 18 launcher tubes (pictured) by a minor explosion which is all fine and good but since the tubes needed greasing they might catch fire. In mid 1943 the Mark 18 was replaced by Mark 1 roll off style launching racks using the Mk 13 torpedo. So I have a Mark 18 launcher with Mark 8 torpedoes. That being the case I cut the end off one of the Mark 18 launchers. I may cut another I am waiting to find if there was a protocol for firing order. To jazz them up I used some Tamiya dark gray panel accent I attached the deck. "Hey Honey! Where do you keep your hair ties?" In this instance better then tape or rubber bands. I went to work on the torpedoes because the color scheme was vexing me. There are only three primary colors: gray, black and custom deck blue/gray. I wanted to make sure my conceived paint scheme wouldn't be regrettable. I gave it lots of thought and pretty much have it now. I did a couple hatches blue/gray and have a few other parts I want in that color. My batch of custom deck paint dried up on me. I sealed it well but the container was not up to the task. I used a simple 2:1 mix and reproduced it. This time I put the mix in an emptied Testors thinner bottle. I wish I thought of doing that on my own but read it somewhere. I can spend more time now because I finished my 1:72 Pegasus Pershing and I can spend more time indoors cause it's dark out way earlier. Thanks for reading this far

-
This thread is dear to me. I need to read things several times and seeing all the same suggestions that were given to me is heartening. I refer most specifically to over fairing which I read here and in reply to a question of mine. Insure your bulkheads are held fast as you fair I tried shimming but it seemed to only be good for a plank then more shimming would be necessary. I'm thinking at this point I would be better advised to plank over the bad area and sand. Hard for the experienced, near impossible for the beginner. I am not going to fair my replacement pinnace until I have seen a plank laying on a bulkhead to get a better idea of where and how much Tapering the planks. I have tried that and it has merits though it isn't always stated in guide sheets. BUT where and how much. That answer would lie in the tic marks made on the bulkheads which is somewhere else to make mistakes. Planking fans are easy to understand but more difficult to implement. All that paper or cardboard to be cut and lined up proper...LOL. I botched the pinnace beyond salvation so I bought another and learned from my mistakes, my experiences and the offerings of the members. The suggestions offered in this thread are correct. Read each one and read it again

-
Keep doing what your doing. That you notice and understand the problem is good. Solving it will be better though. Good Luck I hope you get the answer needed
-
I see your concern and it is quite a valid one. I have not been able to solve my issue which is the same as yours. I am on my first planking attempt and frankly it is very hard to do. You have the plank bent and twisted which is an art in itself or are the planks semi -shaped already? I found your build log
-
I like your work. The weathering is very good. I think tanks are hard at 1:72 which is why guys buy the big ones. Tonight I essentially finished my first tank a 1:72 Pegasus Pershing. I only work in 1:72 and it is fine for planes but this kit...I dropped the small pieces a lot and lost the front MG.
-
Work bench width and height - any recommendations?
rudybob replied to Dr PR's topic in Modeling tools and Workshop Equipment
I don't like bending over much so my benches are tall, long and not so wide I can't easily reach to the back. I don't like attaching saws, grinders, vises, etc so I attach those to wood then clamp them when needed. My primary bench goes around the corner in an L. I like looking out windows so I faced it that way. Have fun . -
If I heat bend in one plane fine but when I heat bend in another plane in the same area my previous bend goes away. I am specifically referring to my pinnace build at the bow. So I try to bend in two planes concurrently. It can be done but not at my skill level. What would you suggest? Thanks
-
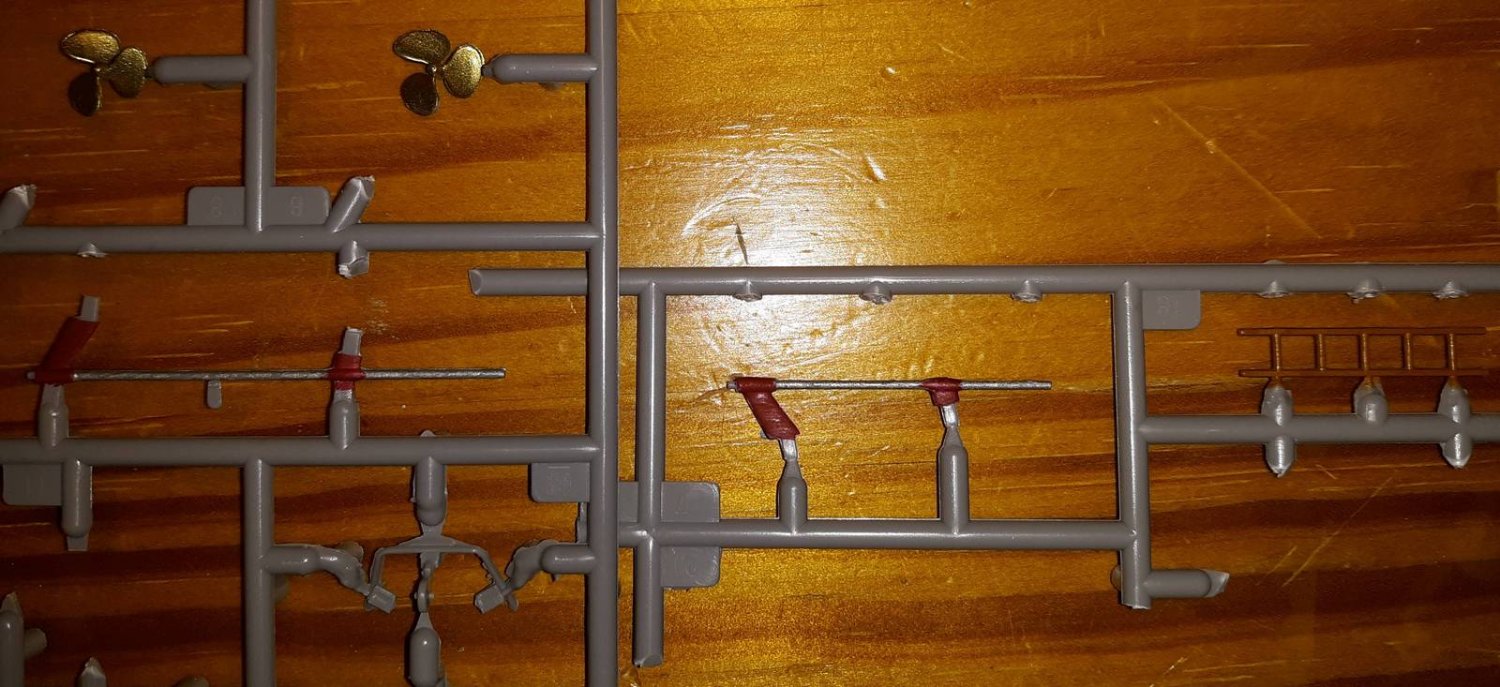
I had a moment today. For the first time when painting parts on the sprue I clipped most holdfasts first. It would have been nice to discover this decades ago but I am happy it came to me at all. It means my skill level just went up. I am sure many guys been doing it like this since forever. Then I had another moment after I clipped two of the three shafts and struts. It matters where I clip. What's a post without a picture?