HOLIDAY DONATION DRIVE - SUPPORT MSW - DO YOUR PART TO KEEP THIS GREAT FORUM GOING! (Only 24 donations so far out of 49,000 members - C'mon guys!)
×


Nearshore
-
Posts
188 -
Joined
-
Last visited
Content Type
Profiles
Forums
Gallery
Events
Everything posted by Nearshore
-
 Hi Daiga, First, I would like to say that you are doing a fine job on your model, especially it being your first build. I agree with you that mistakes only improves your skills for future builds. Don't take it the wrong way on the critics that comment on this forum. They are only trying to give you resources to improve your skills. I have had many critics on the model I am building and welcome the guidance they provide. To answer you question on the part in post 16, I believe that part is a cleat. I am not sure what lines were used to secure to that cleat, but I am pretty sure thats what that part is. I 'm sure that someone will have more information on this part and its purpose. I hope that you continue to post your progress on your build so that others may learn from your mistakes as well as your successes. Keep up the good work you are doing and enjoy the satisfaction and achievements that building one of these ships offers once completed. I hope you continue to post your progress, you are building a fine model and I think that it looks amazing so far!! Cheers Nearshore
 -
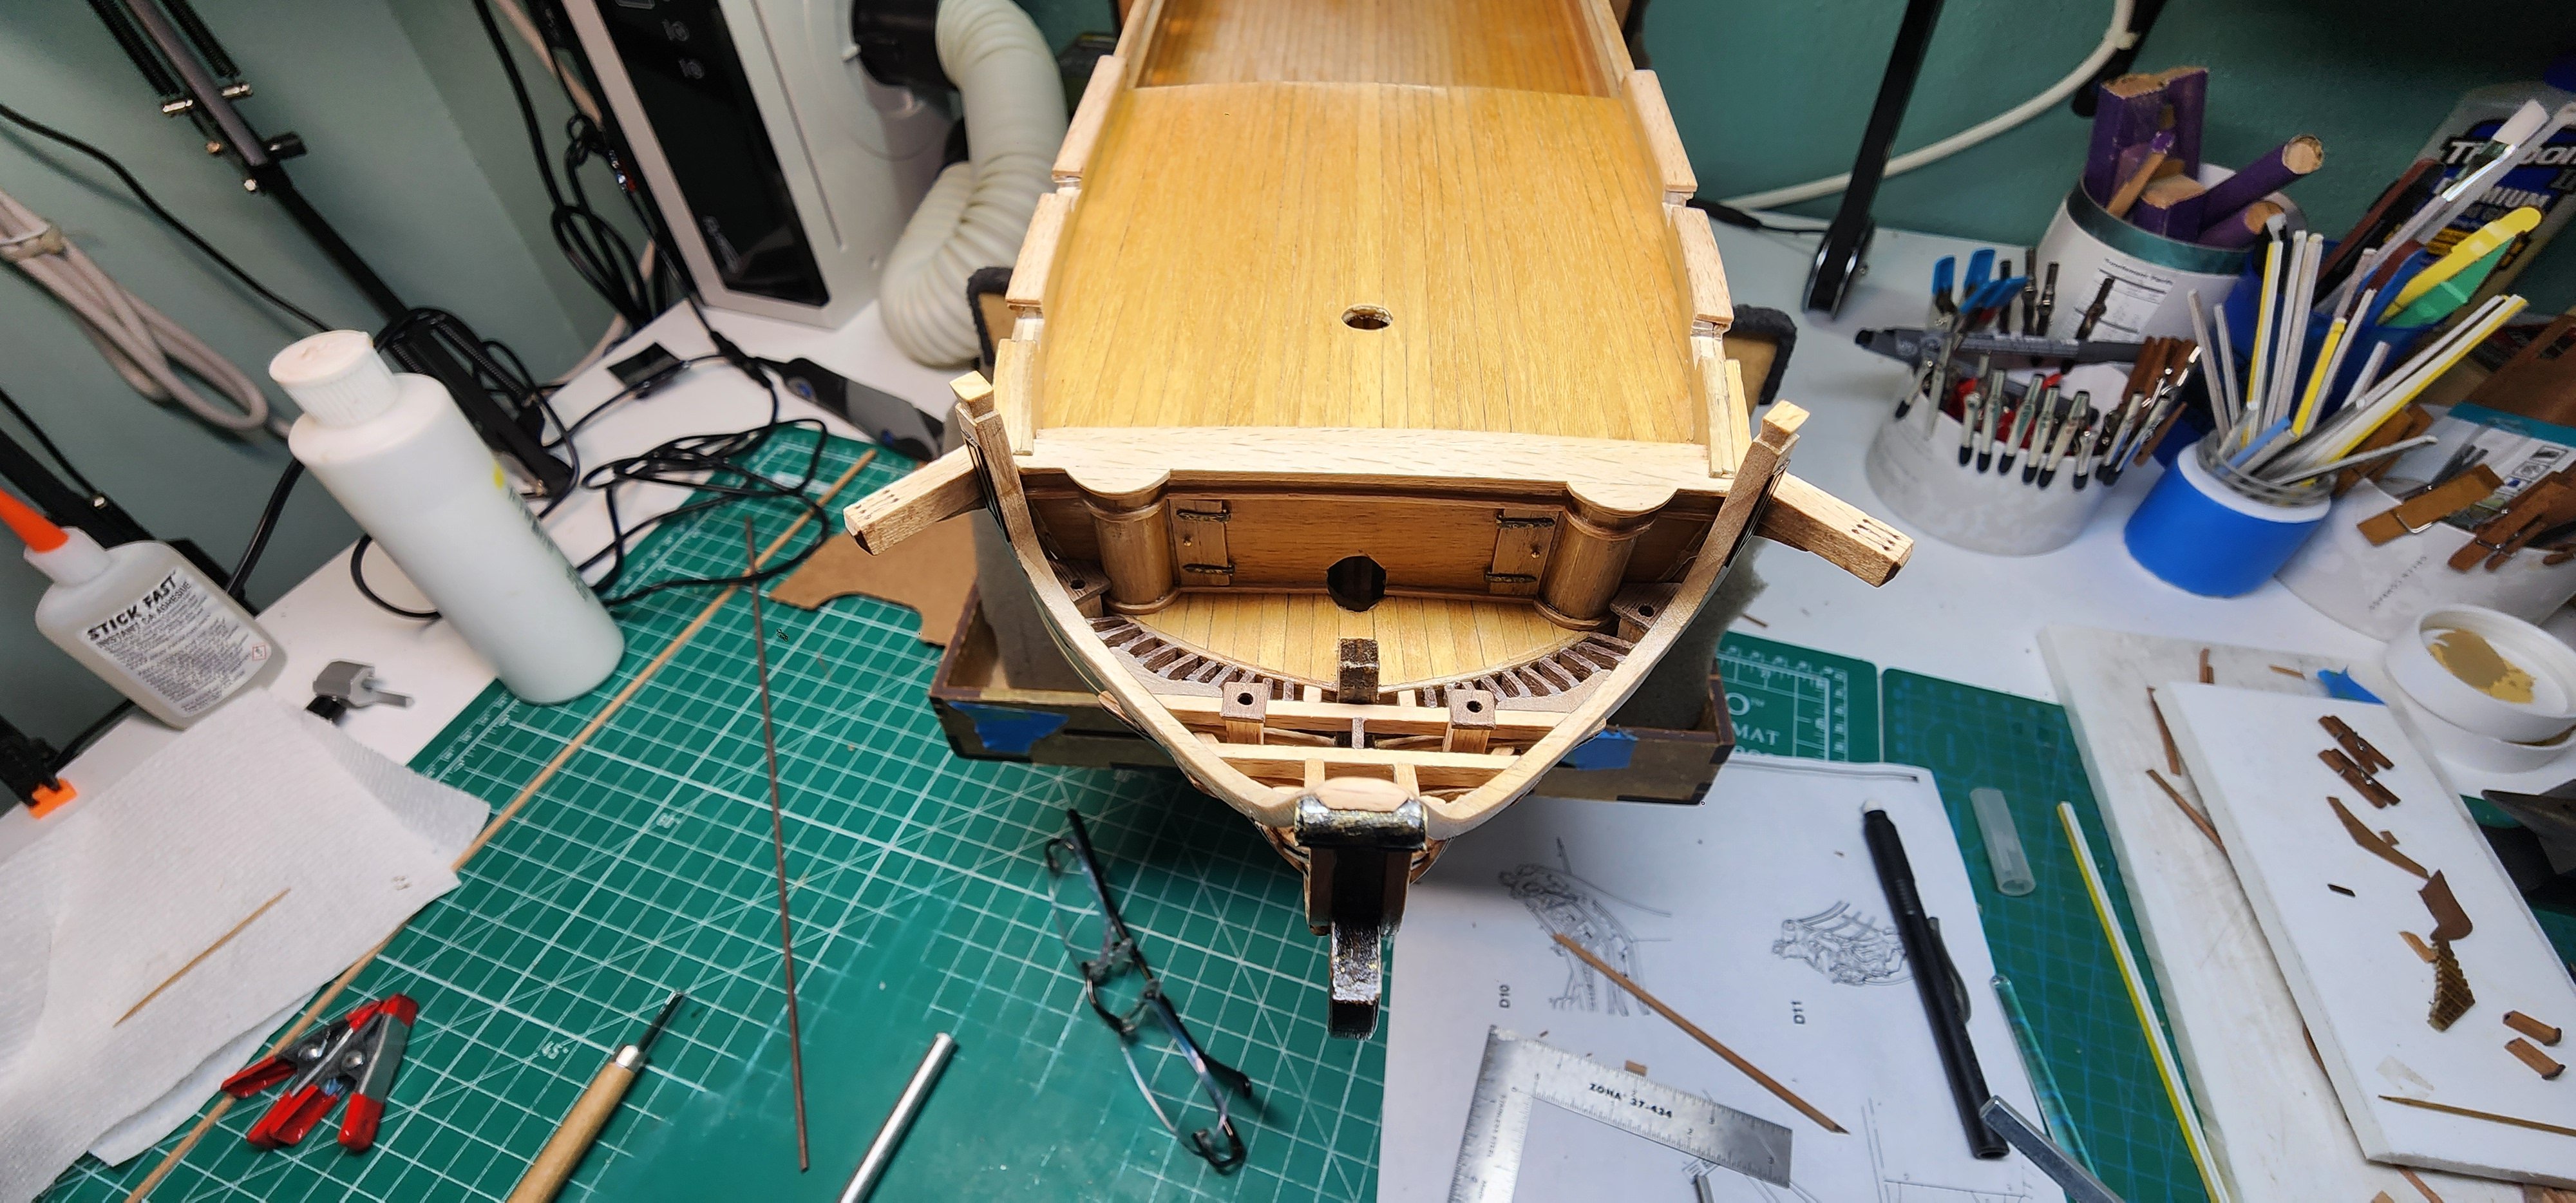
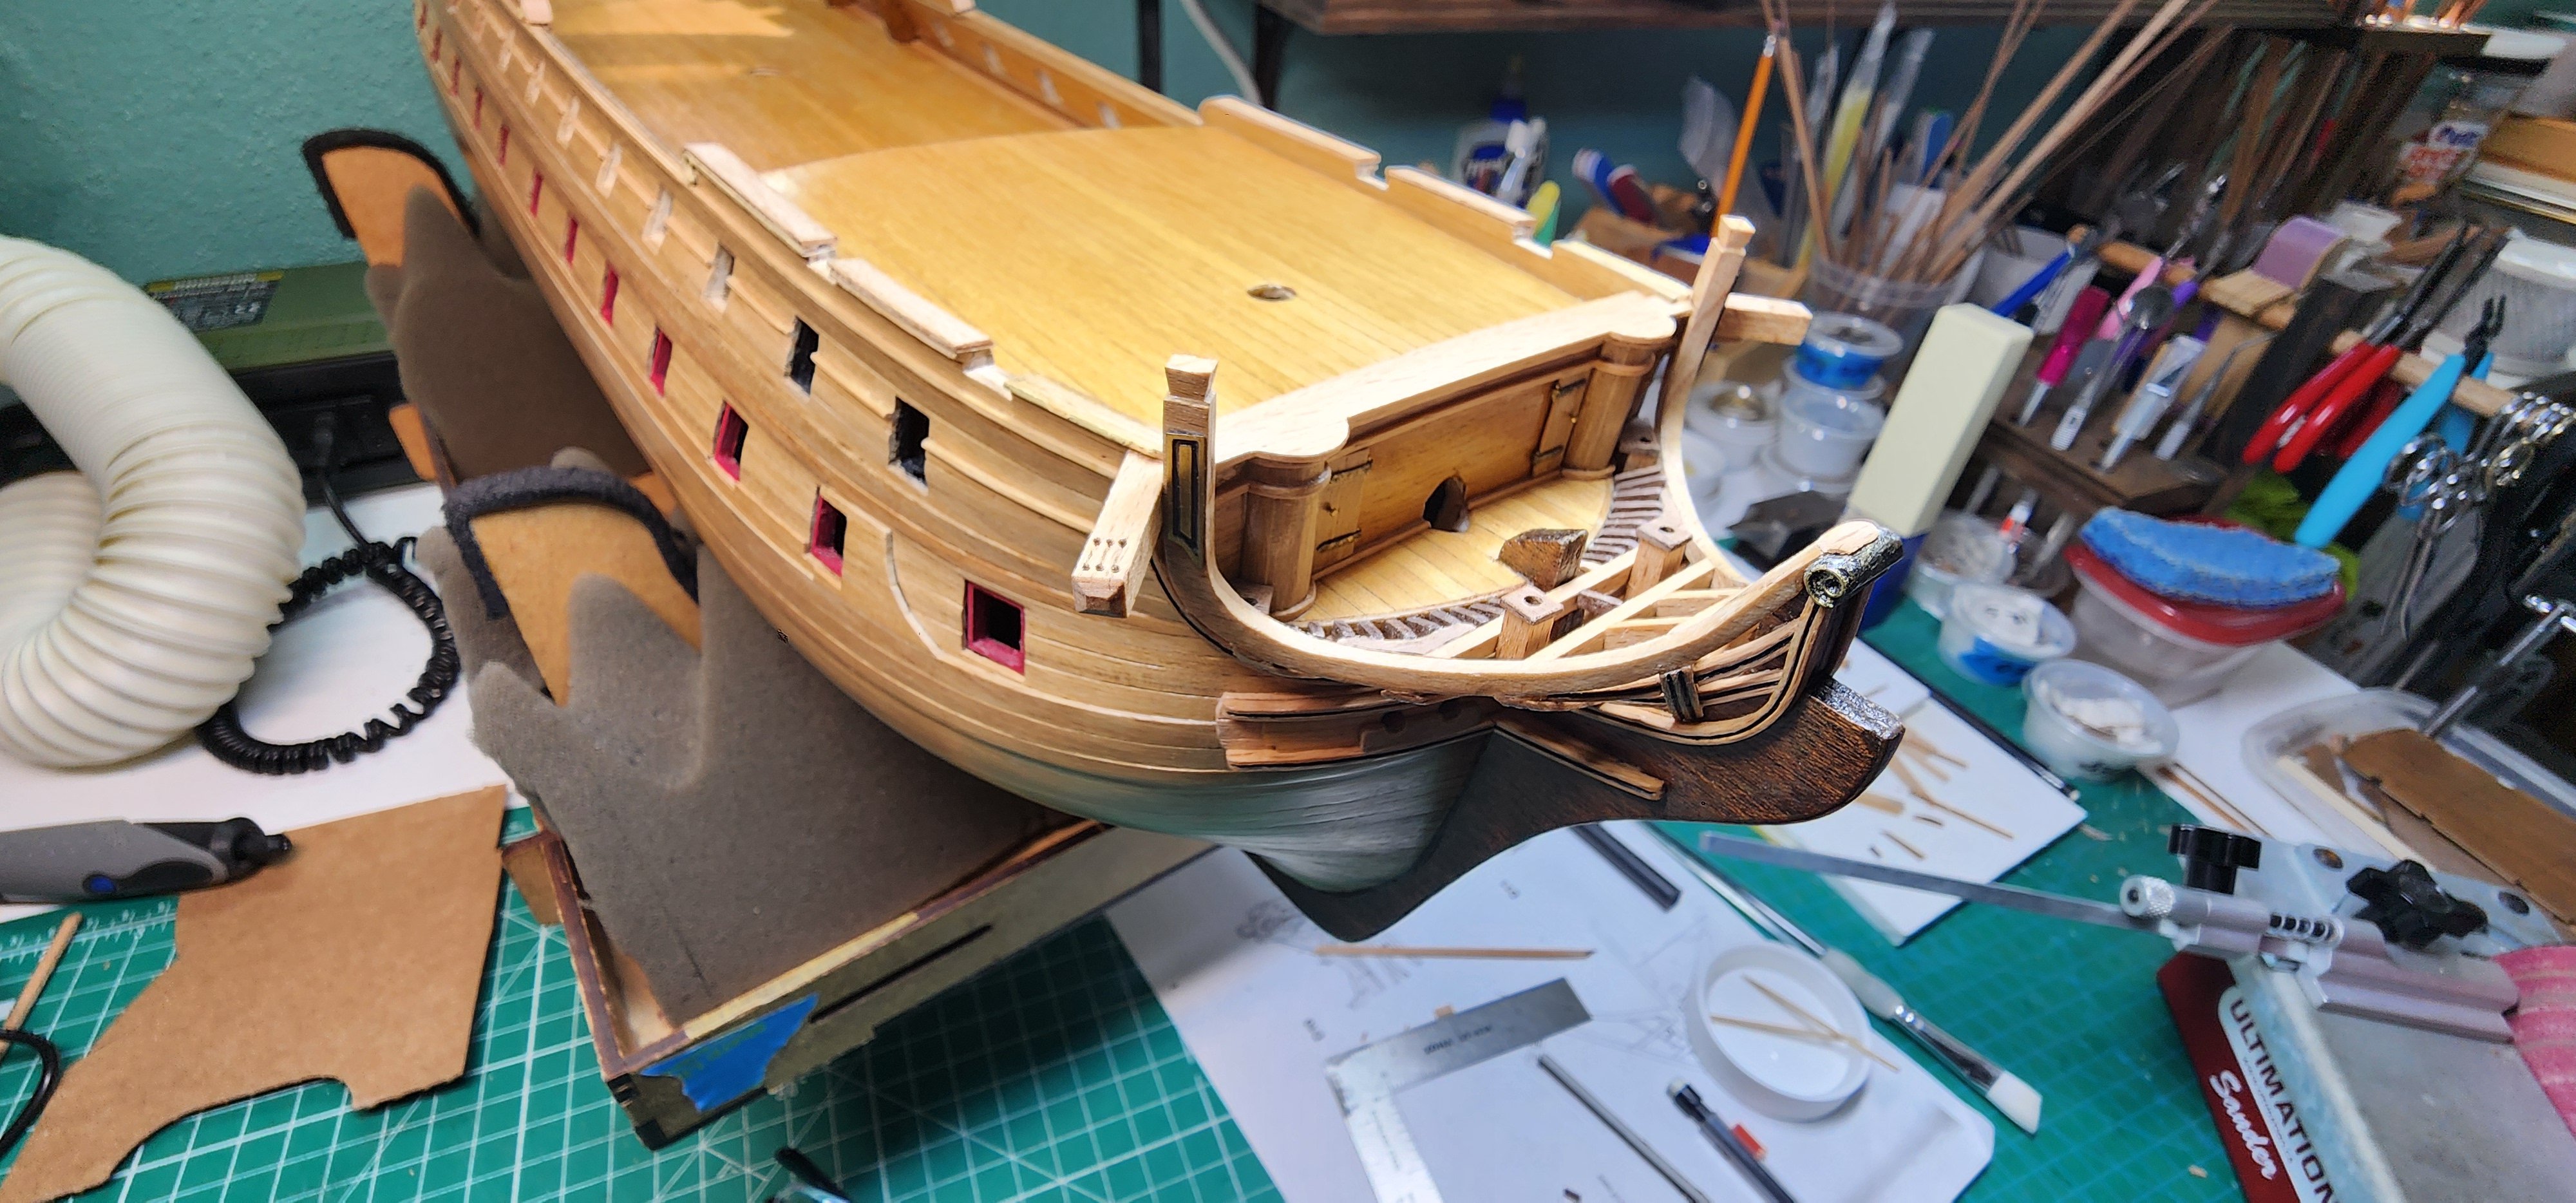
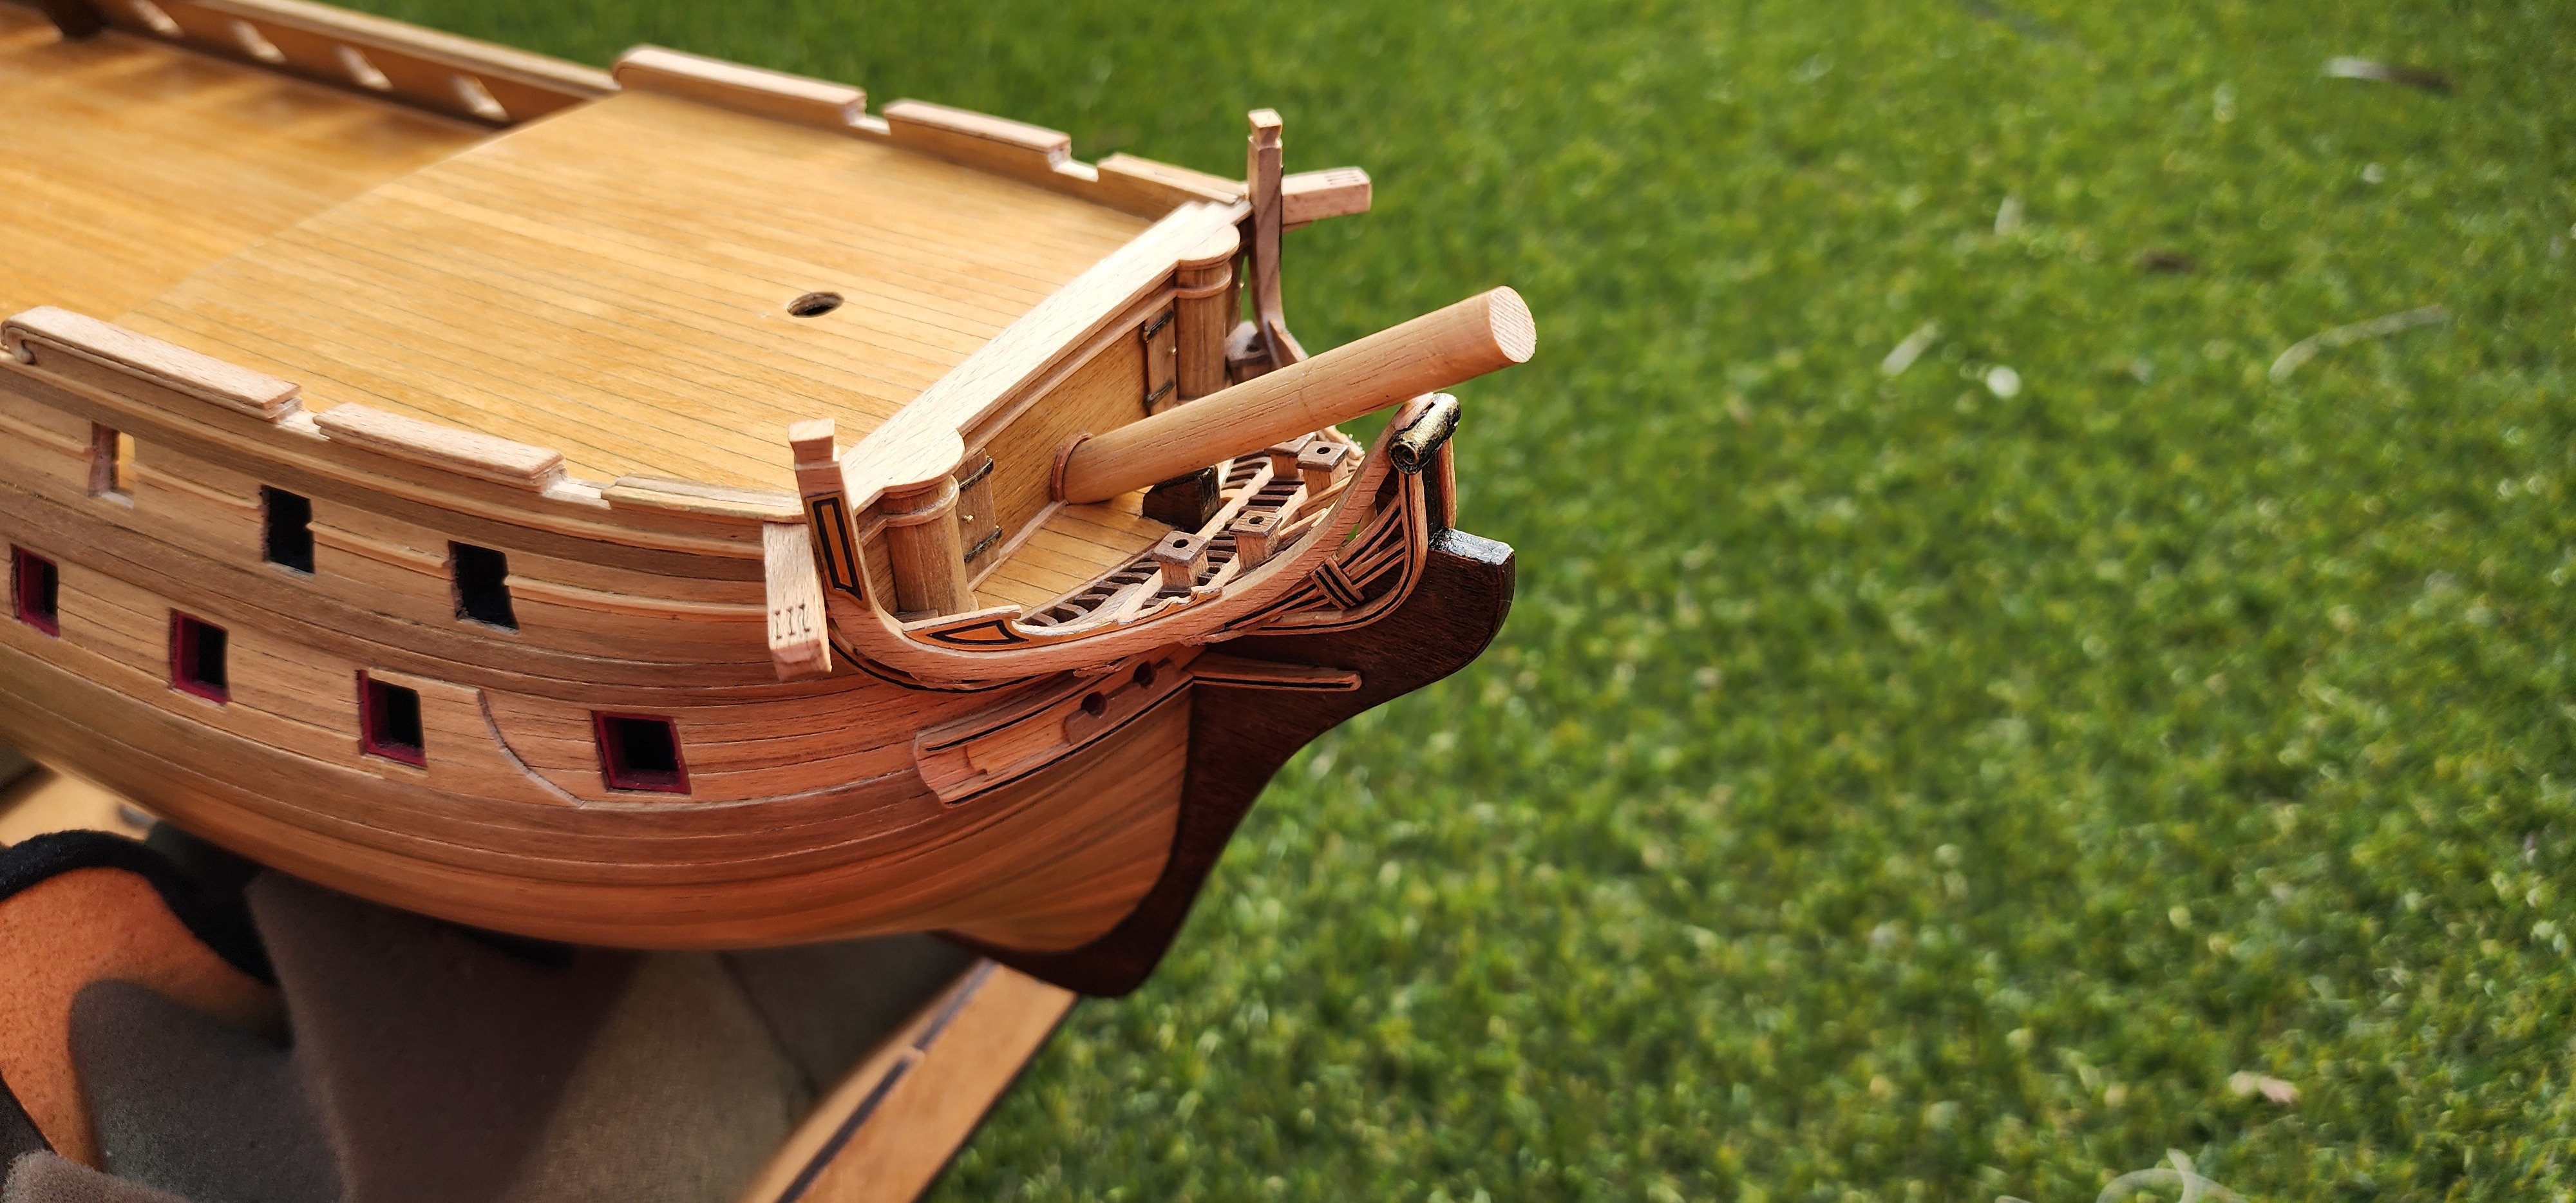
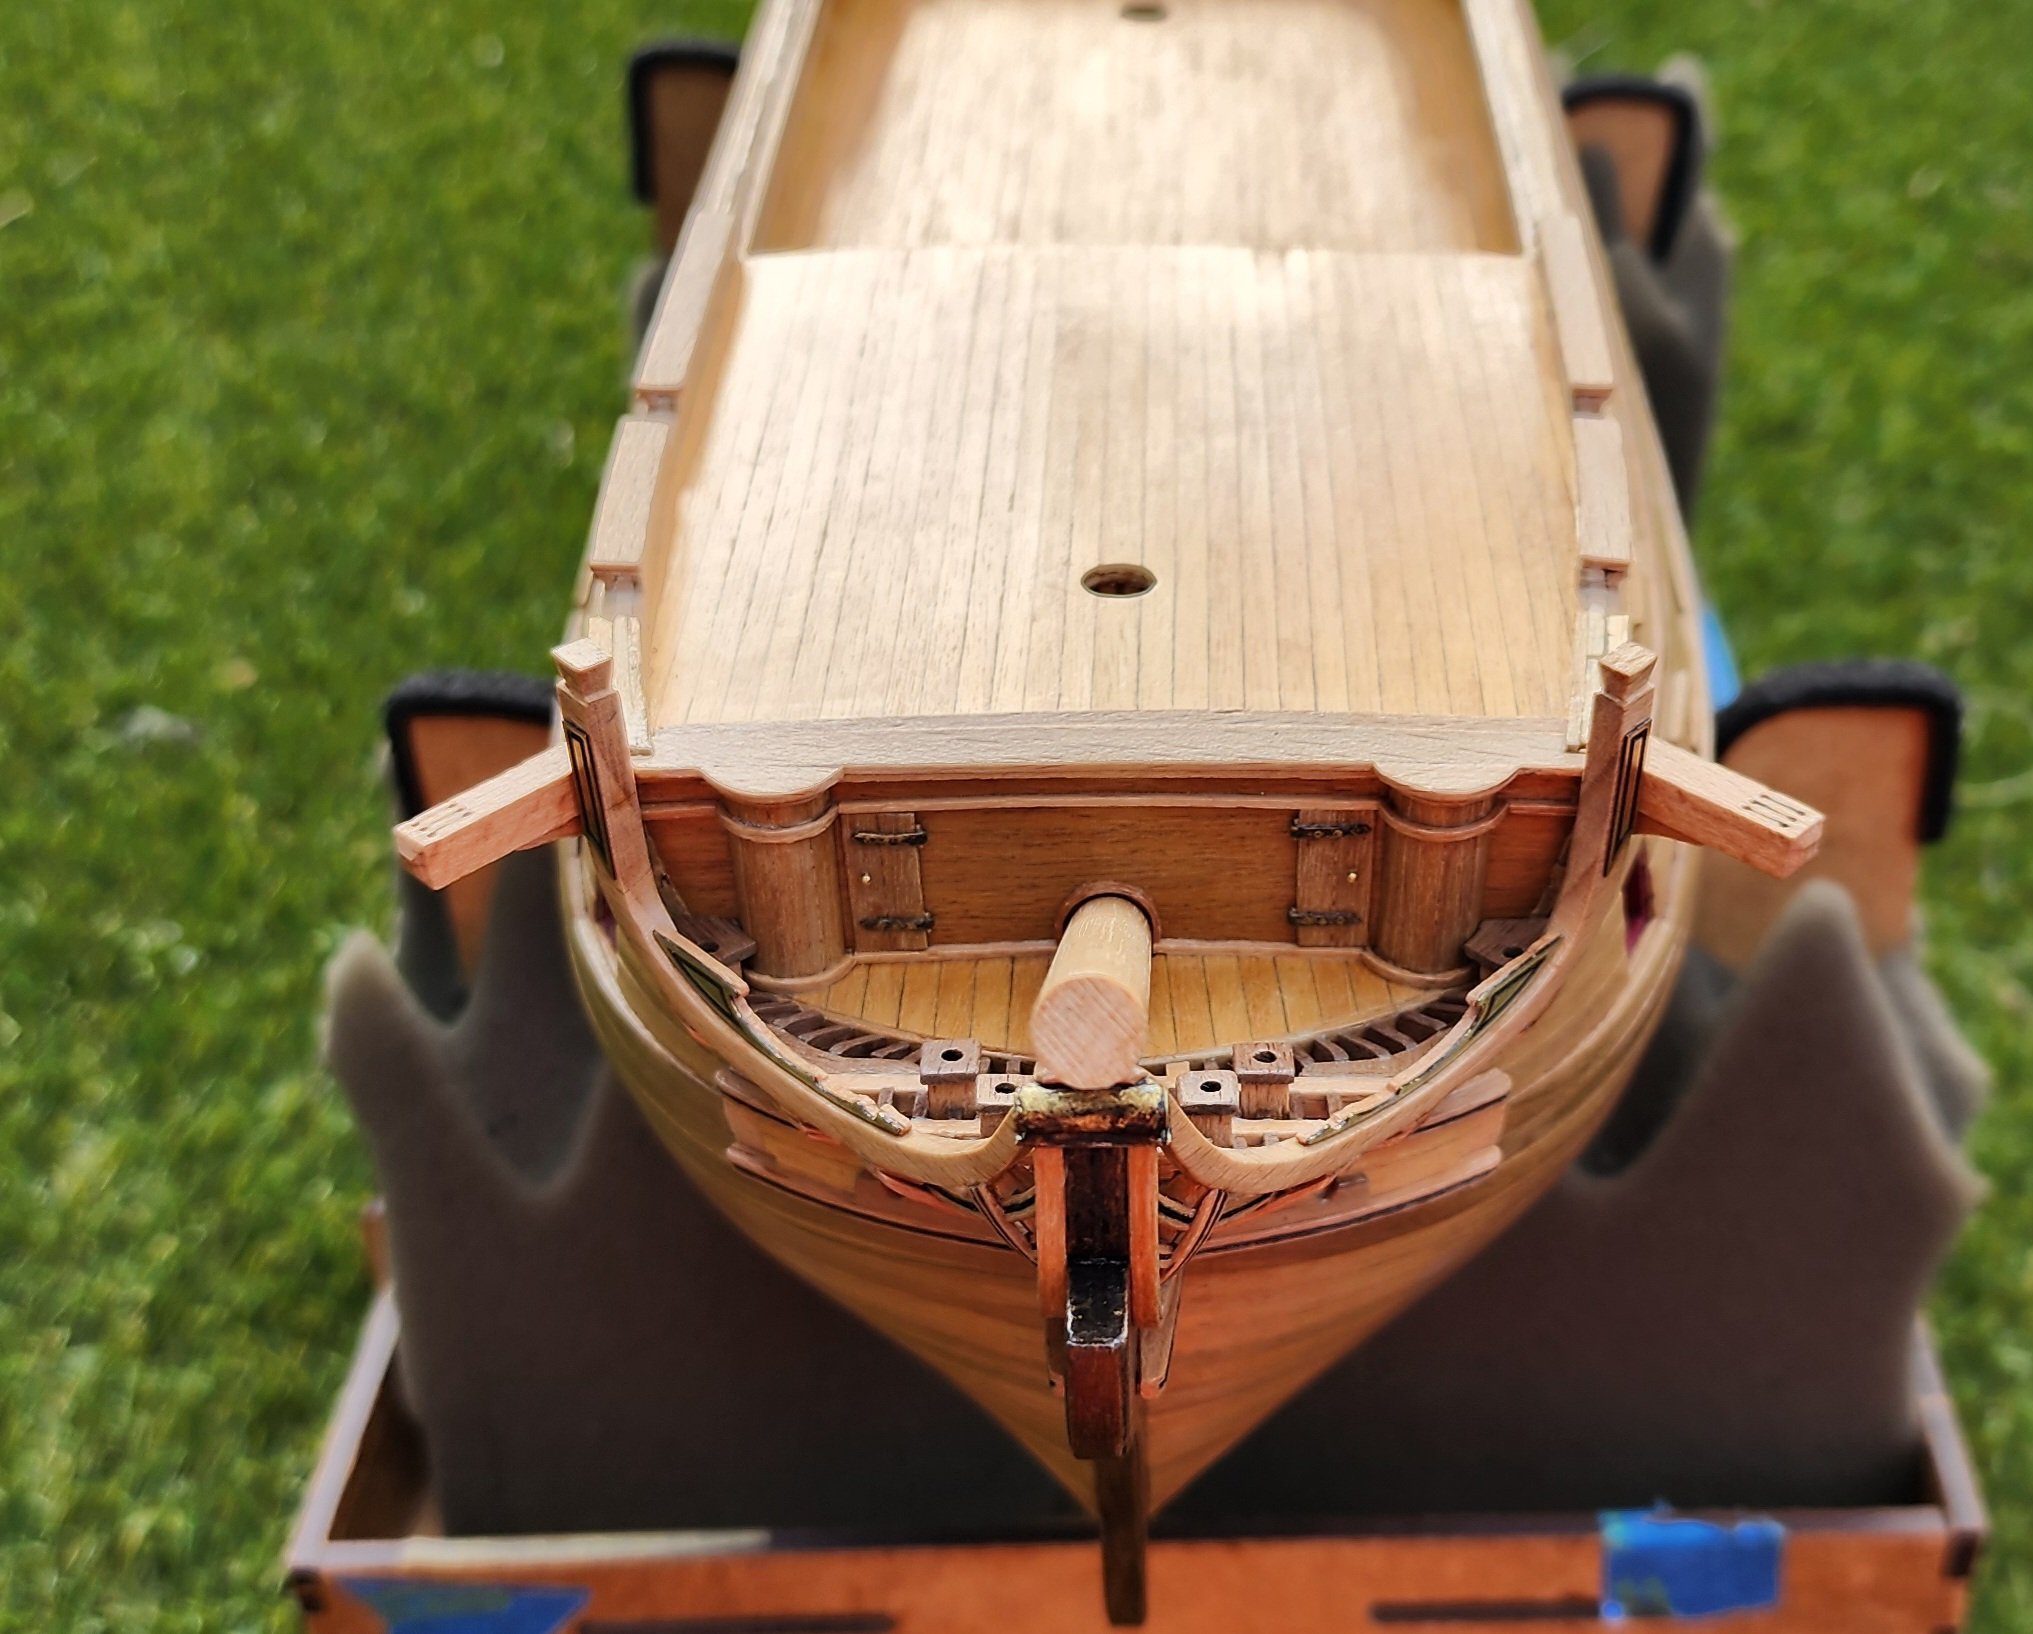
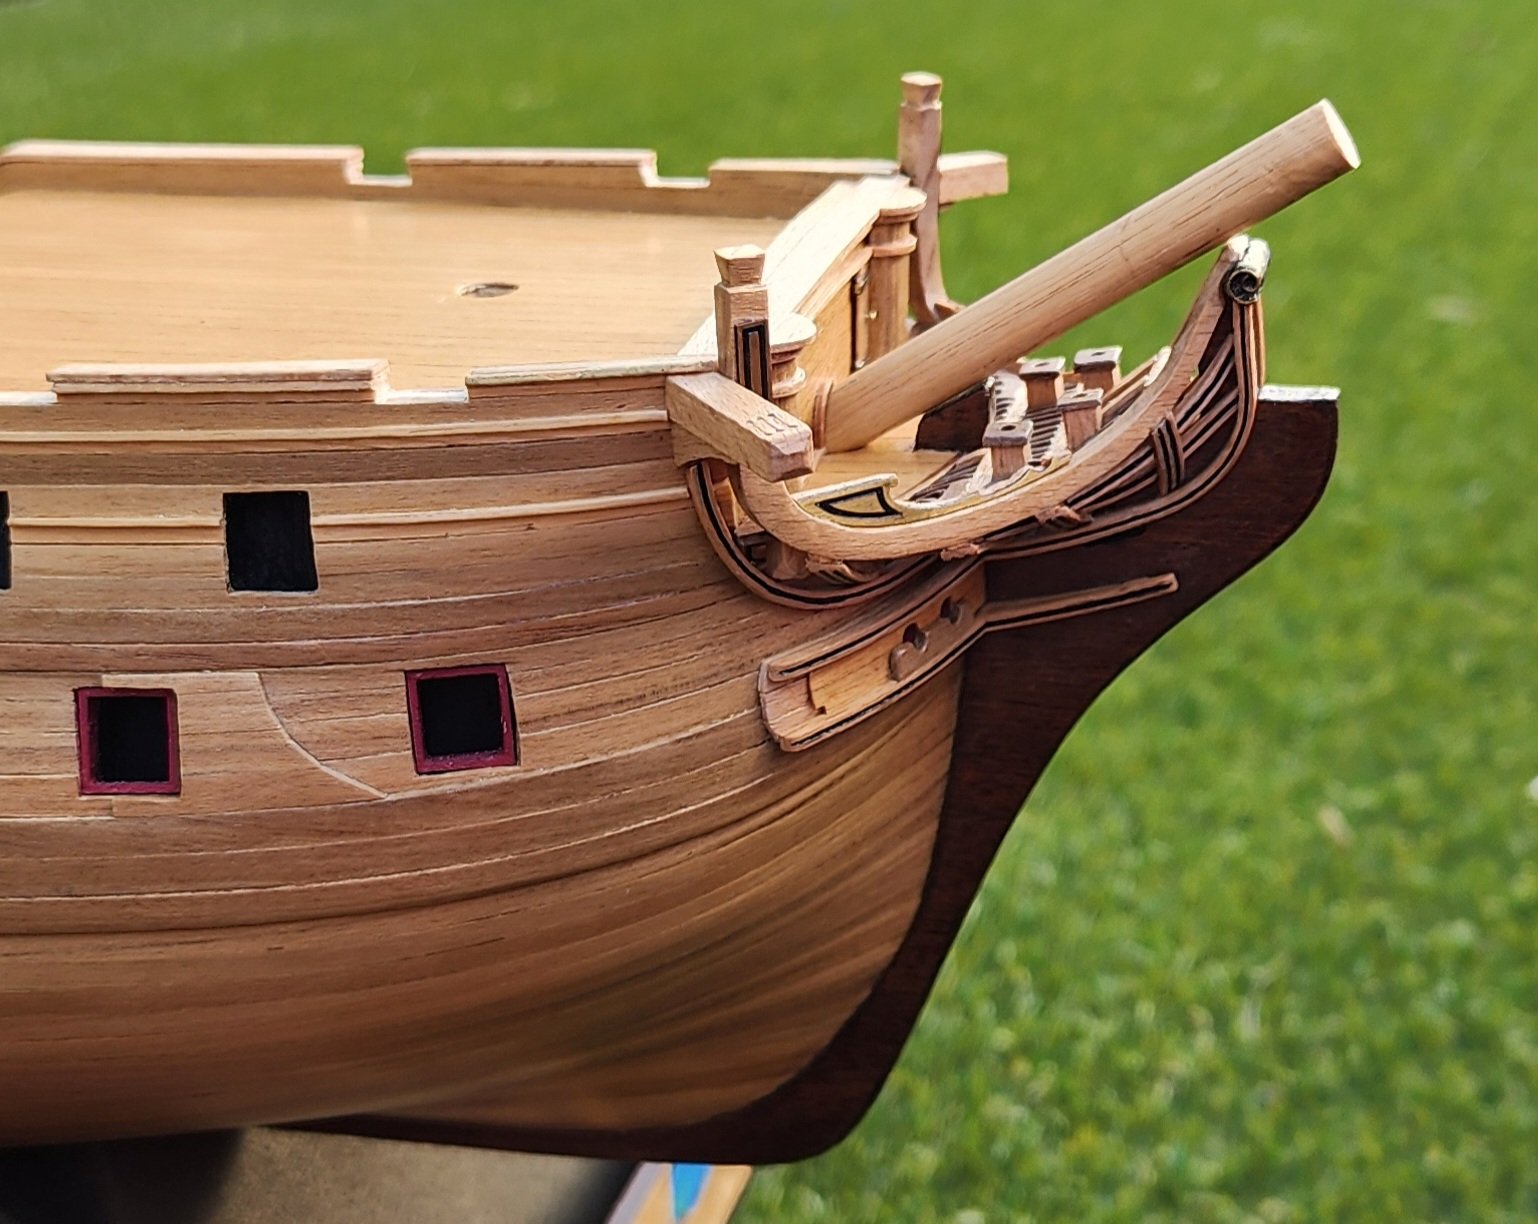
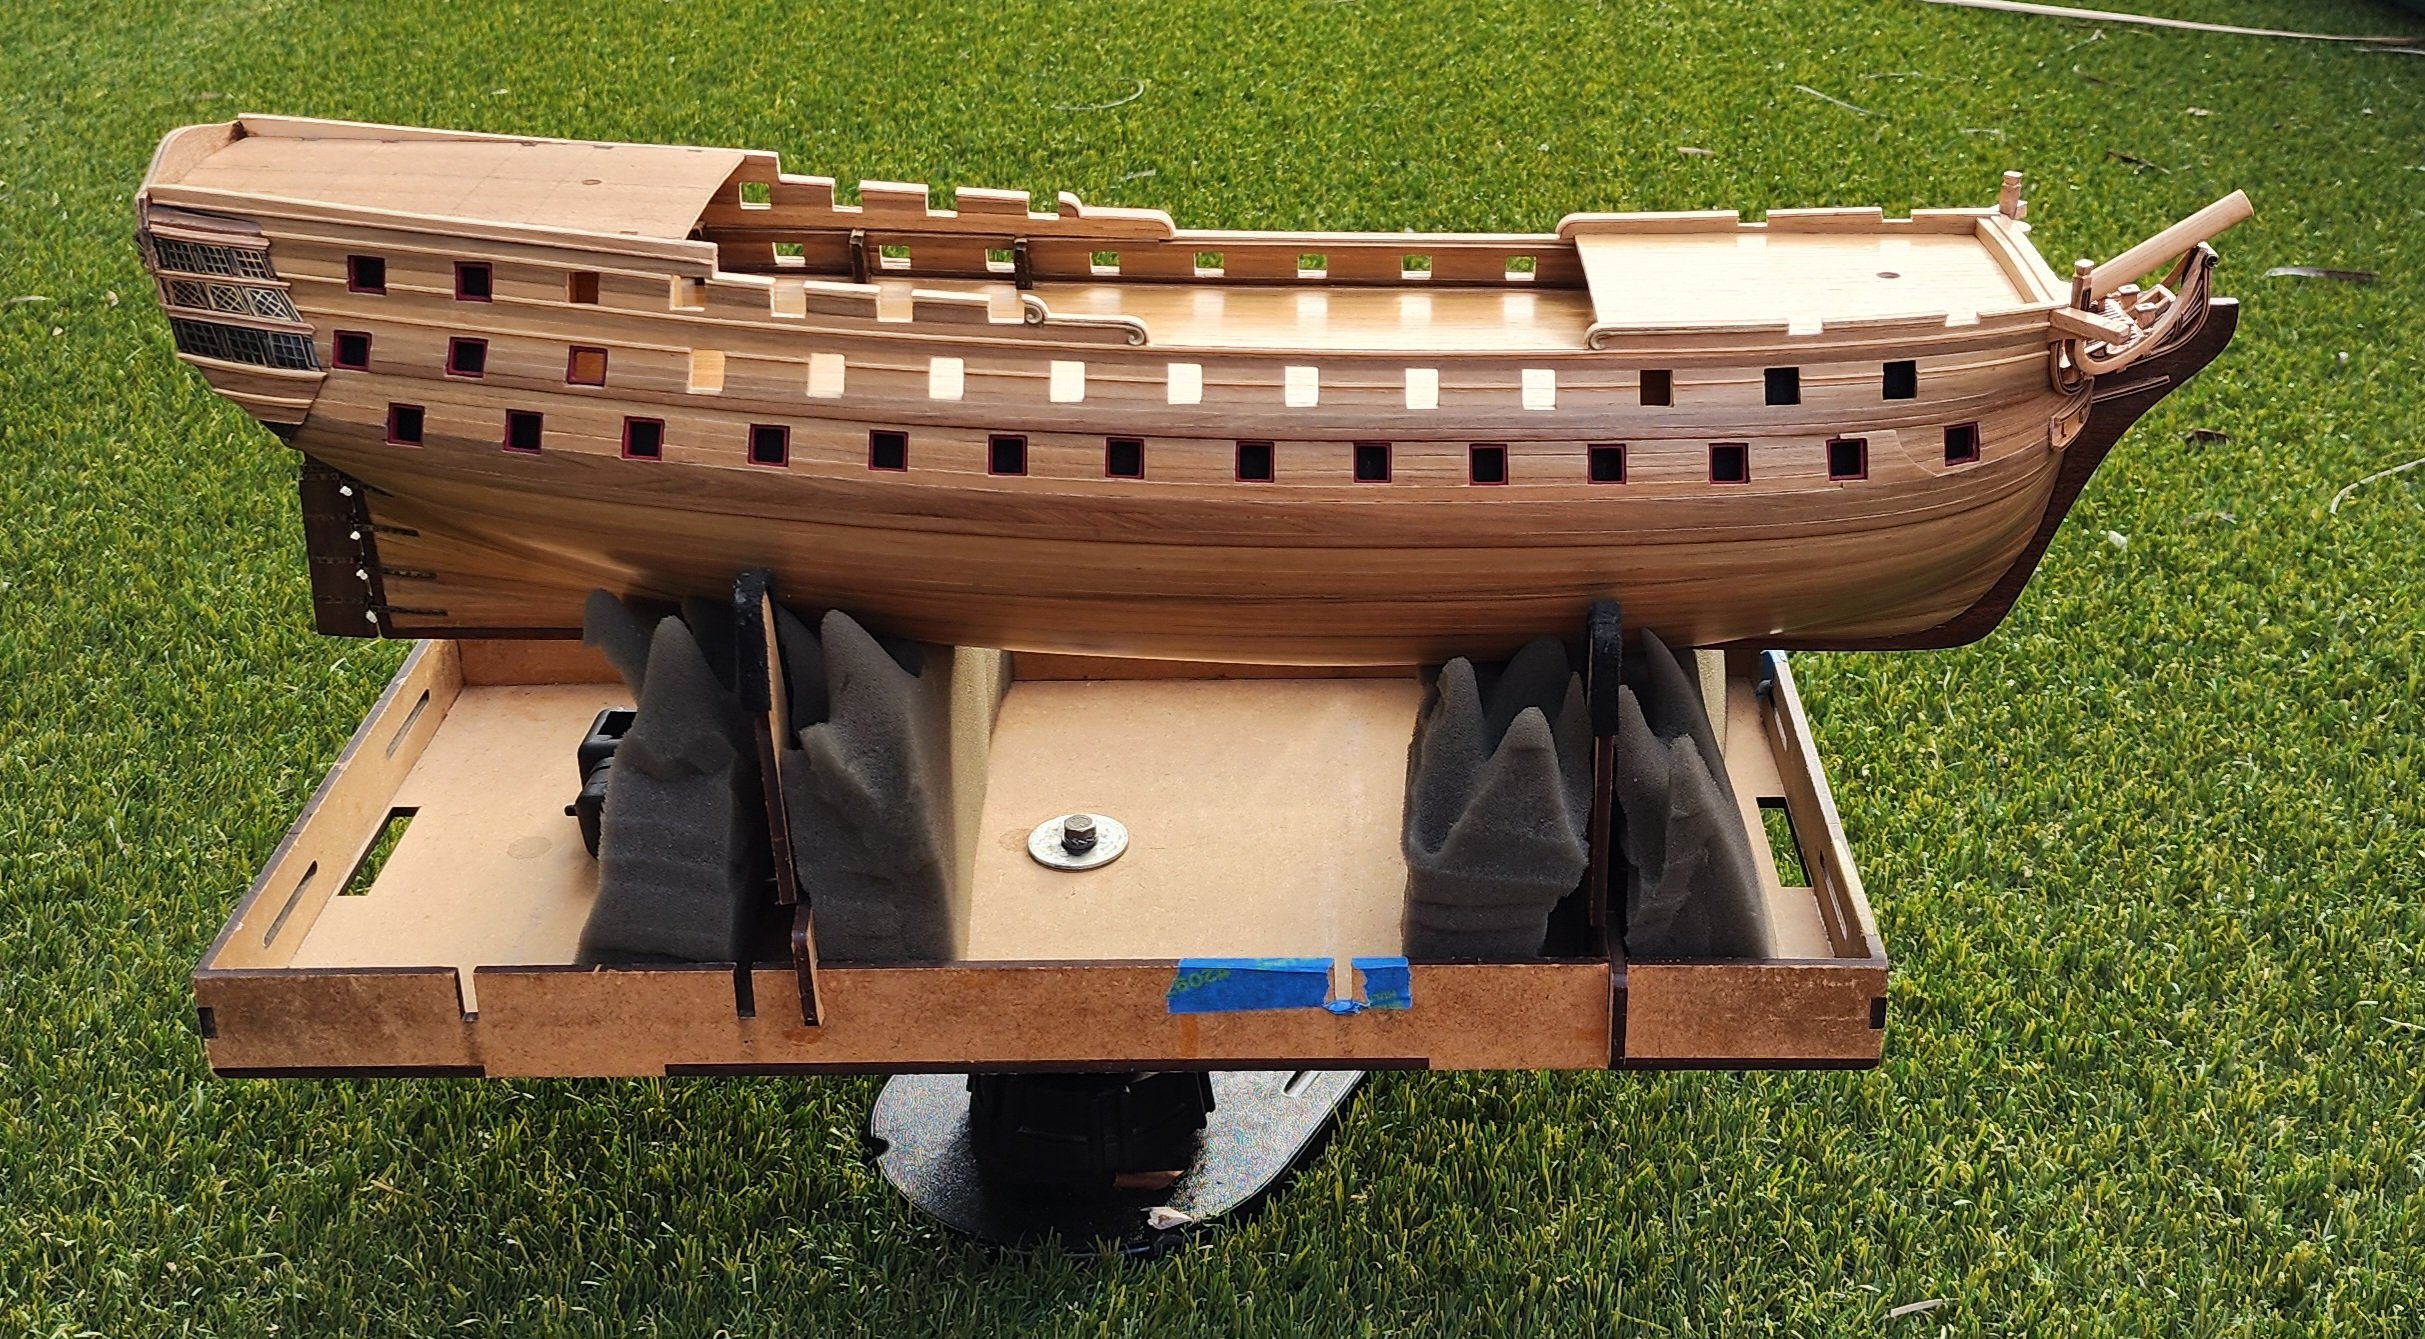
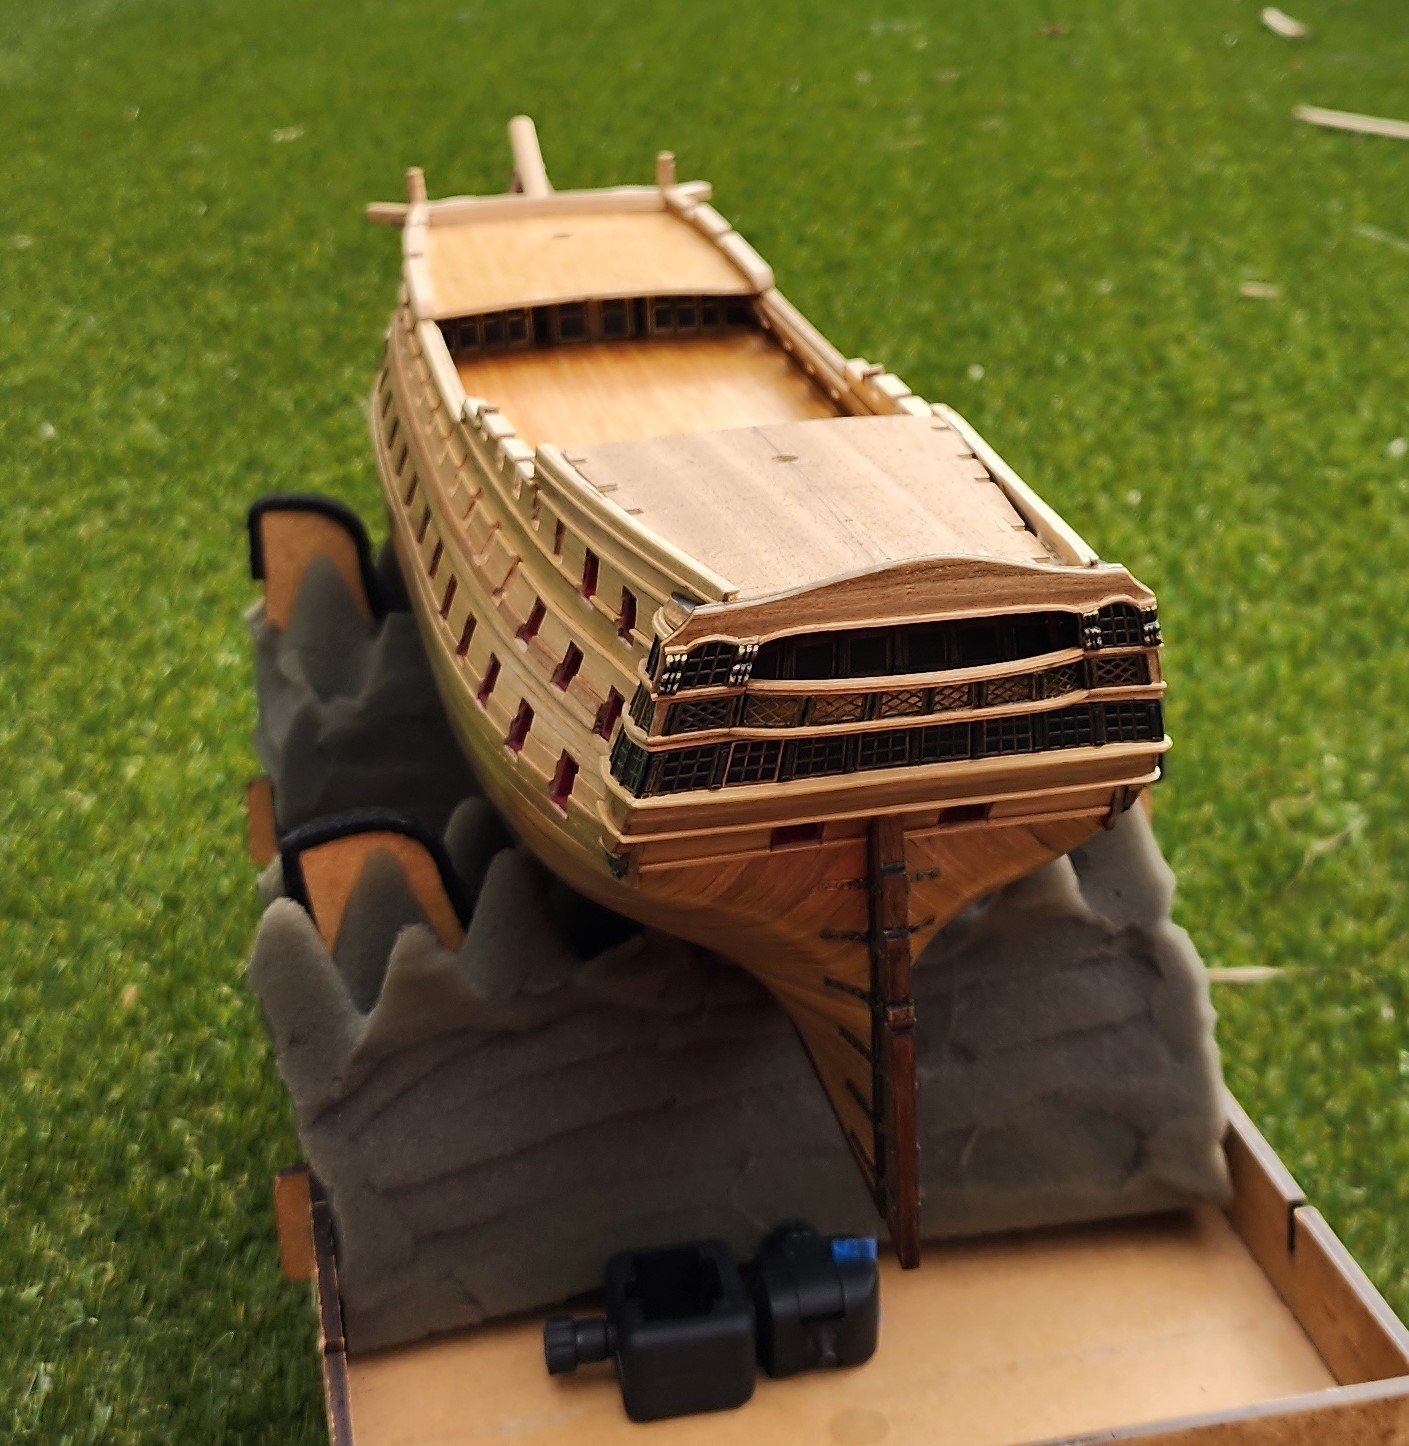
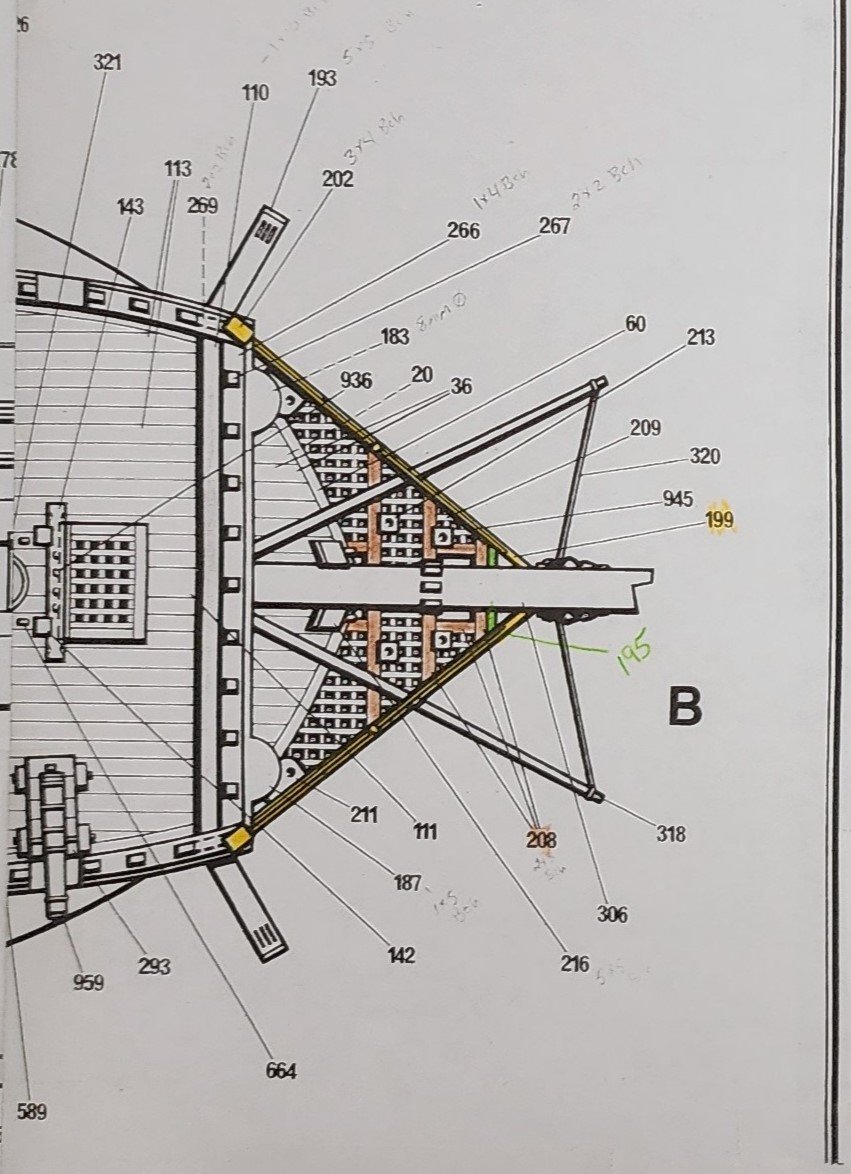
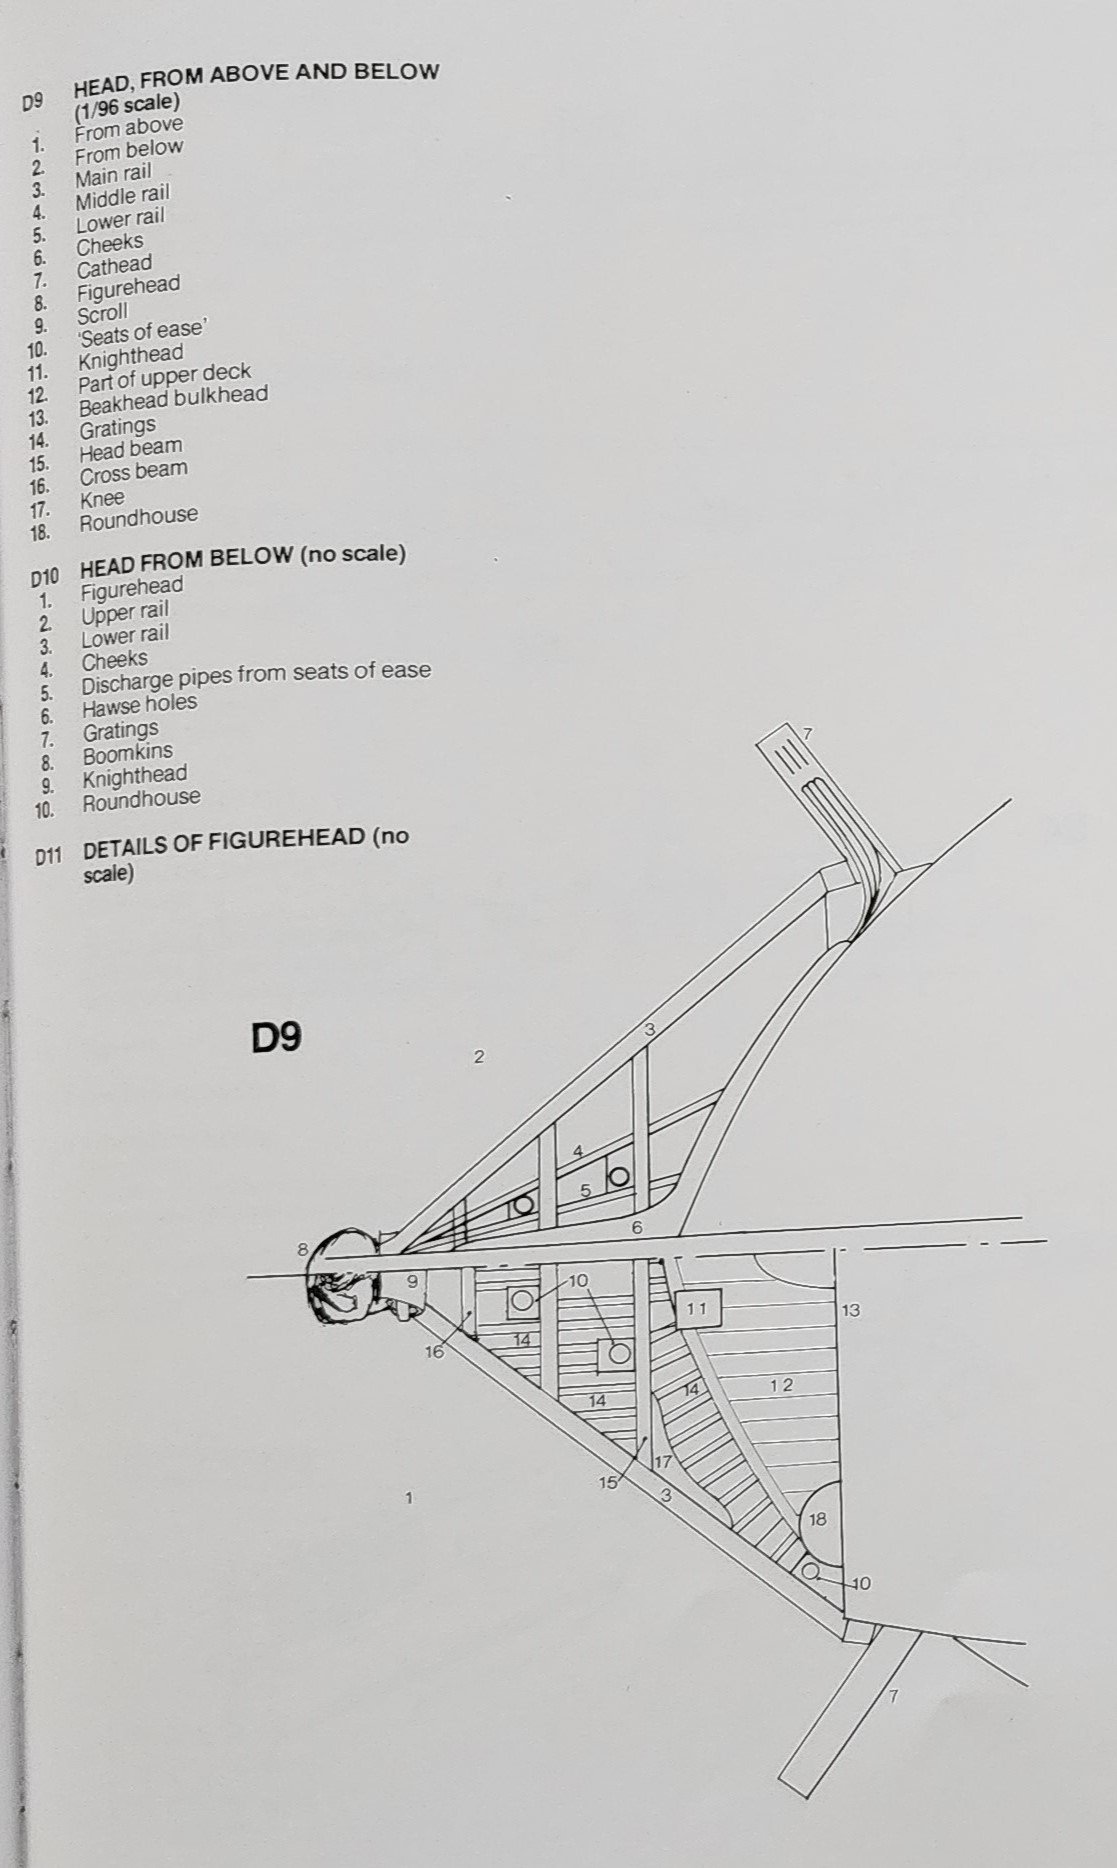
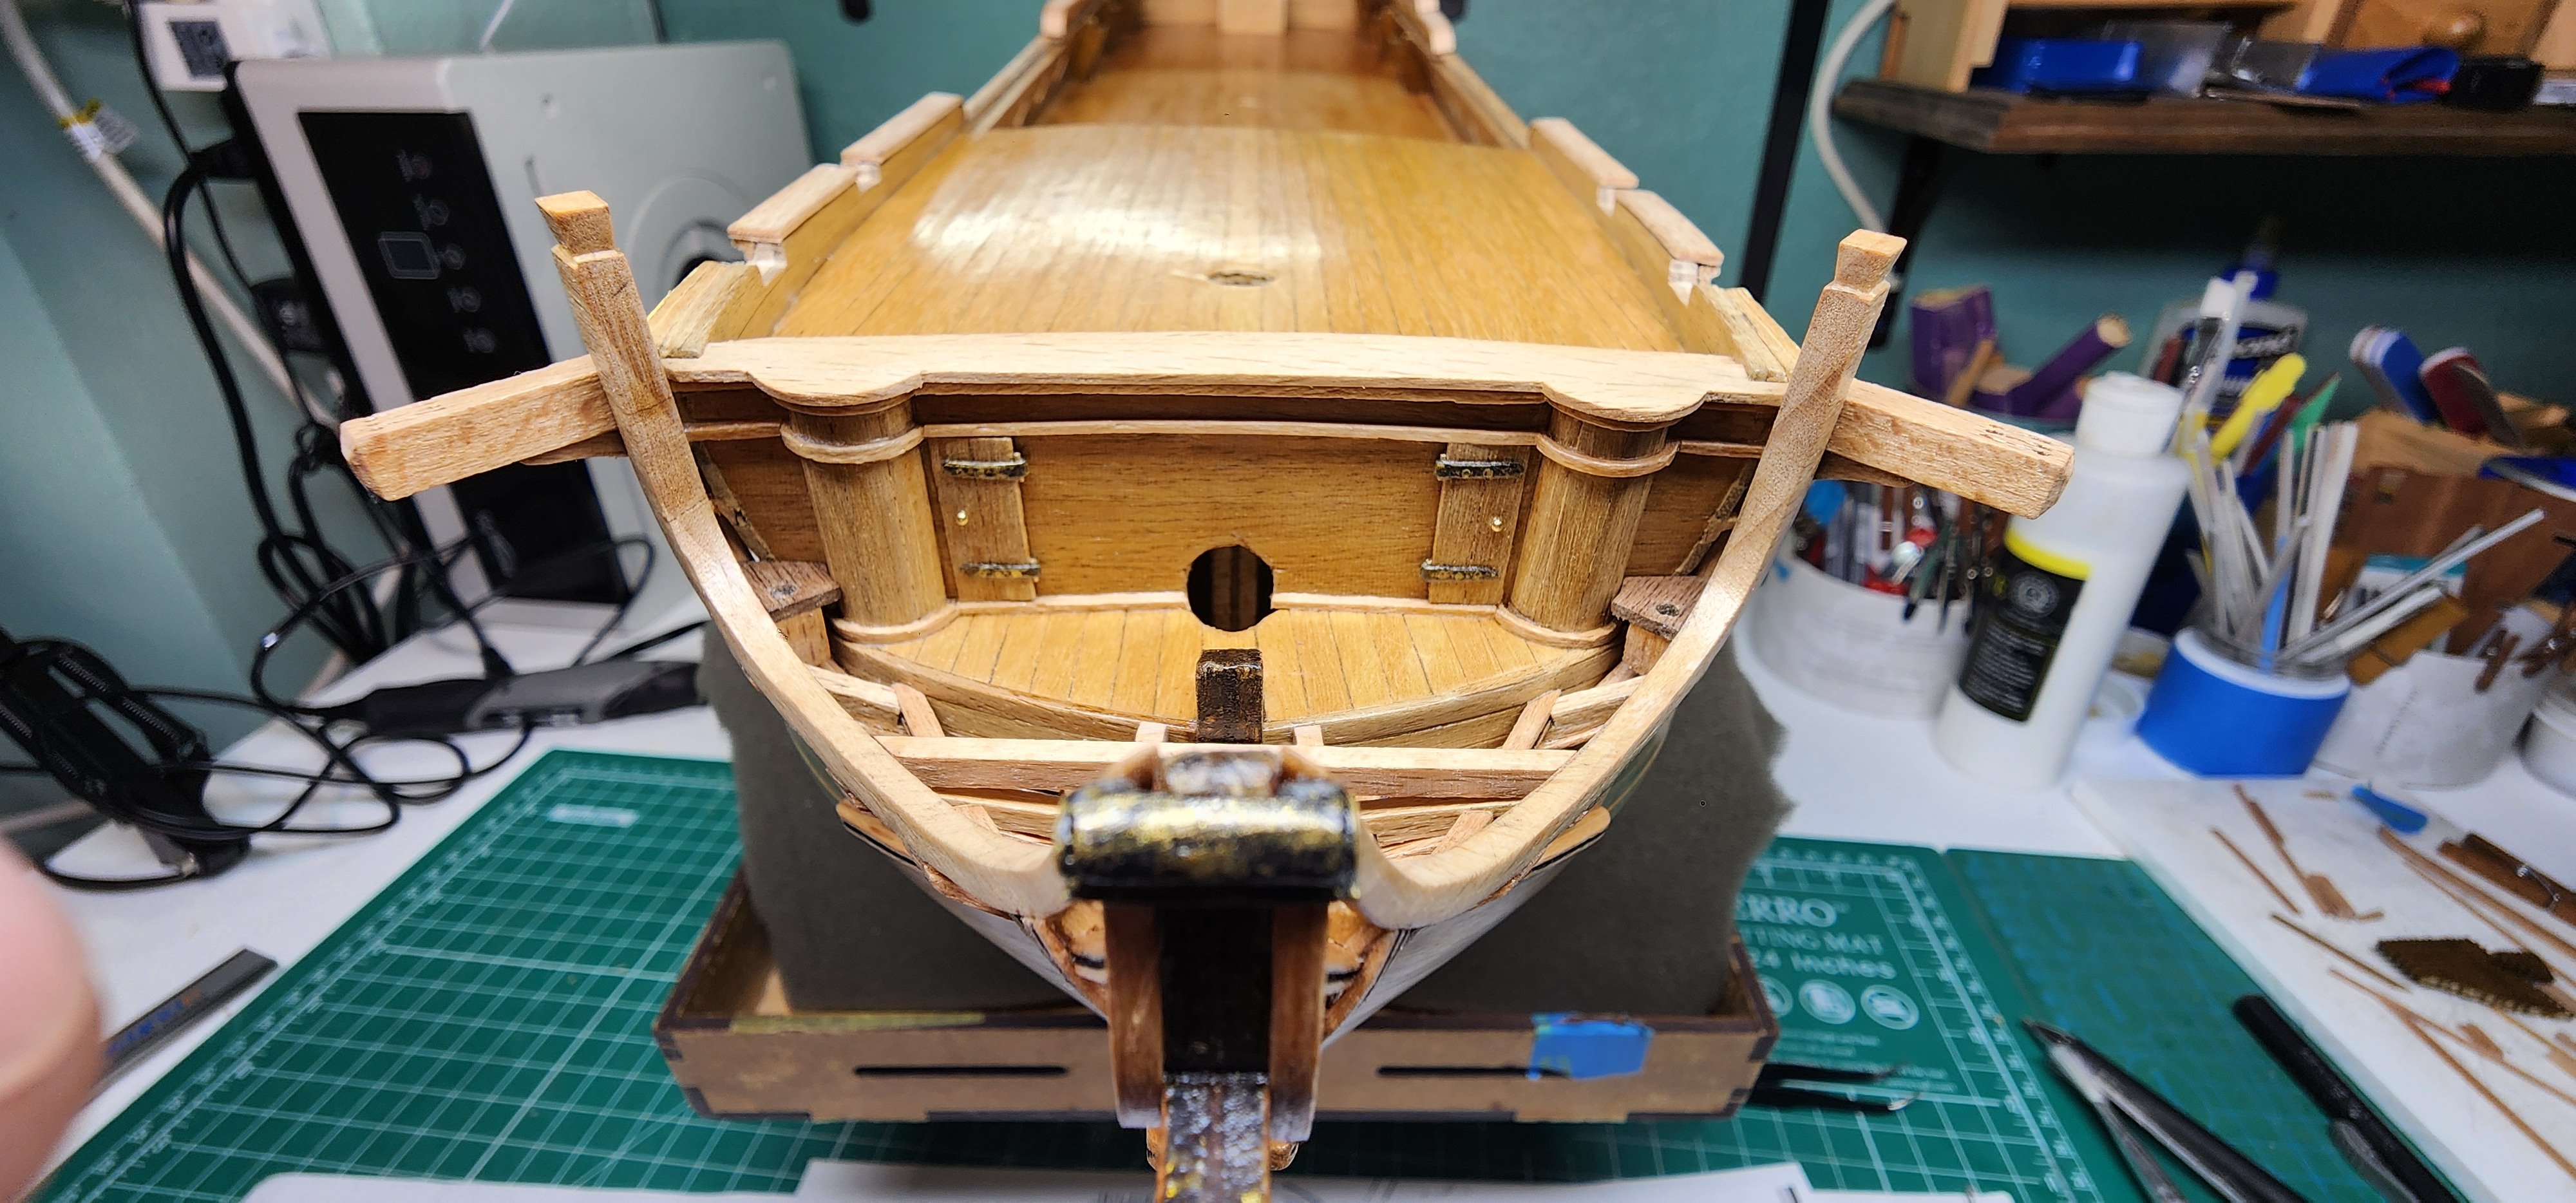
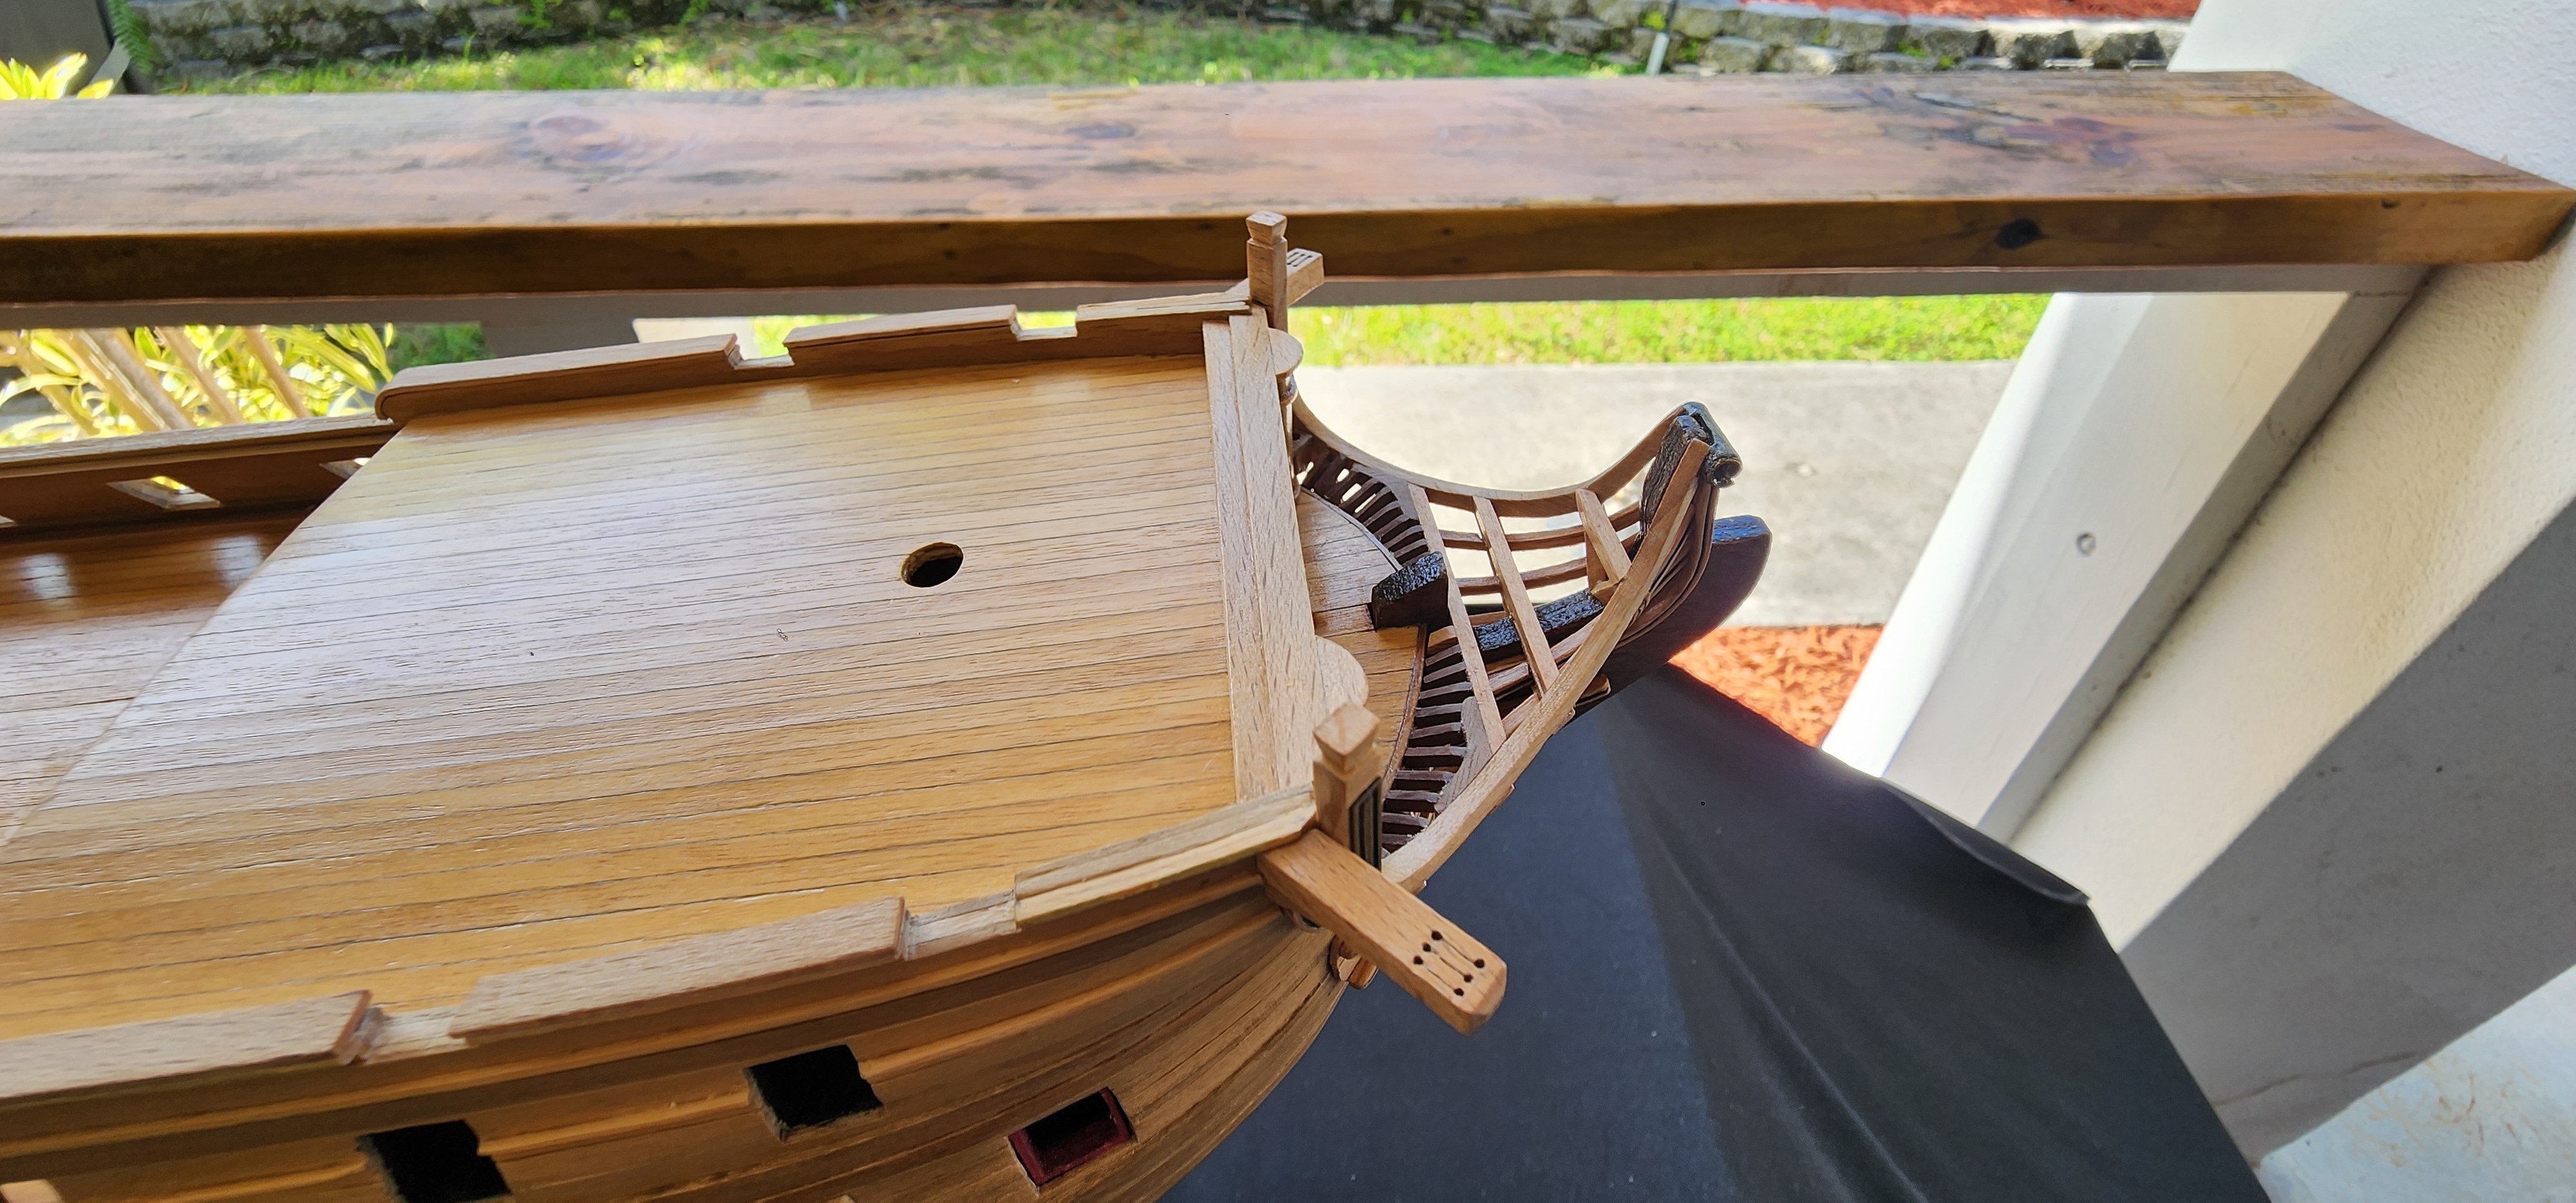
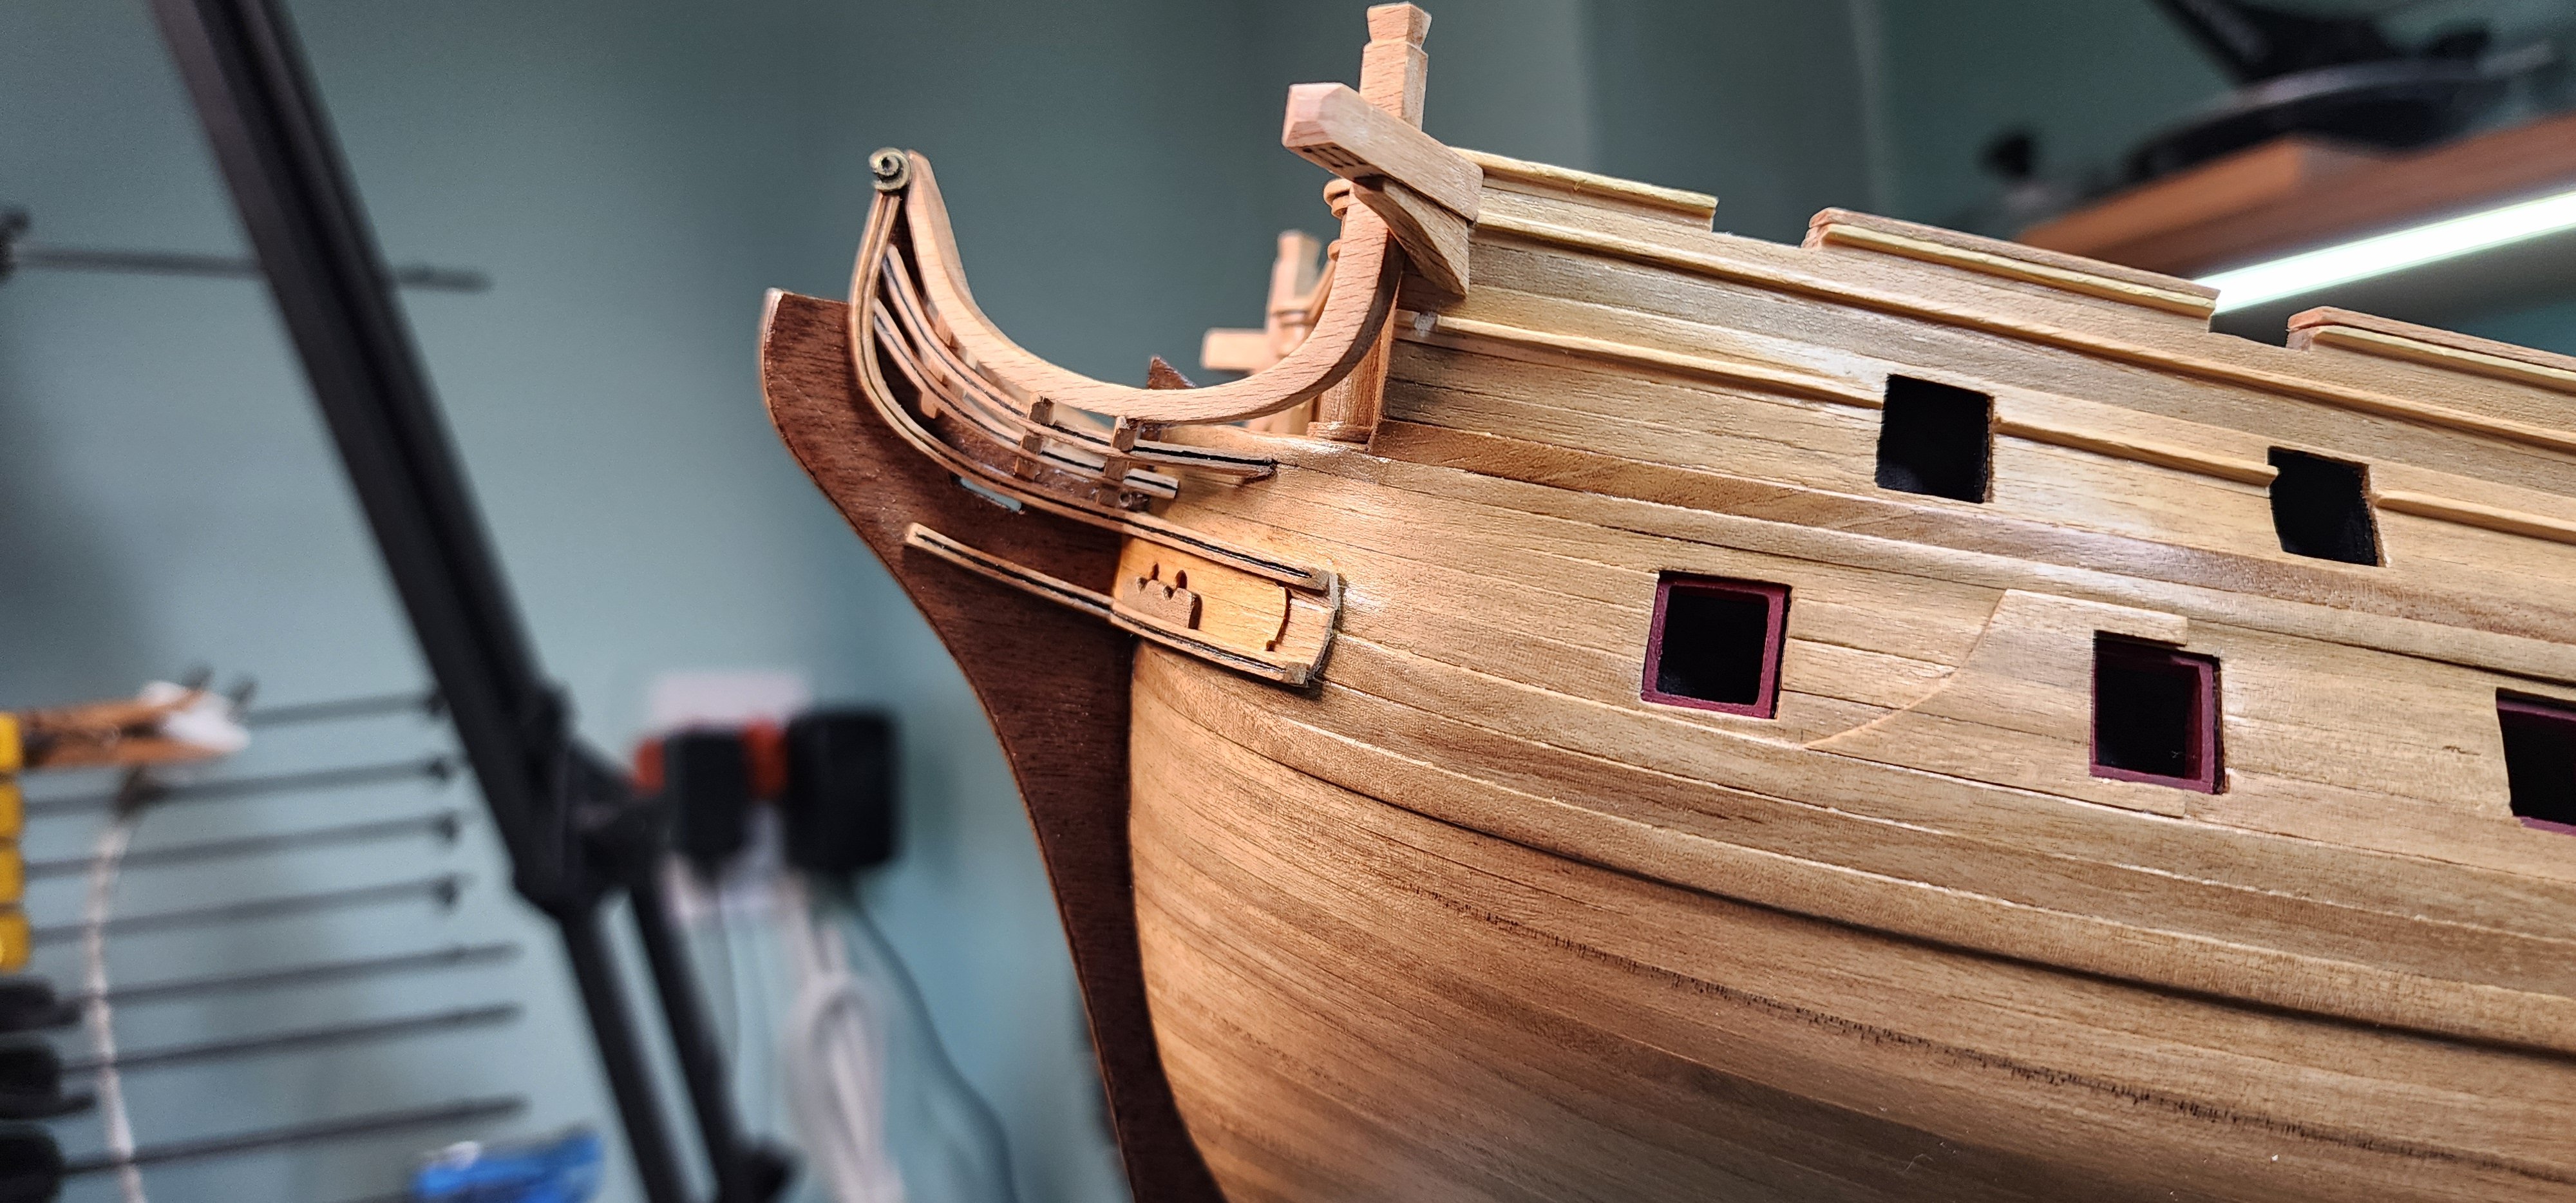
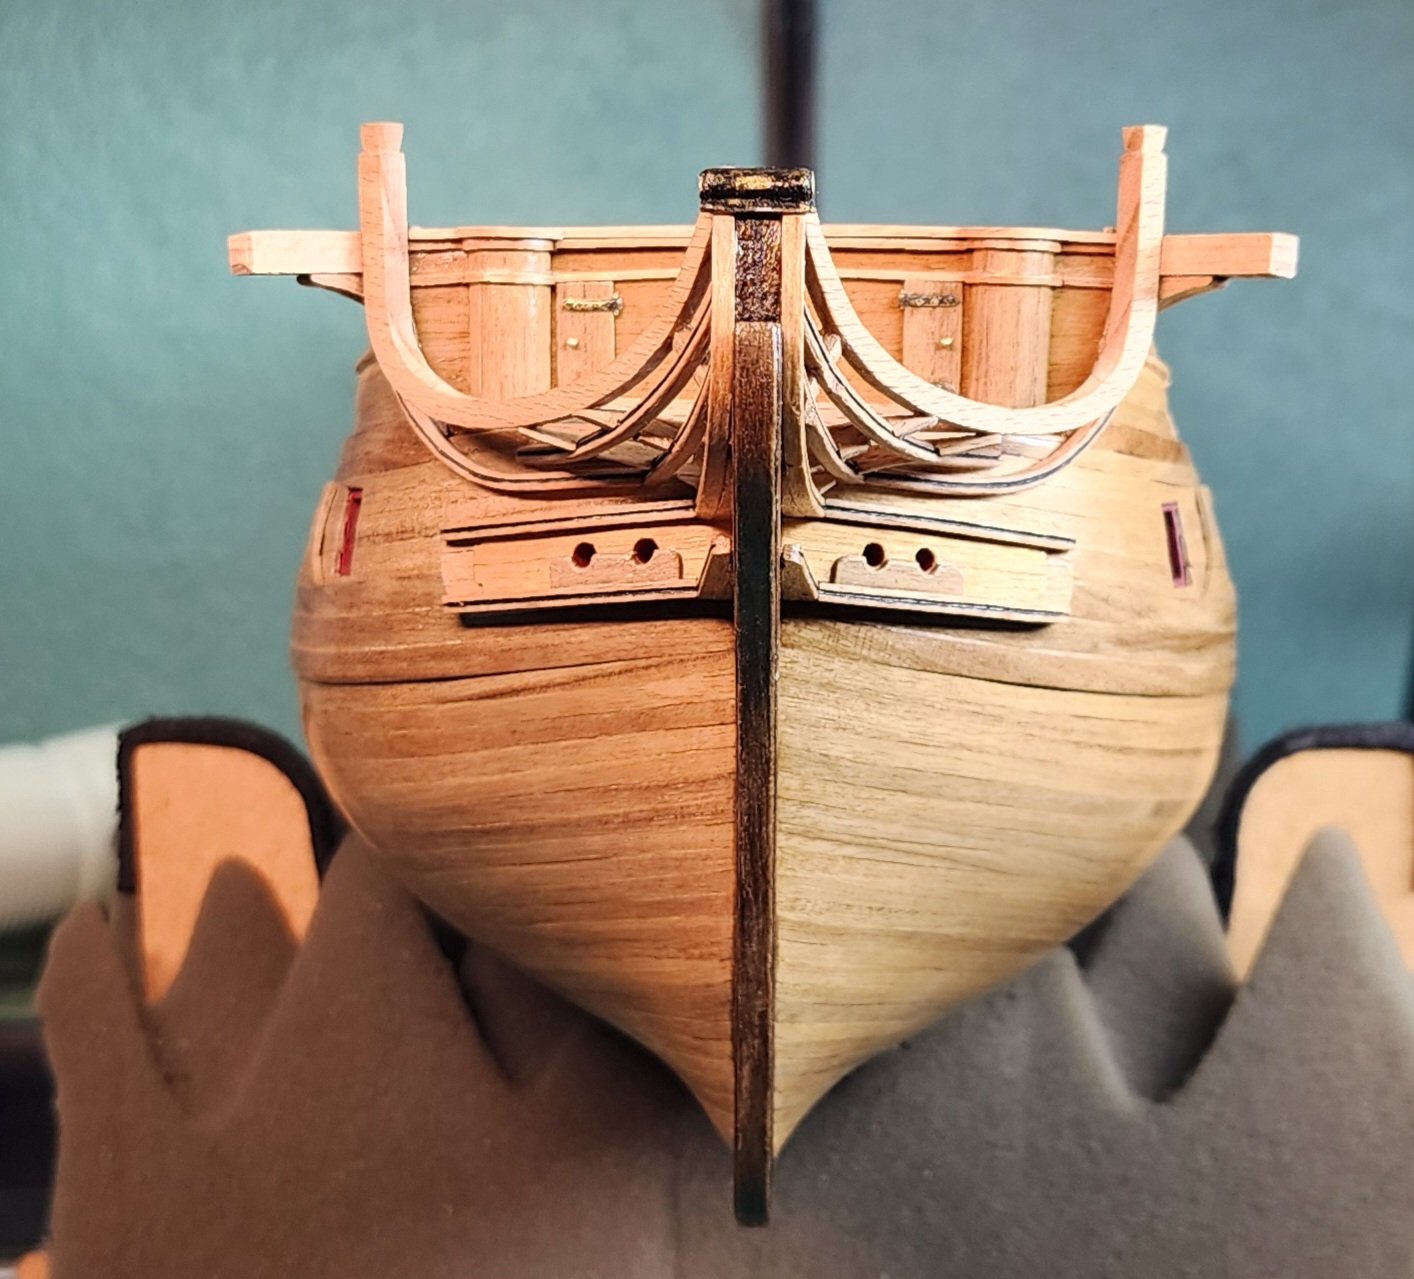
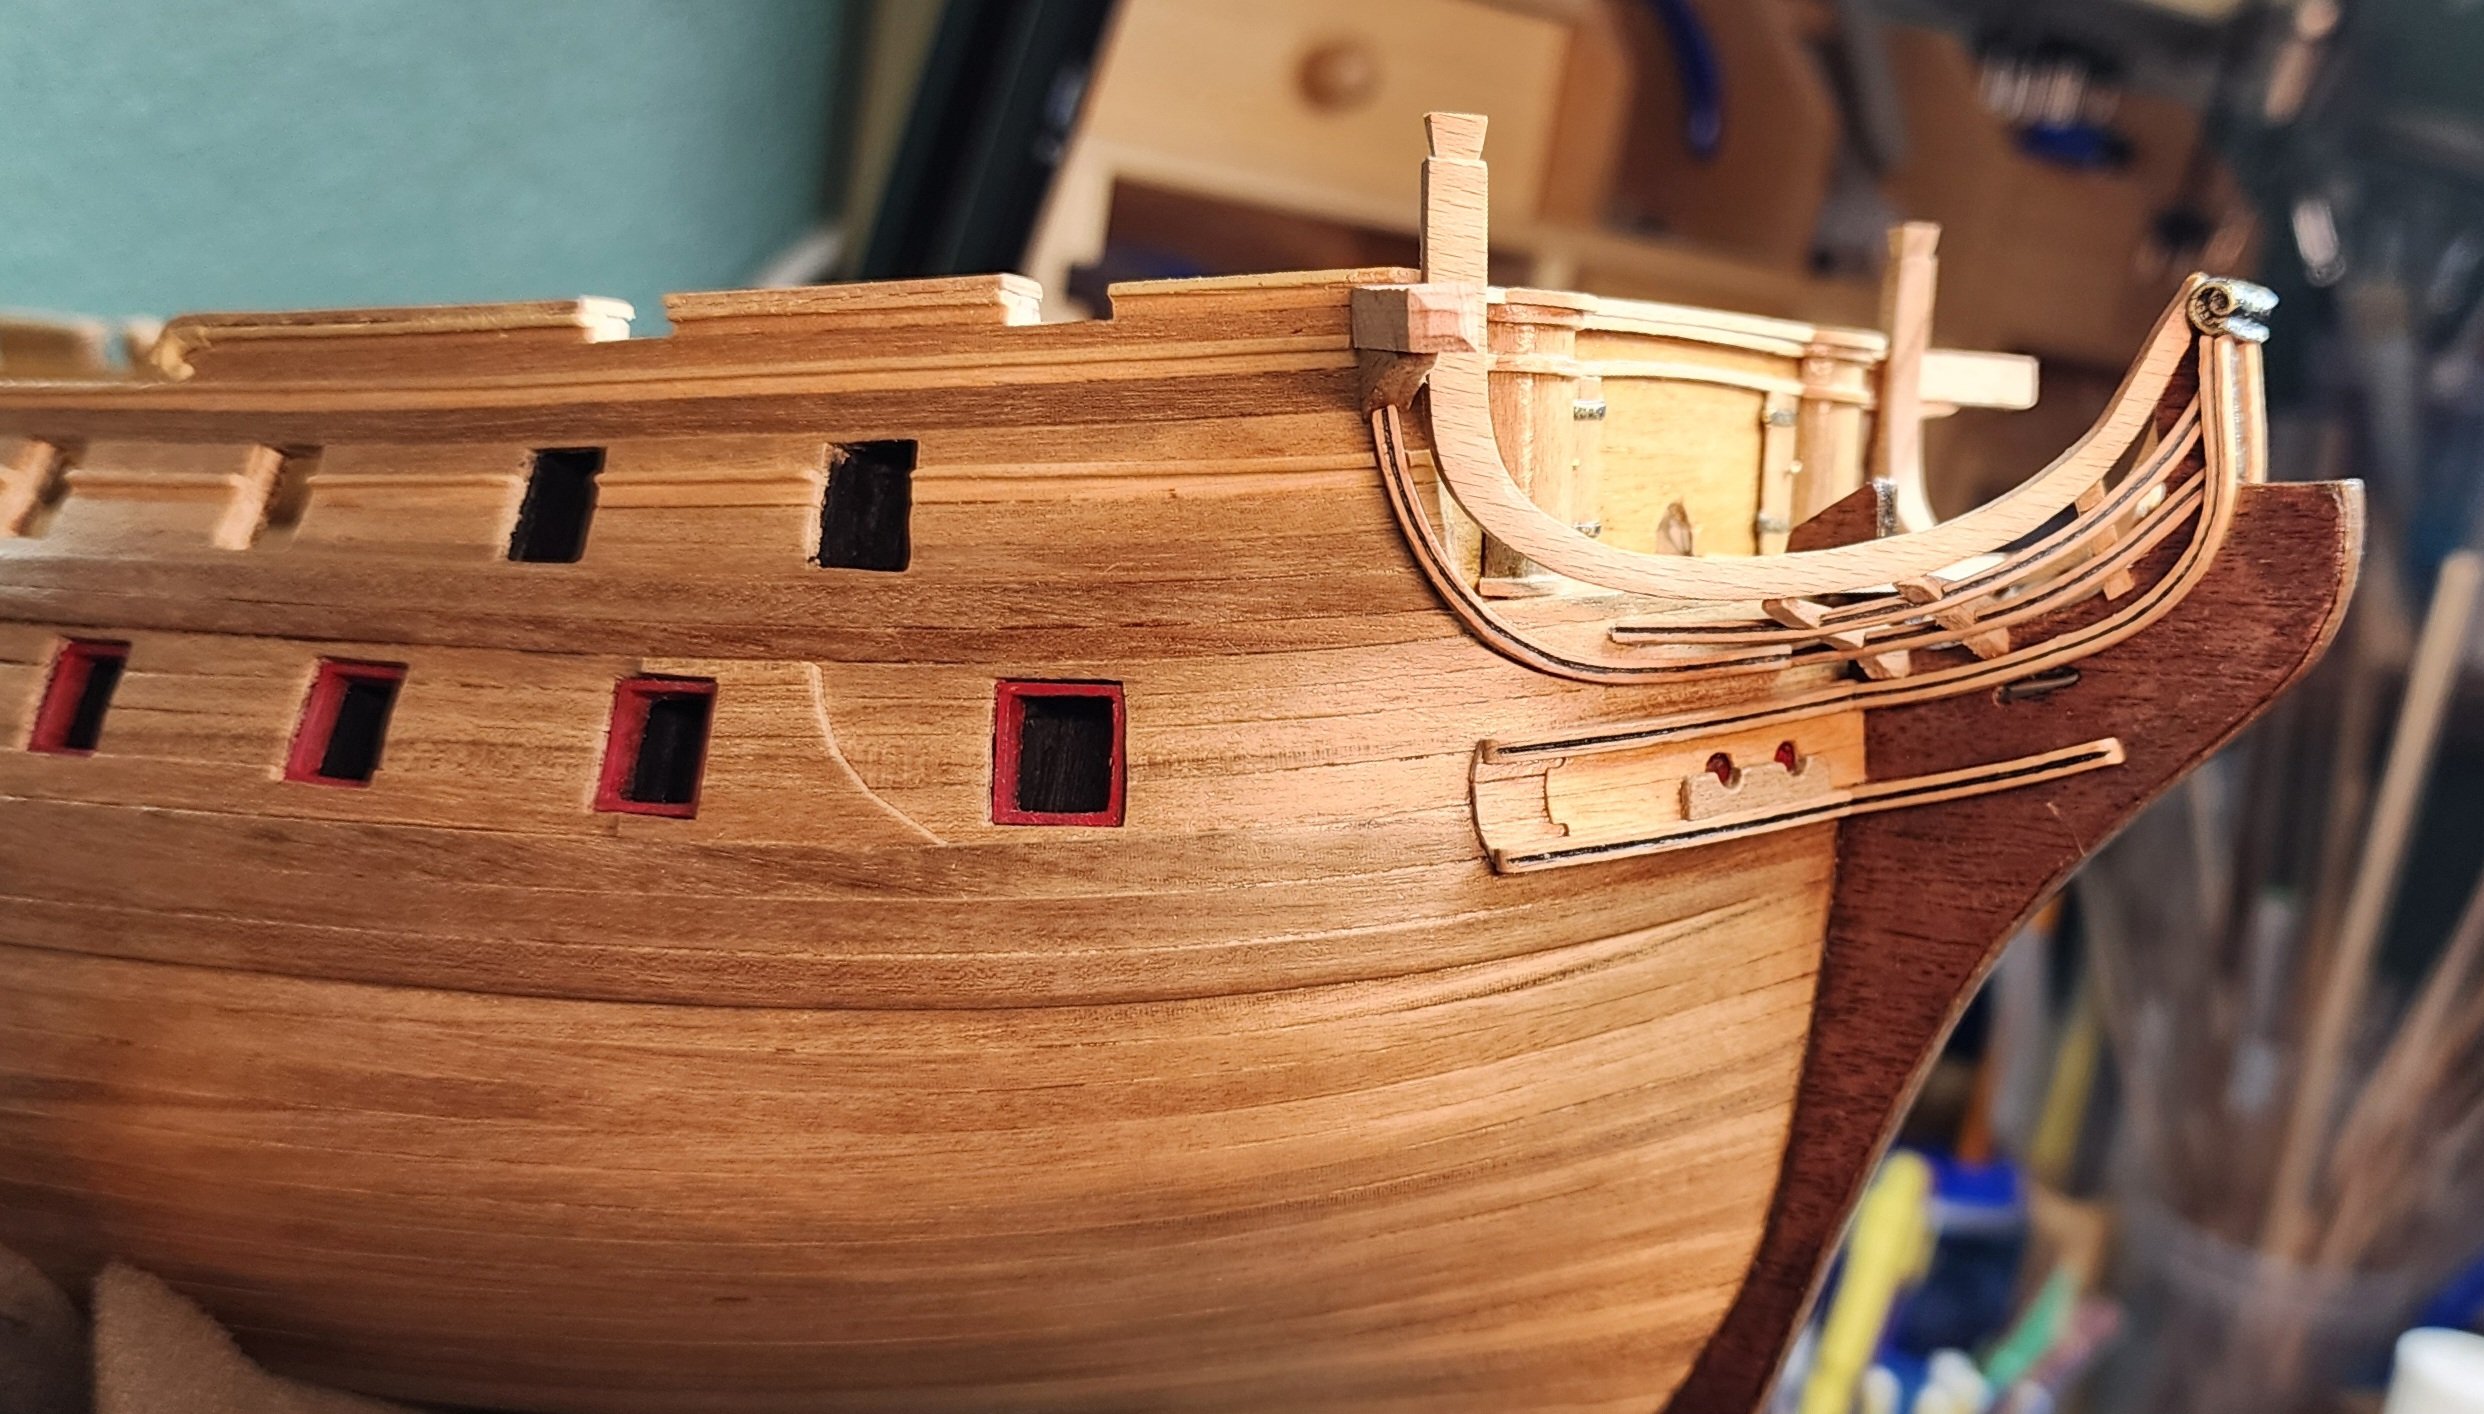
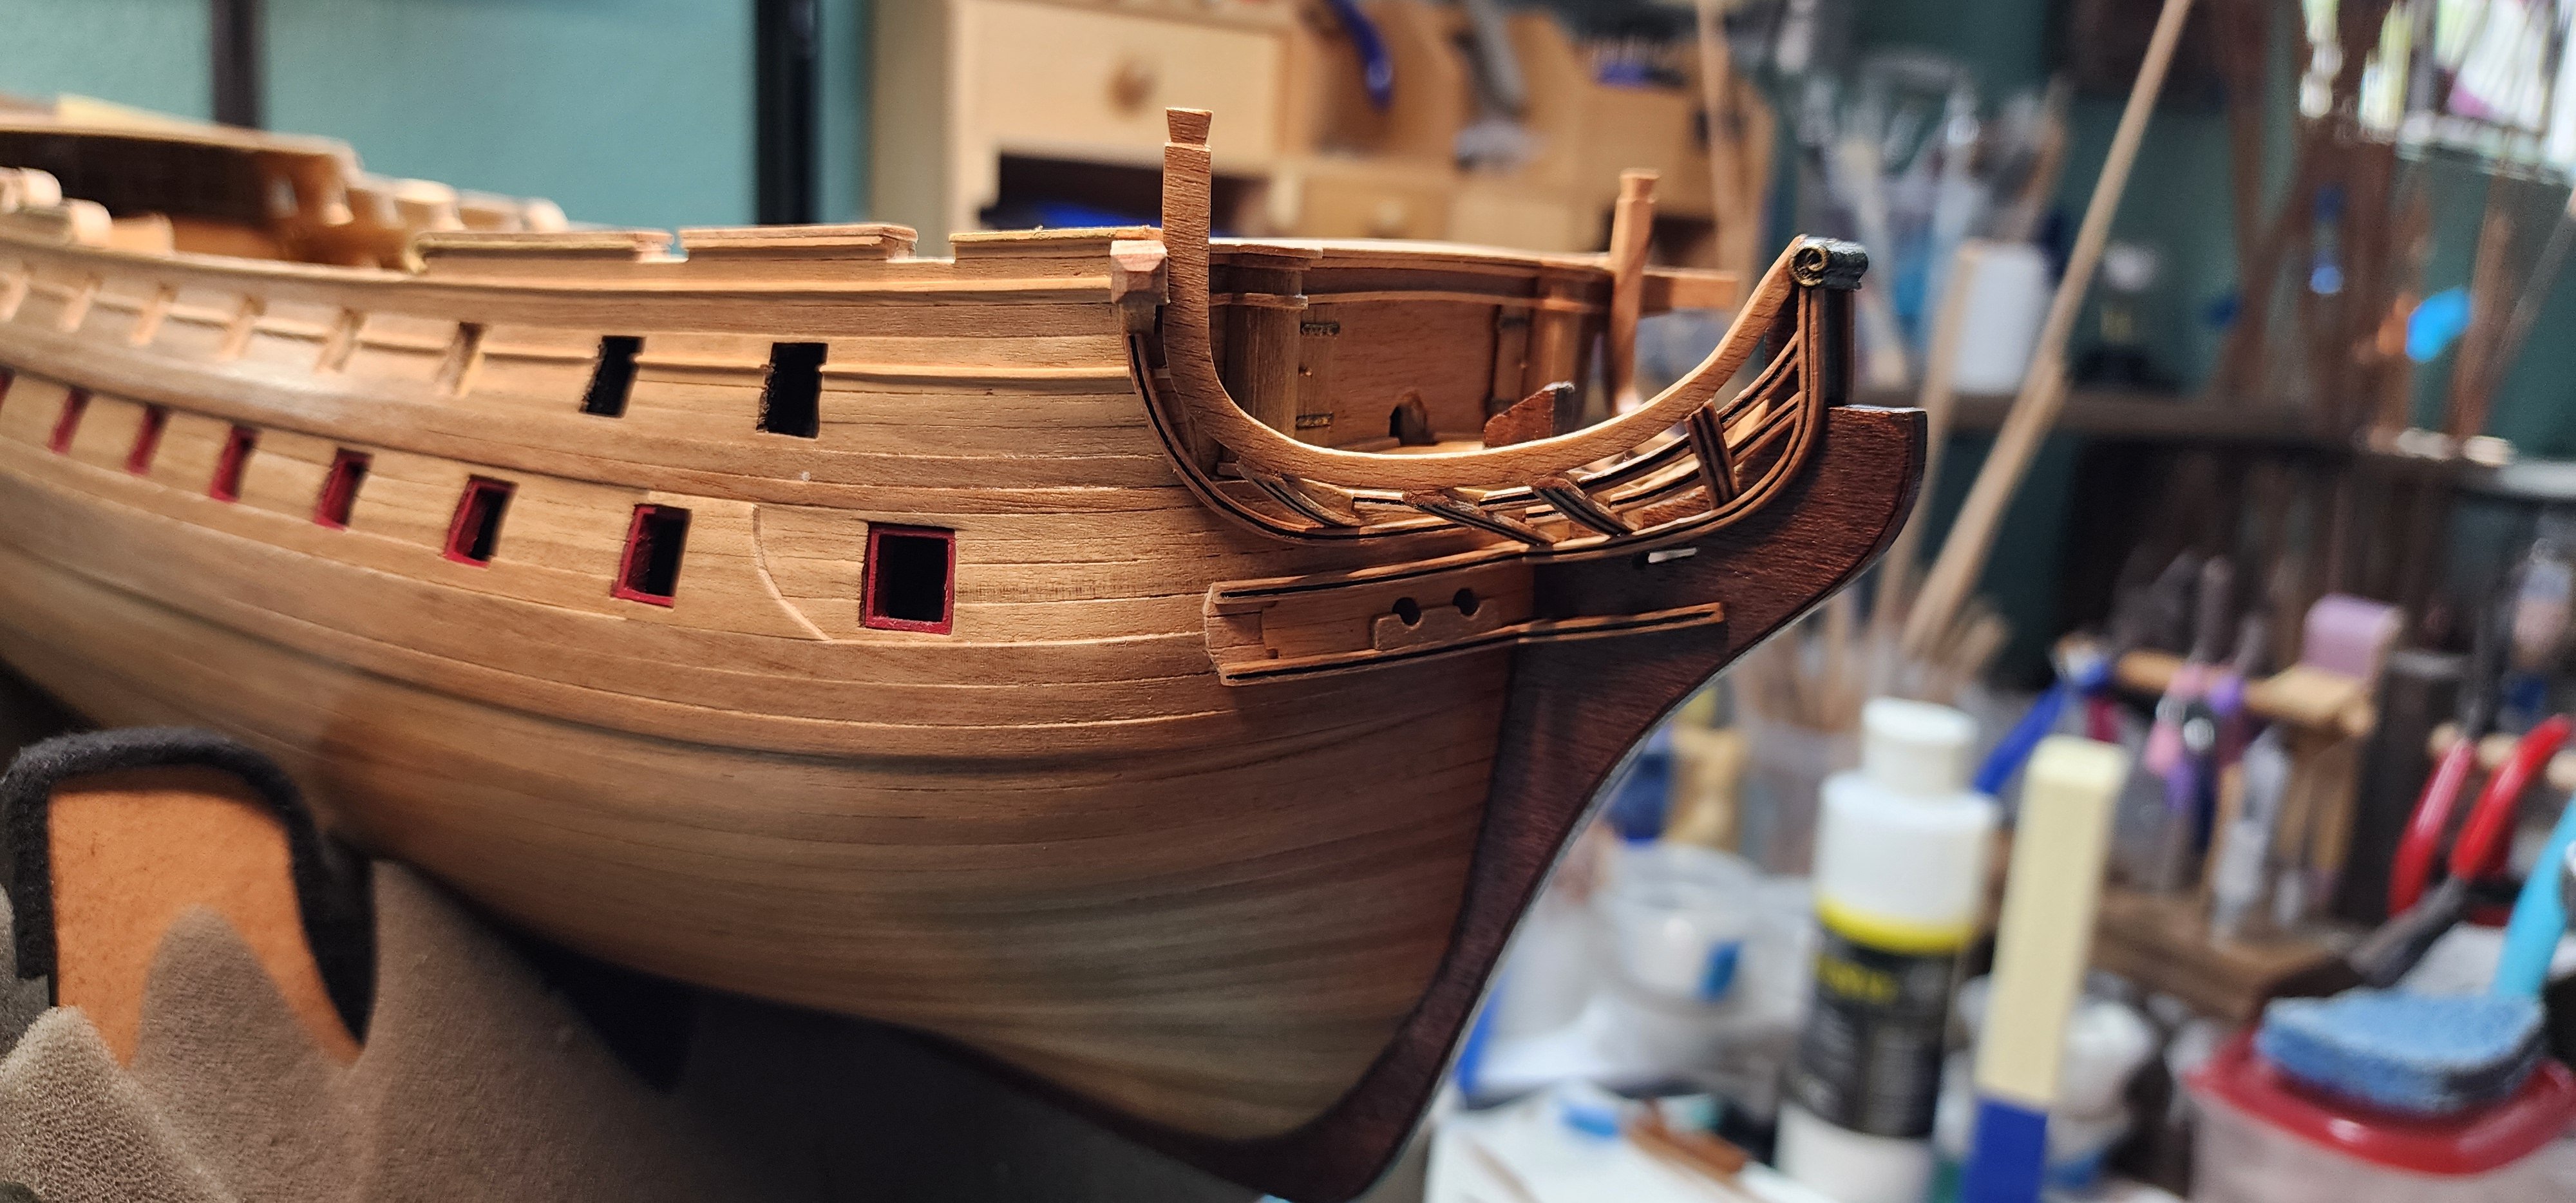
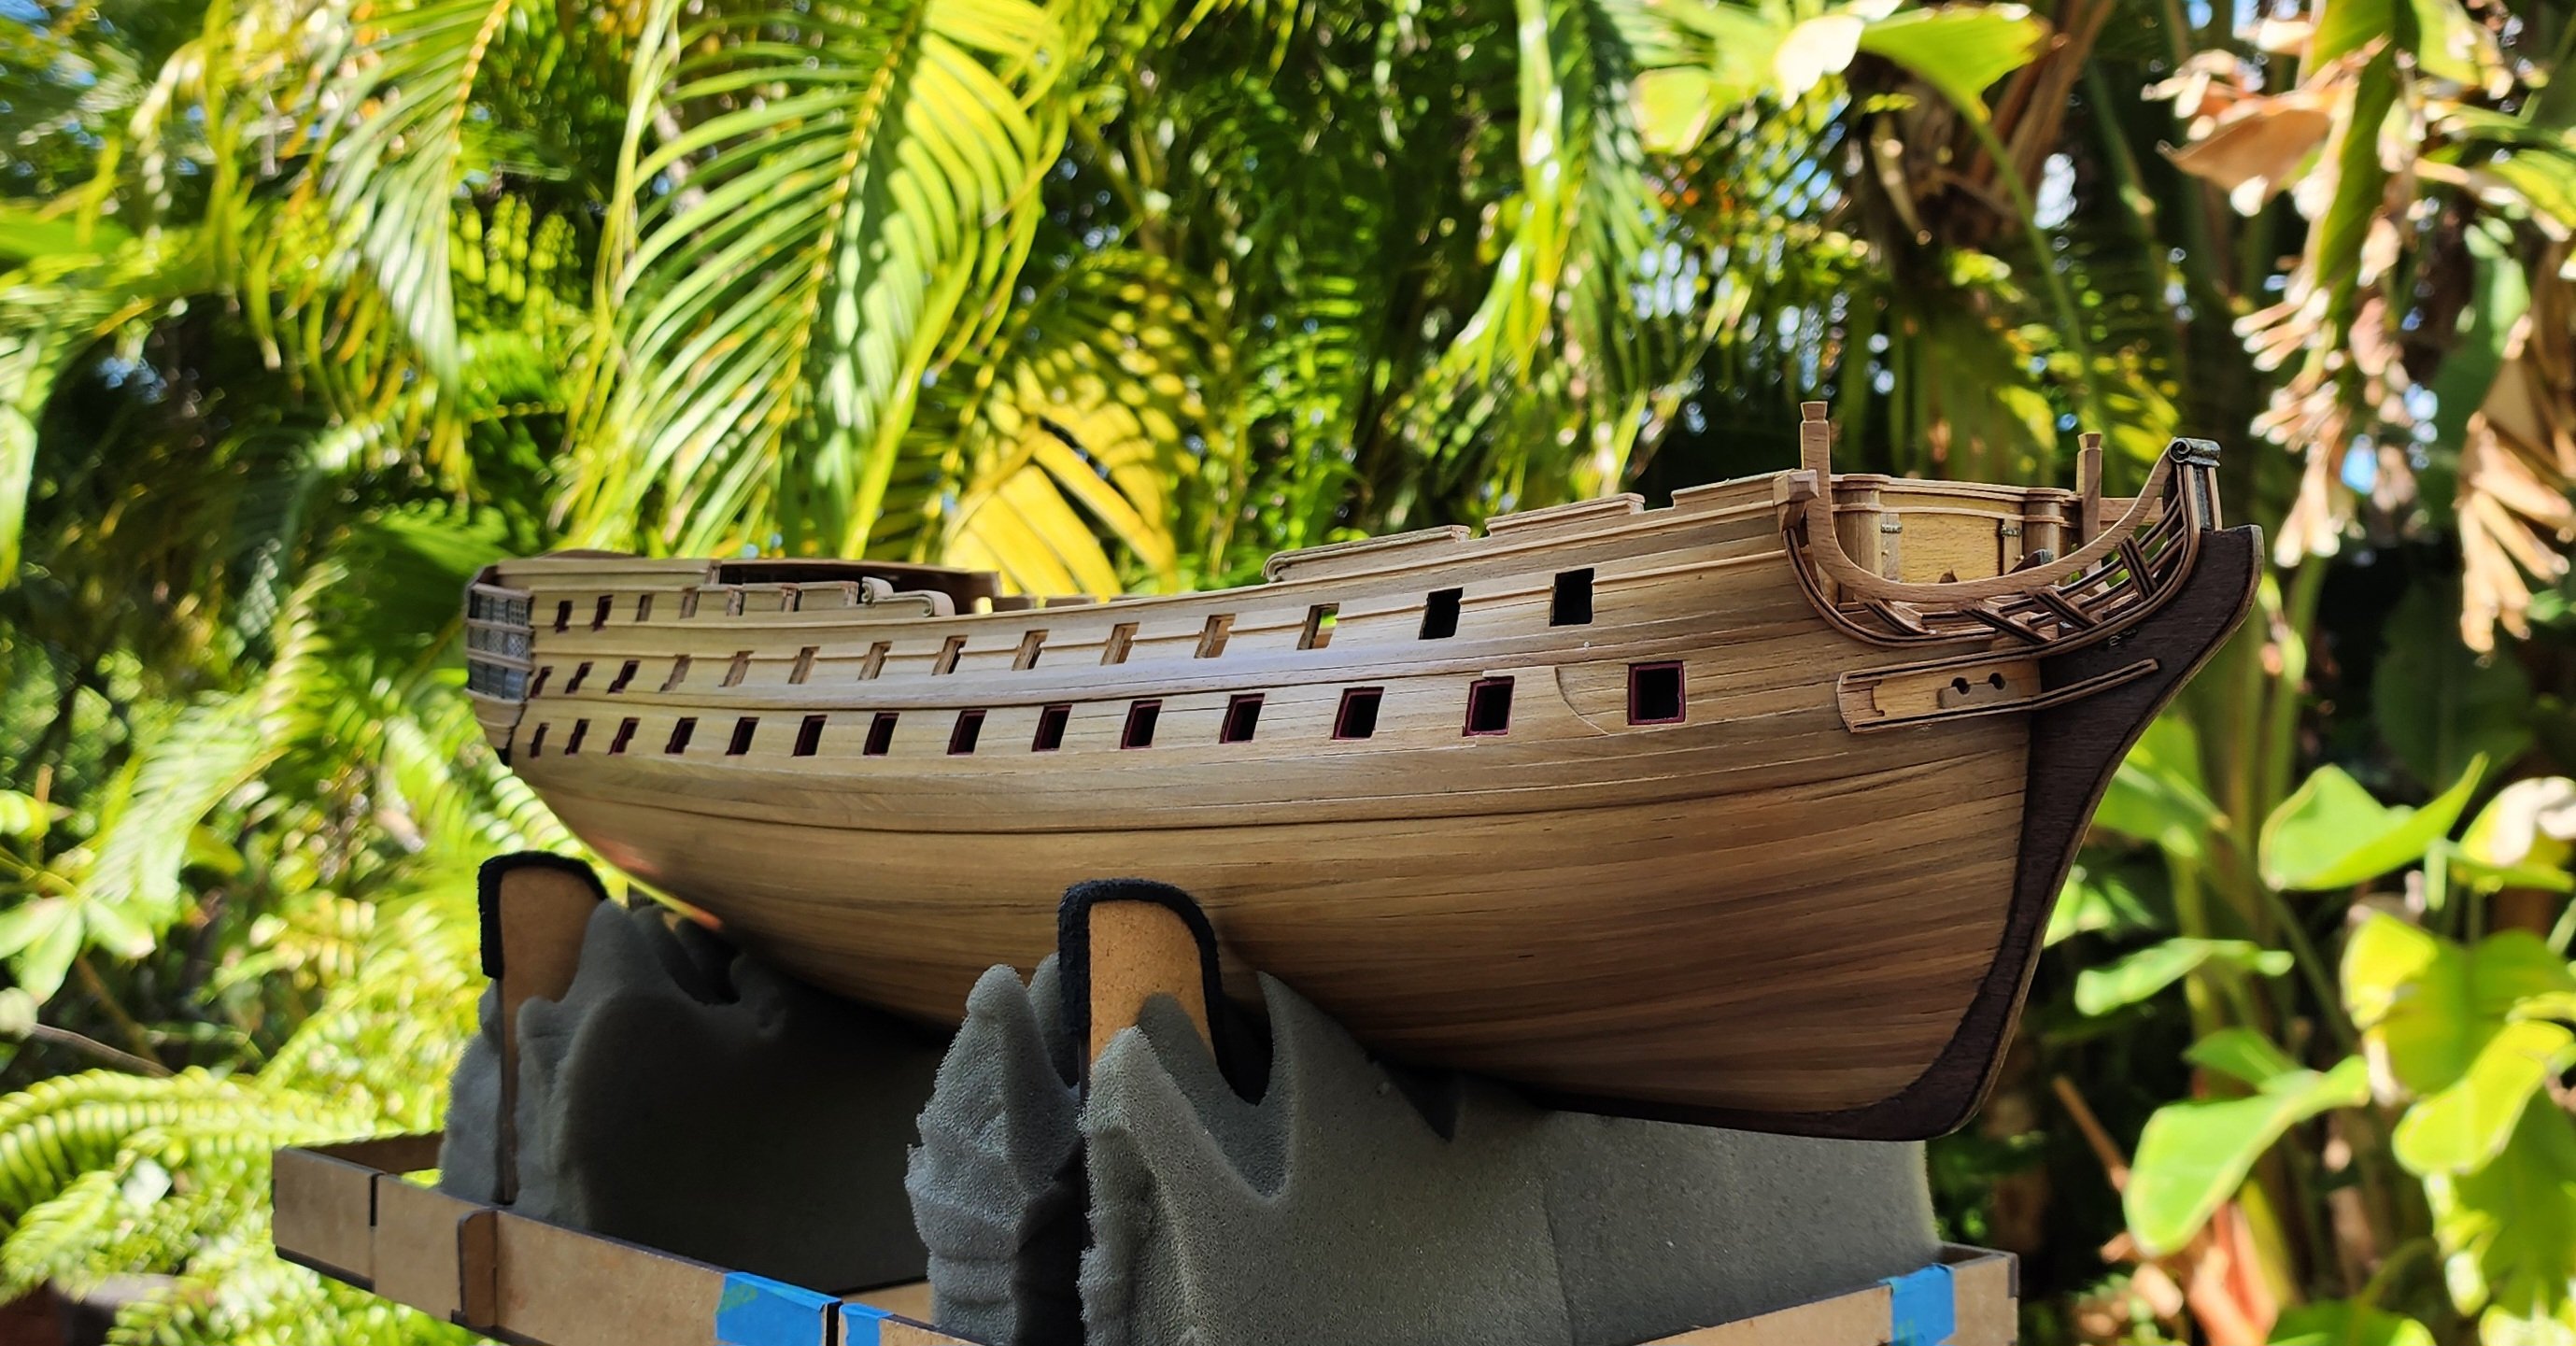
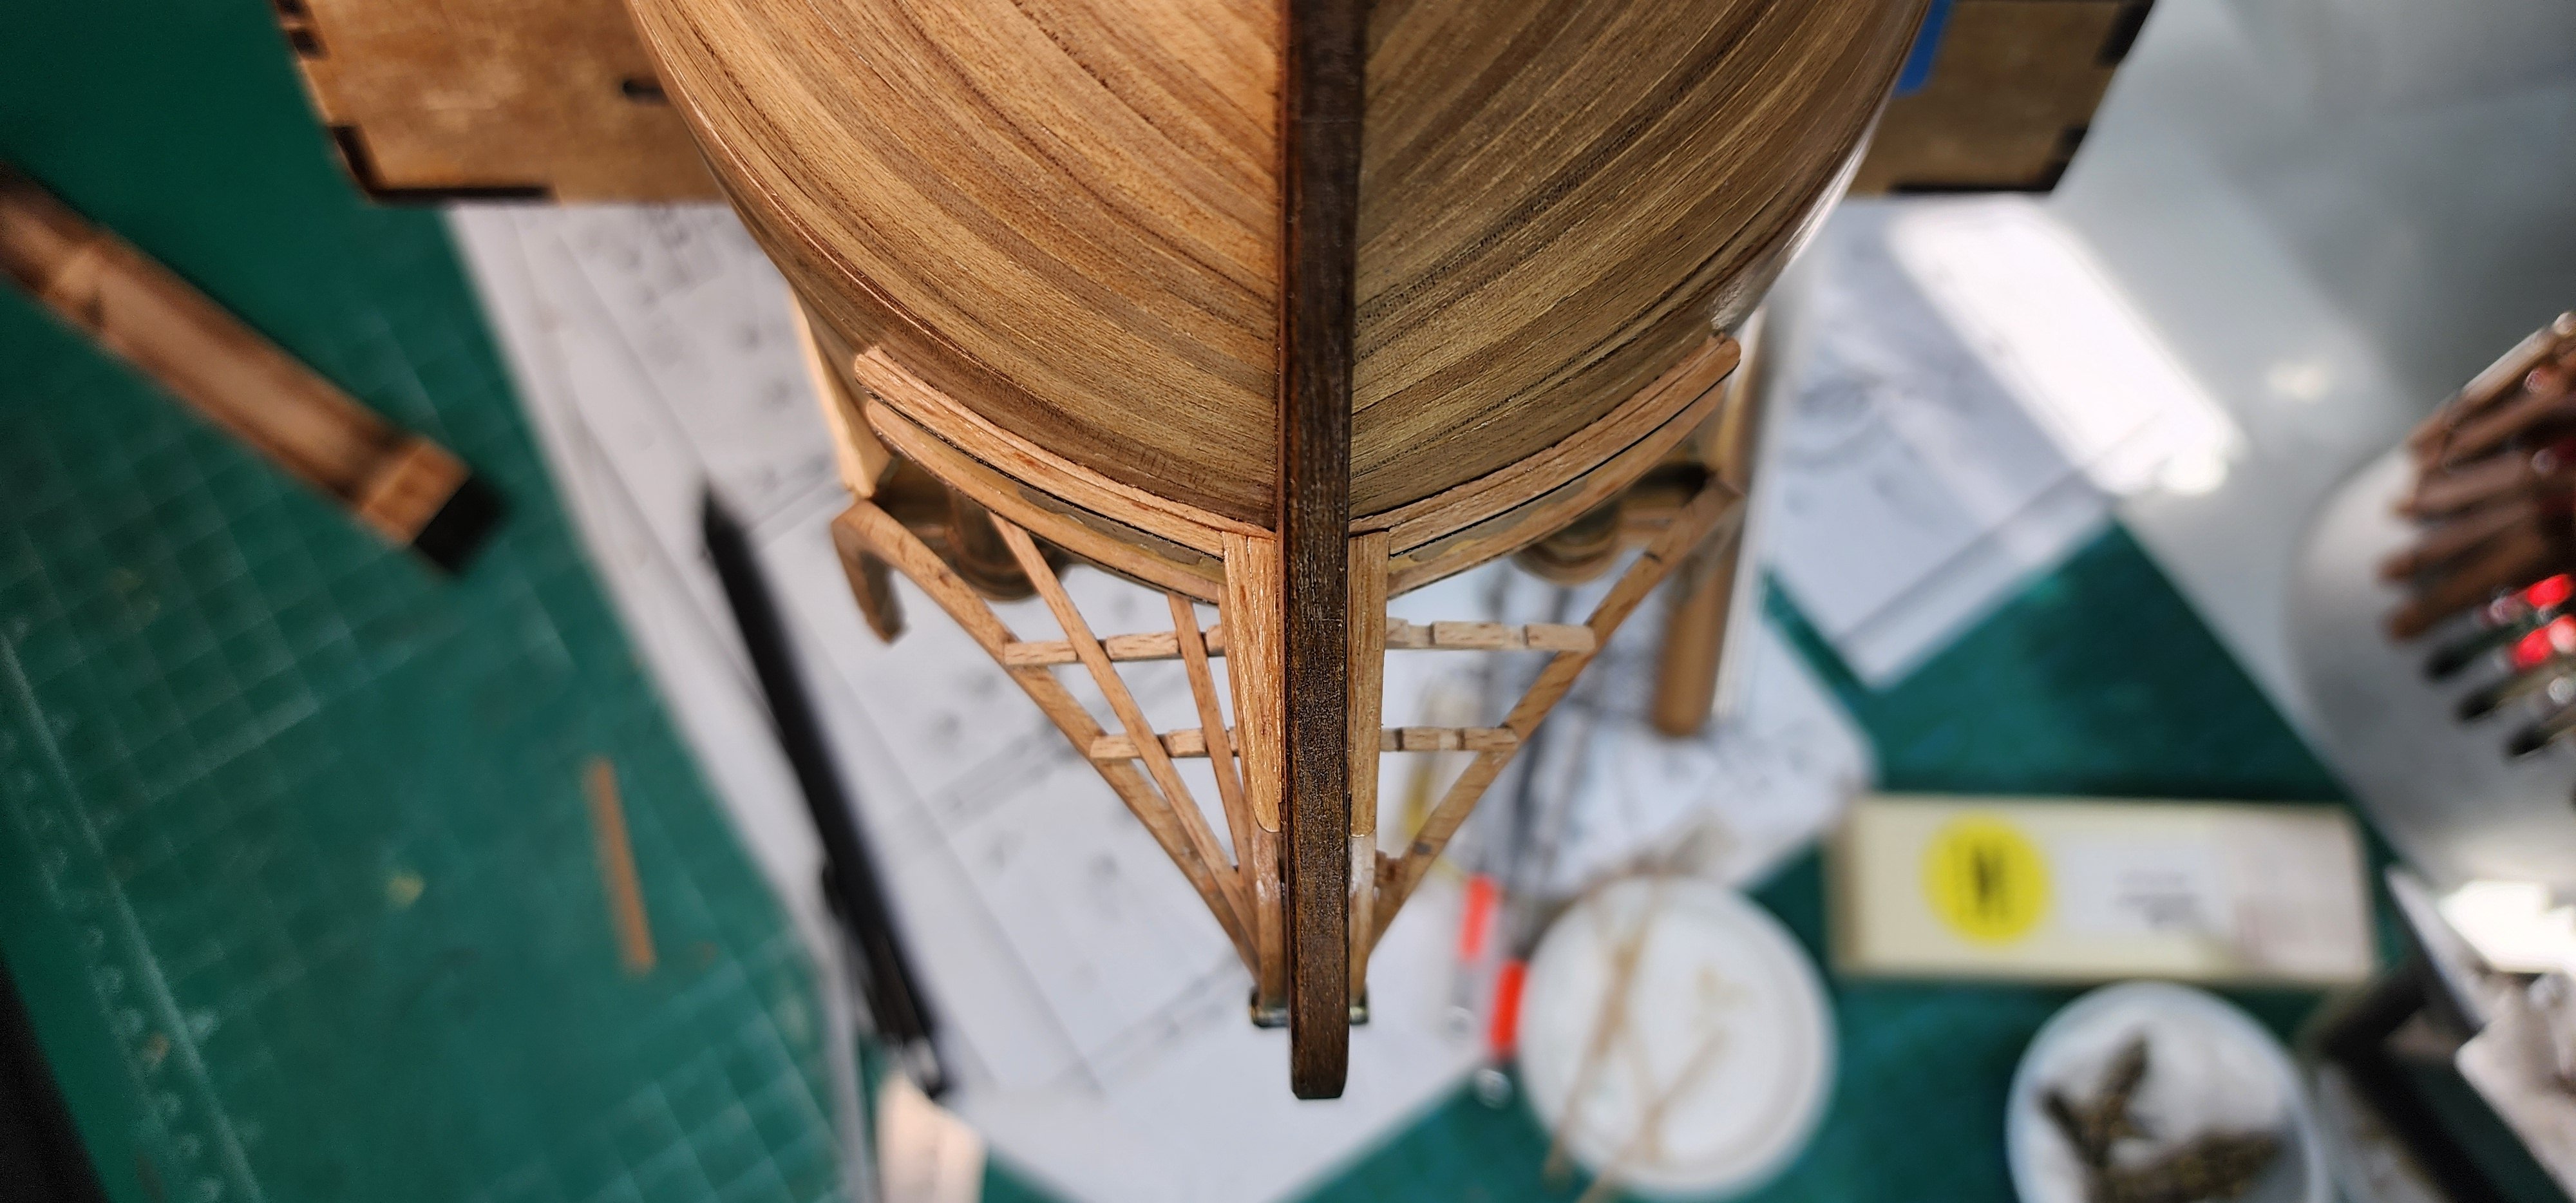
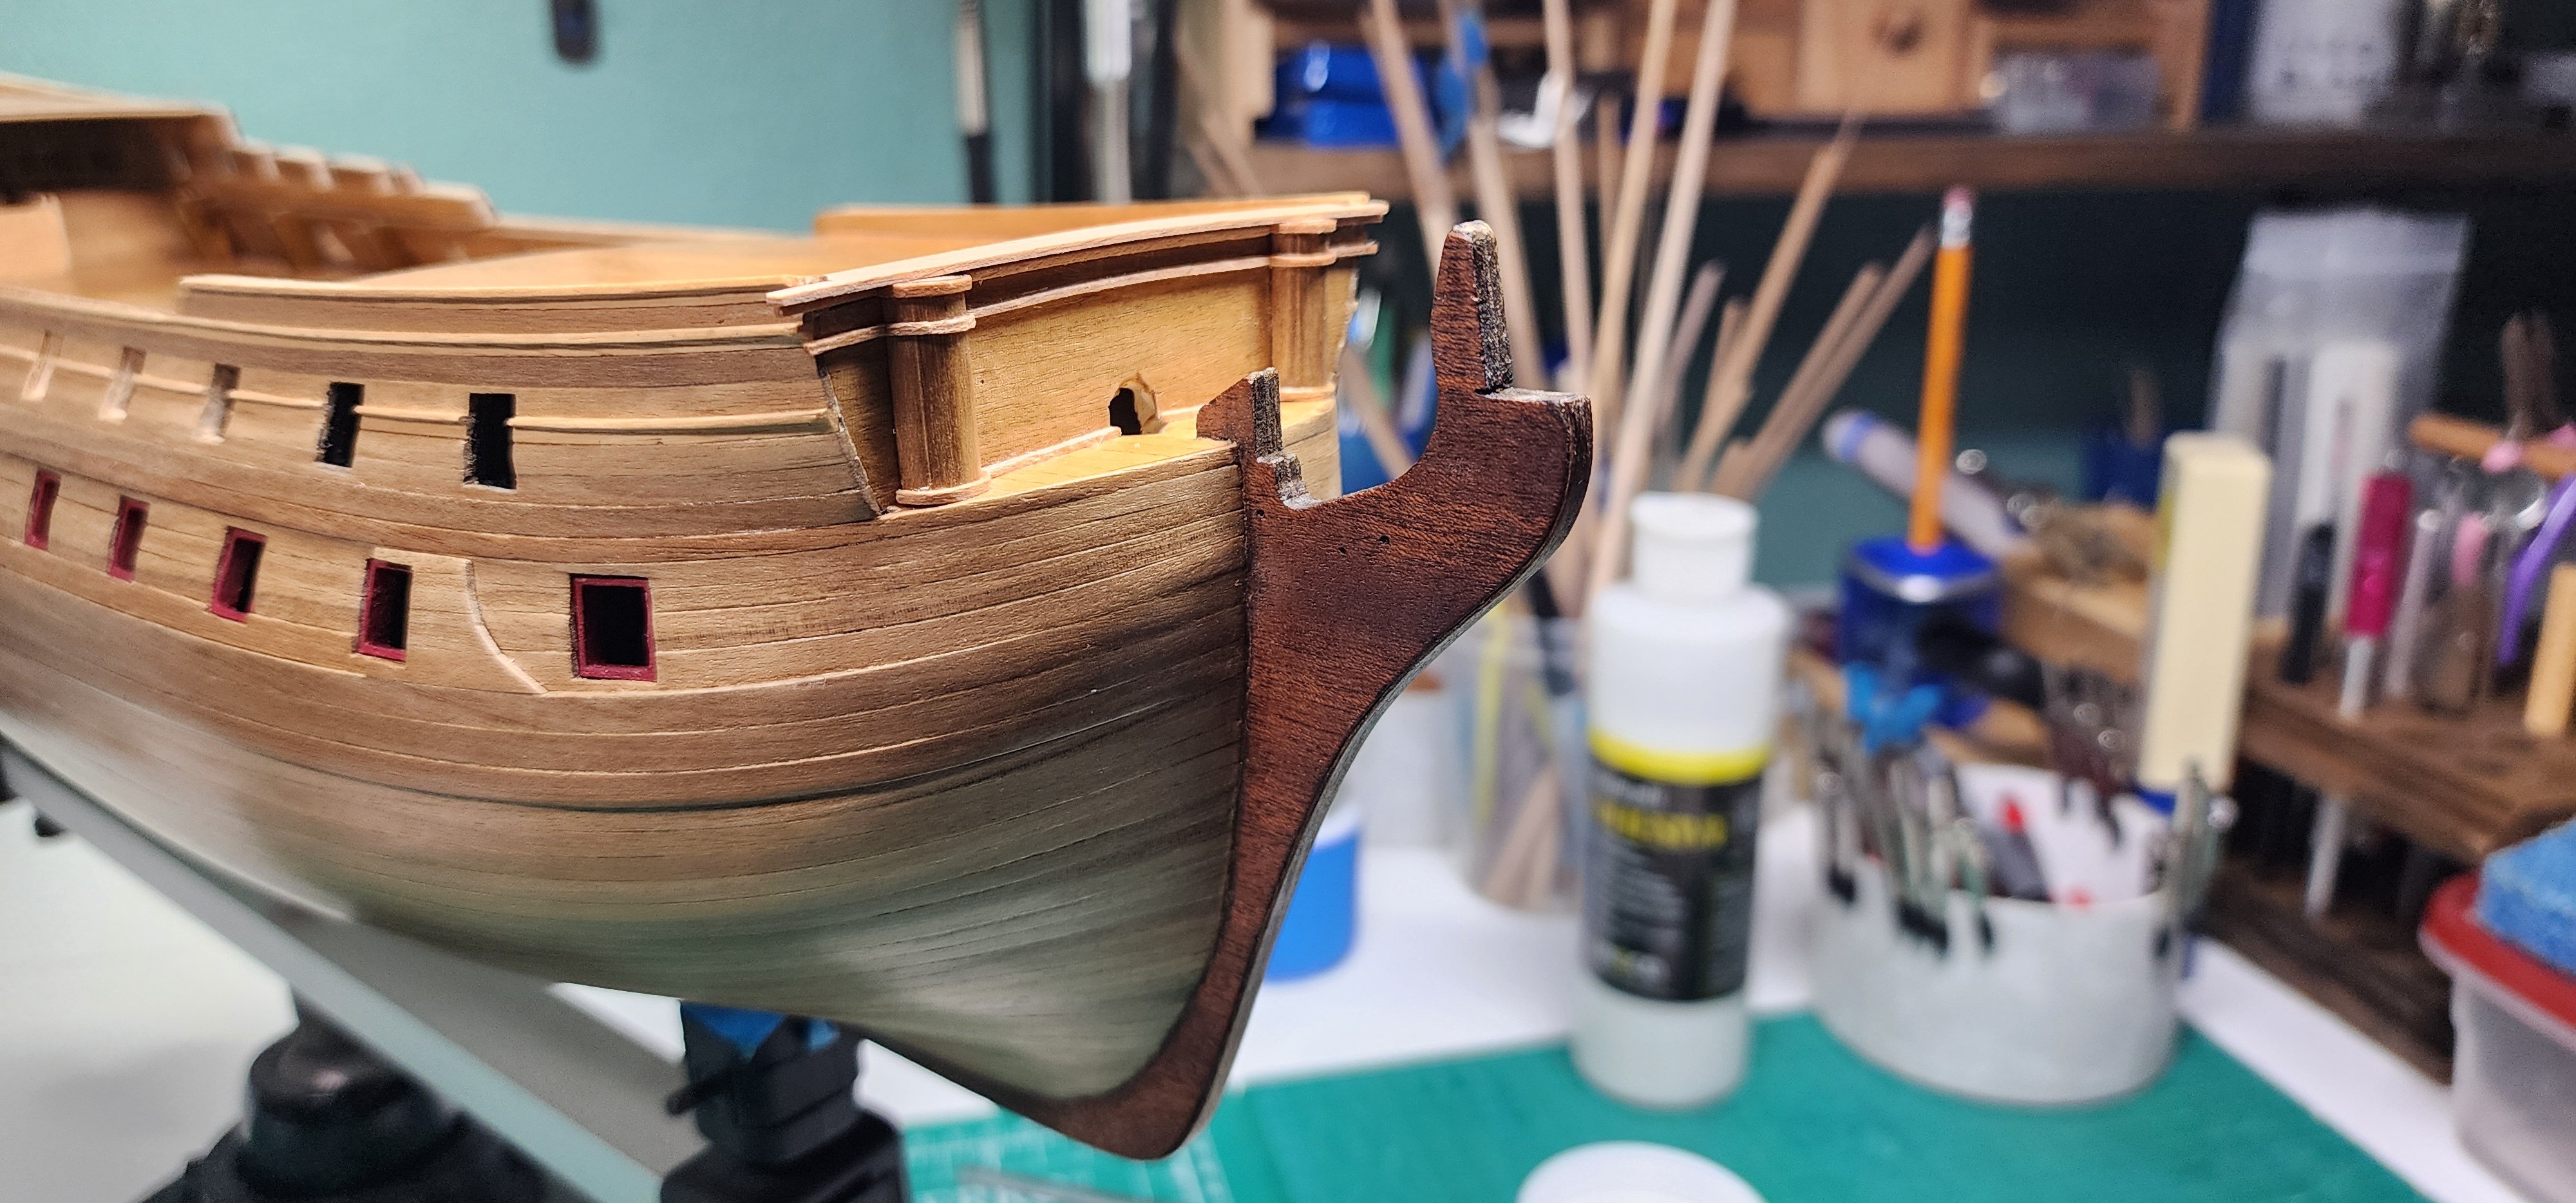
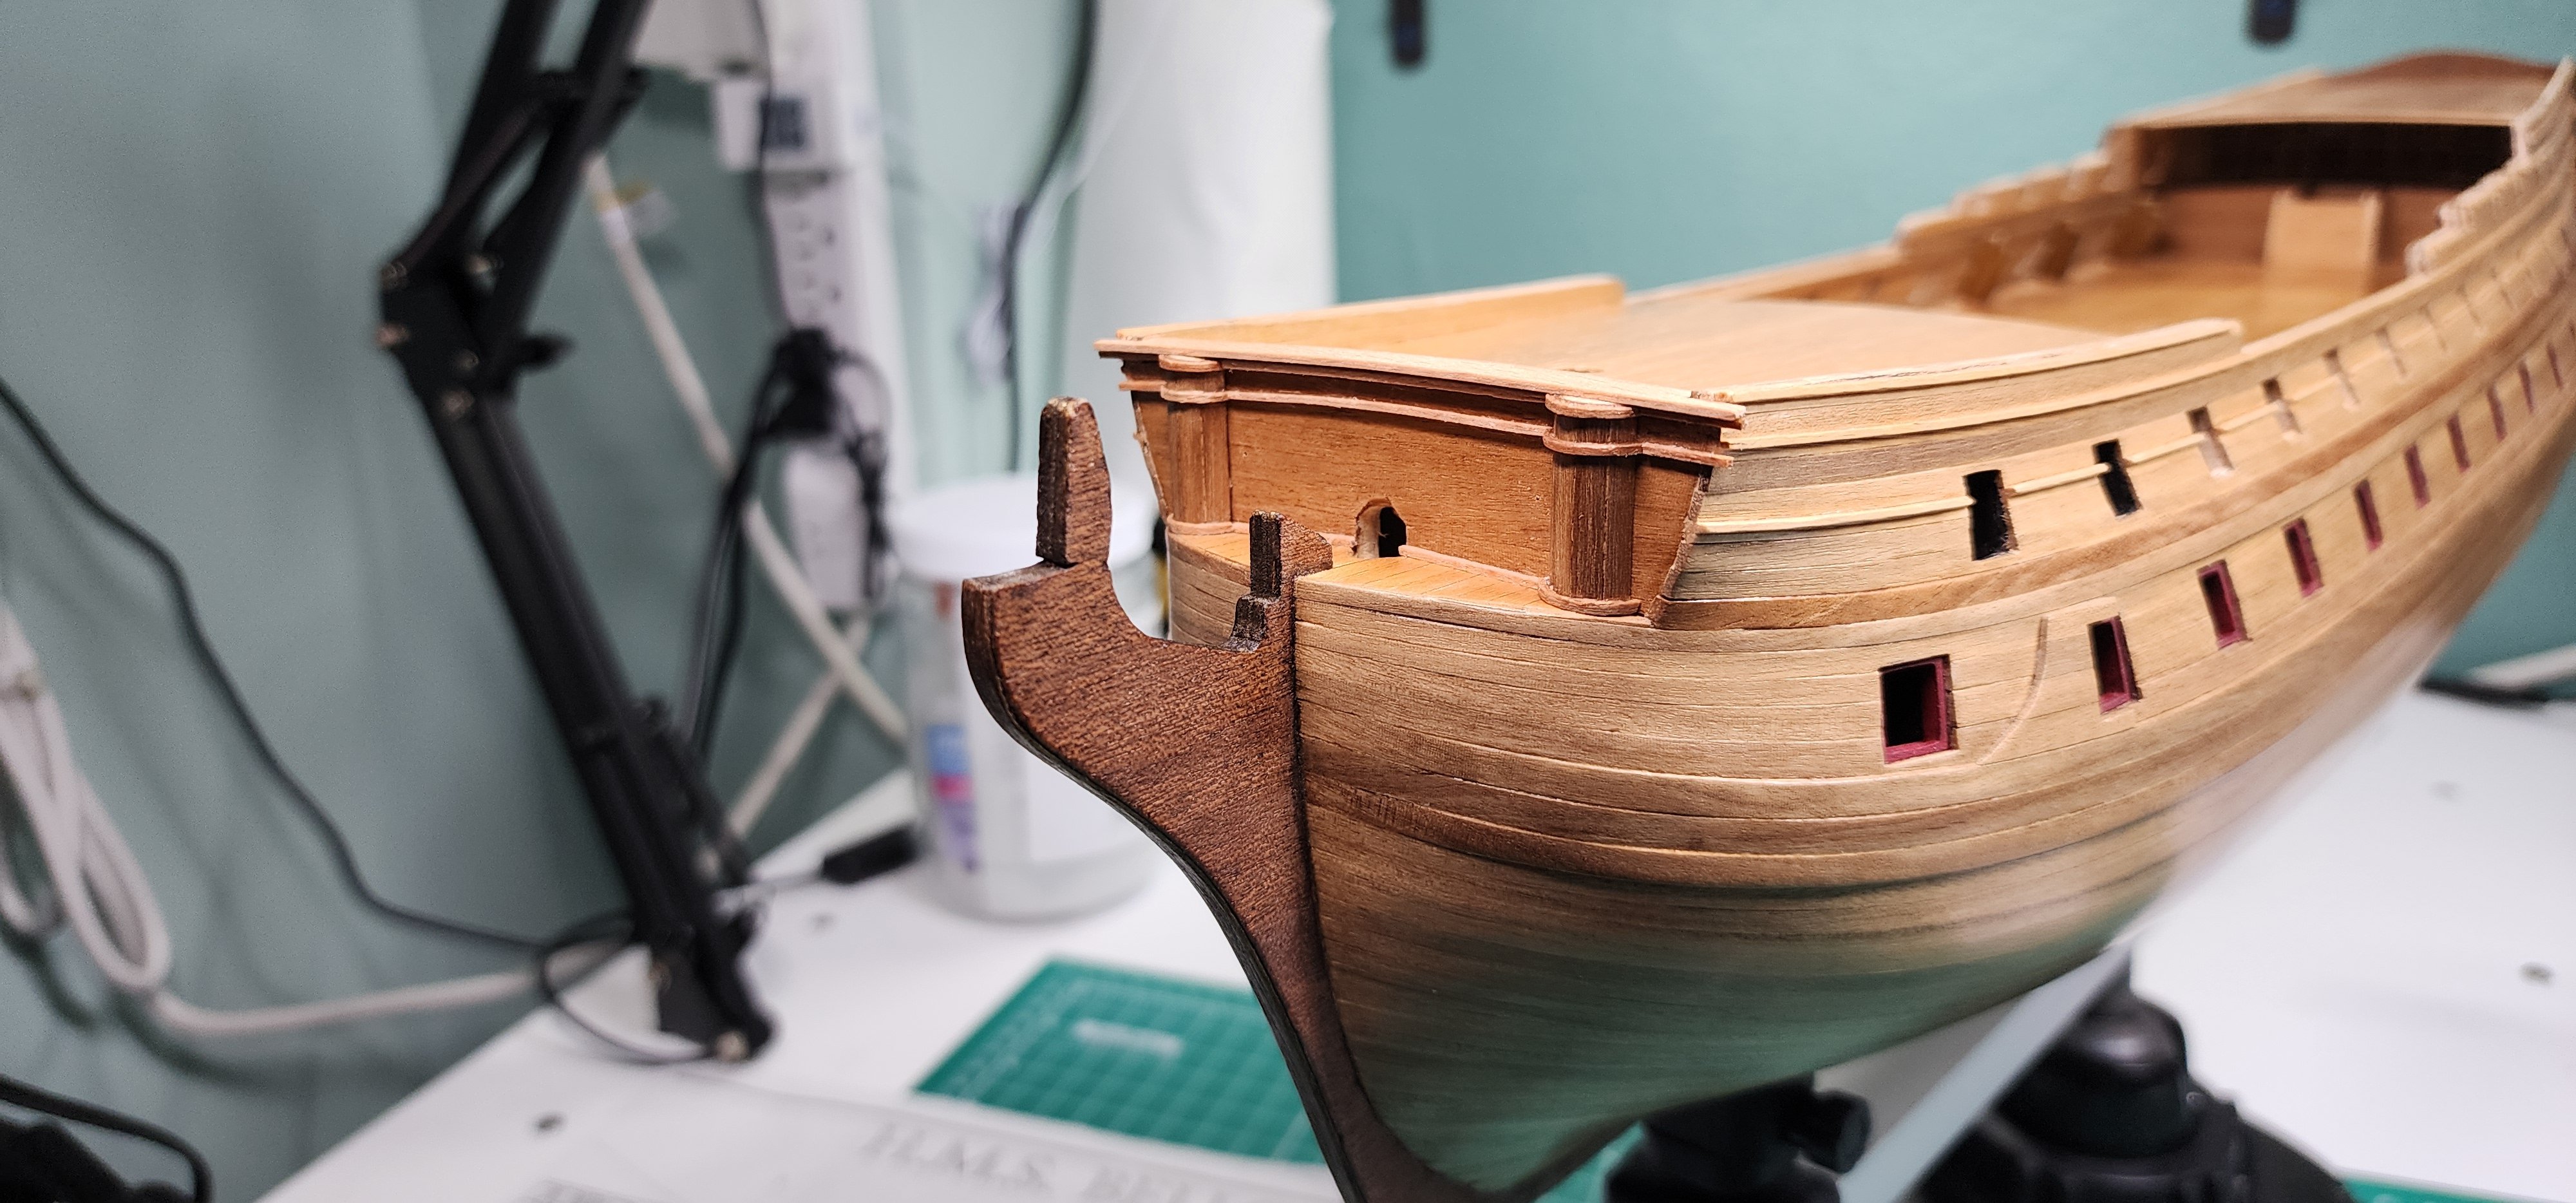
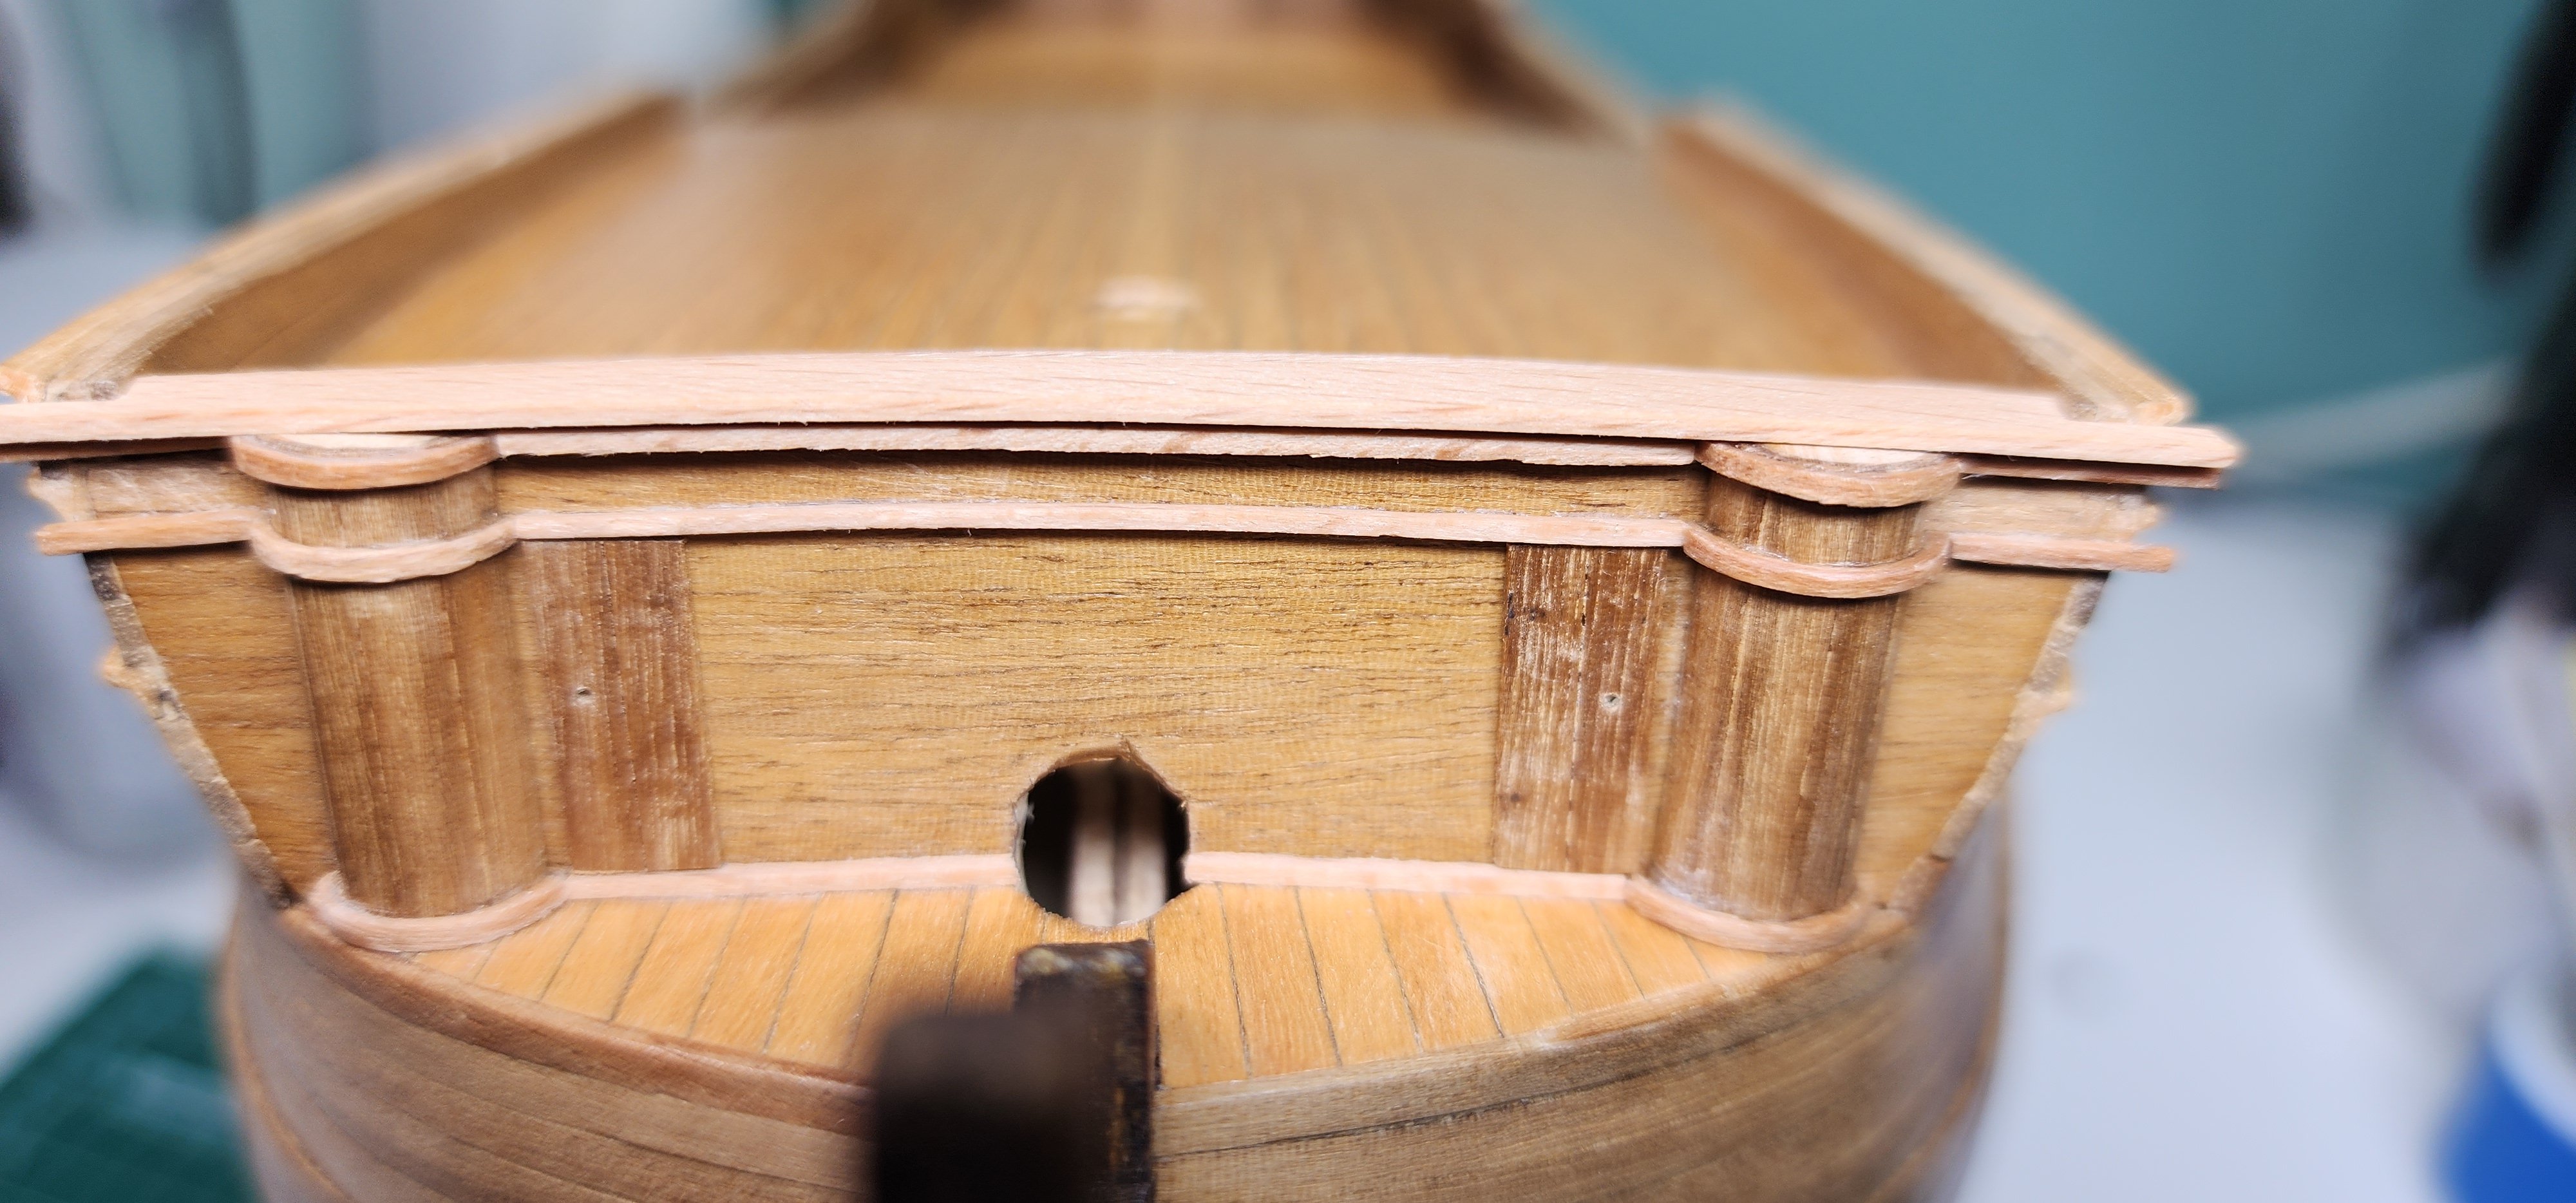
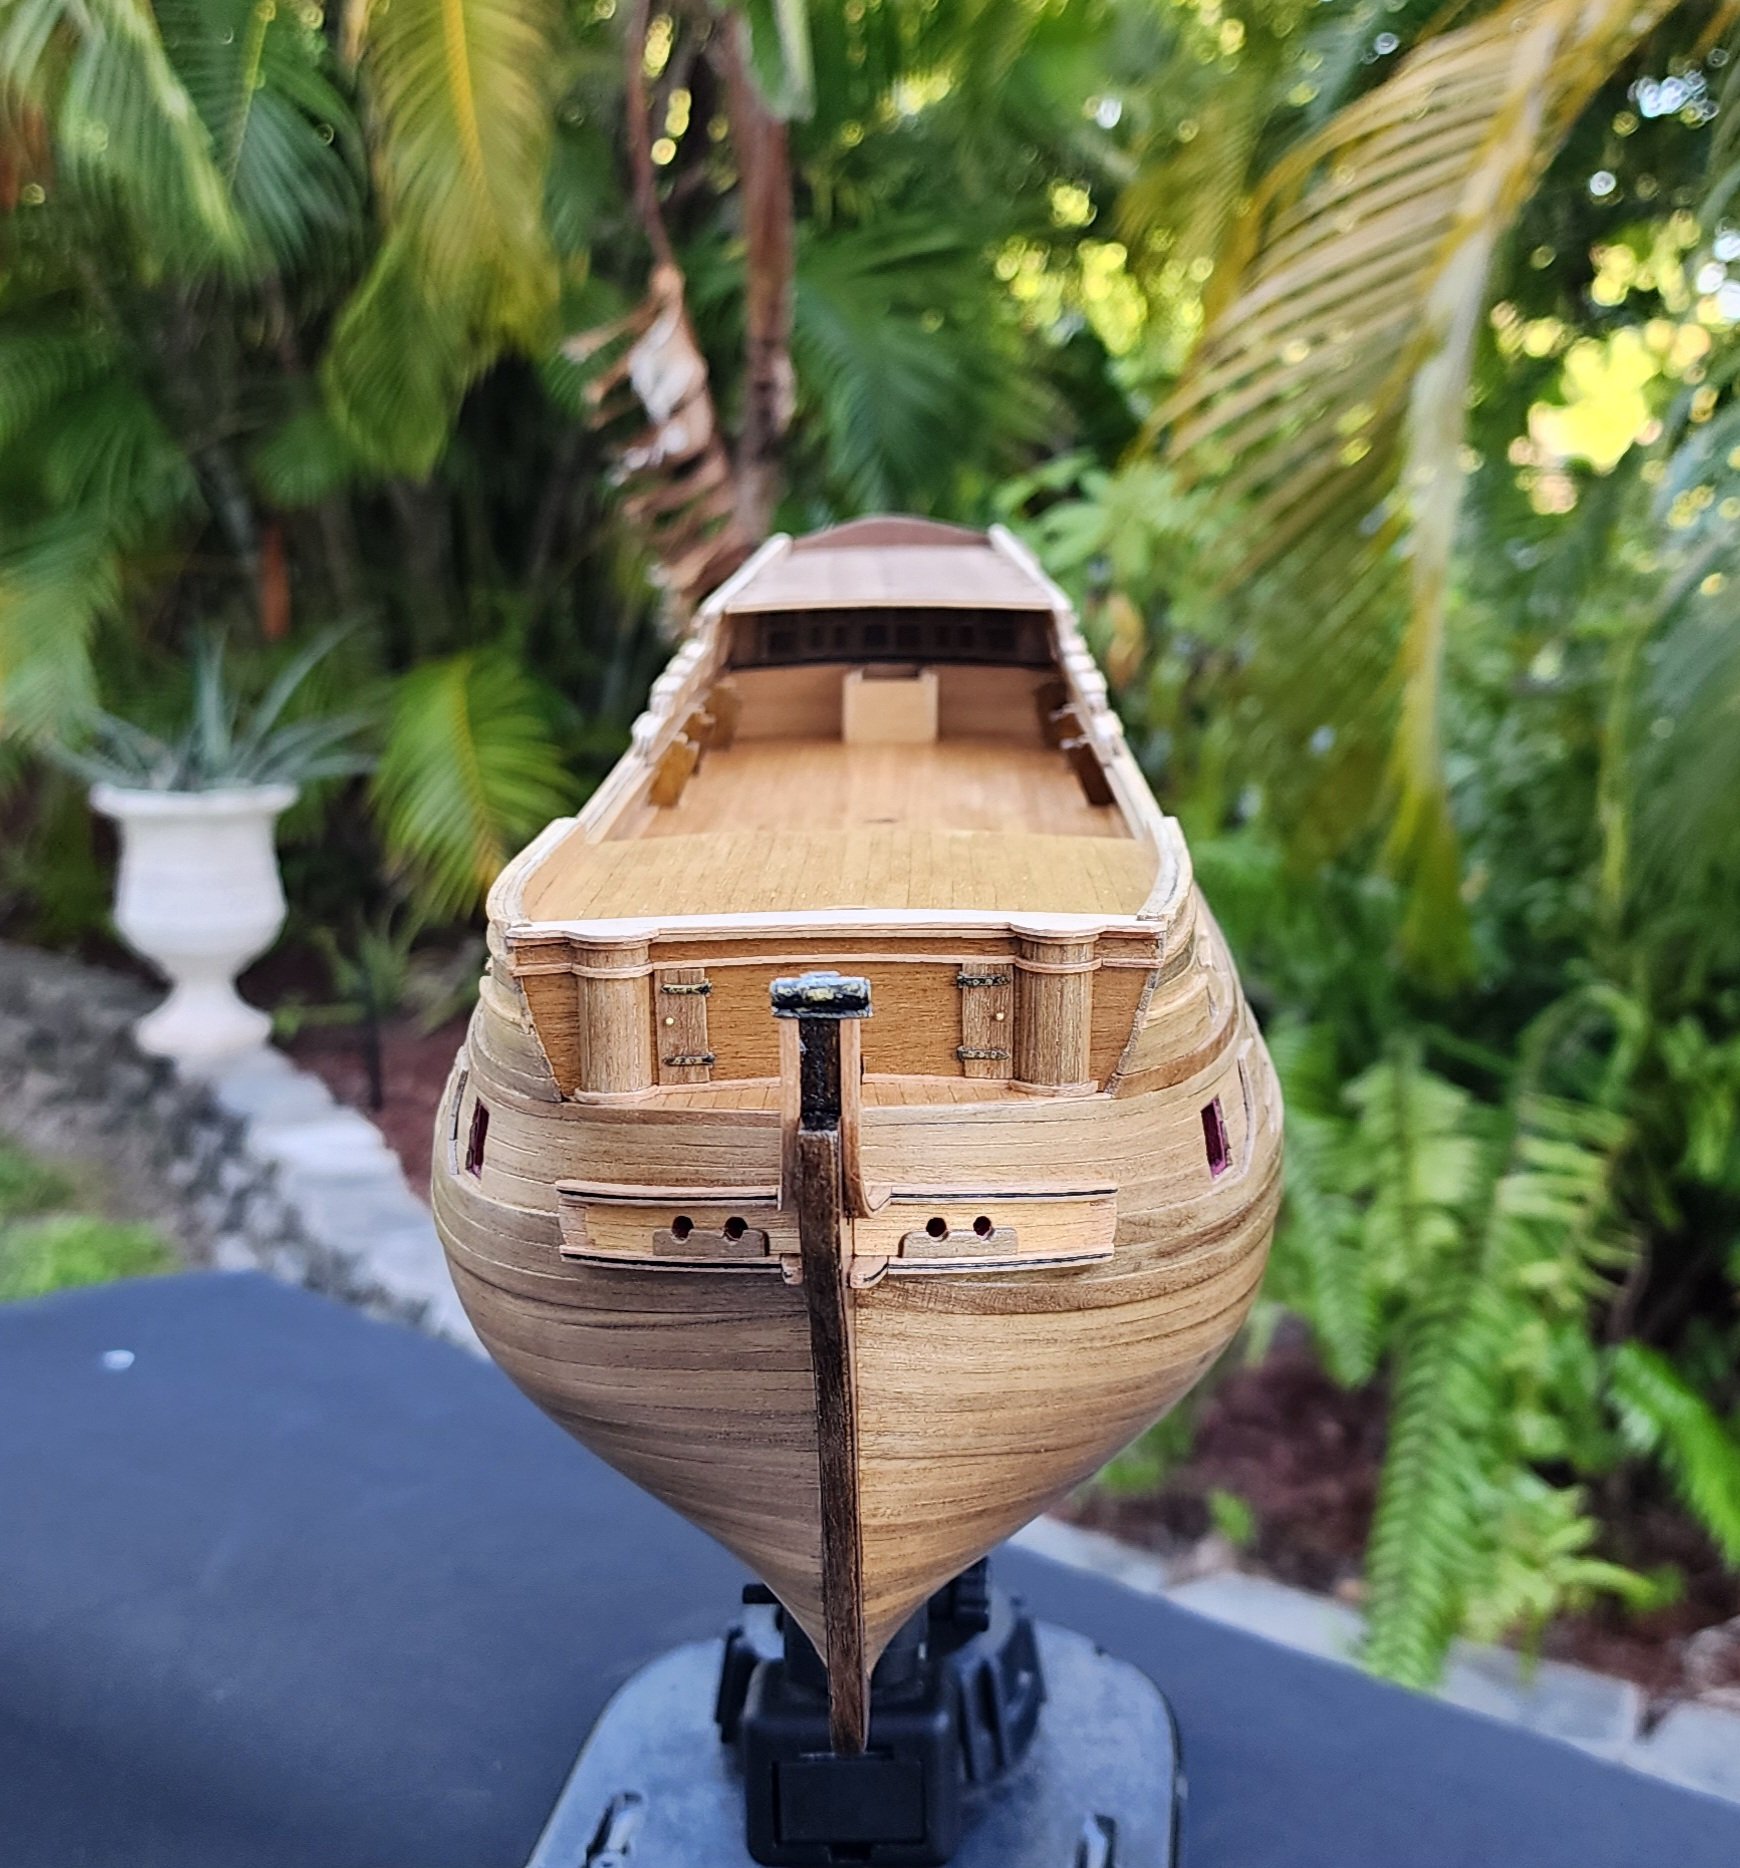
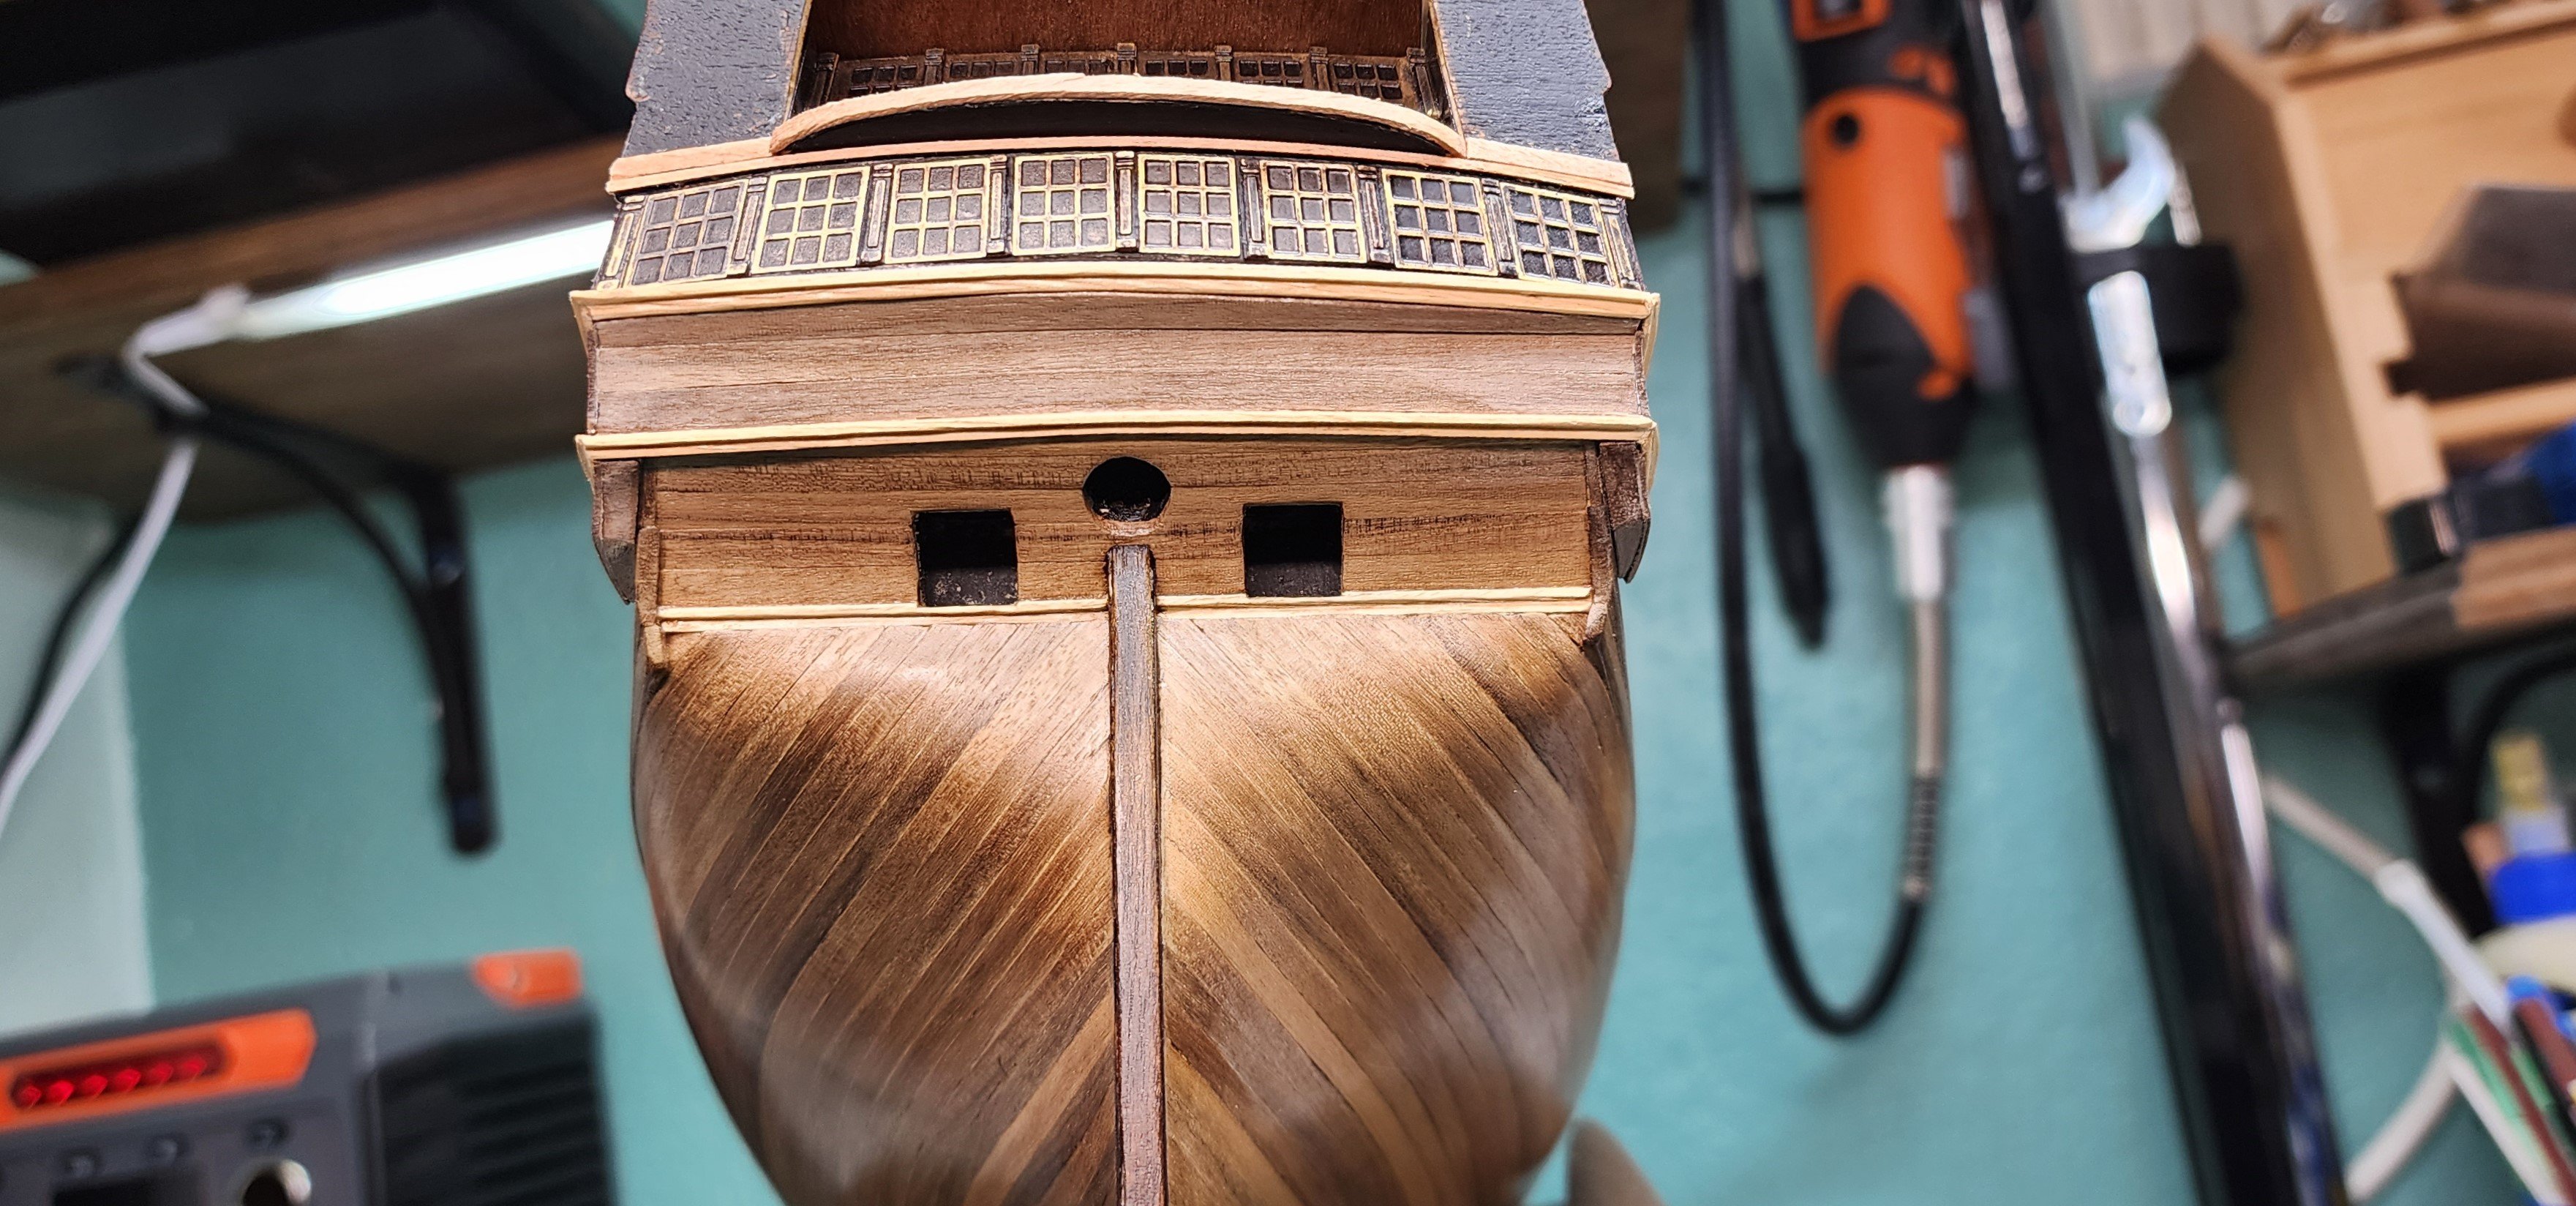
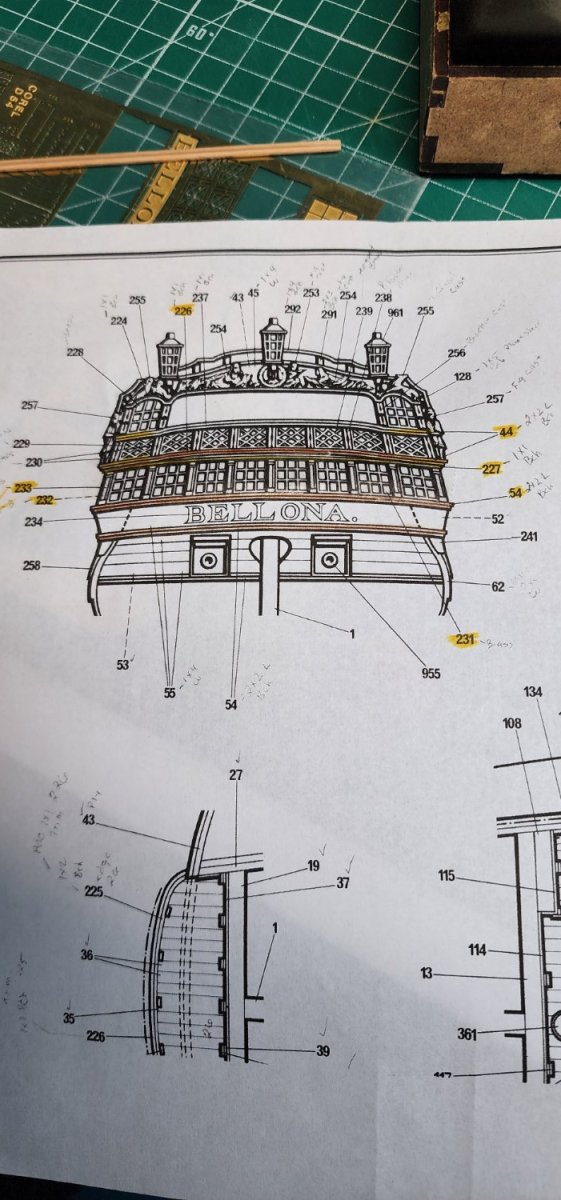
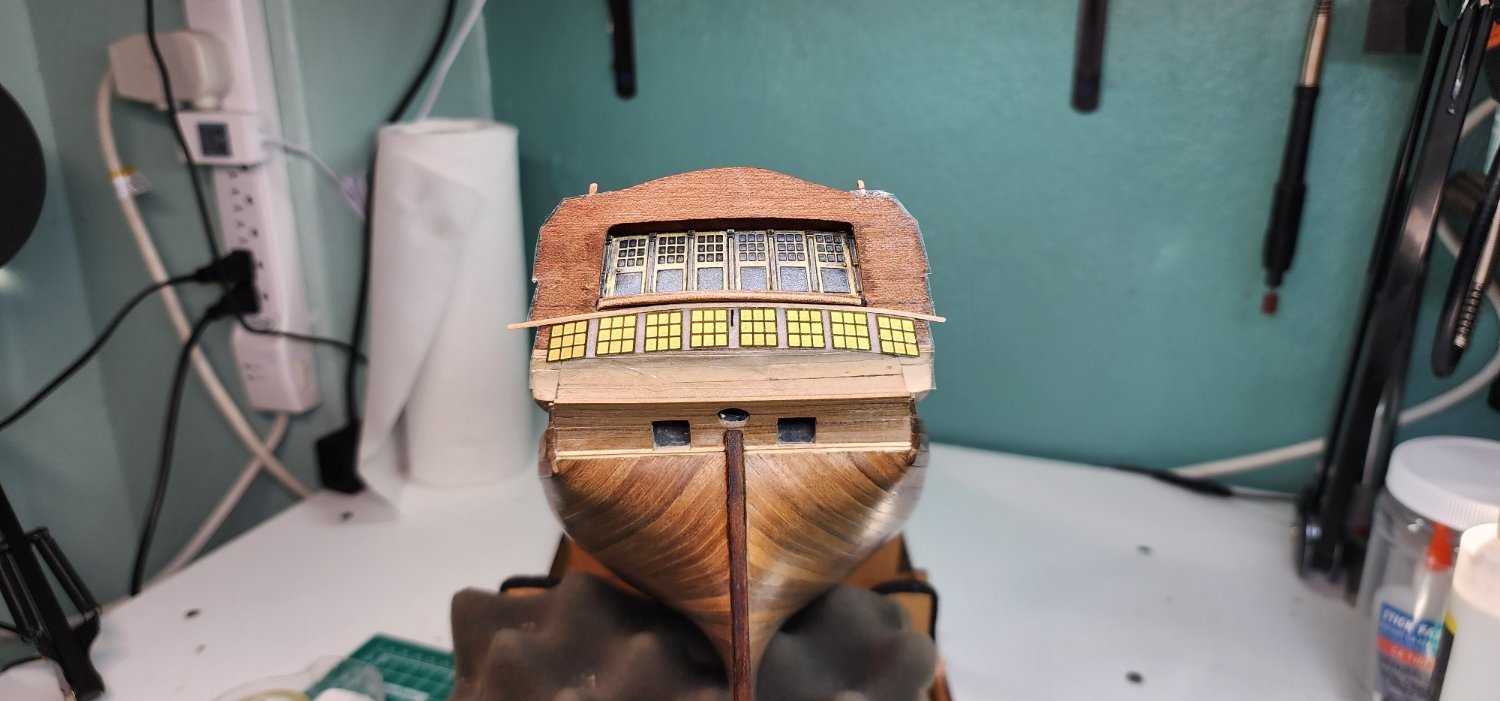
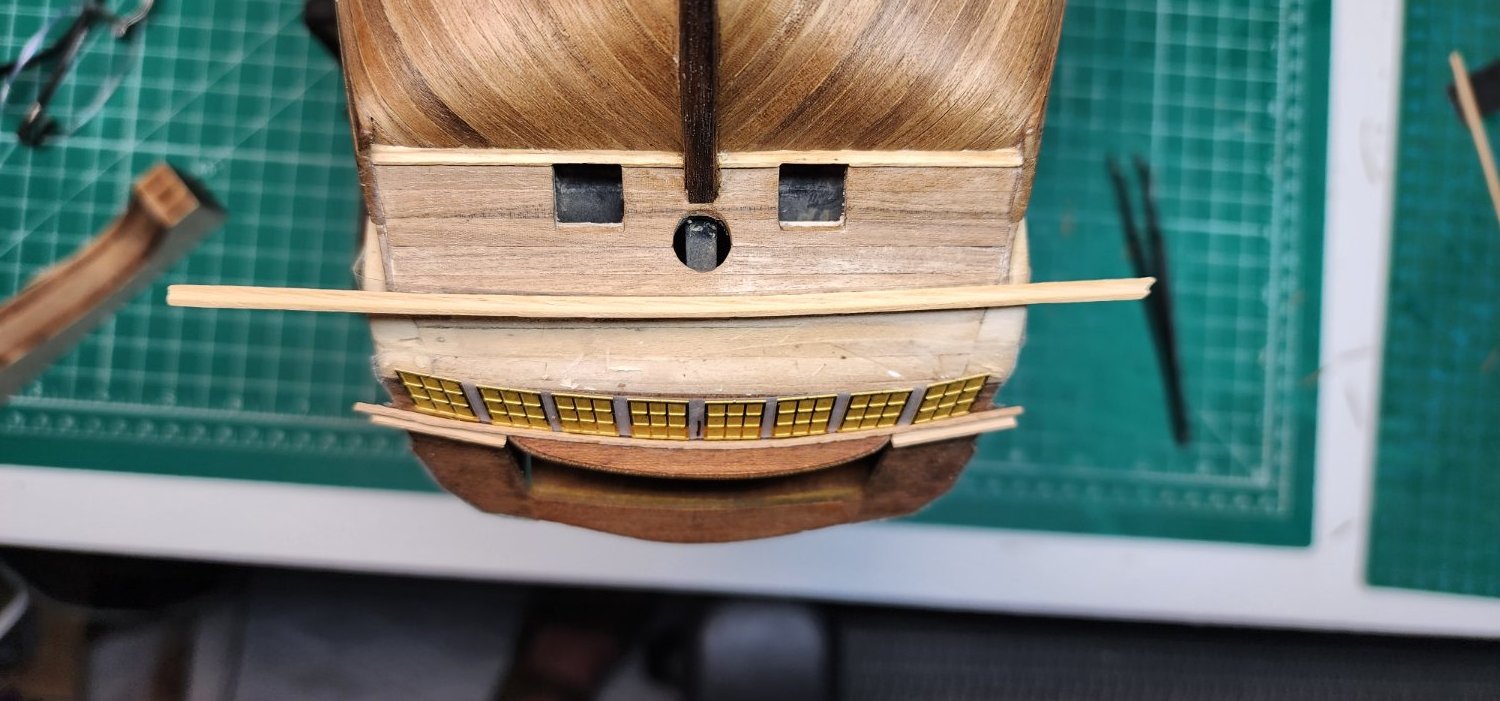
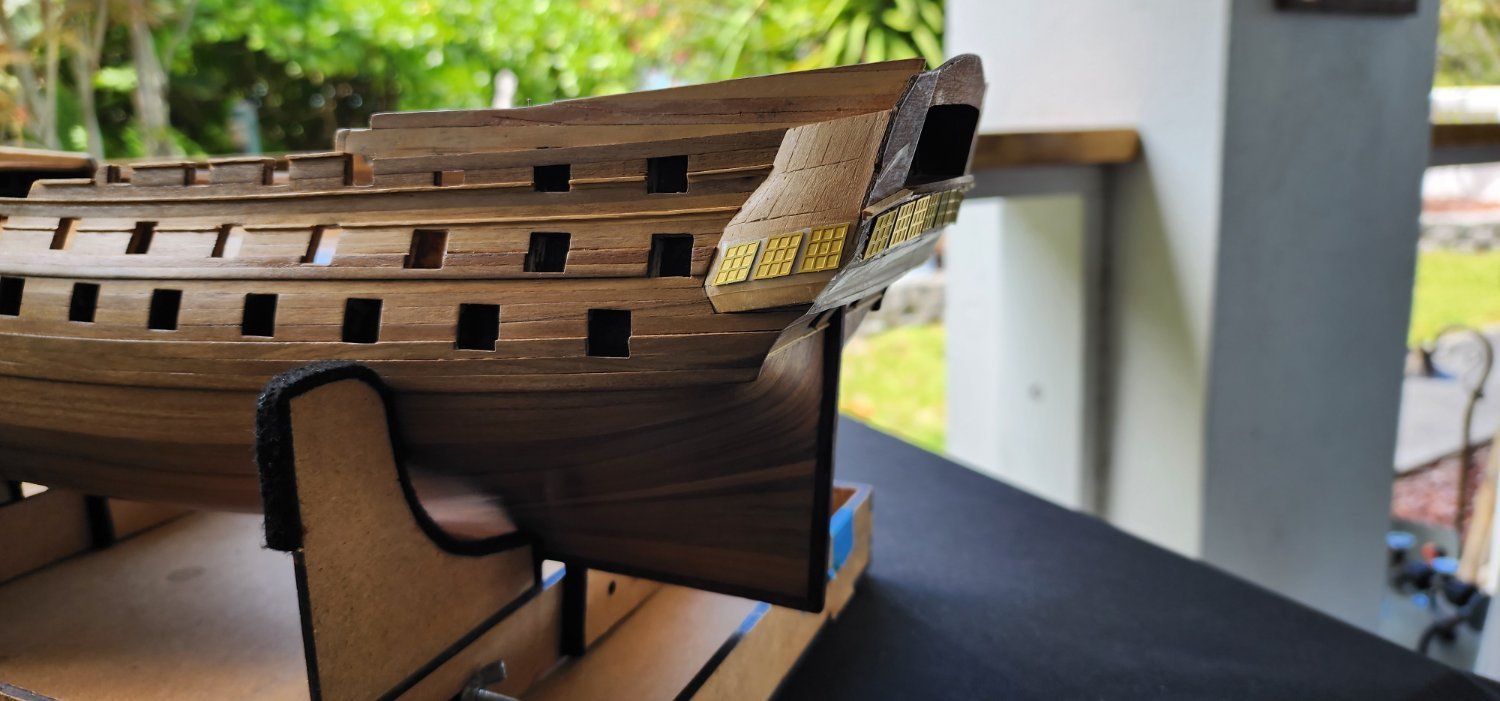
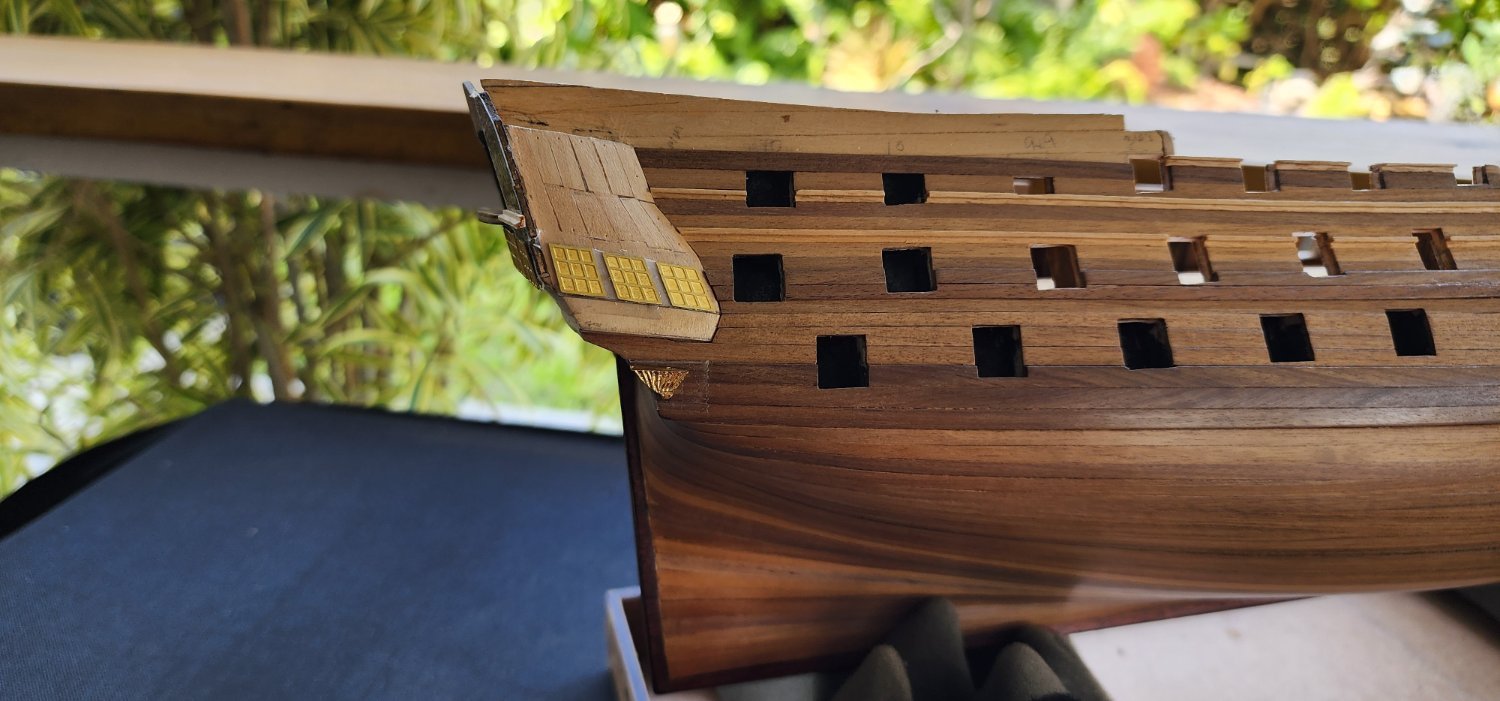
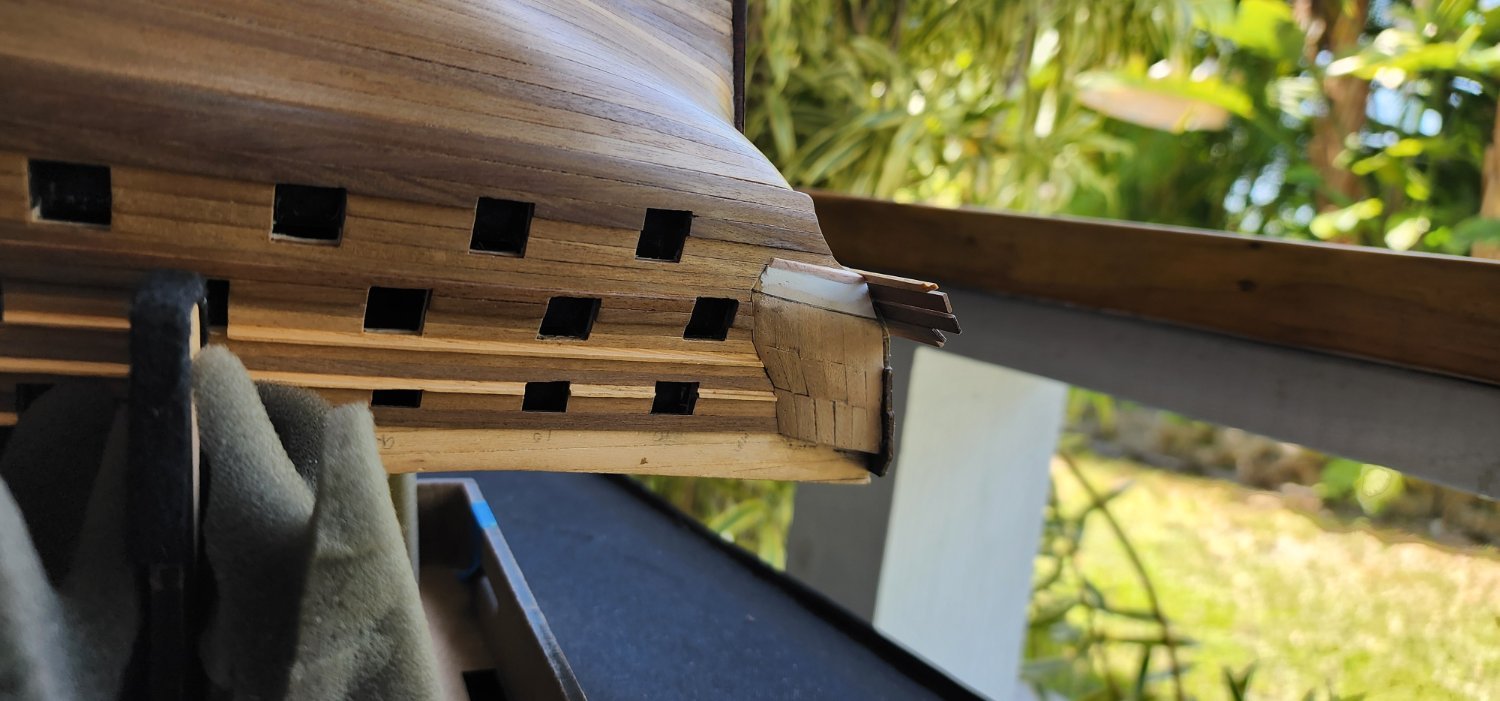
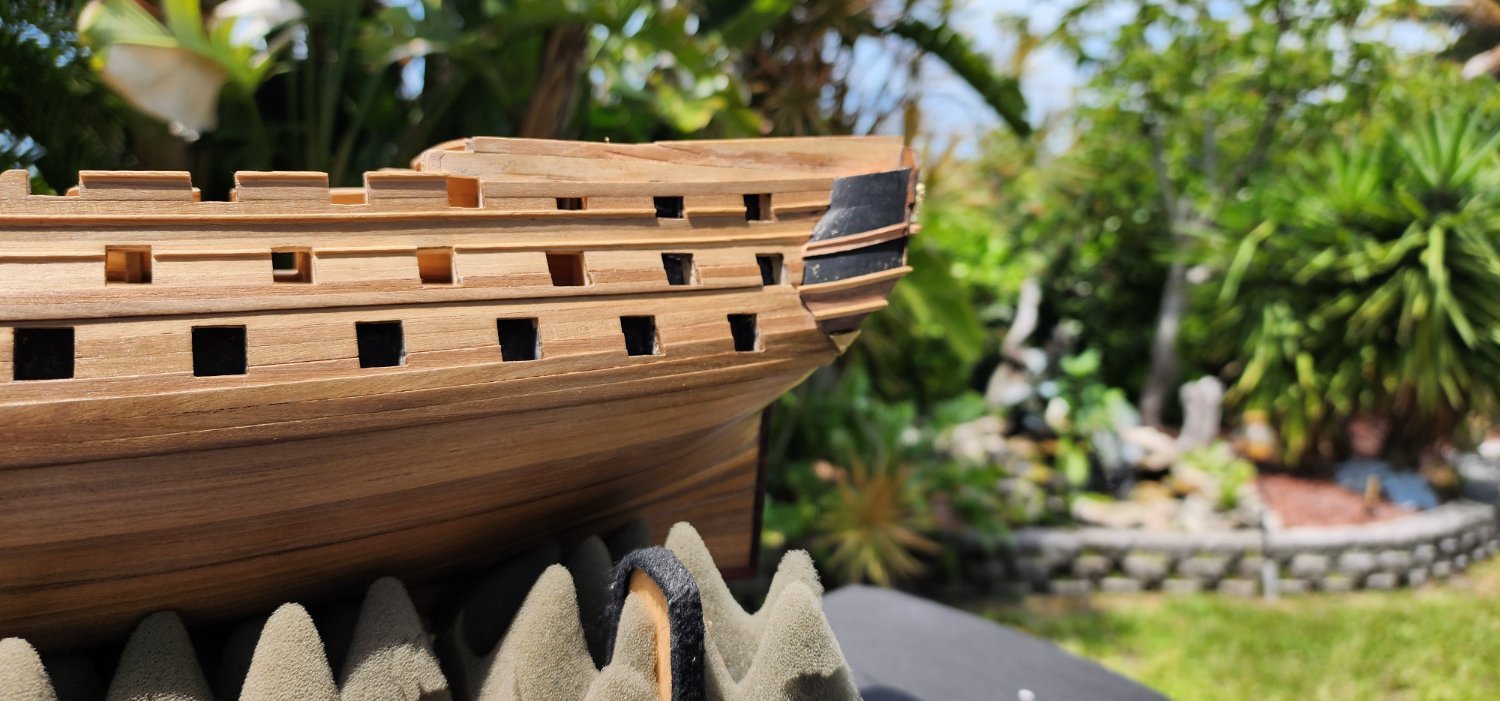
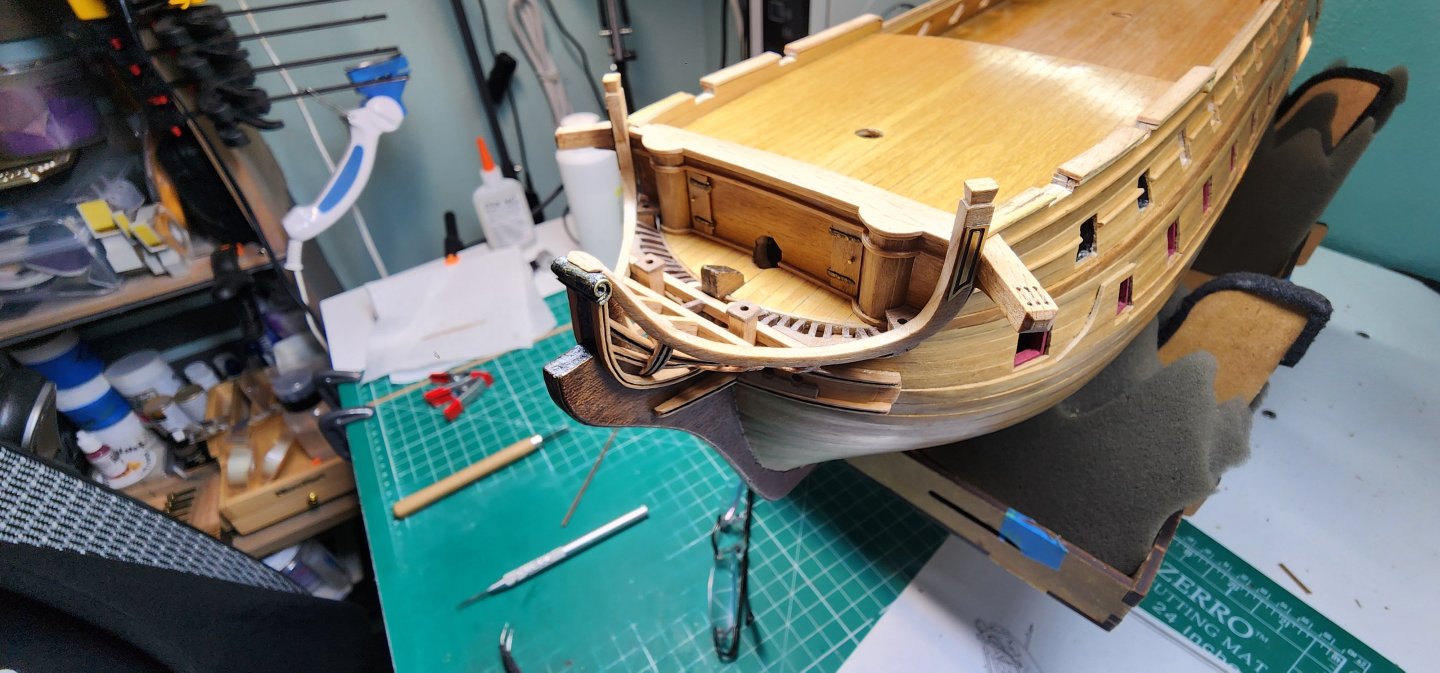
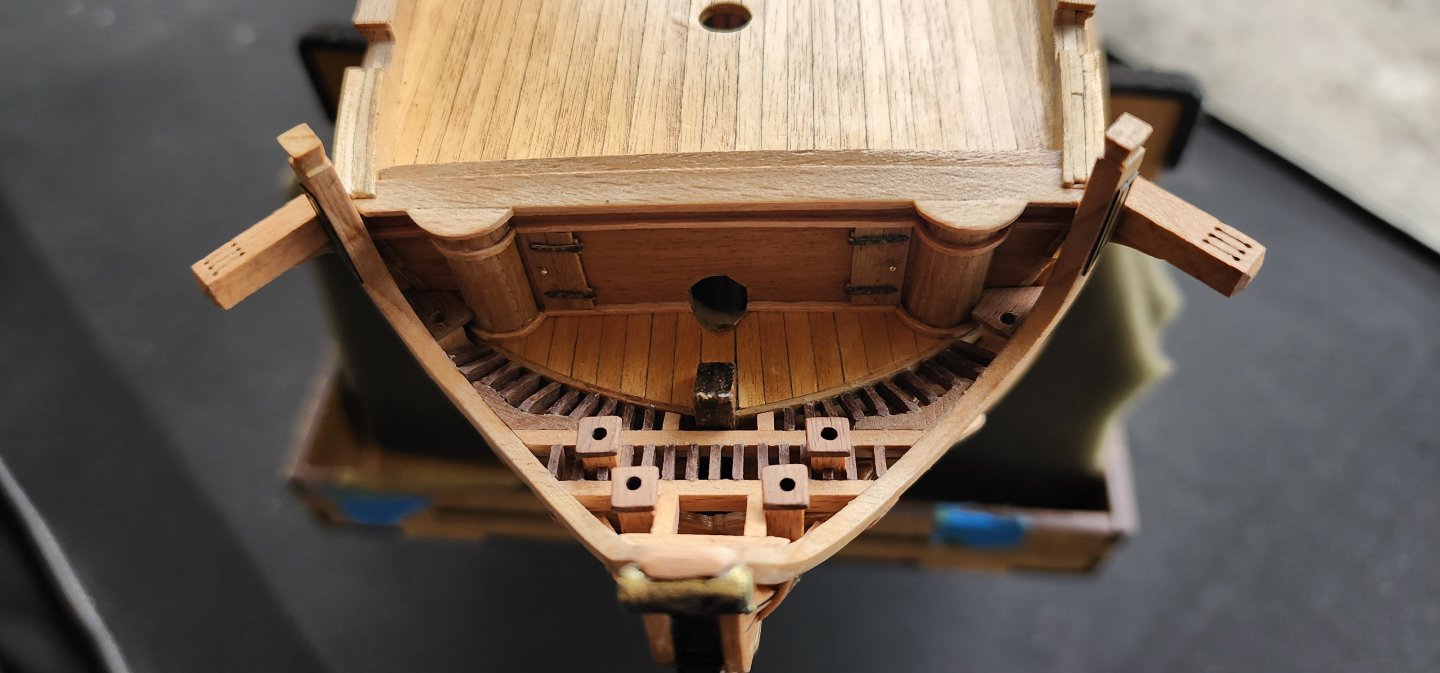
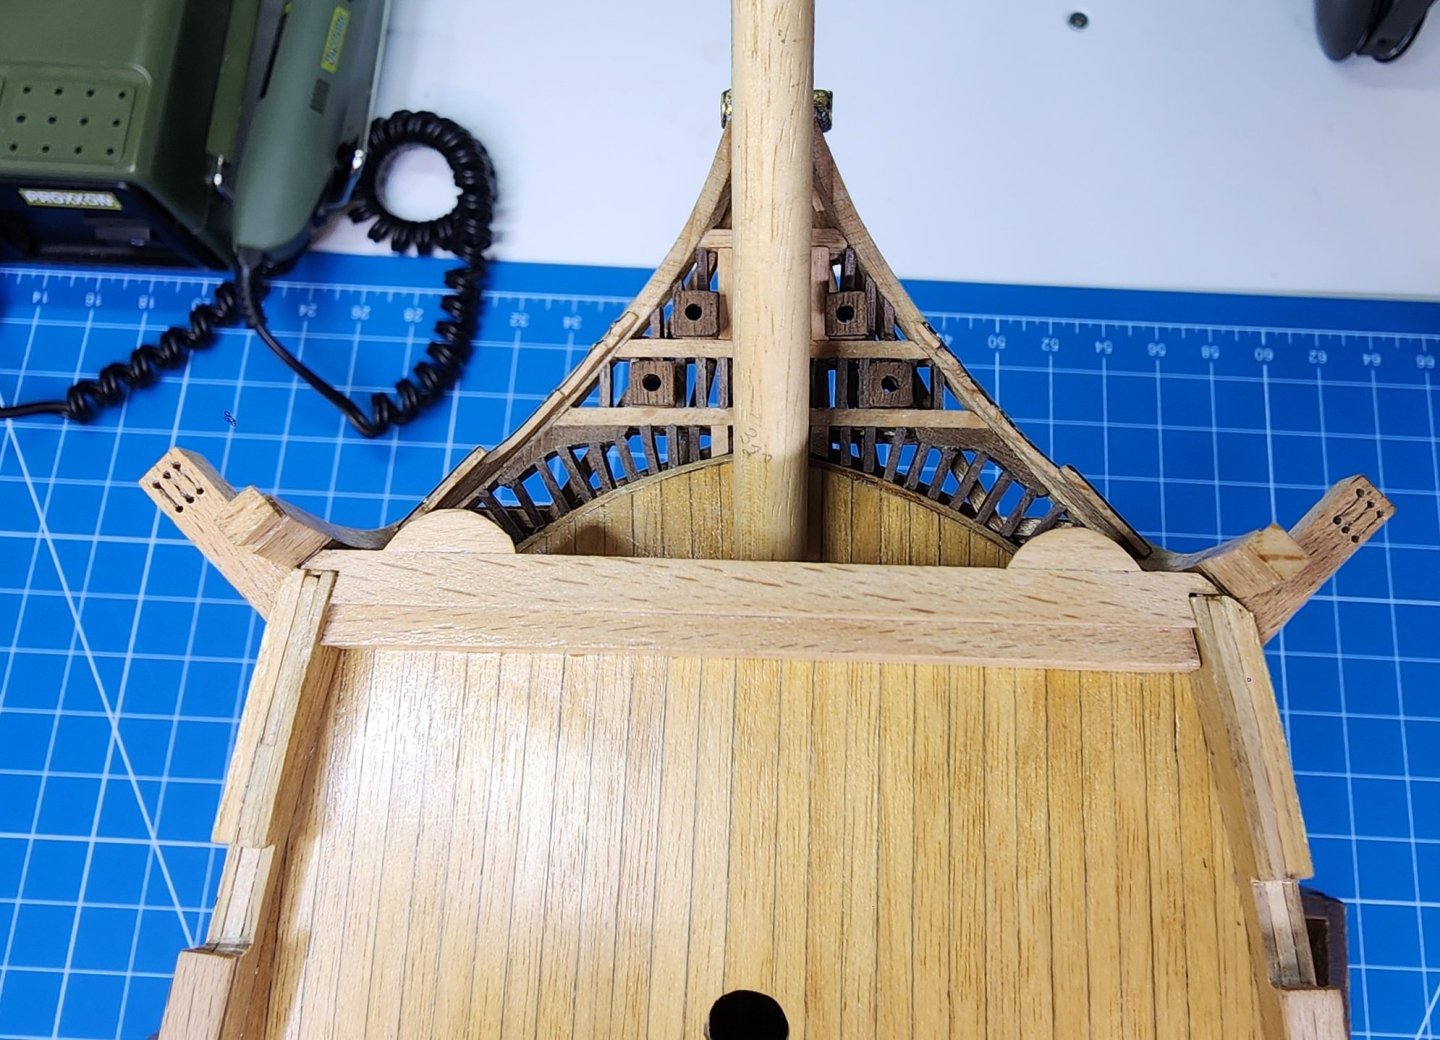
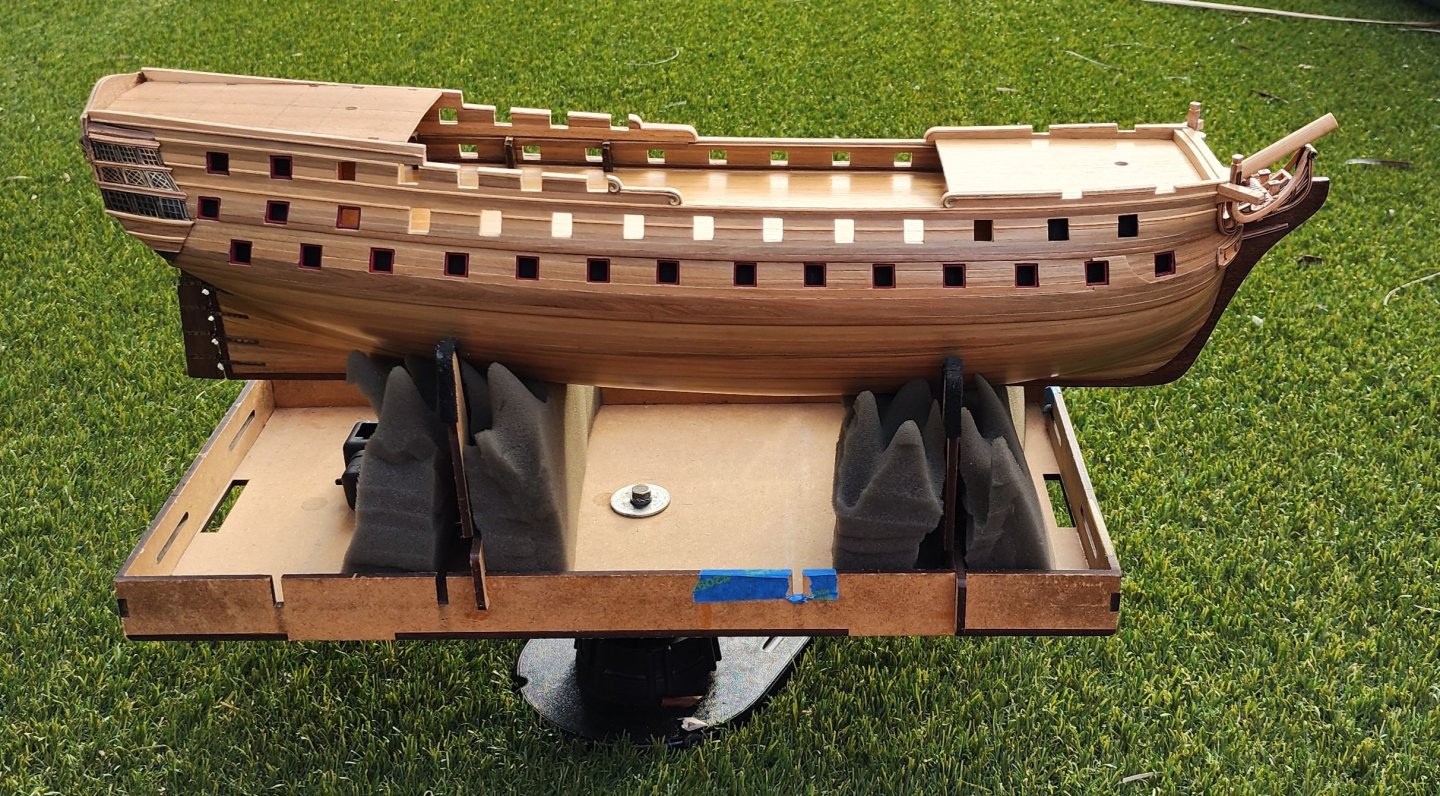
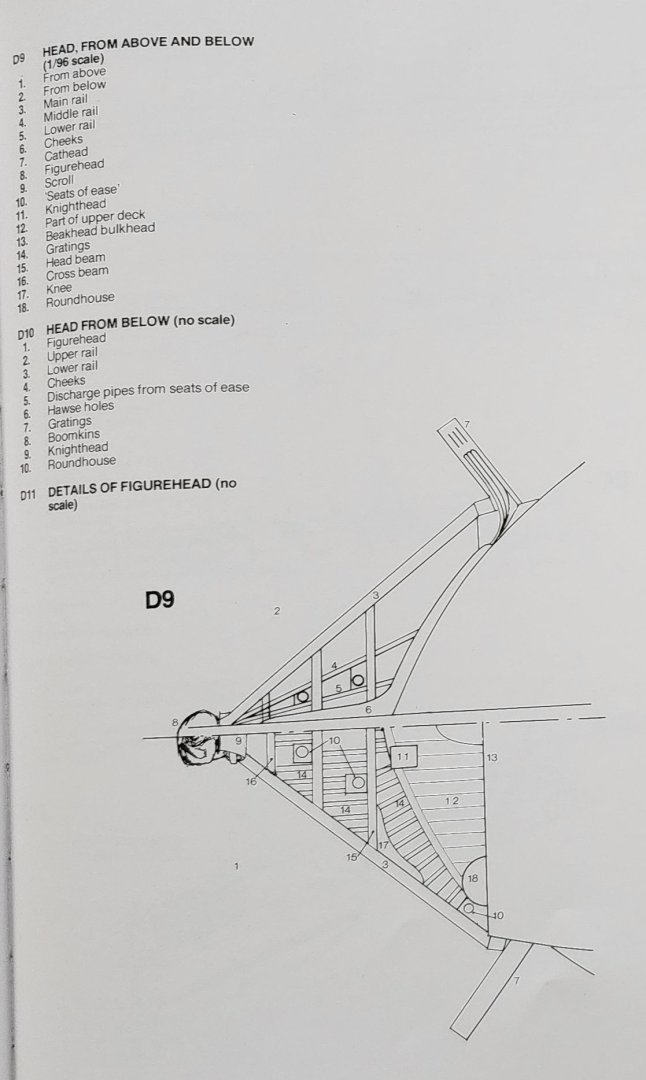
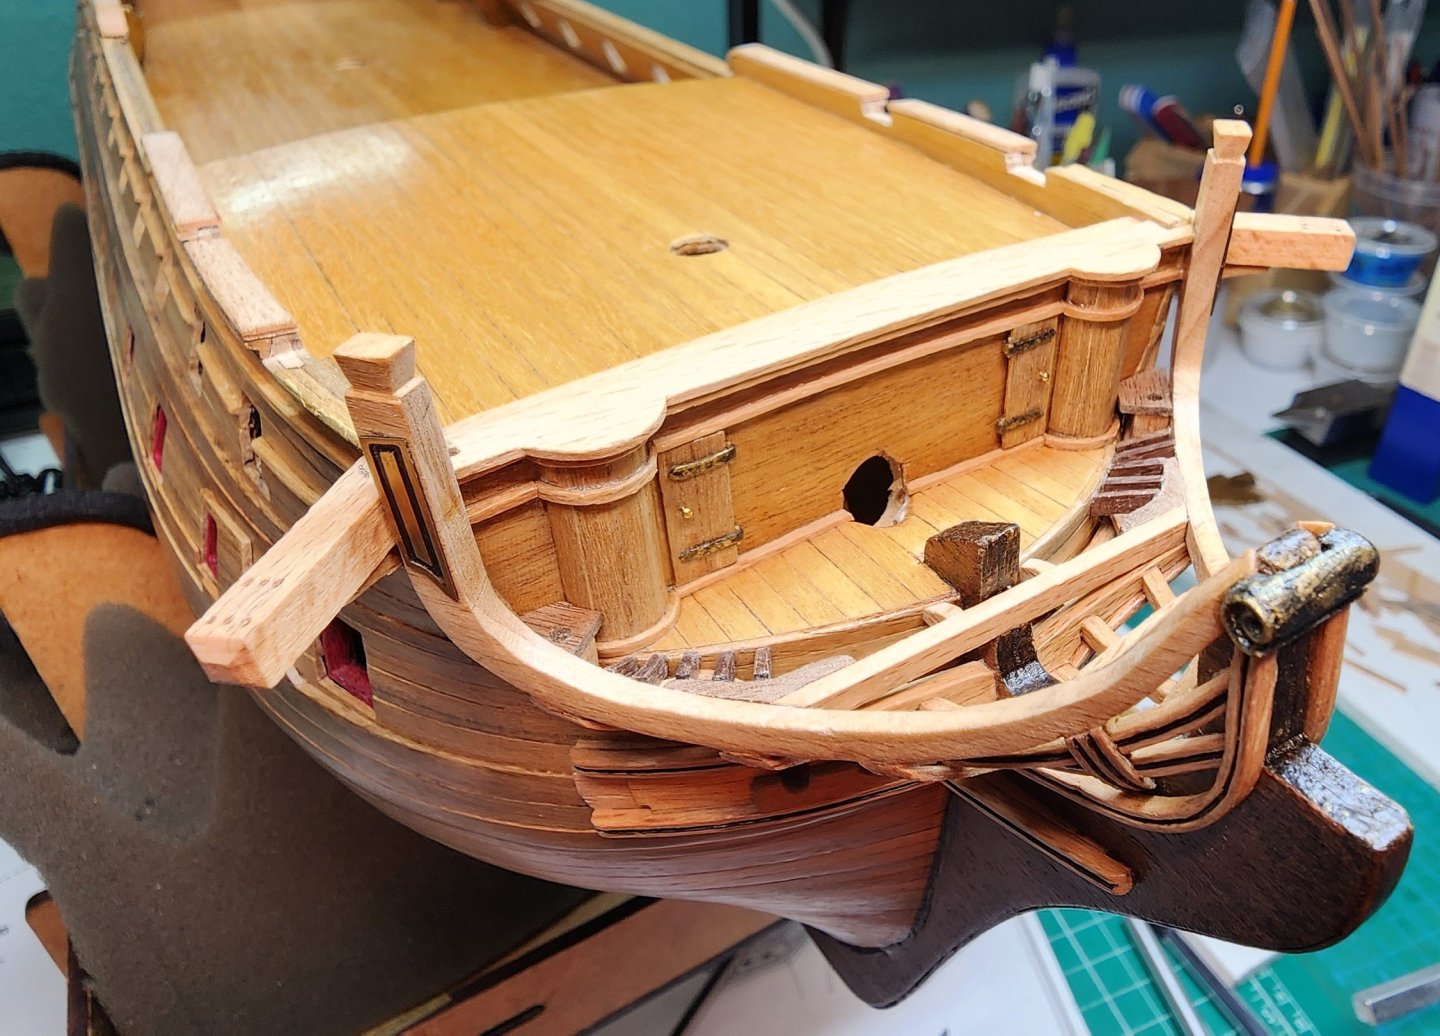
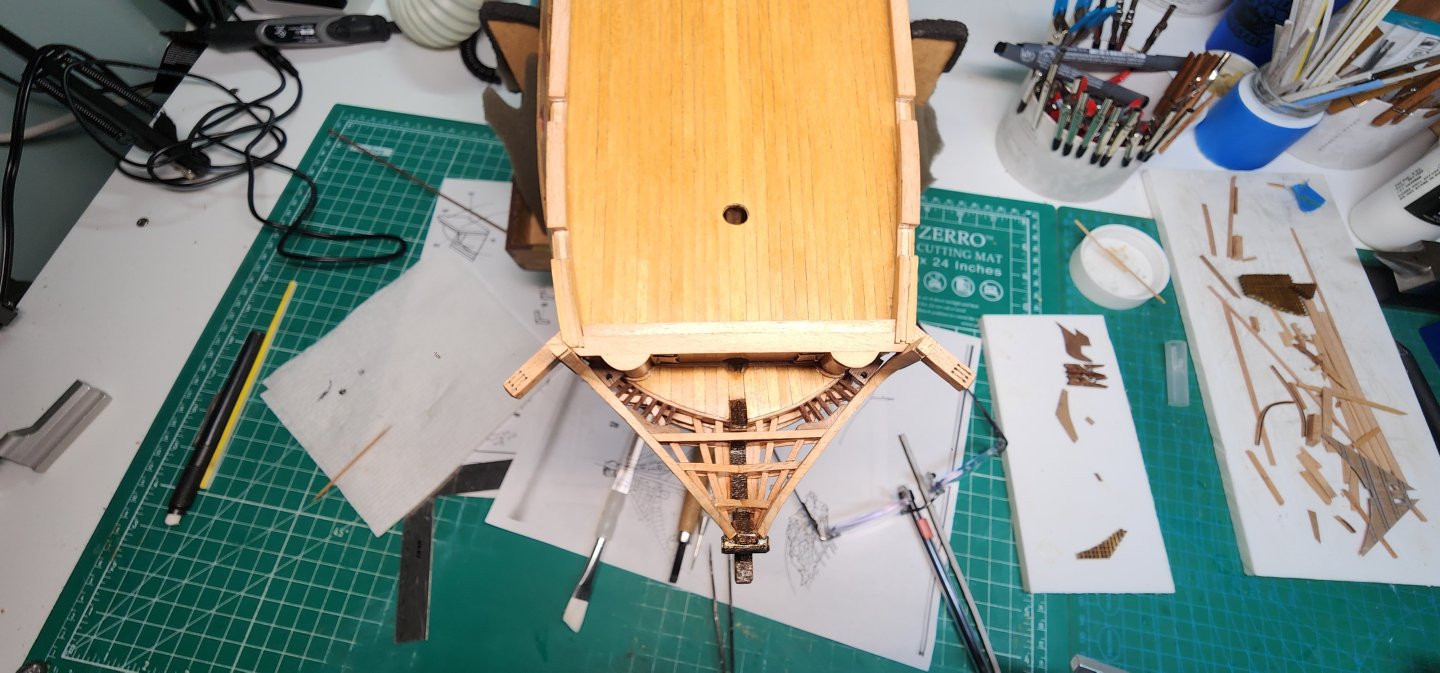
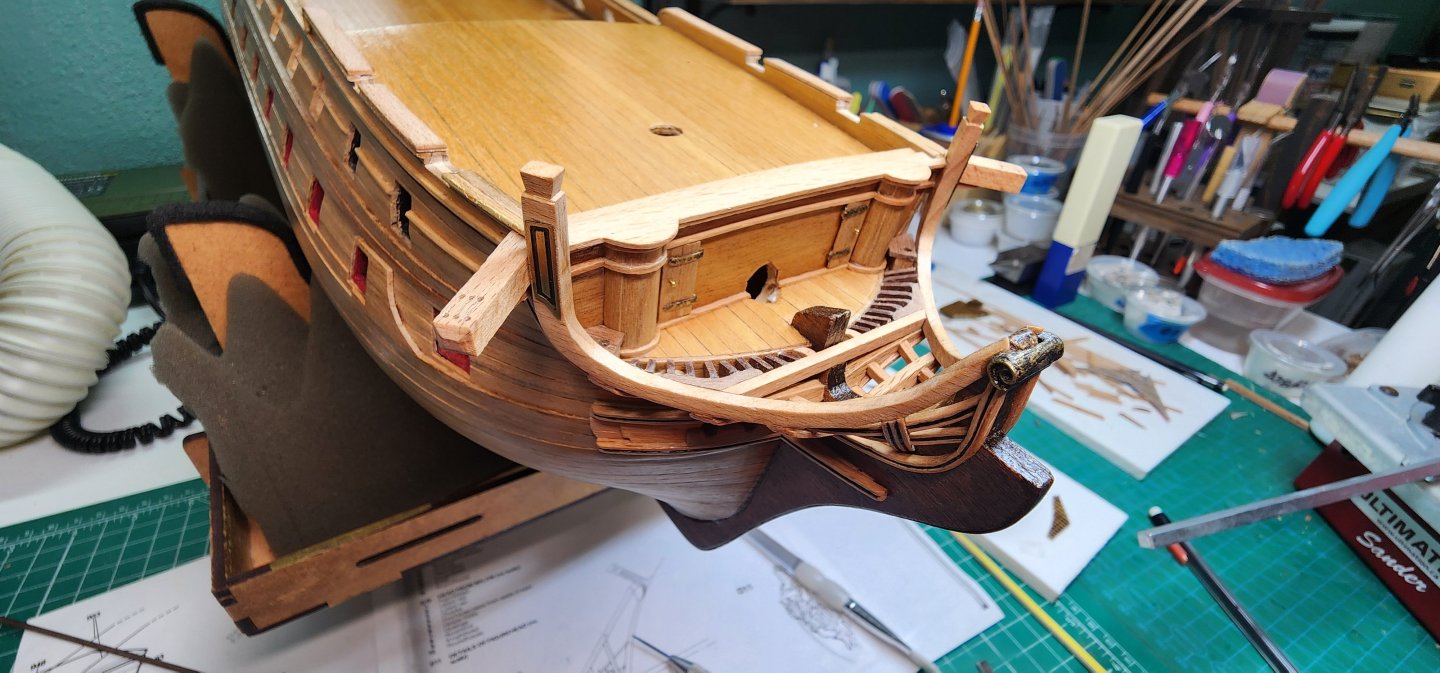
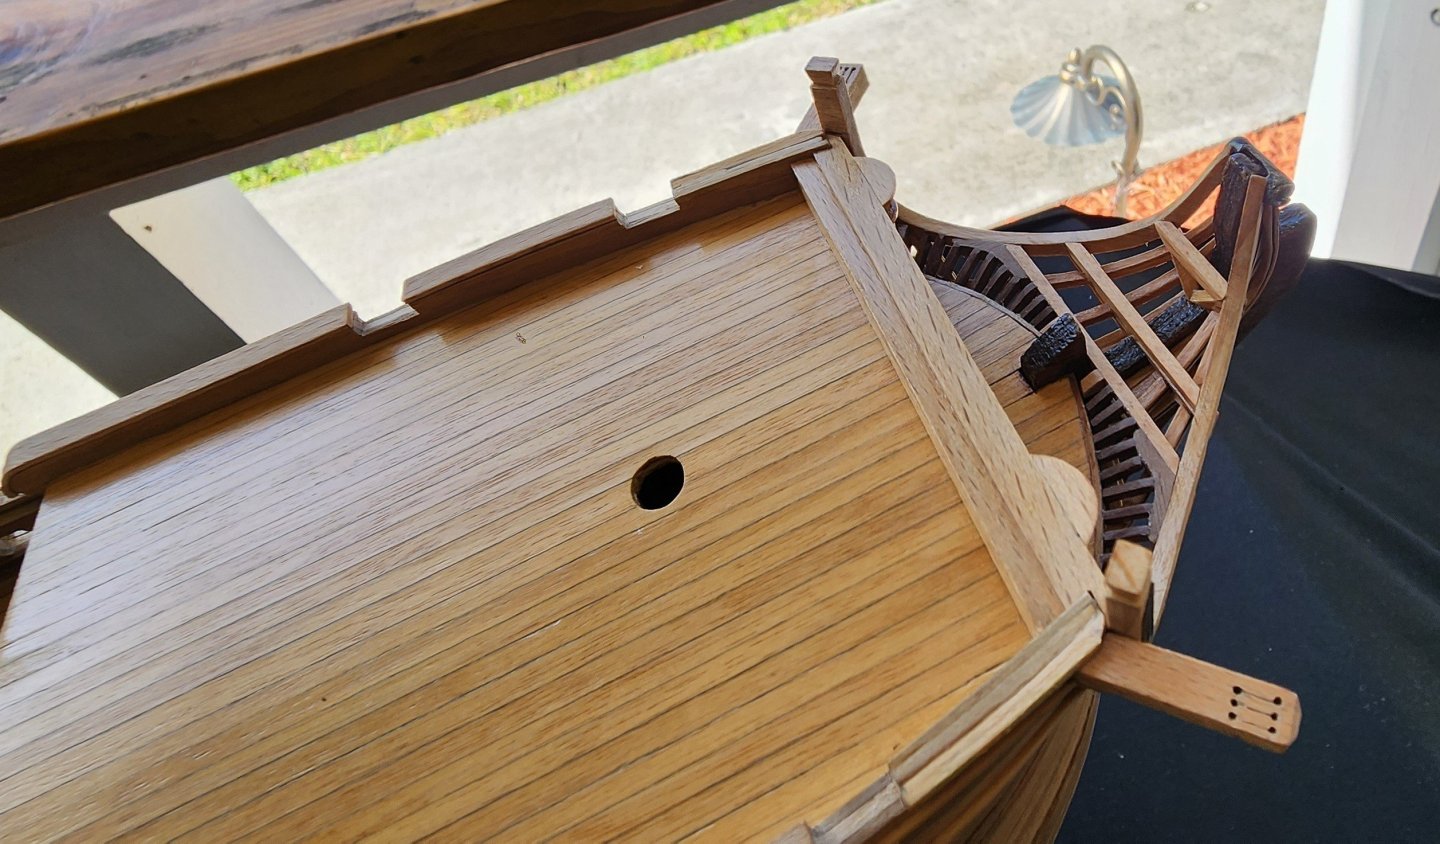
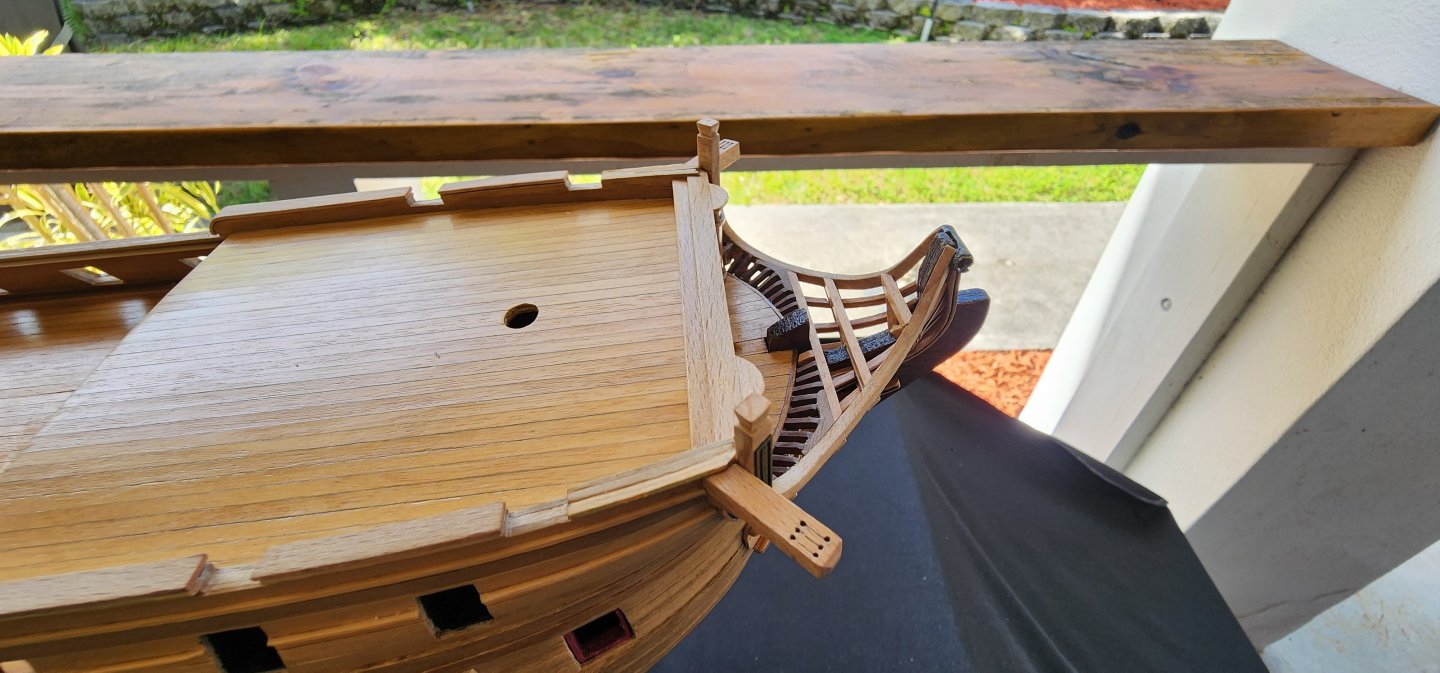
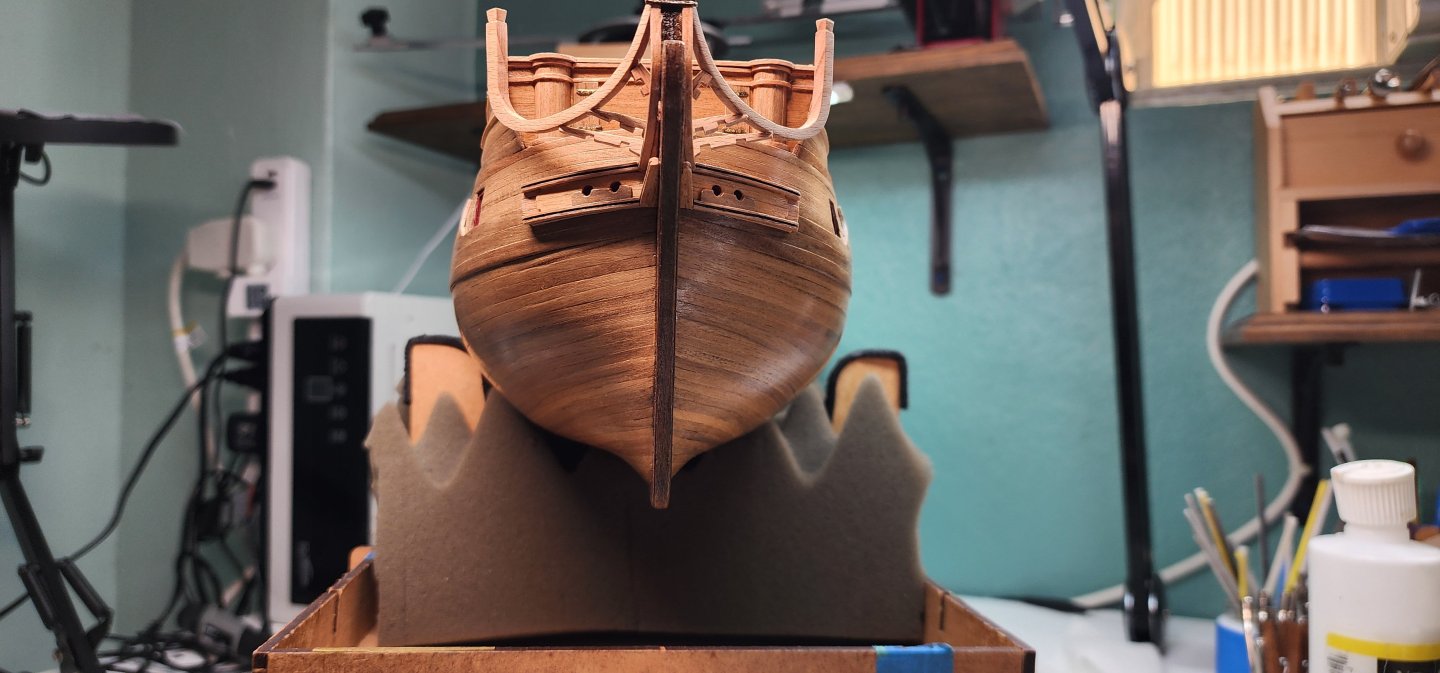
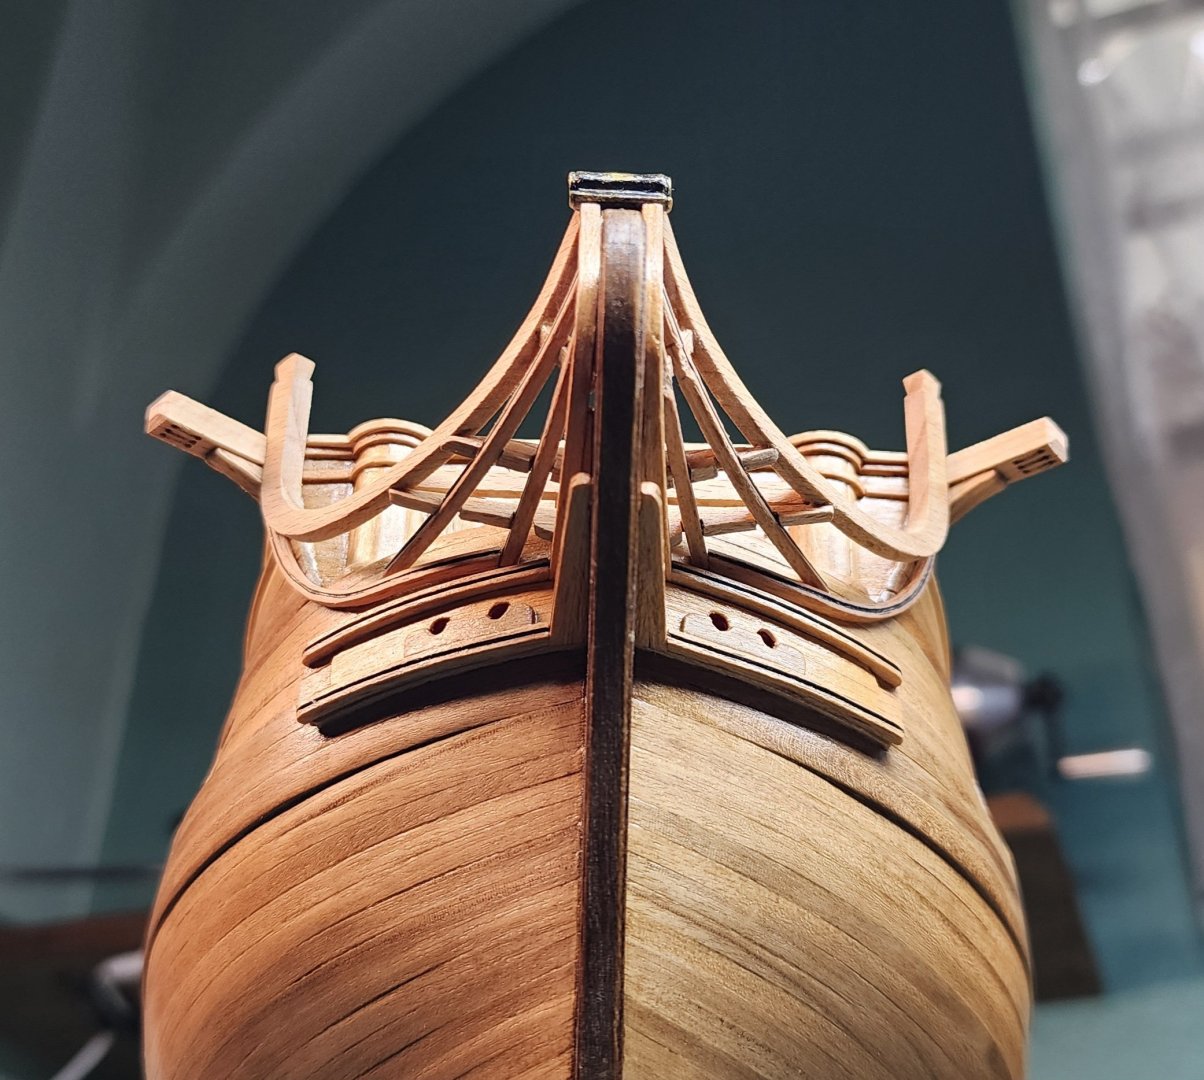
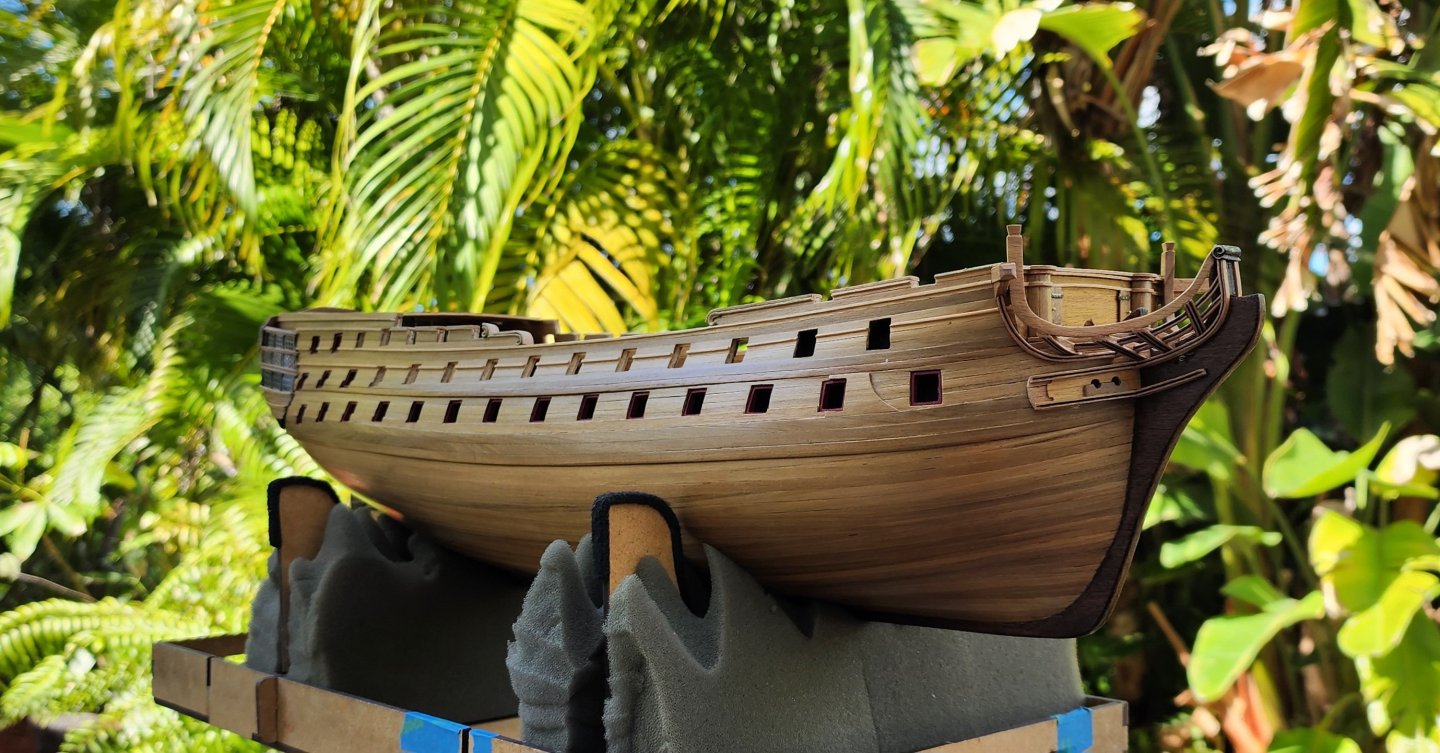
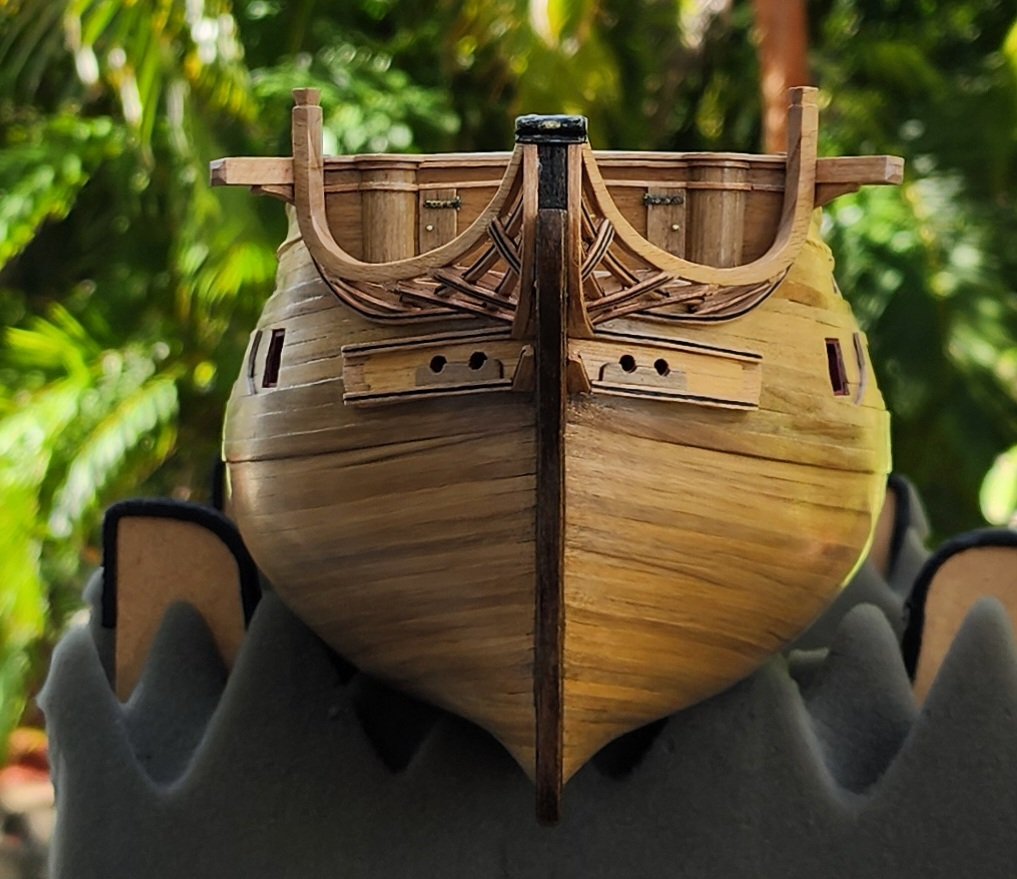
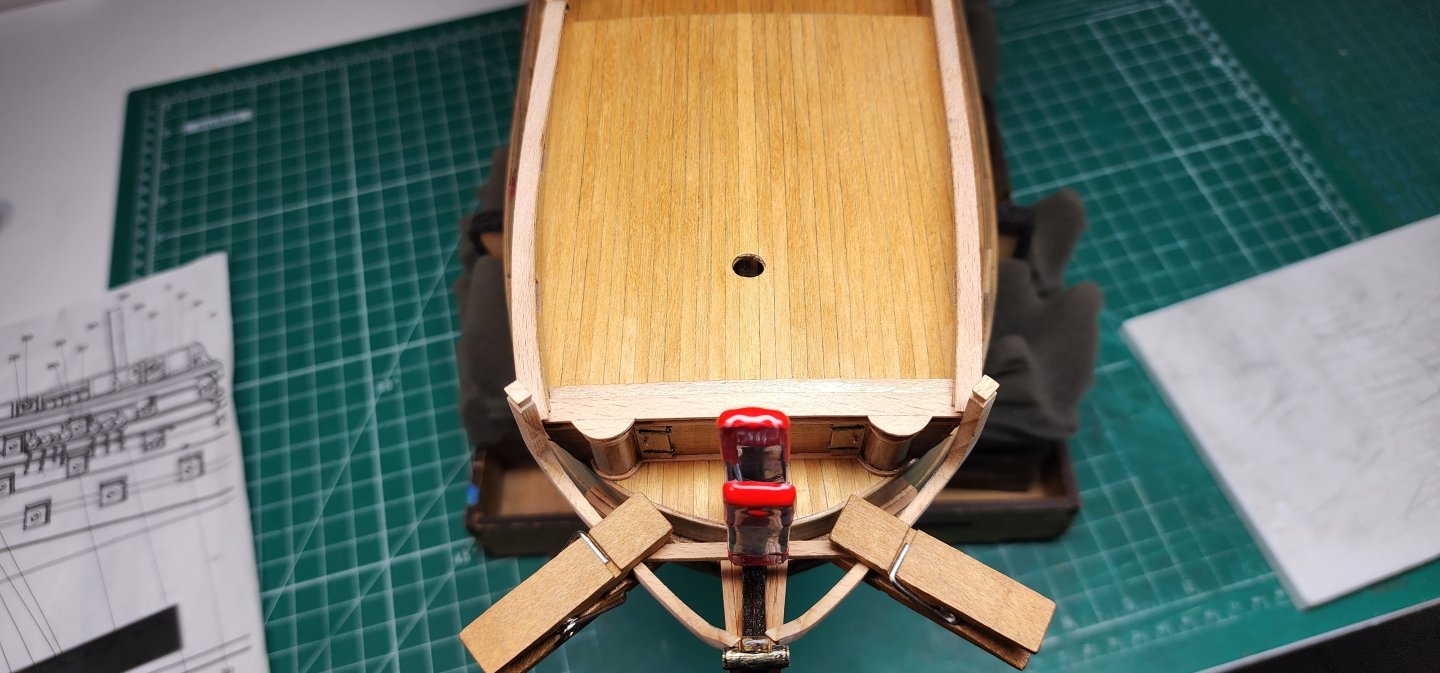
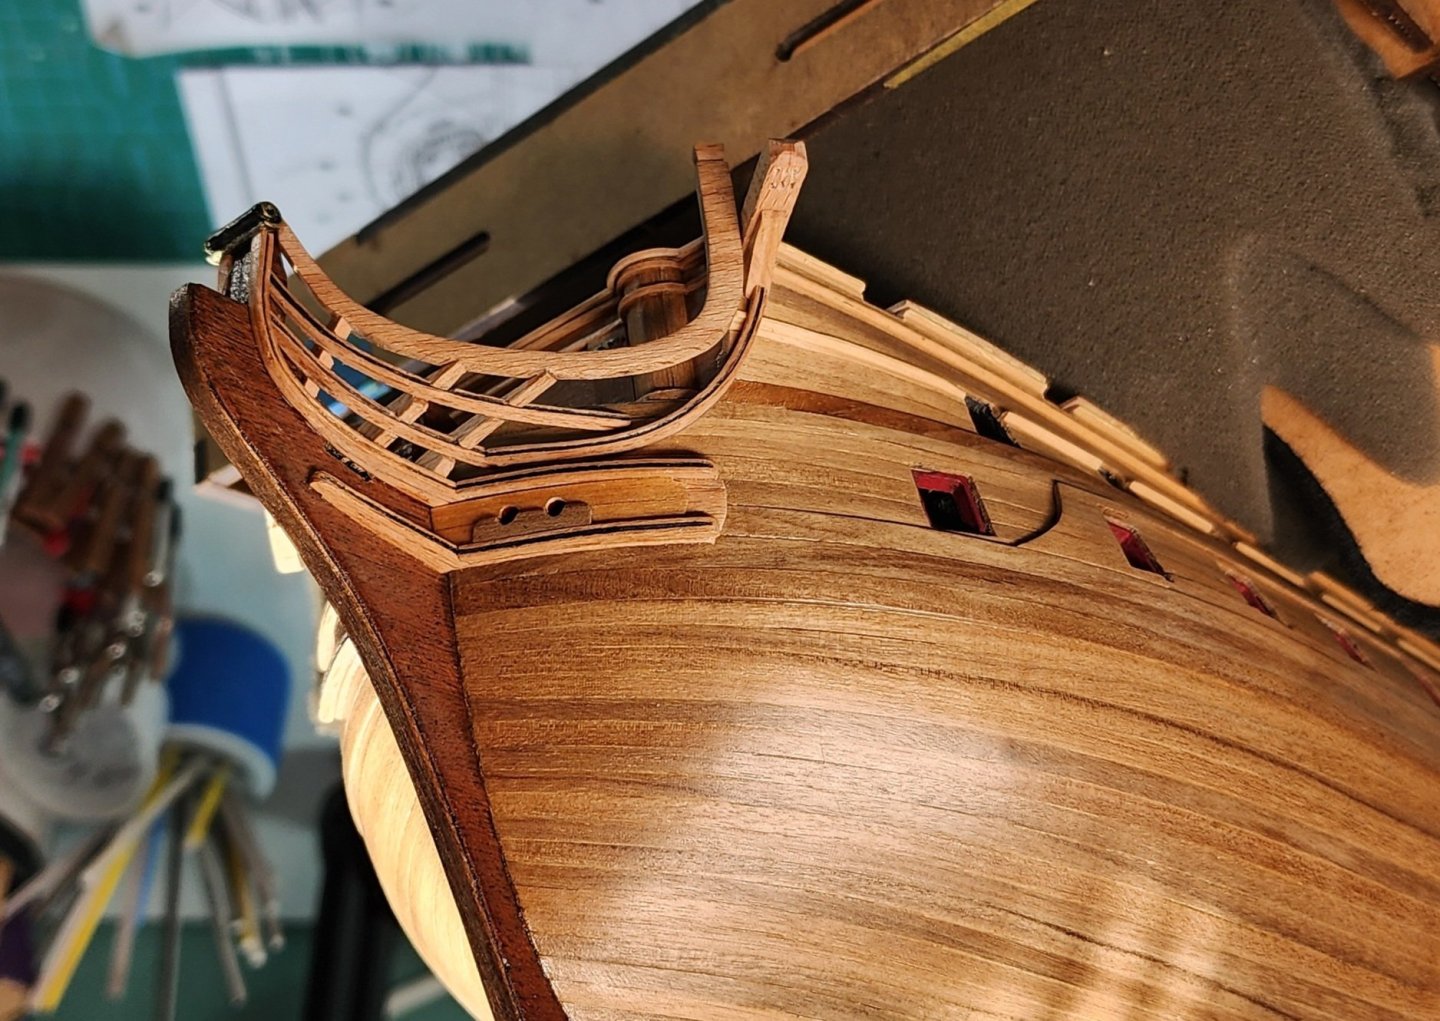
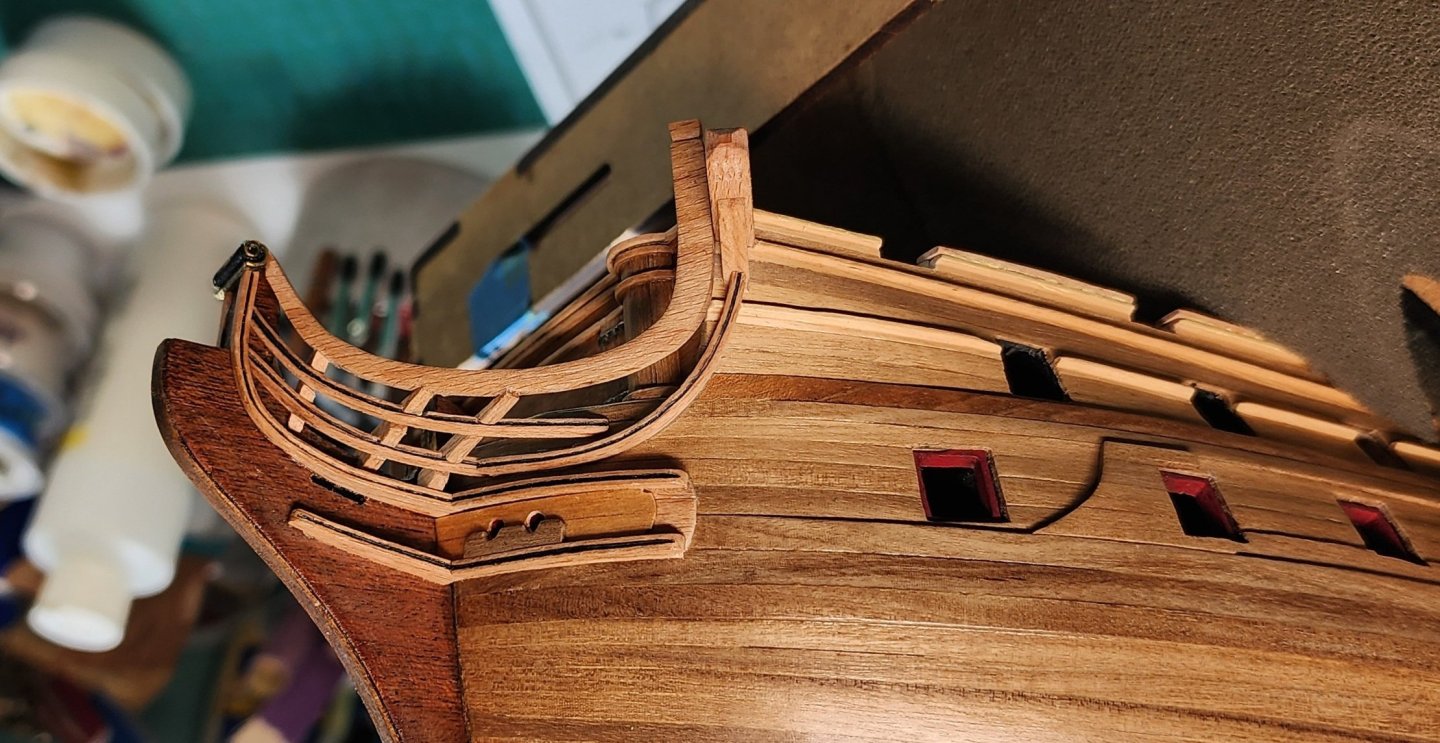
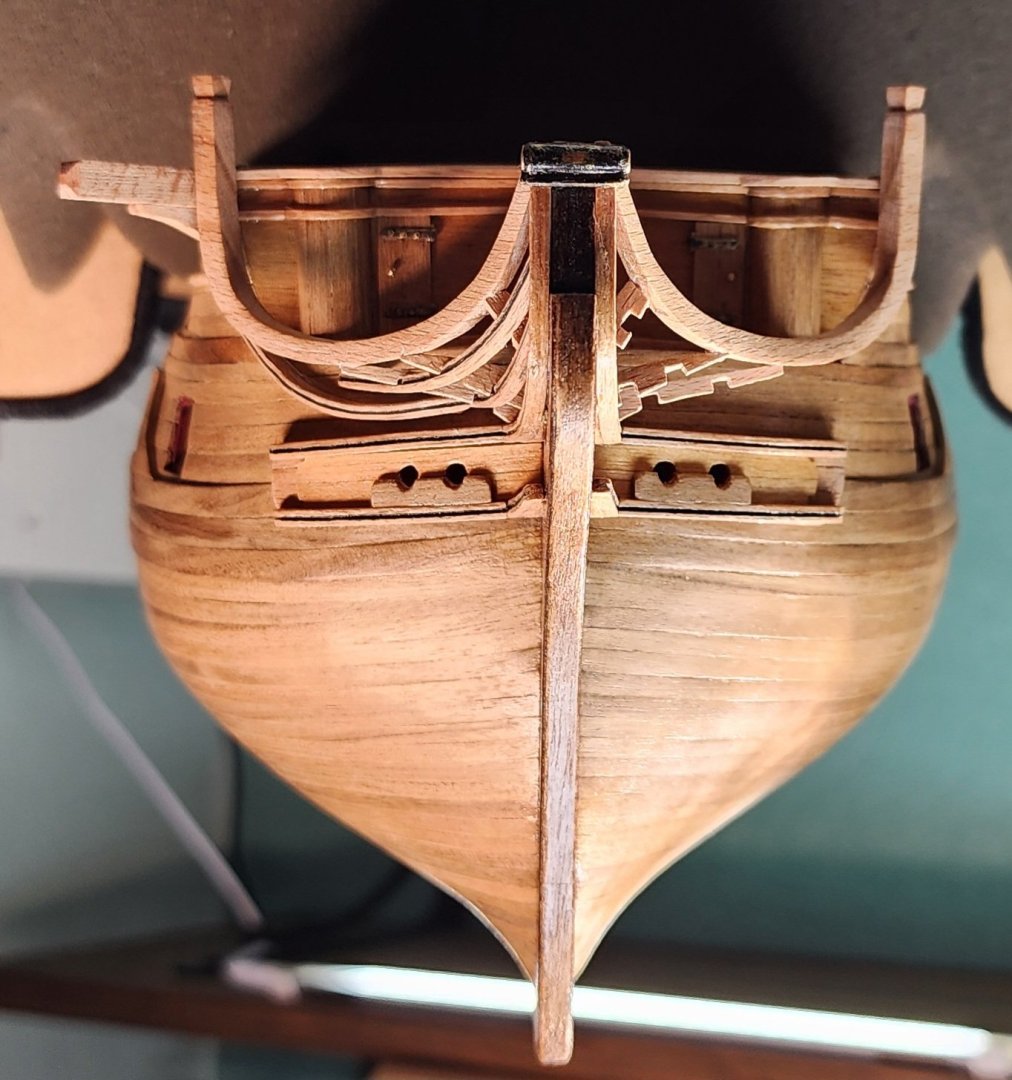
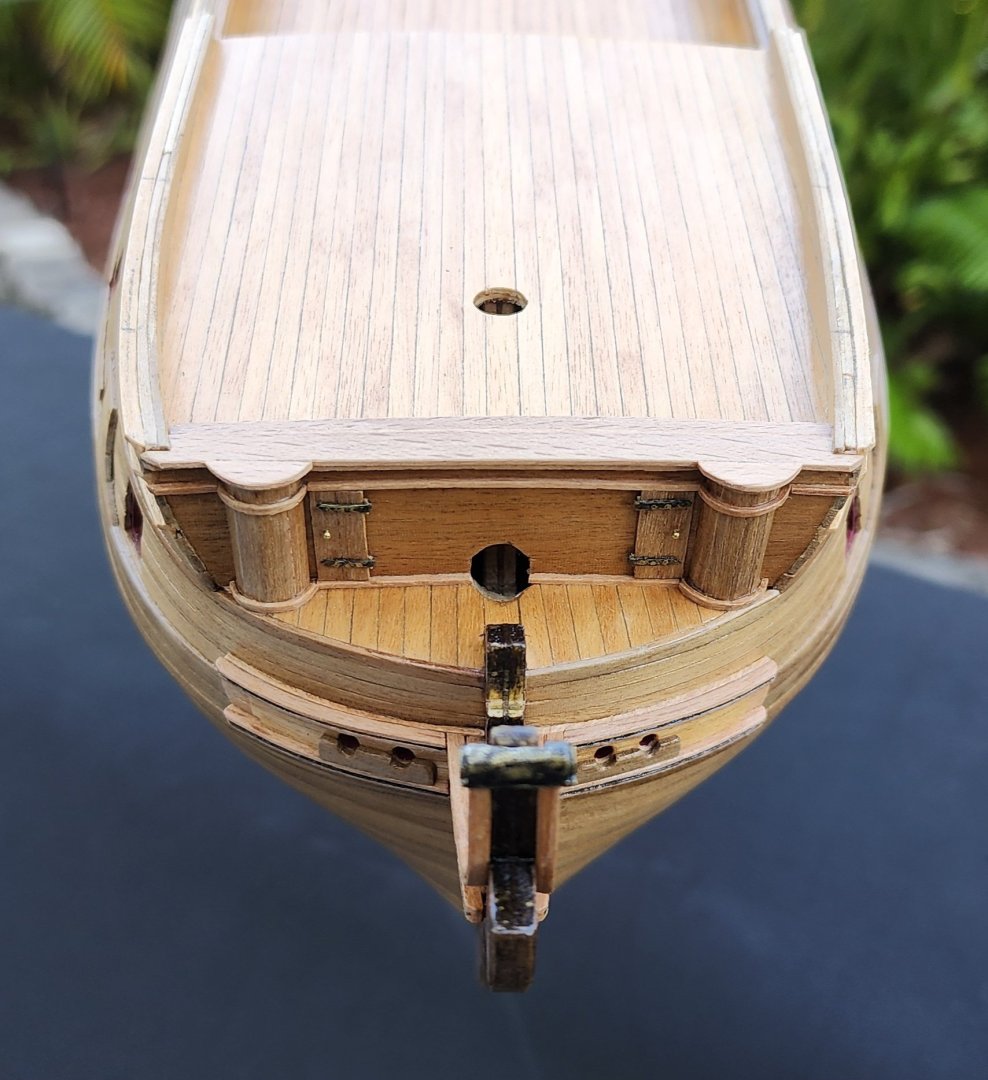
Hello All, Well, I have a small update on Bellona. I completed the bow grating and seats of ease. I installed the first 2 seats and began installing the grating starting in the middle and working my way outboard. It was not a very complicated task, just took some time with the small boards and getting the proper angles. I didn’t like the way the head rails terminated at the stem, so I installed a small piece of beechwood to cover the gap that was there. I think it came out ok and looks better than it did. Once the first set of seats were installed, I installed the last 2 seats and remaining grating boards. I like the way it turned out and it looks more in line with the AOS illustration. The discharge of the seats just misses the rails, but my wife made a comment that there must have been a bit of a mess on the bow of the ship. I told her that one of the punishments for telling a fib was to clean off the head rails of any left over……well you know. I could imagine that if the cook made a sour meal causing an excessive use of these seats that he also would be punished by having to clean up the mess 😊. I cut off a small piece of 8mm dowel for the bow sprit to help prevent me from damaging the head rails if I accidentally grab that area while repositioning the ship. I didn’t like the way the bow sprit looked as it exited from the forecastle. I did not do a very good job carving the opening for it. So, I took some 1 x 1 mm beechwood and installed it around the opening to trim it out. It flows nicely with the rest of the trim in my humbled opinion. Well, that’s all I have for now. I think that I am ready to start working on the interior of the ship. I have a few things to clean up on the stern that I am not satisfied with, but that won’t take too much time. As always, your comments and guidance are always welcome. Enjoy the pics. Cheers Nearshore


-
Hi Andy, I am building the same ship. I am about 2 1/2 years into the build. The instructions are not the best and if followed verbatim they will get you into trouble. If I can be of any assistance, I will be more than happy to share my experiences. If you need some perspective pictures of a particular area, I will be more than happy to share what I have with you. I have taken more than 2000 pictures along the way which have helped me in identifying issues and solutions. Good luck on your journey, this is a nice model, and I'm shore you will enjoy the challenges that it has to offer. Cheers Nearshore
-
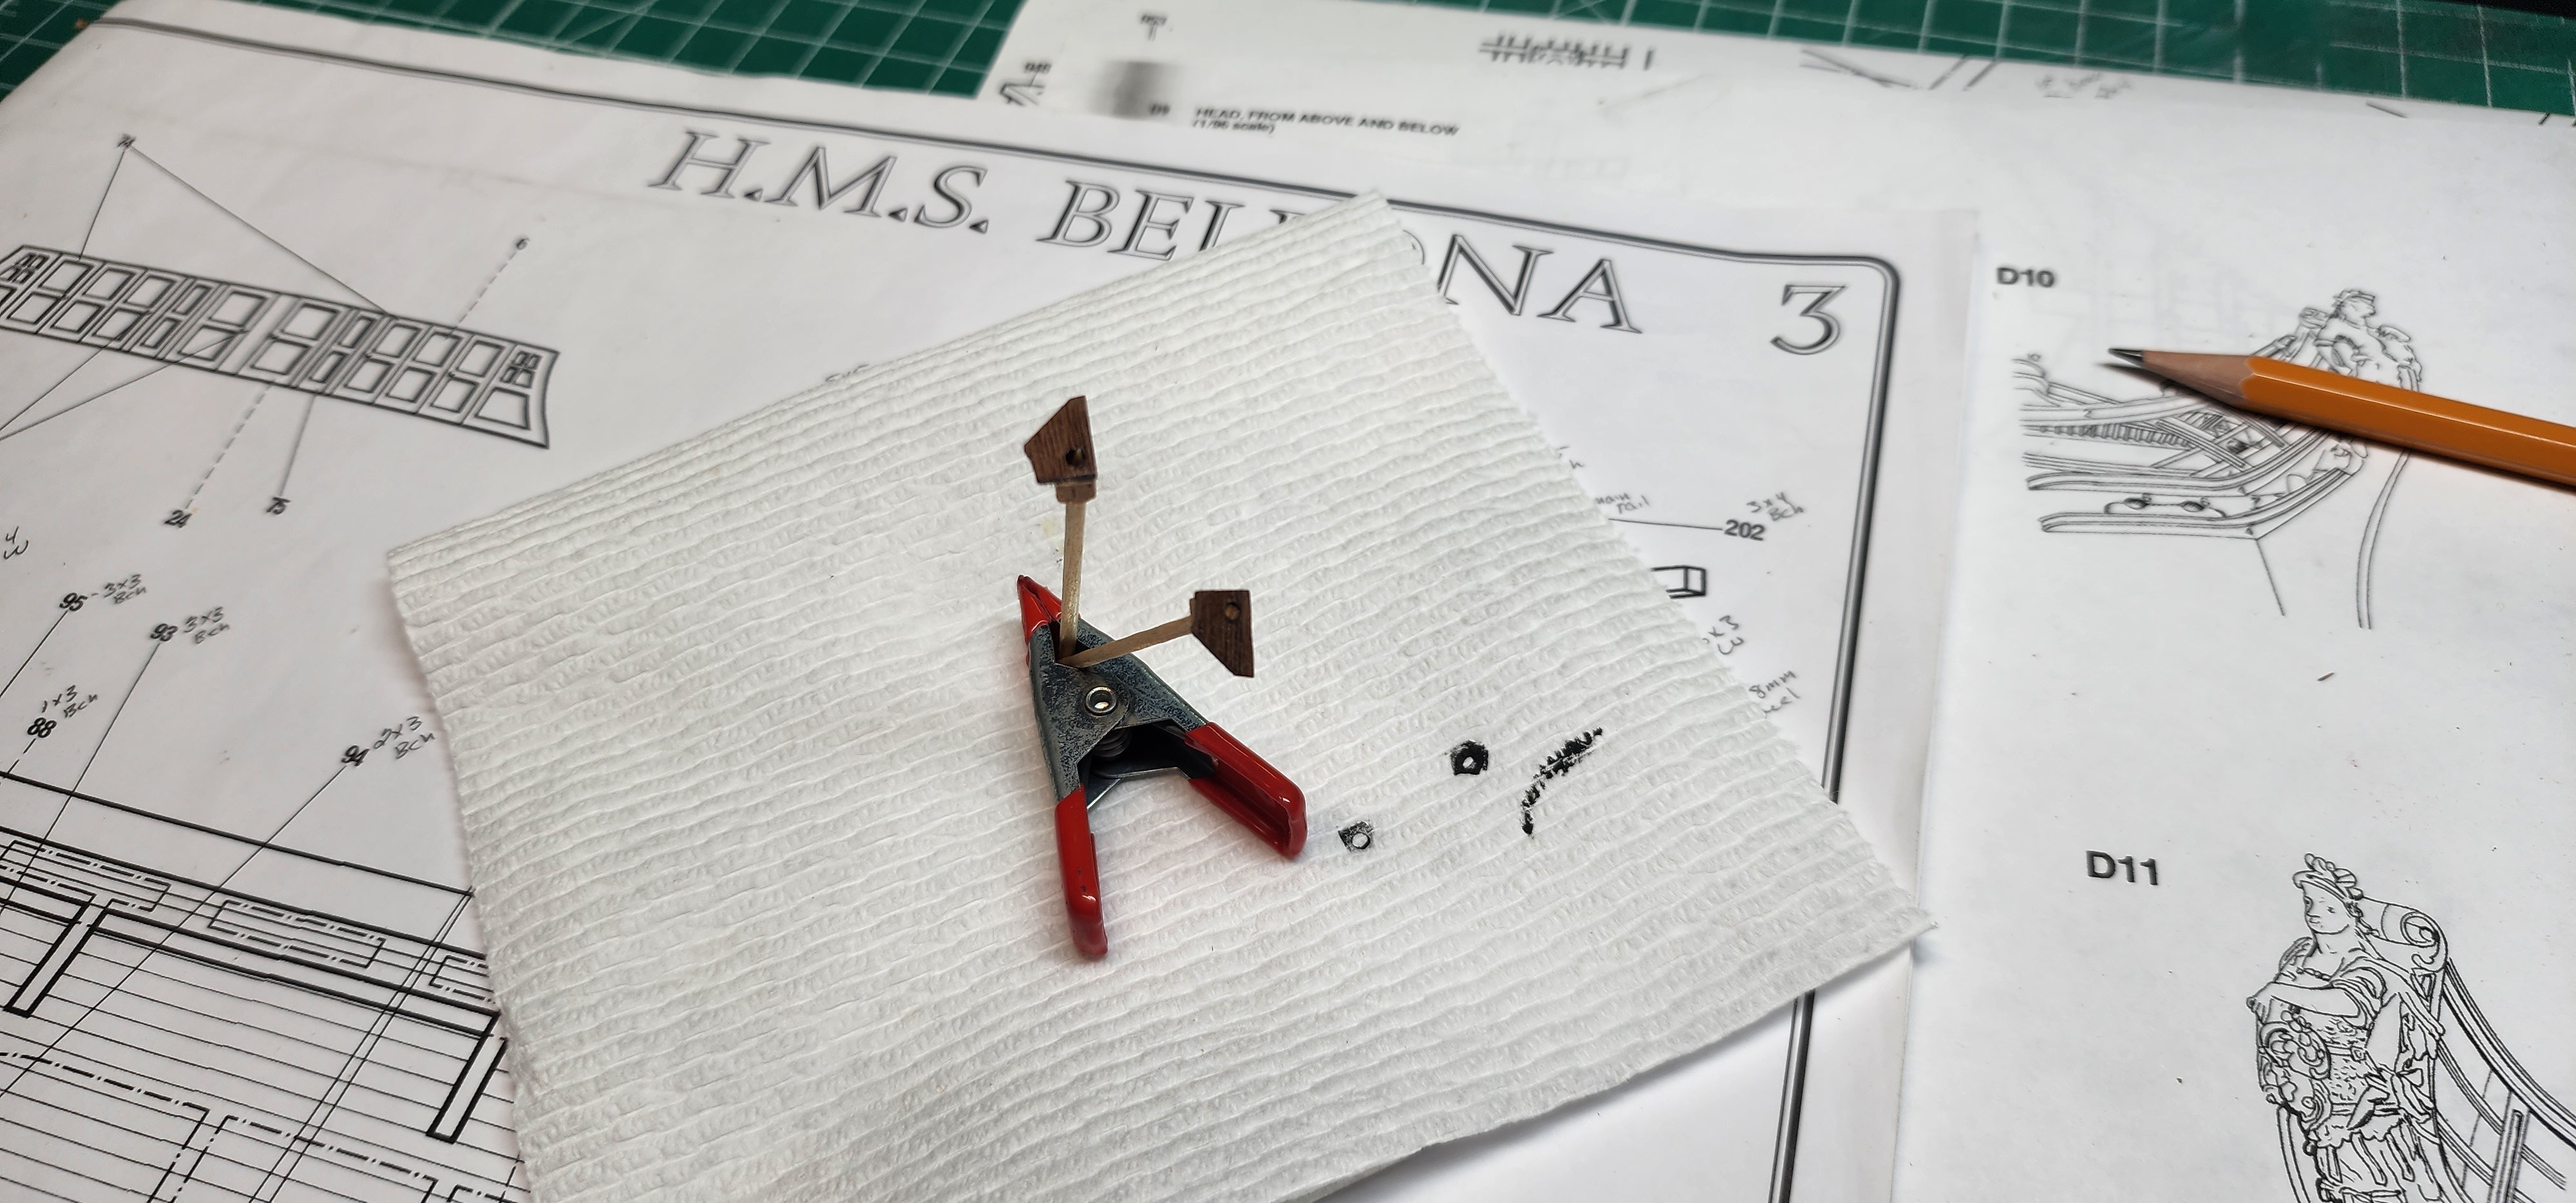
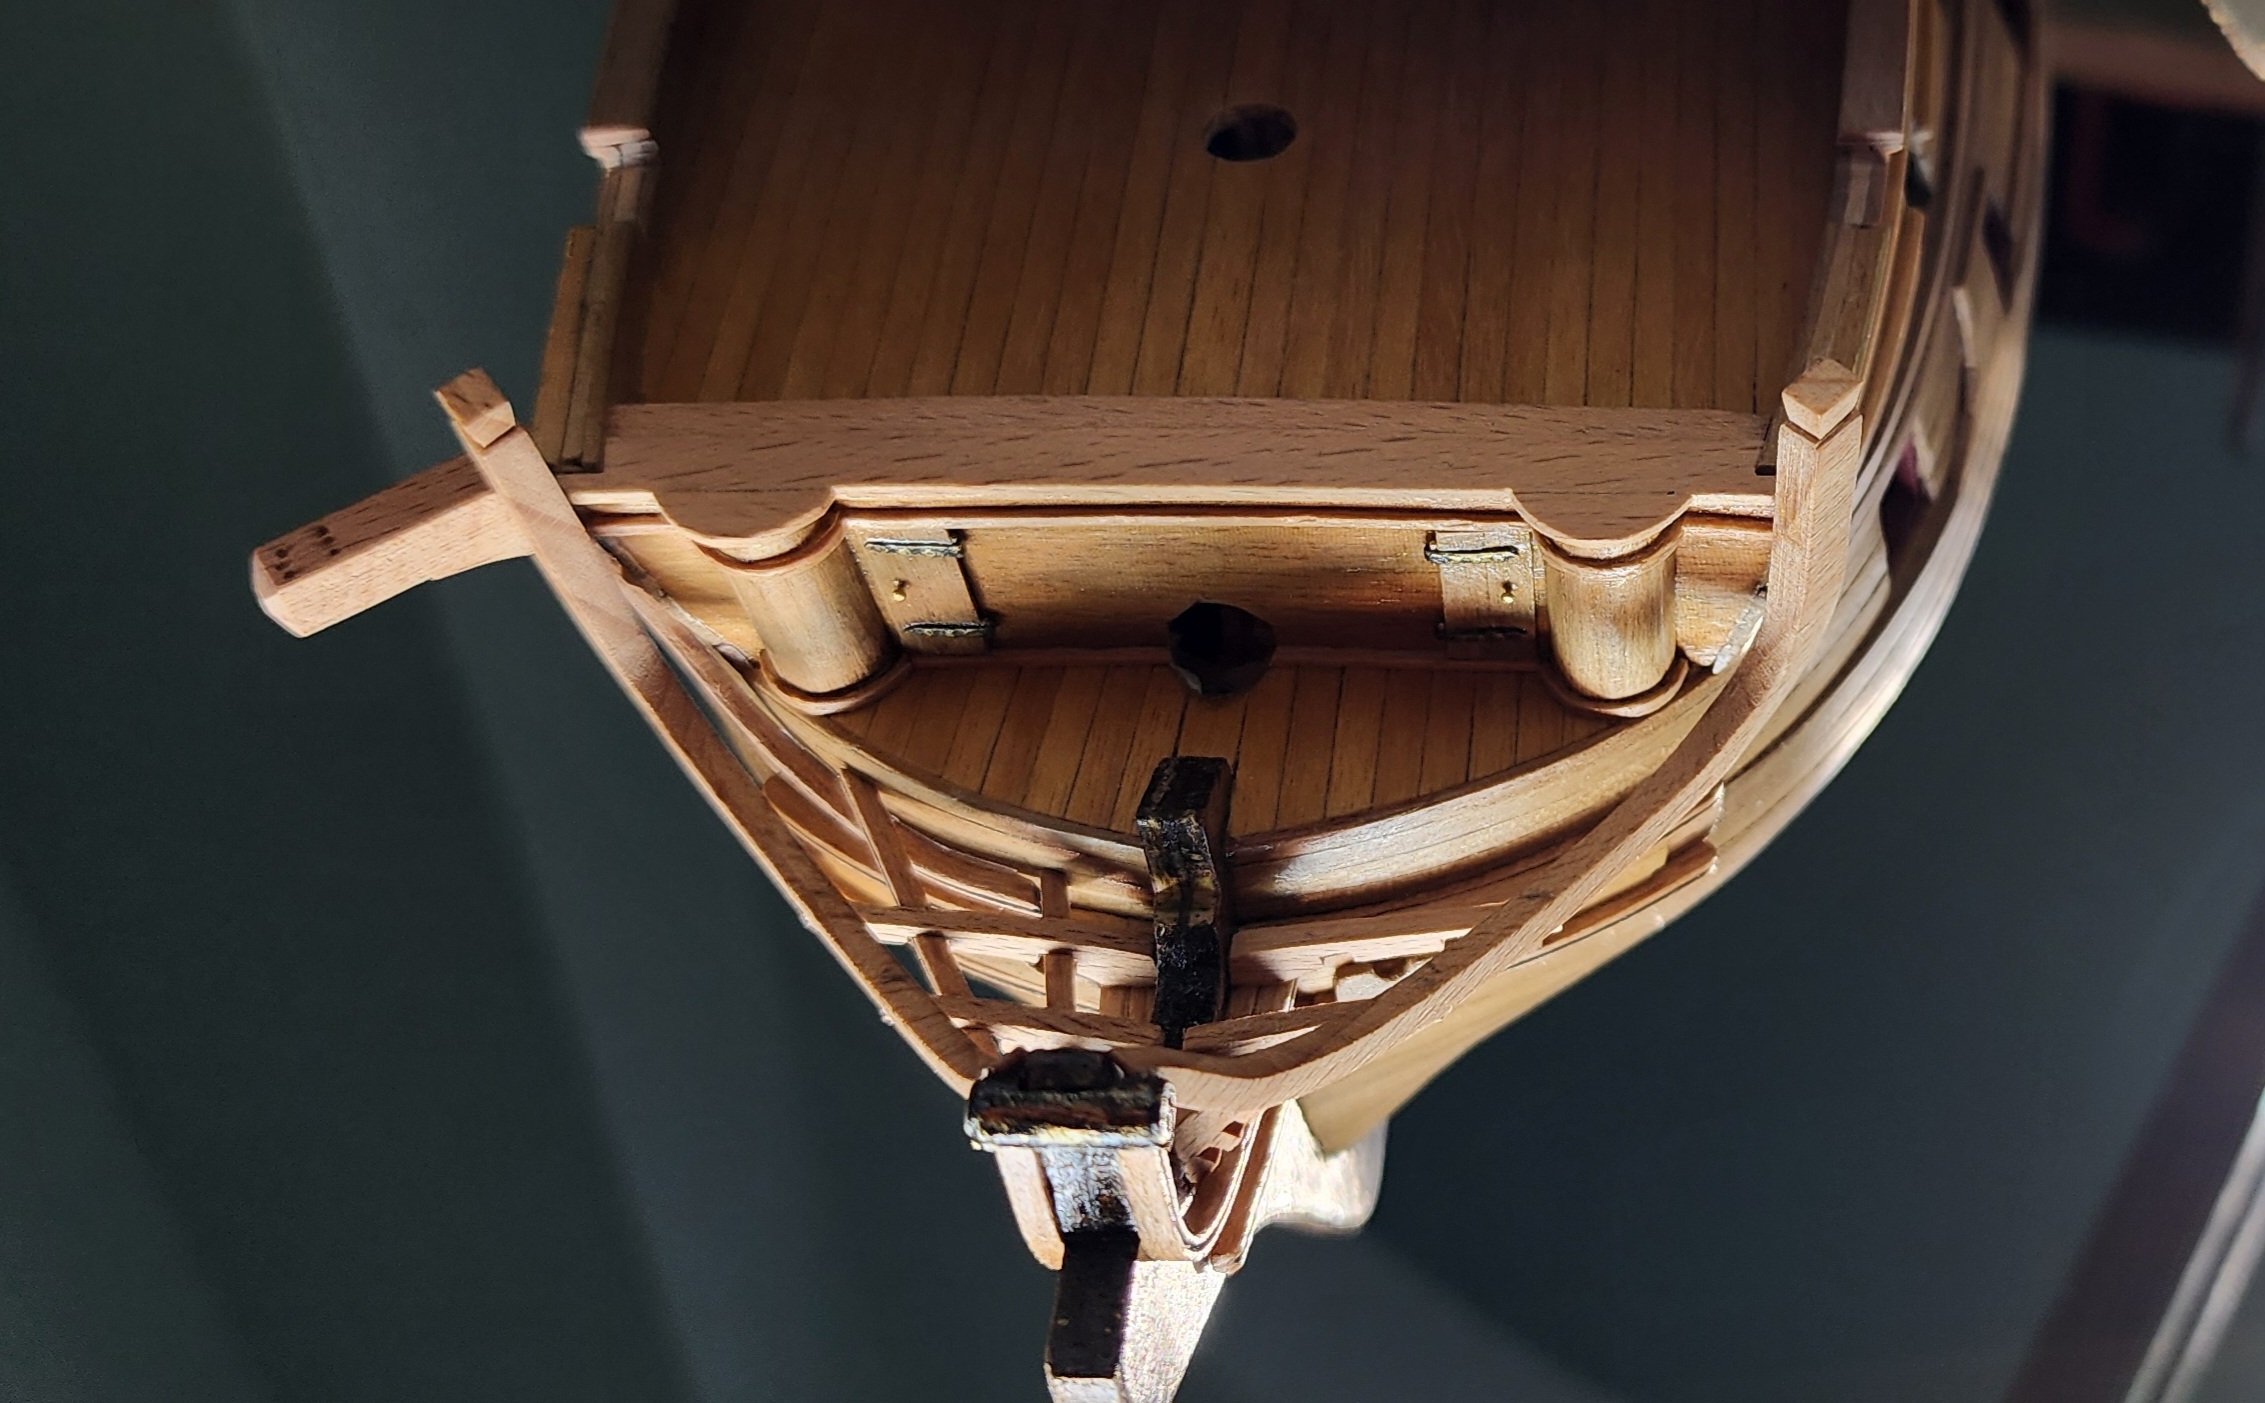
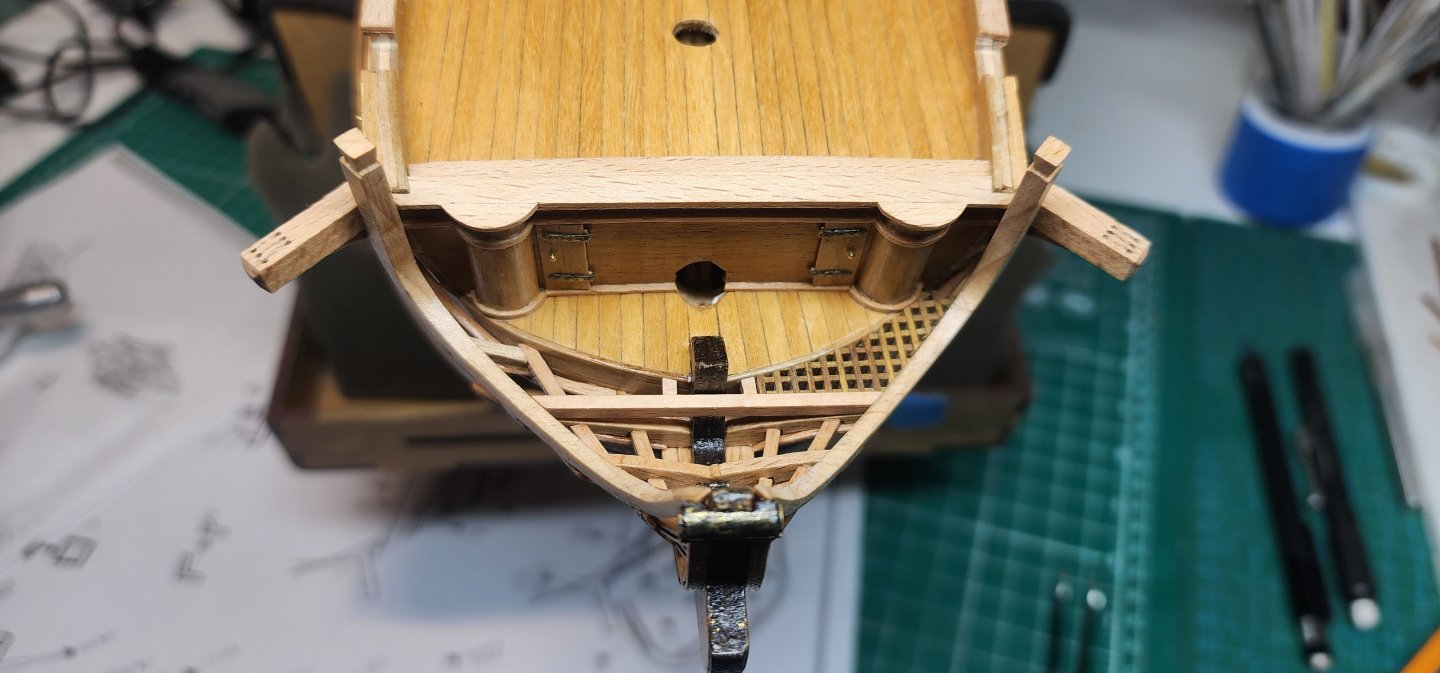
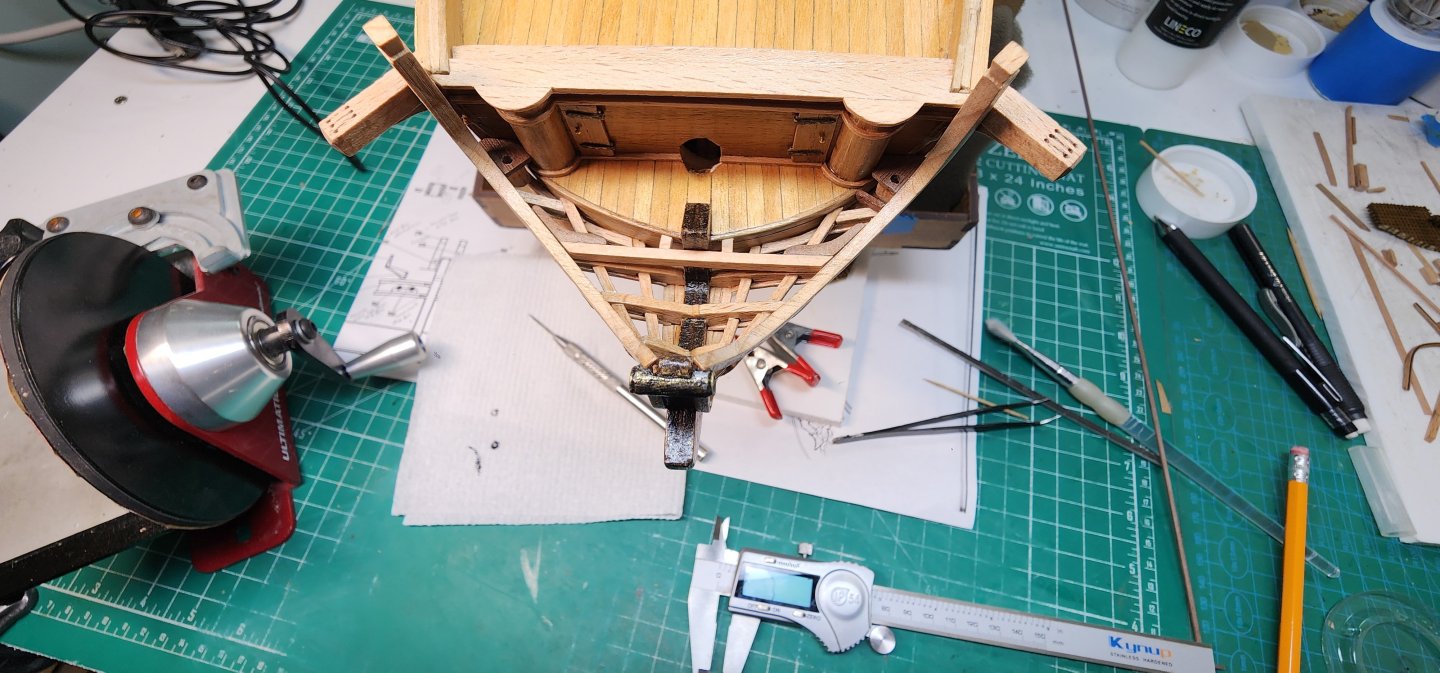
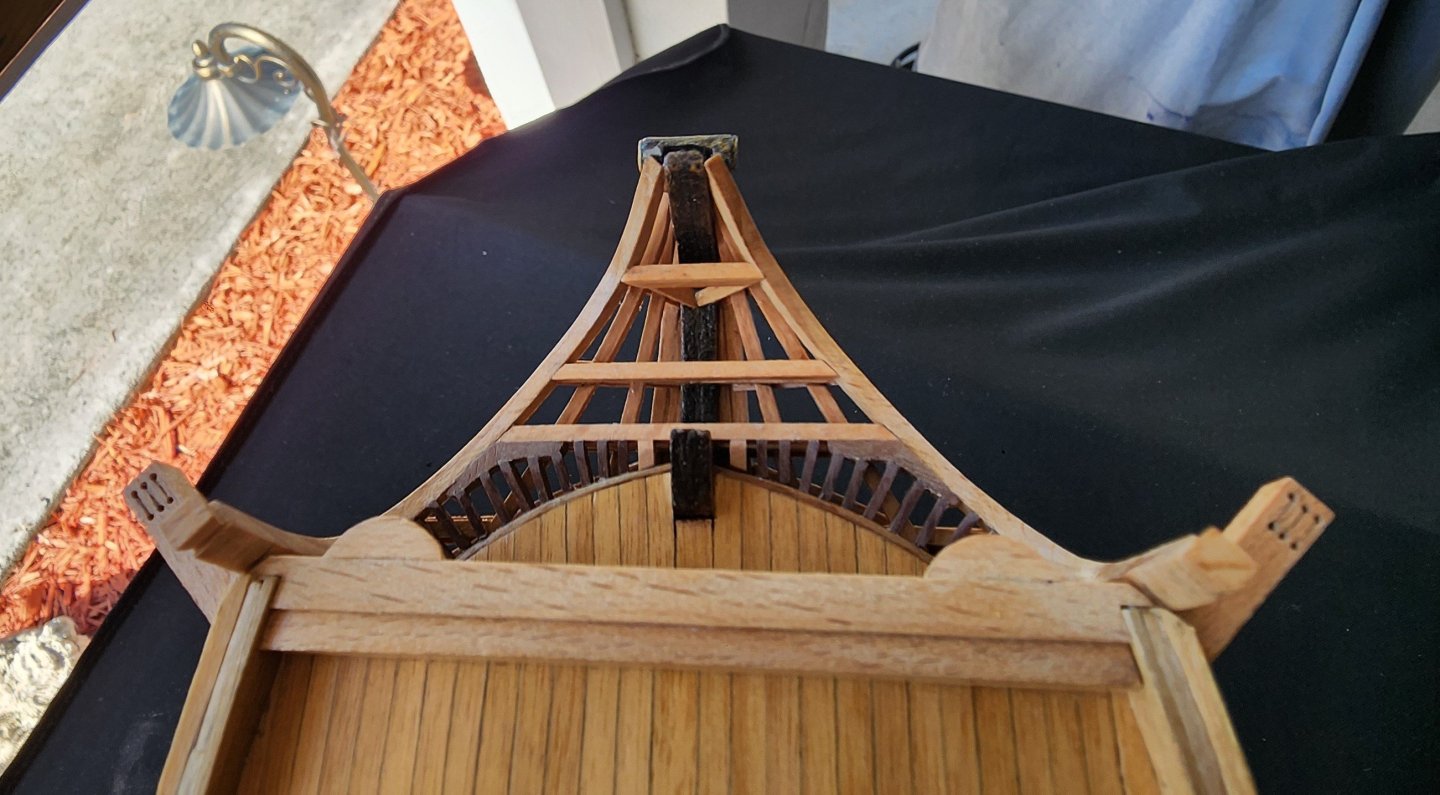
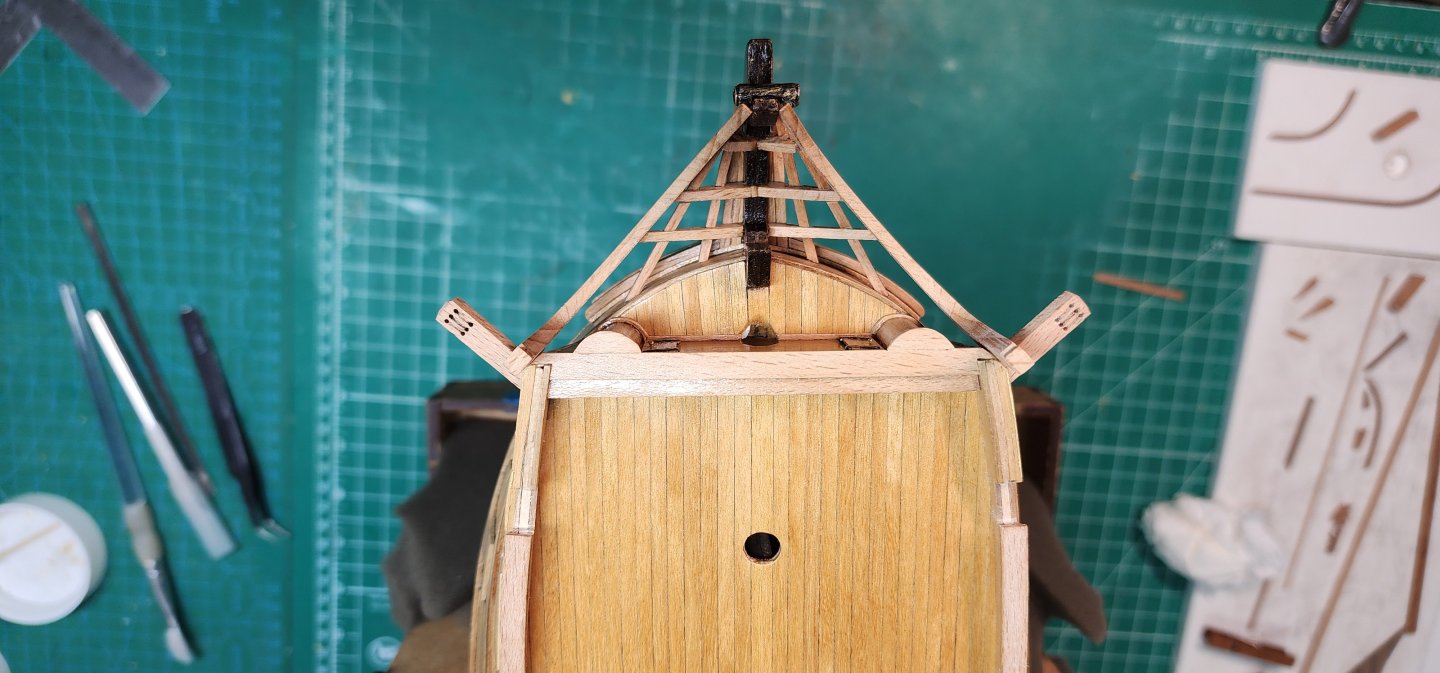
Hello All, Small update on the Bellona. I started installing the head grates using the grating that was supplied with the kit. I made a template out from some cardboard and shaped it to fit in the first section of the head. I then used the template to cut and shape the grating and dry fitted it to the head. I didn’t really like the look of the grating, and I felt that it was not an accurate interpretation of the period and conflicted with the AOS illustration for this section. I decided that I would attempt building the grating as shown in the AOS book. I found that the brass for the inner seats of ease that was supplied with the kit did not fit properly either. I built new ones from 4 x 4 beechwood and 1 x 4 walnut for the seat and glued them in place. I then shaped the knee from walnut and attached them to the head beam. I took some 1 x 4 walnut and reduced it down to 1 x 2 for the grating. Then I painfully started cutting and shaping the grating strips and gluing them in place. This took some time and patience as the pieces were very small and each end of the boards had a different angle where they attached to the hull and head beam. After I completed this I shaped and installed the remaining cross beams. Well, that’s all I have for now. I will continue with the remaining grating and seats of ease installation and provide another update when I make some more progress. Cheers Nearshore


-
I think you made the right decision. I like the matural tones of the wood.
-
Hi Yves, I forgot to ask if the weights you used are buss bars? Im an electrician and they look oddly familiar.
-
Hi Yves, Looks like this is going to be an incredible build. You are quite the master modeler and i will be following you on this journey. I imagine this will take a couple years to complete. I am looking forward watching and learning as you progress with this complexities of this project. I understand that its not realistic to put a timeline on building a ship of this magnitude, but do you have an idea on how long it will take to complete? Cheers Nearshore
-
Hi Yves, Thanks for the compliment. It means a lot to me. I've studied your build log, although different scales, there are still a lot of similarities. Nearshore
-
Thanks for the complement.
-
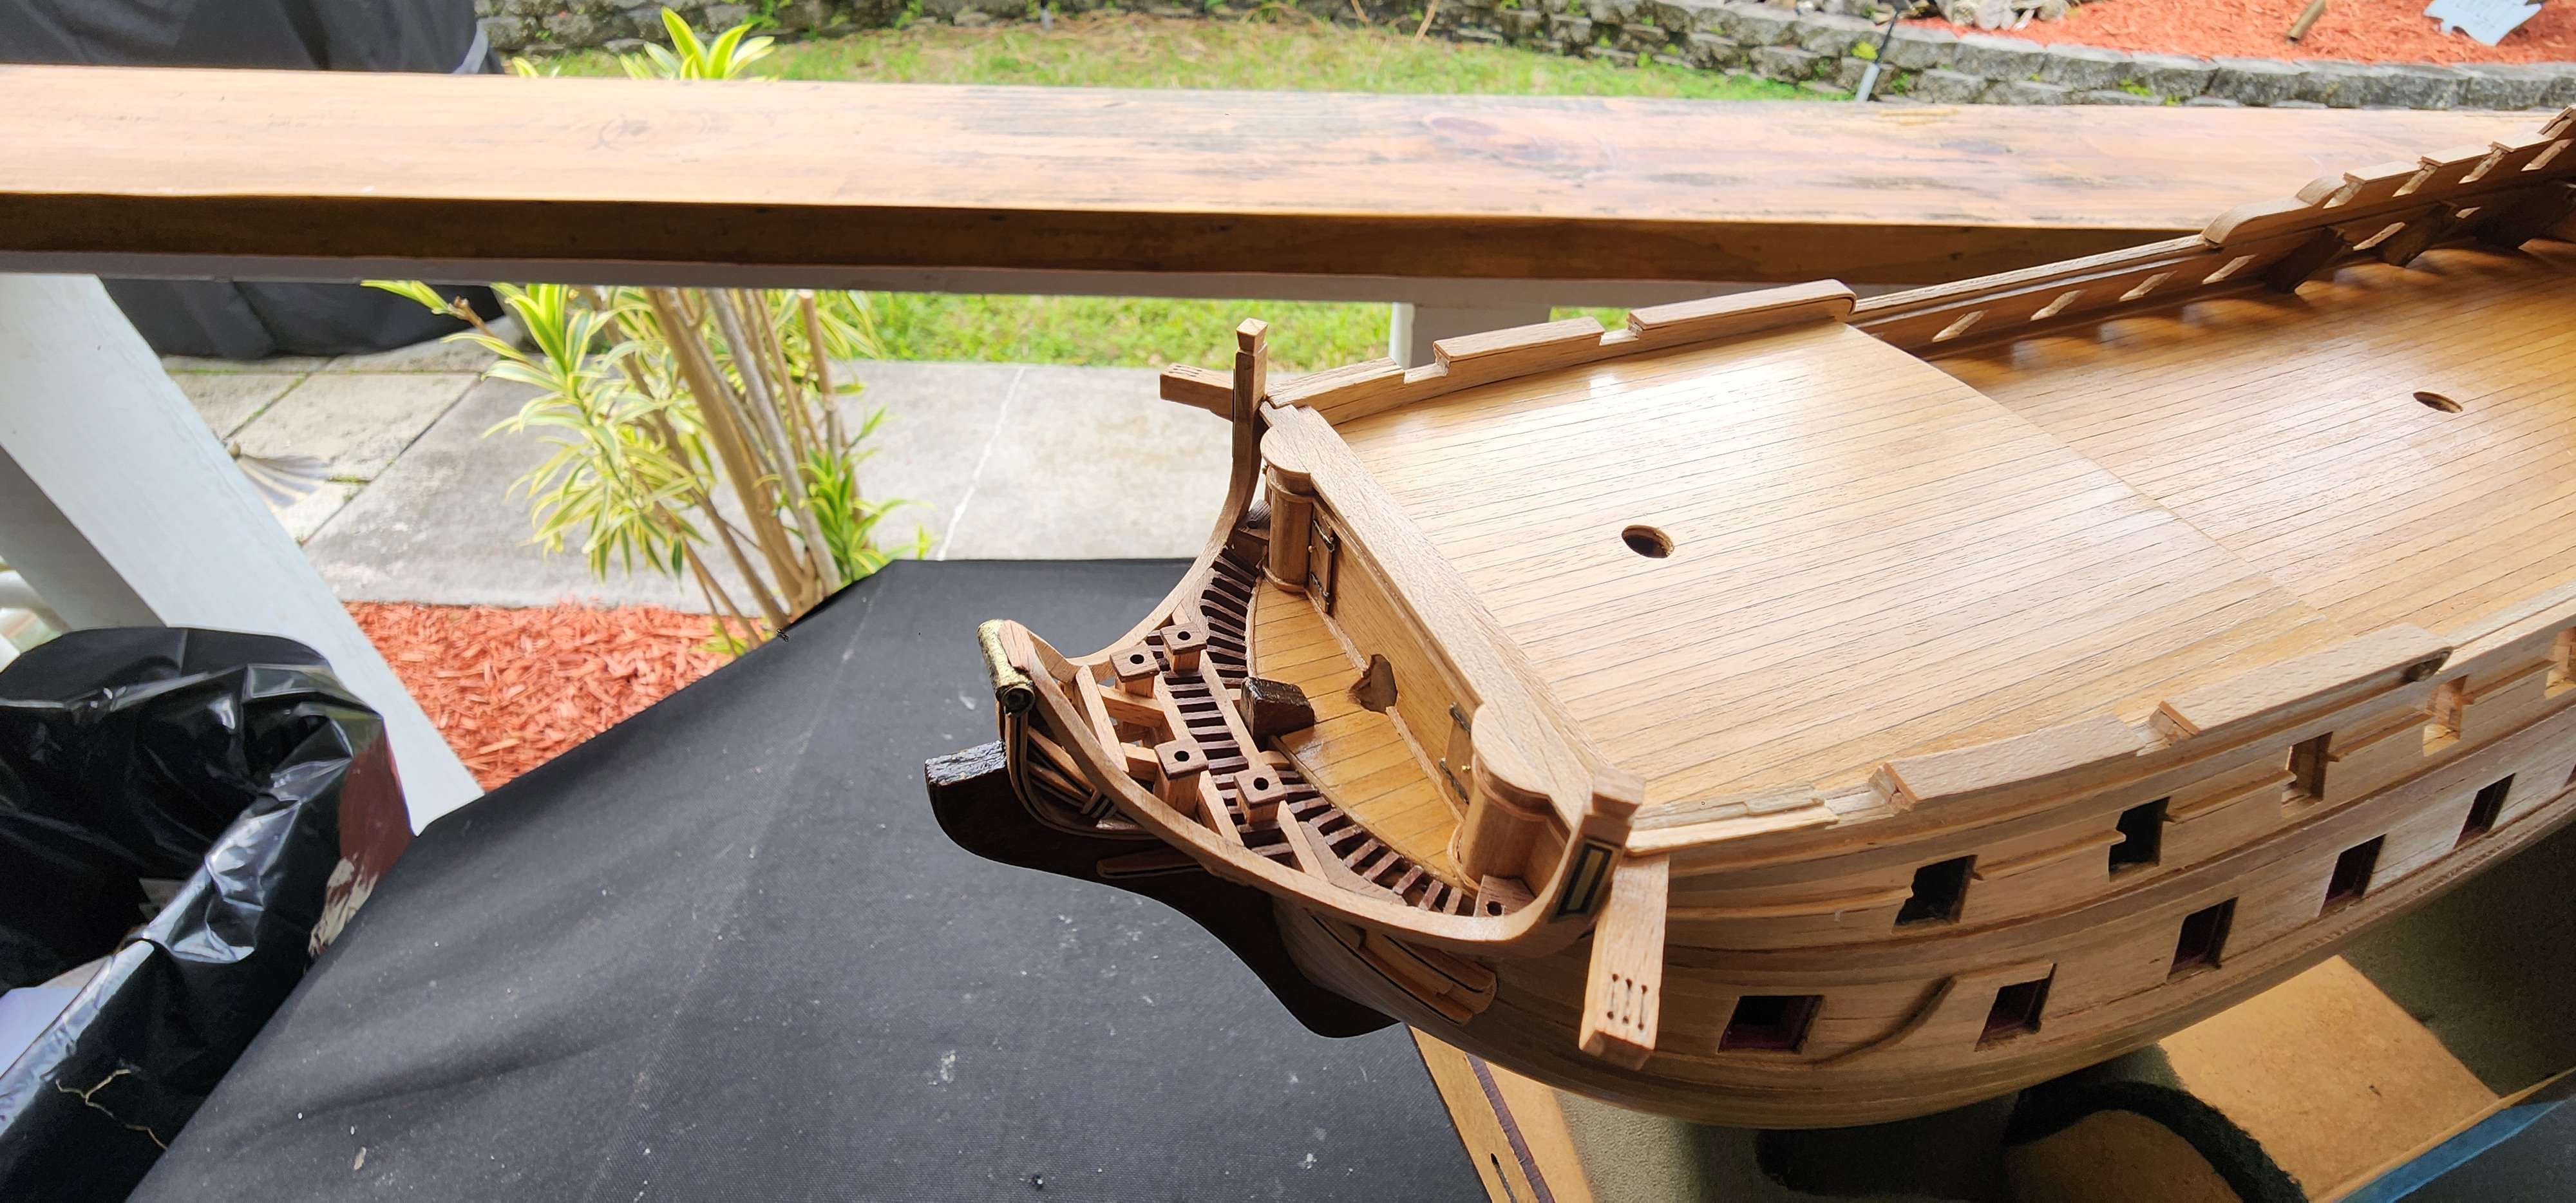
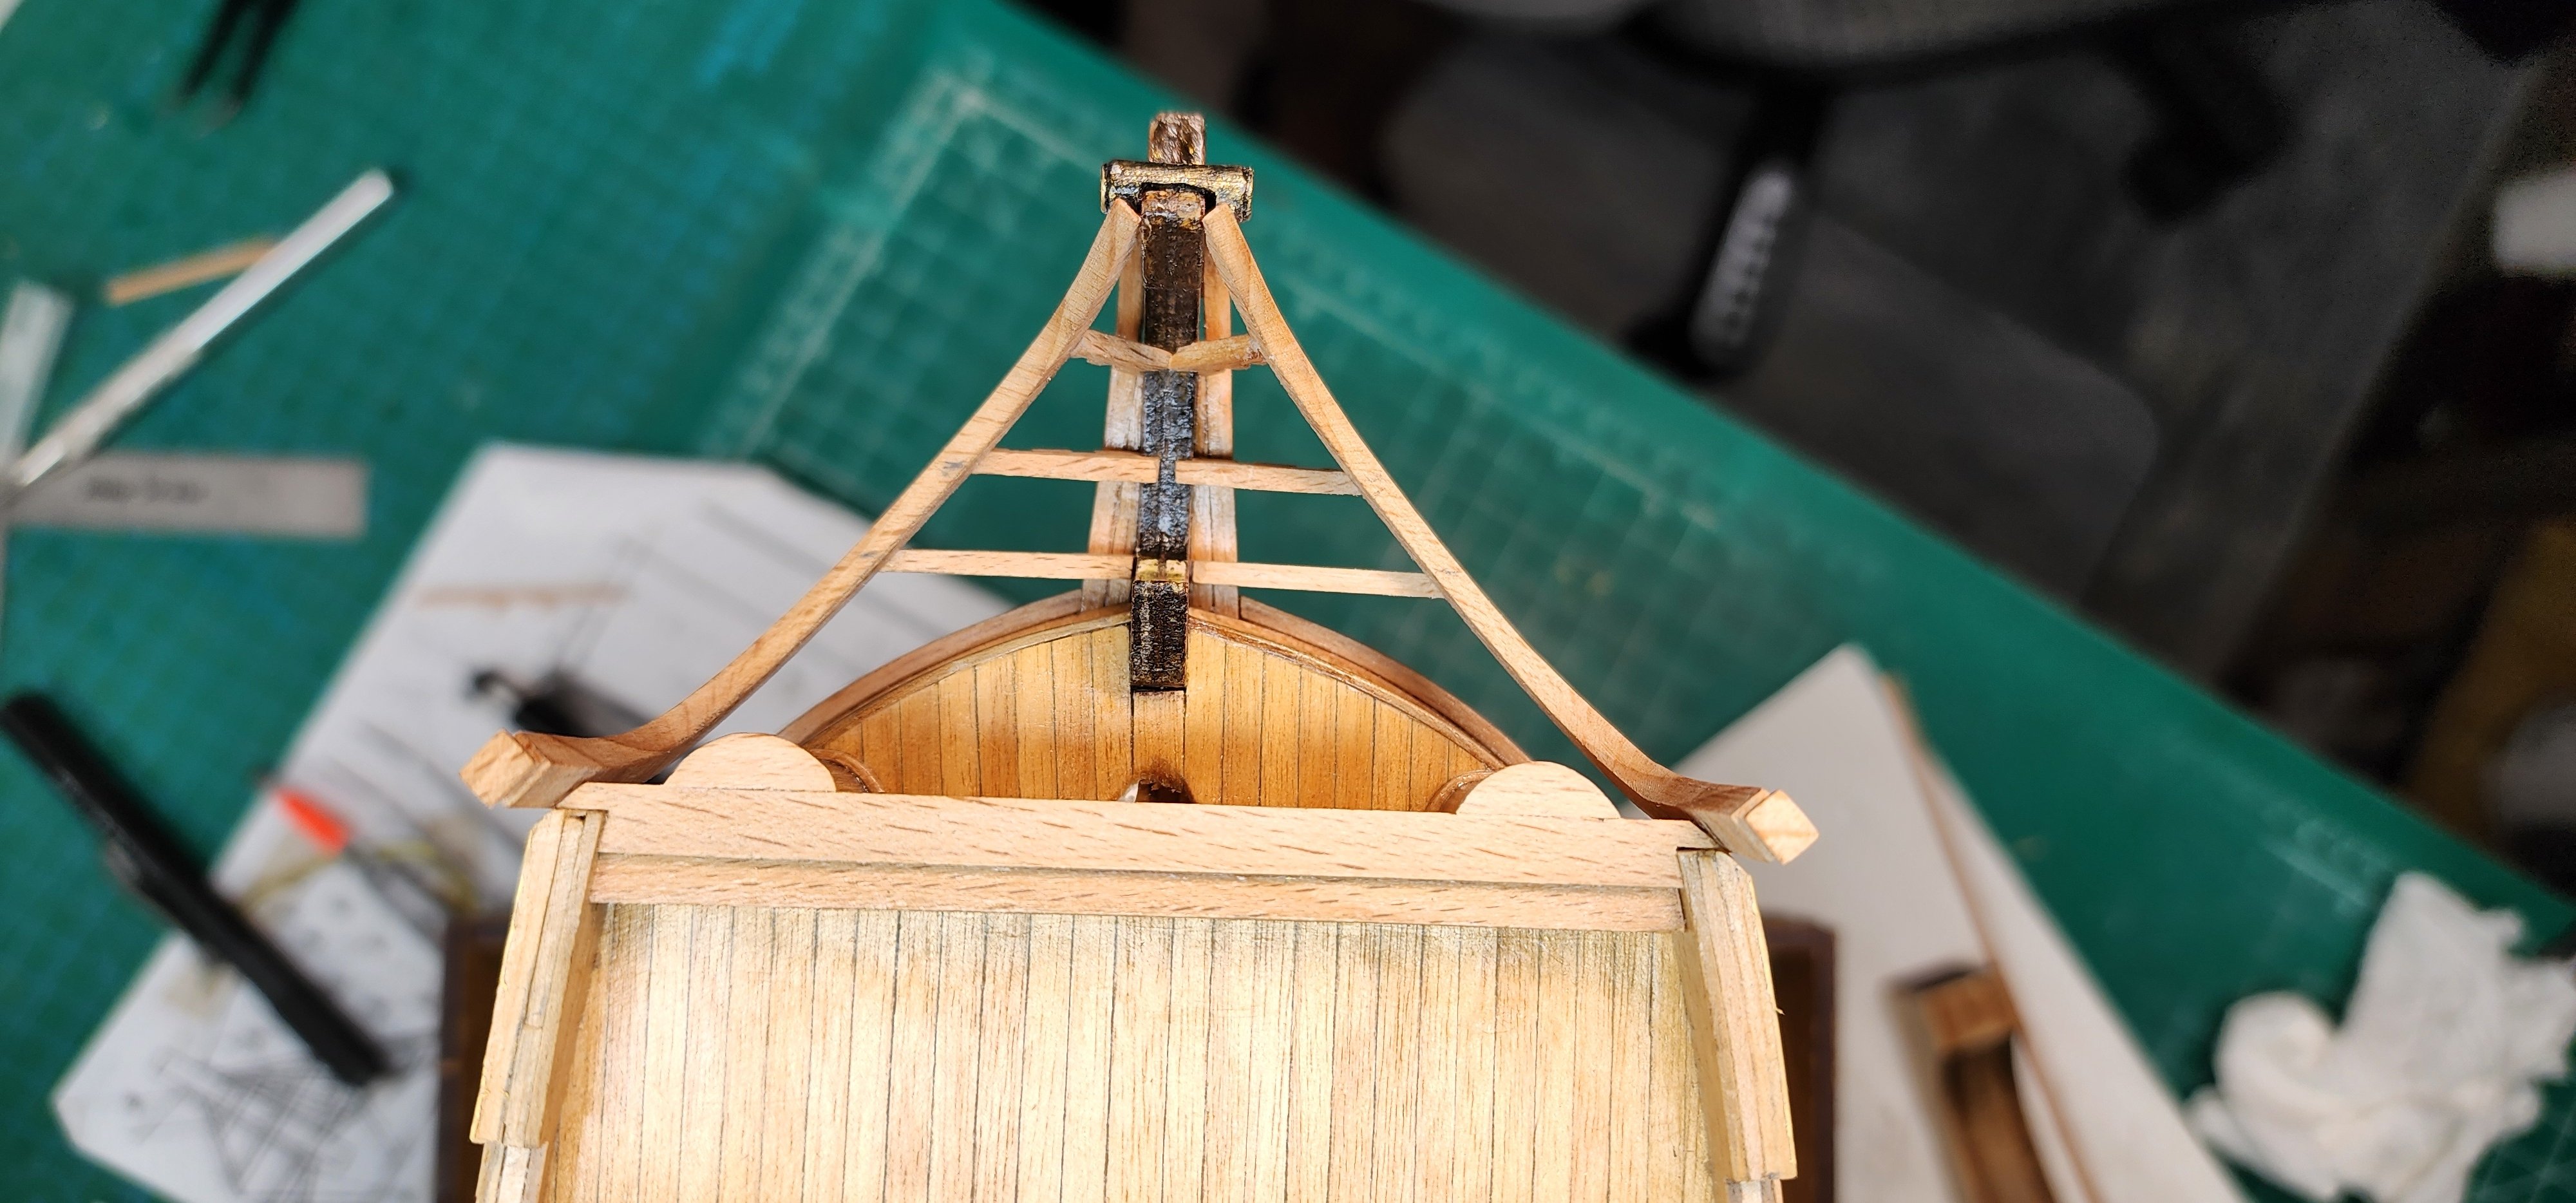
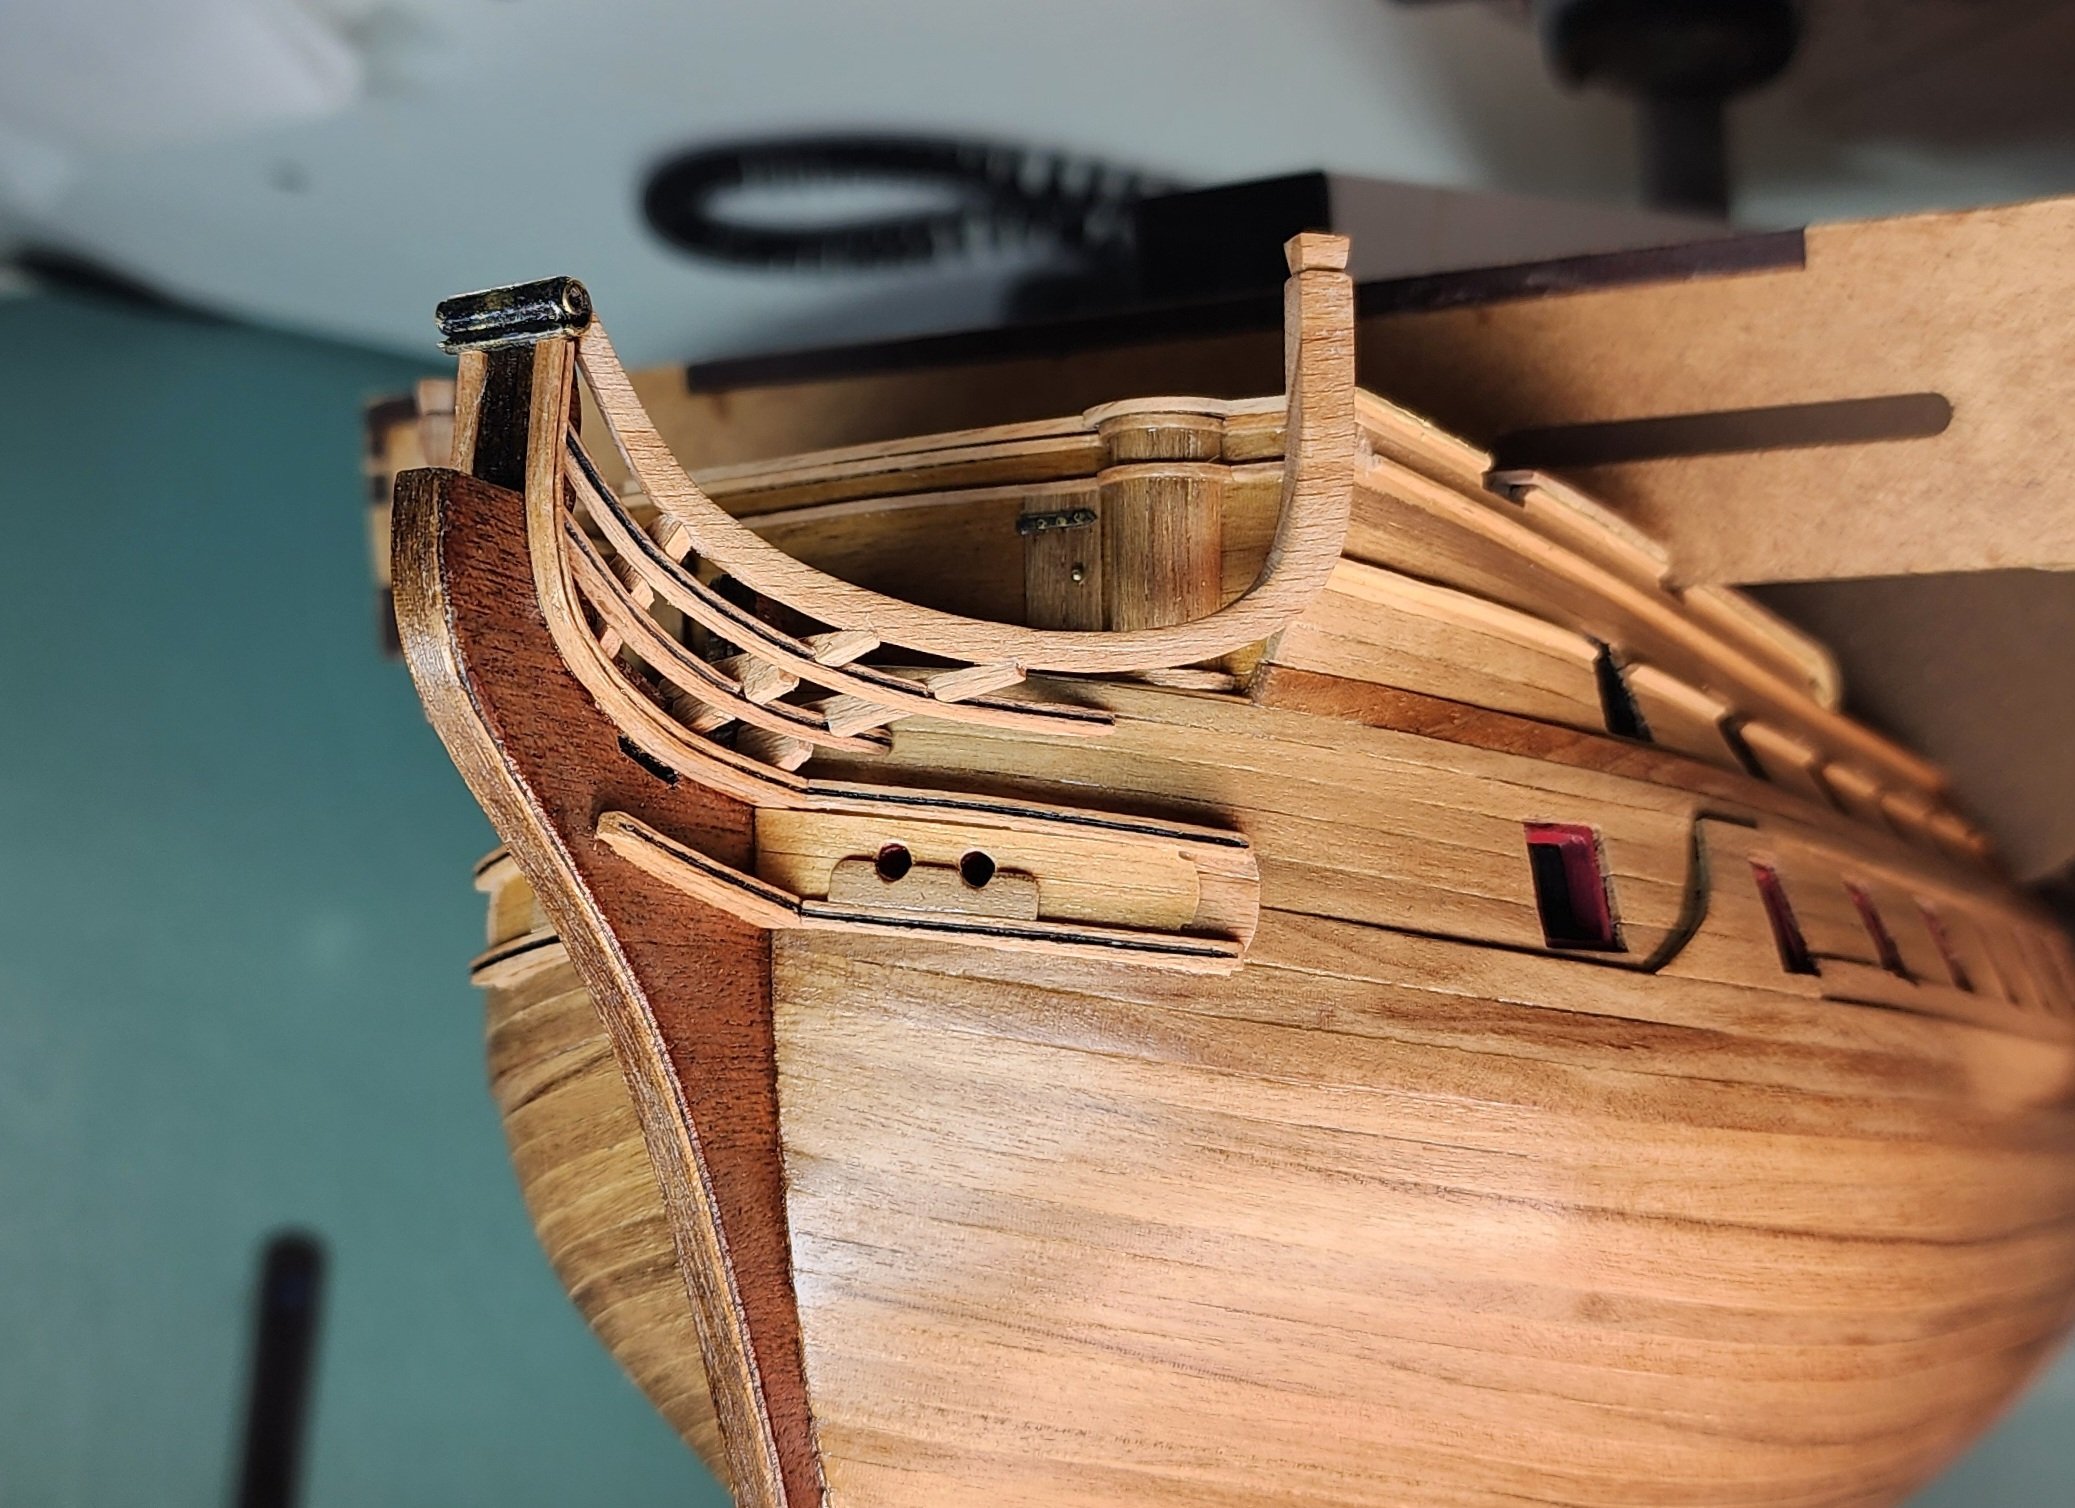
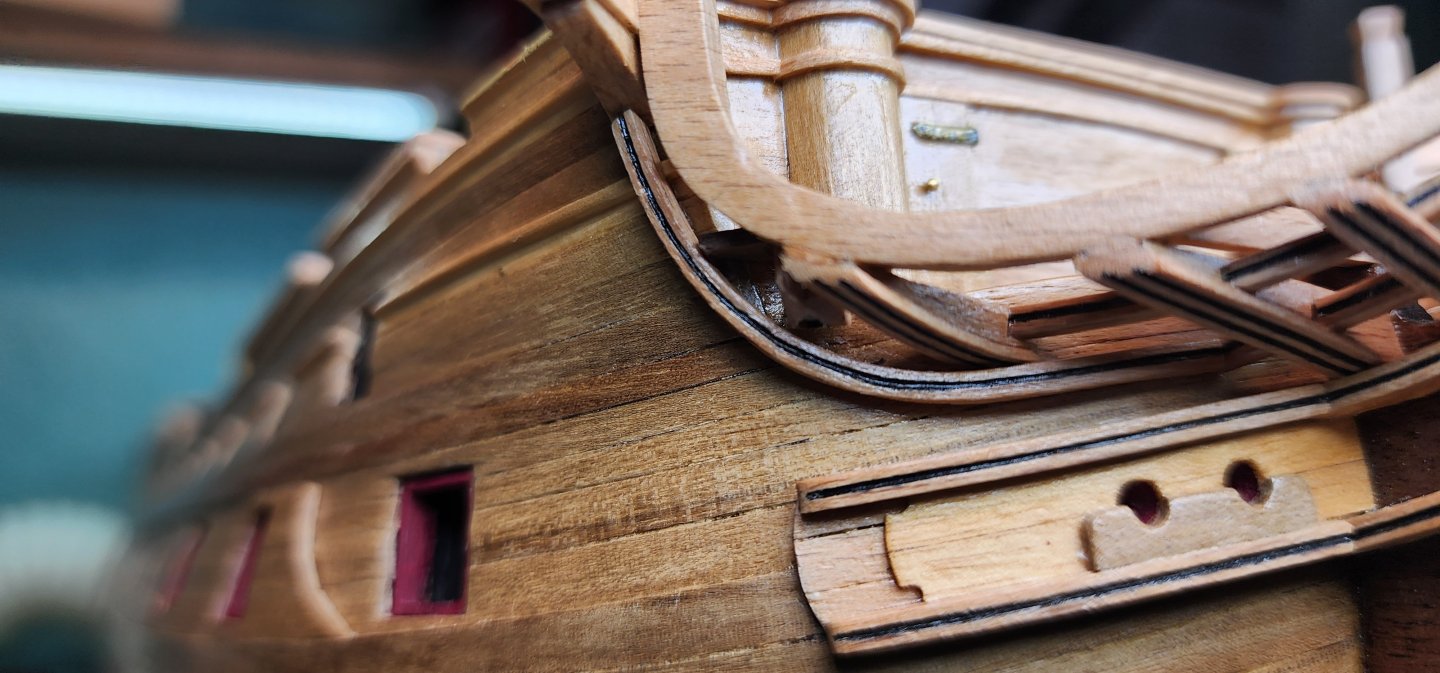
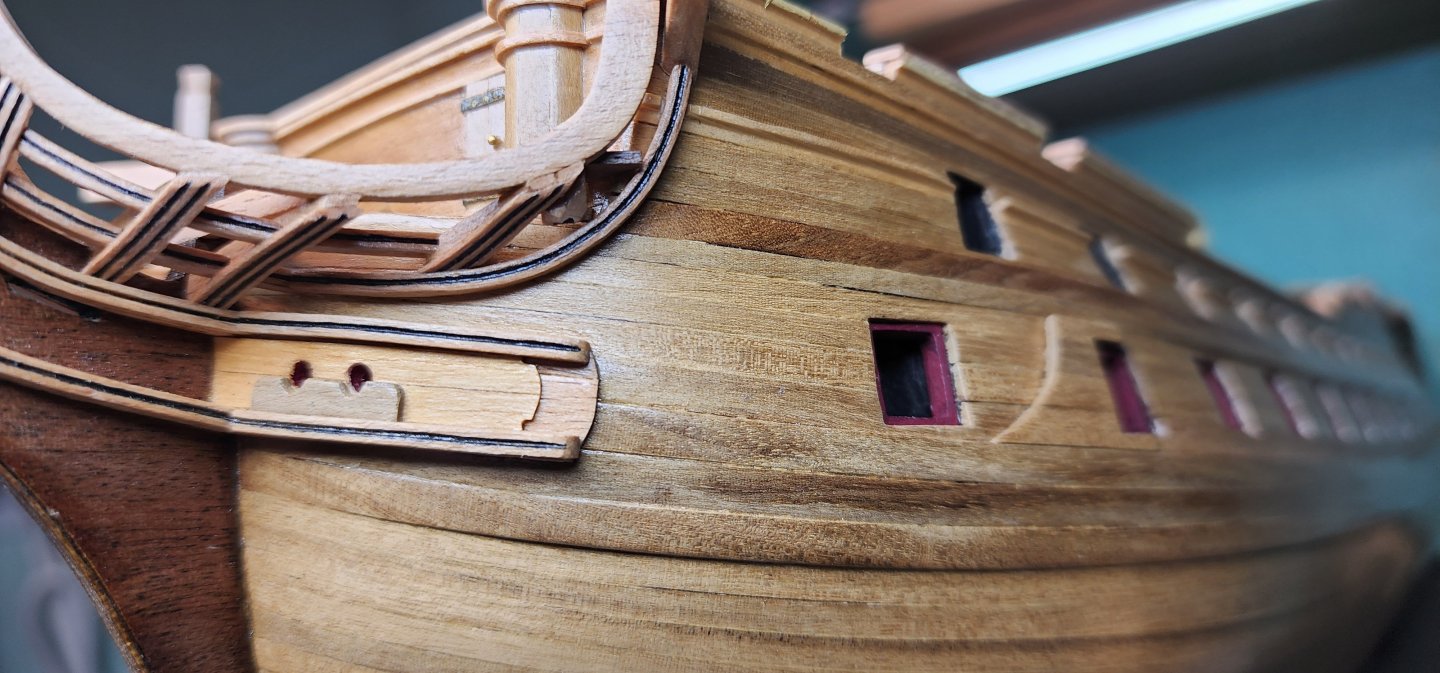
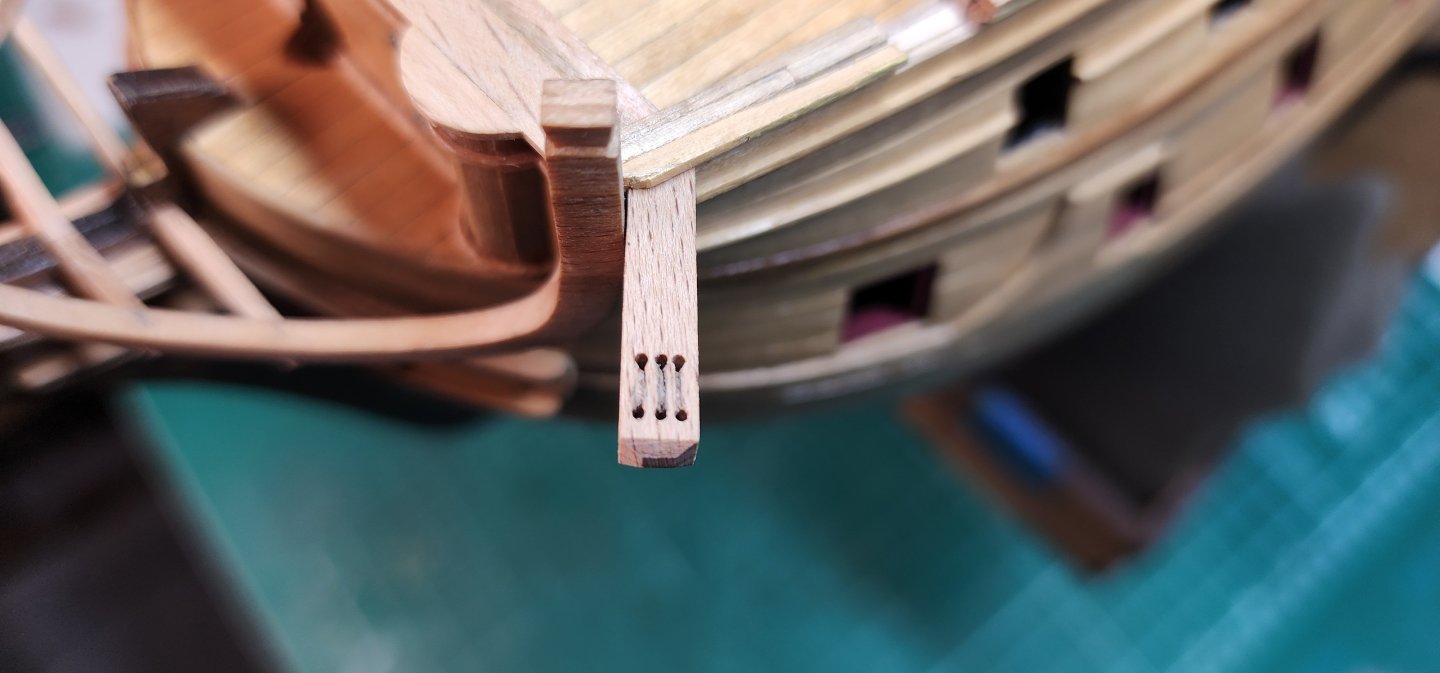
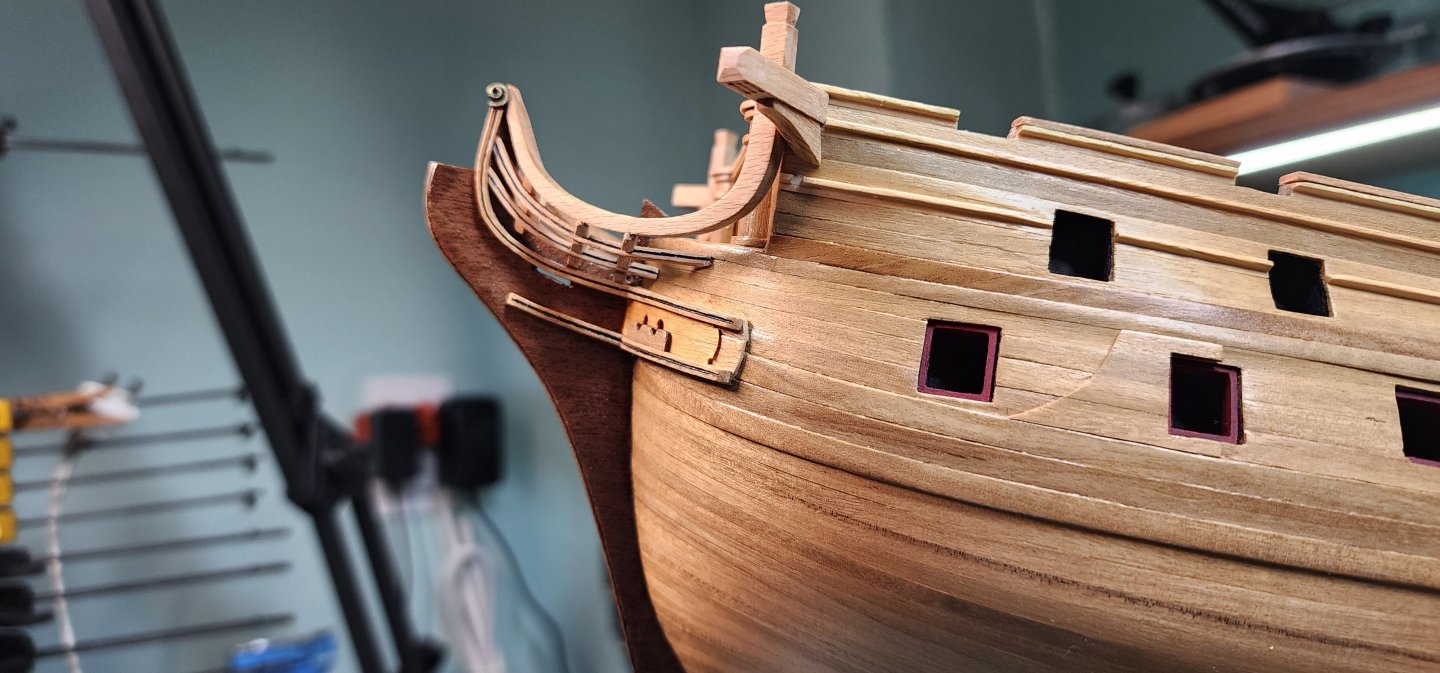
Hello All, I have a small update on my progress of the Bellona. I have been working on the headrails and so far, this has been one of the more challenging parts of the build. I fabricated the catheads and drilled the holes for the cat tackle line. I used a jig to drill the holes and then inserted a piece of thread in the holes and used it to saw the lines between the holes. I did not get any pictures of this process but thought it was worth mentioning because the lines are so close together and getting a clean cut between the holes was easier this way than trying to cut them with a razor knife. After the catheads and knees were installed, I completed the installation of the 2nd and 3rd head rails. Once they were in place I was able to complete the installation of the ekeing rail. The ekeing rail was a bit tricky as it curves around the shape of the hull and also changes in direction upwards connecting to the cathead knees. Once these pieces were in place I was able to complete the last head timber that fits between the ekeing rail and head rail. After all the rails were in place I installed the outer head timber coving. I used my molding shaper and a black pigment marker to highlight the grooves I made in the timber covering. I then applied a couple coats of WOP to everything. I will begin the installation of the cross members, grating and seats of ease and will provide an update once I make some progress. Well, I hope you enjoy the pics and as always, your comments and guidance are always welcome. Cheers Nearshore


-
Look forward to following you progress. I have been toying with possably building the same ship once I've completed the Bellona which i have been working on for the past 2 years. I am pretty far away from completing her so i still have plenty of time before i make that decision. Good luck and have fun building this amazing ship. Cheers Nearshore
-
Hi Jeff, Looks very neat and clean. I am not familiar with the USF Confederacy from Model Shipways. Is this going to be a single planked hull? Either way, you are doing a great job. Cheers Nearshore
-
Hi Ronald-V, Your deck planking looks fantastic! True craftsmanship. I purchased the DB250 a while back. I have practiced a bit and it truely is a great tool. Nearshore
-
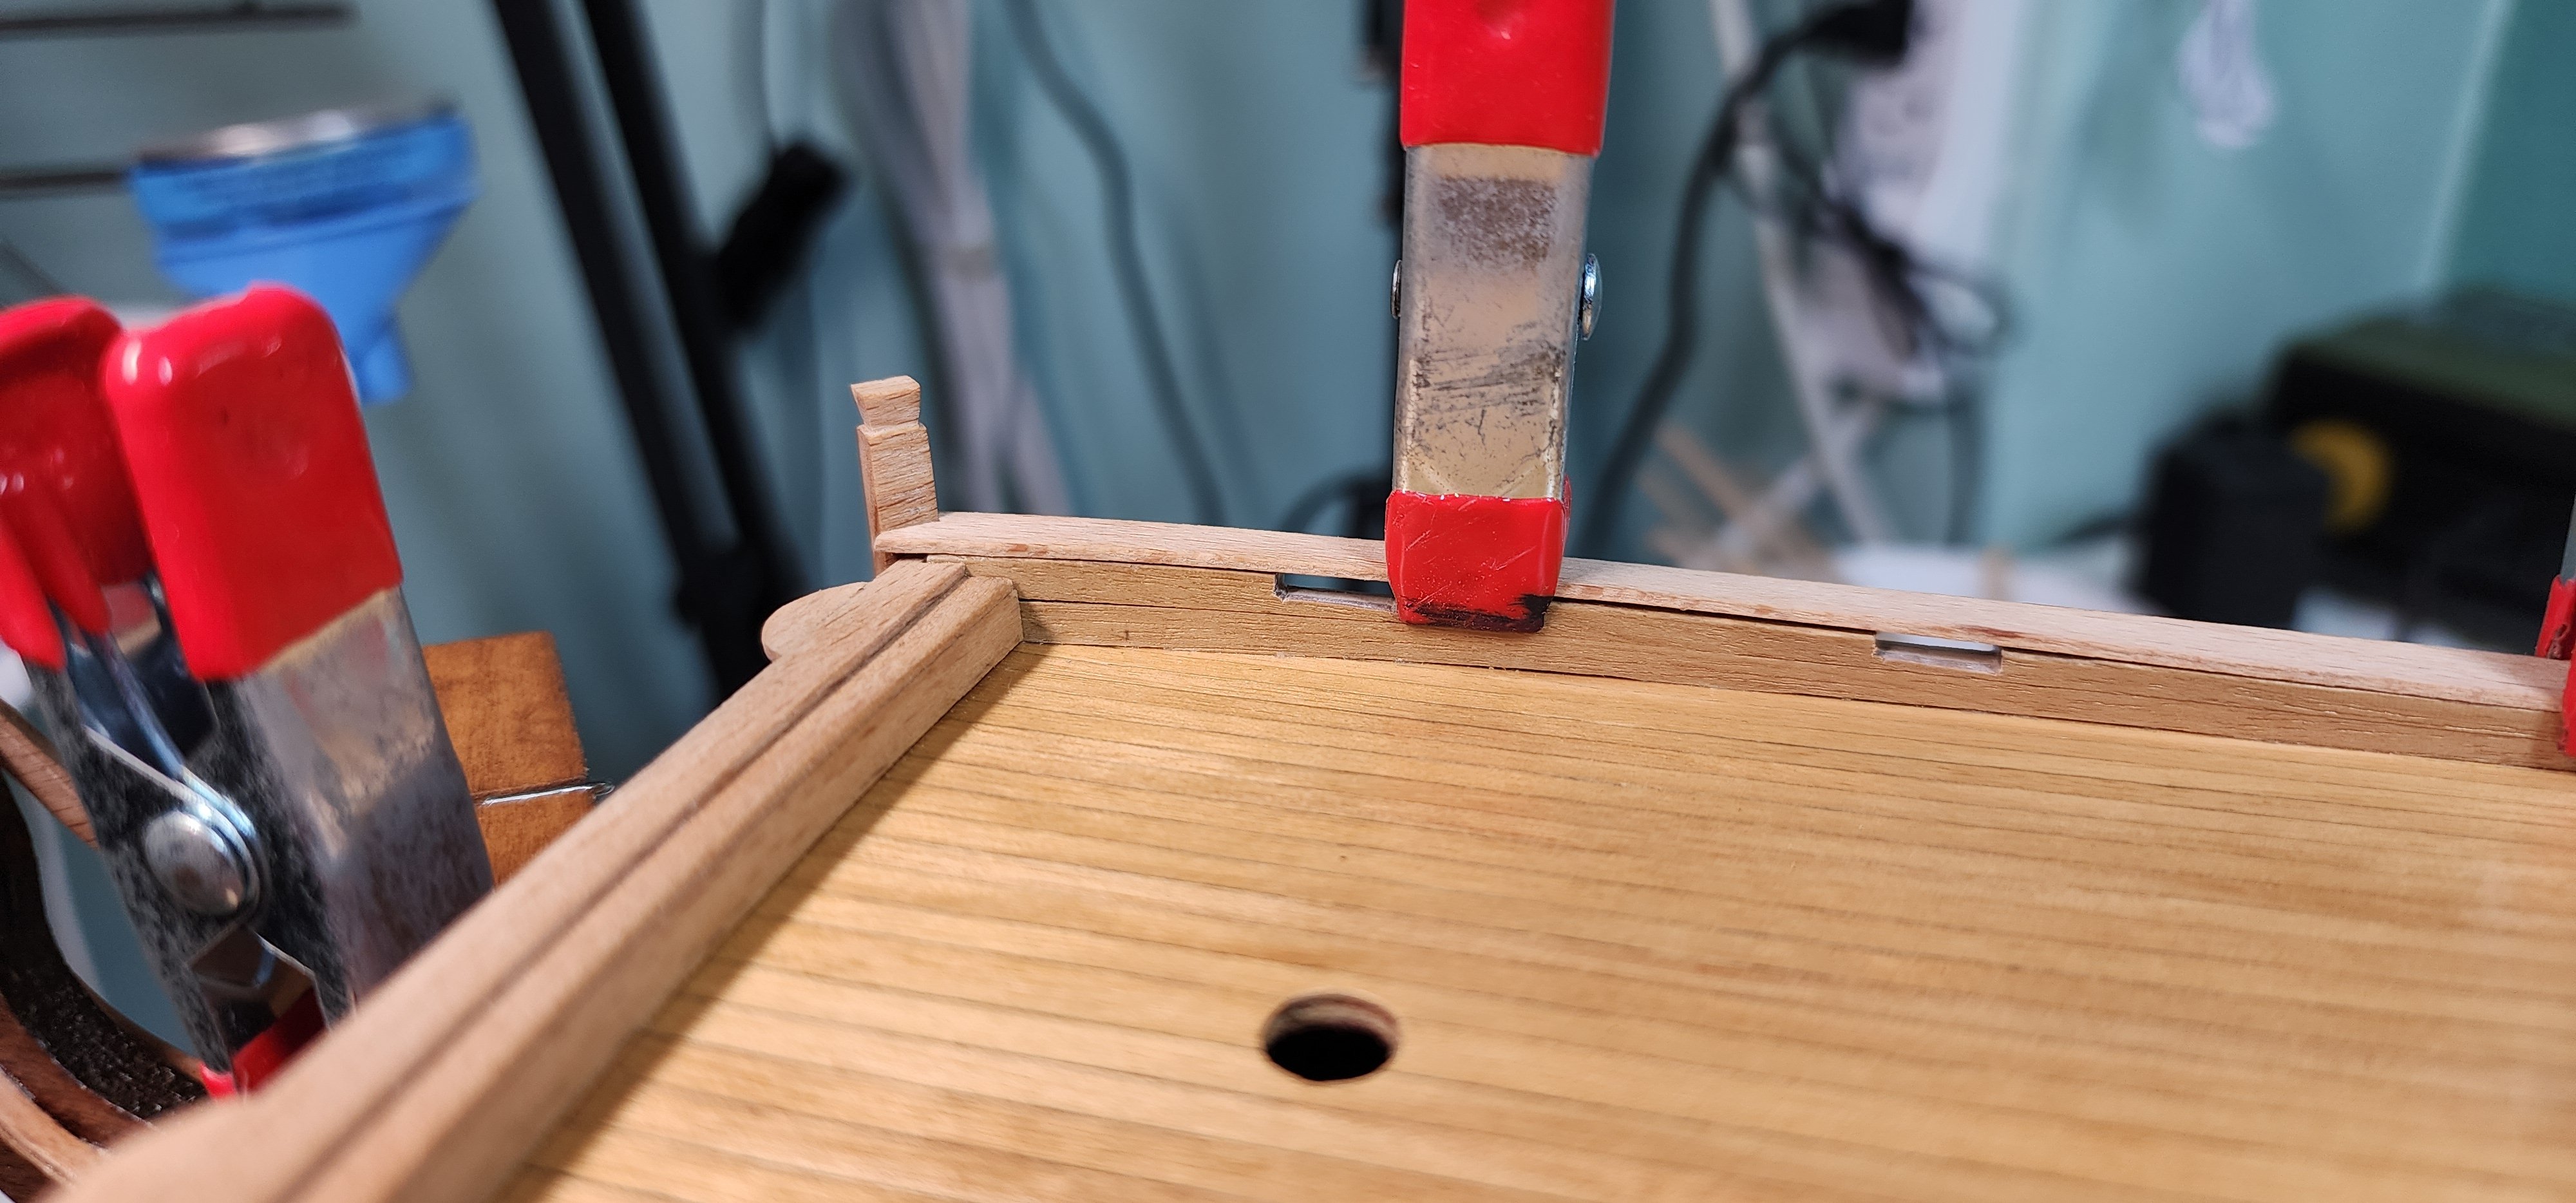
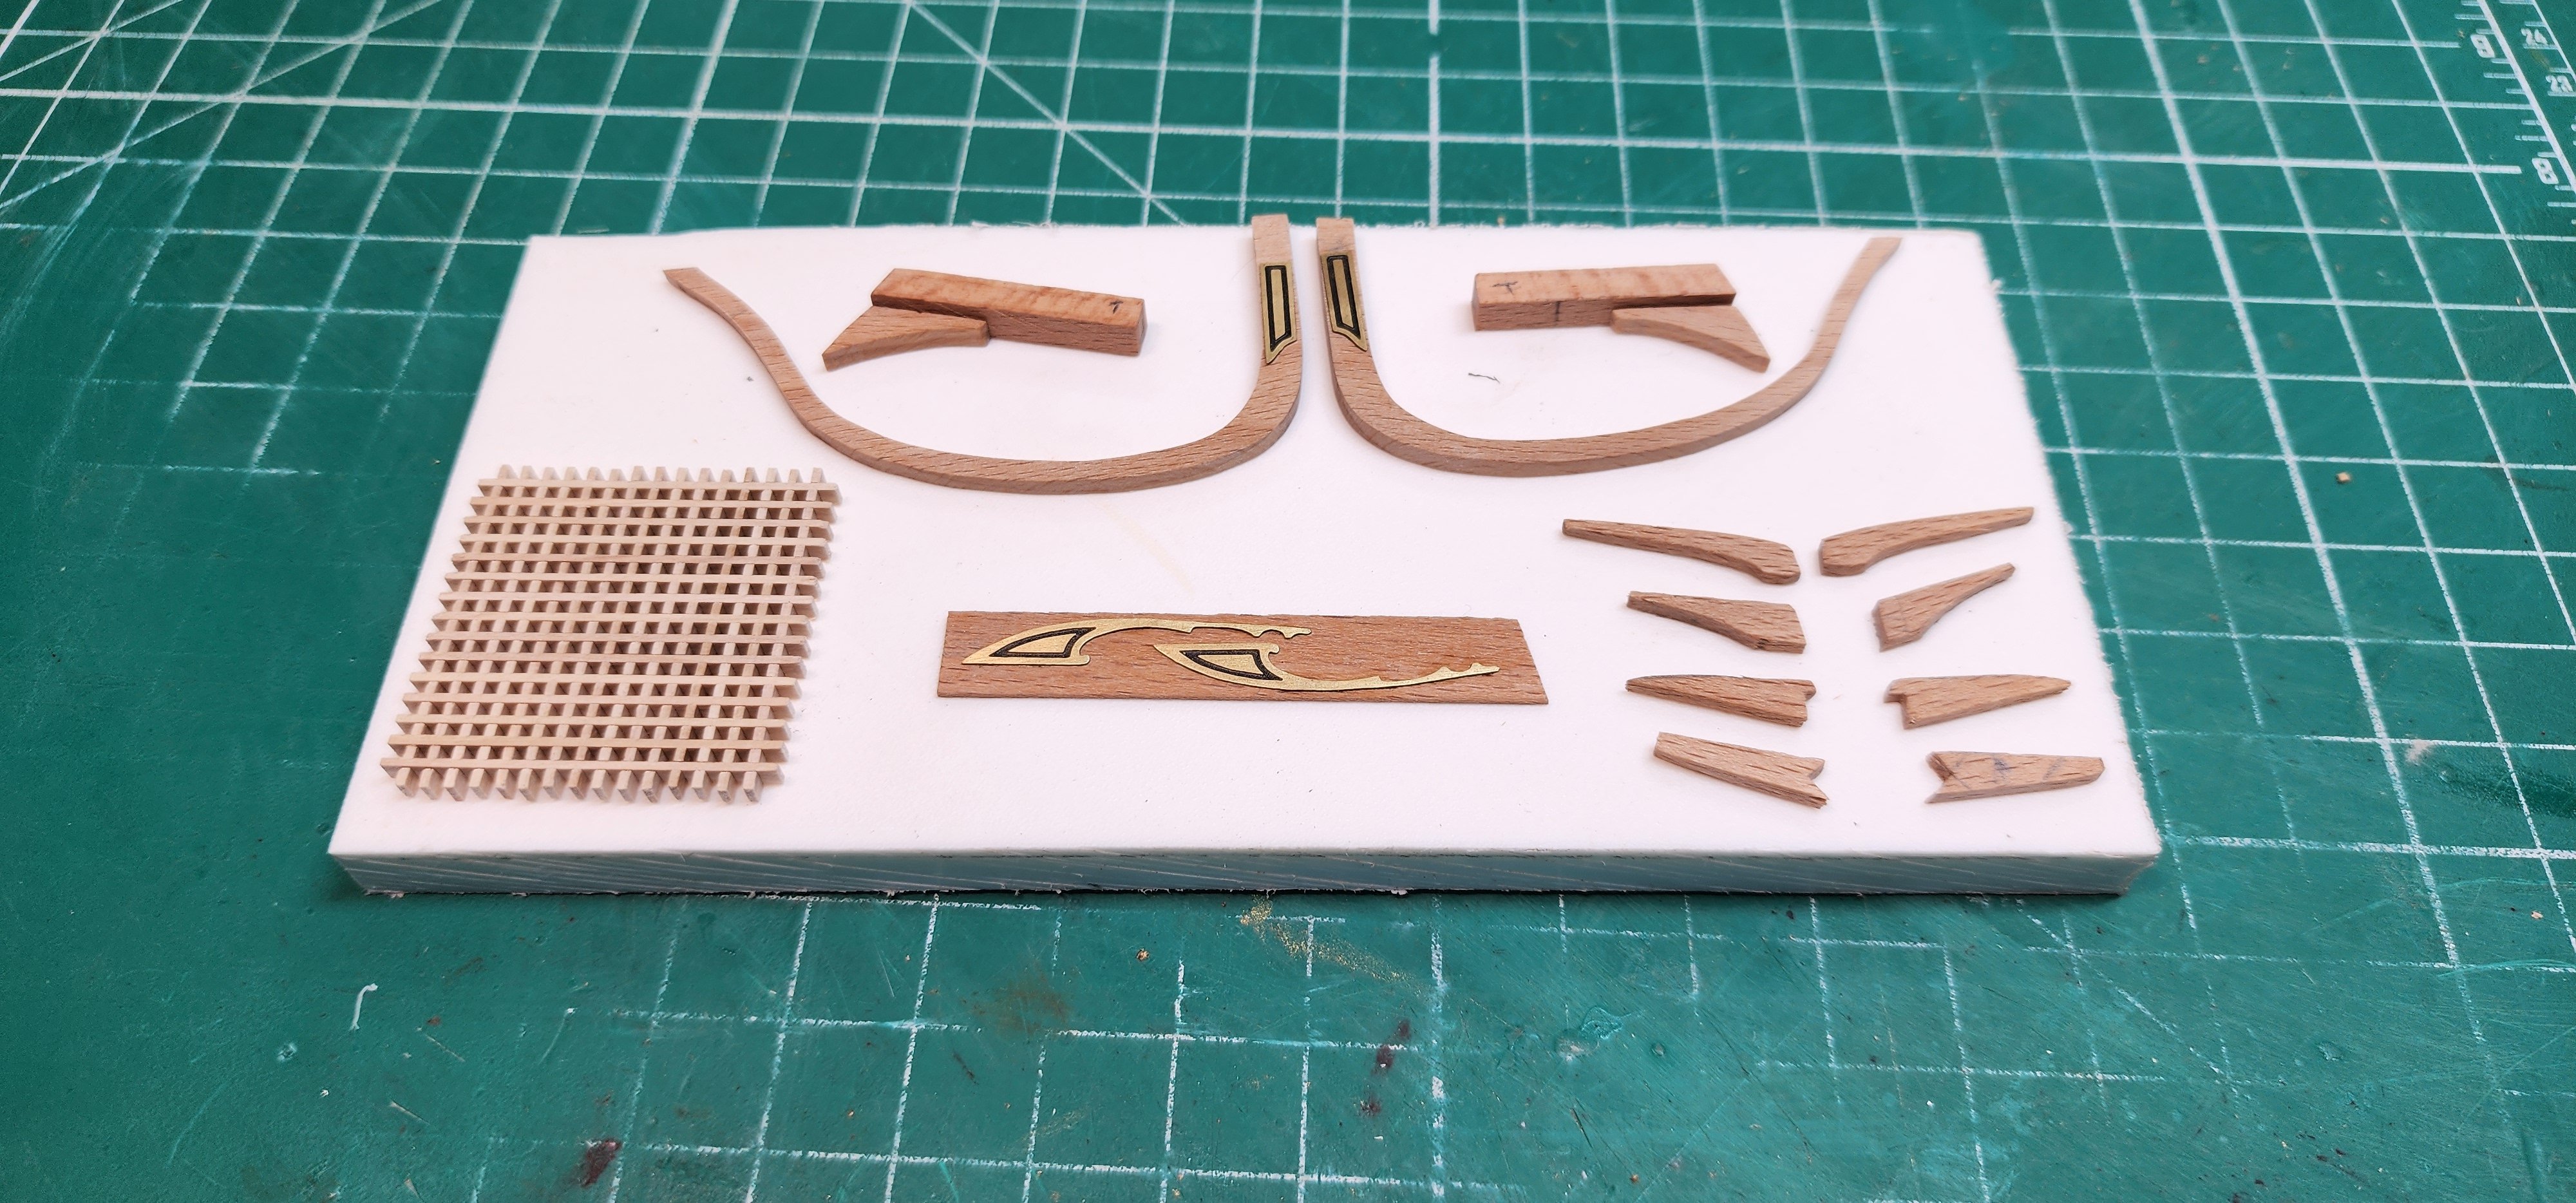
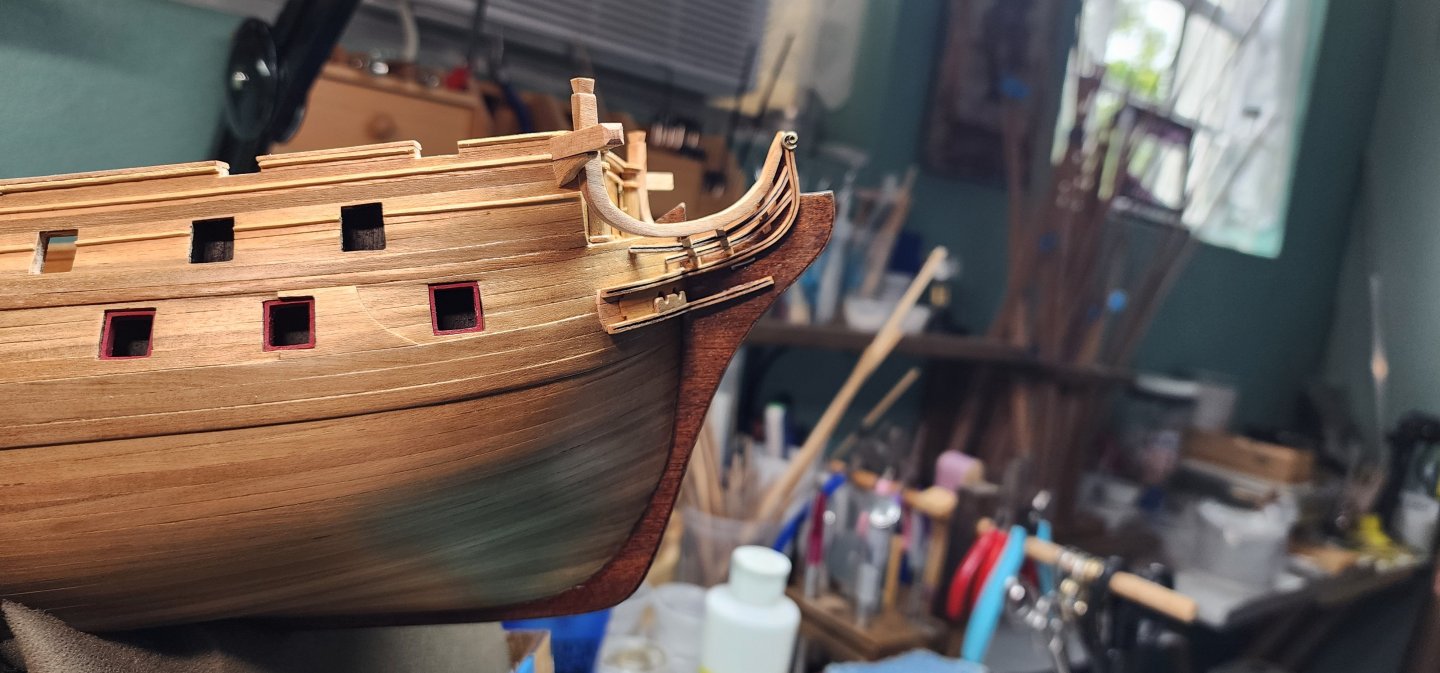
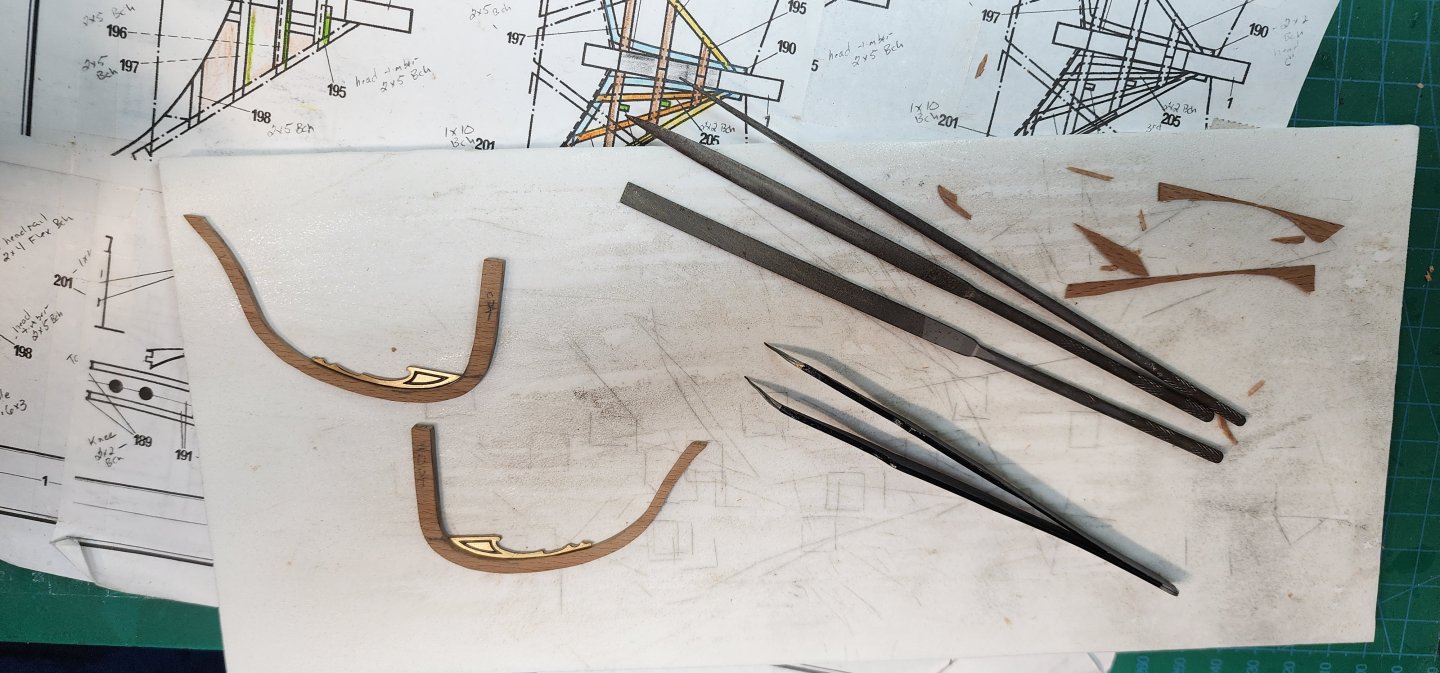
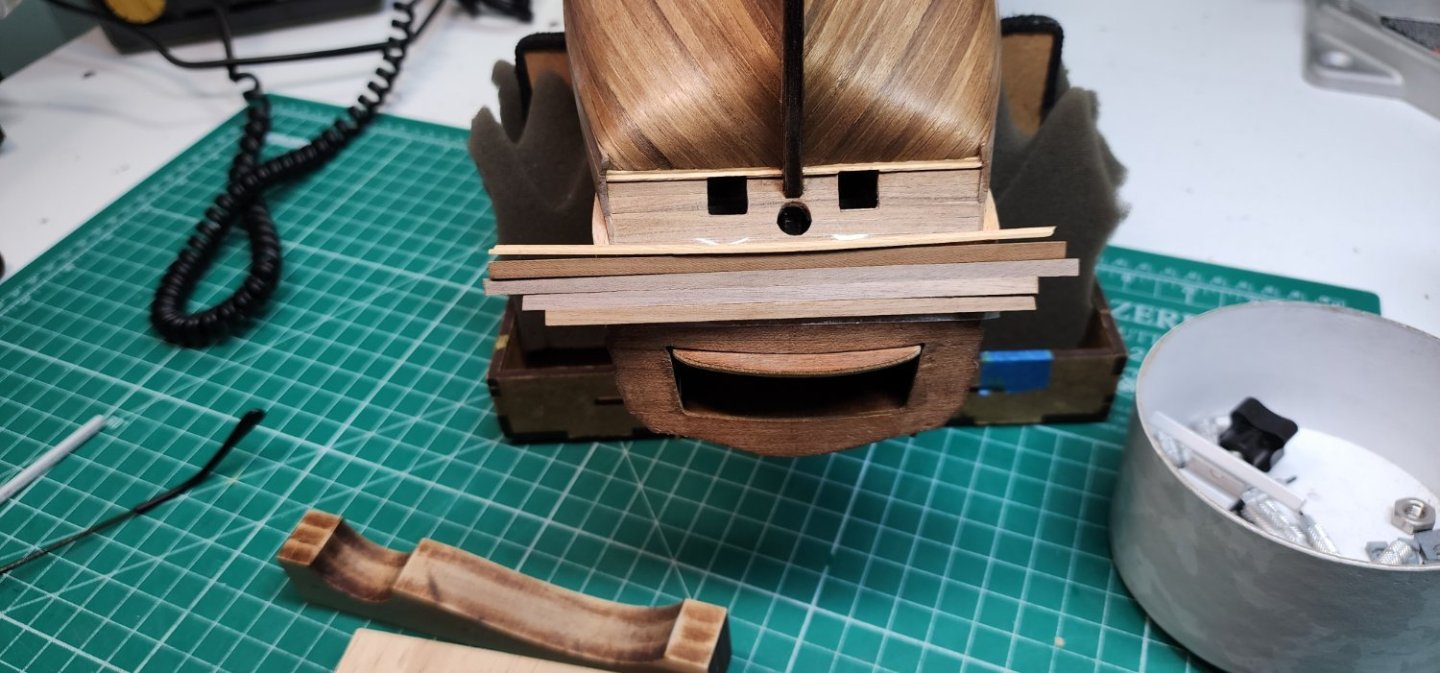
Hello All, Well, I have a small update on the Bellona. I have started working on the headrails. I decided that I would make the 1st head rail out of one piece of beechwood rather than trying to shape the two pieces as the plans called for. I thought that this would look better, and it would eliminate having a seam where the two pieces joined together. I tapered the thickness of the 1st head rail from 3mm to 2mm by sanding the outside of the rail. This allows me to have the inside of the head rail squared up to receive the head timbers. Once I shaped the 1st headrail I attached it to the hull so I would be able to shape the rail sheer plank where in intersects with the headrail. I cut and shaped the head timbers and used PVA glue to temporarily attach them to the stem. I made the molding for the 2nd and 3rd headrail to match the head cheeks that were installed earlier. I temporarily glued the cathead and cathead knee onto the hull and shaped the ekeing rail and dry fitted it to the hull. I have only dry fitted the rails at this point as I will be using them as a guide to fabricate the starboard side. It has taken me some time to get to this point and this part of the build has been quite challenging. All the pieces that make up the head rails must be made from scratch as there are no parts supplied with the kit for this area. It has taken several attempts to get it to a point where I feel it is presentable. I still have a long way to go and will continue to provide updates as I progress. Well thanks for reading my update, and as always, your comments and support are always welcome. Cheers Nearshore


-
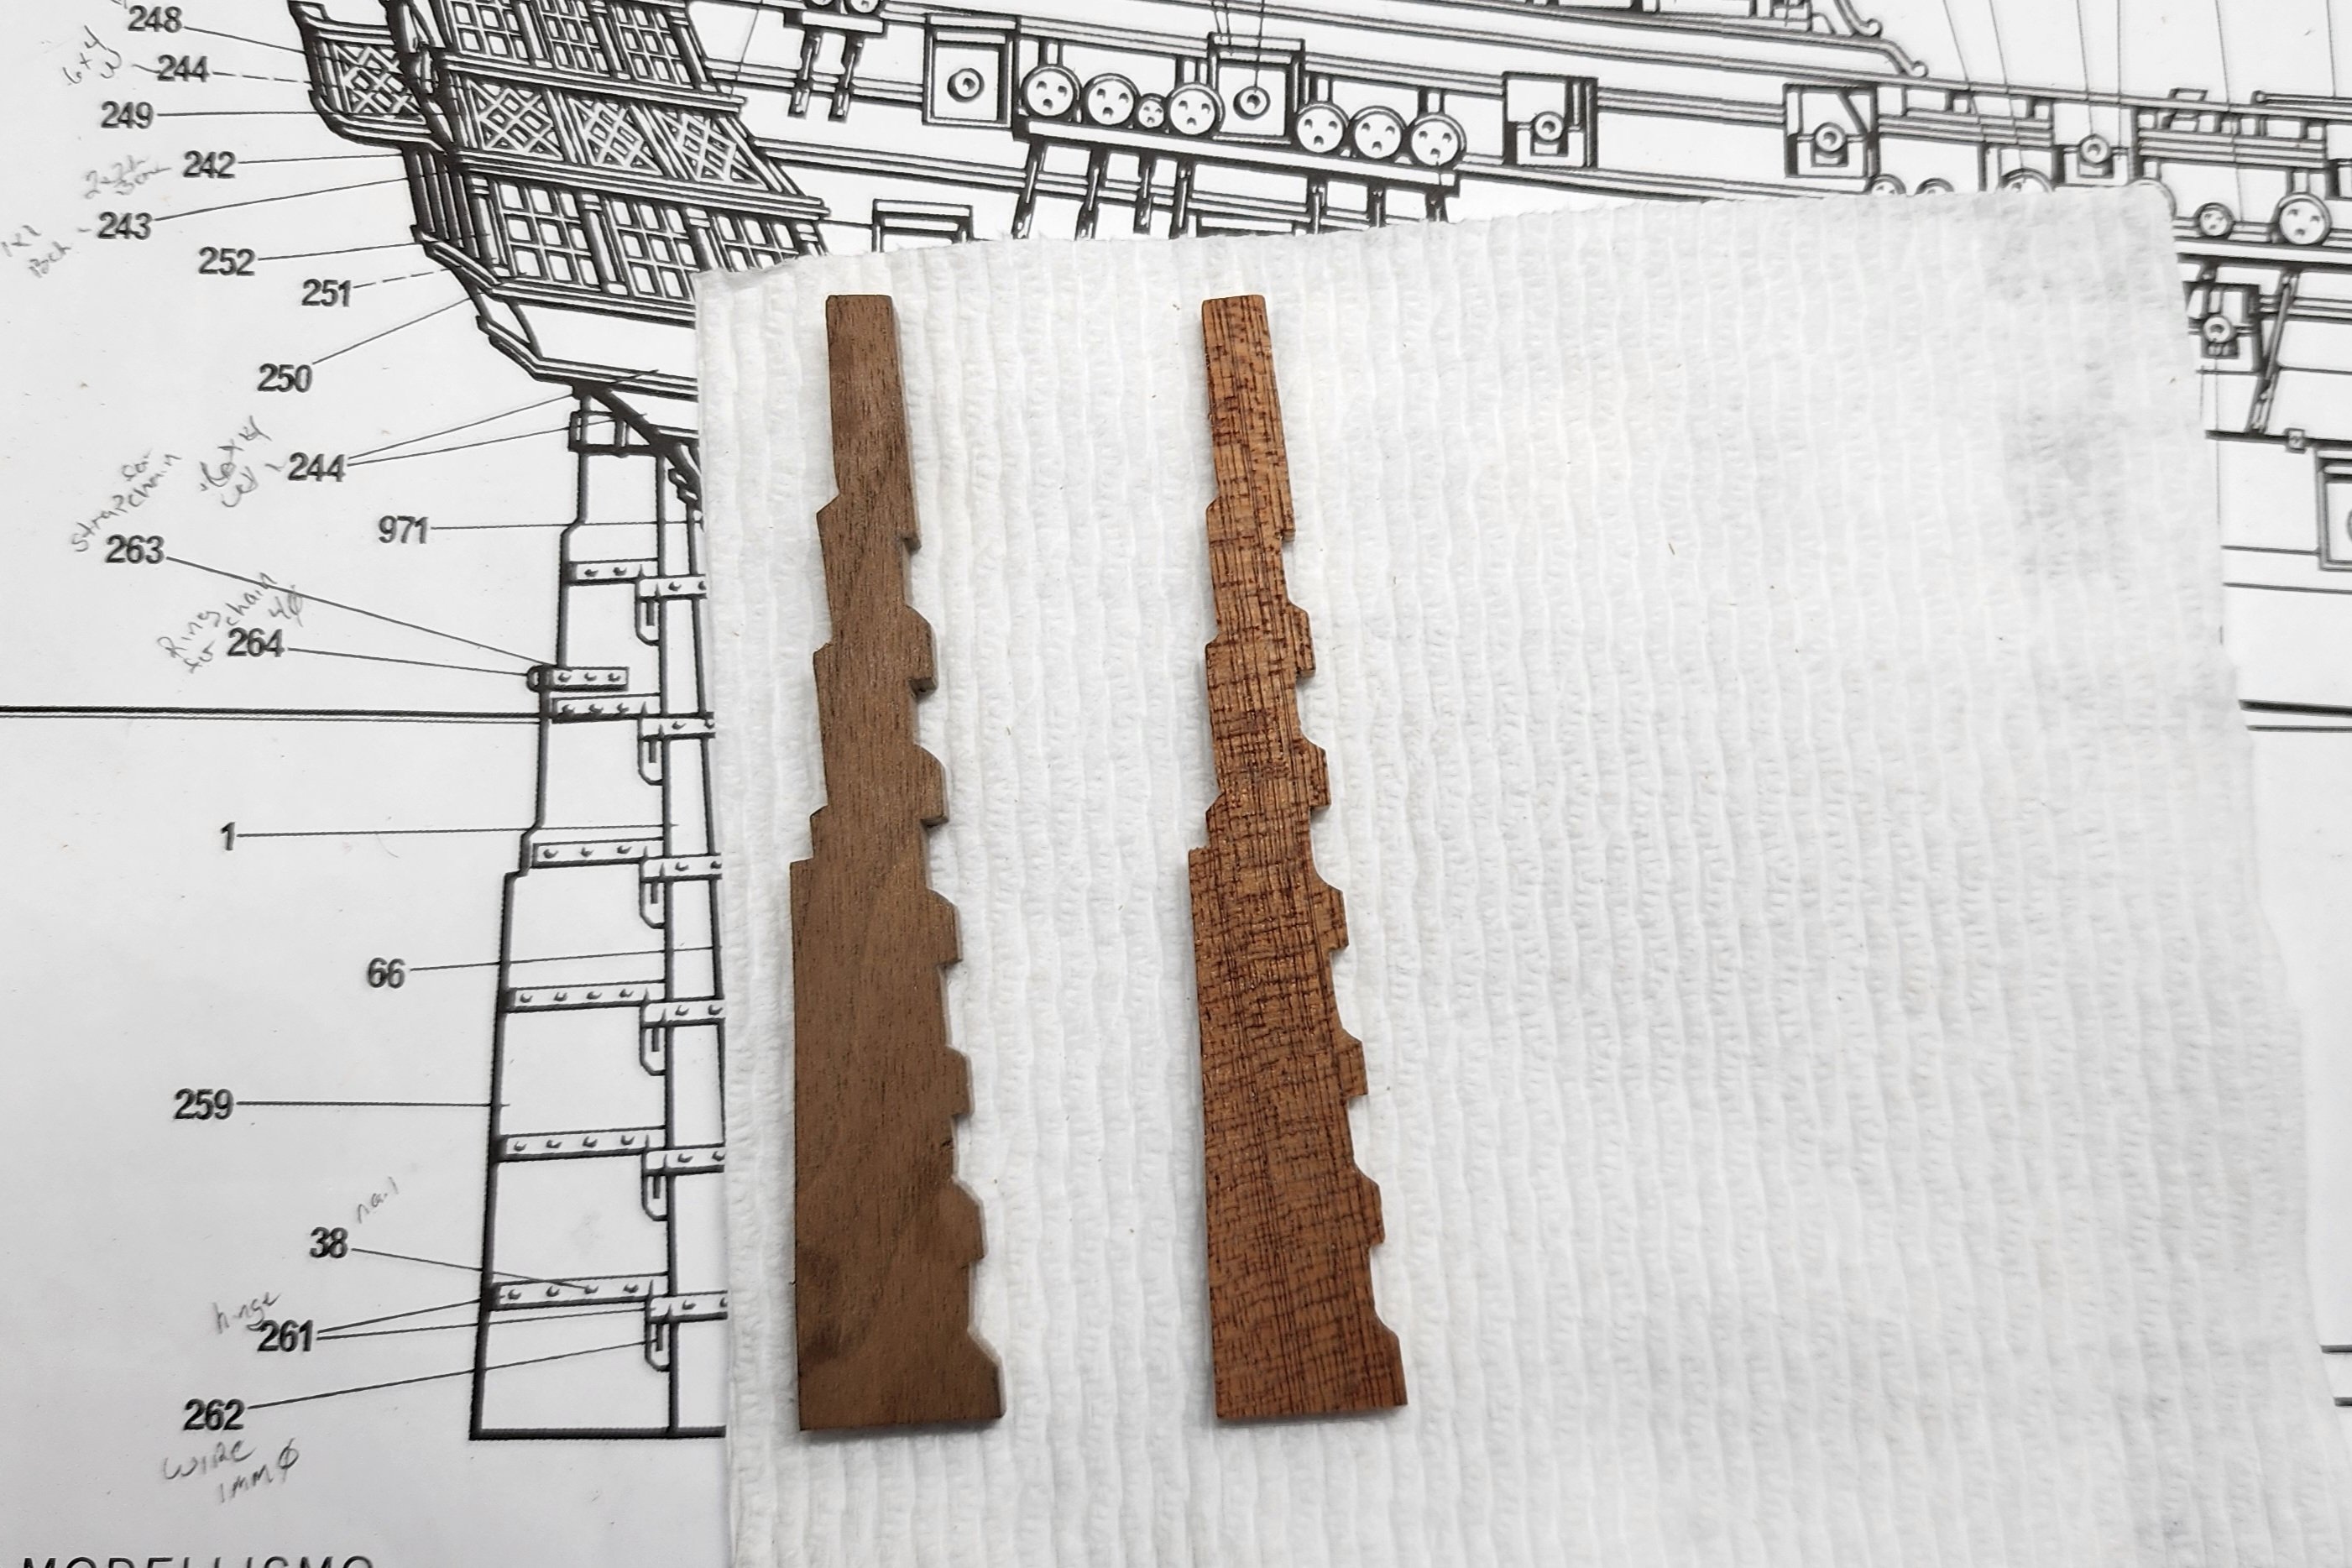
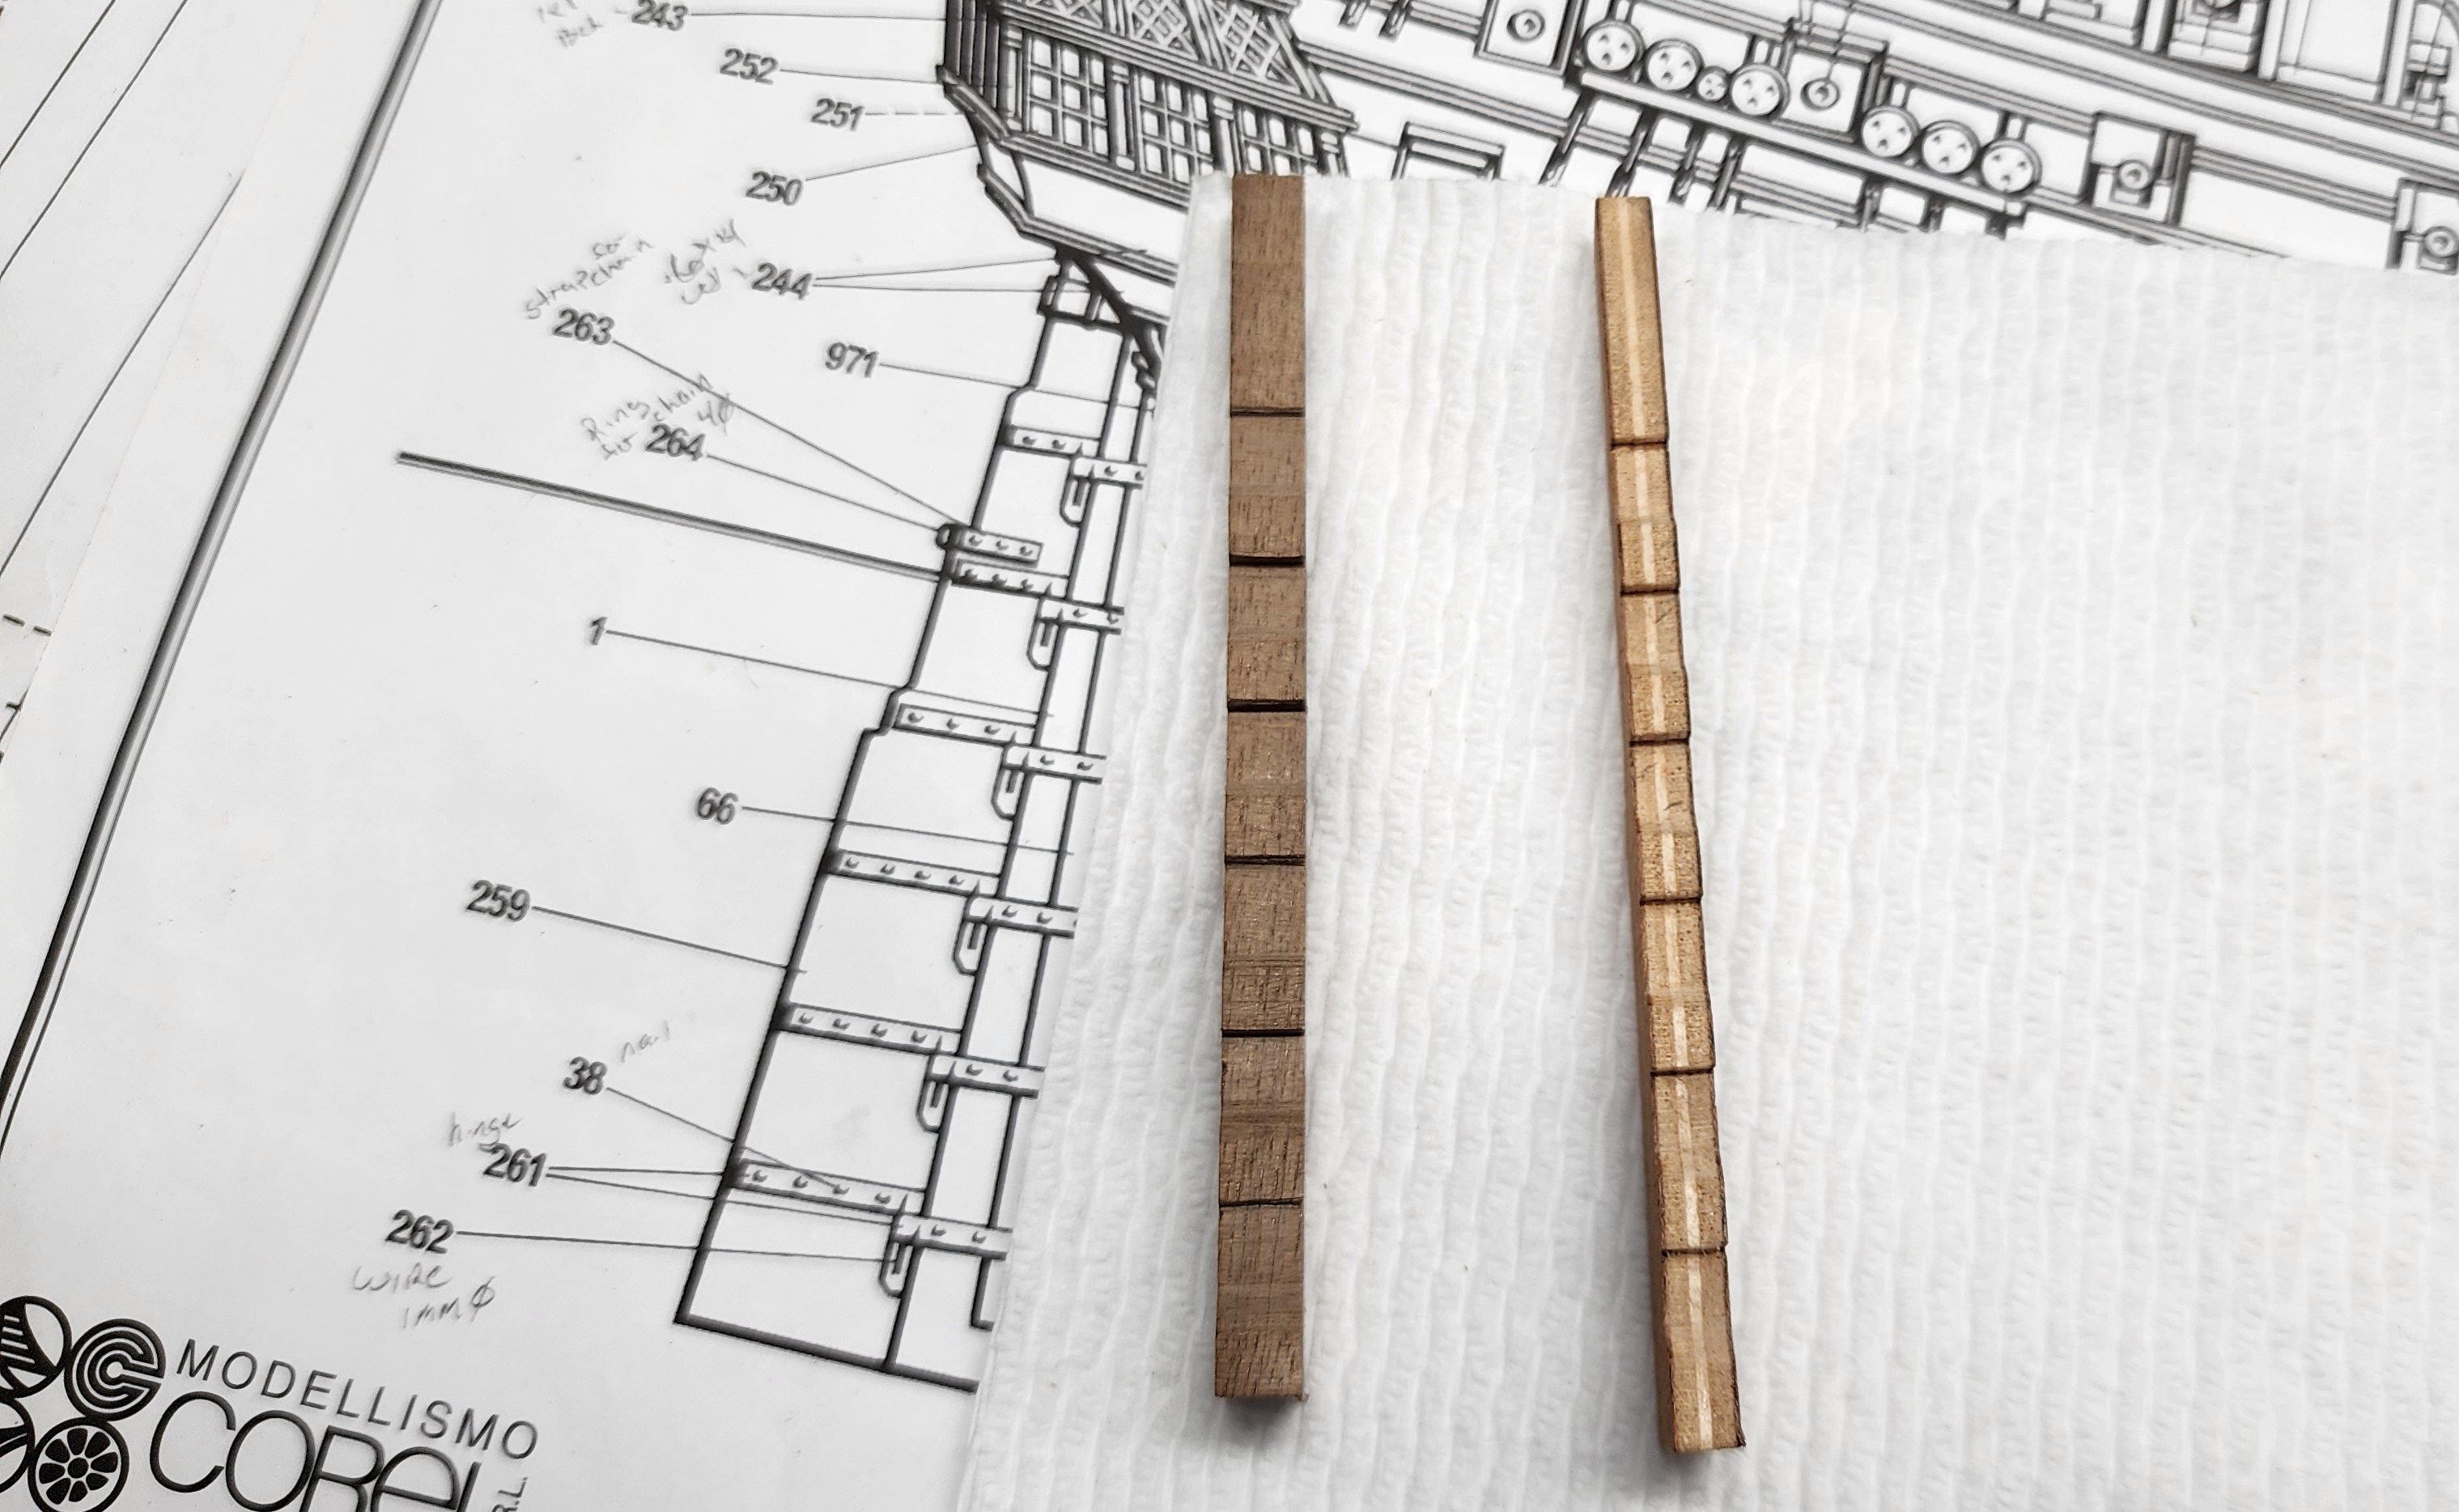
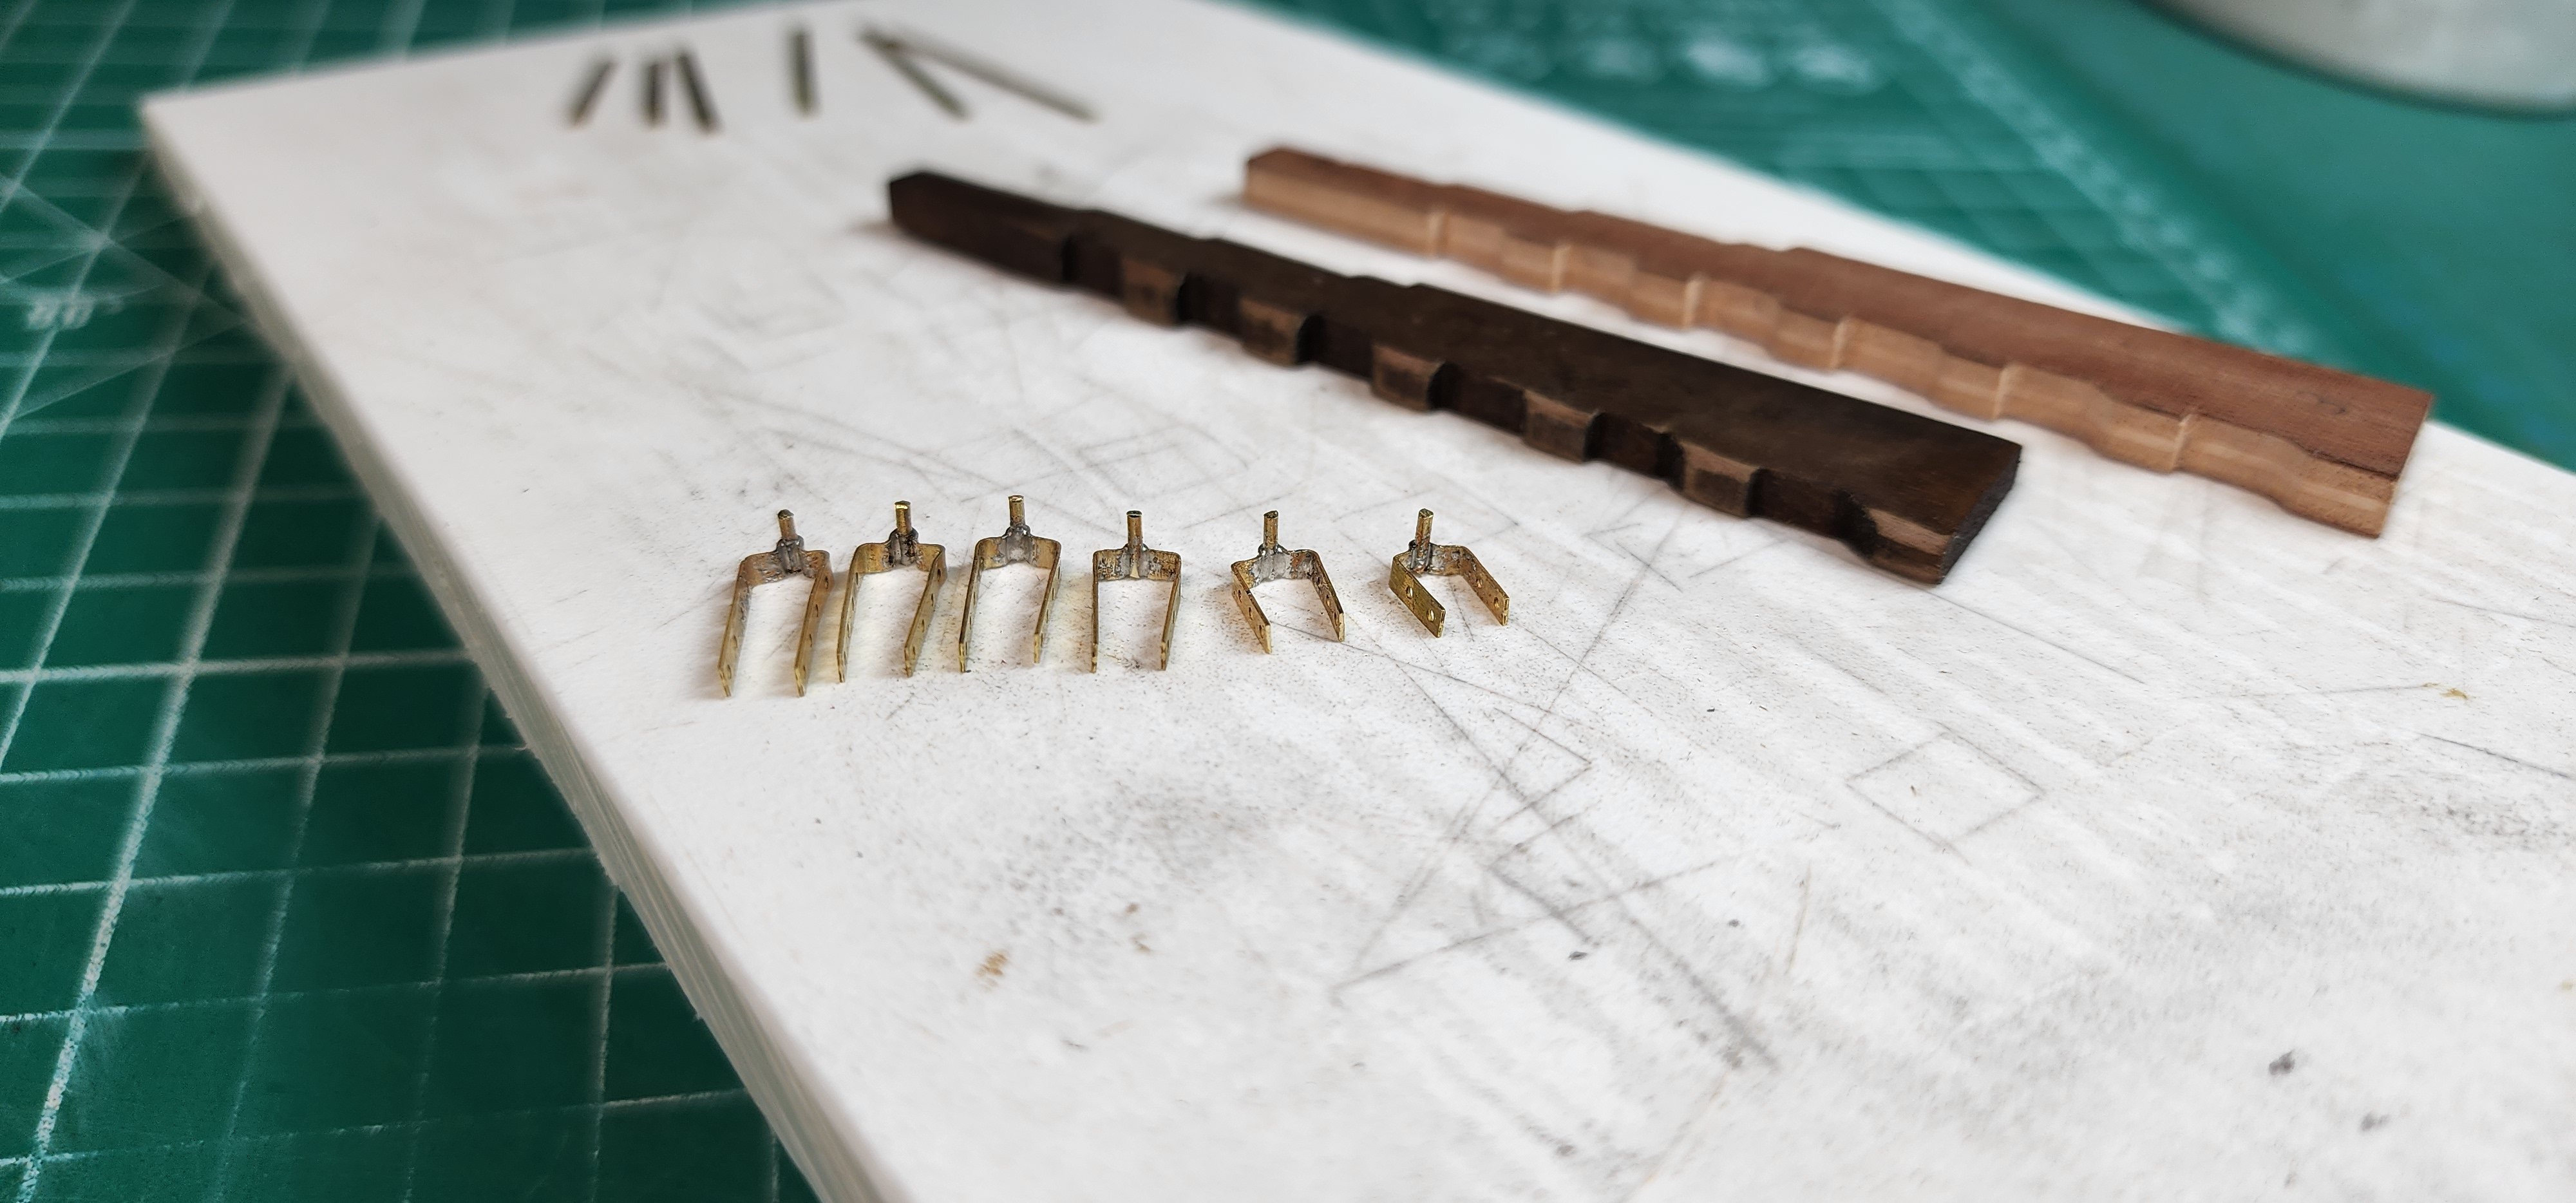
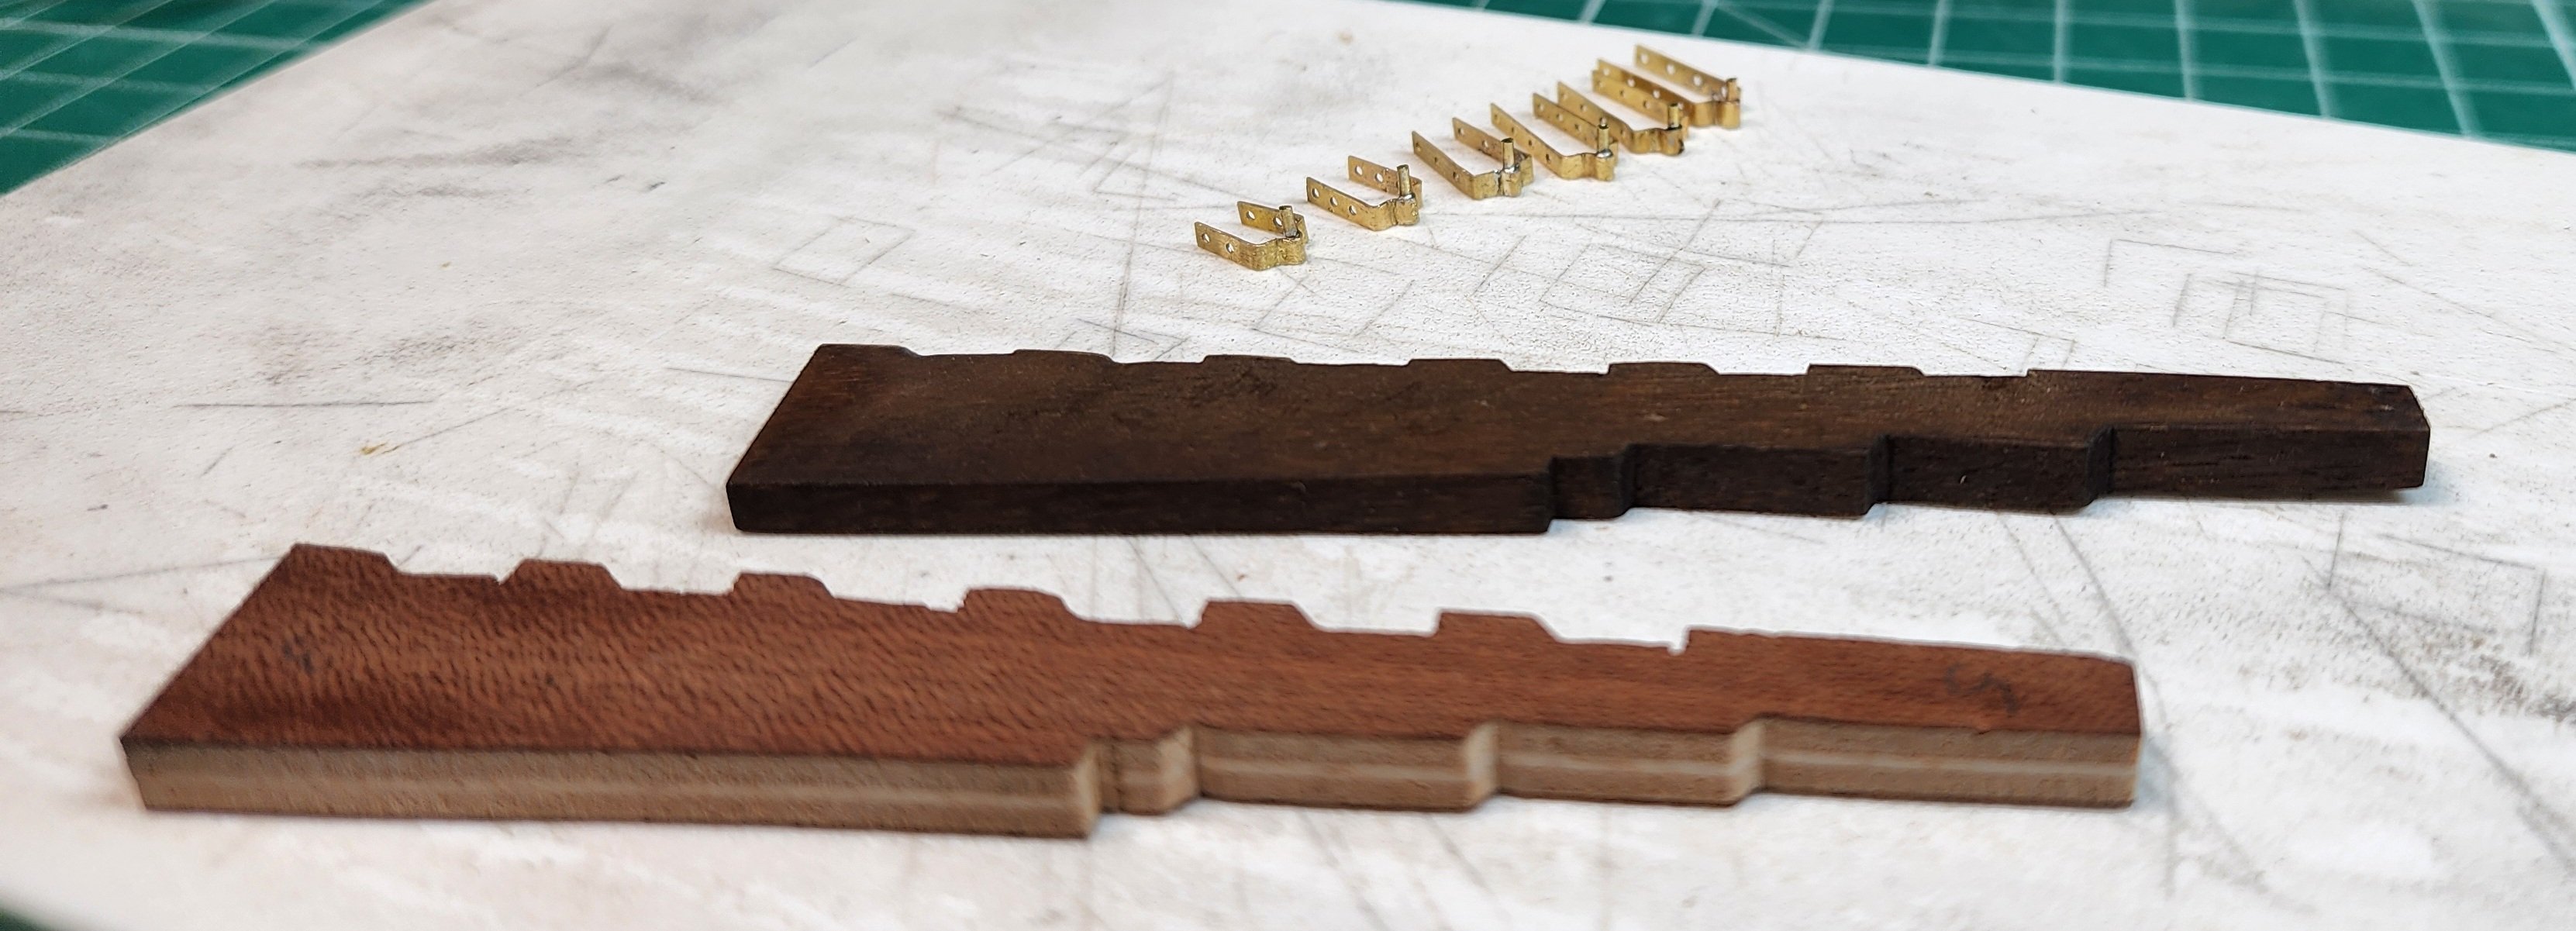
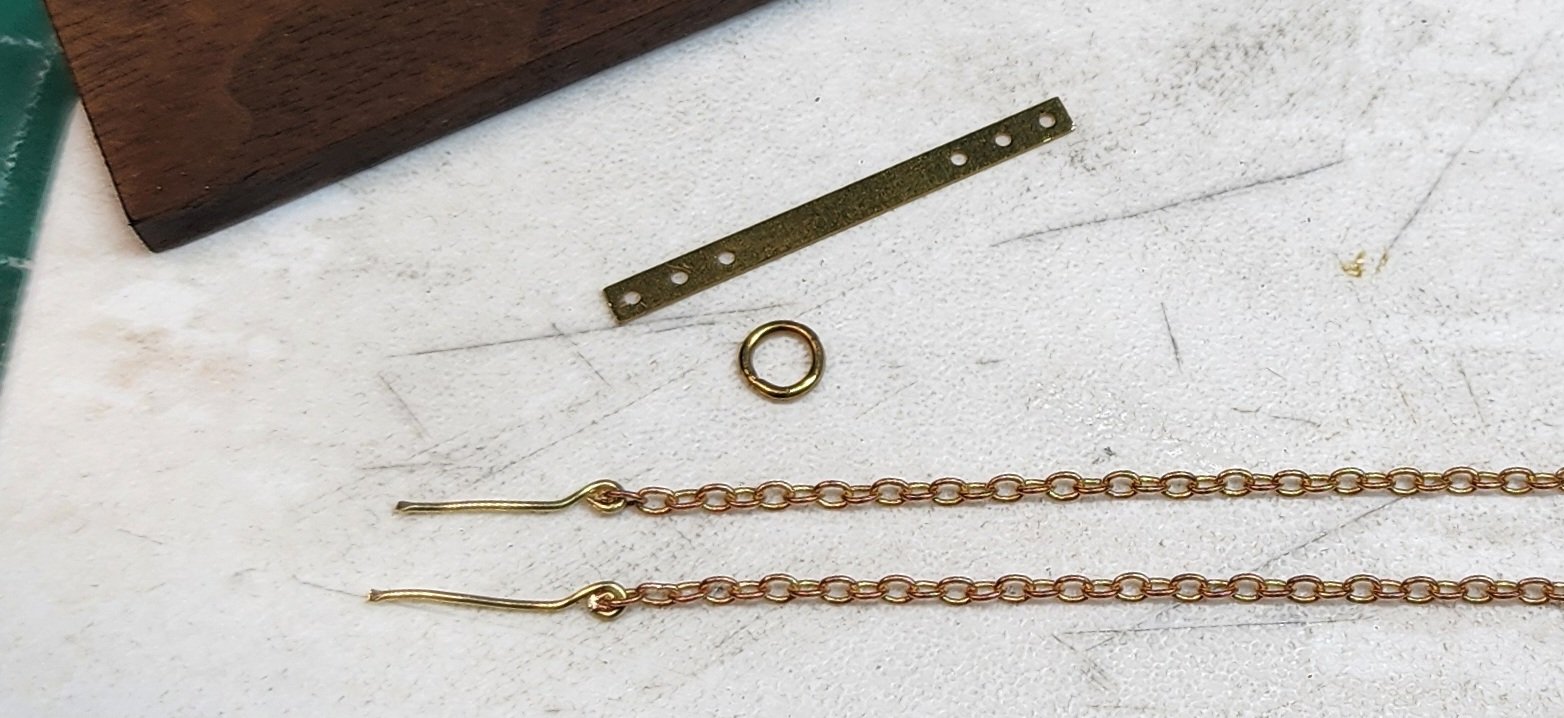
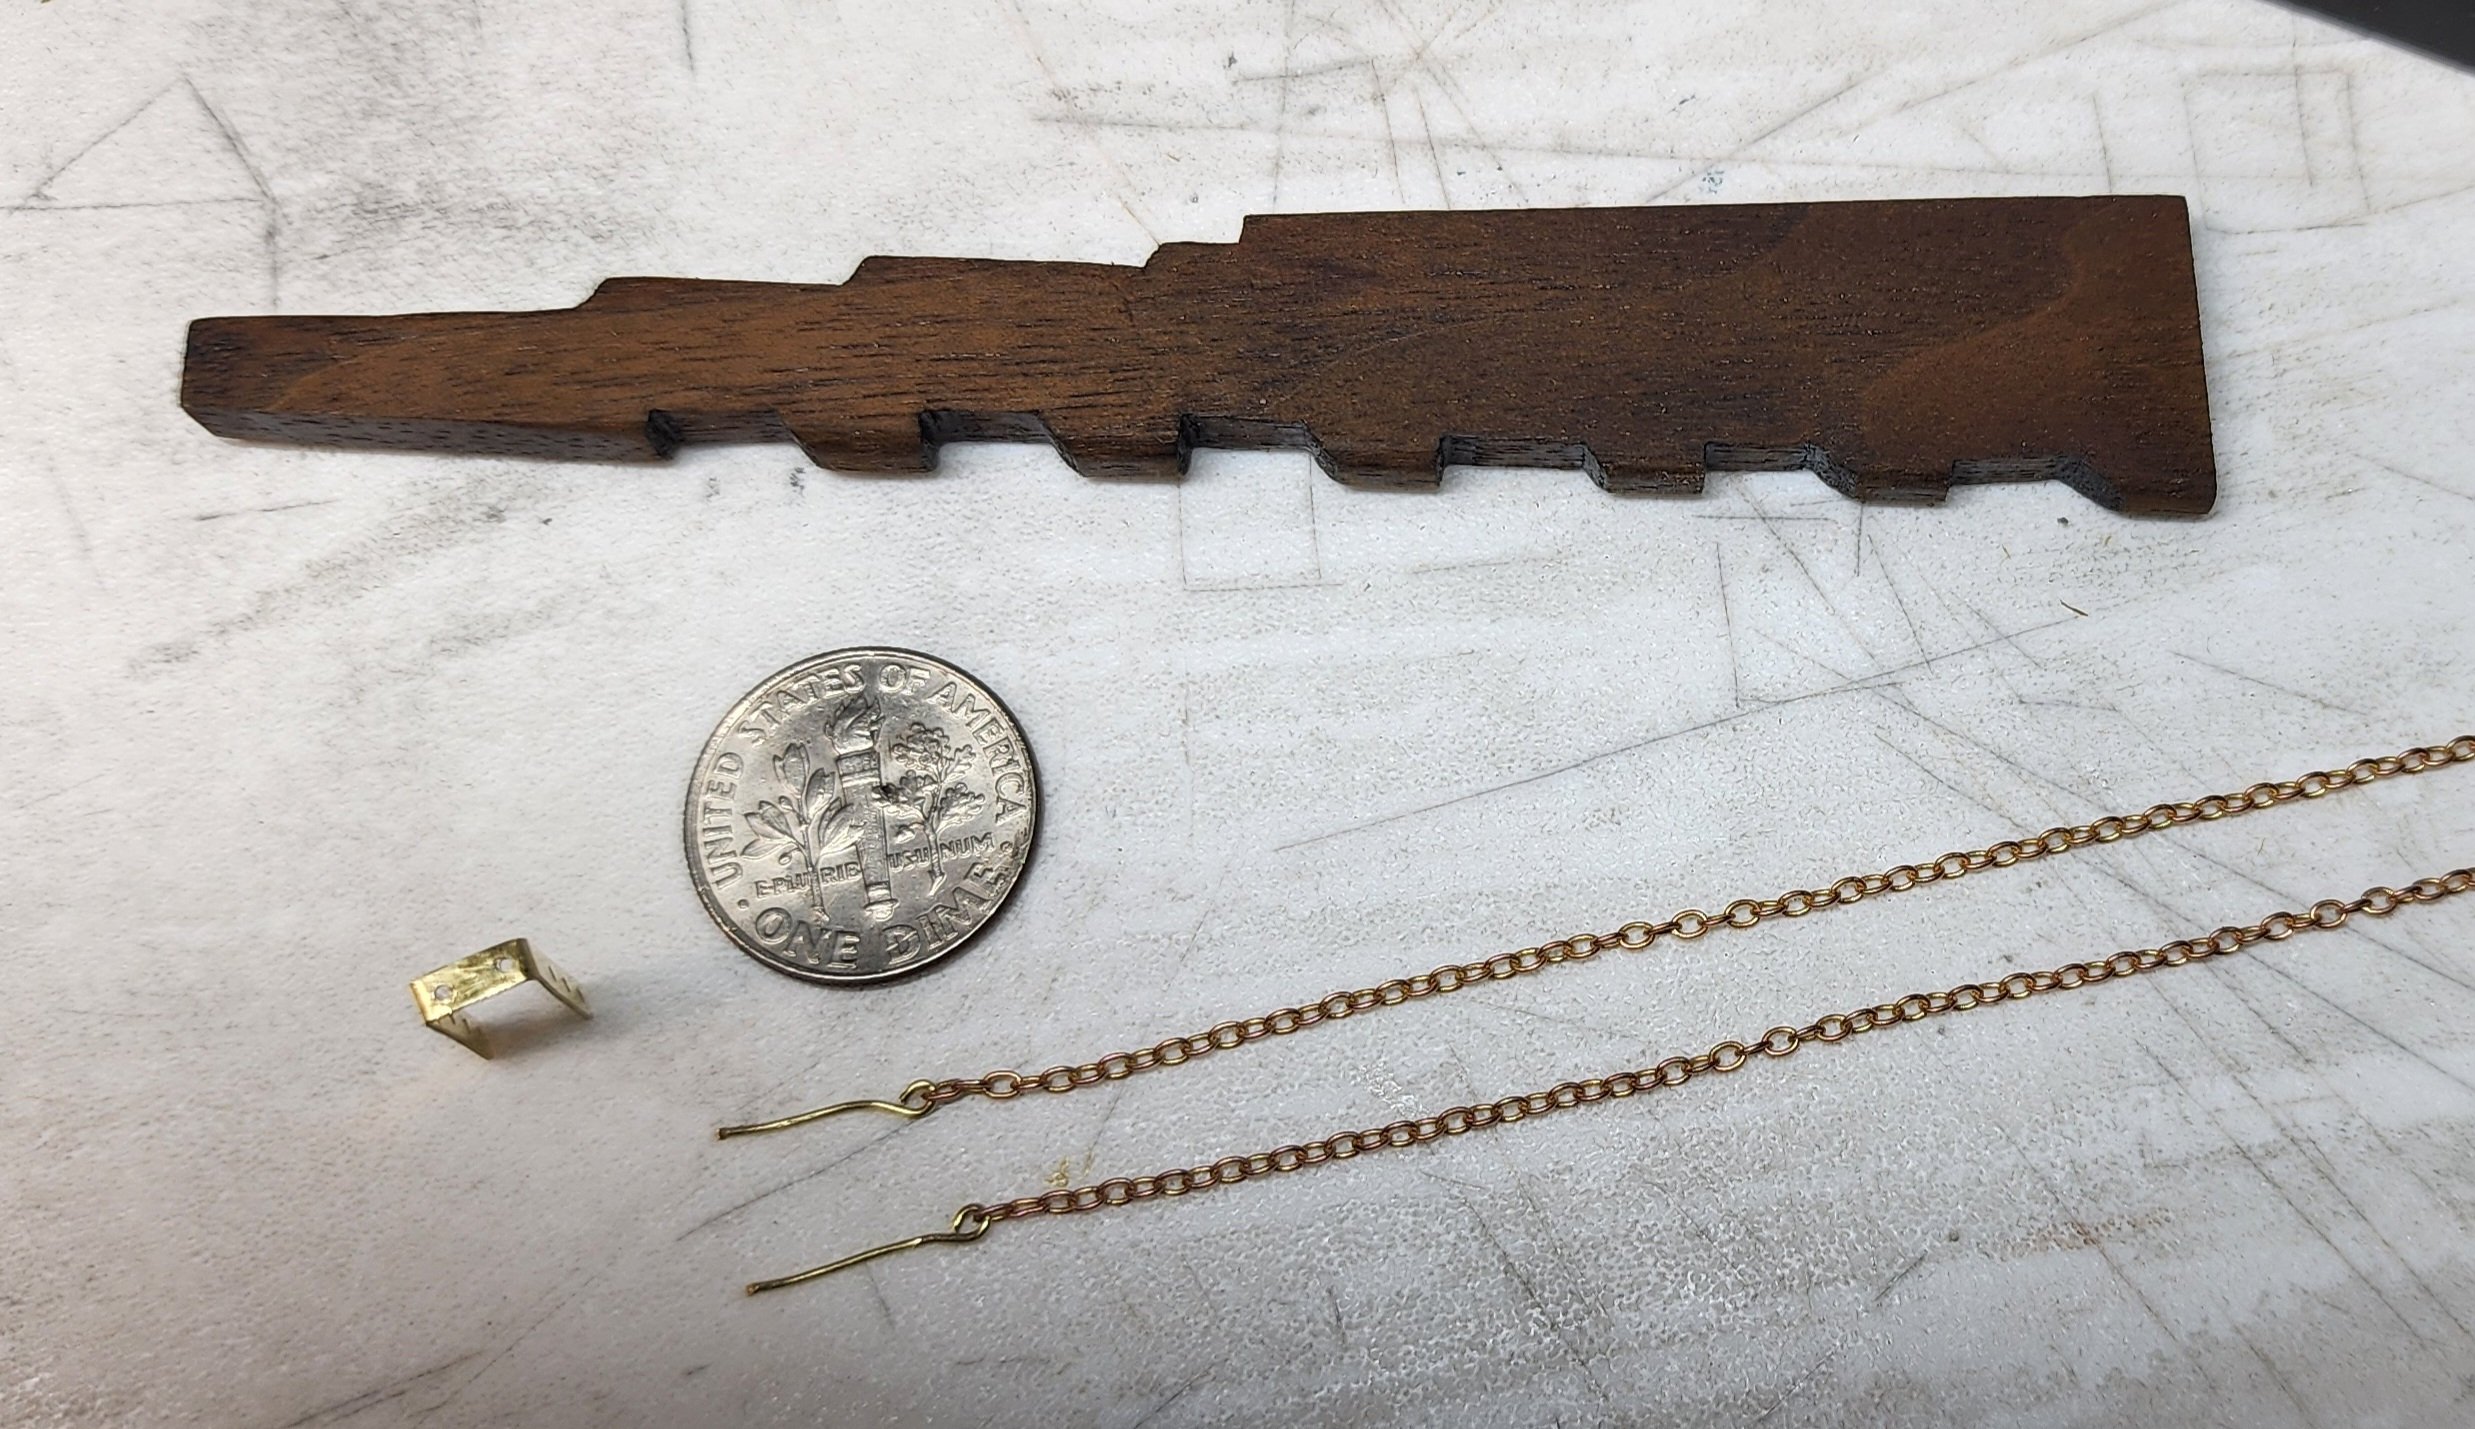
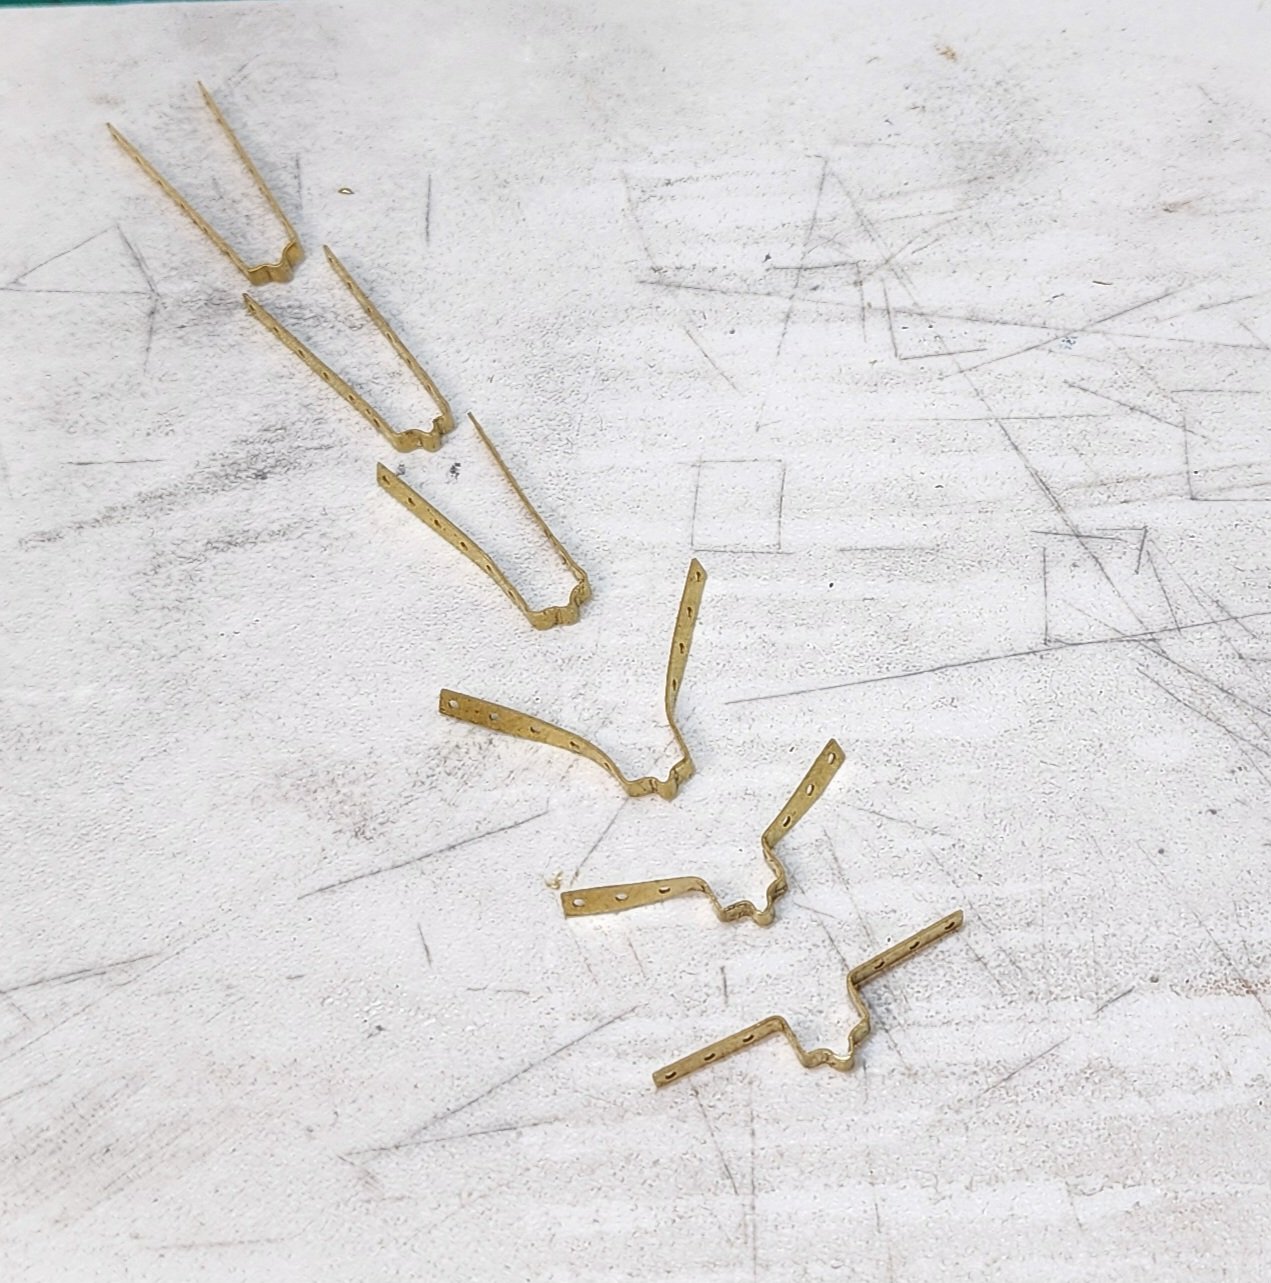
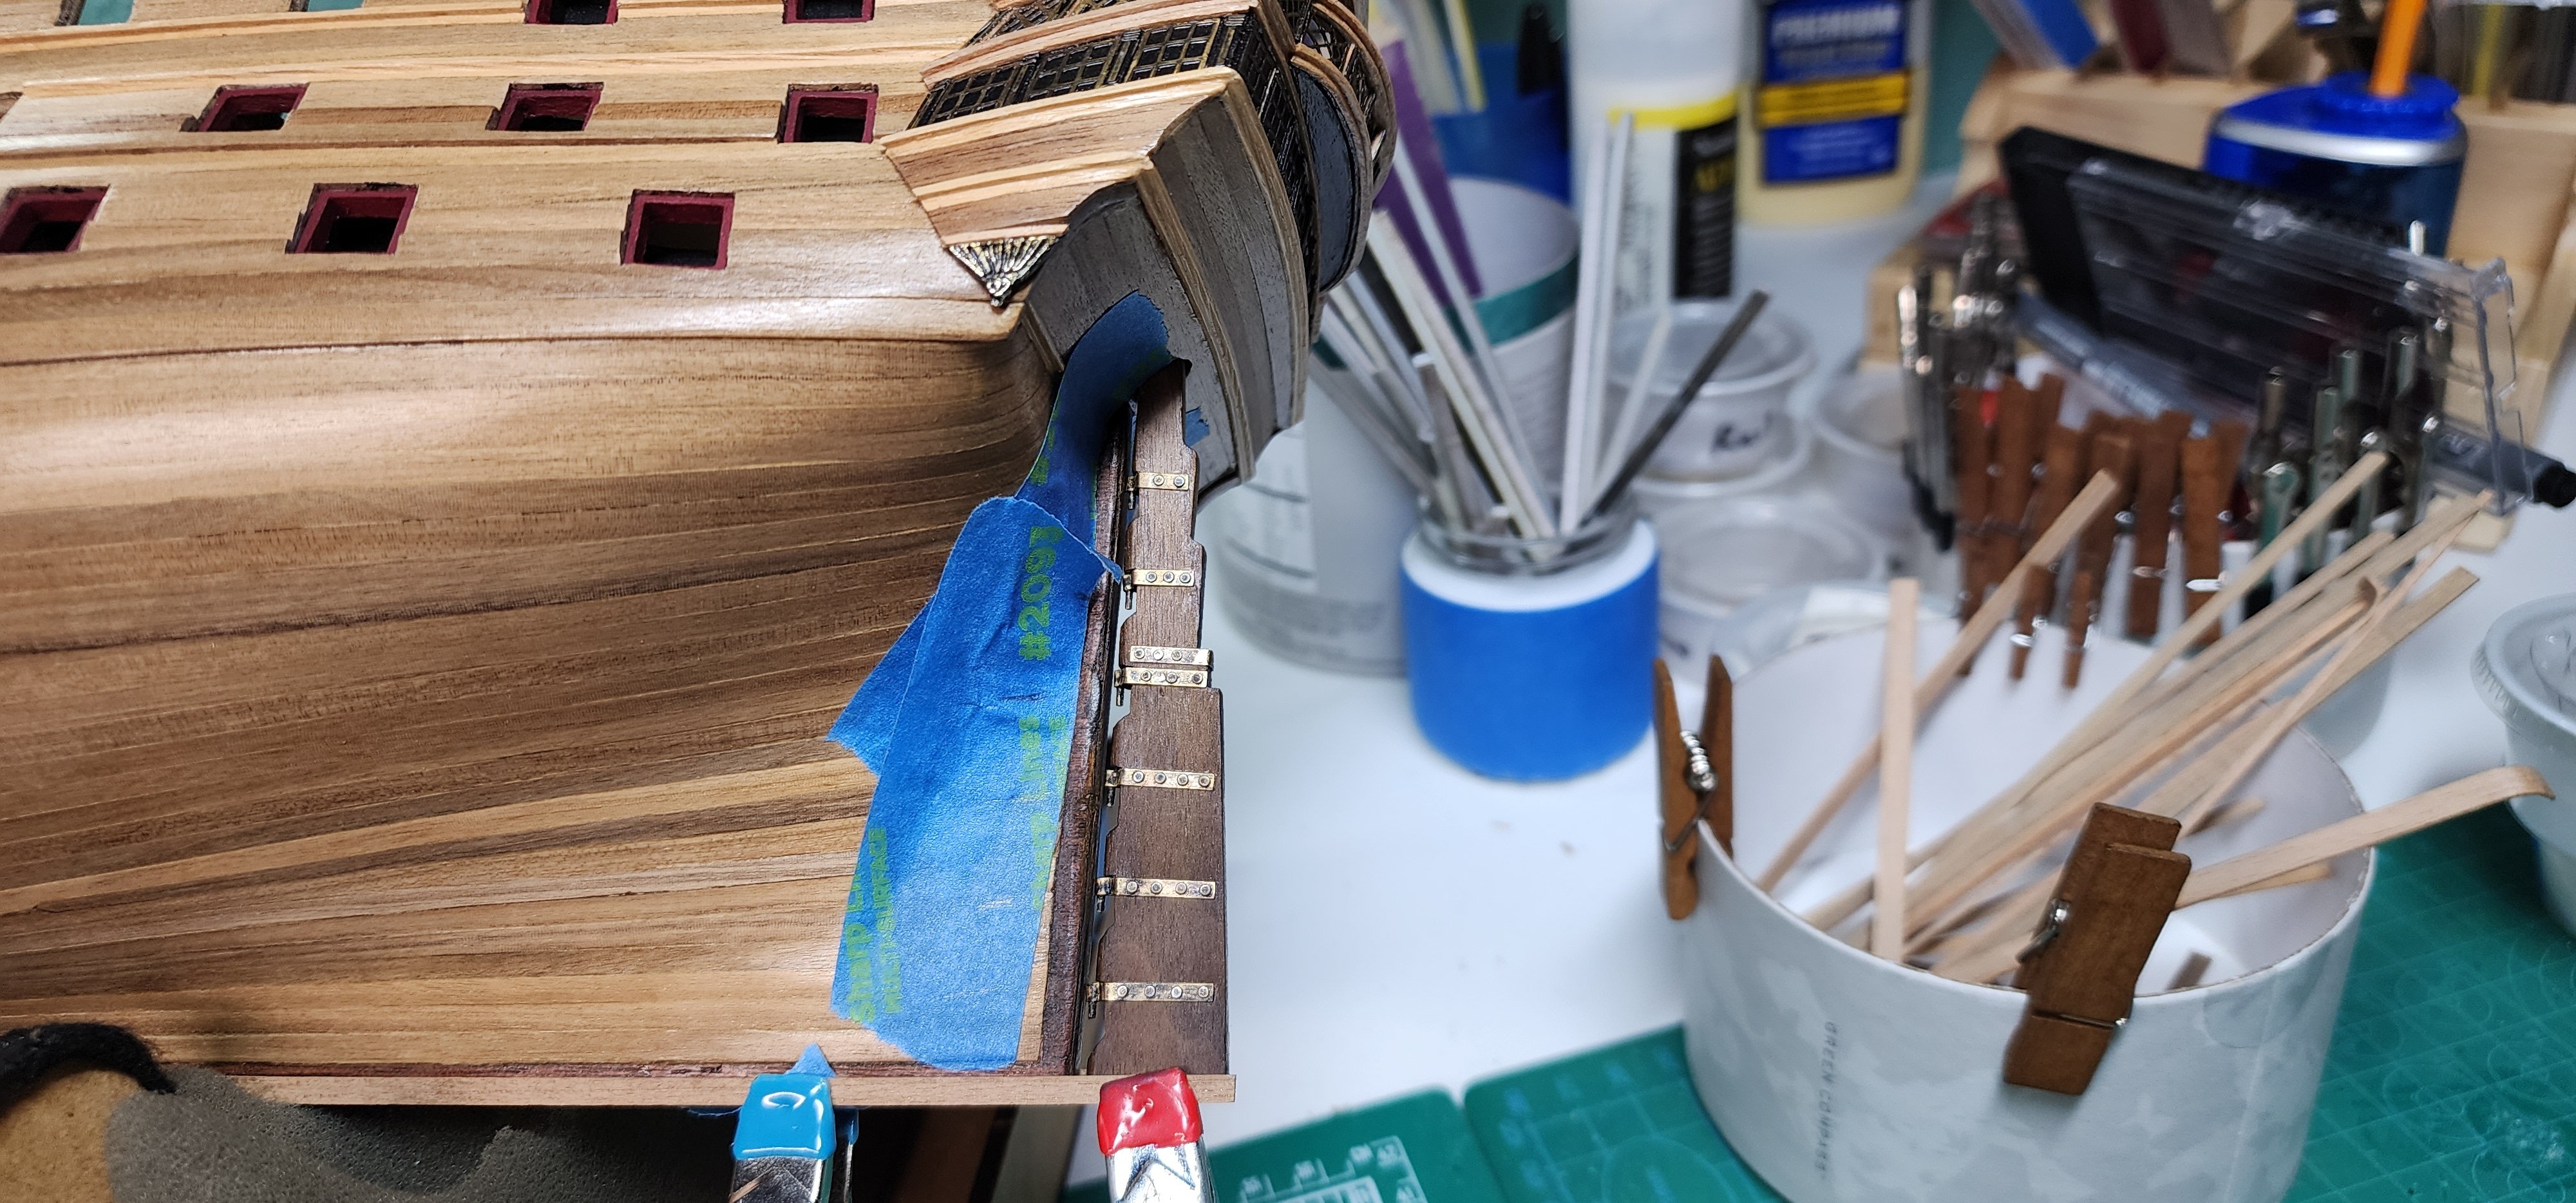
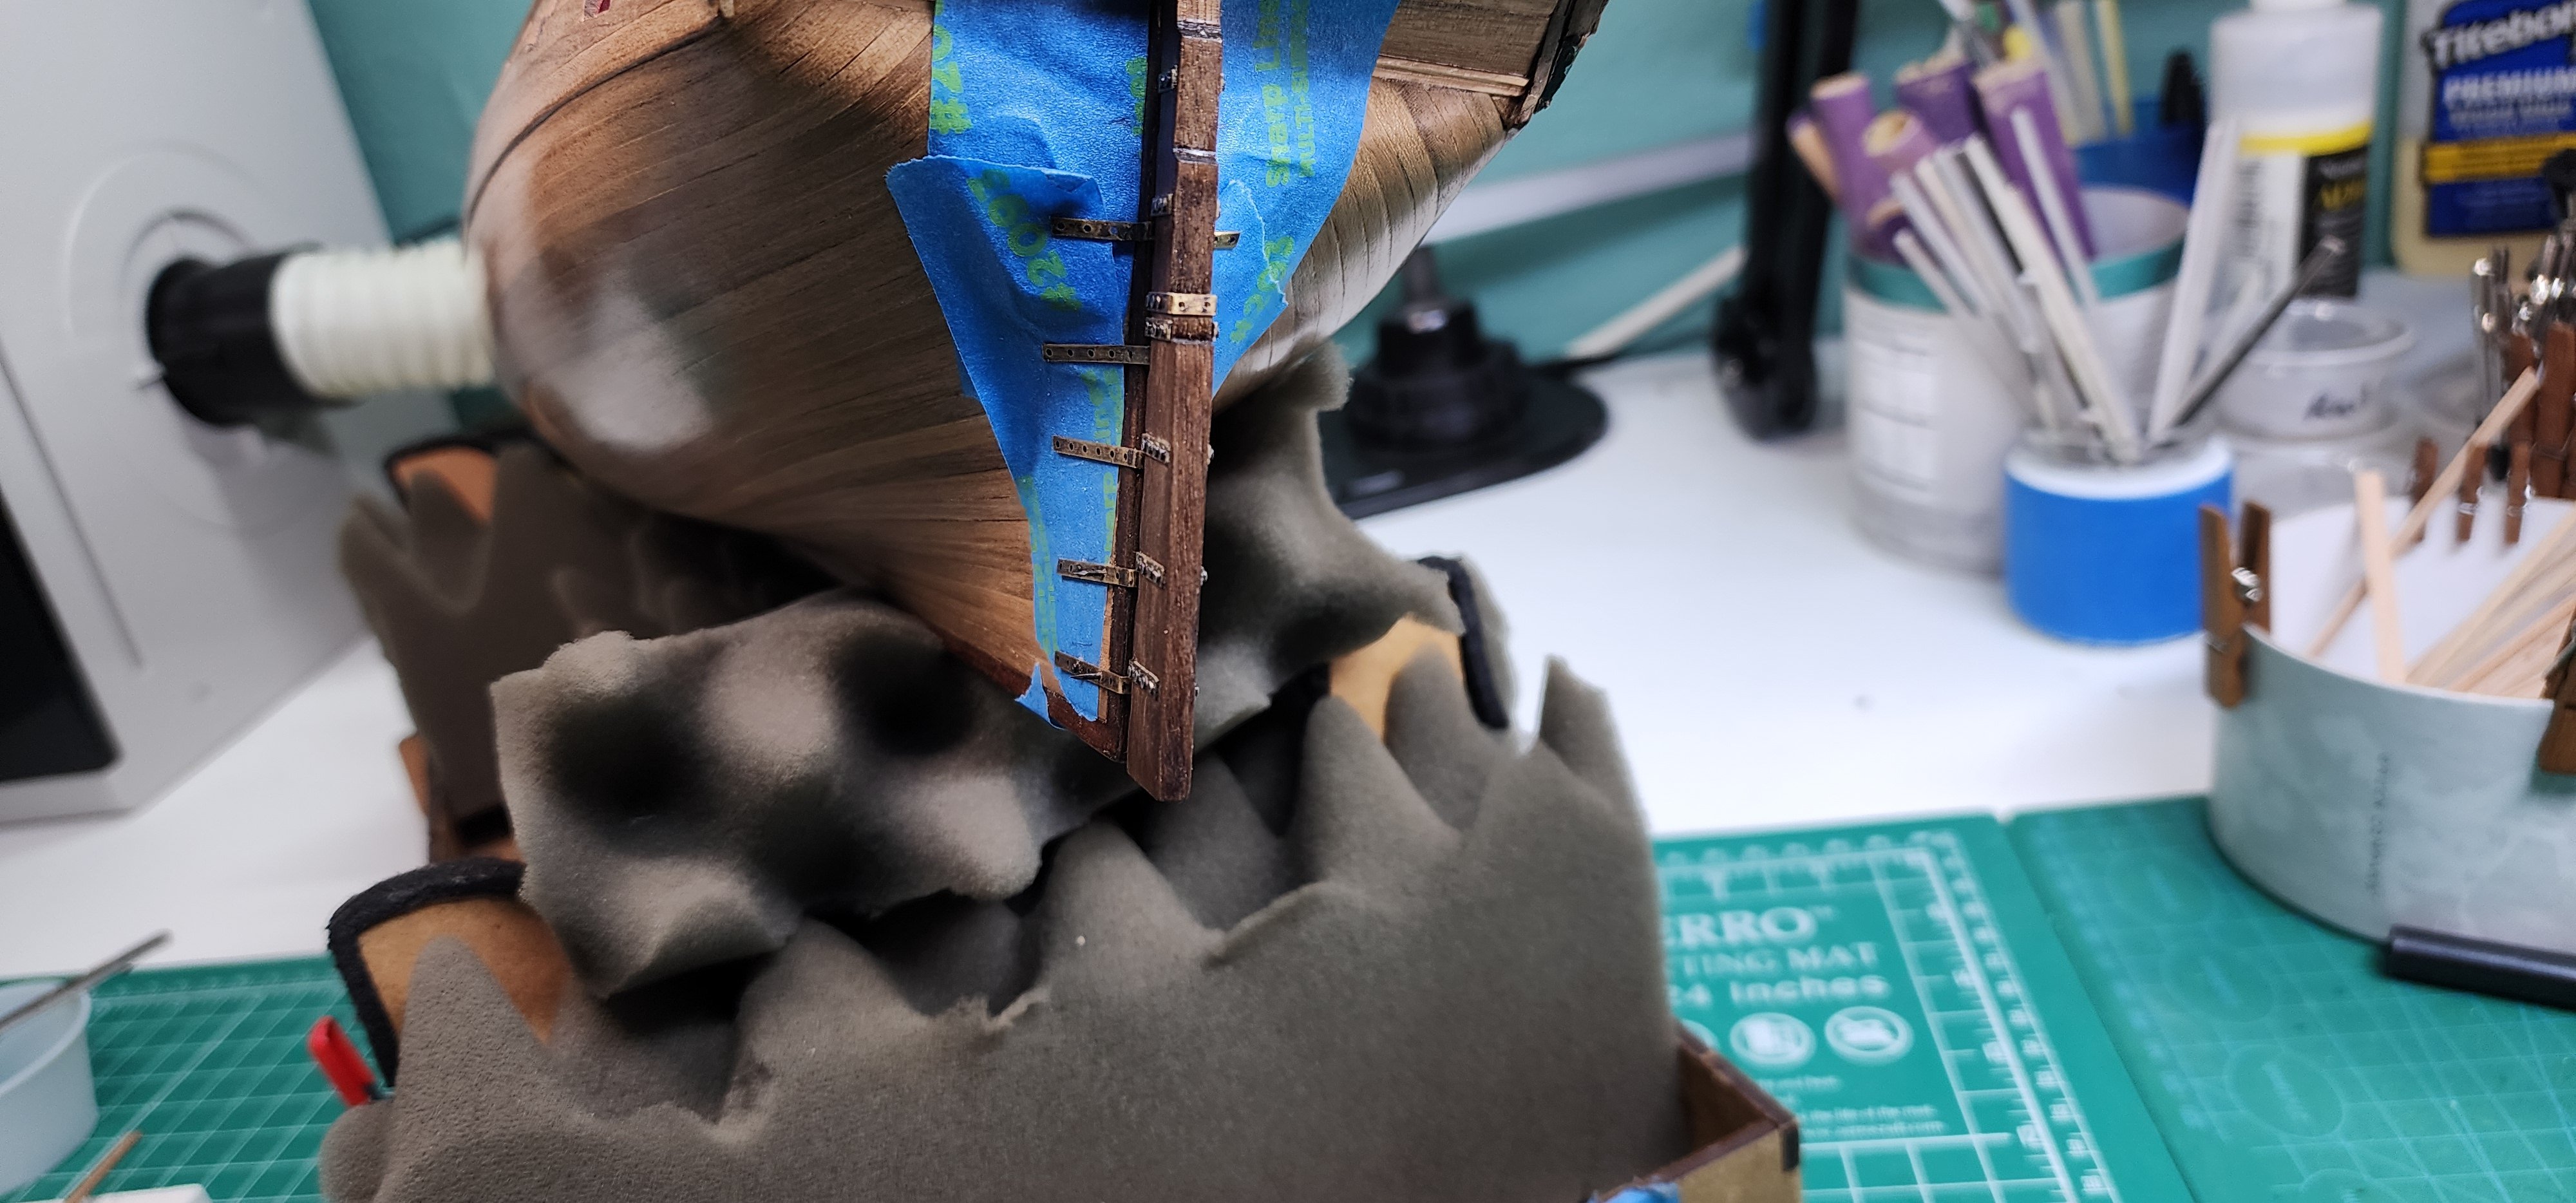
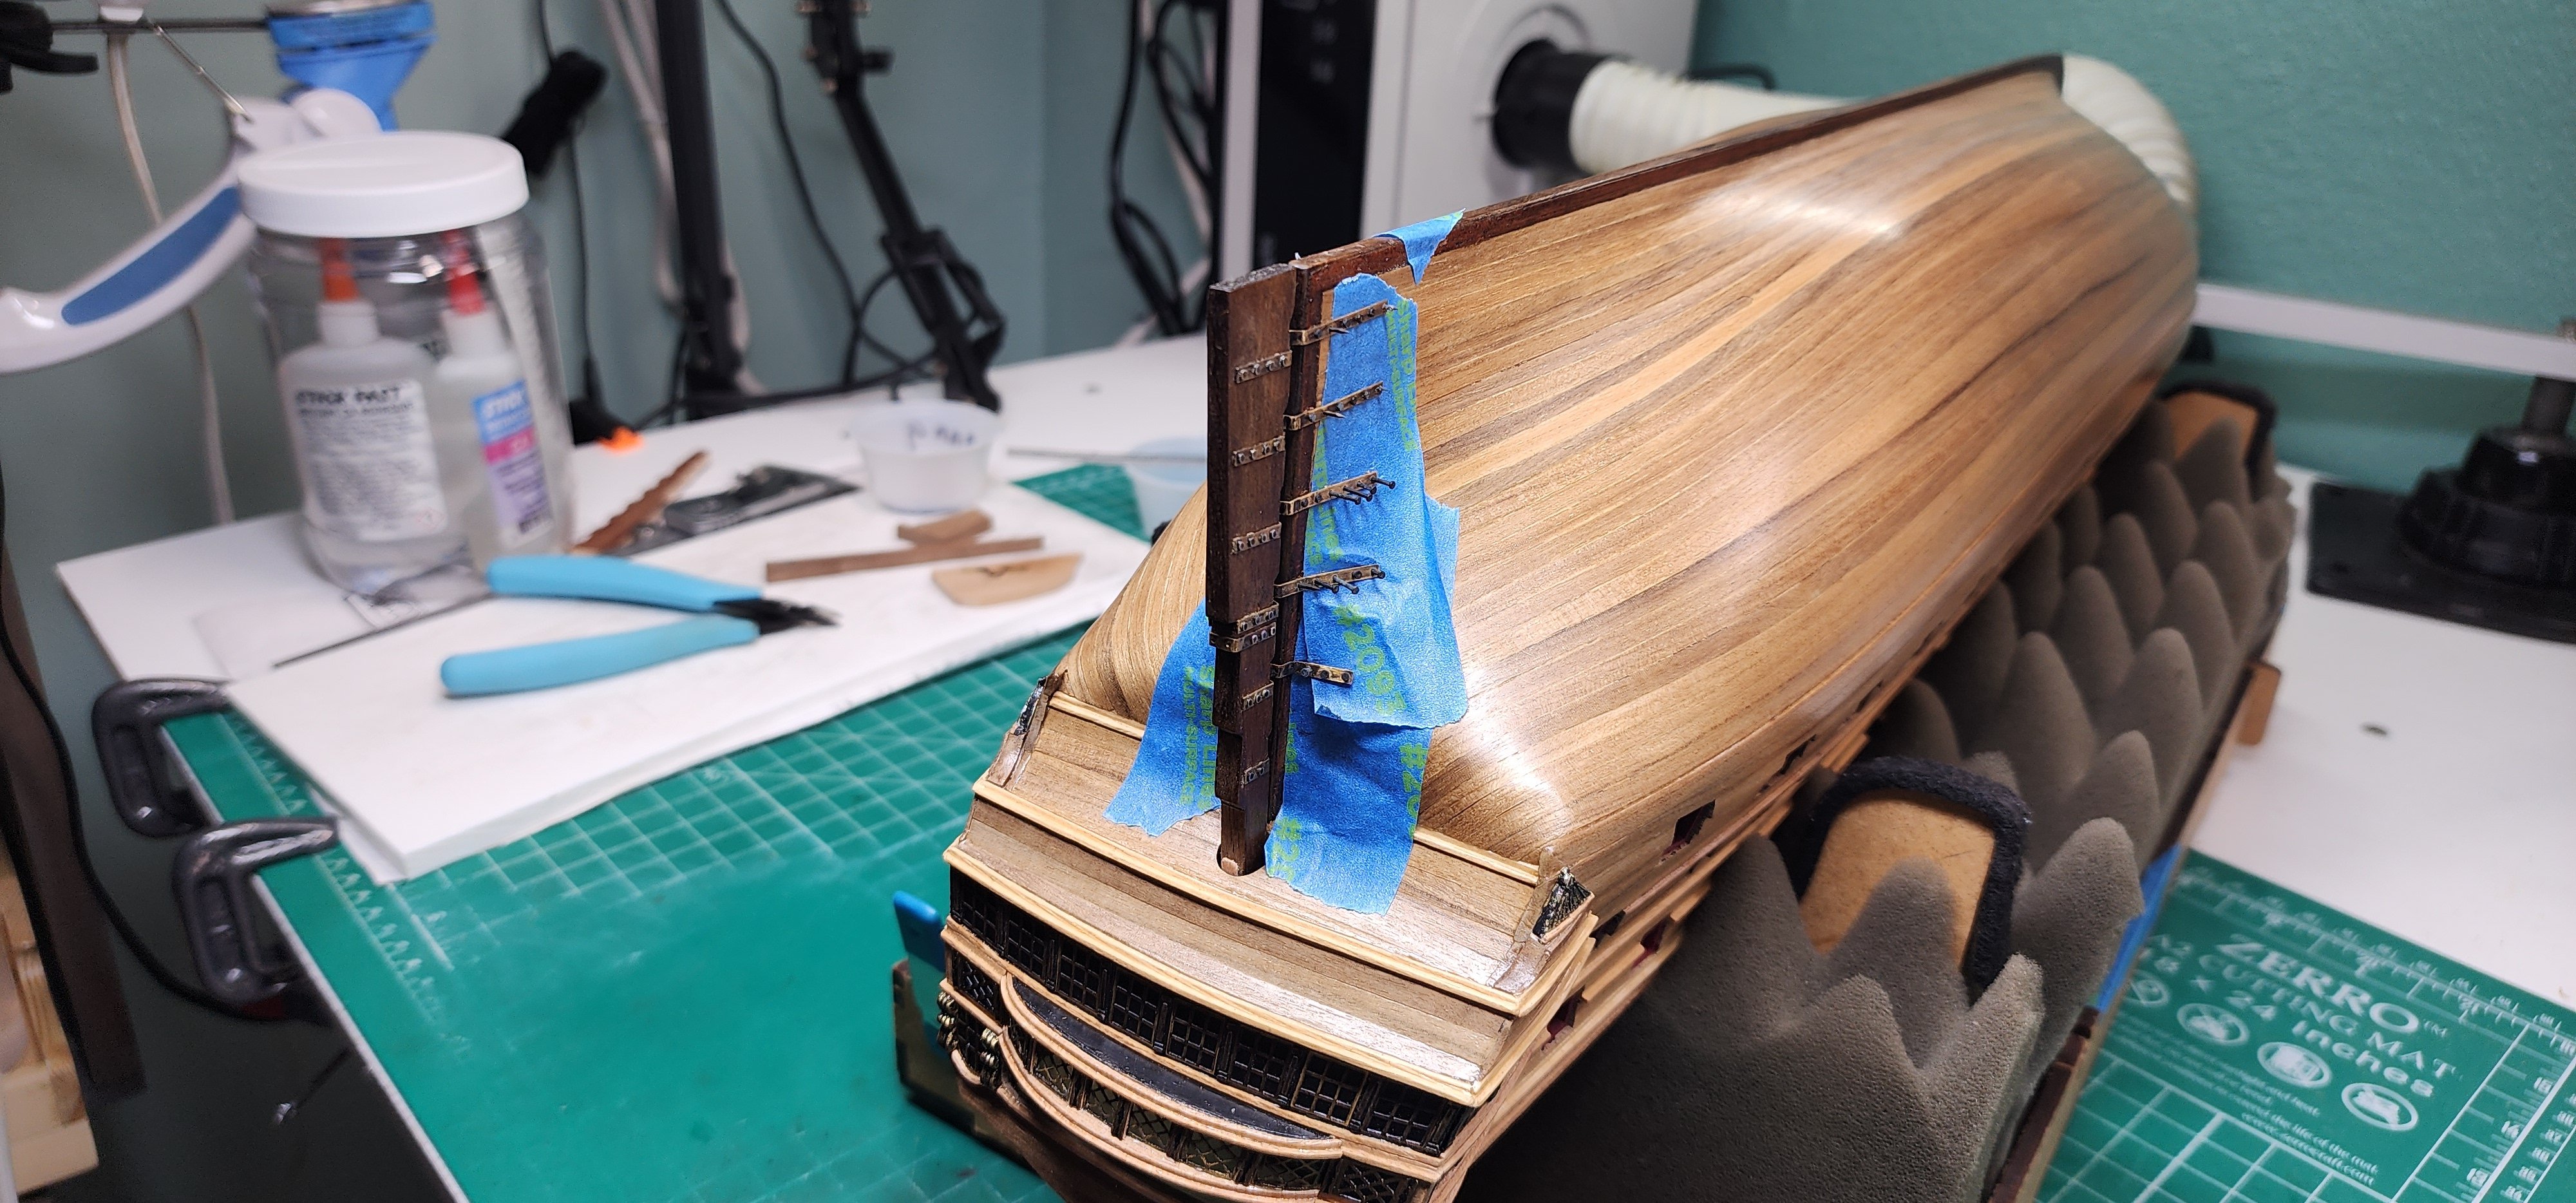
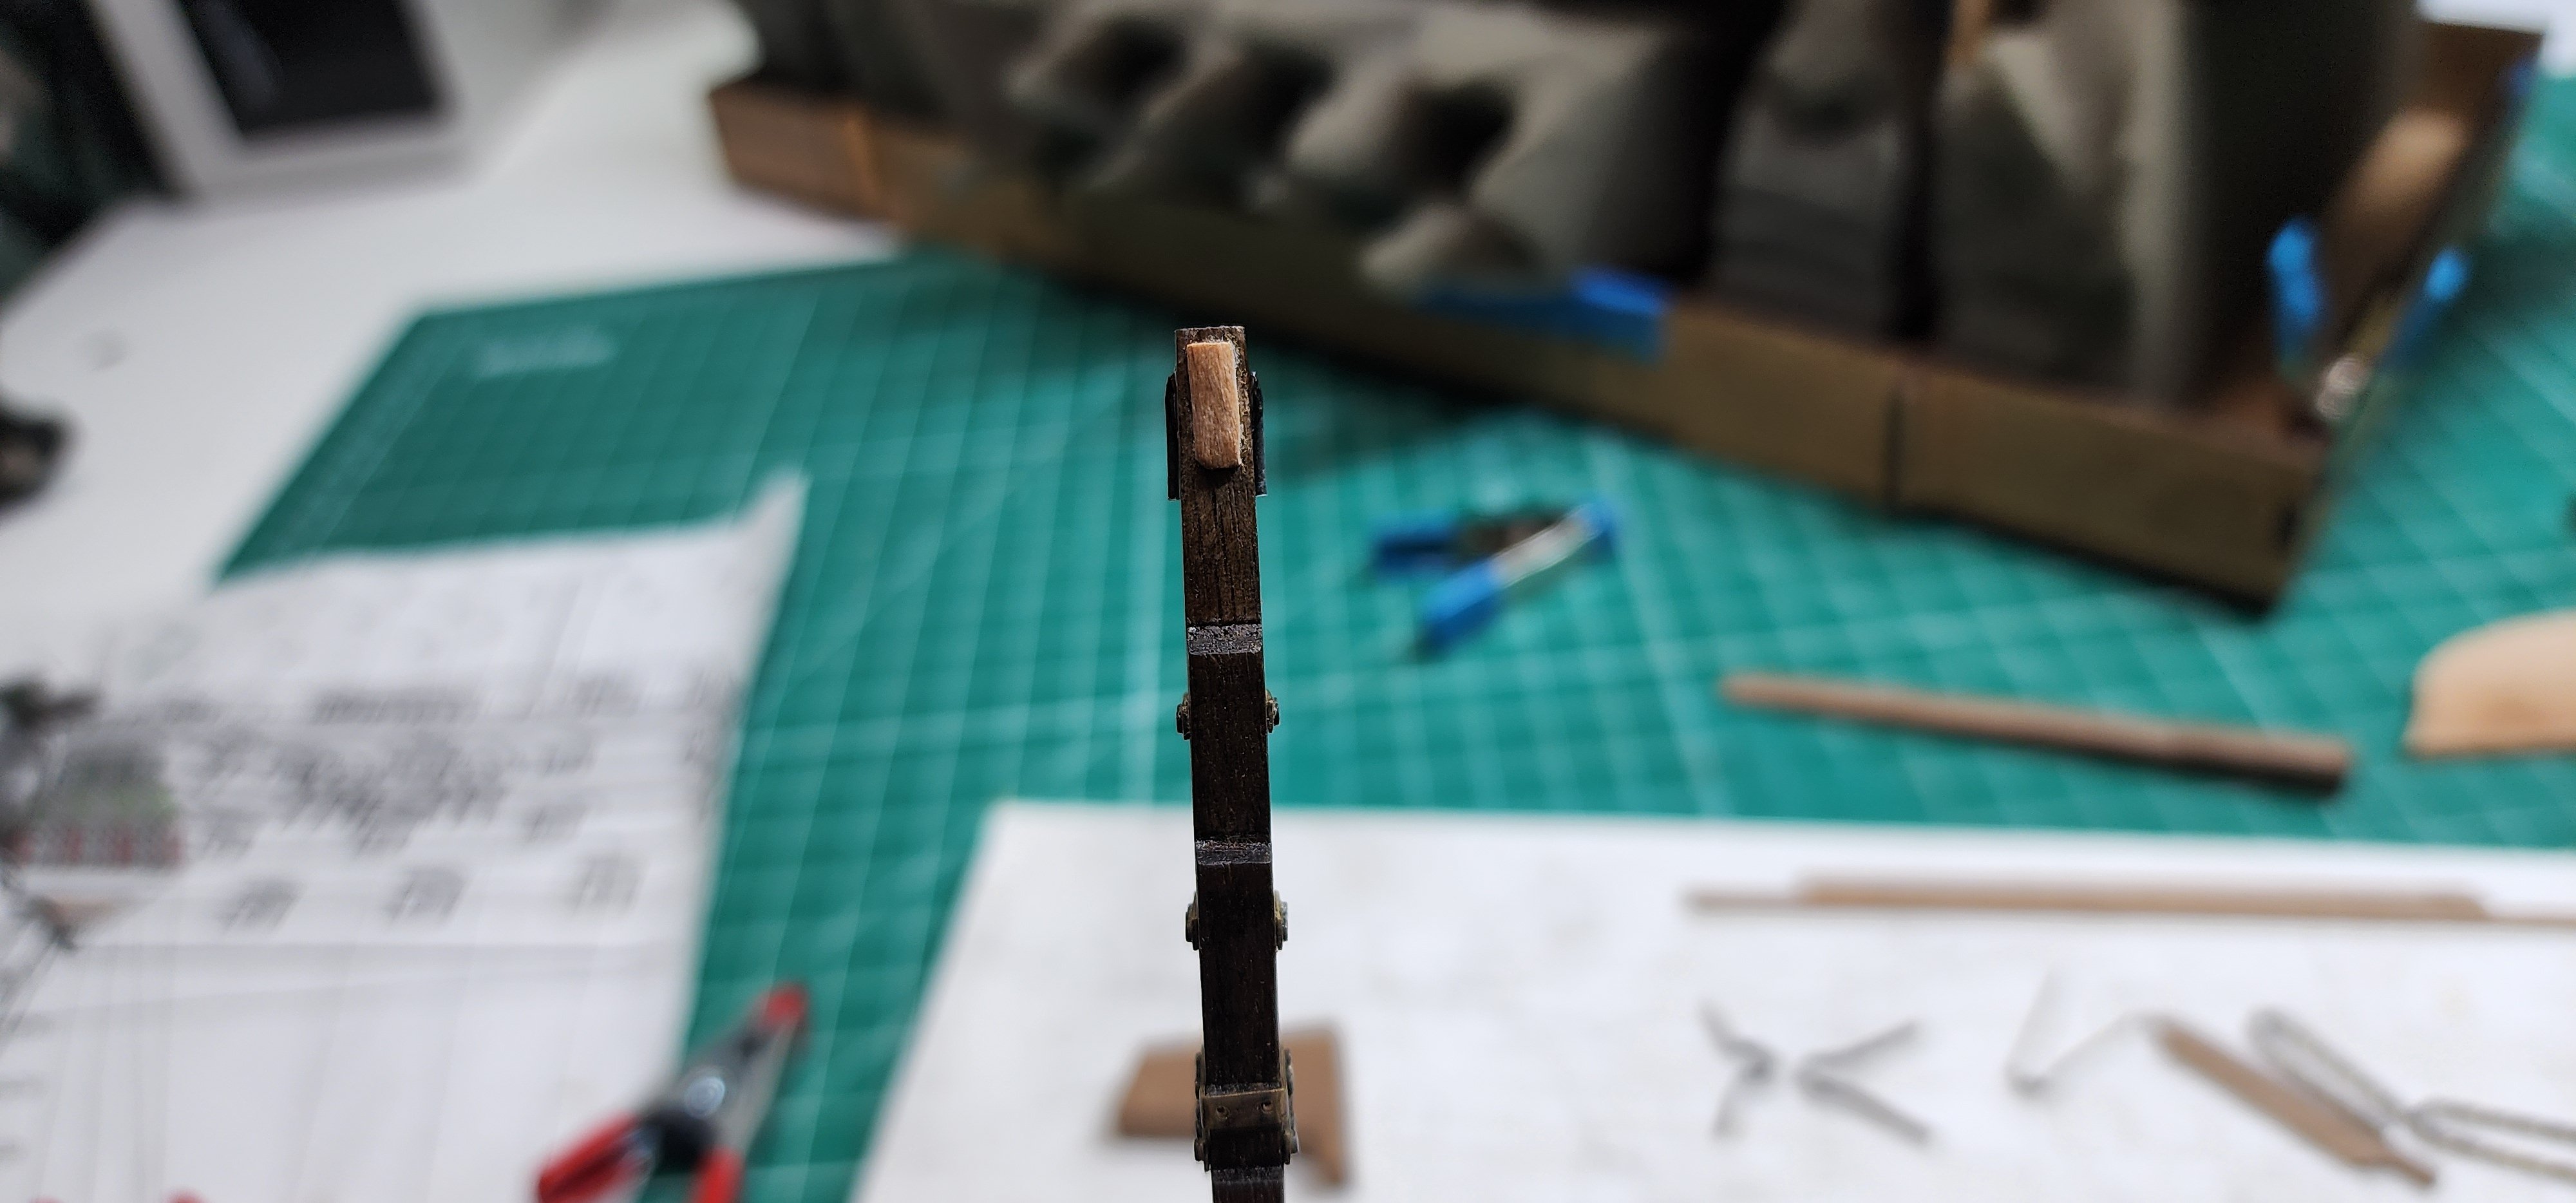
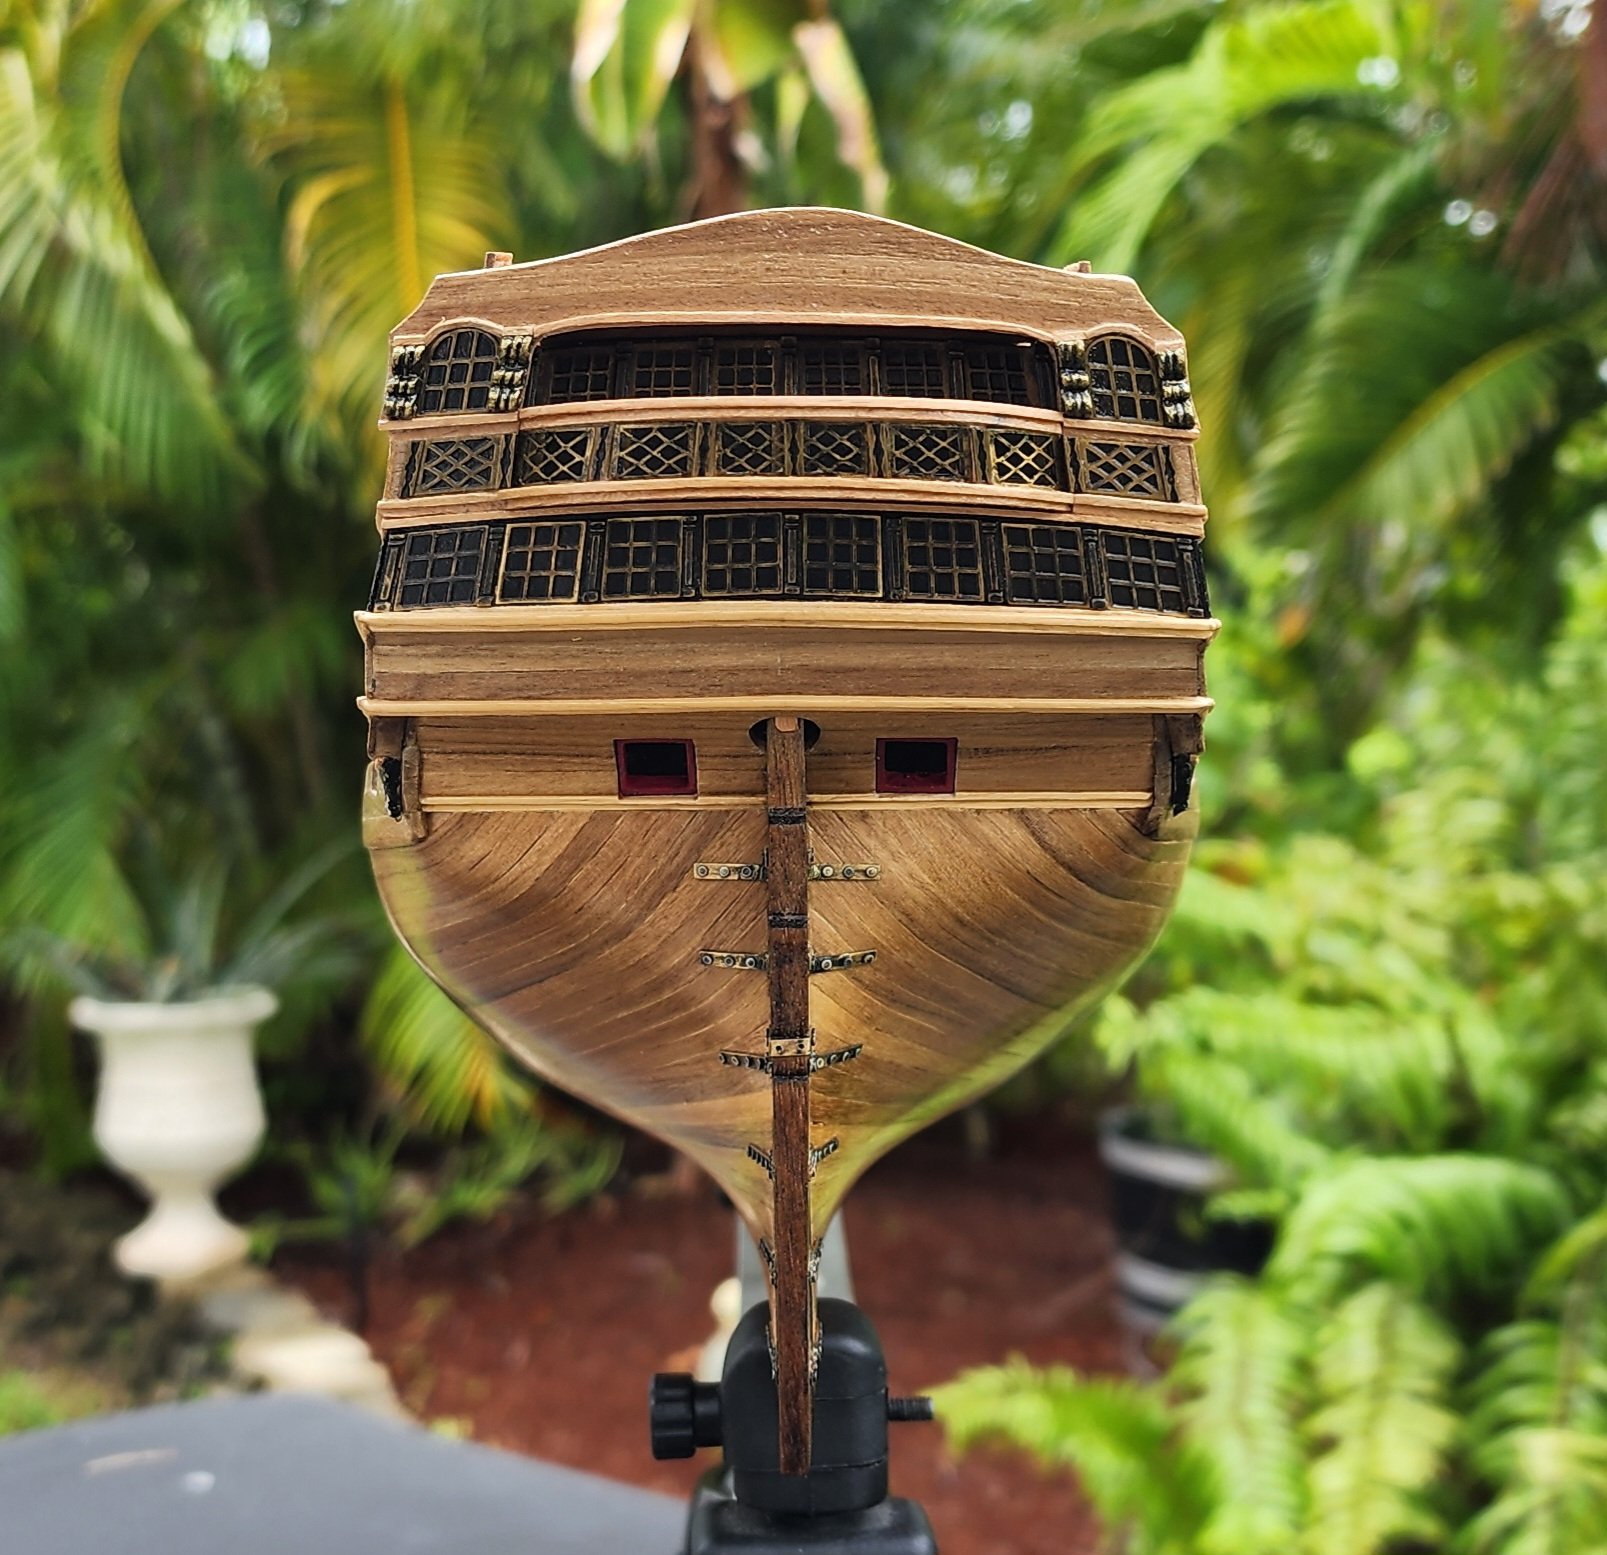
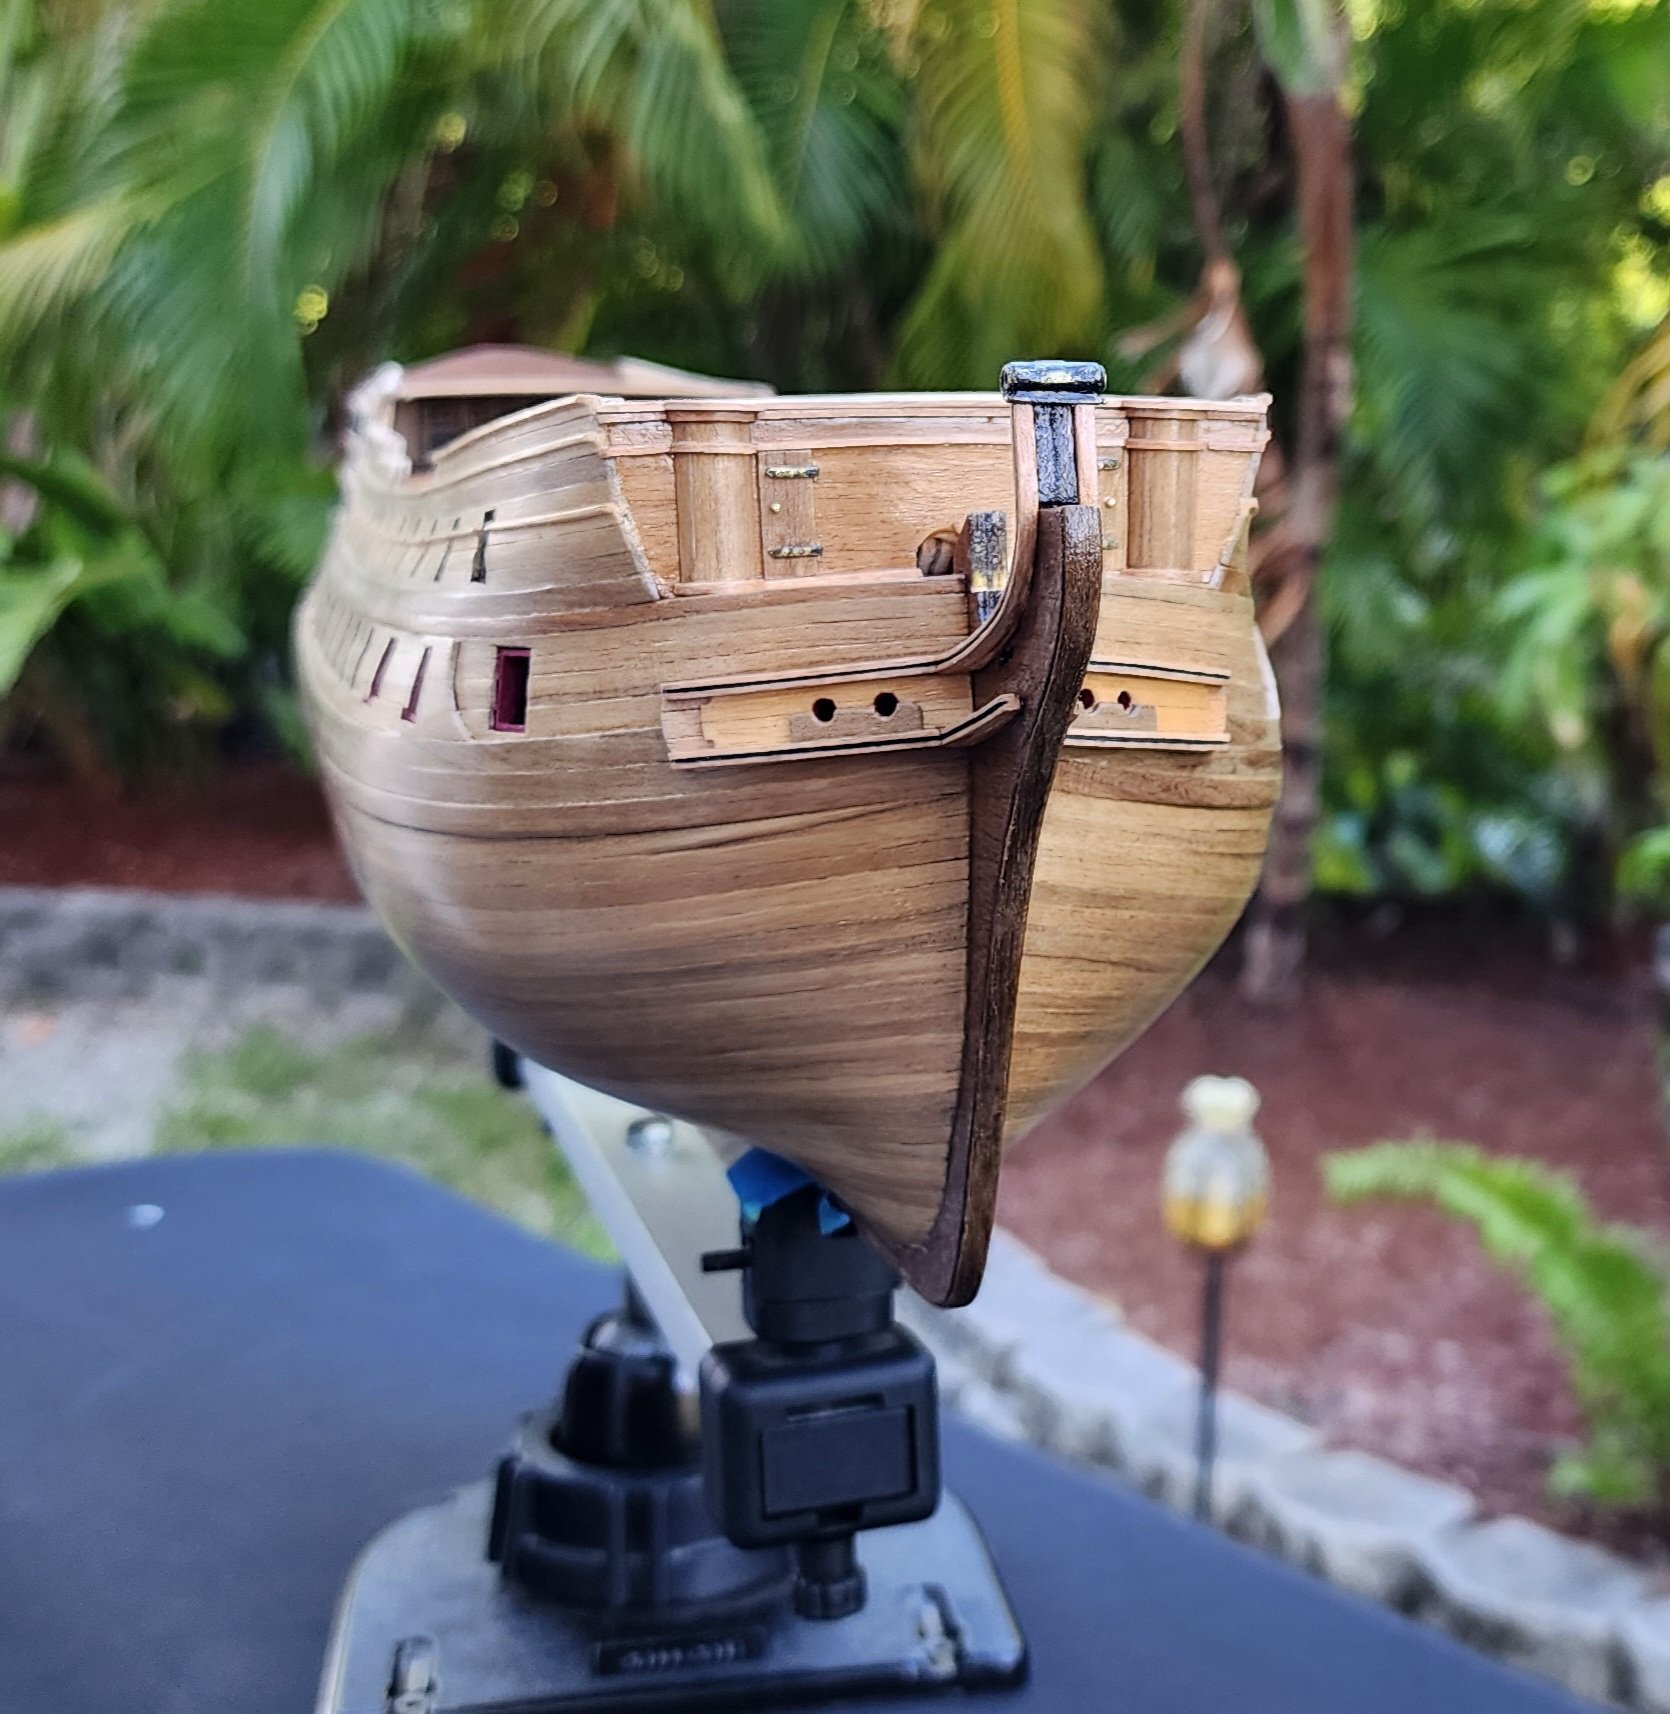
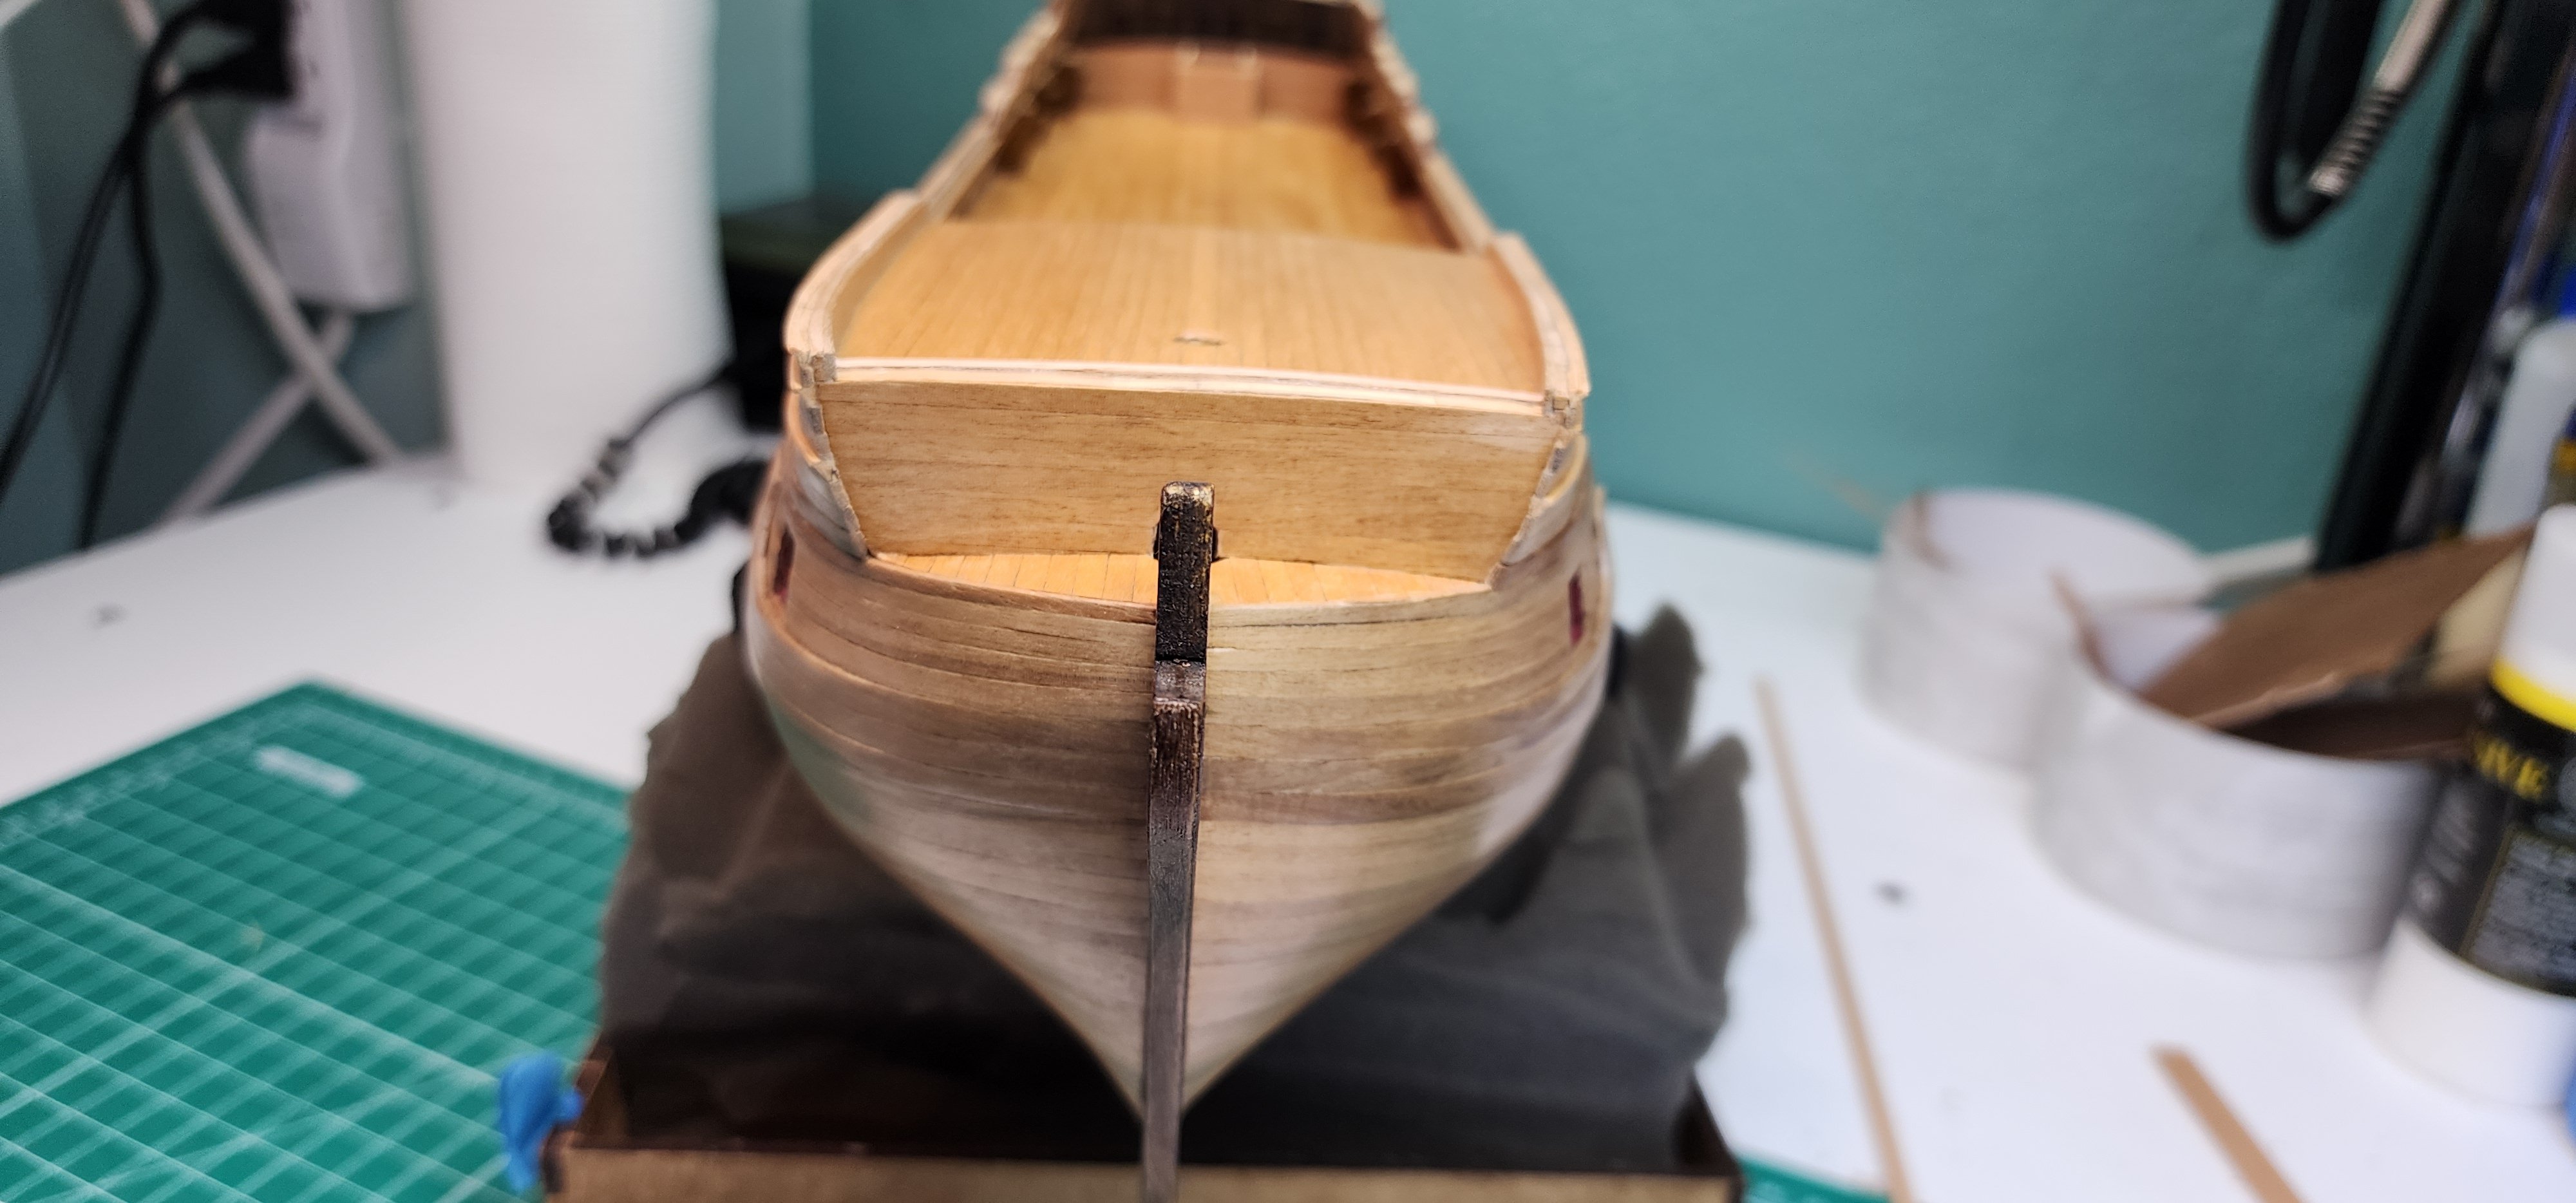
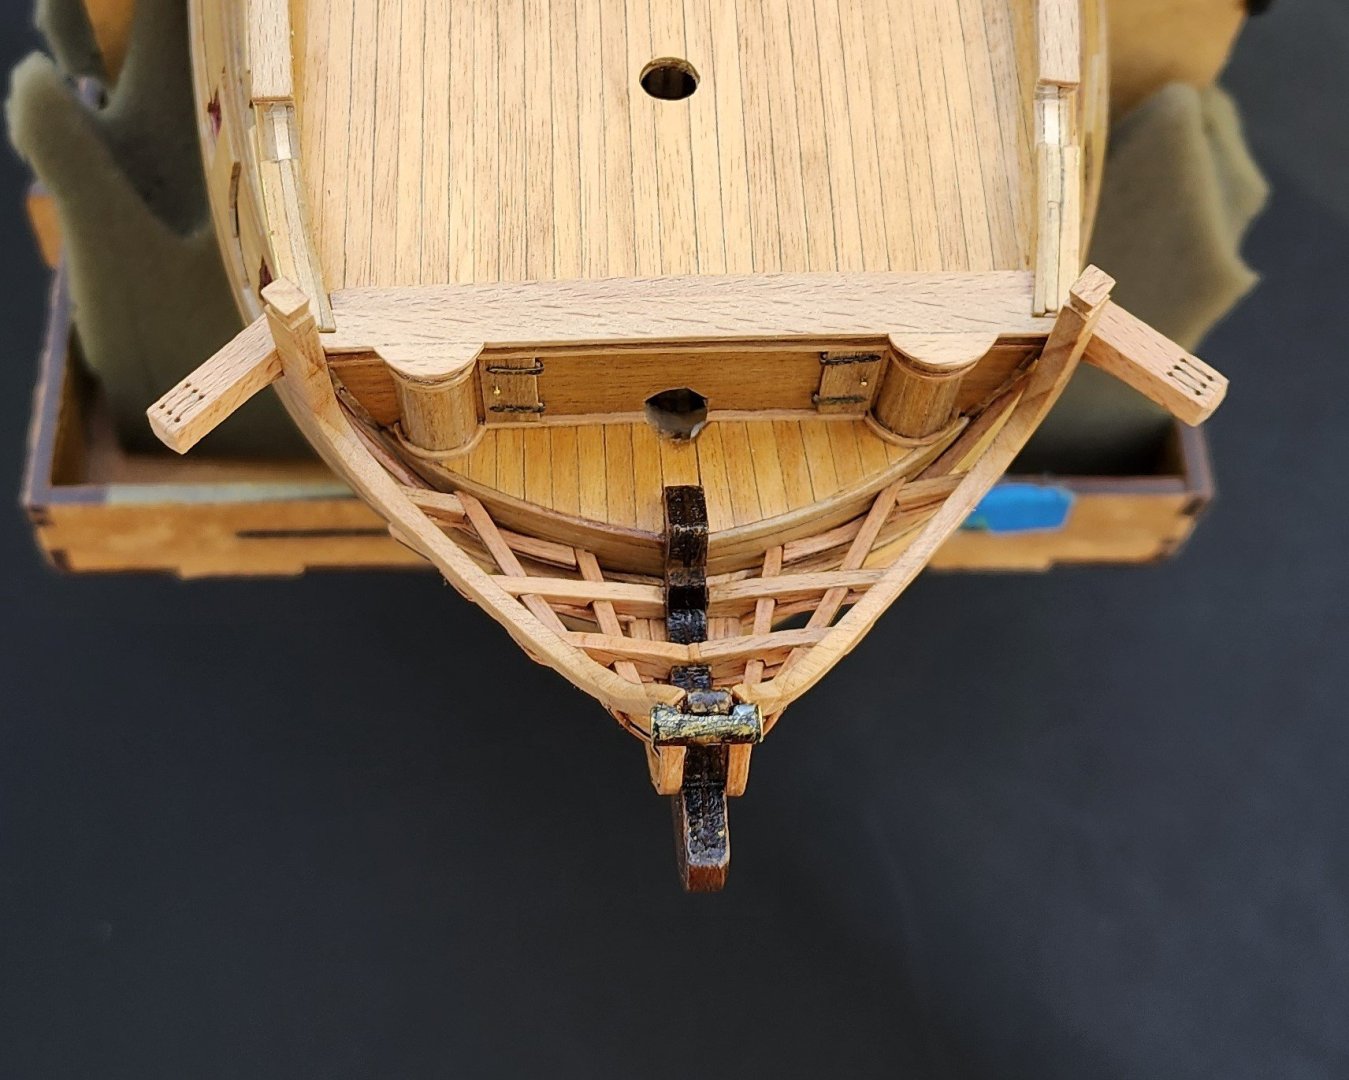
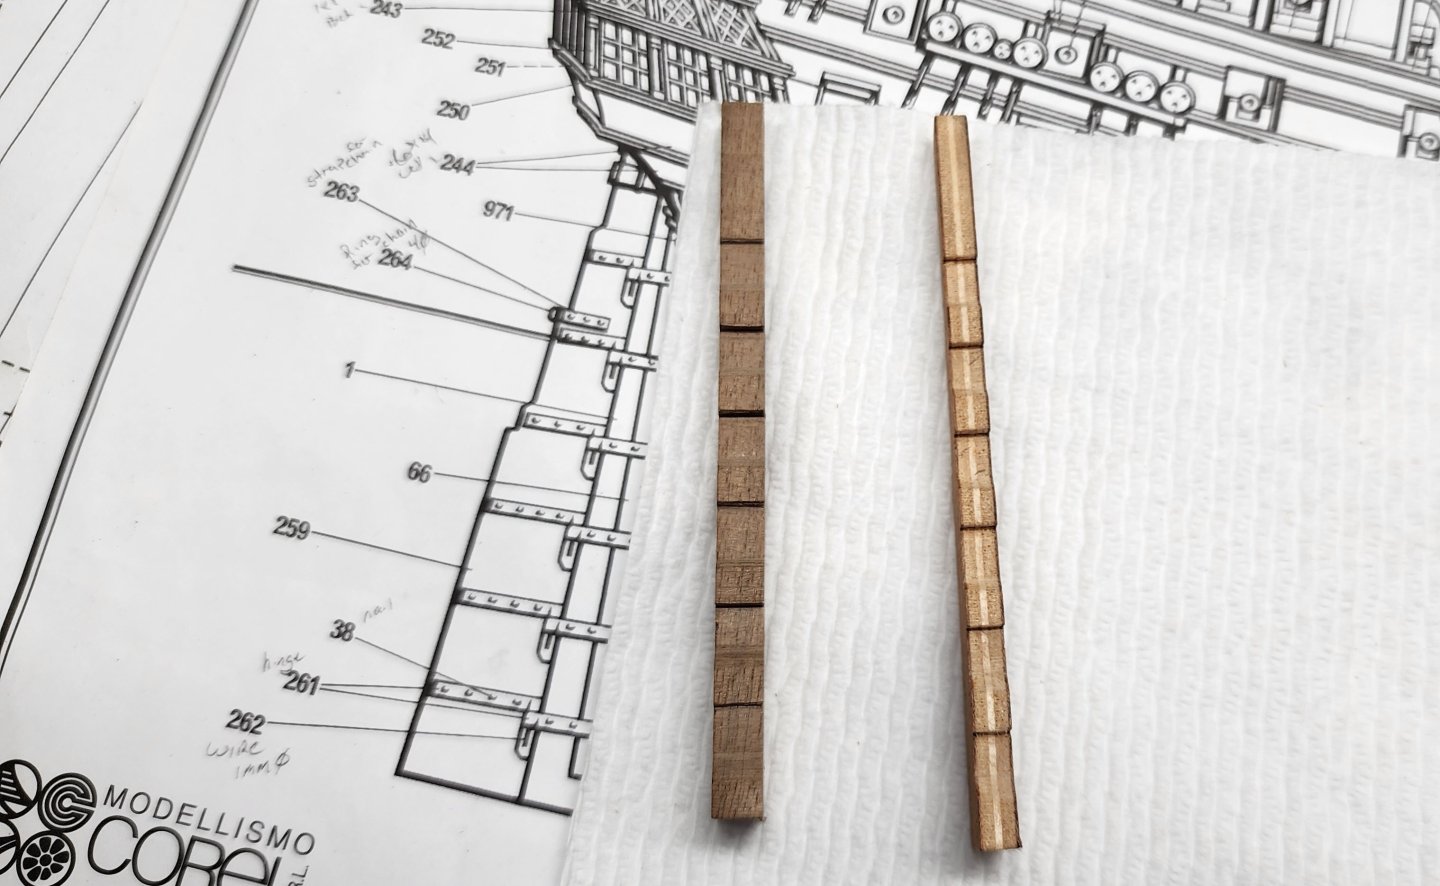
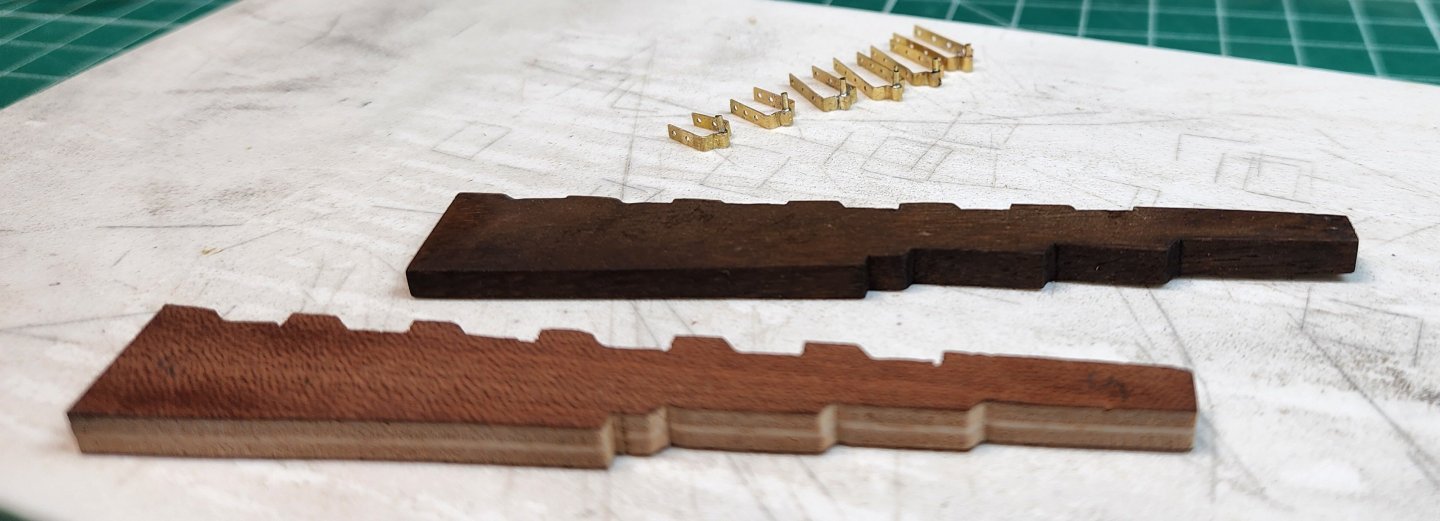
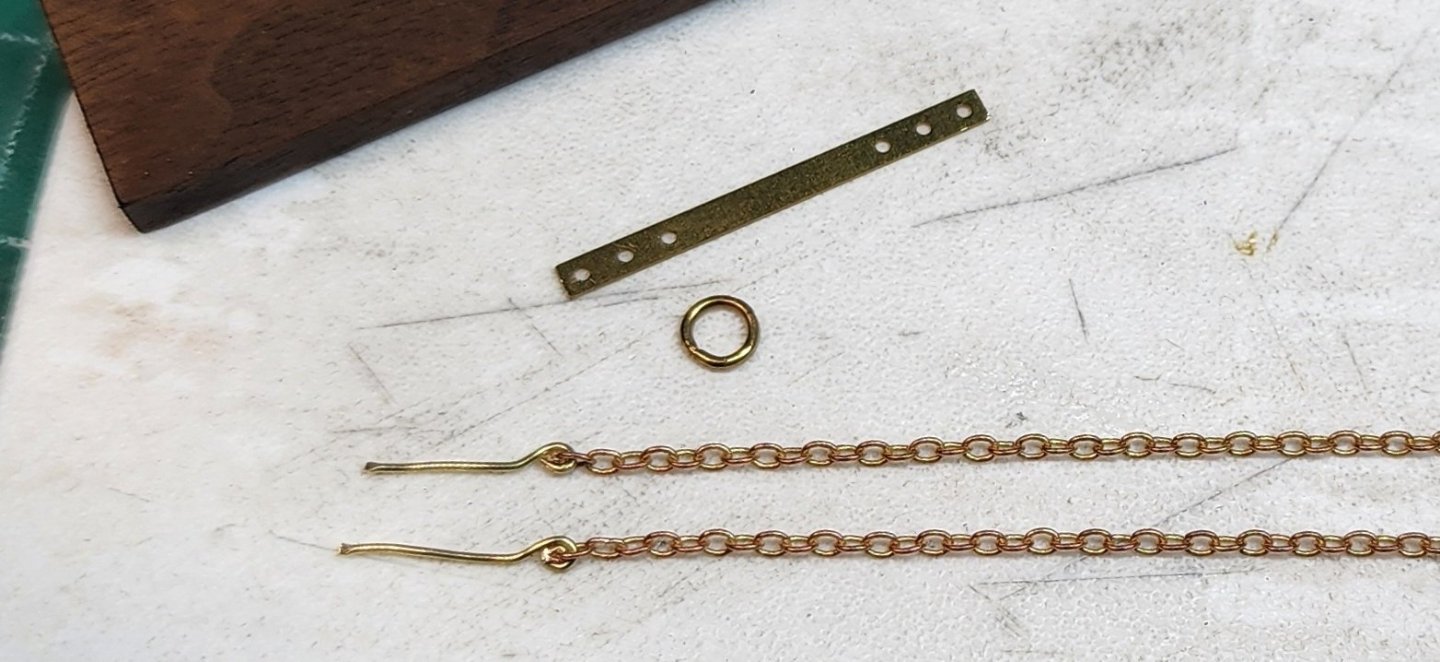
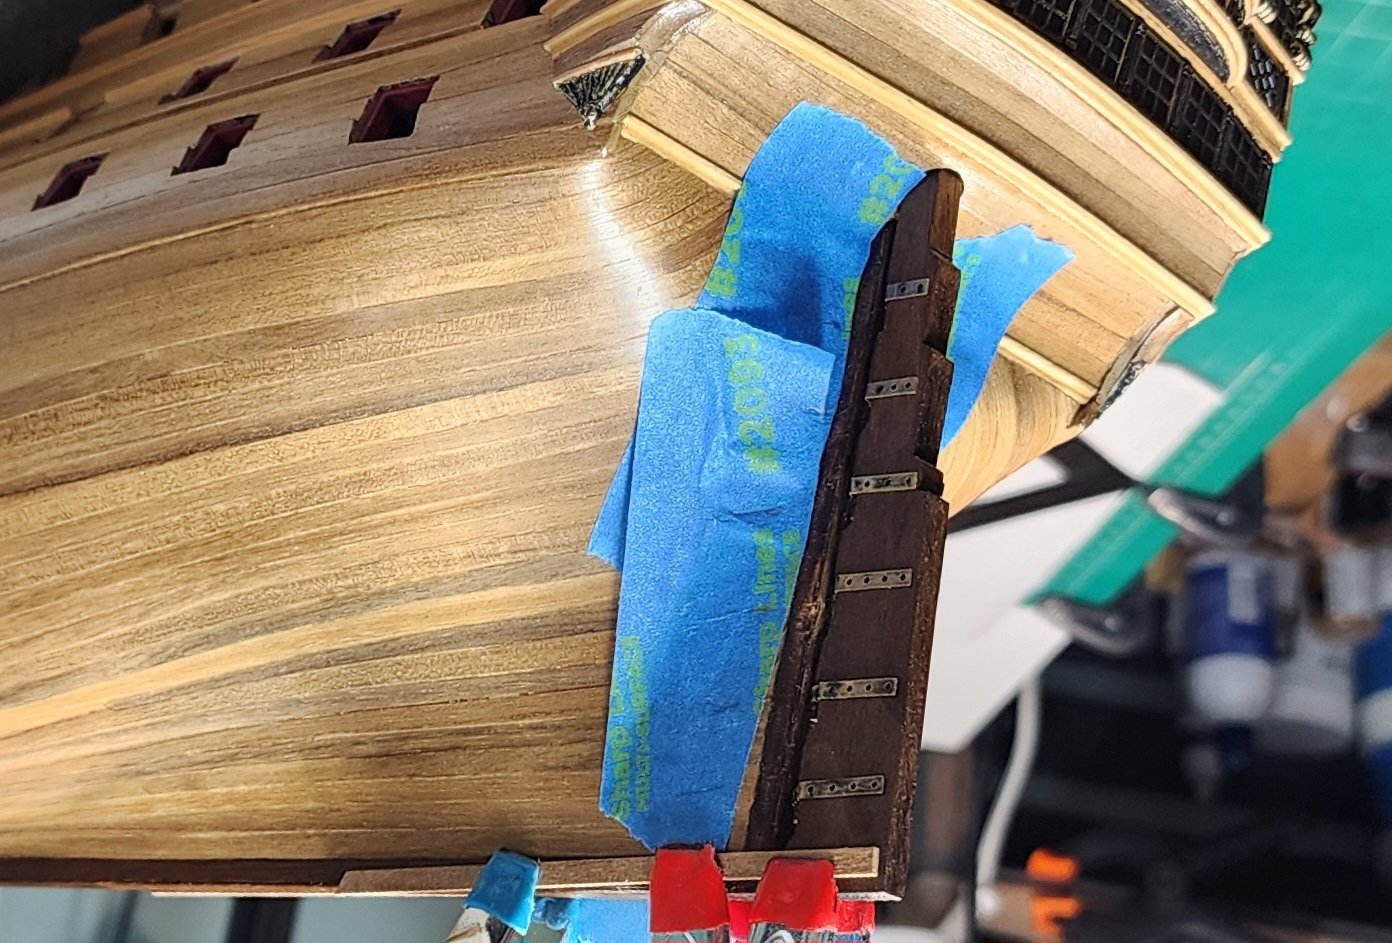
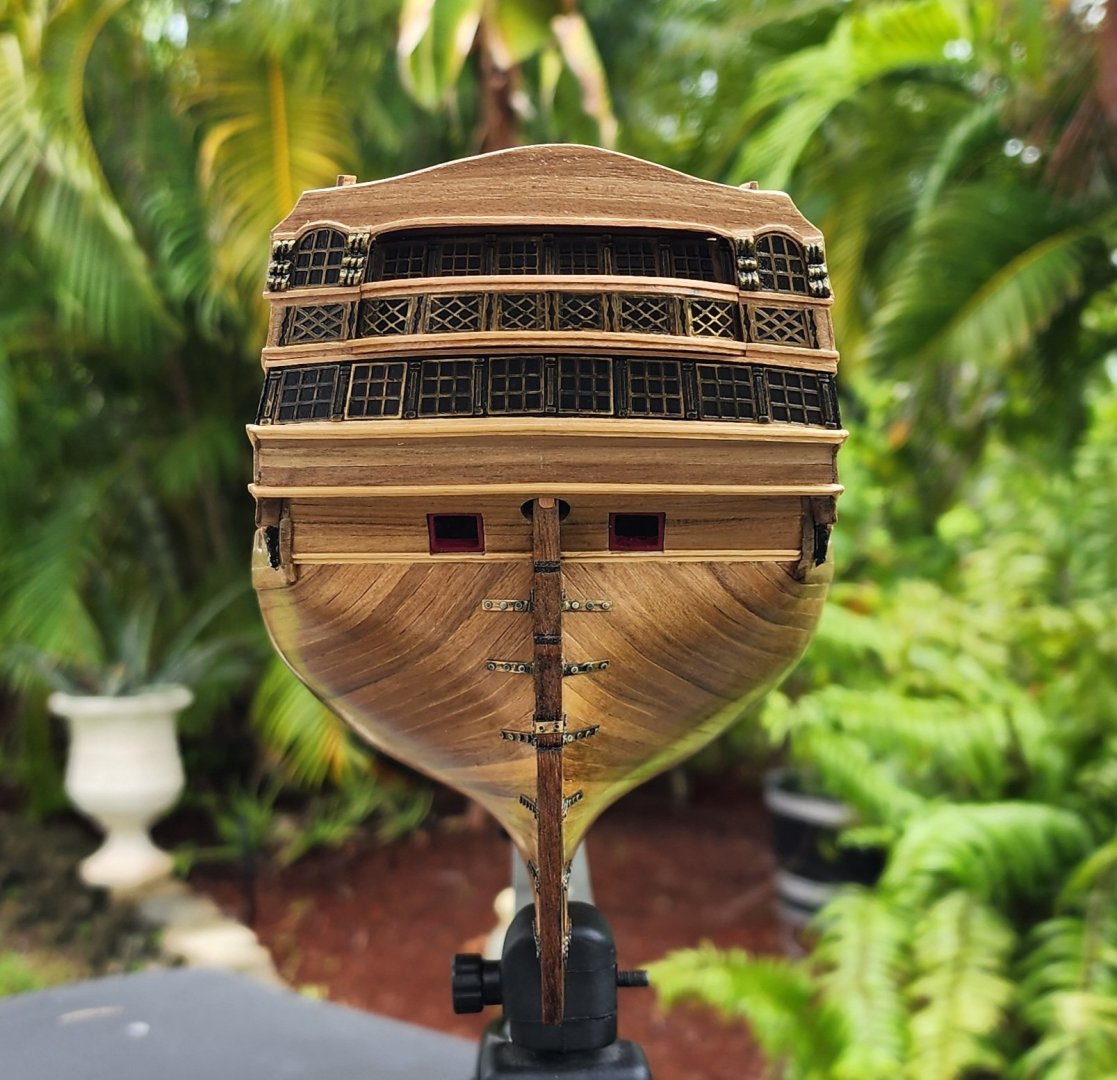
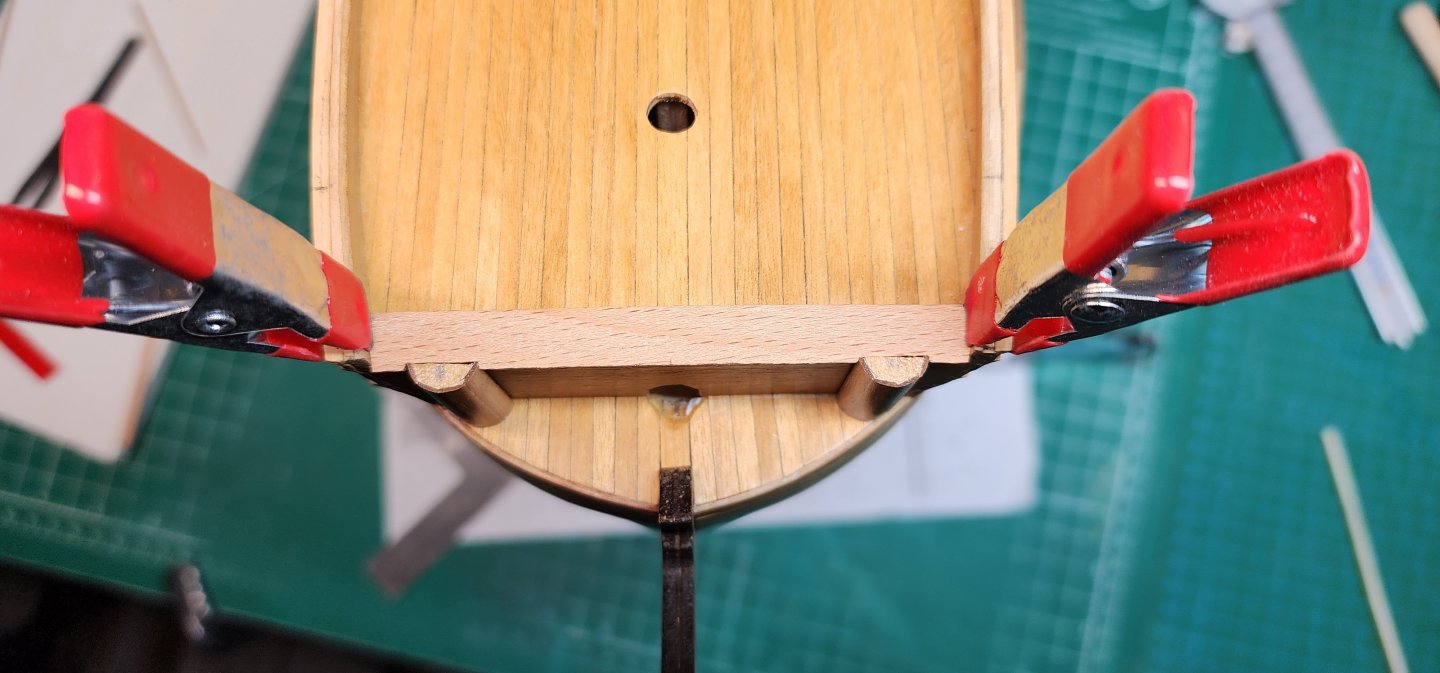
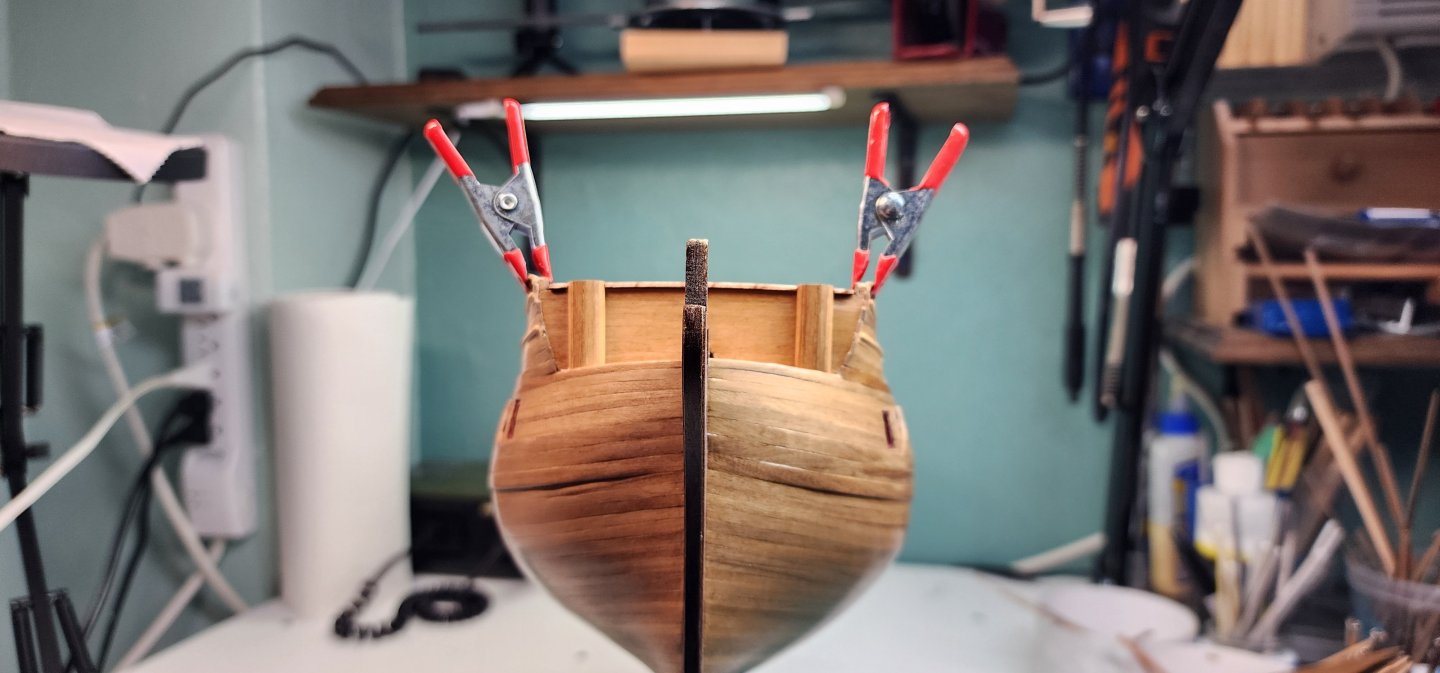
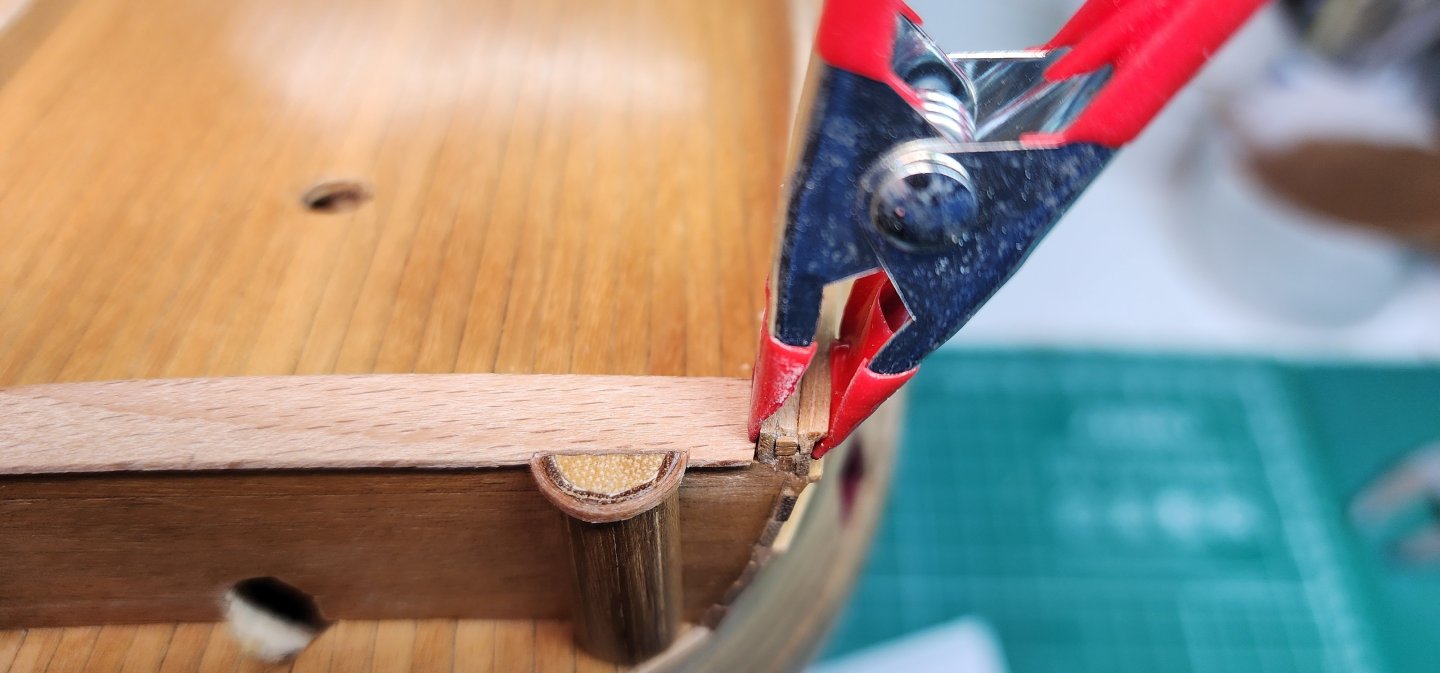
Hello All, Small update on the Bellona. Before continuing on with installing the headrails, I decided that it would be a good time to install the rudder. Figured it would be fairly easy to do, it’s just a rudder right. Well, I did not like the plywood rudder that came with the kit, so I decided to make my own from some walnut stock I had. I used the rudder from the kit as a guide to make the new one. The walnut stock that I had was a bit thicker, so I had to trim it to the proper thickness and taper. Once that was completed, I shaped the hinges that would be going onto the rudder. Once they were shaped, I soldered the 1mm pins to them. The plans called for a 4mm ring to be attached to the rudder for the emergency steering chain. The chain was too small to use the 4mm ring, so I made my own rings to attach the chain to. I also shaped the bracket that they would be attaching to. I blackened the brass and the brass pins that attach the hinges to the rudder and hull. I dry fitted them and then shaped the hinges that would be going onto the ship. I predrilled the holes for the pins on the rudder and the ship's hull. I dry fitted all the hinges and the pins onto the hull making sure that they were even on both sides. Before installing the rudder, I installed the false tiller. After all the holes were predrilled, I cut the pins to their proper length and glued them in place. The rudder came out looking pretty good and I’m happy with the results. Hope you enjoy the pics and as always, your comments and guidance are always welcome. Cheers Nearshore


-
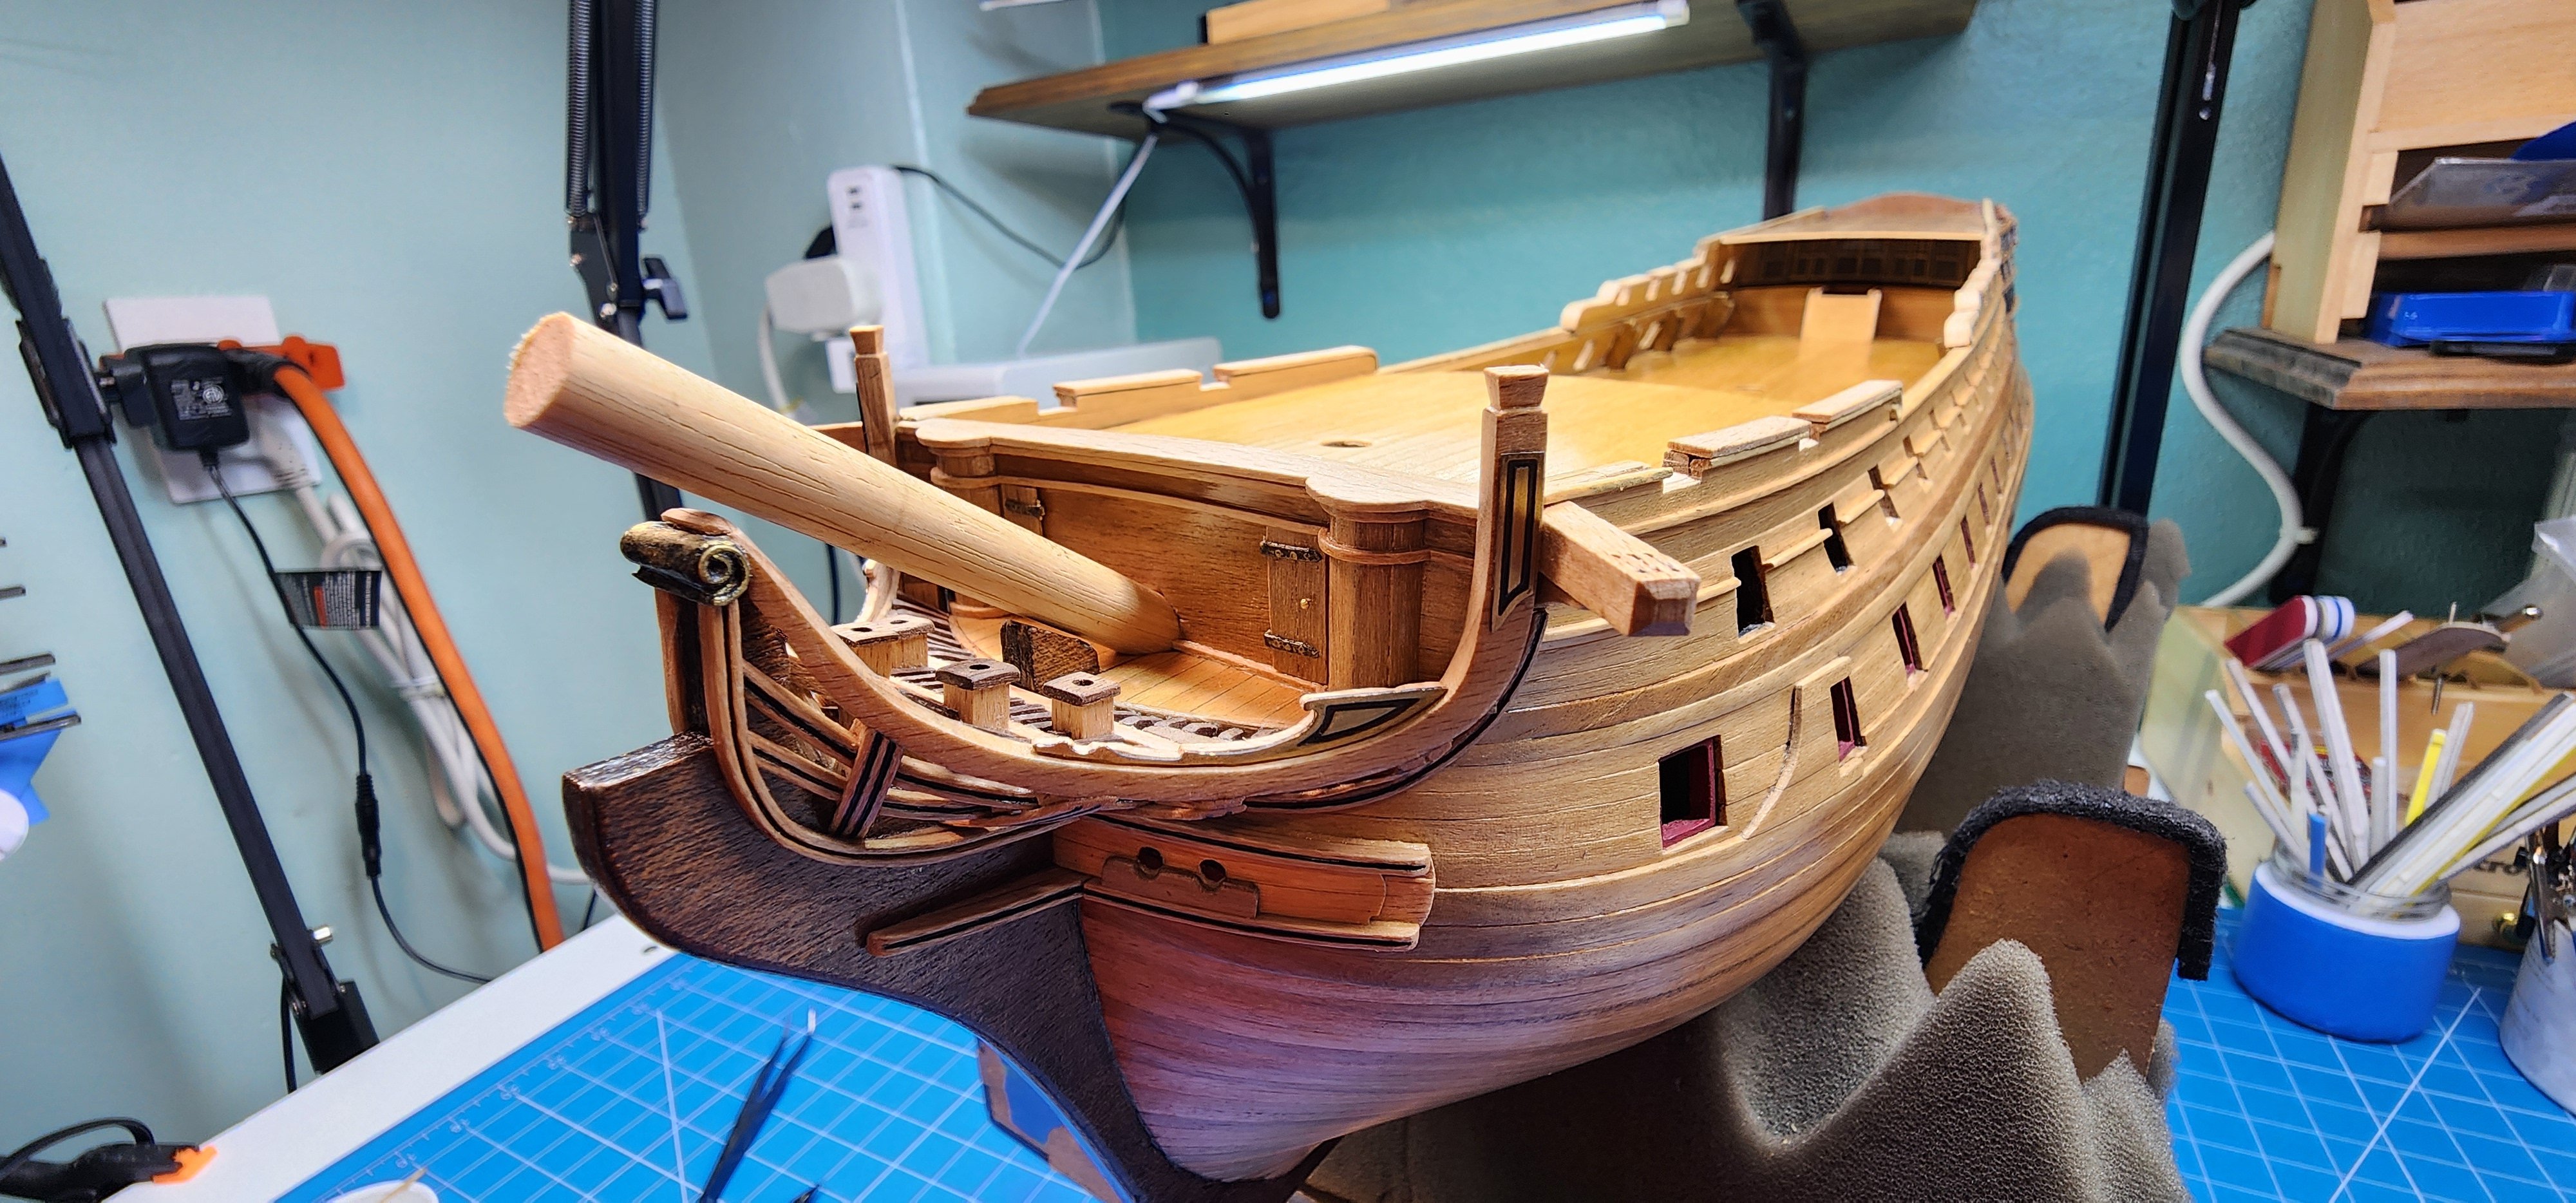
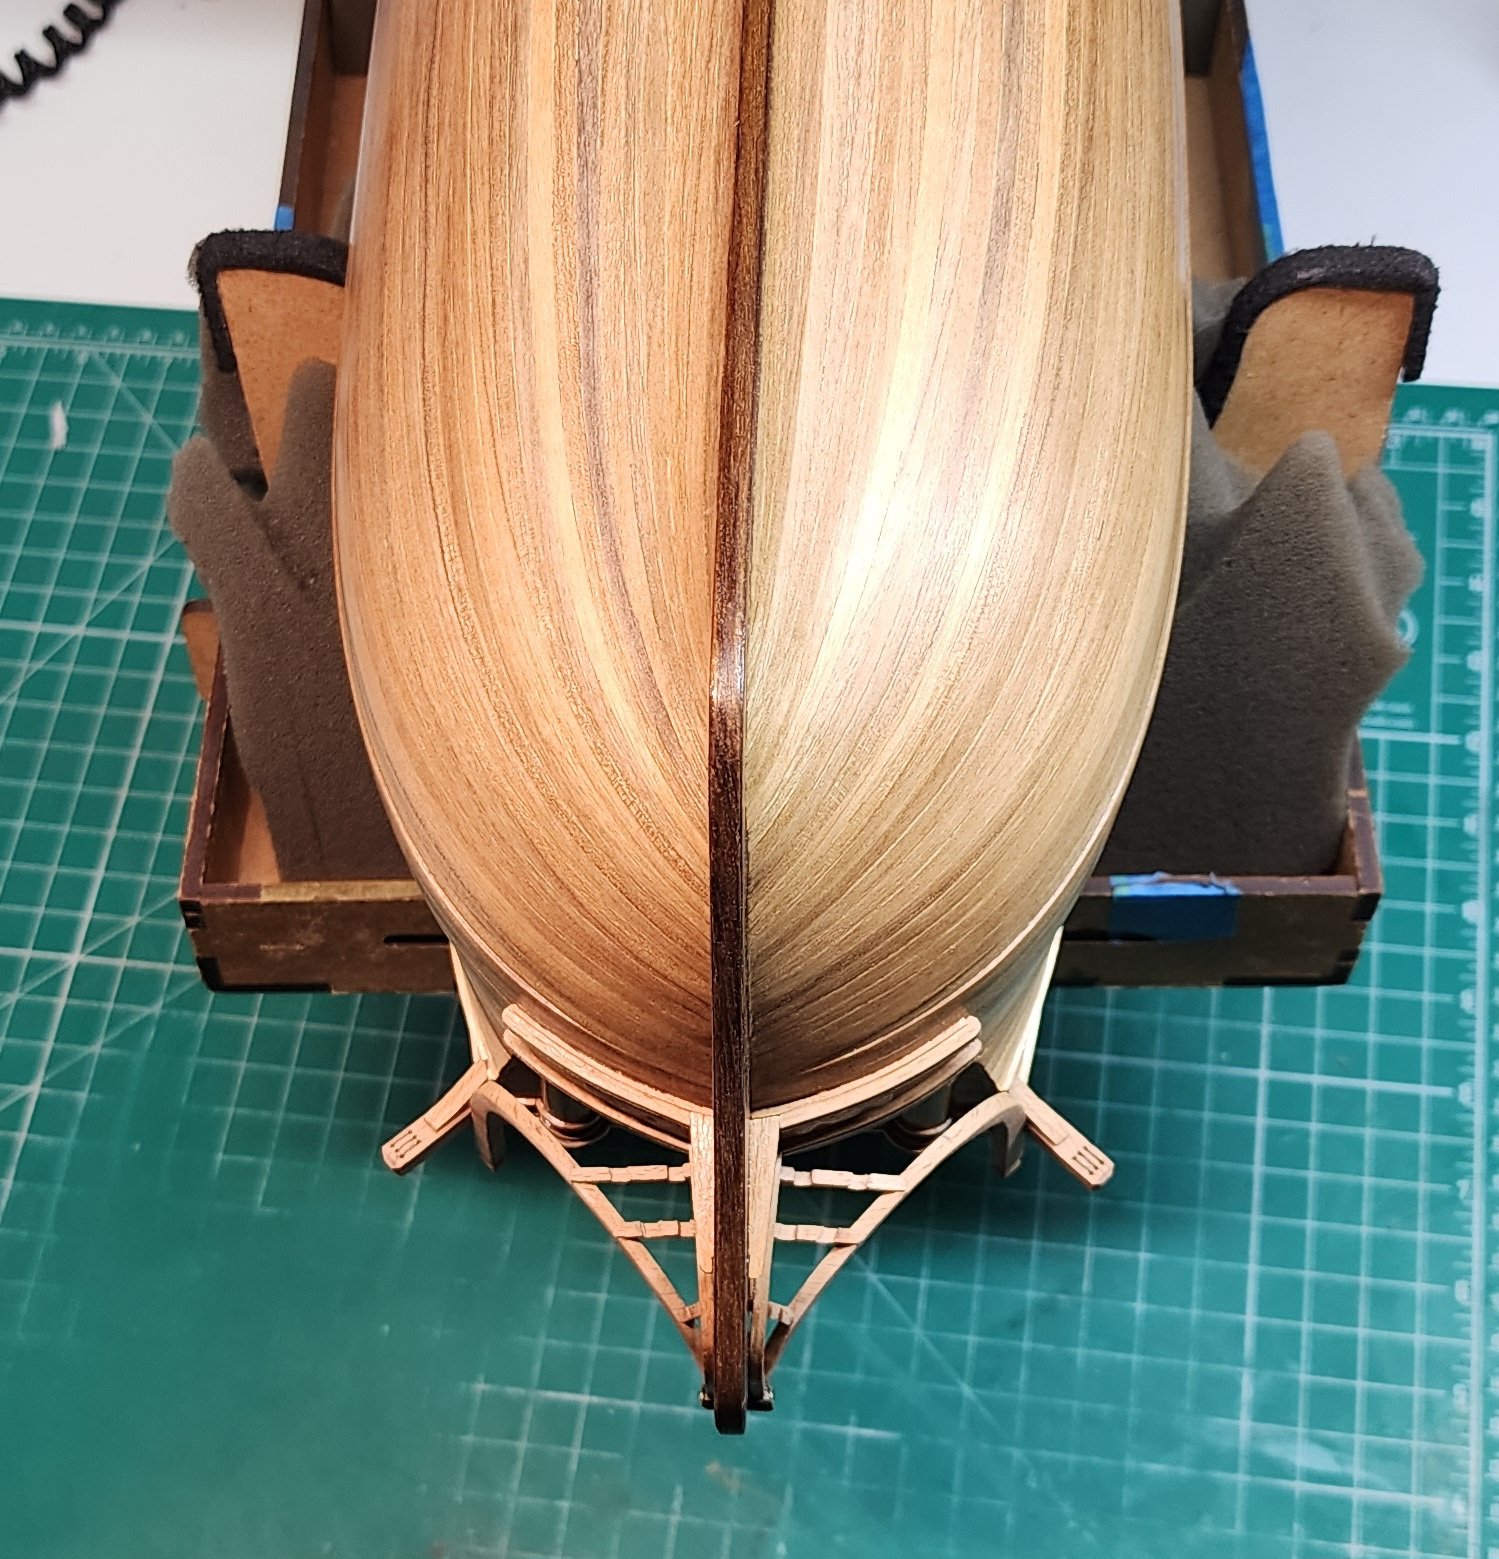
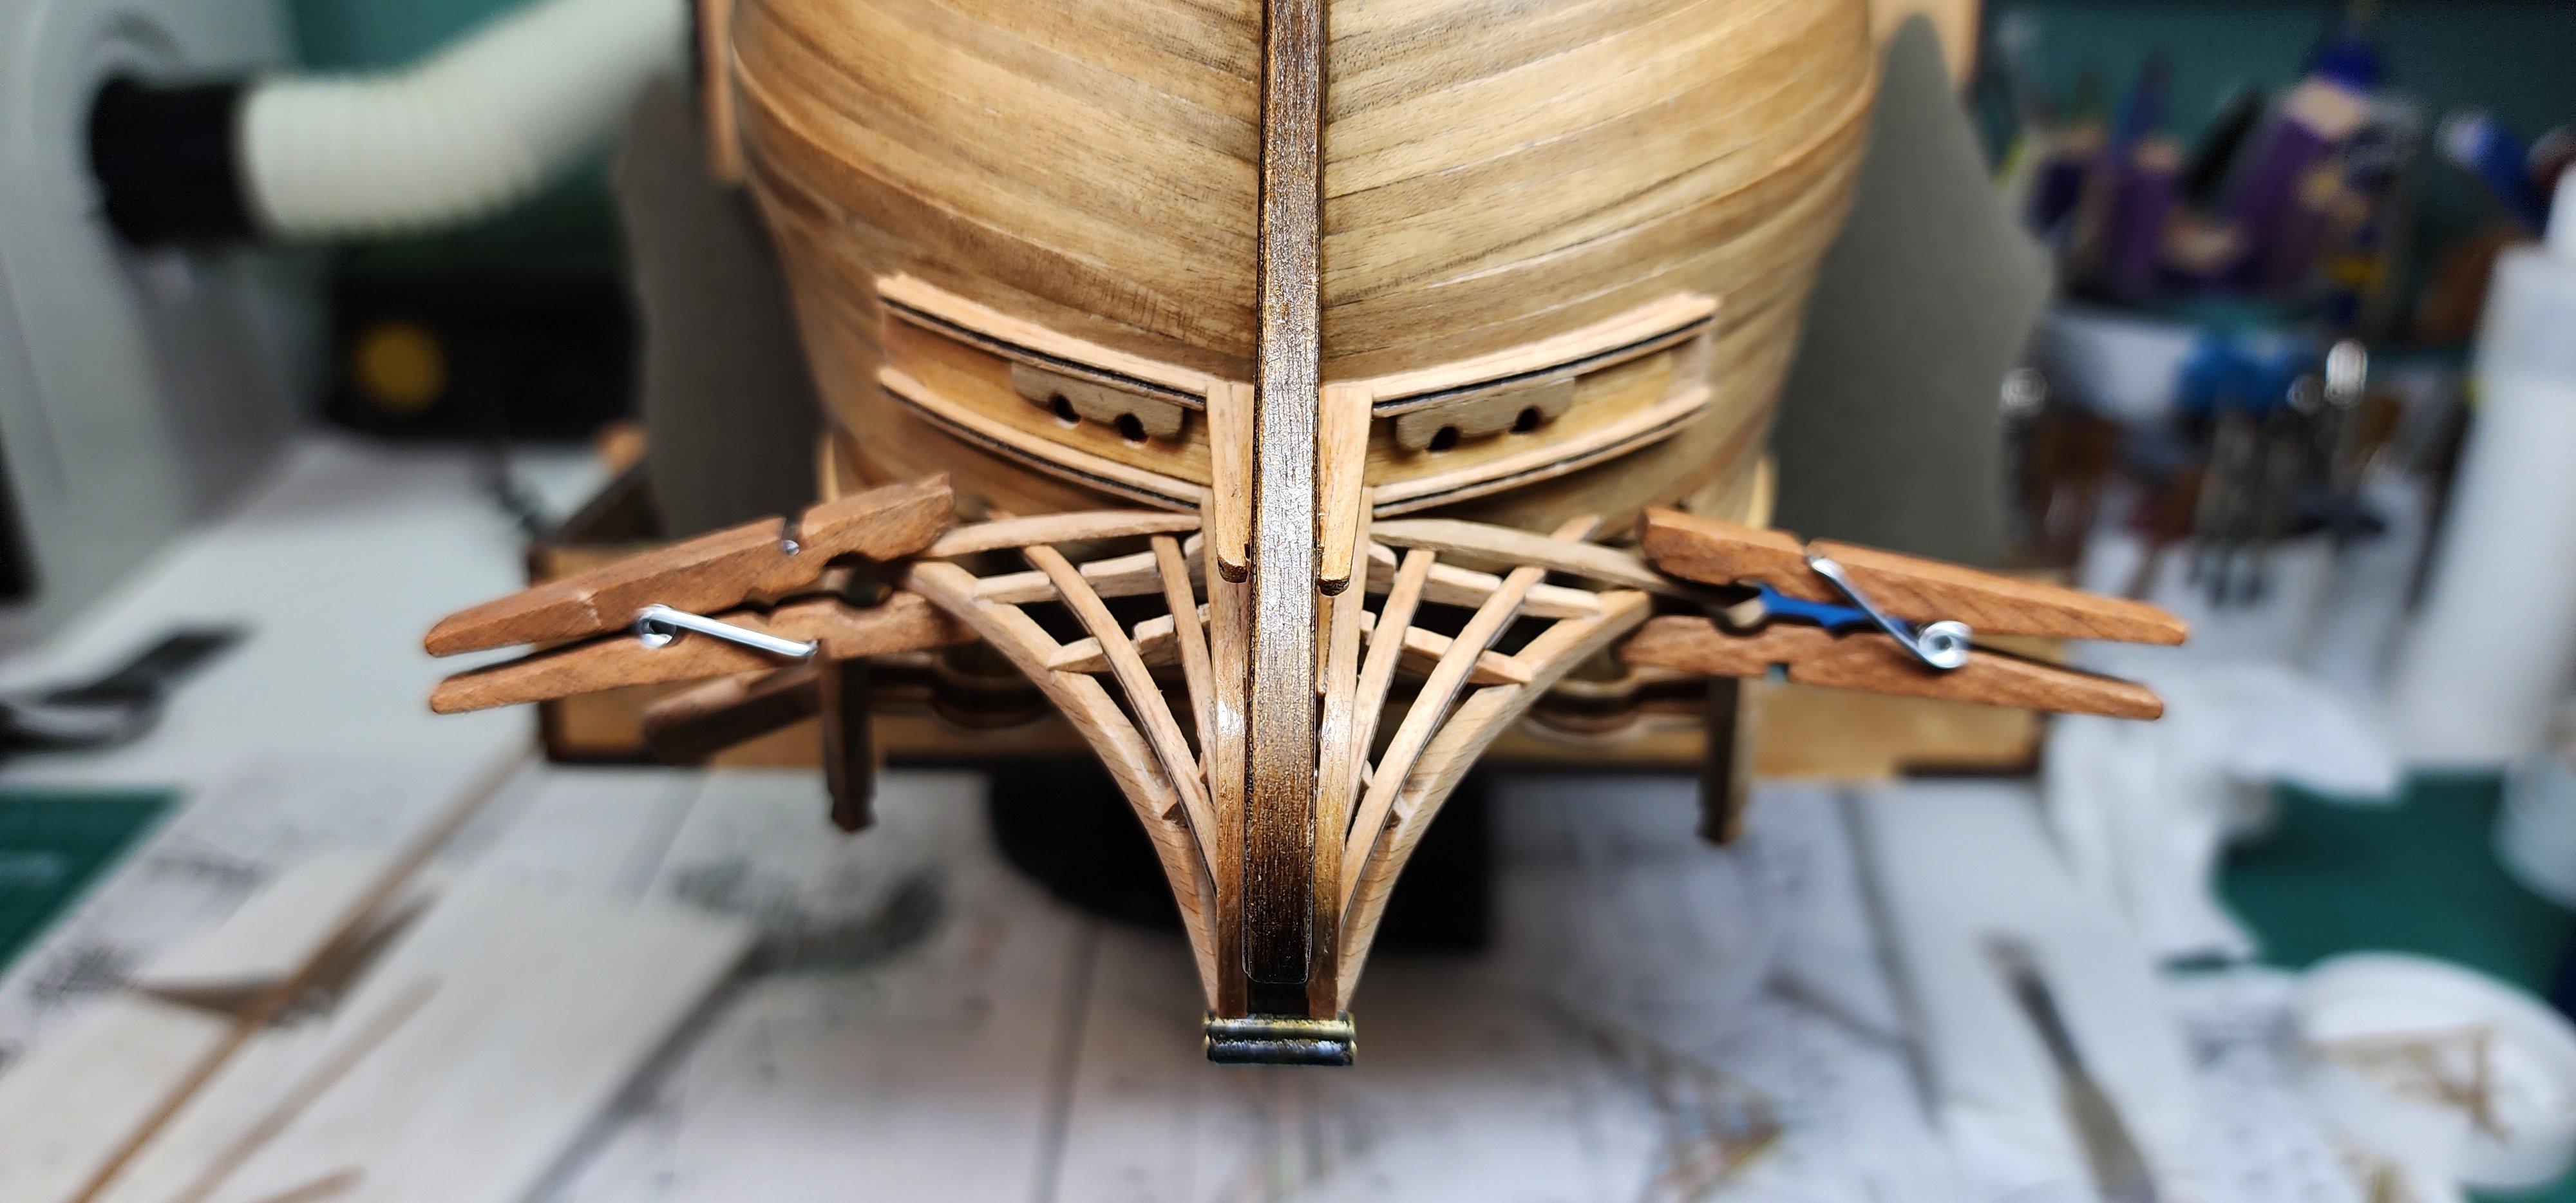
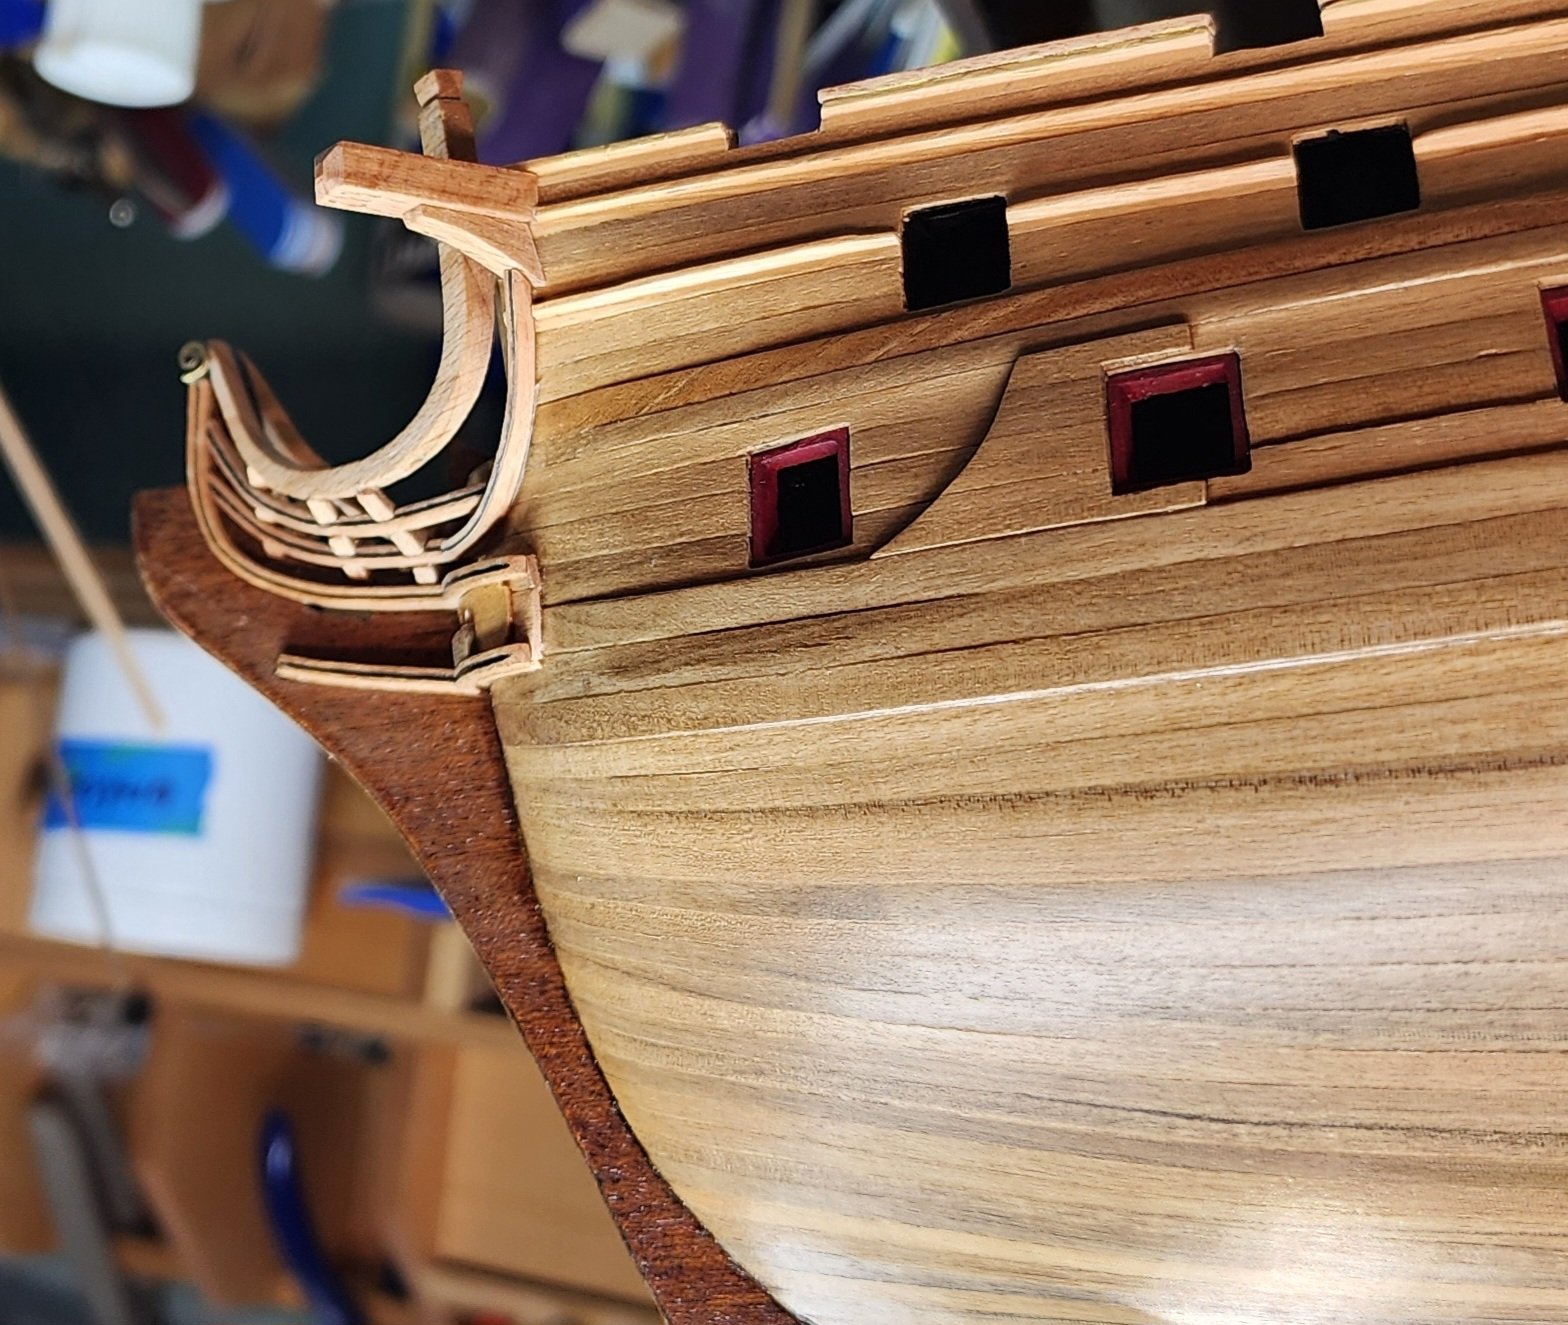
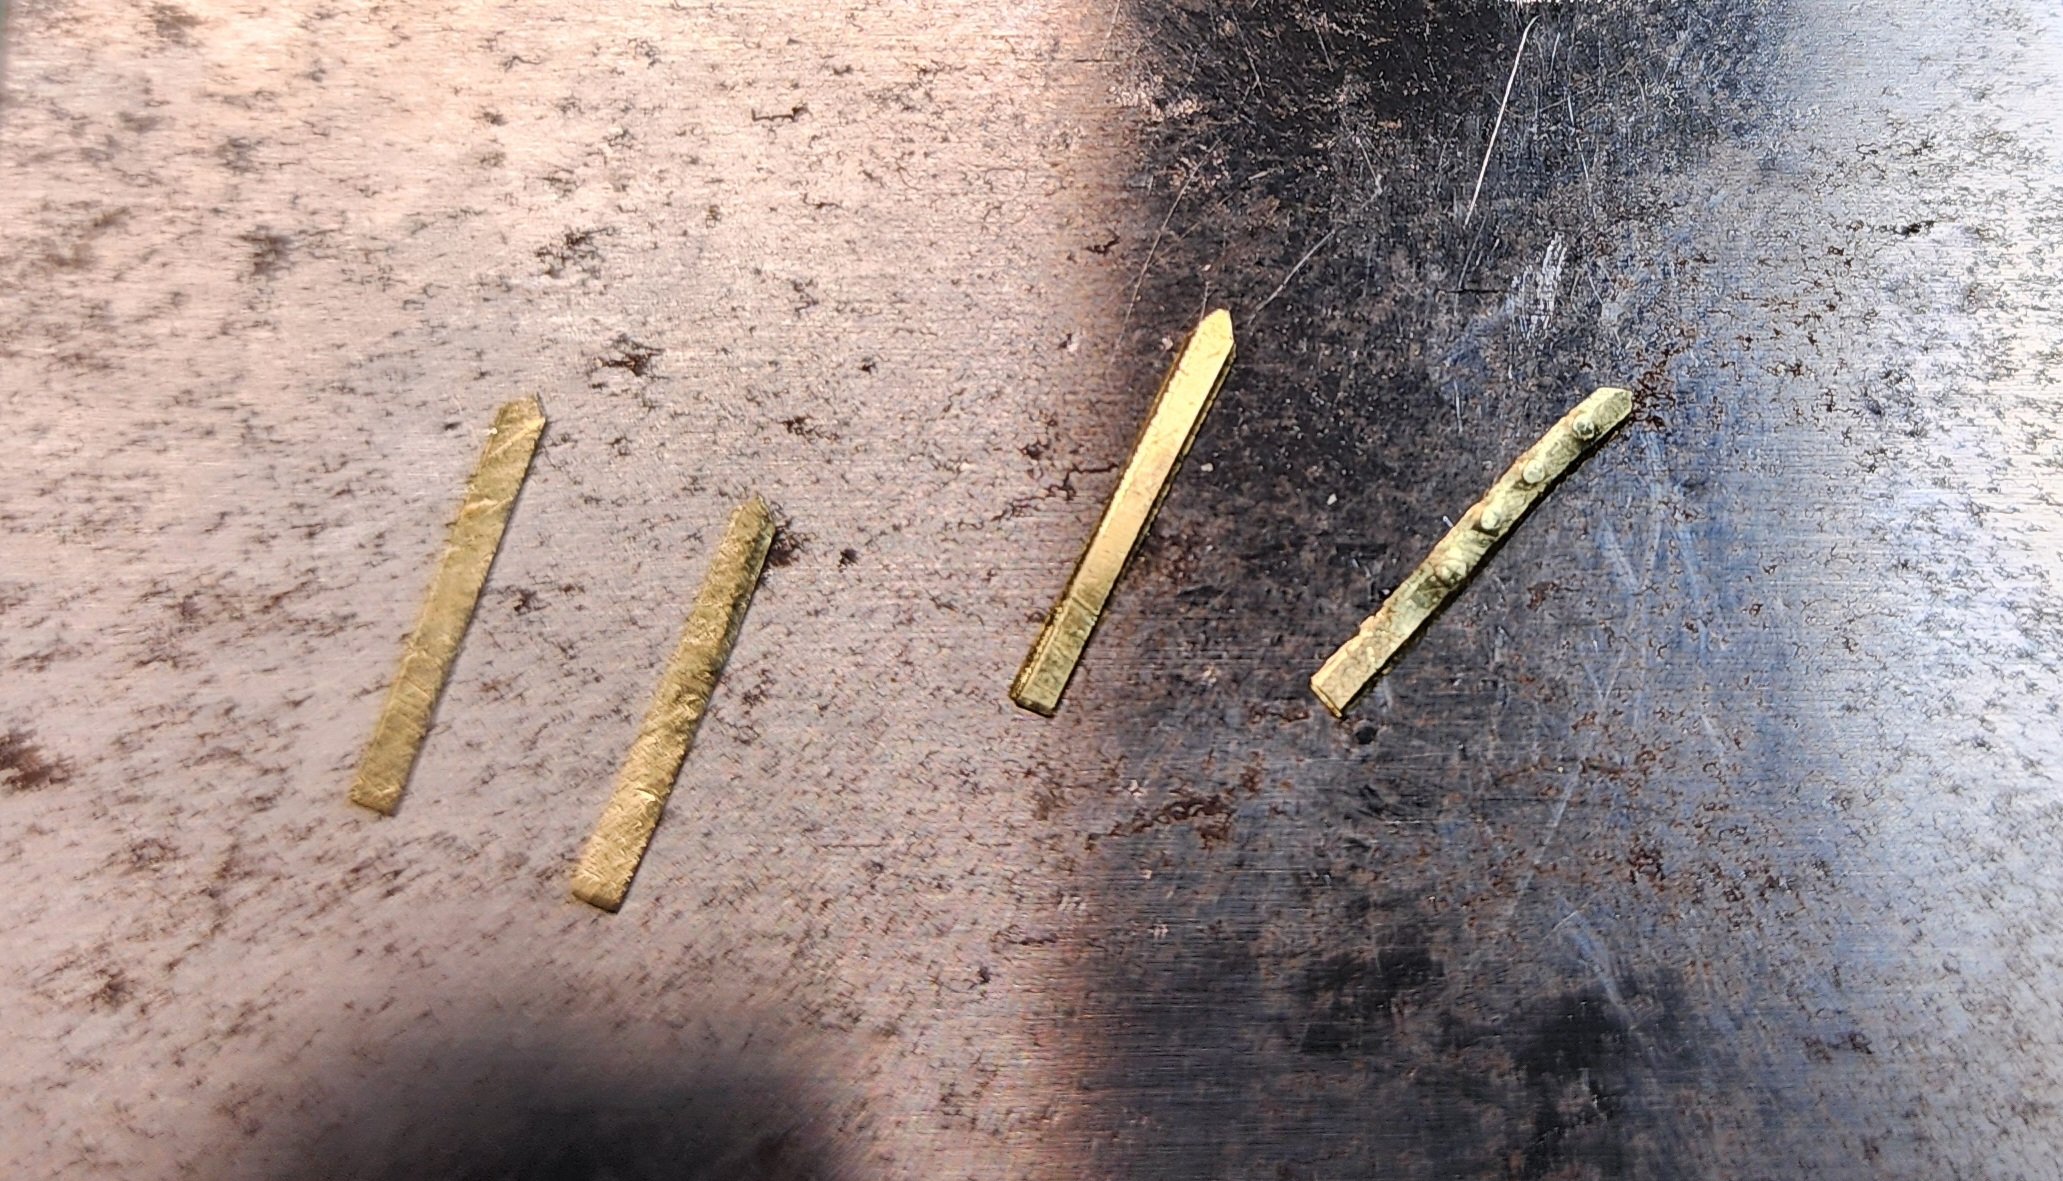
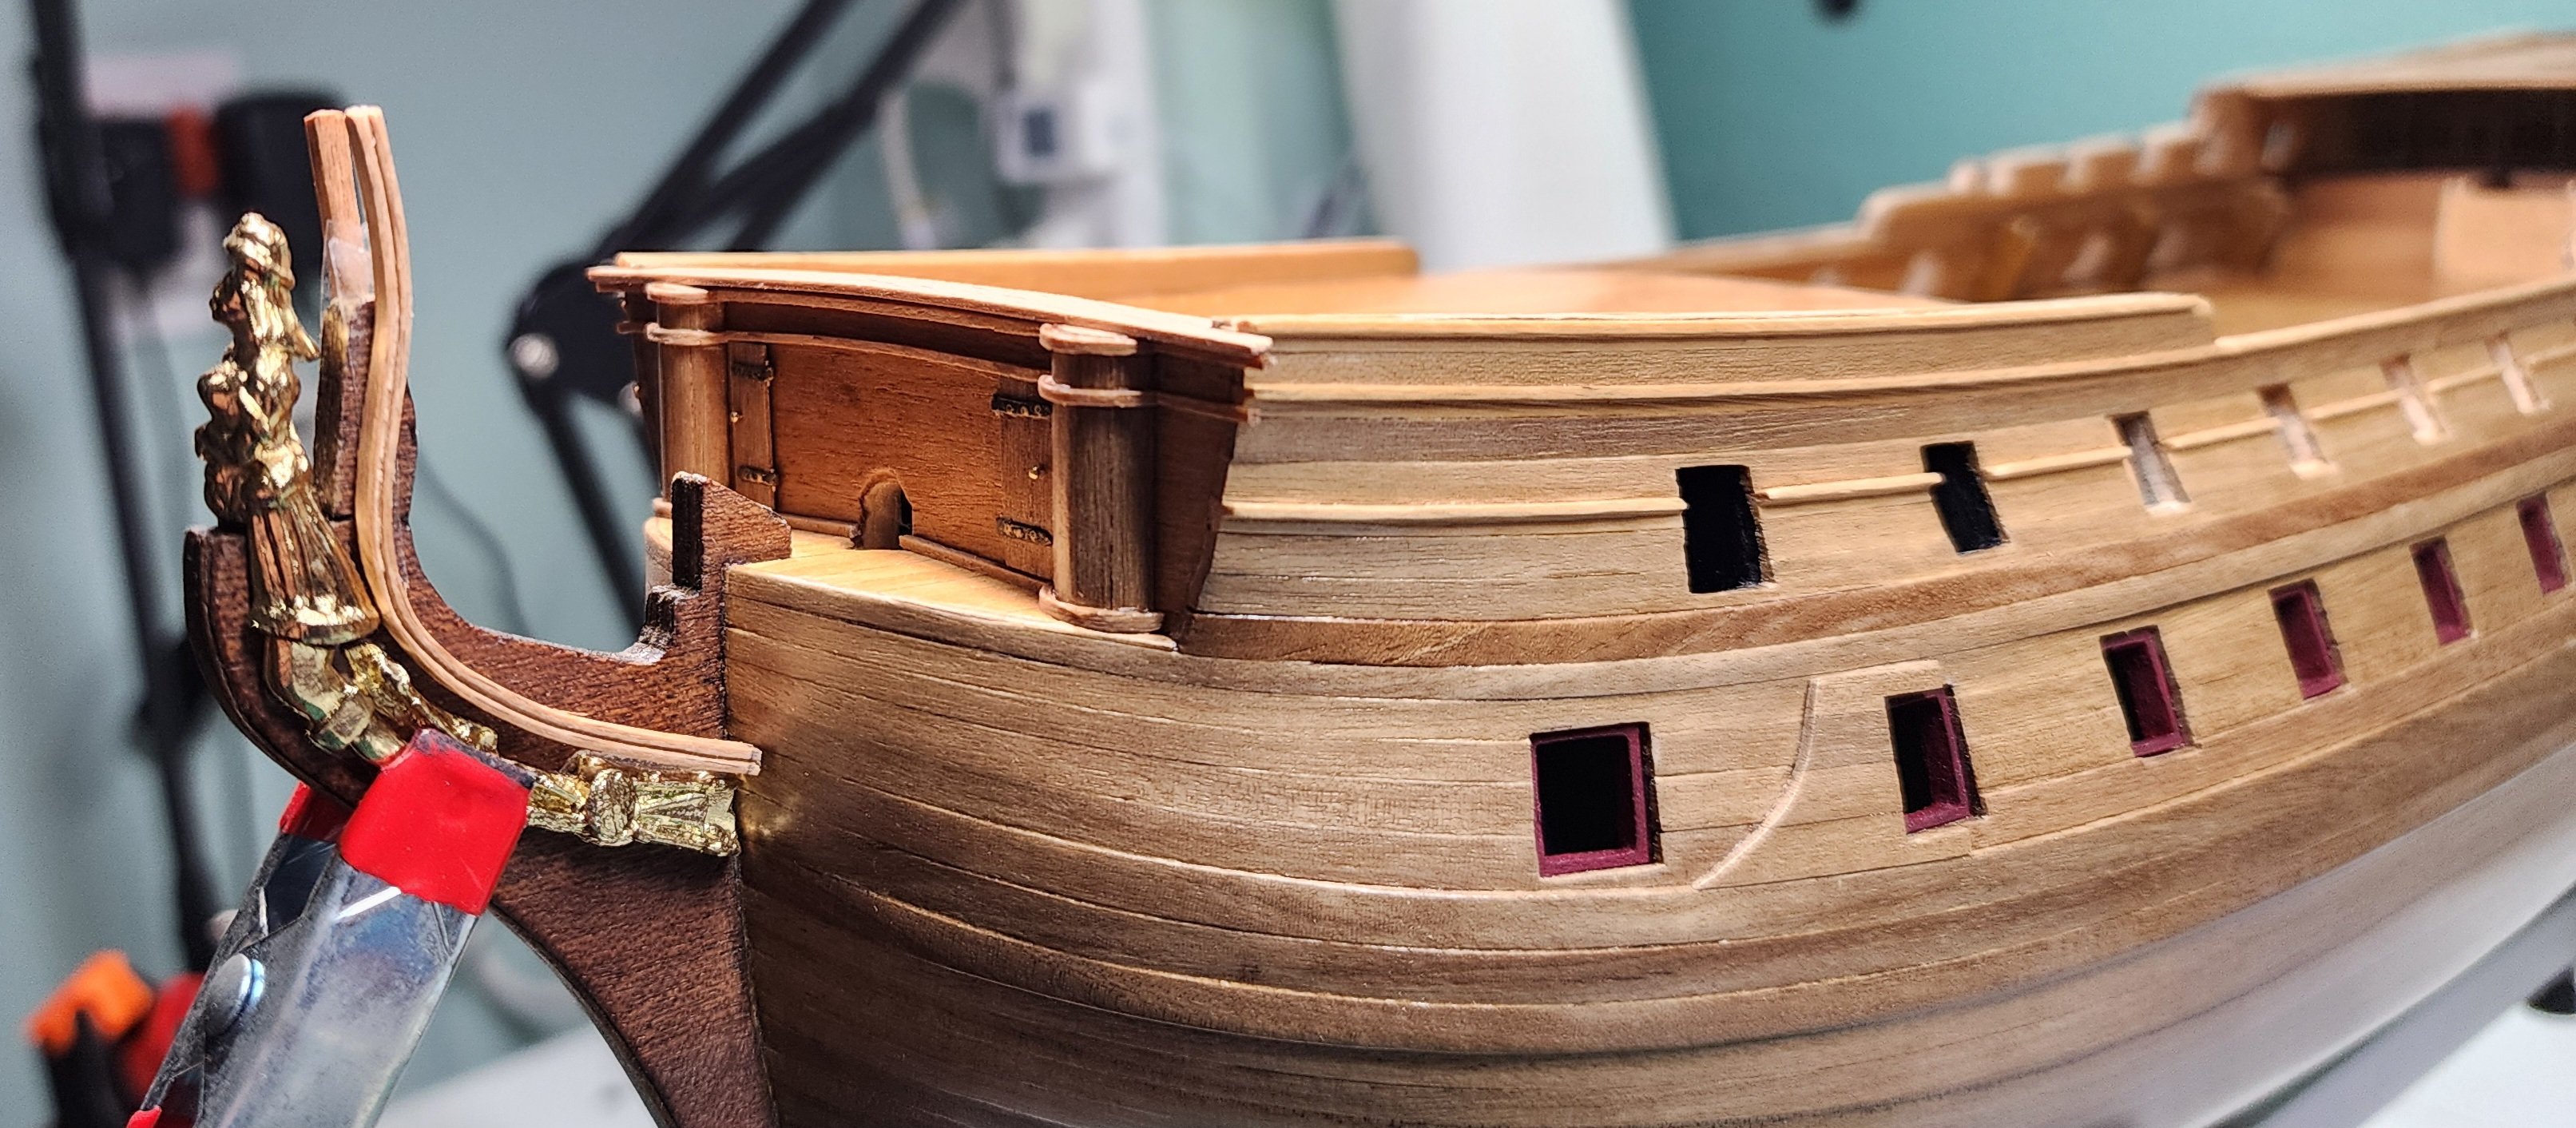
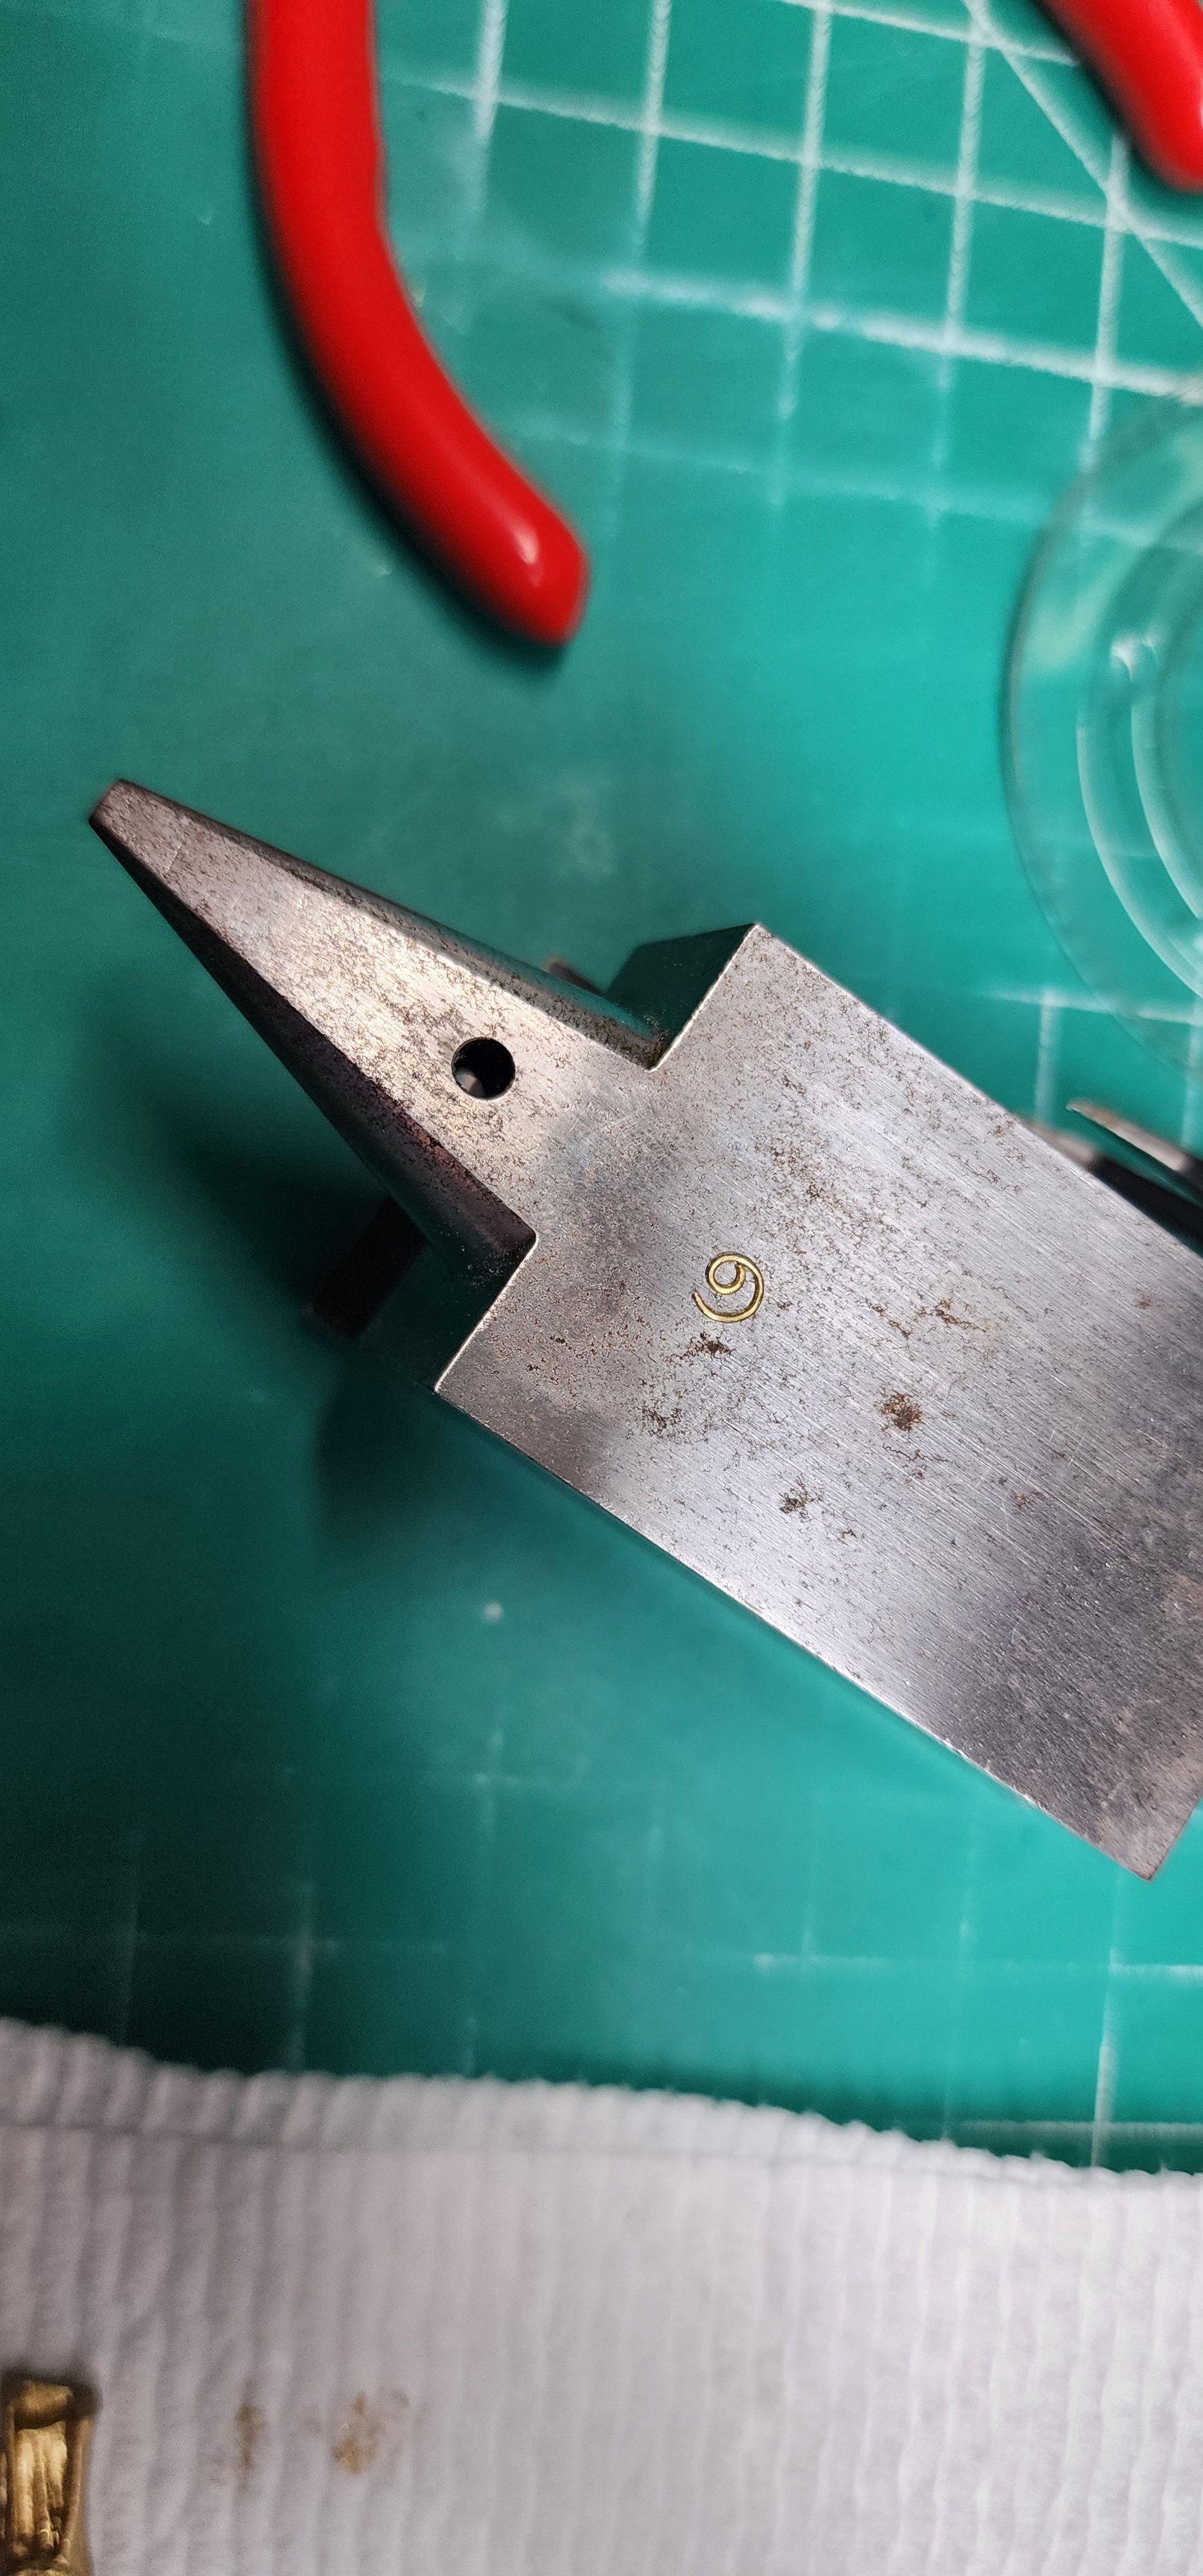
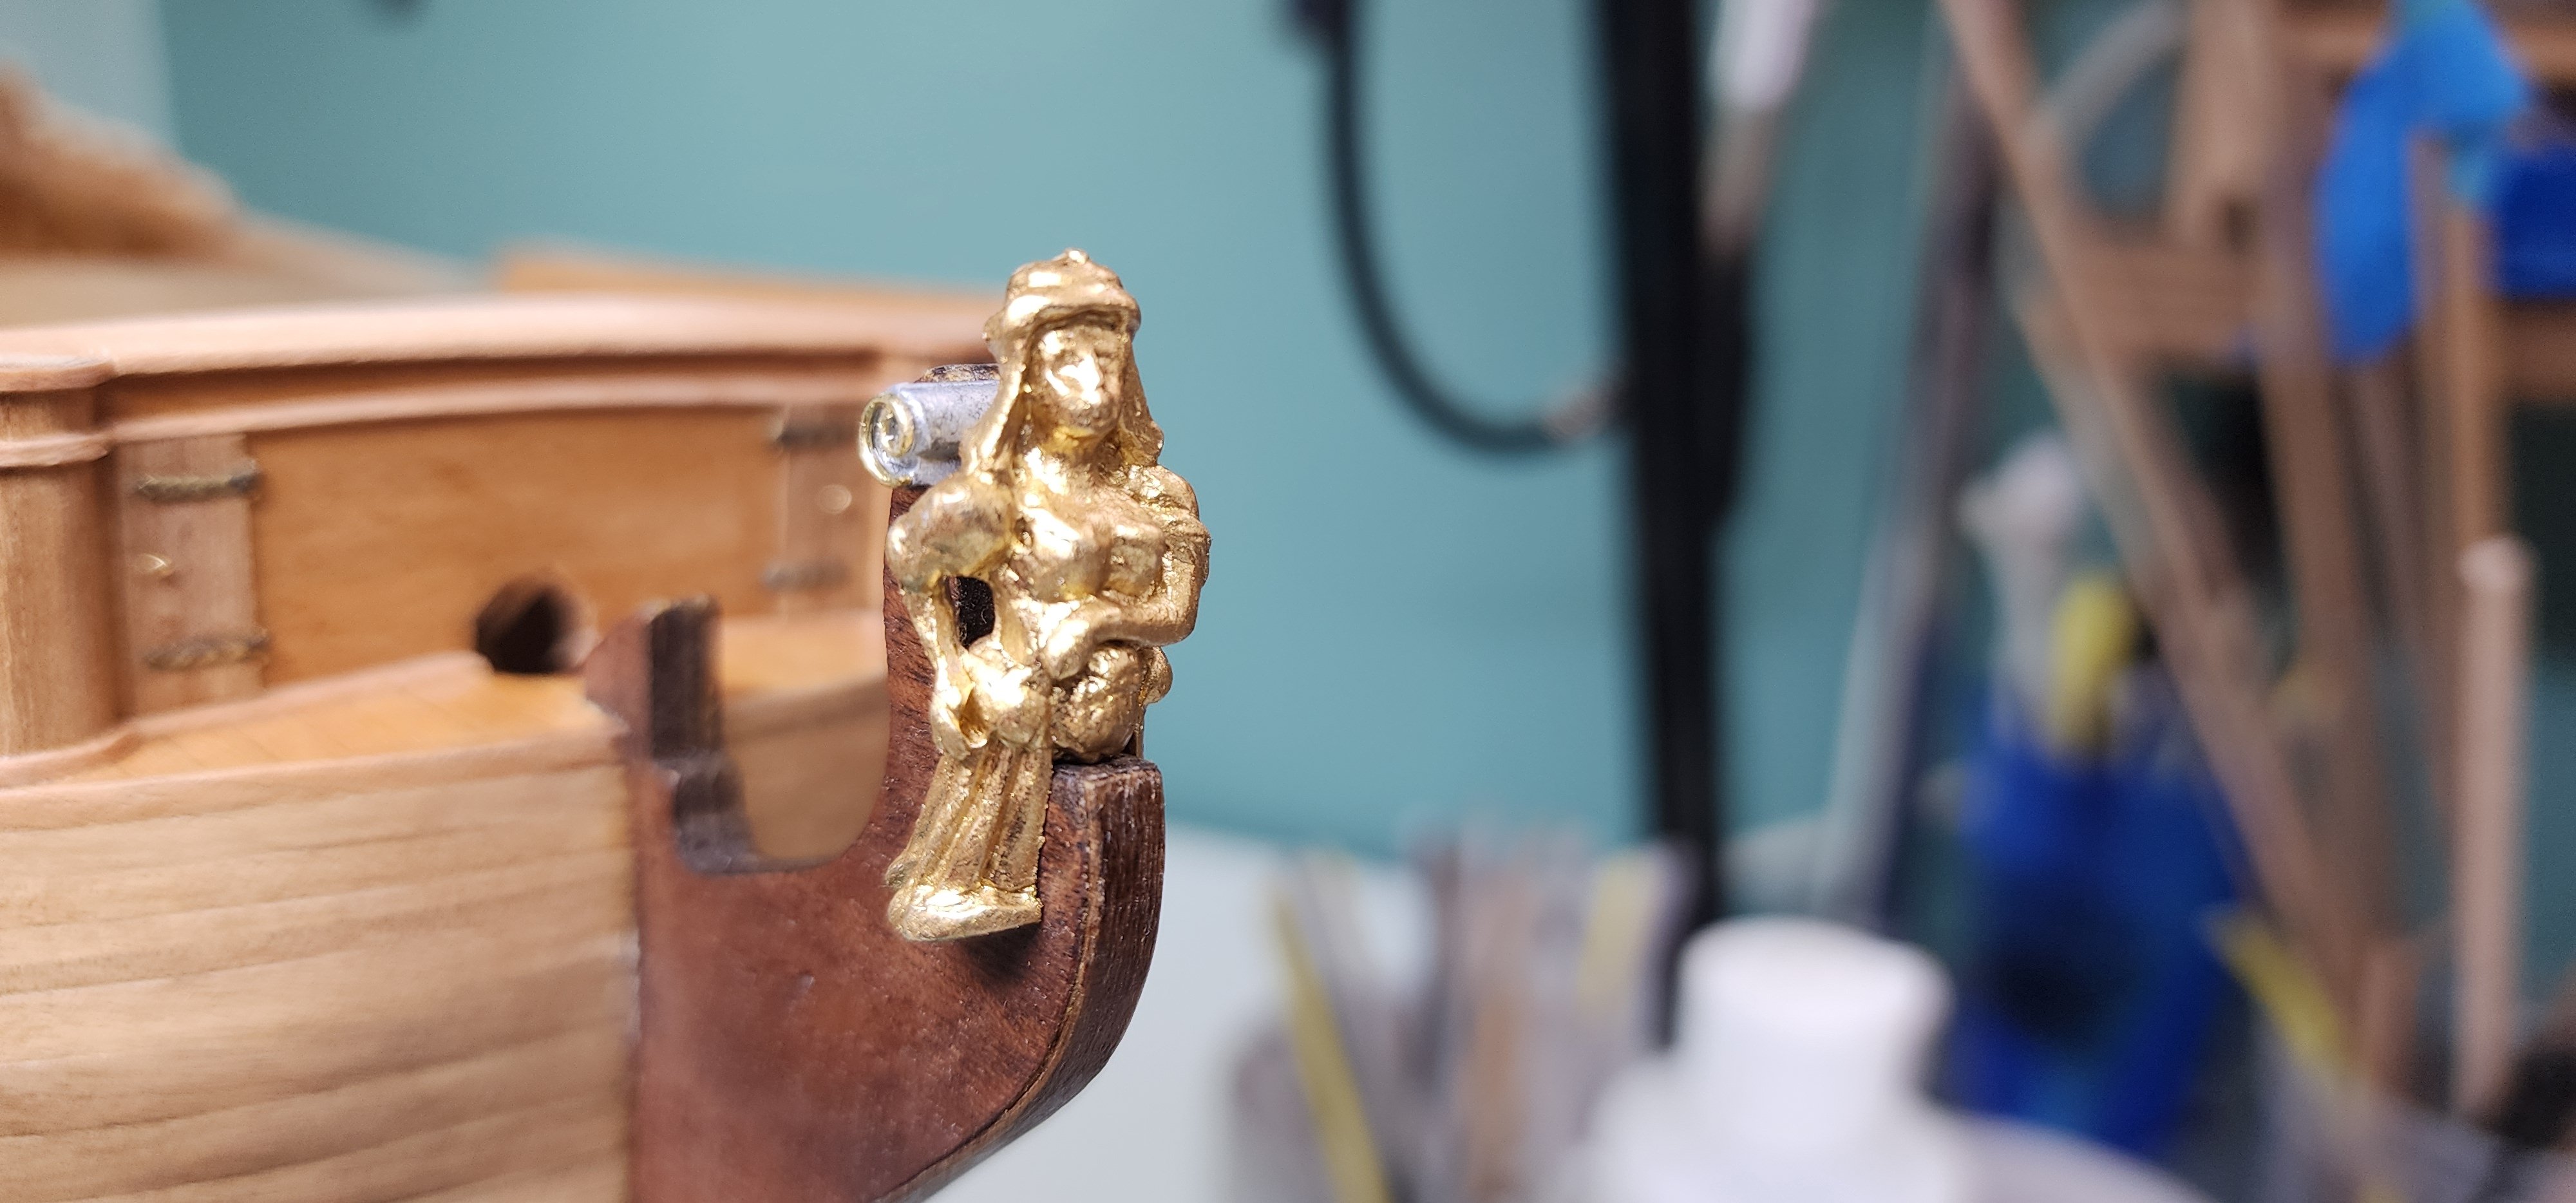
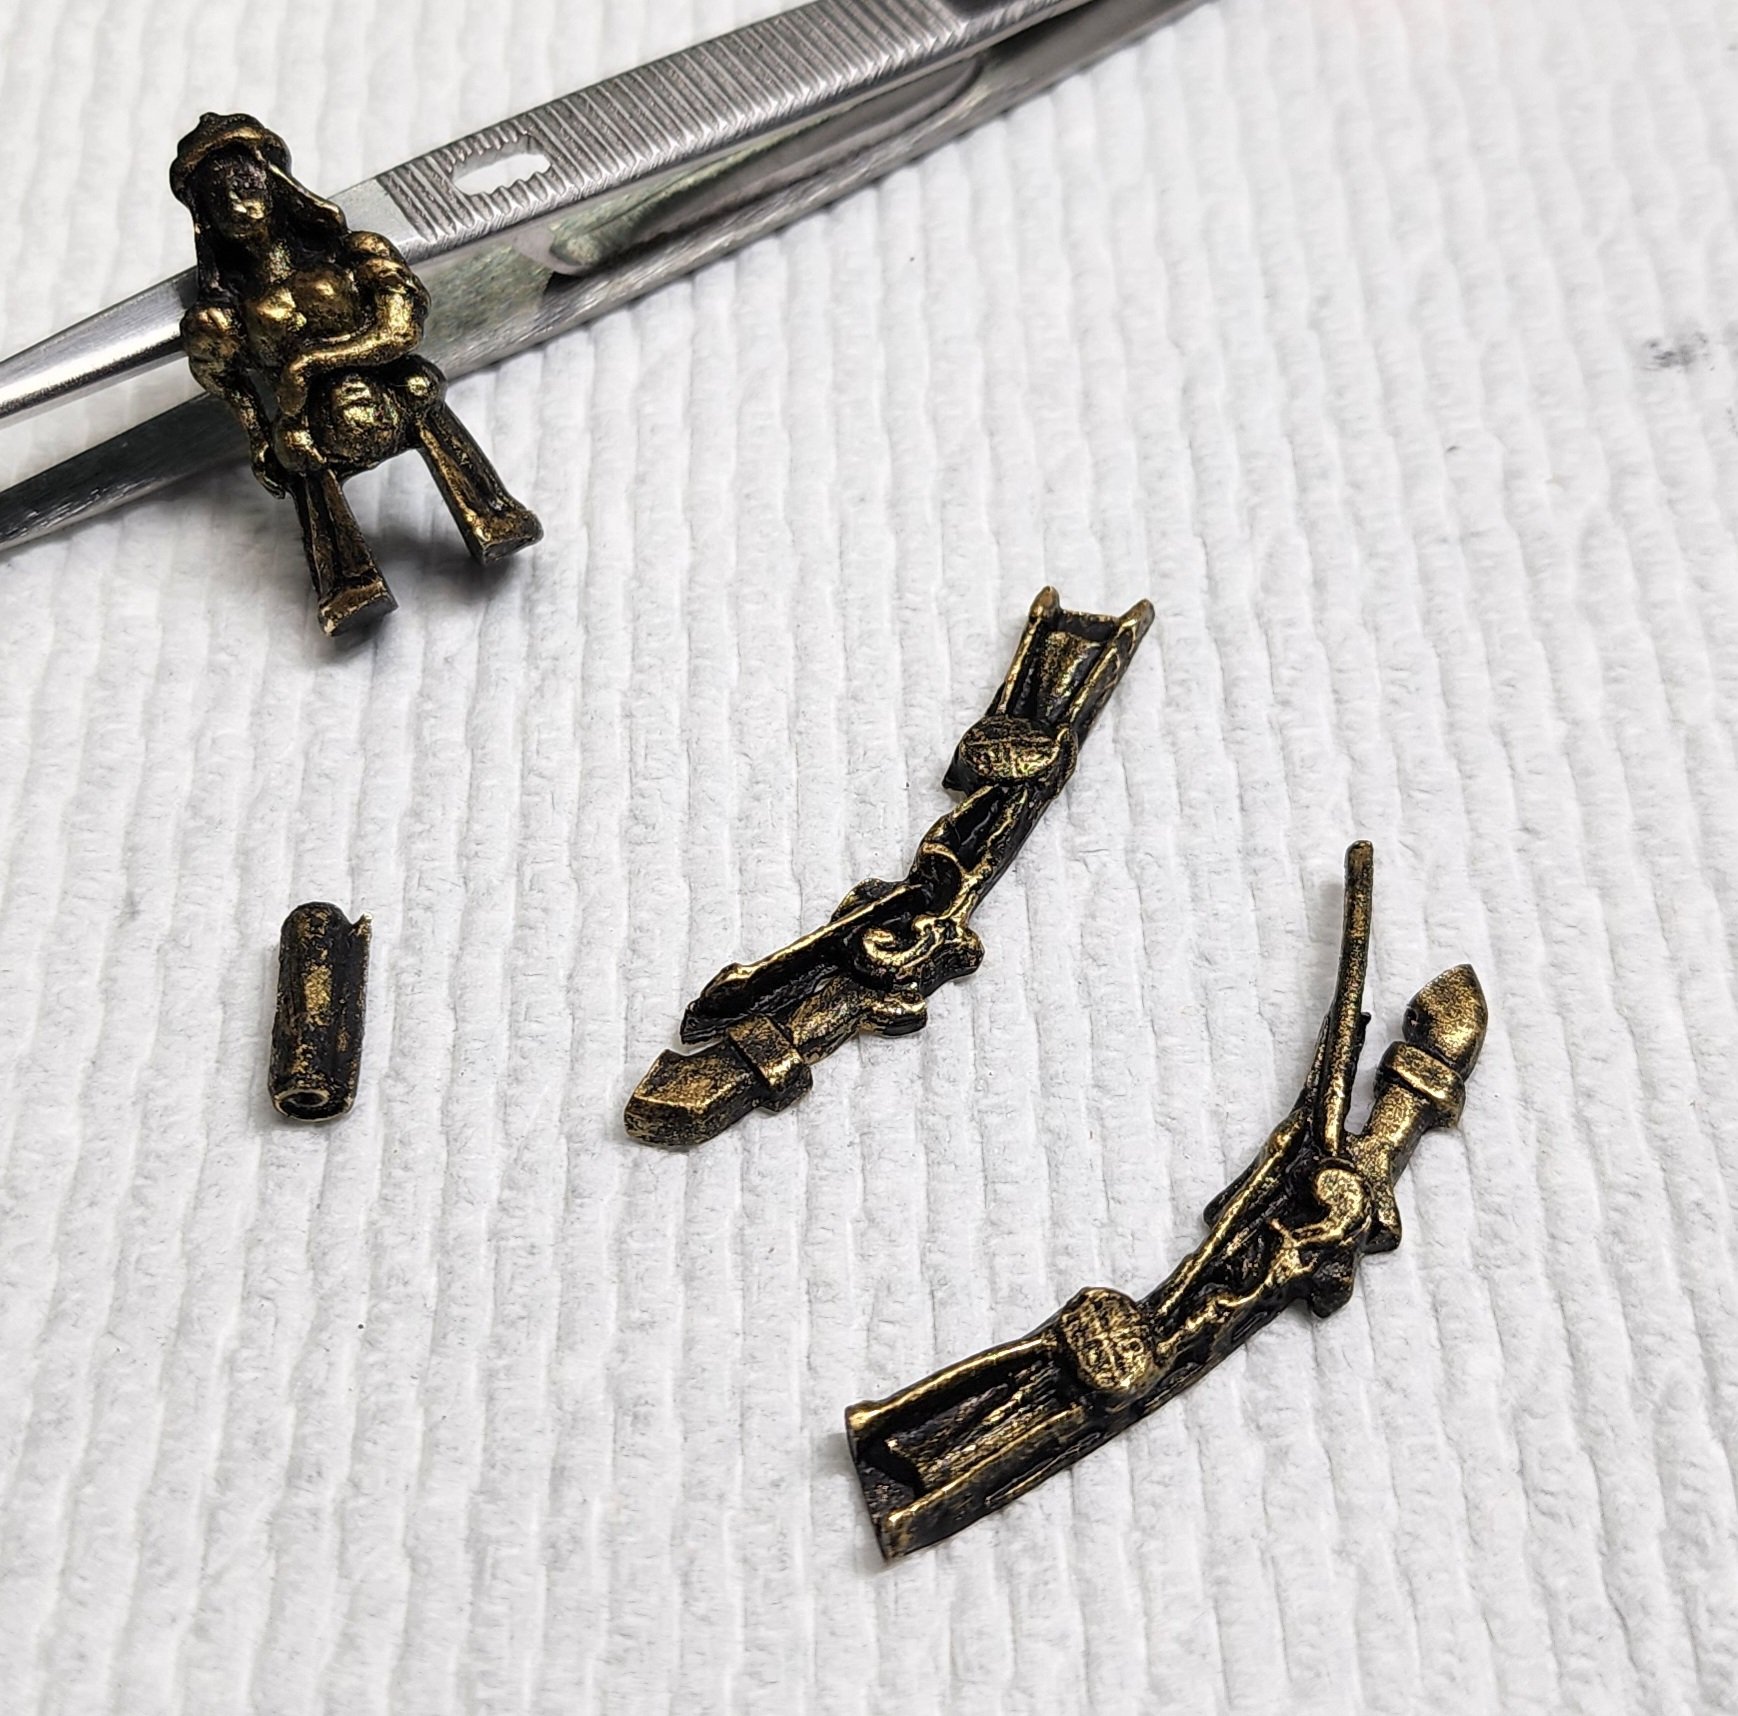
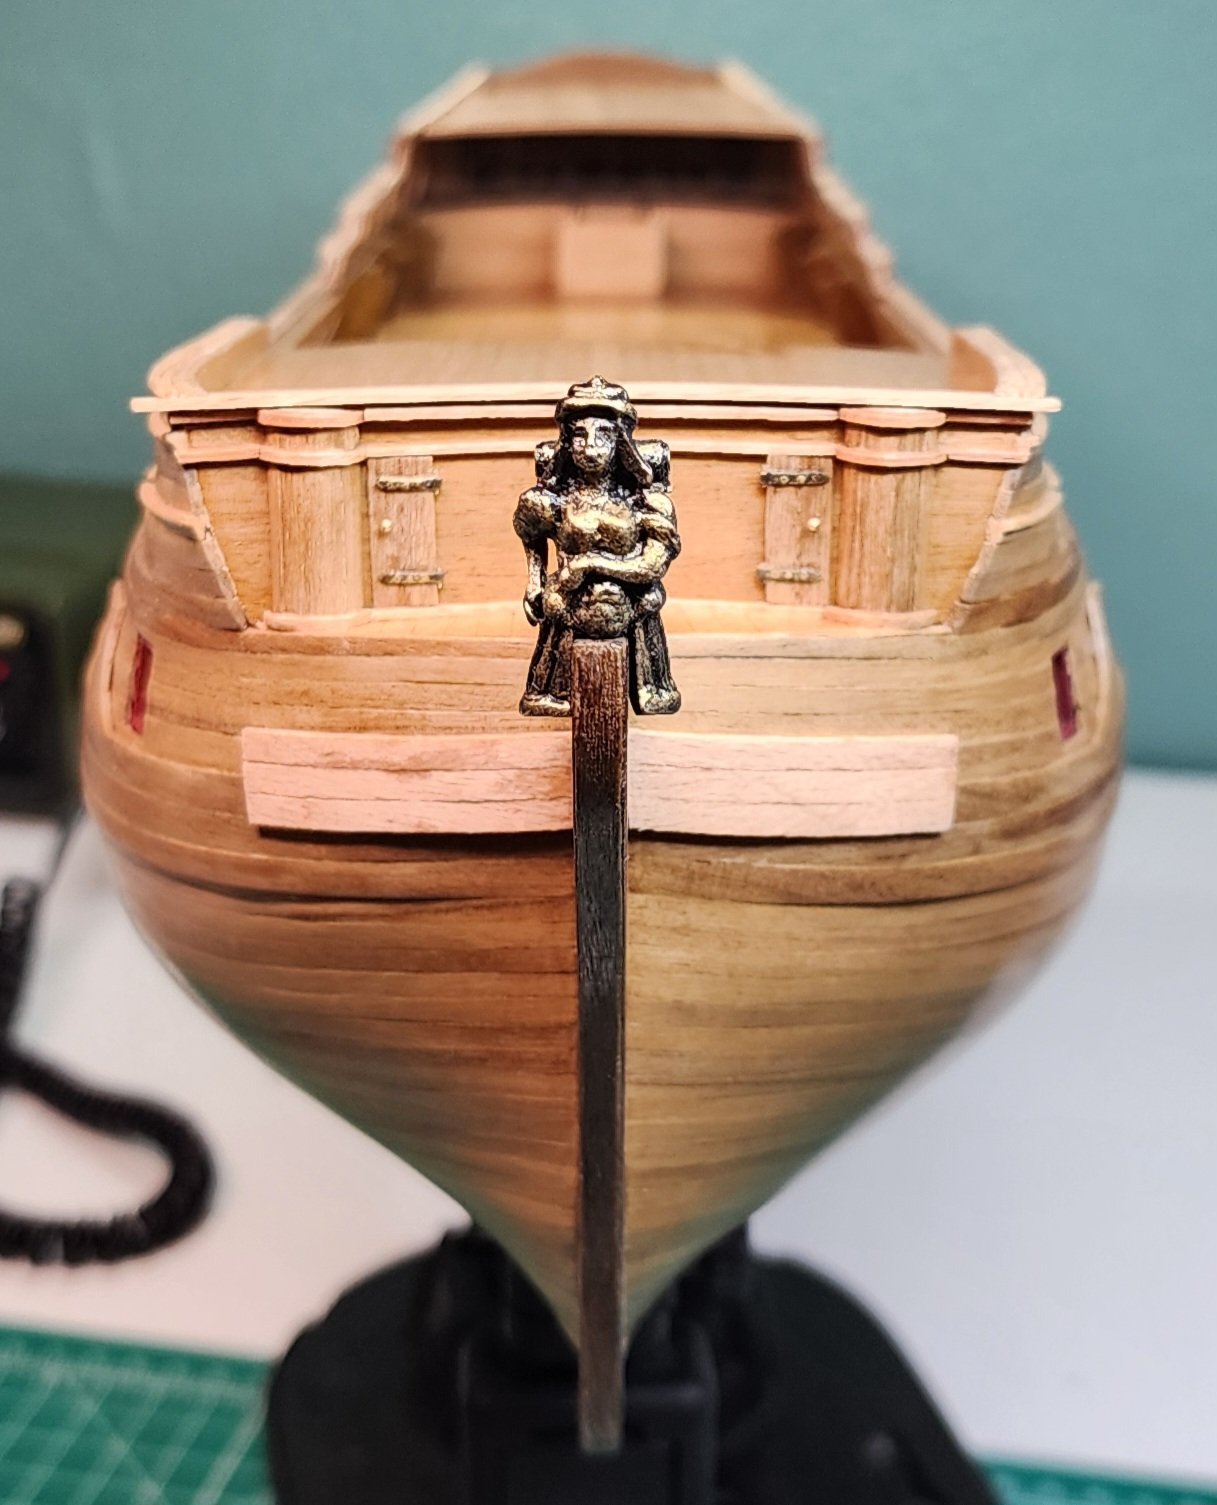
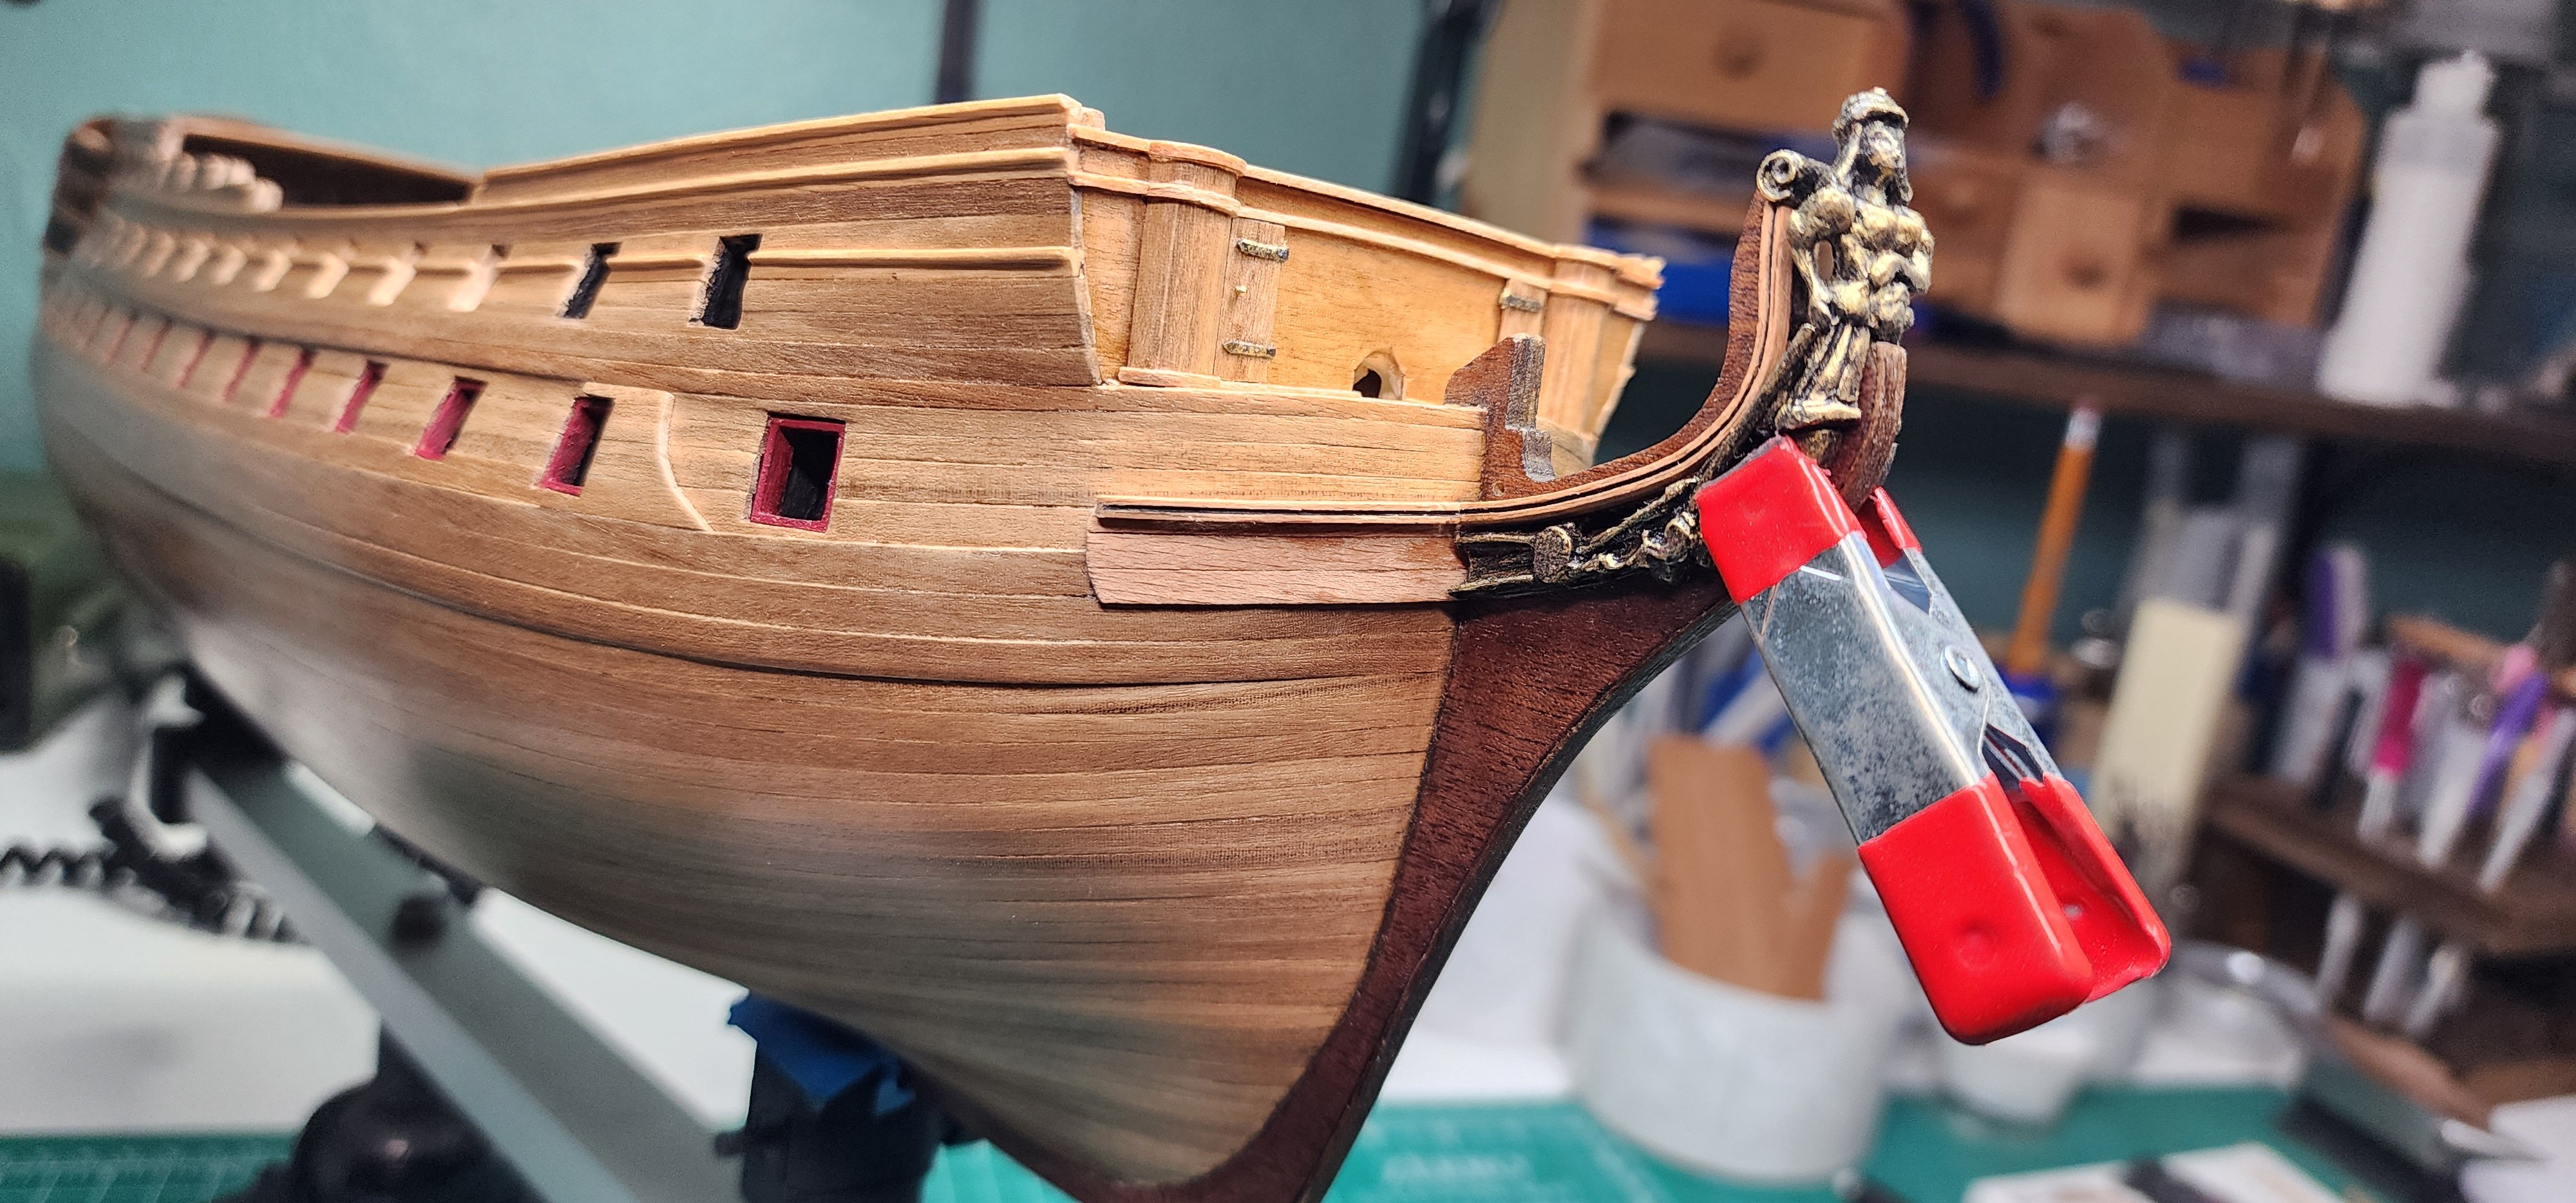
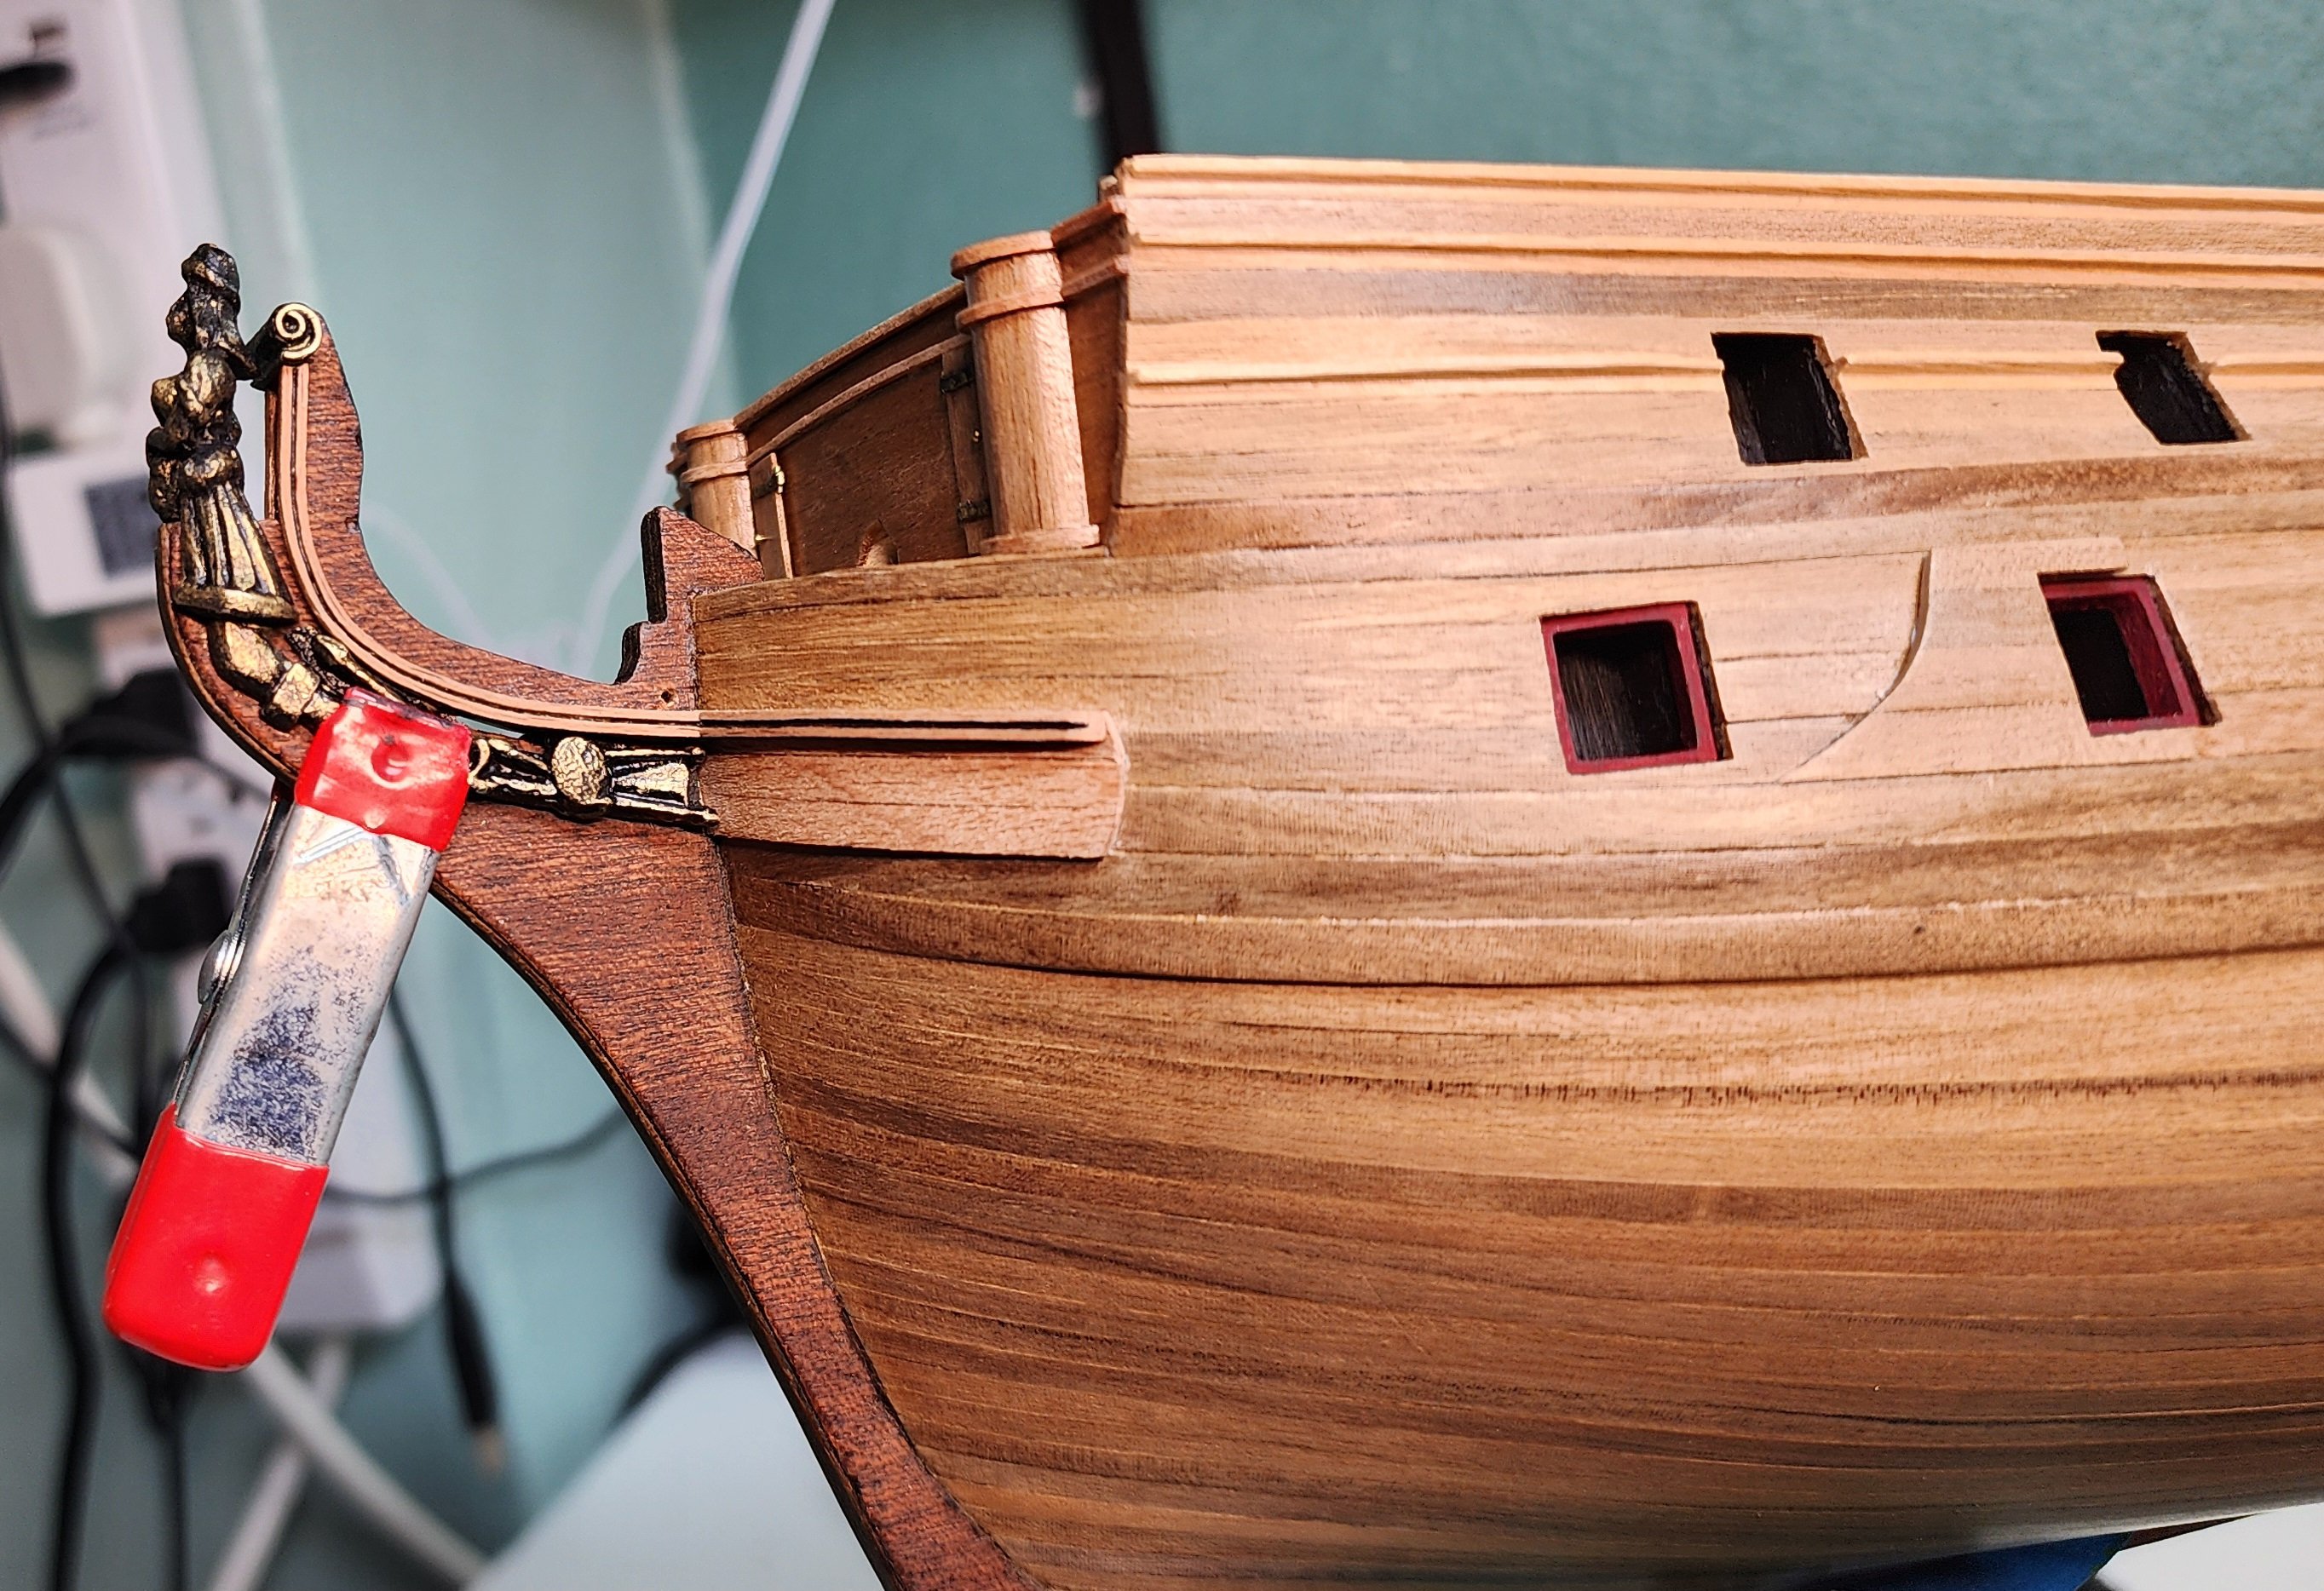
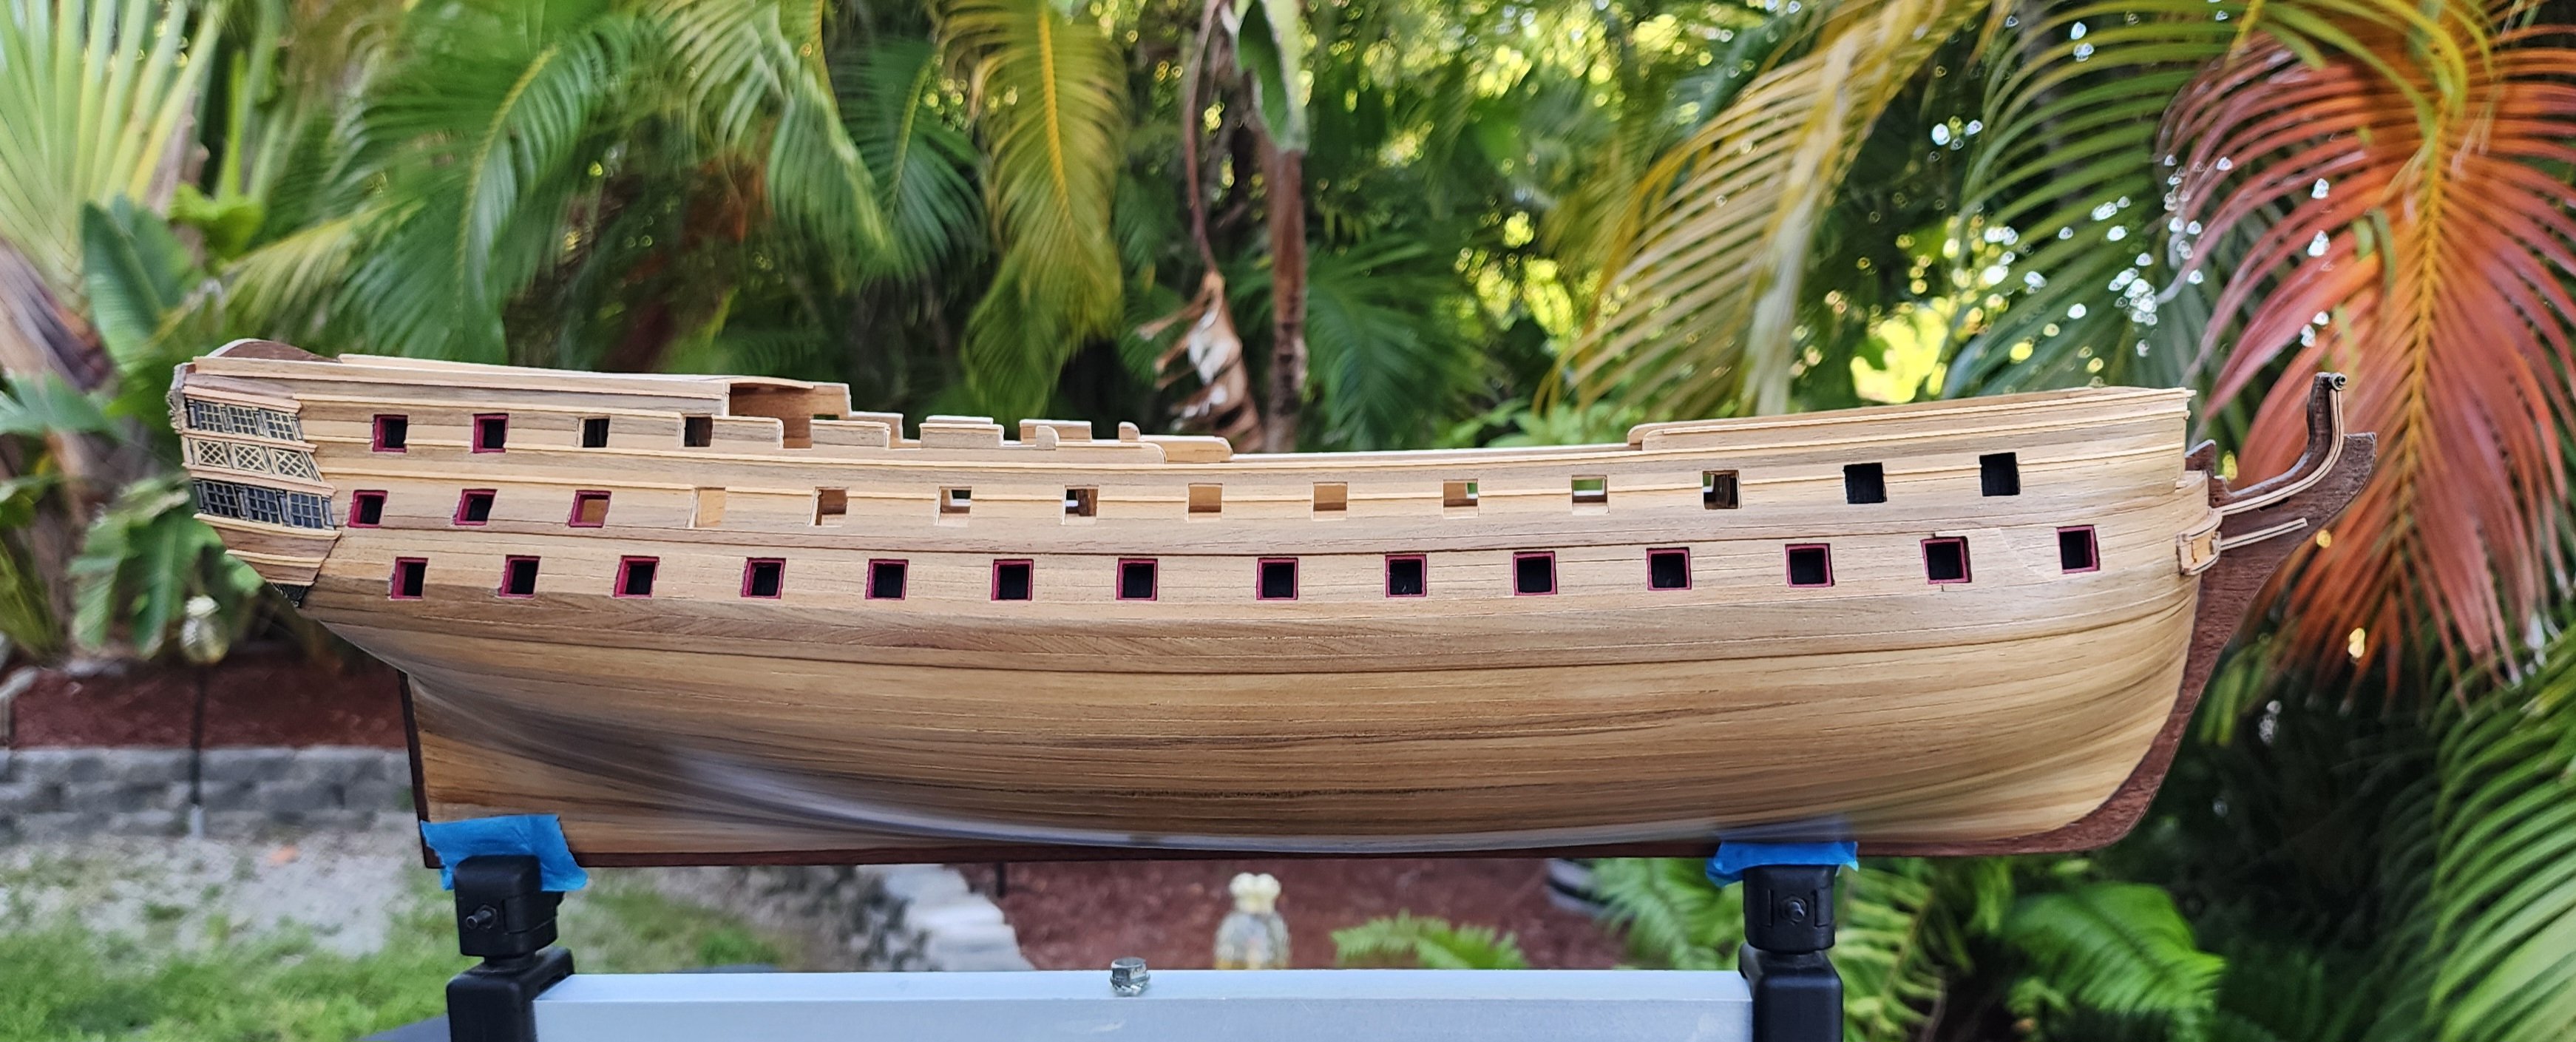
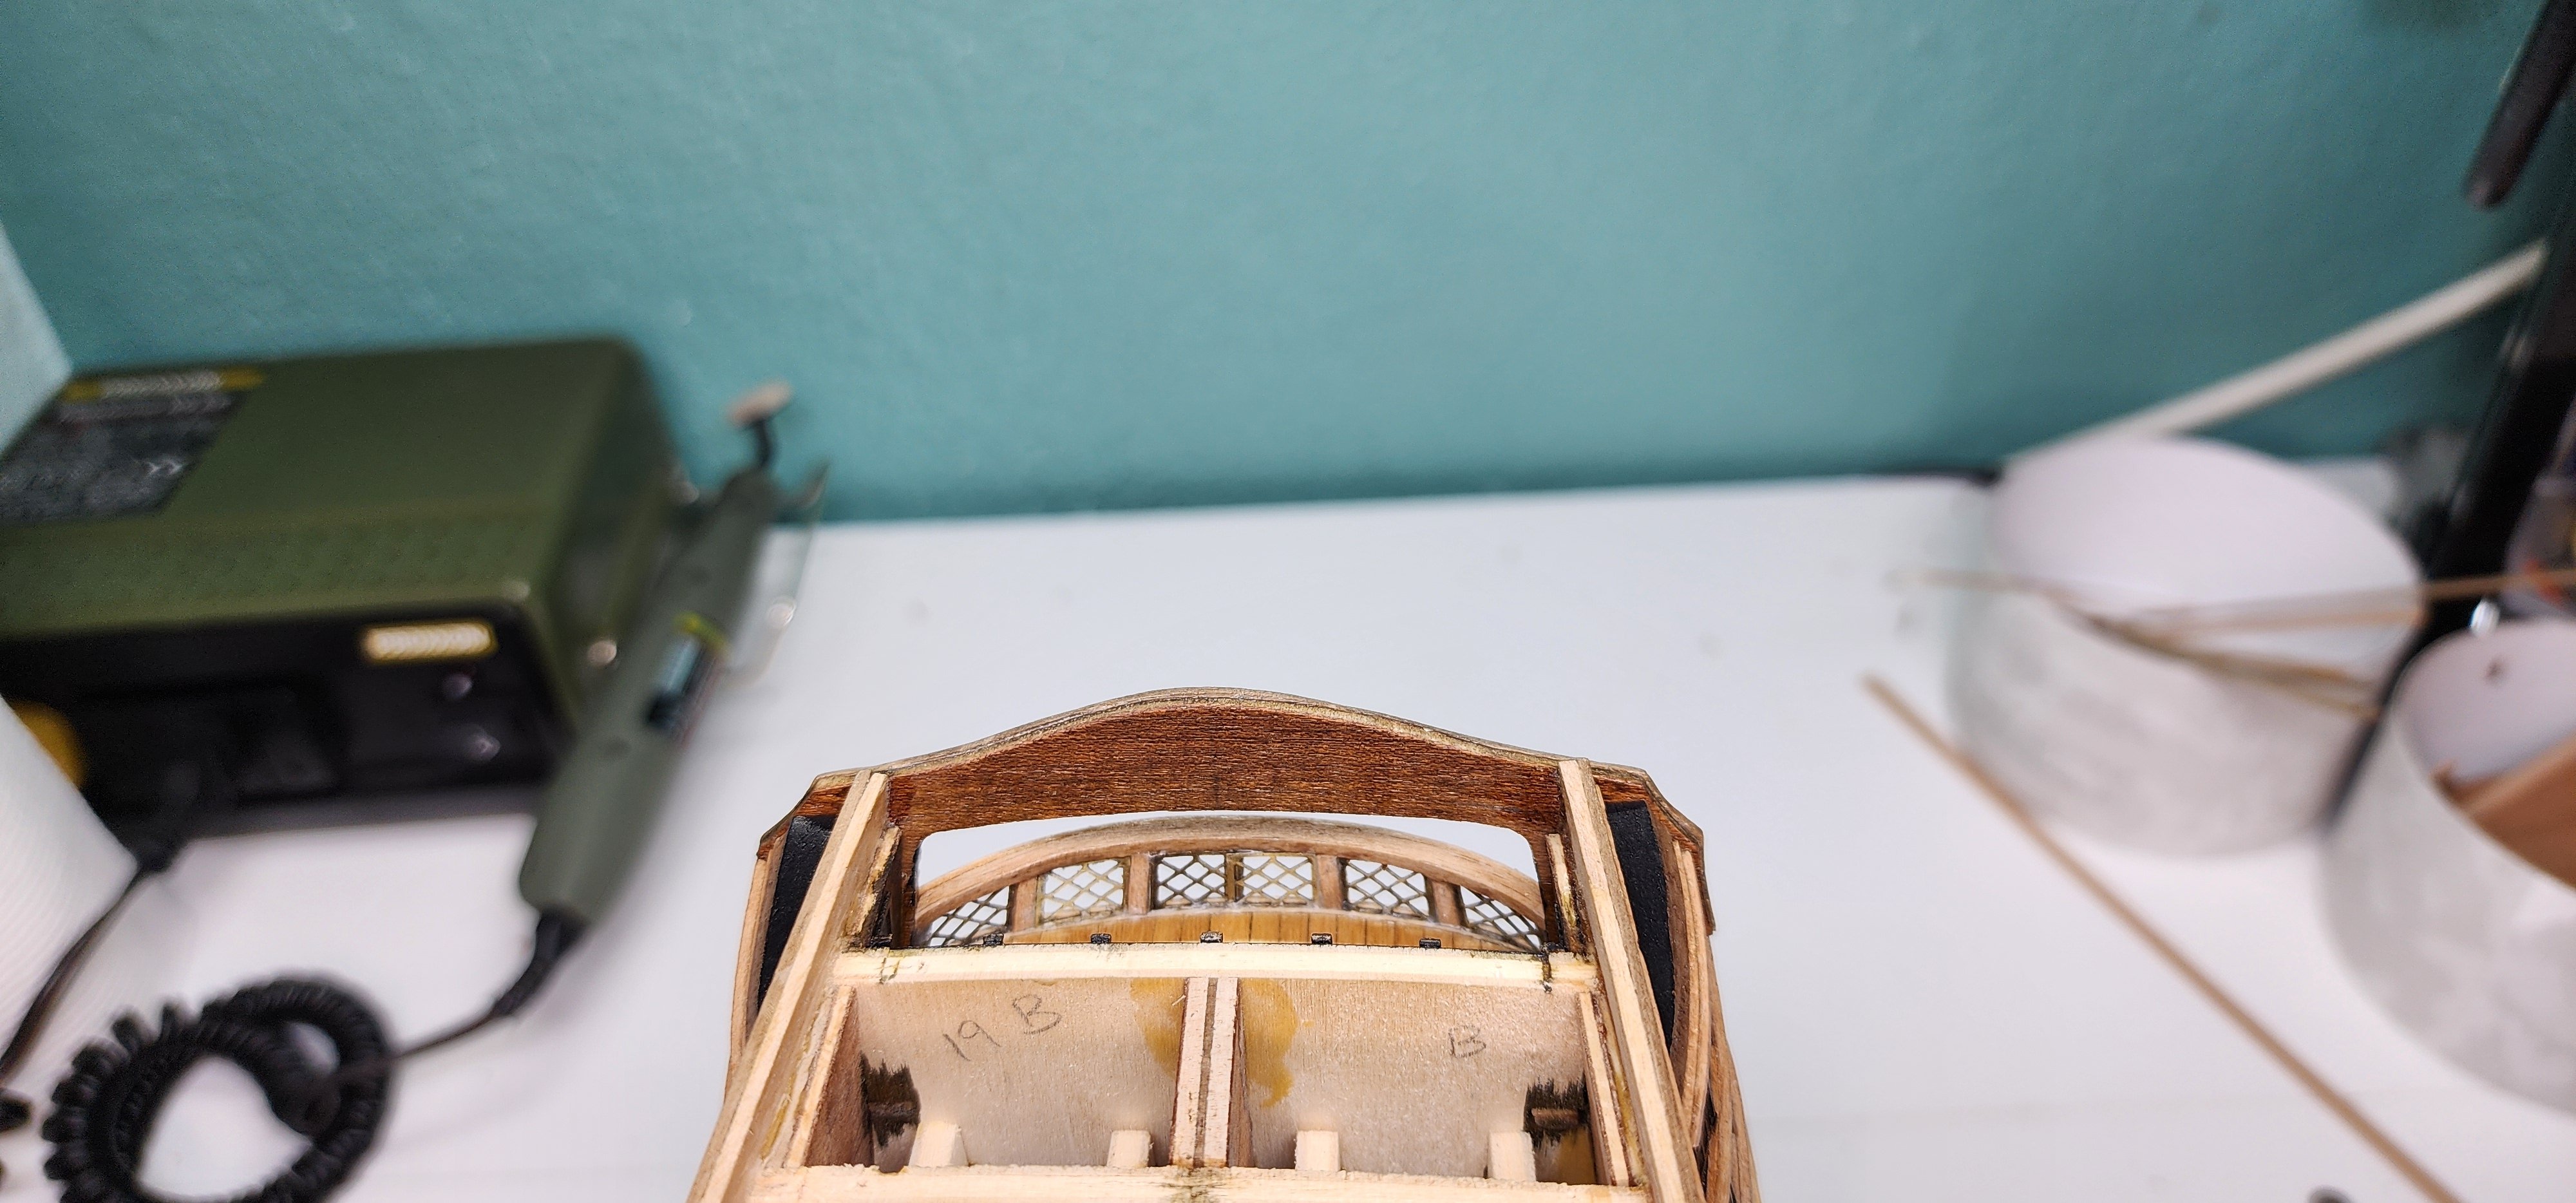
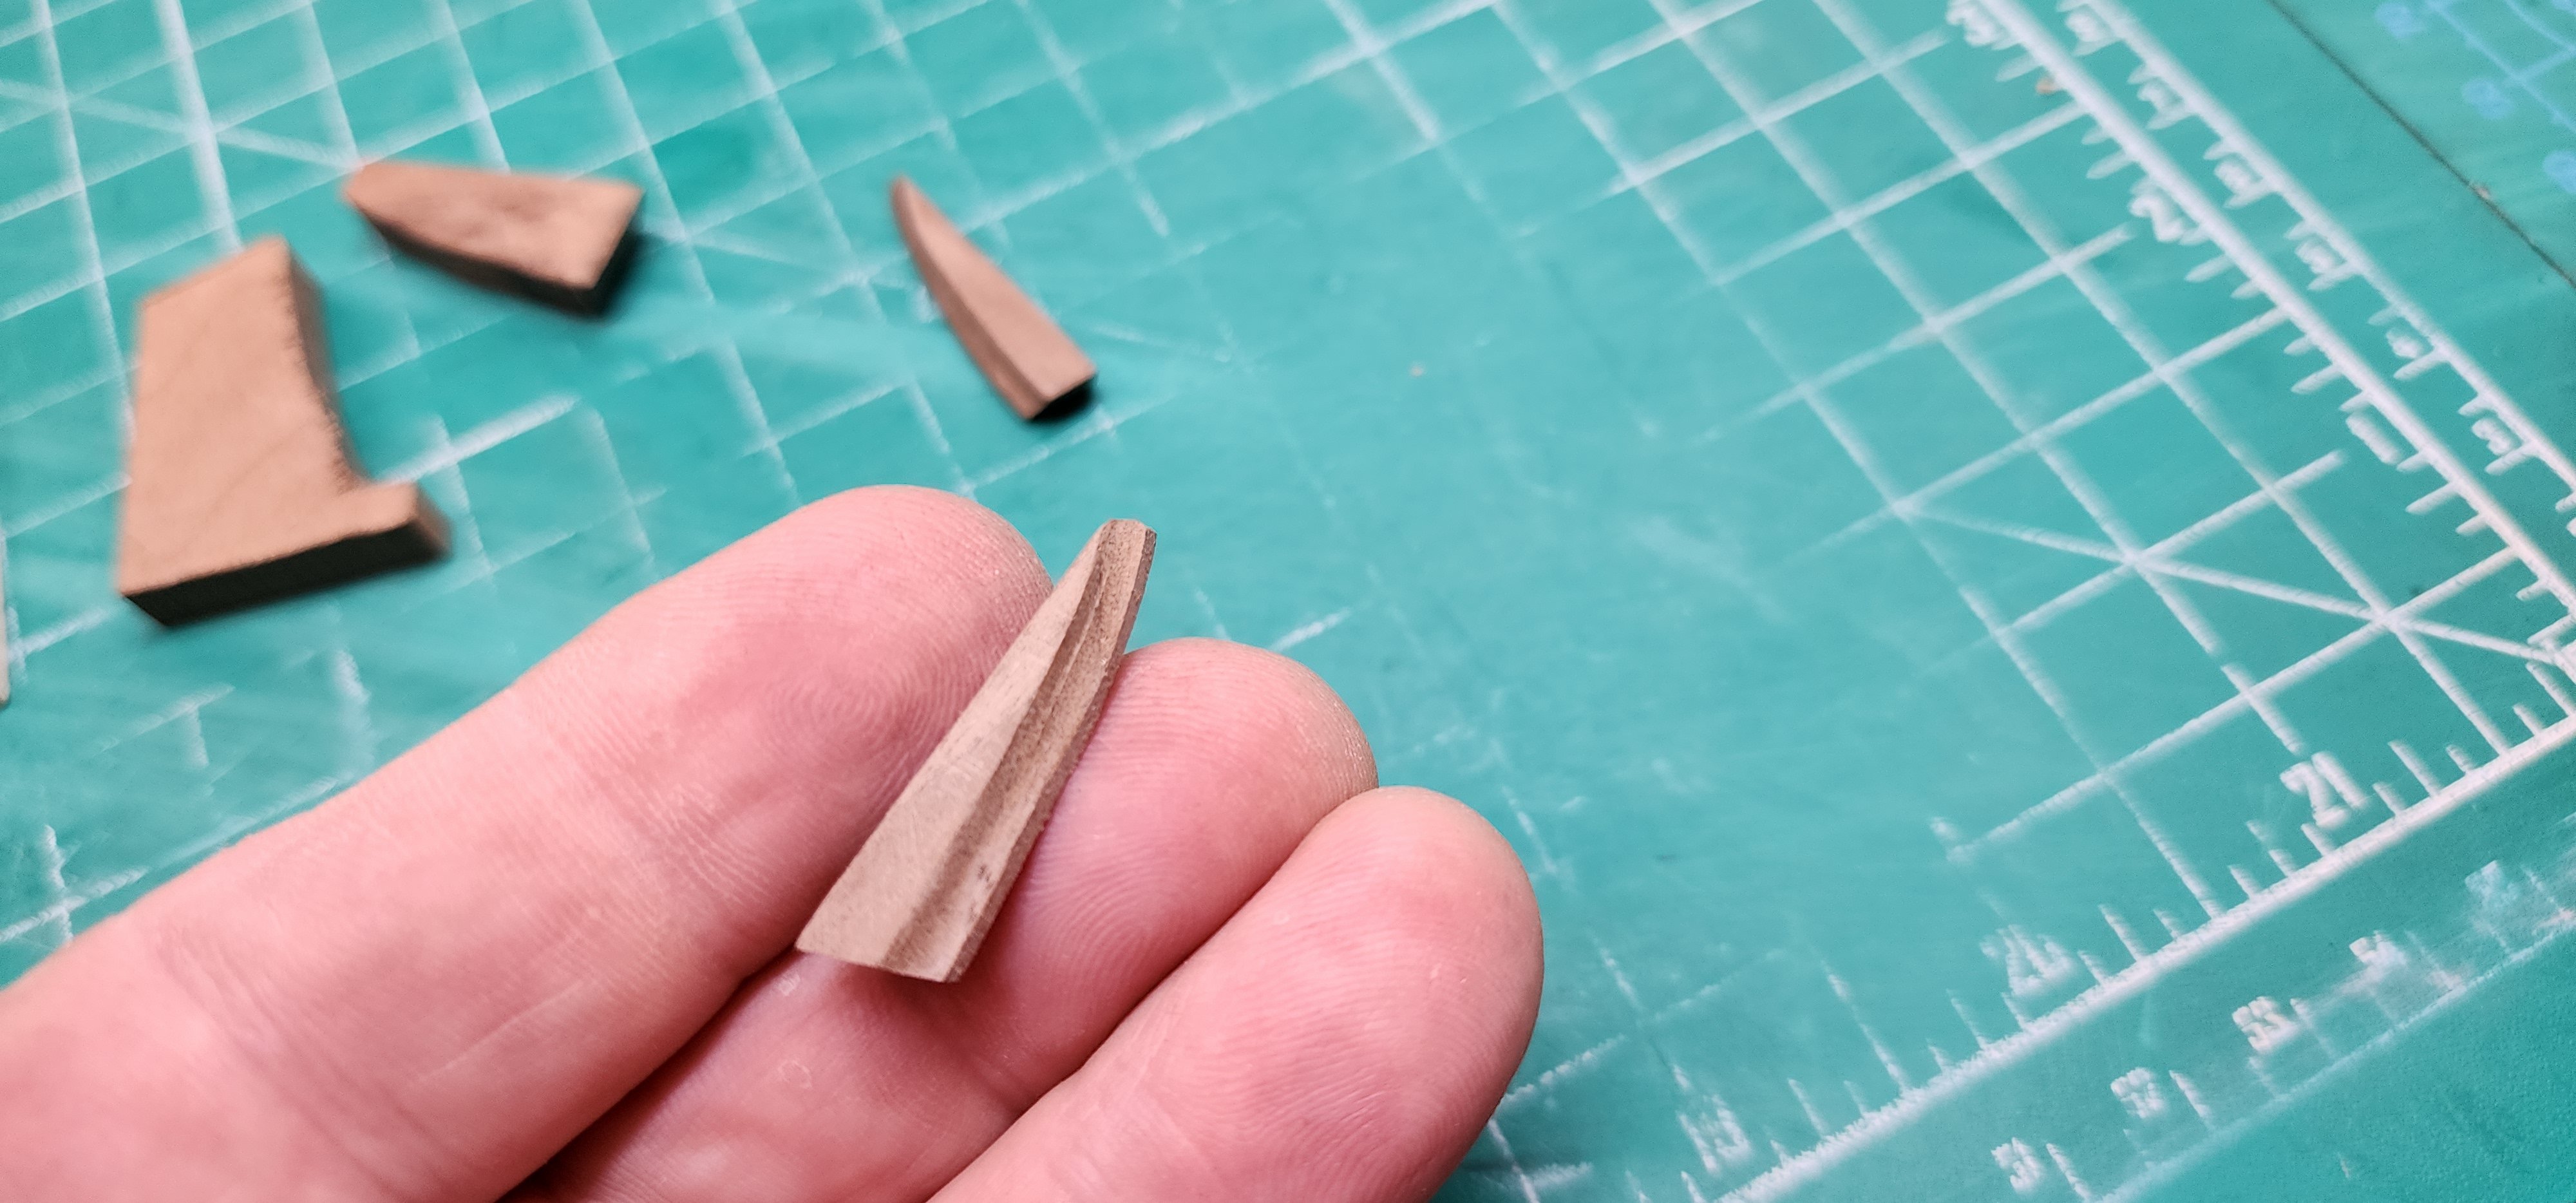
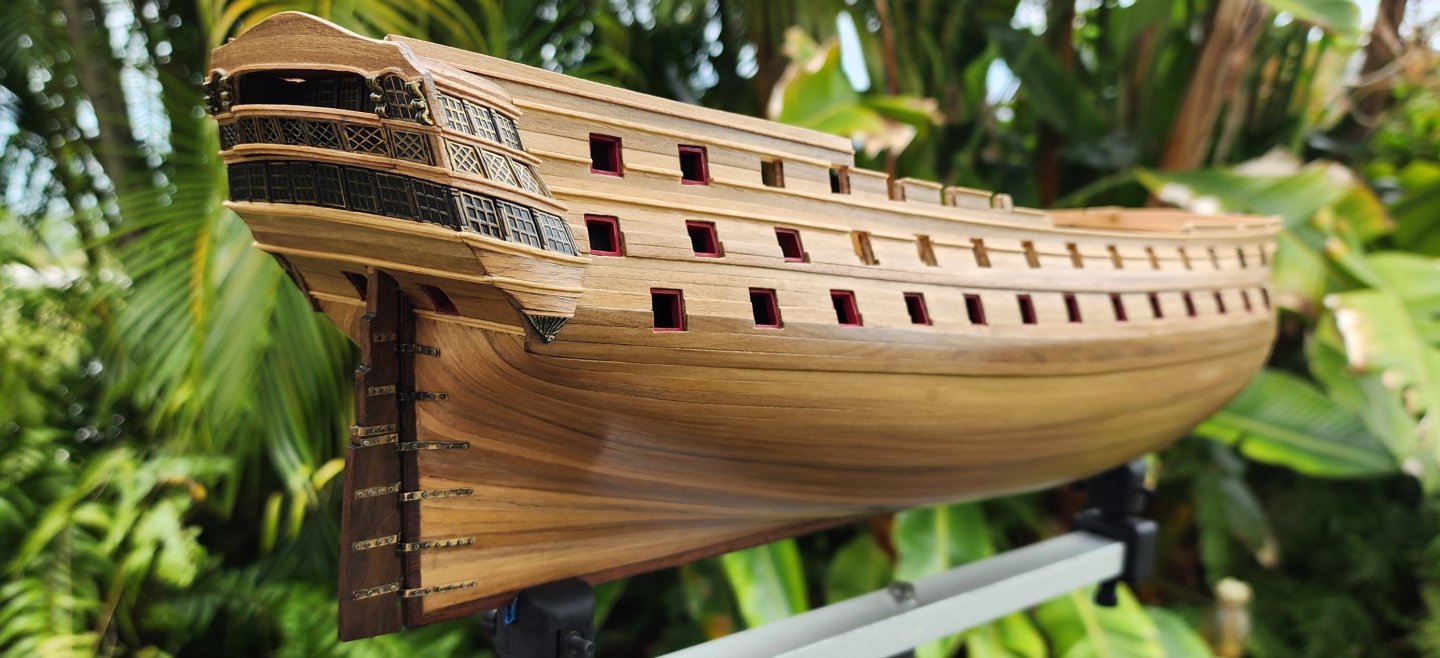
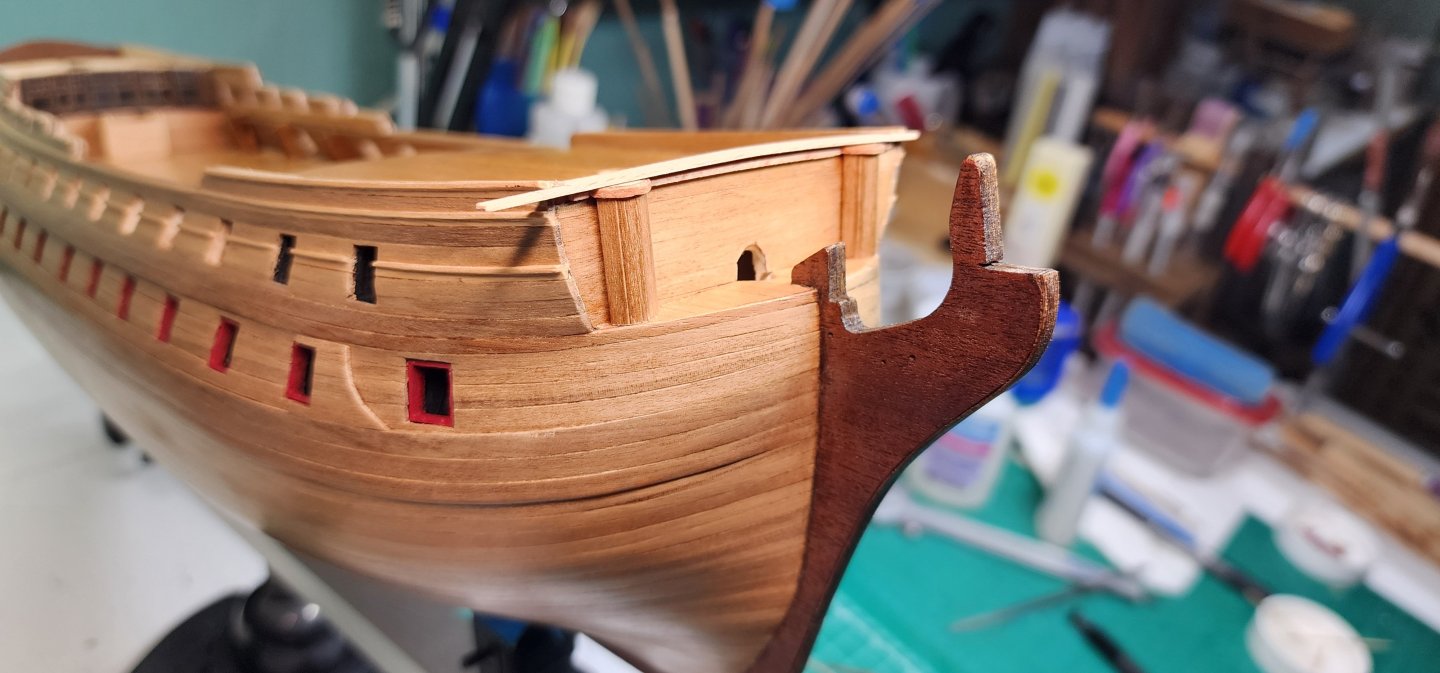
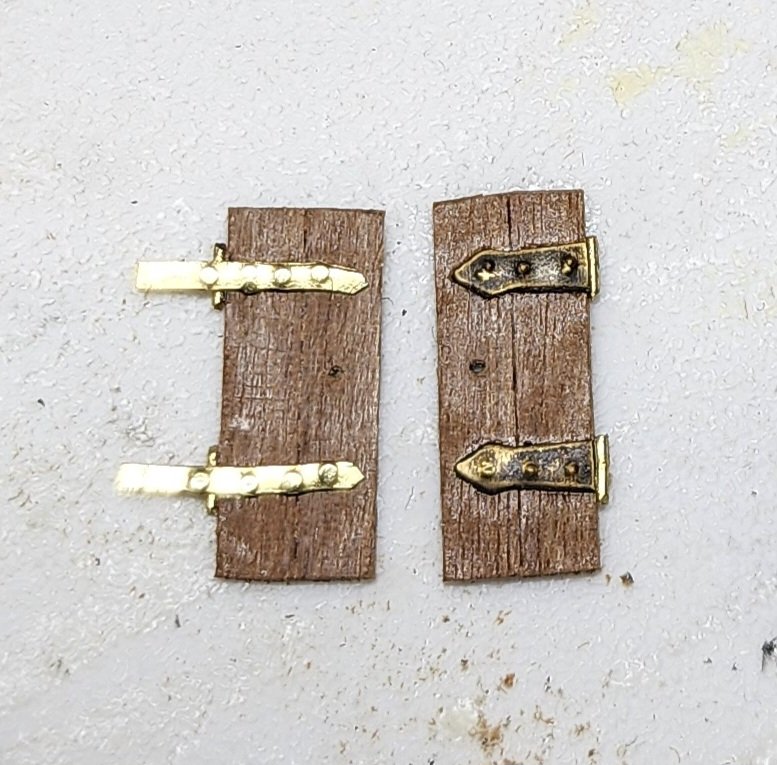
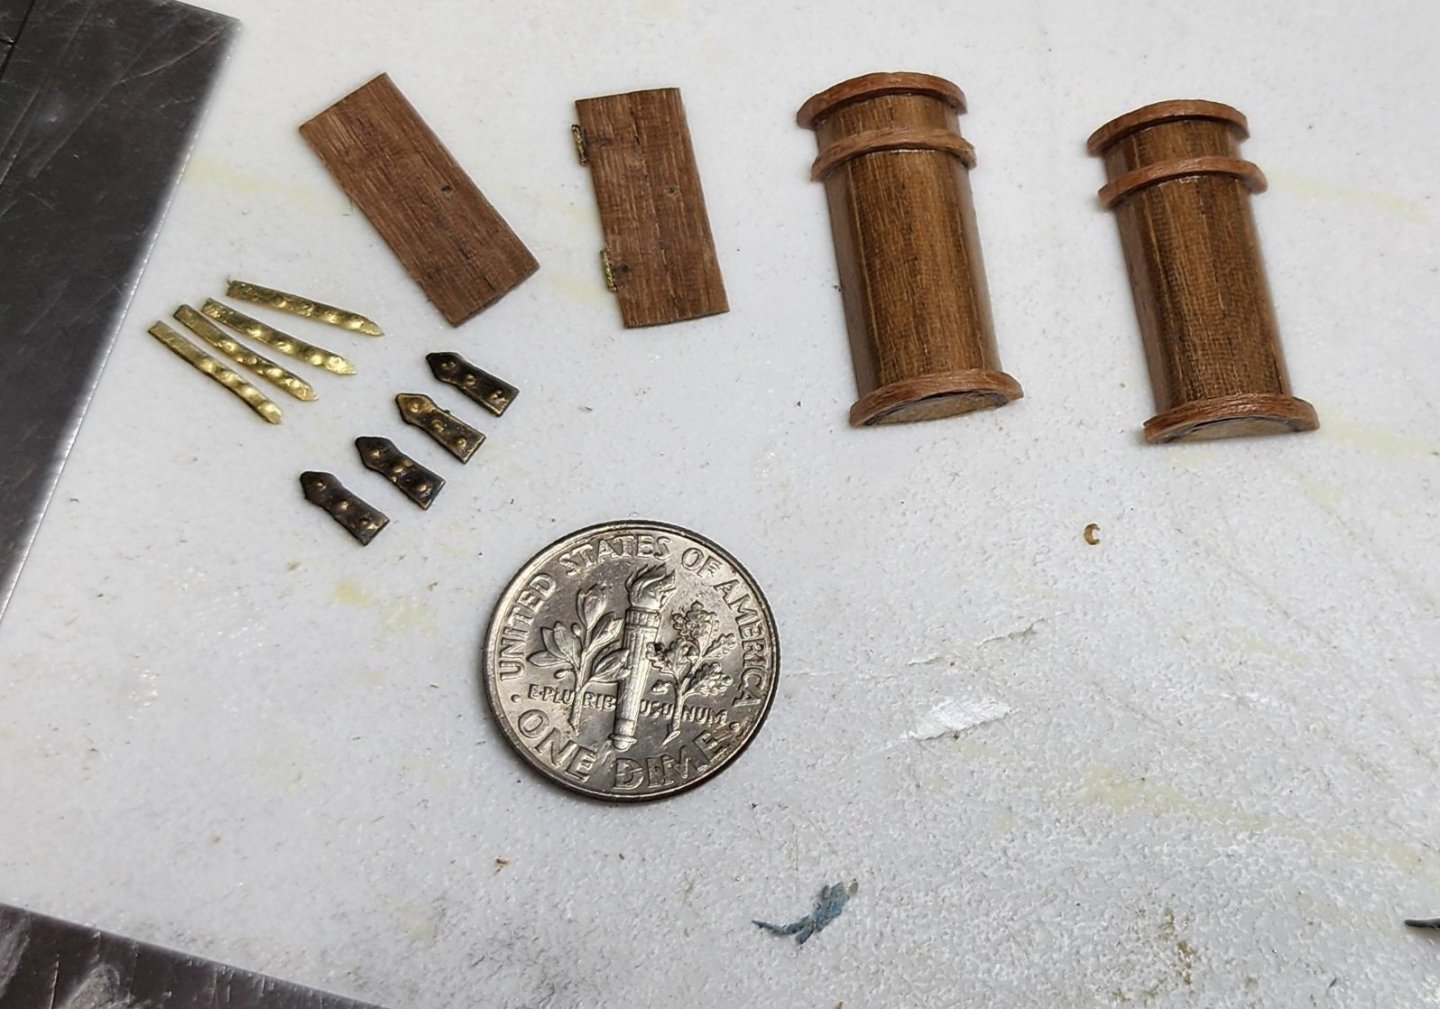
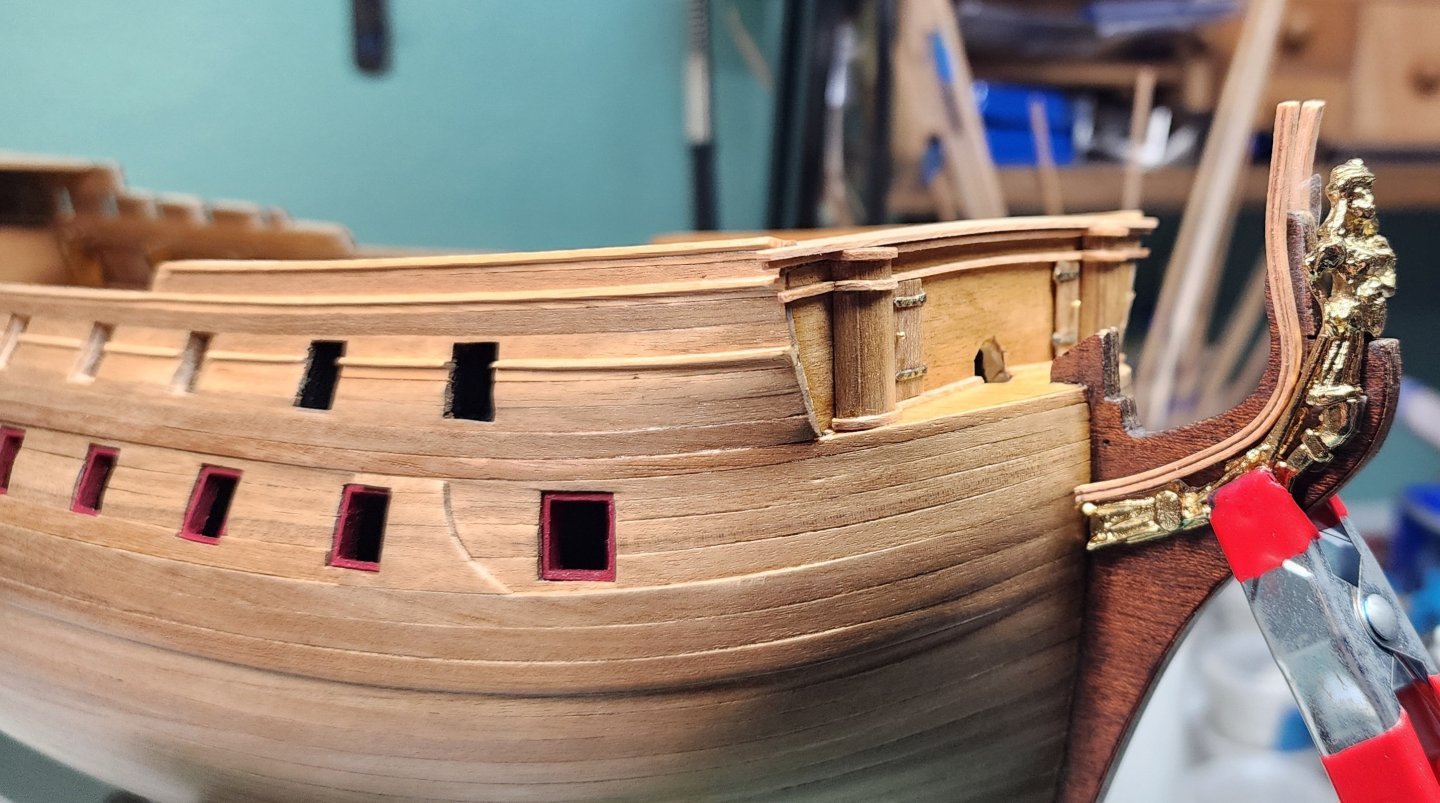
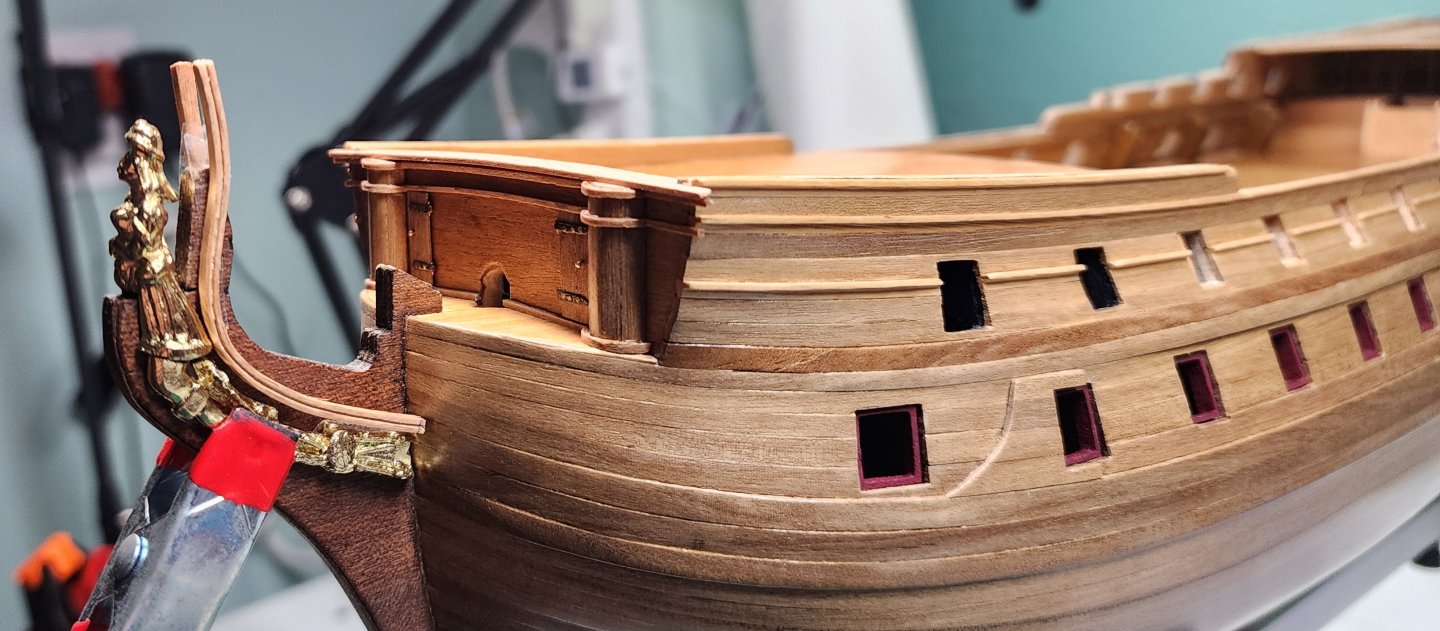
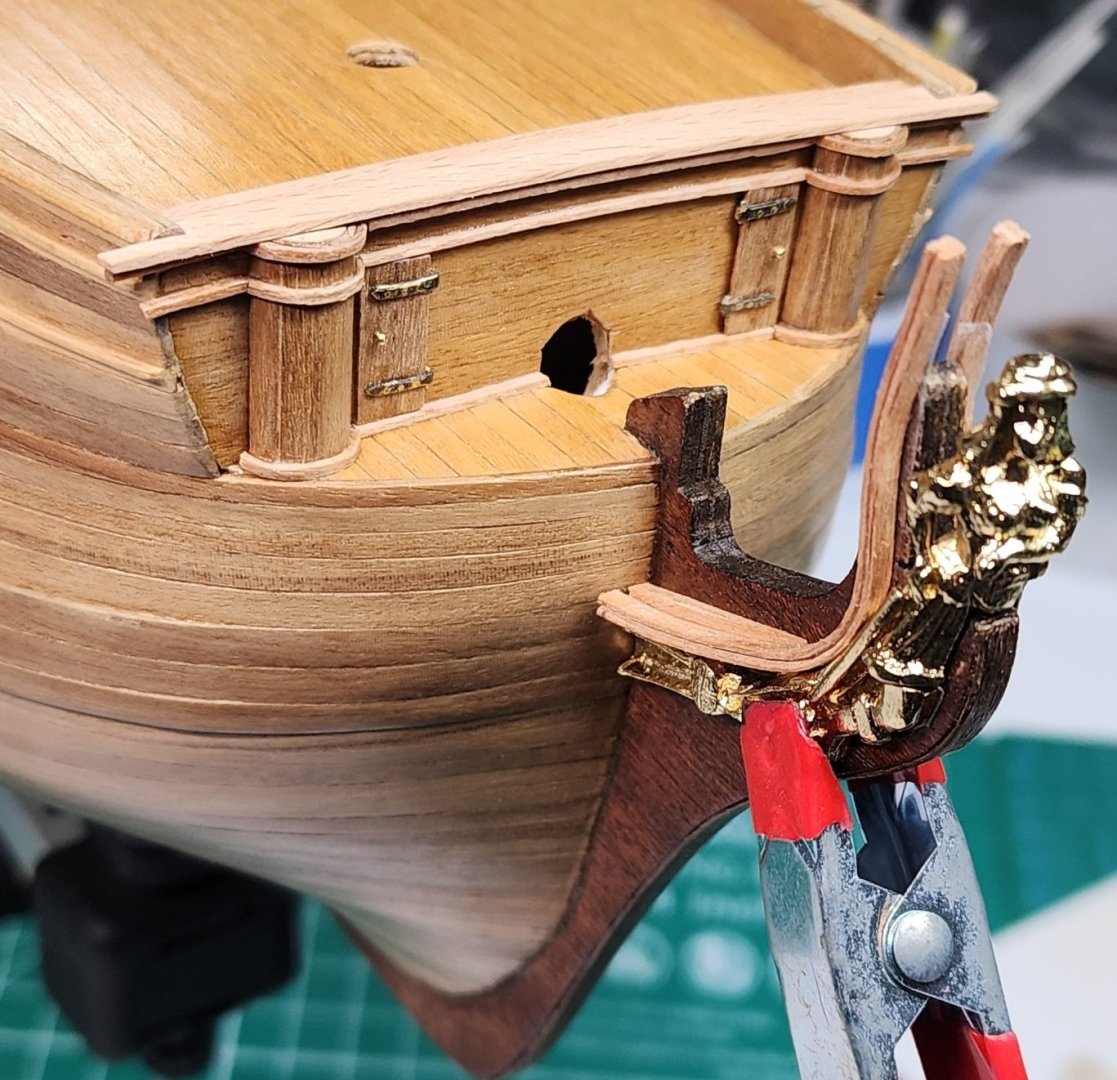
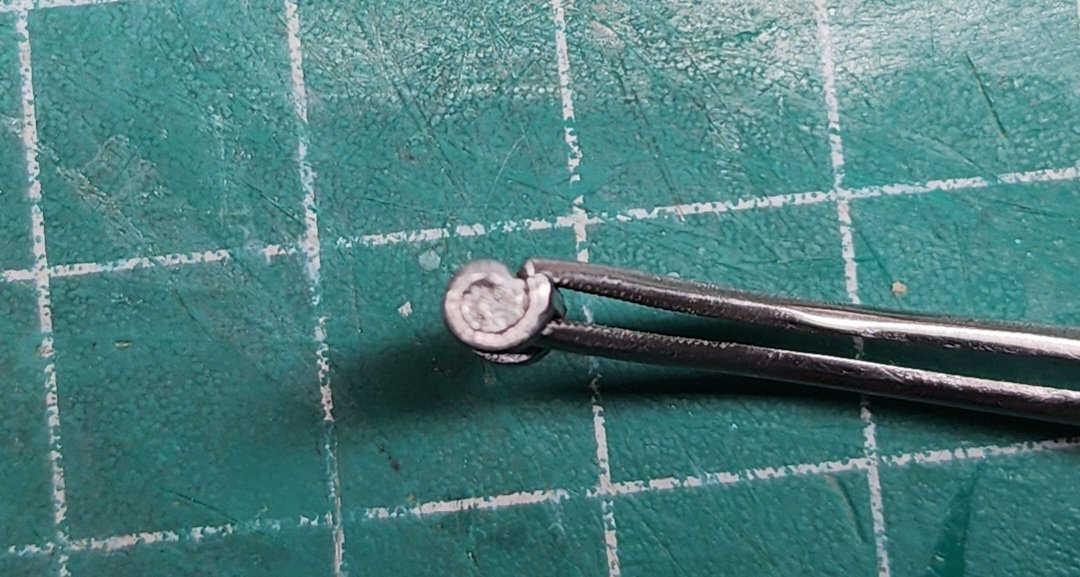
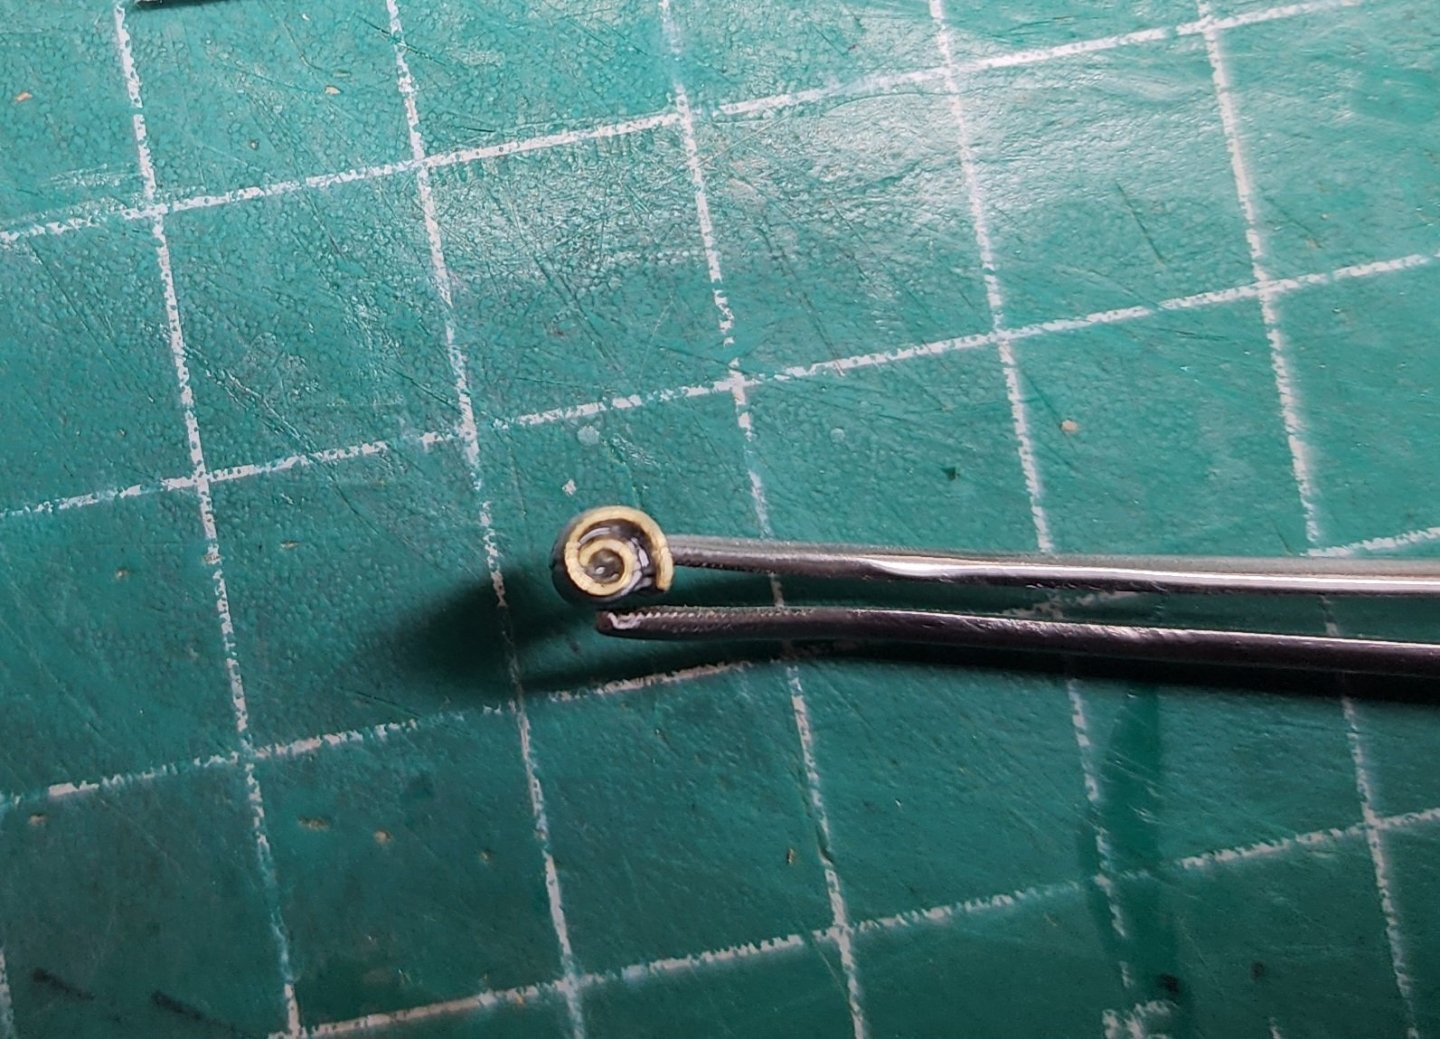
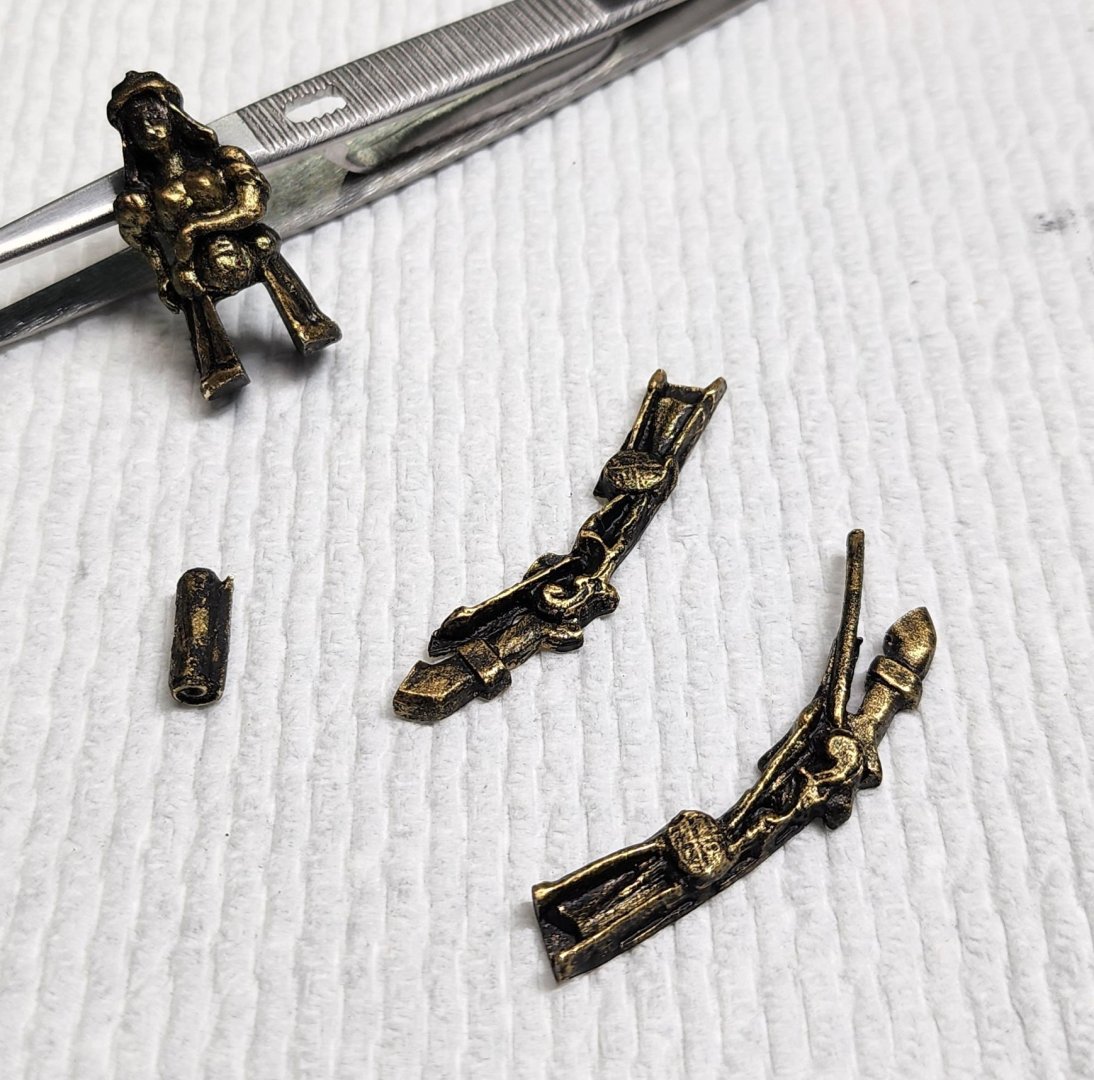
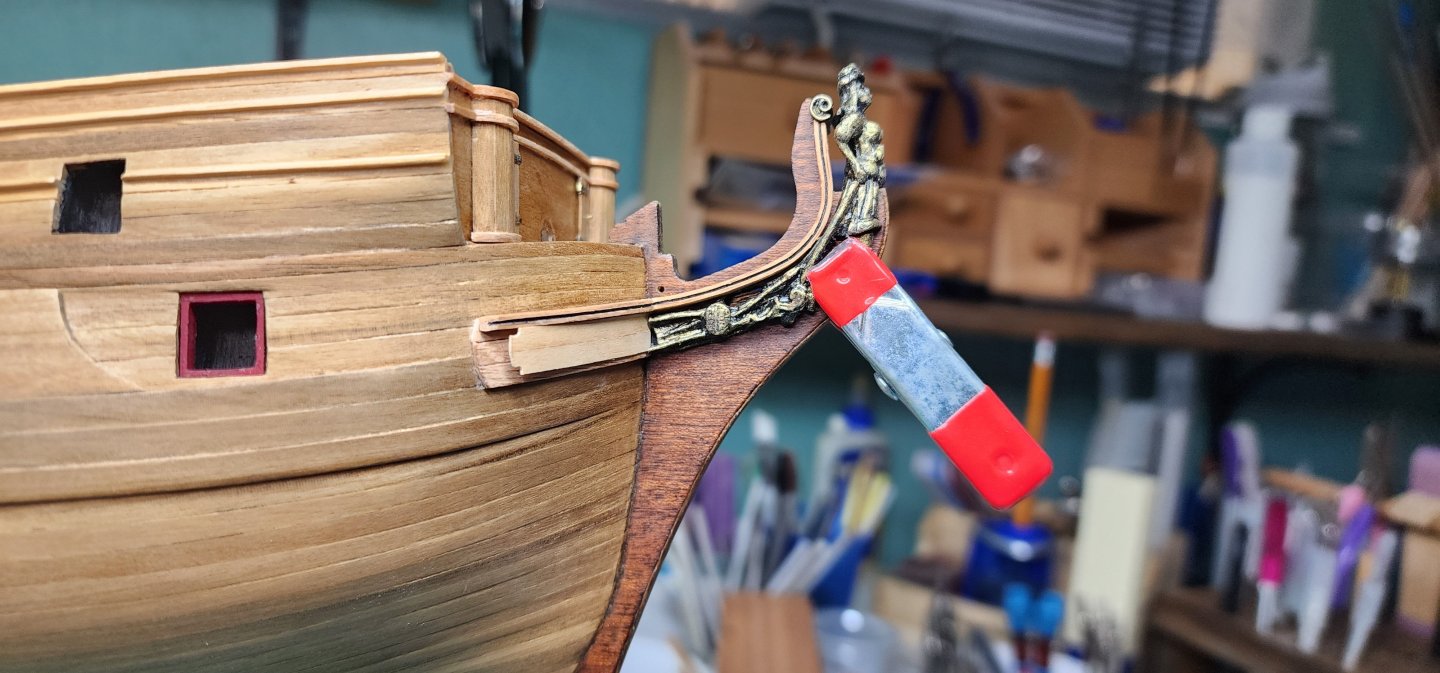
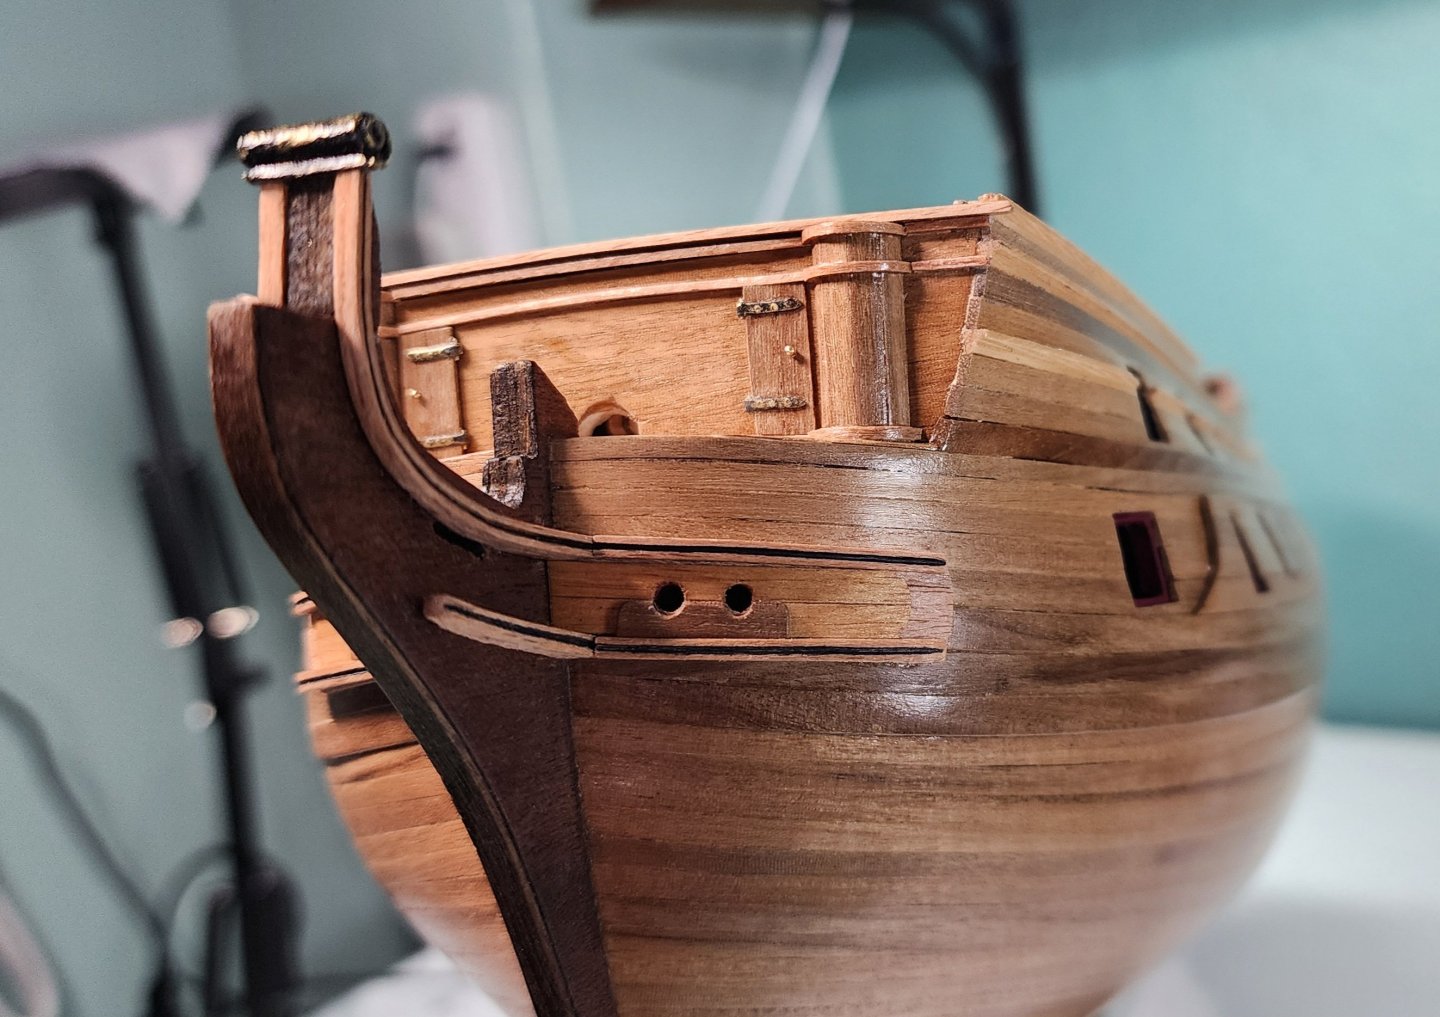
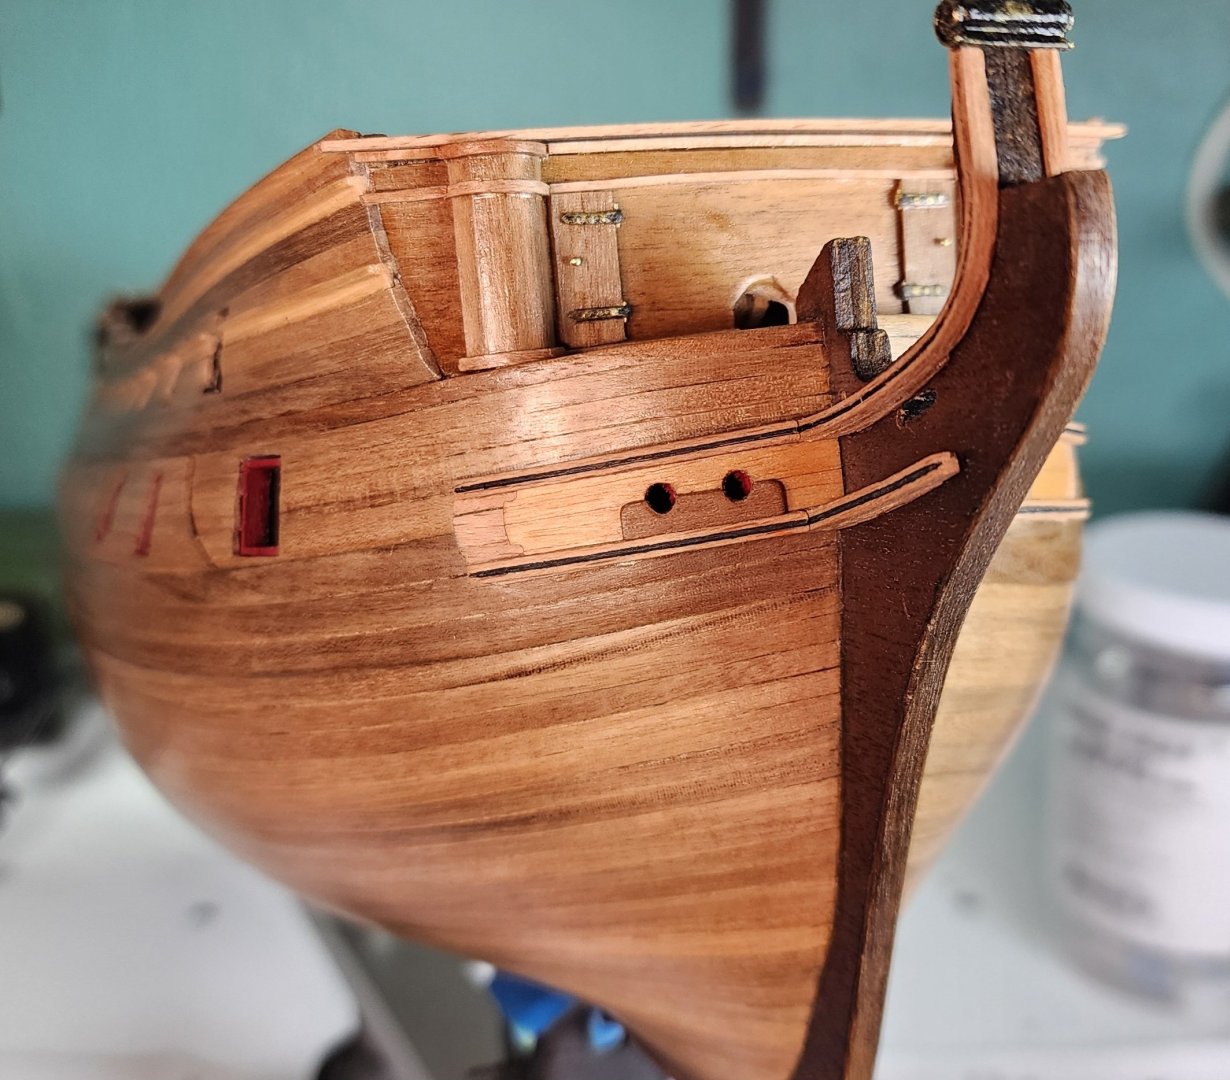
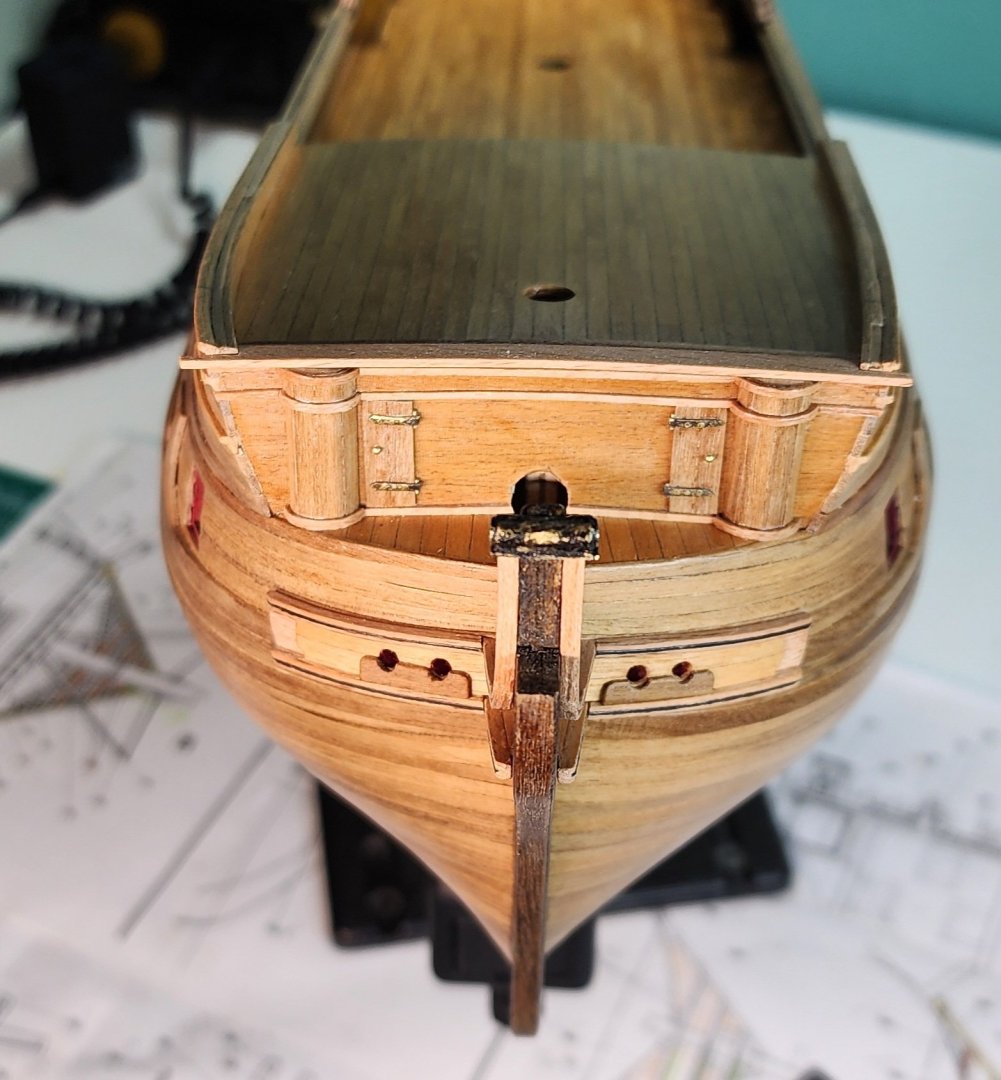
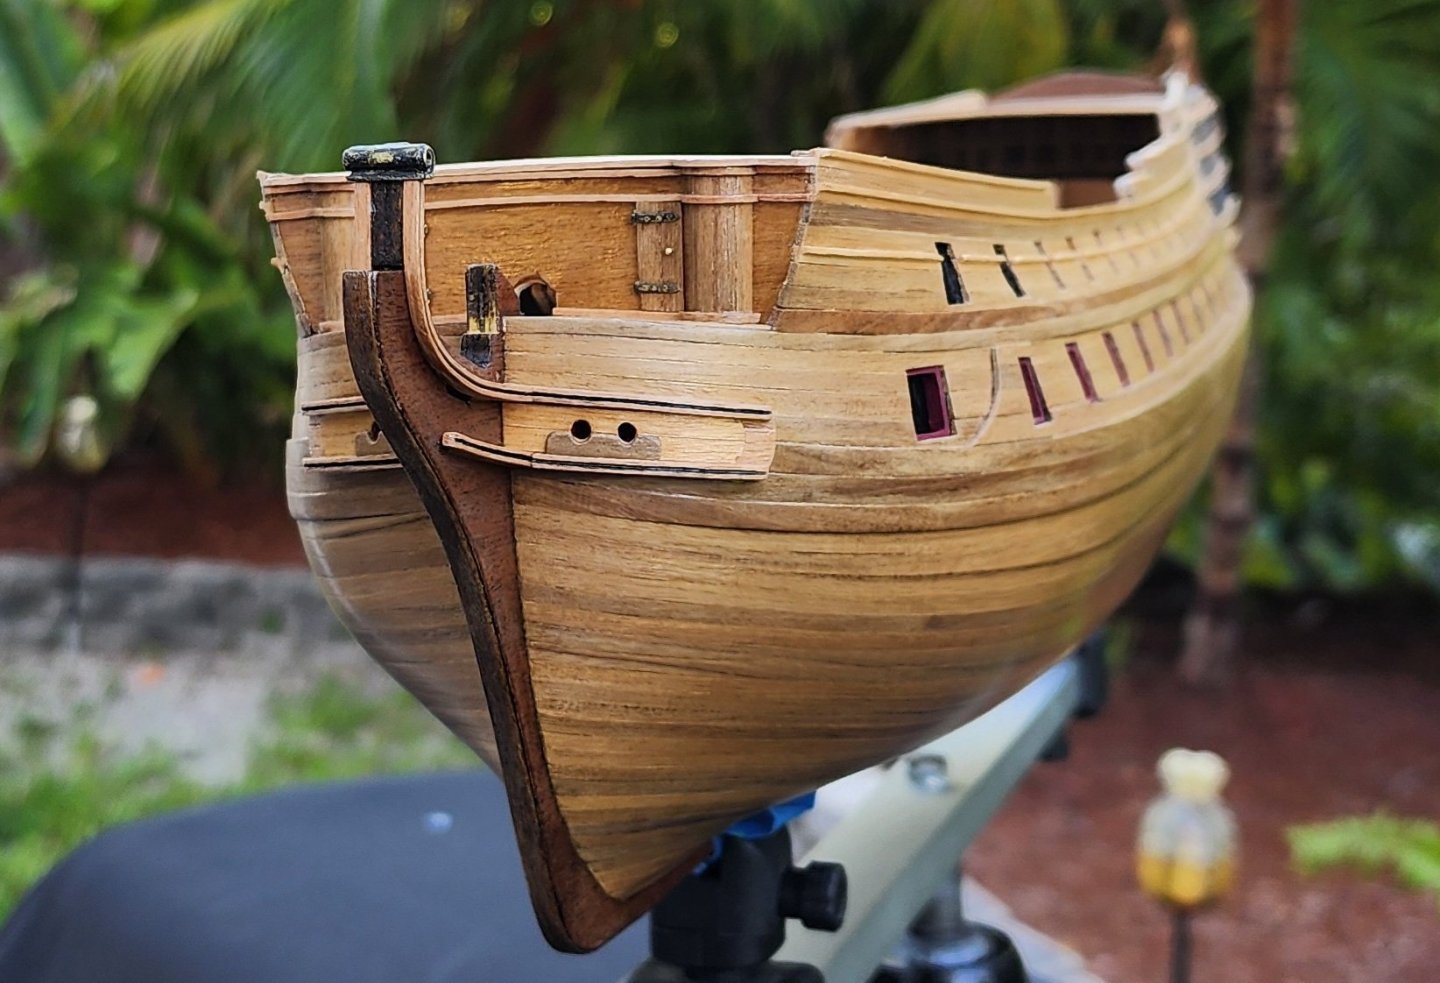
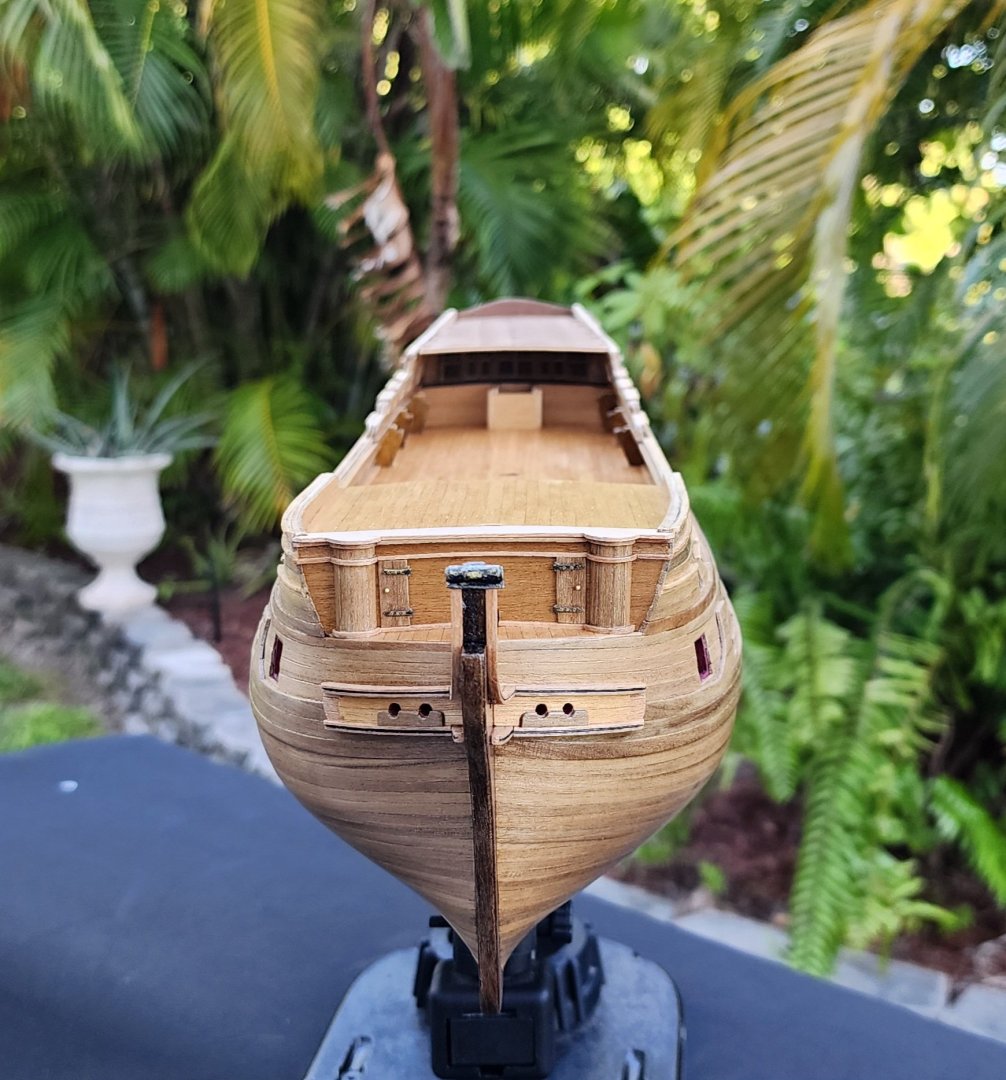
Hello All, Well, this is my monthly update on HMS Bellona. This post marks the 2nd year anniversary of my journey building this ship. My learning curve has certainly had its highs and lows, but for the most part, it’s been a very challenging and rewarding adventure. I never really thought that it would take this long to assemble, and I now understand that putting a timeline on building one of these ships is sometimes unrealistic. Well with that said, let’s get to where I left off. I started working on the forecastle bulkhead, first cutting in half an 8mm dowel and planking it. I cut the dowel to the rough size for the round houses and shaped false cat tail piece 109 so that there was a 1mm overhang on the forecastle bulkhead. I shaped the 1mm molding that wraps around the round house by placing an 8mm dowel in my vise and applying heat to slowly acquire the shape. I found that applying thin CA glue to the 1mm molding and allowing it to soak in and dry gave the wood a bit more strength and helped it from flatting out from the pressure and heat during the shaping process. After installing the upper molding to both round houses I cut, shaped and dry fitted the false cat tail covering piece 110 leaving another 1mm overhang on piece 109. I let piece 110 overhang on the outer edges for the future headrail that will be intersecting at this location. I installed the lower molding to the round houses and bow deck and then installed the doors and hinges for the round houses. At this point the round houses are only dry fitted because there is still one more piece of 1mm molding that has to be applied and doing this is much easier than trying to do it if they were glued in place. Once the doors were in place, this allowed me to know the location of the last round house and forecastle bulkhead molding. I did not like the way the hinges looked on the doors. They appeared to be way out of scale, and it just didn’t seem right. I fabricated new hinges using some brass stock and a very small punch to simulate the bolts for the hinges. I think they came out ok and don’t stand out so much. Once the doors were completed, I installed the last of the 1mm molding on the round houses and forecastle bulkhead. After the forecastle bulkhead was completed, I moved onto the head cheeks. I first shaped the 2mm molding with my molding shaper to give it a .5mm groove in the center of the board. I used the figurehead as a guide for the shaping of the head cheeks. In order to find the final length of the head cheeks I had to install the scroll that sits on top of the stem. The detail of the die cast scroll that came with the kit was awful. To fix this I used a .5mm brass wire and coiled it to hopefully improve the appearance of the scroll. I then blackened the figurehead components and scroll to match the rest of the blackened brass fittings that are on the ship. I installed the hawse hole planking using a combination of beechwood and tanganika planks. After the beechwood hawse hole planking was installed, I completed the head cheek molding. I painted the groove in the cheek molding black to give it an accent and to standout a bit more. For the hawse hole bolster, I used 1mm walnut for this detail. Before assembling the hawse hole planking, I painted the 3mm holes for the anchor lines red. Well, that’s all I have for this post. I appreciate you taking the time to read and look at the pictures. I included some anniversary pictures at the end for your viewing pleasure LOL, and as always, your input and guidance are always welcome. Cheers Nearshore


-
Welcome aboard. You have a great library. May need to hit you up on some information in the future. Nearshore
-
Amazing job on this fabulous build. Can't wait to see your next project. Congratulations!!!! Nearshore
-
Just found this build log. What an awesome job you are doing. Can't wait to see the progress. Nearshore
-
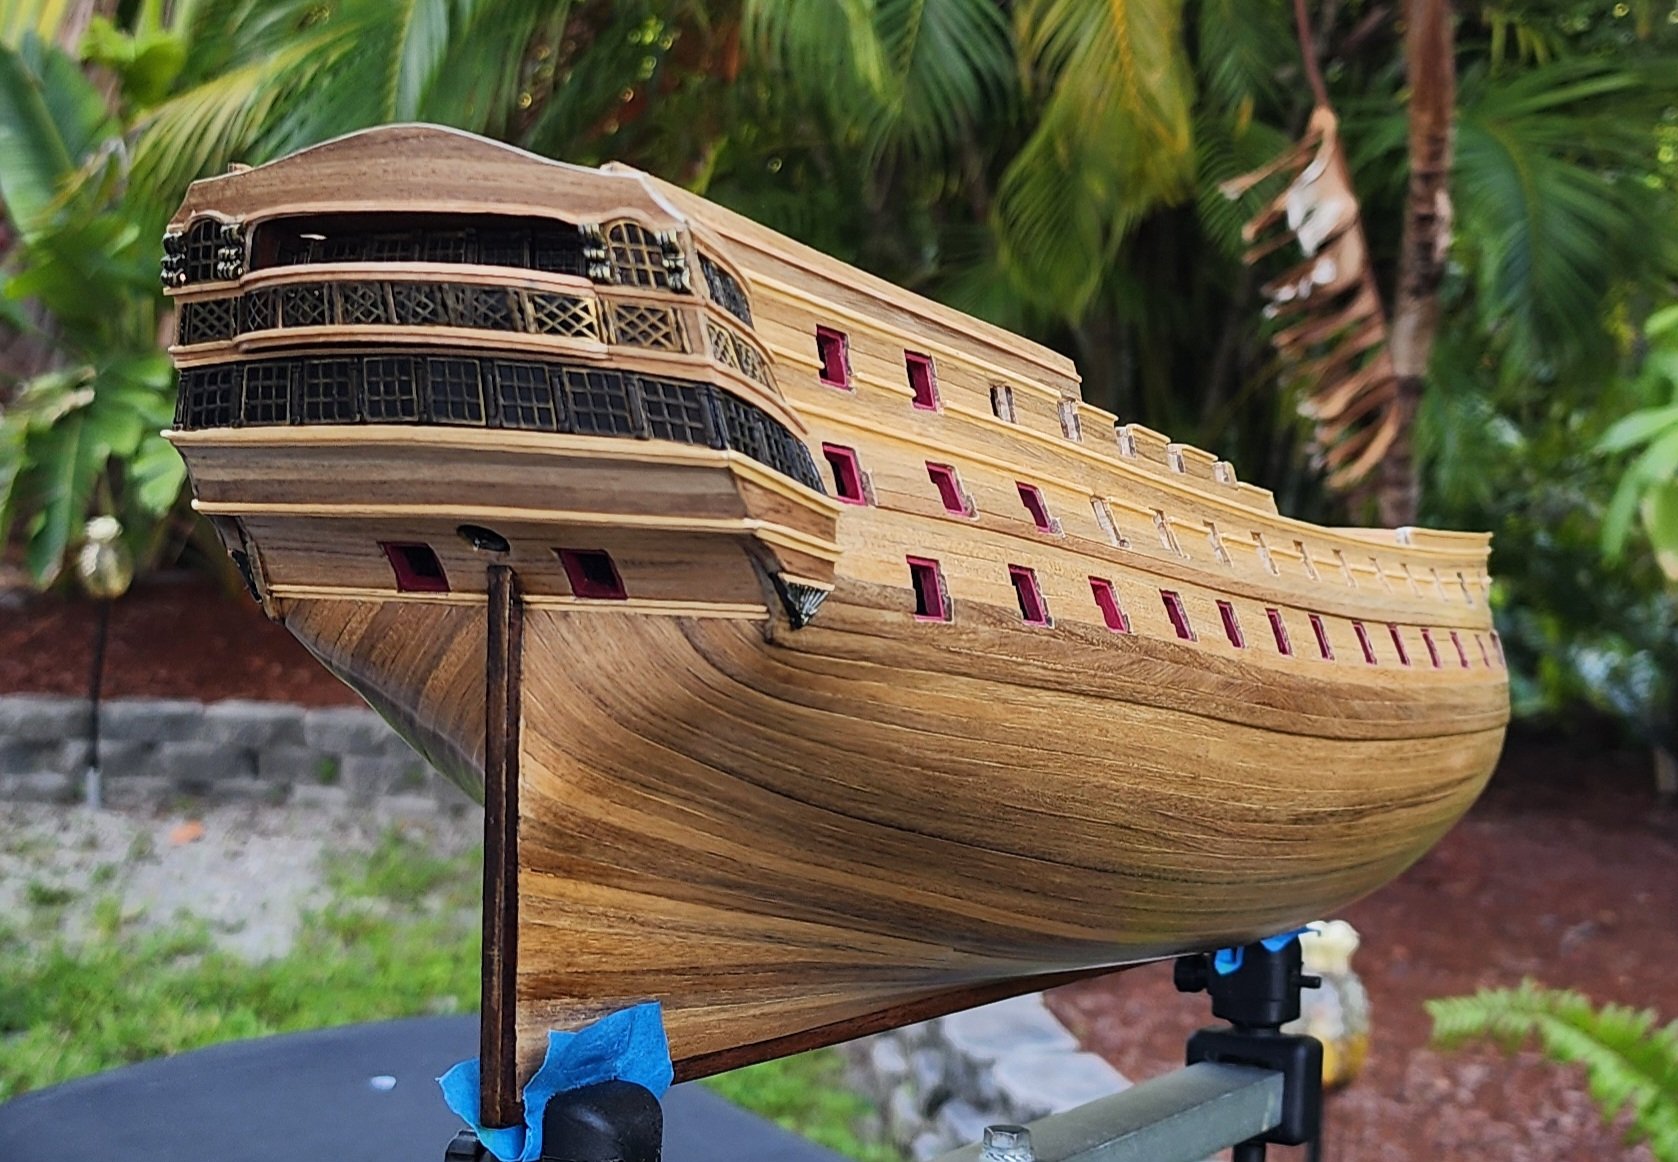
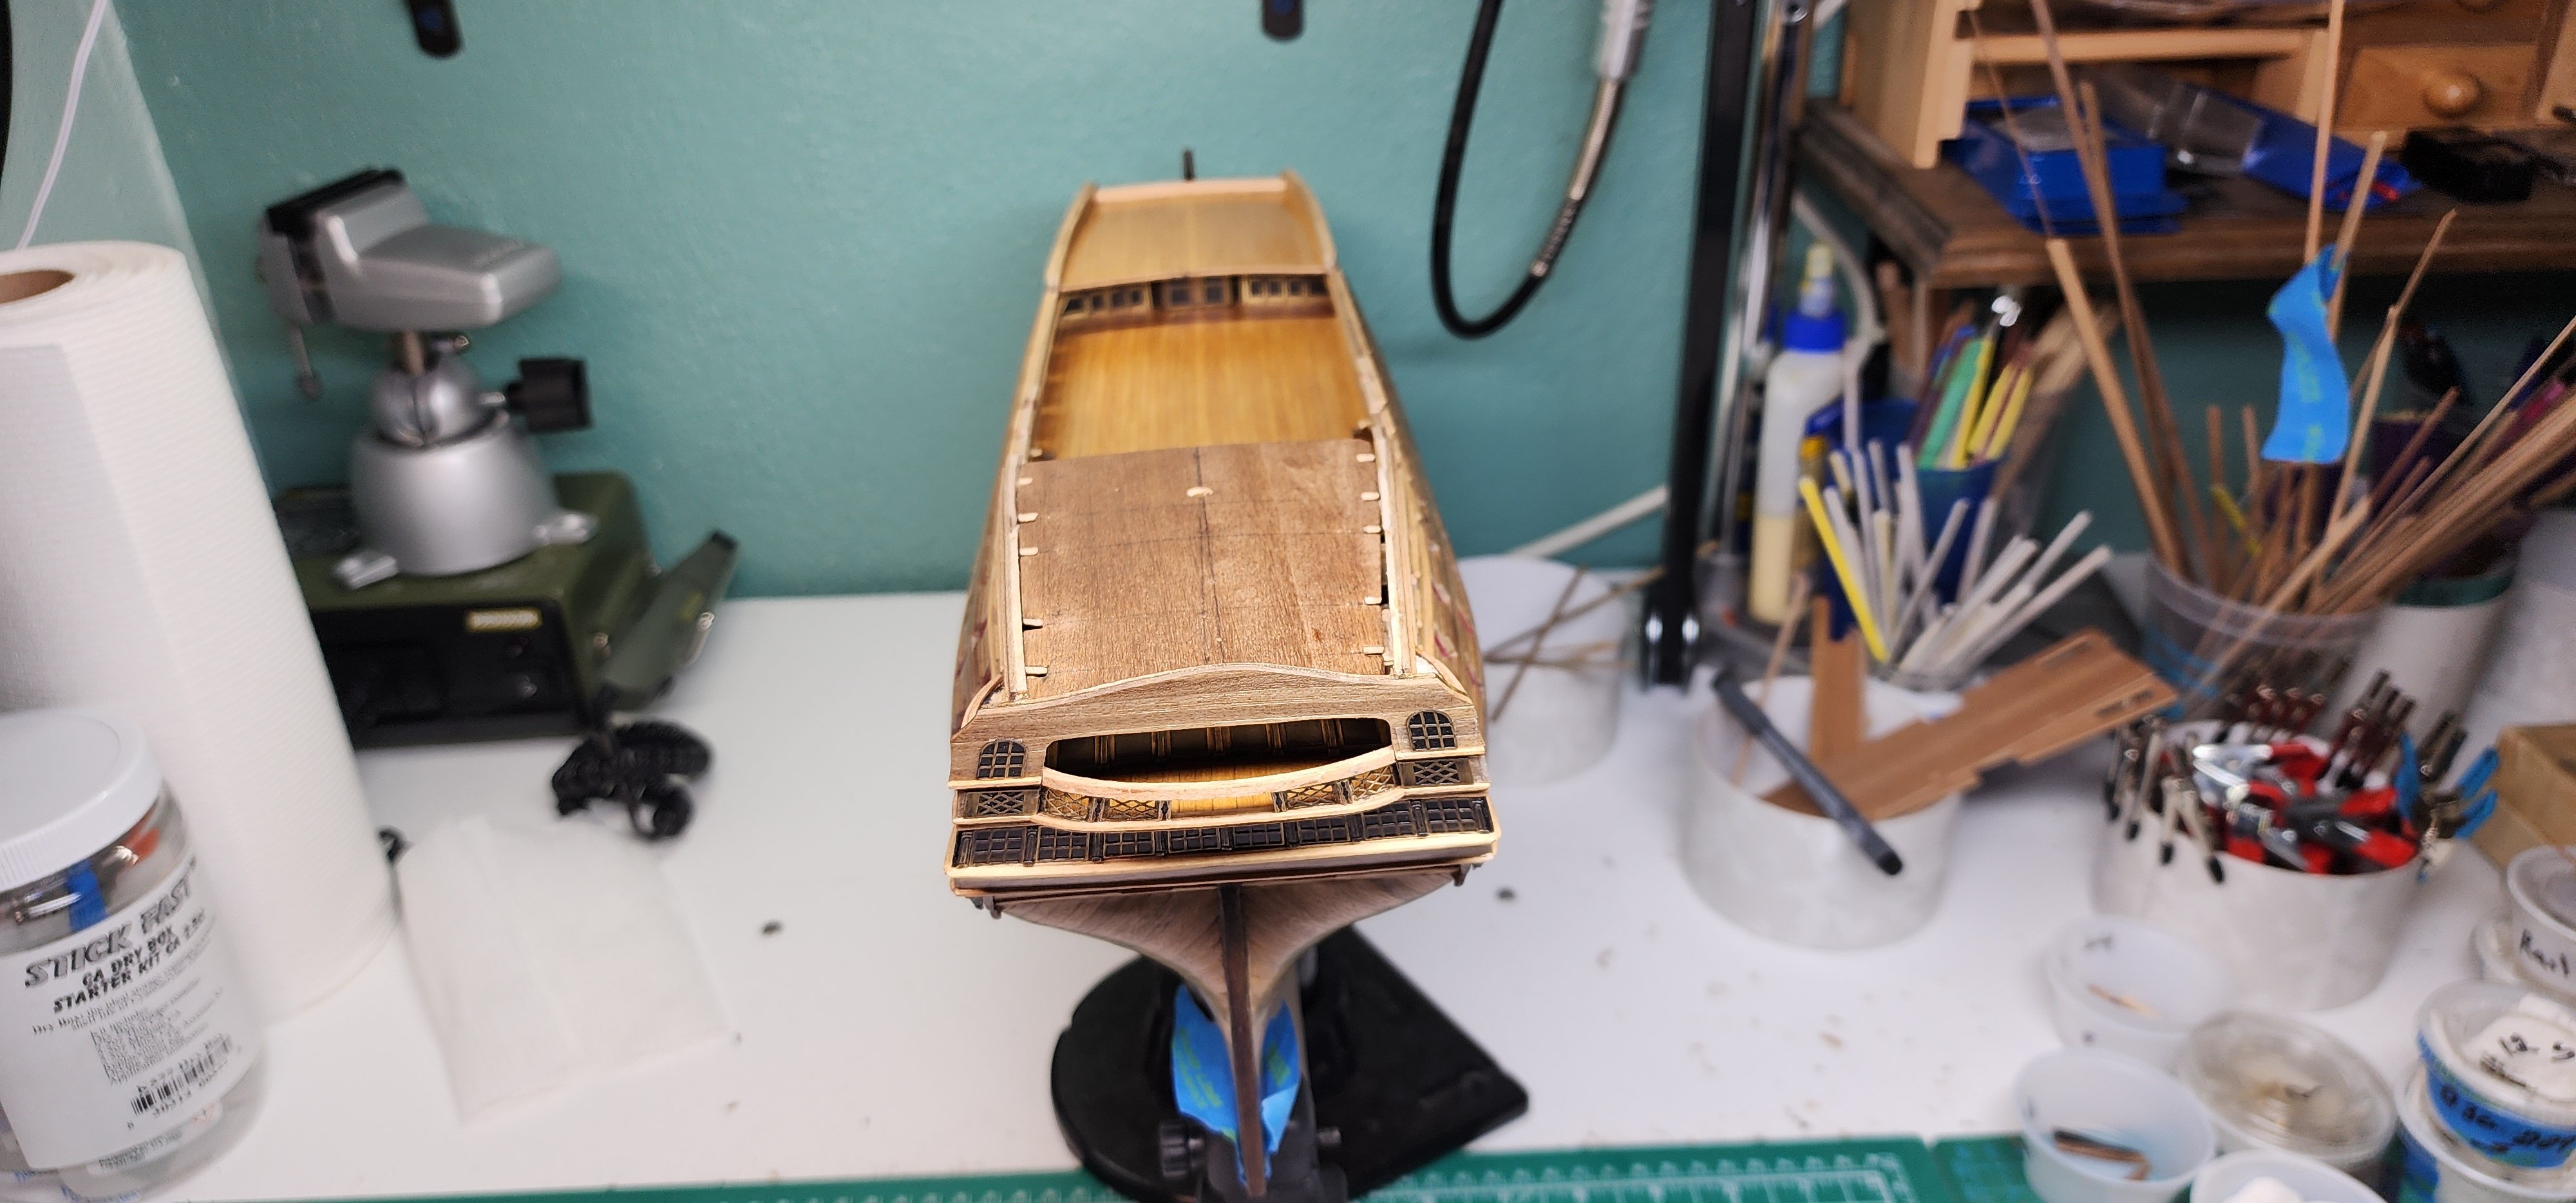
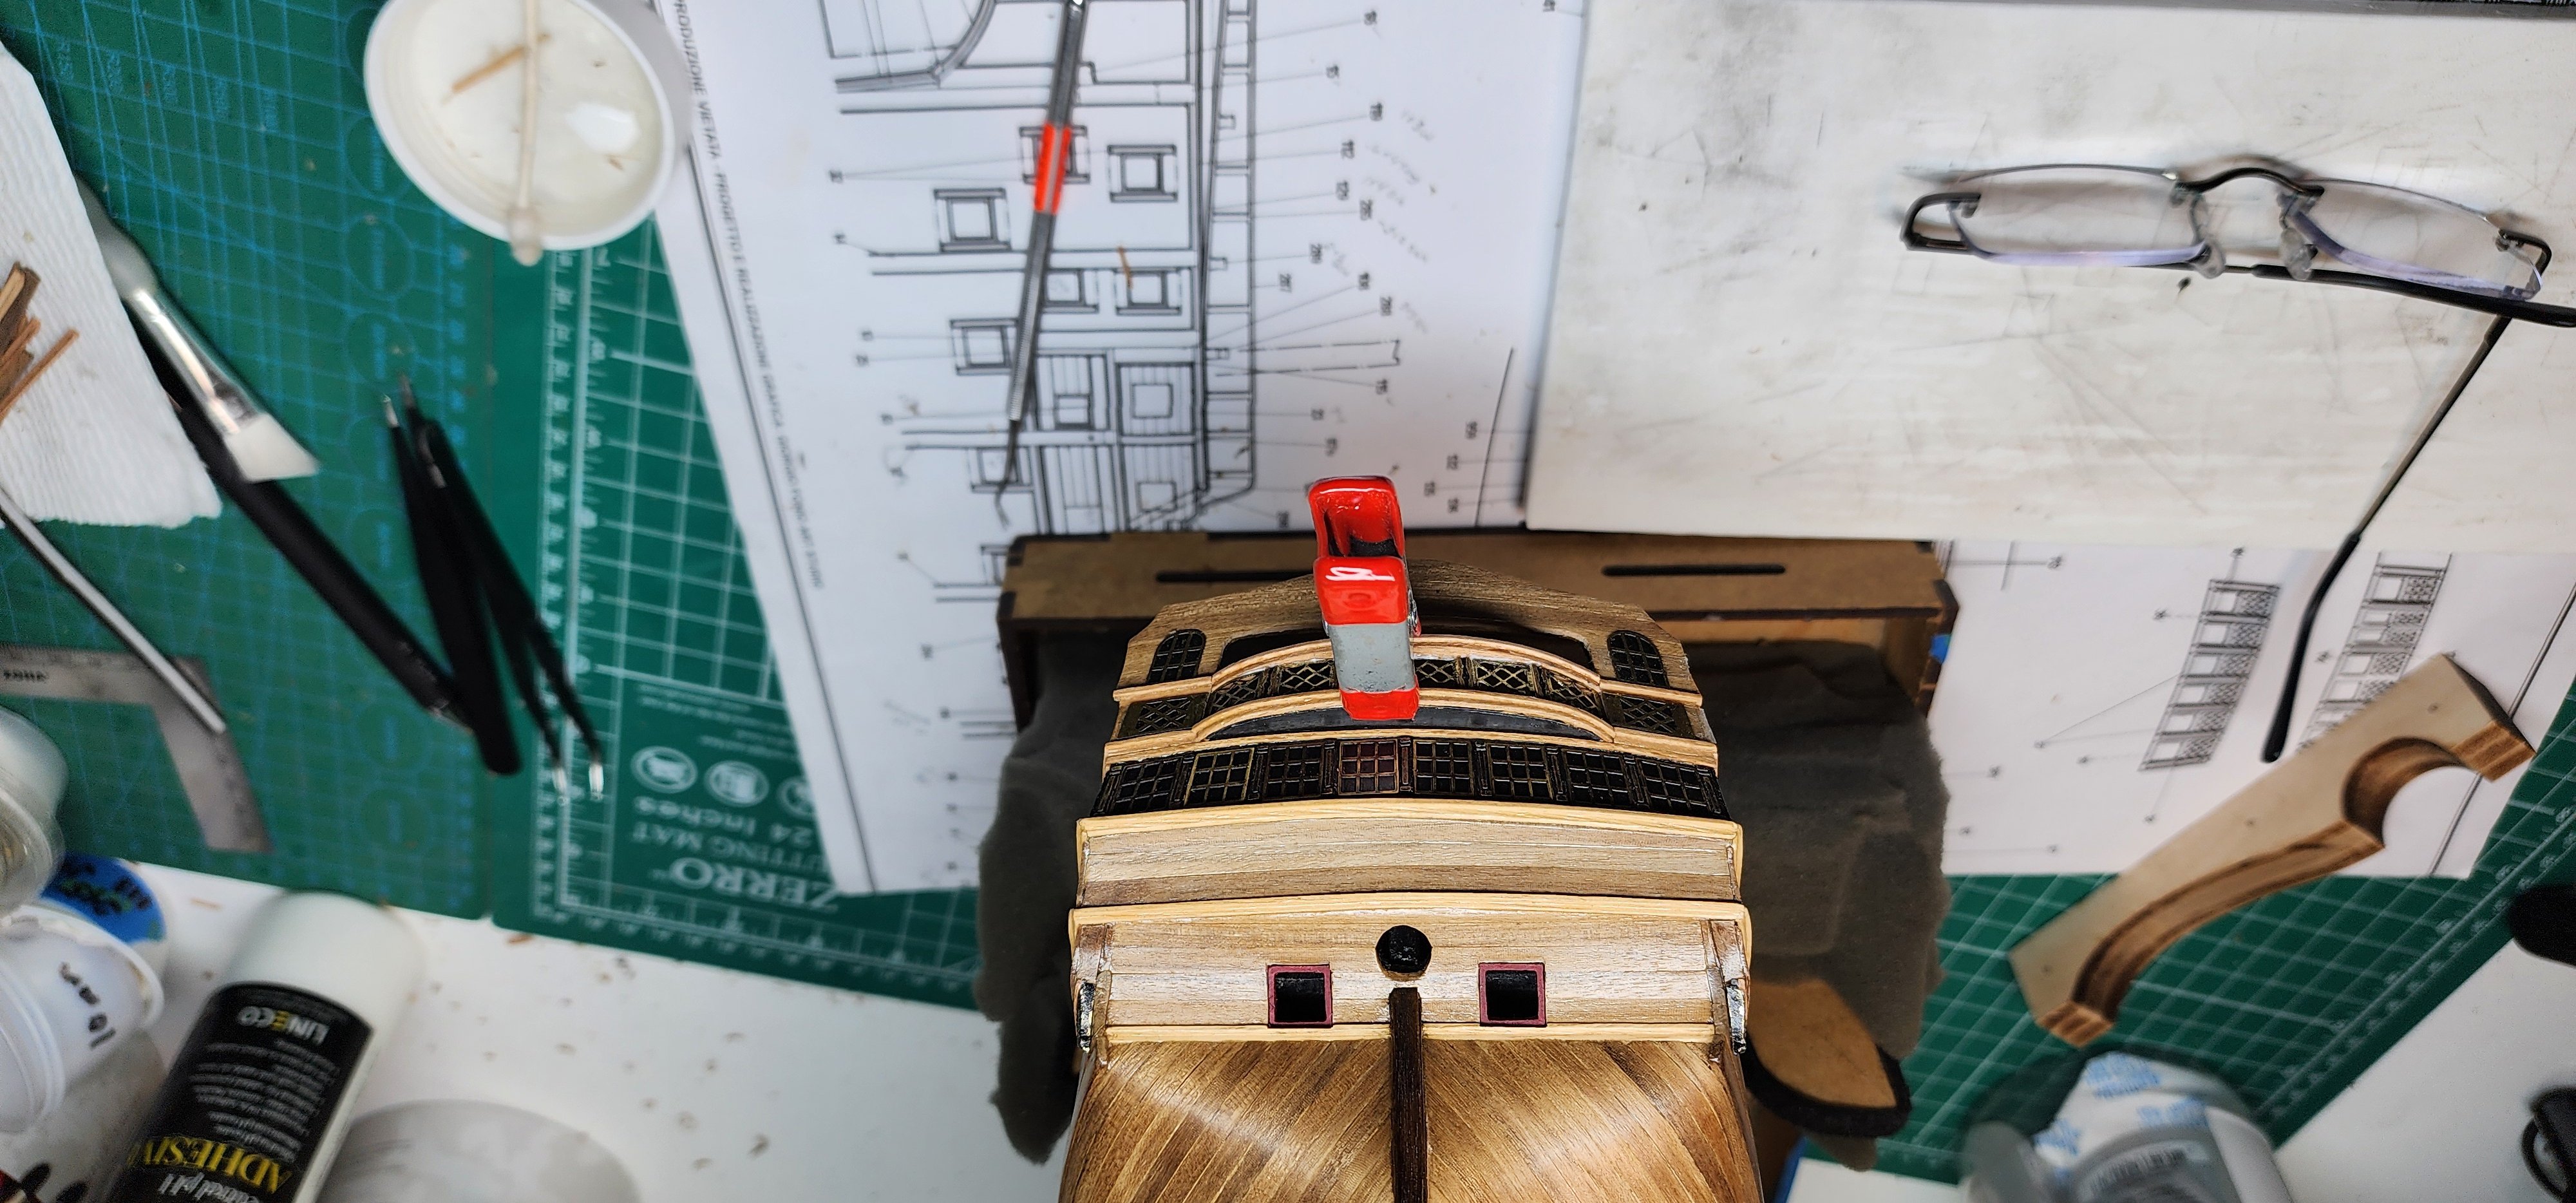
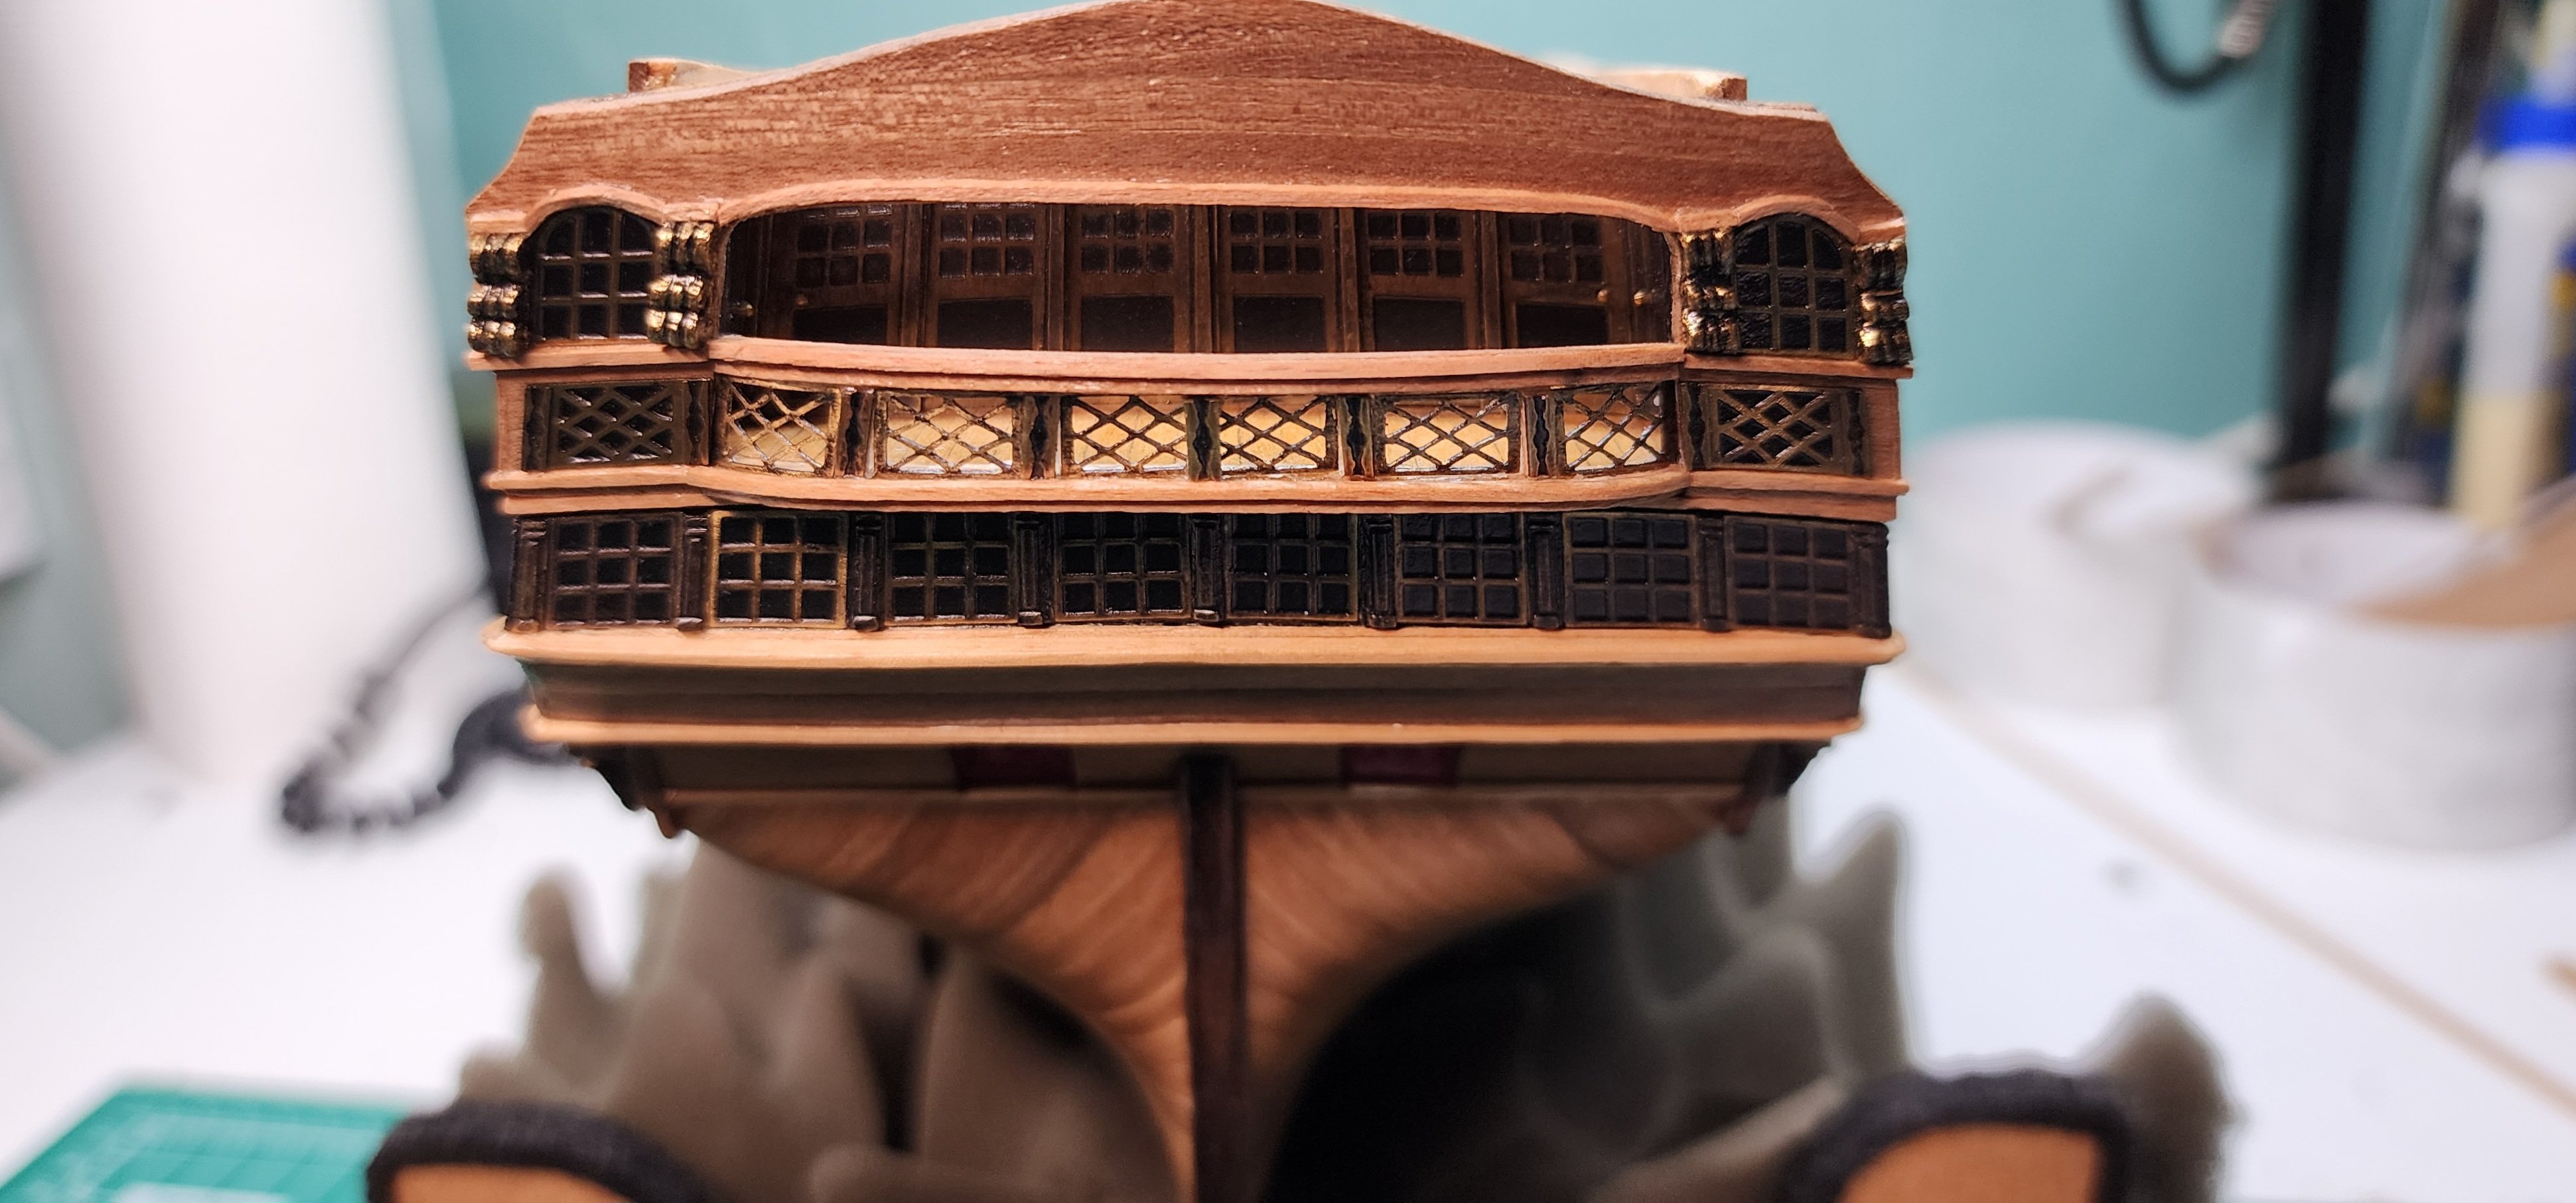
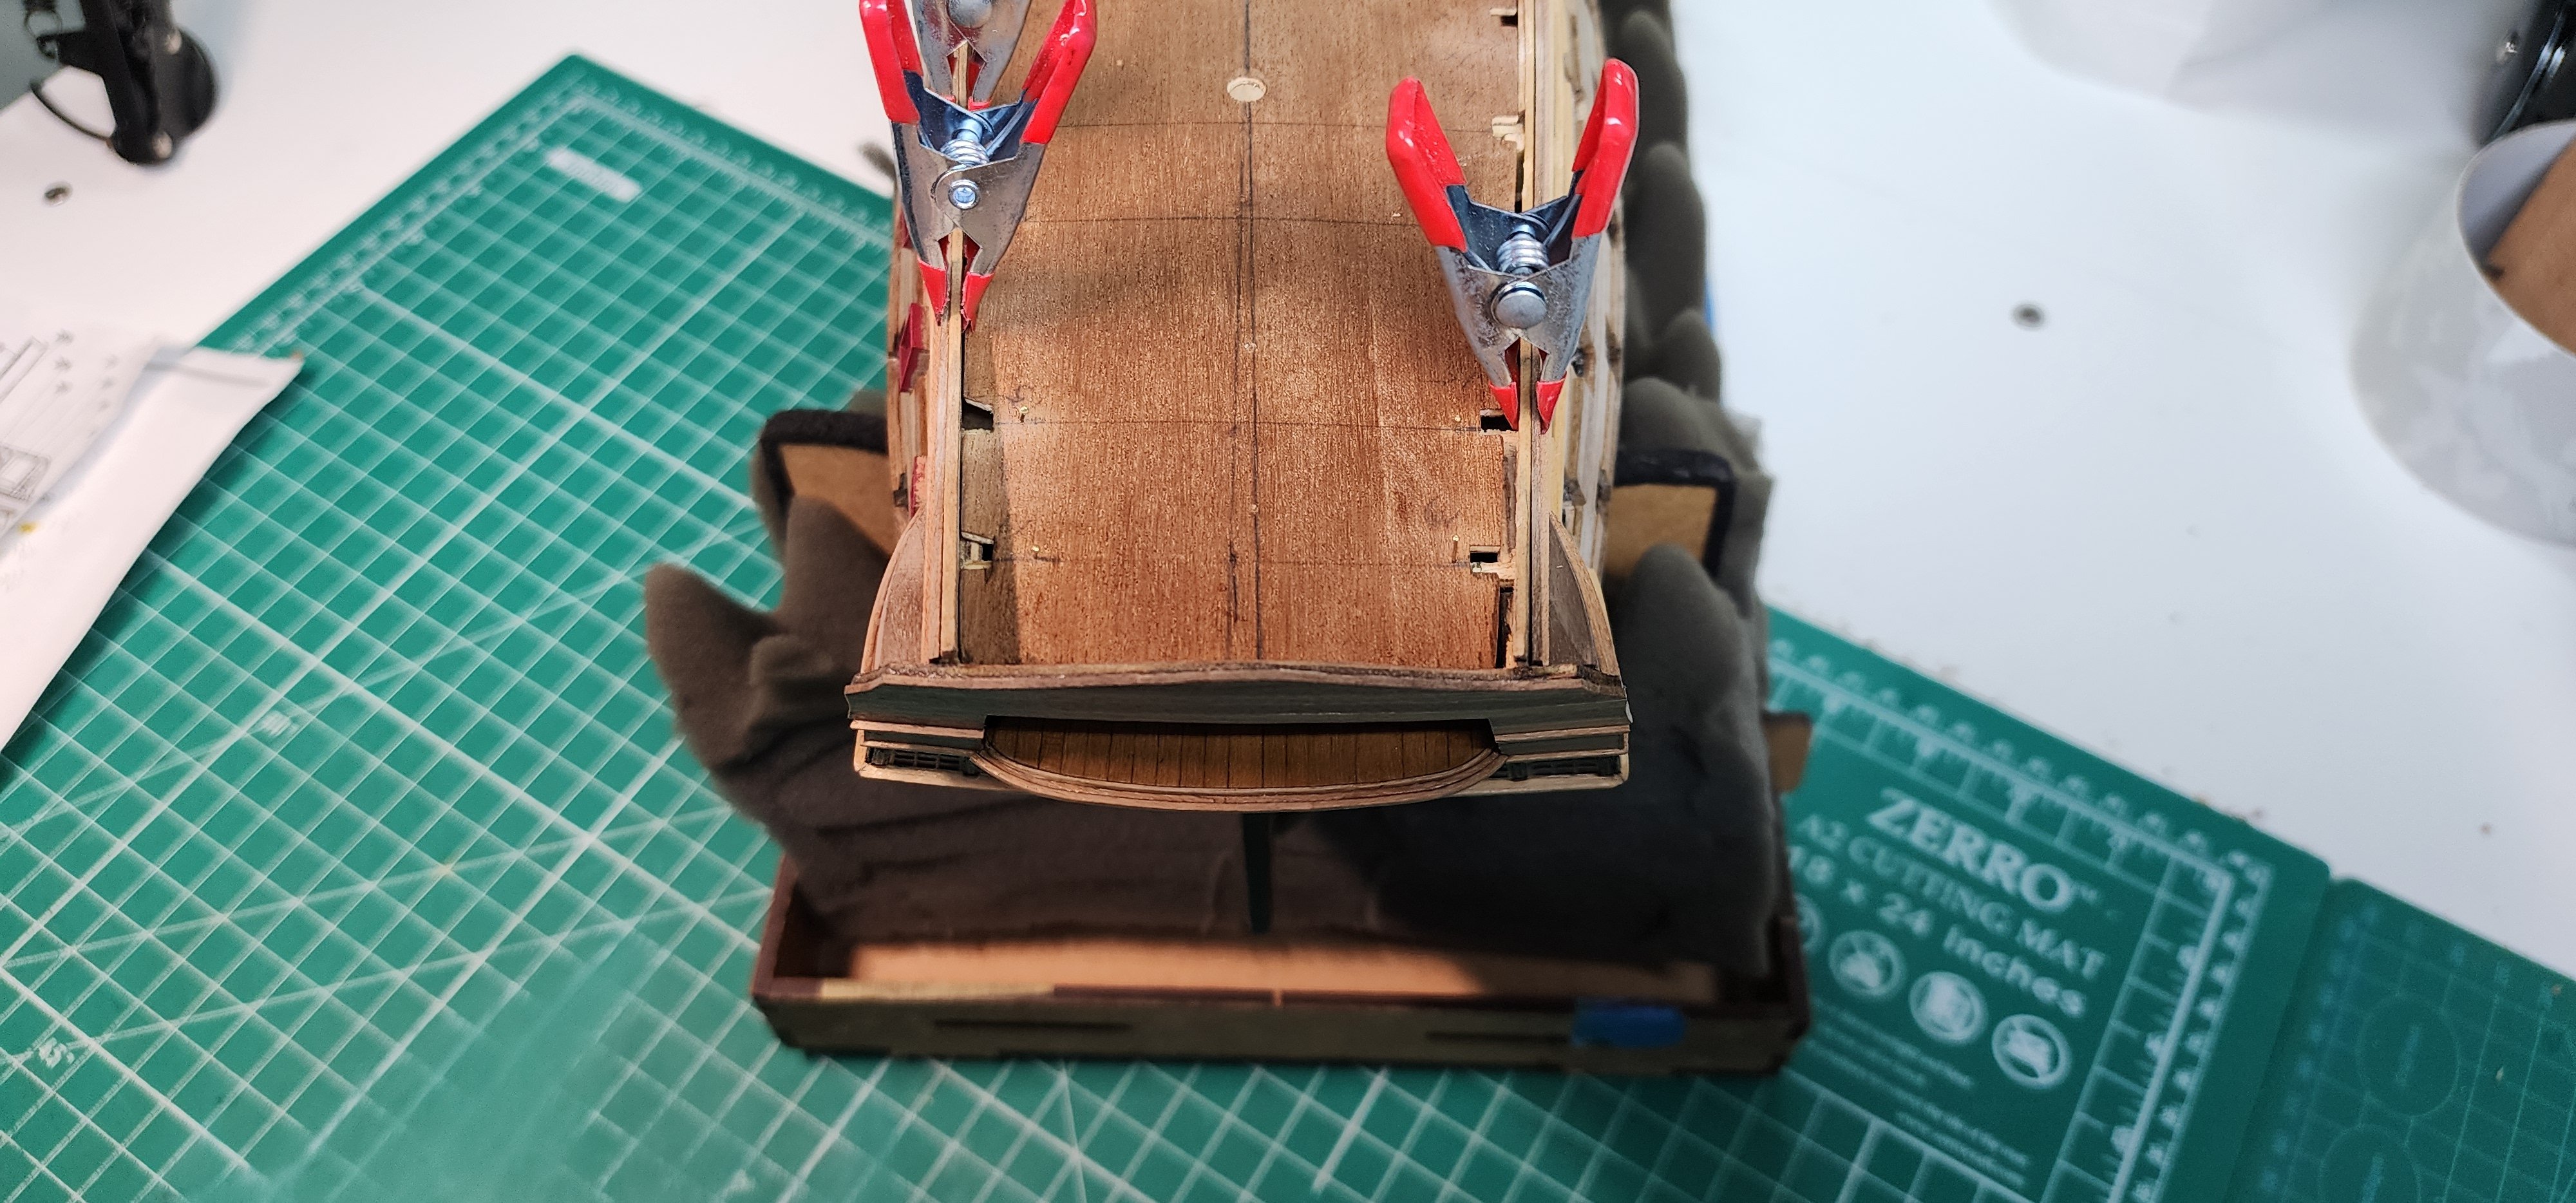
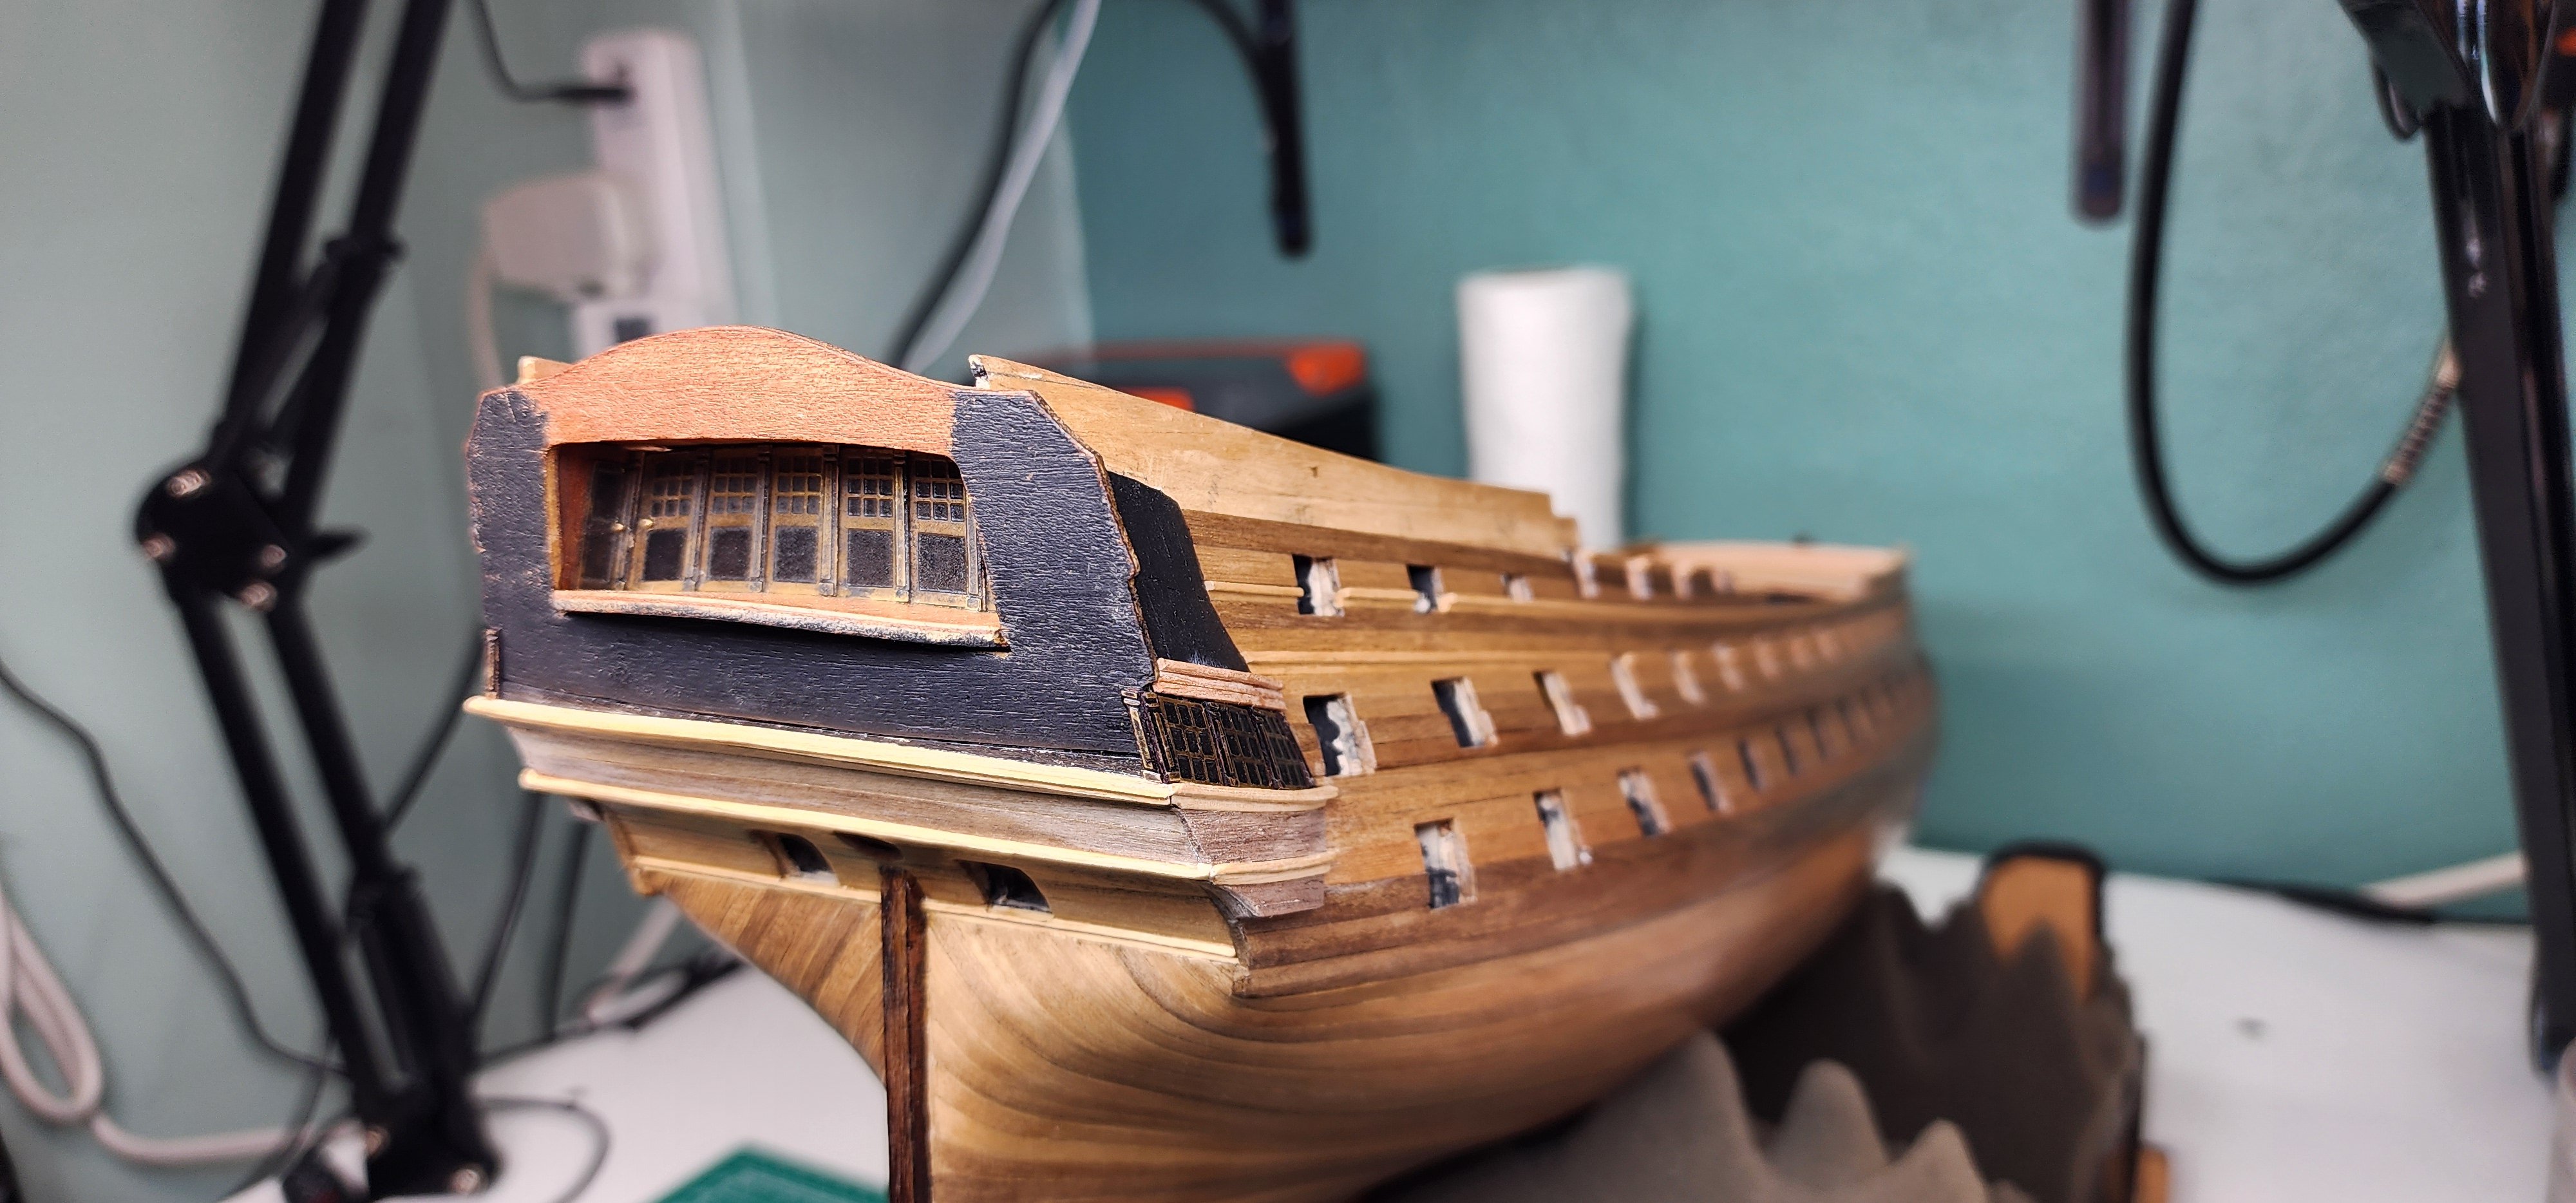
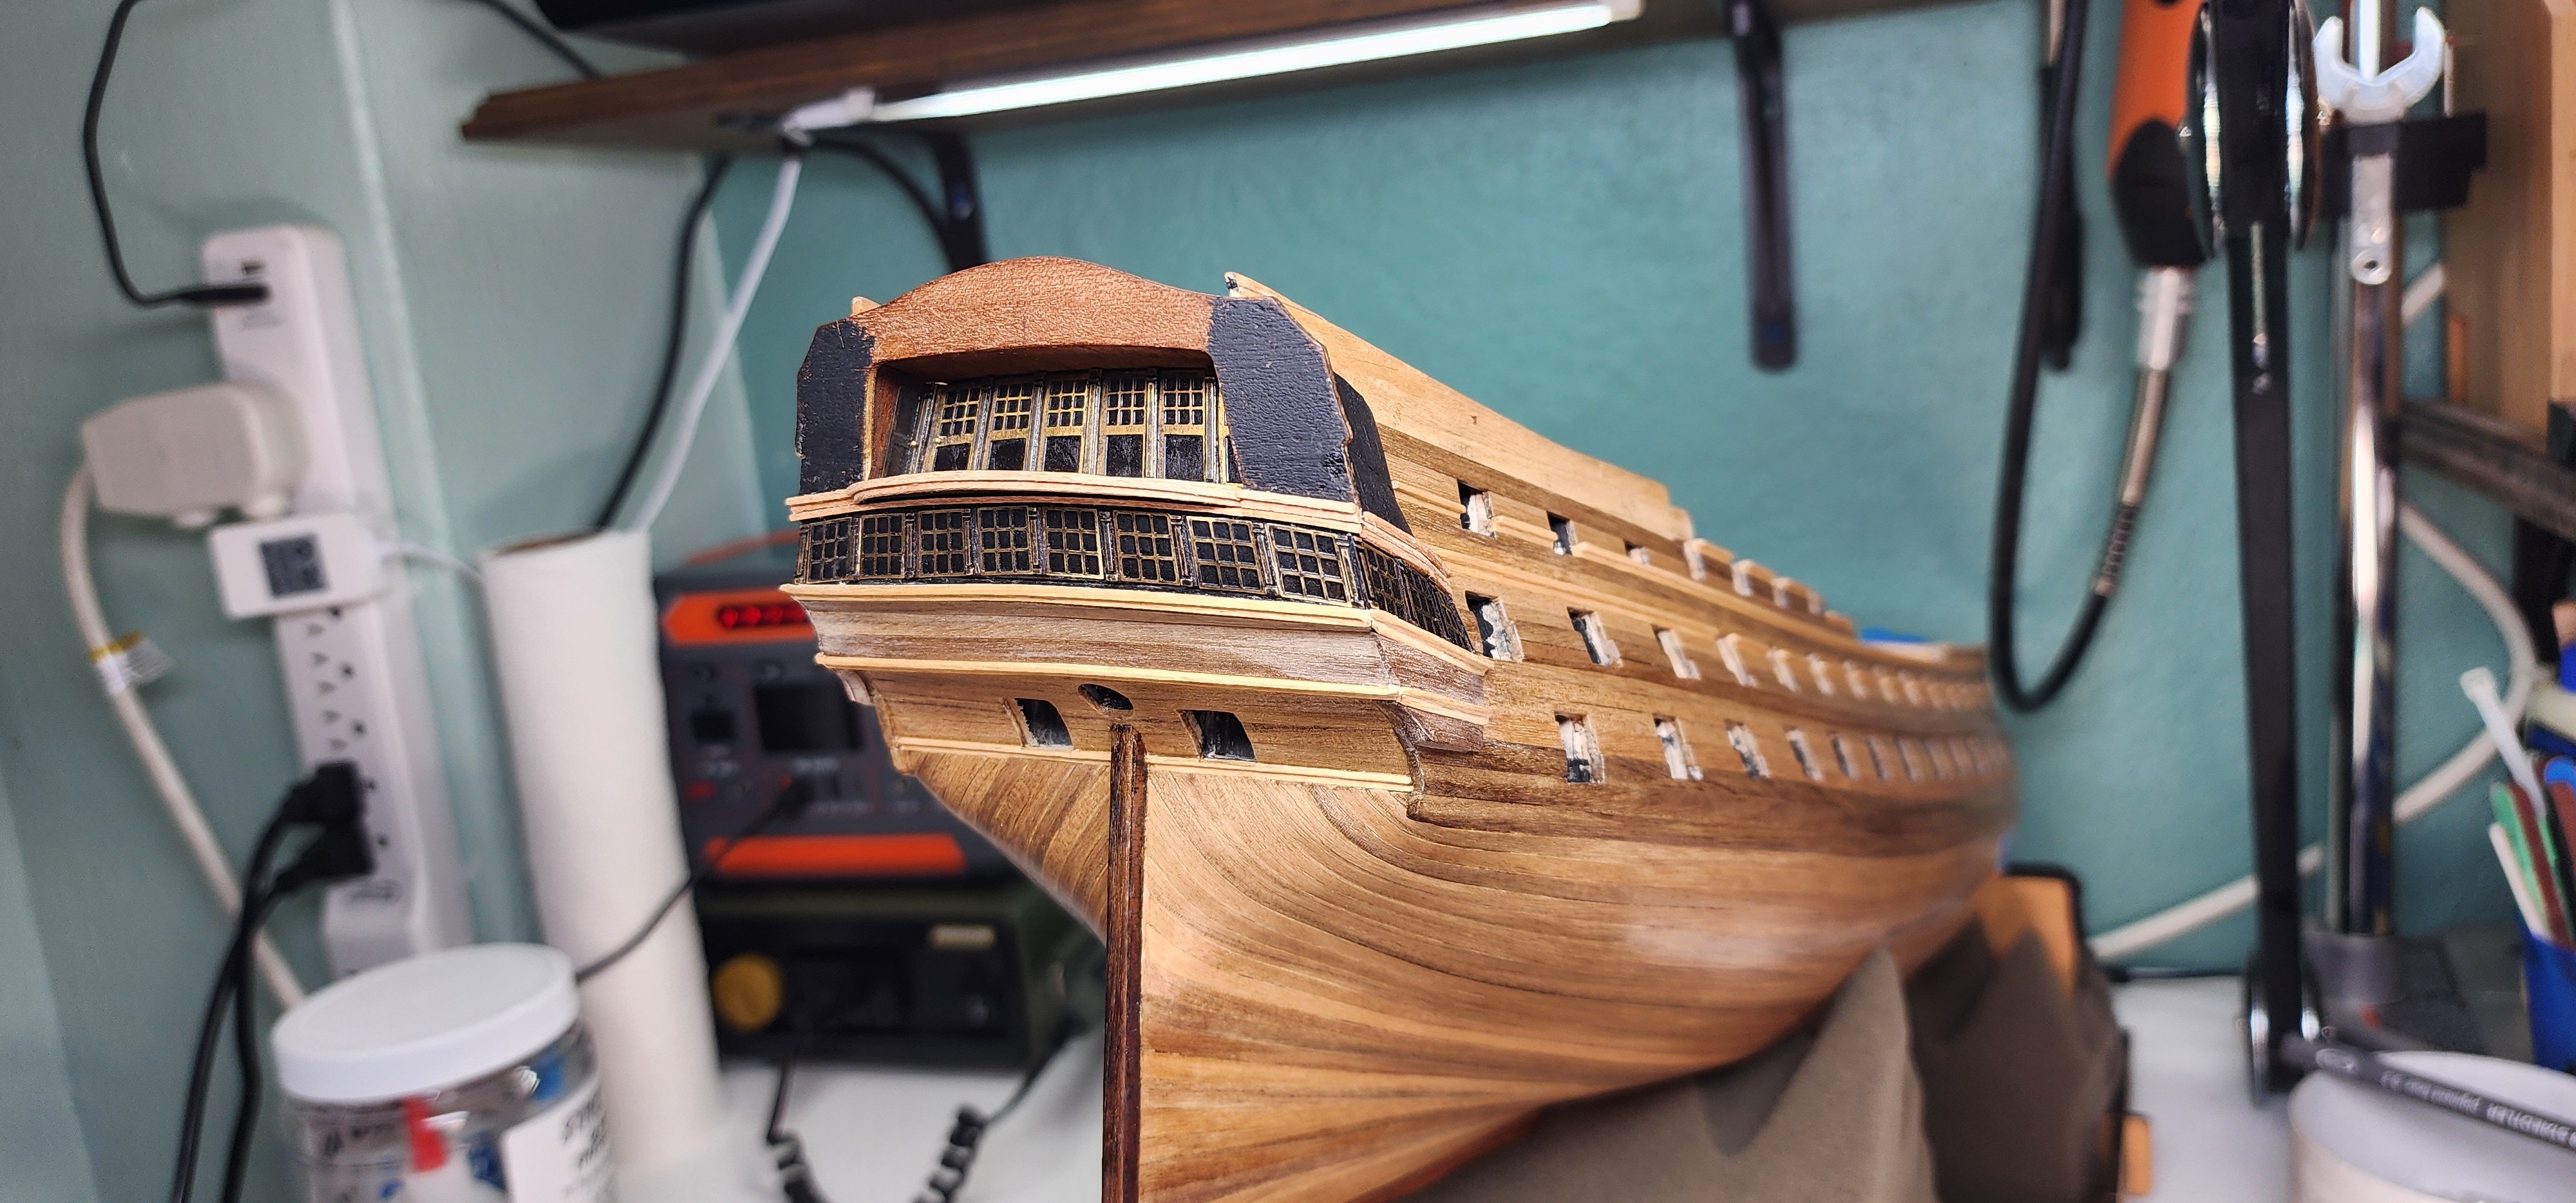
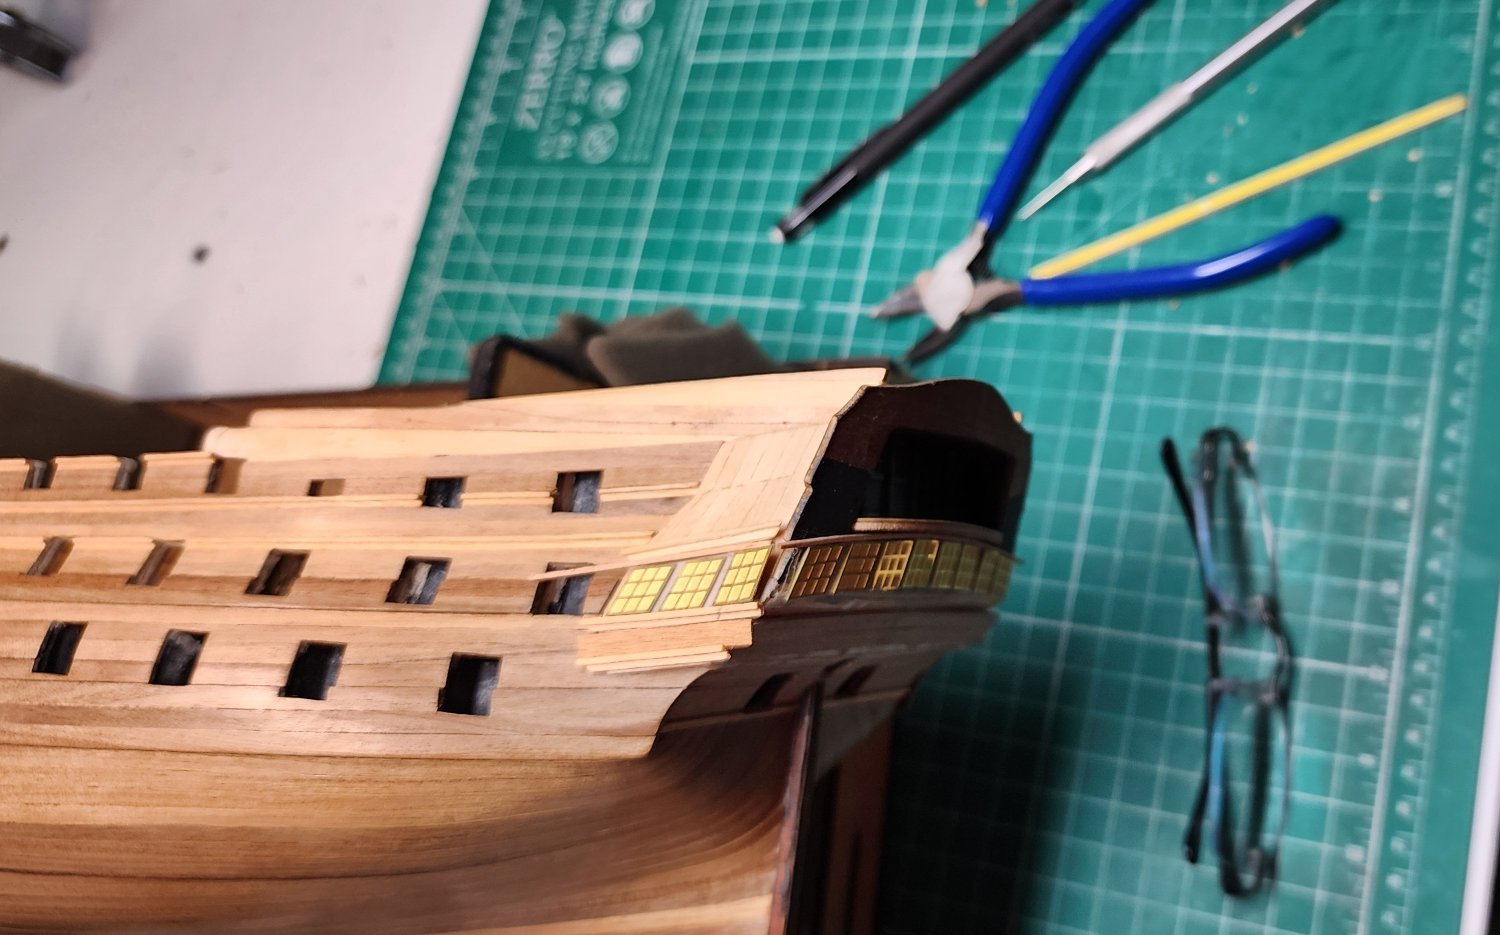
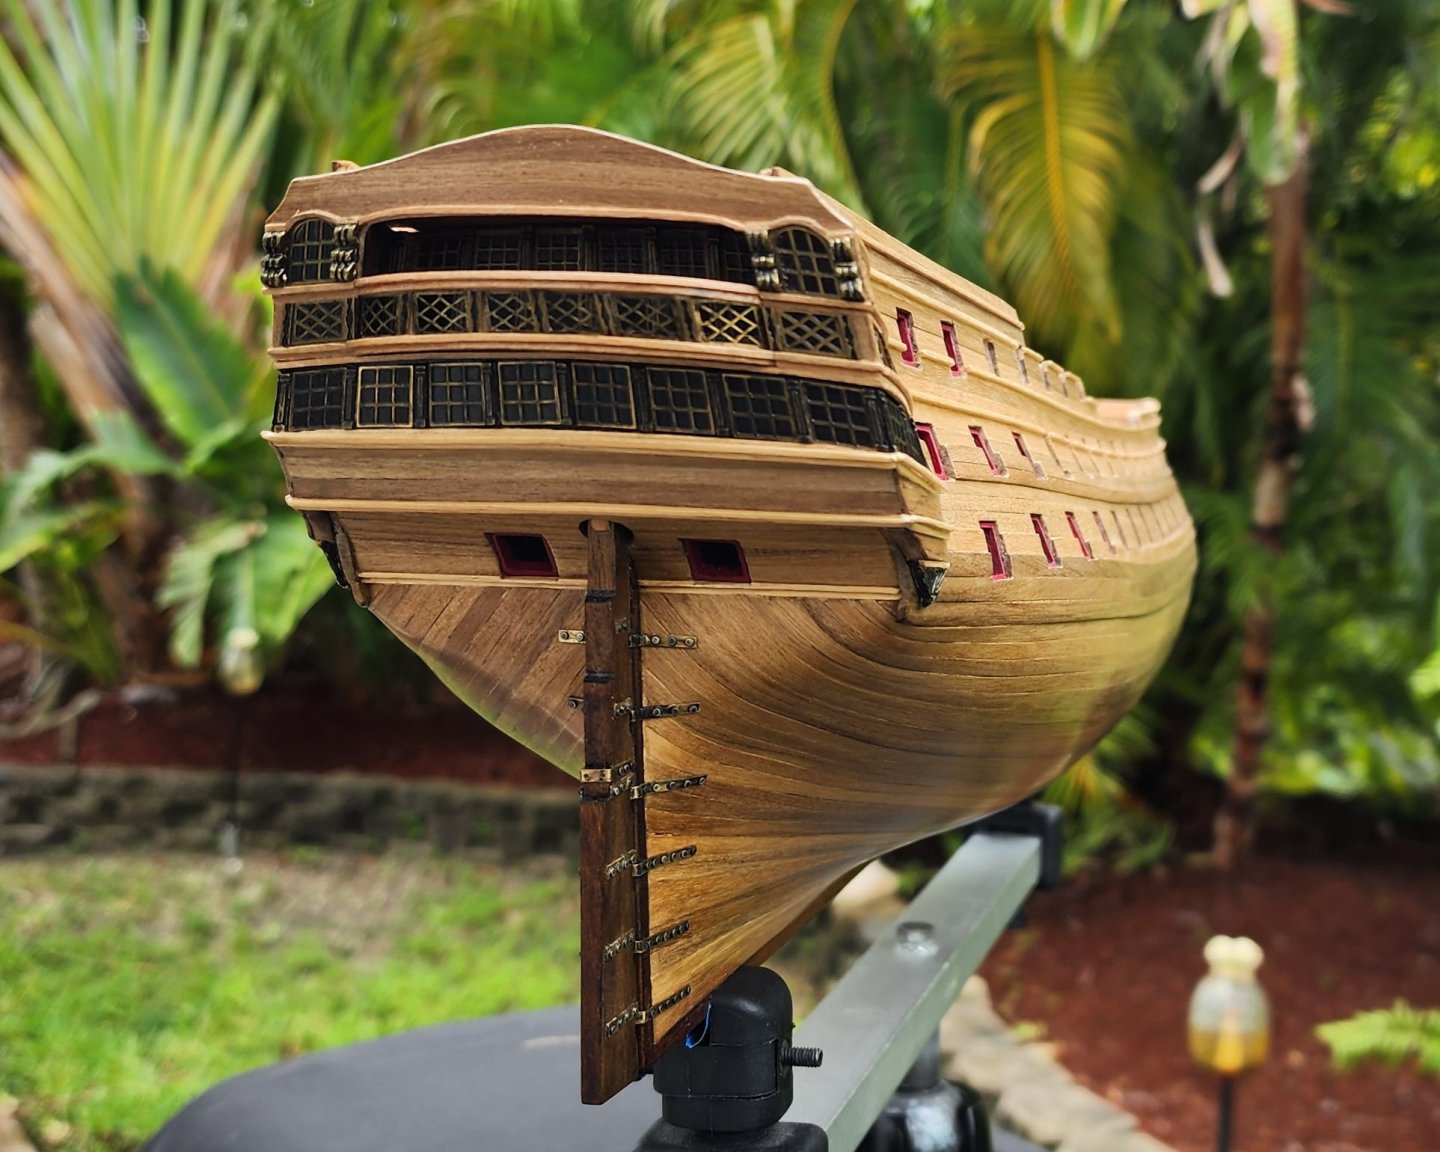
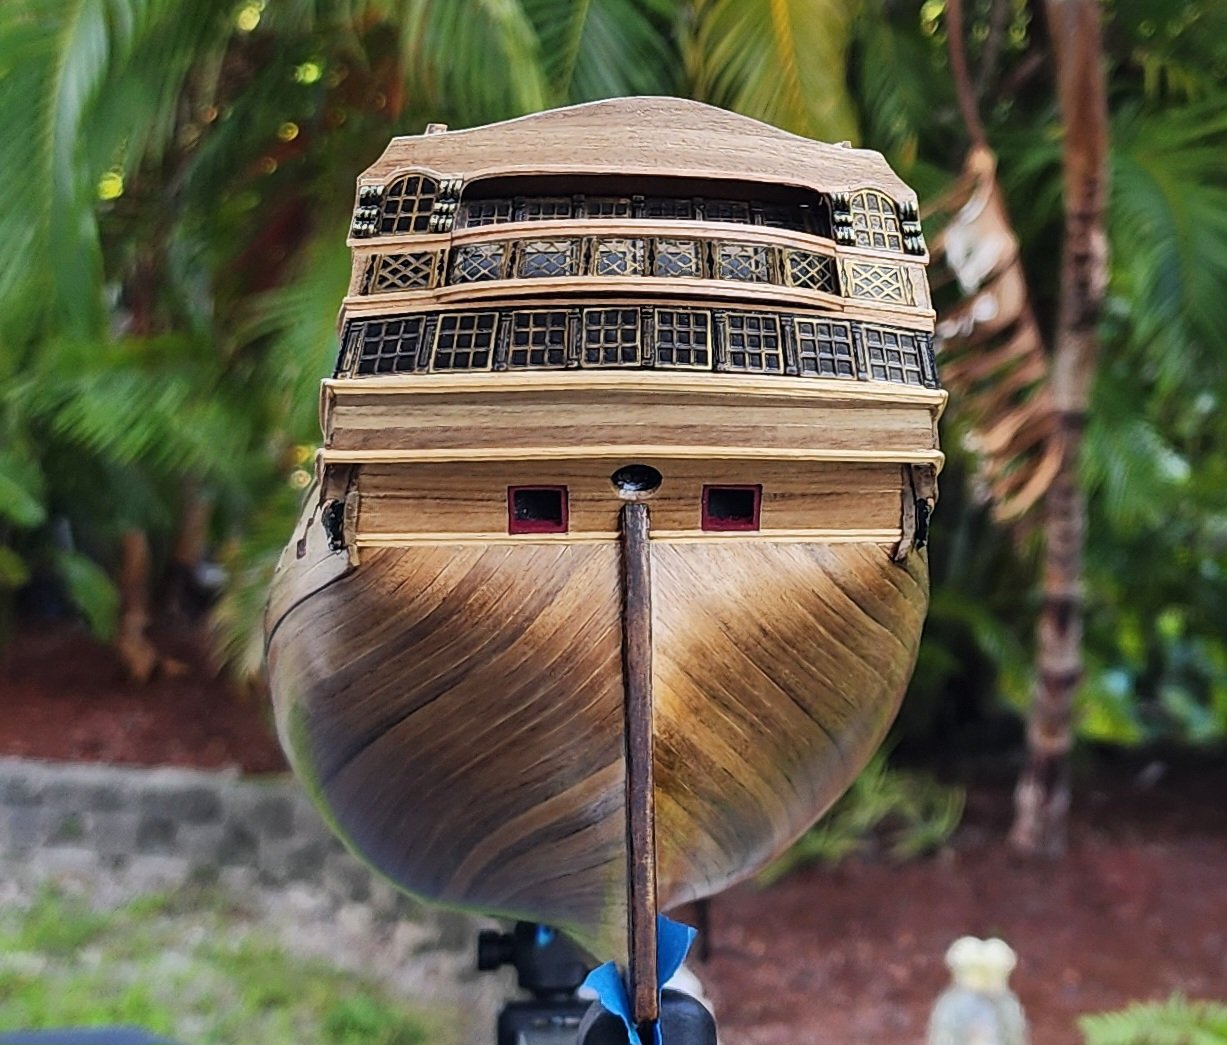
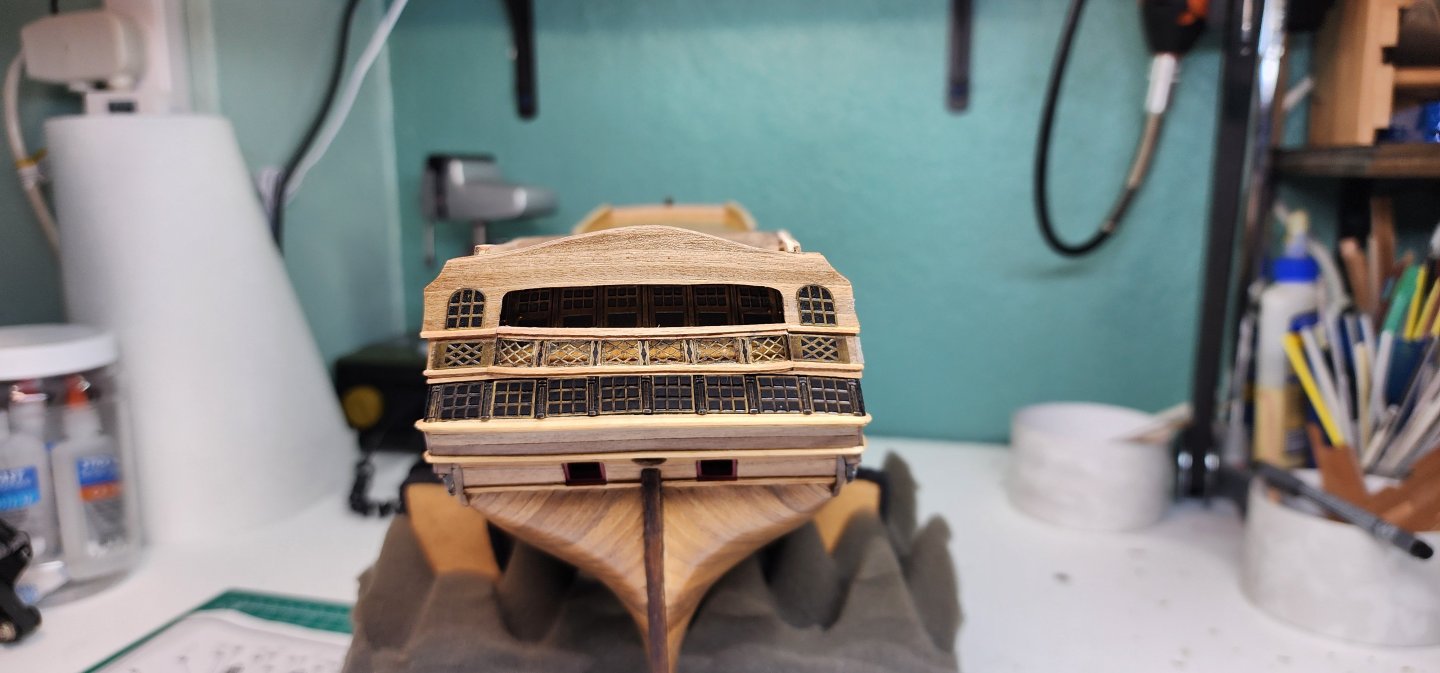
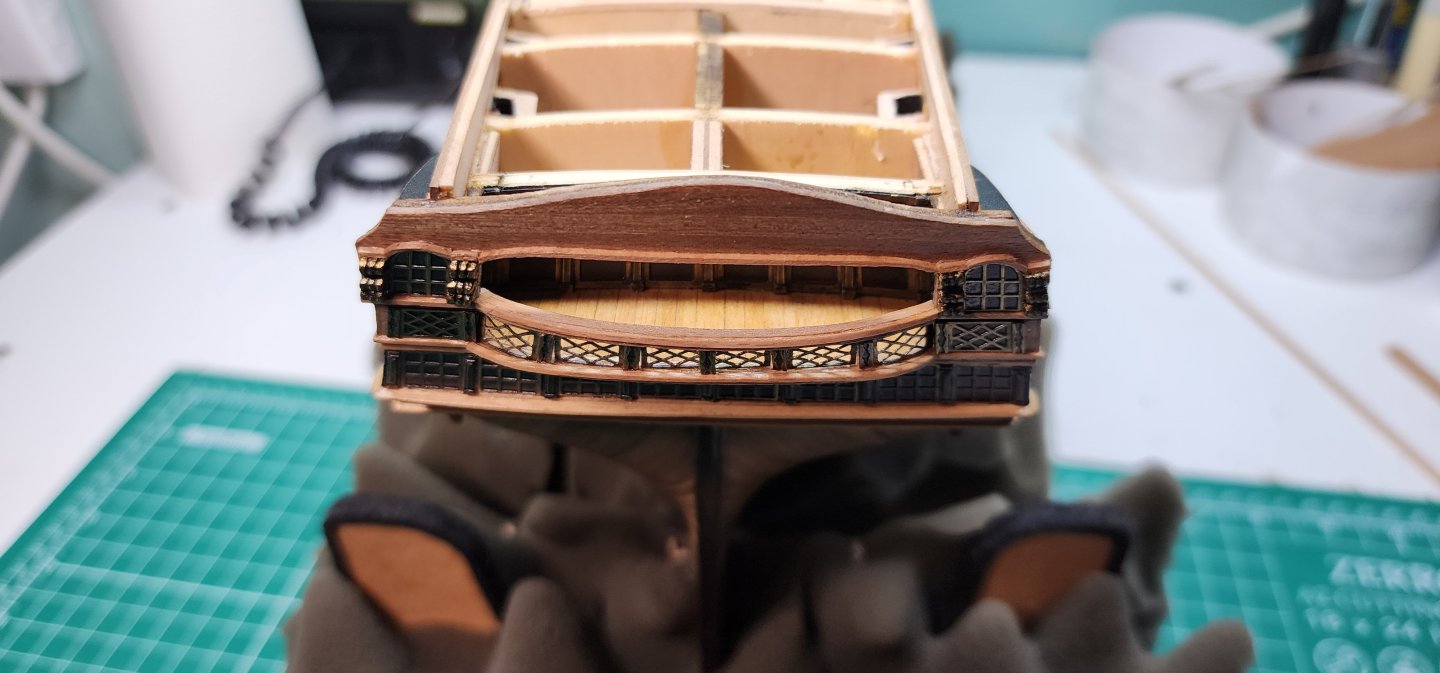
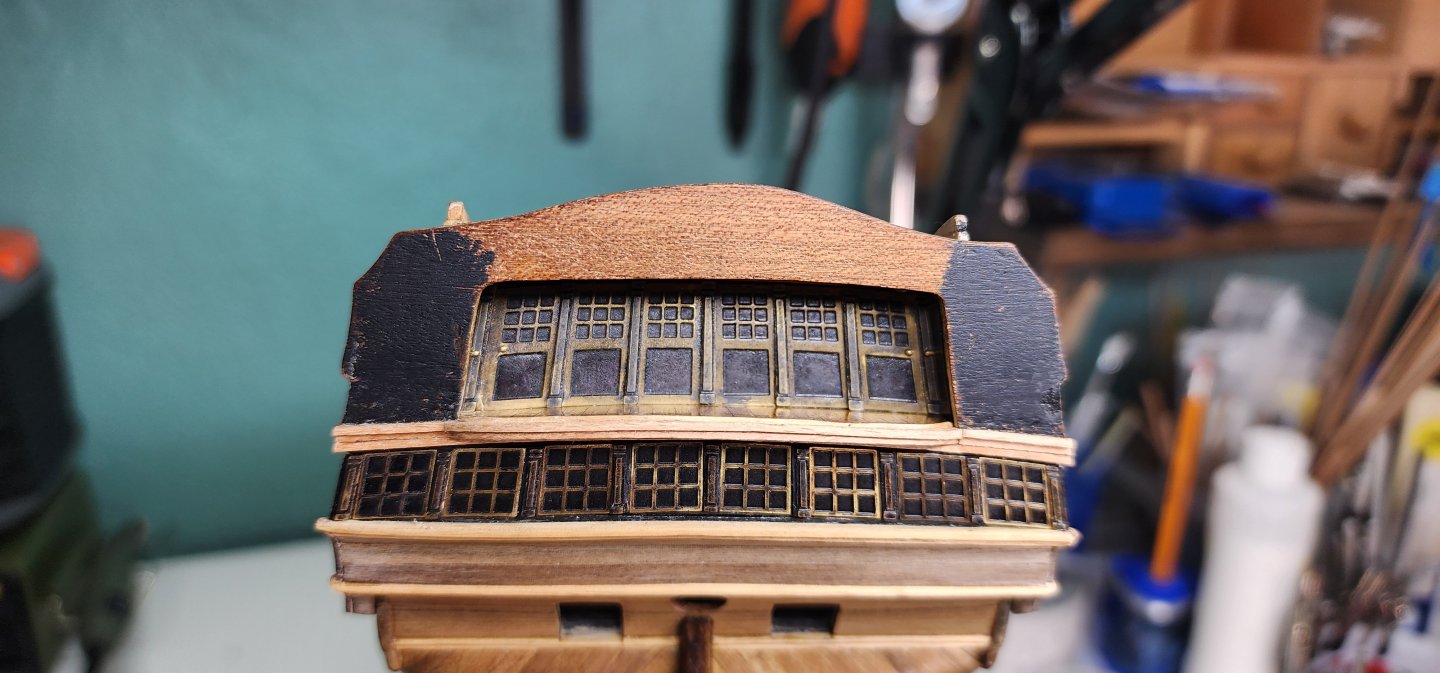
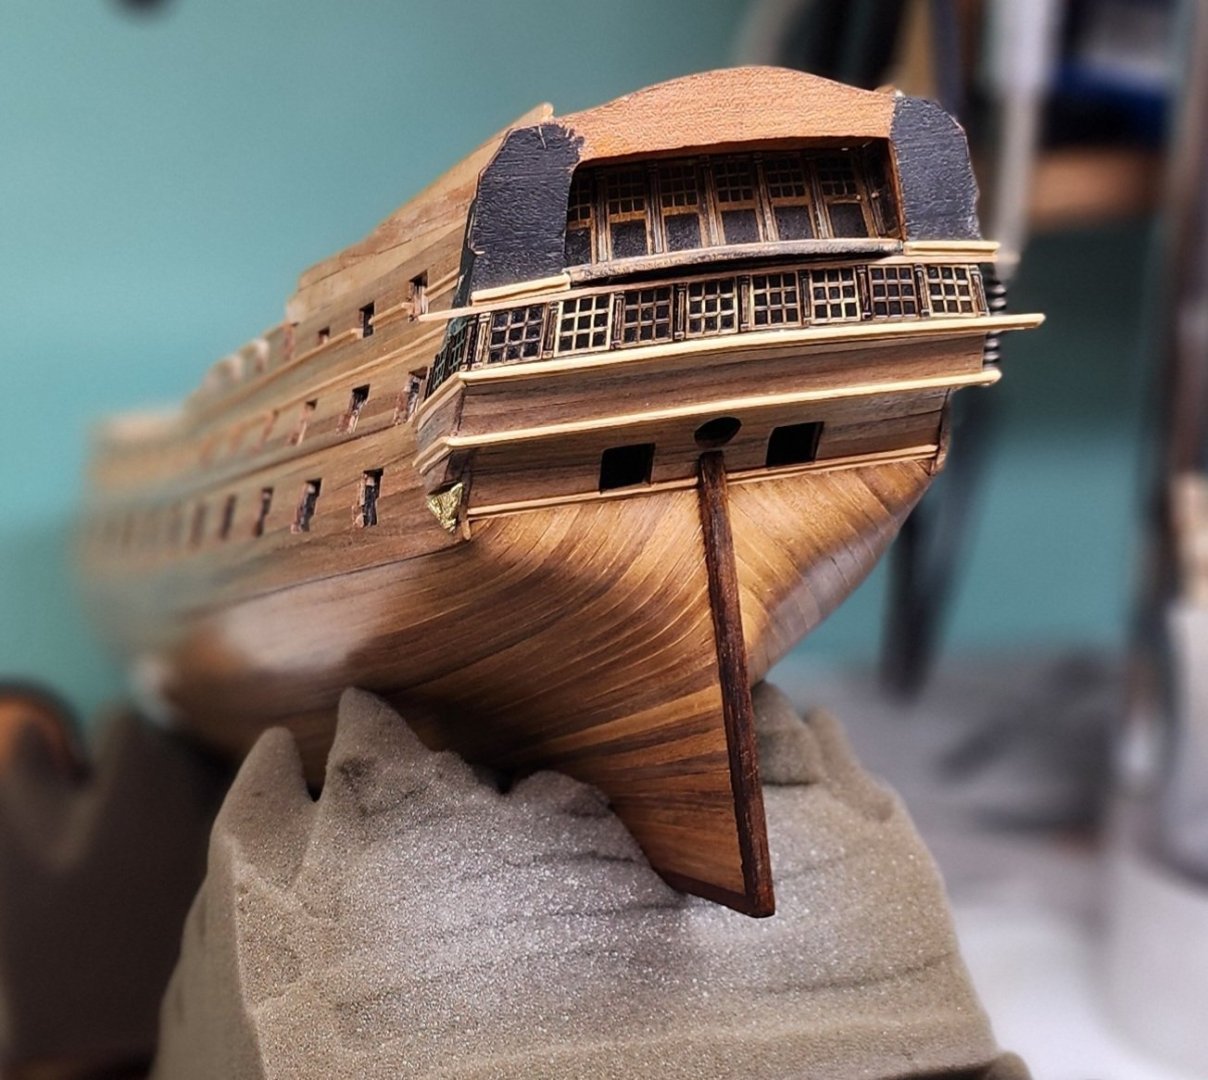
Hello All, Well, I am doing my monthly update. Seems like I have put myself into a routine timeline and only update every month or so. I haven’t really made significant progress, but I am making some progress slowly but surely. I completed the installation of the larboard side canon port post and moved on to working on the transom. I dry fitted the dicast ornaments to see how things will line up. It looks like I am going to have a bit of a challenge installing the larboard and starboard statues which are not shown in this post but are in a previous one. At this point it appears that there may not be enough room for them once the sheer planking is in place. We will just have to wait and see how things turn out and hope for the best. I completed installing the transom railings. This was a challenging task and took me quite some time before I felt satisfied with how they looked. I started with shaping the handrail and then shaped and installed the first part of the fencing, starting with the outboard fencing first and working my way to the middle. I installed the small decretive PE brass pieces to the station post first before installing them to the deck. When I put the lower deck trim on, I left a small ledge, about .5mm to accept and add support to the railing post and fencing. It worked out pretty good and glad I did it. After all the post and fencing were installed, I glued the top railing in place and clamped it to dry. I was worried that the whole thing would collapse under the pressure of the clamp, but it turned out that it was much more durable than I thought. Before I glued the top railing in place, I installed the 1 x 1 trim on the 2 x 2 railing. After the railing was completed, I installed the remaining PE parts onto the transom. I also installed the 1 x 1 trim around the upper windows and balcony opening. I am not really thrilled with how this came out and will circle back later and redo it until I feel satisfied with the result. This is as far as I am going to go on the stern for now as I want to move onto the bow and start working on the forecastle. I have begun this part of the build but will provide an update on that later once I have gotten far enough along. Well, I appreciate you reading and taking the time to look at the pics. Hope you enjoy them and as always, your input comments and guidance are always welcome. Cheers Nearshore


-
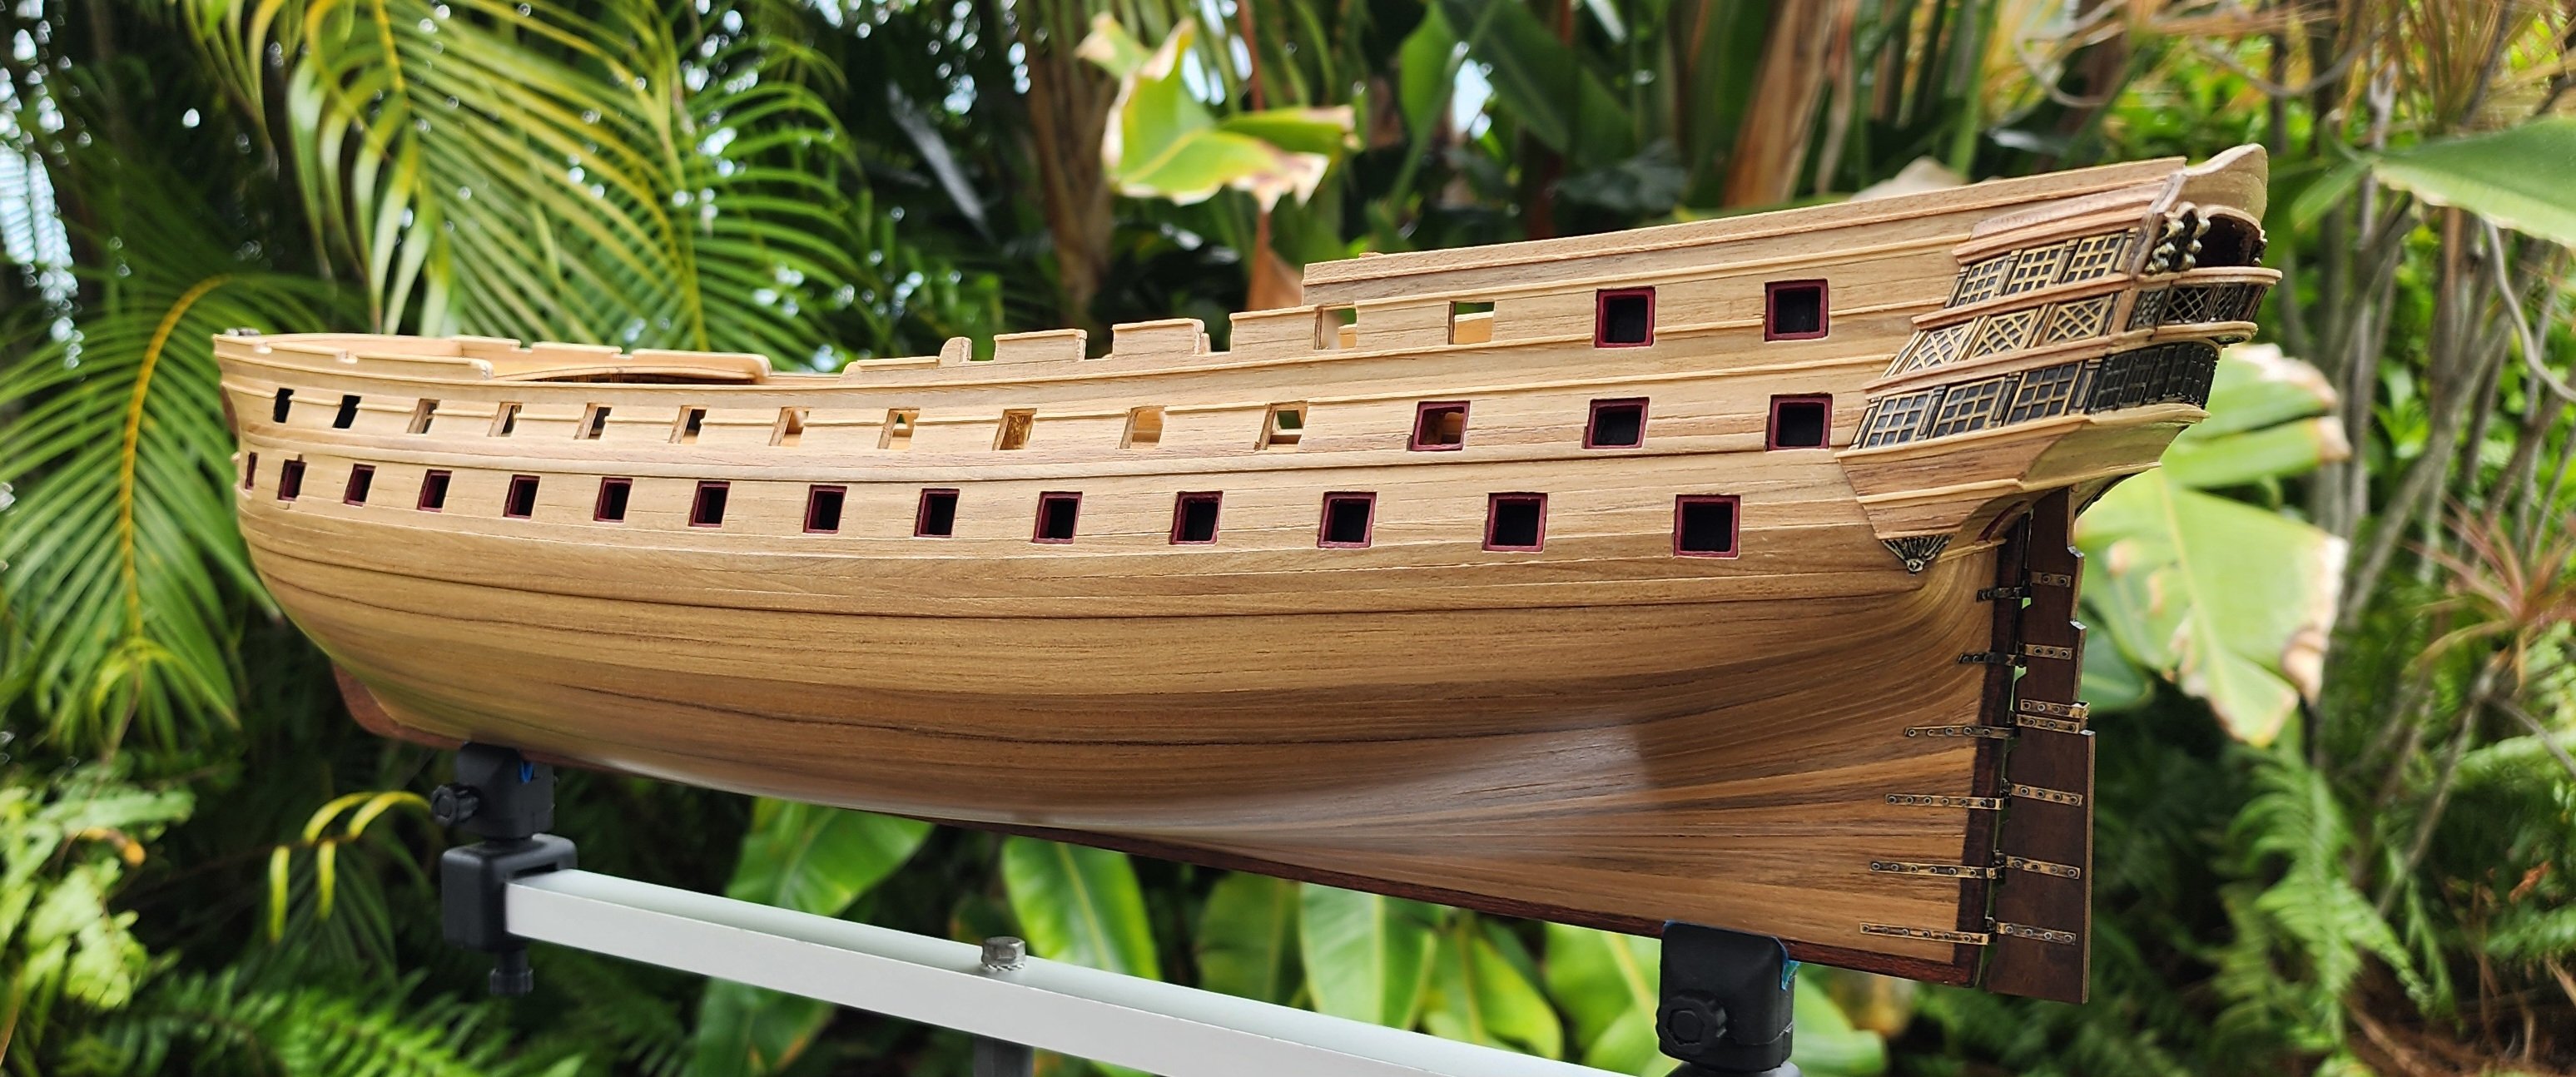
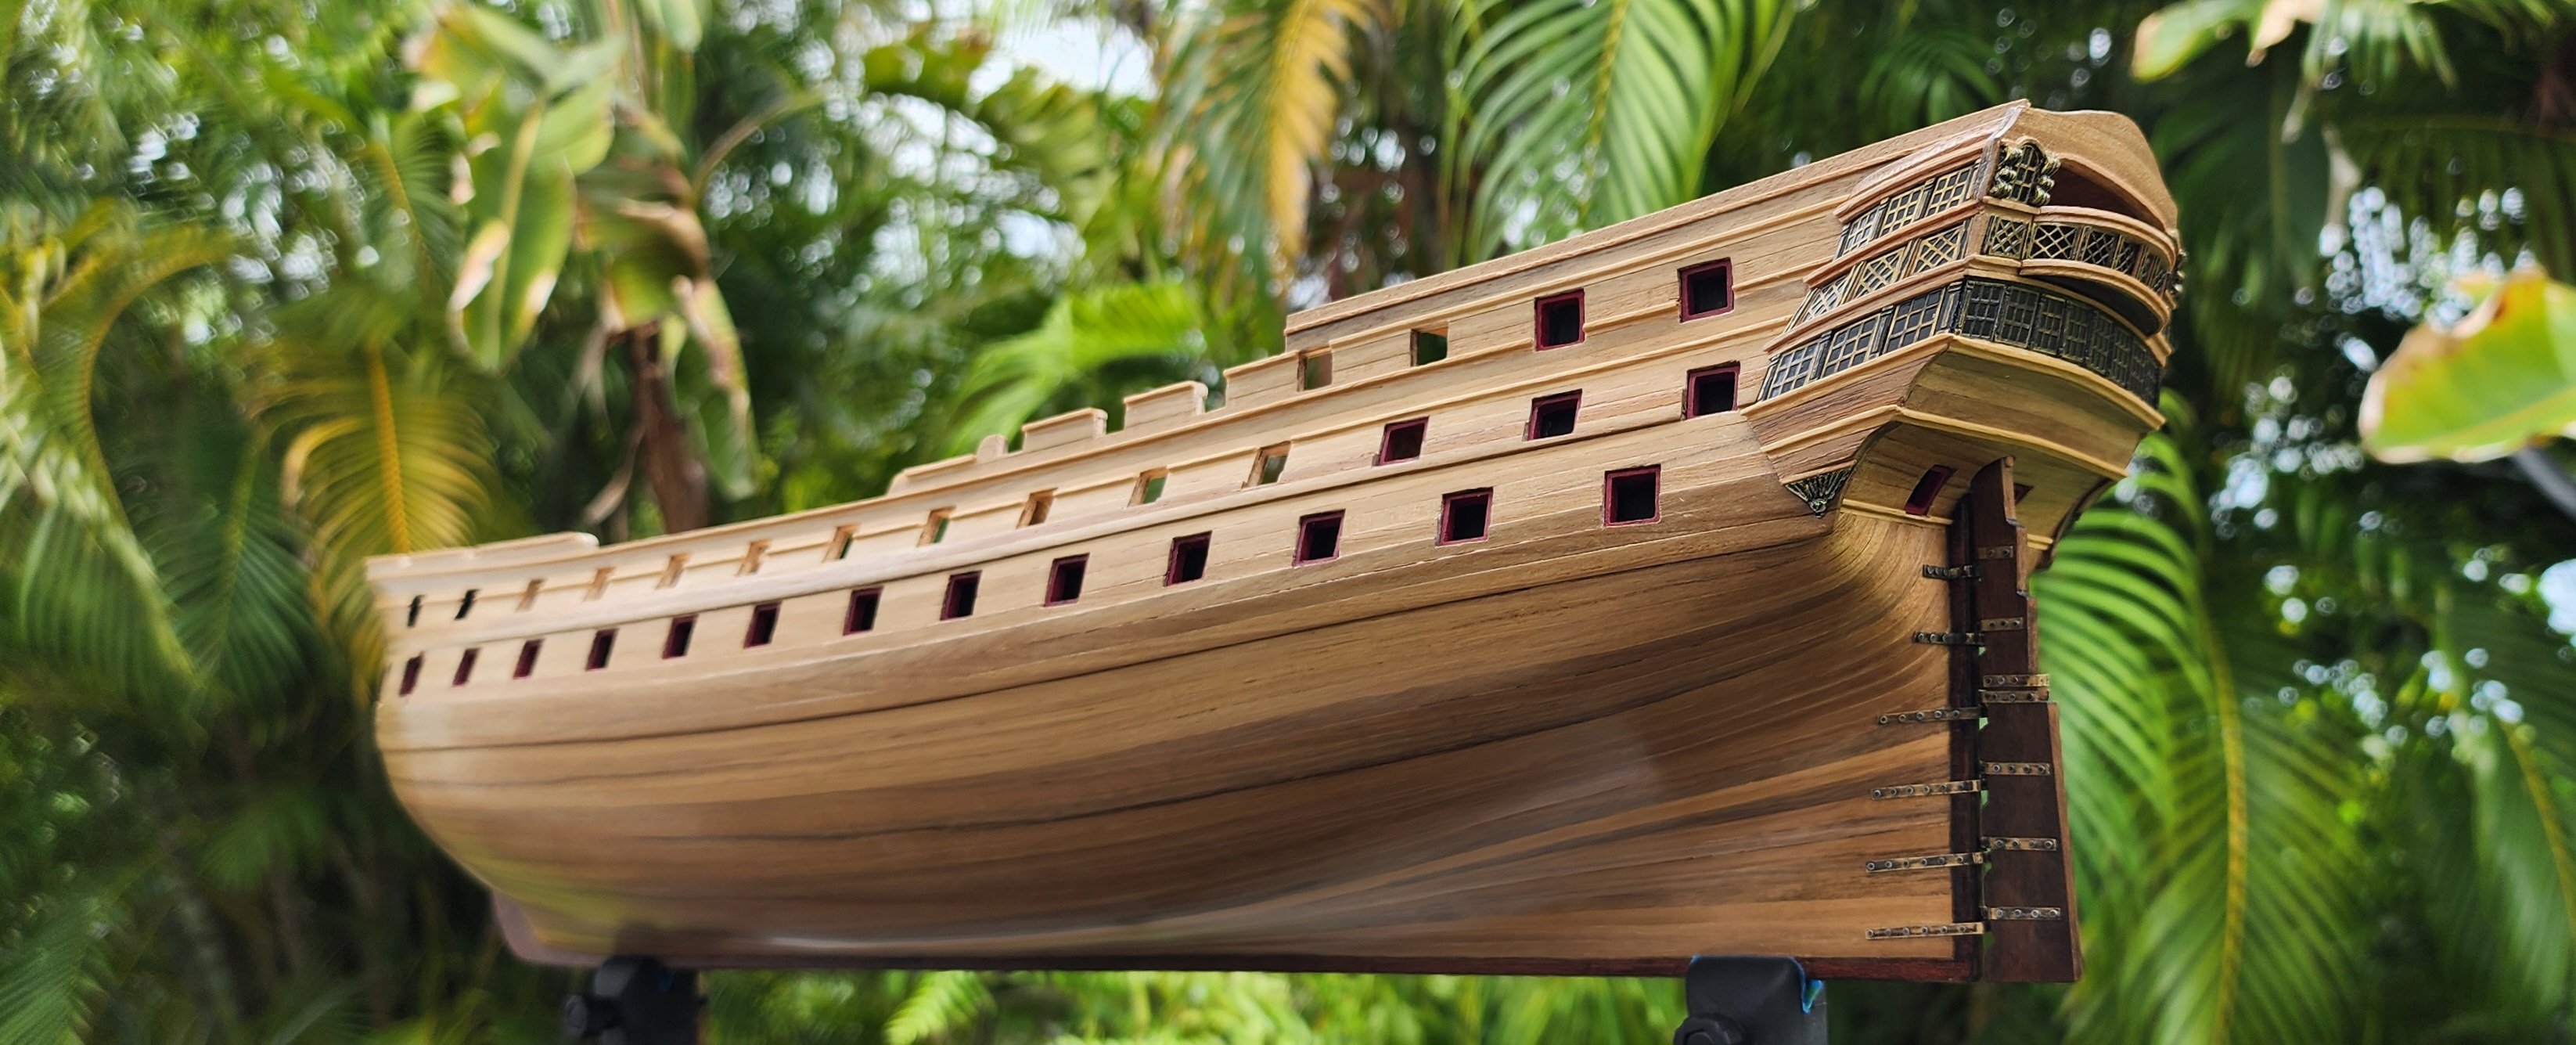
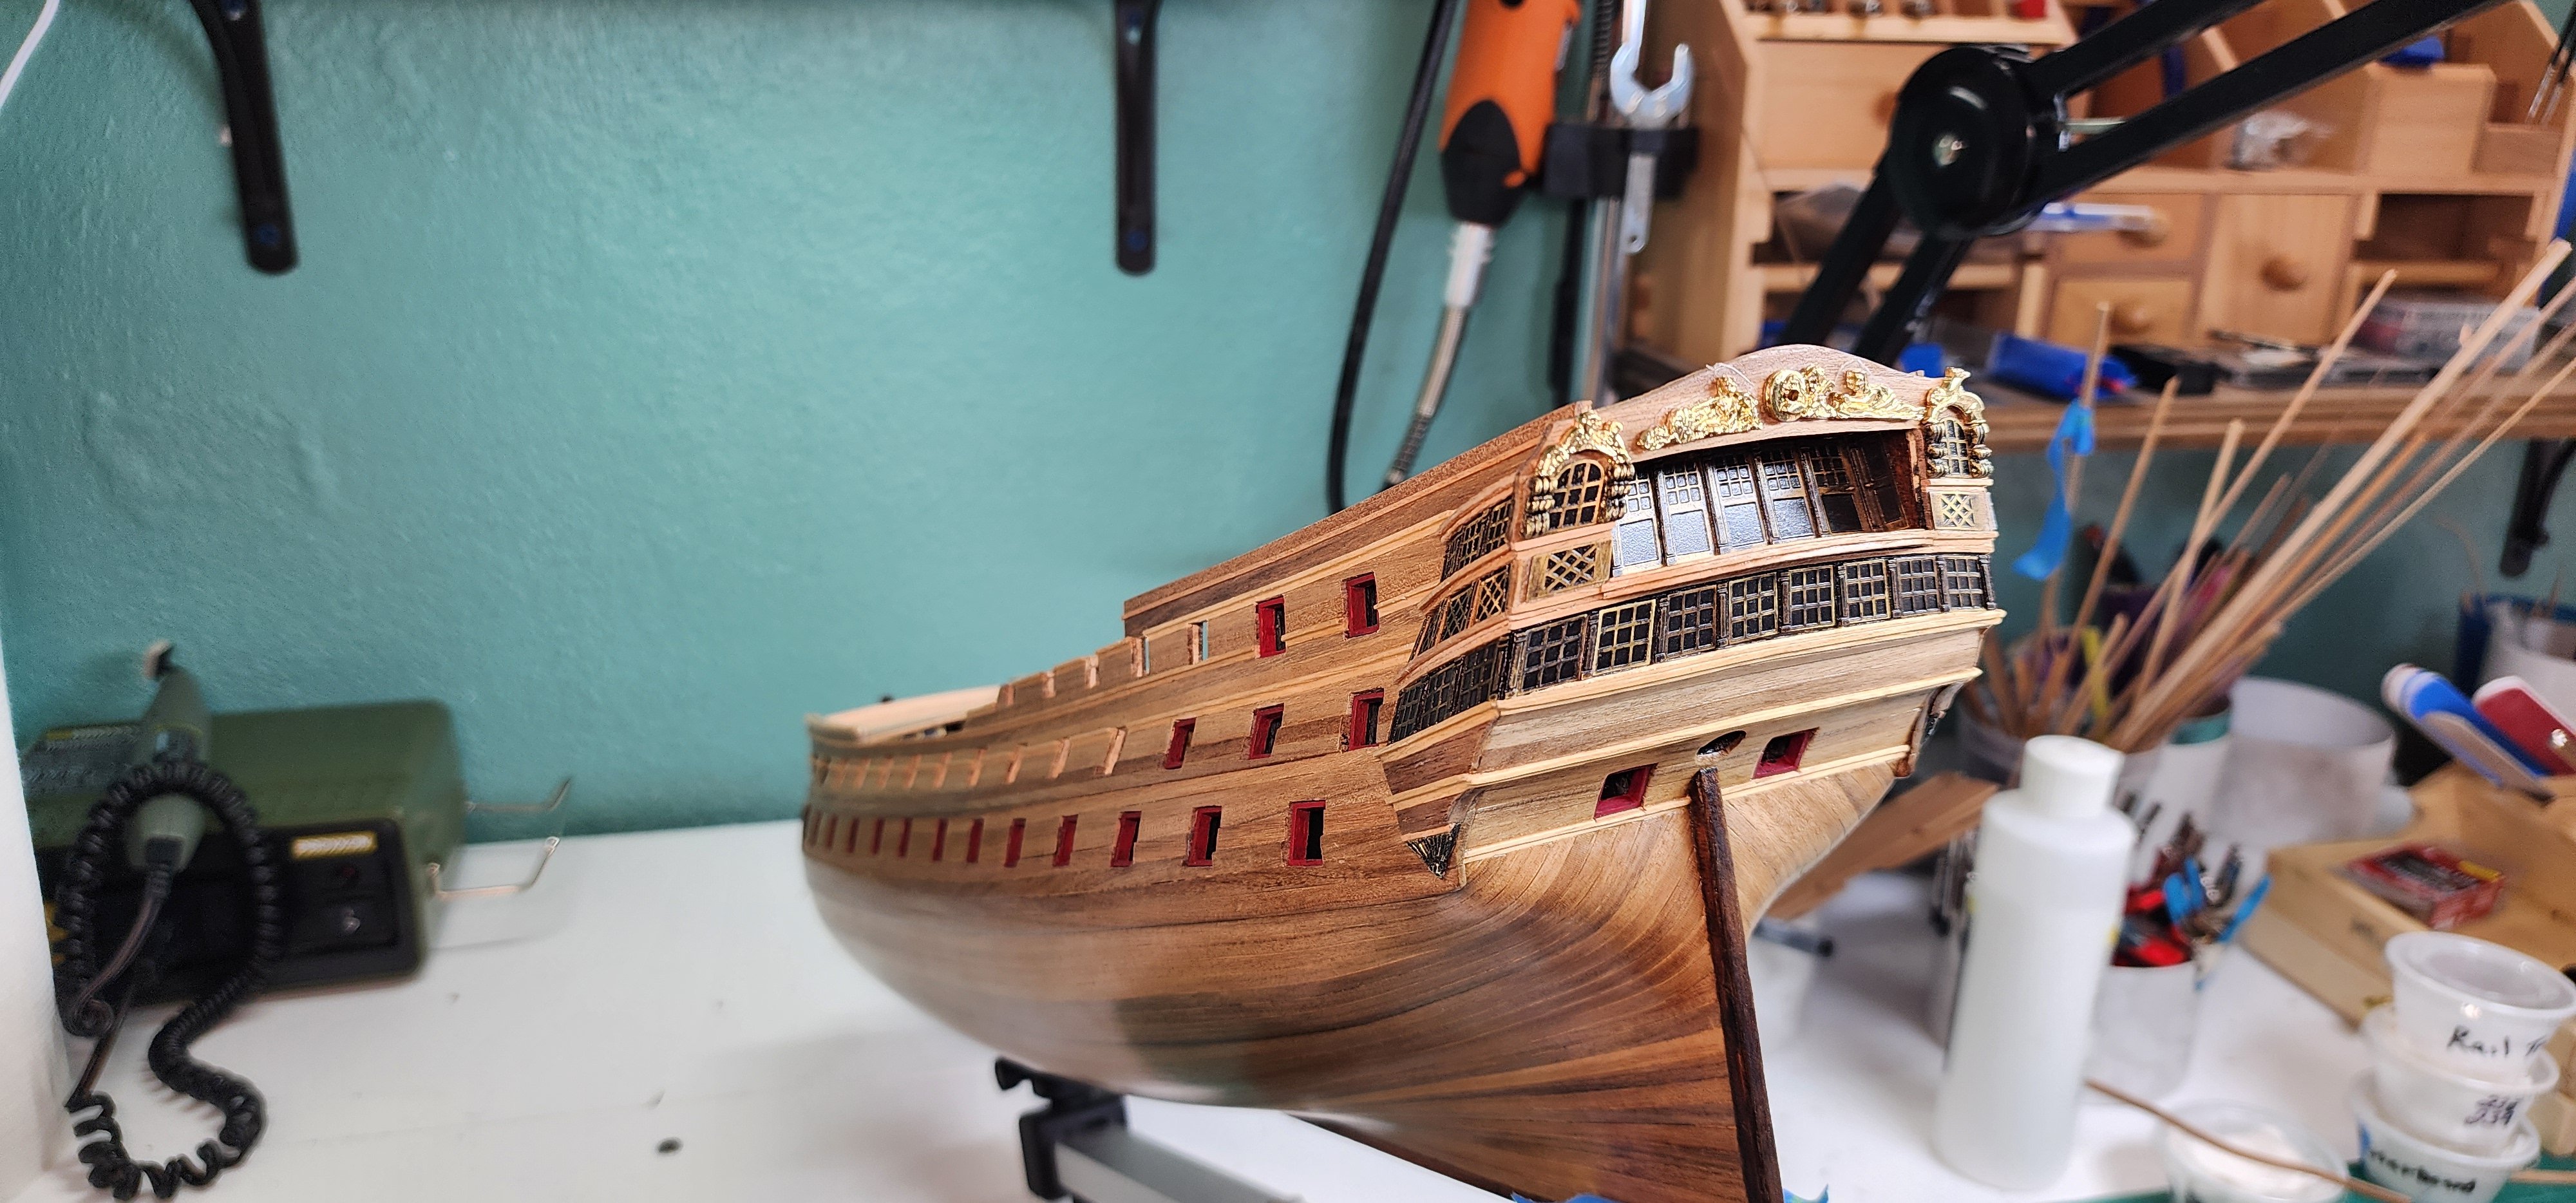
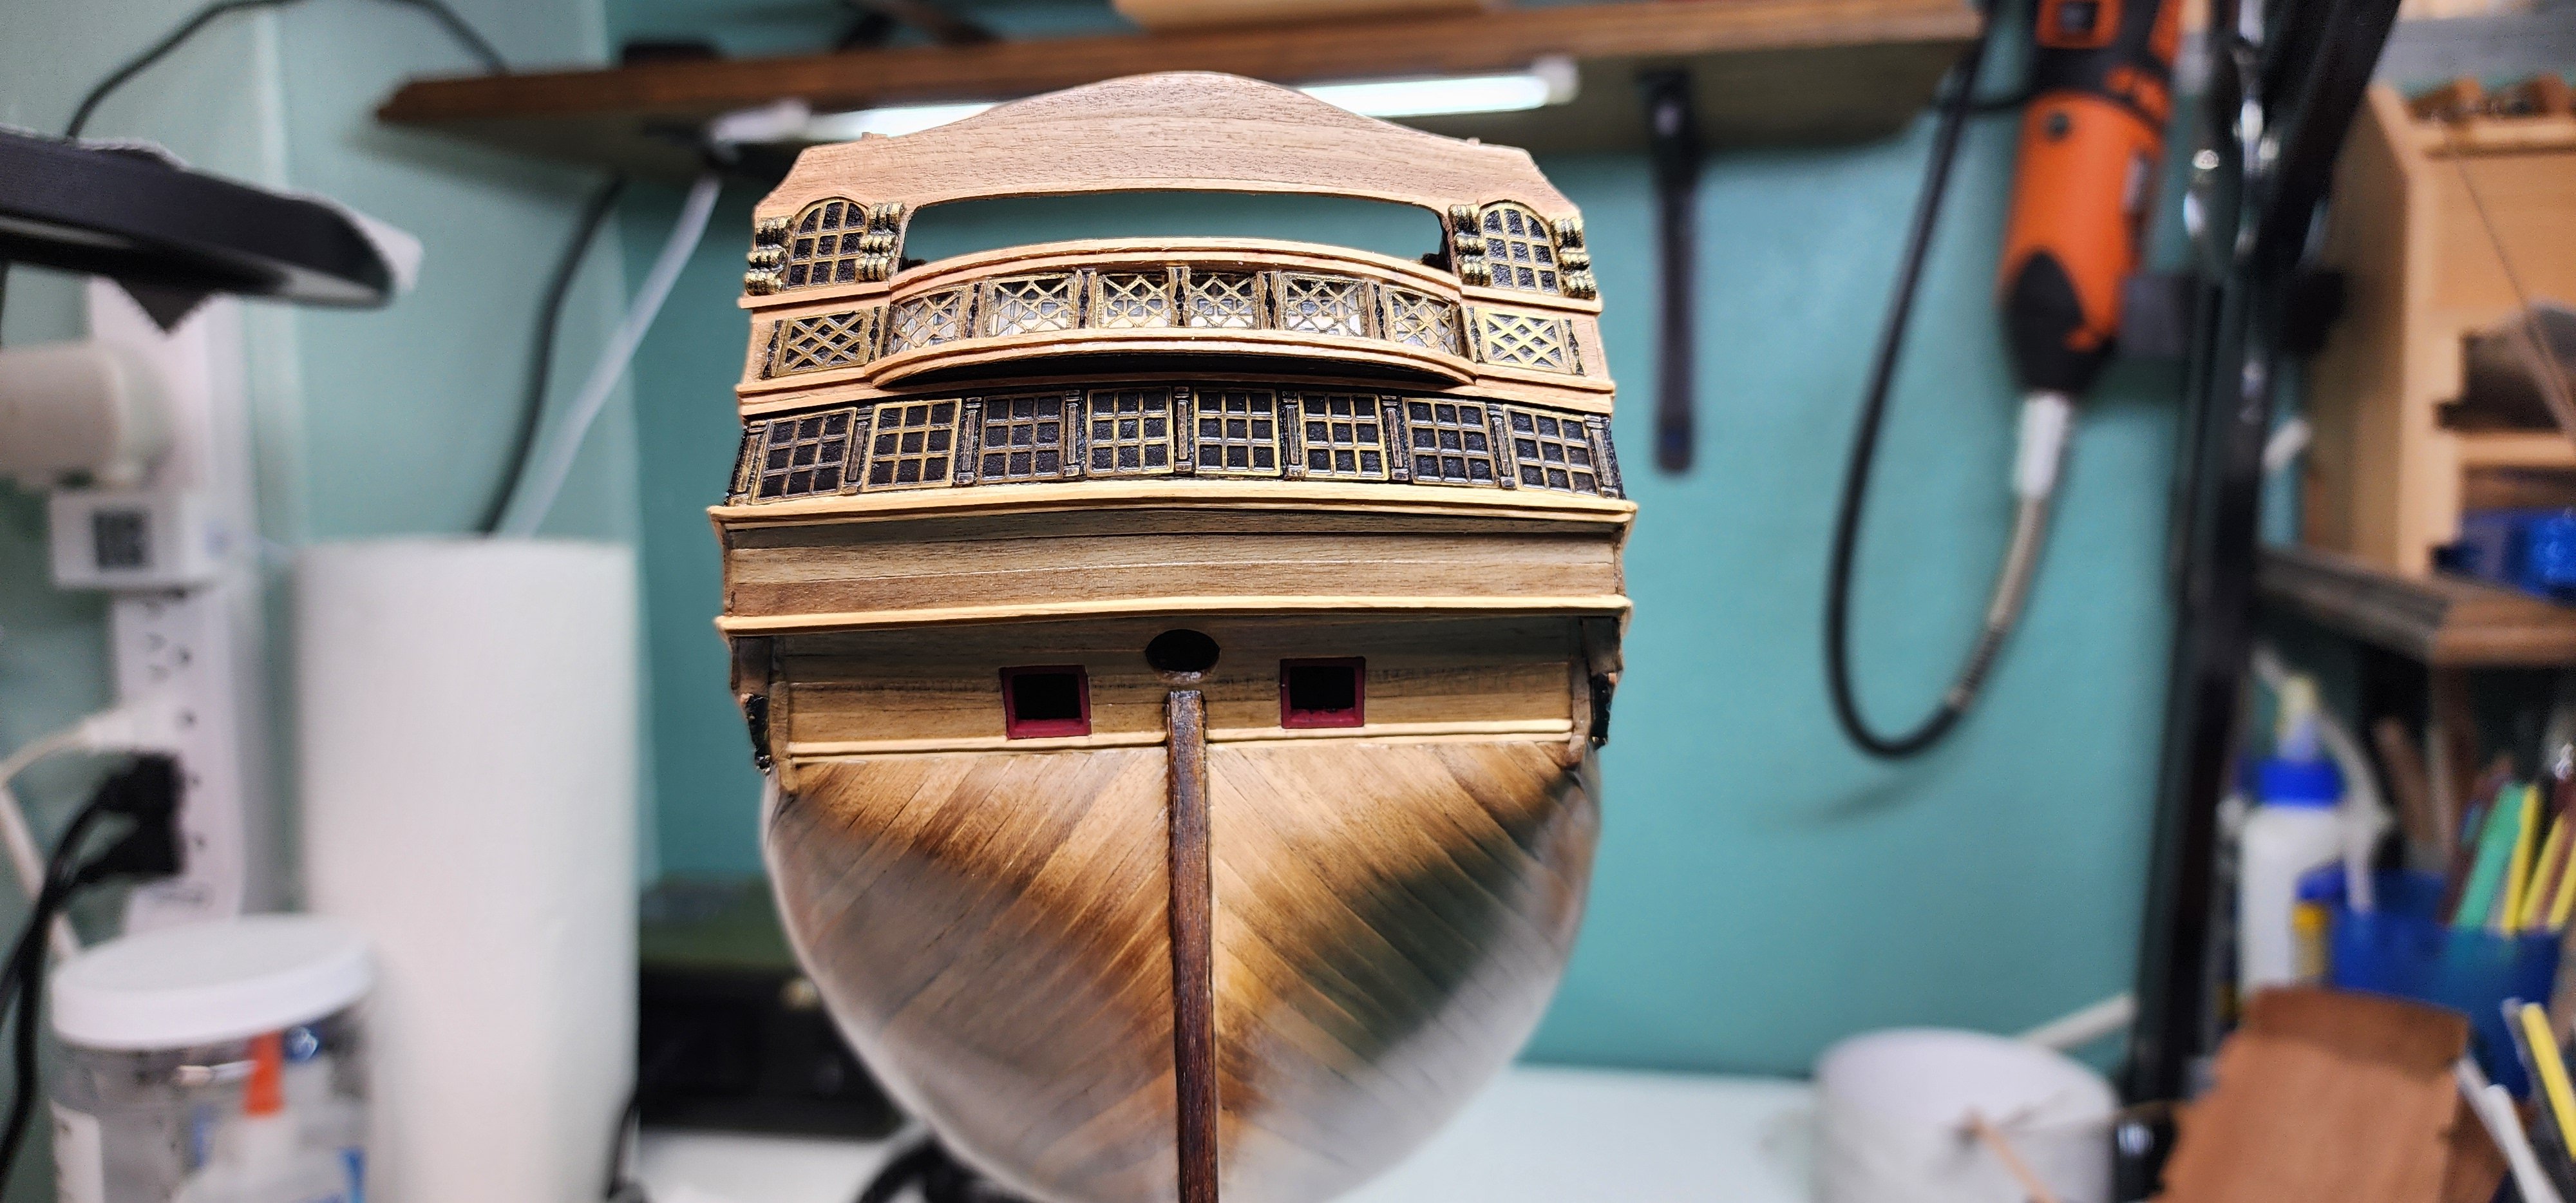
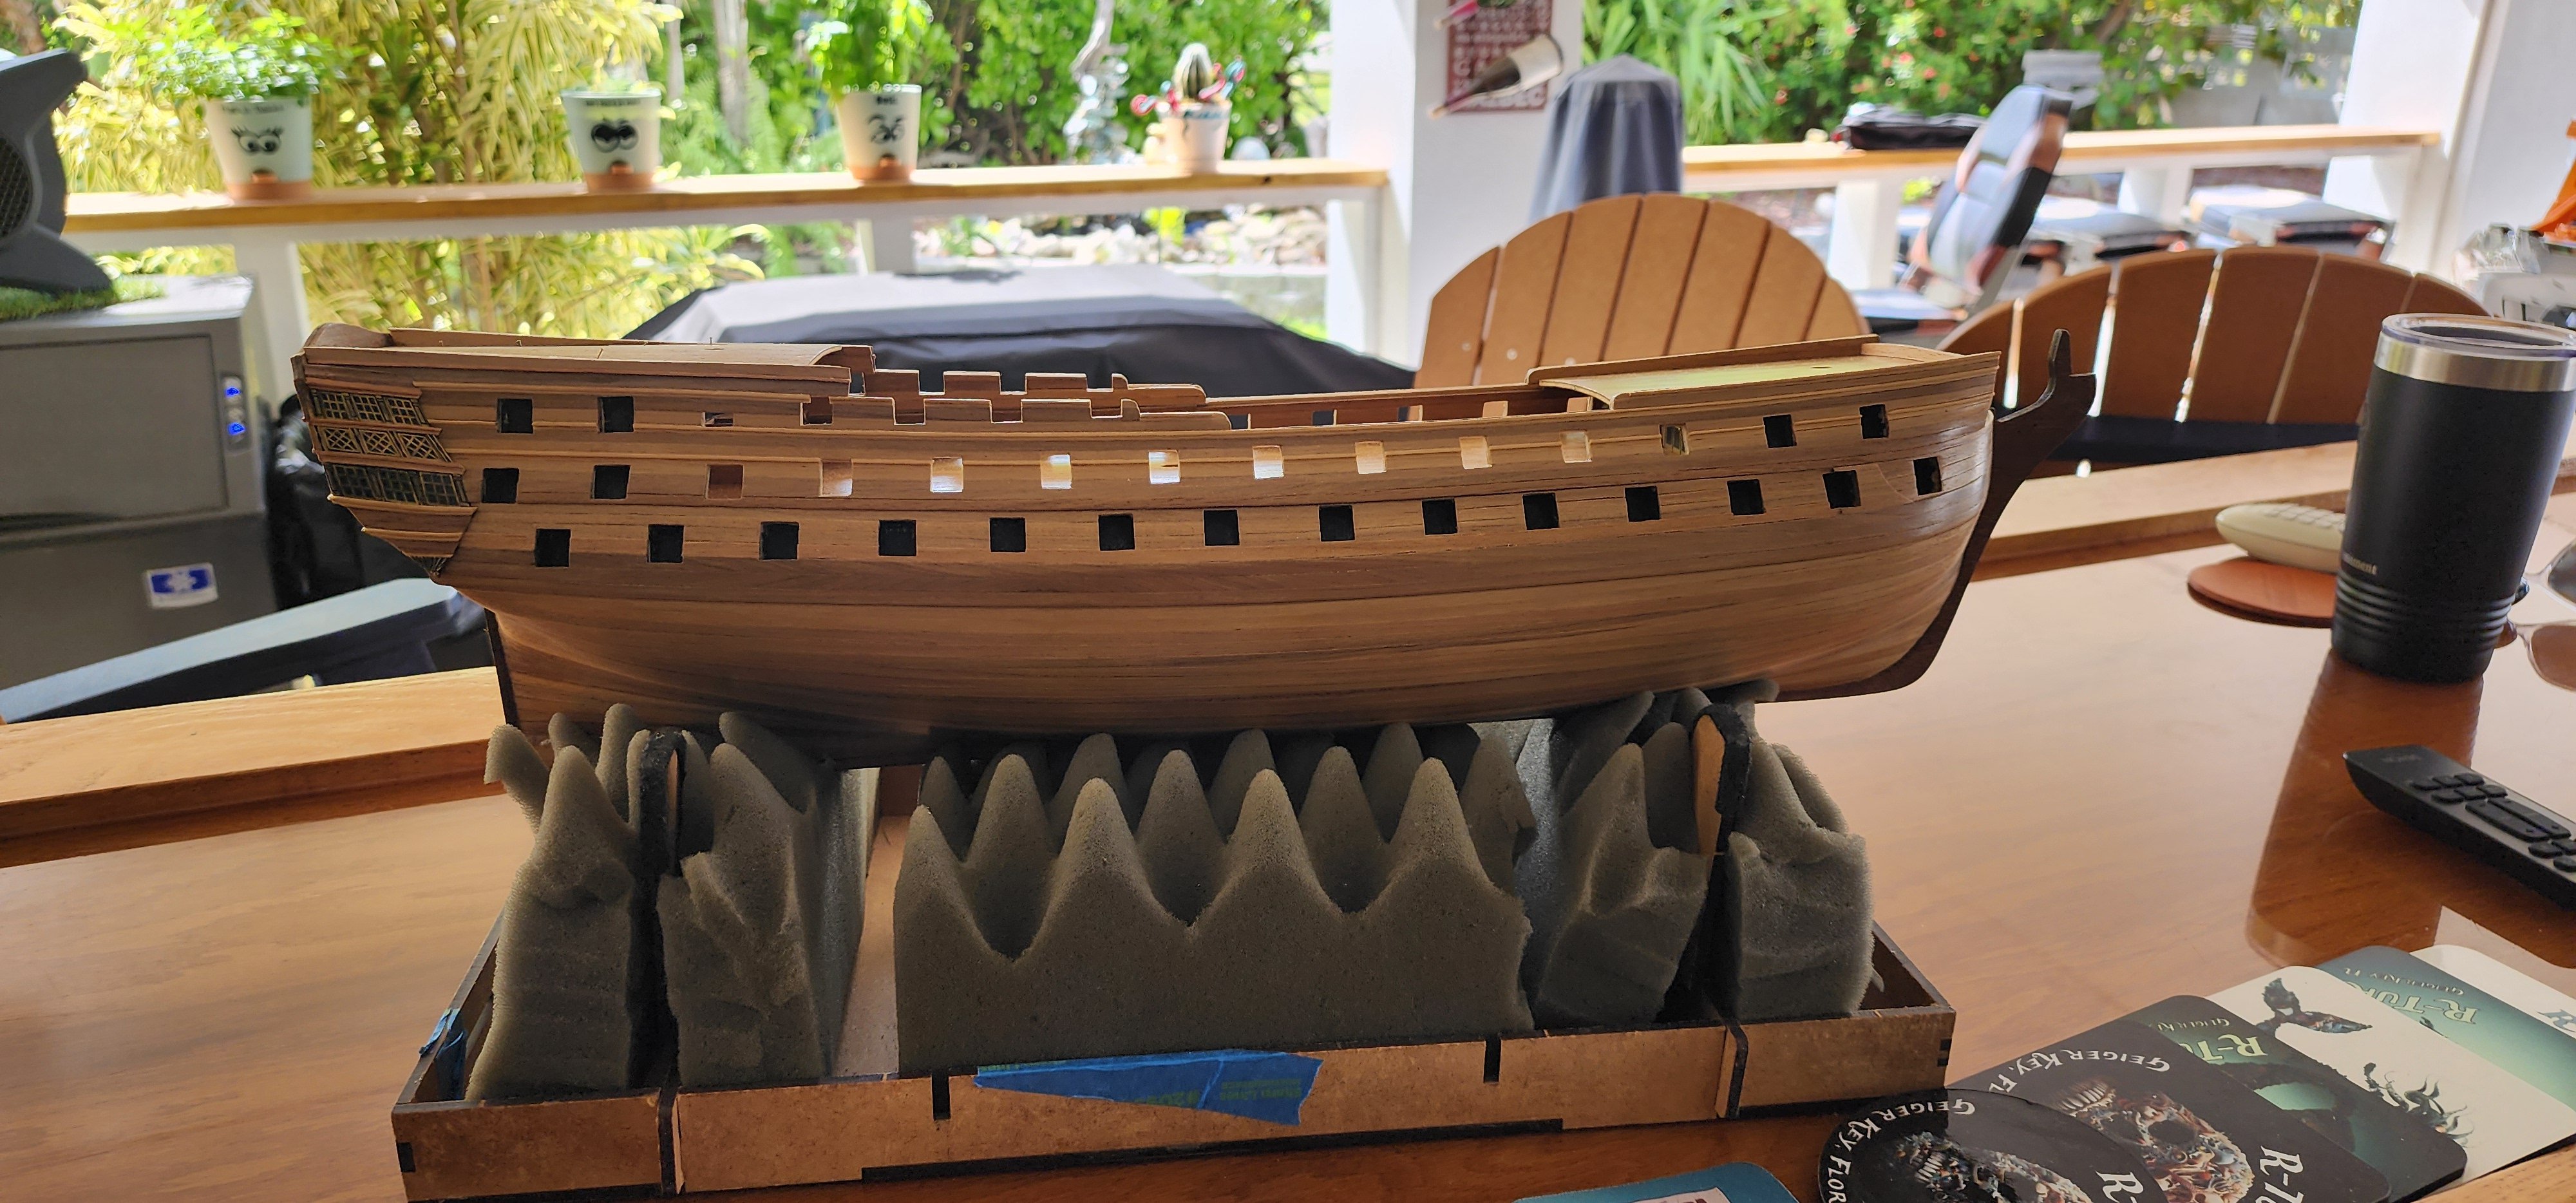
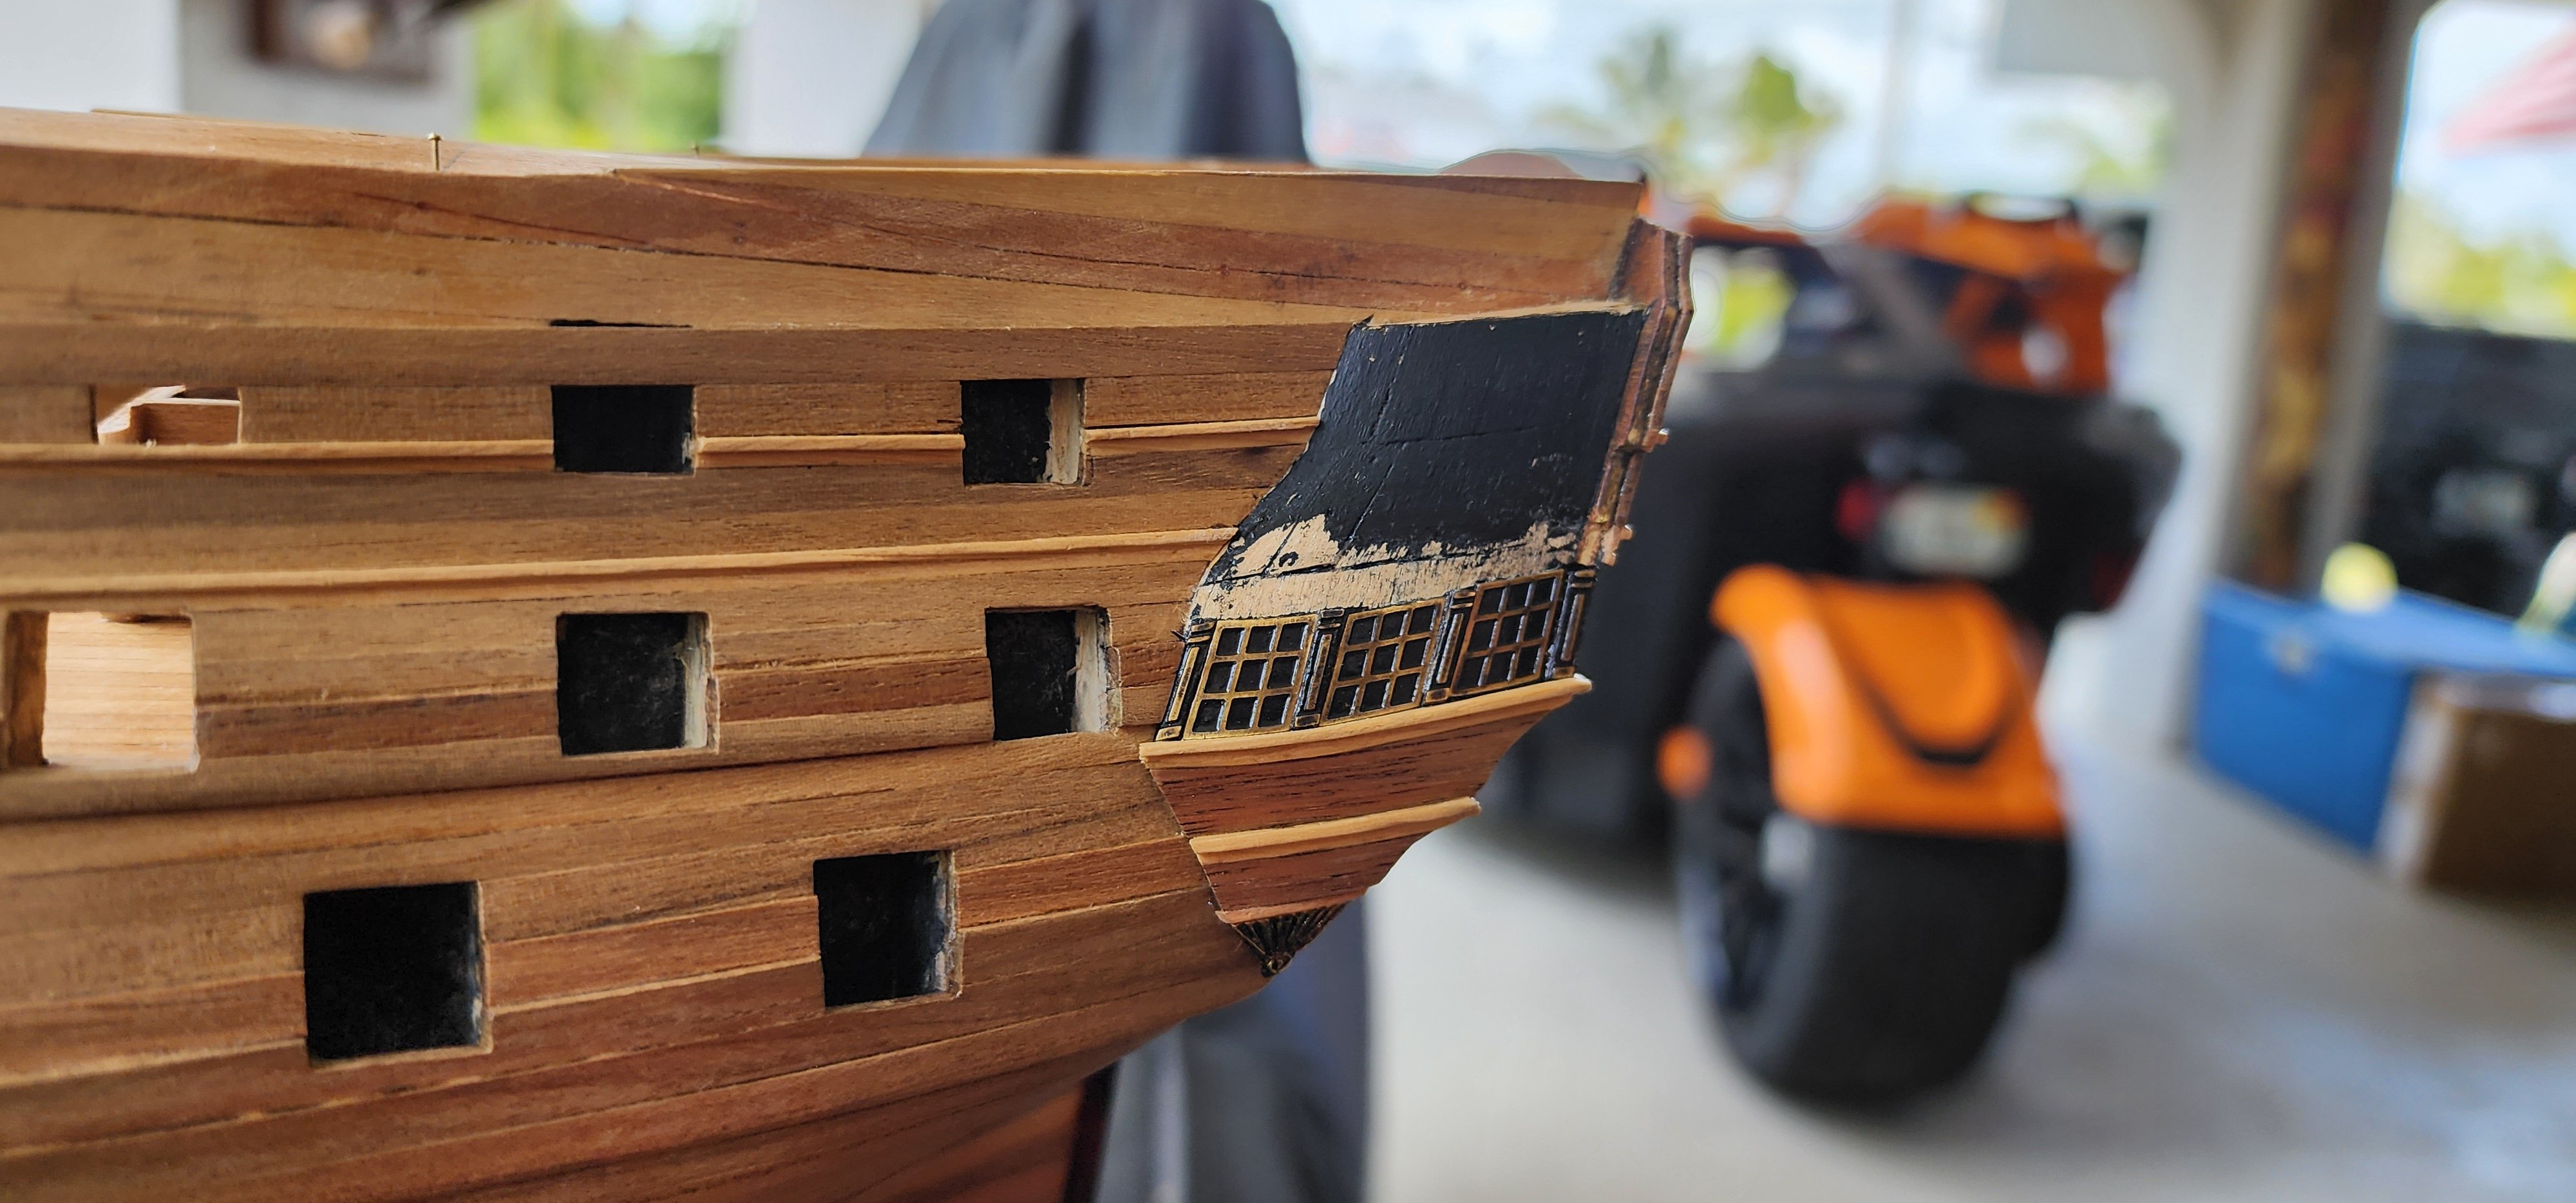
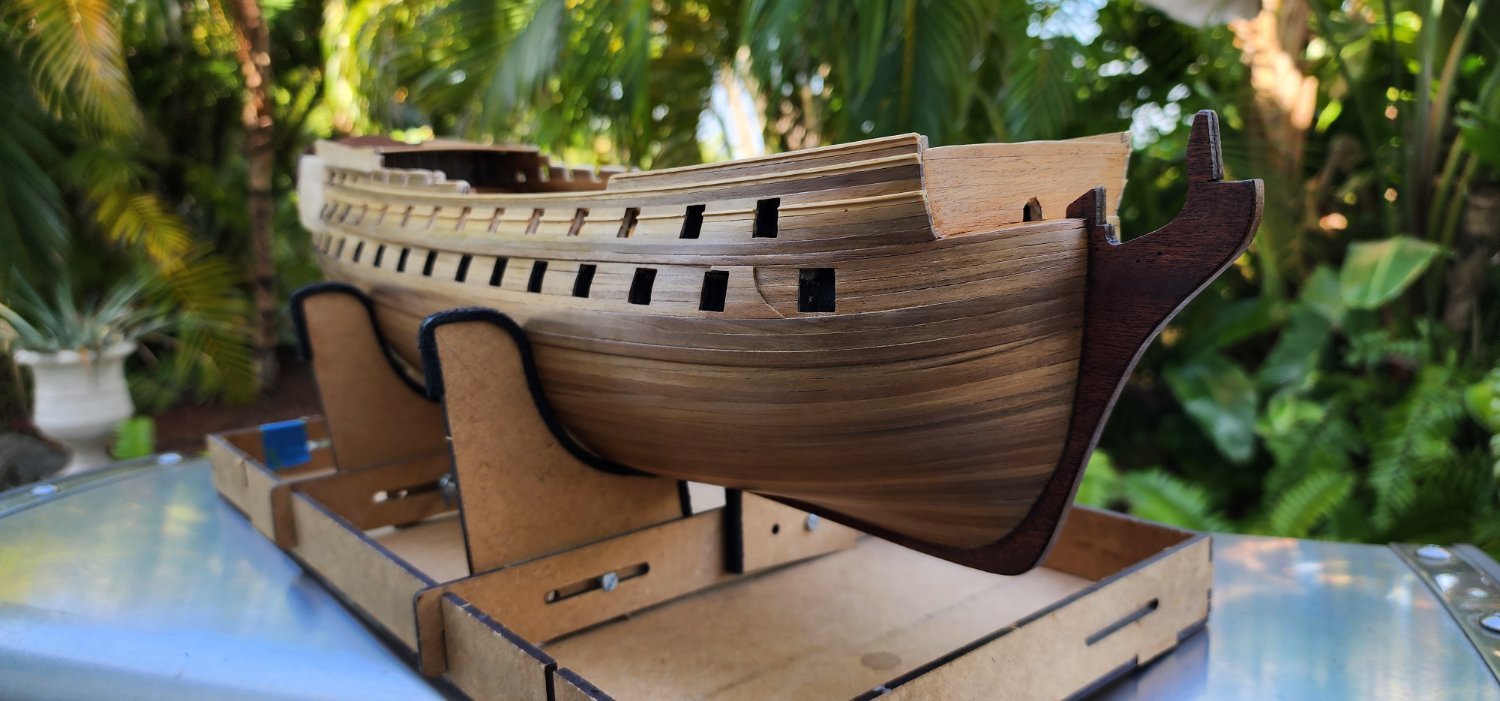
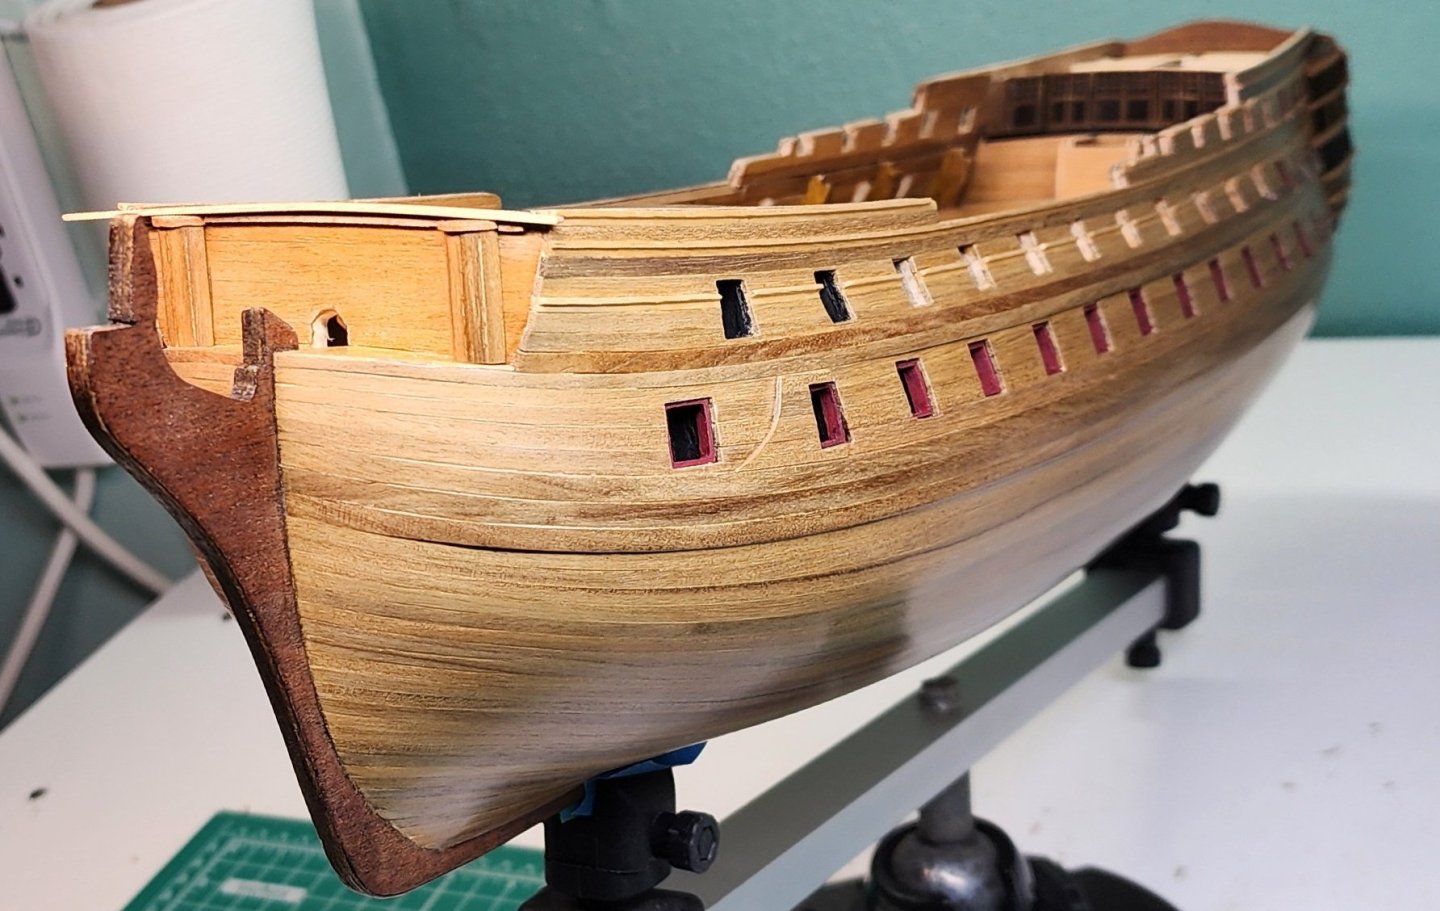
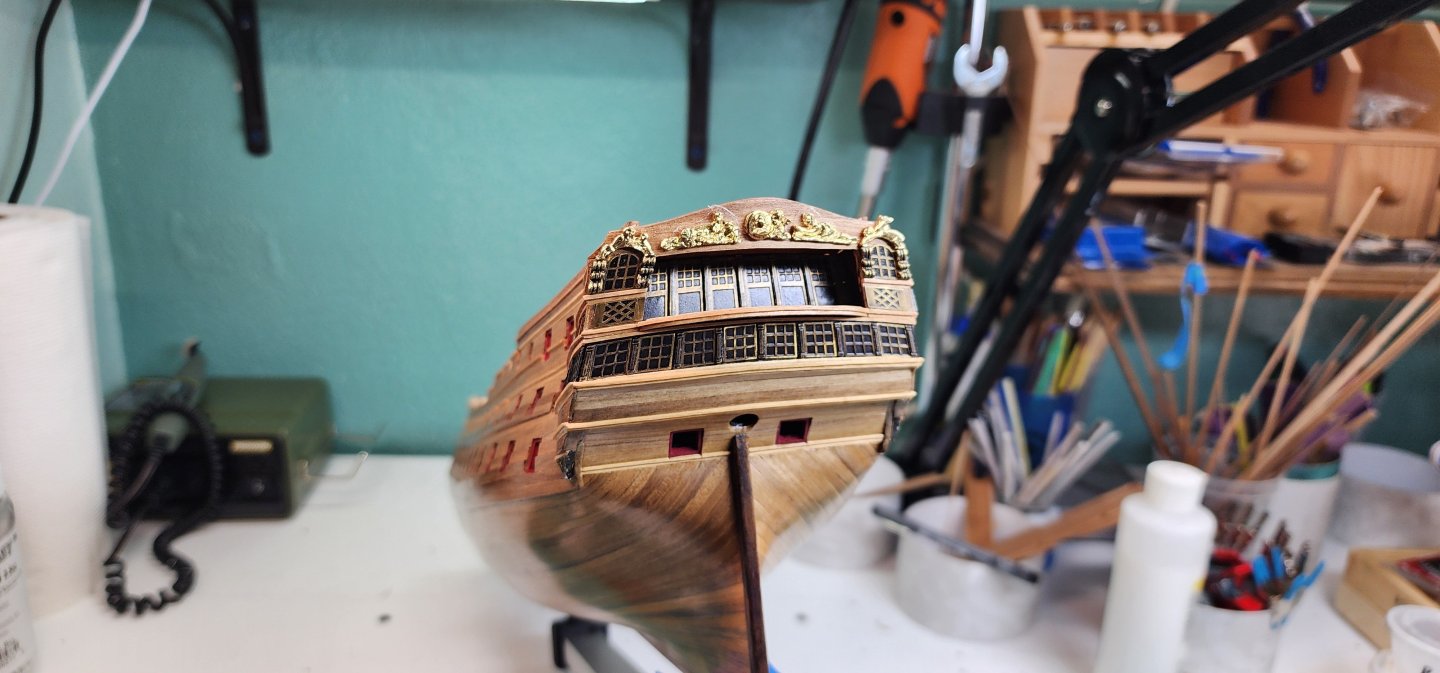
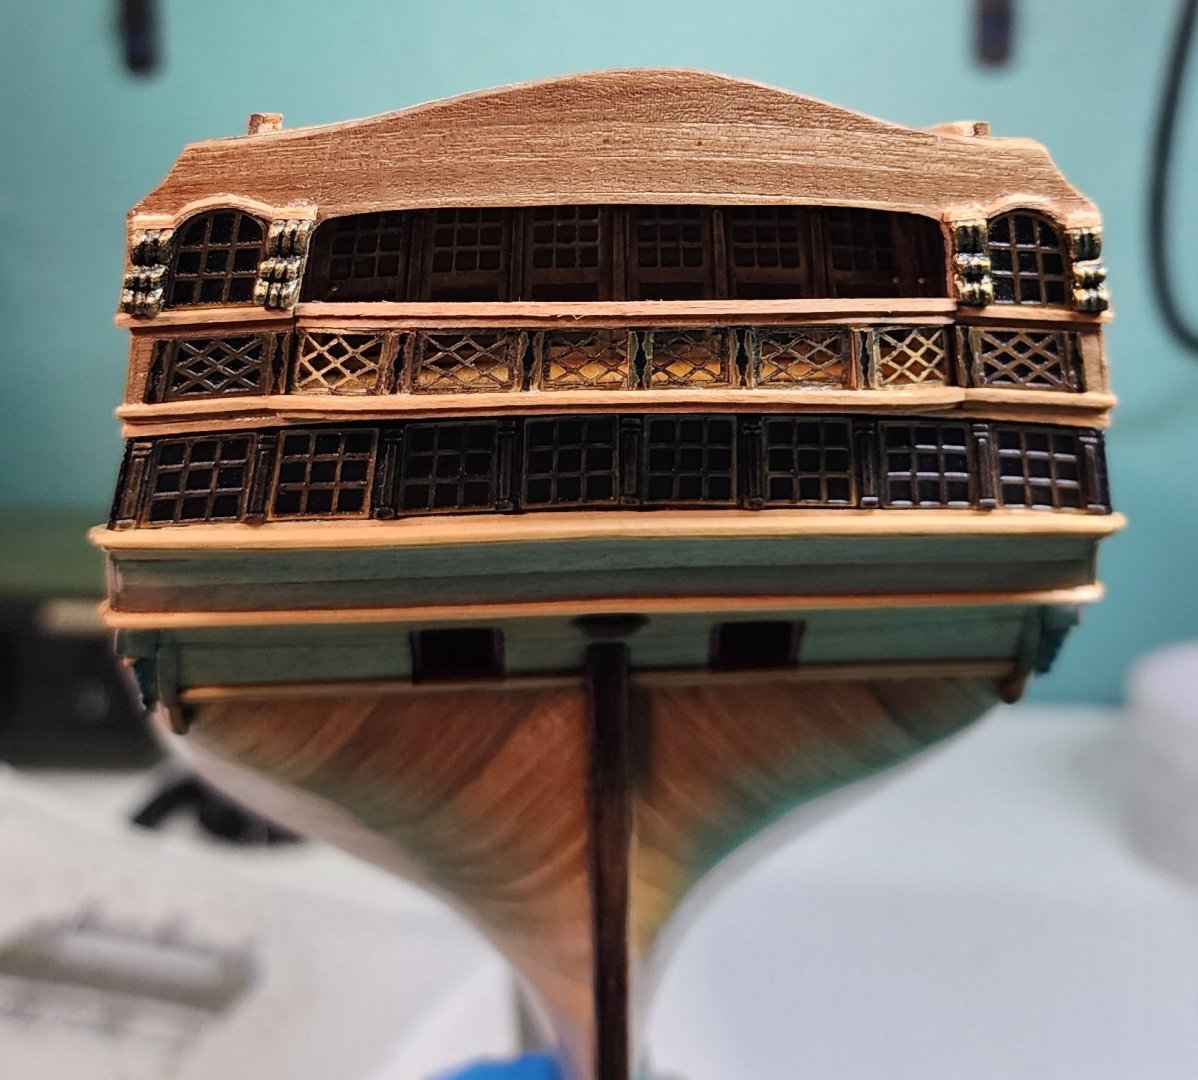
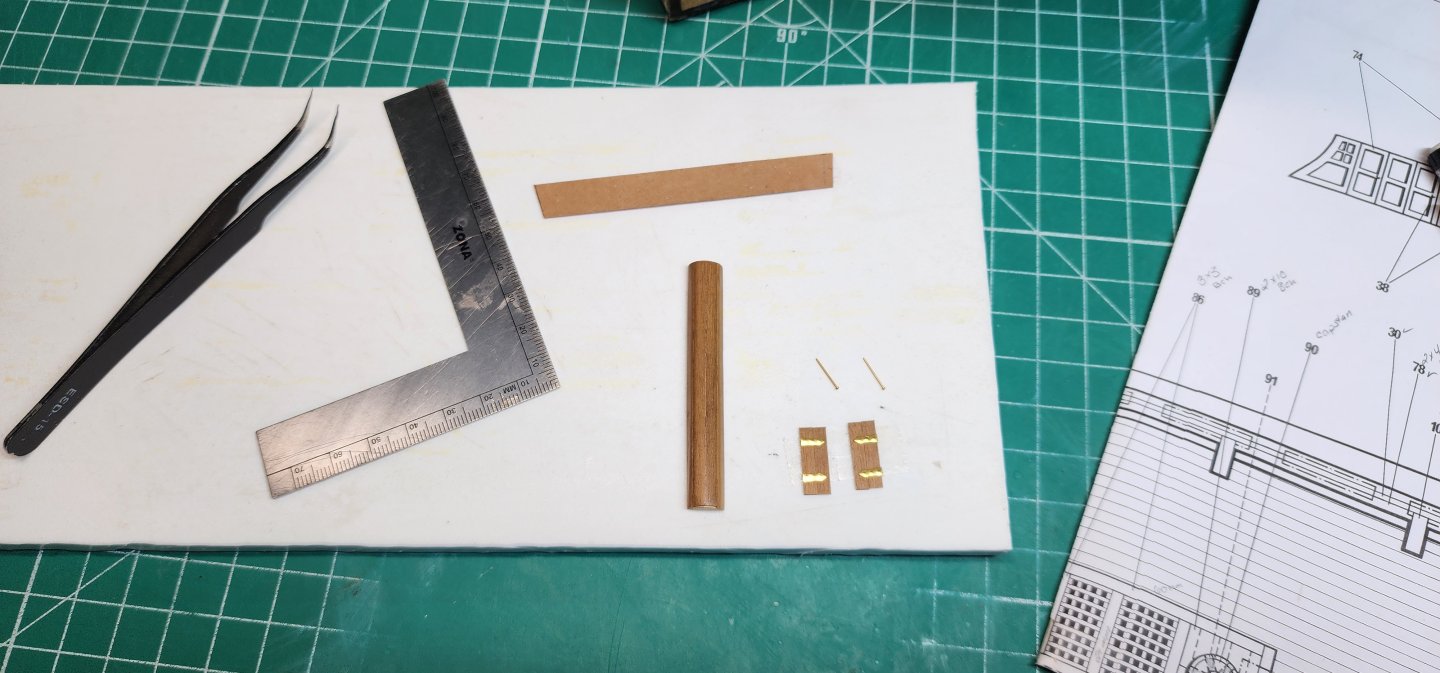
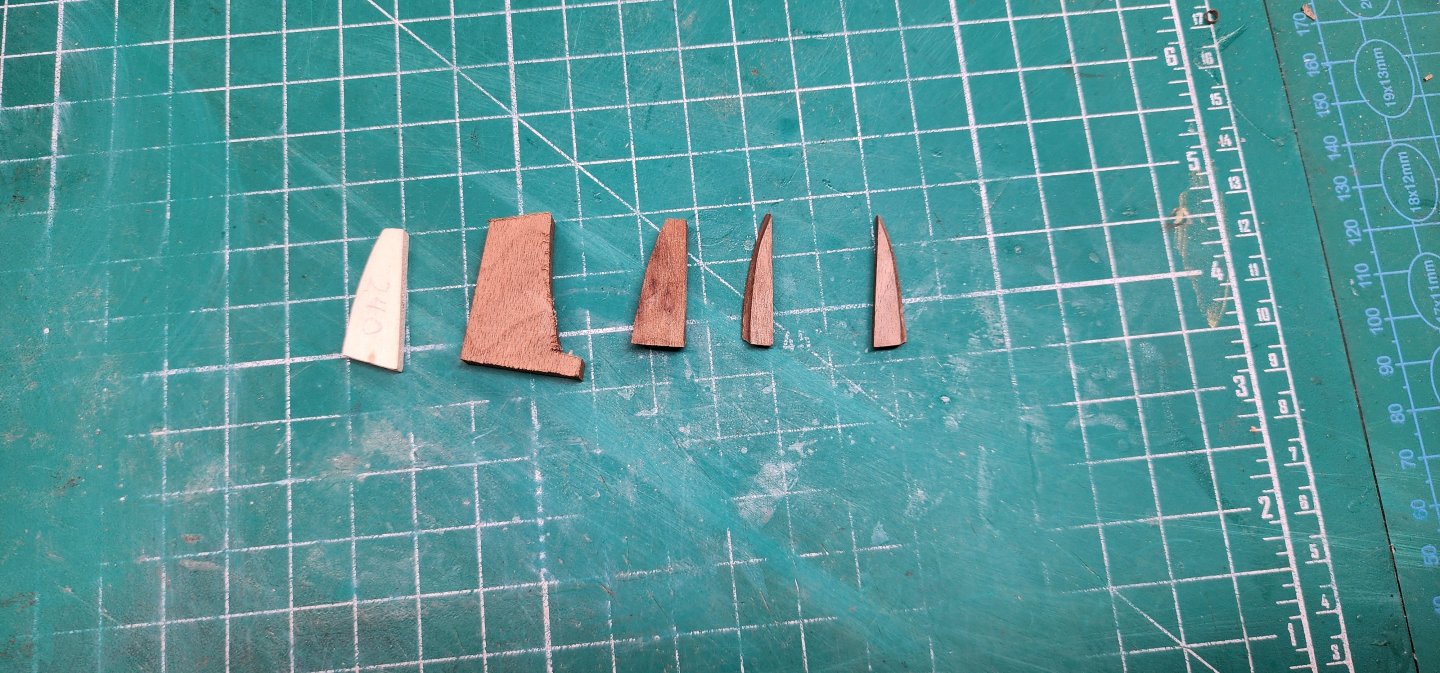
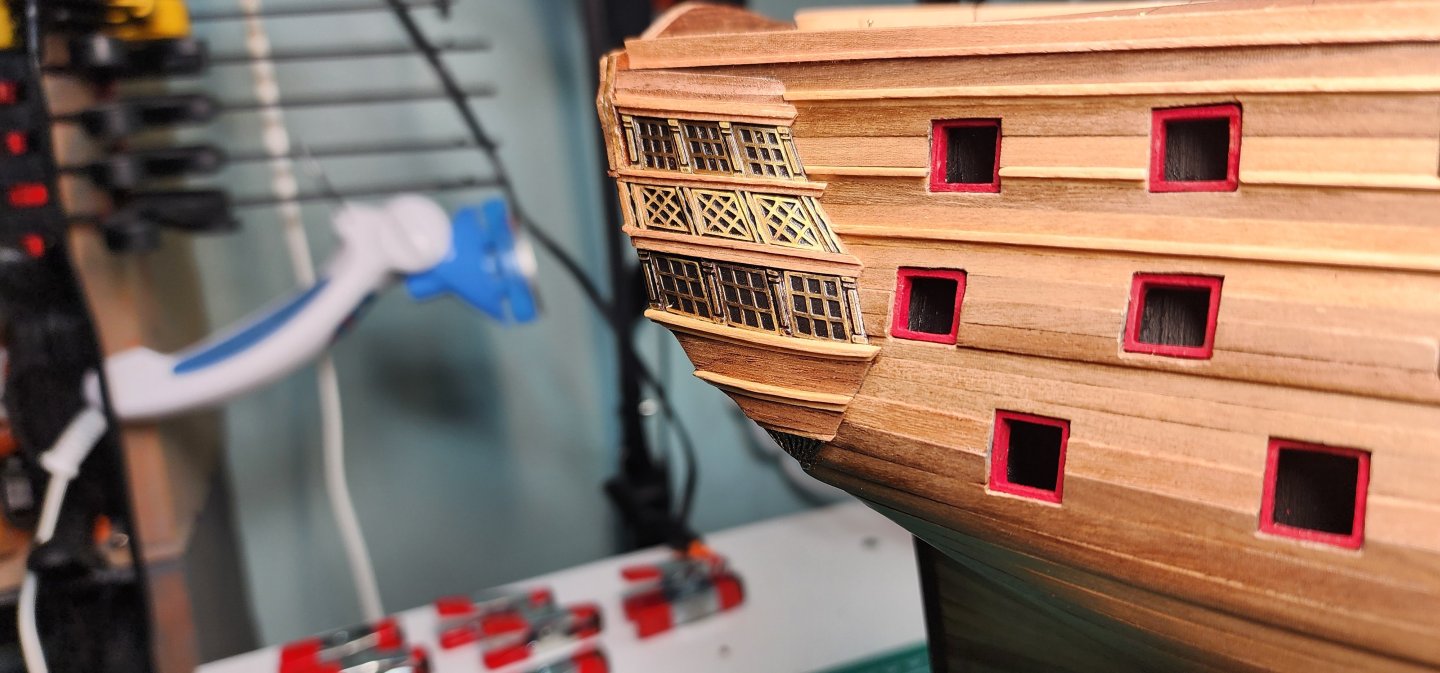
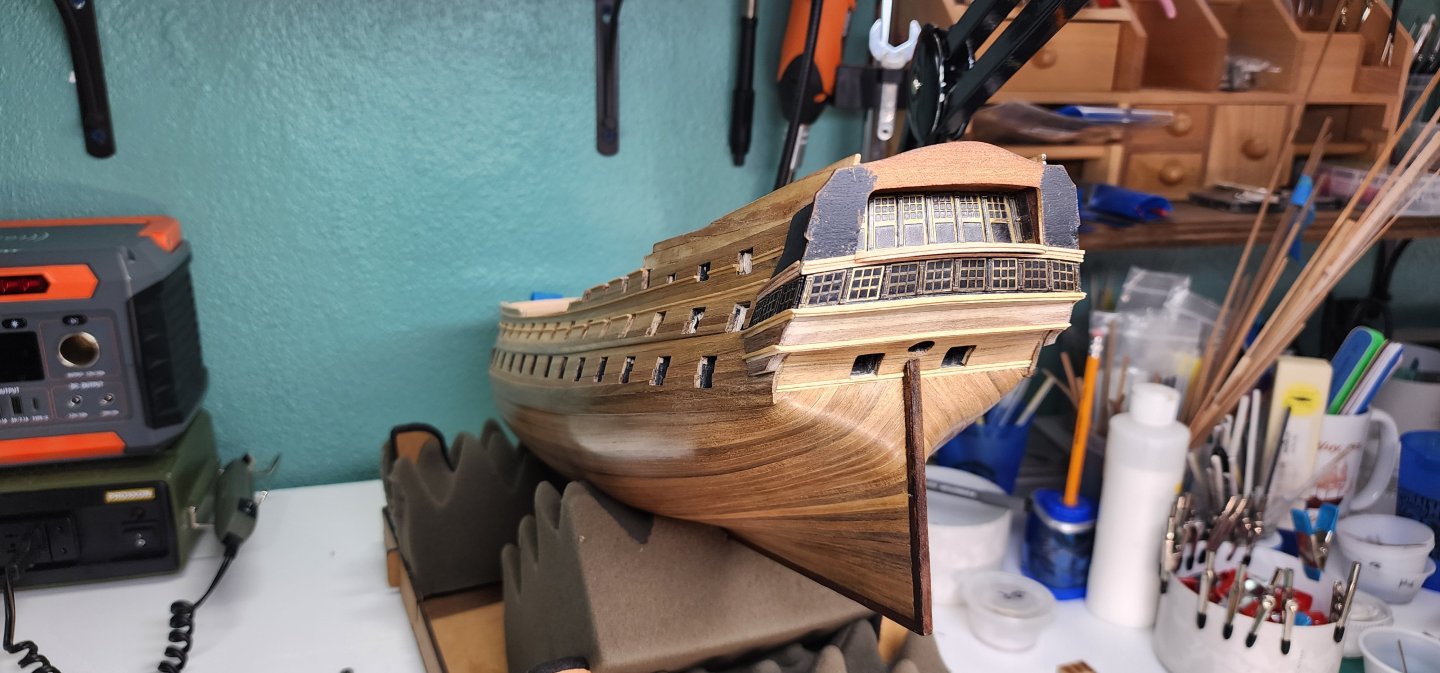
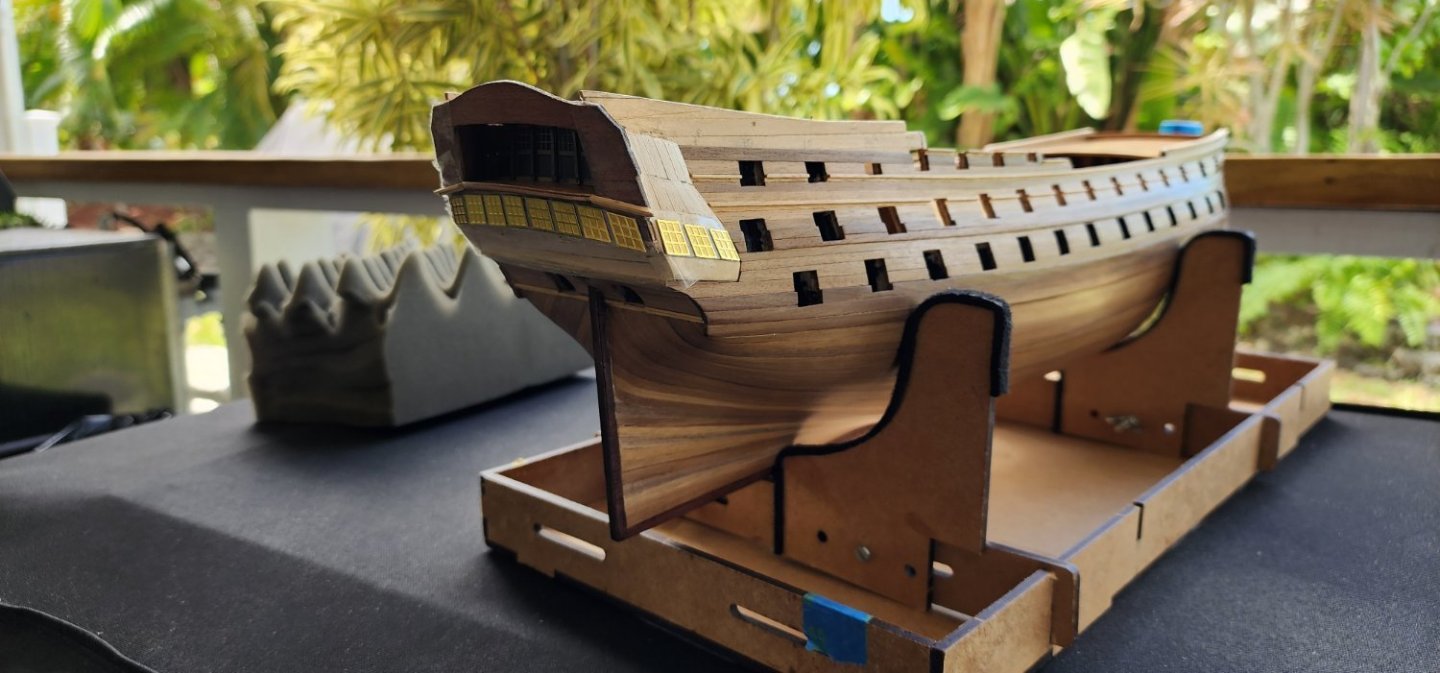
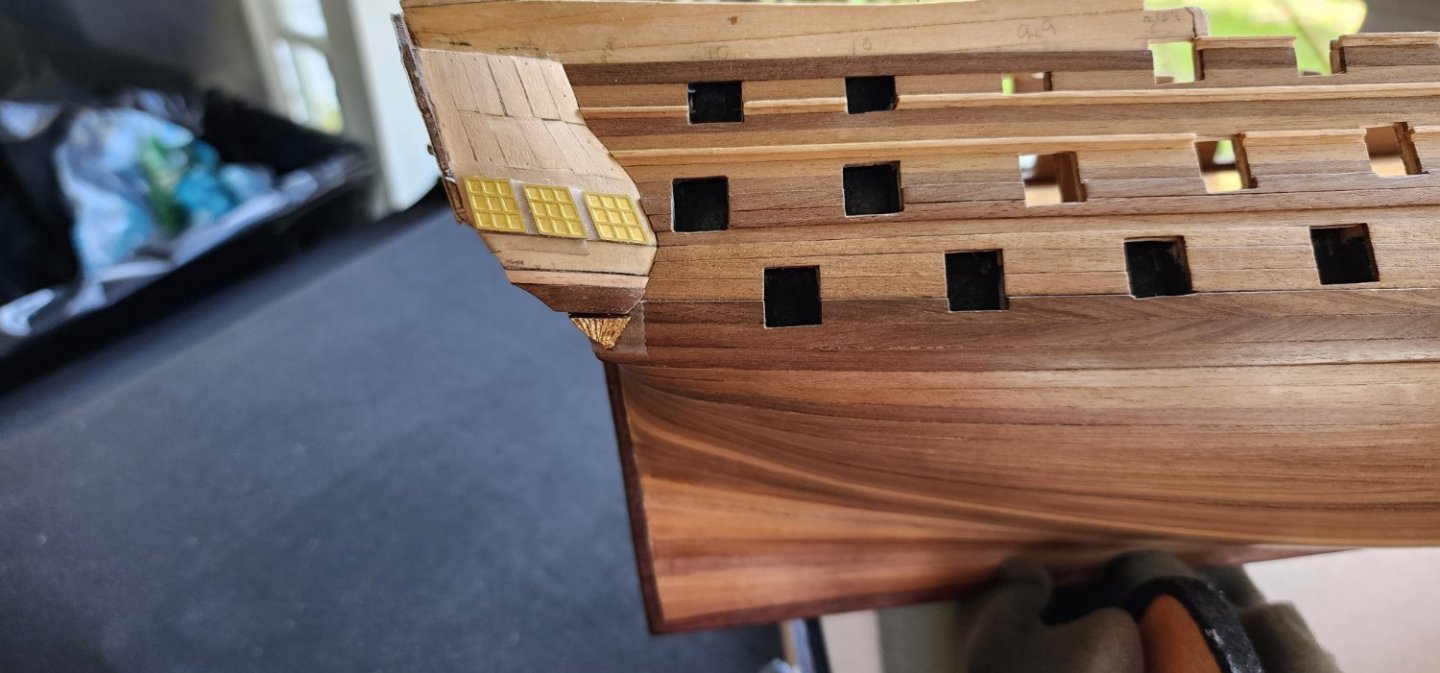
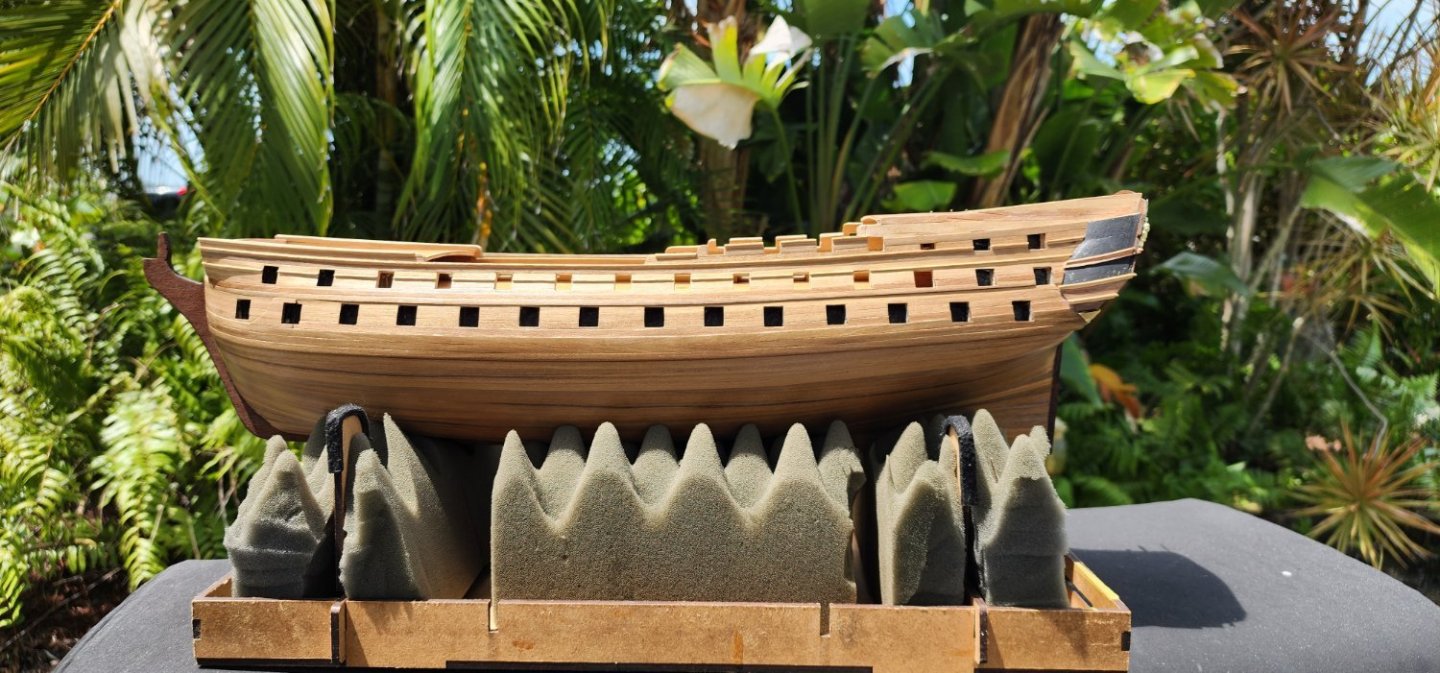
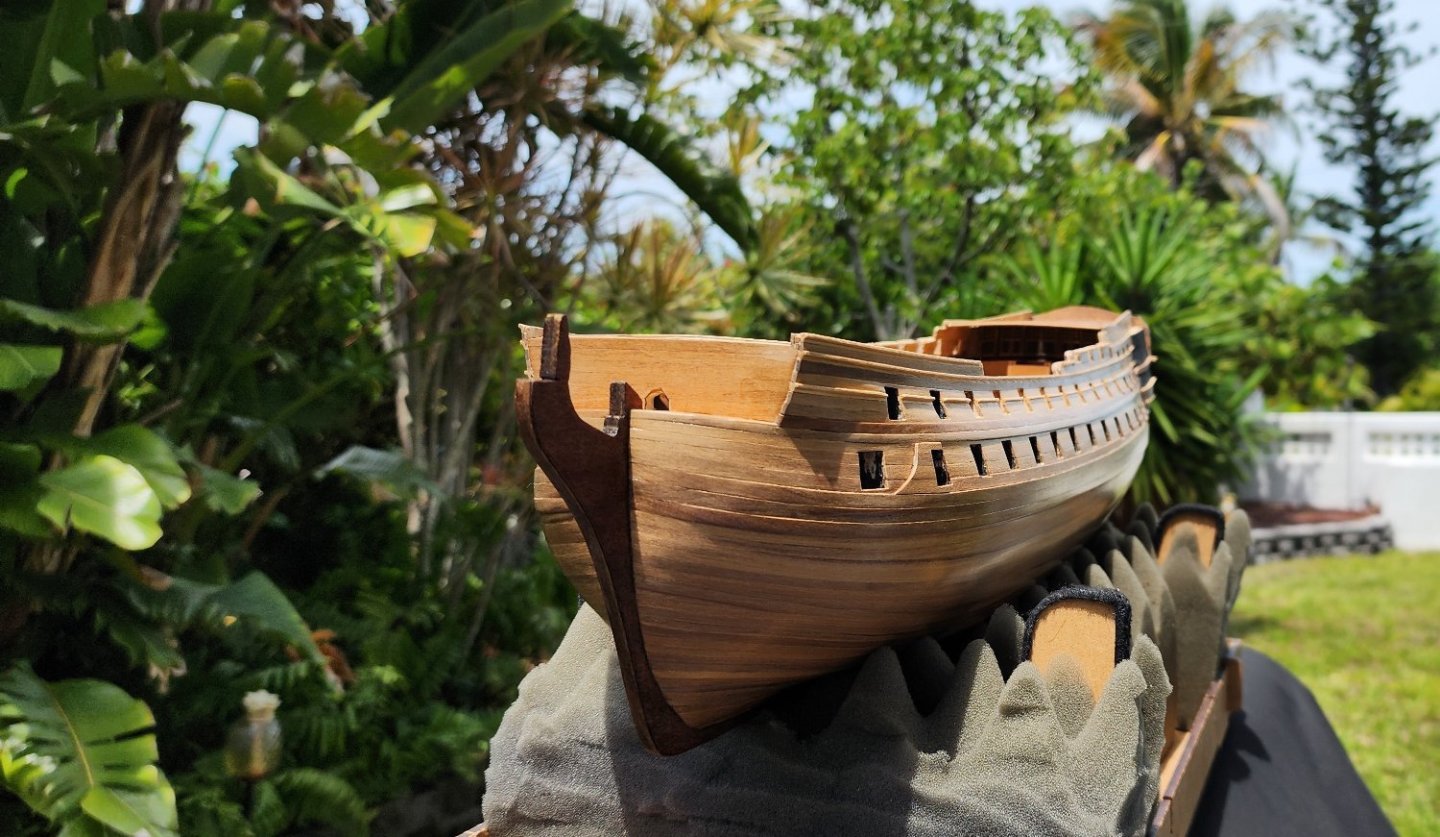
Hello All, Well, a small update on my progress on the Bellona. I have been busy the last month preparing for what the forecasters are calling an active hurricane season. Hopefully the shipyard will come out of this season unscathed. I completed the port and starboard Galleries PE parts and trim. I discarded the kit part 240 and used walnut wood in its place. I shaped this piece to match the contour of the transom. It took a few attempts, but I am pleased with the outcome. Once I completed shaping the galleries cap, this allowed me to complete the planking up to the poop deck. I then was able to trim the first layer of planking to the proper shape and level to match the second layer of planking. I completed carving the remaining cannon ports on both the starboard and larboard sides of the ship and prepared them to receive the port post. I then taped off the false cannon ports and applied the final coat of flat black to them. I painted the cannon port post red instead of the black that I originally was going to do. I feel that this added a better contrast to the ports. At this point, I have only installed the starboard side, but the larboard side is prepped and ready. Well, that’s all I have for now, but as always, your comments and guidance are always welcome. Cheers Nearshore


-
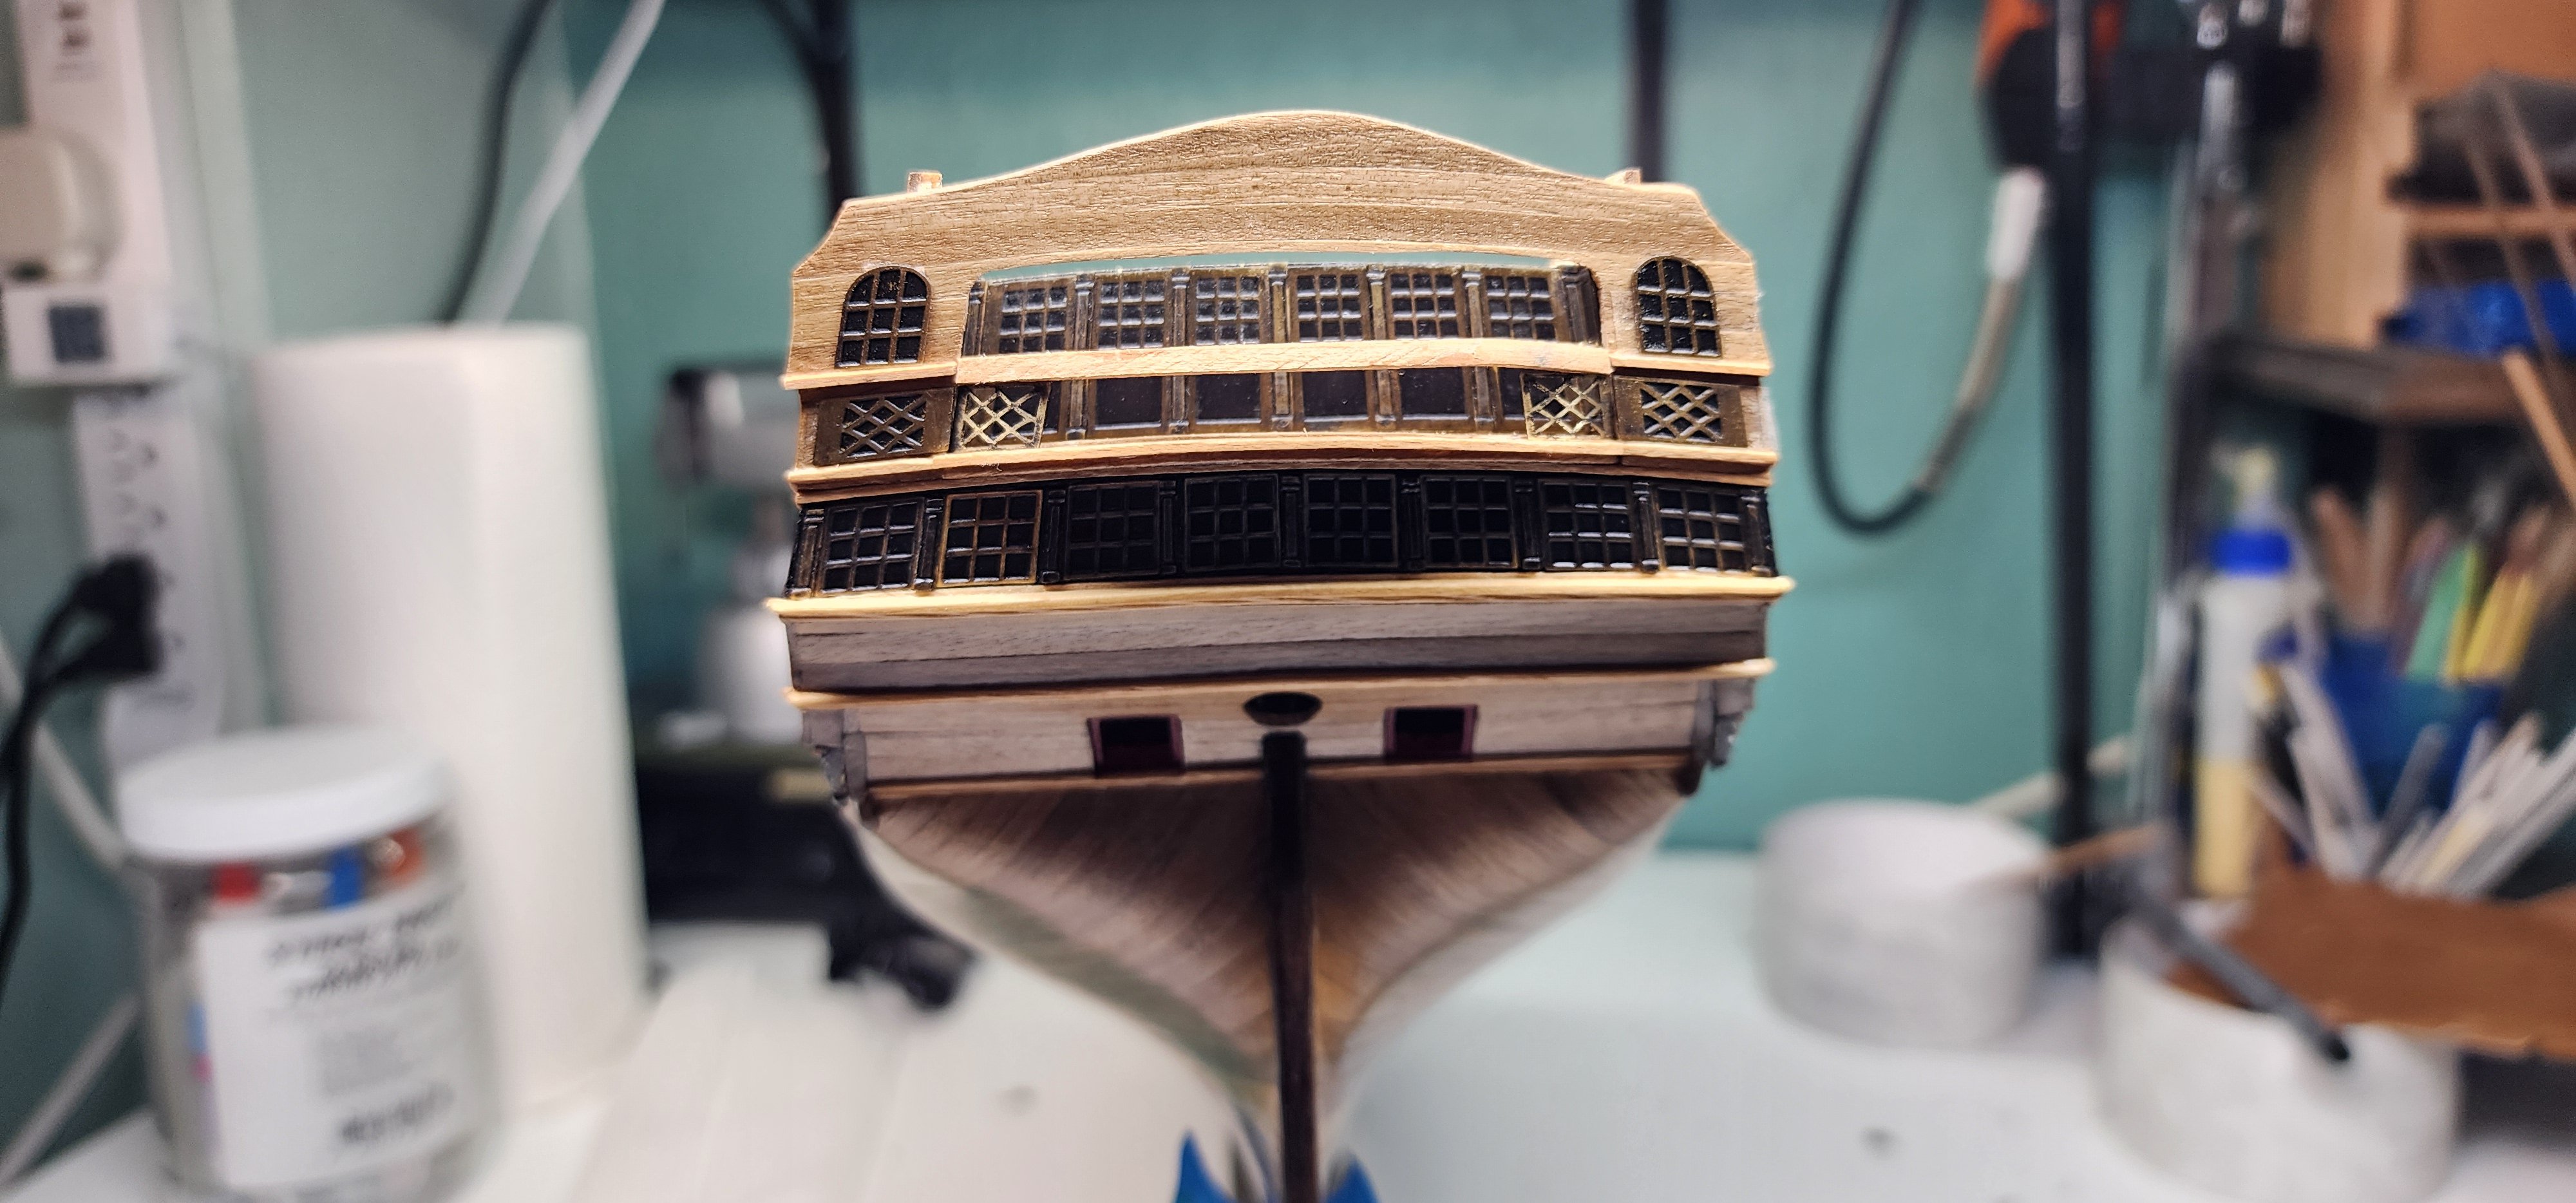
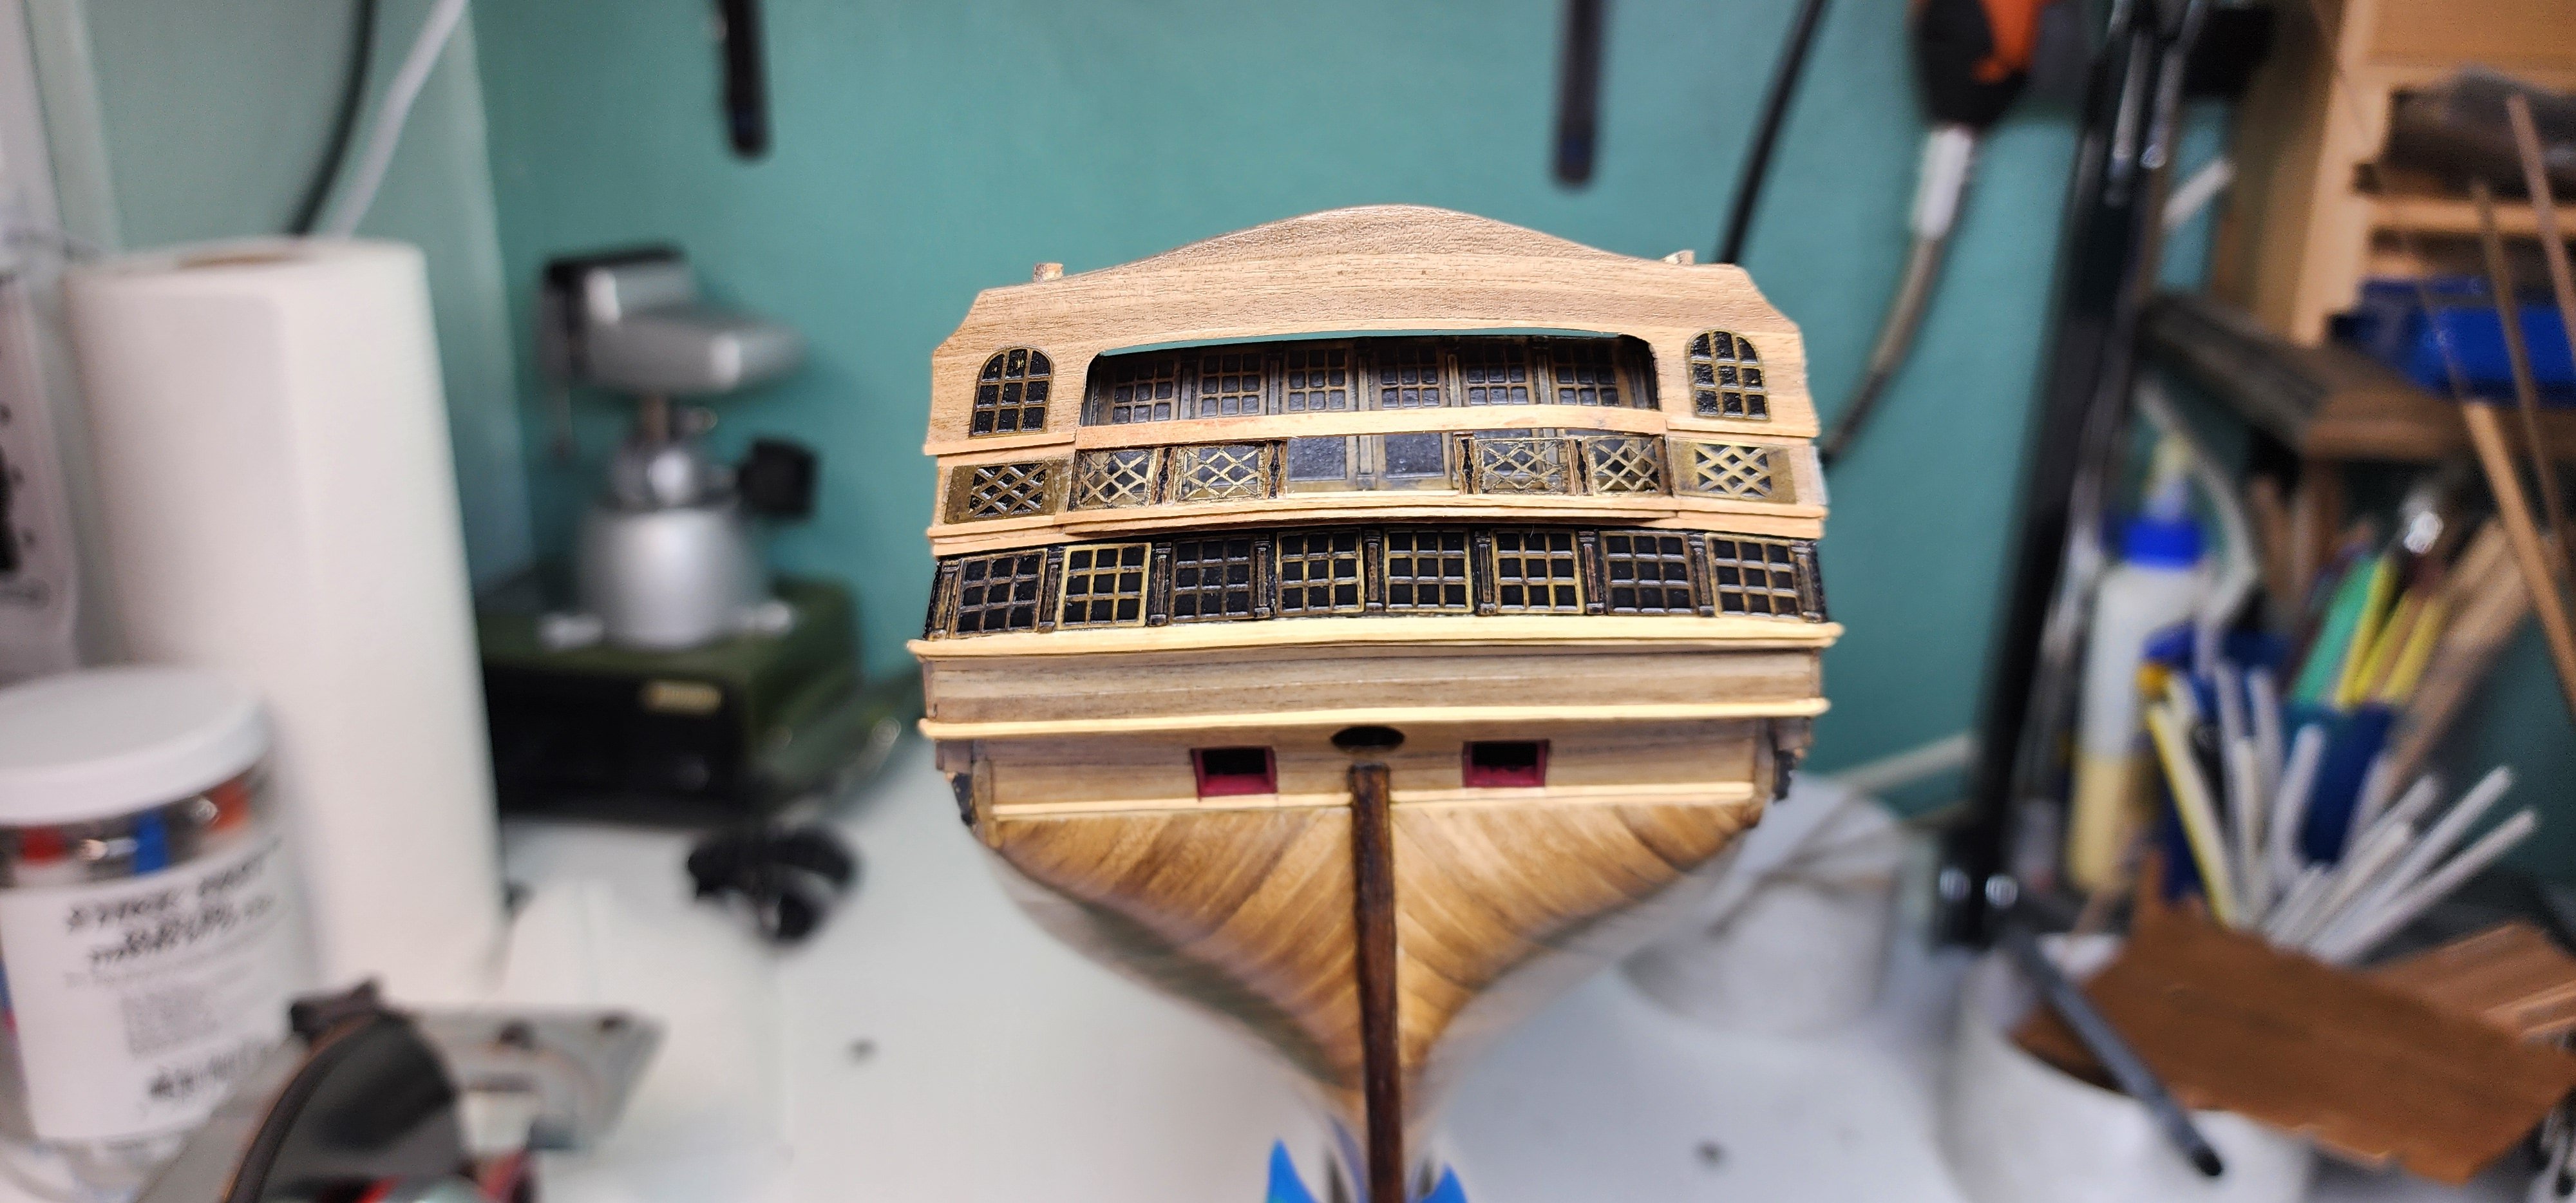
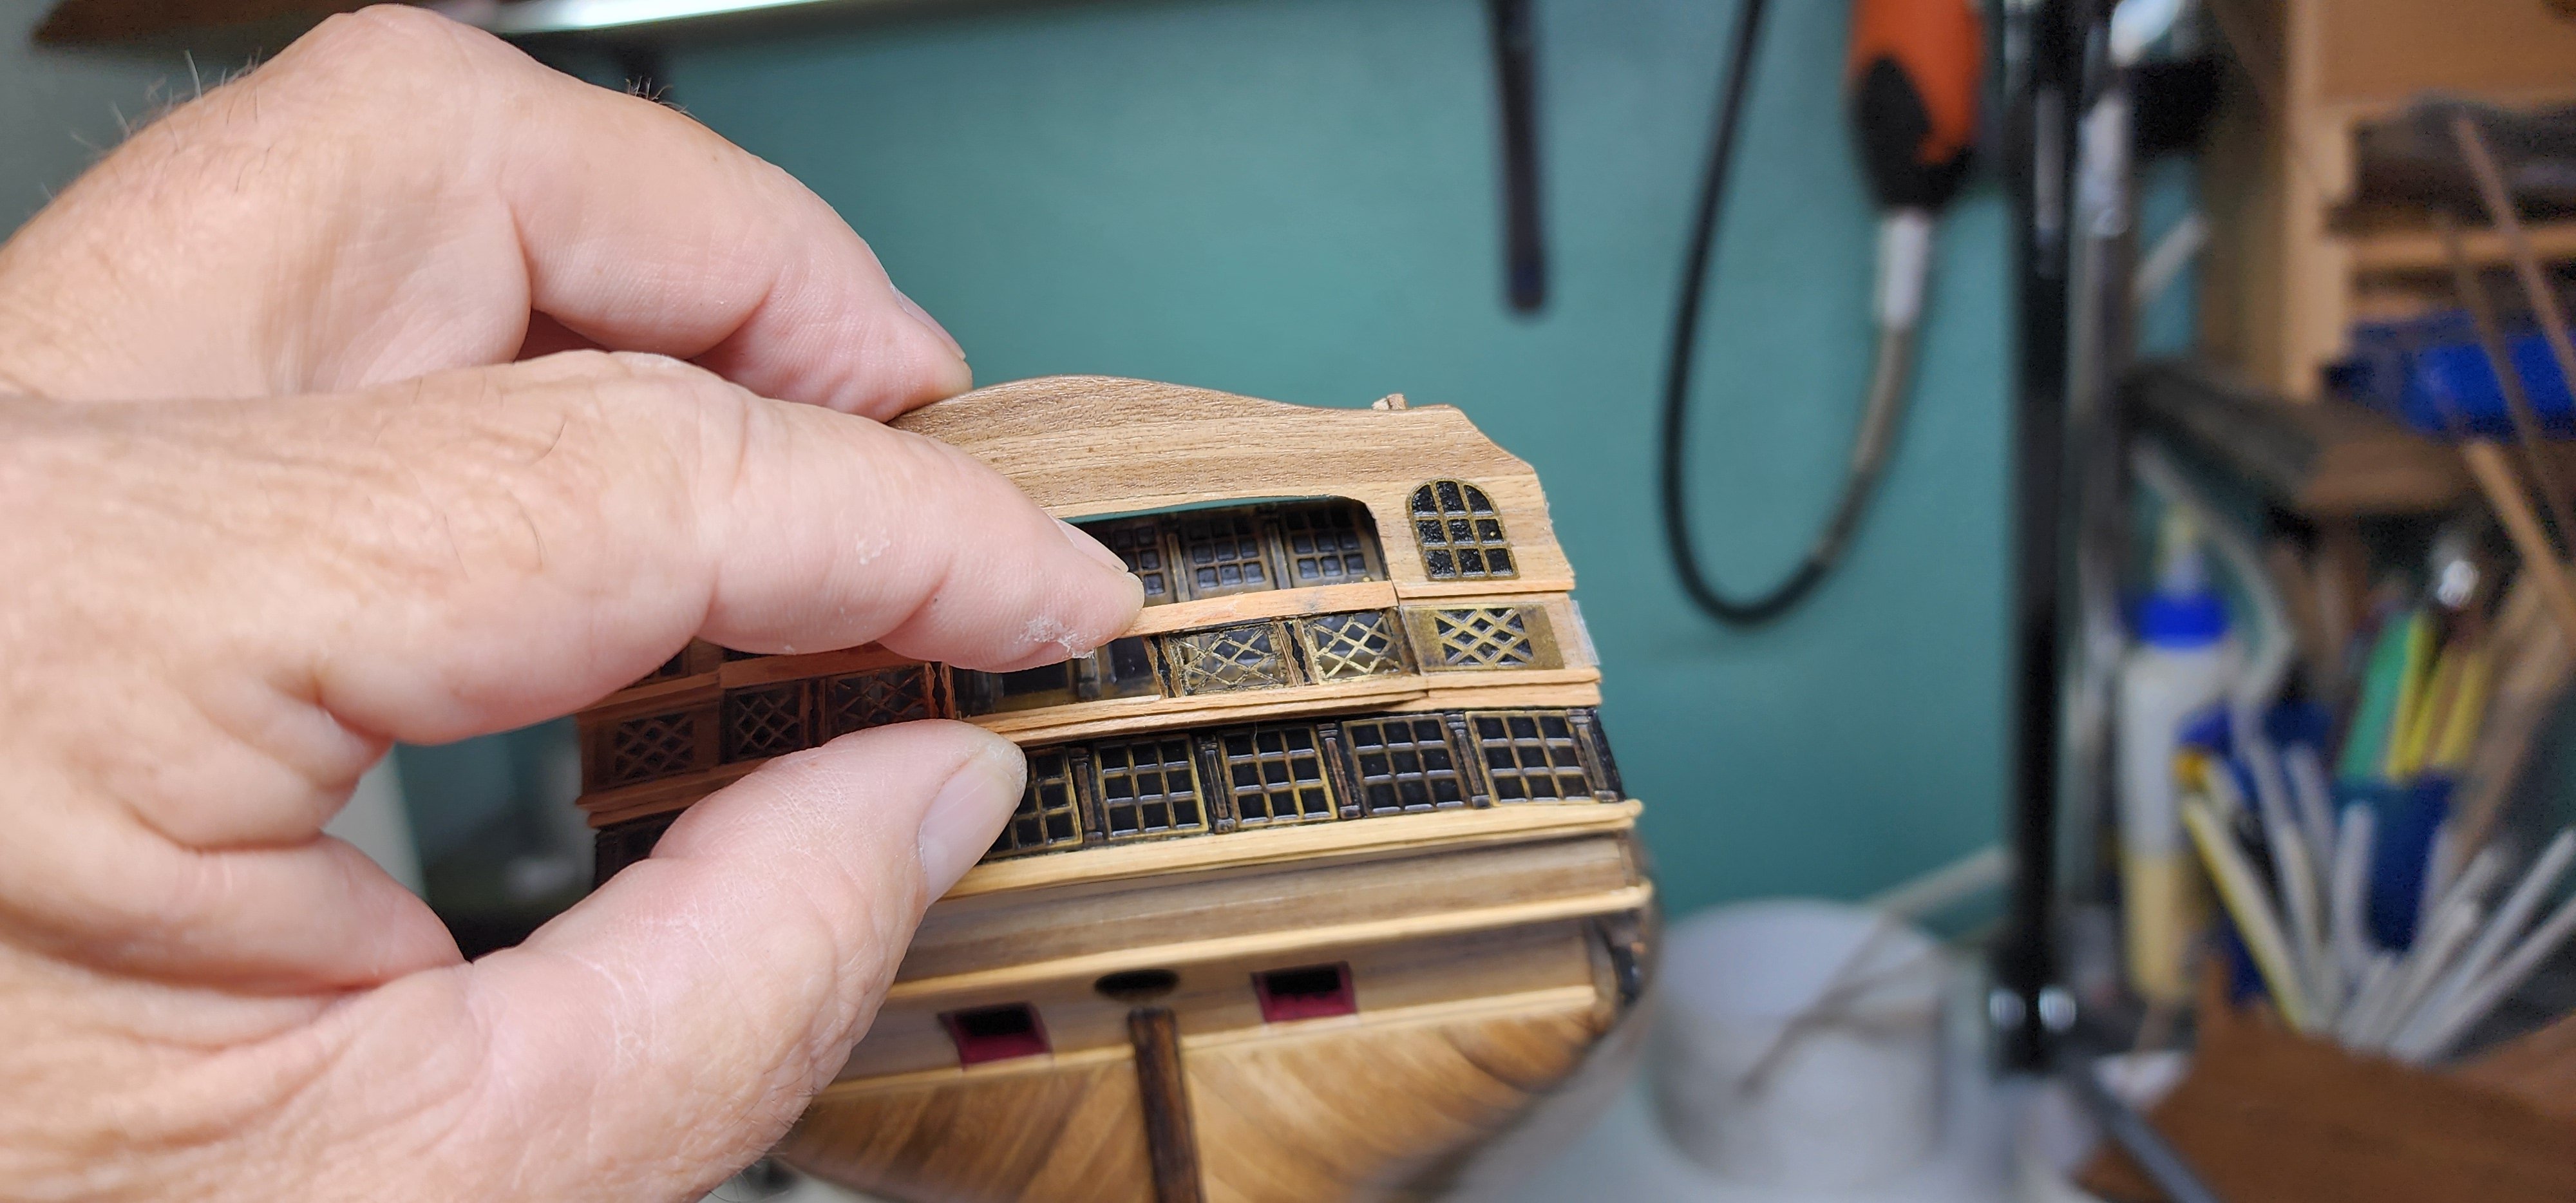
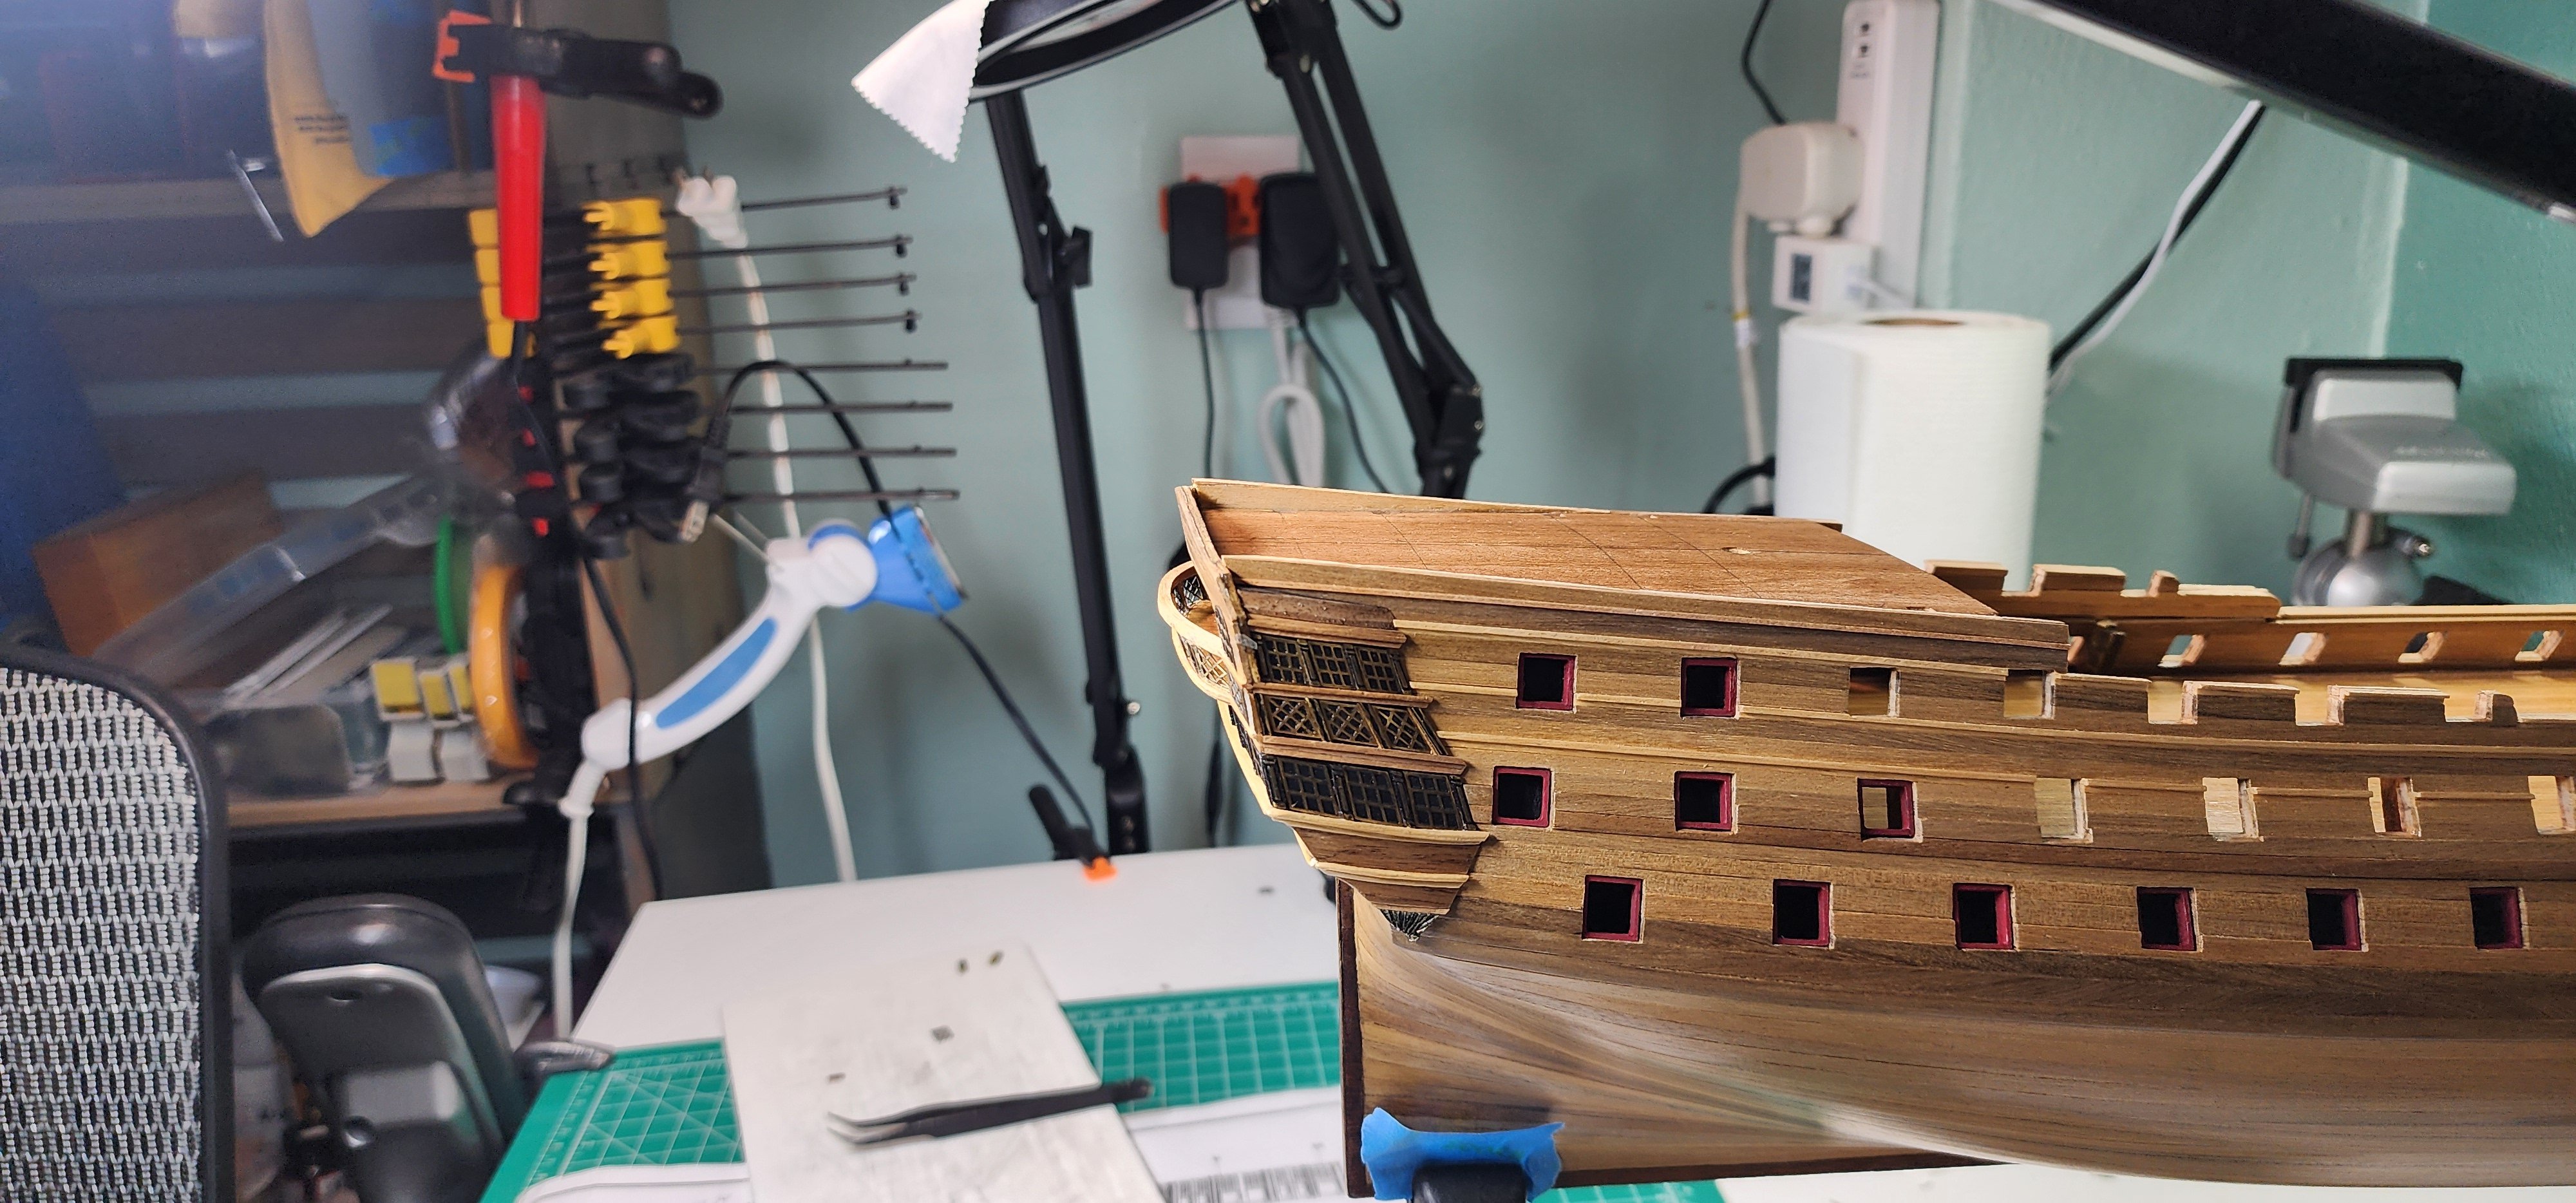
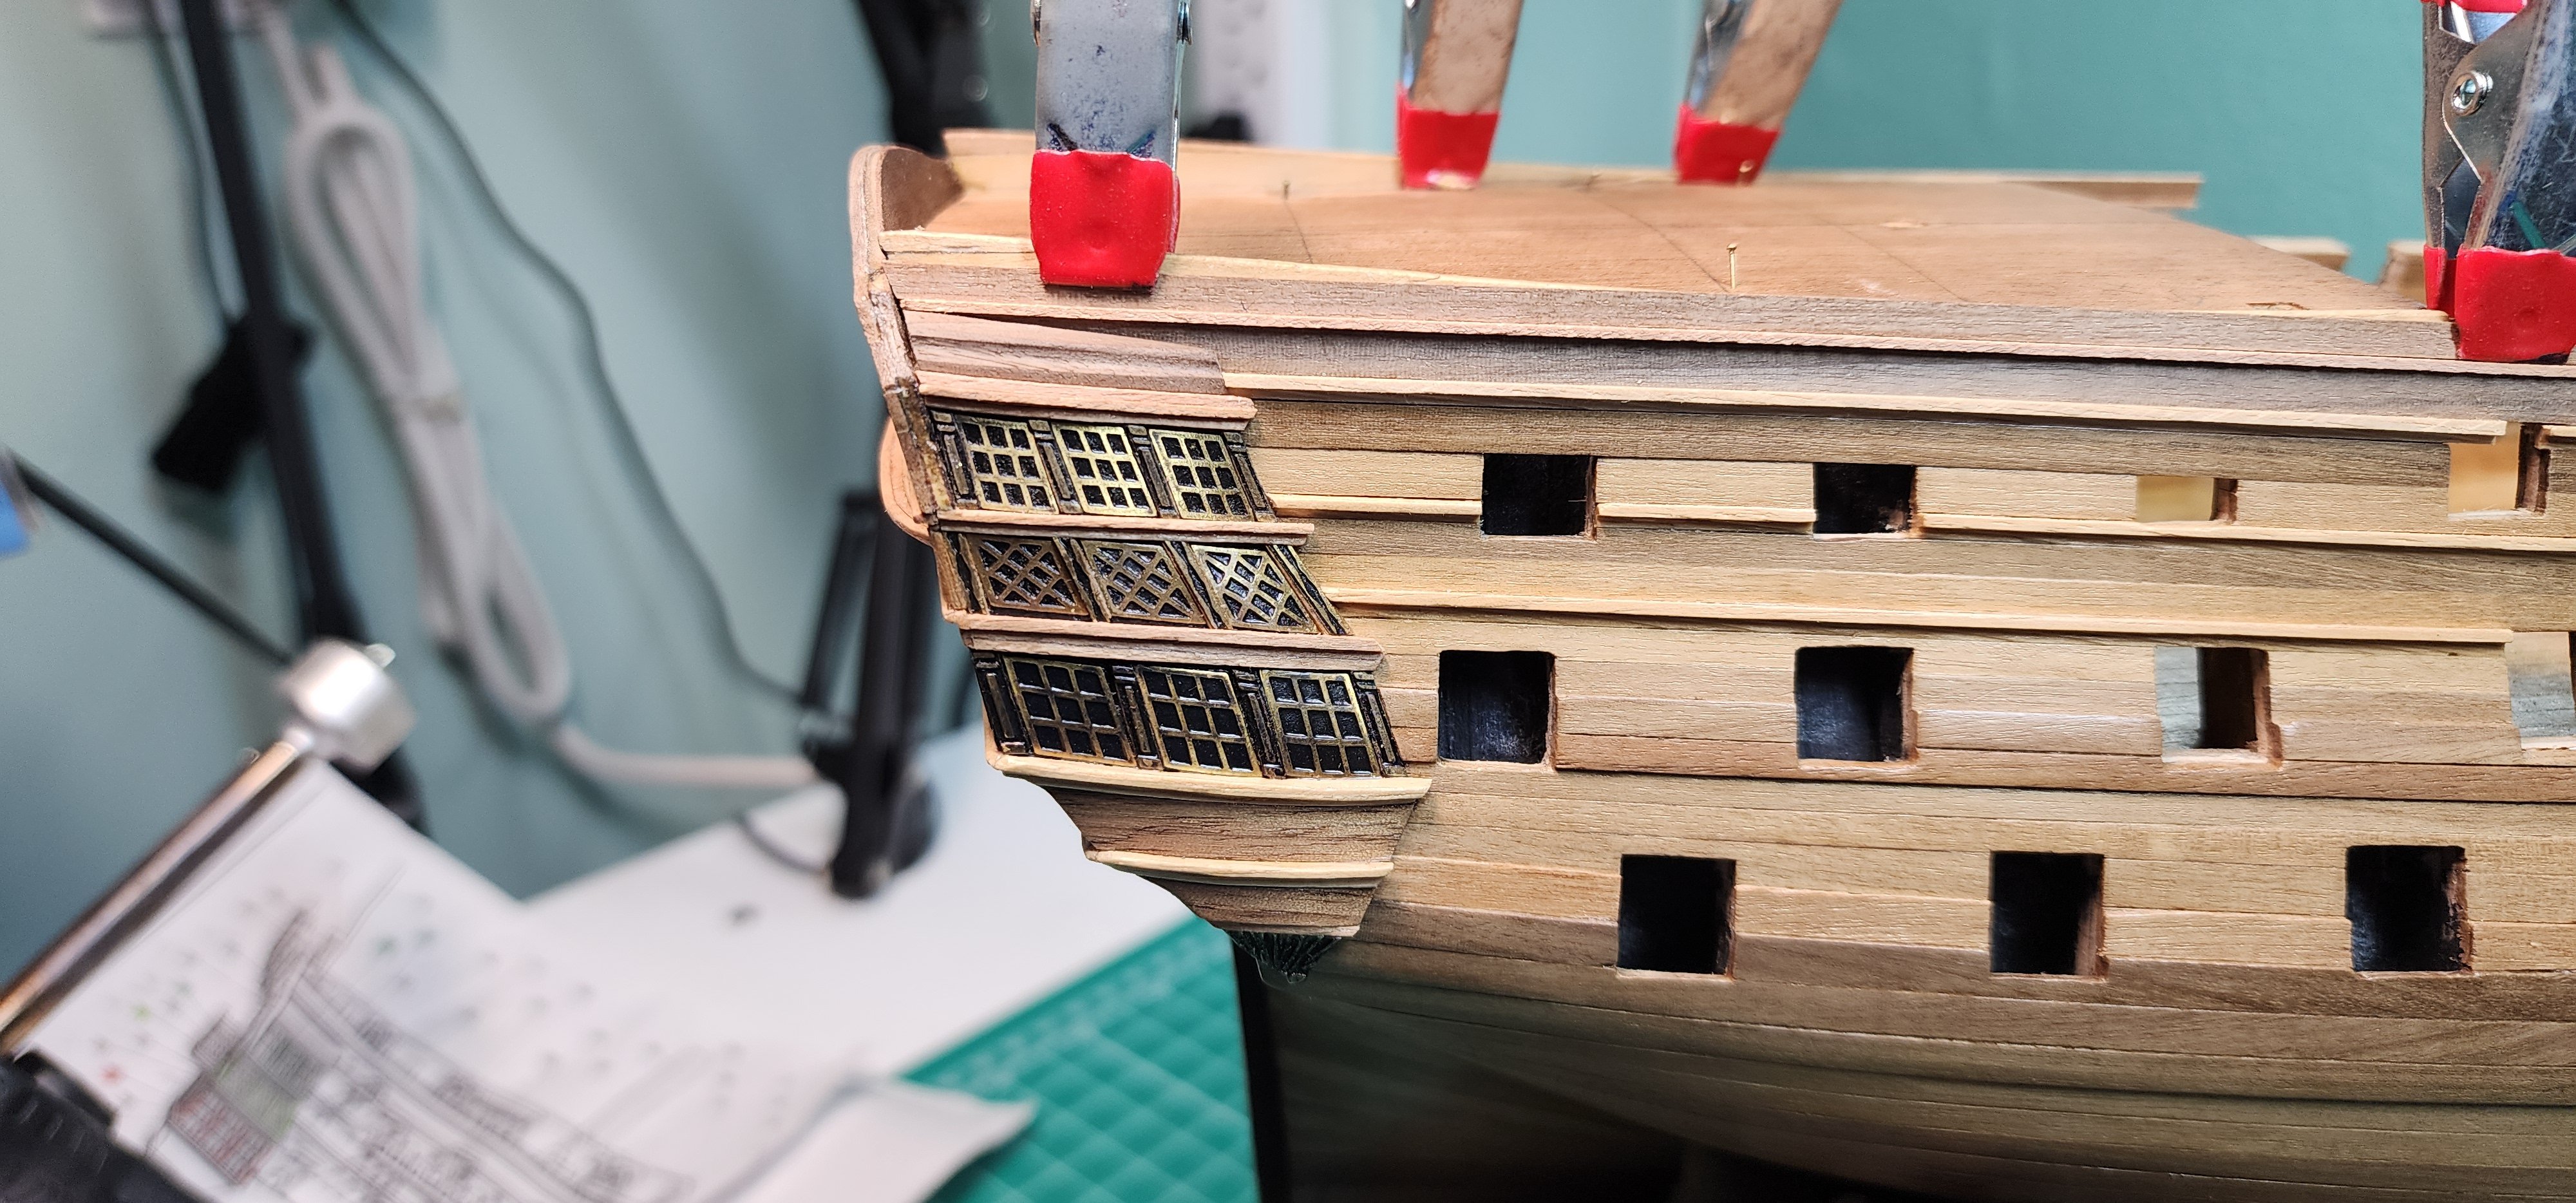
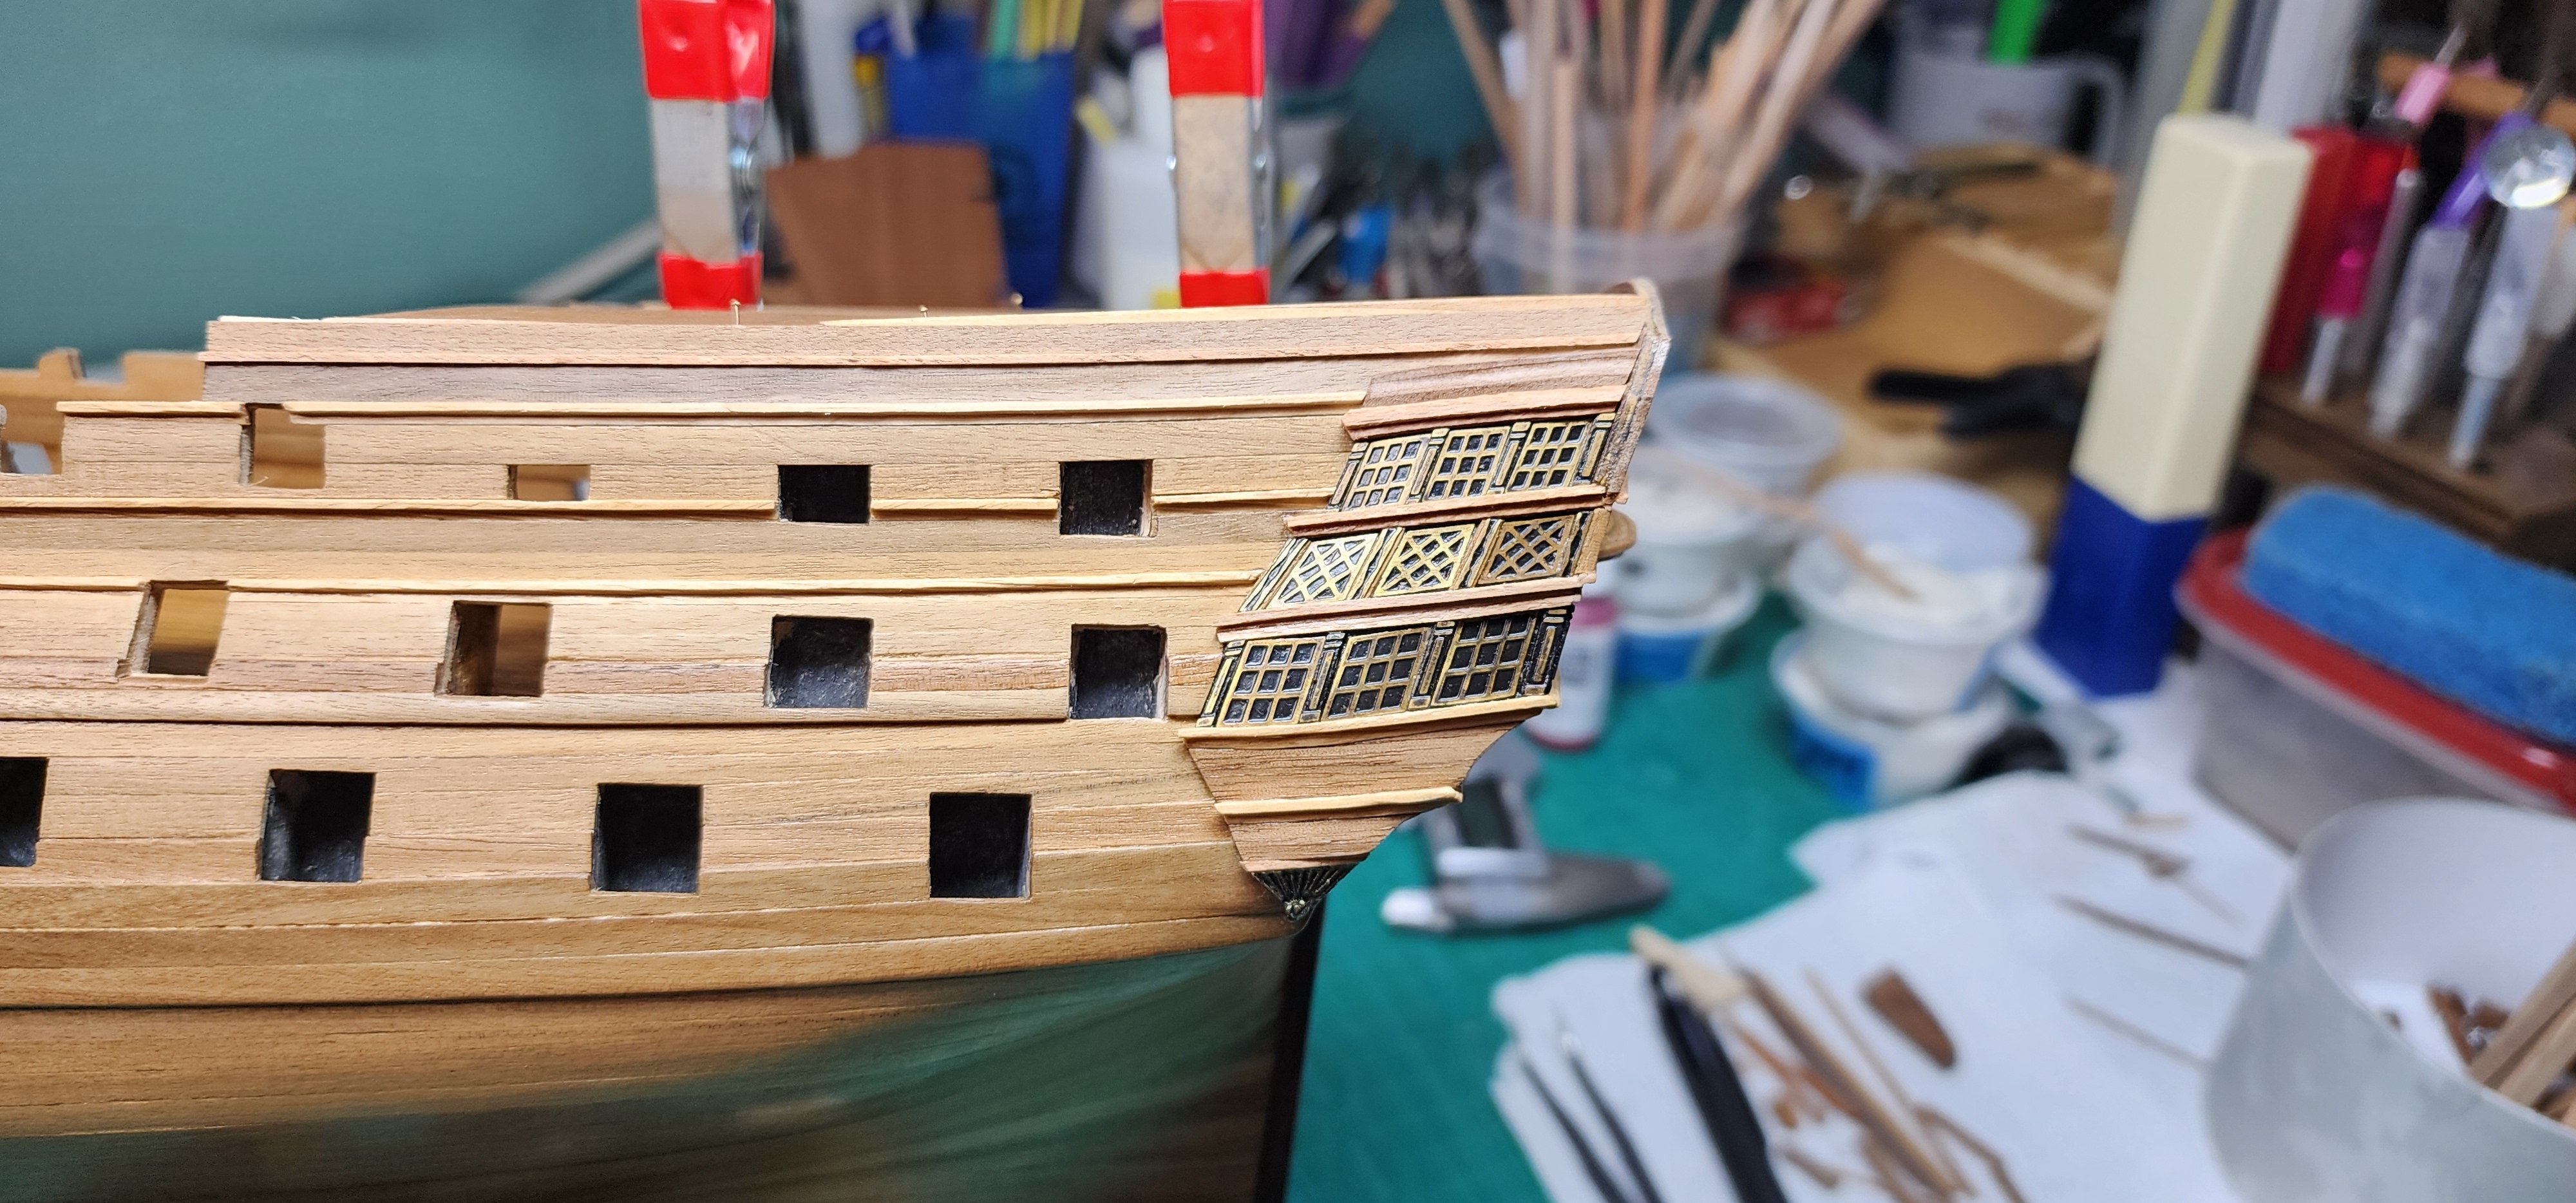
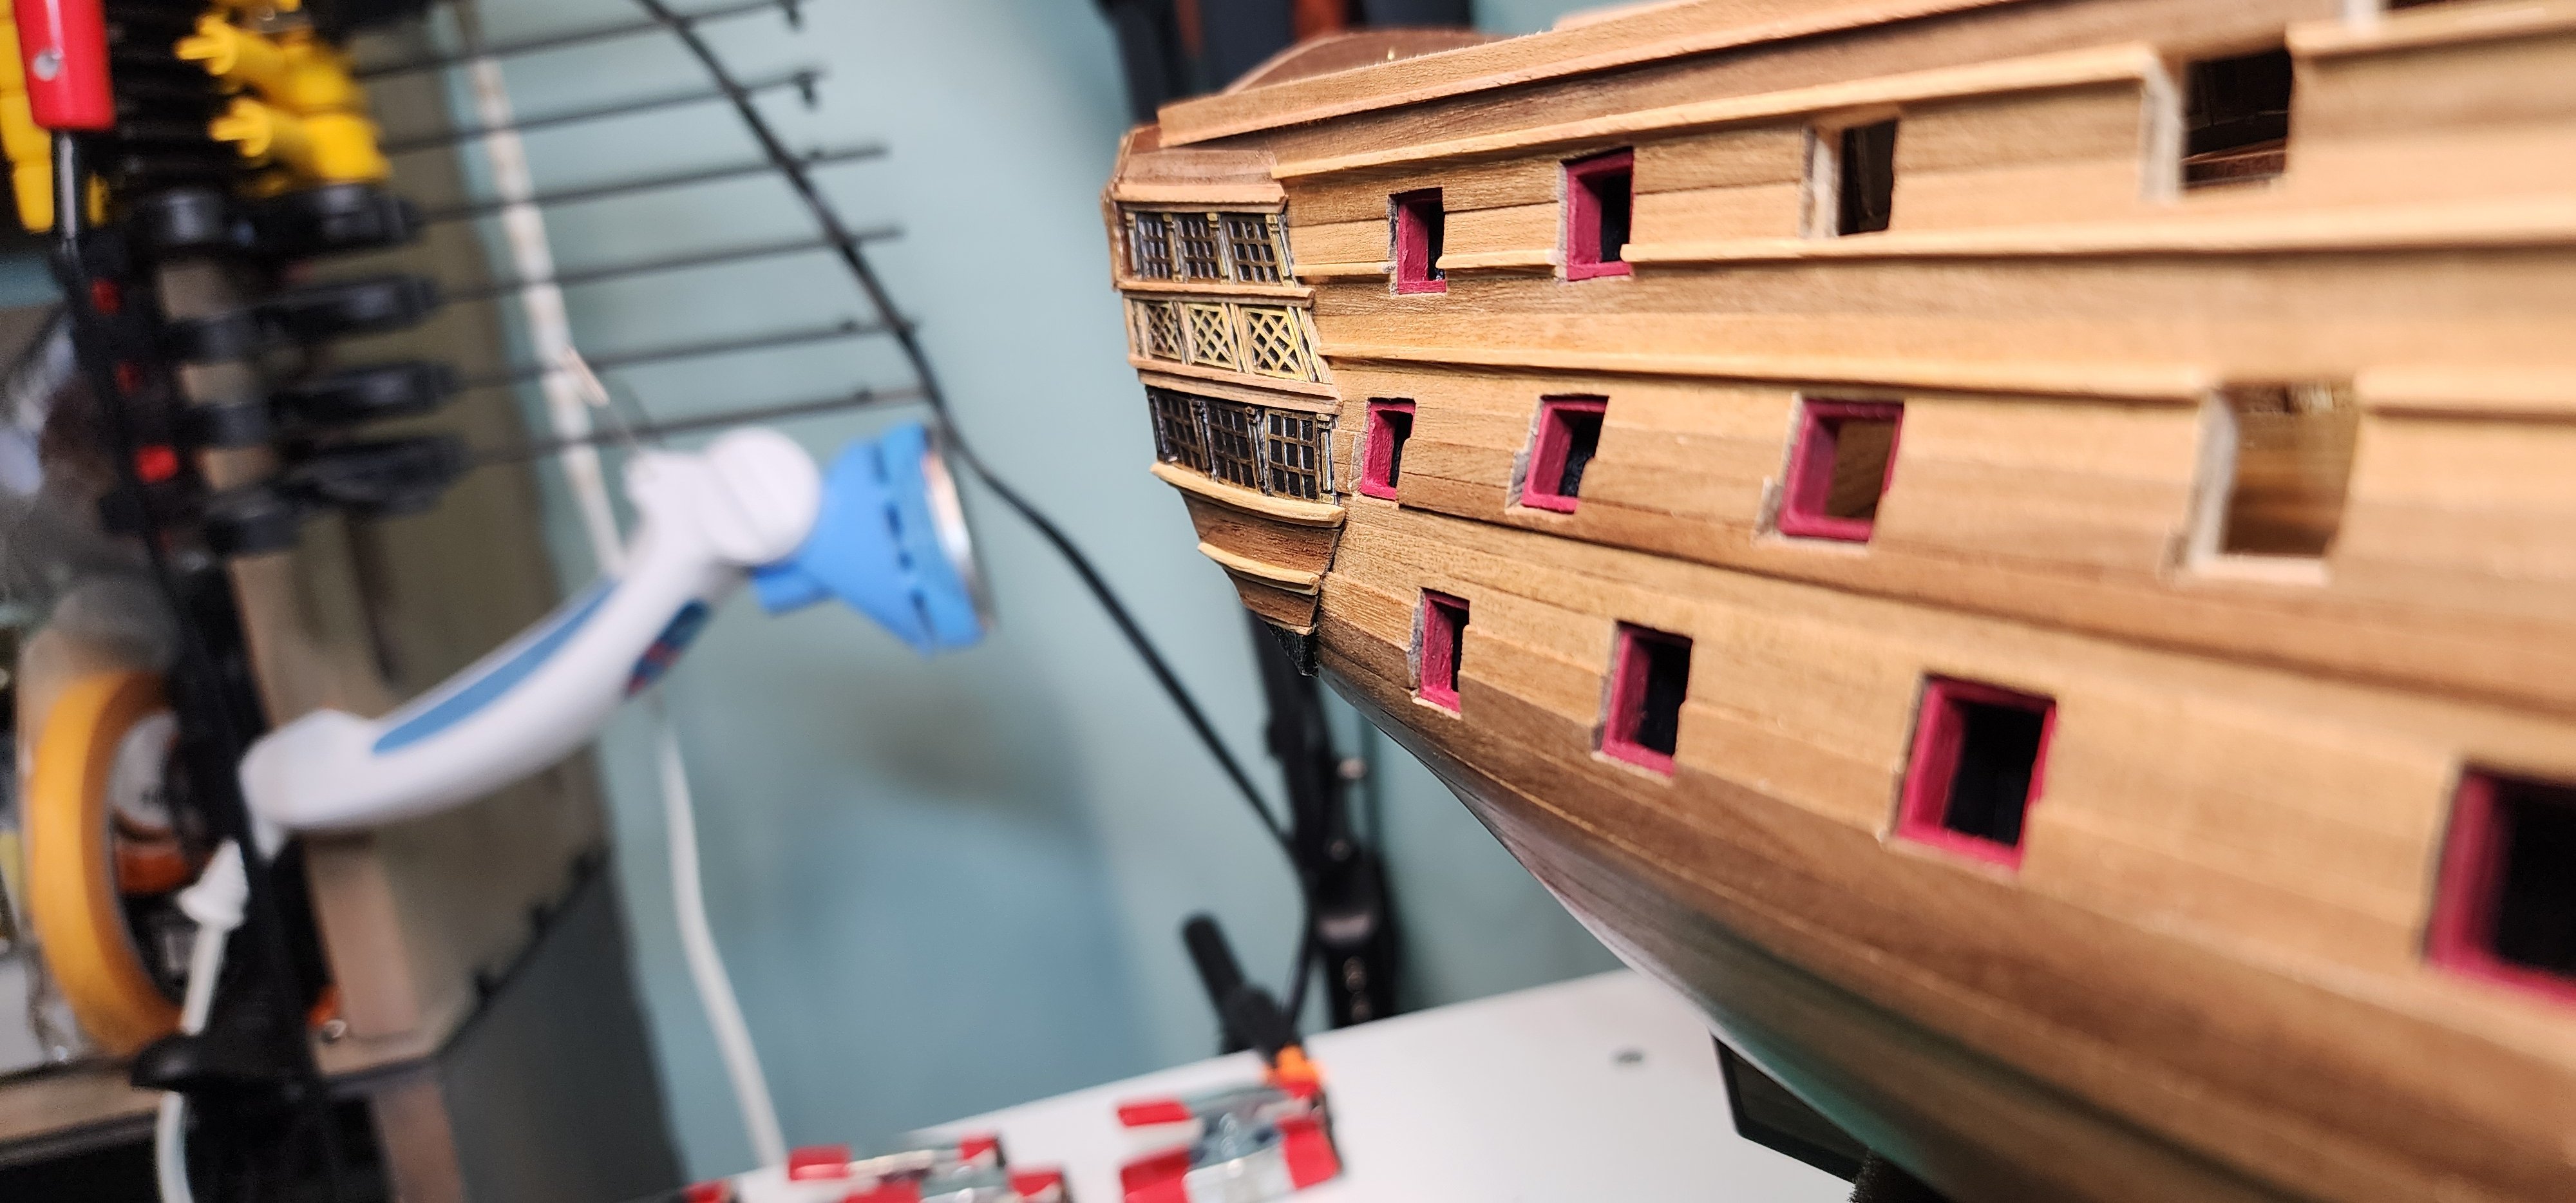
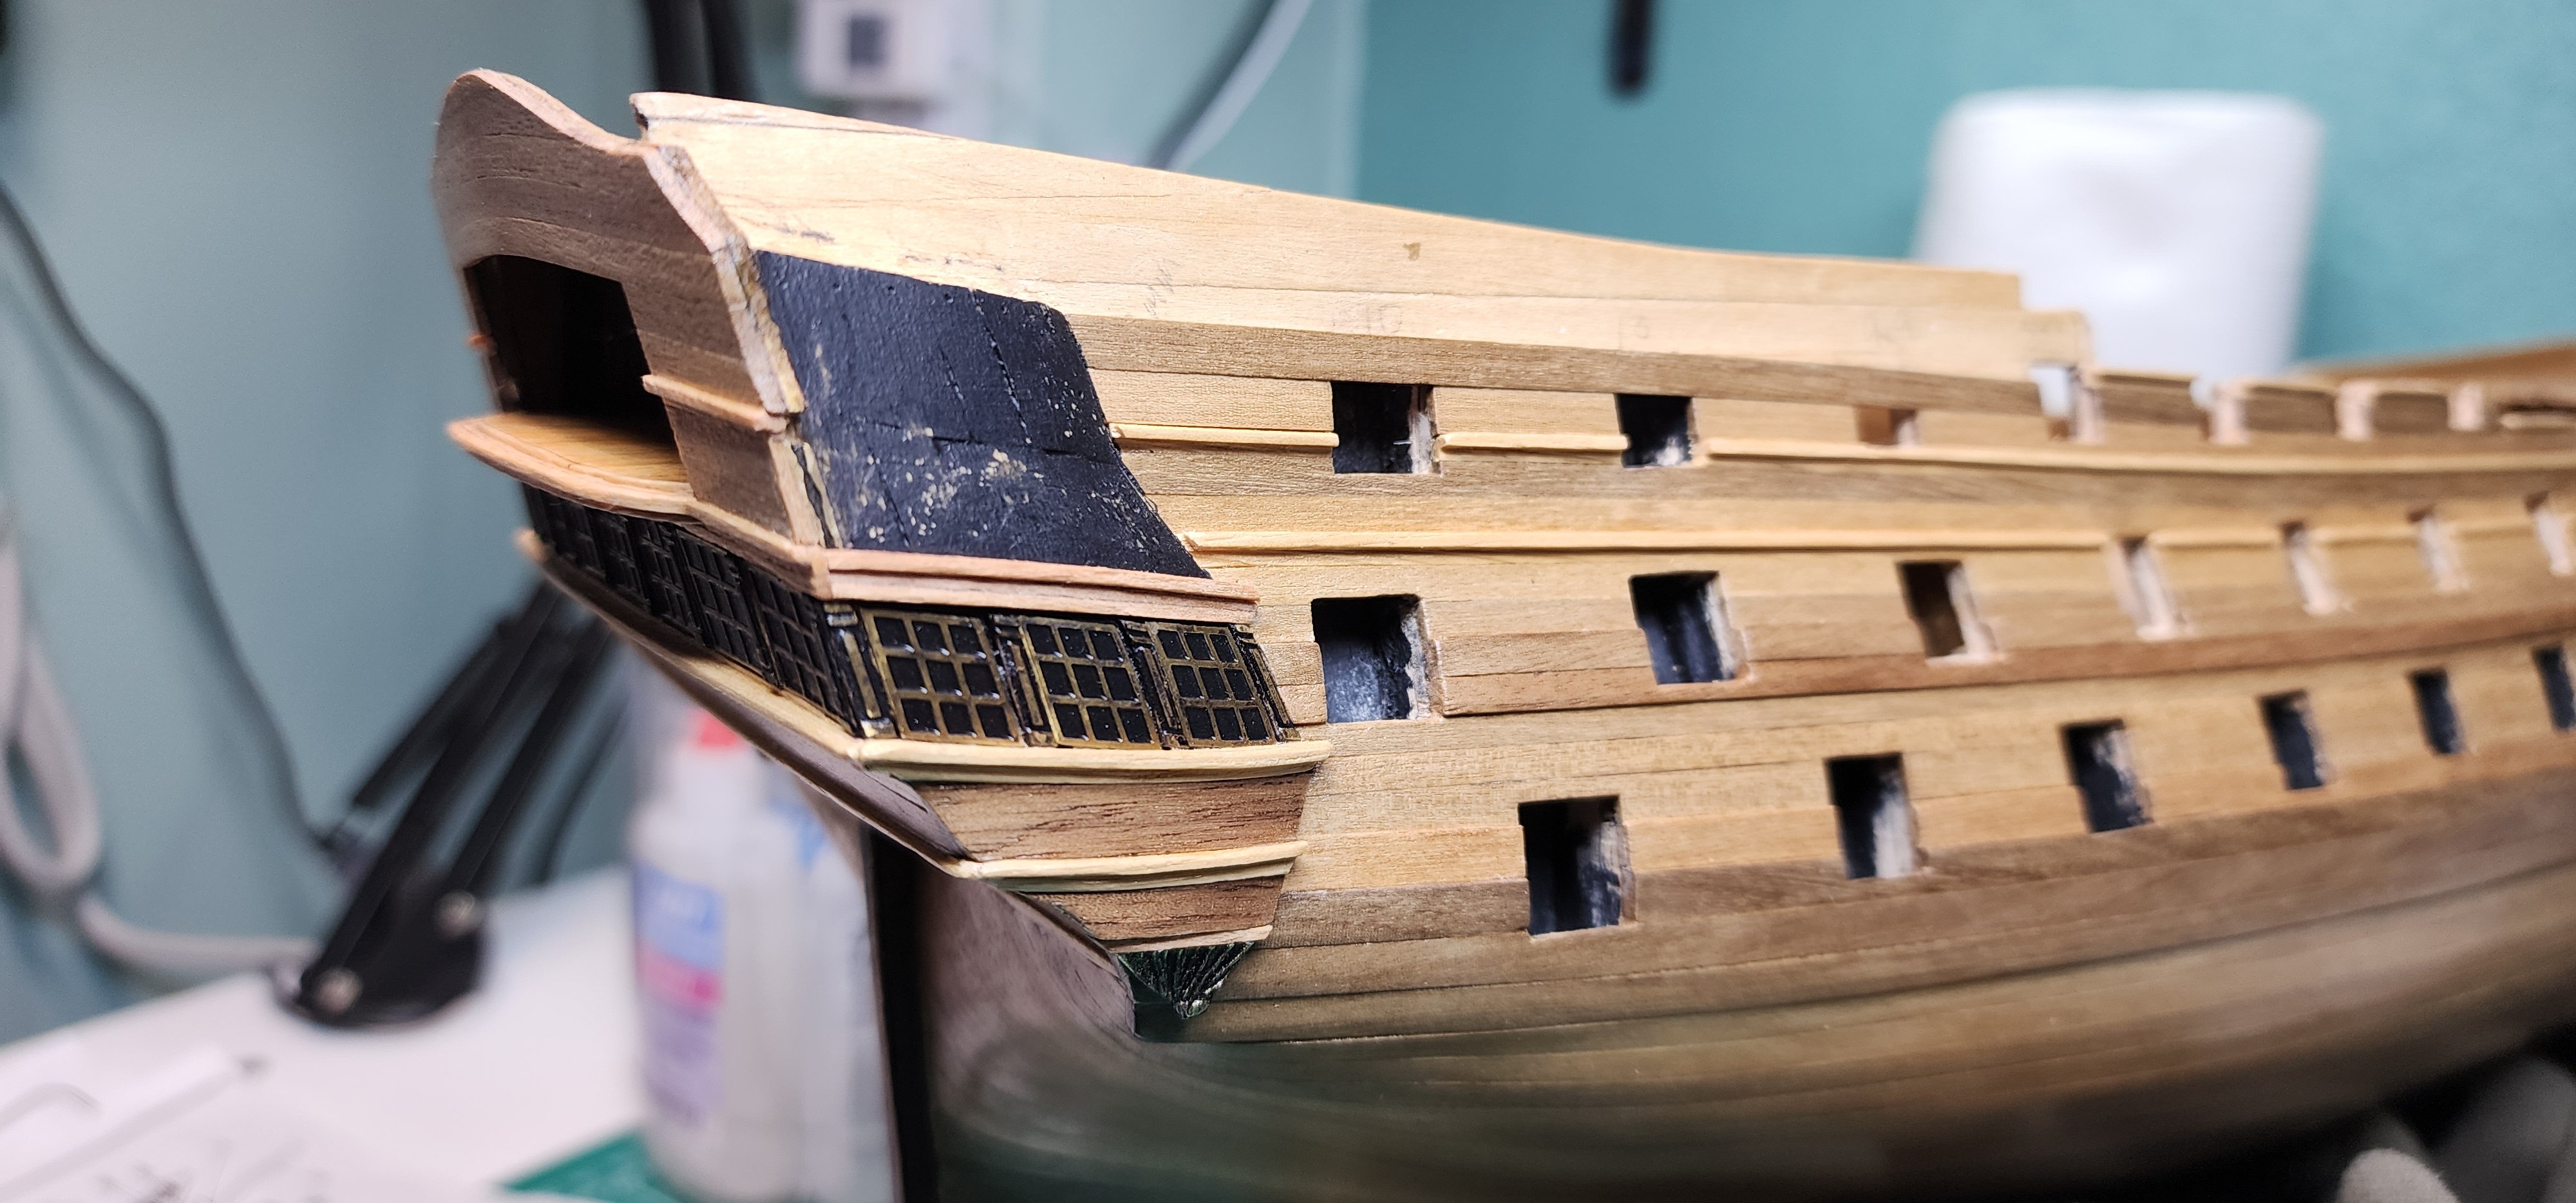
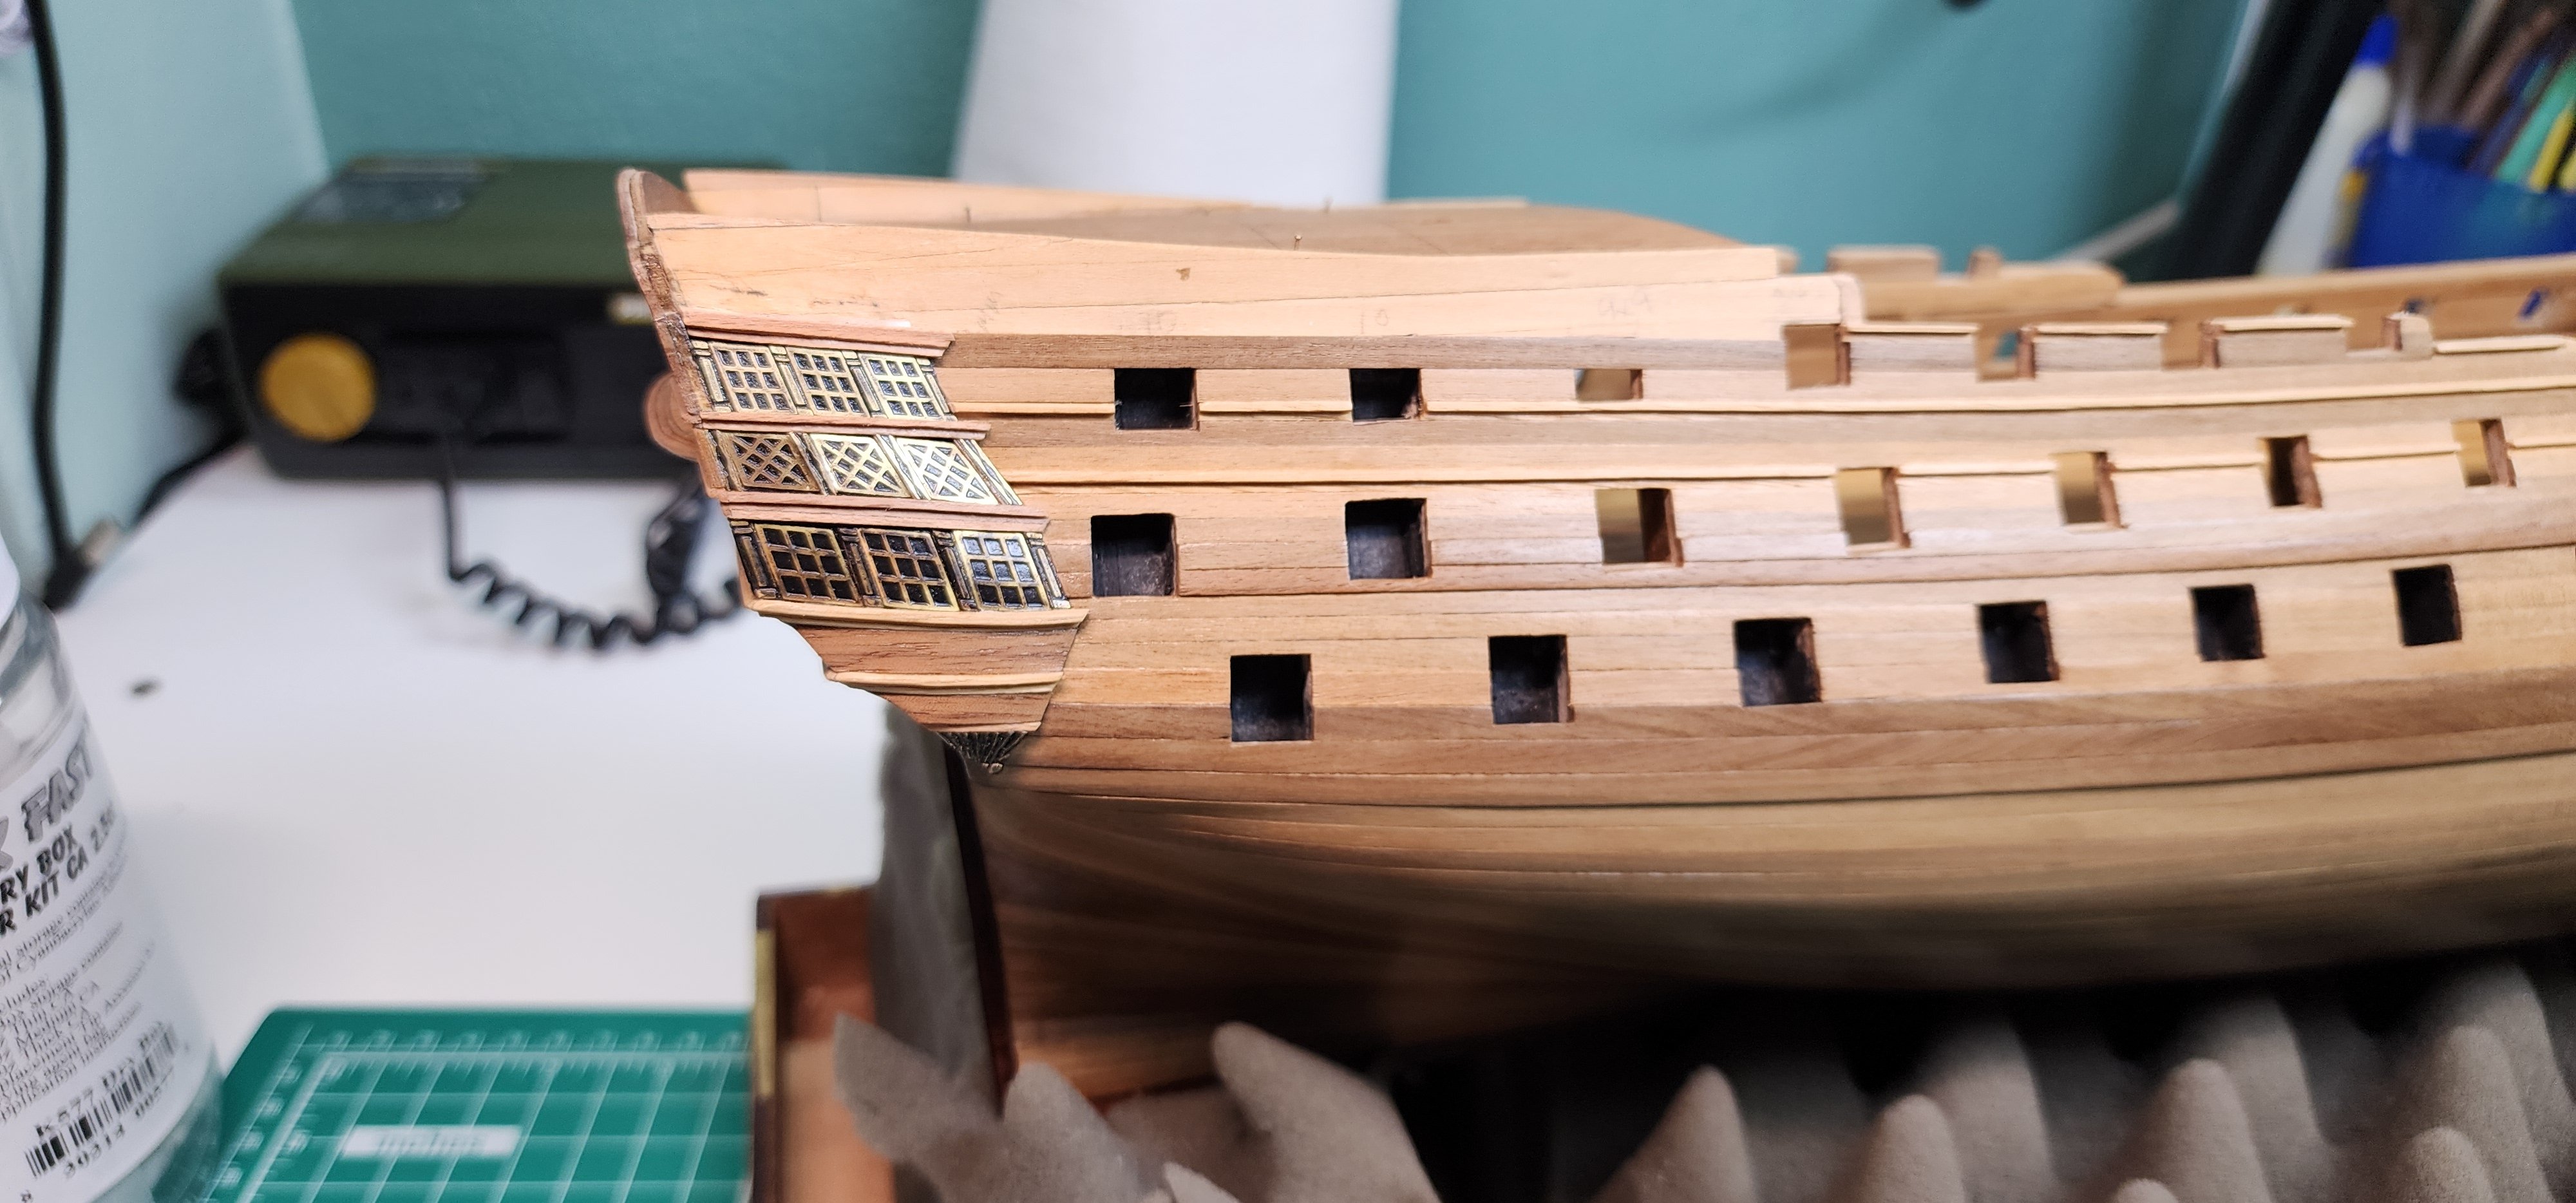
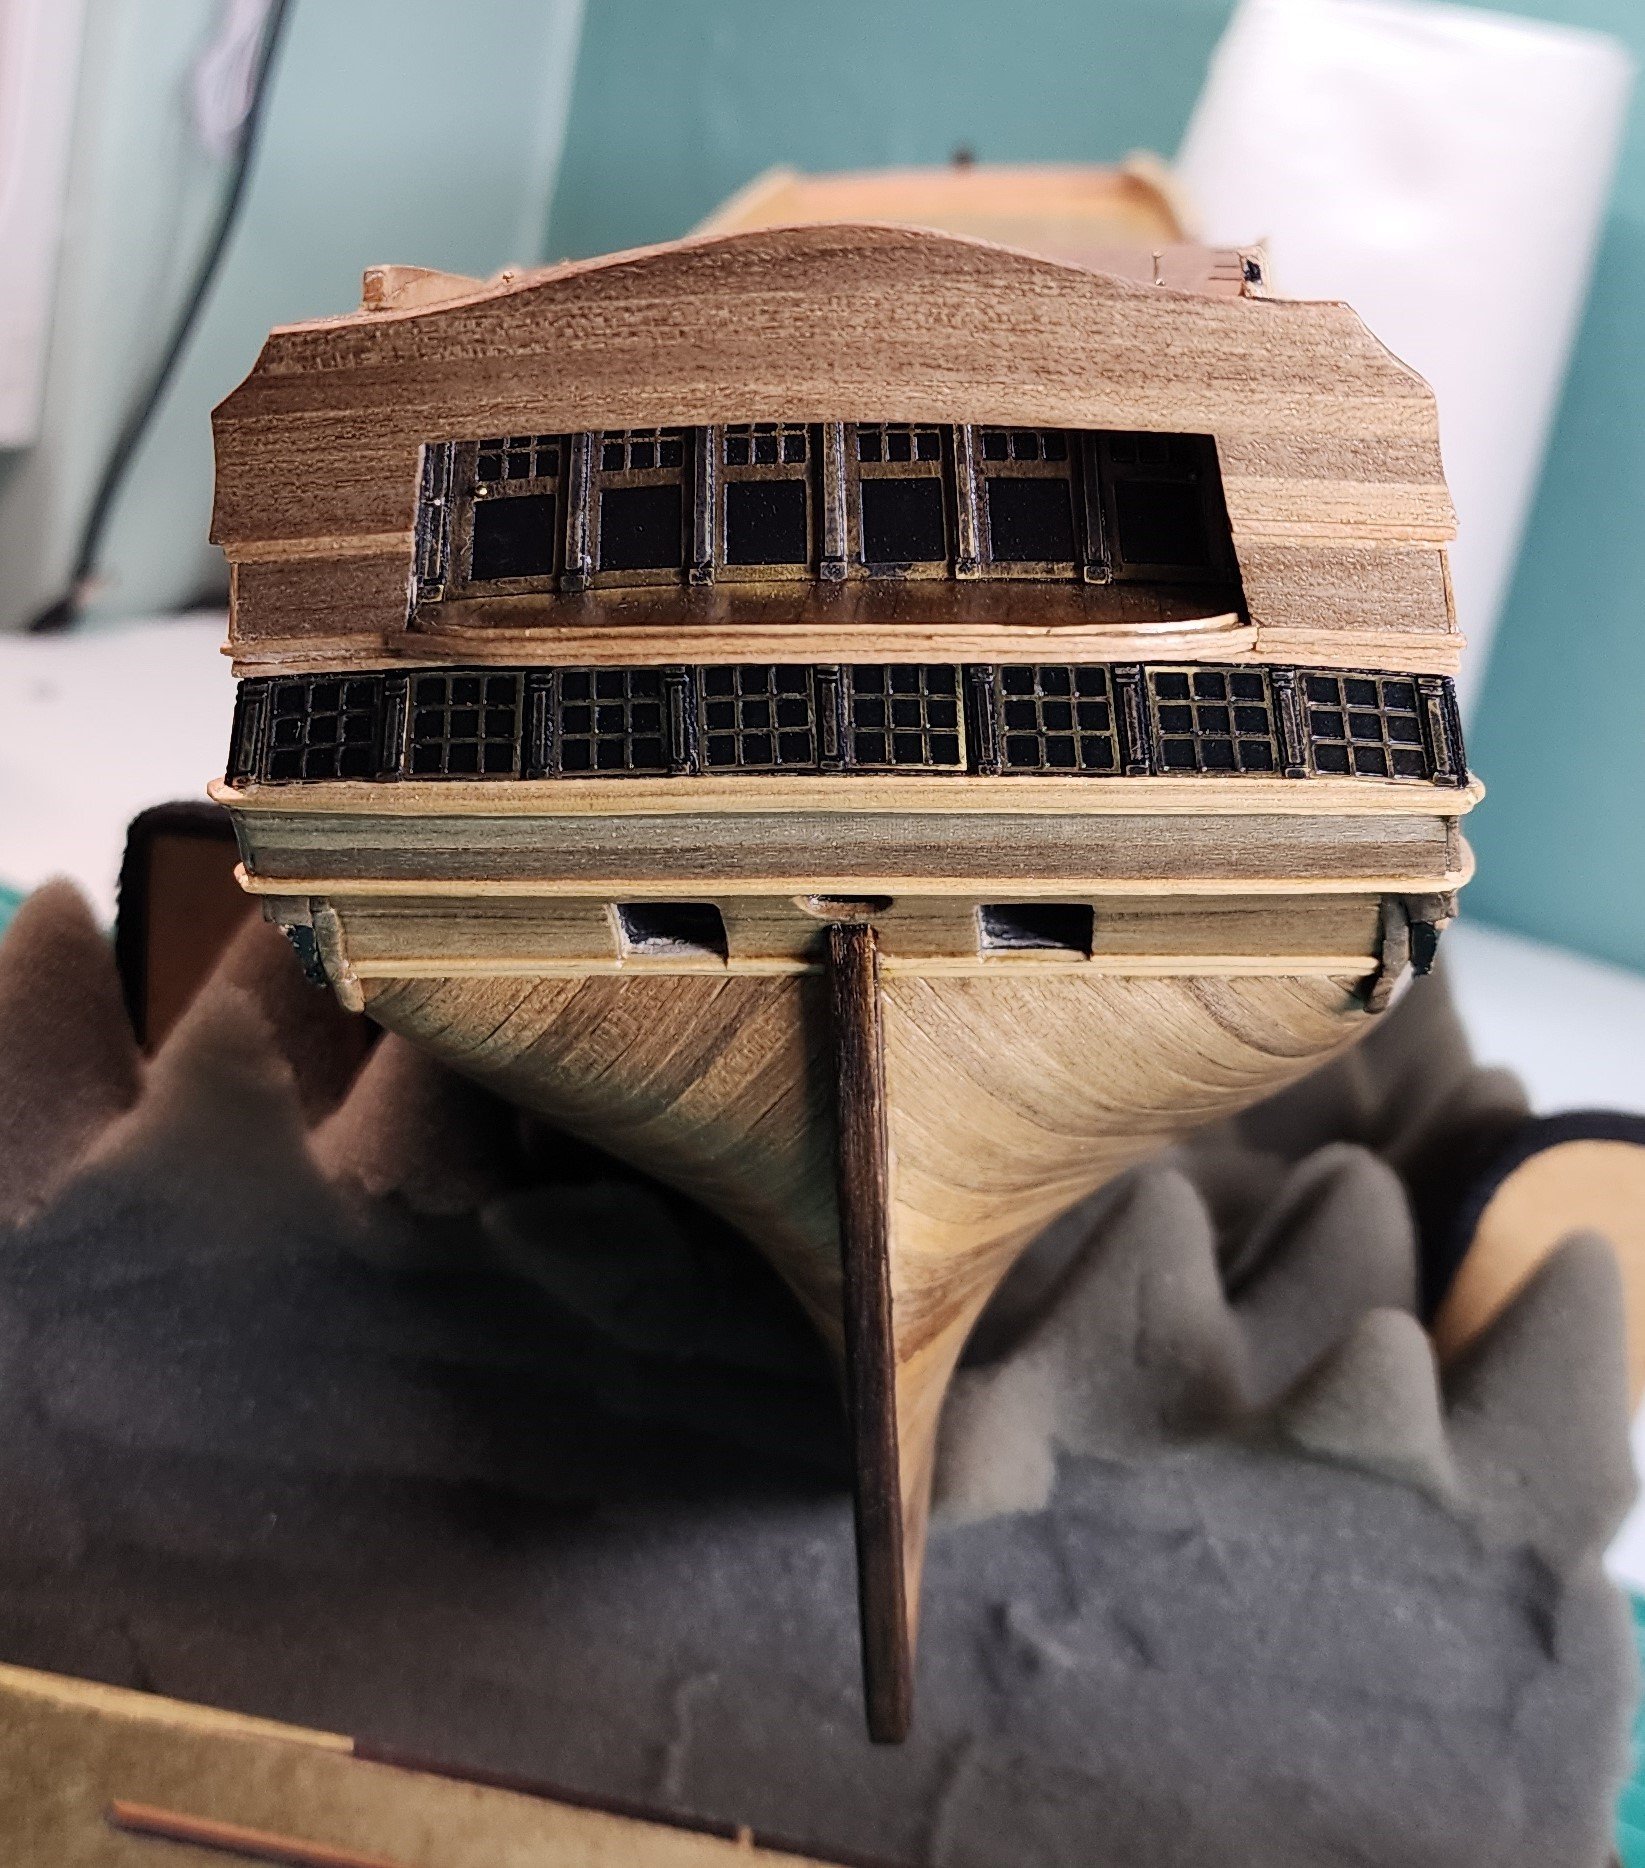
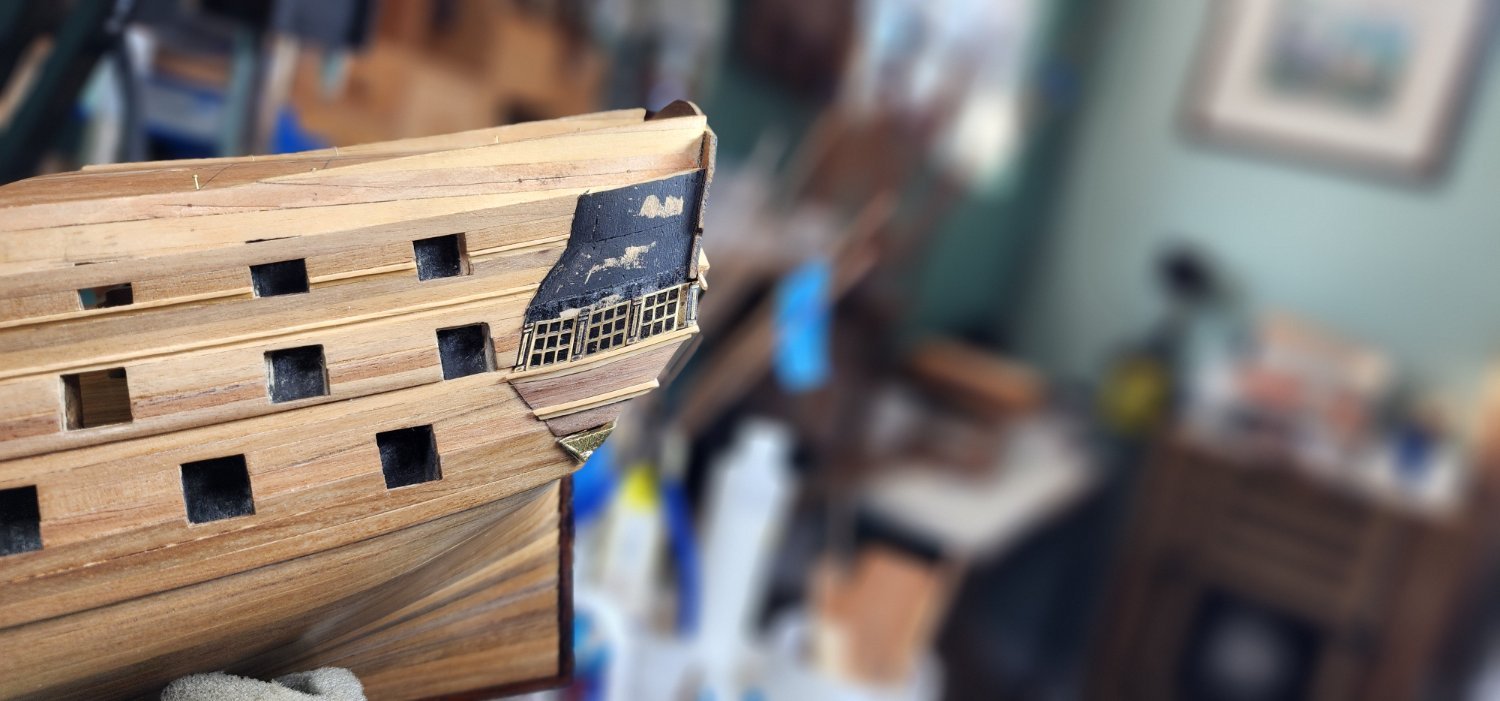
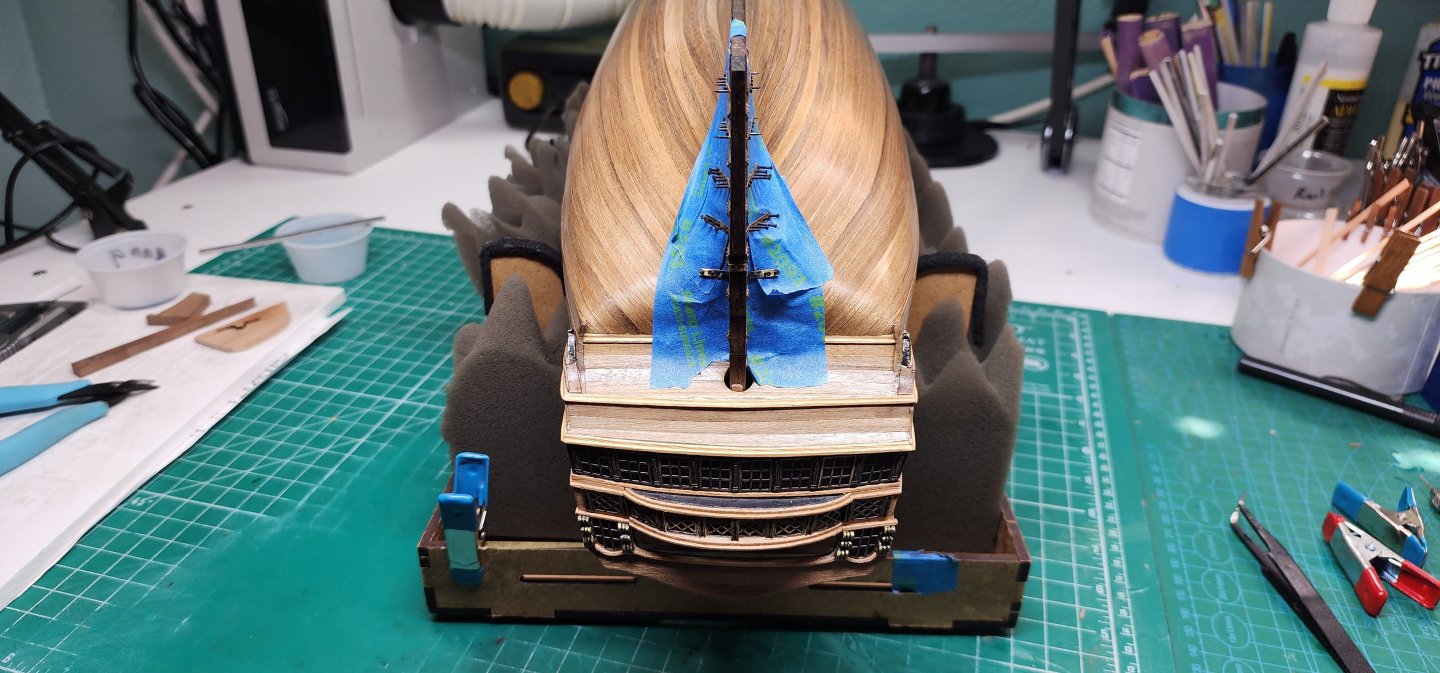
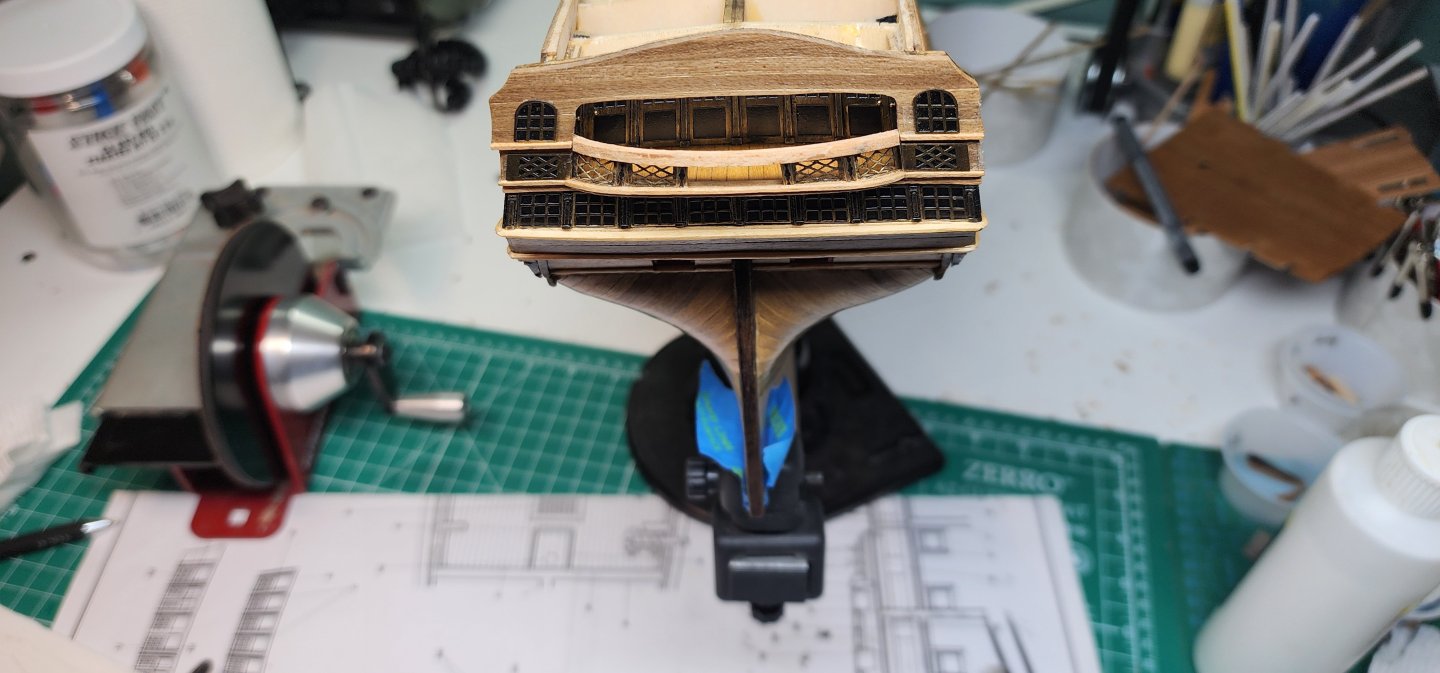
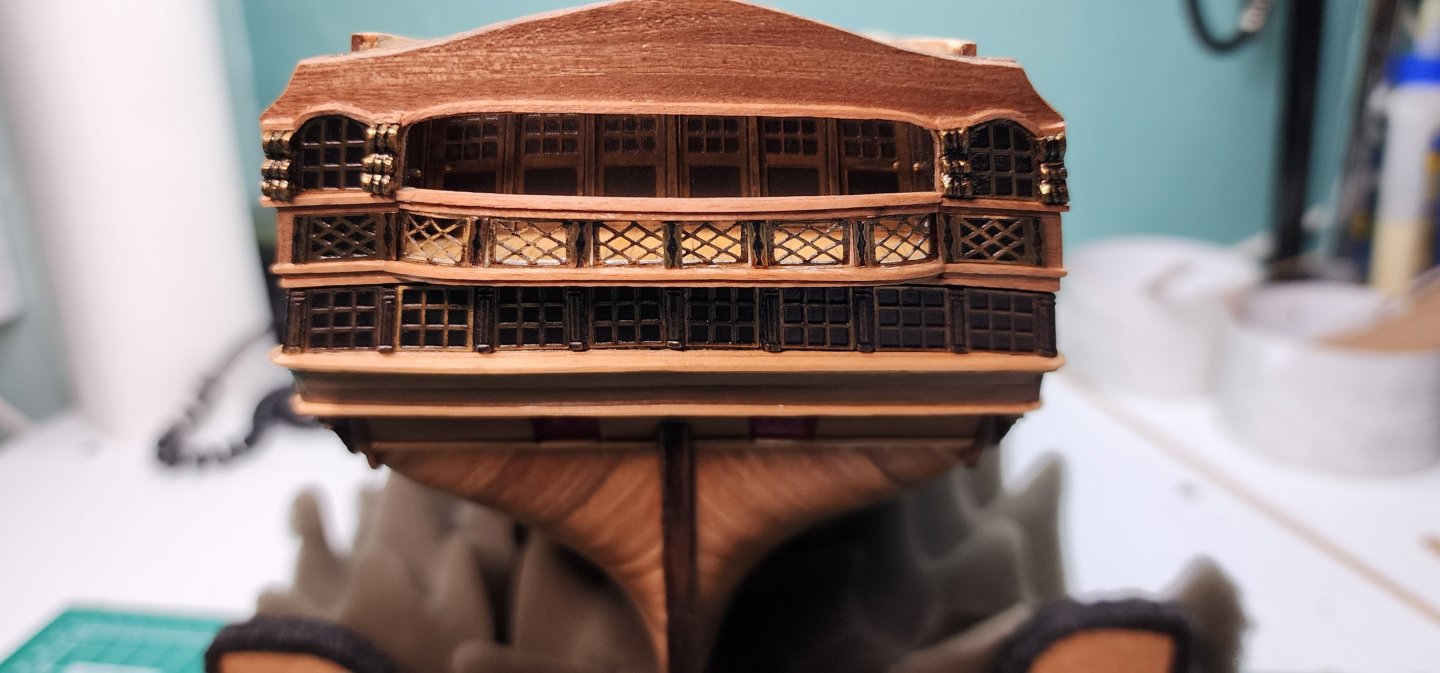
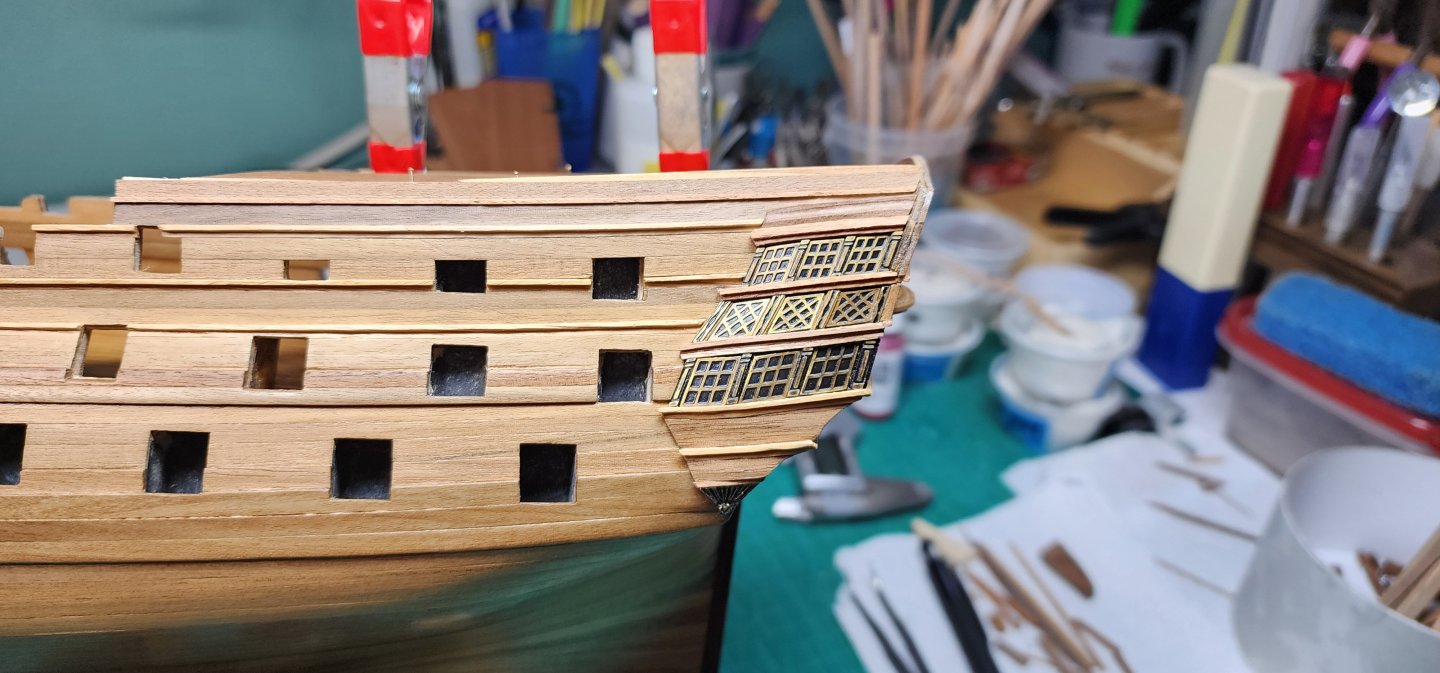
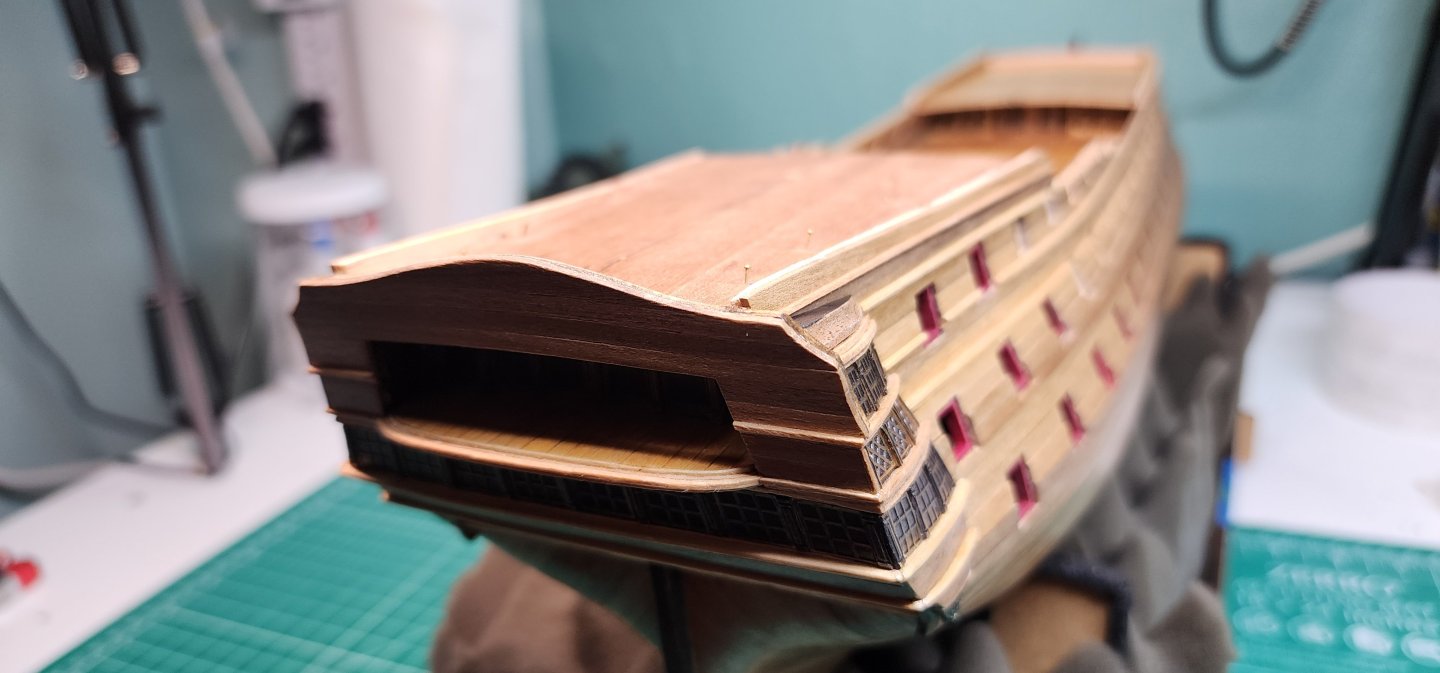
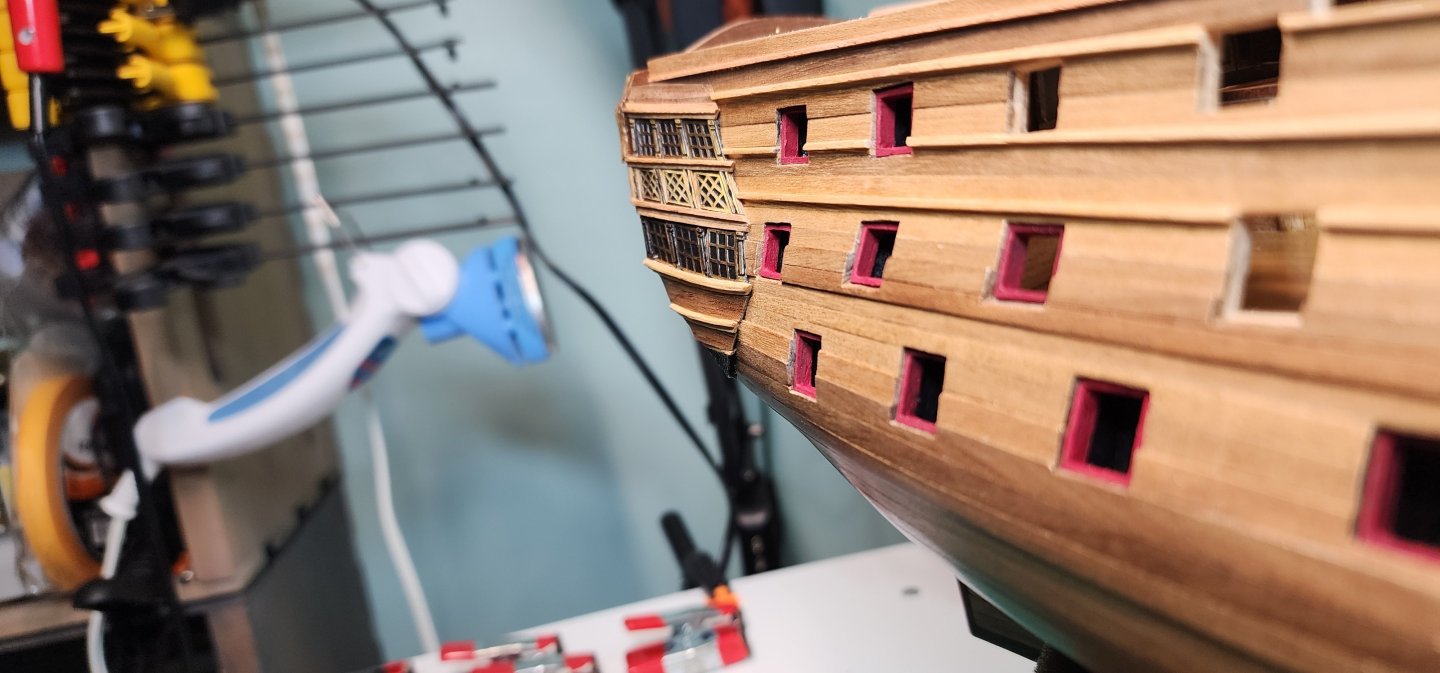
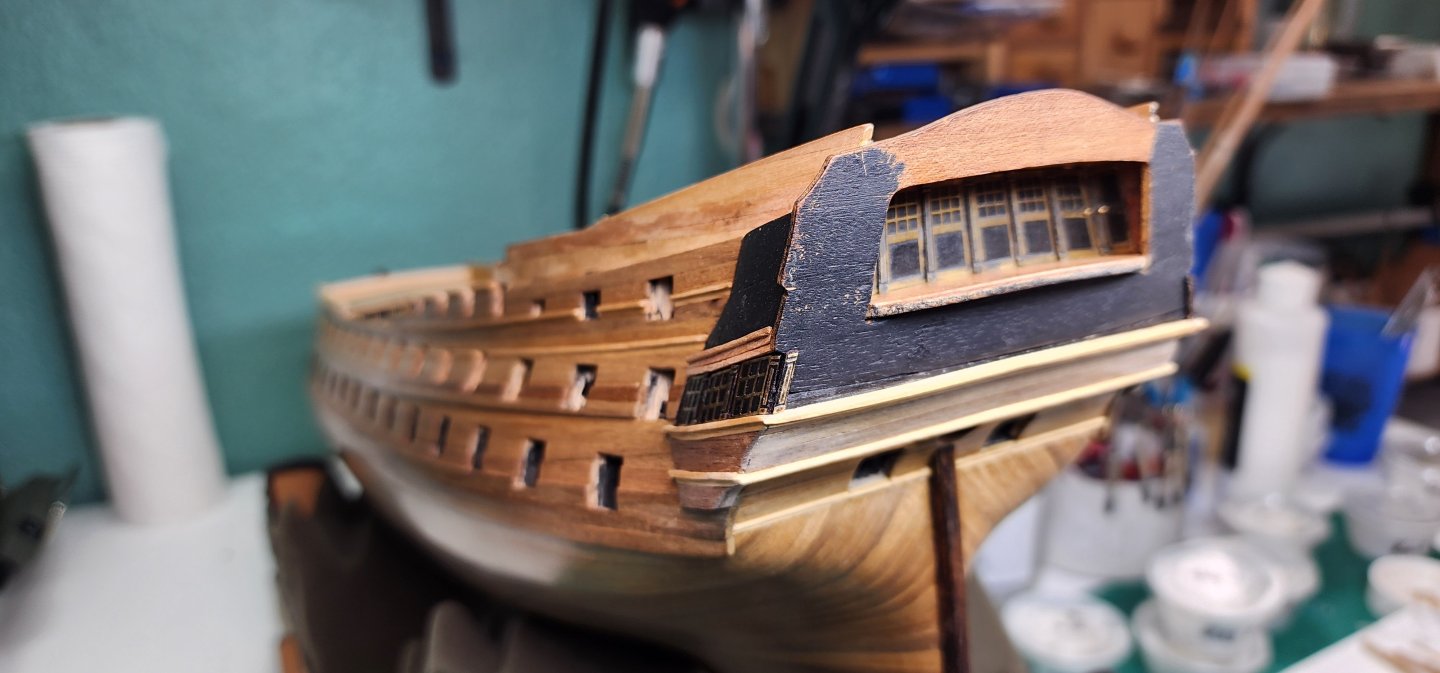
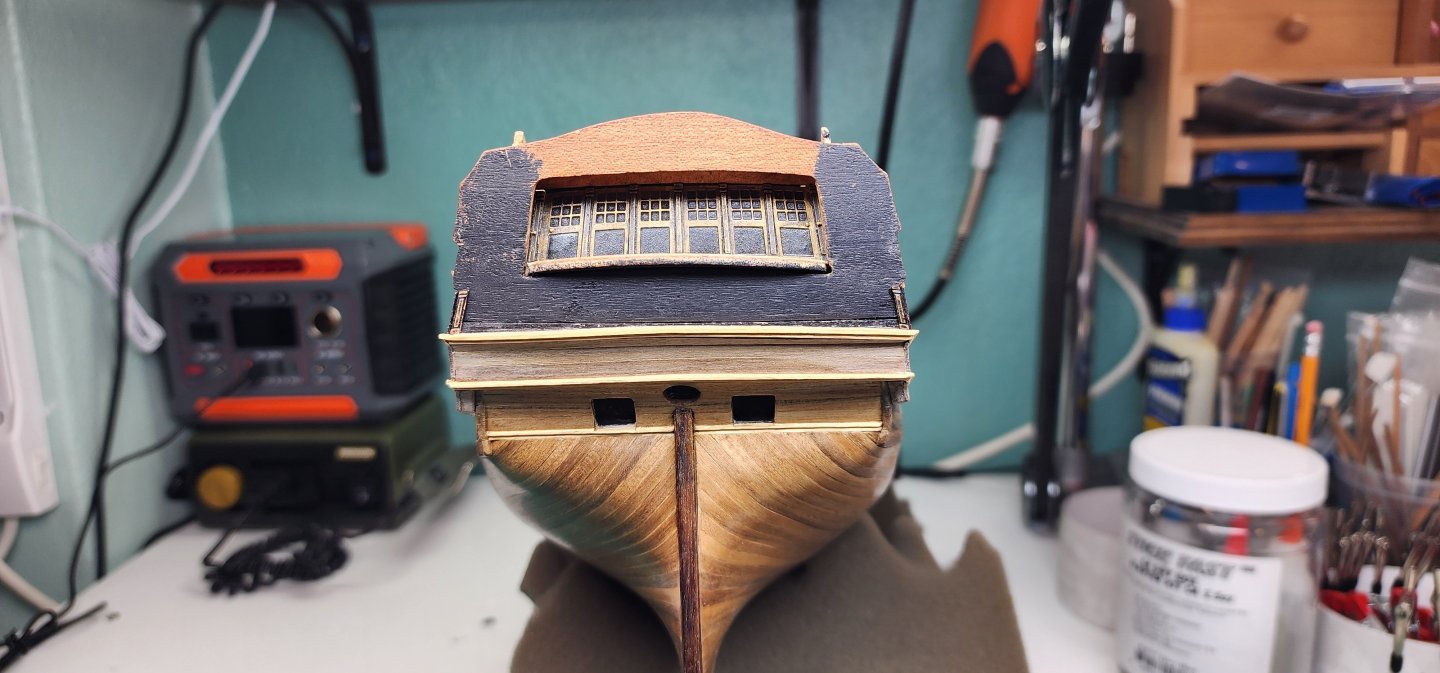
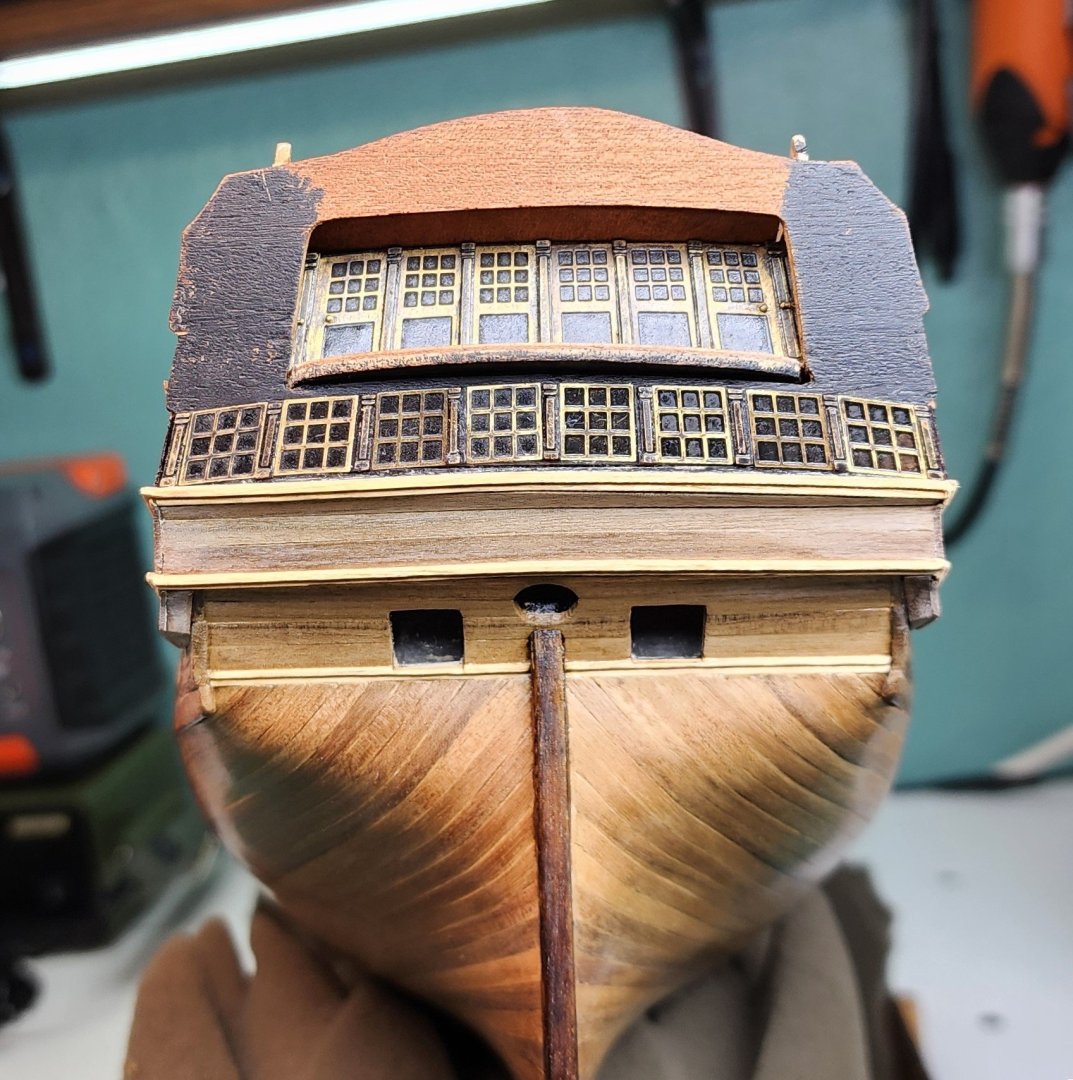
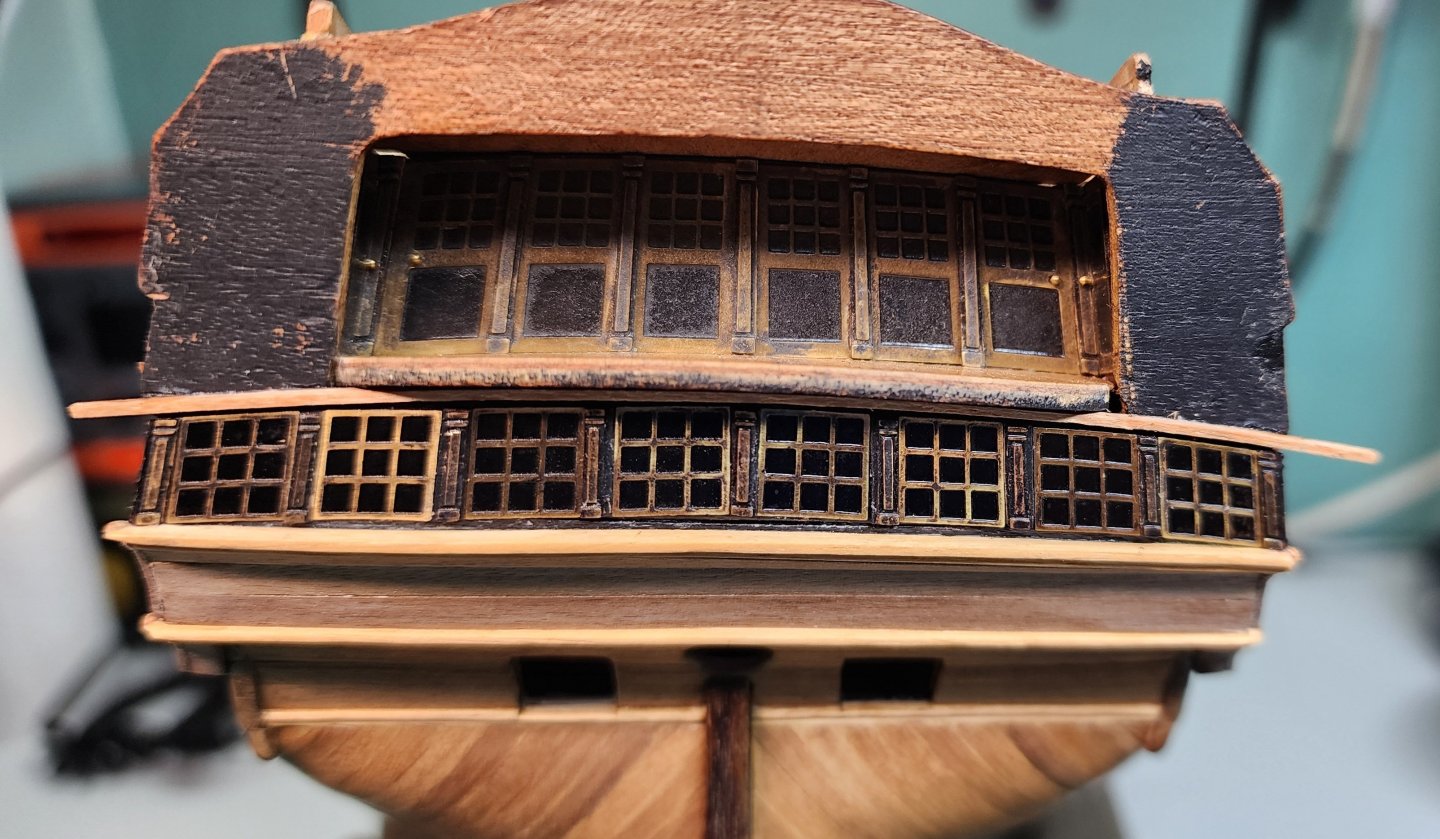
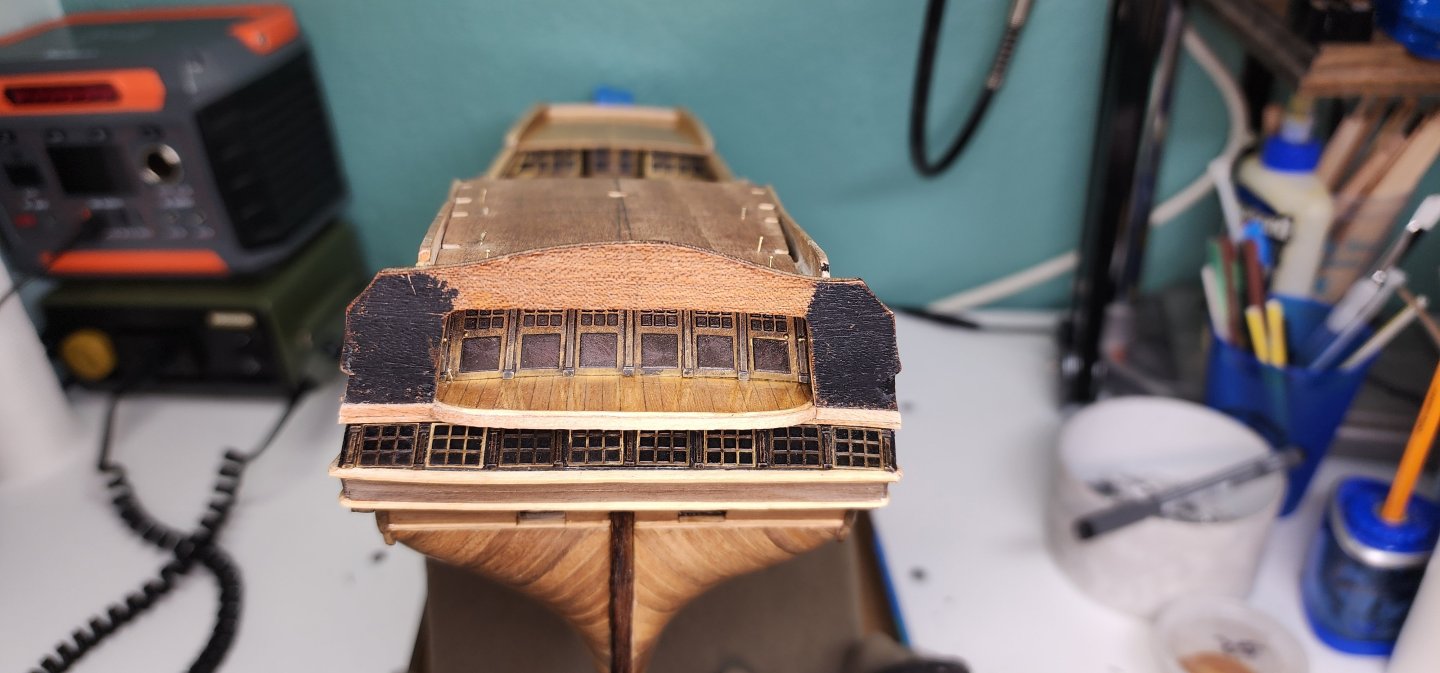
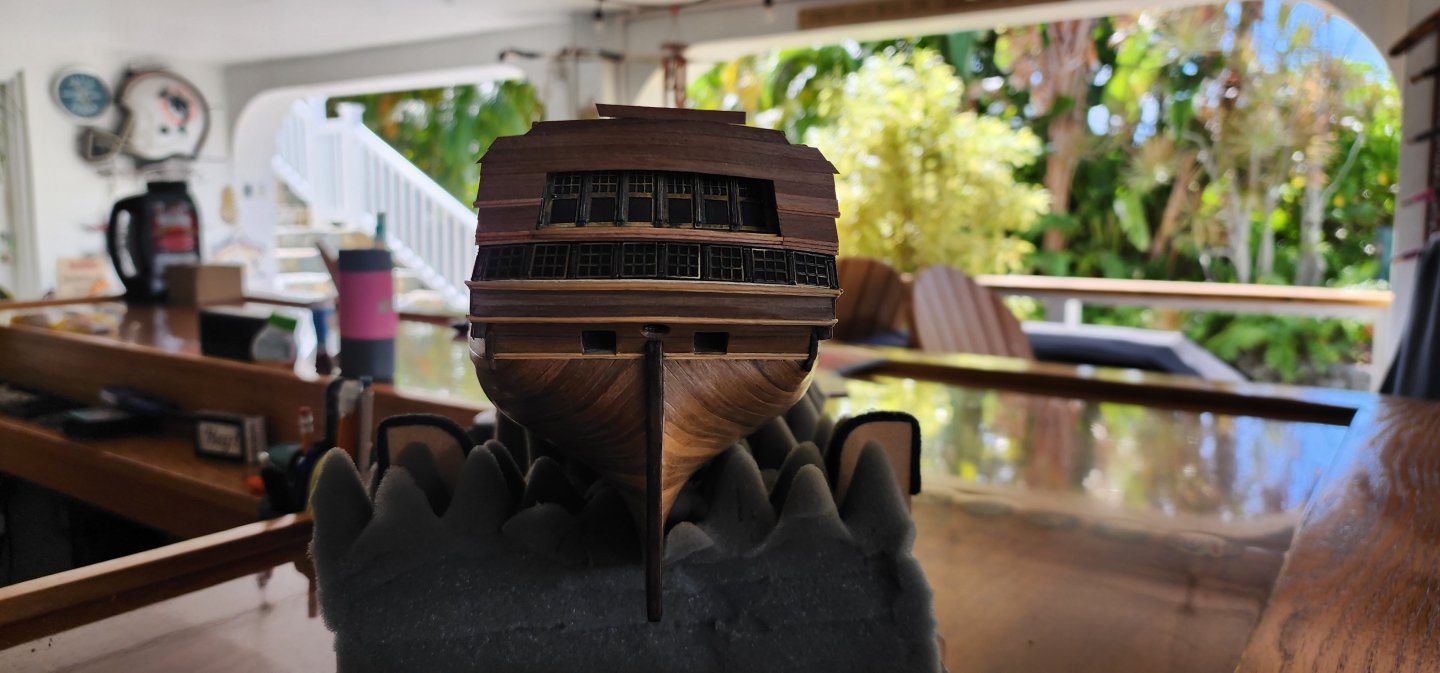
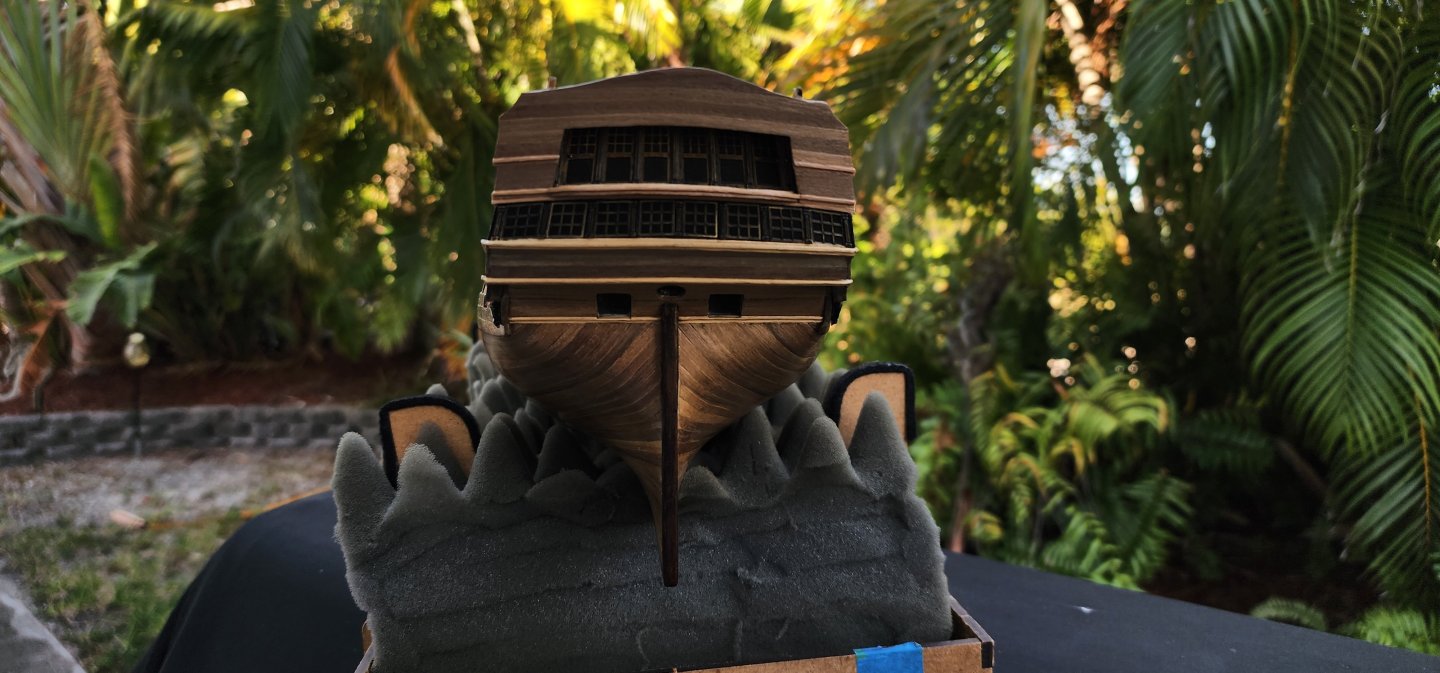
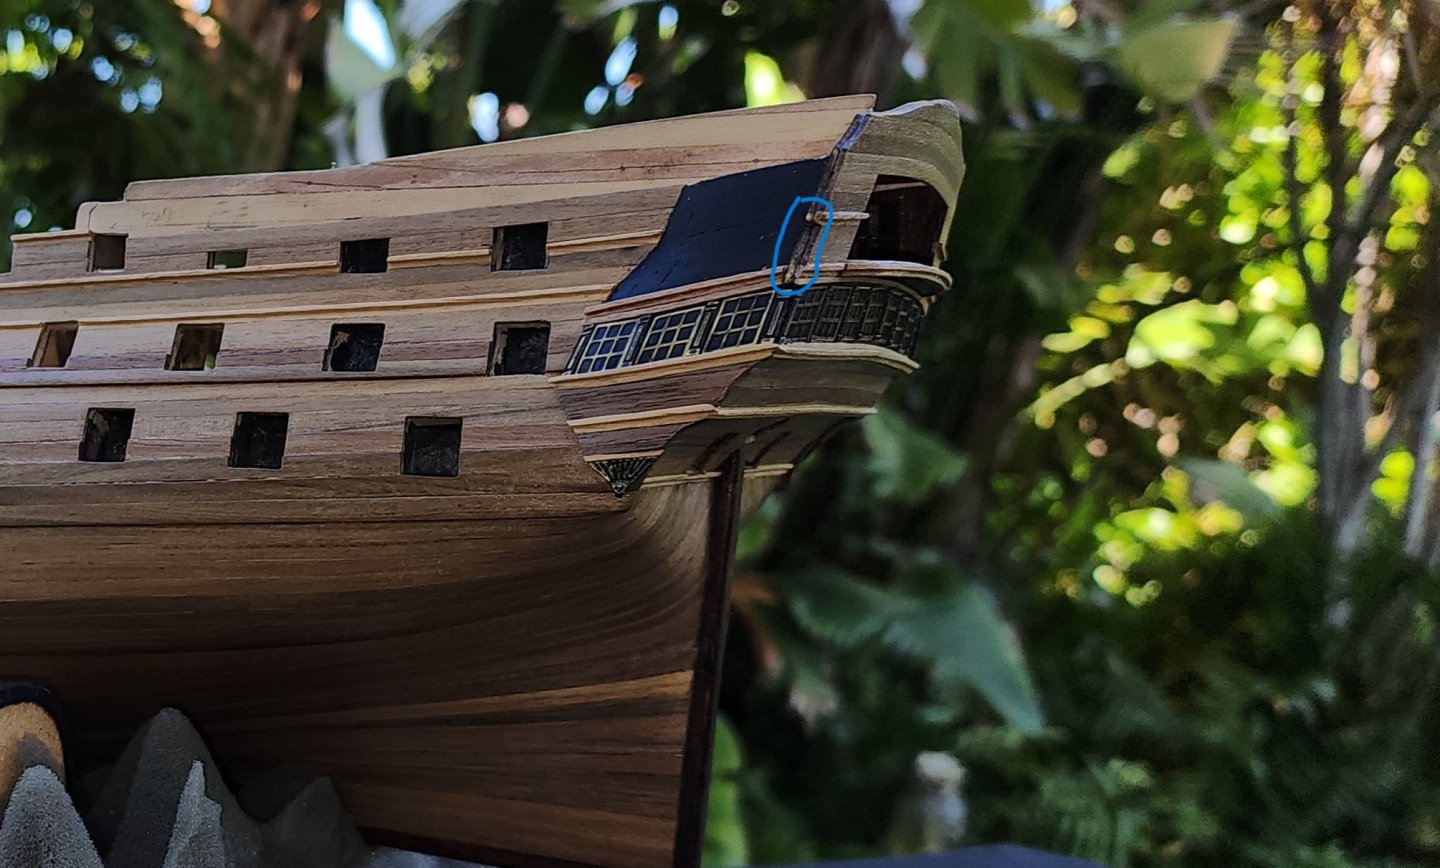
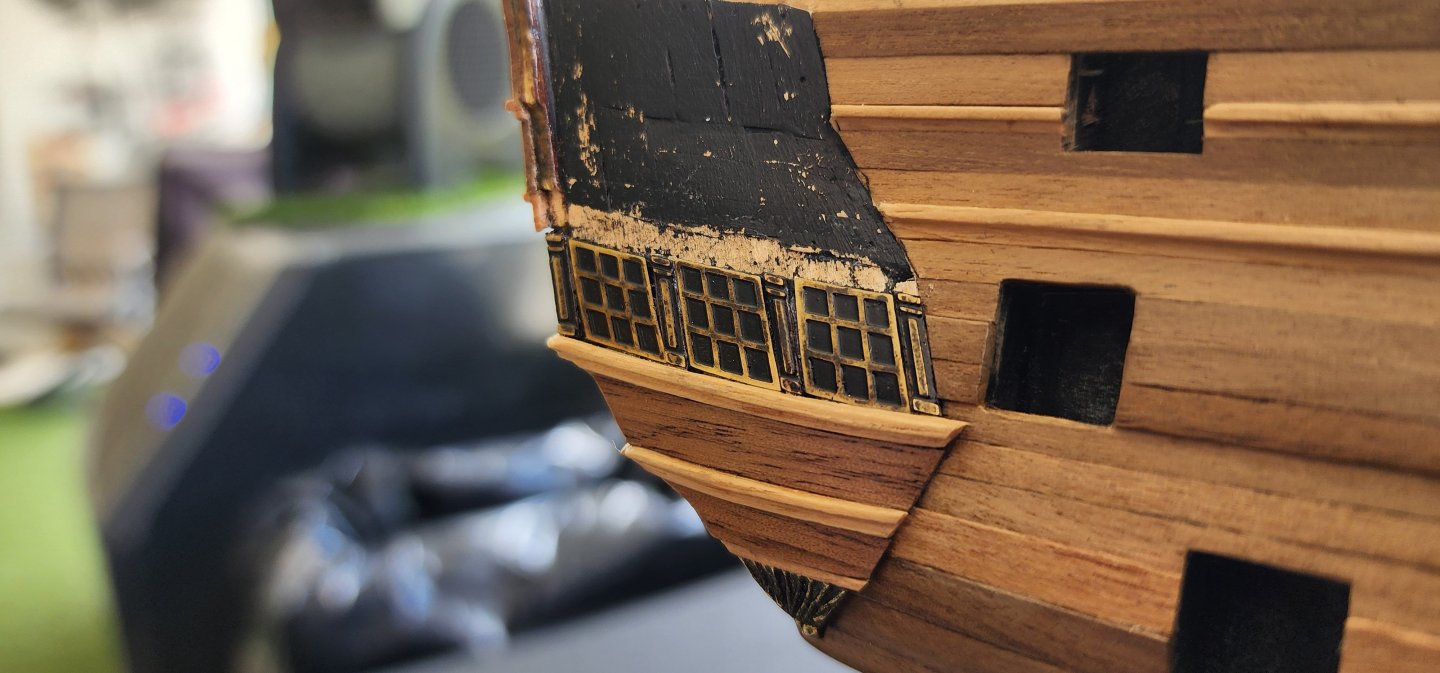
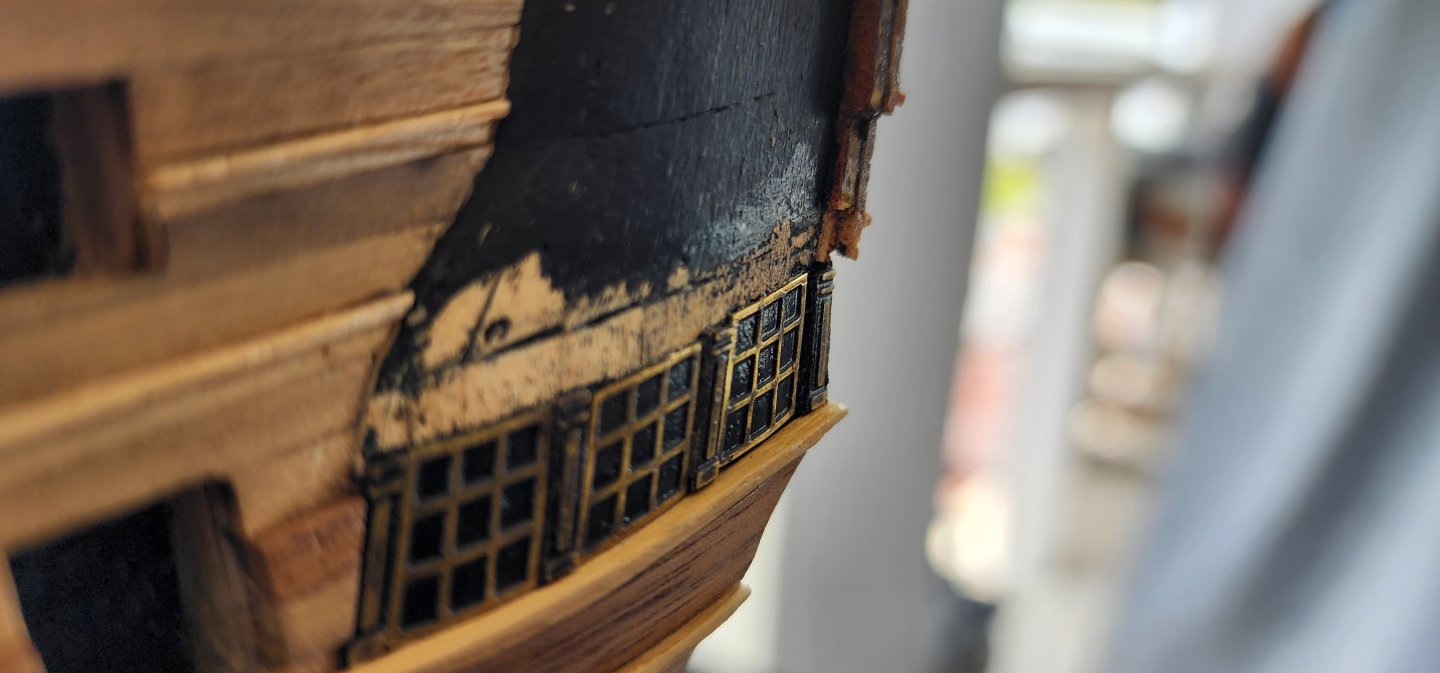
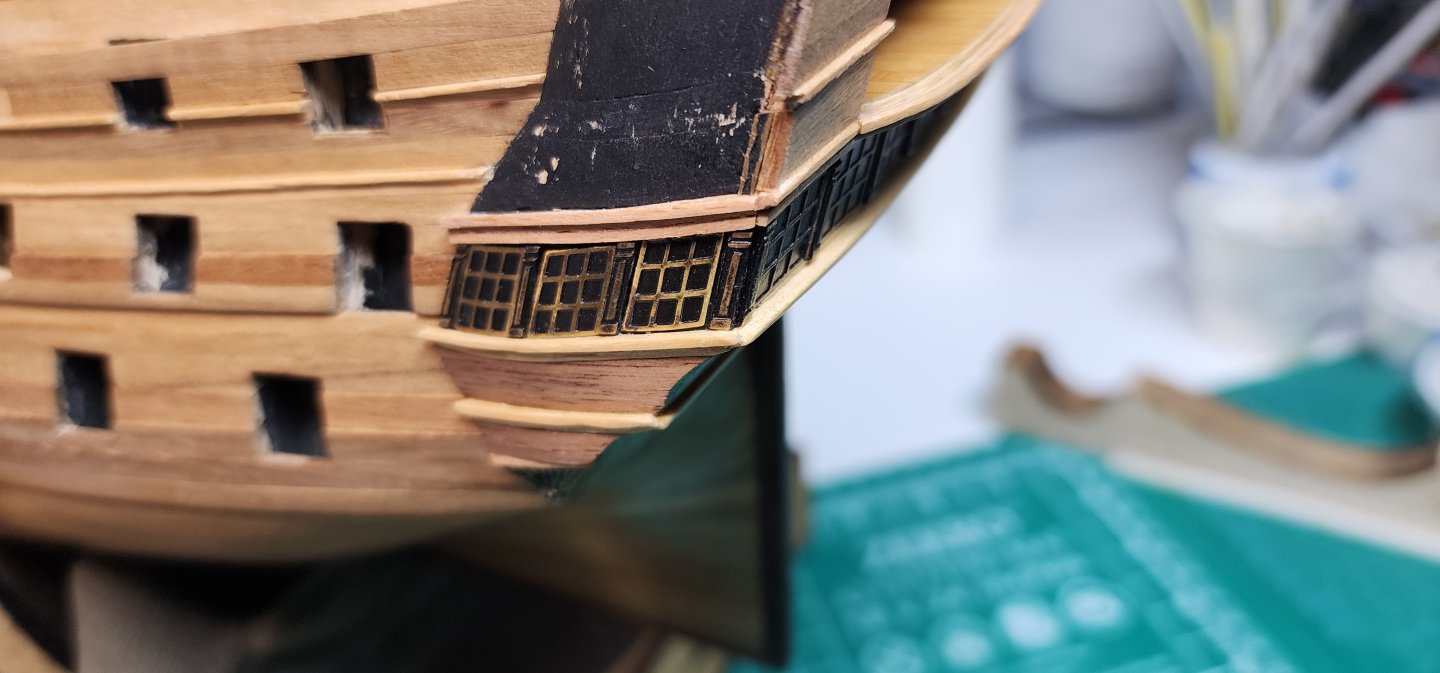
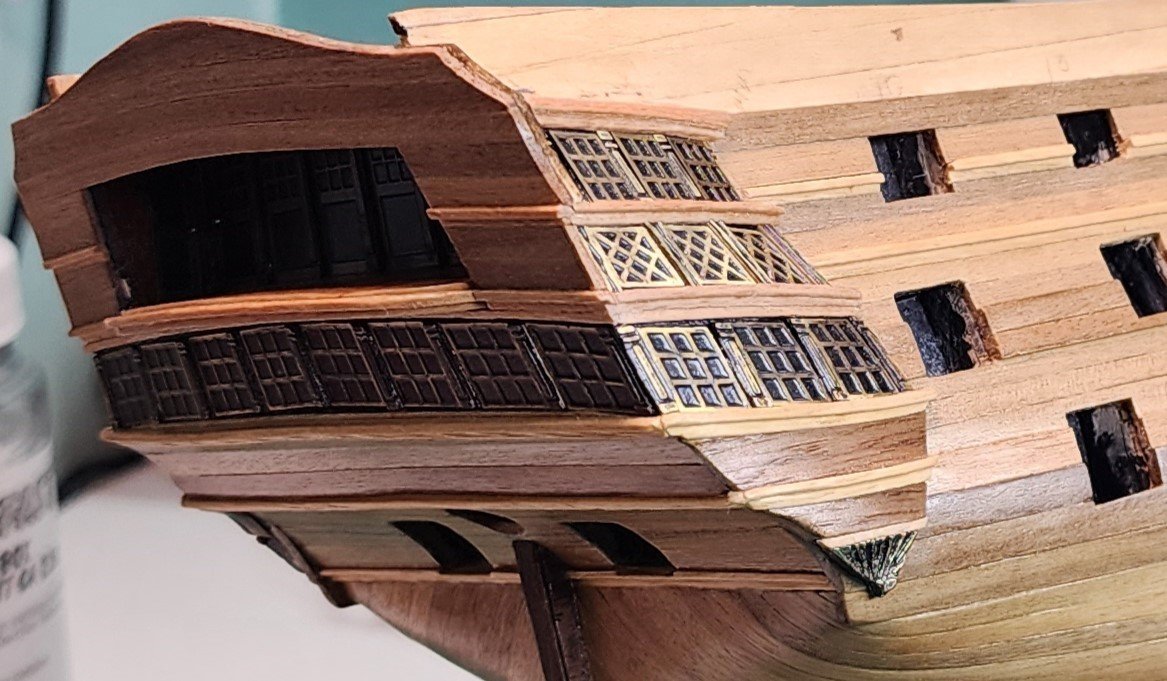
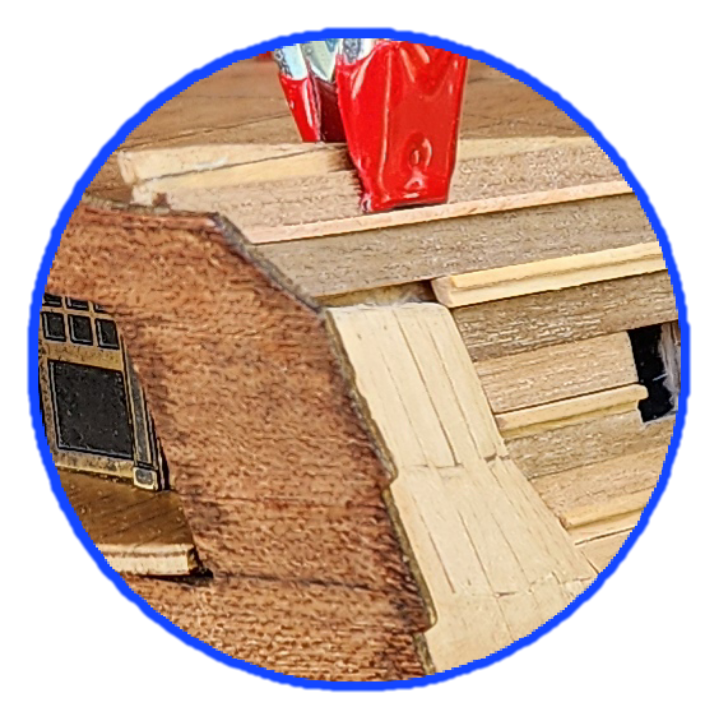
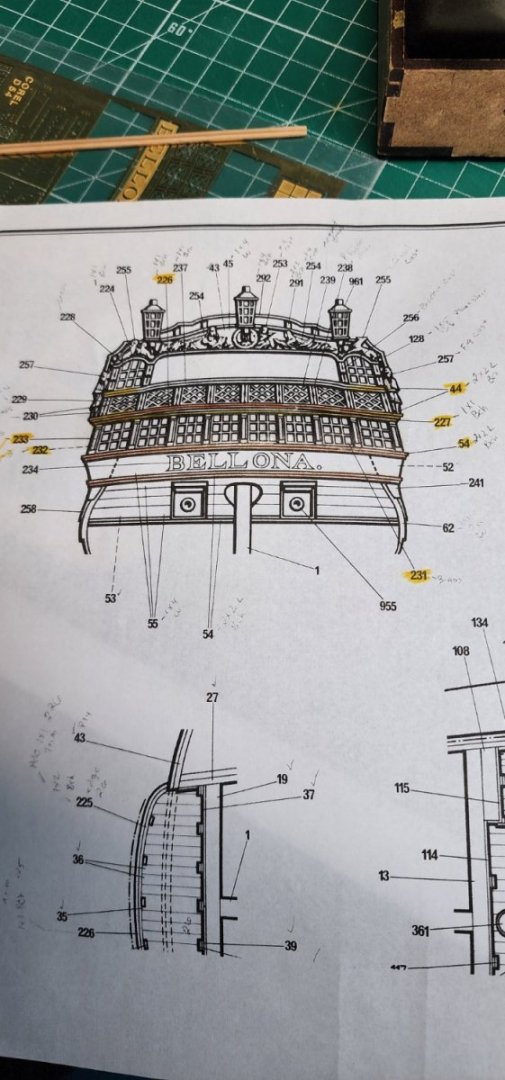
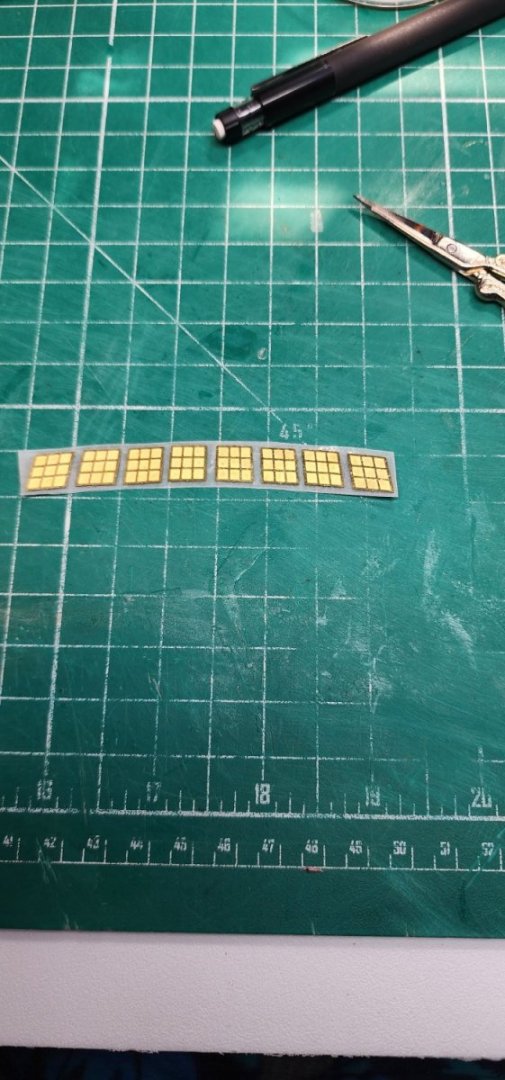
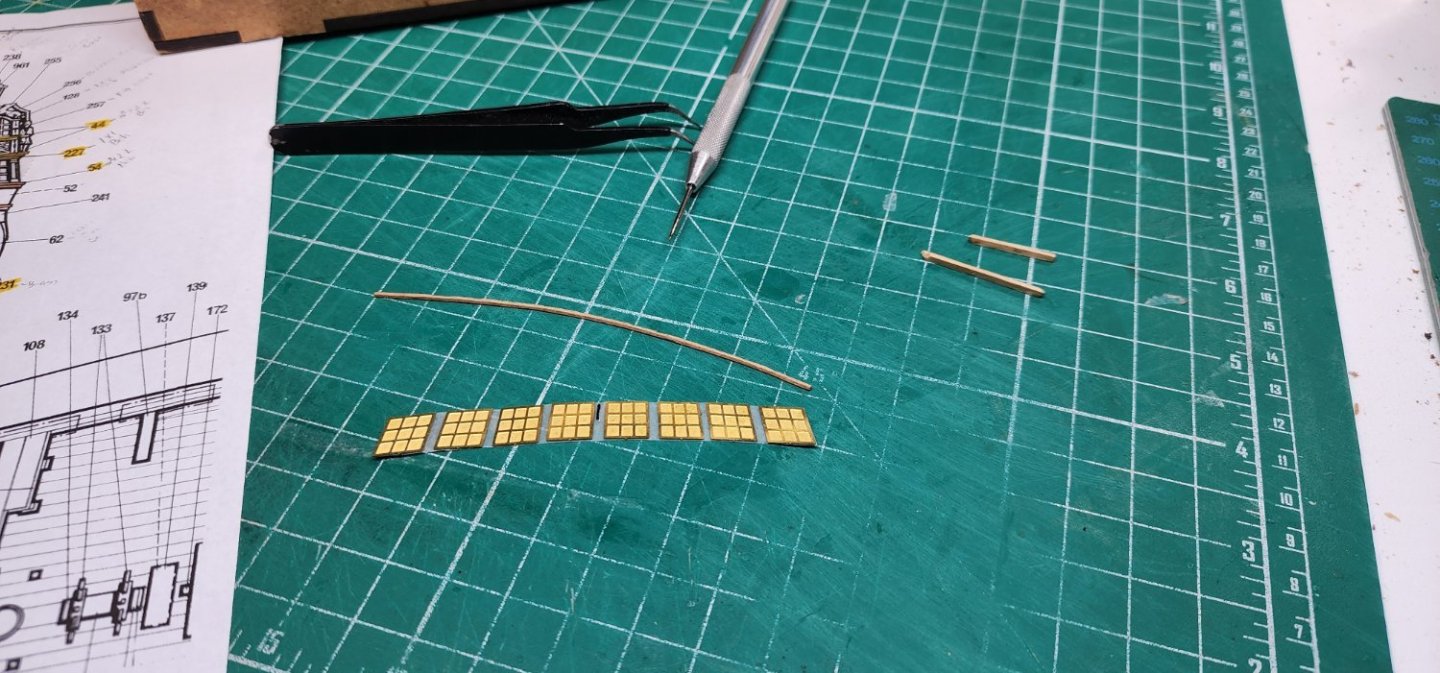
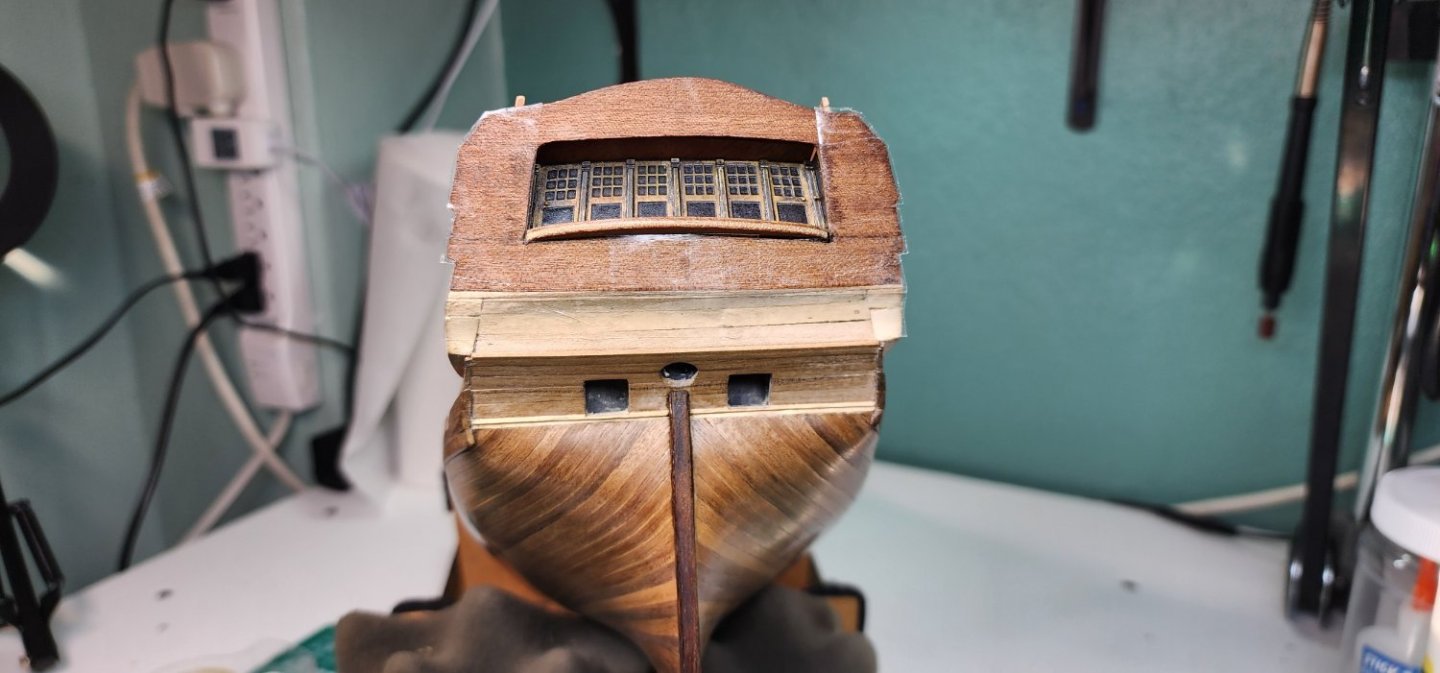
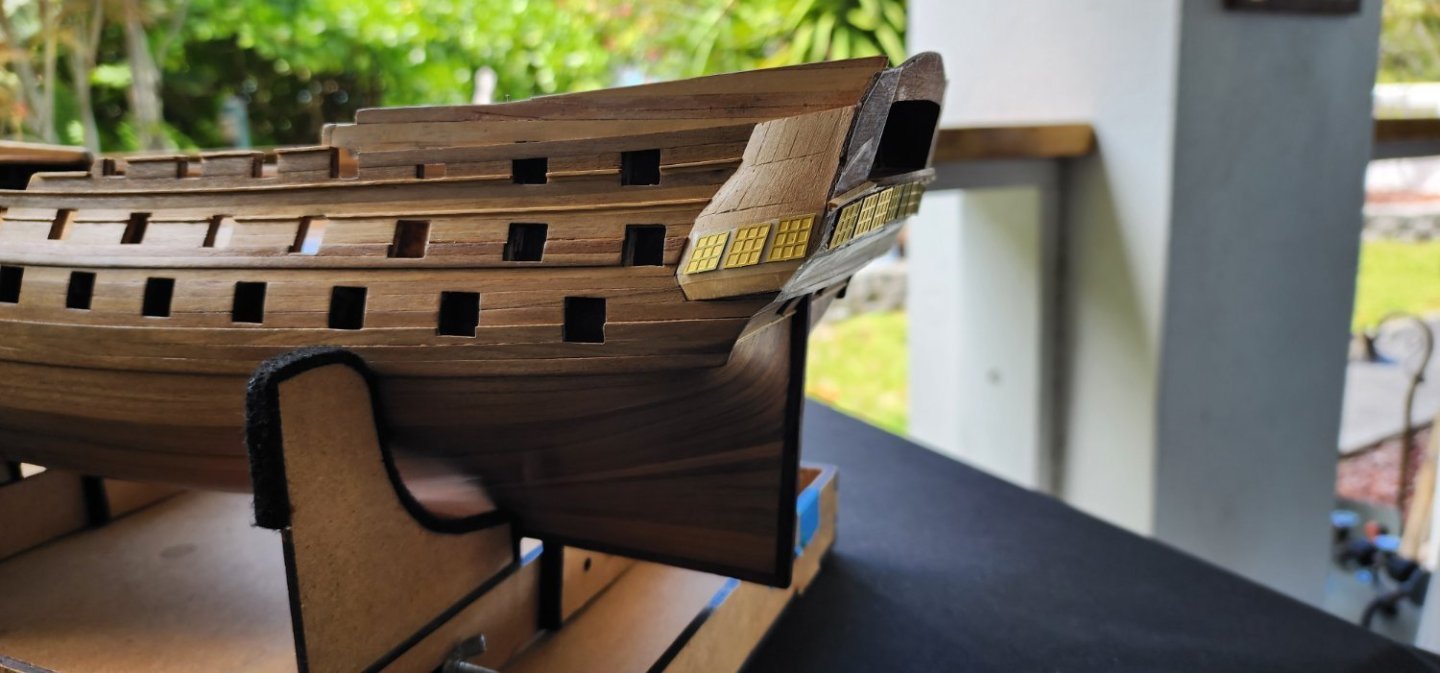
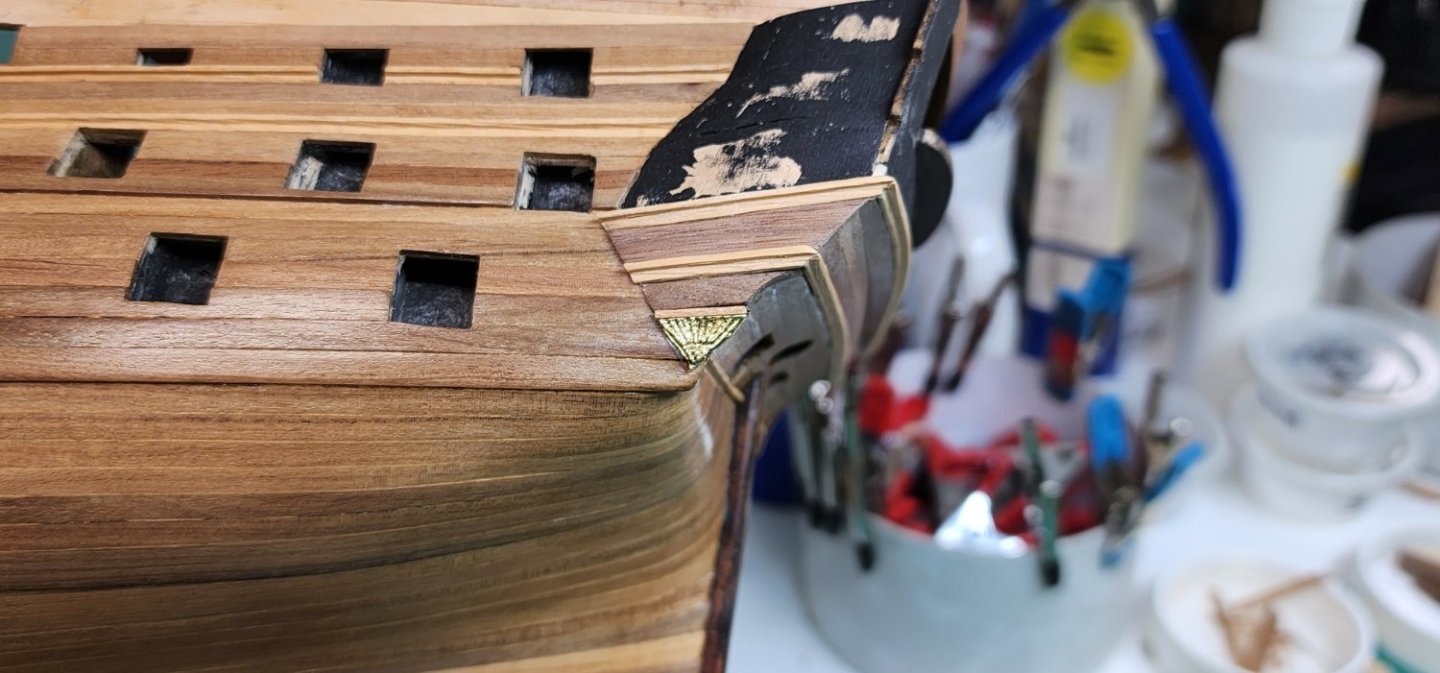
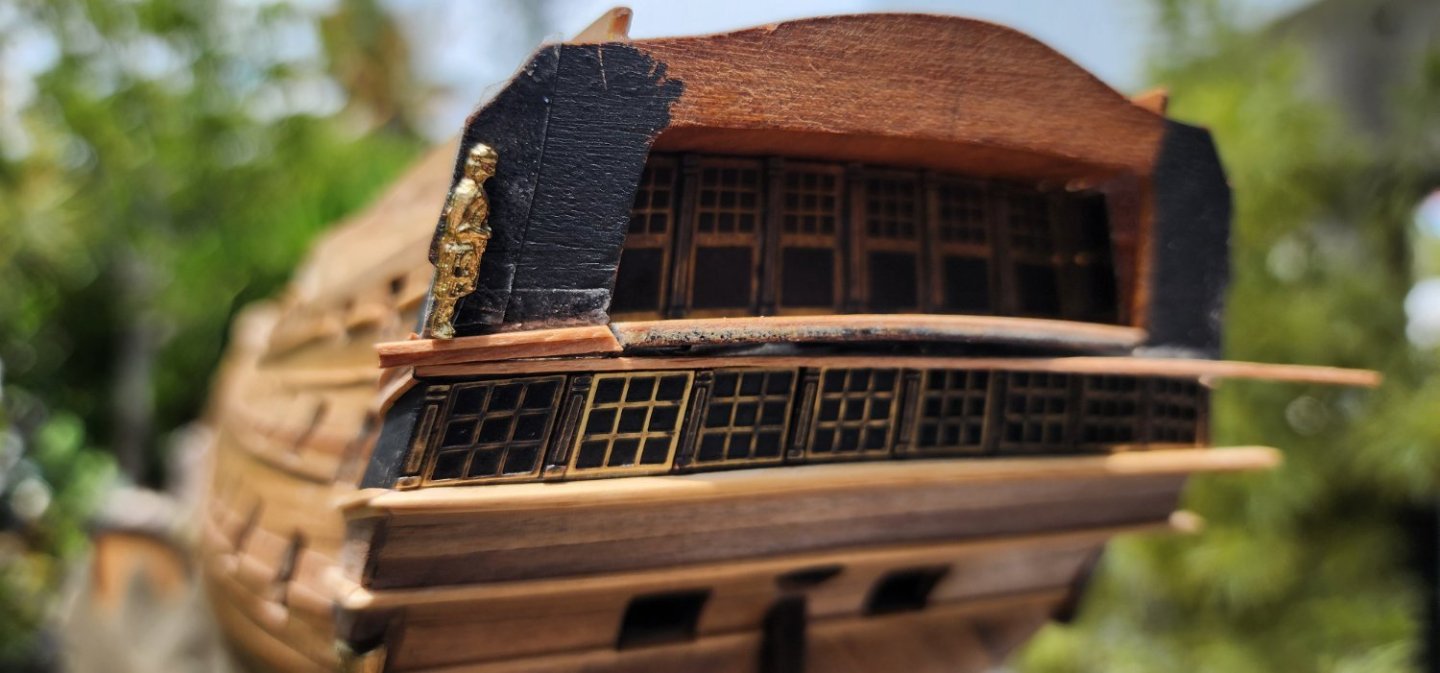
Hello all, Well, it’s been a month or so since my last update on the Bellona. I have managed to make a little bit of progress on the stern galleries. I installed the lower windows on the port and starboard sides and the top moldings above the windows. I installed the transom windows starting at the outer corners and working my way to the center, alternating between port and starboard so that both sides met in the middle at the same time. I began to install the transom planking starting with the 1x1 molding board and “L” molding. I did not use the “L” molding that came with the kit and decided to use the 1x2 beach wood and add the 1x1 molding to it to make the “L” so that the color would be consistent. The plans called for installing the molding in this manner for the transom decking and applying the “L” molding supplied with the kit for the remaining trim. The kit molding is I believe boxwood and the color contrast just was not pleasing to me seeing that I am not going to be painting the model but keeping the natural color of the wood. Once I completed that molding, I installed the remaining transom planks and trimmed them to the proper shape. Once I completed that task, I discovered that I had a problem with the next level, primarily the corner where the transom transitions on the port and starboard above the lower windows. I put a blue circle on the attached picture for clarity. The plans don’t really give any detail on this area, and I assumed that a plank sheer would be covering this area, so it wasn’t too much of a concern. Well, I was wrong. I had to remove the molding and carve out an area on the transom so that the molding would mate in the corners. After this was completed, I continued installing the remaining PE parts on the starboard side up to the last of the windows at the 3rd level. The windows are only dry fitted at this point as I still have to apply the backing to the pilasters before finial installation. It is at this point that I will finally be able to finish the planking up to the poop deck. It doesn’t seem that a lot of progress is being made, but the time it takes to get to this point takes far more time than scrolling through the pictures. Lol It is true, that a picture is worth a 1000 words. Well, that’s all I have so far and as always, your comments and guidance are always welcome. Cheers Nearshore


-
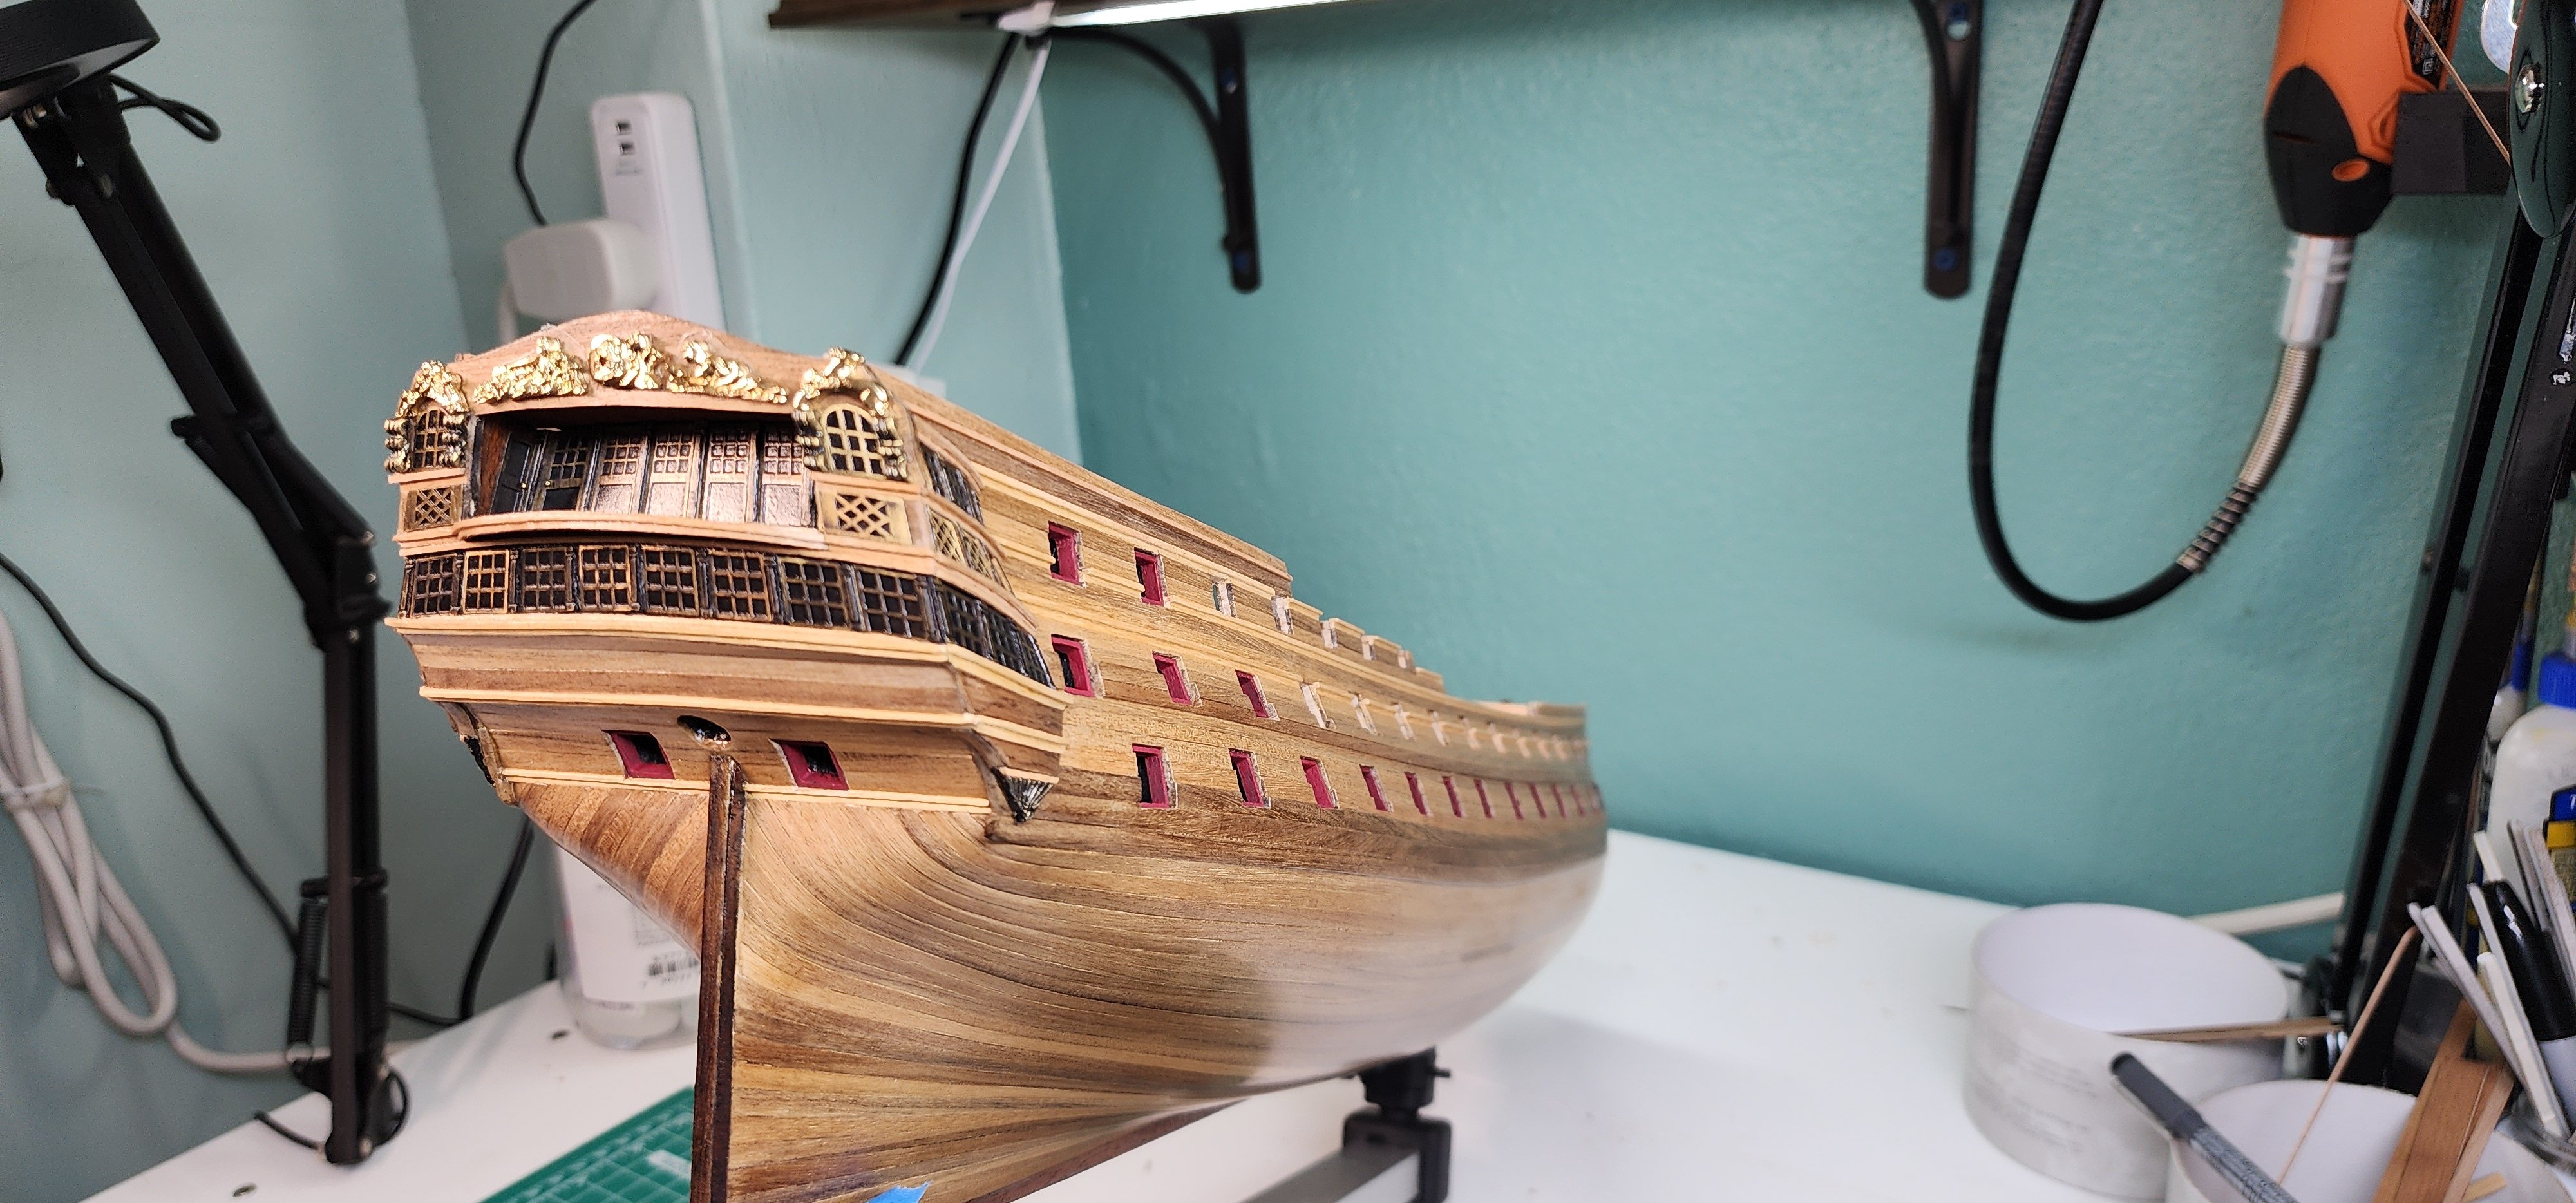
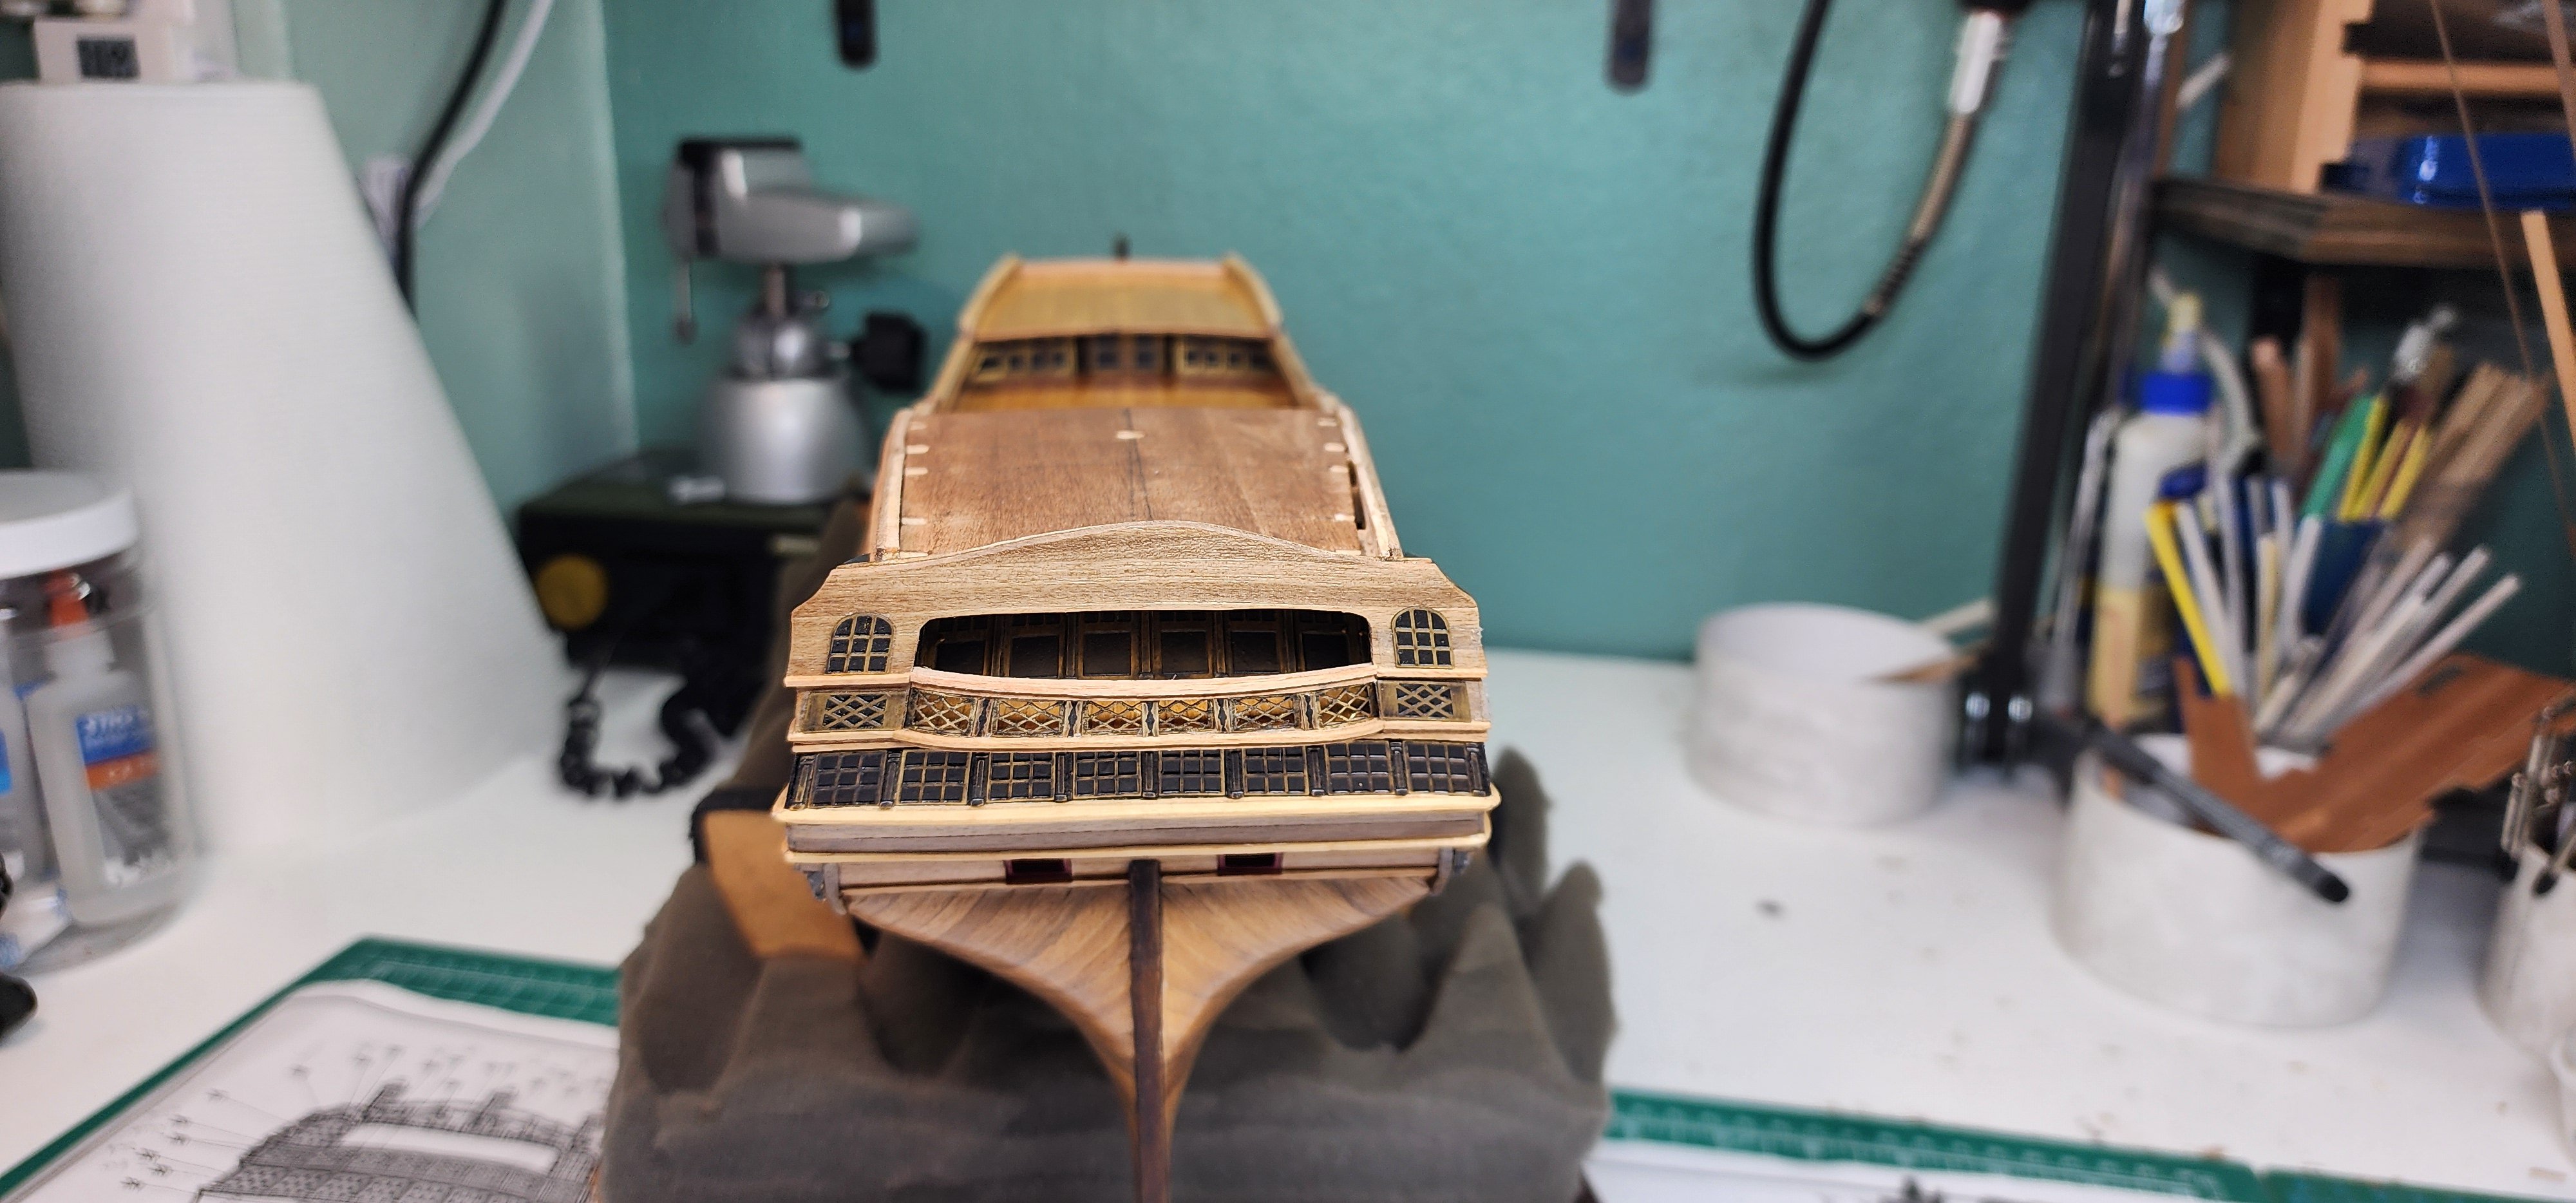
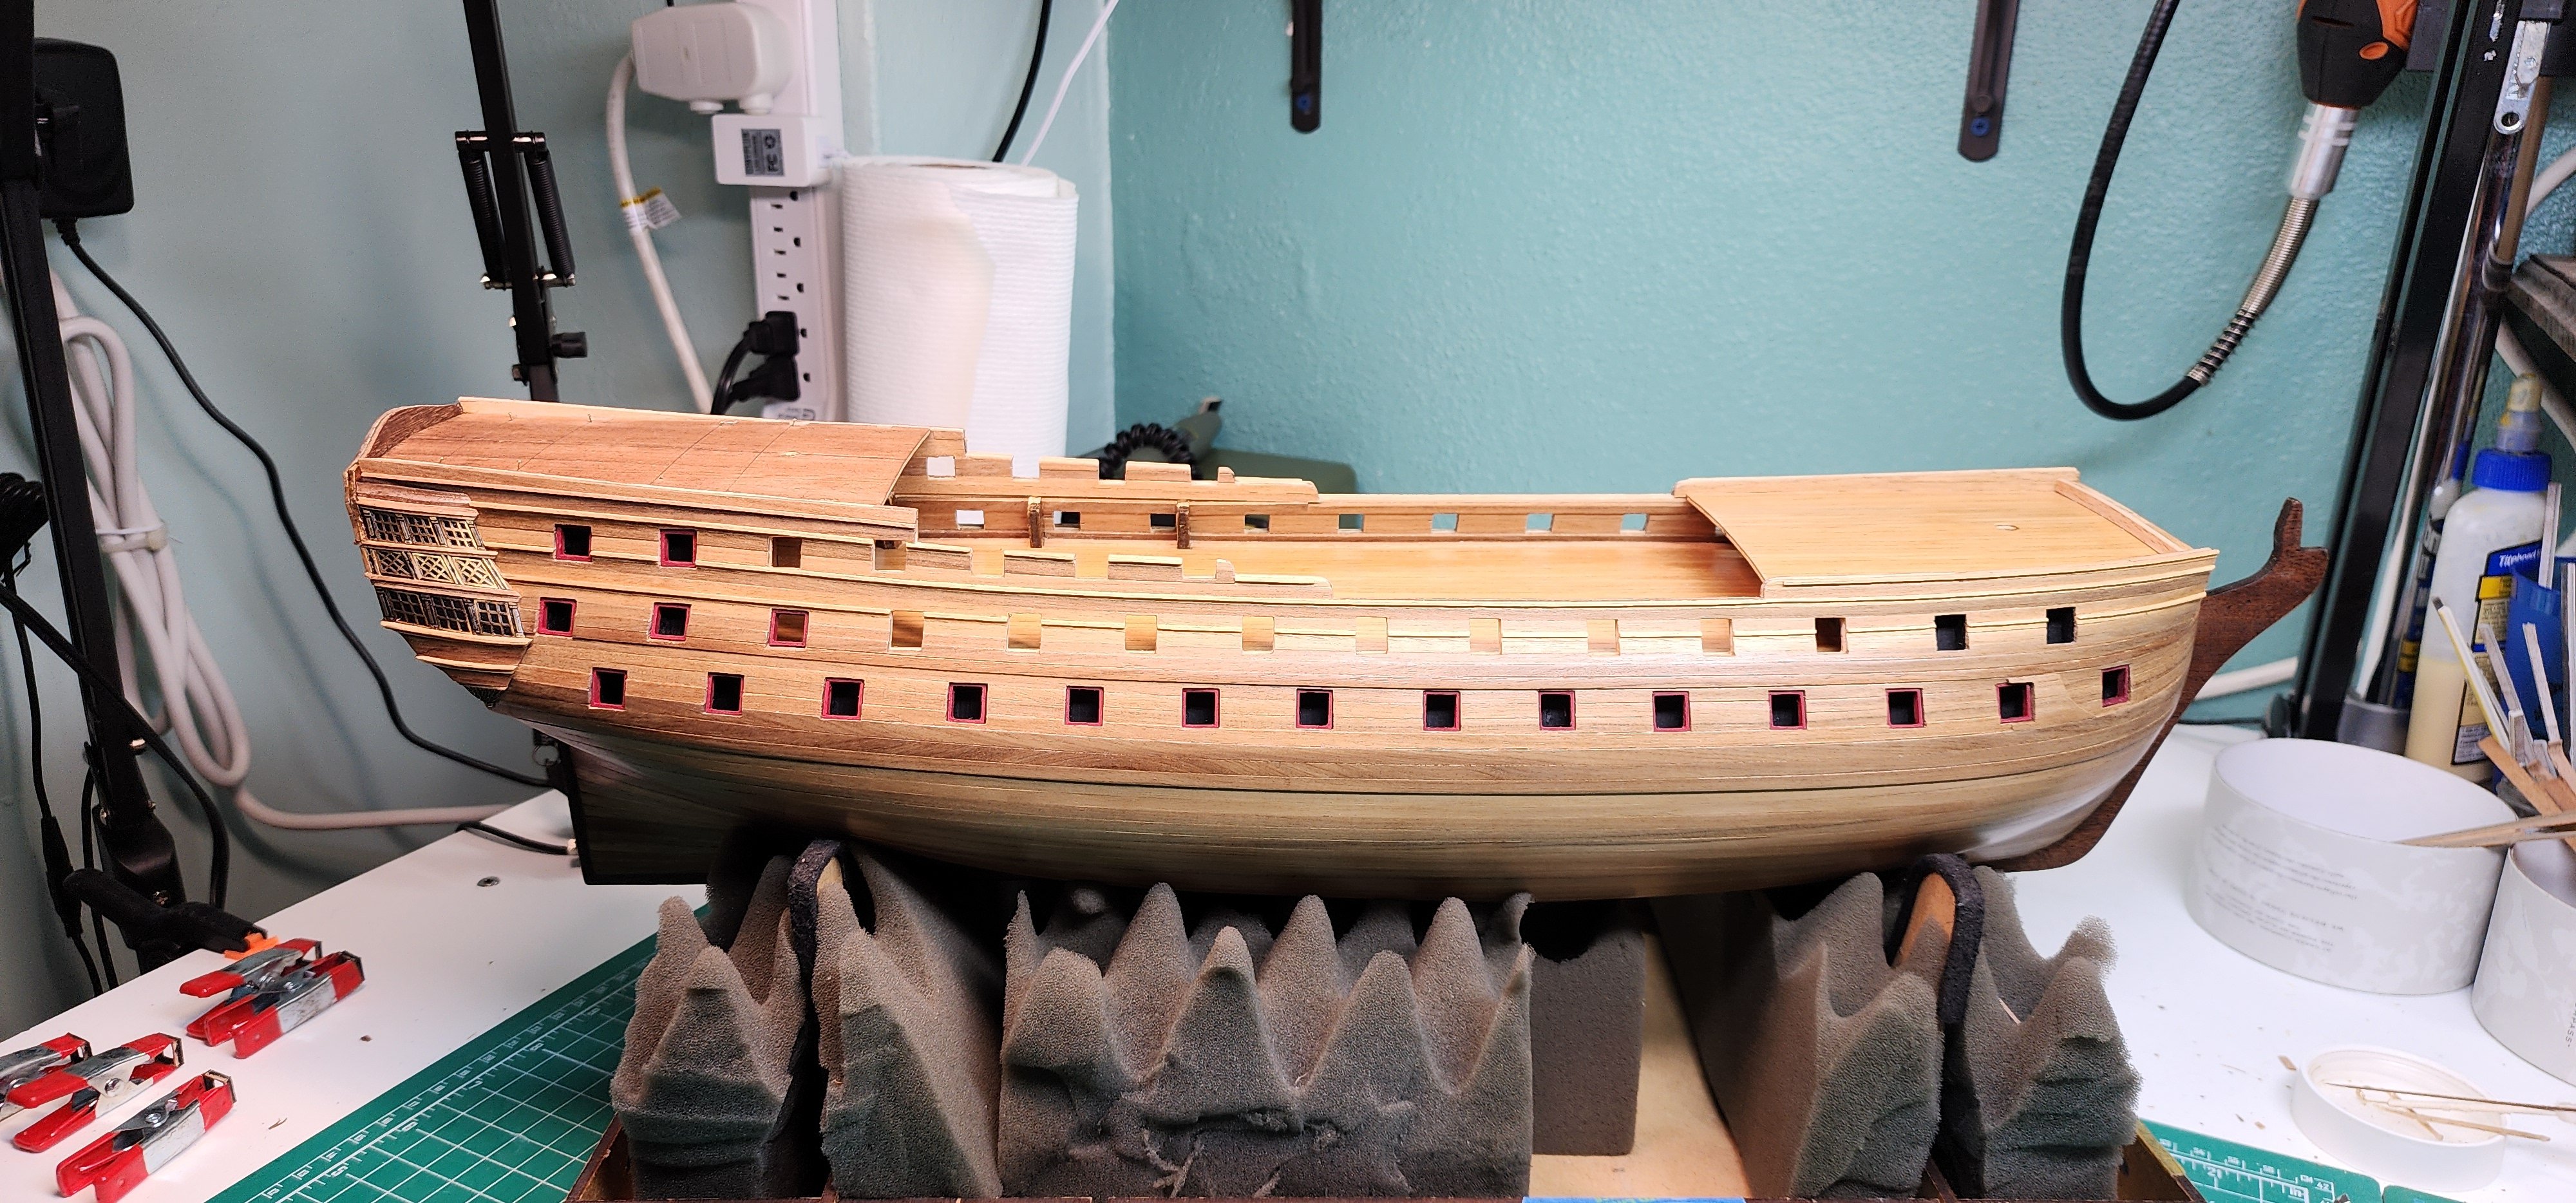
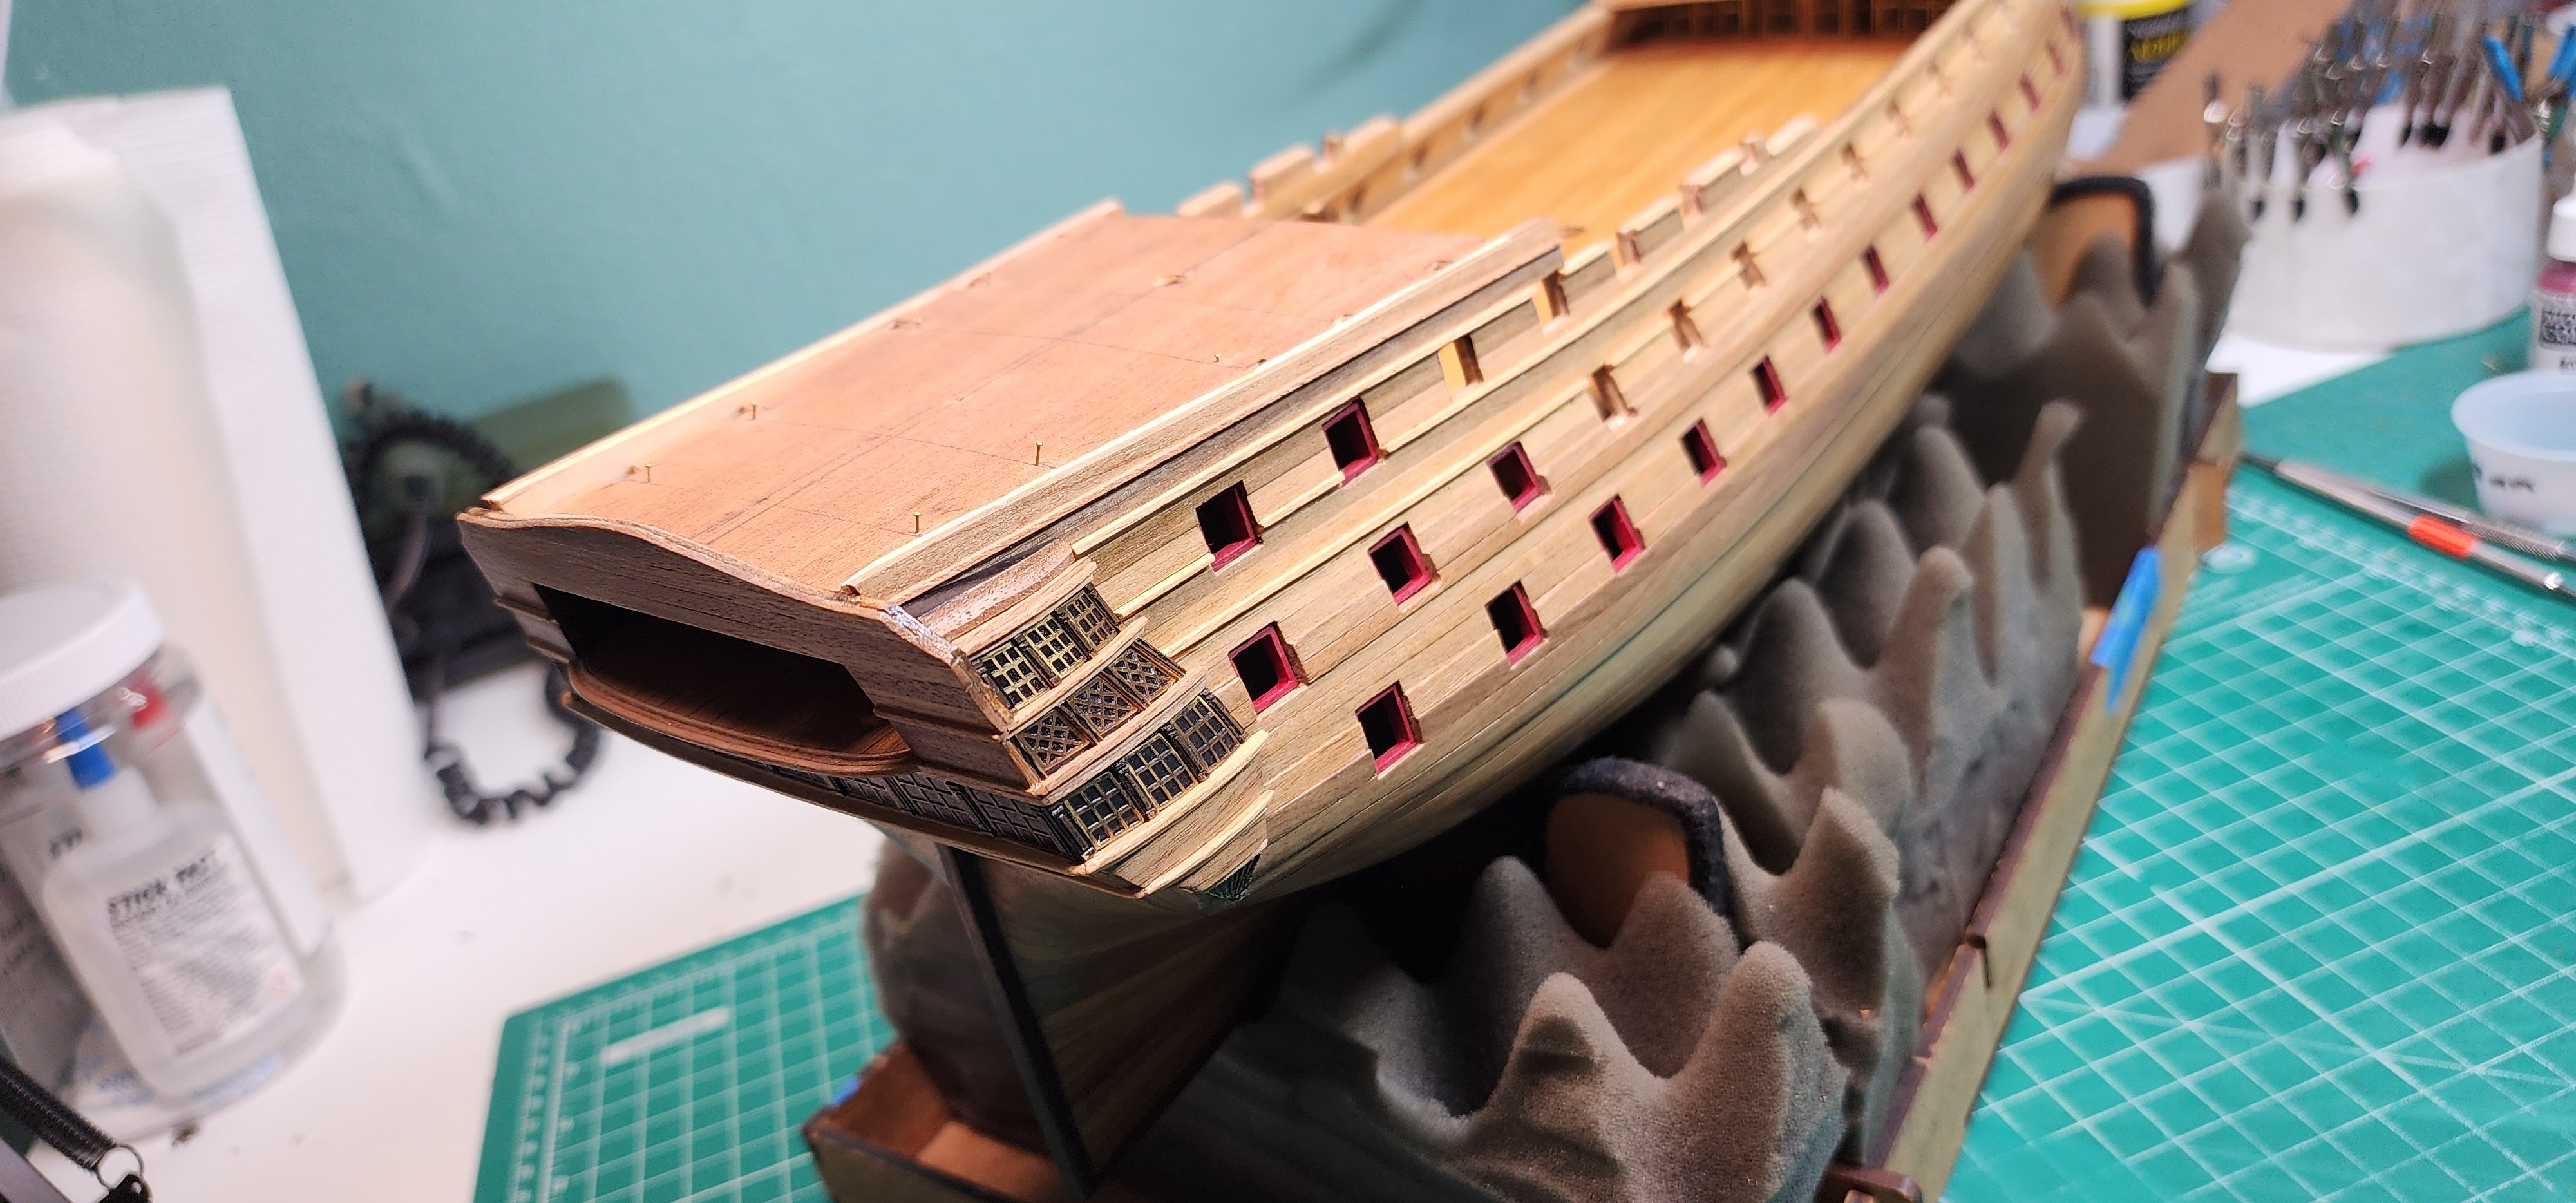
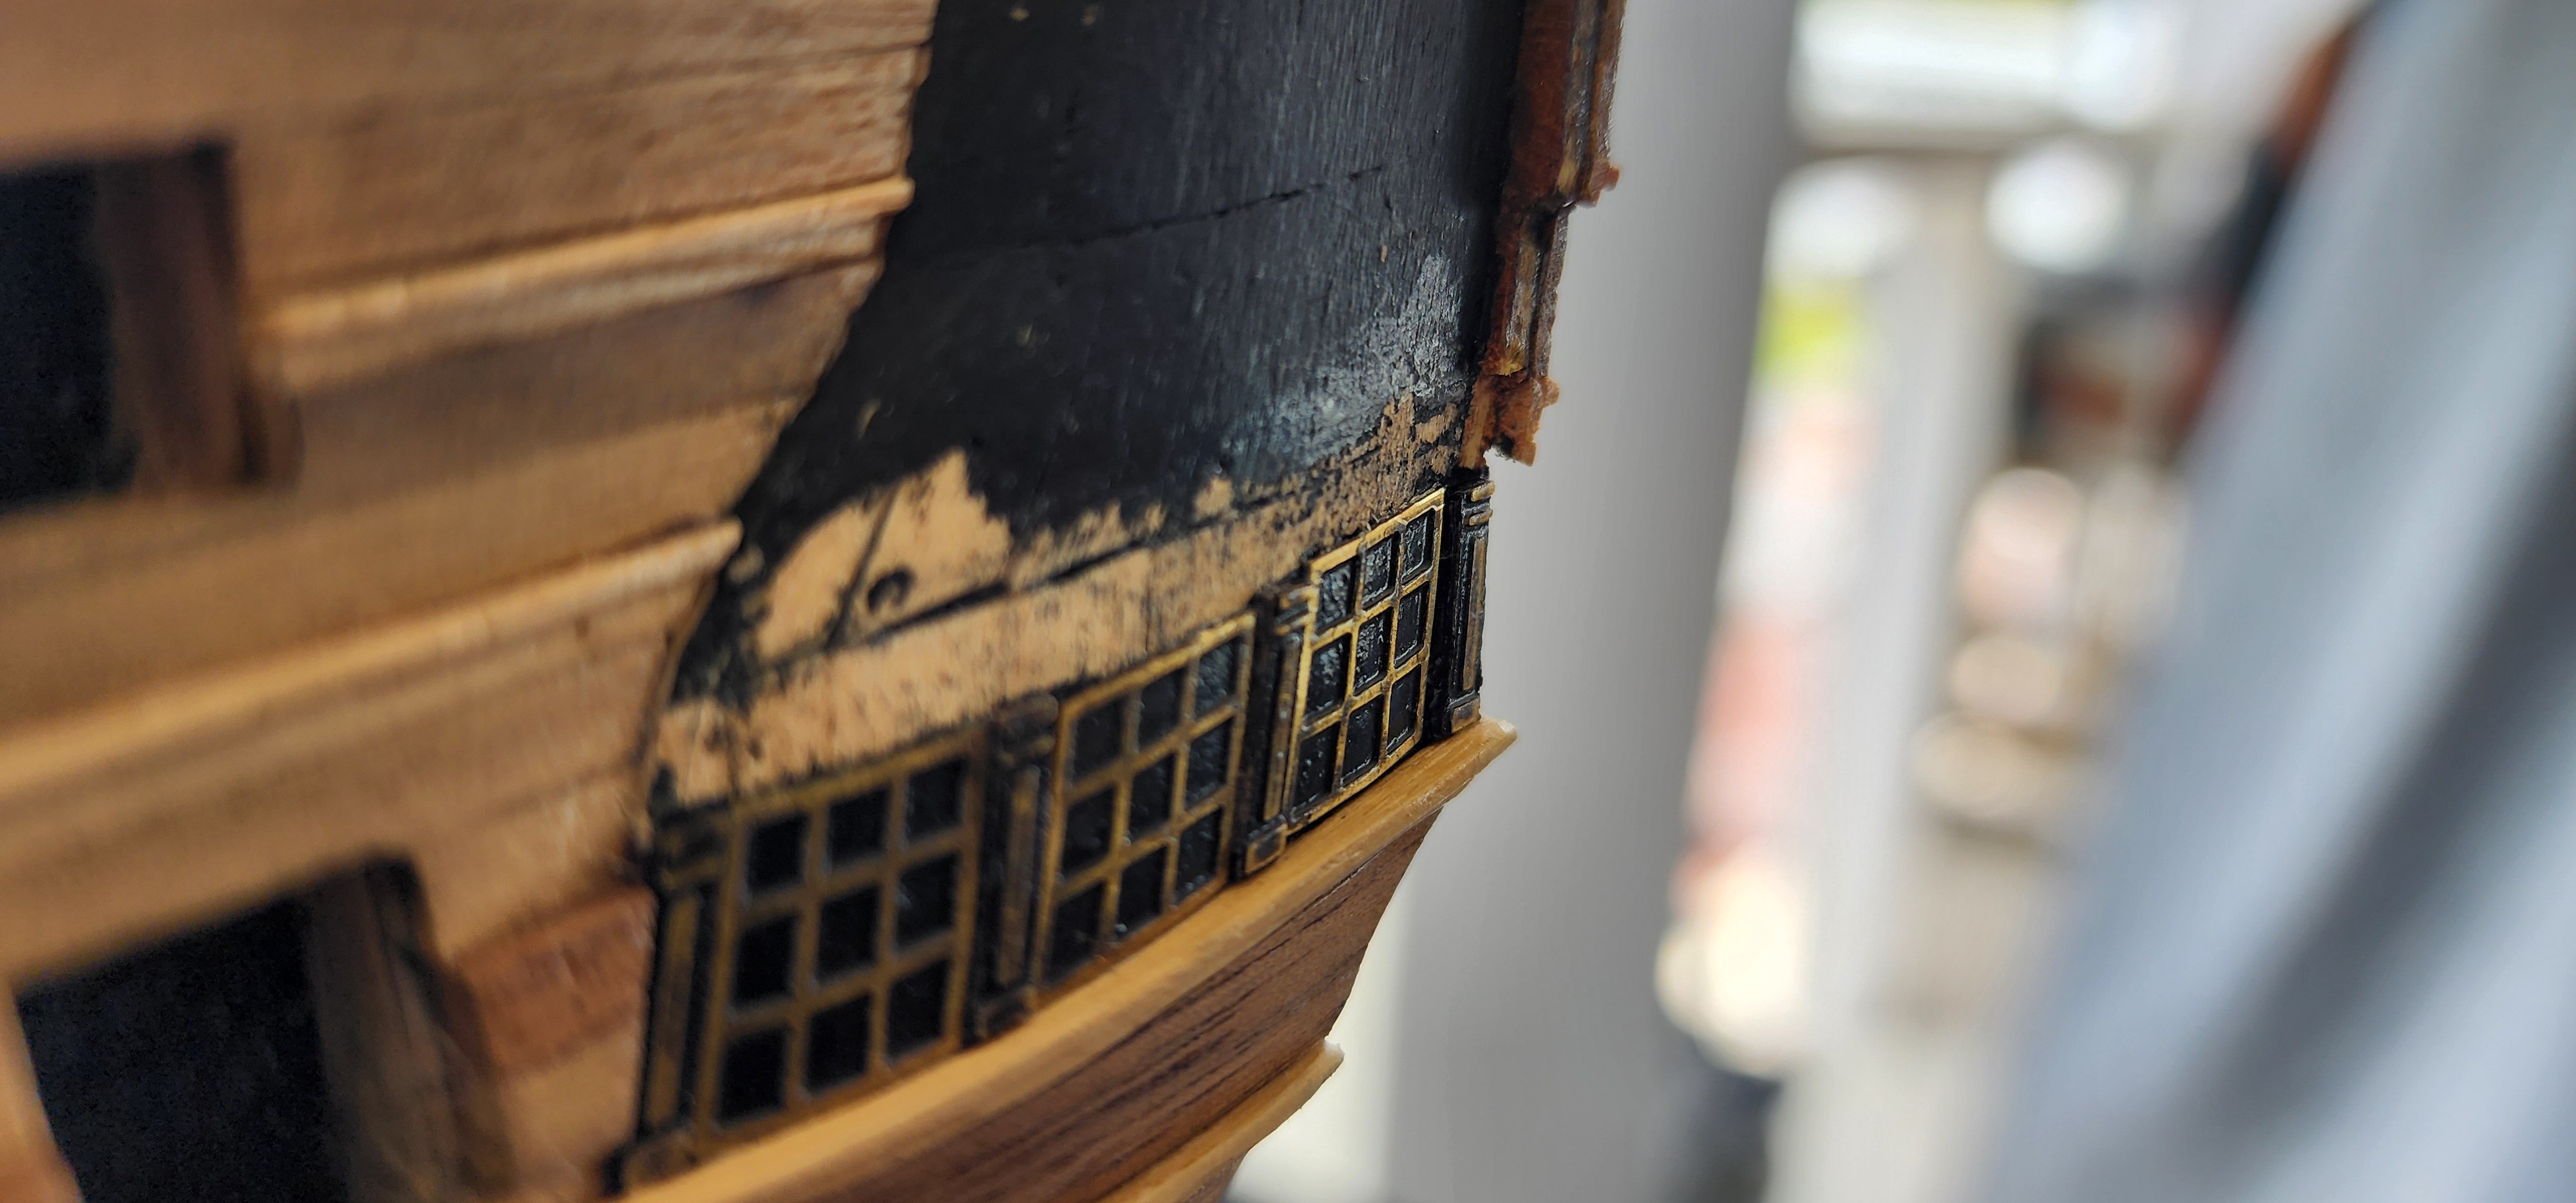
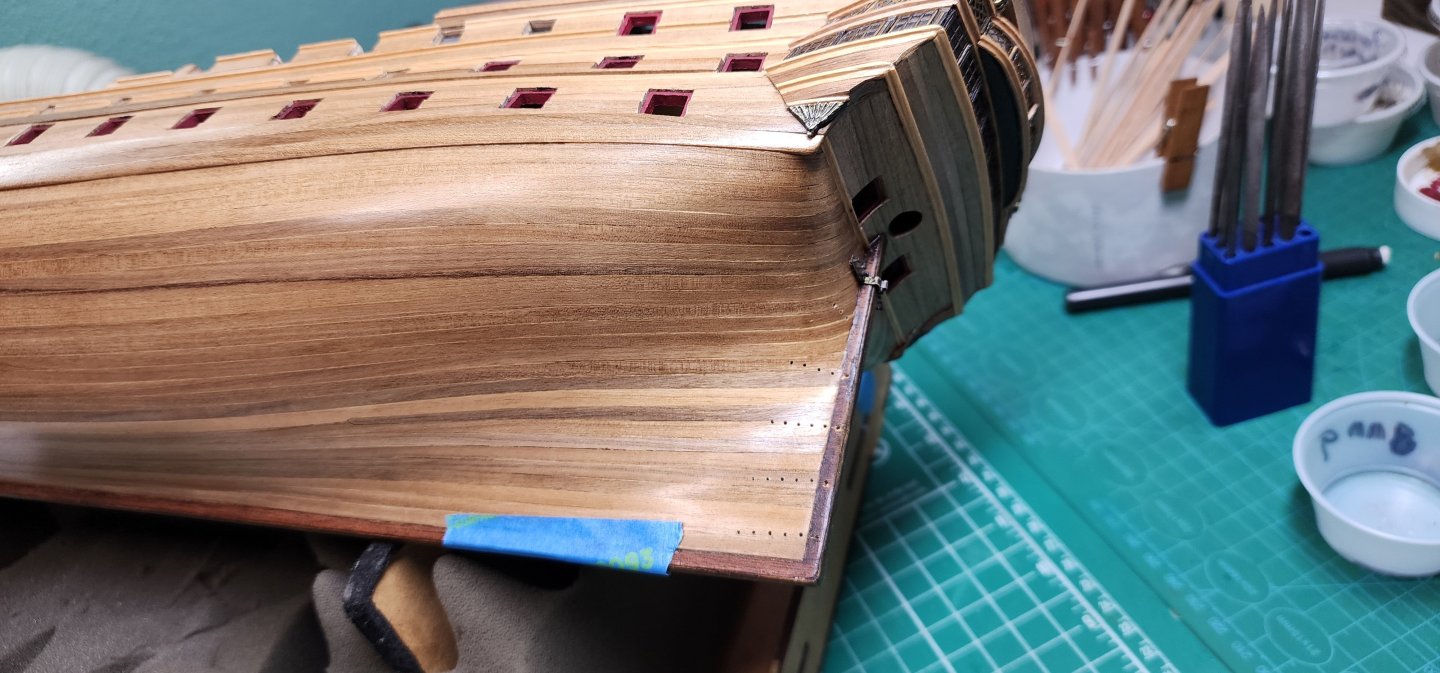
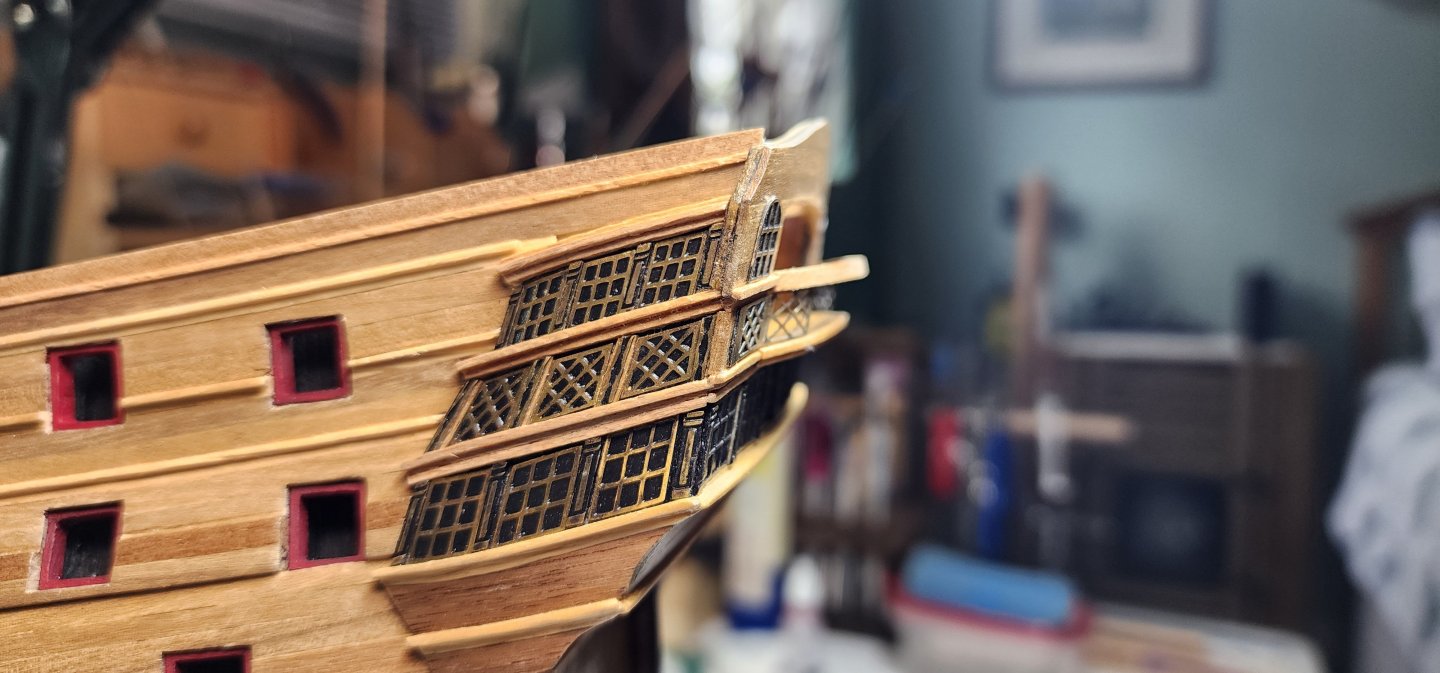
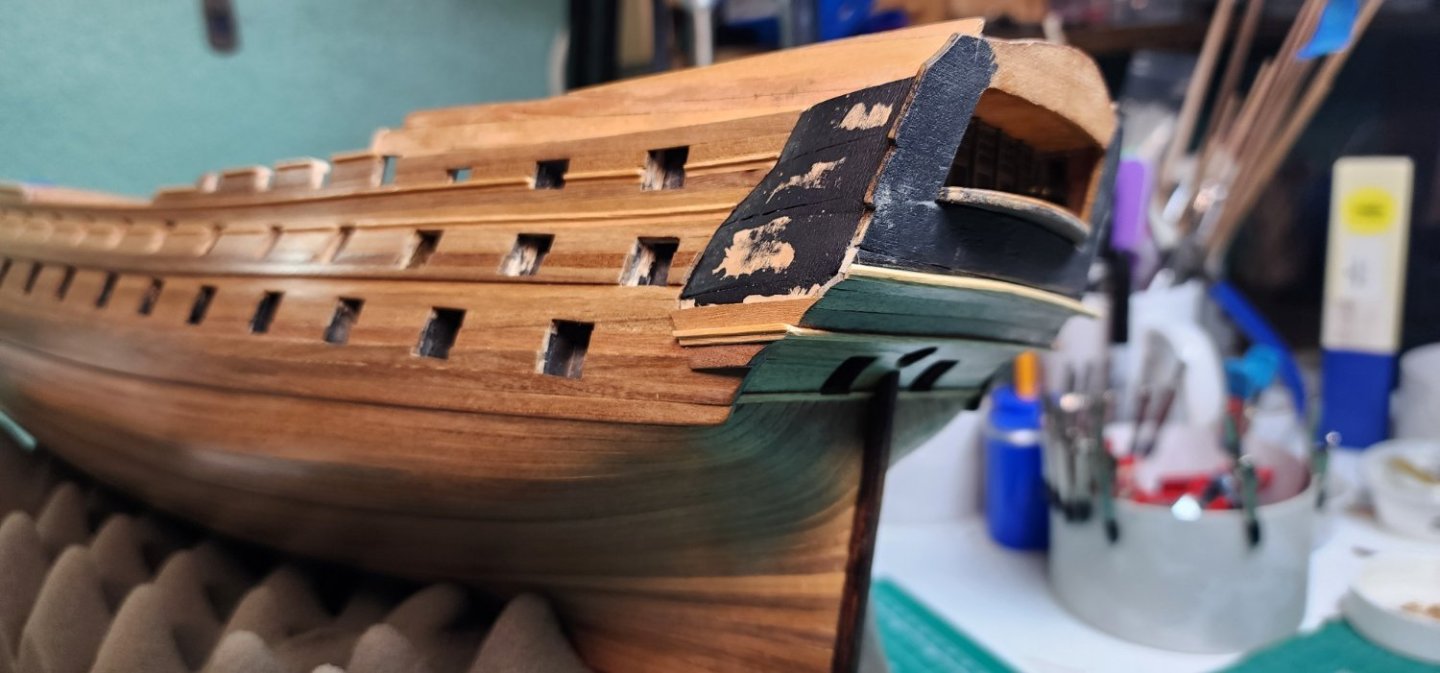
Hello All, It’s been a month or so since I updated my build log on Bellona. I have completed both port and starboard planking to equal levels of assembly just below the top portion of the galleries. As stated in my last post, I think that I may have an issue with the way the angle of the planking is running on top of the galleries. Both port and starboard are equal in the way the angles lay, so if it is a problem, at least I was consistent. 😊 I installed the chain plates, for lack of a better term, on both the port and starboard and install the additional plank just above the wale on the port side. I began to start laying out the photo etched brass pieces that are to make up the galleries on the stern and port side. The parts look very similar, especially the pilasters, and they all have the same part numbers. So, once I remove them from the brass sheet, it is very easy to mix them up and lose track of their positions. As a temporary means of attaching them to the ship, I used two-sided tape and tracing paper. I put the tracing paper on the plans and secured it in place so it would not shift on the plan drawing. I then applied the two-sided tape to the tracing paper and stuck the brass parts lining them up carefully according to the drawing. Once that was completed, I cut off the excess tracing paper and applied the two-sided tape to the areas I was dry fitting. This worked out well and I didn’t have to worry about the individual pieces shifting or falling off from the areas I was working on. During the dry fitting of the first row of windows on the port side, I found that the wooden piece below the window was not thick enough to fit the two wood trims properly. I had to add a small shim to extend it down to be able to fit both wooden trim pieces. The kit came with bass wood for pieces 240 and 241. I decided that I would use walnut instead of the material that was supplied with the kit as these two pieces will be visible from all points of view. I installed the remaining stern planking and trim. The trim took me some time to miter as it was a compound miter and I wanted it to look somewhat presentable. I painted the transom black as well as the side galleries to help blend in the blackened brass pieces once installed. I blackened the brass that makes up the first row of windows and completed installation of the planking and trim up to where the brass will be installed. I will be shifting my efforts to the starboard side so that both port and starboard are at equal stages of assembly before I glue the first row of brass windows. Well, that’s all I have for now, and as always, your comments and guidance are always welcome. Enjoy the pics. Cheers Nearshore


-
Hi Hamilton, Your planking is looking great. I like the way you are going to present your ship, it will be much more colorful than mine. LOL You are doing a great job!!! Nearshore