Rustyj
-
Posts
2,535 -
Joined
-
Last visited
Content Type
Profiles
Forums
Gallery
Events
Everything posted by Rustyj
-
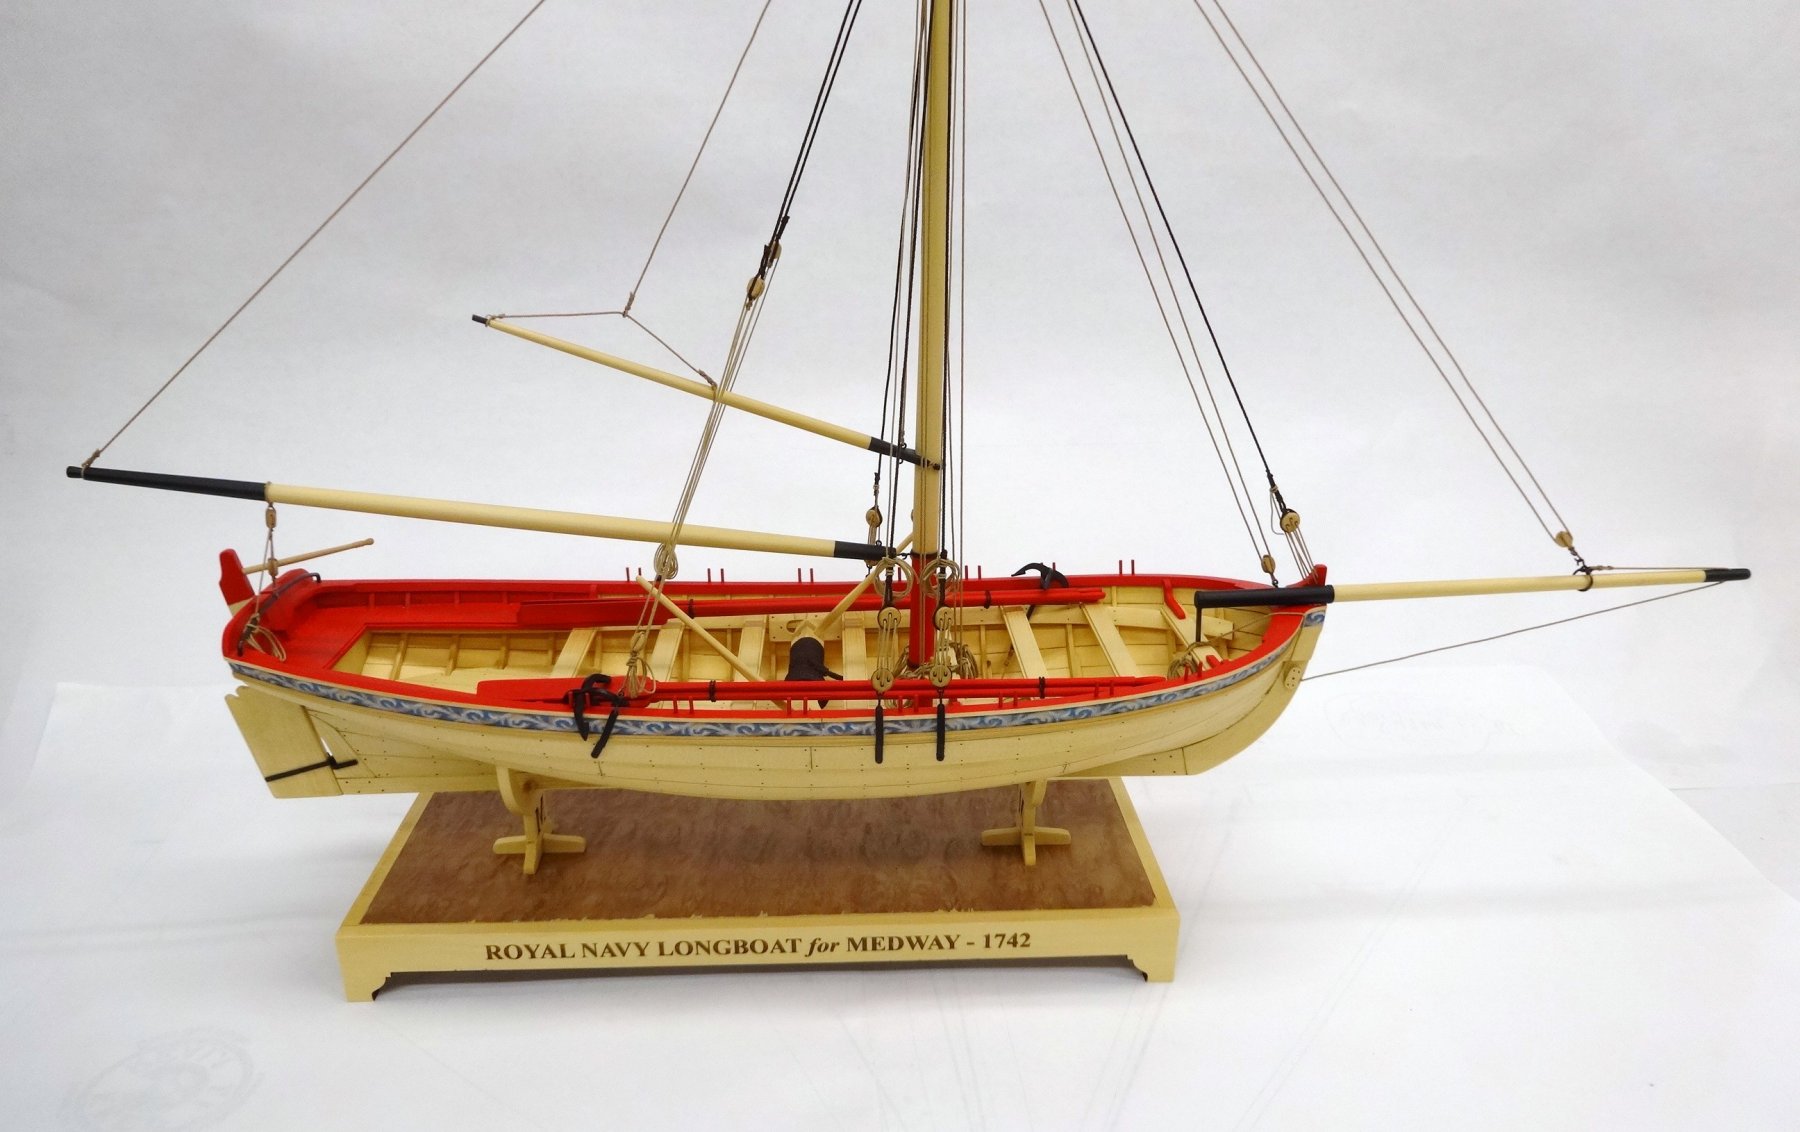
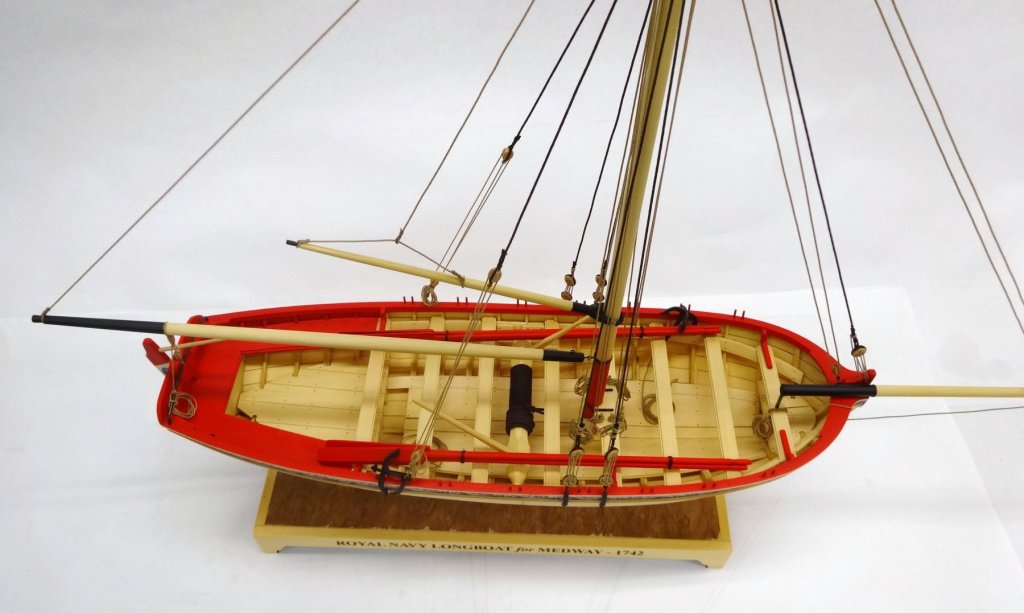
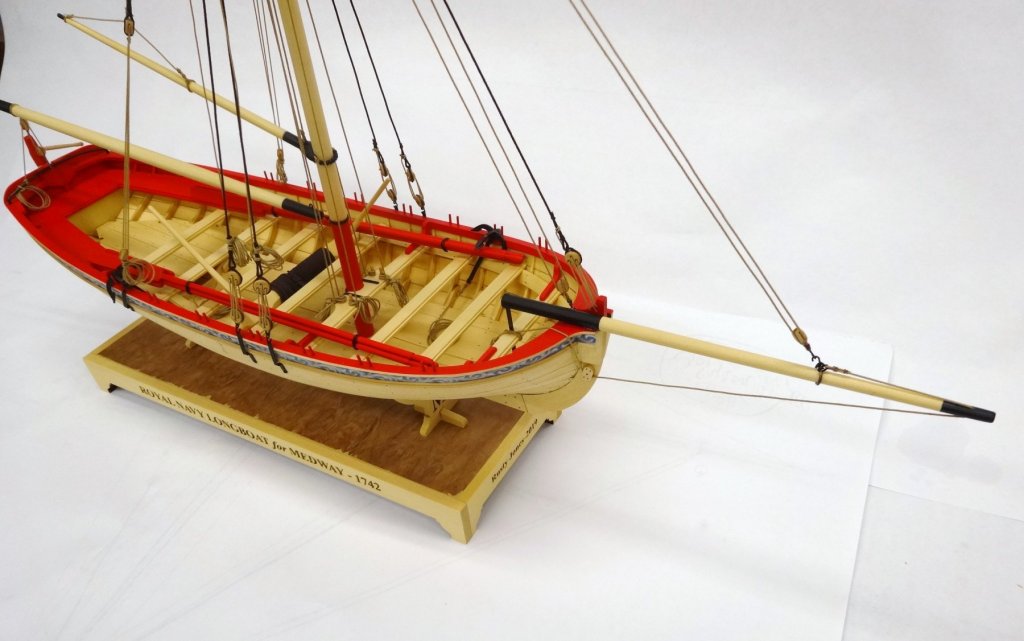
 Well I've reached that happy sad day. The Medway Longboat is now complete. I must say this is a very fun, interesting and high quality kit. I had a great time building it and I hope all of you had as much following along.


- 152 replies
-
- 26
-

-
- medway longboat
- Syren Ship Model Company
- (and 1 more)
-
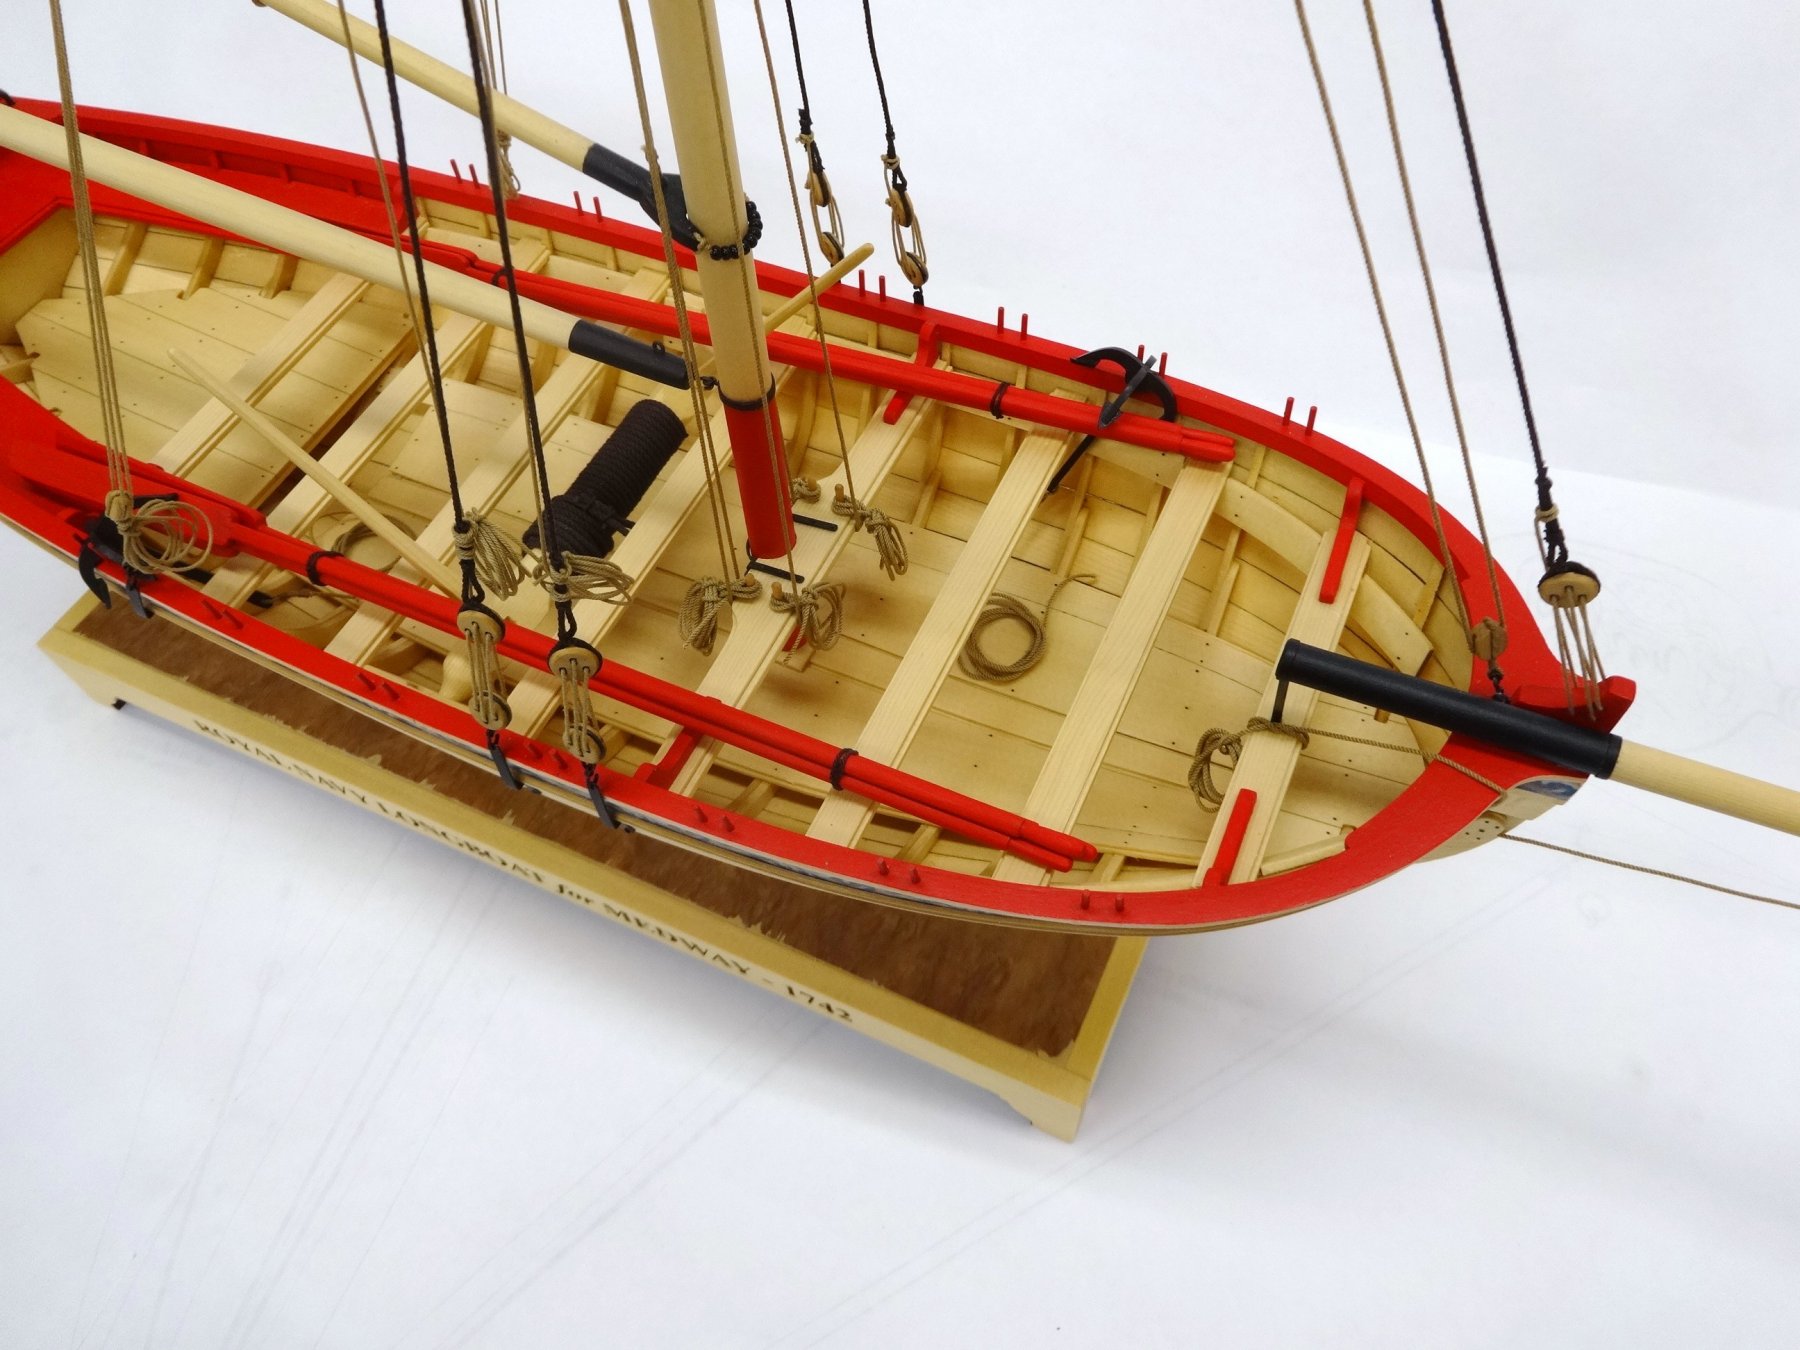
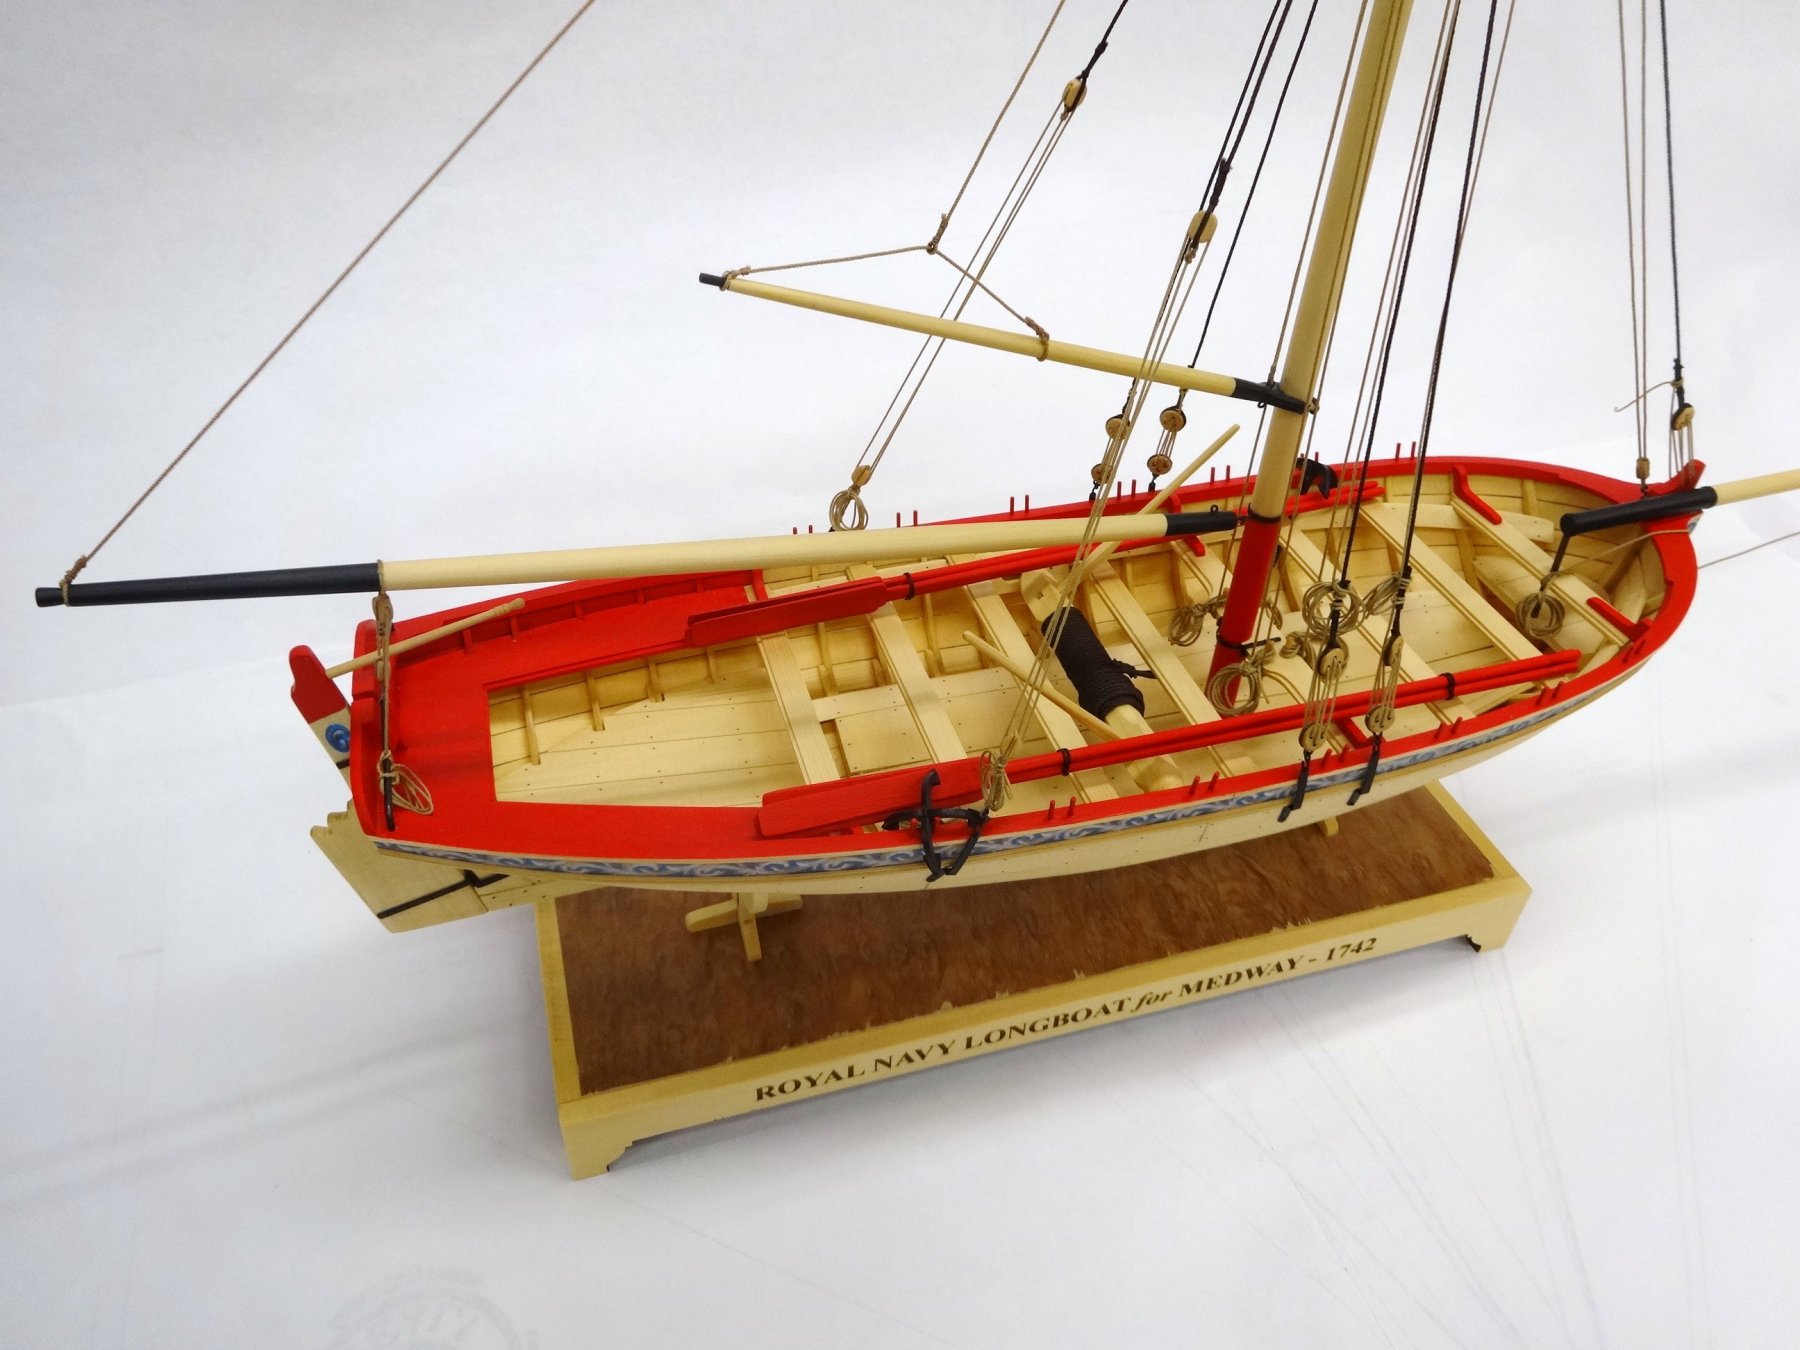
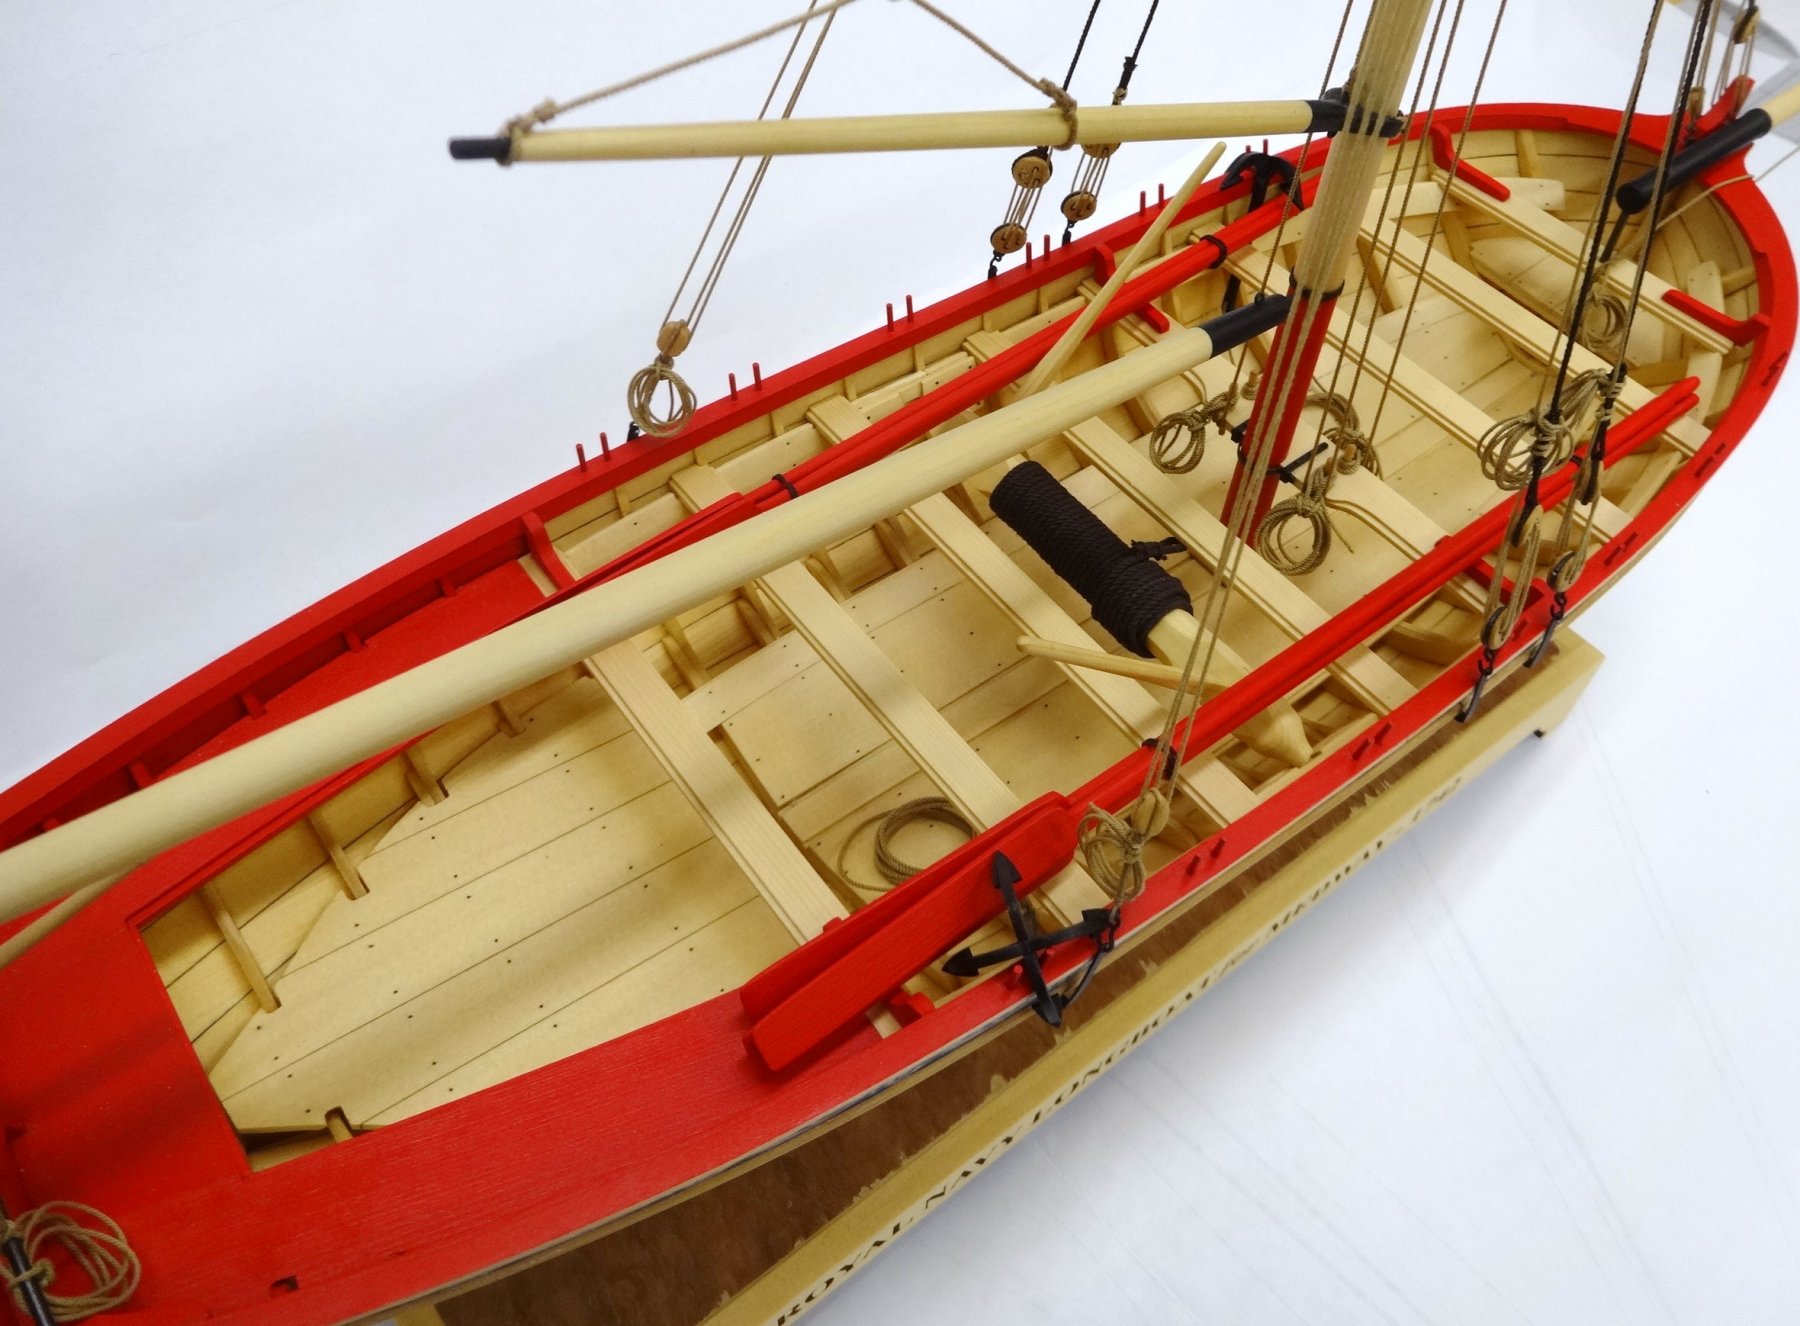
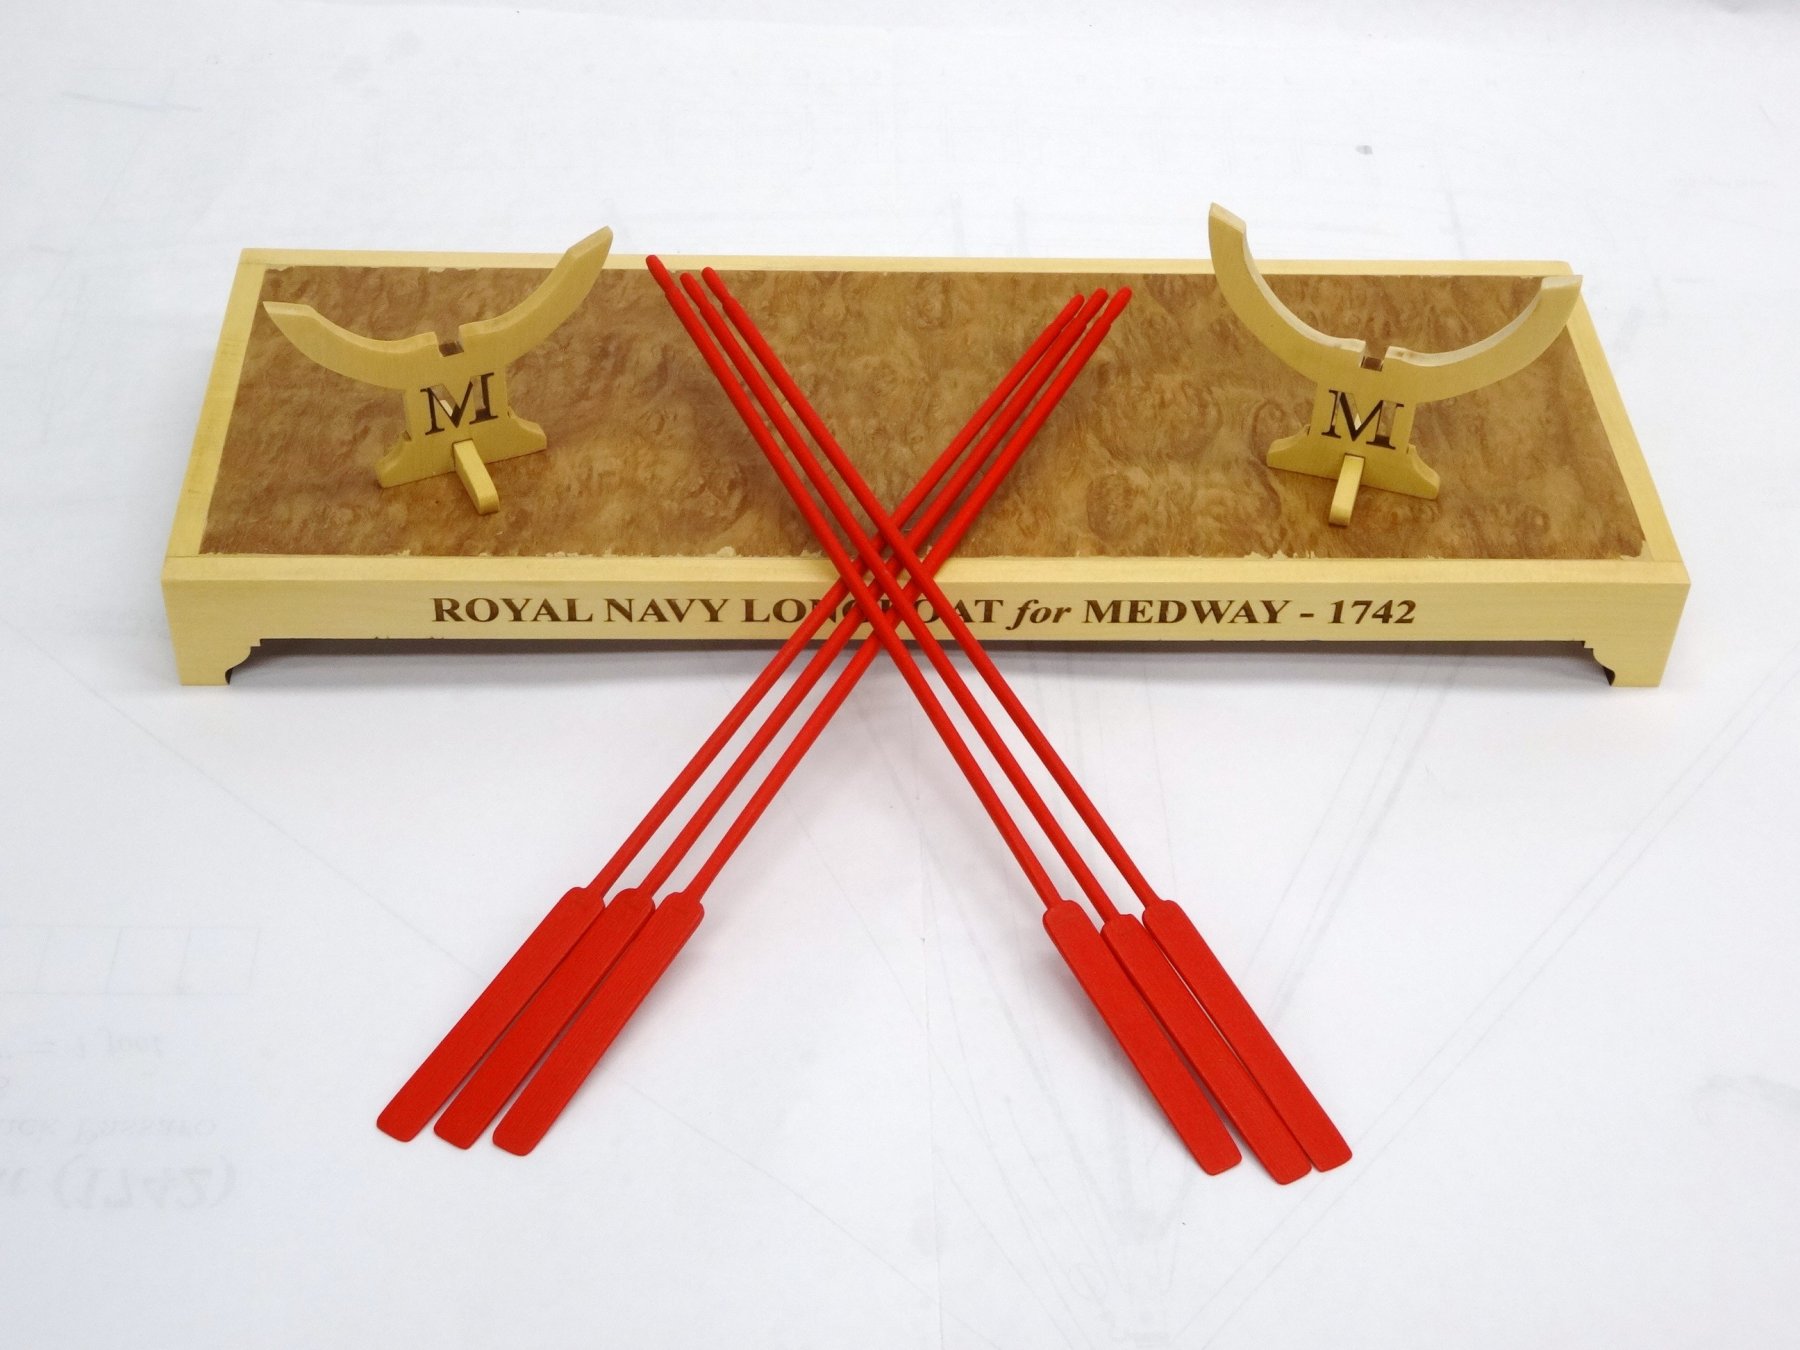
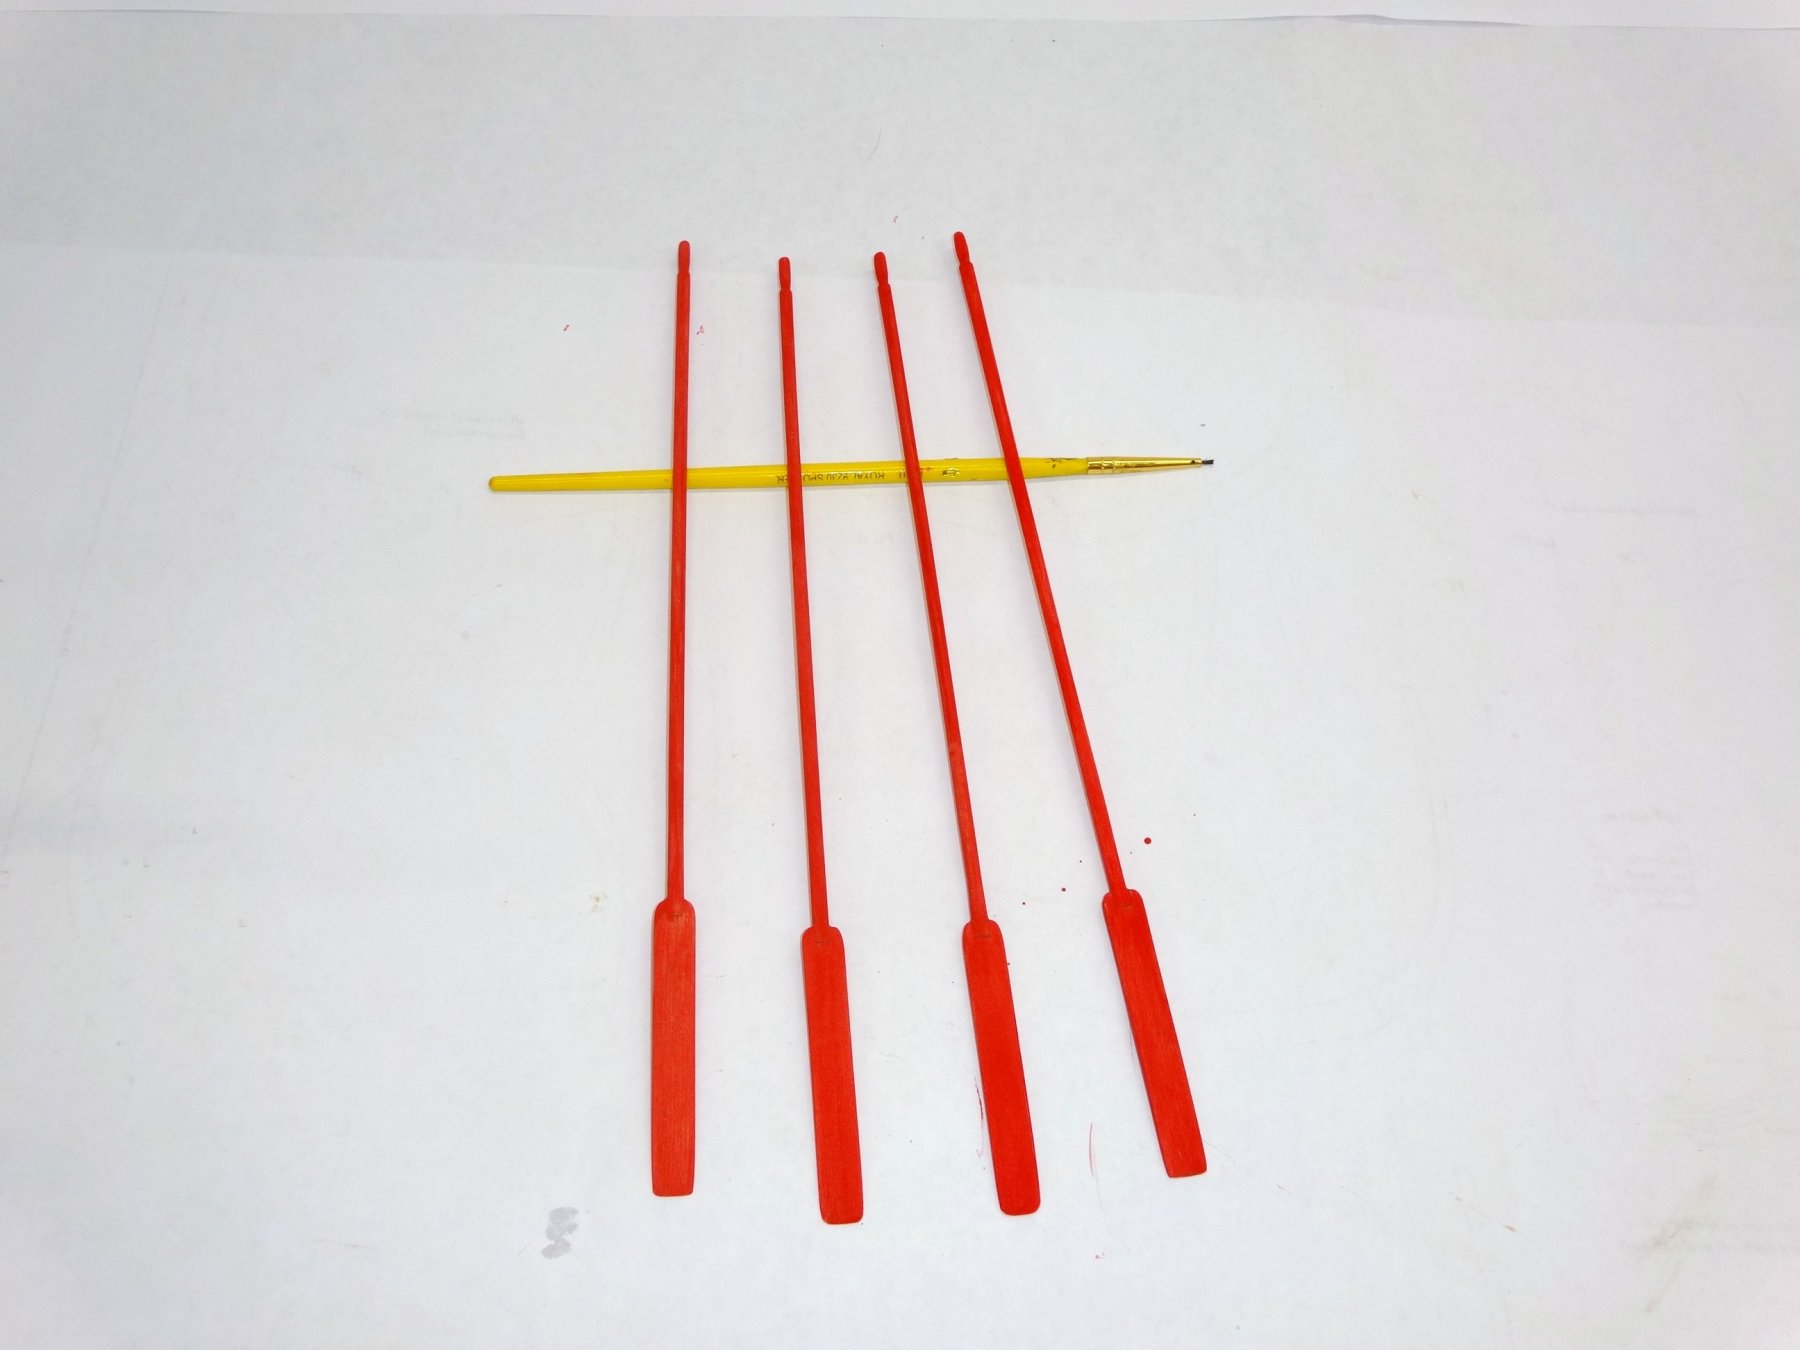
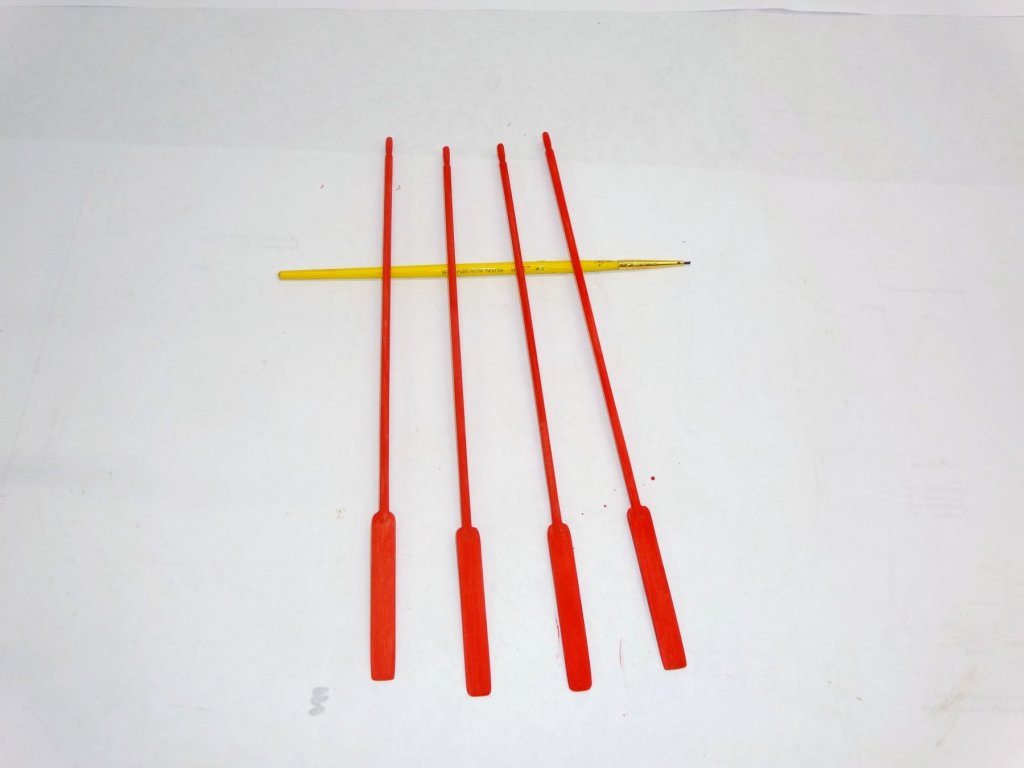
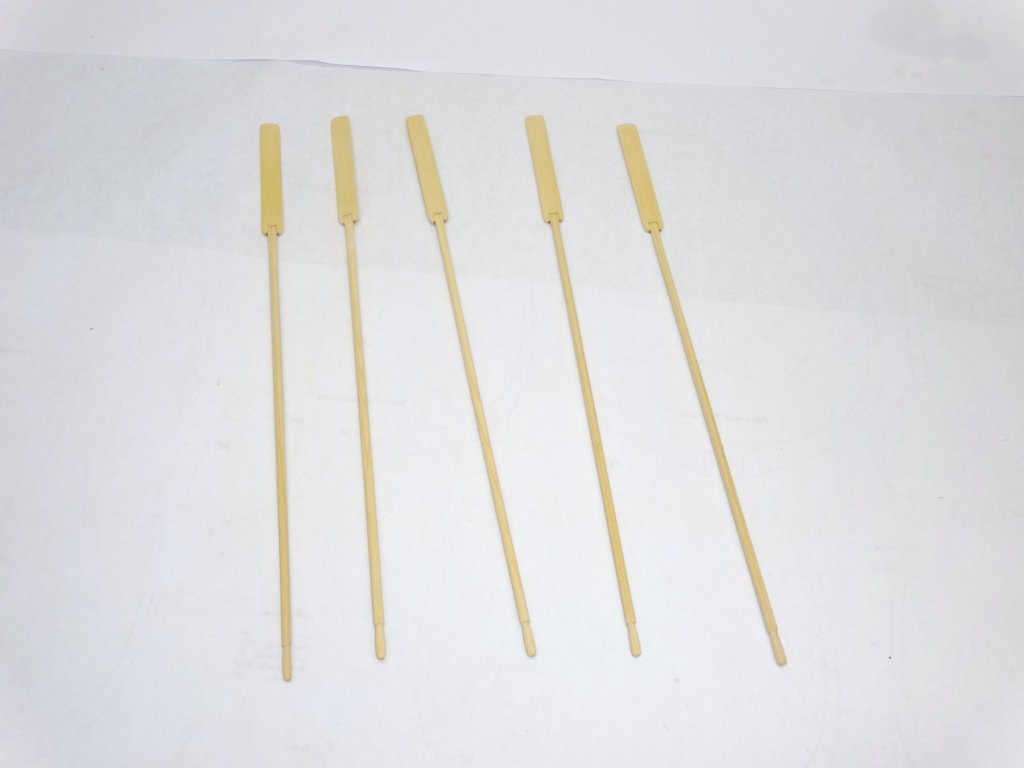
I obtained one of Syren's stands for the longboat. While I'm still finishing the rigging I've also completed the stand and six of the oars. I painted the oars red as they were on the contemporary model.

- 152 replies
-
- 15
-
-
- medway longboat
- Syren Ship Model Company
- (and 1 more)
-
Thanks Chuck, I had a ball and you're welcome anytime! Thanks for the kind words John and Steve and all the likes too!
-
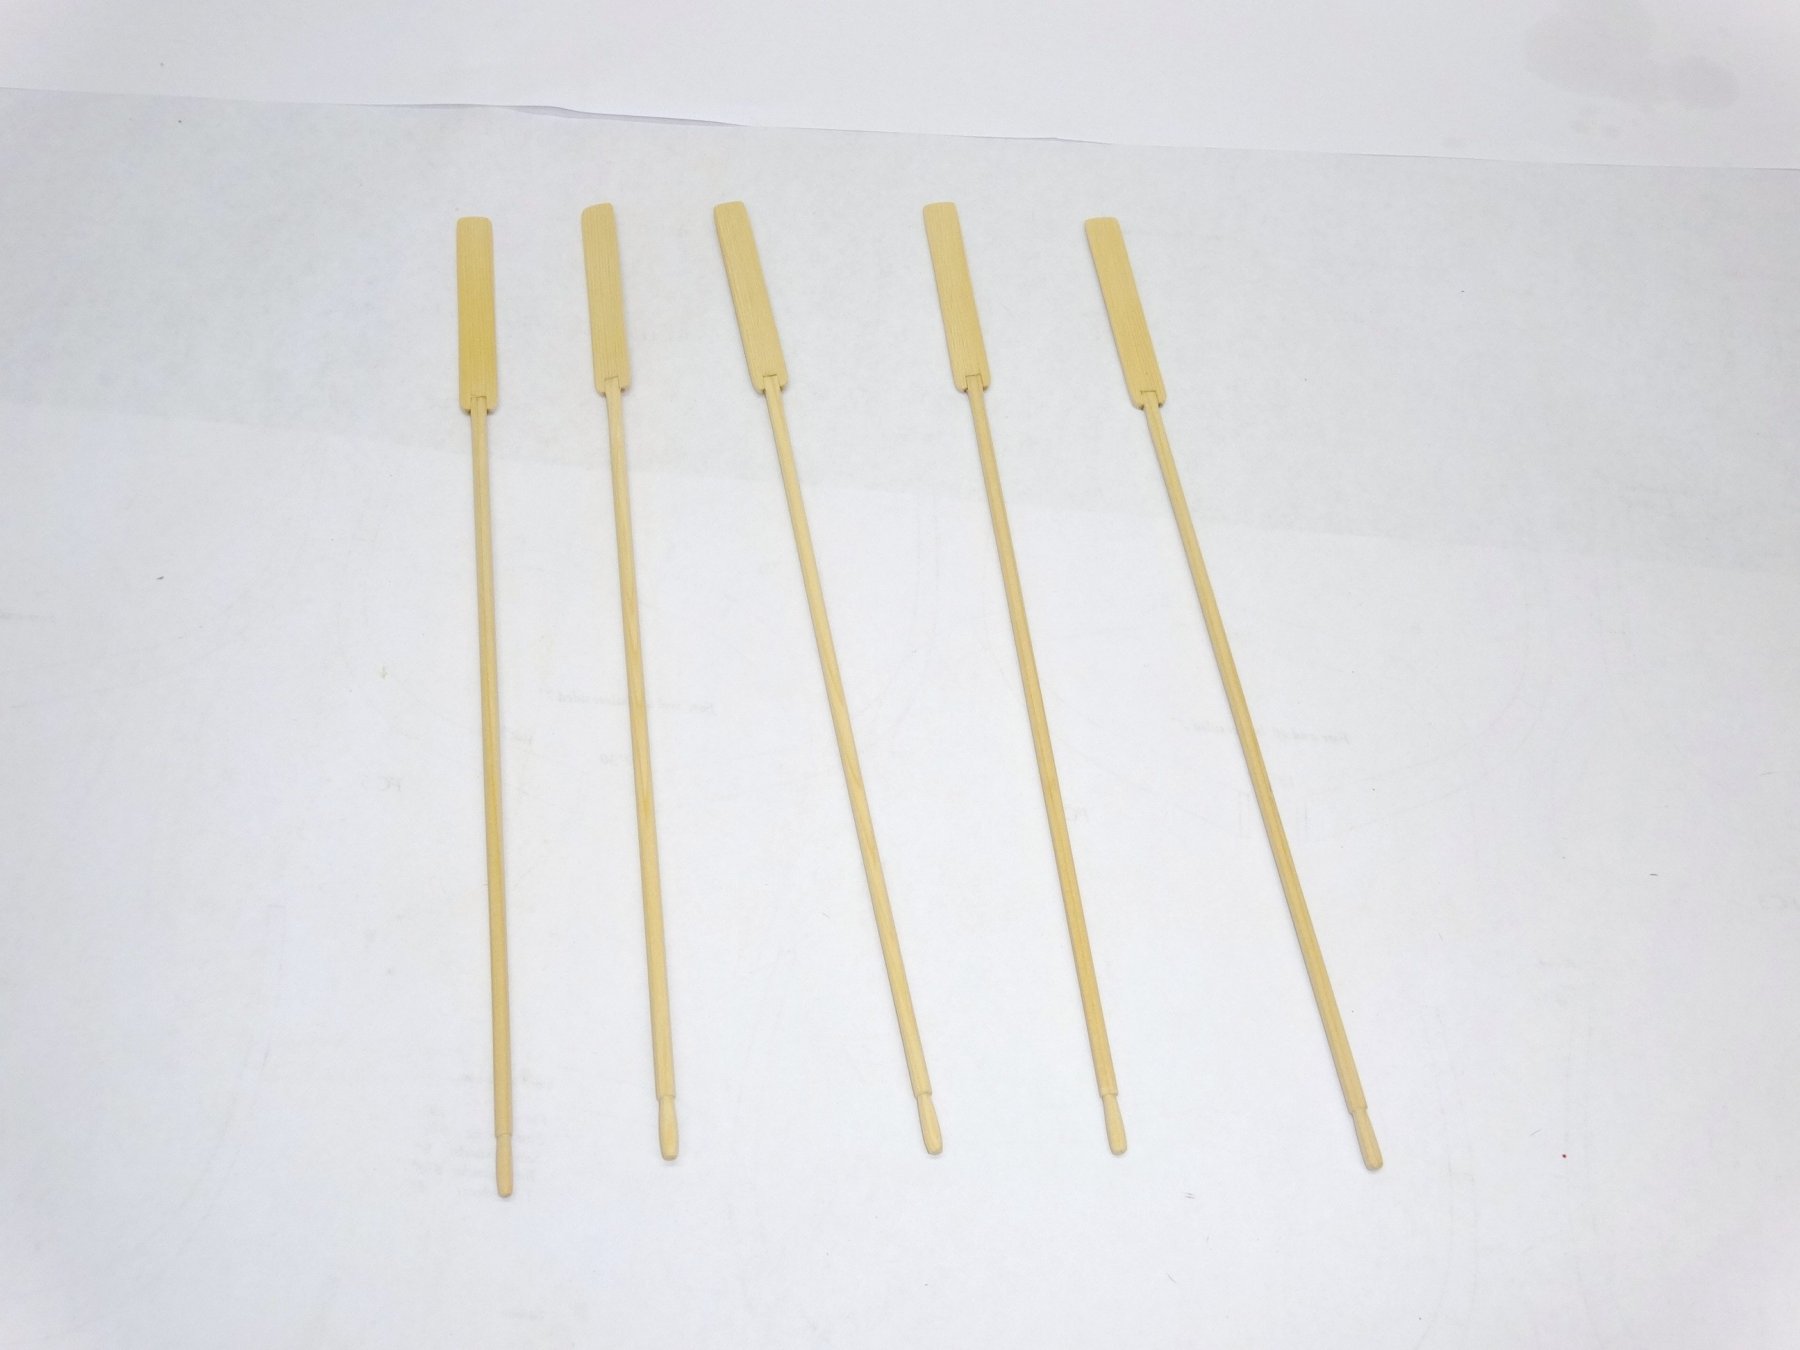
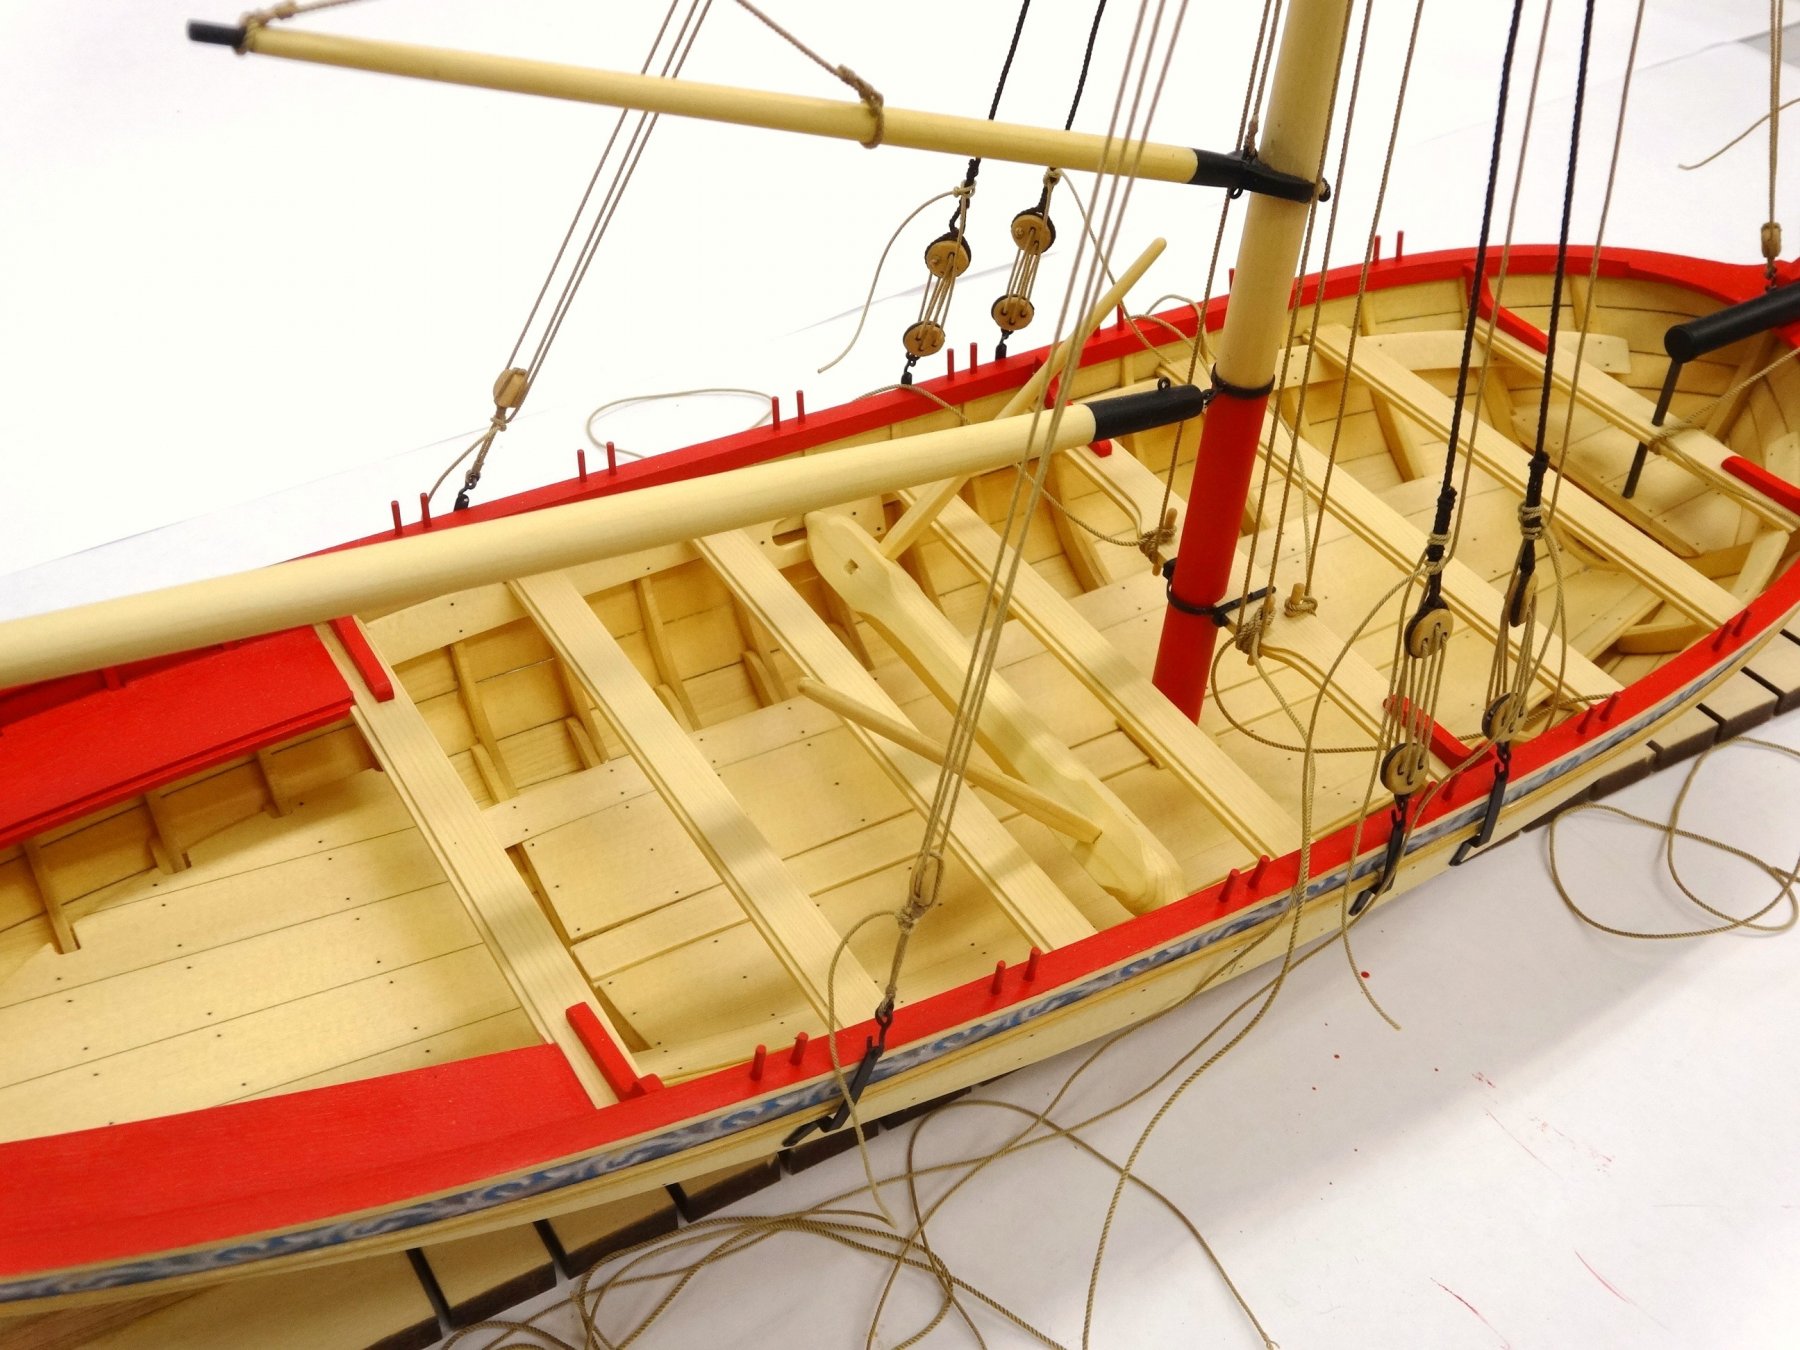
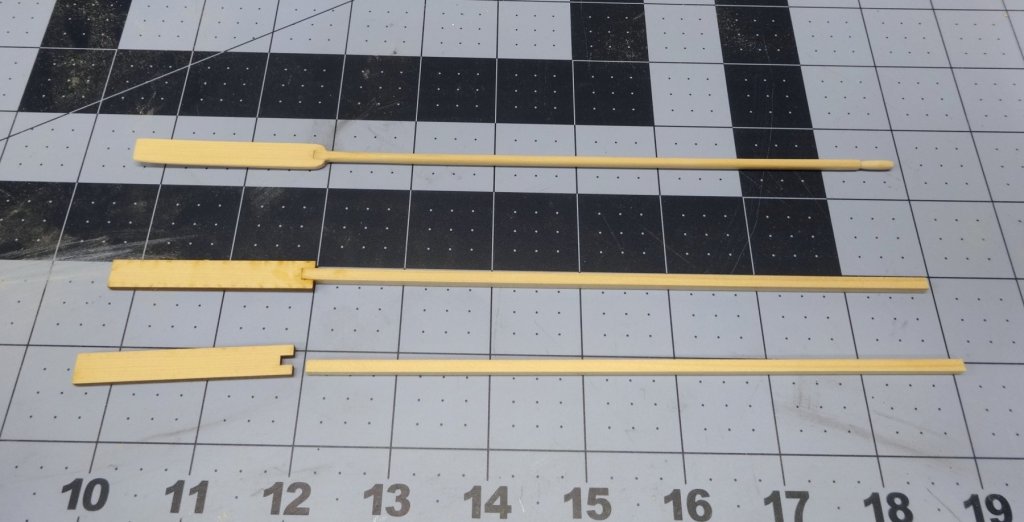
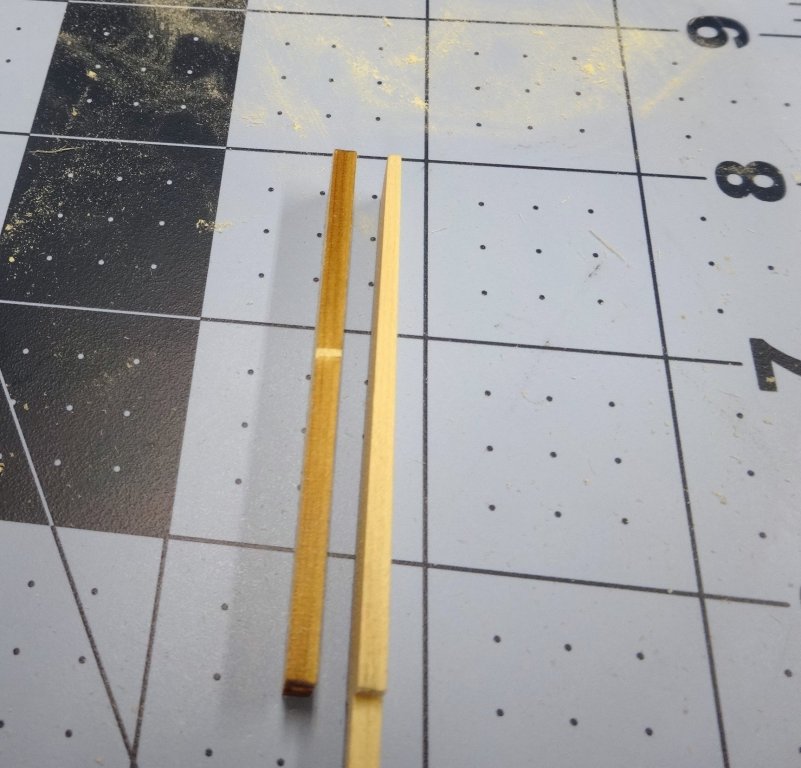
That's great to hear! You'll love it. Thanks for the kind word but I wish I was able to follow you. Thanks Ken. It was a pleasure seeing you and everyone else. Going to Chucks shop was like making a trip to the holy lands. Well I've been whacking away and need to post a lot to catch up. The rigging is mainly completed. There's a lot of line hanging all over the place though. I need to go back and adjust all the line tension and make the rope coils. I've also started to make the oars. Here you can see the start of the tapering to thin the blade down. Still a long way to go. The three stages. Stock untouched, handle attached and sanded and shaped. Finished oars ready to paint, And the first four with their first coat of paint. Whew that was a long one. Thanks for stopping by and all the support!


- 152 replies
-
- 22
-
-
- medway longboat
- Syren Ship Model Company
- (and 1 more)
-
Well done Ben. Not to tricky but enough to make me nervous.
- 64 replies
-
- 1
-
-
- medway longboat
- Syren Ship Model Company
- (and 1 more)
-
Thanks Jeff and also for all the likes!
- 152 replies
-
- 1
-
-
- medway longboat
- Syren Ship Model Company
- (and 1 more)
-
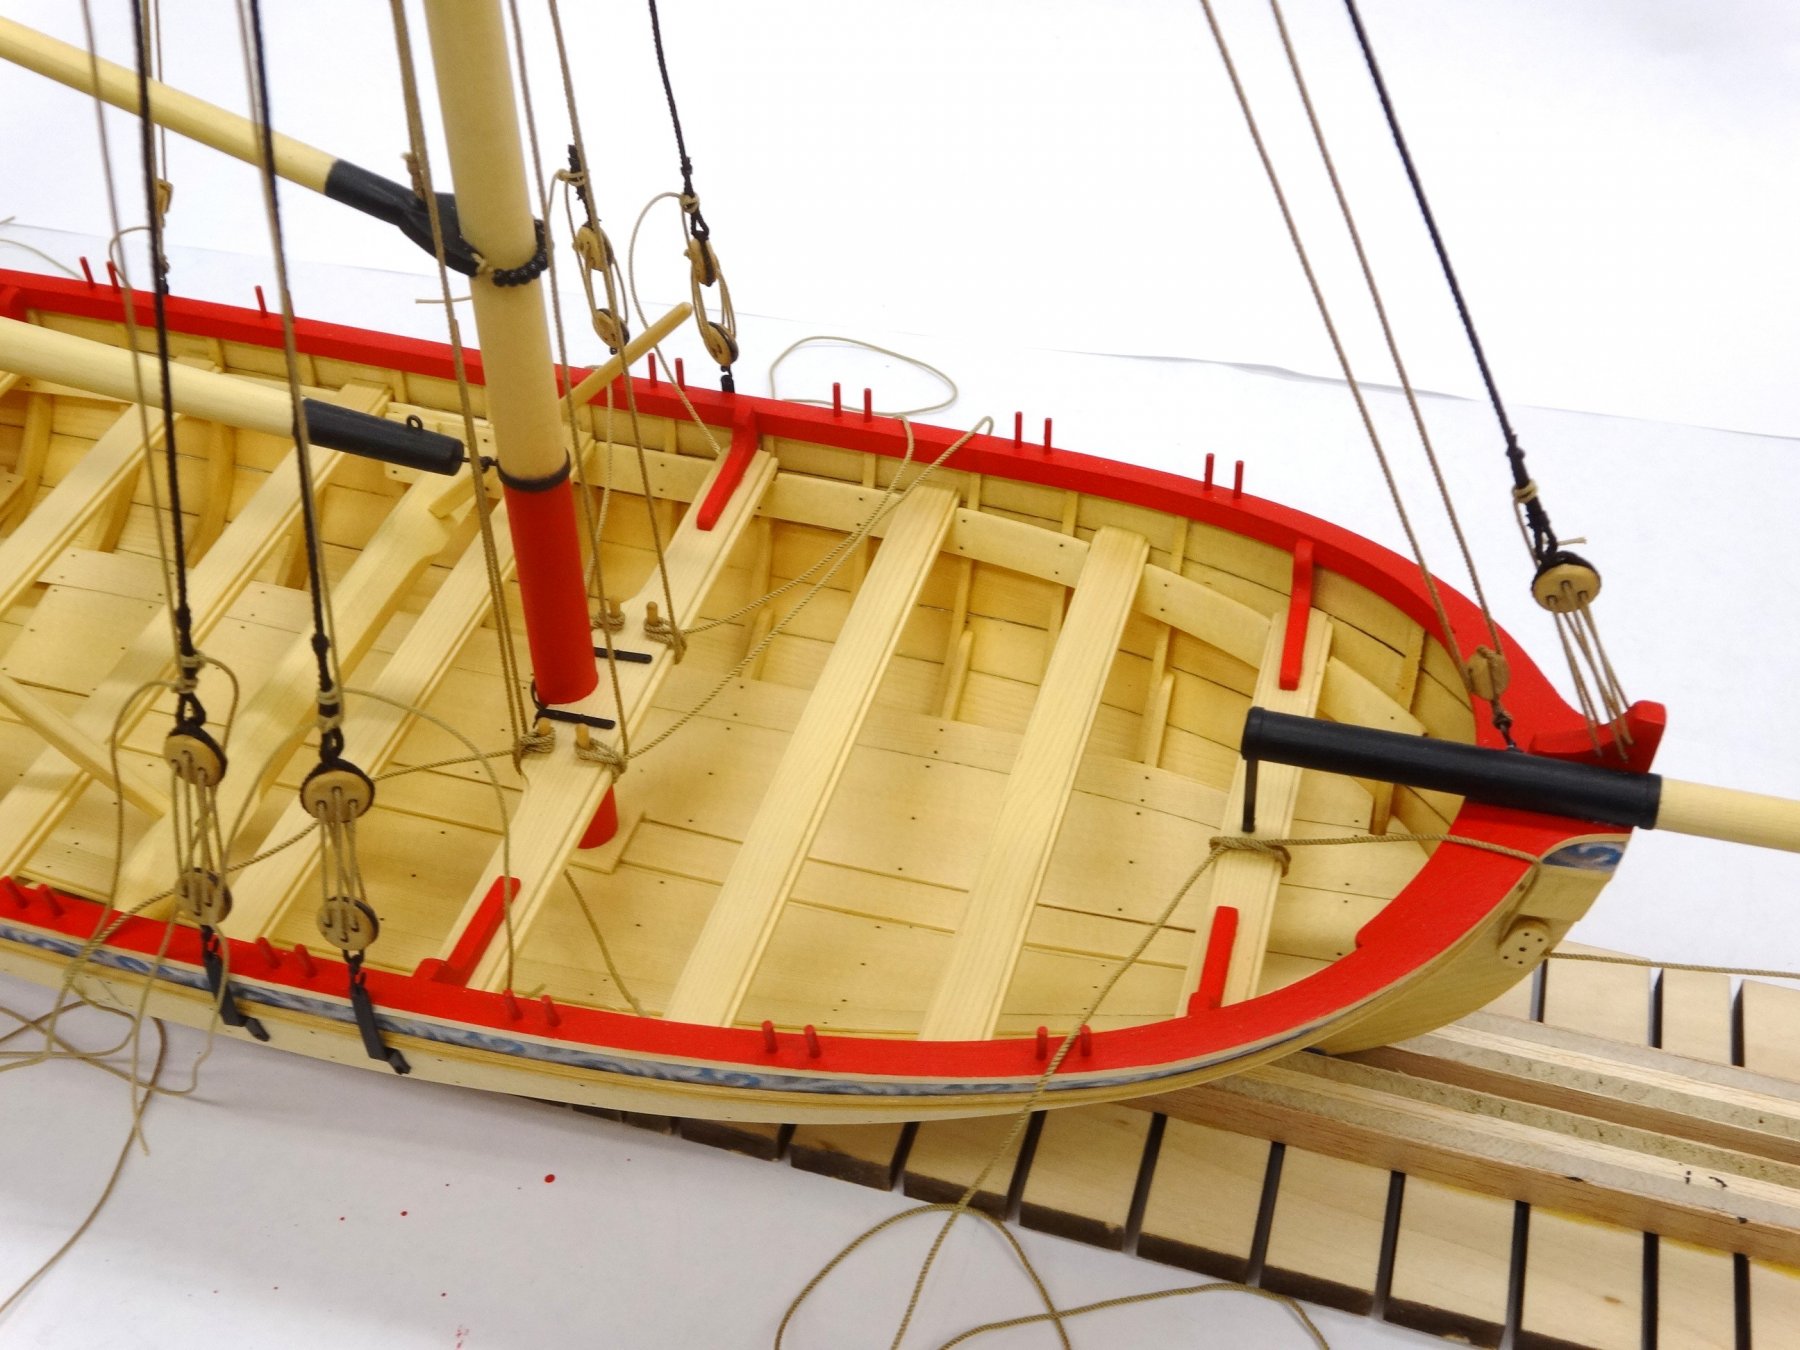
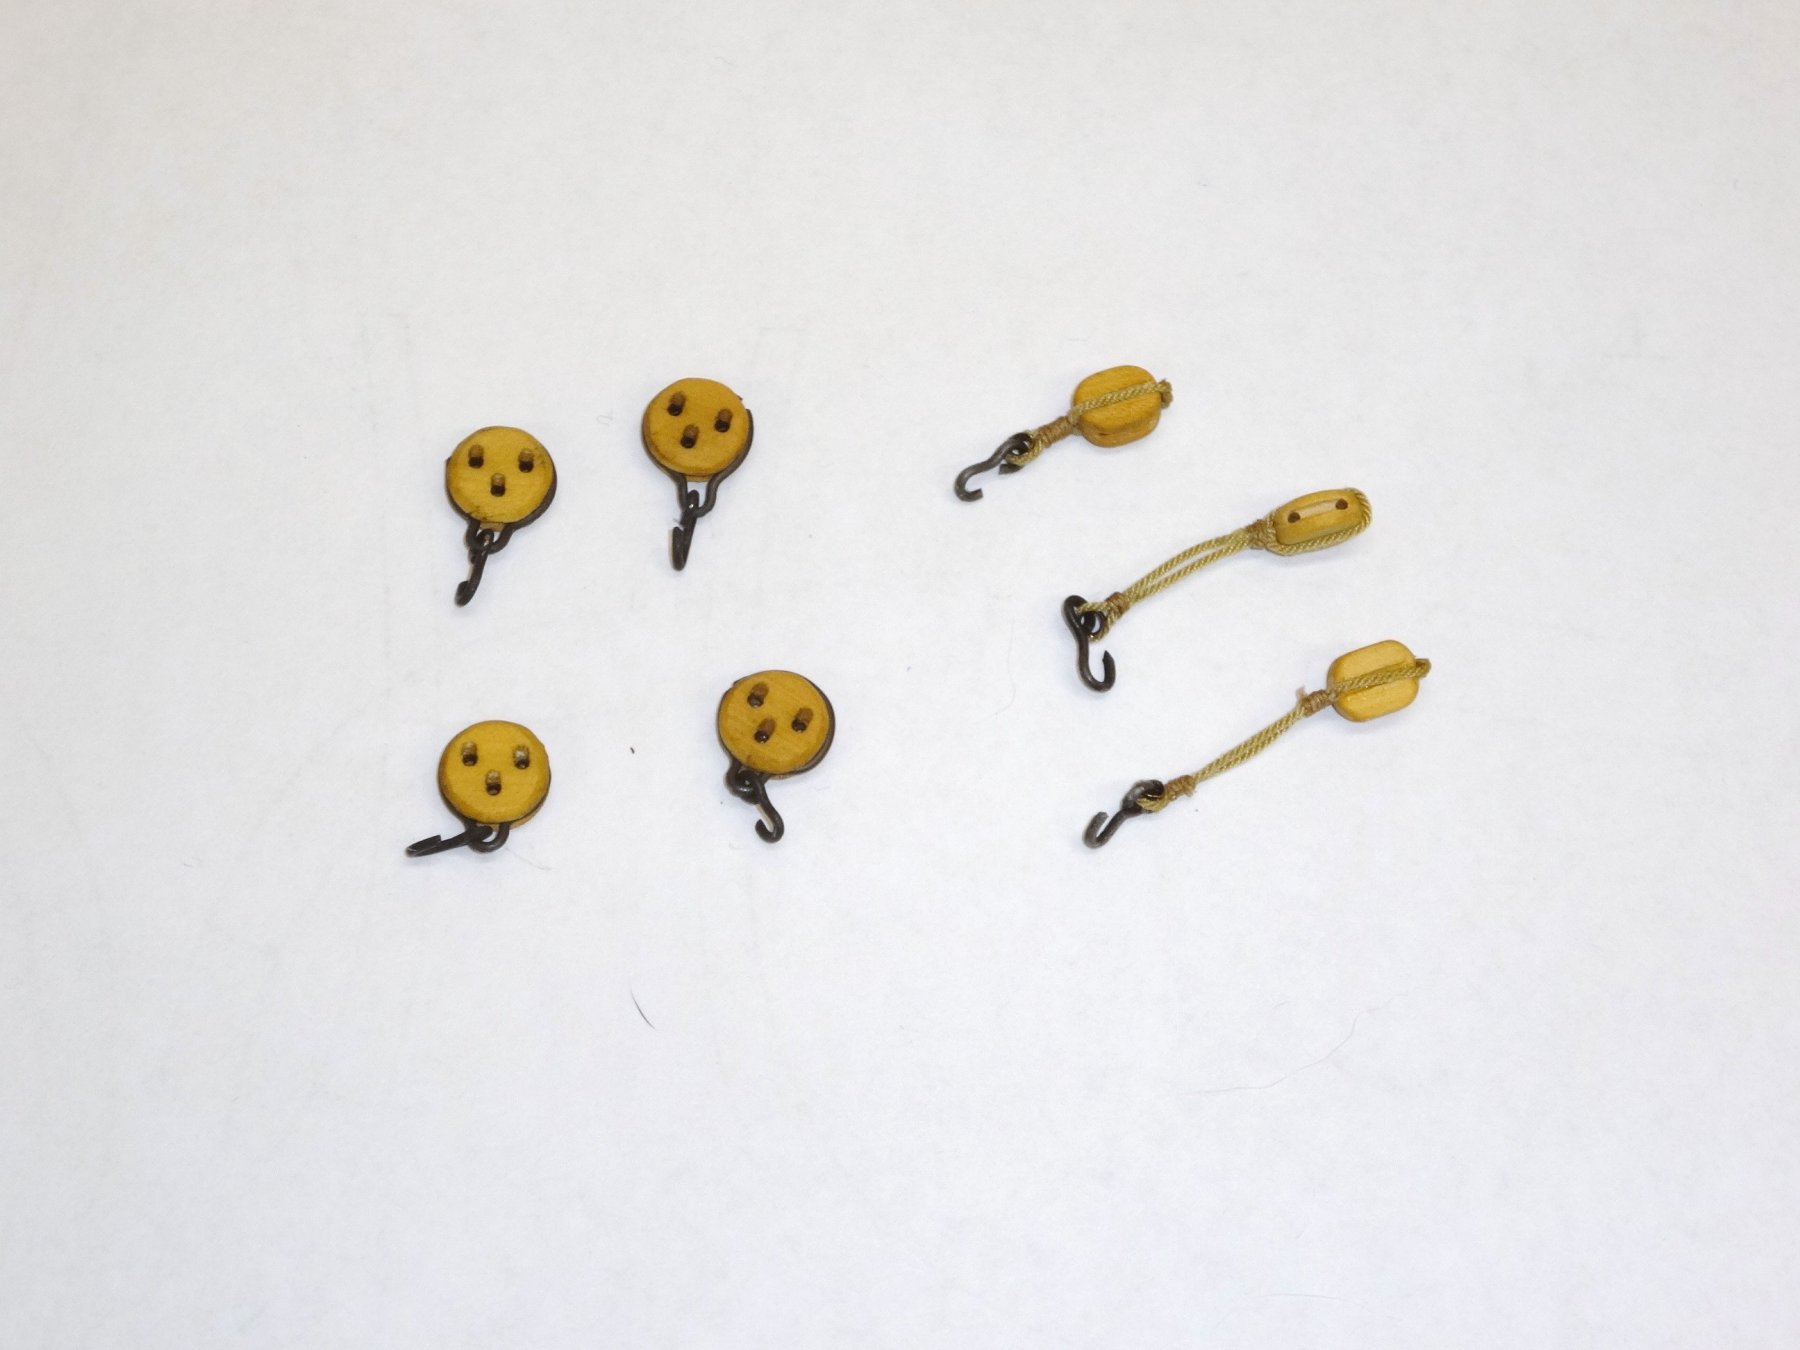
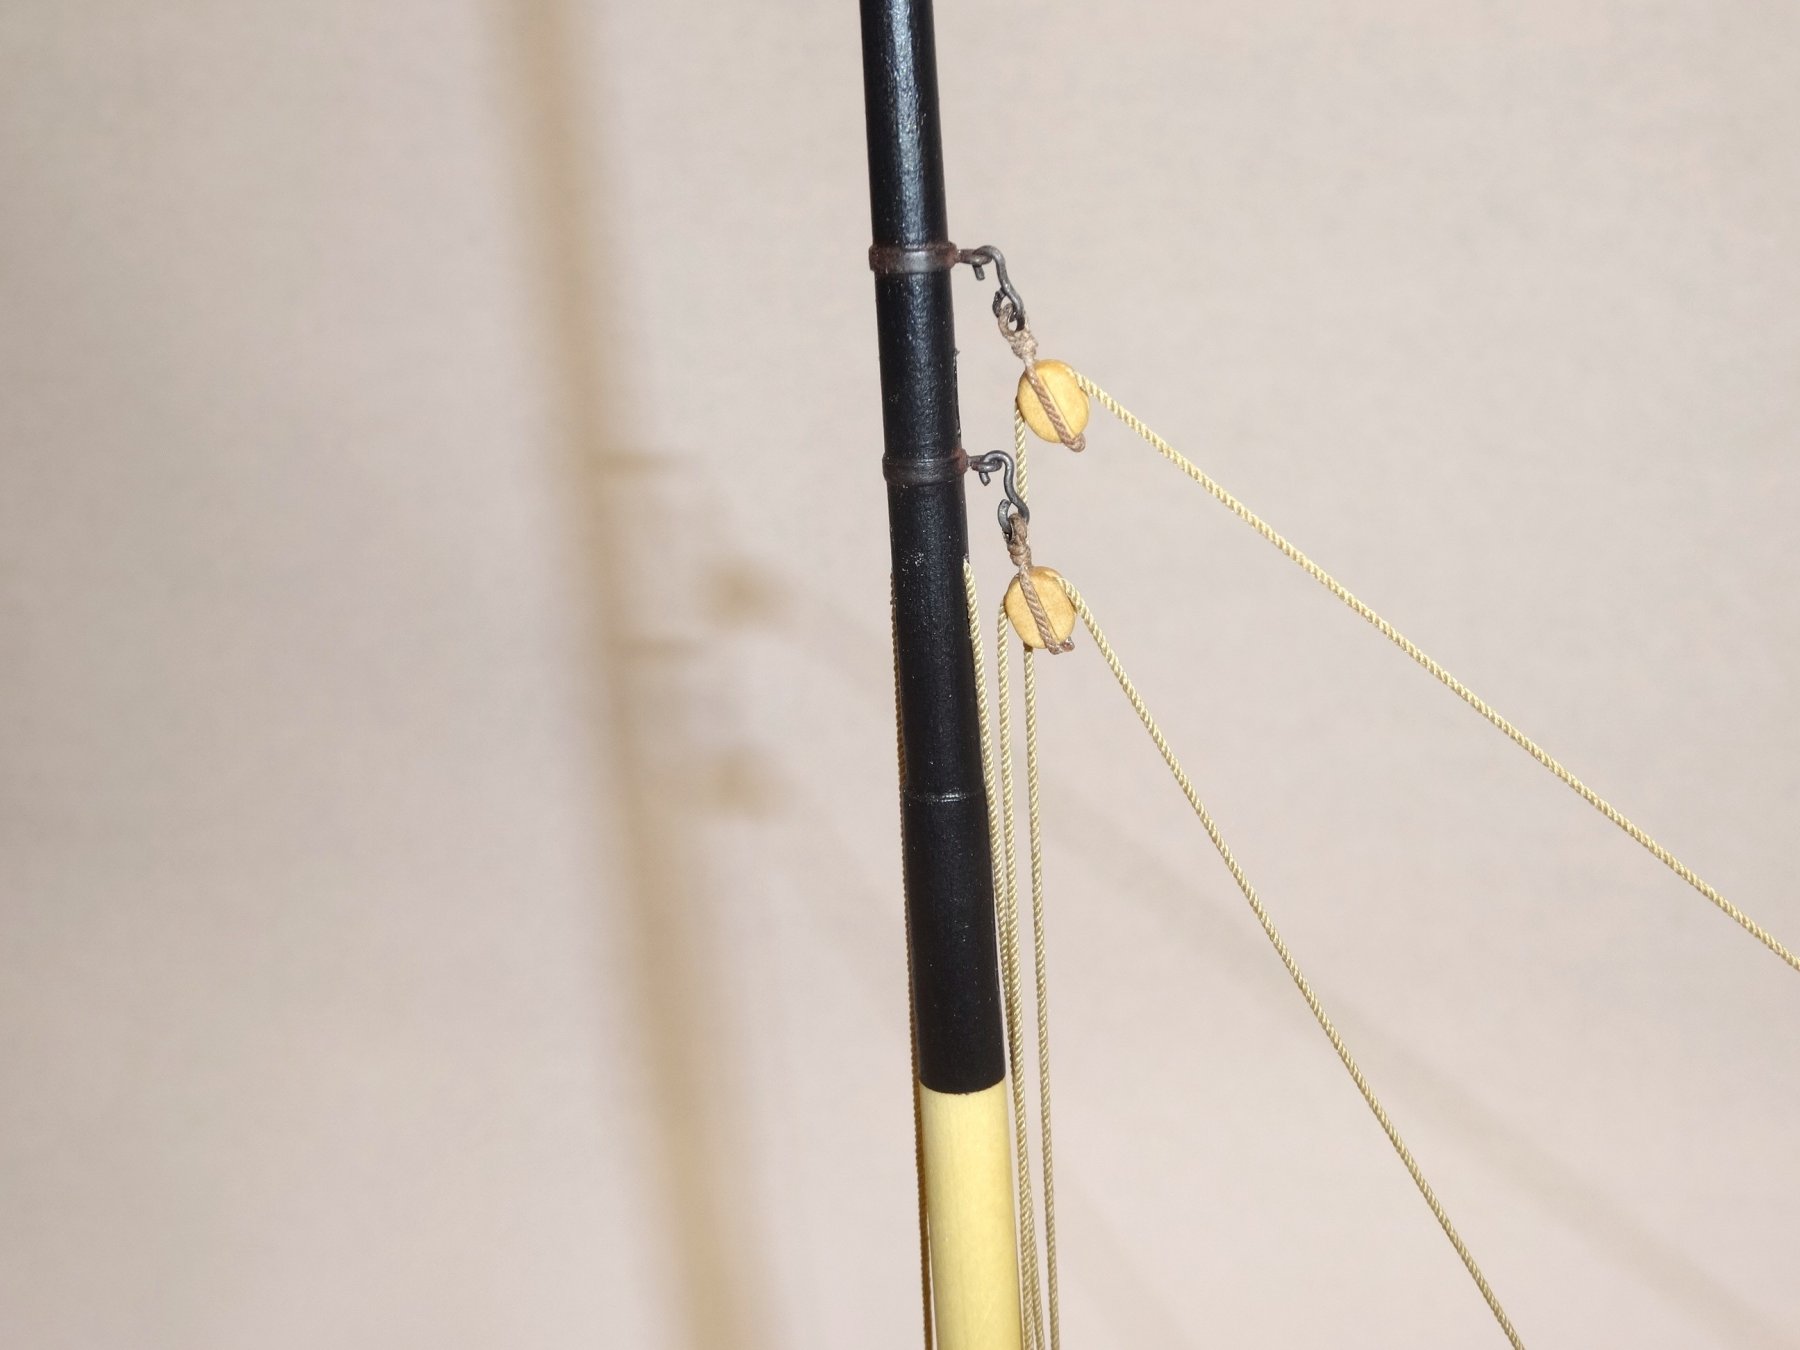
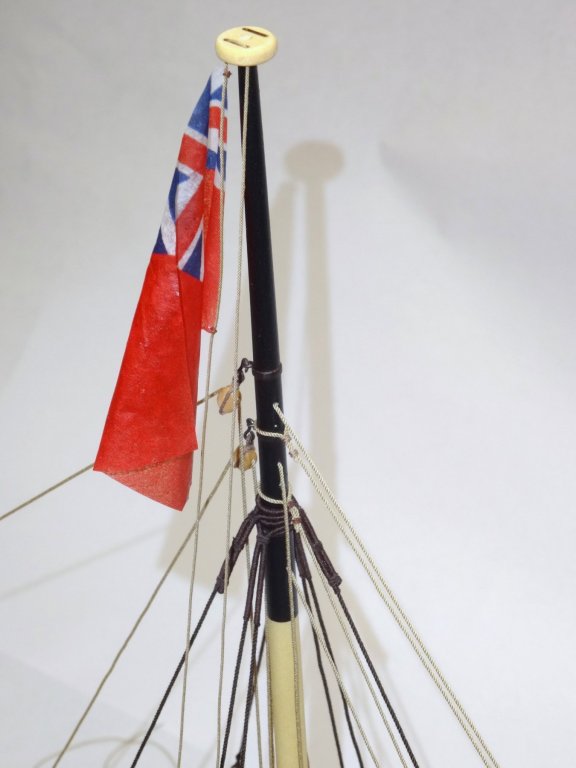
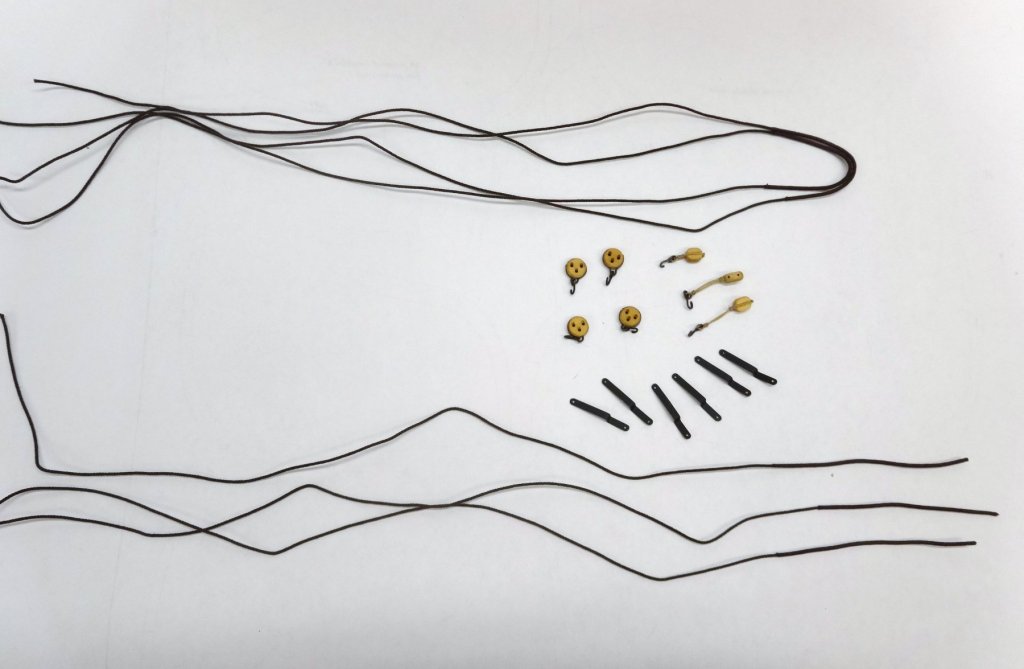
Brief whining moment! Well I just completed 9 straight days of working with limited time in the shop. Ok whining over! I've made the Deadeys, straps and served the line for the shrouds, backstay and the forestay. Let the rigging begin!

- 152 replies
-
- 16
-
-
- medway longboat
- Syren Ship Model Company
- (and 1 more)
-
B.E. I just caught up with your progress and it was a pleasure to view. Your ingenuity and workmanship is fantastic!
- 574 replies
-
- 1
-
-
- cheerful
- Syren Ship Model Company
- (and 1 more)
-
Hi Bob, Ah you did a wonderful job despite the kits shortcomings. Here's to better health in 2019 and a better kit to build next!
- 359 replies
-
- 4
-
-
- prince de neufchatel
- model shipways
- (and 1 more)
-
Off to a good start. I love to see what we use for to clamp and hold planks in place. Very creative!
-
Thanks Chuck, Yes the new version of your rope is even better than your current rope. Hard to believe but true. As you said no "frizzies", looks great right out of the package and working with it is fantastic. I'll be doing the stays and shrouds soon and will post more picture!
- 152 replies
-
- 3
-
-
- medway longboat
- Syren Ship Model Company
- (and 1 more)
-
Good to see you moving forward. Well done.
-
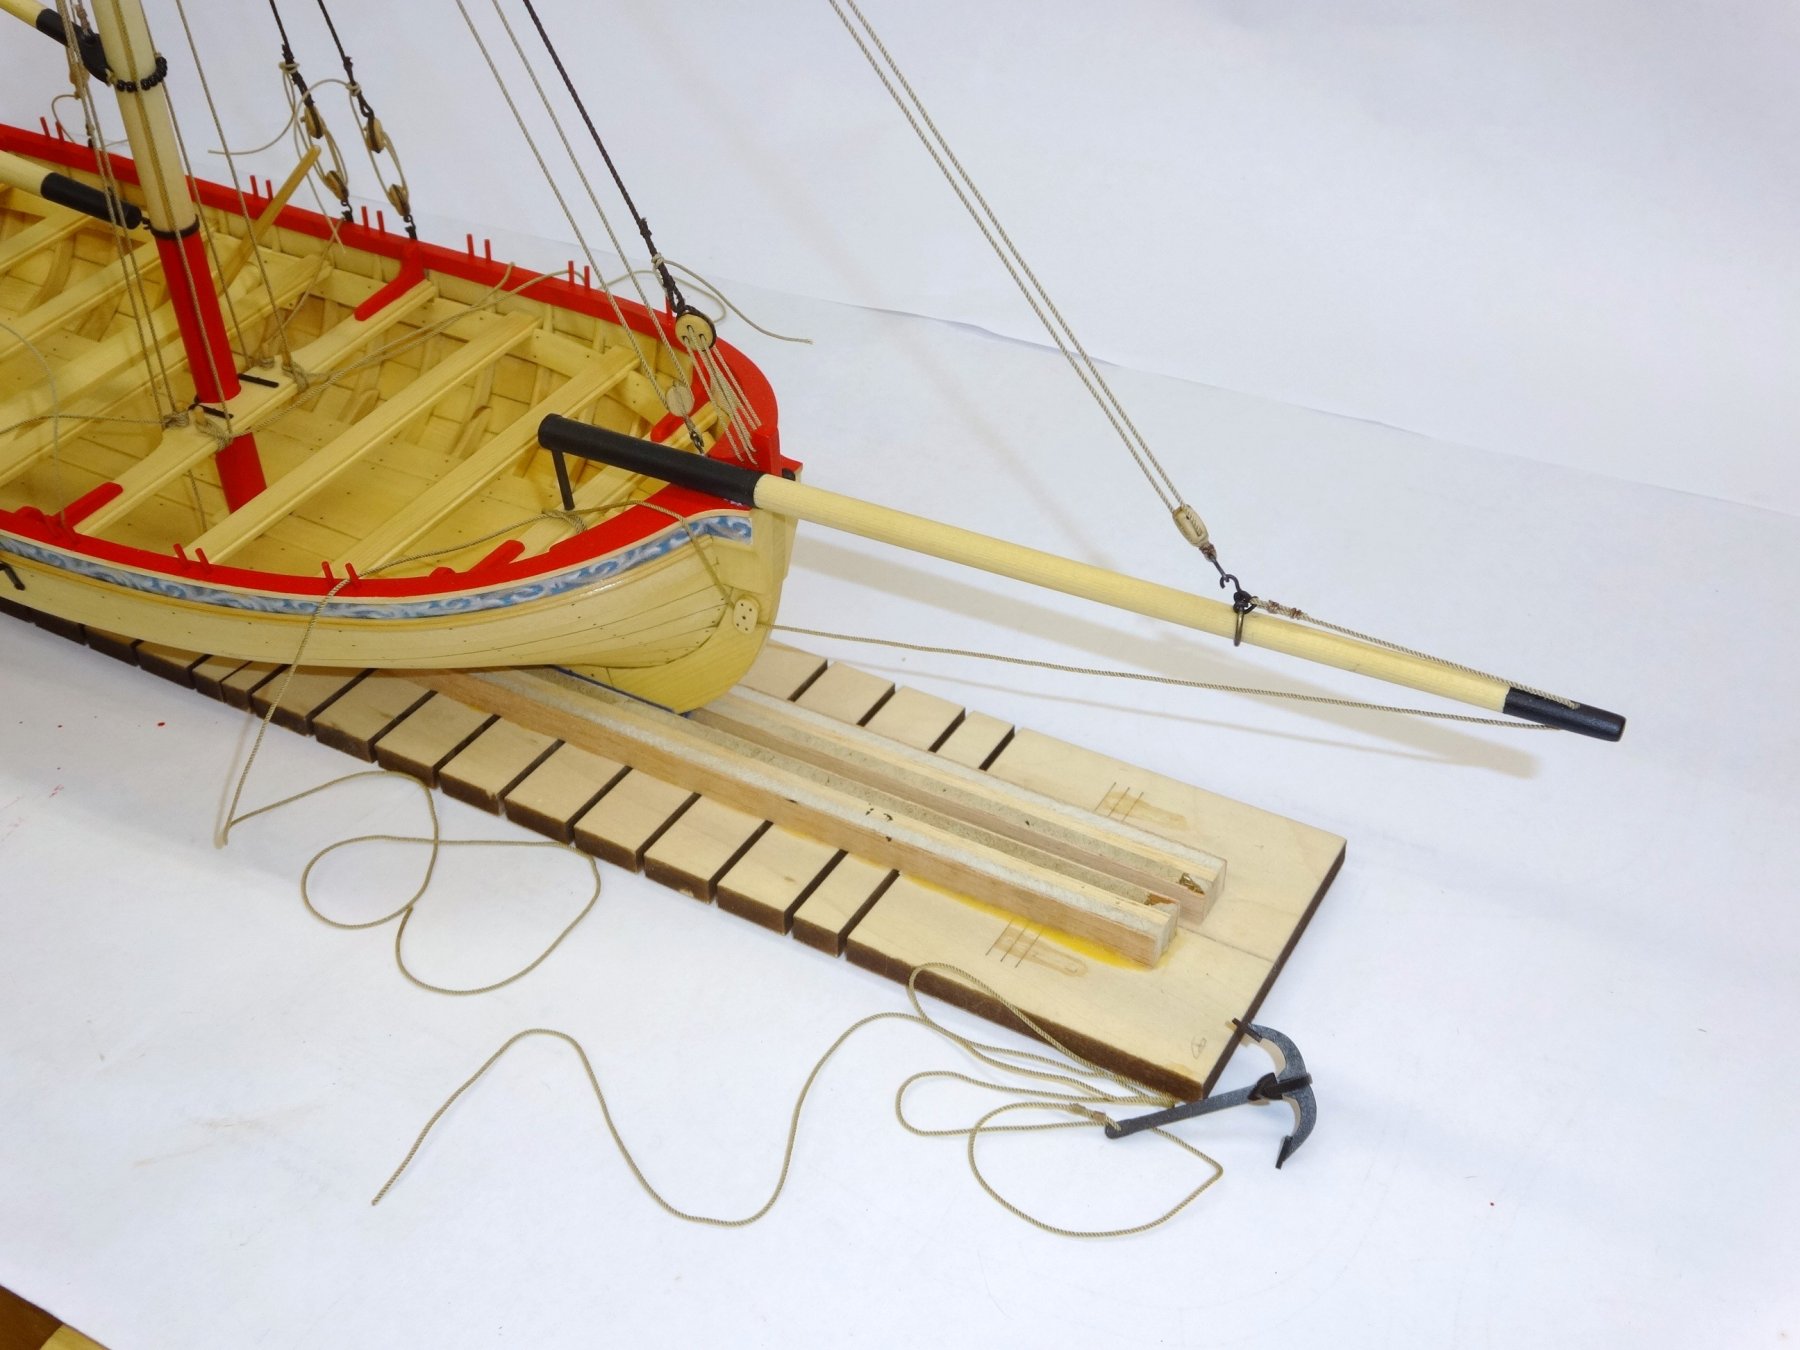
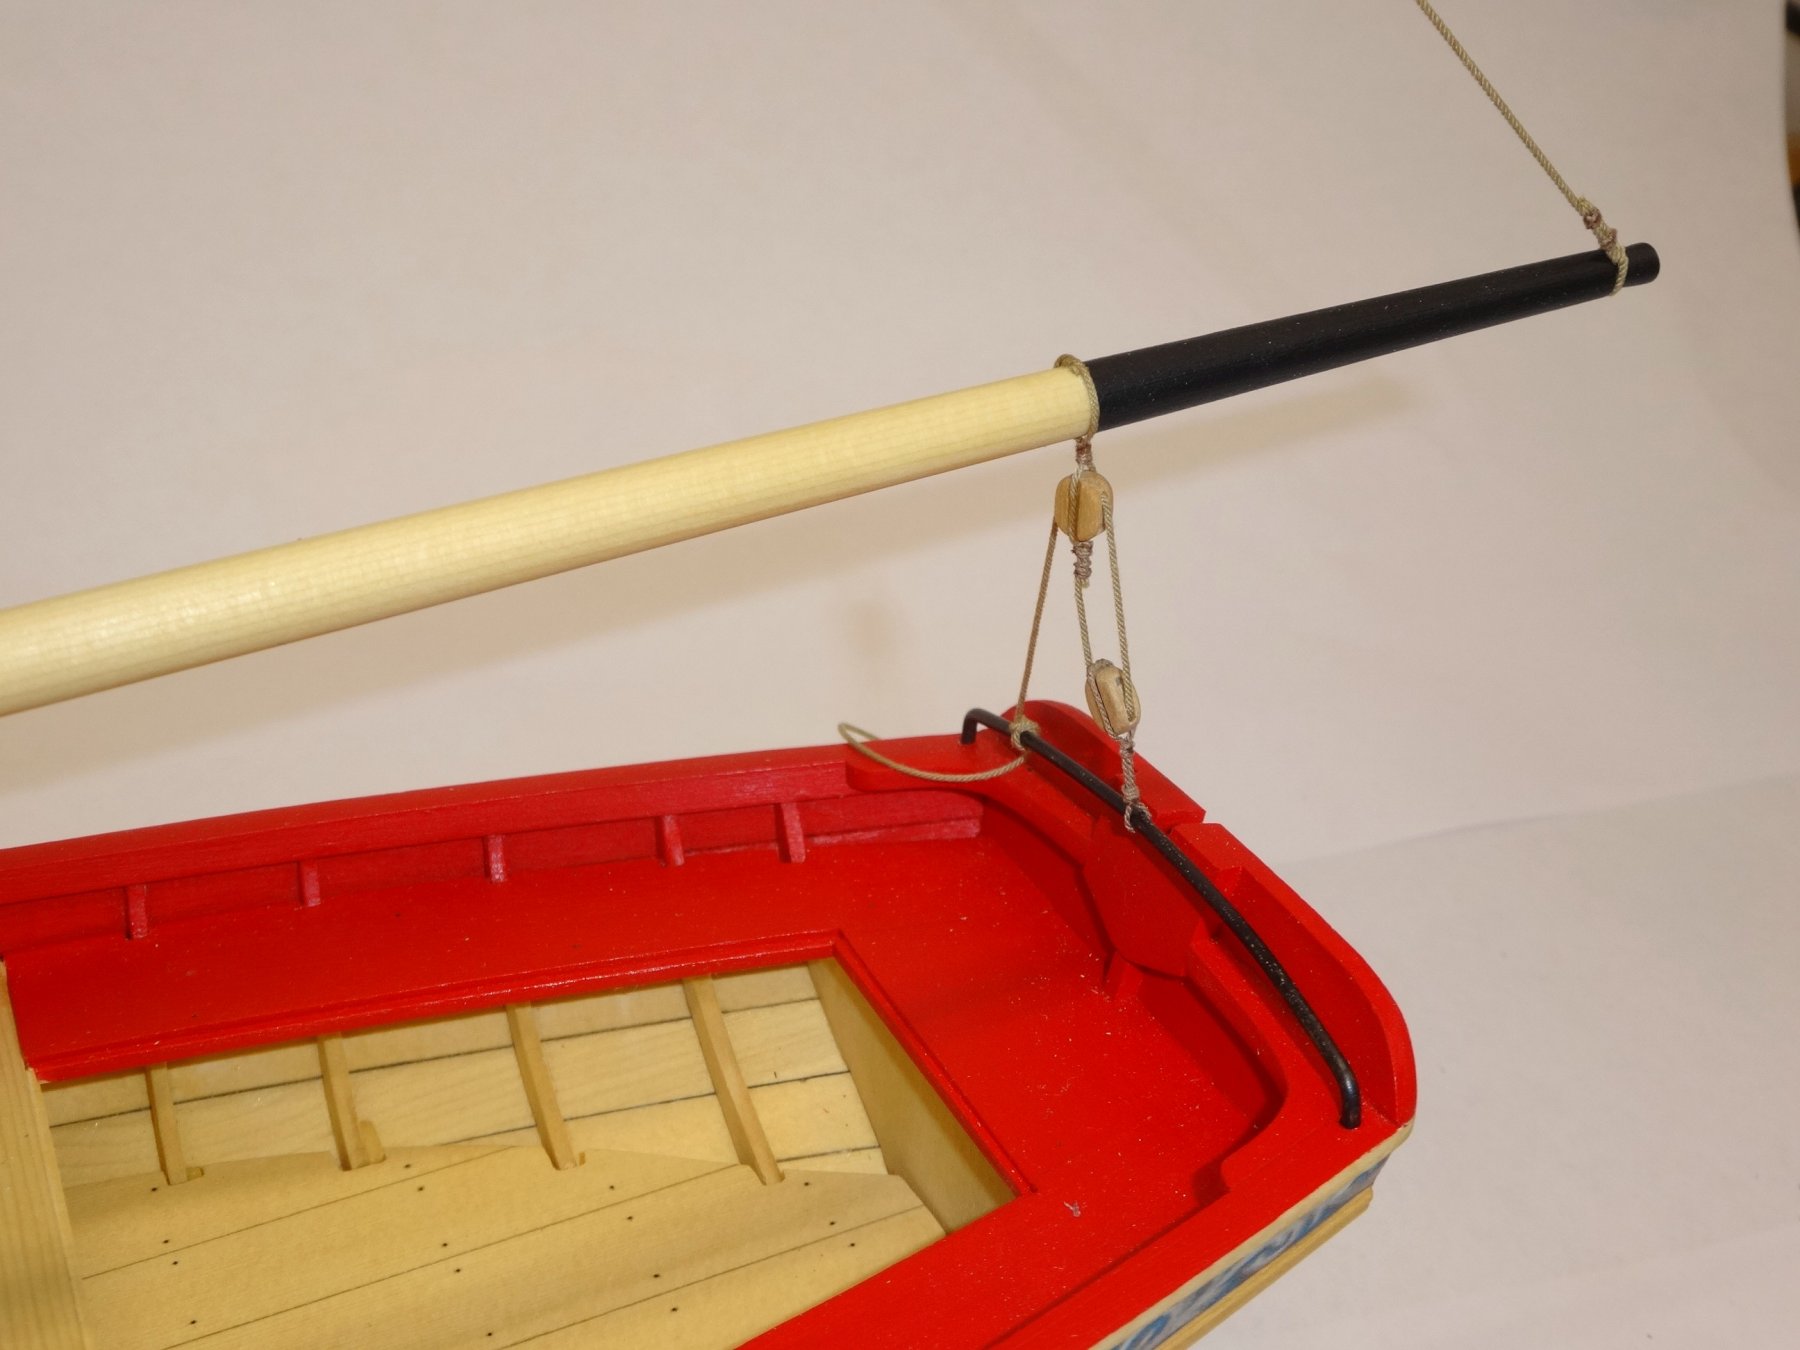
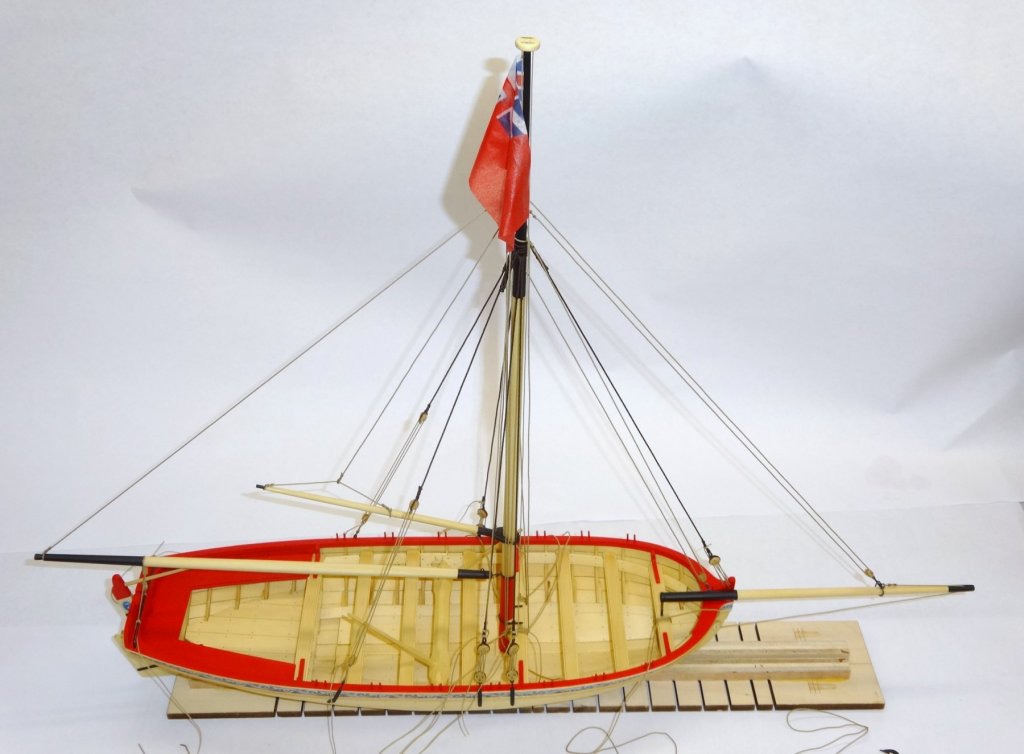
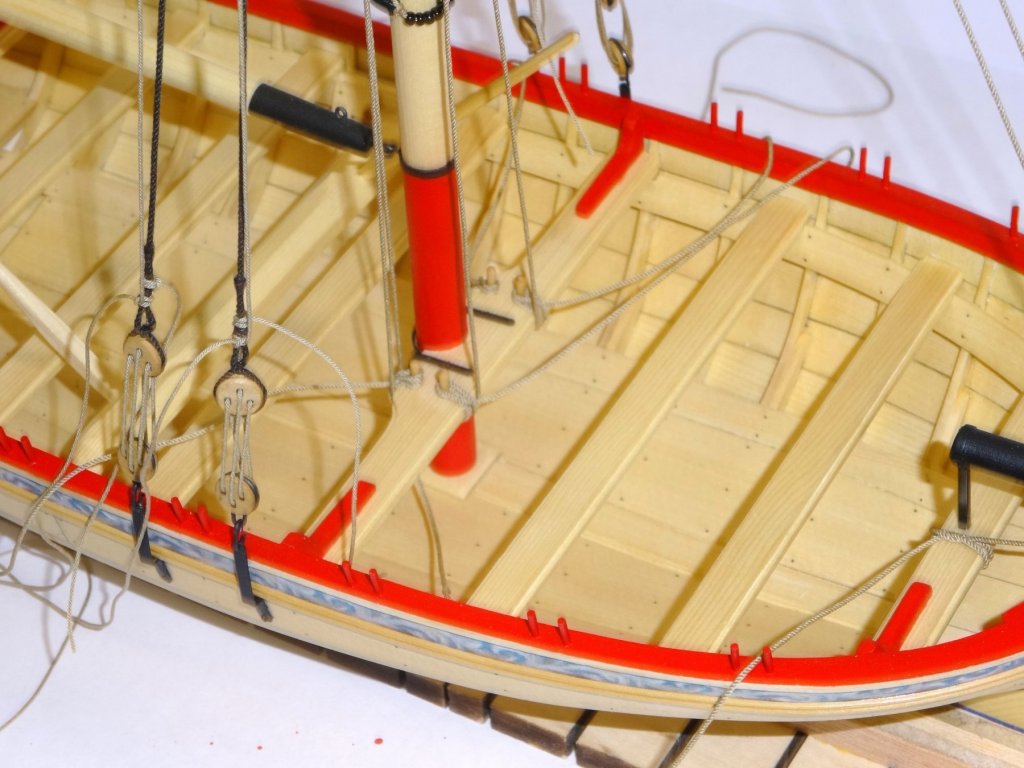
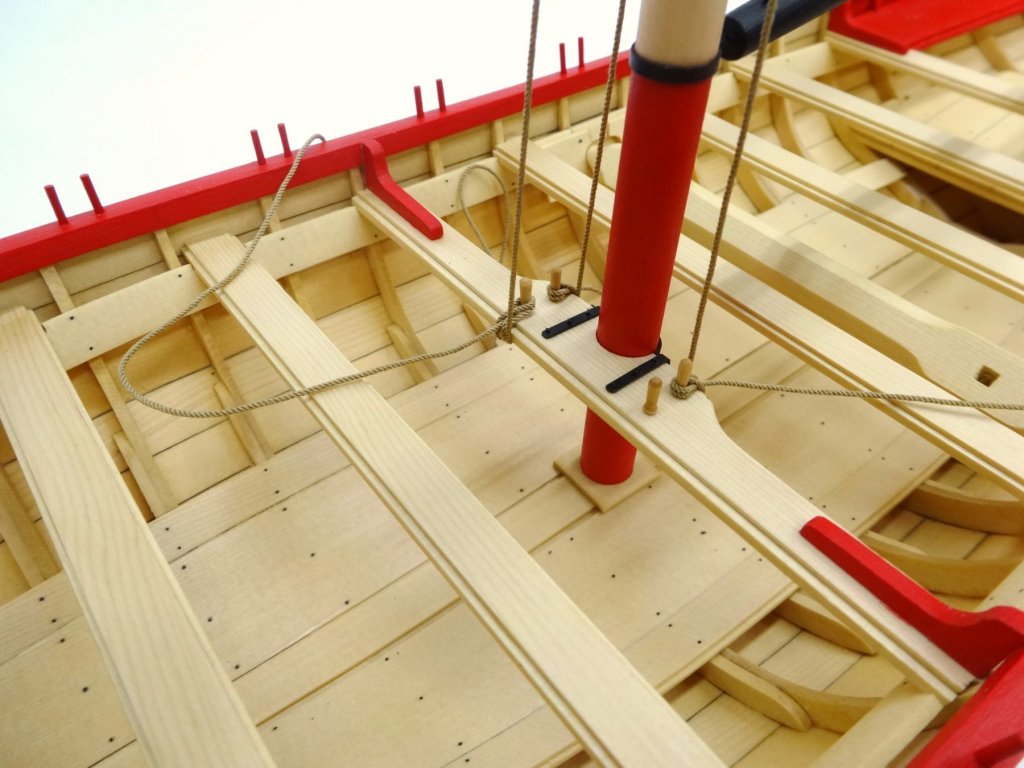
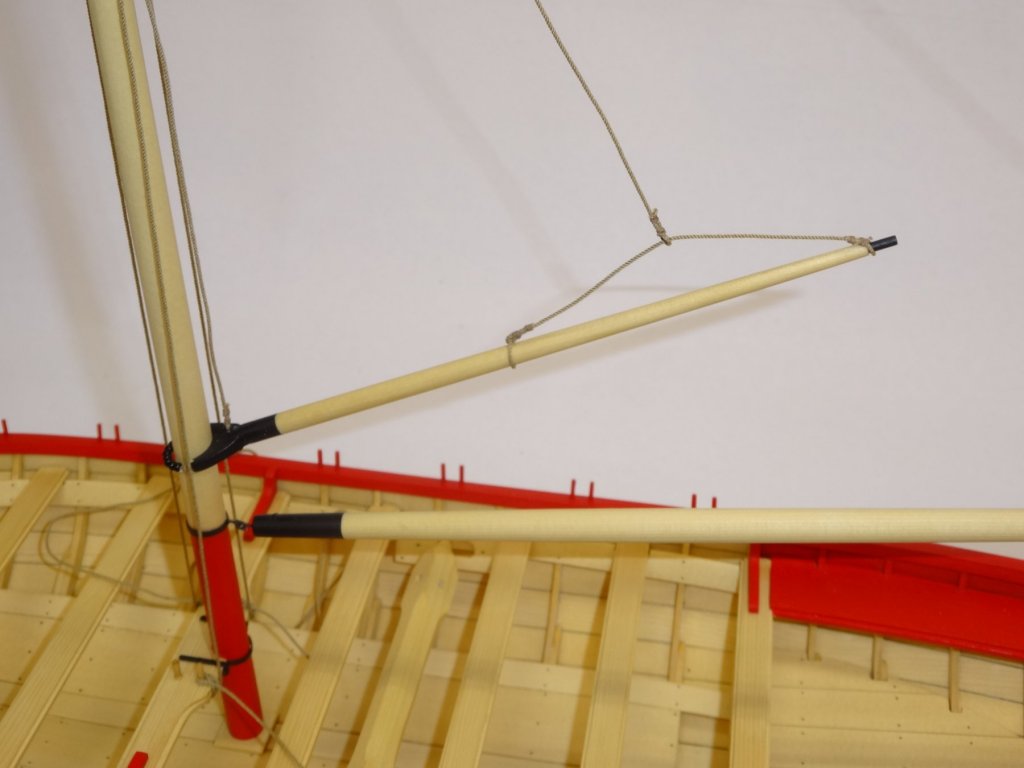
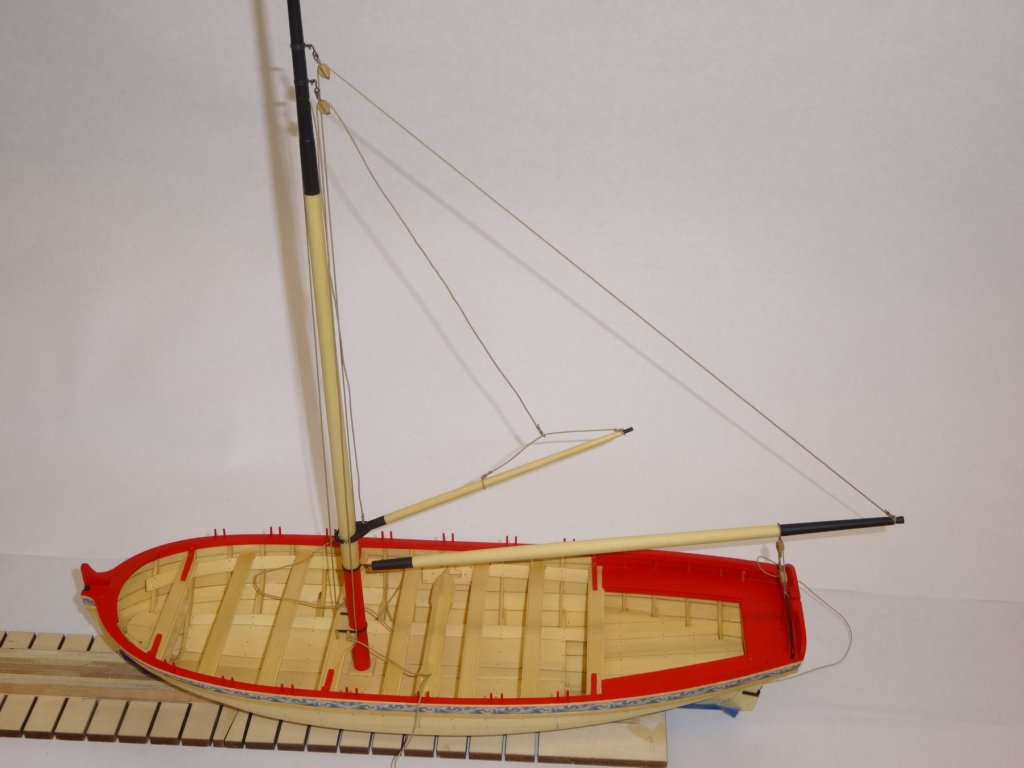
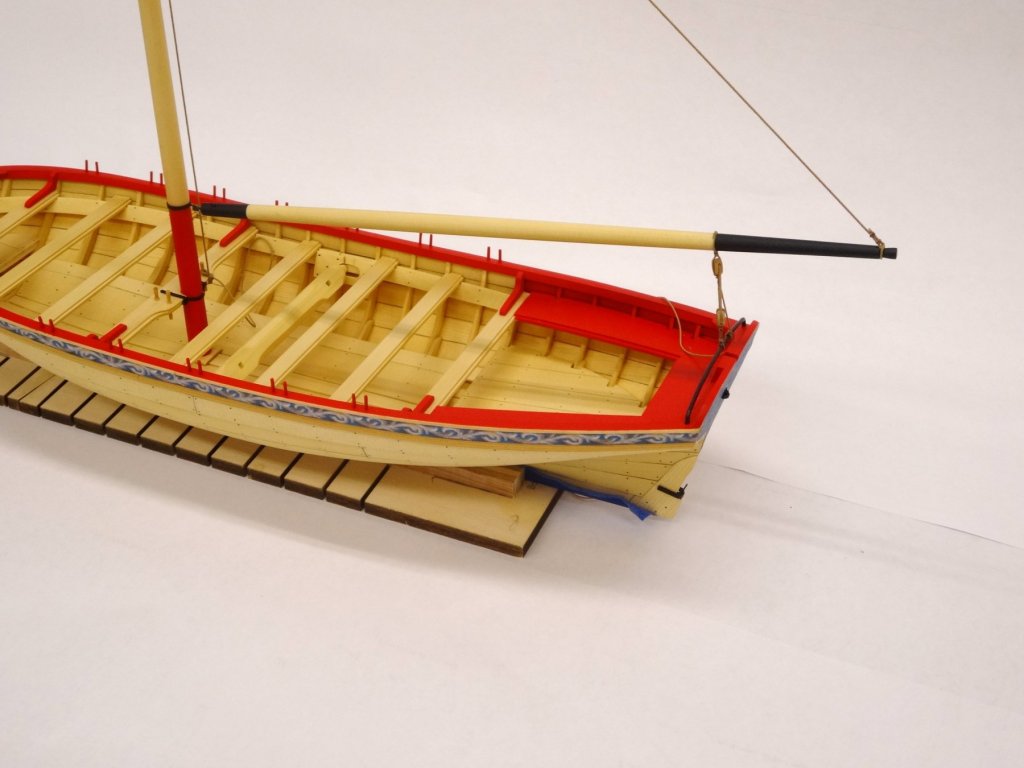
Here is the gaff with the lines attached. And the gaff in position. The lines are in place but will have to be either loosened or tightened as the rigging progresses.


- 152 replies
-
- 19
-
-
- medway longboat
- Syren Ship Model Company
- (and 1 more)
-
Thanks Steve, now get back in the shop! Thanks BE much appreciated. Also thanks for all the likes!
-
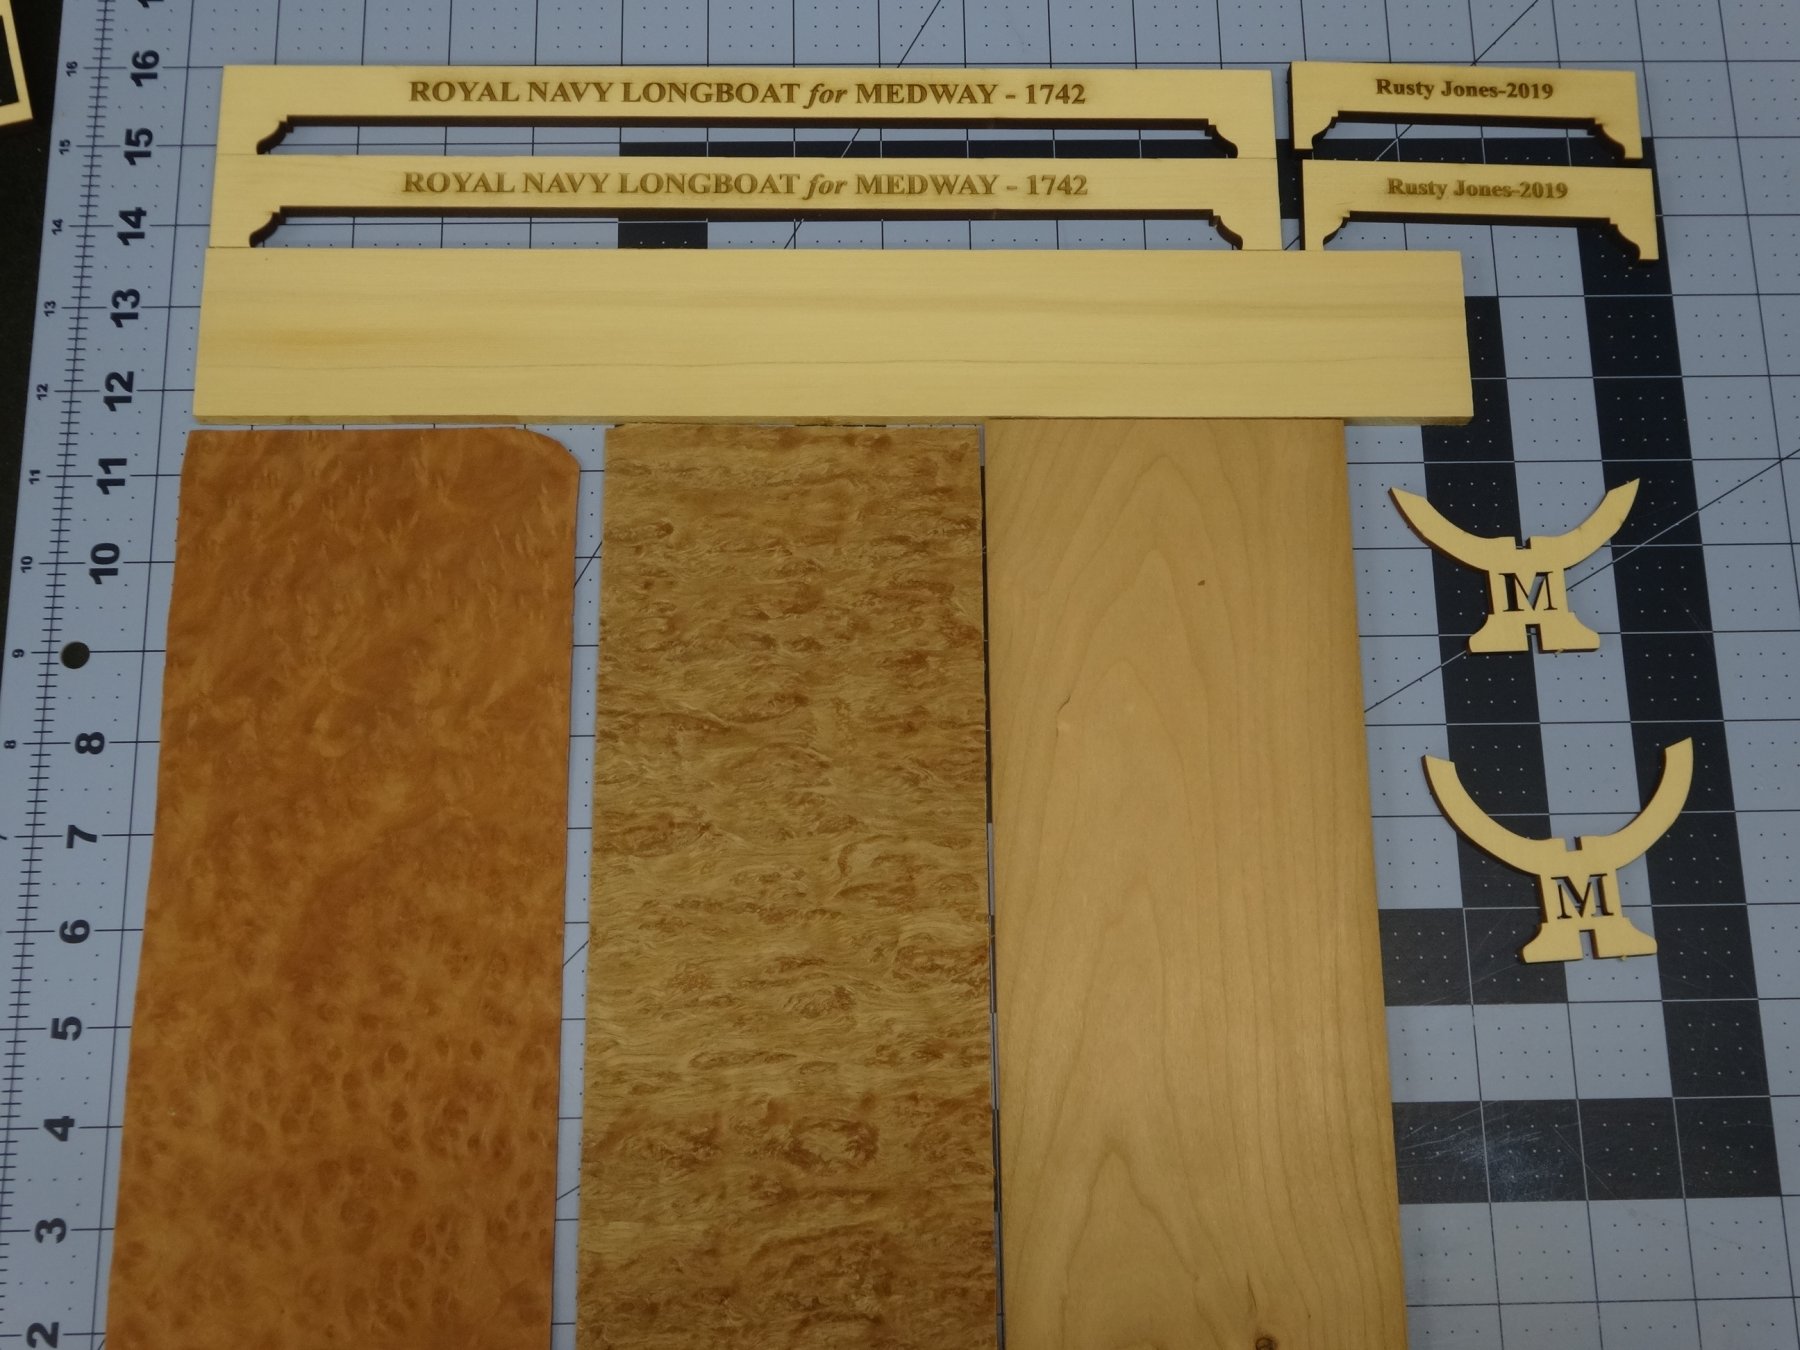
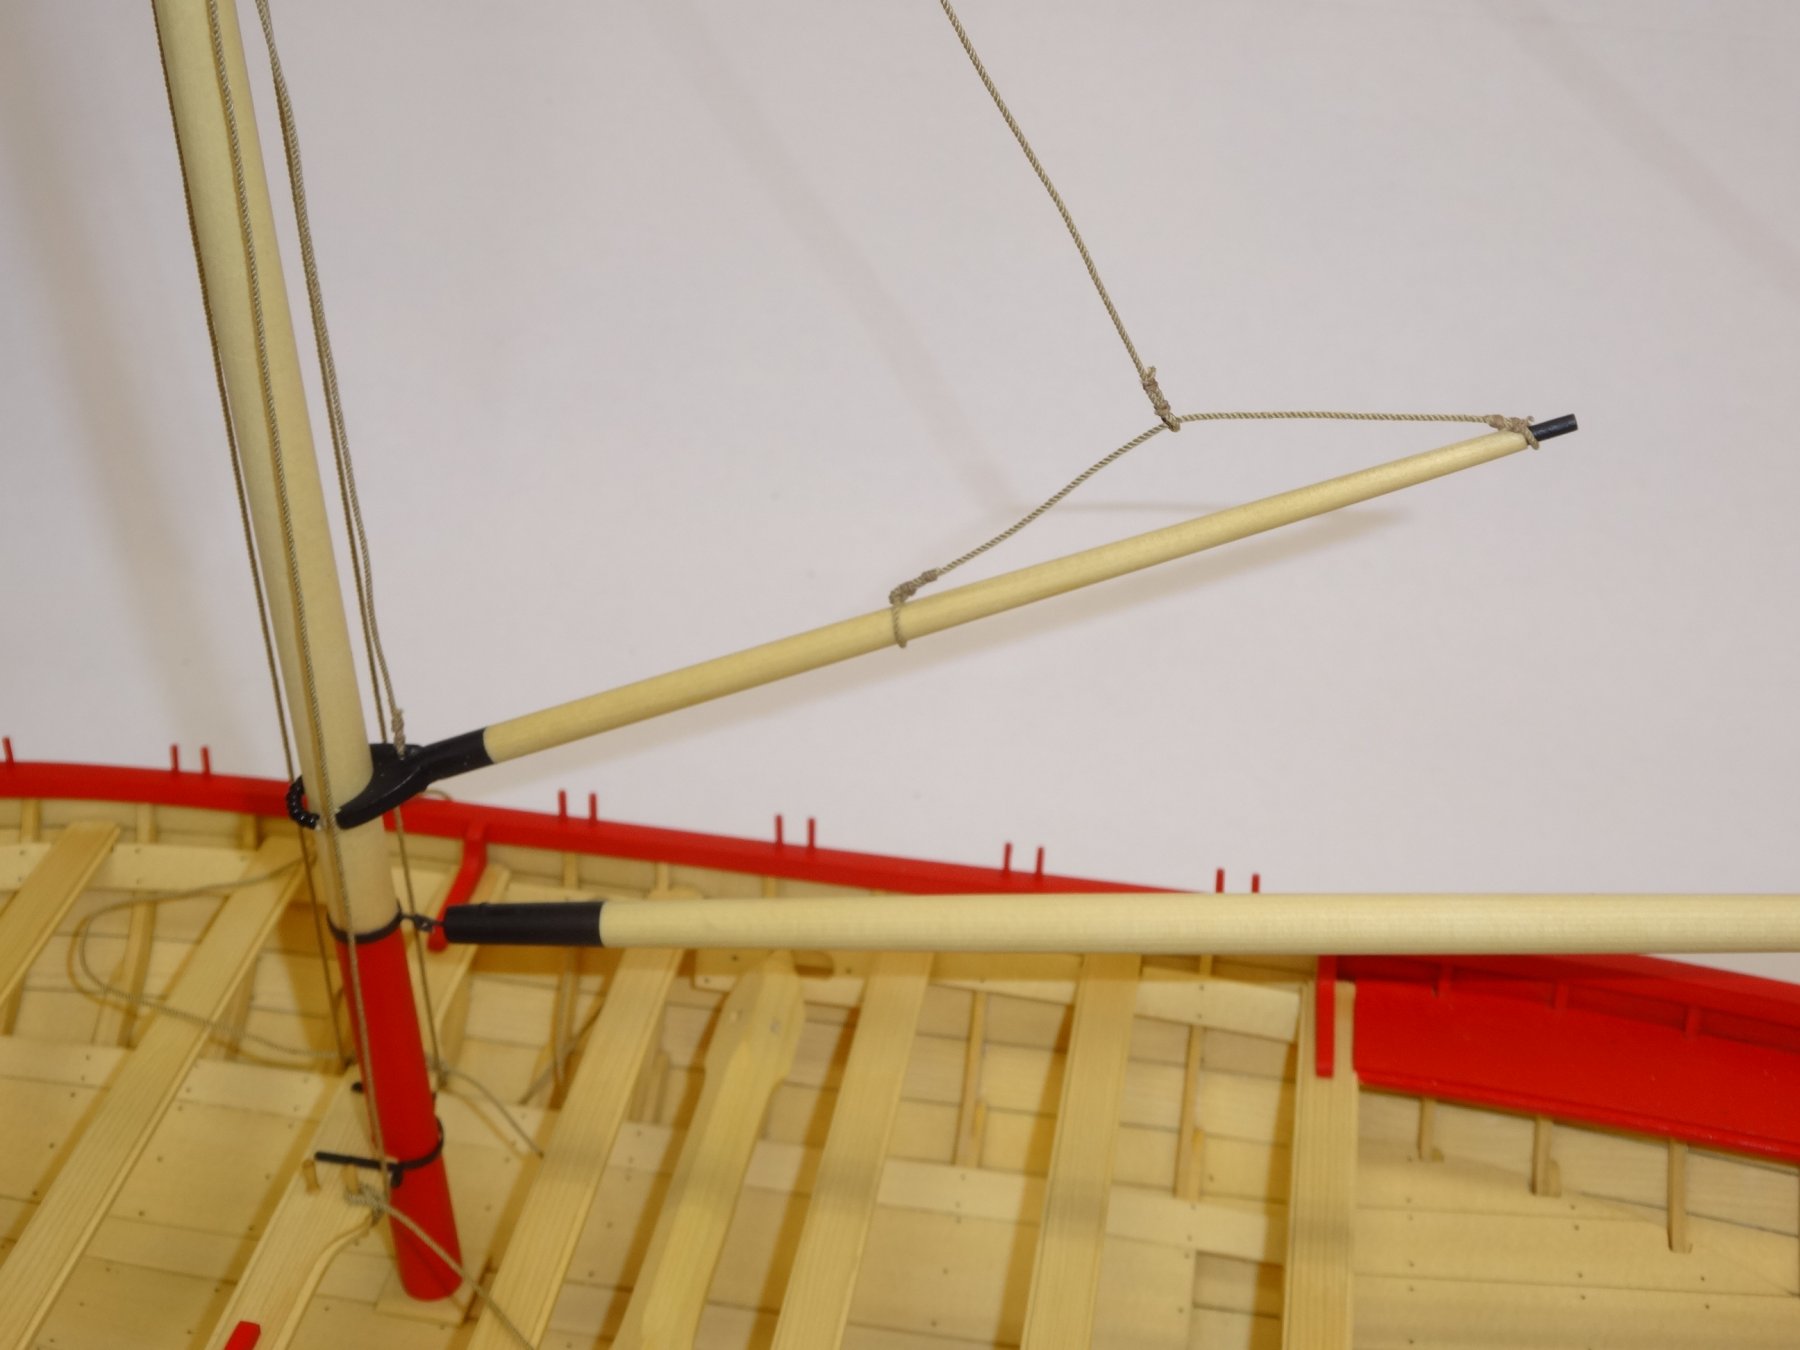
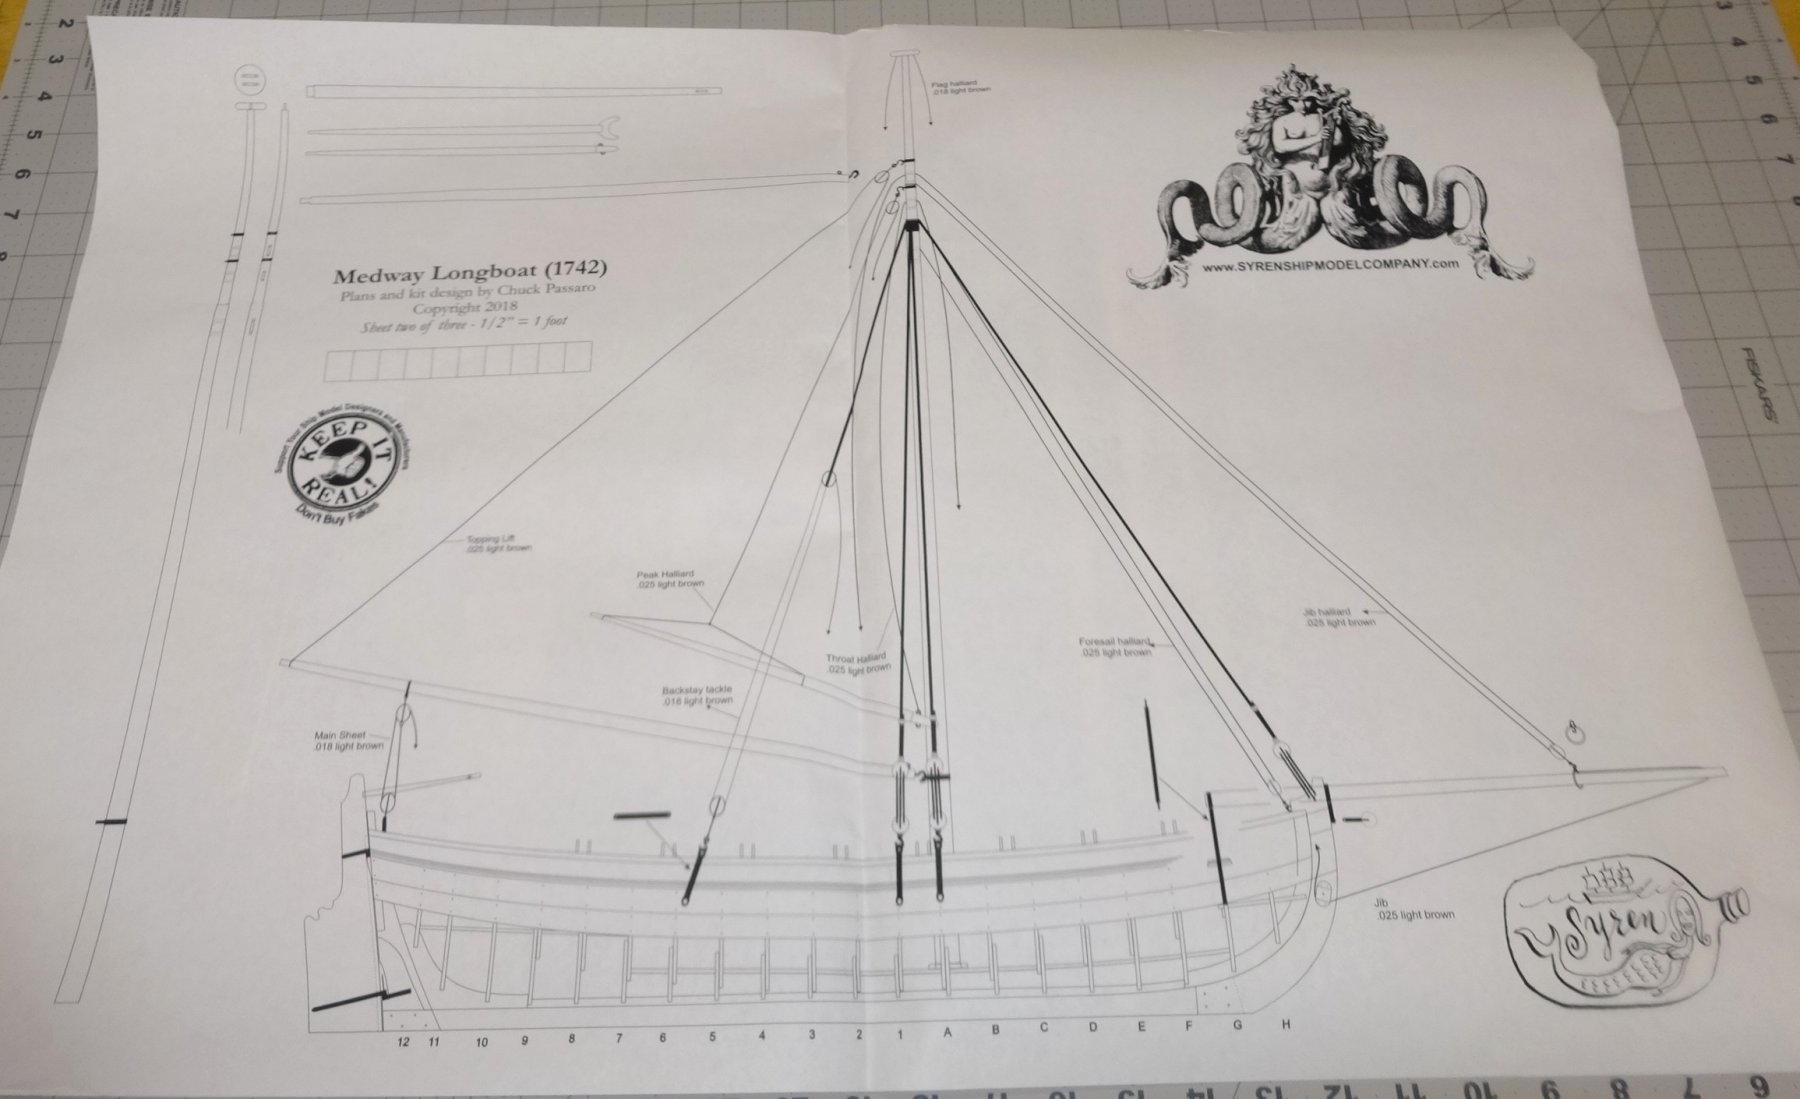
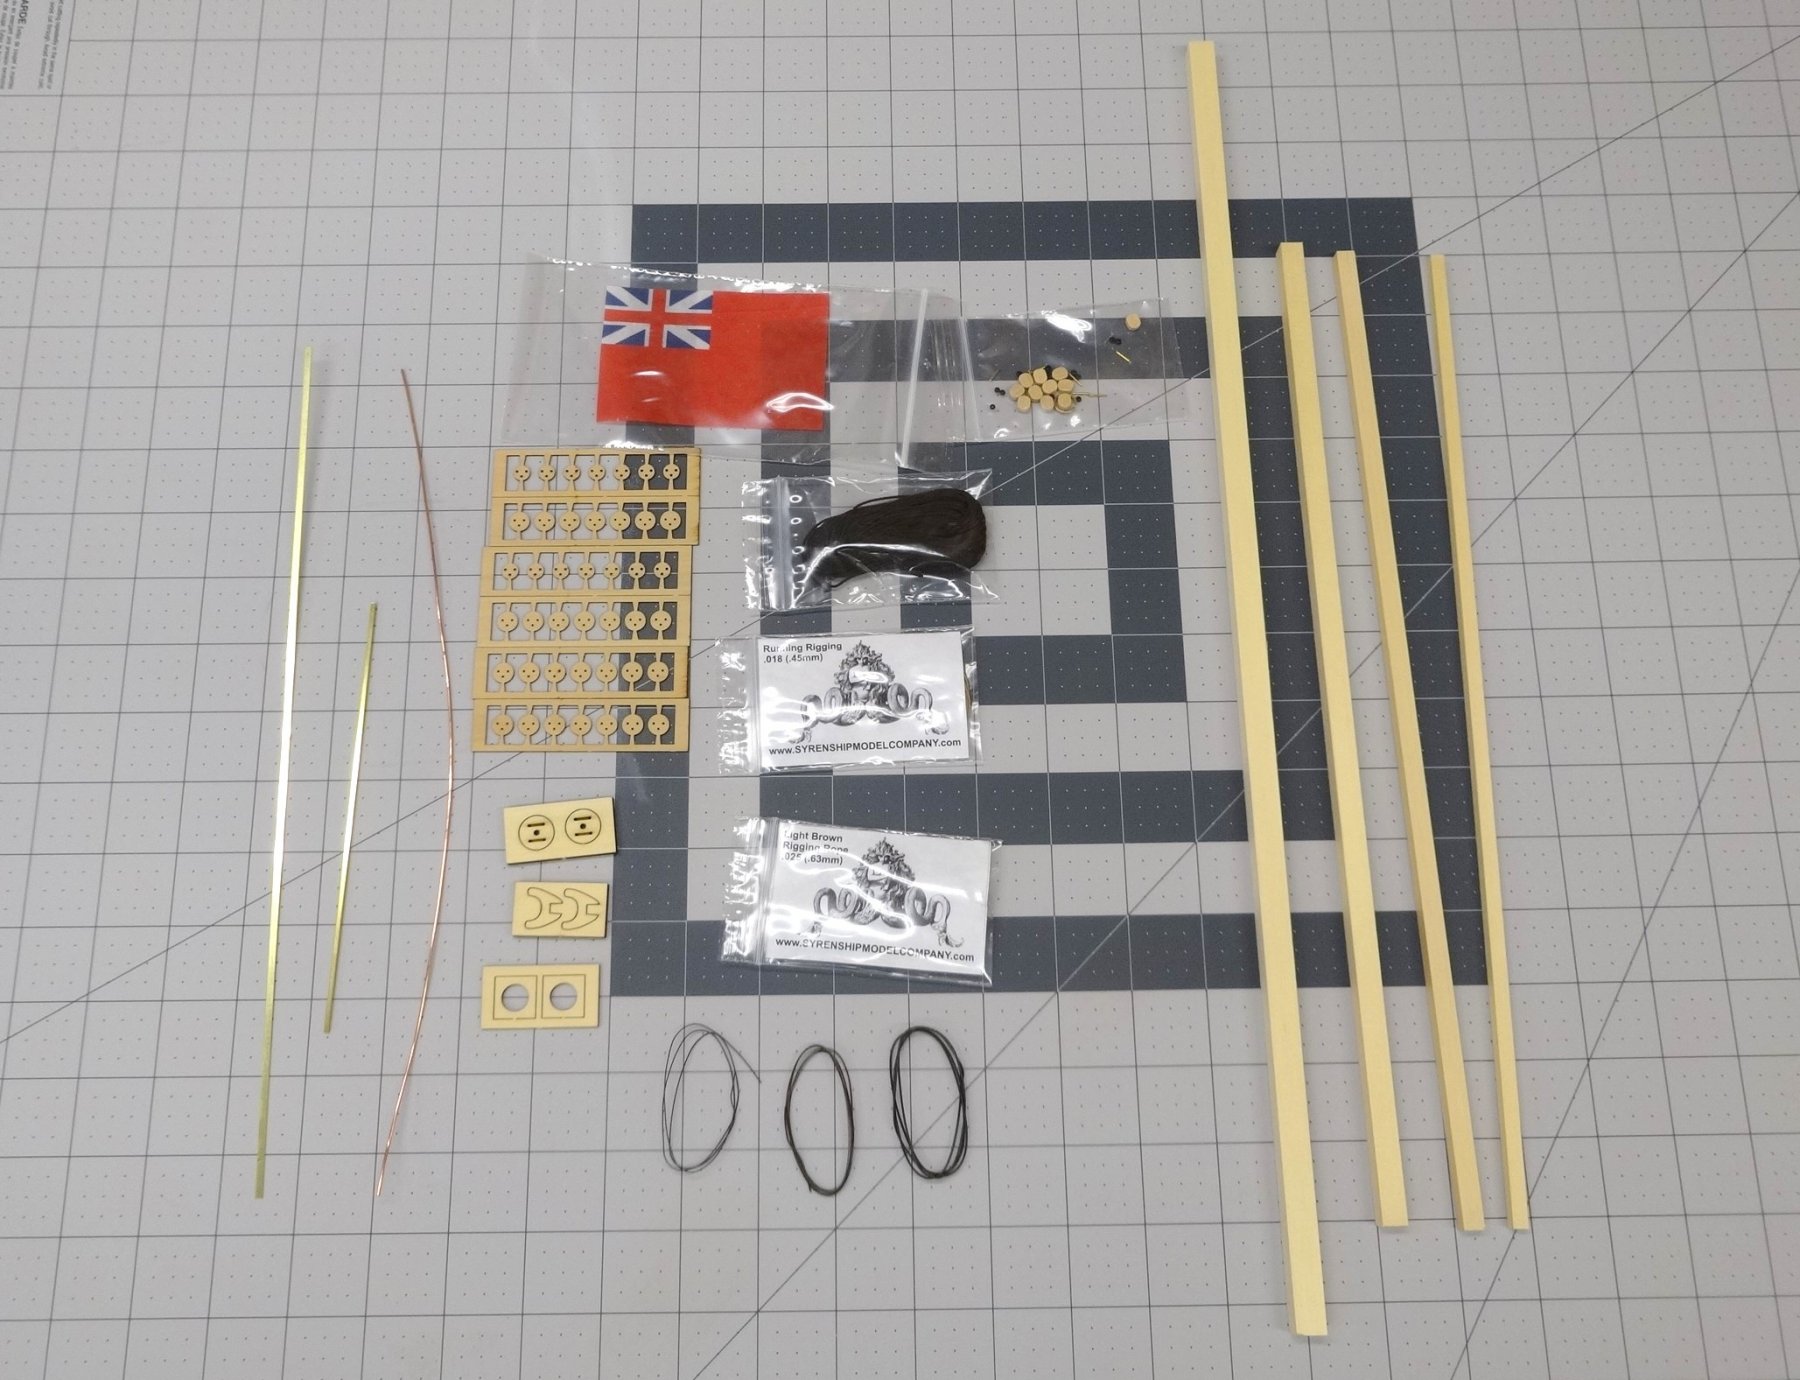
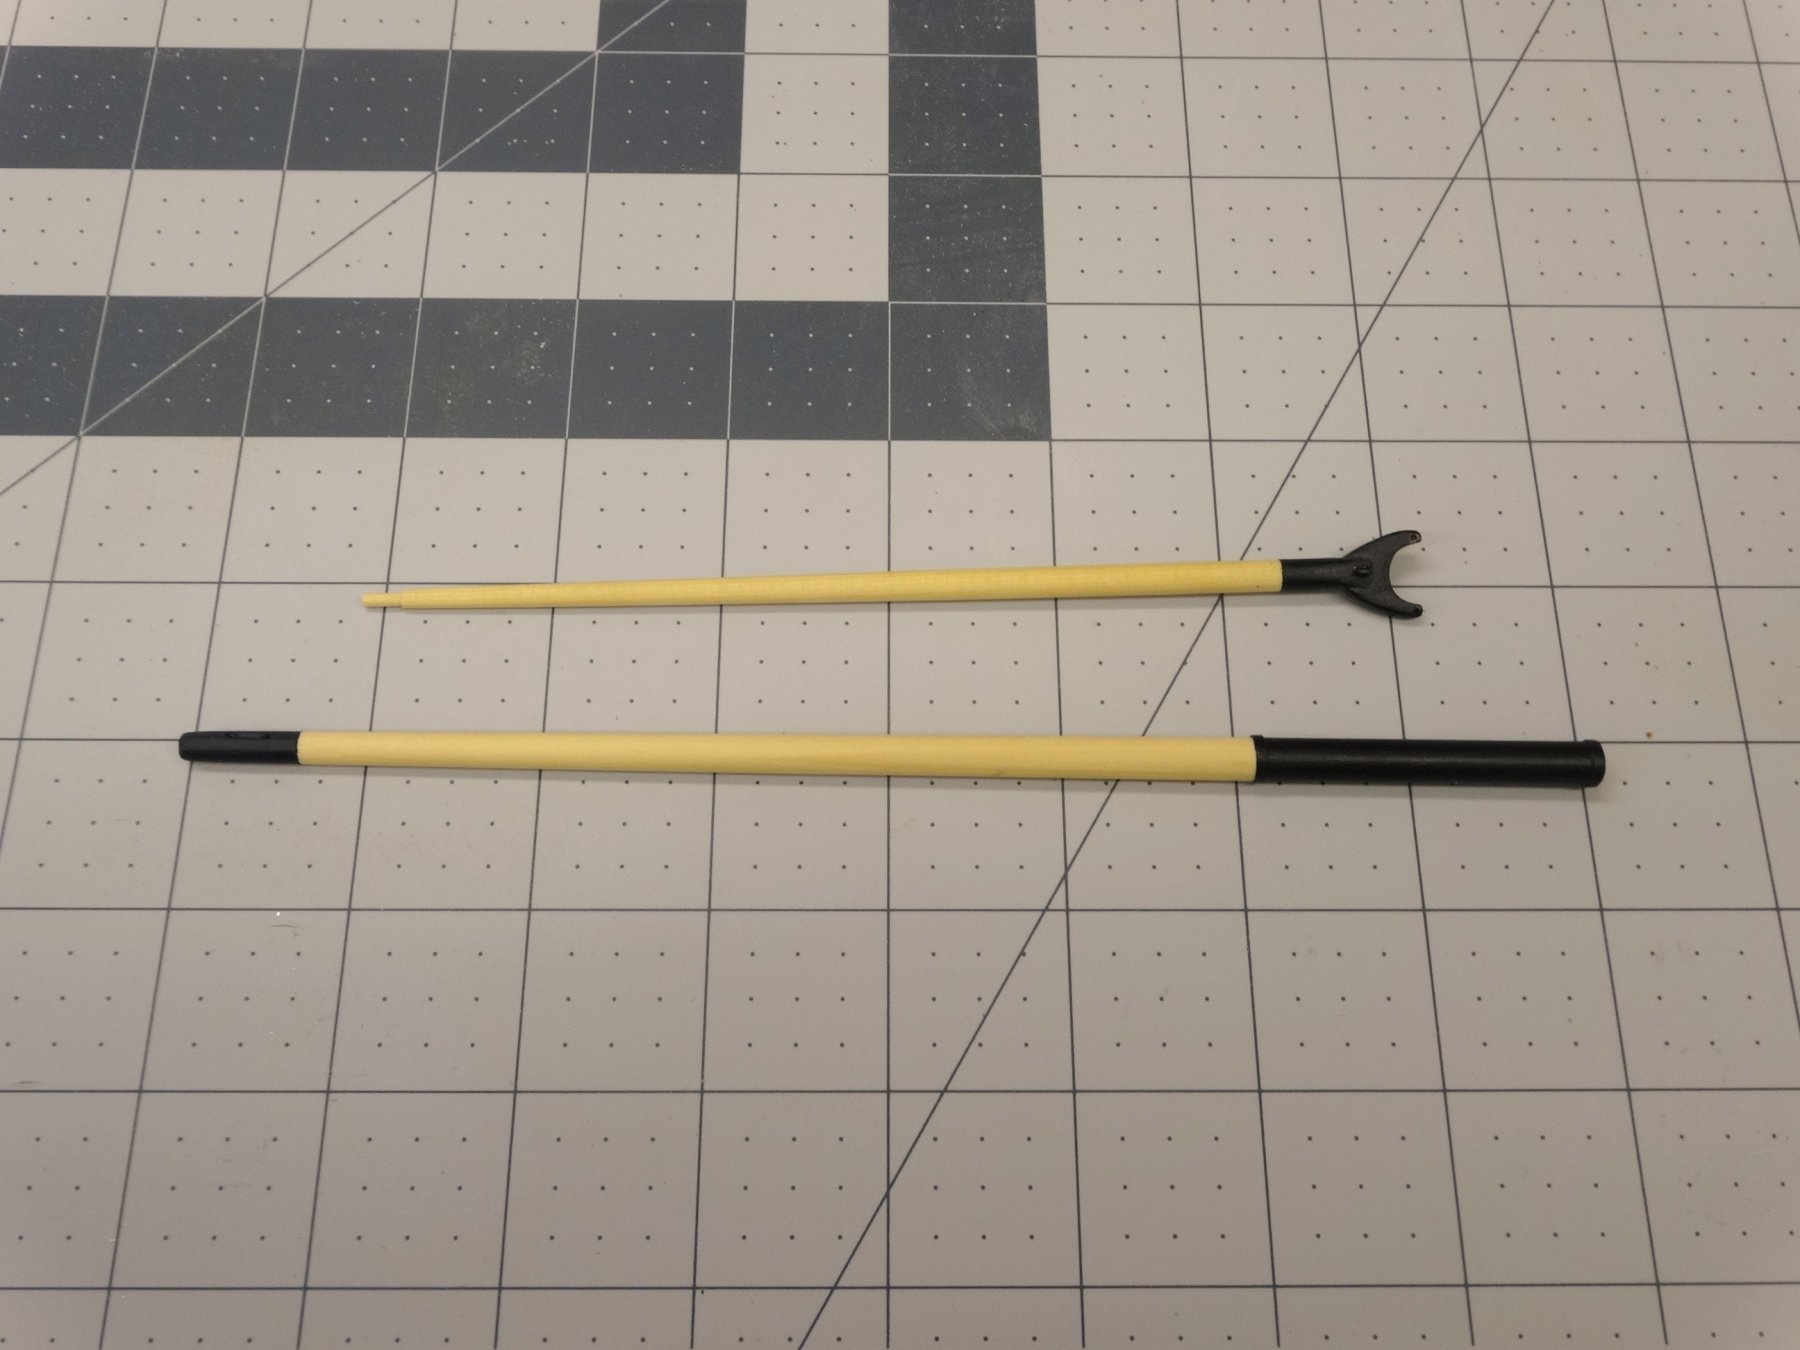
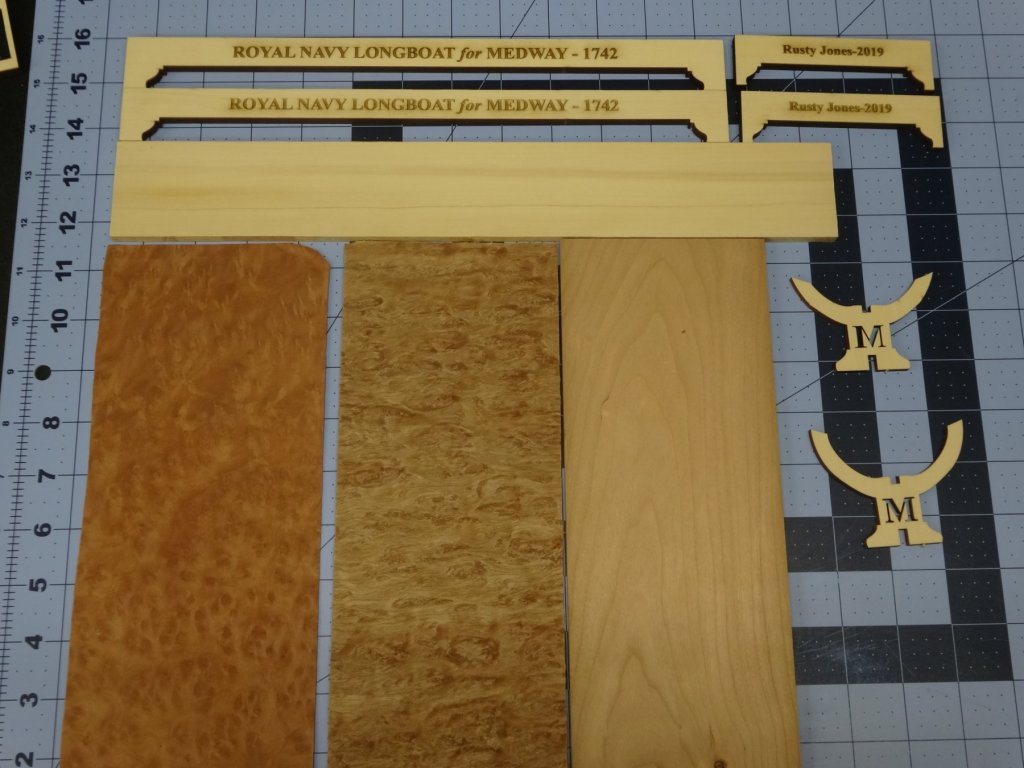
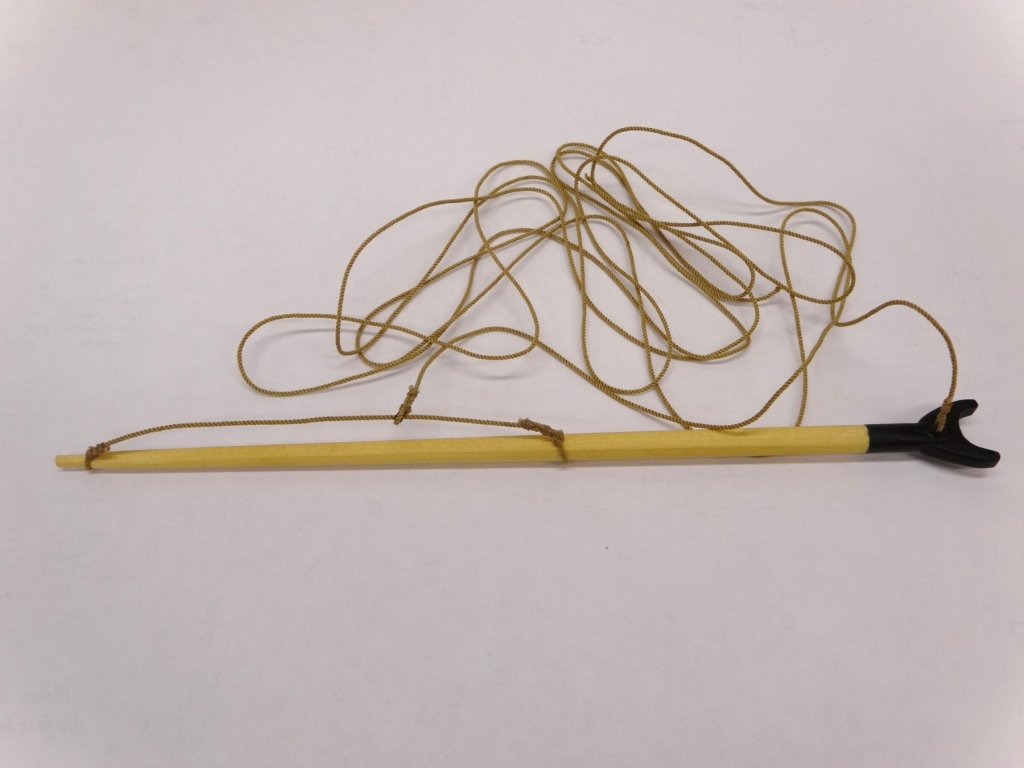
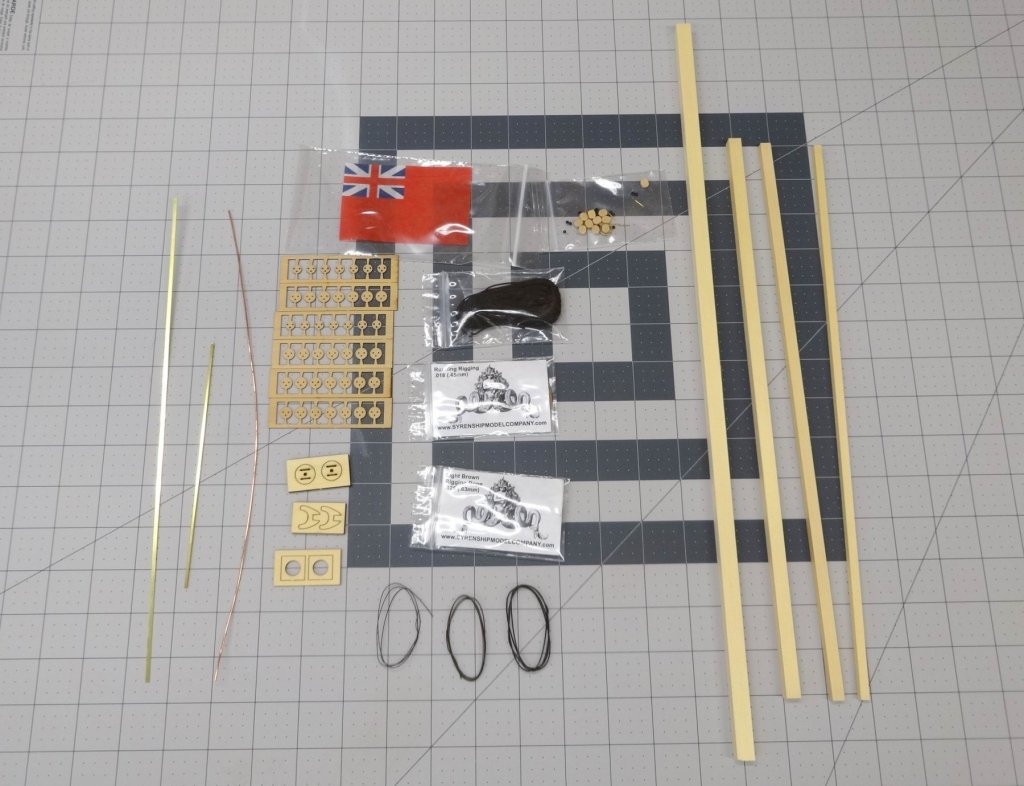
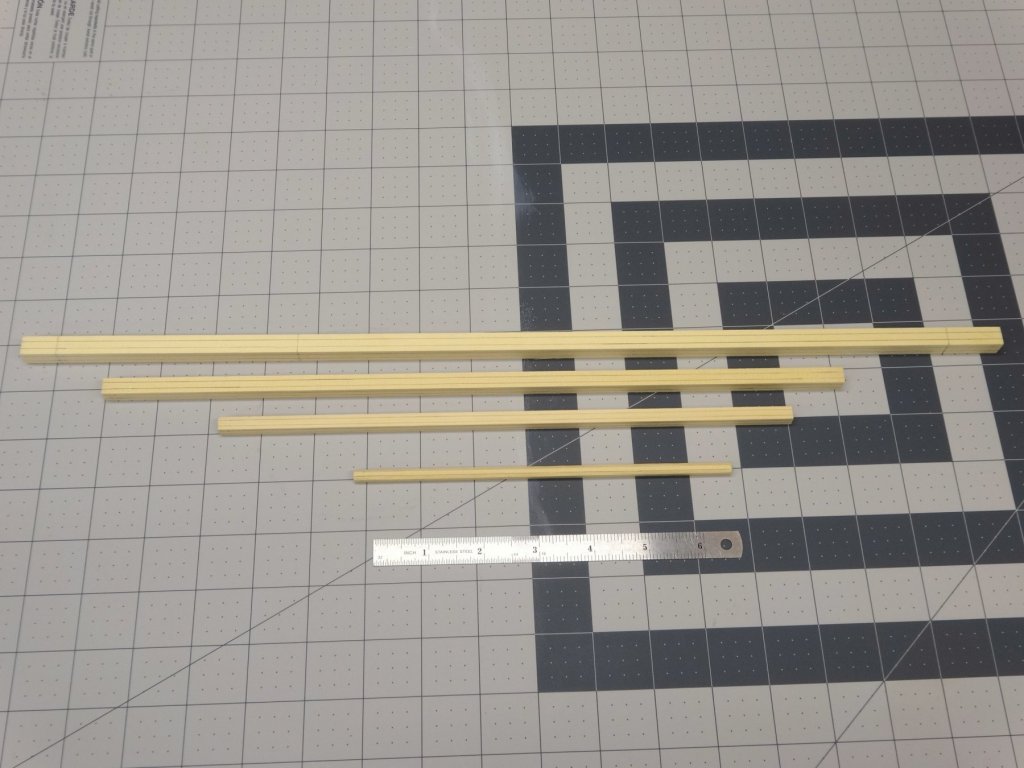
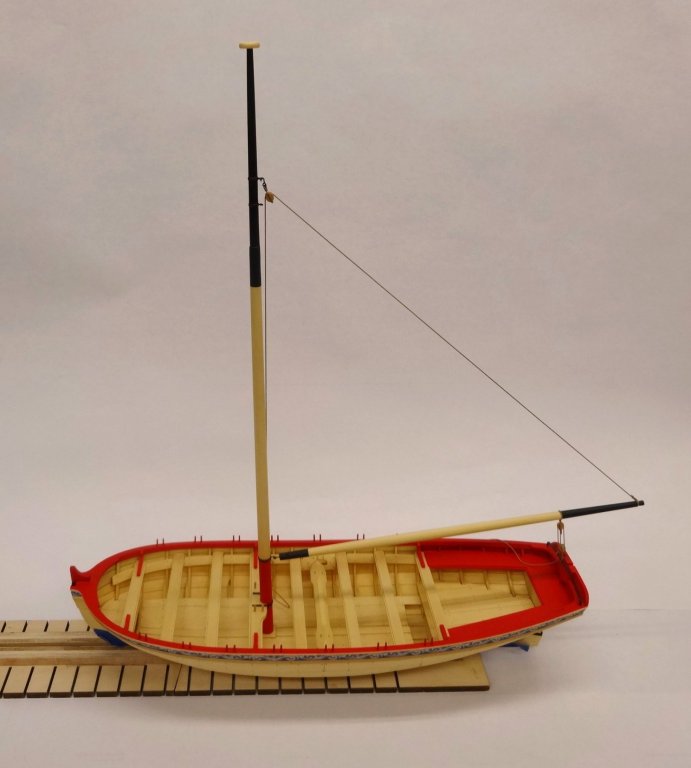
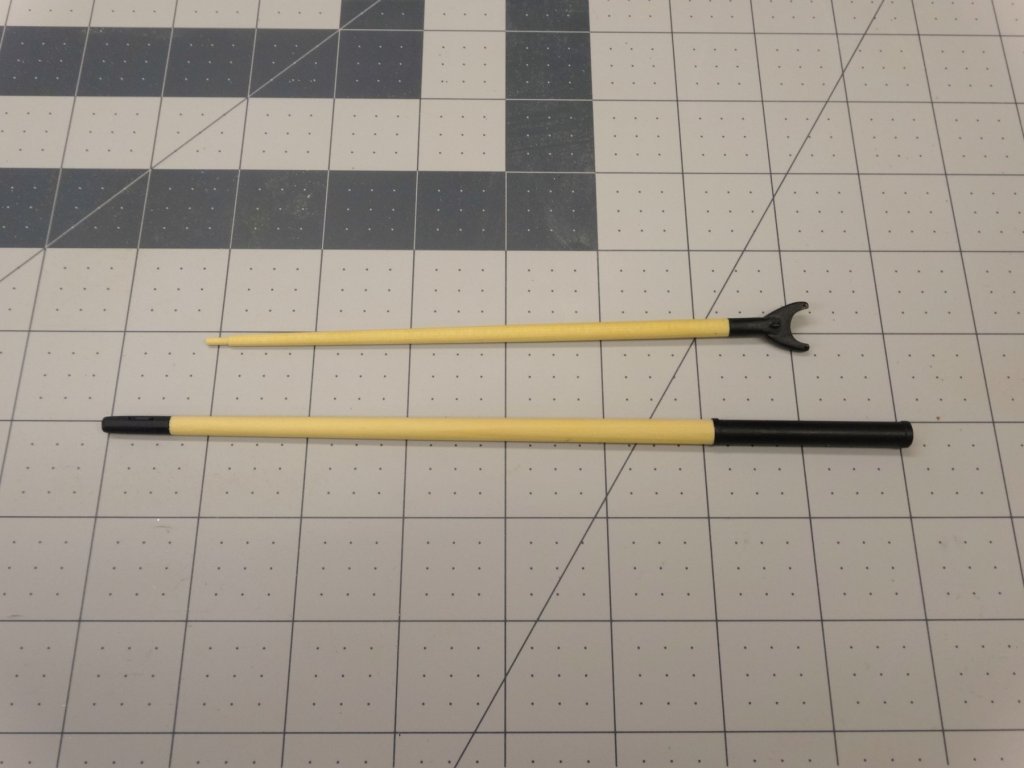
Hi All, The masting and rigging kit arrived and I've finally found some shoptime so the adventure continues. The kit contained wood for the mast, gaff, bowsprit and boom. It also contains the dead eye kits, 1/4" blocks, wire, brass, pins, flag, plan sheet, rigging line etc. to complete the model. Here the wood has been lined off to start rounding them off. The gaff has the sides shaved off with a #11 x-acto. The bowsprite and gaff completed. And I forgot to take pictures of the mast and boom completed but here they are rigged in place. The hooks and eye bolts were made from supplied 22 ga. wire. Thanks for stopping by!

- 152 replies
-
- 20
-
-
- medway longboat
- Syren Ship Model Company
- (and 1 more)
-
Ken, panic is acceptable. It turned out very nice.
-
Boy you have been busy. Your model looks outstanding. I love the additional touches.
-
Yes Ben, very nice!
-
Hi Chuck. Order placed! As I have a lot of your rope on hand I'm good. Otherwise I would have been one of those who use too much rope.
-
Thanks Ken. I'd love to stop in sometime. The only time I see your club is @ the Connecticut show in April.
- 152 replies
-
- 1
-
-
- medway longboat
- Syren Ship Model Company
- (and 1 more)