-
Posts
2,535 -
Joined
-
Last visited
Content Type
Profiles
Forums
Gallery
Events
Everything posted by Rustyj
-
Got It. Adjustments continue!
- 642 replies
-
- winchelsea
- Syren Ship Model Company
-
(and 1 more)
Tagged with:
-
The brain cramp that Mike thankfully pointed out has been corrected. Sorry to say it won't be the last one either. I've added the hance pieces on both sides as well as the strip on the quarter deck. On to creating the bollard timbers and thinning the inboard side of the hull at the stem. Thanks for stropping by!
- 642 replies
-
- winchelsea
- Syren Ship Model Company
-
(and 1 more)
Tagged with:
-
Thanks Mike I'll rip it out and redo.
- 642 replies
-
- winchelsea
- Syren Ship Model Company
-
(and 1 more)
Tagged with:
-
The stern framing is now completed. Everything has been rough sanded. More fairing will be needed once I determine the run of the planking. I the last picture you can see the nice curve of the stern. Next is placing the hance pieces and the piece of strip wood along the top of the quarter deck.
- 642 replies
-
- winchelsea
- Syren Ship Model Company
-
(and 1 more)
Tagged with:
-
That really looks great Mike!
- 607 replies
-
- winchelsea
- Syren Ship Model Company
-
(and 1 more)
Tagged with:
-
Nothing wrong with slow Jim. Looking good!
- 105 replies
-
- winchelsea
- Syren Ship Model Company
-
(and 1 more)
Tagged with:
-
I believe he's referring to applying a coat of wipe on poly or using a sanding sealer.
- 1,784 replies
-
- winchelsea
- Syren Ship Model Company
-
(and 1 more)
Tagged with:
-
Thanks Chuck, Your framing guide and window template really made it come together well. Also I forgot to add one picture to the original post which I just added. Oops!
- 642 replies
-
- winchelsea
- Syren Ship Model Company
-
(and 1 more)
Tagged with:
-
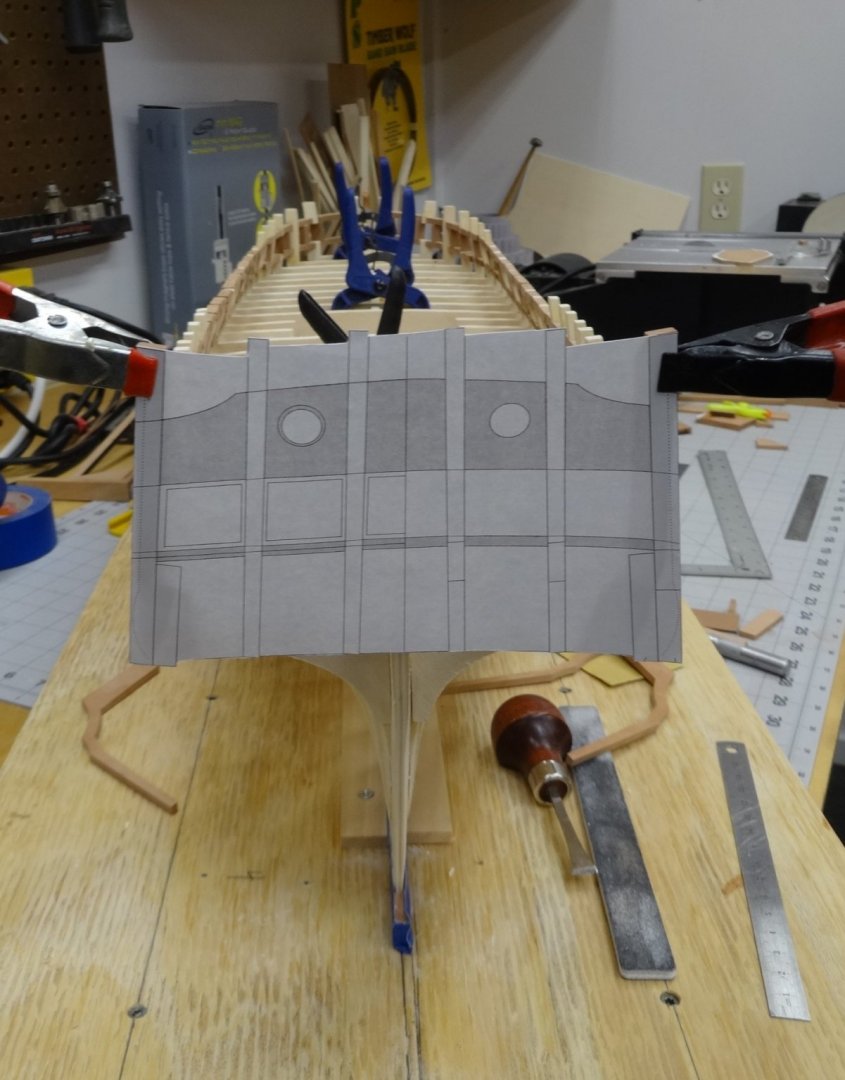
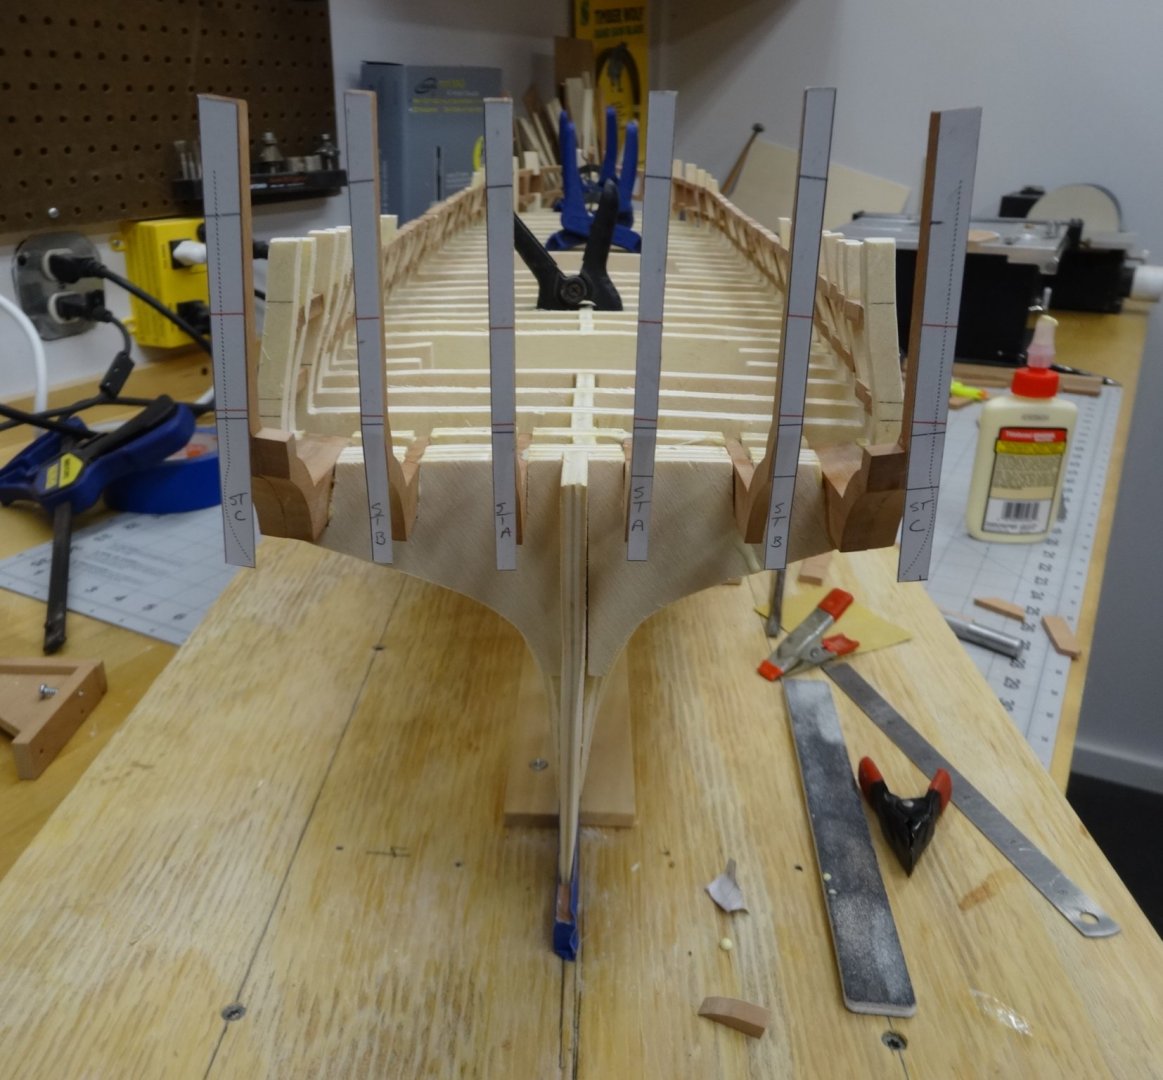
Here's where I am at right now. The stern frames have been completed and I started installing them. First I placed the outer most frames , parts ST-C and ST-D, and then placed the stern framing plan over them to confirm the correct width. Following checks marks and using the spacers here is the assembled stern with some light sanding. A lot more sanding is needed to clean it all up. Oh I've also finished the preliminary sanding of the port side port framing. Time to ice down my shoulder.
- 642 replies
-
- winchelsea
- Syren Ship Model Company
-
(and 1 more)
Tagged with:
-
Thank you Matthias. Very much appreciated.
- 642 replies
-
- winchelsea
- Syren Ship Model Company
-
(and 1 more)
Tagged with:
-
Thanks Matt. Also thanks for all the likes!
- 642 replies
-
- winchelsea
- Syren Ship Model Company
-
(and 1 more)
Tagged with:
-
Thanks Chuck, I started dry fitting last night and notice the curve. Looking at the picture and the optical illusion had me scratching my head. Won't be the last time either.
- 1,784 replies
-
- winchelsea
- Syren Ship Model Company
-
(and 1 more)
Tagged with:
-
She's looking really good. One question. The stern looks flat in the photo. Is there a subtle curve from the center to port and starboard or is it flat? Thanks
- 1,784 replies
-
- winchelsea
- Syren Ship Model Company
-
(and 1 more)
Tagged with:
-
I can't begin to put into words how nice that looks!
- 1,784 replies
-
- winchelsea
- Syren Ship Model Company
-
(and 1 more)
Tagged with:
-
Thanks Chuck. Took the words right out of my mouth!
- 642 replies
-
- winchelsea
- Syren Ship Model Company
-
(and 1 more)
Tagged with:
-
The port framing has been completed on both sides. The starboard side has also received preliminary fairing. After viewing these pictures I noticed the most aft frames lintel is not installed correctly. I'll rip it out tonight and reinstall it! As I needed to give my shoulder a rest I spent yesterday cutting out the stern pieces. All the pieces have been roughly sanded to shape and will receive a final sanding just prior to installing them on the model. Hopefully I'll have the stern assembled by the end of next weekend. That is the family permitting.
- 642 replies
-
- winchelsea
- Syren Ship Model Company
-
(and 1 more)
Tagged with:
-
Welcome aboard! You'll have a great time with it. You've picked a fine project and your taste for a westie is good too! My 9 year old westie is my shop supervisor and she runs a tight shop!
- 137 replies
-
- winchelsea
- Syren Ship Model Company
-
(and 1 more)
Tagged with:
-
Great job adapting the model to what you like. Always love to watch your "changes".
- 335 replies
-
- alert
- vanguard models
-
(and 1 more)
Tagged with:
-
Good luck Jim. Staples printed mine with no scale and they came out right.
- 105 replies
-
- winchelsea
- Syren Ship Model Company
-
(and 1 more)
Tagged with:
-
My right arm will look like Popeye's when I get done!
- 642 replies
-
- winchelsea
- Syren Ship Model Company
-
(and 1 more)
Tagged with:
-
Thank you Jean-Paul. Yes she is a beauty. Thanks Jeff, Tigersteve and Chris and all the likes too. Jim I really haven't given any thought about using a stand or pedestals or whatever way I'm going to mount her. Thank you for bring that up as it would be smart to reinforce for pedestals before planking the hull. I think I would locate them somewhere between bulkheads G, I, K and 9, 11, 13. No real reason other than it looks like a nice distance from the bow and stern. Thanks Bob. Yes I do remember how much "fun" sanding the interior of the Confederacy was so this will be even more fun. My shoulders hurt already.
- 642 replies
-
- winchelsea
- Syren Ship Model Company
-
(and 1 more)
Tagged with:
-
After several days of sanding, numerous sheets of sand paper and sanding sticks later the hull is roughly faired. I estimate I have 12-15 hours of sanding and more than a few Aleve tablets into the hull so far. After the port framing is completed more fairing will be needed. Here I've started to place the port framing. I would cut and fit several at a time and then leave them next to the former until I glued them in place. This way I could make several at a time and then glue several in place. This method helps me not mix them up and keep them in the correct order. I'll work to the bow and then to the stern. No real reason why just the way I'm doing it.
- 642 replies
-
- winchelsea
- Syren Ship Model Company
-
(and 1 more)
Tagged with:
About us
Modelshipworld - Advancing Ship Modeling through Research
SSL Secured
Your security is important for us so this Website is SSL-Secured
NRG Mailing Address
Nautical Research Guild
237 South Lincoln Street
Westmont IL, 60559-1917
Model Ship World ® and the MSW logo are Registered Trademarks, and belong to the Nautical Research Guild (United States Patent and Trademark Office: No. 6,929,264 & No. 6,929,274, registered Dec. 20, 2022)
Helpful Links
About the NRG
If you enjoy building ship models that are historically accurate as well as beautiful, then The Nautical Research Guild (NRG) is just right for you.
The Guild is a non-profit educational organization whose mission is to “Advance Ship Modeling Through Research”. We provide support to our members in their efforts to raise the quality of their model ships.
The Nautical Research Guild has published our world-renowned quarterly magazine, The Nautical Research Journal, since 1955. The pages of the Journal are full of articles by accomplished ship modelers who show you how they create those exquisite details on their models, and by maritime historians who show you the correct details to build. The Journal is available in both print and digital editions. Go to the NRG web site (www.thenrg.org) to download a complimentary digital copy of the Journal. The NRG also publishes plan sets, books and compilations of back issues of the Journal and the former Ships in Scale and Model Ship Builder magazines.


