HOLIDAY DONATION DRIVE - SUPPORT MSW - DO YOUR PART TO KEEP THIS GREAT FORUM GOING! (Only 13 donations so far - C'mon guys!)
×


Rustyj
-
Posts
2,530 -
Joined
-
Last visited
Content Type
Profiles
Forums
Gallery
Events
Everything posted by Rustyj
-
 Hi Grant. Great job on a very perplexing part of the build. Great advice from Mobbsie. Where was he when I was cussing and having the same problems? Keep up the good work mate.
- 339 replies
-
- 5
-

-
- dumas
- Chris-Craft
- (and 3 more)
-
Thanks Bob. Well the good news is we're moved. The bad news is now we have to unpack it all!
-
Hi Bob. I had a moment from the move and was able too catch up on your build. You sure have been making a lot of progress and doing a great job too. Well done.
-
Hi Pat. It's great to hear from you and welcome aboard.
- 310 replies
-
- 2
-
-
- cheerful
- Syren Ship Model Company
- (and 1 more)
-
Hi Dirk, Bob, Grant, Mark and Ken. Thanks for the kind words and best wishes to survive the move. All the likes too!
- 310 replies
-
- 2
-
-
- cheerful
- Syren Ship Model Company
- (and 1 more)
-
Nicely done Grant. This is all new to me and very interesting.
- 339 replies
-
- 4
-
-
- dumas
- Chris-Craft
- (and 3 more)
-
Thanks Brian and Chuck. Unfortunately it's the double whammy of summer chaos and the move. May have to set up a temporary shop in the dinning room.
- 310 replies
-
- 2
-
-
- cheerful
- Syren Ship Model Company
- (and 1 more)
-
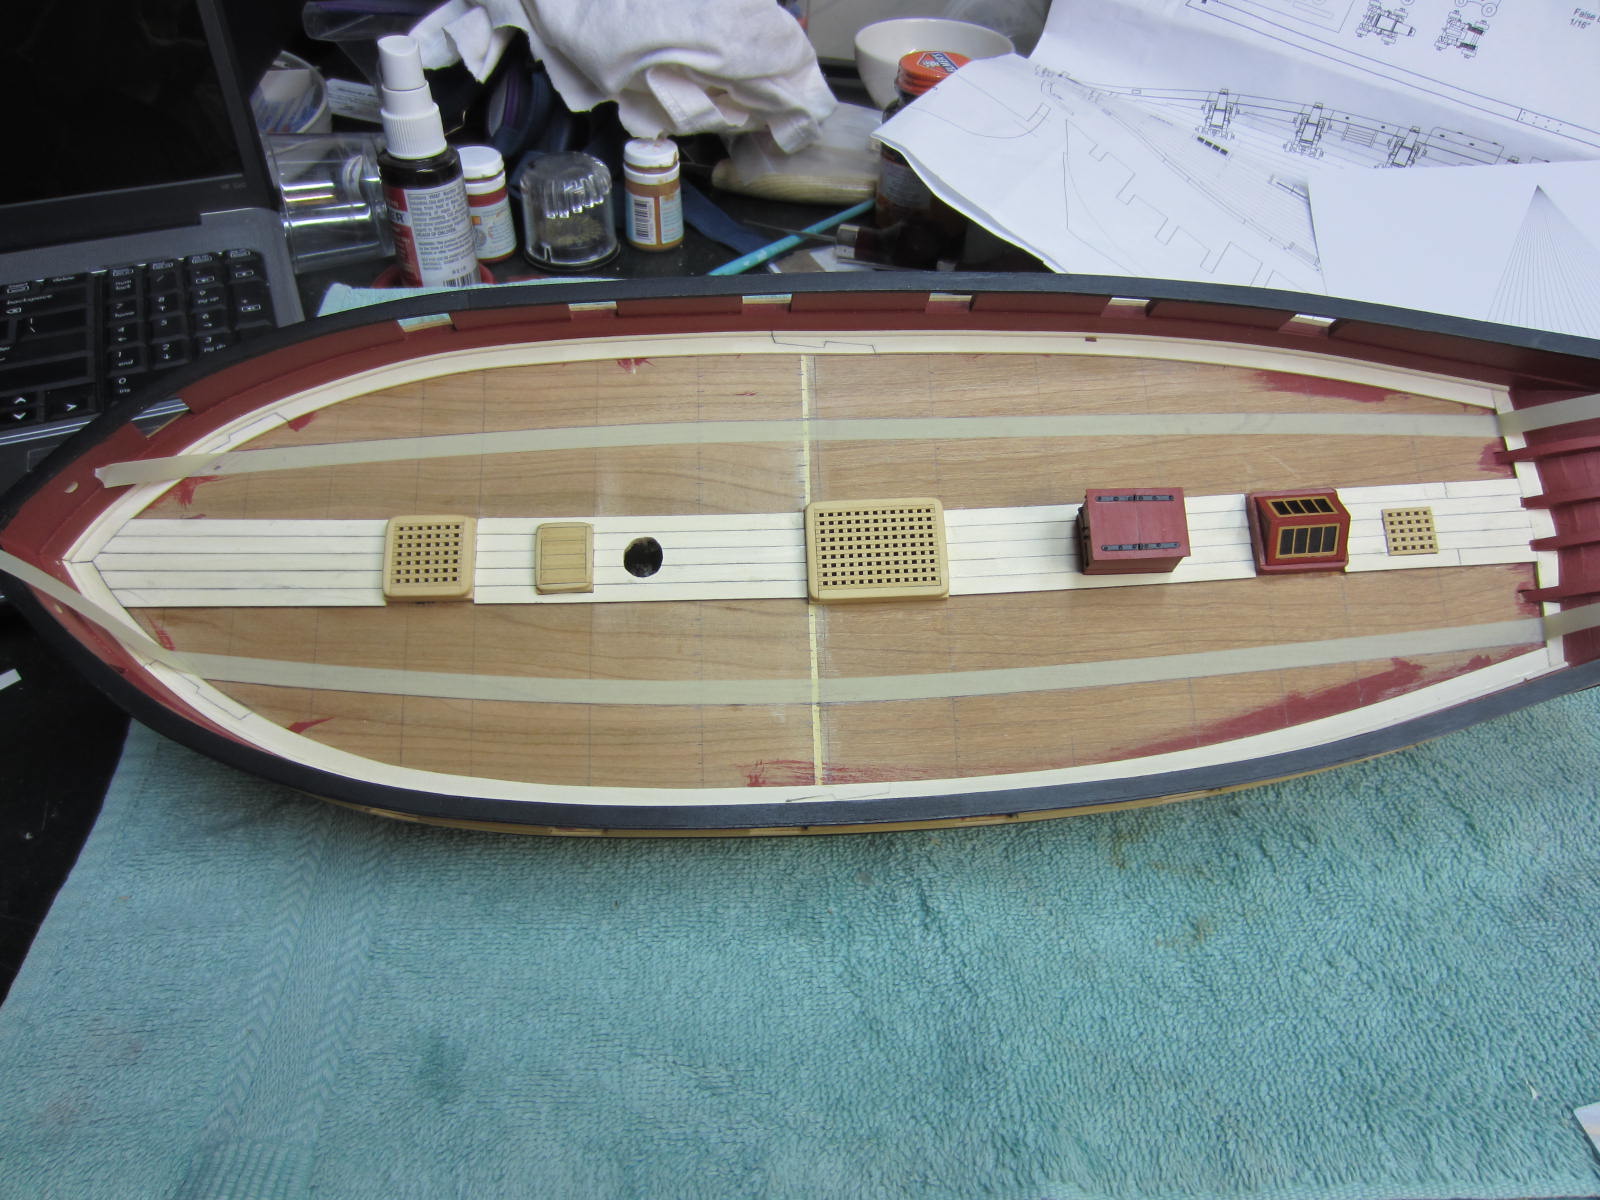
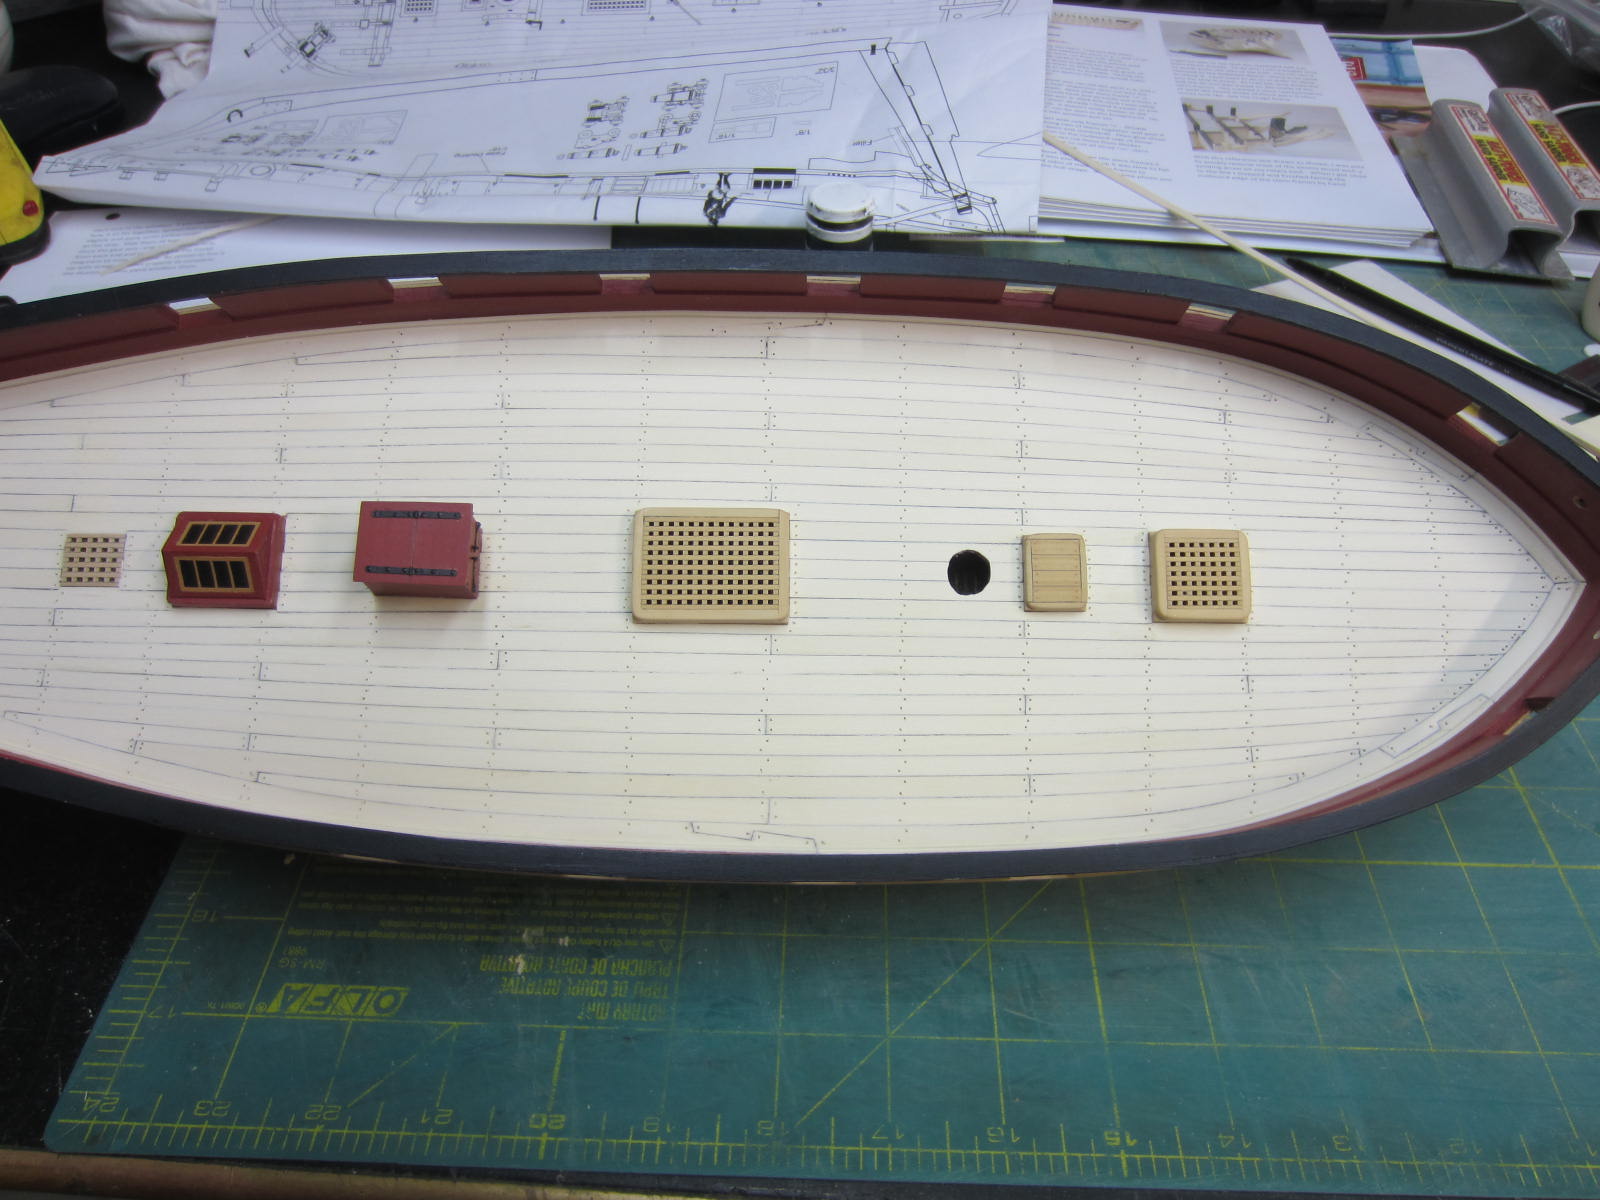
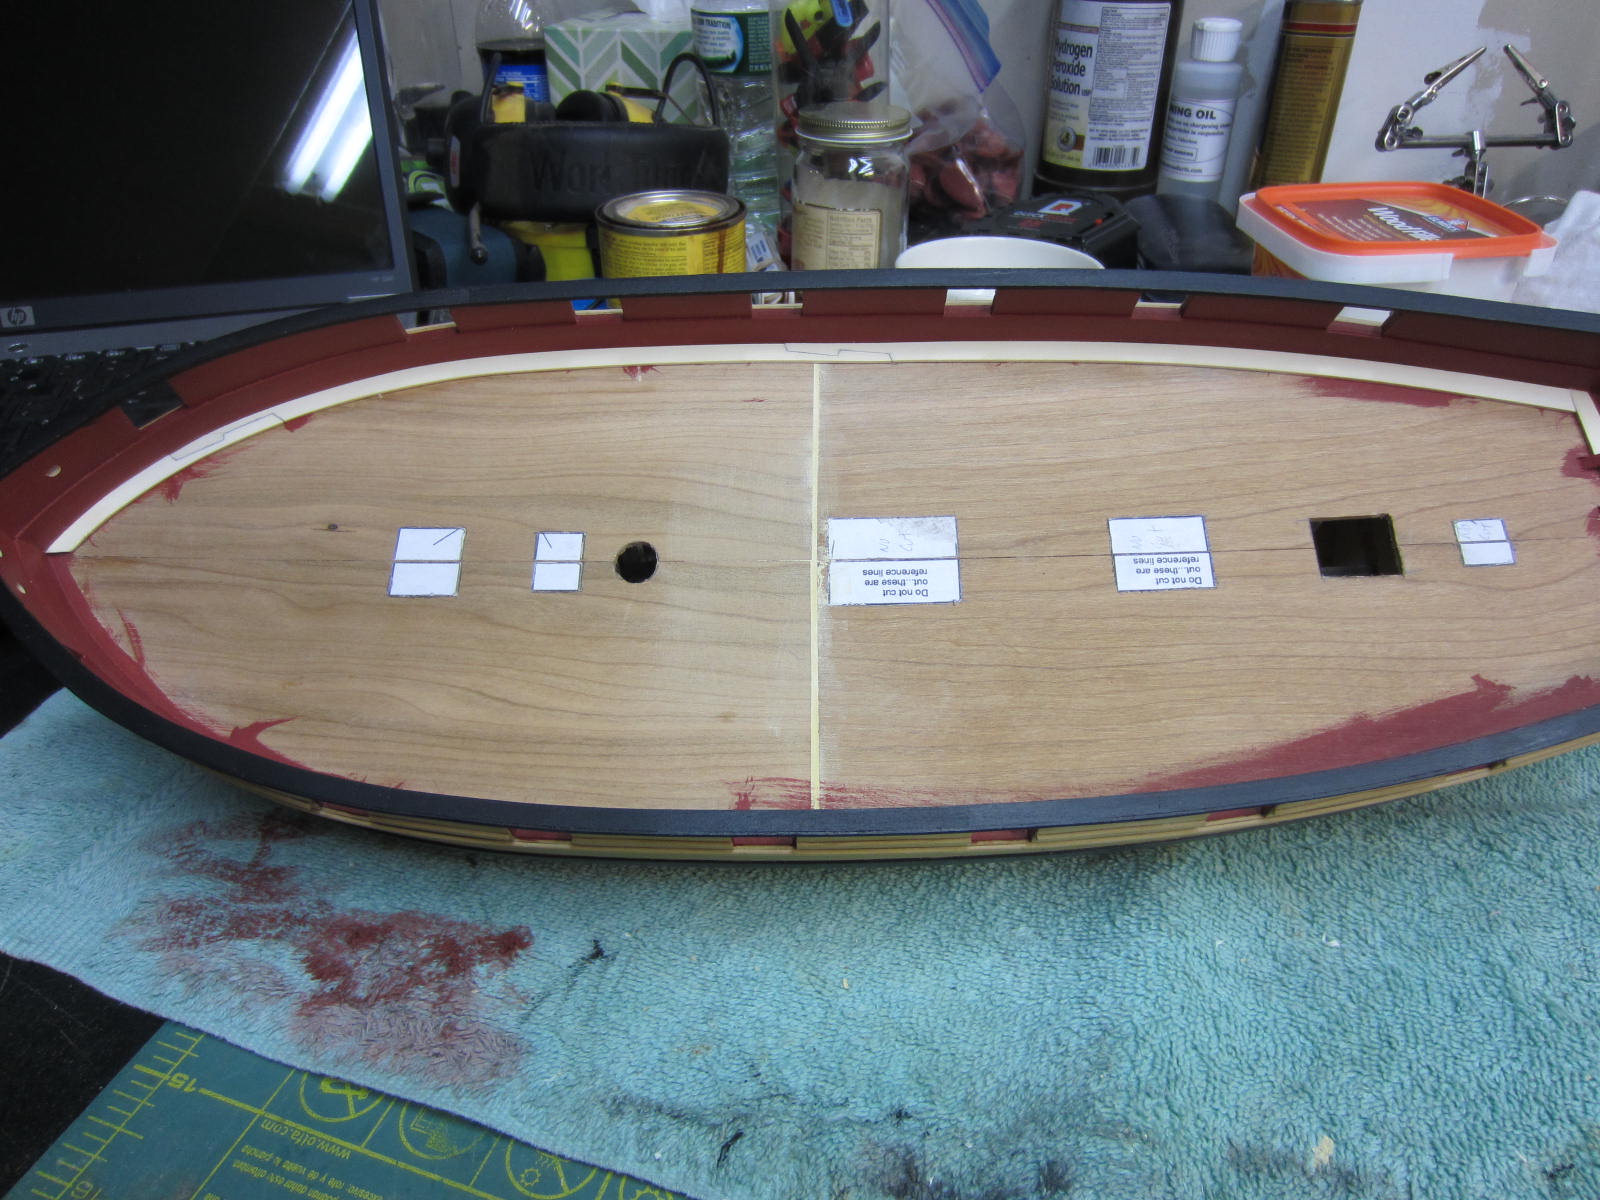
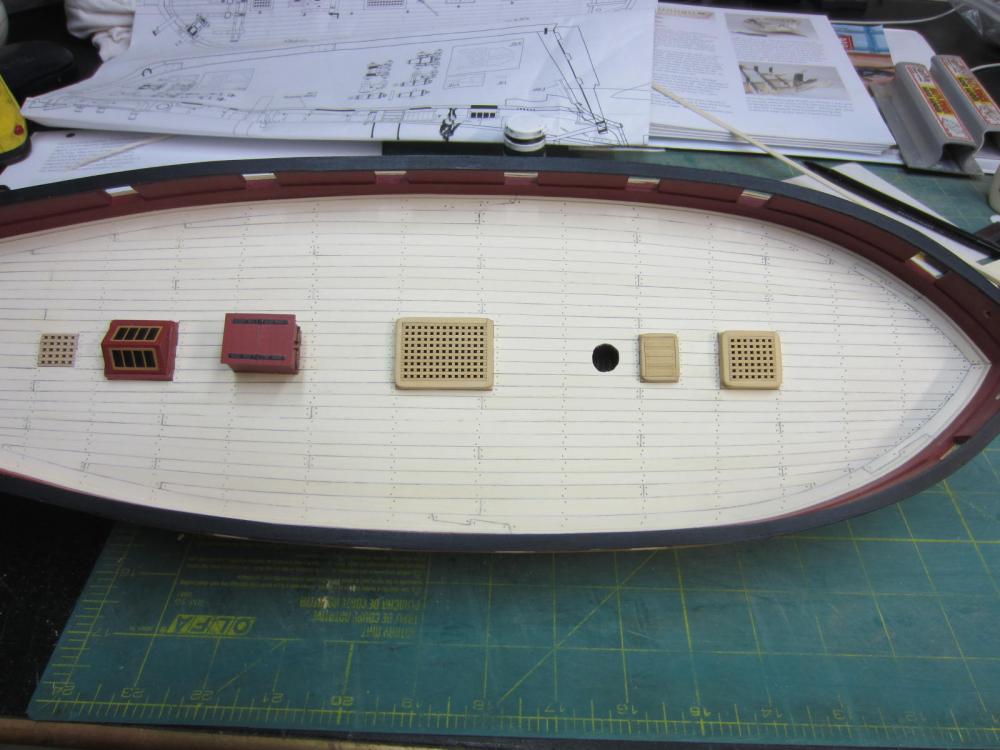
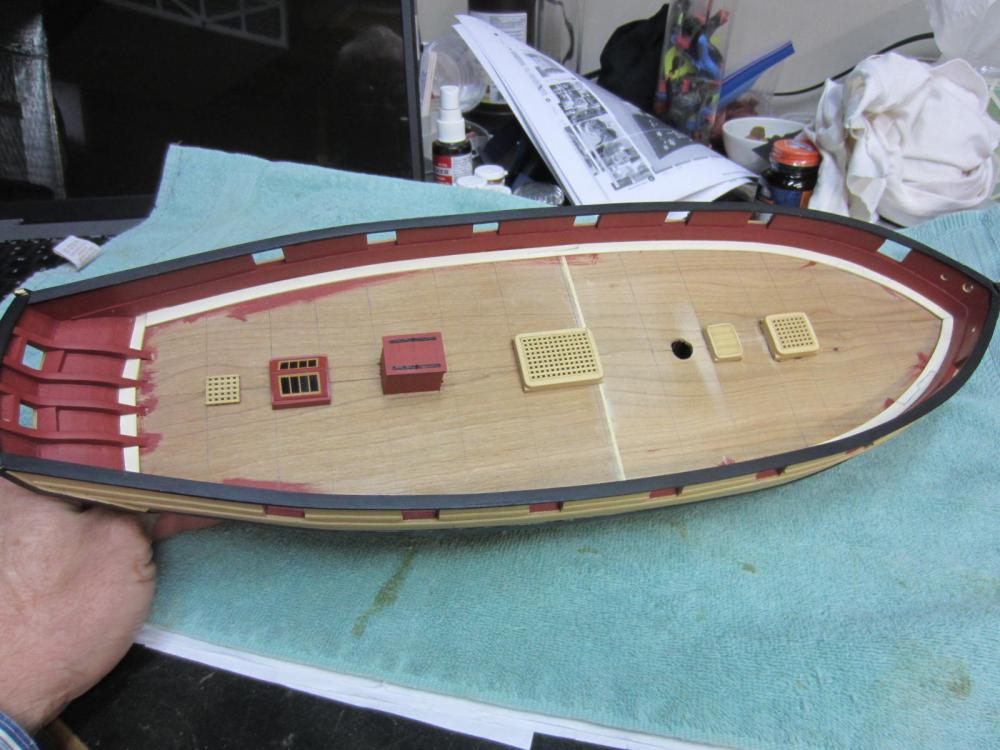
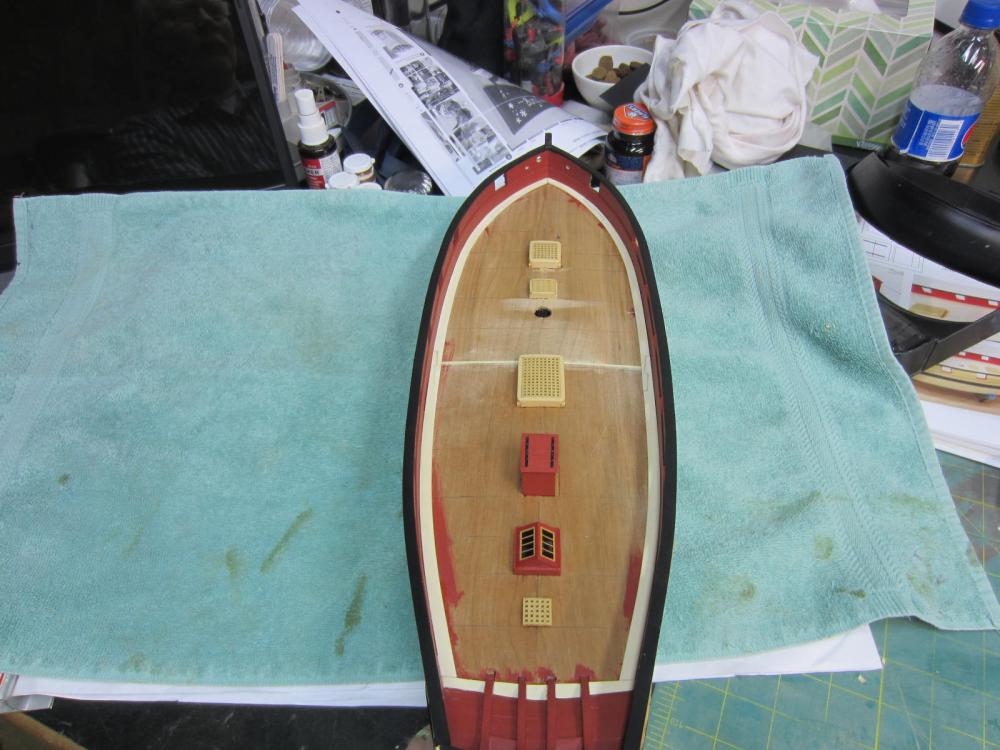
Hi All, Been real busy here with the renovations and getting ready to move. I managed to get the deck planked over the past two weeks. The curved planking was a lot of fun to do in a sick kind of way. J Here is the planking done through the center of the deck. After looking it over I wasn't happy with the alignment with the aft most hatch and skylight. So I ripped off the planking to the skylight and repositioned the hatch and skylight and re-planked it. Much happier now. Here is the completed planking and sadly the last that work that will be done for some time to come. The shop is now officially closed, the Cheerful has been packed up and I'm now starting to pack up the rest of the shop. I’ll be living vicariously through all of you and hopefully rejoin you sooner instead of later. So long for now!

- 310 replies
-
- 25
-
-
- cheerful
- Syren Ship Model Company
- (and 1 more)
-
Thanks Ryland. I really missed seeing you and everyone else at the conference. Hopefully next year turns out better.
- 310 replies
-
- 4
-
-
- cheerful
- Syren Ship Model Company
- (and 1 more)
-
Thanks Chuck. The house is the reason you didn't see me yesterday. Not a happy day!
- 310 replies
-
- 2
-
-
- cheerful
- Syren Ship Model Company
- (and 1 more)
-
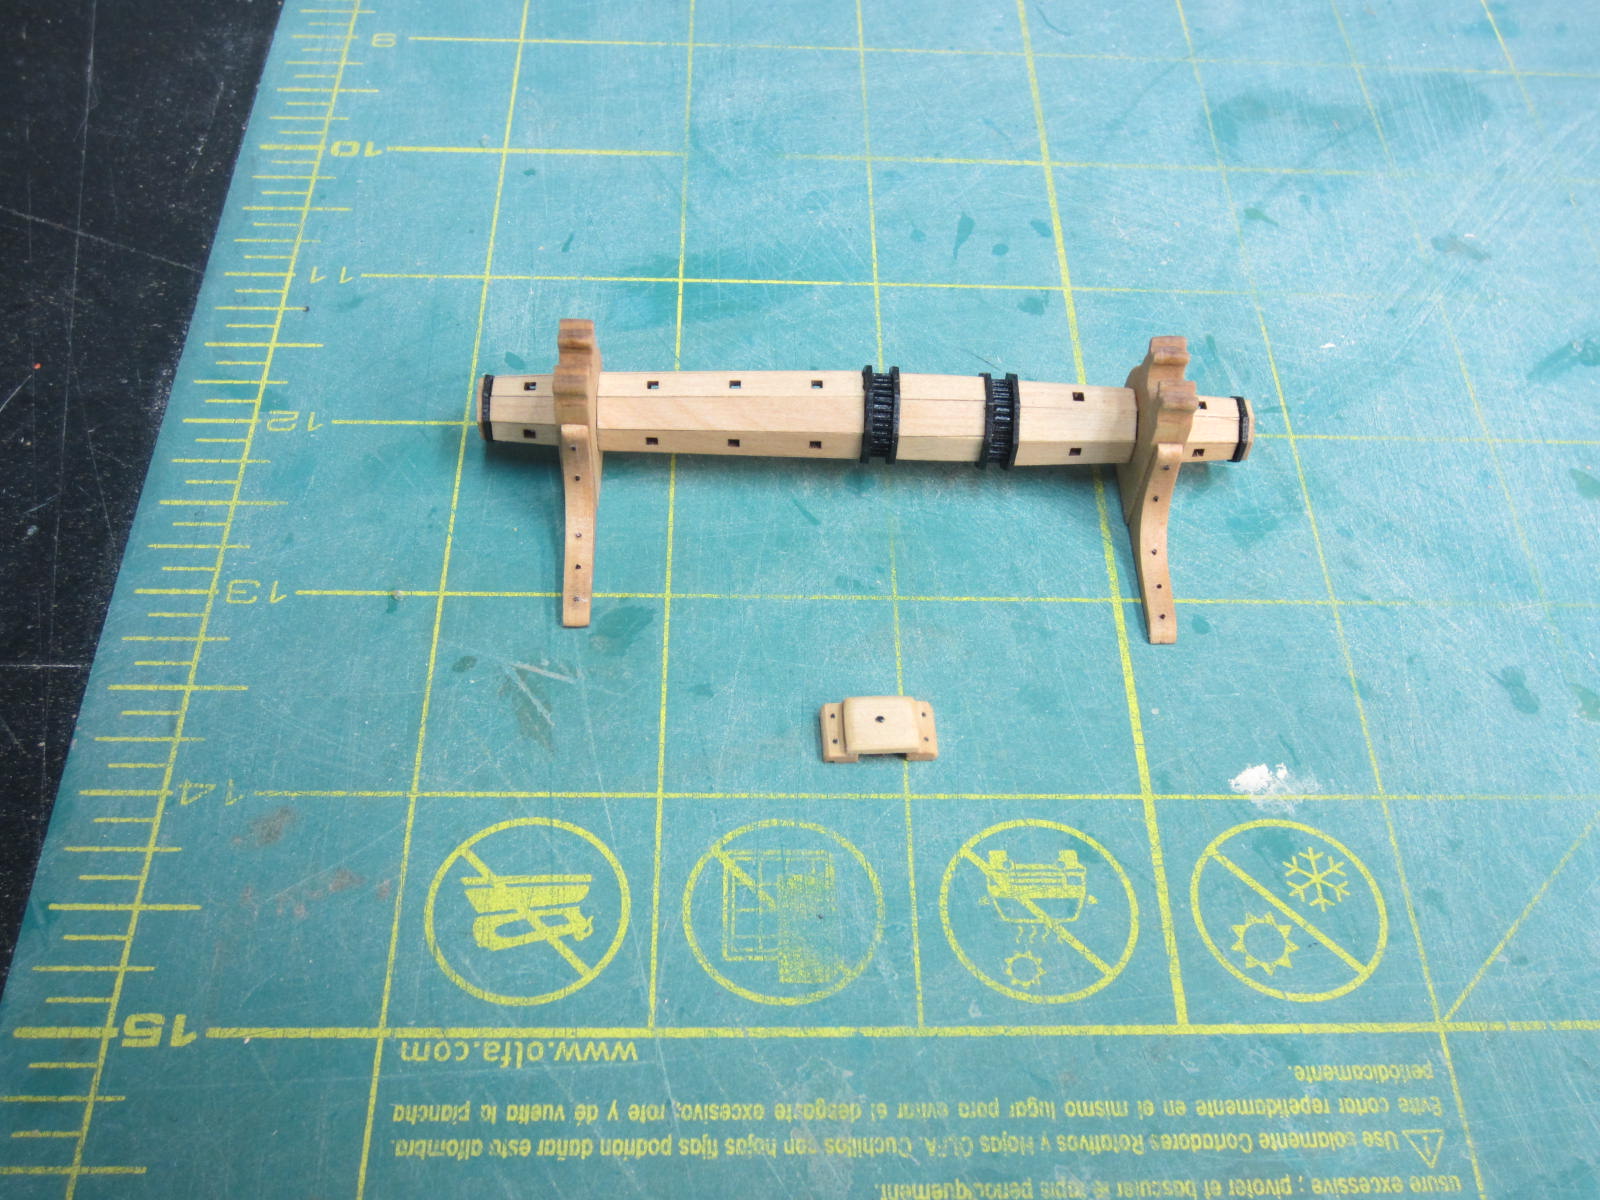
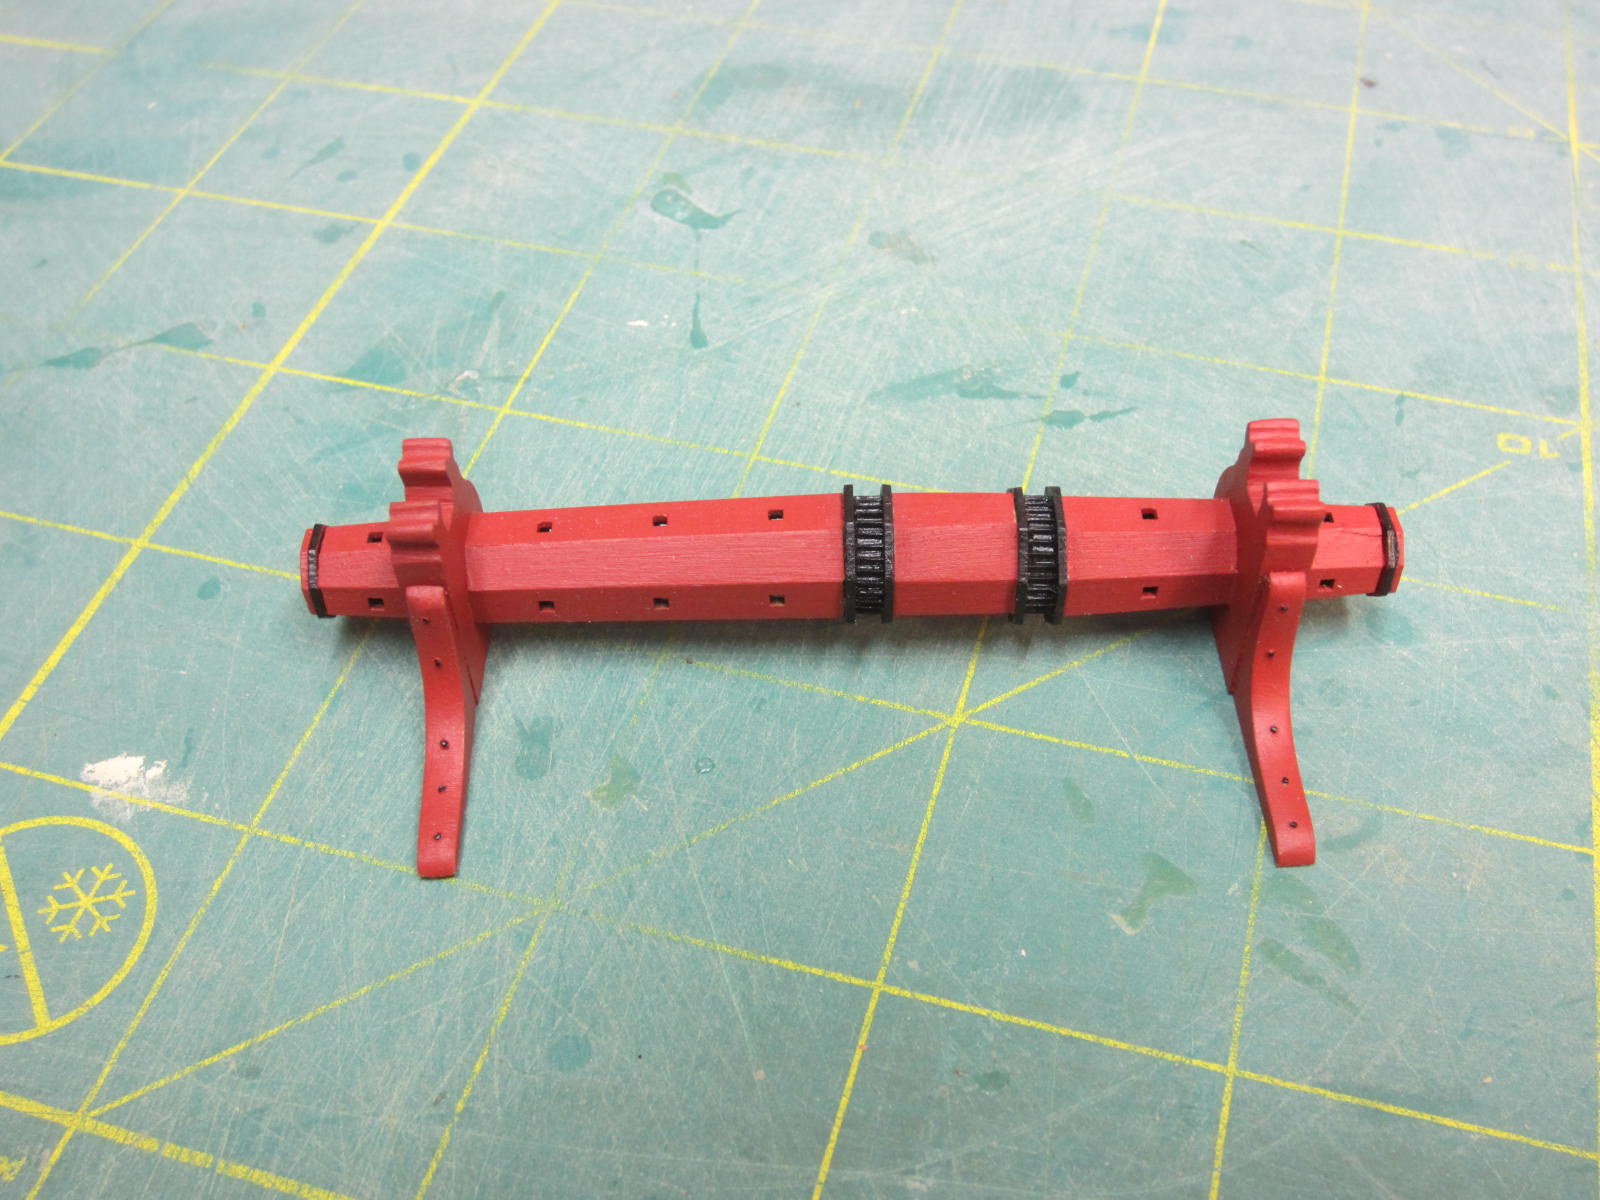
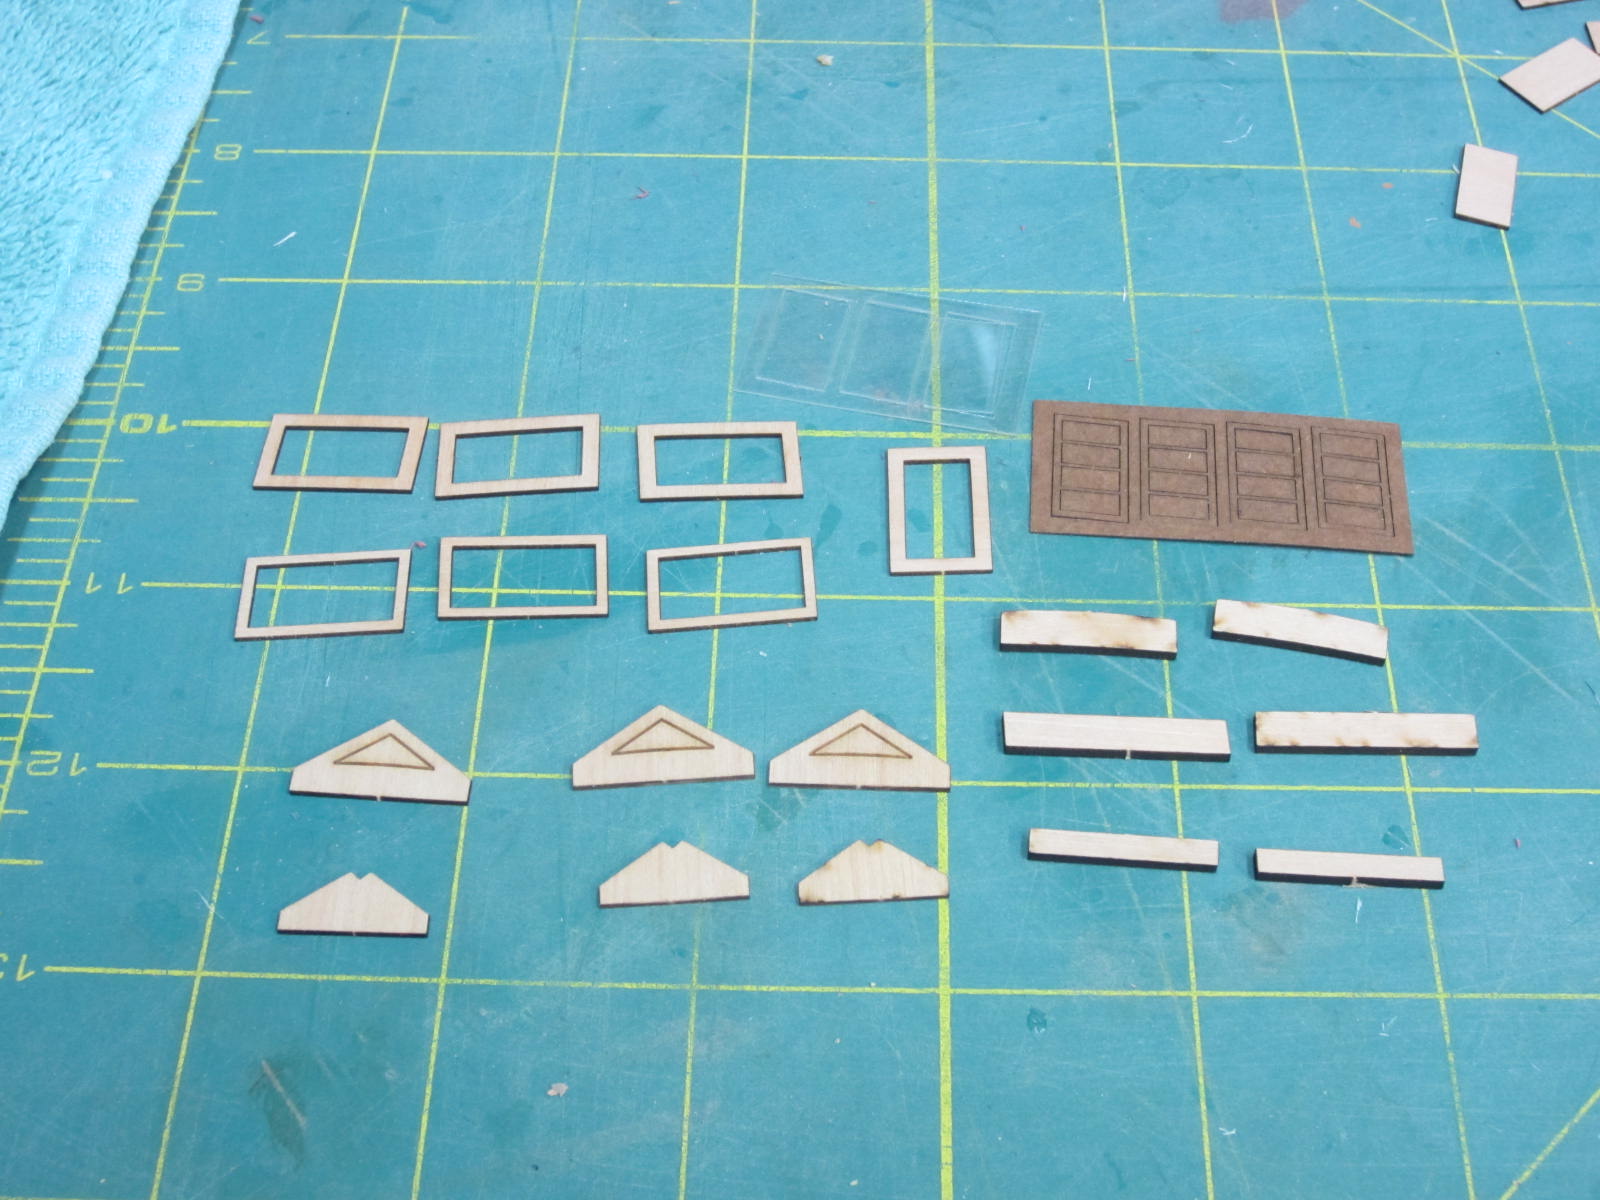
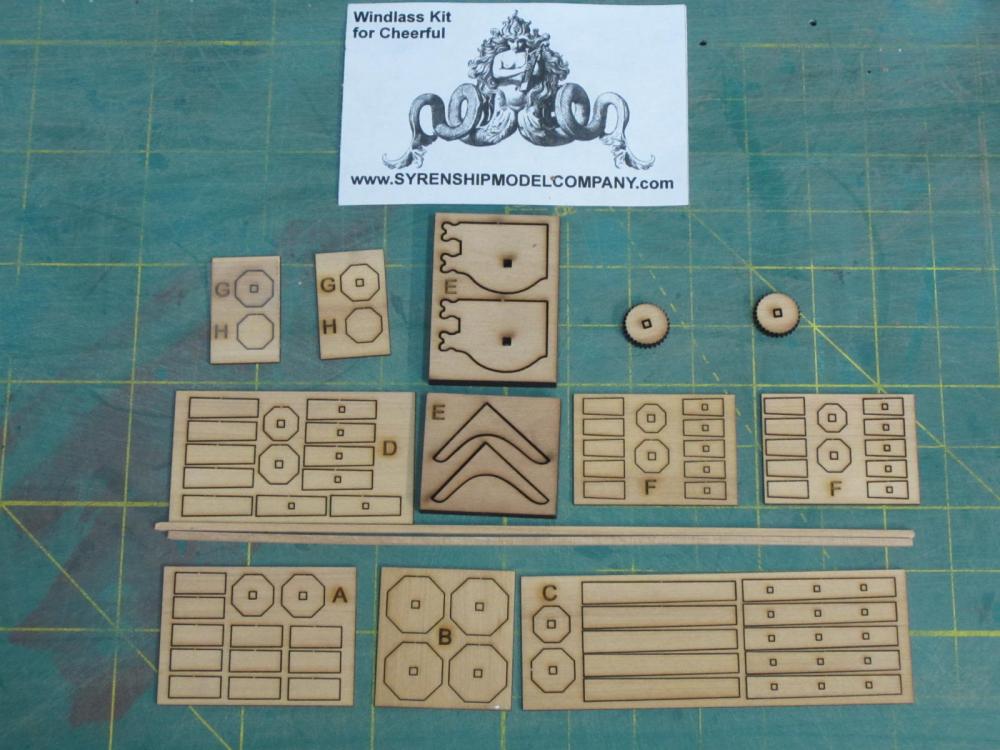
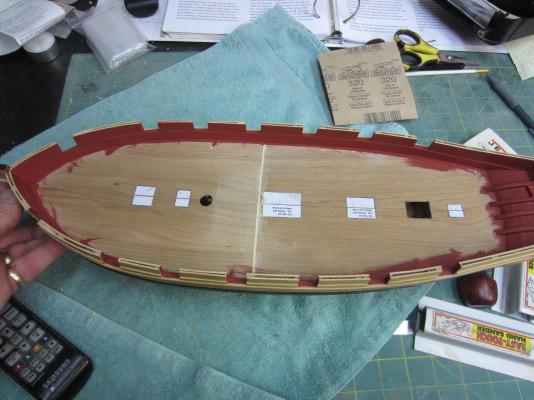
Hi all, As you may have noticed things have been really slow in the shipyard. Renovations at the new house are in full swing and taking most of my free time. Within the next week or two I’ll sadly be closing down for an extended period. Here is a brief update with one more to come. Ok maybe two if I can squeeze it in! The completed companionway. Windless kit from Syren Ship Model Company Here are the hatches, companionway and skylight placed. Now I'm ready to start planking the deck!


- 310 replies
-
- 18
-
-
- cheerful
- Syren Ship Model Company
- (and 1 more)
-
She's looking great and coming along quite nicely.
- 1,051 replies
-
- 5
-
-
- cheerful
- Syren Ship Model Company
- (and 1 more)
-
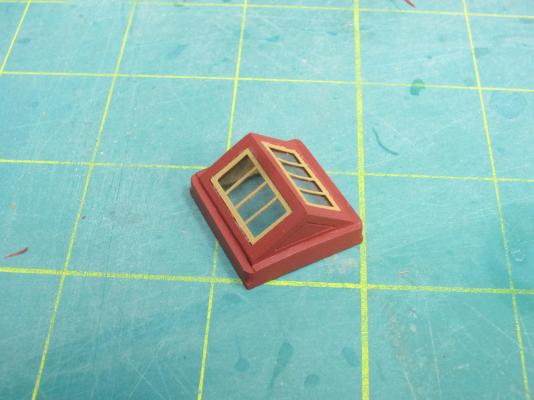
Thanks Ken and all those likes. Next was another of Chucks mini kits, the sky light. It is very small and delicate but as you can see Chuck gives you extra pieces and it all went together with no problems. Companionway and windless are next!

- 310 replies
-
- 16
-
-
- cheerful
- Syren Ship Model Company
- (and 1 more)
-
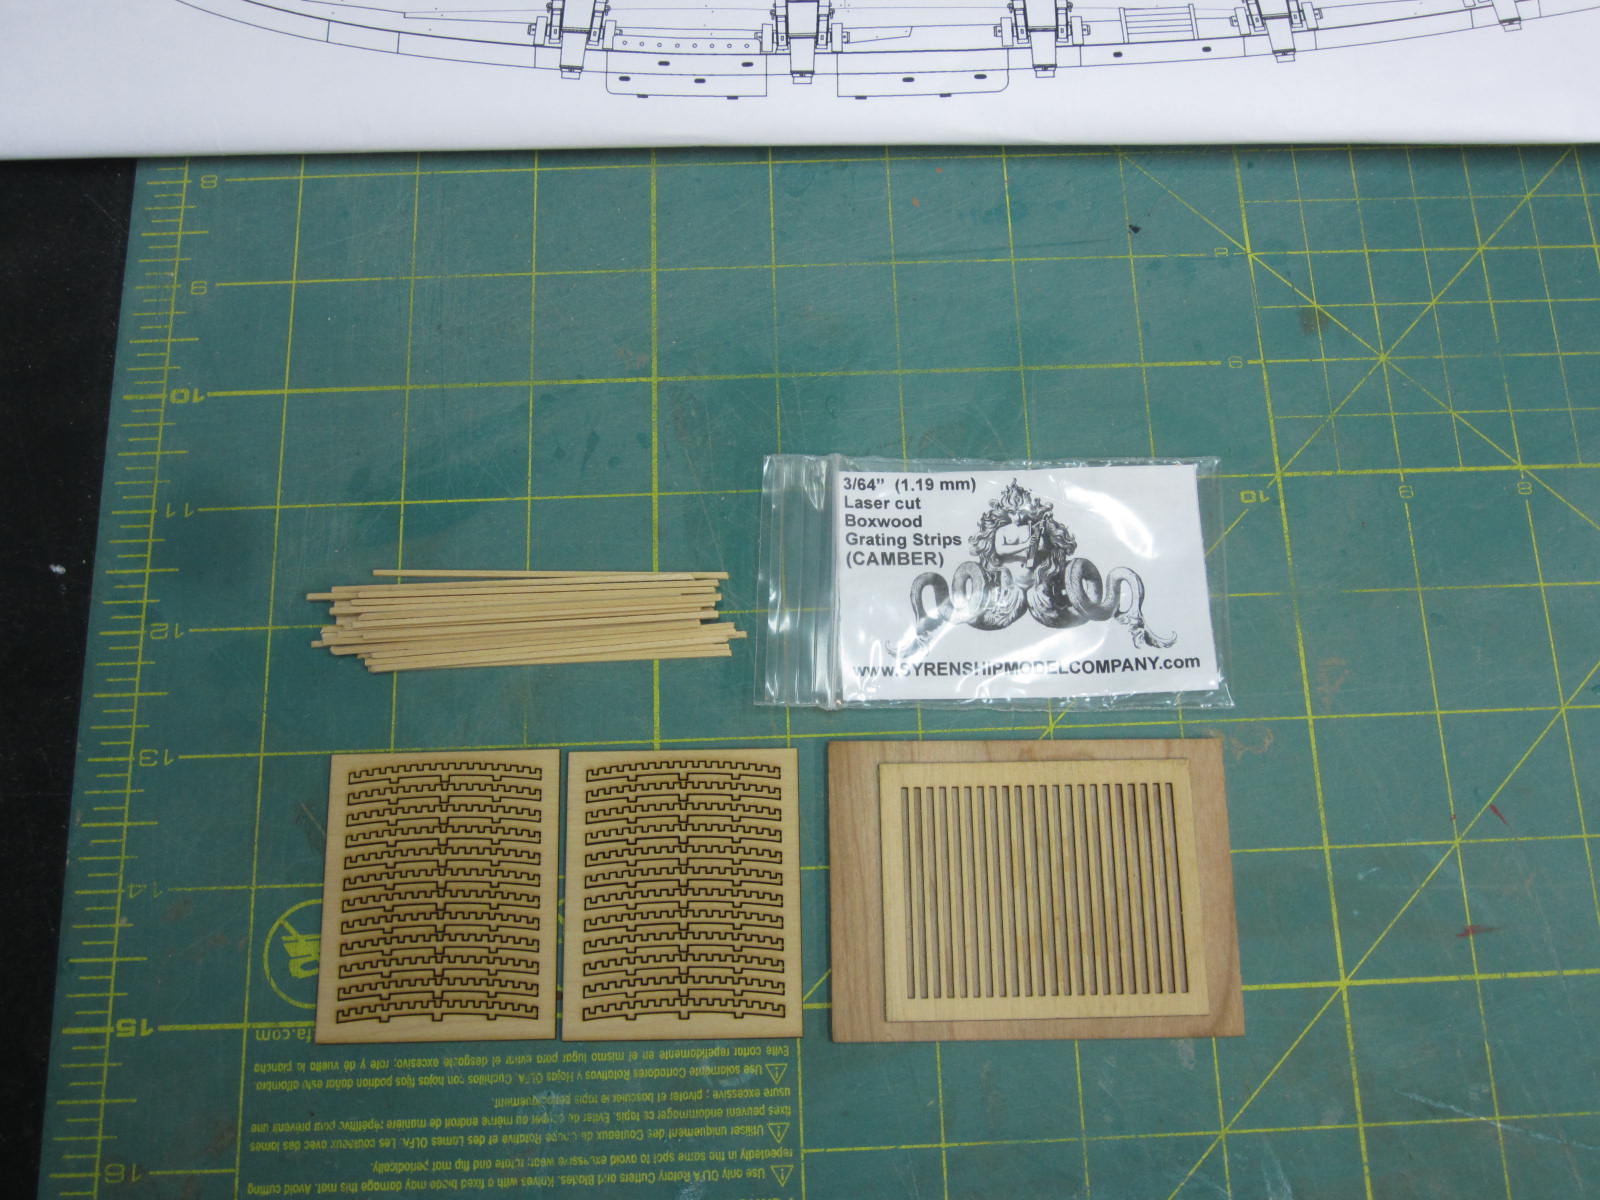
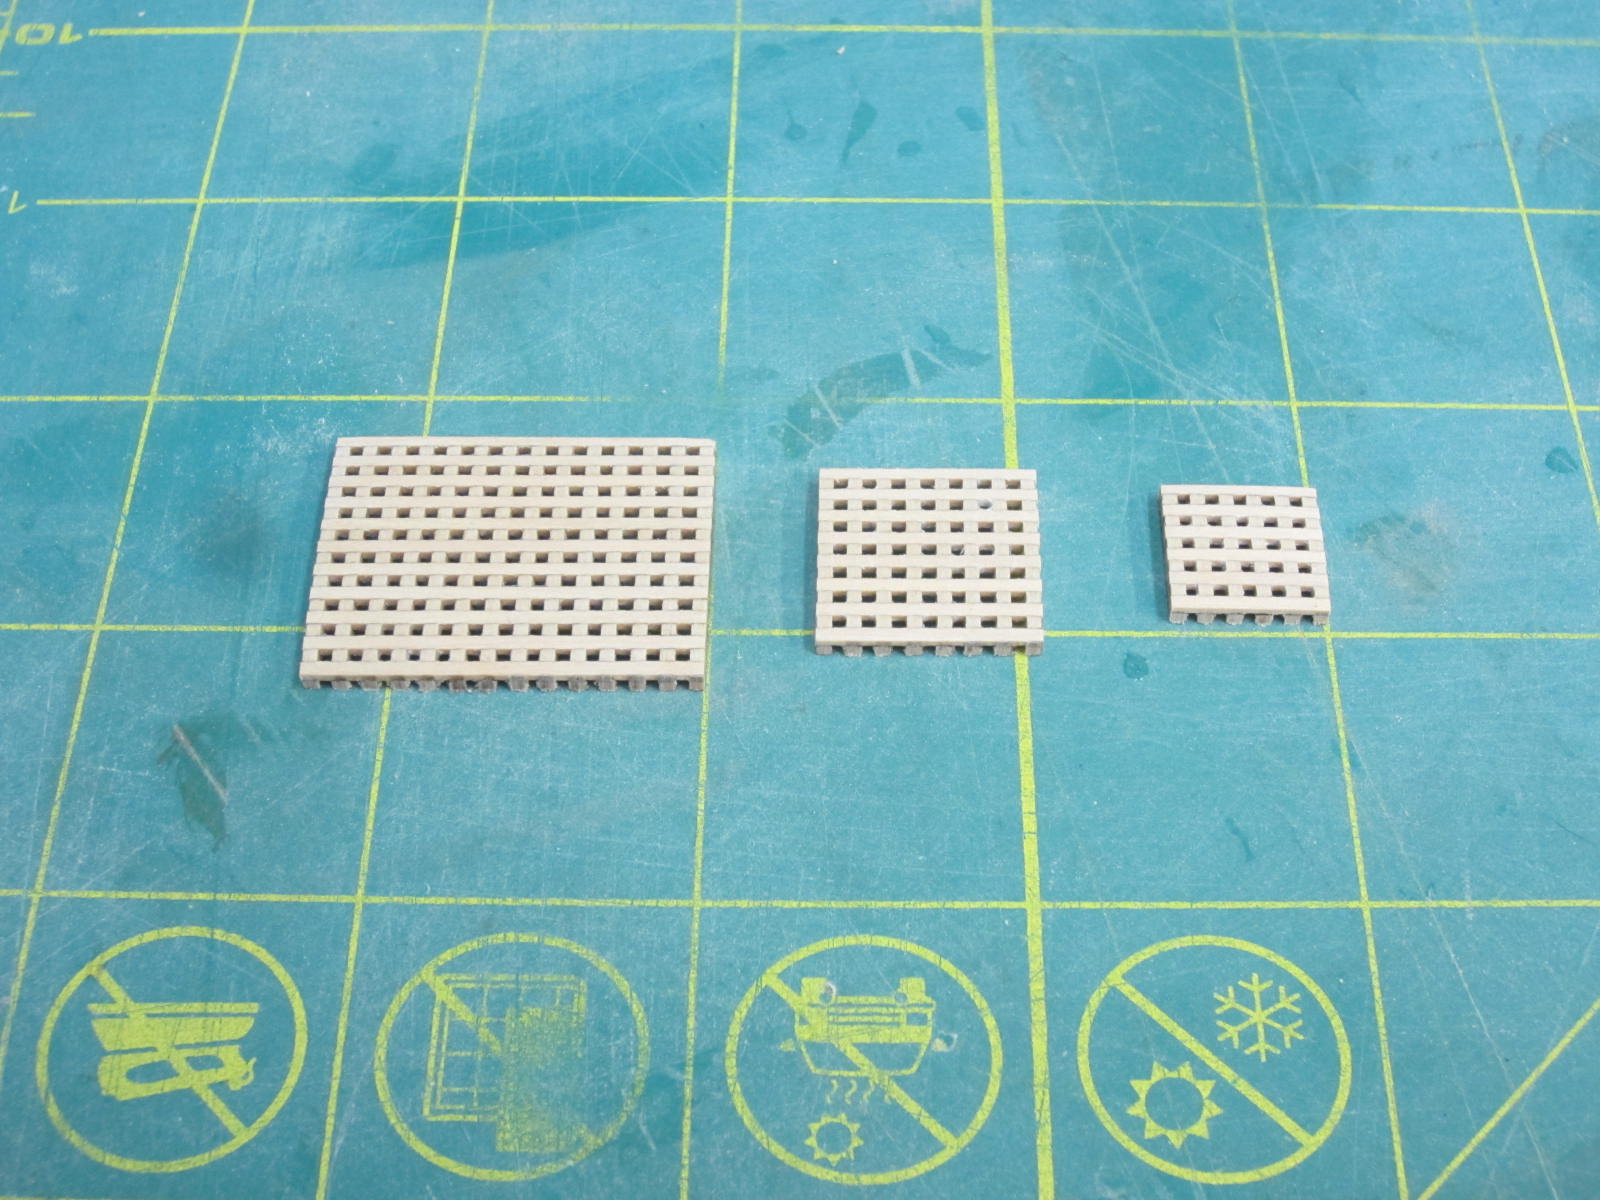
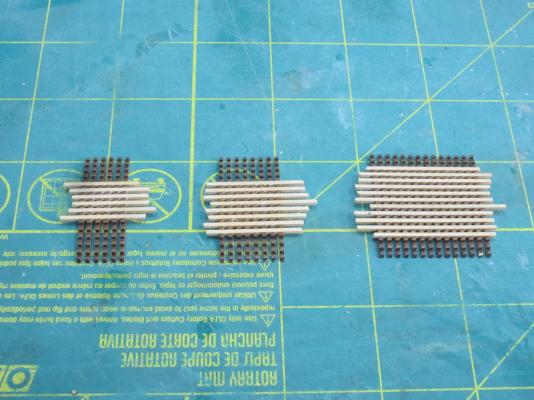
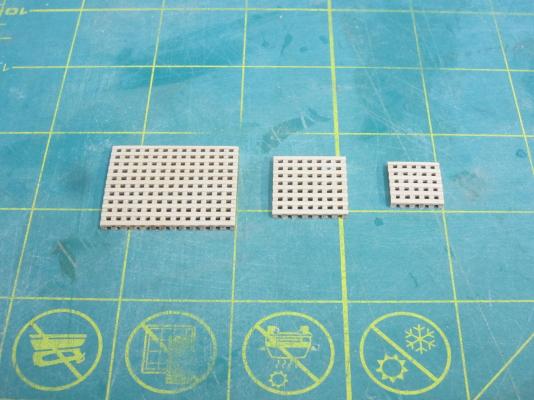
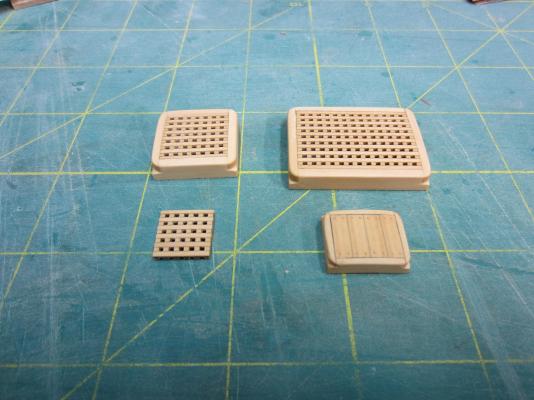
Oh boy it's time to make some deck structures. I love this part of the build. First up is the deck grating and coamings. I’ll be using Chucks jig and cambered gratings strips from Syren Ship Model Company. The gratings and coamings are made from boxwood. You can see how they look after removal from the jig but before being trimmed and coamings added. And here they are trimmed to size and then the coaming added. This grating kit is great! Thanks Chuck!

- 310 replies
-
- 14
-
-
- cheerful
- Syren Ship Model Company
- (and 1 more)
-
Very nice Eric. There are a lot of us using hi-tech towels out here and I'm glad you were able to get one.
-
Cutter Cheerful 1806 by rafine - FINISHED
Rustyj replied to rafine's topic in - Build logs for subjects built 1801 - 1850
Wonderful build Bob. It will be a great reference for cheerful builders, myself included.- 525 replies
-
- 4
-
-
- cheerful
- Syren Ship Model Company
- (and 1 more)
-
Hi Bob. Great choice. I've thought about this model myself. I'm looking forward to following along with everyone else.
-
Thanks Chuck and everyone for the likes. I'm hopeful that I won't be out of action long but the realistic side of me knows I'm just dreaming.
- 310 replies
-
- 2
-
-
- cheerful
- Syren Ship Model Company
- (and 1 more)
-
Hi Bob and thanks. Time will tell but I'm optimistic.
- 310 replies
-
- 2
-
-
- cheerful
- Syren Ship Model Company
- (and 1 more)
-
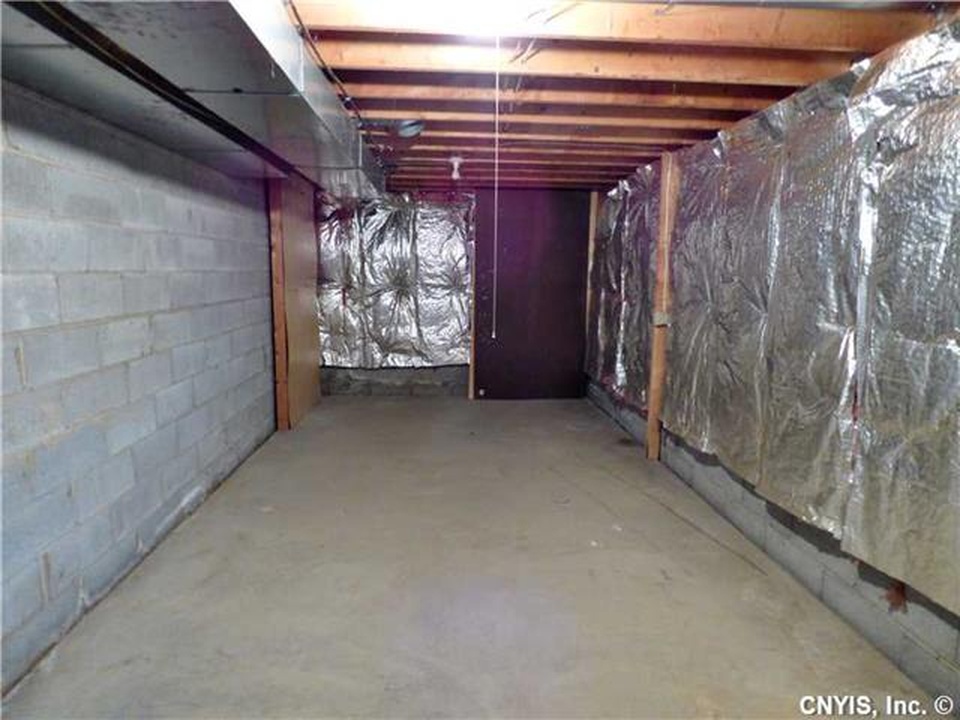
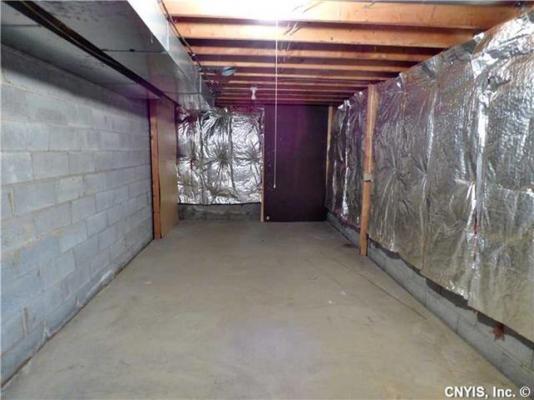
Hi All, Continuing on I’ve completed sanding the bulkheads to the desired thickness. The false deck was cut out of some 1/16” cherry I had on hand. I made it out of two pieces and after adjusting and fitting it I had a minor gap in the middle which I filled with wood filler. Once that was completed I planked the bulkheads and painted it with Red Ochre. Here you can see that the cap rail has been completed and the margin planking has been started. That’s the fun stuff. Well the Admiral and I have purchased a different home and I am now in full renovation mode. Sadly by the end of this month (April) the workshop will shut down until the move has been completed and a new workshop constructed. The new shop will be in a 12x20 section of the basement that is currently unfinished. So it is going to be a happy/sad time coming up. It will be thrilling to double my workshop space but shutting down the shop for 3 months or more will really be annoying! So I will be getting done what I can in between work and the renovations till the end of the month.

- 310 replies
-
- 15
-
-
- cheerful
- Syren Ship Model Company
- (and 1 more)
-
Cutter Cheerful 1806 by rafine - FINISHED
Rustyj replied to rafine's topic in - Build logs for subjects built 1801 - 1850
Great job on her Bob. If you didn't show us that you made the anchors out of wood we would never have known.- 525 replies
-
- 6
-
-
- cheerful
- Syren Ship Model Company
- (and 1 more)
-
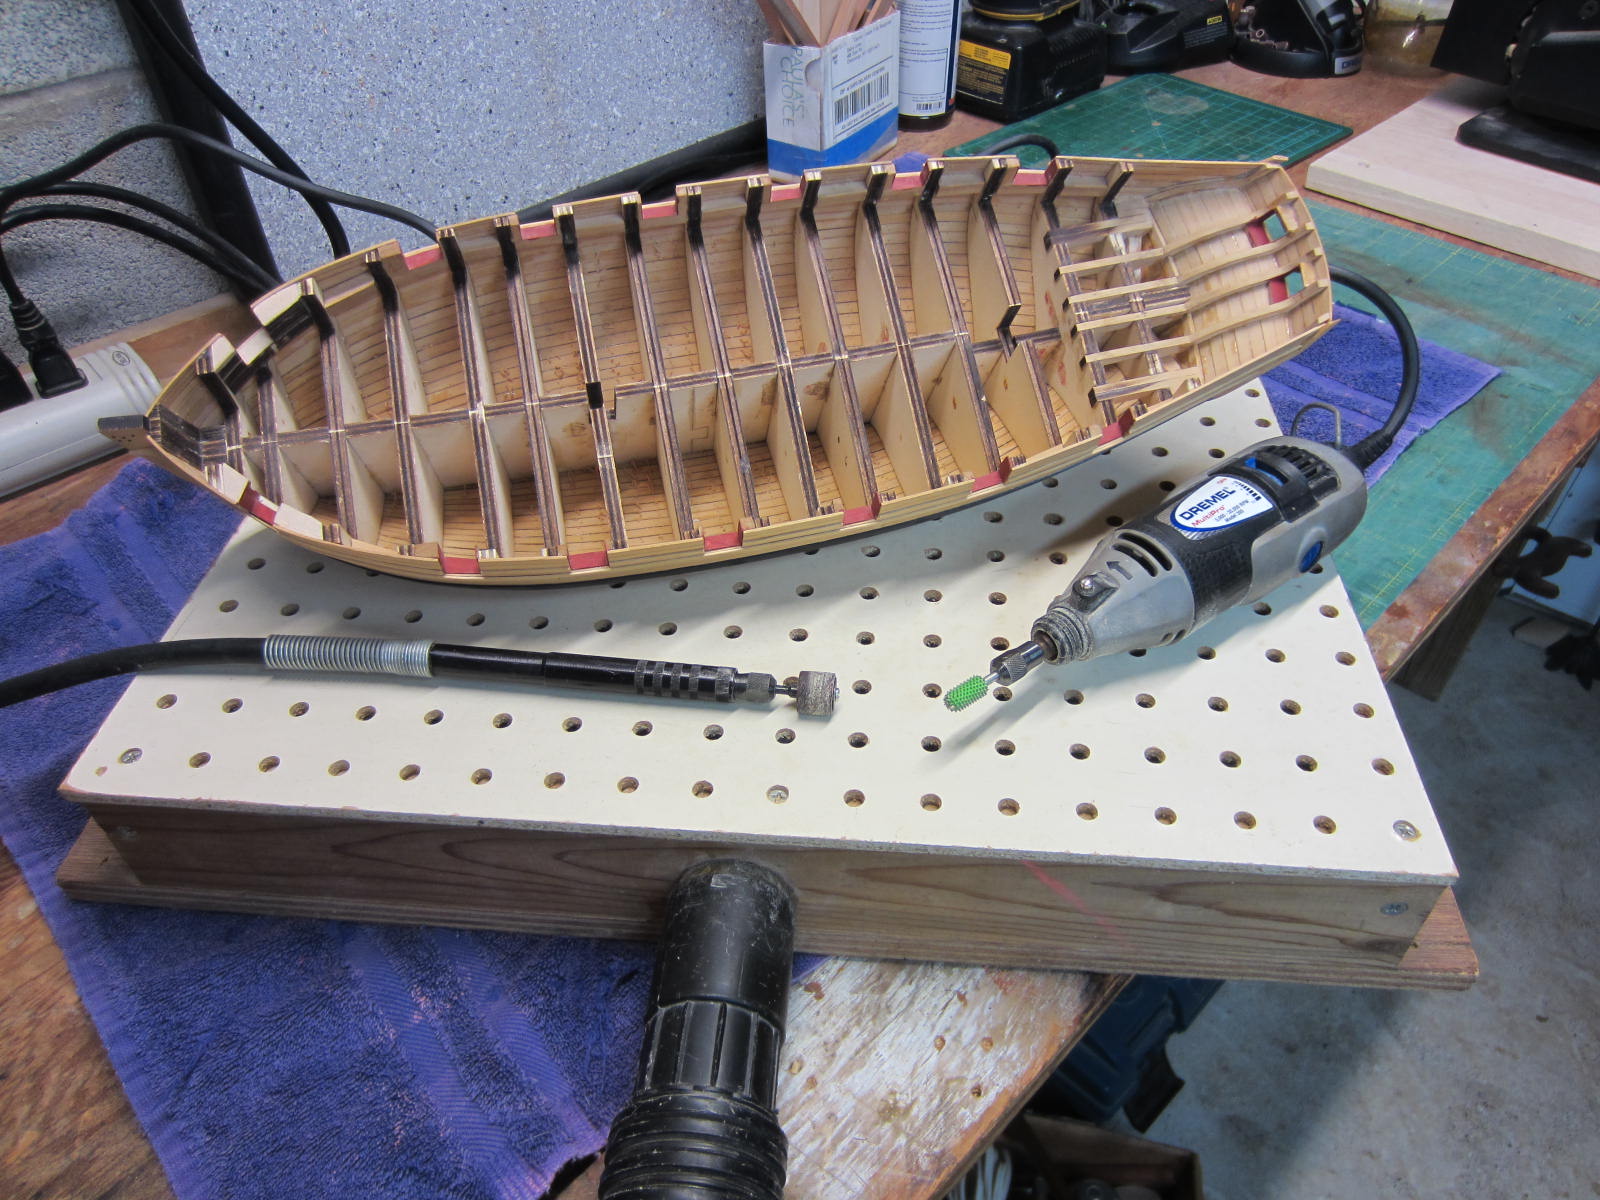
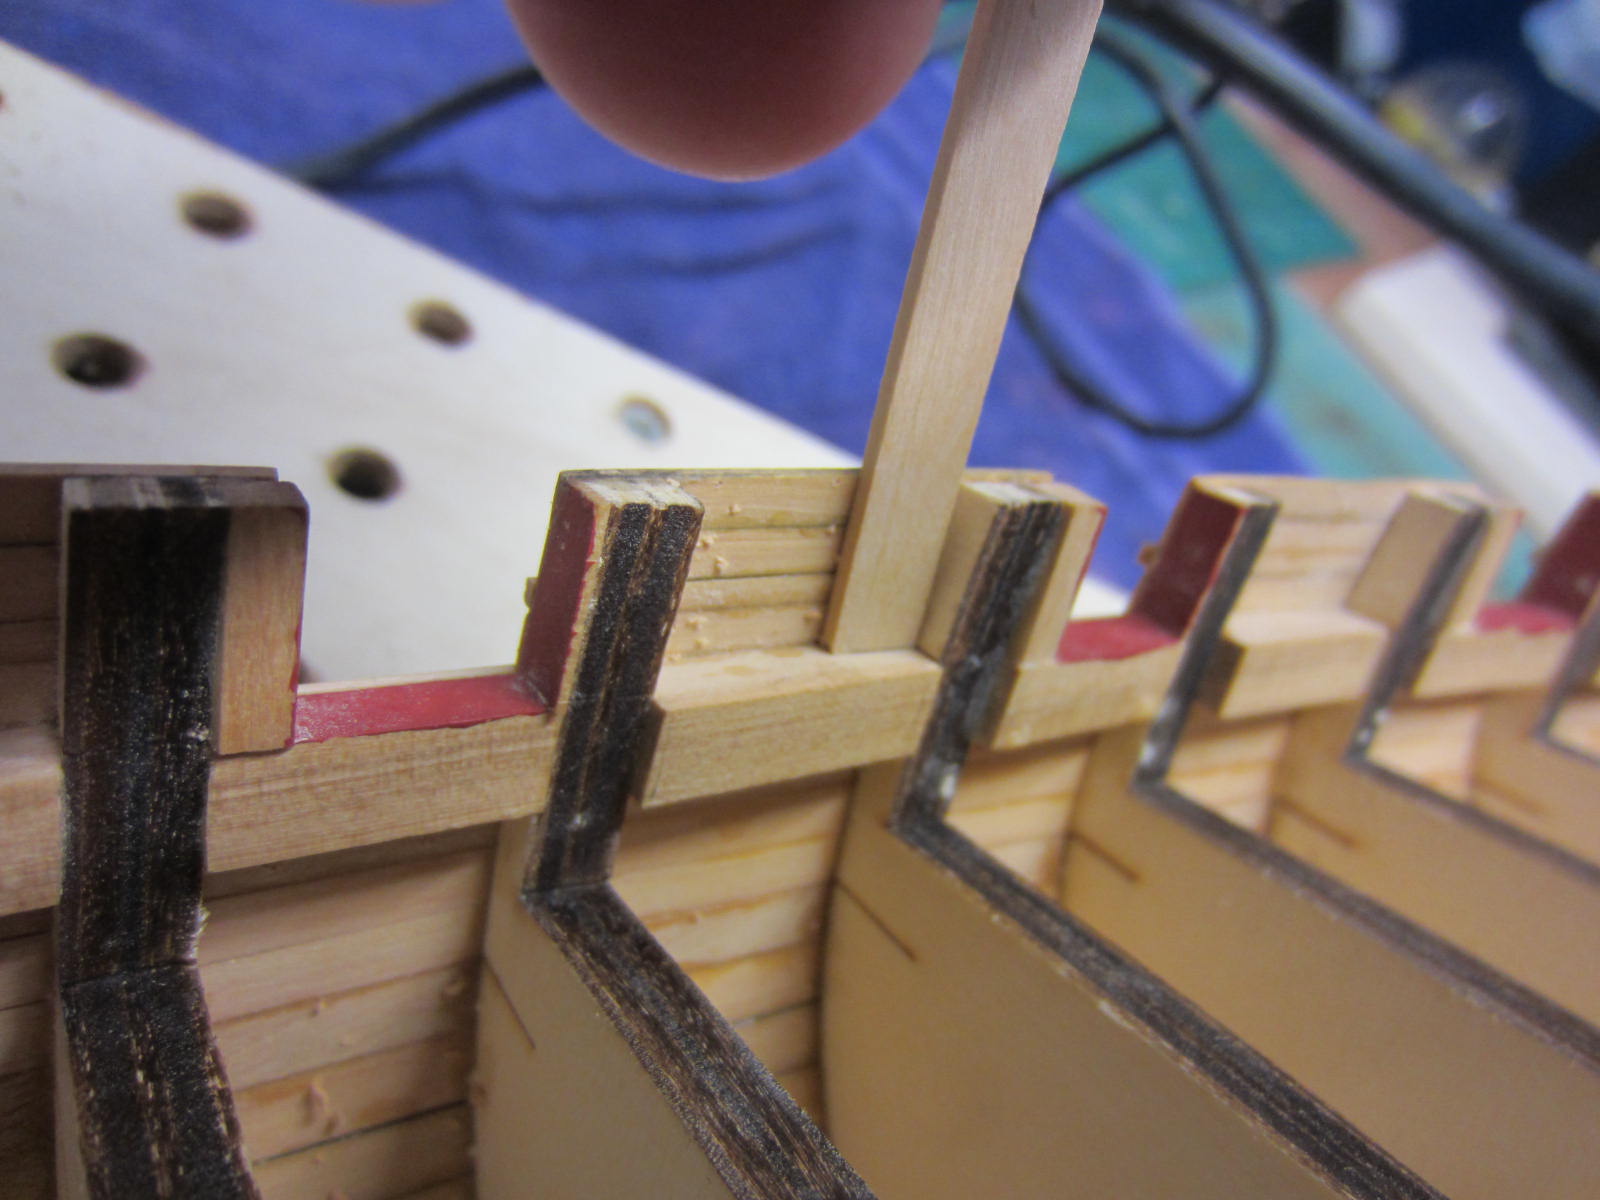
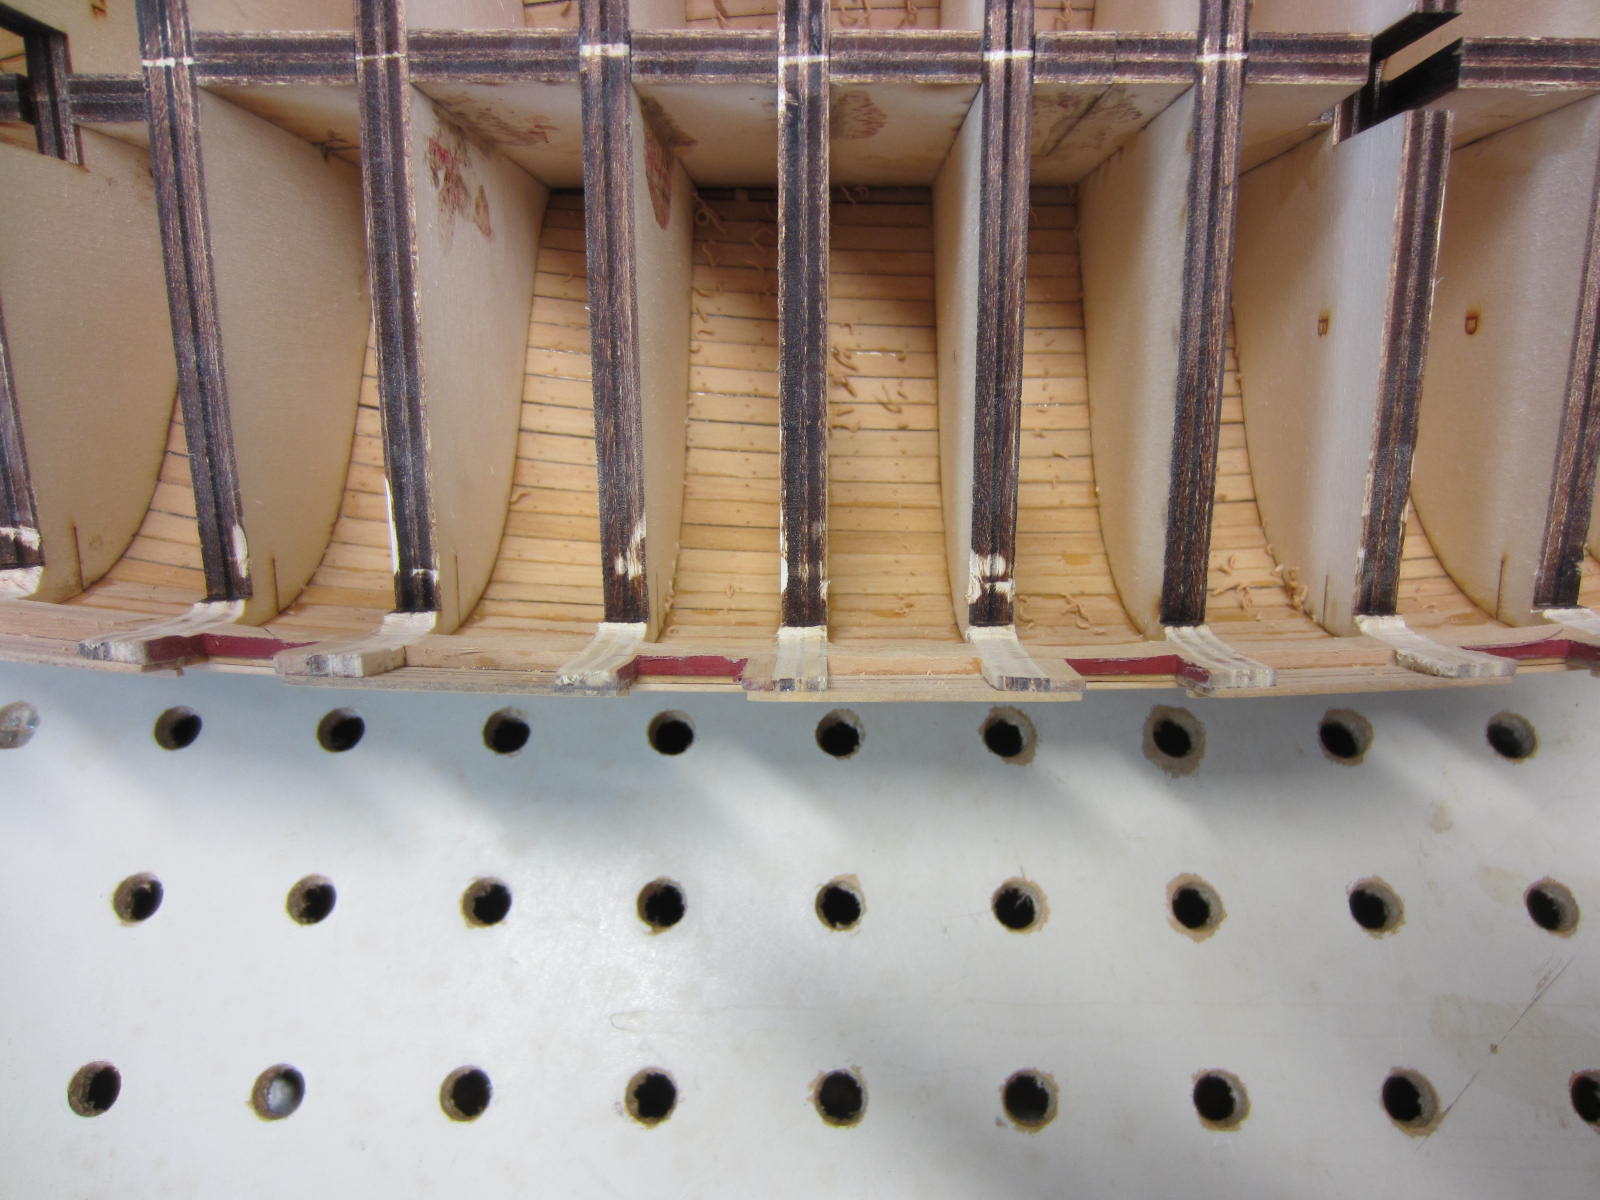
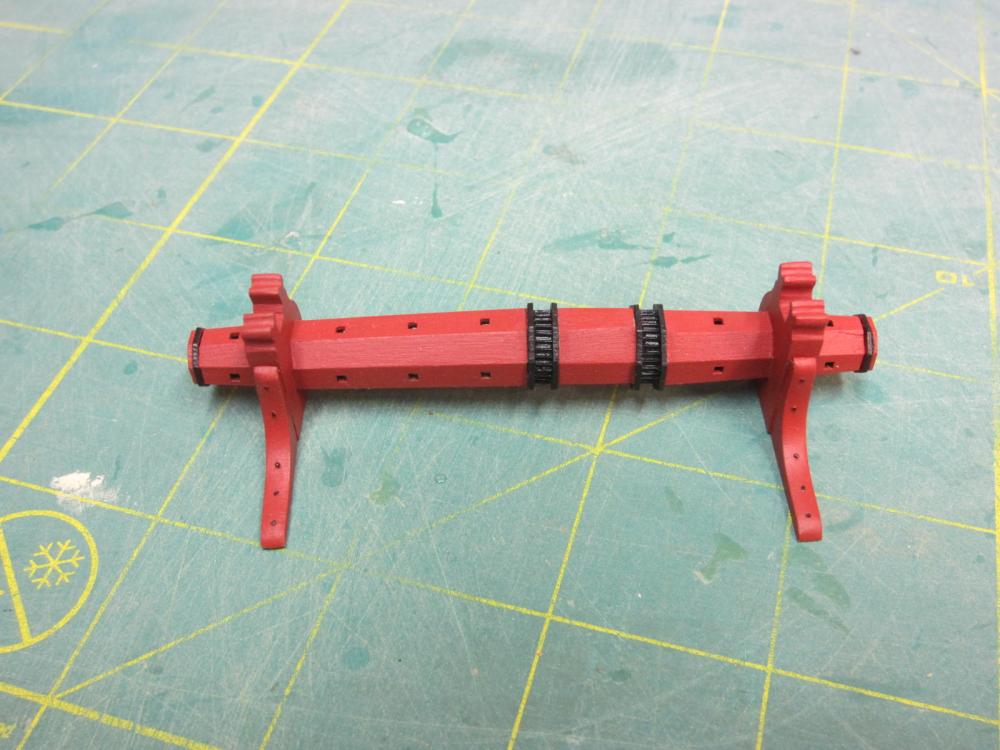
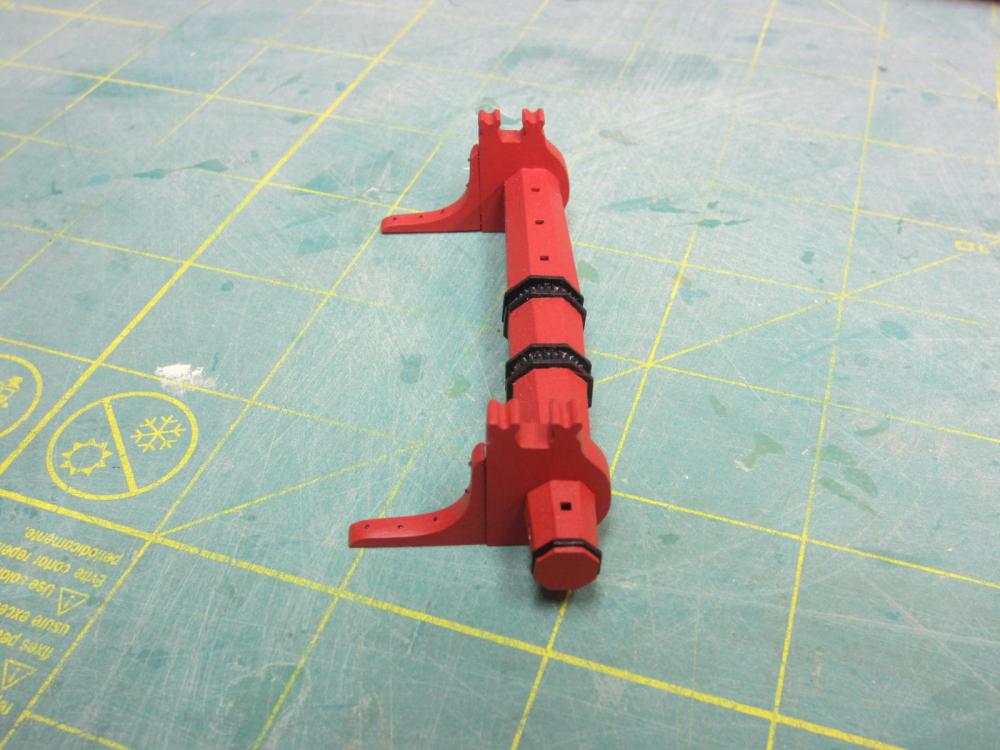
Well it’s time to start chapter 6 which covers inboard work. The first step requires making a lot of dust again. The bulwarks need to be thinned down to 1/16”. I placed a piece of strip wood to show 1/16” and how much needs to be removed. To accomplish this I used a dremel tool with a course bit and then a fine sanding drum to get close and finished with sandpaper. Here you can see the tools I used as well as the down draft table to collect the majority of the dust. Here you can see a section roughed in. Once all has been sanded like this I’ll go back and clean it up and finish it off. After finishing the sanding it will be time to install the false deck and plank the bulwarks.


- 310 replies
-
- 18
-
-
- cheerful
- Syren Ship Model Company
- (and 1 more)
-
Oh Mark if only “twice” was what made it nice! Thank you Nigel, Bob and Dirk for the kind words and also for all the likes.
- 310 replies
-
- 3
-
-
- cheerful
- Syren Ship Model Company
- (and 1 more)