


3DShipWright
-
Posts
202 -
Joined
-
Last visited
Content Type
Profiles
Forums
Gallery
Events
Posts posted by 3DShipWright
-
-
A few minor improvements made over the last week or so:
1. Cross-lashings (supports the course yard jeer blocks) on the fore and main mast heads/caps added
.png.8b9c24b0deee787ec7a8c67583cf7f24.png)
2. Reef tackle lines for the fore and main topsails added
.png.4bd5bb4d5d4a2aa64fd2362adeb73777.png)
3. Carronades replaced with higher quality versions. They don't currently appear tied to their brackets on the hull, but I will update that a bit later
.png.1bce65b2767d44af309b9c31bb893702.png)
-
New screenshot as part of on-going materials enhancements...
The Objective in Layman's Terms: Make the sails look as realistic as possible.
The Objective in Geek-Speak: This screenshot was part of a ray-tracing test (i.e. Cycles Rendering Engine) for the sail canvass material, and updates to the underlying texture nodes to achieve the desired results, which include:
1. If back lit, I want to reproduce the iconic 'golden' effect of subsurface scattering properties. To accomplish this, I figured out that the sails cannot simply be 2-dimentional planes; they must have an actual thickness to them. However, because the quilting, seams, and ropes fed through the sails only protrude from the front, I needed to invert the colors of the normal, bump, roughness, and ambient occlusion textures on the backsides of each sail while ensuring that the normals themselves continue to point outwards.
2. Also when back lit, the translucent - but not transparent - properties should become obvious. This is accomplished by adding a transmissive element to the material, and using a mask to ensure its only applied to the thinner parts of the sail cloth.
3 When front lit, I want the 'micro details' (wrinkles) cloth brush to be visible first on a high-poly copy of each sail, then on a baked normal map applied to the original copy. I've only done the Fore Topsail like this so far, but if it works, I'll do the same to the others.
.png.ff1503c77d4b362db43c0fcf4b067dcd.png)
-
5 hours ago, Kranck said:
Hi !
This is exceptional.
I'm gonna try to do the same with Rhino, with the intent to get CNC output for the parts.
Yours is to remain binary?
Thanks!
Unfortunately, all my work is destined to remain digital. I was born with a disability that severely limits the use of my hands, so I'll never be able to construct the outstanding 'real' models the way you guys do... That said, I can do this:
.png.a1e66ae9ac71bf5be50146cf31909aff.png)
-
Rigging! AHH! So. Much. Rigging. Lol.
.thumb.png.c3ea28fb9278127eb326b4dffece4ca7.png)
- mtaylor, chris watton, CDR_Ret and 2 others
-
 5
5
-
On 12/12/2022 at 2:15 PM, catopower said:
That's incredible. I just started to try to learn using Blender, and I can make a box... maybe.
Haha - yeah, ain't that the truth!
First, thank you for the kind words... this project is about 14 months in the making and has been every bit as tedious as it appears.
Second, Blender is arguably the best software I have ever downloaded - yet the learning curve is such that so many folks I know end up walking away. The skillsets do indeed take a while to develop, once they do, they're yours. For me it was like learning a foreign language. A grind at first, but then something just 'clicked'.
So keep at it, and if there's any particular Blender tips or tricks of the nautical variety you want an opinion on, I'd be honored to help where I can.
Happy Modelling!
-
-
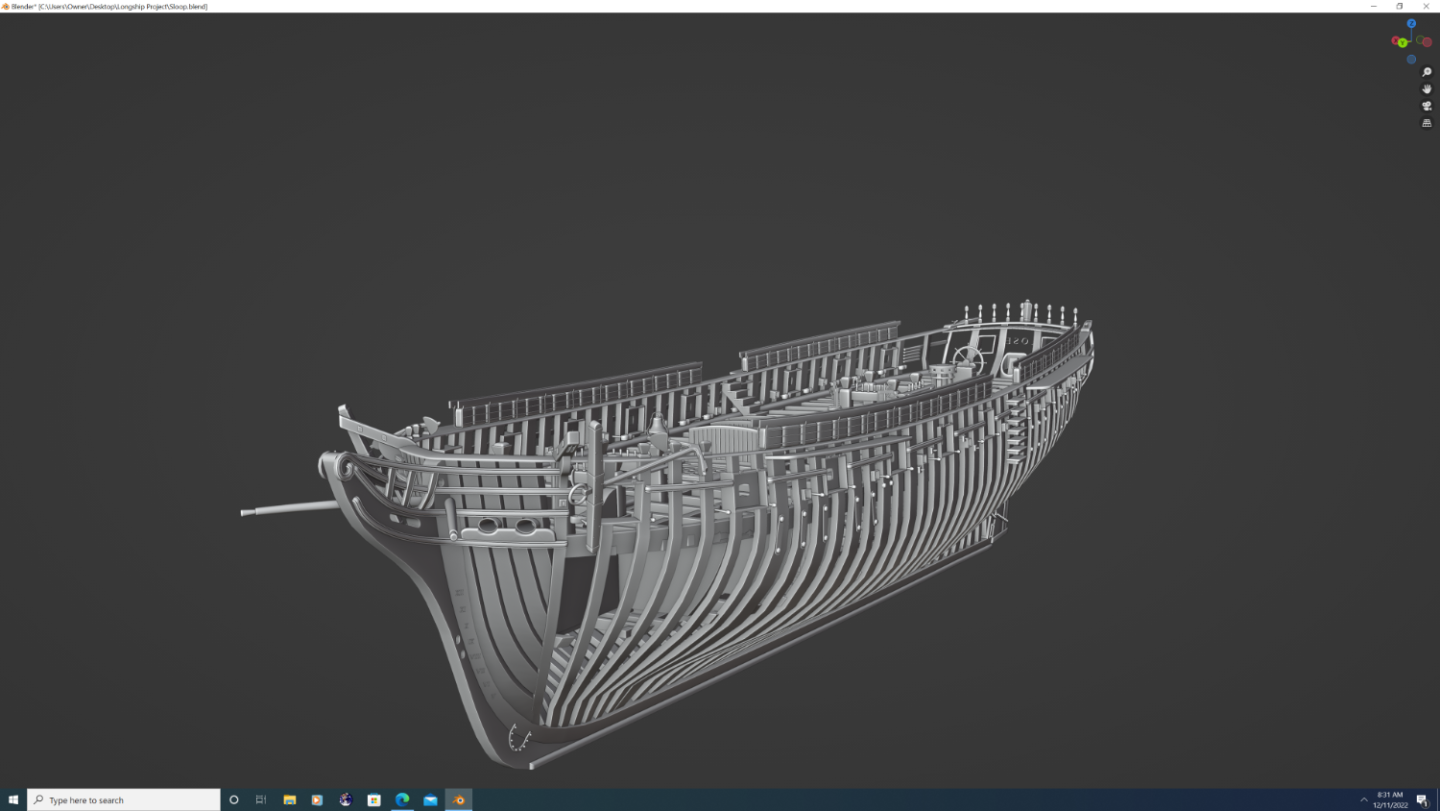
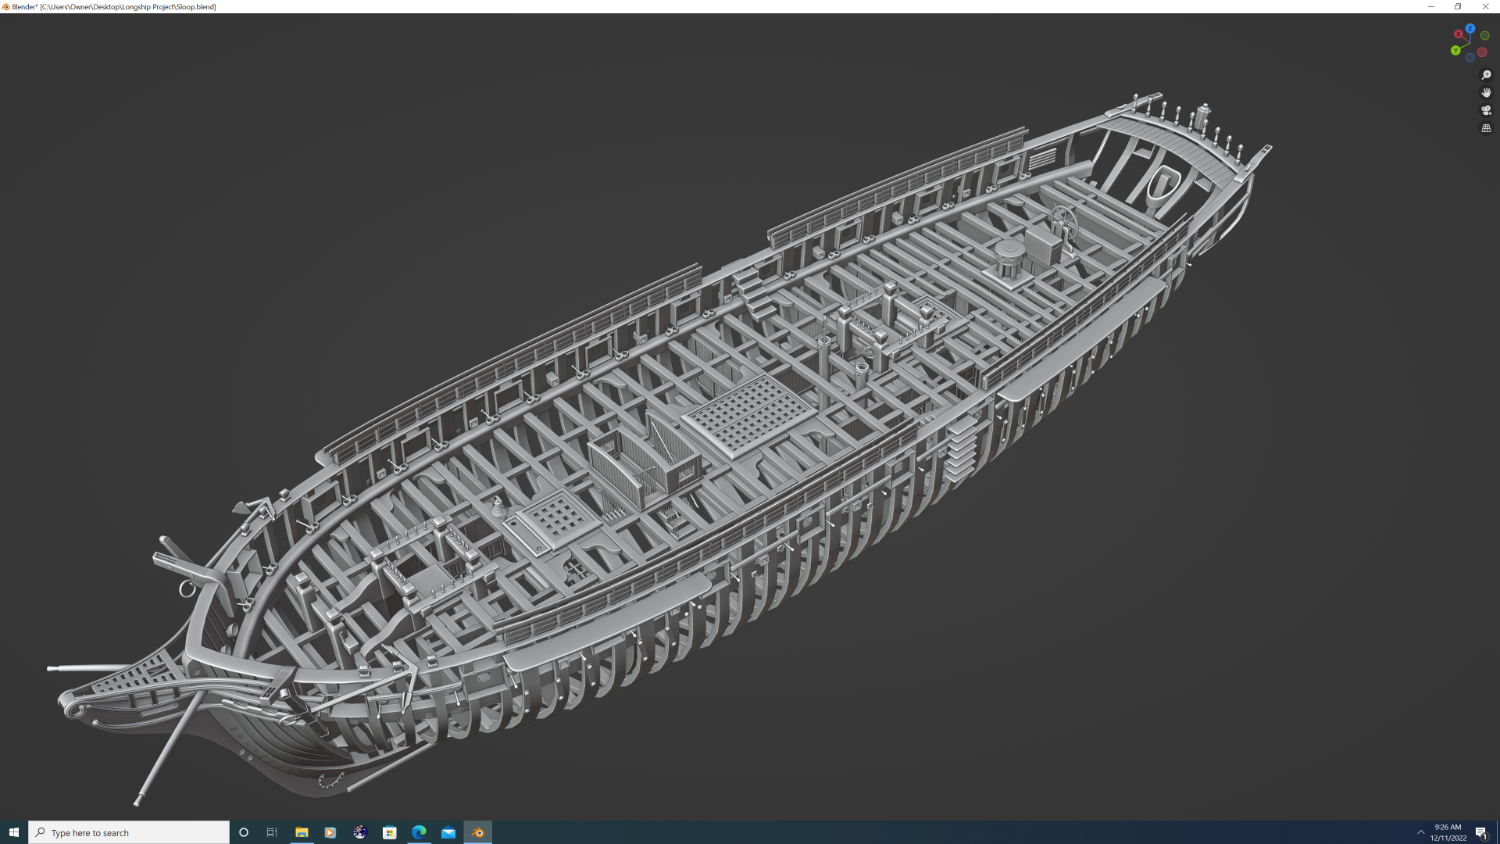
Stripping her down a bit, we can get a better look at the underlying structures.
Note that:
1. A few objects seem to be 'floating' in these images, because in reality, they are affixed to either the internal or external planking (Not shown).
2. The gunports appear to be partially sealed off. This plane is textured as a mesh netting that wraps around the end of the carronades
3. Handles not yet modeled on the pumps
I'll do a comprehensive breakdown by layer in a bit. Comments/suggestions welcome. Thx!
.thumb.png.ff1f1ac3d0cb2c1656e458d2b92165bf.png)
.thumb.png.8058af9a4c886112de2668eedaccbff0.png)
.thumb.png.5f08a91d15a97c449032b38dff354b02.png)
- chris watton, catopower, mtaylor and 3 others
-
6
-
-

.png.09d3e8aee55c88993843b1b954d2afe1.png)

.png.af1f1c025a14d6ba0692dee38f837540.png)
.png.e1057c089868ff6909fe58bae8cfe7c2.png)
.png.1d9ceb9402ddd2ef7407b1d2e345df78.png)
.png.673007642079d7c9f5487e77de48c98a.png)
.png.f2bf648df756264f651de66fb3ac0d63.png)
.png.3c0108c955e7be68e23975e08c4a4a9b.png)
.png.699a2c2fee9c81743624155b87762280.png)
74 Gun | Ship of the Line - 3rd Rate | Blender
in CAD and 3D Modelling/Drafting Plans with Software
Posted
Looking Great Kurtis,
Your project is kinda like ghost of Christmas future for me, as I've decided a 1st or 2nd rate ship of the line will be my next project.
I didn't become a member till your project was well under way, but for what its worth I have hull creation down to a science that doesn't require hours of smoothing, subdividing, and sculpting. I'm sure you probably did some of these steps, but I'm curious to see another blender artists strategy:
1. Import three copies of the plans (as reference images), scale to blender world scale accordingly, and align the plans in all three dimensions. Tip: The origin should be the top of the rabbet (or top of the keel, failing that).
2. Trace the lines with a line mesh or a curve (We'll be converting these to curves, but I'm better working with meshes, so I prefer to start with a plane a delete two of the vertices so I have a line segment, then just extrude as needed. untill it smoothly follows the plans.
3. Repeat step #2 for all hull 'slices' on the plan. Switch into plan view (X-Orthographic) and align each line or curve segment to its correct position along the 'Y' axis when done, it should look like this:
4. Select either the front or back curves, tab into edit mode, and with the pivot point set to 3d cursor, type 's' to scale, 'x' to lock on the x-axis, and then '-1' to essentially flip everything to one side. Finally, in object mode, select everything, convert to curves (if they aren't already), and go to 'object' menu -> 'apply' -> 'apply all transformations' The apply all transformations part is vital to the FINAL STEP
FINAL STEP is continued in next topic reply...