
.jpg.c334ea1d4cfb12b6b3e2eb949f8f8dea.jpg)
Jorez de Saint Nazaire
-
Posts
82 -
Joined
-
Last visited
Content Type
Profiles
Forums
Gallery
Events
Posts posted by Jorez de Saint Nazaire
-
-
thank you friends , many hours of sanding !
-
Hi Josh,
I remembered that the last planking (fore part) was difficult with always "clinker effect"
Do you soaked the planking ? I used also a electric plank bending (from AMATI). it is magic
Before to start the second planking I suggest to fit the keel.
Very nice stealer !
.thumb.jpg.d52f19dee517fe9e360abcbe7be44a87.jpg)
.thumb.jpg.41ffc91e32e9b68540406af6d6ce8b9c.jpg)
.thumb.jpg.e1f4a6b05a37aa9551f62e9b273ec901.jpg)
- theoracle09 and clearway
-
 2
2
-
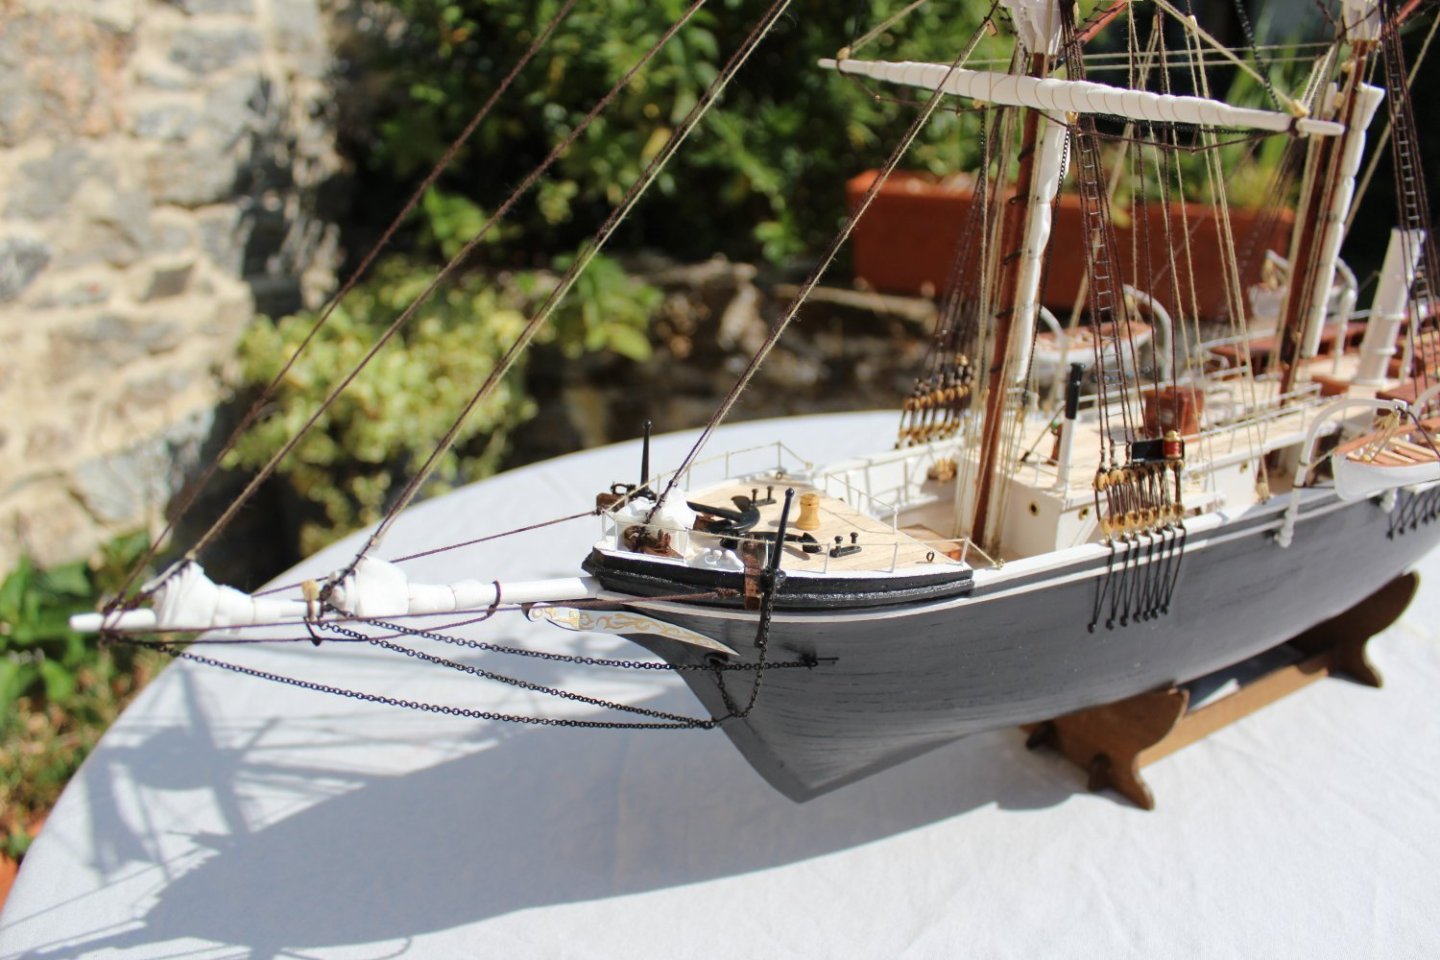
I blackened the chain but it possible to buy black one. It is what I did for the command of the steering

- theoracle09, clearway and Mike Shea
-
3
-
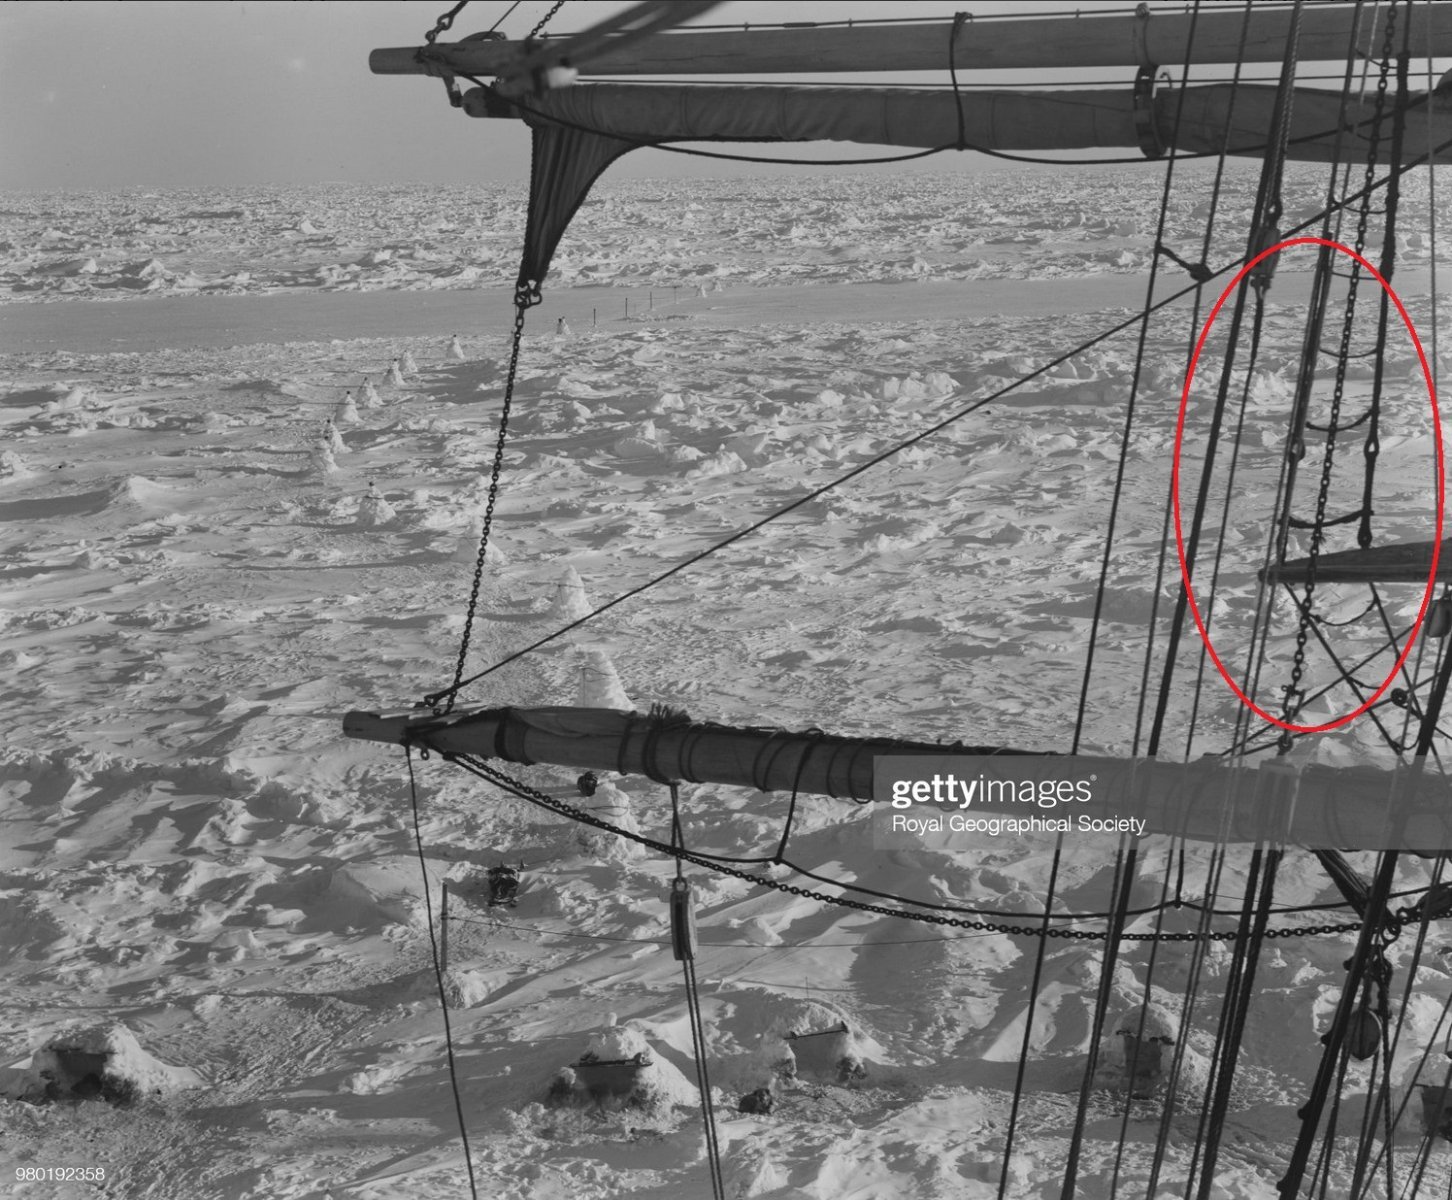
hi Josh
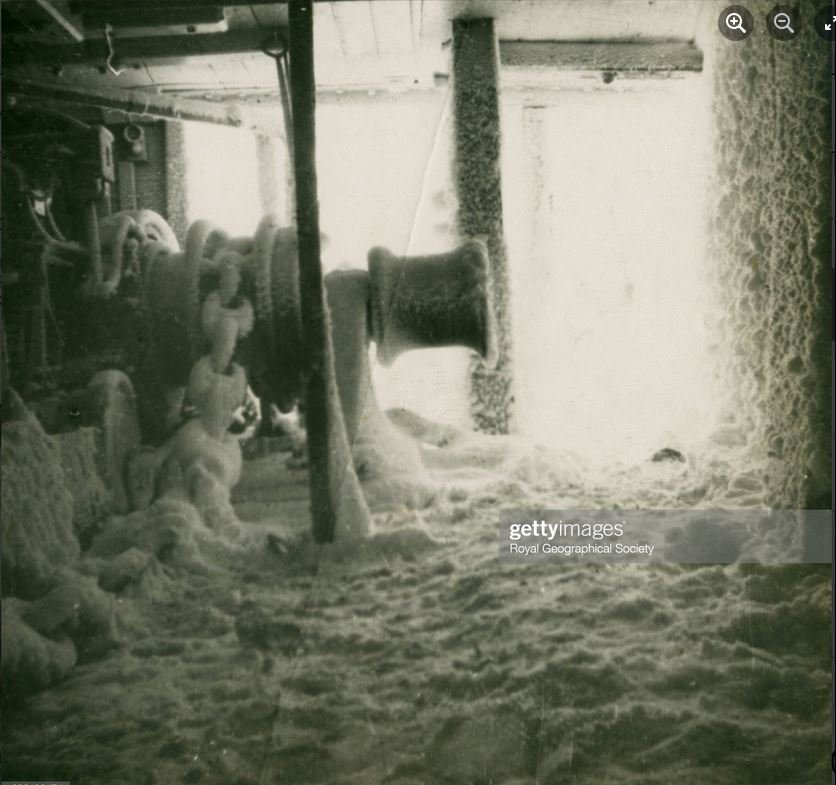
one link but not sure that's from Endurance. To be check
https://www.facebook.com/photo.php?fbid=10220932207752025&set=p.10220932207752025&type=3
-
Hi,
More pictures for your demonstration. 😉
.thumb.jpg.d5f8ed56152f8cf06d9b8b169e424bb4.jpg)
.thumb.jpg.a52f2cfd82667d731560637751d555be.jpg)
.thumb.jpg.a186a1ecc82eb97a7e6185720b1ba7b0.jpg)
.thumb.jpg.e1fbd05e4406280c8bba1302469277b2.jpg)
.thumb.jpg.b04044adf55ca8015d7a34ea9612acc0.jpg)
.thumb.jpg.a09f42c23c4565a270b5033930dc9564.jpg)
.thumb.jpg.8e90634635049d2d024fee4b2e82dc5b.jpg)
.thumb.jpg.ec93037361a3236900013a0f7e385264.jpg)
-
Hi
for the propeller ( I bought a brass one with 2 blades from Raboesch) ; type A diameter 30 mm M4 left (code 145-02).
Just for information.
FJZ

_resultat.jpg.d2e6d8541c541292af3fcc0ae1e09f40.jpg)
-
Hi,
At this stage it could be good to fit the garboard Plank but it is up to you.
Your log is very clear.
For the stern the ply former have the advantage to give the good geometry (volume).
Have a nice day
-
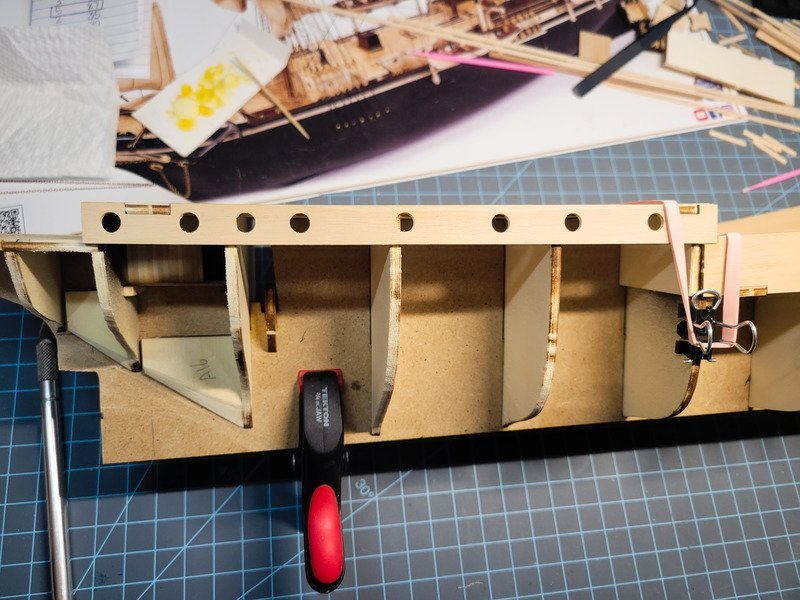
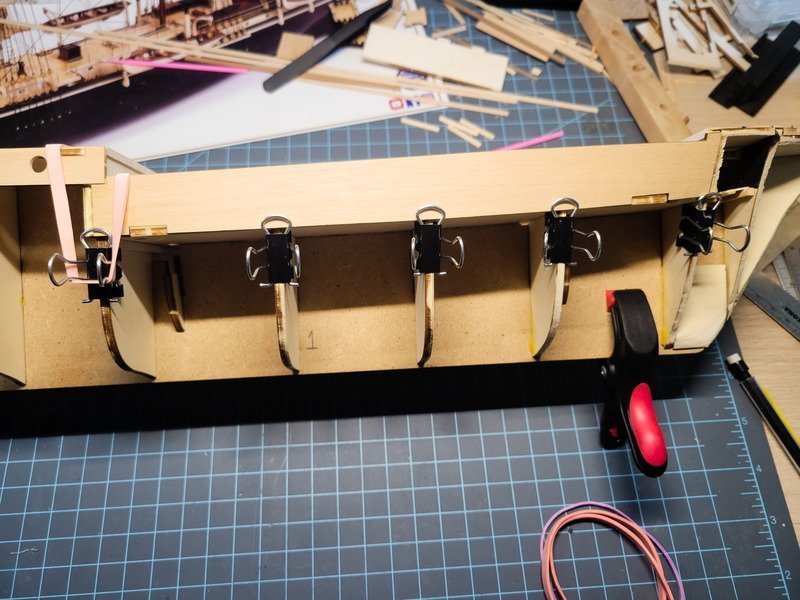
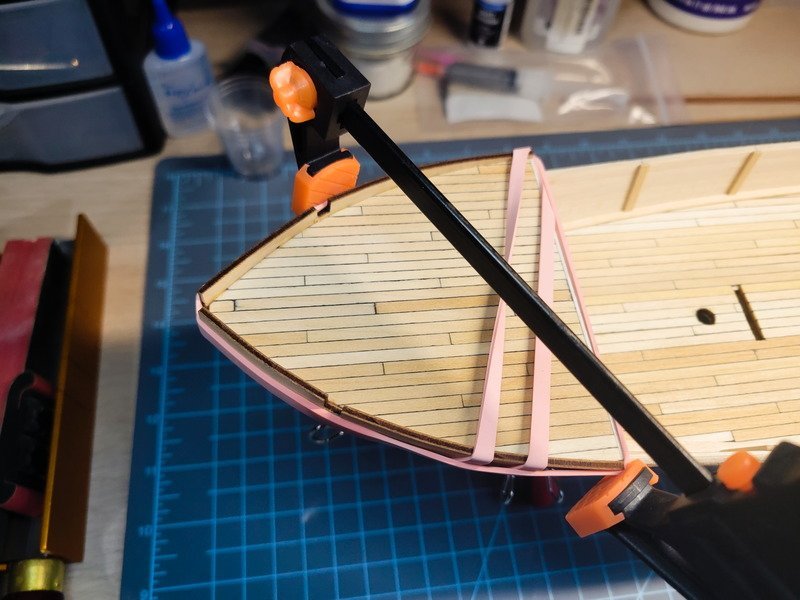
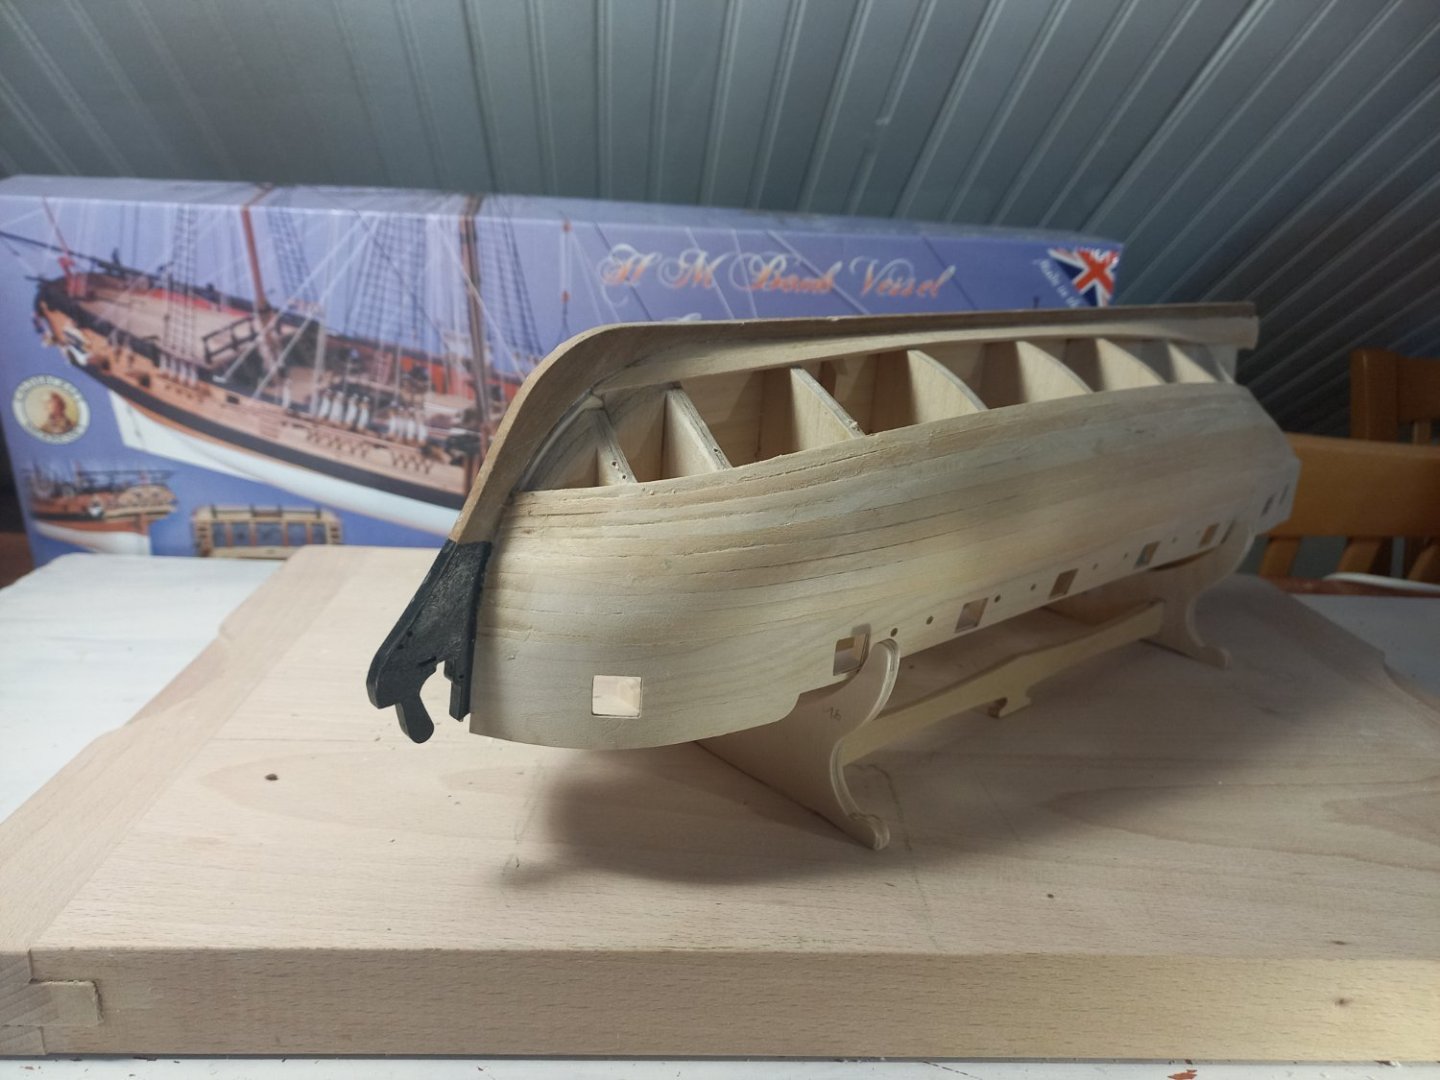
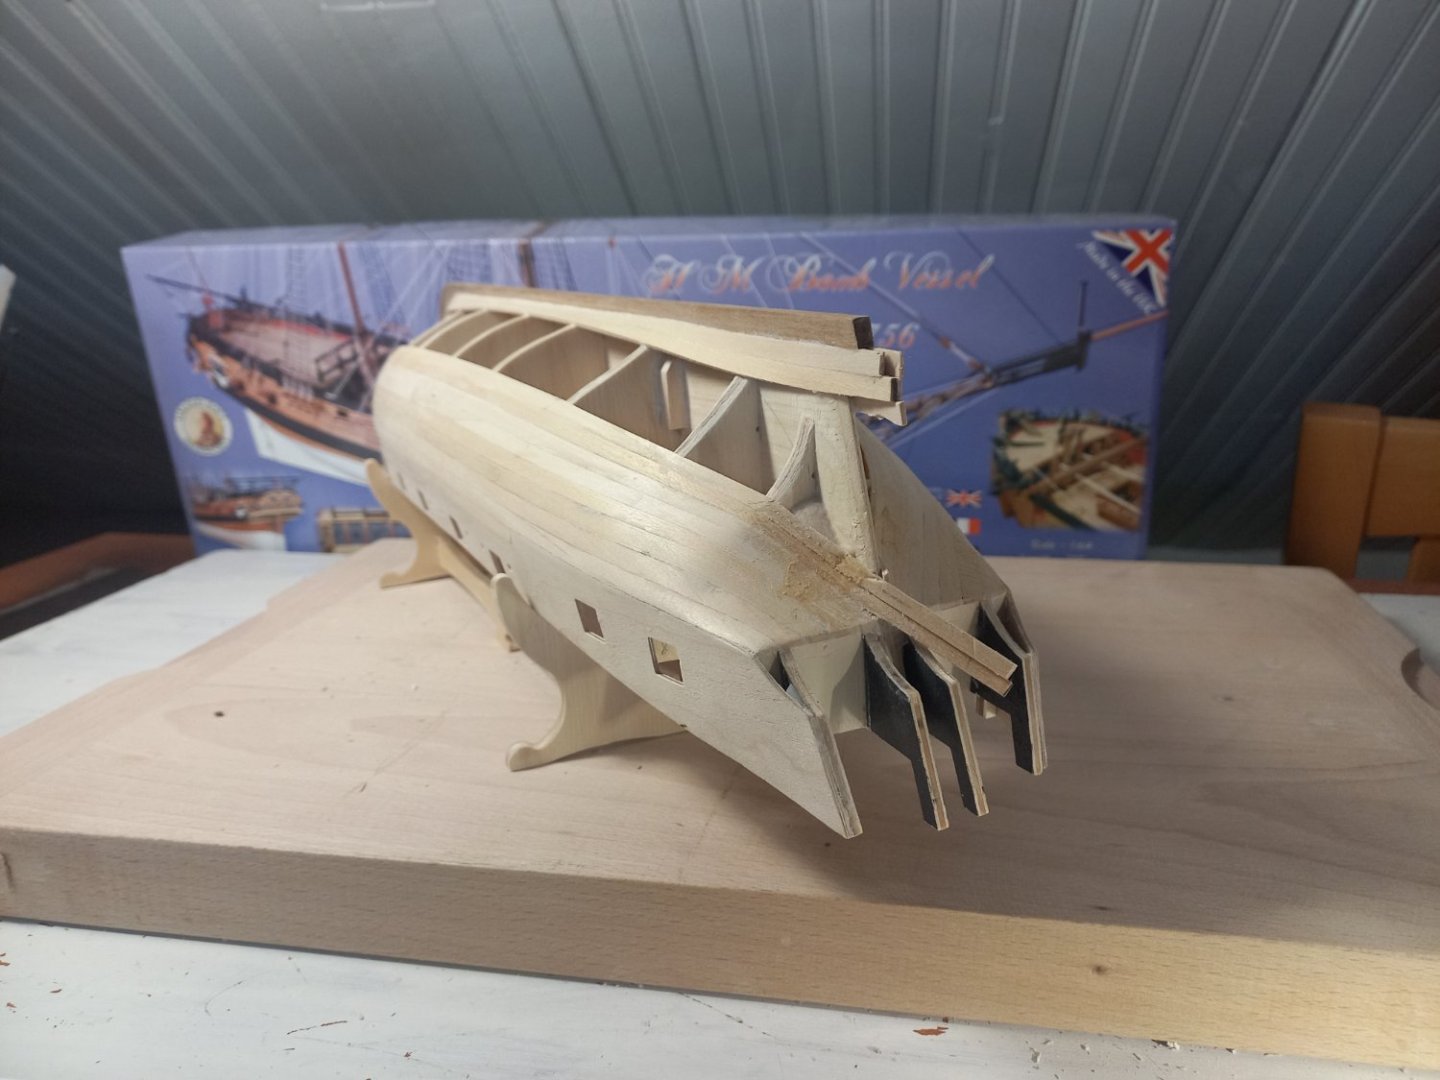
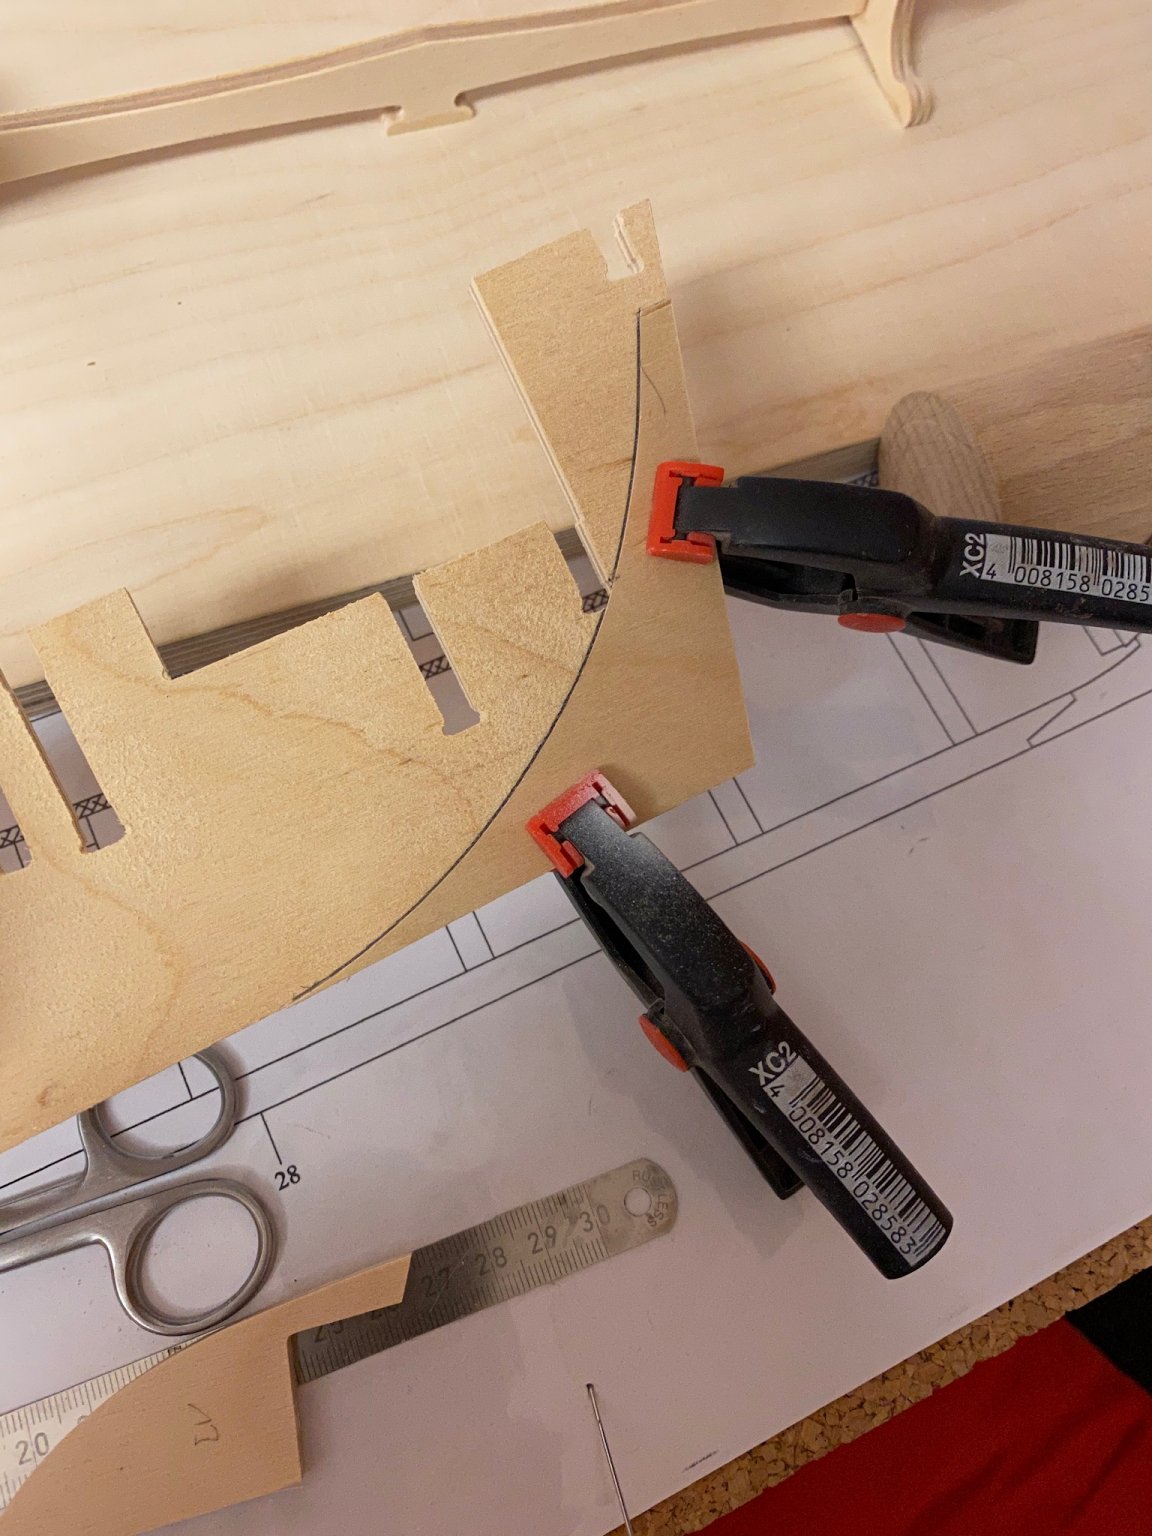
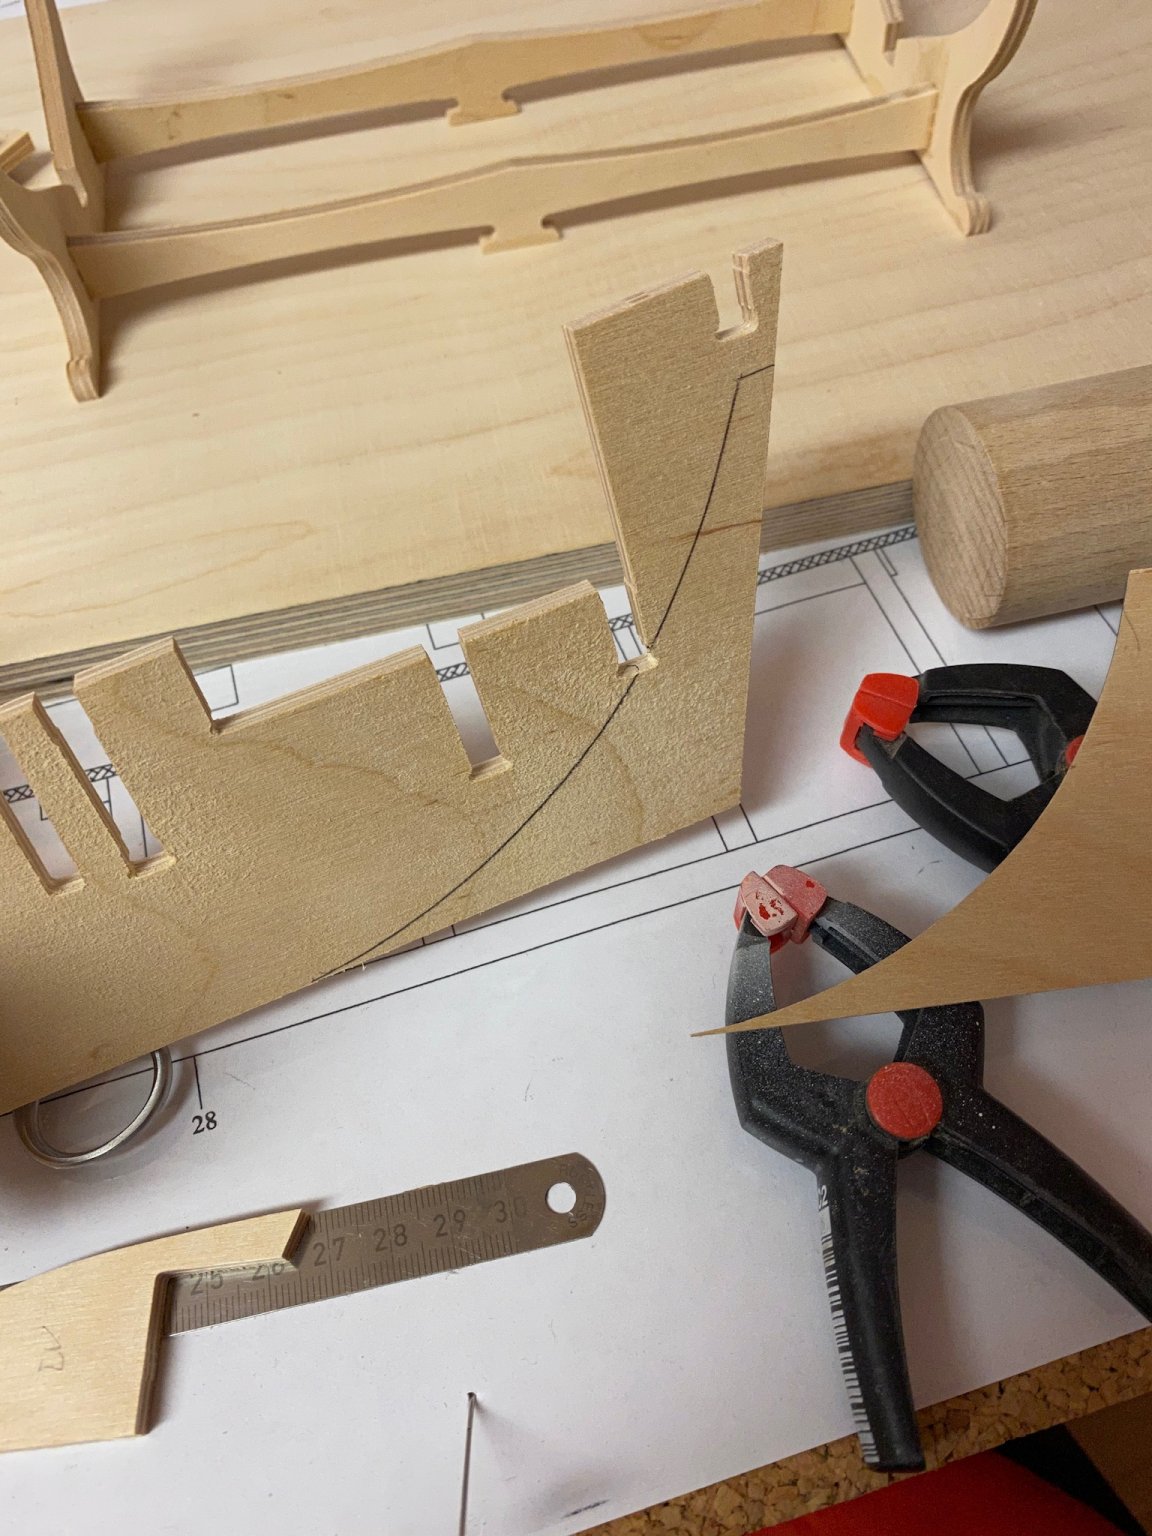
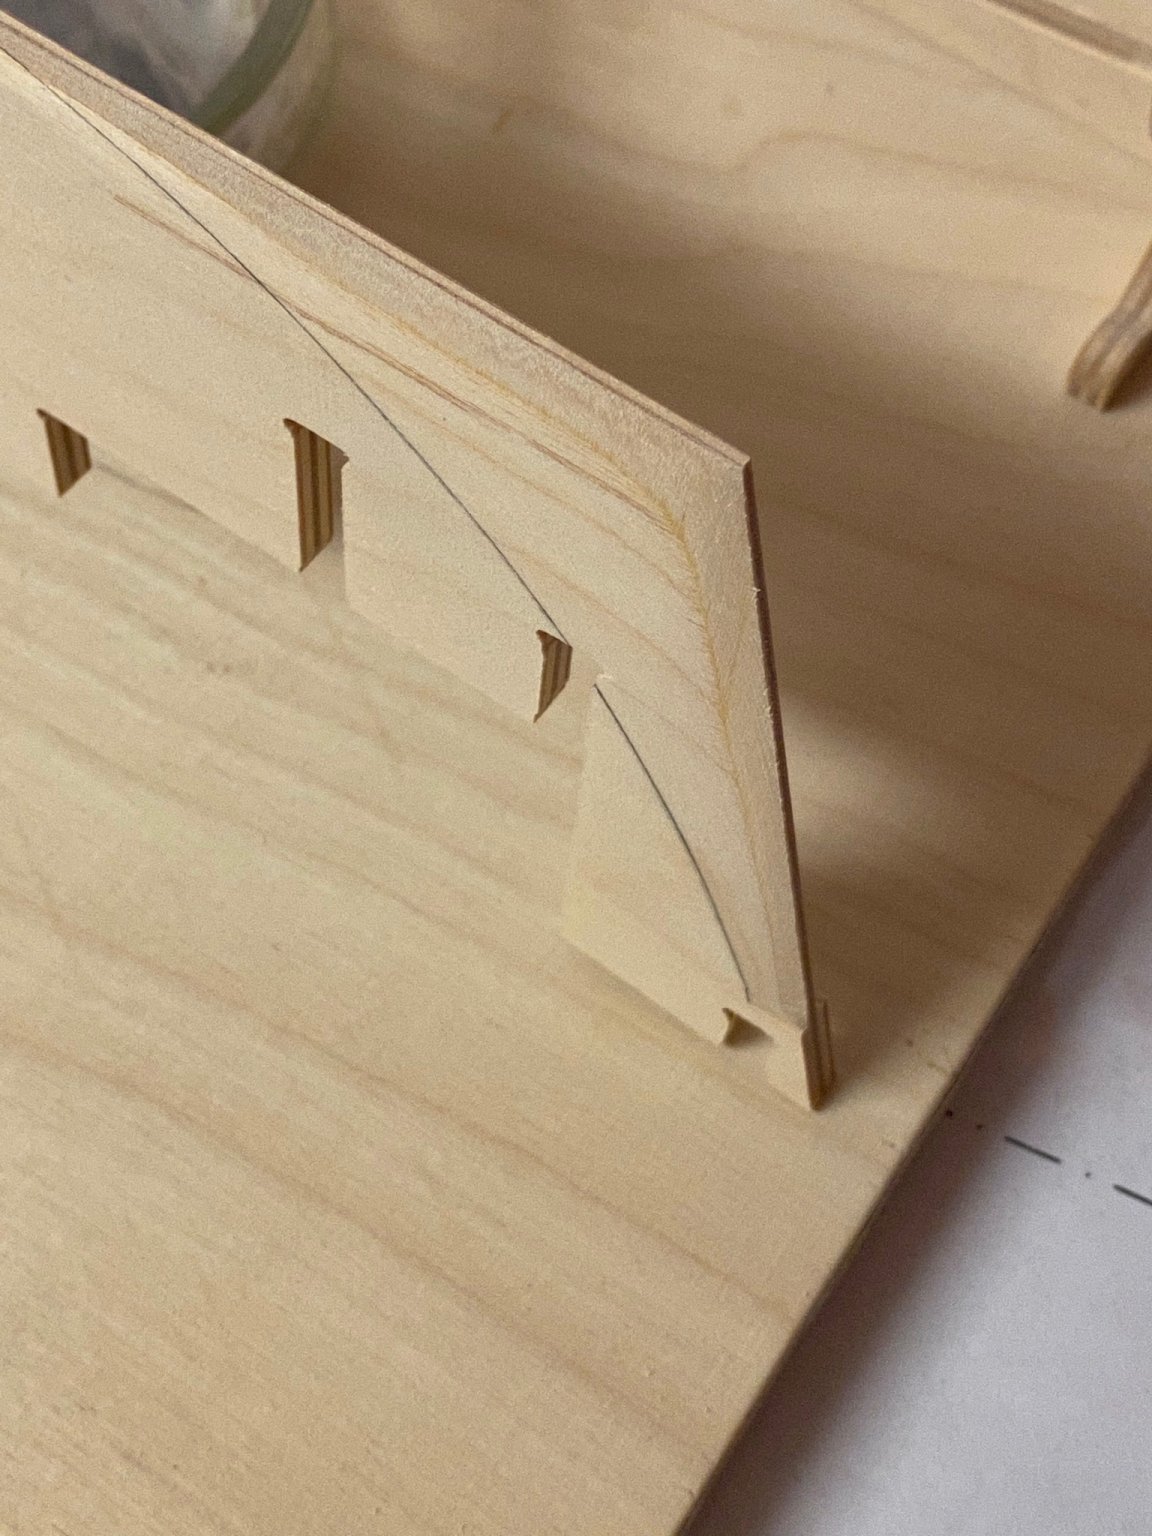
Hi,
First planking completed. 2 stealers at the stern, rabbet for the stem. 1 filler block for the stern and of course hull plank tapering. a good training before the second planking.
Next step the Wale !
.thumb.jpg.9927c5f77731b14ed96c1ae2f3505510.jpg)
.thumb.jpg.1d33432c198a26e32a9e7cdbe7d8eda5.jpg)
.thumb.jpg.a42af79b3942bf11b2098b3016421958.jpg)
.thumb.jpg.f8e18bc2de1a45a3ad3f9501debc57cd.jpg)
.thumb.jpg.f210109494a6528e149614e35d239e88.jpg)
- CiscoH, GrandpaPhil, Thukydides and 6 others
-
9
-
4 hours ago, theoracle09 said:
Yeah I'm just going to call the structure on the quarterdeck a deckhouse at this point, as it does appear the Ritz was a different part of the ship.
I finished the officer's quarter's portholes. Both sides were drilled out to 1/4" using a forstner bit. I also faired the hull, a step I absolutely loathe for some reason. A bastard file took care of it rather quickly, but I still dislike doing the procedure for some reason.
Bulwarks also installed on both sides.
The ply that goes around the bow gave me no issues on the port side. I found when planking the Newport water isn't needed to bend the planks, just a hair dryer. I get it nice and hot (only takes 30 secs or so) and then put the piece where it needs to go and bend it slowly. I clamp it, dry, to cool down for 5 mins or so. Then I take it off and glue it. The port side went on just fine, however the starboard side is stubborn and broke when I glanced at it. It's currently being glued in multiple pieces.
The bulwarks have been lined from fore to aft horizontally (not called for in plans) and the stanchions installed. Once I get the inner bow bulwarks installed (it needs a 5x2mm installed against the ply, then cut to shape) I'll paint both bow bits and the lining on the quarterdeck/bulwarks white.
Thanks for looking!

Hi,
The planking of the deck is vey nice and realistic, Bravo ! you really improve the model
-
Brian,
The quality of the model you are building is inversely proportional to the time, patience, modeling skills you put in to it. You're not slow !
It is a real pleasure to follow you log. I have a long way before to attempt your result.
- AJohnson, Ryland Craze and Peanut6
-
3
-
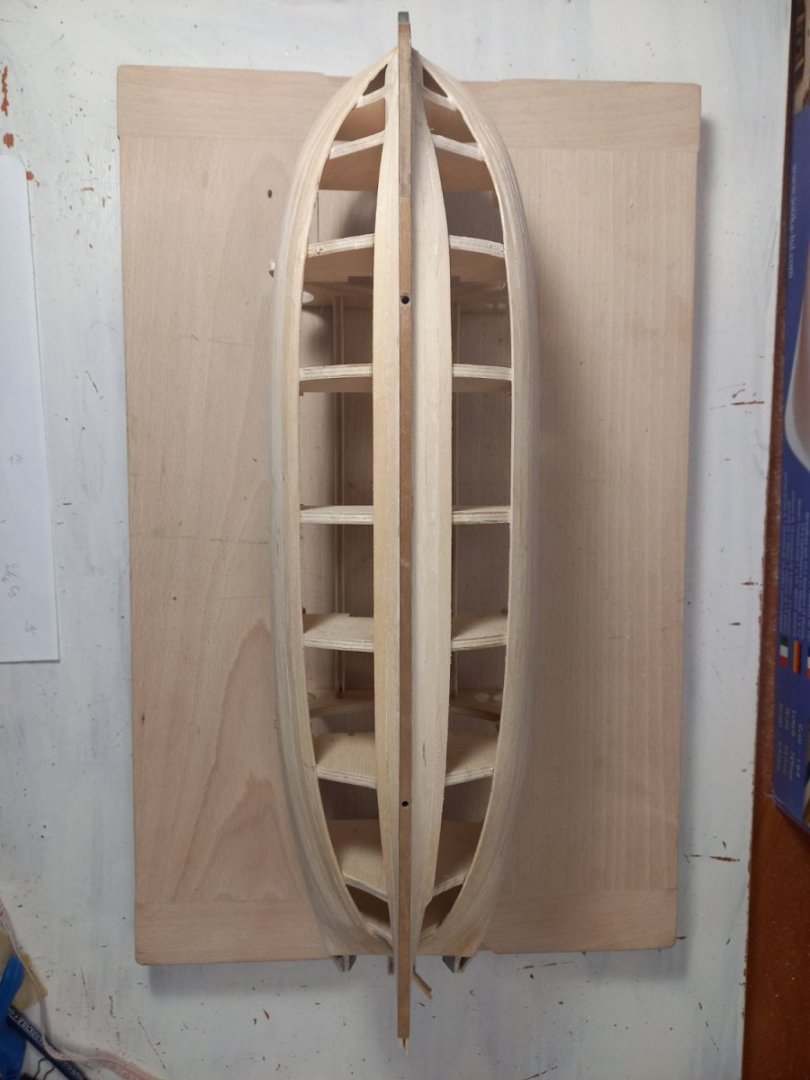
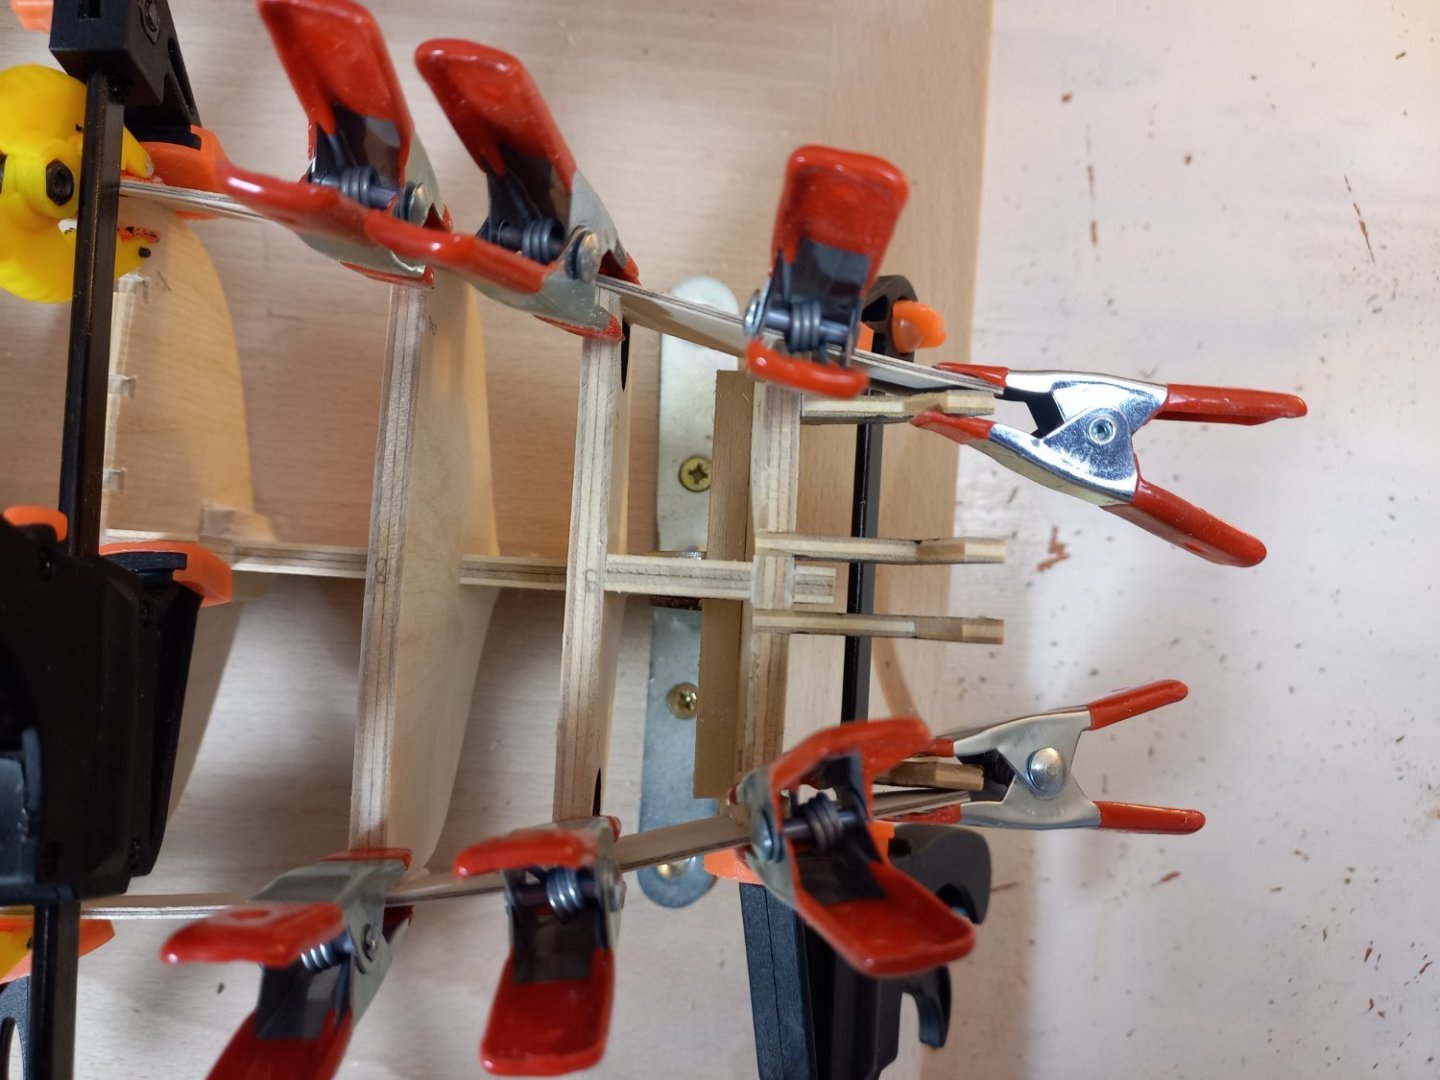
Hello,
First planking in progress....
Have a nice day
- Ryland Craze, GrandpaPhil, ccoyle and 4 others
-
7
-
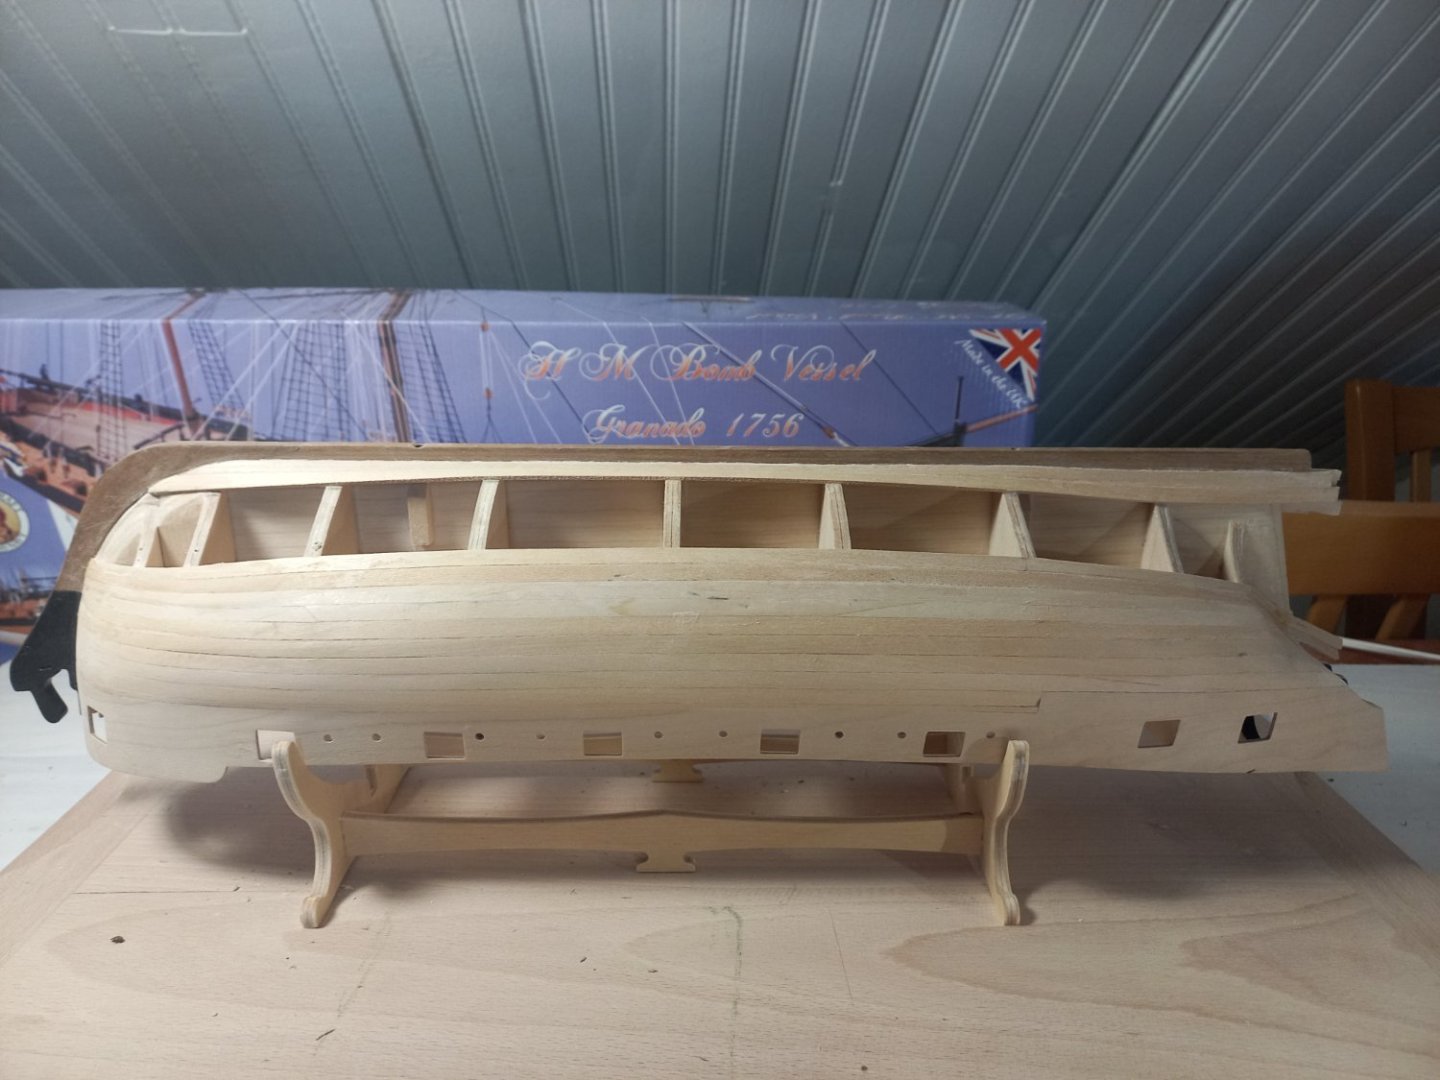
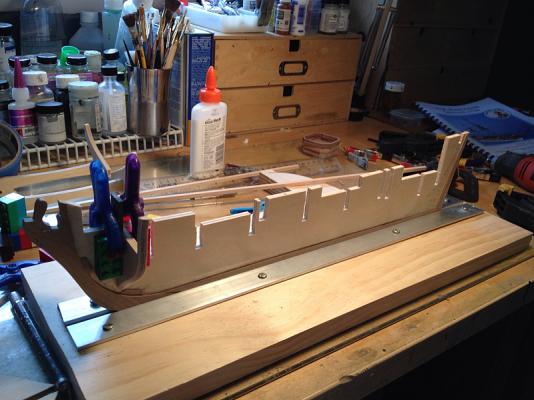
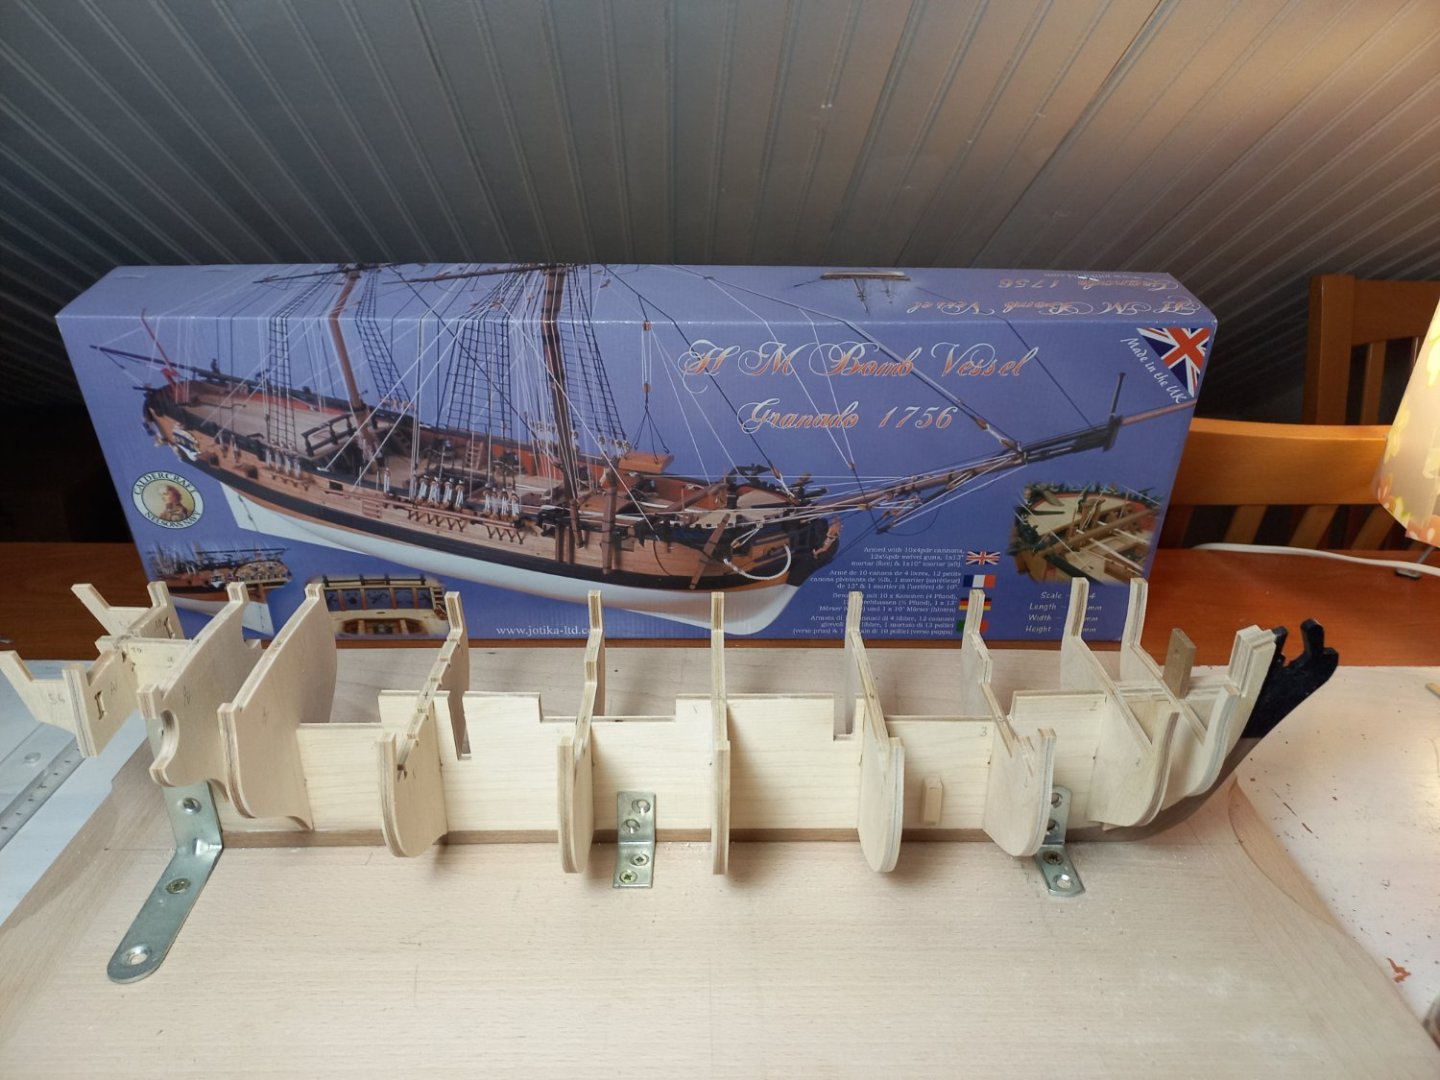 Bonjour,
The Granado is my second wooden ship build these year. This follows the ship Endurance which you can follow the link to in the MSW gallery.
Before to start I learned many things with the forum. Thank You Timmo, Joe, Kevin, Brian, Vane...
I was a little bit disappointed when I opened the box because 3 sheets missing. Thanks to Glenn (Cornwall) the problem was rapidly solve.
Like everybody the fitted of the gunport pattern is not easy. At the end Ithe gunport cutouts of each pattern (port and starboard) were not fully aligned (1-2mm) !
.thumb.jpg.bcf05ffc08f9a29b014466aa03f0ba62.jpg)
.thumb.jpg.5769dd69c685acc88474bd3b7b80453d.jpg)
- Ryland Craze, Dave B, GrandpaPhil and 1 other
-
4
-
On 5/9/2014 at 11:21 PM, jwvolz said:
I was looking for something a bit different for my next build, and most assuredly did not want to copper, having done so on my last three builds, so after much thought I have settled on the Caldercraft Granado. There are some nice builds of her going on her on MSW which have given me some great ideas and nice inspiration.
The kit is very nice right out of the box, with decent looking wood, nice fittings and excellent plans and instructions. I have yet to decide how far I'm going to go with changes and alterations wood wise, but I have some time to decide on that.
So...let's get started!
She's upright on her building board with rabbet and bearding line cut and the first few bulkheads installed. I'm glad we saved (my now teenaged sons') Legos!
Nothing too exciting yet...
Hello Joe,
I will start in few days the Granado. You log is very interesting.
I have one question. what the size of the rabbet 1x1mm or 2x2mm. Have you done the rabbet in the false keel or in the main keel ? is possible to have a detail of the rabbet that you have done
Thank you
François
-
On 6/29/2020 at 8:50 PM, captain_hook said:
Actually I made the first step, tapering the stern to the bearding line. As the kit is designed with no rabbit I will have to improvise or think about some sort of bashing to add one. I made a template based on the plan and transferred the bearding line to the false keel. Then used a piece of plywood with sandpaper attached to it by double adhesive tape to taper the keel so it goes from 5mm to 2mm at the stern.


hello in fact rabbit is rabett
-
On 1/4/2022 at 6:08 PM, HardeeHarHar said:
Well, I added the banding around the windlass, put the bell on the belfry, and built all the ladders. I have them dry fitted, and have posted a photo that shows all the warts that still remain to be touched up with some stain and some WOP. It still feels like progress is being made, warts and all. I have also completed the quarterdeck barricade, and have the elm tree pumps almost finished as well. Will post photos of those soon, as it helps to see what needs to be touched up more =\
.thumb.jpeg.ded686d5b66e1abe010cb020f1de97b2.jpeg)
Please forgive my repetitious pictures, but I did touch up the windlass a little more, and did so semi-successfully from my perspective. I also touched up the ladders a little, in order to reduce the appearance of the layers of different darkness on the sides of the ladder. I don't think I did as good of job with the rungs of the ladder, but maybe if you use your imagination we can all "believe" they look "used" and "weathered". I believe I could do this kind of touch up work forever, with little to no further benefit, so I am going to move on for now....and perhaps spend some time rigging the cannons, instead of staining wood poorly. Thanks for the thumbs up and build fly-bys.
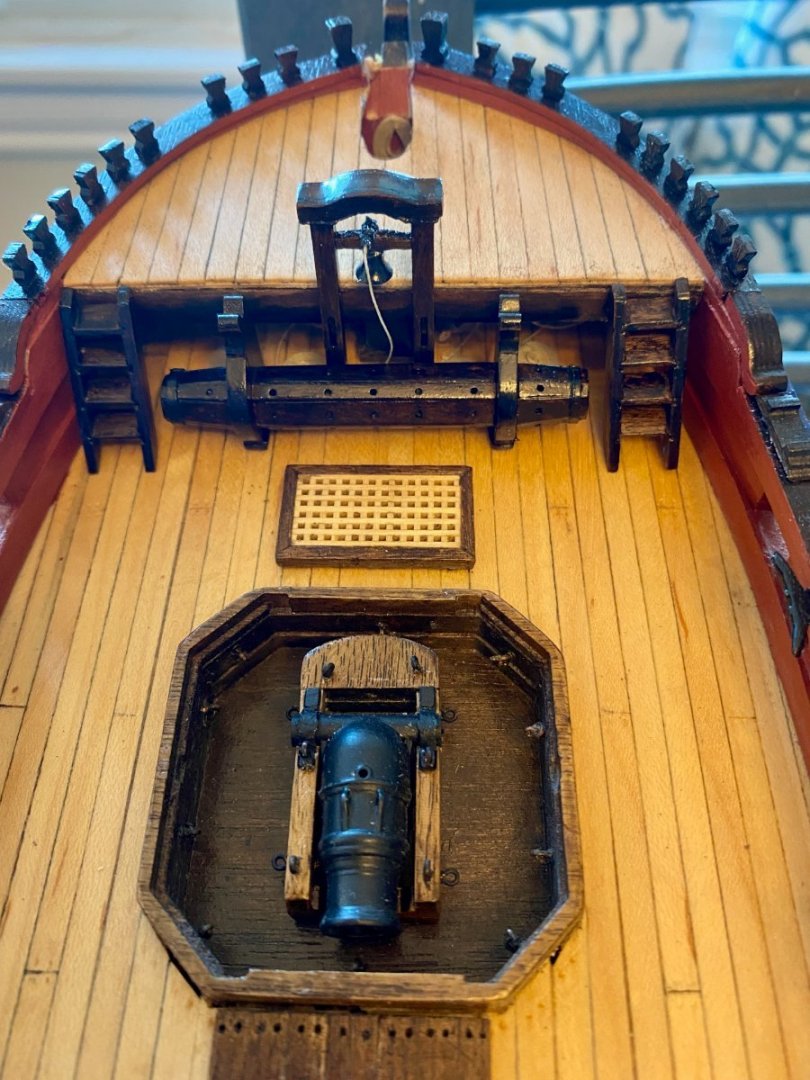
Hello Brian,
what material is the mortar made of ? plastic or brass.
Thank for your log really appreciated
François
-
34 minutes ago, wmherbert said:
Beautiful job. How did you do the ratlines with wire? They came out very nice. Any tips?
Bill
for the ratlines I used brass wire (diameter 0,5mm) after blackening
Have a nice day
-
Bonjour,
That's all folks. Thank you for you following. All pictures available in the Gallery.
A bientôt
François
.thumb.JPG.c454e1ec5b7a0d9e9a985fd9dbf2337c.JPG)
- ccoyle, clearway, theoracle09 and 2 others
-
5
-
Bonjour,
Almost finish after the liferafts...
I change the flag ( blue instead of white) I add navigation lights.thumb.jpg.130a4183a93f2bd0436ec03d9a907c0b.jpg)
.thumb.jpg.f14900b4bcbae1f636c1f02ed9c867c8.jpg)
.thumb.jpg.1b057030df7b3a1bdbeb32dd5abca061.jpg)
- Knocklouder, DanielD, Montaigne and 2 others
-
5
-
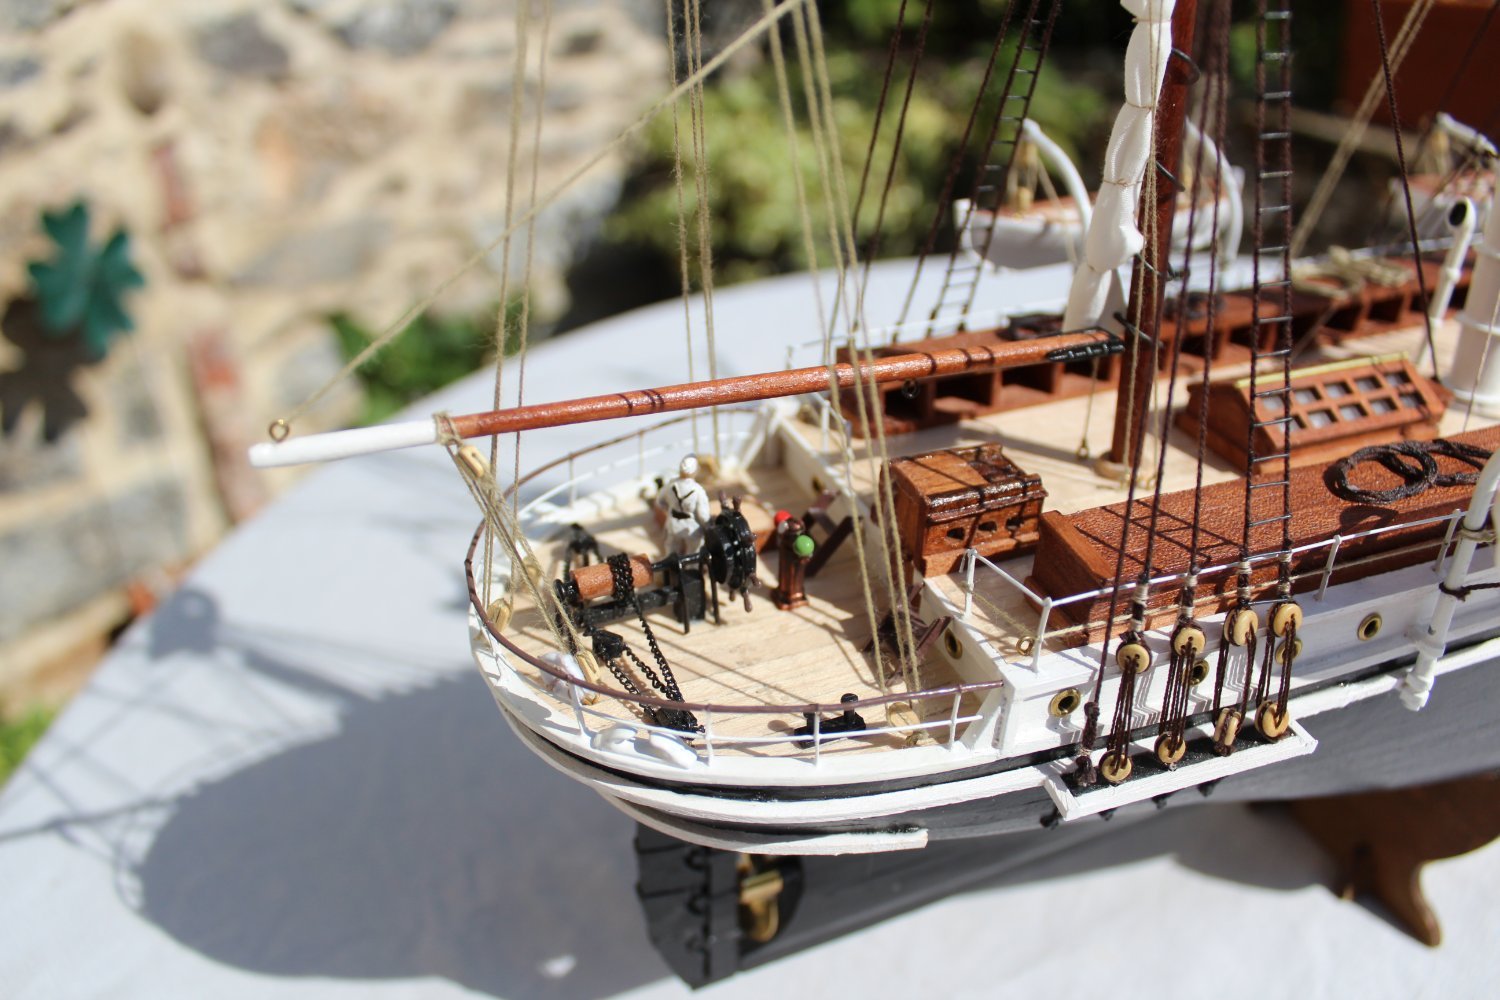
Bonjour,
On the topmast- Furled sails (Premium cotton sail fabric - Ecru 75g/m2)
- fore topmastl with furler + spanner
- Finished shrouds, beginning of ratlines (0,5mm brass wire with chemical blacking)
- Beginning of the stays (anchoring on front deck and not on bowsprit)
- Installation of the lift
- backstays to start
.thumb.jpg.d8a0812608c686a9908fd71856d2e880.jpg)
.thumb.jpg.a2ac59a6f9642acd438616a9aae5ab1d.jpg)
-
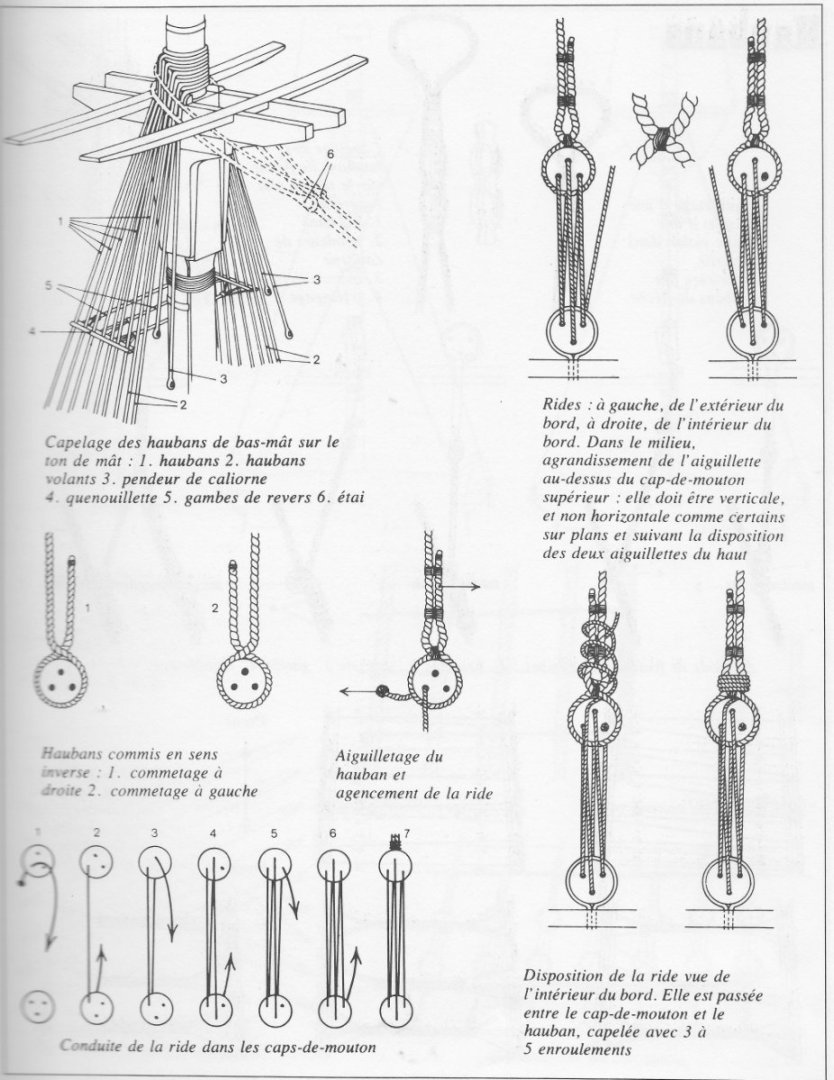
Beginning of the shrouds of the main mast according to the Encyclopedy Mondfeld
.thumb.jpg.06bf903fa889f2c851859f22896e1d45.jpg)
-
-
-
-
Hello,
For the chainplate do you use brown thread or metal profil ?
Thank you
.thumb.JPG.3173fbe0c2d1e5cc88d7973872f3319d.JPG)
.jpg.850794d596a72479bb44d895ccfb753c.jpg)
.jpg.3d830bf7398f90e85bcf1bd8f899a124.jpg)
.jpg.c4d4646db6fe3d85d3befde6385902c0.jpg)

.jpg.ad557eee6c790c34d500db3fc74bb3cb.jpg)
.jpg.200a8488efa87b809d57d27fc463dcb2.jpg)
.jpg.67ad0a98a5ee35da4ab8431b2835b524.jpg)
.jpg.ed26d2d97c3b8b710e2a65e34332c512.jpg)
.jpg.4da1d3257c9dc64be829f4d8f088951a.jpg)
.jpg.2150c859a40899d68e16028380260292.jpg)
.jpg.3f8feaa8bce91698692cecd81c9397e5.jpg)
.jpg.df1b0d756e2d893bd4e65c958922d6c4.jpg)

.jpg.c3b3bc52da17d8455d1ddcaf37bc6397.jpg)
.jpg.7bc34461ced2ffd577f33268106055f1.jpg)
.jpg.fb4beb28fdd18f080965542d1e1e2467.jpg)
.jpg.66a6810e56ca772e7420cb95eb5b92bc.jpg)
.jpg.a8deade7d7c6adacd96cdcbf0c2d2bb2.jpg)


.jpg.668dea2f809628cc68f73f8e7d569bf8.jpg)
.jpg.2243b5d813accdae760a6174e0d196ec.jpg)


.jpeg.5f02ab47013883d27f0f8939851e84d4.jpeg)

.JPG.d82102717fc9334301e533cc1e556ebd.JPG)
.jpg.4a1dd3dab39a33f53040bb152c3bda6b.jpg)
.jpg.70d548eaddd2e49d7676aab2533210ba.jpg)
.jpg.82816d3044af39a387b12dba422e195f.jpg)
.jpg.31a2a686c77bb639dbe8b14725a5f48e.jpg)
.jpg.b22eaef9b7cc6bf940e86ec7a2e82d4d.jpg)
.jpg.35f771fca524fa68eb4e5db347d115dc.jpg)

.jpg.716d4d1eb22dc06e76e17498c714c3d0.jpg)
.jpg.e35f7b5264dc47d03cc3fd4bf619ae19.jpg)
.jpg.918cd04b474ab4cf742594c0a2c8c435.jpg)
.jpg.8b883e7d7b1aacb04069c29ee561064e.jpg)
.jpg.e87ee50b725074815606b257e0ac70b4.jpg)
.JPG.78cf643209beaafa62a86163db7dbf8c.JPG)
Endurance by theoracle09 - OcCre - 1:70
in - Kit build logs for subjects built from 1901 - Present Day
Posted
Hi Josh,
Could you give me the link to these instructions.
Thank you in advance