Loracs
-
Posts
302 -
Joined
-
Last visited
-
 Canute reacted to a post in a topic:
Hobbymill.EU / precision milled exotic woods
Canute reacted to a post in a topic:
Hobbymill.EU / precision milled exotic woods
-
hollowneck reacted to a post in a topic:
Hobbymill.EU / precision milled exotic woods
-
Wahka_est reacted to a post in a topic:
Hobbymill.EU / precision milled exotic woods
-
 @Wahka_est, this is great! thanks for the clarification. For people like me who does not have the volume necessary to justify the base equipment (circular saw, thickness sanders, band saw, etc.), services like yours is so much welcome.
 -
 Loracs reacted to a post in a topic:
Hobbymill.EU / precision milled exotic woods
Loracs reacted to a post in a topic:
Hobbymill.EU / precision milled exotic woods
-
hollowneck reacted to a post in a topic:
Hobbymill.EU / precision milled exotic woods
-
 Loracs reacted to a post in a topic:
In which offense is taken (or, "hey! I resemble that remark")
Loracs reacted to a post in a topic:
In which offense is taken (or, "hey! I resemble that remark")
-
 Loracs reacted to a post in a topic:
In which offense is taken (or, "hey! I resemble that remark")
Loracs reacted to a post in a topic:
In which offense is taken (or, "hey! I resemble that remark")
-
Canute reacted to a post in a topic:
Timber - Various - HobbyMill.EU
-
Canute reacted to a post in a topic:
Hobbymill.EU / precision milled exotic woods
-
Loracs reacted to a post in a topic:
HMS Revenge 1577 by GrandpaPhil - 1/64 - CARD - from Victory Models Plans
-
Cena reacted to a post in a topic:
In which offense is taken (or, "hey! I resemble that remark")
-
@Wahka_est, thanks a lot for the update... it is nice to see you here. Most of all, in modeling or in business, have fun! One question about custom order: do you still plan on offering the option to order with a higher tolerance cuts and strips sanded up/downside (even at higher cost)?
-
Chuck Seiler reacted to a post in a topic:
Timber - Various - HobbyMill.EU
-
@James H, a little late for that but thanks for the review. I'm looking for a new supplier of finely cut strips... it is good to have multiple option available. Shipping will add to the US but for quality... it may be worth it.
-
Loracs reacted to a post in a topic:
Bluenose by Admiral Rick - Model Shipways 2921 - Scale 1/64 - Canadian Fishing Schooner
-
Keith Black reacted to a post in a topic:
In which offense is taken (or, "hey! I resemble that remark")
-
In which offense is taken (or, "hey! I resemble that remark")
Loracs replied to Cena's topic in New member Introductions
I want to join others in welcoming you and strongly encourage you to initiate a build log. Build log are invaluable at conveying information. There is no "expertise" level required. I started mine on my very first ship. Build log are NOT met to show-off your building expertise or skills... it is simply a way to share your new passion with others. Yes, you can get help, sometime even critical comments... but I must say that I appreciated both. It became a learning tool to grow. I'm learning every day from build logs create by both expert and novice and guess what!! I like them all. Note: nothing wrong with plastic build if it is what you have in mind. I have a short one in my signature. They are fun to do too. -
Loracs reacted to a post in a topic:
Oseberg by md1400cs - Ships of Pavel Nikitin - 1/32 scale - with hopefully many added details.
-
Canute reacted to a post in a topic:
HMS Revenge 1577 by GrandpaPhil - 1/64 - CARD - from Victory Models Plans
-
Very interesting... thanks a lot for showing your approach. In fact, you are making it so easy.... but your skill at sculpting is quite apparent. Very nice work.
-
as usual you are.... fast!! It took me several days to rig those little fellows.
-
It is a very sad day for us modelers... but we understand that your decision was likely not an easy one. I truly wish you the best in health and passion. Your service will be really missed. Wait!!! where will we get our wood now! It was such high quality and your service exceptional. Please rest assured that you left a VERY positive mark in the modeling community. Something to be truly proud off. Please take care of yourself...
-
It was my first build... I found it very enjoyable. I would recommend it to anyone.
- 22 replies
-
- 1
-
-
- chinese pirate junk
- Amati
- (and 1 more)
-
kit review 1:48 La Renommée 1744 - CAF Model
Loracs replied to James H's topic in REVIEWS: Model kits
Now, I have to give credit to CAF in many other areas... my comment has to be balance. 1) Design: fantastic design overall. If you are into POF this is a very nice provider, one of few. 2) Originality: Le coureur, which is one unique ship' hull available commercially. HMS Granado, a split design already incorporated within the design of the kit, that a first too. La Renommee seen here, the level of details is impressive. 3) Licensed plan/design, this is one consideration that matter to many. Those are some of the pluses I can think right now.- 20 replies
-
- 2
-
-
- cafmodel
- la renommee
- (and 1 more)
-
kit review 1:48 La Renommée 1744 - CAF Model
Loracs replied to James H's topic in REVIEWS: Model kits
I agree but chapter need to be available... if it takes 2 years to get a next chapter or it is always in limited, short-term supply, that a huge deterrent. Second, "chapters" seen to be a reason to boost the overall price while staying under the radar. Some "modules" are the price of a whole kit! I'm NOT taking about intensive boxwood carving but standard plan and wood. Again, so sorry about the comment, but it has to be said. This seen to be changing at CAF but slowly... precedent is hard to overcome in the buyer's mind.- 20 replies
-
- 1
-
-
- cafmodel
- la renommee
- (and 1 more)
-
kit review 1:48 La Renommée 1744 - CAF Model
Loracs replied to James H's topic in REVIEWS: Model kits
Loving the design... BUT Cherry is a no-go for me at this price point. Premium price has to call for premium wood: Quality Pear or boxwood. I so sorry to say that, but it is just the reality of thing.- 20 replies
-
- 1
-
-
- cafmodel
- la renommee
- (and 1 more)
-
@bnw, this is quite a nice deck planking. Very well done. Would you mind sharing a little bit more on how you made the cutouts in the curved outer plank with such precision? This is something I would like to do... but would like to tap in your experience first.
-
@GrandpaPhil, a beauty... nice to see you back on the revenge. I stopped mine after the standing rigging but likely will get back to it one day.
-
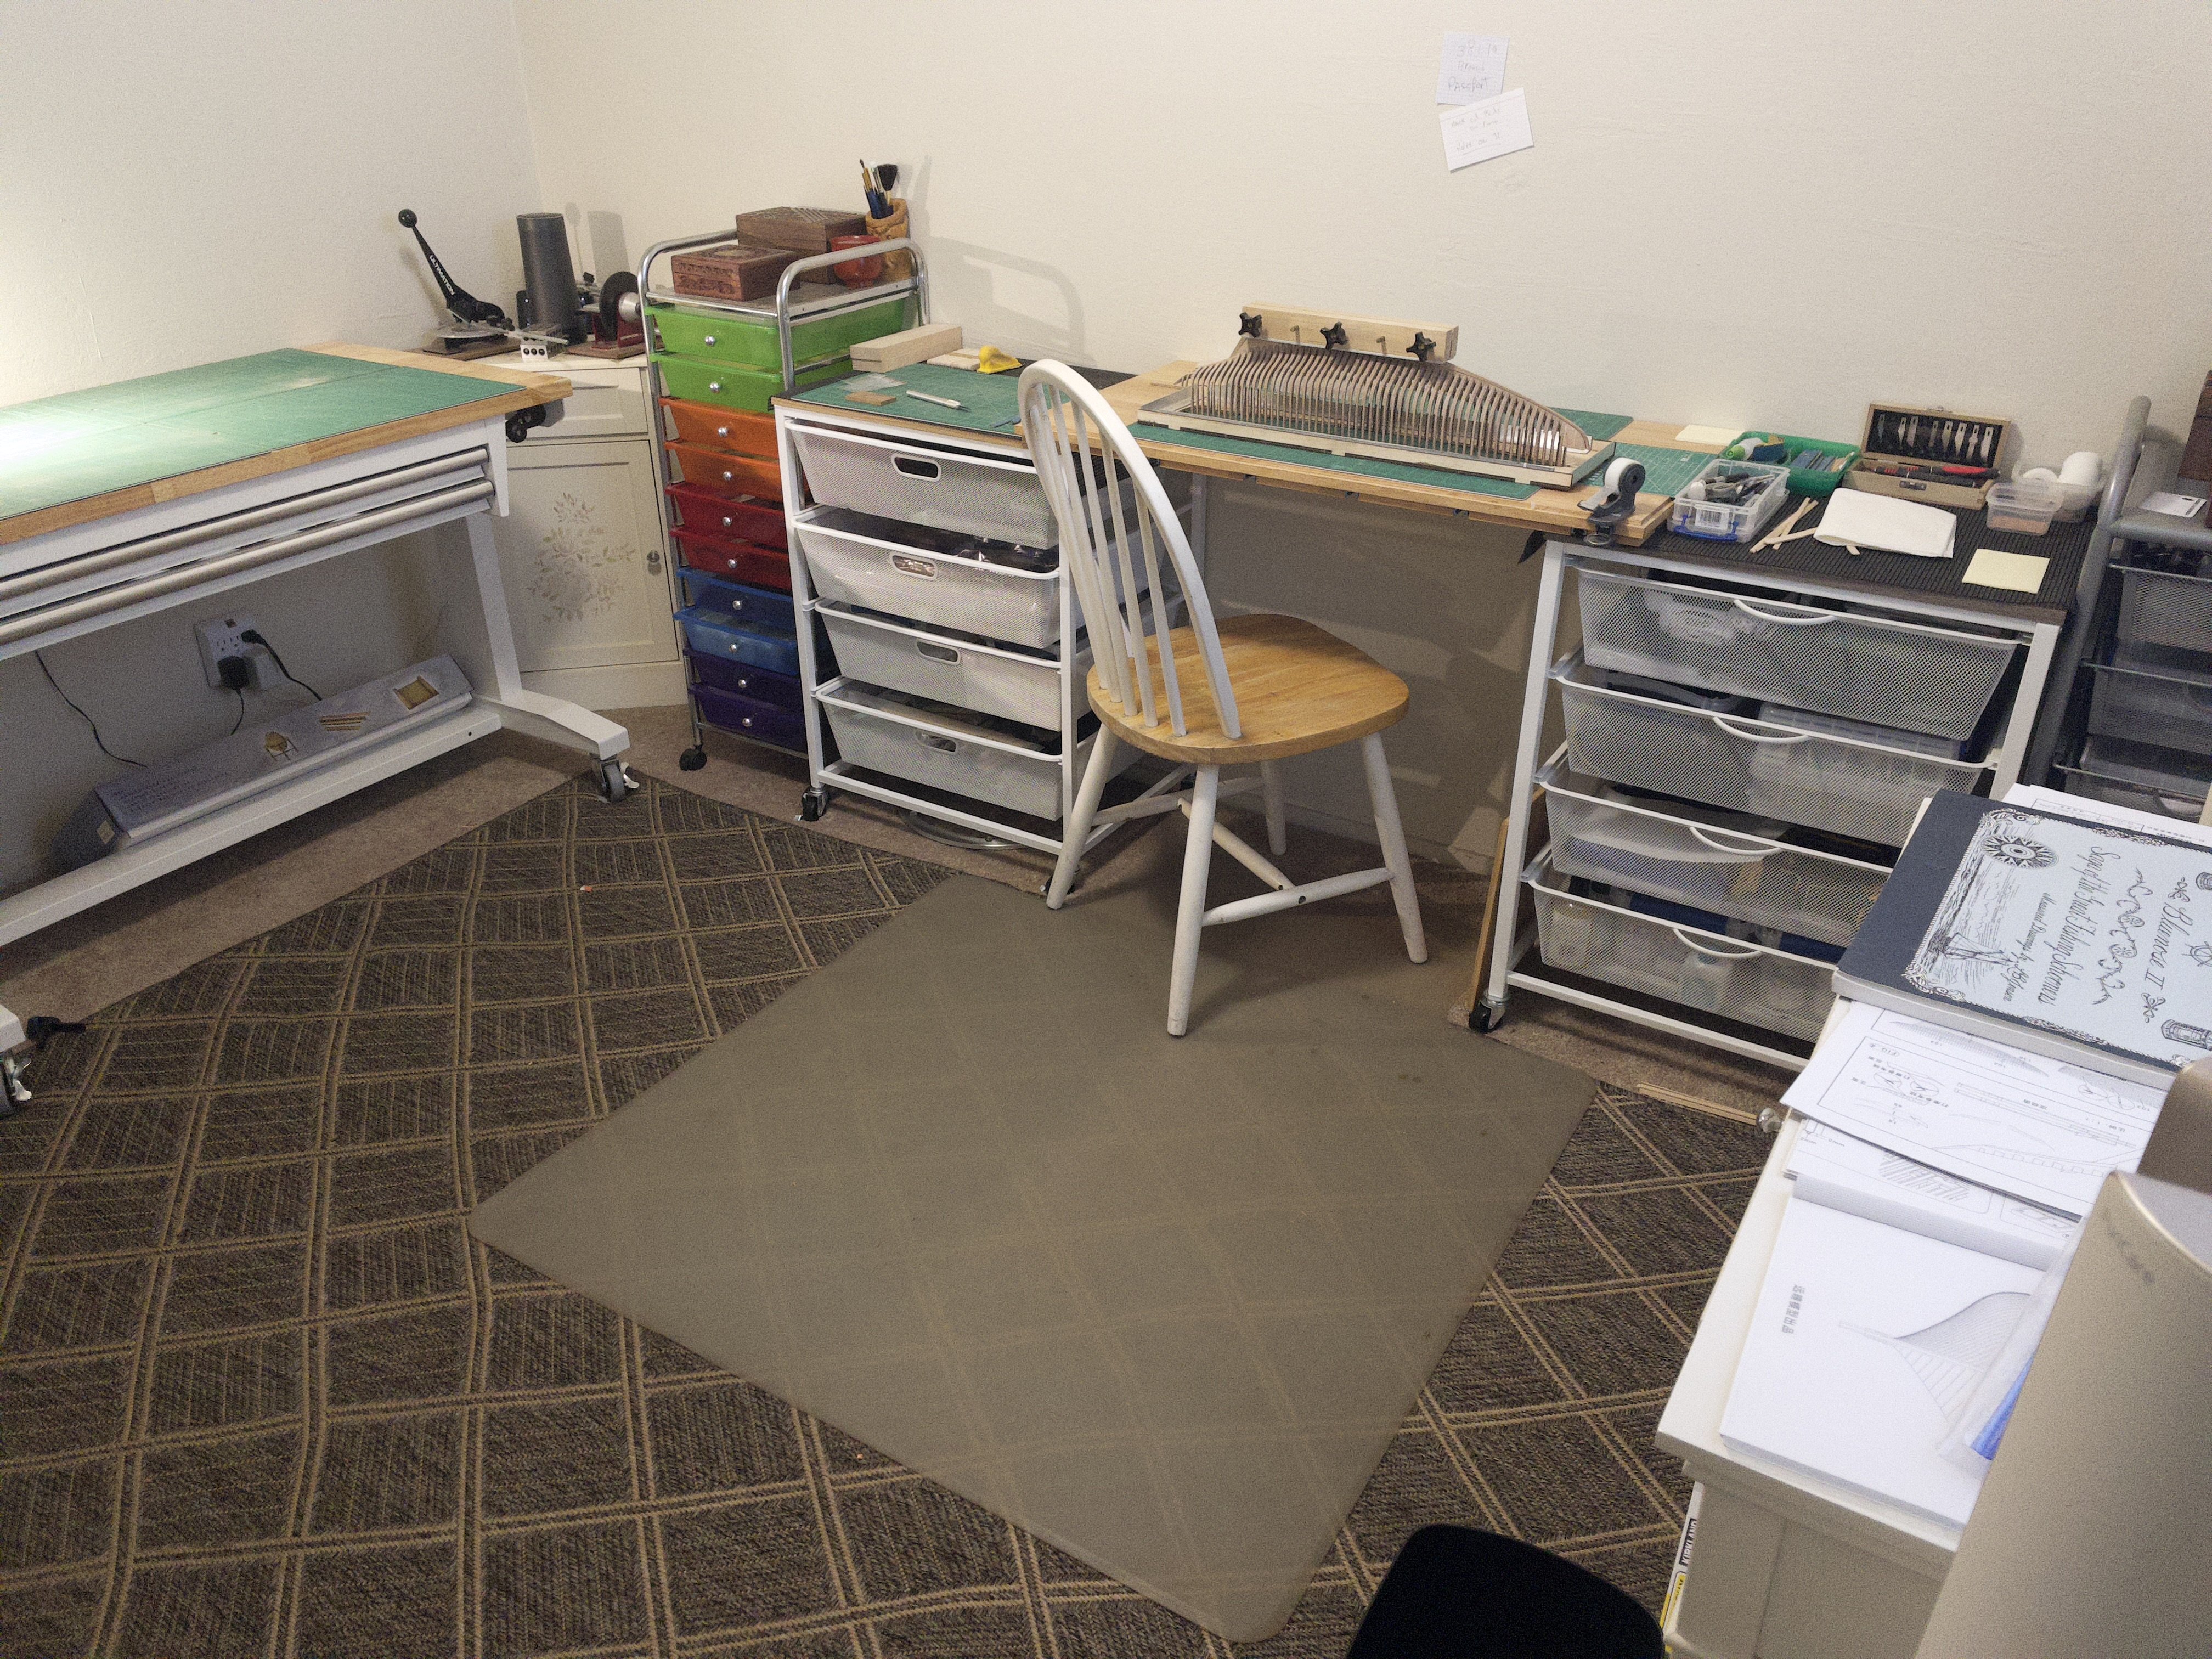
Work area pictures only
Loracs replied to Johnny Mike's topic in Modeling tools and Workshop Equipment
Newly requisitioned modeling room.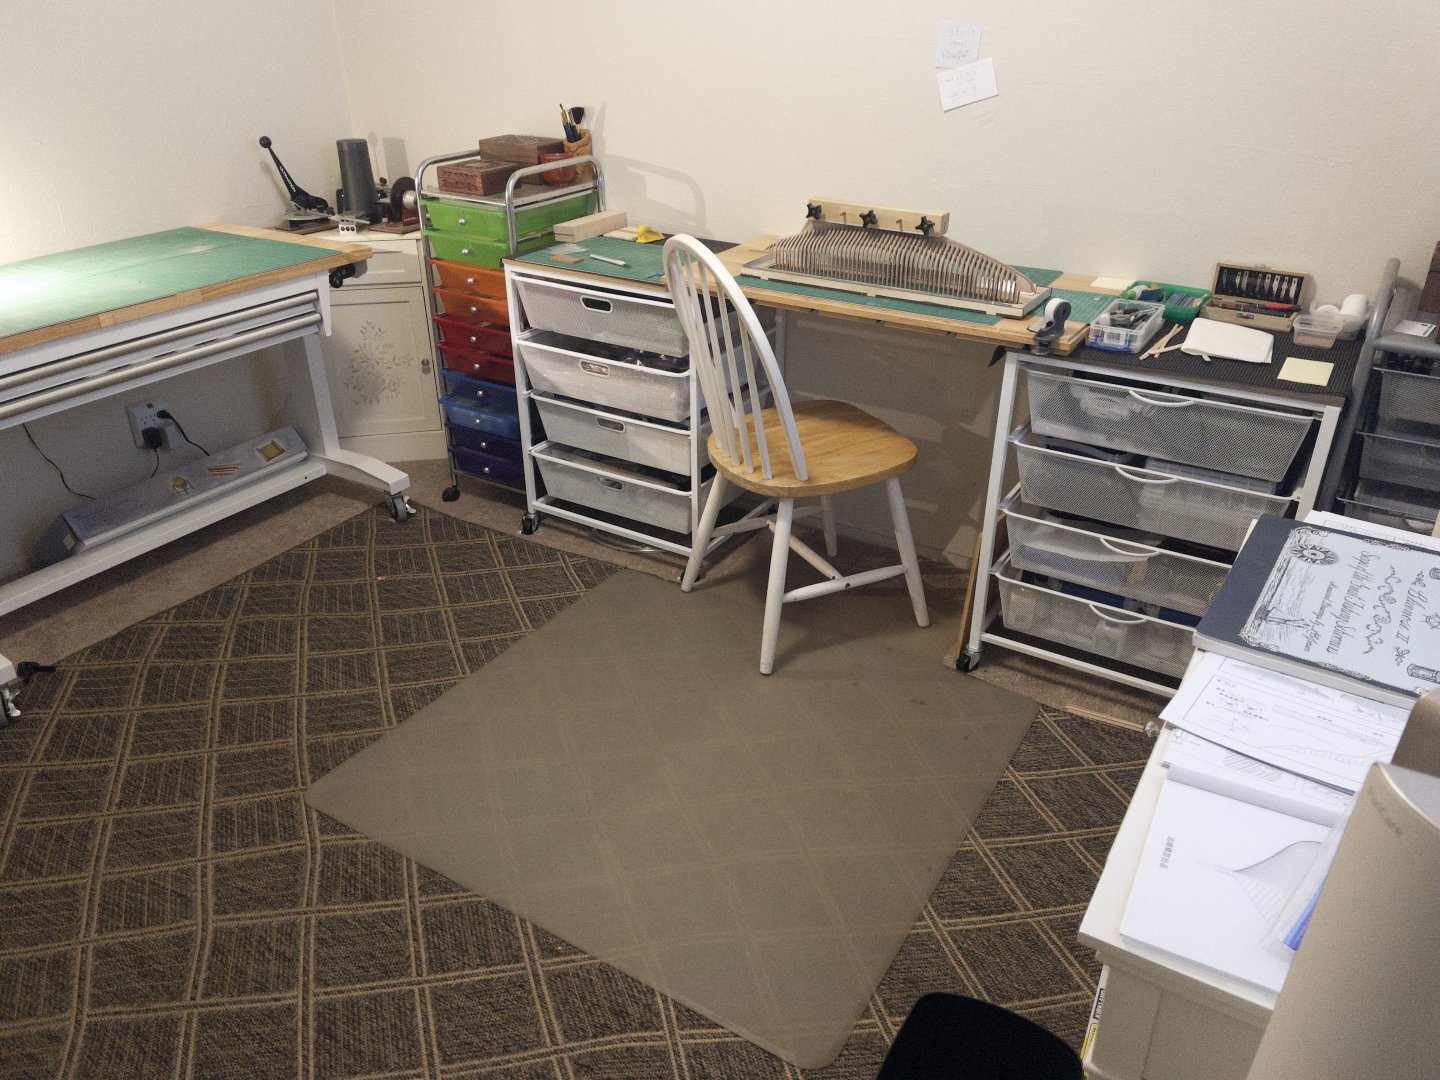
- 52 replies
-
- 10
-
-
I'm at a lack of words.... inspiring work. Please, keep maintaining your log with as much detail as possible. This can act as tutorial for many of us.