Der Alte Rentner
-
Posts
282 -
Joined
-
Last visited
Content Type
Profiles
Forums
Gallery
Events
Everything posted by Der Alte Rentner
-
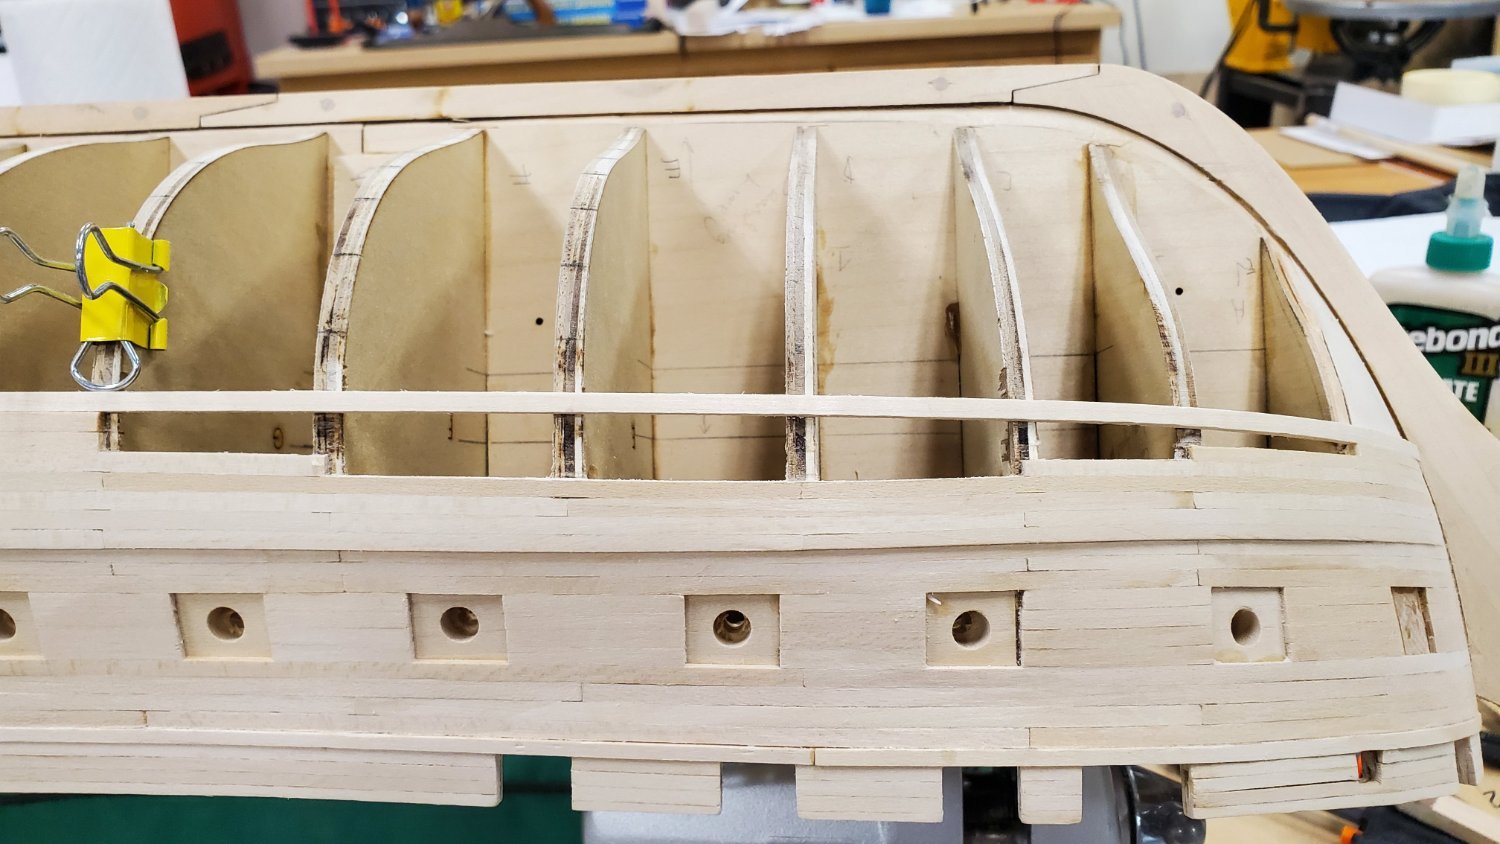
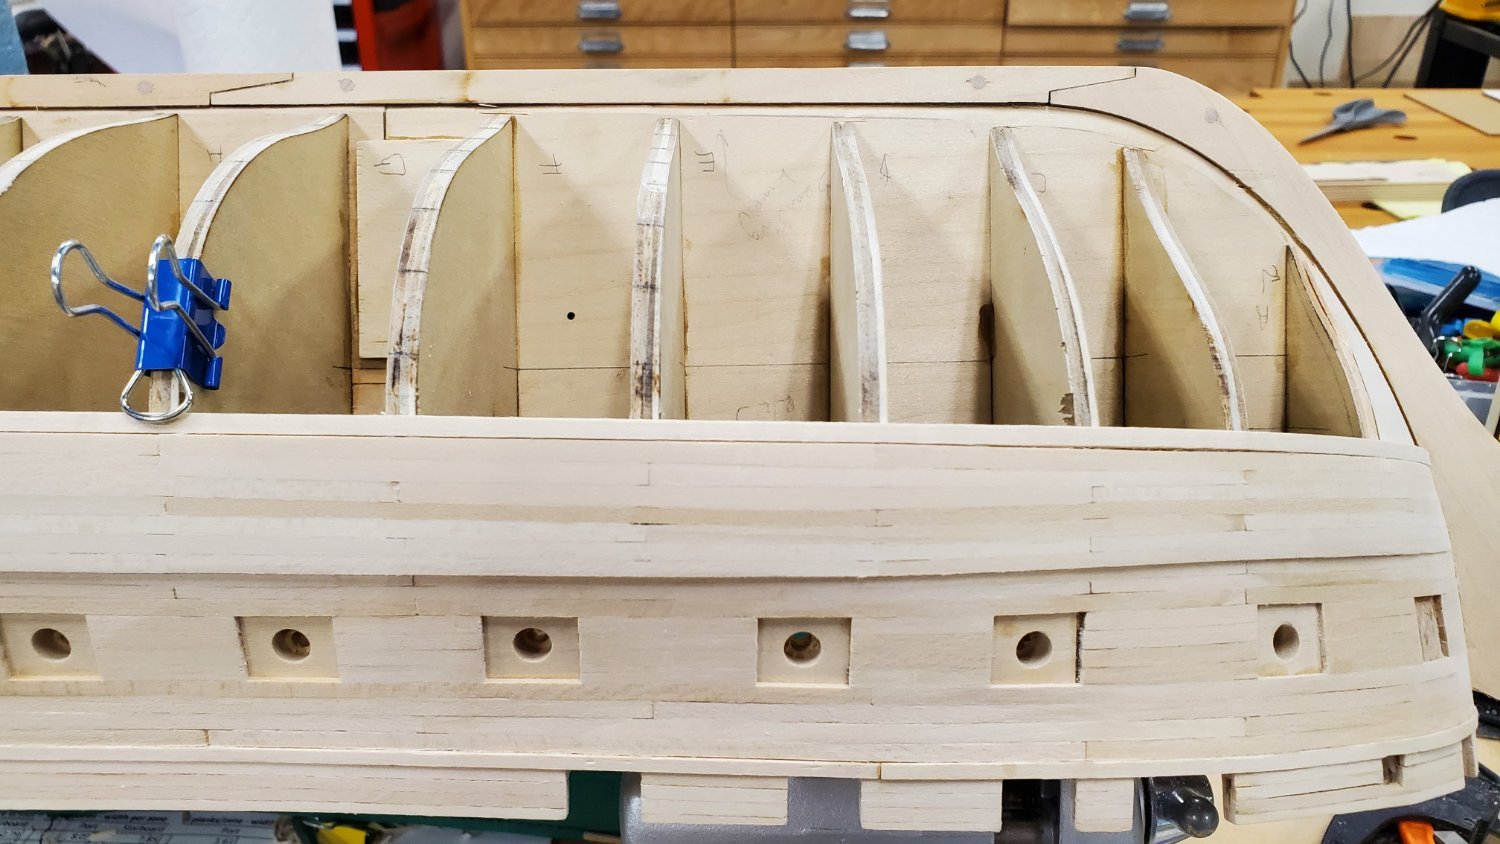
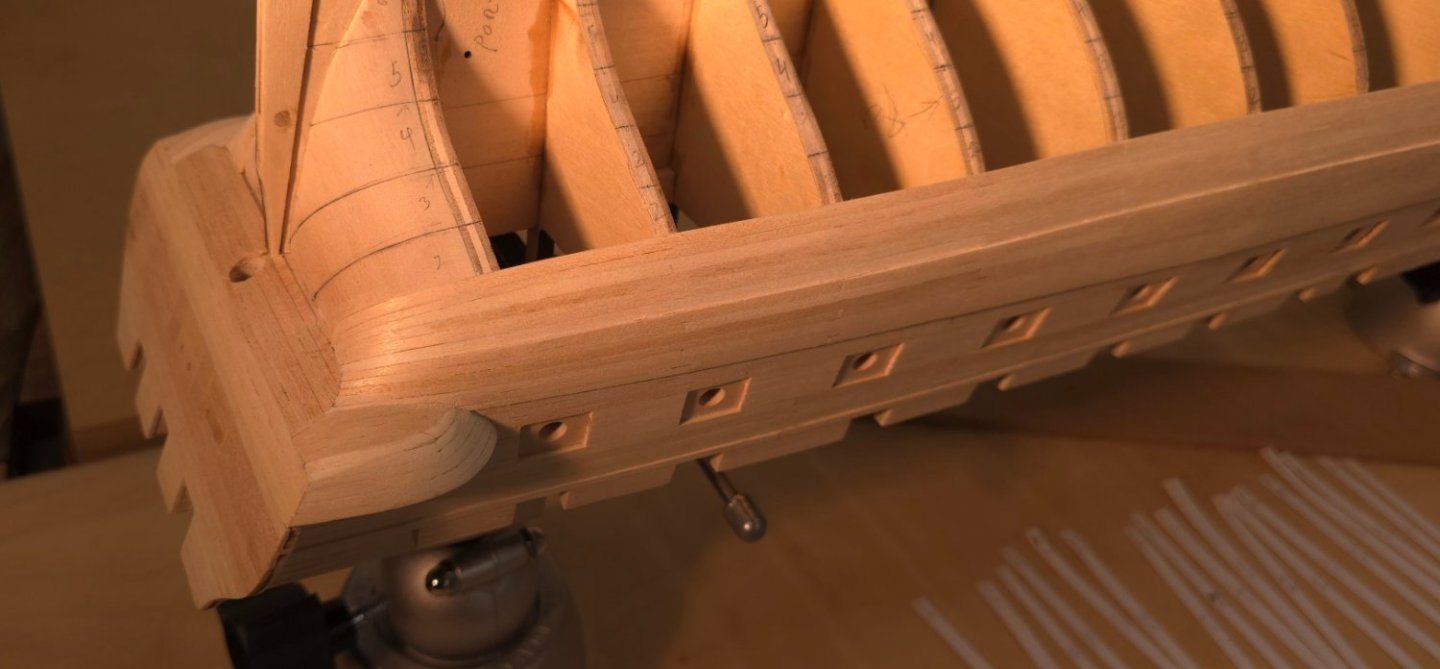
 Seeing as how I'm at that phase of my build, planking over the filler blocks, I can assure you that no matter how well you think you faired the blocks, and bulkheads A and R, you will be shaving and shaping with every plank that covers those areas. Ditto for the bulkheads themselves. Don't sweat in too much now. Getting close will save time later. If you are going to test fit planks now, prepare them as if you were going to affix them. Good luck. And again, I'm impressed with what you're doing with a small set of hand tools. Since I redid one set of filler blocks three times, I'm glad to have had a band saw and spindle drum sander. For what it's worth, once you get past the filler blocks, there won't be much need for fancy power tools.
 -
Amen to that! (Yesterday could have been that motorcycle day. Almost got it down from the jack stand, where I keep it for the winter. What a difference a day makes! 72 yesterday, 22 this morning)
-
Hey, I'm getting the hang of this planking thing! It's time consuming getting everything set up before gluing a plank segment, but done right, the seams are really tight and there's very little trimming required afterwards. Nuff said.. (well, except for figuring out how the new phone camera works. I swear these photos looked a log lighter on the phone. Oh well.)


-
I thought I was posting this to my build log. After I saw it ended up here, I copied it and posted to my own. I'll delete the post above. Sorry. I still don't fully know my way around this website.
-
USS Constitution by mtbediz - 1:76
Der Alte Rentner replied to mtbediz's topic in - Build logs for subjects built 1751 - 1800
This quote ended up several pages from where you made the comment, so it may seem out of context given where you are in the build log now, but, I will adopt this as my motto going forward. (I was reviewing your work on hull planking today. I said it then, but will repeat it now, Excellent work!) -
Your build log was my second stop this afternoon. I was considering doing as you did, start planking wale to keel for a few zones, then switching to keel up and meeting in the middle. You noted that Bob Hunt did the planking from wale to keel, but in the Practicum he applied his tick marks first - and that was done with a top to middle, bottom to middle methodology. Just having completed zone 1 on both sides, I'm already veering off course with the ever so meticulously applied and mathematically calculated tick marks (well, at least at the extreme ends). I am pouring over build logs to find the best way to deal with these tick marks - especially at the stem. Measure six or seven times, cut once... To the point about this taking a while? It doesn't help when one breaks a plank (or two or three) in a zone. Yeech! (methodology modified to hopefully prevent this going forward) 😉
-
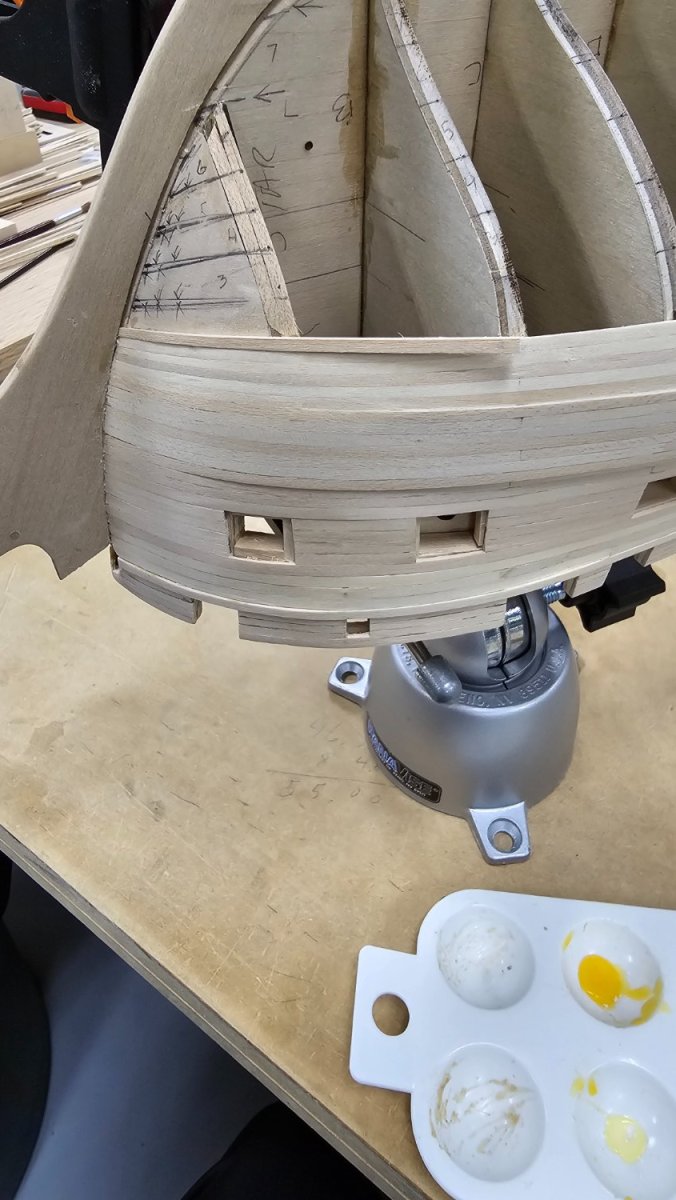
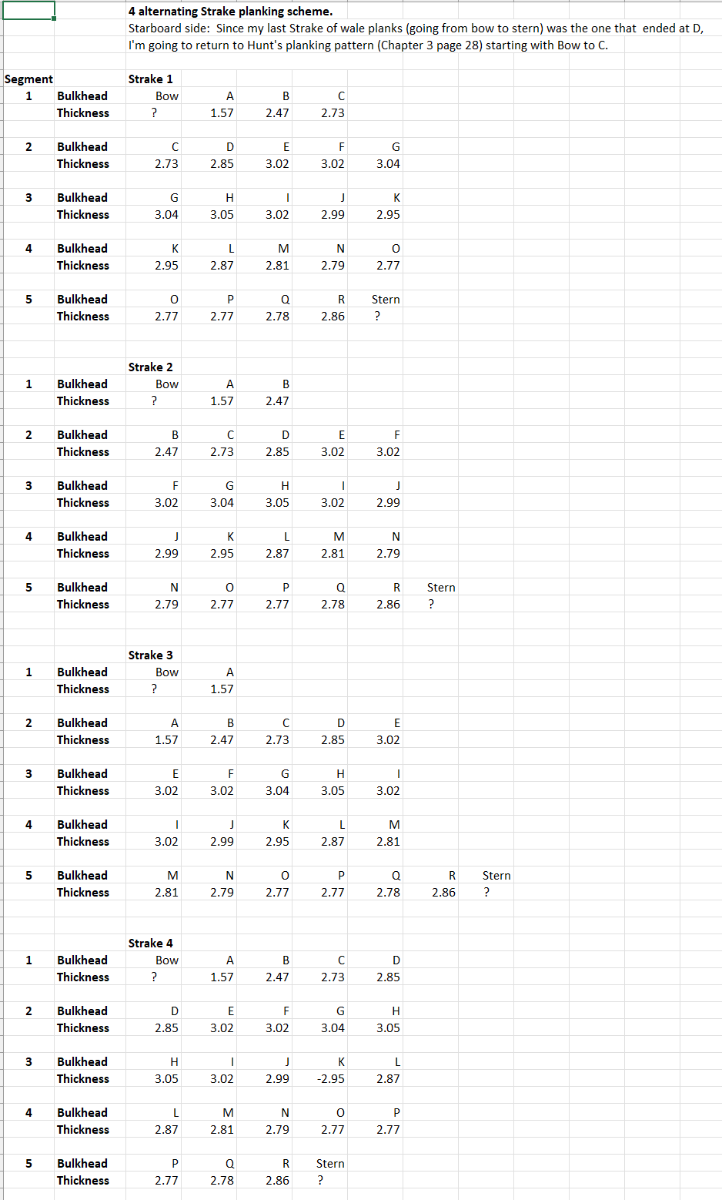
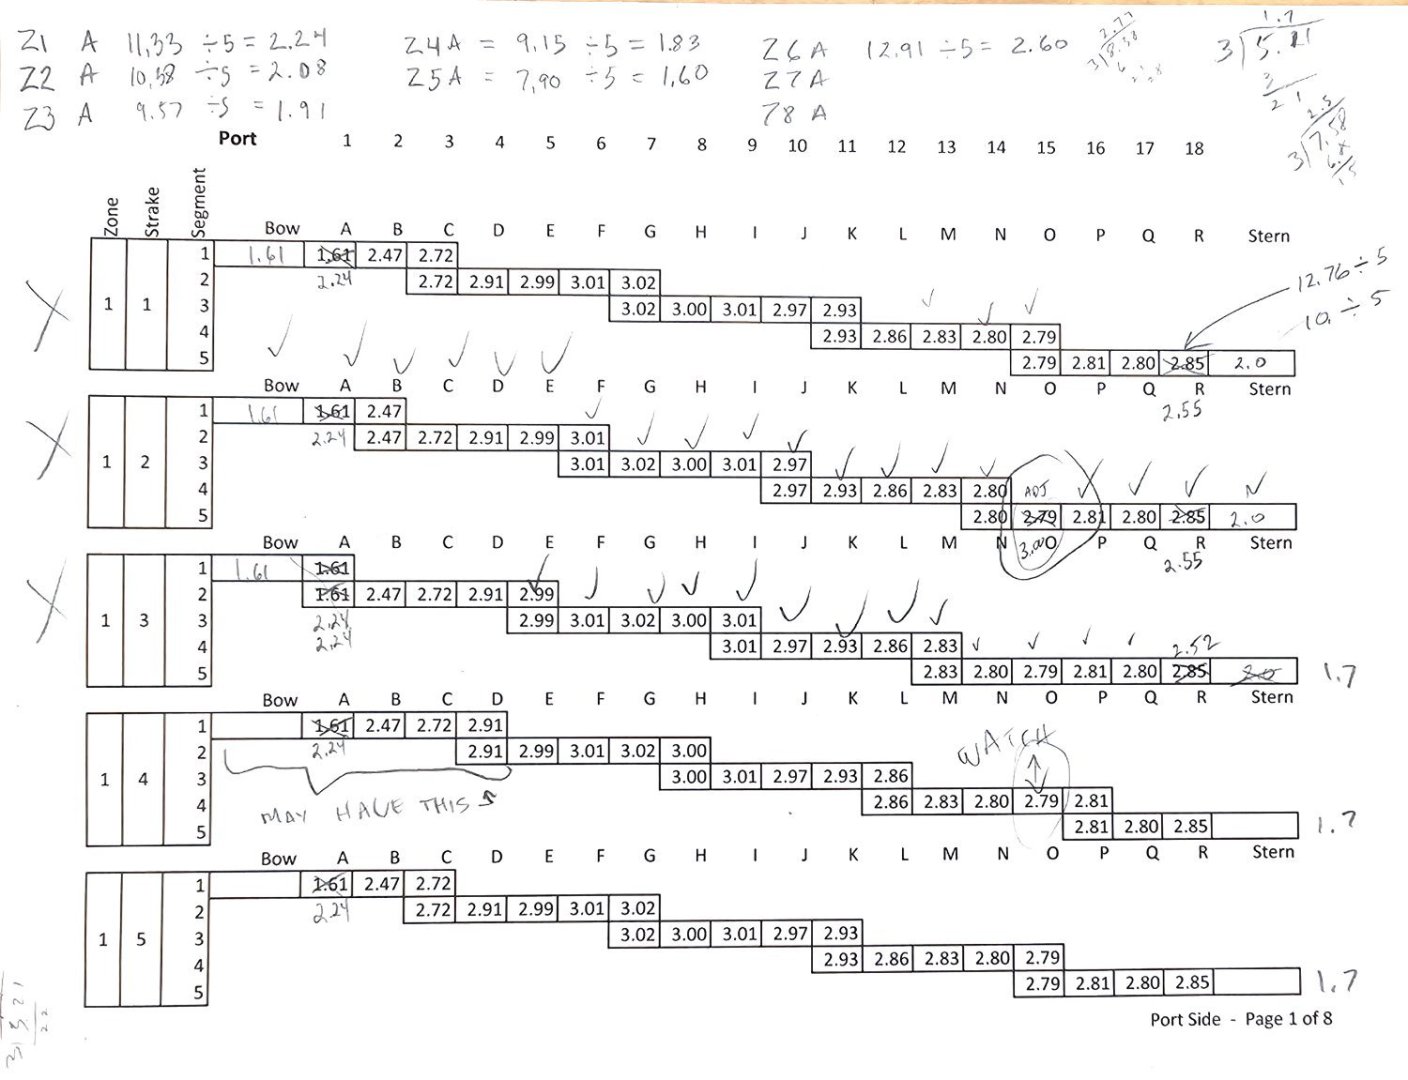
I can't believe how long it's taking per strake on the remaining planking. Yesterday I was at the shop for 6 hours of uninterrupted work, and I only got two strakes on the port side done. With the one I did a few days earlier, I have 77 more to go. At 3 hours per strake, I've got 231 hours to go before the hull is finished. I had hoped to get into a groove, but found that there was more prep work involved before adding a strake, and more finishing work required after a strake was in. The prep work was mostly tweaking the bulkheads, which I thought I had faired so well (evidently NOT), and making adjustments to my math to keep the strake line clean - no more dips or fat spots. In retrospect, Bob Hunt's slight shortcut of using 1/8" planks for the central sections of the hull would have saved me some time. But, in for a penny, in for a pound. I'm losing a bit of time shaving a fraction of a mm off of each plank there. But the milling machine makes that fairly easy. Also, I found it easier to work with a revised spreadsheet. Since each zone has slightly different widths at the bow and stern, I didn't find the one I started with (above) that useful. See below for the work in progress. I've got a page for every zone - port and starboard. Strake 1 on port side: Strakes 2 and 3: I don't think I'll be back until I've completed all of the planking - assuming I alternate zones port to starboard, or after I complete the port side, assuming I don't alternate. See you in late March or early April?


-
Your instincts are spot on. Look at post 13 of my build log for a technique that worked well for me, I'm embarrassed to admit I couldn't figure out how to supply you a link. Post 13 is about half way down on the first page of my build log here.
-
Aha! That explains everything... Lesson learned. No more working on Conny on Manhattan Club nights. Impressive that you're accomplishing so much with a minimal set of tools. Keep up the good work.
-
USS Constitution by mtbediz - 1:76
Der Alte Rentner replied to mtbediz's topic in - Build logs for subjects built 1751 - 1800
It's a pleasure following along with your build. Excellent workmanship as usual. -
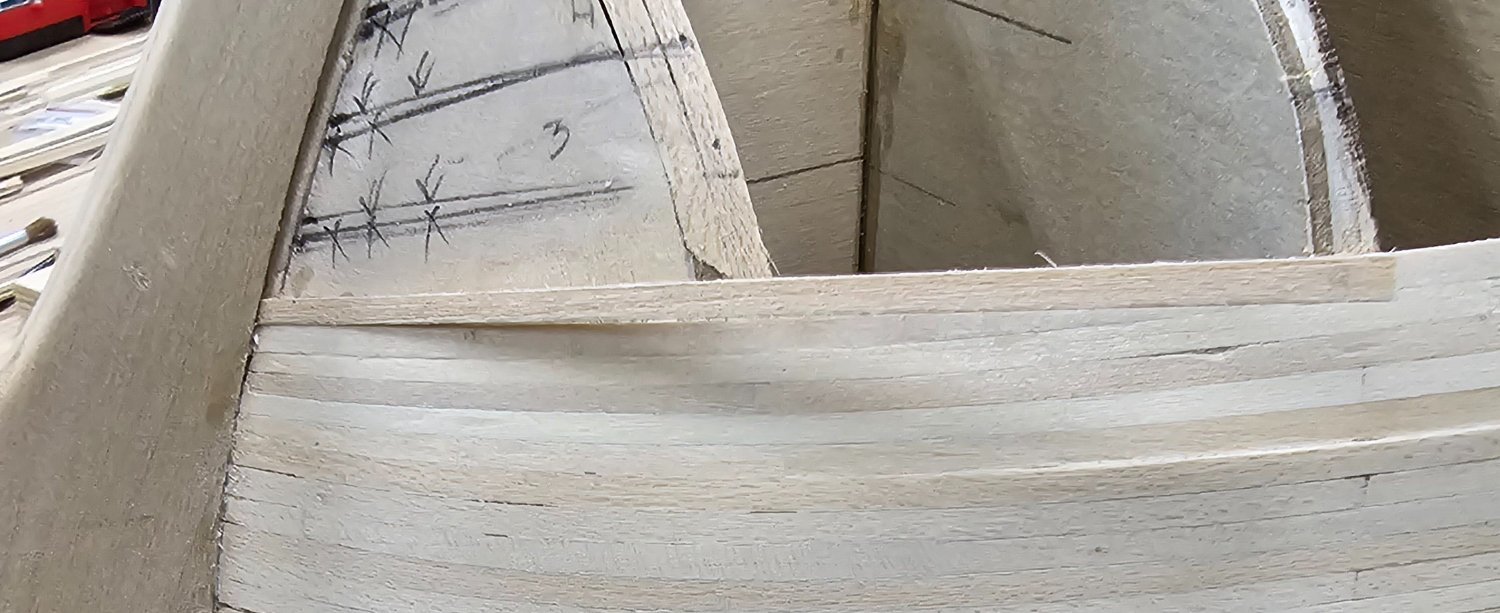
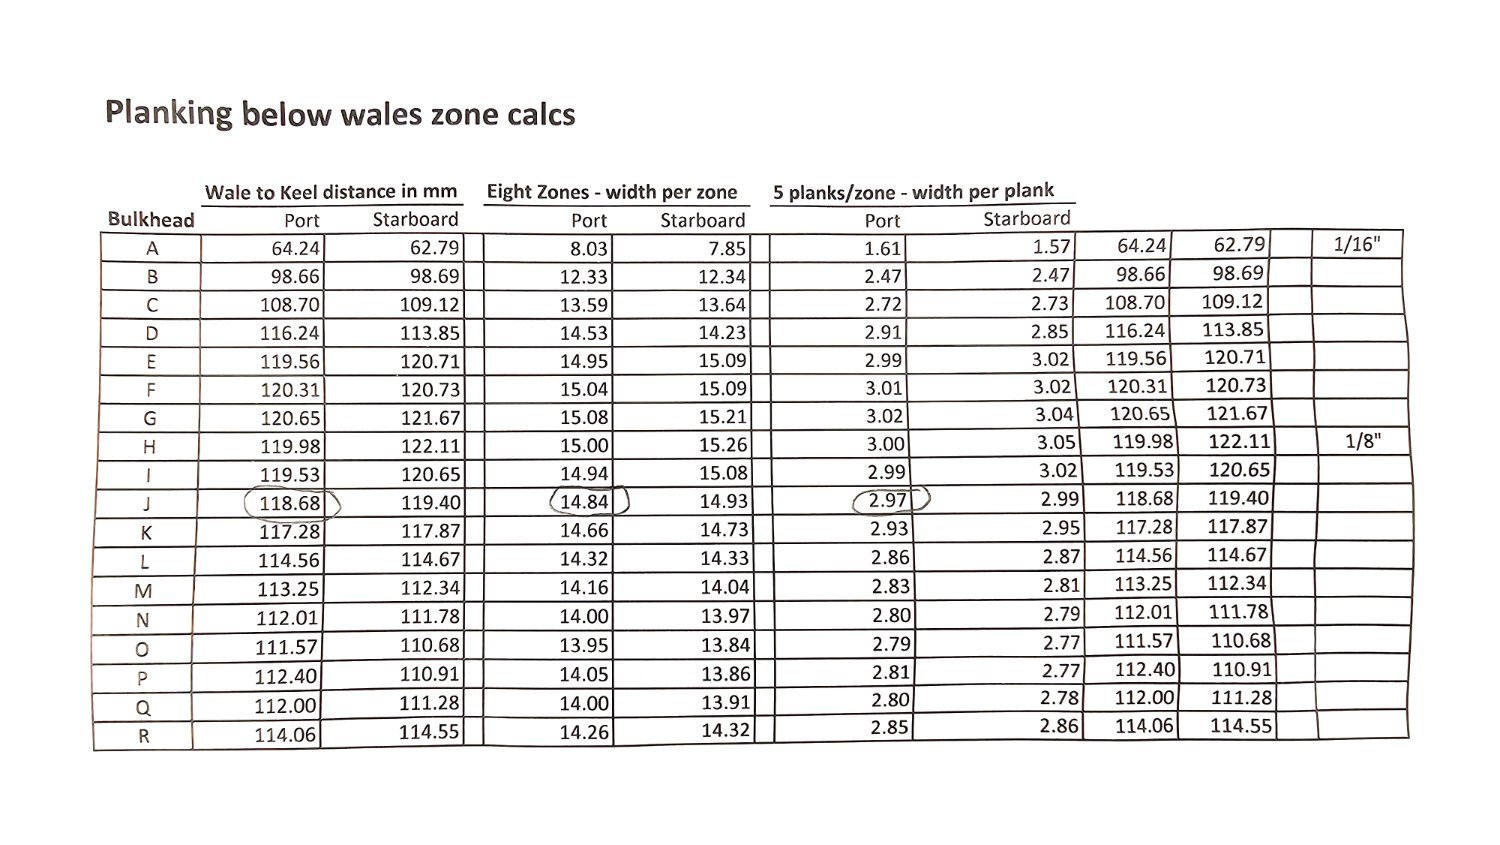
I plan to use the math to shape the planks as well. That's why I went to the trouble of creating that first spreadsheet. I am developing a second one that tells me what the width of a plank segment should be at each bulkhead. Since there will be tapering at the stem and stern, I'll have to make some adjustments to the sheet - Starboard side calcs shown below. The tick marks are there as a double check. Recall the issue I just corrected at bulkhead D (post 127 above)? I want to avoid a repeat of that and I think these tick marks will alert me to anything going awry.

-
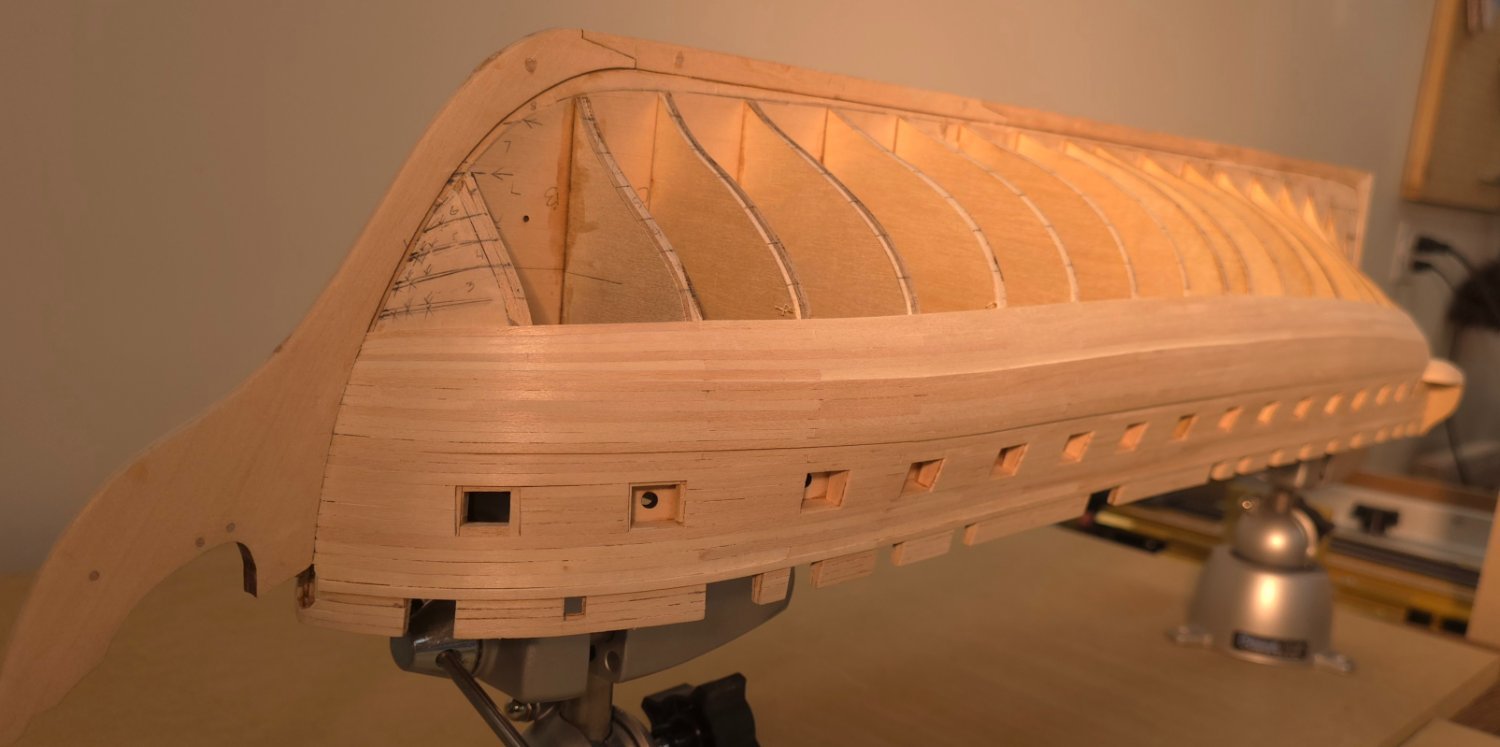
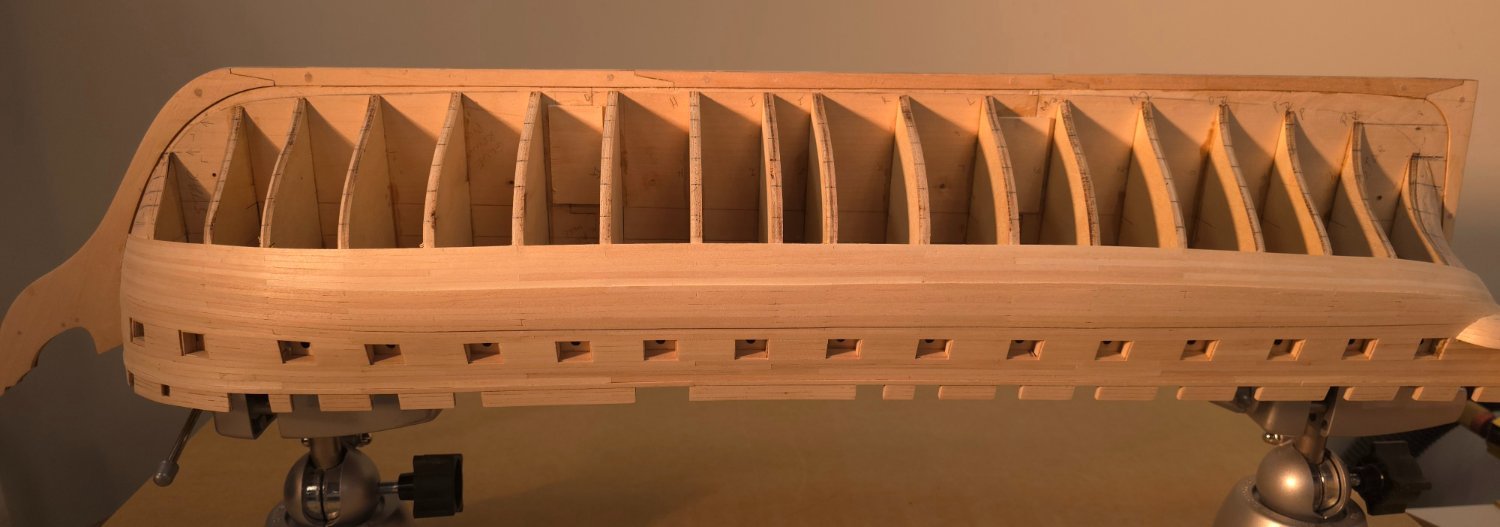
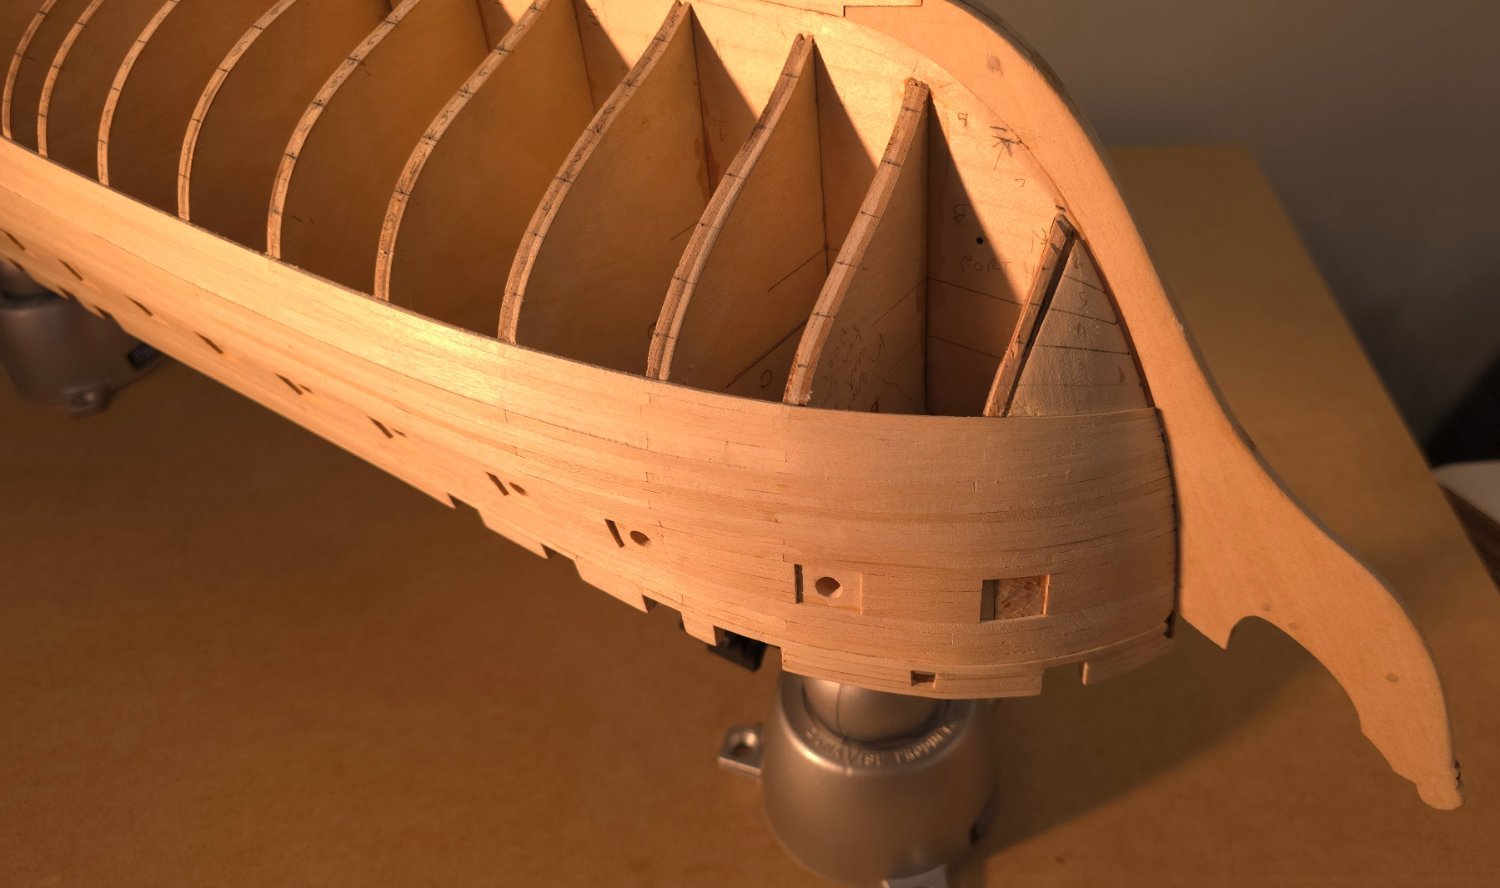
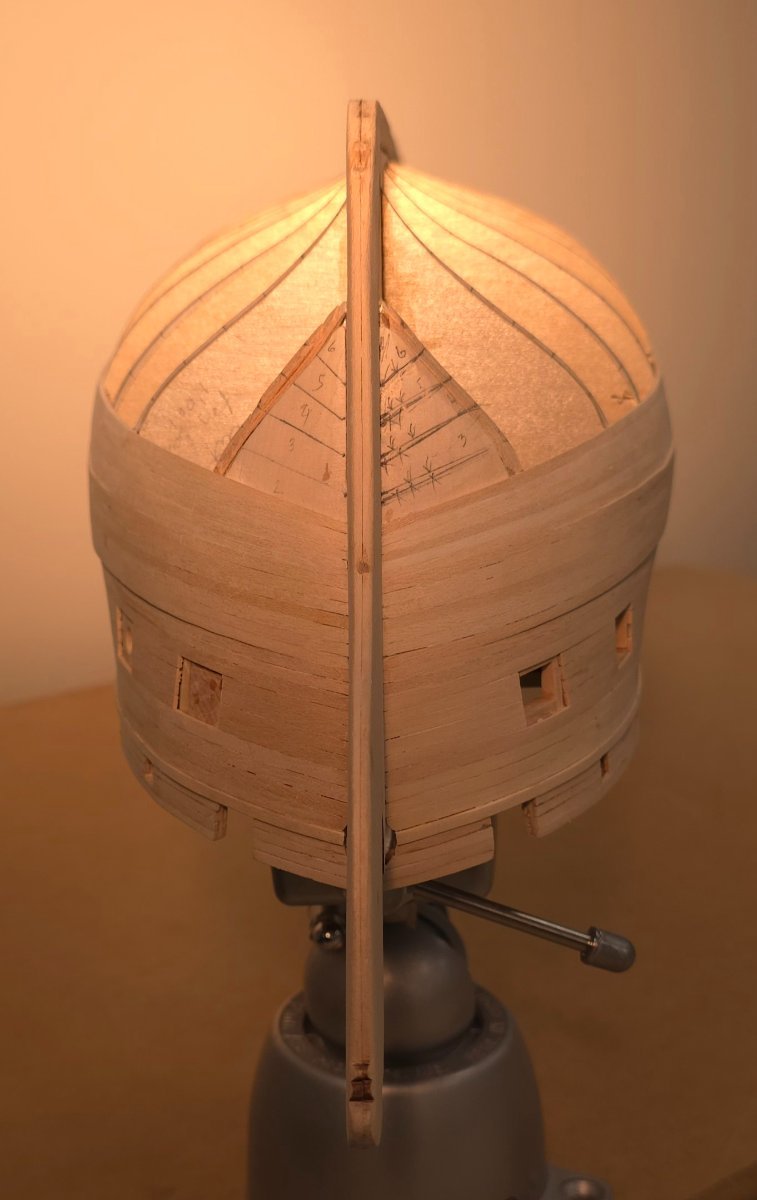
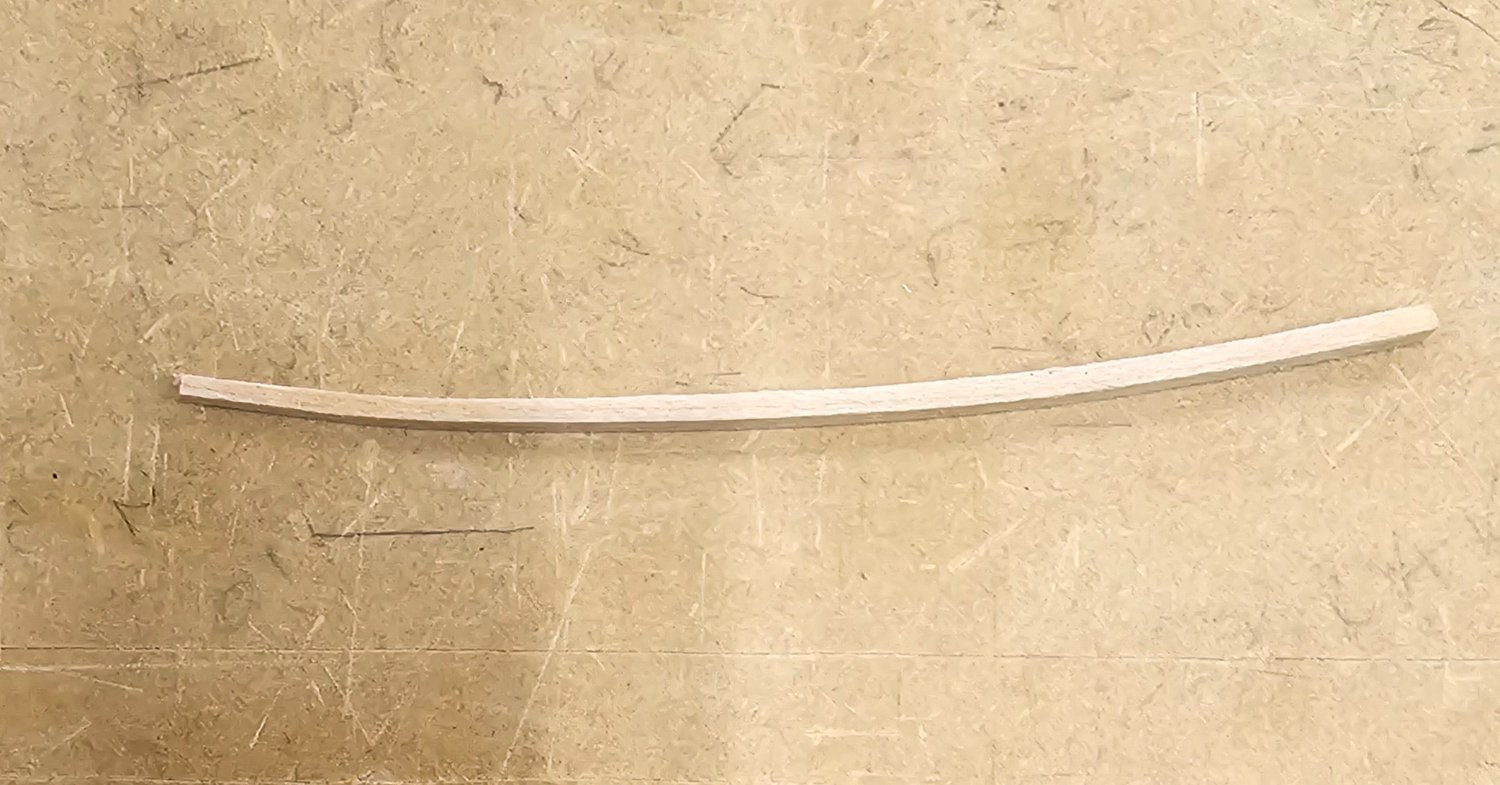
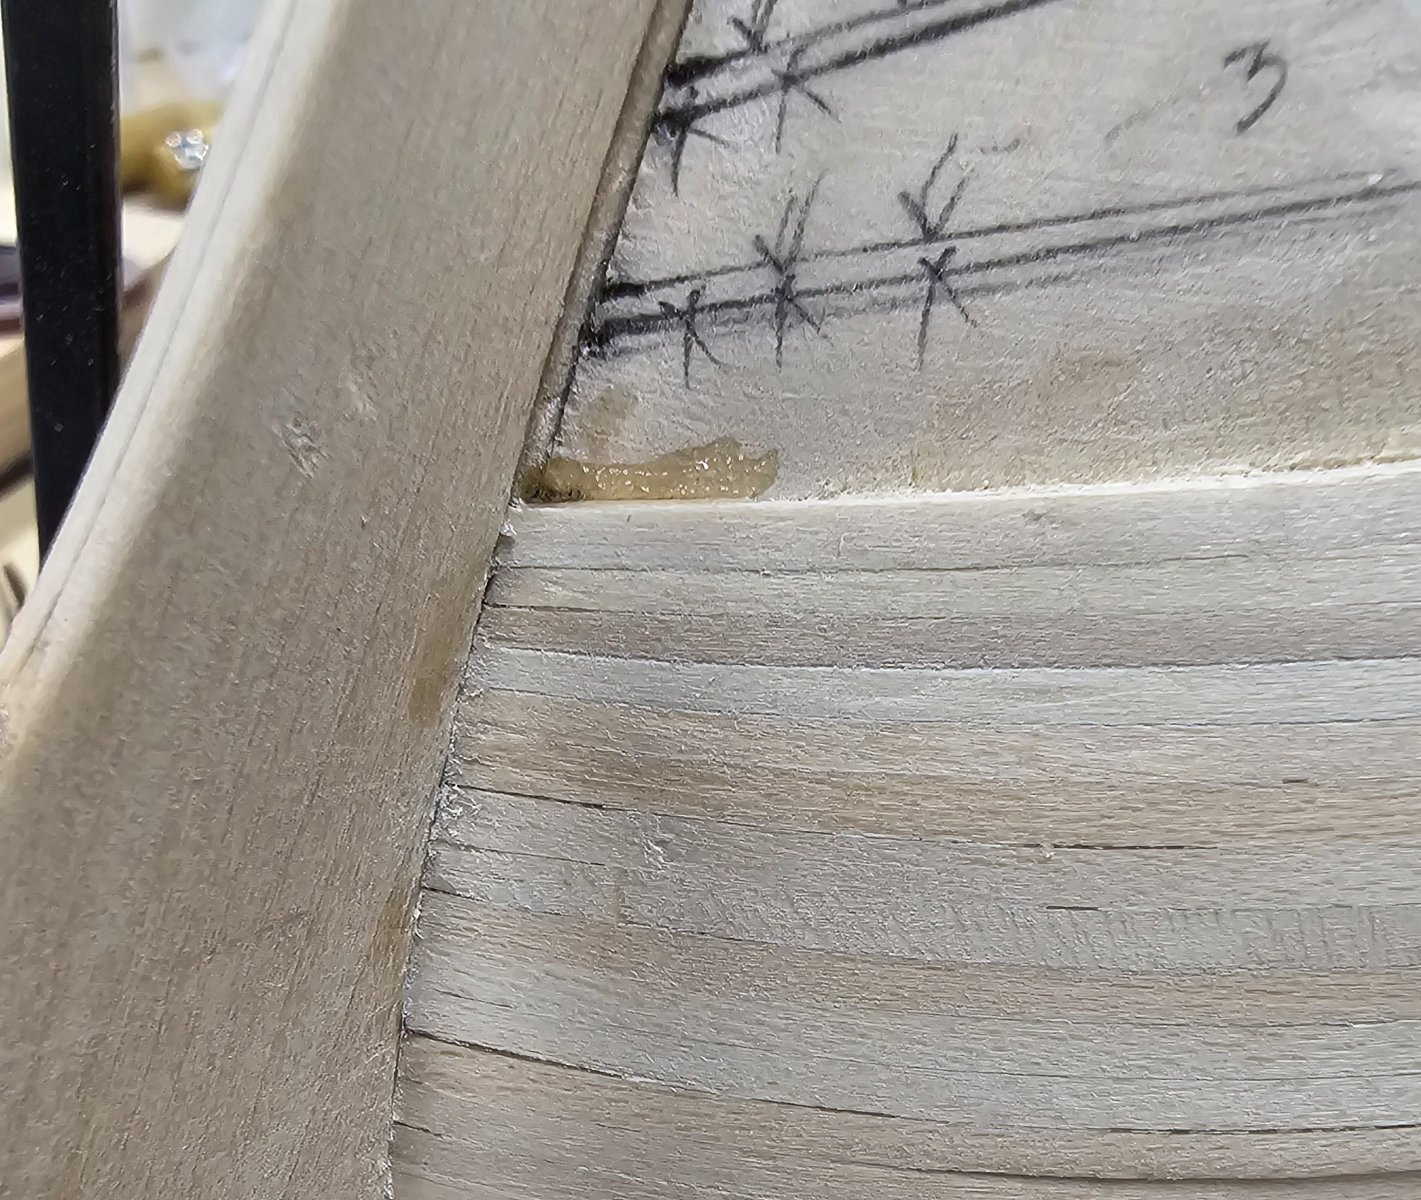
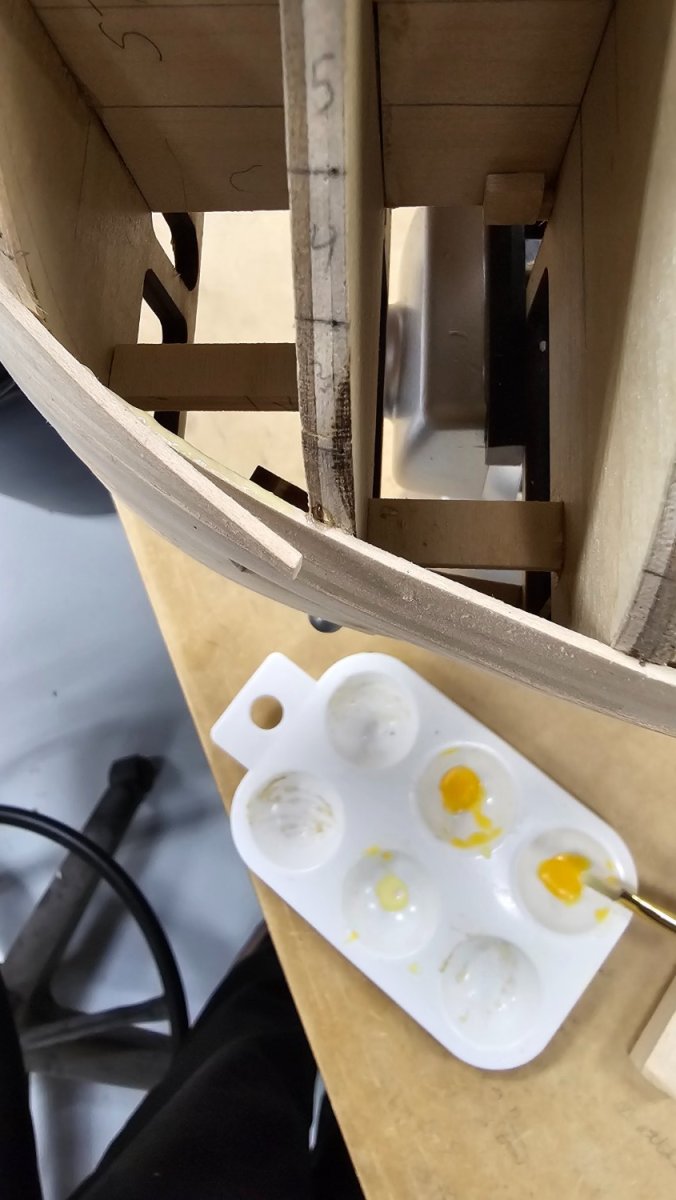
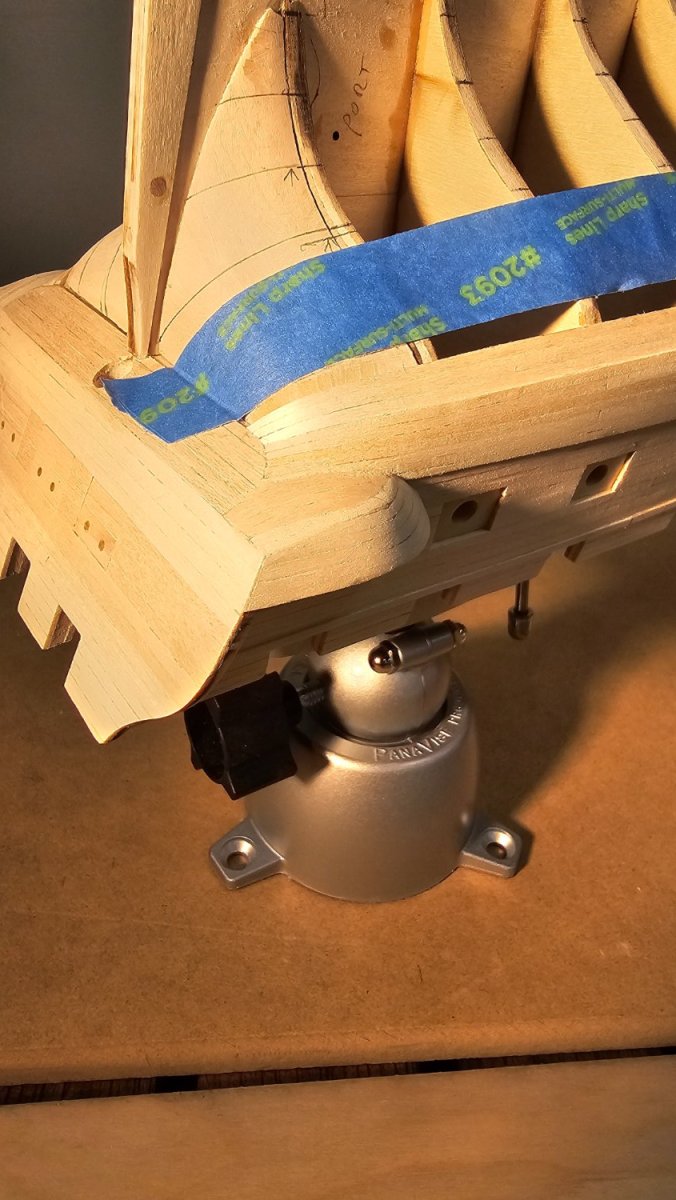
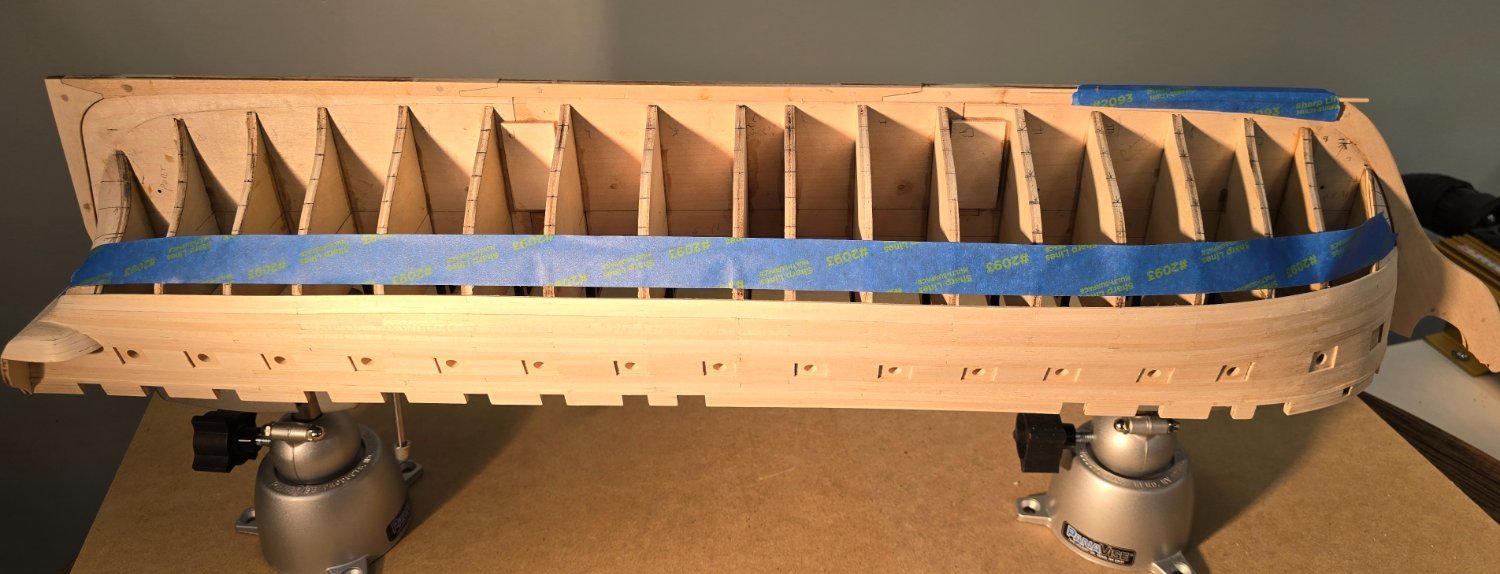
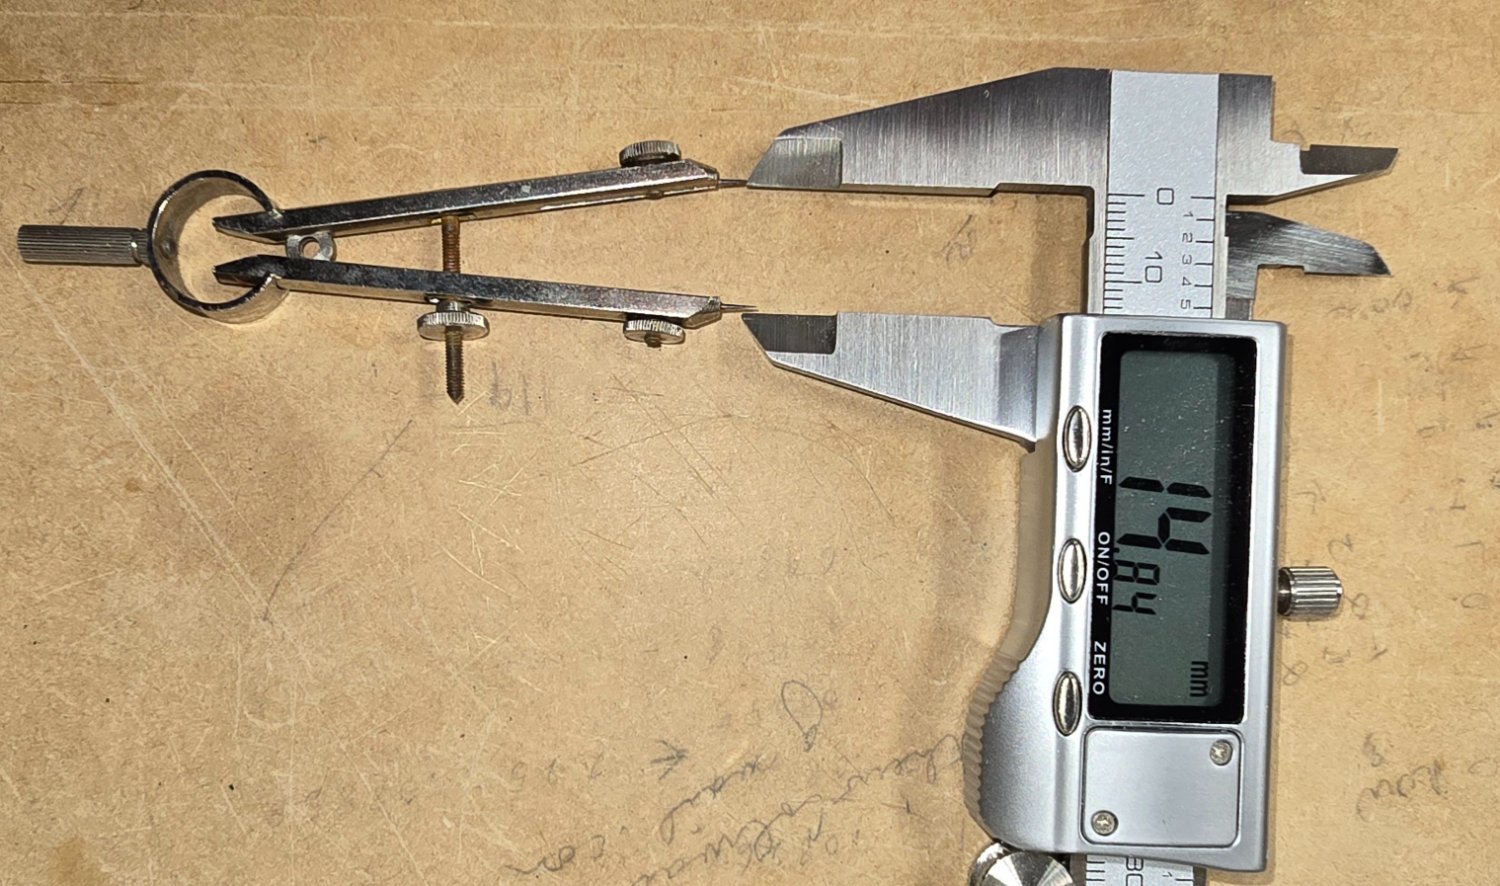
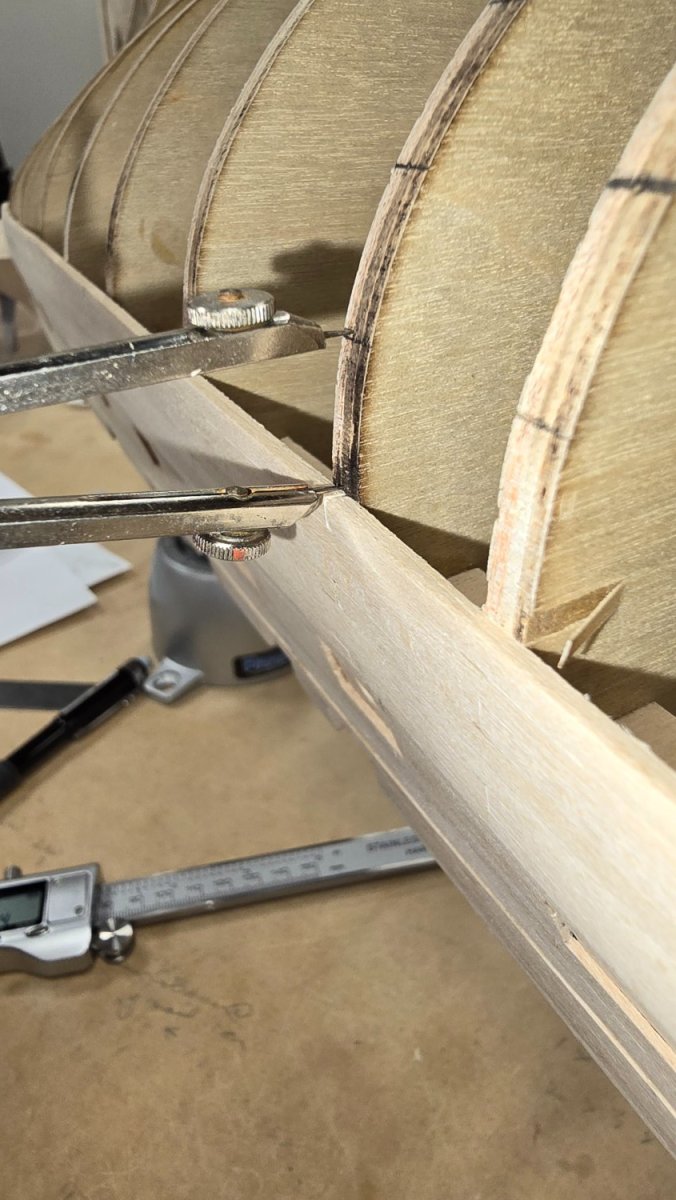
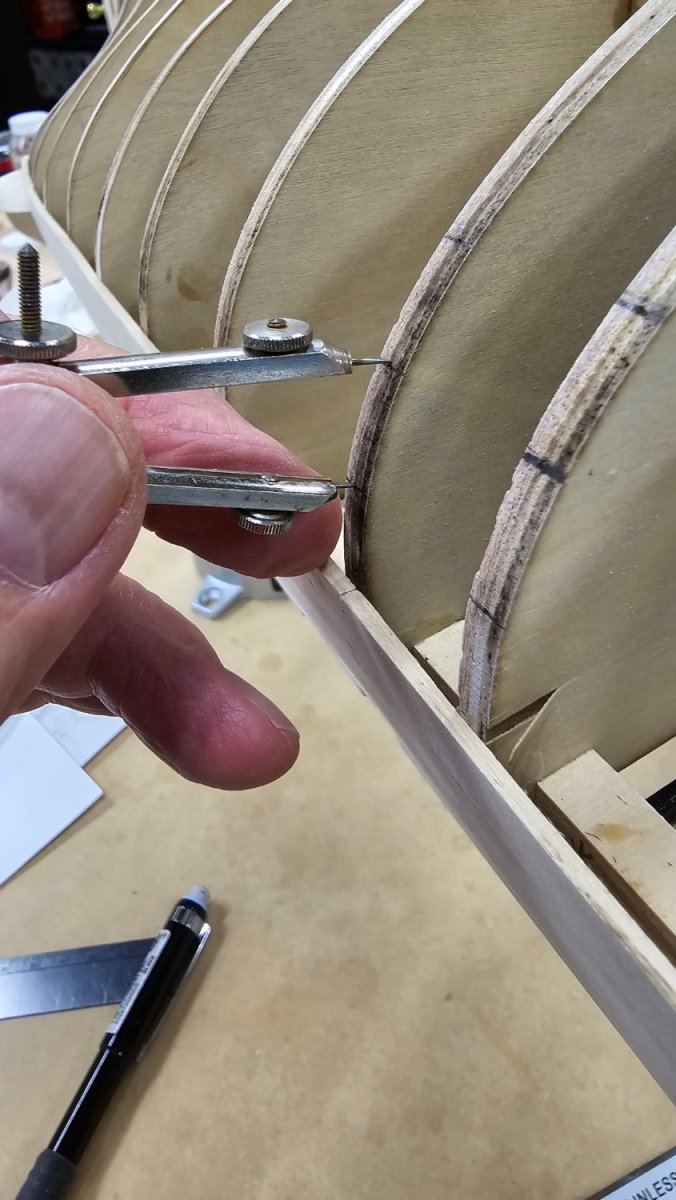
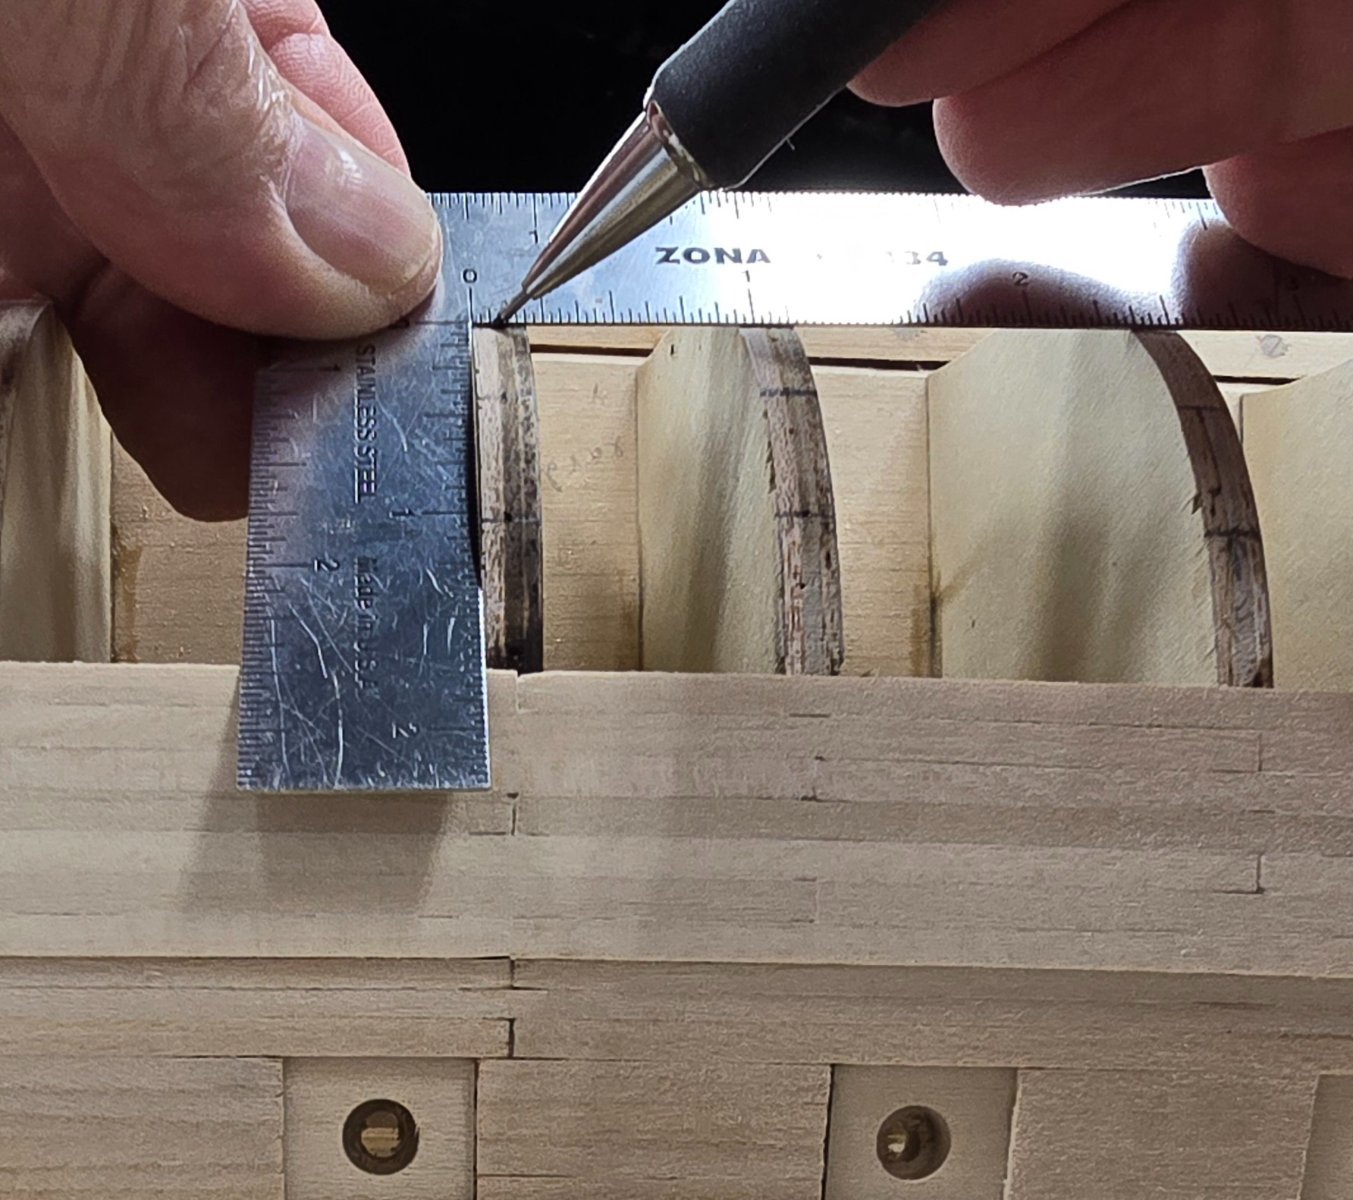
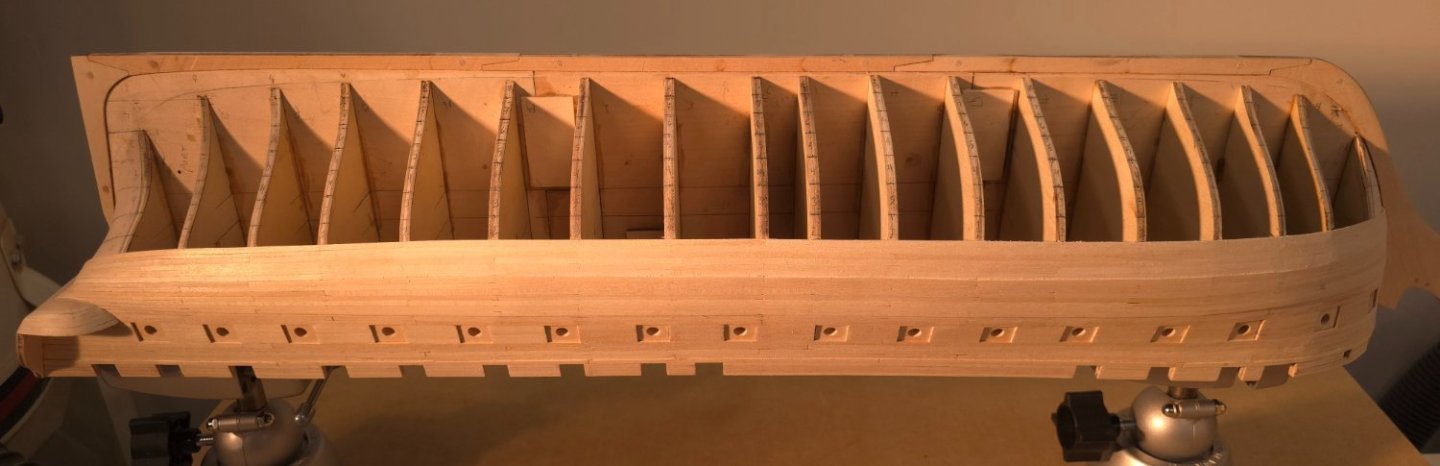
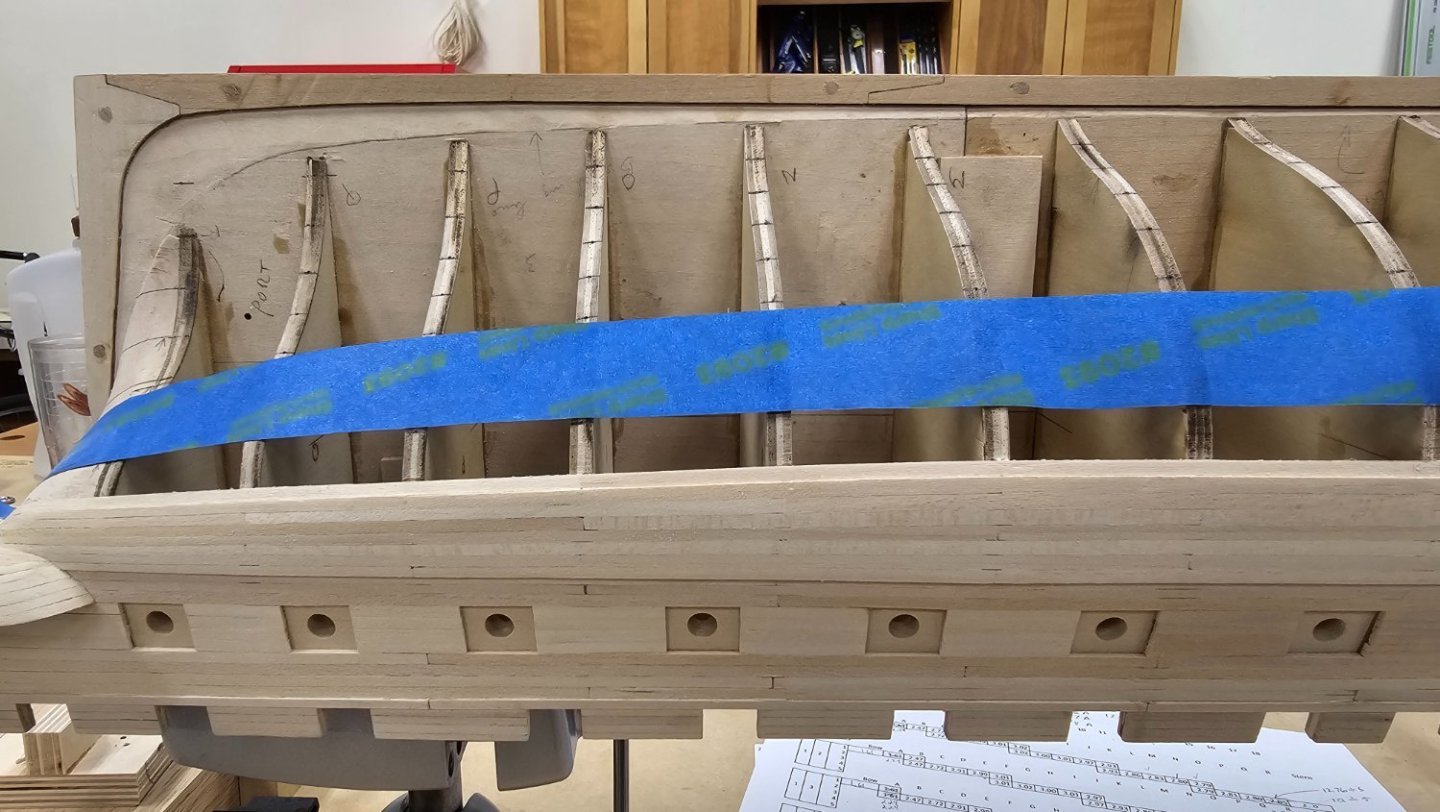
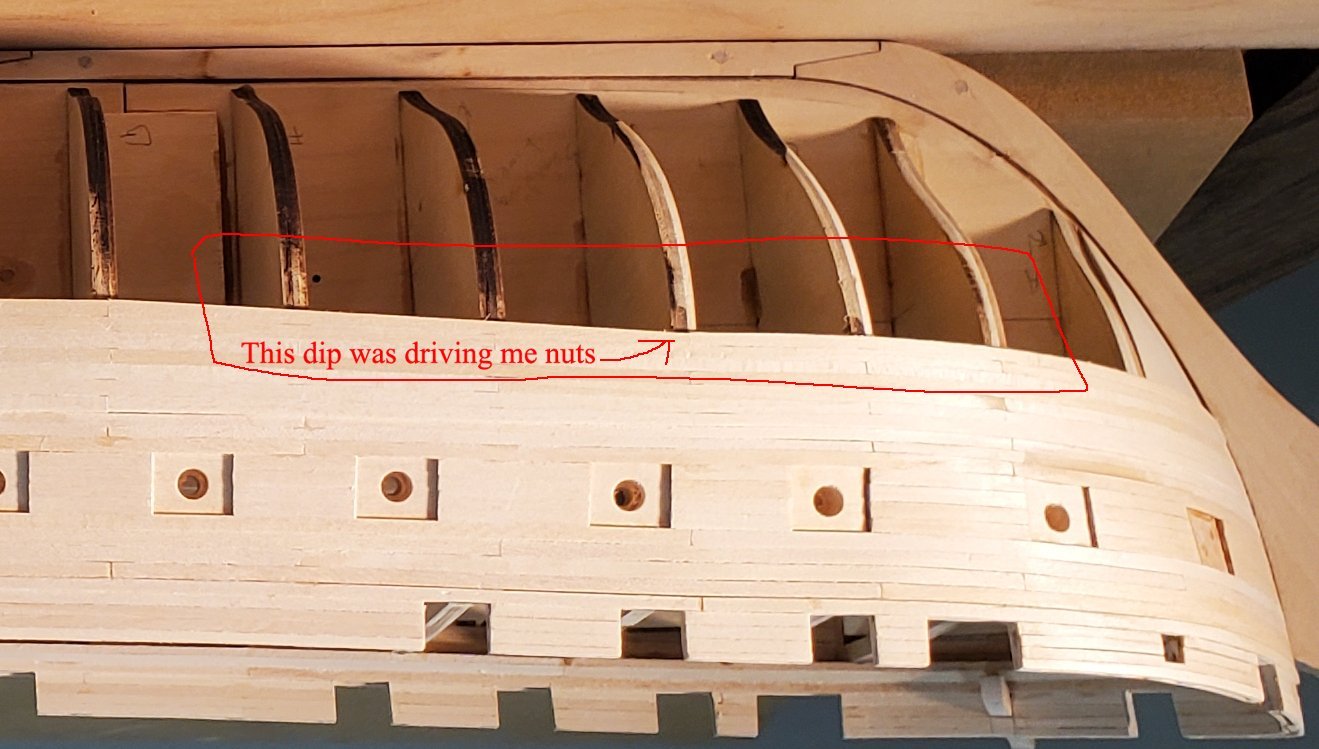
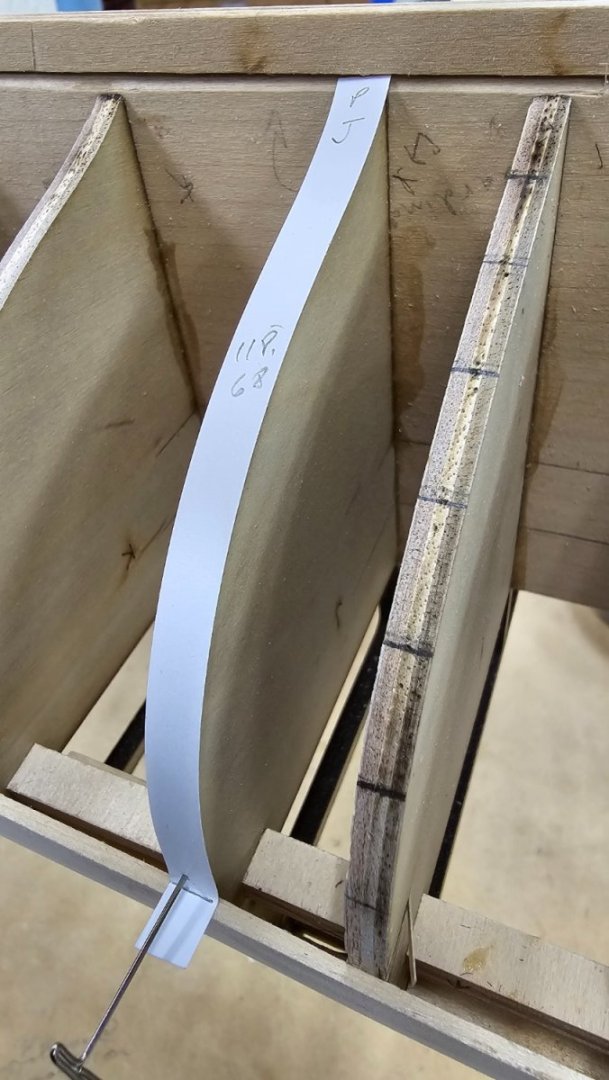
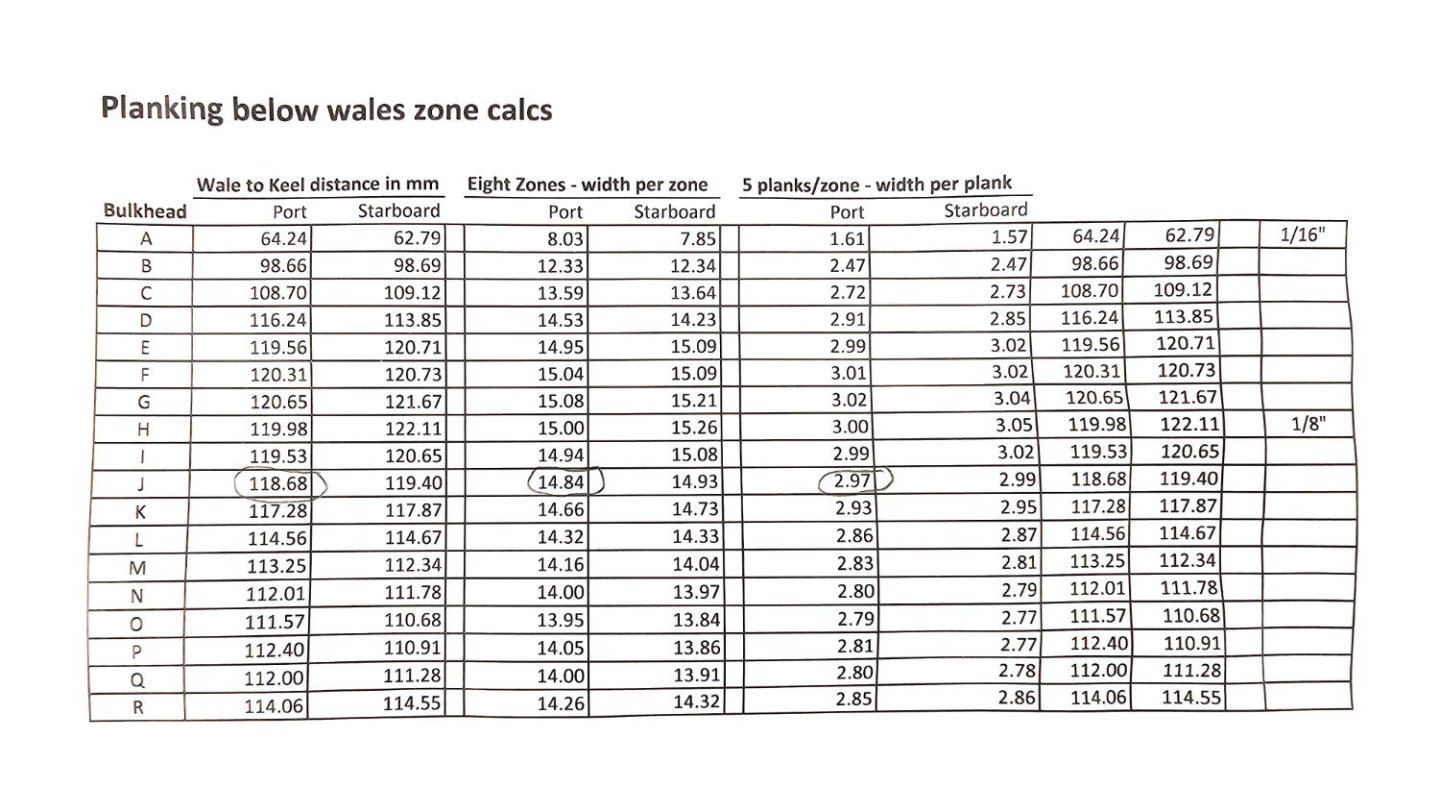
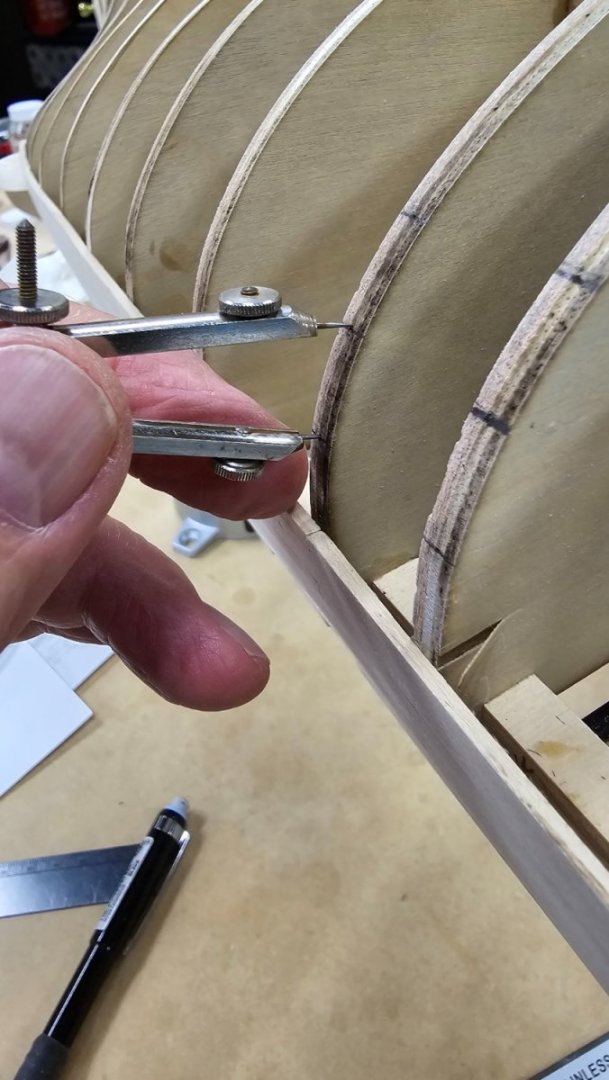
I'm back at work in the shipyard. Though I enjoyed my time on Lido Key visiting my brothers, I was stunned to see that I had put on eight pounds. Silly me, I though I was keeping up with the diet and exercise and would come home perhaps a pound or two lighter. Ugh! Back to my routine. But first: I had to get rid of that dip in the wale at bulkhead D. So, I opted for demolition and re construction: Before: The remodeling: Note the plank temporarily in place to mark the new lower edge of the wale. (upper edge in this bottom up photo) After: Not perfect, but much less annoying. The rest of the day was spent revisiting my measurements and marking the bulkheads with tick marks to indicate the 8 zones I intend to plank. I opted out of using proportional dividers and the start-in-the-middle-with-1/8"-strips as advocated by Bob Hunt. Instead I'm going for a more mathematical approach, which I've seen others at the site use as well. I double checked the numbers bulkhead by bulkhead and made sure my spreadsheet was correct. Here's the paper strip I used to measure distance from bottom of wale to rabbet on port side bulkhead J. The numbers on the spreadsheet check out. In later steps, I'll be using the individual plank dimensions to shape the planks. Using a tool I've kept since my high school drafting class, the small divider, I set the width for the zone to 14.84 mm (1/8 of 118.68mm) using my vernier caliper. This was a little fiddly but close enough. I walked the divider up the bulkhead making little holes that I marked with pencil. Rinse and repeat for all bulkheads on both sides. I tapered the lines at the stern, keeping an eye out for symmetry between port and starboard. That's enough for one day. Time to update the build logs (this one and the king-sized Word document on my home PC). Next up will be to do the tapering at the bow and finally start making small pieces of planking out of larger ones..


-
I'm glad I stumbled upon this post. That was Dec 5, 2023. As of Fed 3, 2024, still have not received replacement stock for the USS Constitution from Model Expo. (In case someone from Model Expo is checking in to MSW, see Ticket #22286.) I've moved on on my own. Very disappointing experience...
-
Hey Rich, After you provided feedback to my comments in SUBaron's Conny build log, I dove back into your log. Having just finished the wales and about to embark on planking down to the keel, I took particular note of these sections of your log. In the photos above (post 60), I noticed that the first two gun ports on the portside are lower by a plank or two from those on the starboard side. Fearing I screwed up yet again, I consulted the Practicum and confirmed that his build has symmetry between port and starboard sides. Did I miss yet another detail? (Let's call that a rhetorical question. Too late for me if I did). It's been a while since I've looked at your build log. Coming at it with the benefit of hindsight, I'm even more impressed at the level of detail you provided. Lastly, that's quite the collection of future builds you have there... Best Peter
-
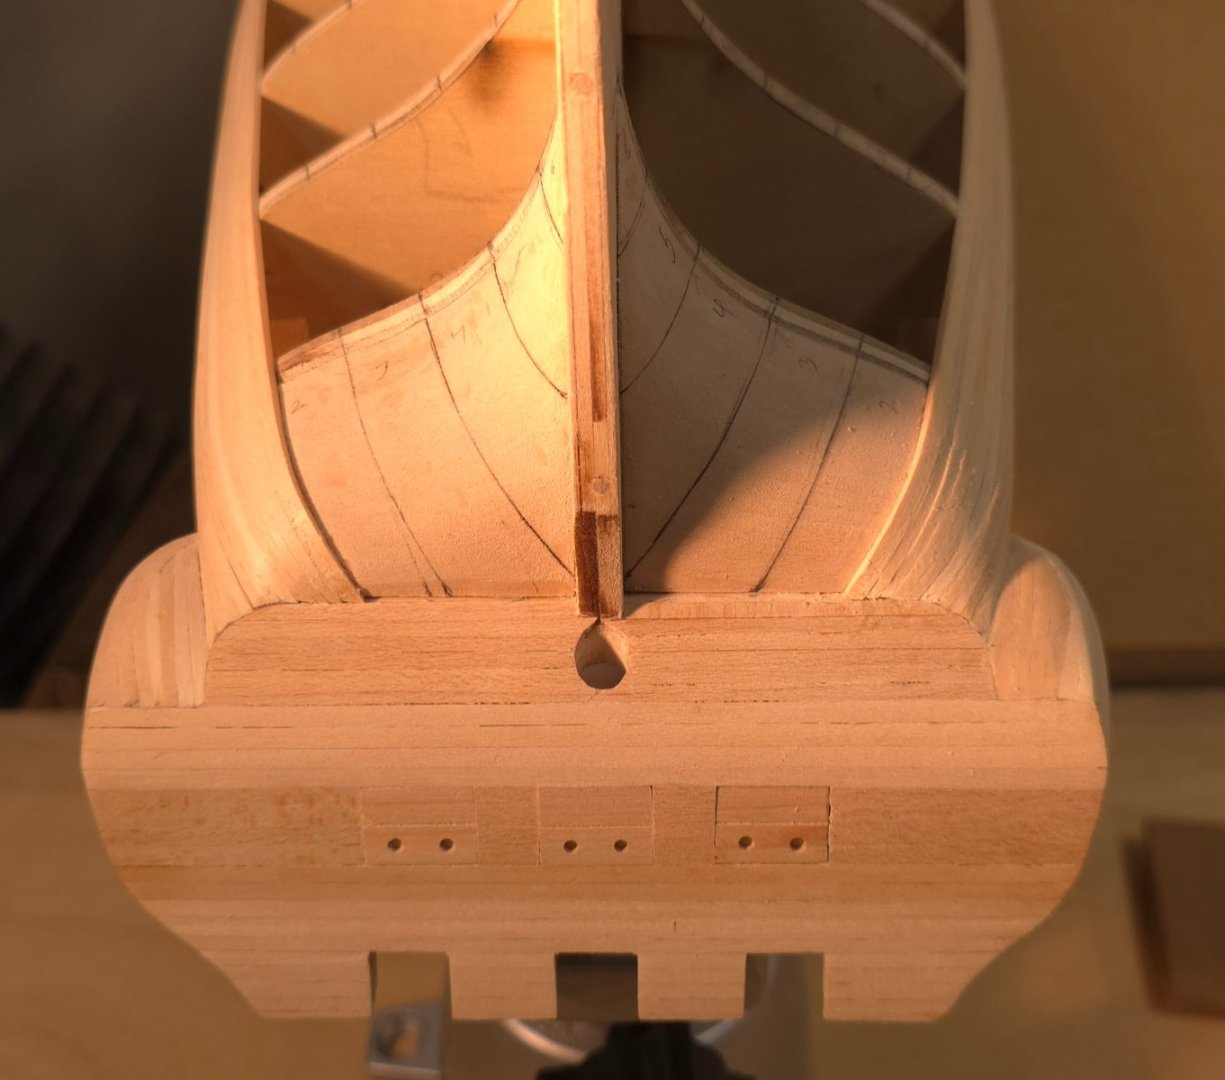
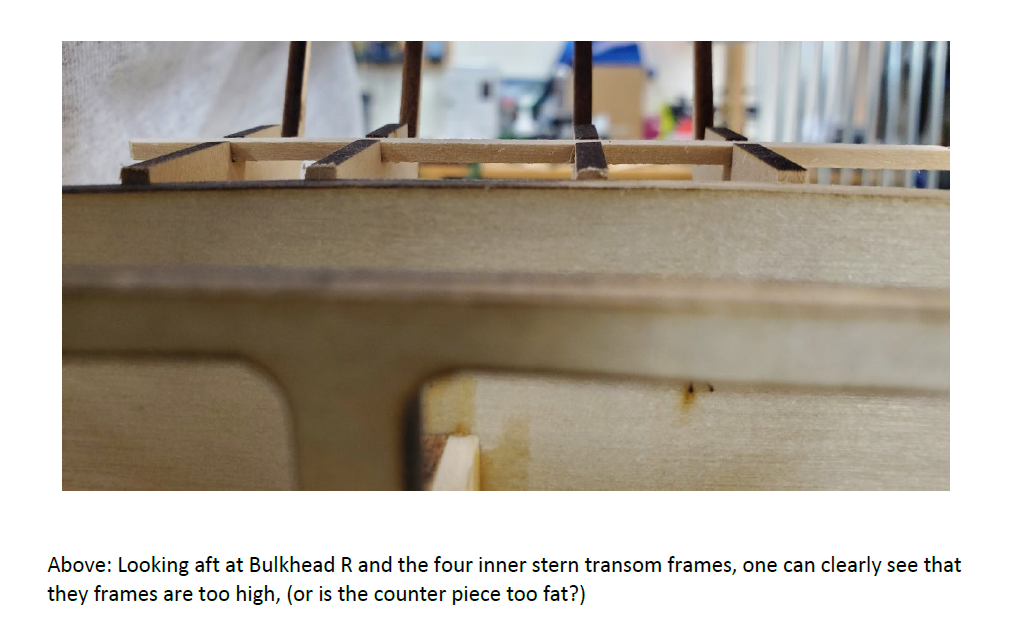
Evidently, I missed that step, and dealt with it by trimming the excess off the bottoms of the transom frames. Man, that seems like a lifetime ago... Looking at SUBaron's photos above, I'm left to wonder if that 11/32" trimming of the counter led to its being too high when mounted to Bulkhead R, resulting in the necessity of adding the shim. In my own build log, I noticed that I only had to trim about 3/64" off the bottoms of the transom frames to correct the oversight - not 11/32", which I would have expected. I think the important thing is for the top of the frames to be flush with the bulkheads for the deck planking that will follow. Also, like Jon, I don't see how the hole for the rudder post ended up where it did. The setup looks correct. I compared her photos to those in my build log and the location of the center point for the hole seems correctly placed. Interesting. My takeaway from all this is that SUBaron did a much better job of reading the Practicum than I did. I must have just looked at Hunt's pictures and missed that little detail. Thanks to you both, Jon and Rich, for chiming in. I'll be digging deeper into your build logs trying to avoid as many pitfalls as possible. And to SUBaron, hang in there. These things happen to everyone here. Nice job so far. Keep up the good work.
-
your cup runneth over with good ideas
-
Well that's a good news and a bad news situation. The good news is I'm not losing my mind after checking my post 12 and seeing no references to the counter there. The bad news is, nowhere in my build log do I mention that I reduced the thickness of the counter. Can't wait to get back to the shipyard to measure. If that's a step I missed, I'll have to figure out how to fix it. Thank you for providing the practicum reference. I do have the practicum with me on my laptop and I just checked to see if anything jogged my memory. Sadly not, but I'm pretty sure I missed that Practicum note. When will this come back to bite me in the backside?
-
Jon, This is news to me (I think), did I miss something? Peter
-
As soon as I saw the glue over run on the rudder, my first thought was how do you clean that up. You addressed that, but as I contemplate all the small item gluing I'll be doing on Conny, the bigger question is, how do you avoid over run in the first place? Further, since Super Glue sets so quickly, how do you accurately position these small pieces in the first place? Any ideas?
-
USS Constitution by mtbediz - 1:76
Der Alte Rentner replied to mtbediz's topic in - Build logs for subjects built 1751 - 1800
I'm soooooo glad I asked. I will drill these holes before I plank the deck! Thank you Mustafa -
USS Constitution by mtbediz - 1:76
Der Alte Rentner replied to mtbediz's topic in - Build logs for subjects built 1751 - 1800
I noticed that between posts 111 and 117 that the holes in the bulwarks for the eye bolts for the cannons appeared. I assume this was part of the necessary drilling you mentioned in post 117. Pardon a newbie question, but what tool did you use to drill the holes in the bulwarks? -
USS Constitution by mtbediz - 1:76
Der Alte Rentner replied to mtbediz's topic in - Build logs for subjects built 1751 - 1800
Ha! Somehow I doubt that. But thank you for the encouraging words. -
USS Constitution by mtbediz - 1:76
Der Alte Rentner replied to mtbediz's topic in - Build logs for subjects built 1751 - 1800
Man-oh-man, The hull is gorgeous. Maybe I'll rethink this painting thing after all. (Will you be taking the Summer off again, so I have the hope of maybe catching up? 😁) -
not very likely. 😁