Der Alte Rentner
-
Posts
1,018 -
Joined
-
Last visited
Content Type
Profiles
Forums
Gallery
Events
Everything posted by Der Alte Rentner
-
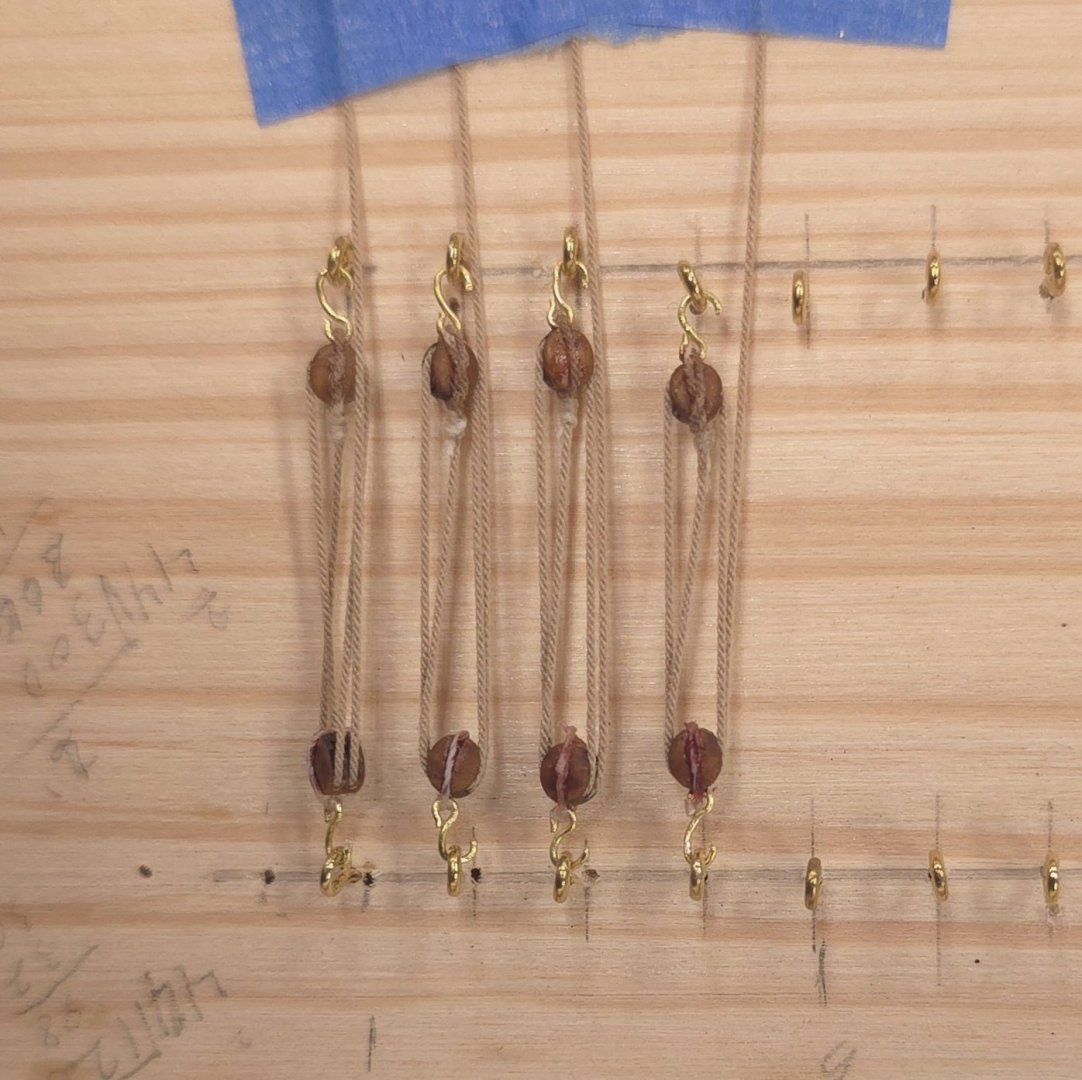
 One more decision to make. Which belaying pins to use? I spent some money and got delaying pins from Syren. Here's a close-up of the Model Shipways version up against the Syren pin. In the close up, Syren pins looks more realistic. But to the naked eye, the Model Swipways pins shine (pun intended). If I go for the latter, I'll have to order more, since I hit the supply pretty hard for the quion handles.
-
Now, why didn't I catch this last month? XKen may have an absolutely brilliant approach to stropping blocks! In my idle time, I'm going to try this myself to see if it's as clever as it looks.. I'm researching how best to make chainplates. Since I won't be painting them black, I'll need an approach that keeps the brass looking good. Anyone with links to methods that might fit the bill, please chime in.. .. and as long as I'm soliciting opinions, thoughts? I think I like it. But I'm not 100% sure. Plan B would be to paint the wrinkled part of the eyebrow flat black, leaving the brass colored arch. Plan C would be to try to use the same stain I used for the dark planking.

-
Thank you Gregg. Any thoughts on whether to put a couple of coats of poly on all the brass? Or let them age?
-
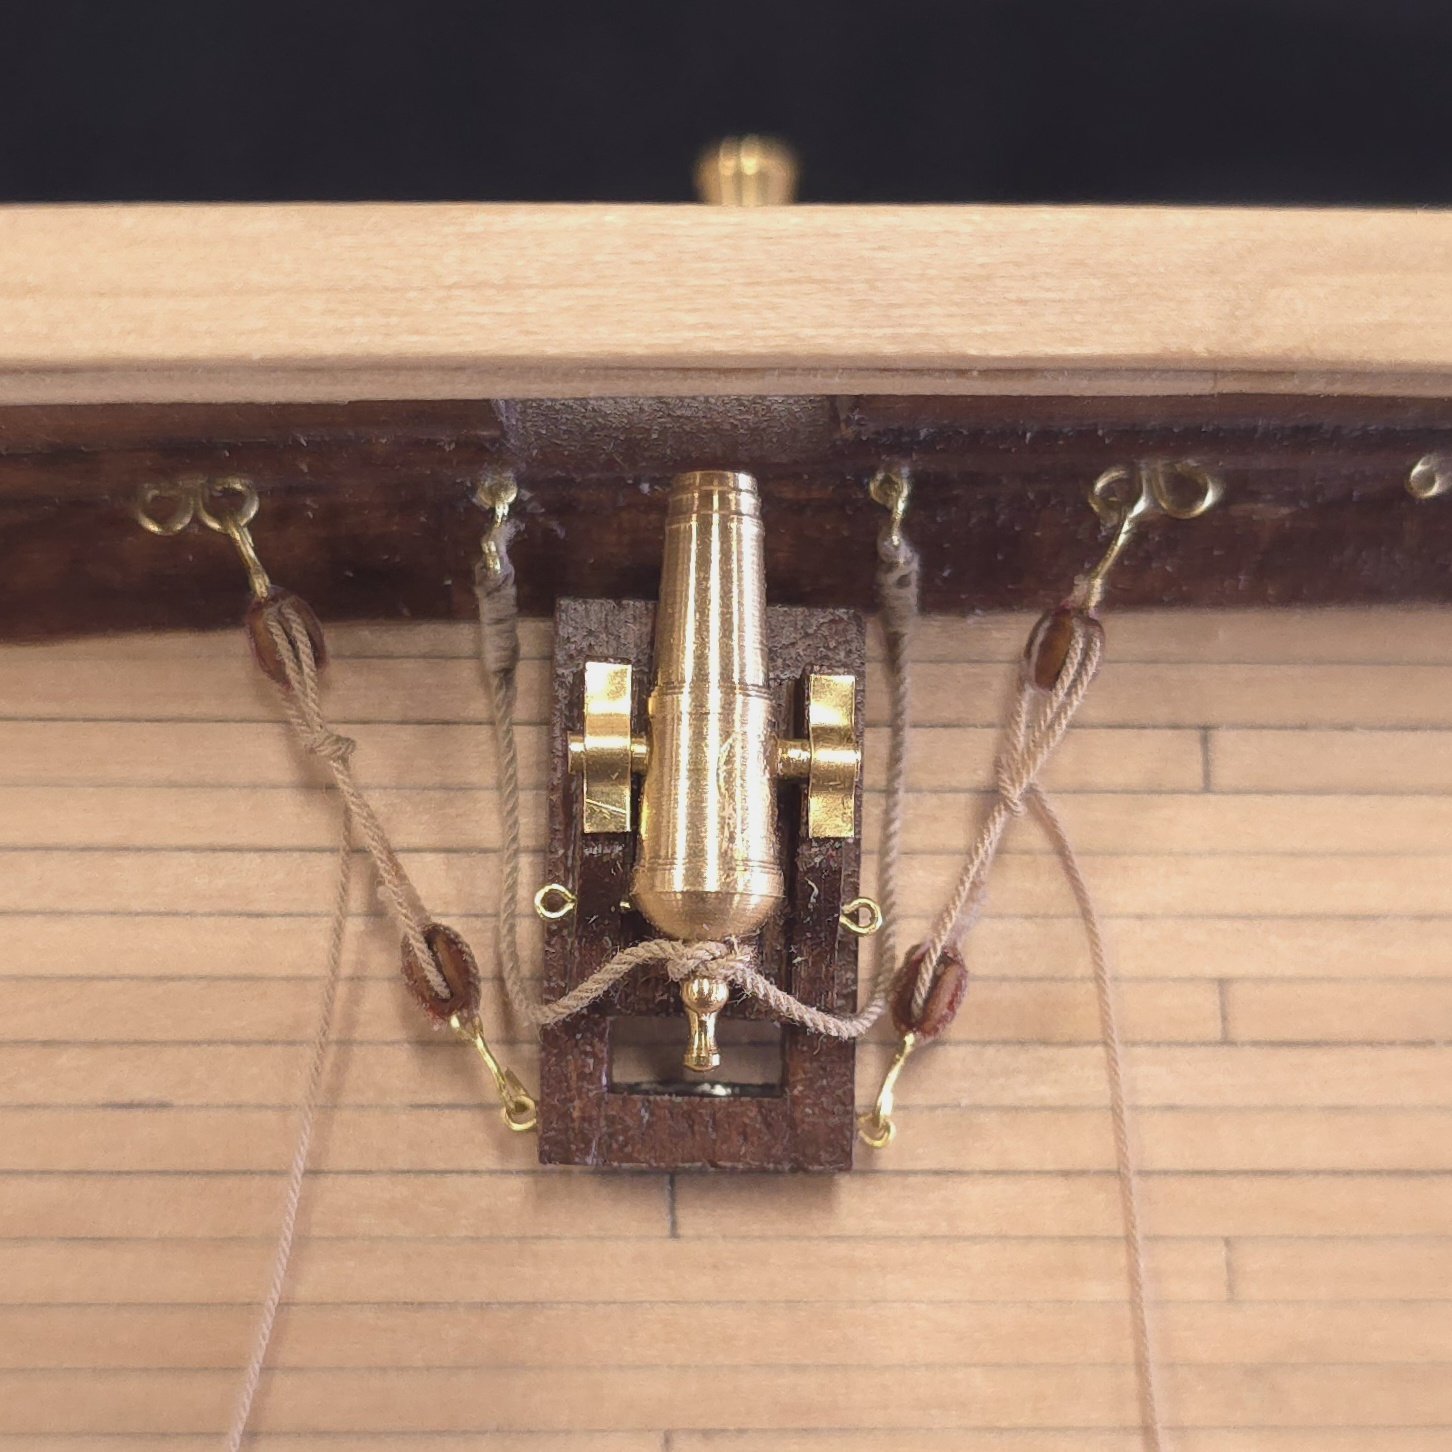
Another decision made - pin rails before tackles and breech lines. It seemed to me I would have a difficult time positioning the rails once the carronades were glued into place. So, after I completed fabricating the breech lines, I fabricated and installed the pin rails. I finished the tackles and breech lines lines, but I think I'll have to hold off on rigging the guns until I get the cleats installed and make sure I haven't overlooked any eye bolts that need to be placed somewhere on the bulwarks.


-
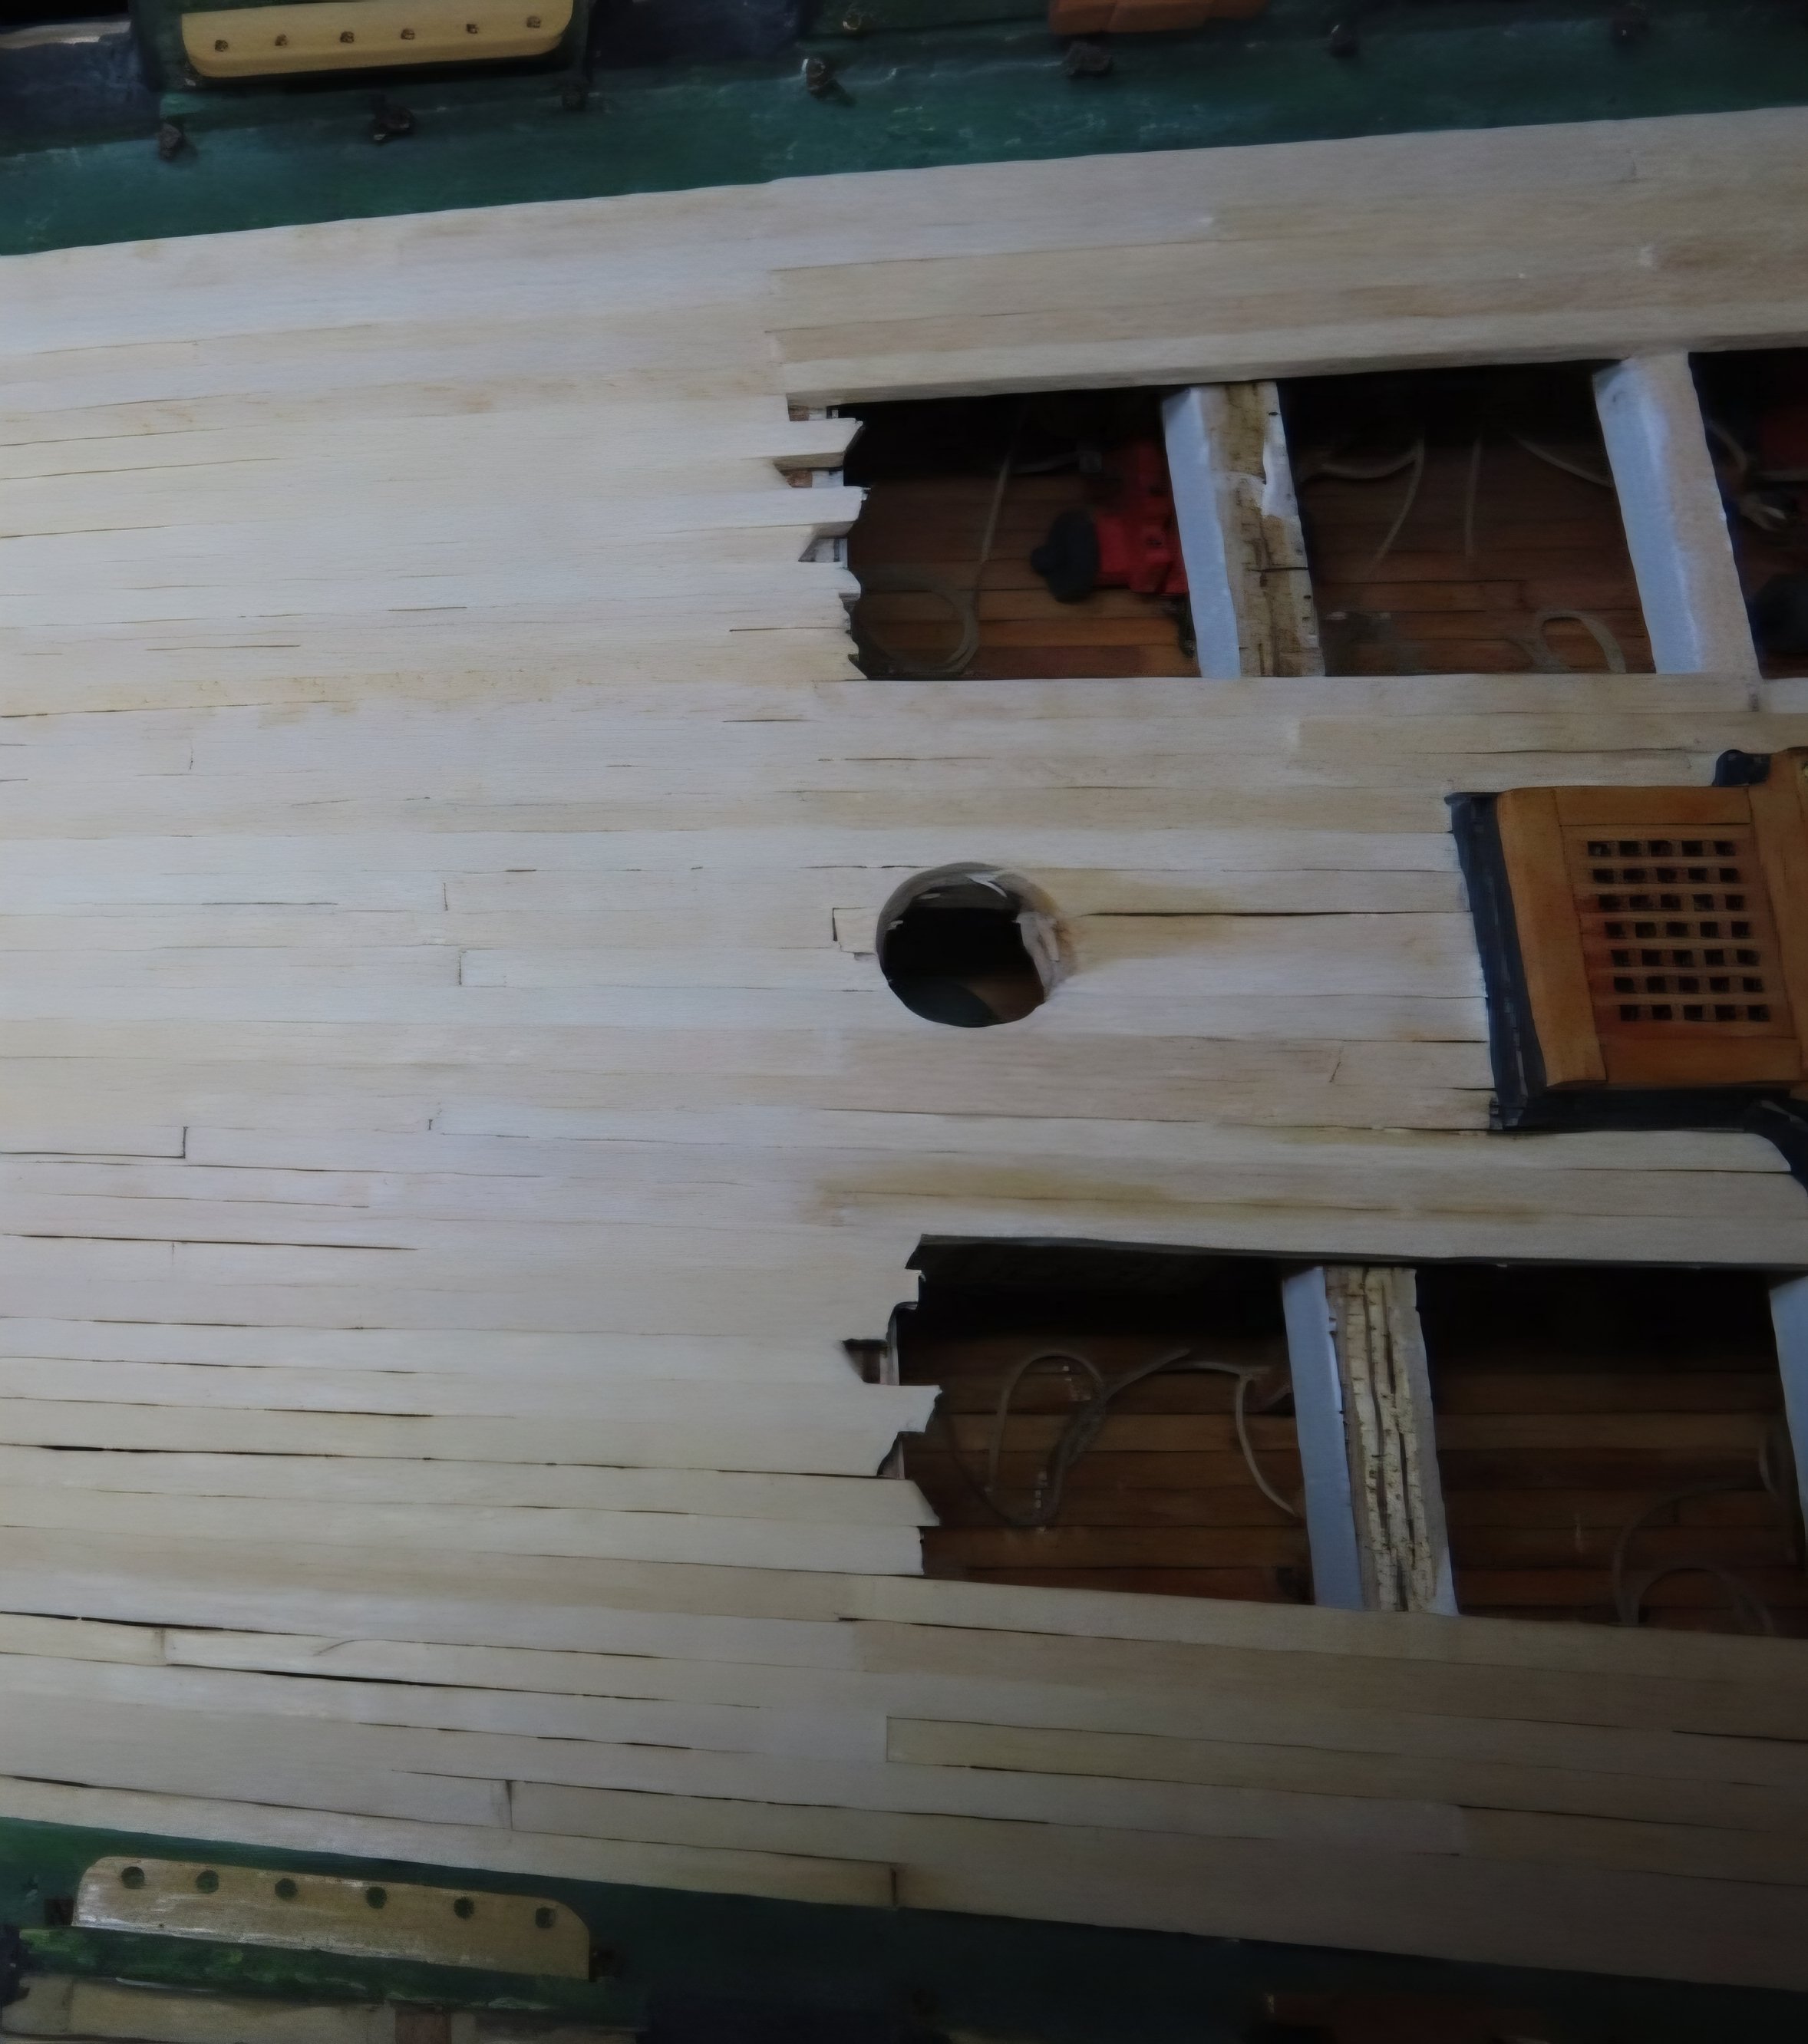
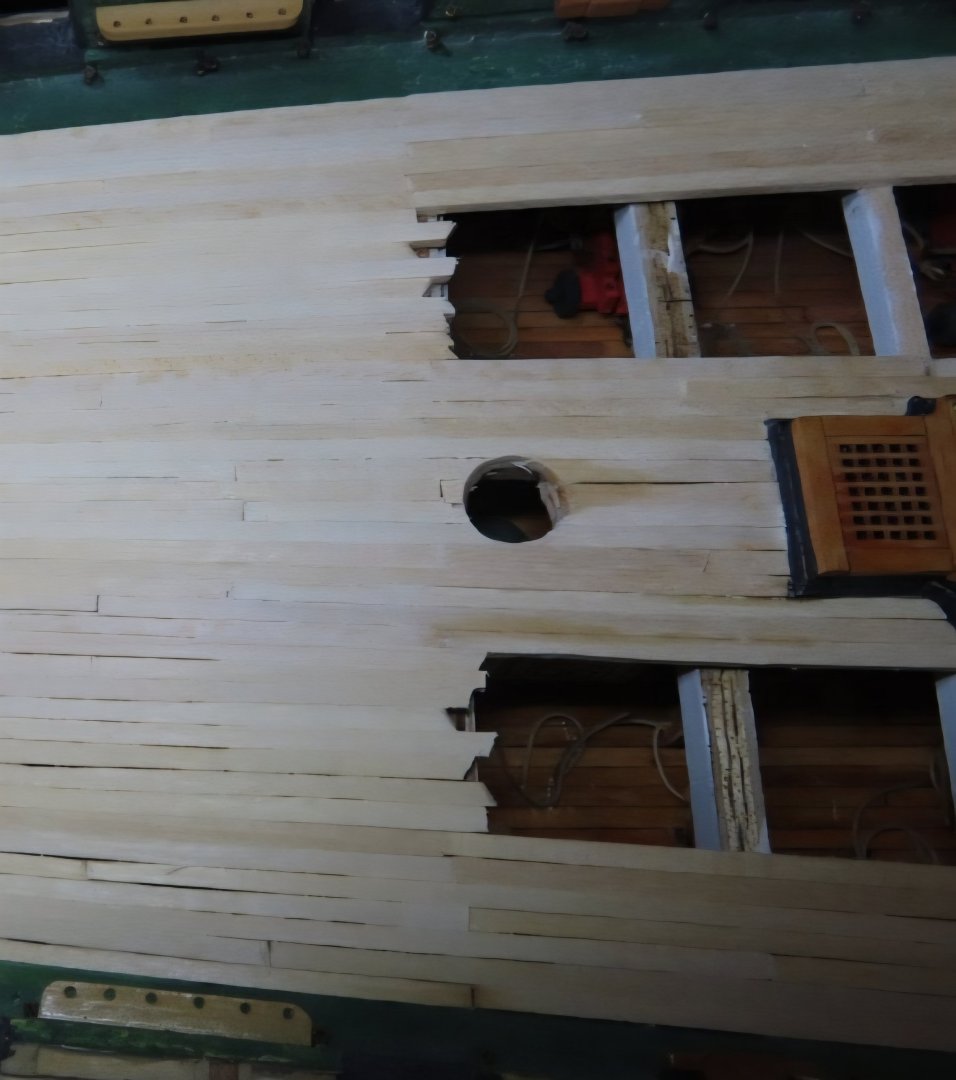
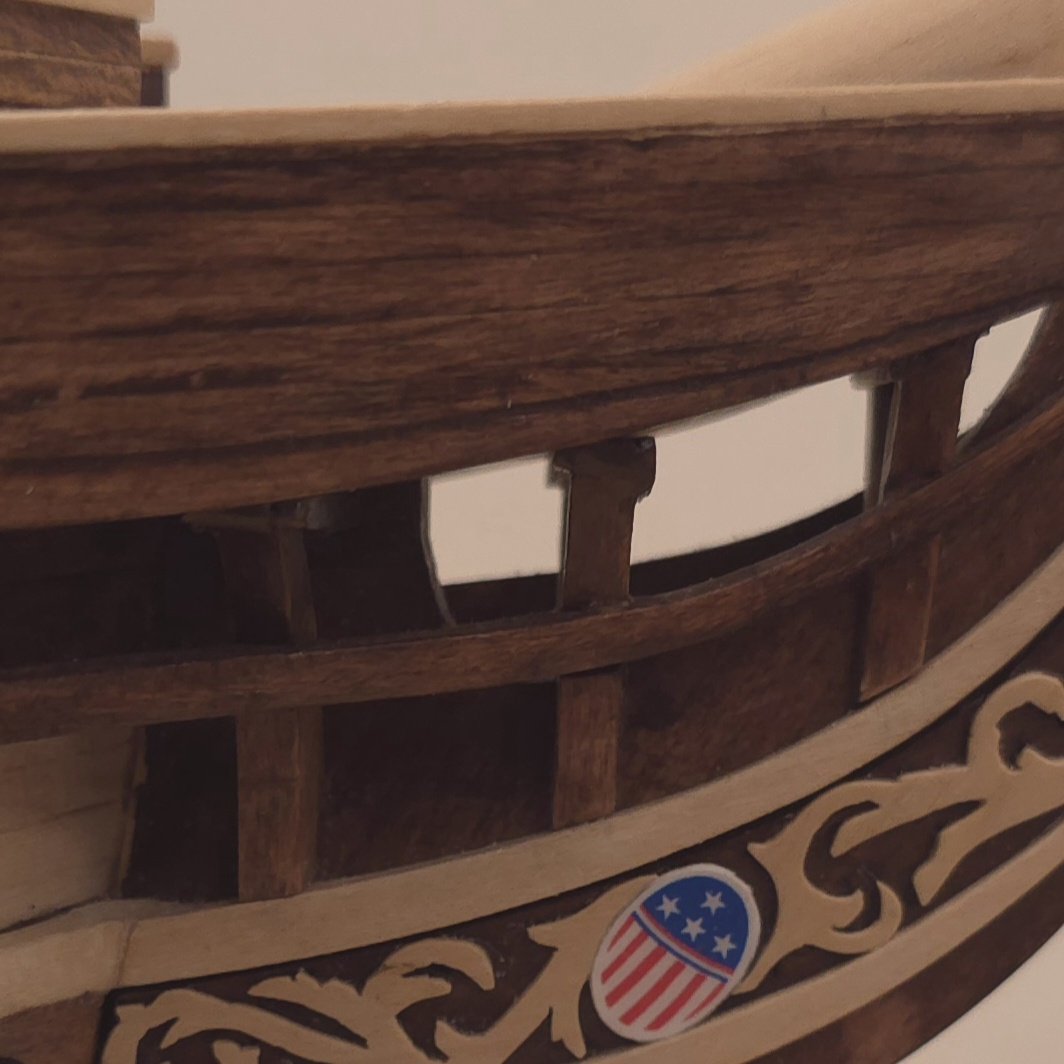
In your leaving the spa deck open to permit viewing the the gun deck below, is the intention to leave the planking, and I apologize for not having a better word for this, ragged? As far as the carronades are concerned, the beauty of the selection you made is that you bypass the obstacle of the overly wide waterways. Unlike mine, your guns will actually poke through the gun ports. Good choice!
-
You are correct, Haiko, the answer is in my build log. And you don't even have to look that far, just scroll back towards the top of this very page - Posts 759 and 762. The answer is, Ropes of Scale and Syren. For what it's worth, I chose .6 mm beige from Ropes of Scale for the breech line. It's a tight squeeze through the eye bolts, so I treated the tips of the line with C/A glue, let it dry, then sliced at a 45° angle to facilitate a pointy end to pass through the eye in the eye bolt. For the tackles I used .45 mm.
-
As nice as your first planking looks, I don't really think you need much by way of advice to deal with the second planking. I too have sought books on planking techniques and downloaded several articles from the MSW site. In the final analysis, I ended up incorporating techniques gleaned from other build logs. I devoted a lot of space in my build log to planking, as you know because you've seen these. I'm not necessarily holding myself up as the expert in the field, but I think I managed fairly well. Have a second look, and see if that gets you started. You will need a proportional divider and some variation of a spreadsheet, if you want to do proper job of tapering.
- 233 replies
-
- 1
-

-
- Model Shipways
- constitution
- (and 5 more)
-
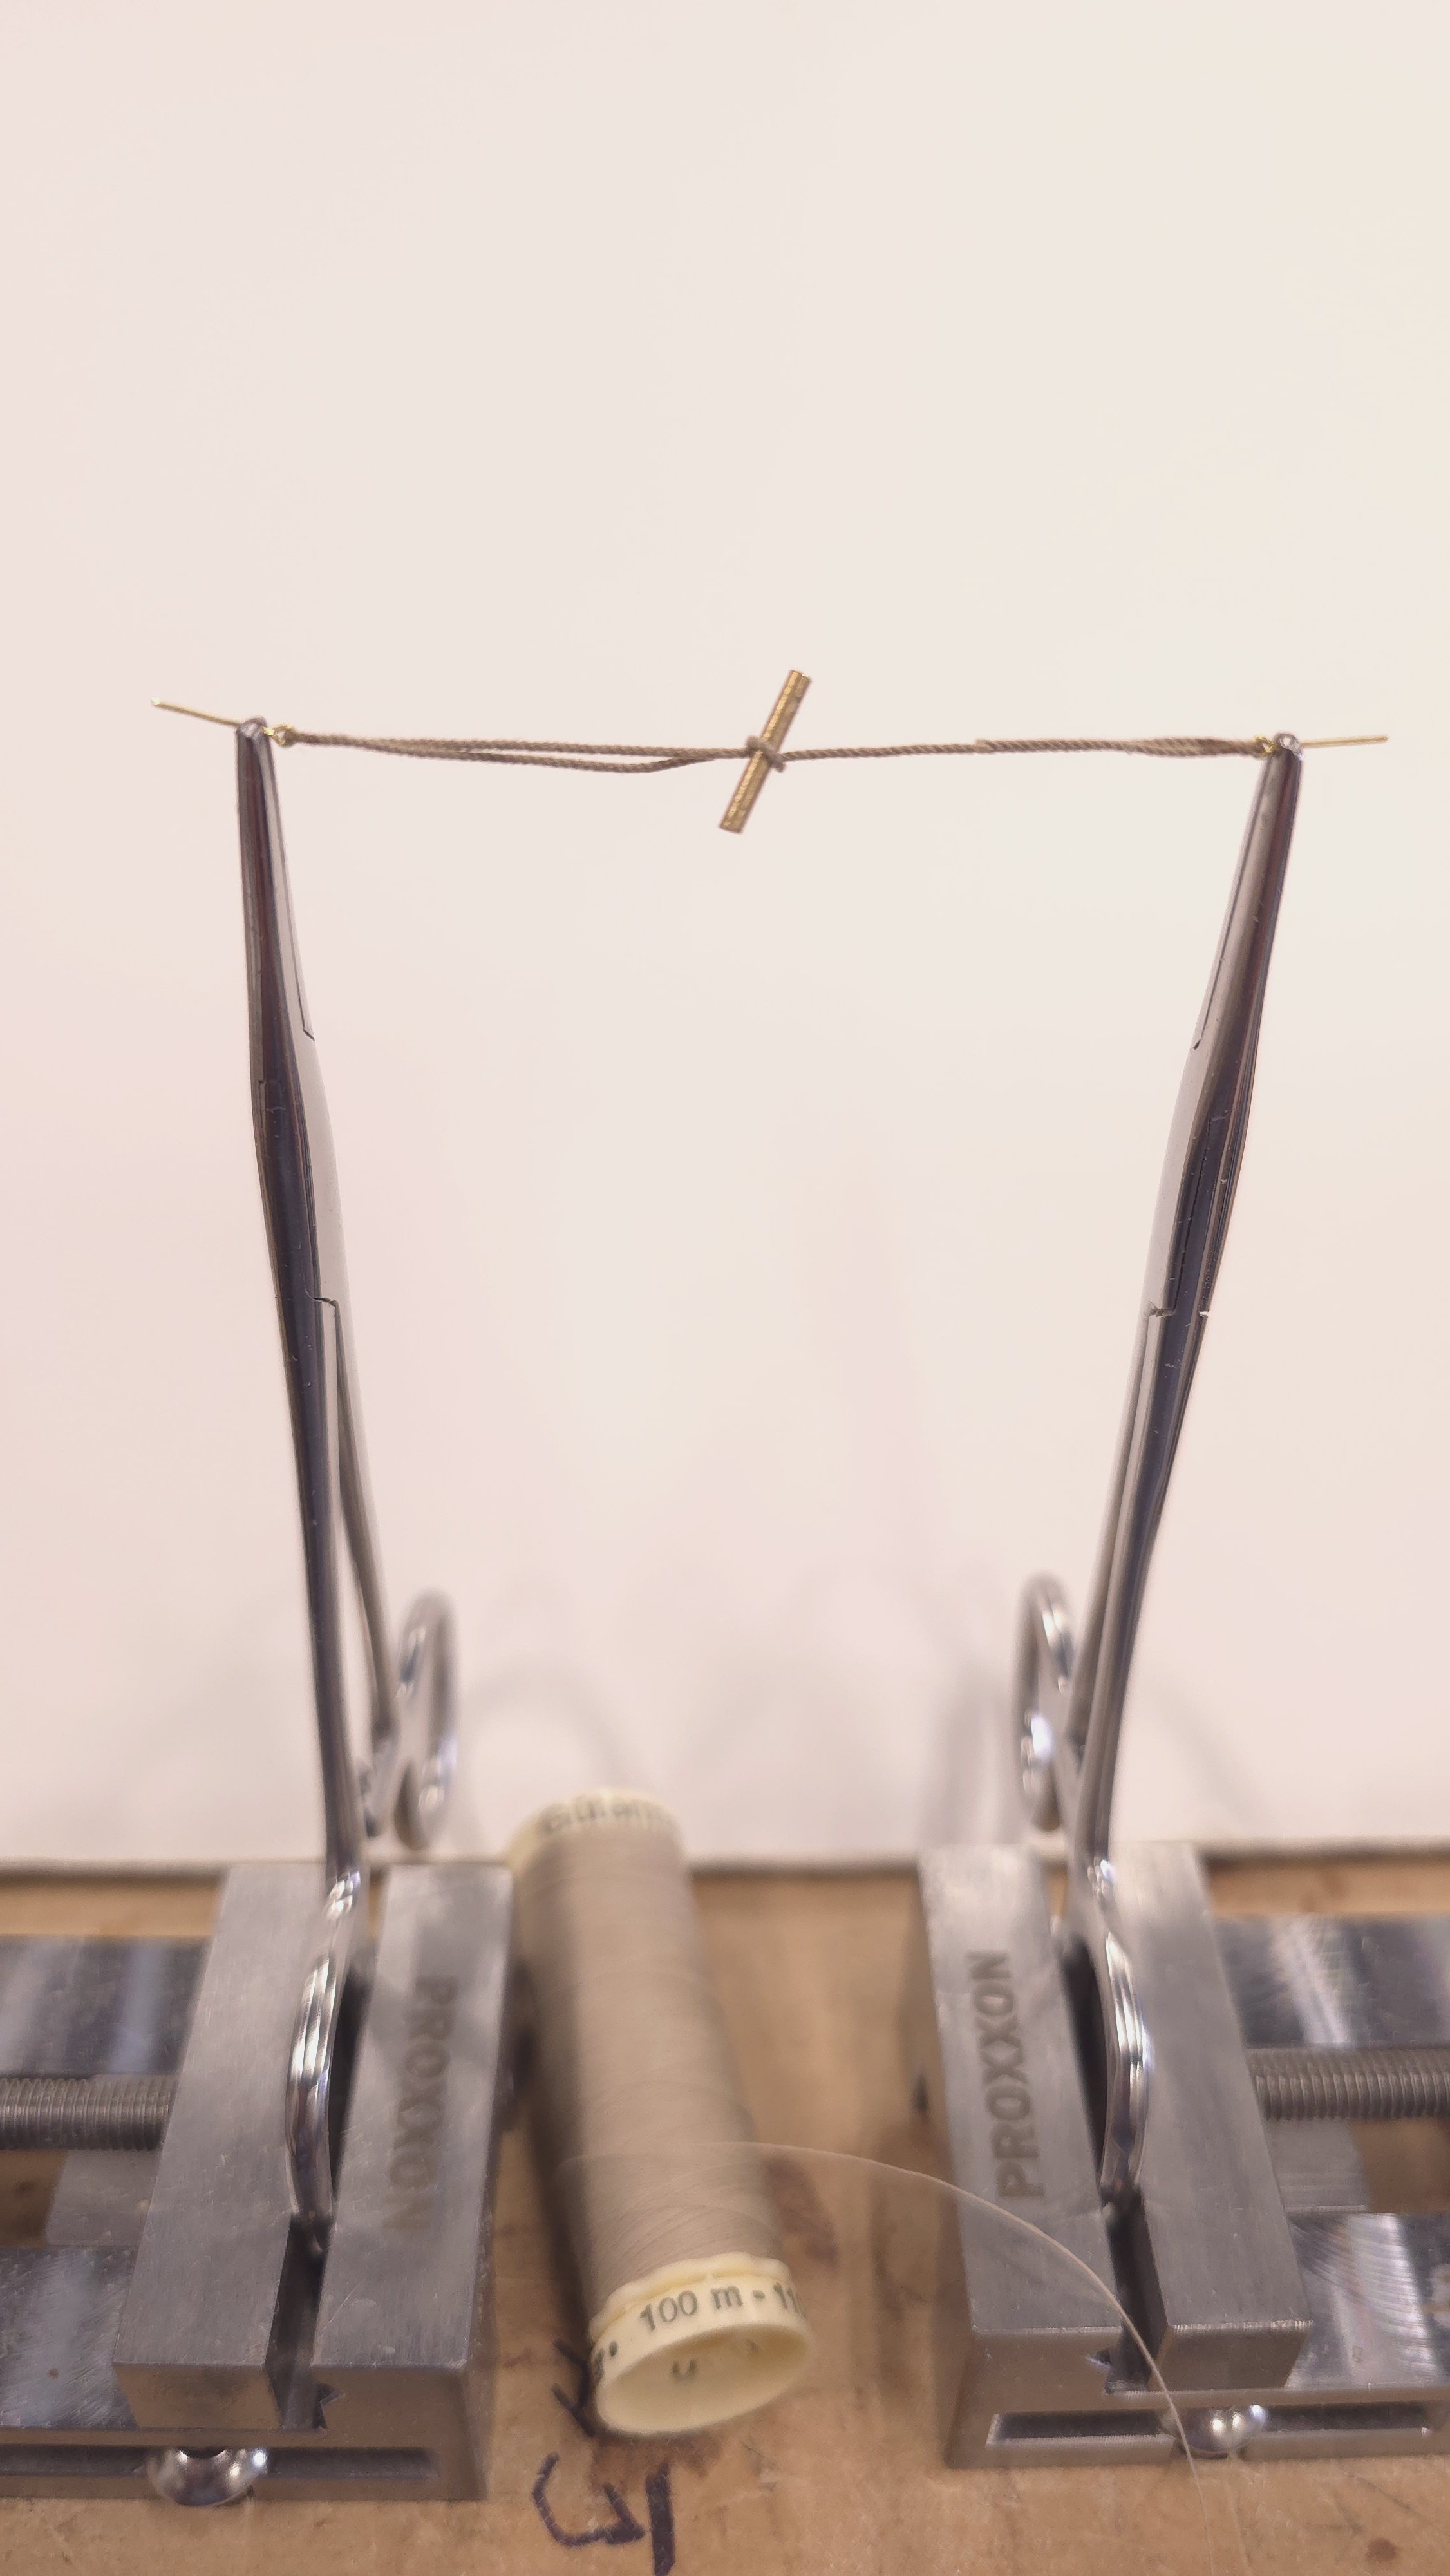
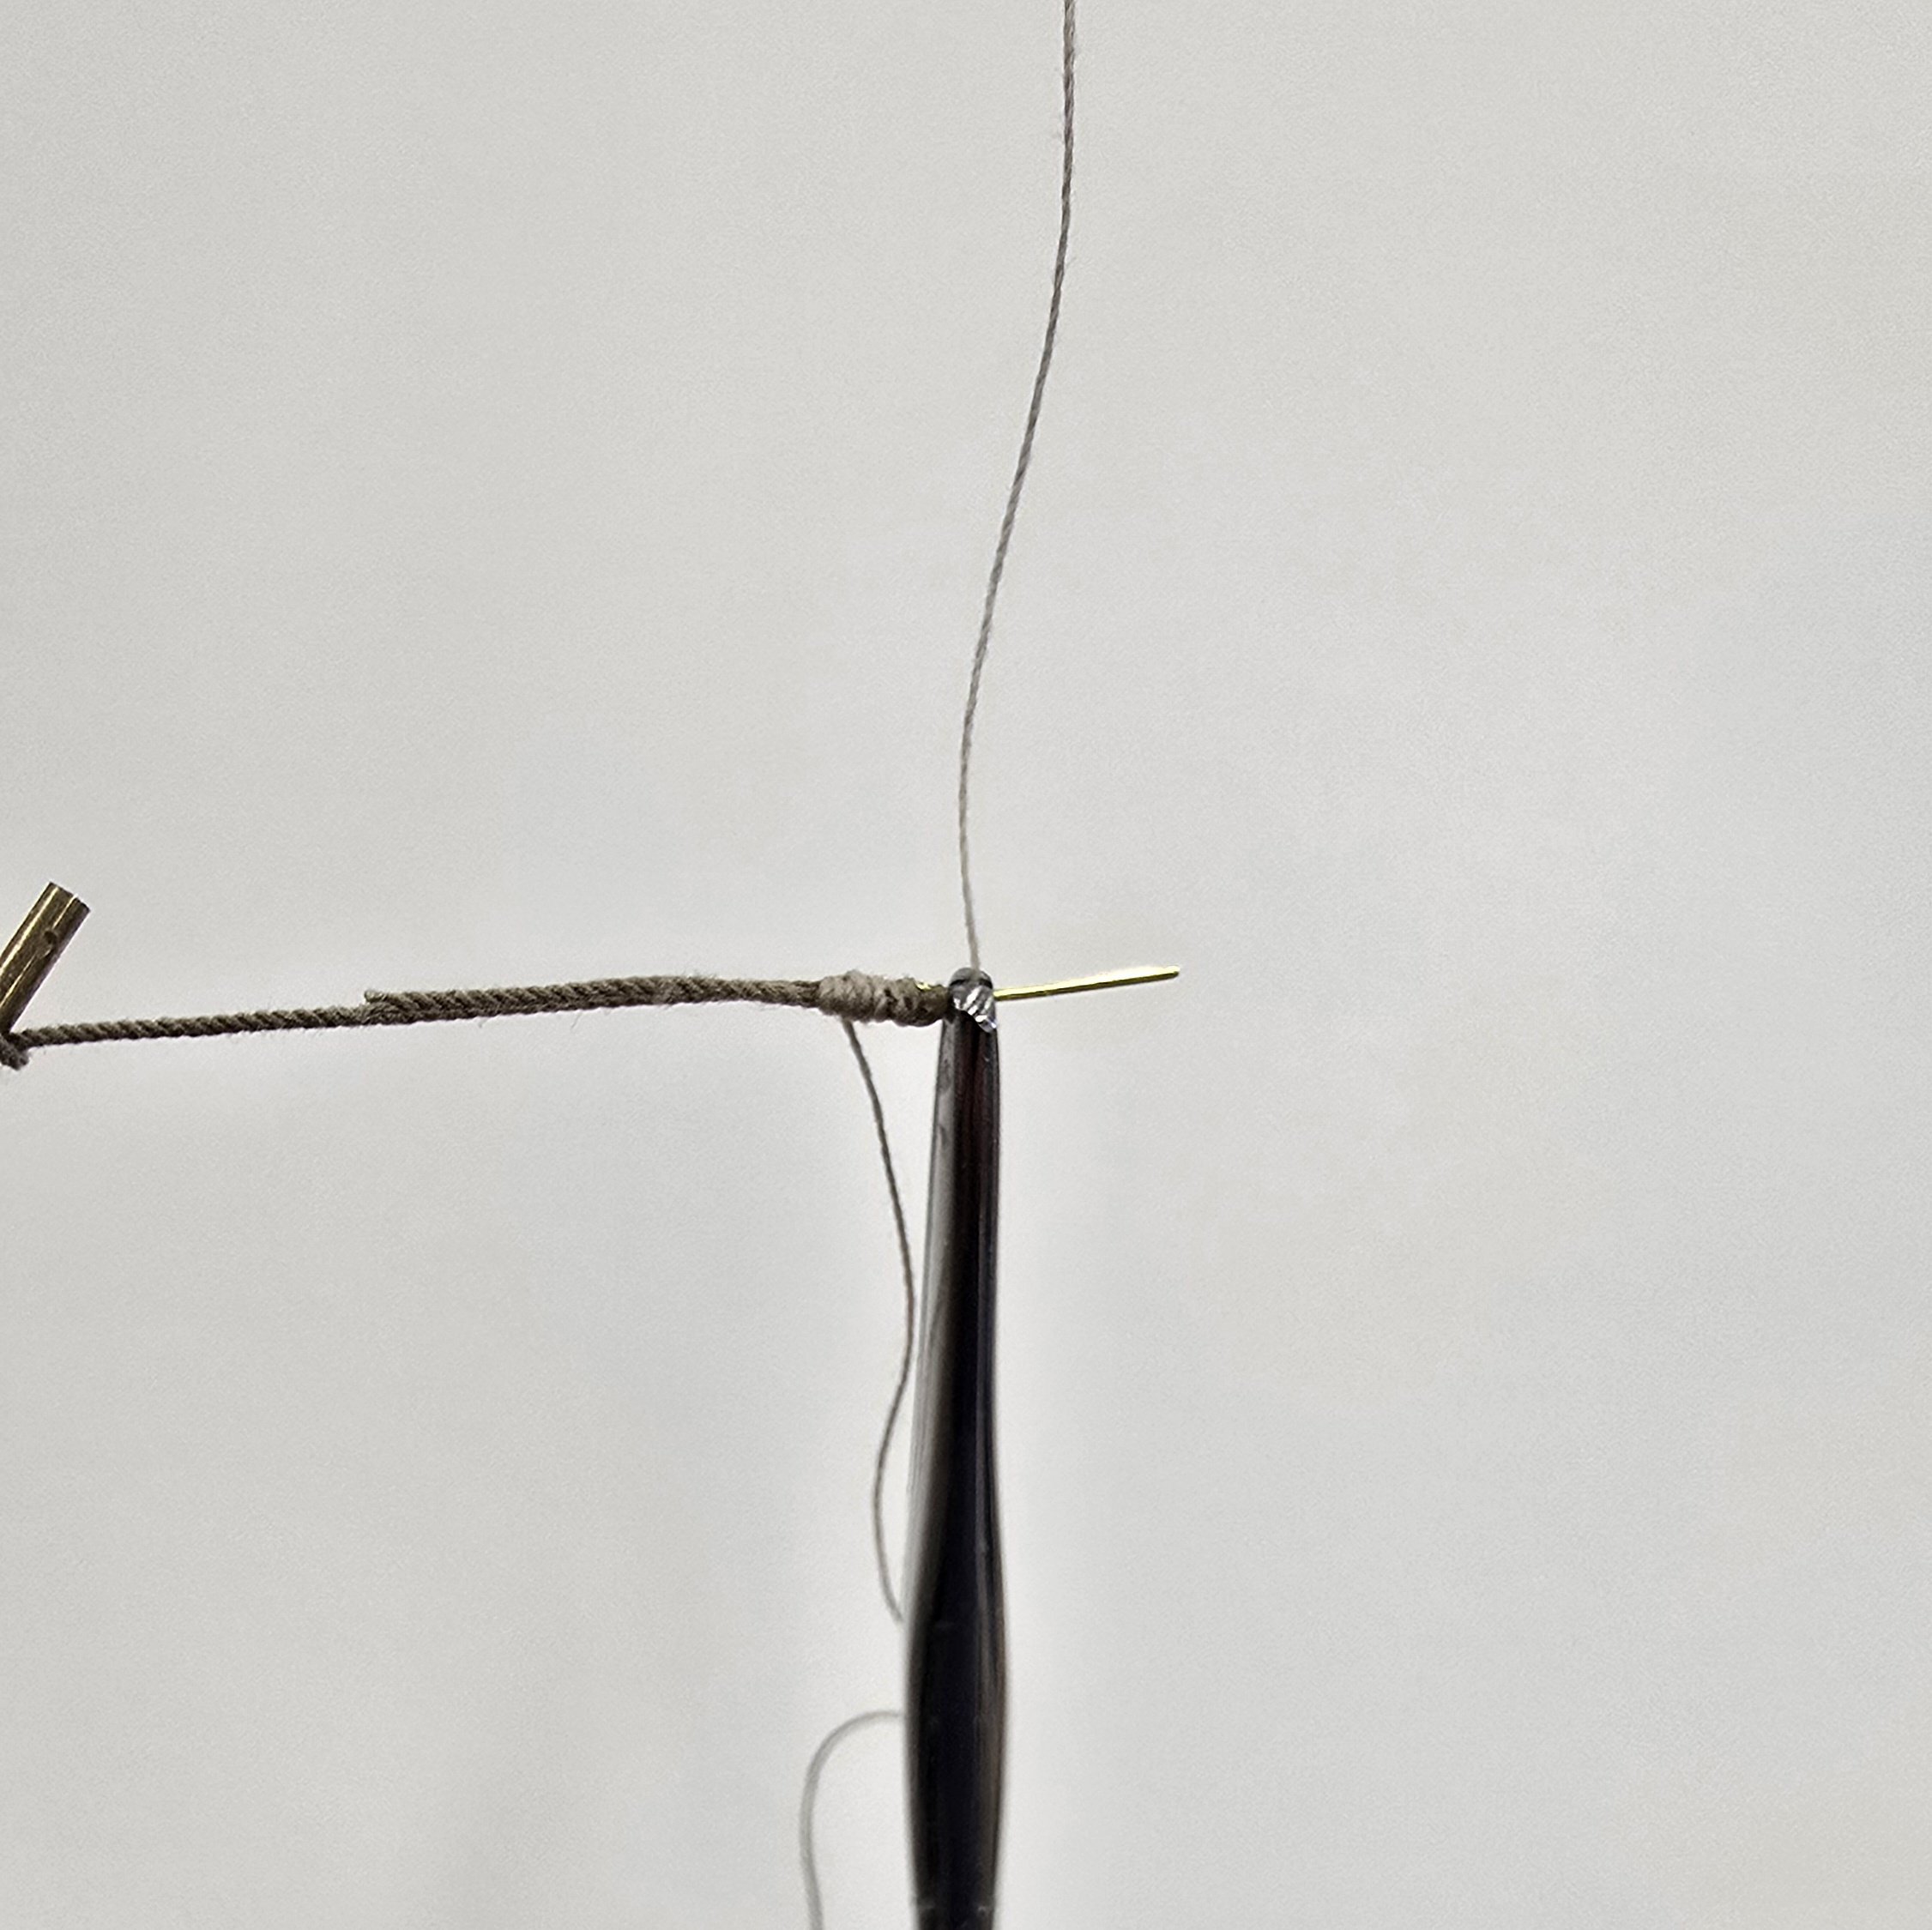
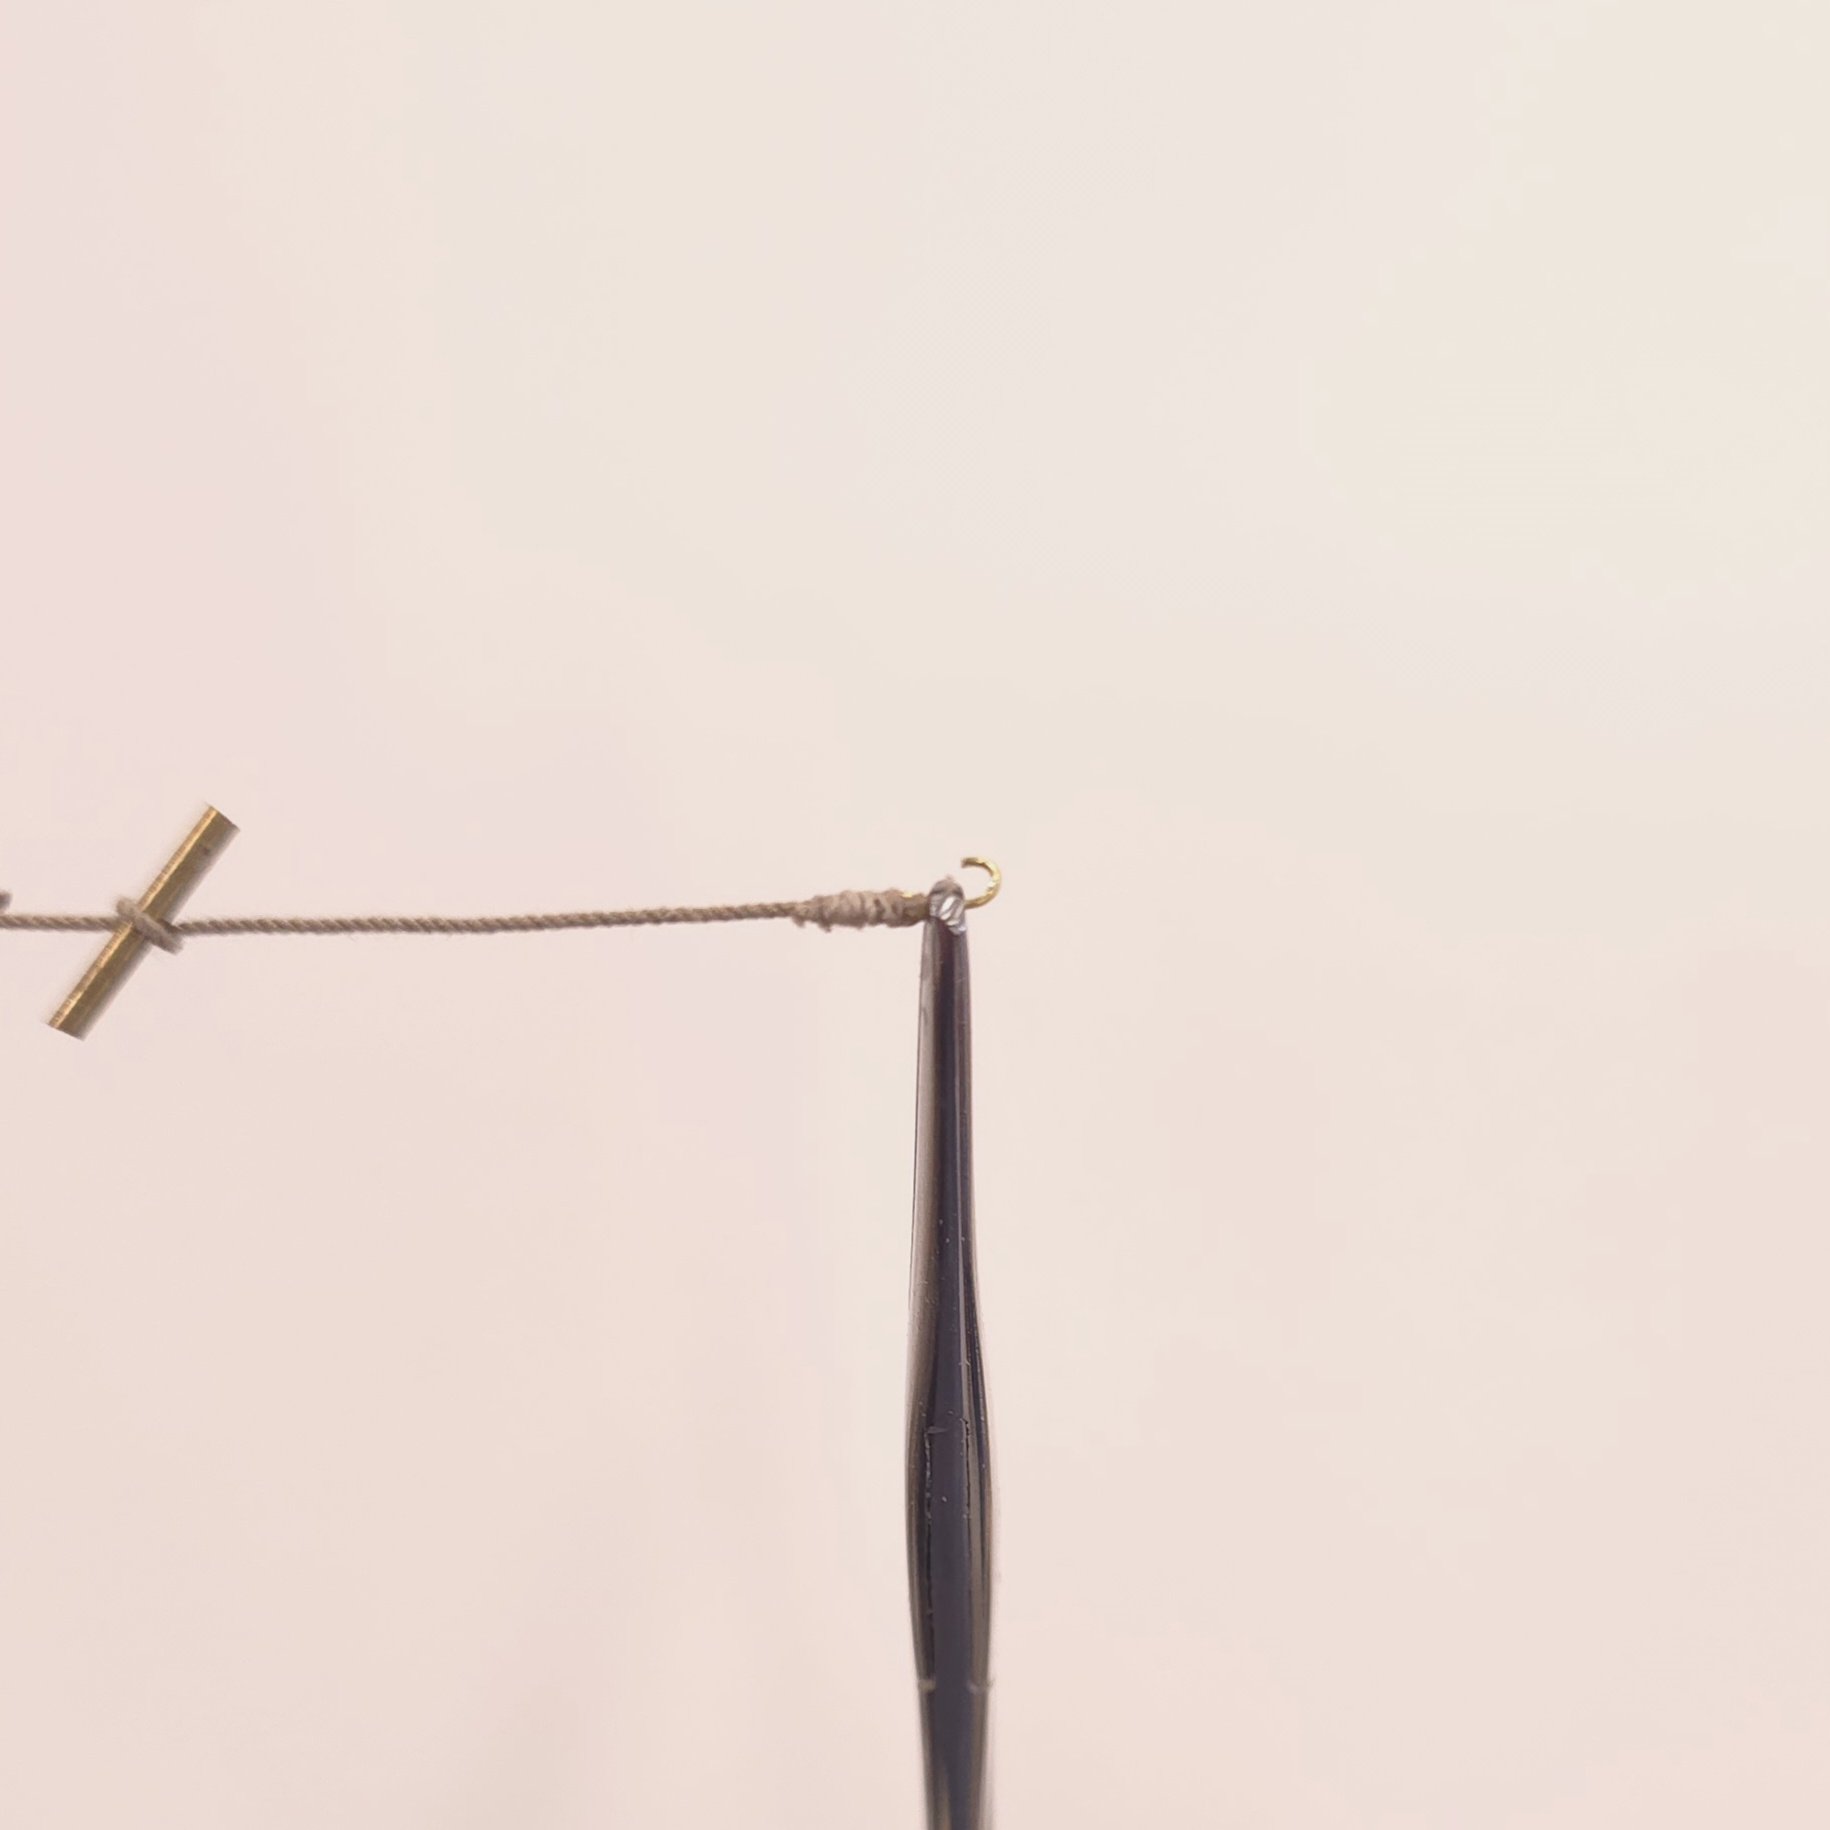
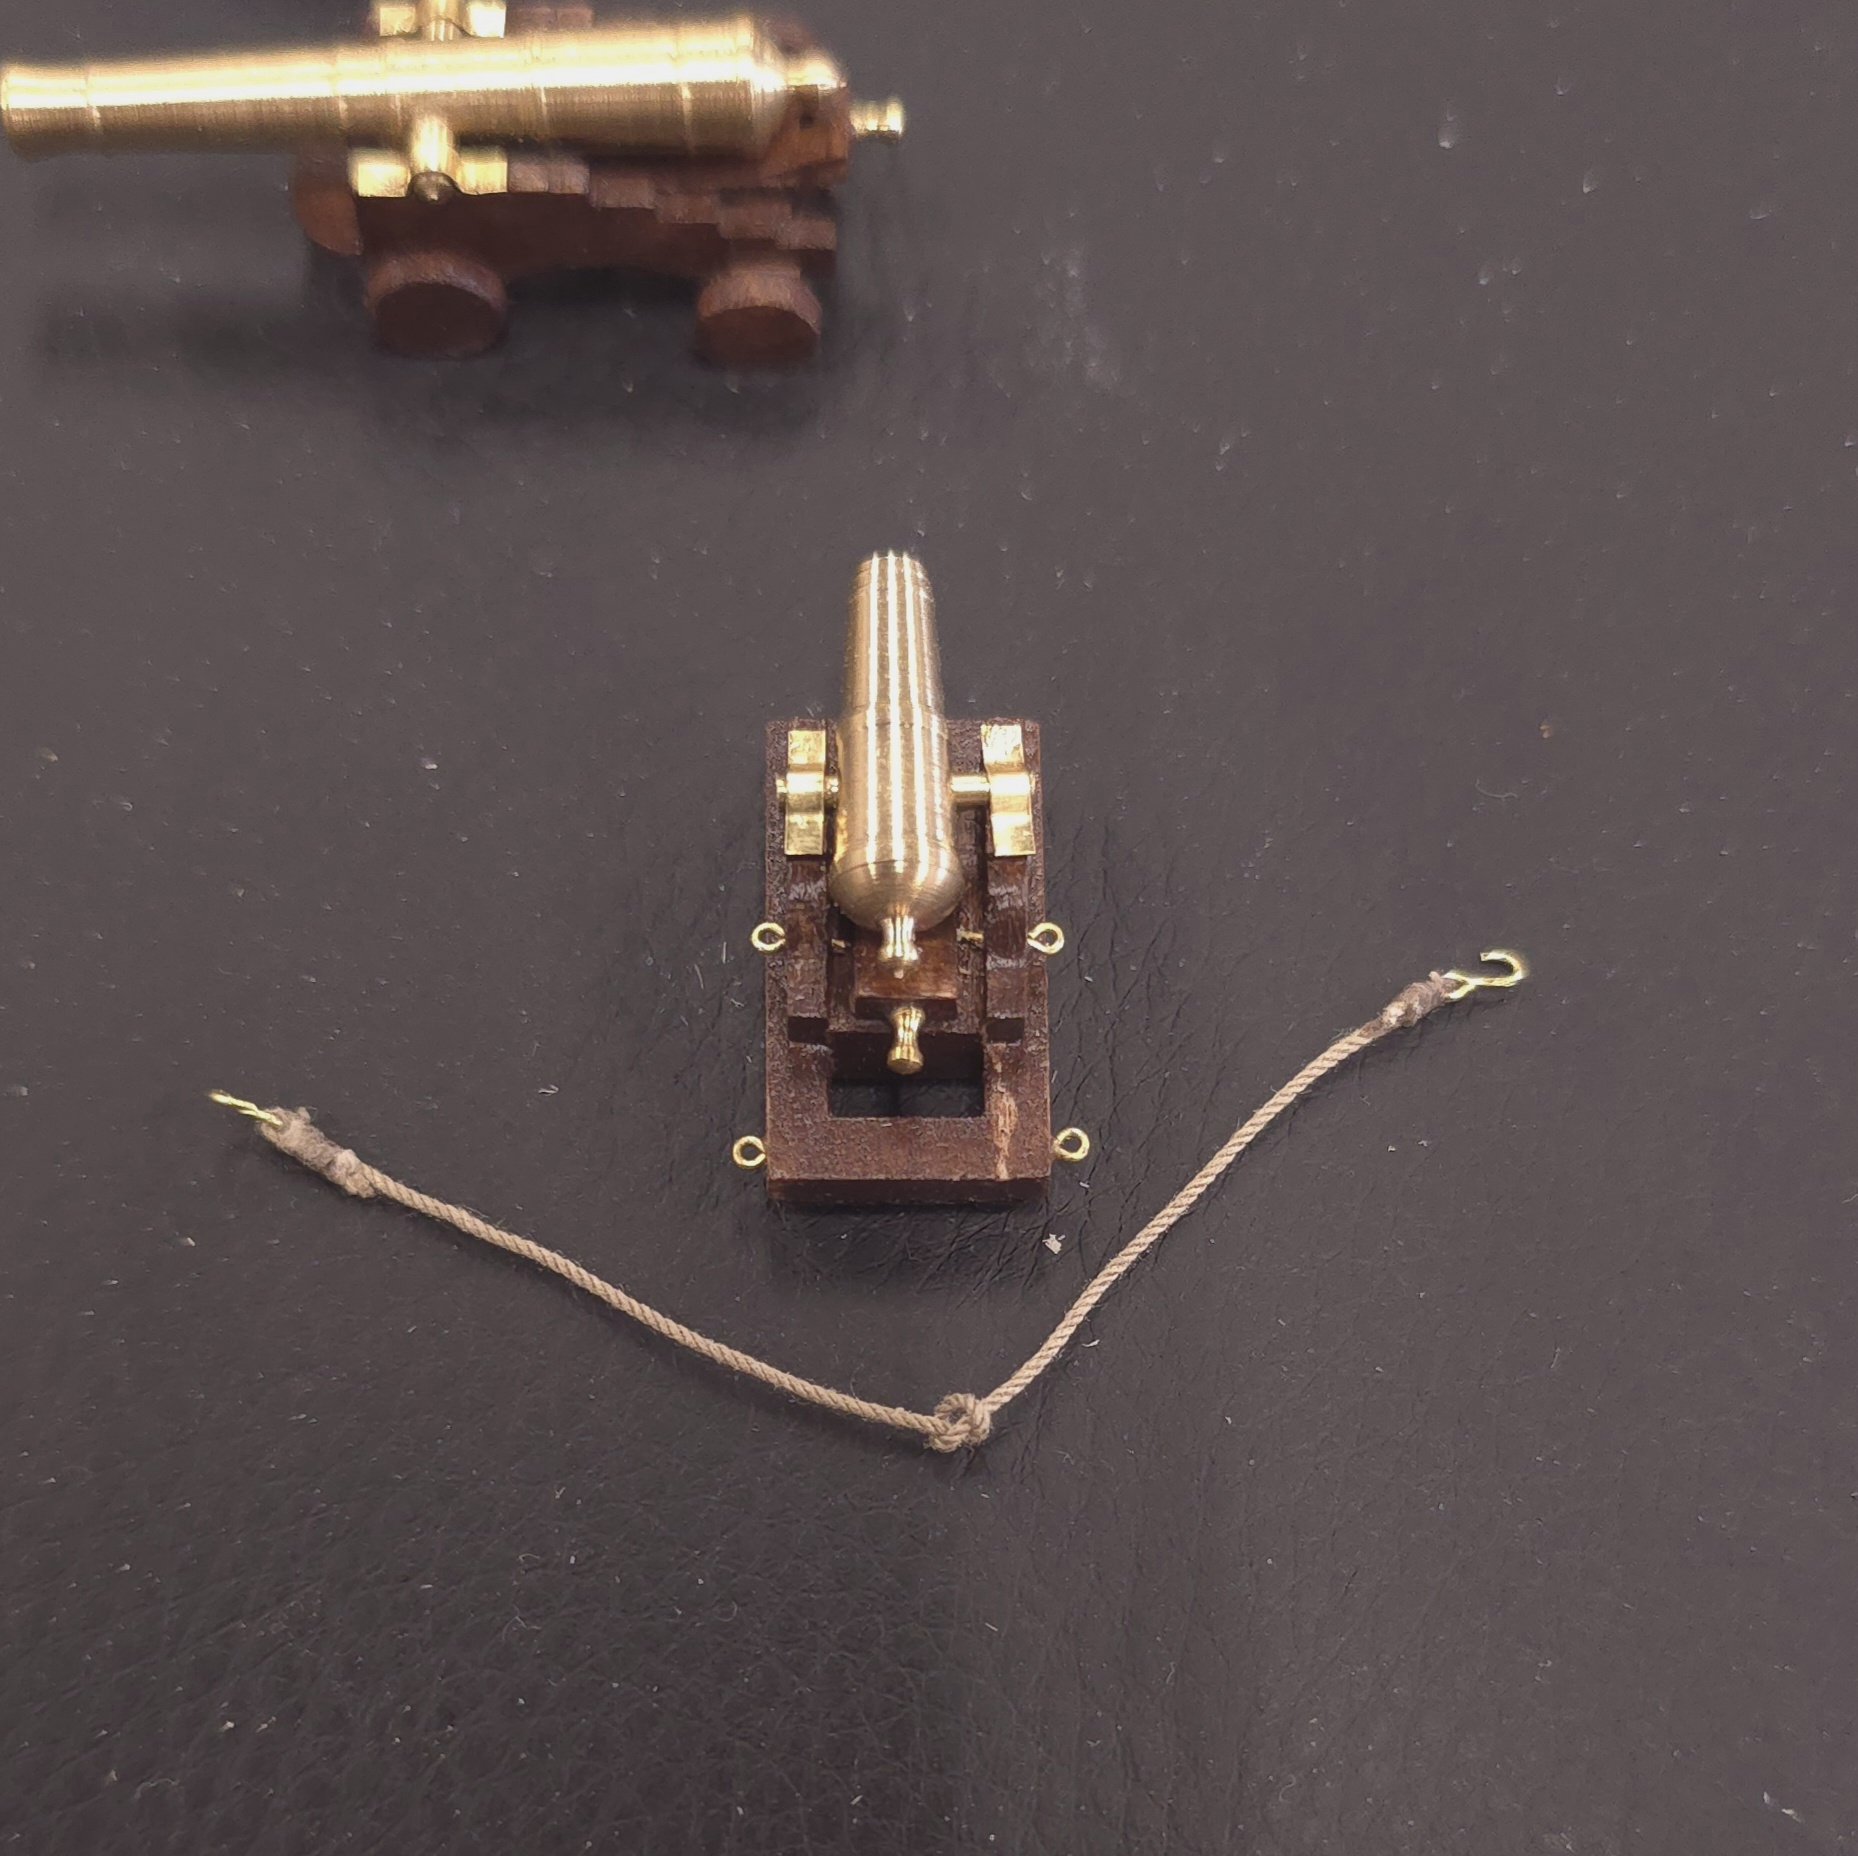
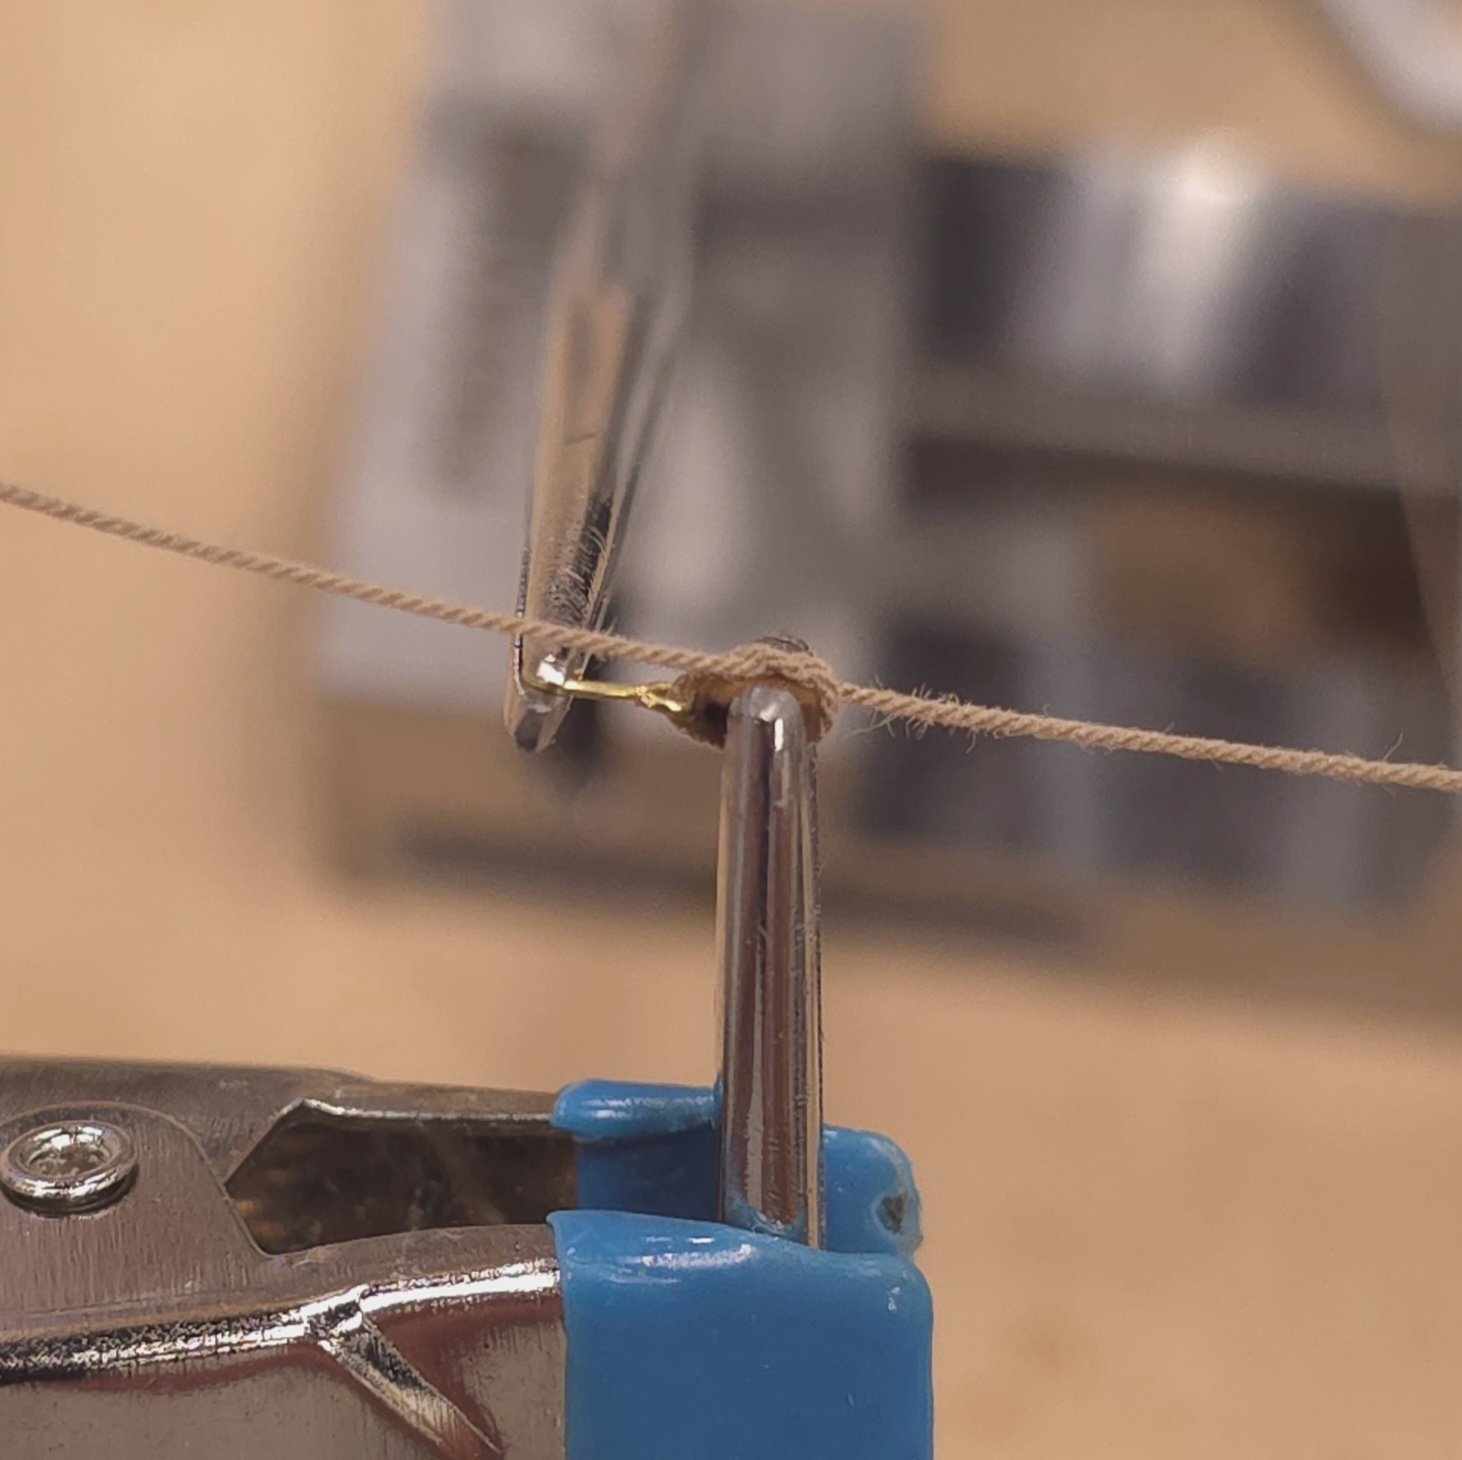
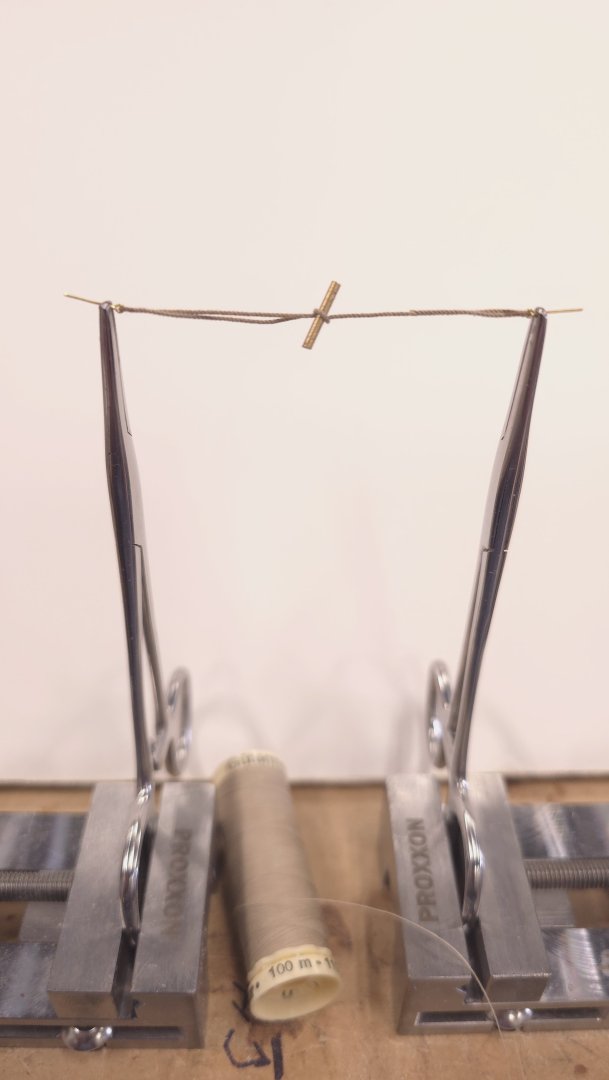
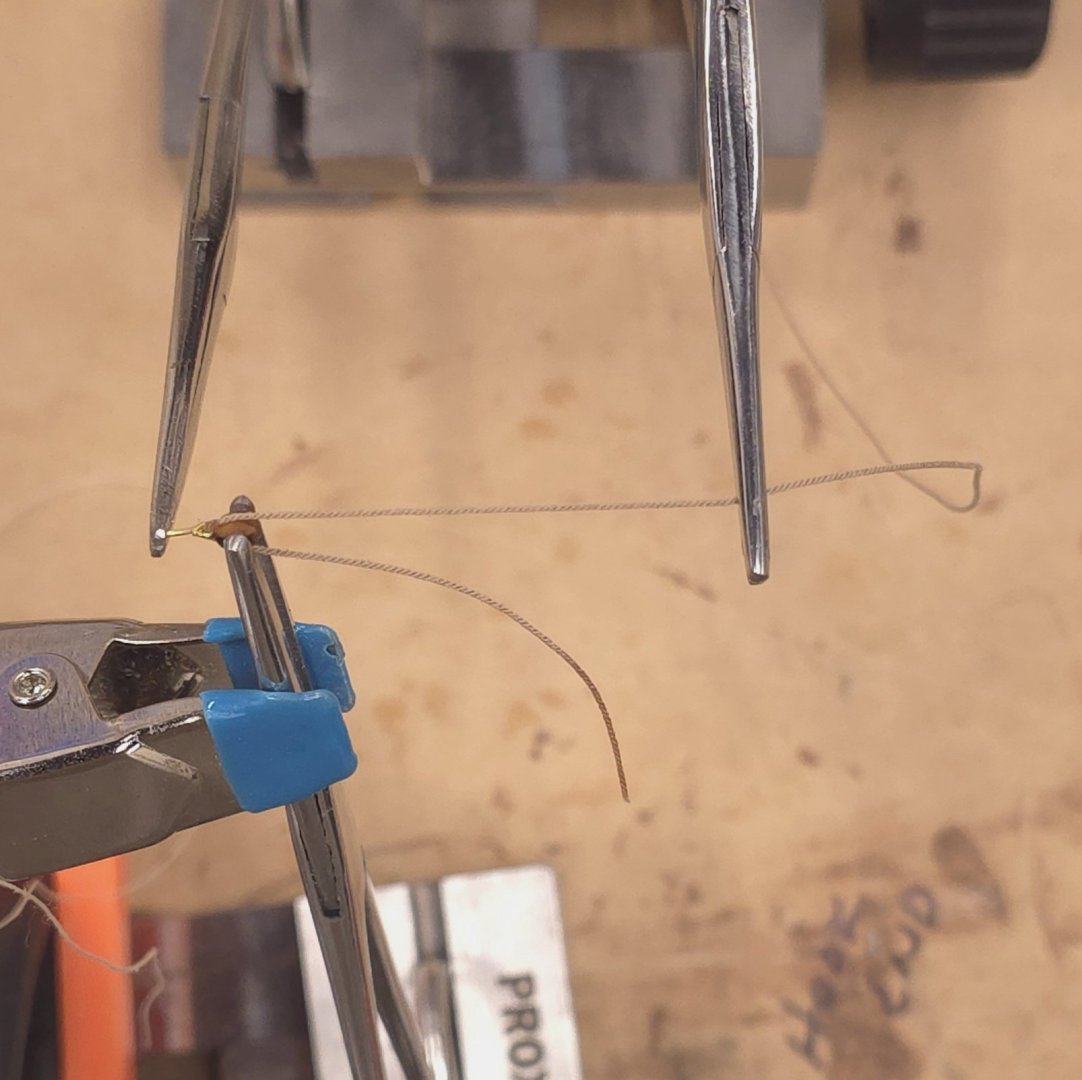
Once again, my apologies to those who have done this before. I'm documenting the procedure for creating the breech lines for my own use later, when I copy from these posts to my personal build log. Still, there might be one or two newbies out there who might benefit from this exhibition. To free up my hands for the seizing, I literally bolted two Proxxon vices to my workbench. The rest should be self-explanatory. Note: the carronade is not glued in. This was just a test fit.. I started working on the pin rails as well, but have yet to decide which I will install first - the pin rails or the carronades. So, I will make the breech lines first and postpone the decision until the later.


-
Thanks for checking in. Hope to see you back in action soon. Good luck with the Orchards. Coincidentally, some nephews of mine just bought an apple orchard in a small town outside of Erie, Pennsylvania. It's very recent news to me, so I don't have much by way of details, except that I've been told it's a lot of work. Back to the first course of planking: Remember, this doesn't have to be perfect. Use filler and sandpaper and make your life easy. And because you will have a decent foundation for adhesives, the next layer will be much easier to deal with than direct plank on hull construction. Best Peter
- 233 replies
-
- 1
-
-
- Model Shipways
- constitution
- (and 5 more)
-
USS Constitution by mtbediz - 1:76
Der Alte Rentner replied to mtbediz's topic in - Build logs for subjects built 1751 - 1800
As I'm contemplating my next steps, I'm looking through build logs of others to see what the best order of construction is. In your case I noticed that the cleats and belaying pin rails all went in long before the carronades. In your experience, is it easier to install the carronades, bow chasers, breech lines and tackles after the belaying pin rails and cleats? My thought is, it should be easier to rig the tackles and breach lines without obstacles on the bulwarks or deck. Am I wrong? -
We haven't heard from you in quite a while. I imagine that you're into some deep dive on some point of research and that will be seeing the result of that fairly soon?
-
I appreciate the compliment, Mustafa, but I'm never going to catch you. Unless you stretch your summer vacation into December. Then maybe I'll have a chance. 😁
-
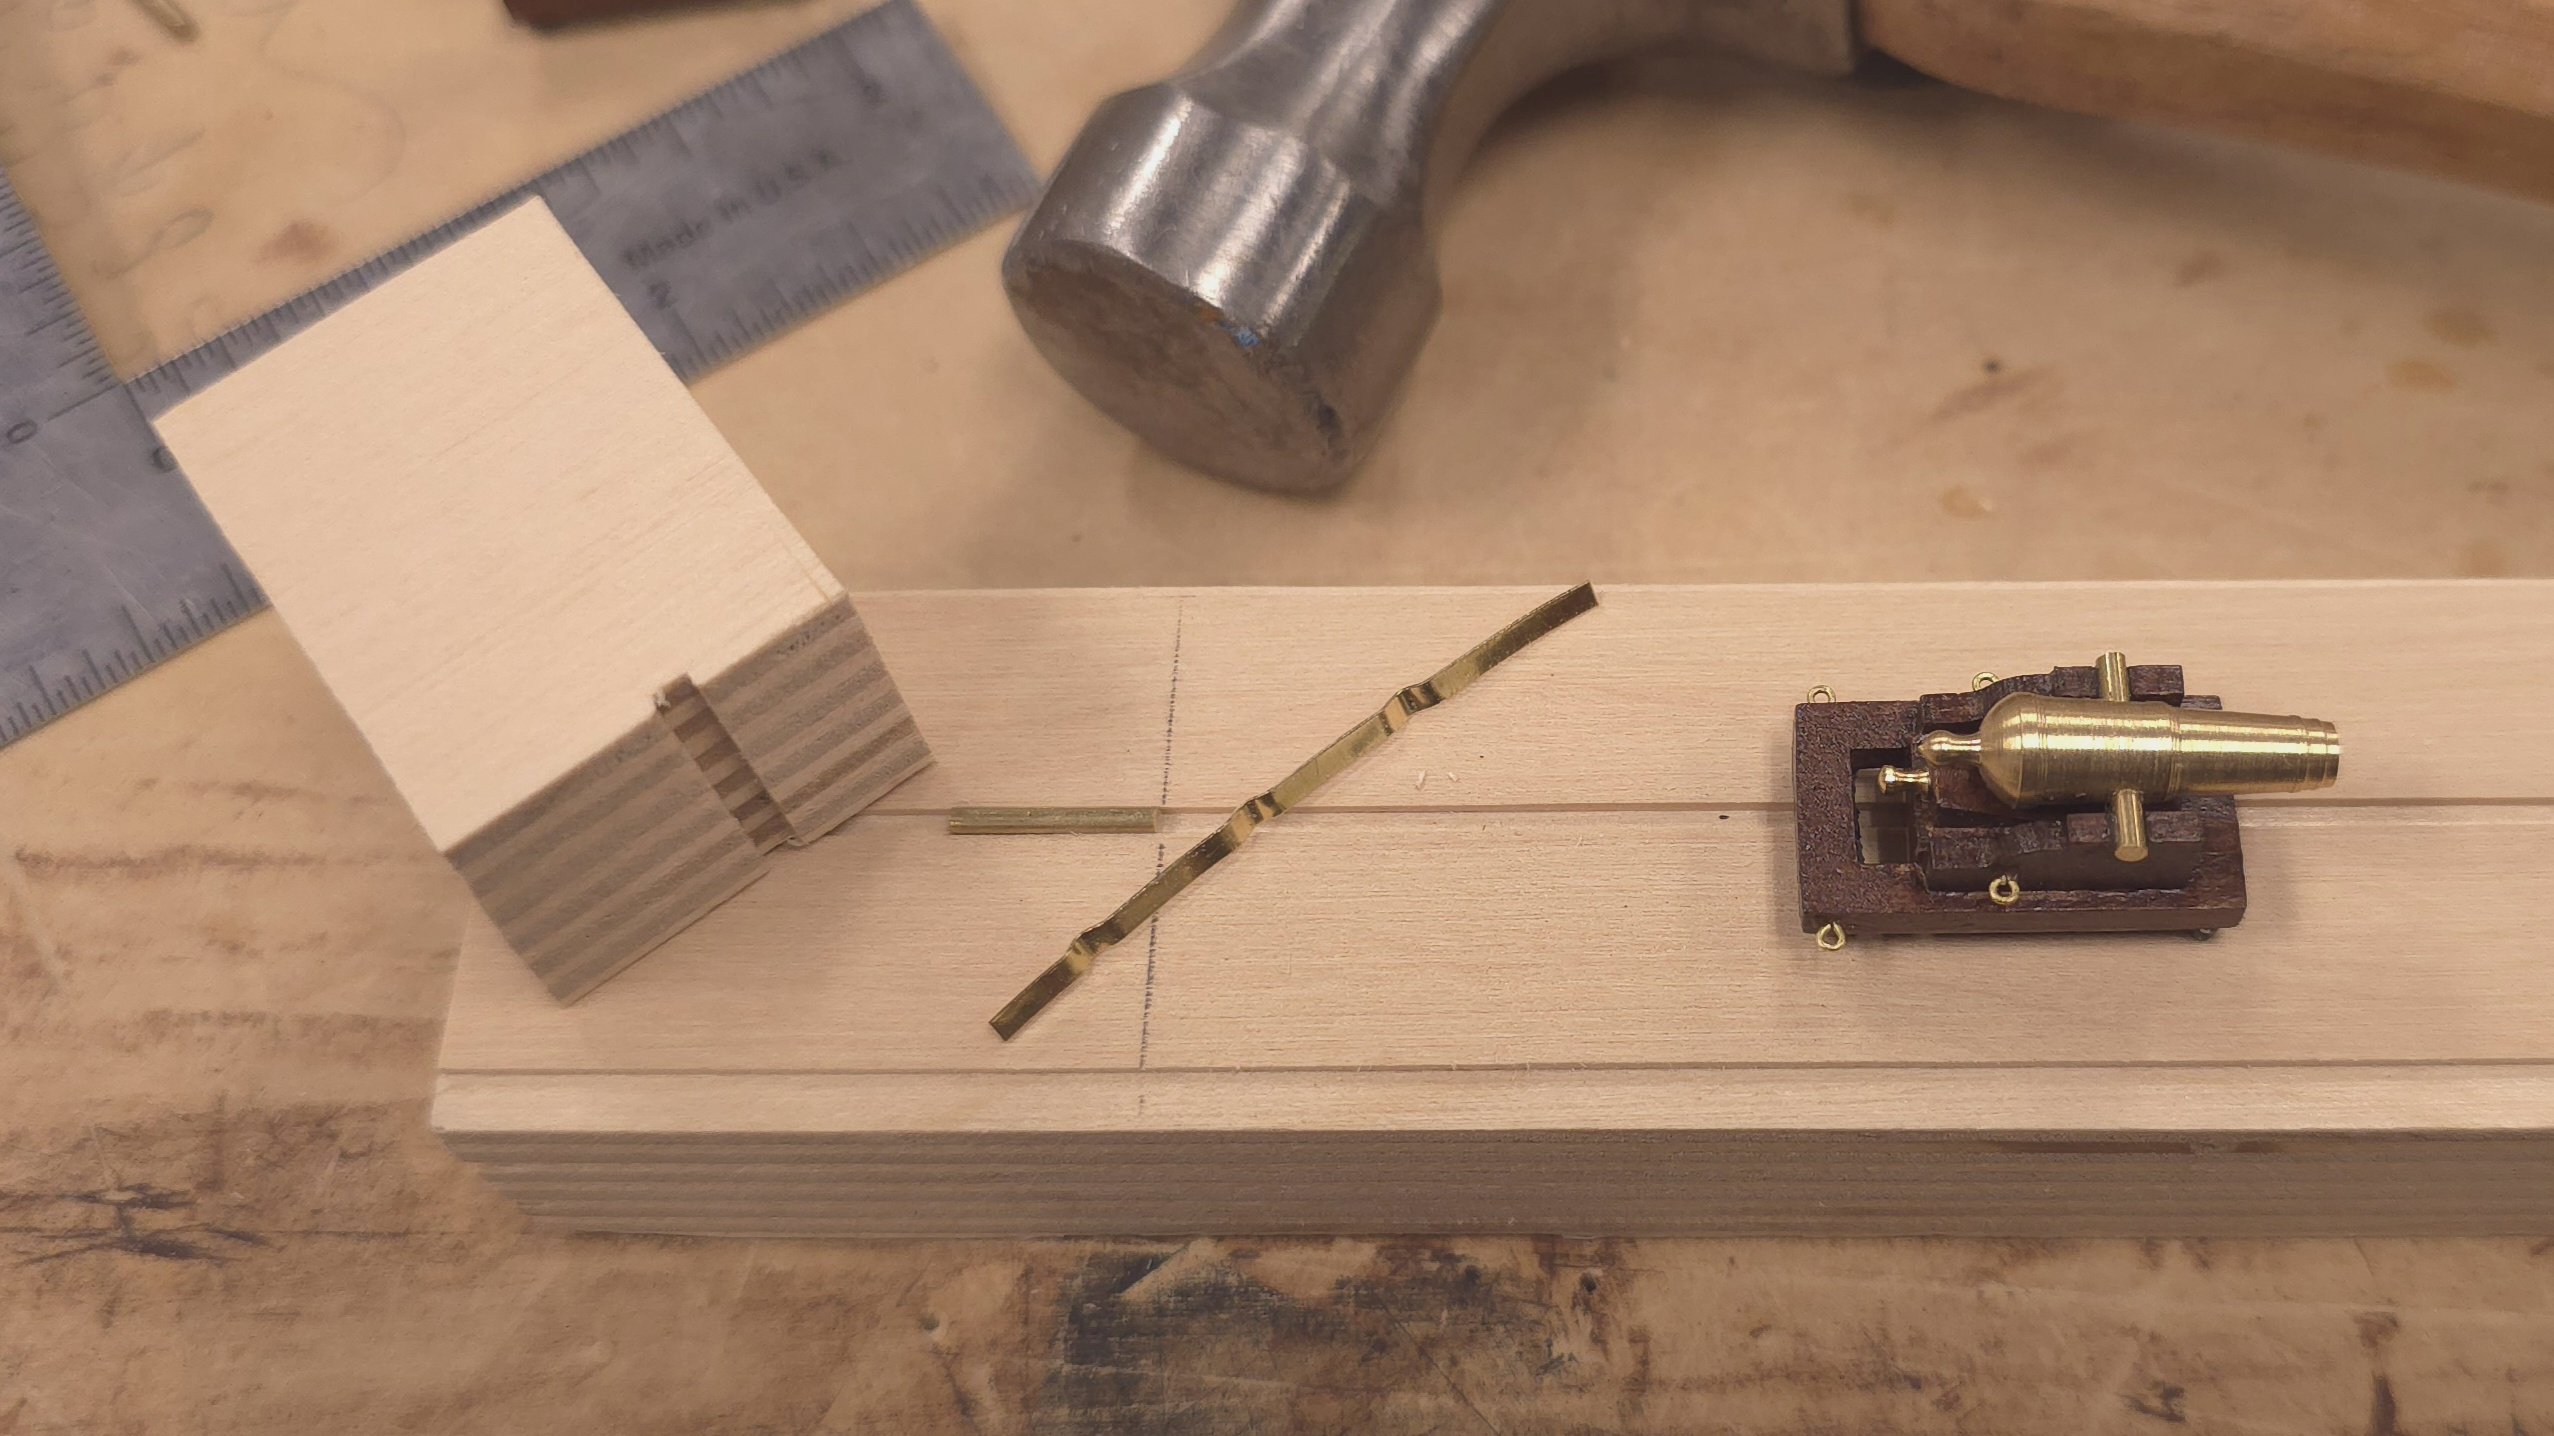
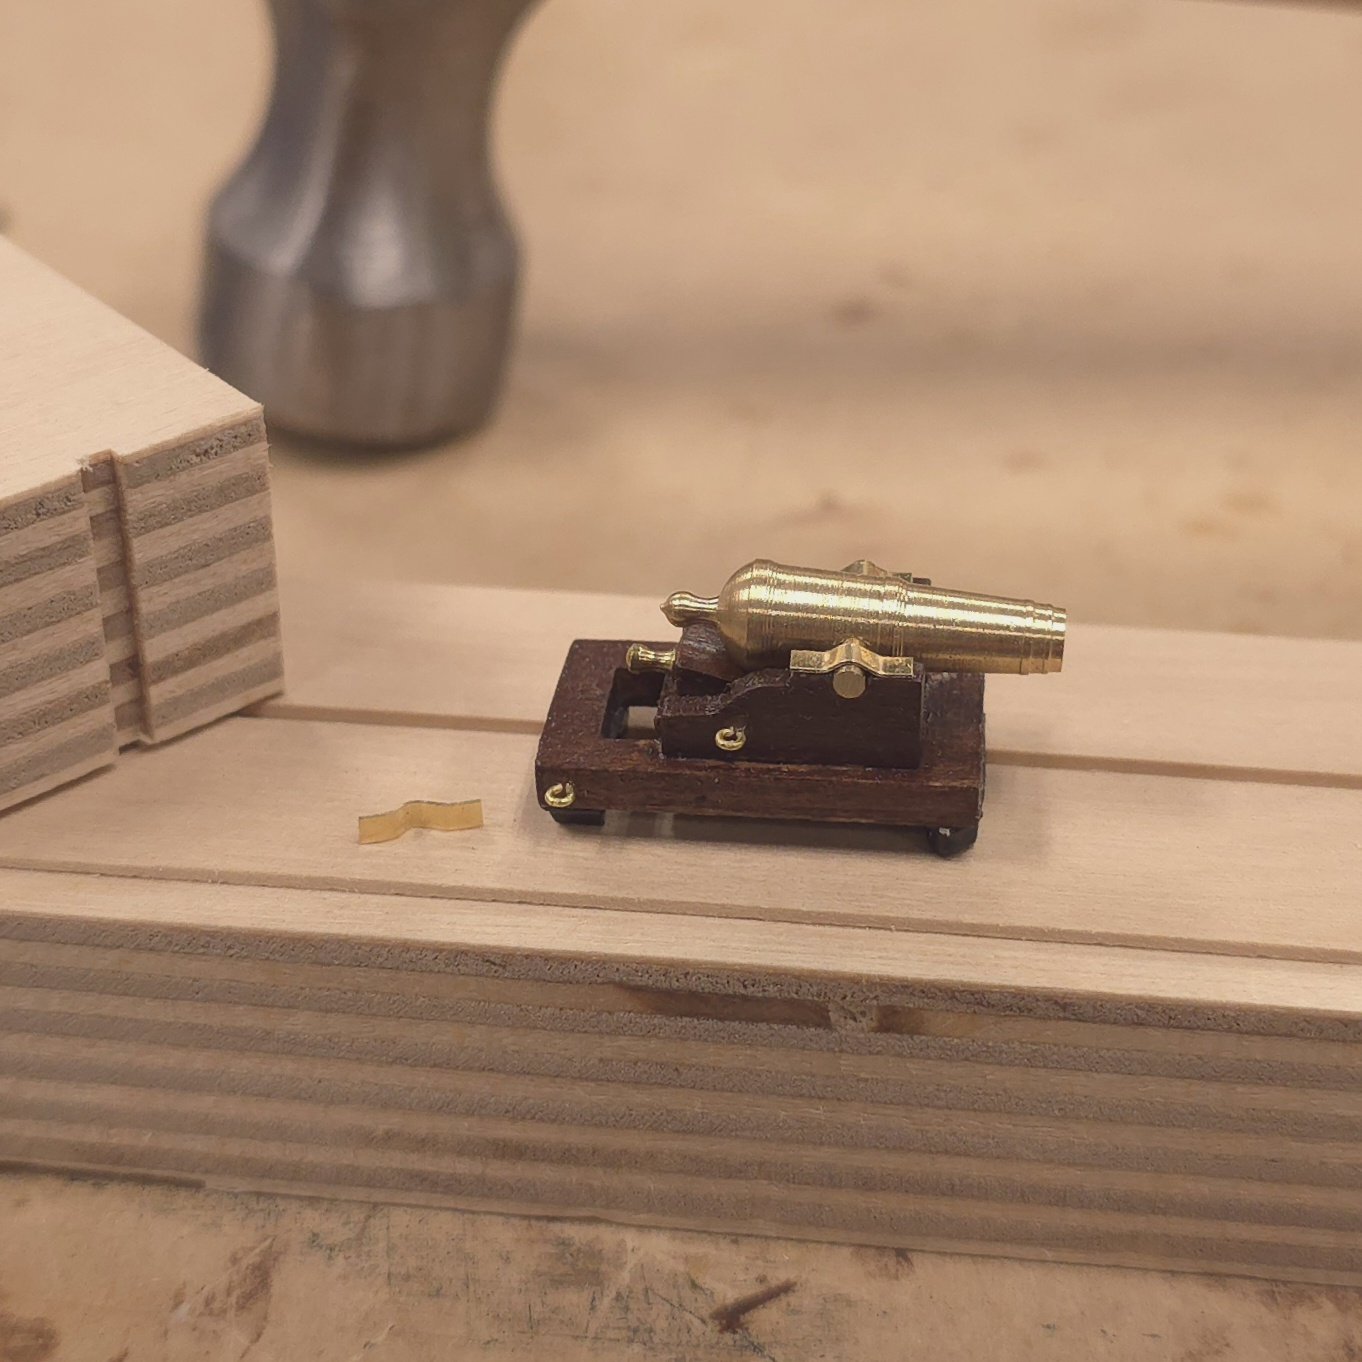
No joke! Worse, maybe because I had a couple of coats of poly already on the carriages, the CA glue set super quickly. No room for error! I actually rehearsed picking up the straps before applying the glue to the carriage. I did drop two, but because I had the glue on the carriage and not on the strap, I just picked up a replacement strap and got the job done. For what it's worth, I tried really pointy tweezers first, they were a fail. An old fat blunt pair of tweezers held much better.
-
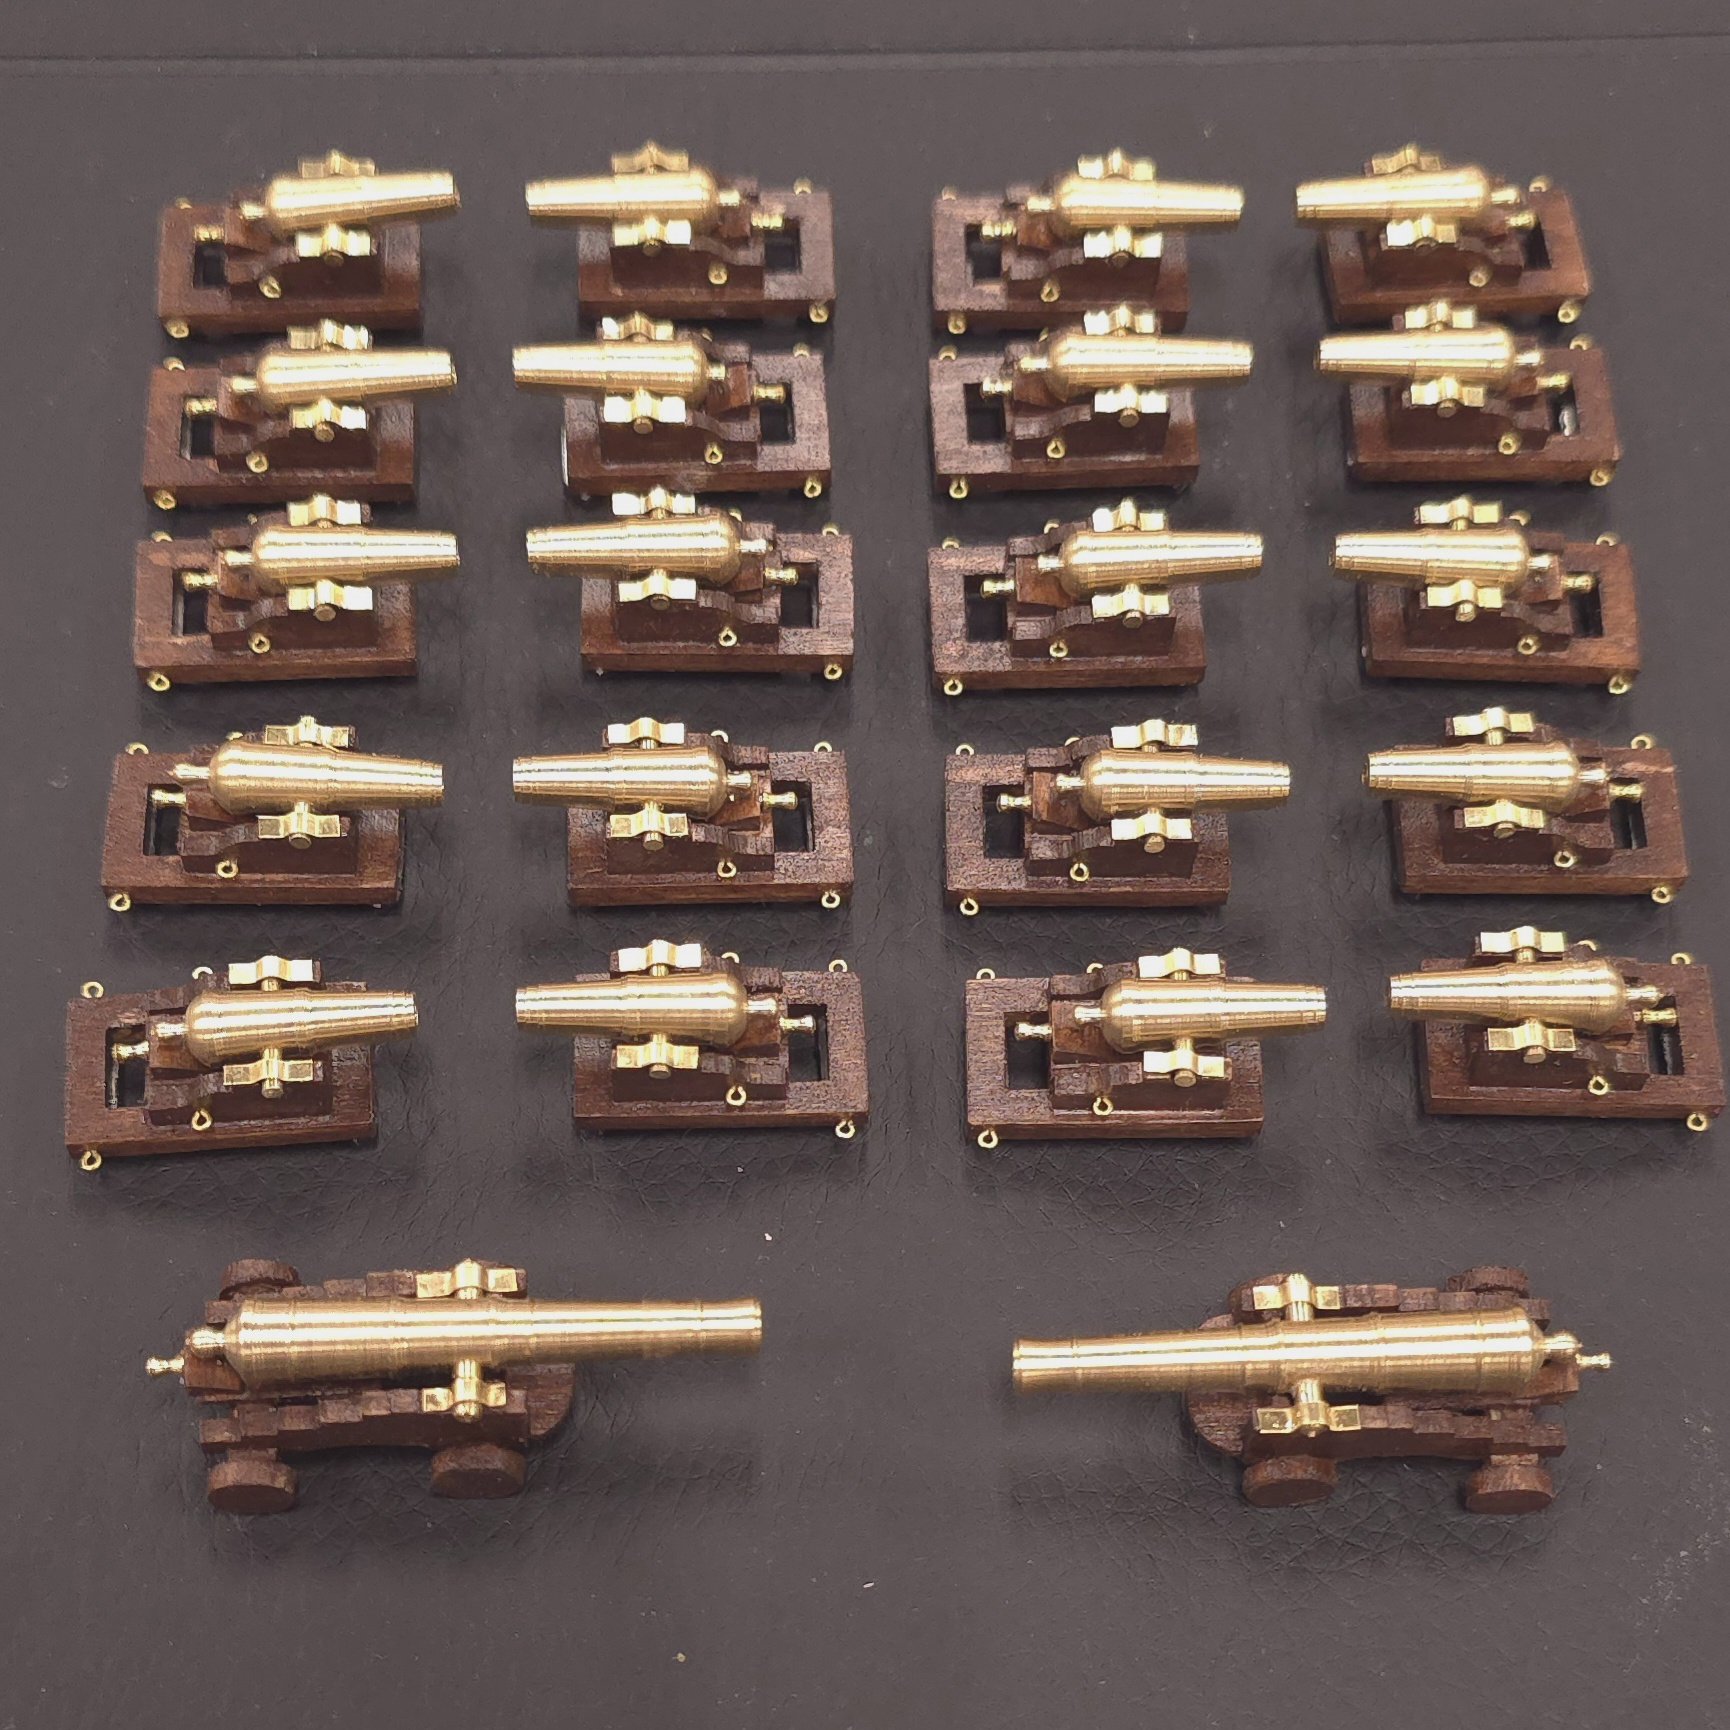
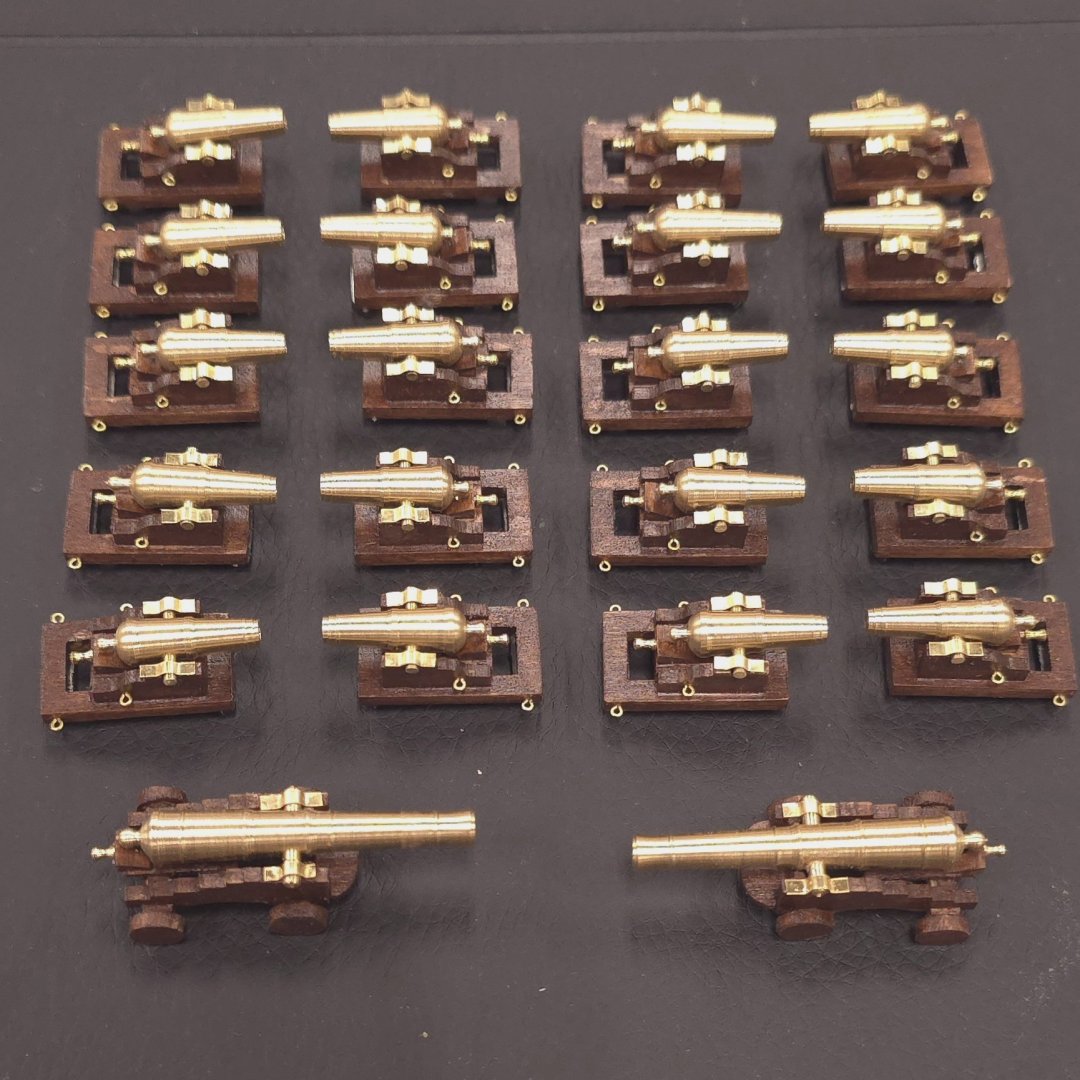
Another photo suitable for framing? Straps added to all Spar deck guns. Next up? Address gammoning issue? (Drill out the dowels I stupidly plugged the holes for the gammon chain with. See Gregg's recent posts about turning those holes into slots for rope gammoning.) Fabricate breech lines? Fabricate or ignore "eyebrows" ( gunport curtains? Start chain plates and channels? We'll see..
-
That is indeed my intention. Thanks.. But before I get that far, I'm going to attempt to make the straps for the carronade trunions. The thought of painting on a brass colored stripe ala Bob Hunt (Chapter 11.8 The Carronades) did occur to me. But you know me, I like the fiddly work. 😁 Borrowing a technique from Mustafa, I'm once again in manufacturing mode.


-
Then, by all means hold off fairing until the bulkheads are solidly in. Then proceed with caution. Use a strip of whatever material you plan to plank with as a tool to help you visualize the curve of the hull fore and aft as you fair. As great as I thought everything looked at the fairing stage, when I got to planking, I got a heaping dose of reality. However, given what I've seen in your build logs, I think you'll do just fine.
-
USS Constitution by mtbediz - 1:76
Der Alte Rentner replied to mtbediz's topic in - Build logs for subjects built 1751 - 1800
Should I take that to mean you're in the kiddie pool? 😄 -
USS Constitution by mtbediz - 1:76
Der Alte Rentner replied to mtbediz's topic in - Build logs for subjects built 1751 - 1800
Not as hot here (south west coast of Lake Michigan) at the moment. Enjoy your summer
-
Aha! Well done. You are reaping the benefits of your copious research at the onset. Sadly, it's a little late for me - on two fronts. Not the least of which is that the head supports are in the way of any gammoning. And worse!!! I even forgot to drill out those freaking holes. I guess I'll be dealing with this using a pin vise. (I believe I noted in my own log that I don't remember why I put dowels there to close those holes, but I do remember saying to myself, self, drill those holes out! The old grey cells, they ain'twhat they used to be.) You sir, are well ahead of the game.
-
If by "beveling" you mean "fairing", I would wait until everything is glued into place. Otherwise, please explain what you mean by beveling.
-
Done with tackles.

-
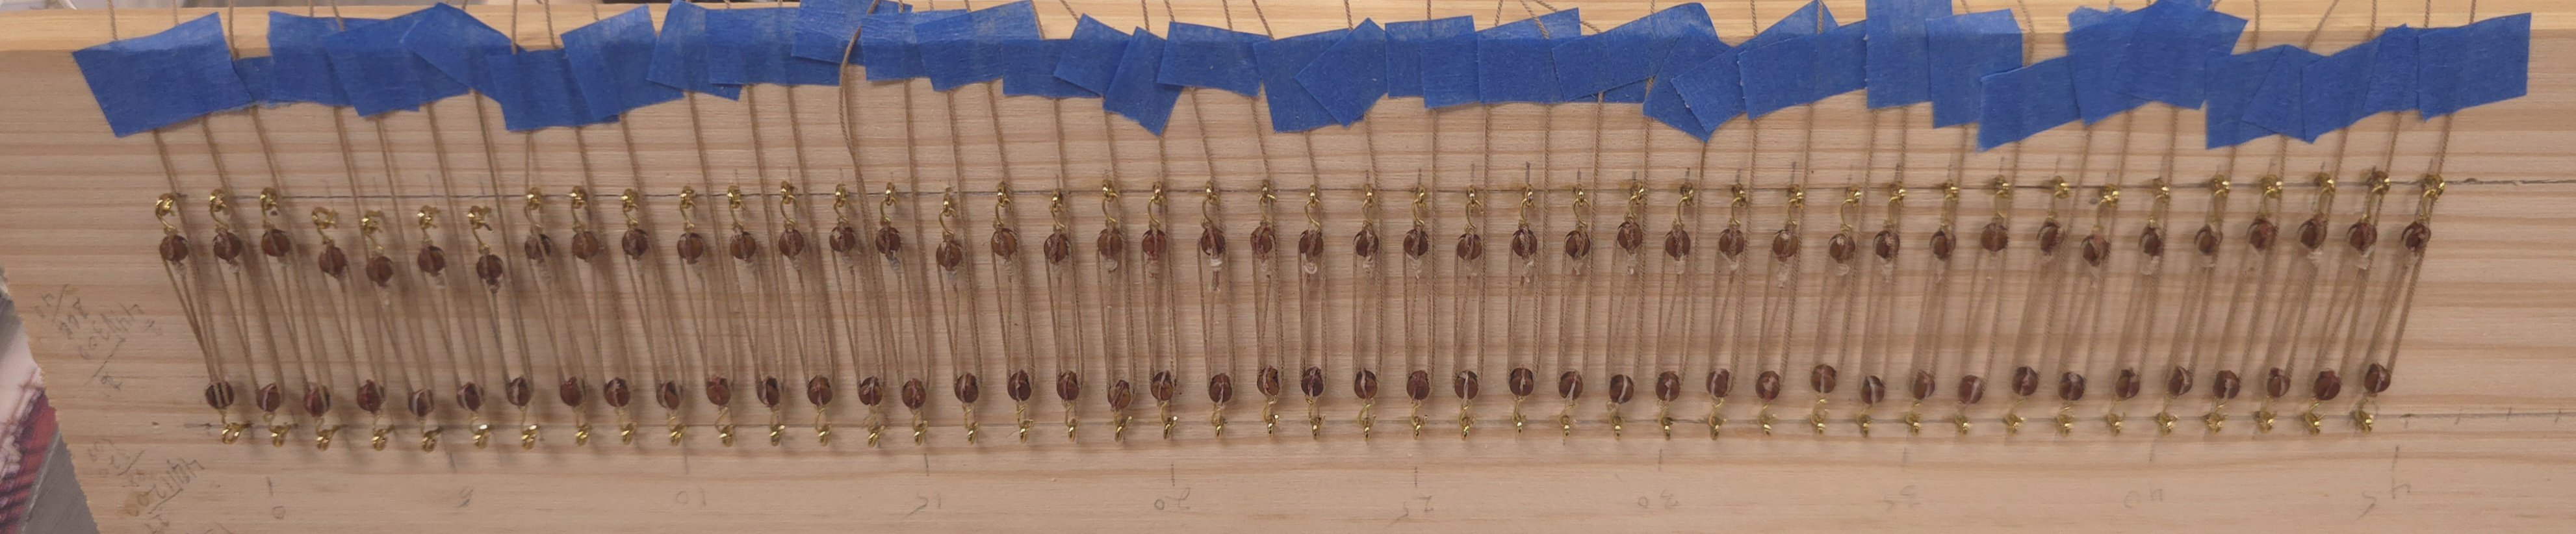
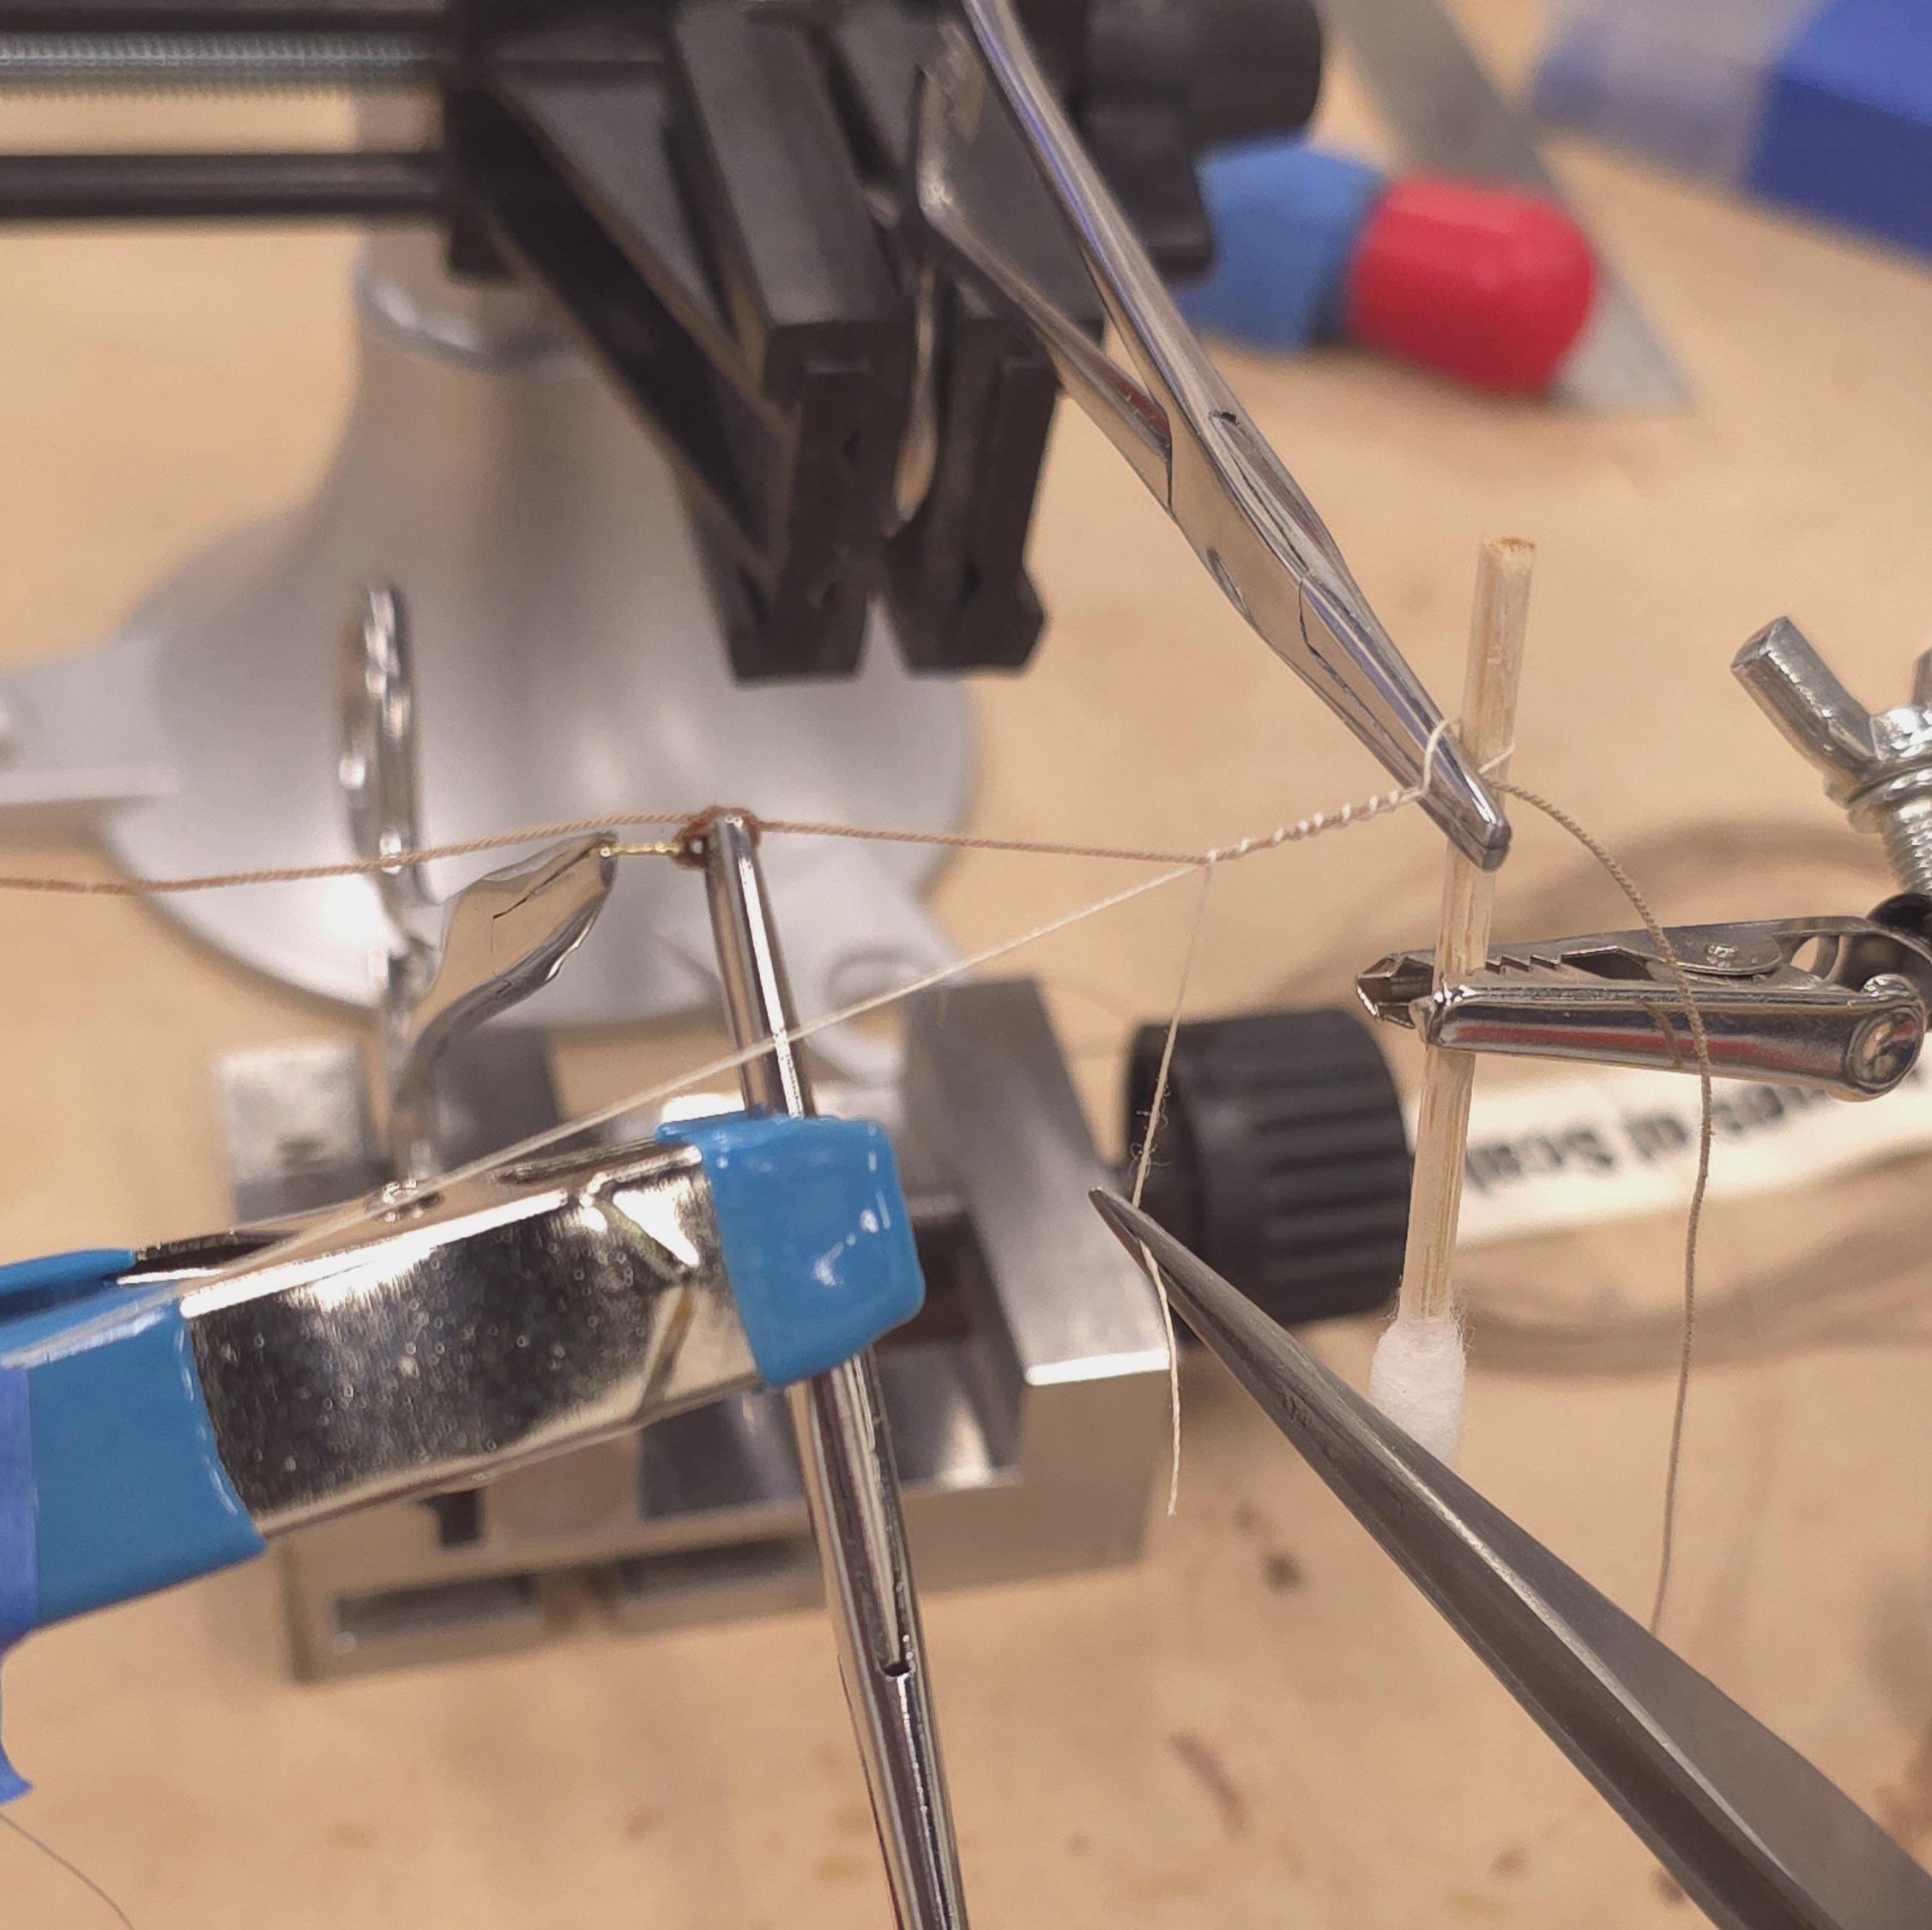
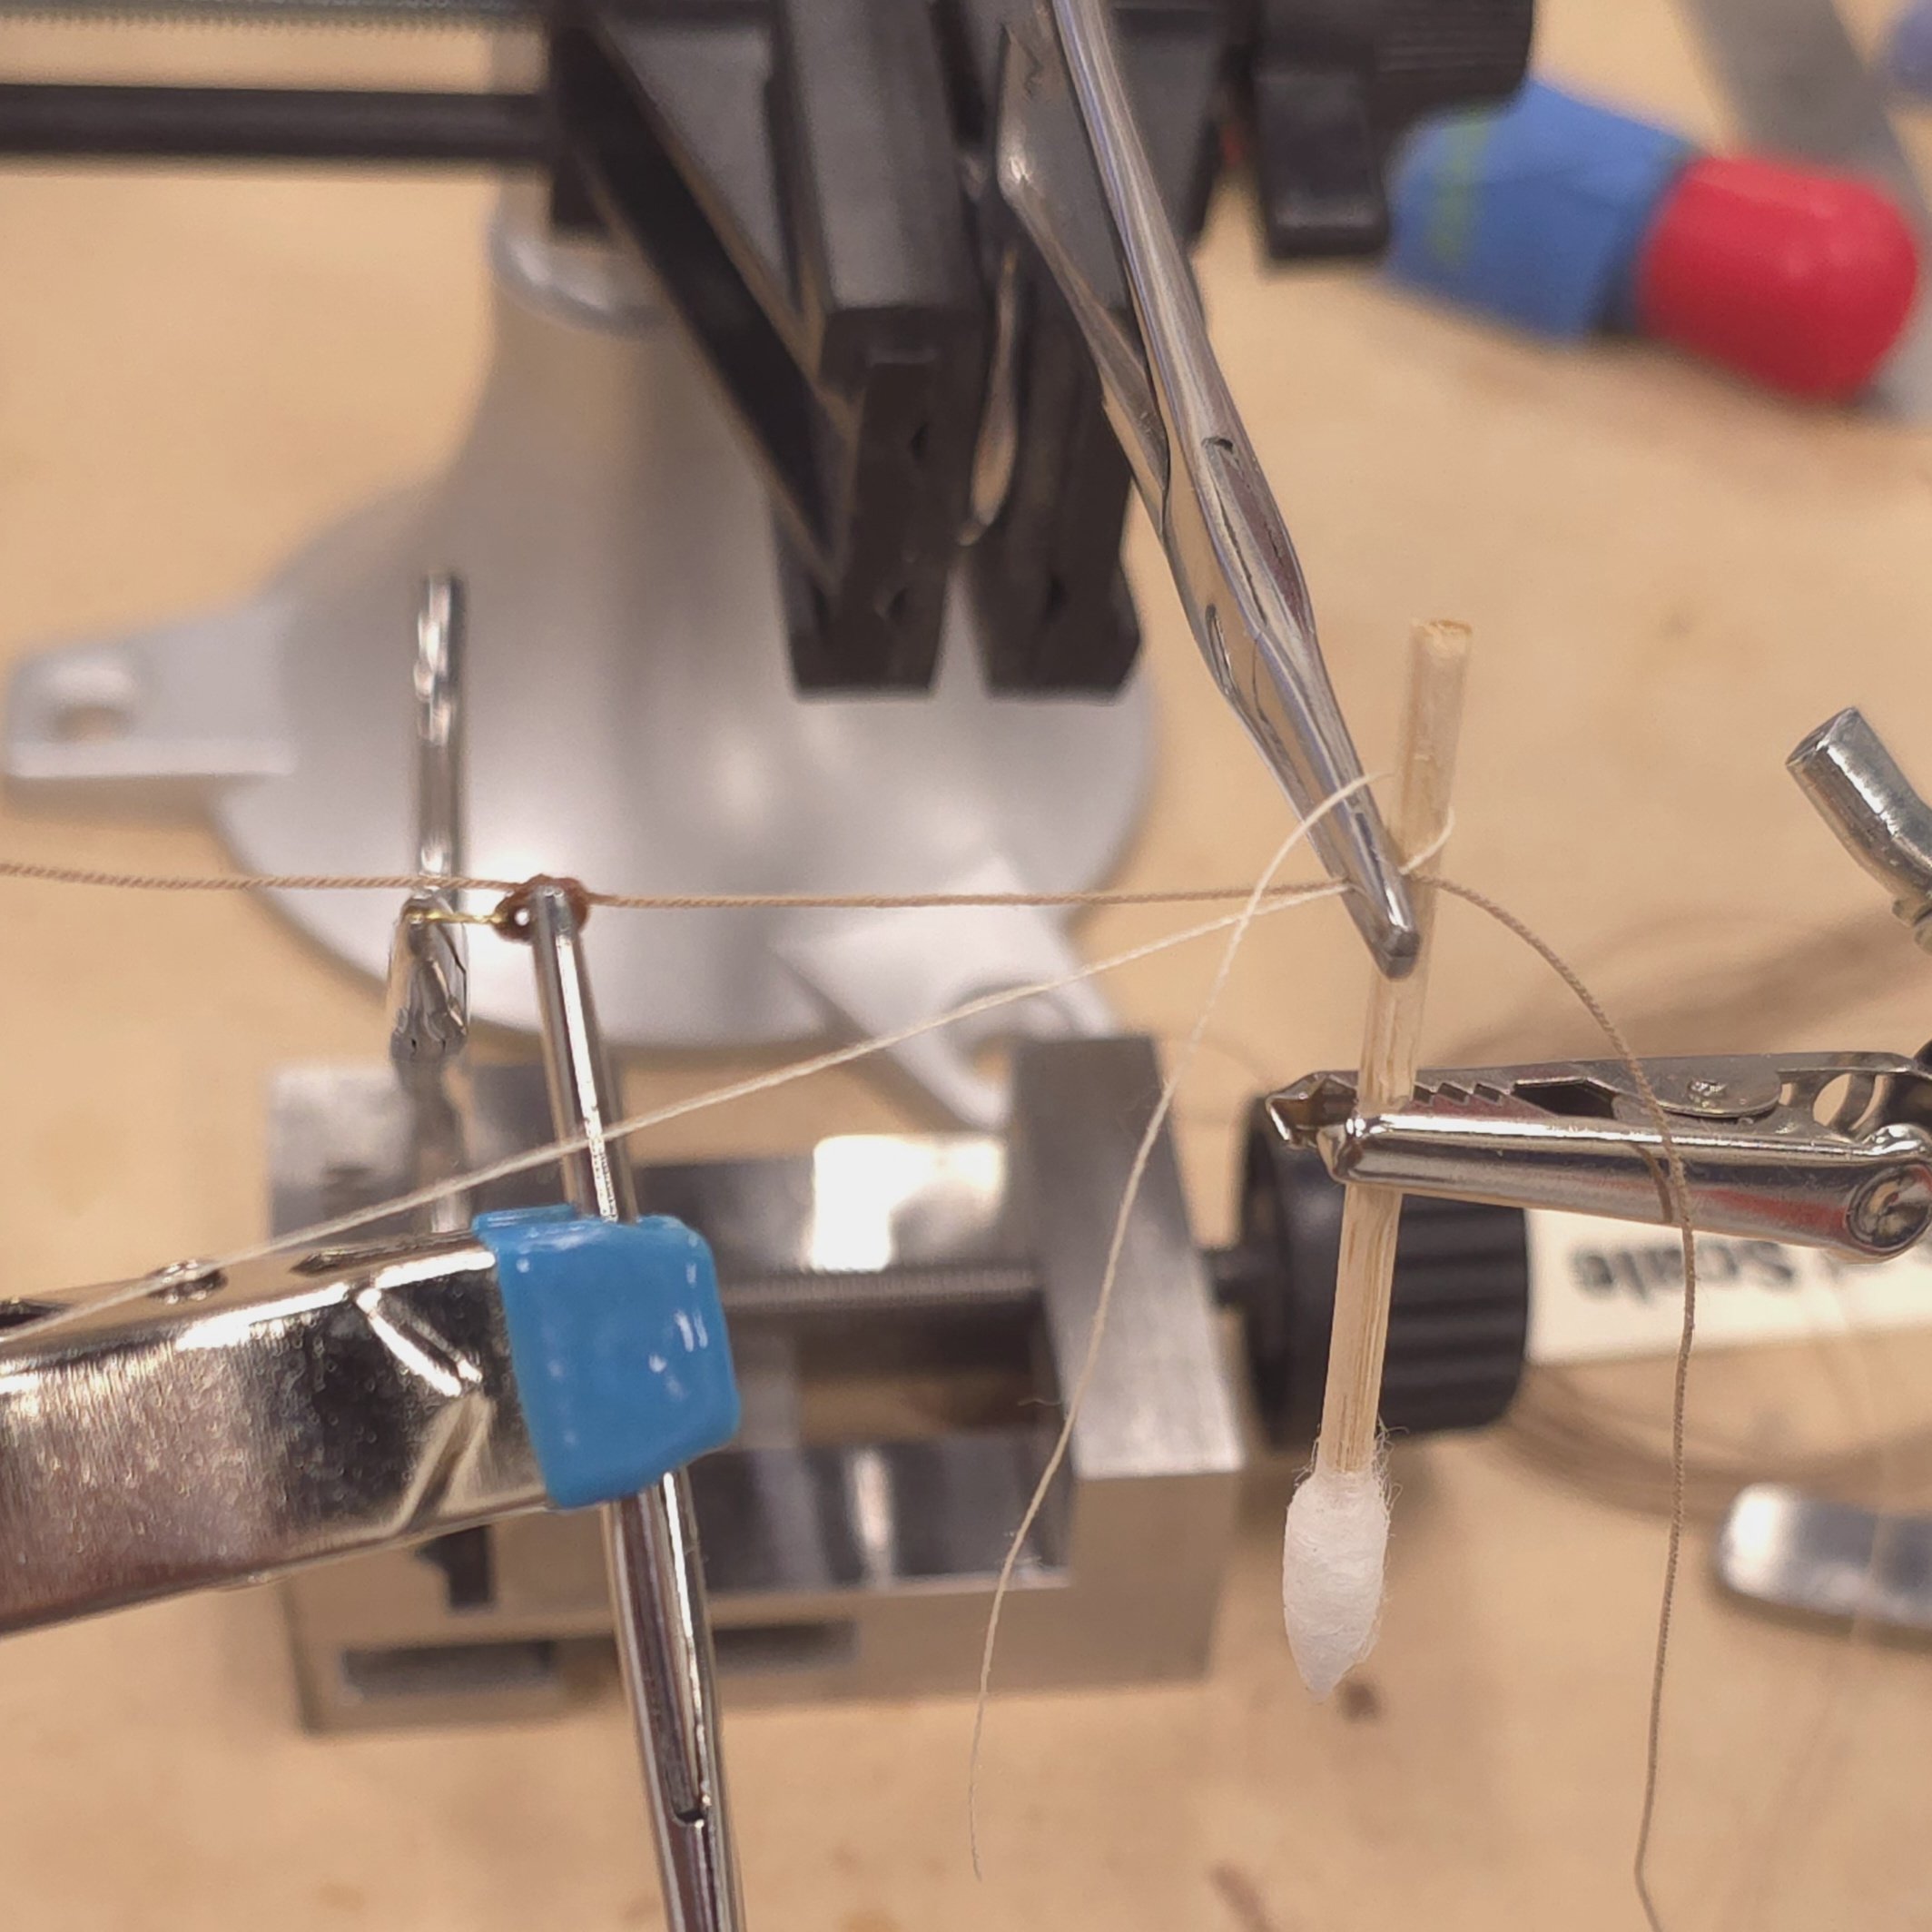
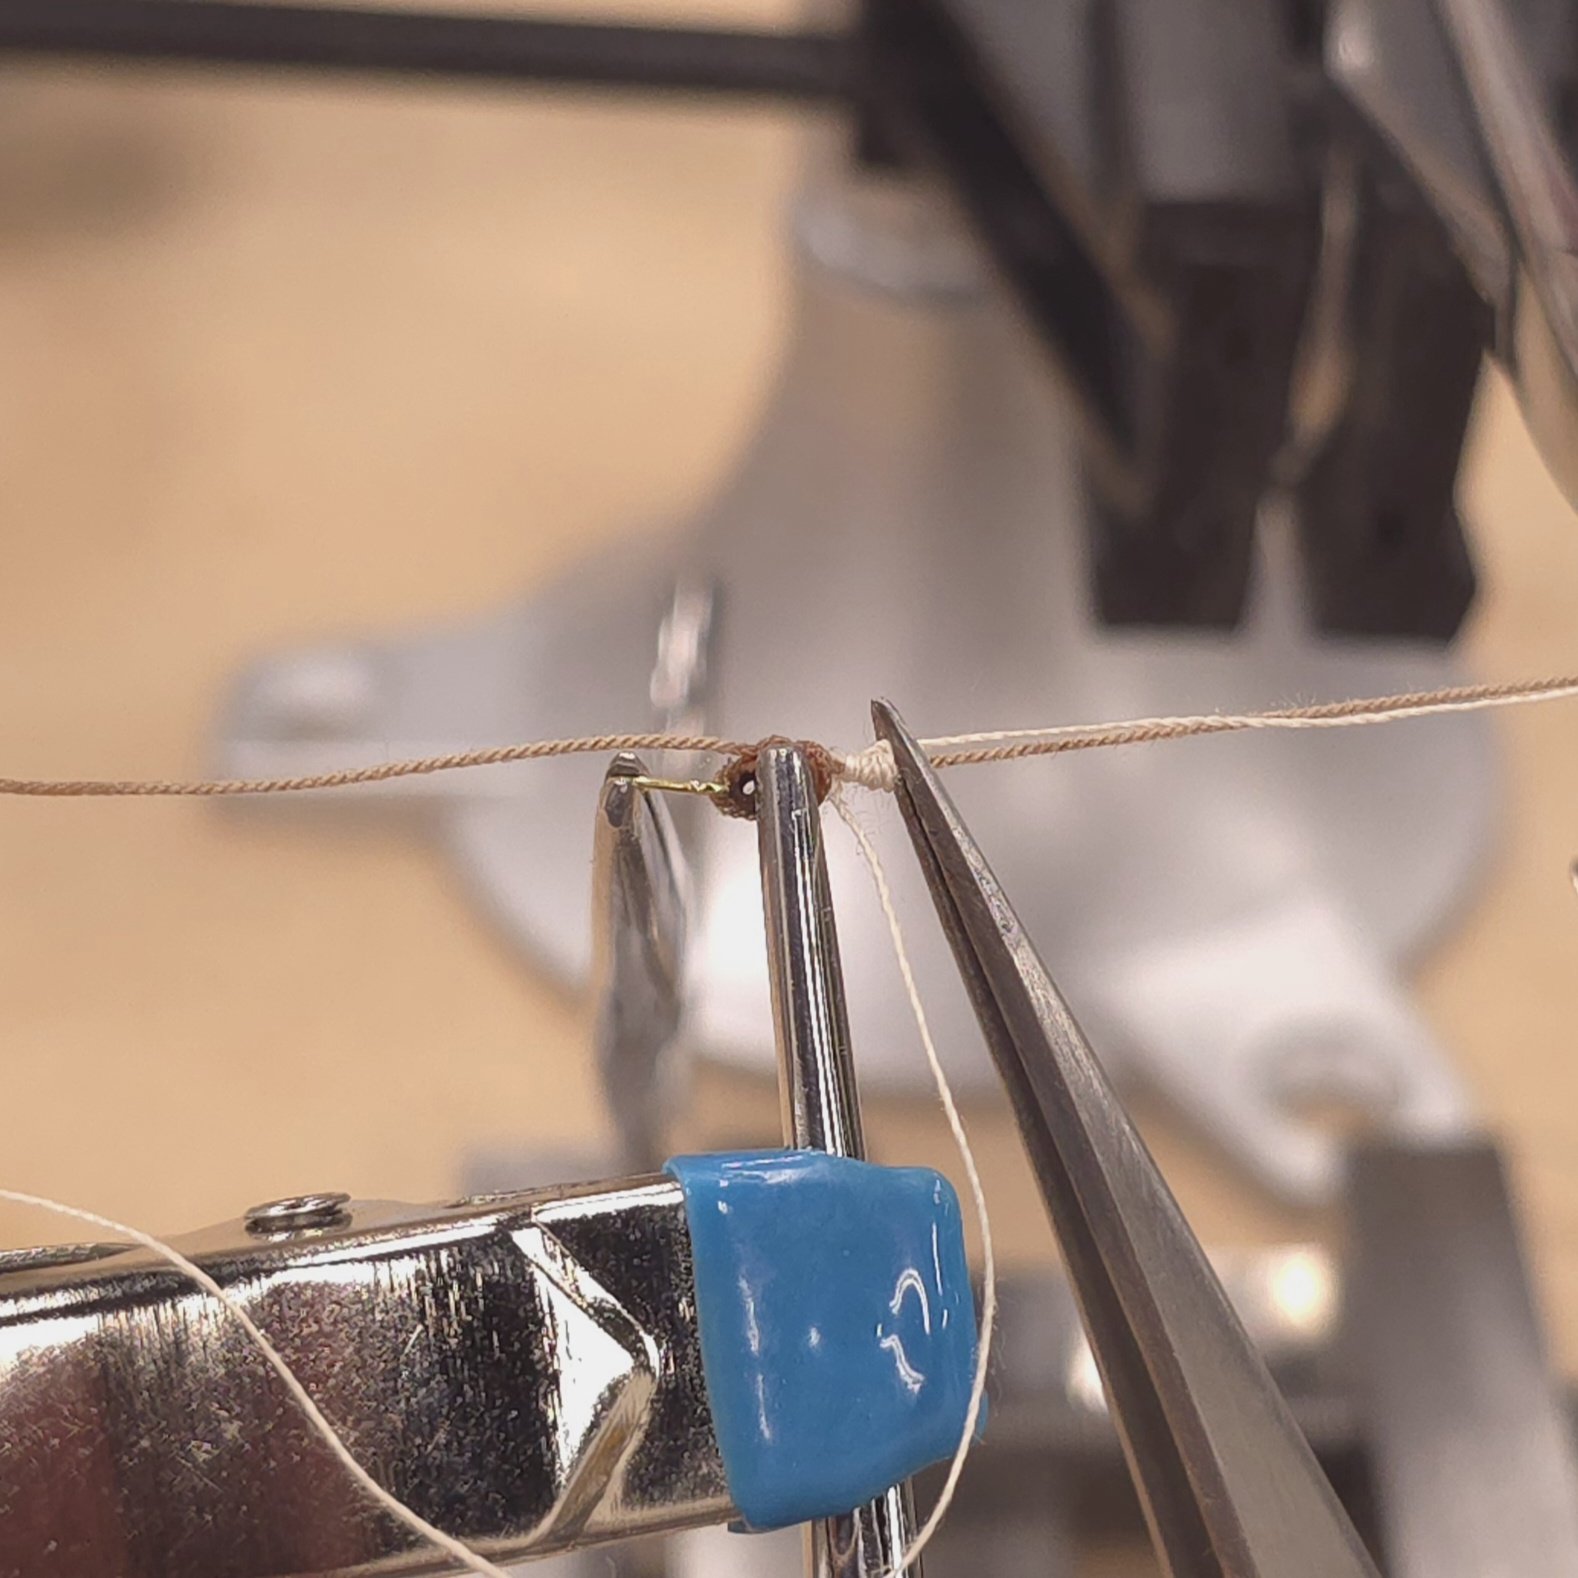
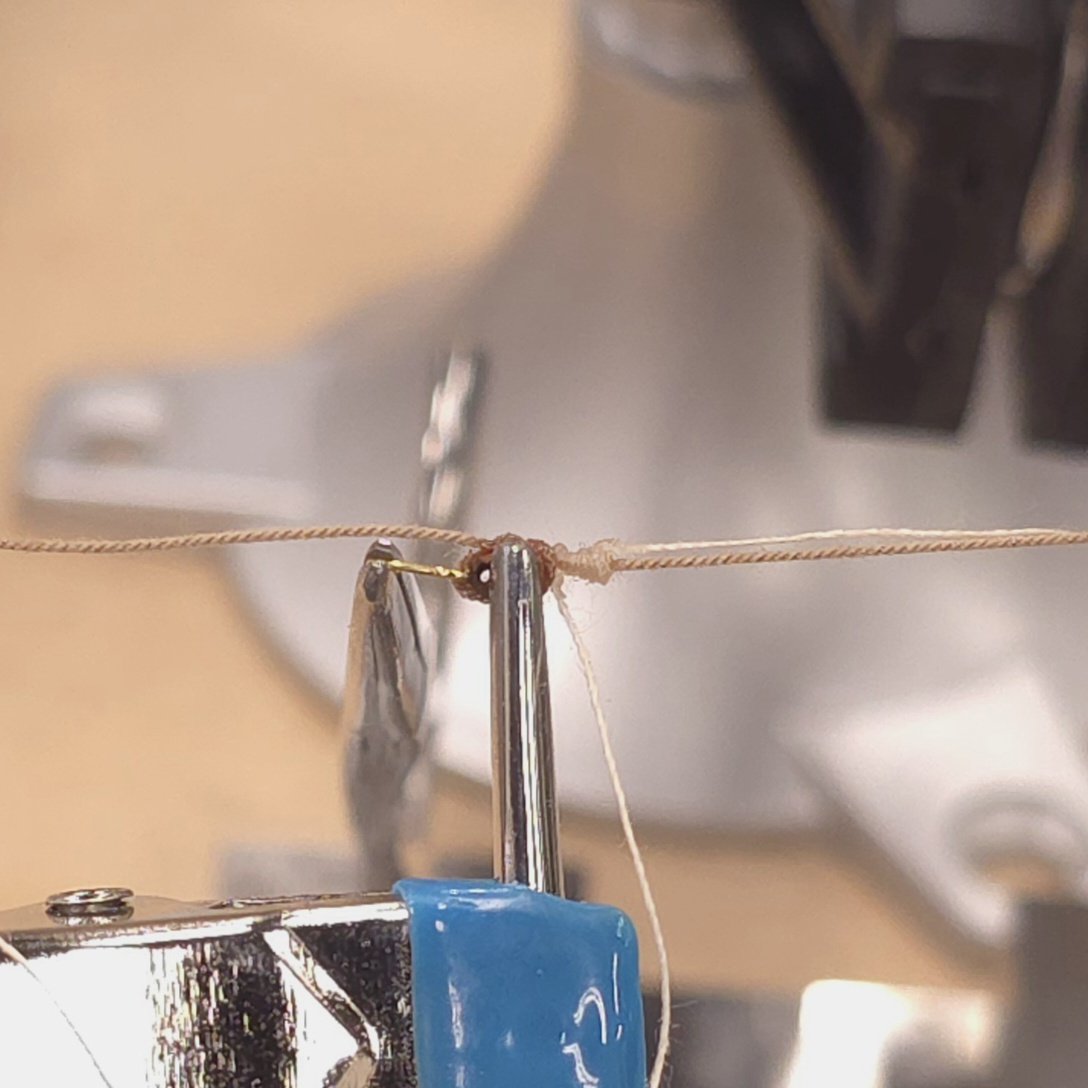
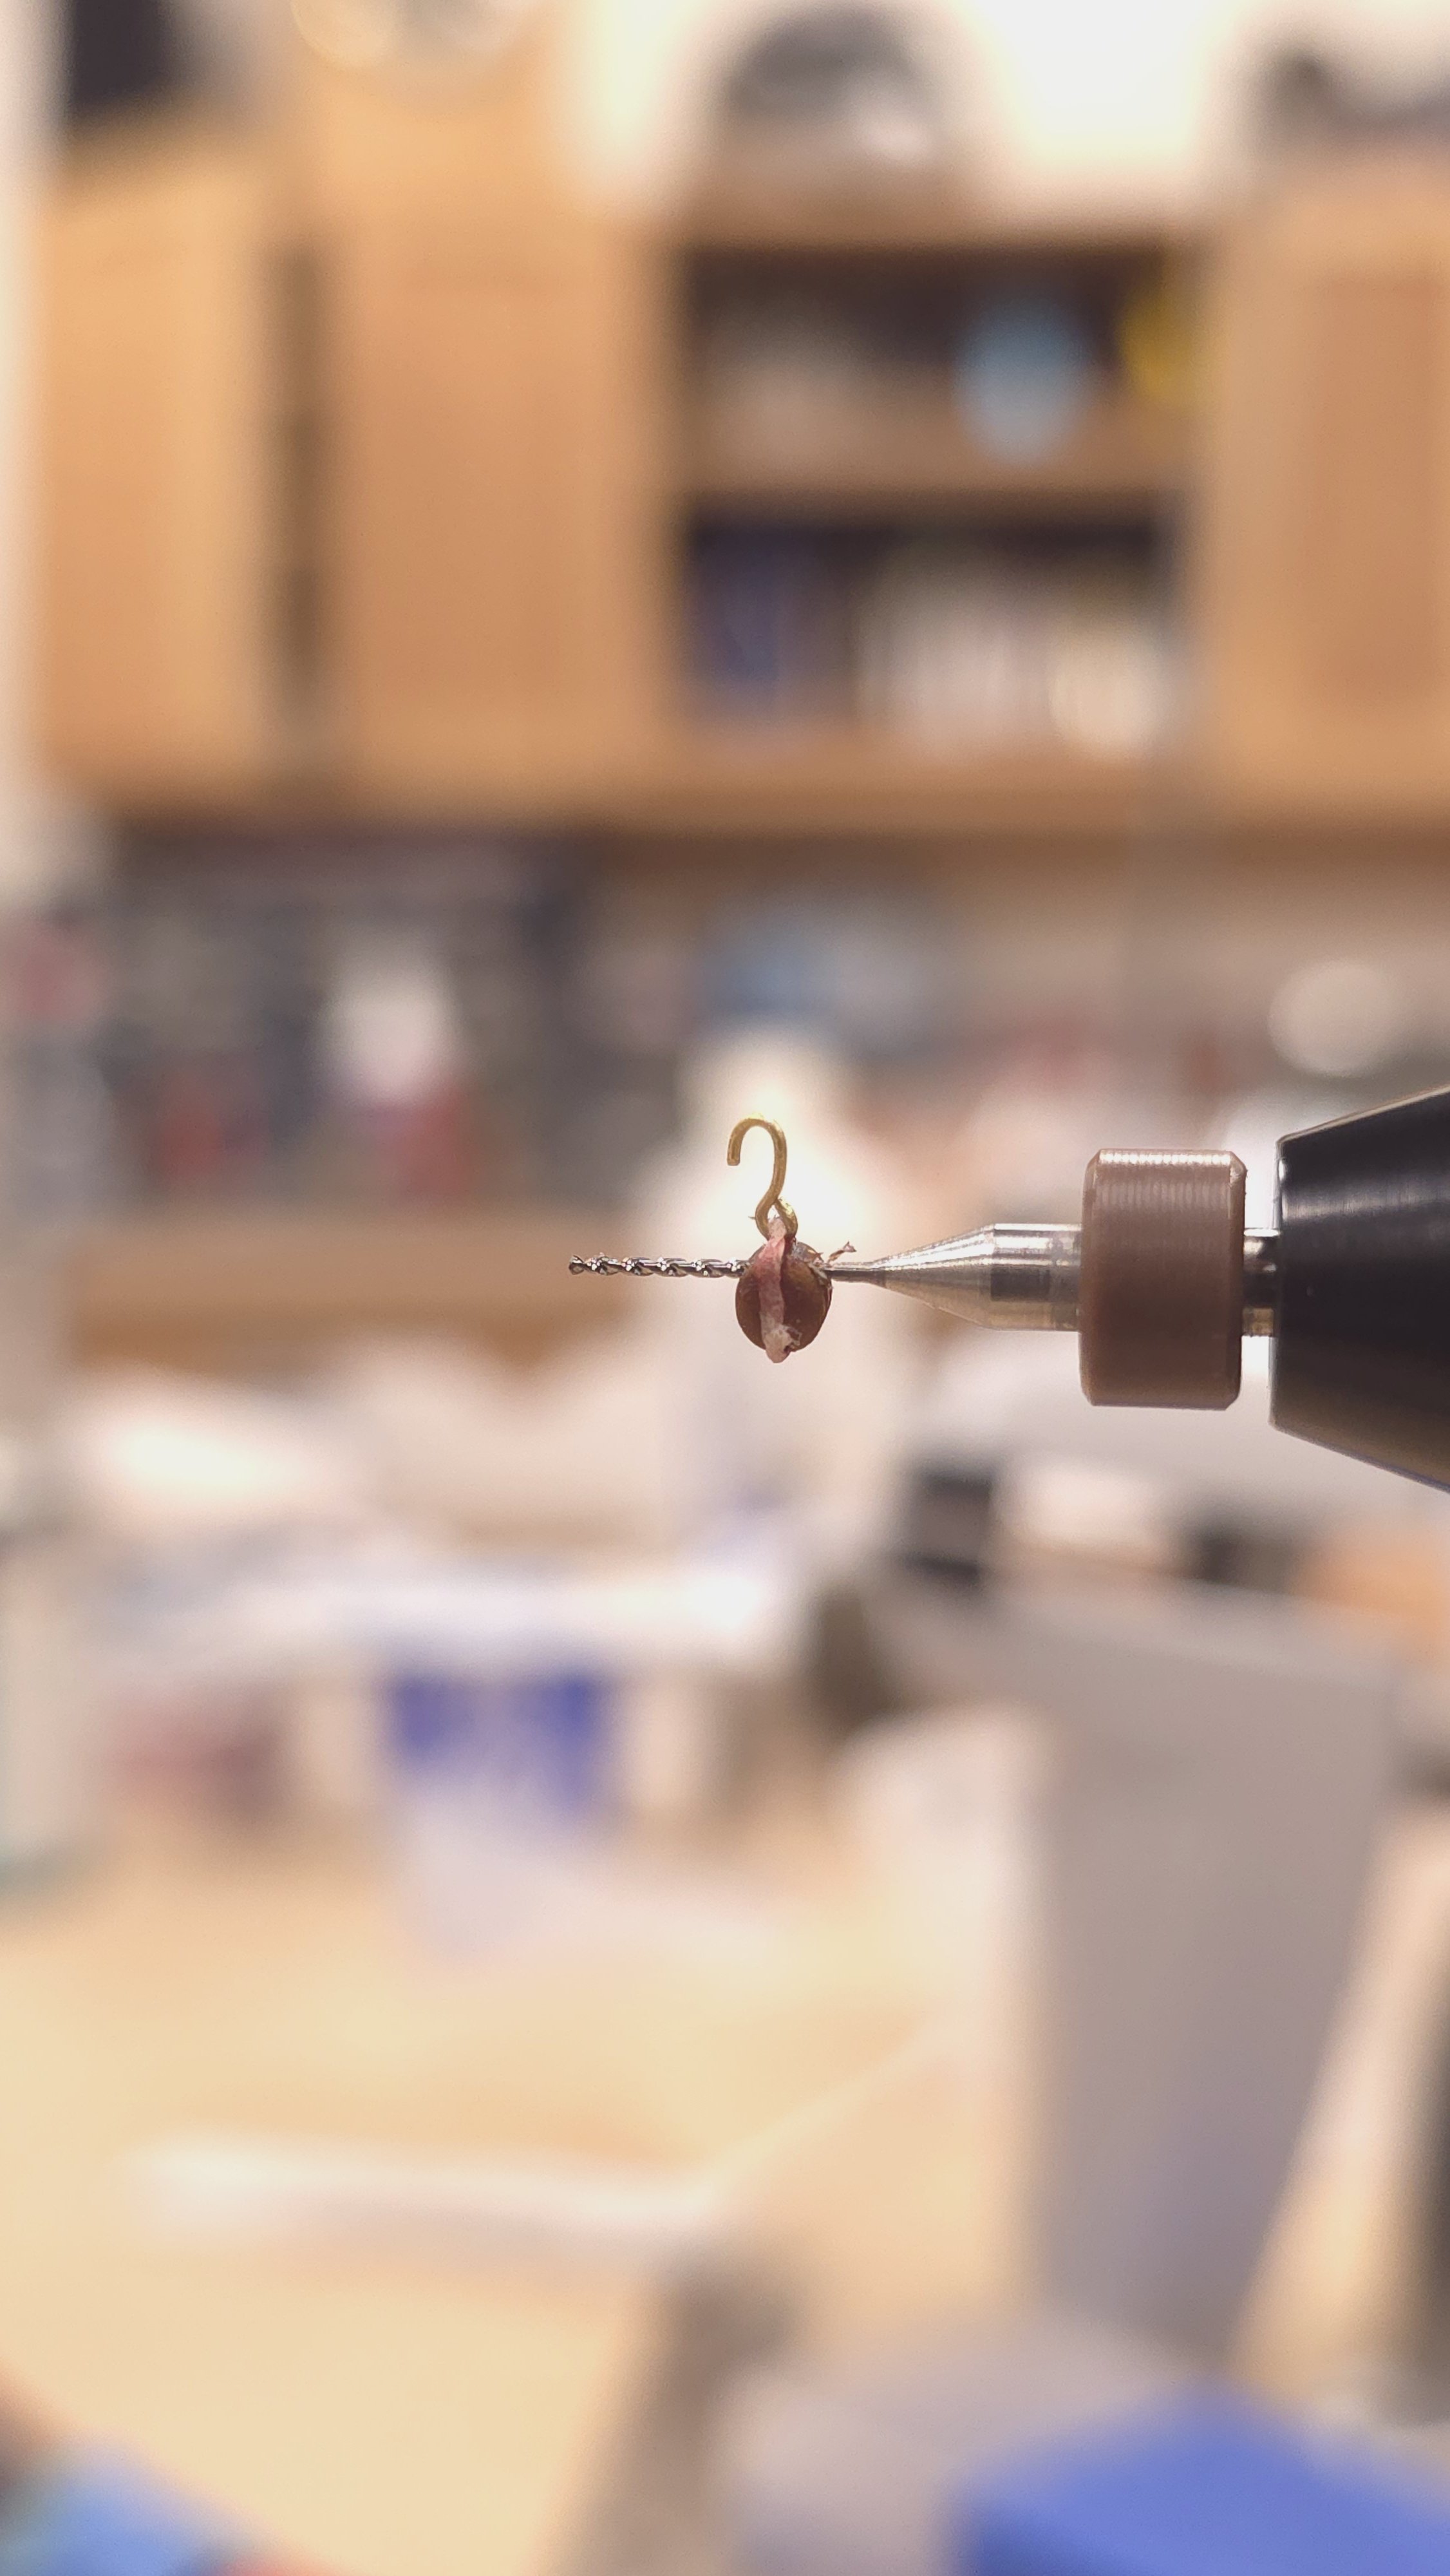
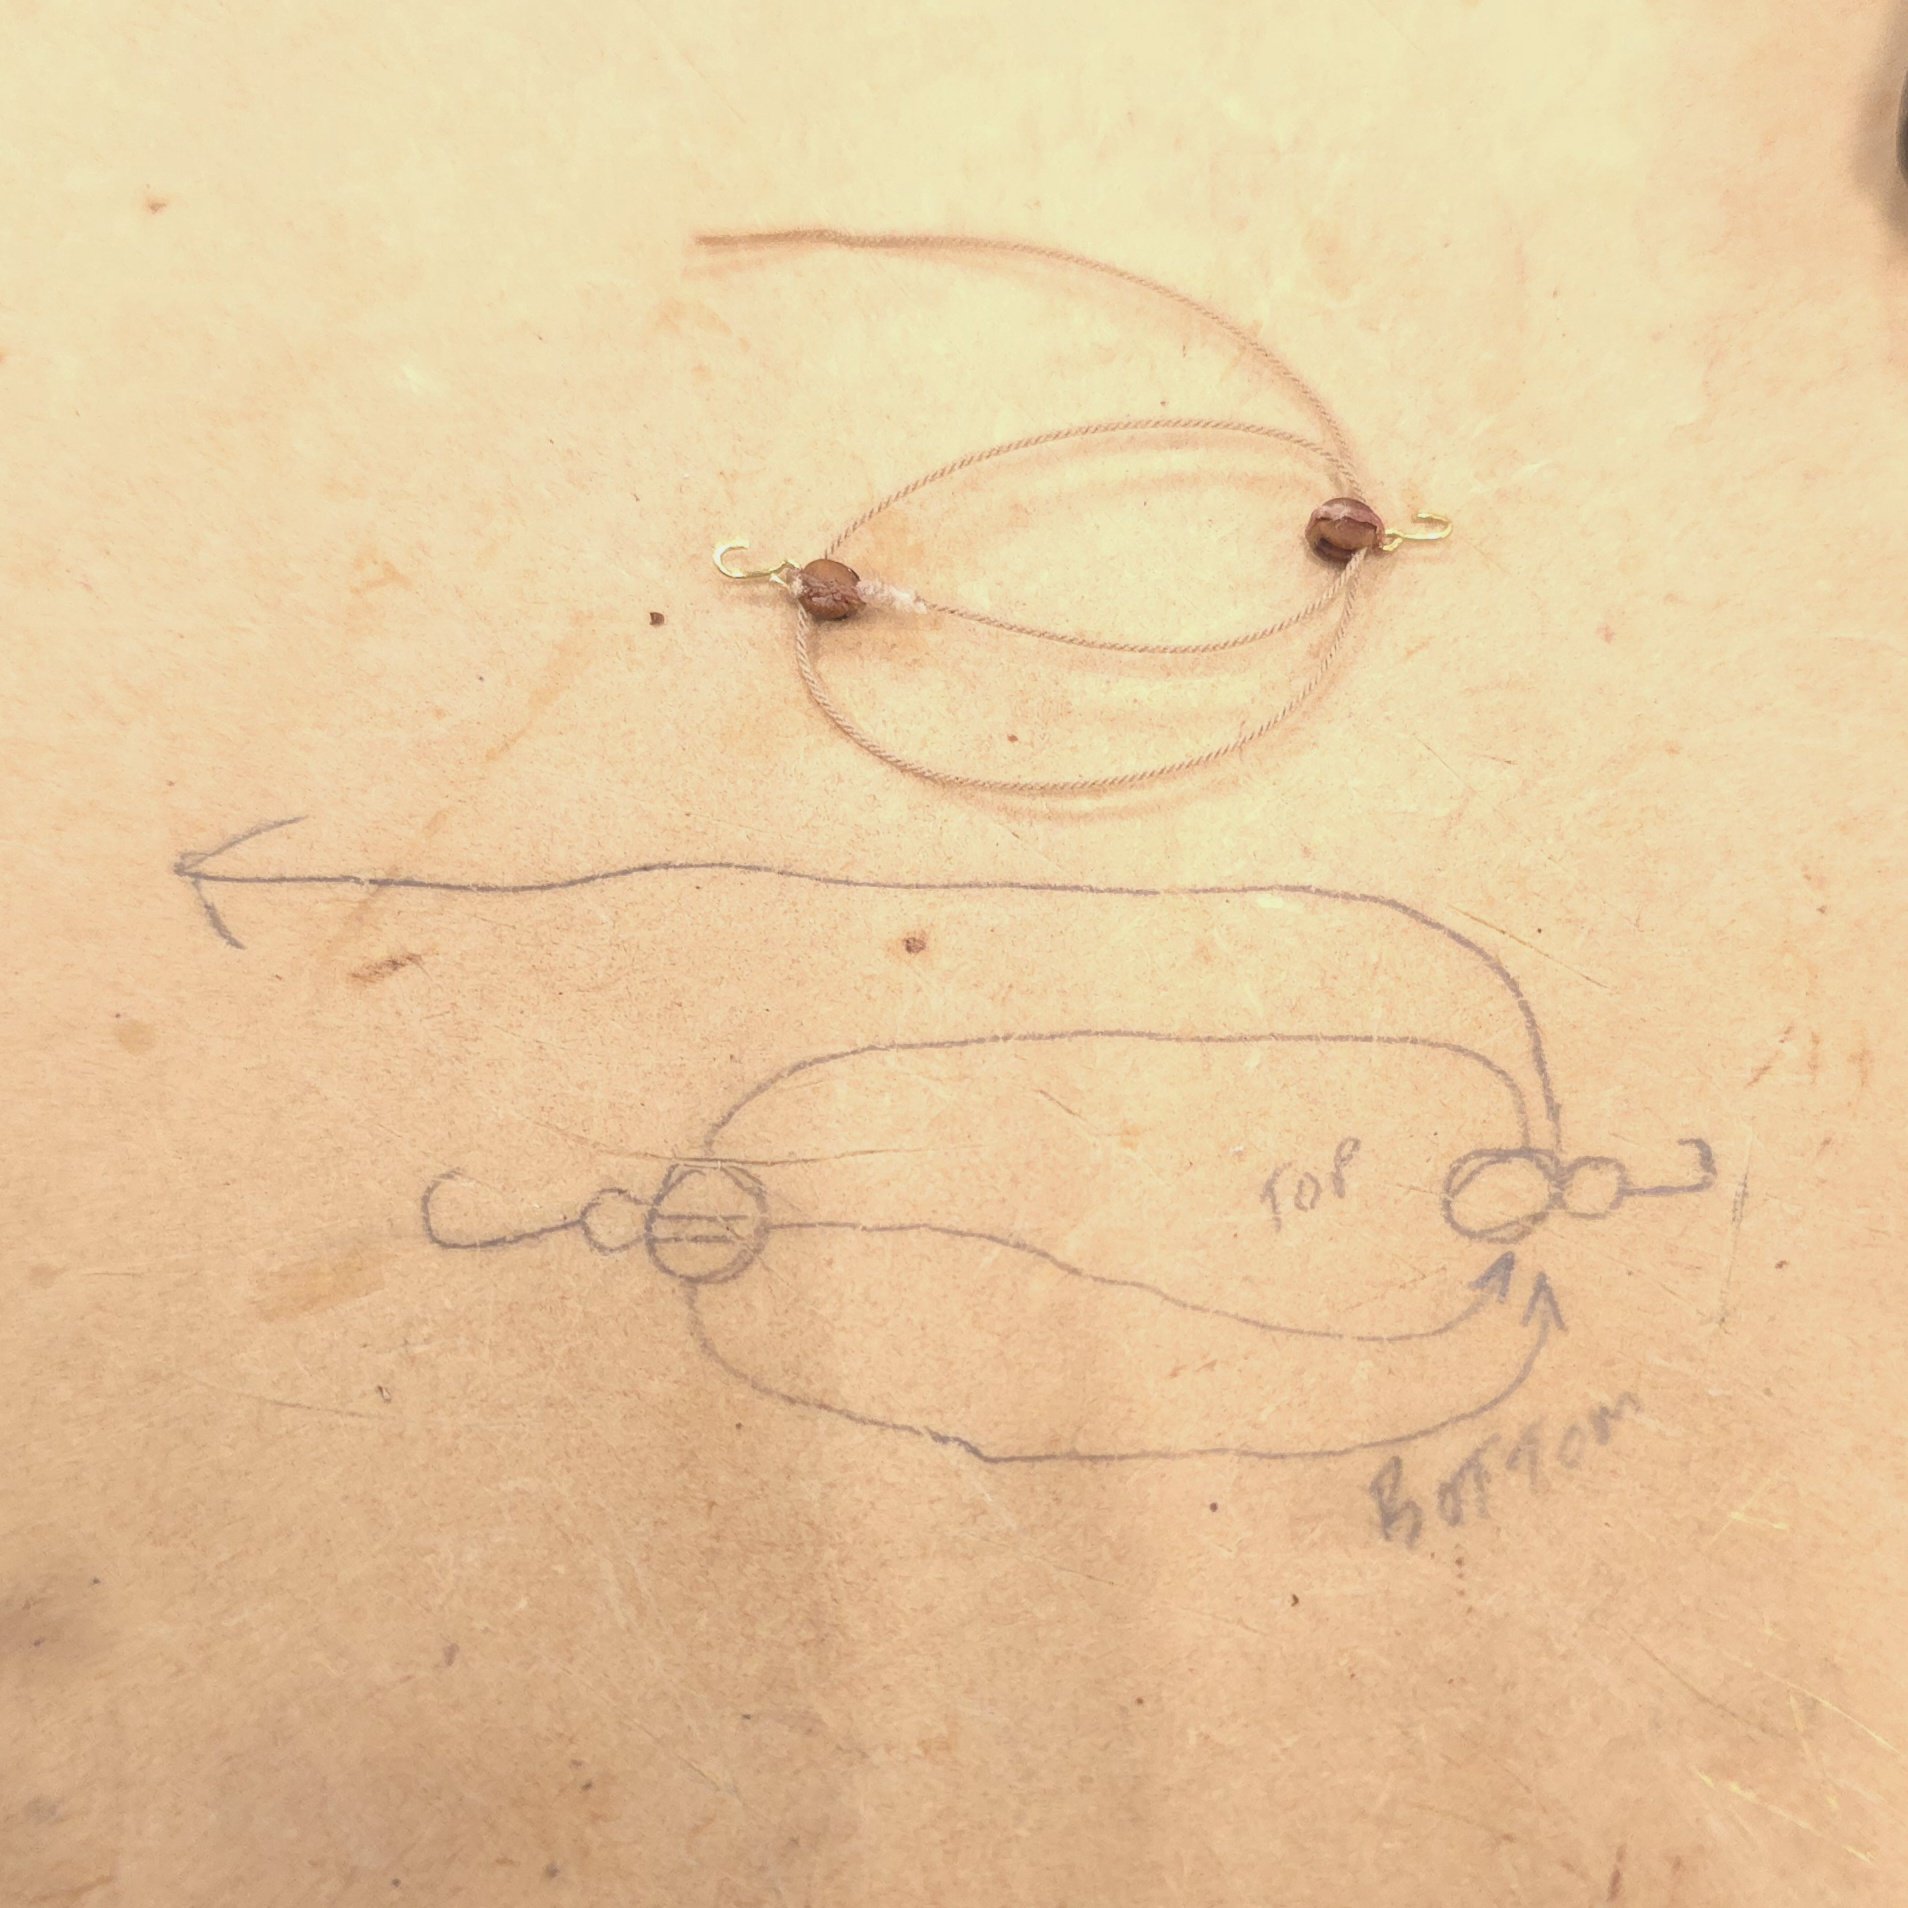
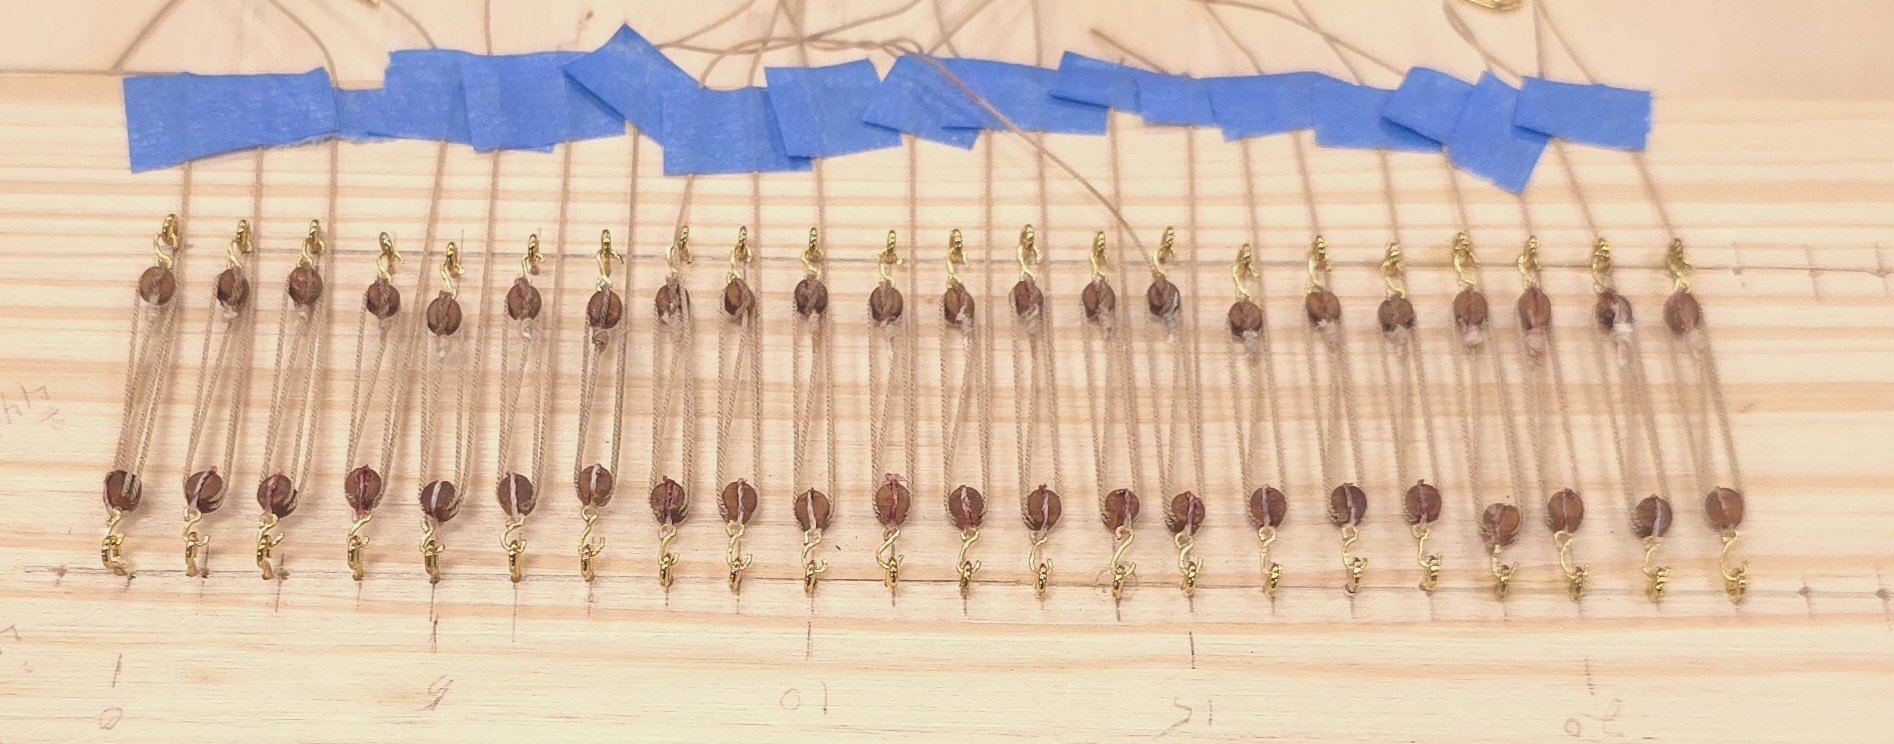
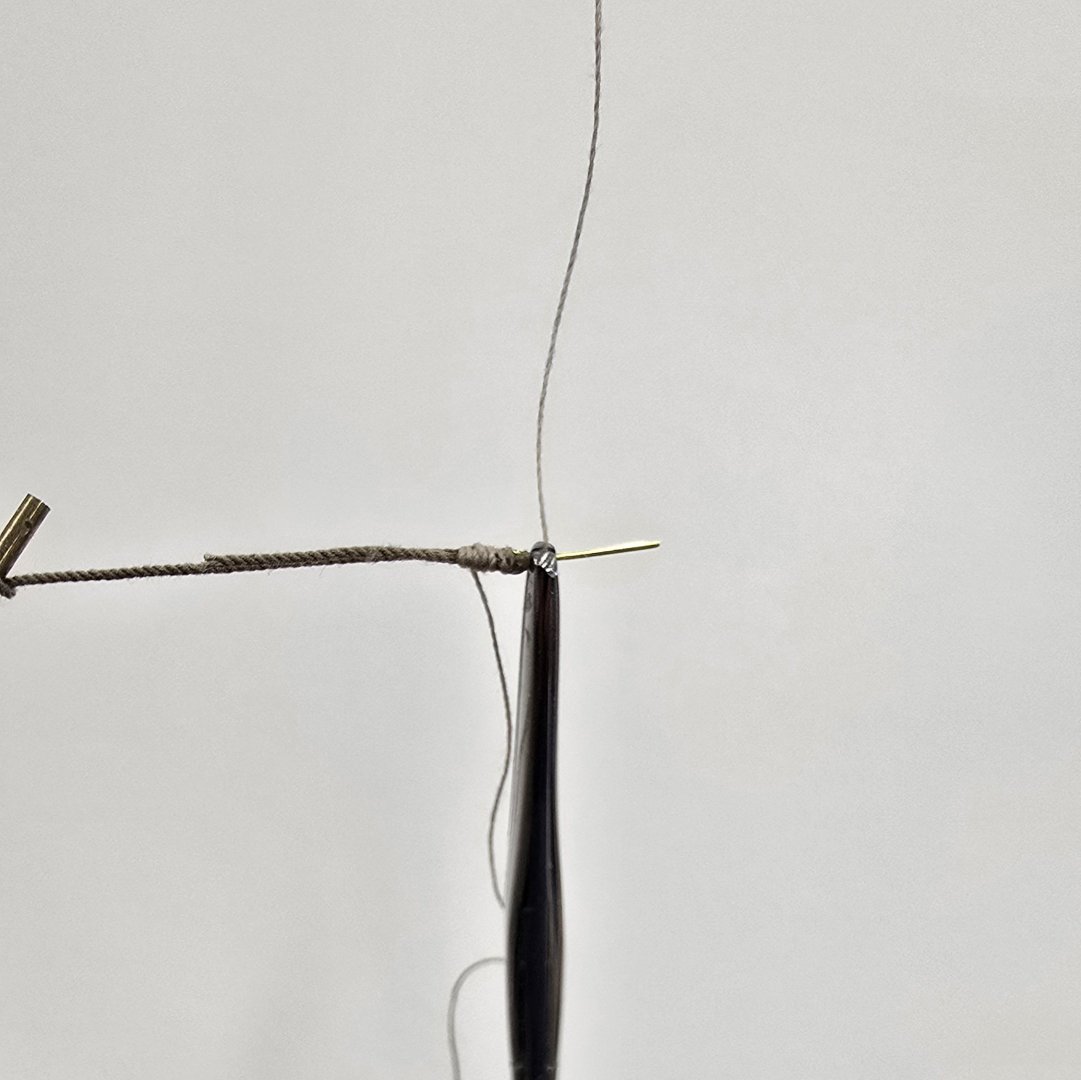
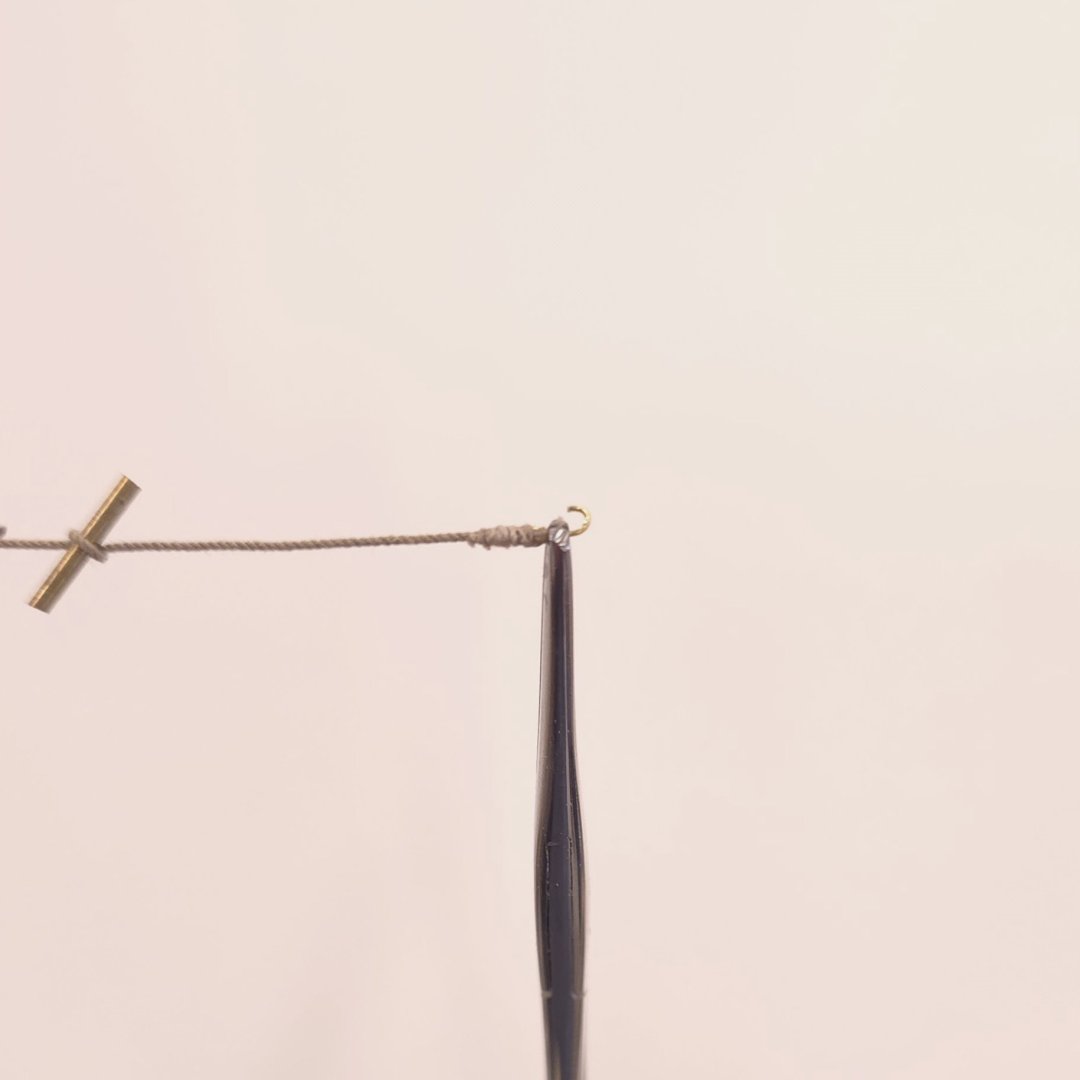
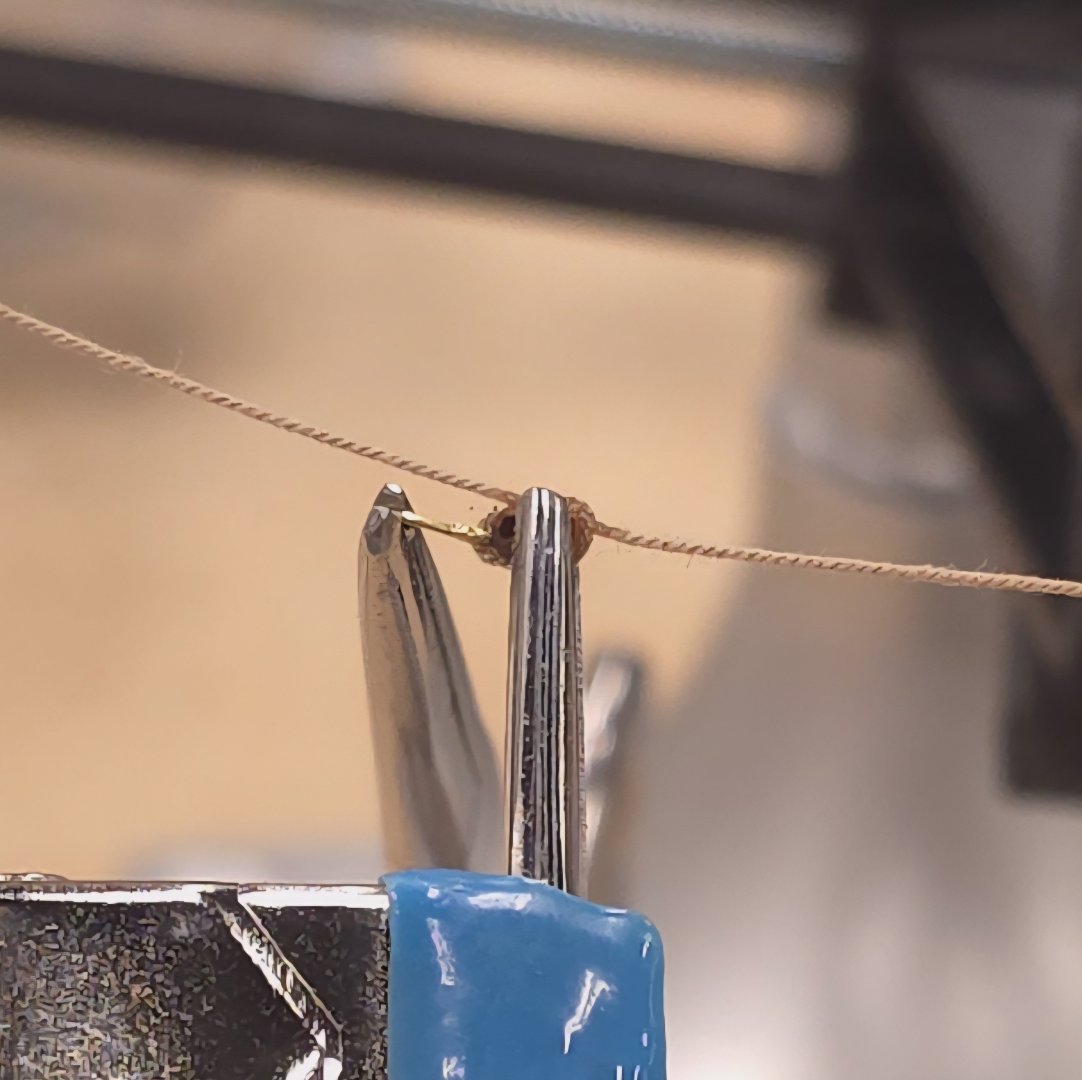
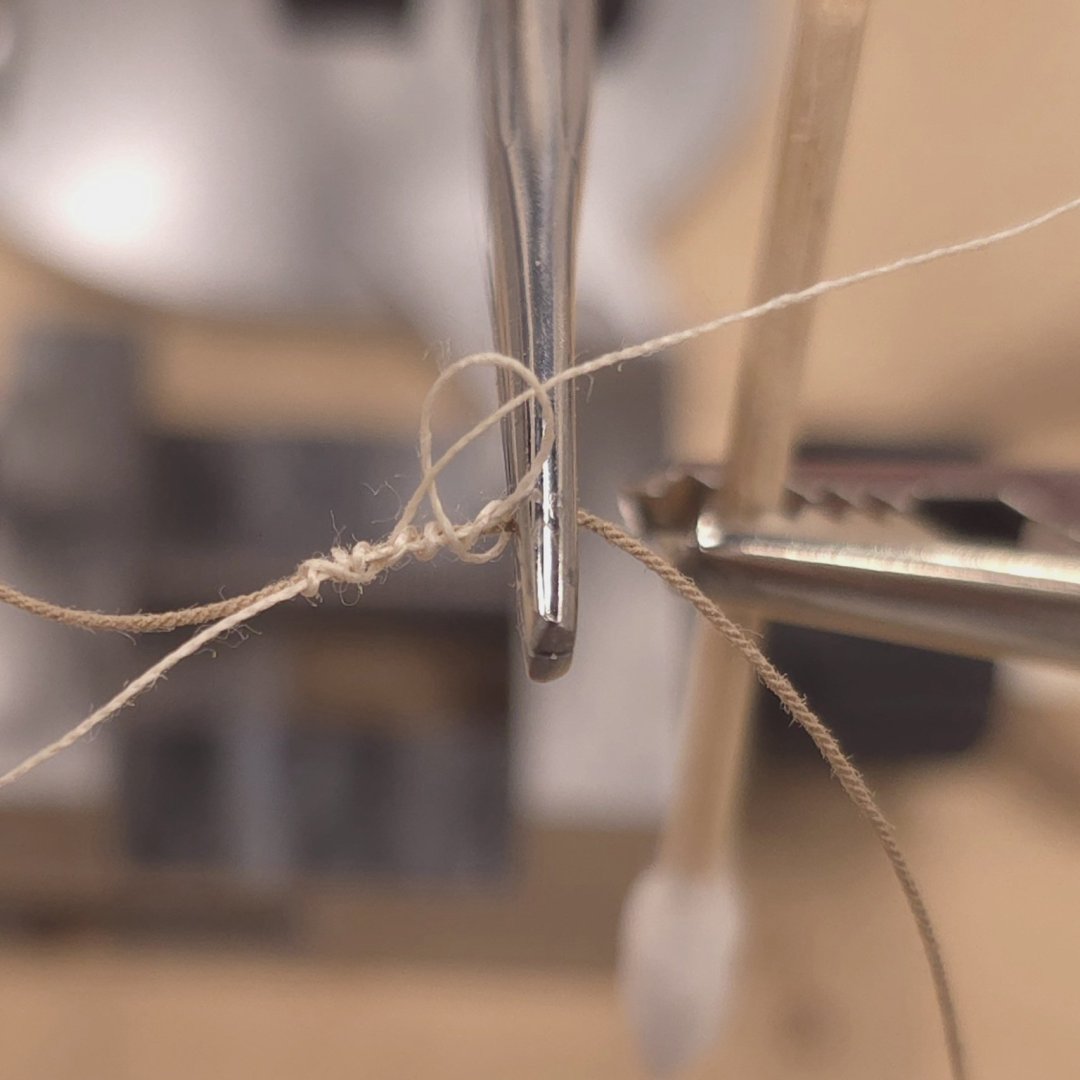
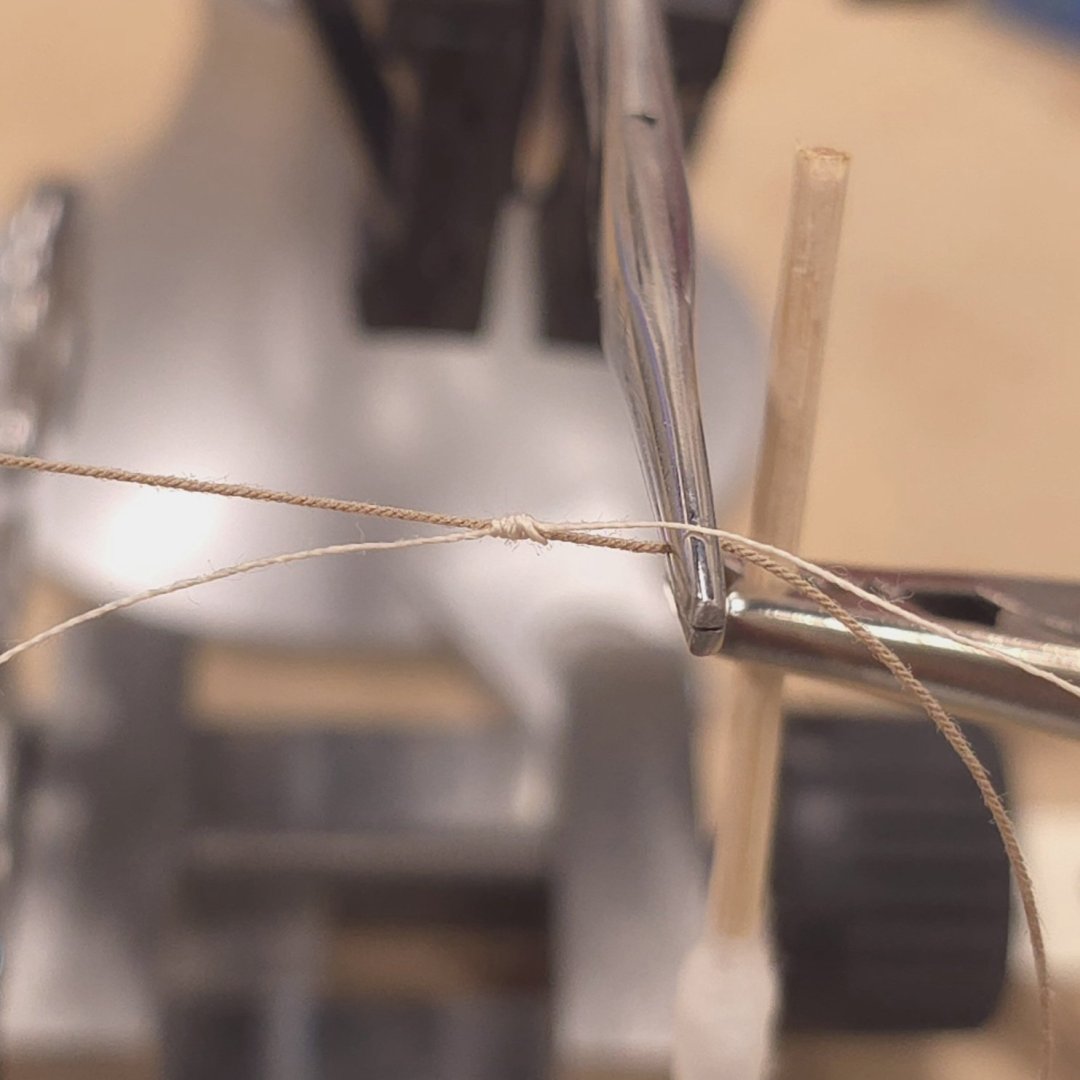
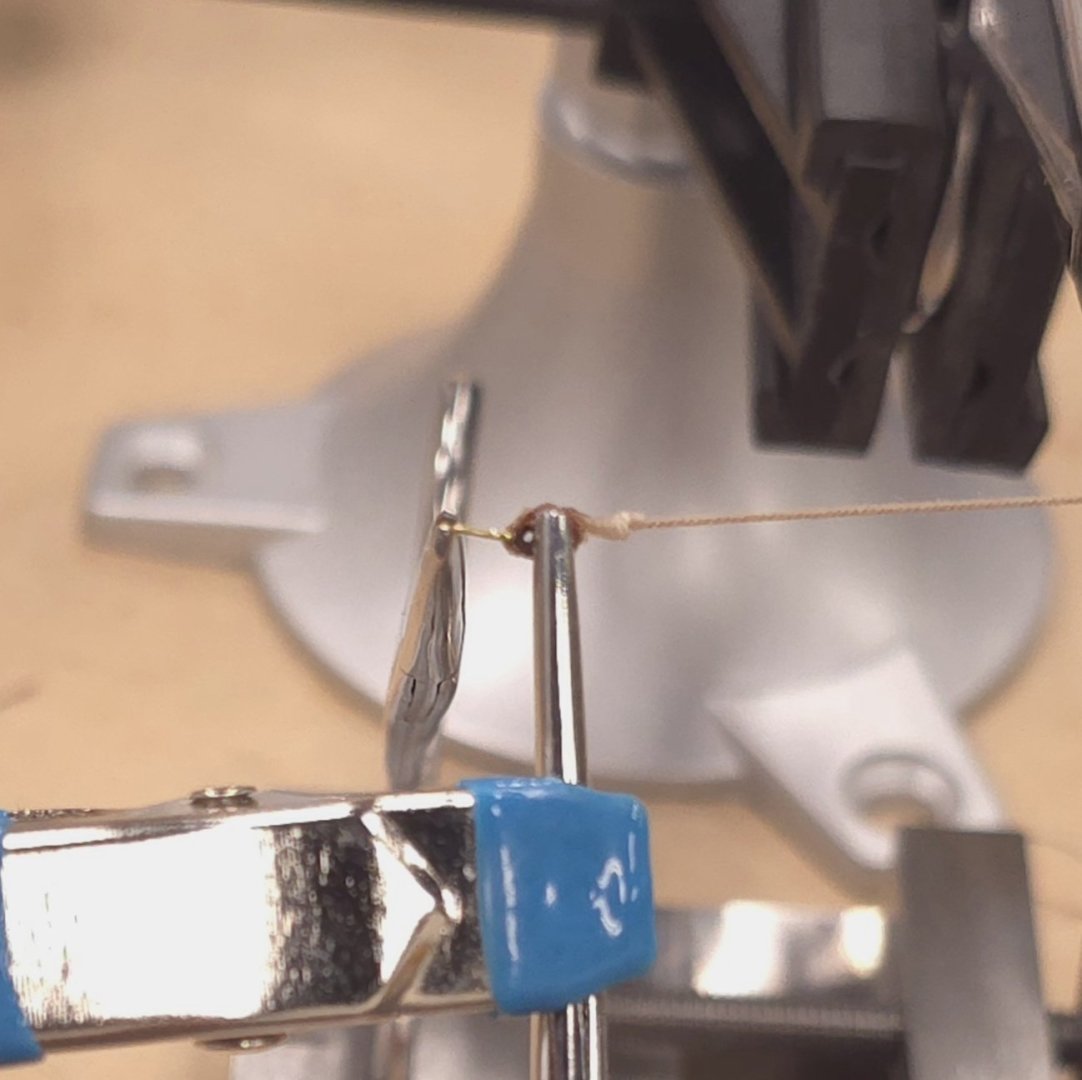
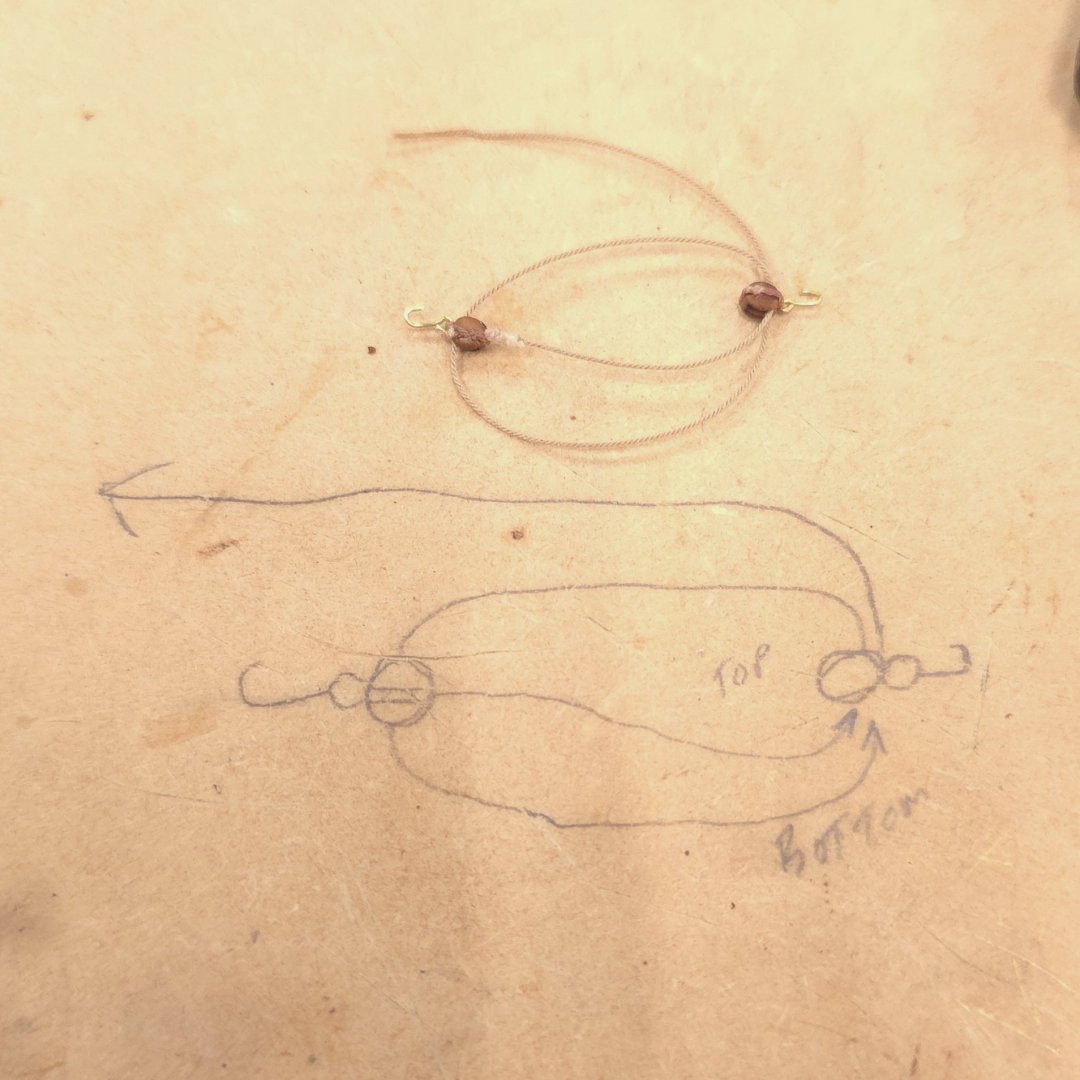
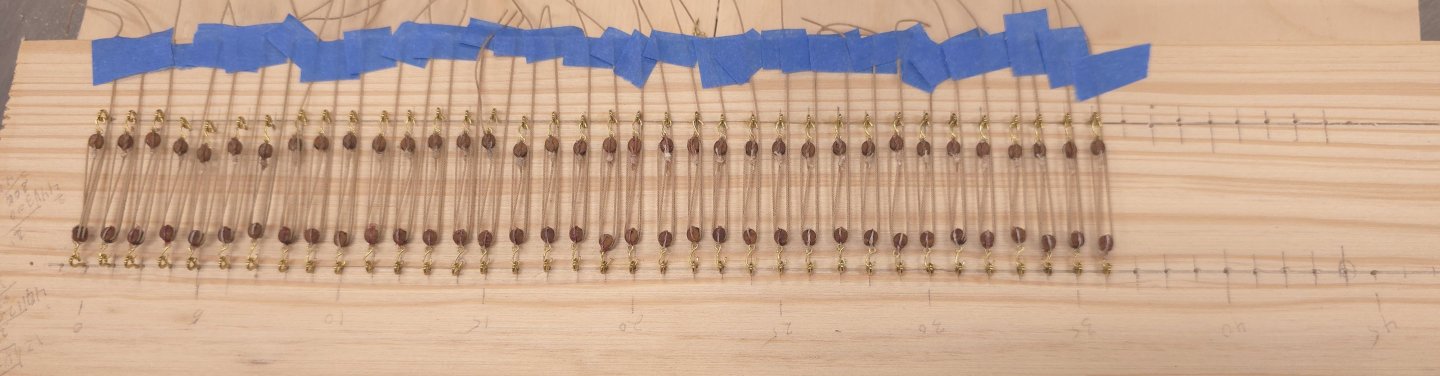
Hmmm, I was pretty sure replied to Mustafa's post above yesterday, but I must not have hit the Submit Reply icon. Basically, I agreed that Mustafa's technique is correct, but because I chose to use Model Shipway's eye bolts to make my hooks, instead of making them from scratch, I put myself on this path. Those eye bolts are brittle if overworked. Moving on.. I'm submitting photos of the process I used to fabricate the tackles. This may not be of much benefit to seasoned veterans of model ship building, but I know I'm going to pull the information from this website into my personal build log on my desktop later. So, in part, this is my own documentation of the process. I think the photos are self-explanatory, but I'll lead off with the comment that many hands make light work.. I used a drop of super glue and held the line against the eye of the hook until the line held fast. Then positioned the eye precisely against the single block. I tried other methods, but the simplest, most effective solution was to simply tie a knot. Note, this only works because I use the cotton rope. A knot in the polyester rope would not stay tight, nor would it take C/A glue readily. Then I added a tiny drop of C/A to lock things in place.. Then moved on to seizing.. Note, you don't see it here, but on the far left of the clamp with the blue rubberized end, I used a piece of masking tape to hold the other end of the seizing line. Once again, a dab of C/A glue to lock things down at the end. Cut away excess, Measure, Another dab of C/A glue before Slicing the line at a sharp angle to facilitate rigging. The holes in the Syren blocks were too small for the .45mm rope, so I had to take two passes to enlarge the holes without splitting the blocks. This needed to be done for both the single and double block. Rig the tackle. 36 tackles rigged, leaving 8 more to do on the weekend. (What are the odds that, before I hit "submit reply", I will succeed on one pass without typos or editing?)


-
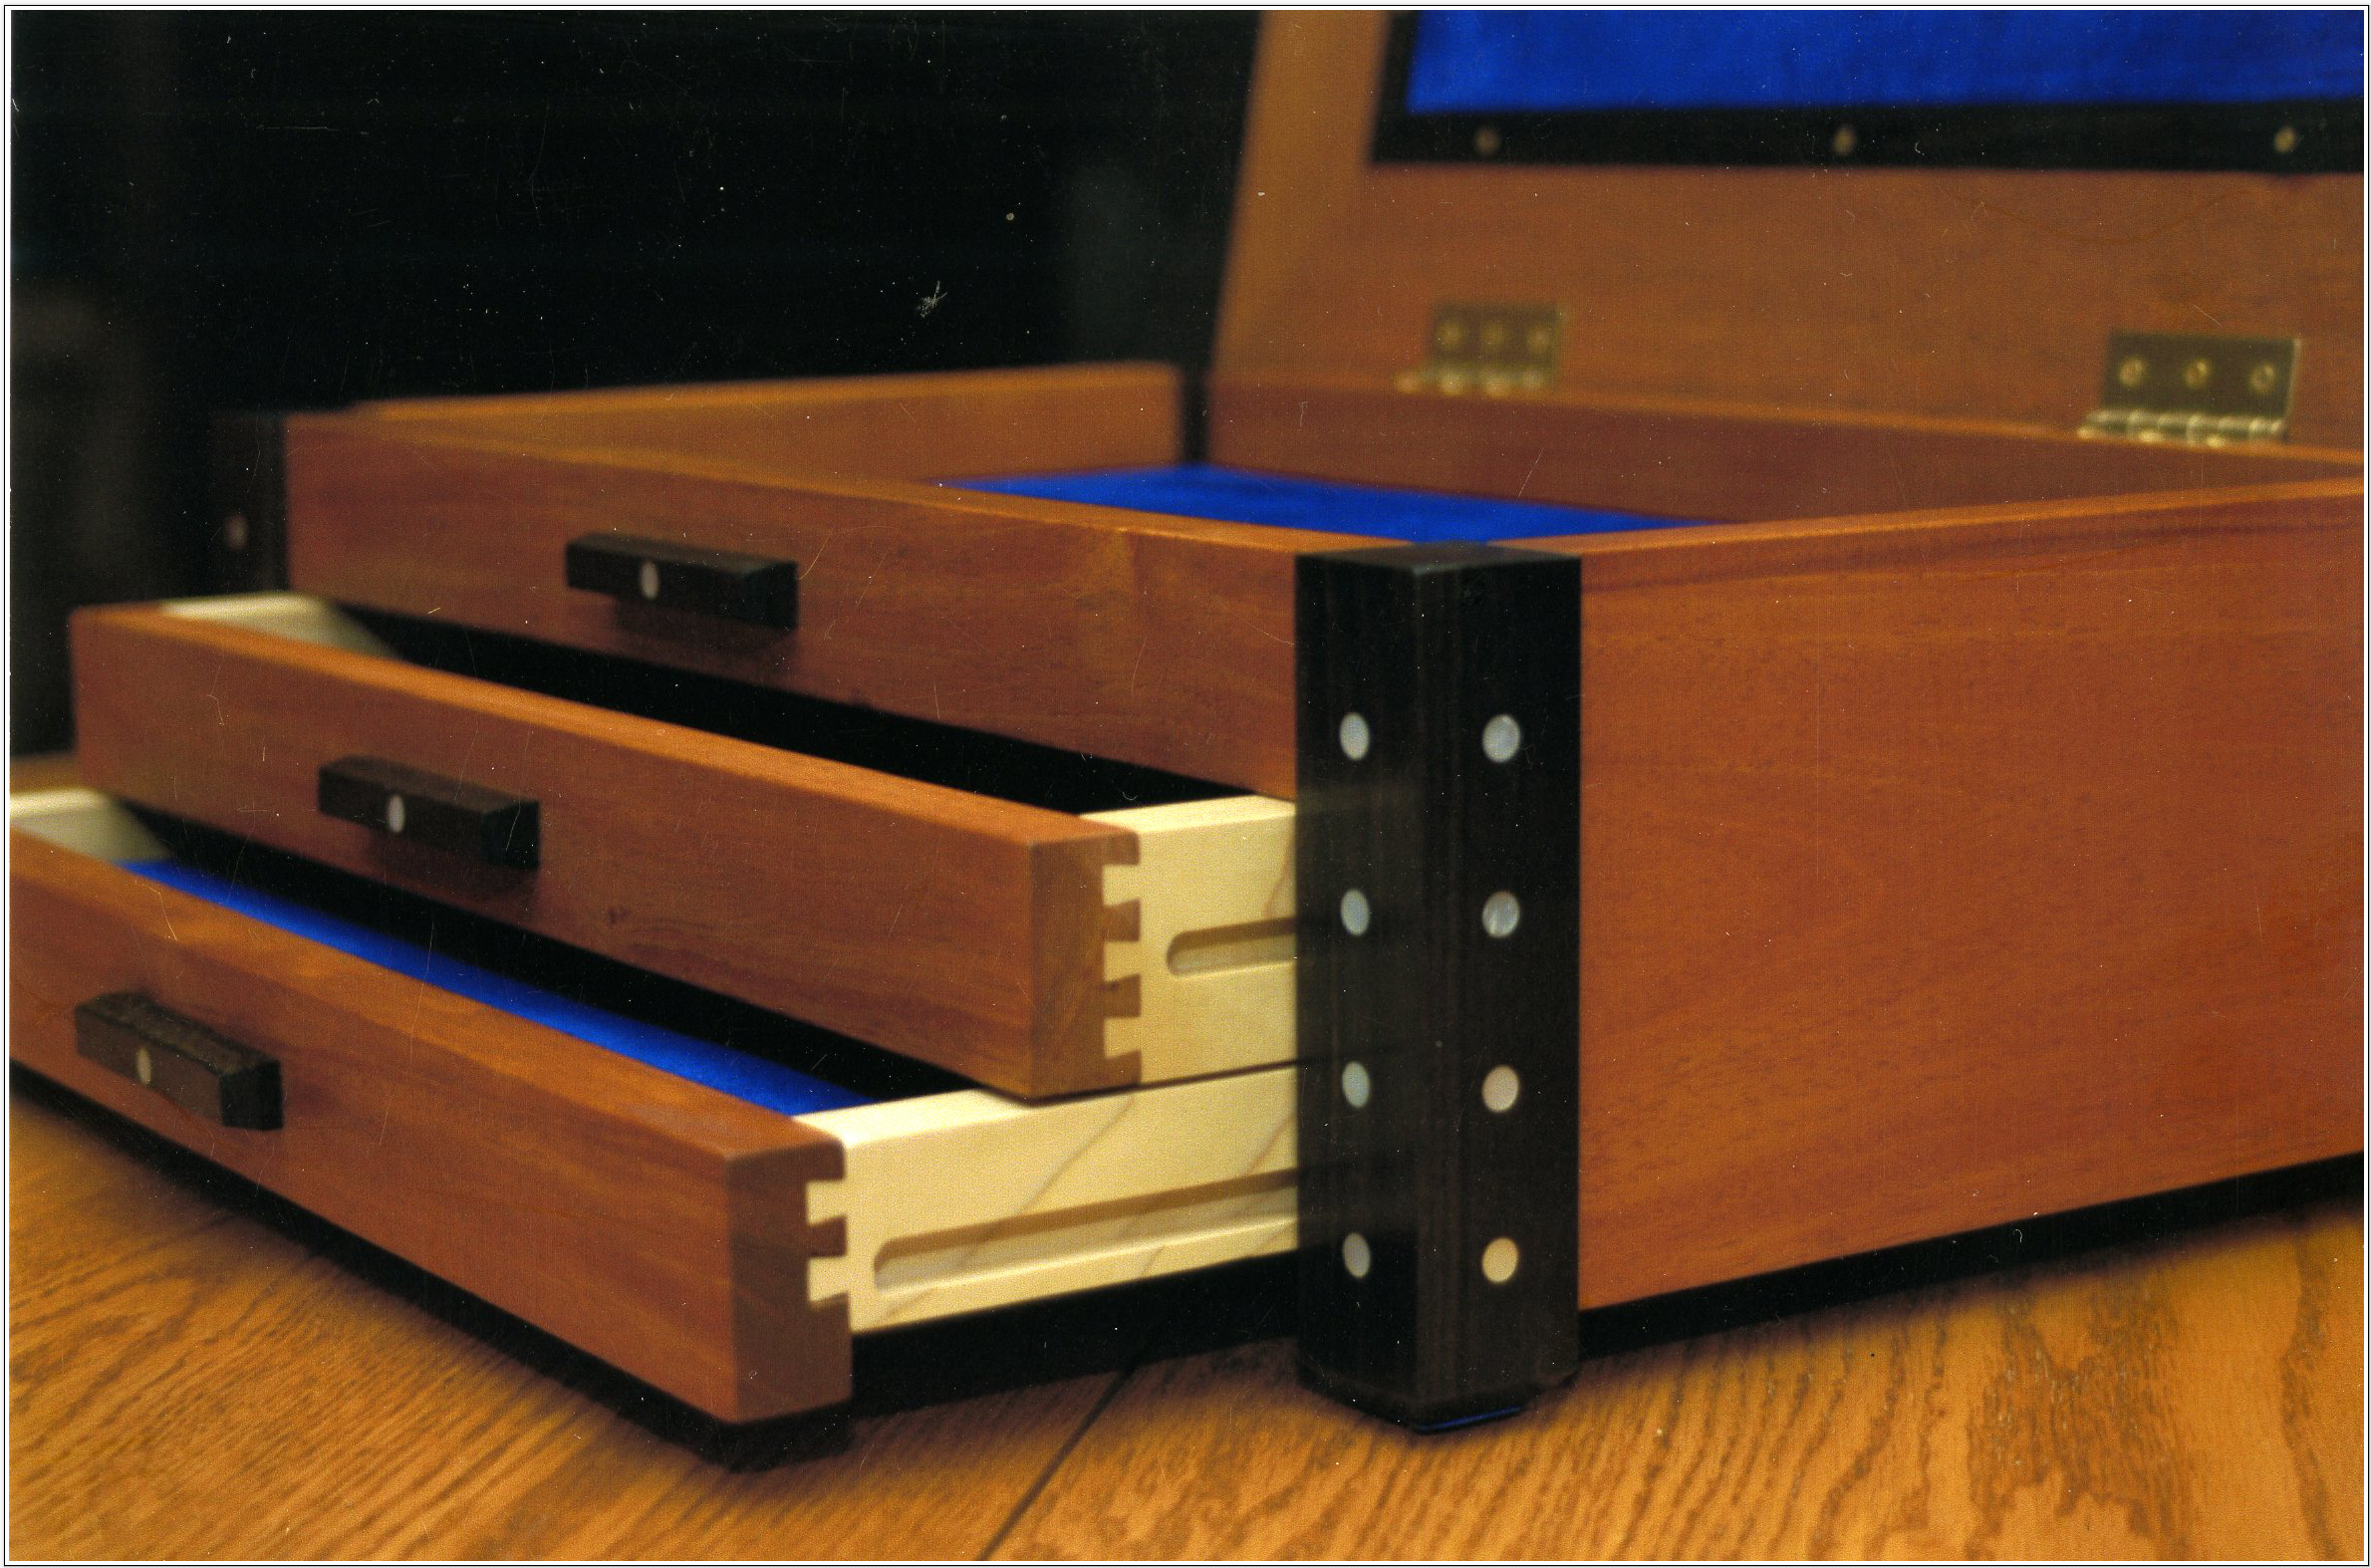
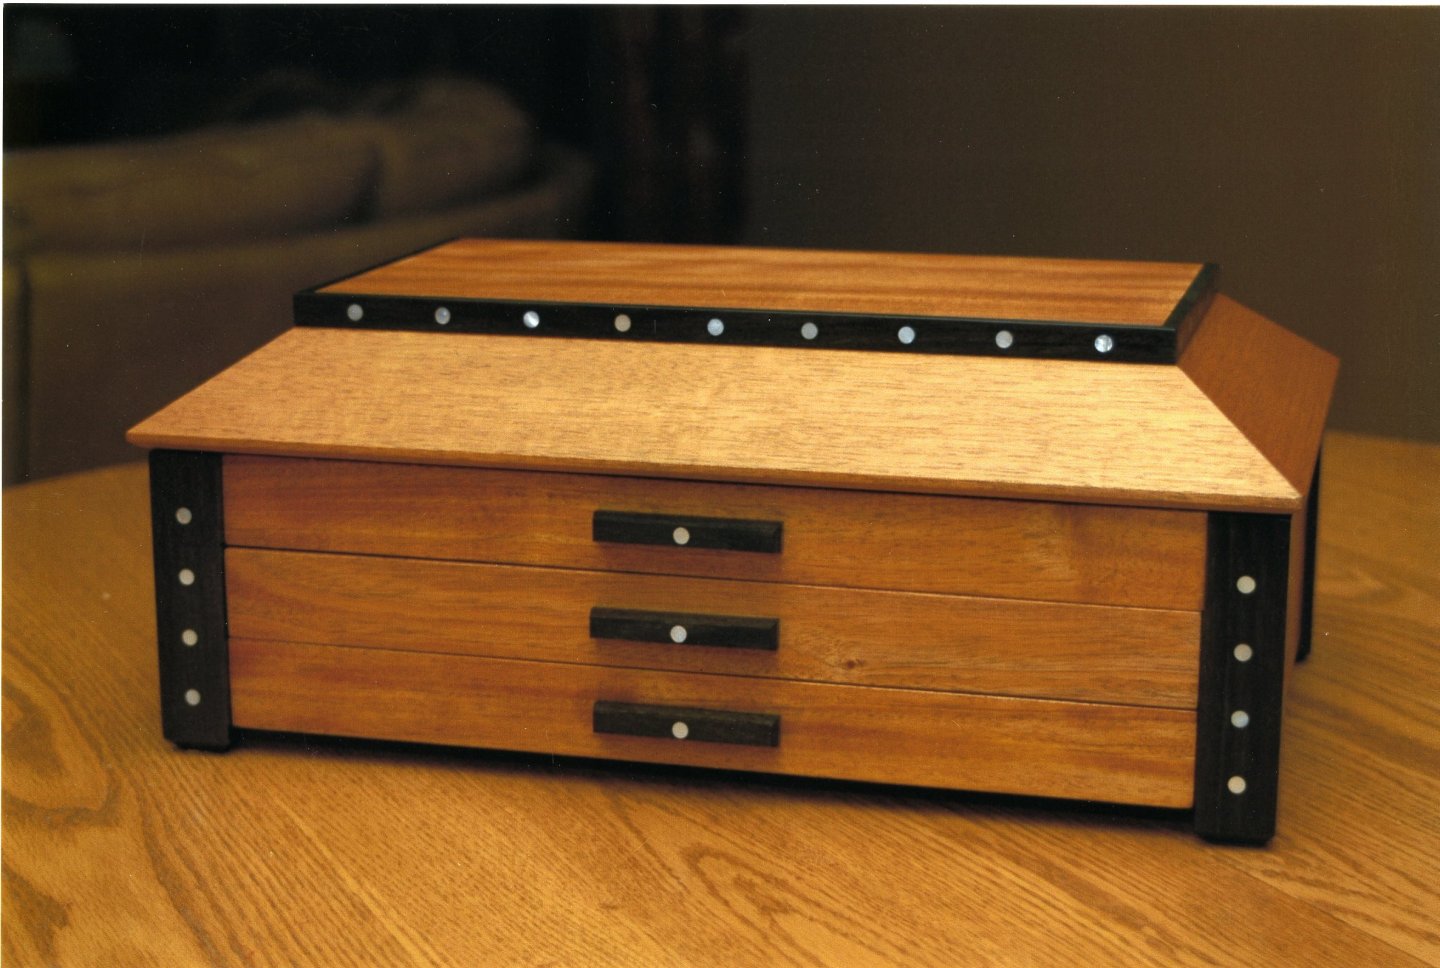
I know you're long past this build, but I had to comment on the mahogany. I have a mahogany piano (built in 2005) that I had refinished to satin black about 40 years ago. Man, do I regret that. I still use the piano but, some day, it will be replaced with Disklavier. When that happens, I'm going to have the harp unstrung and will dismantle the piano to reclaim the mahogany. Having worked on it for a jewelry box for the missus, I fell in love with it. I found it incredibly easy to work with, but then I was working on a slightly larger scale. Fine work on your part here. And thanks for a moment of nostalgia. Ironically, or coincidentally, I remember now that the person I got the idea from repurposed an old piano for the project. Ebony and Ivory, in his case, came from the piano keys.

-
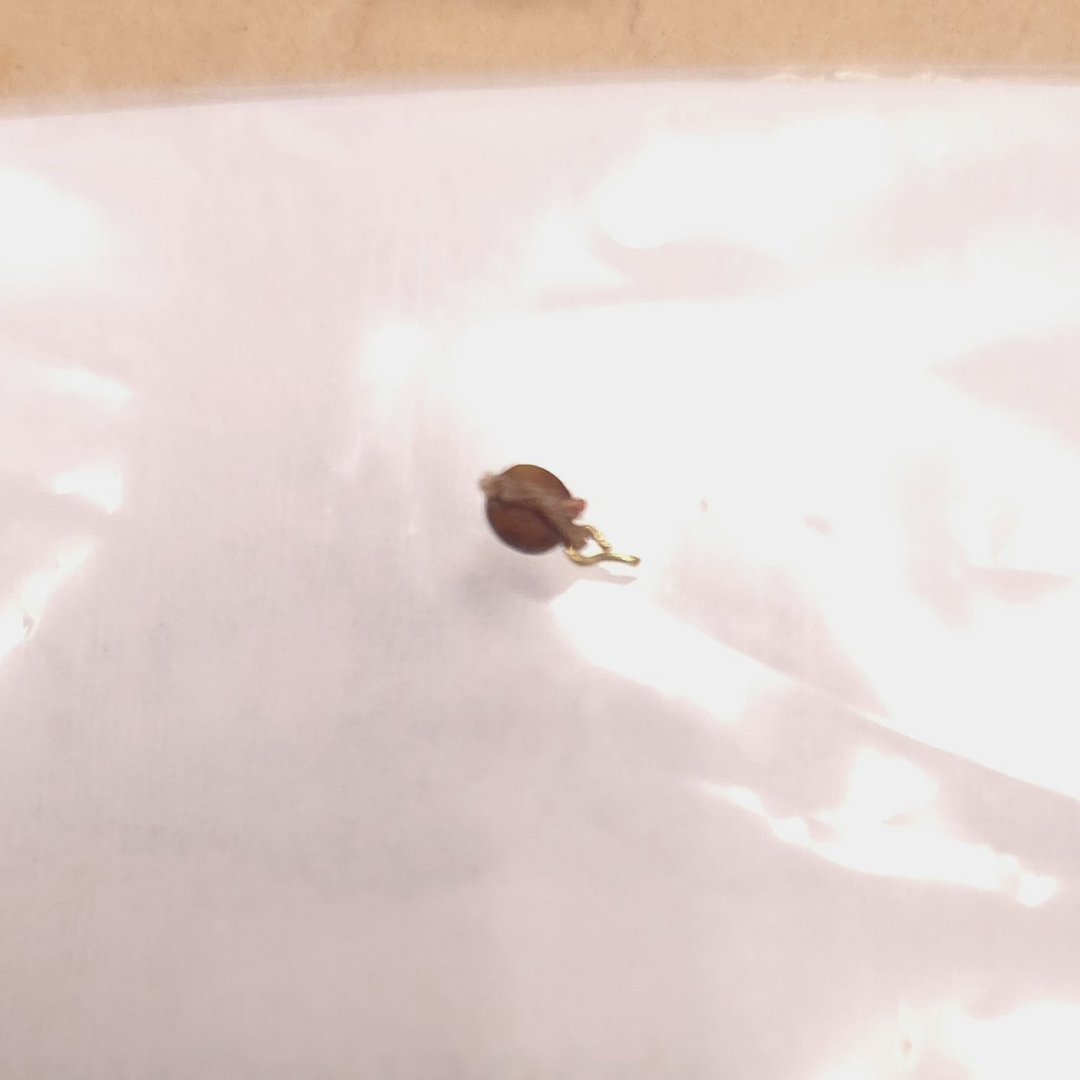
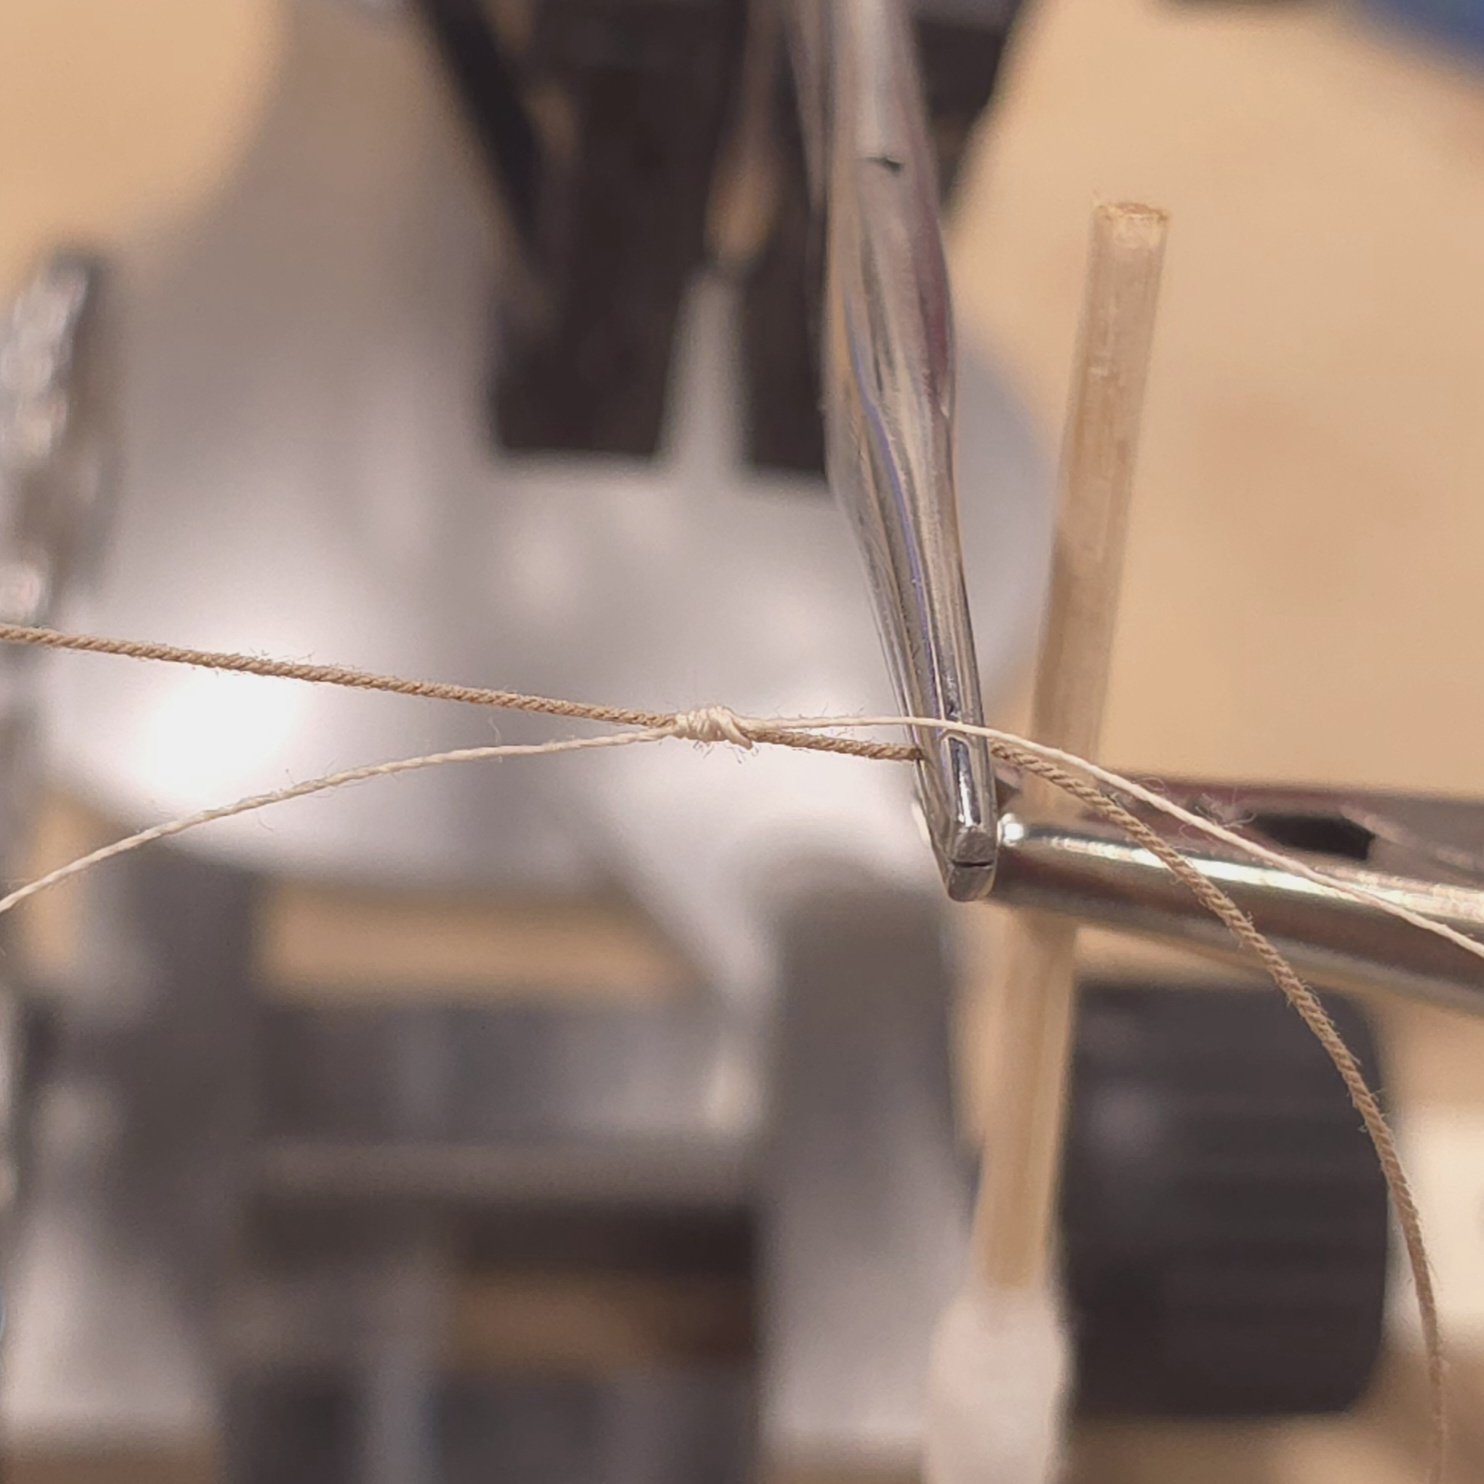
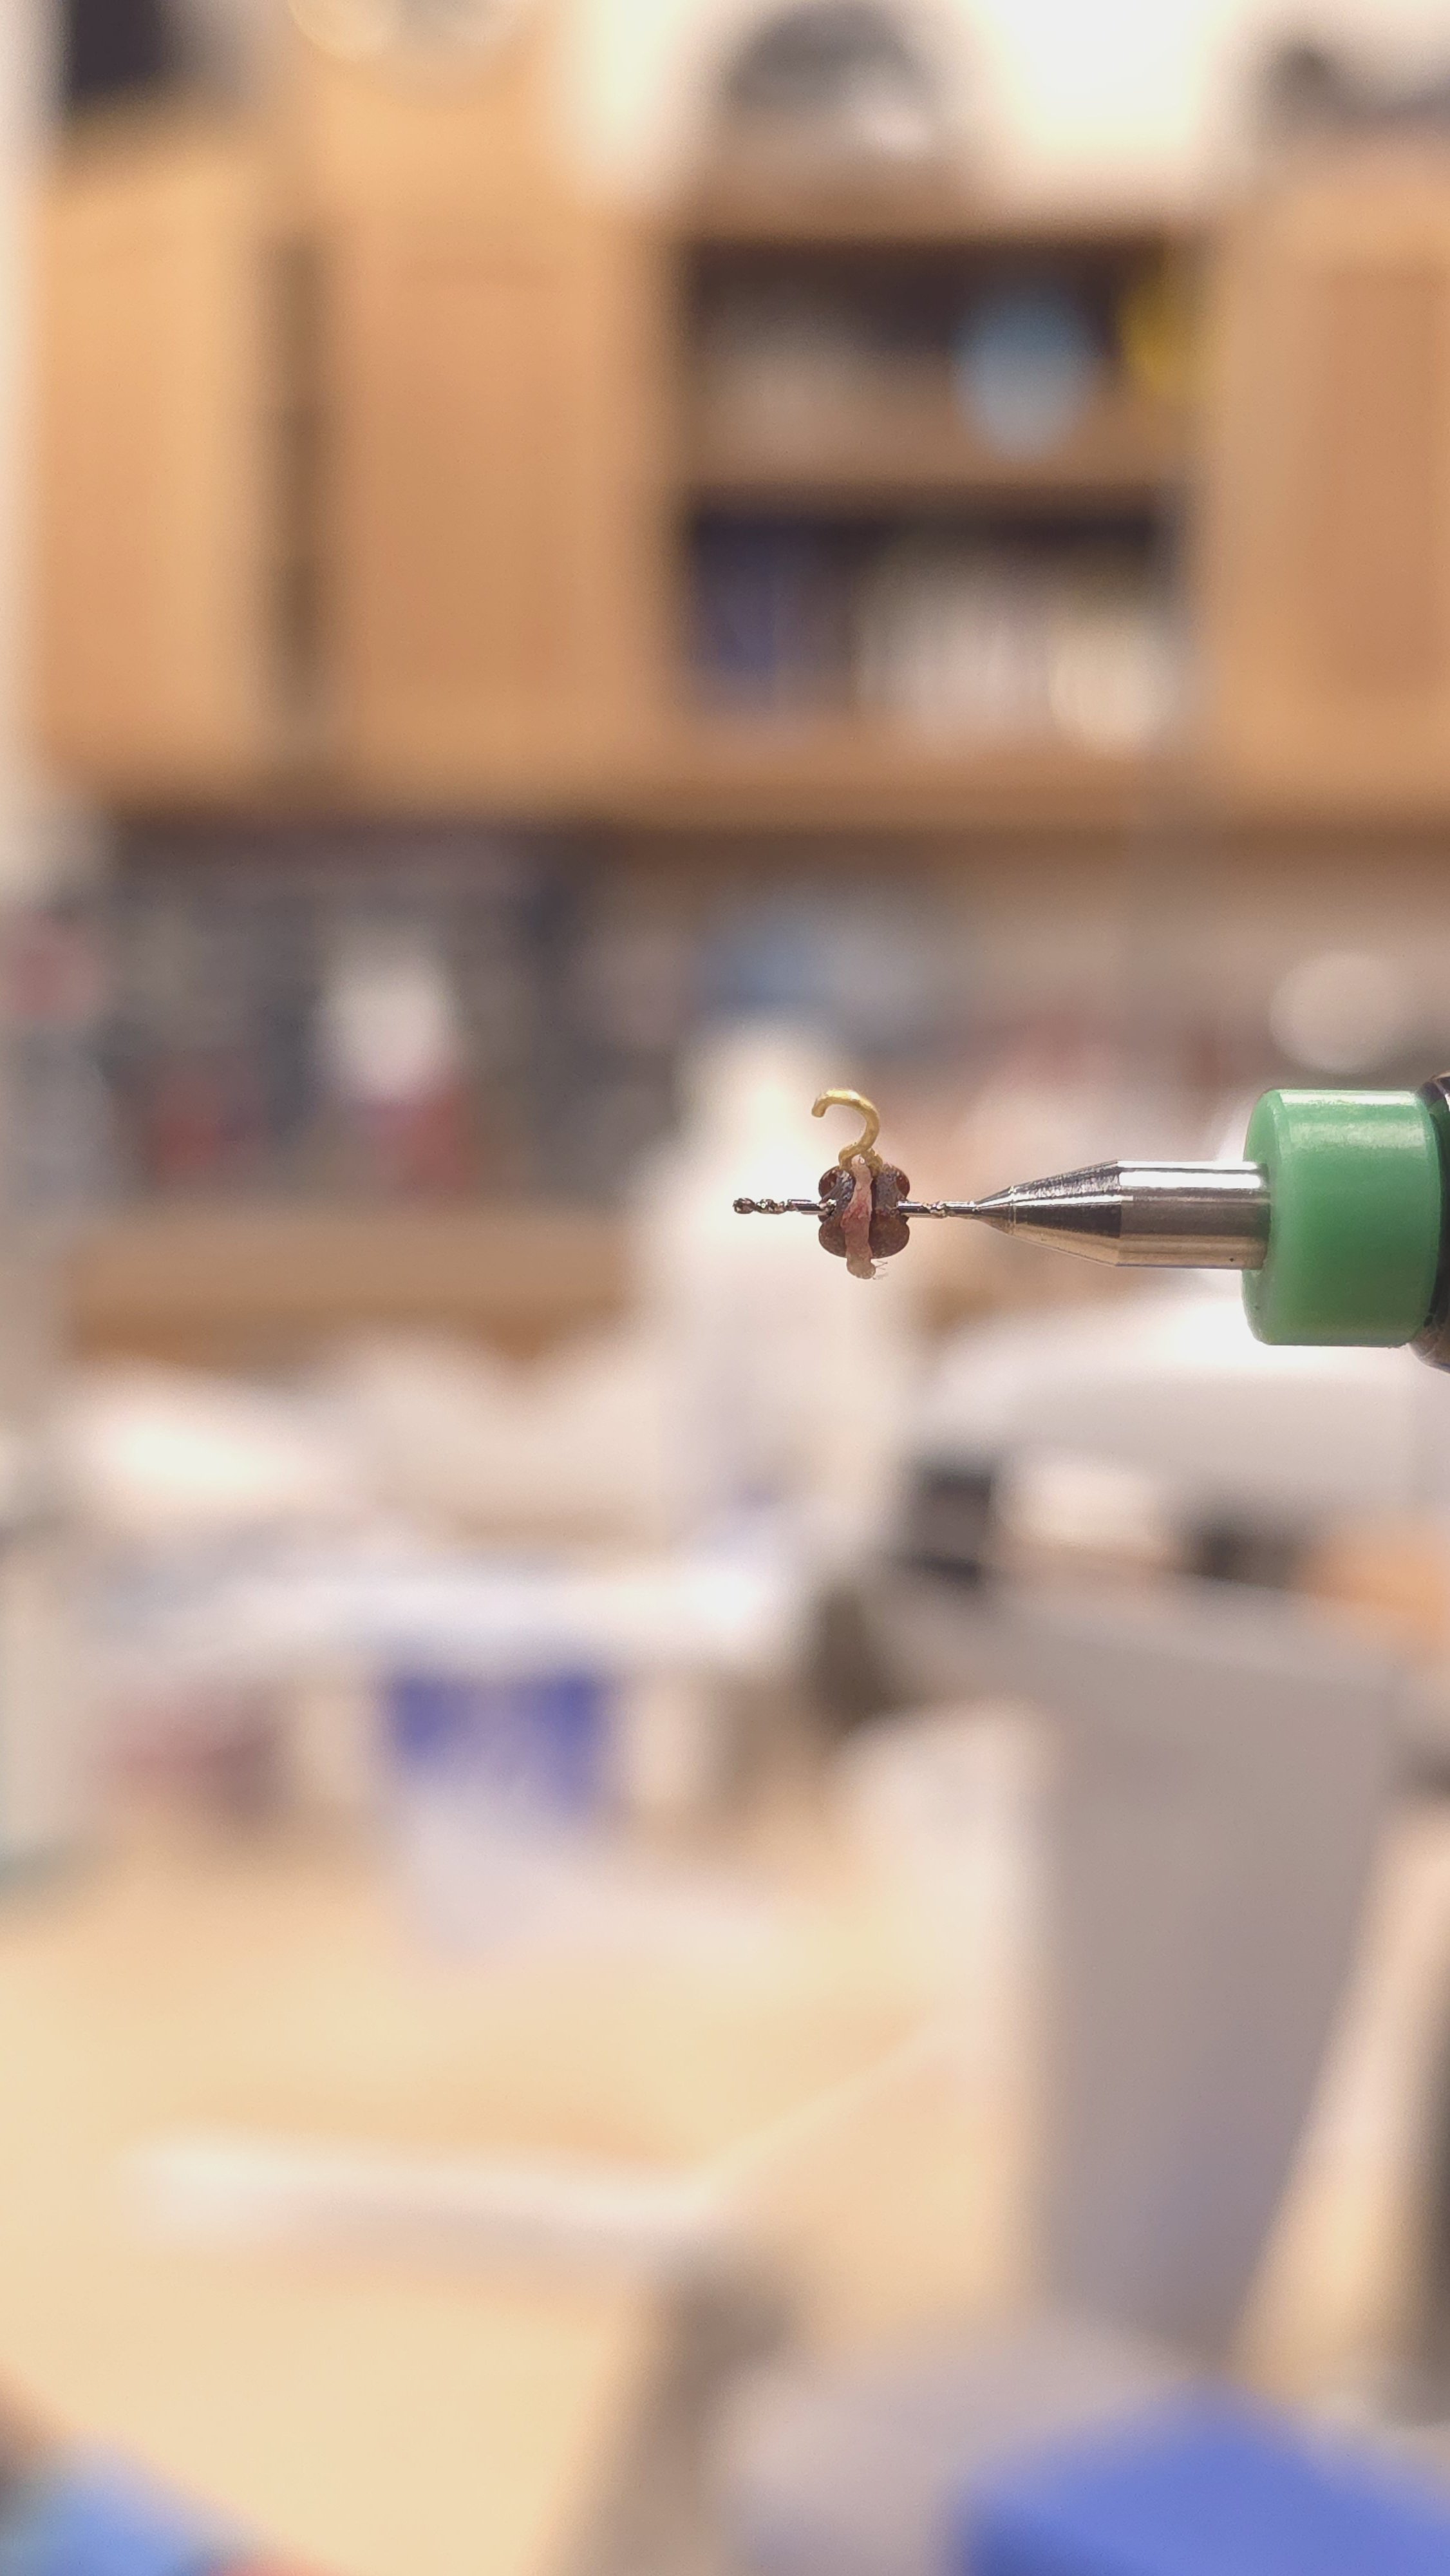
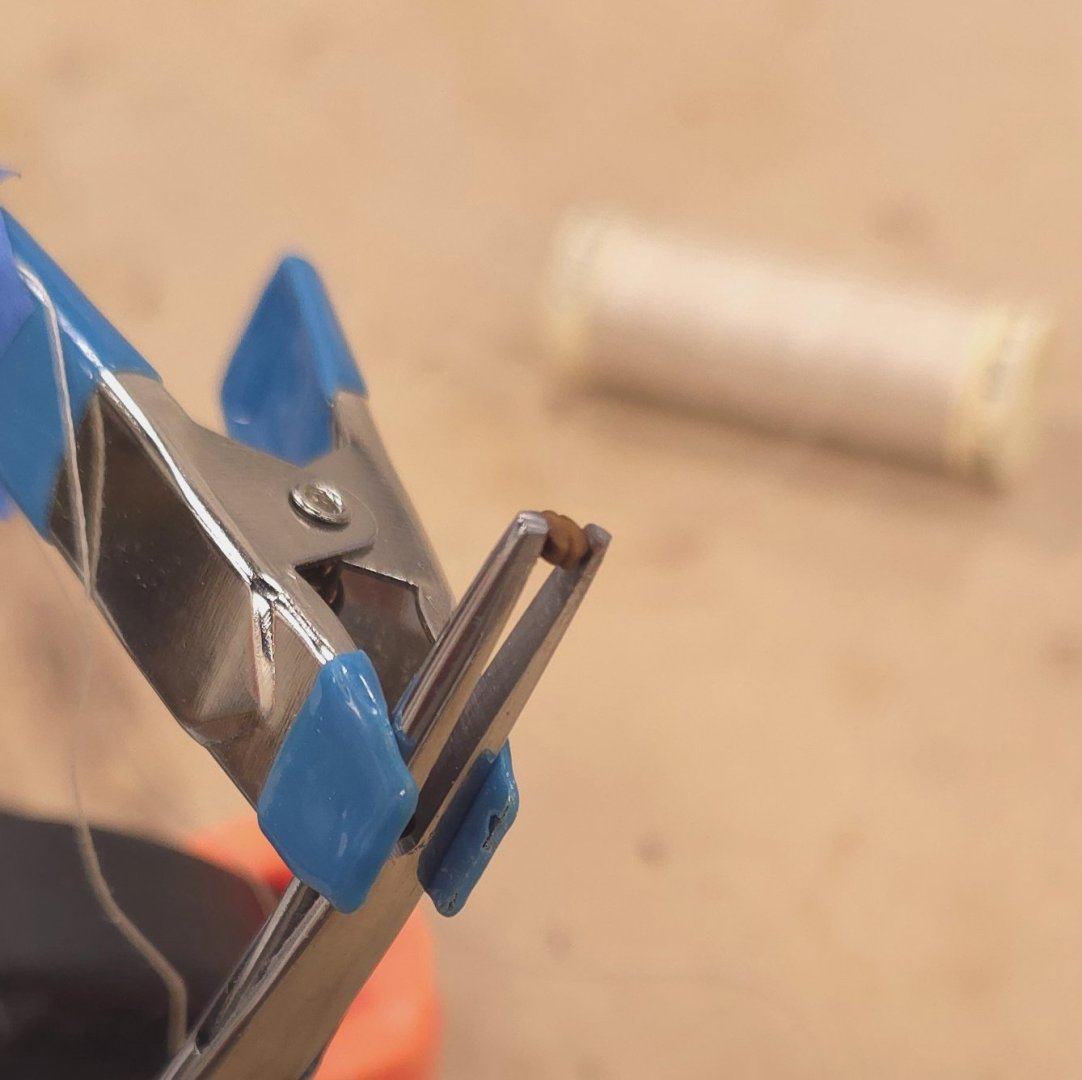
And the winner is.... Ropes of Scale tan .45mm. While I prefer the color of the polyester, it would not take c/a glue. I had to revert to cotton to be able to tie knots and lock them in with a drop of c/a. I'm losing some time because I am doing the Hunt recommended seizing, so, Back to days of fiddly work.. P.S. For those who suggested I twist the hooks, here's proof that these eyebolts are fragile, and cannot be overly worked.