SiriusVoyager
-
Posts
502 -
Joined
-
Last visited
Content Type
Profiles
Forums
Gallery
Events
Everything posted by SiriusVoyager
-
 Weather deck is completed. Planking the hull next.
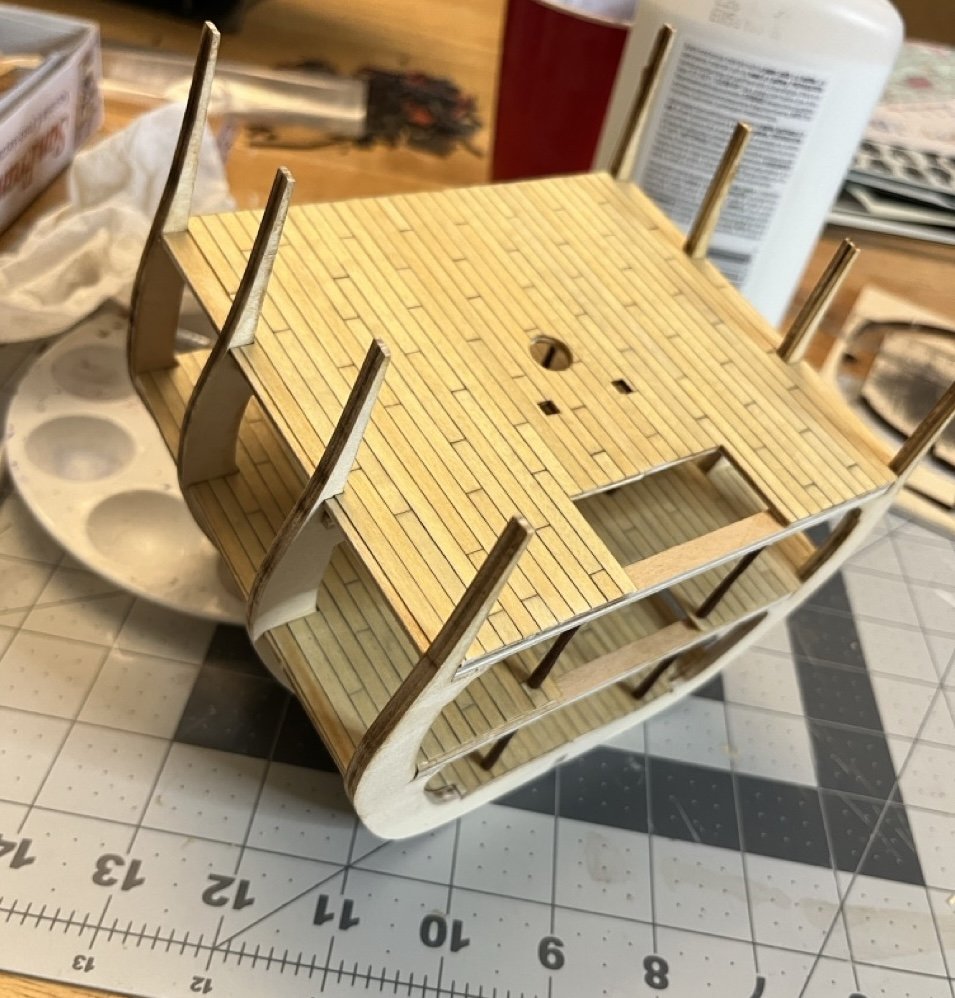
- 86 replies
-
- 2
-

-
- San Francisco
- Artesania Latina
- (and 2 more)
-
Wecome to MSW! This looks like an interesting little build.
-
You could paint the sails black. It would probably be the most unique pram sails on the forums
- 33 replies
-
- 2
-
-

-
- Model Shipways
- Norwegian Sailing Pram
- (and 1 more)
-
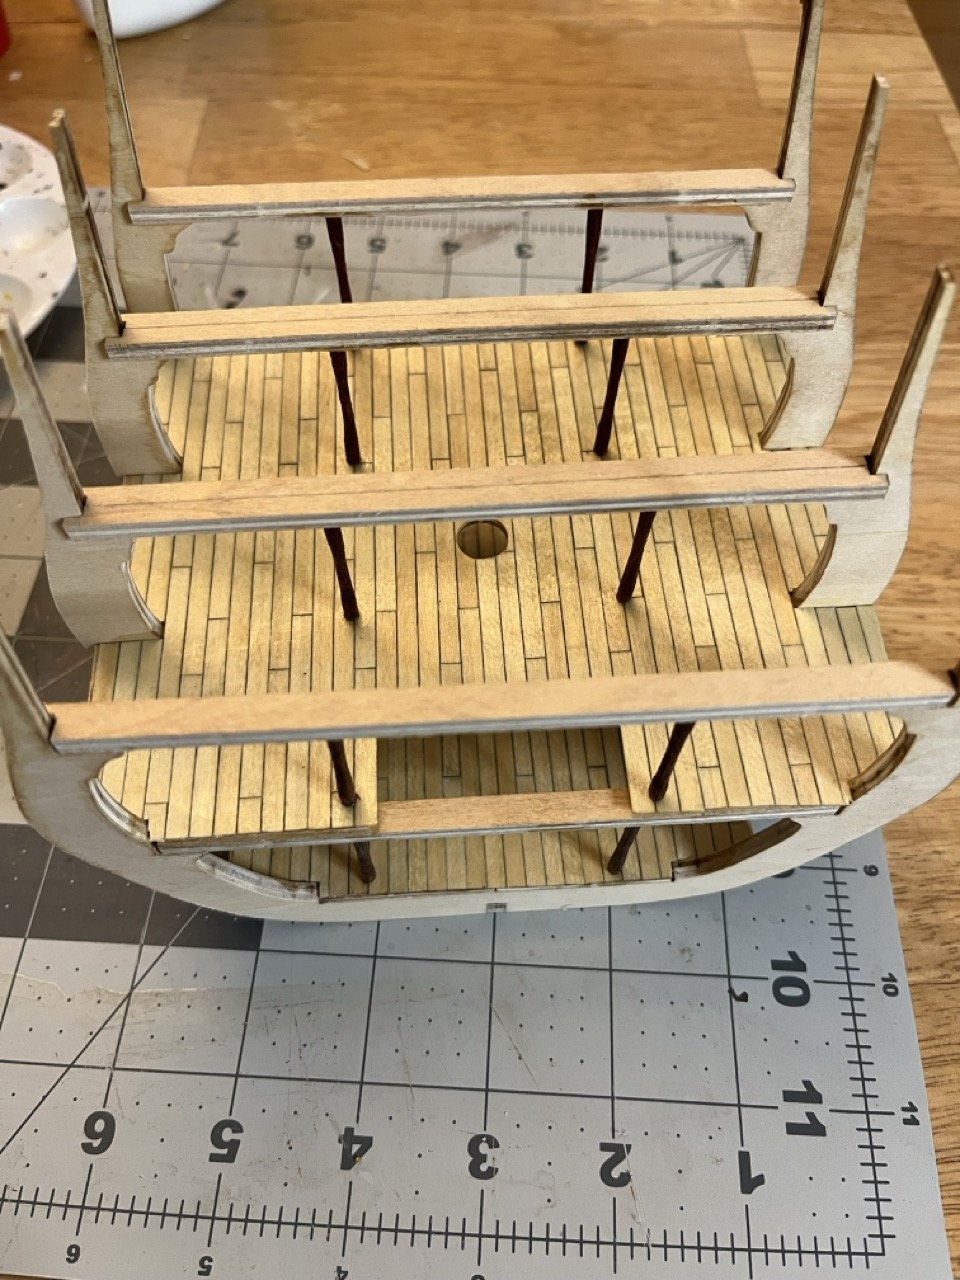
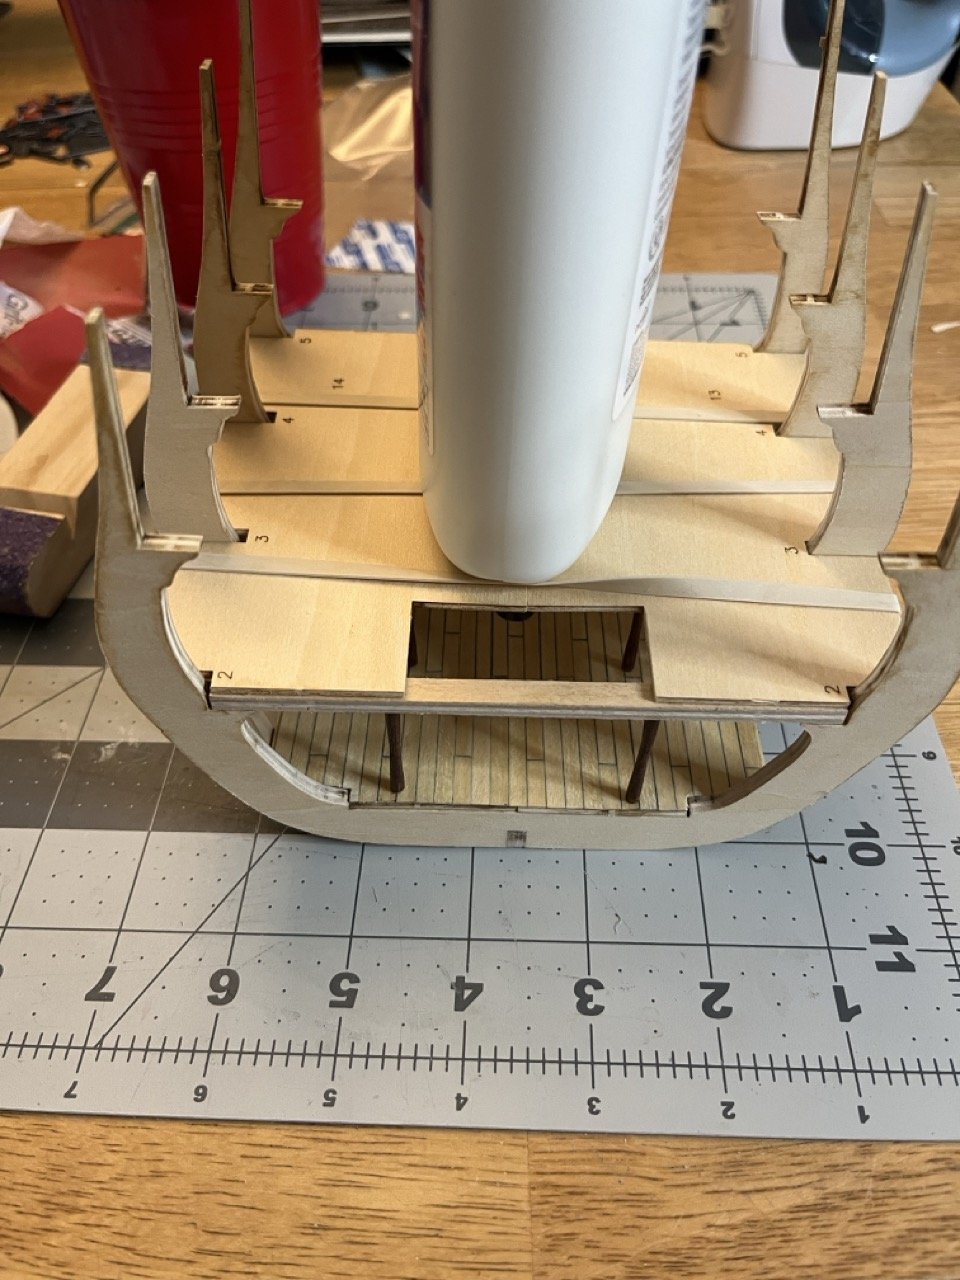
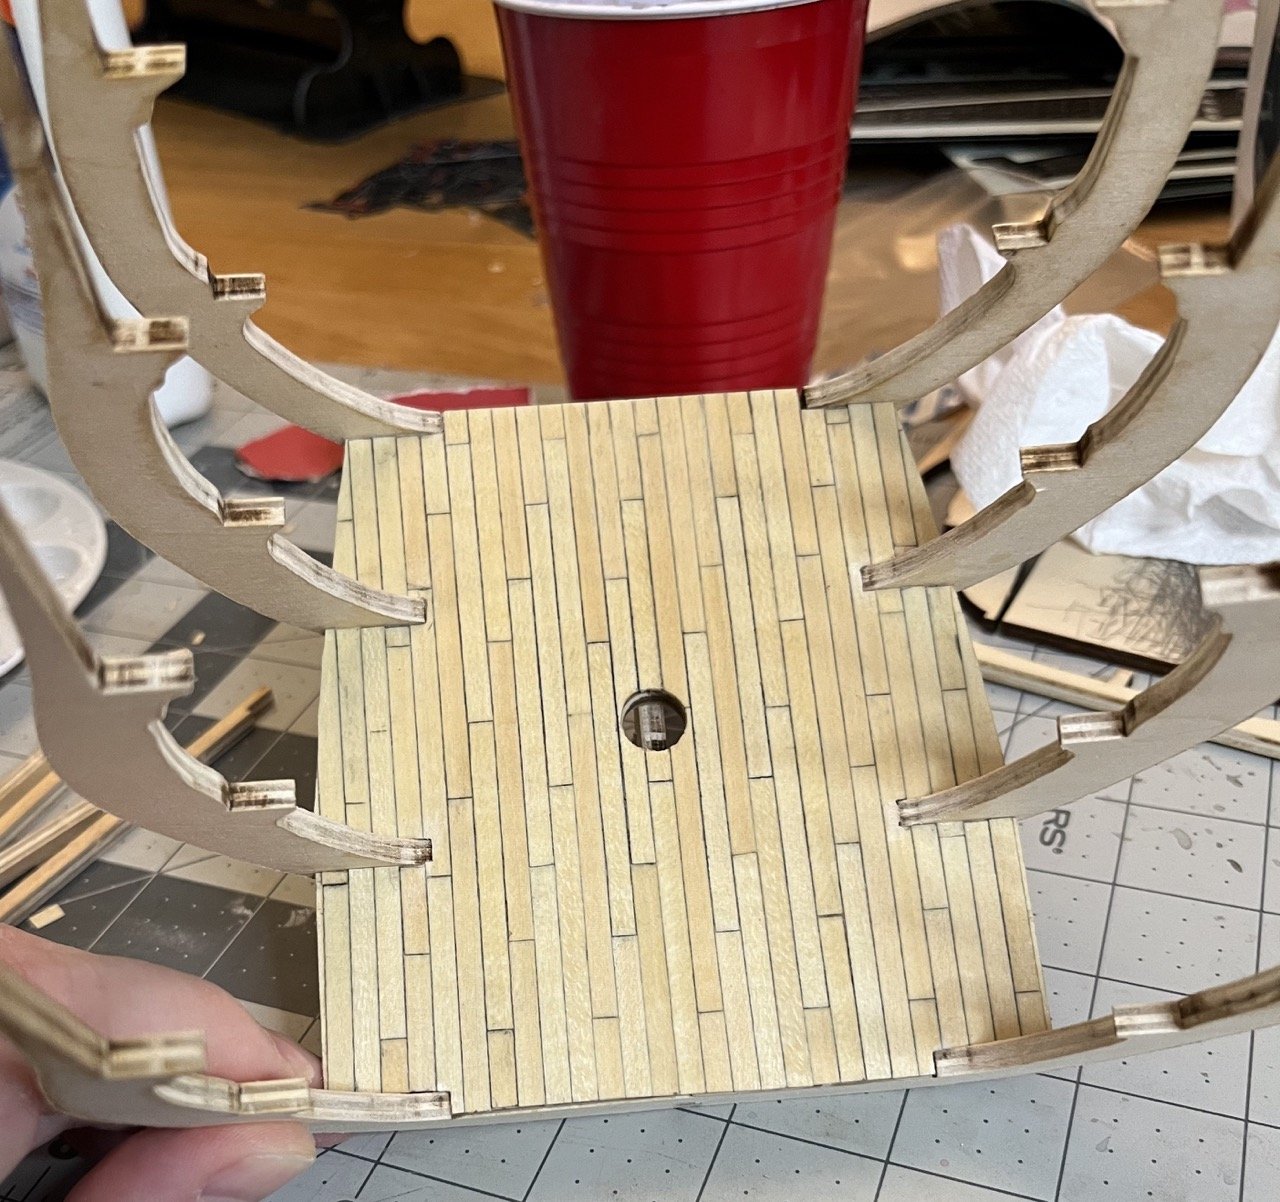
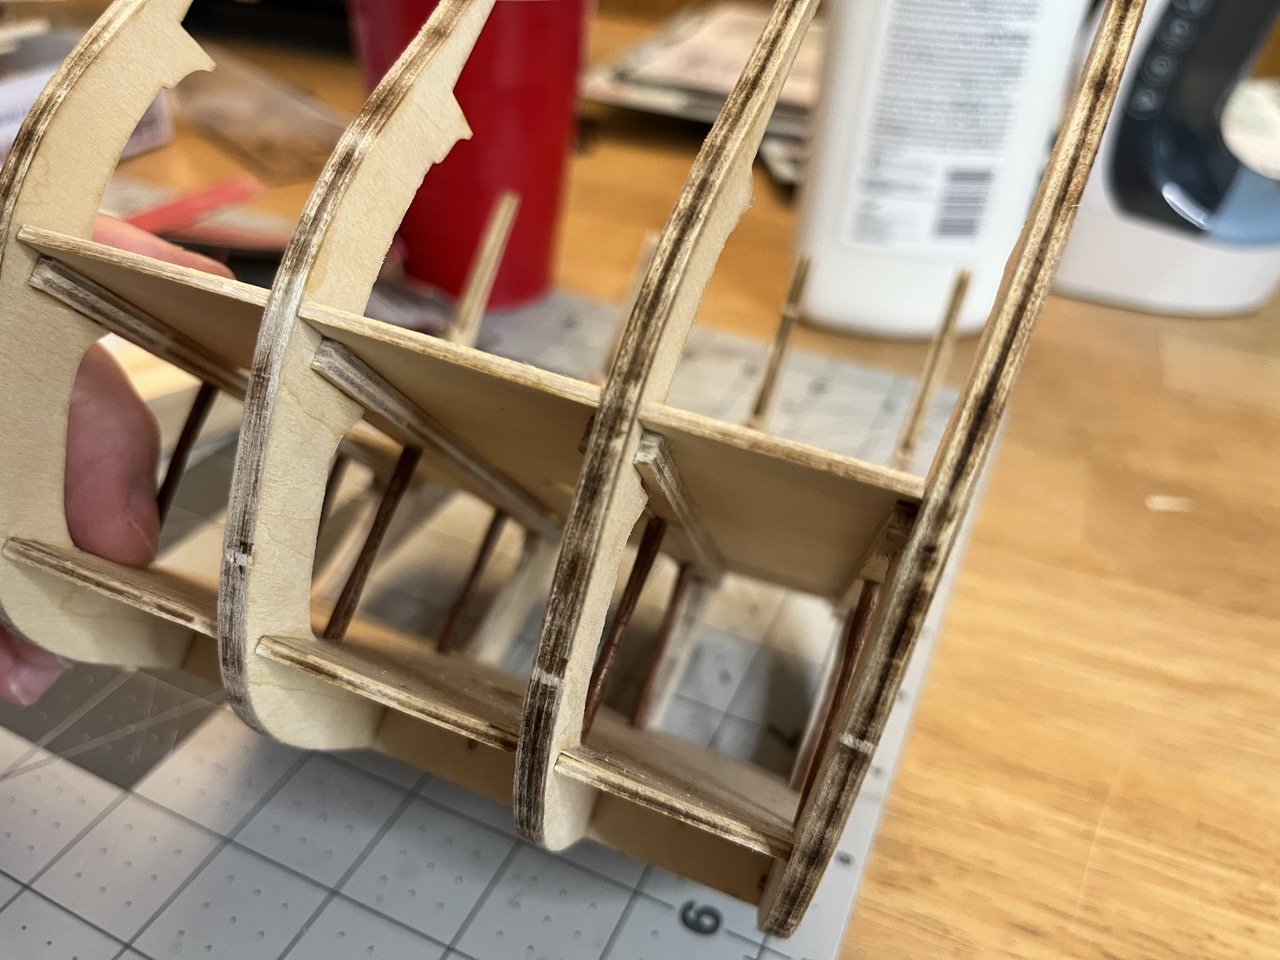
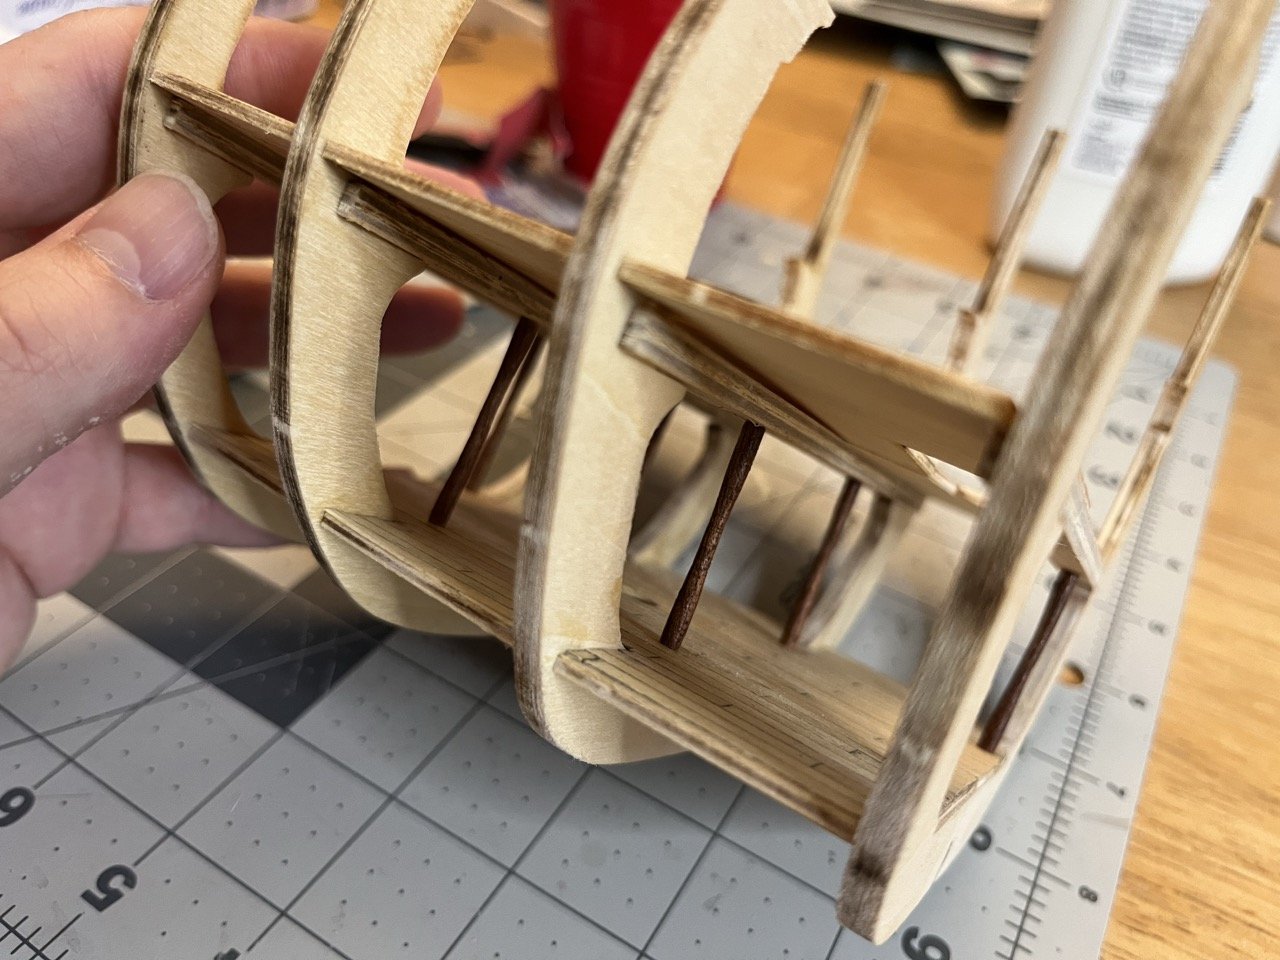
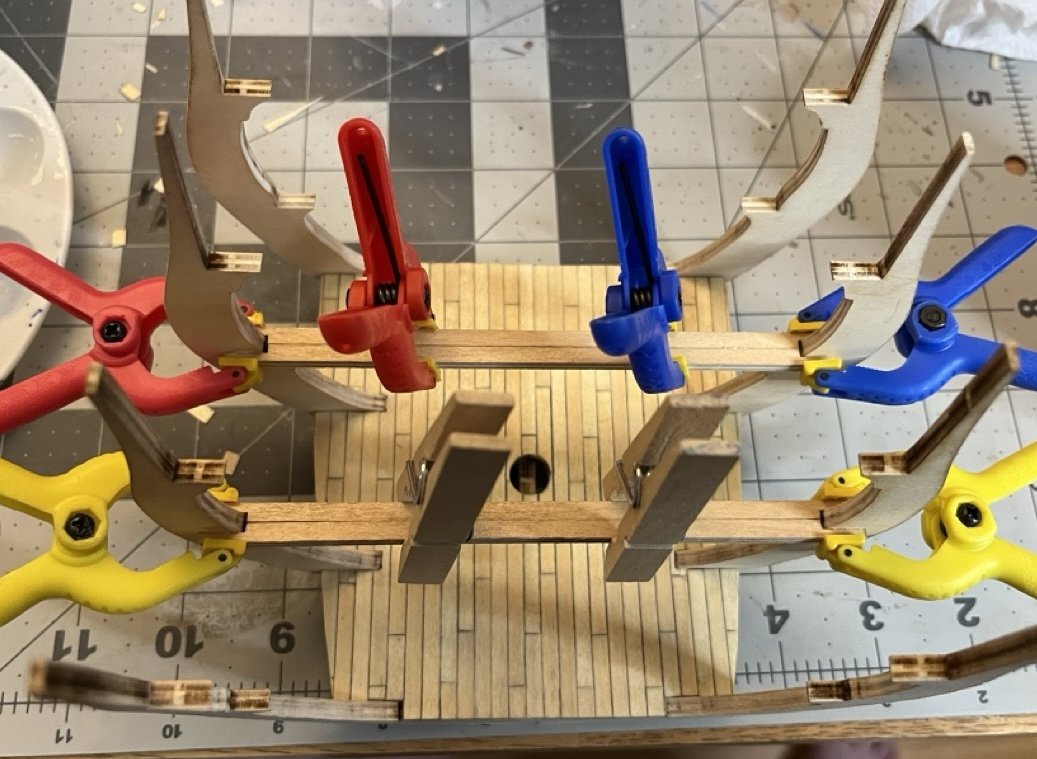
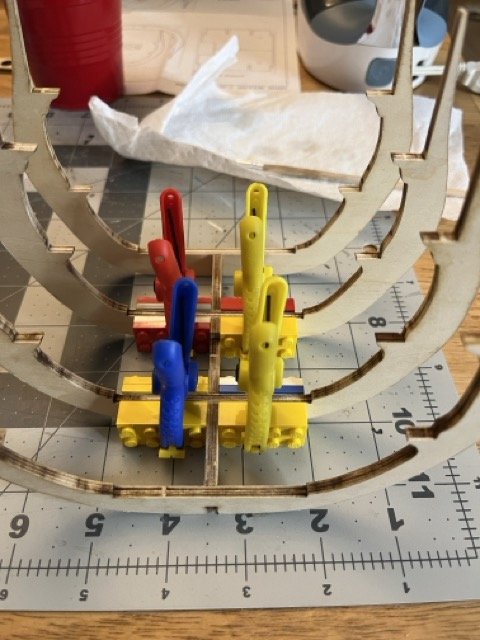
Stanchions made and placed in the same way as above. I tried by best to get them as aligned and vertical as possible. I may have to try again on bottom right. They are wedged in there pretty well so it may be a difficult task. I don't think anyone would notice unless they were specifically looking to see if they are aligned. The next sub deck didn't want to fit as nicely as the other two decks. I had to make a little extra room for the sub deck to fit around a couple of the frames and it lined up ok. It is a bit off at the mast opening, but that will be covered by the deck planks. The frames being a bit warped (from the first post) required me to hold everything together by hand to make sure the frames were aligned and tight to the deck. Time for more deck planks.


- 86 replies
-
- 1
-
-
- San Francisco
- Artesania Latina
- (and 2 more)
-
I can understand why the instructions say to draw on the caulking for a casual builder. Cutting and laying the individual planks do take some time, but I feel like it is worth it. First gun deck planking finished, prior to finishing. Sanded and varnished with shellac Beams for the weather deck being installed.
-
That is a great looking Dory you got there! Can't wait to see the start of the Pram.
- 69 replies
-
- 2
-
-
- Lowell Grand Banks Dory
- Model Shipways
- (and 2 more)
-
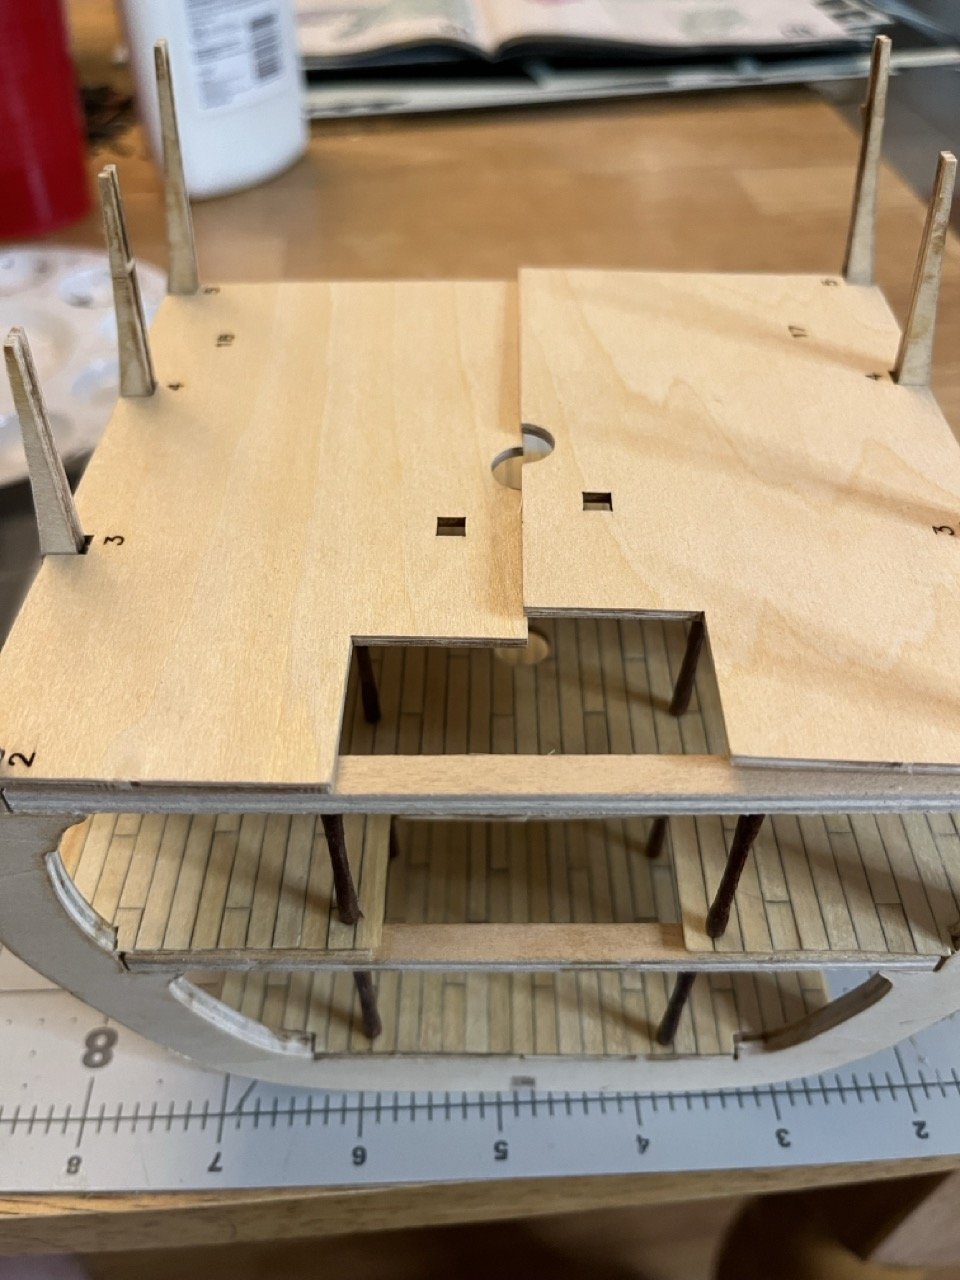
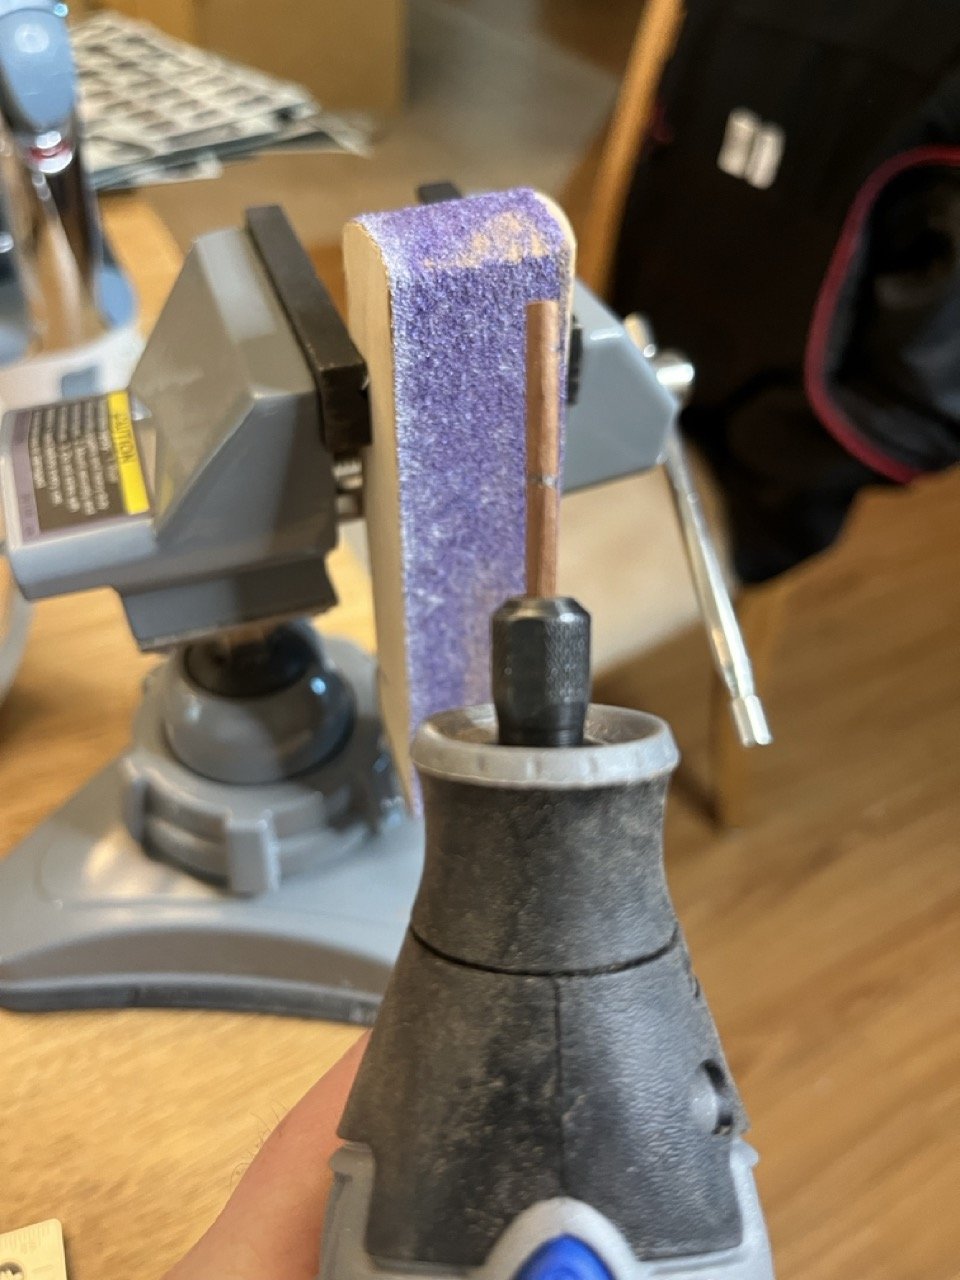
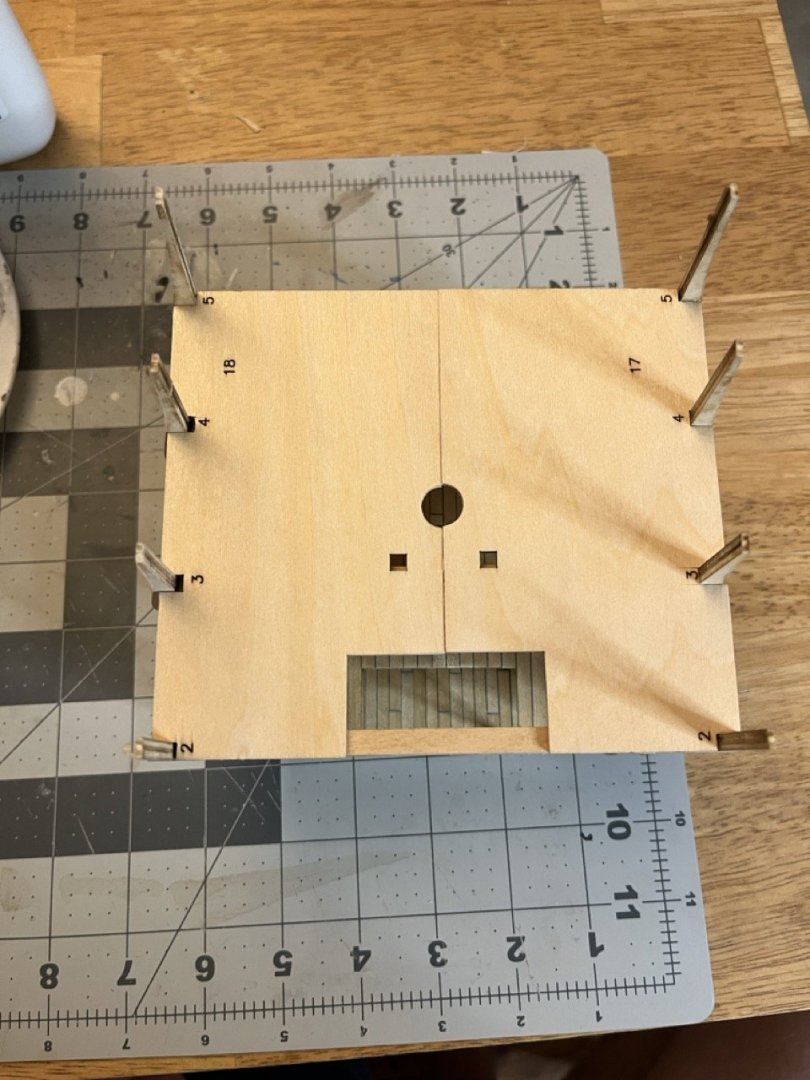
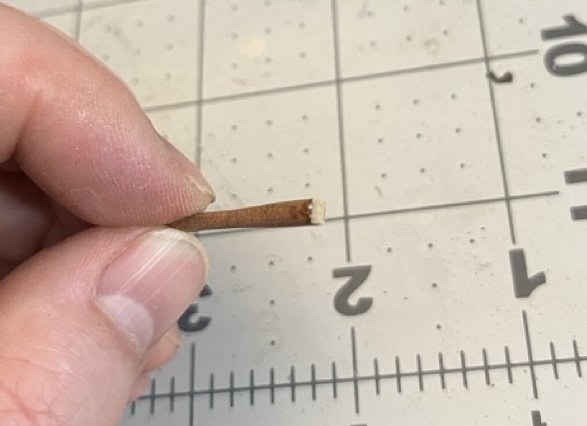
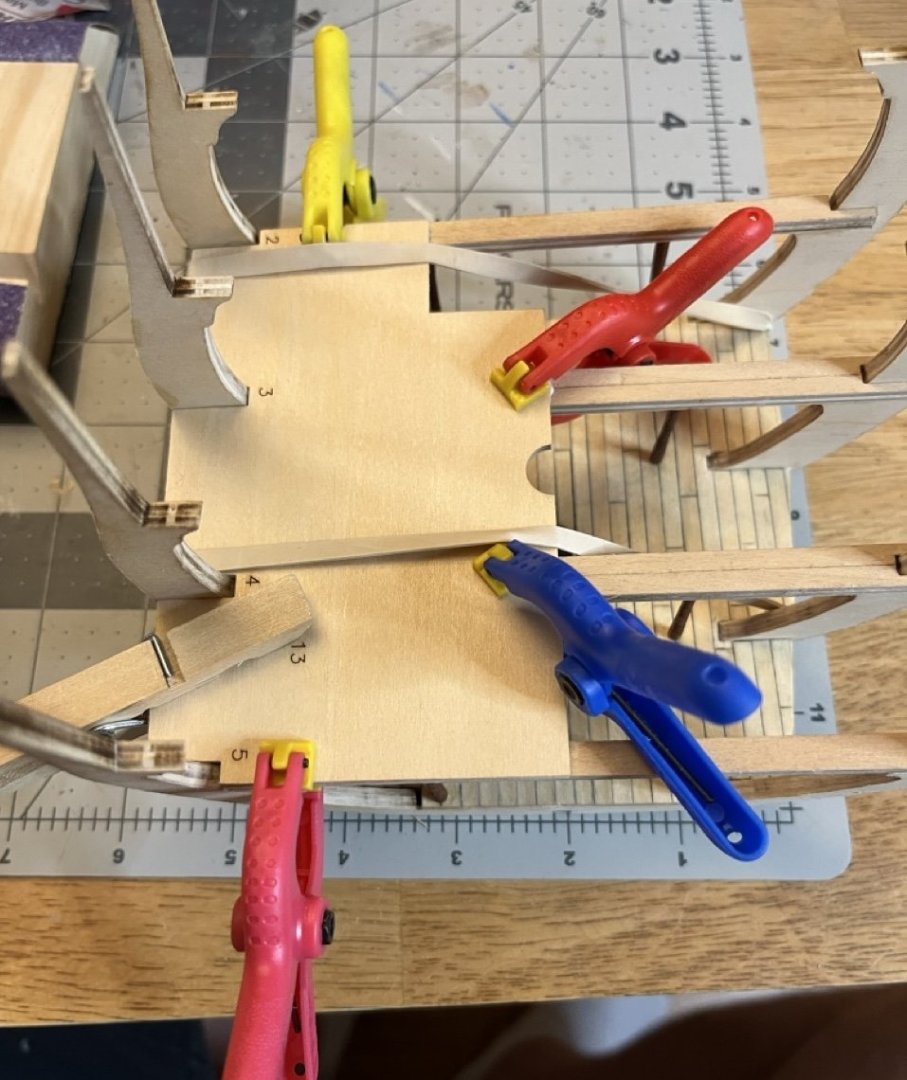
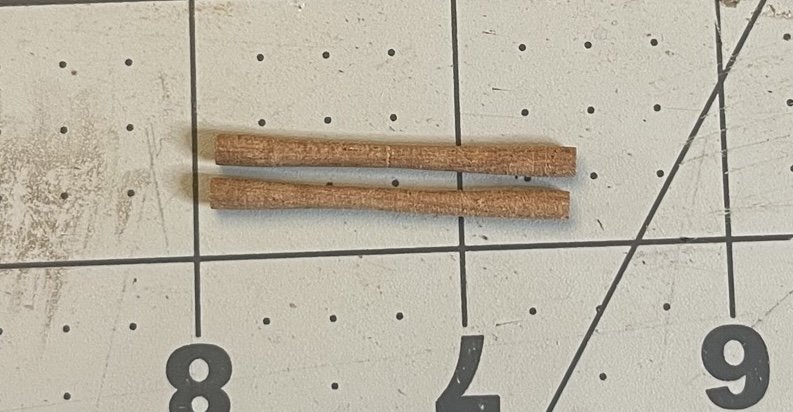
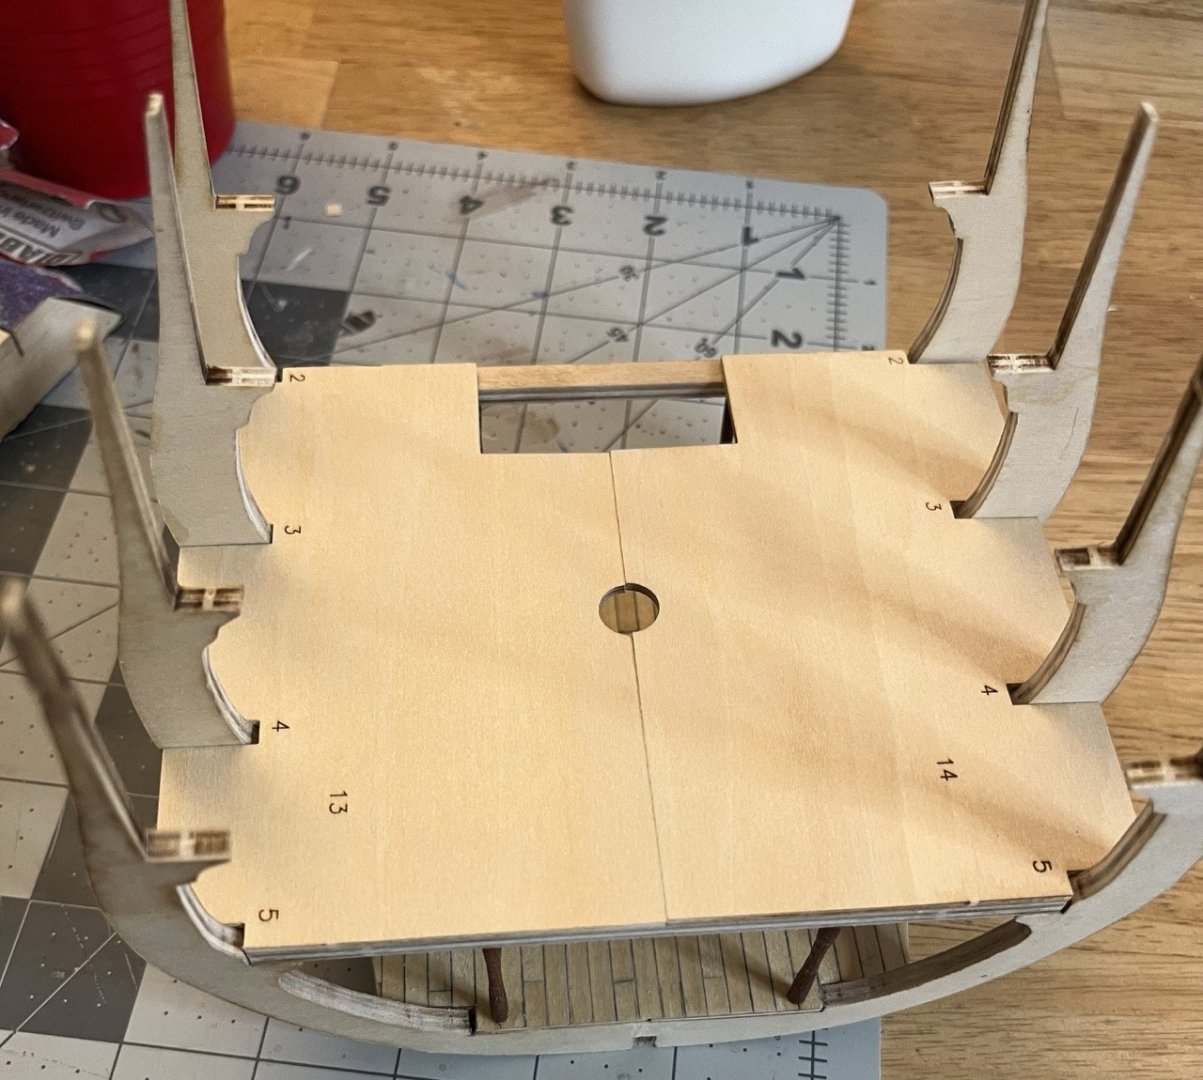
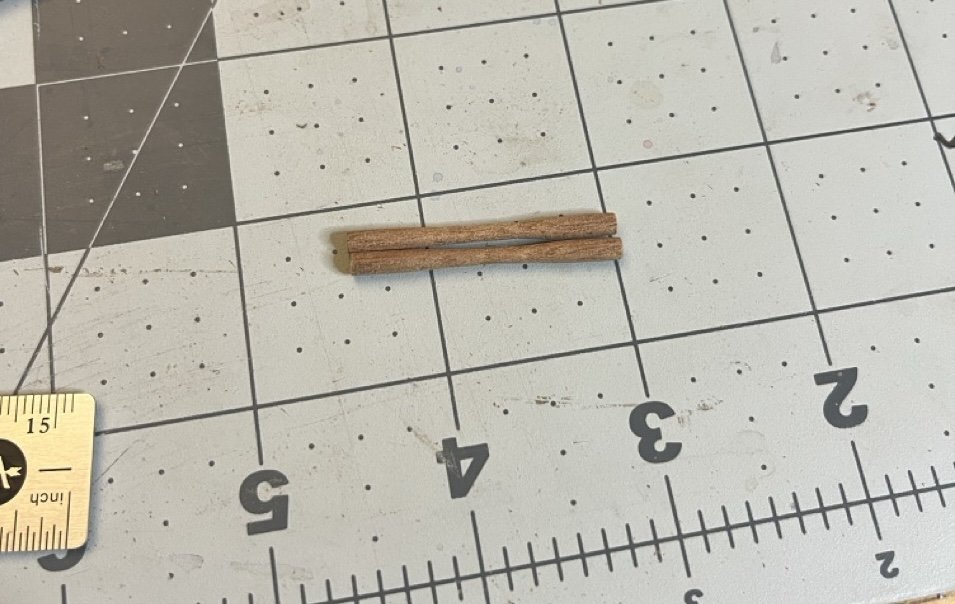
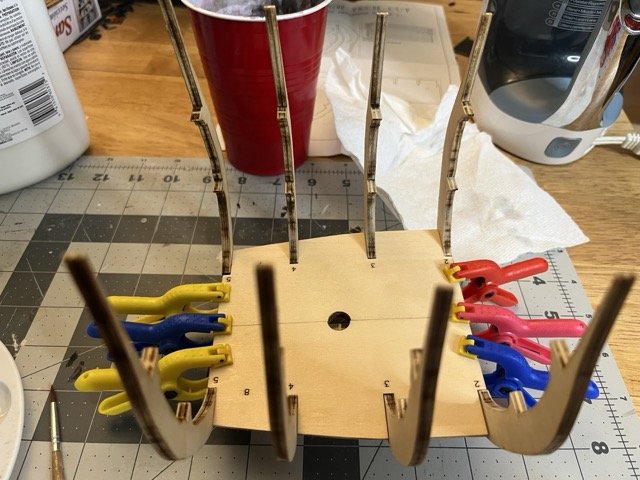
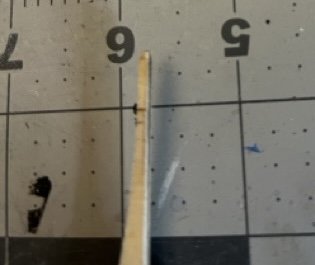
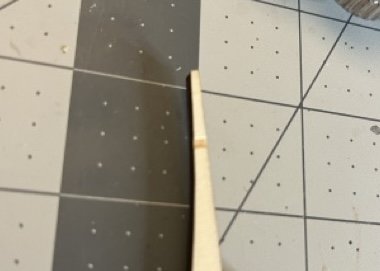
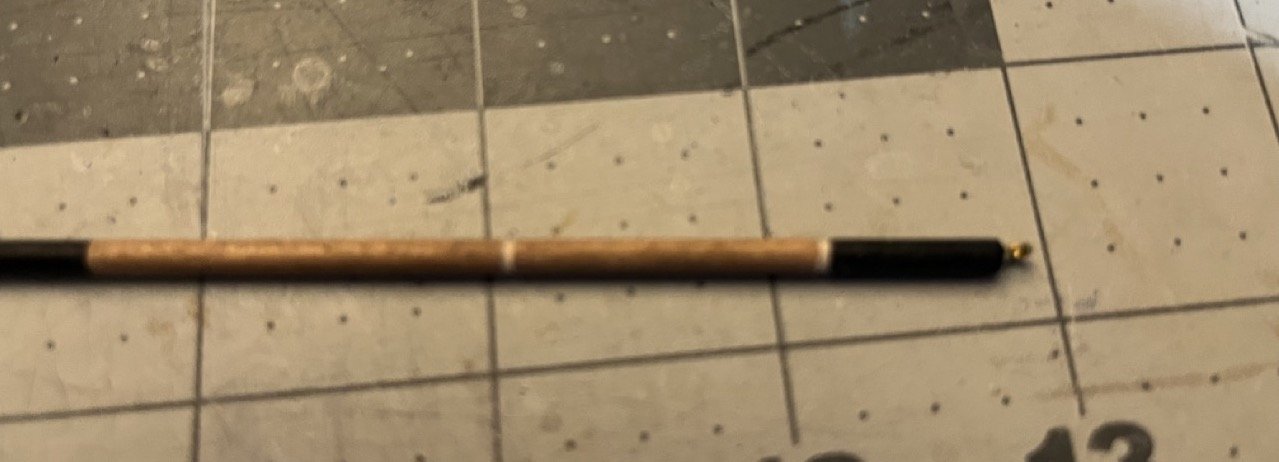
After making the first two stanchions by hand I decided there must be an easier way. I don't have a lathe but I do have a new dremel. The small dowel fit perfectly. I put a block with 60 grit sand paper in a vise and let it rip. It worked pretty well, I just had to be careful about leaving enough of the original dowel so that it held straight in the collet. One Stanchion was slightly too short so I added a shim that won't be visible. I forgot to take a photo of the stanchions in place. I used shellac to varnish them. At this point I took a bit of a break to decide what to do next. I had seen some build logs where people decided to make some of the crates and bundles prior to adding the next deck. I had thought about doing this as it seemed like a good idea for obvious reasons. Looking through the instructions I can sort of see why the manufacturer put the decks in first, though I can't really articulate why. I decided to continue on with the decks. A little bit of sanding to make sure the edges of the seam were flush and the sub decking is installed. I had seen on some build logs that people had problems with the sub decks not fitting properly on the cross beams. Some of them were pretty significant, in a way that the deck was dramatically sloped. Fortunately mine was minor enough that it is basically a none issue. This side looks fine. This side has a little gap on the middle two frames. I am not sure what to do about the cross beams. The plywood shows itself too well and doesn't look right to me. I may stain it to hide the layers. I definitely prefer the straigt basswood sheets used the Modelshipways kits over plywood used by AL and Occre. I started laying the planks for the second deck. This time I made sure to use the 1324 pattern. Tick marks are added to mark where to cut out for the mast.


- 86 replies
-
- 2
-
-
- San Francisco
- Artesania Latina
- (and 2 more)
-
I understand exactly what you are talking about because I have wondered the same thing on a different model. For me it made it very difficult get those last strips in because they had to be sized just right. I suspect that the instructions do it that way because it allows full width planks to be placed for most of the length of the hull, while the center planks can be cut to fit without a lot of prior planning. The next time I plank a hull I will be using the techniques found Here rather than following the instructions.
- 7 replies
-
- 2
-
-
- Swift
- Artesania Latina
- (and 1 more)
-
Nice job making the transom work backwards. It looks like your pram is on its way to turning out quite nicely.
- 33 replies
-
- 1
-
-
- Model Shipways
- Norwegian Sailing Pram
- (and 1 more)
-
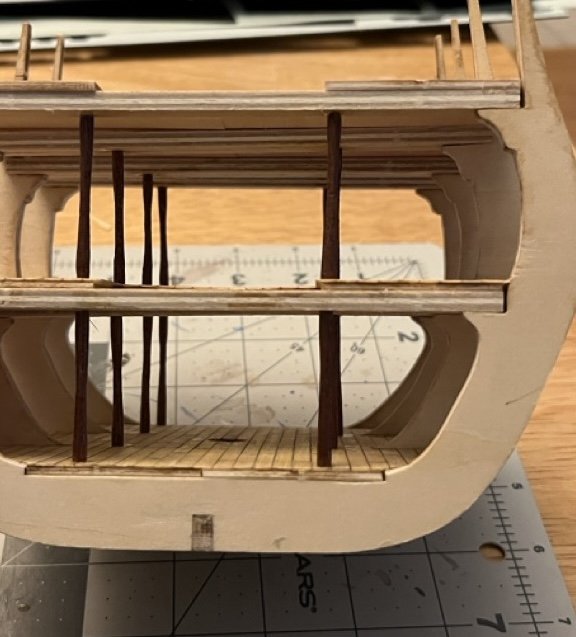
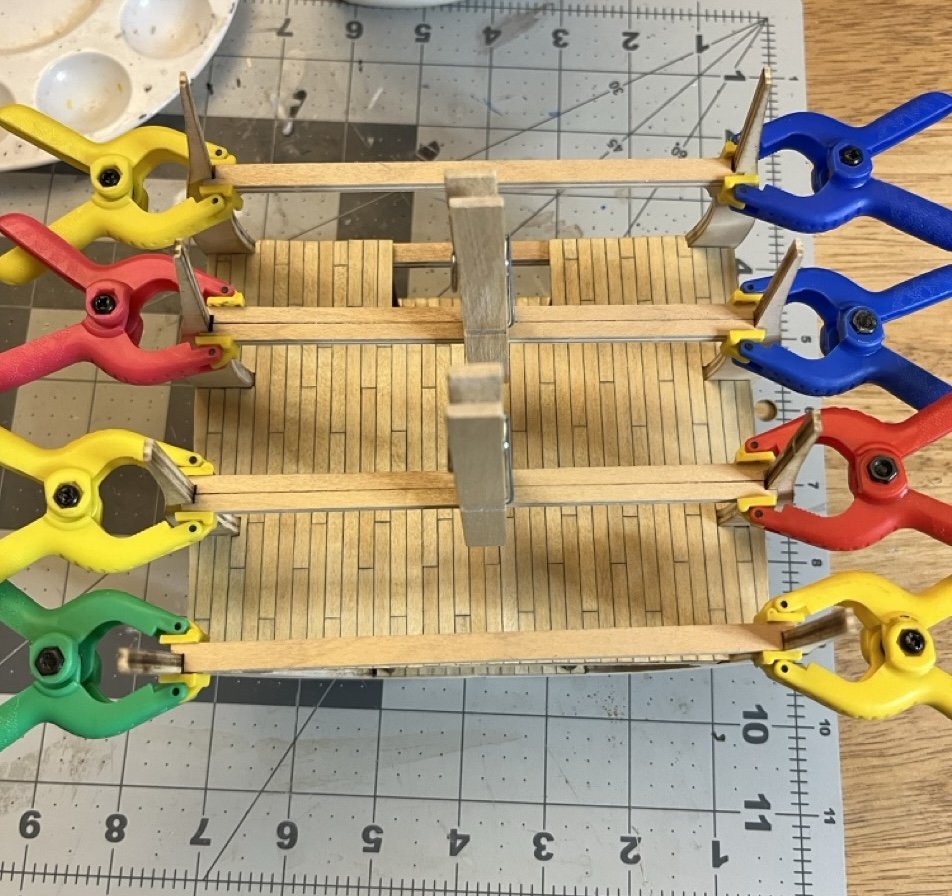
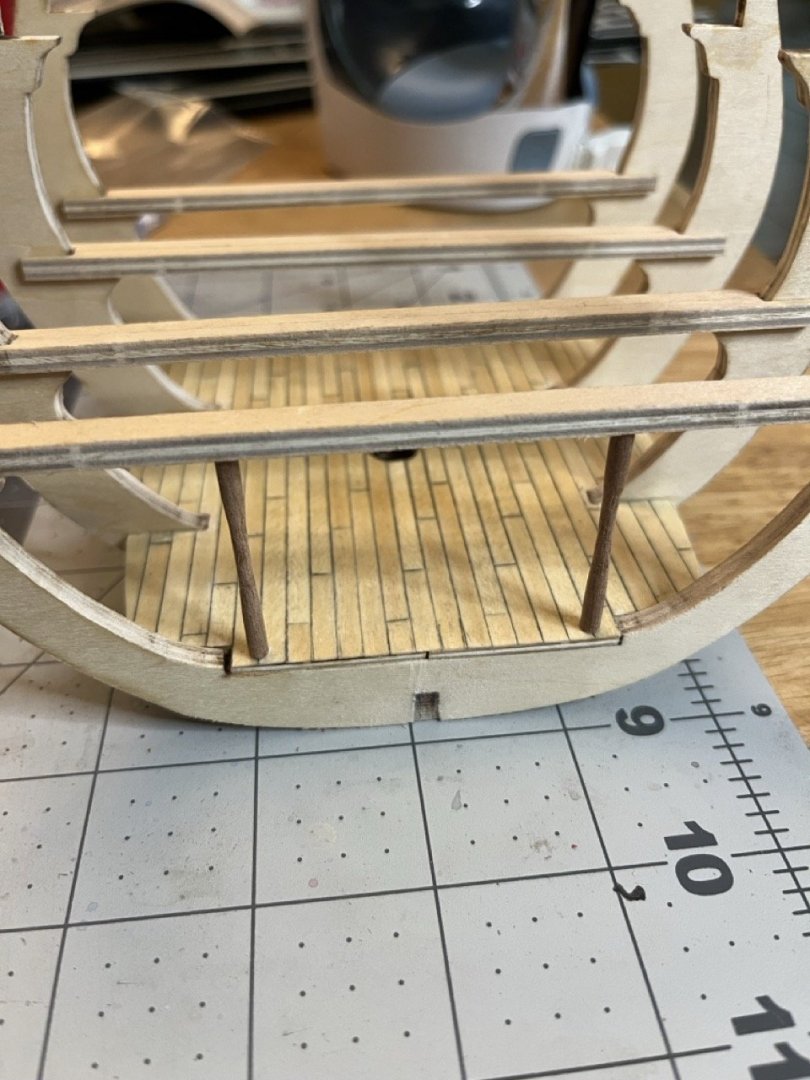
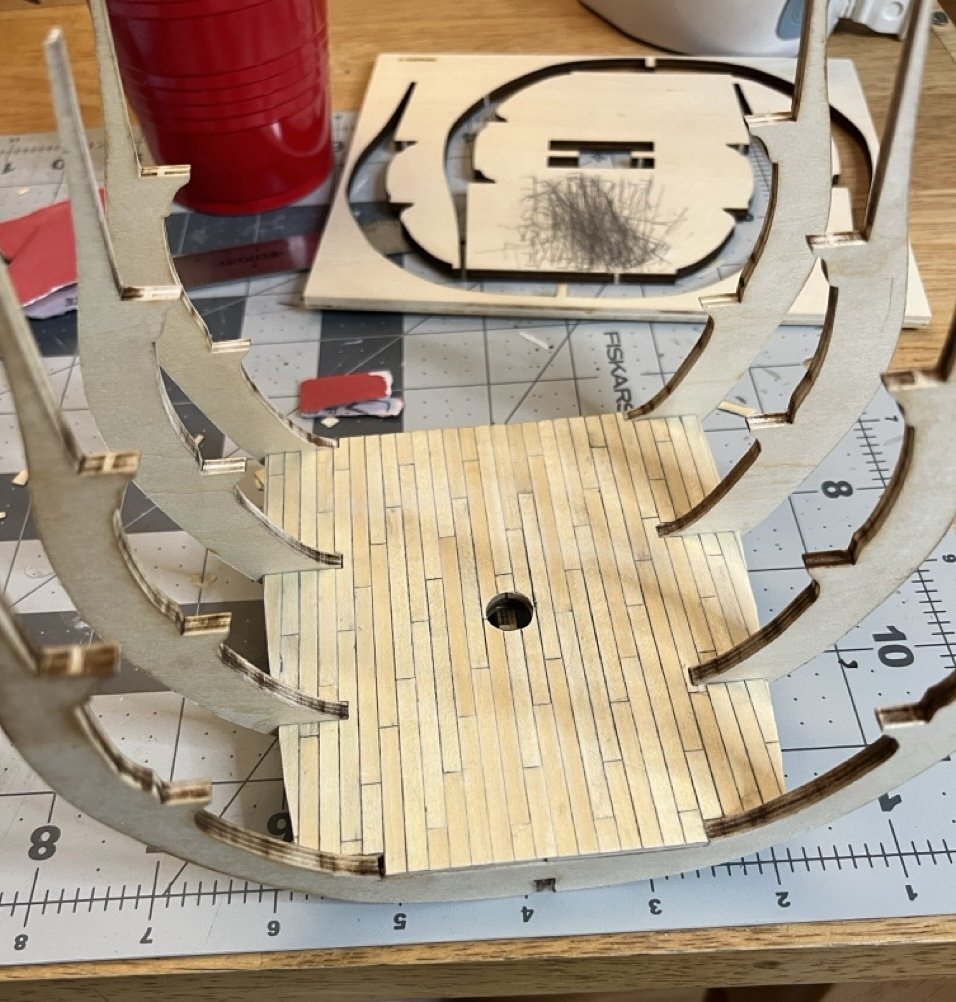
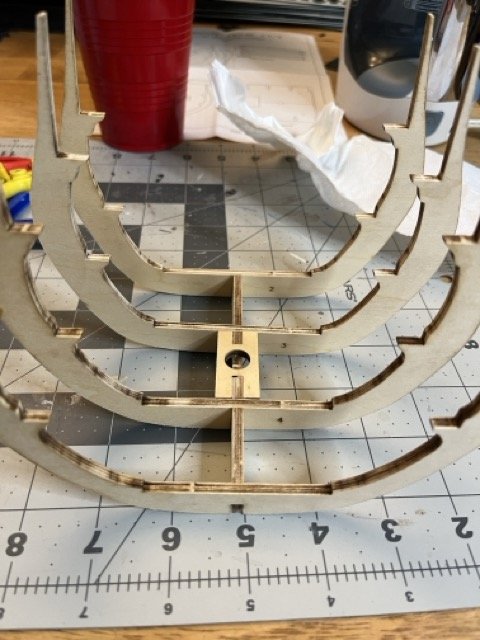
I had previously thought that the hull would be planked on the inside, but looking at the instructions, it is only above the main deck that is planked on the inside. I cleaned up some of the char markings in areas that would be visible. The deck also has been varnished with a few thin coats of shellac. The cross beams installed as well as two of the stanchions shaped and installed.

- 86 replies
-
- 2
-
-
- San Francisco
- Artesania Latina
- (and 2 more)
-
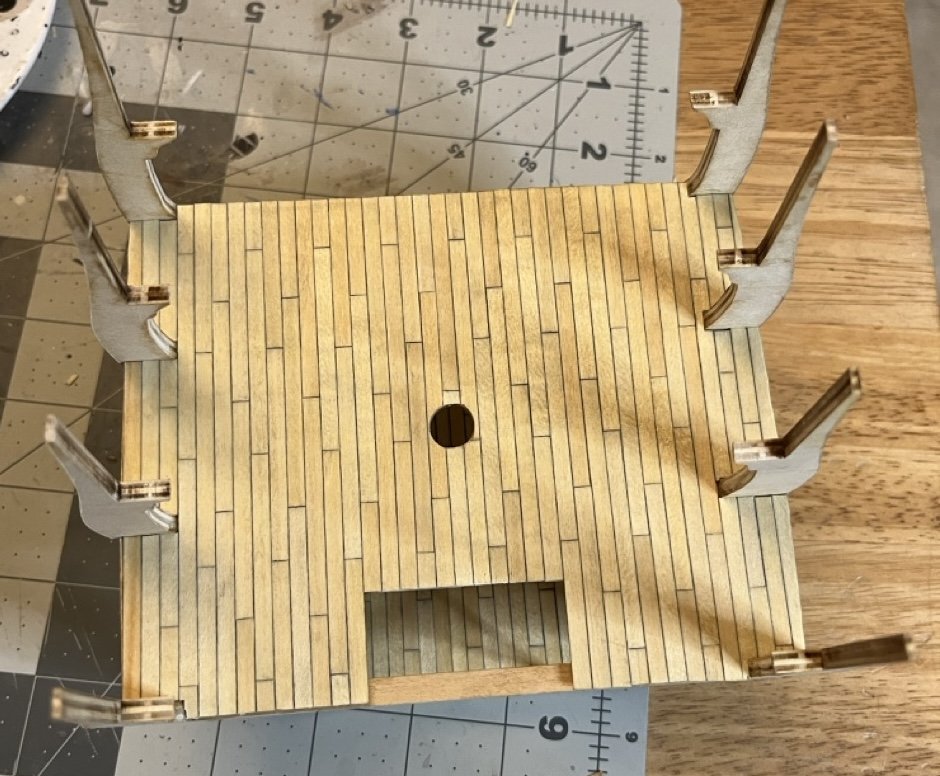
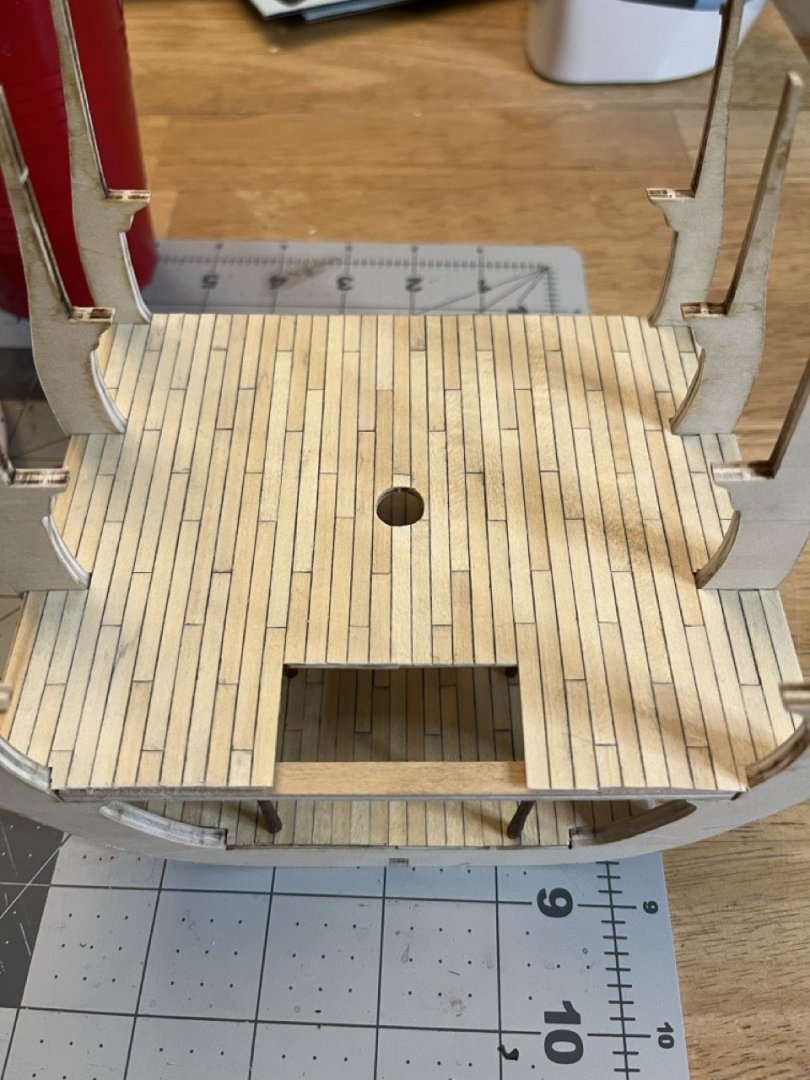
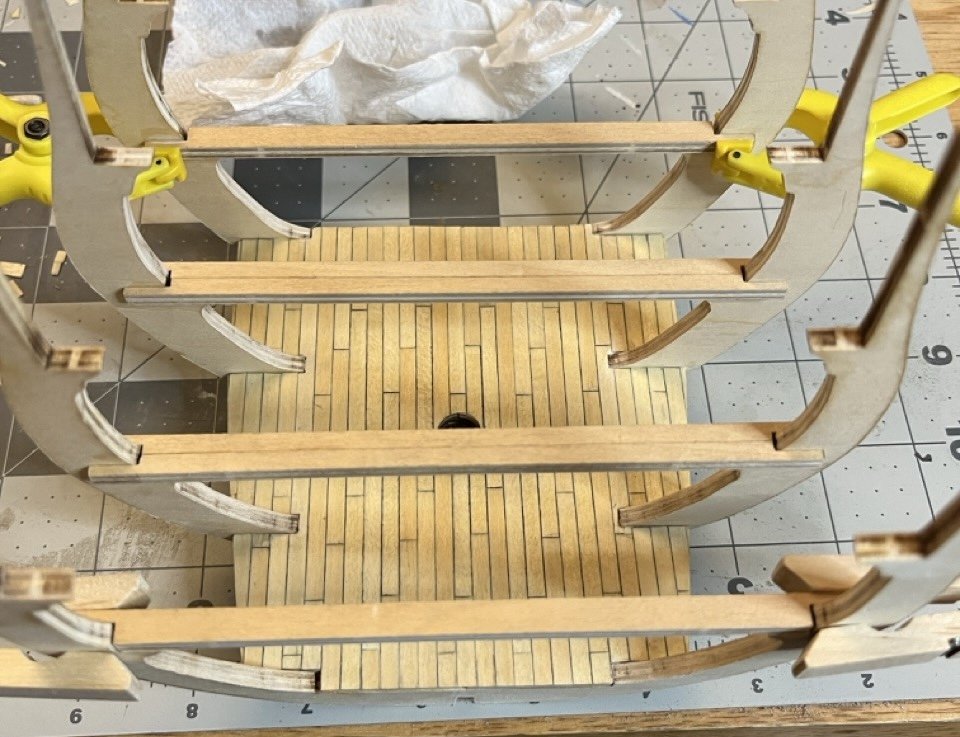
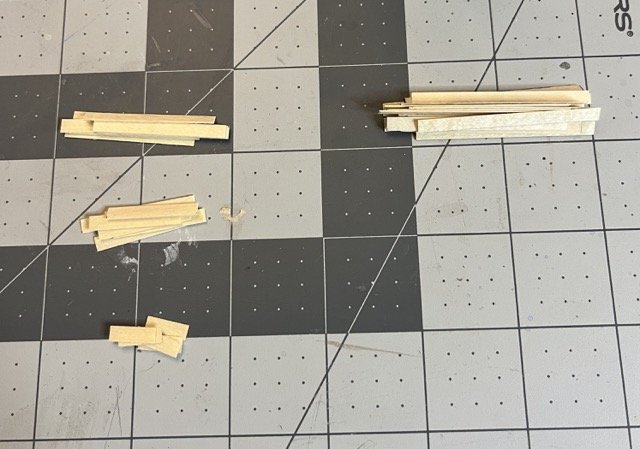
First level deck planking completed. My intention was to do a 1324 pattern, but after about 6 rows I realized I was doing a 1234 pattern. I decided that it would be more trouble than it was worth to change it since it won't be easily seen when two more levels are added. For caulking I first attempted to use pencil lead on multiple strips being held together. That didn't really work very well because most of the strips didn't get any pencil lead on them. I then decided to try black paint. That didn't work well either because the paint spread too much. I went with the more time consuming method of running a pencil along each individual edge. The remnants of which can be seen on the marked up scrap wood. I gave it a once over with sand paper, but everything always looks worse once you look at it in a photo so I will go over it again prior to varnishing.
- 86 replies
-
- 2
-
-
- San Francisco
- Artesania Latina
- (and 2 more)
-
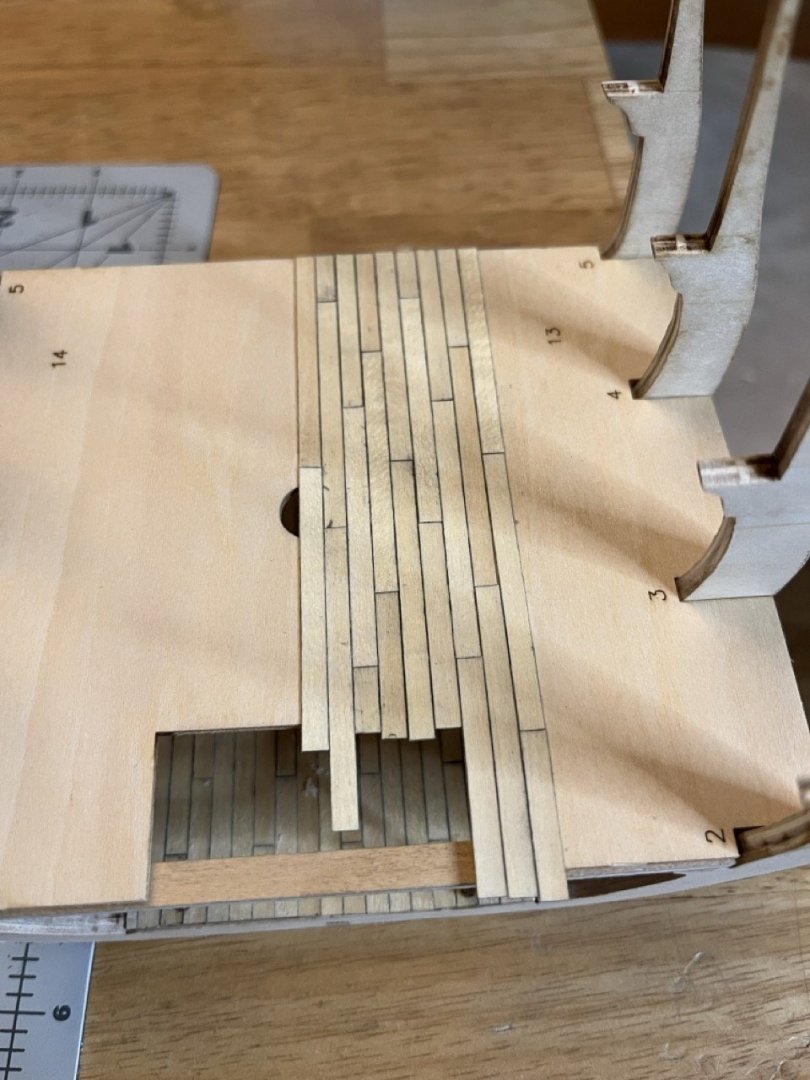
The next step is to plank the deck. The instructions call for laying all of the planks and then drawing on the caulking. I decided to cut the planking and do a 1324 pattern. The deck is just over 11mm across and the strips are 4 mm wide which means I will need 7 of each size to get started. The instructions call for each plank to be 50mm, so I will use that length. That means the lengths for the four starting planks will be 12.5mm, 37.5mm, 25mm and 50mm. Upon measuring the strips to cut the 50mm planks, I found that each of the "300mm" strips are closer to 299mm. Of course I found this out after I cut the smaller planks. I hate wasting material unnecessarily. I also found that no matter how carefully I measured and cut, all of my planks vary in length by about a mm. I suppose in theory, if I place them randomly it should all average out and not be noticeable.
- 86 replies
-
- 2
-

-
-
- San Francisco
- Artesania Latina
- (and 2 more)
-
Props to you for jumping right in! I wish I could have had the patience for this when I was a kid. Don't let it get you too frustrated and keep finding creative ways to get things done. As far as your mom and the iron, it may be worth asking. Ironing wood should be no different than ironing cotton as far as the iron goes.
- 7 replies
-
- 3
-
-
-
- Swift
- Artesania Latina
- (and 1 more)
-
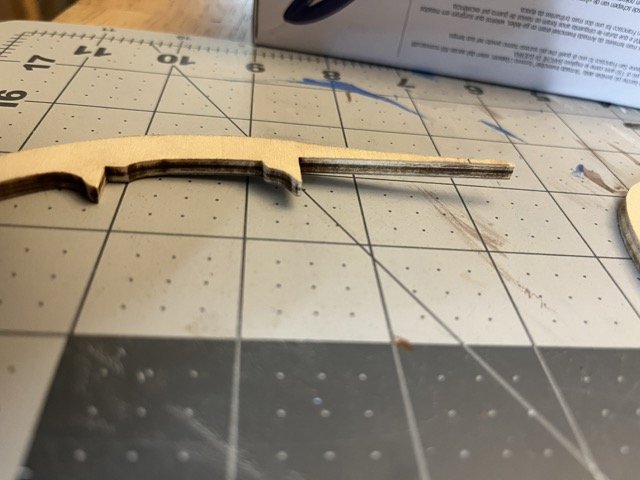
This will be my 5th ship/boat model. I wanted to keep things fairly simple and focus on improving model building skill. This model isn't based on any specific ship and is supposed to be representative of a 17th century Spanish Galleon. I know from some other build logs that there are historical inaccuracies. I am not sure how much I will focus on that as my intent is to focus on technique. I may make some changes inspired by some of the other build logs I have seen here. My first impression opening the box was that everything looked very clean and well packaged. I am not very thrilled about not having paper instructions and plans. I downloaded the instructions to my phone and will have to use my computer if I need to look at the high res images on the CD (that is actually nice having those). Getting started, some of the outer layer of plywood broke off while cutting out the four frames. I also found that two of the frames were bent, one sort of significantly. I was able to flatten them out using some water and an iron while giving it a bit of bend in the opposite direction. I started attaching the frames to the false keel. I probably should have started with the inner frames, but it was fine. The outer frames weren't supported on the outer edges by the false keel so care was needed to make sure that they were straight and square. Middle two frames sub deck sheets fit perfectly


- 86 replies
-
- 3
-
-
- San Francisco
- Artesania Latina
- (and 2 more)
-
New member and brand new (Paper) modeller!
SiriusVoyager replied to Marcel1981's topic in New member Introductions
Welcome to MSW! -
I may have had to repaint my dagger board after installing. The pram is looking great! Your paint looks good to me.
-
The oars for my Dory looked like the machine was shaking as well. It was pretty bad. I felt like the quality control was lacking, but like you, so many praised these kits so I thought maybe I just got an off one. Sounds like it may be a common problem, at least with this particular series of models.
- 69 replies
-
- 1
-
-
- Lowell Grand Banks Dory
- Model Shipways
- (and 2 more)
-
The finished product. Every build is a chance to gain experience, learn something new and hopefully get a bit better for next time. It may be a while before I try weathering a boat again.


-
Welcome to MSW. I haven’t built plastic models since I was a kid, so I basically started with zero experience. I’m still not that great at it after [almost] four models, but I am still enjoying the experience. You will do fine.
-
That is a very nice looking Dory. Great job on your first boat model.
- 30 replies
-
- 1
-
-
- Grand Banks Dory
- first build
- (and 2 more)
-
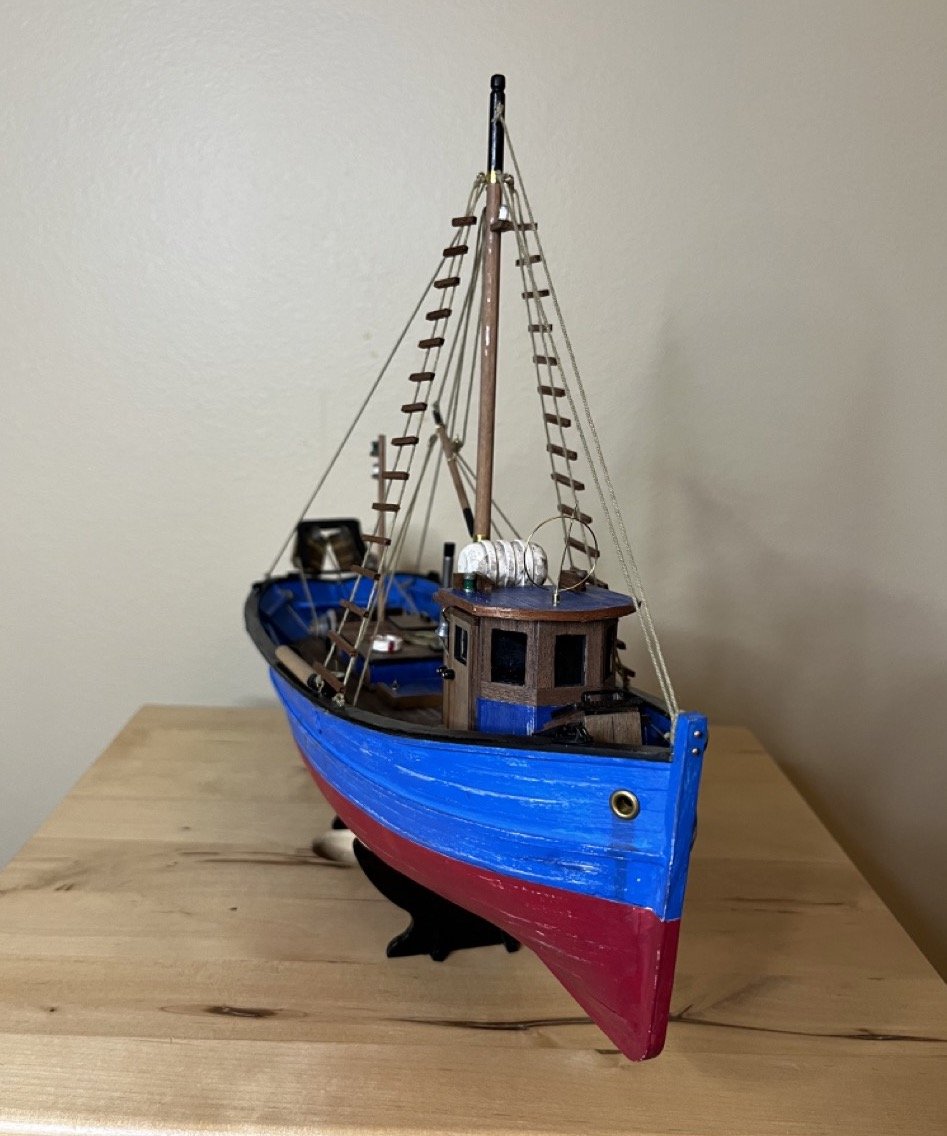
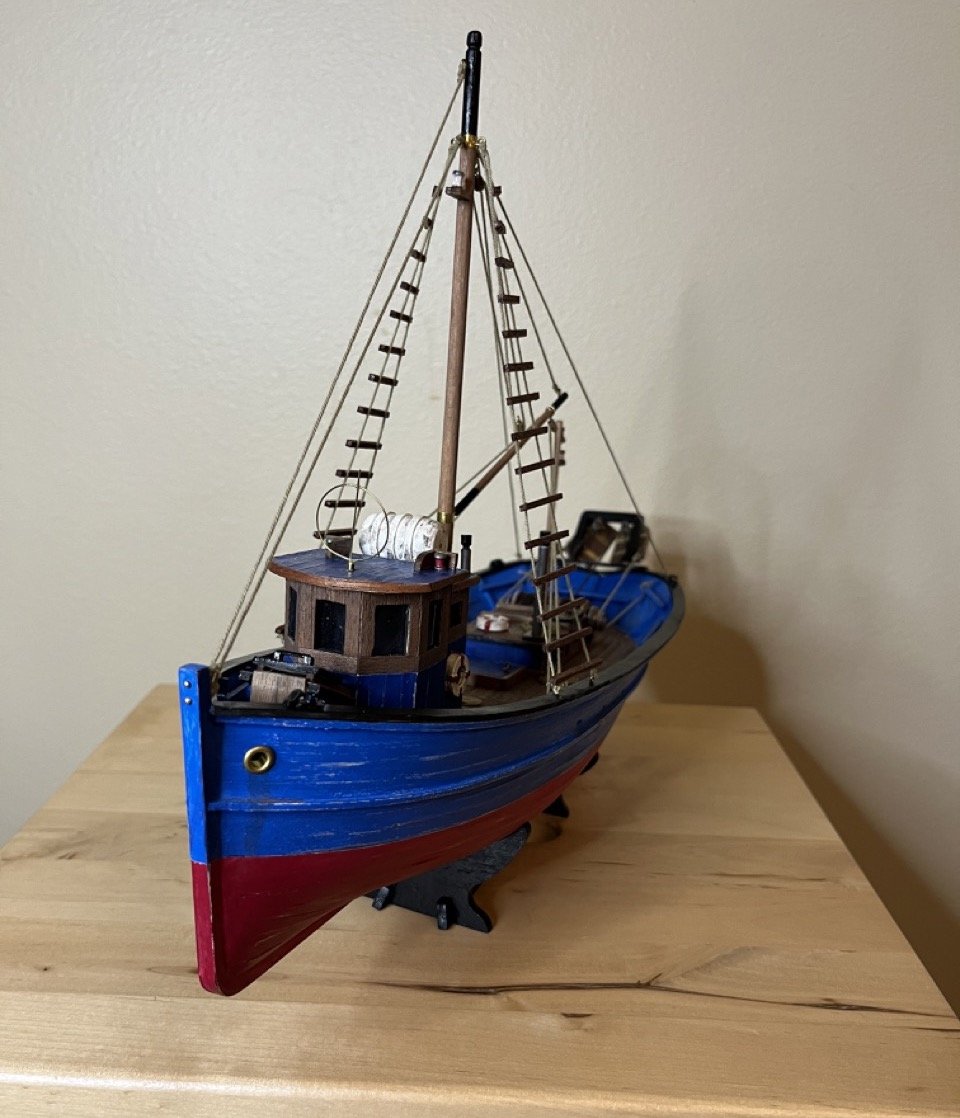
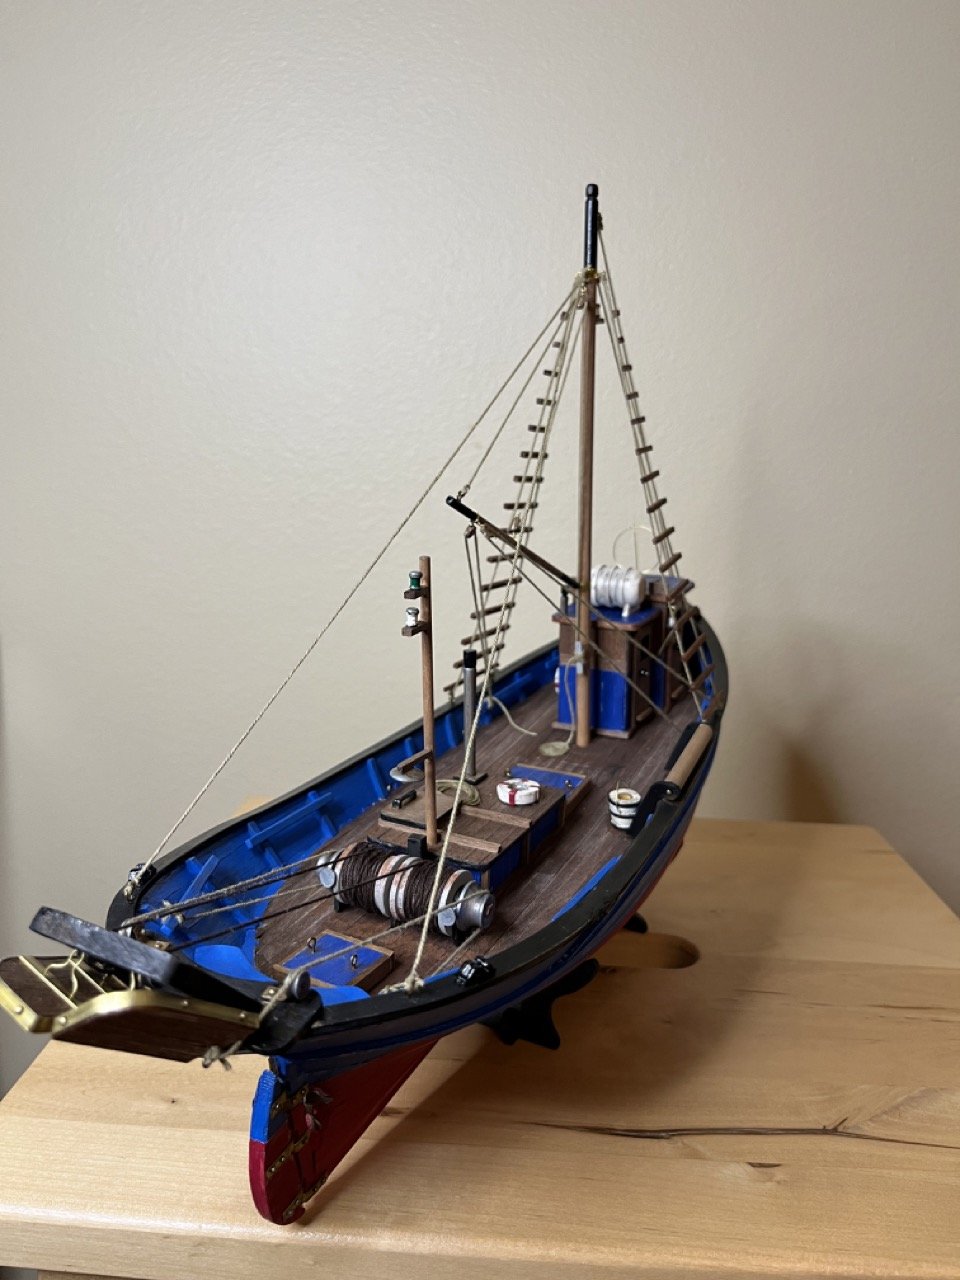
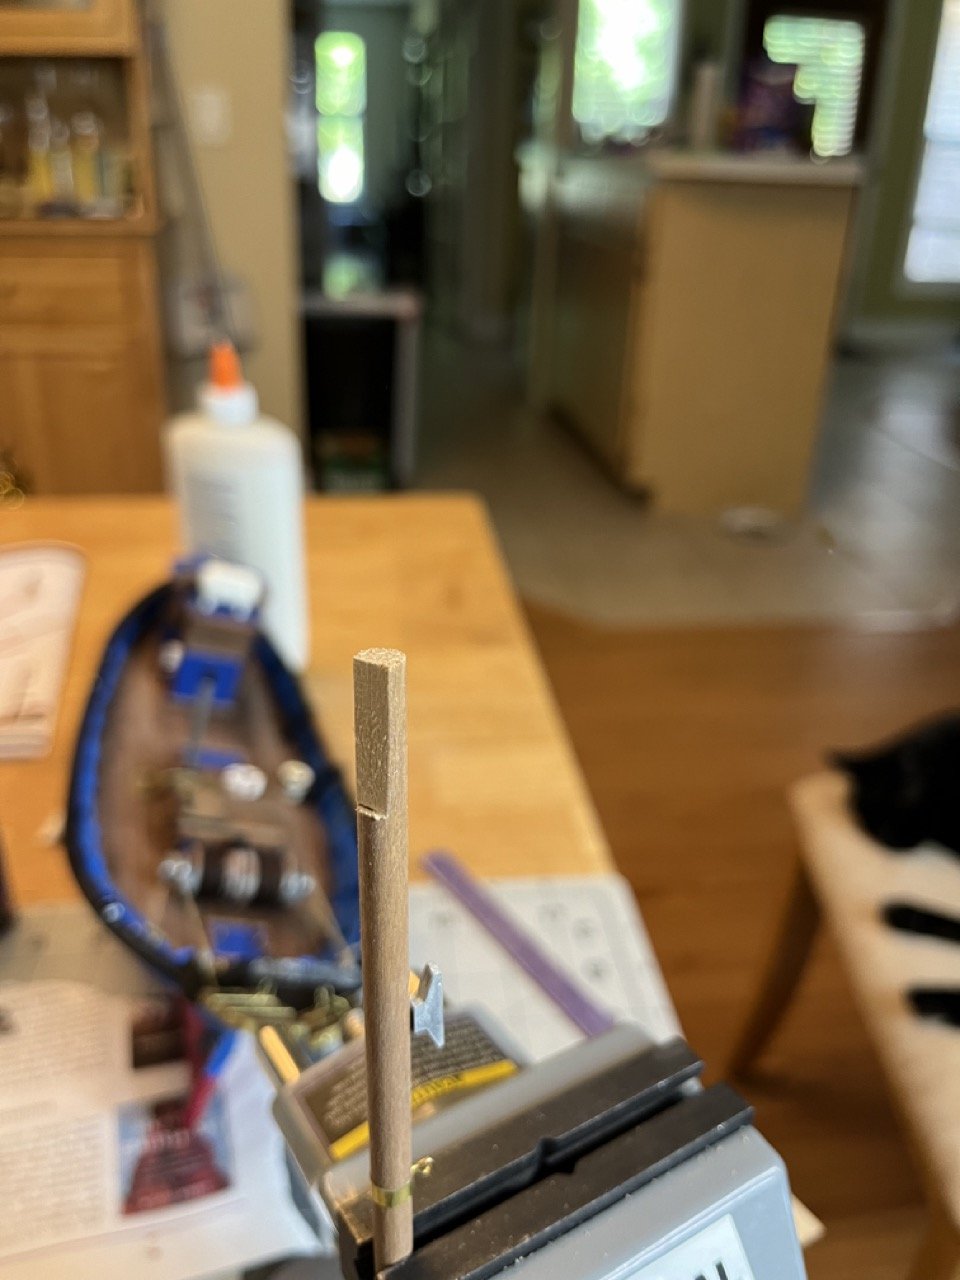
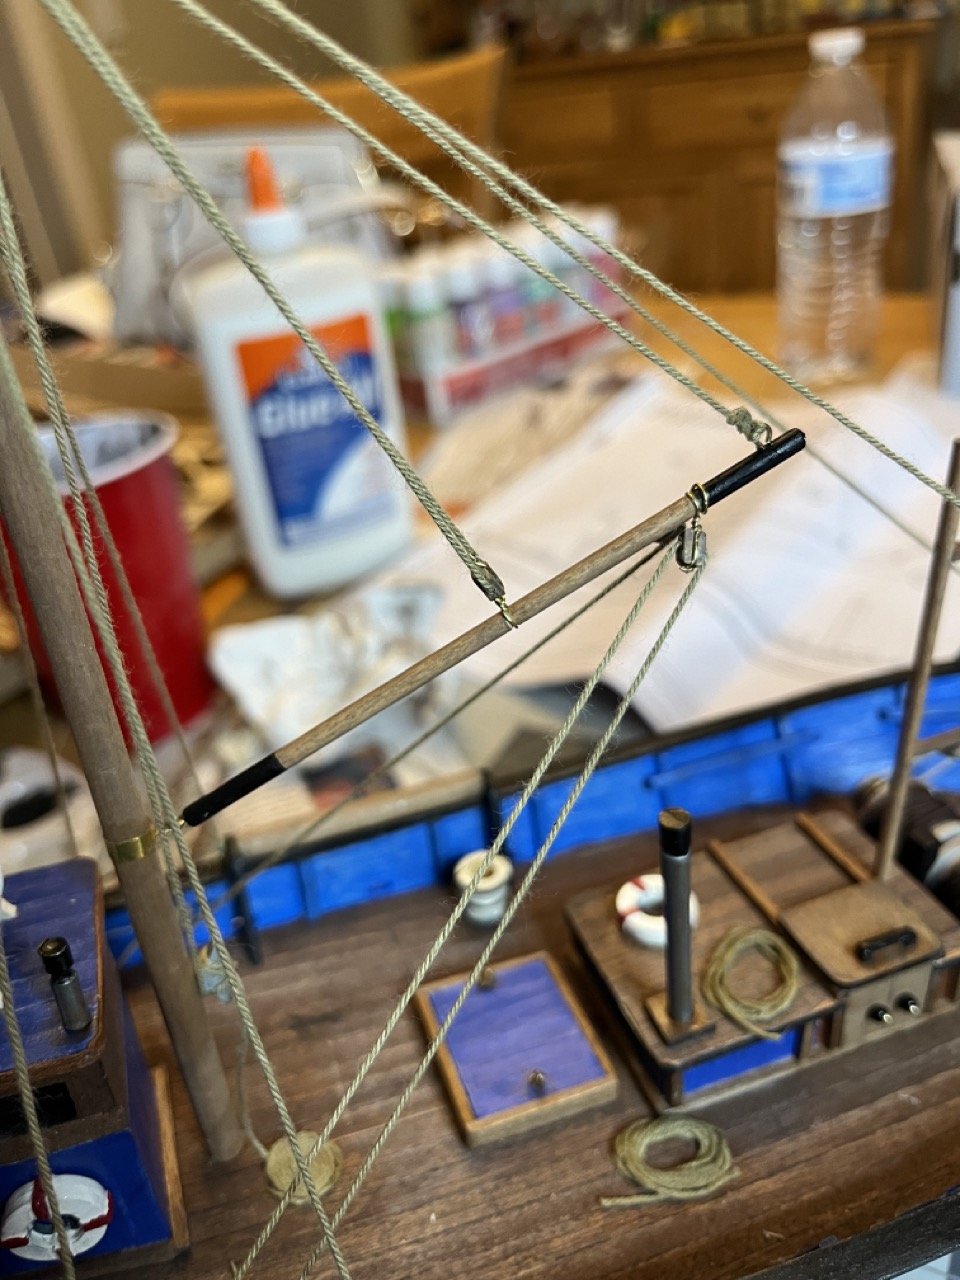
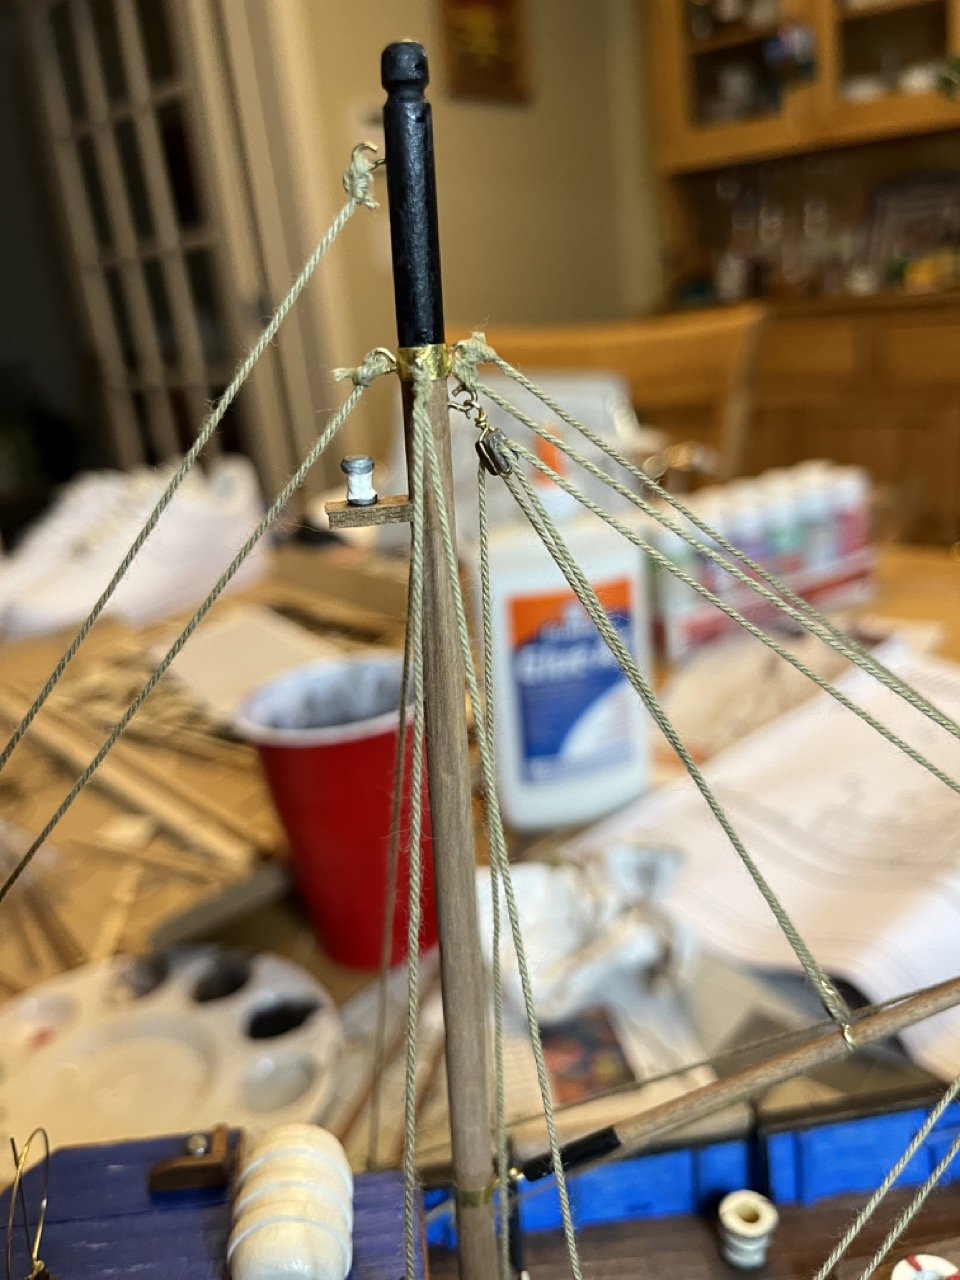
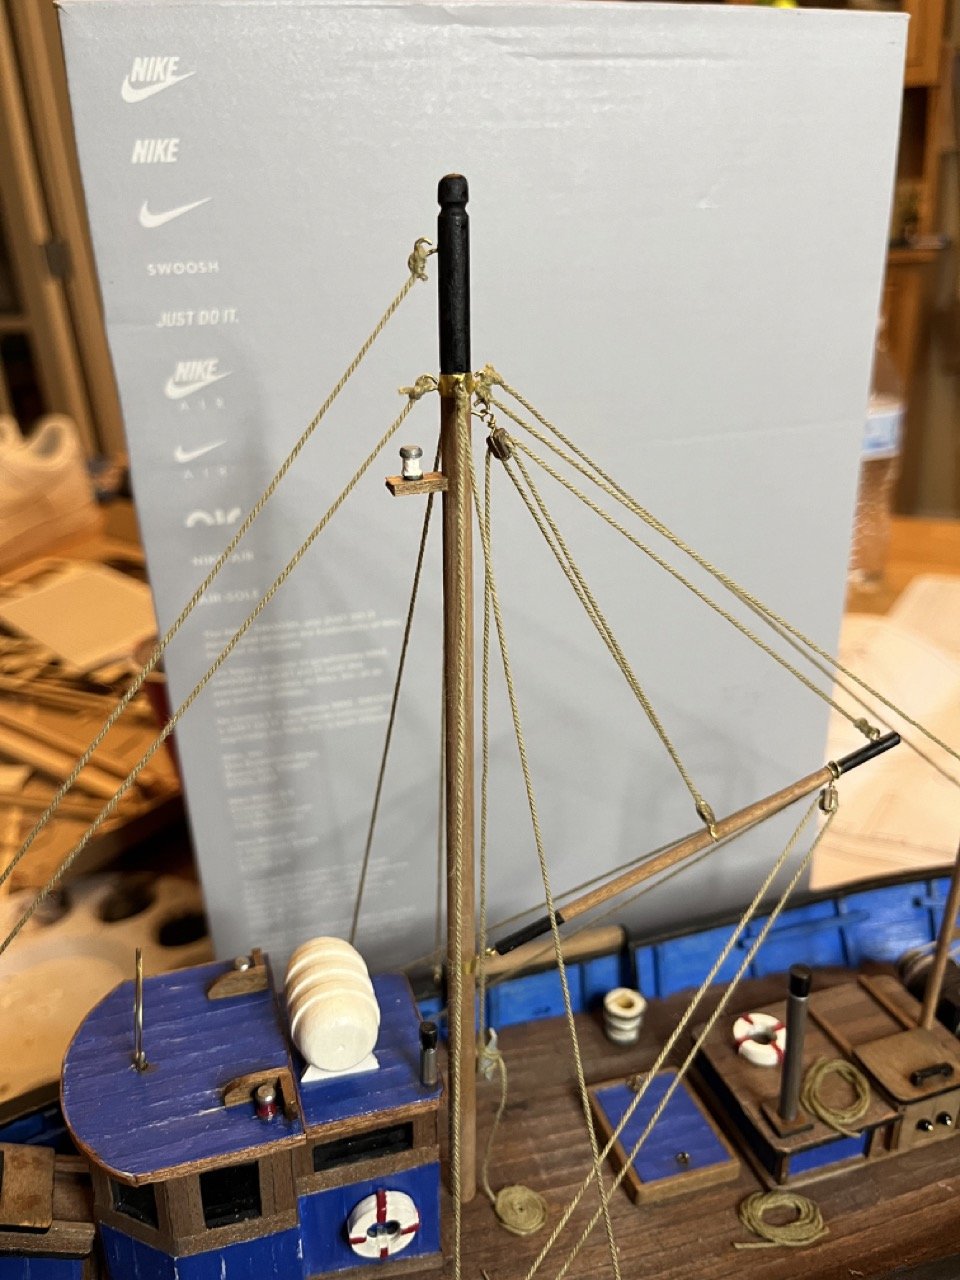
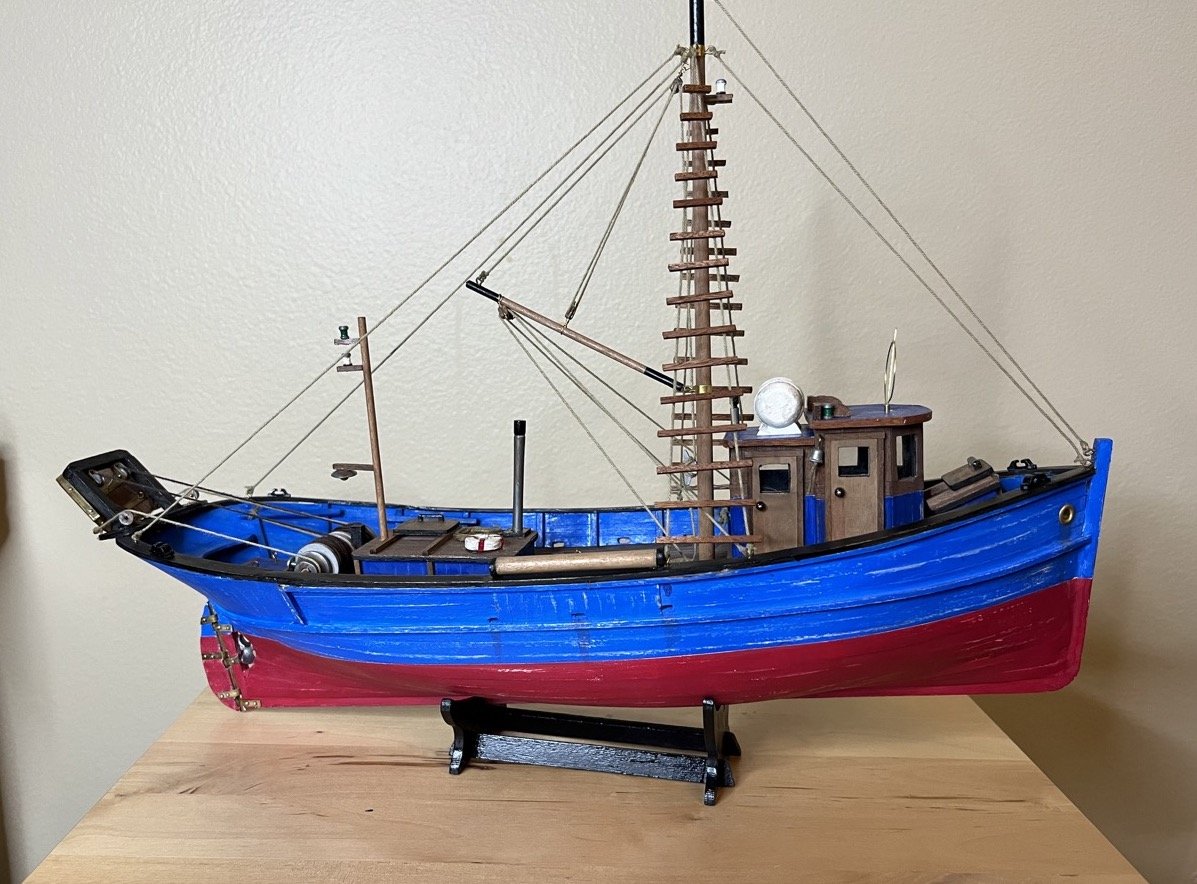
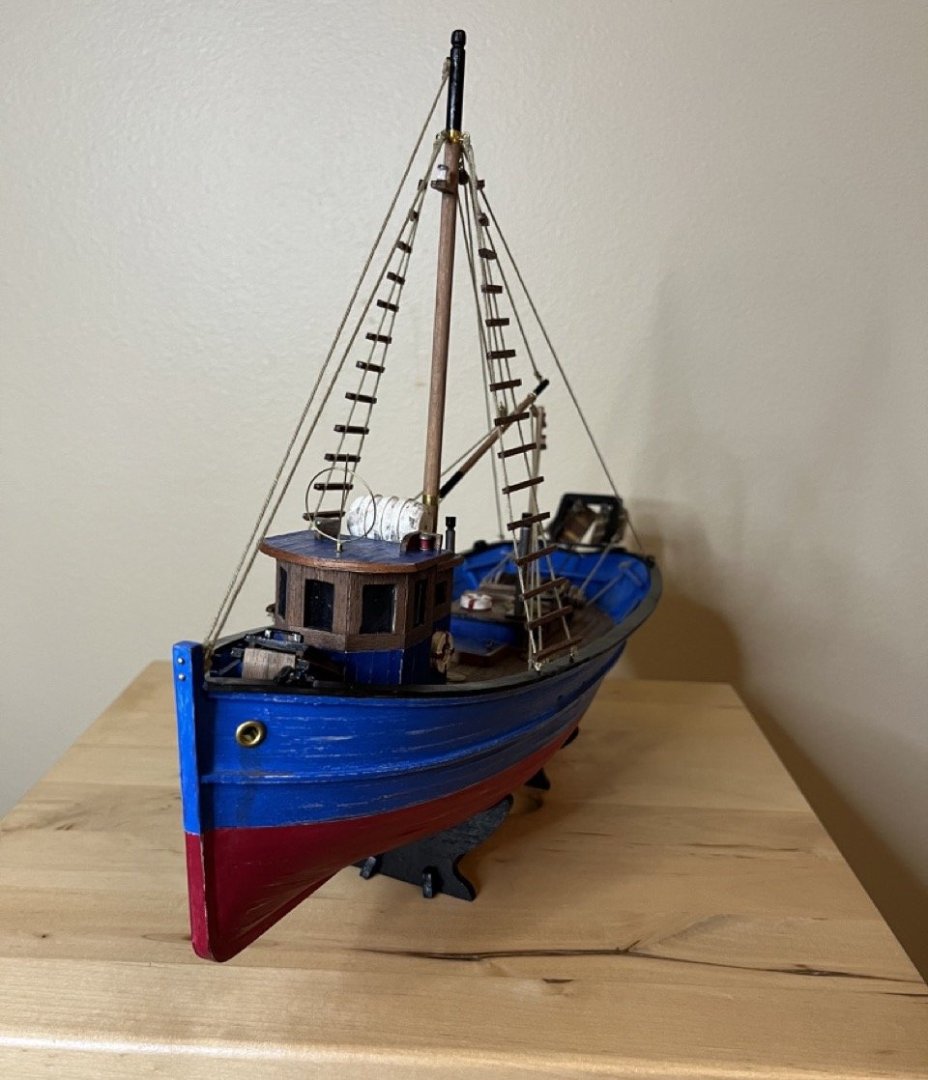
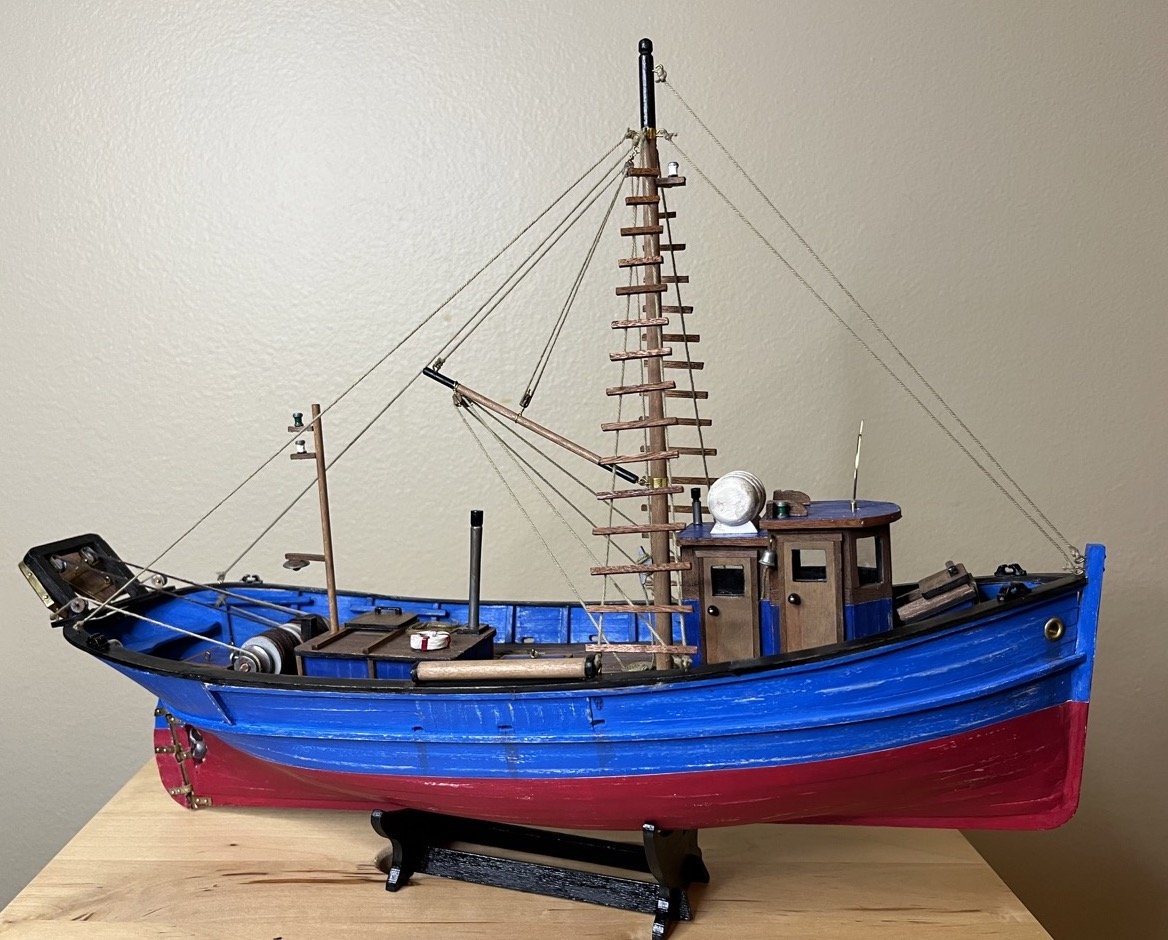
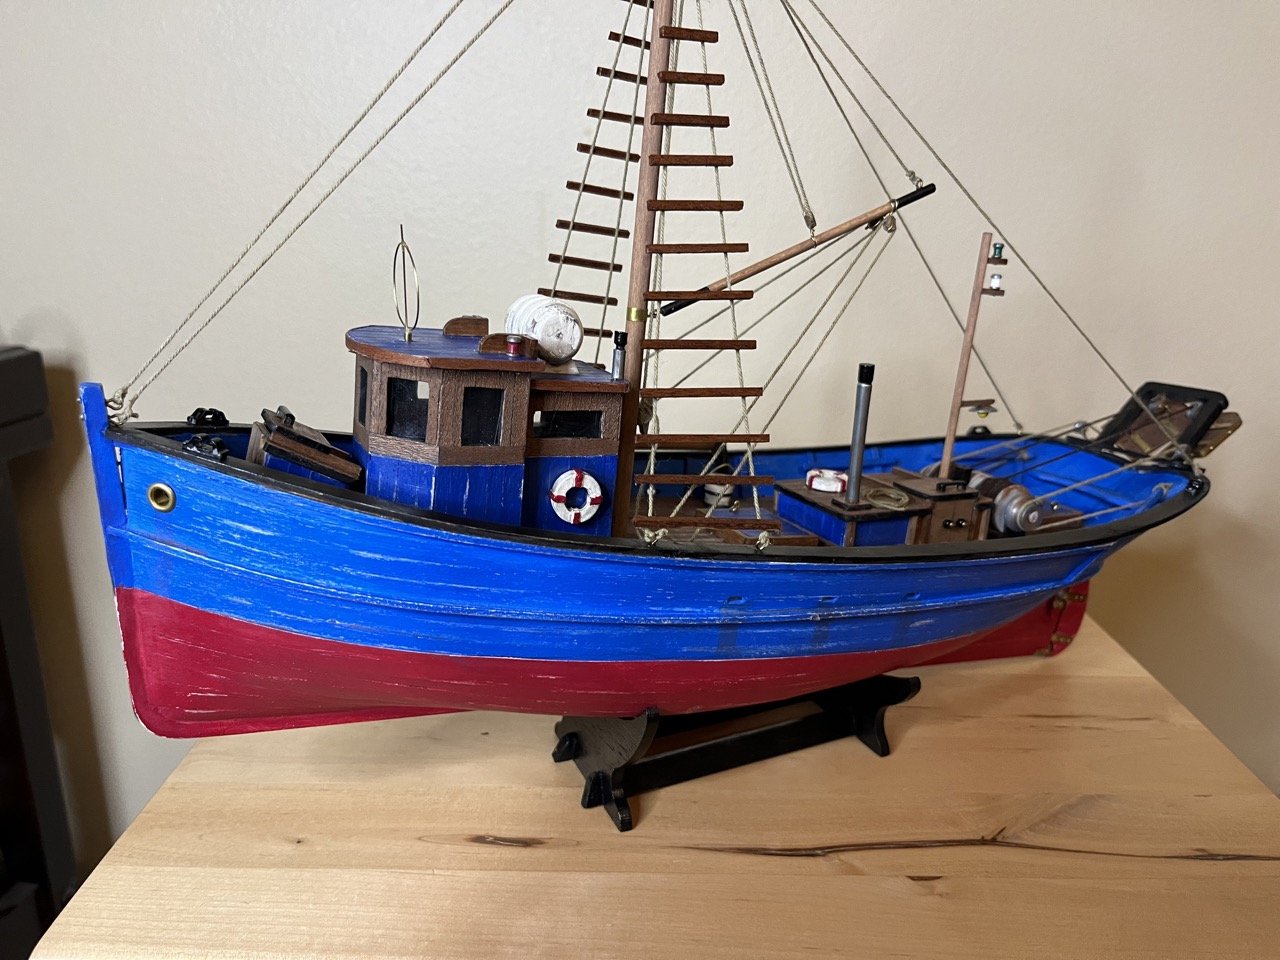
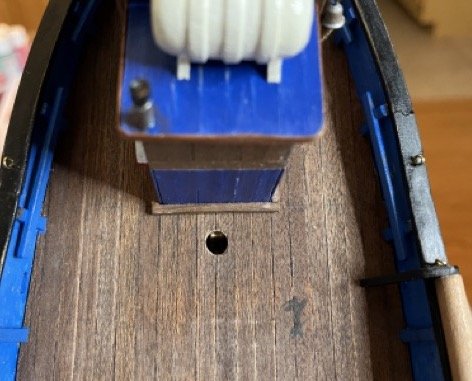
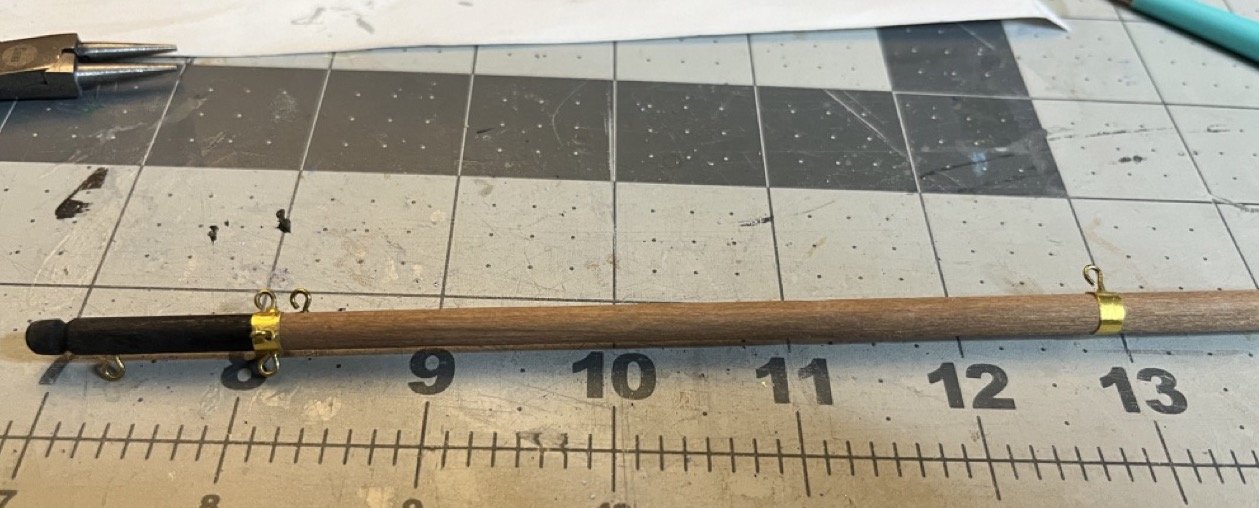
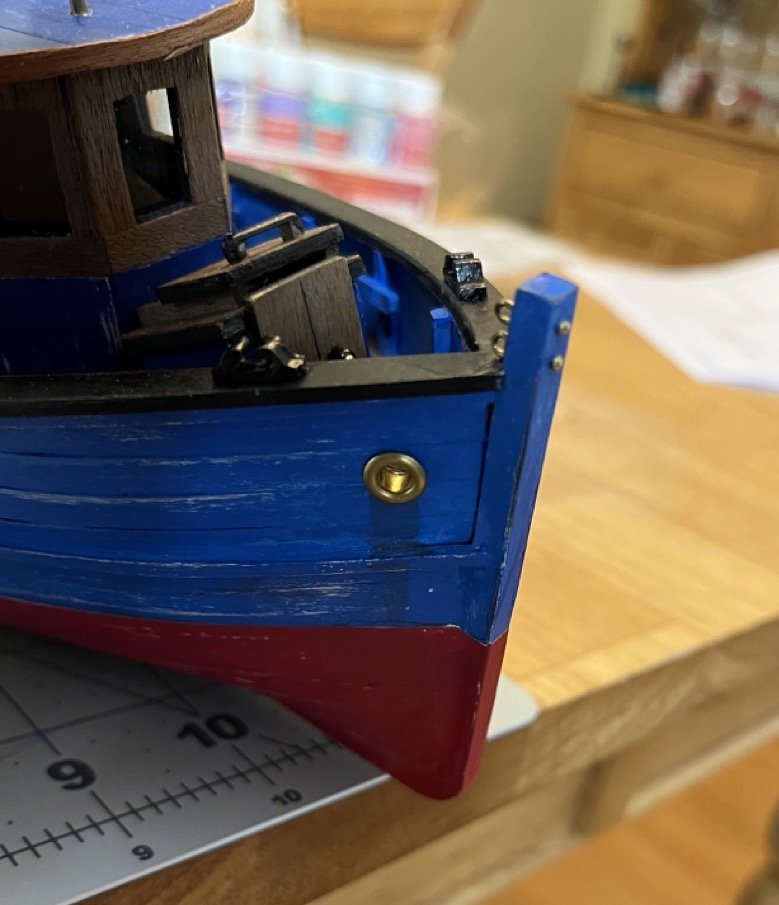
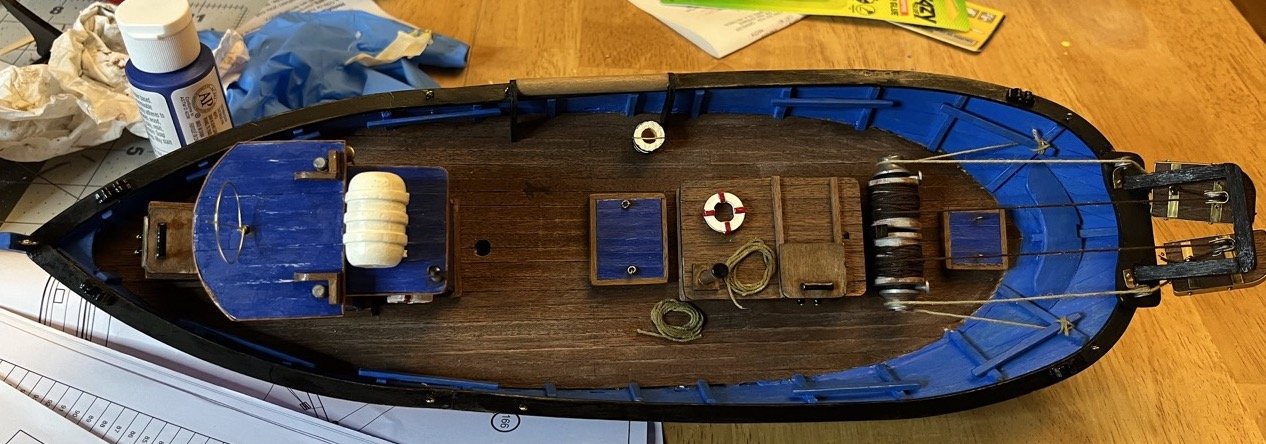
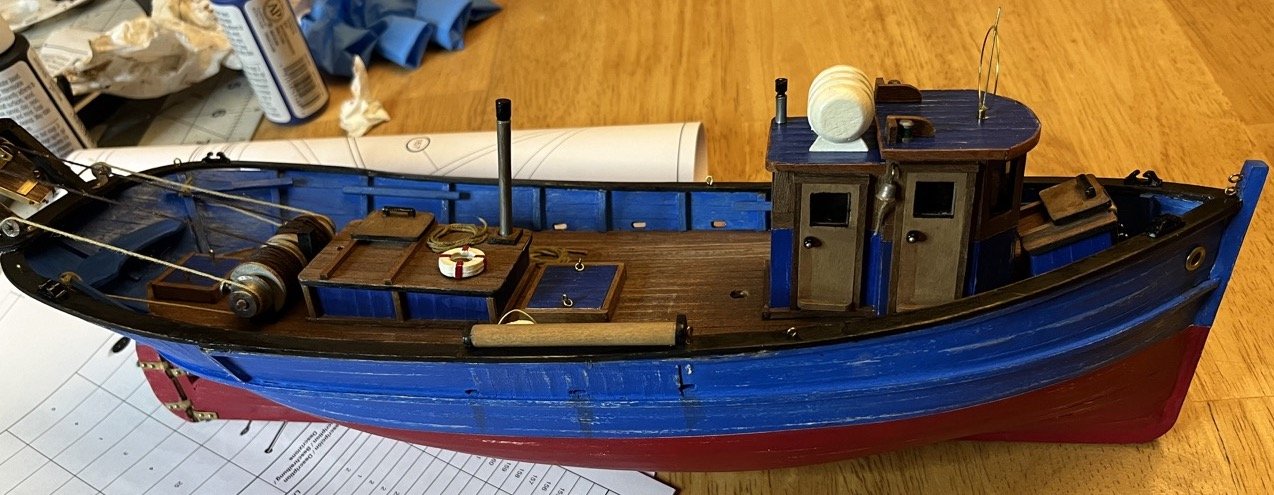
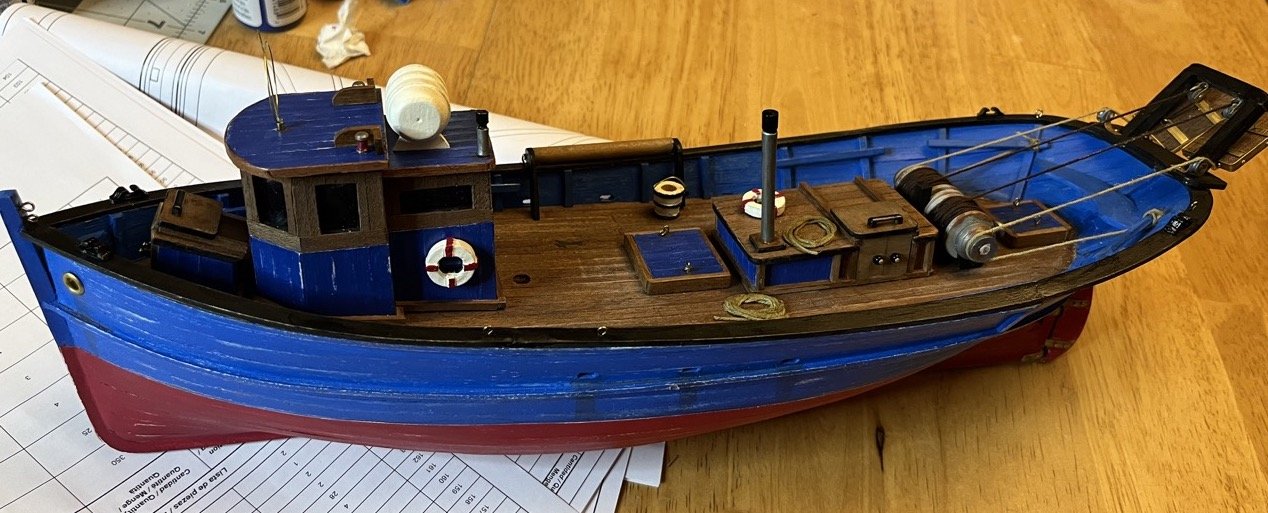
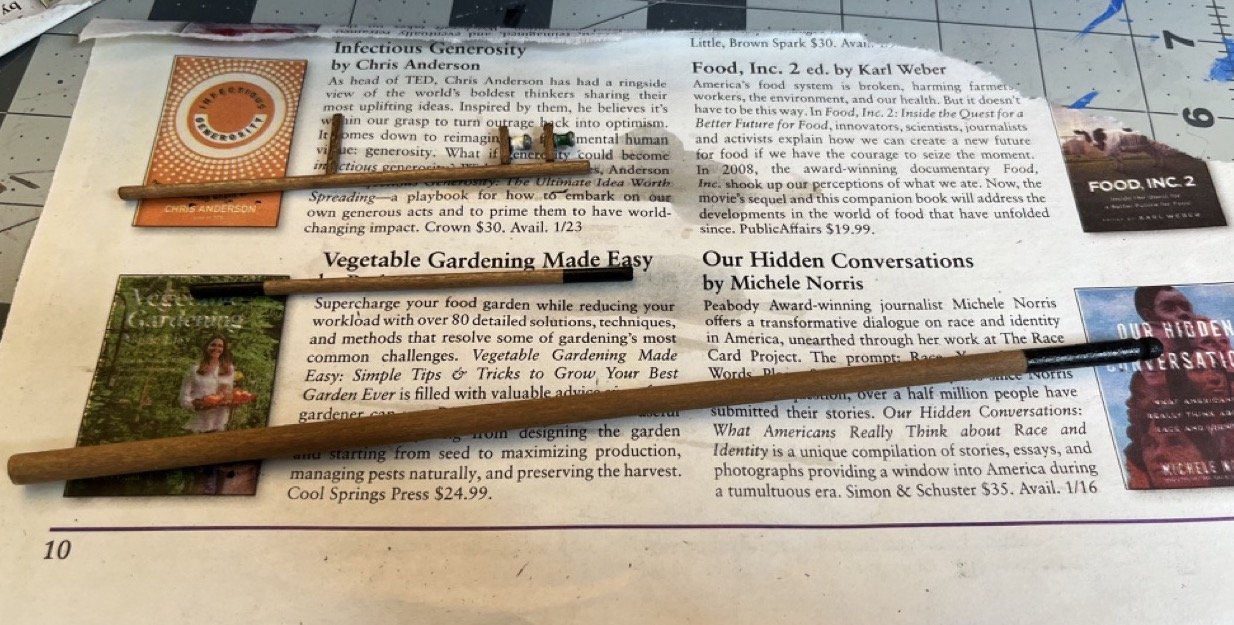
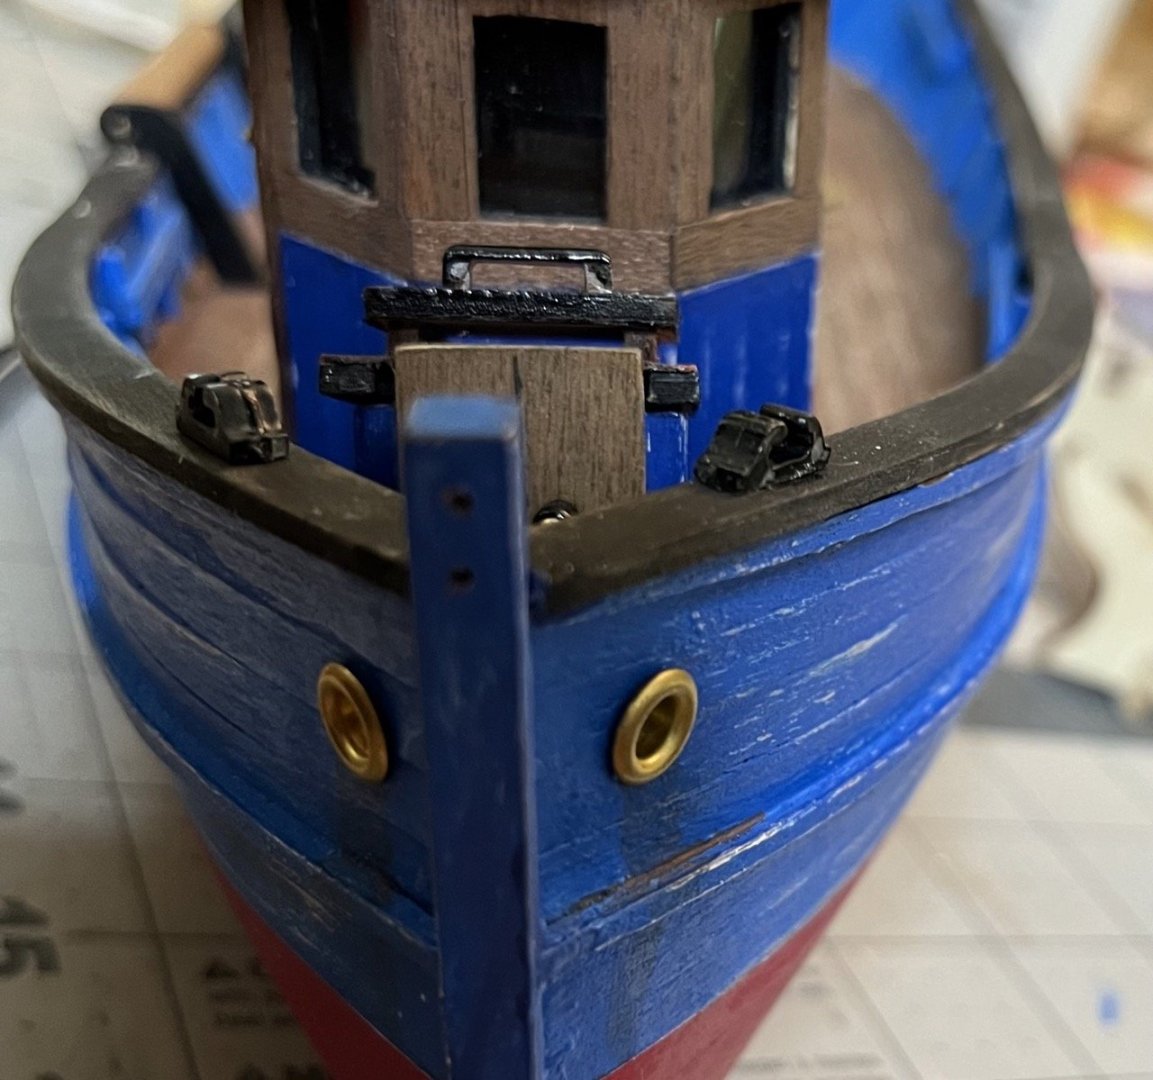
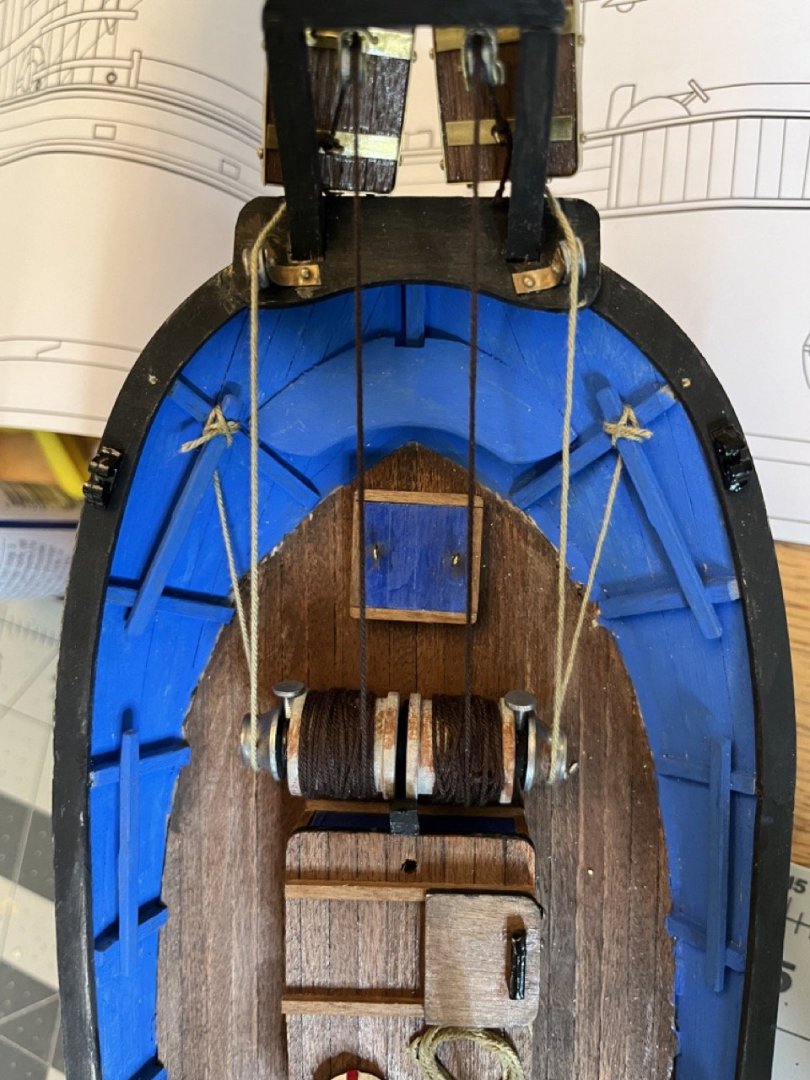
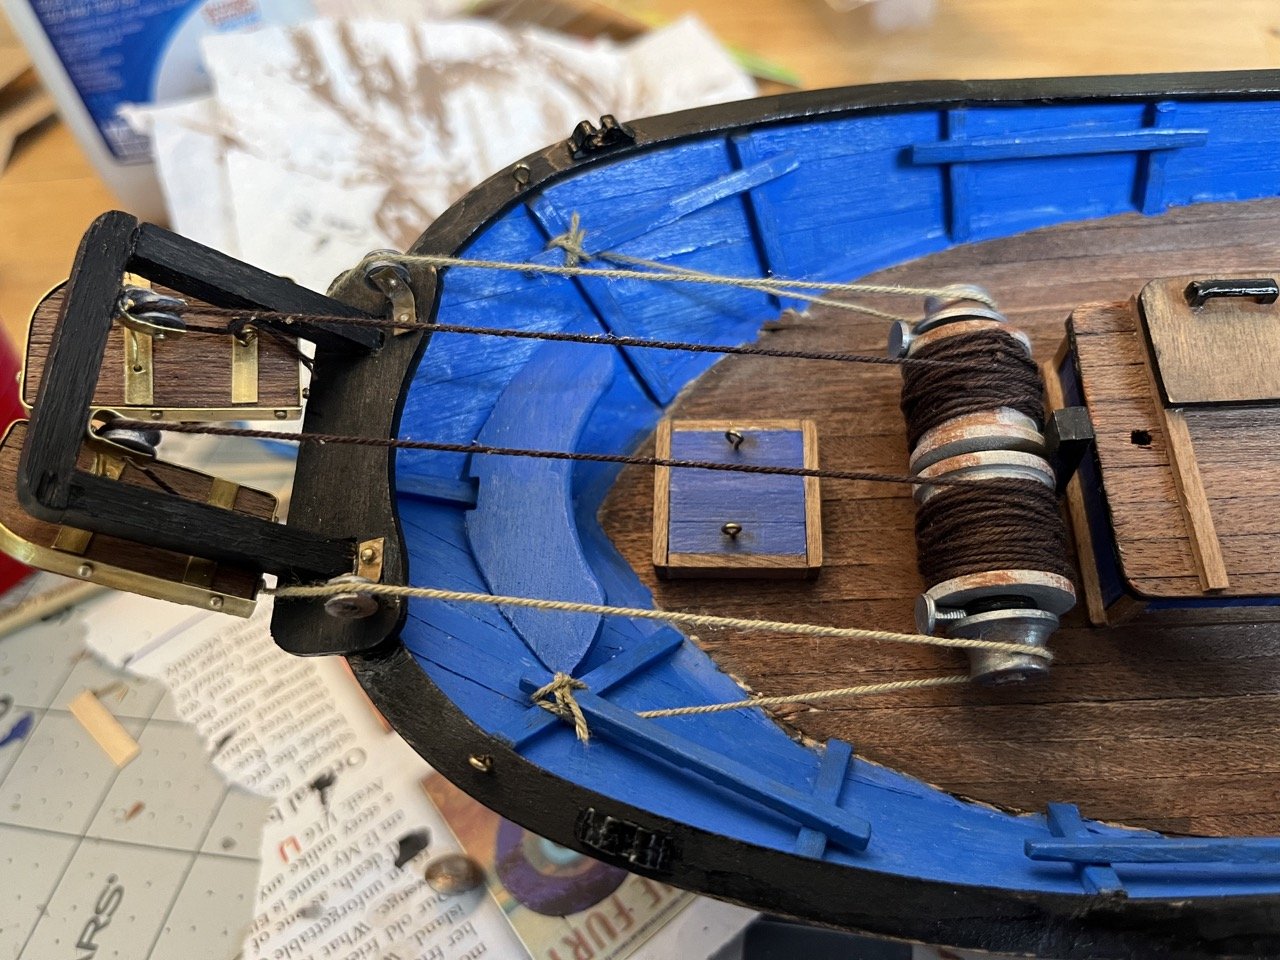
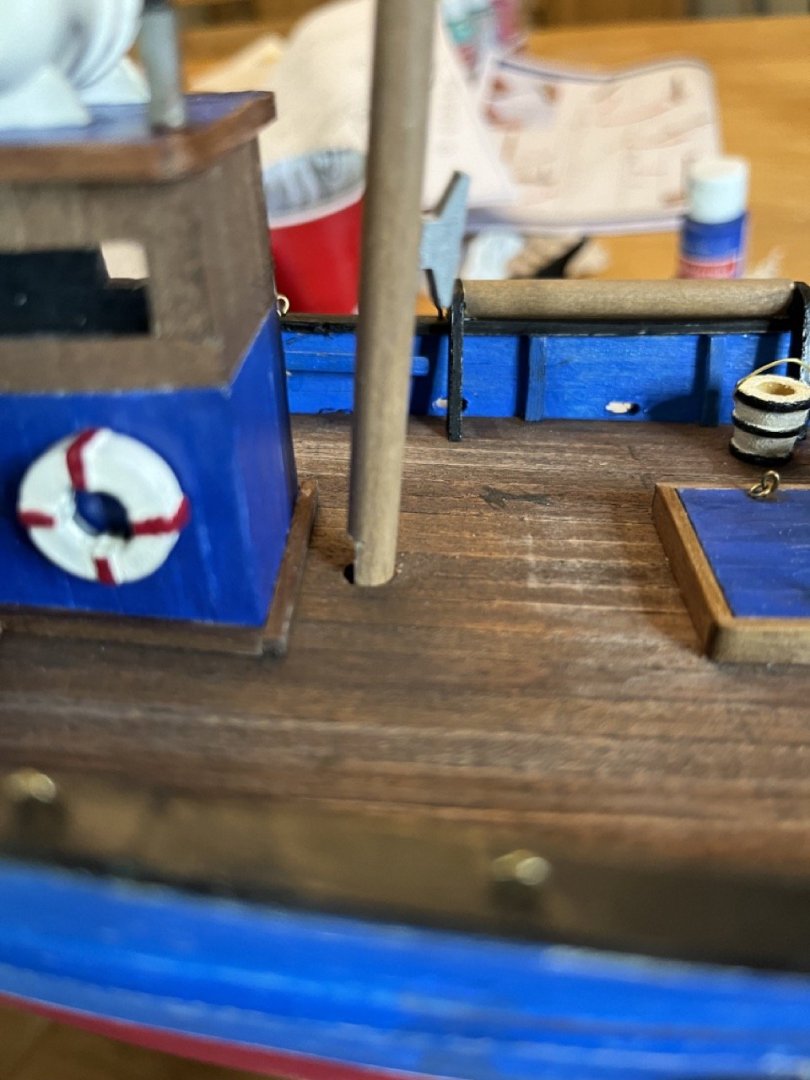
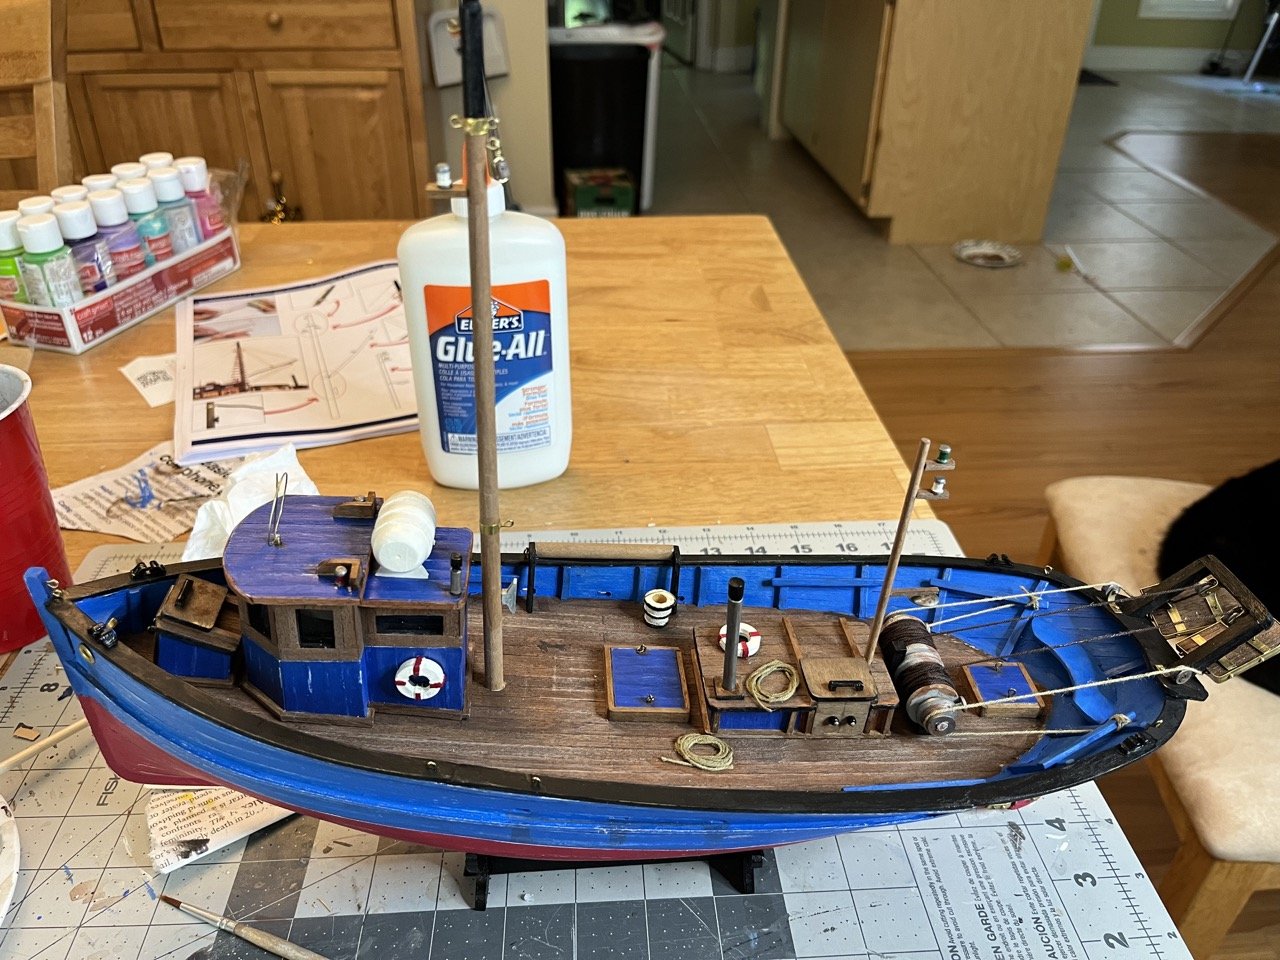
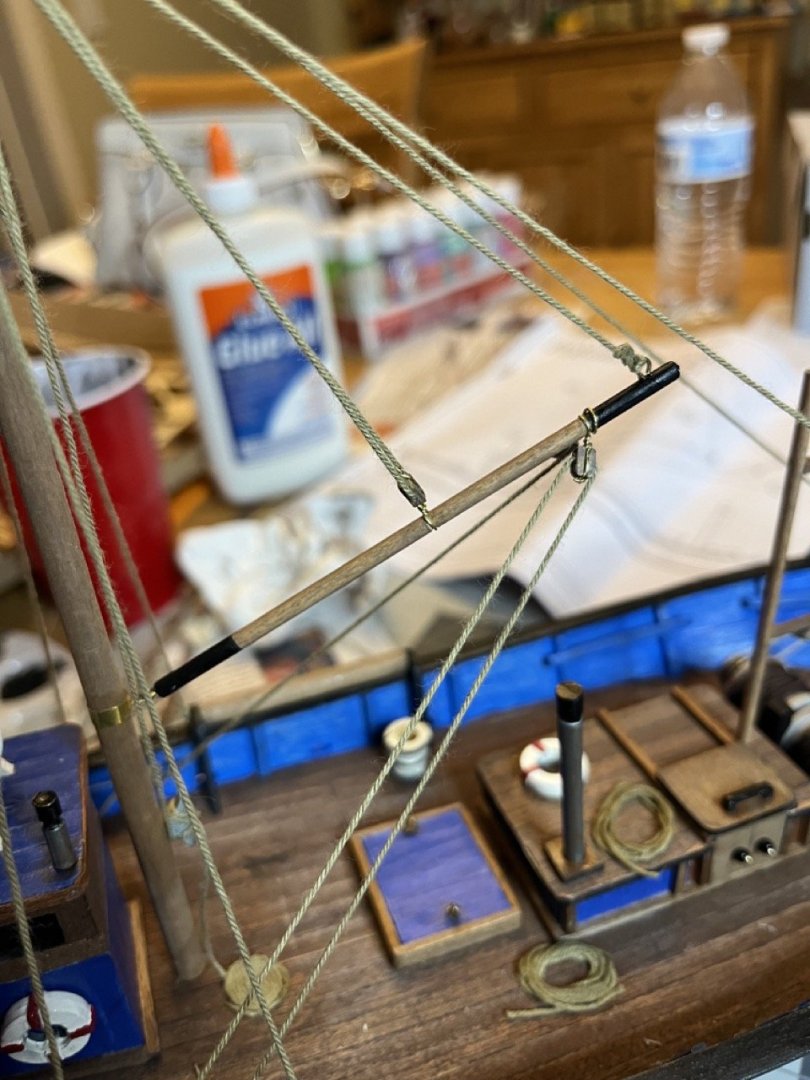
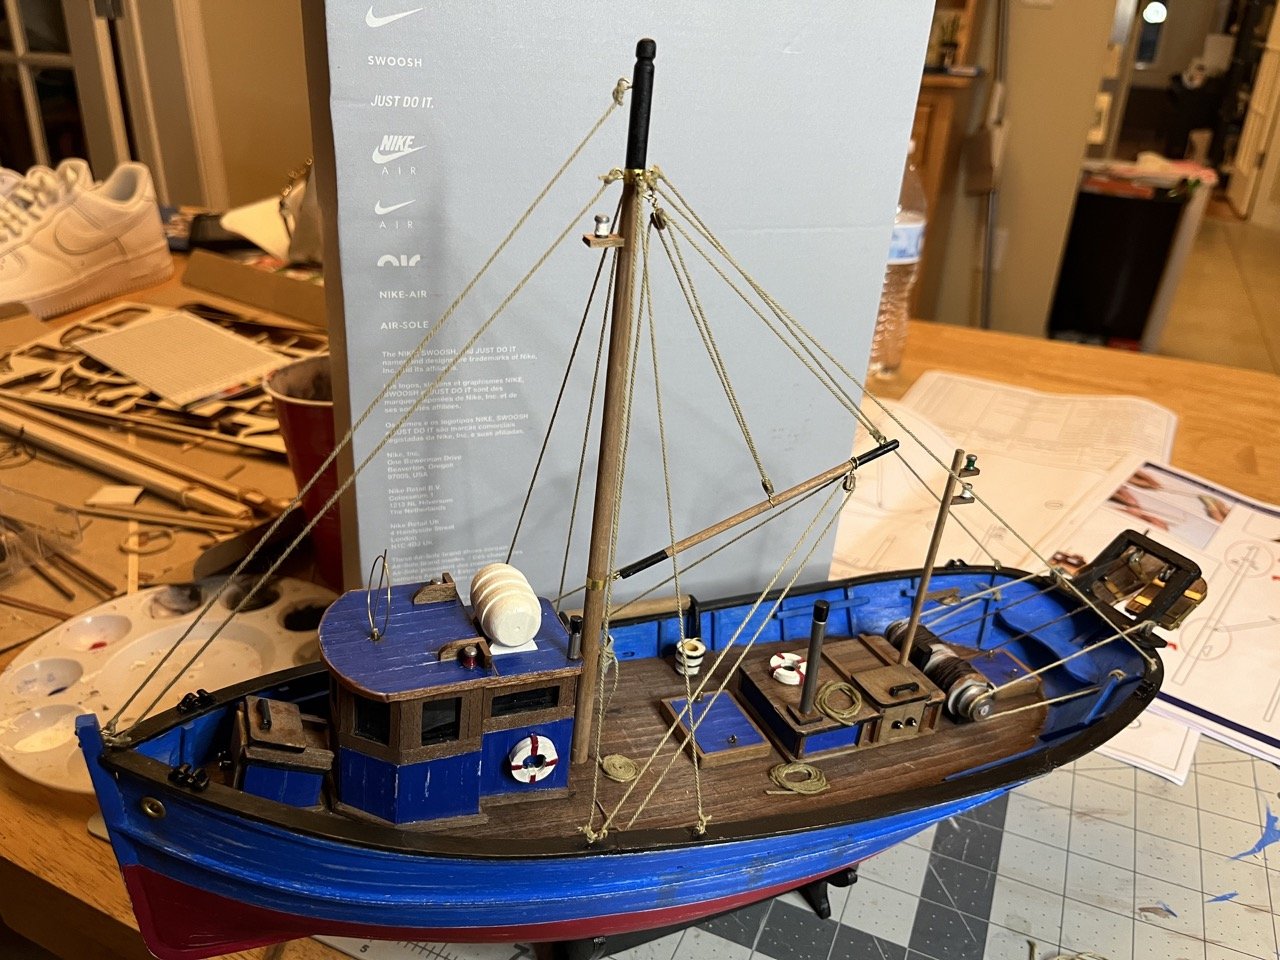
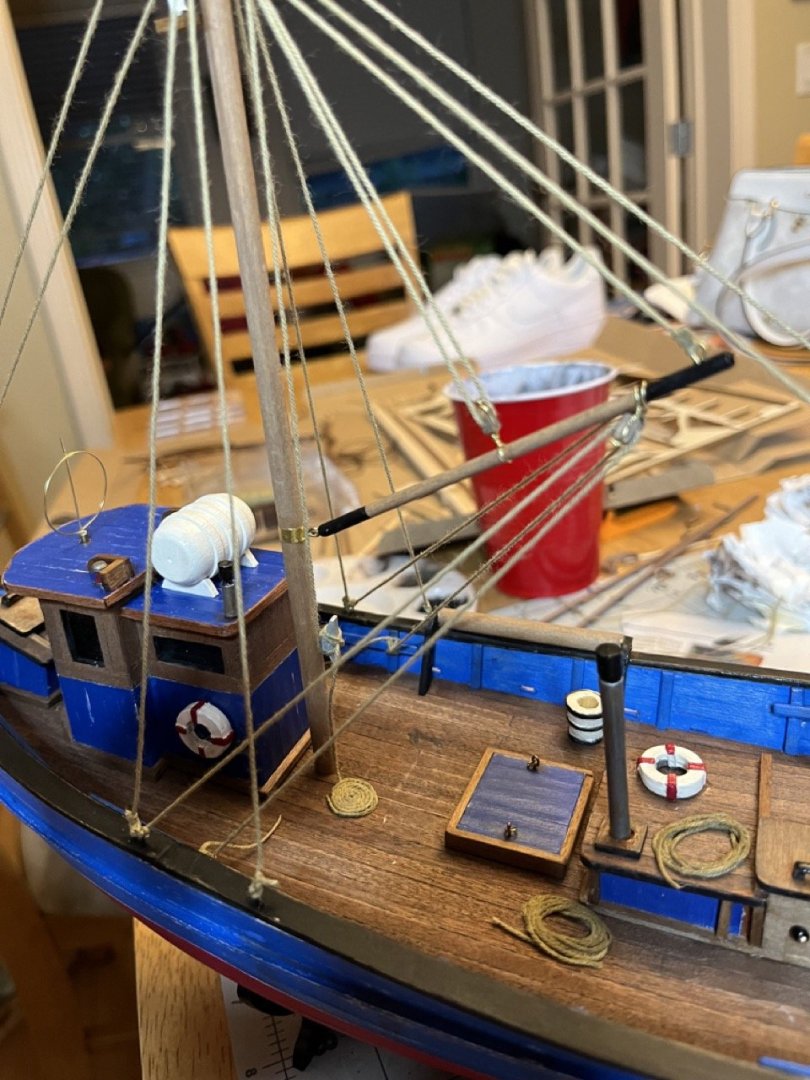
It was now time to install the pieces onto the deck. I had a slight issue on the bow with the forward hatch not fitting properly. I am not sure if the parts are just off or if I assembled something incorrectly. The front hatch should face forward, but it was way too close to the wheel house. I decided to turn it around to face the other direction. I figure that since this isn't a model of a specific boat I can take some artistic license there. I also assembled and rigged up the trawling winch. I tried to make it a look a bit rusty, but it sort of looks like there was an unfortunate accident. We won't talk about it... I think I tied the lines upside down. Making the masts The instructions appear to simply tie the blocks to the boom and presumably glue them into place. I didn't like that because it just didn't seem like a very good way to to go about it. I also wanted to secure the blocks with wire. I used a round file to notch the boom for the blocks. Sorry about the blurry photo. The mast is supposed to have a few brass bands around it at the eyelets. I think OcCre shorted me a brass strip. I used some brass tape and it worked pretty well. I think it made for a better band than I would have made trying to bend a strip around the mast. The forward eyes for the fore stays should have been drilled earlier. I couldn't really drill partially in from the inside so I drilled through the stem and made rivets. I ran into a little problem where the mast goes into the deck. There is a small piece of the spine/bulkheads blocking the hole. I am not sure how I could have made this error since everything lines up pretty will from the factory tabs and slots. To solve this I cut a small piece from the mast. I took the measurements off of the plans, which was a mistake. I should have measured off of the actual model. I simply glued the piece back on and trimmed it to the proper length. Main mast and light pole installed. Boom installed and rigged. The instructions were not very clear how the rigging was supposed to go between it and the main mast. The only way that really made sense was to use one piece of line from the end of the boom, up to the two sheave block, back down to the block mid boom, back up to the two sheave block and down to the cleat. The parts list for the lines going from the boom to the sides of the ship listed line that was too short to be useful so make sure to add 50mm or so. The sheaves in the blocks were not large enough to get the line through so I had to widen them out with a small round file. The fore stays and back stays were straightforward. The last steps will be to finish the Jacob's latter and touch up some painting. The whites are a little too white for a working boat so I will dirty them up a bit.


-
Double check the instructions. It probably said glue and sawdust mix to fill gaps. I learned about that trick from this kit as well, and it worked fairly well for me when I had a gap that also needed to be bonded.
- 69 replies
-
- 2
-
-
- Lowell Grand Banks Dory
- Model Shipways
- (and 2 more)
-
As far as the bulwarks, Occre's can definitely be tricky. Definitely line them up as best you can, but fortunately you be planking over them, which can cover up small alignment errors. I do have one suggestion about planking that I think Occre does wrong in their instructions. They have you plank both layers prior to placing the keel. I would suggest attaching the keel to the first layer of planking, then install the second layer of planking. I followed the instructions and had a problem where the keel didn't fit properly over the planked hull, and I didn't have a good way to fix it. By installing the keel prior to the second layer of planking, if something isn't shaped quite right, it can be filled in, then the second layer planking can be shaped to fit around the keel covering the filler.