
Dulrakk
-
Posts
25 -
Joined
-
Last visited
Content Type
Profiles
Forums
Gallery
Events
Posts posted by Dulrakk
-
-
Main mast, Main boom & Main gaff yard
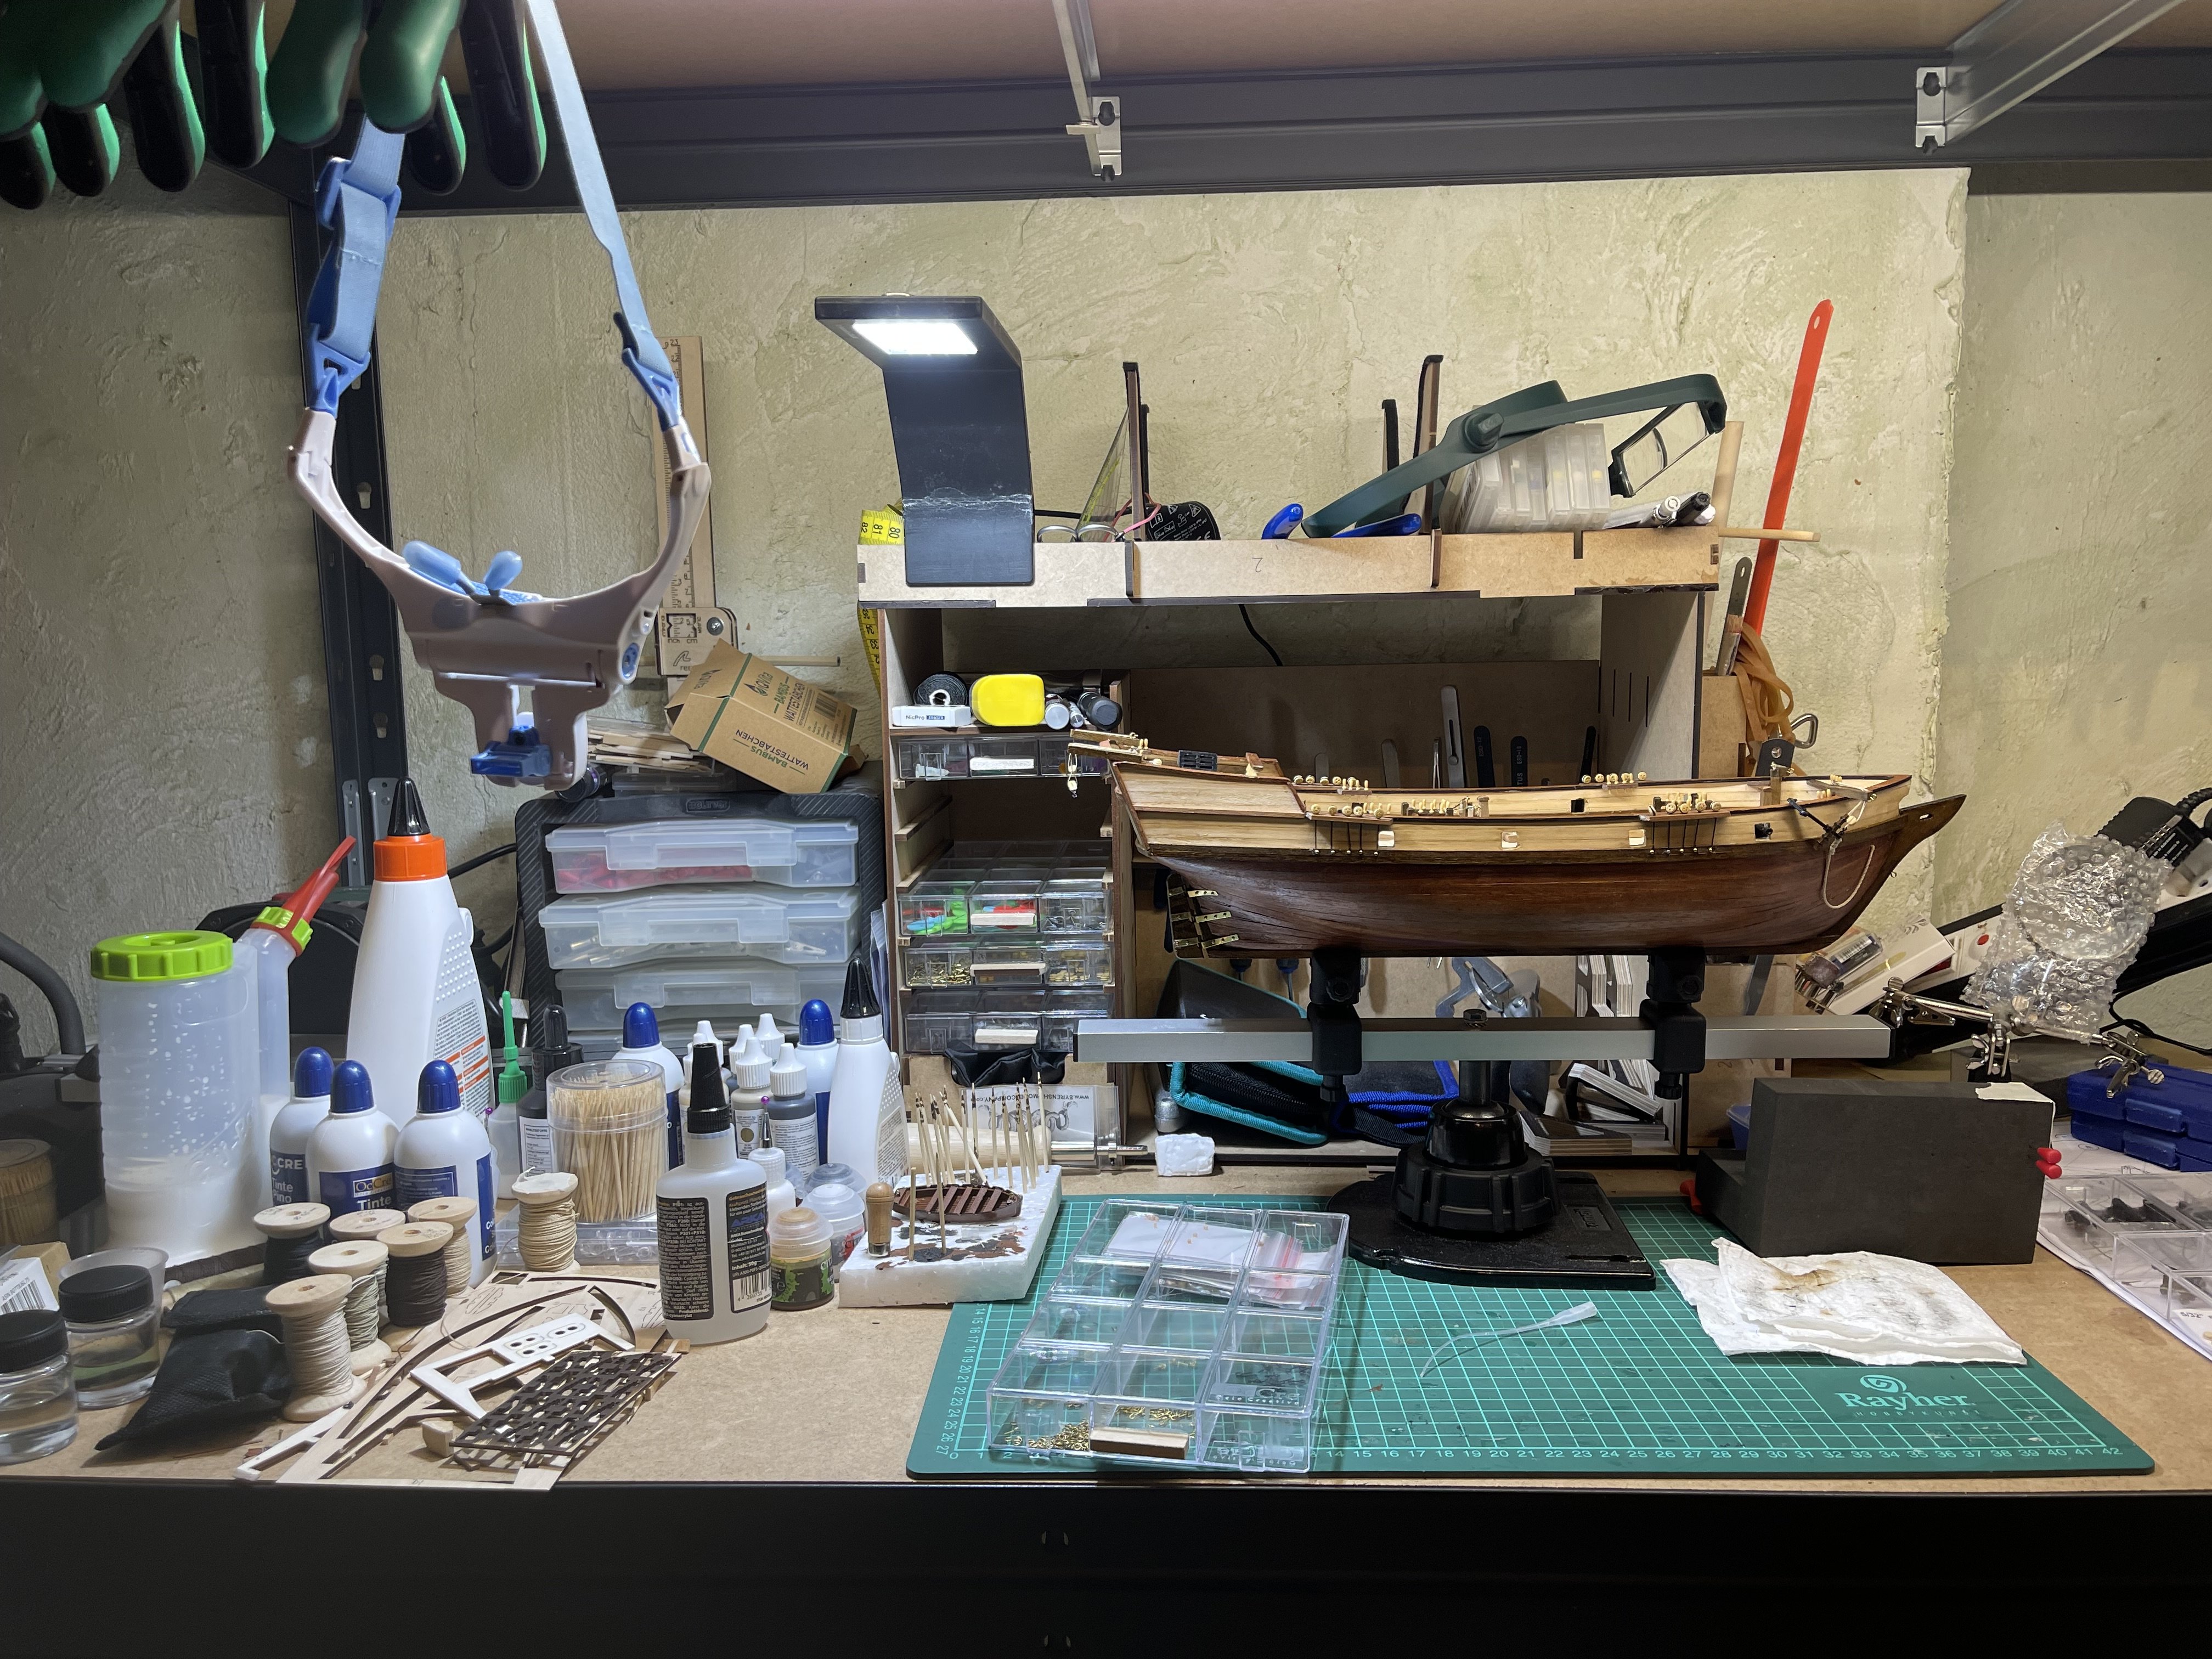
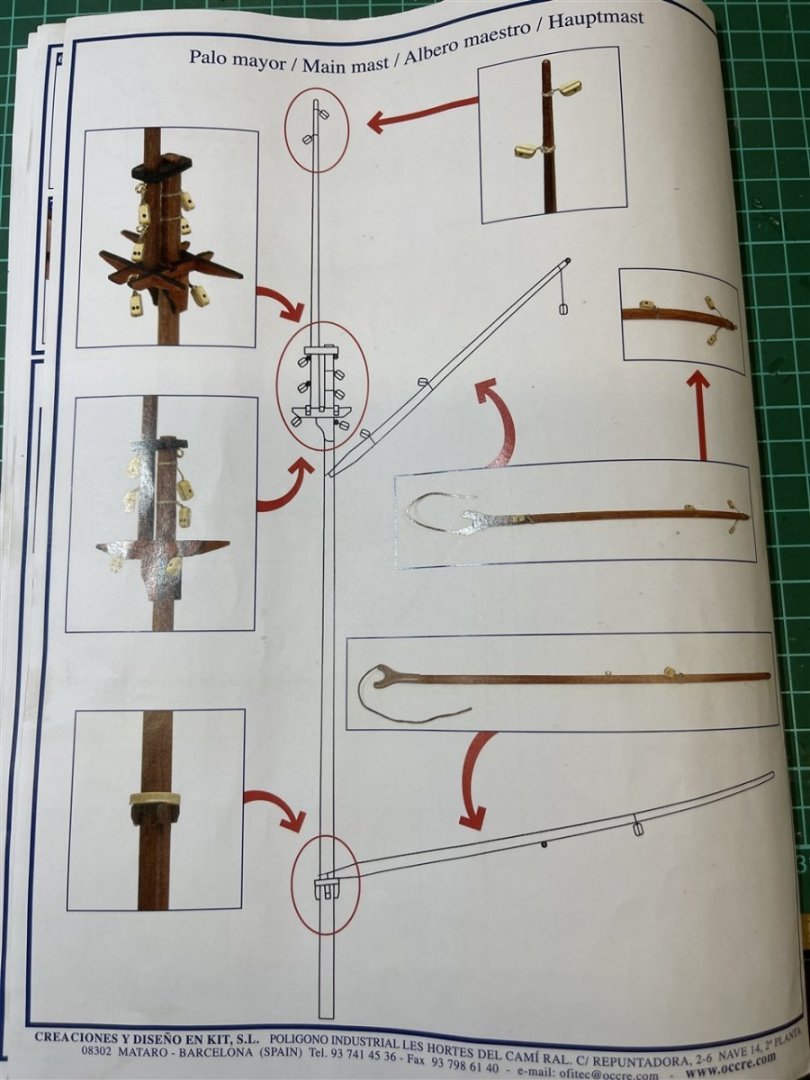
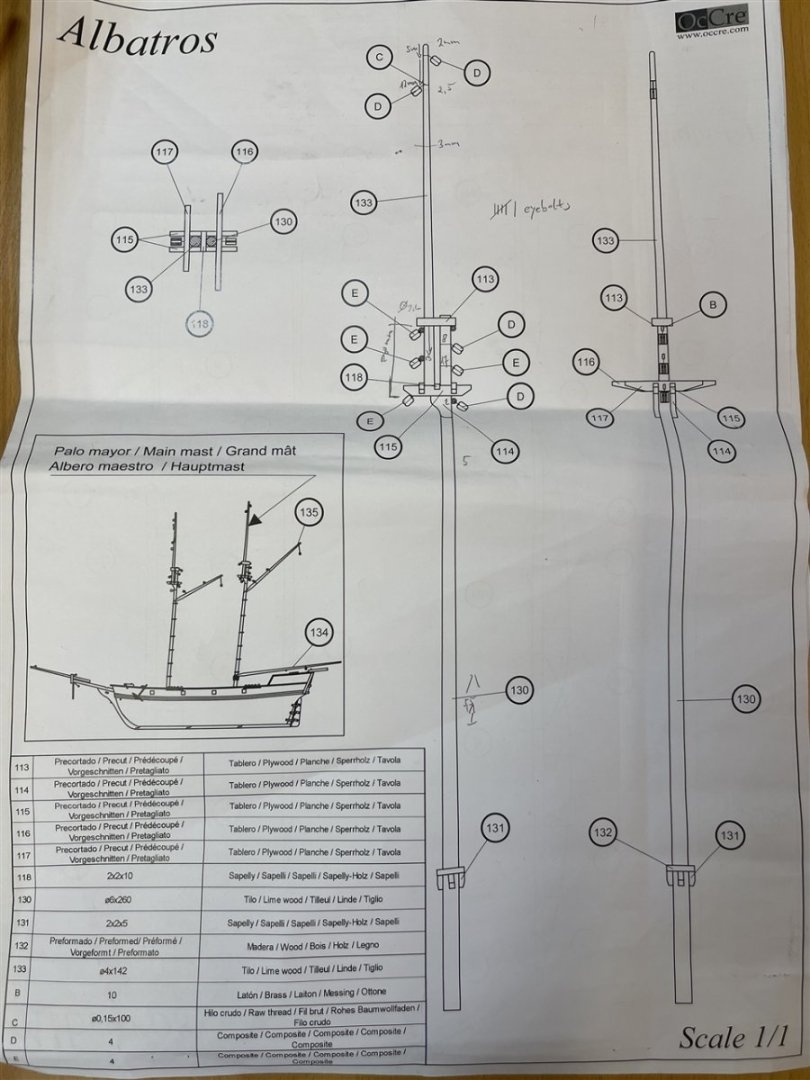
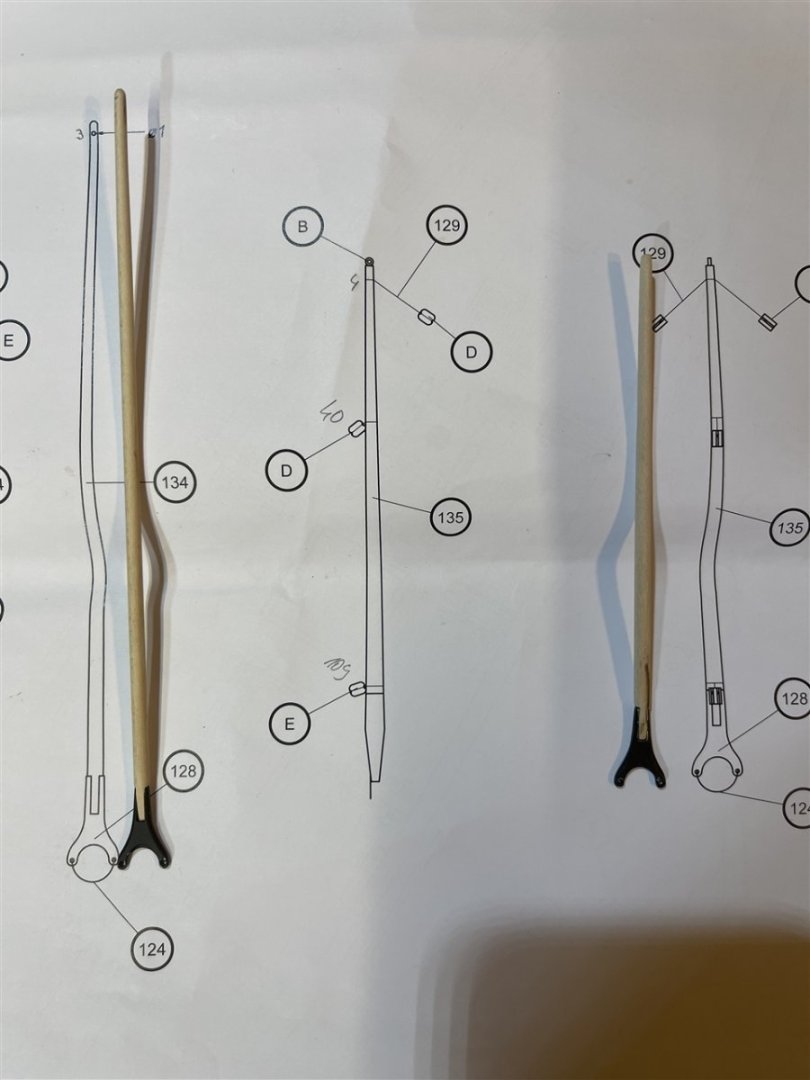
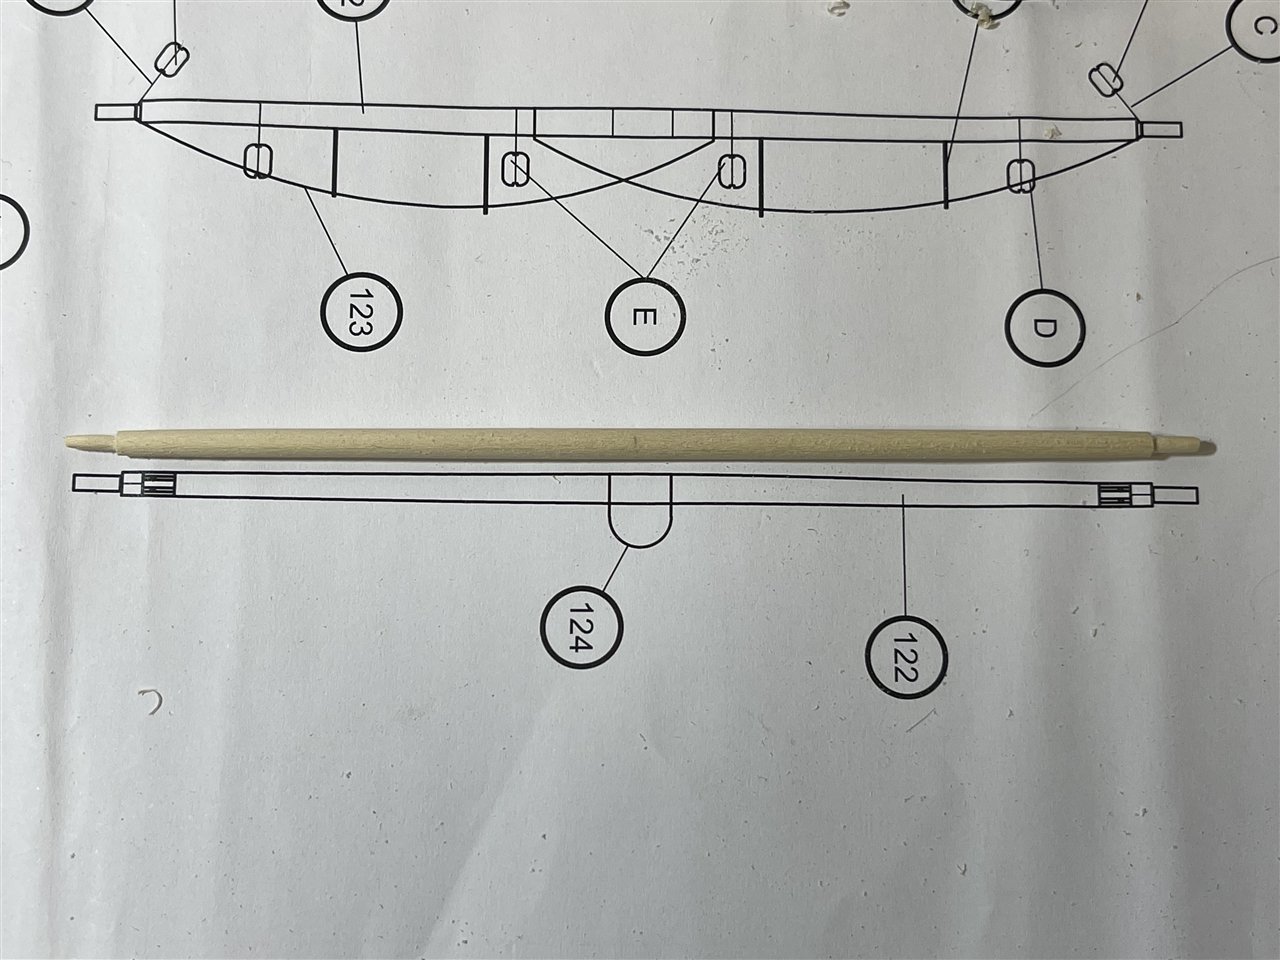
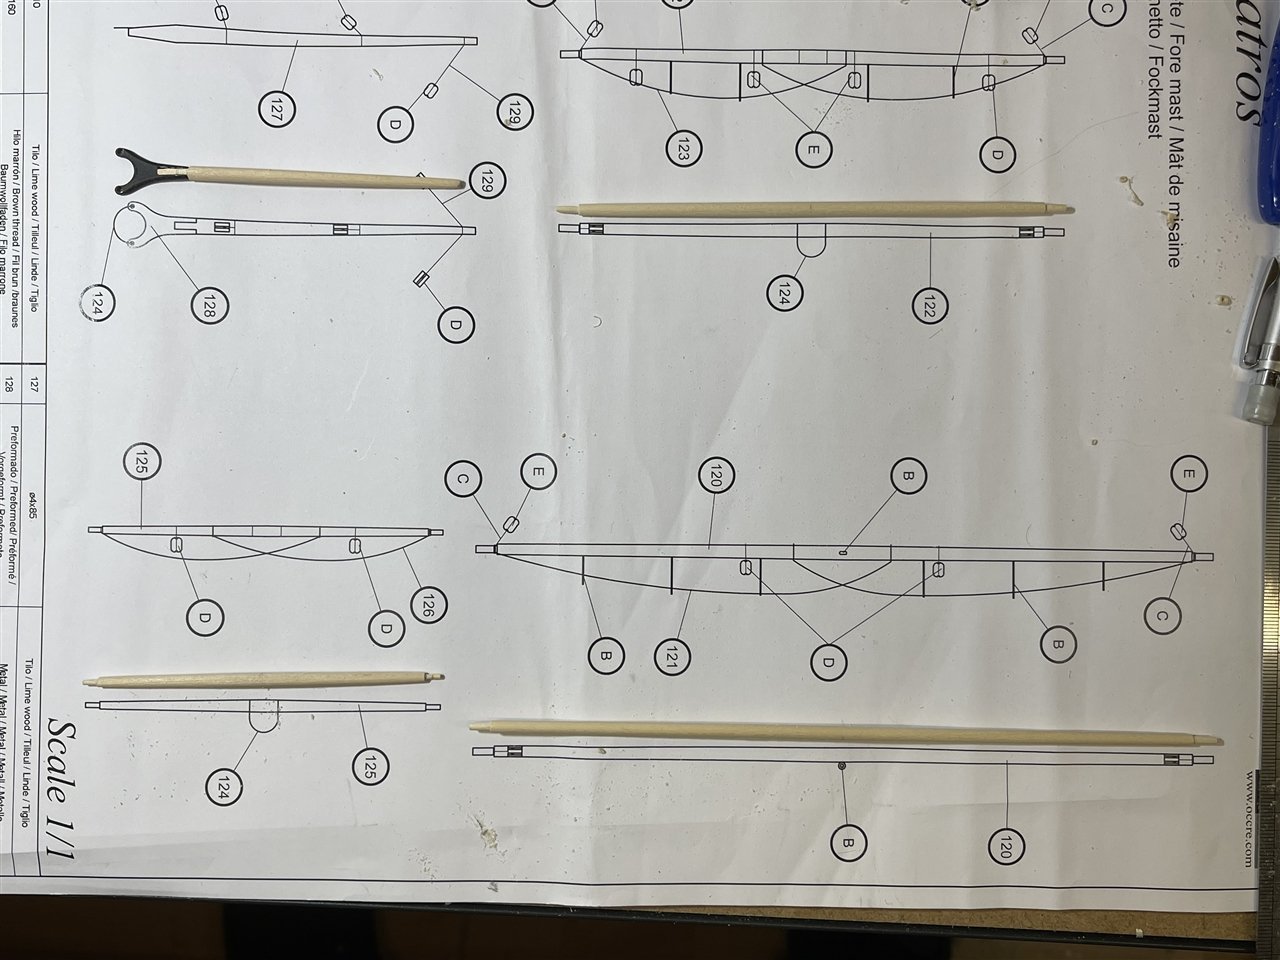
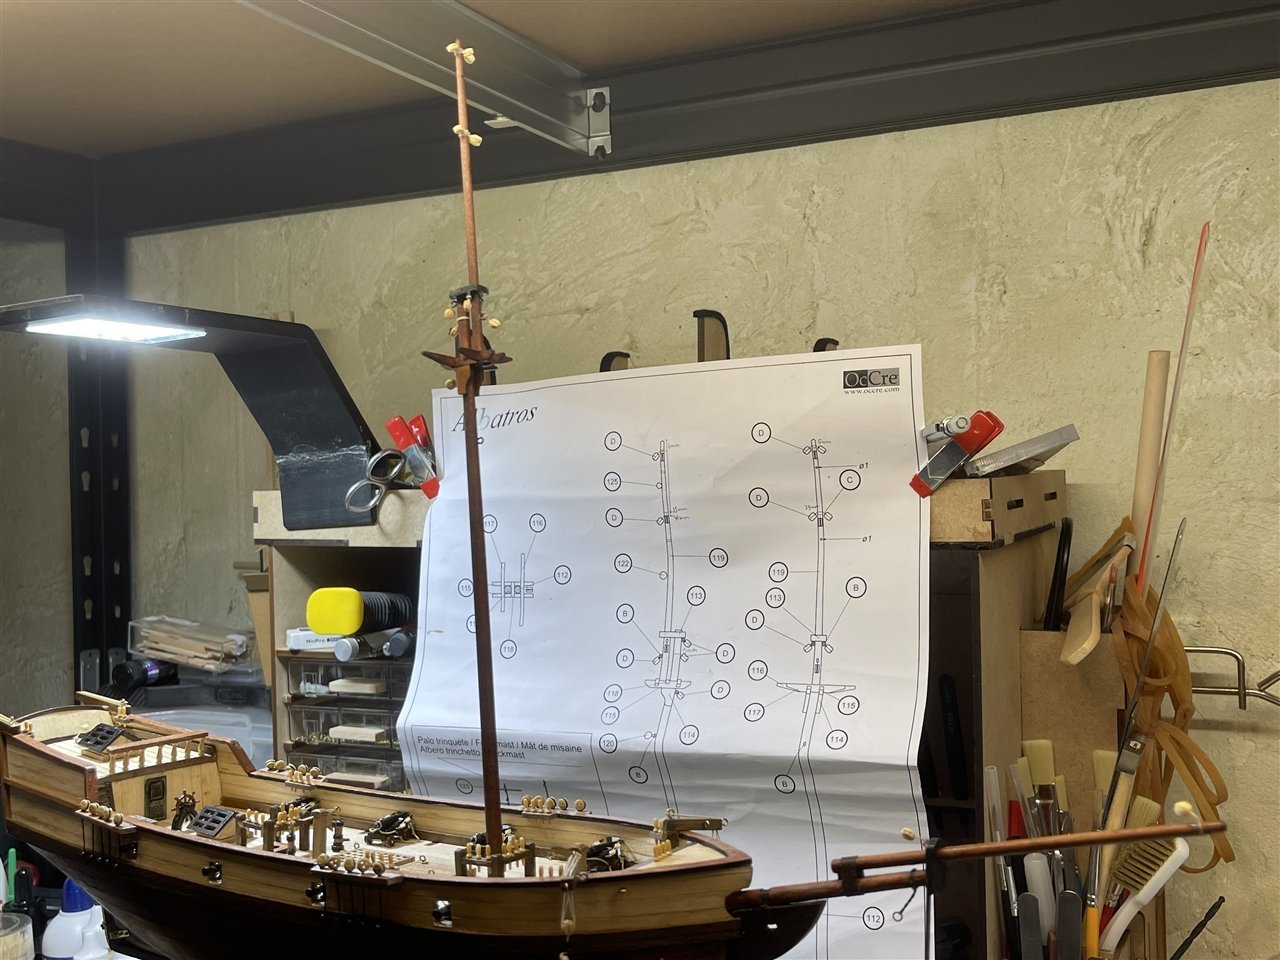
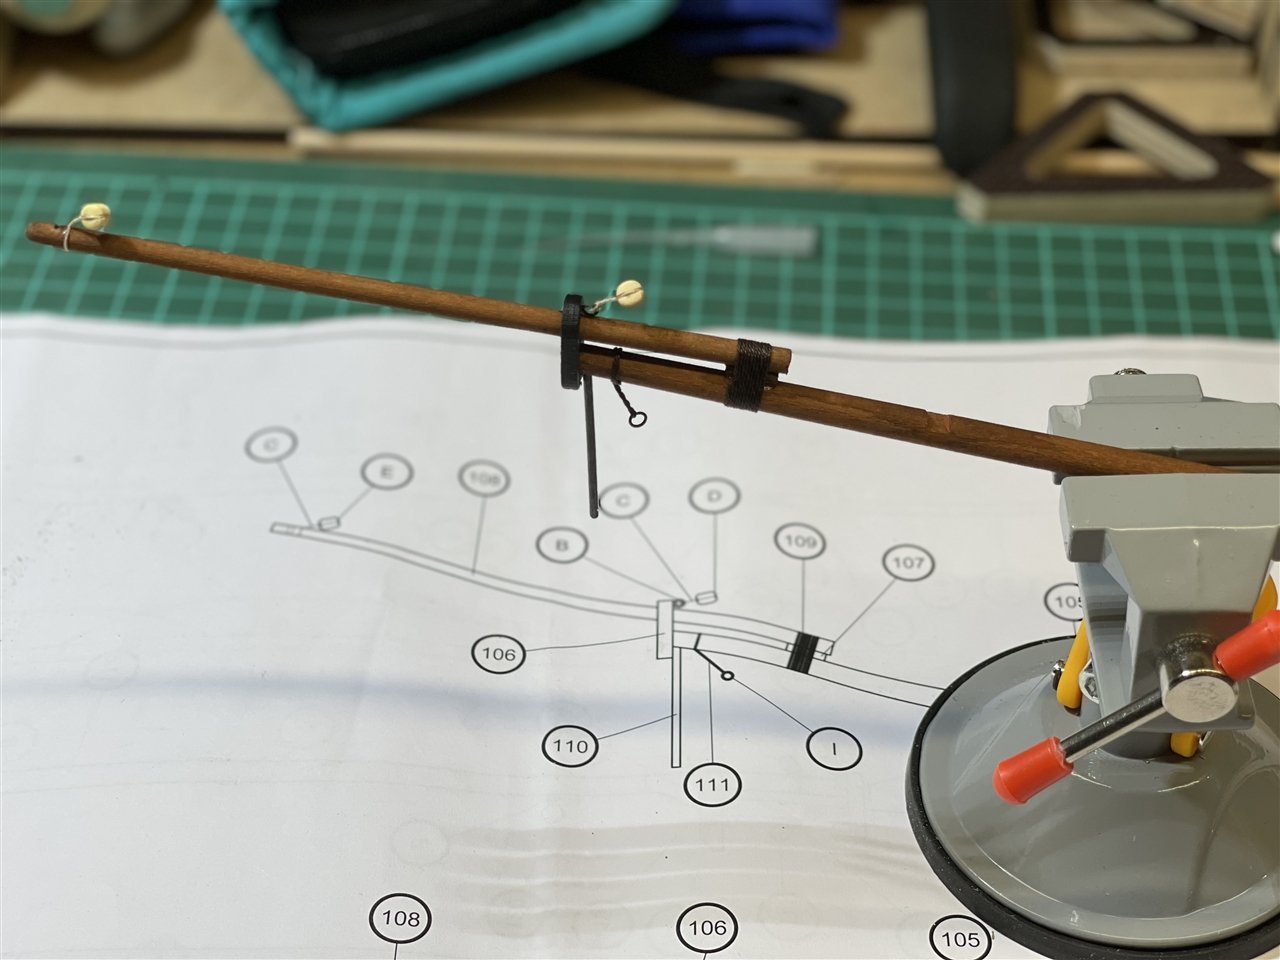
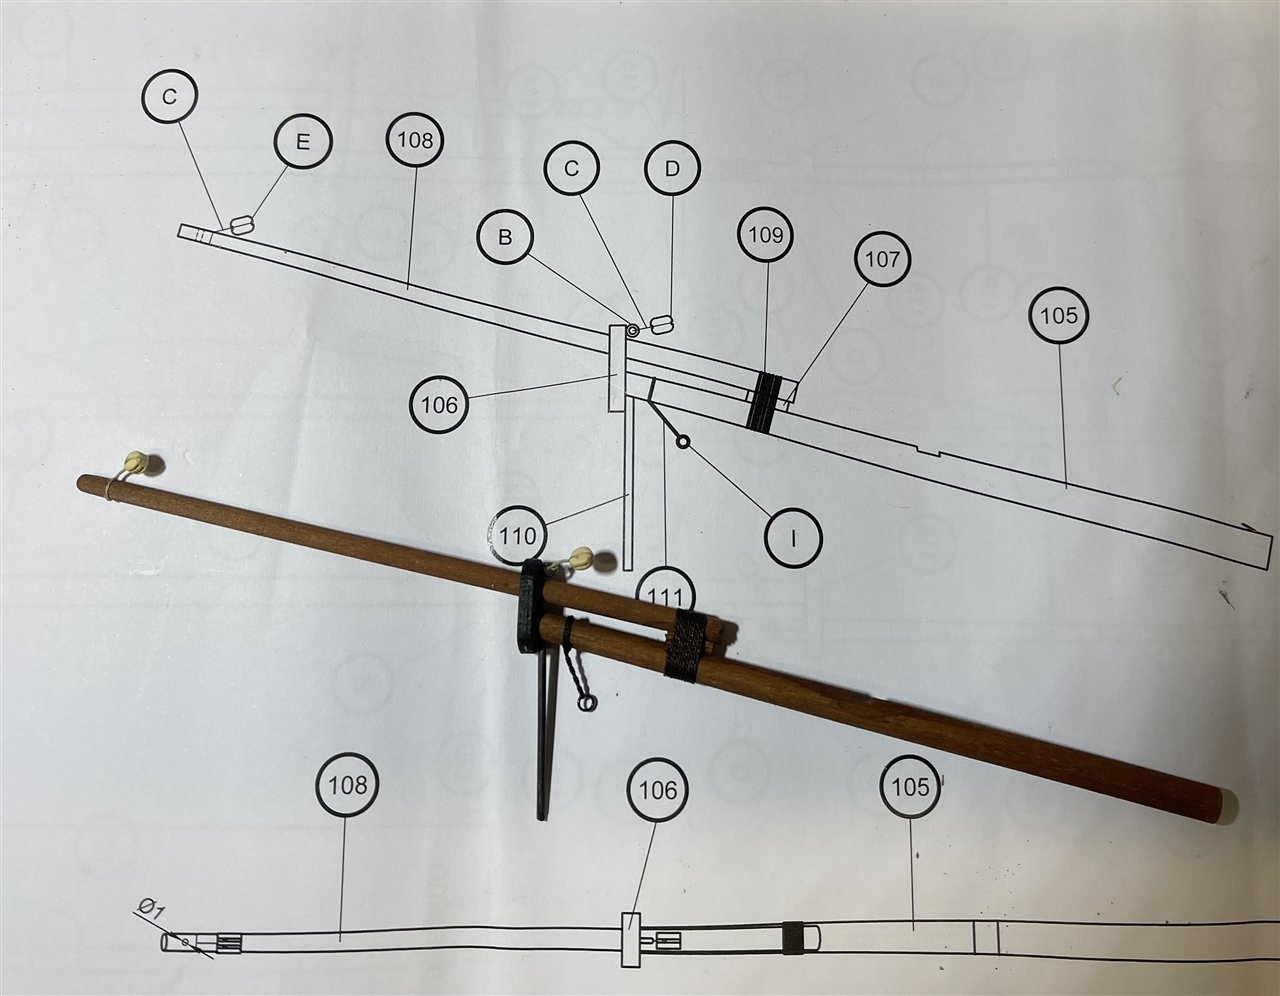
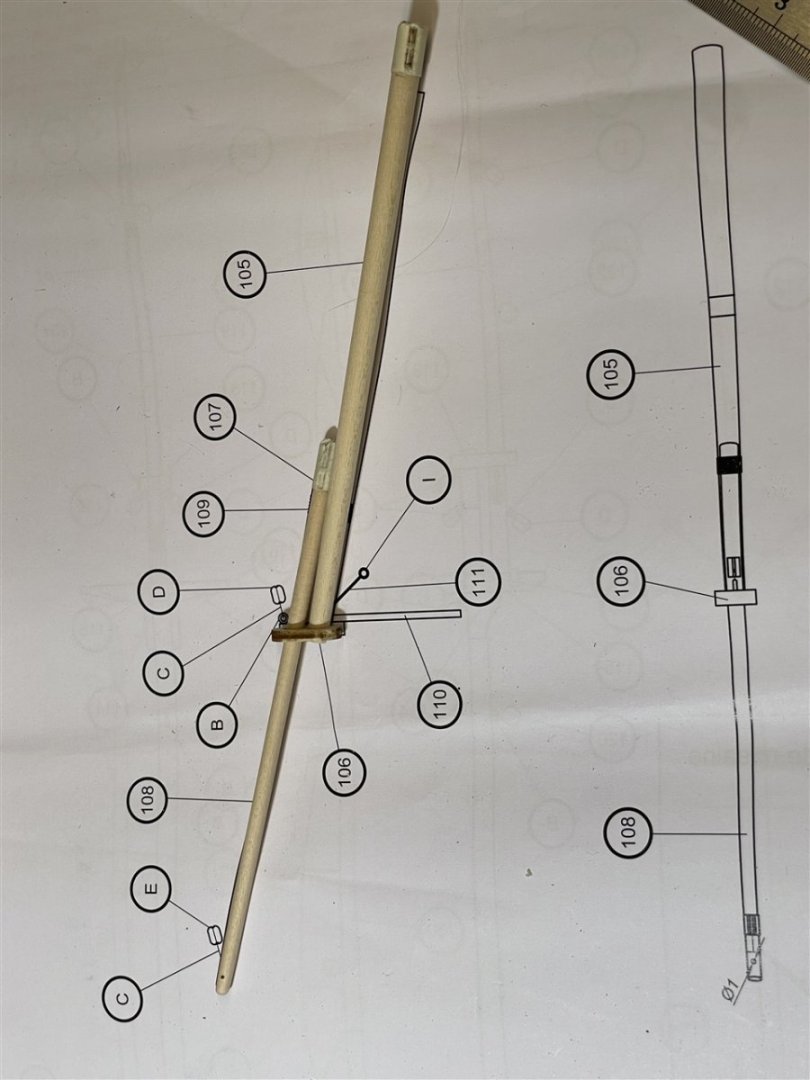
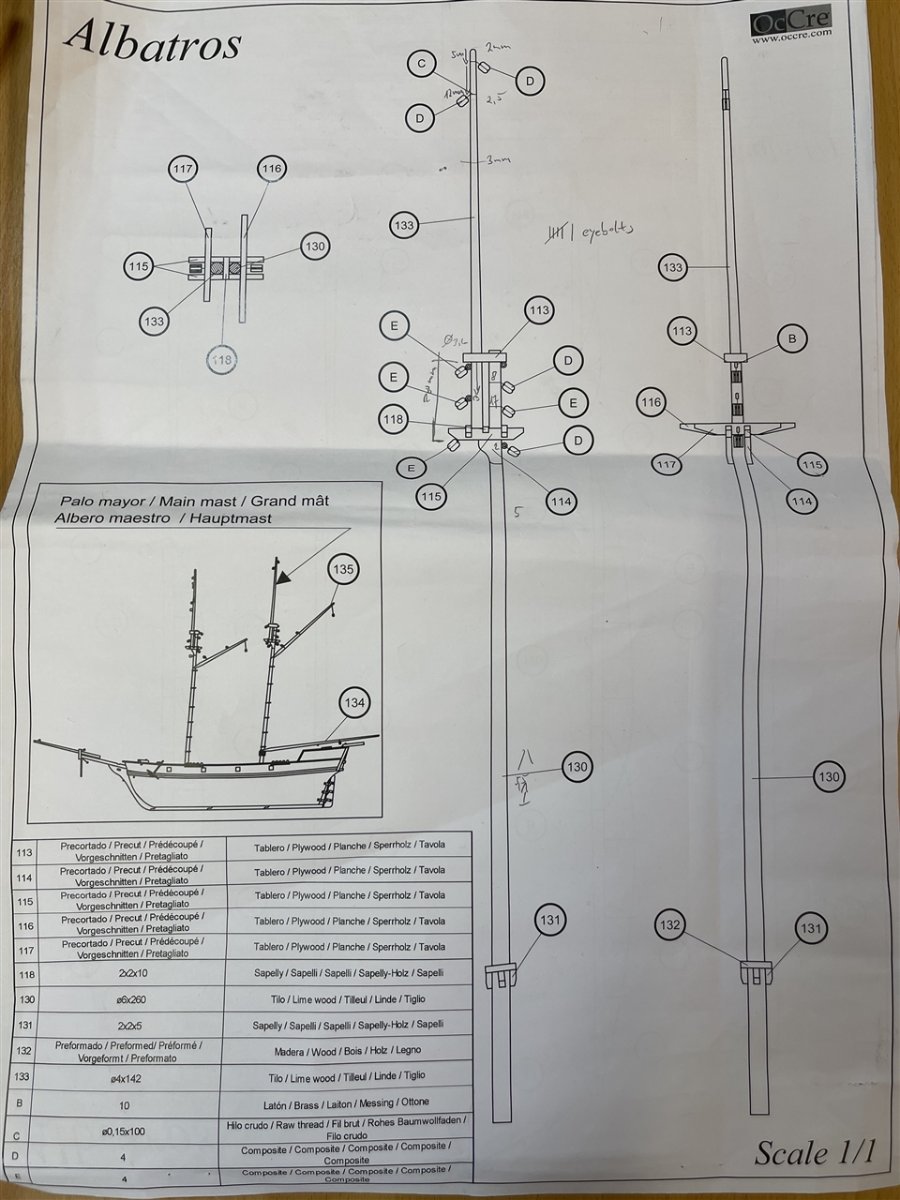
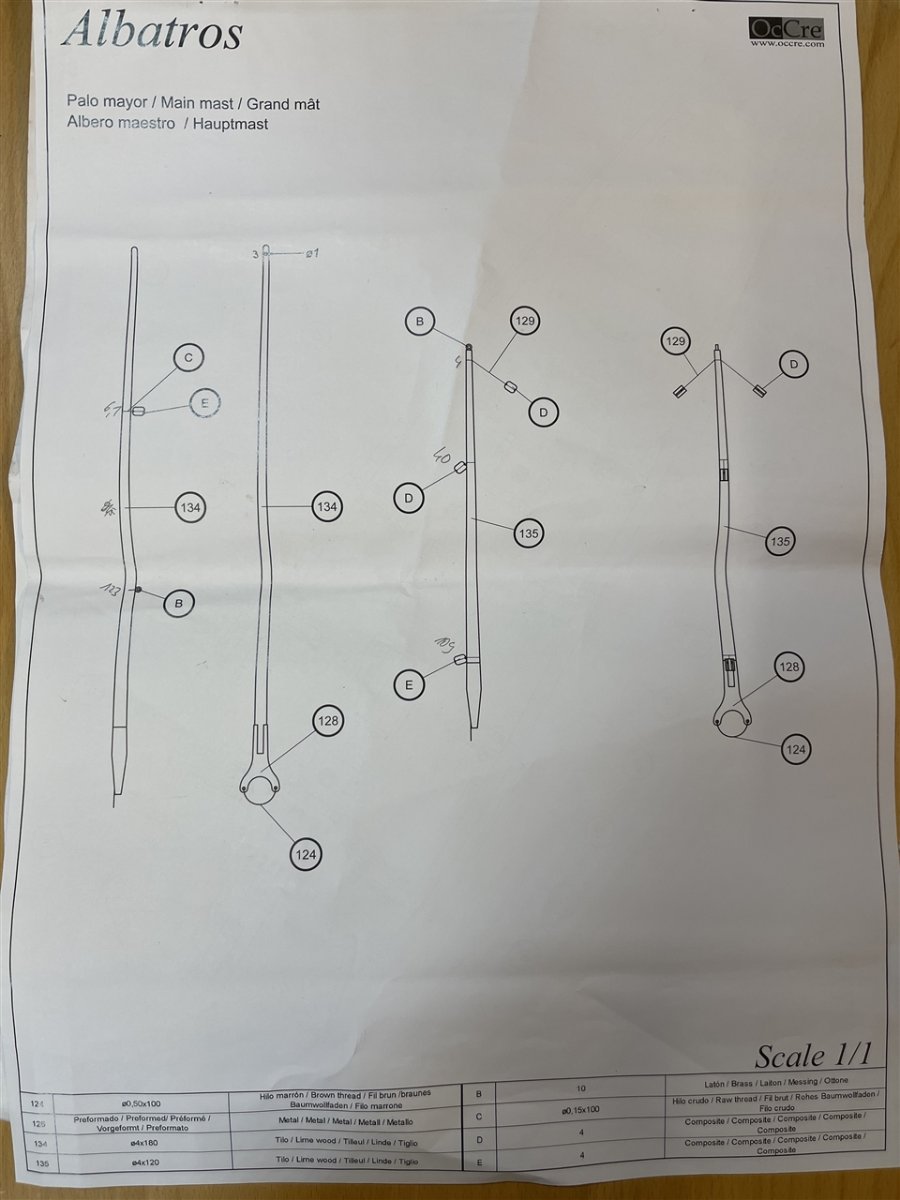
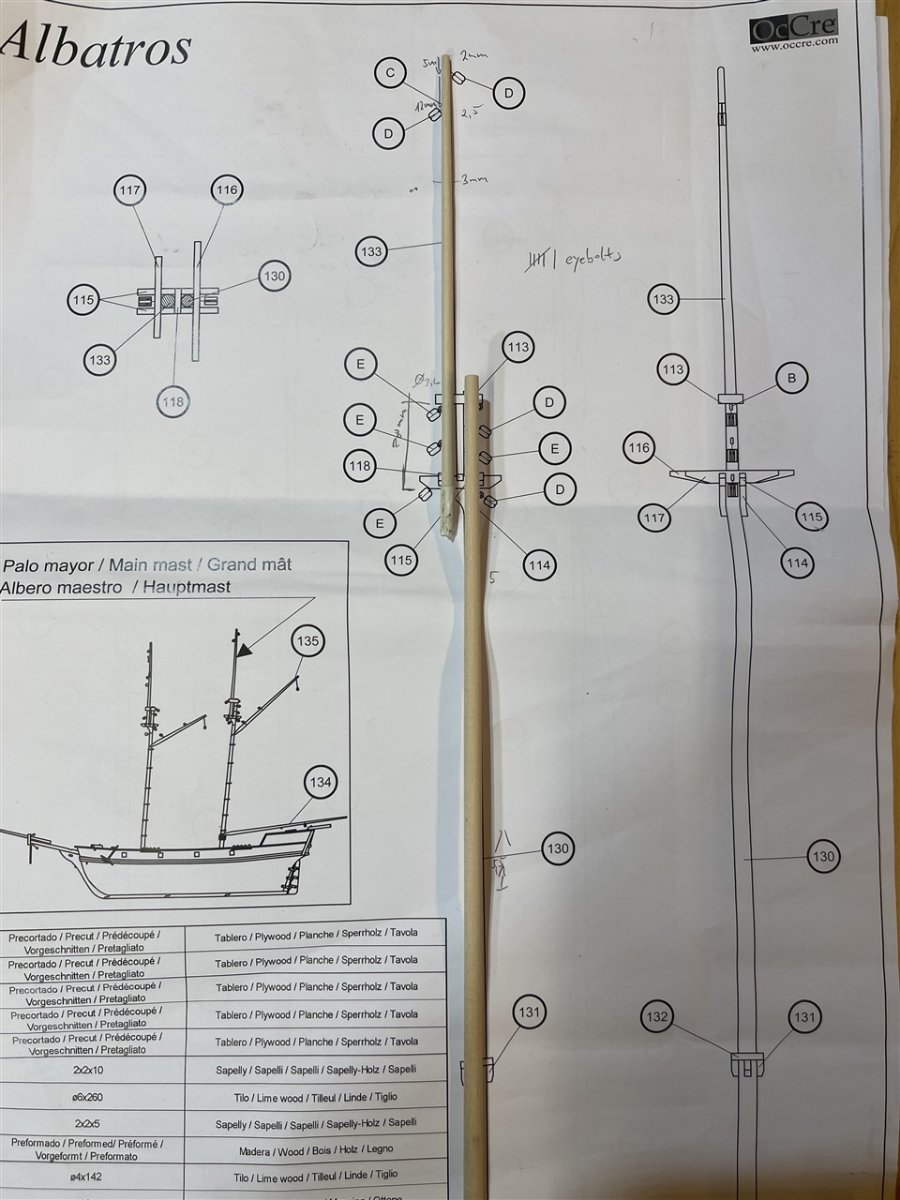
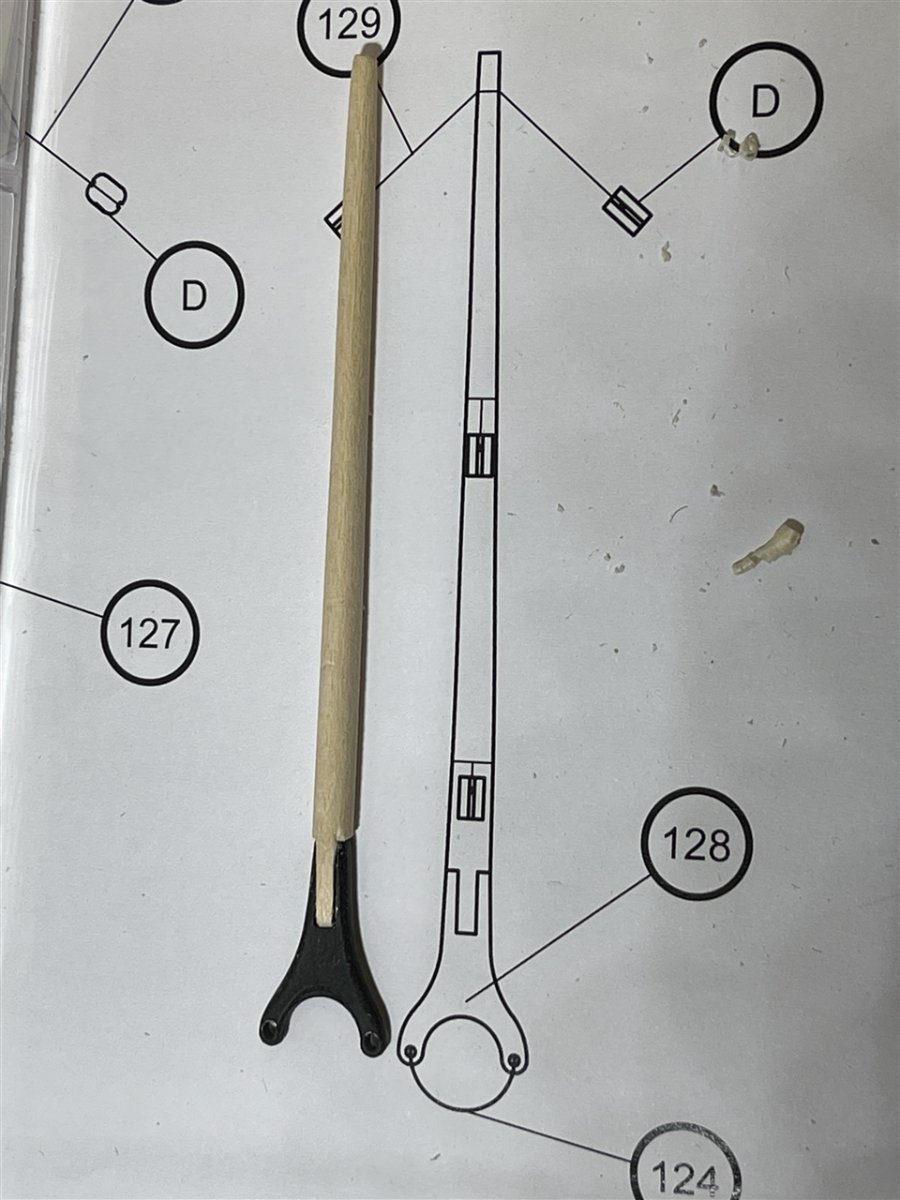
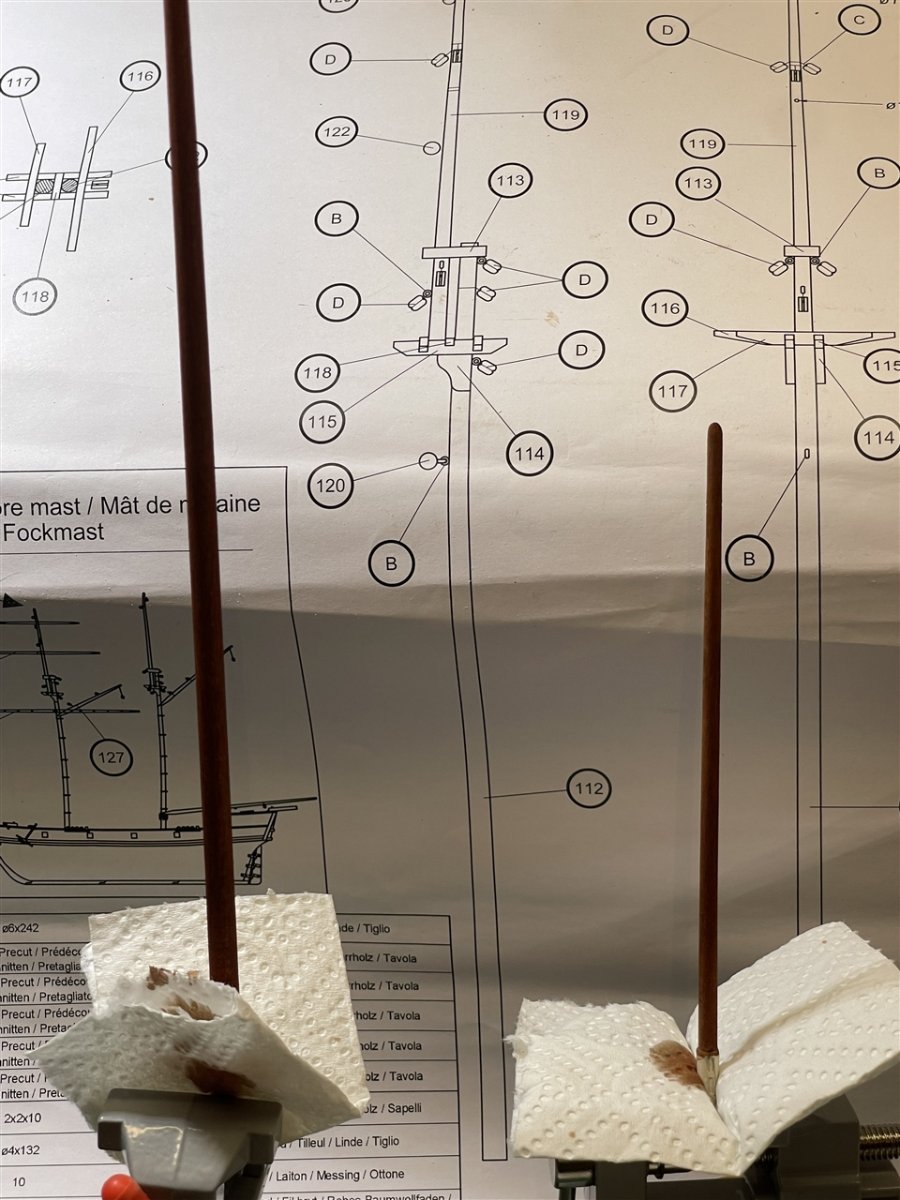
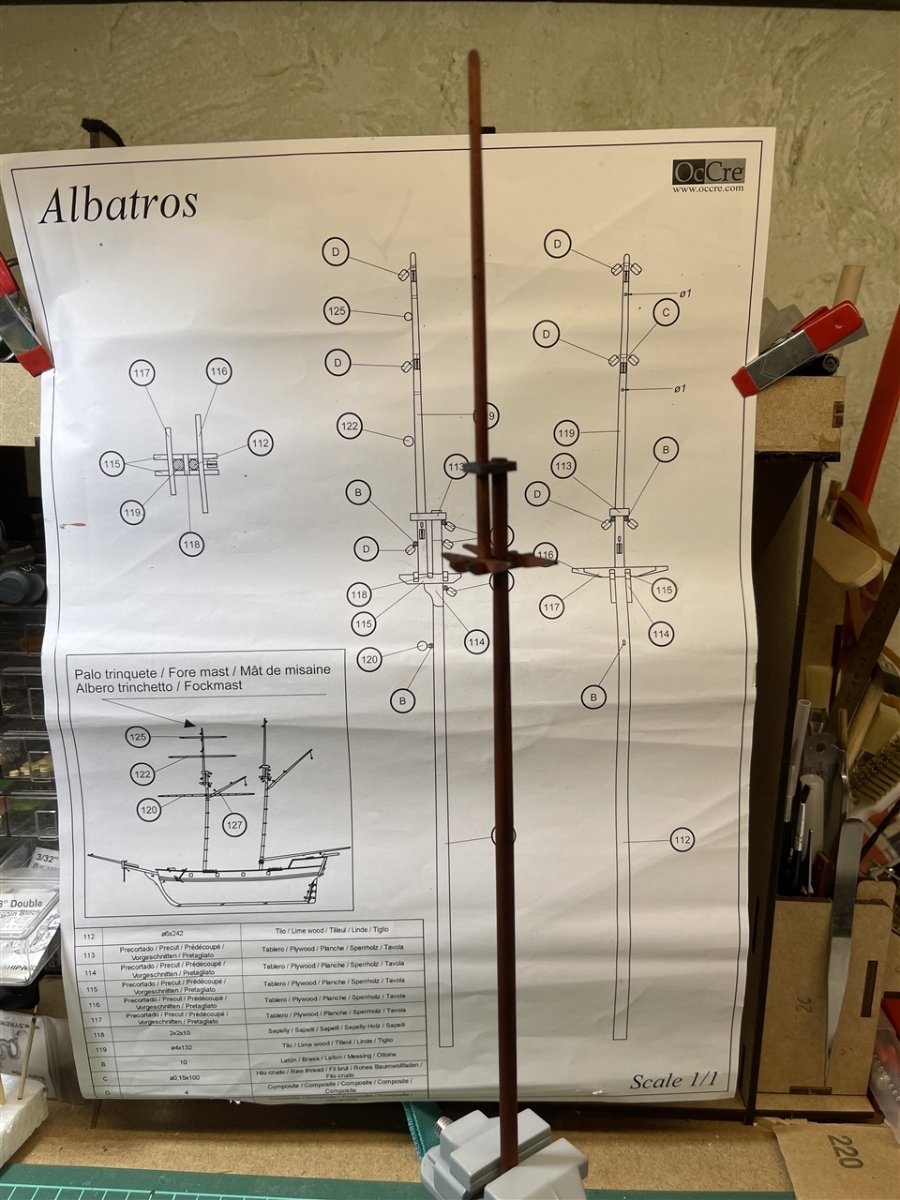
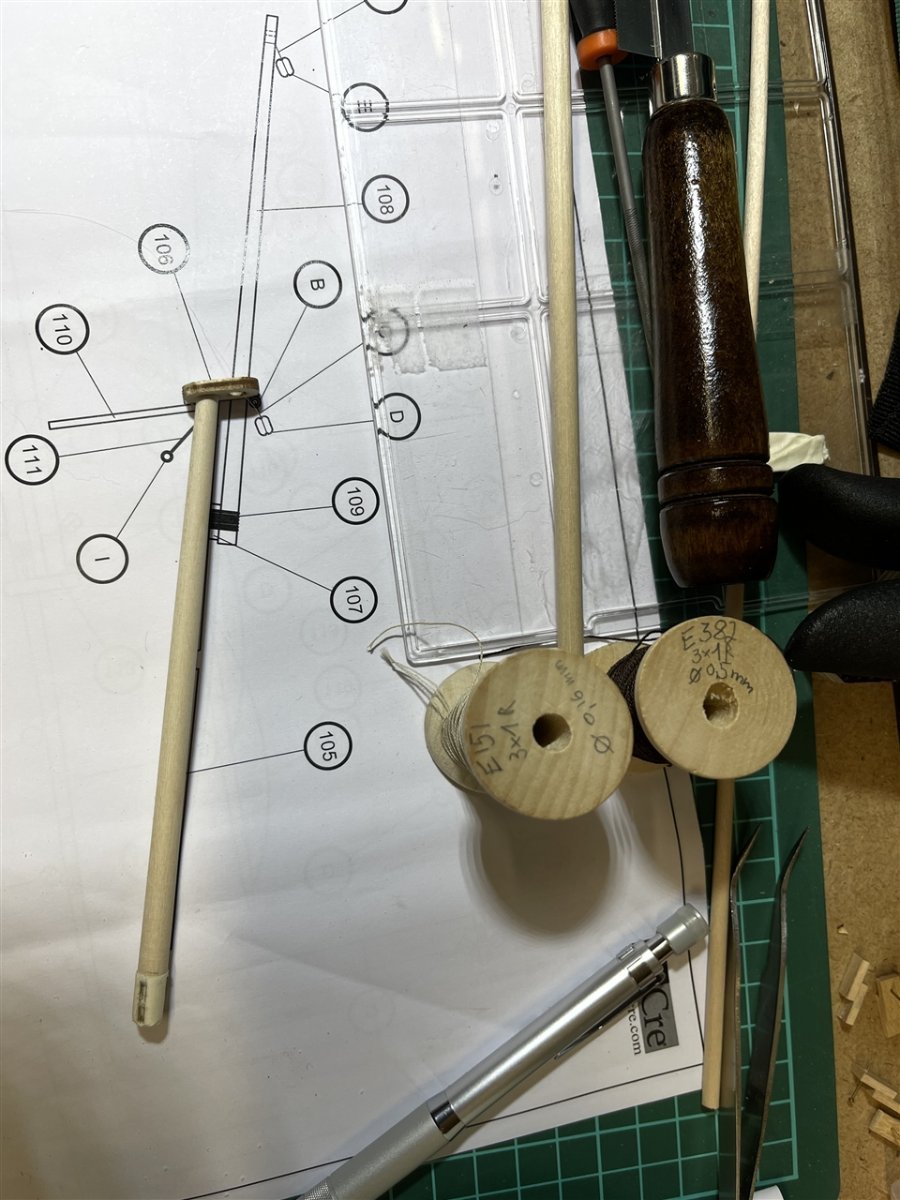
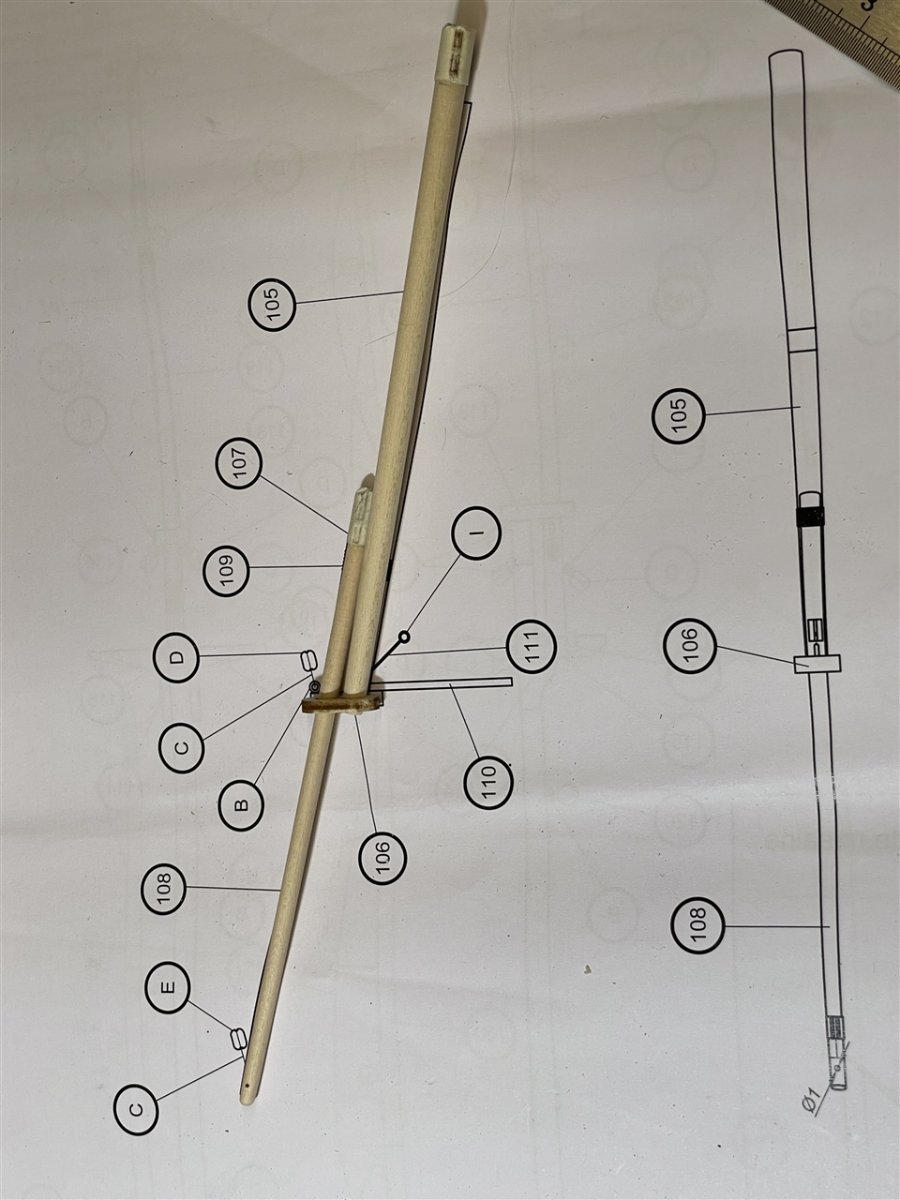
Building the main mast is very similar to the fore mast. There are the main and main top mast, the main gaff yard and the main boom. Few images and two 1/1 scale plans give you all the informations you need to build the parts:

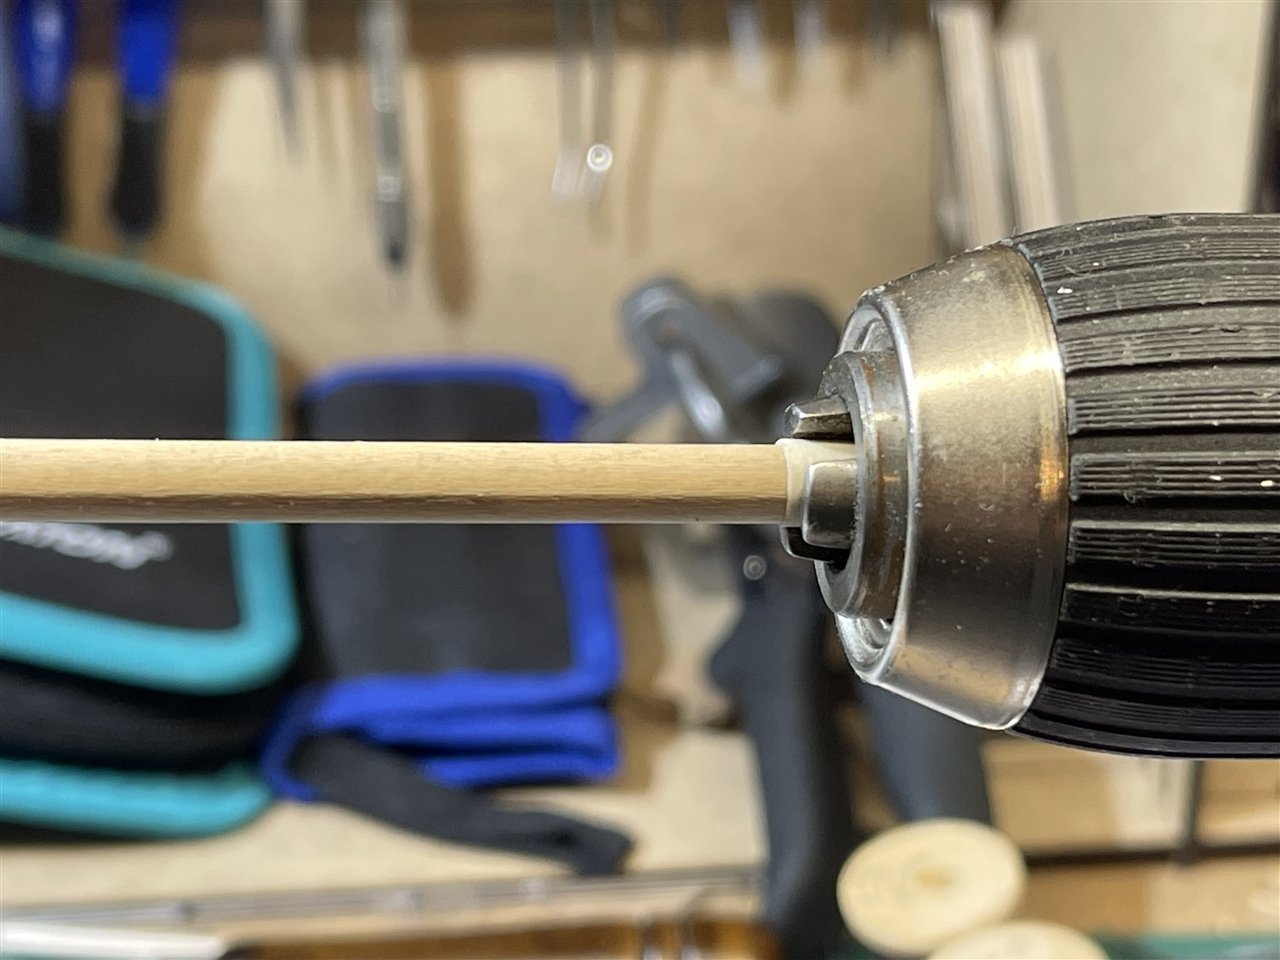
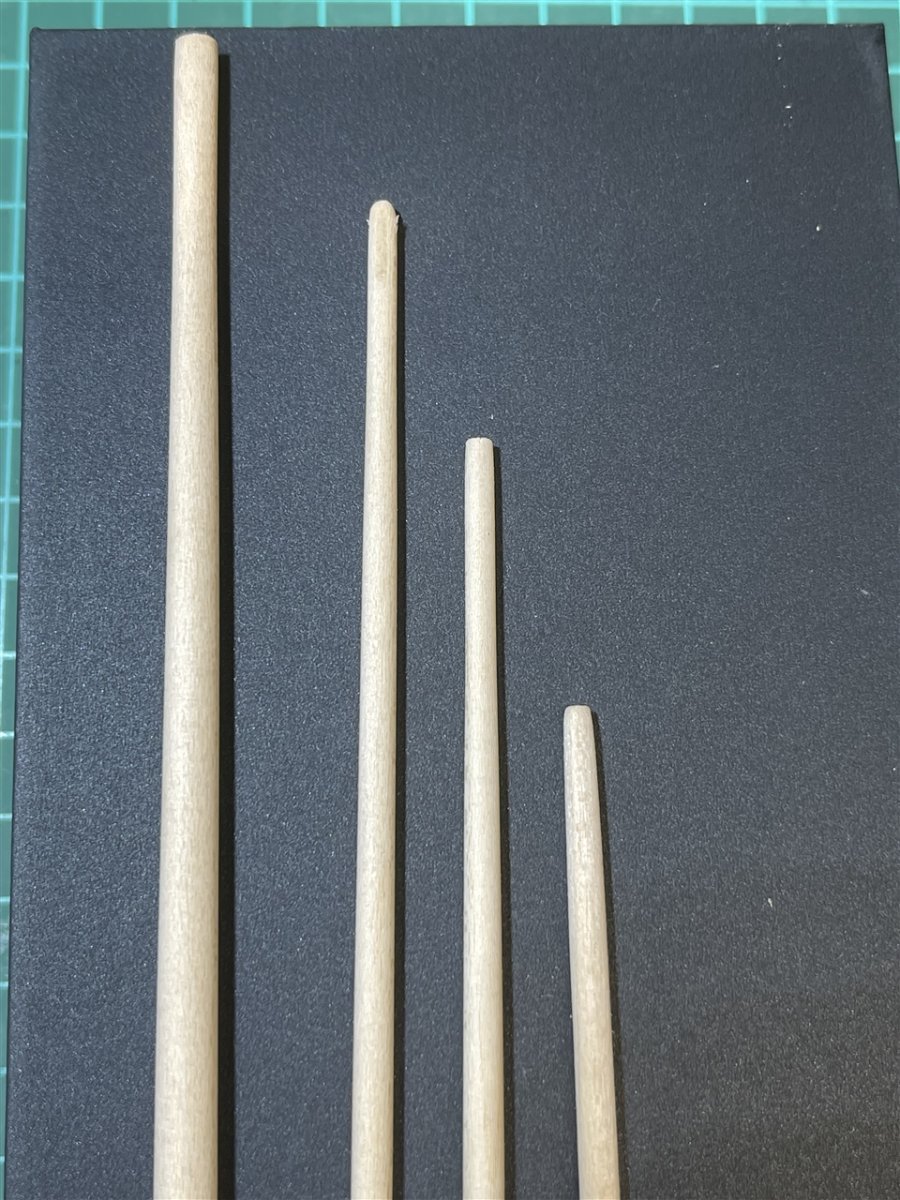
All dowels have been cut to size and tapered. This time I have used the power drill.
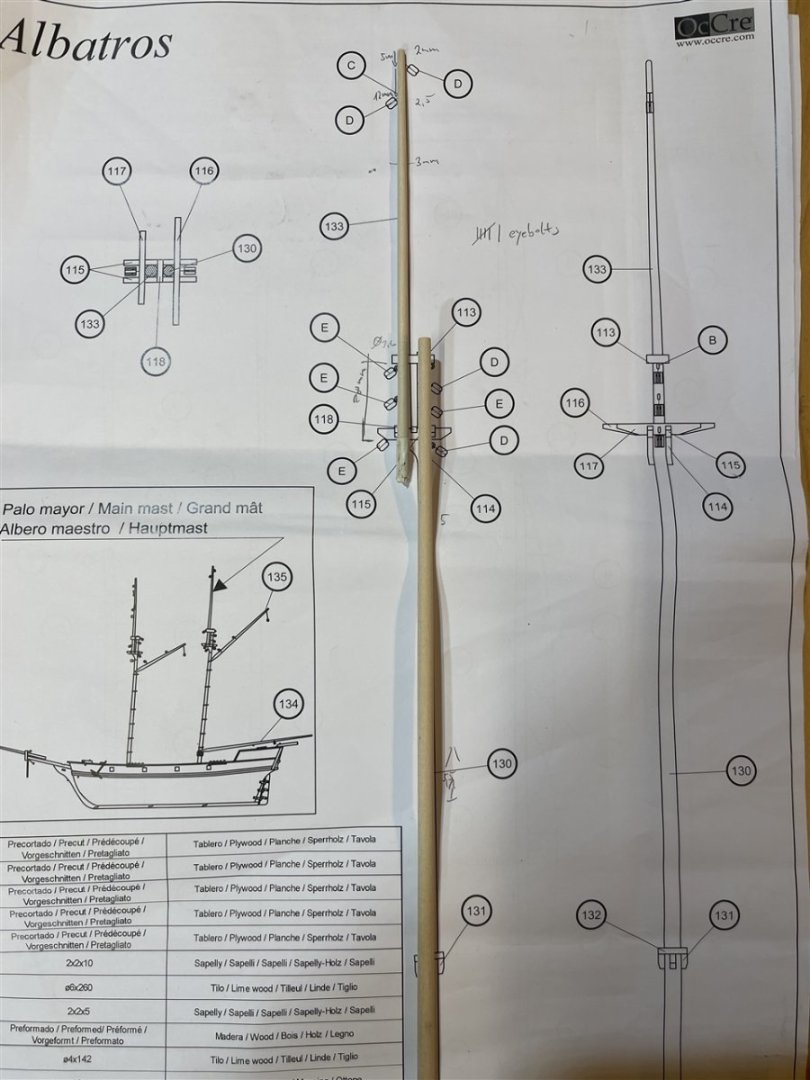
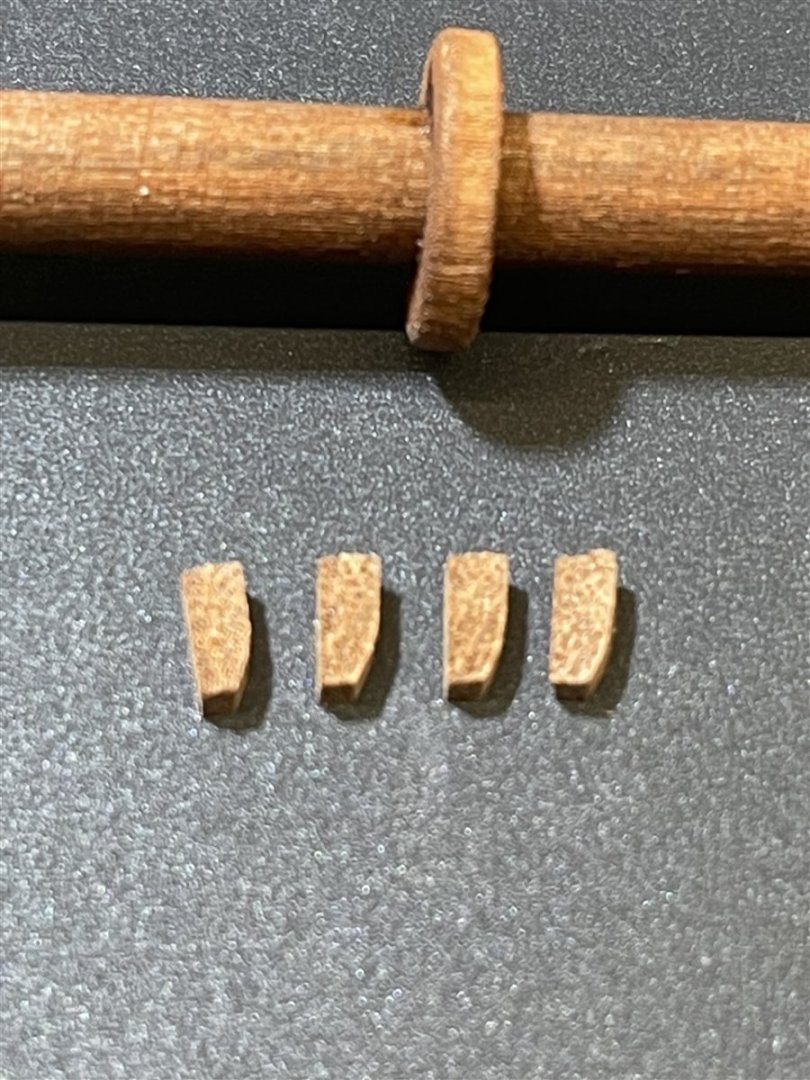
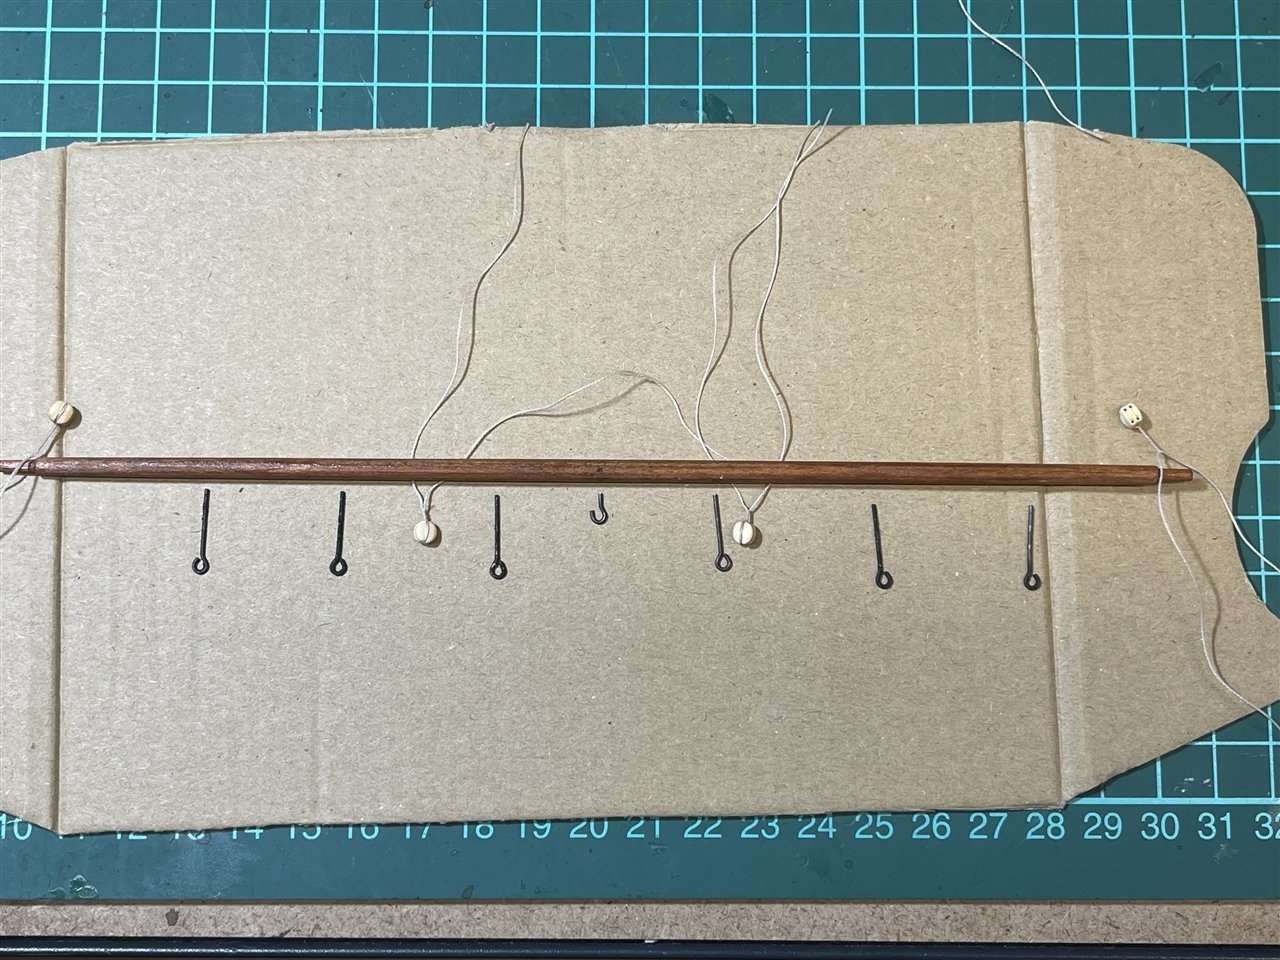
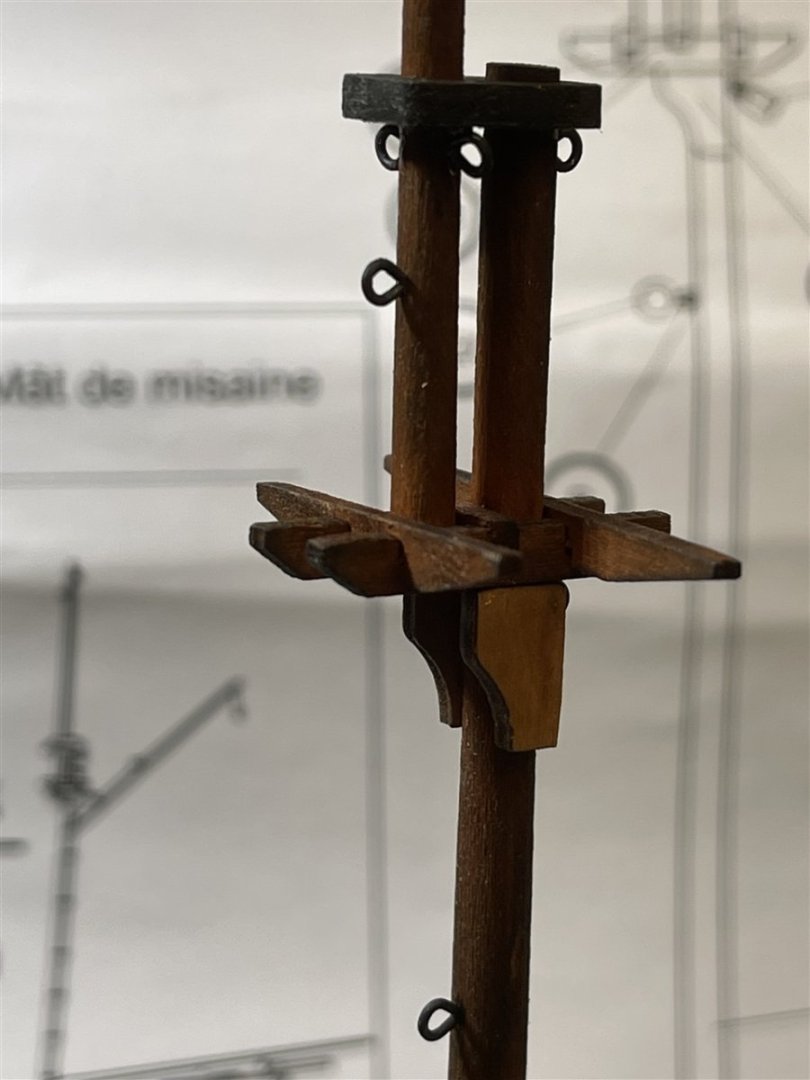
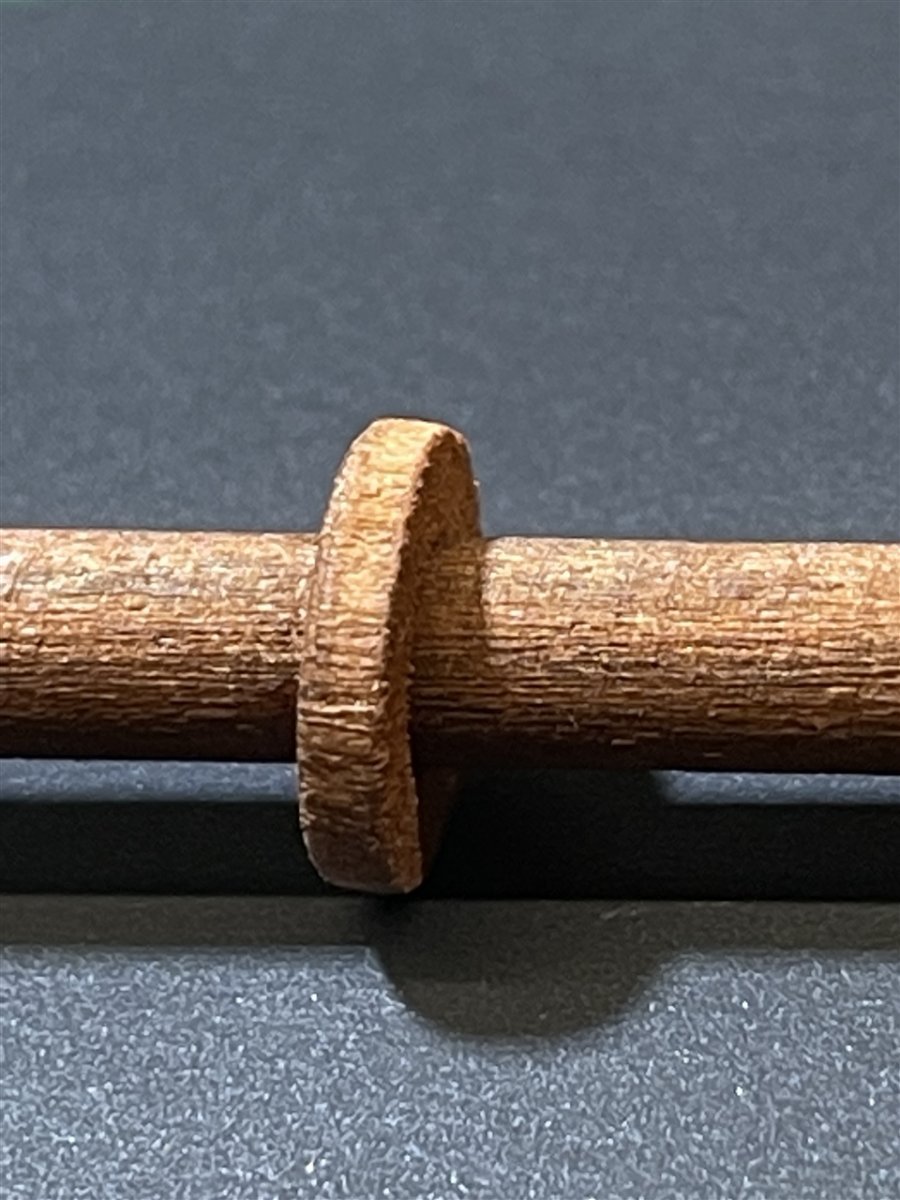
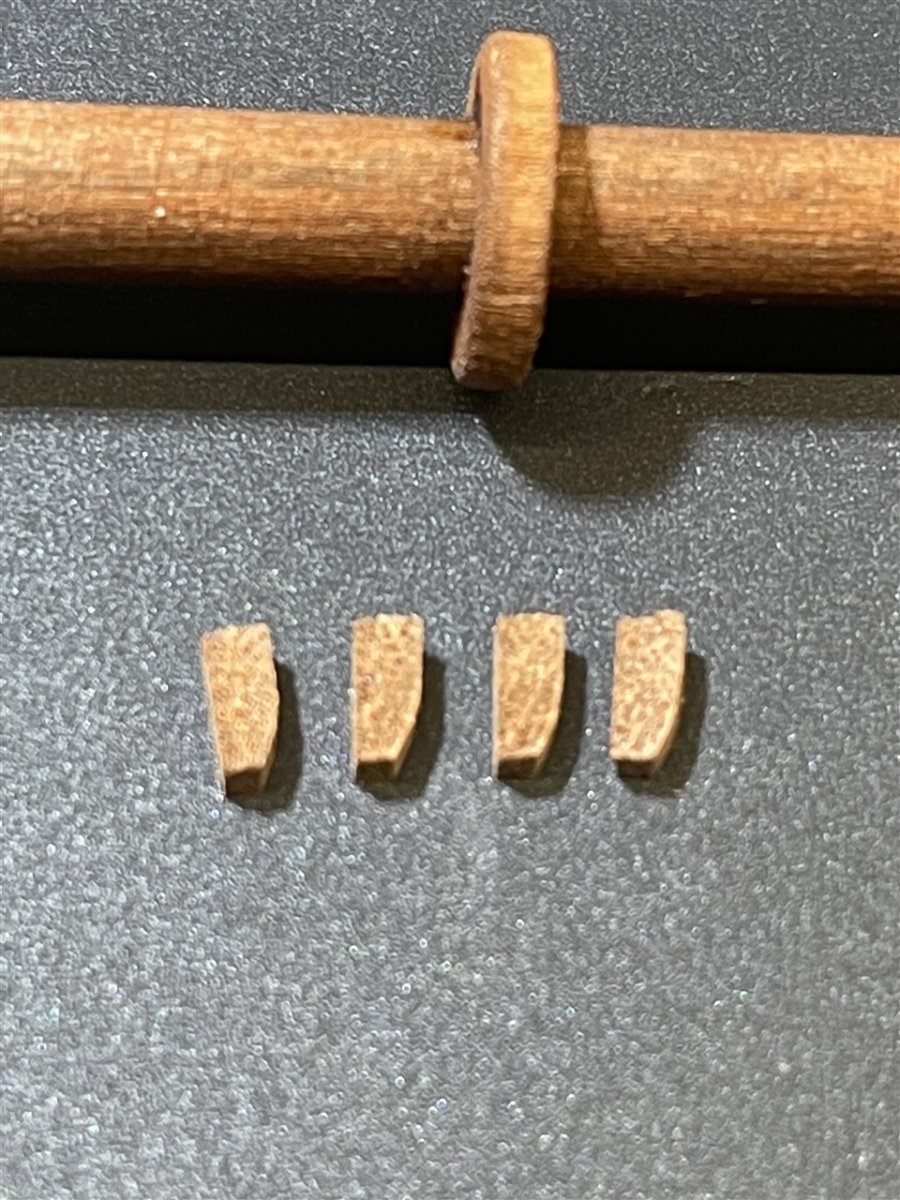
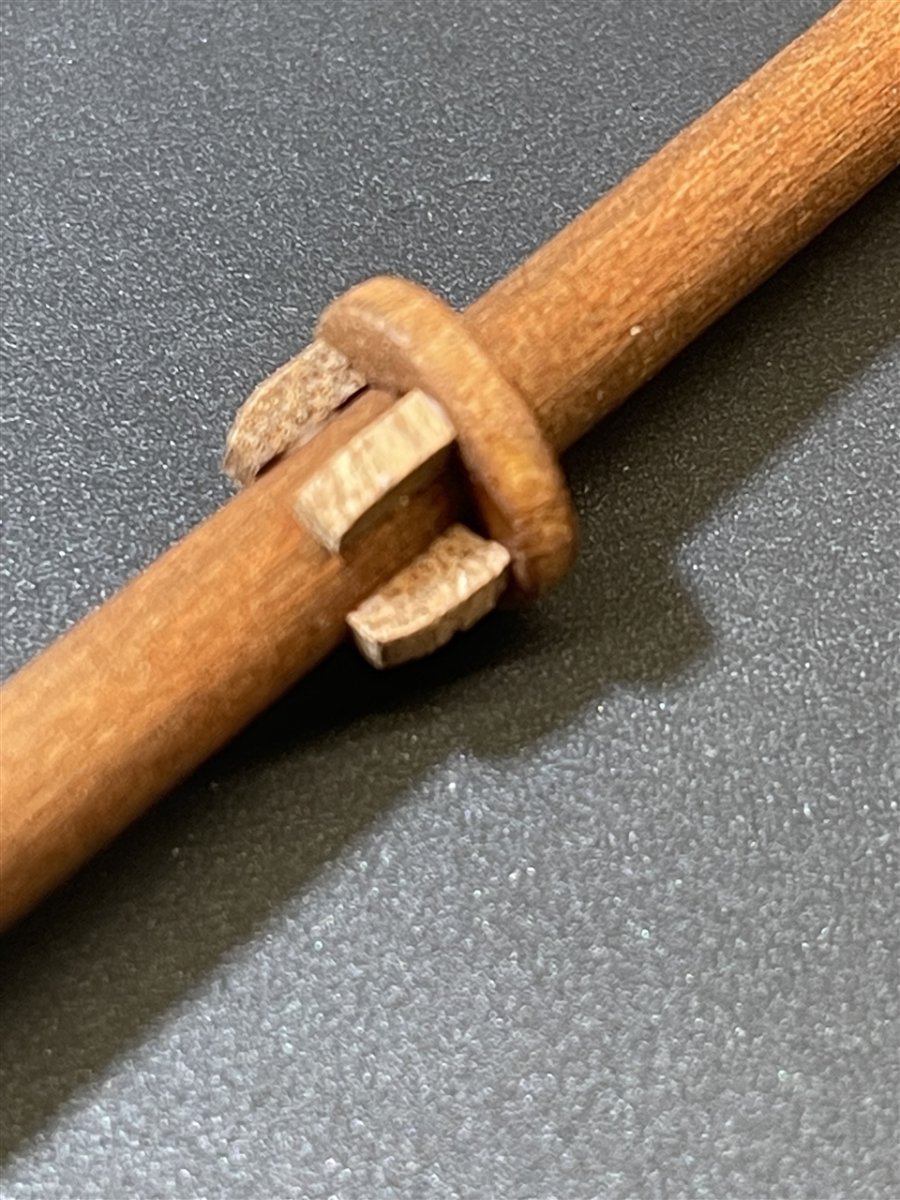
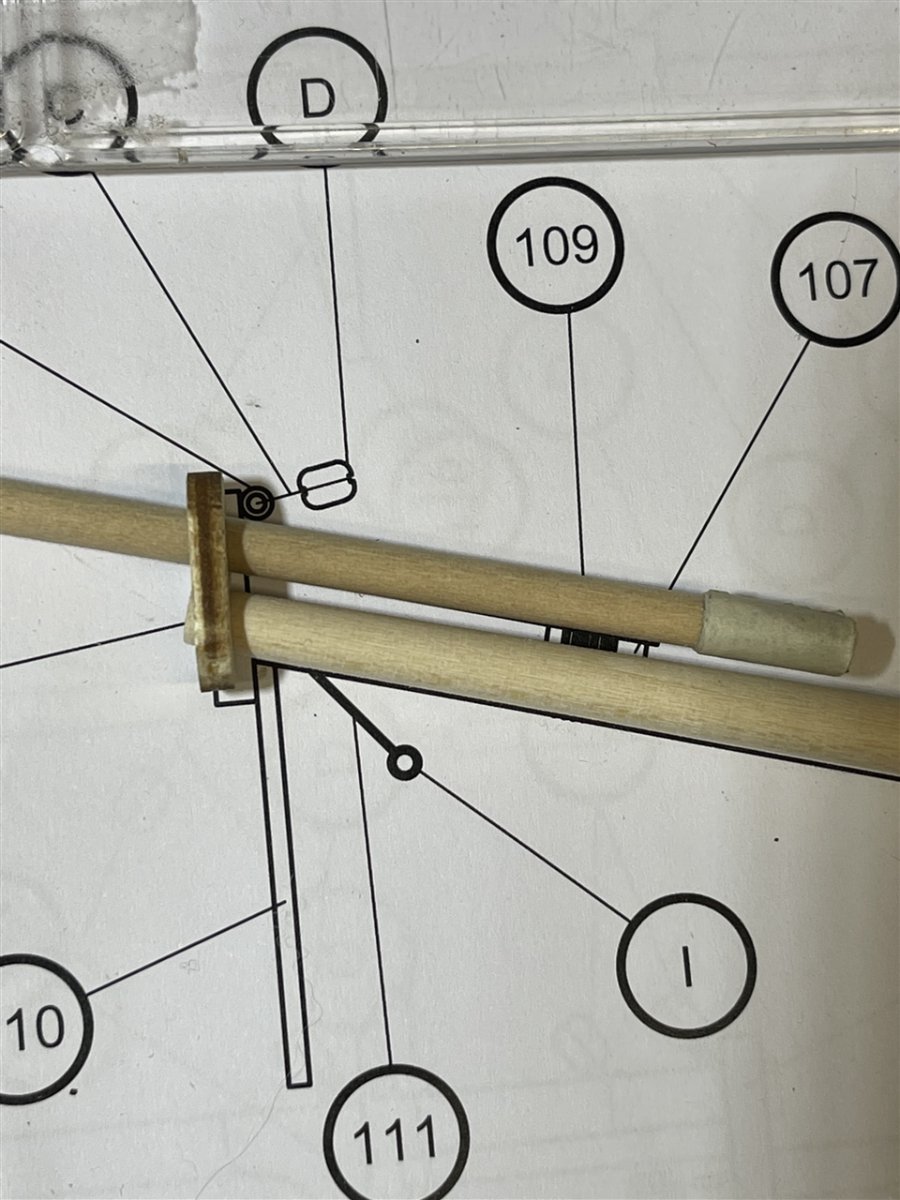
Then all parts needed got prepared for the assembly. These are the cross- and trestle trees, the mast cap, the cheeks, 7 eyebolts, 7 single and 6 double blocks, main boom jaws and gaff yard jaws. I don't know the english term for the little collar and its supports (part numbers 131 and 132 on the plan above) :
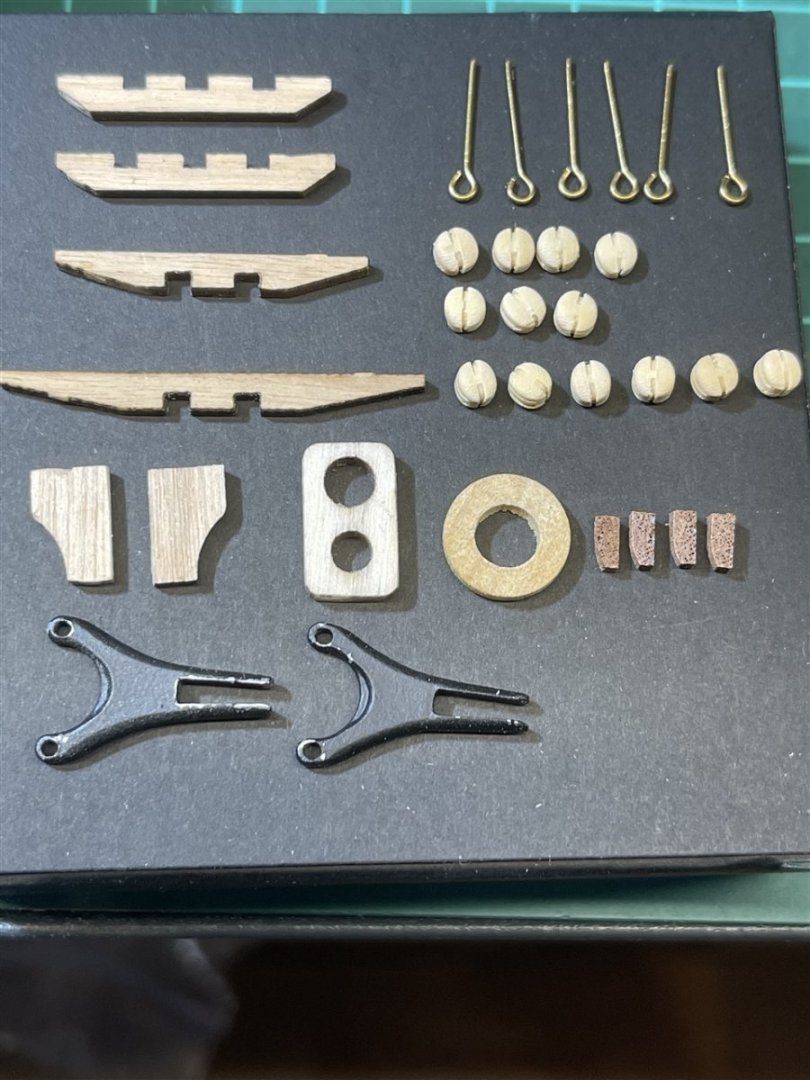

After painting or blackening all parts got assembled.
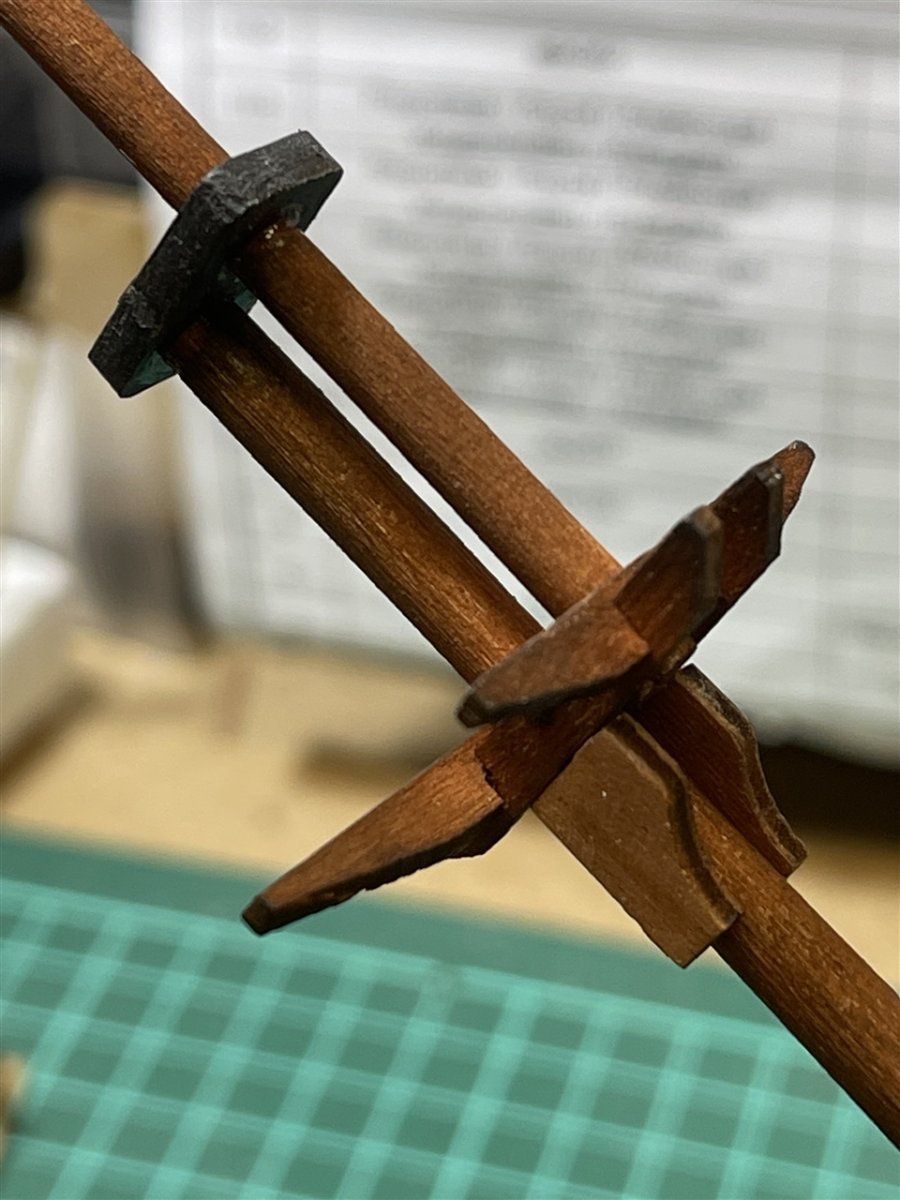
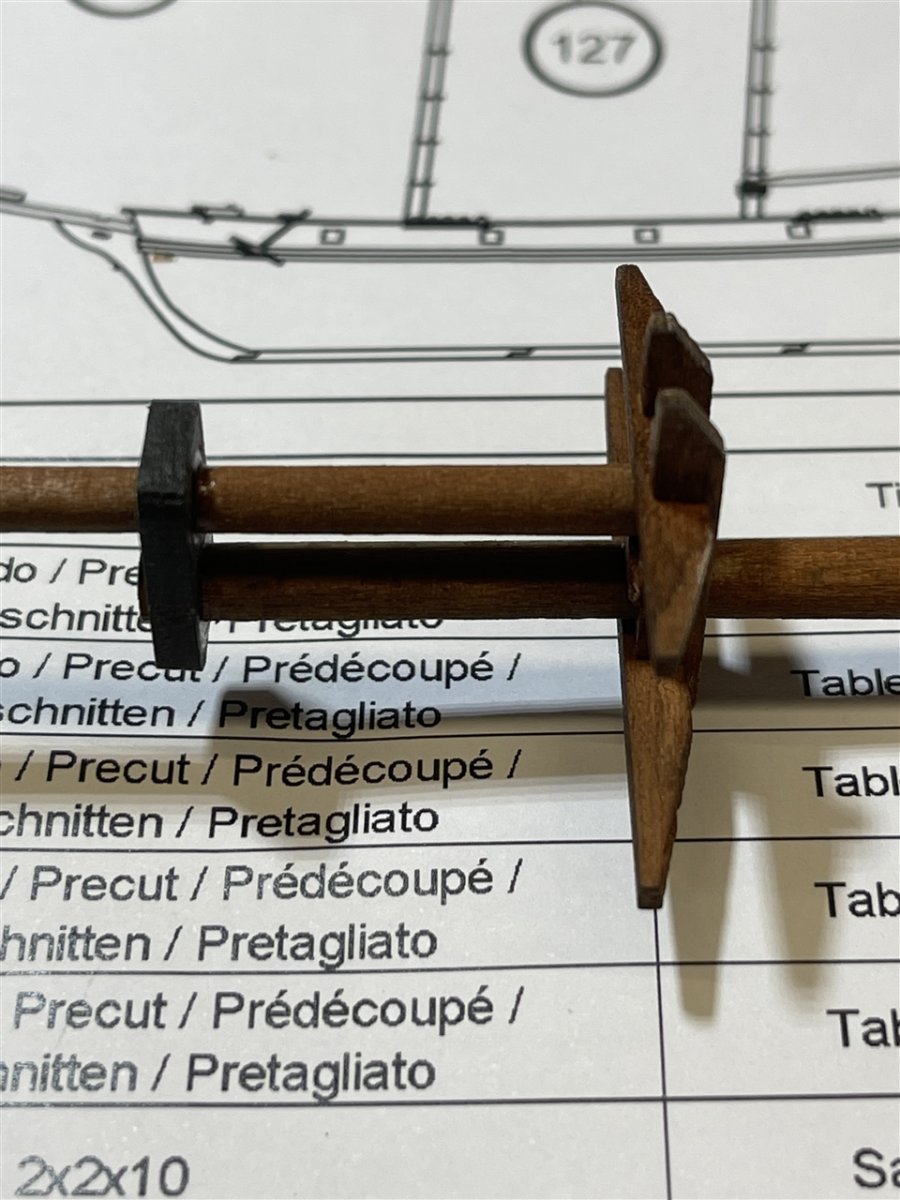
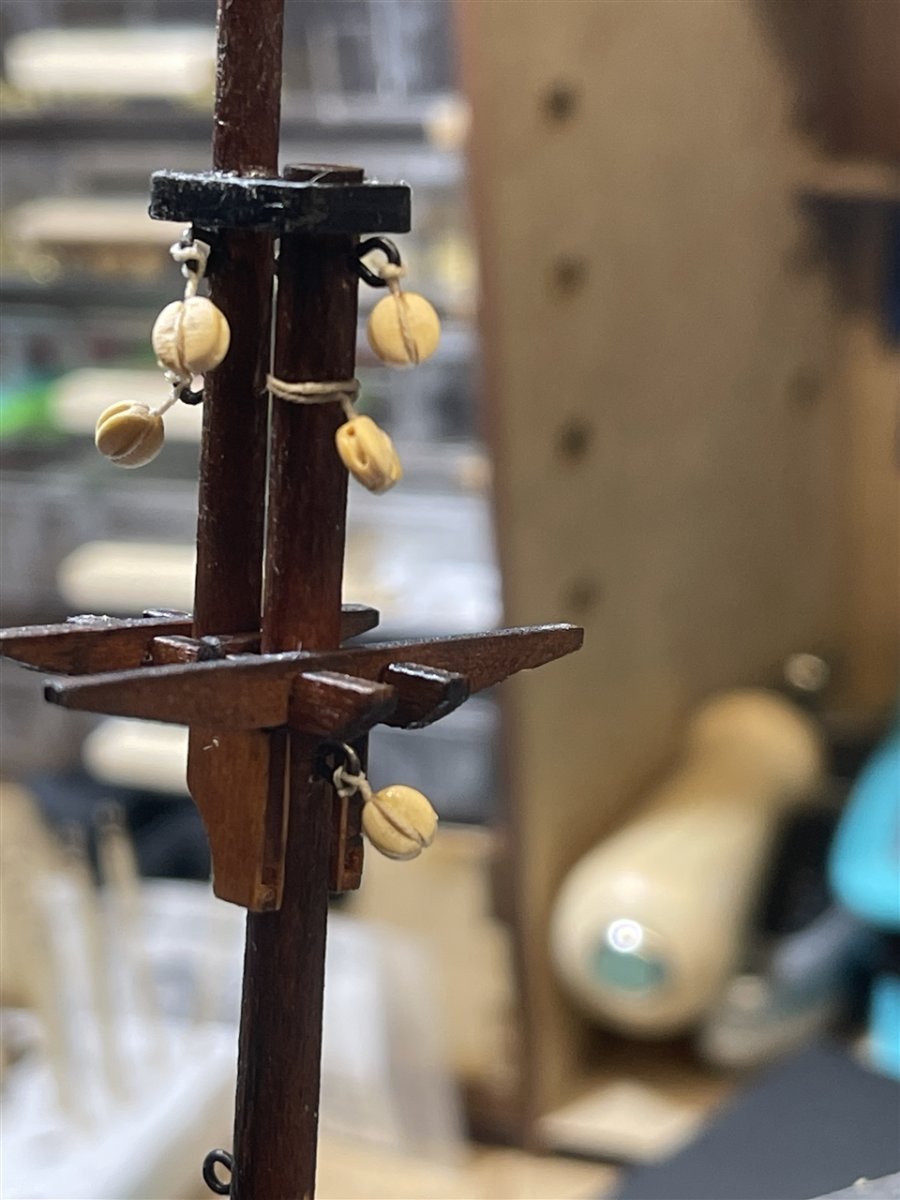
The crosstrees and doubling section:
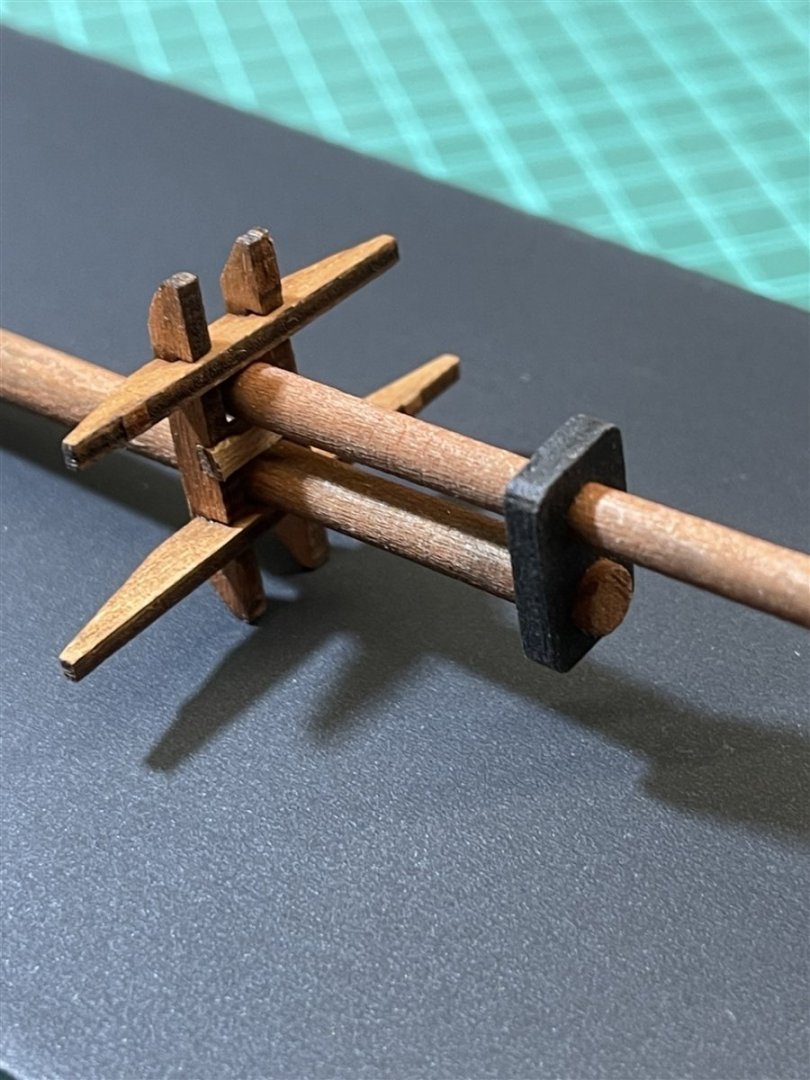
The "collar & supports":


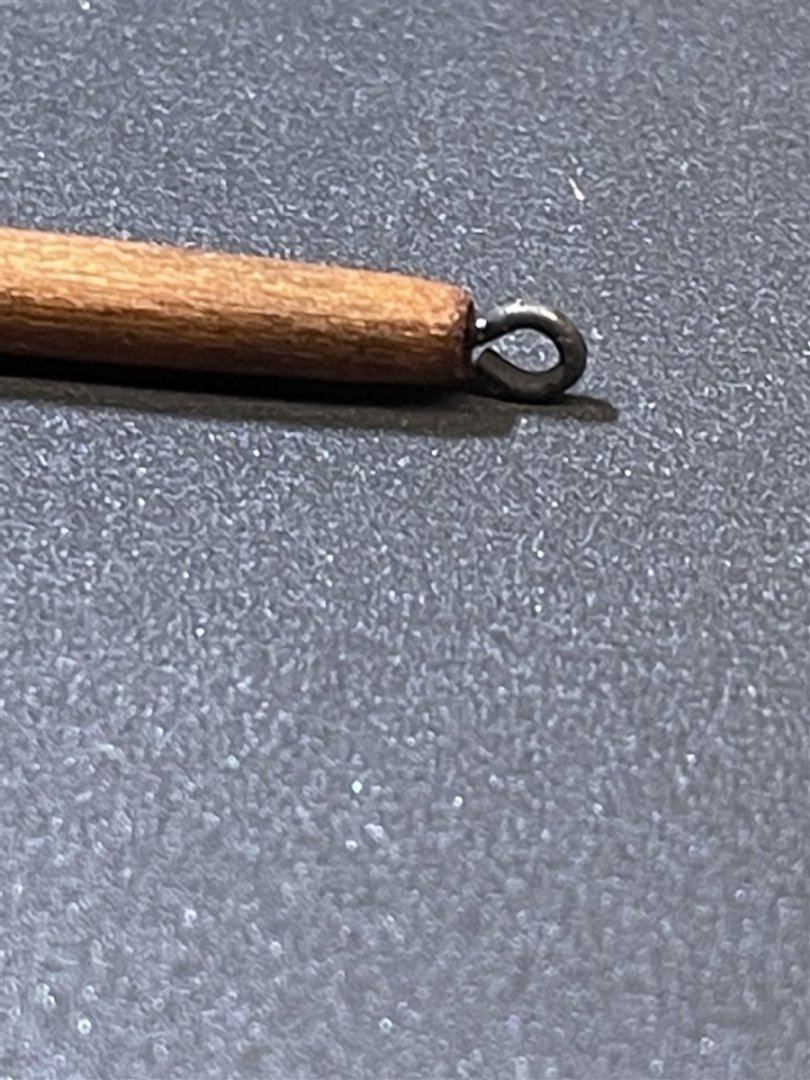
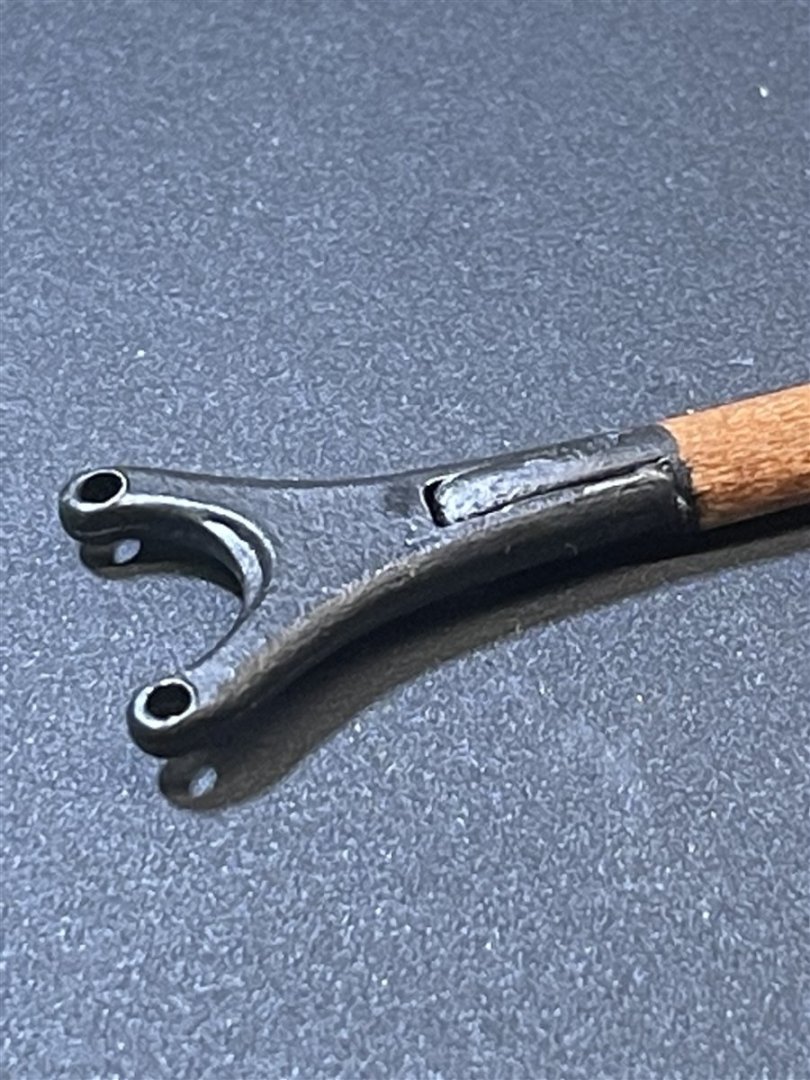
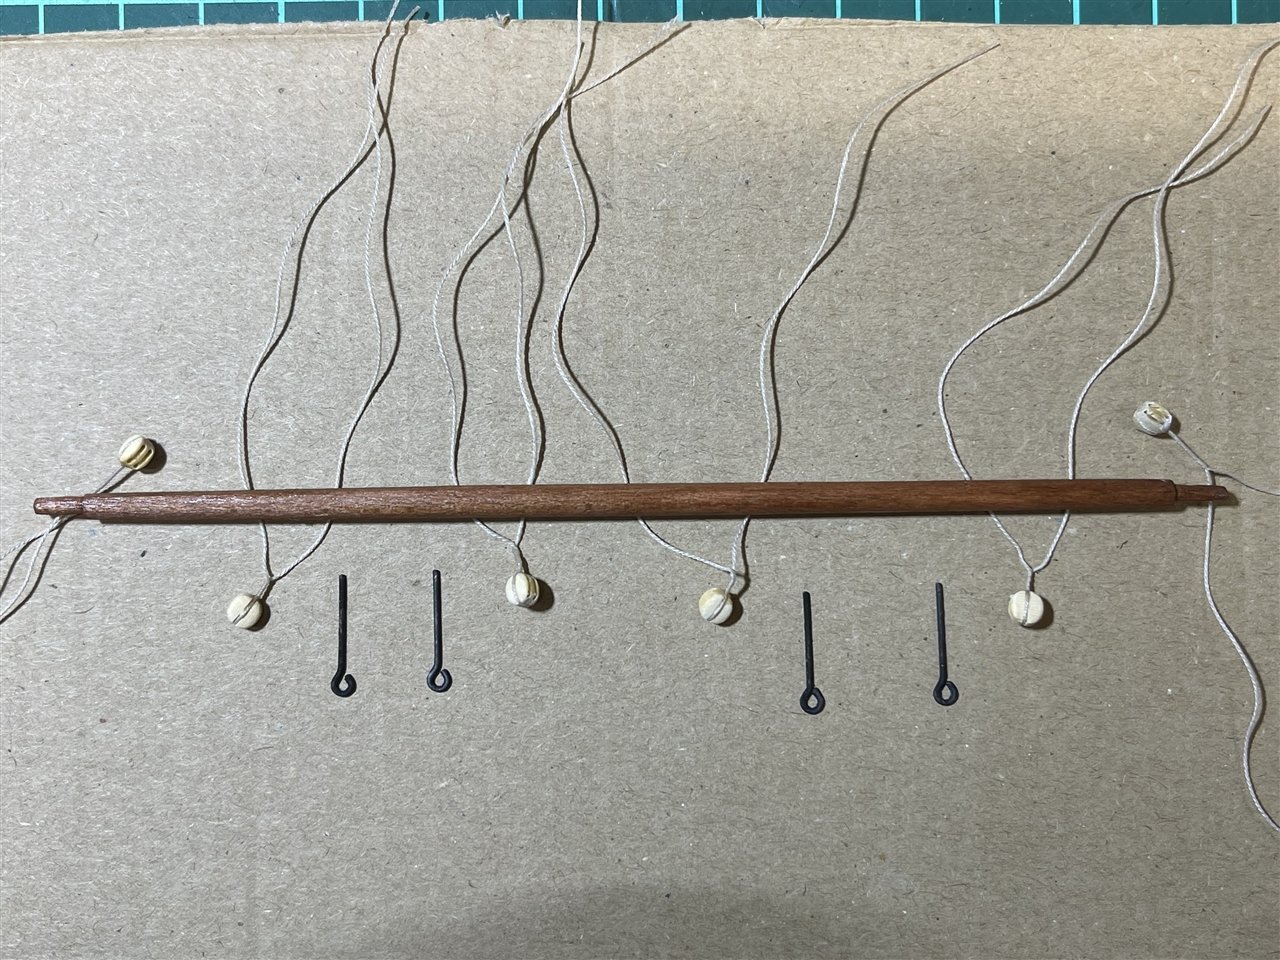
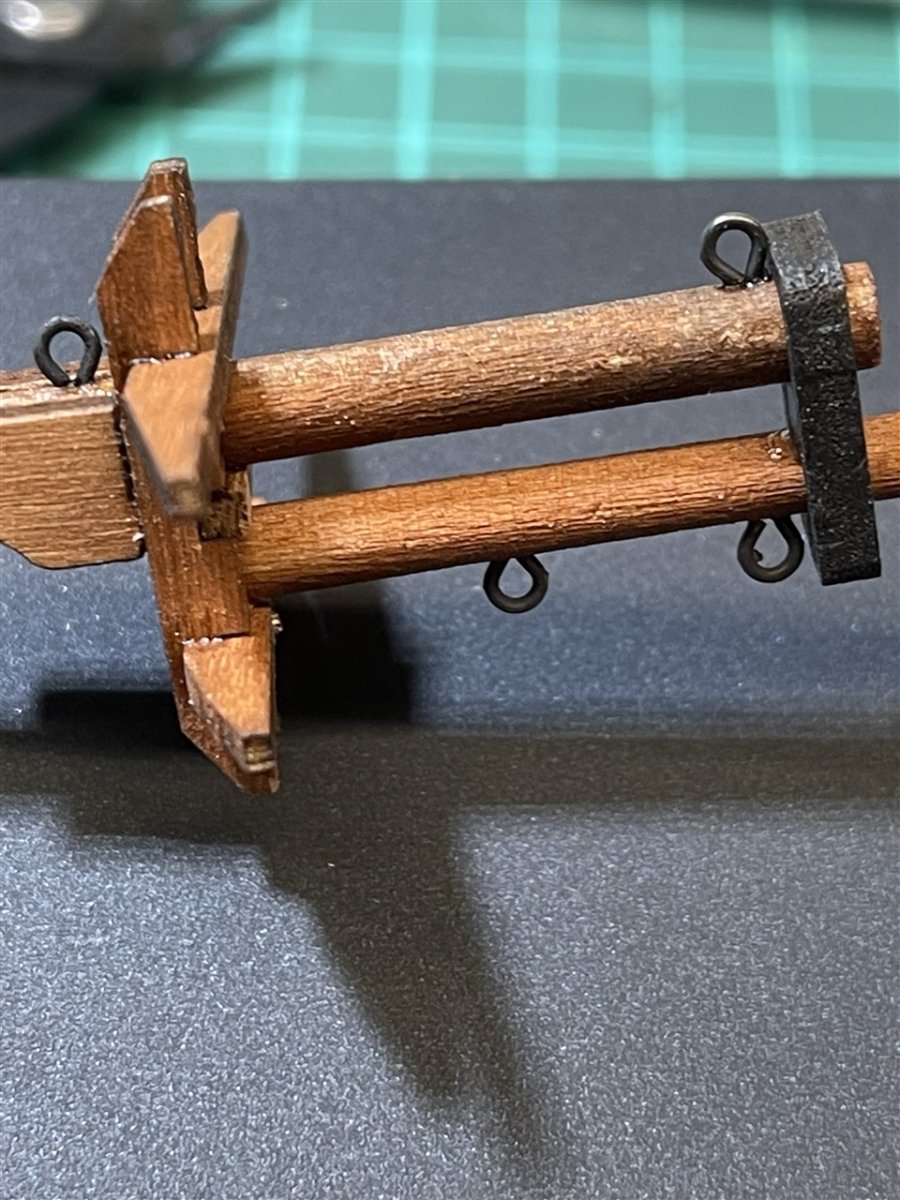
Next step ... adding all the metal parts ... eyebolts and jaws:

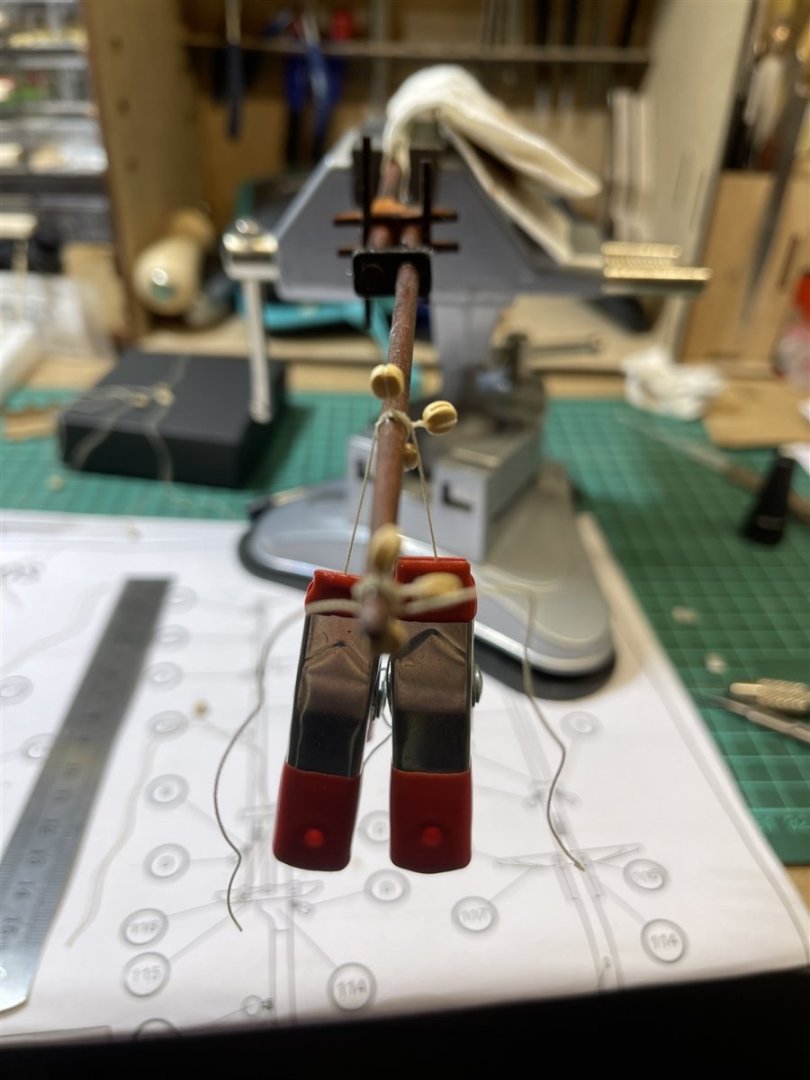
Then again ... the fun part having blocks and clamps or frogs and lobsters:
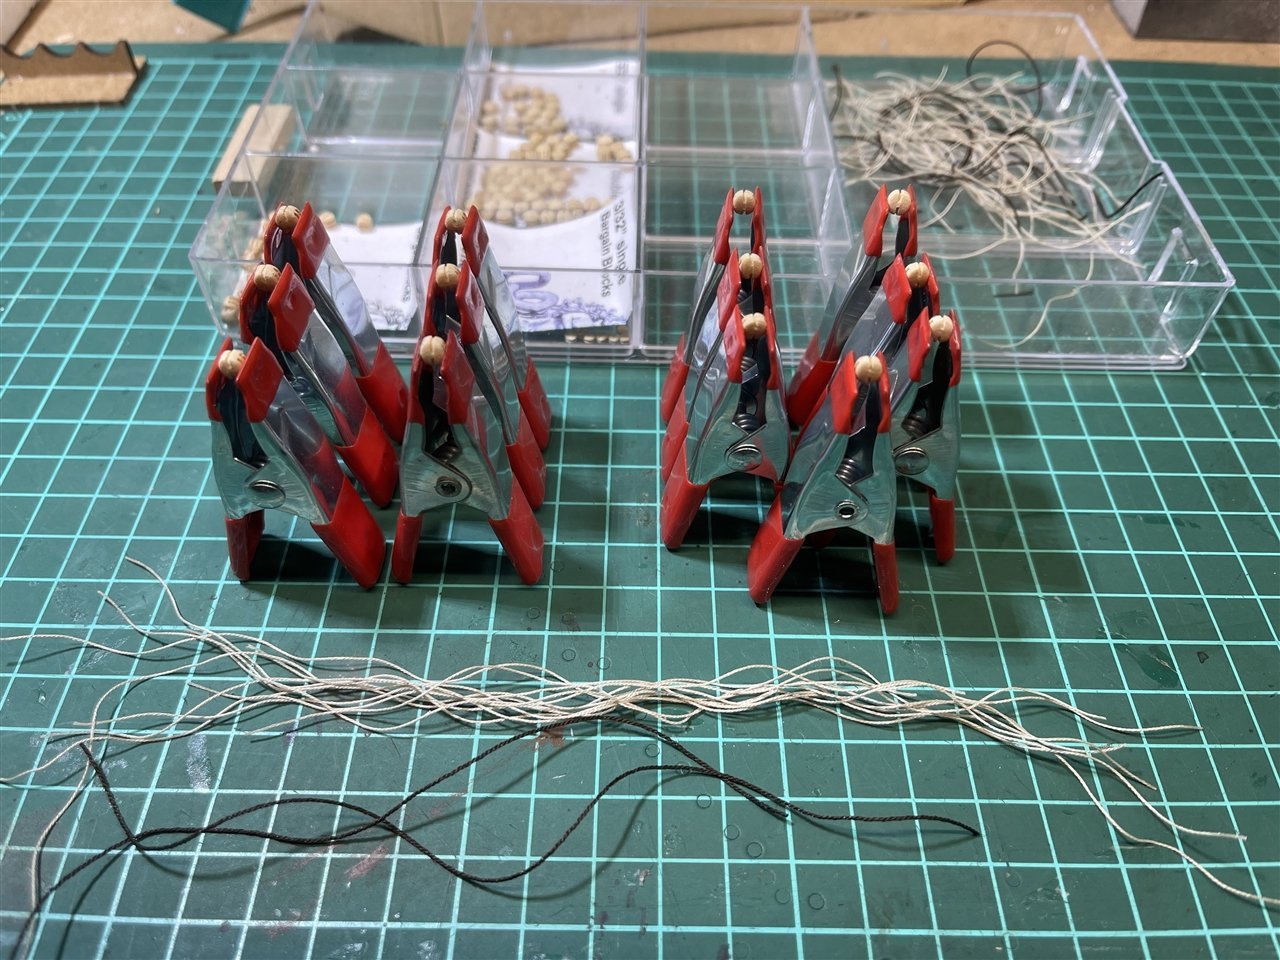
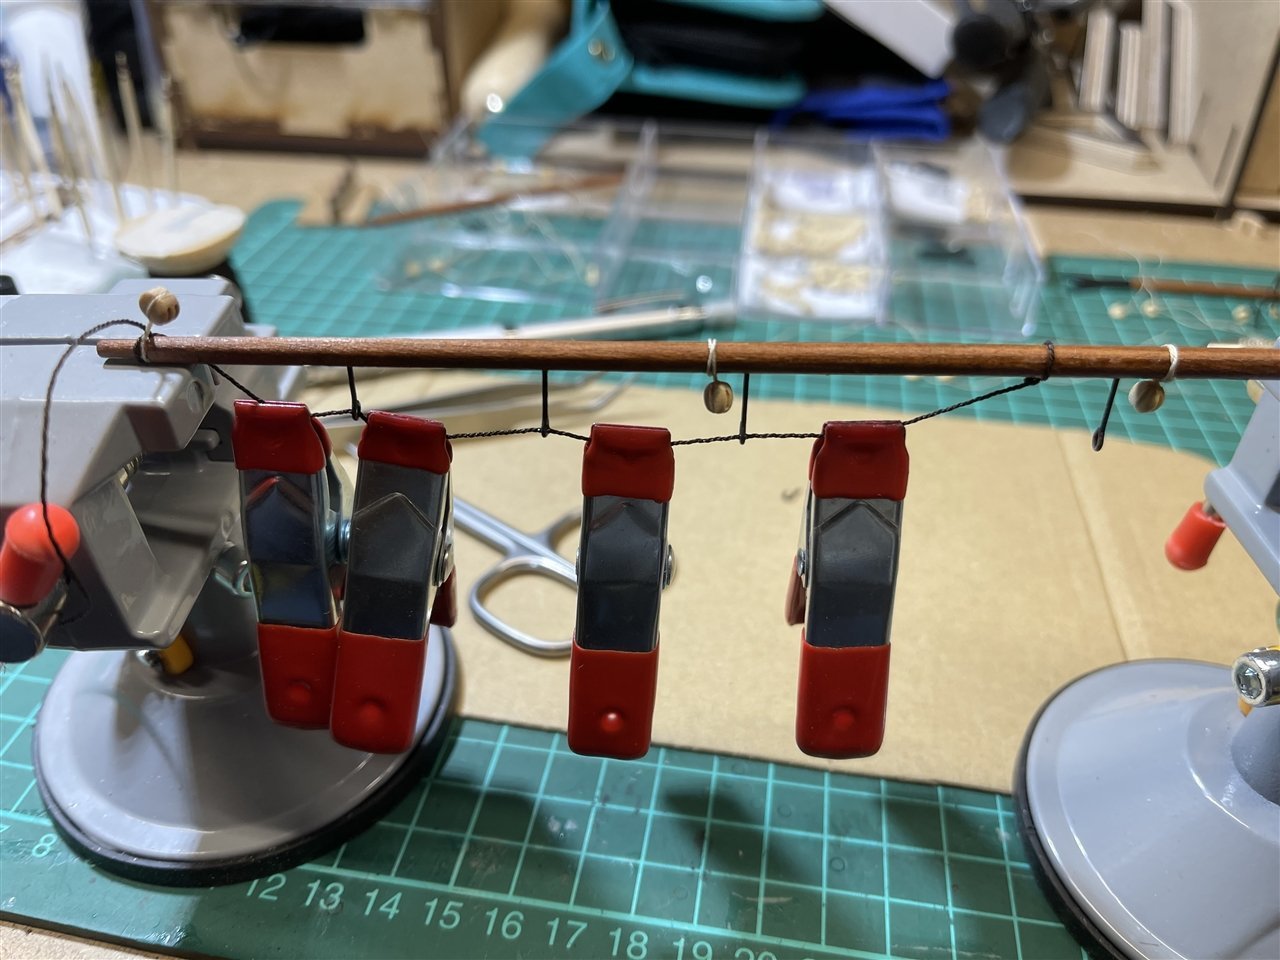
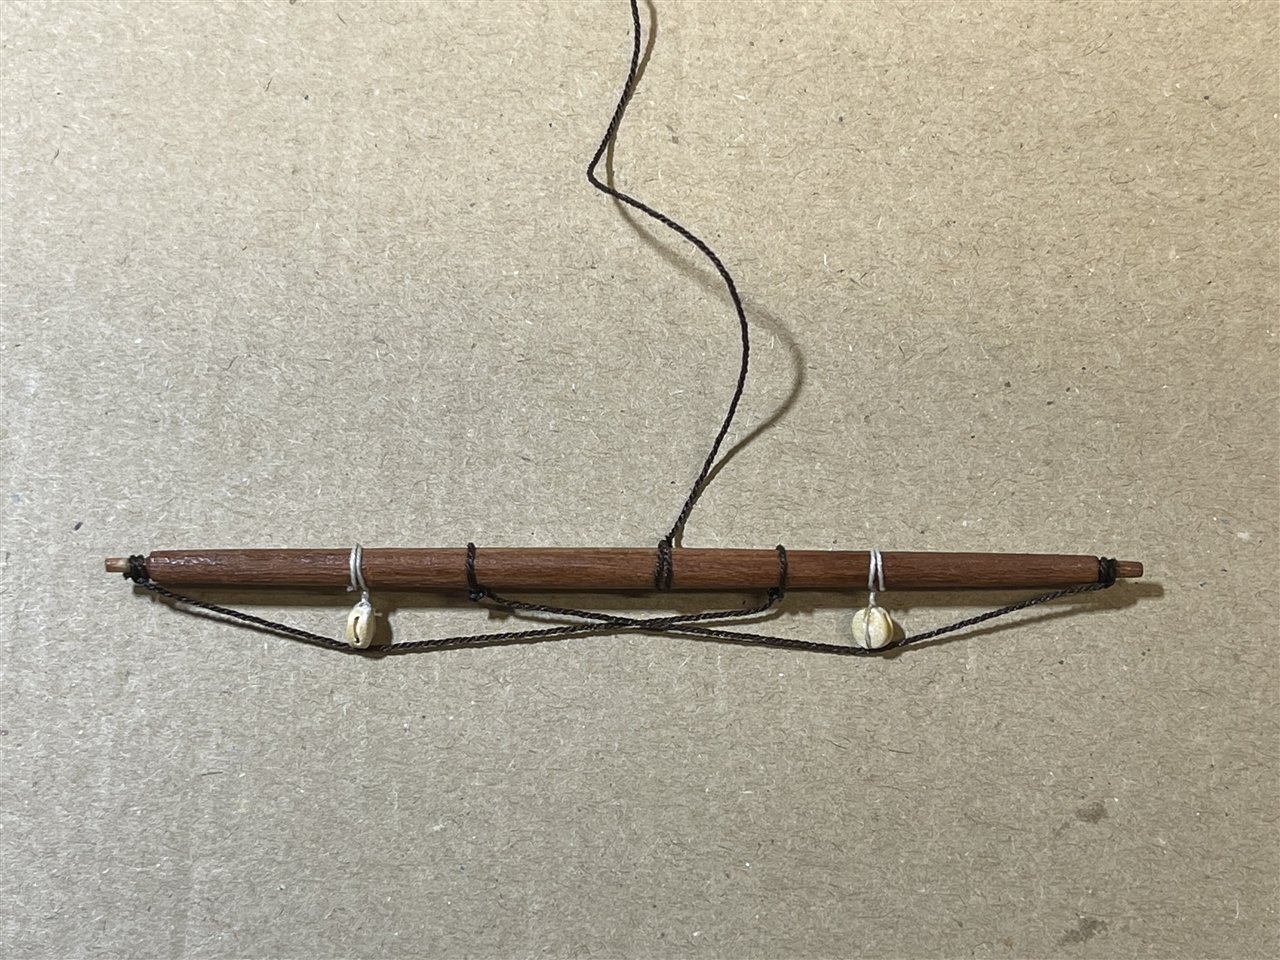
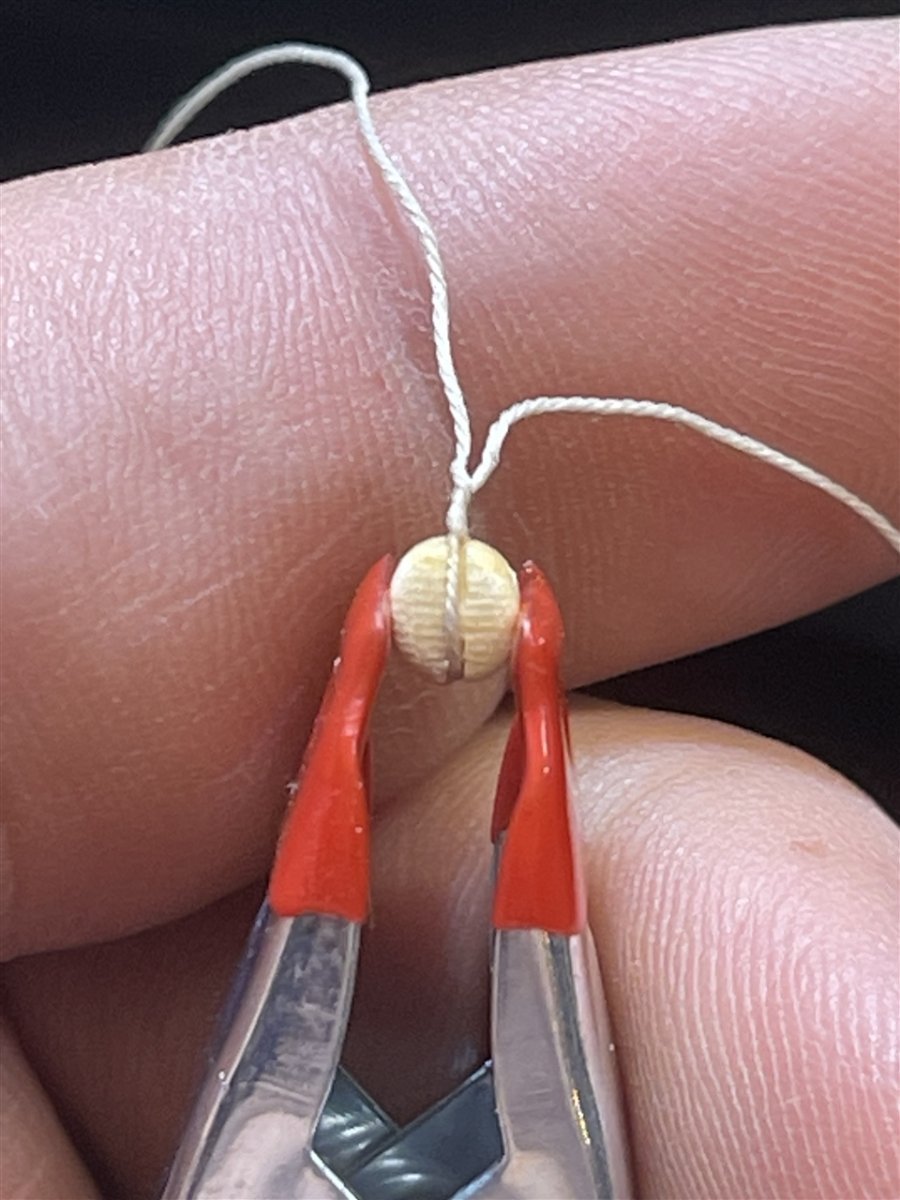
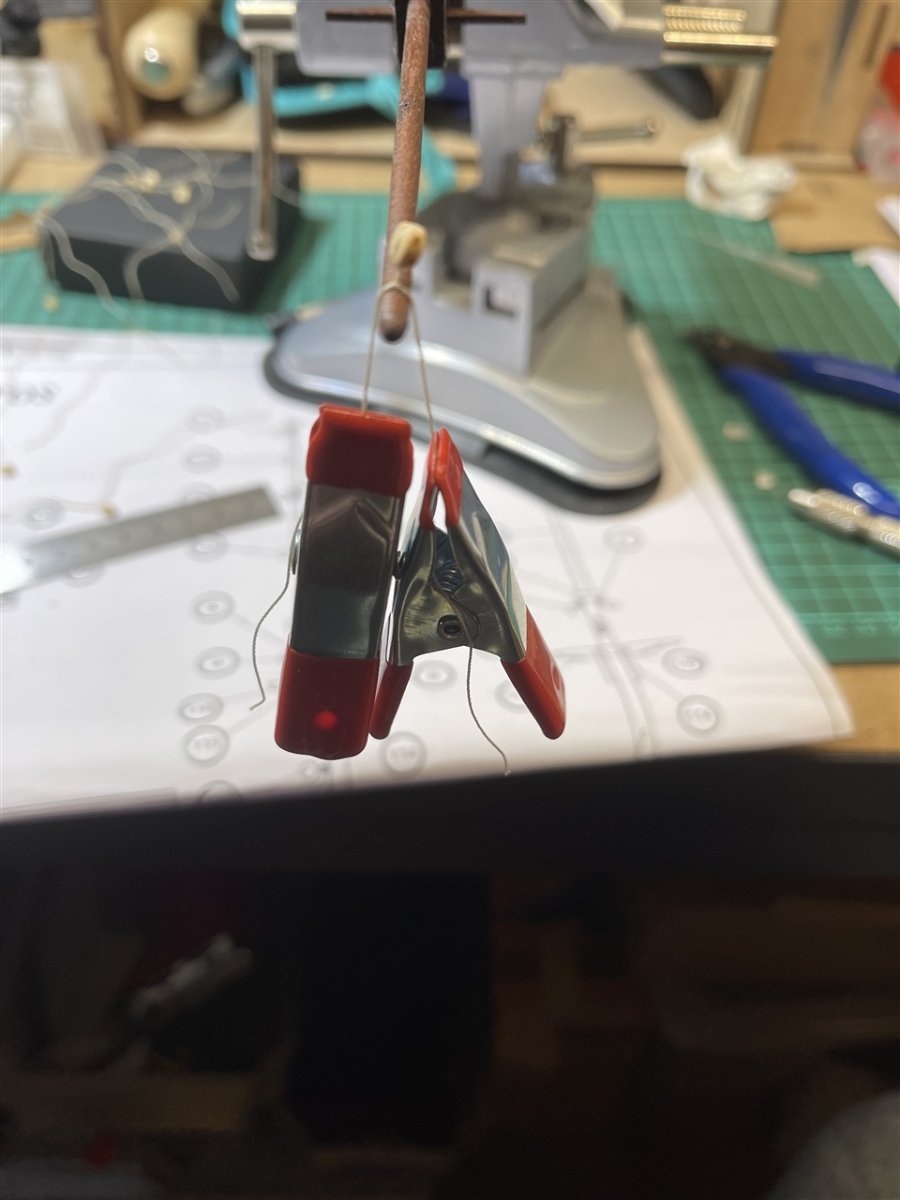
For the two blocks at the tip of the gaff yard I have used the clamps to assist me by measuring the correct length of the ropes so that both are identical. I then tied them together to make it easier fix them onto the right position.


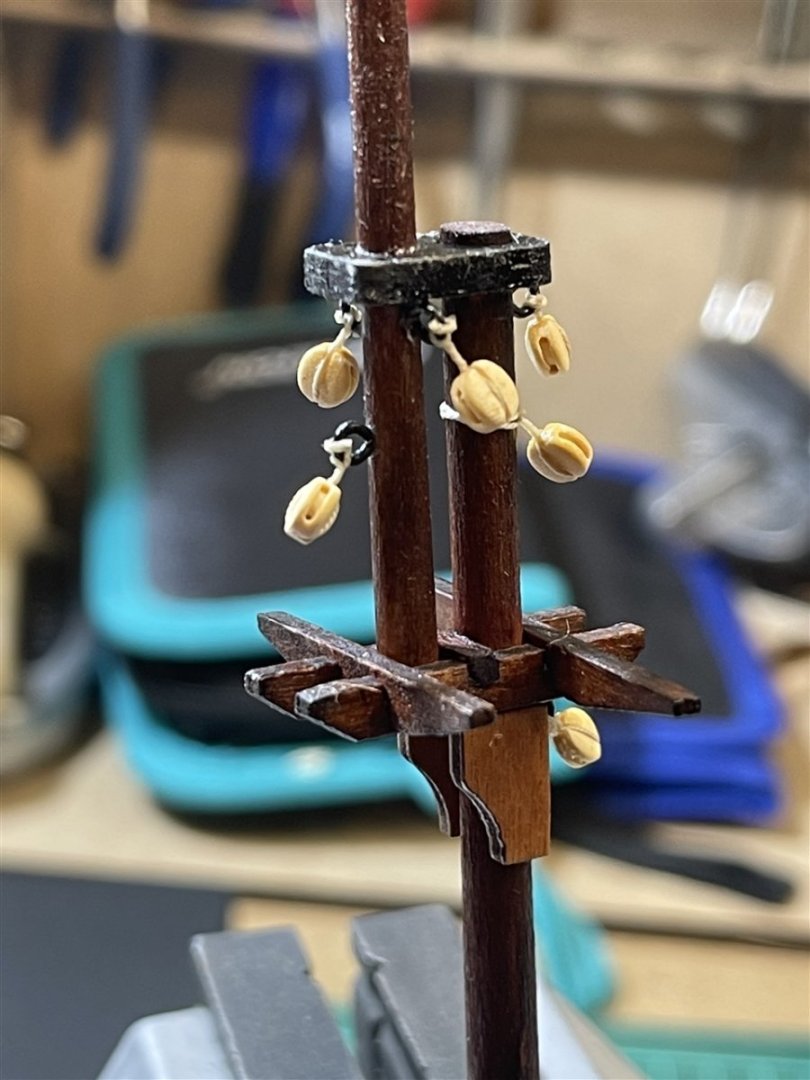
Finally all frogs got some hair:

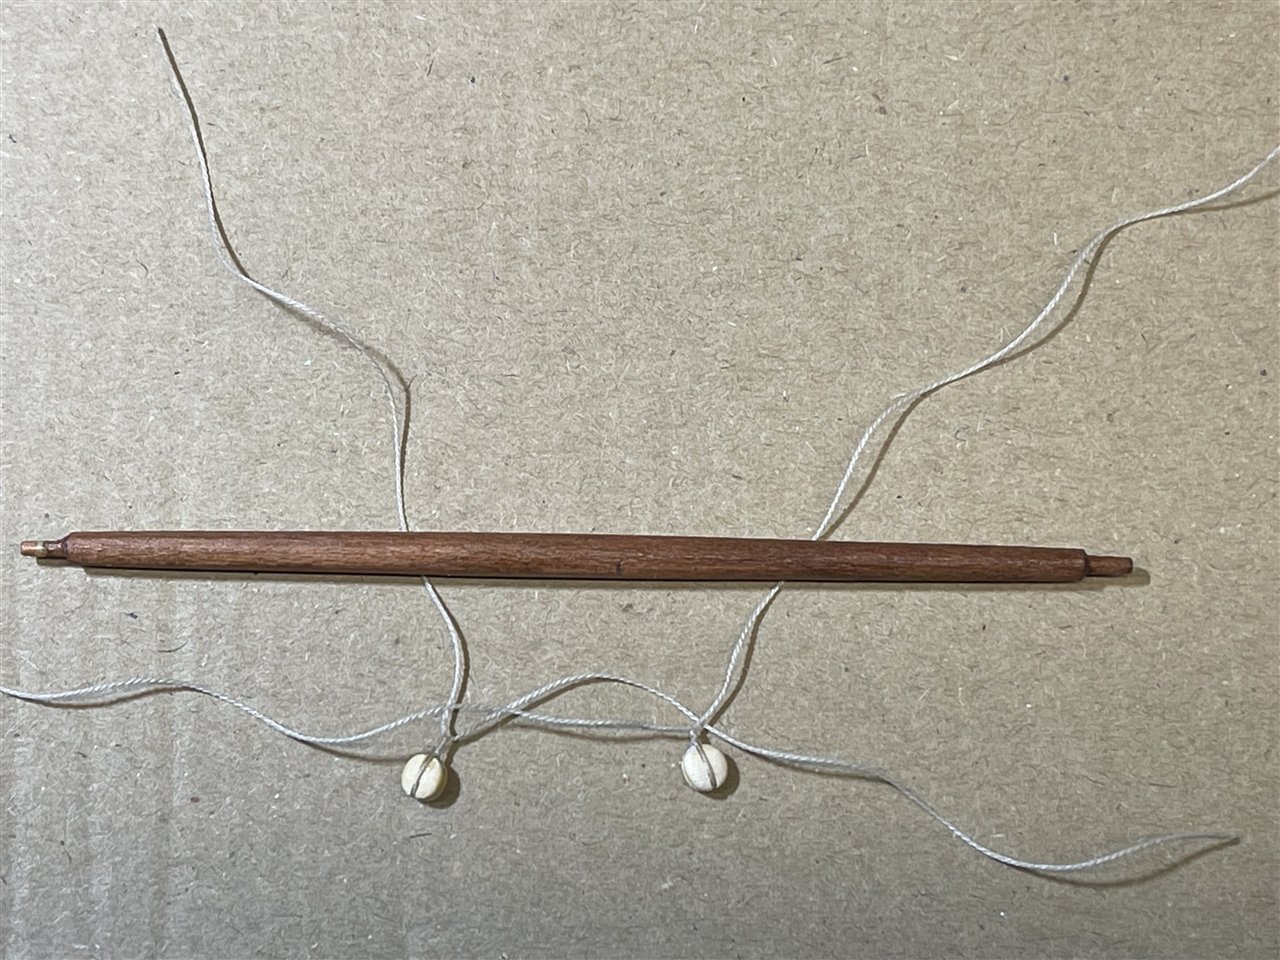
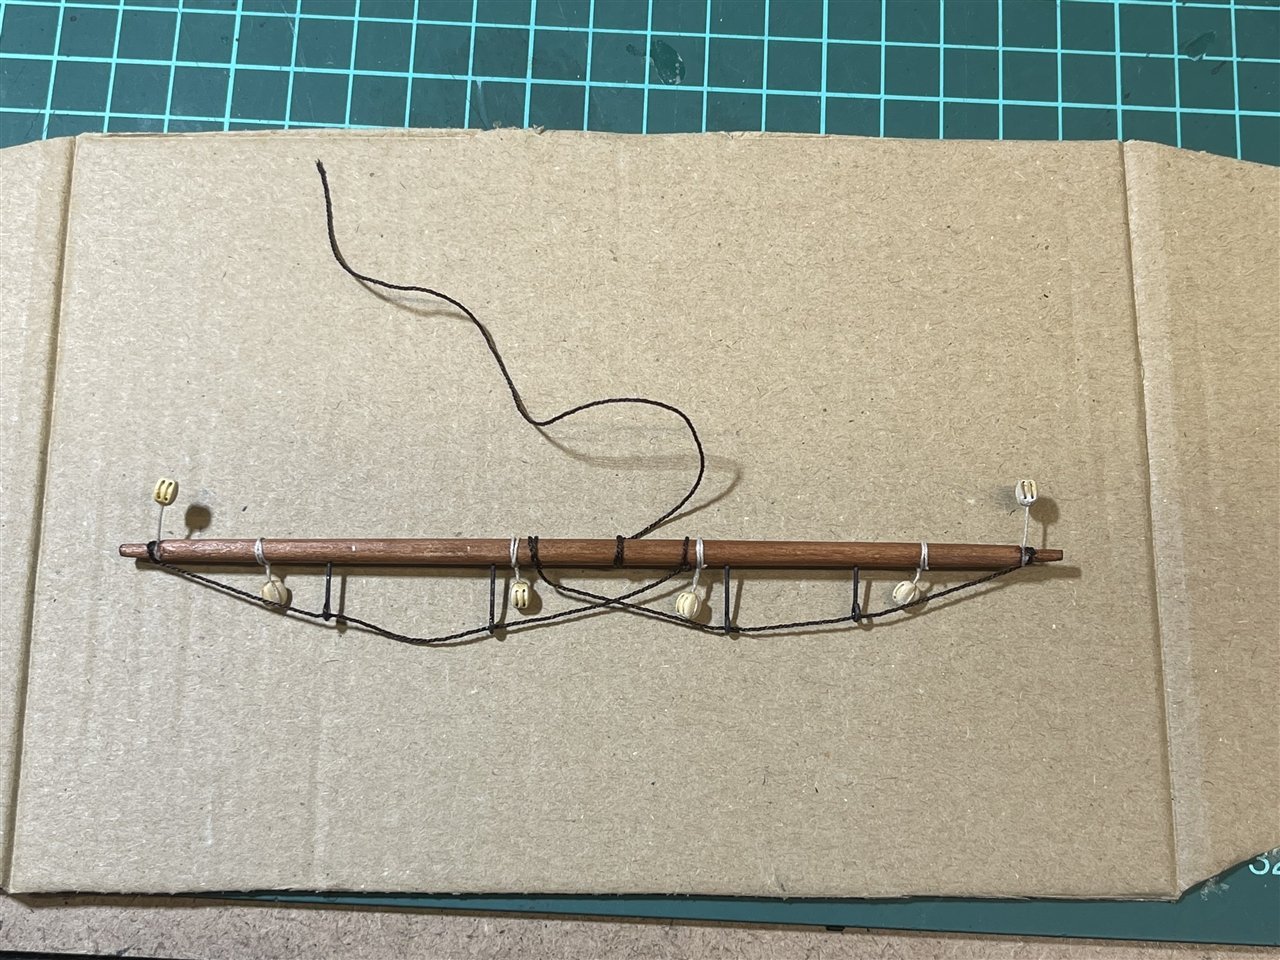
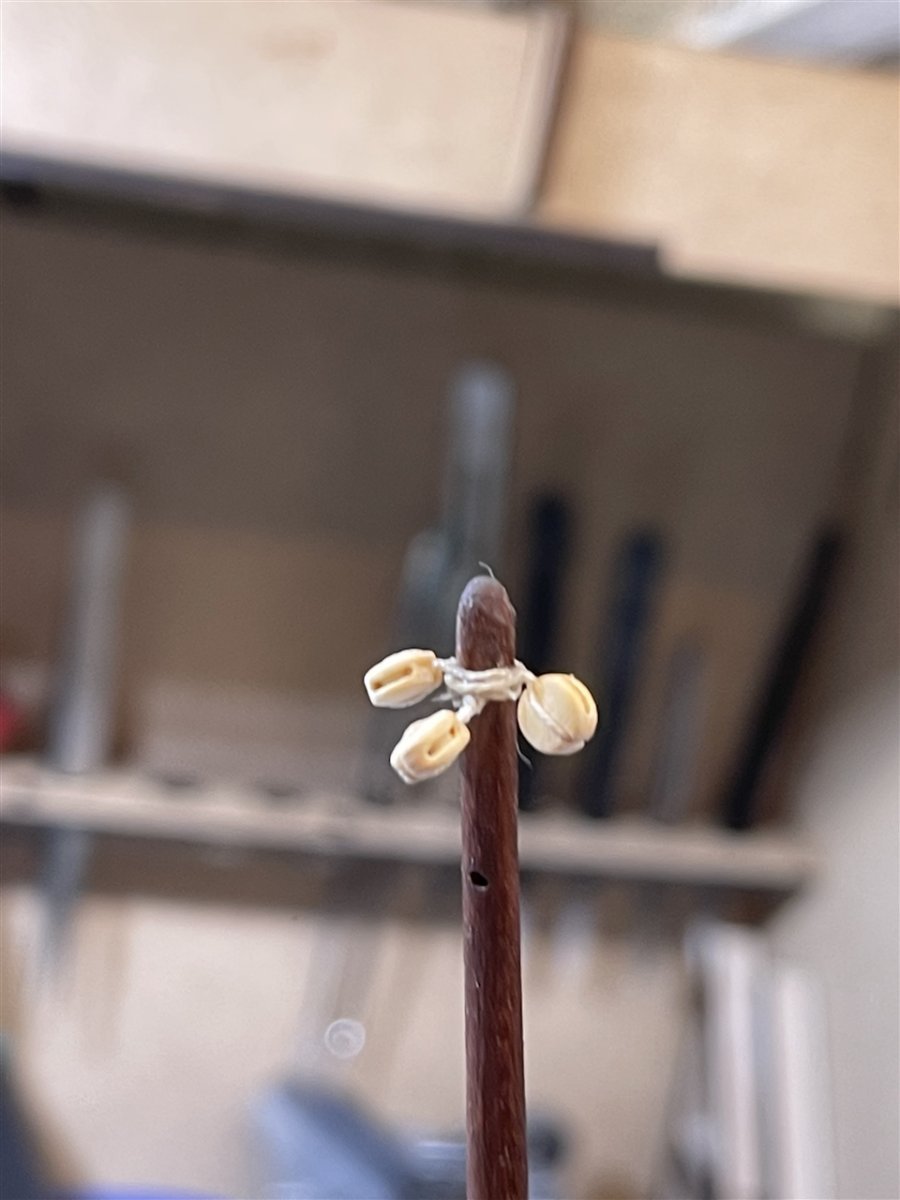
Then all blocks got tied to their positions:
Gaff yard:

Main boom:
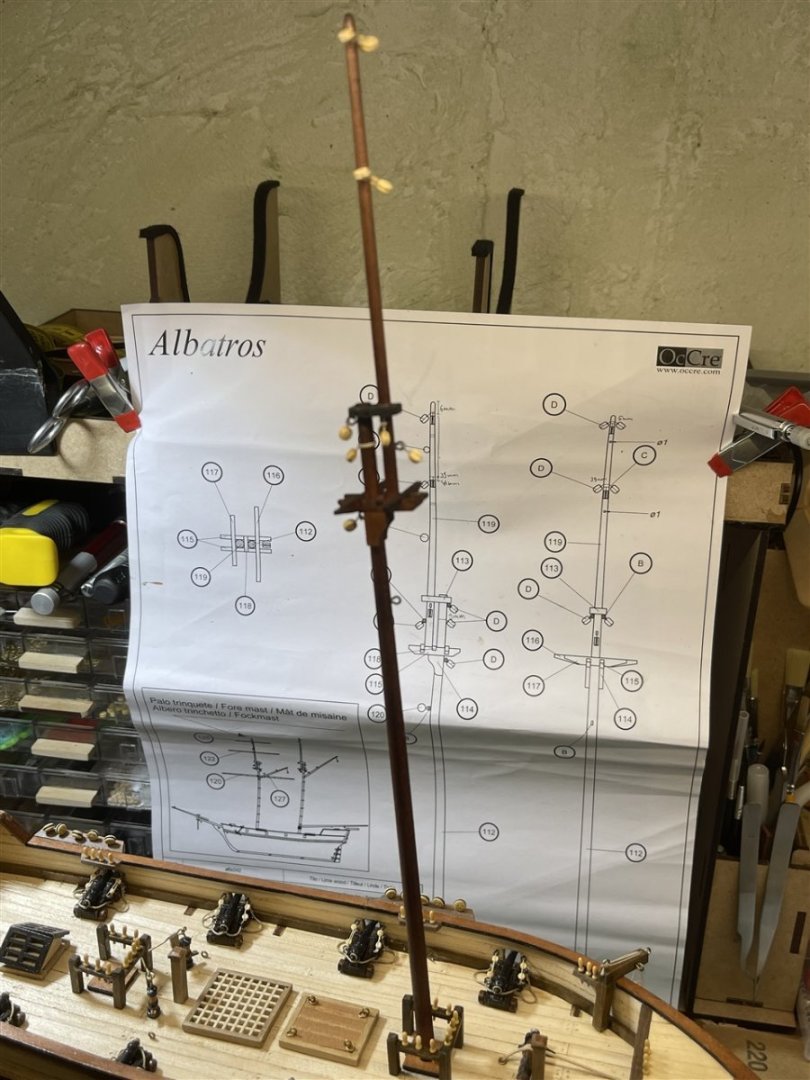
Main mast:


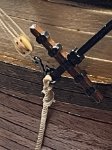
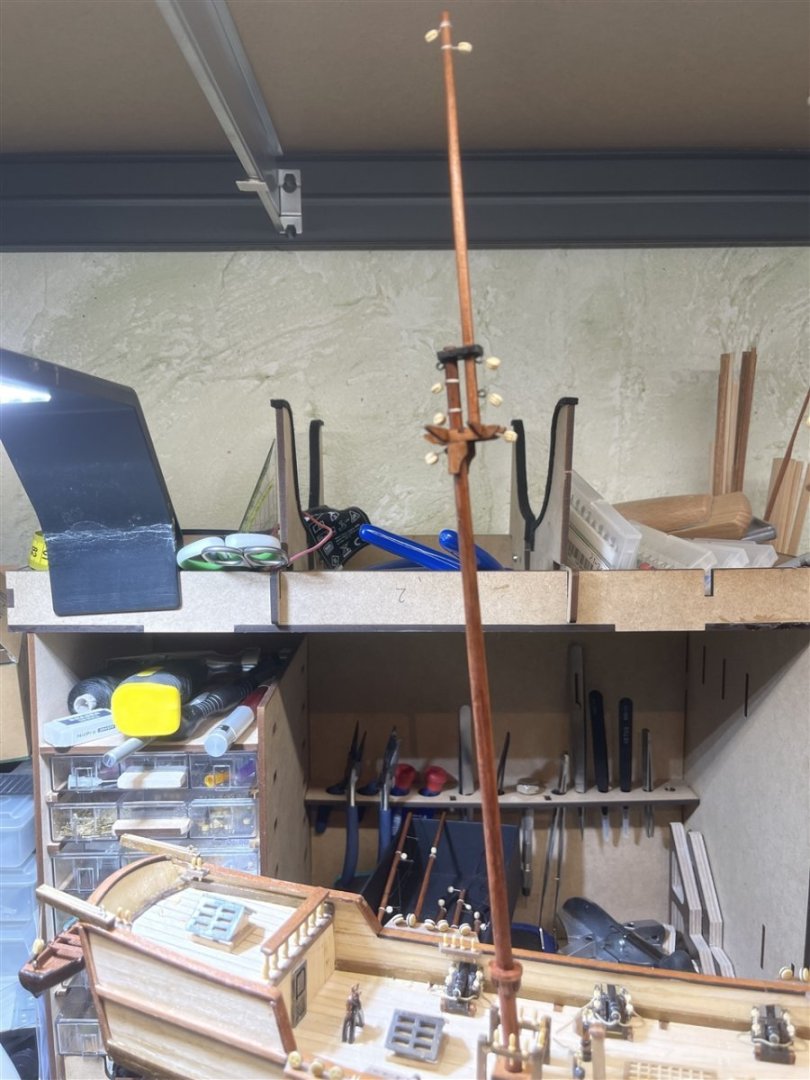
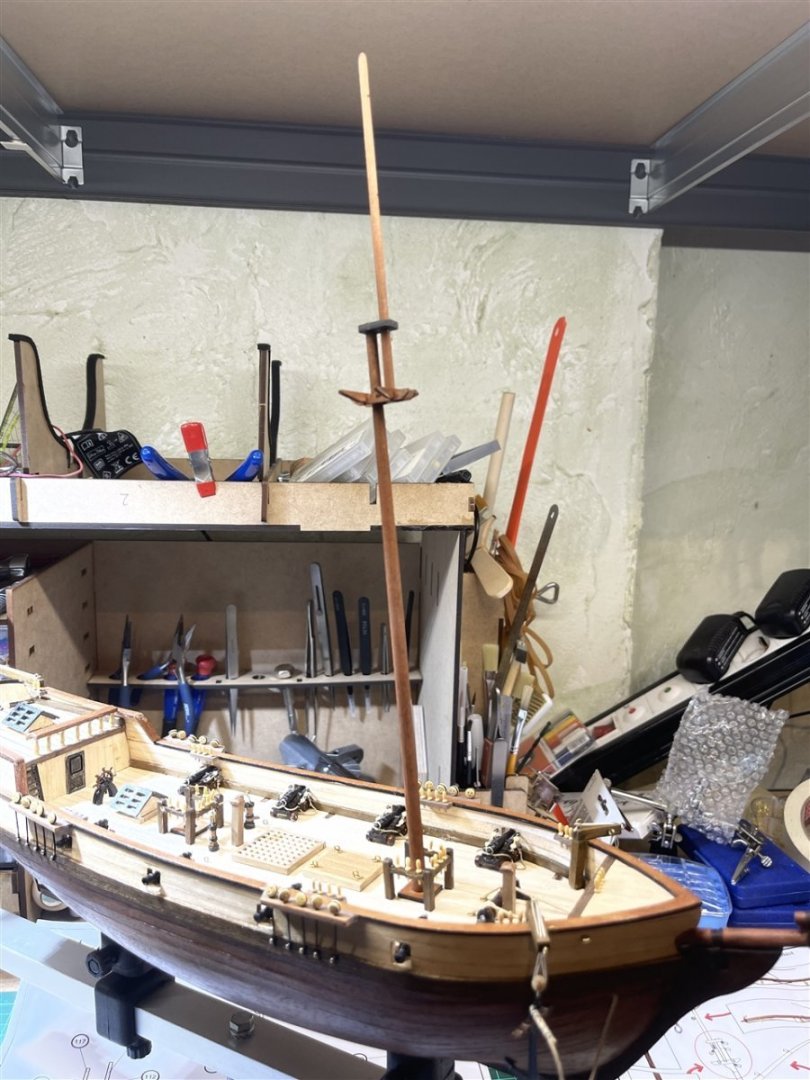
Dry fitting the main mast ... great
")
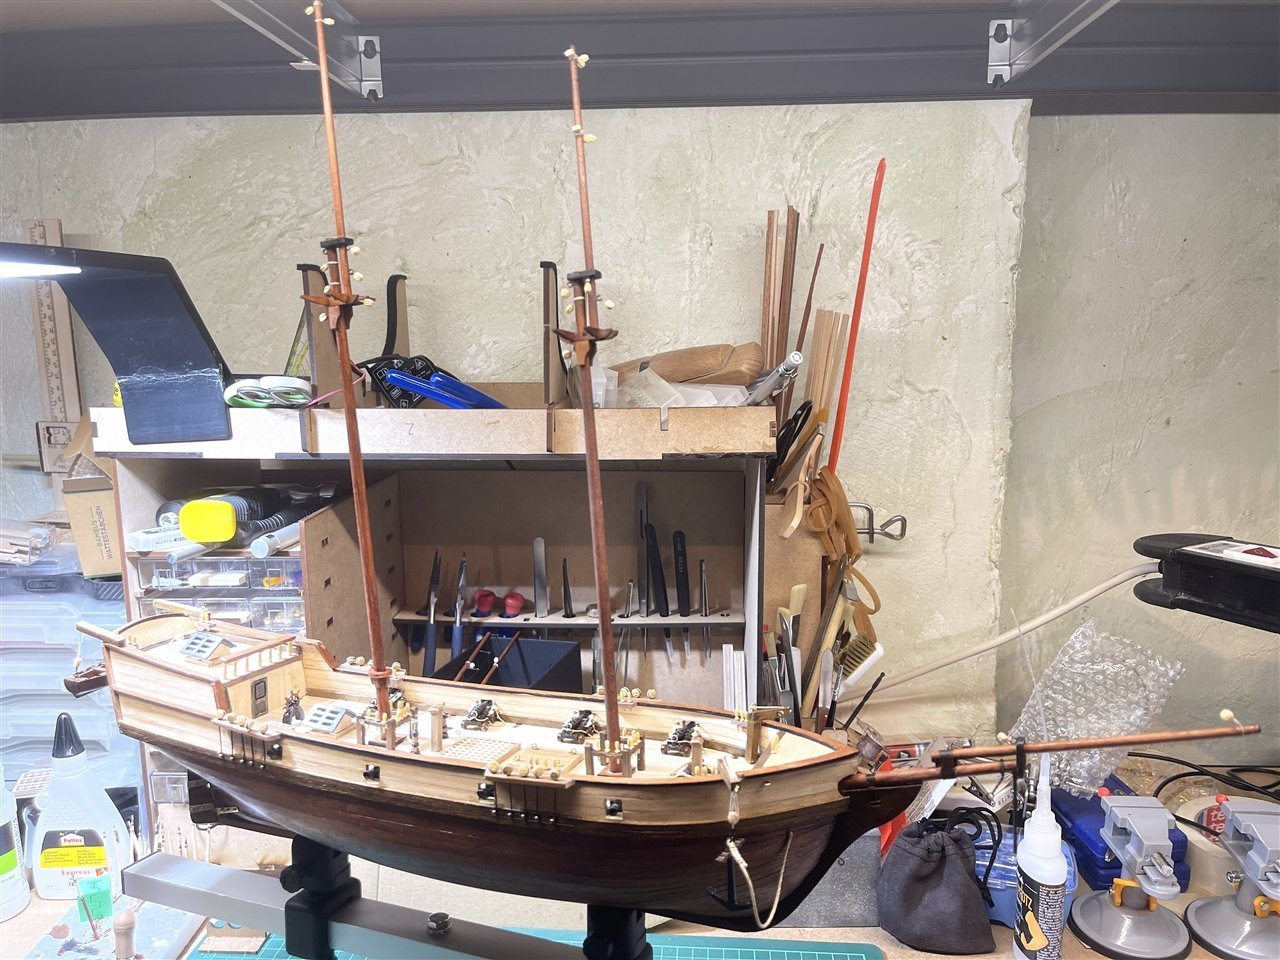
And now both masts together ... I love it:
I'm still not sure when to mount the yards on the mast ... before or after glueing them to the ship?
But now I have to do some minor work first to add the cleats for the gun tackle ends and I will remake the door and ladder out of wood to get rid of the metal parts. After that, I have to assemble my serving machine to make the seizings for the shrouds.
I wish you a happy easter weekend ...
Kai
- GrandpaPhil, ccoyle and MajorChaos
-
 3
3
-
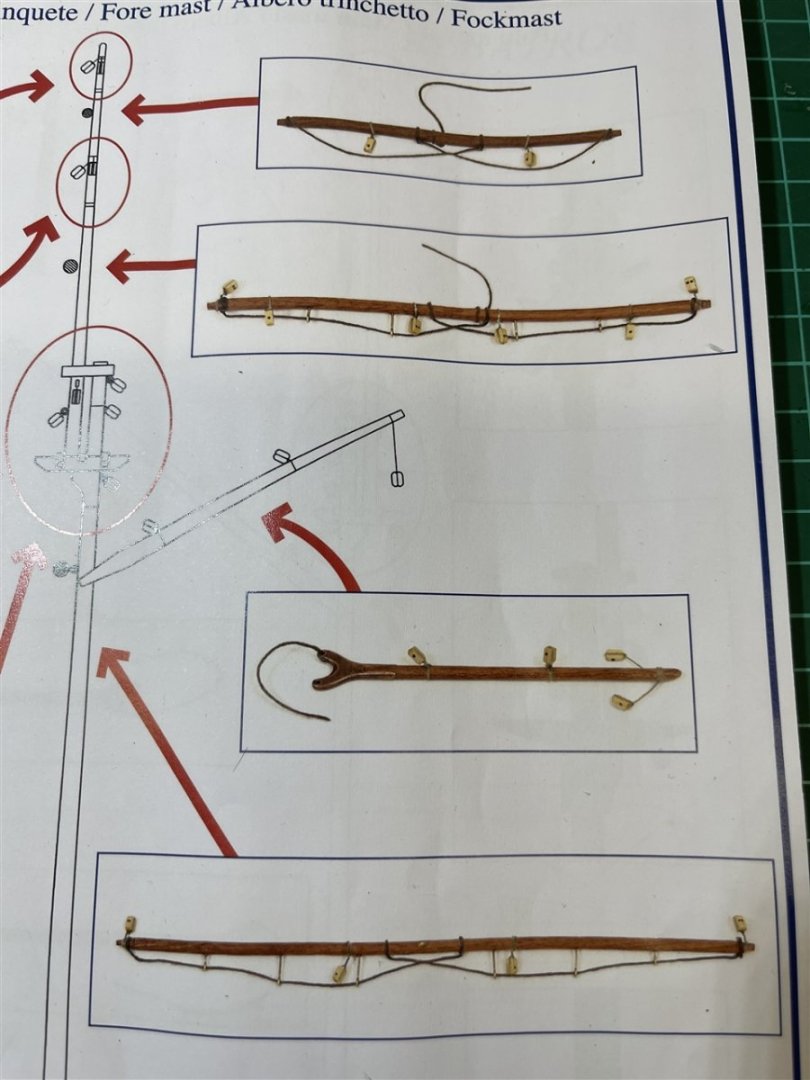
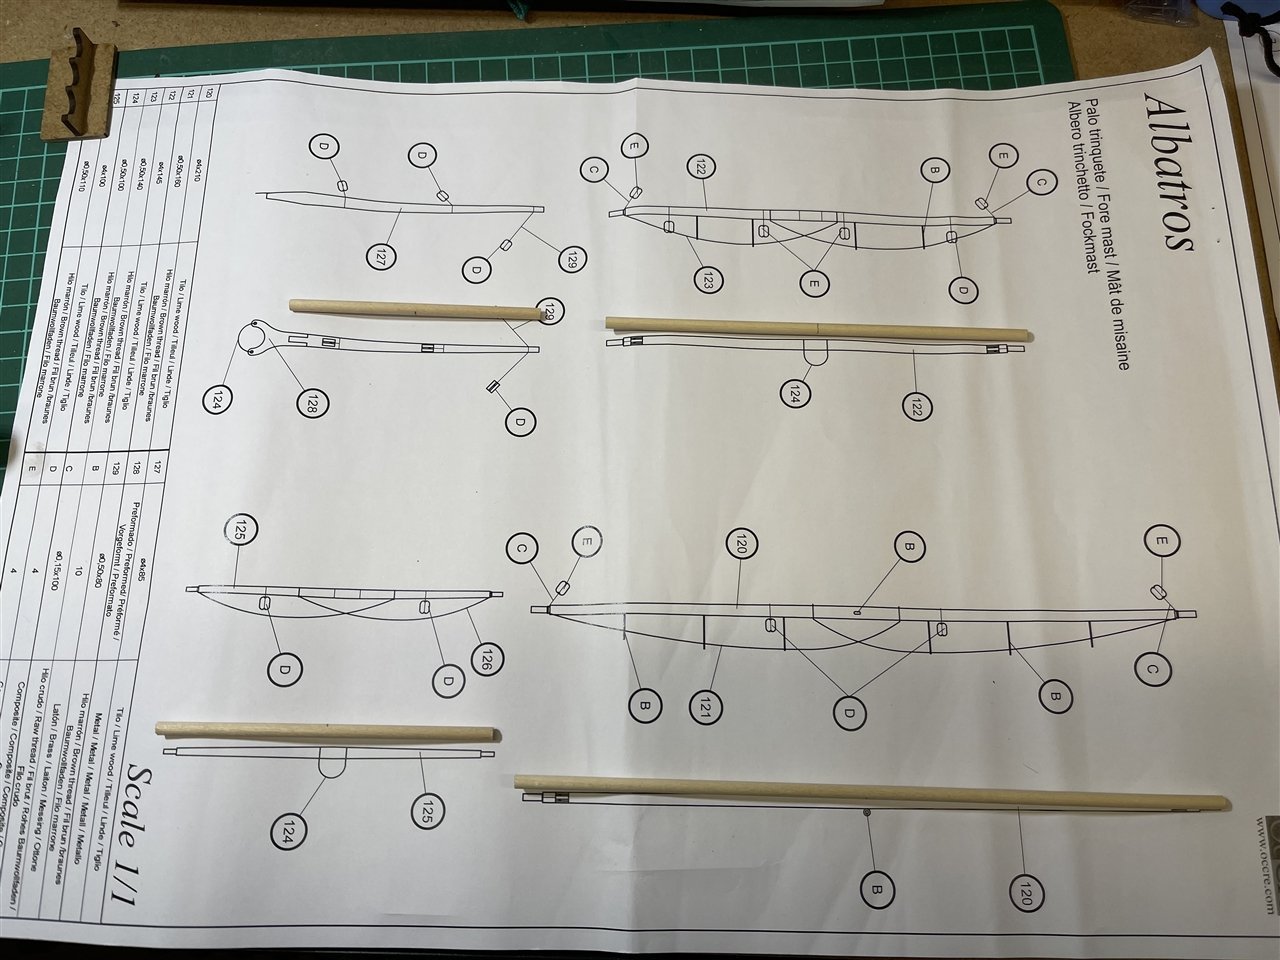
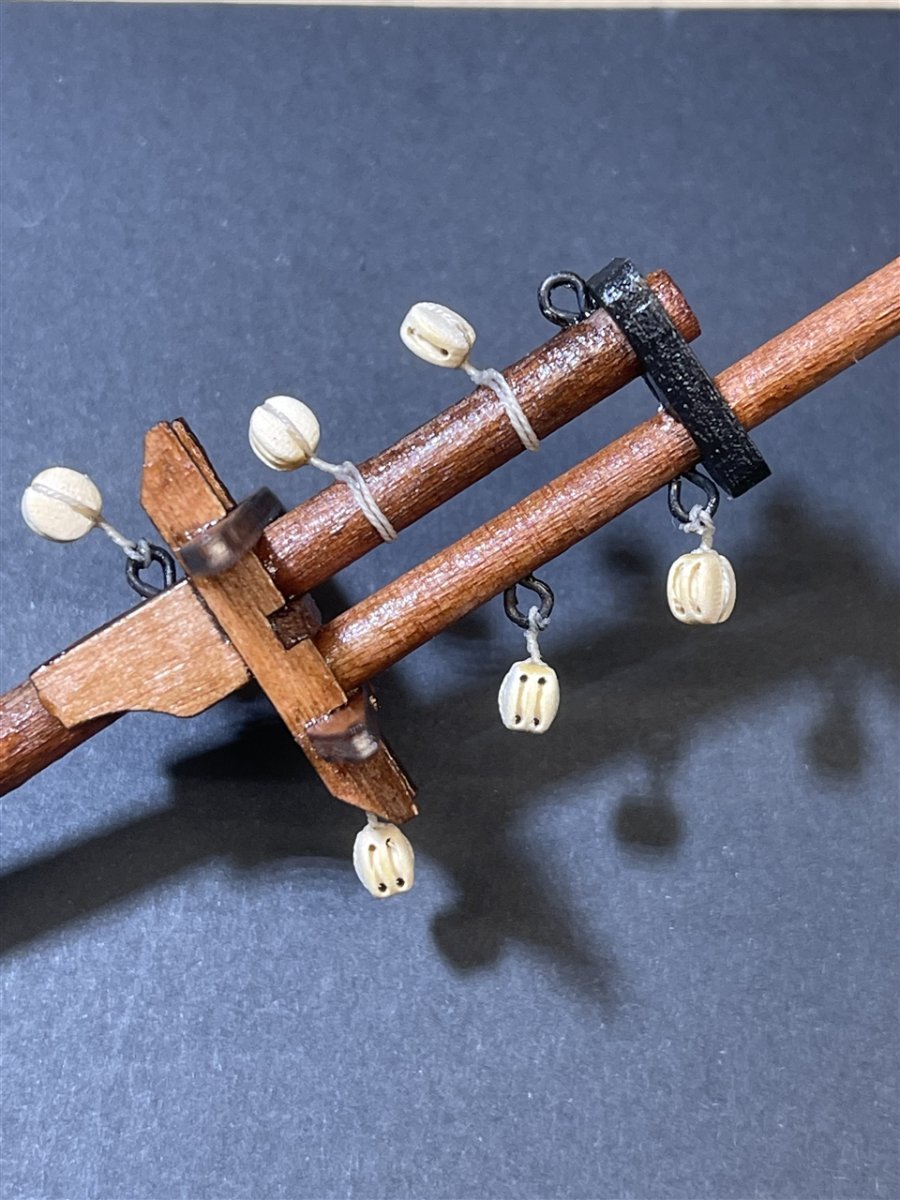
Fore Mast - Yards
It has been a lot of work and a lot of fun making the yards.
There are 4 yards:
- Fore course yard
- Fore lower topsail yard
- Fore upper topsail yard and
- Fore gaff sail yard
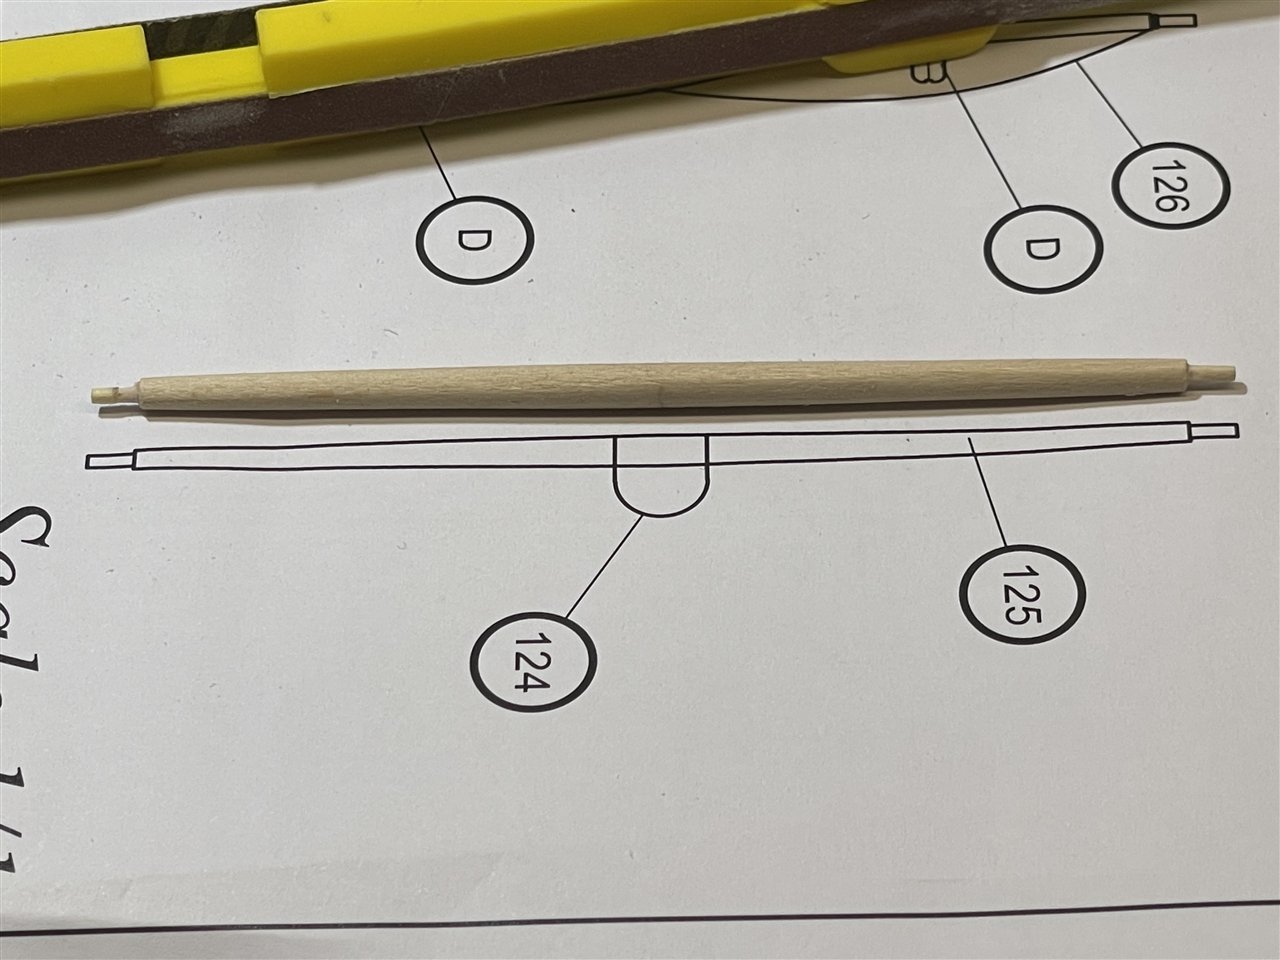
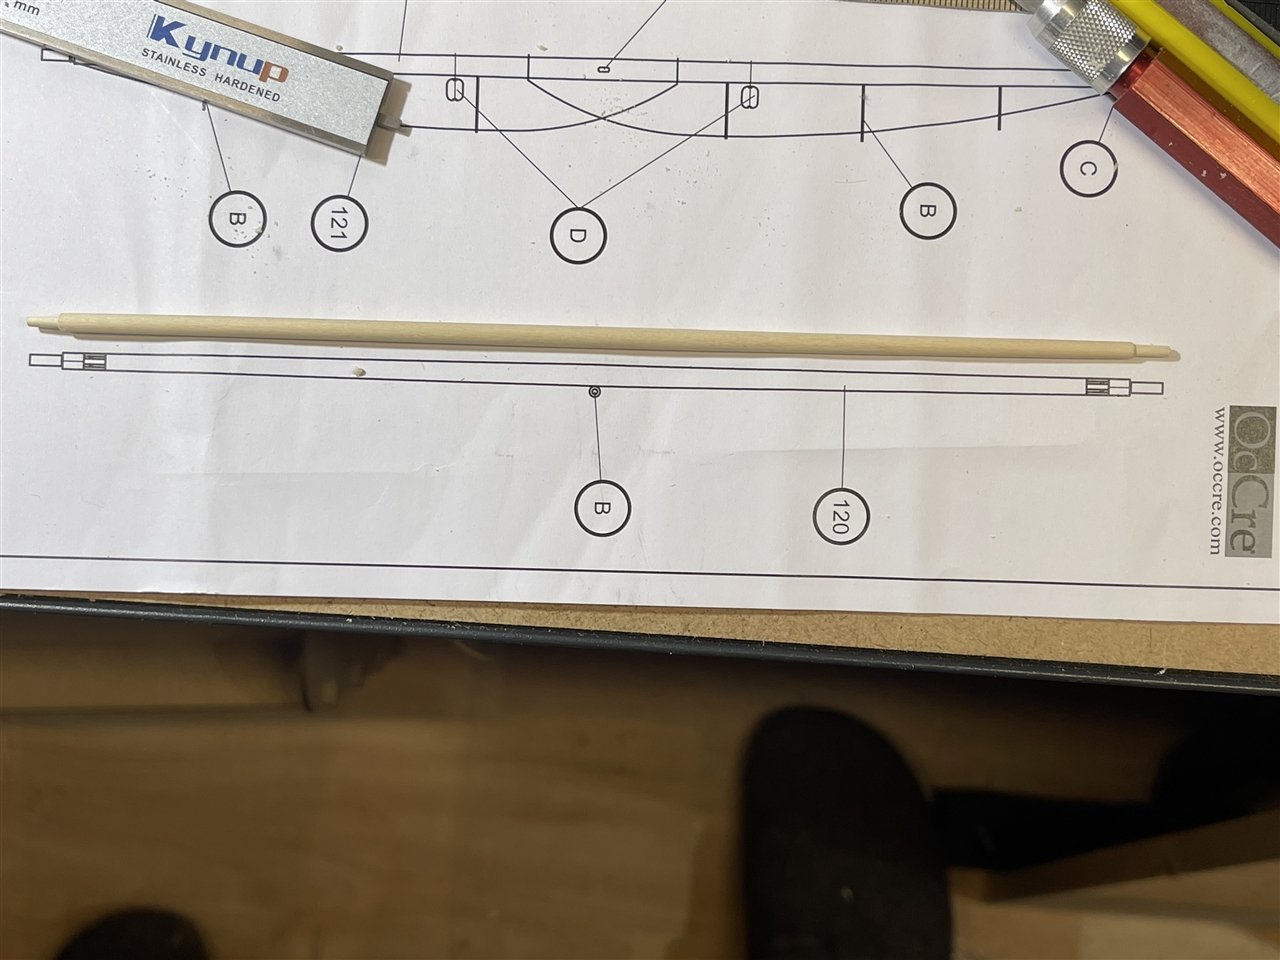
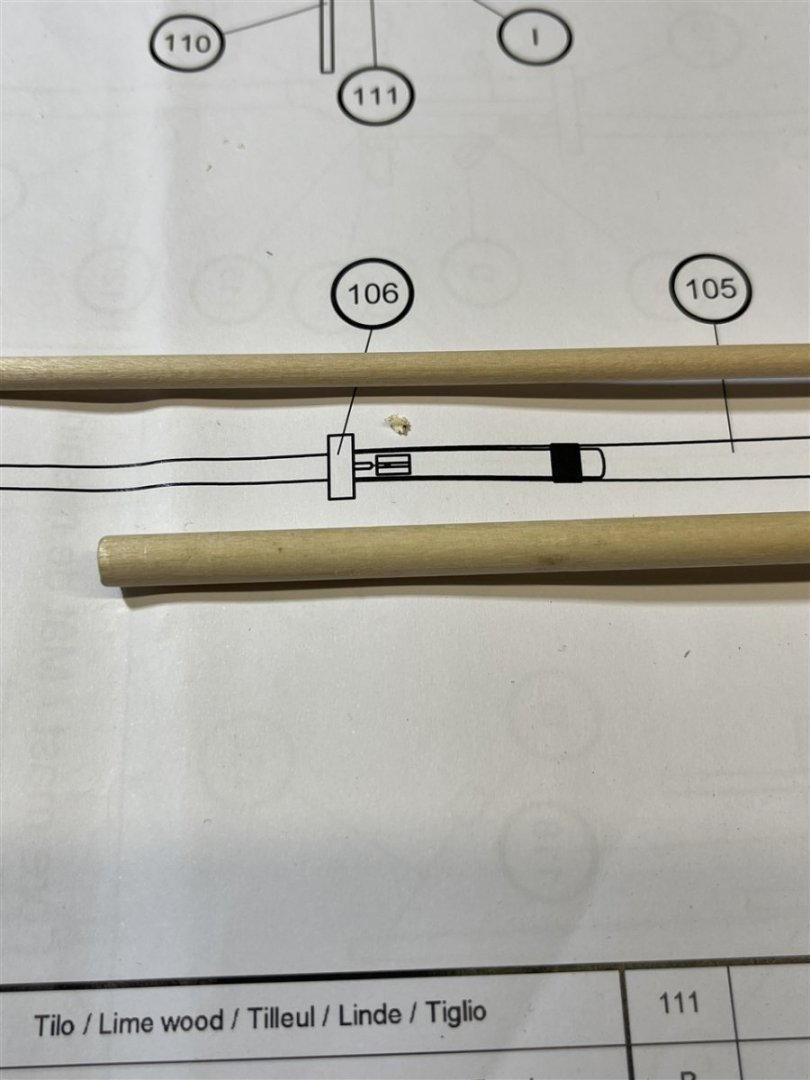
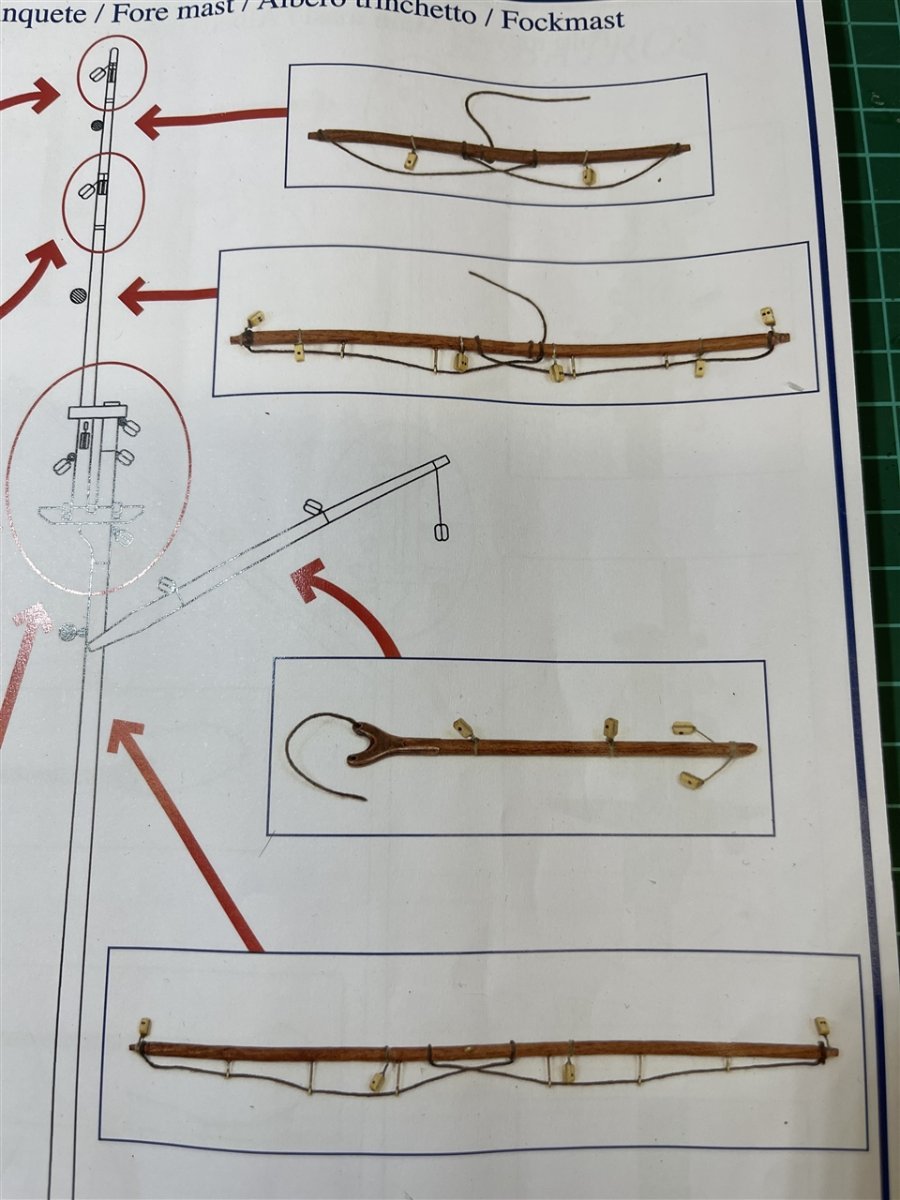
To cut the 4mm limewood dowels to size you have to use the 1/1 scale plans:
As you have to taper both ends of the yards down to 1mm / 2mm I didn't use the power drill this time because I was afraid to break something off.
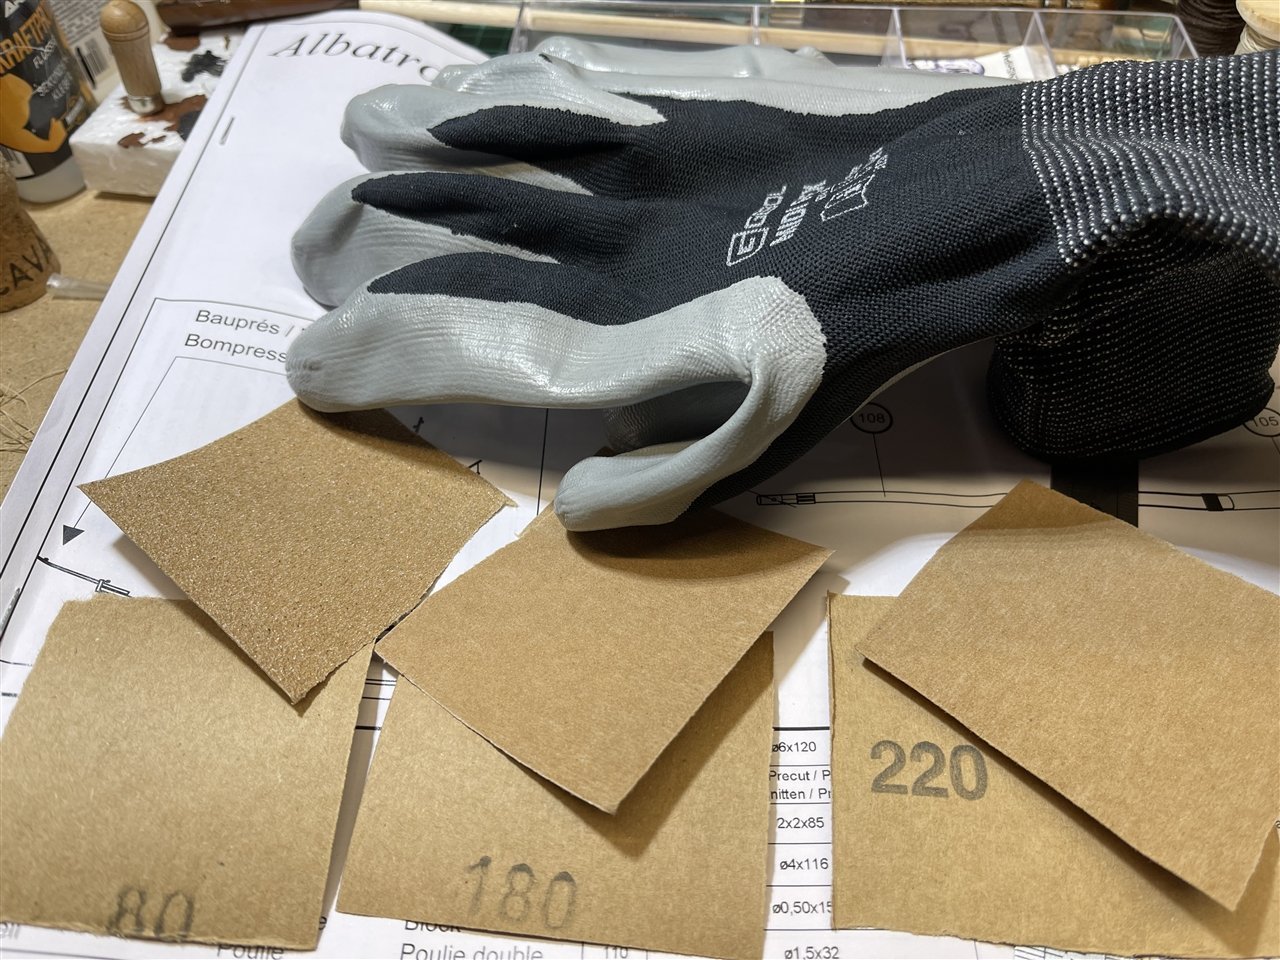
So I used a small plane to give the dowels a rough taper and the finished them using 120, 180 and 220 grit sanding paper.
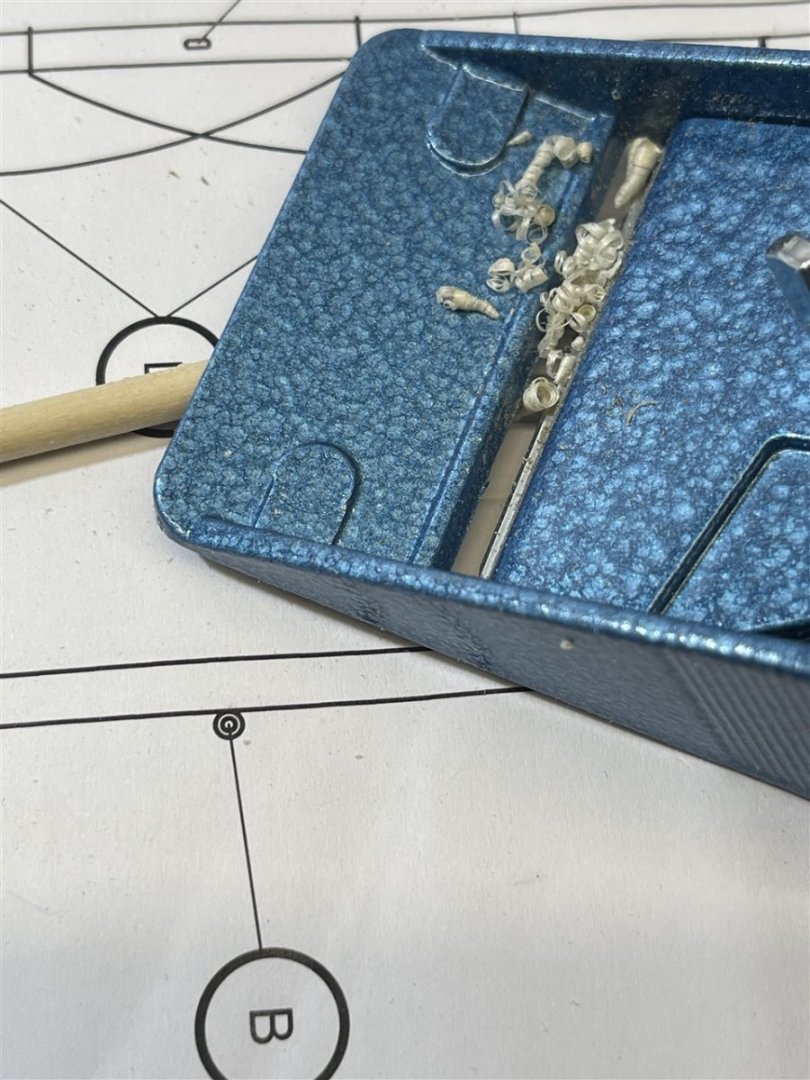
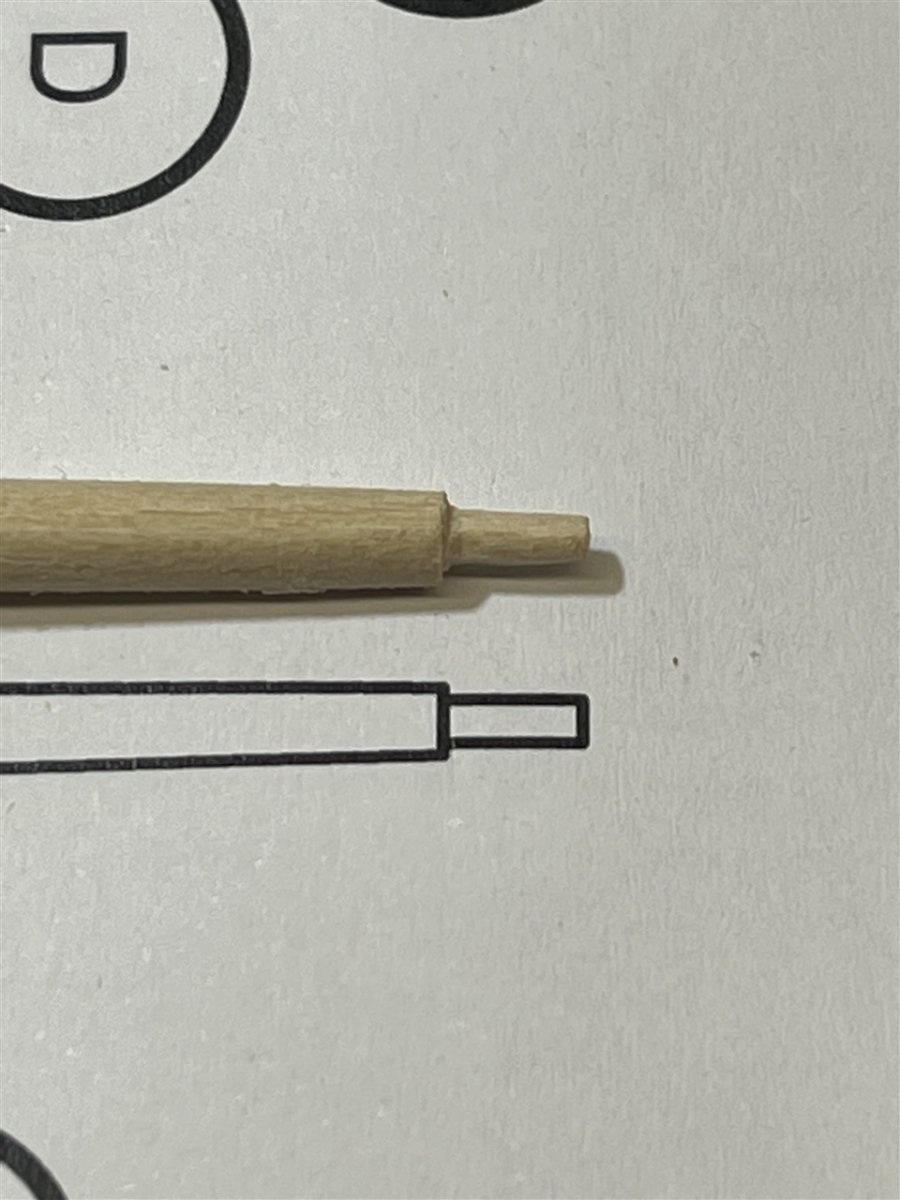
For the first time builder there are always some challenges waiting. So the tips of the yards took some time scraping off Jack Aubrey's golden curls:
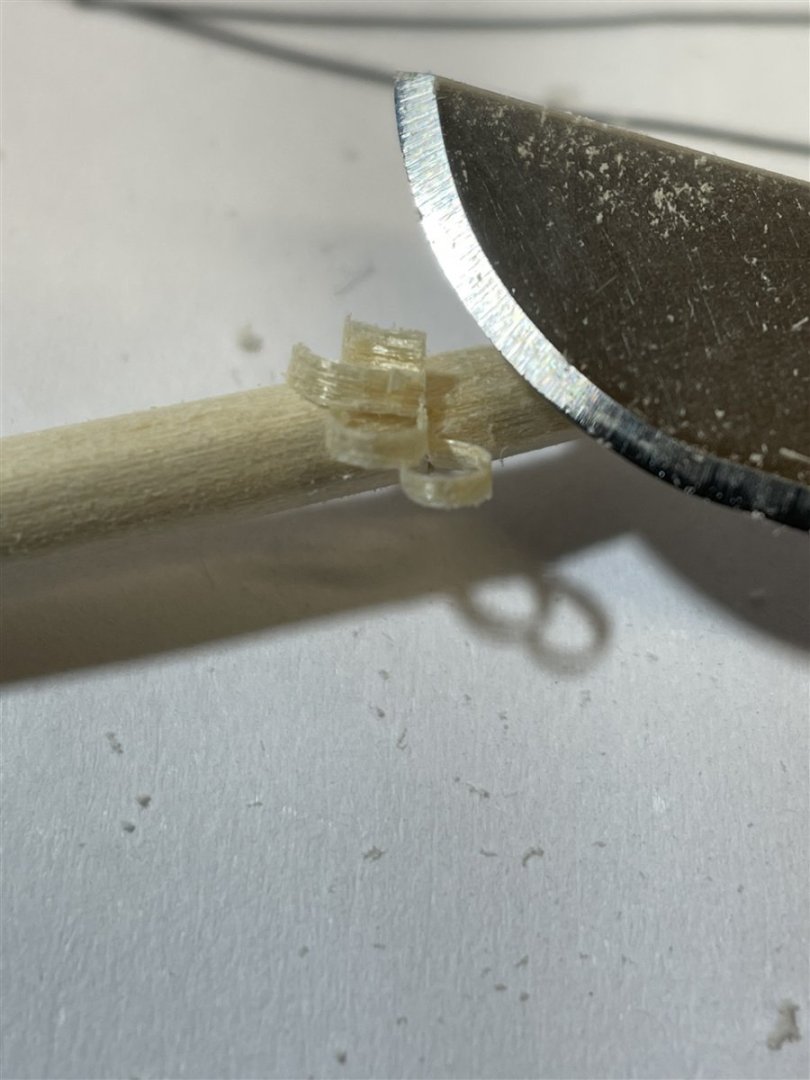
The upper topsail yard ones down to 1mm:

The lower topsail yard and fore course yard ones down to 2mm both:

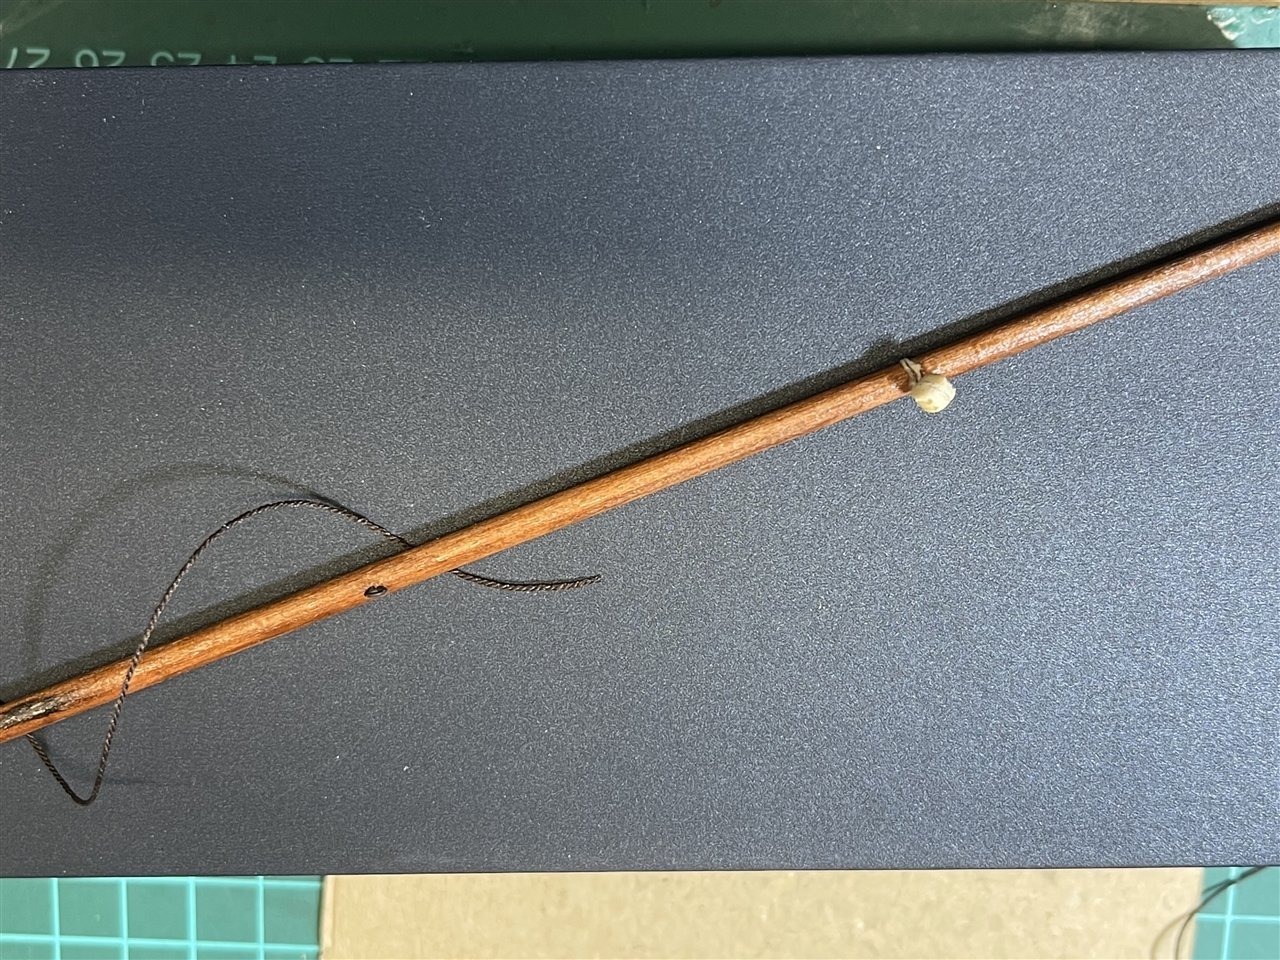
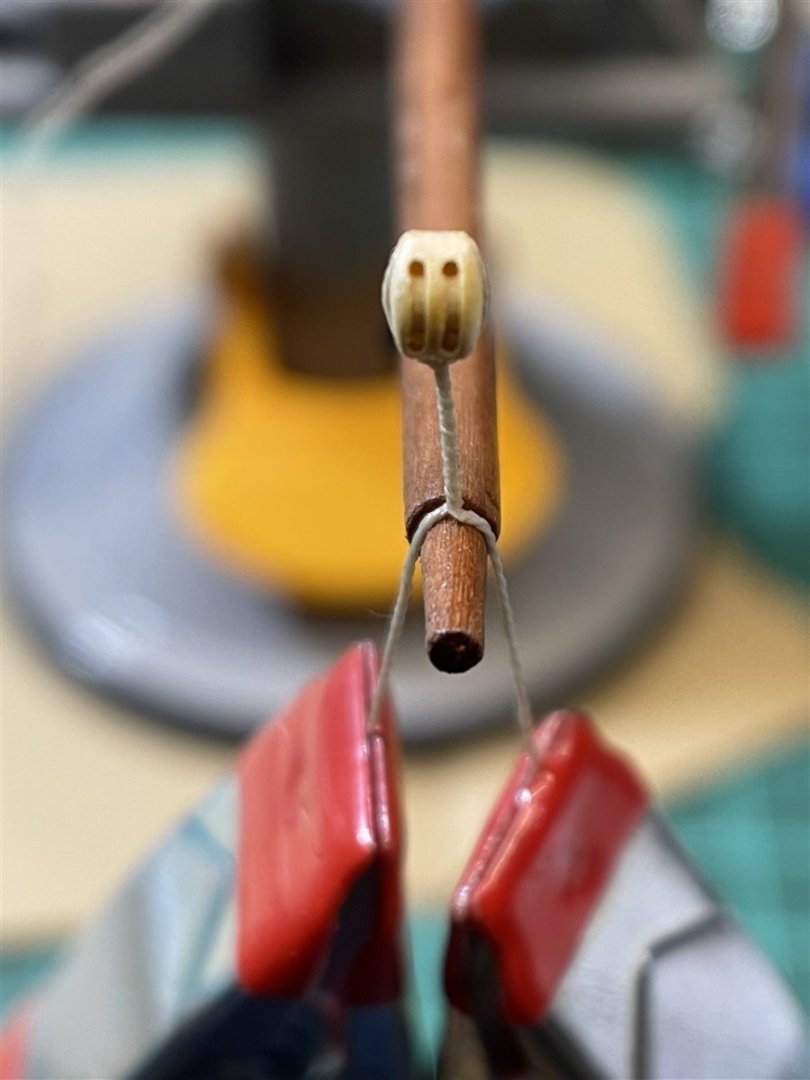
Finally the gaff yard had to be trimmed to fit to the gaff jaws:

And done:
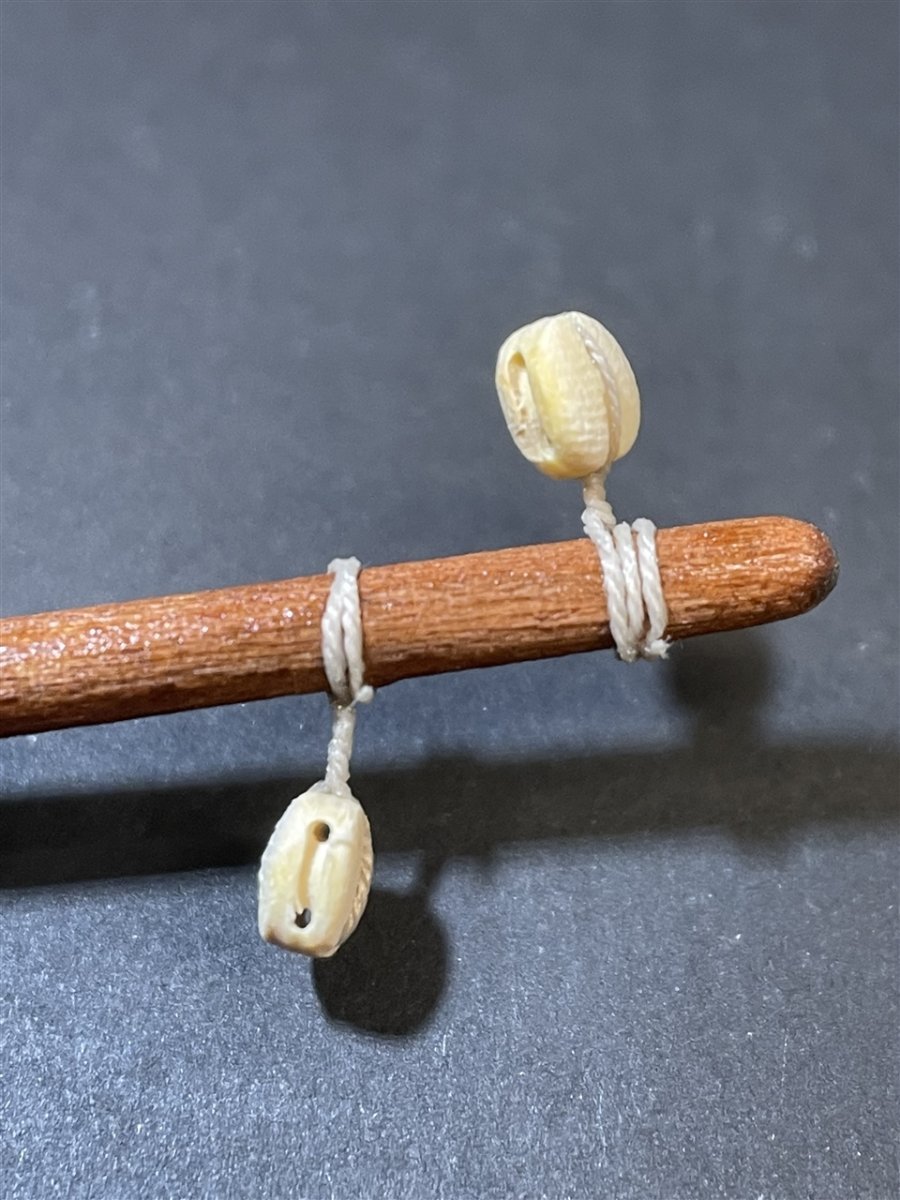
Then the yards have been painted, the eyebolts blackened and all the blocks have met their clamps again. Somehow it reminds me of the episode of Hornblower "The Frogs and the Lobsters" ...
To make the assembly easier, I use a small vice and my clamps of course ...
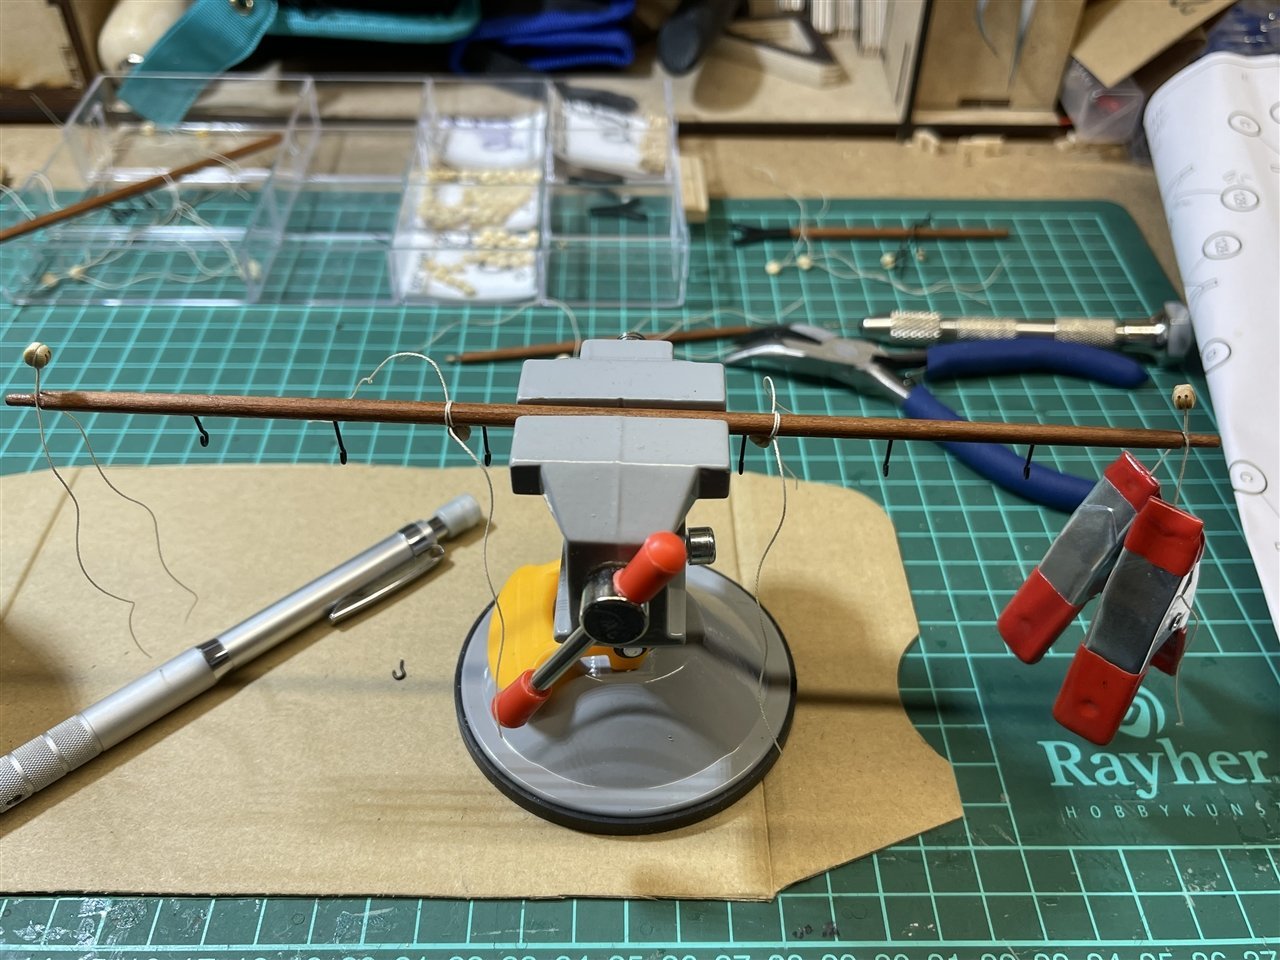
Fore upper topsail yard:
Fore lower topsail yard:
Fore course yard:
Fore gaff sail yard:
And finally all yards are done:
I will attach them to the fore mast as soon as the shrouds are done. Next up are the main mast and yards. Hopefully I get it done during this week so that I can start doing the shrouds next weekend.
Have a nice week,
Kai
- MajorChaos and GrandpaPhil
-
2
-
Hi Dan,
nice to See the Adder here on the forums. I will start my line of Ships from VM with the Sherbourne before getting the Adder. I‘m looking forward following your build log as I will have a reference to Look after as soon as I will start with my Adder.
Kai
- hollowneck, Theodosius, Mr Whippy and 1 other
-
4
-
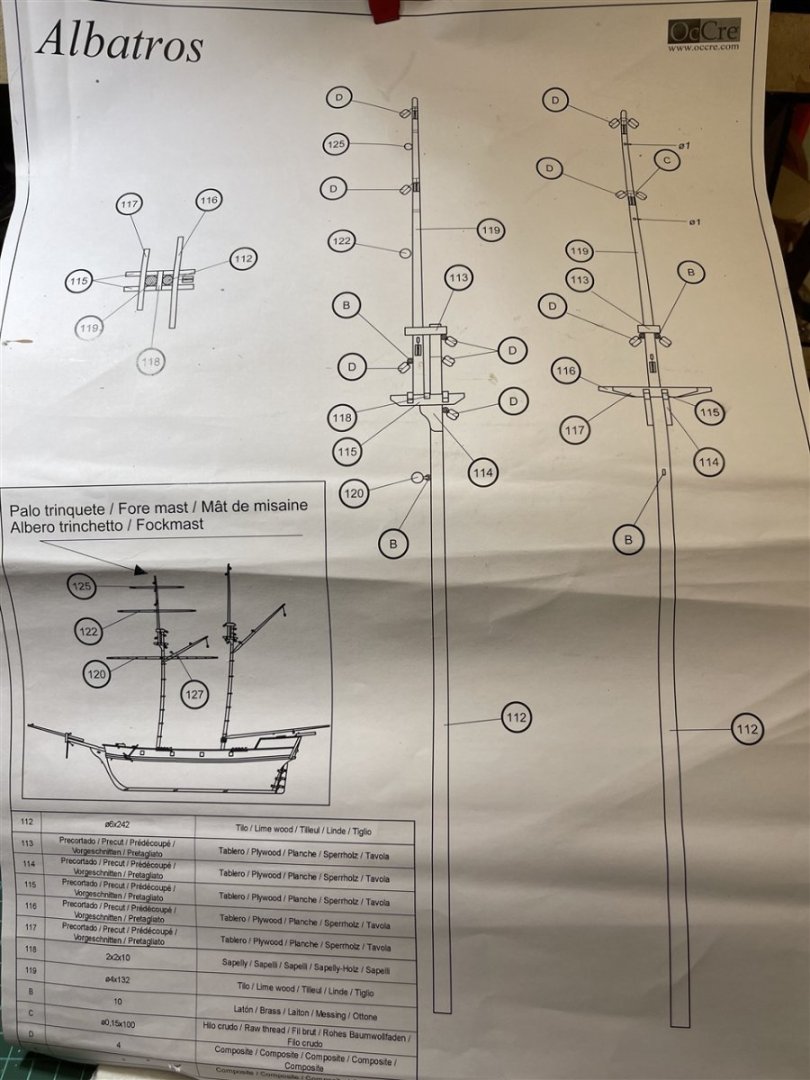
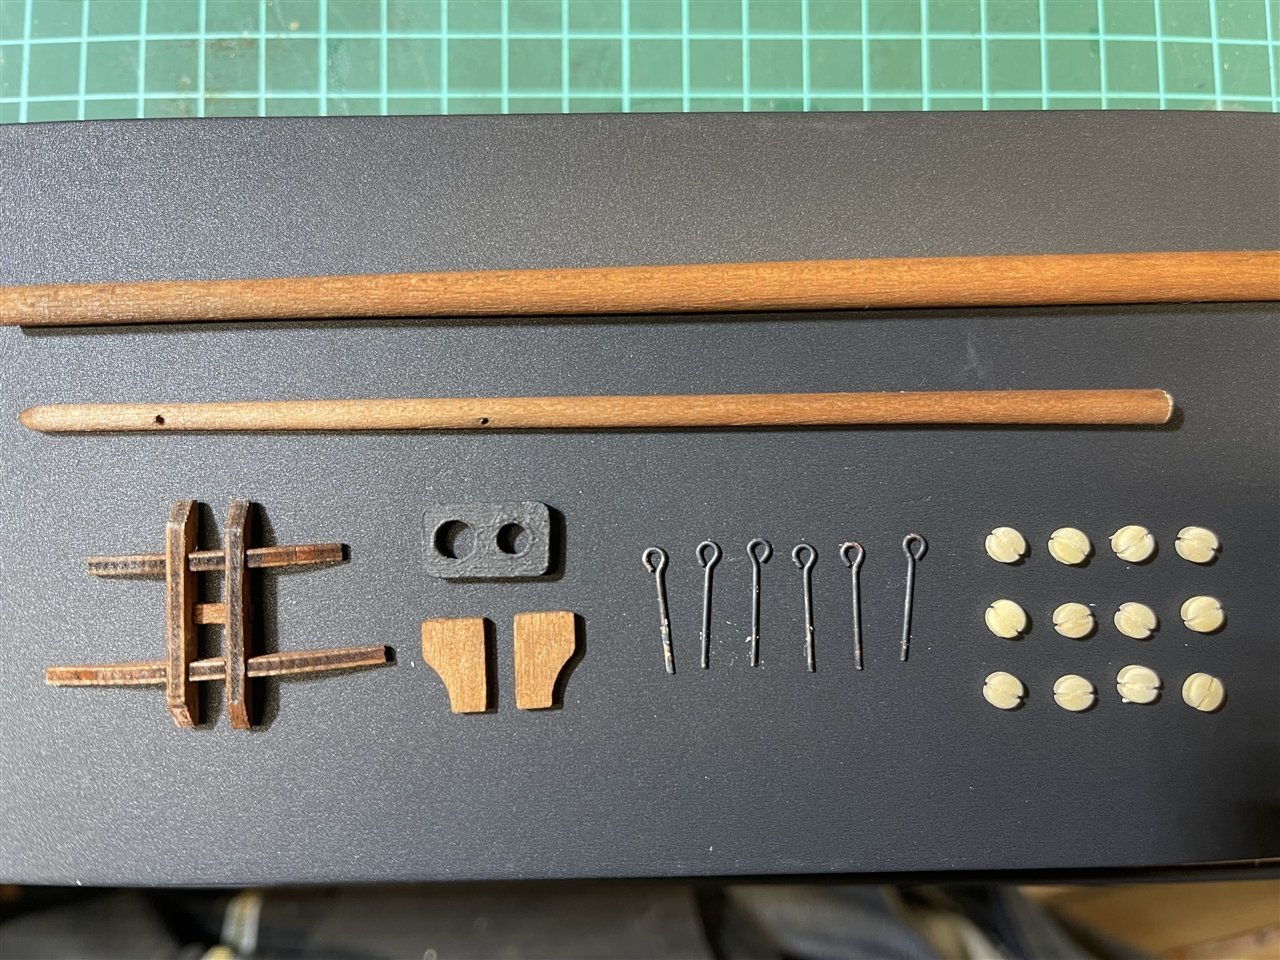
Foremast
I have started to make the fore mast :
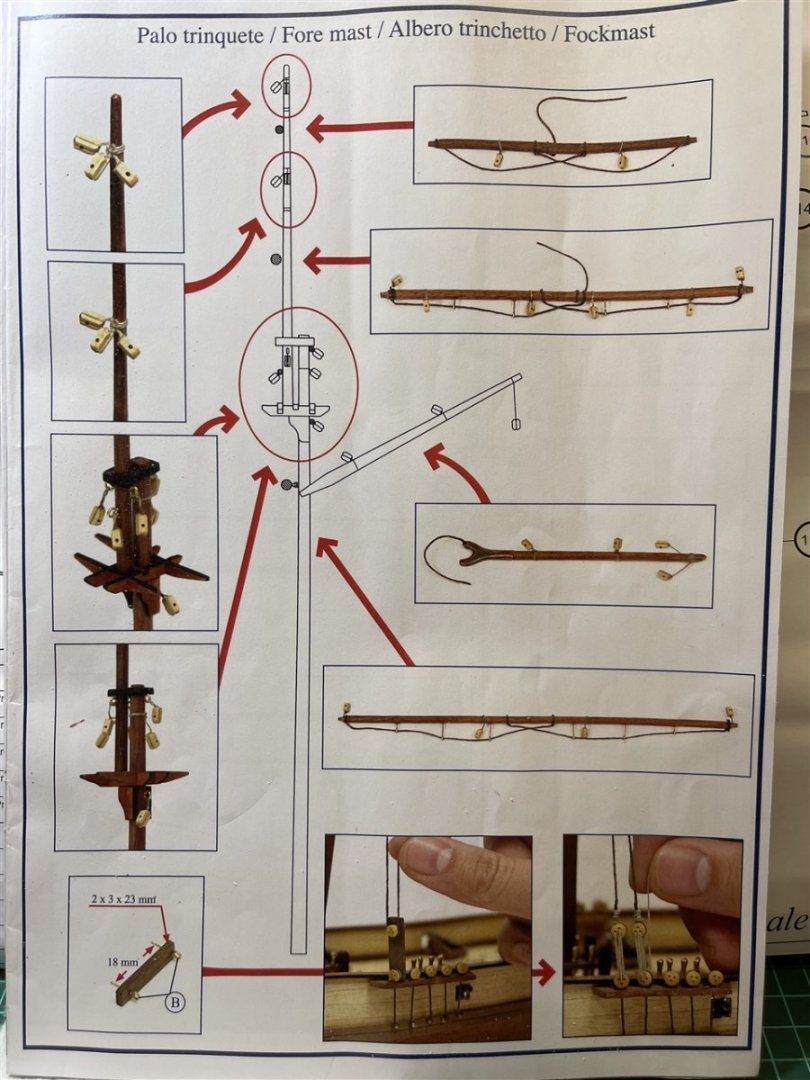
Limewood dowels tapered, cut to size and painted ...

All other wooden parts have been painted and the crosstrees glued together. 6 eyebolts needed to get blackened and 12 single sheaved blocks have been picked out of their box to accomplish all the parts needed ...
Dowels, mast cap and crosstrees glued together ...
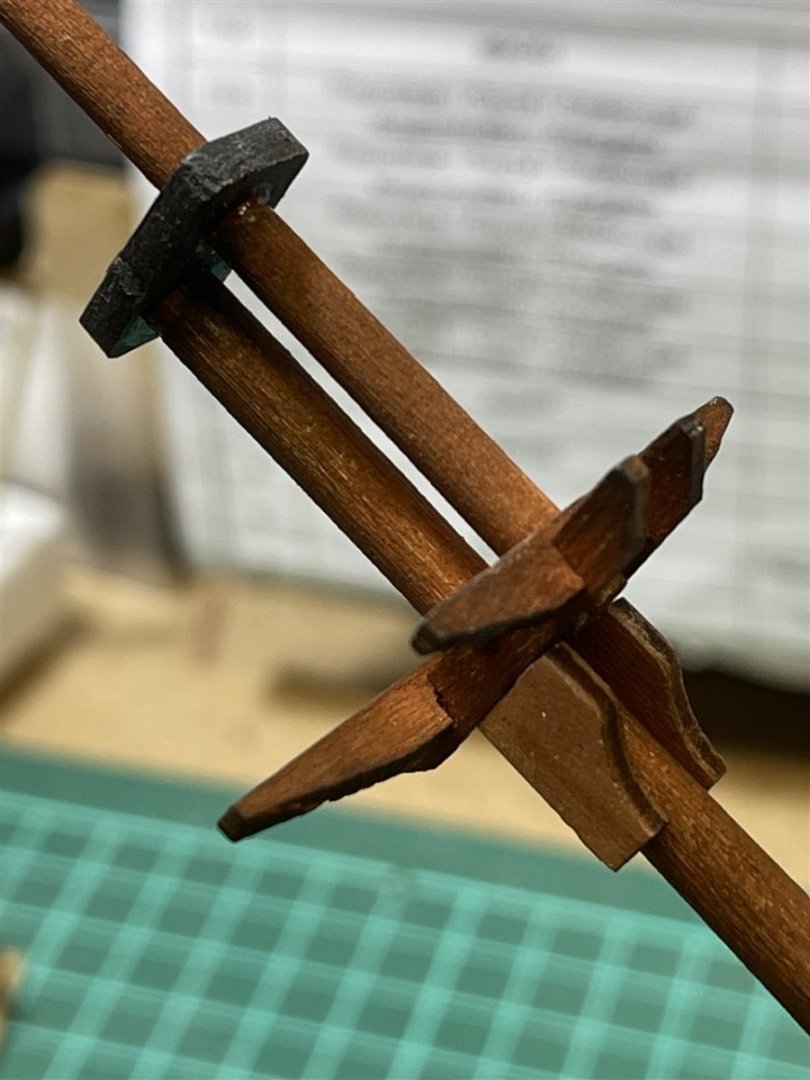


I do like the 1/1 scale plans as they help me a lot to check my parts regarding size and position ...


First dry fit of the fore mast ... the mast rake is clearly noticable but it is not uncommon to see this on schooner-type ships I think ...
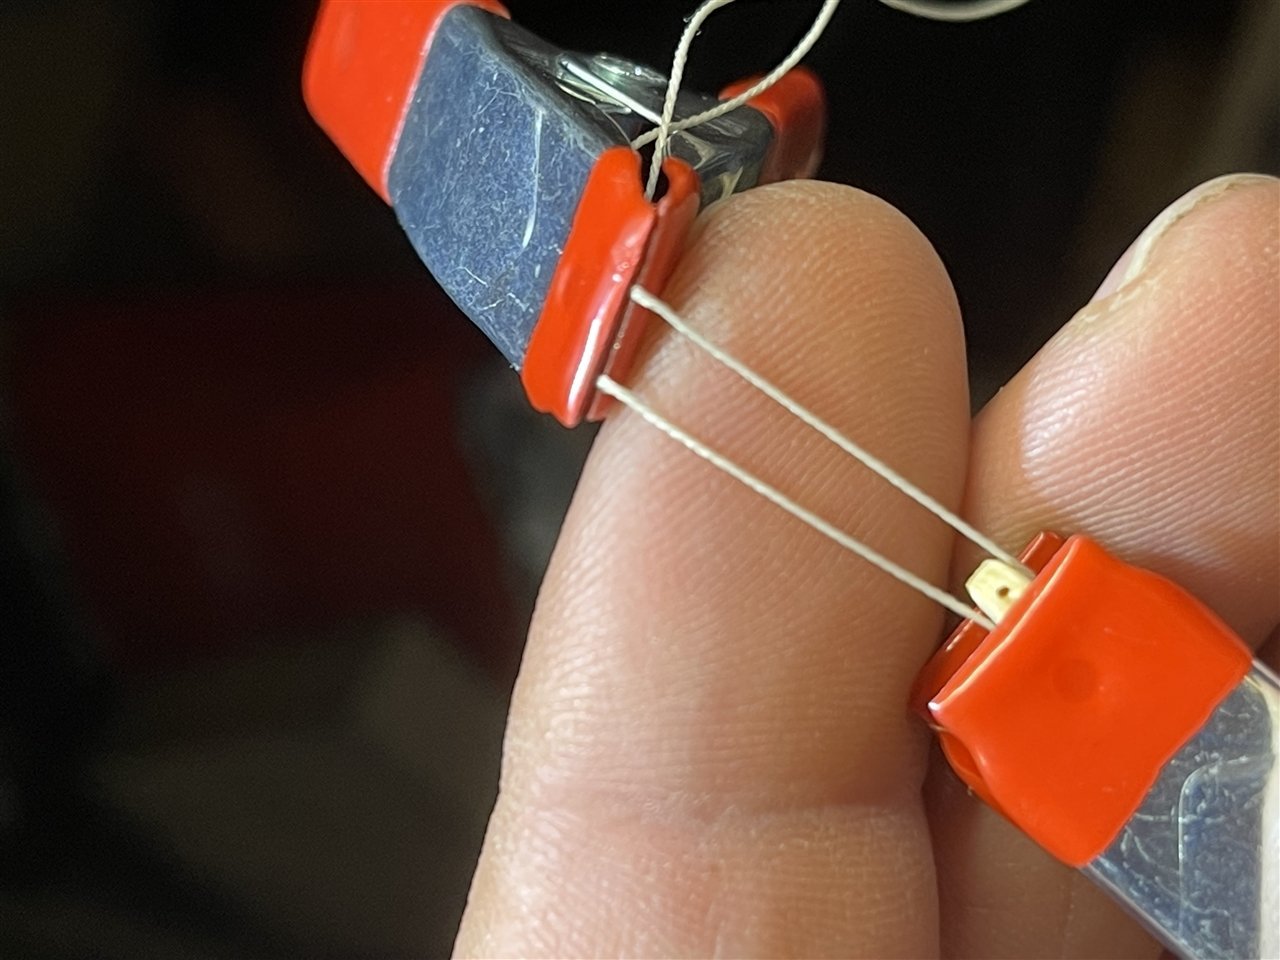
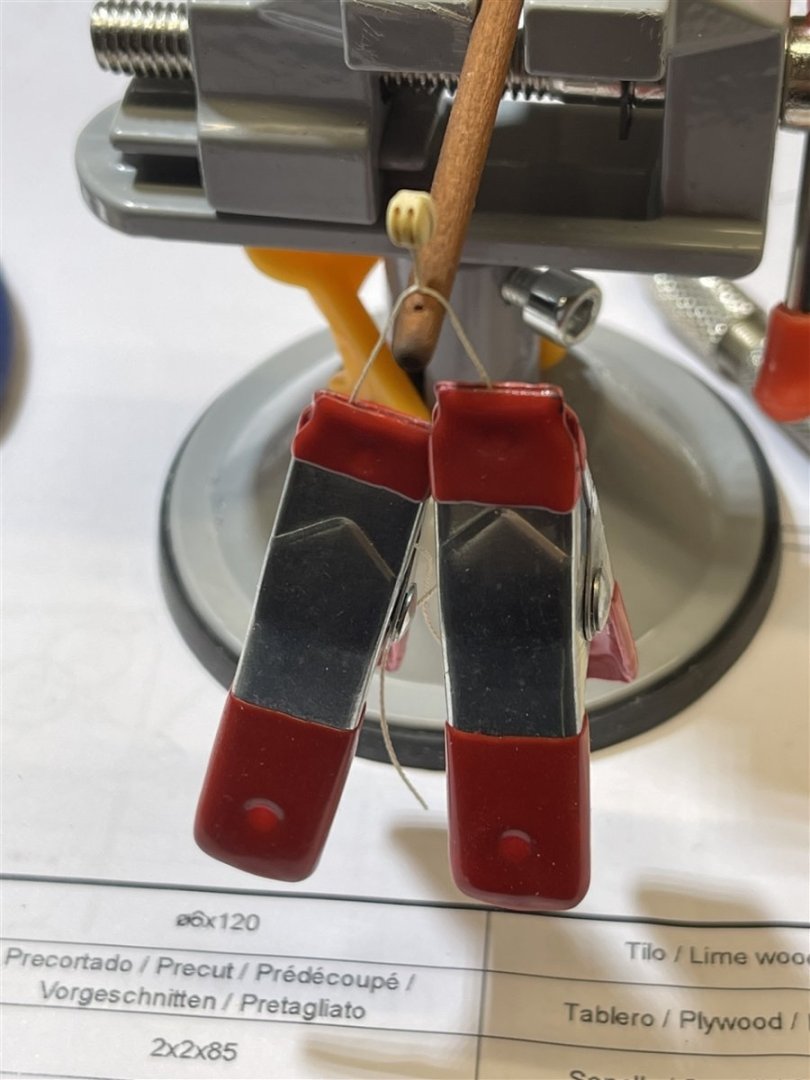
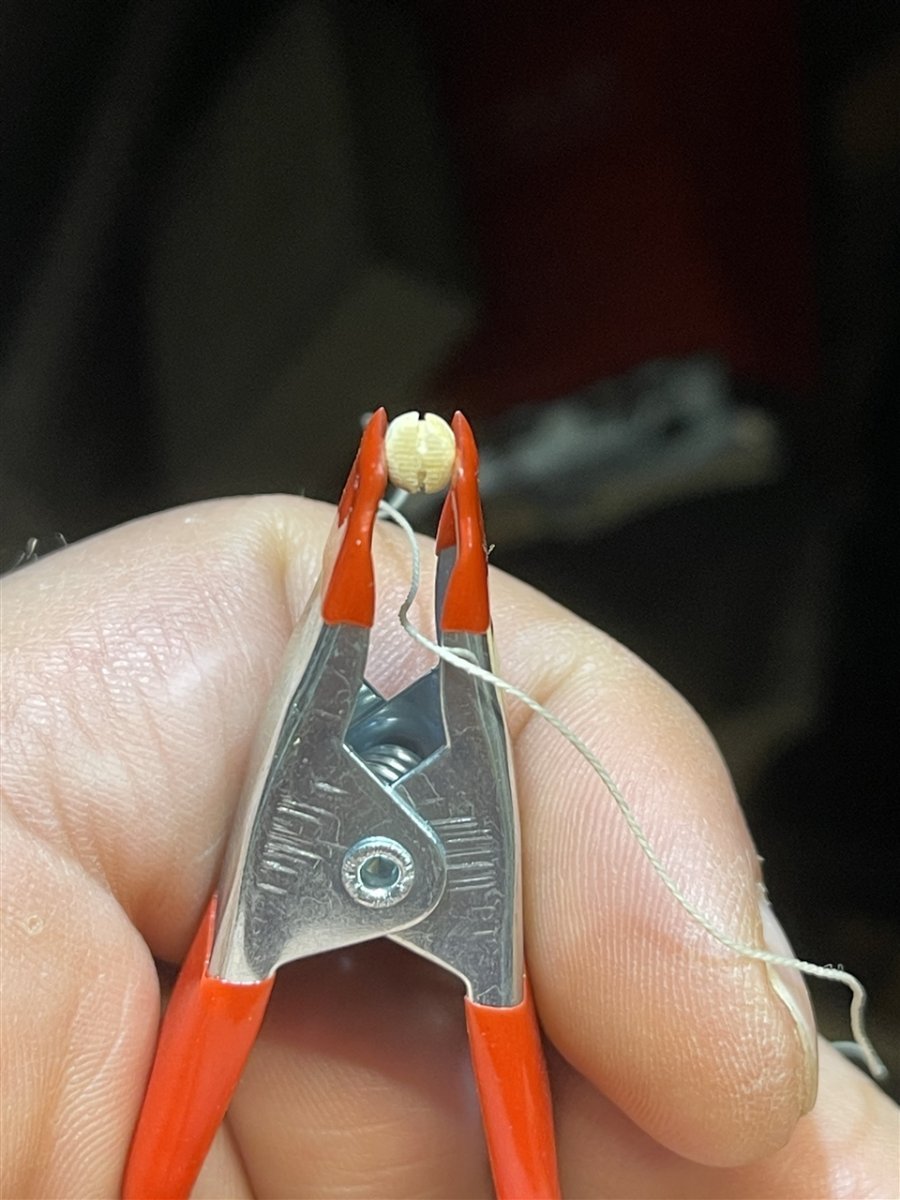
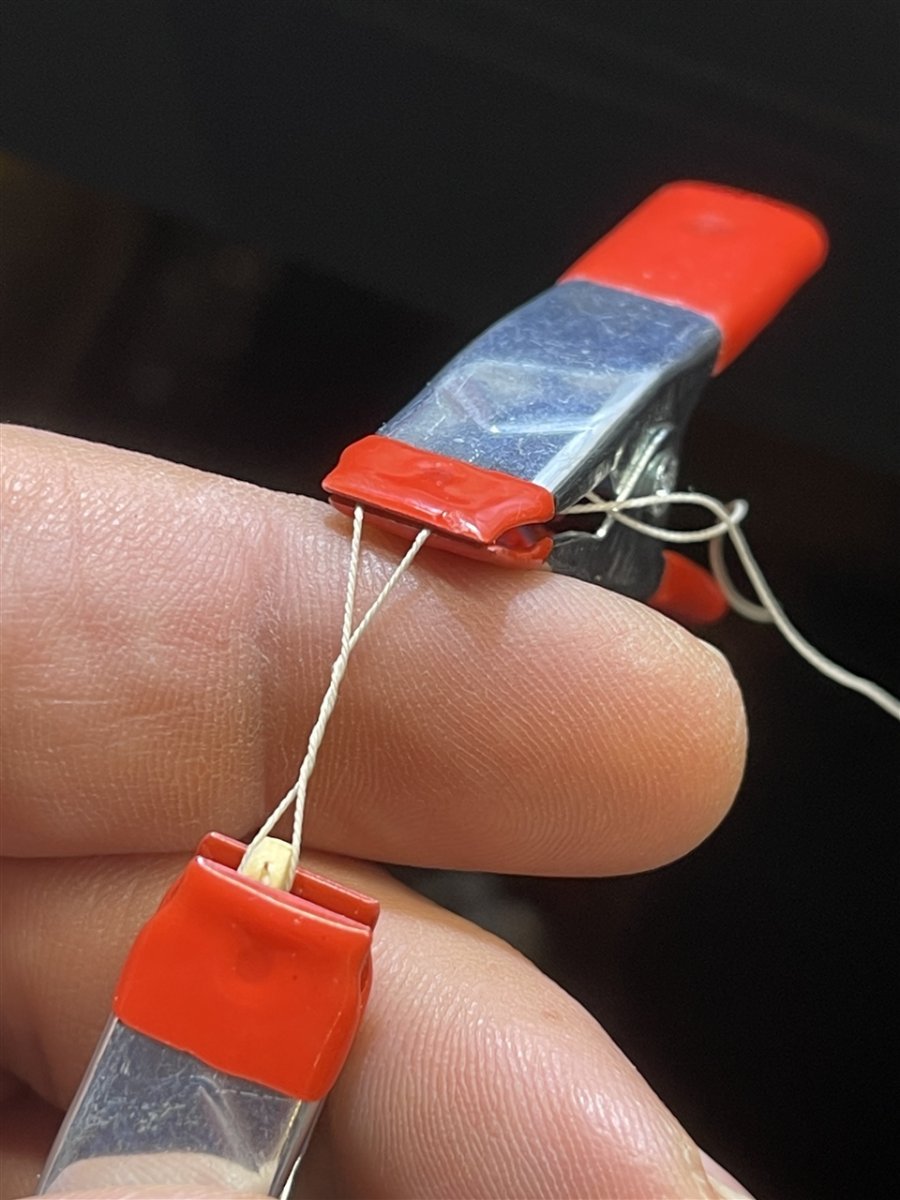
Now comes the fun part ... preparing the blocks. To make it easy I use my "2-clamp-method"
First step is to secure the block using the first clamp and place the block in the direction that you can put the thread around it ...
The clamping force of the 2" clamps is strong enough to hold the blocks in place without damaging them.
the blocks are so nice that everyone deserves his own clamp and so all the blocks accompanied by 0.16 homemade thread got prepared for step number two ...
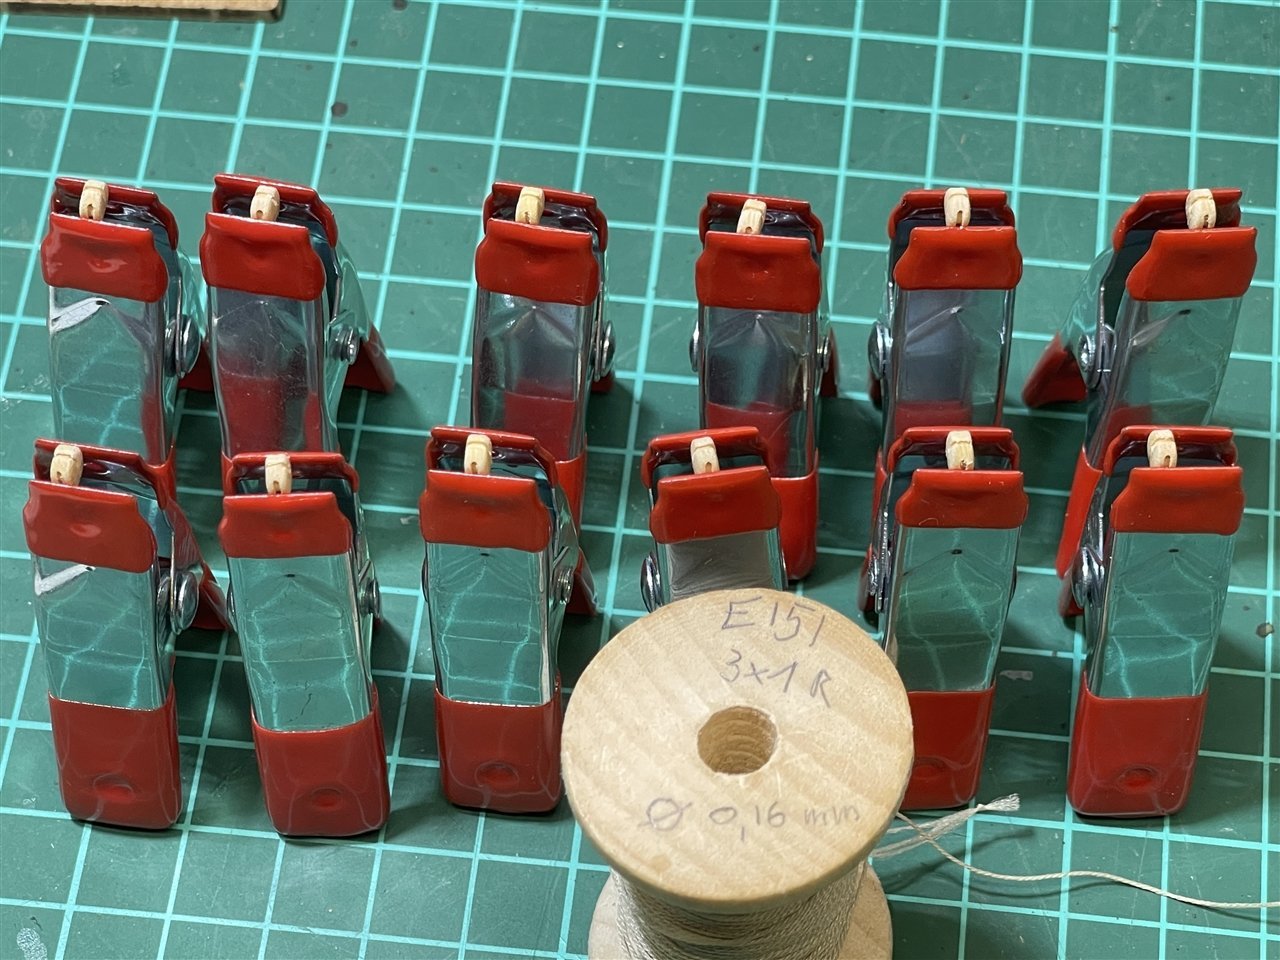
You then put a piece of precut thread through the clamp and secure the loose ends of the thread with a second clamp. The second clamp is positioned over the index finger. The design of the clamp and its weight keeps the thread in position and nice and straight. I do make the strings 18 cm long. This provides enough length to tie the blocks without the need of using tweezers or any other rigging tool easyly around the mast or to the eyebolts and the cut off ends of the thread are still long enough to make the rope hanks I will place after the rigging is completed. So there is no waste.

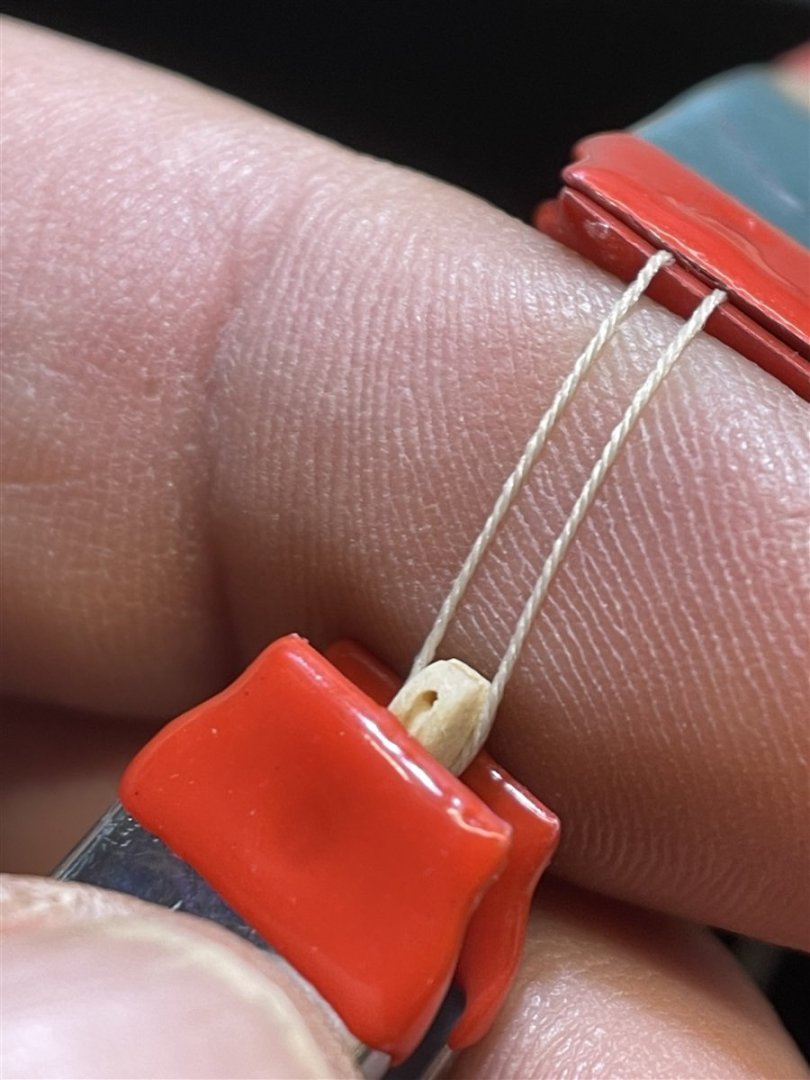
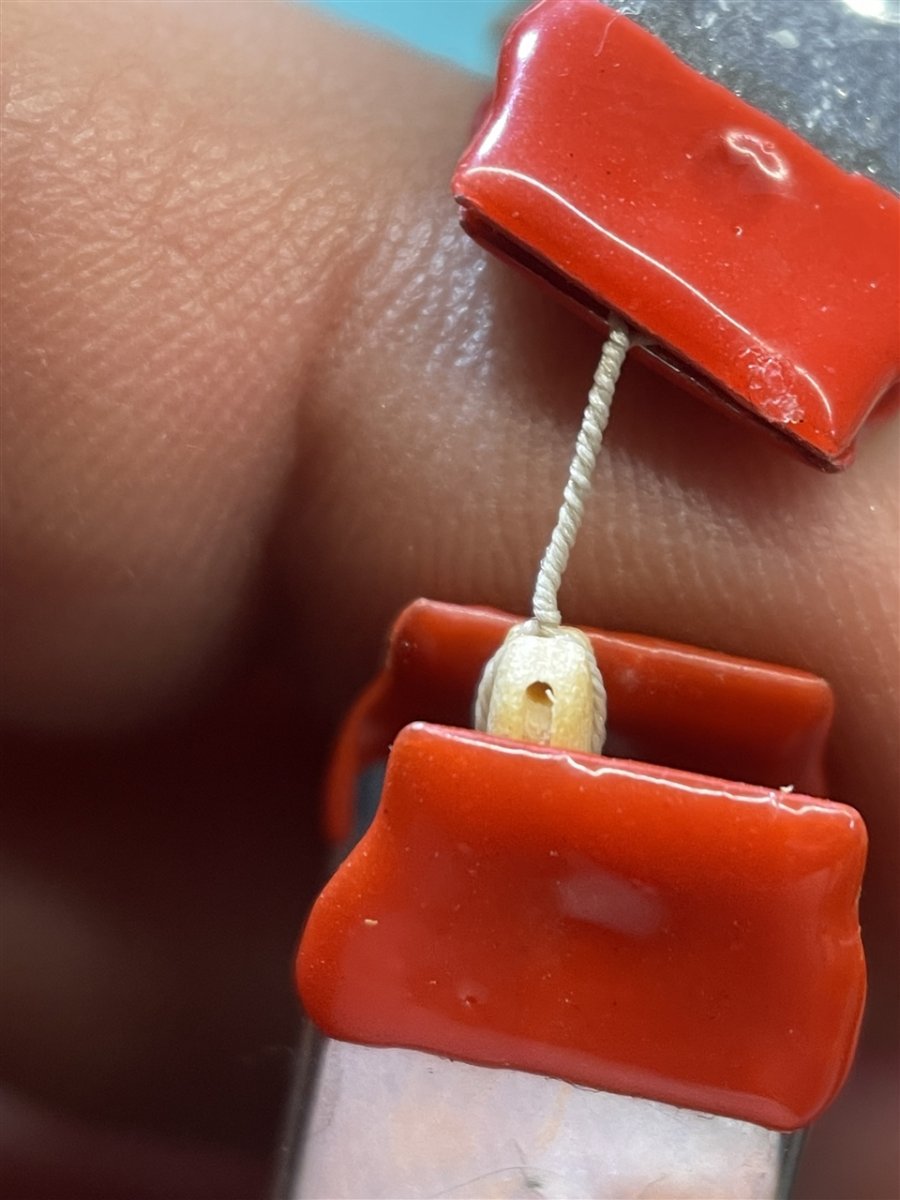
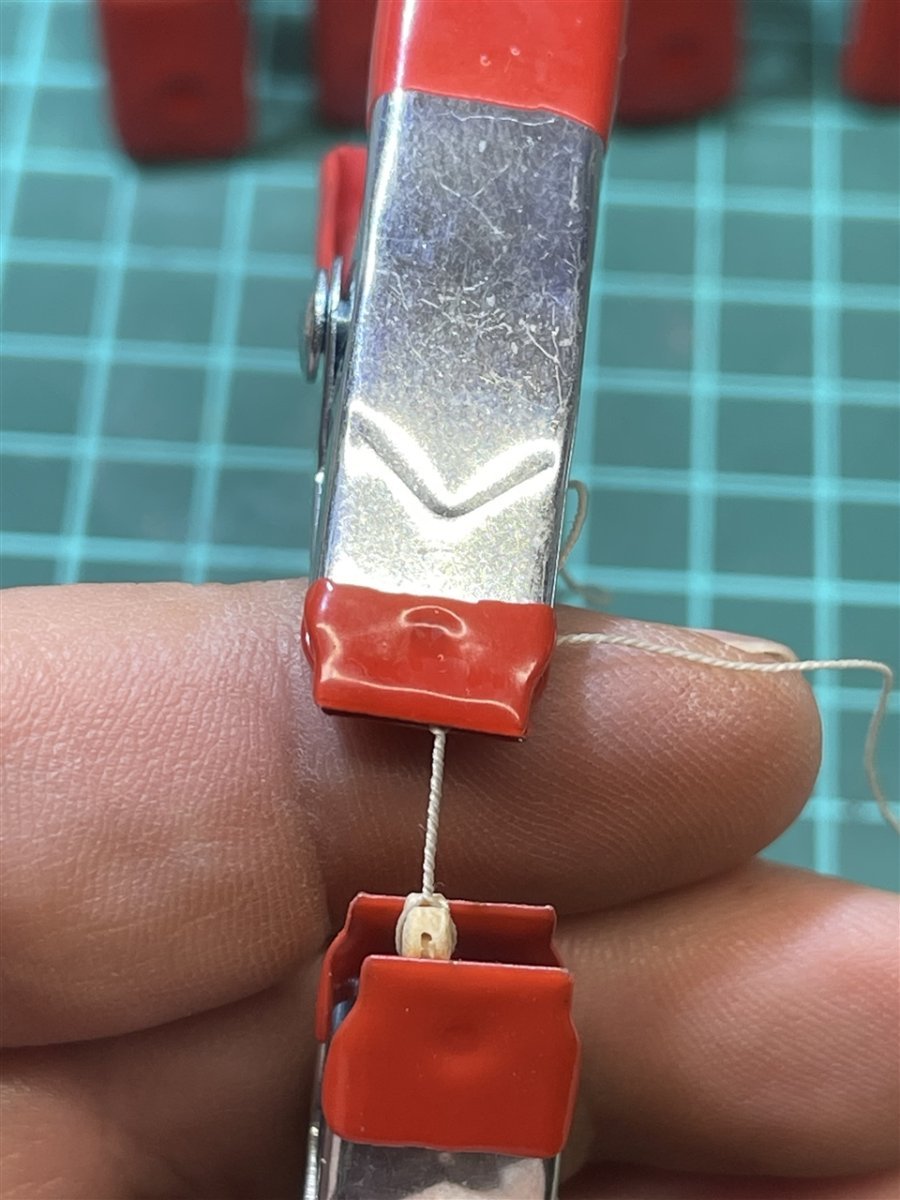
I start to twist the thread by turning the block-holding clamp clockwise until the twist starts to look like a seizing and the thread fits tight around the block ...

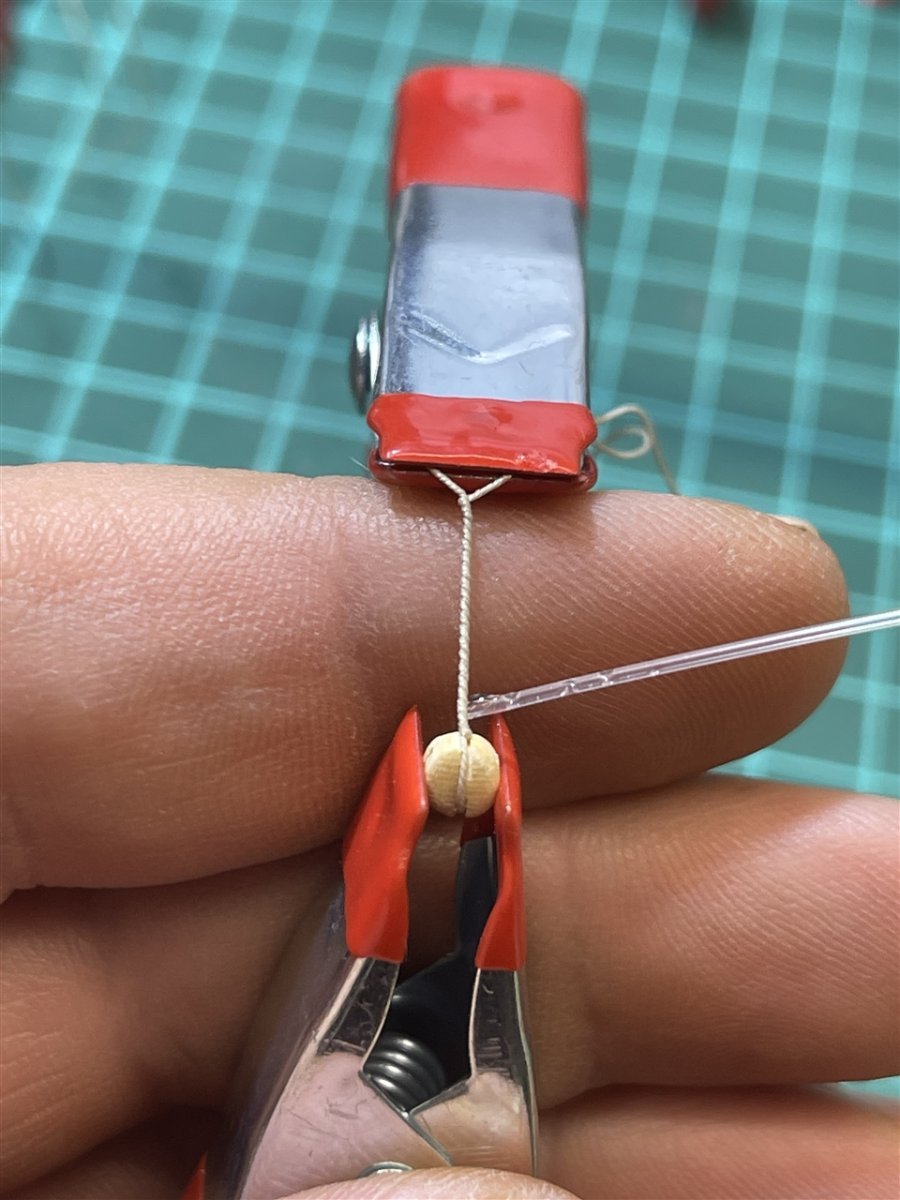
The clamps prevent the assembly from untwisting so you can hold it very relaxed as long as you need to set your drop of glue to secure everything ...
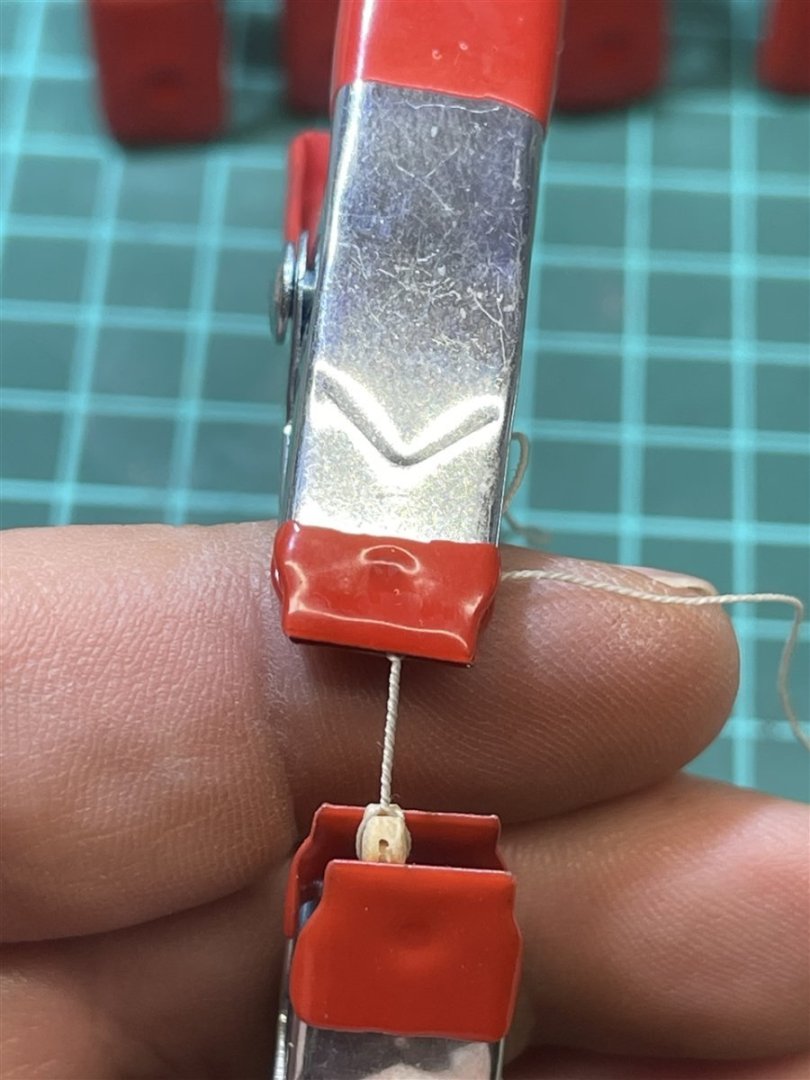

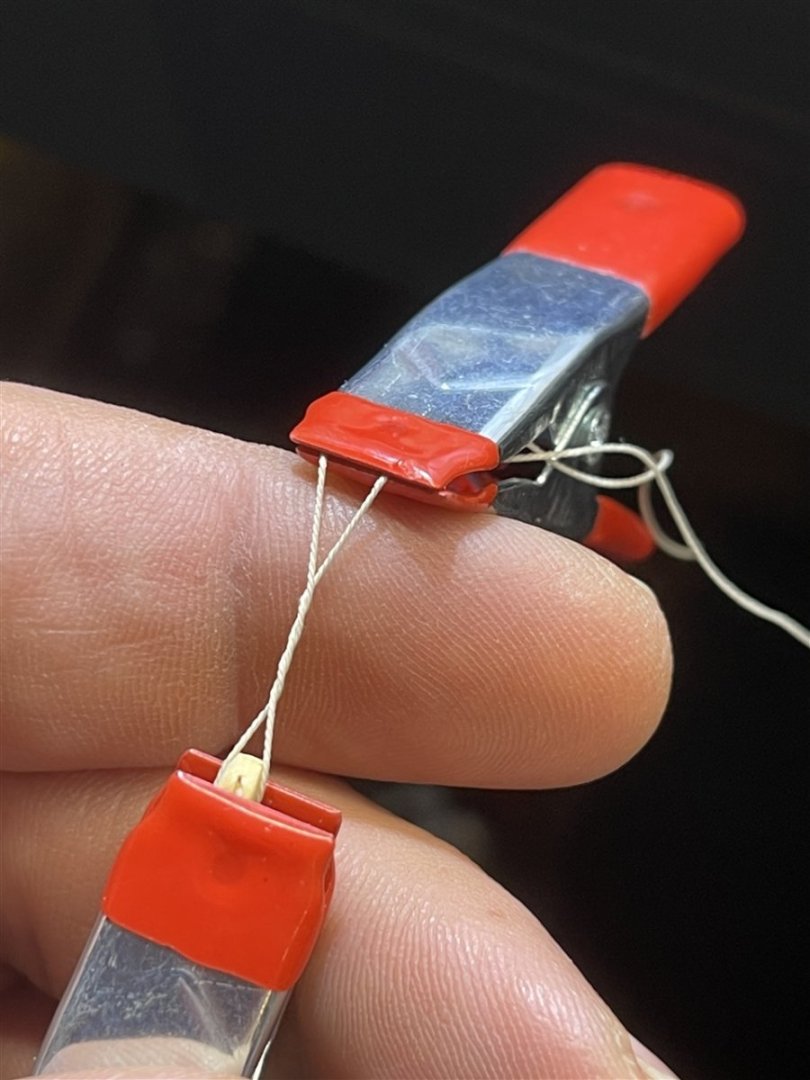
As soon as the glue has set you can untwist the unglued parts of the thread ... rinse and repeat until all blocks are done ...
Now its time to leave your clamps behind my dear blocks ...
All eyebolts glued to where they have to go ...
To tie the blocks to the mast and eyebolts the clamps are joining us again. I clamp the mast horizontally in a vice and put one 2" clamp to each of the loose ends of the blocks ropes. This allows me to place the blocks on the mast in such a way that I can tie and glue them in place at my leisure.

All blocks in place ...


Now she starts looking more and more like a ship ...
To complete the fore mast I have to make 4 yards next. I'll get back to you when I'm done.
Thank you for reading and have a nice week ...
Kai
- RossR, Ryland Craze, GrandpaPhil and 2 others
-
5
-
5 hours ago, allanyed said:
Kai,
LOVELY first build! Changing to the Syren blocks was a wise decision.
Question regarding the gammoning as I have not seen it done this way on any contemporary model or any drawings based on contemporary sources. Is this a kit instruction or was this actually done this way in some cases?
Thanks
Allan
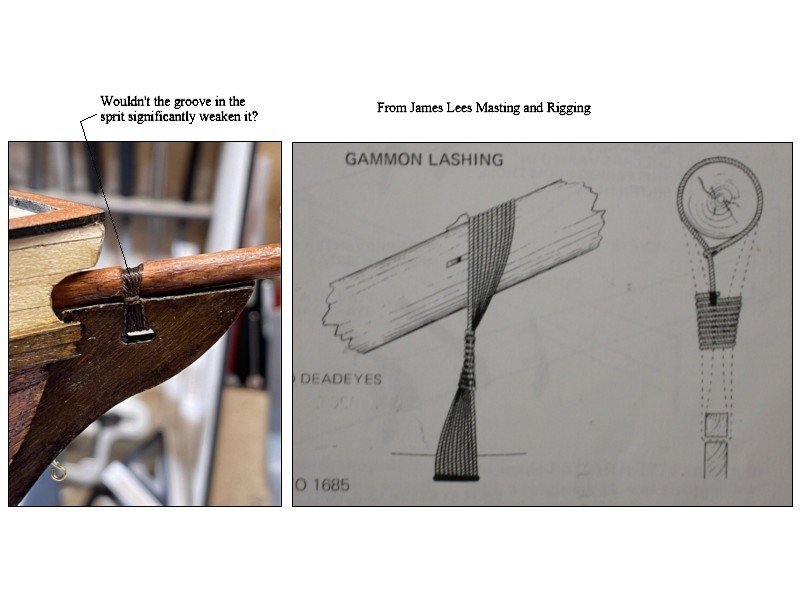
Thank you for your nice reply.
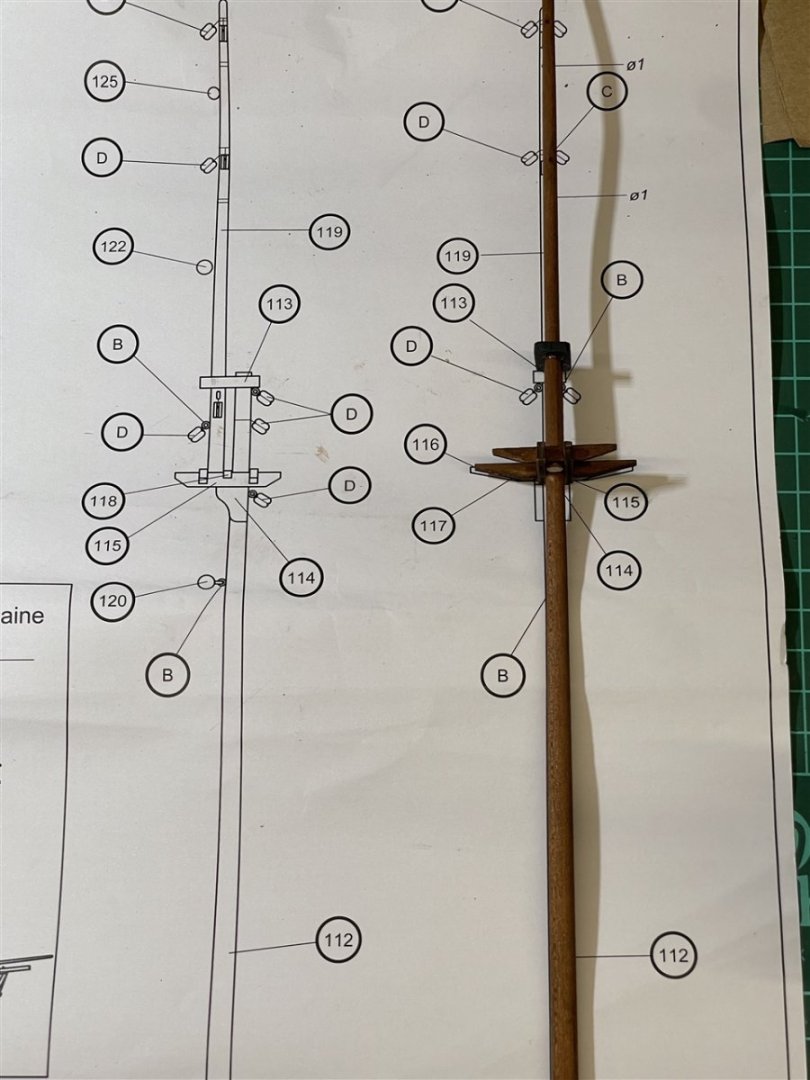
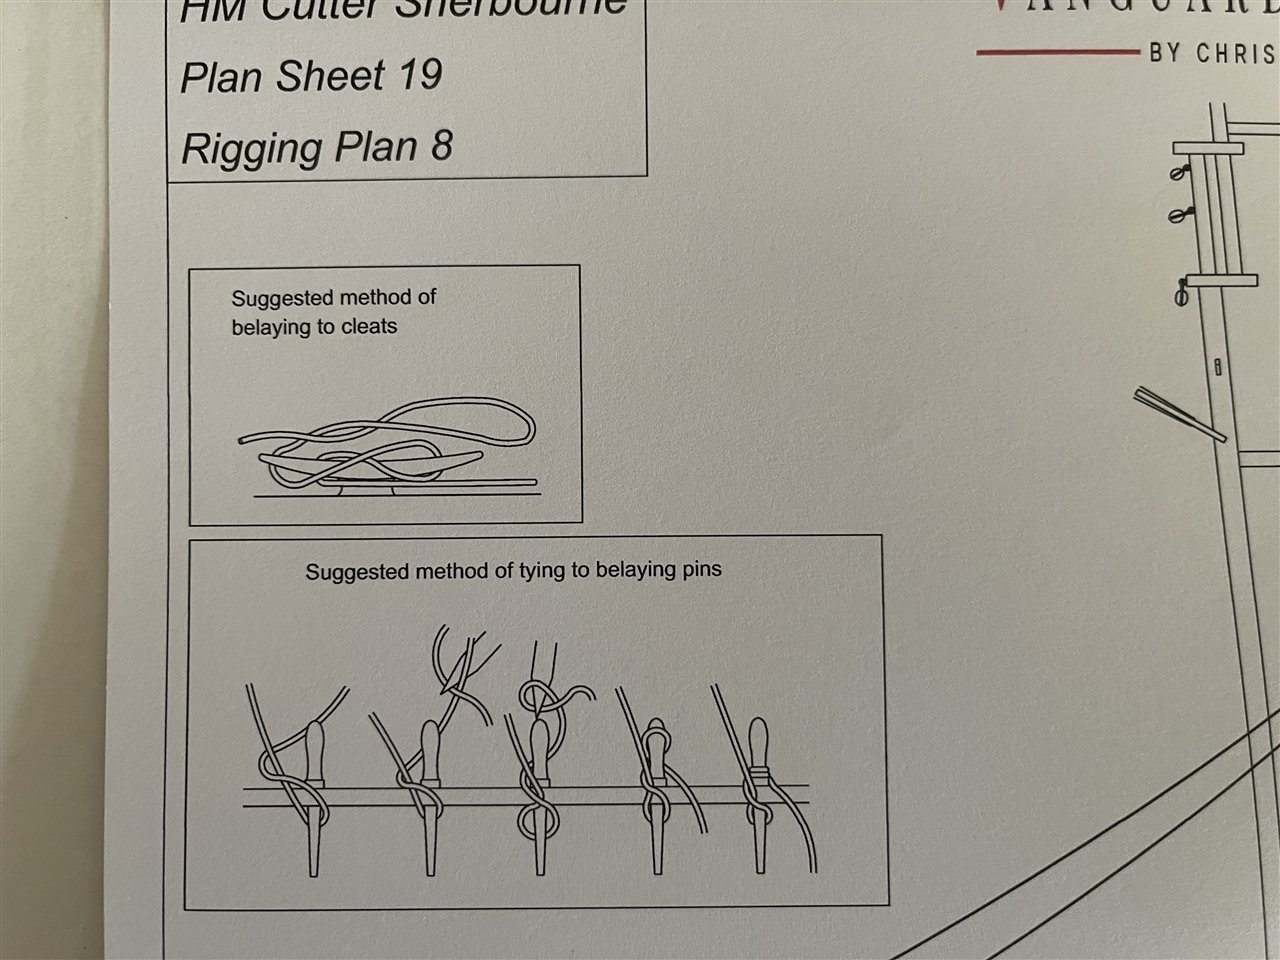
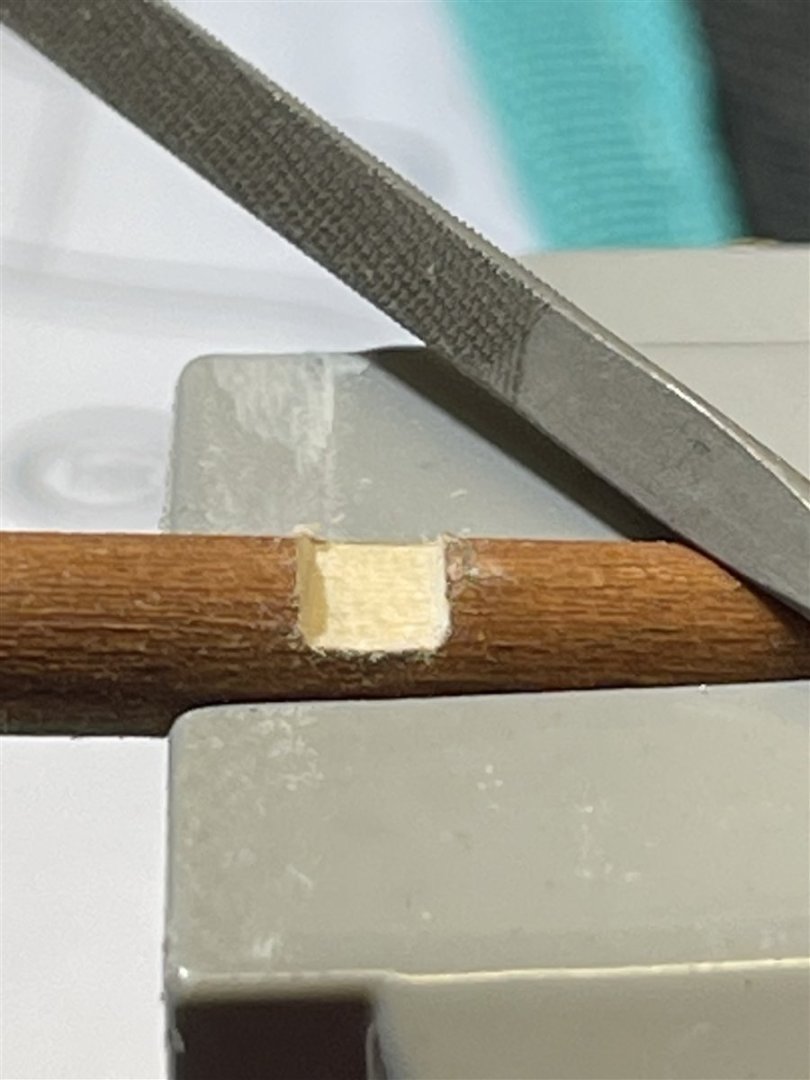
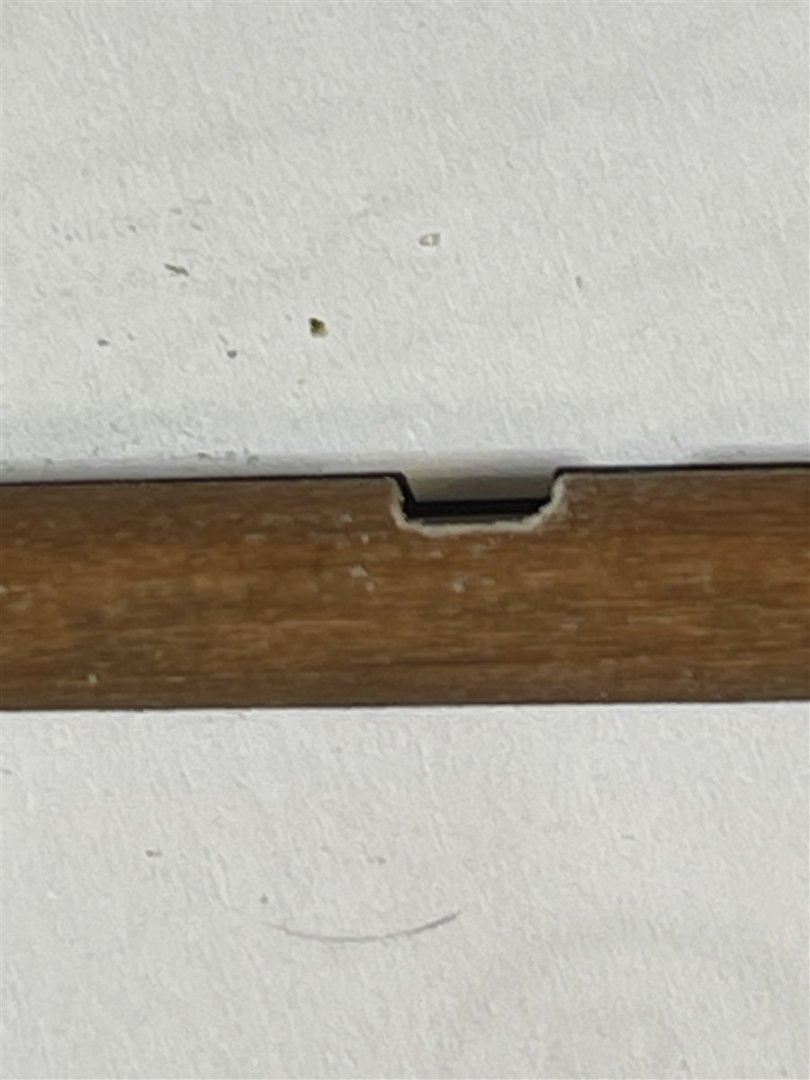
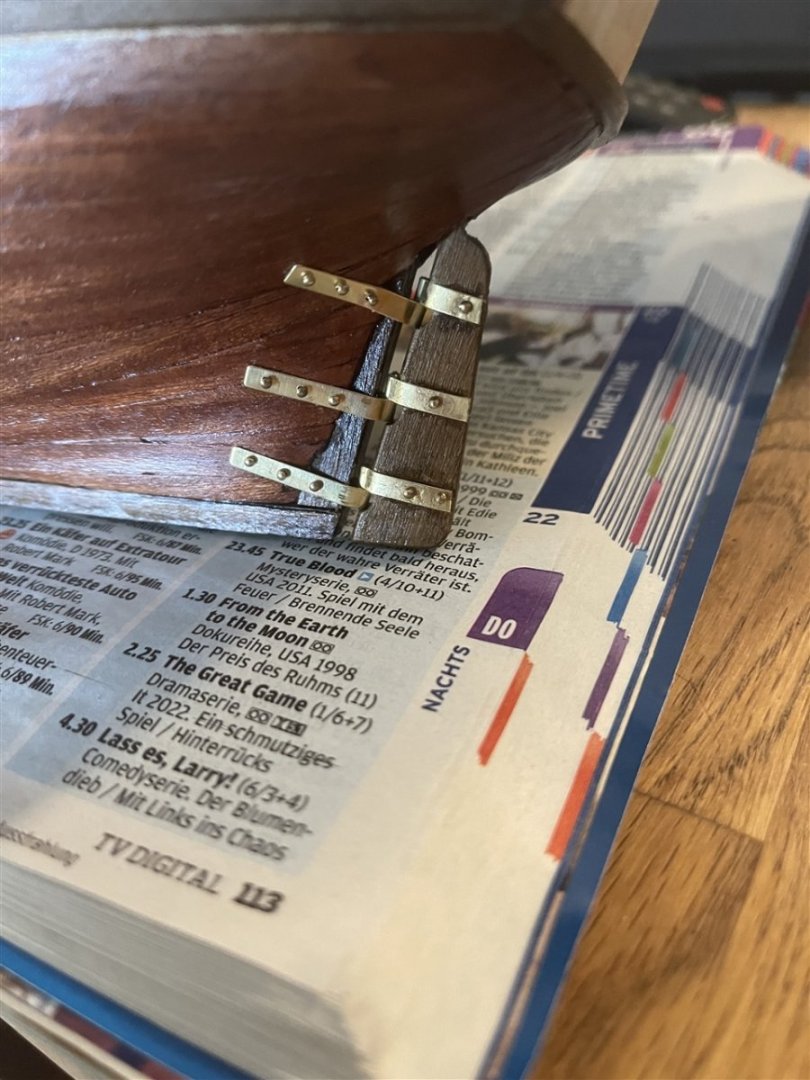
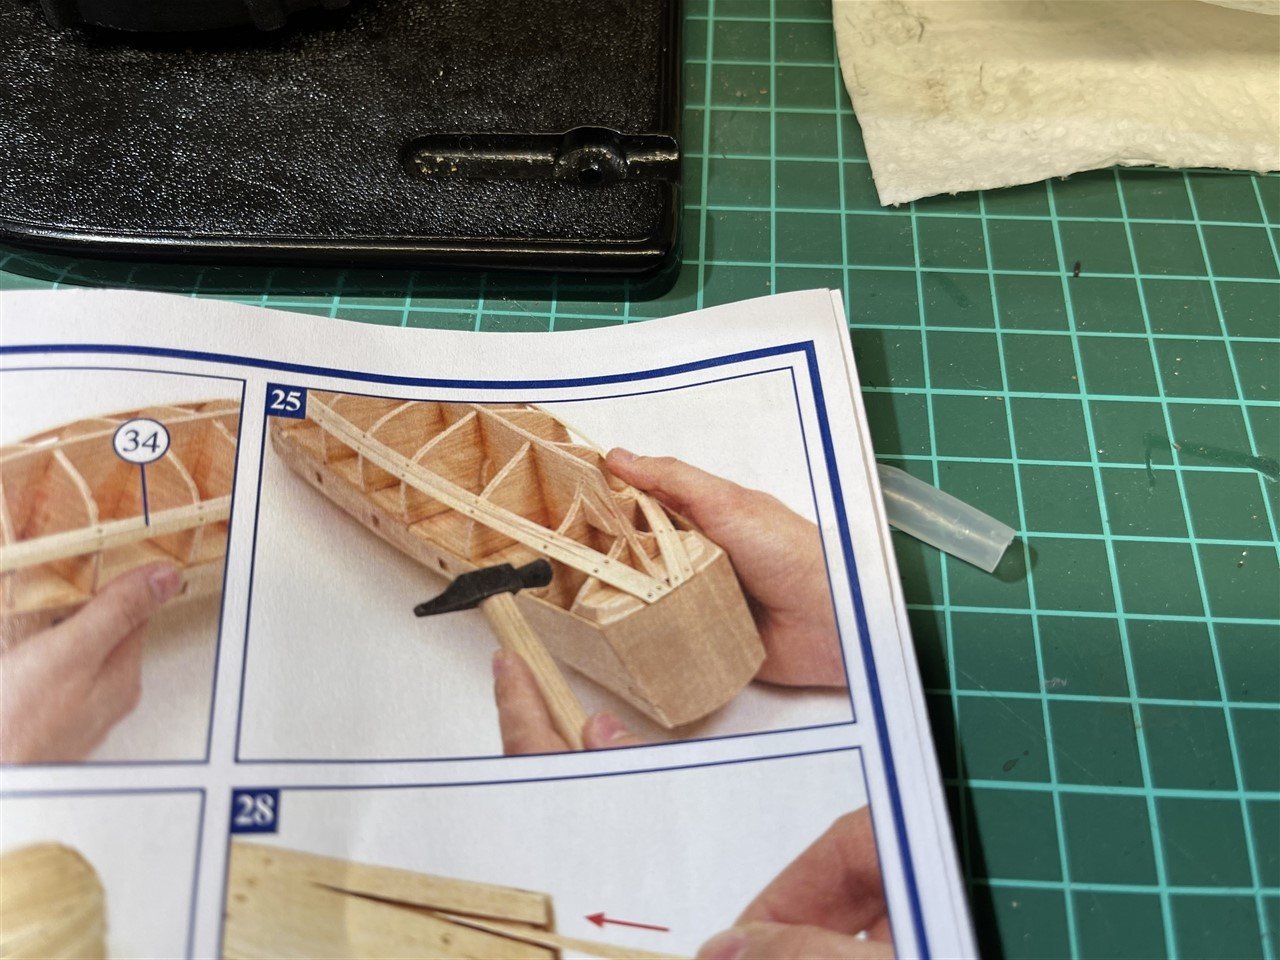
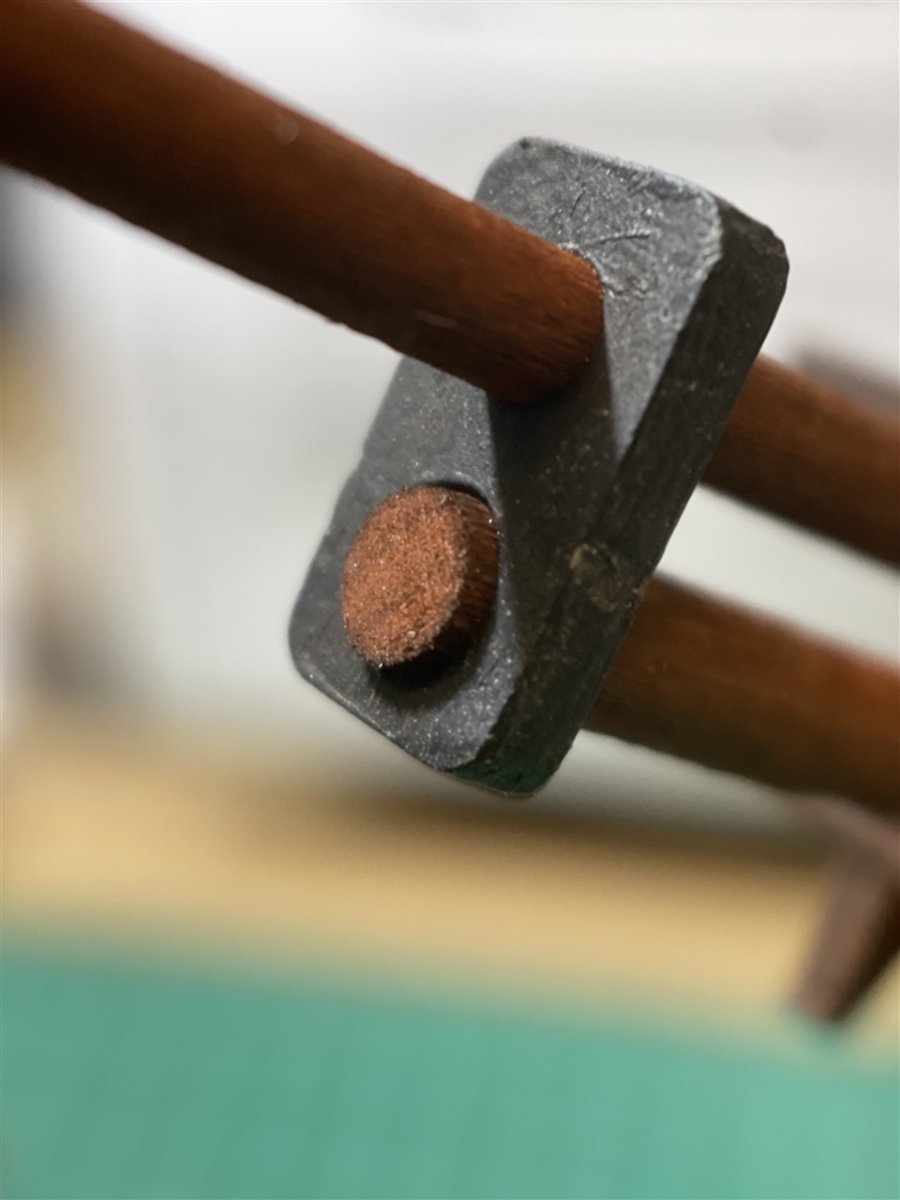
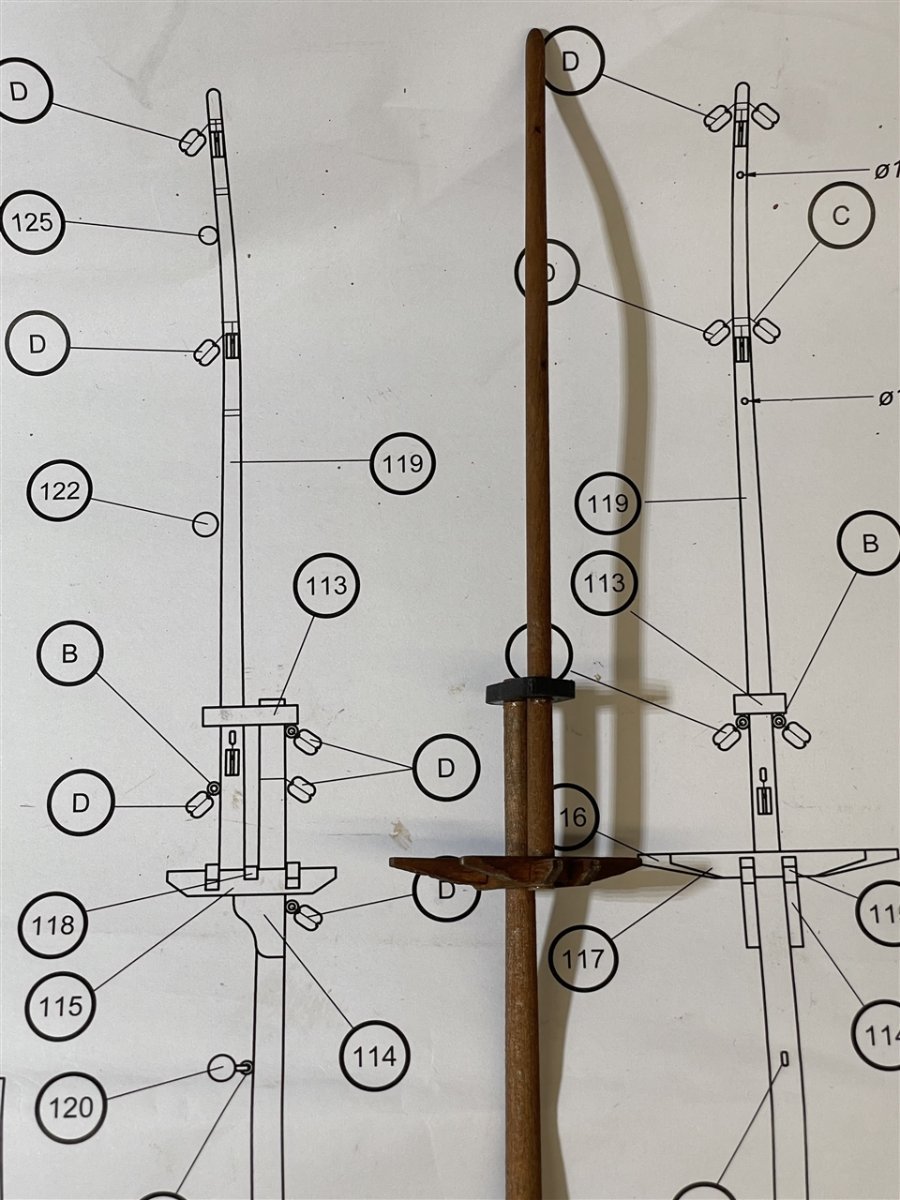
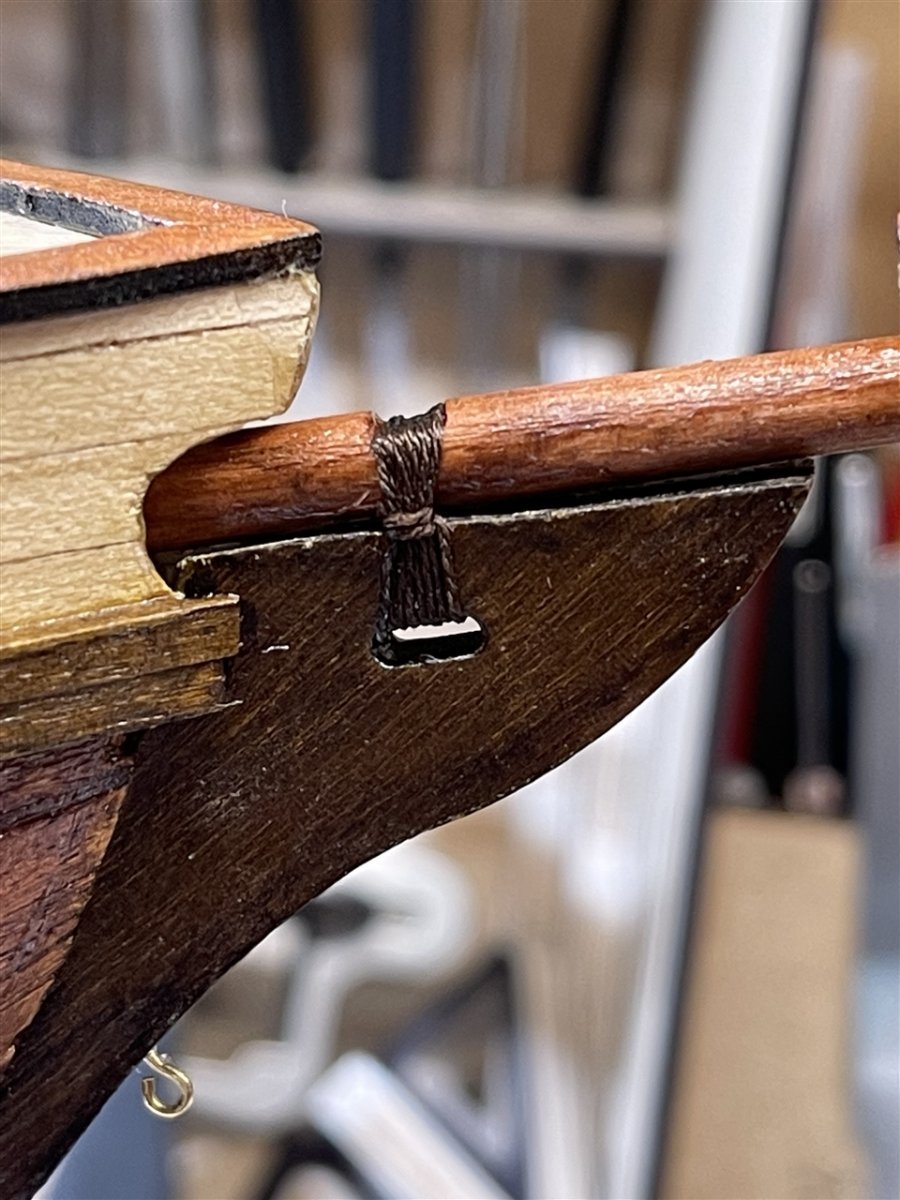
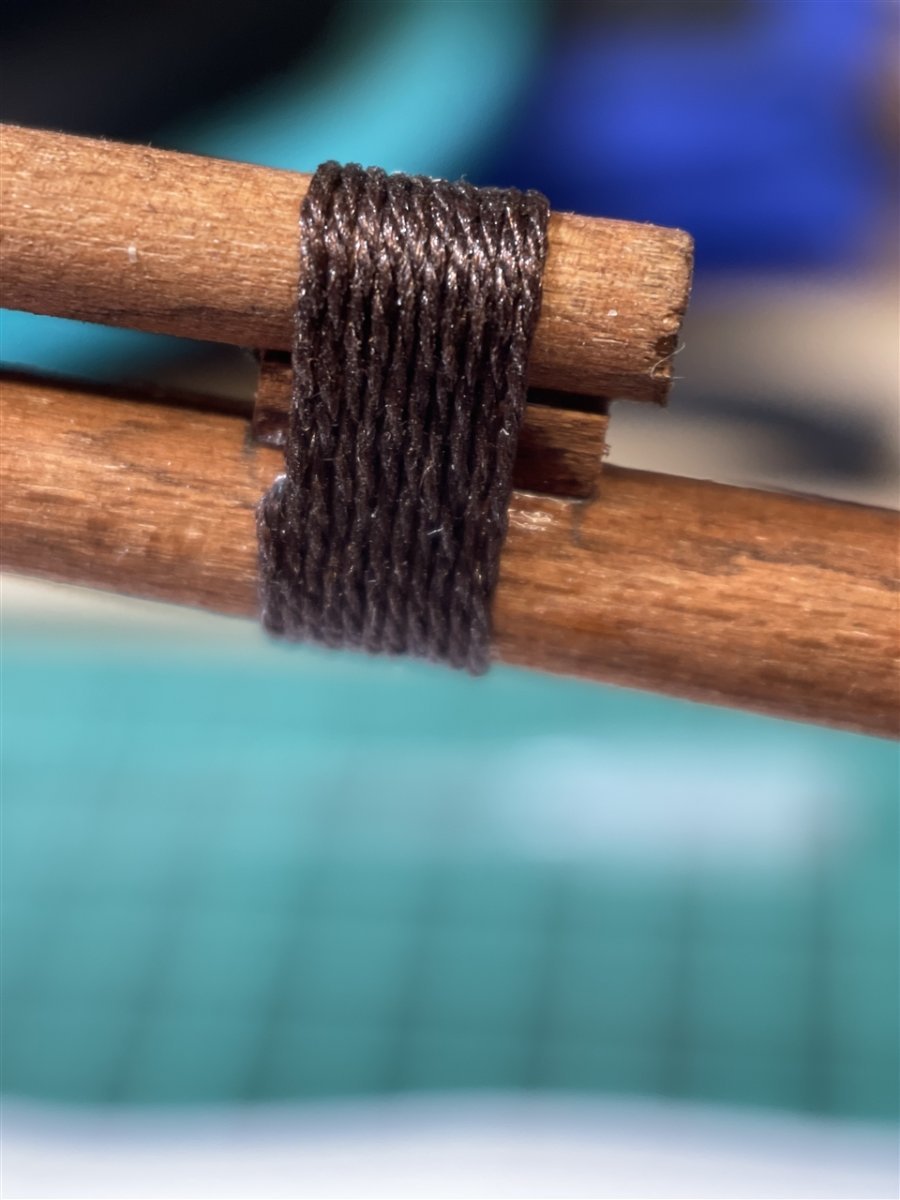
The gammoning I did according to the instructions (lower right):

I have found an image in the book "The Anatomy of Nelsons Ships" that looks similar but you can see that there is a wooden saddle on top of the boom having these cutouts. I fully agree that cutting the boom itself would weaken it so that surely was no option.
Kai
- MajorChaos, Ryland Craze and allanyed
-
3
-
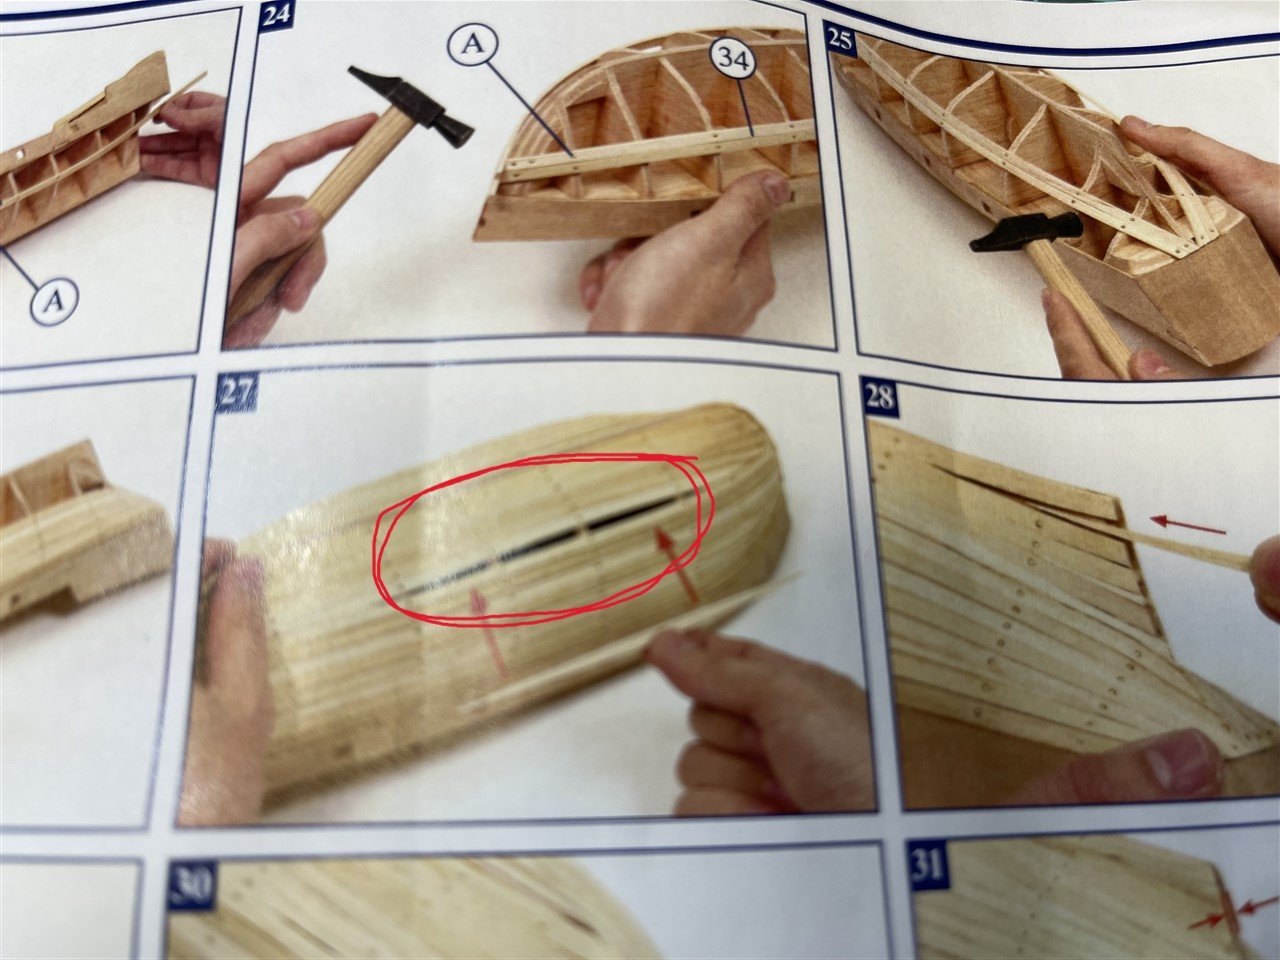
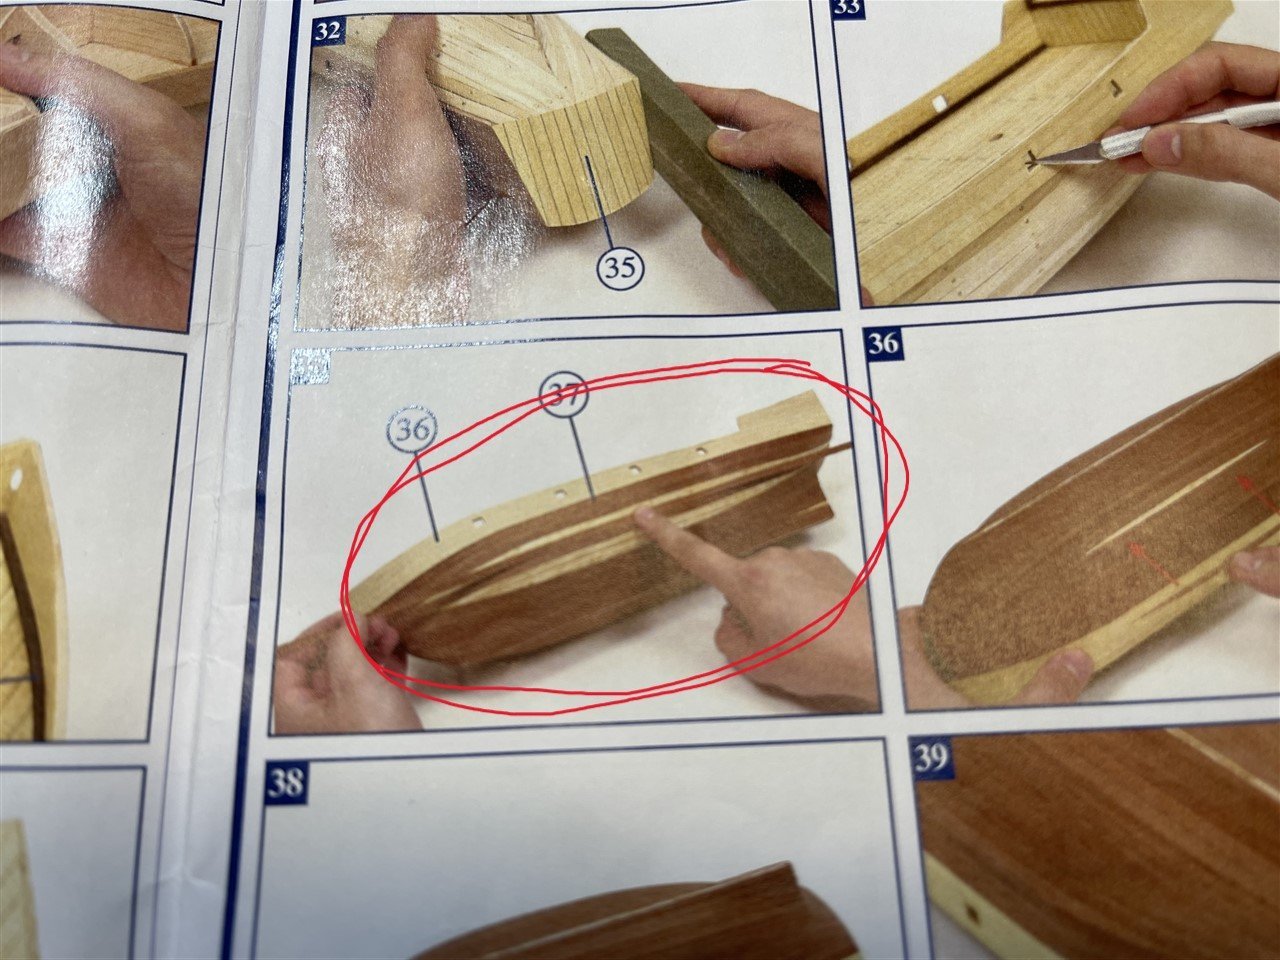
21 hours ago, MajorChaos said:
I wonder how many OcCre boats are built with this mistake.
I think at least all Albatros builds after watching the instruction videos 😂
To be fair it is correct in the written instructions but I didn't pay the necessary attention to them after watching the videos.
Kai
-
-
HM Armed Cutter Sherbourne - 1763
1:64Vanguard Models
Part Number - VM - 16
Available from Vanguard Models for £149.00 (around €175.00)History
From the publisher’s website:
HM cutter was a 6-gun cutter of the Royal Navy. She served in the English Channel for her entire career, operating against smugglers. She was sold in 1784. Sherbourne was built at Woolwich Dockyard under the supervision of Master Shipwright Joseph Harris, to a design by Sir Thomas Slade, and was launched on 3 December 1763, having cost £1,581.8.9d to build and fit.
Sherbourne was commissioned under Lieutenant John Cartwright, later to become a prominent parliamentary reformer, and was assigned to support the work of the Board of Customs by operating against smugglers in the English Channel. Cartwright commanded Sherborne from 7 December 1763 to 14 May 1766. His area of responsibility was the South Coast of England, including Dorsetshire and Devon. His brother George, when at loose ends, went with him in Sherborne on a cruise out of Plymouth to chase smugglers.
Lieutenant Christopher Raper succeeded Cartwright in 1766 as Sherbourne’s commander for the next three years. Between 1769 and 1777 the cutter was commanded successively by Lieutenants Stephen Rains, Thomas Rayment and Thomas Gaborian, all the while remaining based in the Channel. Her final commanders were Lieutenant Arthur Twyman, from September 1777 until May 1778, and then Lieutenant Arthur Hayne until September 1779. She was then laid up.
In 1783 Sherbourne participated in William Tracey’s unsuccessful attempt to raise HMS Royal George, which had sunk in Spithead in 1782. Although the dockyard rated Sherbourne as unfit for service, Tracey conducted some repairs and she was of some use.
She was finally sold at Portsmouth on 1 July 1784.
Tons burthen – 85
Length – 54 ft 6 in (16.6 m)
Beam – 19 ft (5.8 m)
Complement – 30
Armament – 6 x 3-pounder guns + 8 swivel gunsThe Kit
Designed by Chris Watton this kit is aimed for the novice builder.

This skill level is defined as follows (text from publishers website):
"NOVICE: We have pitched this level at the absolute beginner, whilst still providing a good basis for more experienced modellers to make their own individual mark on the project. Kit design and techniques are all aimed to make this project as easy for you as possible, guiding you in every way to create a successful and beautiful model that you can be rightly proud of."
The kit includes (text from publishers website):
- Laser cut and engraved parts in MDF and pear wood.
- Laser etched and cut lime wood deck with treenail detail
- 2 sheets of photo etched brass
- High resolution 3D-printed parts.
- Double planked hull in limewood for first planking and pear wood for second planking.
- Walnut dowel for masting.
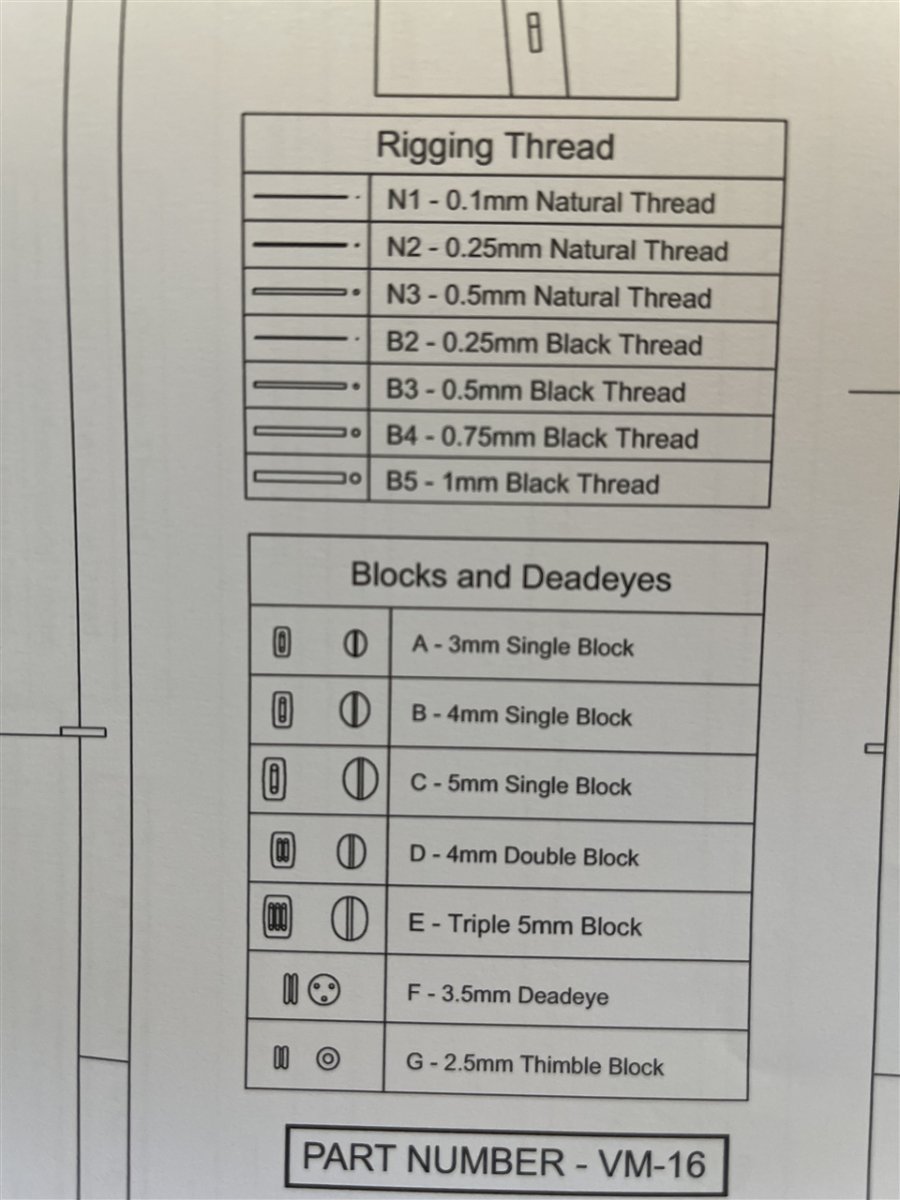
- Multiple sizes of both black and natural rigging thread along with all necessary blocks and deadeyes
- Comprehensive, full colour instruction manual, along with NINETEEN plan sheets which include all masting and rigging drawings. The rigging drawings are designed to allow the novice to successfully complete a rigged ship.
- Features laser-engraved treenails on both inner and outer bulwarks.
Dimensions of the finished build:
Length Overall – 512mm
Hull length – 284mm
Height Overall – 484mm
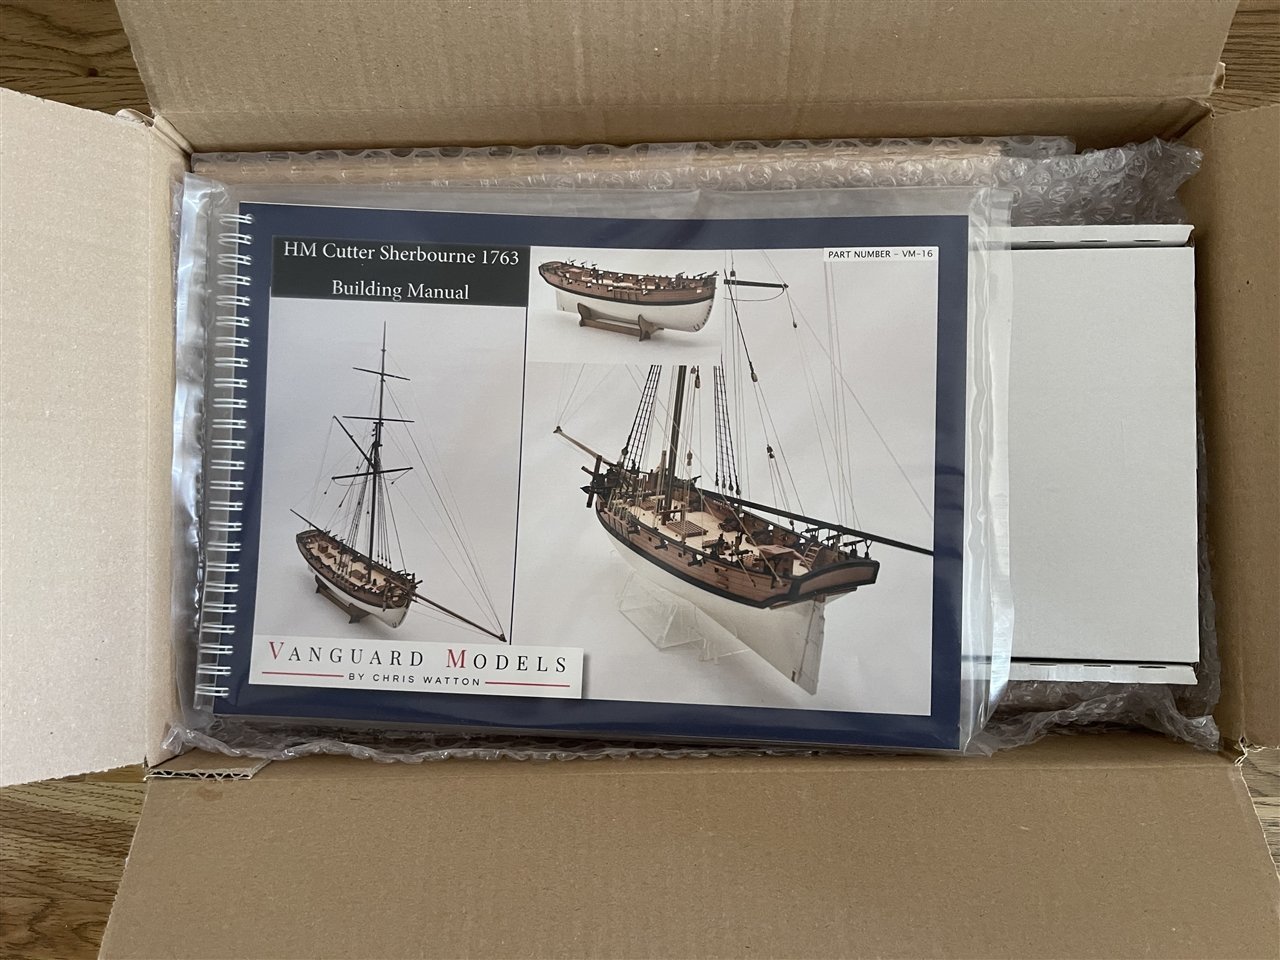
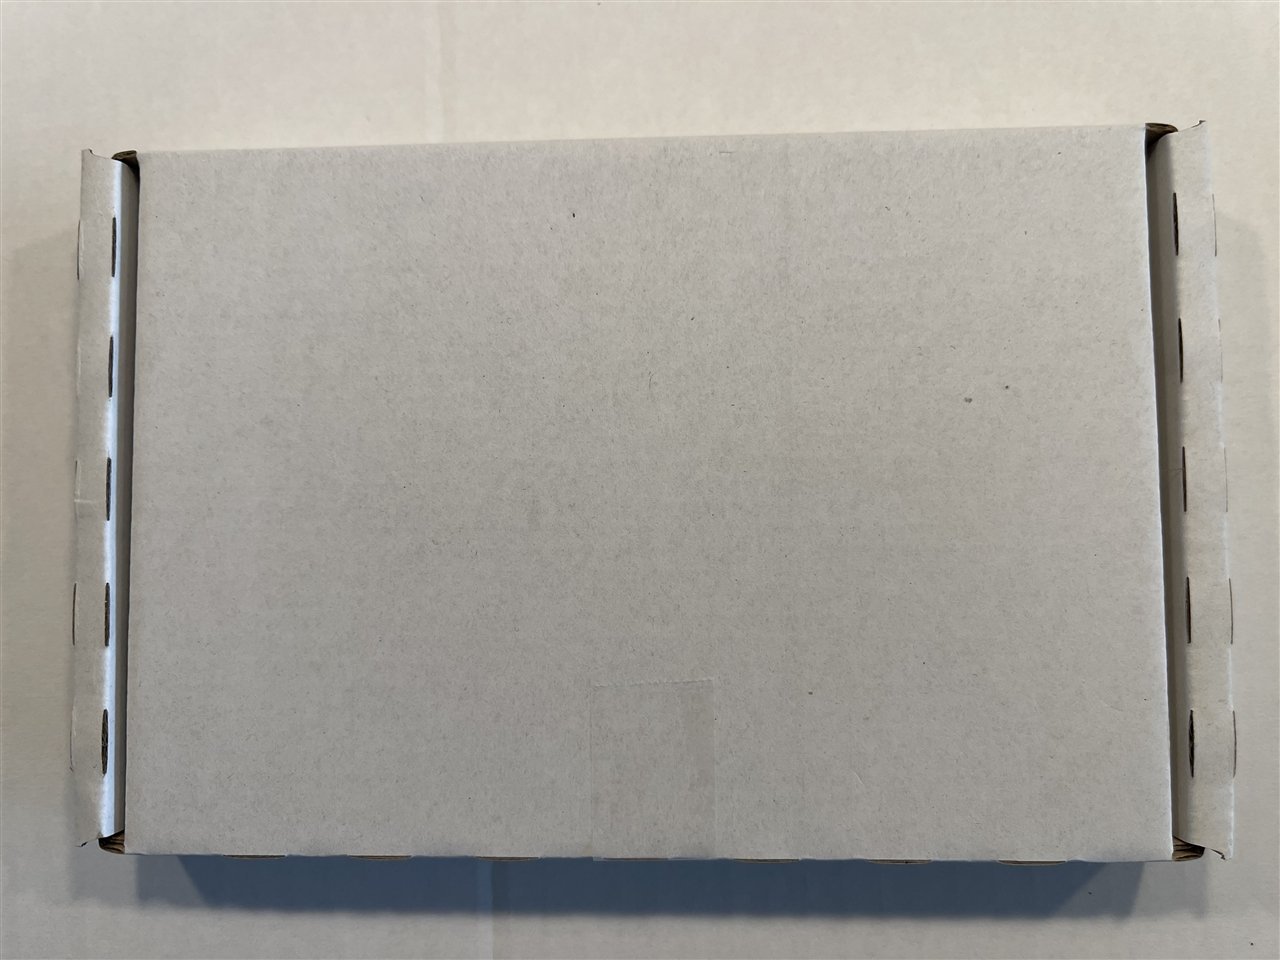
Width Overall – 202mmThe Box
The kit comes in a sturdy nice looking box covered with an A3 printed product label which is affixed to the lid of the box.
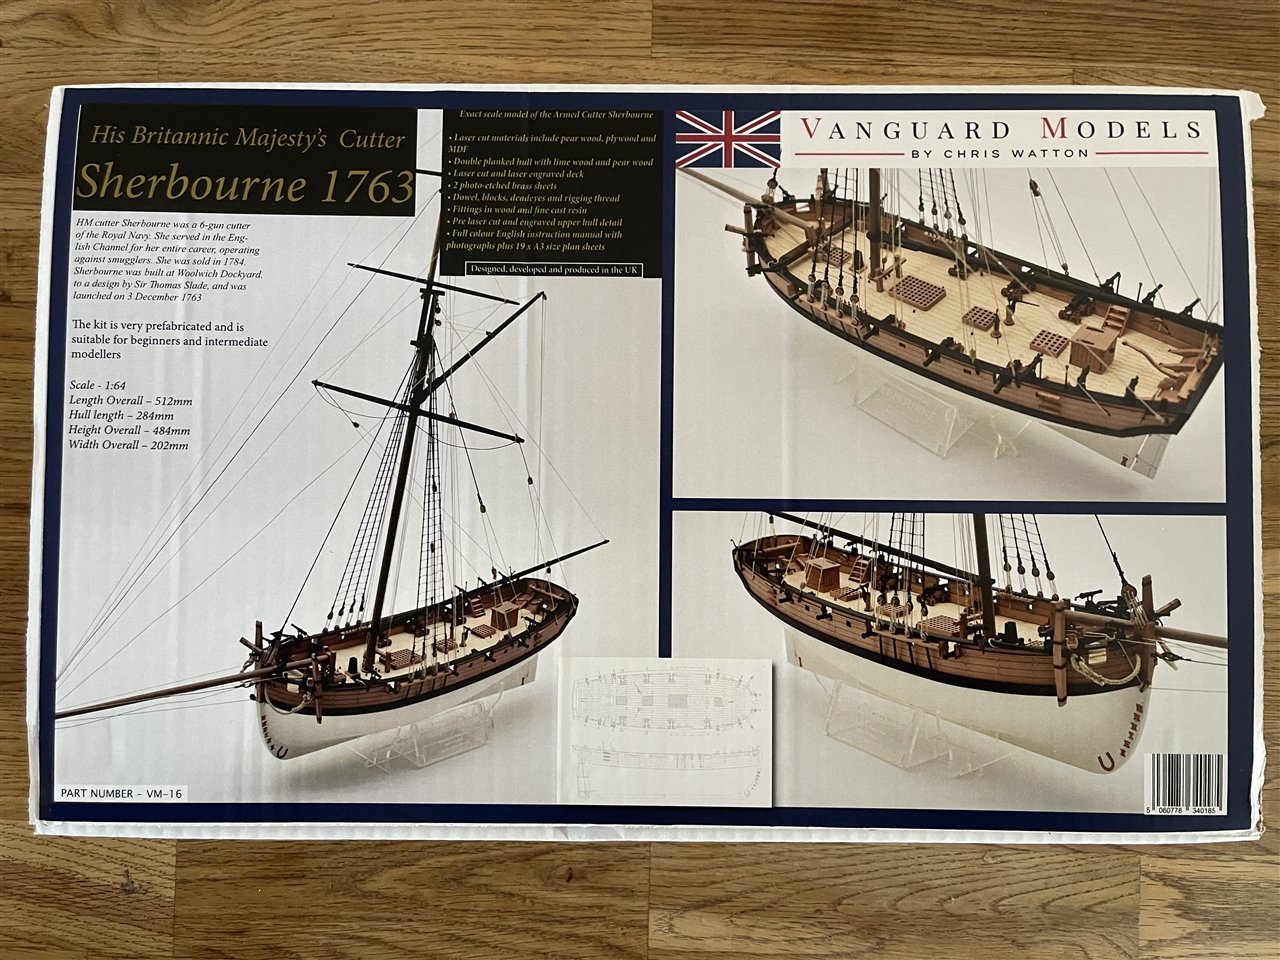
Inside the box everything is very well protected by either plastic bags or wrapped in bubble foil. None of the parts arrived damaged, warped or bended.
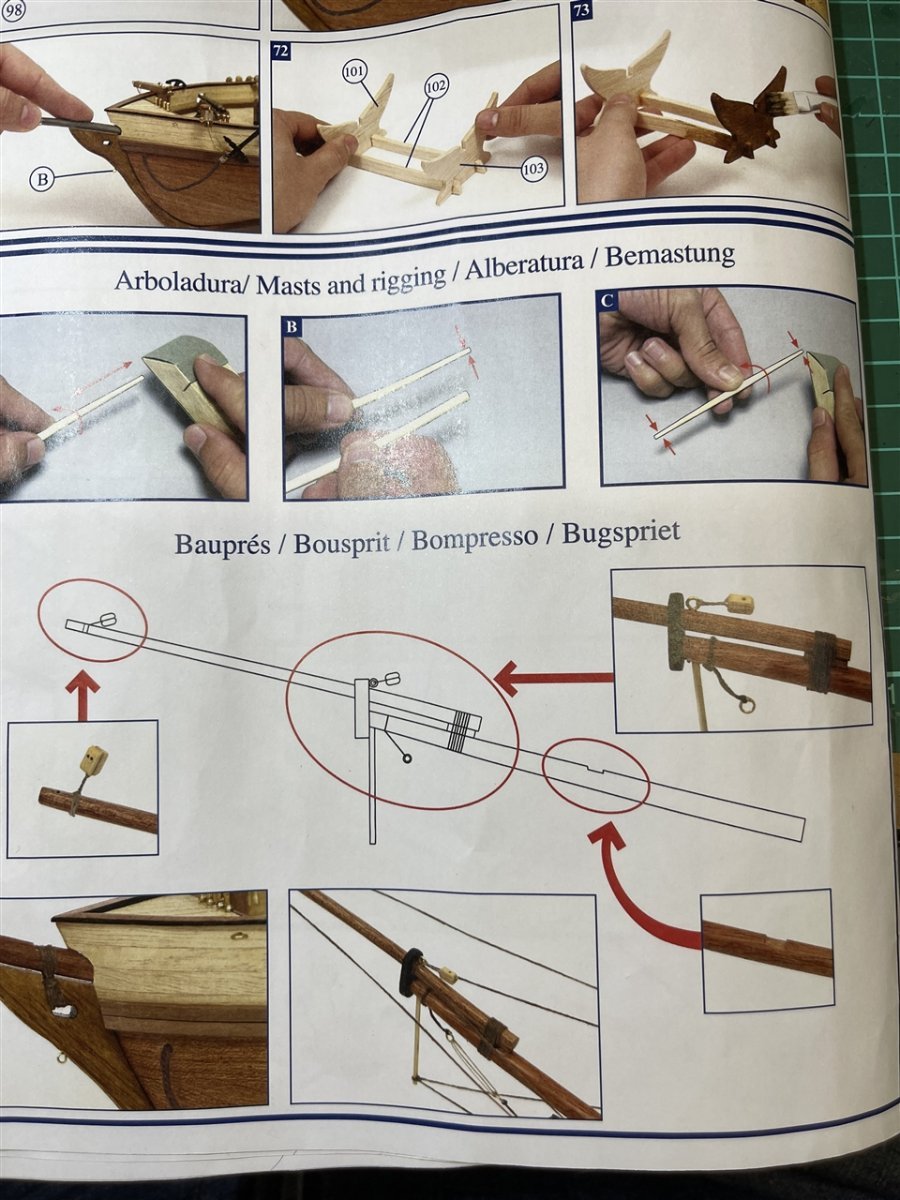
Instructions / Plans
After opening the box you will see the instruction manual and the plans:
The instruction manual is of high quality paper, fully coloured and has a spiral binding which is very practical if space on your workbench is limited. In addition you always can download the instructions from the website and have it ready on your iPad or other digital device.
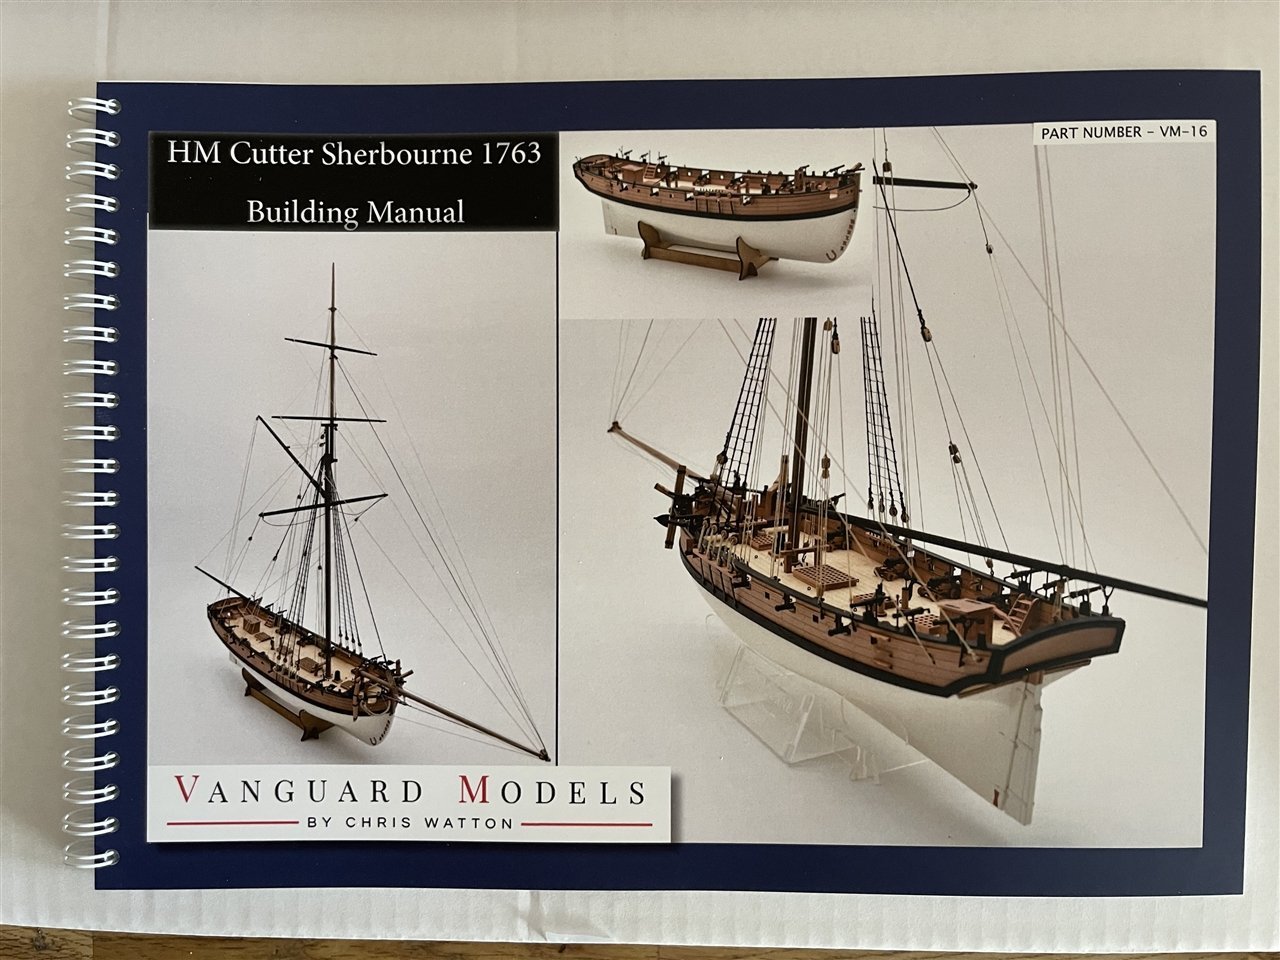
In the manual you have step by step instructions from the very beginning up to the rigging as well as a lot of useful informations regarding e.g. recommendations for tools, colors and glues you can use to get the best out of your kit.
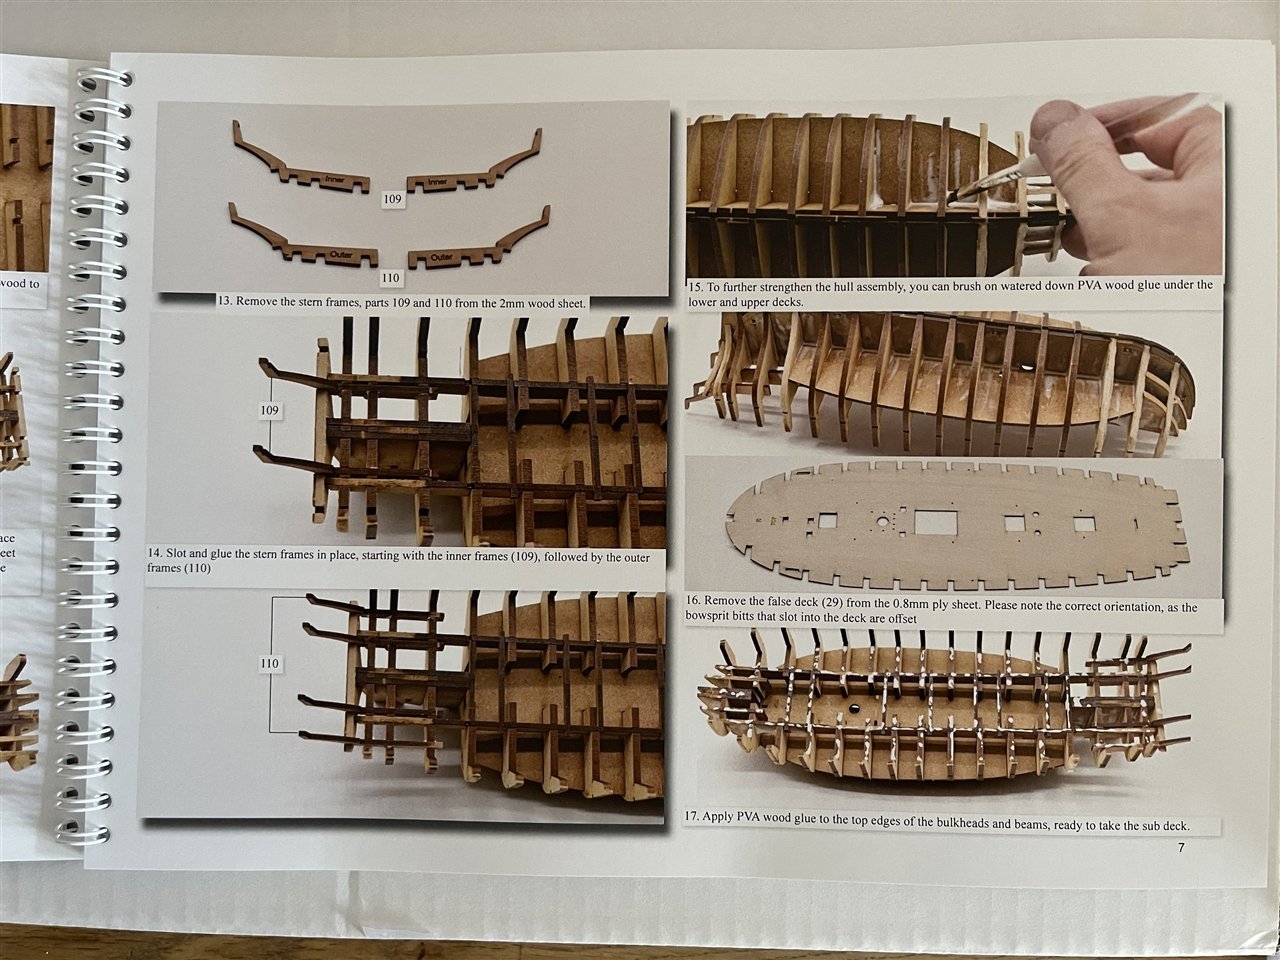
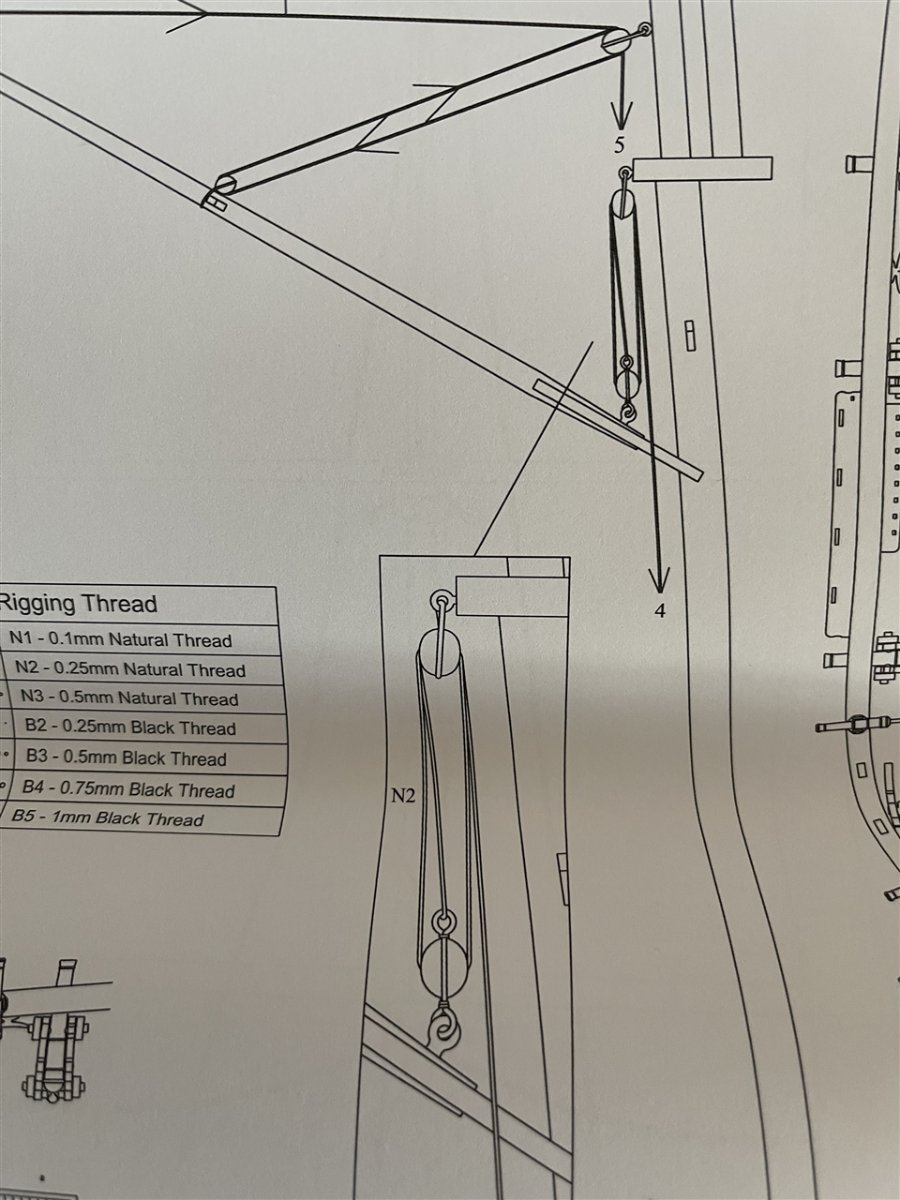
The instructions are supplemented by 19! A3 plans. Some examples of informations you can get from them:
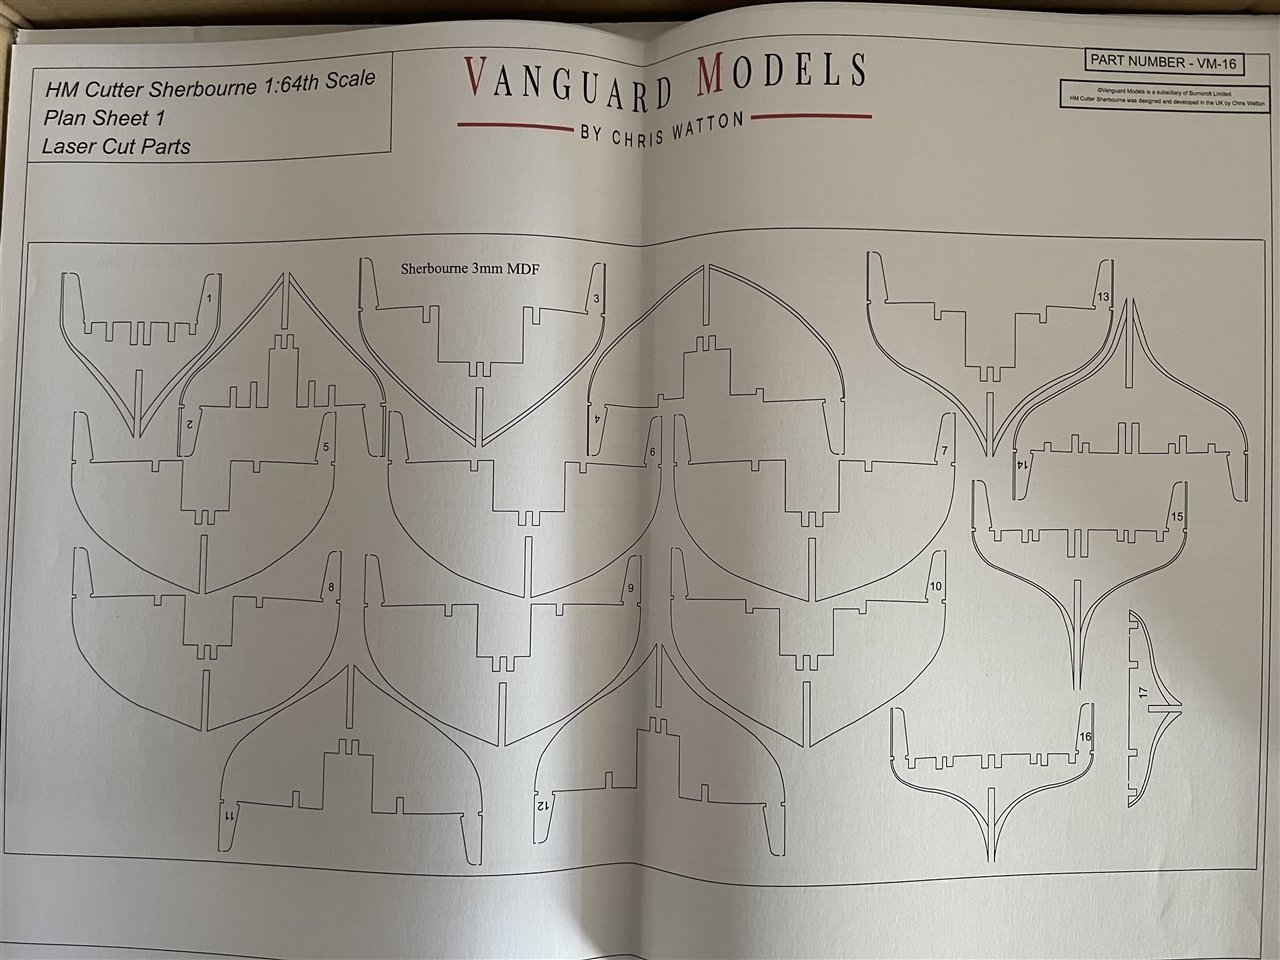
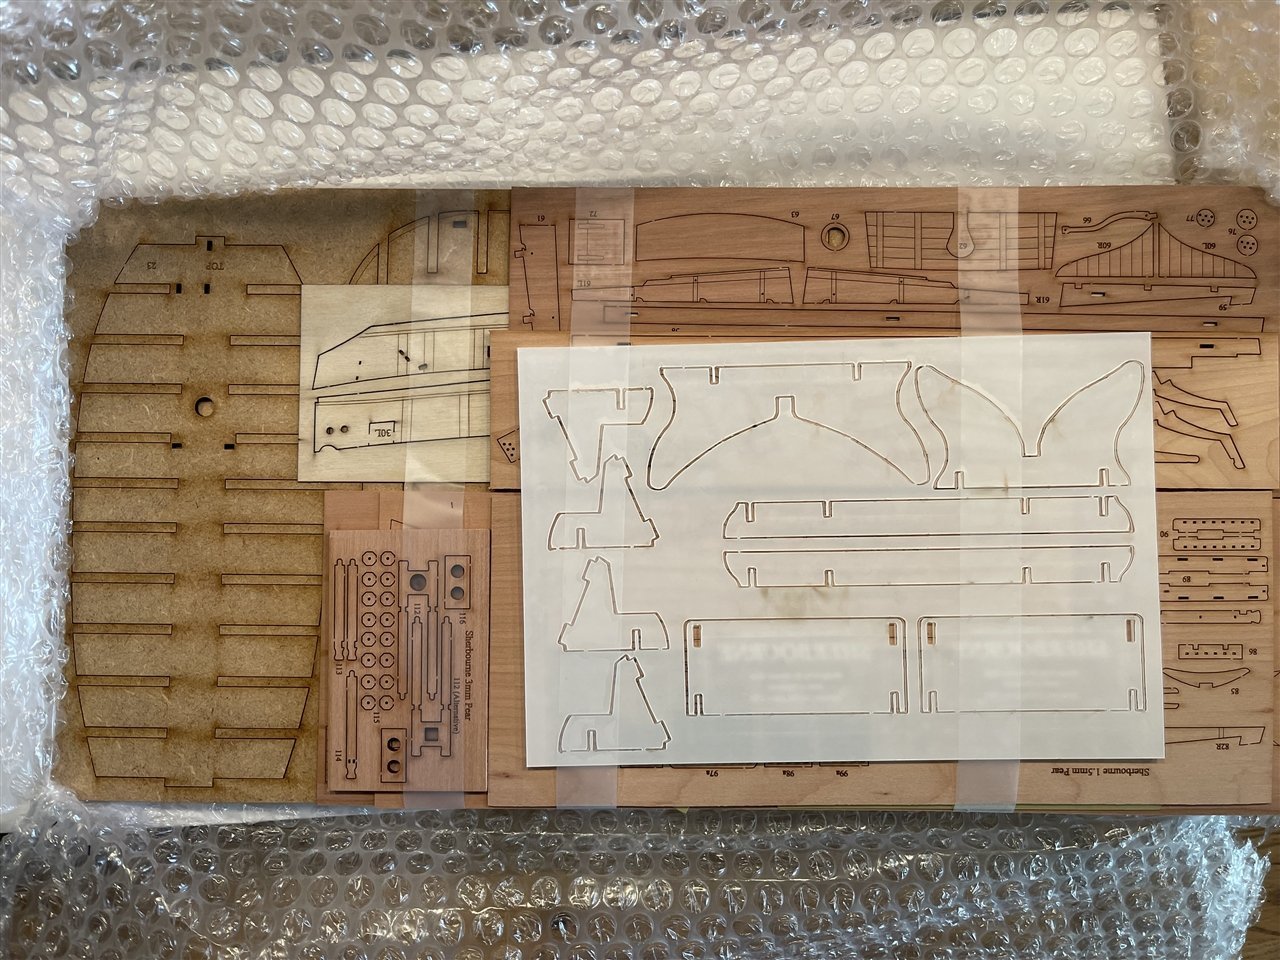
Overview of the laser cut parts:
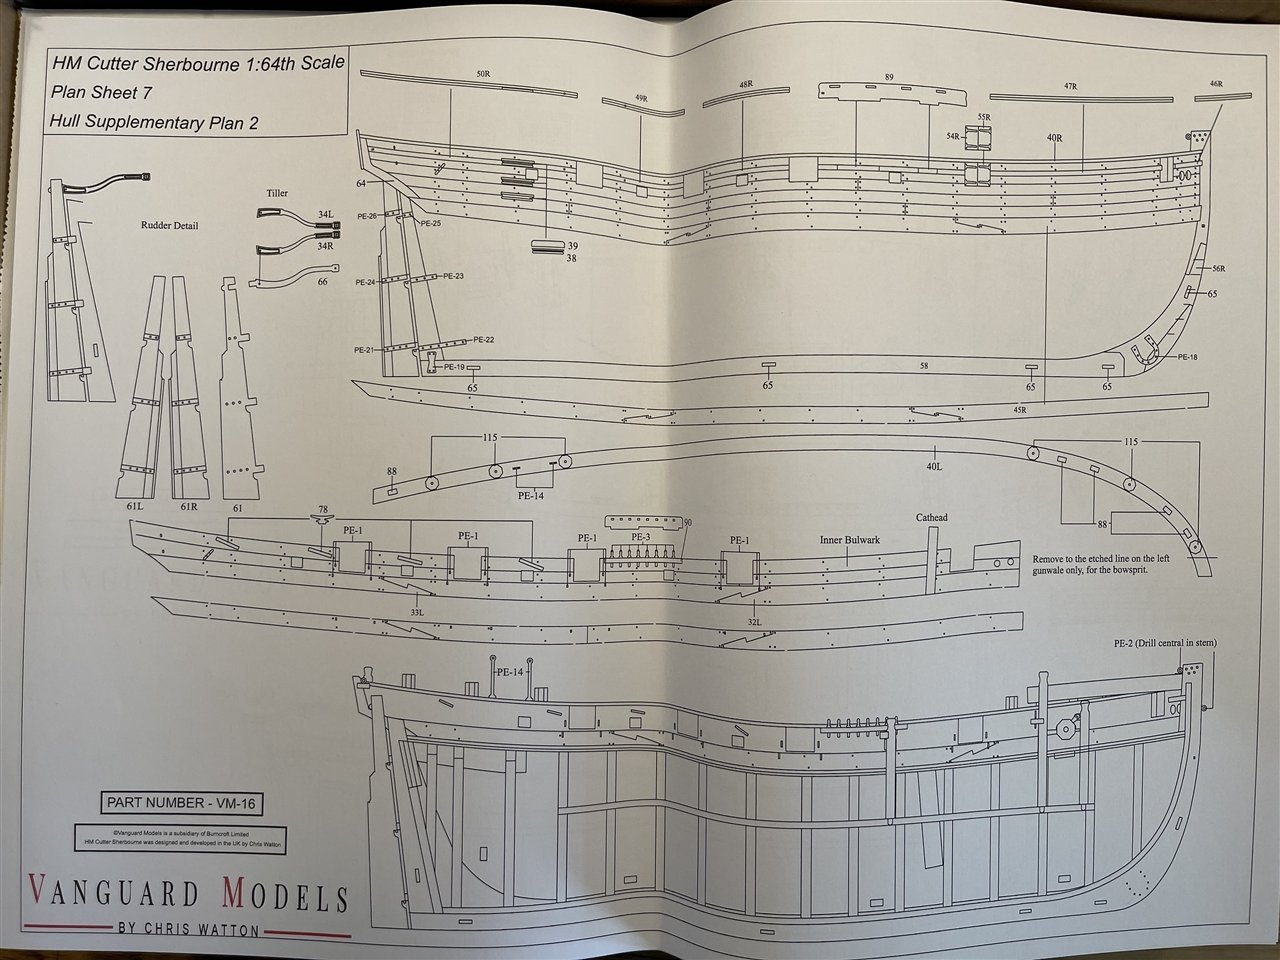
Detailed drawings of the model, parts and assembly:
Parts needed for the shown assembly phase, clearly marked so you can identify them easy and fast:
Some detailed instructions on how to assemble parts with all the measurements given:

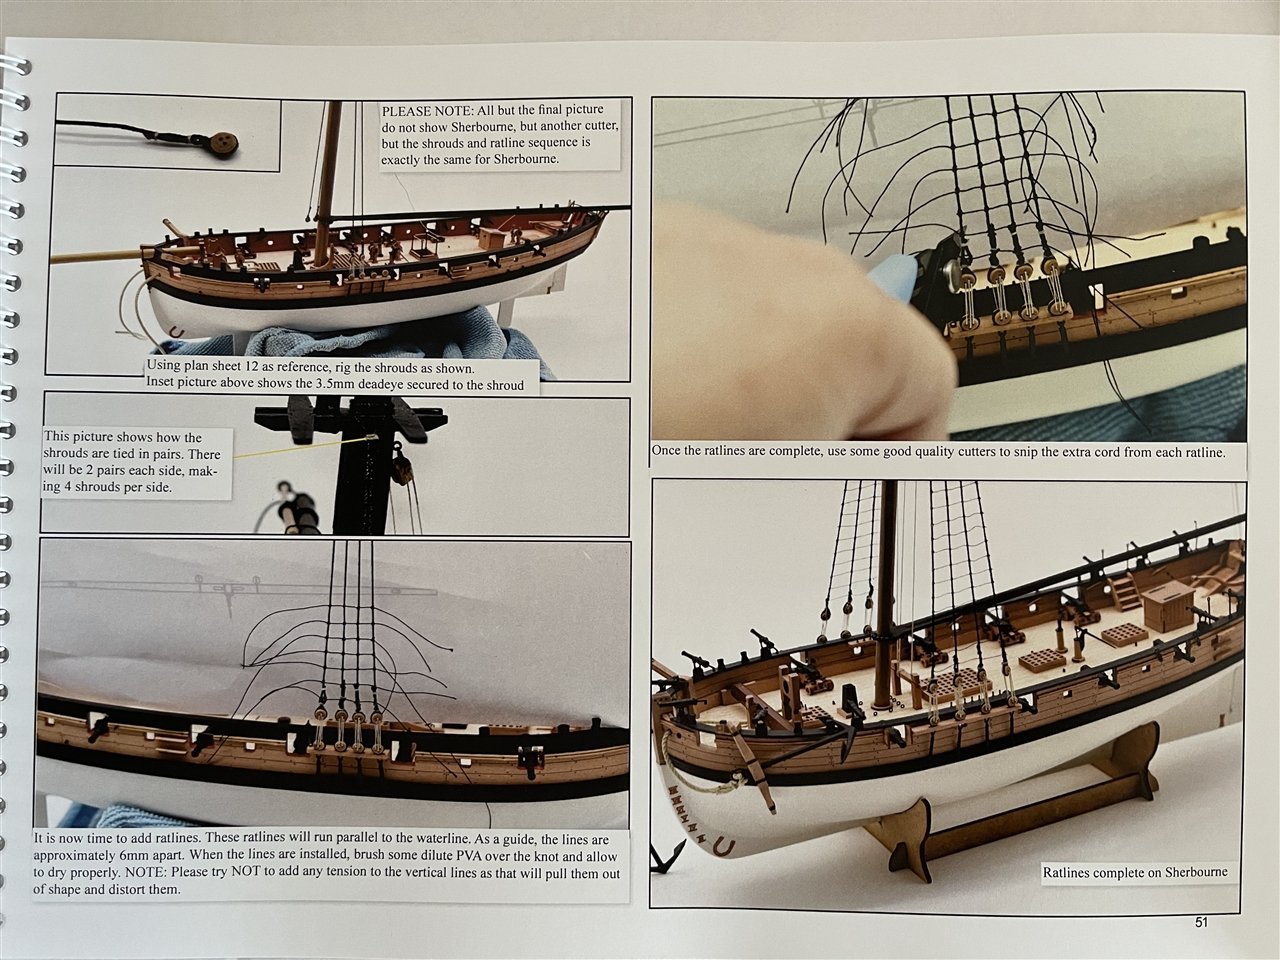
And finally the rigging instructions in such a high level of detail that rigging this model will be pure fun and excitement ...
From leading the threads through the blocks ...

and where to belay them ...
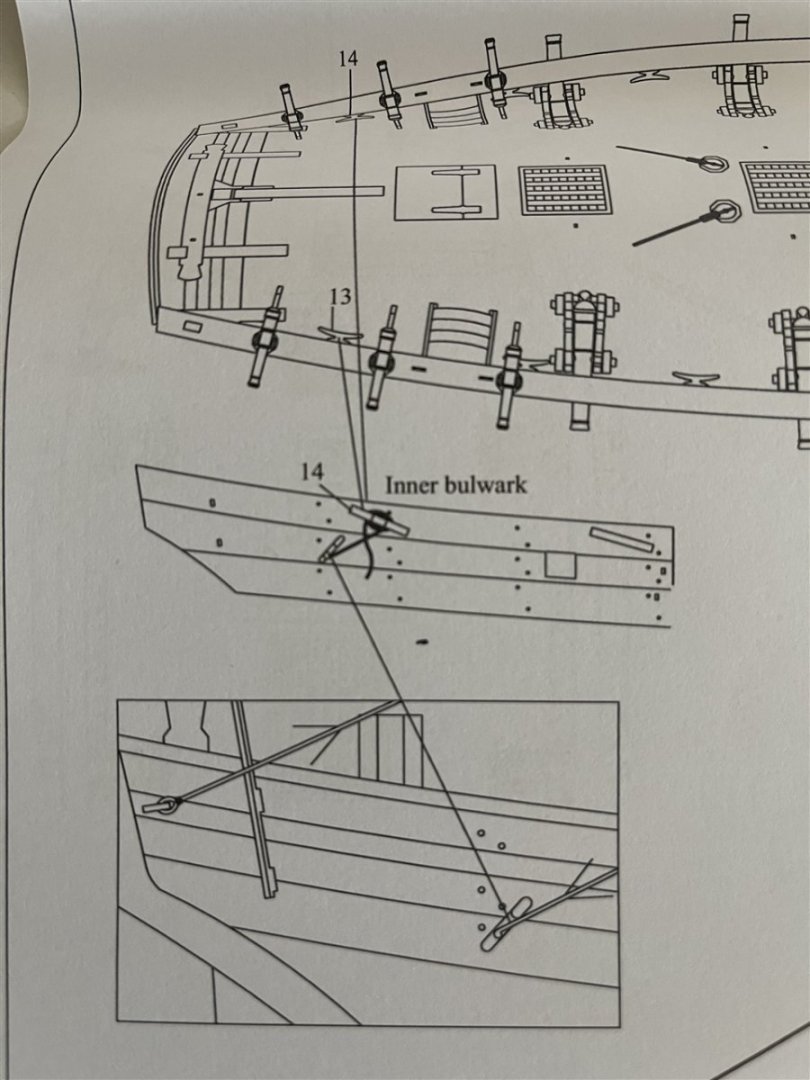
and last but not least ... how to do the belaying ...
The Parts
As mentioned above, all parts are well packed and secured.
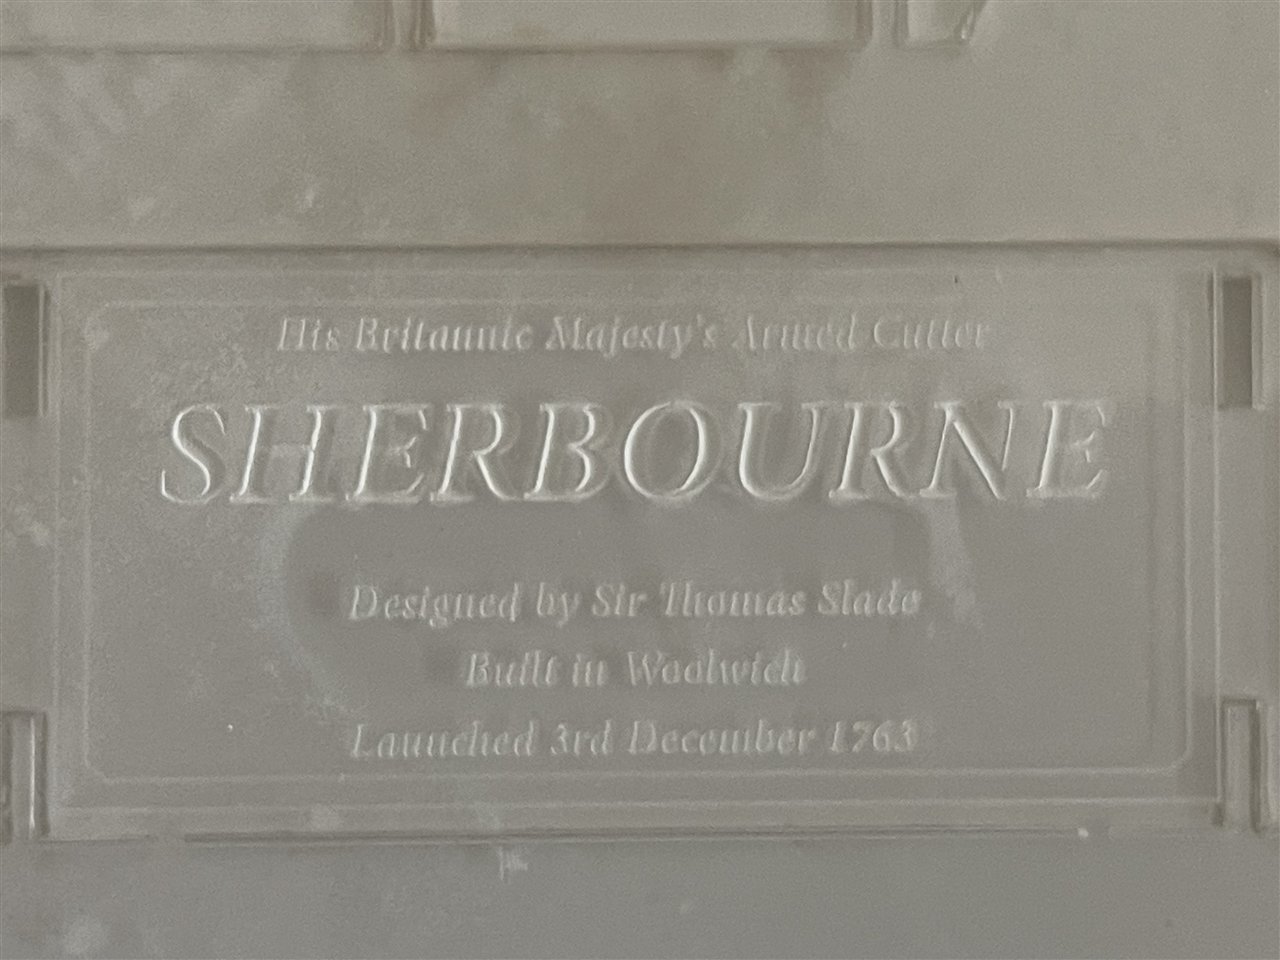
From top to bottom we first have the display stand made of clear acetate protected with a thin foil;
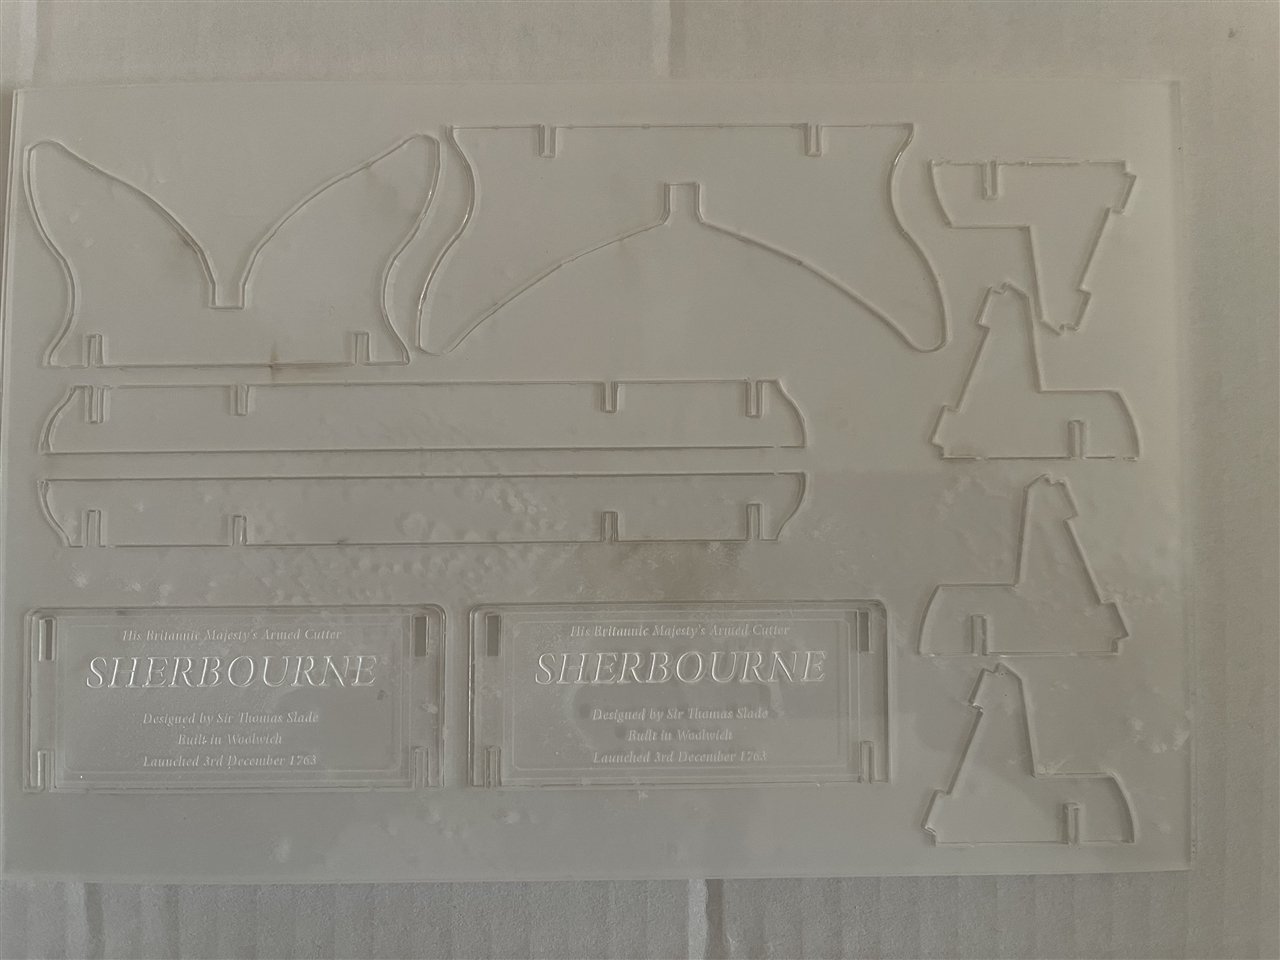
The stand has two engraved nice looking name plates ...
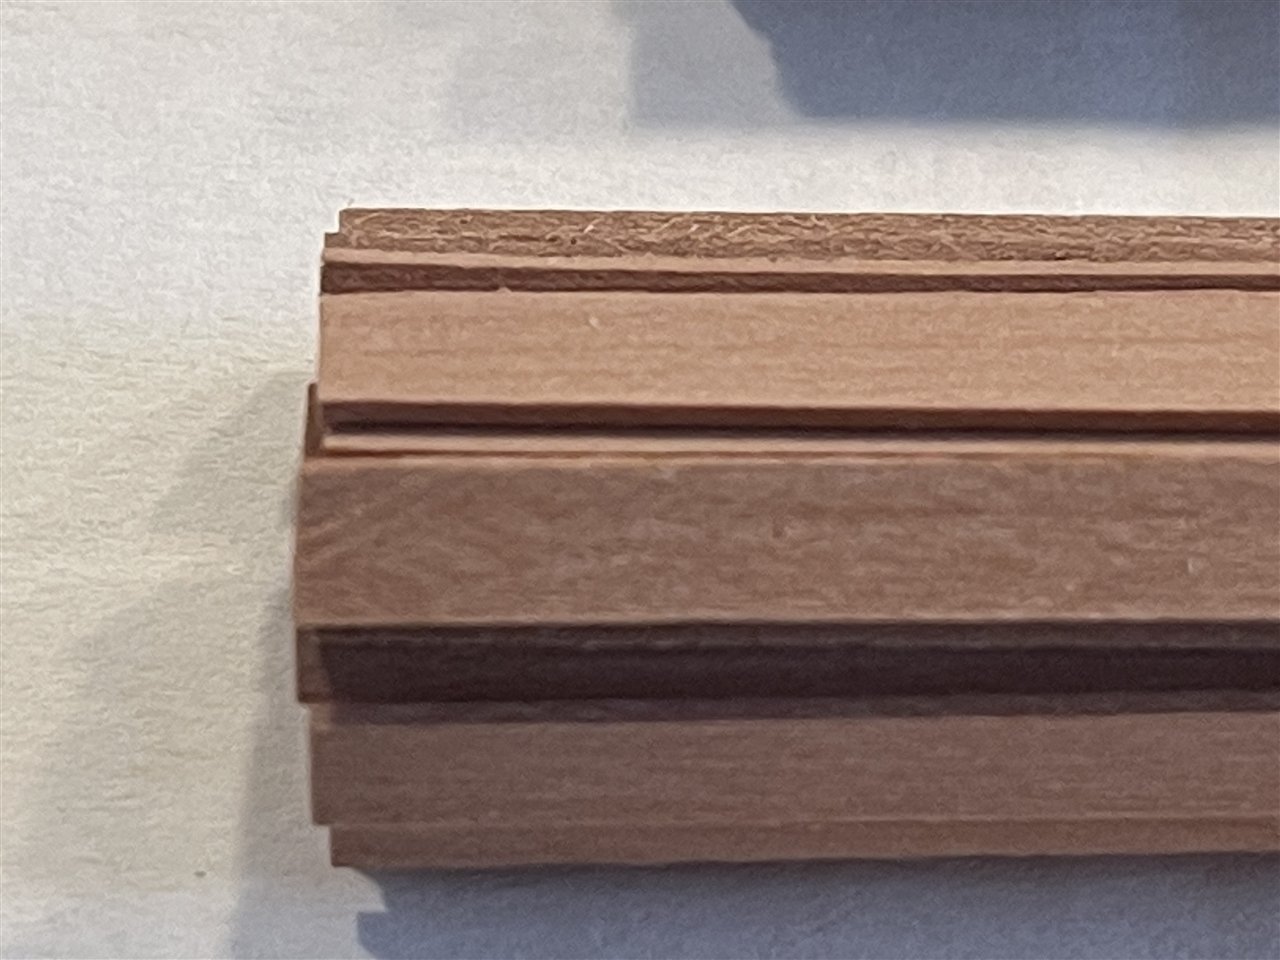
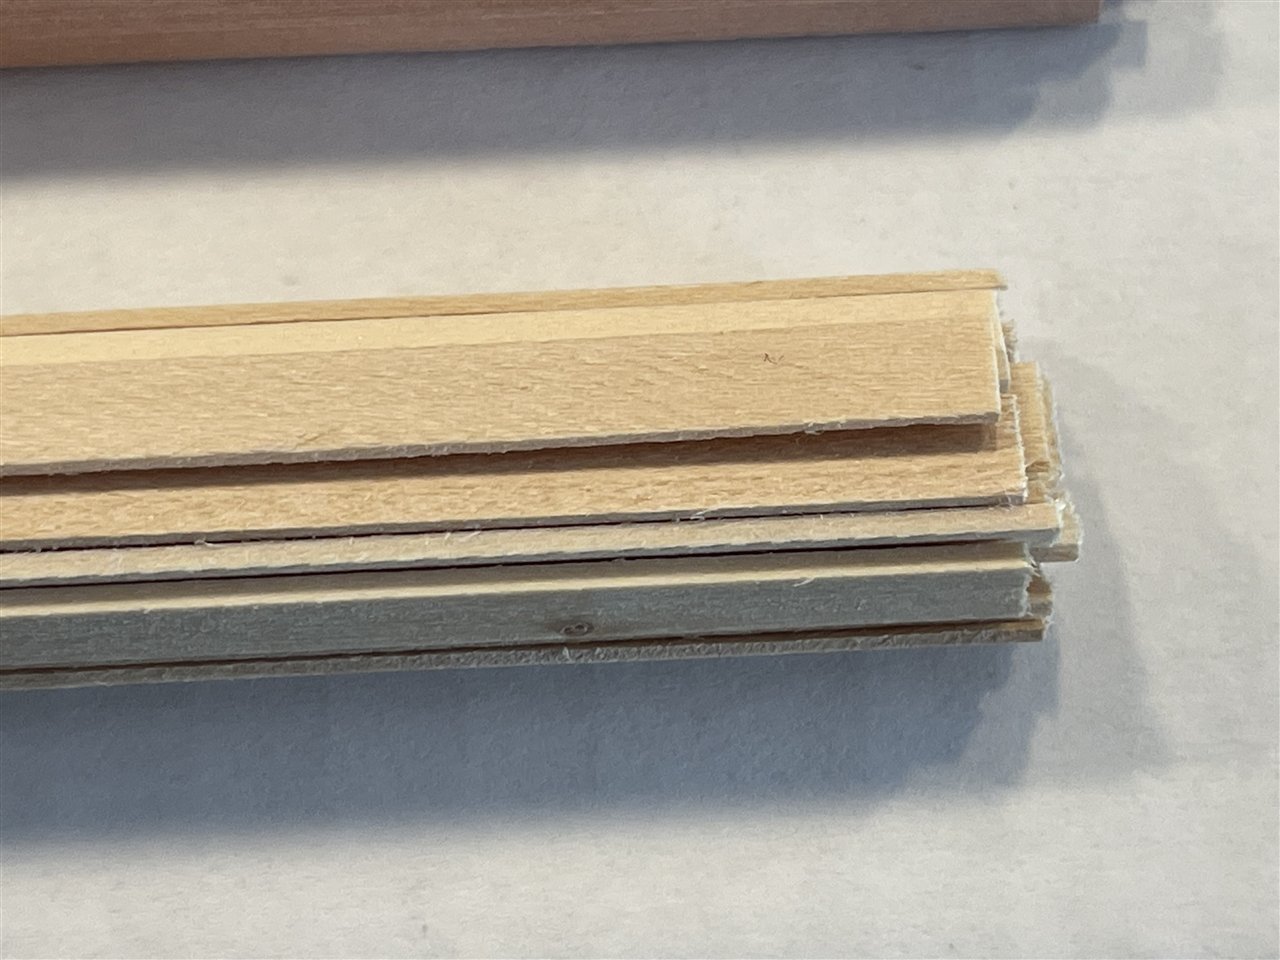
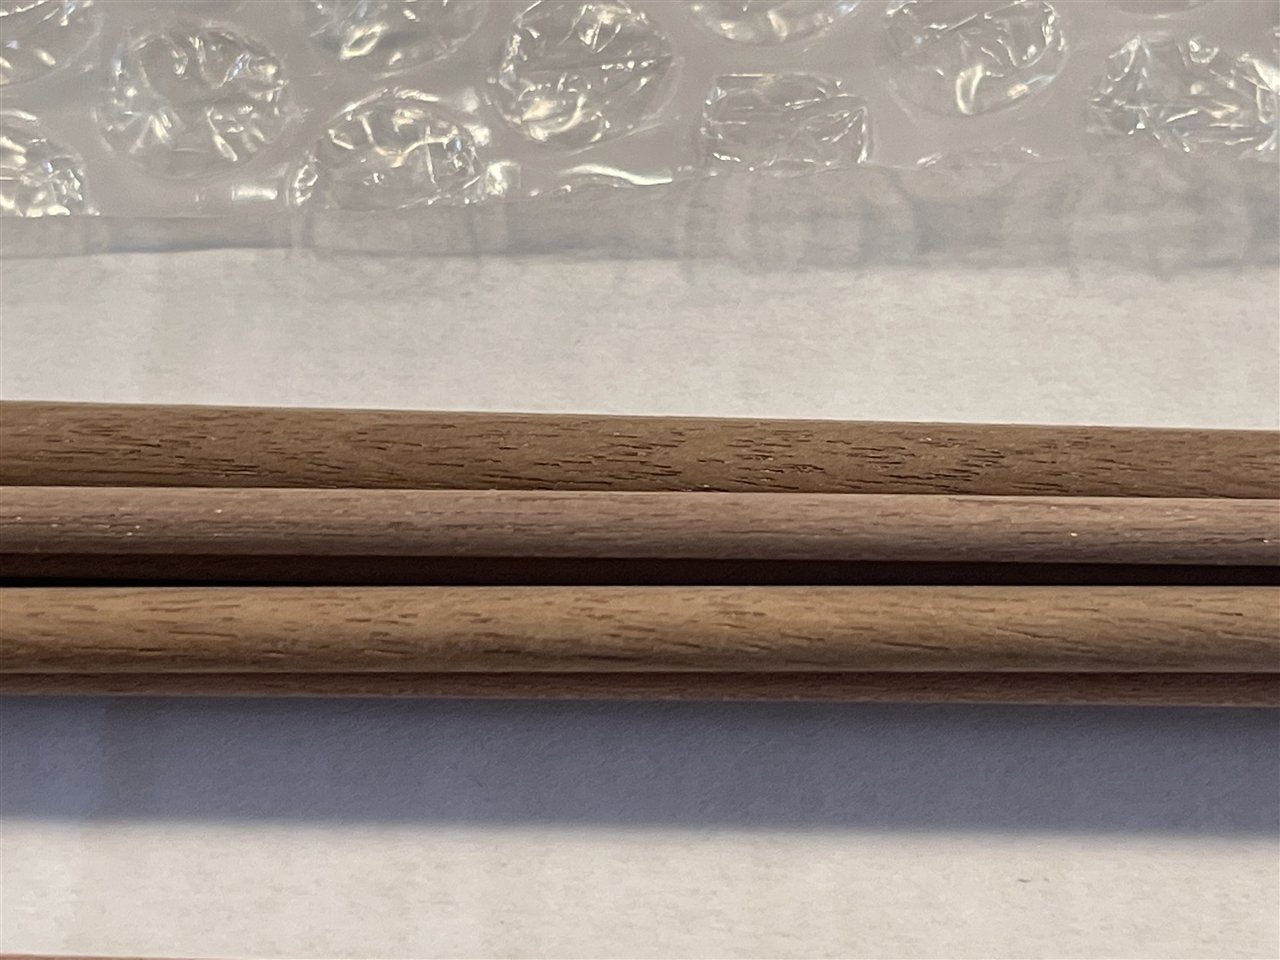
Next there are three bundles of wood: Lime wood for the first planking, pear wood for the second planking and walnut dowels for the masts, yards and other parts like the hand pumps:
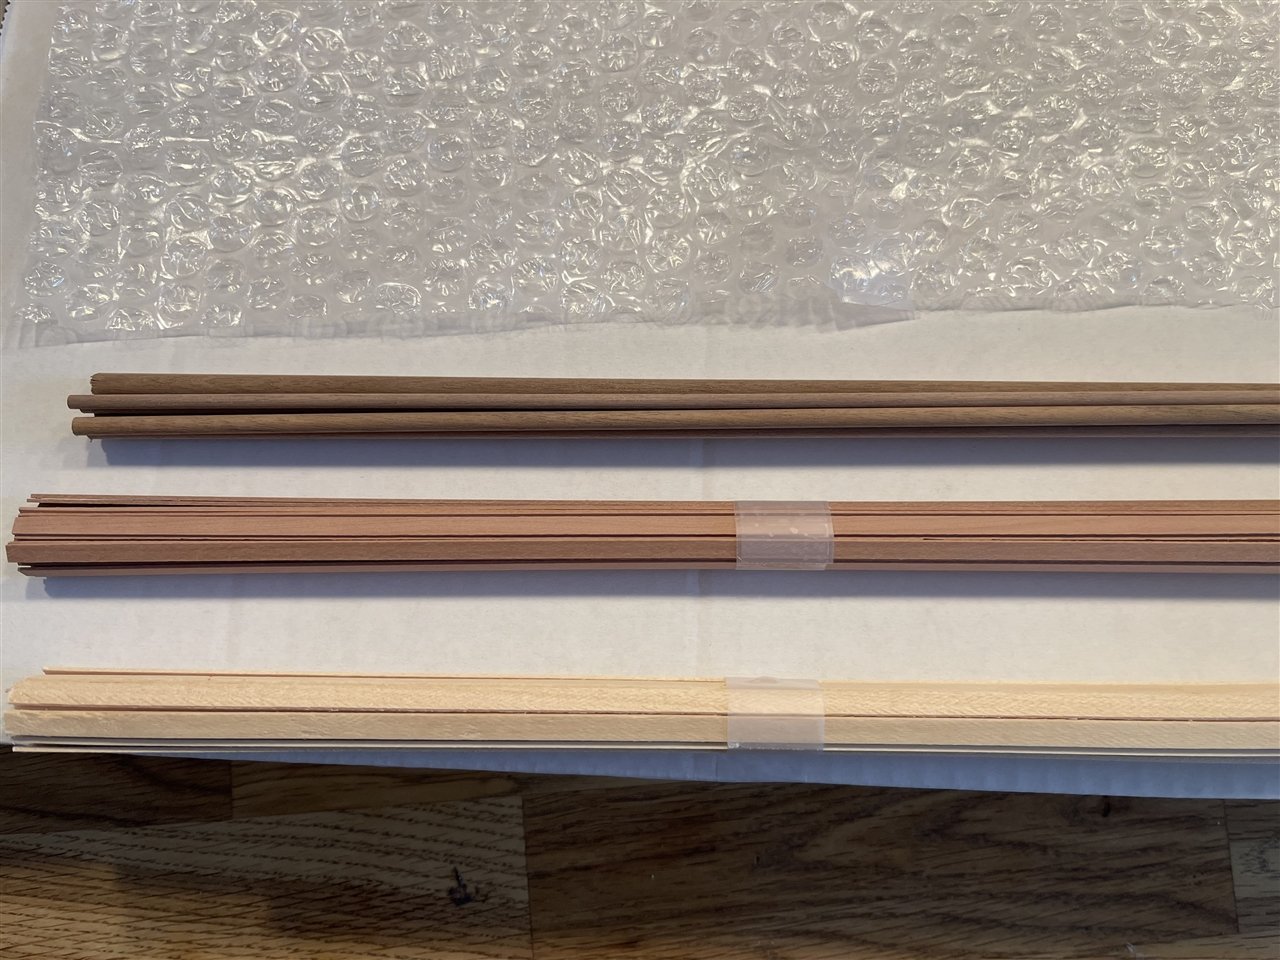
The wood strips and dowels are of high quality, no scratches, bendings or fuzzy edges as the macro shots show:
All the rest of the parts is precut/prefabricated.
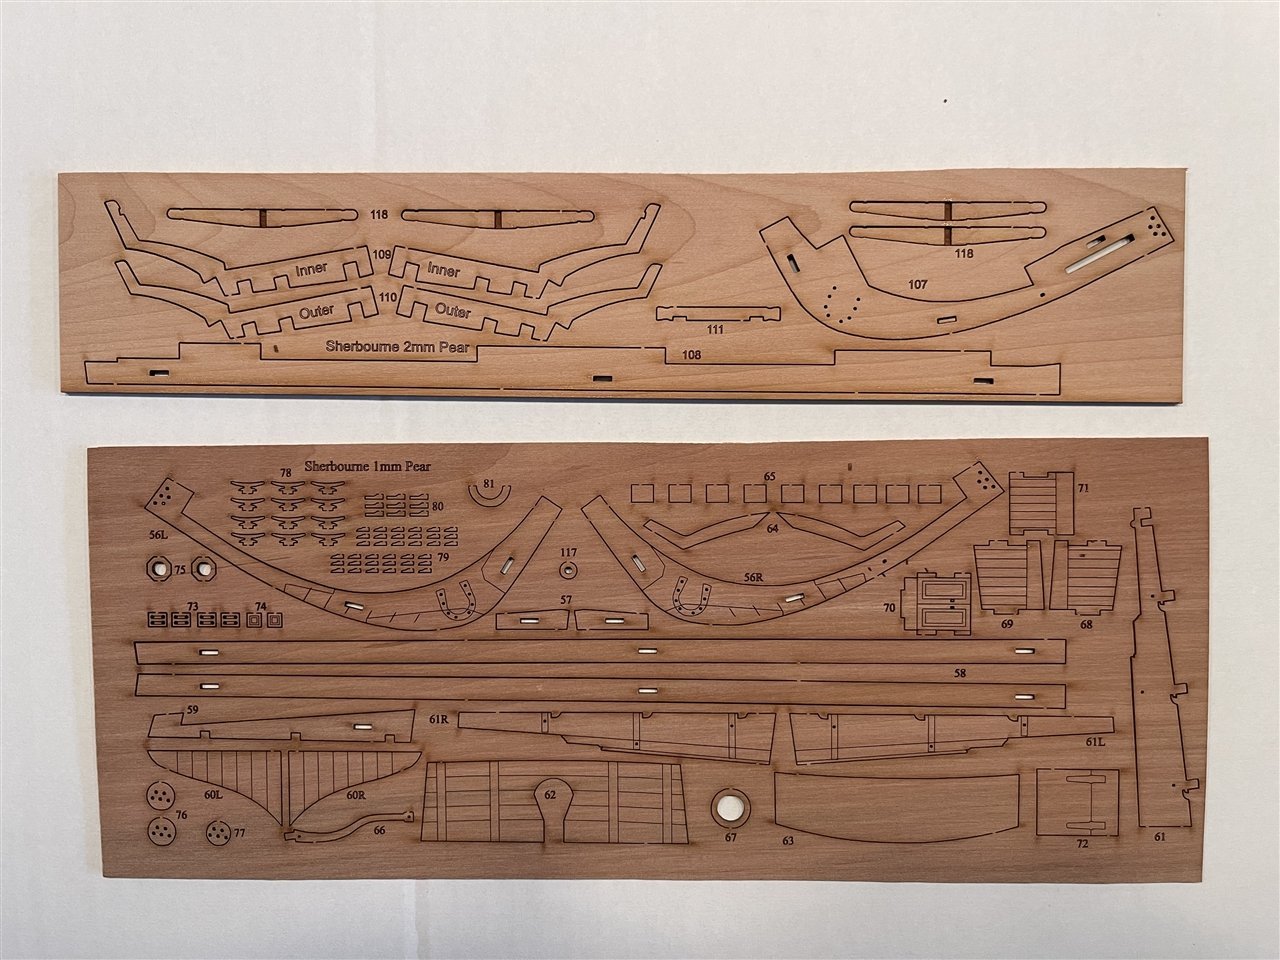
Laser Cut Sheets - Pear Wood
Upper sheet: parts for the anchors, stern frames, keel and prow
Lower Sheet: parts for keel and prow, rudder, stern counter and transom parts, companionway as well as some fittings ...
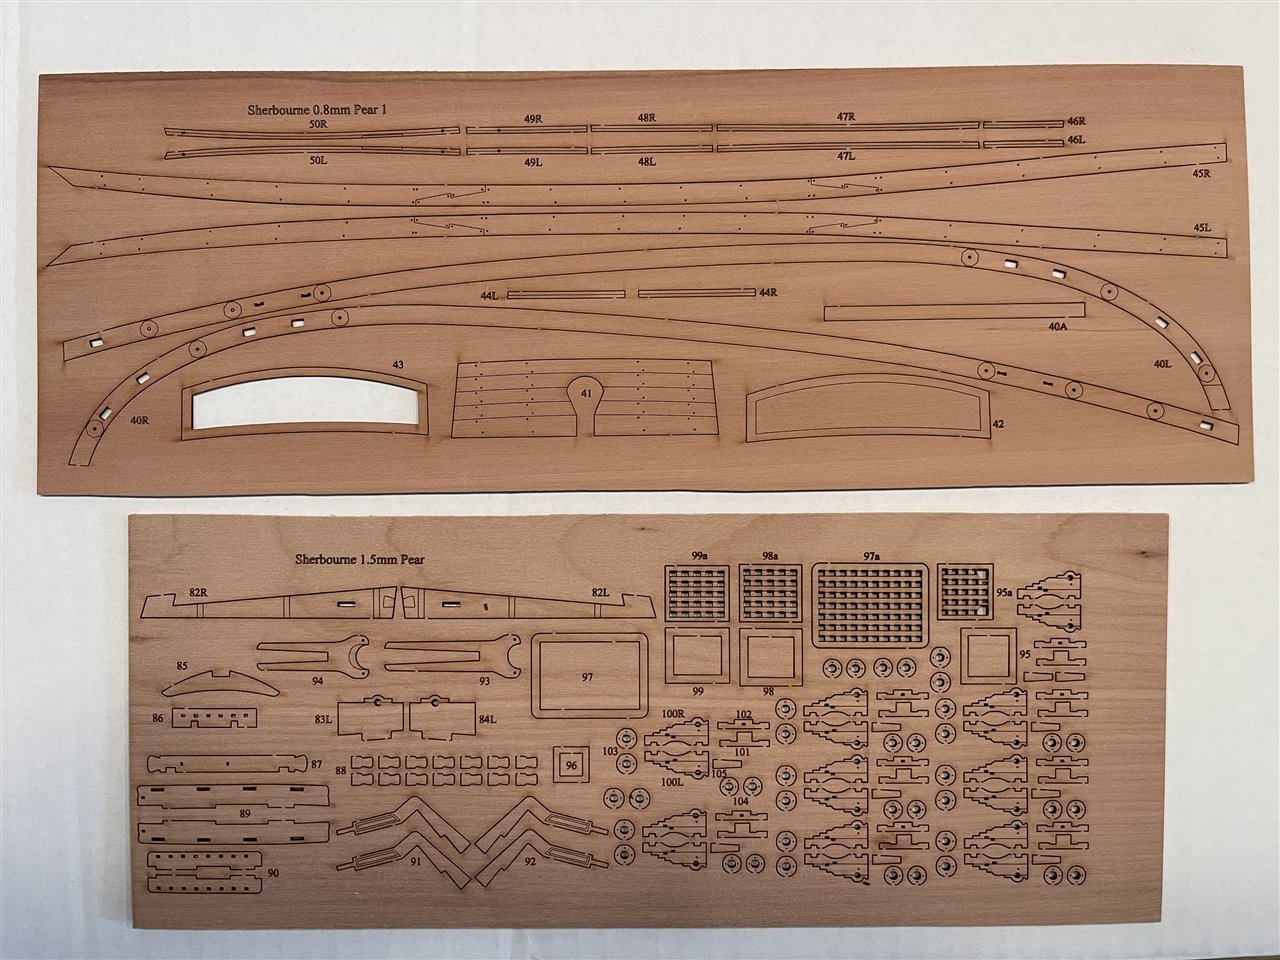
Upper sheet: Rails, transom parts and counter, main wales and gunwales,
Lower sheet: Rudder parts, channels, pin rails, timberheads, catheads, gun carriages, gratings and more fittings
Upper sheet: Bulwark patterns and port lids
Lower sheets: Left: Mast caps, posts for the swivel guns, pawl posts and bitts / Right: Spirketting planks, bulwark ladders and tiller arm
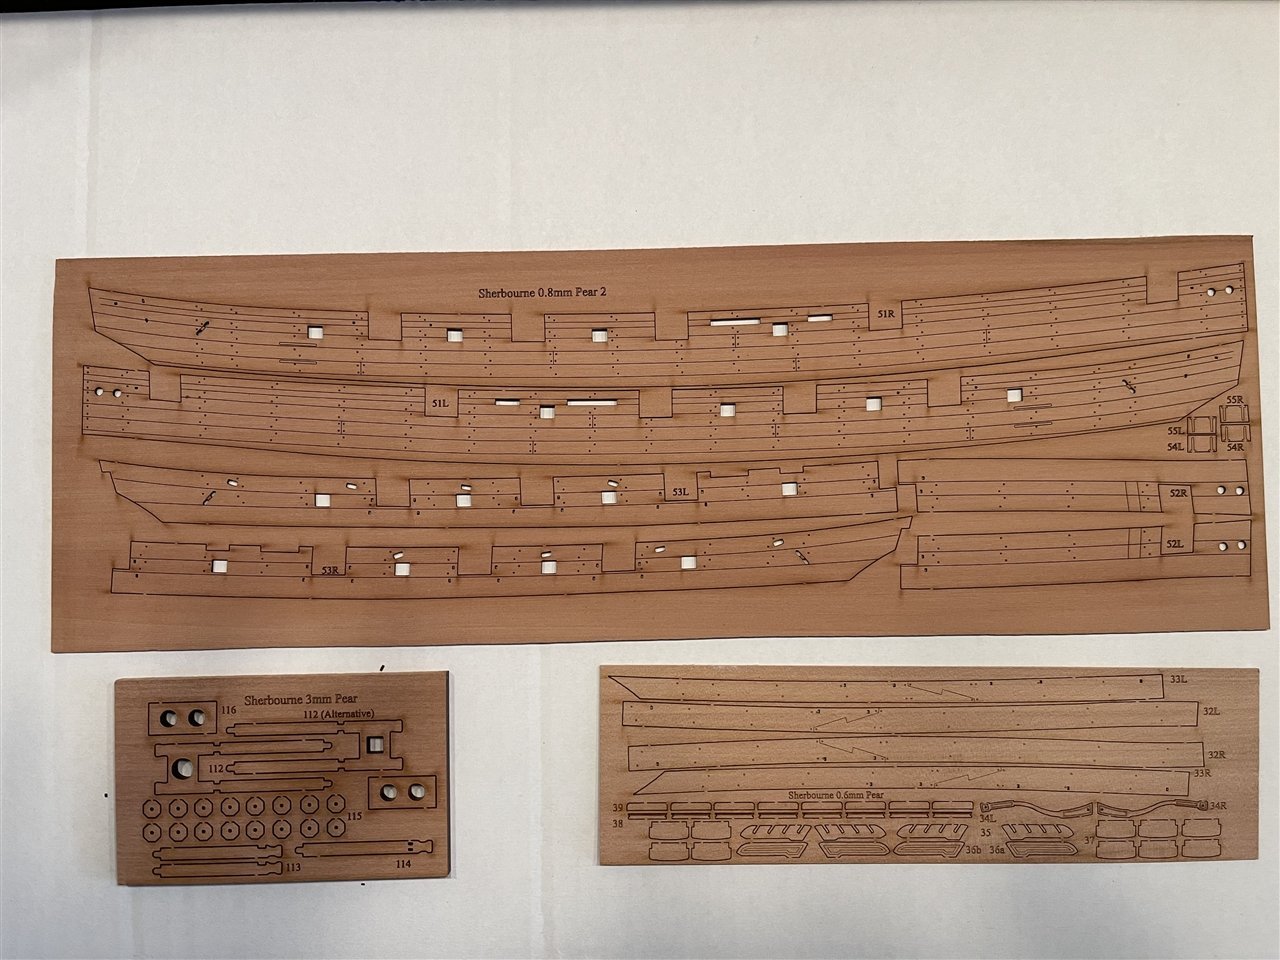
The cuts and engravings are really impressive:

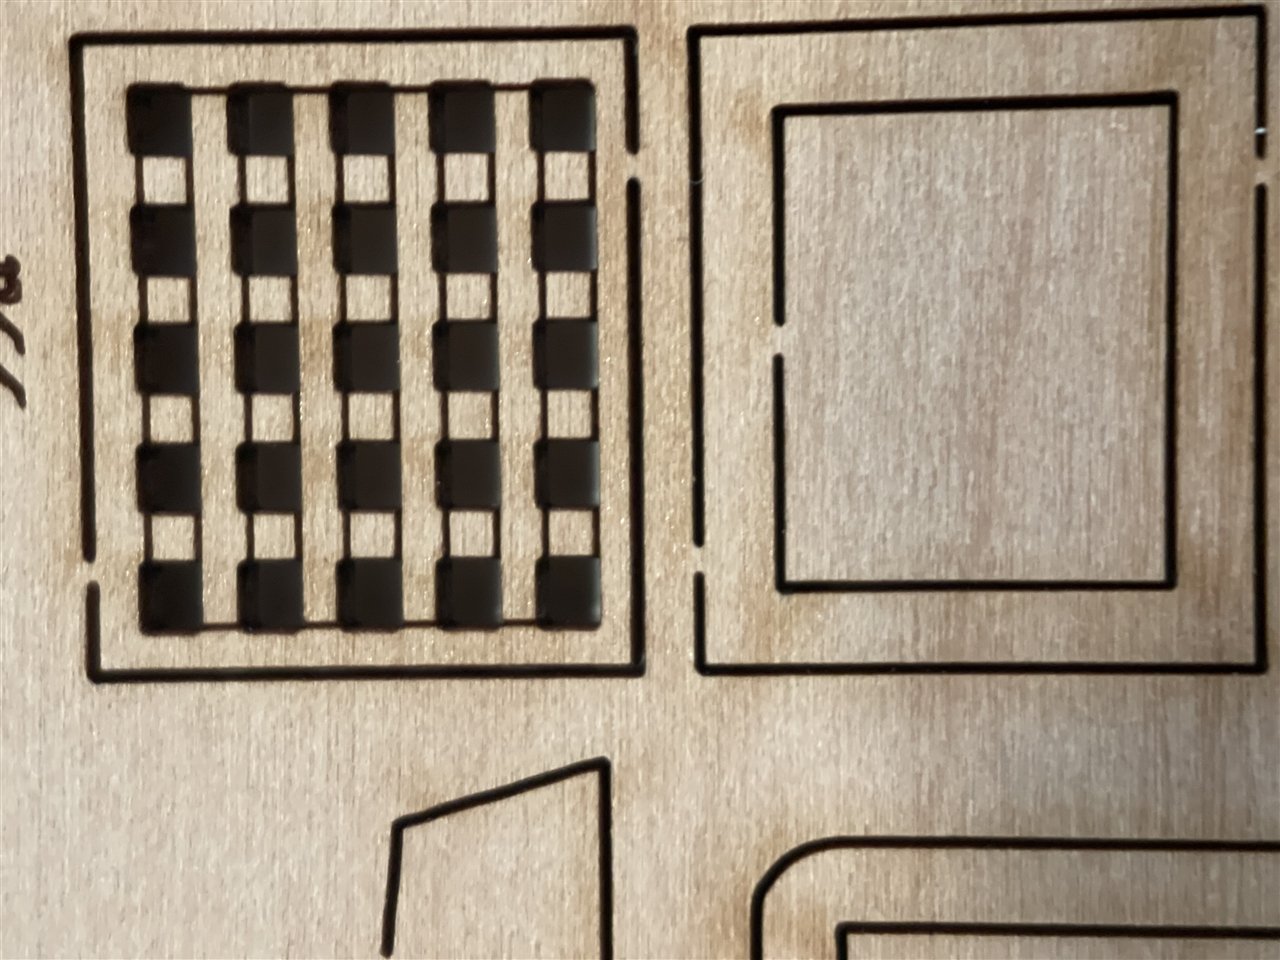
Treenail details:
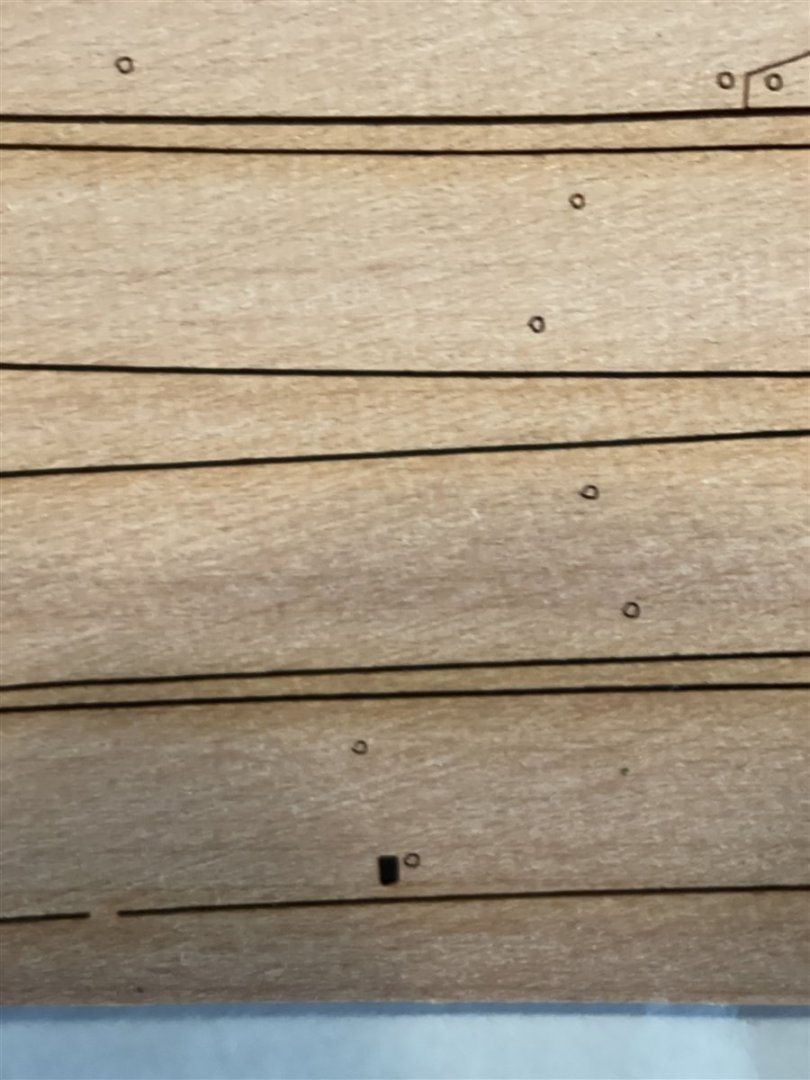
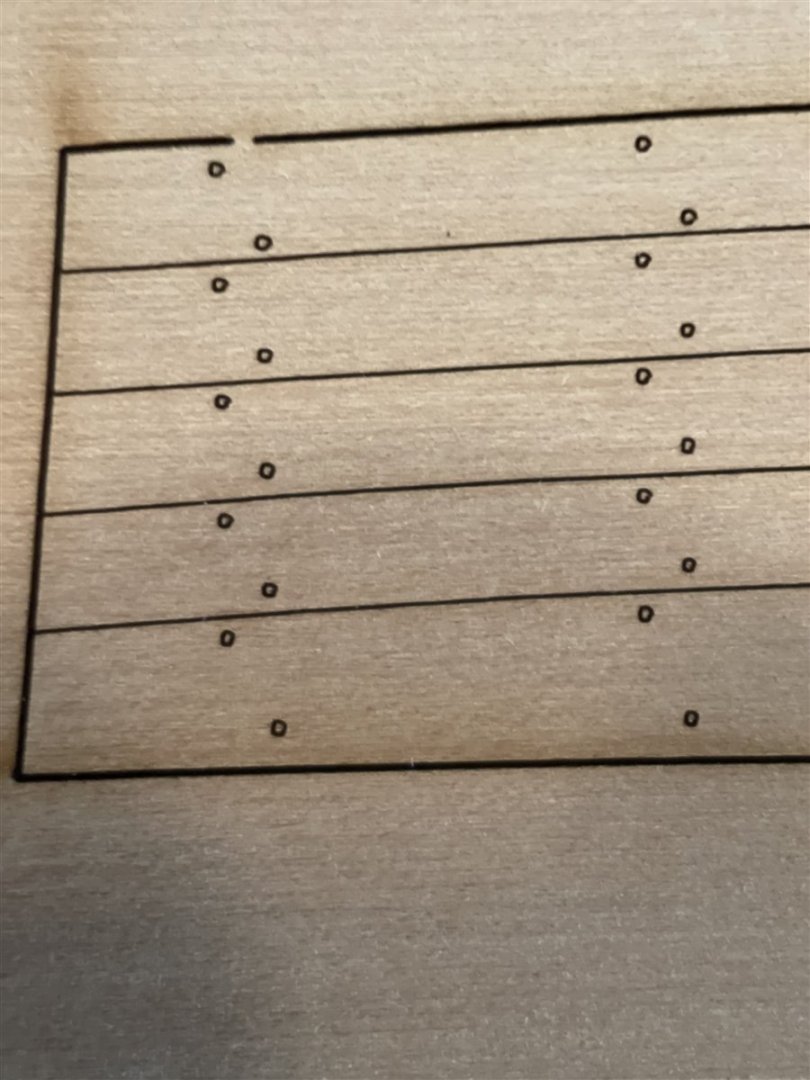
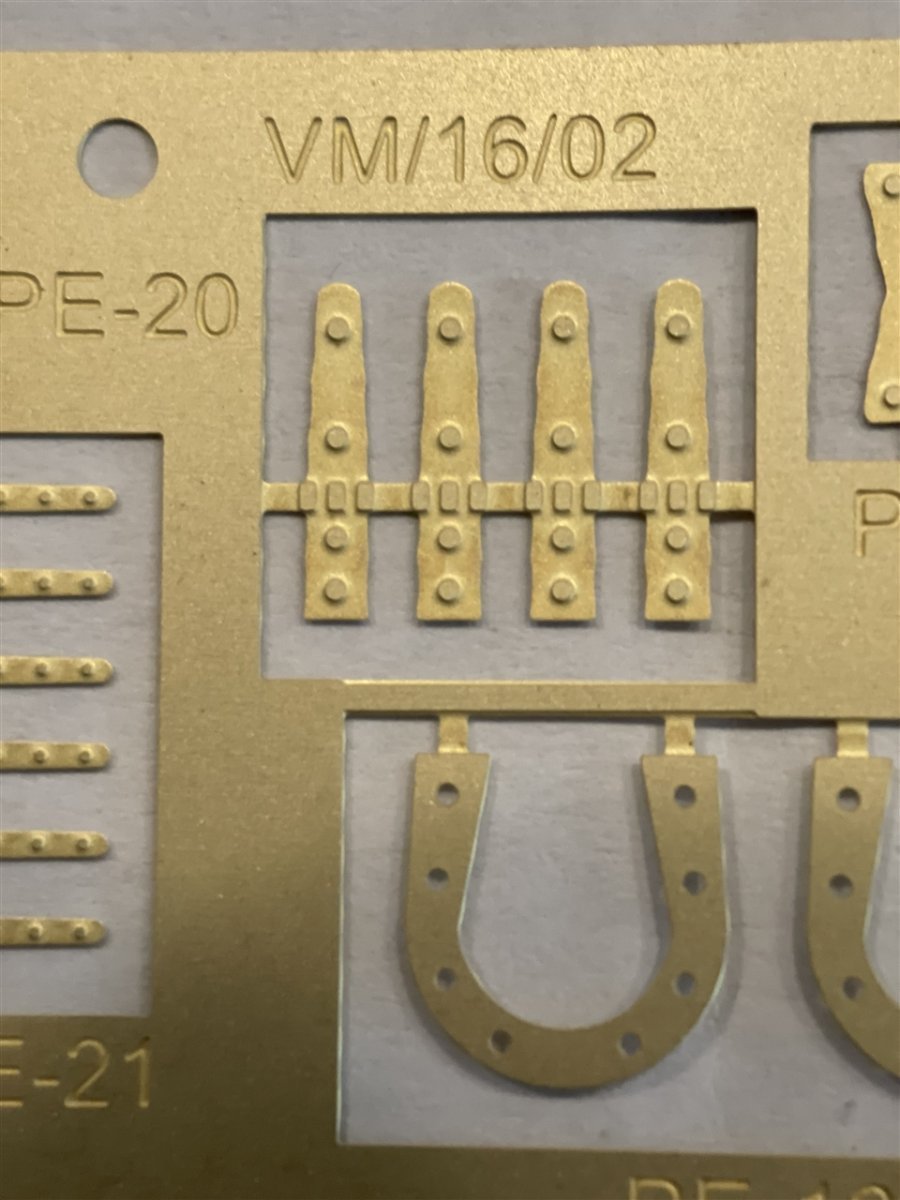
Photo Edged Parts
There are two small sheets with photo edged parts.
Upper sheet: Mainly parts for the Chain plates, handpumps, eyebolts, hooks, belaying pins, stanchions, swivel guns, gun carriage center booms, anchor rings and lower boom cradle
Lower sheet: horse shoe plates, fish plates, rudder straps and depth markings
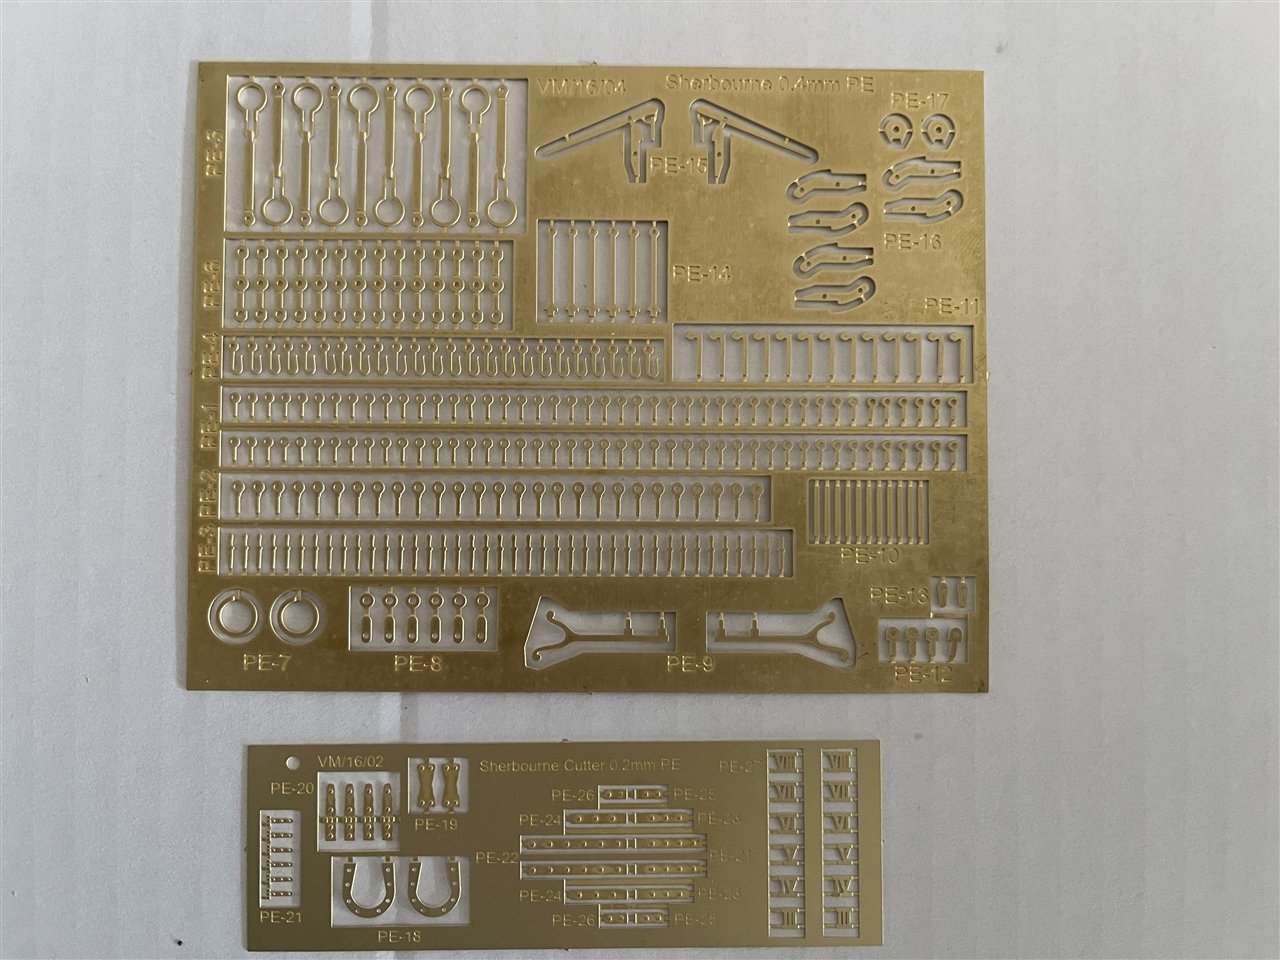
As well as all of the prefabricated parts the level of detail and quality of manufacturing is very very good:

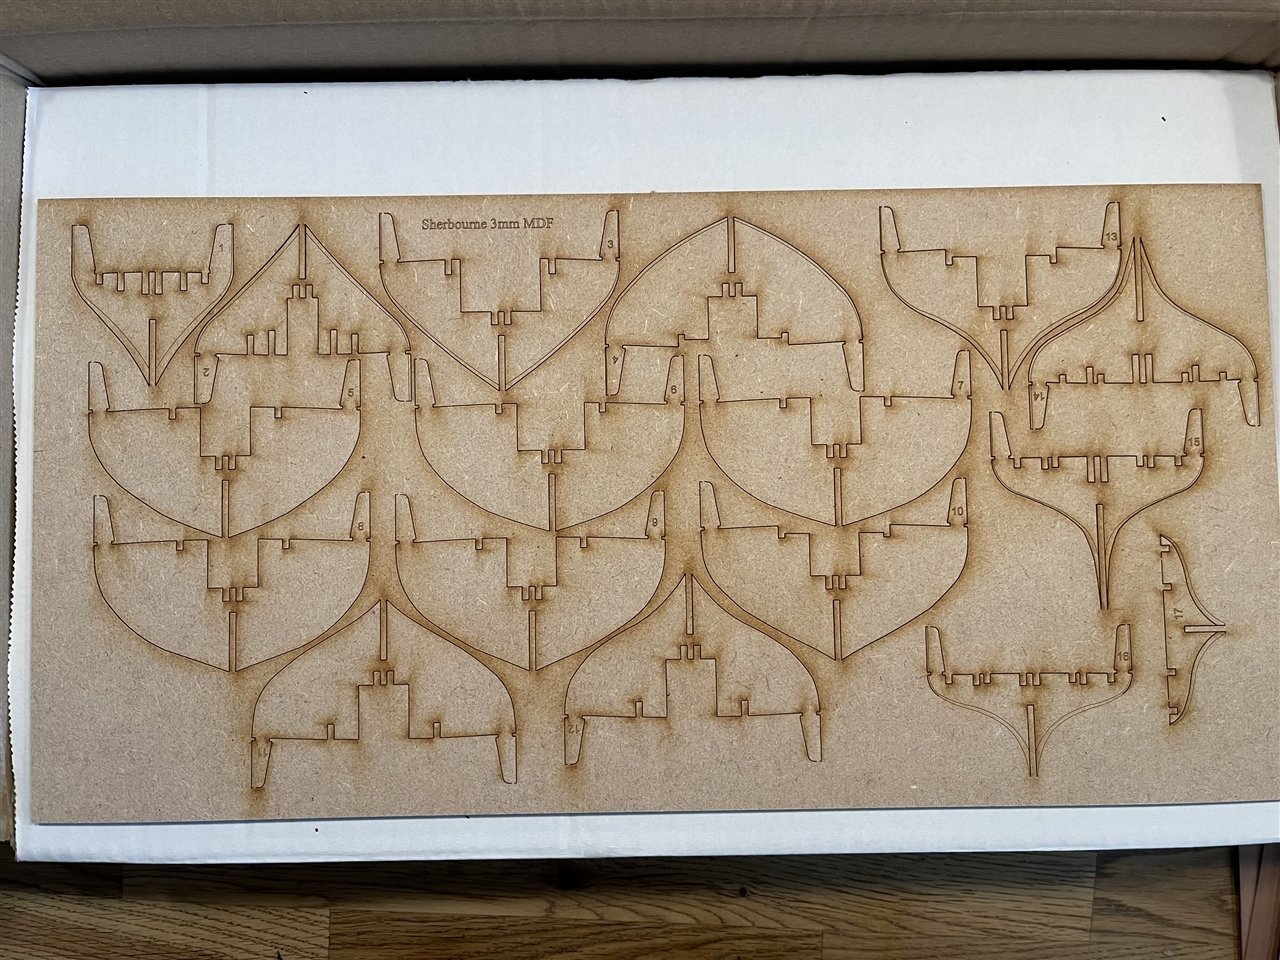
MDF Parts
There are two MDF Laser Cut sheets mainly holding the parts for the skeleton.
2mm sheet: Building cradle, deck beams, false keel and keel/bow parts, support patterns, locking pins and the lower deck
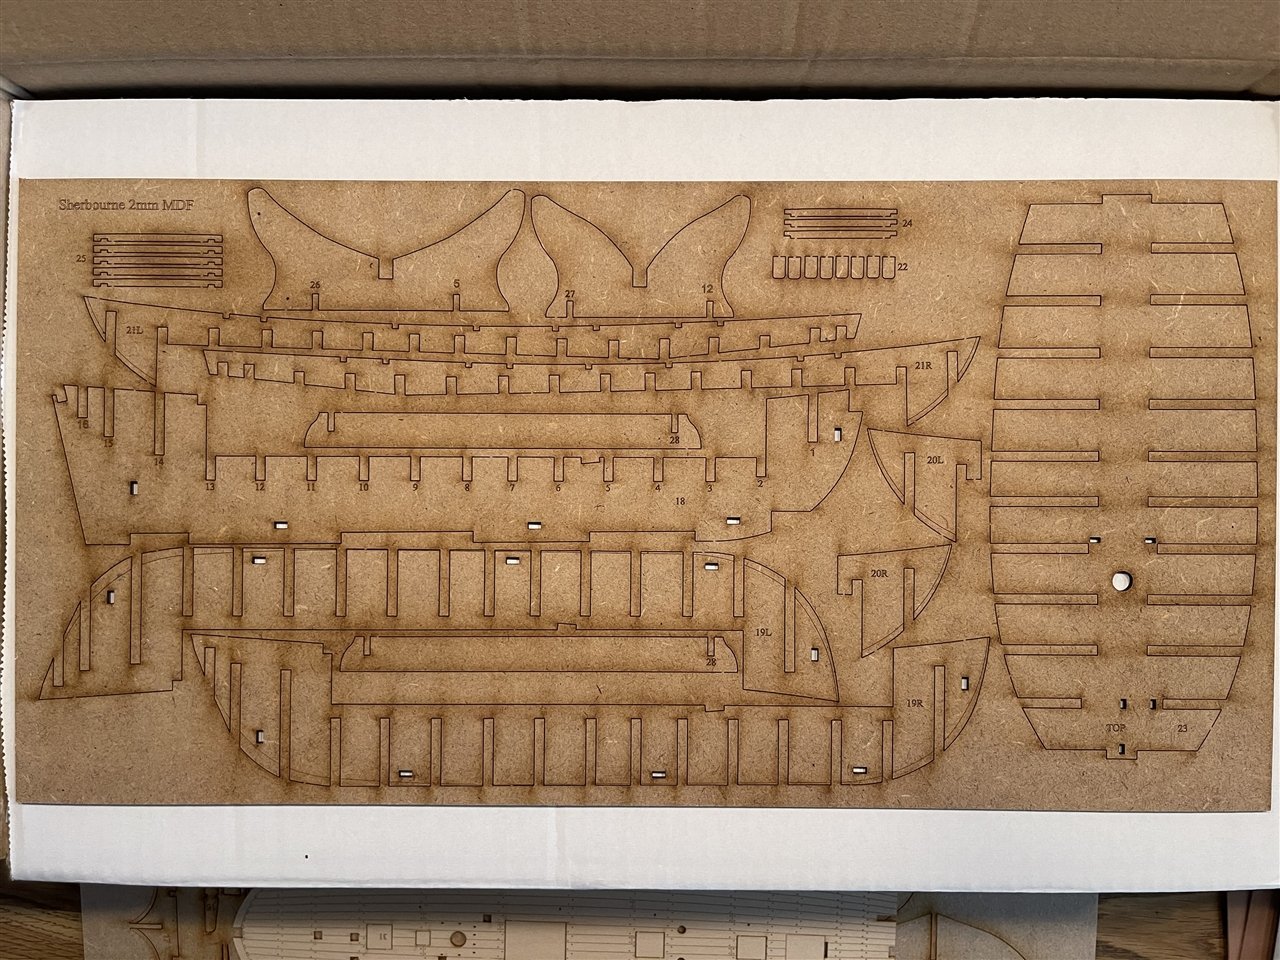
3mm sheet: Bulkheads
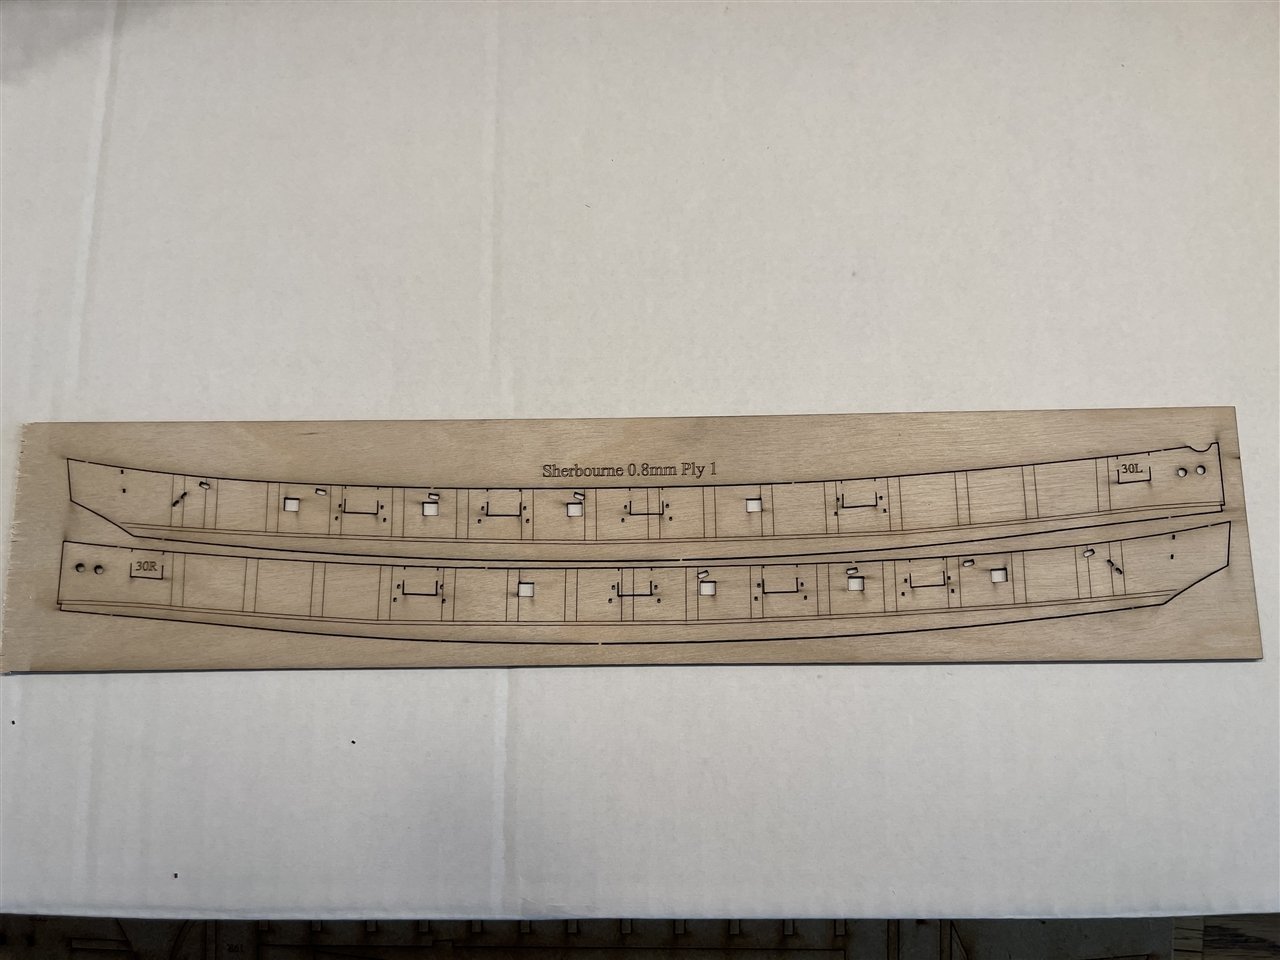
Plywood Parts
There are three parts out of plywood. These are the left and right side bulwarks as well as the sub deck.
The bulwarks have markings on it to help align them as well as to ease the process of fitting the bulwark patterns:
This image shows the sub deck and the engraved lime wood deck which will be glued on top of it:
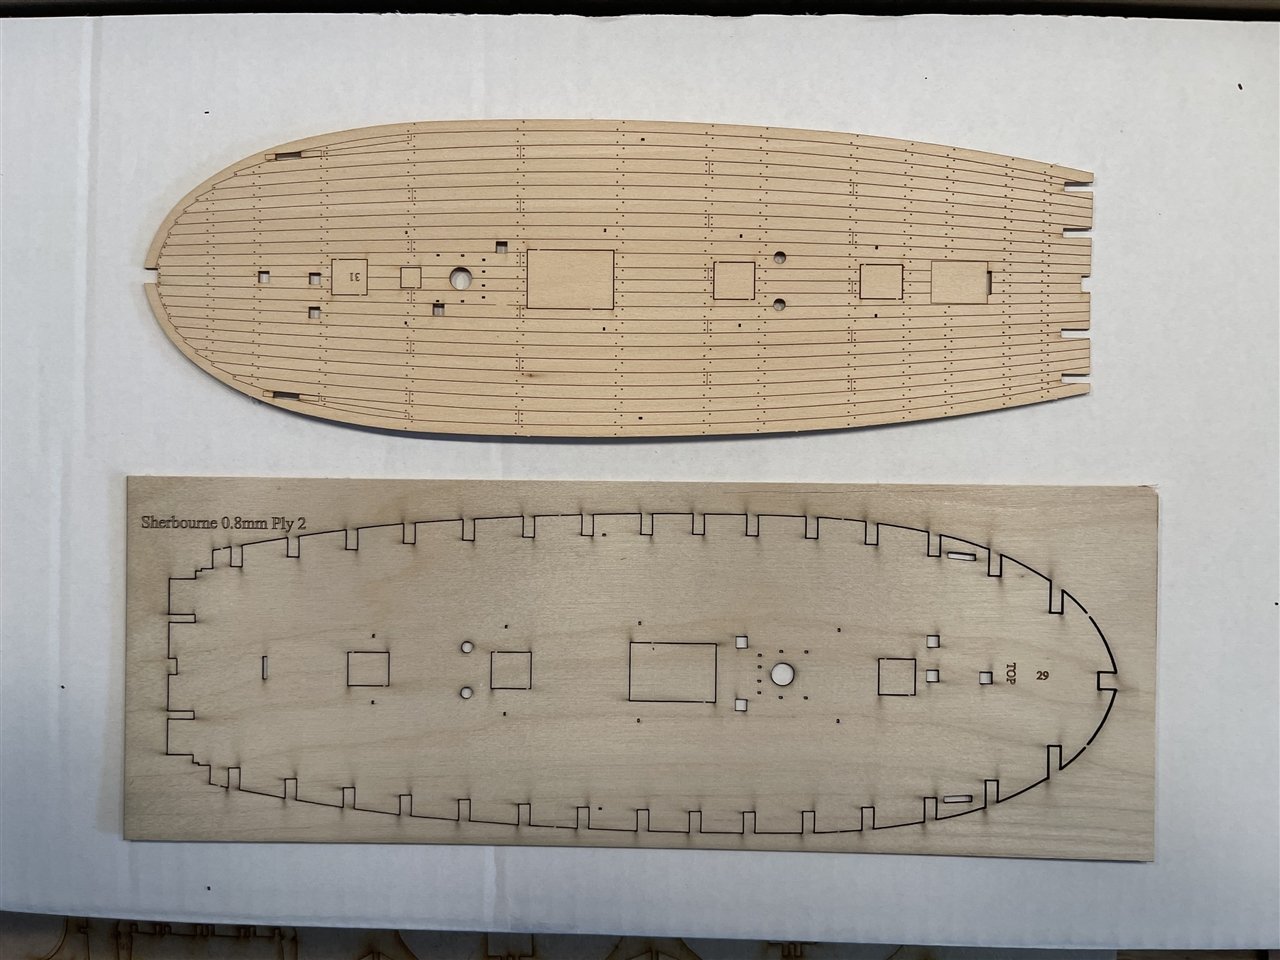
Again the level of detail and the manufacturing quality is astonishing:

Fittings and Materials
These are provided in a little box so nothing is rolling around in the big box.
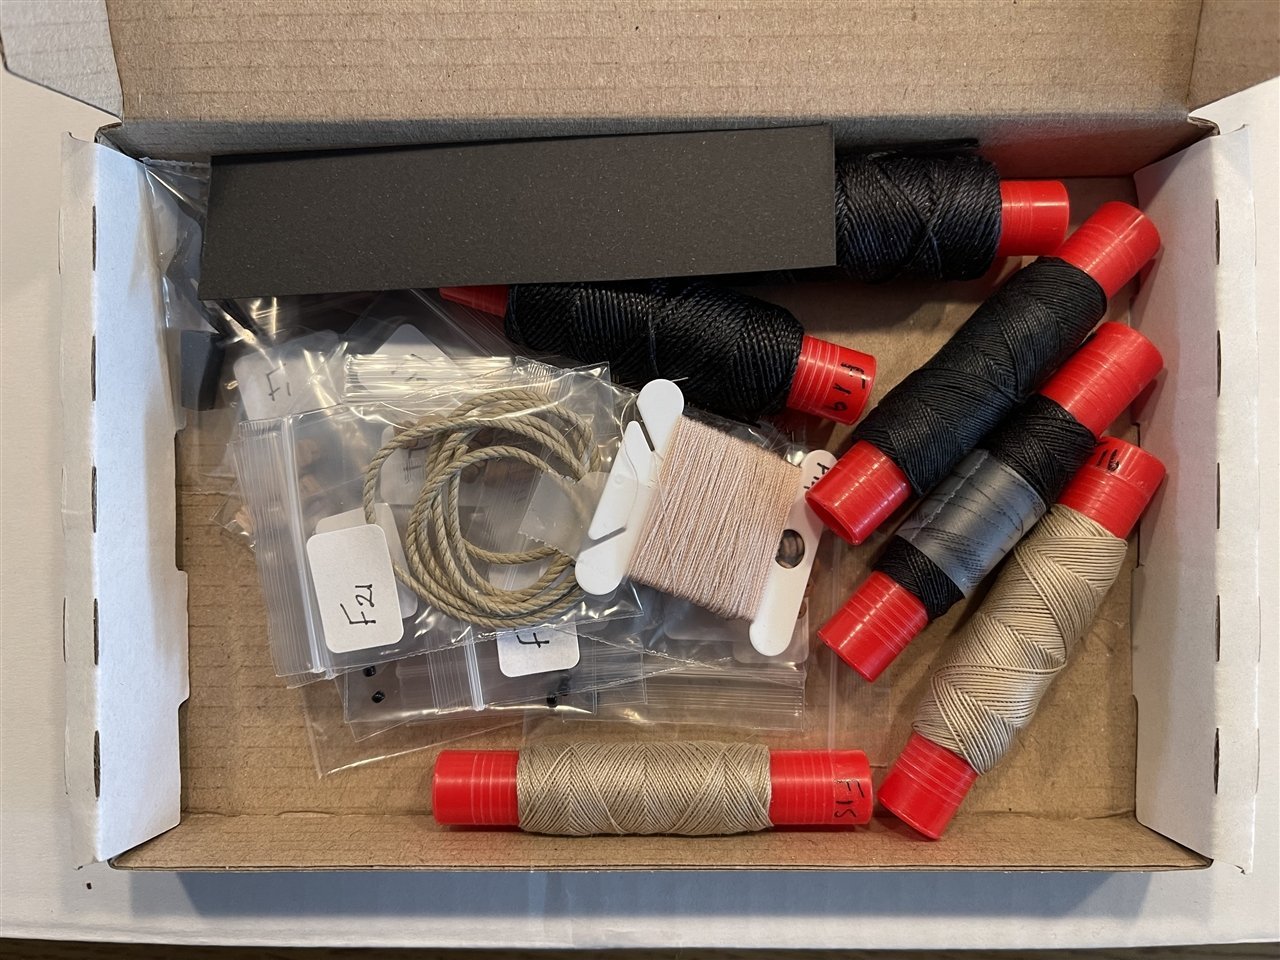
All items are clearly marked and waiting for assembly in their plastic bags ...
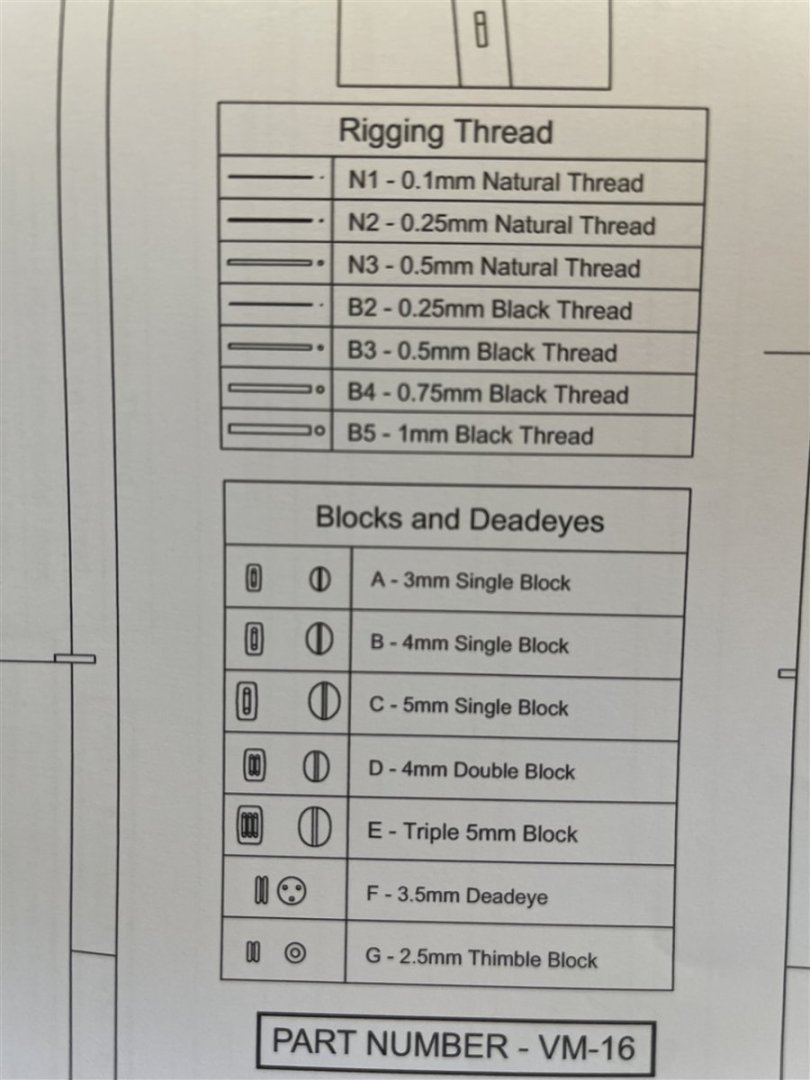
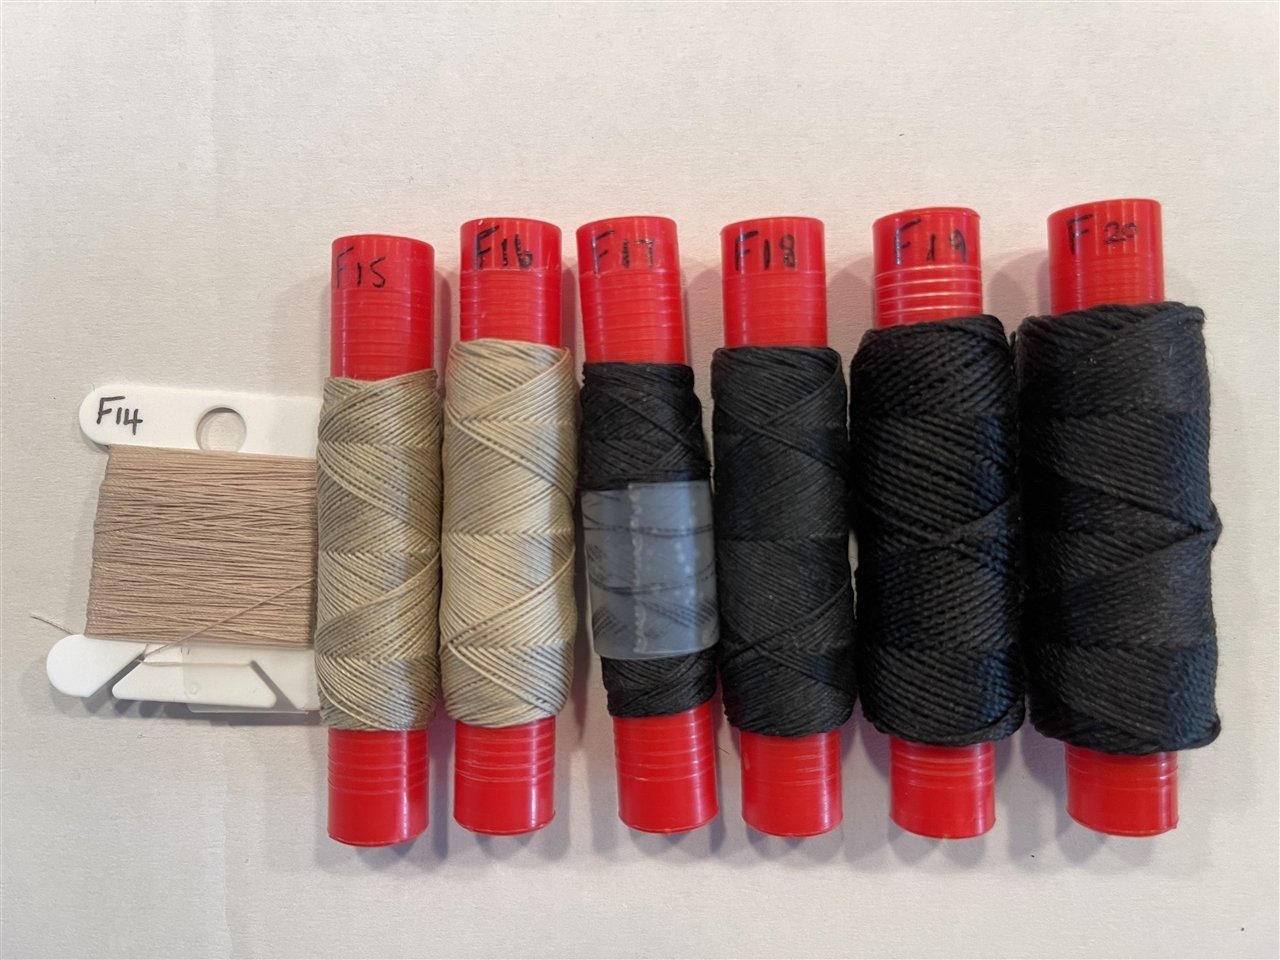
There are 3 sizes of natural coloured thread (0.1mm/0.25mm/0.5mm) and 4 sizes of black coloured threads (0.25mm/0.5mm/0.75mm/1.0mm). The threads are of good quality as well as all parts in this kit:
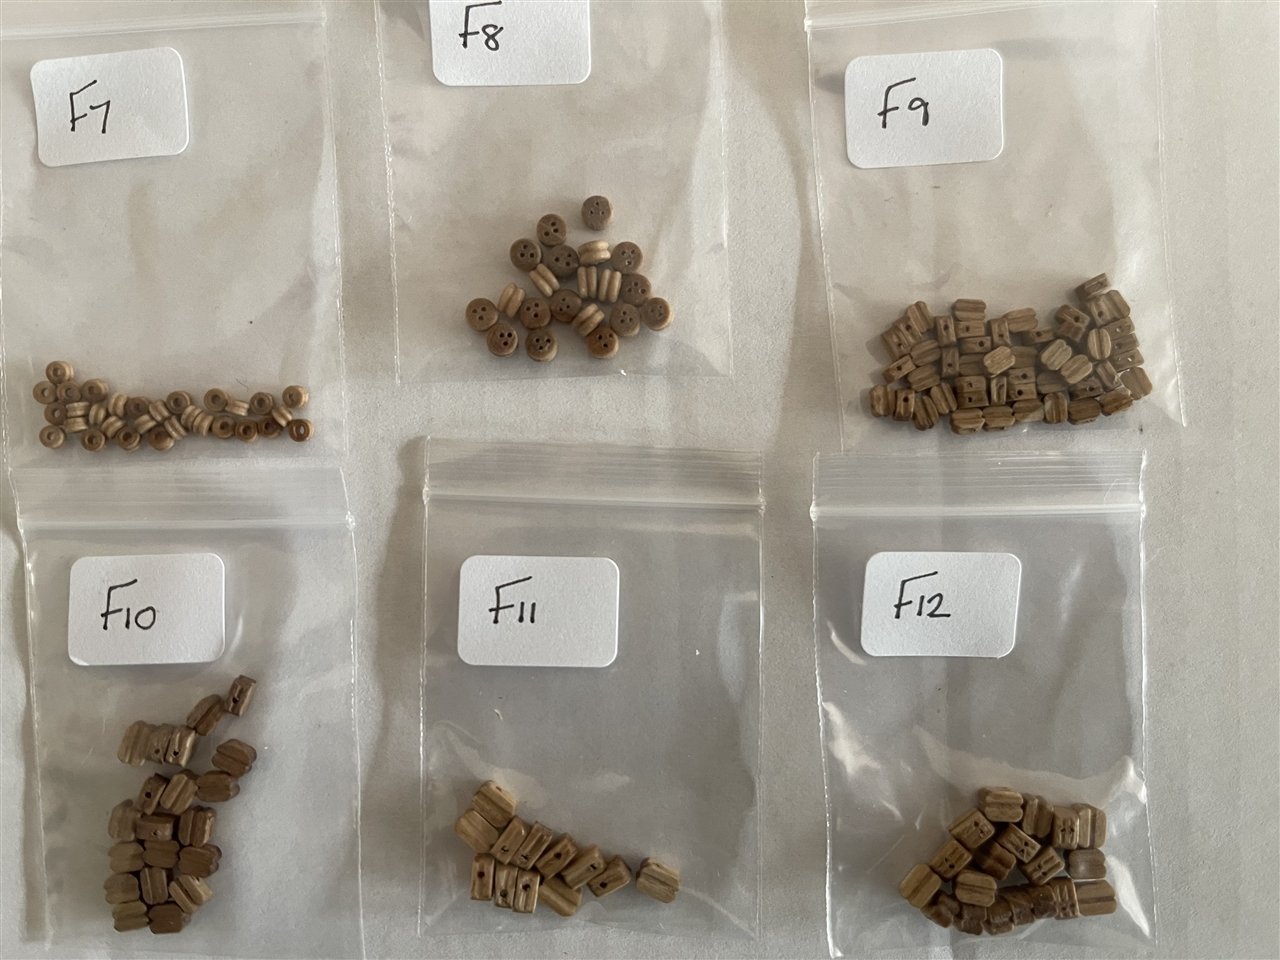
The kit comes with wooden blocks and deadeyes in different sizes: Thimble blocks (2.5mm), Deadeyes (3.5mm), single blocks (3, 4 and 5mm) and double blocks (4mm)
The 3 D printed parts are the 3 pounders, swivel guns, anchors, the chimney and the main winch drum:
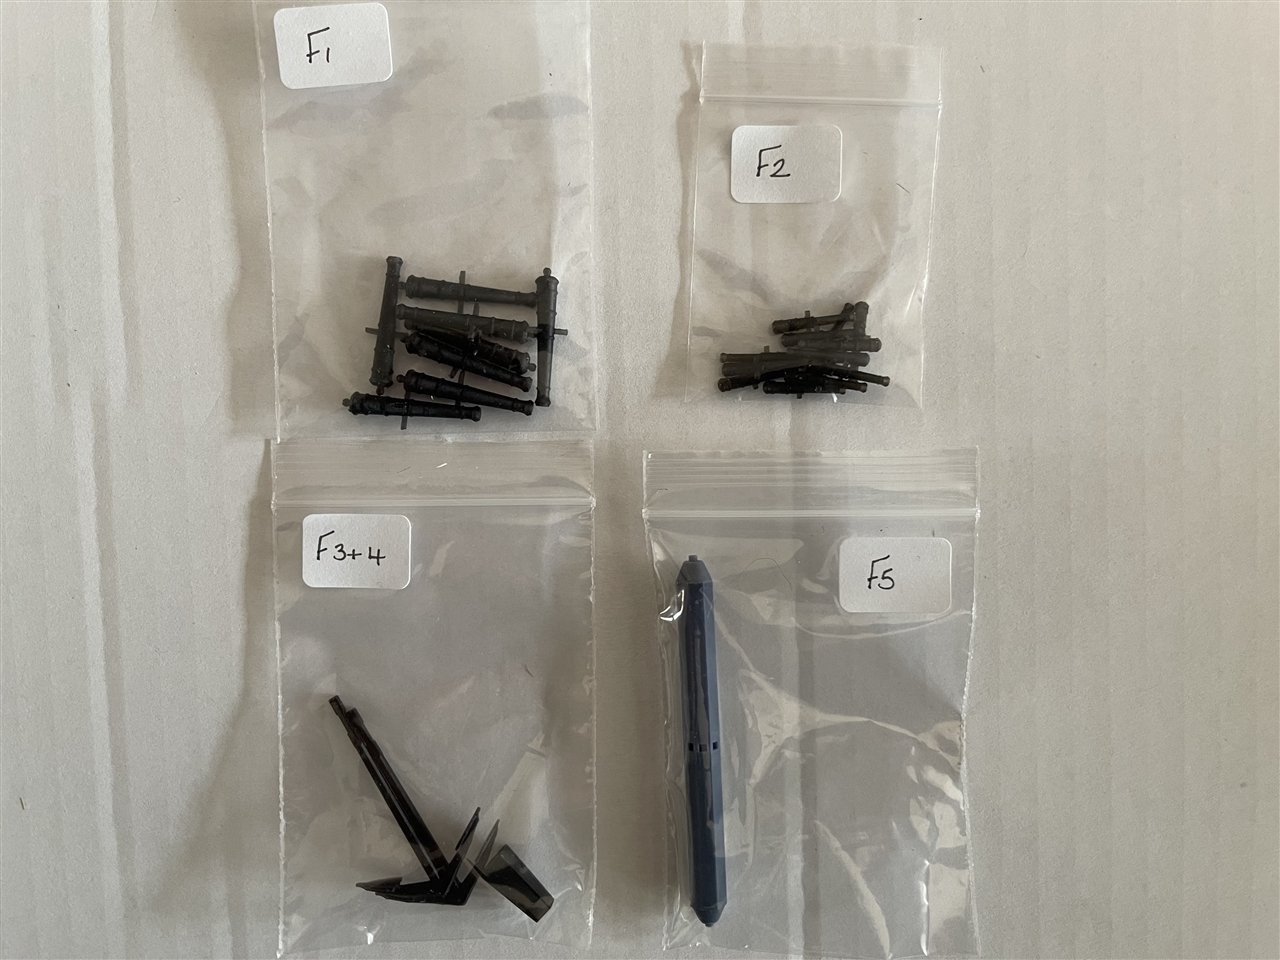
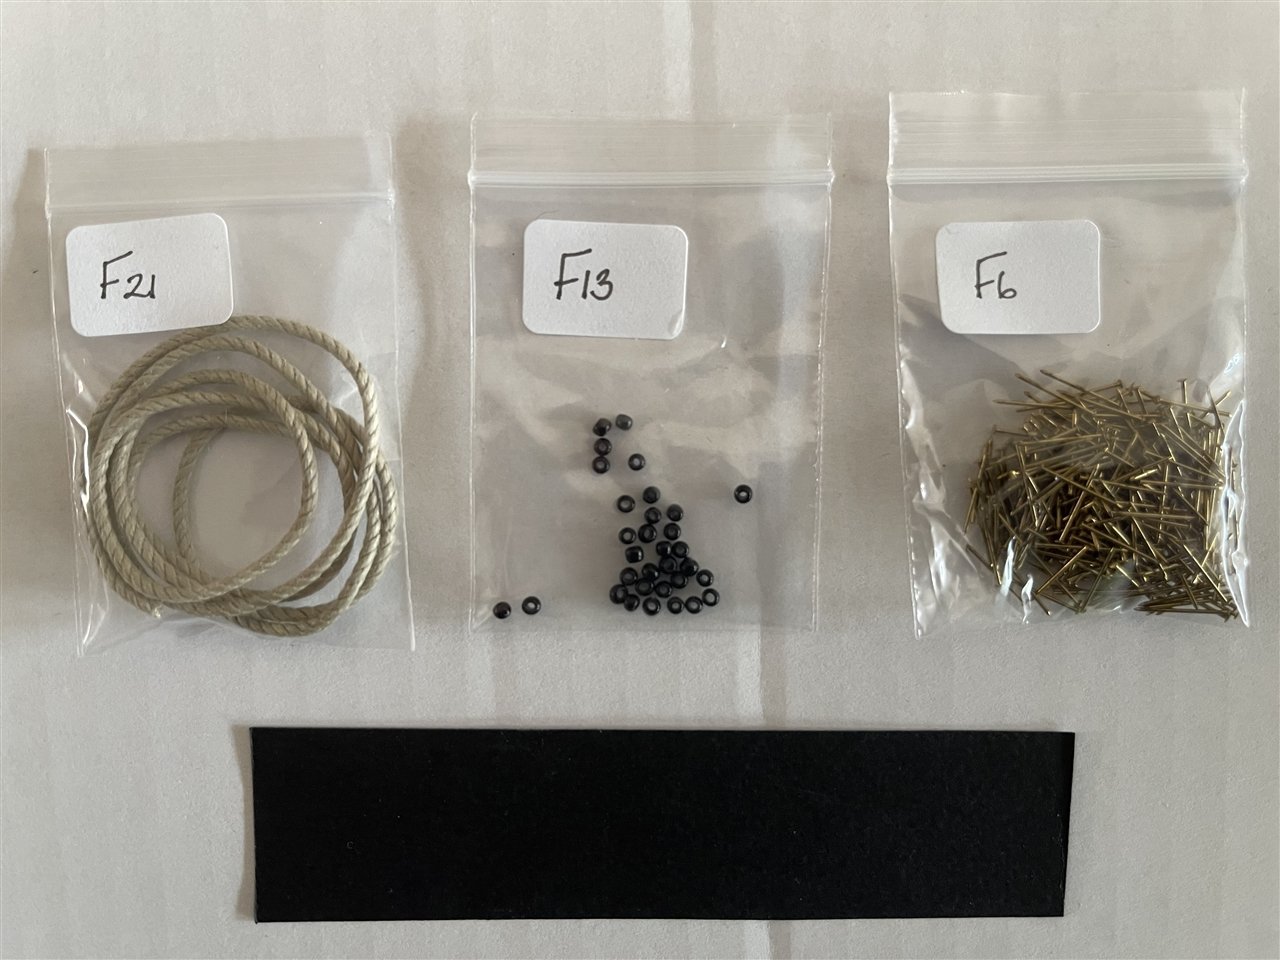
Finally we have the anchor hawse rope, parrel beads, brass pins and a small piece of black cardboard for the anchor stock:
Conclusion
It is hard to believe that you can get this kind of quality for so little money. The manufacturing quality is of the highest standard across all components of the kit.
Following the instructions step by step and making use of the plans should enable everybody to achieve the goal of finishing the build of an extremely well looking ship model with a high level of detail regarding its size.
As there are a lot of prefabricated parts the potential for frustration should be very low and that's what I am looking for as a beginner.
Just looking at the parts and the really good instruction manual as well as the plans is so much fun that you can draw all your motivation from it alone to start and finish the model. In addition the build time will not be hundreds of hours so you can see the light at the end of the tunnel as soon as you start your build.
If you are a beginner this kit will for sure get you addicted to ship modelling. For experienced modellers it must be pure fun as well and if this will be your first Vanguard Models ship kit I think it will not be your last one.
-
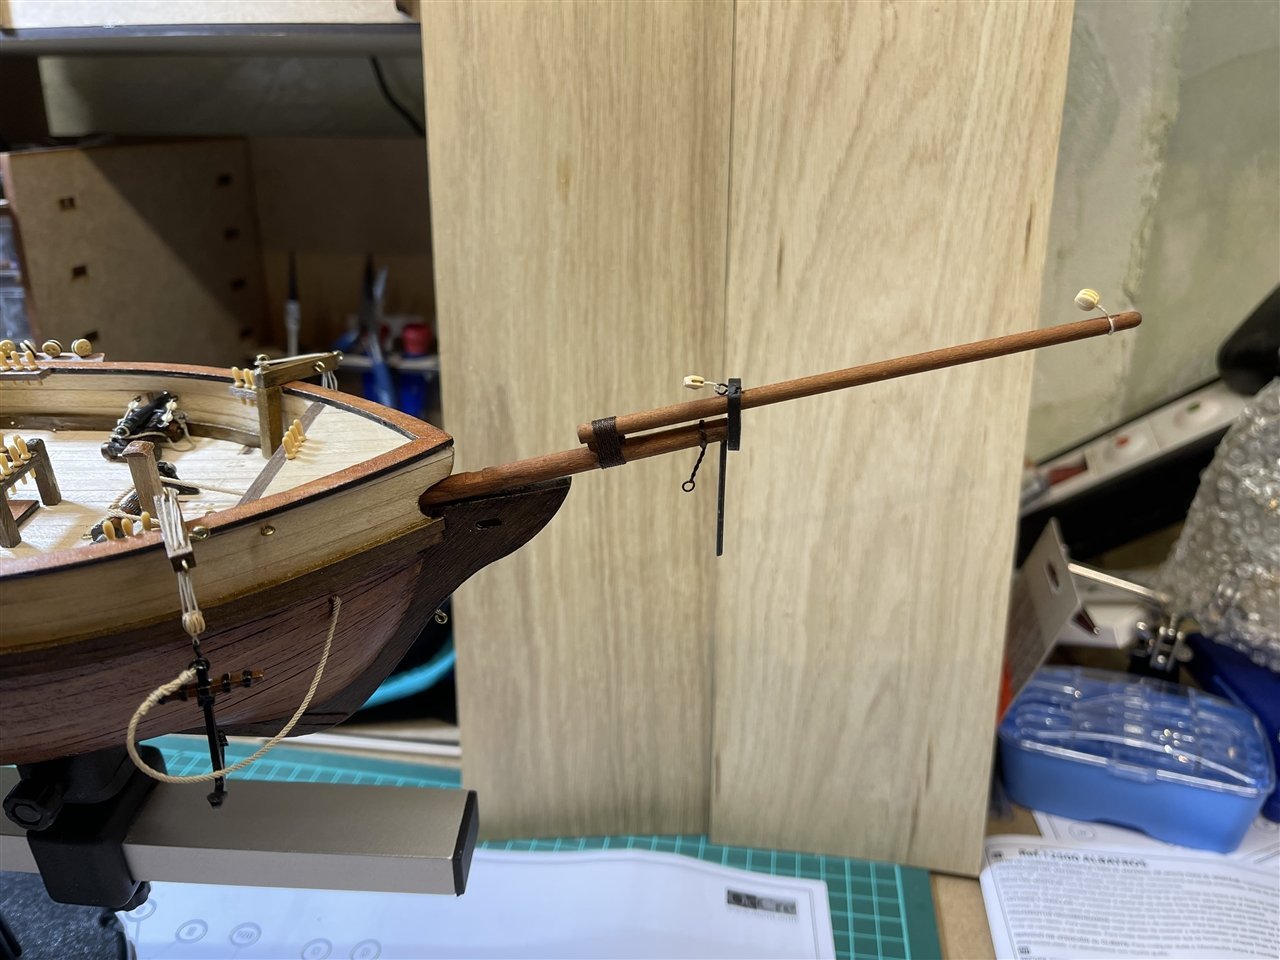
Bowsprit - Finished
After successfully dry fitting the bowsprit everything was glued in space. Then the gammoning was done ...

Some pictures of the current state of the build ... She looks beautiful and I really enjoy the building experience but still have a lot to learn ...


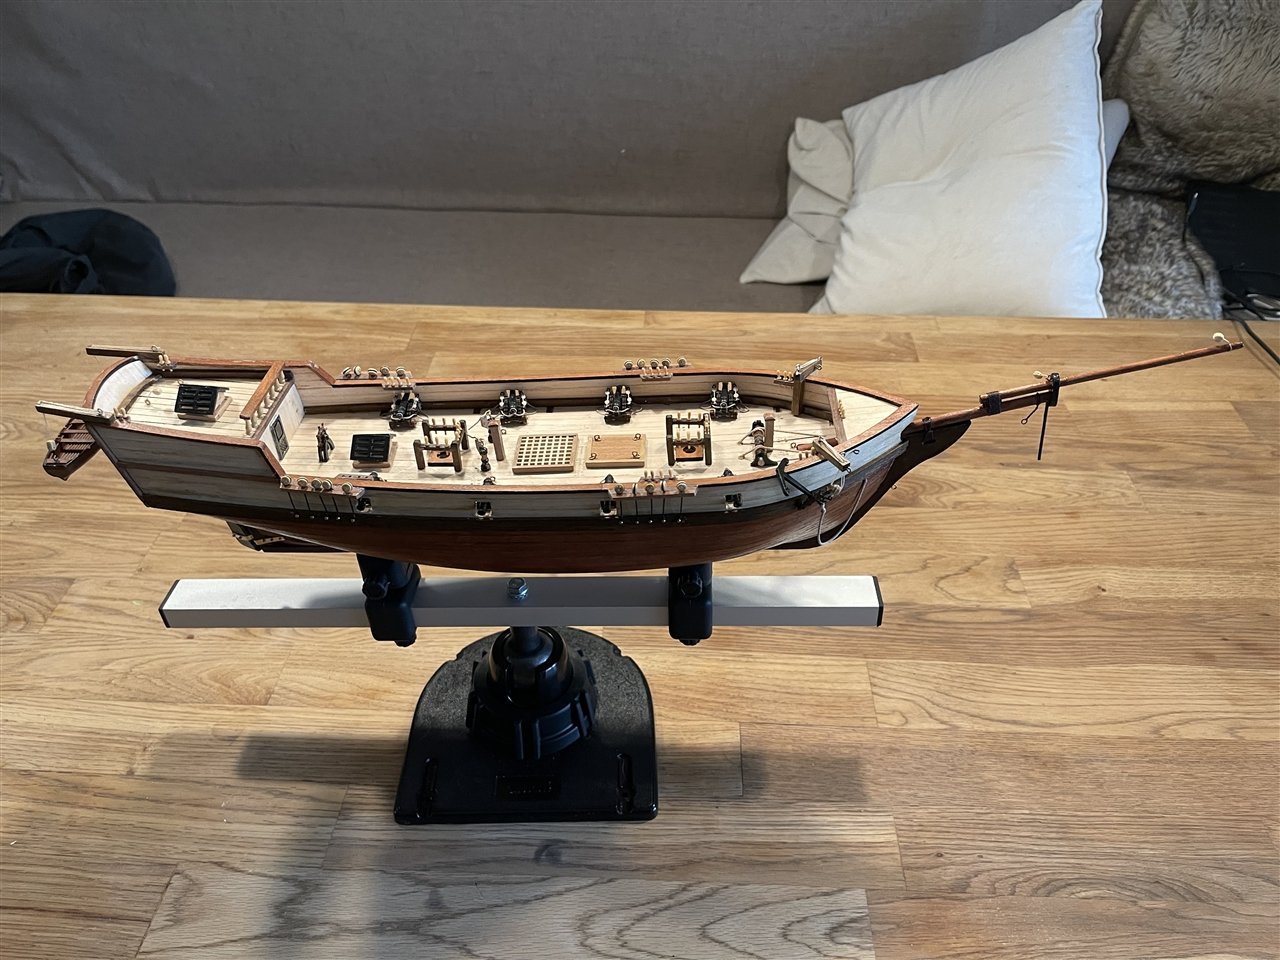
That's it for the weekend. Now I will start doing the masts. Same principle as the bowsprit but many more parts. Let's see how far the week will let me go for it.
Have a nice one,
Kai
-
Bowsprit - Assembly
After painting the booms and the cap the assembly started.
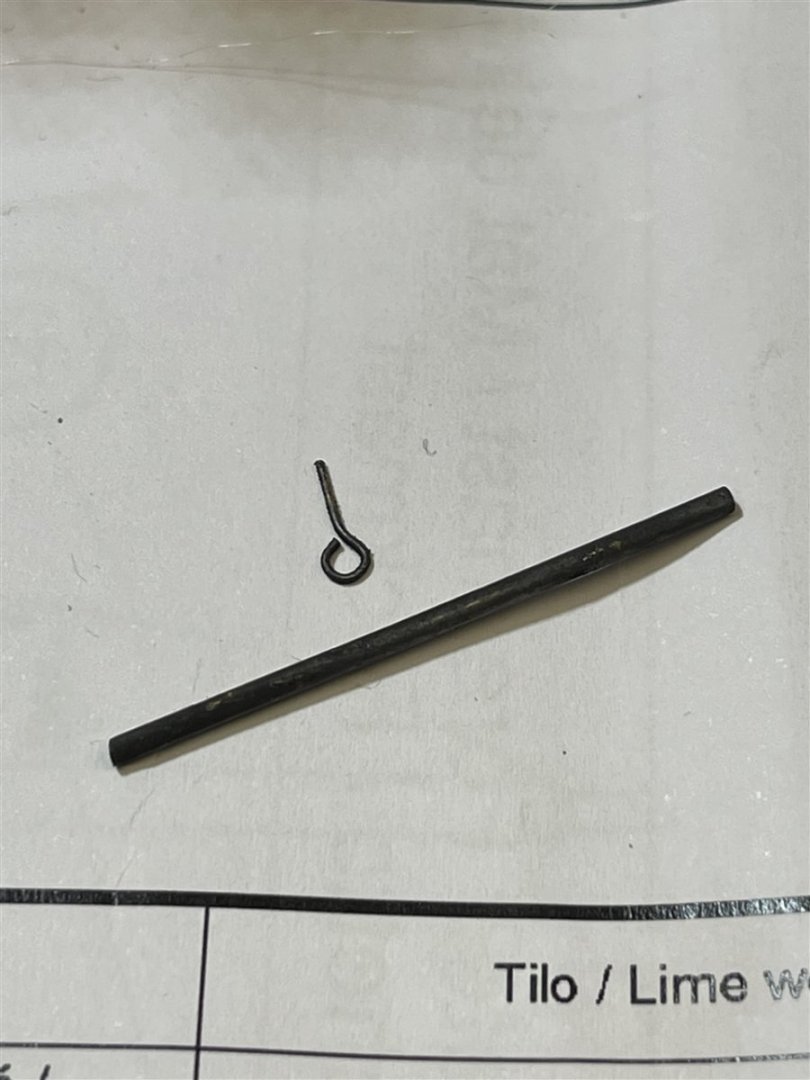
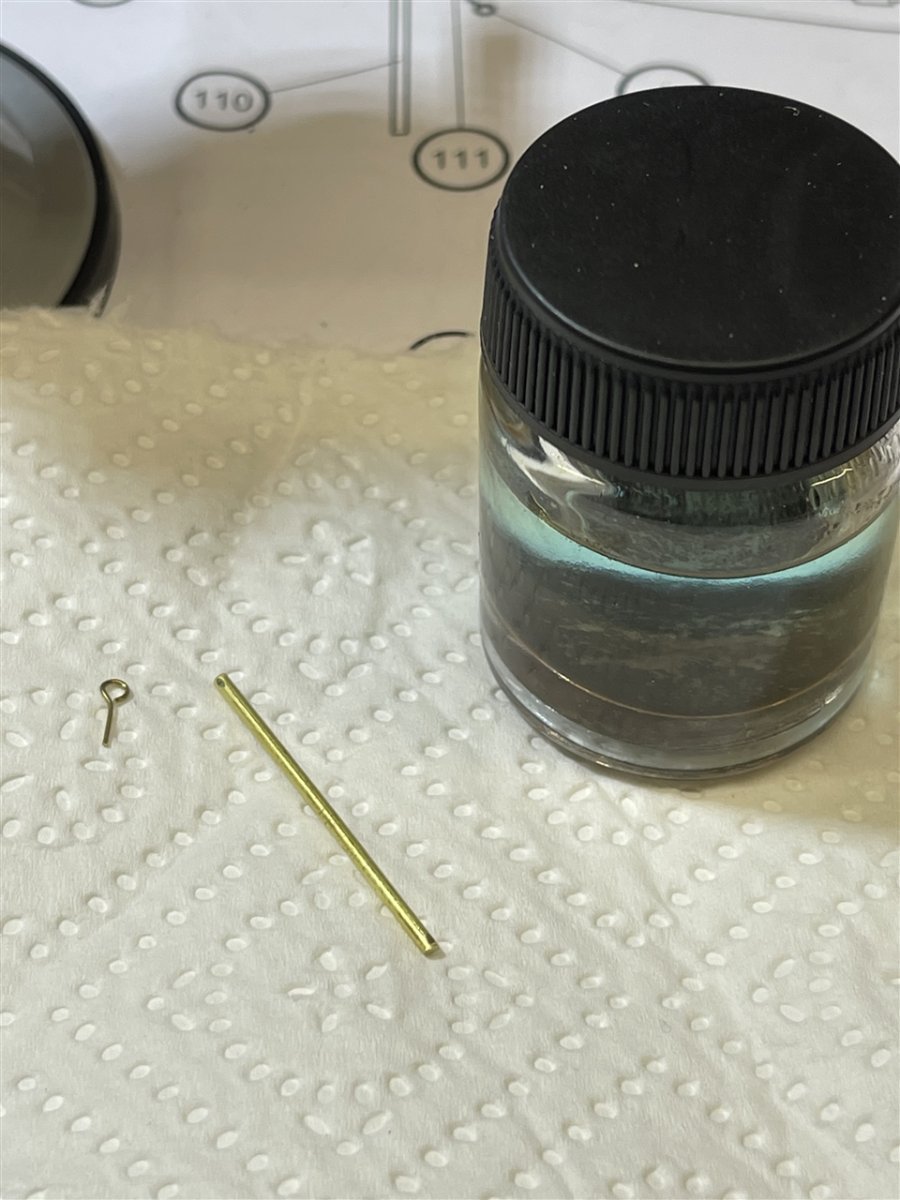
Parts needed: 1 double and 1 single block, 1 eyebolt, 1 ring, the brass rod as the dolphin striker, the tapered dowels and 0.5 and 0.15 mm threads.

I stropped the blocks using two 2" clamps to hold the block and the thread into position

These two clamps are just as useful to position the stropped block on the boom. So you have enough time to place it and to glue it into position

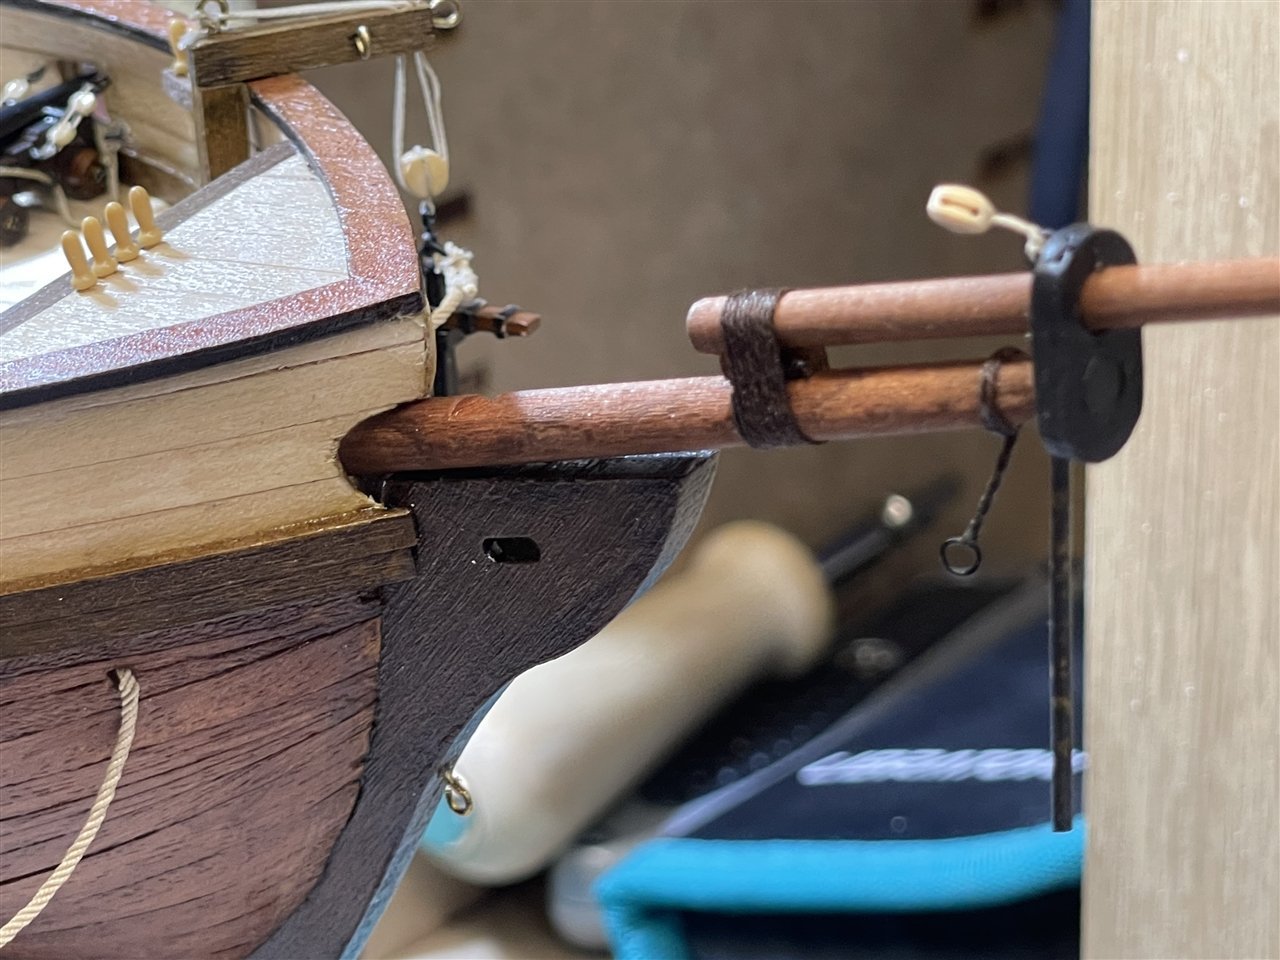
Finally the second block, the dolphin striker and the front part of the bobstay were added before the foot of the jib boom was tied firmly to its rest (don't know the right expression for this little wooden part between jib boom and bowsprit)


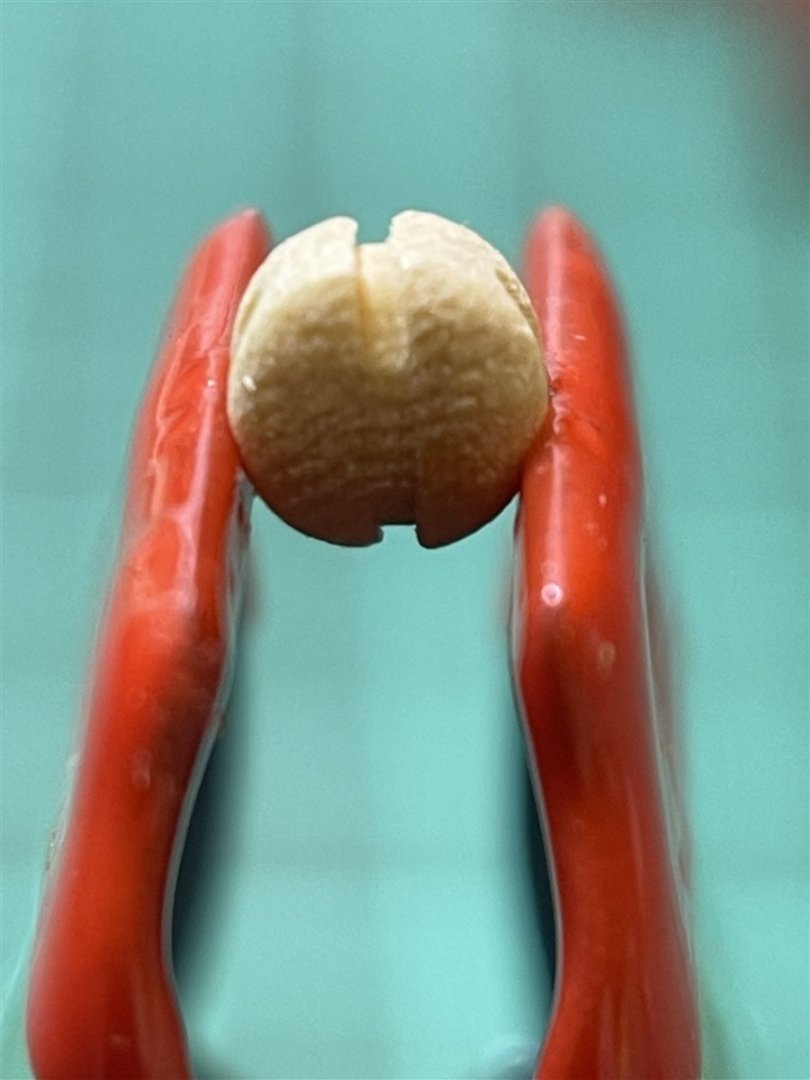
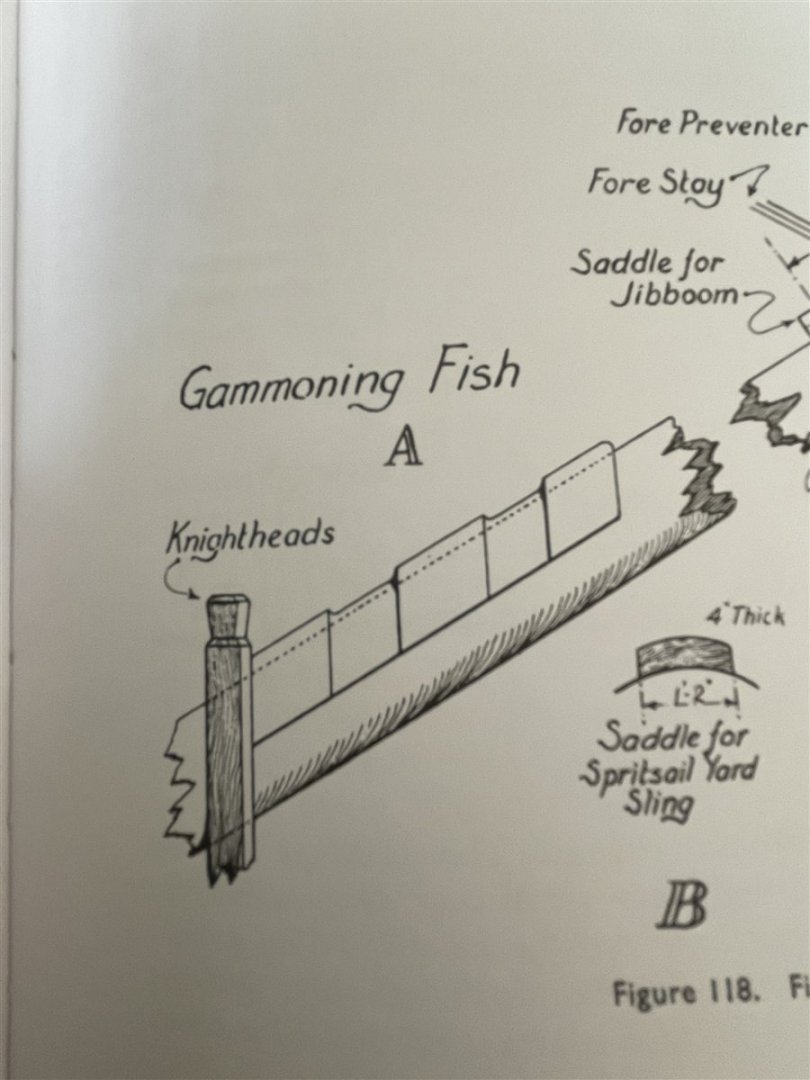
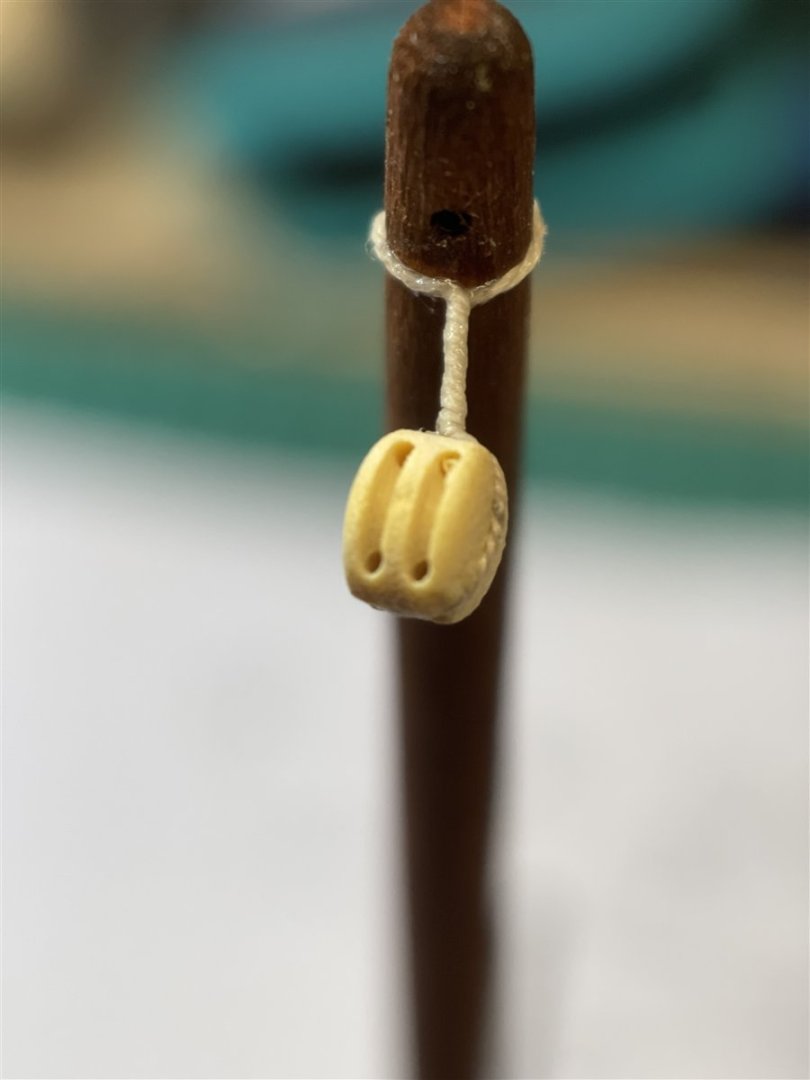
Lust but not least the gammoning fish was carved ...
The finished bowsprit ...
Dry fitting the bowsprit ...
Little sanding needed to get the bowsprit laying flat ...
Kai
- GrandpaPhil and MajorChaos
-
2
-
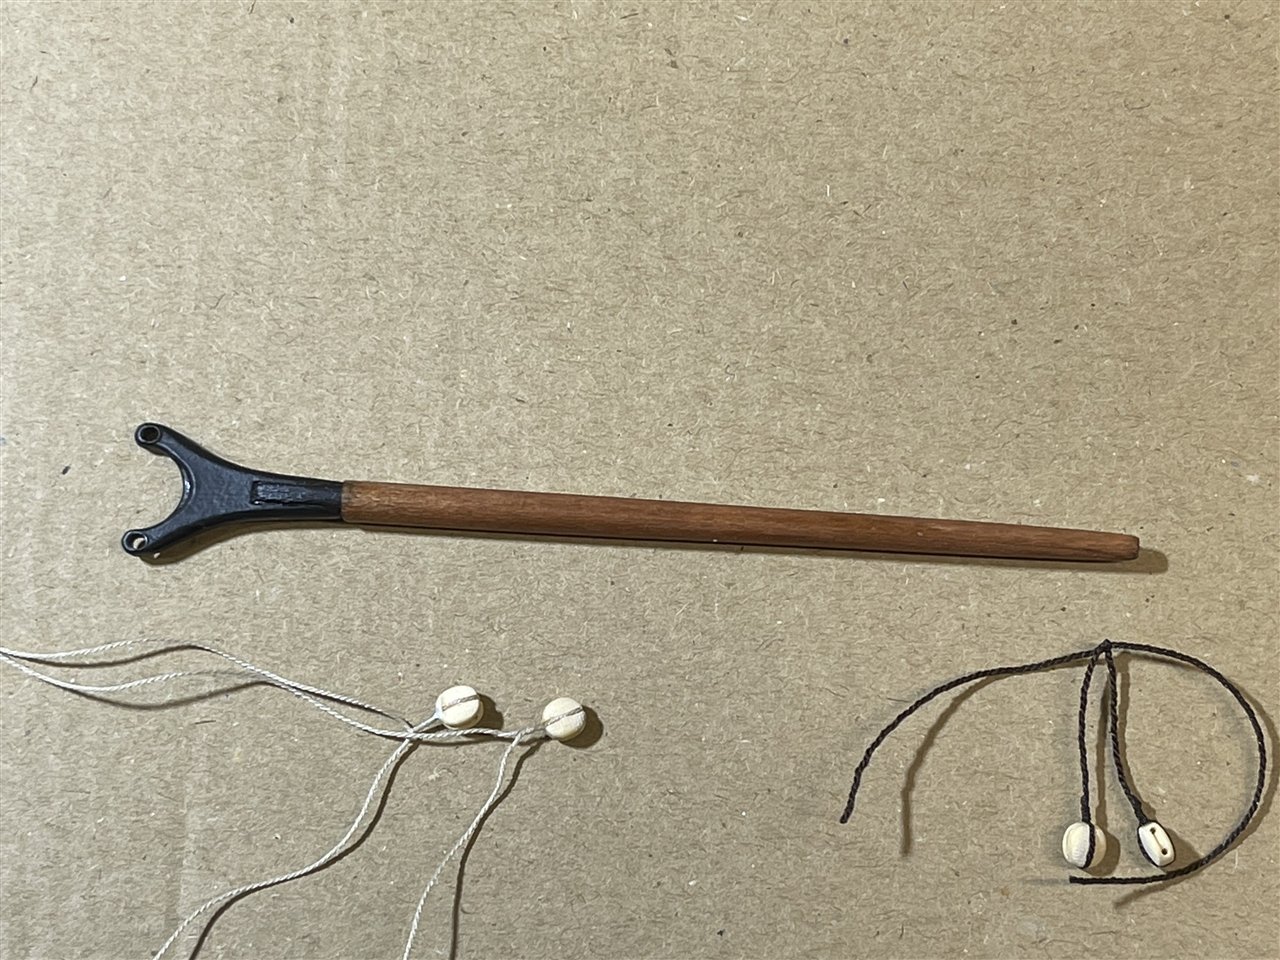
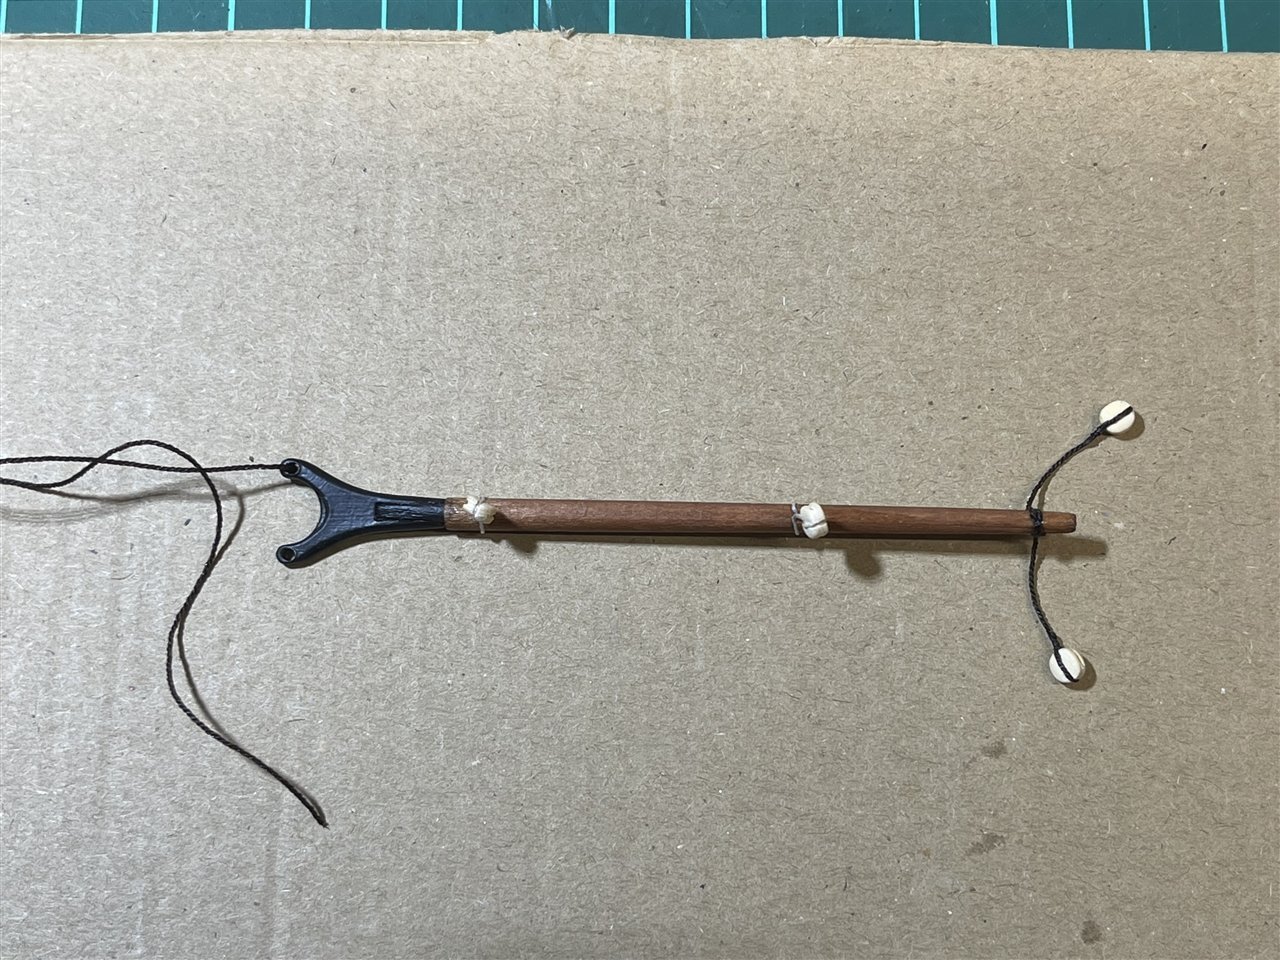
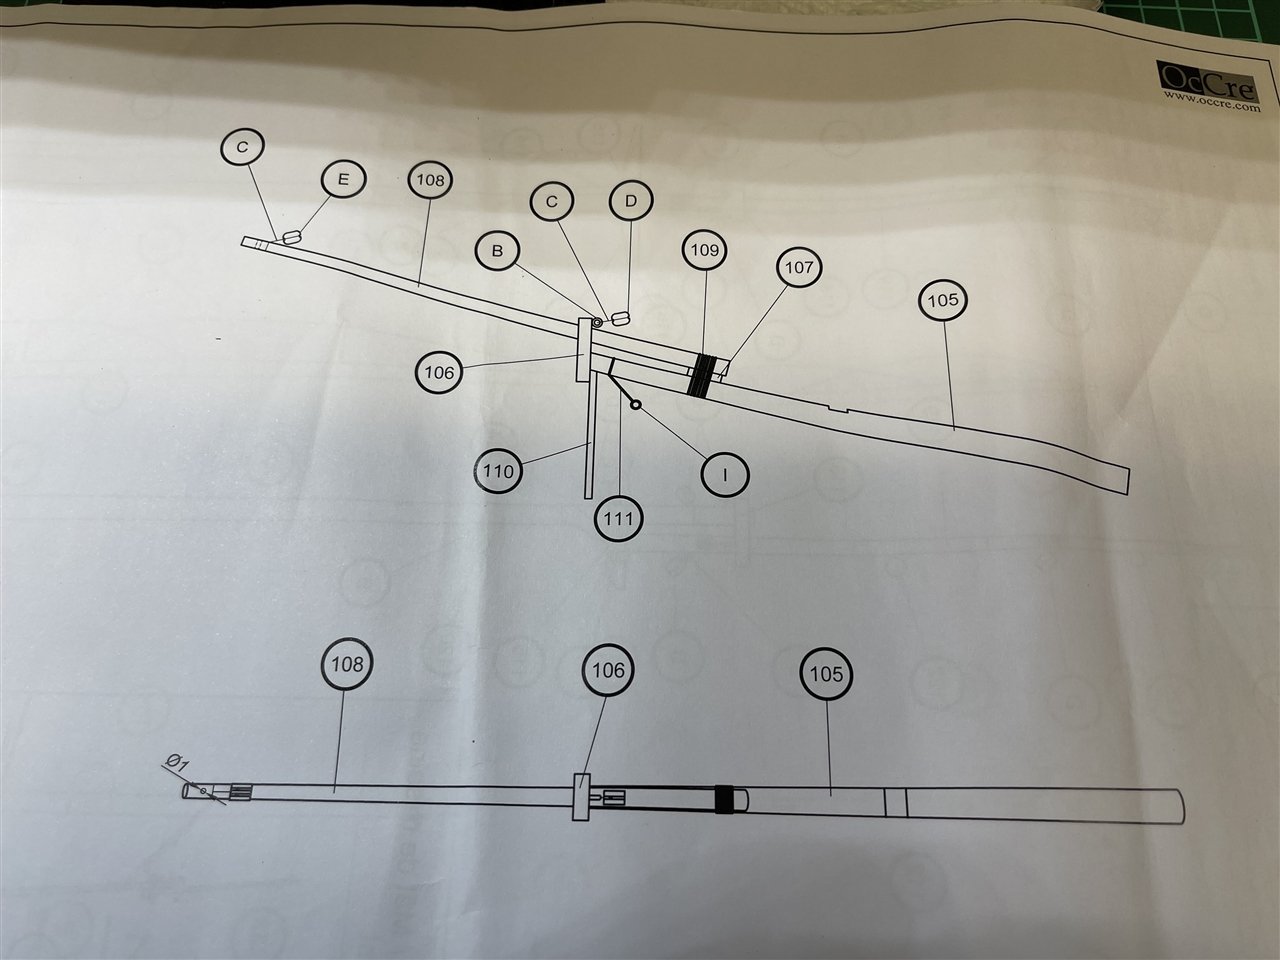
Bowsprit - Preparing the Parts
Besides the two booms there are some smaller parts to get prepared before the bowsprit assembly.
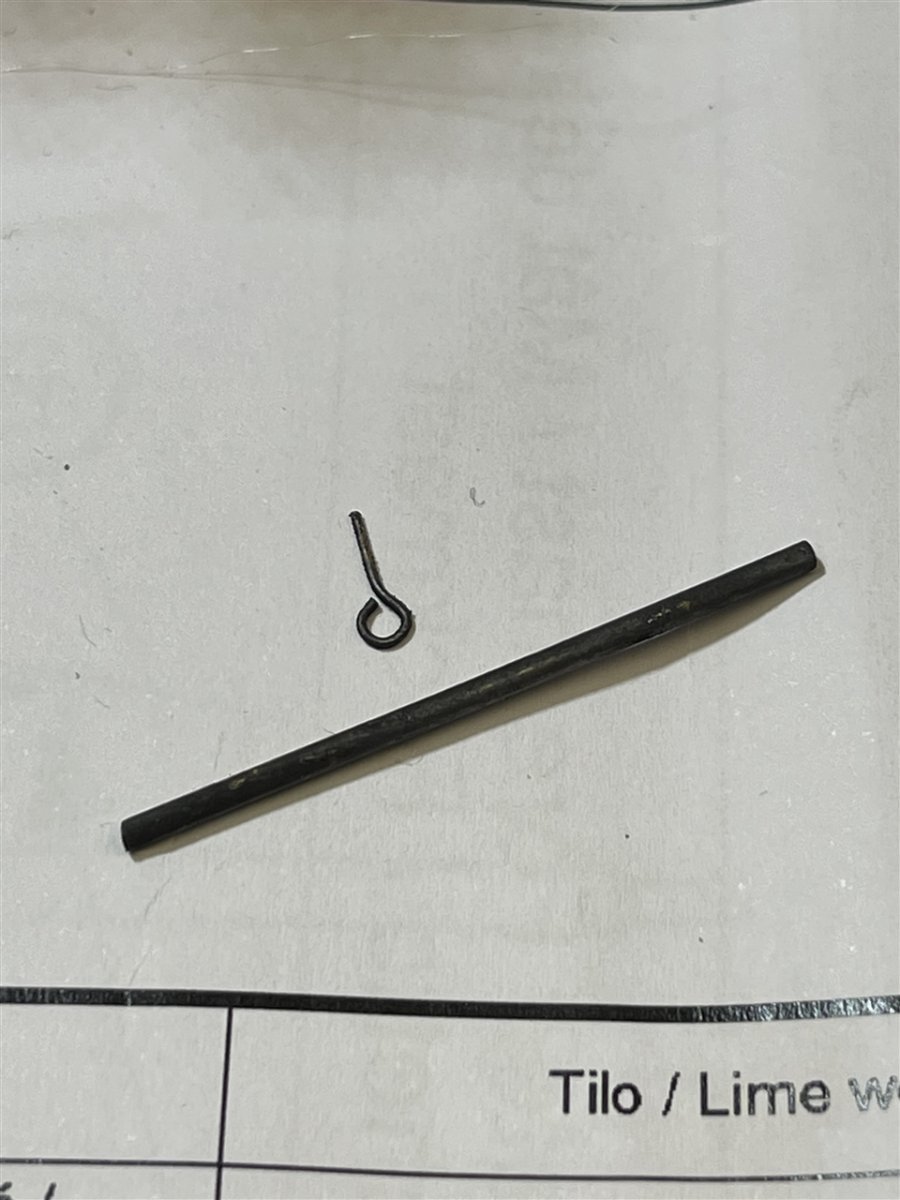
Blackening the brass parts:

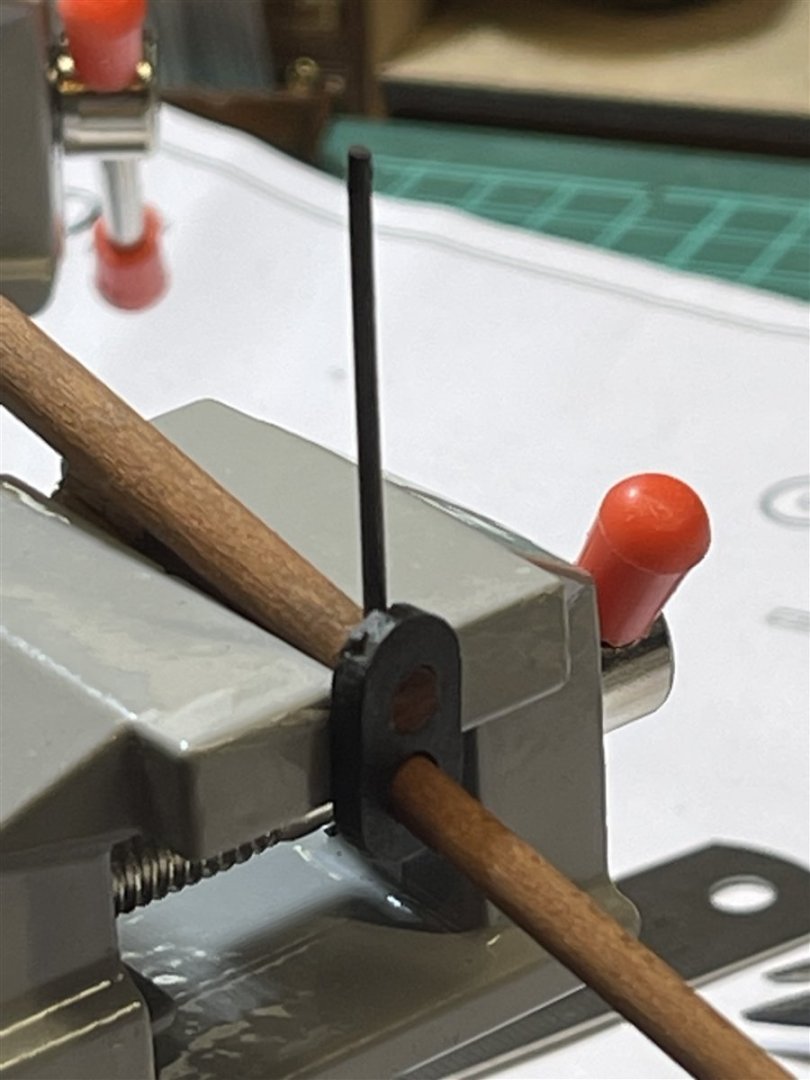
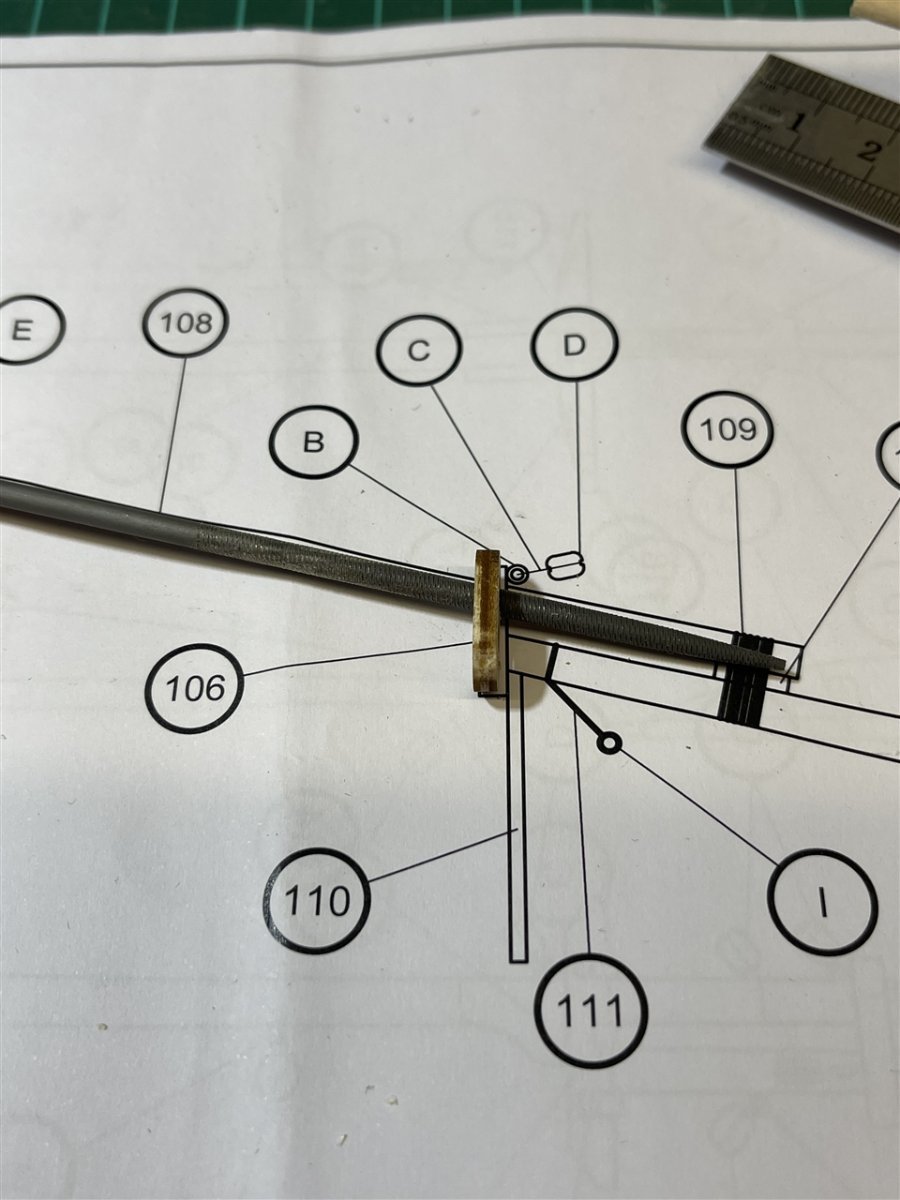
Then I used a rounded file to file the holes in the bowsprit cap to the right angles that the booms will fit in according to the instructions:

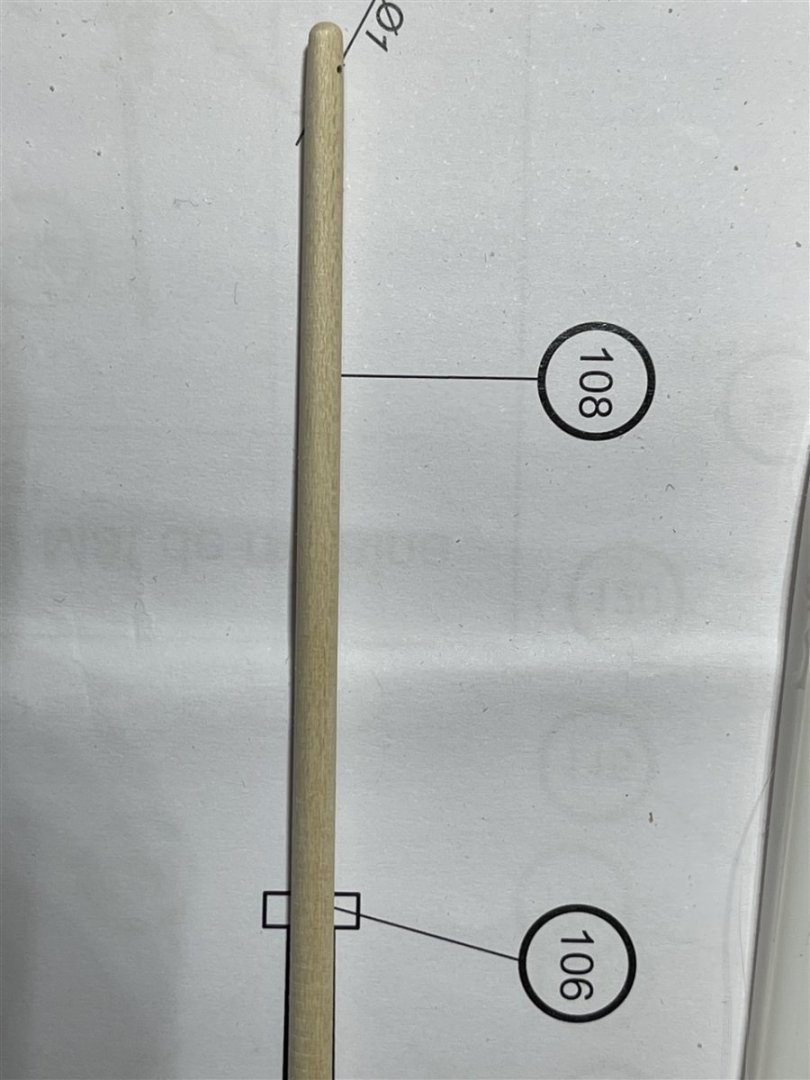
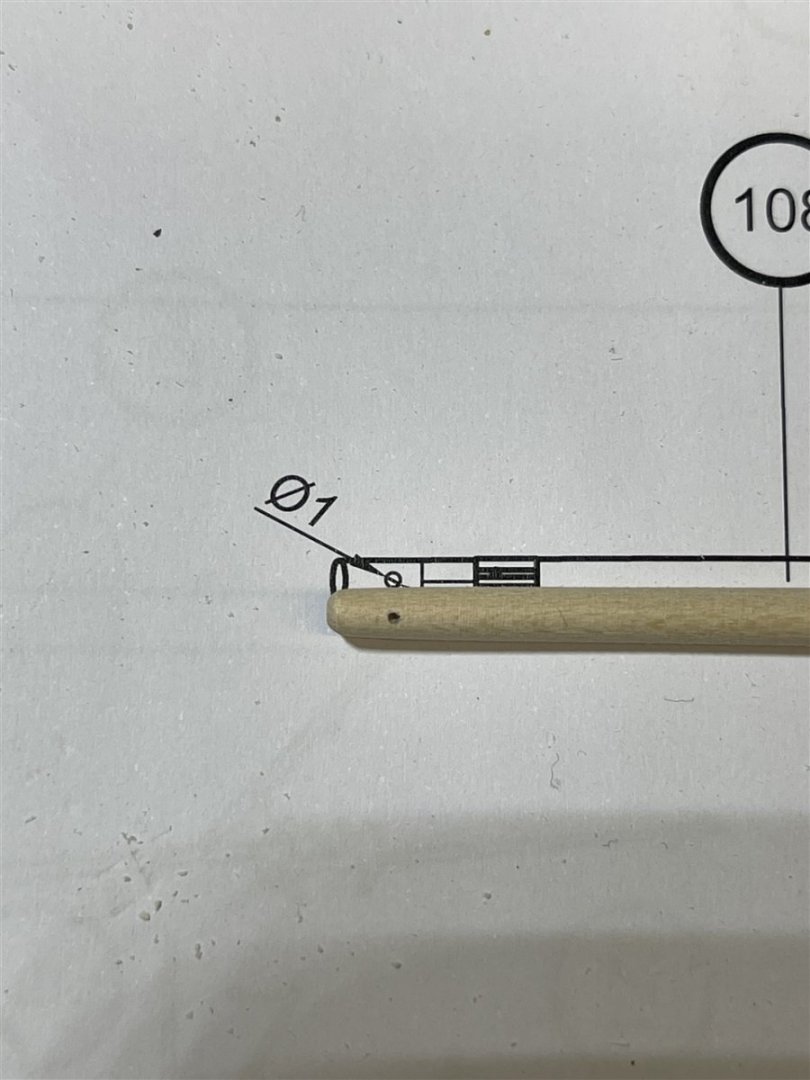
To make the booms one lime wood dowel need to be tapered from 6 to 4 mm and another one from 4 to 2 mm. Before tapering the 1mm hole was drilled at the top of the jib boom.
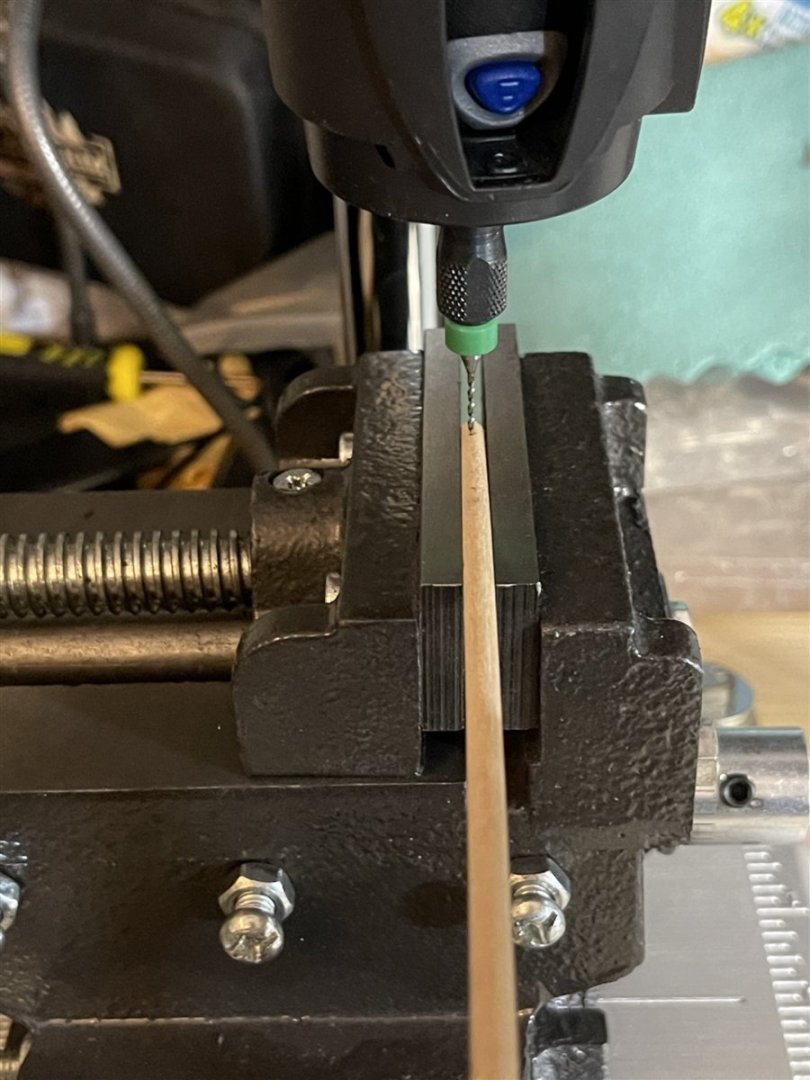
To taper them I used an electric drill and 80, 180 and 220 grit sanding paper. Don't forget to use gloves as it can get very hot. To protect the end of the boom I have added one additional cm to the measurements and wrapped some tape around them.
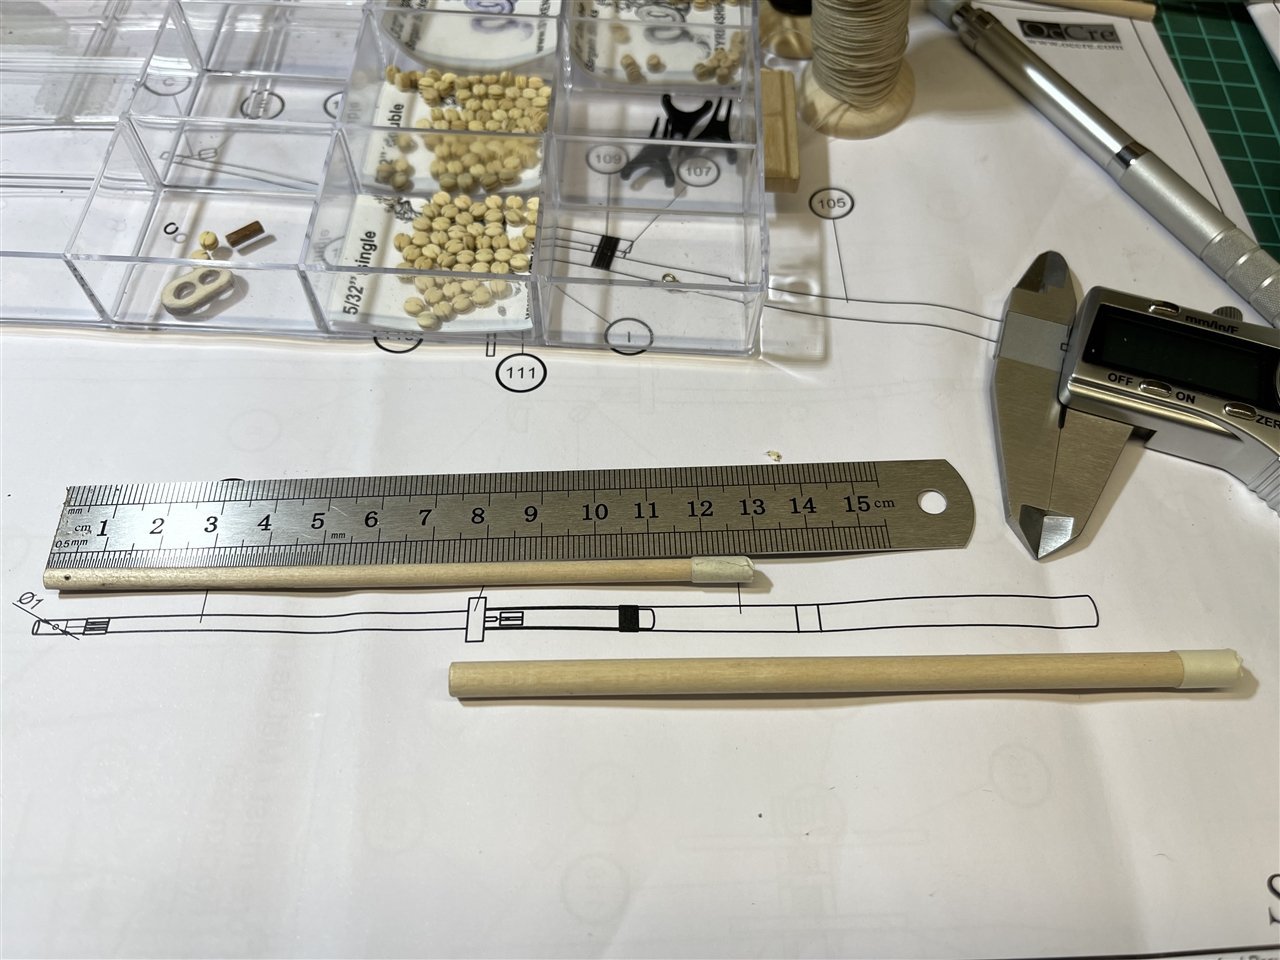
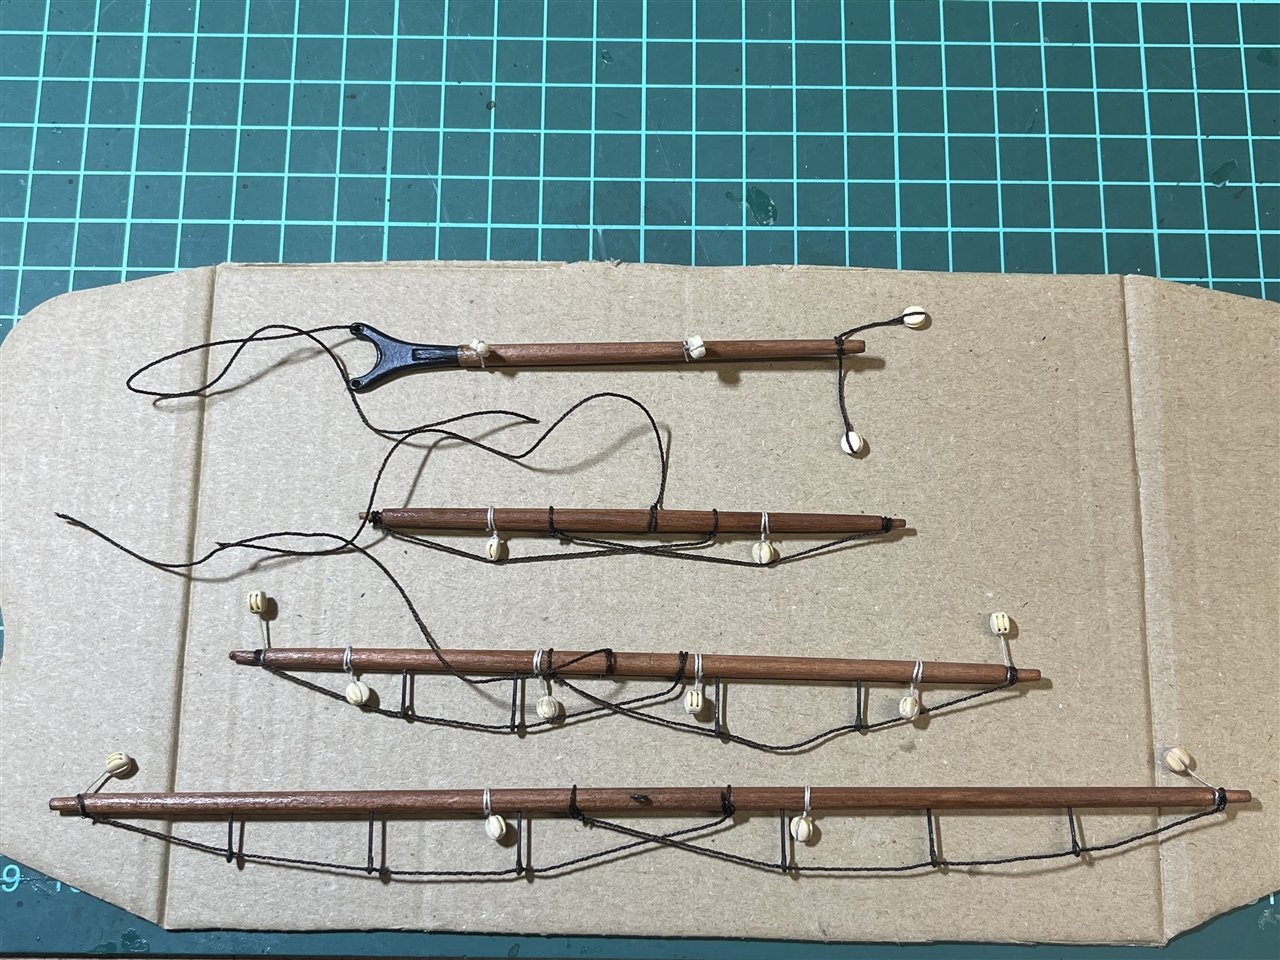
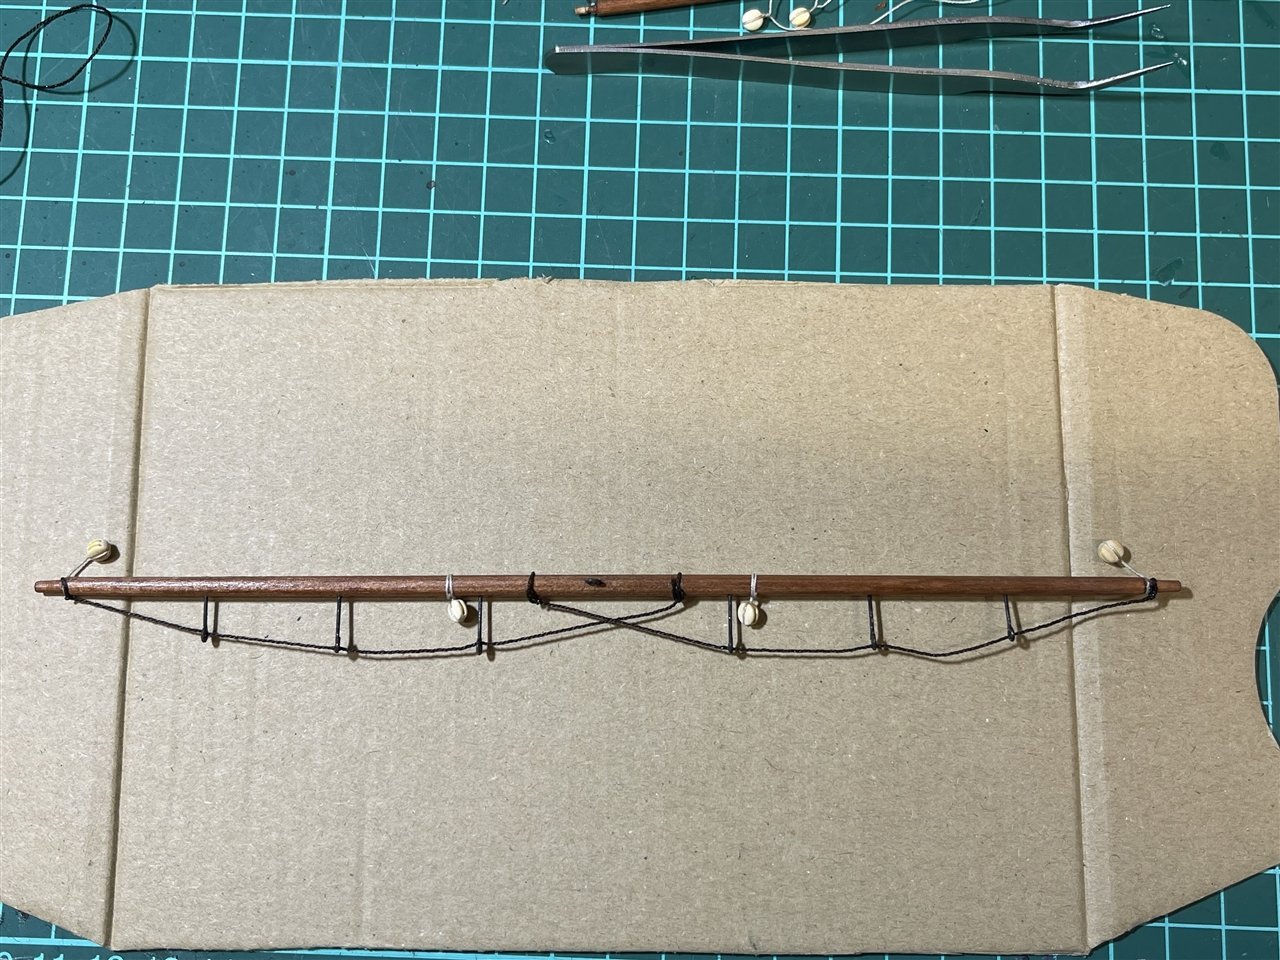
It took me about 20mins to taper them as it has been the first time I did this so I constantly was rechecking the booms with the drawings. These 1/1 scale plans are really good to check the dimensions and alignements. But finally everything fits to the plan ...

Alignement of the booms ...

Coming next ... Assembly of the bowsprit.
Kai
-
Guns/Cannons
It's been a busy week but I managed to get the remaining gun tackles finished.
Port battery done ...
I'm still not sure how to make the loose ends of the tackle lines but I'm leaning towards applying cleats to the bulwarks and wrap the loose ends around them.
I have found some useful information how to do it here (post #11, last image).
Next step in the build is the bowsprit.

Not too much to do so hopefully I get it done this weekend and then can start doing the masts.
Have a nice weekend,
Kai
-
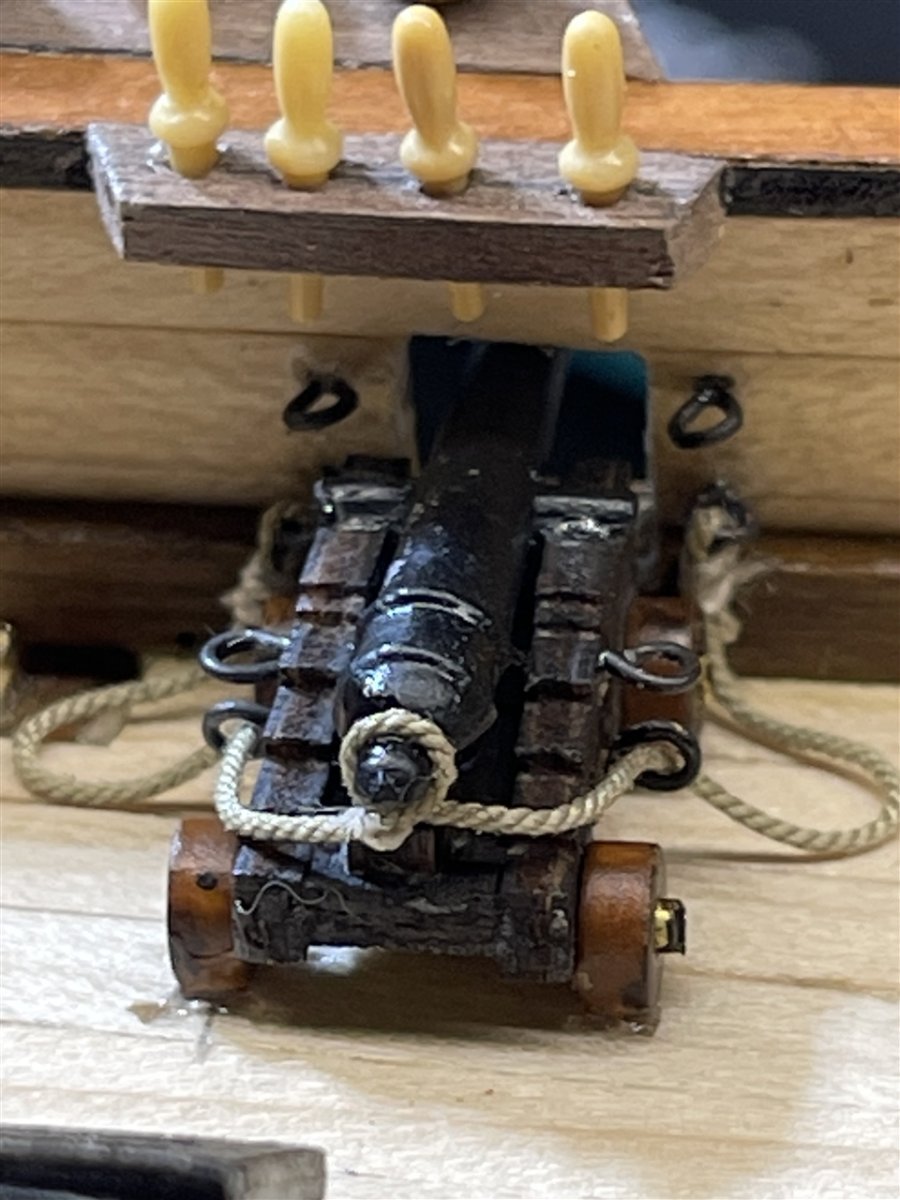
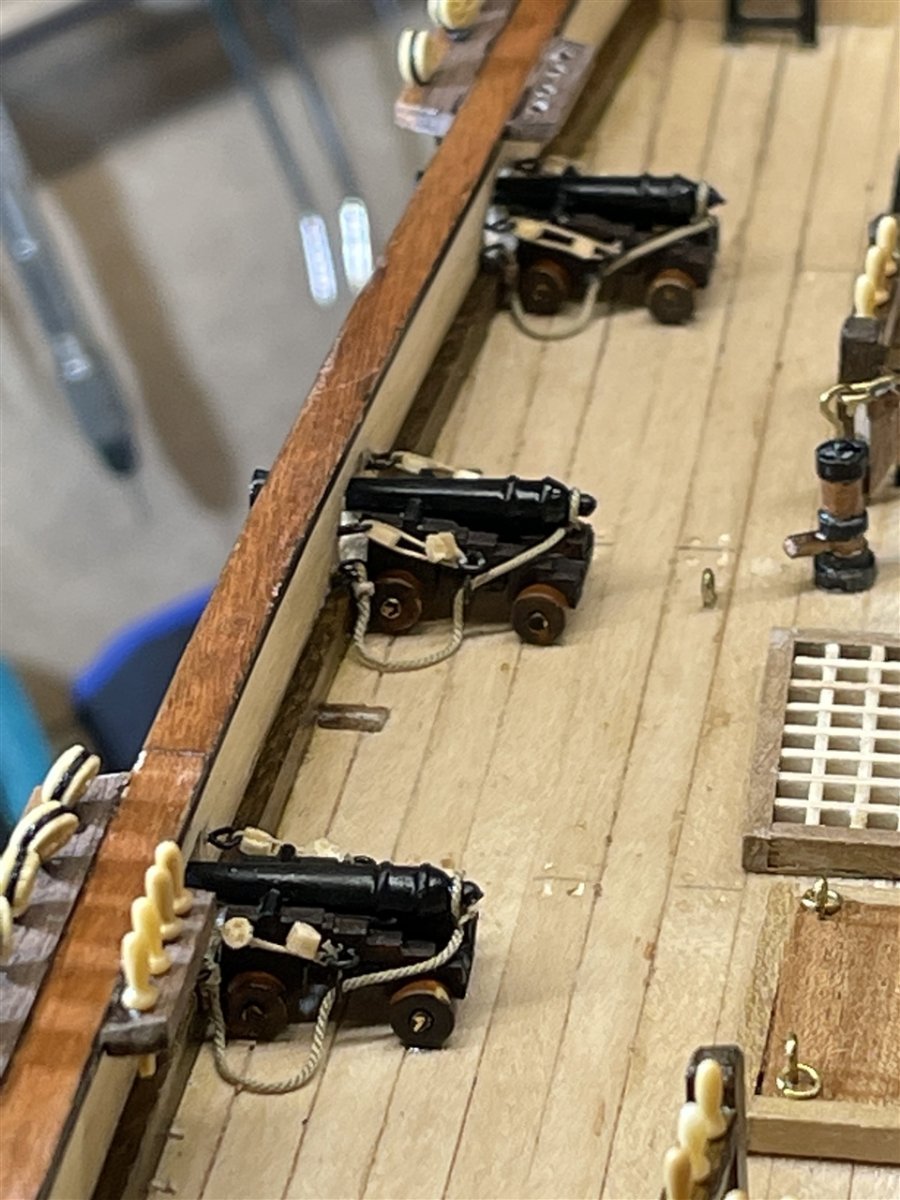
Guns/Cannons
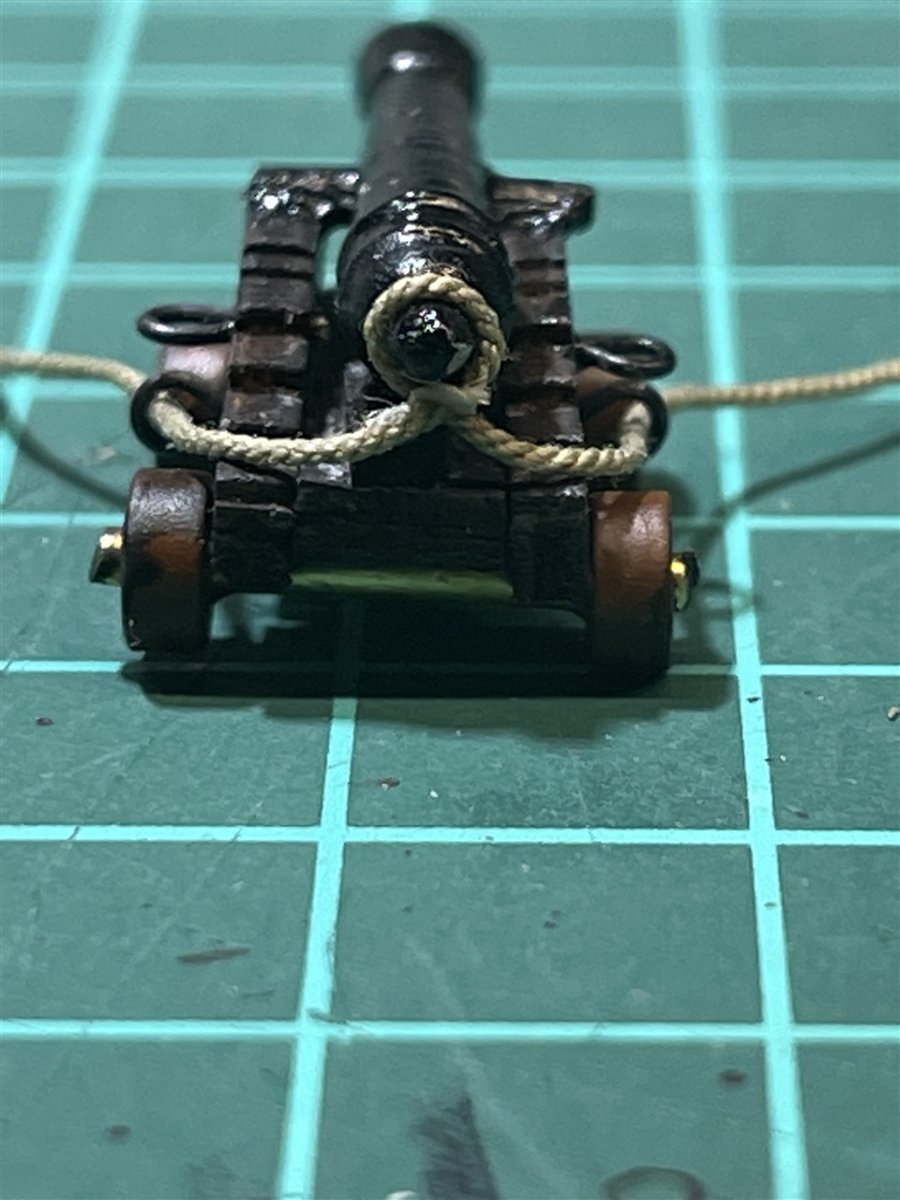
The last items to put on the deck are the guns ... or do you say cannons?
They are cute little ones ...
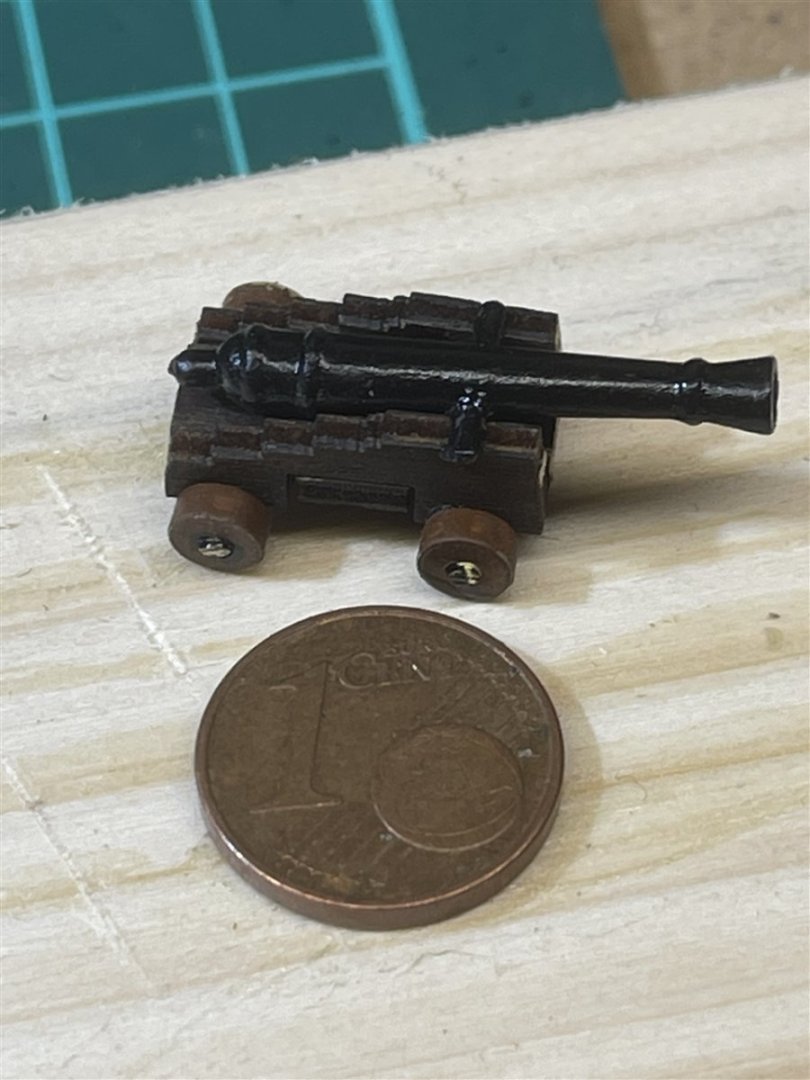
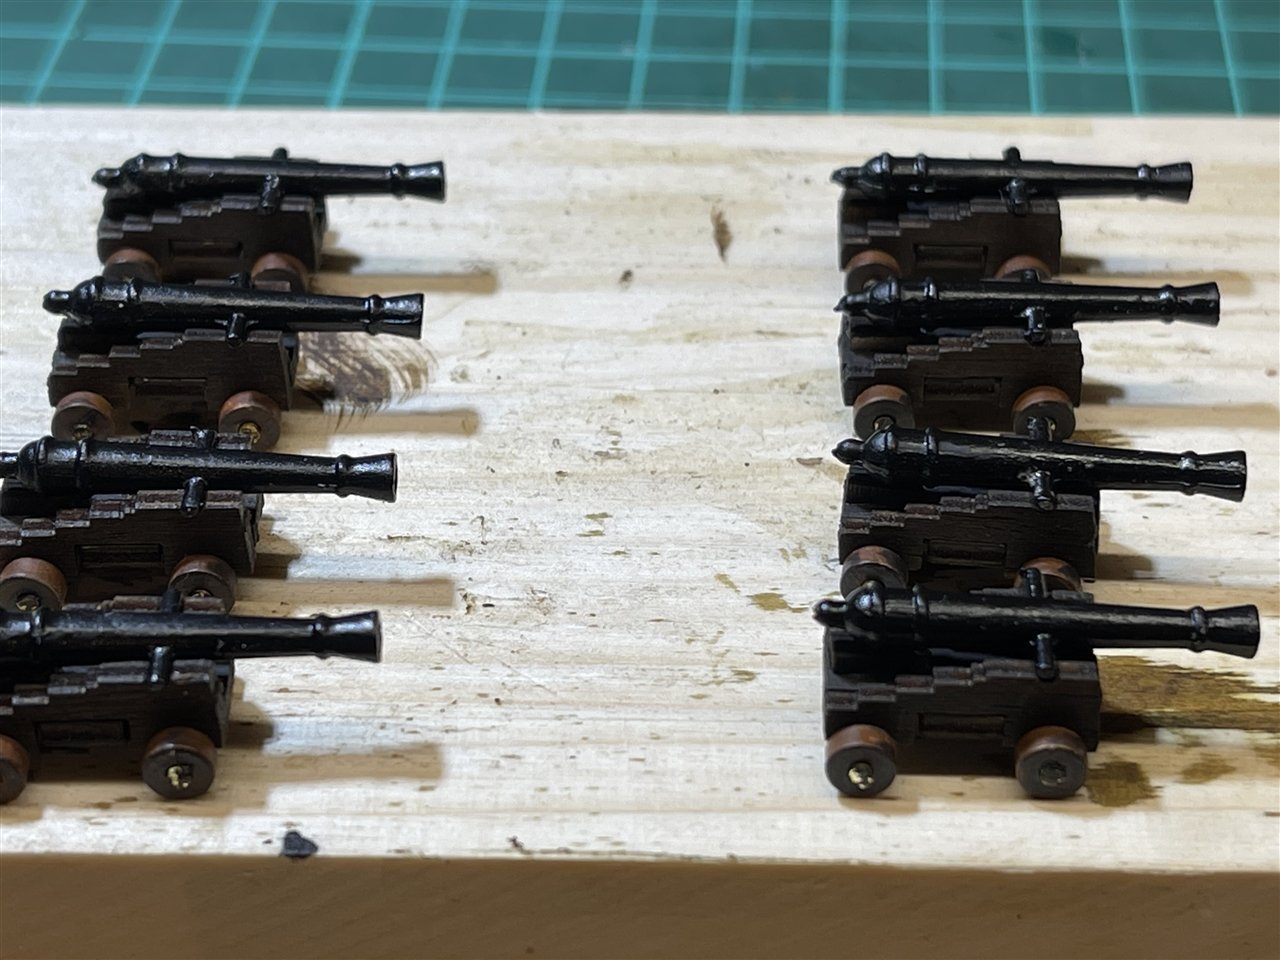
The cannons are supposed to be placed on the deck as the next image shows:
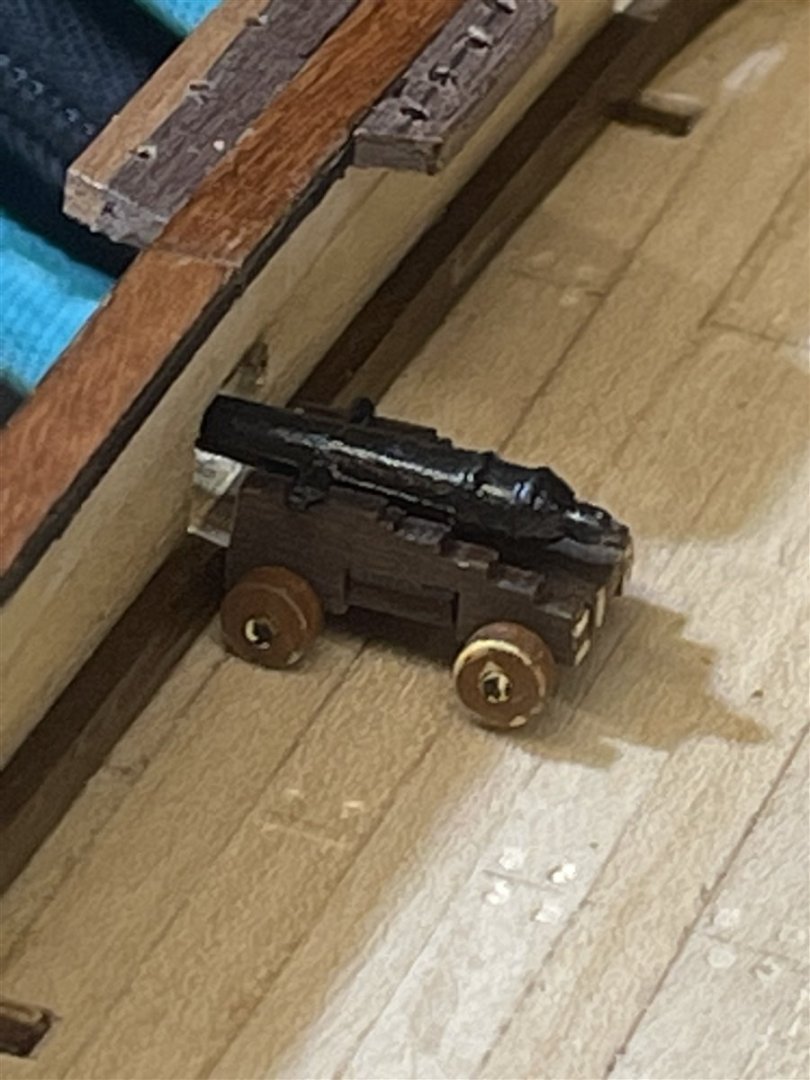
This in my eyes looks "wrong" so I have deceided to do some gun rigging to let it look more interesting.
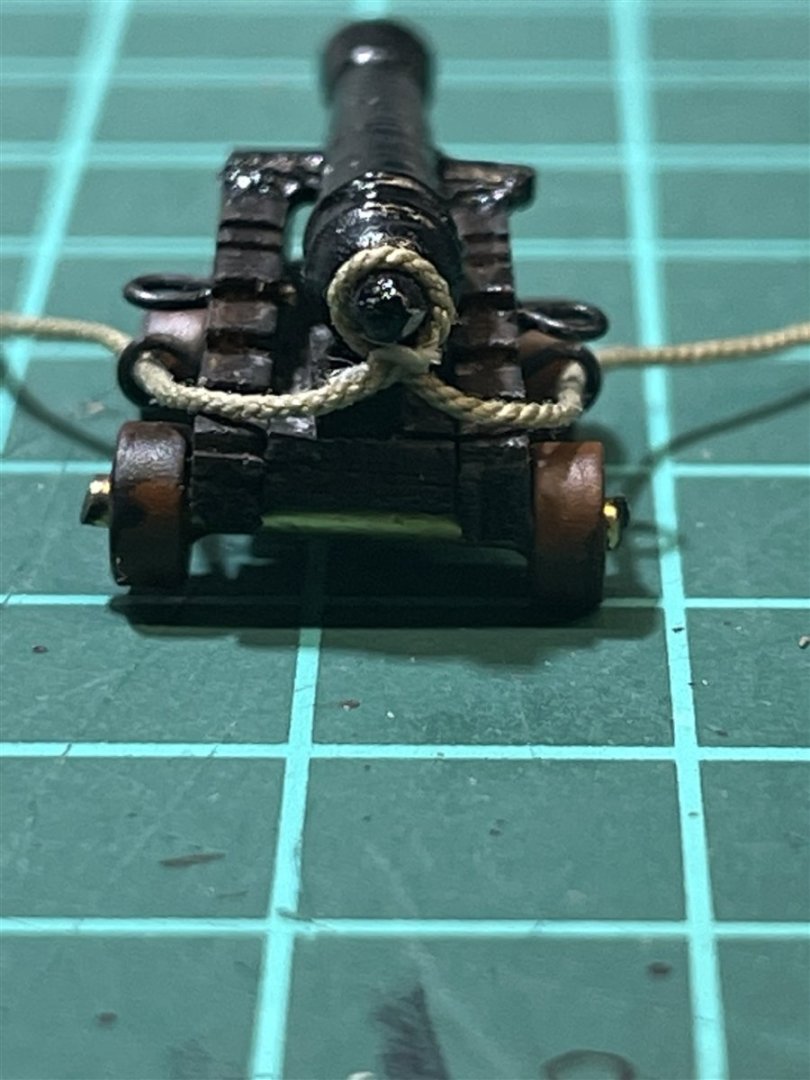
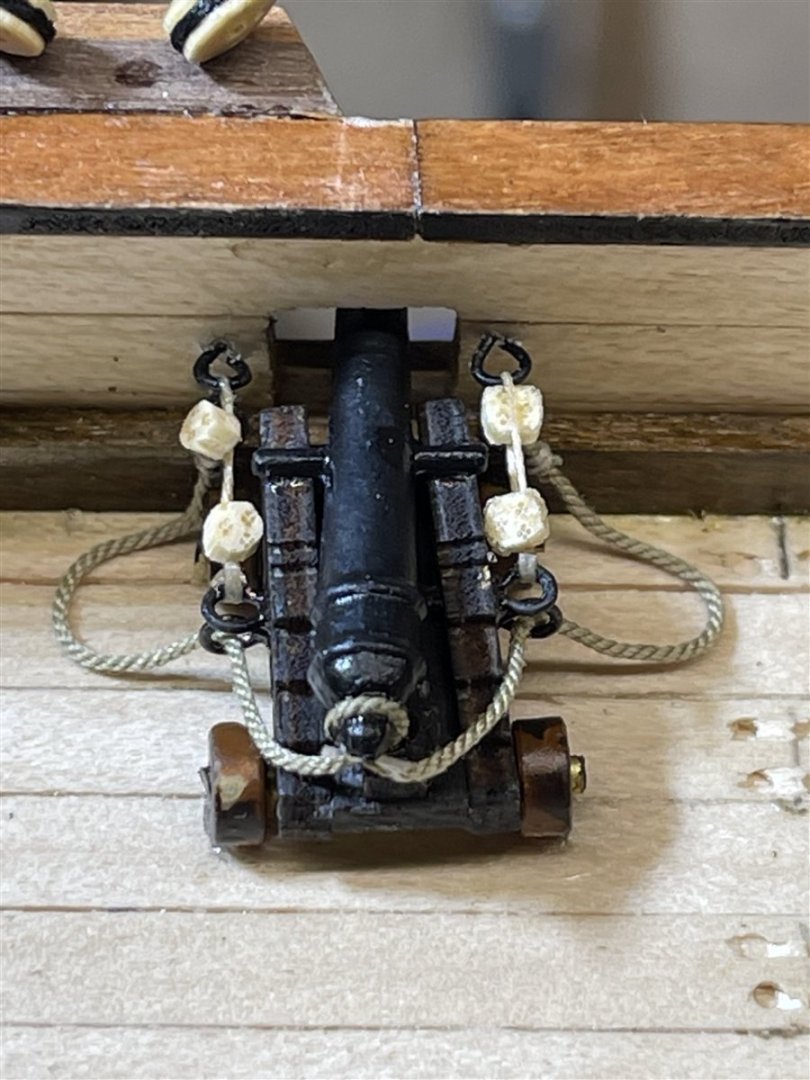
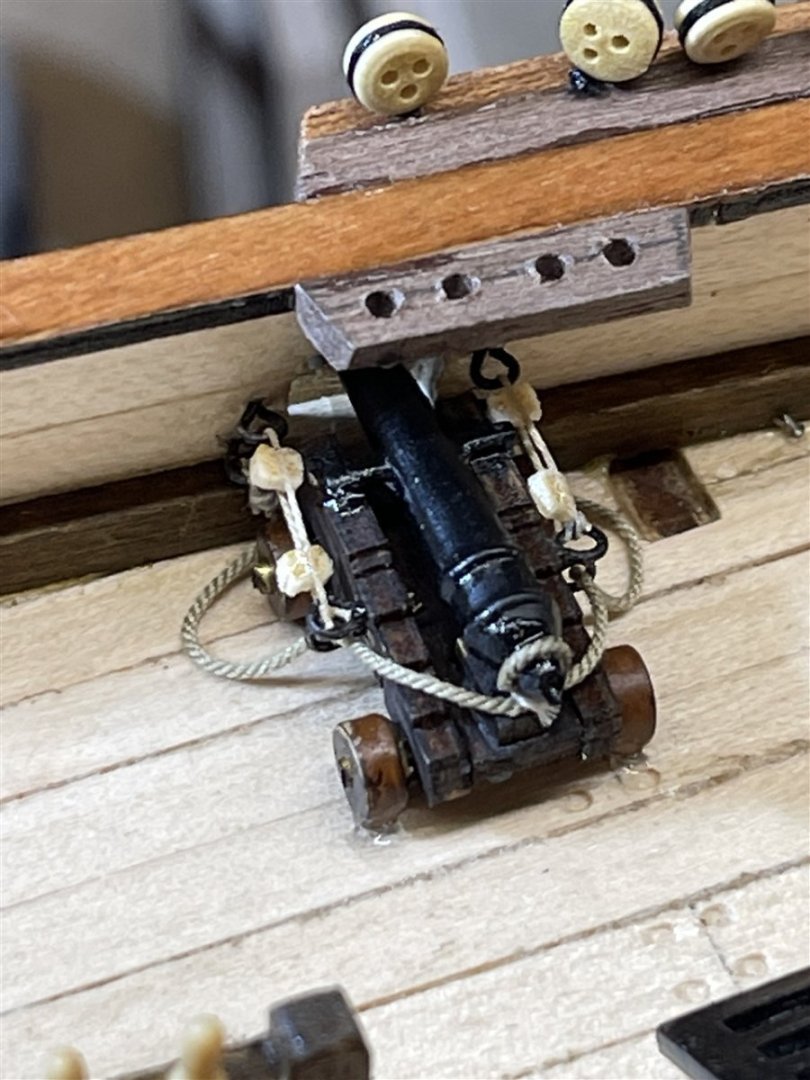
First I have added 4 eyebolts to each carriage and tied a breech rope around the knob at the cascable using a half turn and secured it with a little seizing.
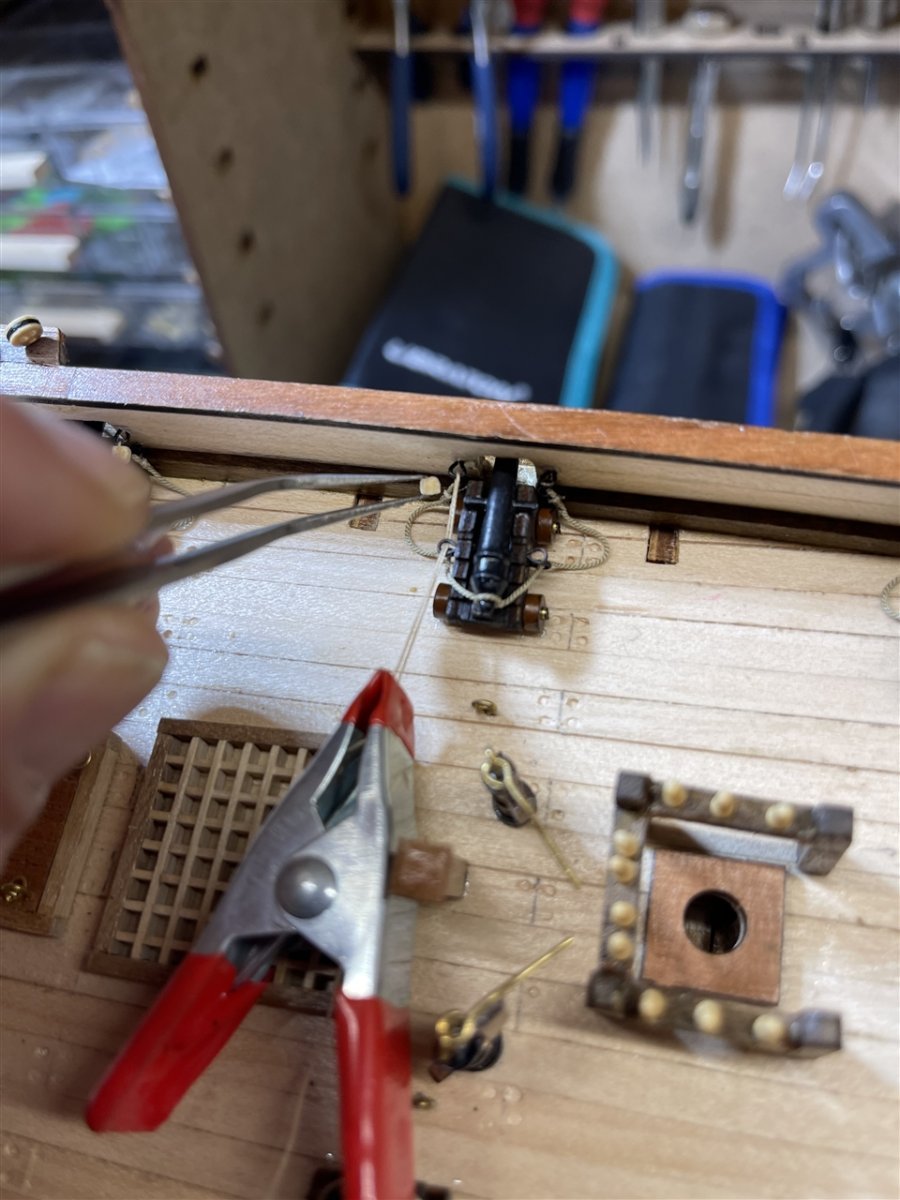
Then I had to tie the breech rope to the eyebolts which will be set into the bulwarks.
To do this I have built a little jig to ensure the correct length of the rope and helping by securing the rope to the bolts with small seizings.


As you can see I have already started to blacken the brass parts ... and finally the breech ropes are done:


Then the cannons were placed onto the deck and the eyebolts set into the bulwarks ... nice look

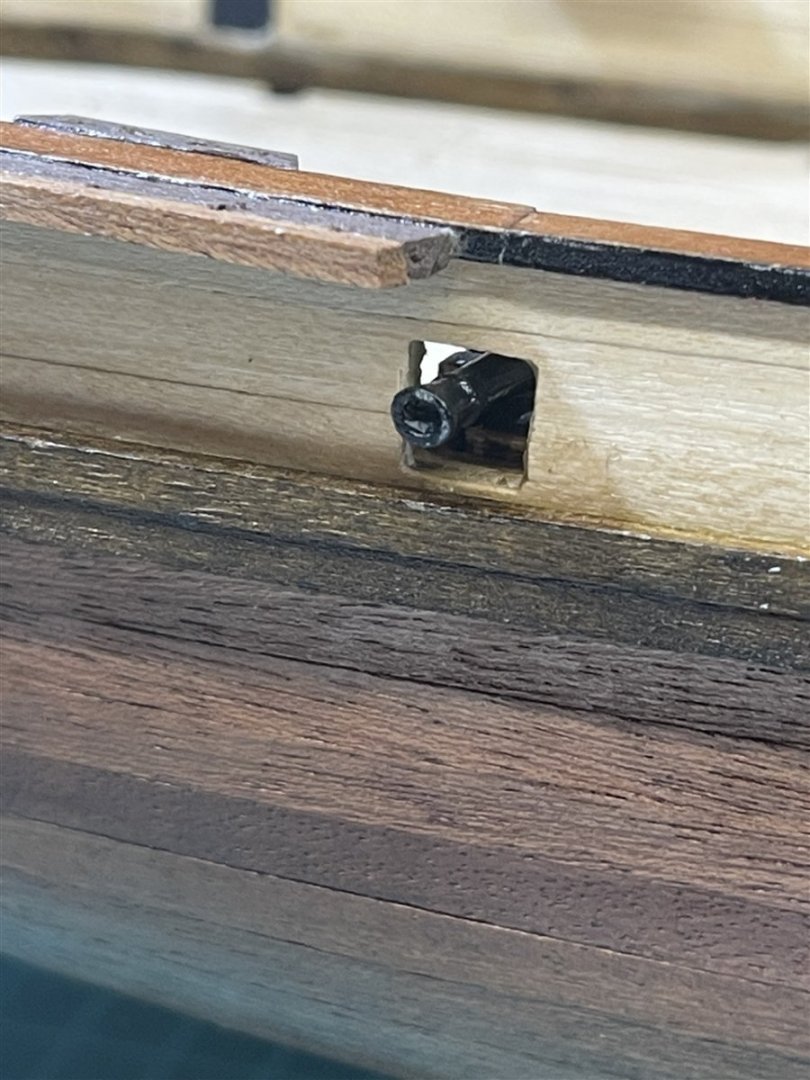
I have added additional 2 eyebolts to each gunport to make the outhaul tackles. The training tackles I will not do as there is no space to avoid any hassle with the already installed bolts for the rigging.
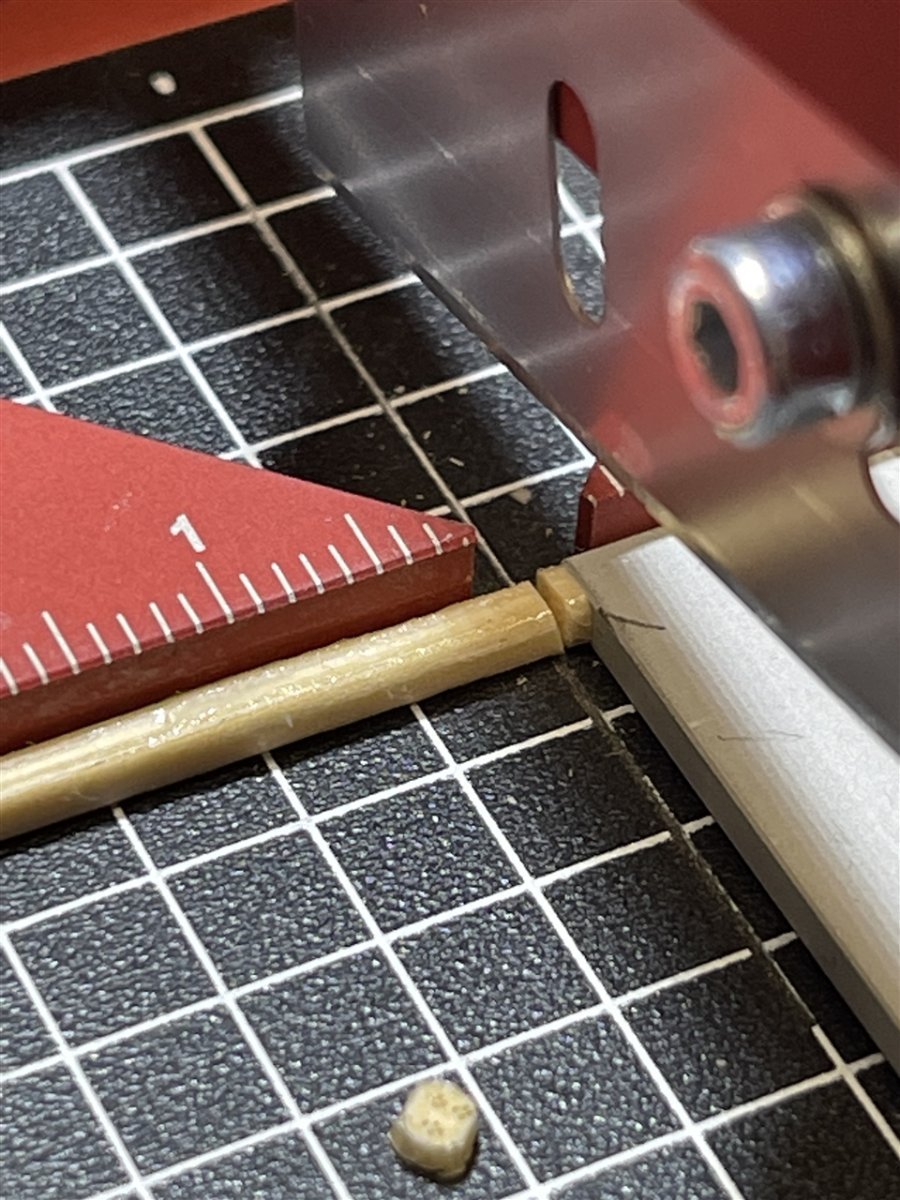
Unfortunately I do not have any blocks to scale. Even if I would have them there is no space between the bolts (8 mm) to do it correctly using stropped blocks with a hook and the rope connecting them. So I had to make some fake blocks.
To start the tackles I have looped some 0.1 mm rope through the bolts and secured them with a simple overhand knot.
Next step was to make the fake blocks using a toothpick and cutting it to 2 x 2 x 0.7 mm pieces

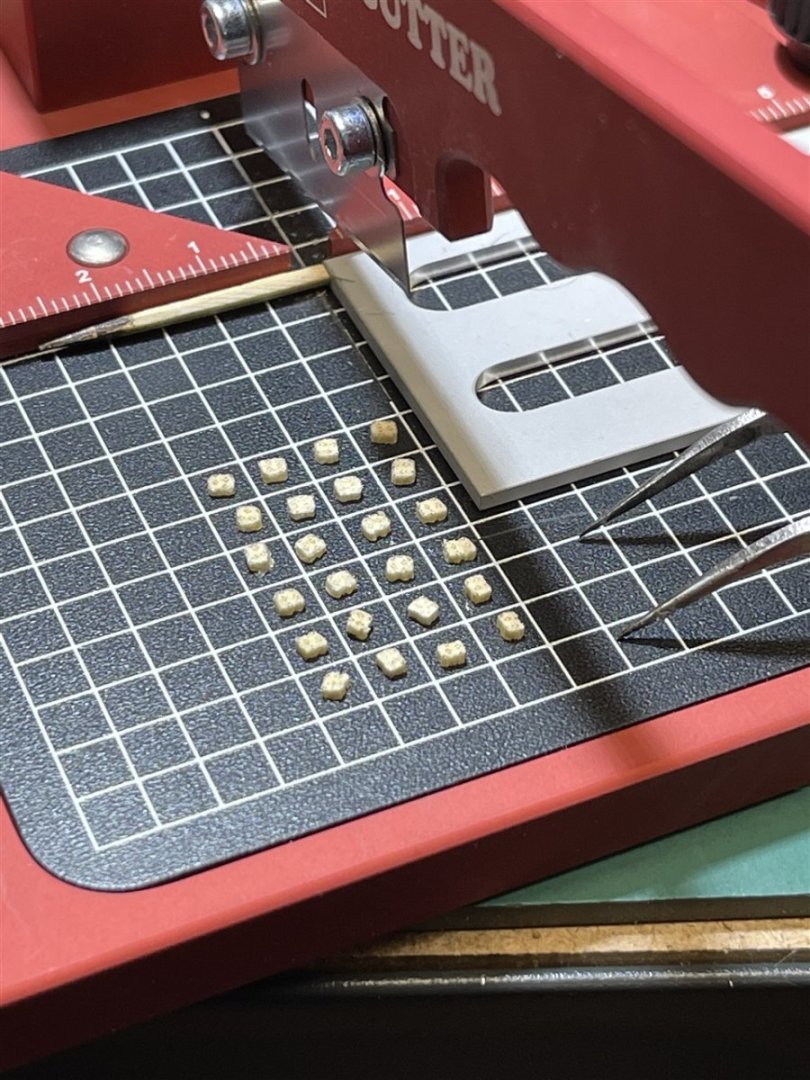
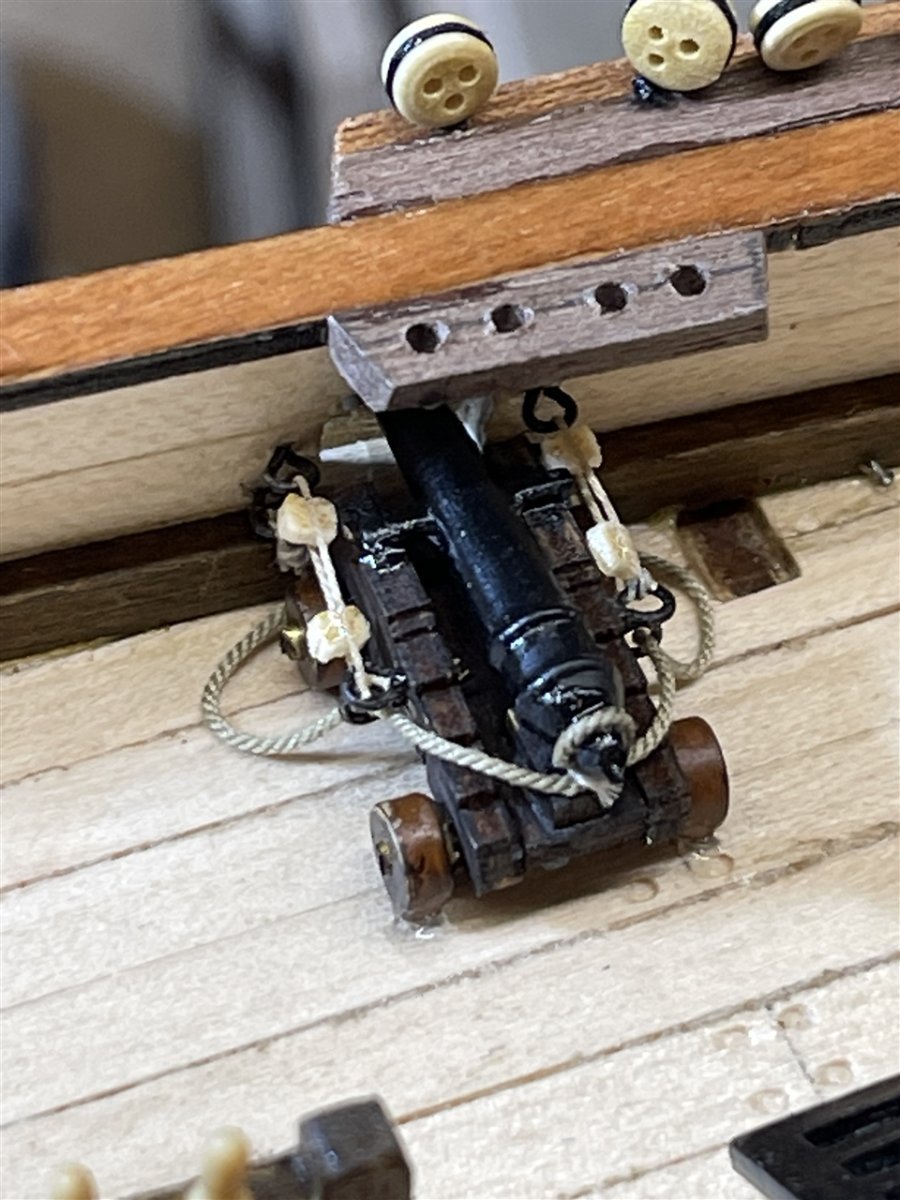
Then I had to put the blocks to the tackle rope. I started by putting them on top of the ropes ... not satisfying ... then I have put the block at the bulwark side between the ropes and the one at the carriage side on top of the ropes ... better ... finally I have put them all between the ropes ... best result I was able to achieve so far.

If you look at the tackles of the starboard battery you can follow this process of evolution from the bow to the stern and looking at it I will always remember it.

Nice little battery ...
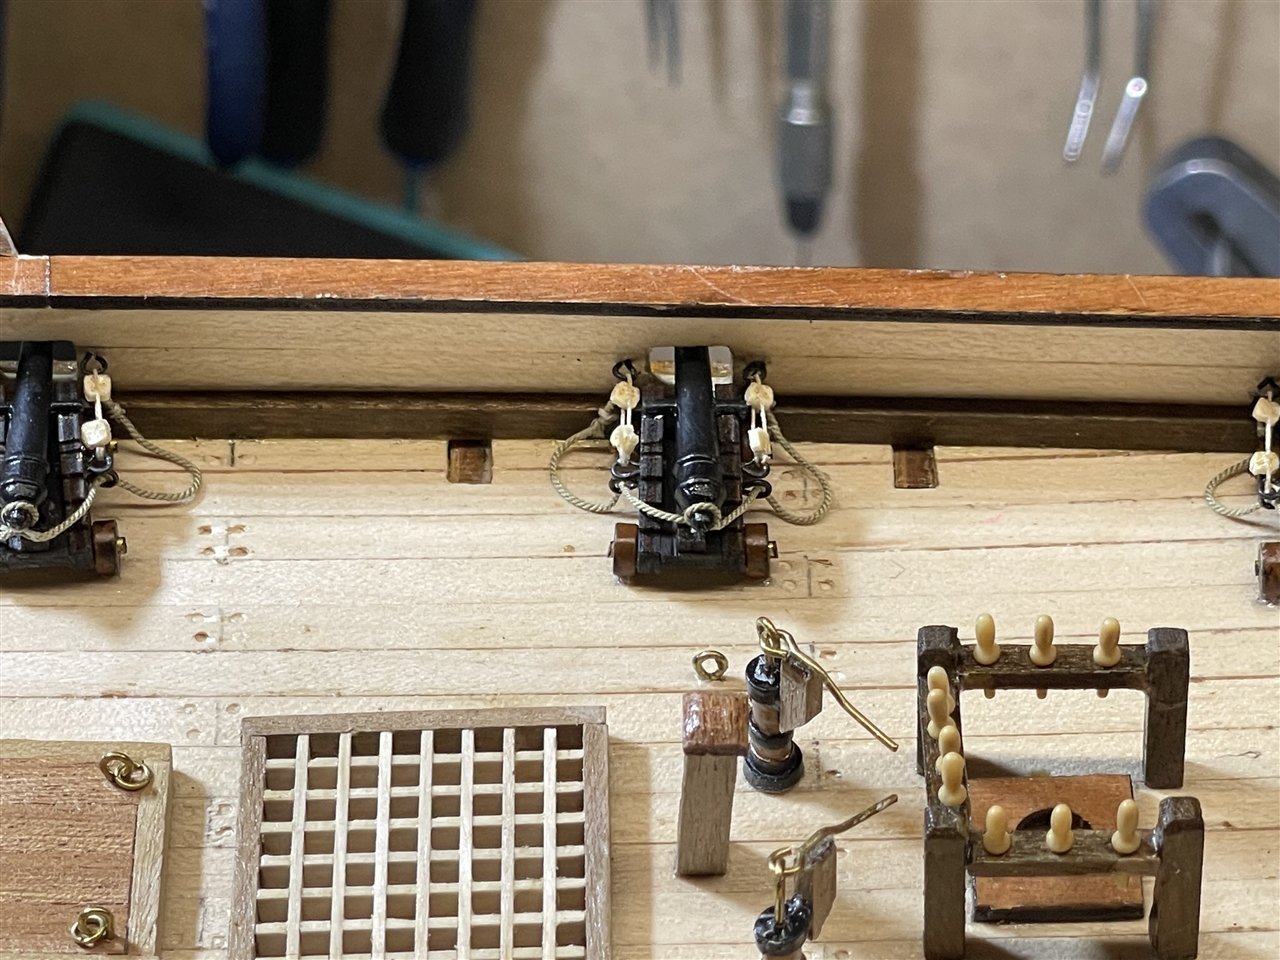

Starboard battery done and one on the port side ... three more to tackle ...
Next week I will finish the tackles for the three remaining cannons and then I have to decide what to do with the ends of the tackle lines ... I think there are two options. One is to lay them as a rope coil onto the deck and the other is putting cleats to the bulwark and then making rope hanks and put them onto the cleats ...
I will let you know ... next update will follow on friday.
Kai
- RossR, GrandpaPhil and MajorChaos
-
3
-
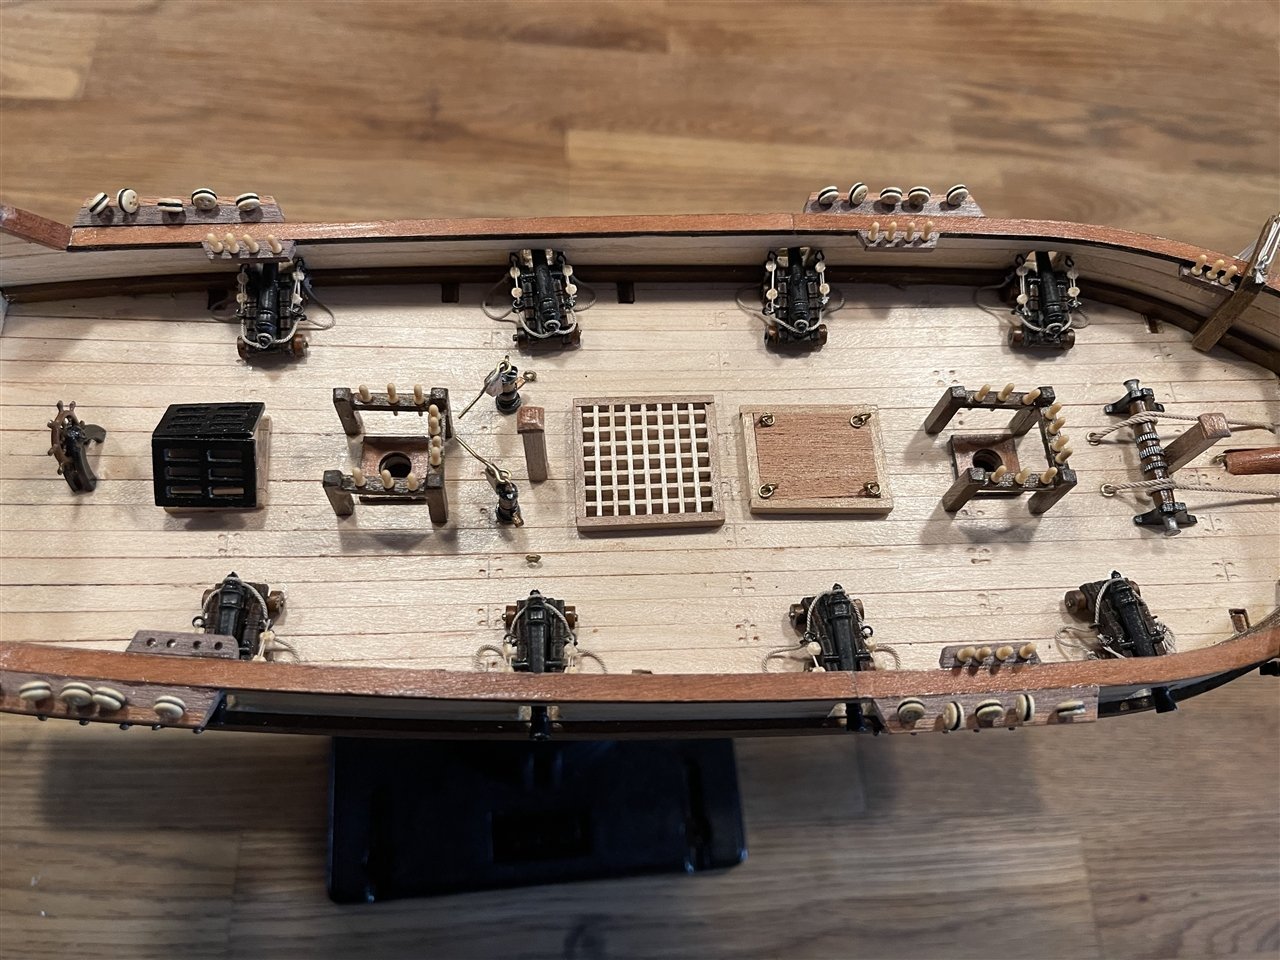
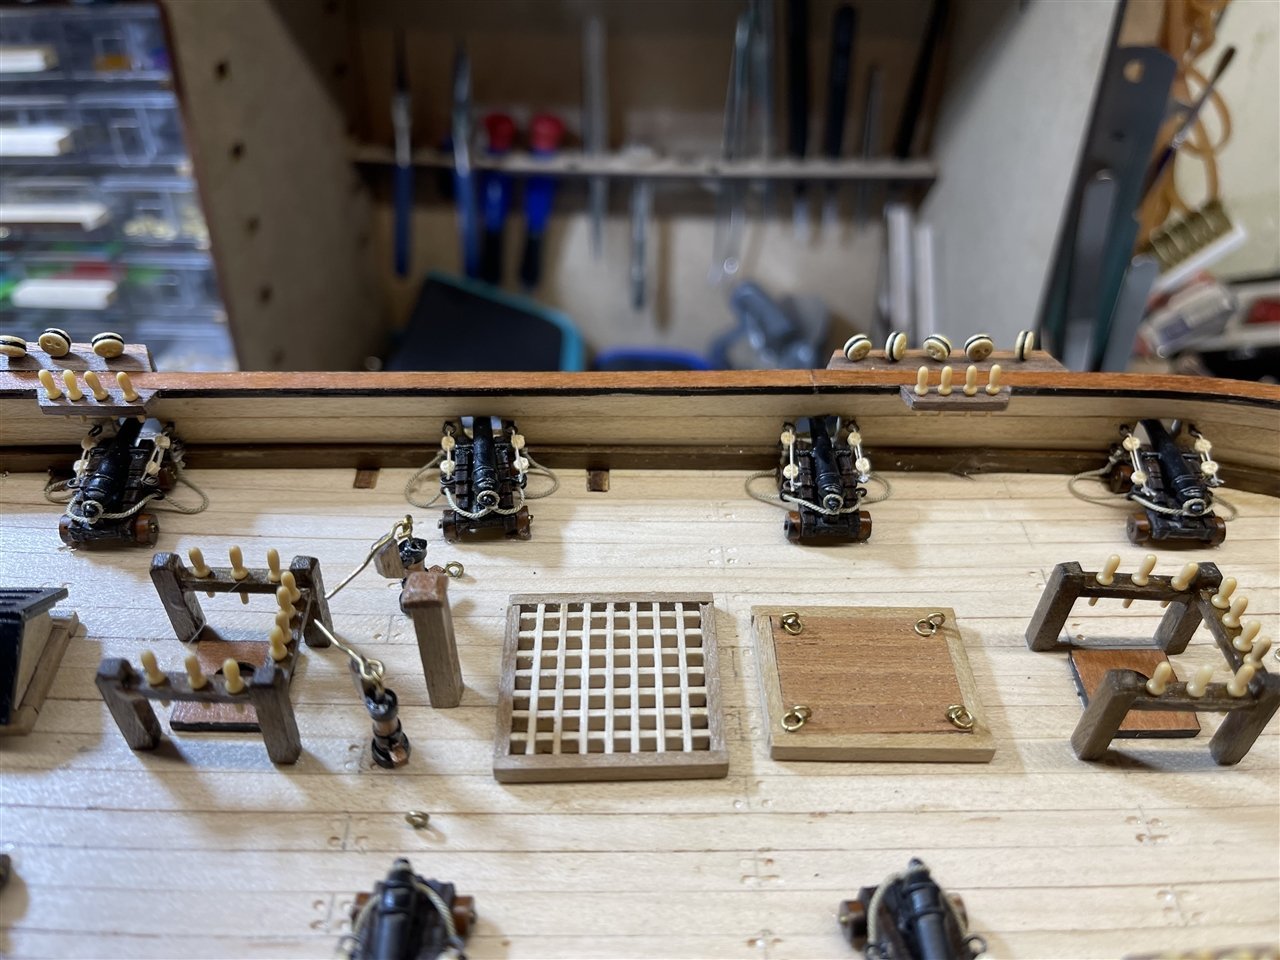
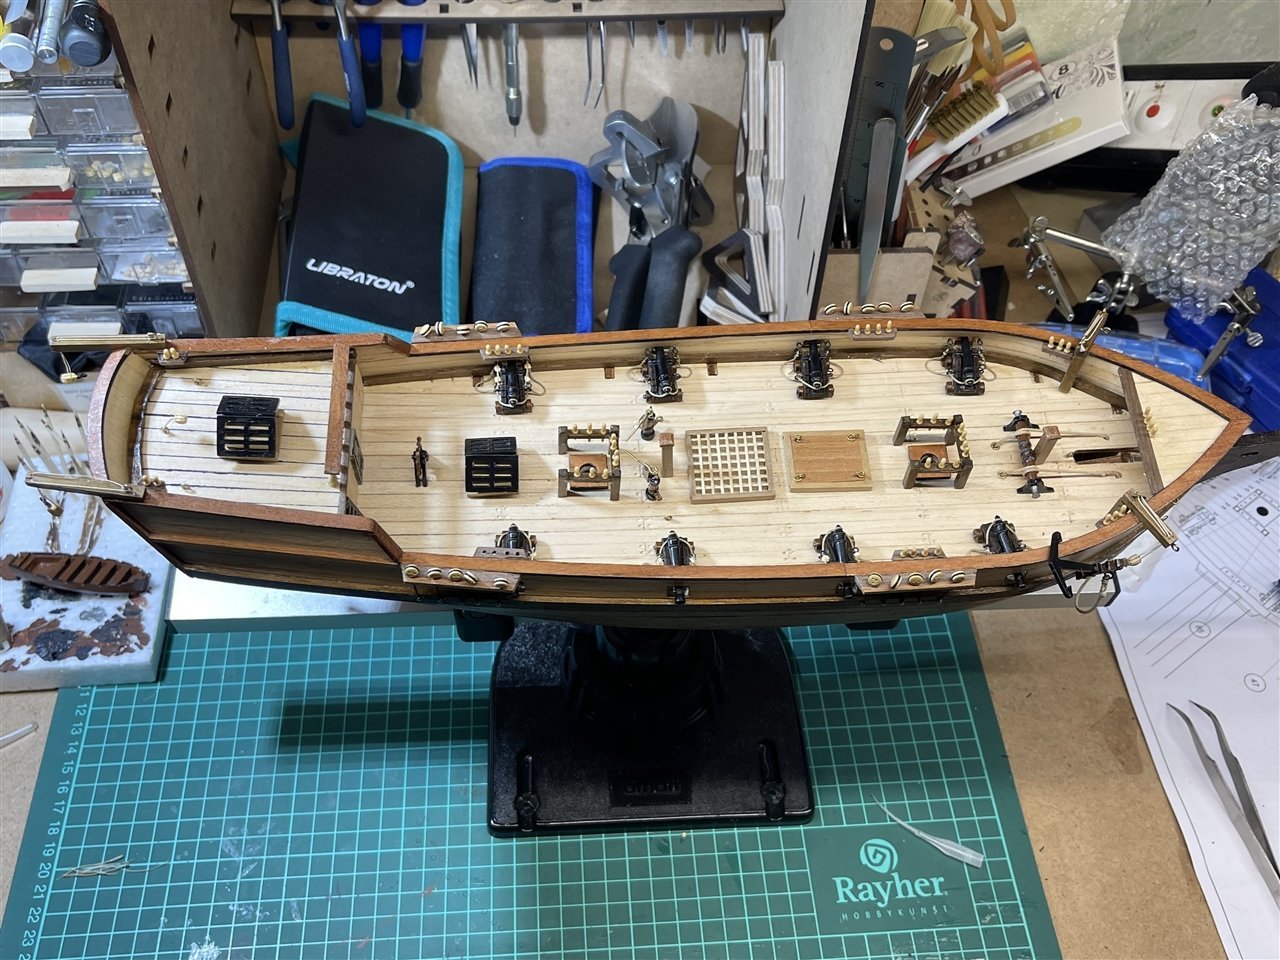
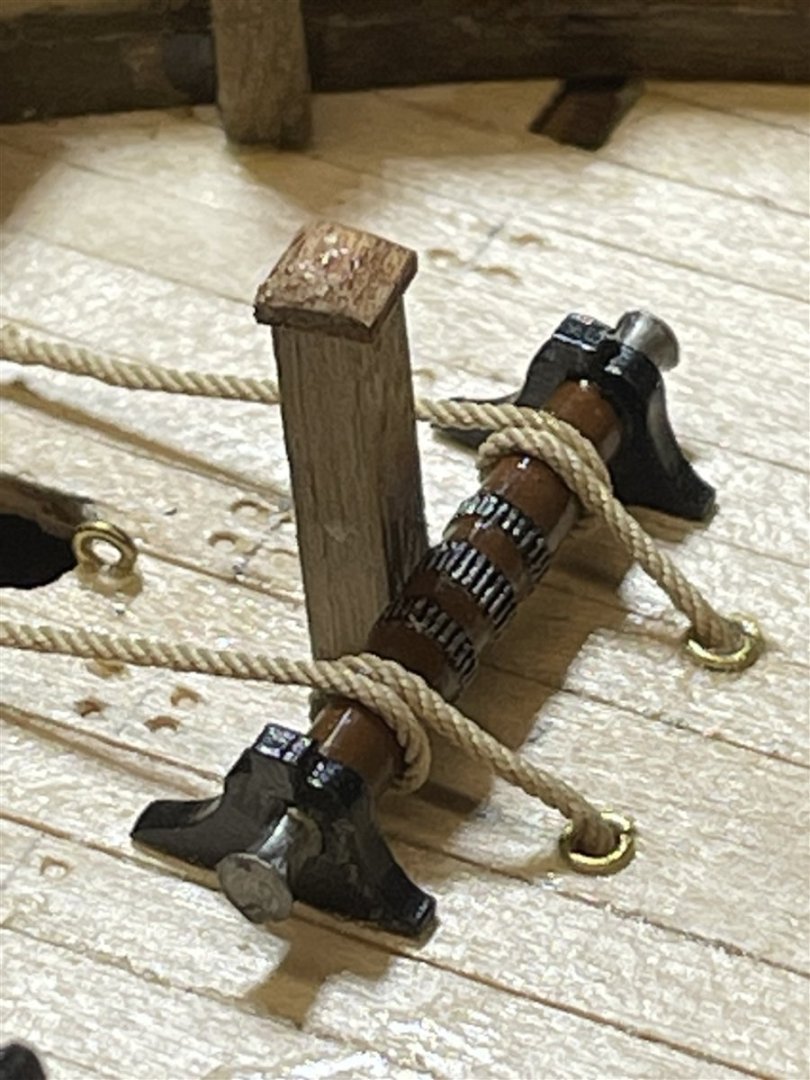
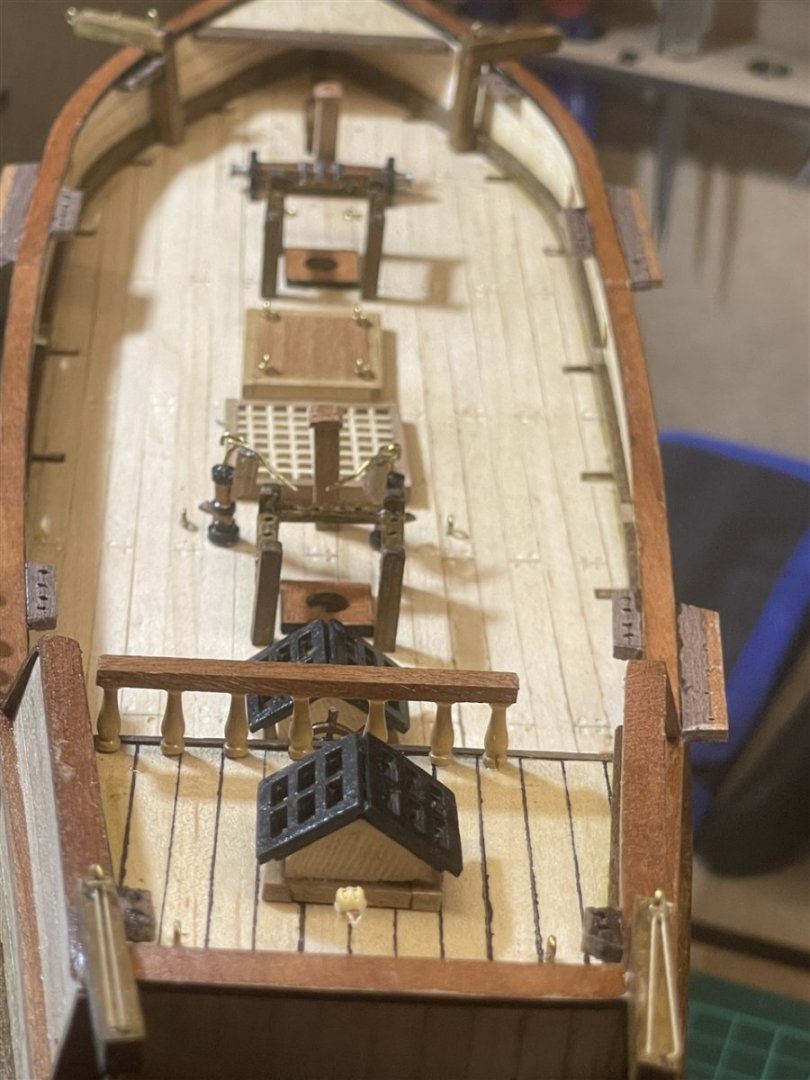
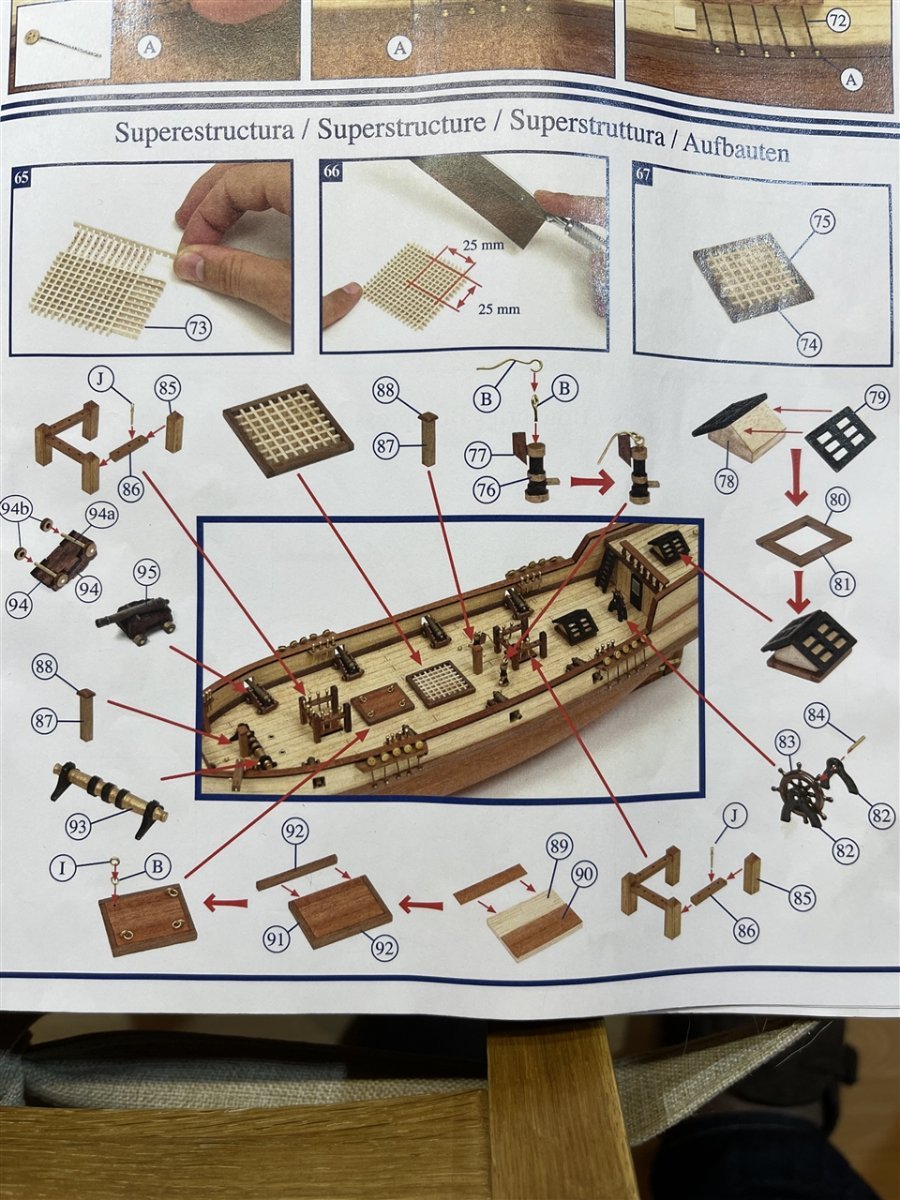
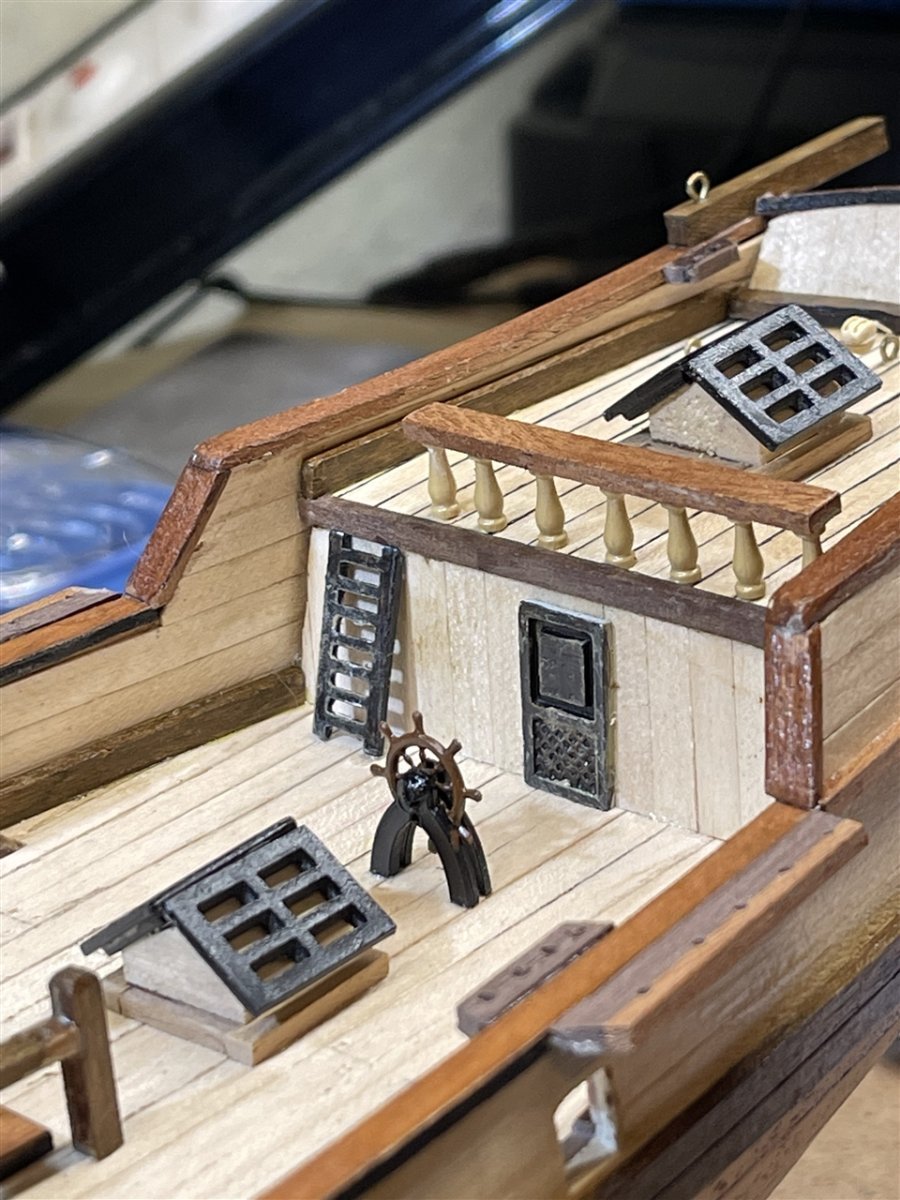
Deck Fittings
After completing the hull there is only one picture in the instructions showing the assembly and the placement of the deck fittings. In addition you can refer to very good 1/1 scale plans showing all of the items and every single eyebolt and where to place them.
But first I had to do the deadeyes ...

Doing the deadeyes and tieing a block to an eyebolt have given a small foretaste of rigging ... and this has tasted very well
Then I had to proceed as follows

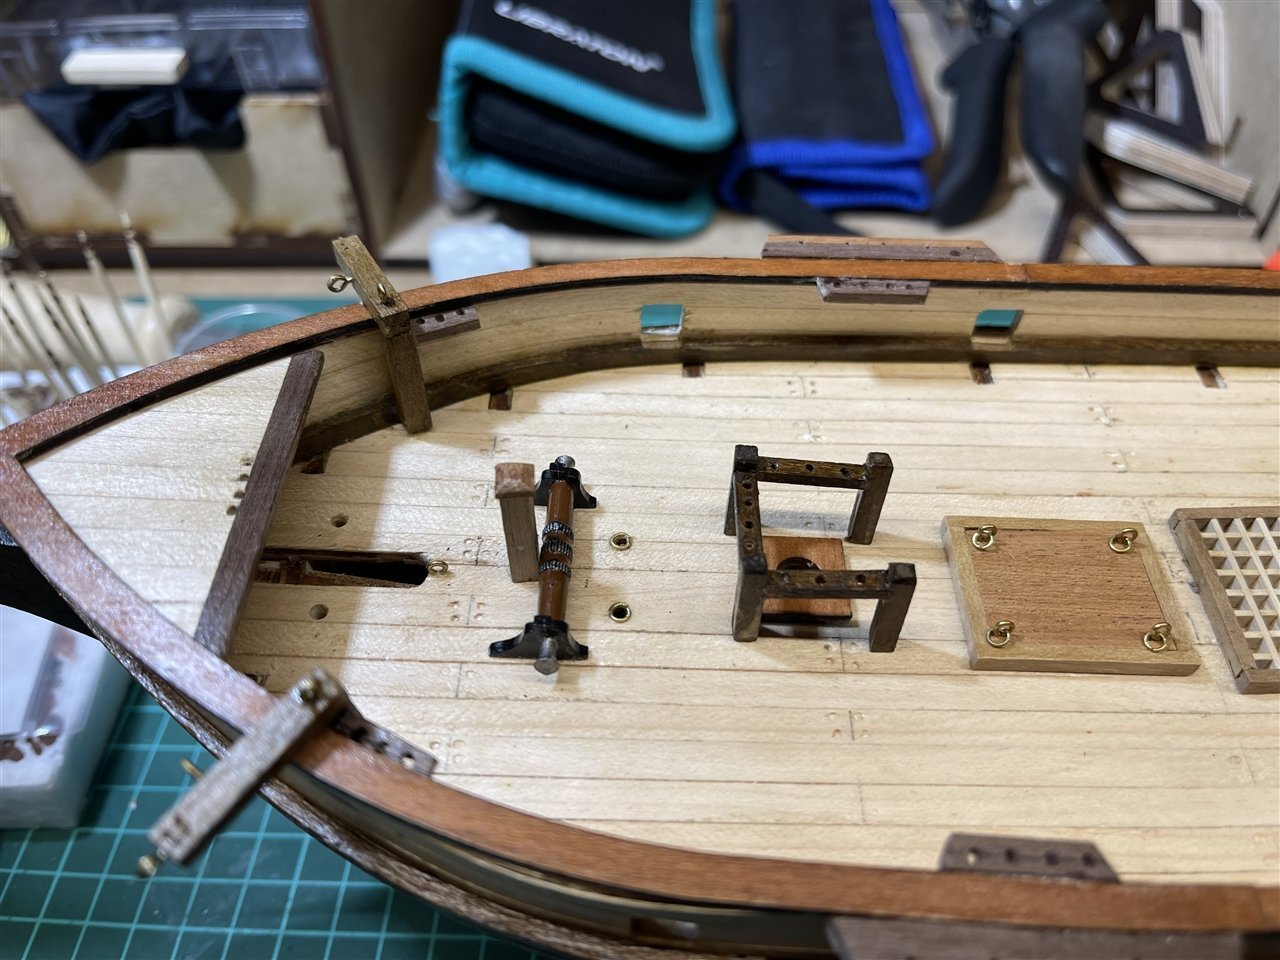
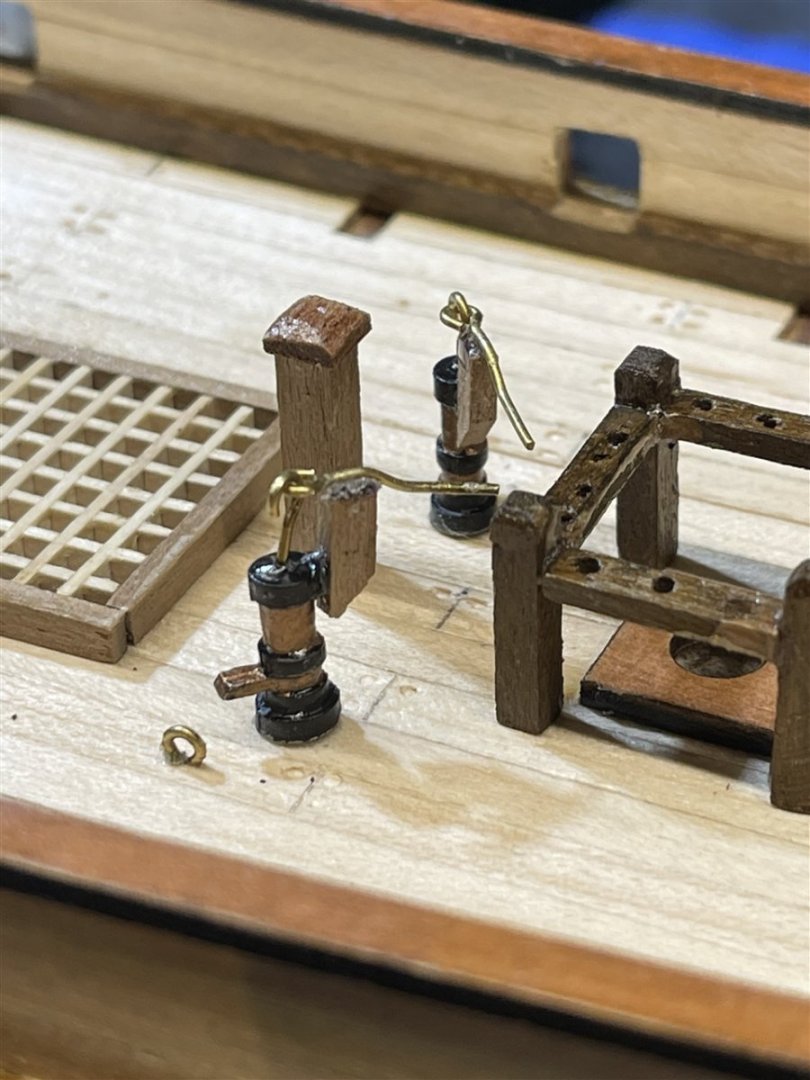

Again a lot of cast iron parts ... it's ok for some of them but not for the door and ladder. Unfortunately I do not have a lot of scrapwood as it is my first wooden ship model but I will look what I can do to replace them with wooden ones. The winch I will keep ... it's not looking too bad ...
And here you get some images showing all fittings in place but the guns ...
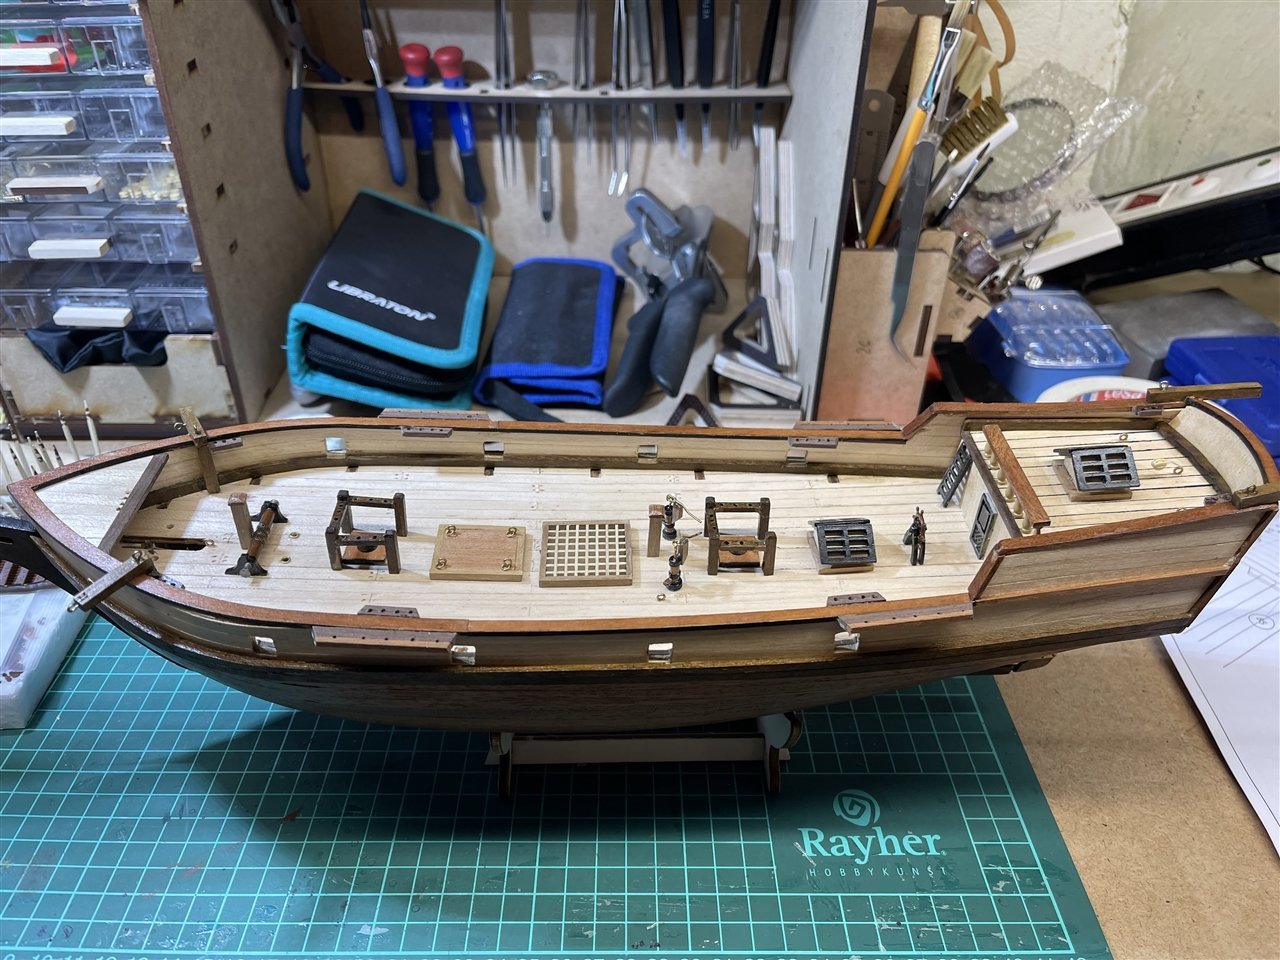

Images do not hide anything ... Either the shipwright has been drunk or something did horribly go wrong transferring the informations from the plan to the deck ... some misalignements happened so I will have to pay more attention and show patience even when doing the "easy stuff".
Next will be the guns ...
Kai
- GrandpaPhil and MajorChaos
-
2
-
8 minutes ago, ccoyle said:
A 10 km spool? 😯
Yes, indeed … it is 14 Euros a spool and my supplier does not have smaller ones for these specific threads.Kai
-
Blocks & Ropes
It is time to leave the build for a little excursion on how even a beginner can improve the overall appearance of his build. There are small details you may even would not be able to see from two feet away but in my opinion at least you will feel the difference. In my case these are ropes and blocks for example.
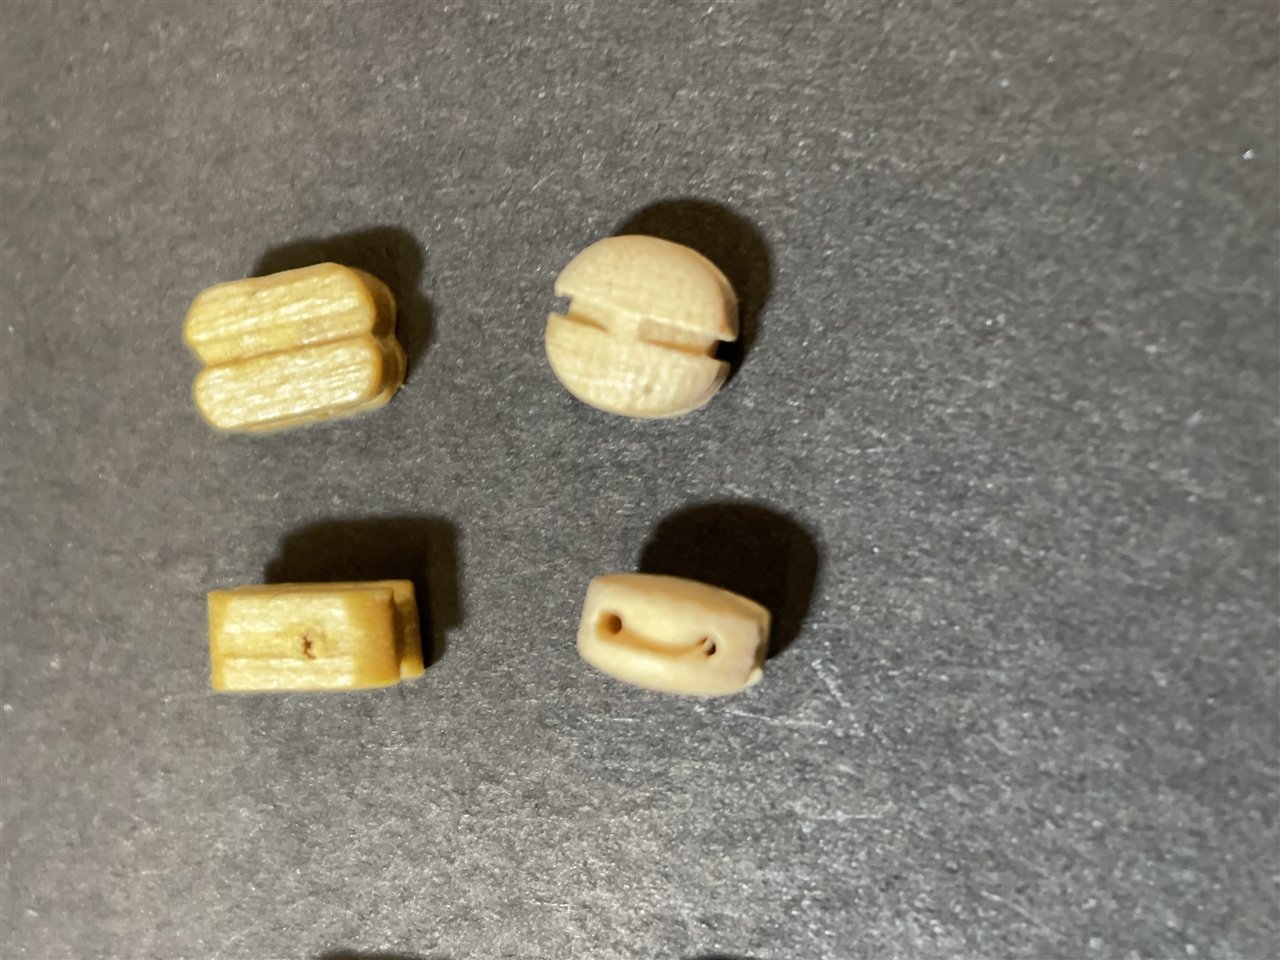
Blocks
Looking at the blocks supplied with the kit and the ones Syren offers you will understand how fast the order has been placed to substitute all blocks needed for the kit.
On the left hand side you will see the kit-blocks and on the right hand side the Syren ones.
All blocks are 4 mm double sheaved.
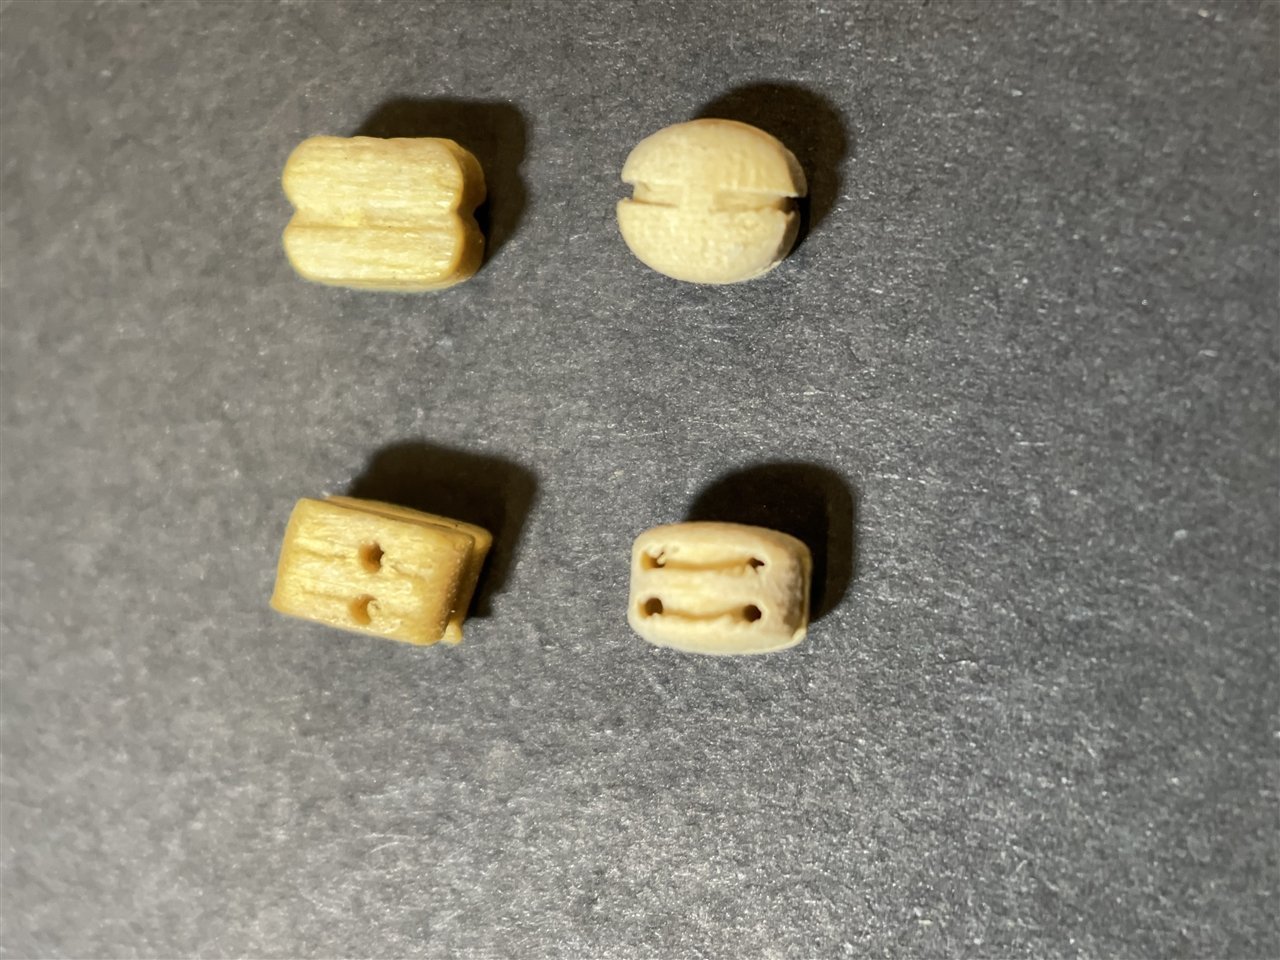
Same as above but this time we have the 4 mm single sheaved blocks.
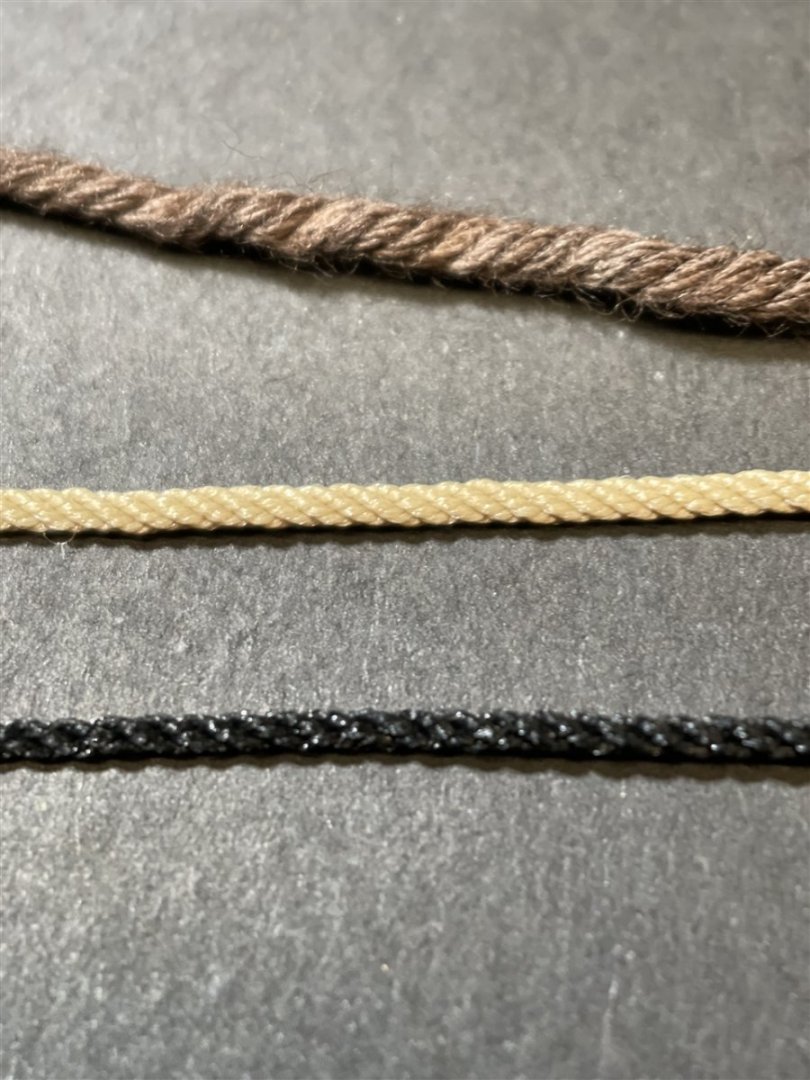
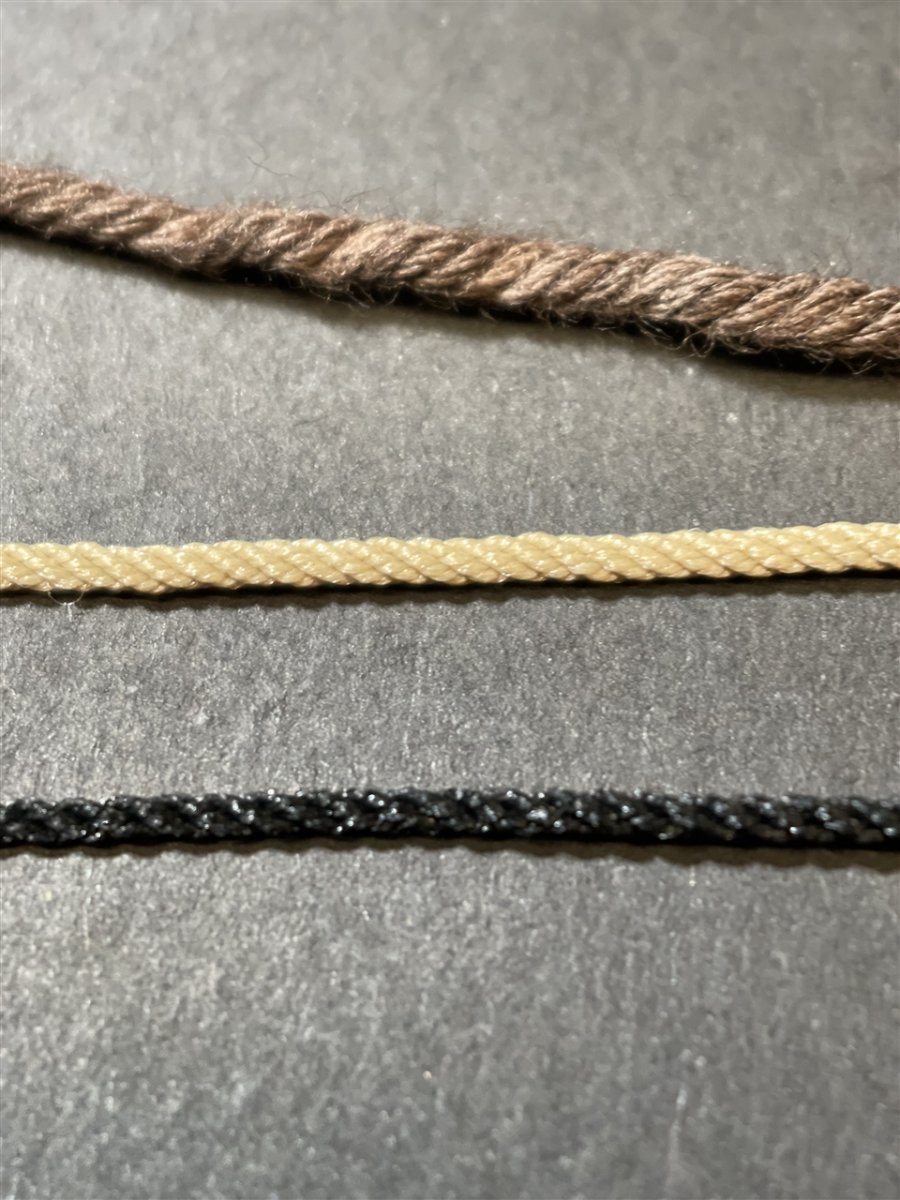
Ropes
Same for the ropes. The kit ones are fuzzy cotton ropes so you sure will need some bees wax I think and they really don't look like to scale if you compare it to the scale ropes I have ordered to test them.
Looking at the postage as well as the customs and handling fees it can get quite expensive to get all the stuff from abroad to Germany. You guys abroad are really blessed with the number of suppliers for these special items ... ok ... we Europeans have Vanguard instead 😁.
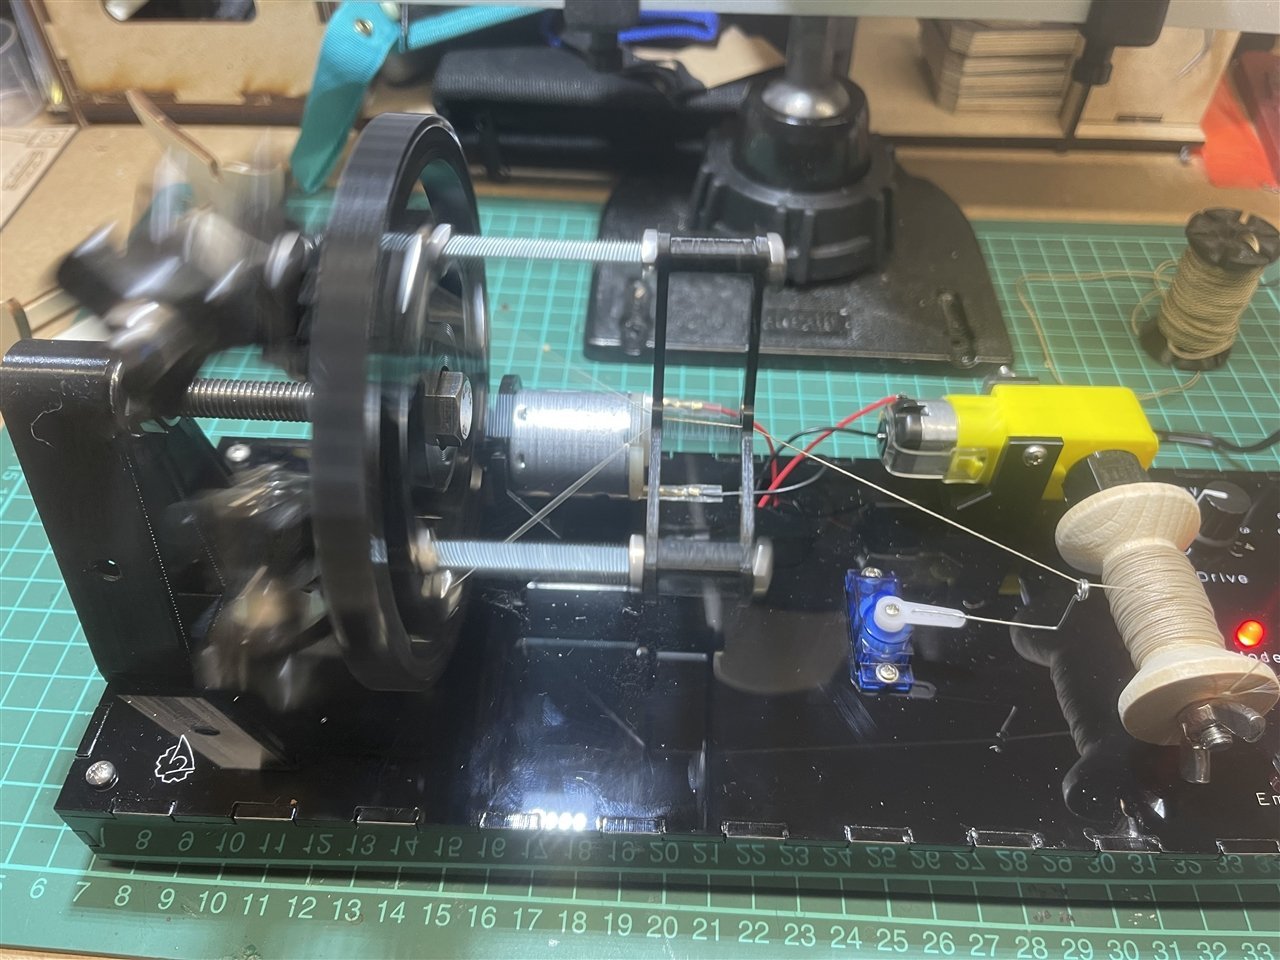
As I will not be able to craft those blocks myself I started to concentrate on rope making. As a Christmas present I got the Ultimate Rigging Tool Kit from ShipWorkshop.com.
Here you can see the PL-4-3 "endless" rope making machine and a spool case with the spools holding the different threads needed for rope making:
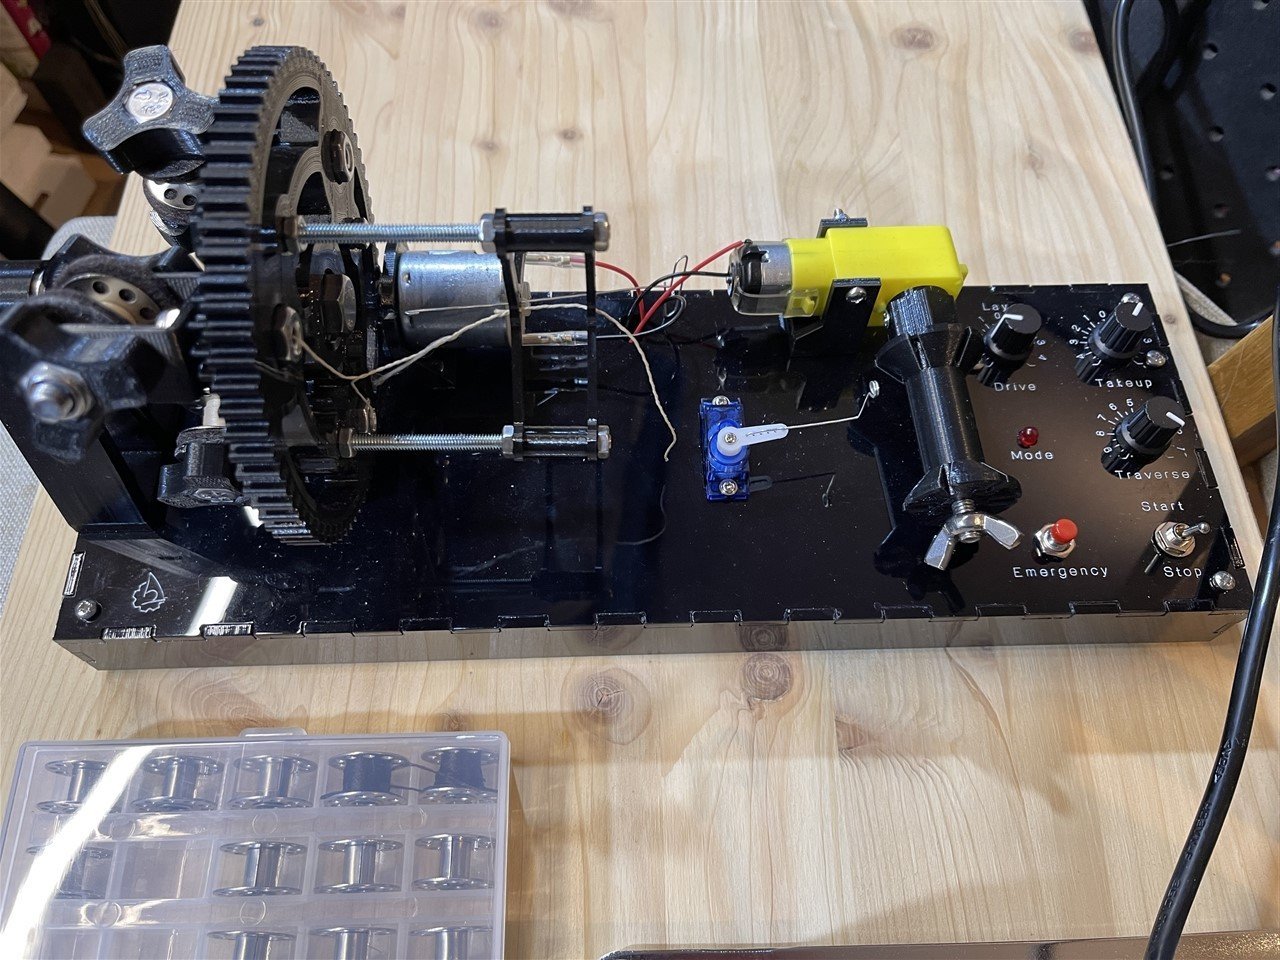
There is a topic where you can get some more details here
The rope making machine working making 0.15 mm 3-stranded right layed rope to substitute the kit provided 0.15 thread.
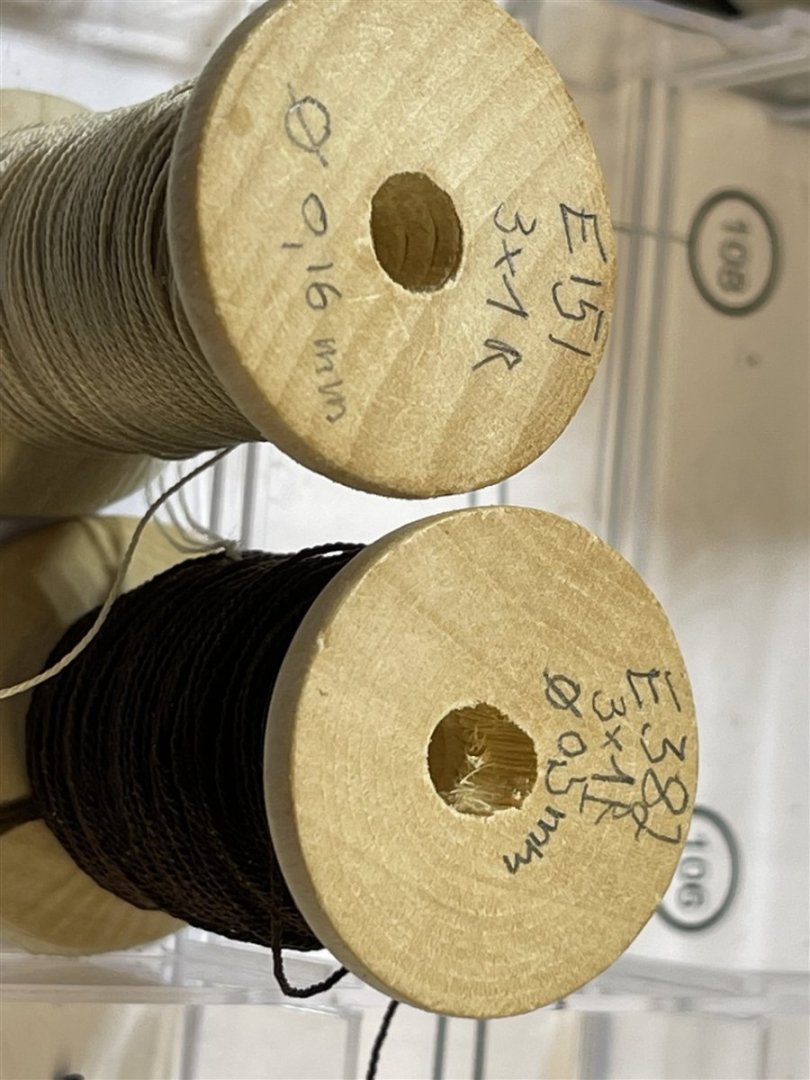
And now there are some items that we Germans have right in front of our doors. There is no family living here who never have used at least one of the good old German Gütermann threads ... yay ...
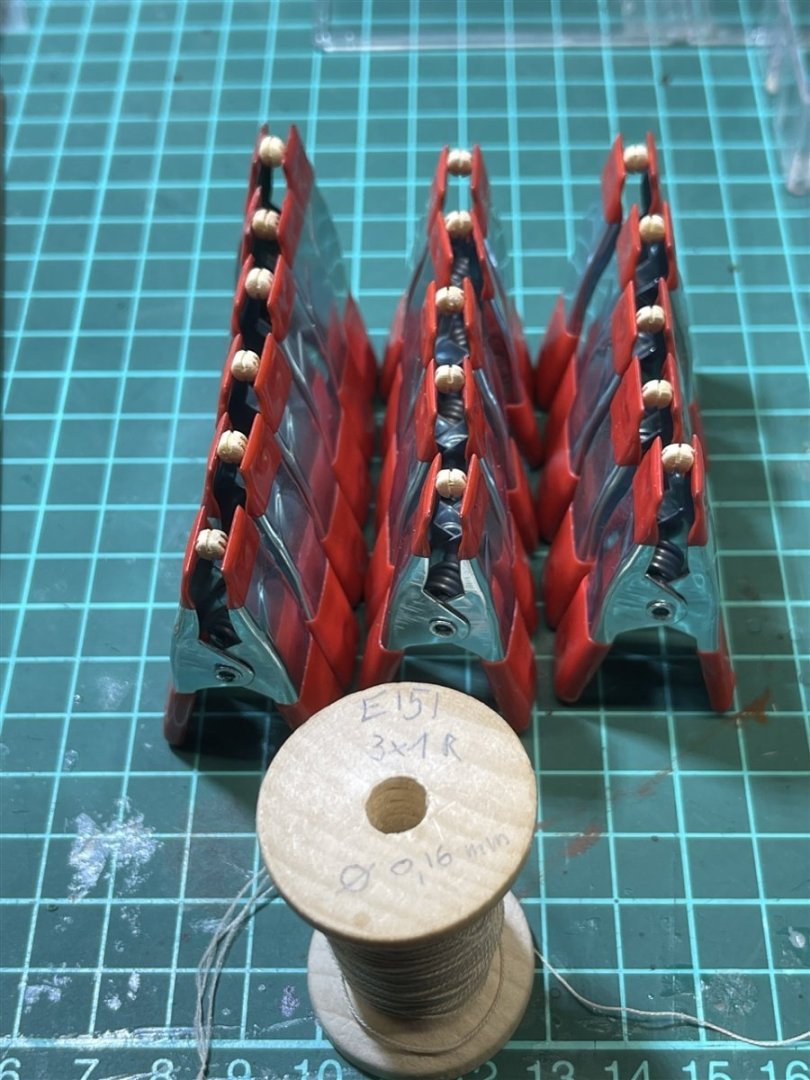
For rope making I use the E121 for the very fine ones, E151 fine to medium and E382 medium to large all in 4 colours (black, dark brown, tan and beige)
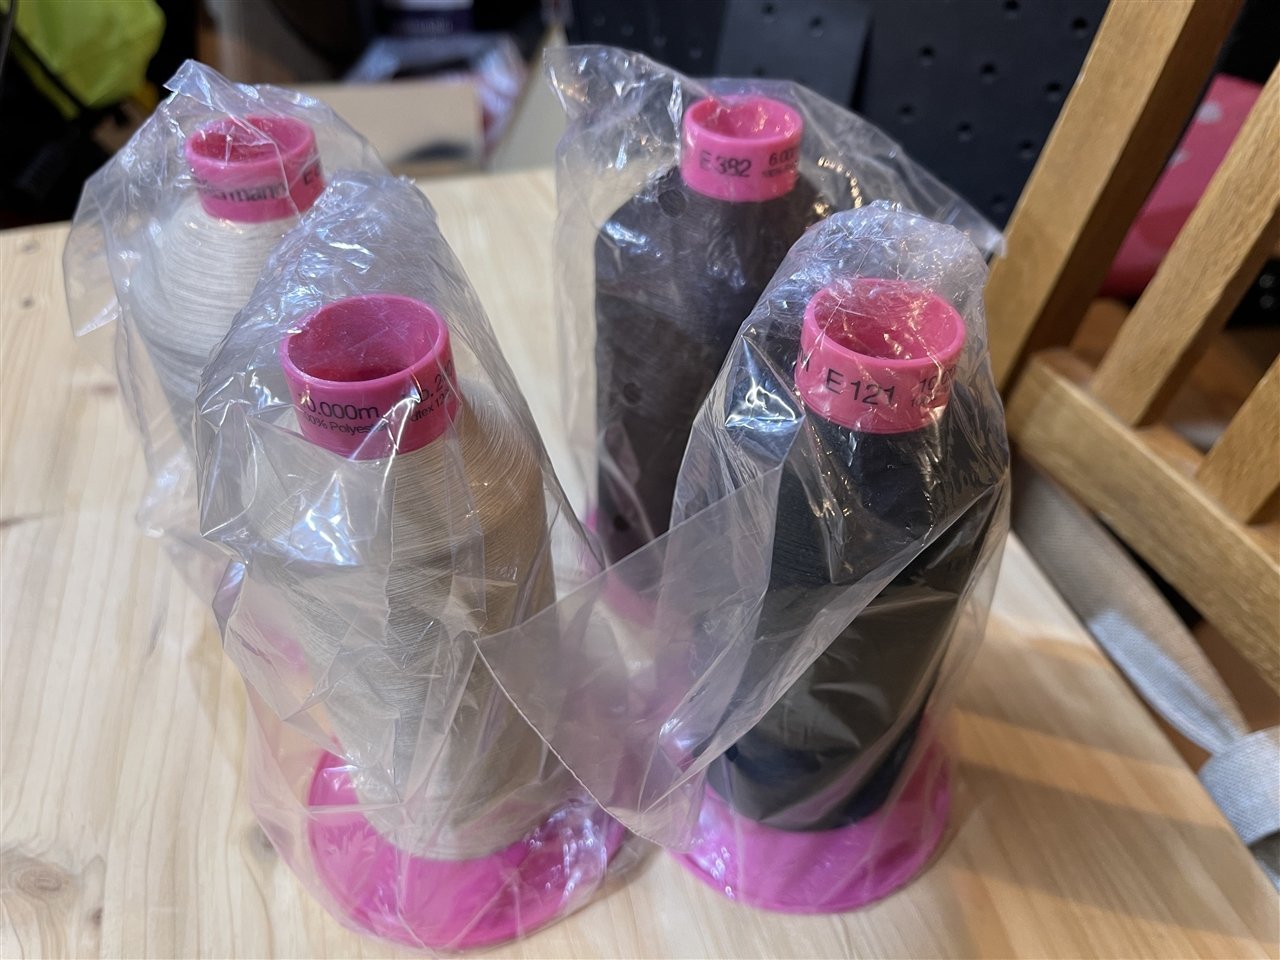
10.000 m per cone will serve me a long long time ...
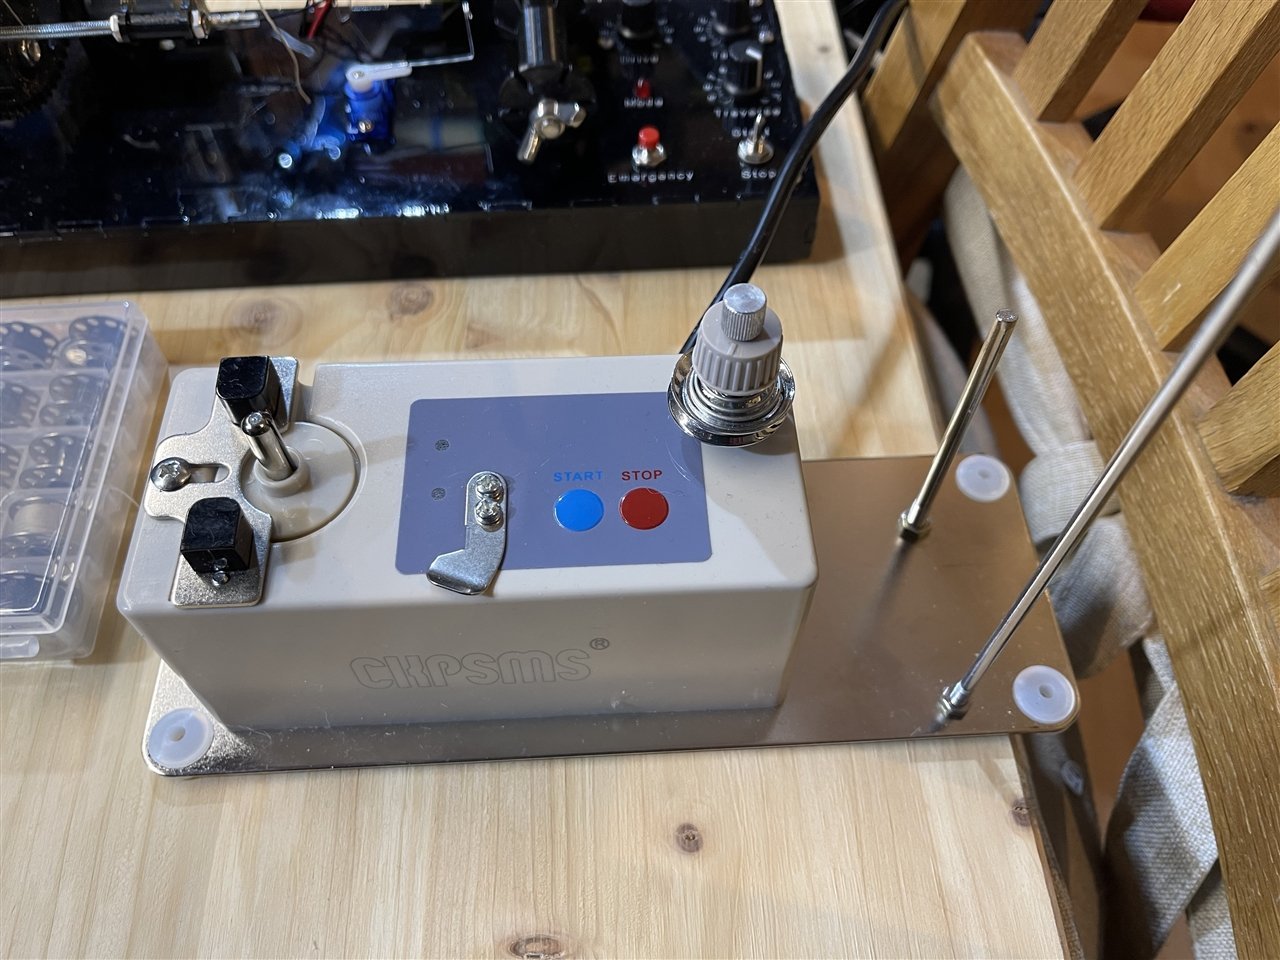
To get the thread onto the spools I do use a little machine as well. This one I have to share with my wife and daughters as they need to fill their spools for the sewing machine.
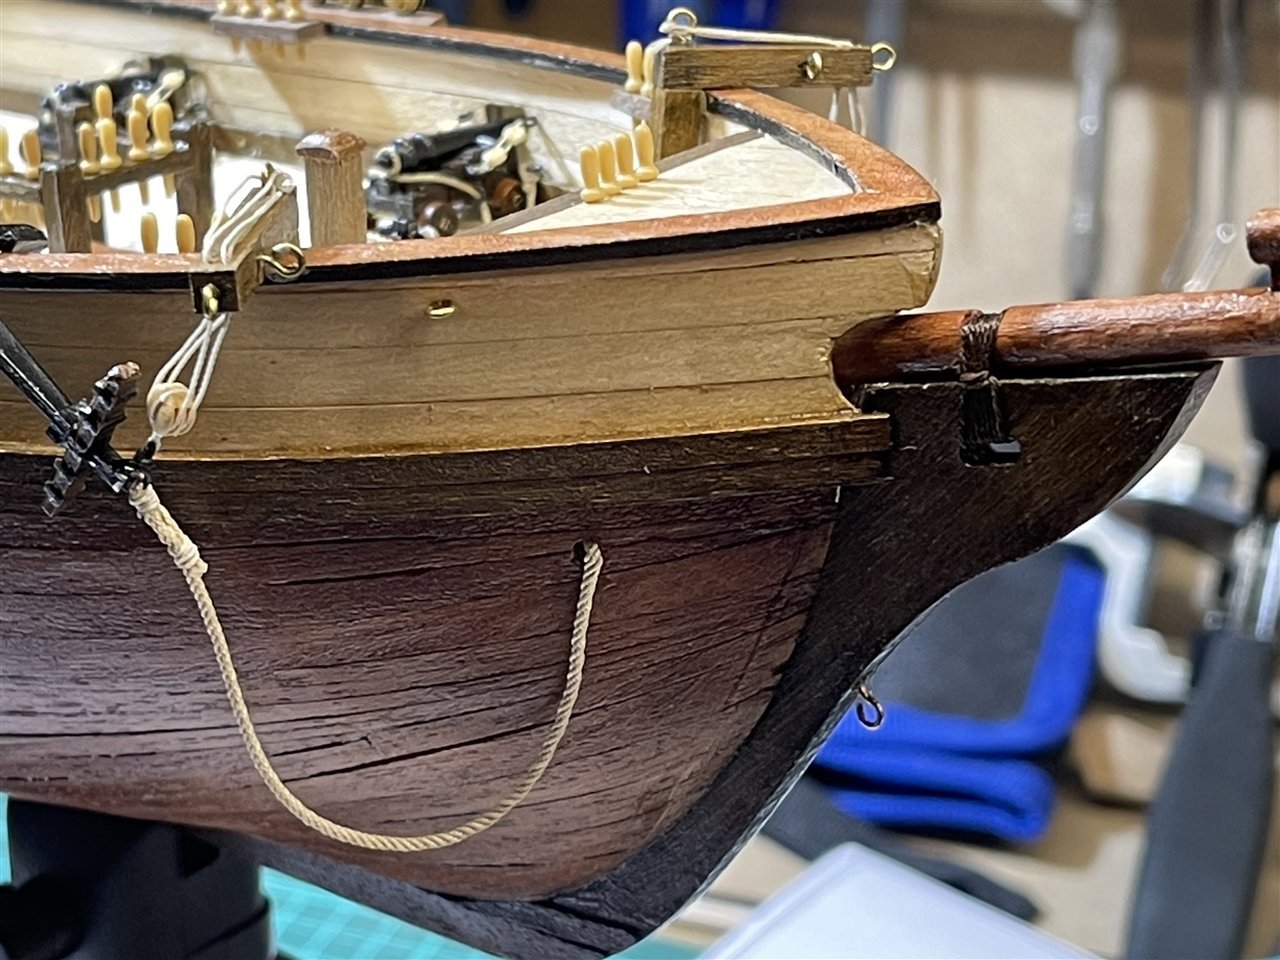
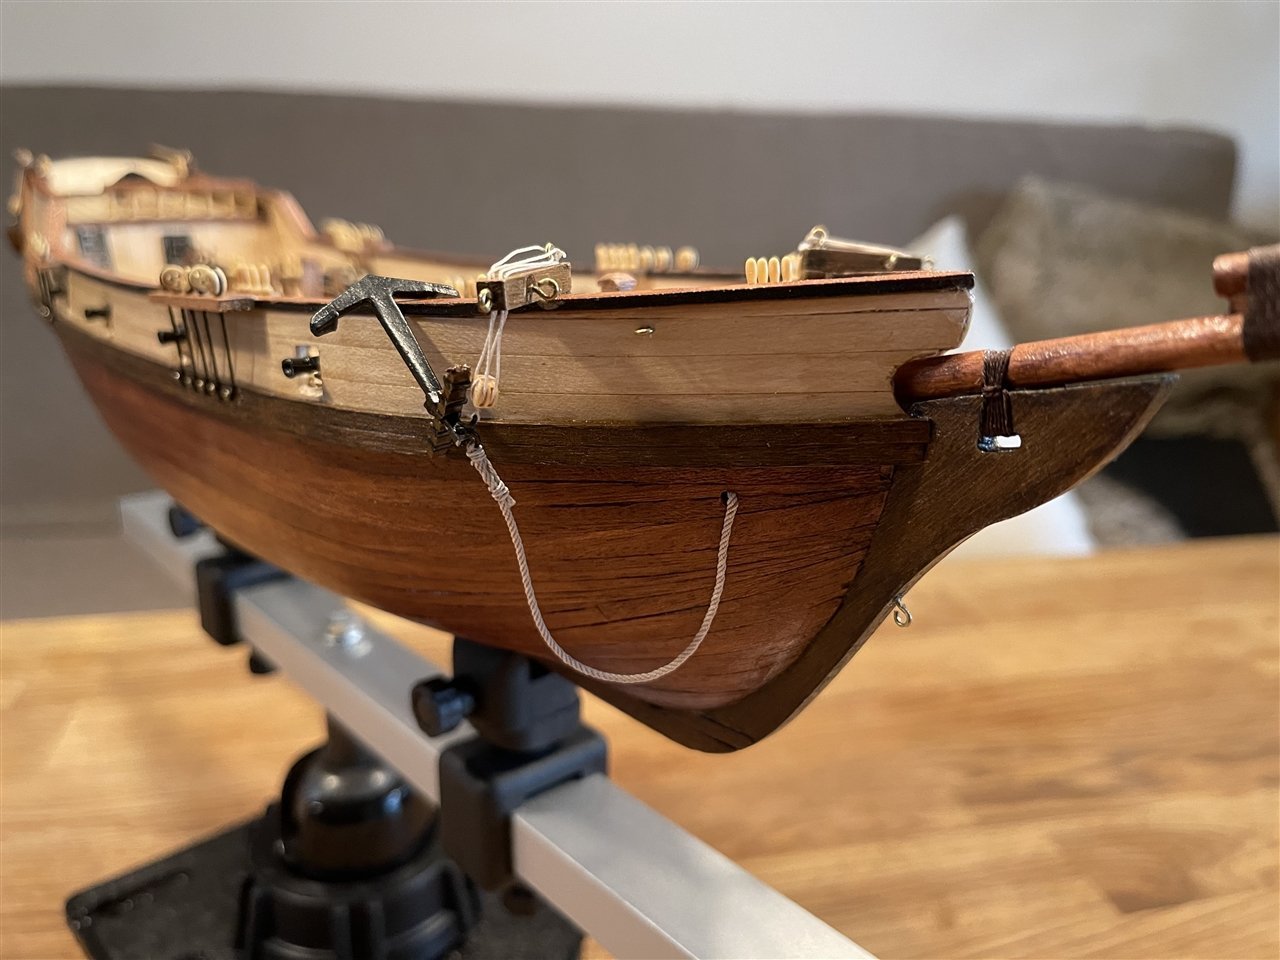
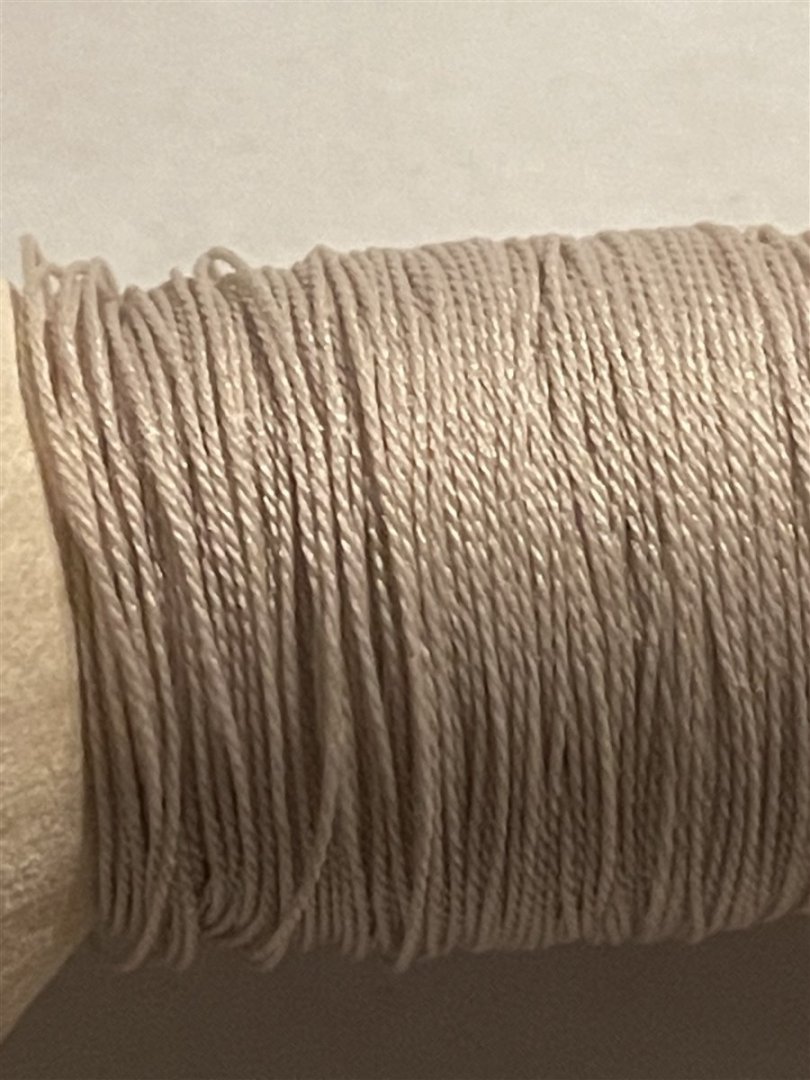
Here are some examples (top: kit provided anchor hawse rope / middle: self made anchor hawse rope (4-stranded) / bottom: same as before but 3-stranded and wrong colour for anchor hose rope)
And if you will put all parts together you will see and feel the difference I mentioned above. Here comes the anchor ... rigged and ready to get dropped
That's it for today ... need some sleep now. I will continue tomorrow ...
Kai
- allanyed, GrandpaPhil, ccoyle and 1 other
-
4
-
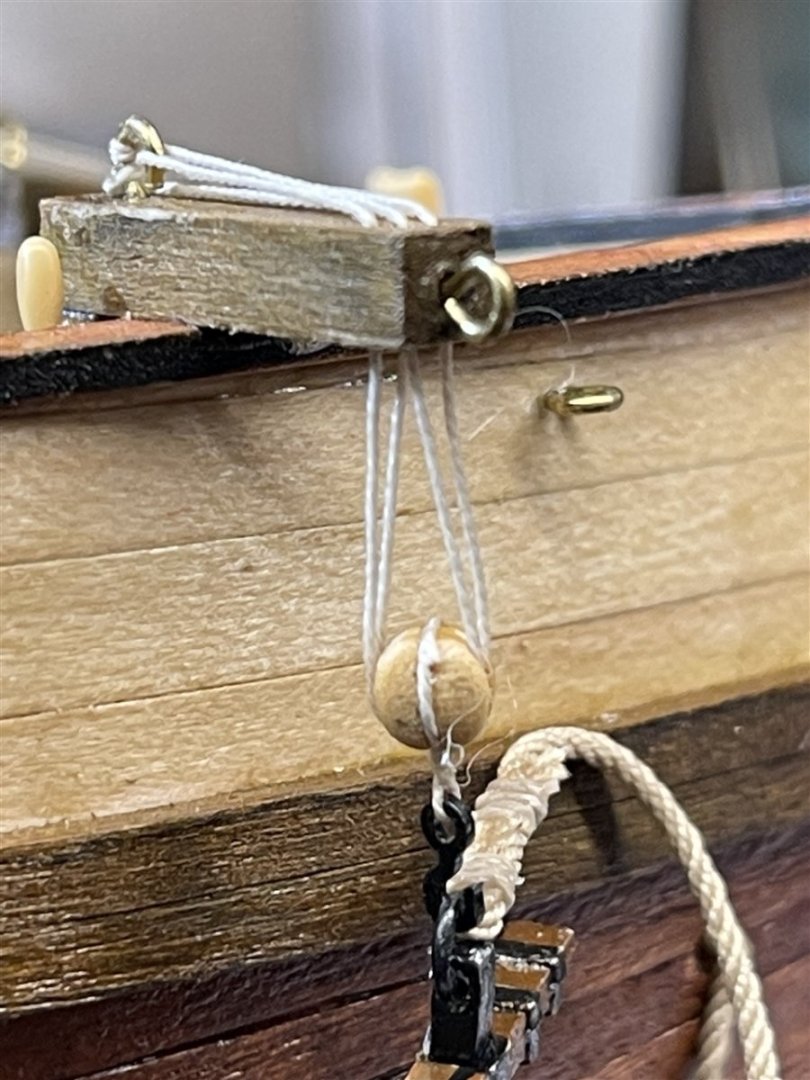
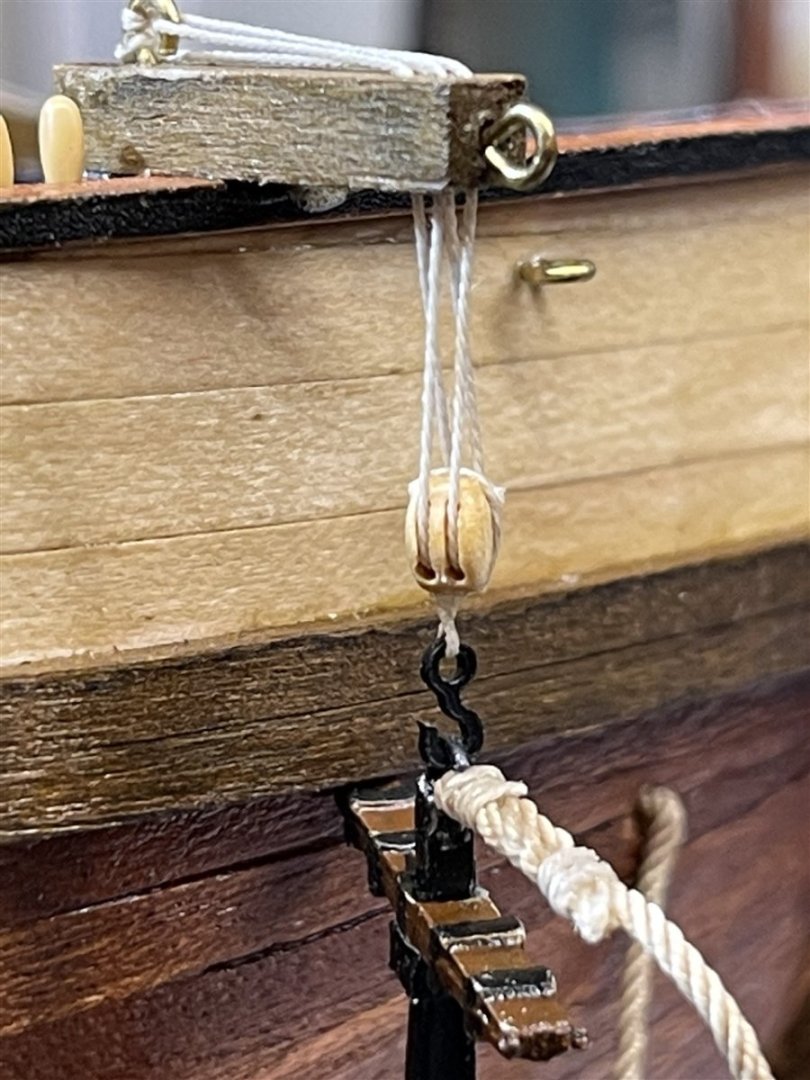
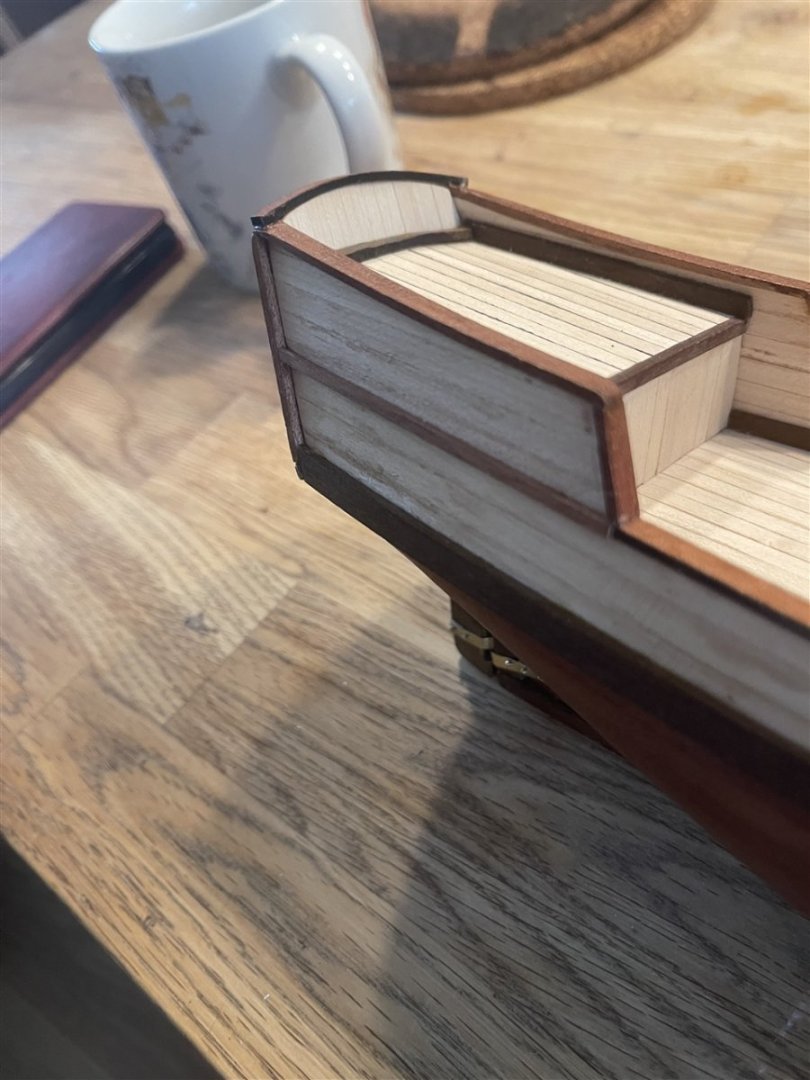
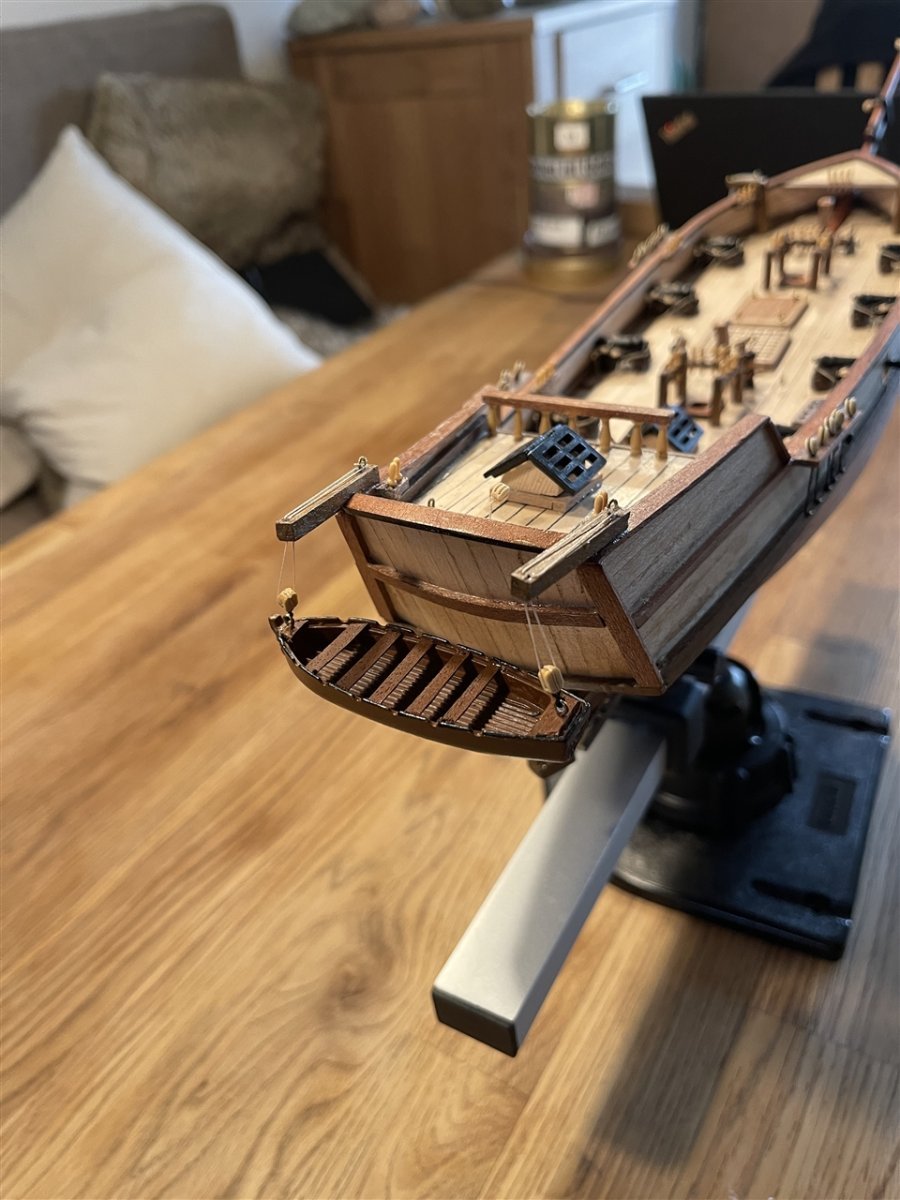
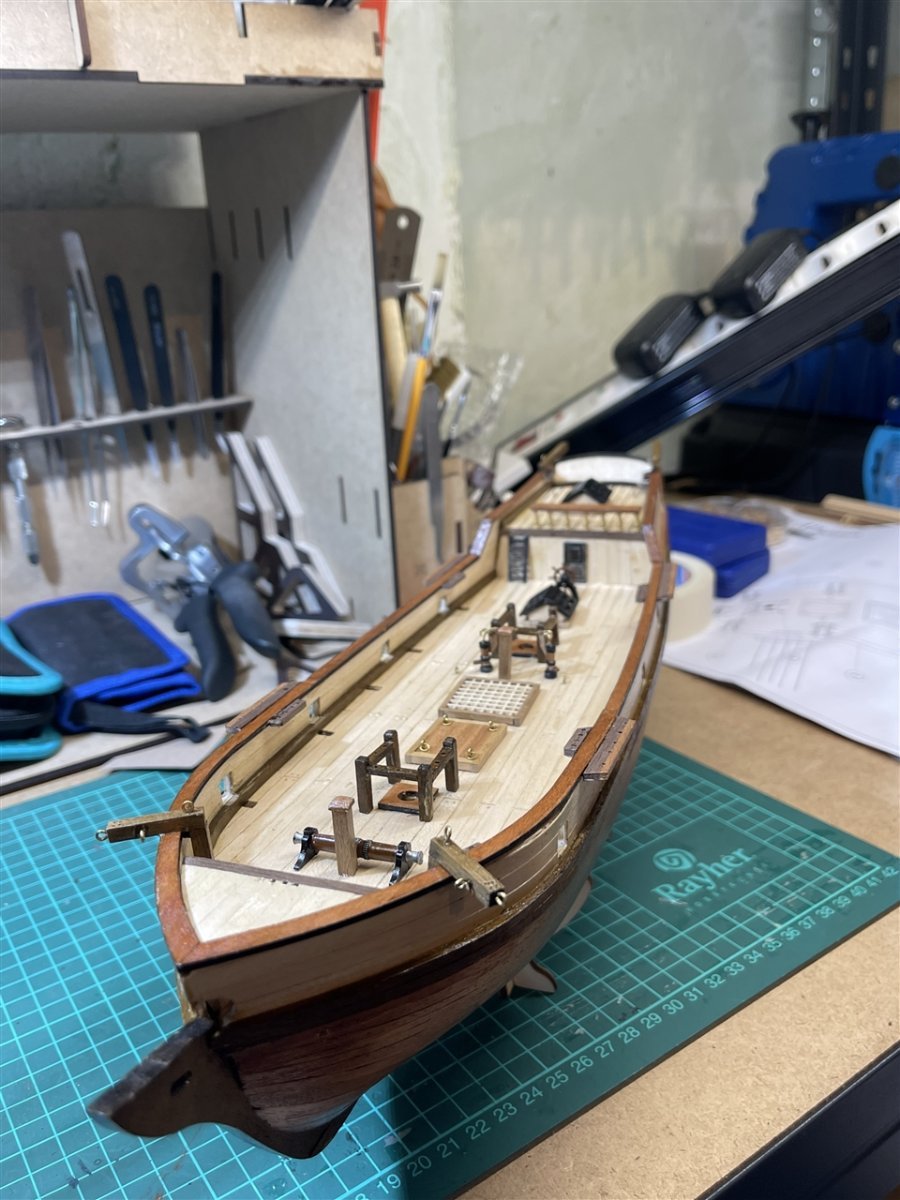
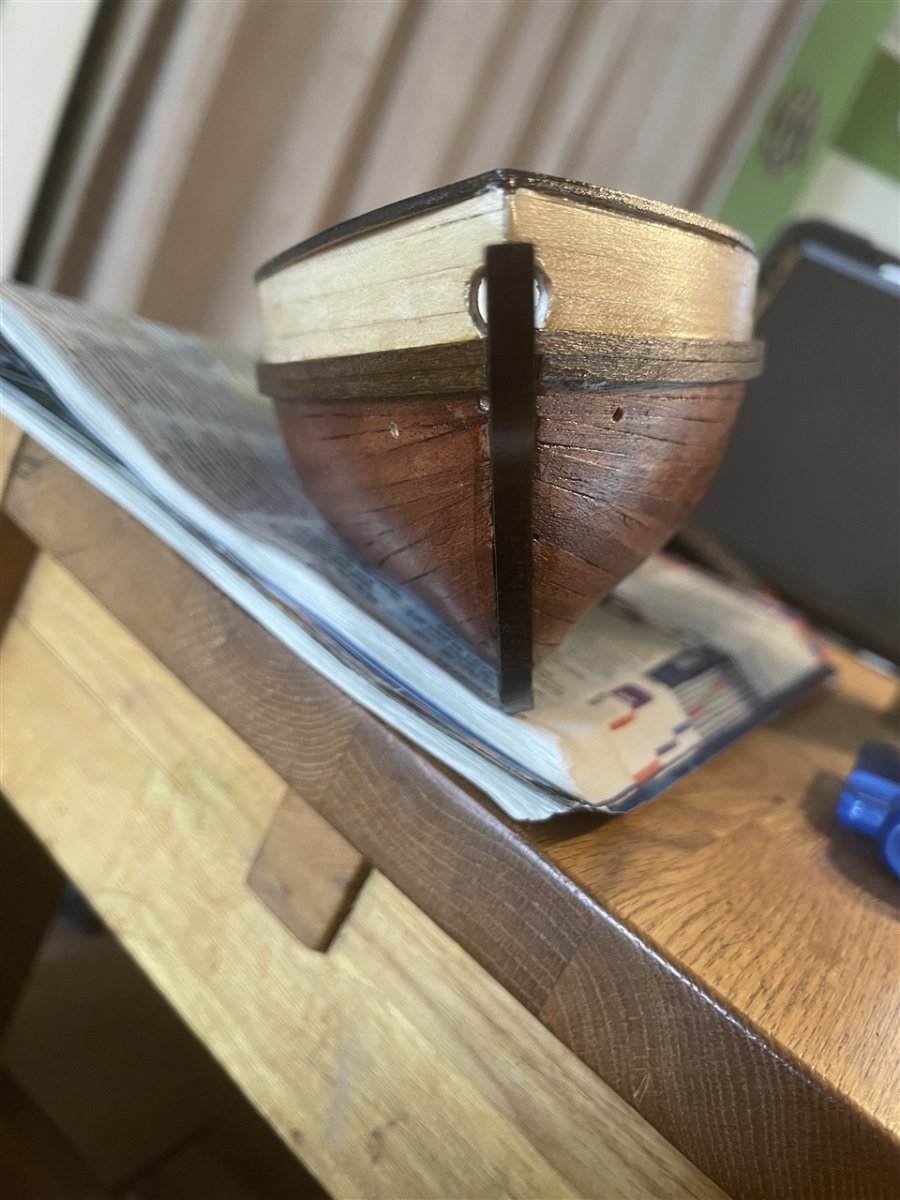
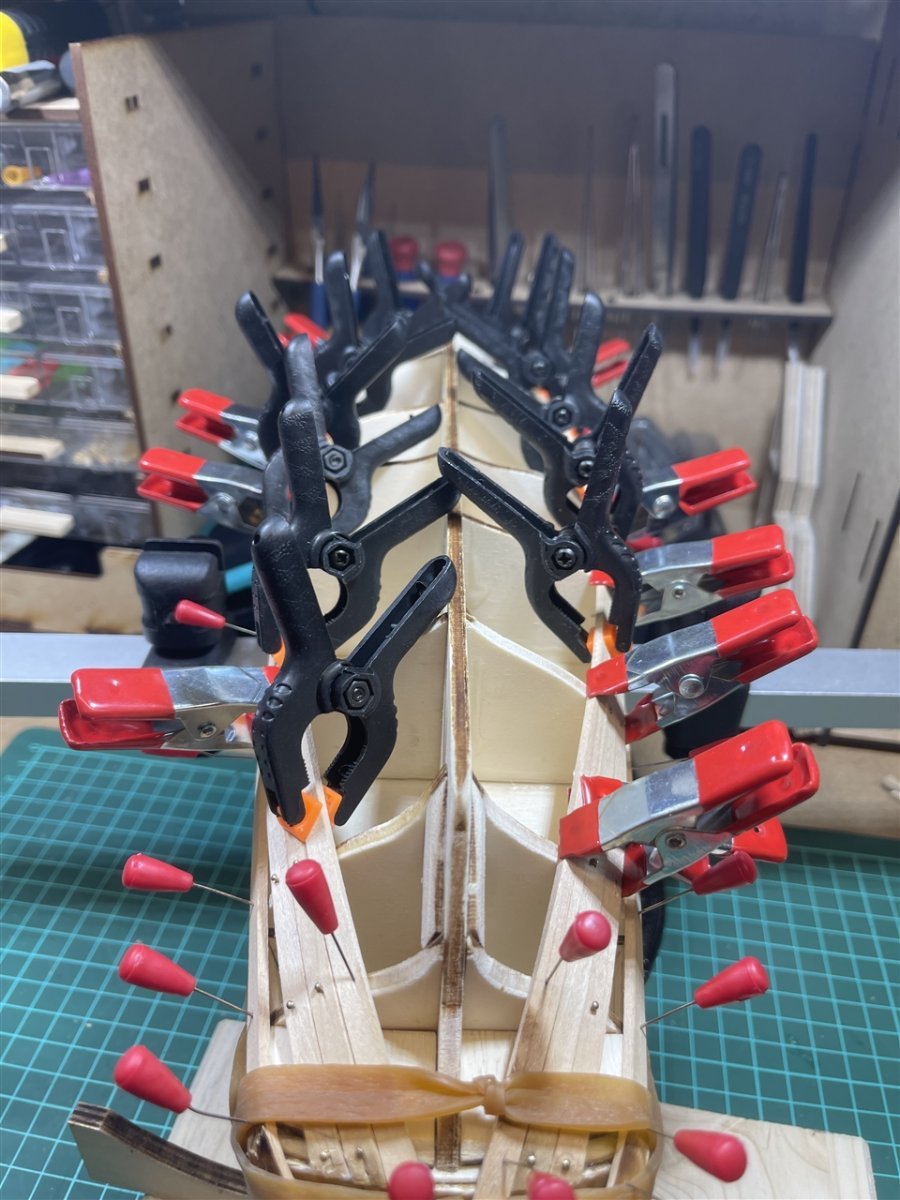
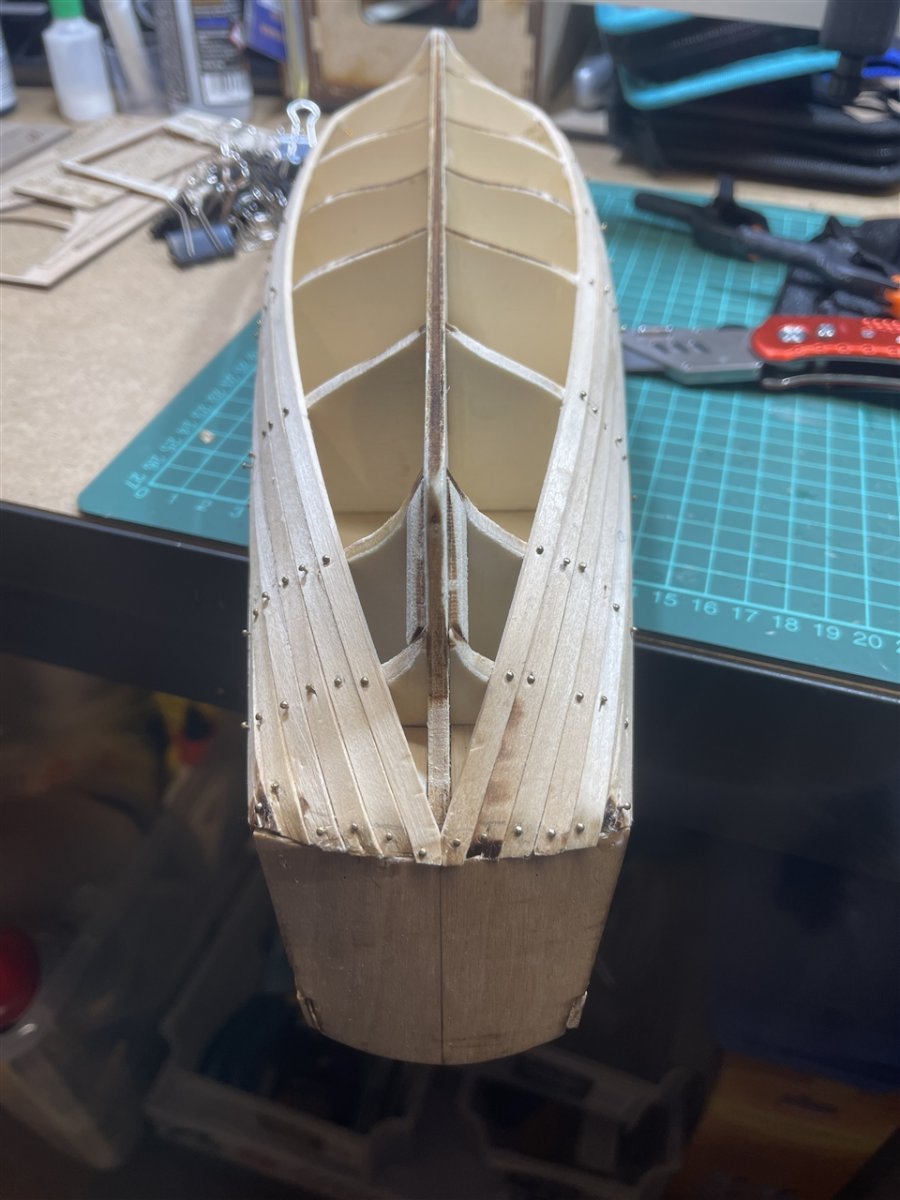
The Jollyboat or cutter (don't know the right expression if there is one)
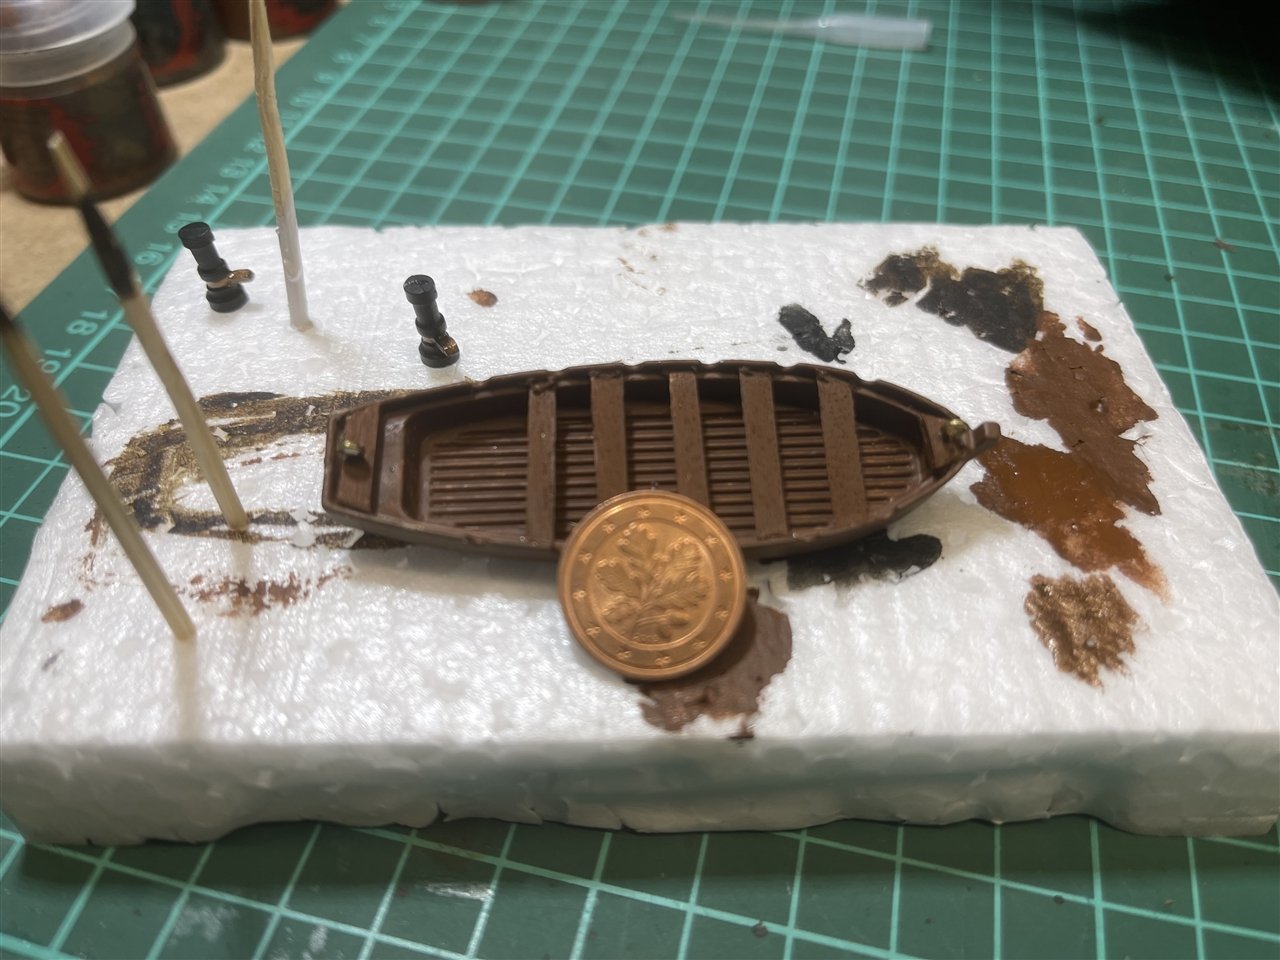
That has been the point I felt confident enough to deviate from the instructions. Some of the parts are out of cast metal so is the jollyboat. The way it should look like according to the instructions didn't please my eyes. So I have used some veneer strip left overs from the planking and built some banks. Now it looks more like a boat than a bathtube.
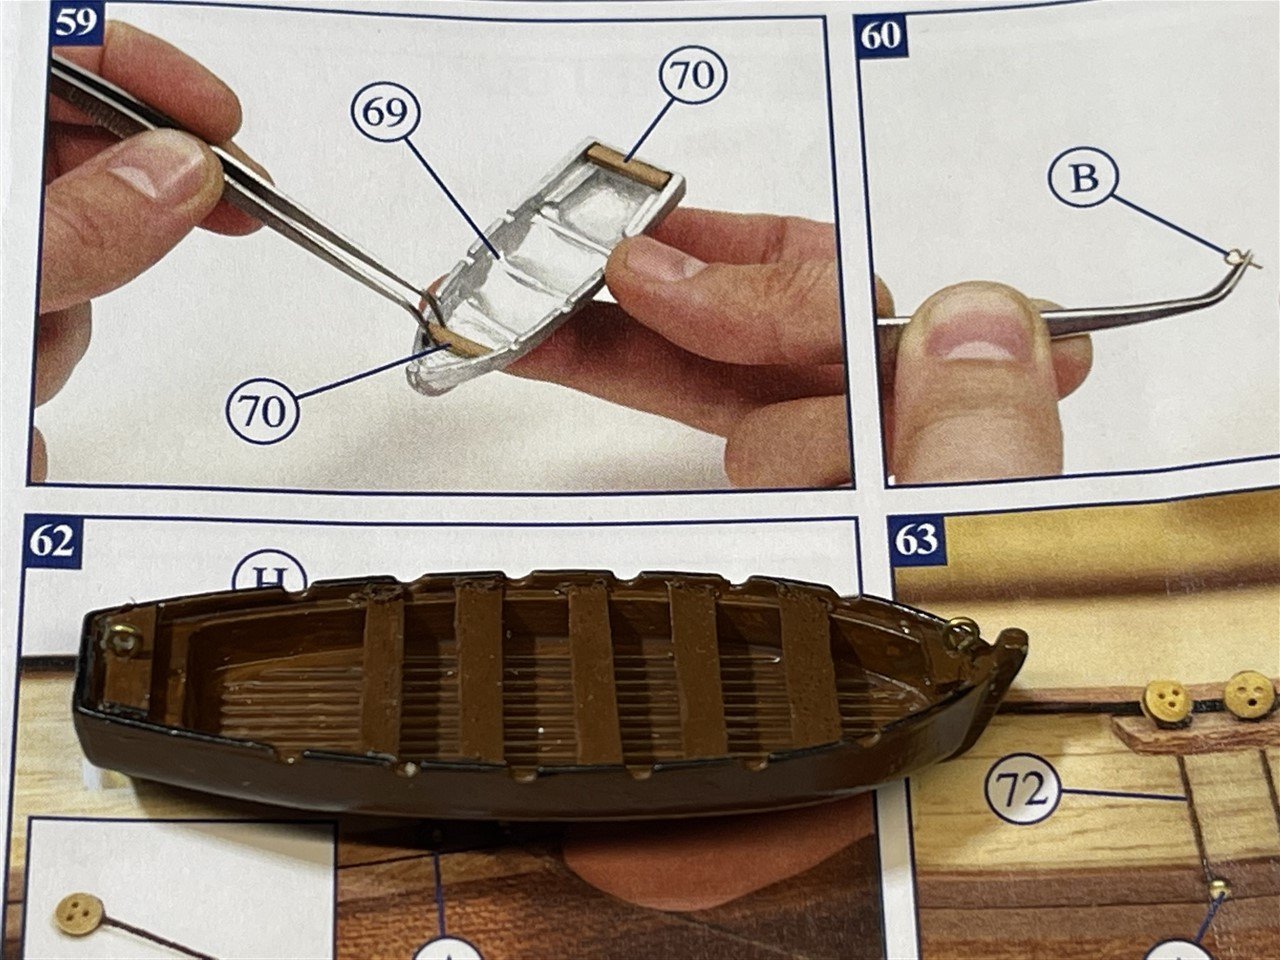
I sometimes use a 1 Cent Euro coin to give the impression of the size. The diameter of the coin is 16 mm (= 0.63"). In the background you can see another metal parts from the kit ... the hand pumps.
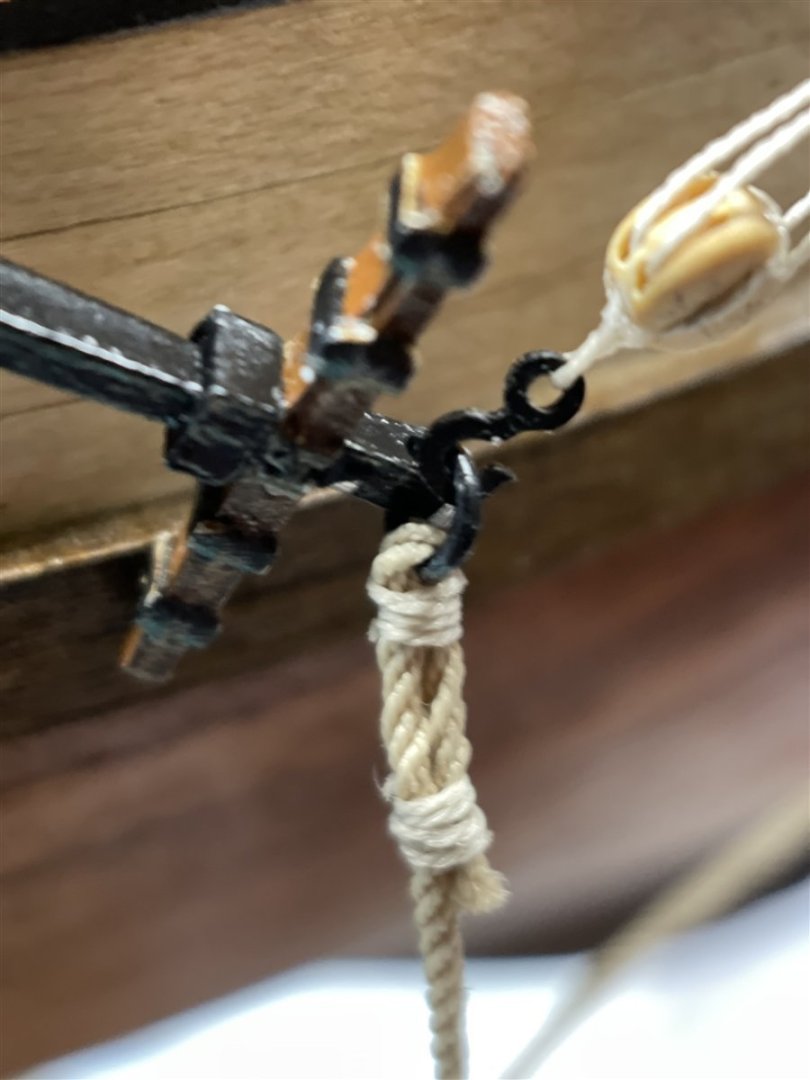
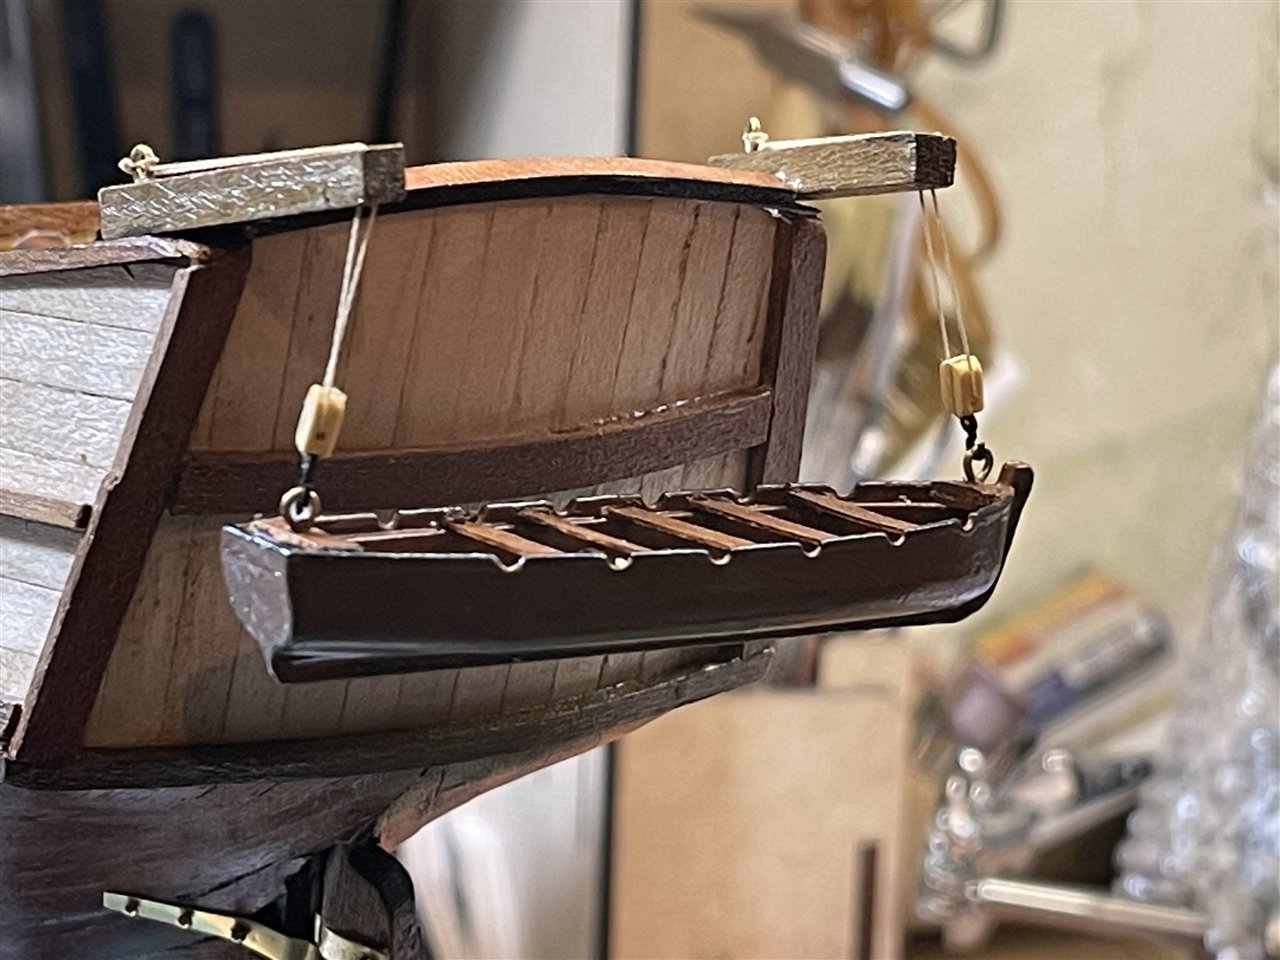
Next deviation happend as the boat should be rigged to the stern of the ship. I couldn't imagin having fun during the rest of the build with a dangling boat tied to the stern. So I did not have tied the blocks directly to the eyebolts but tied some small hooks i have bought from Syren Ship Model Company to the blocks and now I can attach/detach the boat whenever I like.
Whilst searching for the hooks I have found some other very interesting options to improve my build a little. But this is stuff for the next post.
Kai
- MajorChaos and GrandpaPhil
-
2
-
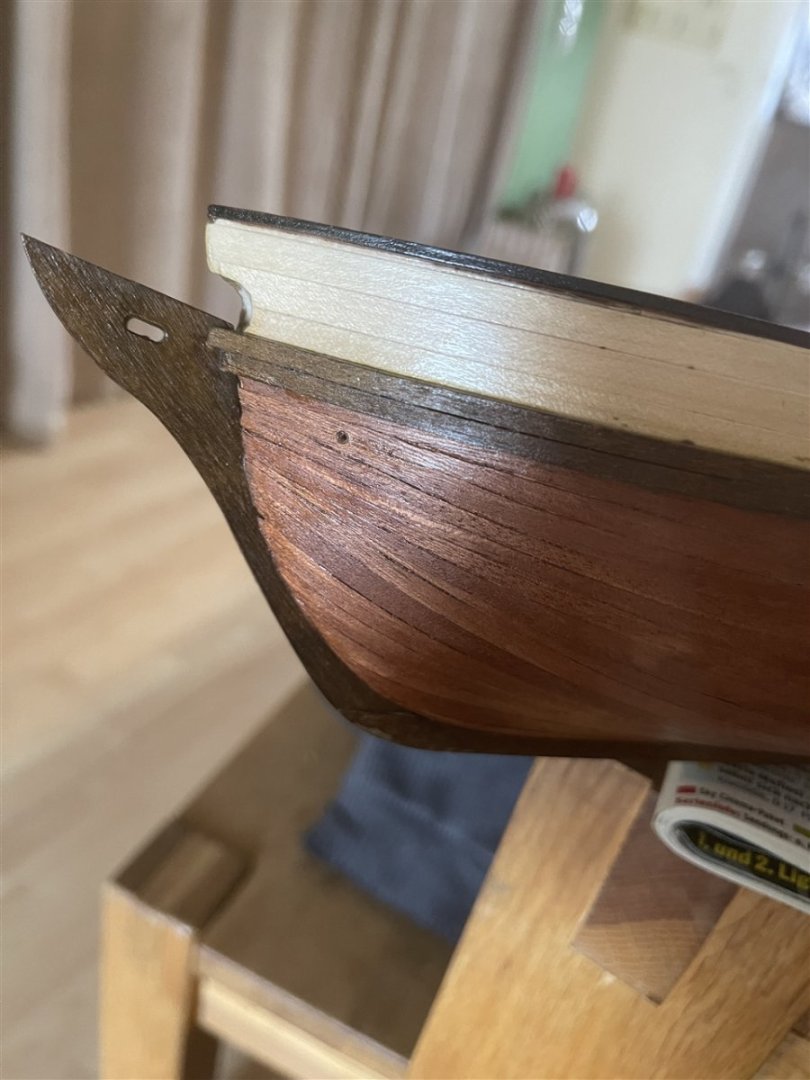
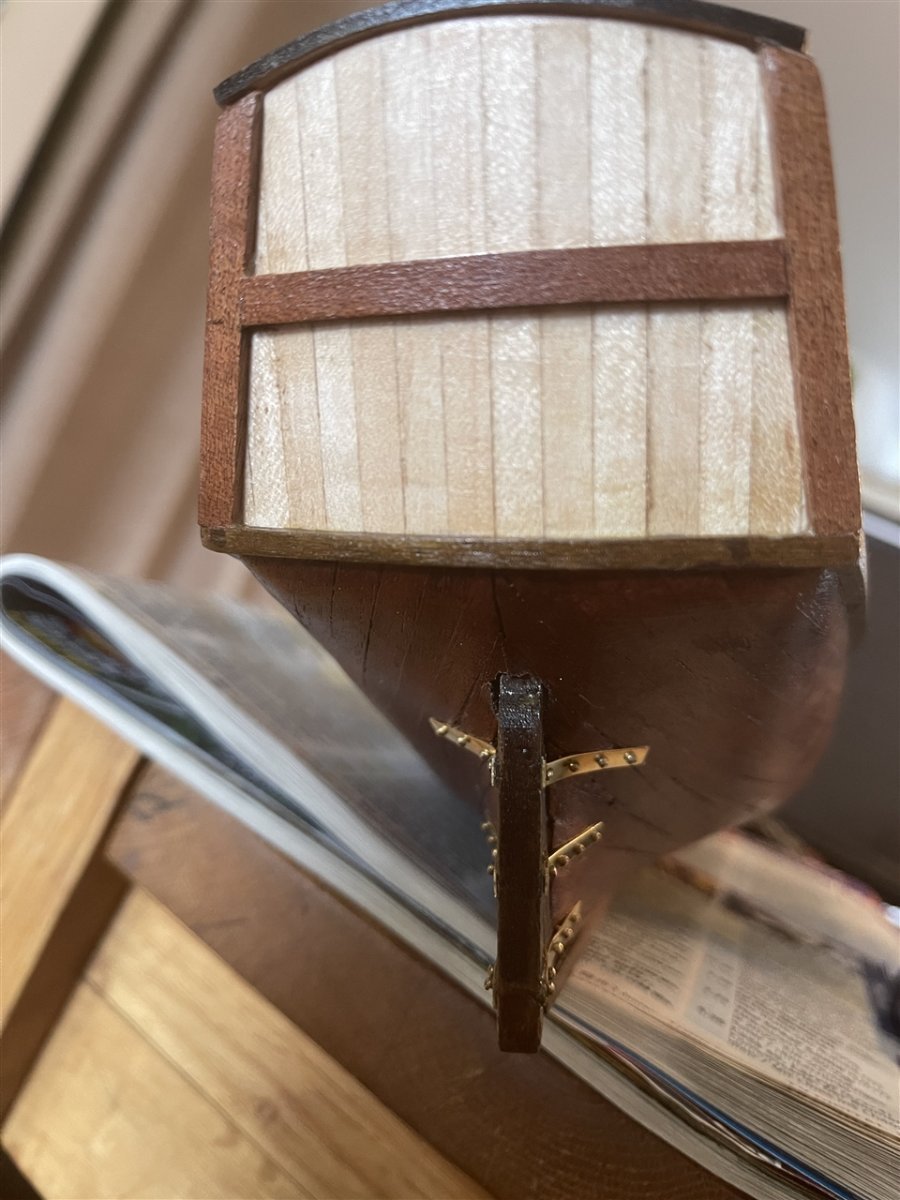
Finishing the hull
Last thing to do to finish the hull is installing the rudder. At this point I have used CA glue for the first time in this build to glue the brass pintles to the rudder. I don't know why but glueing brass to brass has been easy but brass to wood ... what a mess. The brass gudgeons I have pinned to the hull using the small brass nails but no glue. At this stage I even did not blacken the brass parts which I will do in the future.

And finally the completed hull ...
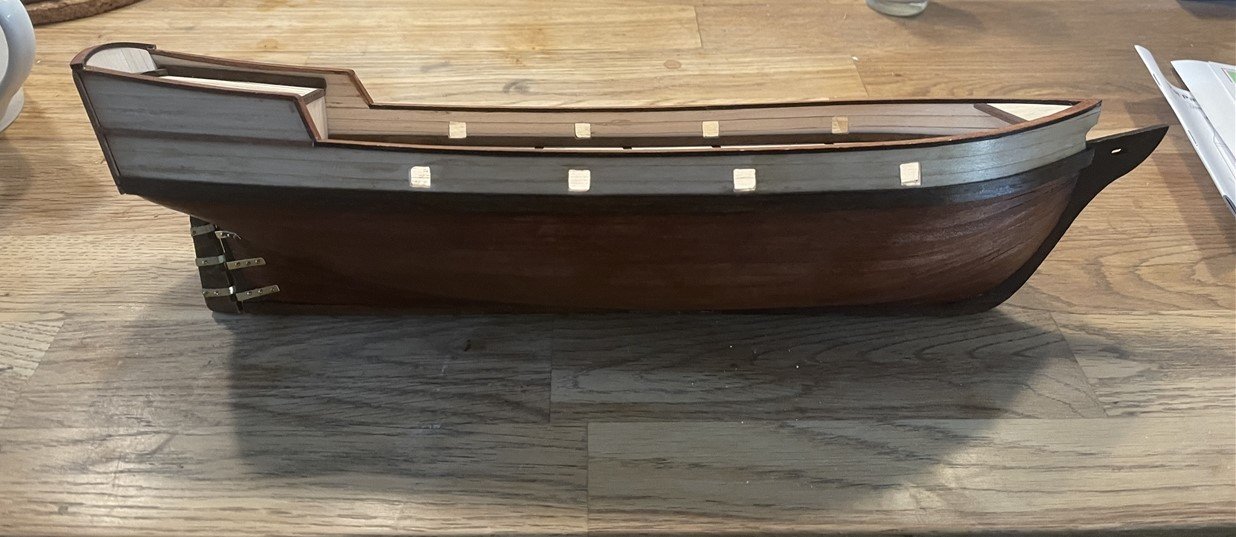
Over all a nice and satisfying experience so far. At this point I have started to look after the next kit(s) I would like to build. Yesterday I have preordered the HM Armed Cutter Sherbourne from Vanguard Models to build my way up to the Indy ... Nelsons Navy and especially the frigates are my objects of desire. If Chris will design a 120-gun Nelson Class 1st Rate in 1:64 one day this one would get a seperate room in my house.
But first things first ... let's finish the Albatros build.
Kai
- GrandpaPhil and MajorChaos
-
2
-
Second planking and deck planking
To do the second and deck planking you have to use paperthin veneer wood strips (0.6 mm). The instructions recommend to use contact glue to do this. I did it for the deck and the inner and outer sides of the bulwarks and would not do it again.
The contact glue itself is easy to use. Put glue on both of the parts you want to glue together, let them dry, and they will stick together forever ... instantly.
There is now way to get the veneer strips off again without breaking them and scraping off the rest of the already glued parts of the strip.
Fortunately this did not happen to me but the reason why I quitted using contact glue is its consistency after drying. In between the planks it sits like a film of thin "rubber" and during sanding it smeares the planks and you get it not sanded away. Maybe I have used a bad brand so if you can recommend some contact glue not having these properties then I may will try it again.
For the second planking of the hull I have used some diluted express PVA glue. It takes longer but you have enough time to align the planks and get a nice finish.
In no case I would recommend tu use any kind of CA glue. It will stick through the planks to your fingers and your second planking will look like having recieved a broadside of a first rate ship of the line. In addition the sapelli dye will not stick to the areas where the dried CA sits on the top of the planks.
I do not have any images of the planking process but some of the finished results:

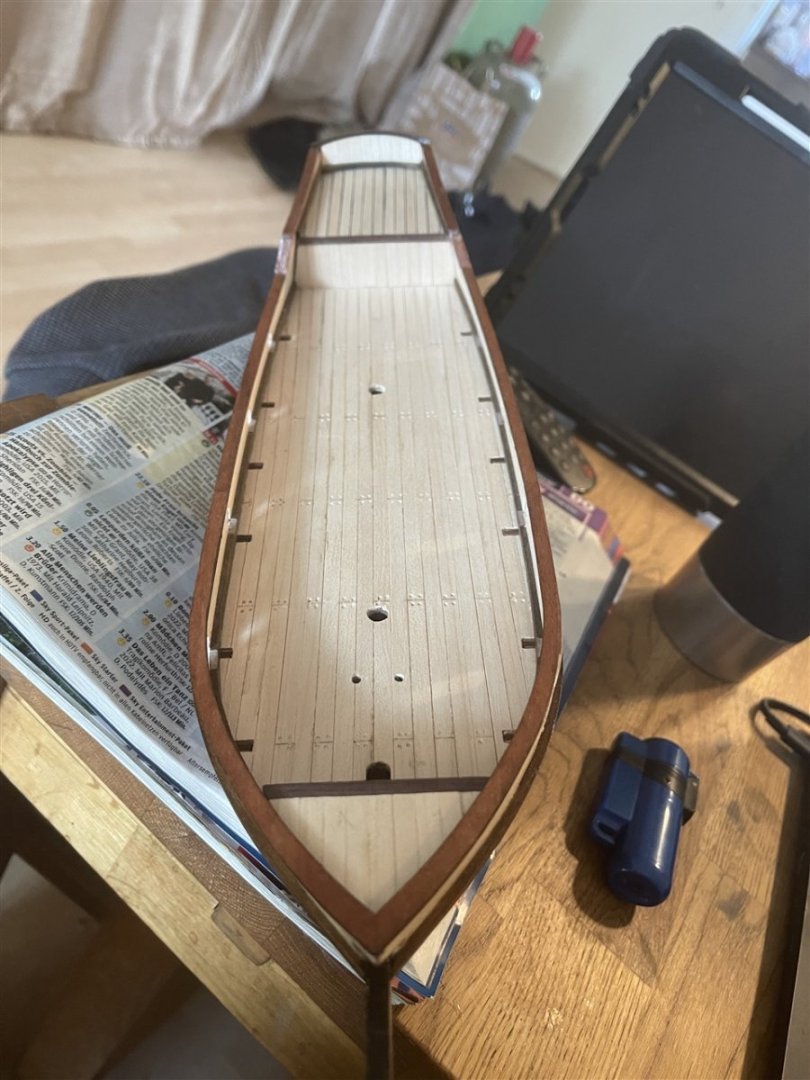


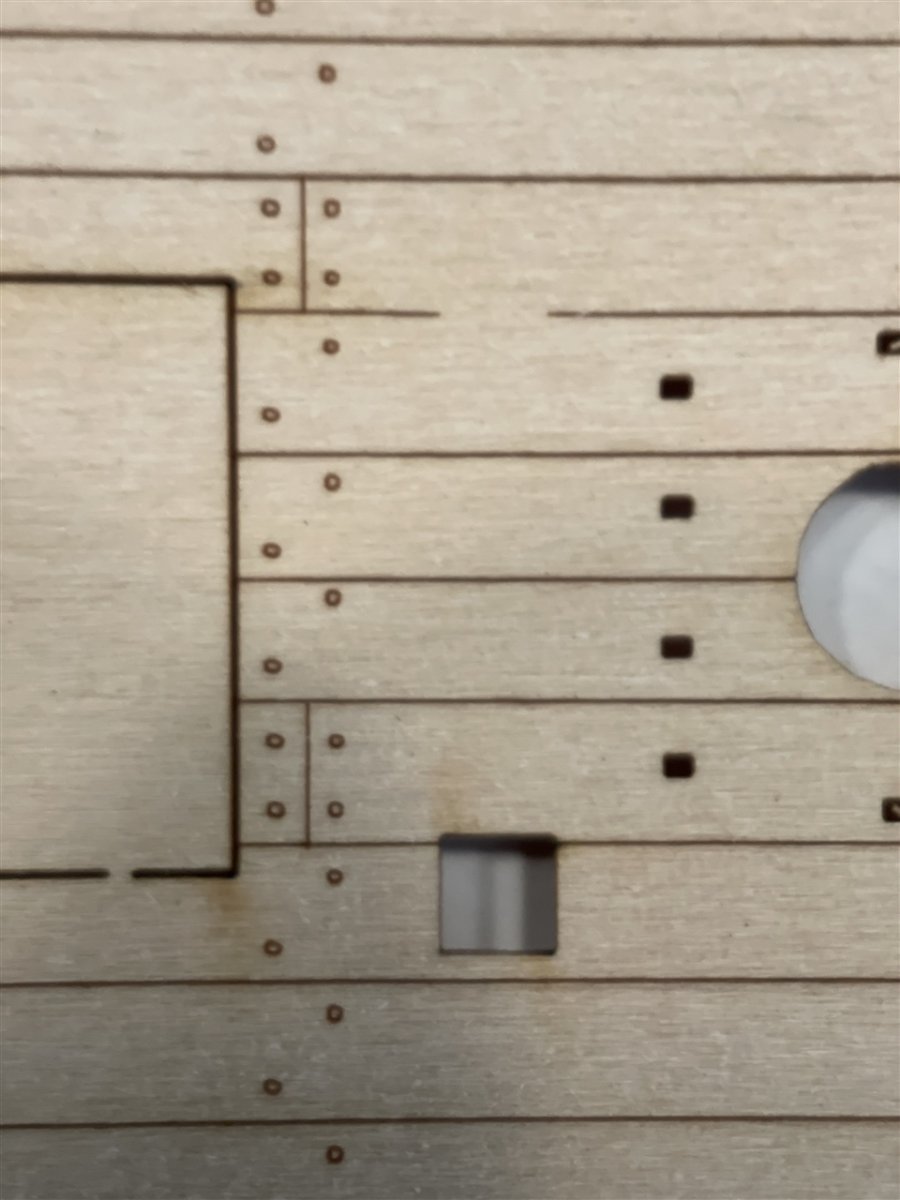
Now I have to show you a mistake I have made during the deck planking. So do NOT cut out the marked slots after you have planked the deck. There is no need to as the tips of the bulkheads will neatly sit under the planks.

To be continued ...
Kai
- GrandpaPhil and MajorChaos
-
2
-
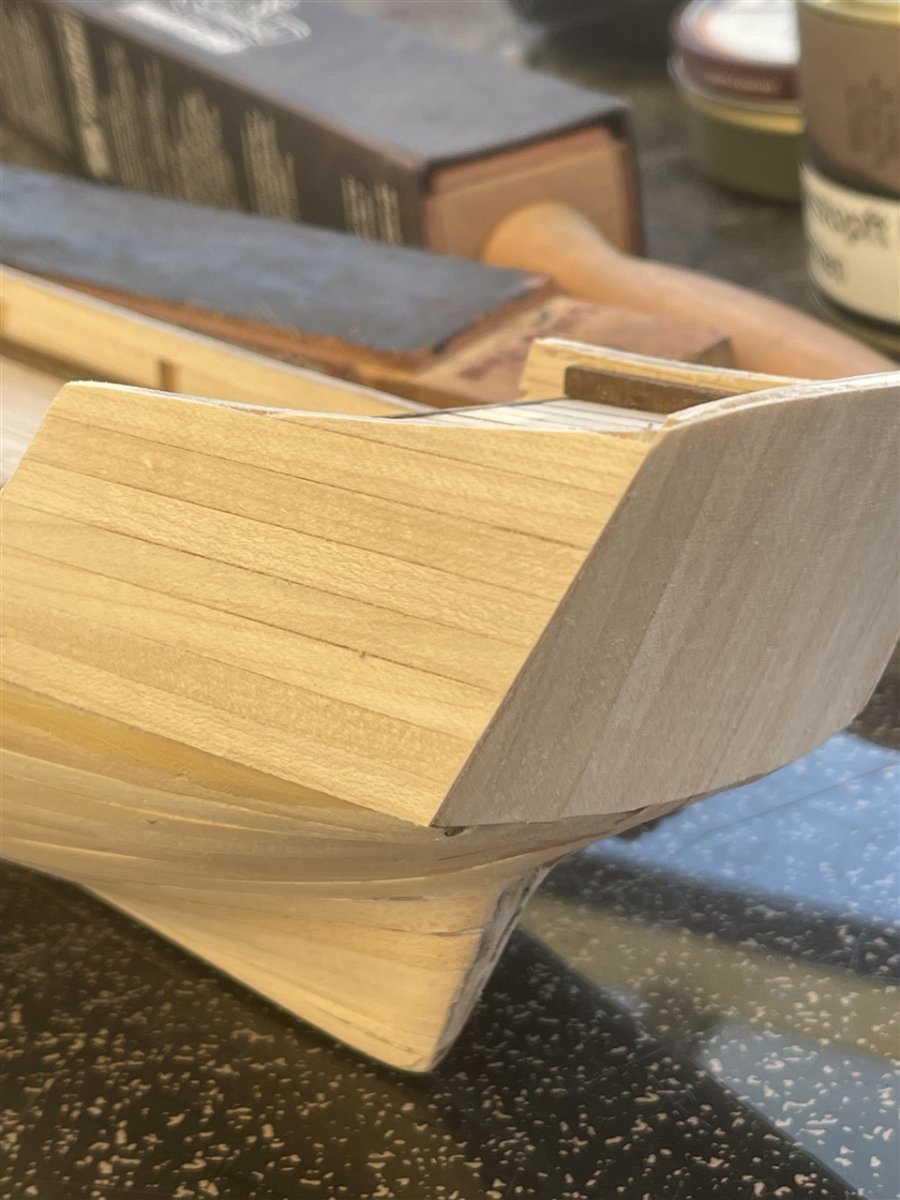
Let's start ...
As I have written in my member introduction planking was the reason that I did not finish my possible first wooden ship model 40 years ago. So it was time again to meet my "endboss".
So I did what Germans do, I followed strictly the instructions which I know now are a little weird according the way of planking compared to what I have read the last week in the relevant threads here at MSW. As a result I have ordered the "NRG Half Hull Project" to understand and learn it better.
According to the instructions planking starts somewhere below the waterline, two planks on both sides then down from the bulwarks closing the gap and finally up from the keel to the rest of the planks ...

The final gaps have been a challenge for the first time builder
But if you like to have a finished ship model at the end you have to go through it ...
I did two planks a day and prepared two for the next day. To prepare the planks I soaked them for 30 mins in tap water, tapered and bended them in the bow amd stern areas and clamped them to the skeleton and let it dry. They kept the form pretty well so glueing them has been easy.
Clamp twice ... glue once

Same process for 8 days ...

Today I have to admit that I do like it to plank a hull. It is satisfying to see them fit one after the other. Even drawing out the pins and sanding the hull have some relaxing and meditative aspects I really enjoyed. The black burn marks at the stern are the result of forcing resistant plank ends into position by using a soldering iron but no water.
In the future I will treat the first planking as there won't be a second planking.
Kai
-
11 hours ago, flounder_23 said:
I have this model being shipped and it will be my first as well. Looking forward to seeing your progress Kai!
You will like it. Hopefully you can avoid doing the mistakes I did as I will show them all 🙃.
Kai
-
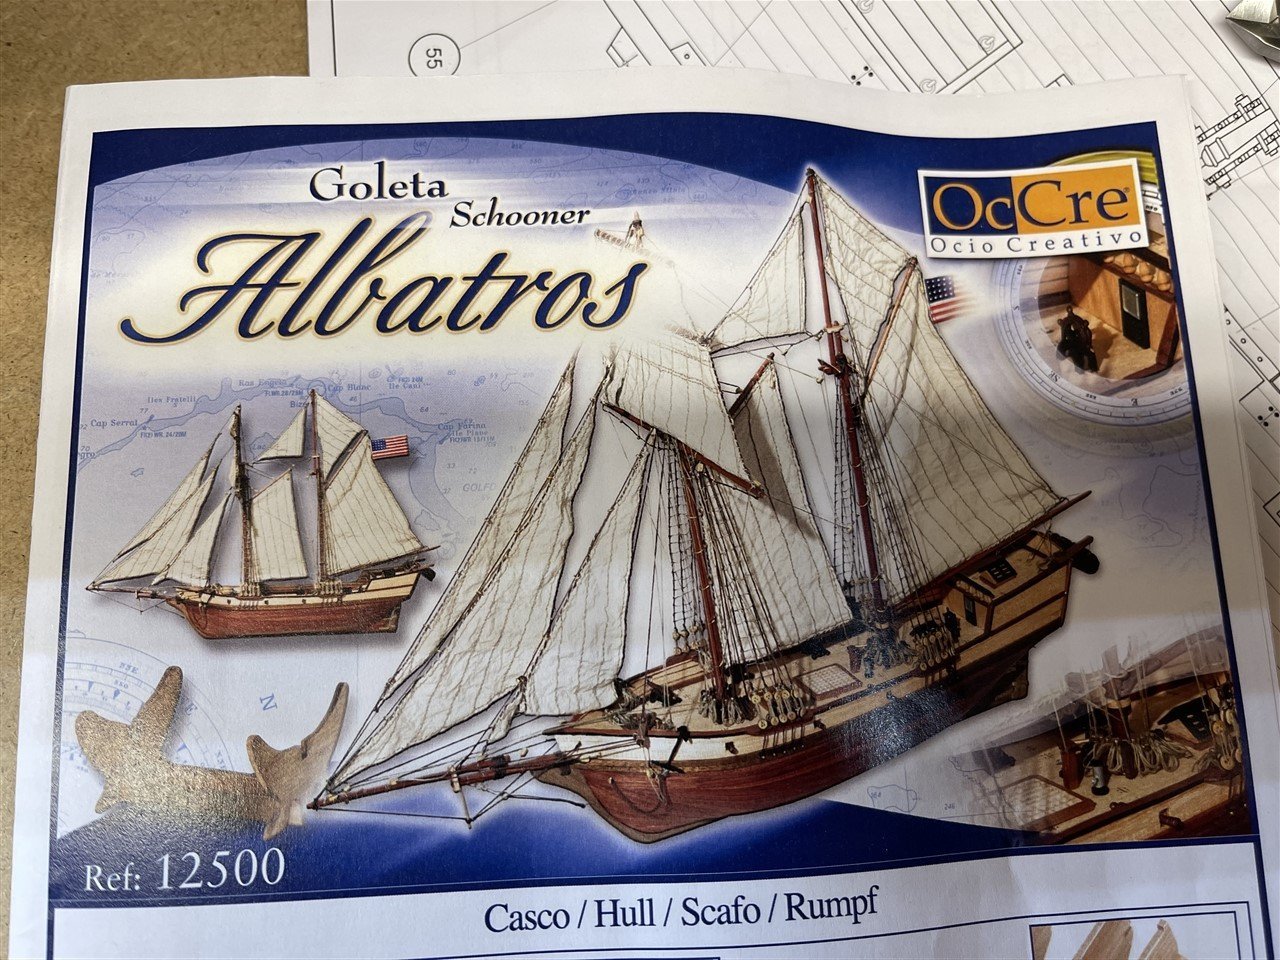
It is not the first build log showing OcCre's Albatros but it is the very first wooden ship model I will build.
To start with shipmodelling I have selected the Albatros as she should not be too tough to build and there is a series of YouTube videos showing the build step by step I can refer to when I need it.
I have started this project at the end of November last year and already have spent some 60 hrs working on it before I have joined MSW a week ago.
Therefore this log will be a rough wrap up of what I have done so far and then will join the actual stage of the build - rigging the guns.
As I am not a native speaker I will have to translate some nautical terms from German to English and getting the photographs uploaded and resized first. Starting tomorrow I think that all posts will be done until sunday.
You will see a lot of mistakes I think so any help and comments which will help me to improve my modelling skills are highly appreciated.
Thanks in advance ...
Kai
-
3 hours ago, knightyo said:
Hello Kai,
Since you enjoyed the Hornblower books, I would like to recommend the series by Patrick O'Brien which covers the same era, if you haven't already read them. That series of books is so enjoyable to read that many people read the entire series annually.
Alan
Hello Alan,thank you for the recommendation … First book ordered
Kai
- mtaylor, Keith Black and JeffT
-
3
-
Hi everybody,
40 years ago I got a kit of a wooden brig as a christmas gift … the task of planking the hull in combination with poor instructions and the lack of available informations set an end to this project. As I still love wooden model ships I have decided to try it again. For the restart I have picked the Albatros from Occre - 1:100 scale and already did it past the stage of planking … and I love it…
I am addicted to frigates of the 18th century and have read all of the Hornblower books and have seen all the movies so HMS Indefatigable from Vanguard Models is the one I want to build in the future. On my way to her I will have to learn a lot and get used to the techniques I will need. In addition I want to get used to the Vanguard-style and plan to work my way up by building one of their cutters, the HMS Grecian, the Speedy and the Sphinx before I will finally be able to try the Indy.
All help I will get from you is highly appreciated an maybe … some day … I will be of help to other fellow shipbuilders.
Kai
- chris watton, KevinR, JeffT and 2 others
-
5


Albatros by Dulrakk - OcCre - 1:100
in - Kit build logs for subjects built from 1801 - 1850
Posted
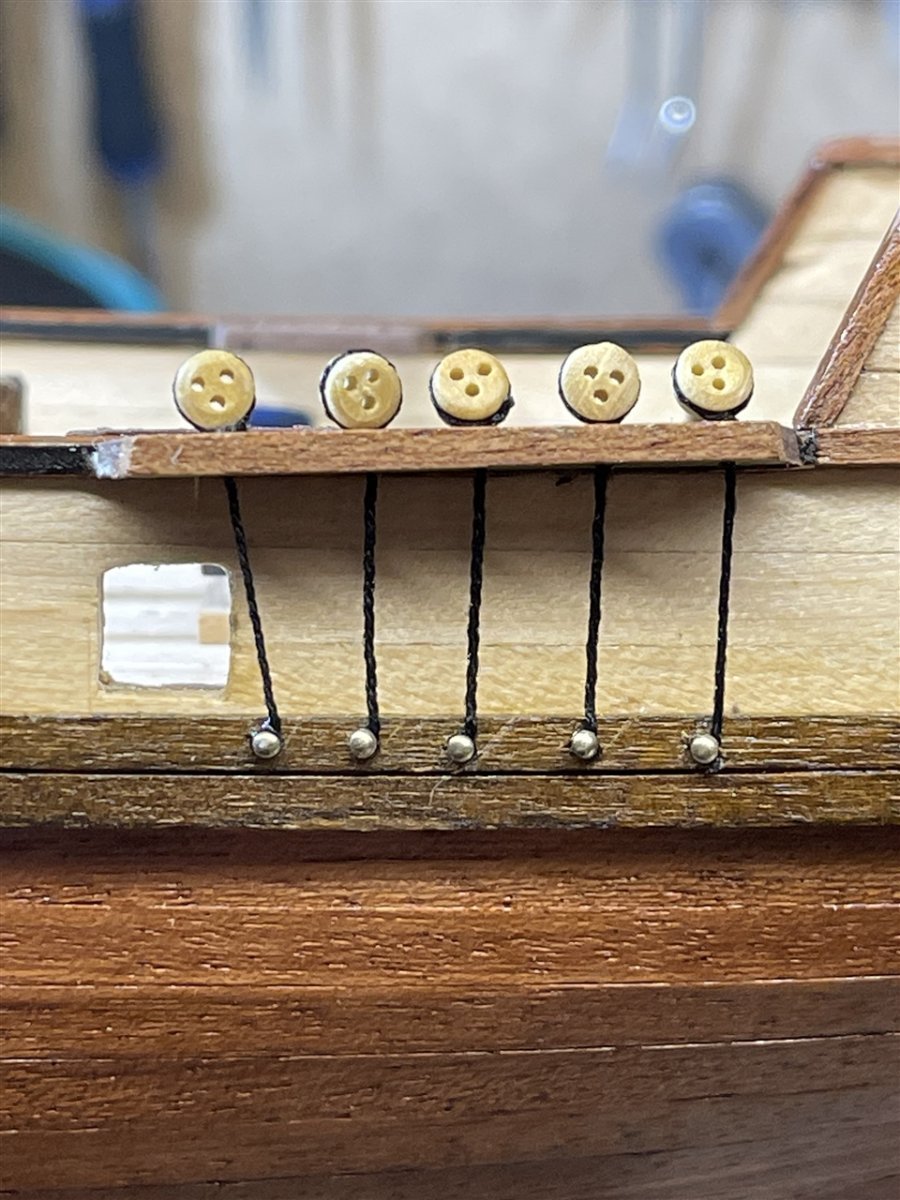
Some small things needed to be done in order to get them ready before rigging can start.
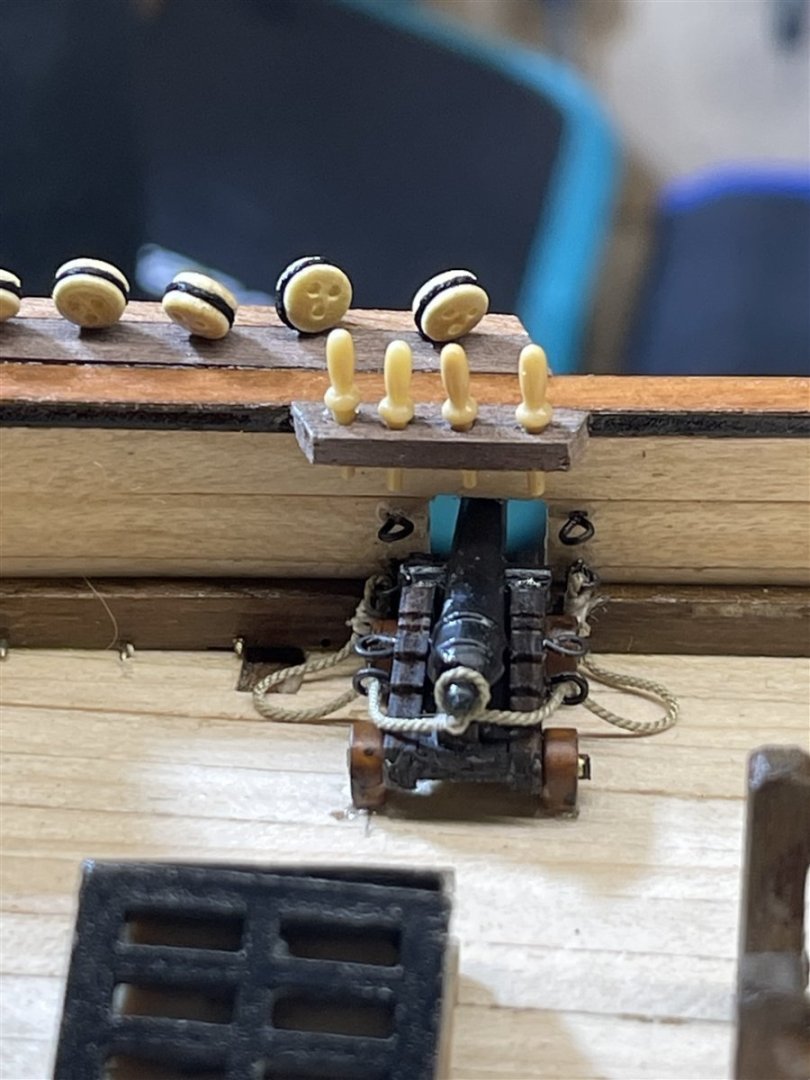
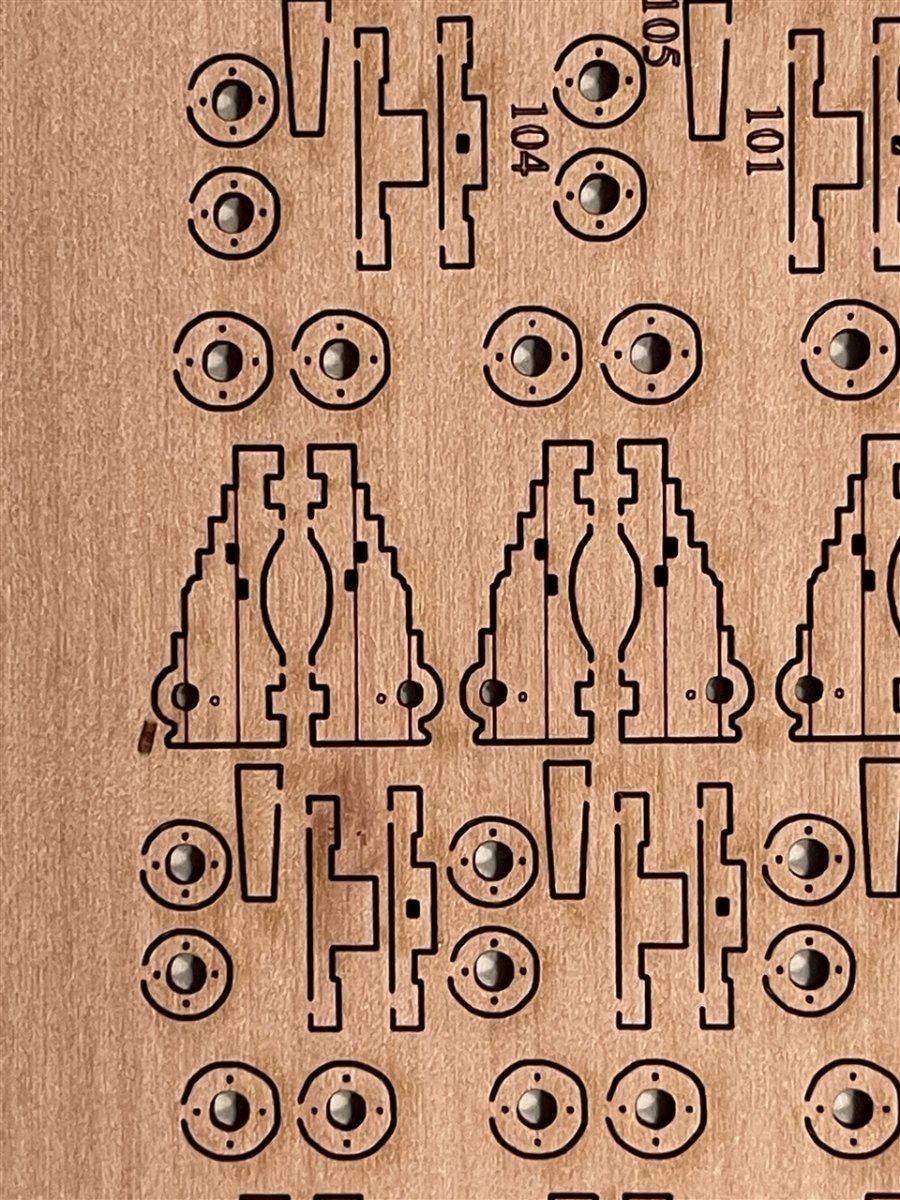
Belaying pins
These needed to get painted. I have used a spare limewood plank 5 x 2 mm as it is the same thickness as all pinrails and fifie rails aboard the Albatros.
I had to drill some 50 holes. I have made them 0.1 mm smaller then the pins diameter to hold them tight and firm.
To paint them I asked my "helping hands" to assist ...
I did it myself ... priming ... painting ... lowbrainer
Shrouds
To make the shrouds out of my yarn I needed tu use my vertical rope making machine as I needed to have 3 x 2 strands to achieve the right diameter as the 3 x 1 stranded rope has been a little too thin using the Gütermann E382 yarn.
The machine is attached to the head of a wooden bord and the strands looped around the hooks
At the bottom end all strands are tied together to a weight. In this case I have used one 50 gram calibration weight.
Two minutes later 1,4 m of shroud rope had been done
In comparison to the kit provided rope (upper one) the time an effort spent in self made ropes pays off
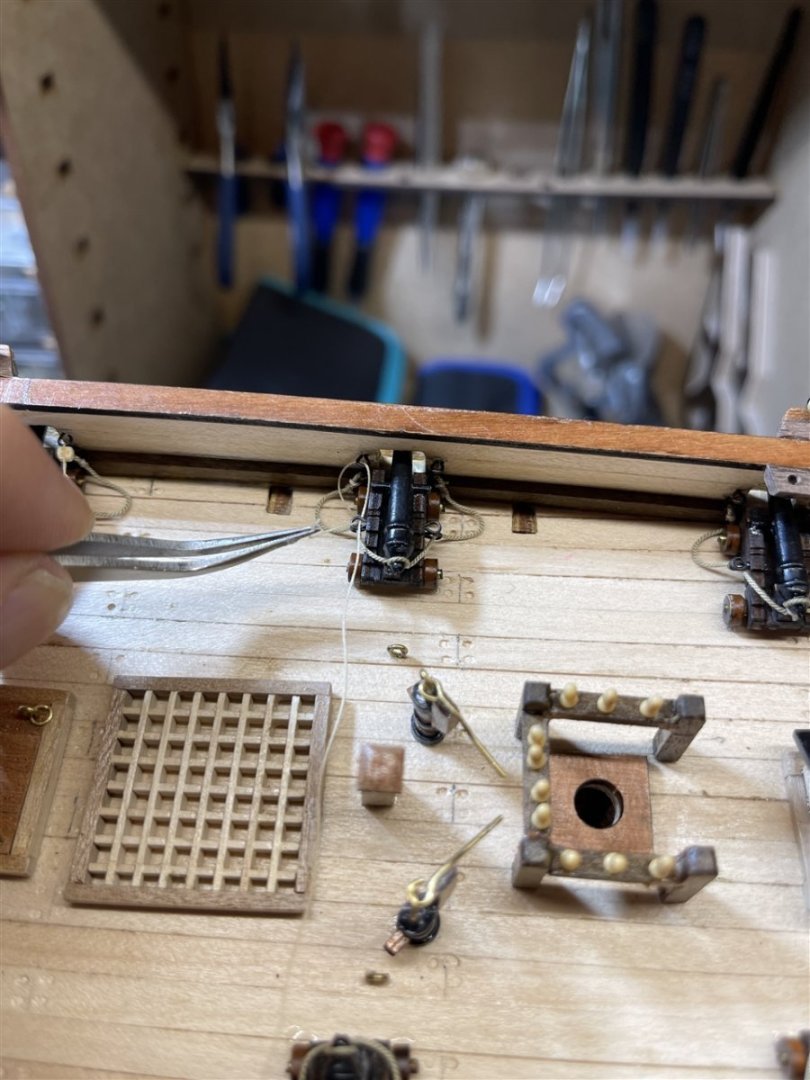
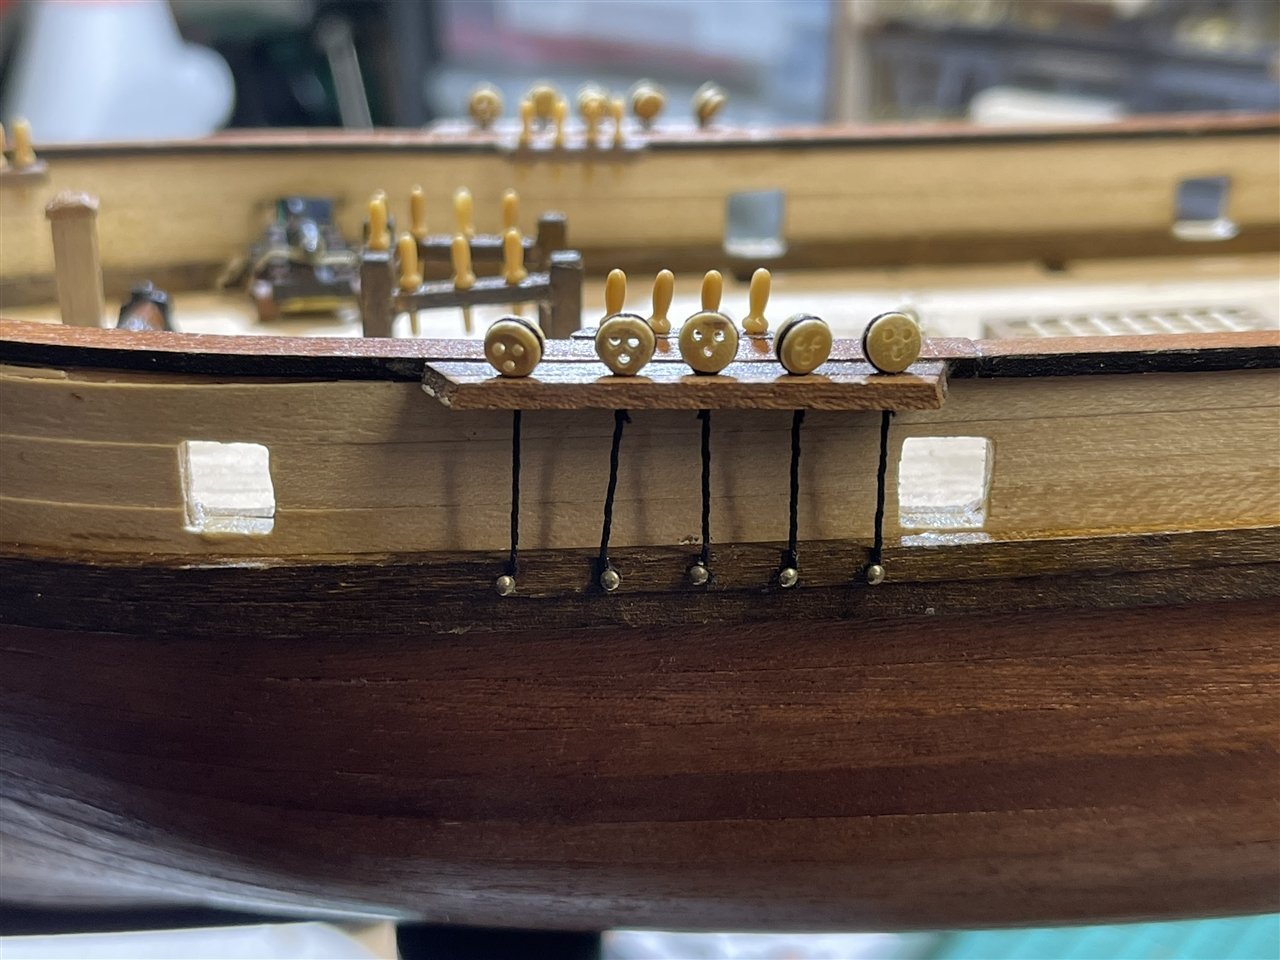
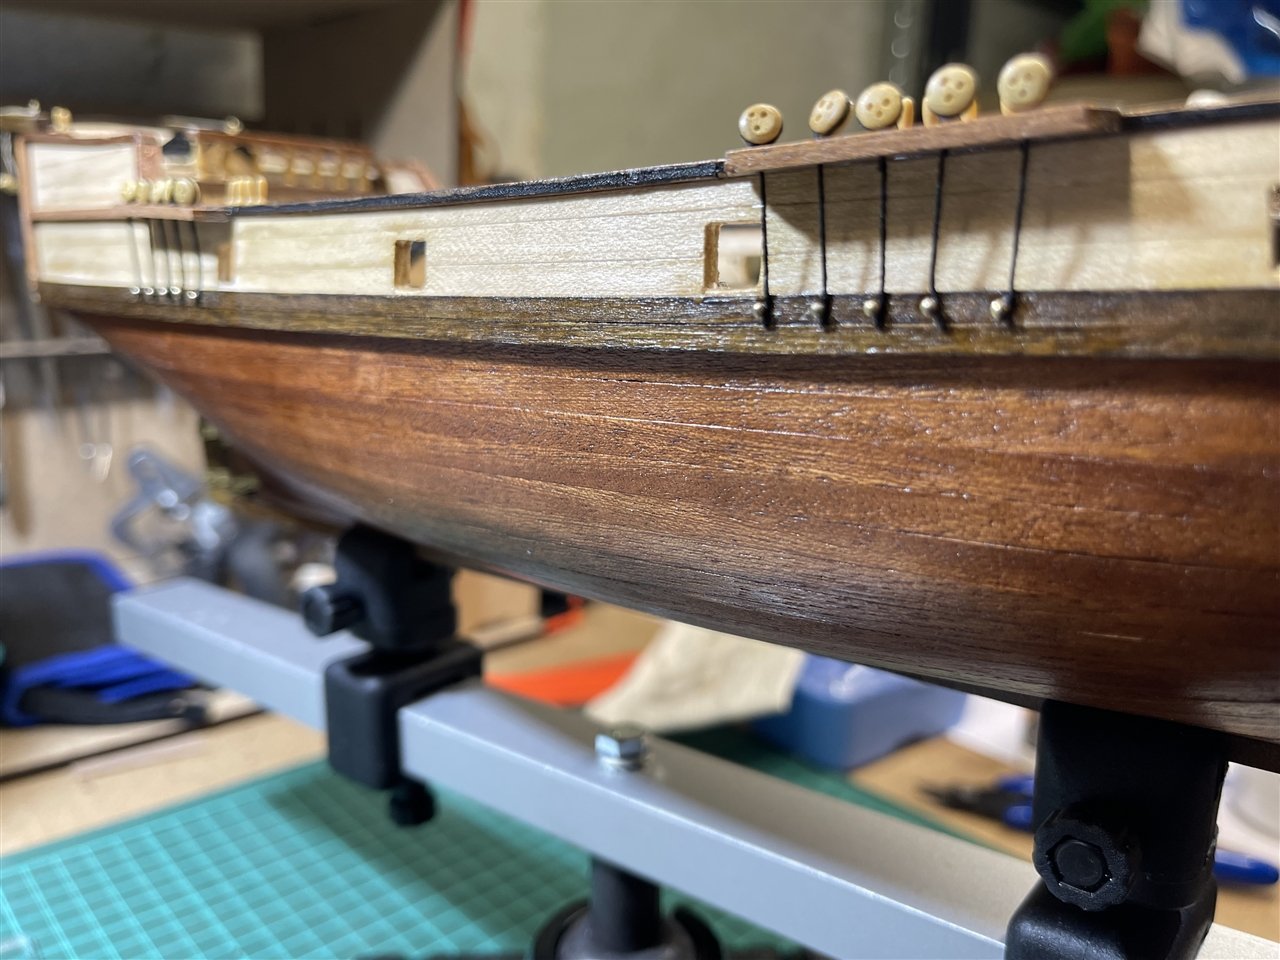
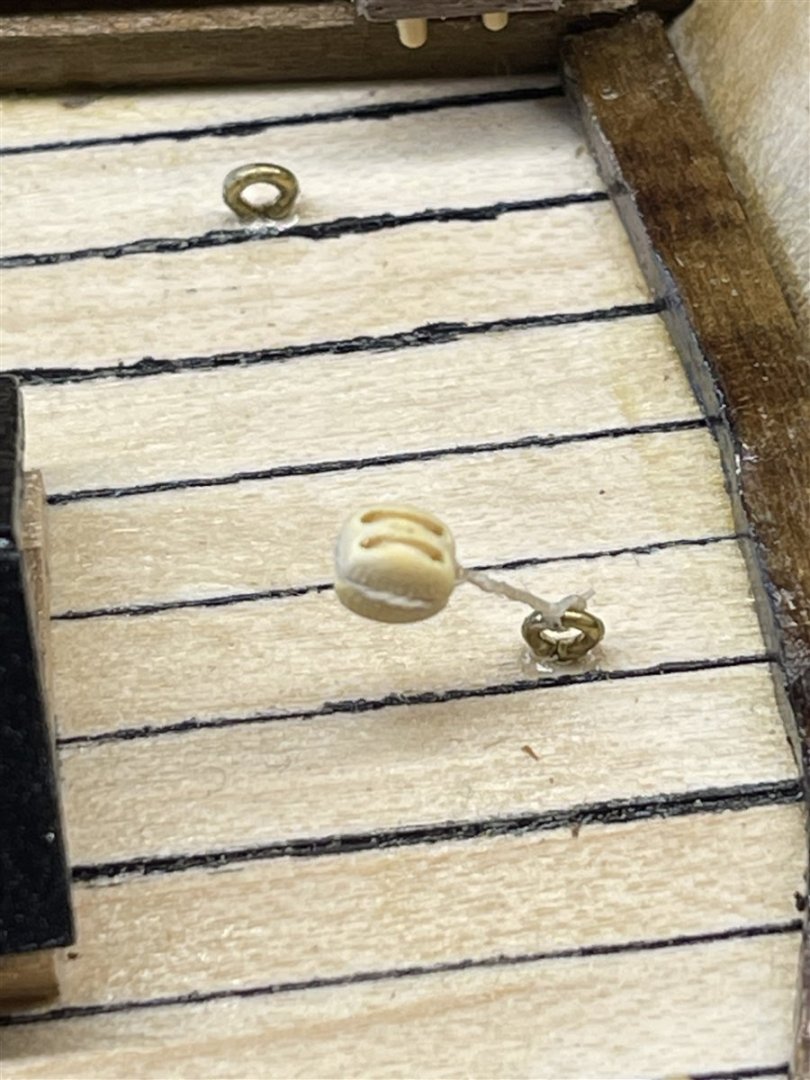
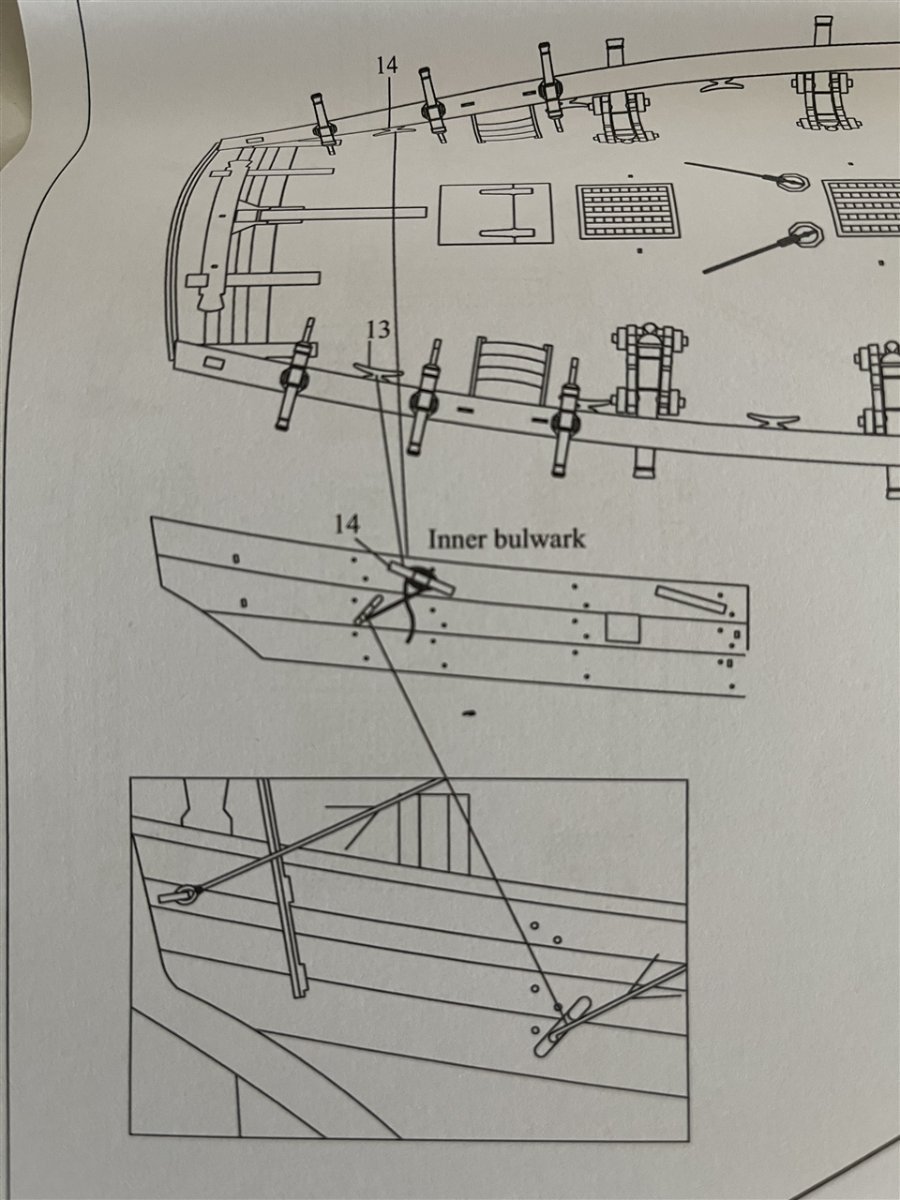
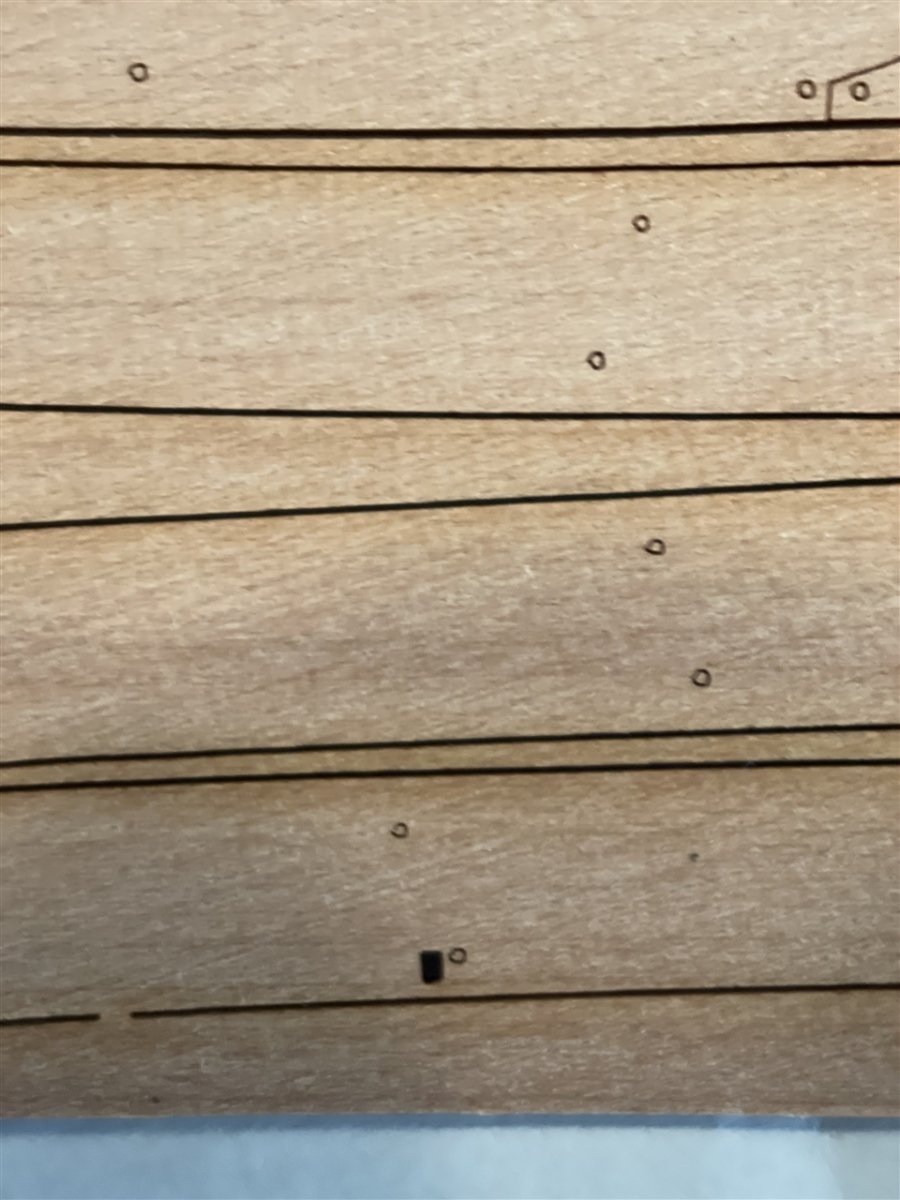
Cleats and gun tackles
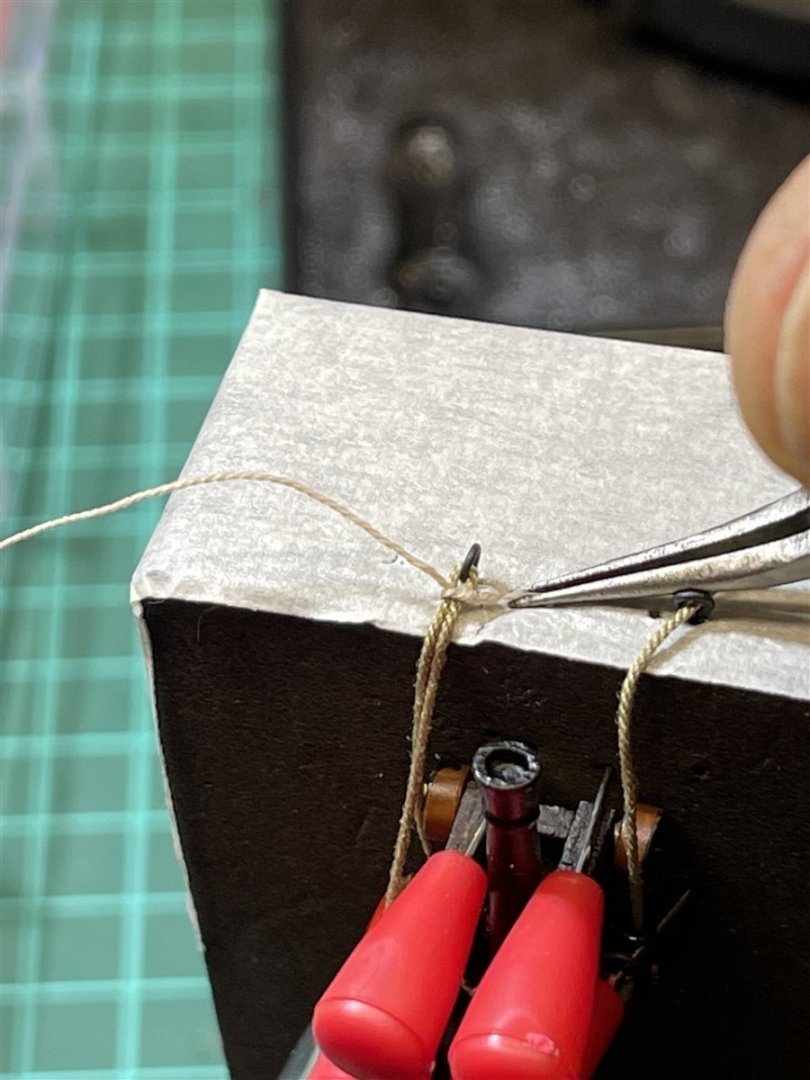
Last but not least I have startet to finish the gun rigging befor I can put the masts in. There are all the loose ends of the gun tackles to do. As I do not want to get them layed down on the deck I had to build some cleats to attach them to the bulwarks.
I have used a spare limewood plank again. Using a vice to hold it and a 4mm / 220 grit rounded rasp I started to file a little curve into the woodstrip
Then I have used a square file to shape the profile that it kind of looks like a cleat
I have set my cutter to make 1mm slices ... 8 Guns thats 16 cleats
Some dye and they are ready to get attached to the bulwarks
By far not perfect but macro lenses do not hide anything ...
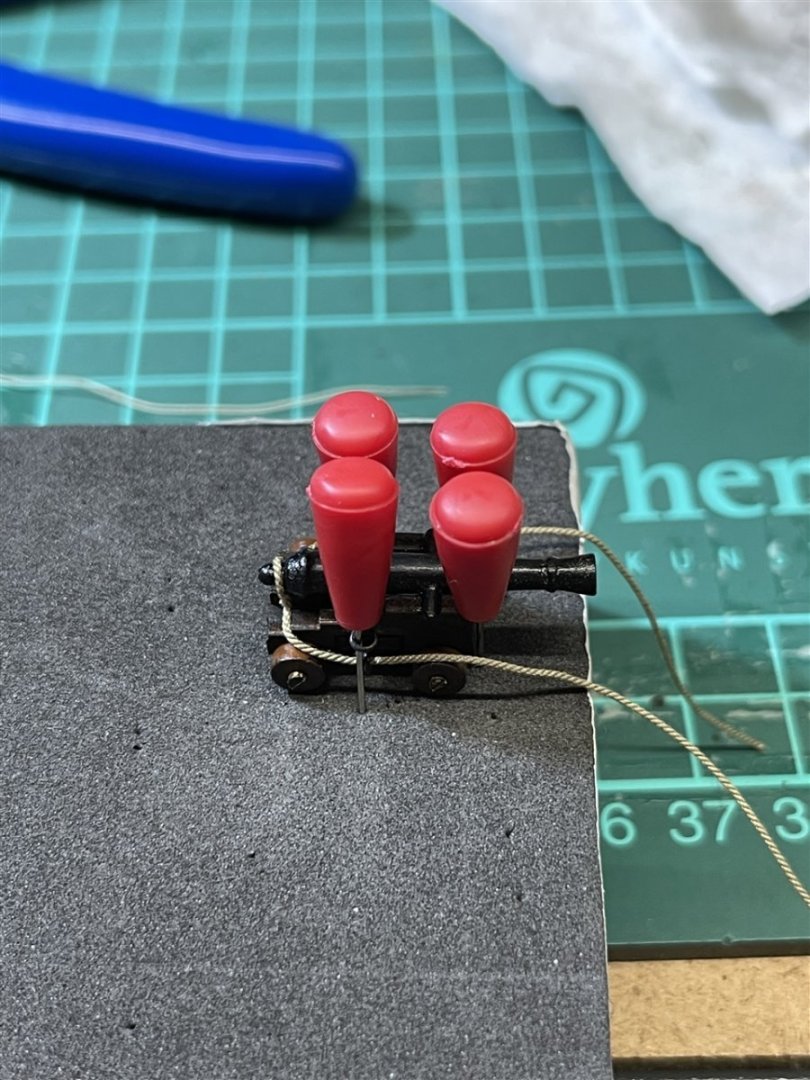
To make the rope hanks I have used some pins, a foamboard and diluted PVA glue ...
Finally the first cleat got attached and the rope hank placed into position
That's it so far ... 15 more to do and then I will place the masts and start the rigging ...
Have a nice week,
Kai