

PvG Aussie
-
Posts
95 -
Joined
-
Last visited
Content Type
Profiles
Forums
Gallery
Events
Posts posted by PvG Aussie
-
-
-
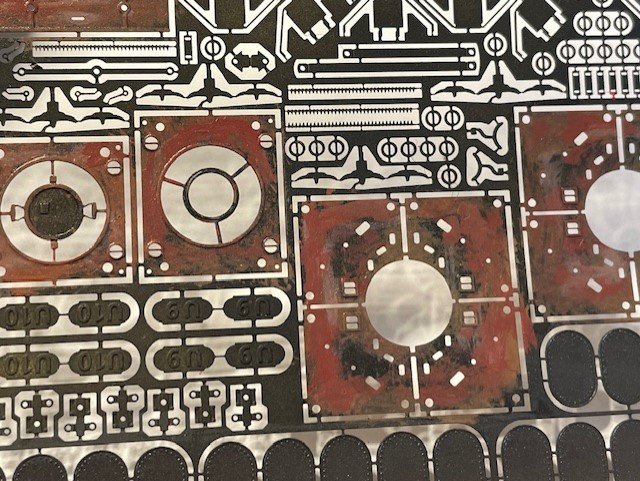
Fiddly bits, fiddly bits, and more fiddly bits!
X10
X10
X12

Only X4
X3
X10
See what I mean!
Cheers
- Canute, Haliburton, king derelict and 4 others
-
 7
7
-
My greatest achievement of the day, the headlight. Height 25mm/1inch!

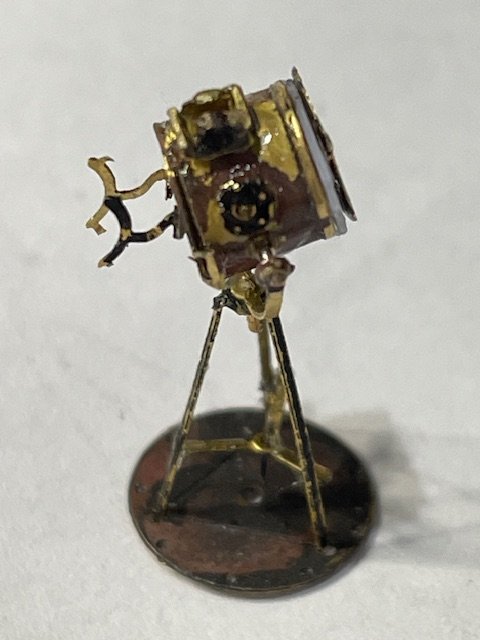
Cheers, Peter
- king derelict, Canute, Haliburton and 4 others
-
4
-
 3
3
-
I have found the answer to my 'flag question' thanks to the forum section on flags and http://www.modelwarships.com/features/current/flags/flags.html
Cheers, Peter
- Haliburton, mtaylor, Knocklouder and 2 others
-
5
-
Hi Ralf,
I see no one has written to tell you how to add a signature to your posts. It is really quite easy.
Go to the top of your page and click on the 'down arrow' next to your name (Pfalzer).
Go to 'Account Settings', then 'Signature'
There you go. Just add what you want. The aim is to keep it to no more than four lines (Not many do this).
Have fun.
Cheers, Peter
- Knocklouder, Keith Black, mtaylor and 1 other
-
3
-
 1
1
-
Thanks for all the likes and 'Wows!'
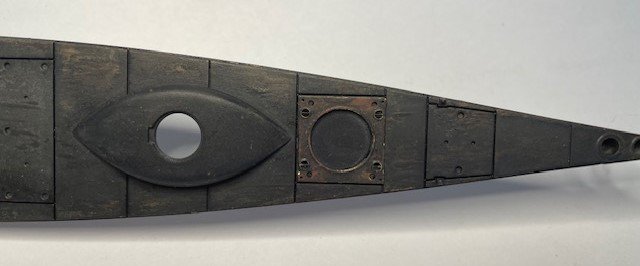
Had a good day today. I managed to paint, weather and attach the hathes and torpedo doors to the bow.
Built the rear machine gun and hatches and added them to deck.

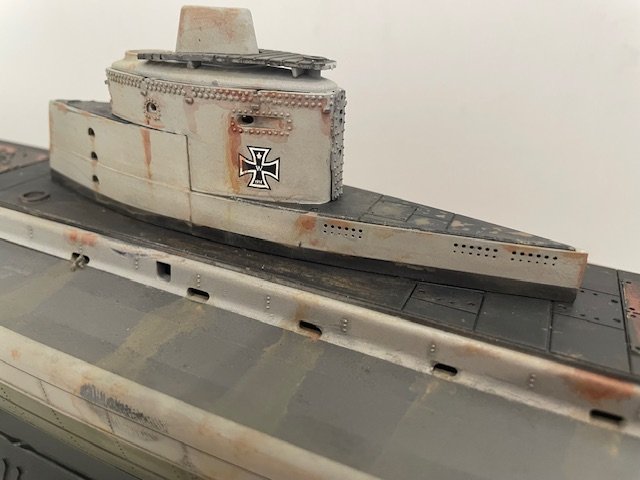
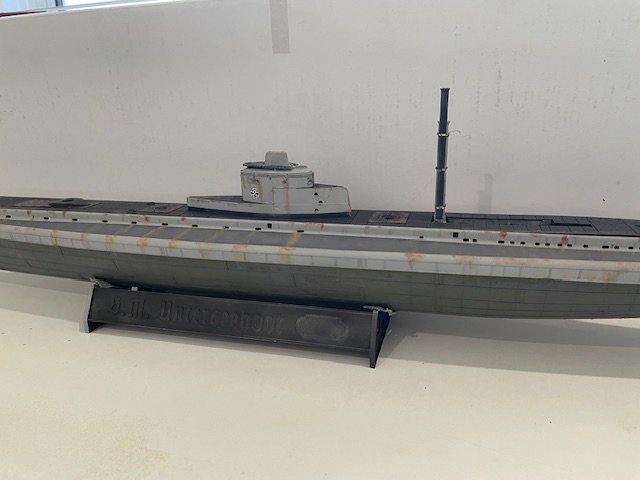
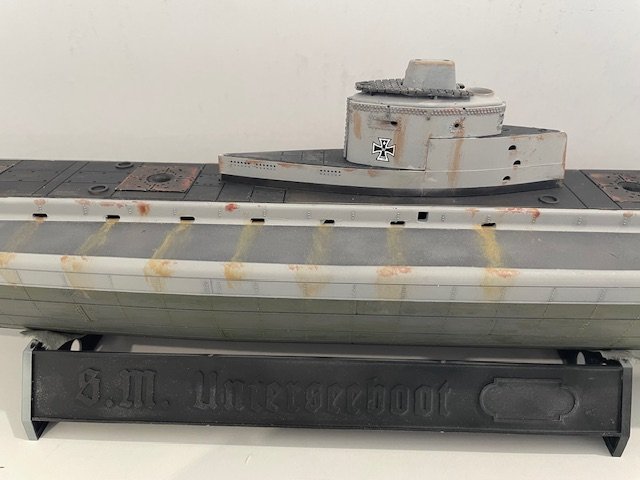
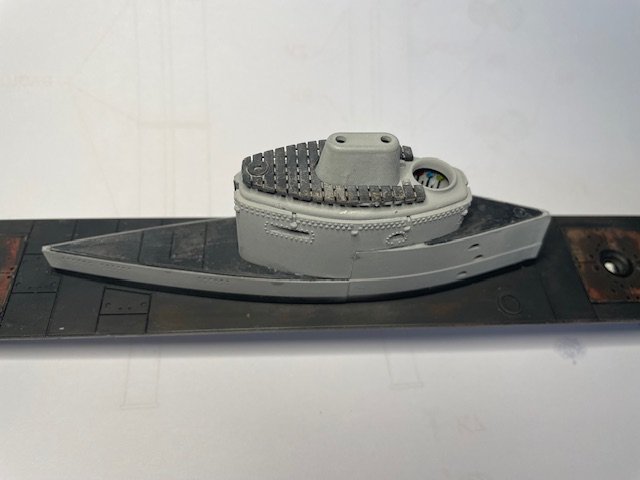
Also finished and attached the conning tower. (I have the tower crew to add later)
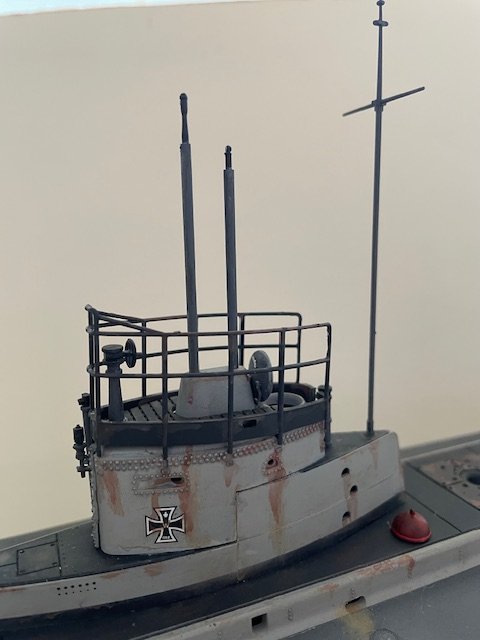
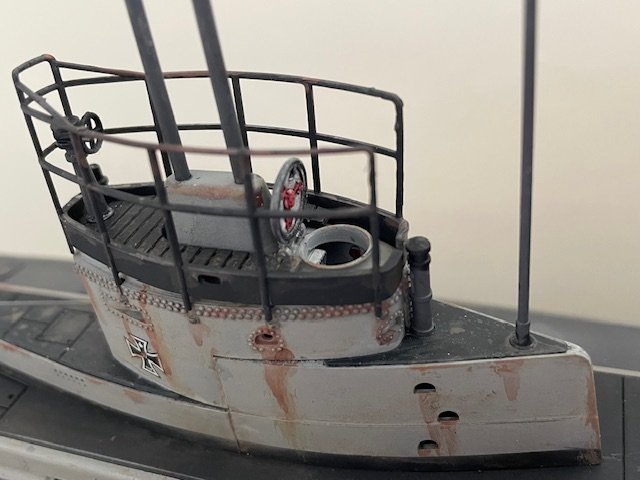
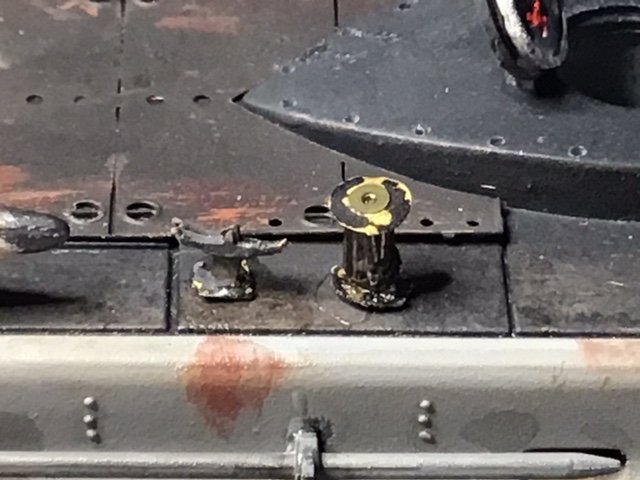
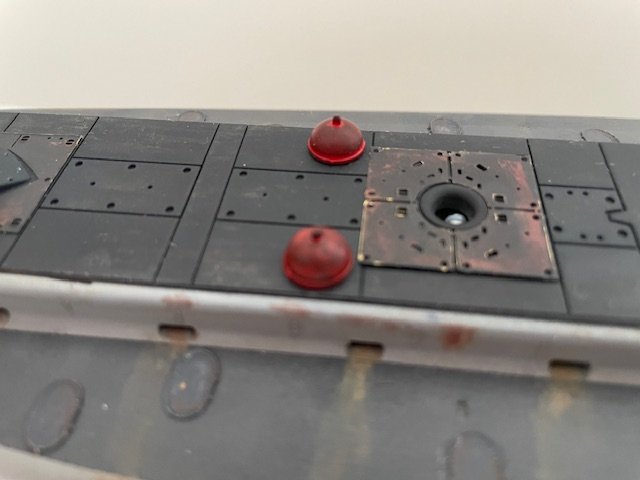
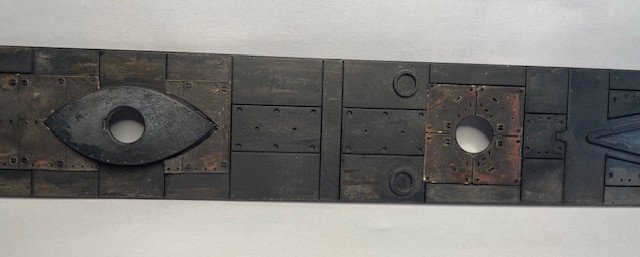
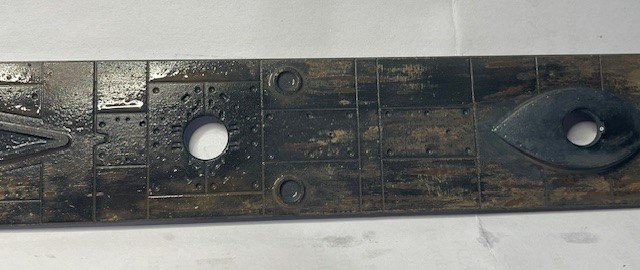
Still didn't find out what the red knobs are or how to present a decal flag so it looks real. (See previous post for details.)
Have a good weekend folks.
Cheers, Peter
- Haliburton, Javelin, Canute and 3 others
-
6
-
Jond, If only I had a suitable place to build such a wonderful boat, I would build one also! Enjoy your build.
Cheers,
-
Little time so little progress yesterday. Today has been better.
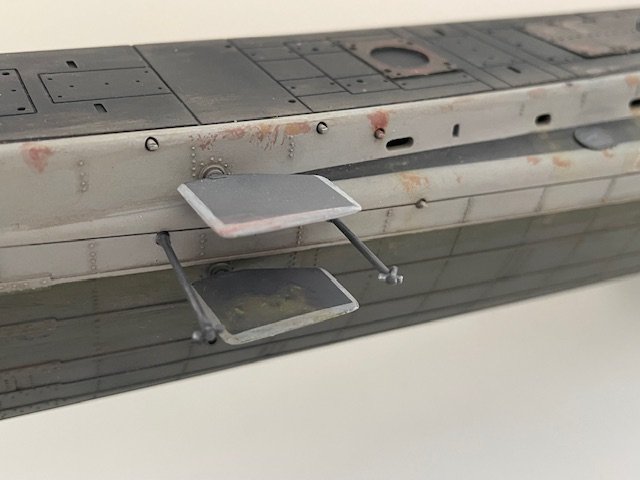
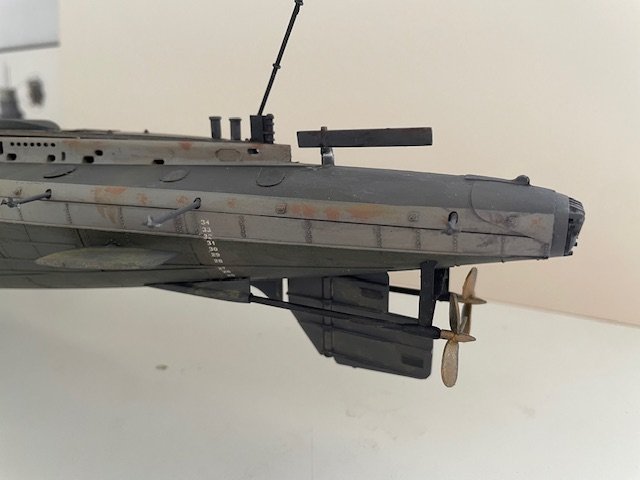
Managed to repair, paint and weather a join on the aft deck, also installed diving planes fore and aft. (Forgive the terminology. I'm no submariner by any means.)
Added the propellors, stays, flag pole and bollards.
I have two questions where I need help:
- What are these red things on the deck, and
- What is the best way to display a decal flag? (I read that using tin foil allows for good shaping.)
Cheers, Peter
-
An easy day today.
I finished the weathering on the hull and conning tower.
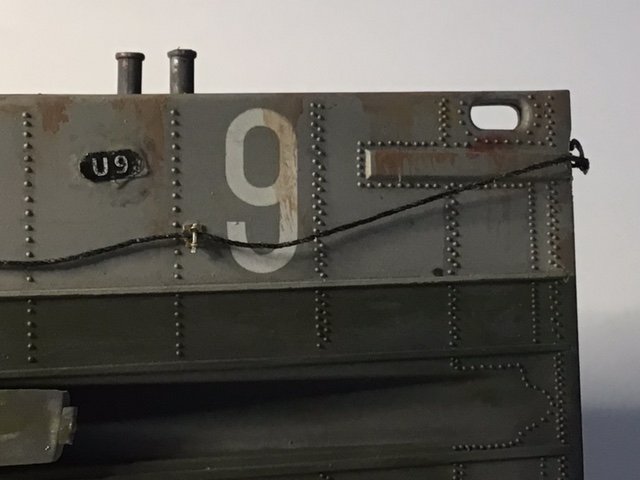
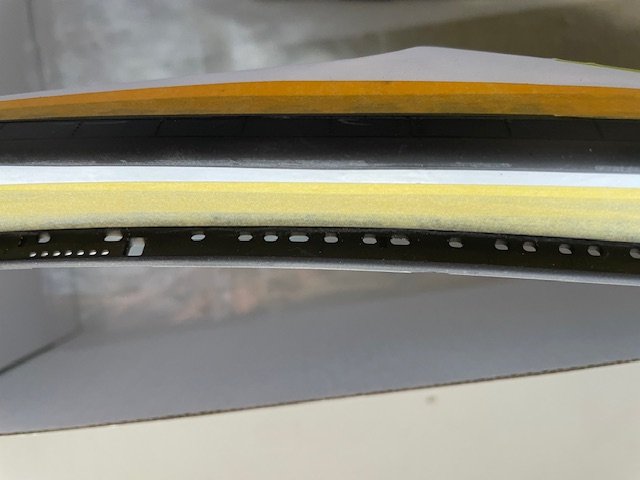
I just realised that I forgot the air vents on the side air tanks (all 34 of them!).
Better get started now!

An hour later and they're on.
Cheers,
- Haliburton, Canute, king derelict and 5 others
-
7
-
1
-
Thanks everyone for the advice. I just used it successfully on my 'build' post. ☺️
- GGibson, Scottish Guy, CDR_Ret and 2 others
-
5
-
It's coming together! (Thanks for all the likes and comments)
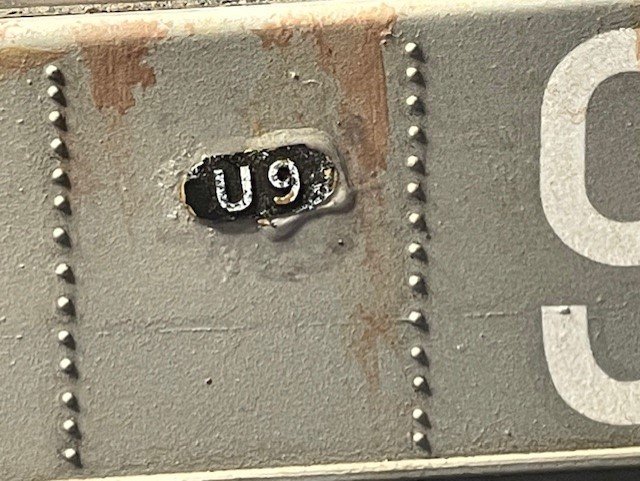
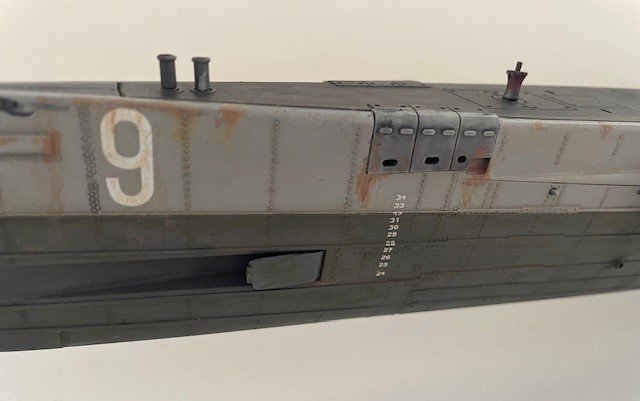
Yesterday I added decals to the hull and conning tower, using "Tamiya Mark Fit'. Tricky because of the debth decal sizes but I am very pleased as they look great.
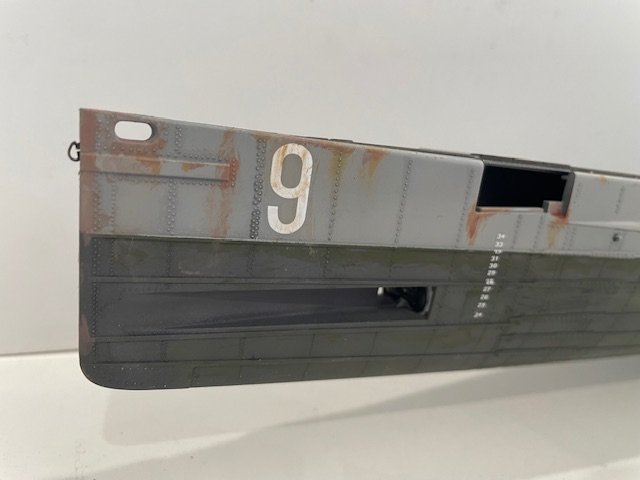
The next job was to nervously start the weathering. I mixed two rust colours using a combination of Vallejo German Orange, Artesania Latina Hull Red, Royal Blue and Deep Yellow. The colours are ok, but I think I want to add a black, grey or brown wash to give an overall aging appearance and play down the possibly excessive weathering on the port side air tanks.
A Tamiya Panel Line Accent Color (of 1/1 Black/Grey) also added a little extra but is not very noticeable. I think the straight black would be too dark.
Cheers, Peter
- king derelict, Scottish Guy, Canute and 5 others
-
7
-
1
-
-
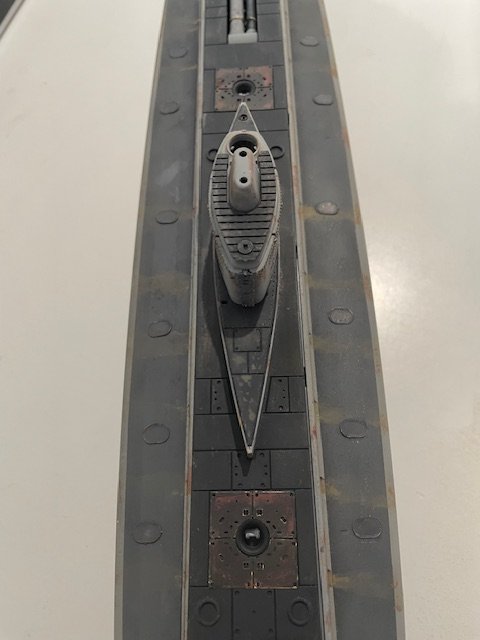
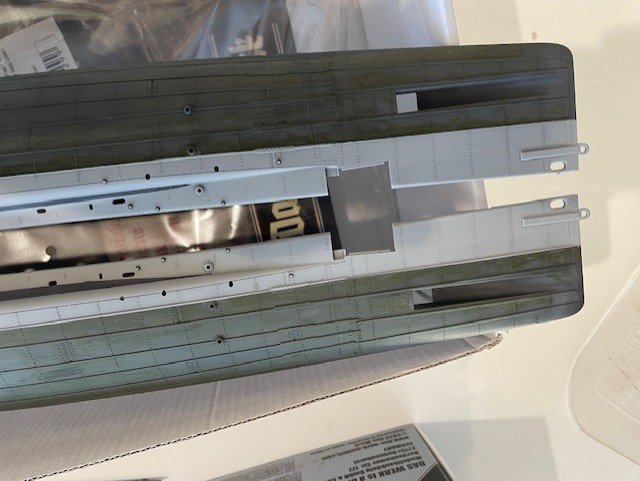
Another great day!
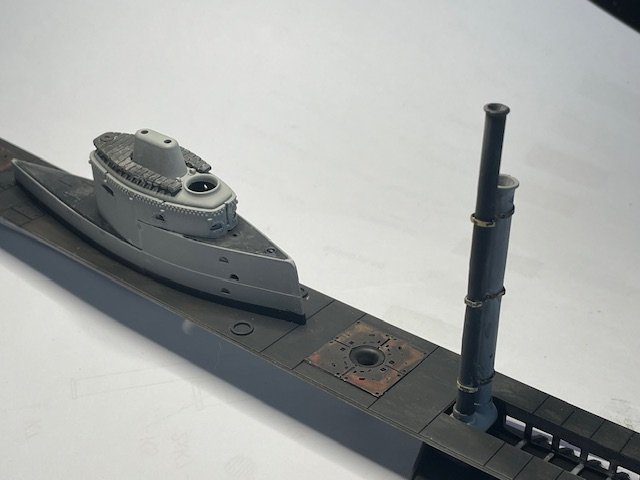
- I had fun with kit and aftermarket 'tubes'. The fit required cutting and sanding but it did work out. (The black one is for engine exhaust, and the grey one is an air intake.)
- The underside parts of the deck were then added.
- I started on the coning tower and dry fitted it to the deck to check the fit. Obviously it isn't weathered yet, maybe tomorrow.
- I'm happy with the look of the deck so it may not be long before I glue it onto the hull (ok Javelin?😉).
Cheers,


- Canute, Haliburton, mtaylor and 4 others
-
7
-
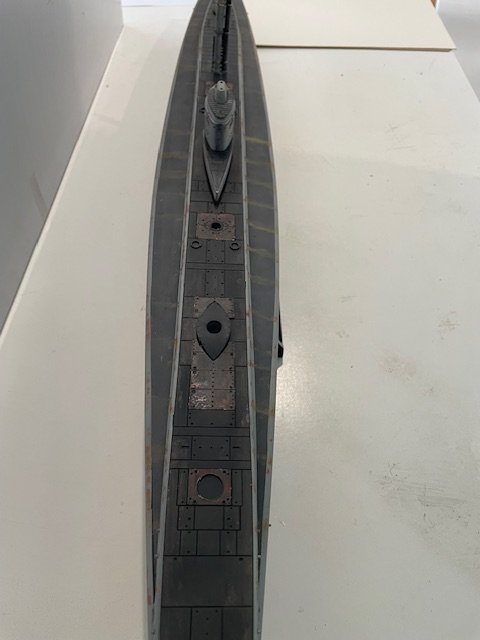
Better? I think the deck weathering is far more subtle. I also added the previously weathered deck panels, as well as Black Tamiya Panel Line Accent Color. I'm happy with the results.
- king derelict, Canute, mtaylor and 3 others
-
6
-
Thanks for the likes and comments.
The biggest danger with weathering is 'going overboard' (excuse the pun), so I think I will clear spray, hair spray and final German Grey spray the deck again. I made the error of weathering without letting the top coat dry properly and I washed off too much. Thanks for your thoughts.
- mtaylor, Canute, king derelict and 1 other
-
4
-
A great day!
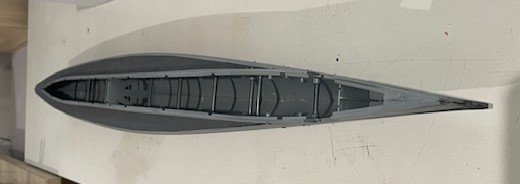
Firstly, I glued the two halves of the hull together. It was a bit of a challenge and it took me an hour and a half! I'm happy with the result.
Secondly, I dry fitted the deck and it was excellent.
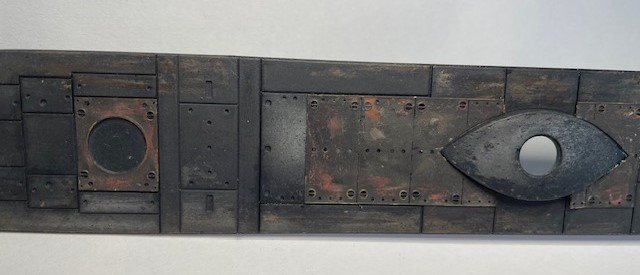
Thirdly, I weathered the deck with hair spray and a top coat of Vallejo German Grey. It is meant to look like tar brushed over timber decking. The result looks a bit grubby but that may have been how it was. Feedback would be appreciated as I may have over weathered it.
Thanks for all the 'likes' and comments. I thoroughly enjoy checking them first thing in the morning.
- Javelin, Canute, Scottish Guy and 3 others
-
6
-
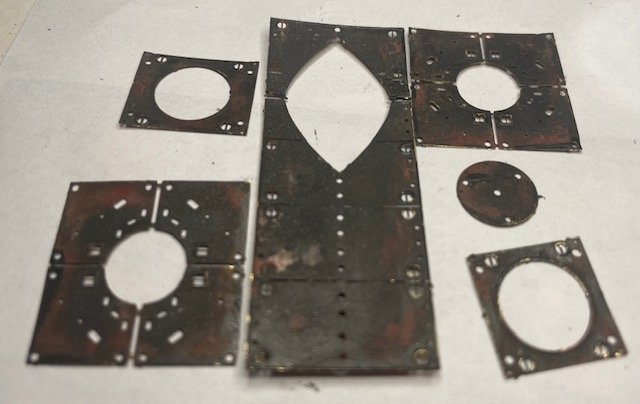
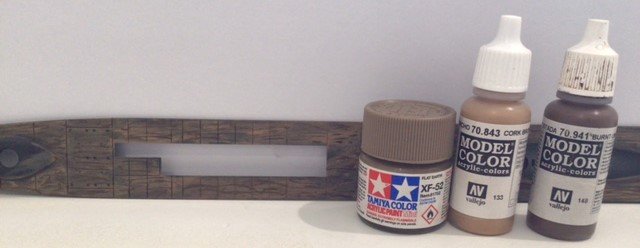
Not much done today. Too many distractions. However, I did weather the deck hatches, Tamiya Dark Iron XF-84 over hair spray over a mix of rust colours. I'm pleased with the results. Tomorrow I want to weather the main deck with it's timber look underneath.

- davec, GrandpaPhil, Canute and 3 others
-
6
-
Some old people like to talk about their illnesses. I Don't! Just say that I didn't do any modelling yesterday and I only started late today. But what a great afternoon it was.
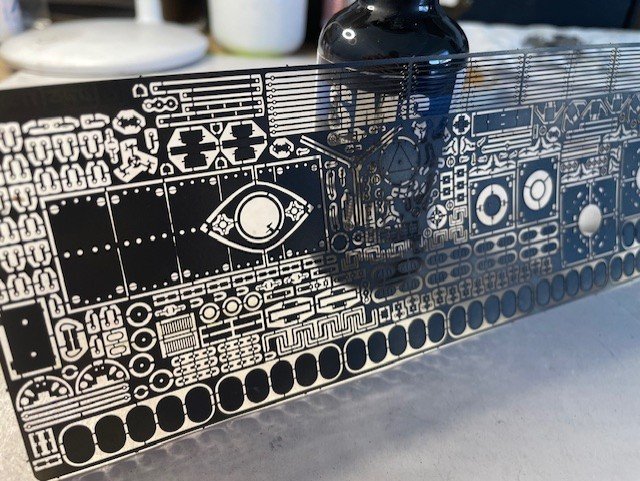
My PE parts arrived today and I primed them. Also I masked and painted the light grey areas of the hull (Weathering will have to wait). It was a pleasing few hours.
Ps. Thanks for all the 'likes' and special greetings to those that are 'following' me.
- Scottish Guy, Haliburton, mtaylor and 5 others
-
8
-
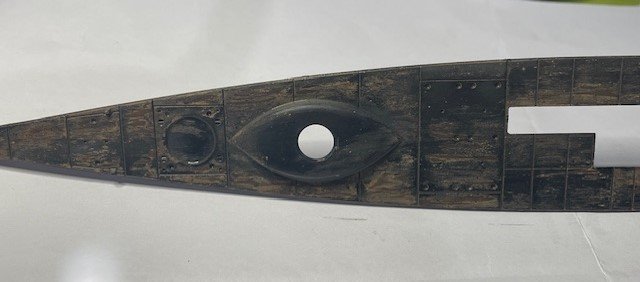
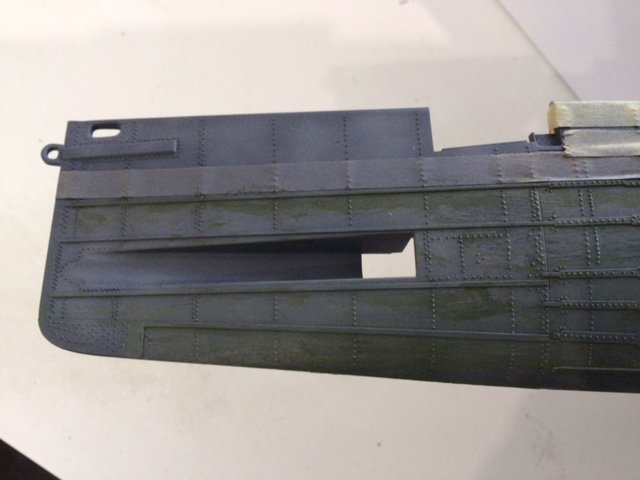
I think I'm reasonably happy with today's results.
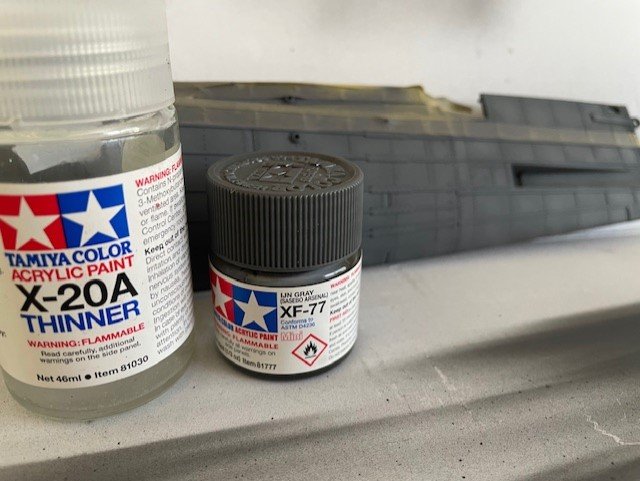
I firstly gave the hull another coat of Ljn Gray as the lighter grays underneath looked too light this morning.
Next I started playing with the algae look by adding SMS RAAF Dark Slate which I applied with a hard brush. Then followed this with a larger brush wash with the same paint. I also started on the deck 'timber look' which I intend covering with hair spray and a very dark grey or even black so that I can weather walking areas to show the timber underneath.
I'm not sure, but I think the green and timber look ok.
- GrandpaPhil, mtaylor, yvesvidal and 5 others
-
8
-
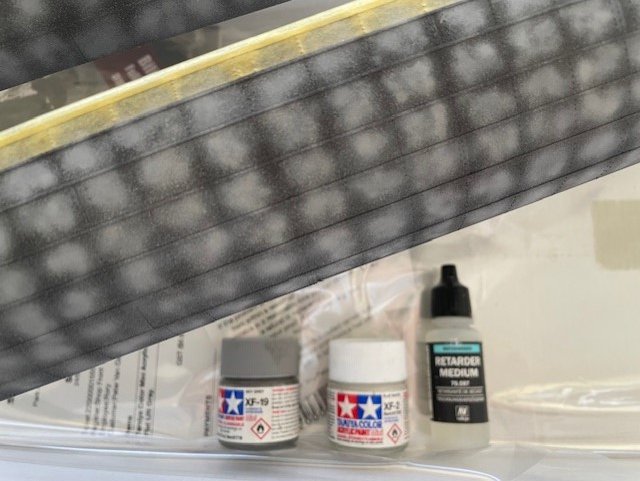
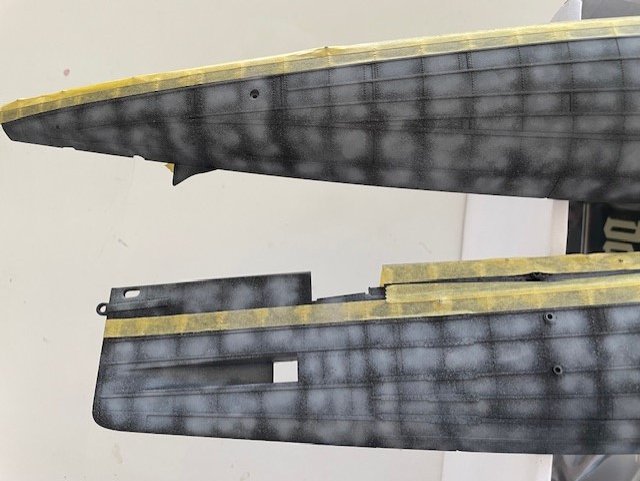
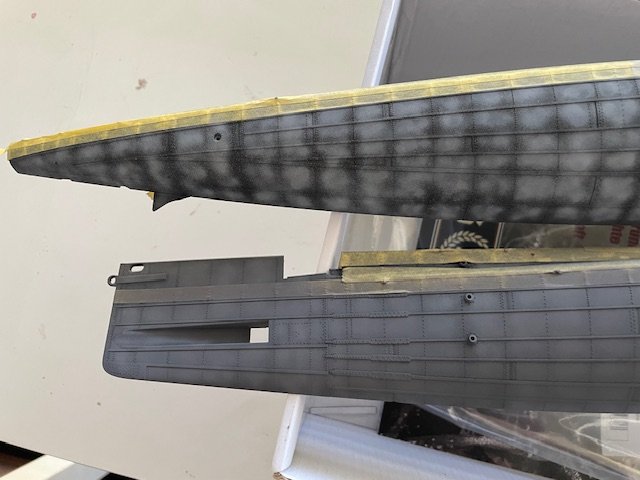
I'm happy with today's effort eventhough my air brush played up badly with the low pressure required. So today I:
1. Masked the lower hull for painting.
2. Cut the hull pieces from the sprue because I didn't want to do 'fiddly bits' on big pieces. (NB: Scottish Guy!)
3. Did the first spot marbeling on the hull and tank tops. Used Tamiya Sky Grey XF-19 and 20A Thinner, (1:2), Retarder Medium at 10psi.
4. Did the second spot marbeling using Tamiya Sky Grey XF-19, Flat White XF-2 and 20A Thinner, (1:1:2), RetarderMedium at 10psi.
5. Applied the final coat of Tamiya Lijn Gray XF-77 at 20psi.
6. Applied a clear coat of 'rattle can' Tamiya Flat Clear TS-80.
Next time, I think I may add panel liner as well as stencil some tiny patches of a lighter colour onto the lower hull.
- Scottish Guy, yvesvidal, Javelin and 5 others
-
8
-
Micha, I did it this way because I find it easier to handle the parts while still on the sprues. There is no real problem with cut marks later on as it is only the primer and there are plenty of opportunities to paint the 'missed bits' later. I will probably do the same for the next stage so as to avoid getting my fingers in the way.
Stay tuned for tomorrow's report, I'll let you know if I change my mind.
Cheers, Peter
- Scottish Guy, Canute, mtaylor and 1 other
-
4
-
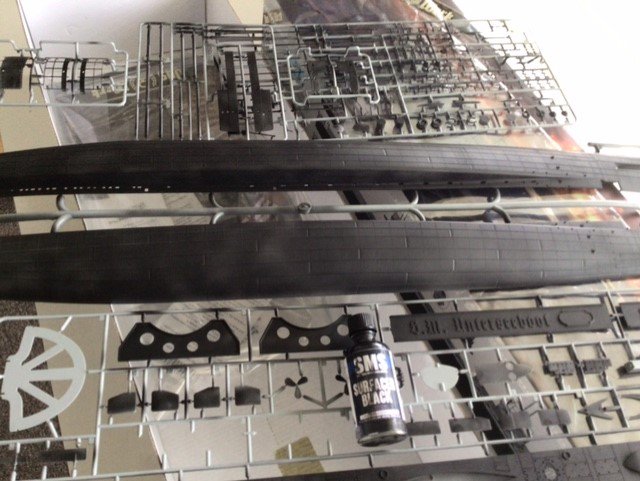
I've started!
Today I:
1. Gave up on waiting for parts in the mail.
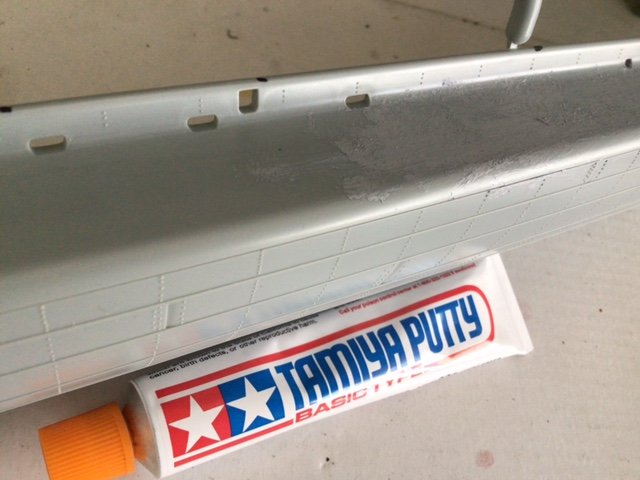
2. Slip proofed the walk areas on the top of the tanks. I used an old brush and Tamiya Putty and cleaned the edge with Tamiya Lacquer Thinner. I tried Tamiya Surface Primer but the effect was not textured enough. I am very pleased with the result.
3. Primed everything! What was grey is now black (SMS Surfacer Black).
Tomorrow I will start weathering the lower hull by 'black basing and lighter marbeling'.
-
-
Gary, don't hold your breath waiting for the parts. They usually take at least a month to get to Australia! Sorry I sound like a sad loser. It is just that I know exactly what you're going through. If I were you, I would start to think of my next build.
Cheers,
- gsdpic, king derelict, Canute and 2 others
-
5
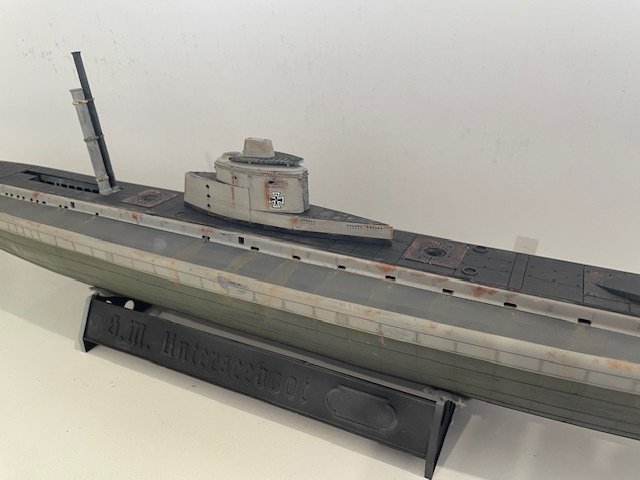
SM9 1908 by PvG Aussie - Das Werk - Scale 1:72 - PLASTIC - WW1 U-boat
in - Kit build logs for subjects built from 1901 - Present Day
Posted
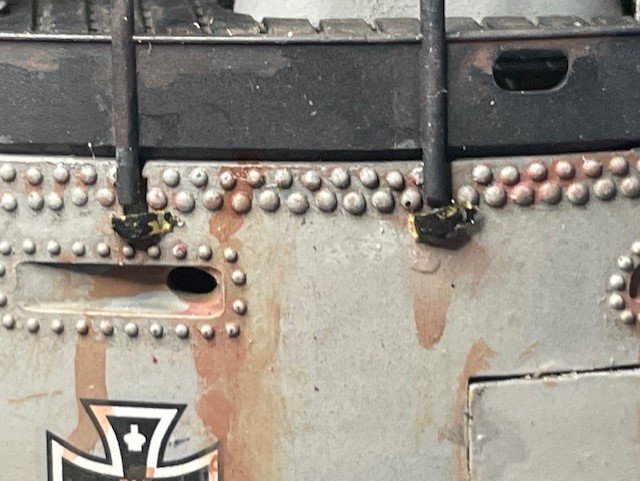
Thanks for the 'likes and wows' I certainly need them to keep enthused. I've finished the 'fiddly bits' but am now at the stage where I keep breaking things as the model becomes more conjested. Is it just me or does that happen to everyone?
Anyway, progress is being made today as I:
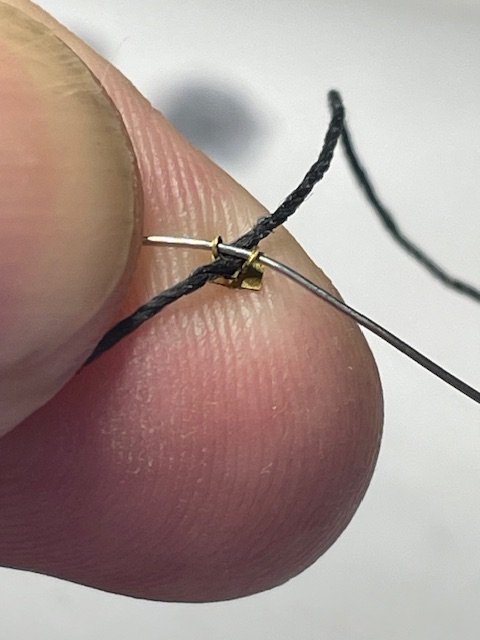
Completed the rigging around the diving planes,
exhaust and air intake tubes, and set up the antenna posts in preparation for the wire strands.
Have a great weekend,
Cheers