NenadM
-
Posts
3,254 -
Joined
-
Last visited
Content Type
Profiles
Forums
Gallery
Events
Everything posted by NenadM
-

Cutty Sark by NenadM
NenadM replied to NenadM's topic in - Build logs for subjects built 1851 - 1900
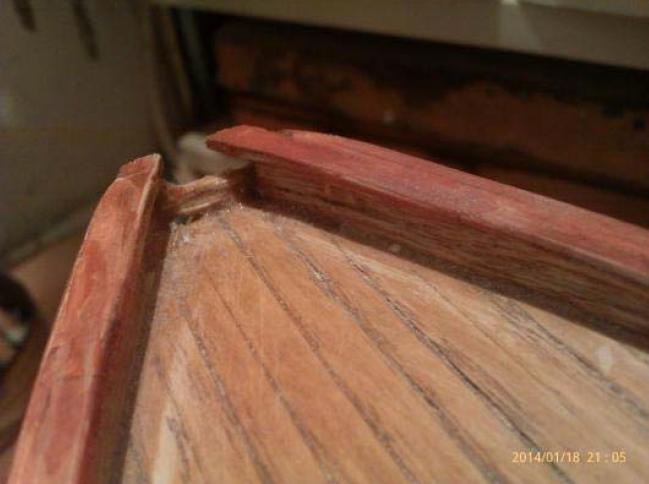
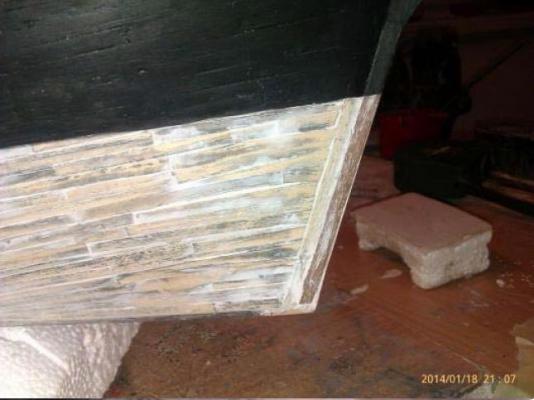
Daniel I "thinned" tooo much cutwater during hull saaaaaaanding and it had 3-3,5 mm depth instead 4-4,25 mm. So, must do something to correct it. I find solution in two aditional outside layers of veneer which are(will be) covered with black acrylic paint and coppering. Edges are finished with putty mask so this all is (will be) covered. Only "double" you can see is unprecise work. On this way transition from planks to cutwater is so much softer and front hull, stem bow and cutwater look much sharper and more proud. So, as I wrote earlier - happy end of one mistake I made -
Cutty Sark by NenadM
NenadM replied to NenadM's topic in - Build logs for subjects built 1851 - 1900
Marc As I am in painting job about week and more , Admiral ask me what to hell need so much time just to paint Her ... why, to hell, you need another sandpaper with granulation 400 ...- 4,152 replies
-
- 1
-

-
- cutty sark
- tehnodidakta
- (and 1 more)
-
Marc Looking your topic I say to myself Watch and learn And the watch and learn again
-
Cutty Sark by NenadM
NenadM replied to NenadM's topic in - Build logs for subjects built 1851 - 1900
And here is it again ... worm of doubt in my mind Little progress on weekend, mainly slow slow slow precise (trying) painting over rails (I had to use magnify glass and Brush painting with such a thin tip that can be seen only under a magnifying glass) , with 100-200 interruptions by family ... give me that ... give me this ... where is ... could you ... why do not you ... why did not you ... when you will ... what do you think about ... It is time for ... what happened with ... have you ... And over that all At one moment in the evening, my daughter came in workshop ... it was cold (timer turned off the heating) so as I am bald, I putted on some dirty cap on top of my head, in working clothes with putty and paint traces every where on it, sitting still in corner on workbench without any visible move, my nose skintight to magnifyer, cigarette in corner of lips, smoke around head, trying to be quite and still as it can be done, only hand with brush ostensibly stoned to Her Majesty, deep concentration, excluded from all around, working on places where 1/2 mm means different of straight line and curvature, Mendelson or something similar in background, and she said: " You look just as a mad scientist " ...
- 4,152 replies
-
- 3
-
-
- cutty sark
- tehnodidakta
- (and 1 more)
-
Cutty Sark by NenadM
NenadM replied to NenadM's topic in - Build logs for subjects built 1851 - 1900
It is easy, Bob. Just thinned veneer ... good "surgical" scalpel needle for "rivets" and the need to camouflage the mess So make a mess and solution will come ...- 4,152 replies
-
- 1
-
-
- cutty sark
- tehnodidakta
- (and 1 more)
-
????? what happen?
-
I must try this technique
-
Cutty Sark by NenadM
NenadM replied to NenadM's topic in - Build logs for subjects built 1851 - 1900
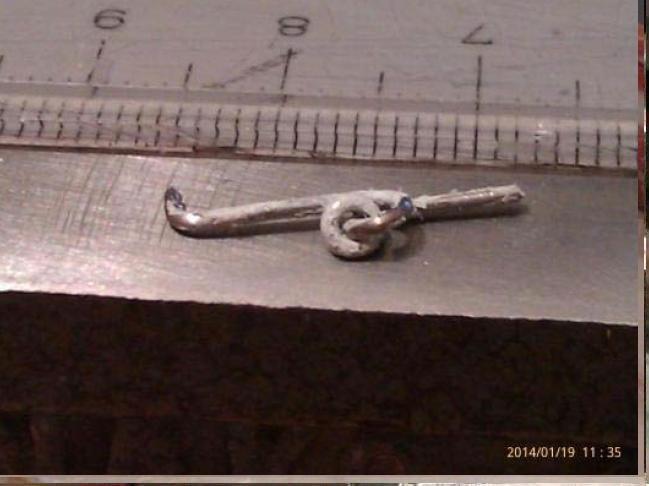
Little playing and testing with thin wire from paperclip. If I do not find a thinner and enough strong, and at the same time, arable wire, ring is unnecessary because the whole thing looks a bit bulky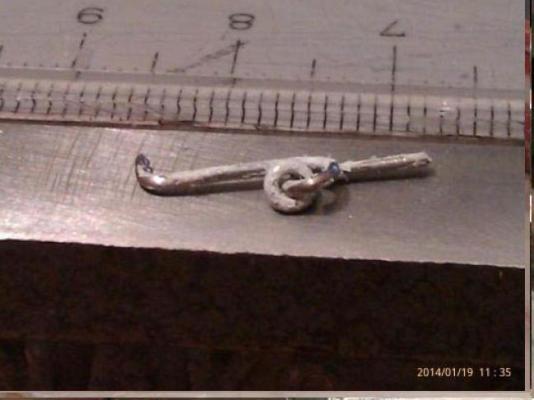

- 4,152 replies
-
- 3
-
-
- cutty sark
- tehnodidakta
- (and 1 more)
-
Bending planks is still mistery for me Please put some photos of bending
-
Cutty Sark by NenadM
NenadM replied to NenadM's topic in - Build logs for subjects built 1851 - 1900
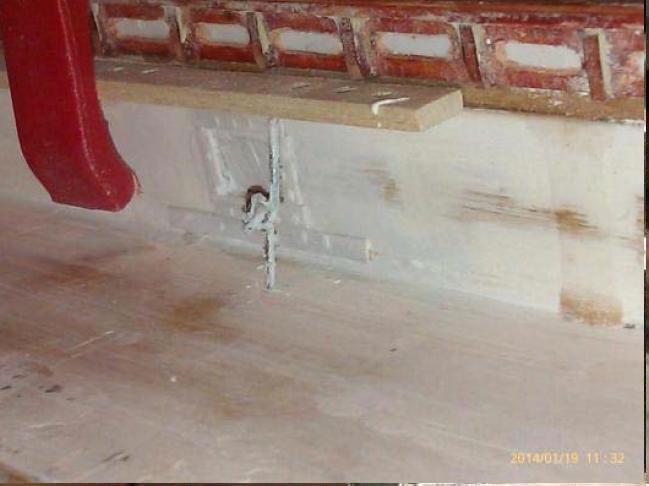
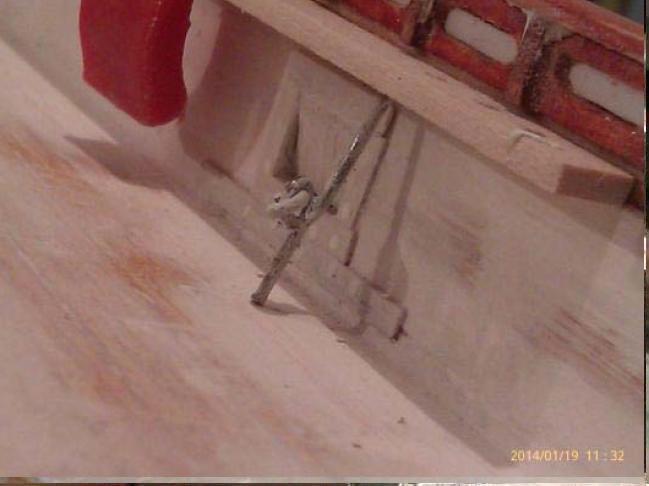
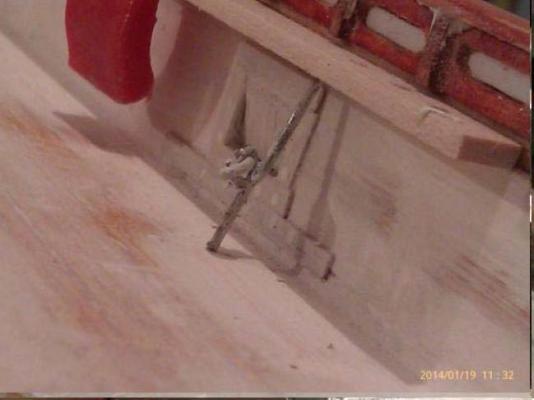
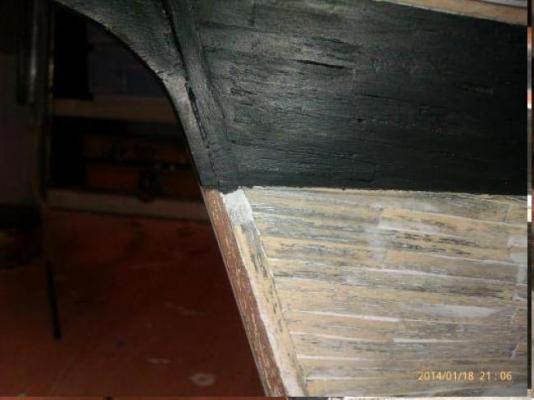
Daniel Here are close-ups. If you need explanation, just post here or by PM, as you wish


- 4,152 replies
-
- 2
-
-
- cutty sark
- tehnodidakta
- (and 1 more)
-
Cutty Sark by NenadM
NenadM replied to NenadM's topic in - Build logs for subjects built 1851 - 1900
Thx Burga and Lou Daniel Just now, my cellphone ( best camera in house) is empthy, and you must wait for a little. In meantime, as you have enough patient, notice that all "steps" of building are somewhere in deepnes of this log. I coud never suppose that this log will have 39 pages and almost 25.000 visits, and understand that is sometimes booring to digg and dive deep inside to find some referent picture. And maybe some detail important to someone other I was not considering as important and don`t take picture ( or I was shame of big mistake ...) Anyway, it seems that almost all of Her today look and feel could thanks to coincidence and accident, spicy with my sense and some artistic talent and relatively skilled hands. Many mistakes I have made, and my model is everything but accurate to the scale. When I woke up one day in my today commitment, I was allready moving far far away without any chance to correct this earlier massive mistakes on any way but to start over from beggining. And deccission (wrong ?) was made, and I moved forward If you will follow this log, you will see what I mean. First, when I start to work on waterports on inside bulwarks. Second, when I start to correct space on main deck under fore and under aft deck. Tommorow I shall put some close-ups, but do not understand exactly what are you looking for. I can describe if you wish more detailed every step runnung of bow than I have done in this topic, but, personaly I do not think that what I have done is right and proper way of building model. Absolutely everything you can see now is exclusively and purelly a mater of luck, and all sense I have in makeing it how it has to look. Mistakes leave me nothing in hands exept sense, strong will, and some artistic approach Thank you for your interest- 4,152 replies
-
- 1
-
-
- cutty sark
- tehnodidakta
- (and 1 more)
-
Cutty Sark by NenadM
NenadM replied to NenadM's topic in - Build logs for subjects built 1851 - 1900
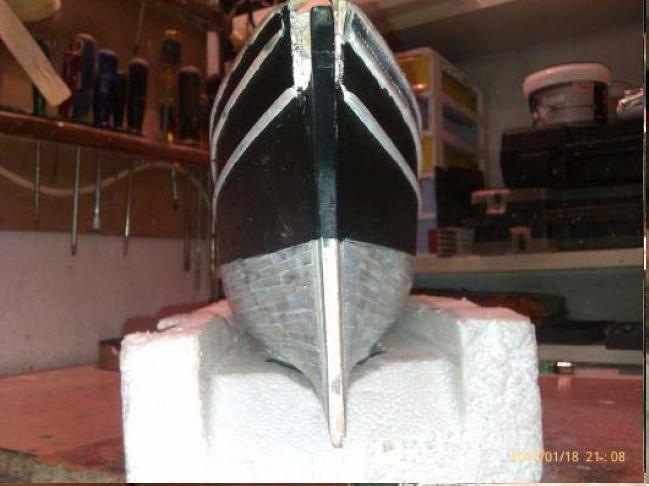
Go forward in painting Coloured, Her Majesty now seems so much longer no matter I removed bowsprit. She looks quite large ... and workshop desk looks quite small for further works. I must cook up something about this question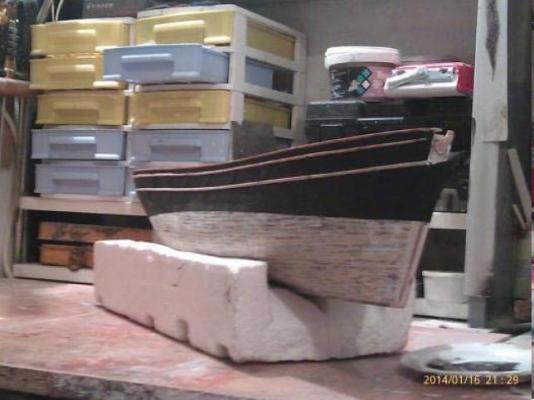
- 4,152 replies
-
- 2
-
-
- cutty sark
- tehnodidakta
- (and 1 more)
-
Cutty Sark by NenadM
NenadM replied to NenadM's topic in - Build logs for subjects built 1851 - 1900
Thank you, Lou, I think it still need additional work -
Cutty Sark by NenadM
NenadM replied to NenadM's topic in - Build logs for subjects built 1851 - 1900
In post #573 ad. 16. I mentioned something about researching small parts on outside bulwark I have done my little research in all plans and photos I collected, with idea to be a reminder for me not to forget something When I put results on paper, it seems that can be also useful for all other members from CS fleet, as intend to overload model with details. Considering that I am probably not understanding particular positions, or made some mistakes with names, this material, by my opinion is only for further investigation on internet and as reminder when details come in line Of course, most useful were Lou`s set of pictures ( thanks again Lou), C-plans and internet Document is originally made in MSWord, but that type can not be attached, so here is *.pdf version reduced to size under 2MB small elements and parts.pdf Important notice - At august 20th 2014. I discovered that attached file is damaged. I tried to make new, but, original document is in MSWord, 5MB large, and reducing to 2MB make pictures unclear. I noticed over 20 downloads, I suppose, with great disappointment because nothing can open. So, if anybody is still interested in this, I ll be glad to send original MSWORD file to designed private mail with no size restrictions- 4,152 replies
-
- 2
-
-
- cutty sark
- tehnodidakta
- (and 1 more)
-
Keep on. Admirals sometime just do not understand ... Sometimes do
-
Cutty Sark by NenadM
NenadM replied to NenadM's topic in - Build logs for subjects built 1851 - 1900
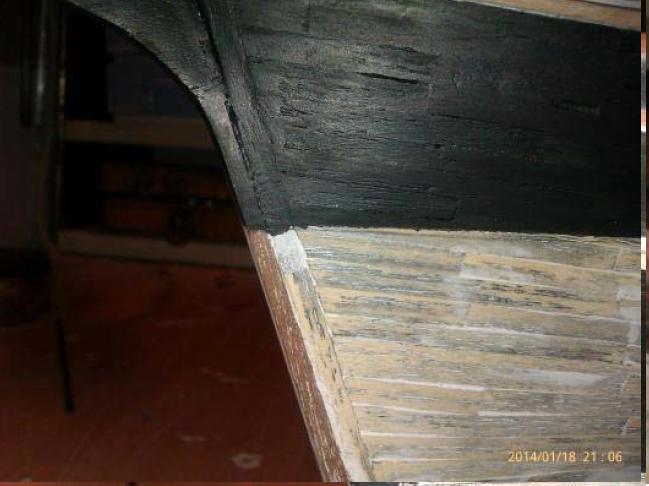
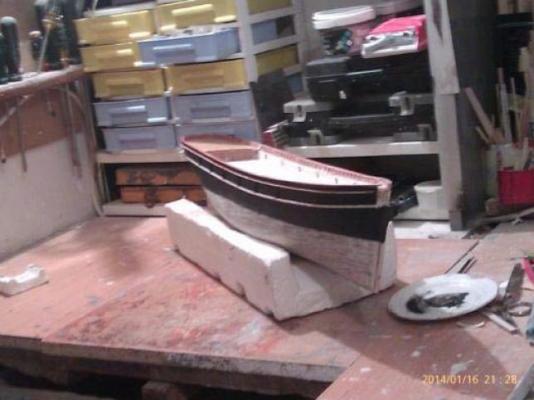
Start of prelimarry painting. Rails are not painted yet Hand-painted with help of magnifier, 2 hours until my eyes dropped down to workbench Appearance is growing up ! Endless sanding and puttying and enormous polishing of hull is definitely worth it In pictures this is not seen (low resolution and weak camera) , but I got exactly what I was looking for: Strip with water-ports look enough smooth and straight as it is done from metal plates, in hull under square white rail you can see strips of planks on quite similar way as on the CS. Real masters sure can do this much better, but I am very proud to myself where I was and how it is going now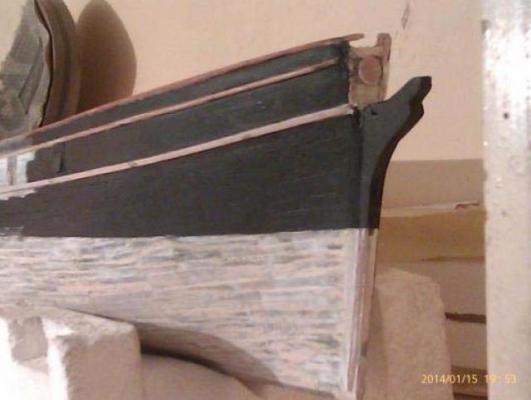
- 4,152 replies
-
- 3
-
-
- cutty sark
- tehnodidakta
- (and 1 more)
-
Cutty Sark by NenadM
NenadM replied to NenadM's topic in - Build logs for subjects built 1851 - 1900
Advice needed from experienced members In this stage, there is a lot of thinking about sequence of next moves, considering, for instance, that during coopering model must be turned upside down during rough words on main deck little sensitive parts may be damaged Also I am a little bit afraid to forget something and to find myself in swamp again So, I make some draft of next moves, and I really need your thinking about order of steps 1. Final light sanding and puttying bow and stern, cleaning whole ship from dust and trash ( I am here right now ) 2. Preliminary protective painting outside bulwarks and upper part of hull ( Black paint from waterline to rails and between rails, white on square rail and teak on rounded rails ) 3. Cleaning inside bulwark with white panels from putty ( It is dirty now ) 4. Preliminary protective painting white panel bulwark in teak colour ( Removeing old paint, sanding with 400 sandpaper and repaint them ) 5. Correcting space under forecastle (poop) deck ( There is chaos now, and lot of things must be put inside ) 6. Correcting space under aft-deck ( There are some mistakes I must correct ) 7. Inside white Bulwarks – makeing inside waterposts ( That will be fun ) 8. Preliminary protective painting inside bulwark ( Maybe final painting, after all this steps I am afraid that there will be no way to precise paint after ) 9. Waterway – makeing and preliminary painting in grey colour ( I am still thinking how to make it, but it is very visible part ) 10. Stanchions ( Bob, I am thinking about your work all the time ) 11. Replanking main deck ( Must be done to raise a little under line of waterway, and to cover consequences of mistakes I made earlier ) 12. Rudder – makeing, coopering, soldiering and mounting ( In this stage, model can be turned upside down without damage ) 13. Coopering ( Finishing coopering, there are in my opinion no other works which demand turning model again. Only one question – what to do – how to keep model form damaging cooper plates. I am thinking about hard ) 14. Pinrails/deadeyes holders, makeing, mounting and preliminary protective painting ( ) 15. Makeing (or bying) and mounting deadeyes with their stanchions ( ) 16. Light small details on outside bulwark and upper part of hull (windows, etc) ( I am just researching this point in all plans I have and in all pictures I have, and ... there is so much of them ... it will be separate post ) 17. Ornaments on bow and stern, makeing, mounting ( ... big big big challenge ) 18. Climbing on deck works- 4,152 replies
-
- 1
-
-
- cutty sark
- tehnodidakta
- (and 1 more)
-
Cutty Sark by NenadM
NenadM replied to NenadM's topic in - Build logs for subjects built 1851 - 1900
Yesterday in Serbia was the Orthodox New Year as an informal traditional holiday, celebrated as the start of the New Year by the Julian calendar. In the 20th and 21st centuries, the Old New Year falls on January 14 in the Gregorian calendar. The most common is called Serbian New Year (relics of nationalism). Serbian Orthodox Church continues to celebrate their feasts and holidays according to the Julian calendar. It is located primarily in Serbia (including Kosovo), Bosnia and Herzegovina and Montenegro. Fireworks are prepared by the Serbian Orthodox Church and fired from the Church Cathedral of Saint Sava, where people also gather. Petards, petards, petards and as usually many idiots with fire guns shooting in sky … like a battlefield in place I live. Being atheist, I do not celebrate this forced holiday, and hate shooting and explosions all around. What is the fun in shooting? All that bullets must fall down somewhere. Primitive and wild, lasts half night. And today is regular working day- 4,152 replies
-
- 1
-
-
- cutty sark
- tehnodidakta
- (and 1 more)
-
Wish you luck with your build. Fir now it seems nice and clean What scale is your CS? Will nail holes be visible? I had that idea, but leave it. In my scale (1:100 or 1:96) them should be so little, and somewhere in building I decide to follow natural colours of CS, so, nails are not visible on Her. Depends what you like, and hlw much time want to invest in such a thing Holes on deck naturaly lead to holes on hull, what mean - a couple of thousand. Keep posting please
-
Cutty Sark by NenadM
NenadM replied to NenadM's topic in - Build logs for subjects built 1851 - 1900
Daniel I dont know name of that piece. Maybe it is not a individually named piece. I was just looking for : how it looks like and what to do to look like real CS Bob I agree that this hobby is not a race. But, people as people ... you can race if you want with everything in life (Who will be faster to brush his teeth, who will quickly tie his shoe laces). Let them run as they want and enjoy in hurry Worm ? This is trick question Today fine and precise sanding, little corrections on bow and stern, and relatively successful attempt of water line. Reading another log on MSW (Keelhauled) I decide not to paint under waterline and coopering layer because I am not sure how it will be "glued" over acrylic paint (when I finally find something useful for coopering and make decision about type of glue) BTW, without bowsprit, She looks like a man without teeth and corrected stem without proud bowsprit under looks like snub ... She cried: "What have you done to me ?!?!?!" "OK" I said, "makeup follow in further stages" and She must be patient for a while, although She frowns and grumbles- 4,152 replies
-
- 1
-
-
- cutty sark
- tehnodidakta
- (and 1 more)
-
Cutty Sark by NenadM
NenadM replied to NenadM's topic in - Build logs for subjects built 1851 - 1900
Worms again
-
Cutty Sark by NenadM
NenadM replied to NenadM's topic in - Build logs for subjects built 1851 - 1900
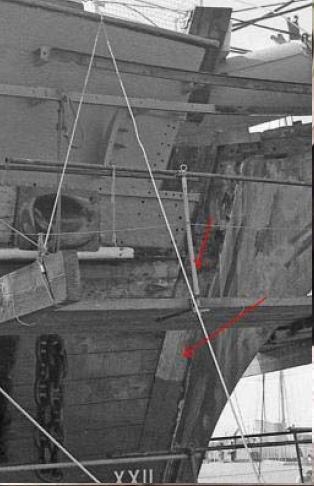
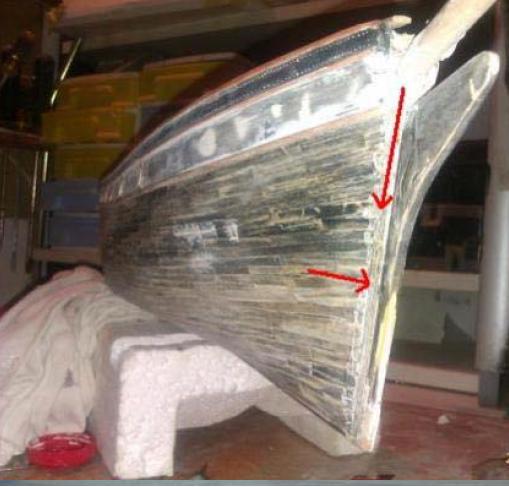
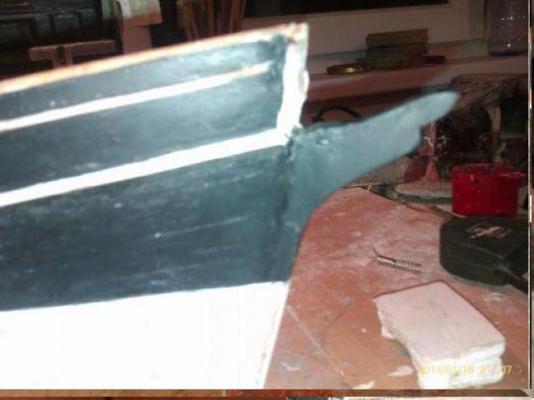
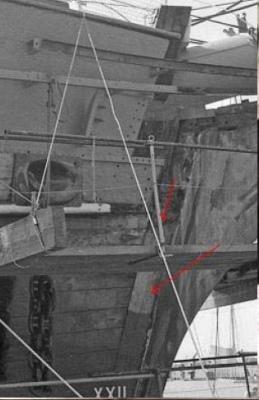
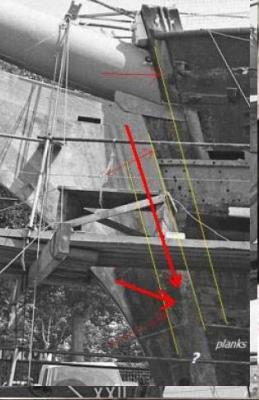
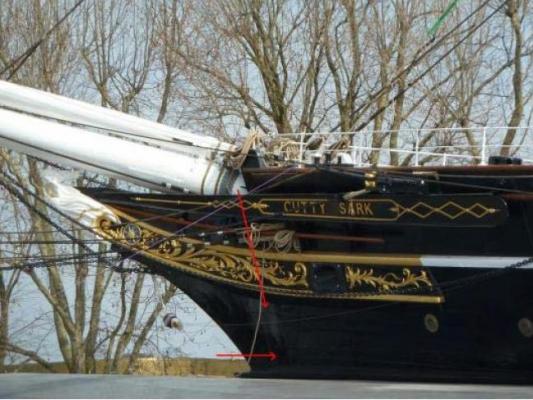
And the best In posts #441 and #449 I discussed about some lines on stem I noticed, and not see in other models, which are not clear what them represent on C-plans I think I succeed to got them when with way of planking second layer and with mahogany strip on stem Here are Lou`s pictures and some from Internet. Line is marked with thick red arrow And here is my attempt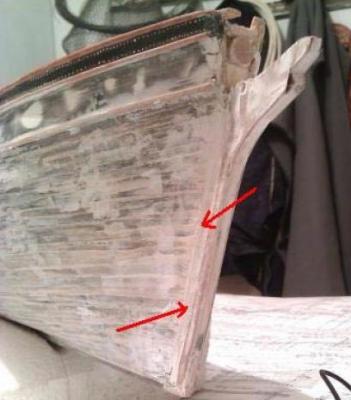

- 4,152 replies
-
- 1
-
-
- cutty sark
- tehnodidakta
- (and 1 more)
-
Maybe time for go to the dark side (scratch) ?
-
Cutty Sark by NenadM
NenadM replied to NenadM's topic in - Build logs for subjects built 1851 - 1900
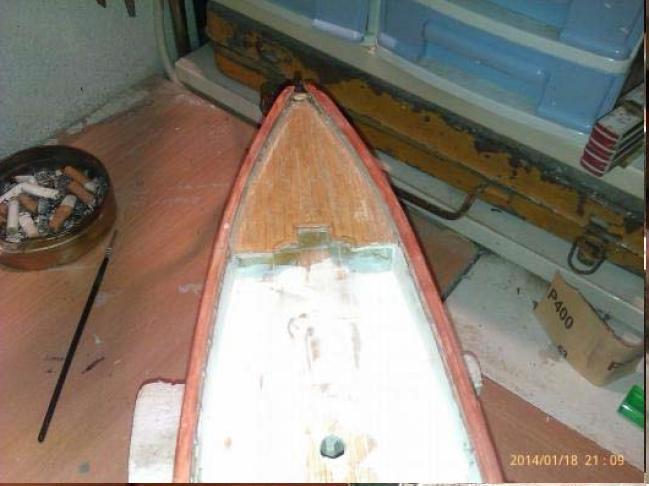
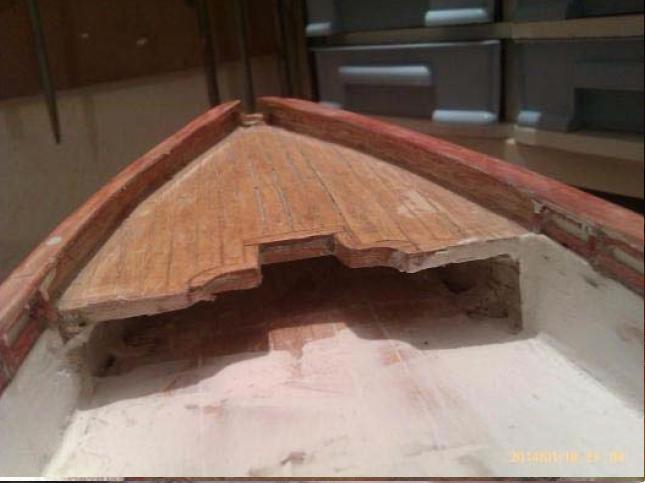
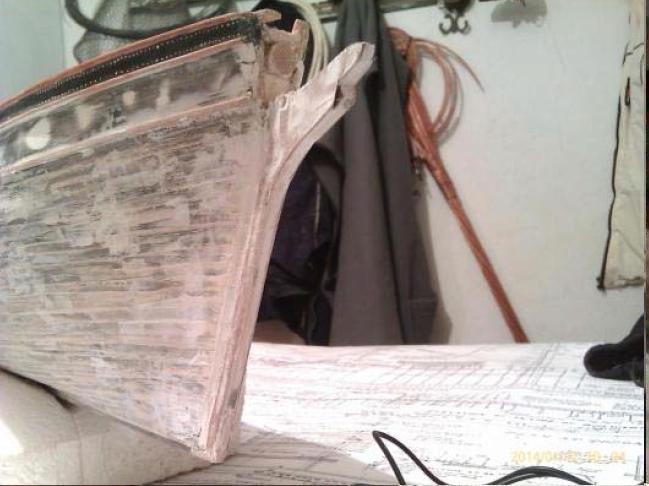
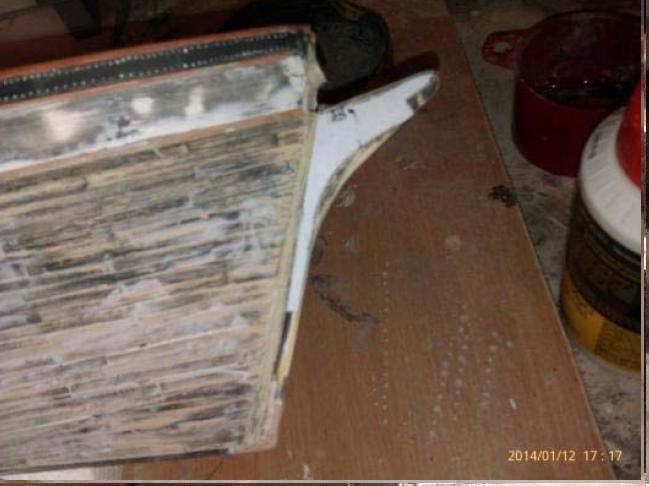
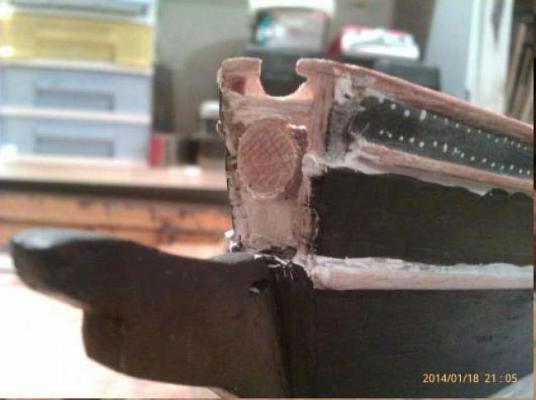
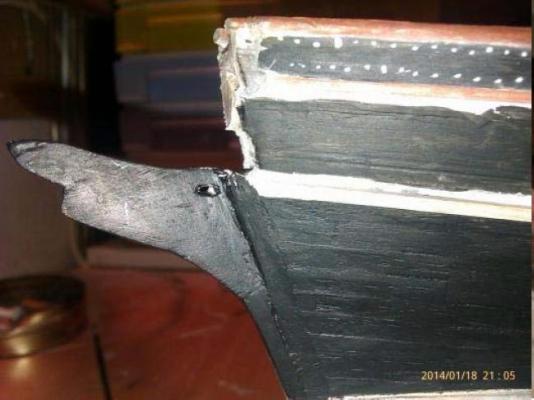
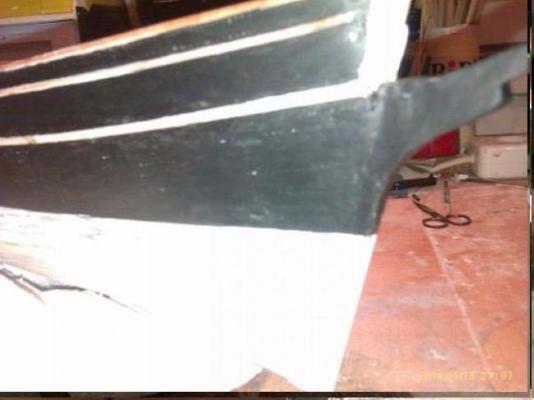
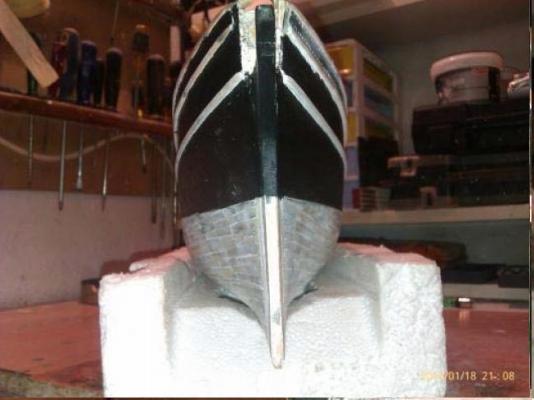
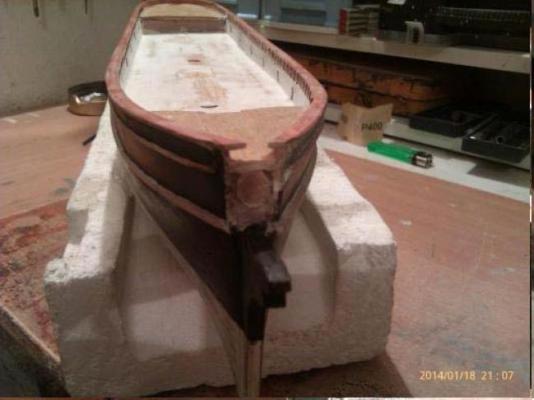
Bowsprit is removed, and it will be quite a work latter to mount new Stem is corrected according to C-plans. Two thinned layers of mahogany veneer added to stem to reach "strong" 4 mm. I think successfully Light glueing of C-plan part Look of new stem after swamp-works. Not finished jet, but correct lines are there And new stronger look of 4 mm stem from front. I realised that I am guilty for last 3-3,5 mm I had on stem (carelessly sanding in previous works). Another thing has to be thinked about earlier which I did not I decided not to correct thickness of keel downside, it is/will be not visible OK, let`s go forward Precise puttying in places of assembly of planks when it is needed, and very light sanding ( with sandpaper 280 and 400) begin and follow. Then stern finale .... then preliminary painting to the line of coopering. Determination of that line is something for what I must dive deeper in MSW

- 4,152 replies
-
- 3
-
-
- cutty sark
- tehnodidakta
- (and 1 more)
-
Cutty Sark by NenadM
NenadM replied to NenadM's topic in - Build logs for subjects built 1851 - 1900
Bob In meantime, I found some ways to manage this access, but ... female part of my family can not restrain theirself when see something they think as cheap. On the other side, it is not my way to hide my eventally account from them, so ... Marriage and familly diplomacy, and something or someone must be collateral damage of that ... Heh ... spice of our lifes And "spice must flow" ( Quote from Dune, Herbert)- 4,152 replies
-
- 2
-
-
- cutty sark
- tehnodidakta
- (and 1 more)