NenadM
-
Posts
3,254 -
Joined
-
Last visited
Content Type
Profiles
Forums
Gallery
Events
Everything posted by NenadM
-
 Very nice work, Bob
 -
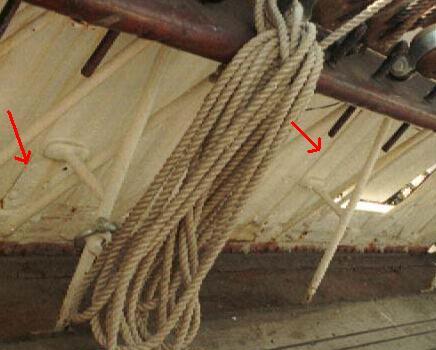
Bob, I am researching edges of second planking layer on bow and stern according to sternpost, keel, figure holder and coopering layer. See post #441 in my topic Also very useful Lou`s answer and links !!! Thx for photos
-
Bob I kindly please you to take and attach some (as much clear as you can) photos of your CS as it looks today from angles as above I have some dilemma and want to chek something (edges of second plank) Thank you Nenad

-
Go on, I ll follow
-
Cutty Sark by NenadM
NenadM replied to NenadM's topic in - Build logs for subjects built 1851 - 1900
Thx Keelhauled Some research is necessary, Tehnodidakta plans are poor, C-plans are OK, and less of experience force me to investigate, almost over photos, and to test some steps. Massive corrections I had to do are not very entertaining. Last 3 months I mostly correct mistakes instead of going forward. I must say that this is a fun also, a kind of pleasure when fix mess is certainly present, but more fun is in real progress looking how your model grows up- 4,152 replies
-
- 2
-

-
- cutty sark
- tehnodidakta
- (and 1 more)
-
How much truth in this words ... Same as this Over a par decades ago, when ZX Spectrum appears, I collect EVERYTHING I can find about ZX and programing in Basic. I have been completely lost in space until one month had expired. Question lead to answer who lead directly to next question ... without ending Naval and ship history lasts over than 2500-3500 years, with permanent evolution of rigging methods. What more to say ?
-
My vote for Cutty Resources for research are unlimited
-
Dognut ! You are sleeping again ? Everything OK ? In my Topic our great friend (Lou) put some very interesting and very useful links See you soon Nenad
-
Cutty Sark by NenadM
NenadM replied to NenadM's topic in - Build logs for subjects built 1851 - 1900
Lou van Wijhe !!!!!! Thank you very very very much ( I think that our friend Bob will immediately dive deep inside for some years оr decades ) -
Hello Kim Bad things happens, but head up, and keep on going I agree with Doreltomin There are about 30-35 years when I run Heller, and I was not satisfied with paints. Model really look as a toy with pure colours you got in Kit. So I experimented with colours, add extra ropes and deck stuff ... entrance to the dark side Little tip: Dont put away plastic scarps - they are very useful for testing colours In that time, there were not acrylic paints, and now it could not be problem if you have experiance with them Wish you luck, and waiting for more photos Nenad
-
Cutty Sark by NenadM
NenadM replied to NenadM's topic in - Build logs for subjects built 1851 - 1900
Some more testing. Water posts or freeing posts First I try to make "doors" of veneer ( putty on both sides and acrylic black on one and acrylic white on other side) but in that case ( because of thickness of my bulwark wall) there must be two veneer doors with ugly hole between and at side Then I try to make them of solid wood (slat 2 x 5 mm) , something like this And I think this will be right solution Imitation of metal strips, in my case ( thick wall of bulwark), on white side, can be used in two ways 1. to visually mask thickness 2. to help to mount and glue "doors" Also add decoration with hinges and rivets, something like that In my scale, holes must be near 9x10 mm, resized from Campbell scale. (In original Tehnodidakta plans, holes are 6x7 mm. To little visually) Hmmm Pin rails and bulwark panels are junk from scratch box ( I was curious how it will look) How large is 0,5 mm ? So much - if posts panels are 6x7 mm or 7x8 mm and you do not want horizontal space between post panels and bulwark wall.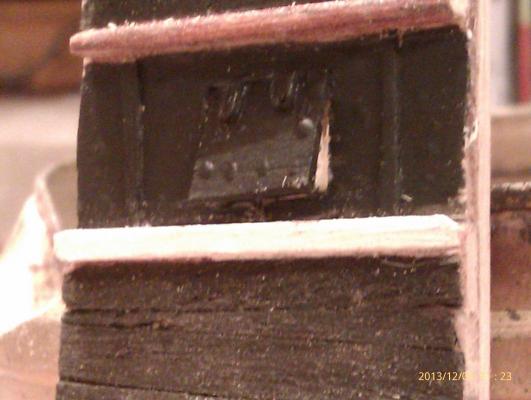


- 4,152 replies
-
- 3
-
-
- cutty sark
- tehnodidakta
- (and 1 more)
-
Cutty Sark by NenadM
NenadM replied to NenadM's topic in - Build logs for subjects built 1851 - 1900
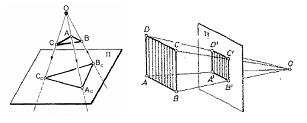
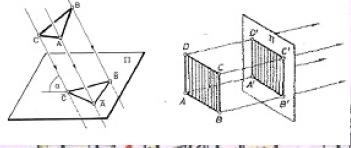
Bob tip for you you can measure very precisely distances and pointes in Campbell plans using photoshop Open desired *.pdf, activate rulers ( in cm, inches or what you need) zoom at desired part, and simply move cursor over drawing Applying this method, there are dimensions and positions of water-posts Ha !!! On which way thicknes of line affect precise measurement ? Or ... are drawings consider and contain horizontal curvature of bulwarks, and increase in length due to the curvature, or it is horizontal projection !!!! And what type of projection this or this Bang your head and keep on going, as on animated gif down !!!!!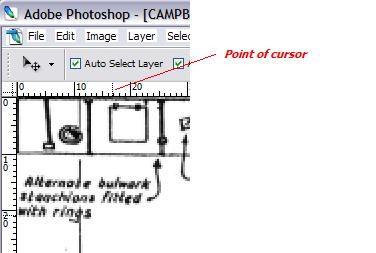


- 4,152 replies
-
- 1
-
-
- cutty sark
- tehnodidakta
- (and 1 more)
-
Cutty Sark by NenadM
NenadM replied to NenadM's topic in - Build logs for subjects built 1851 - 1900
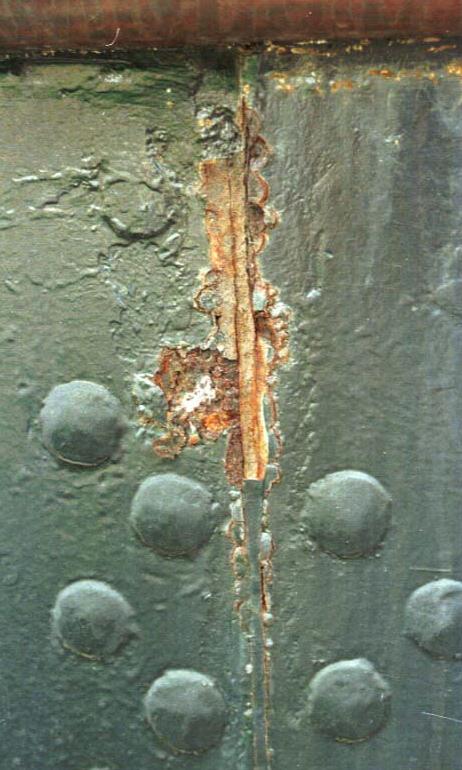
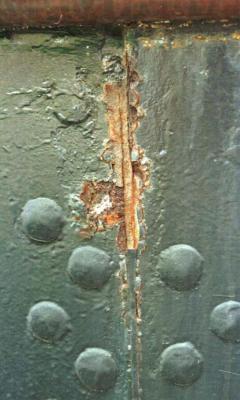
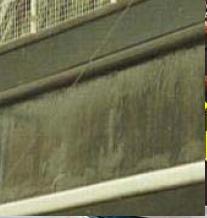
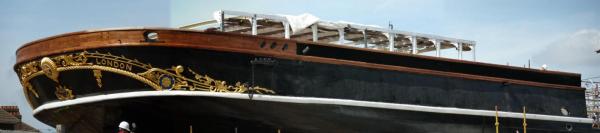
Bob It is told: "The one who was bitten by snake, is frightened by lizard" Just do not want to drop in swamp again, and just do not want another deep surgery. I think this was enough for one lifetime/one ship building. And further stage is delicate and every big mistake is visible. When I finished bulwarks with panels, I was not satisfied by them colour (sadoline). It is fact that this mistake can be corrected later, but that forced me to test first Wish I have done some tests in earlier stage .... Rivets ... Pictures we have get are ... thought-provoking ... level of aggressiveness of seawater, and next conclusion .. rather iterative periods of maintenance. When I was in Army ( Navy on Adriatic sea), ships were made of metal, and maintenance was done every single year. Every 4-5 years general overhaul. So, carefully analyzing pictures we have get, on some places it could be seen that rivets are not precisely in line. I think that, as any other work, considering almost 150 years of maintenance in different harbours all over the world , there were workers with less or more wish to put things in right places in line, and there were also different working supervisors, with or without plans. Only experience they had. Sometimes them were dedicated, sometimes they were not, just make necessary patches. Not to forget meaning of short time they had, and very significant moment - they were forced to race for cargo. Put a patch and come back to a rice as soon as it is possible. Also, as you look at pictures from time when Cutty was Ferriera, it seems that maintenance was deadly poor. Look at this picture of Ferriera ! When such corrosion is visible from the outside, can you imagine what is inside? Can you imagine what is hidden between wooden and metal parts? How did it affect to rivets ? I think that is impossible to locate every rivet to exactly period, even a single plank. Obviously, some frontiers and dead-lines must be in our heads, and every one of us must put some limits in some places. I wish I am dedicated to this work as Lou, Sudomekh an you. I am rather a bit inpatient ... Cheers !!!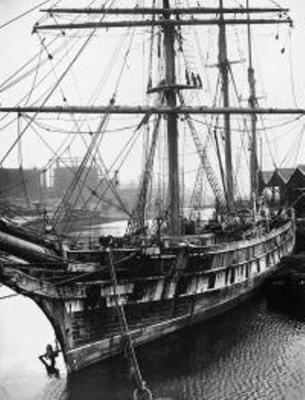
- 4,152 replies
-
- 1
-
-
- cutty sark
- tehnodidakta
- (and 1 more)
-
Bracera (Brazzera) by Albuk
NenadM replied to Albuk's topic in - Kit build logs for subjects built from 1851 - 1900
Very nice and precise work, Alex Keep on -
Cutty Sark by NenadM
NenadM replied to NenadM's topic in - Build logs for subjects built 1851 - 1900
Thank you Alex, I already find that webs, and remember them to use when I (one day) come to the real coopering at bottom of hull In this stage, I consider that solution, but big problem (for me) arise - painting over alu/cooper/Zunc... everything I try result in very easy damaging of painted surface ( paint did not apply well and permanent). I have tried with car paint sprays ( same result), with oil and nitro colours ( they have too much varnish inside and result is too much blinky for my taste) . Here in MSW that problem was described in separate Topic, but I am not so dedicated to go on that way and, as you know, in Bgd is hard/almost impossible to find some of that stuff PS - do you go to modellers compettiton on Airport Museum in Belgrade on december 15. 2013 ? http://www.muzejvazduhoplovstva.org.rs/?jez=eng&id=1 -
Cutty Sark by NenadM
NenadM replied to NenadM's topic in - Build logs for subjects built 1851 - 1900
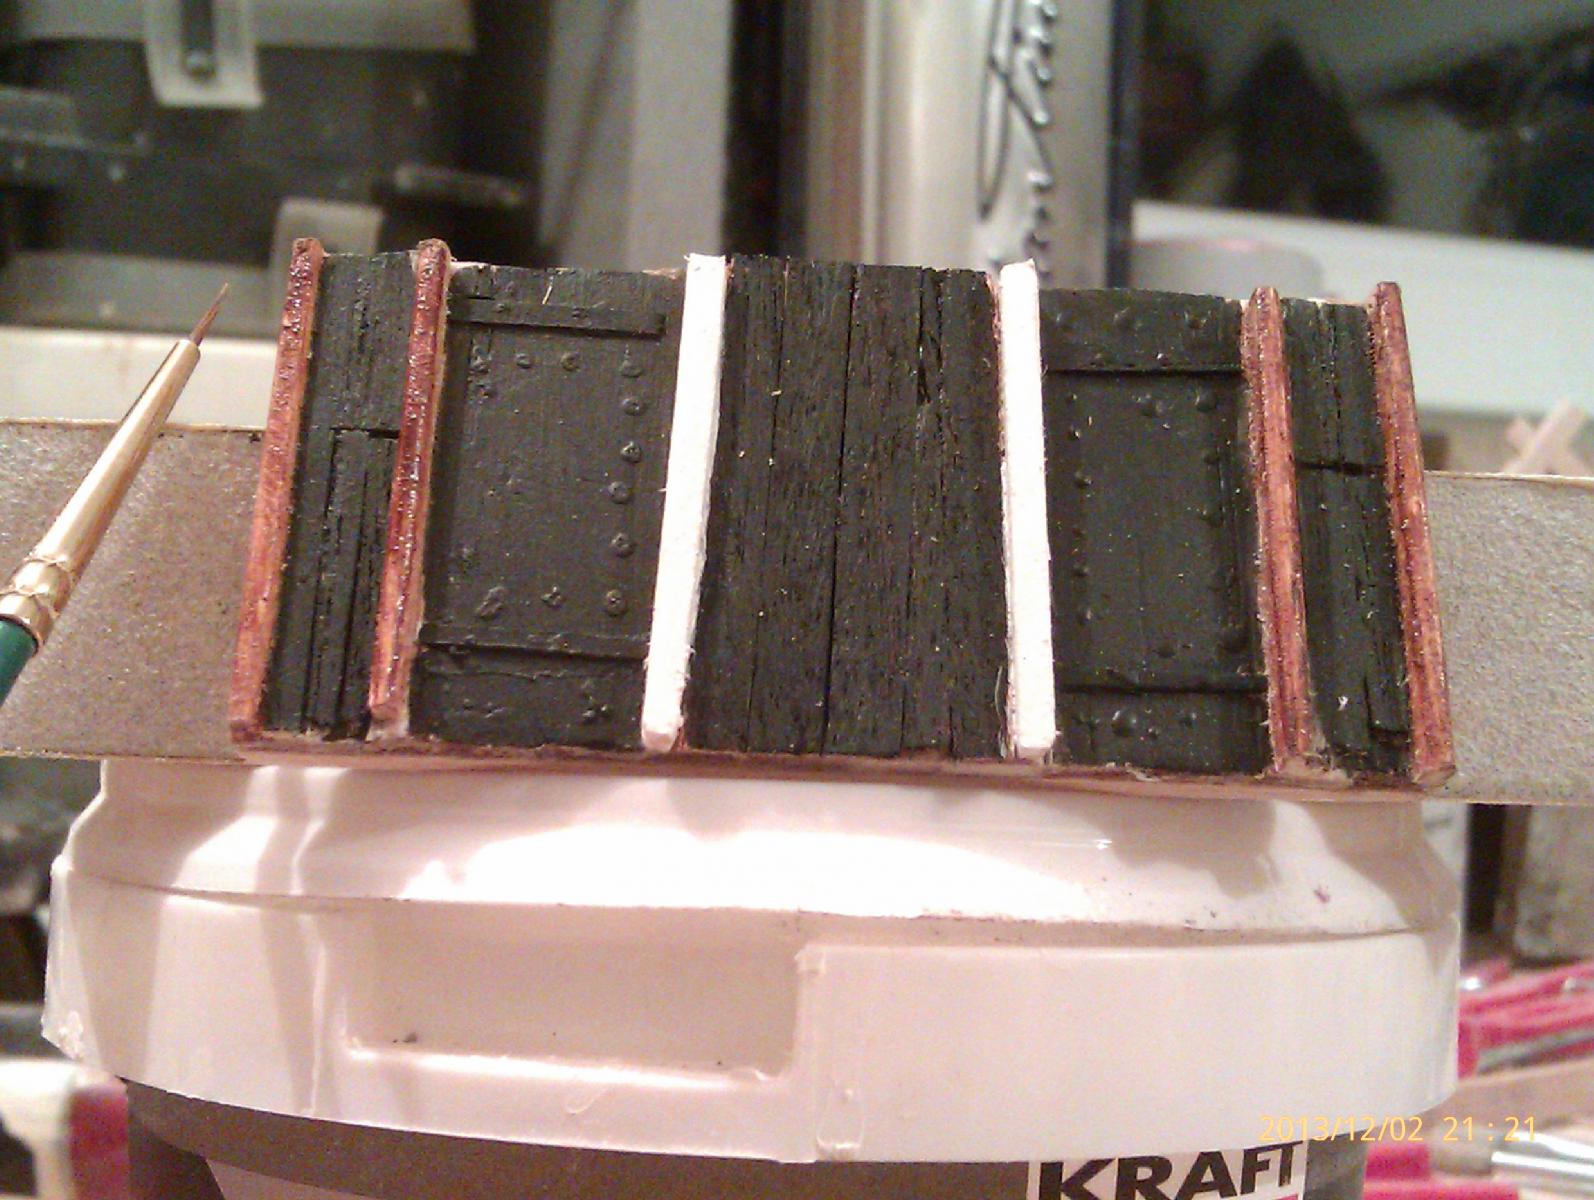
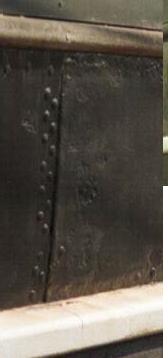
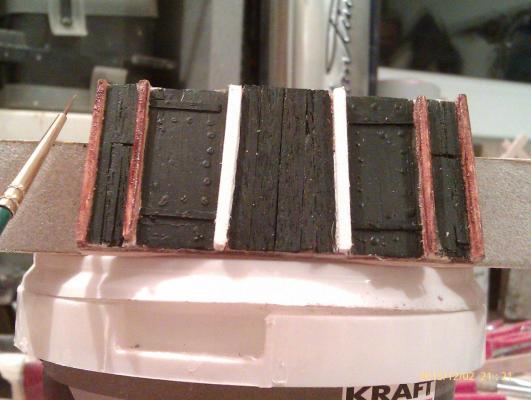
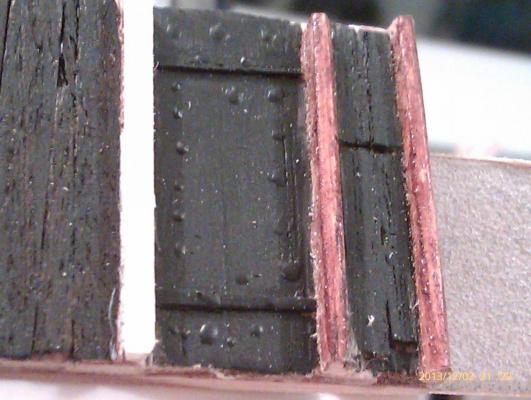
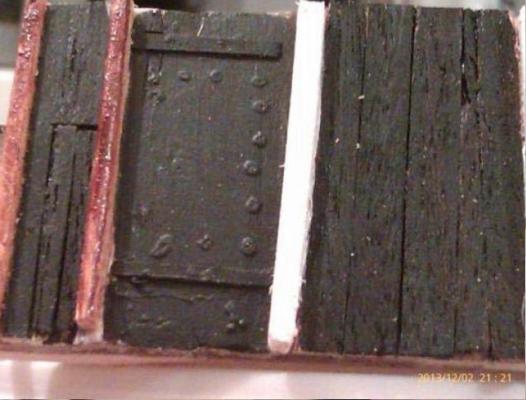
Here is analysis and reflection on the results of the last test Because of my poor English, positions are marked by numbers for easy follow General conclusion Paint - only acrylic, nothing more or less. Maybe some matt lacquer and patinate at the end. In general, paint must be prepared (diluted with water) with adequate density, even to be applied in 2-3 layers. In my test, layer is little thicker than it has to be. Painting will be done with thin and very thin paintbrush ( I do not have spray, and think it is impossible to cover and protect this little parts you do not want to cover with spray) Sadolin (thin rails) - not adequate for this purpose and for such a small scale of applying. There must also be applied acrylic in proper shade ( that must be object of special test before final painting) Position 1 and 3 Top rail and main rail - thickness 2 x 2 mm and 1,5 x 1,5 mm. Not big and visible difference. Colour is not adequate, and this will be tested separately In comparing with previous test when I use 1 x 1 mm strips, difference is present, and I have aesthetic dilemma In some pictures from Greenwich it seems that it will be more similar if I use 1 x 1, and on other, it seems that they are almost similar with as white square bender Position 2 It is OK, 2 x 2 mm squared, nothing to comment Position 4 Testing with one piece of lime veneer, with very light sanding and no putty. It had to be more smooth, but less than surface on position 7, in the way that you can only perceive wood stucture Position 5 Testing with 3 pieces of lime veneer, also with very light sanding and no putty. Same conclusion as on position 4, adding that I must cut slices more precise Position 6 Testing with mahogany veneer, with very light sanding and no putty. It seem to be OK with add of little putty and better sanding. In this position wood structure must be visible Position 7 Surface of metal plates. No veneer, only balsa ( first layer of plank) with a lot of putty, and with fine gradual sanding. I think I hit the right thing, with add that painting must be with 1-2-3 thinner and smoother layers of colour Position 8 Experimenting with veneer and plastic thinned to 0.2 mm and glued to "metal" surface. This will be applied inside near water-ways on white bulwark , as on picture above Position 9 @keelhauled I concluded that the little parts, as rivets, that are visible on metal plates gives "metal" look and feeling So I make two attempts. One with little drops of glue, other with little drops of putty applied with thin paintbrush. The result is above all expectations, with add that even little drop must be smaller, and put in better order and lined with another On some parts of hull, they are not so thick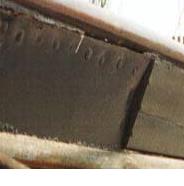

- 4,152 replies
-
- 2
-
-
- cutty sark
- tehnodidakta
- (and 1 more)
-
Cutty Sark by NenadM
NenadM replied to NenadM's topic in - Build logs for subjects built 1851 - 1900
Sudomekh I shall be very happy if I can find some in Belgrade. As I wrote somewhere, in Belgrade shops it is impossible, and choice is very reduced, so putty and simulation must be applied In my house I had some different wooden scraps, but I dont have circular saw, ot any other corresponding tool to make my own strips Thanks for your interest and help -
Cutty Sark by NenadM
NenadM replied to NenadM's topic in - Build logs for subjects built 1851 - 1900
Lou and Sudomekh You are so dedicated in the way that I stay breathless !!!! This documents are real gold mine for studying details Thank you very much, I really appreciate this In the name of thanks I send you some beer ( we are too far away to meet and drink in that name)
- 4,152 replies
-
- 1
-
-
- cutty sark
- tehnodidakta
- (and 1 more)
-
Cutty Sark by NenadM
NenadM replied to NenadM's topic in - Build logs for subjects built 1851 - 1900
Thx Bob and Marc Here is more testing. Comments and explanation tomorrow ( now is 23h and I am sleepy, and sending this from phone waiting my line to bathroom. Why are fathers and husbands always last in line?)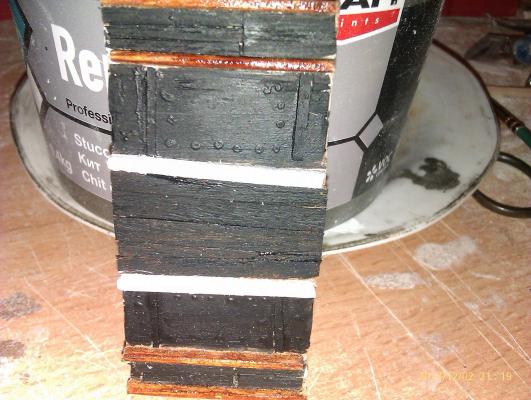
- 4,152 replies
-
- 3
-
-
- cutty sark
- tehnodidakta
- (and 1 more)
-
Three best looking clippers ever : Cutty Sark, Ariel and Flying Cloud Do you plan full rigging with sails ? I ll follow with great interest Cheers Nenad
-
Cutty Sark by NenadM
NenadM replied to NenadM's topic in - Build logs for subjects built 1851 - 1900
Bob I am thinking about something similar to try, veneer + putty with very very very smooth surface, and ( if I find how) very light nacre reflections Just bought some acrylic paints and I ll give it a try in the evening -
Cutty Sark by NenadM
NenadM replied to NenadM's topic in - Build logs for subjects built 1851 - 1900
During final partial sanding and puttying of hull, waiting for putty to harden, I proceed in testing ( thickness of rails, planking and colour) Rails maybe little wider ( 1x1.5 or 1.5 x 1.5 instead 1x1 mm ?) Colours definitely must be acrylic ( this will be my next test) Veneer ? Must be more precisely. Colour ? Definitely must be acrylic Metal plates ... alu-foil definitely not, for man reasons. Very thin plastic? Maybe, but not happy with this solution Tomorrow I shall probably be a bit smarter about this

- 4,152 replies
-
- 4
-
-
- cutty sark
- tehnodidakta
- (and 1 more)
-
Cutty Sark by NenadM
NenadM replied to NenadM's topic in - Build logs for subjects built 1851 - 1900
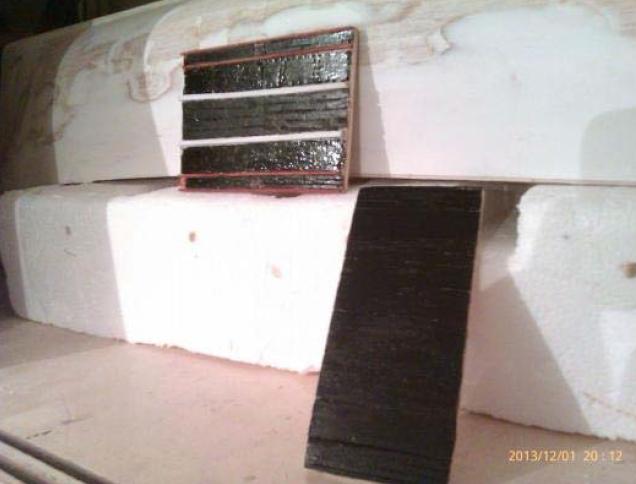
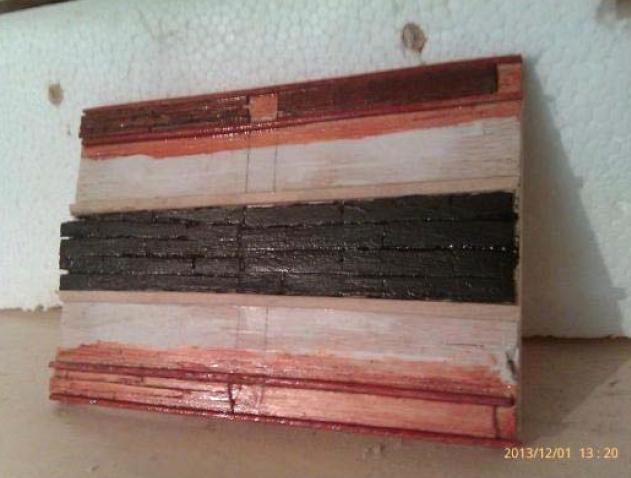
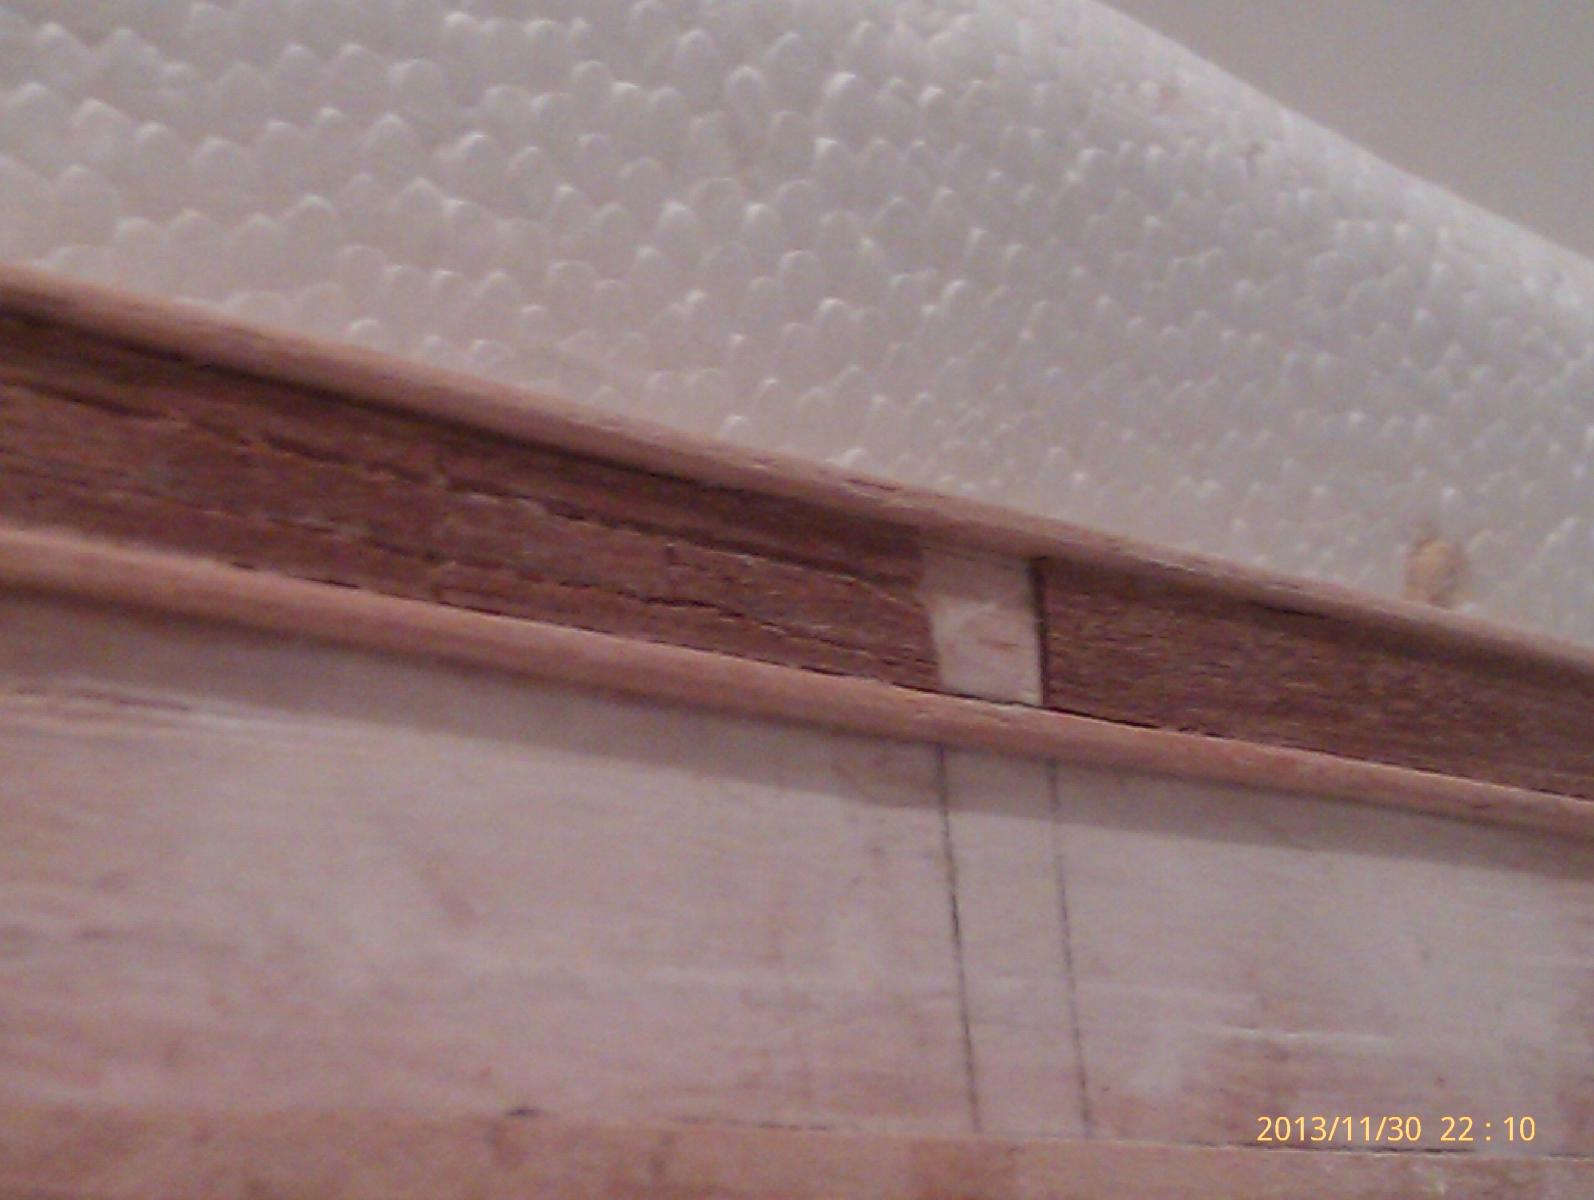
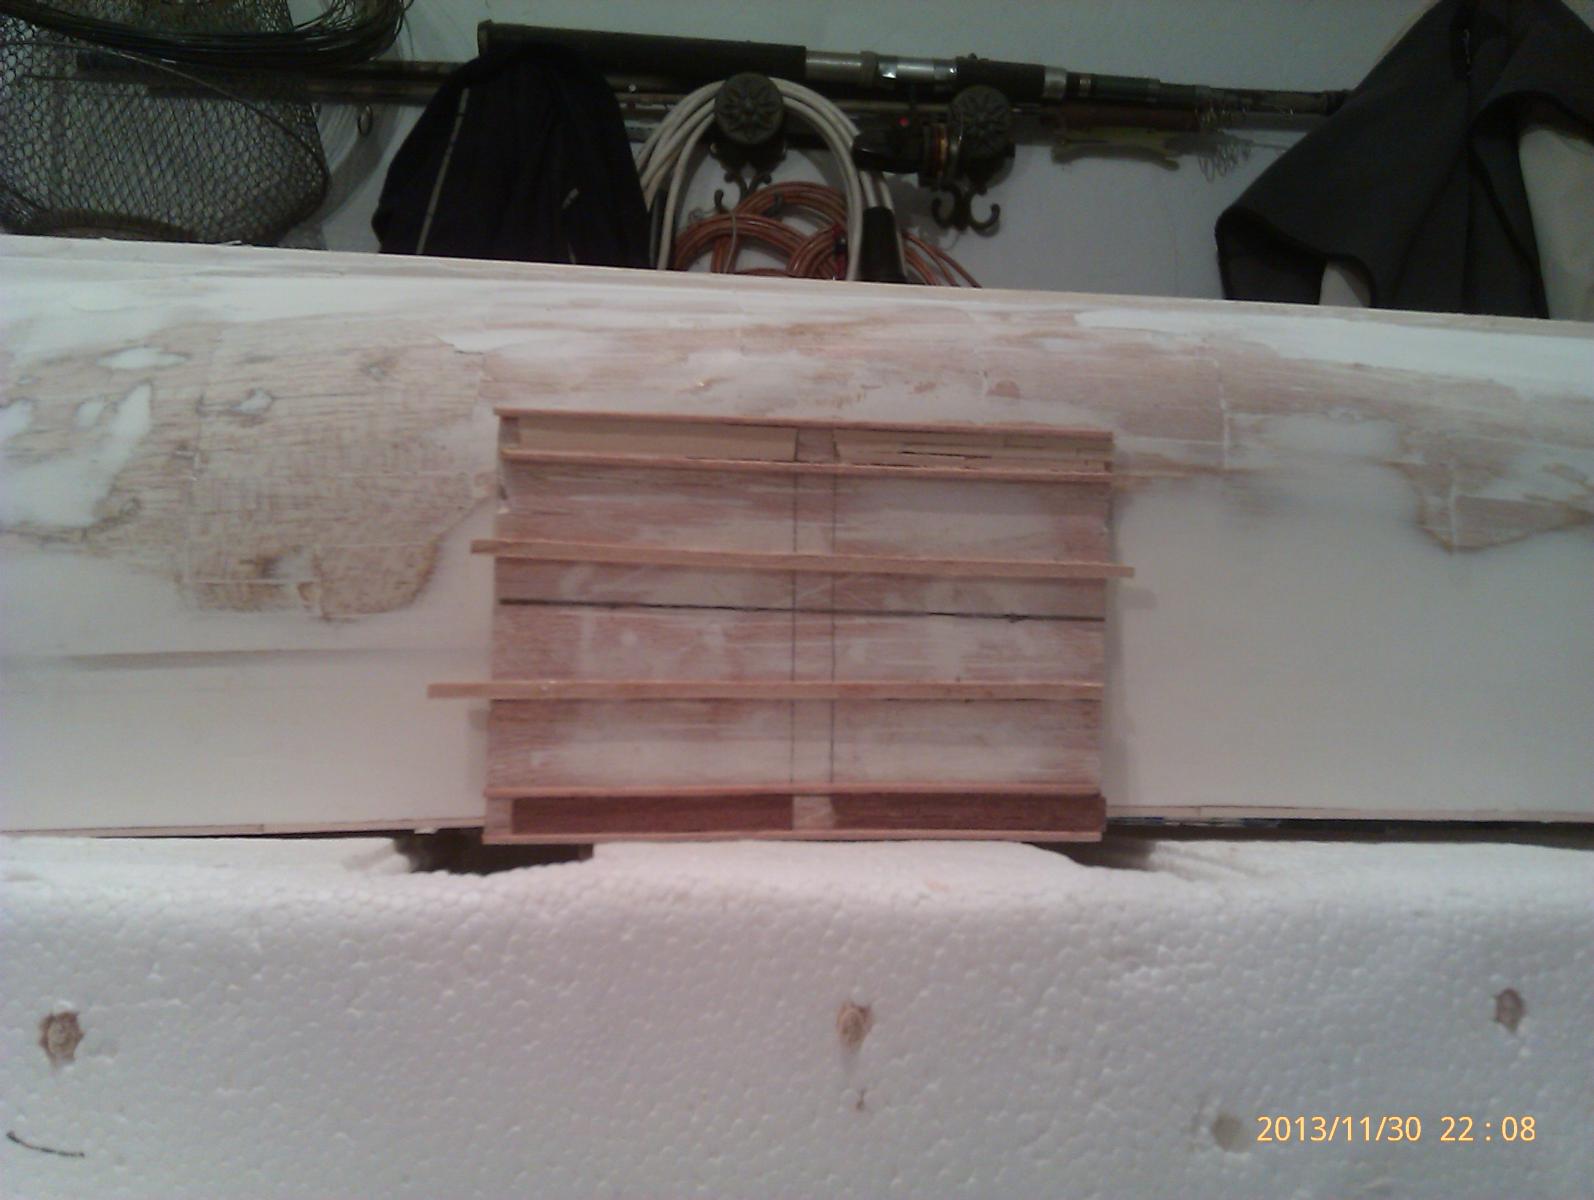
Learn until you live. If I did some test works in earlier stages, I probablly did not run in problems ... Start of making some test work to see what thickness of rails to use, and how to put veneer. Thin rails are 1x1mm and they are rounded, wider rail is 2x2 mm and it is squared
- 4,152 replies
-
- 2
-
-
- cutty sark
- tehnodidakta
- (and 1 more)
-
Cutty Sark by NenadM
NenadM replied to NenadM's topic in - Build logs for subjects built 1851 - 1900
Thx, it is just I though Earlier reconstruction before fire. Where did you find this pictures? -
Cutty Sark by NenadM
NenadM replied to NenadM's topic in - Build logs for subjects built 1851 - 1900
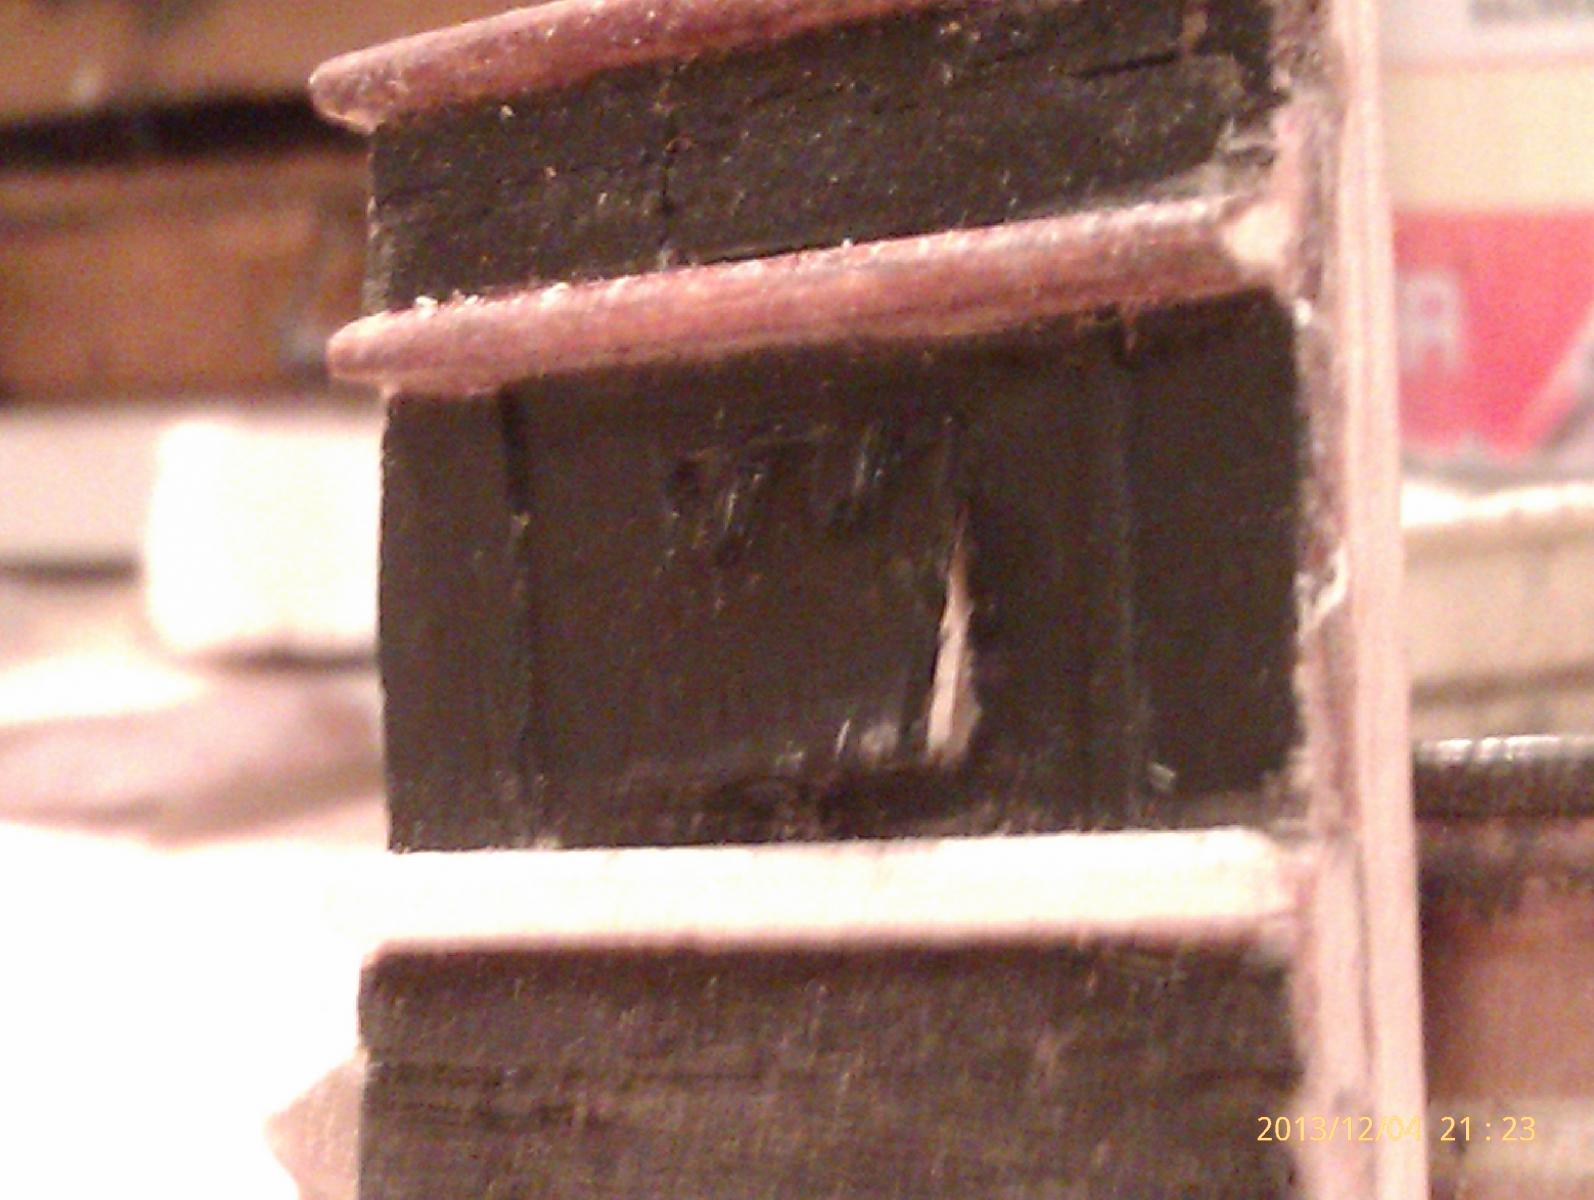
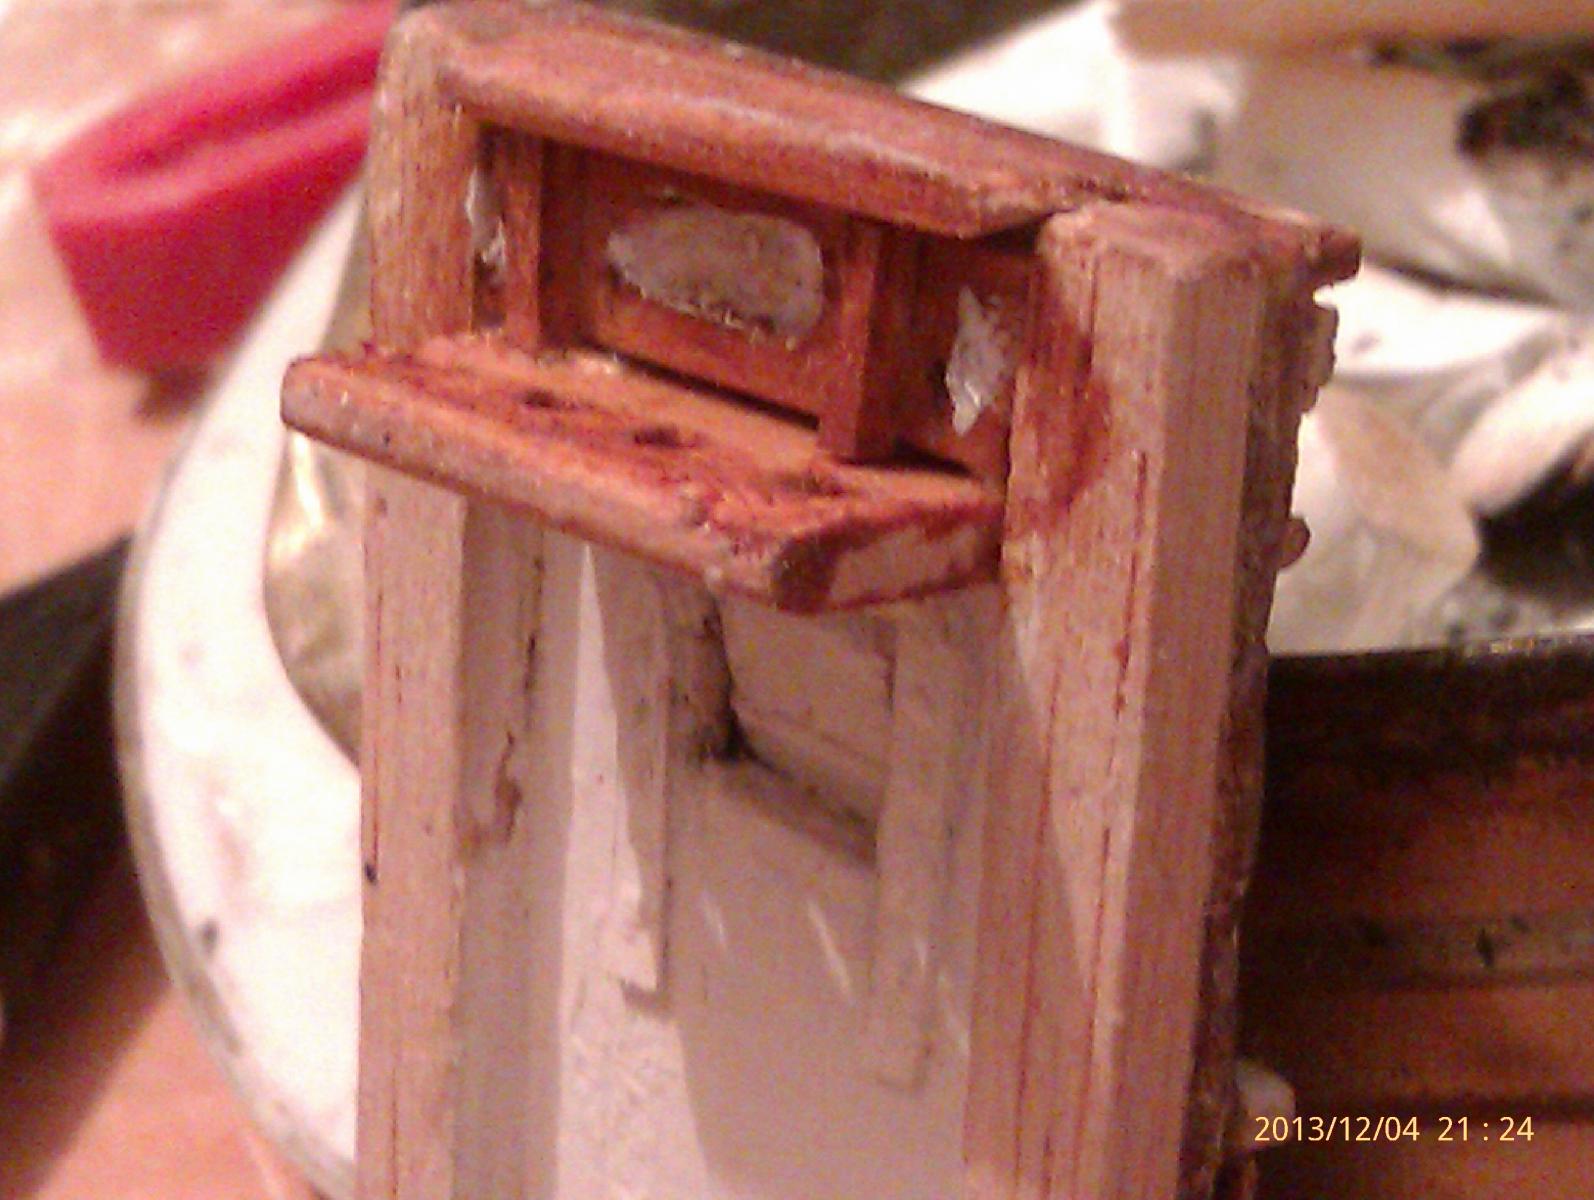
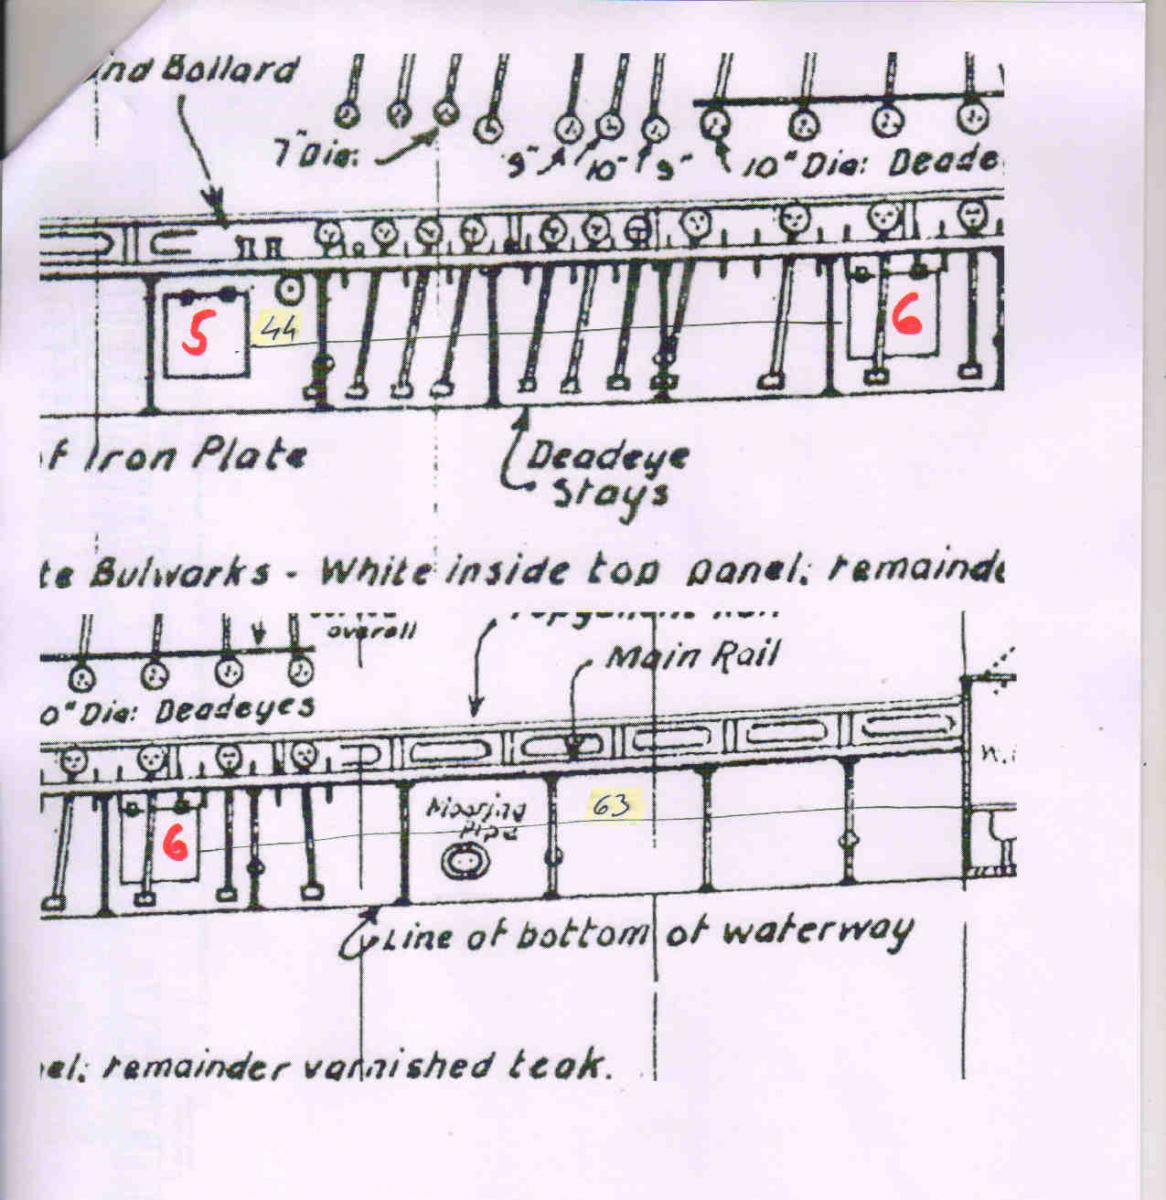
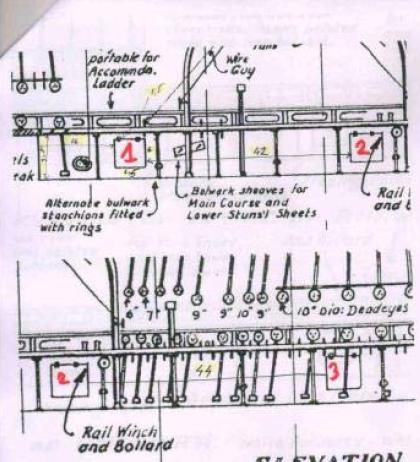
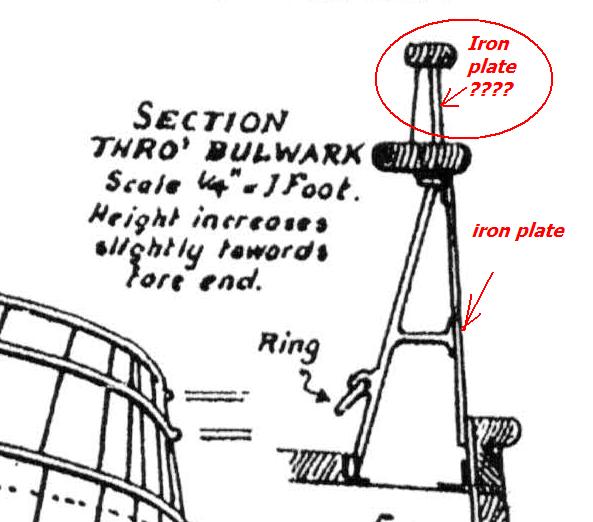
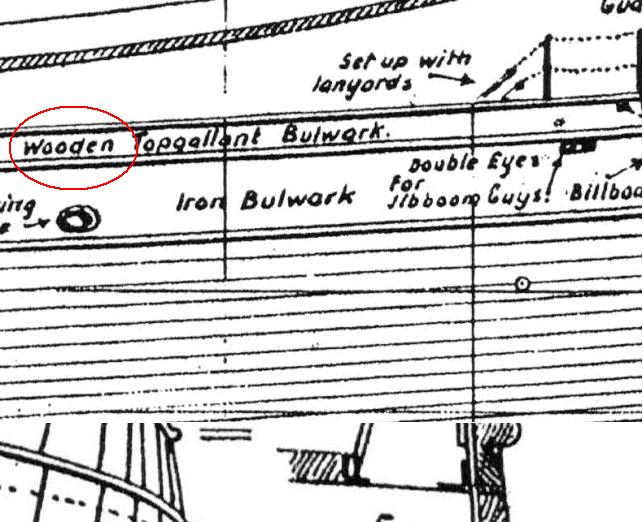
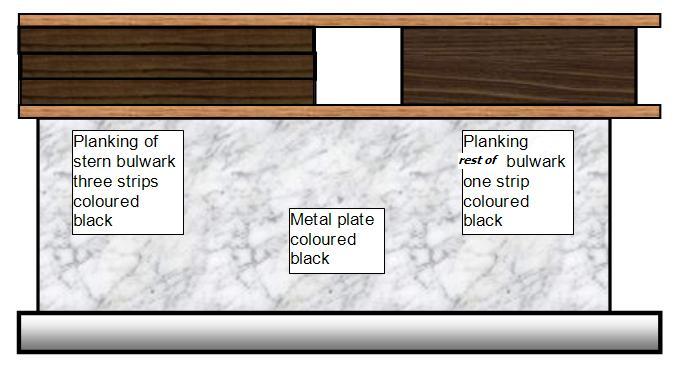
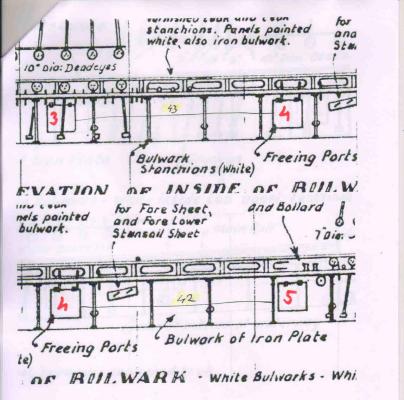
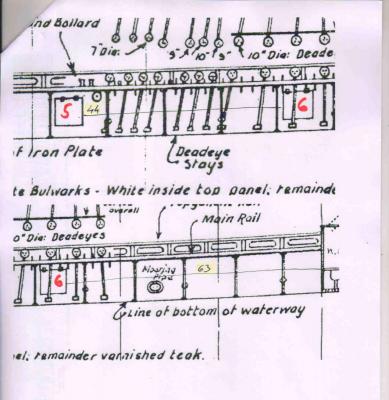
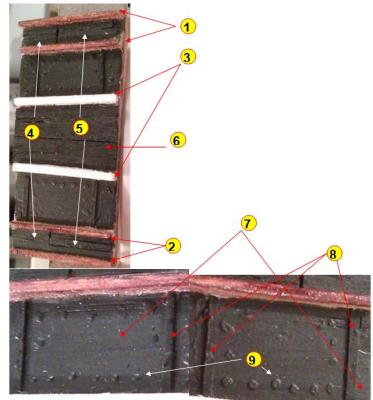
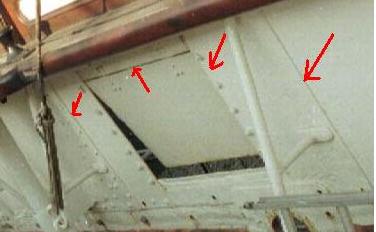
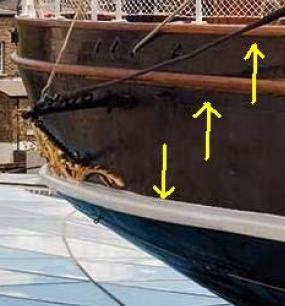
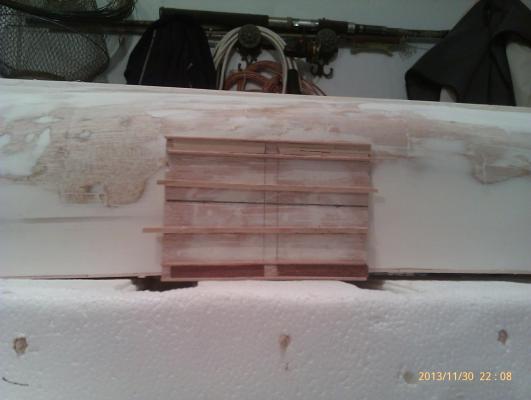
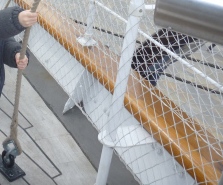
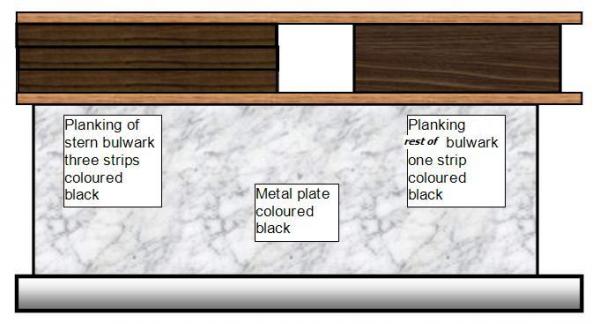
Little research and analyze Question - method for second planking outside bulwarks between two thin rails: Campbell plans are little confusing about structure of middle bulwark between two thin rails: On the other side for forecastle bulwark between two thin rails - there is no dilema - iron but at side there is question - wood or iron on bow - wood Maybe is answer in next picture taken during rebuild It seems pretty clear that stern bulwark is made of three horizontal wood layers and central and fore bulwark between two thin rails are made of iron ( also conclusion is that the white inside panels are of iron and around them is wooden mask, so Bob`s method for making white panels is adequate as they are made) That question substantially affected the way that the processing of the outside second layer will be applied My idea is next What do you think my friends ? For my model scale, on stern, space between two thin rails is 5mm, so on stern bulwark, there will be three 1,6 mm wide strips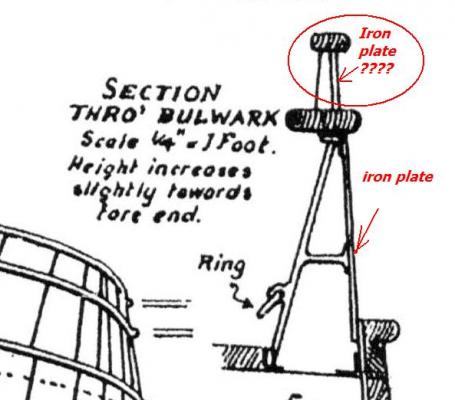


- 4,152 replies
-
- 1
-
-
- cutty sark
- tehnodidakta
- (and 1 more)