NenadM
-
Posts
3,254 -
Joined
-
Last visited
Content Type
Profiles
Forums
Gallery
Events
Everything posted by NenadM
-

Cutty Sark by NenadM
NenadM replied to NenadM's topic in - Build logs for subjects built 1851 - 1900
Thanks Sudomekh, I have noticed that confusing details on C-plans I started hull of model by kit parts, and fortunately, curvatures of ribs on that critical part are almost correct. I am not so skilful as you, and to be honest, not so dedicated, so rather reckon on photos and my sense. Another thing is mess I have made and now trying to get out of this Your advises are very helpfull -
Cutty Sark by NenadM
NenadM replied to NenadM's topic in - Build logs for subjects built 1851 - 1900
Bob Thanks for nice wishes, and I am sending to you and your family my nice thoughts and wishes We do not have Thanksgiving day, but on december 31 is New year ( two non working days), on january 07 is Christmas ( two non working days) and on january 13 is so calles Serbian new year (orthodox calendar), so with weekends, almost two weeks of almost no-working days By the way, I follow your steps and methods of testing testing testing. Now I am in stage of fine-tuning hull curvatures, which mean - little layers of putty, wait it to harden, then sand, and again and again ... until I shall be satisfied. In mean time, I have made simulation of planking hull to test methods of next stage ( bender strips 1x1 mm rounded, second layer of veneer and alu-foil and painting it). Pics to come -
Cutty Sark by NenadM
NenadM replied to NenadM's topic in - Build logs for subjects built 1851 - 1900
@ Sudomekh I must ask you for little attention, please do not misunderstand me I am very pleased if you put comments and pictures that are connected to concrete post or detail of building which is shown or discussed in concrete post, even it is not strictly related with Cutty Sark, which are and will be very usefull as for me, and to the followers of this topic But, please, do not overload this Topic with things that are not connected to the questions which are actually on posts. There are warning points on MSW, and I do not want to go on this way BY the way, I am very interested in your work, and please open your Topic in building logs or in Gallery of finished models Thanks Nenad -
Cutty Sark by NenadM
NenadM replied to NenadM's topic in - Build logs for subjects built 1851 - 1900
@Spencer, I think that I "visually lost" proper lines so hull did not look like hull on CS ( extremely fat stern for instance). I think that I mainly success in correcting this. My camera is poor, light conditions also, and in pictures you can not brightly see third dimension of model, and real meaning of my words -
With my Einhell ( similar to Dremmel ) similar problem arise. Jaw is worn from use and no longer holding tools. While I do not buy new calipers, problem is solved with a layer of thin tape - self adhesive paper. This works for sanding and similar jobs, but to drill small holes, if you are very lucky
-
I agree with Sudomekh If you want to make a really good model, only option is scratch building based on Campbell plans and photos available on Internet. Another available plans, sheets and instructions ( even for plastic kits) will be very useful for comparing and researching You can find and download on your own responsibility Internet SERGAL ROMA sheets ( 12 large pages including Campbell 3 sheets) + step by step photo instructions. Free for download, but copyrights ... so I do not put link there
-
I have only rigging plans of AL in *.pdf
-
Cutty Sark by NenadM
NenadM replied to NenadM's topic in - Build logs for subjects built 1851 - 1900
Bob That was the exact reason I decided to make top rail and all under top rail I have done - before going down to second planking and coopering. The blessing in disguise is that my bulwarks are now almost 2 mm thick and, thus, pretty strong, and that thickness could not be seen ( I hope) - they will be covered by top rail and pinrail, and masked with stanchions etc. Only place where thickness eventualy could be seen are 1. water posts, so I must do them very carefully to visually mask thickness with hinges and holders etc 2. metal plates will not be reentrant enough as on real CS and in the Campbell drawings, so I intend to garnish them with a lot of simulation of metal strips and rivets which are shown on pictures of CS. As they (bulwarks) are strong, when I lay my CS upside down on top rails with hull up on Her styrofoam dry dock, I dont believe that anything will crack. Anywhere, wish me luck with this Nenad- 4,152 replies
-
- 1
-

-
- cutty sark
- tehnodidakta
- (and 1 more)
-
Cutty Sark by NenadM
NenadM replied to NenadM's topic in - Build logs for subjects built 1851 - 1900
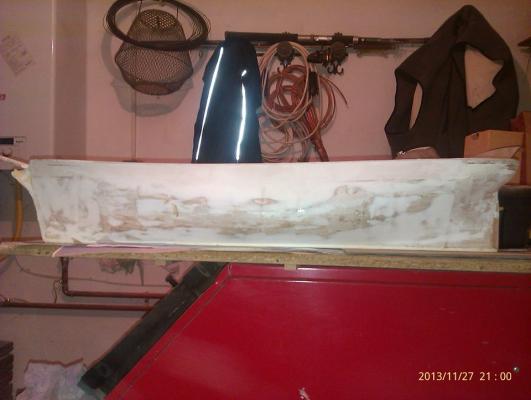
And the best part Comparing to the earlier stage, it seems that all main lines of hull are still there Side view before ripping deck elements and bulwarks Side view now I know that my work differs from the lines if I has digged them from Campbell drawings, but for me it seems as it is pretty acceptably Where I was, I must say I am very happy The feeling that I finally get out from swamp, and that I am finally close to come to stage of master (ha !) and precise work is really great
- 4,152 replies
-
- 3
-
-
- cutty sark
- tehnodidakta
- (and 1 more)
-
Cutty Sark by NenadM
NenadM replied to NenadM's topic in - Build logs for subjects built 1851 - 1900
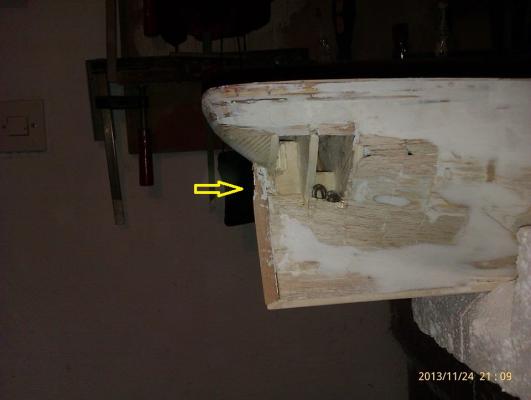
Comedy "CS by NM" act III part 2 Fixing the hole(s) Not The Beatles Holes are filled, some putty applied, and it looks much better than I hope Oh, yes, there will be additional sanding and putty (again...)
- 4,152 replies
-
- 2
-
-
- cutty sark
- tehnodidakta
- (and 1 more)
-
Dognut As I see on other topics, even the keel is made of many more parts, building whole keel is first move everywhere, even in fantastic "full hull planking" as it is called here ( fantastic masters works when you do not have ribs in kit, and when you pick up even rib from curvatures on drawing, and every rib is made of many pieces, and keel is made of many pieces too) In my plans, whole keel is made of one part of plywood (except stern post, but stern post is first to glue on place before positioning ribs). And there was some kind of laying strip on bow which I glued and removed later as redundant by my way of planking. For other purposes, I carefully draw a line where edge of planking is on the bow and down on keel. On the stern there is stern post as edge I do not envy you in a situation where you found it, and I'm really interested in how you're going to get over the same Keep on and good luck with it Waiting for more pics Nenad
-
So, after diveing follow digging? I supose you have clear idea what to do. Will you explain ?
-
Well, dont rush with next build. You have potential skills, so dont kill them with rush
-
Just as bogeygolpher said
-
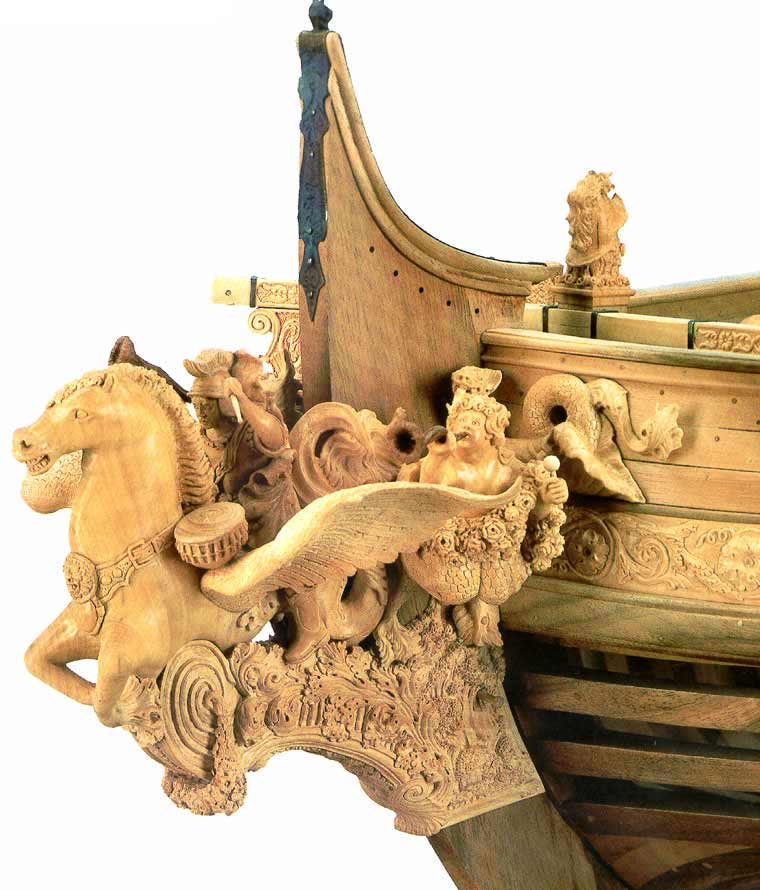
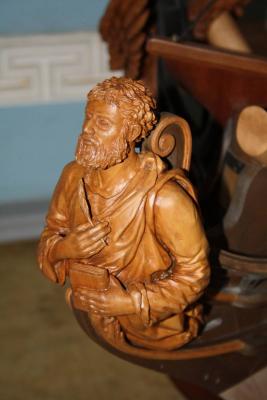
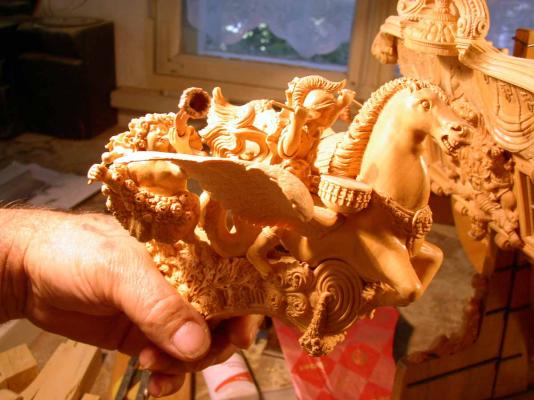
Awesome work Sherry. How do you did it ? Dremel tool or by hand tools ? Just yesterday I had little discussion with Bob (Rfolsom) in his log about making figurehead of CS. Your work is new inspiration for me to try something like this Thanks Nenad
-
Cutty Sark by NenadM
NenadM replied to NenadM's topic in - Build logs for subjects built 1851 - 1900
Bob Our thoughts obviously go in the same direction. I was/am also thinking about your detail "2.5" which is invisible on model, but very significant for strength and endurance of pinrails. There will be a lot of ropes, and every single rope has to be streight and tight, and even a minimal tension of each separate rope will be cumulated in one point - one pinrail I had seen perfect done Corel plastic CS, on which this "little" forces caused breaking mast Nenad- 4,152 replies
-
- 1
-
-
- cutty sark
- tehnodidakta
- (and 1 more)
-
Spencer, dark side is dark side. Lot of problems you do not have following kit instructions. But, even in a kit building, if you must/want to step away of instructions ( adding details, implement some things and tehnics there are not in instructions) it is very easy to slip to the dark side Modified quote from Star Wars Fear ( could you can do it) is the path to the Dark Side. Fear leads to anger ( if you couldnt) ; anger leads to hate ( hate your model) ; hate leads to suffering ( why I can not do this) ... Train yourself to let go of everything you fear to lose ( and to start over and over) ... You cannot escape your destiny ... I can feel your anger... it gives you focus, it makes you stronger!
-
Well done. Good, interesting and usefull research
-
When I start, I have seen some pictures of figurehead made from one piece of wood by hands and Dremel ... I was fascinated, and think ... I can do that. Something like THIS, considering that Nanny is not so complicated ... in meantime I have seen extraordinary work of Ivan Trtanj, and all of that turn me down... I can not do that Then I got Dremel tool ( Einhell ), appetite grows ... Yes I can do that ... But after working with it, I am not sure any more .... In my TEHNODIDAKTA kit figurehead is made of cast lead, and also I dont like it. So, this is pretty far away, and another (Hmm)x100 thing... Pumps ? Honestly, I didnt think about (yet)

-
Dognut I hope you did not drown Her ... If you did, specialy for you something from "Song Of Ice And Fire" ( R.R.Martin) The Ironborn do not fear dying at sea or drowning; indeed it is their saying that "What is dead may never die, but rises again harder and stronger. In a ritual of Ironborn, people are drowned in sea water (their holy water) and then brought back to life harder and stronger
- 70 replies
-
- 1
-
-
- cutty sark
- constructo
- (and 1 more)
-
Bob, please look at my post #386, I am interested in your opinion, and dont want to overload your topic with my question. Be free to answer directly in topic where you want. This question is surely interesting and significant for your build too
-
Cutty Sark by NenadM
NenadM replied to NenadM's topic in - Build logs for subjects built 1851 - 1900
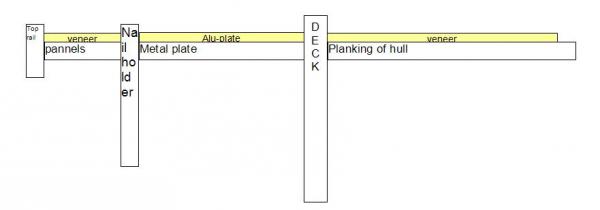
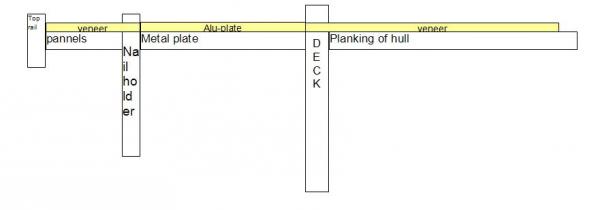
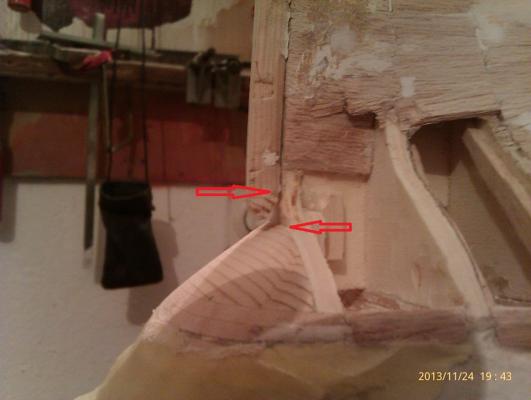
For Bob and the others I need your advice, and experience Coming along to second layer, some questions arise. To be more clear, because I do not know exactly English terms, I ll use this drawing for better explain what torment me Where are presented Number 1 is top rail, in my scale ~ 1 mm wide Number 2 is parallel bender (?) at same height and colour as top rail Number 3 is parallel white bender, little wider, in my scale ~ 1,5-2 mm wide Edges of 1. and 2 are rounded, edge of 3 is squared Red "a" sign is outside surface of bulwark with white panels, in my scale ~ 5 mm wide, has to be covered with second layer of veneer, and to be painted over in black color Red "b" sign is outside surface of metal plate with water posts, in my scale (and conditions made by mistakes) ~ 1,3-1,5 cm ( not decided yet). I intend to plate it with strips of alu-foil, and to paint over in black color Red "c" sign is regular planked area of hull, after second planking, it will be painted over in black color Bob, in your photos, I concluded that for now you mounted No3, and No1 and No2 wait until you mount "a". Also, final outside painting and covering of surface"a" and "b" is waiting for No1 and No2 And here is dilema Option 1 If I first mount No1 No2 and No3, then sticking is easier and excess adhesive can be removed nicely and precisely. Also, rounding edges can be done without damaging second layer. But on that way, putting of second layer can be complicated and un-precise with possible risk to damage bender strips. OK, this can be done with extremly patient and precise hands. But on that way, there is great dangerous when start paint, to get some paint over strips, which will be extremely narrow in my scale Something like this Option 2 If I first put second layer of the veneer and alu-plates, without previous painting, It will be very hard to qlue benders over them, and to remove excess adhesive. Also, painting of "a" and "b" will be pain. Painting of benders too. They are so thin to cover them and protect of unwanted paint Option 3 If I first put second layer of the veneer and alu-plates, and paint it before mounting benders, and after that over it qlue bender strips No 1,2,3 , removing of excess adhesive will surely damage veneer. If in this option paint benders before, it is question how glue will keep on paint. Painting benders after mounting can be hard and messy too And it all must look clear and neat as on picture above, in very parallel lines. They are so much visible on model, and this mistakes can not be masked later with anything. This is, in my opinion, very important stage of building Another question: When is the right time to cooper bottom of hull ? After or before up mentioned works Hardly waiting for your thoughts and experiences

-
It would be much better if you do not have to rush
-
Cutty Sark by NenadM
NenadM replied to NenadM's topic in - Build logs for subjects built 1851 - 1900
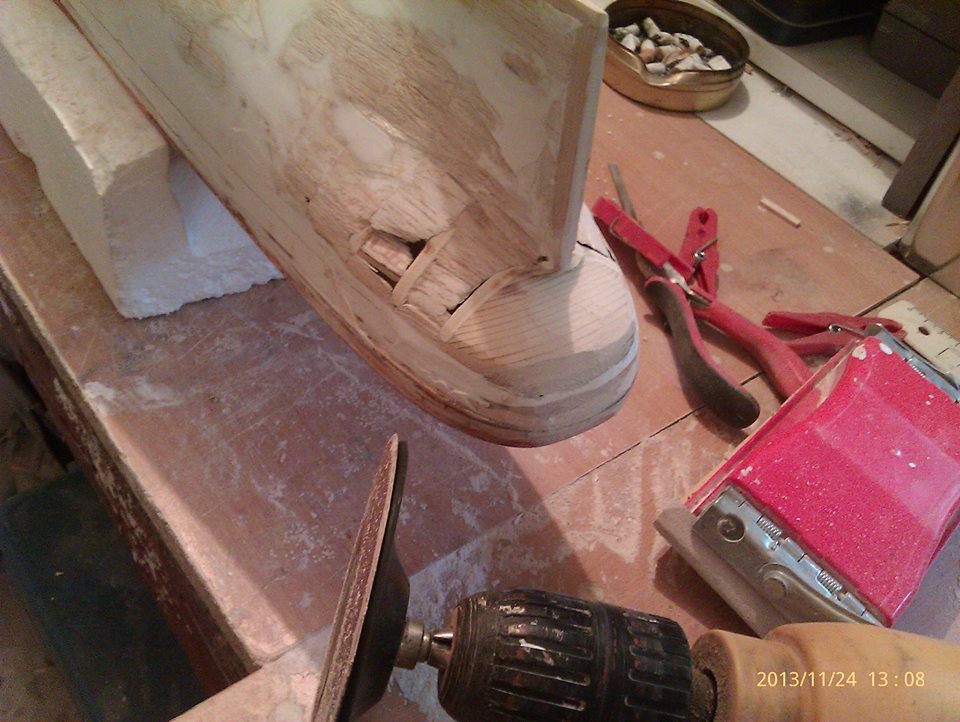
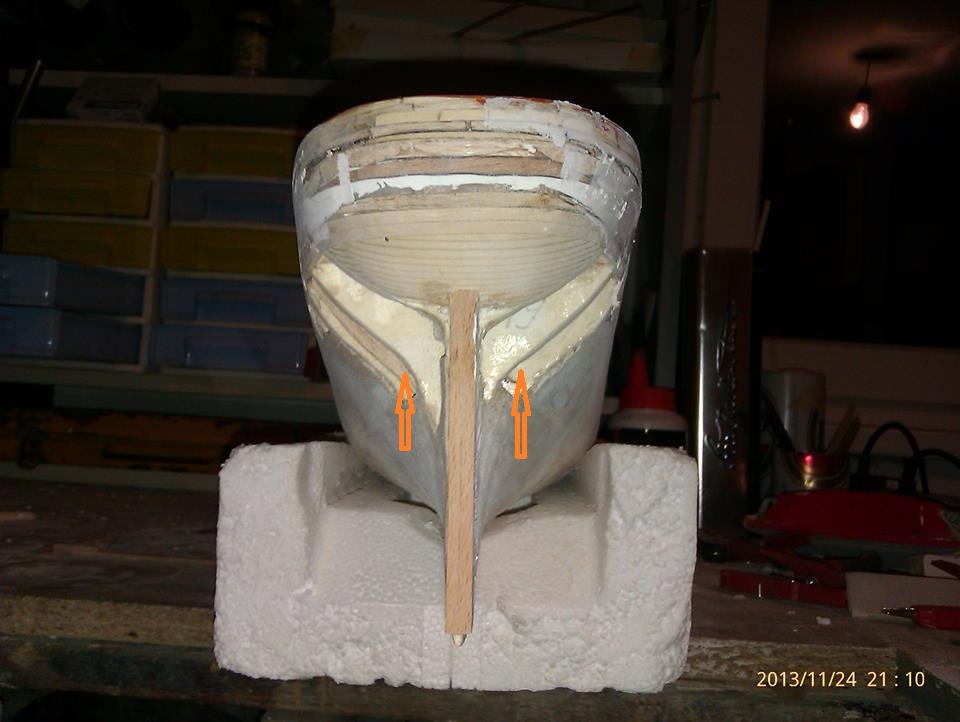
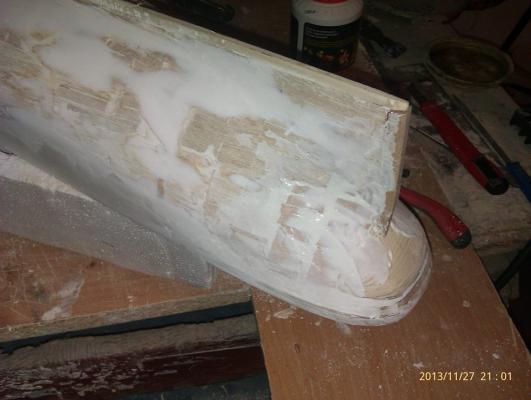
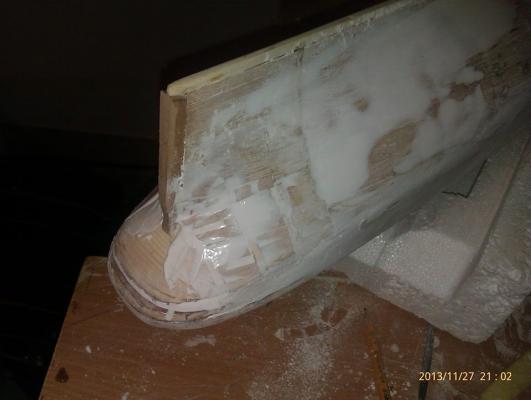
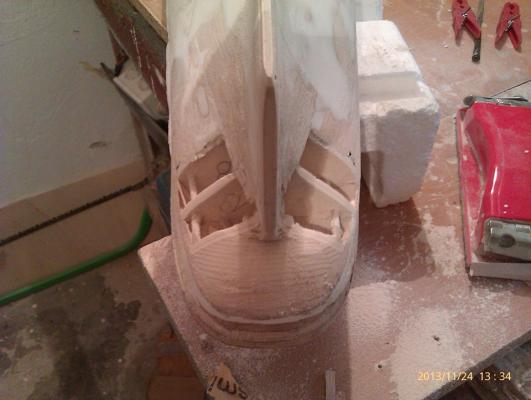
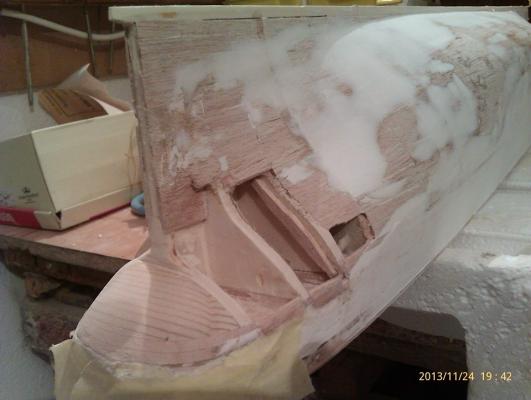
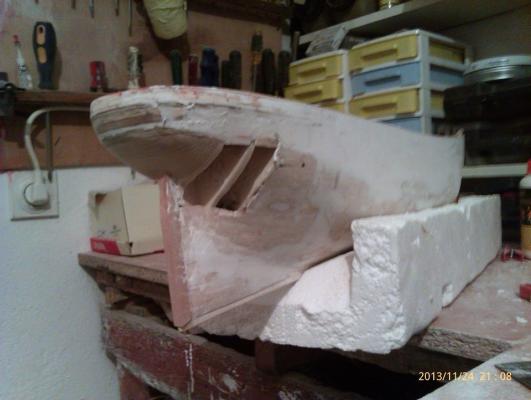
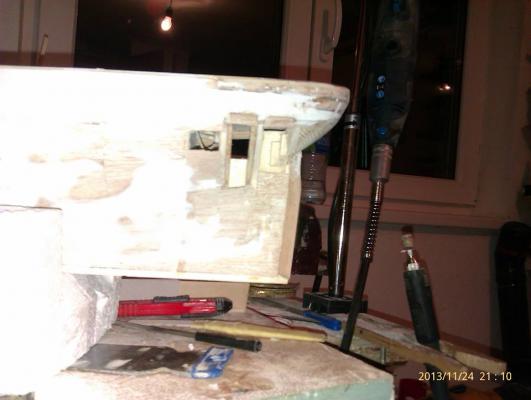
I picked up all my will and courage, and bravely come in shipyard, so Comedy "CS by NM" act III part 1 begine Working title: "Finding lost stern" Episode: Deep surgery Working music : Music from movies ( mainly from "Lord Of The Rings" ) Working drink: Beer and tea Lead role: CS Main annoy: Me Lasting: 3h+4h with pause for lunch and little dream ... Obviously, ugly "elephant" must be flatten somehow, so I start digging ... not with modeler tools, but with hard artillery (drill with sanding circle) After a while, I concluded that Flattening must be spread to sides of ship to connect somehow to lost ( and some new founded) lines and curvatures. In this stage, I become really sure that deviations in compare to Campbell will be there anyway. So, what to do? Long ago I decided not to start over. What is left ? Only whole appearance of the whole with lines as much as can be smooth and in generally as much is possible to remind to Her hull lines. And all possible details over to turn attention of watcher .... Keep digging, and noticed that new and old lines require for holes to be deeper and deeper No, it will not look good. What to do ? A lot of Hmmmmmmmm, pair of cigarrets to clear and clean mind, and after a while realised that I must rip out old stern post. More necessary sanding, and I find that stern will be flattened almost 1 cm !!!!!!!!!! What had you done, Nenad ??? Where was your brain ( if you had something in head) ???? More sanding ... and after nearly a hour, I make a new ( little longer and little wider) stern post and mount it ( Now, for difference, stern post has little curve expressed in Campbell plans) And somehow, suddenly, it seems that I have find my lost stern ... In the morning of this day, it seems to me as a complete impossible mission. And then it catch me ( what a supprise ?) ... collateral damage ... obviously in this situation I can not have both - proper lines and angles of stern, and a poop right in scale. So, it seems that poop will be little longer, and I must leave with these, and to find a way to visually mask it somehow (cooper, bonds, chains ...) For now, it seems that I mainly succeed to kill elephant !!!! Sure, there will be more buffing and polishing putty and sanding before secondary planking And for end, picture which brightly represent my inpatient at the very start of this building. Unequal and unbalanced rear ribs.... @ Dognut, if I can do it, you also can do it. Bravely and half crazy go ahead Sometimes I think about, when finally reach to and finish second planking, to kill all earlier posts and "Hello MSW, I build CS about year ago, and today I find this great site, I had no older photos, but here am I and this is my log ...." Of course, joke. I am very proud of my splodge EDIT on May 27th 2014 On this point I must add something important for dummies as I am. Equal width and thickness of stern post and rudder - it is now right time to think about this !!!! See posts #1063 and further. I didnt think about, and run ( again) in problem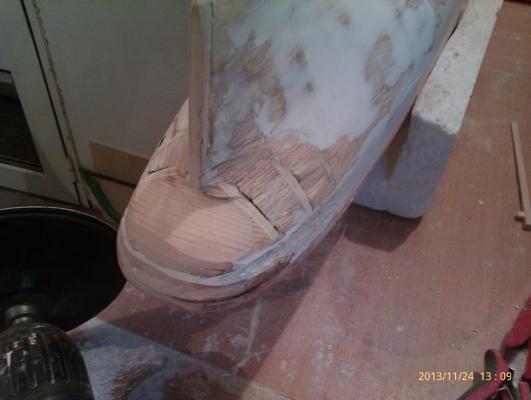


- 4,152 replies
-
- 3
-
-
- cutty sark
- tehnodidakta
- (and 1 more)
-
Cutty Sark by NenadM
NenadM replied to NenadM's topic in - Build logs for subjects built 1851 - 1900
@Sudomekh, did I understand well, lenght is almost 2 m ??? Wow. Realy wow. My CS lenght will be about 1m, and I have continious fight with Admiral where this " hudge" model will stay when it will be finished The saddest day of every year ... outside is only 50C, winter comes, tomorrow will snow and garden must be prepared for it and closed for joy All water batteries in home-yard are closed and prepared for winter, all garden hoses, tables and chairs are moved to basement, all garden tolls picked up and secure, all fallen leaves collected and swiped ... Nothing to do outside until spring But plenty to do inside, some "elephant back" still wait in shipyard, and there is a fear - could it be corrected at all, even though to look like ...- 4,152 replies
-
- 1
-
-
- cutty sark
- tehnodidakta
- (and 1 more)