NenadM
-
Posts
3,254 -
Joined
-
Last visited
Content Type
Profiles
Forums
Gallery
Events
Everything posted by NenadM
-
 Good work Are you buying or making yourself cooper plates? How thick is folly ? I think it will be nice coopering In some thoughts about "coopering" Cutty, looking at her pictures, it seems that proper colour is messing In other way, before restoration, it seems that was cooper Why do you decide for cooper ? Nenad
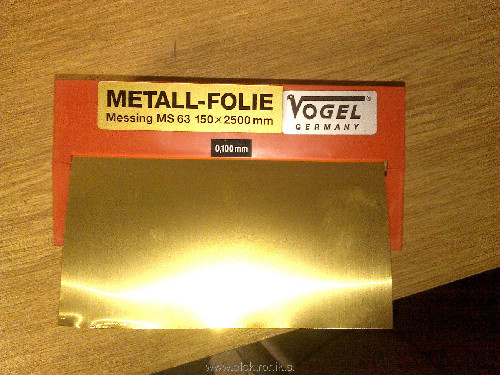

-
Cutty Sark by NenadM
NenadM replied to NenadM's topic in - Build logs for subjects built 1851 - 1900
And a great news ! Expecting to appear one more Cutty Sark scratch build topic on MSW. Dognut, come one, we are impatient !!!! Support Dognut !!!- 4,152 replies
-
- 1
-

-
- cutty sark
- tehnodidakta
- (and 1 more)
-
Cutty Sark by NenadM
NenadM replied to NenadM's topic in - Build logs for subjects built 1851 - 1900
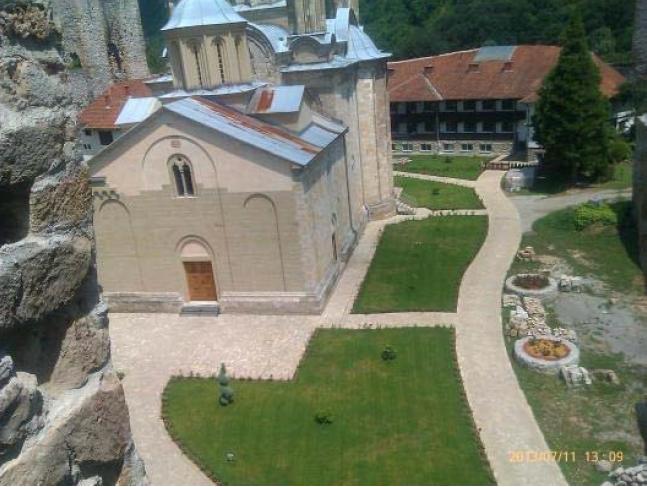
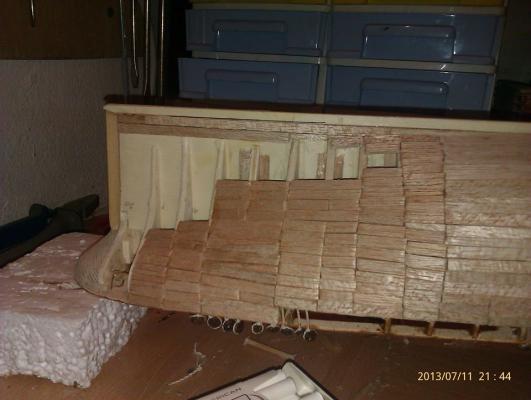
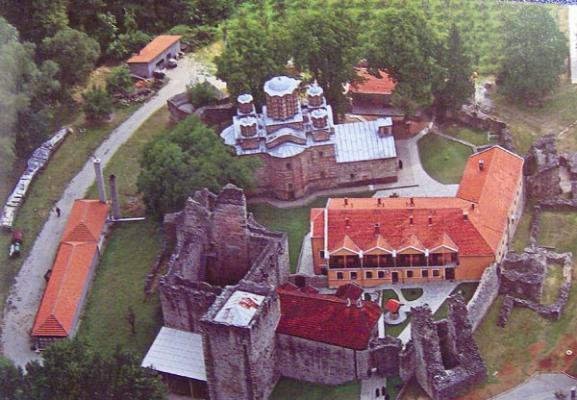
After short jump to history of ex-YU kit models After short jump to scale of Bracera. and ... after short trip to Manasia monastery (again today, climbing on fortres) and after " You could water the flowers and spread laundry while I watch my soap opera " Here we go again on Cutty. Primary layer of planking is almost done. Just one evening of working left. Uhh... Lasts more than a month Two sides of the ship, 23 inter spaces, at about 20-25 strips per area = about 1000 strips. Each of them, measure, cut, fit, intends glue, apply glue, fit, and again next : measure, cut ... Boring. Boring. Boring. i wanna do something which is not - planking (at least - sanding) And someone said to love planking?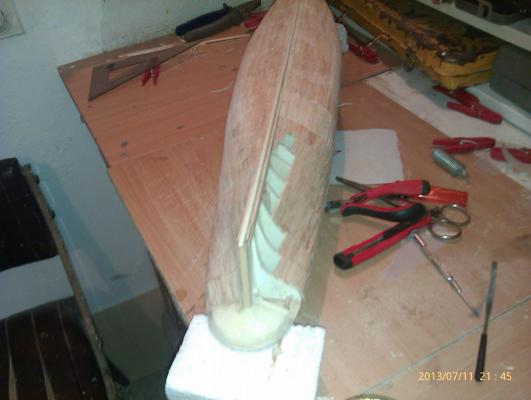

- 4,152 replies
-
- 1
-
-
- cutty sark
- tehnodidakta
- (and 1 more)
-
Cutty Sark by NenadM
NenadM replied to NenadM's topic in - Build logs for subjects built 1851 - 1900
Alex Unfortunately, the entire catalog is scanned, only a few pages, Bracera is missing. I will send a message on FB asking to scan that page, so I'll answer to you. In mean time, on MSW there is topic , Wishmaster wrote that he work by TEHNODIDAKTA plans in scale 1:20 Bracera by Wishmaster - scale 1:20 in Scratch Build Edit 10-07-2013 13:00 I got a message from FB - in that catalog there is no Bracera ... In post # 87 that was my assumption, and bad memory. Sorry for mistake -
Cutty Sark by NenadM
NenadM replied to NenadM's topic in - Build logs for subjects built 1851 - 1900
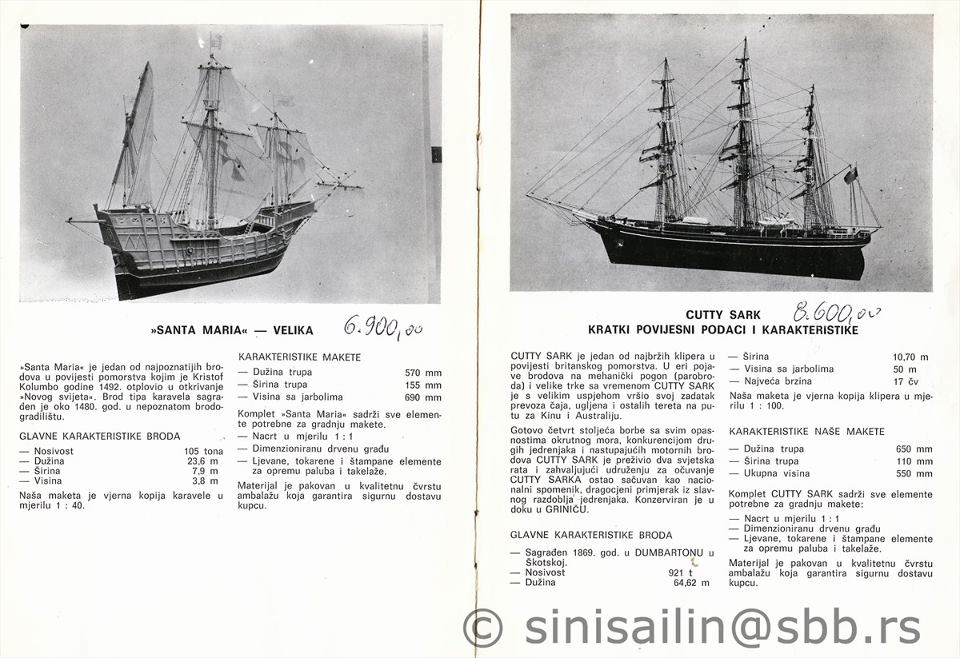
In posts #4 and #5 Matt (aka Sven) and John ( aka Tarbrush) asked what scale is my model, and I had no answer In mean time, thanks to FB modeler group in Serbia, one member posted scanned old TEHNODIDAKTA catalog from 1984 in which I read that my Cutty Sark model is in scale 1:100. Catalog is in Serbian (Croatian, 1984 it was one), but words 1:100 are there Memories and sentimental feelings of excitement 30 years ago while I was waiting for my kit arrives In that catalog also were offered ship kits for next models - Jadran ( school sailing boat of former YU navy) - Constitution - Nava from Dubrovnik - Bounty - Santa Maria -Cutty Sark - Galley ship from Dubrovnik - Bracera and few more TEHNODIDAKTA stayed somewhere in history, but some old plans are preserved by modelers. One of this plans is actual even today in MSW building logs (Bracera by Wishmaster)

- 4,152 replies
-
- 1
-
-
- cutty sark
- tehnodidakta
- (and 1 more)
-
Cutty Sark by NenadM
NenadM replied to NenadM's topic in - Build logs for subjects built 1851 - 1900
Forward slowly to the bow... Very like Mark`s thought and often remember that "The shipwright is slow, but the wood is patient."- 4,152 replies
-
- 1
-
-
- cutty sark
- tehnodidakta
- (and 1 more)
-
There is alternative way to use balsa as first layer of planking (strips 2 x 5 mm) , if you are not familiar with classic way or you do not have proper tools ( bending long strips), and when your model allows that ( as for example Cutty Sark and similar ships which were coopered by default). On same places you must add extra ribs Of course, there will be a lot of sanding and puttying. After that, when you reach proper lines, there comes second , very precise layer of planking with veneer and zinc/cooper foil
-
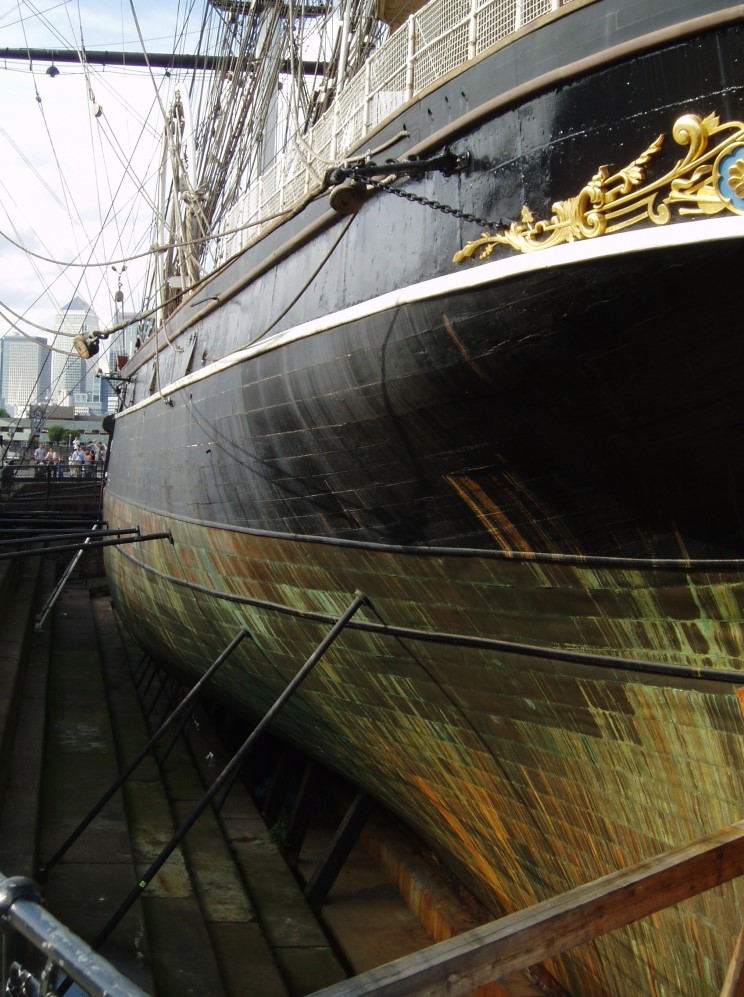
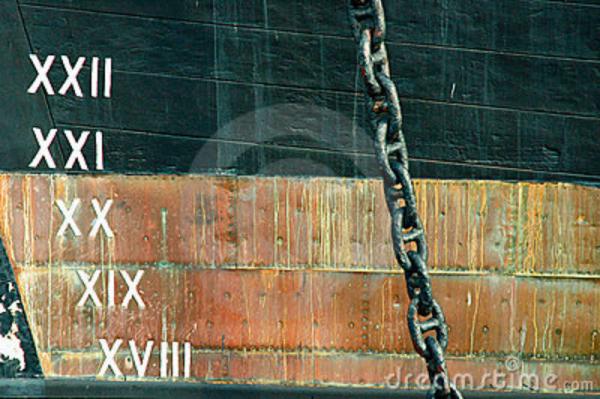
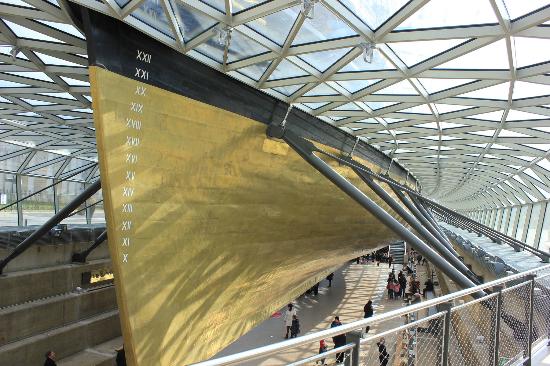
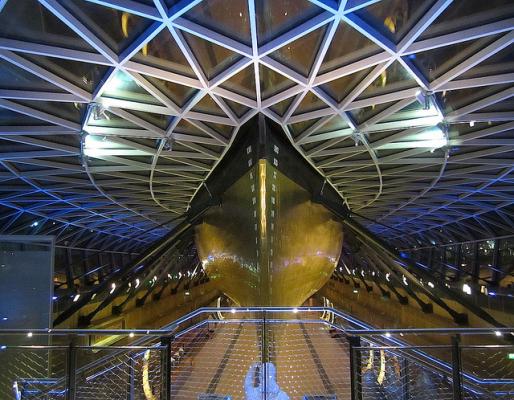
I find some clips on "Youtube" dedicated to coopering. Maybe there is some good idea ? Possible criteria can be - what is seen when you finish and look at your model Also suggest to find on Google Flicker and similar services pictures of cooper plate of existing Cutty Sark in London and to analyze that carefully. Maybe is solution there
-
Cutty Sark by NenadM
NenadM replied to NenadM's topic in - Build logs for subjects built 1851 - 1900
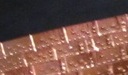
Hello. Popeye Looking pictures of Cutty, attached on post #22 and second picture on post #83.. and espetialy this it is quite clear that coopering follow after planking. And that is my plan (for now). Also, If you carefully look at this pictures, you will ll see that coopering cover all plates under, so they can not be seen. That situation arise some other ideas (line of veneer just to the line of cooper). Final decision depends of coopering material I can find in Belgrade when times come. I must comment that cooper plate you can order and bye, that most commonly modellers use on most models I have seen, is very same on every model, and I do not like this. In next picture you can see what I mean In my opinion, dimension of cooper plates must correspond as much as it is possible to dimension of original cooper plates For now, I think I find a way to bring something that will most resemble the original ship, its color of "coopering" and appearance. I still have no clear and bright idea, but there are times to go there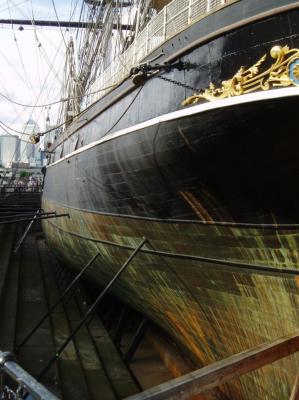
-
Cutty Sark by NenadM
NenadM replied to NenadM's topic in - Build logs for subjects built 1851 - 1900
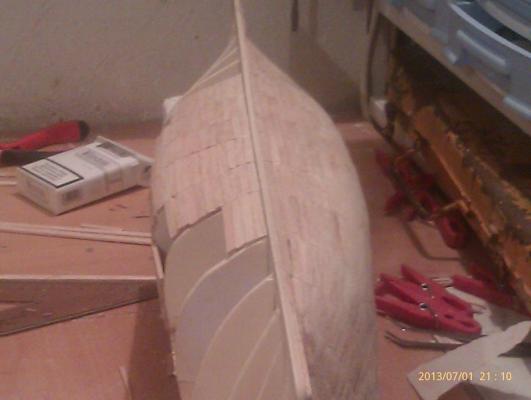
Thank you, Anja That will be great challenge, but I believe in my self and to my sense and hands and almost sure it will be all right. Fortunately, there are on internet many pictures of bow and hull of Cutty in London from different angles, helping to compare every step For example and we will see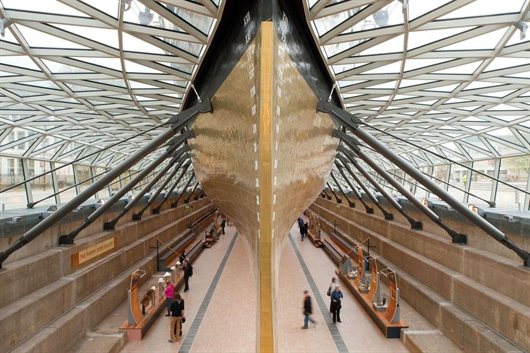
- 4,152 replies
-
- 1
-
-
- cutty sark
- tehnodidakta
- (and 1 more)
-
Cutty Sark by NenadM
NenadM replied to NenadM's topic in - Build logs for subjects built 1851 - 1900
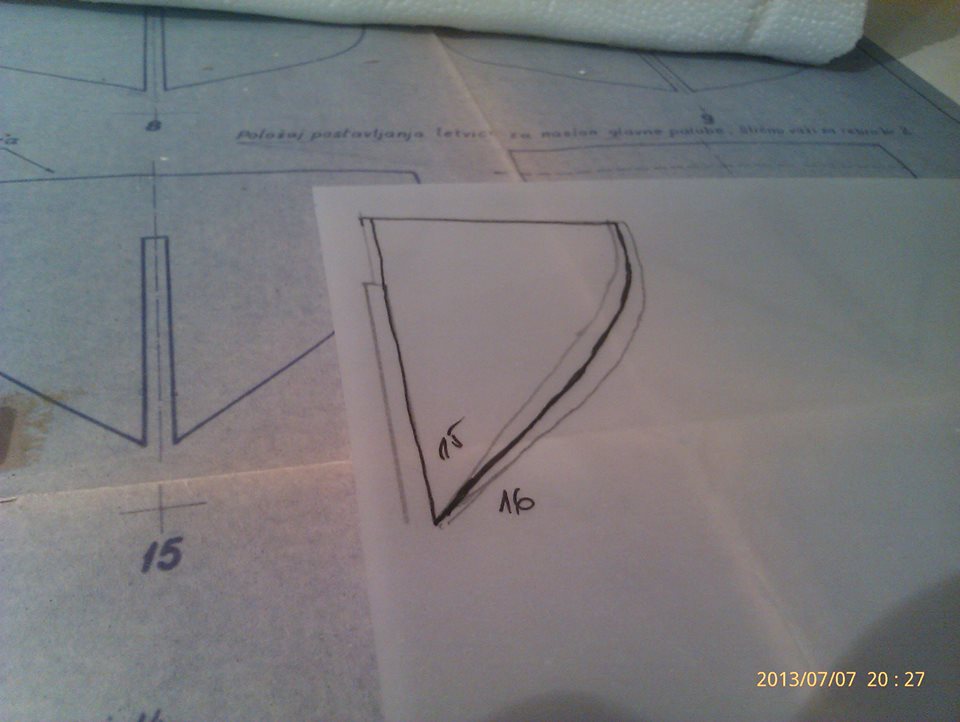
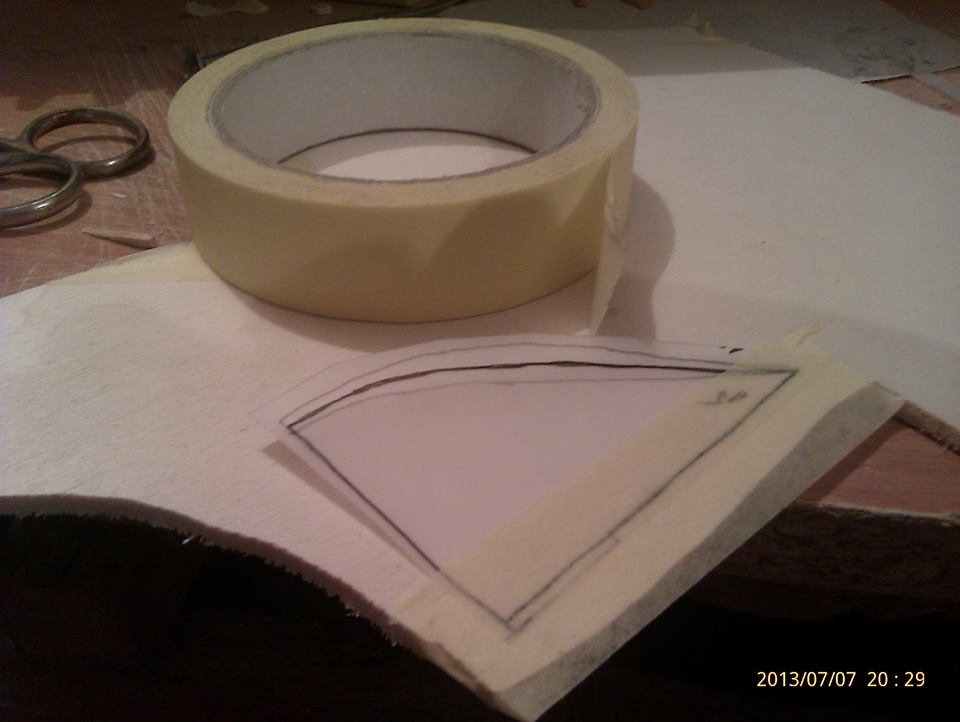
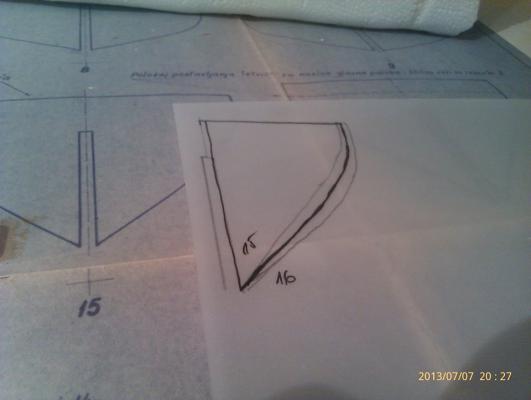
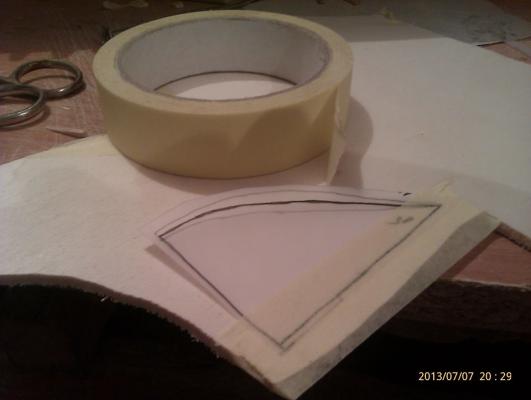
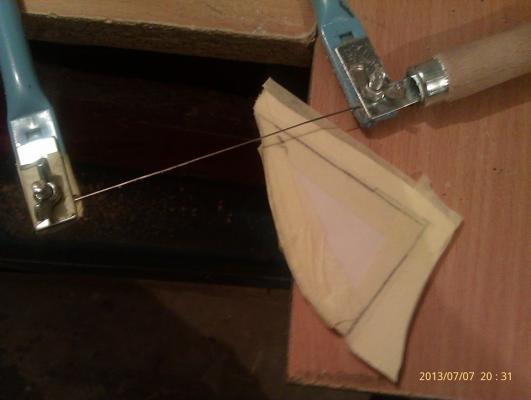
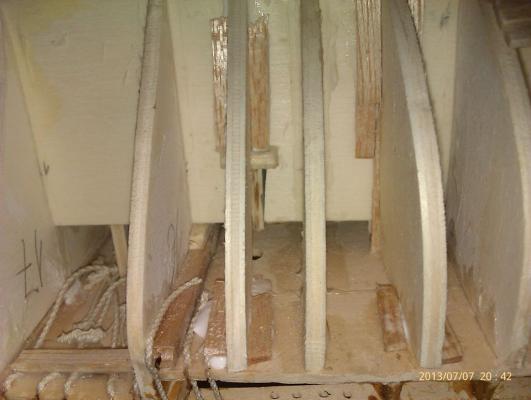
And when we come to bow, there is waiting same thing again. It is obviously that TEHNODIDAKTA`s Cutty needs some extra ribs, if you use this way of planking with short strips. Existing outside rib line is to much sharp-broken on existing ribs mounted as in sheet And there is way I use to get middle line between existing ribs outer line And the way to transfer it to the plywood with tracing paper and transparent paper tape. If it is necessary, you can bold lines on paper tape Surely, there is a little trap noticed in post #7. Horizontal line on every rib is not at same height (deck curvature). There is no short and easy way to get precise position (because the slope of the deck), and you must try, and chek, and fine touch up, relying on your own sense. After mounting it, everything is now clear, and there is much smoother and much proper line of rib¨s outside Bearing in mind that additional rib has no bearing designed to keel, here is the way how to glue extra rib and how to put and fix right horizontal and vertical angle of rib

-
Cutty Sark by NenadM
NenadM replied to NenadM's topic in - Build logs for subjects built 1851 - 1900
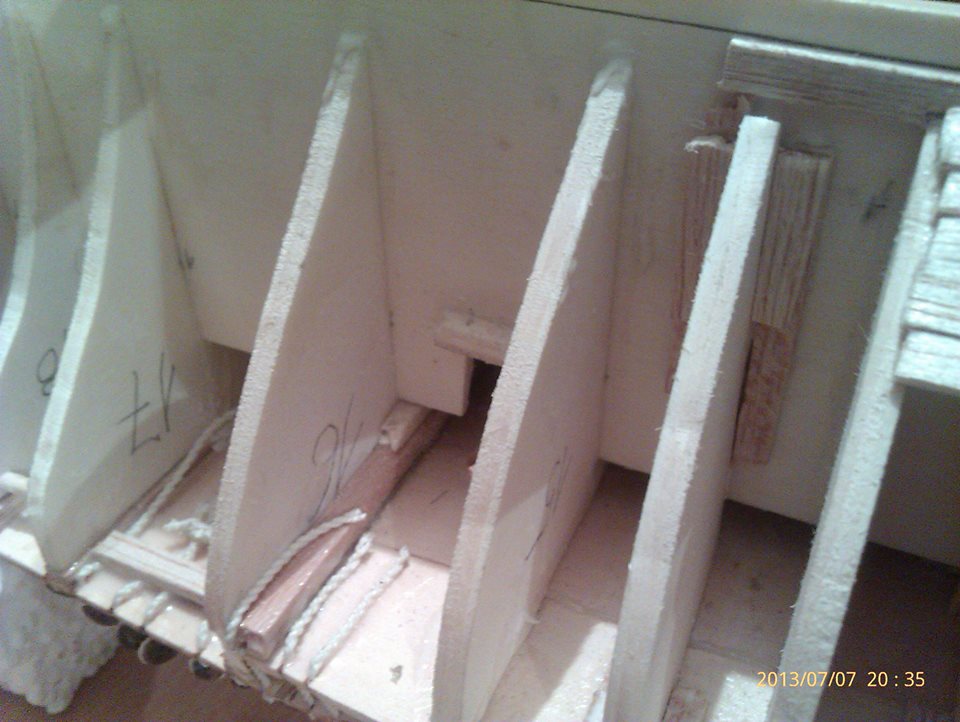
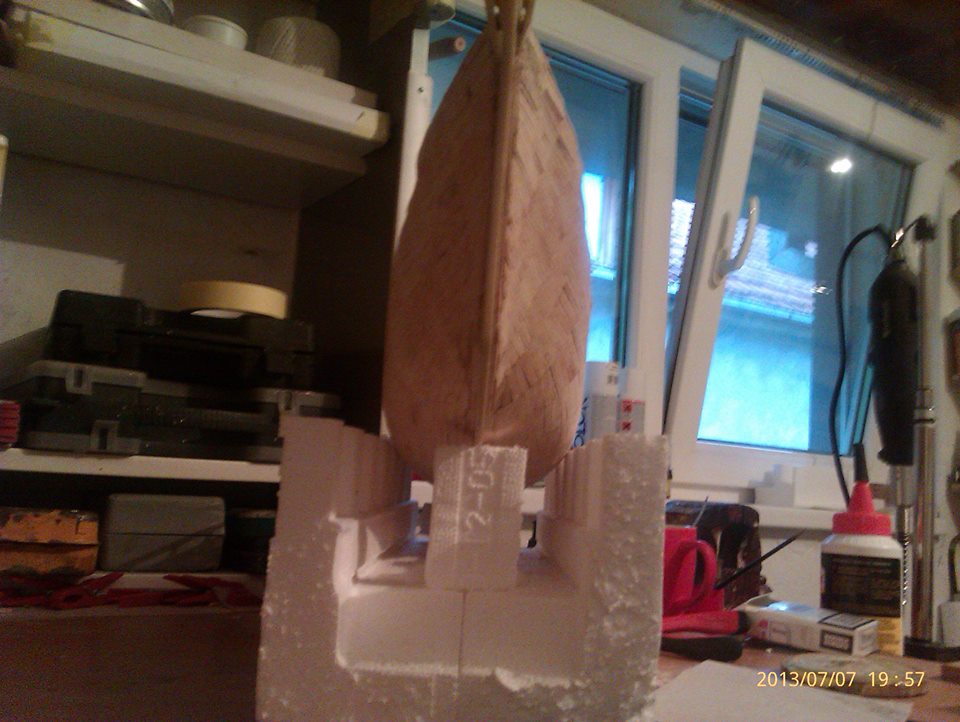
And tonight there is some progress - finished primary planking layer of bow, and lets go to finish same thing on stern For now it seems like a mess, but there will be sanding and covering and sanding, and after that second layer of planking. Main line is obviously - here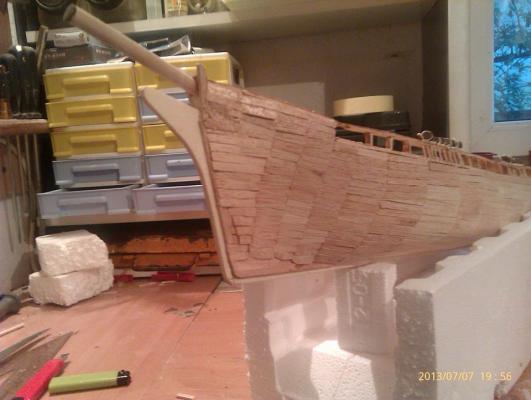

- 4,152 replies
-
- 2
-
-
- cutty sark
- tehnodidakta
- (and 1 more)
-
Go forward and enjoy as much as you can
-
Cutty Sark by NenadM
NenadM replied to NenadM's topic in - Build logs for subjects built 1851 - 1900
Make life to yourself as much richer and filled as you can. Depends only of you- 4,152 replies
-
- 2
-
-
- cutty sark
- tehnodidakta
- (and 1 more)
-
Add extra weight to model ?
NenadM replied to NenadM's topic in Building, Framing, Planking and plating a ships hull and deck
Ulises you read my mind -
Add extra weight to model ?
NenadM replied to NenadM's topic in Building, Framing, Planking and plating a ships hull and deck
For now in my thinking preffer some metal solution -
In my opinion, some kind of testing must be done. Also cut outside and then correct with sanding. Very important to begginers
-
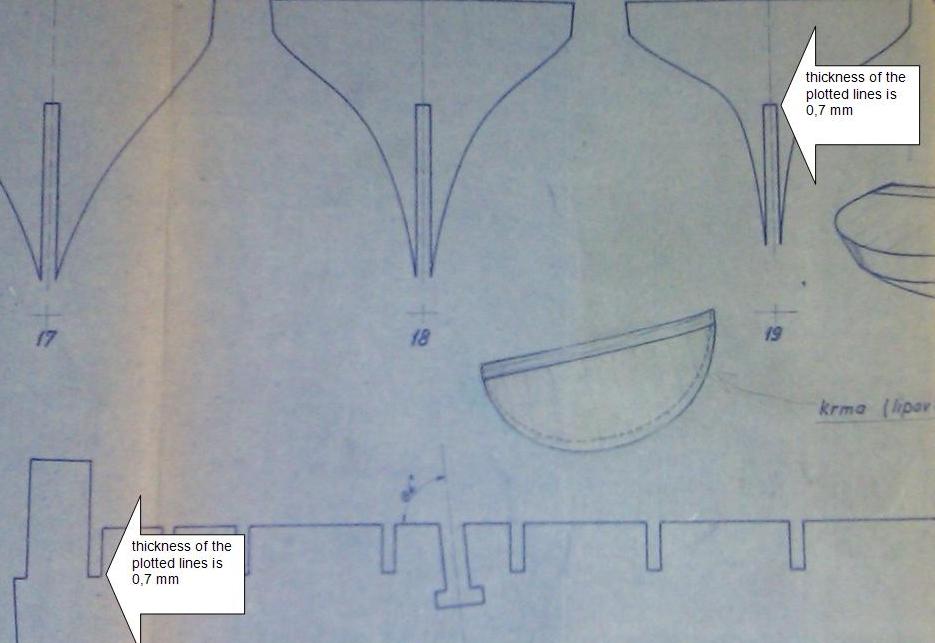
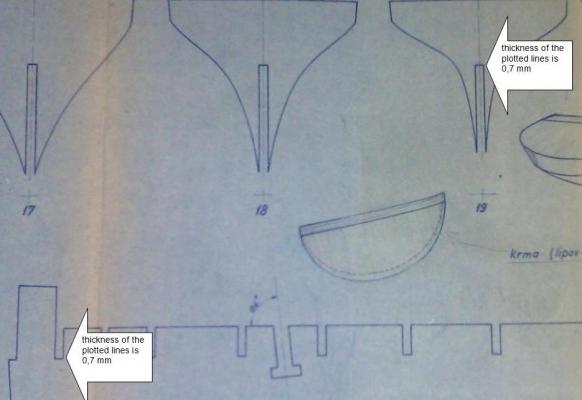
In conditions when the ship ribs are not laser cuted, and there is only an old draft made with old technology (hand drawing and photocopying - the so-called blue-print) may occur mistakes with consequences for further work As a consequence of old copy technique, the thickness of drawn lines in the draft is about 0.7-0.8 mm. When the drawing is transferred to the plywood at the beginning of cutting, we will determine the cutting saws 0.1-0.3 mm thick In other words, it is possible to cut above, or to cut below, or just in the middle of drawing line, which is almost twice as thick as saws. If you add in the inevitable loss of material during the sanding after cutting, it can be almost inevitable errors of about 1 mm when the rib put into its place on keel, since there is an same error in the hole - the hole in the keel to set the ribs, and in holes - holes in the ribs. This one milllimeter ( even up to 1,5-3,0 mm if you are not precise enough) can significantly affect the precise location of the deck - especially if wants to preserve the longitudinal and transverse curvature, and also causes vertical motion which causes vertical moves of horizontal lines for good planking Usually there is a lot more than just a one rib, and the error is necessary to multiply. How to avoid? What is the real position of the line cutting?
-
Planking is a really piece of art, and top craft of modelling ships. And hard for us beginners
-
Cutty Sark by NenadM
NenadM replied to NenadM's topic in - Build logs for subjects built 1851 - 1900
Next big question : extra weight - yes or no. I open related topic on MSW -
Add extra weight to model ?
NenadM replied to NenadM's topic in Building, Framing, Planking and plating a ships hull and deck
And any idea for next situation: One side of hull is completely closed by planking, the other side is almost closed. Only stays holes for masts on deck Thinking is is quite necessary to add some weight. A moment of inattention and the ship went down on the floor ( yesterday for instance). Long run to fix it on standing Of course, this way of planking give possibility to easy remove some strips to put something in, but ... Obviously, lack of timely reflection, and must pay some price for that
-
Keep on going Your topic is very useful for me
-
Cutty Sark by NenadM
NenadM replied to NenadM's topic in - Build logs for subjects built 1851 - 1900
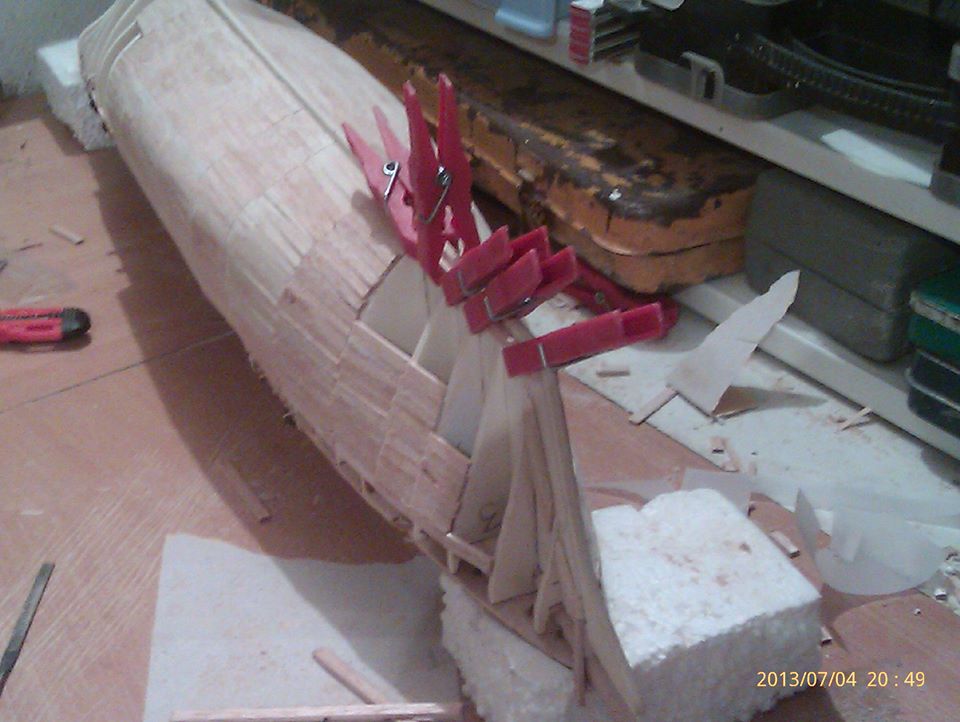
After one more business trip with 6 hours of driving, after visiting Monastery Ravanica from XIV century finally at home. And instead resting, go downstairs More fun this evening, continue toward bow, and then ... hear some scream from the garden, "who took my pincers .... " or whatever ... I tried to pretend I'm not here, but noise continues. Cute short discussion follows without winner, but she did not fail to note that should a hair cut grass. As if I do not know that It appears that some clip are more important than appearing of the both symmetric bow lines. How does she not understand? She has more than 200 clips and exactly this taken 10 are most important this evening ? And I have only one ship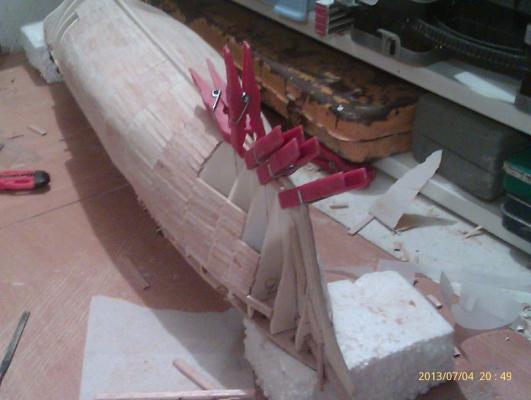
-
Ship Modeler's Workbench
NenadM replied to CaptCraig's topic in Modeling tools and Workshop Equipment
3x3m room next to the garage with a boiler for central heating, rearranged as little workshop for any work it is needed. And there clear work desk about 1 x 0,5m and place near to spread sheets on some wooden boards on top of boiler. Tools around on shelves. Cutty has her own closed wall shelve when she is resting from me on opposite wall of room Some problems arise according to the dimension of Her Majesty,and I suppose that workbench must grow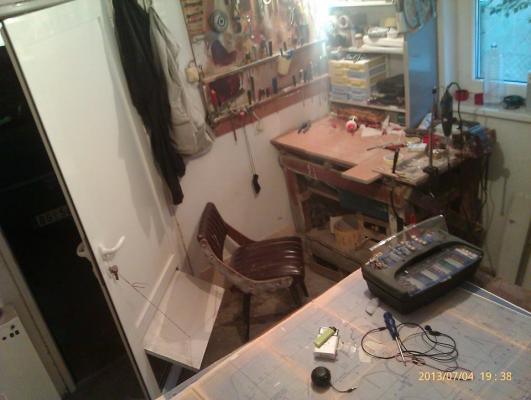
-
Cutty Sark by NenadM
NenadM replied to NenadM's topic in - Build logs for subjects built 1851 - 1900
Thank you for advices. Any other idea? I have some, but still thinking about