NenadM
-
Posts
3,254 -
Joined
-
Last visited
Content Type
Profiles
Forums
Gallery
Events
Everything posted by NenadM
-

Cutty Sark by NenadM
NenadM replied to NenadM's topic in - Build logs for subjects built 1851 - 1900
Ok Bob, I see it, even it is inverted. Today I start thinking again about starting CS from begining .......... but it would not happen ... 6 mounths of work is there .... Find myself in the middle ... cut off lines in intend to put them again latter after finish sanding Edit : when finishing second layer of planking .... I ll see when Edit sept.15 2013 Lines had unexpected good role and function to clearly show "holes" and "hills". After cutting them down, all curvatures of body are much smother, and that was very god decision -
Cutty Sark by NenadM
NenadM replied to NenadM's topic in - Build logs for subjects built 1851 - 1900
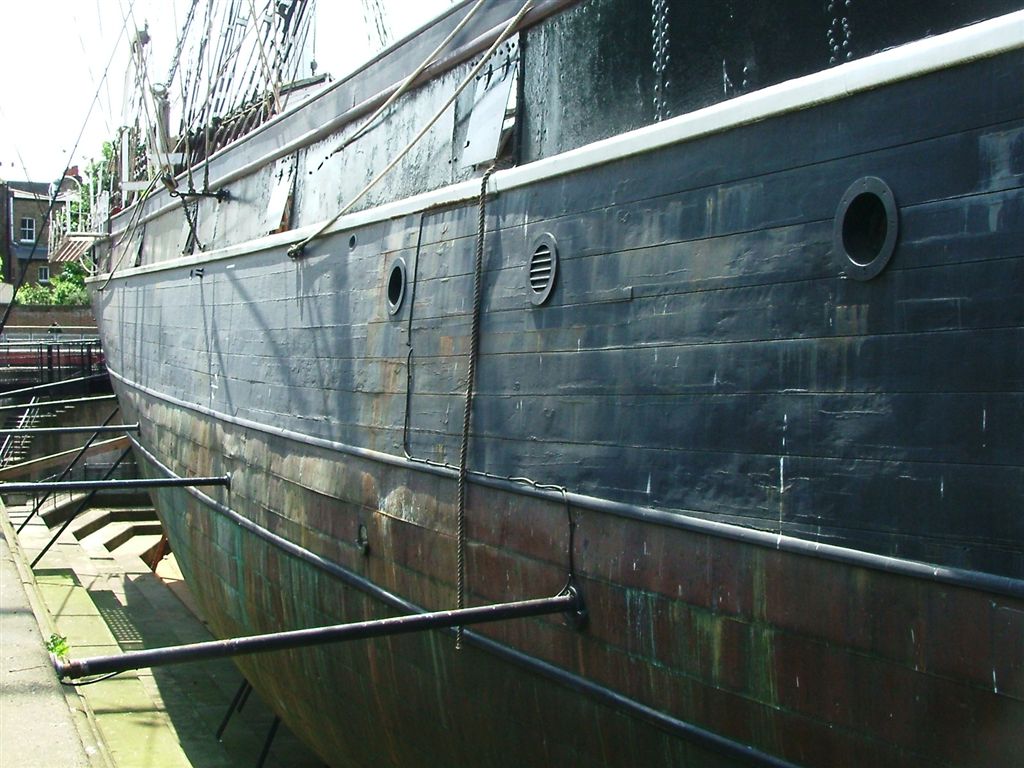
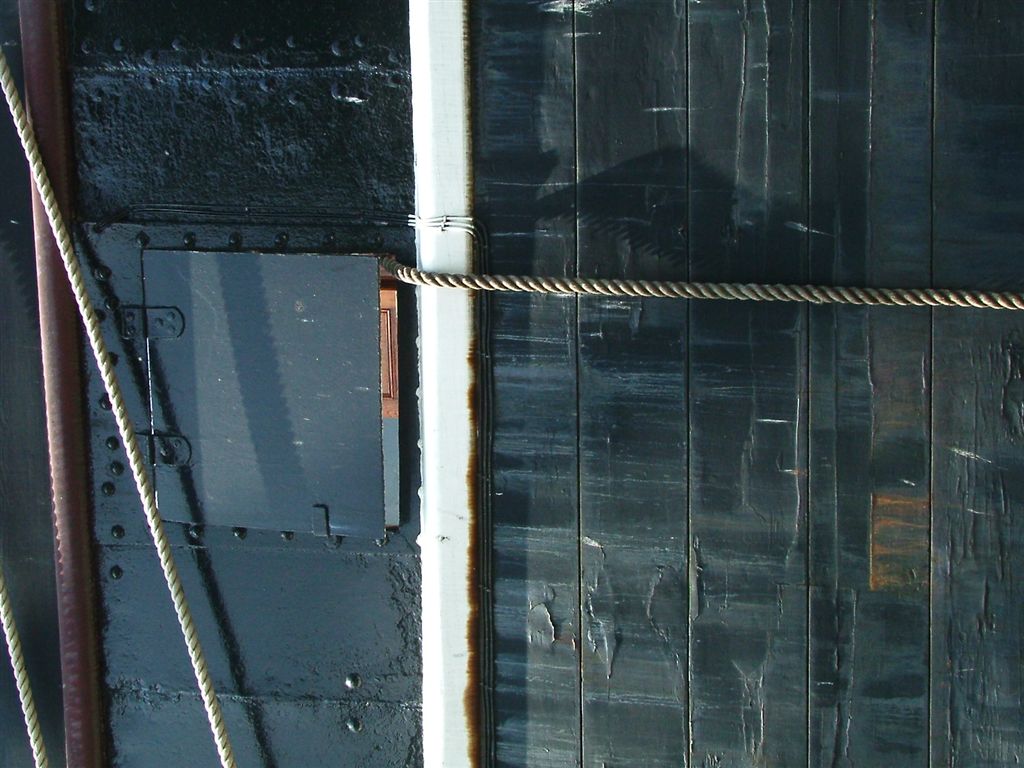
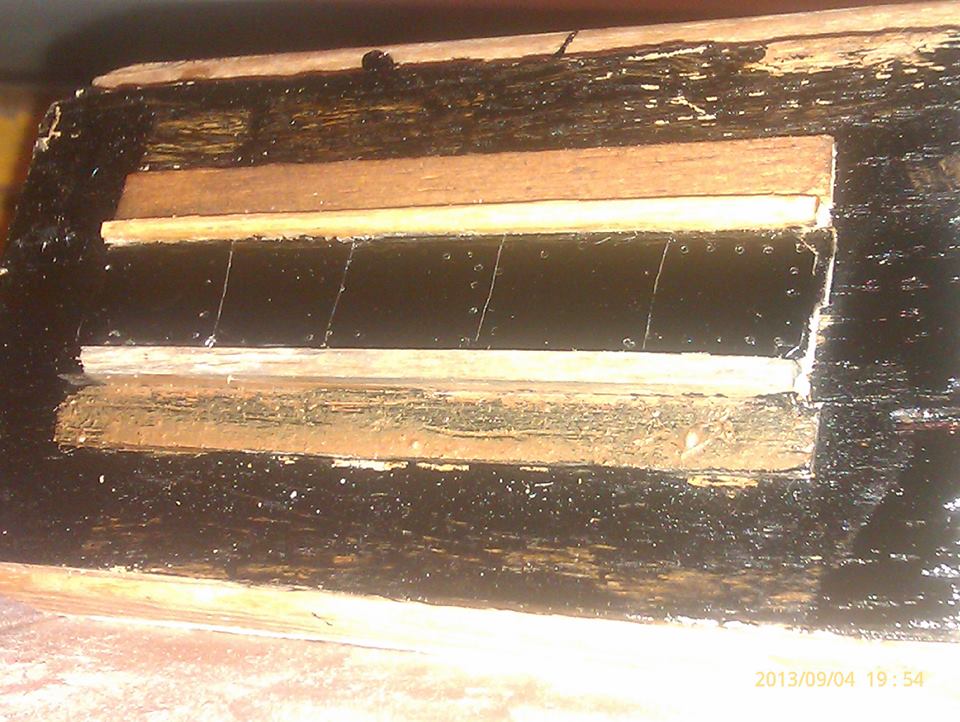
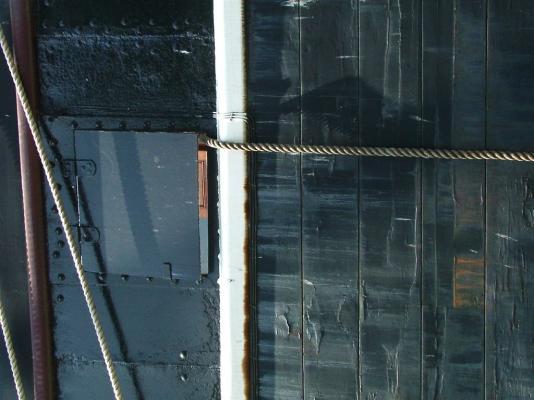
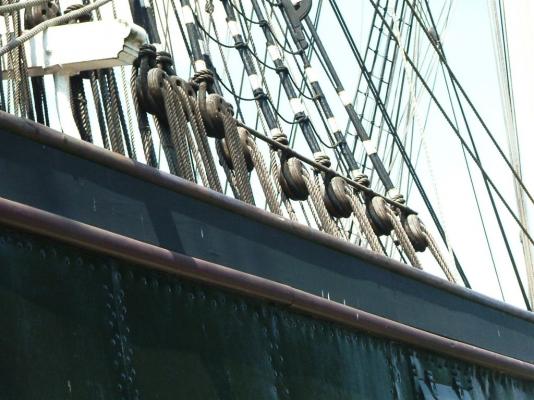
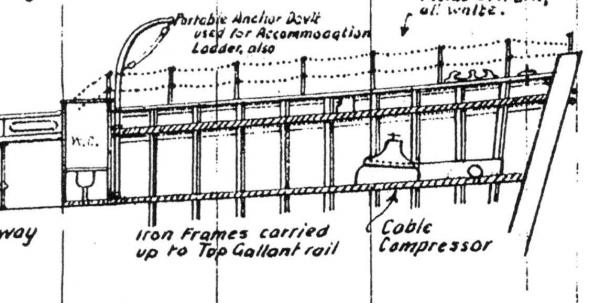
And here is dilemma ( or two) First In almost all pictures of CS before fire, like one attached above, there can be seen fife horizontal lines ( I dont know exactly english word). In my plans there are only three. From up to down, first and second are rounded and thinner, third is nearly squared , and wider. They existed in CS today But Fourth line separates coopering from planking WHAT IS FIFTH LINE, which I dont have in plans ? In plans there is no line 4 In restored CS now, lines 4 and 5 do not exist !?!?!? There are also not shown in Campbell plans, and other plans I have What to do or not to do on model ??????? Second Watch carefully next two pictures It seems that on model must be some kind of "coopering" under the black colour ? In my plans, that section is planked too ??? What do you think ? Edit at 21:30 I try something, and it seems that something like this will be all right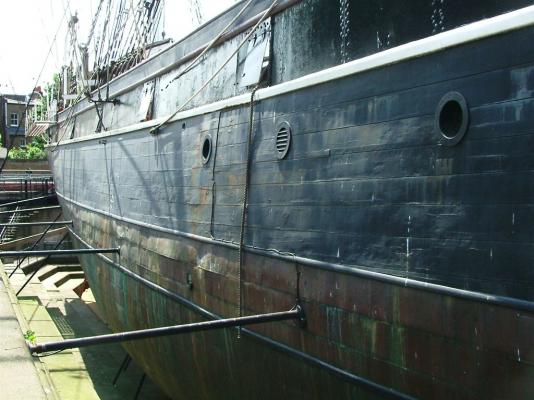
-
HMS Bounty by matke
NenadM replied to matke's topic in - Kit build logs for subjects built from 1751 - 1800
Hello Matke When you finish sanding as Edward said, then first put thin layer of glue, to assume better adhesion of second layer. Think about using a shorter pieces of strip. Also, to see how it goes (double curvature), first try on some bottle or something similar and try going to fit in areas which go narrower. In trying, try also how will go final light sanding of strips. In my attempts with decking floor, I use veneer 0,5mm, and LATER I see that it should look better with balsa veneer ... ( see attached pictures in post #49 on my topic). That learned me that I must try before start Everything is on you, depends what you want from your model Go forward, I ll follow Nenad -
Cutty Sark by NenadM
NenadM replied to NenadM's topic in - Build logs for subjects built 1851 - 1900
Holly Internet !!!!! Look at what I just have found on HNSA.ORG !!! TEXT-BOOK OF SEAMANSHIP THE EQUIPPING AND HANDLING OF VESSELS UNDER SAIL OR STEAM. FOR THE USE OF THE UNITED STATES NAVAL ACADEMY. BY COMMODORE S. B. LUCE, U. S. NAVY. REVISED AND ENLARGED BY LIEUTENANT AARON WARD, U. S. NAVY. WITH ILLUSTRATIONS DRAWN BY LIEUTENANT S. SEABURY, U. S. NAVY. New York: VAN NOSTRAND COMPANY, 23 MURRAY STREET & 27 WARREN STREET. - 1891. I start to read immediately in the evening and find it very useful for everybody on MSW to learn almost everything about sailing ships, their parts and construction, rigging, sails, ropes, knots, blocks, their uses and species and etc- 4,152 replies
-
- 2
-

-
- cutty sark
- tehnodidakta
- (and 1 more)
-
I think that right position for your topic is in "scratch build logs" ???
-
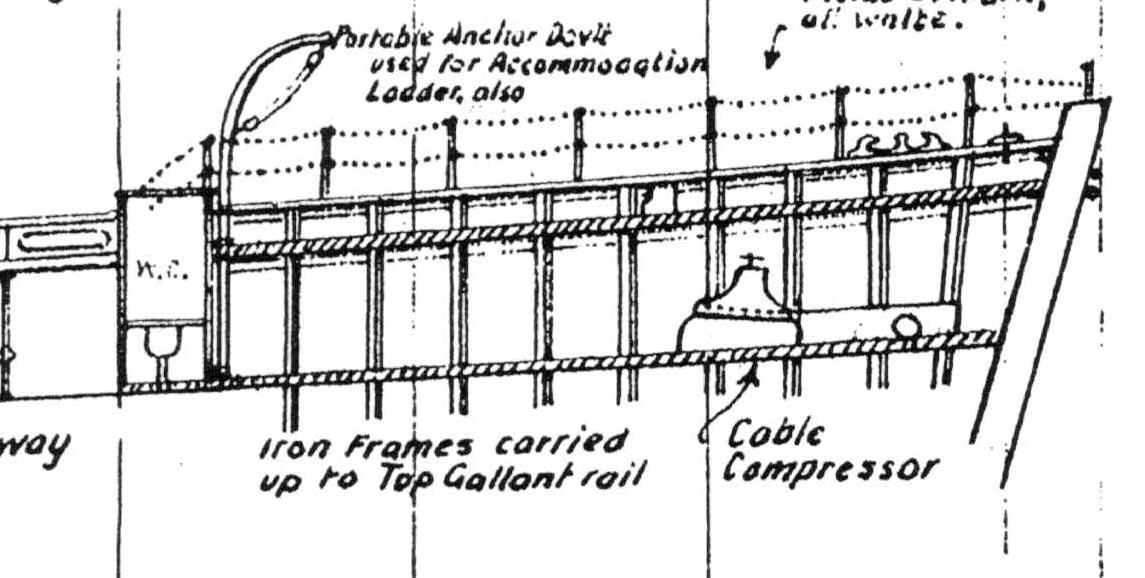
Hey, Bob Somewhere on Internet I find plans for CS made by SERGAL ROMA (Italy). What a surprise ! 8 sheets by SERGAL, and 3 sheets by Mr.Campbell ( "General Arrangement", "Rigging plan" and "Sail plan"). Copyright ? I dont know, but ... Also on Internet I find instructions made from "Billing boats" for Cutty Sark "564" ( 40 pages) There are also REVELL plastic kit instructions ( H-399-380) and REVELL A 05401-0389 with interesting details Also, there are instructions for Rattlesnake made by MODEL SHIPWAYS NO MS.2028 with usefull and helpfull tips and ideas. Model Shipways Hull and Rigging plans for Rattlesnake were prepared in 1963 by Mr. George F. Campbell All that find by the Google /pictures accidentally, ready for free download ??? And, of course, I have my plans - poor designed and full of mistakes (TEHNODIDAKTA - see post #63 in my topic). Unfortunately, the above mentioned plans, I found at an advanced stage of work (90% of planking was over), and as I invested quite a lot of work, I'm left to try somehow to correct mistakes, and I hope that the later details of CS will mask errors that can not be corrected ... For example, look at attached detail of Campbell plan and proportions on it. In my plans, between the two front deck, space is only 6 mm. How to put anything under ? I am not Harry Potter ! And you sure use internet and pictures from Greenwich, where is really much to analyze and learn And, also there are some books I read this days And also, there are other books that I'm looking for about CS other books.pdf I think that is enough for a solid headache Happy modelling !!!!

-
Cutty Sark by NenadM
NenadM replied to NenadM's topic in - Build logs for subjects built 1851 - 1900
Bob, In my country, it is said: "When you hiccup, someone is talking/thinking about you" Do you hiccup tonight ? While sanding, there was many "hmmm..." and "hmmmm..." looking from every side to Her Majesty, discovering places to correct something- 4,152 replies
-
- 2
-
-
- cutty sark
- tehnodidakta
- (and 1 more)
-
Cutty Sark by NenadM
NenadM replied to NenadM's topic in - Build logs for subjects built 1851 - 1900
Just luke that ! Right words. Every time I went downstairs to Her I look at Her, gently touch her sides with all possible sense of my fingers, and said: "hmmmm..." and sand little more or fill some imaginary or real "holes" in planking, and then "hmmmm..." again. That is the way it goes, I supose -
Cutty Sark by NenadM
NenadM replied to NenadM's topic in - Build logs for subjects built 1851 - 1900
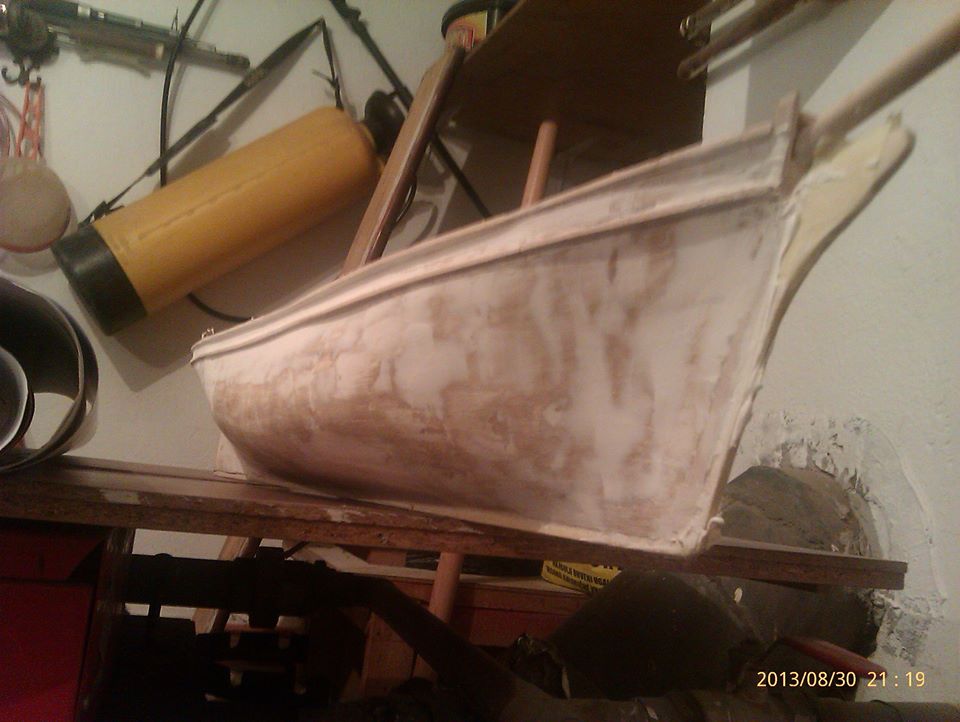
Nothing interesting from three day travel, except many many many many many crazy Turkish drivers on road driving very fast ( over 150km/h) and extreme dangerous ... what a ride .... very hard to stay alive on road ... idiots ... they drive full car of children more than 2000 km per day ... only one tired and sleepy driver .... one day from Istambul to Berlin ..... After coming home (21:30) DEADLY TIRED, I visit her majesty in her dry dock, and make some photos With my camera (on Htc Wildfire, 5 MP) without daylight I can not picture deepnes to show beautiful lines that slowly appear ( sanding is still far away to end) Dilemma i mentioned above is about horizontal strips, but more about that - tomorrow when I find proper English words, and make some time to scan details from three additional different plans of Cutty I get in meantime, and connect with adequate Google pictures. Horizontal strips on picture I put temporary to assume right attitude for woodfiller , and I ll see if they will stay or not
- 4,152 replies
-
- 2
-
-
- cutty sark
- tehnodidakta
- (and 1 more)
-
Mike Slowly preparing for rigging of my Cutty model ( it is far away from now), I concluded that it first must be really serious research in many different rigging plans and in pictures on Google, and other pages with photos. My sheets are poor with details, so, it seems that after research I LL HAVE TO MAKE SOME KIND OF MY OWN RIGGING PLAN. Or, to try to bye from Maritime museum ??? Please, keep posting your progress, I am very interested Nenad
-
Cutty Sark by NenadM
NenadM replied to NenadM's topic in - Build logs for subjects built 1851 - 1900
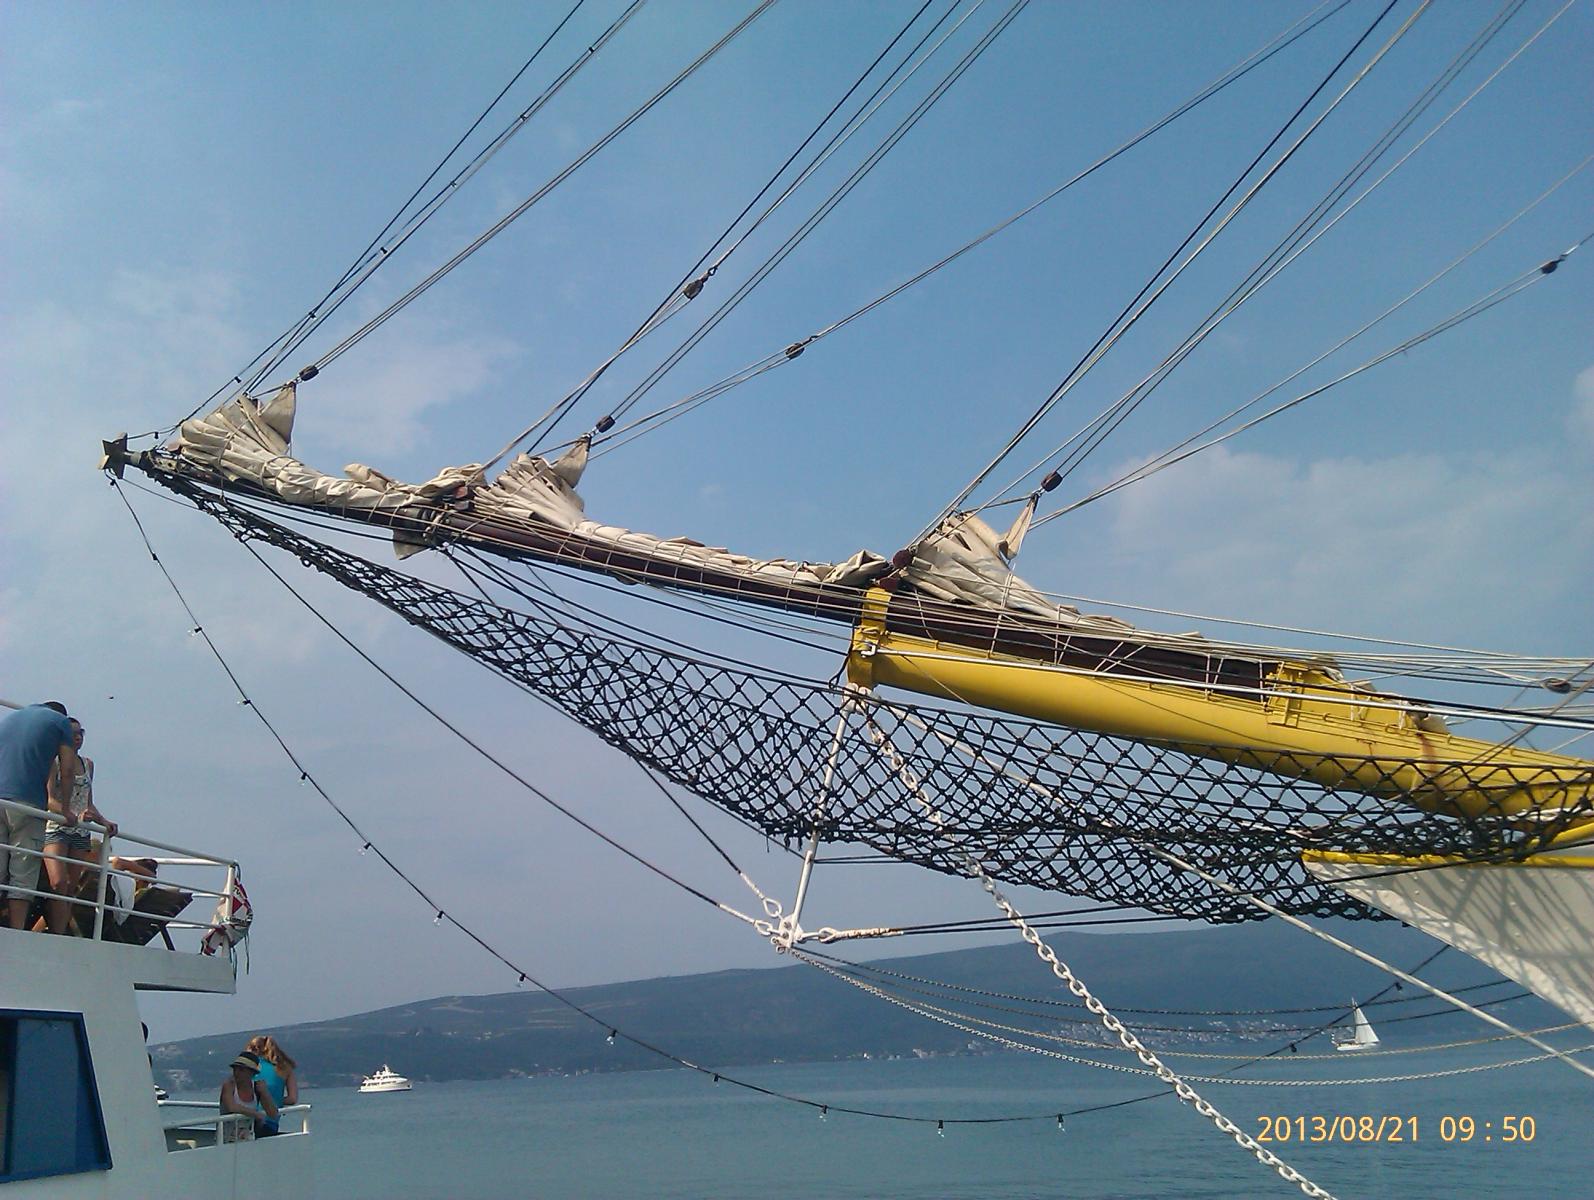
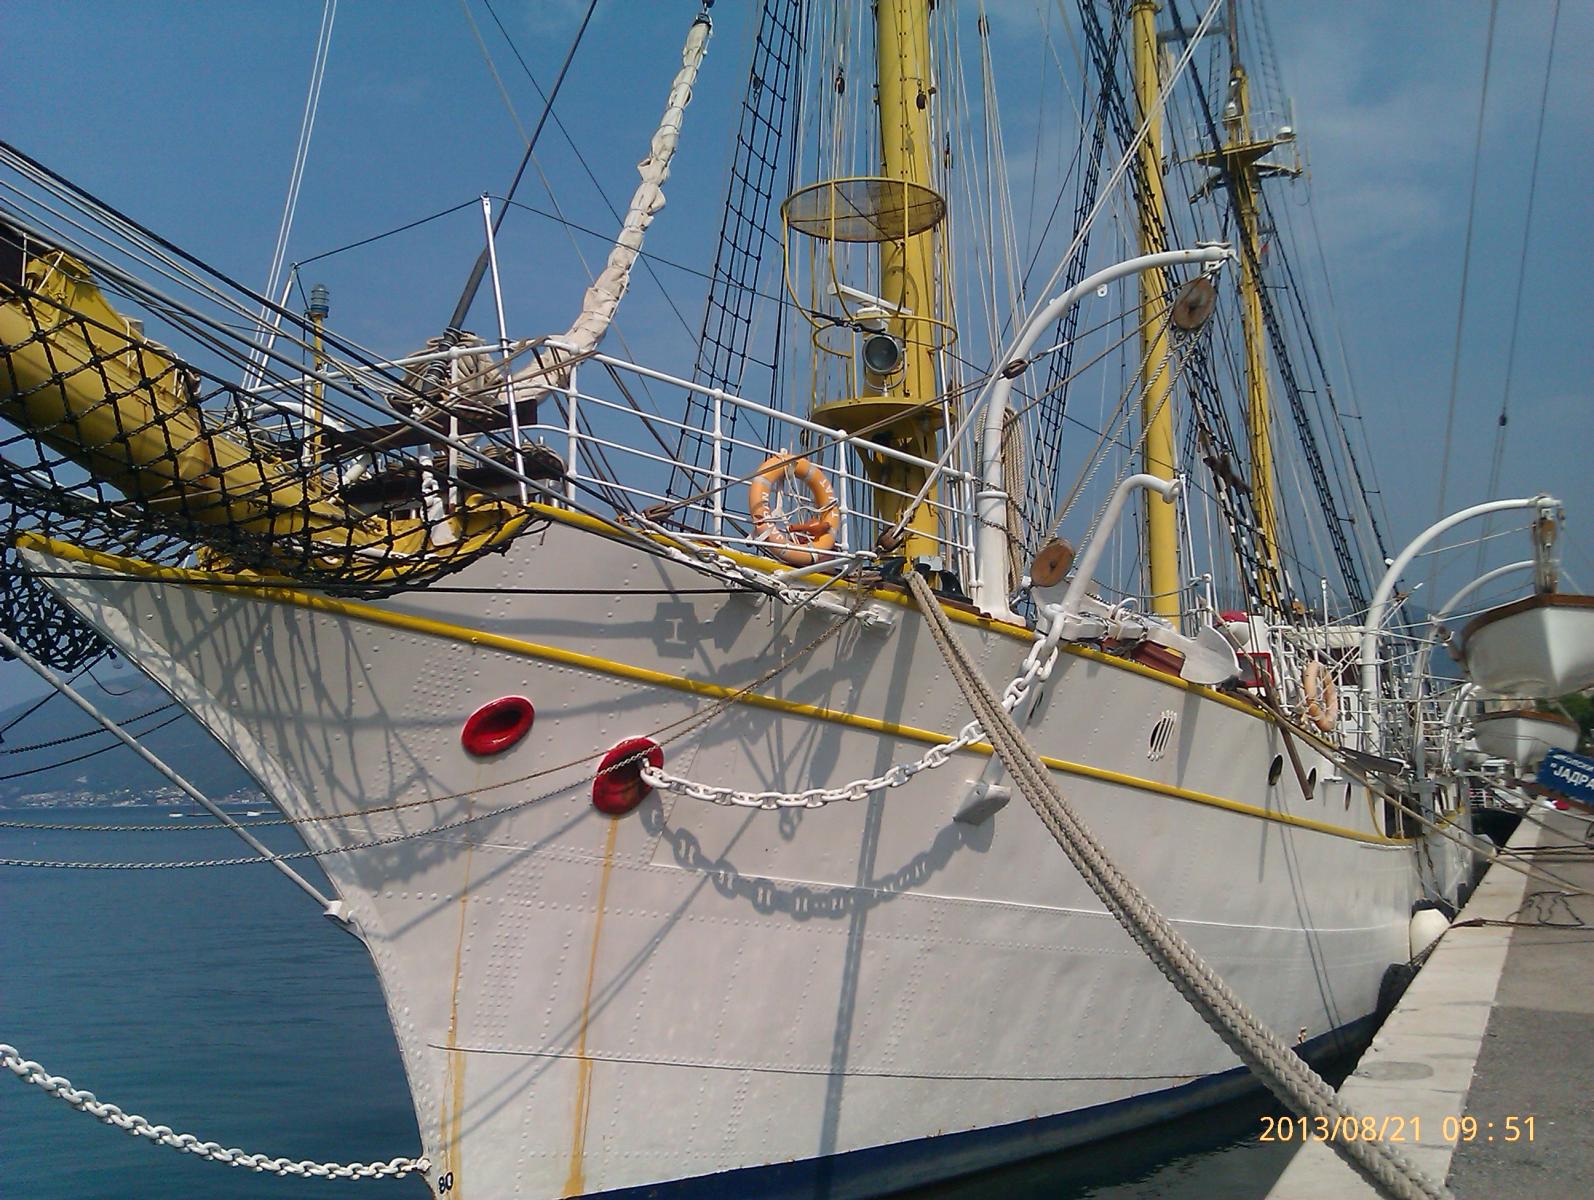
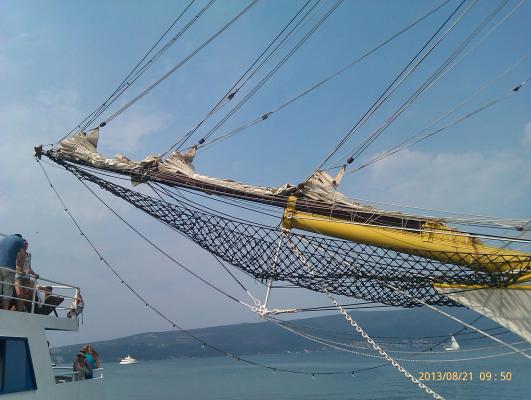
Something interesting, in mean time. In Tivat, Montenegro, I had seen old school sailing ship JADRAN, which was the one of the most popular ship for modeling in former Yugoslavia Impresive And interesting history of this ship ( see Wiki) Edit on november 20. 2013: According to policy of Administrators, this post have to be removed. But, some of Moderators like that, so it will remain


- 4,152 replies
-
- 2
-
-
- cutty sark
- tehnodidakta
- (and 1 more)
-
Cutty Sark by NenadM
NenadM replied to NenadM's topic in - Build logs for subjects built 1851 - 1900
Brian For a beginner in modeling ( as me), a bit of research is really necessary, if you want to make decent model. Somebody on MSW said: "... I had no idea what I'm going in ...". Heaven and hell at the same time... Today, I have only an idea what any singular rope on rigging is for, and how it works. How are they fitted, how they move. Research is interesting for me, and I dont want just to follow poor rigging instructions I have, when time comes to try to do it. Surely, there are all other topics on MSW and I have to learn a lot, but there is enough time for that. First to finish sanding, then planking, then deck furniture, then masts ... etc etc, long time in front of me to learn. But I do not hurry. Cheers Nenad- 4,152 replies
-
- 2
-
-
- cutty sark
- tehnodidakta
- (and 1 more)
-
Cutty Sark by NenadM
NenadM replied to NenadM's topic in - Build logs for subjects built 1851 - 1900
I am ready for vacation Bearing in mind that I'm not allowed to sunbathe, arming myself to stay in the shade with a few interesting books on my laptop
- 4,152 replies
-
- 1
-
-
- cutty sark
- tehnodidakta
- (and 1 more)
-
God job, Dognut, I really like it. Try to find some time, and carry on Nenad
-
Cutty Sark by NenadM
NenadM replied to NenadM's topic in - Build logs for subjects built 1851 - 1900
I hope so, Popeye Just look in topic about month or two back, and I can see where I was and where I am now ... It is going slowly but constantly forward Starting on march 13th Whole may I was playing making 66 dead-eyes ... and 66 ropes for it... Planking start on 06th of june until 14th of July , sanding start two days after it goes ... Today I am not in office, because the terrace is on line, and Admiral is jumping on my head whole week ago ... And as usually , early morning I decided to start cutting granite and applied cement adhesive, ... and electric power failure in whole part of Belgrade I live.... until 18h ...without electric power, I can not cut tiles on dimension, i can not mix mortar ... nervousness grows to the sky ...mother-in-law wants to drive her to the mortuary stone cutter ... bank dont work without electric and I can not pick up cash ... calls calls calls ( one day I must try how far I can hit my cellphone) ... battery on cellphone empty ... in friday on business trip again ... meils meils meils .... Nah ... I can not wait until 10 of august to disapear ... vacation !!!!!!!! -
Cutty Sark by NenadM
NenadM replied to NenadM's topic in - Build logs for subjects built 1851 - 1900
Better and better ( this is not the end) Edit on October 04. 2013: Later during sanding I had to remove it. But they were very useful to lead lines of putty and sanding to proper lines.
- 4,152 replies
-
- 2
-
-
- cutty sark
- tehnodidakta
- (and 1 more)
-
Cutty Sark by NenadM
NenadM replied to NenadM's topic in - Build logs for subjects built 1851 - 1900
Christian Circumstances forced me to that technic. 30 years ago with S.Maria I tried with boiled wather, with steam, with some tips and tricks I read about and some on my own, but I was not satisfied with results. With S.Maria finally I put long strips and then fill large rest holes with mix of gypsum and wood glue, and sanding it until I die ... And then cover all hull with paper strips ..... That was 30 years ago, when there was no chance to read something about ship modelling ( ...Former socialistic Yugoslavia with no chance to order and to pay something from other country. Even not to know what is on other side of border ...) When in CS came to planking phase, I tried it again, but no, no, no, not at all. After that tries and fails, I did some Google and Flicker and ... photo-research on CS, that lead me to the next: Coopering for clipper ship is essential for good look, and it in model covers all eventual little mistakes under it. On the other side, to the upper part of hull, it is clear that individual boards are extremlly narrow compared to the dimensions of the ship, and there are painted in black - fully covered with paint !!! That lead to conclusion - second layer of planking must be made from thin strips of veneer or thin balsa wood, not wider than 3-4 mm. The rest is coopering. Doing it all on a first layer is impossible mission for me, and that were reasons I decide to try something new, to imitate solid hull. Planking with short strips (with adding extra ribs), it is no doubt on it, surely lead to proper lines Of course, there are, and there will be a lot of additional partial putting layers and precise sanding to assume proper shape, all seems messy confused and disordered, but lines that appear on ship under sanding and putty seems to be proper and well looking Edwin I`ll follow it Thx -
Amazing job Slawek Please explain little more your "coopering" technique Nenad
-
Cutty Sark by NenadM
NenadM replied to NenadM's topic in - Build logs for subjects built 1851 - 1900
Now is 20:10 h , and over a 35 Celsius. Only to seat on terrace (not resolving tiles jet) drink cold milk-ness-coffie and to be on internet with laptop on my knees Work ? What work ? Too hot even for thinking ...- 4,152 replies
-
- 1
-
-
- cutty sark
- tehnodidakta
- (and 1 more)
-
Elmir What is the elevation of the fourth support post from the bow to the deck ?
-
Cutty Sark by NenadM
NenadM replied to NenadM's topic in - Build logs for subjects built 1851 - 1900
Thank you Edwin, I`ll do my best. But, looking what other fellows on MSW do ... first class ... I doubt ... it is said " from your lips to God`s ears" -
Cutty Sark by NenadM
NenadM replied to NenadM's topic in - Build logs for subjects built 1851 - 1900
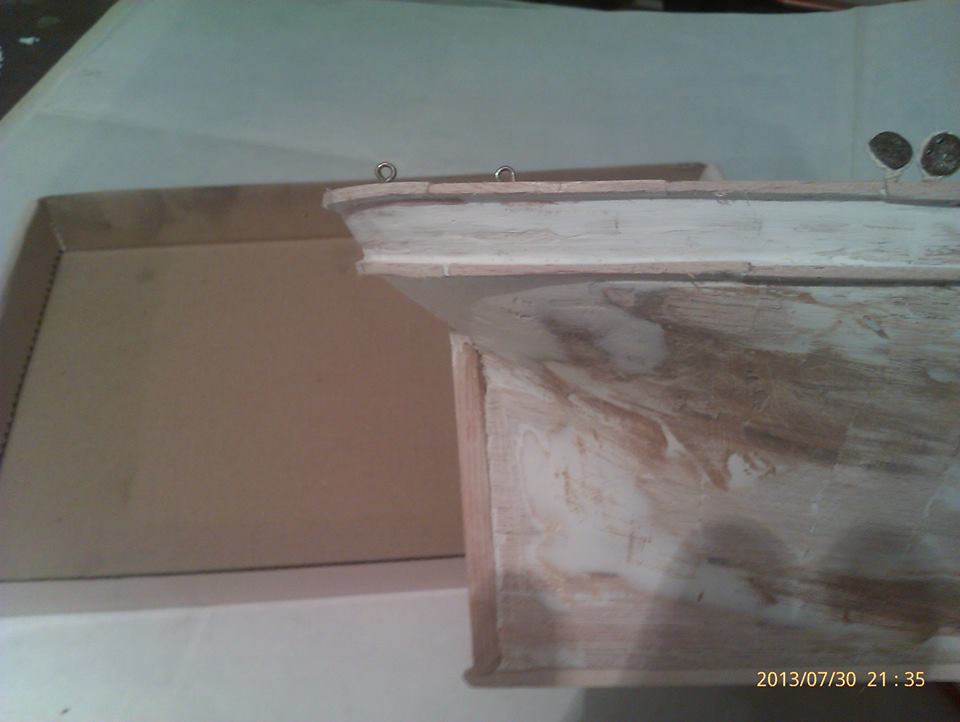
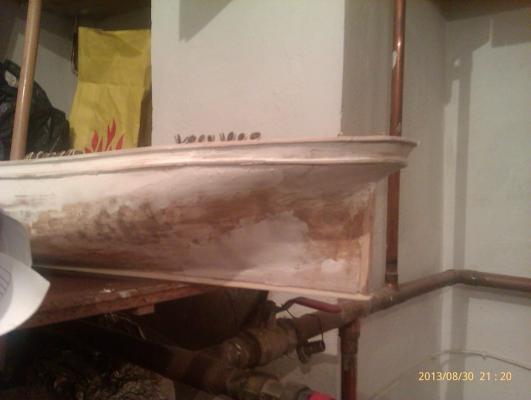
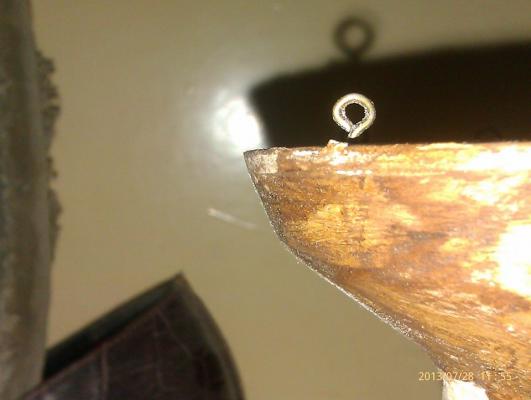
Finally I get out to workshop Main task for today was to assume proper angle of the Cutty¨s counter This was situation before starting And thanks to picture Lou van Wijhe was kind to post, it is now clear what had to be done. First I set the upper auxiliary leading line form balsa ( multiparted, super glued, round sanded, later I`ll reduce the width and depth), than with Dremel tool on small speed sanding gently counter to proper angle. After that, the second auxiliary lead line was seated (also multiparted, also super glued, also round sanded. Standard glue is no strong enough, and slow binding) , and then was time for some precisely puttying Little mess now, but tomorrow when putty get hard, with sanding seems that it wil be O.K. It seems must first make special "tool" for sanding that narrow spaces Lou`s picture is behind THANK YOU LOU !!!!!!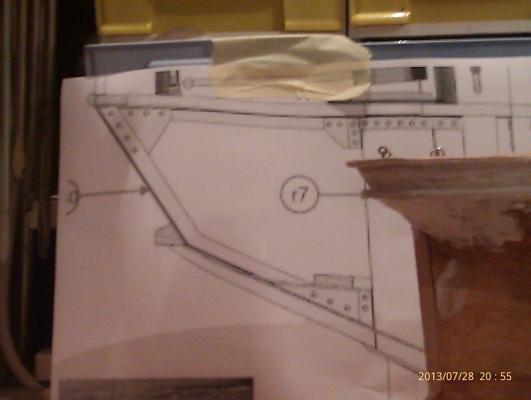
-
Go on, Rich, I ll follow Do you think about planking deck with veneer instead drawing lines ? Nenad
-
How to sew sails on your wifes sewing machine
NenadM replied to Mirabell61's topic in Masting, rigging and sails
Very usefull when I one day (or year) reach that phase, and I shall follow this topic. Still planking and saaaaaanding... In mean time, my thoughts are about thickness of canvas ( proper word ?) for Cutty 1:100 . Some kind of silk ? And how to sew it ? Far away for now, but my mind work what he wants, and think a lot in advance