SaltyScot
-
Posts
867 -
Joined
-
Last visited
Content Type
Profiles
Forums
Gallery
Events
Everything posted by SaltyScot
-
 You made a fine job of that, Ronald. Very clean and precise. I have mine still to do so let's hope it looks half as good as this once I am done!
 -
You are doing a fine job, she is coming along nicely. Sie ist grösser als mein Model, die Details werden besser sichtbar. I am following along on this one!
-
Why thank you, sir!
-
Hi, Rick, We have recently acquired a 26' Hunter and we love being out in her! Sailing has moved to the top of my all time favorite things to do (I love being on or in the water anyway, always have). MeCray is a point of discussion in our household at the moment.......
-
I had actually looked at this, Phil because I have that particular build bookmarked for reference purposes. Very nice work indeed. I shall attempt to get it done as well as you have. My procrastination is me gearing myself up to do it
-
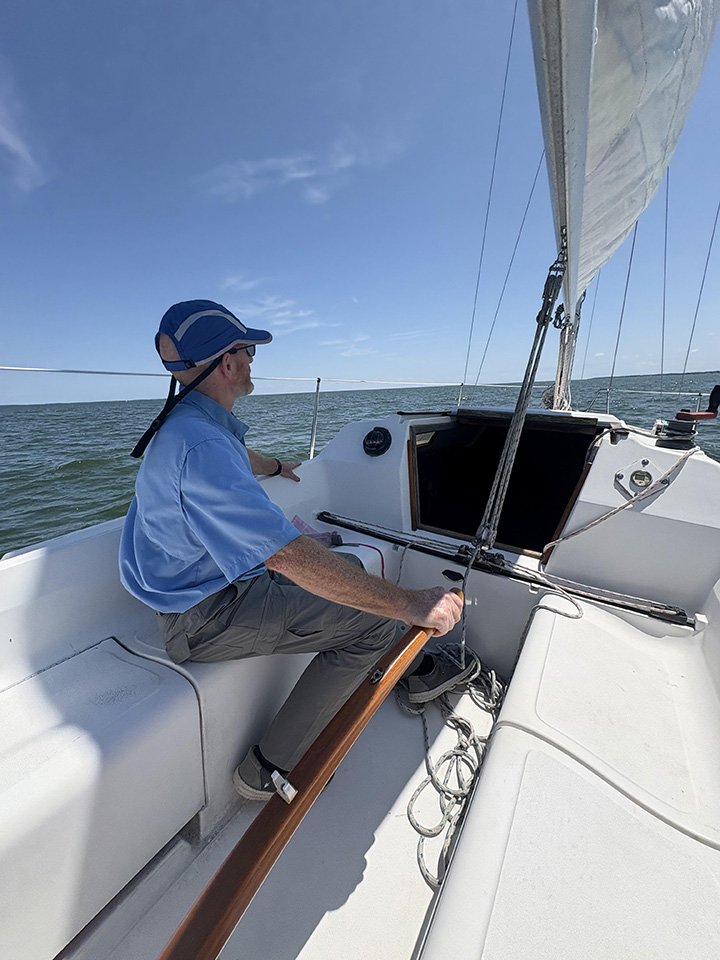
Now THAT is an impressive image. We have recently acquired a sailboat, obviously nothing like these J class beauties but it is soooo much fun being out on her. Our house is right at the mouth of the Potomac river where it empties out into the Chesapeake Bay so we have plenty of water to play with. Because of our location, my interior designer wife has given our house a nice nautical theme. I think one of these pictures would look very nice in our living room. Thank you so much for sharing! As a side note, I have a feeling that a lot of my future models (if not all of them!) will be yachts. After having built this one I am kinda hooked I just love the way they look.
-
Beautiful work, Marjin, truly. You are in the right place
-
Nail on the head, Keith. Nail on the head.
-
Welcome aboard mate. That is a fine old model, one that does need some tlc but, like others have said, not beyond the realms of possibility to accomplish. Have fun with that!
-
Welcome! It sounds like you are bringing a lot of "hands on" experience with you. Have fun.
-
Welcome, Erik. It looks like you already have an "in" here so I will just say enjoy!! I look forward to seeing your work once you do get up and running.
-
Welcome to the forum!! Feel free to ask any questions you may have, that is what we are all here for, to help each other!
-
I know I am a little late to the party but welcome aboard, Terry. At this point I usually like to tell new folks not to be afraid to ask questions but you seem to have that sorted. Enjoy!!
-
New to the Wooden Ship Assembly/Build Community
SaltyScot replied to rturcic72's topic in New member Introductions
Welcome to the club, Rob. -
A very warm welcome, Heaven. I haven't looked if you have started a build log yet but, if and when you do, do not be afraid to ask any questions! There are a lot of folks here who would be only too happy to help you out. That is one of the nice things about this forum, there are many more!
-
Greetings from Washington state, USA
SaltyScot replied to Paul B.'s topic in New member Introductions
Welcome to the forum, Paul. This is a very friendly place and there are plenty here who are willing to help and answer any questions you may have. Do not be afraid to ask, we all started somewhere!! -
I love old cars of any kind and this is a nice one!! I shall pull up a toolbox, sit myself down and follow along on this one if I may, sir.
-
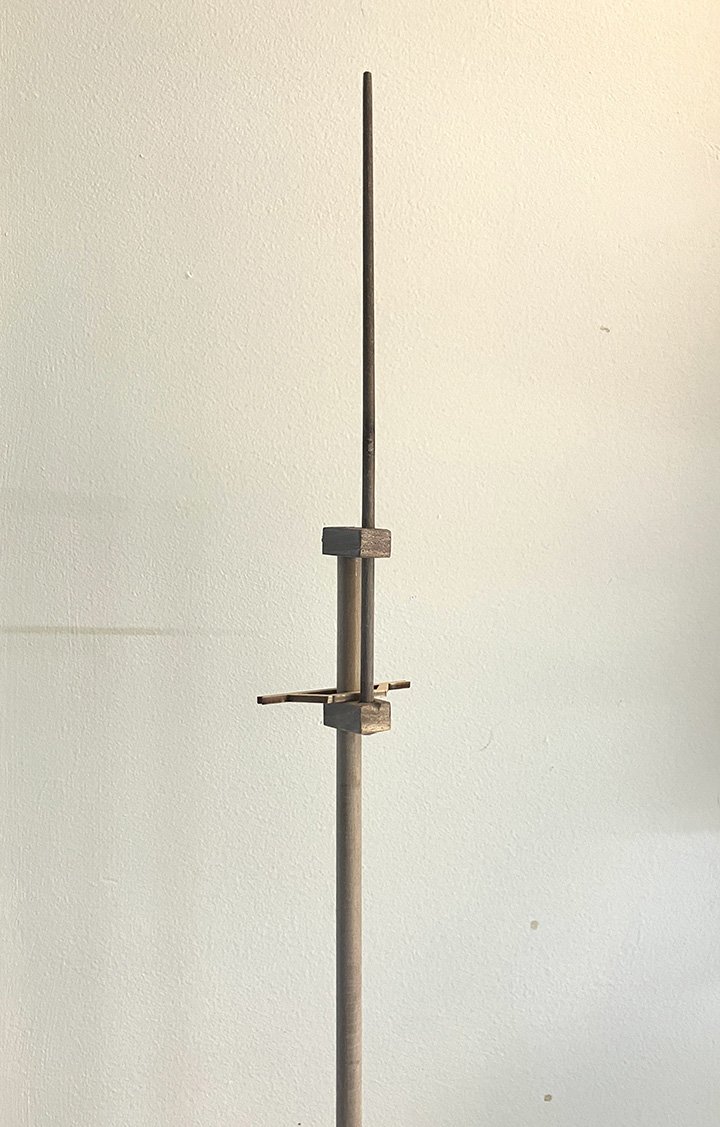
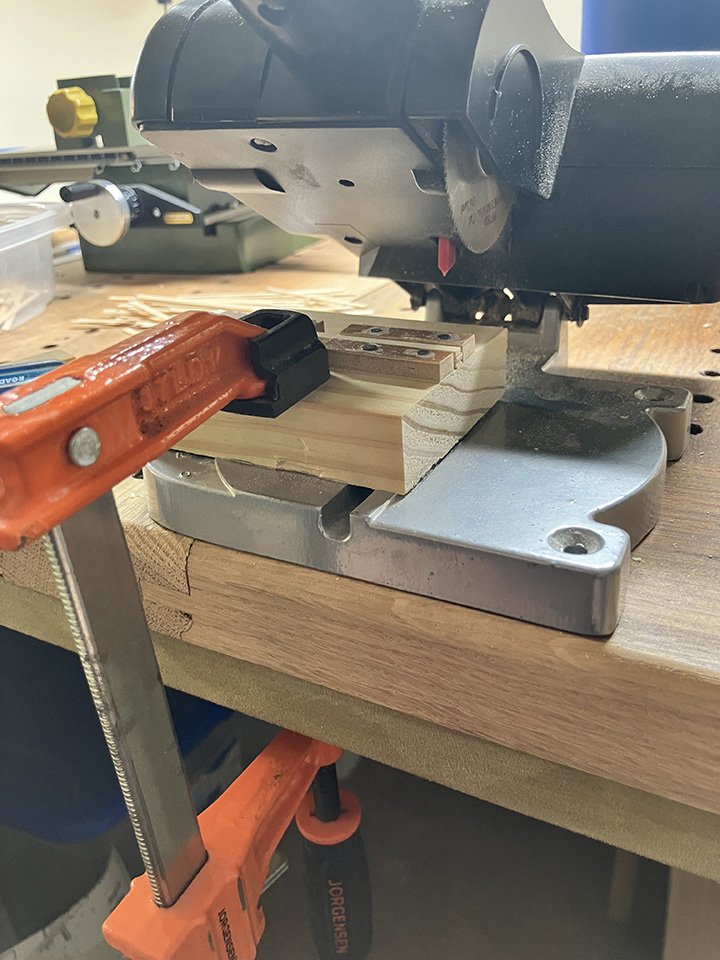
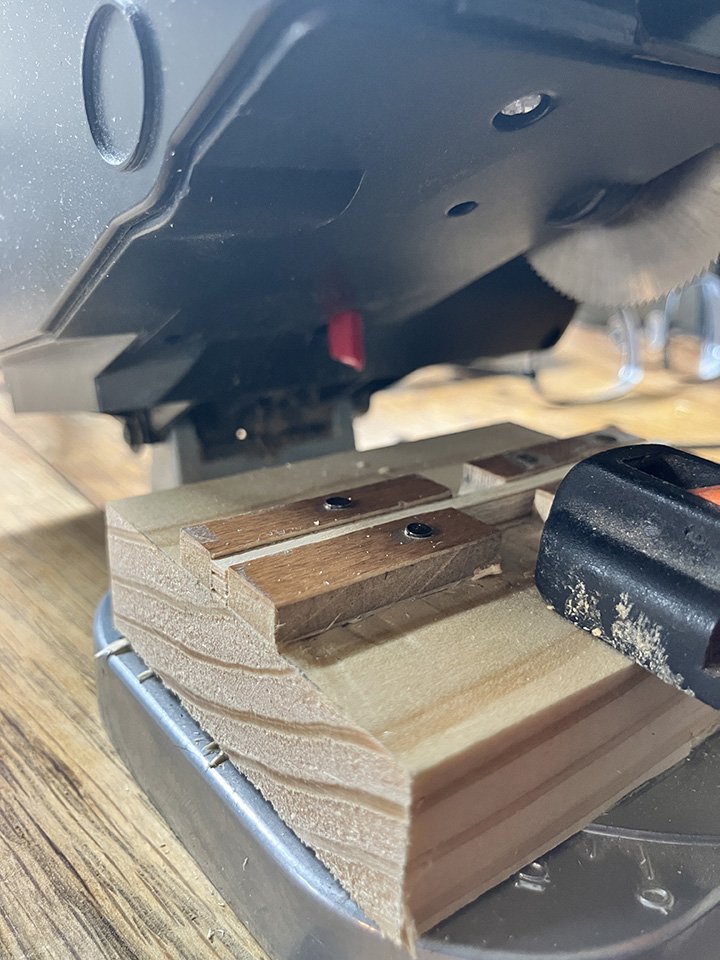
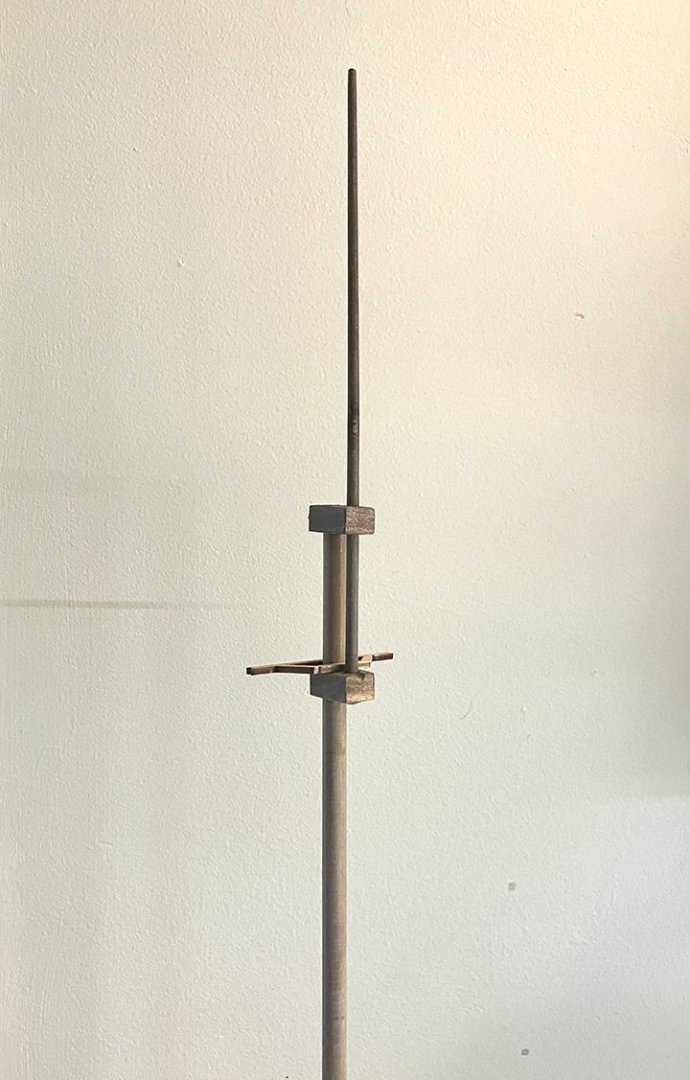
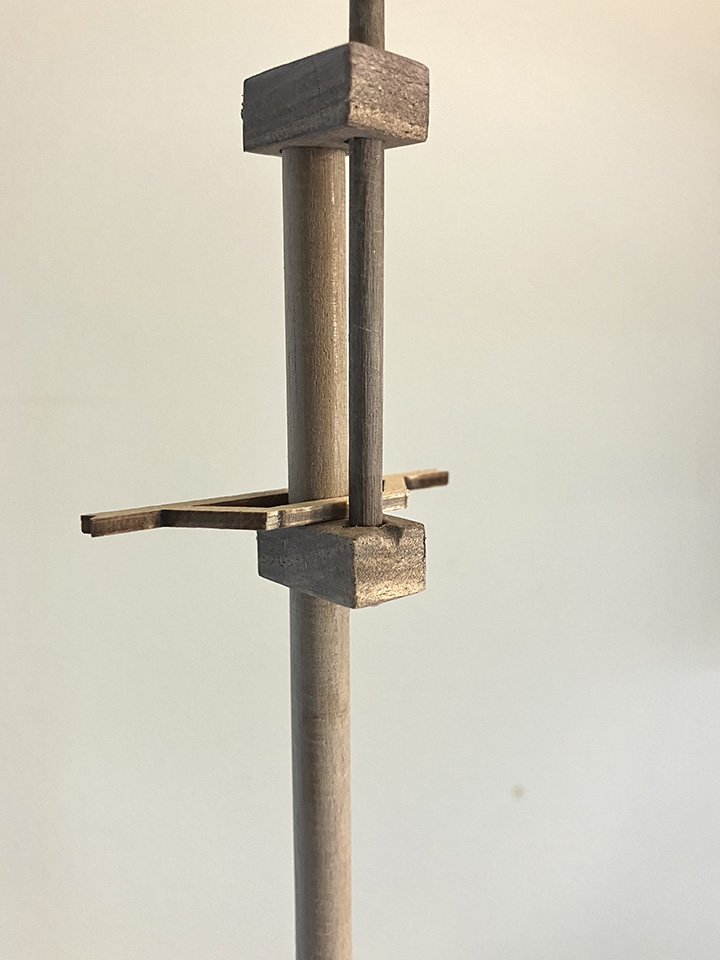
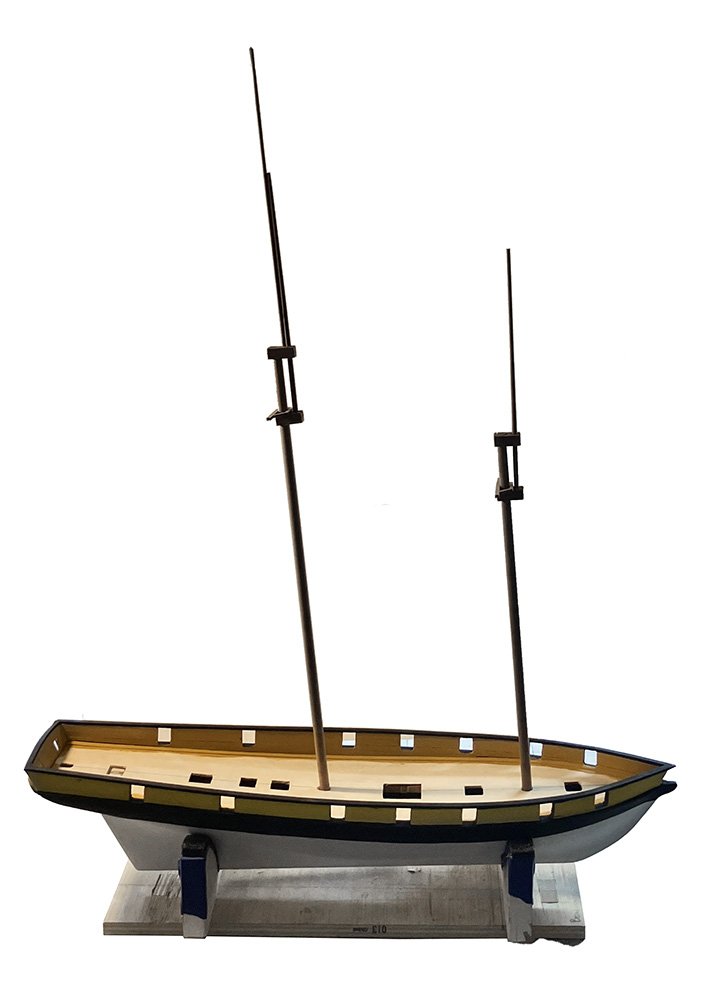
Hi folks. The summer is drawing to a close but the weather has been soooooo perfect these past two weeks it seemed a crime to be indoors. We have been busying ourselves with activities on and around the Chesapeake Bay (sailing, fishing etc.) and have loved every minute of it! But, I did manage to devote my attention back to the Lynx recently and wanted to post a quick update. I made a small jig so that I could cut all the deck planks to the same length. My little mini chop saw took care of the job in short order: I cut the planks a little longer than the required 80mm and let them hang out of both ends of the jig. After cutting the one side I simply reversed the pnks, butted them flat up against the outside edge using a flat piece of wood and cut the other ends. They are all nice and equal. Next up was the masts. The cross and trestle trees are a simple affair on this ship and there is no top on them according to the plans. If necessary, I can add one if needed. As I mentioned earlier on in the build log, I remade the mast caps out of maple but scrapped them and decided to go with walnut. The plywood kit supplied ones were awful. I have not added the cheeks yet on either mast and the rake angles are not final, the masts are just sitting in place for now so that I could see how she looks. All this has been my excuse for not yet tackling the intricate and, from what I have read, rather frustrating job of nibbing the deck planks. I cannot put that off any longer however because I need to get on with the rest of the ship once it is done. That will be my next task (or perhaps I will prep the yards and boom....??) We will see.
- 257 replies
-
- 11
-

-
I could not have put that any better! It has been a minute since I looked in and you have made some amazing progress, Maurice. Truly a joy to behold sir.
- 332 replies
-
- 1
-

-
- Harpy
- Vanguard Models
- (and 1 more)
-
I like the nail work on the cheeks Steve, it just looks good!! That bowsprit and accompanying tackle looks impressive there mate, well worth the gnashing I would say I hope mine looks half as good once I am done.