SaltyScot
-
Posts
867 -
Joined
-
Last visited
Content Type
Profiles
Forums
Gallery
Events
Everything posted by SaltyScot
-
 @Coyote_6 @Keith Black Thanks guys. I strive continuously to reach y'all's standards of excellence 😉
 -
That is very explicit, Johann, I like your color coding for the different lines. A nice way to sort all that rigging out. I speak, read and write German very well but, I must say, those words on the images were completely new to me!
-
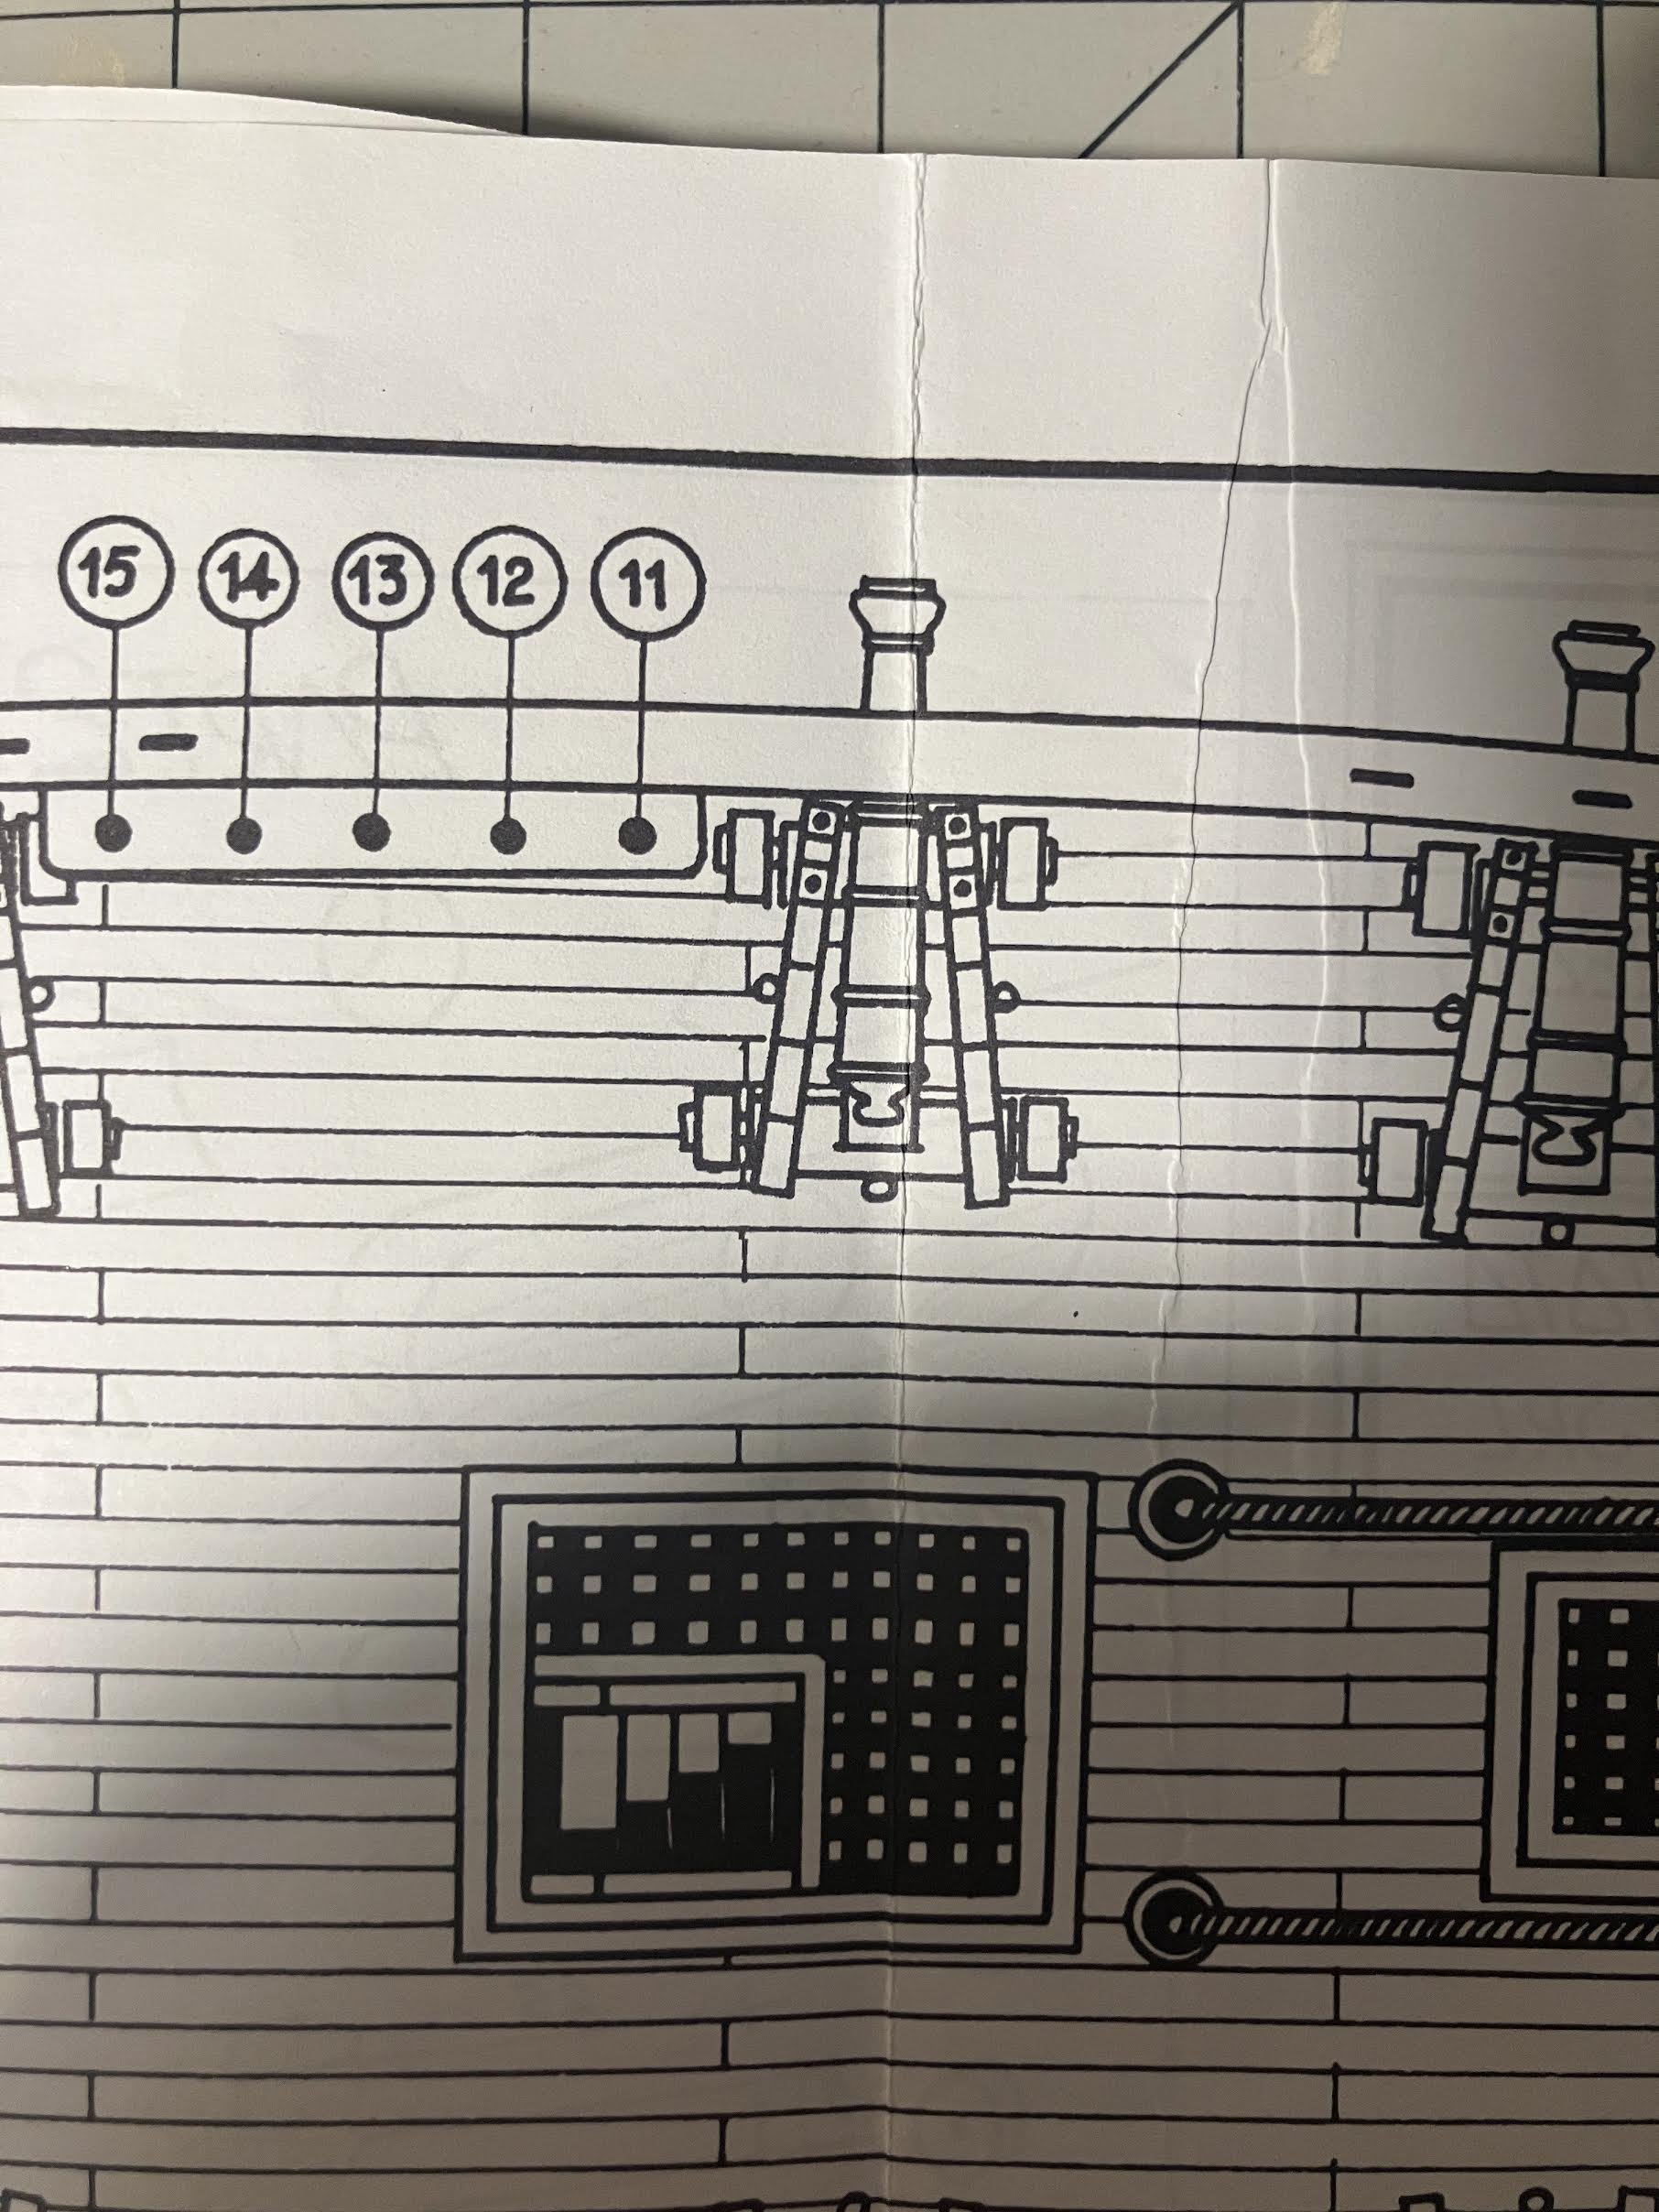
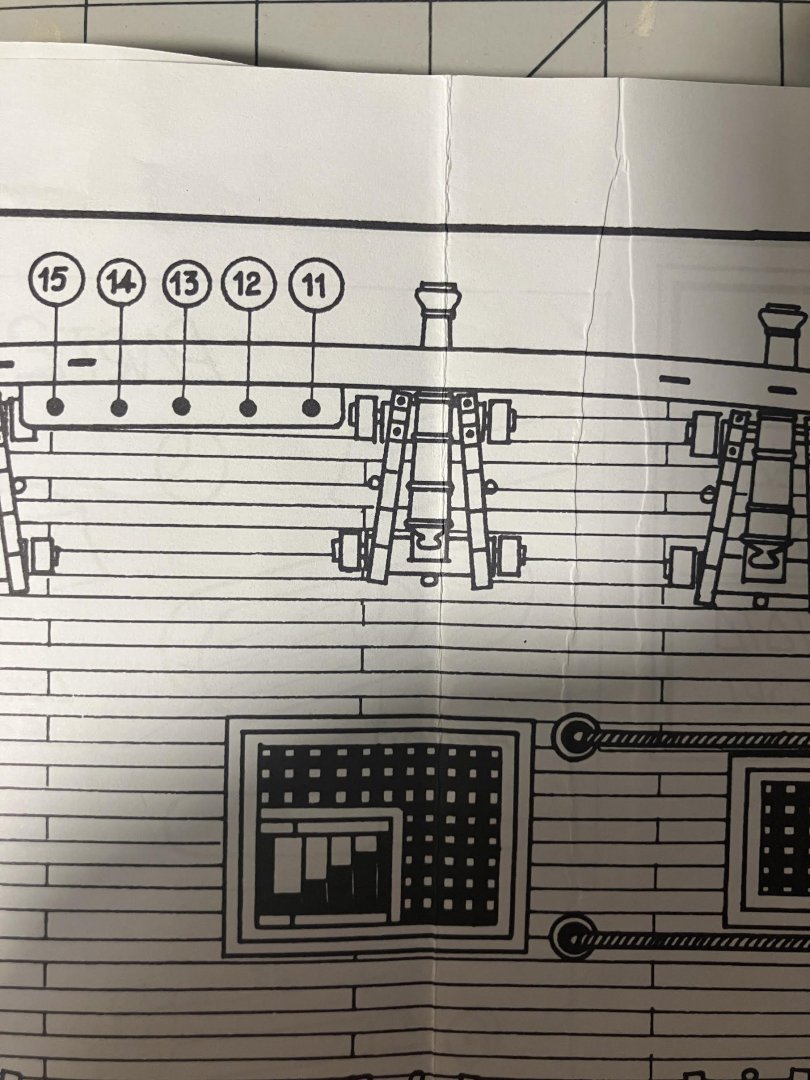
Thank you so much for pointing that out, Jerry. I don't know what possessed me to build it that way, the plans clearly show how it should be done: I am glad I only put the prototype together now. Thanks also for the images.
-
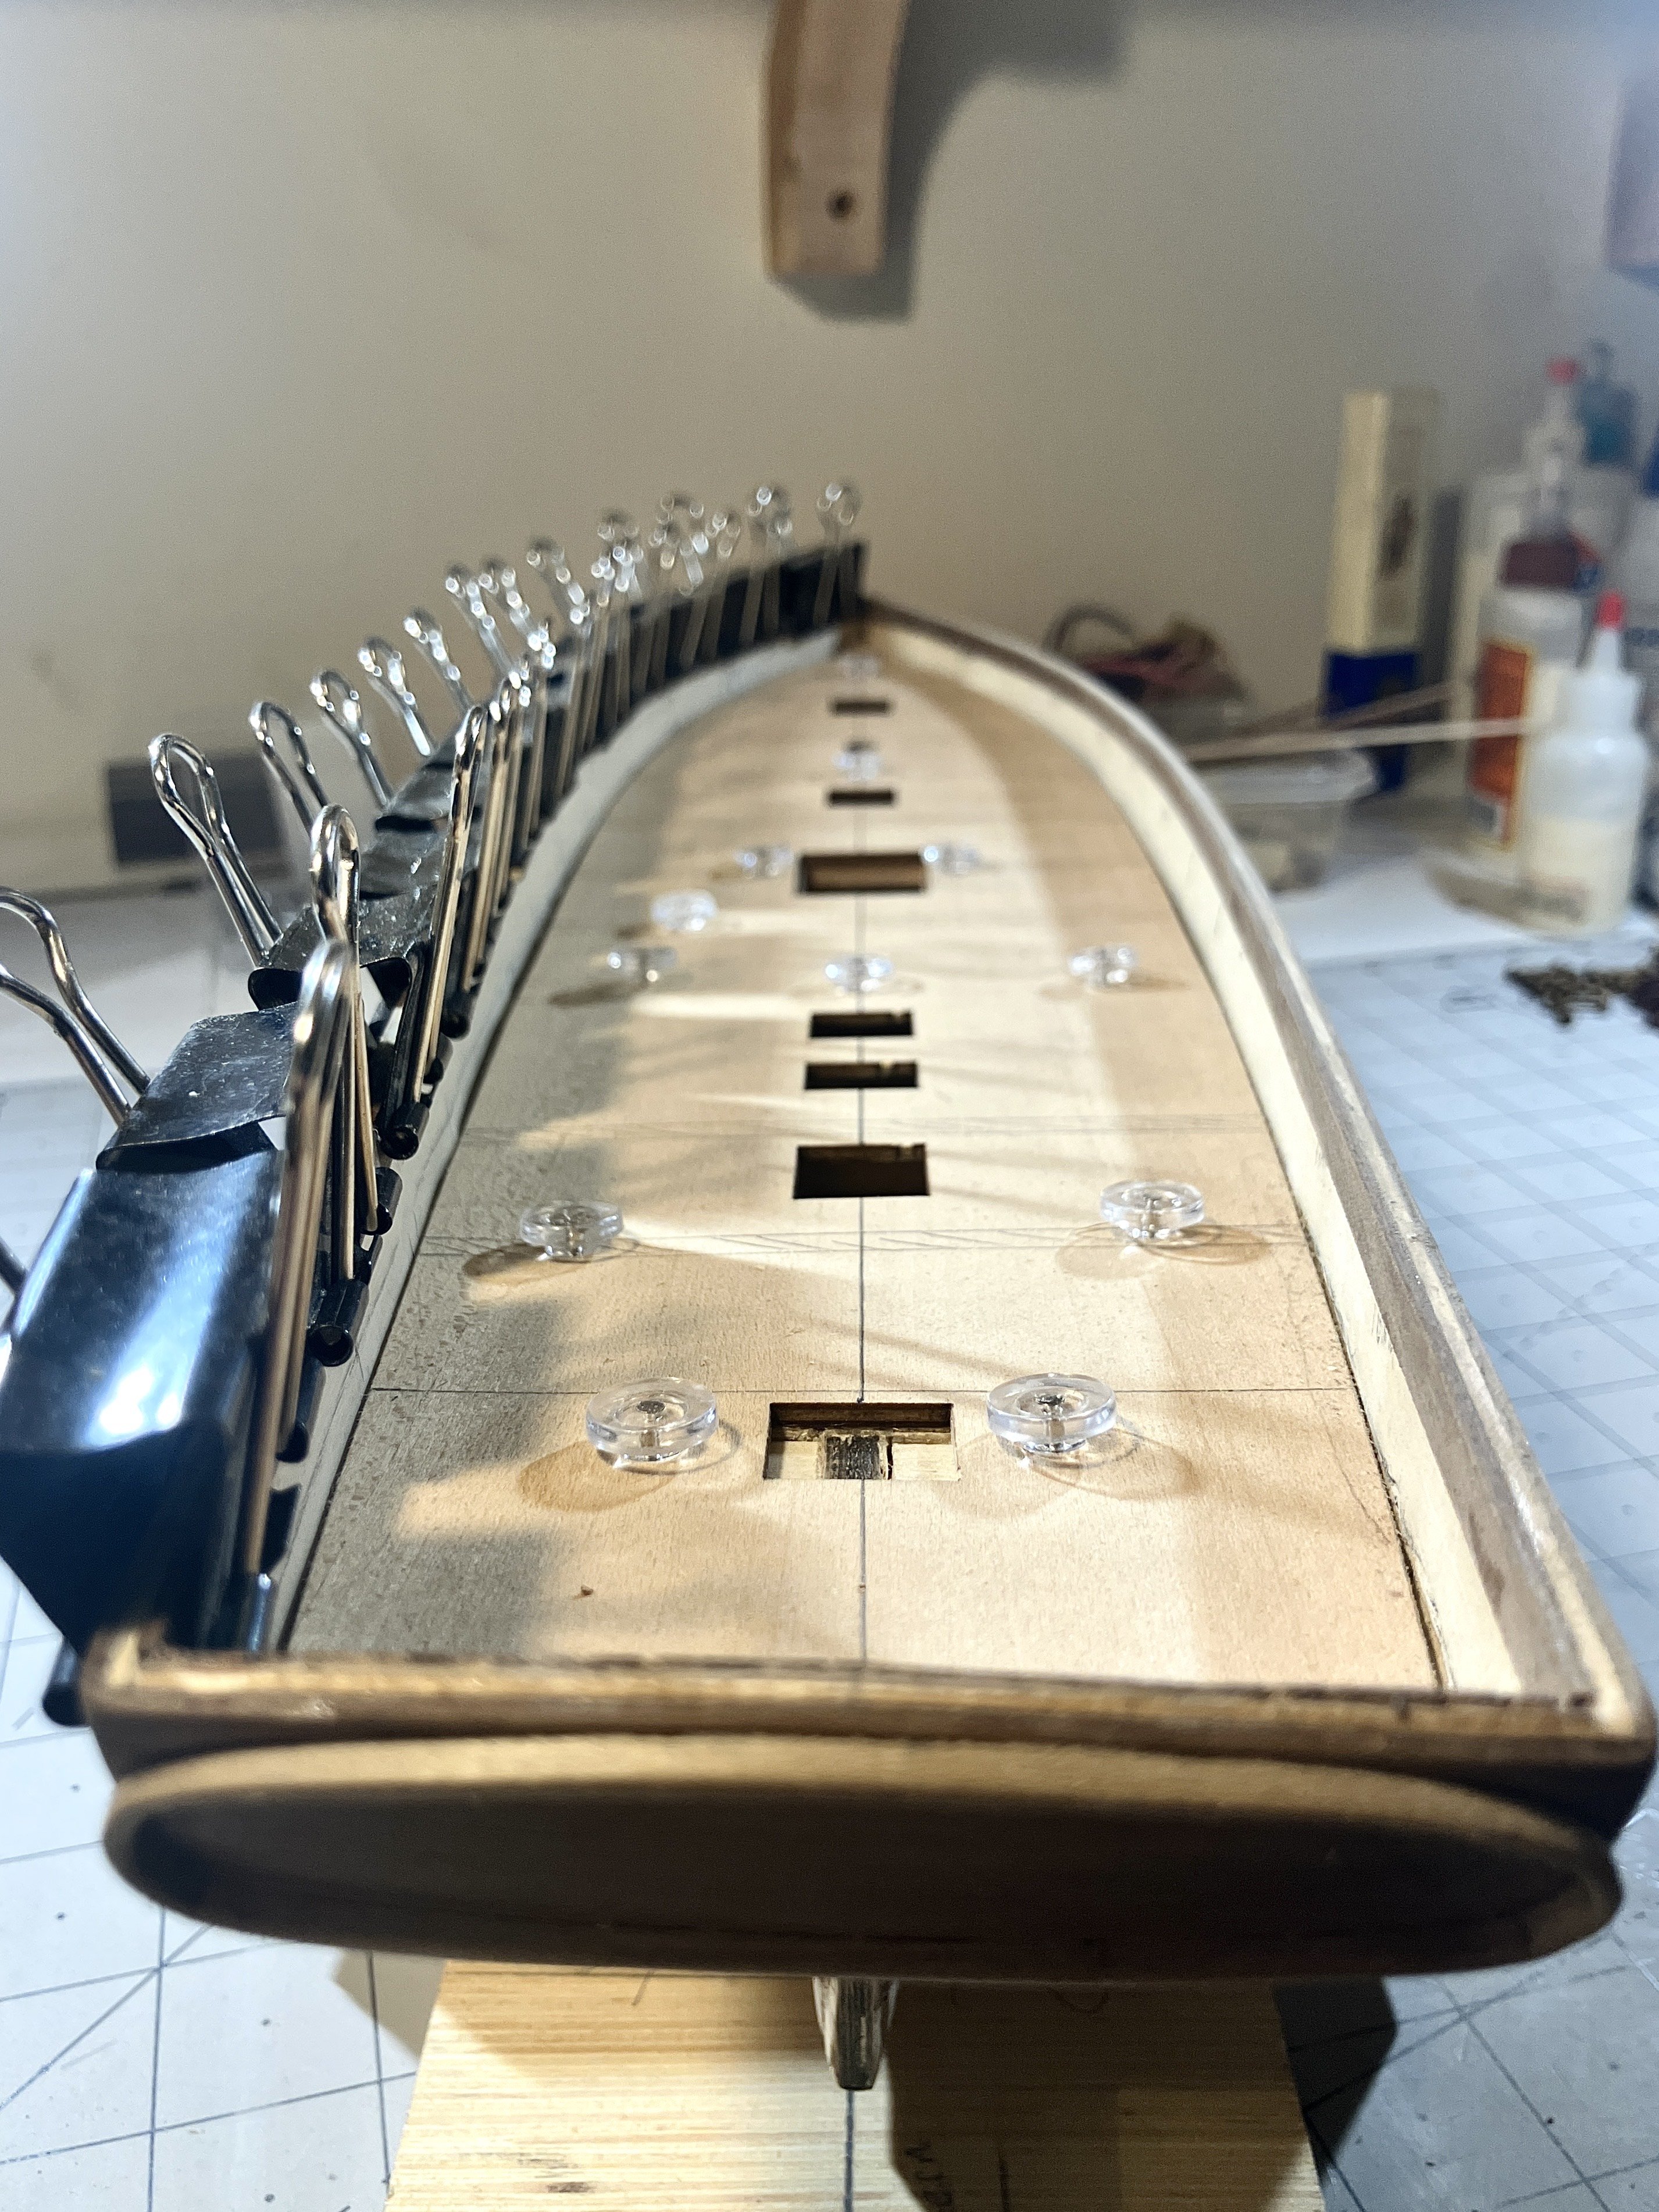
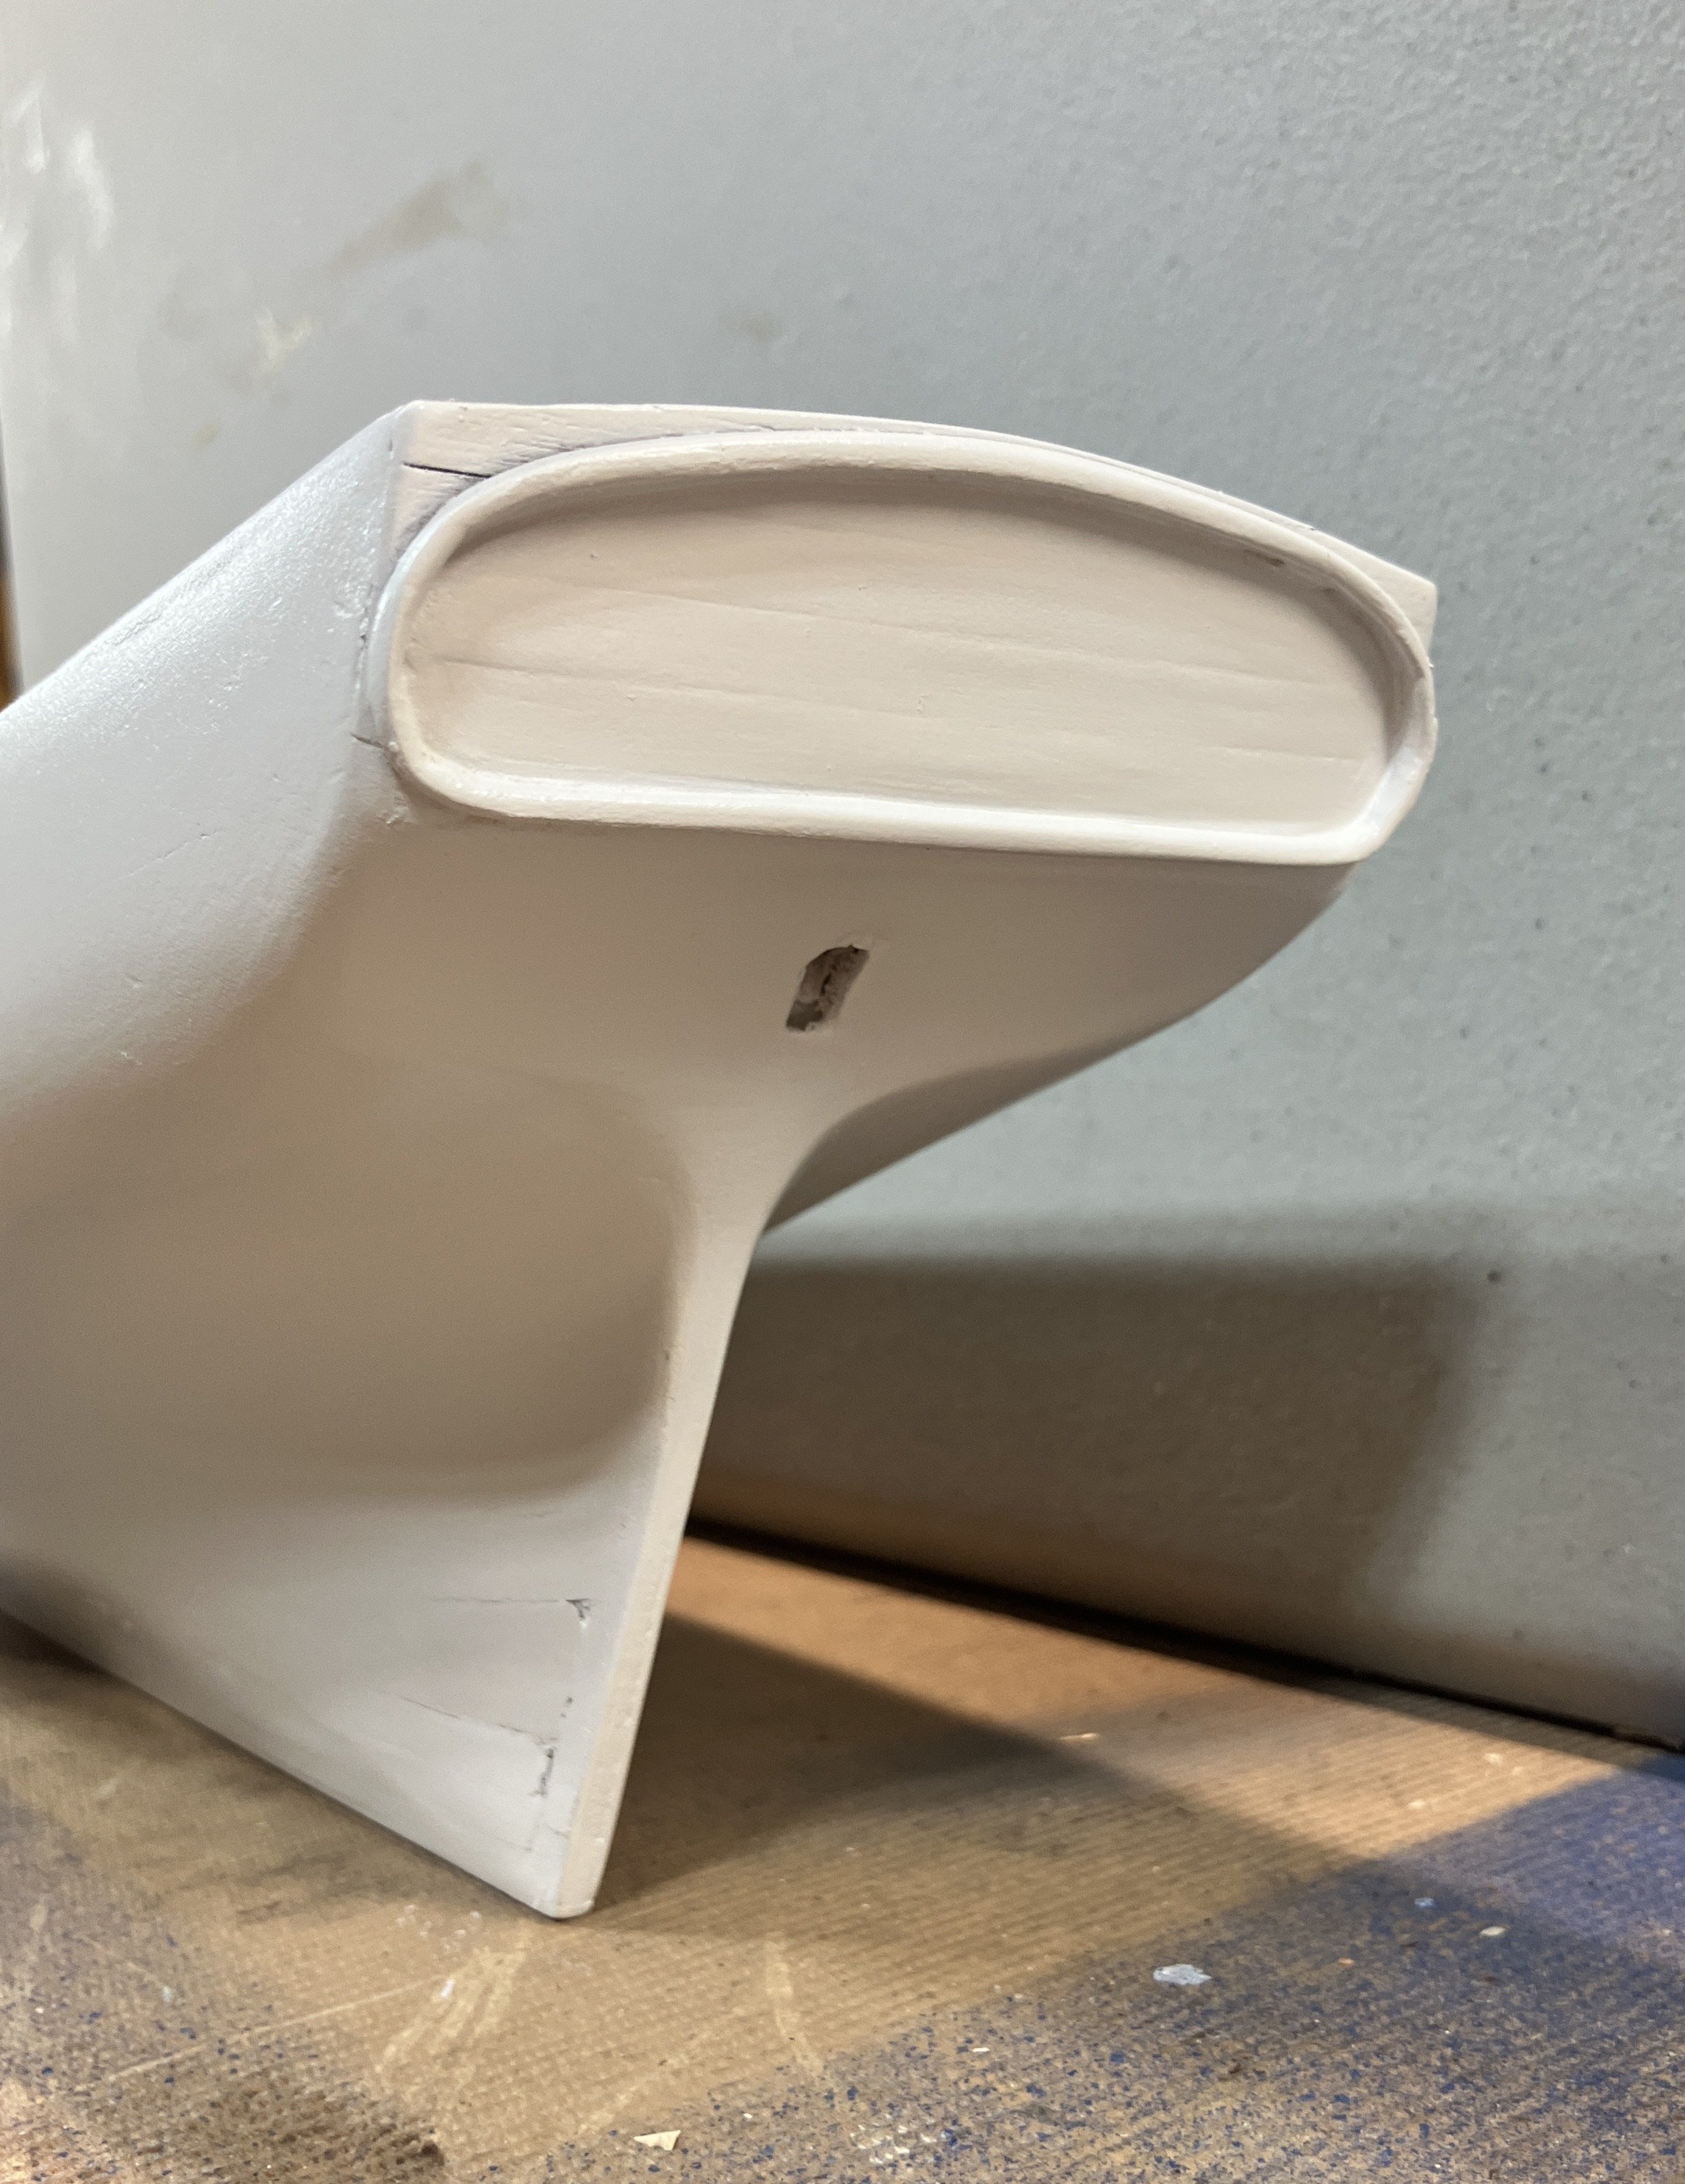
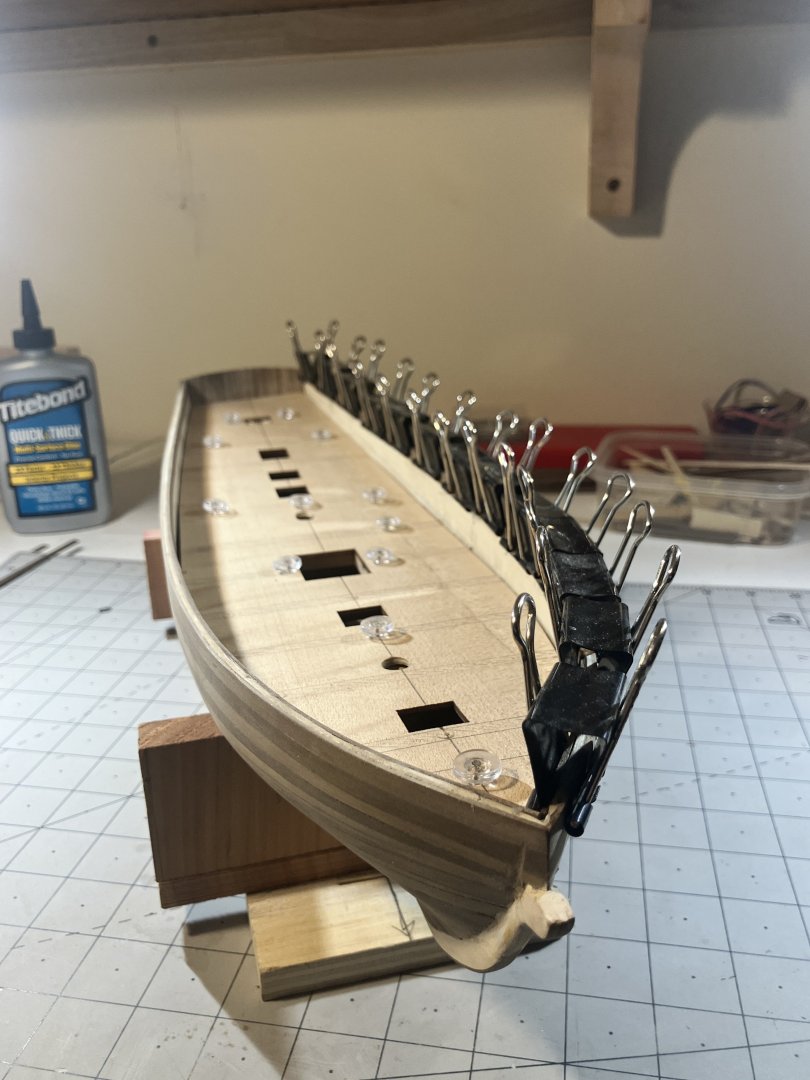
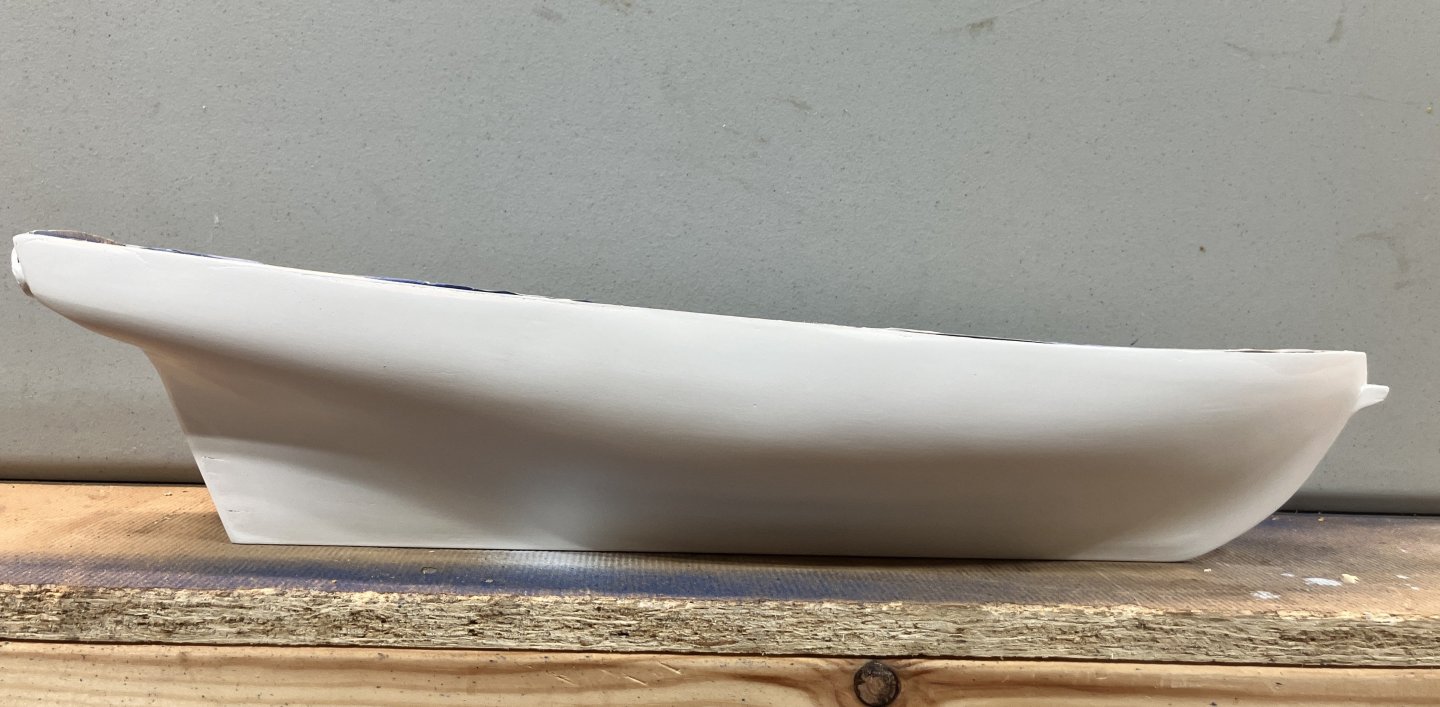
A small update on my Lynx build folks. Once the hull planking was complete I started adding the bulwark strakes. I used walnut for these too. The false deck was fitted, glued and pinned in place to dry before I started: Once that was done I made a template of the exact dimensions of the inside of the deck surface area so that I could shape and bend the wood for the waterways. With that template (made of card), I traced the outer edges onto a piece of scrap wood to give me the two shapes I needed. I soaked two strips of walnut for 24 hours in hot water. Funny thing, I actually let them float in our hot tub for that period of time because I didn't have a vessel big enough to soak them or a way to keep water hot for that long. Luckily we haven't shut the hot tub down for the summer yet and it went very well! The soaked planks were bent edge wise and held in place using pins. They will remain like that for another 24 hours: While they were drying, I filled the small cracks in the hull, smoothed it all over with 220 grit and gave it a coat of white primer. She looks fancy in her new coat This was the initial coat so there is still some fine tuning to do with small inconsistencies here and there:


-
I was thinking why the color scheme was very similar to, let's say, HMS Victory. Thanks for that wee tidbit of info, Phil.
-
On that note, I found a beautiful old piece of wood here on our property that I intend to shape and use for my stand on the Lynx. I find bringing a natural aspect into something like that, without it being too distracting of course, lends the final display an air of "class". Just my 10 cents worth, Phil.
-
It most certainly does. Thank yoi!!
-
Hi folks. Just a very quick note on a decision I reached earlier today (while I was out in the garden prepping my planter beds for beans actually!). I have decided to go with the following color scheme for my build: Below the waterline will be white with a dark blue strip running between that and the tan/mustard/ochre ish (tbd) color on the bulwarks above. Very much like this one which is being so finely done by @Dr PR. I like those colors!

-
Nice tutorial there, Glenn, a real eye opener. It's nice to see old Stadler and Waldorf having a chat next to your fish pond too
- 241 replies
-
- 2
-

-

-
- Vanguarrd Models
- Harpy
- (and 1 more)
-
Very precise work there, matey. Tell me, how did you get the anchor cables and cathead lines to hang so nicely? That is a trick that eludes me right now.
-
The coloring on the inside of the wee boat is fantastic, B.E. You picked out the tones well, sir. I like the contrast between those darkish brown tones and the white on the outside. I am seriously considering a "lifeboat" scratch build at some time in the future and when done, I hope it looks half as good as this one here!
- 332 replies
-
- 5
-
-
-
- Harpy
- Vanguard Models
- (and 1 more)
-
That isn't the worst idea in the world, Tom. I guess it would be a little time consuming but what else have we got to do 😂
-
Your attention to detail is awe inspiring, Phil. Now I also know what baggy wrinkles are too
-
Tom, nice work. Looking at the last photo in your latest post I noticed how good the deck staining was. What method was used on that one, sir?
-
Those cap rails look spectacular with that oil finish, Jo. What oil did you use on them?
-
Pristine is all I can say, a sight to behold.
-
I Have an Itch to Scratch
SaltyScot replied to SaltyScot's topic in Modeling tools and Workshop Equipment
I have those, Adam, and a slow grinder to keep them sharp (I am a wood carver by the way). Thanks for your feedback, sir. -
Well ya learn somethin' new every day! You did a good job on getting that done, Glen. Quite resourceful.
- 301 replies
-
- 3
-
-
-
- Constitution
- Bluejacket Shipcrafters
- (and 1 more)
-
I Have an Itch to Scratch
SaltyScot replied to SaltyScot's topic in Modeling tools and Workshop Equipment
Considering most of my tools are DeWalt anyway, this makes total sense (at least that is how I am going to present my case to the treasurer ) -
I Have an Itch to Scratch
SaltyScot replied to SaltyScot's topic in Modeling tools and Workshop Equipment
Yes, a good vise was the other thing I had thought a lot about, along with the scroll saw that is already on my list. I have a nice soldering iron already, Phil, and I have already purchased that sailmaking/wood bending tool that you had recommended. As far as the milling machine goes, I think I will start a kit, like @Jim Lad suggested, and see how I get on. -
I Have an Itch to Scratch
SaltyScot replied to SaltyScot's topic in Modeling tools and Workshop Equipment
You are right! A sound piece of advice, John, and one I shall heed 100%. The last thing I want is a pile of (sometimes expensive) equipment sitting around that I thought I needed. That would be very foolish. I have opted for a decent scroll saw, but only because my old one had seen better days. THANK YOU!! -
Welcome aboard. Have fun on your new journey!
-
Welcome aboard! If you have not already done so, start a build log so that others can follow along.