-
Posts
1,016 -
Joined
-
Last visited
Profile Information
-
Gender
Male
-
Location
Lenzburg, Switzerland
-
Interests
Flying, travelling, reading, free tobacco abuse...
Recent Profile Visitors
-
 Speedy reacted to a post in a topic:
HM Cutter Alert by flyer - Vanguard Models - scale 1:64 - naval cutter
-
 Mike_H reacted to a post in a topic:
HM Cutter Alert by flyer - Vanguard Models - scale 1:64 - naval cutter
-
 Gaffrig reacted to a post in a topic:
HM Cutter Alert by flyer - Vanguard Models - scale 1:64 - naval cutter
-
 Nick 843 reacted to a post in a topic:
HM Cutter Alert by flyer - Vanguard Models - scale 1:64 - naval cutter
-
 brunnels reacted to a post in a topic:
HM Cutter Alert by flyer - Vanguard Models - scale 1:64 - naval cutter
-
 petervisser reacted to a post in a topic:
HMS Bellerophon by flyer - FINISHED - Amati/Victory Models - scale 1:72
-
 Desertanimal reacted to a post in a topic:
HM Cutter Alert by flyer - Vanguard Models - scale 1:64 - naval cutter
-
 Ronald-V reacted to a post in a topic:
HM Cutter Alert by flyer - Vanguard Models - scale 1:64 - naval cutter
-
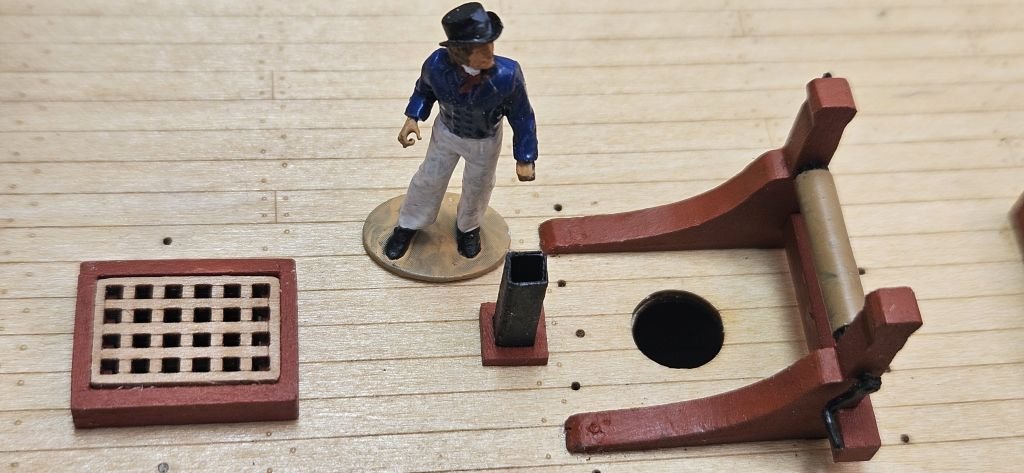
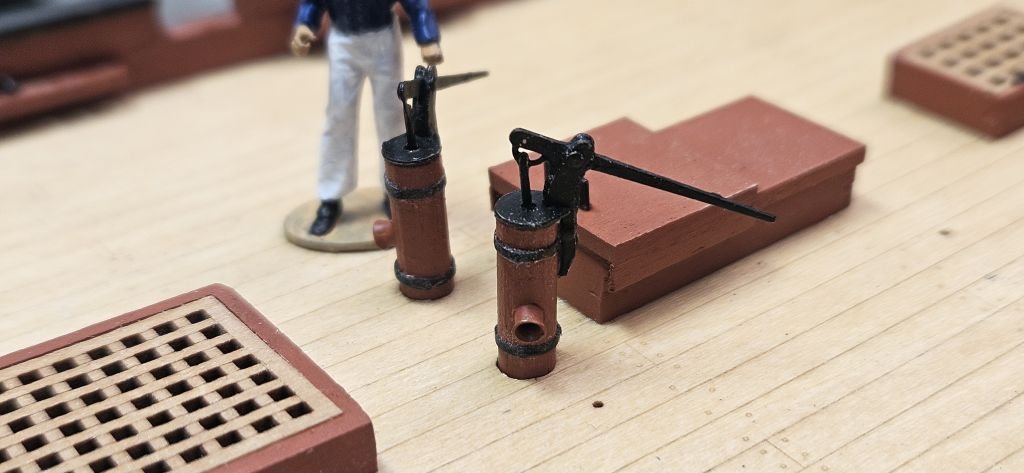
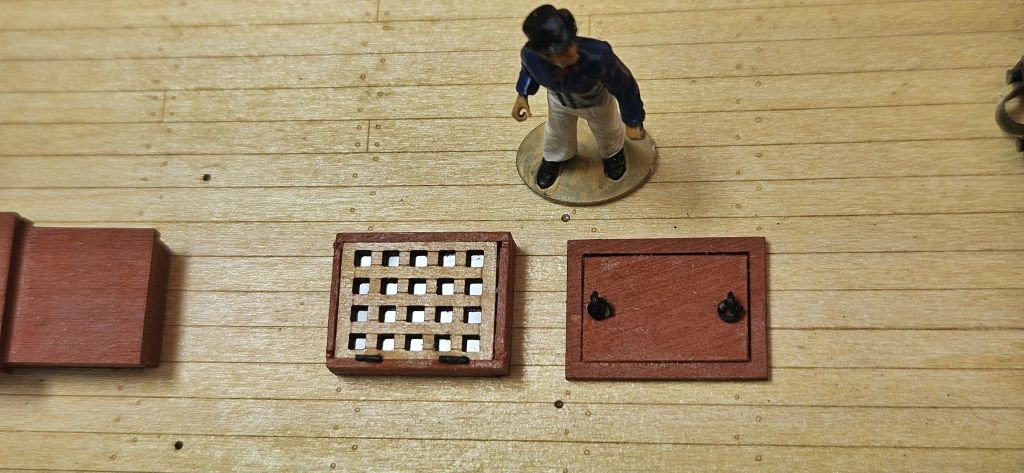
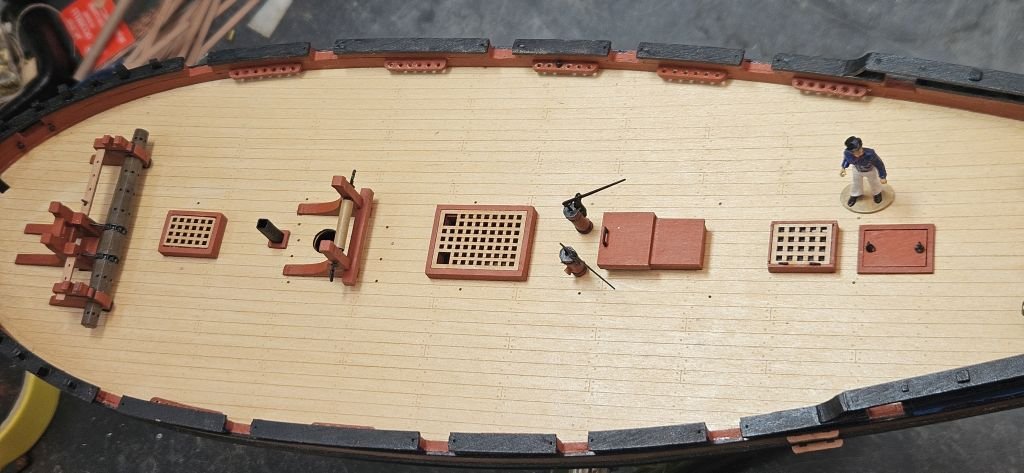
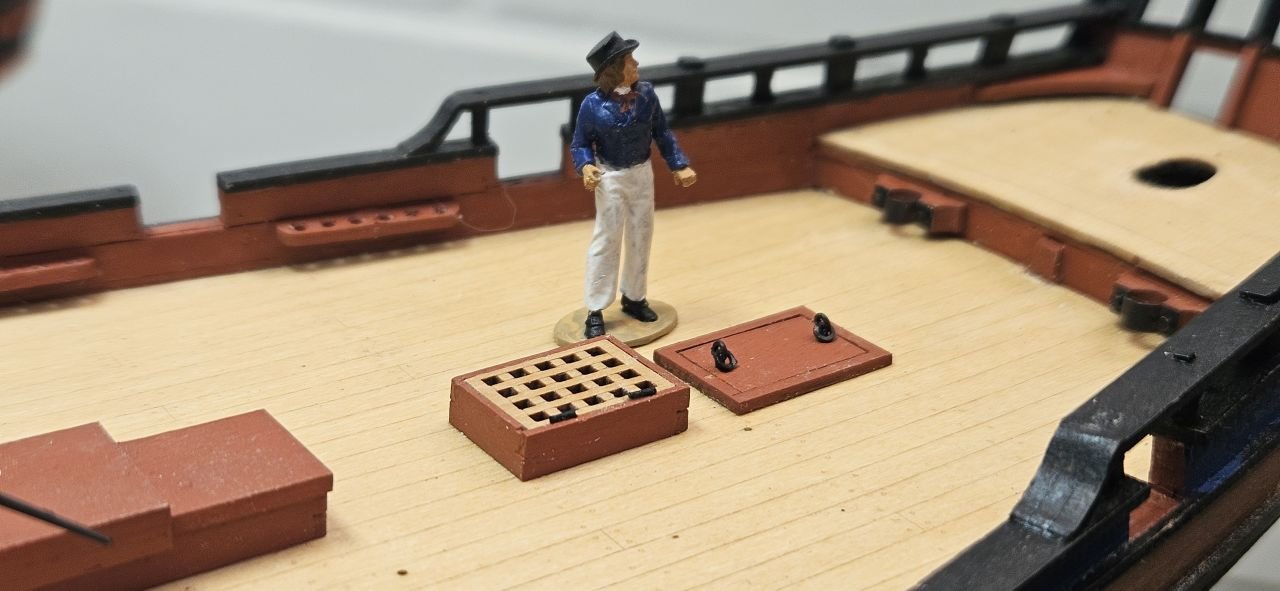
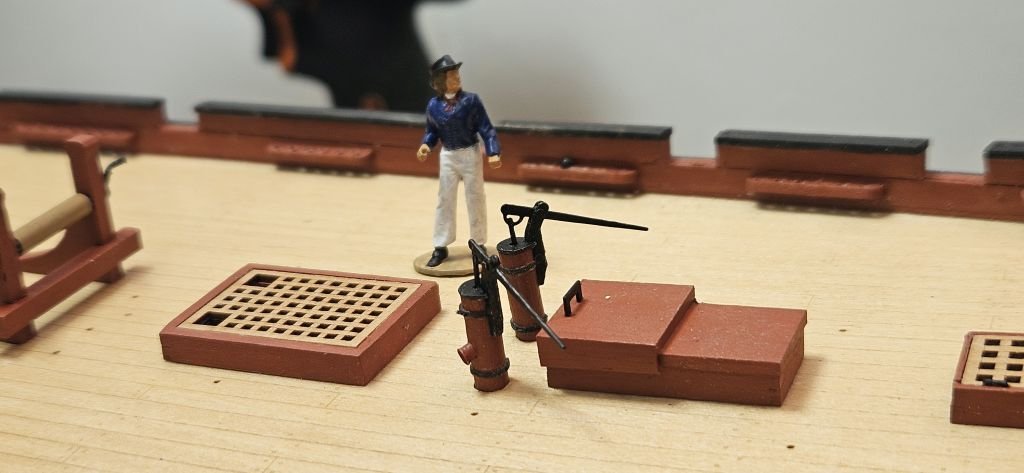
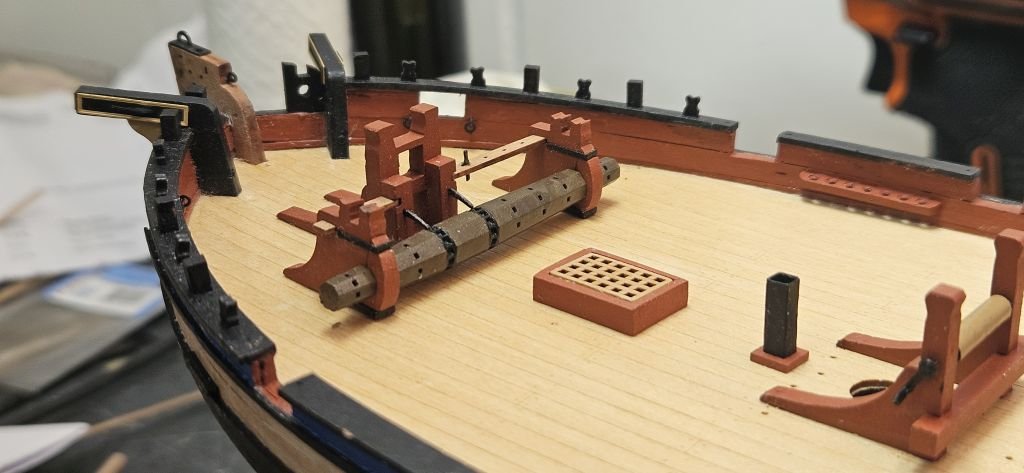
The next step was installing the various deck fittings. First was the main winch and bitt assembly which worked well Then came the forward companionway which presented the first problem. The parts of the coaming didn’t fit the grating and had to be shortened/adapted. Speaking of the grating: those wooden, laser cut gratings which come with the second edition of the kit are superb. The jeer bitts assembly went like a dream while the main hatch did ask for minor adjustments. The pumps got a small upgrade with iron hoops made of cartridge paper and discharge ports made of reworked cable-end sleeves. The aft companionway was a bit changed to imitate the sliding runners. The coaming of the skylight was completely changed to let the grating into the coaming. That grating was also filed thinner to make room for a ‘glass’ pane underneath. Two short pieces of wire imitate the hinges. The bread hatch assembly was then straightforward again. Finally, the stove flue was taken in hand. Fortunately, I was initially unable to locate the flue (part 108 - found it later). With some stripes of cartridge paper, I folded and glued a square tube (or to be precise, about 5 of them until I had an acceptable result), painted it black and glued it into its base. Now the serial production of the guns has started. main winch forward hatch, stove flue and jeer bitts pumps and aft companionway skylight and bread hatch
-
 flyer reacted to a post in a topic:
Chris Watton and Vanguard Models news and updates Volume 2
-
 flyer reacted to a post in a topic:
Chris Watton and Vanguard Models news and updates Volume 2
-
 flyer reacted to a post in a topic:
Chris Watton and Vanguard Models news and updates Volume 2
-
 flyer reacted to a post in a topic:
Chris Watton and Vanguard Models news and updates Volume 2
-
 Nipper reacted to a post in a topic:
Chris Watton and Vanguard Models news and updates Volume 2
-
 Canute reacted to a post in a topic:
Chris Watton and Vanguard Models news and updates Volume 2
-
Thank you for enriching our hobby and I really admire the work you do for those figurines and make use of them as much as possible. On my models I try to present everyday figures and preferably in a posture they could hold comfortably for a few minutes. (In railroad modelling I learned to place figures and cars in an unspectacular position, so that you wouldn’t be surprised to see them in just the same way a few minutes later. It adds reality. So only ballerinas standing on tiptoe and never somebody running or fighting; but people talking, standing or sitting.) Therefore, I humbly suggest figures of sailors doing quietly usual tasks: E.g. A lieutenant (could be Babbington) being skipper on a cutter or standing watch with telescope under his arm . A seaman (Barret Bonden?) serving as lookout or looking for albatrosses on the horizon. An able seaman climbing slowly the shrouds. A marine standing guard. Somebody scrubbing the deck. An able seaman steering. … But of course, only if you are no more than ankle deep in work. And the Aubrey/Maturin pair will be a must for my future Surprise - they could be scratching away on their fiddles for hours. Regards Peter
-
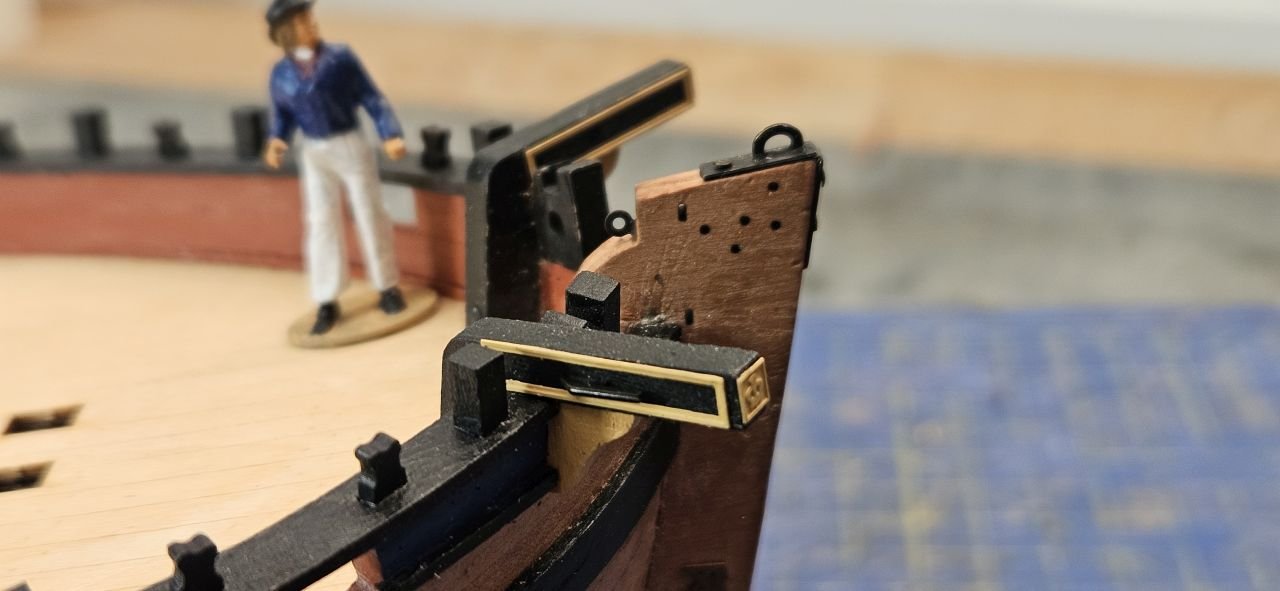
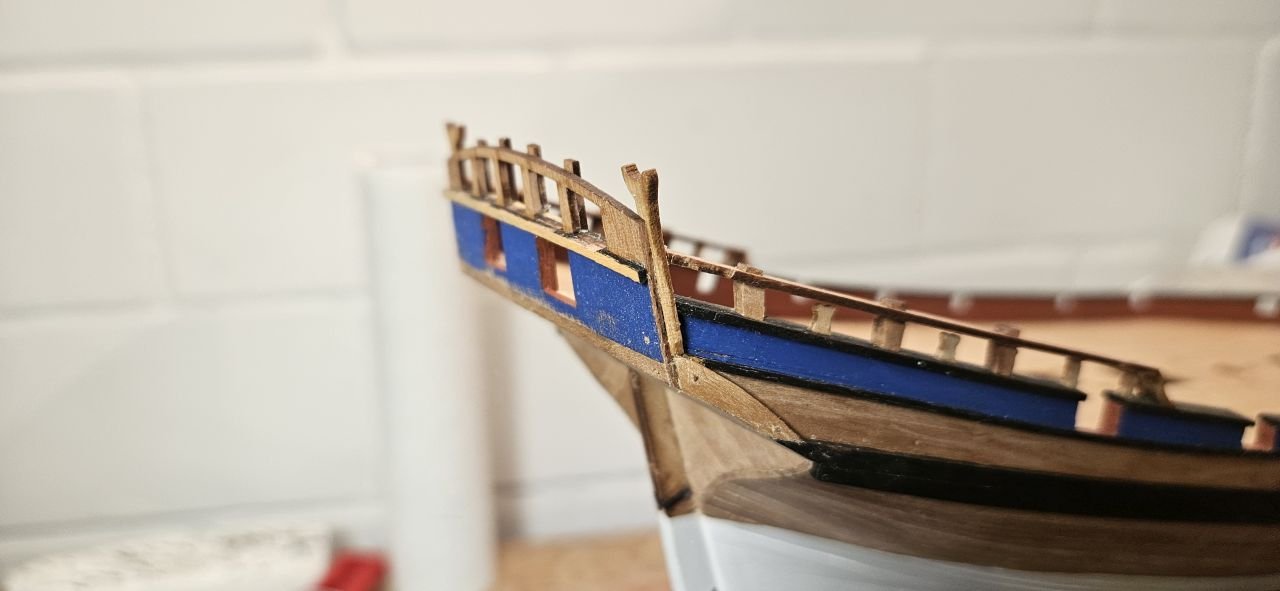
The next bit was finishing the bow. Sometime during that process, I decided to leave the stem in natural wood instead of painting it black. It is simpler and with the equally natural stern post it looks symmetrical and pleases me. The rest was pretty straightforward according to the instructions. The shot racks are installed as well, as are the entry steps. The openings in the shot racks were opened up a bit on top to give a better support to the shots in rough sea. the mizzen mast steps are in place as well a really nicely looking vessel
-
Adventurous? Perhaps, sometimes, but not crazy enough to try that project. Your very well-done Alert would make a much better canvas for such a painting than my poor one. It’s also a question of resources – timewise, I think. Being over 70 now, I might only have some 30 useful years more left in ship modelling. Therefore, I should better concentrate on projects which I might possibly finish in my time. 😉 In the meantime, I will try to fix the worst shortcomings those merciless pictures did uncover. As always.
-
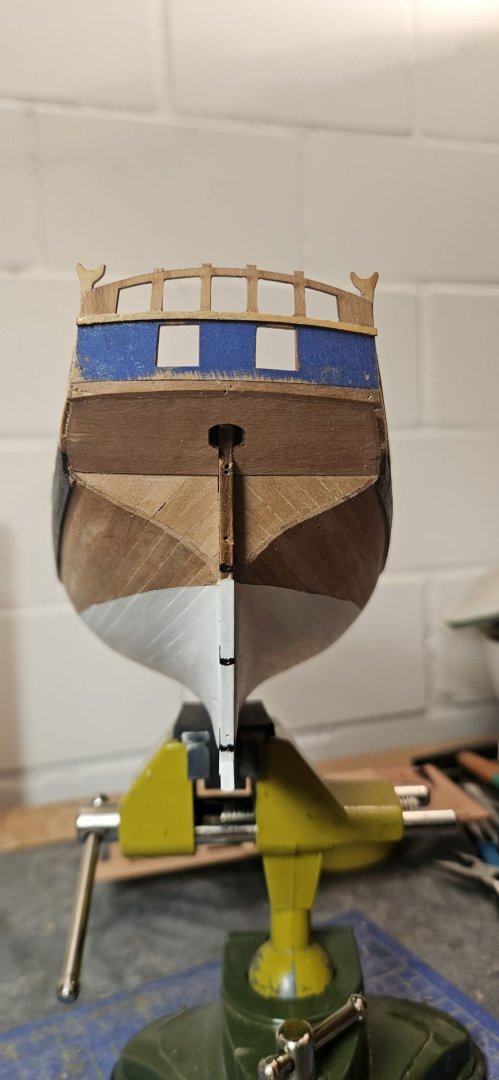
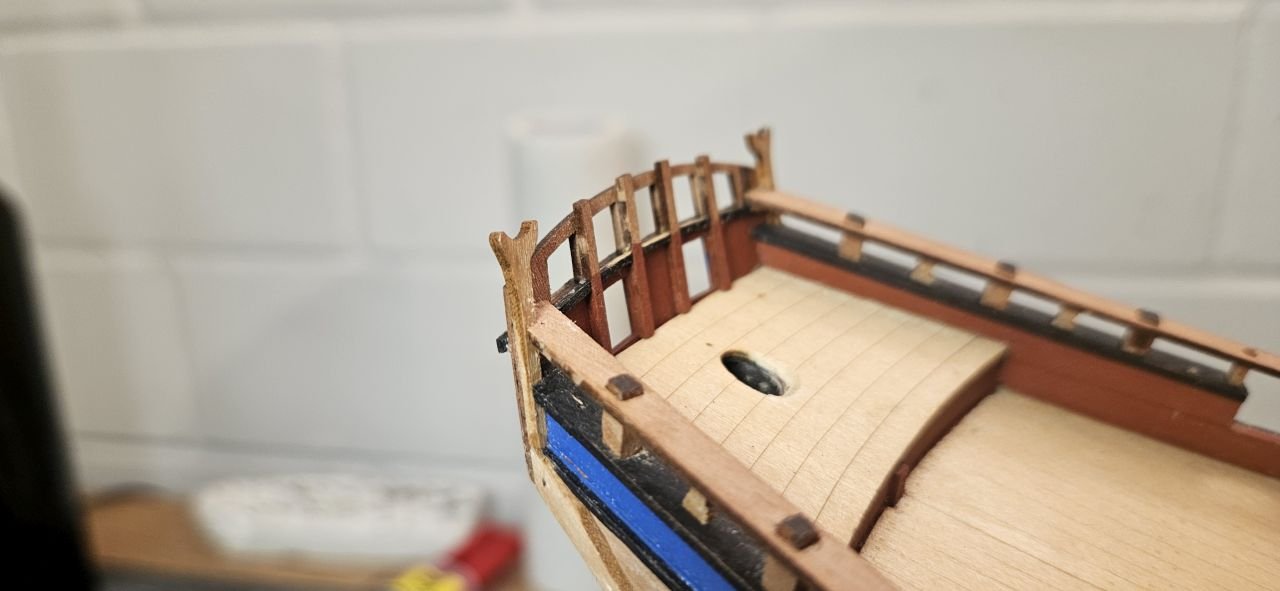
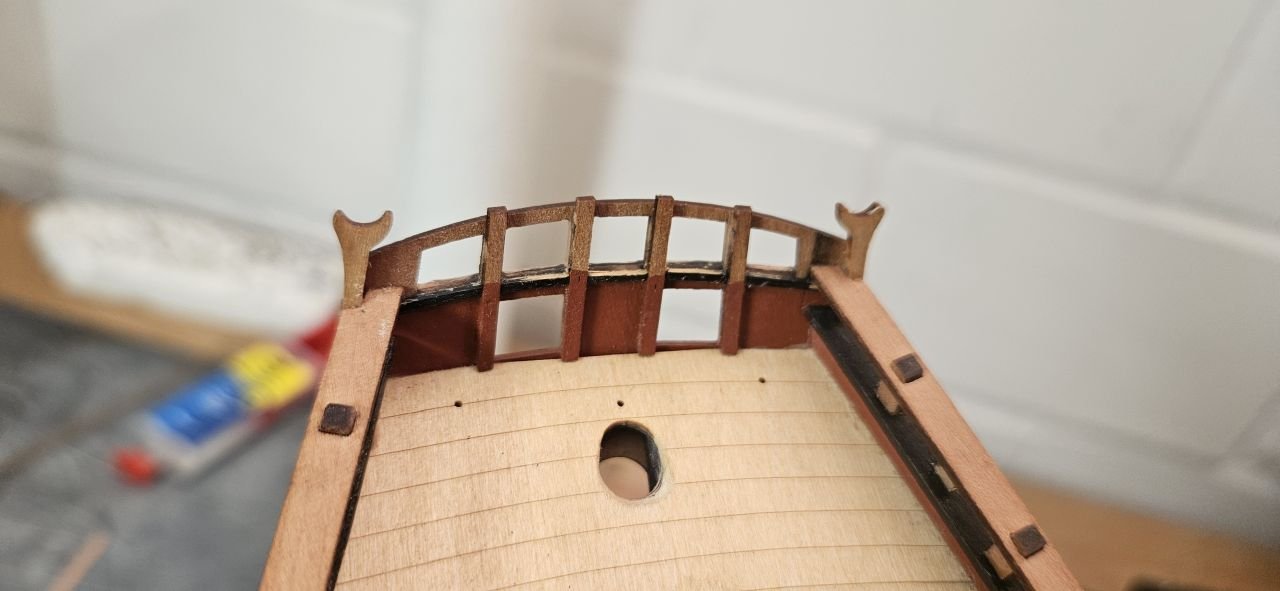
Building the stern really was a puzzle. More than once, I was properly puzzled how to make the parts fit while trying to adhere to the kit’s manual and Peter Goodwin’s book. The kit’s upper transom part leaves an open space at the lower end when properly brought to the height of the platform deck. Others had the same problem before – so it seems that not only unprecise building on my part is the problem here. A sidewise bent 1 x 3mm strip was glued on below the lower end of part 49 and adjusted. Next problem was the side counter timber which is one massive timber on the prototype, including the boom cradles on top, but here consist of several parts (part 76 and the outer edges of part 49 and somehow the parts 75). After due consideration I didn’t fix the cradles on the side of the transom but glued it onto its forward side, trying to create the impression of one continuous counter timber. Above the stern chase ports should be a rail, the upper counter rail. To simulate it I added a 1mm x 1mm strip on the inside on the same height as part 52 on the outside to create the impression of a 3mm wide rail. Building up the rough tree rails needed a lot of adjustments but was more or less straightforward. One still open question is the painting of the counter. Goodwin shows it in black while the kit’s manual leaves it open. To leave it in wood and varnish would still be an option, especially as I don’t intend to add the decorations. They would certainly look nice but also a little bit pretentious for a mere cutter. The blue colour band in itself is probably already rather more than an ordinary cutter would get from the admiralty. Additional strip below the transom Building up the upper counter rail Approximation of the side counter timber All painted and testing the tiller – so far, so good
-
Thank you and I will do my very best. A visit to your Alert showed me what could be possible. Presently I do not plan to attach the friezes but will try to achieve the impression on the cover of AOTS Alert instead. Making my own sails and adding a boat should nevertheless create a sufficiently sophisticated result.
-
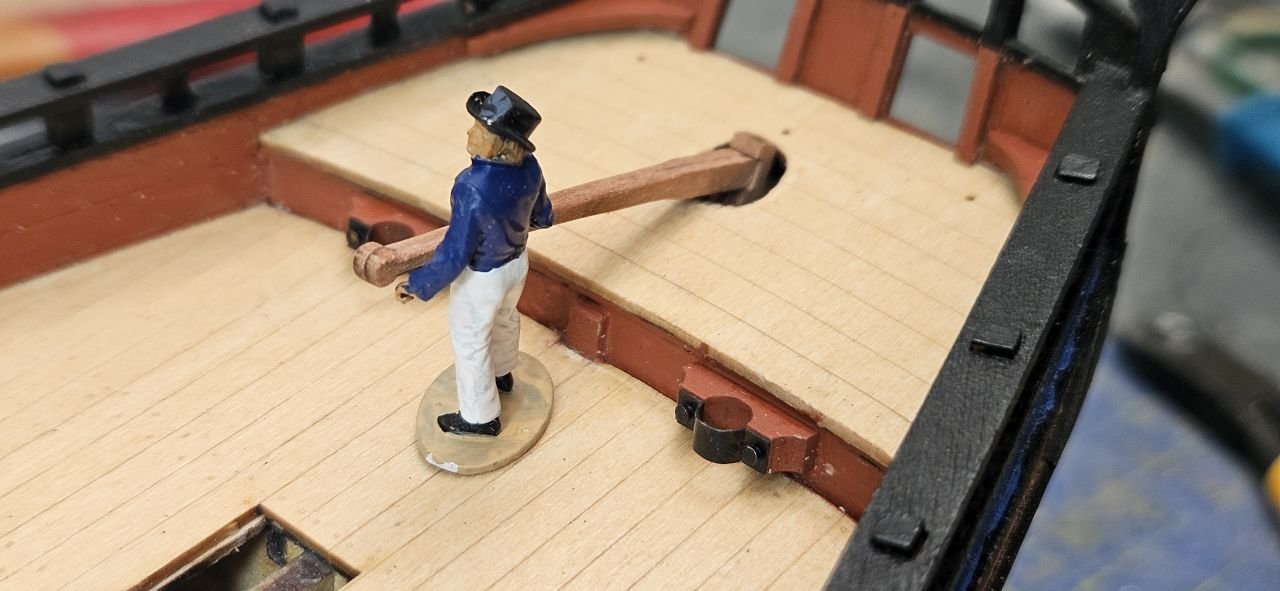
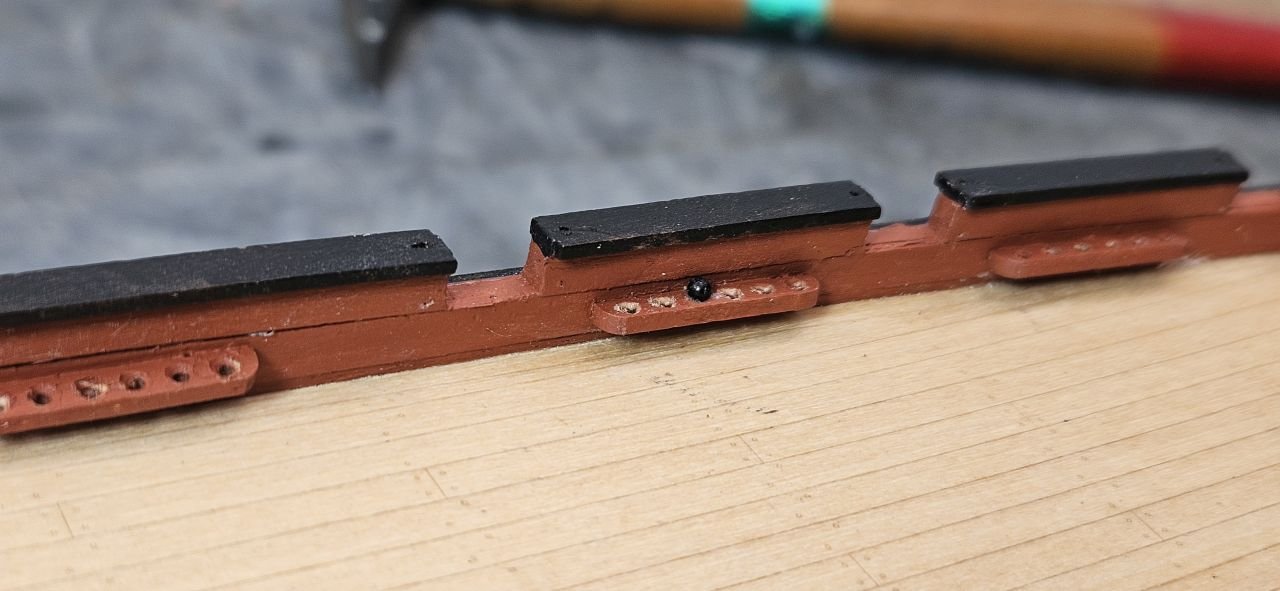
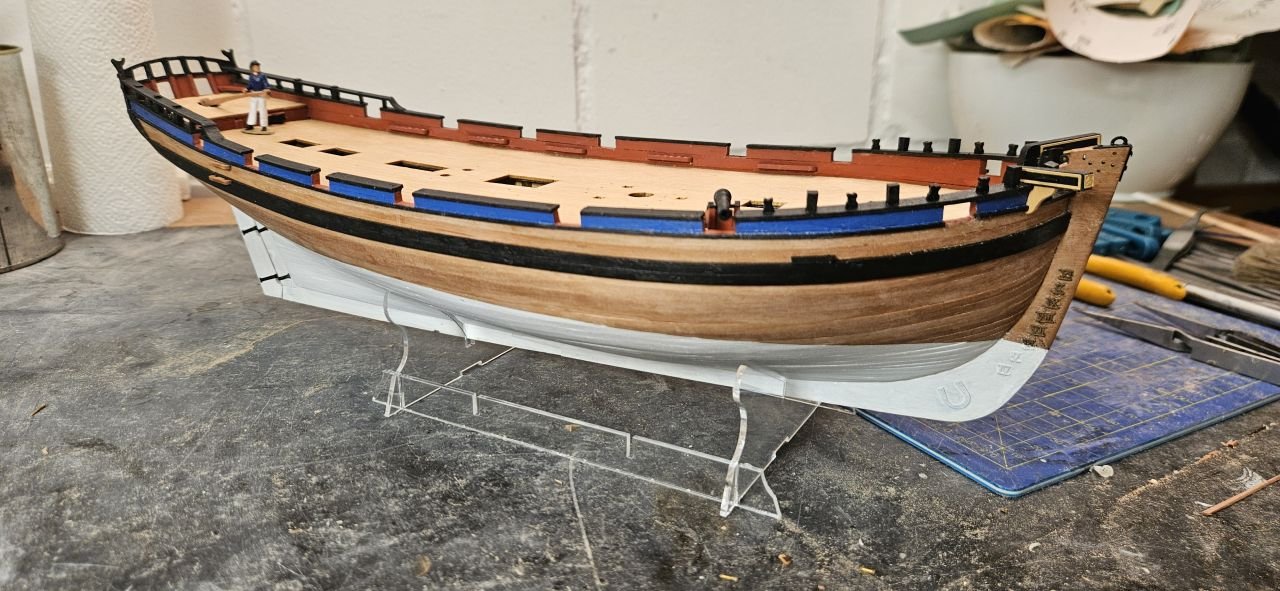
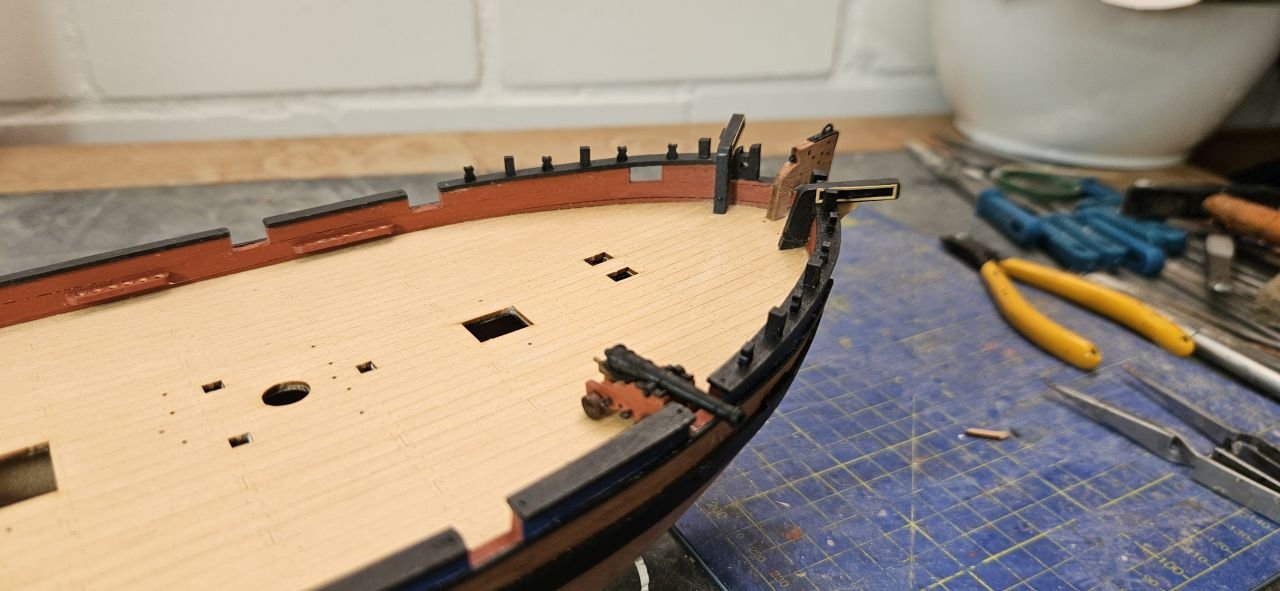
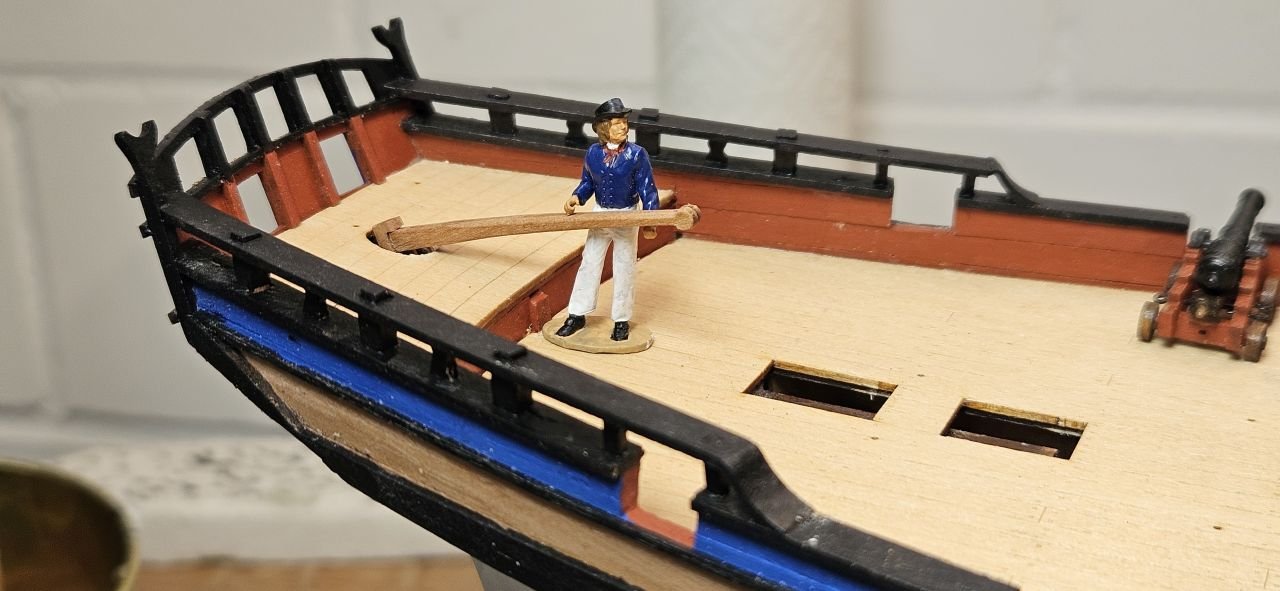
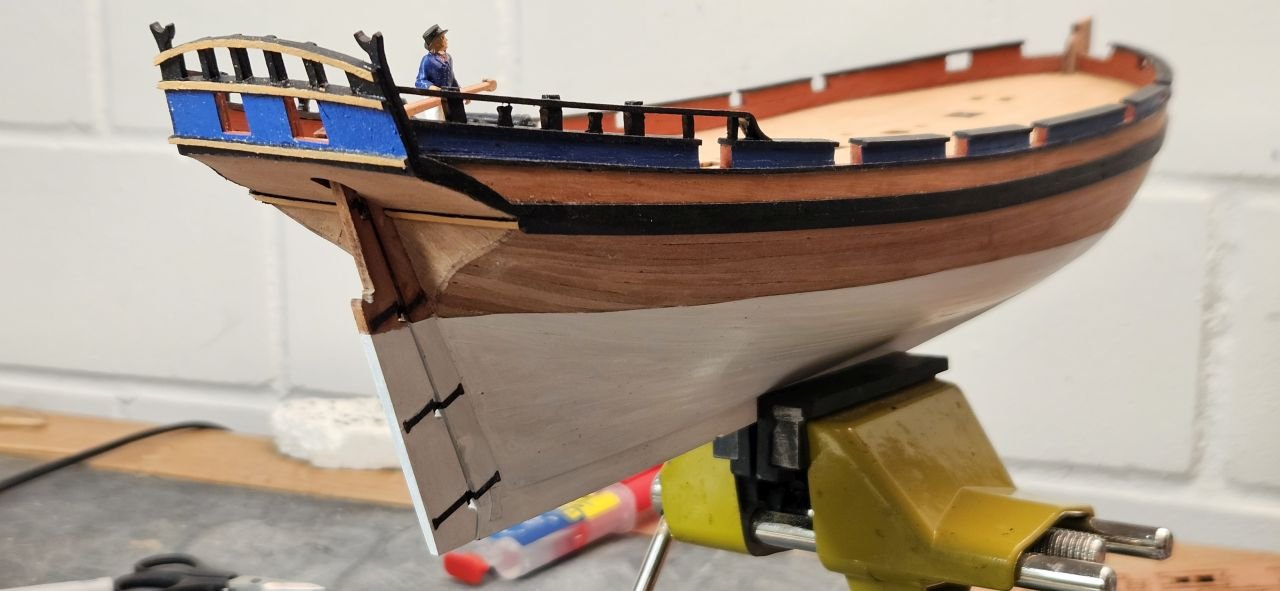
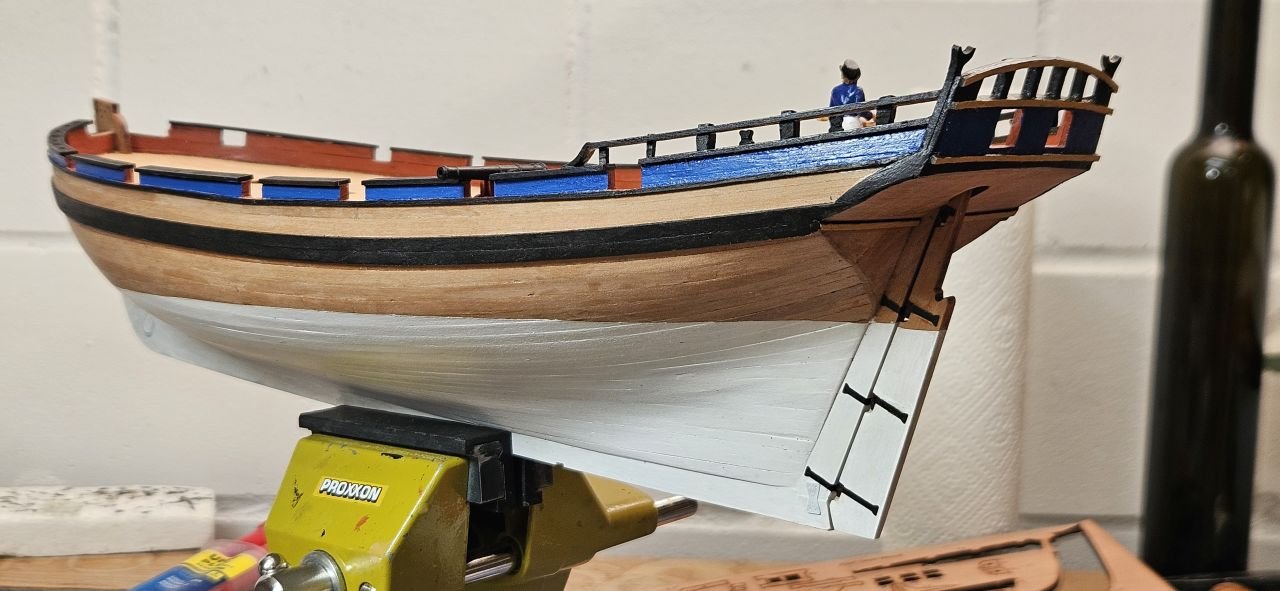
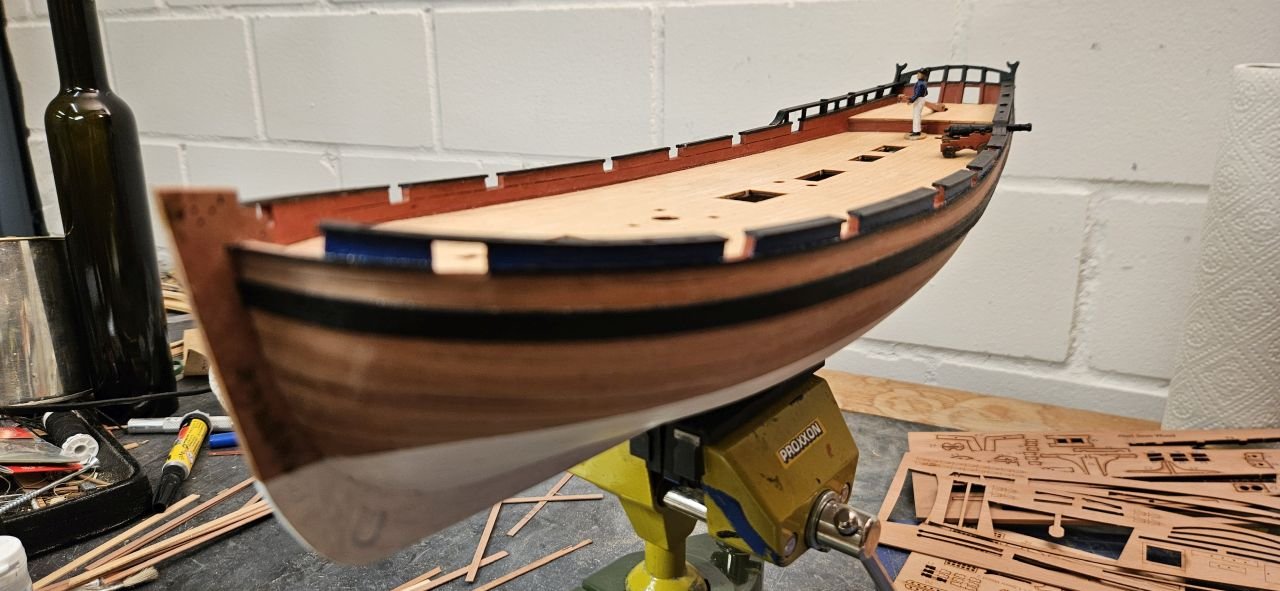
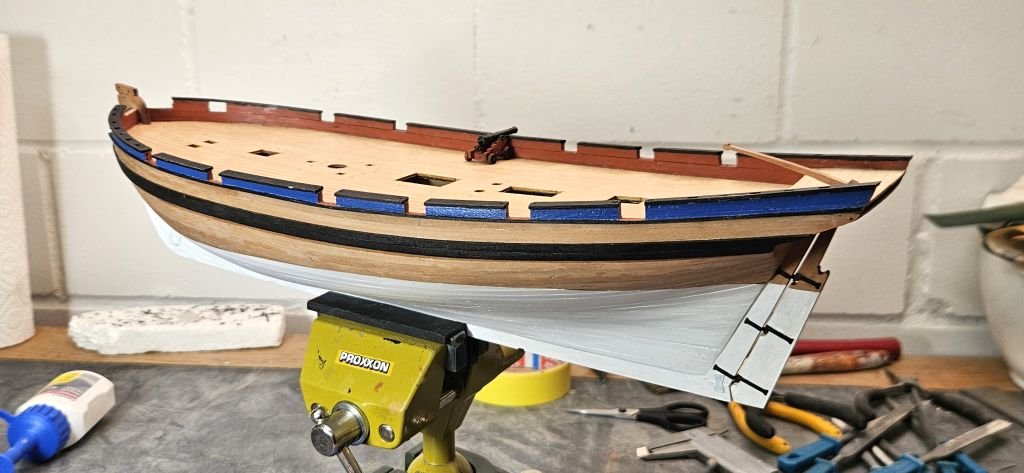
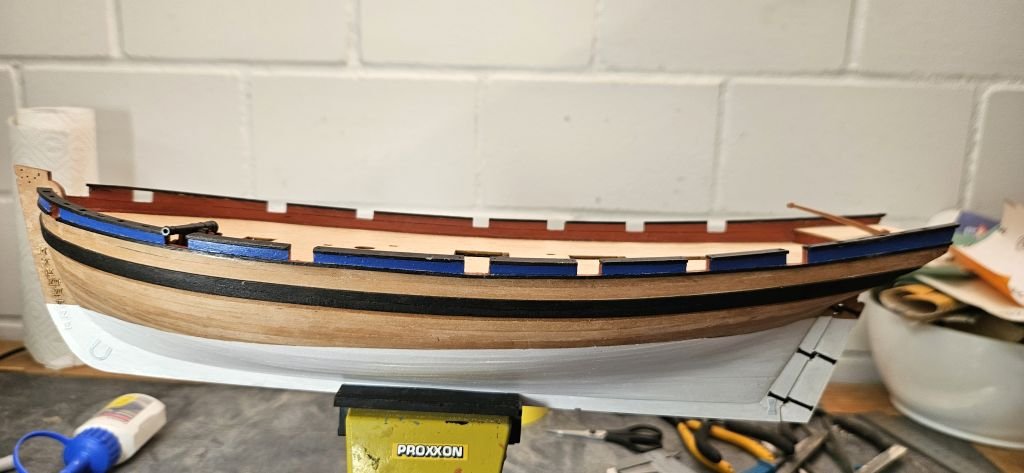
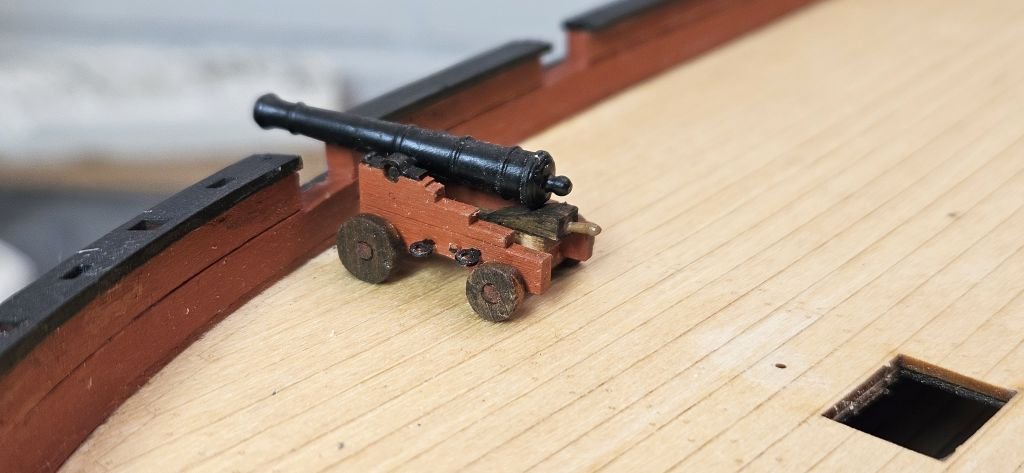
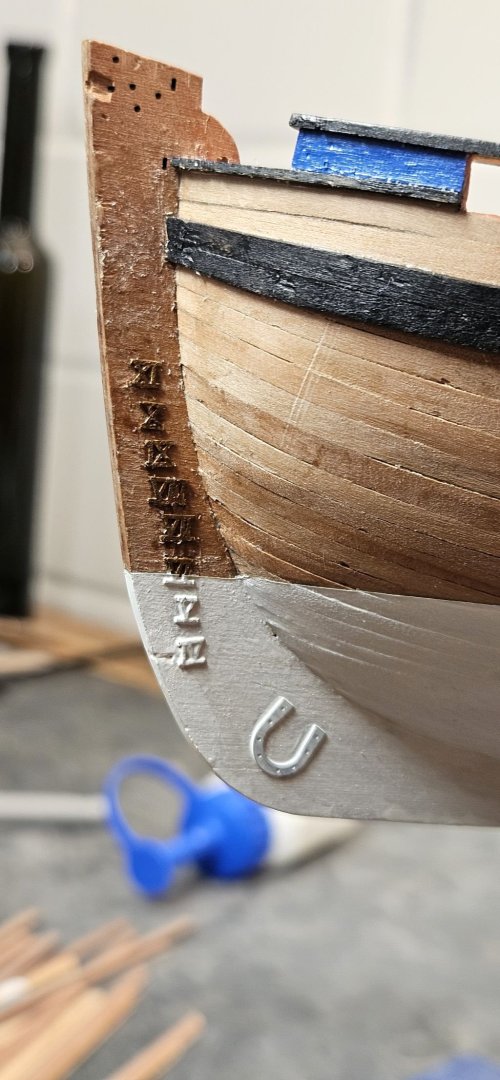
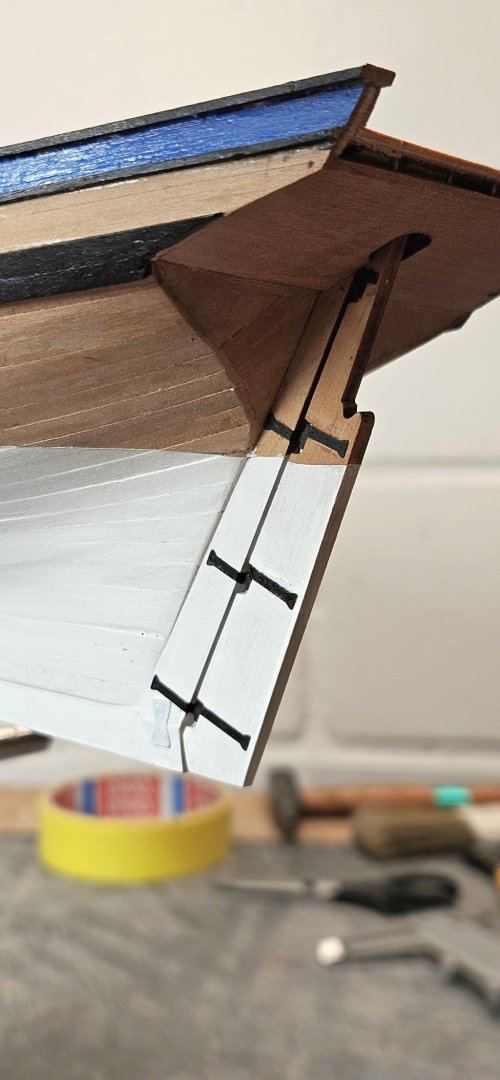
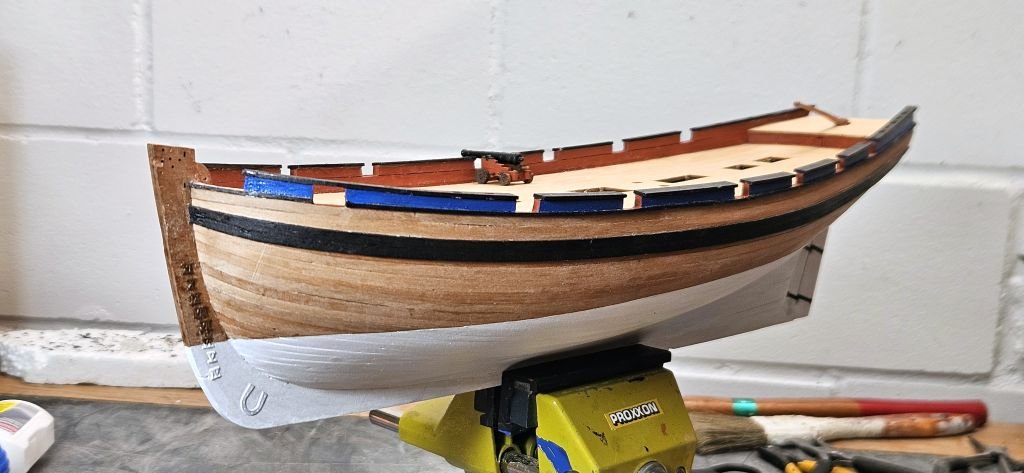
Next step was installing the deck and planking the inner side of the bulwark. Below the two 4mm planks I added an additional 1mm strip. This gives the bulwark a bit more height and could be an approximation of the waterways. Then I marked the positions of the gunport openings with the help of the provisionally installed drift rail. The openings were the filed down to 5mm above deck level. After some final trimming of the bulwark top, the rails were glued on, the required slots cut out and the gun ports trimmed. During that process I noted that the foremost gunports (which are covered by the drift rail) don’t work because the drift rail conflicts with the cannon. After rechecking the instructions as well as the size of the gun I decided to let that stand but would grant the skipper the use of a saw when he sees the need arise to use that ports in earnest. Now the strips marking the sheer rails and finally the main wales were glued on in the appropriate height. For better definition of the colour, I tried to paint all parts as far as possible before glueing on. This is helpful when installing the inner bulwark planking but worked as well on the wales. Now I did place the draught marks and horseshoe and fish plates on the keel. With a mixture of whitewash, dull white and about 5% dull black I painted the lower hull and the lower part of the rudder. The rudder fittings were blackened and glued onto rudder and hull. The rudder is only provisionally fixed. I deliberately painted over the keel plates and the lower drought marks as I consider them part of the construction and they may benefit from the protective cover with white lead paint. On the other hand, I left the rudder gear blank as it is part of a mechanical device which should move freely and may need to be occasionally checked for wear and tear. Trimming the rails Hull almost finished rudder Seems one of the carpenters was a bit careless with his axe 6 pounder gun looking elegant
-
 flyer reacted to a post in a topic:
HM Cutter Alert by flyer - Vanguard Models - scale 1:64 - naval cutter
-
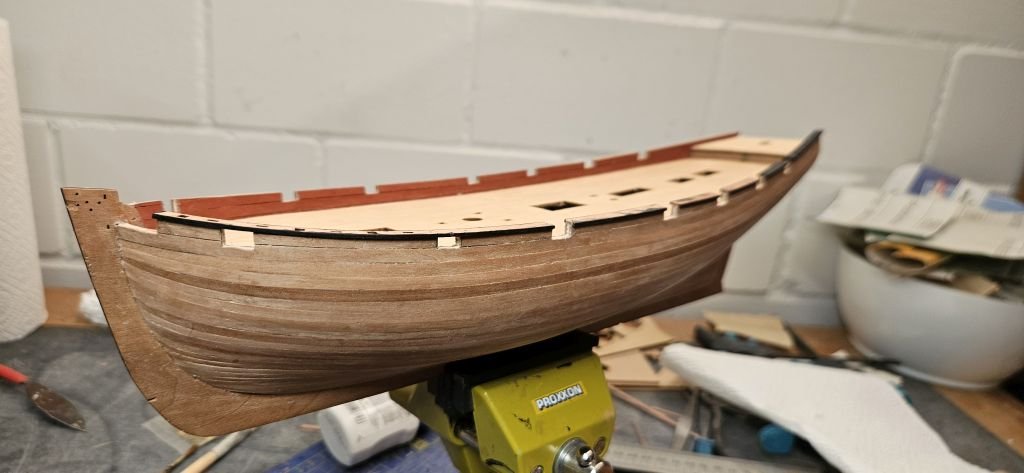
The second planking is now finished. It took rather long due to being a bit fiddly (and my sometimes lacking motivation). The outcome is unfortunately to my liking. Unfortunately, because I intended to paint the lower hull with an off-white paint. Now with the quite acceptable planking I’m having second thoughts about covering my woodwork… Next the wales and different wooden strips will be placed ‘from inside to outside’. The height of the bulwark was set somewhat by eyeballing and is now too high. I will install the deck, mark the height of the bulwark on the inside, sand it down and measure the position of wales and decorative strips on the outside from the top down. Nex time I build this kit I will take care to correct the upper edge of the first planking to the correct height above deck BEFORE starting the second layer!
-
 flyer reacted to a post in a topic:
HMS Pegasus 1776 by Moonbug - Amati Models - 1:64
-
 flyer reacted to a post in a topic:
HMS Pegasus 1776 by Moonbug - Amati Models - 1:64
-
 flyer reacted to a post in a topic:
Chris Watton and Vanguard Models news and updates Volume 2
-
 flyer reacted to a post in a topic:
Chris Watton and Vanguard Models news and updates Volume 2
-
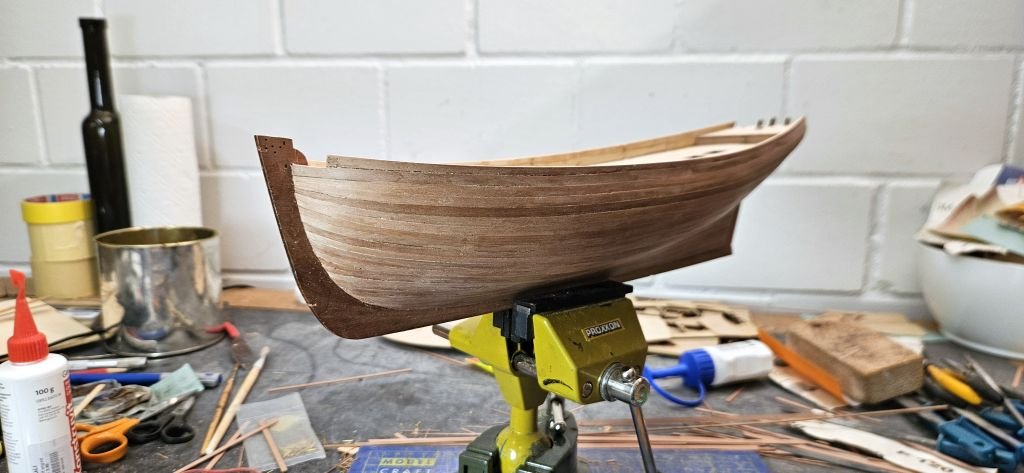
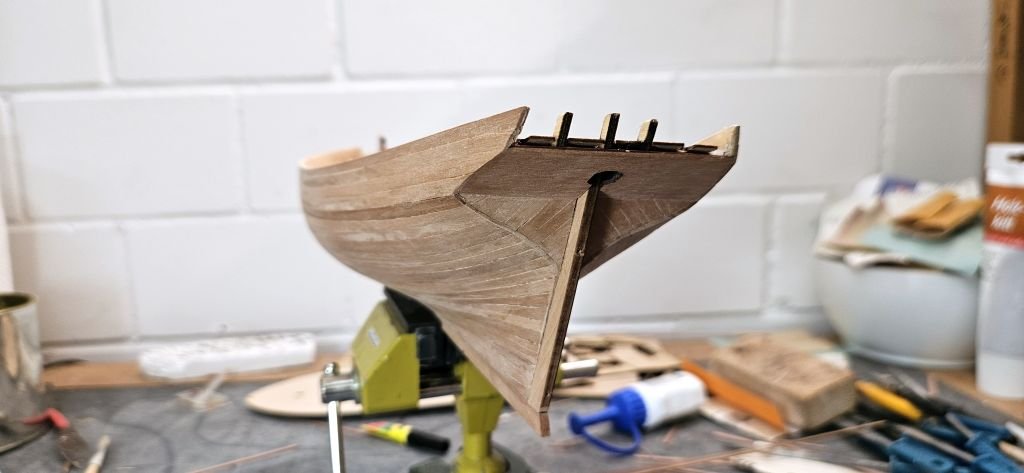
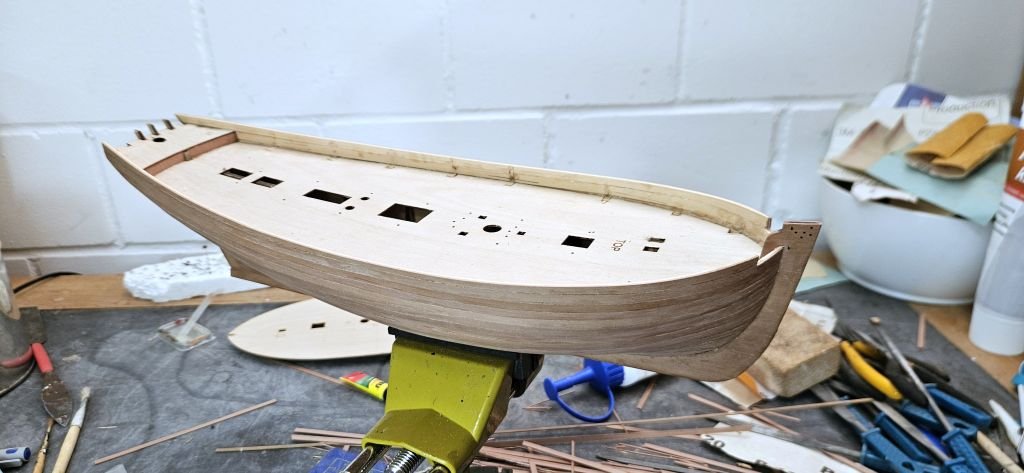
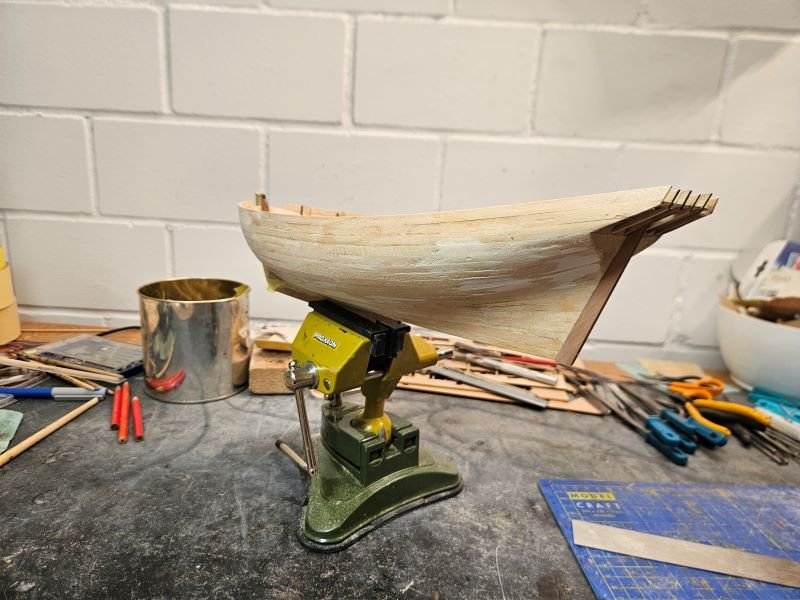
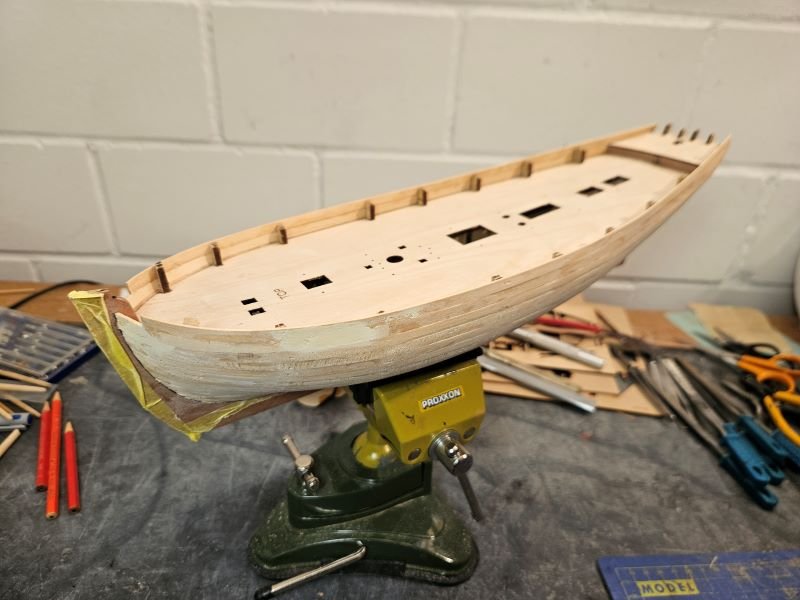
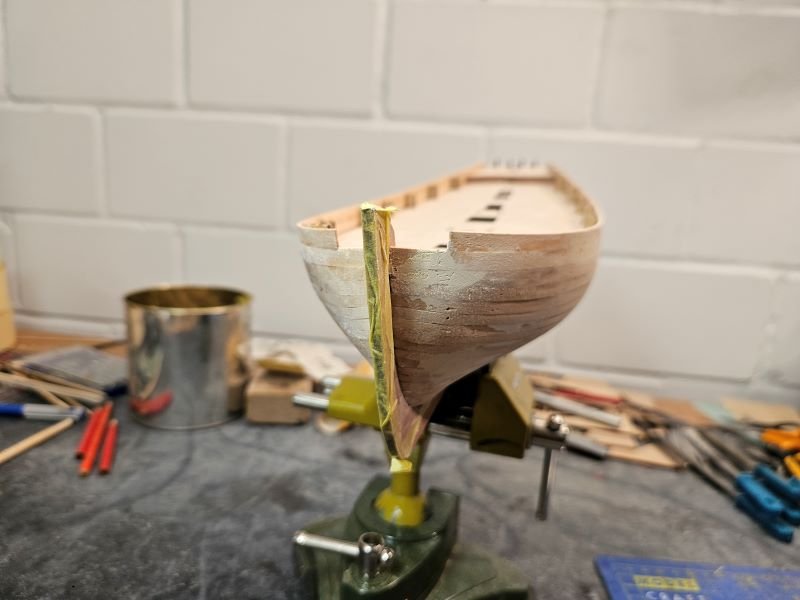
The shipwrights in my wharf worked rather slowly lately. After Bellerophon any project seemed a bit trivial. A longer inactive period has now ended and they are set to proper work again. I used the beautifully laser engraved lower deck to try different methods to caulk the seams. But neither following the seams with a sharp pencil or fine marker nor filling the seams with black paint and scratching the deck clean again produced acceptable results. Finally, I decided to use the main deck just as it is, with a layer of clear varnish. Now I glued, filled and sanded the first planking layer. During that task I found that my worry about perhaps building a too simple kit was rather invalid and the task was as demanding as ever but fortunately included a much smaller hull than the last one. I love the elegant lines of Alert’s hull
-
 flyer reacted to a post in a topic:
Chris Watton and Vanguard Models news and updates Volume 2
-
Hi Techtonic Thanks for the hint and congratulations for finishing that monster. And what a lovely result you got and in such a short time! Did you ever sleep? About using others’ ideas in one’s own build: I’d rather call it borrowing because I don’t keep them but preferentially pass them on. Some details you found in my log were other’s brainchild. And anyway, I’m rather flattered that you found my example helpful. Cheerio Peter
- 366 replies
-
- bellerophon
- victory models
-
(and 2 more)
Tagged with:
-
A smaller boat is very high up on my wish list too. Logic dictates that any ship definitely needs at least one boat to communicate with the shore and for various other tasks. In ‘The Naval Cutter Alert’ Peter Goodwin writes about boats: “… For conveying stores, dispatches and officers and crew, the Alert carried a single boat. (…) In all probability, 6- or 8- oared cutters varying between 12ft and 18ft in length were employed. Alternatively, a long boat either 14ft or16ft in length may have been used. (…) In December 1763 one such (Admiralty) order decreed that during winter only one small 4- oared boat should be allocated and that it should be carried rather than towed to avoid being lost. An order of June 1779 mentions 16ft boats for cutters while another of July 1783 recommends the addition of a second boat. (…) When not in use the boat was stowed on the upper deck between the main jeer and topsail bitts and the two elm tree pumps abaft. (…) When required the boat was either swung out or hoisted inboard from tackle suspended from the boom. Should the vessel encounter action the boat was towed astern… The ships boat also served to convey boarding parties onto vessels ordered to be searched; and for laying out the kedge anchor for warping the ship; or for towing the ship when becalmed. ” A contemporary model of the naval cutter Hawke kept at NMM shows a small boat stowed on deck. I guess that all this information is also valid for any other ship or smaller vessel. So, each vessel must have had at least one boat. It may not always be shown on contemporary models because smaller vessels may have towed it quite often but for heavy weather there must have a been a possibility to take it aboard. I really would appreciate a model of a small 12ft or 14ft boat which would also fit all your small models. With a small stand to place it on deck included, you should be able to sell at least one model to every serious model builder who bought one of your smaller kits 😉. Peter
-
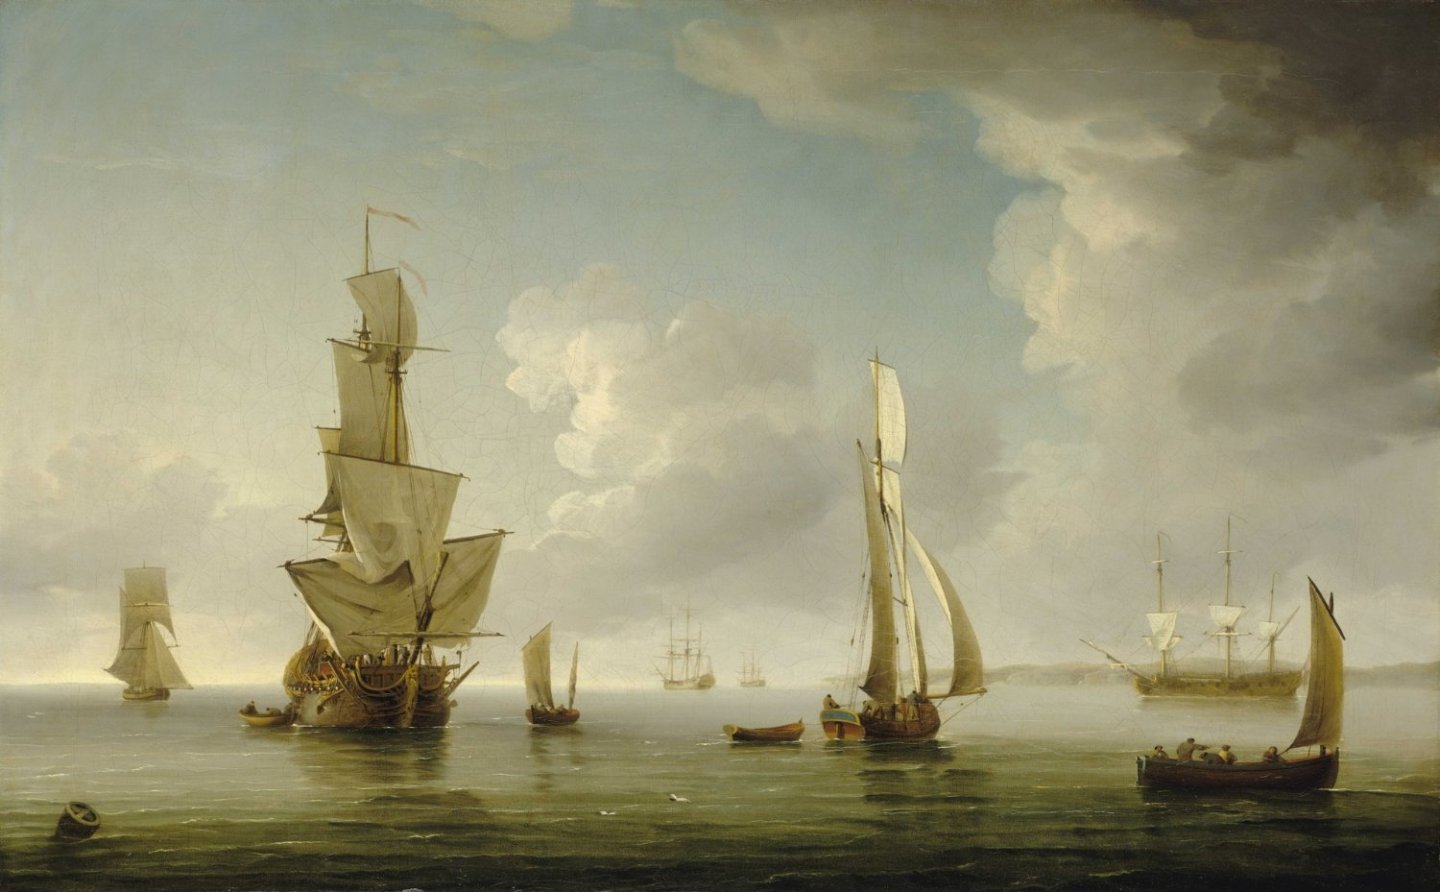
The Naval Cutter Alert by flyer - Vanguard Models - scale 1:64 The next project is another step ahead in kit quality – a Vanguard Models kit. The HMS Vanguard kit itself was also a Chris Watton construction, however with his own line of products I believe he took quality one or several steps further. Although the kit looks great, there are – fortunately - still possibilities to change it to my liking or even to improve it a bit. For additional information I will count on Peter Goodwin’s ‘The Naval Cutter Alert 1777’, a book of the AOTS series. My first thoughts are: The cutter must have a boat. With the kit I ordered Vanguard Model’s 18ft cutter with the intention to shorten it to 14 or 16ft to easier find room on deck. In the meantime, Chris Watton announced that he will soon offer a printed 14ft cutter. I will consider this or – if it is still too large – perhaps commission Caldercraft’s 14ft jolly boat. Sails will be hoisted. But I will make my own as the kit’s ones are not to my liking. The rigging layout could be changed to an improved and standardised cutter rigging without spread yard and with spreaders for the shrouds. However, right now, I think the kit’s rigging scheme has its very own charm and is not only confirmed by the contemporary model of the cutter Hawke but also by contemporary paintings of Charles Brooking. Decision to be taken later. Shipping in Light Airs in the Thames Estuary by Charles Brooking 1723 – 56
-
Hi Nils As we would say in Swinglish: I pull my hat before you (ich ziehe meinen Hut vor dir). Not only have you built another unique, detailed, outstanding gem but you also finished it in about 8 months! From scratch! Without plans! Wonderful! Cheers Peter
- 330 replies
-
Hi Allan, And a happy new year to you too! Yes, Lees mentions '...through blocks under the fore top...' several times and the drawings show those blocks fixed at the extremes of the trestle trees - except on page 102 where a 'double block is seized to the crosstree'. I wonder if regulations in those times really went as far as to specify the exact locations of those blocks. Lees, in his introduction, mentions that his written sources mainly deal with size and dimensions. I guess that the actual run of the lines of the running rigging he shows is an average of the many but still limited number of models he studied. I'm always tempted to follow kit instructions if they are not directly contradicted by e.g. Lees. Respectable kit designers may use Lees or their own research for the rigging plans and certainly try to be as historically accurate as possible. But even somebody like Chris Watton may have to use approximations sometimes to construct a practicable and sellable kit. And then sometimes I'm just lazy and tempted to take the easy way out. Cheers Peter
About us
Modelshipworld - Advancing Ship Modeling through Research
SSL Secured
Your security is important for us so this Website is SSL-Secured
NRG Mailing Address
Nautical Research Guild
237 South Lincoln Street
Westmont IL, 60559-1917
Model Ship World ® and the MSW logo are Registered Trademarks, and belong to the Nautical Research Guild (United States Patent and Trademark Office: No. 6,929,264 & No. 6,929,274, registered Dec. 20, 2022)
Helpful Links
About the NRG
If you enjoy building ship models that are historically accurate as well as beautiful, then The Nautical Research Guild (NRG) is just right for you.
The Guild is a non-profit educational organization whose mission is to “Advance Ship Modeling Through Research”. We provide support to our members in their efforts to raise the quality of their model ships.
The Nautical Research Guild has published our world-renowned quarterly magazine, The Nautical Research Journal, since 1955. The pages of the Journal are full of articles by accomplished ship modelers who show you how they create those exquisite details on their models, and by maritime historians who show you the correct details to build. The Journal is available in both print and digital editions. Go to the NRG web site (www.thenrg.org) to download a complimentary digital copy of the Journal. The NRG also publishes plan sets, books and compilations of back issues of the Journal and the former Ships in Scale and Model Ship Builder magazines.


