flyer
-
Posts
1,016 -
Joined
-
Last visited
Content Type
Profiles
Forums
Gallery
Events
Everything posted by flyer
-
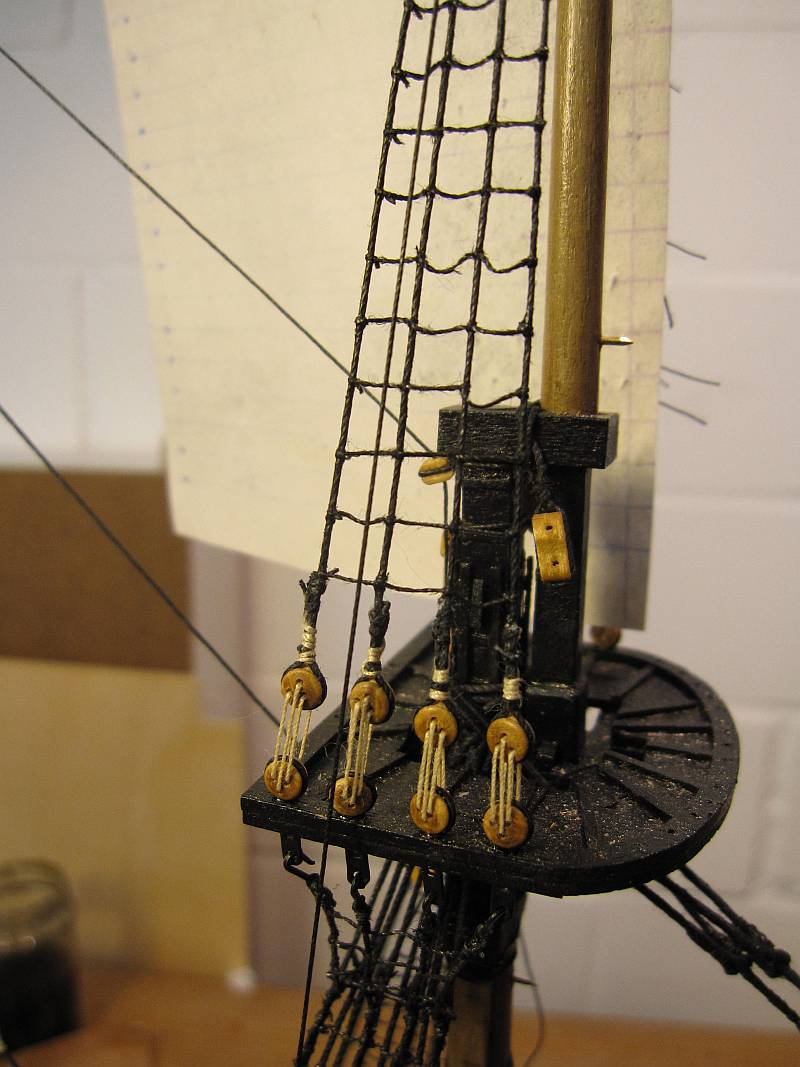
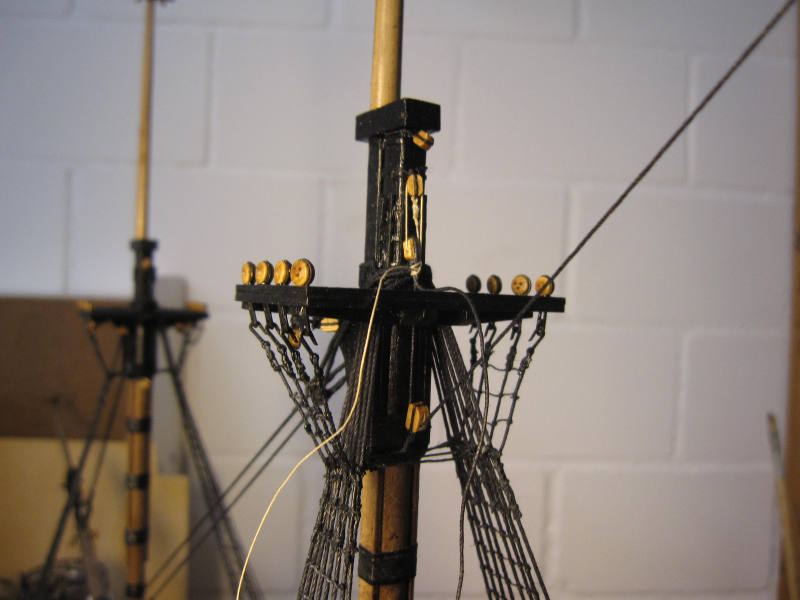
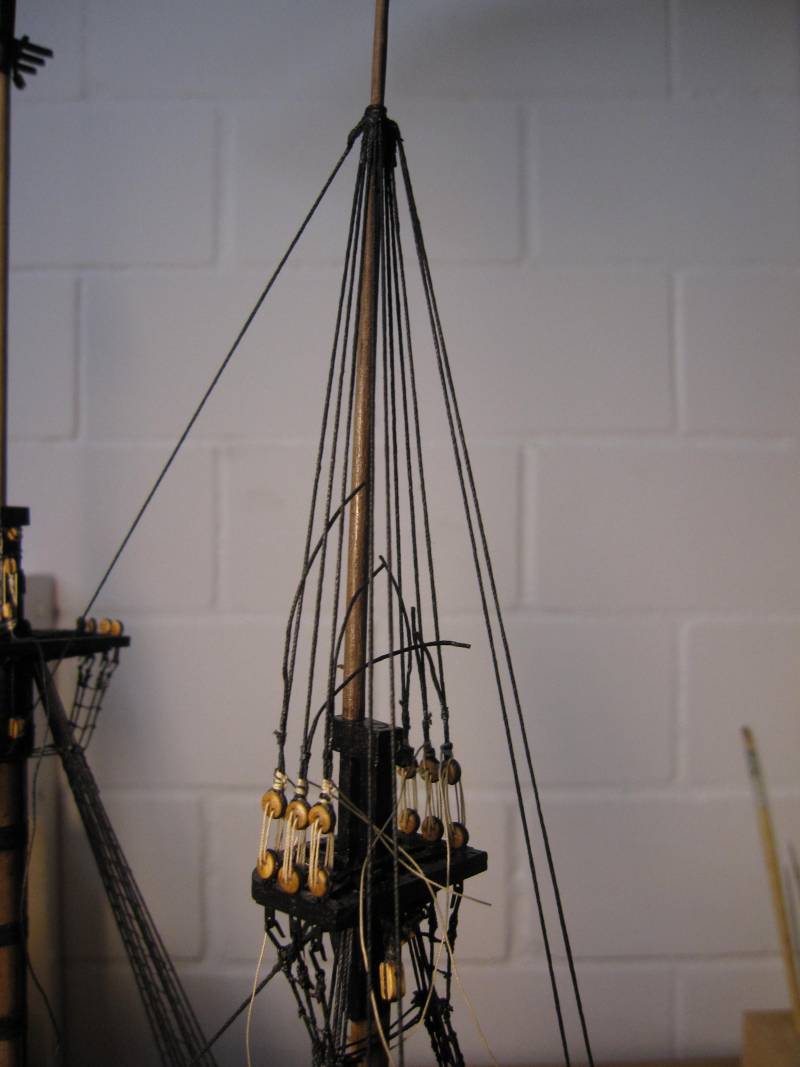
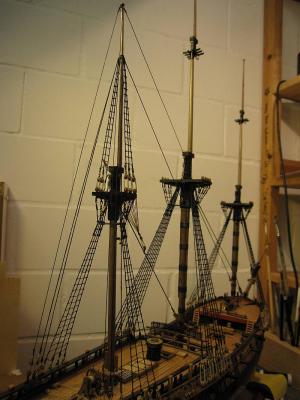
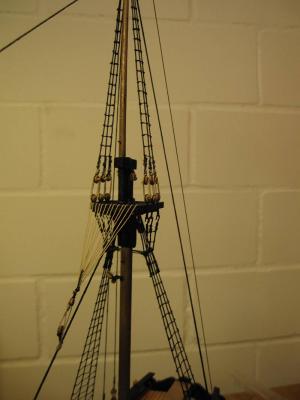
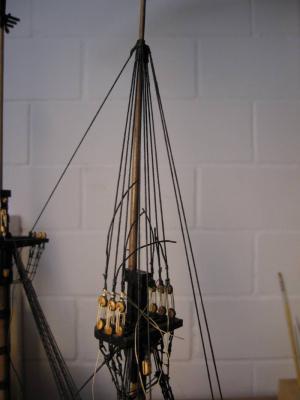
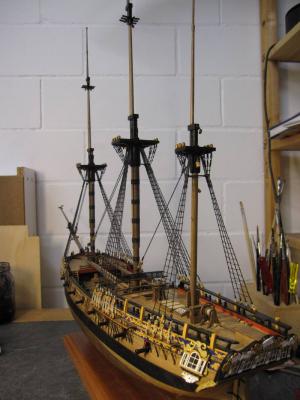
 Ratline knitting continues on the main topmast. Checking the relative size of shrouds and stays I noticed that the shifting backstay according to the plan is too fat (how I feel with that poor rope!) as it should only be 0.7 of the associated shrouds and backstays. I took all threads one size smaller than on the plans. Looking at the finished stay on the picture I think perhaps the blocks could also be replaced by smaller ones. Main top taking shape Rather delicate shifting backstay but according James Lees

- 431 replies
-
- 2
-

-
- pegasus
- victory models
- (and 1 more)
-
Hi Andy, Well, there I was just a few days abroad and coming back I find that you have already half finished masting and rigging your Pegasus! You had a really impressing start into that sometimes exhausting chapter! Noticing that you use wood for mast bands I’d like to point to alternatives: Some use styrene stripes which handle perhaps easier and I prefer cartridge paper for all parts which where iron bands in the original. This handles easily and simulates iron quite well, even before coloring it. I’ll try some acrylic to smoothen my ropes – that seems a splendid idea. And you even have some time to improve your English! I will with all force try my swinglish minimum on the level yours canadinglish to hold. (Perhaps you know the story of that Alitalia pilot misunderstanding all his radio calls from New York tower, blundering across their airspace and making a mess of his flying until finally an unnerved controller told him: ‘Alitalia, before you come here again – learn some English!’ Then a very British voice cut into the frequency: ‘You call THAT English, sir?’) Cheers Peter
-
But remember: Power tools also make your slips and errors faster much bigger – and so far I’m only talking about nicks in the wood. So, it’s your choice - do you want to live fast and furious or slow and gentle. (OK, OK, there are more options - like slow and furious etc.) Peter
-
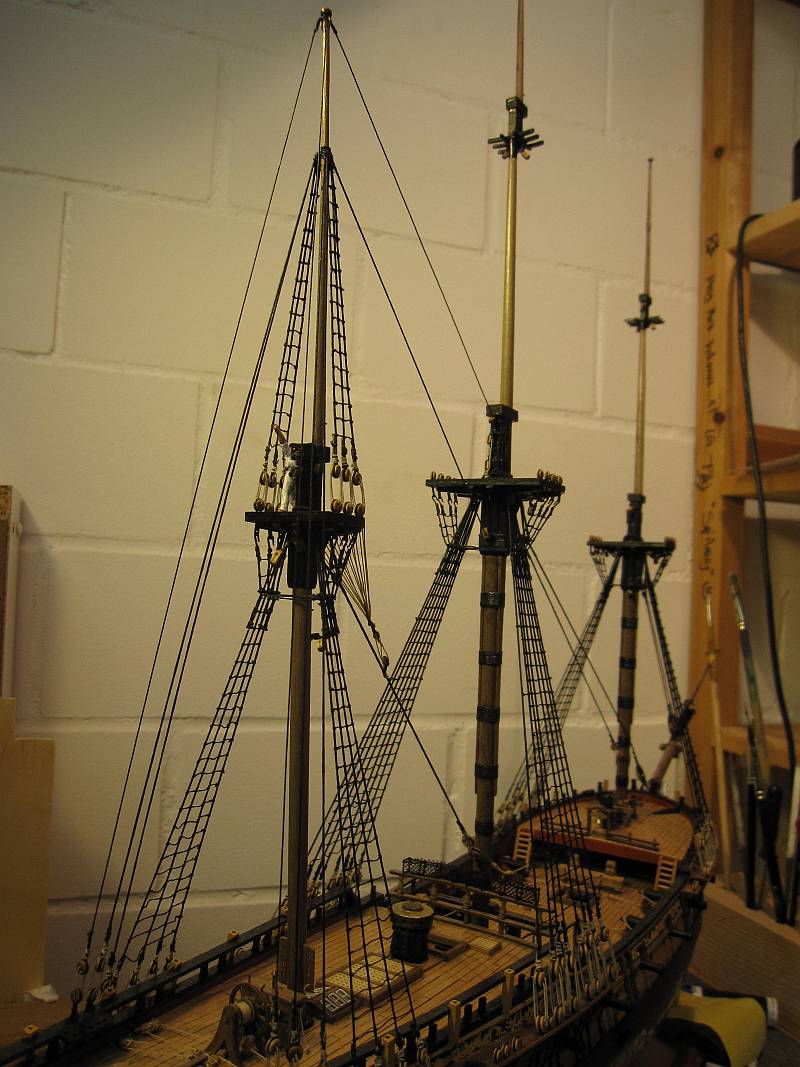
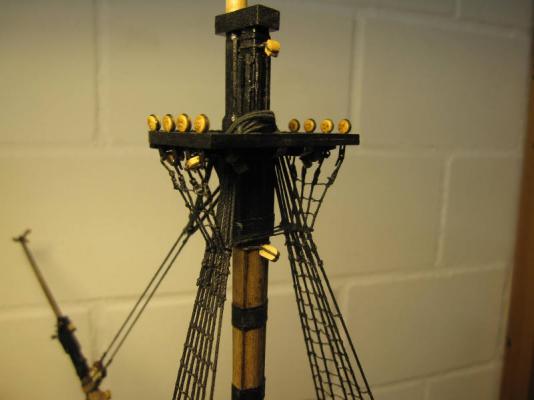
The standing rigging on the mizzen mast has been finished. Some small corrections were made: Quite obviously (also told by Lees) the royal stay and the royal backstays must be of the same size. I took .25 black threads for both. The mizzen topmast and royal stays have their upper end attached with a simple eye-splice instead of the more complicated version with a mouse. The later is used only on mizzen lower mast and main and fore lower masts and topmasts stays. Standing rigging on the mizzen finished lower mast Mizzen top Royal stay and backstay have the same size. Note the eye-splice – no mouse on the upper end crowsfeet
-
Hi B.E. Hi Aldo Thank you. Cheers Peter
-
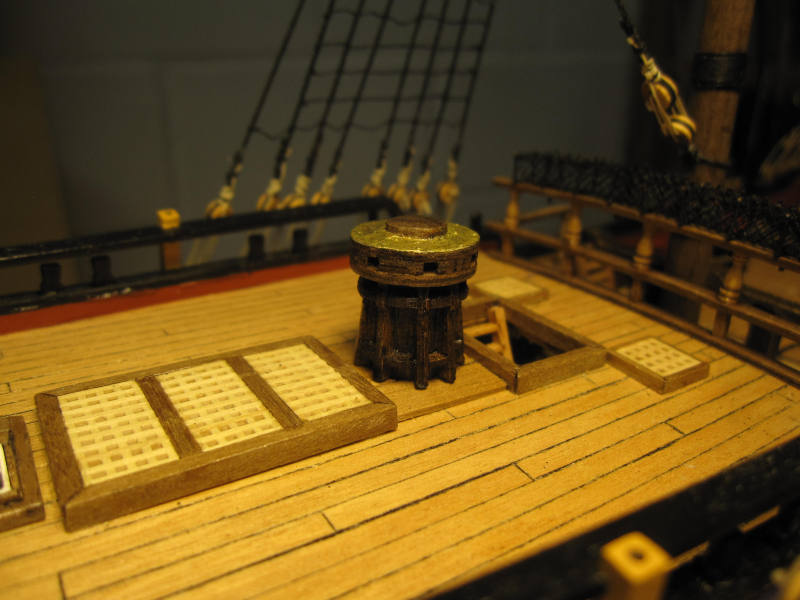
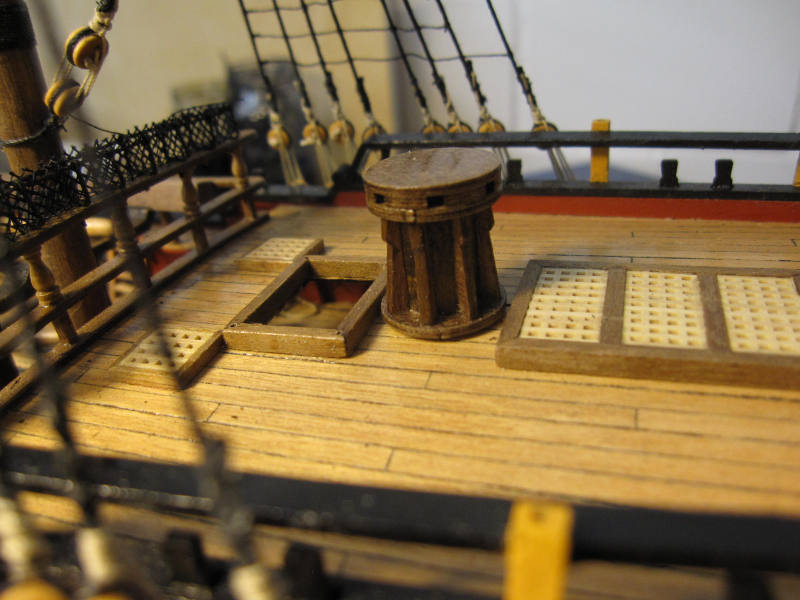
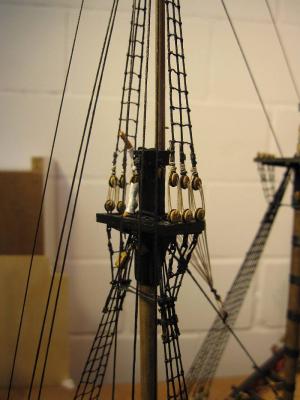
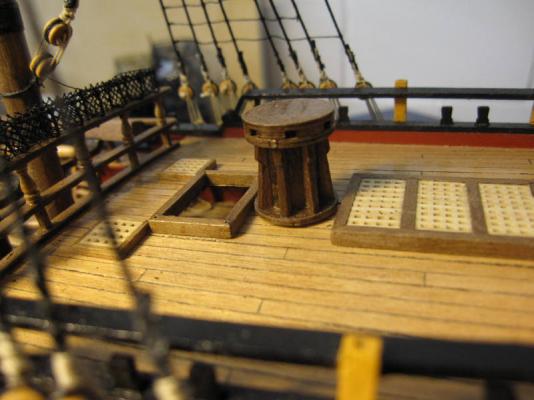
Between the rigging work on the mizzen mast the reworking of the upper capstan continued. It was made without palls according to the model in Annapolis or the one on HMS Pandora. Capstan “out of the box” First try – room for improvement Finished version, mounted on a small step Once again I must say, that without all that information and input from MSW such small things wouldn’t be possible.


- 431 replies
-
- 2
-
-
- pegasus
- victory models
- (and 1 more)
-
Thank you Aldo, there is more….
-
Hi B.E. I was just lucky to find them in my toolbox. You should get similar items in a good assorted hardware store in the electric/electronic department. I wish I would find some masts with the quality of those on your Pegasus in the toolbox as well… Cheers Peter
-
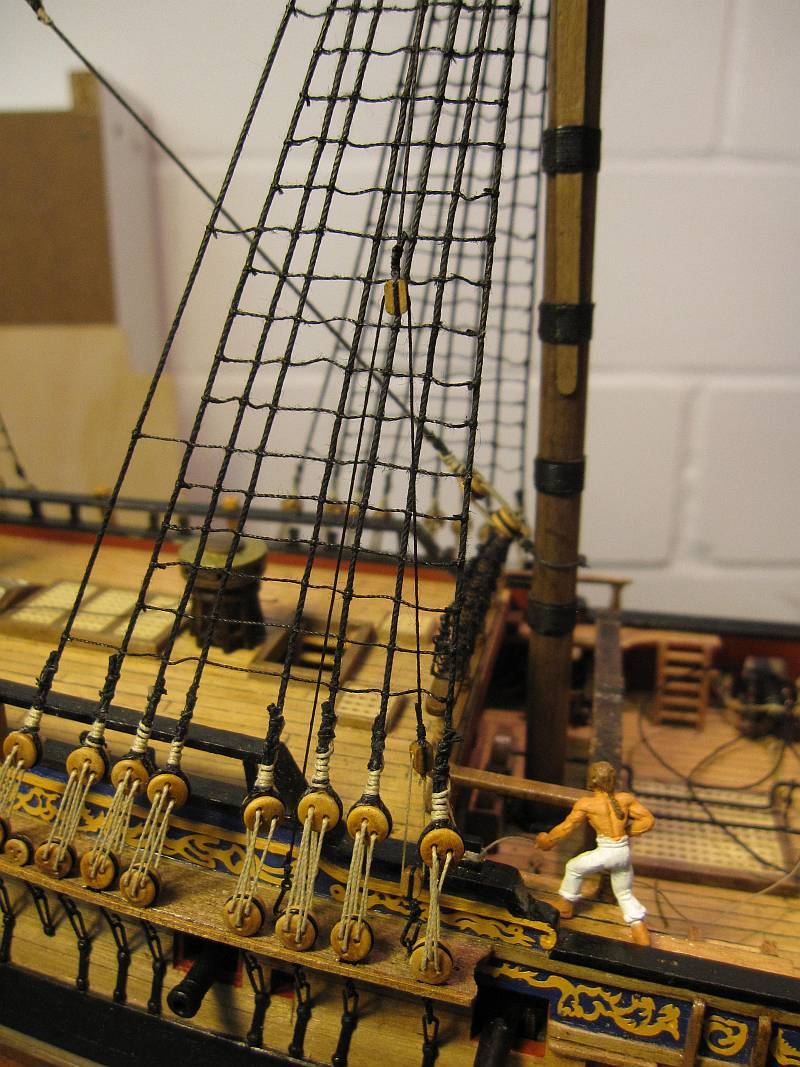
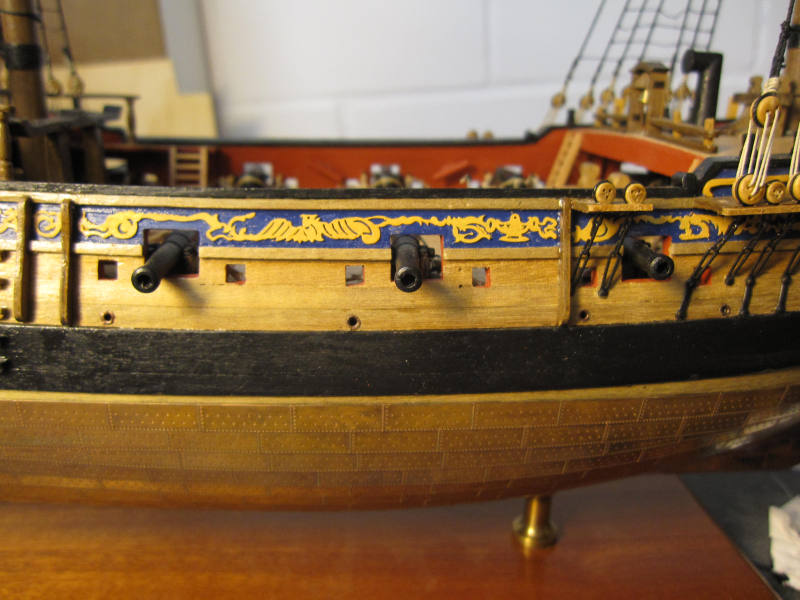
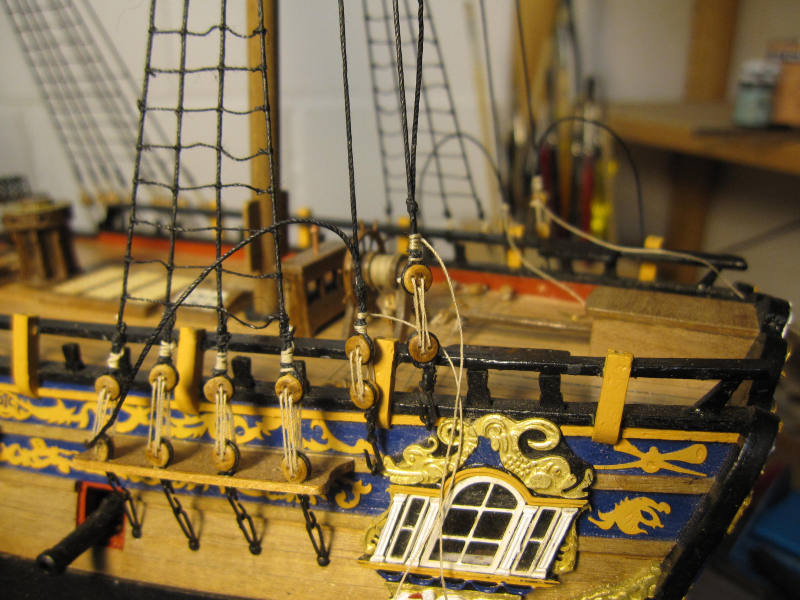
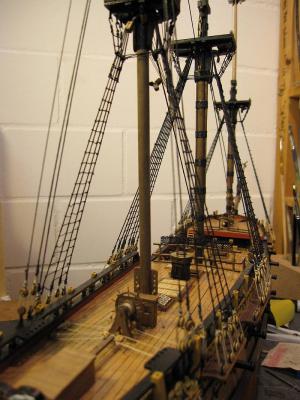
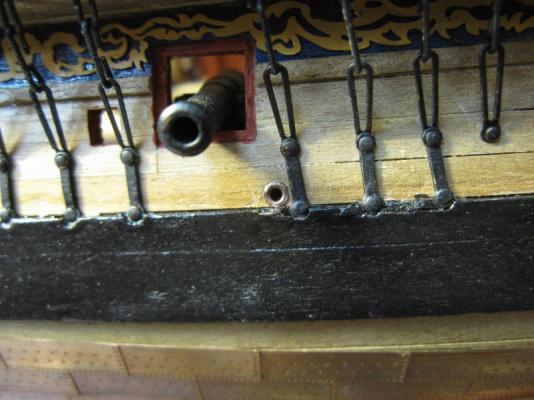
Those scuppers (one is slightly larger for the pump dale) look quite acceptable. I think they were lead or copper lined; I painted them a dark copper. Scuppers placed according B.E.’s research. Thank you! The main wale needs some smoothening The main top has now mizzen topmast- and topgallant stay added. According Lees the mizzen topgallant stay is hitched to the after side of the main stay. I find this a strange way to belay a stay but at least it is easily done. Main top with mizzen topgallant- and topmast stay
- 431 replies
-
- 1
-
-
- pegasus
- victory models
- (and 1 more)
-
Hi Bummer Of course I am quite proud if you find something helpful in my log. Especially as I see that you are following B.E.’s excellent build as well. About the chain plates: I widened them at the neck with a flat tool (screwdriver) until I could enter the deadeye and closed them careful again with a pincer. Just follow Goethe‘s Erlkönig: „Und bist du nicht willig, so brauch’ ich Gewalt.“ Cheers Peter
-
Hi David I’m glad if I can be of any help. Same ways as others are for me. Cheers Peter
-
Thank you Bummer. It is necessary for a good result as about a felt 90% of those ships are rigging. Peter
-
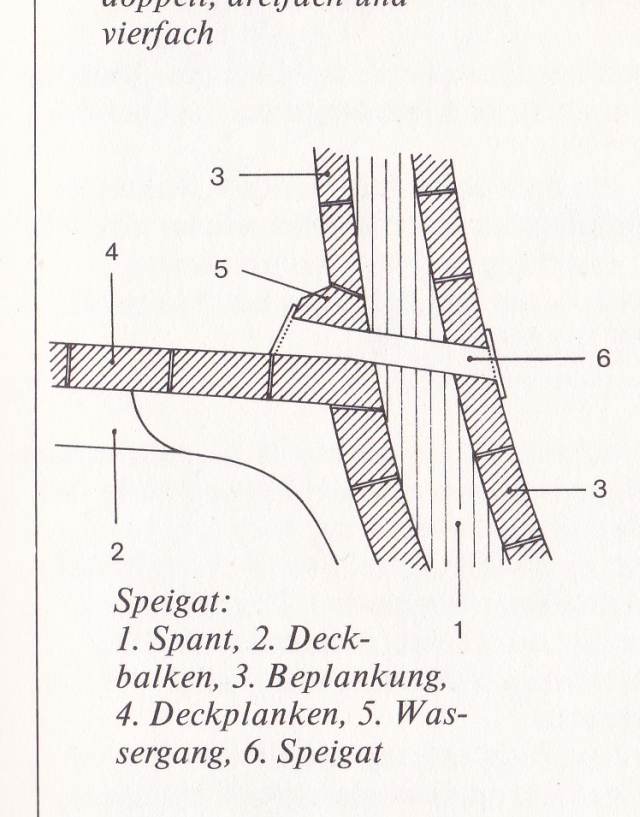
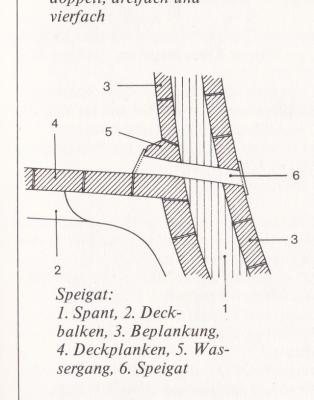
Hi B.E. Thank you very much for your help and the extra information about the pump dales. Those little pieces come in different sizes and I can easily use a bigger one. And I will gladly use your example for the longitudinal placing of the scuppers. The height will be taken from their function and will be just a bit below the level of the main deck. On my Pegasus this will be similar to yours - just above the main wale. cross-section of a scupper by Wolfram zu Mondfeld. Regards Peter
-
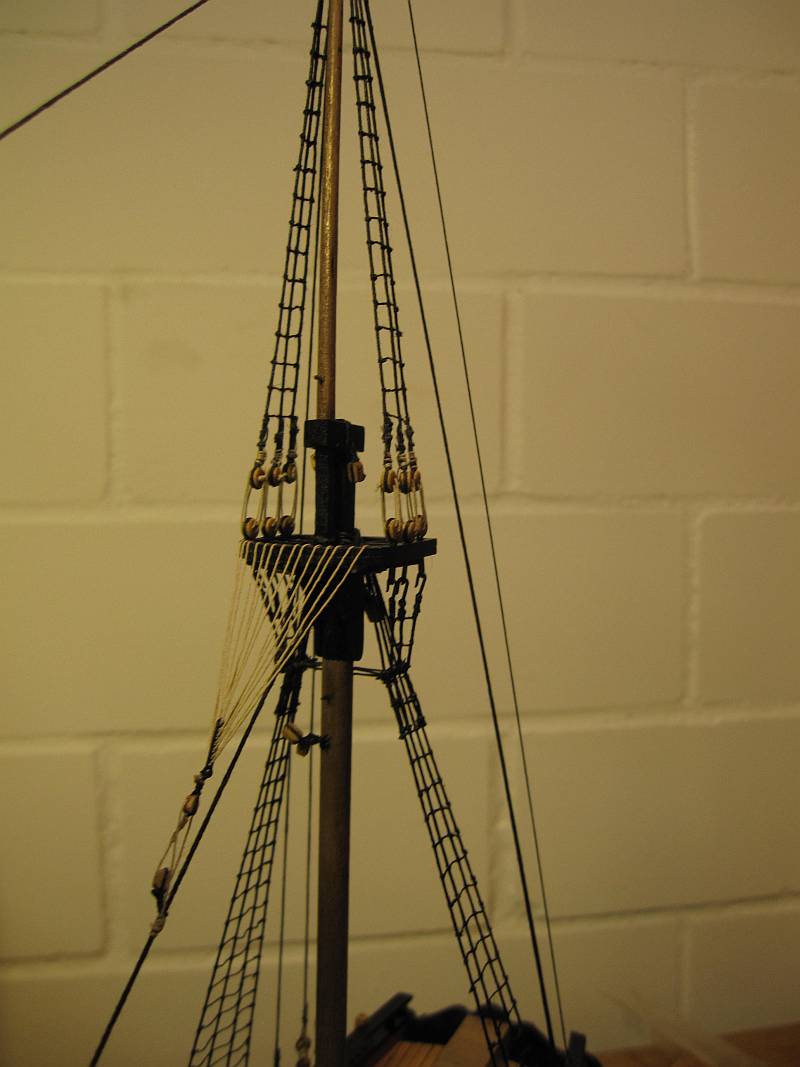
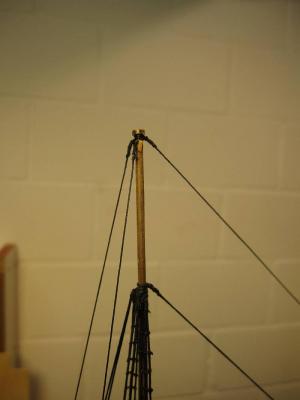
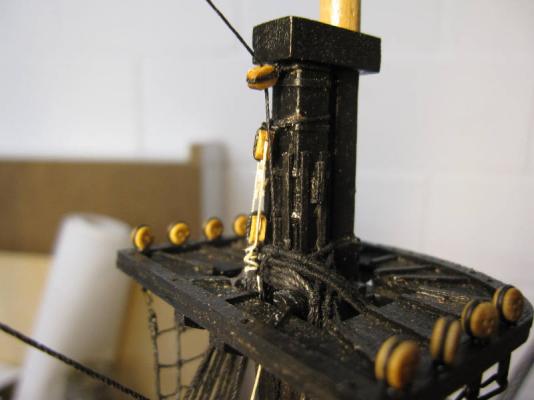
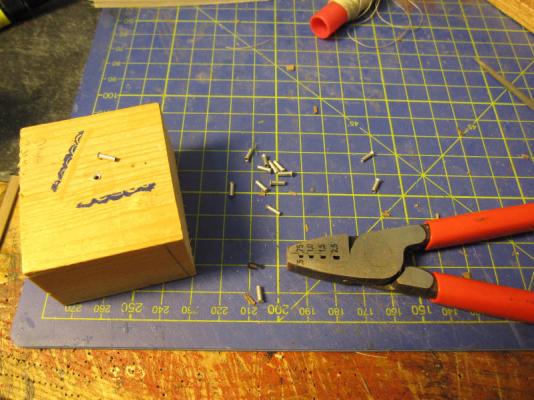
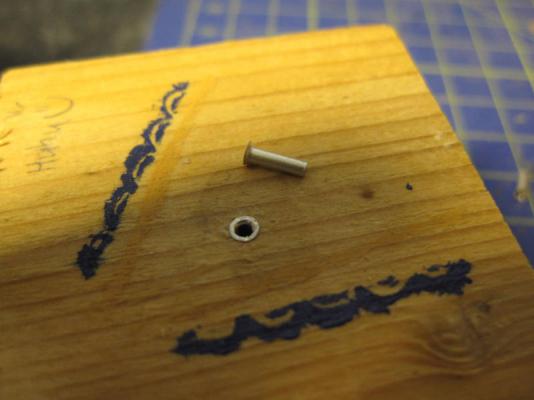
OK, Amati was right, I was wrong (again). There are in fact 2 different sizes of rigging hooks and I used the wrong (bigger) one for the futtock shrouds. Fortunately it’s hardly noticeable but other builders should difference between rigging hooks and futtock shrouds hooks. The hooks on the futtock shrouds are the wrong, slightly larger variant Meanwhile work continued on the mizzen topmast. The shrouds and backstays were done according to the plans but I wasn’t happy with the way the topmast stay was depicted on the plans. It was rigged in a similar way to the main topmast stay but according James Lees it should be different. Of the various possibilities shown in his book I choose one which was possible for the year Pegasus was built and which I did like because it would set up the 3 stays on the mizzen in parallel. (Perhaps my inner housekeeper tidying up?) Backstays The mizzen topmast stay leads up through a 5mm single block at the bibs and is set up in the main top When sorting through my toolbox’s electric compartment I came across those small tubes which are used to fix the ends of small copper cables when connecting them by connector blocks instead of smoldering. I think the smallest should make fine scuppers – at least the test sample looks OK. For the position of the scuppers I will shamelessly copy from another fine Pegasus (thank you, B.E.!). What I found in my toolbox... ...should make nice scuppers. The outer tube diameter is 1, 5 mm or about 10 cm when converted to the prototype. I think this fits.


- 431 replies
-
- 1
-
-
- pegasus
- victory models
- (and 1 more)
-
A small step is completed: All the lower shrouds are installed and the work moves now 1 floor up. The catharpins were changed. The 0.7 rope according plan is too thick- 0.5 is right (catharpins are smaller than the associated shrouds). the catharpins size should be about 0.7 of the shrouds After seeing B.E.’s Pegasus and its capstan in these pages mine was asking for a change. I took HMS Pandora’s as an example. (Pandora is only about 2 years younger than Pegasus.) The top was modified and covered with a metal sheet. I choose brass instead of copper because I believe this was mainly used. The capstan will undergo further modifications and be placed on a step instead of directly on the deck. Old capstan right out of the box Capstan under renovation: The brass cover is already dirty and the bosun is calling for some seamen to clean it.

-
Hi Frank Glad to hear the restoration work on you went well. Let’s hope they turned you out as good as new and not in such a weathered state as your (lovely) old boat. Take care Peter
-
Hi Michael This is a really outstanding build and your ship has some of the very catching atmosphere you feel in the Vasa museum. Excellent! Cheers Peter
-
Hi Aldo OK, you got me with your 1th of April upgrade kit. Great work then, if not by Amati, by you! And I didn’t mean interior electrical lightning, just real windows. With those already demonstrated surgical skills I wouldn’t fear for the patient. Cheers Peter
-
Thank you, Aldo. Sometimes I think those vessels consisted of more than 90% manila. Cheers Peter
-
Hi Aldo Once again I had a look at your Pegasus and find I must use more foul words while working on mine. I would like to challenge you to use even more foul words while reworking your great cabin and provide it with some real light. Did you notice how B.E. made improvements there? I like that and shouldn’t such a greatly improved quarter badge as yours is allow a real glimpse into the interior of the cabin? Take care Peter
-
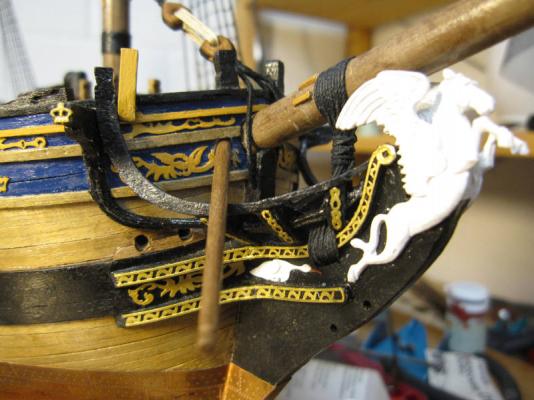
Hi B.E. Thank you. And in the process of reworking the collar I had a good look at the bow again and decided to rework it a little. I left off the gold decorations on the bow rails initially because I thought it to much. Now after seeing the overall impression of the bow I decided to rework the rails with a bit of filler and to install the decorations. The new look is more delicate and I like it. Hi Dave Again: merci vöumou. (For foreigners: That means thank you very much in our elegant native tongue.) Hi Frank Thanks again; and I agree: Sites like this greatly enhance our hobby. You all take care! You hear me there? peter
-
Hi Frank It’s truly wonderful how you can show us that smelly old boat so full of live. A really amazing build! Cheers Peter
-
The mainstay collar was indeed rigged wrongly. I cut it off and had to make a new (longer) one. Now that hole has a purpose and all looks better. Those two seem content with the new mainstay collar
-
Hi Dave You are of course completely right (unfortunately). And I was wondering about that hole but forgot again about it. This means I will make a new collar. But thank you very much for telling me! It will still be rather easy now to correct that mistake. Cheers Peter
- 431 replies
-
- 1
-
-
- pegasus
- victory models
- (and 1 more)
-
Hi B.E. Thank you. I did some more research on boomkins and found that they should be reworked a bit. Right now they lead a few mm above the bow head rail where in fact they should lay on it. On some vessels they seem to be held with an iron band or a lashing onto the rail. Now I understand that in fact they can be just bolted to the bow with their inboard end and are fixed onto the head rail with the boomkin shrouds thus having a stable 2-point fixing. Cheers Peter