flyer
-
Posts
1,016 -
Joined
-
Last visited
Content Type
Profiles
Forums
Gallery
Events
Everything posted by flyer
-
 Hi Timmo A great looking Granado on the make! I like the alterations you made. The Granado kit is for me still a turning point in our hobby. Never before did I see a kit of this quality with such good instructions. There is still room for improvements but just ‘out of the box’ the ship is still a splendid build of a fine looking vessel. Cheers Peter
 -
Hi Spy Thank you for the great pictures and for making me aware of a special place. The existence of that harbor and the fleet of sailing ships was news to me. Now there is a new location on my to-visit-list. Cheers Peter
-
Hi Frank Yes I was thinking about your solution as well but after the first failed repair I opted for the hard way and am making a whole new topmast. I’m glad you did more stable work on your fore mast. Hi Mobbsie Thank you, I’m hanging in but still think it was rather superfluous of Mr. Murphy to prove his law once again. Hi Martin Well, now I’ve done it, I hope Mr. Murphy will be satisfied and we all will now have some peace from him for some time. Cheers Peter
-
Hi Spy Sure I’m interested and very much so. And I dare say quite a few more as well. On Granado I tried the fully furled version shown here on the lower yards because that way I felt justified to leave off much of the smaller rope work like leech lines, bunt lines or reef tackles. For that kind of furling on those upper yards you’ll need at least also the buntlines. The sail bulge on my yards is really still too large. I did use the finest cotton available but the full sail area. Next time I will try to reduce it by one third and adapt the shape of the sail accordingly. Take care Peter

-
Hi Mike Thank you for your sympathy. Actually the mast broke twice. First at the point where the hole for the tie for the upper yard was – unfortunately I drilled it into the smallest part of the mast and it was perhaps a little too large. The second time it broke again after trying to repair it with epoxy glue and a stabilizing brass wire in the center (centre?) of the mast. Fortunately our cat is about a hundred years old, only sleeps and eats and walks slowly from and to the respective places – little feline danger for my ships. Cheers Peter
-
Hi Andy Taking the ship out into bright sunshine is the ultimate test for colors, details etc. You pass that test with flying colors, so to speak. Cheers Peter
-
Hi Mobbsie Get well fast! Grant’s idea is nice although I think that we anyway leave enough of our DNA on our models in the form of 'Blood, Sweat and Tears'. Take care Take a little more care Peter
- 1,279 replies
-
- 1
-

-
- agamemnon
- caldercraft
- (and 1 more)
-
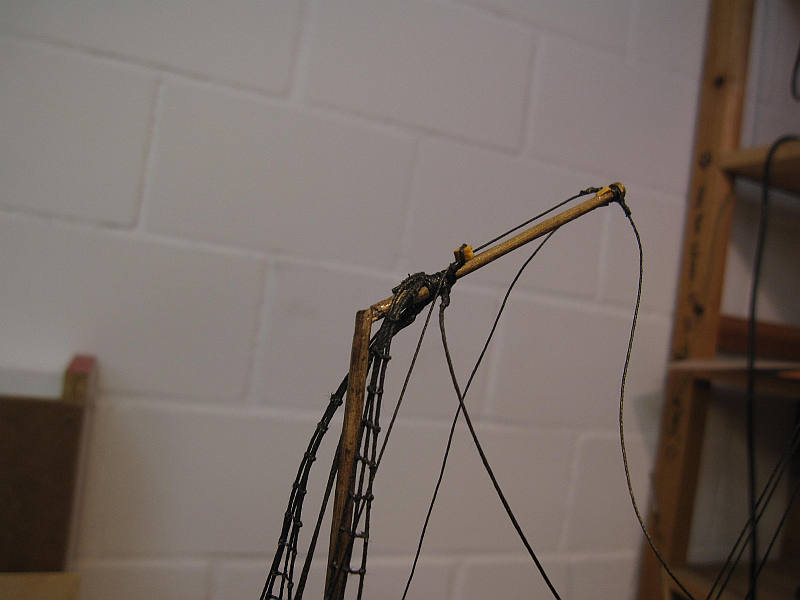
*@*!!#§* :mellow: While working on the main top mast the question about the stability of the mizzen topmast has been answered definitely. Not the way I hoped. First I thought about repairing the mast by ‘fishing’ it but the remaining length below the top was insufficient (this would have been an interesting project). Then while dismantling the mast I asked myself if I could save the cap and replace only the part above it mortising it with the lower part within the cap. But I thought this not stable enough and the cap was broken apart to be able to take out the lower topmast (the whole mast assembly was fixed with epoxy glue and cannot be dissolved without destruction). The remaining question now is if I should also replace the mizzen top according B.E. research with a larger one. This would be a lot of work and I will have time to think about it while making the new topmast.
-
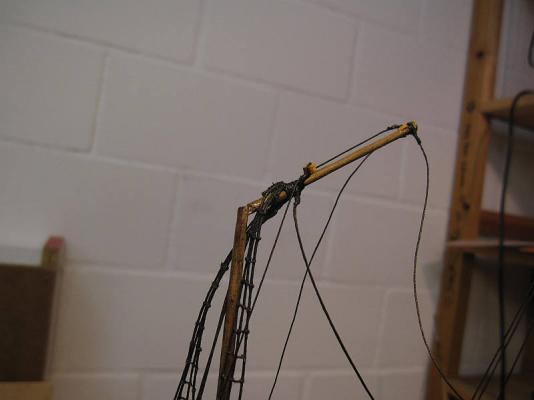
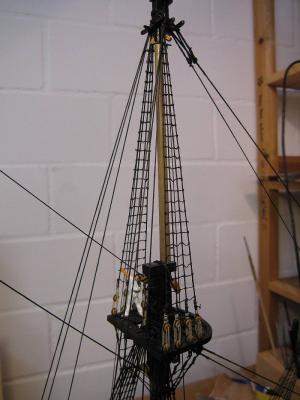
The main topmast is now fully rigged. Once again the principle of starting the standing rigging low and aft (at the mizzen) and working forward starting then again aft with the mizzen top mast proves its worth. That way you have access to the tops where you have to rig up stays and preventers. Last work on the backstays Foretop with stay and preventer Finishing work on the foot of the preventer stay Main topmast

- 431 replies
-
- 1
-
-
- pegasus
- victory models
- (and 1 more)
-
Hi Michael Every time I look at your wonderful Wasa I want to build mine again… It’s really a gem you are building with the same kit I put together just by the book many years ago. About your personal ramblings… As long as your civil wars stays civil just try to enjoy your travels. One of the Star Alliance Members is paying for my hobby (and the living) after all and I really like those frequent customers traveling in comfort! My wife dreads the time (not so far away) of my retirement and having me at home and underfoot all the time. I will have to travel then occasionally just to give us some breathing space. We do have a wonderful partnership but we are accustomed to have and value also some time on our own. Wives are always right…. Take care Peter
-
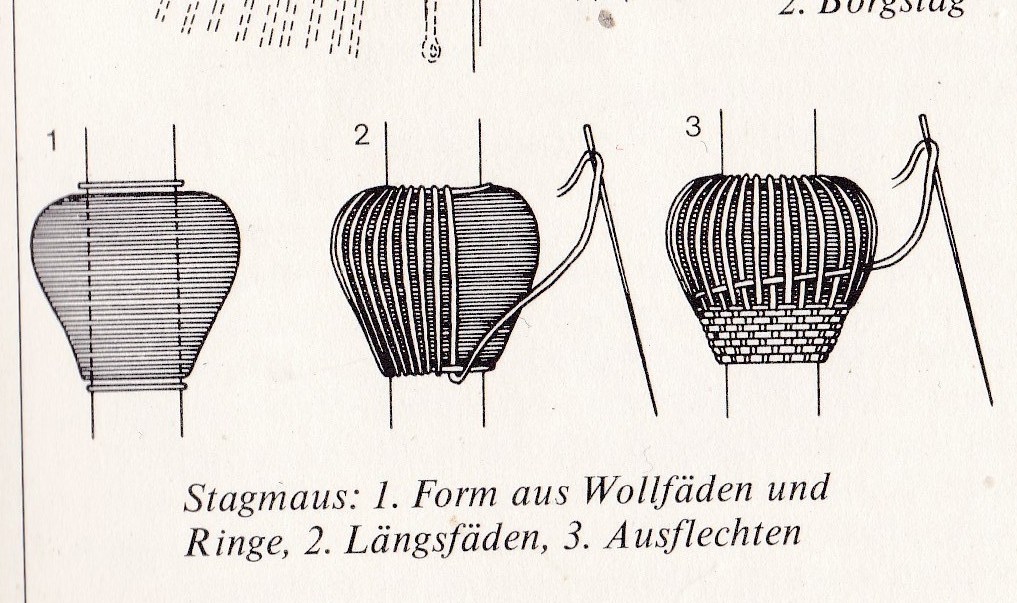
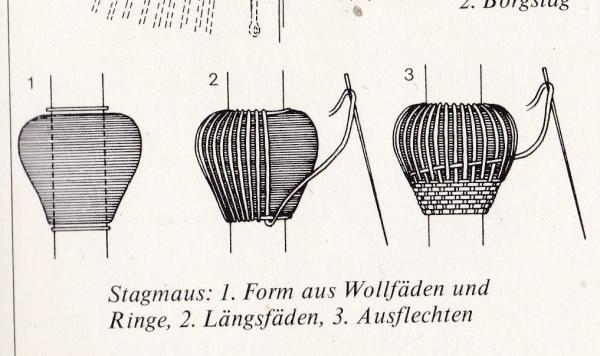
Hi Andy You must serve some quality (Swiss?!) cheese on your Pegasus to attract such a quality mouse. Nice. Perhaps you could just round out the aft edge a bit. I think the mouse was originally built up with ropes and threads and therefore shouldn’t have too sharp an edge. Here is how Wolfram zu Mondfeld builds his mouse. He uses thread but I think wood with a somehow roapy texture would be fine as well. Me, I am too lazy for all this and just use a asymmetric figure-of-eight-knot to simulate a mouse. Cheers Peter
-
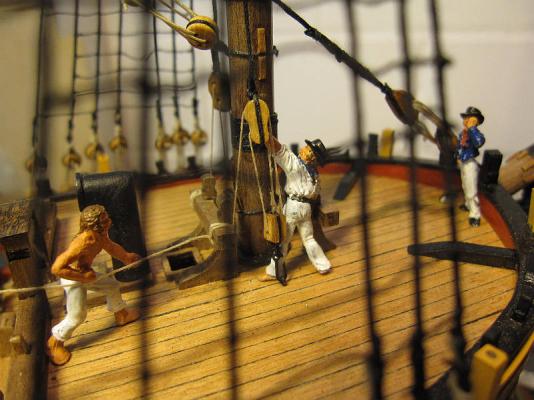
Bonjour Adeline Merci. I got the crew figures (25mm height) via http://www.cornwallmodelboats.co.uk/acatalog/amati_crew.html They come in cast metal in the raw and you have to paint them. Cheers Peter
-
Hi Andy Quite well hidden, ain’t it? Hi B.E. Thanks. Yes, James Lees gives the same information about the lift, but, as you, I like it better that way. (I pretend to have had a rather old fashioned bosun when fitting out Pegasus.) And yes, I still have hope although it’s rather difficult to continue rigging work with crossed fingers. Cheers Peter
-
Hi Aldo Well, thank you – but that topmast looks a bit ‘minty’ and I’m not yet sure if it has to be replaced anyway after all… Cheers Peter
-
Hi Frank Thank you. I’m still waiting for some barnacles to grow on Pegasus but perhaps its too dry. Cheers Peter
-
Hi Andy Great looking shrouds! I especially like the serving (which I avoided so far because of sheer laziness). About the way the shroud is taken around the deadeye: I’m afraid I did it exactly the same way as you – the wrong way. James Lees actually tells us that it should be clockwise on both sides of the ship. I will leave mine wrong as they are but will correct that on the next build. You fix your lanyards initially only with a half hitch to leave room for adjustments. That’s sensible. Additionally I also leave a few cm of extra length on all the shrouds and stays until everything on one mast is attached and adjusted. The knots and lashings are only fixed with diluted white glue which can be dissolved again with a little water in case a deadeye has to be shifted. Only when all the rigging is standing are the ends trimmed and the lanyards fixed permanently. Cheers Peter
-
Well Aldo... While working on the ratlines of the main topmast I realized that I forgot the jeer blocks for the main yard. Fixing them after the topmast shrouds required something like a minimal invasive operation. And… ...promptly I broke off the top of the completely rigged mizzen topmast. After some censured expressions (no fun) I fixed it with epoxy glue and a 0.5mm brass wire in the center of the mast. It’s hardly visible (except for a very slight bend) and I hope it will hold. Lashings for the starboard jeer block Both jeer blocks in place


- 431 replies
-
- 1
-
-
- pegasus
- victory models
- (and 1 more)
-
Hi Aldo Thank you. Yes, I’m looking forward to that great feeling (I’m not yet there by about 30%) but… …afterwards waits the dreaded sail making which is even more cumbersome with the stitching on of the bolt rope by hand. But I forgot – I’m doing this by my own free will! Aren’t we jolly masochists, altogether? Cheers Peter
-
Hi B.E. No problem with the niggling – I will do it myself the next 60 years or so, whenever I look at Pegasus’ mizzen top. Couldn’t you just rebuild only that one on your ship? Cheers Peter
-
Hi Frank It’s nice to hear from you and even to get compliments from a barnacle – encrusted experienced shipbuilder! Thank you. Take care Peter
-
Hi B.E. You are right. I didn’t question the platform dimensions. But now I had a look at Granados mizzen top and it is much closer to your calculated figures. I think that you will eventually rebuild that top according to what you calculated. All the lubbers will be happy and I will learn to live with a mistake in my Pegasus. That’s one of the drawbacks of building yourself: You know and remember every little built in fault. Oh yes, I did look at remco’s log and am stunned. What an artist! Regards Peter
-
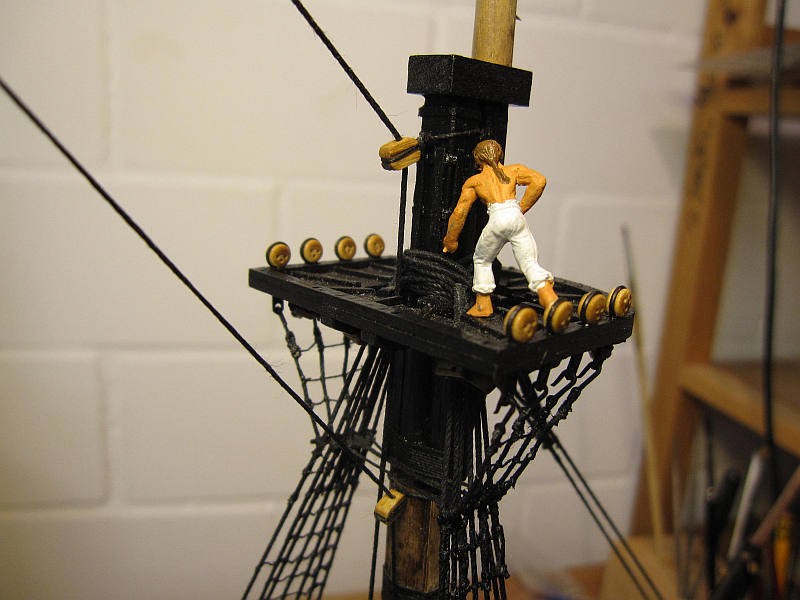
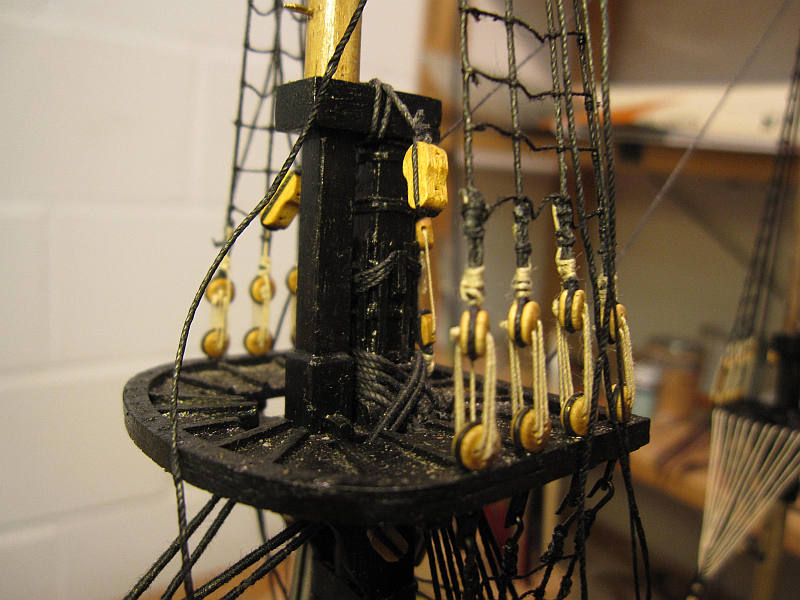
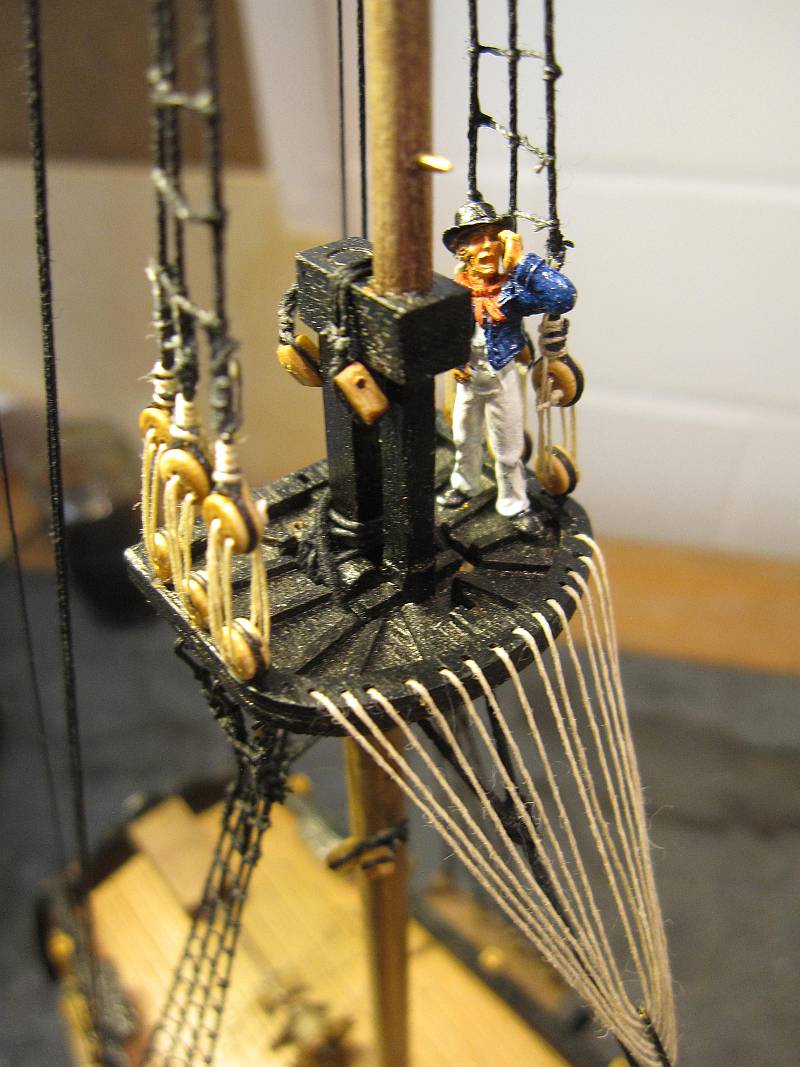
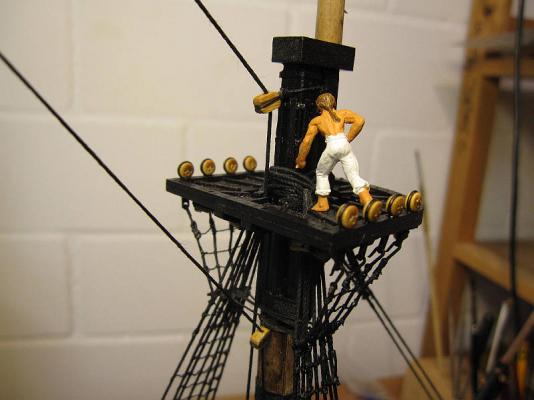
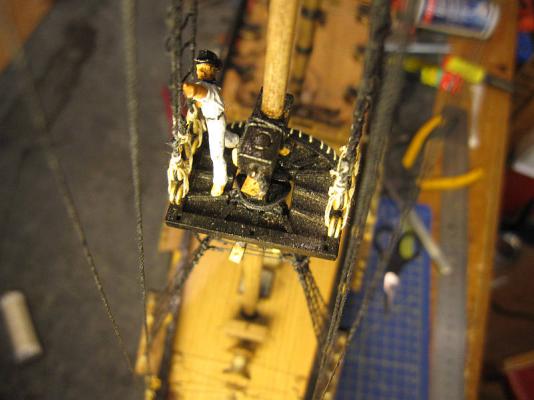
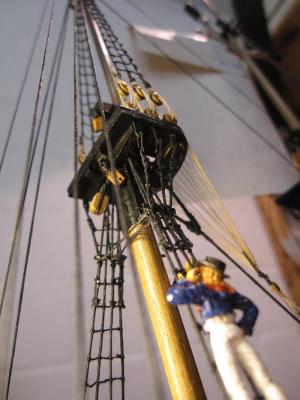
Hi B.E. Thank you for the compliments. And that was an interesting question about the mizzen top! I wondered how Steven Maturin would find his way up there. On larger ships, such as the Surprise, he was sometimes found in the mizzen top. But while on Ariel – which would be of a size similar to Pegasus – he seems only to have ventured the main top. Probably Patrick O’Brian was aware of the problem. The size of the square hole fits Lees’ description with 2/5 of the width of the platform. This gives us exactly those 13 mm we have. Also the size of the trestletrees seems adequate. Then I was asking myself what clearance we need to squeeze a lubber through. Manholes in aircraft wings are of the tightest I know and certainly not for lubbers. The smallest there are about 16’’ by 14’’ (or 40 by 35cm) – you shouldn’t be claustrophobic as an aircraft mechanic! If we now take those 35cm as an absolute minimum clearance this would give us 5.5mm on our Pegasus. With an opening of 35mm minus the mast of 3,5mm we have only about 5mm per side for clearing and trestletrees. Conclusion: There seems not enough space for a lubber’s hole in that mizzen top. They will have to use the futtock shrouds or stay below. Cheers Peter No place for lubbers… The bosun would anyway take the route via the futtock shrouds Much of the remaining clearance in the square hole is filled by ropes

- 431 replies
-
- 2
-
-
- pegasus
- victory models
- (and 1 more)
-
Hi Mobbsie Thank you. Already more than half of the ratline knots are done. Phew! Take care Peter
-
Hi Mobbsie Don’t give up the ship! I think that’s a problem with those behemoths. Basically it’s the same work than on a, for example, Pegasus but much, much more of it. And if you hate repetitive work such a project is really tedious. You make me think about my next build (I would like a 74 or the Agamemnon) but perhaps it would be wiser to look for a frigate like the Diana, Surprise (???) or perhaps chucks Winchelsea if he could provide us somehow with the difficult parts. Take care Peter
- 1,279 replies
-
- 1
-
-
- agamemnon
- caldercraft
- (and 1 more)