flyer
-
Posts
1,016 -
Joined
-
Last visited
Content Type
Profiles
Forums
Gallery
Events
Everything posted by flyer
-
 Hallo Nils Those are absolutely stunning looking guns! Please forget everything somebody may have said about museum quality being a goal almost out of reach. Nevertheless, if you allow, I would like to pass on a remark I received from one of the old salts at the administration about guns wheels: It seems that the wheels of the ships guns were left in wood and no iron hoop was covering the bearing surface. The hoop would only tear up the deck while wood on wood would run ok. Those iron hoops were mainly put on onto field guns wheels, where protection on rough ground was essential. Sorry for nagging again. On the other side it could simplify your work. Cheers Peter
 -
Hi Timmo It’ is great how you improve that already excellent kit! Keep up the good work Peter
-
Hallo Nils Well, are those highly precise models really accurate replicas? The original ships at those times were built with the very simplest tools like broad axes, coarse saws and simple forges for the ironwork – they didn’t have any fancy mills or such things. If you look at the Vasa from a close distance, you almost see every stroke with the axe by the skilled carpenters. So, all the apparent imperfections on our models are actually just the imperfections on the original ship, shown in perfect scale. At least that’s what I keep telling me. Keep up the good work Peter
-
Hallo Nils Your gun tackles are looking good. I marvel at the way you build your very own Pegasus. She may not have that precision down to the last 1/100 mm called ‘museum quality’ many of us try to achieve, but she will be a unique handcrafted masterpiece with a very special charisma. After all that flattering, I hope you will allow one remark: The breaching rope of your gun should rather be natural hemp instead of tarred. A rule of thumb another fellow told me is: If it moves, it’s natural. Keep up the good work Peter
-
Well, I learned (thanks, Gregor), that a few uploaded pictures in previous posts went missing – perhaps a problem with MSW’s server. With the editing function it was possible to reload them. Did anybody have similar problems or is it just me? Cheers Peter
-
Grüezi Gregor After your visit on my log I had to have a look at yours – and it certainly is worth quite many more. Seeing how you improve that basically already excellent kit makes me once more proud to be a fellow citizen of that great seafaring nation: Switzerland. Keep up the good work Peter
- 210 replies
-
- 2
-

-
- Sherbourne
- Cutter
- (and 5 more)
-
Thank you, Michael. But I’m afraid that any compliments for elegance should rather go to the Surveyor of the Navy, John Williams, who designed the very properly named swan class. (I’m glad; he didn’t come up with something like a swimming Ford Anglia.) Cheers Peter
-
Hi Martin Now, that’s an interesting thing. Rigging going up by itself? I want to learn that trick! Thanks and take care Peter
- 431 replies
-
- 1
-
-
- pegasus
- victory models
- (and 1 more)
-
Hallo Niels Of course I am glad if I will be able to help you. Ask away! Regards Peter
- 431 replies
-
- 1
-
-
- pegasus
- victory models
- (and 1 more)
-
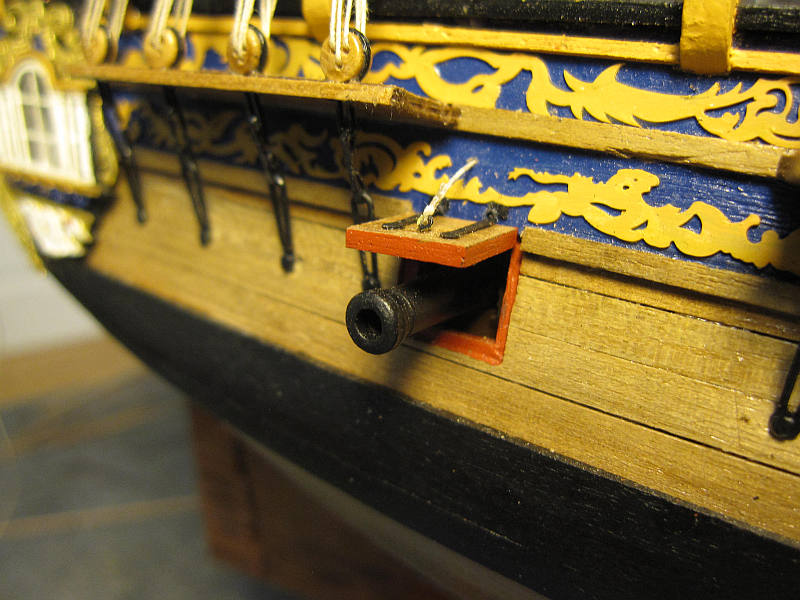
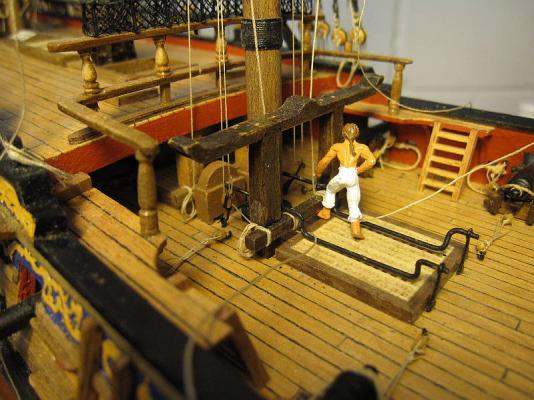
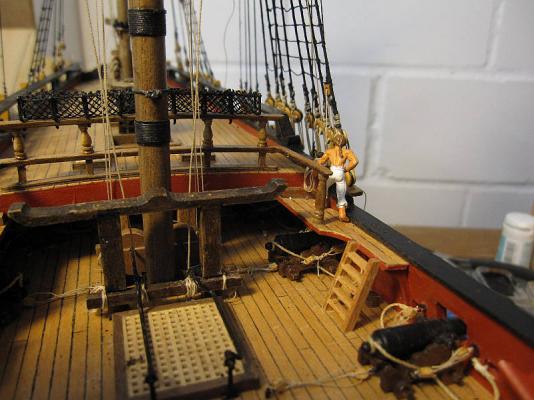
Between knotting and splicing I made the first gun port lid and installed it. The hinge got an additional small piece of cartridge paper to represent the fixed part on the hull. The first gun port lid is attached

- 431 replies
-
- 8
-
-
- pegasus
- victory models
- (and 1 more)
-
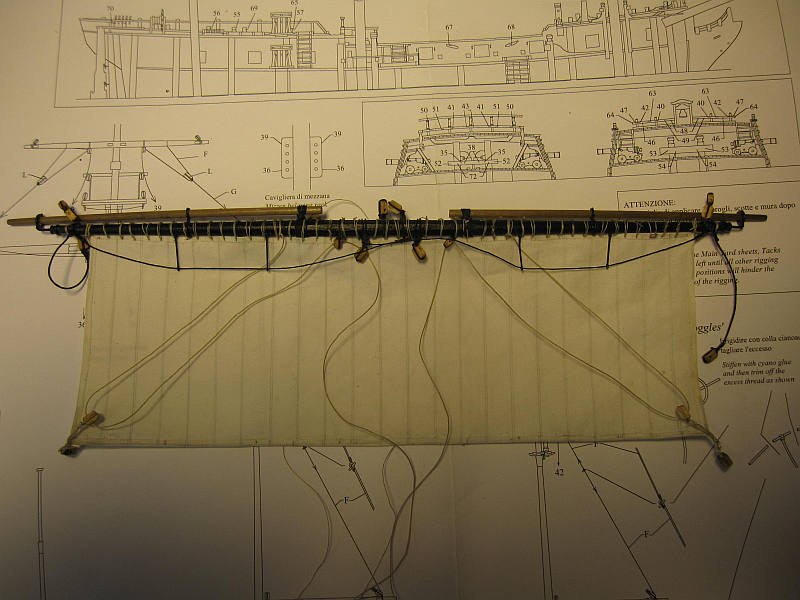
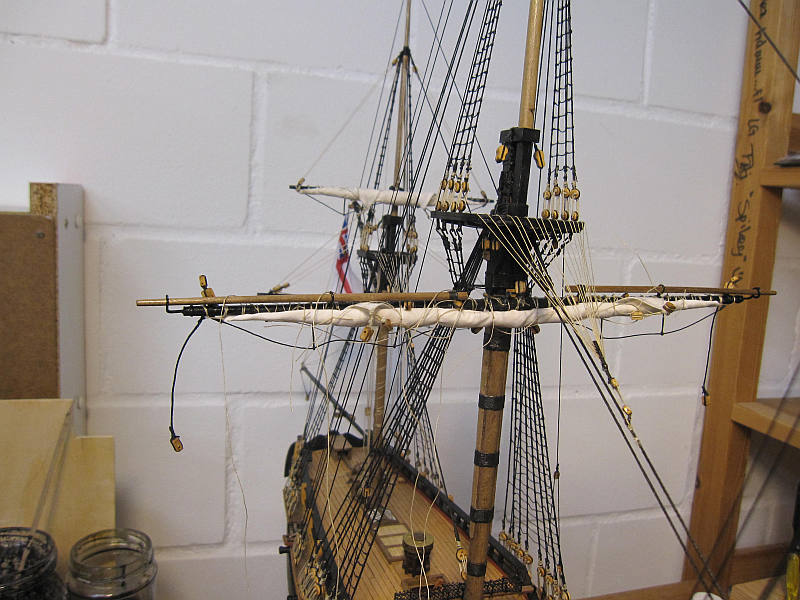
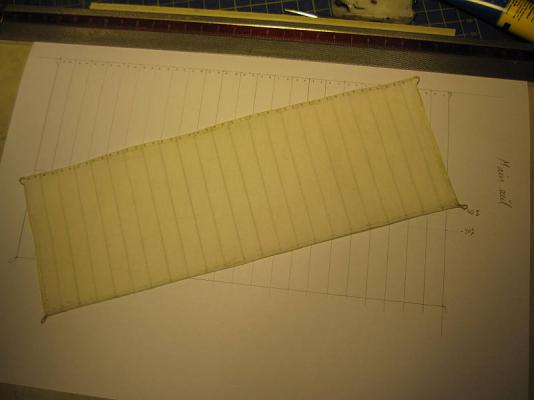
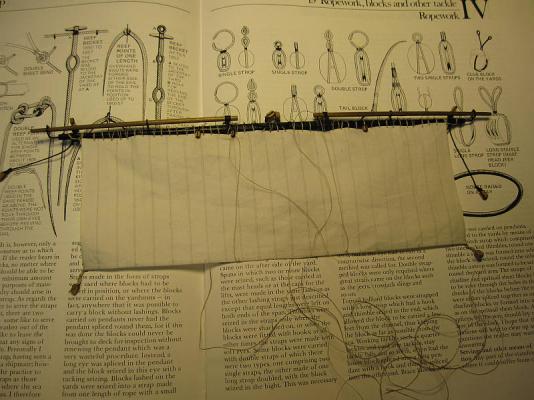
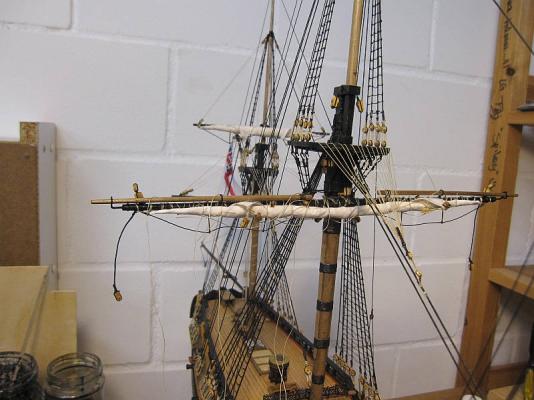
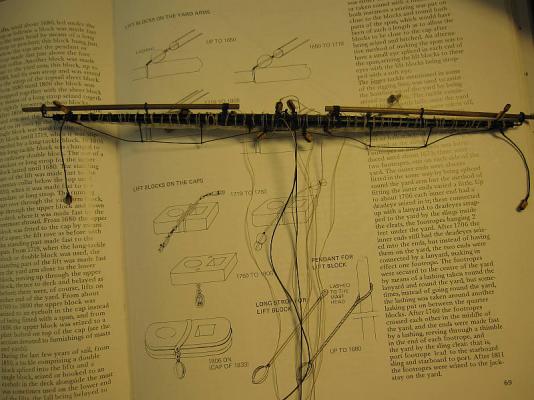
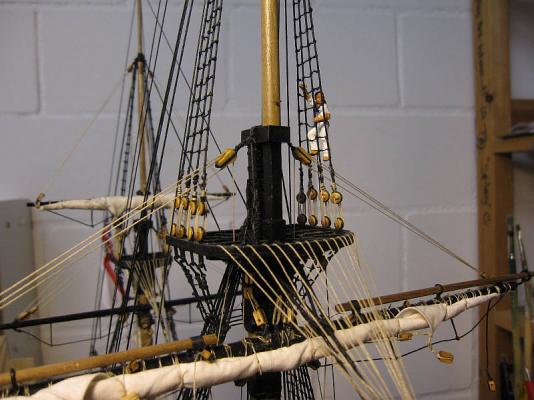
Braces, sheets and tacks on lower yards will be installed last in order not to block access to the deck. Next was the mighty main yard. First, the main sail was made similar to the mizzen top sail. Its size was reduced by about 30%. I need a little material to form a bulk in the middle of the furled sail and for such a large square sail this seemed about the necessary size. (The furled sail looks quite OK.) The sail was bent to the yard and blocks for sheets and clues as well as clues and buntlines were attached. There will be 2 buntlines rigged according Lees. This means that only one buntline could be attached to the sail as it will lead through several blocks back to the sail as its own second buntline and can only be fixed with the yard mounted. The buntline blocks on the yard were positioned wrongly (I put them up according the plans) and had to be shifted. Then the sail was furled and now the yard brought to the mast. First a sling was put in place to hold the yard. Then it was held to the mast with the truss pendants (no parrel rope on this yard). The pendants lead towards the deck and are seized with simple falls via blocks to the riding bitts. Now the jeers were installed and belayed to the main bitts. The clue lines were belayed on the riding bits. Finally the lifts were put up and the ends belayed – contrary to the plan, but according Lees- on the timber head near the first main mast shroud. The belaying points according to the kits plans differ for several lines from those in Lees ‘Masting and Rigging...’ and I mainly followed Lees. Main sail Buntline attached in front of the sail. The legs through the outer buntline blocks can only be put in place with the yard on the mast. Clew lines in place Yard with sail furled provisionally put in place – looks OK Thimble for the sling (in fact a spliced eye) and truss pendants put on the yard Sling with its lanyard and the jeers Belaying of jeers, falls of the truss pendants and clues (left to right) The lifts are belayed at that timber head Lifts in place


- 431 replies
-
- 12
-
-
- pegasus
- victory models
- (and 1 more)
-
Hi Mike That’s a very nice Badger! Congratulations. I wonder if you shouldn’t change your tag at least to ‘ordinary seaman mike’?? I’m presently working on the ensign2.0 for my Pegasus. How did you fabricate that fine ensign for Badger? Keep up the good work Peter
- 153 replies
-
- 1
-
-
- badger
- caldercraft
- (and 1 more)
-
Hi Martin Congratulations on the finished Rattlesnake. I’m sure; she will be the foundation plank of a great fleet. And I wish you joy with the next project - flying is great. About the clutter on your workbench and elsewhere: If you allow I would like to quote again my favorite citation of old Albert Einstein “Only the simple minded keeps tidiness, the genius masters the chaos.” Mastering chaos with a pillow case is very philosophical... Cheers Peter
- 104 replies
-
- 1
-
-
- rattlesnake
- mamoli
- (and 1 more)
-
Hi Ulises While browsing through Michaels log I found your Vasa. That’s a great build and I especially like that excellent rope work. About the order on the workbench I would like to quote Einstein (the same quote is pined onto the door of one of my daughter’s room…): “Only the simple minded keeps tidiness, the genius masters the chaos.” If you allow a critical remark: I would suggest throwing away those sails and looking for a much, much finer fabric. The way it looks now, it rather spoils your outstanding rope work. Oh, and having built the same ship years ago, I still shudder when I look at that red lantern. I wonder what Michael plans to do there. Keep up the good work Peter
-
Hi Nils With the plans only for the running rigging I would be lost at sea quite some time. I have to search for more information about the running and belaying of the various lines in Lees’ book and sometimes in the excellent building manual of CC’s Granado. Cheers Peter
- 431 replies
-
- 1
-
-
- pegasus
- victory models
- (and 1 more)
-
Hi Max No, I’m sorry. This is a kit and the parts come laser cut. But you could order the Victory plans e.g. via http://www.cornwallmodelboats.co.uk/acatalog/victory-models-plans.html They cost about 30 Euros. Regards Peter
-
Hi Martin Thank you! It may look smooth (seen from a distance) but I can assure you setting it up didn’t always go that smooth. Sometimes the cat (of only one tail) seemed quite shocked by some expressions. Take care Peter Hi B.E. Thanks a lot. It was always my intention to make my own flag. Trying to compare it with the one provided with the kit, I didn’t find the later anymore. But I guess it would have been too stiff anyway. As always, I especially value such positive comments coming from somebody with your attention to details. Cheers Peter
-
Hallo Nils Just found that the Amati rigging plans are better that thought. While checking the way buntlines are set up on the main sail, I found that the necessary blocks are provided on the plans everywhere, where buntlines are to be set up. That point goes to Amati! My help is the often mentioned book by James Lees. Cheers Peter
- 431 replies
-
- 1
-
-
- pegasus
- victory models
- (and 1 more)
-
Hallo Nils Thank you. Oh, I would like to applaud progress on your fine Pegasus but take your time. Sometimes it is better to recharge your batteries away from the fiddly work on those things. I think the Amati plans do not provide enough help when you start the running rigging. Do you have suitable books on the subject? Take care Peter
- 431 replies
-
- 1
-
-
- pegasus
- victory models
- (and 1 more)
-
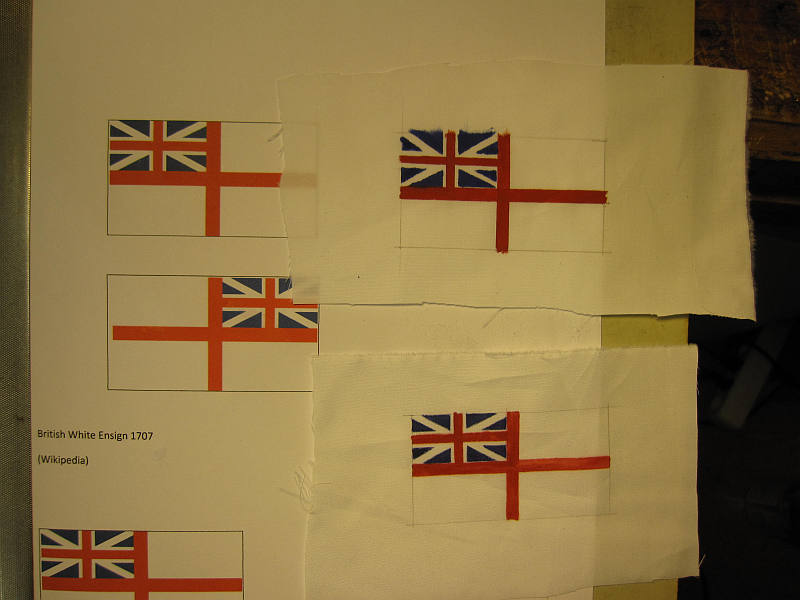
Hi Mobbsie Thank you. Yes, but what I don’t like is the fact that the flag looks a bit dirty because the running crayon has dirtied the white parts. Now, Frank (Riverboat) wouldn’t mind to fly a somewhat grubby flag (in fact, he probably would reject a clean one) but I do have some scruples. Reducing the size of the finished sail will be quite some work. The whole running rigging would have to be reset as well. I will now first make the main sail –perhaps reduce it some more in size- and see how it looks. Take care Peter
- 431 replies
-
- 1
-
-
- pegasus
- victory models
- (and 1 more)
-
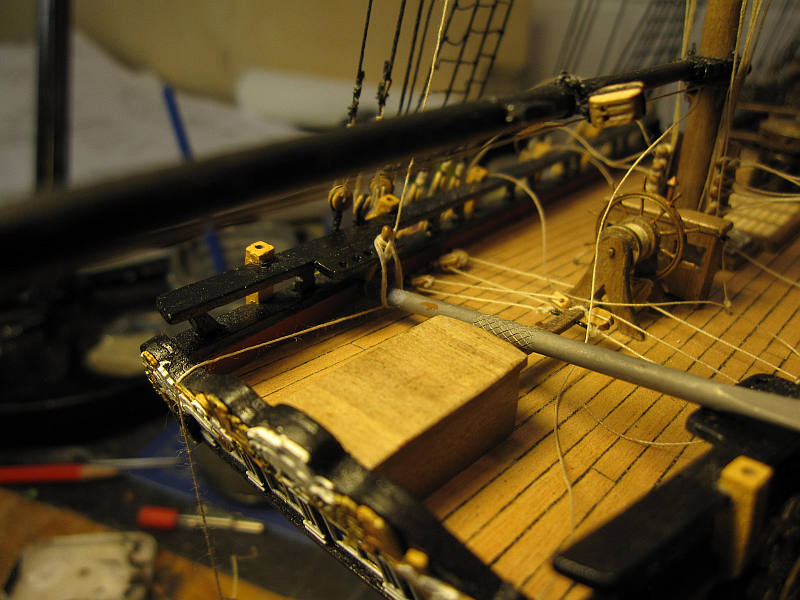
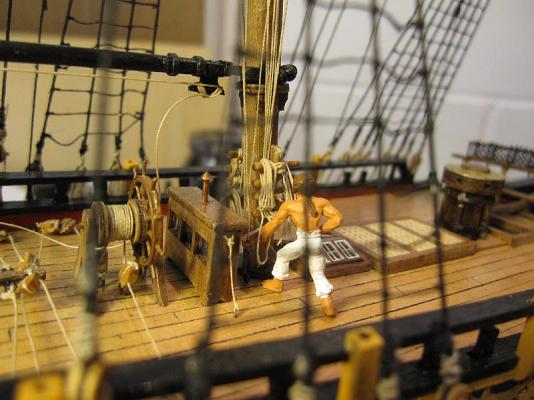
Now I started to fix all the rigging lines along the centerline. (See remark above. ) Usually I use the actual end of the line to make the rope coils. Several times I was glad to have some extra length when I had to retie a rigging line for one reason or another. Braces and sheets are left off for the time. First I will finish the work along the centerline on all the masts. Rope coils are made in place with the help of a nail file and fixed with diluted white glue Fathers little helpers... The top sail looks a bit bulky – perhaps sloppy work from the top men when furling the sail or perhaps I should reduce the size even more

- 431 replies
-
- 5
-
-
- pegasus
- victory models
- (and 1 more)
-
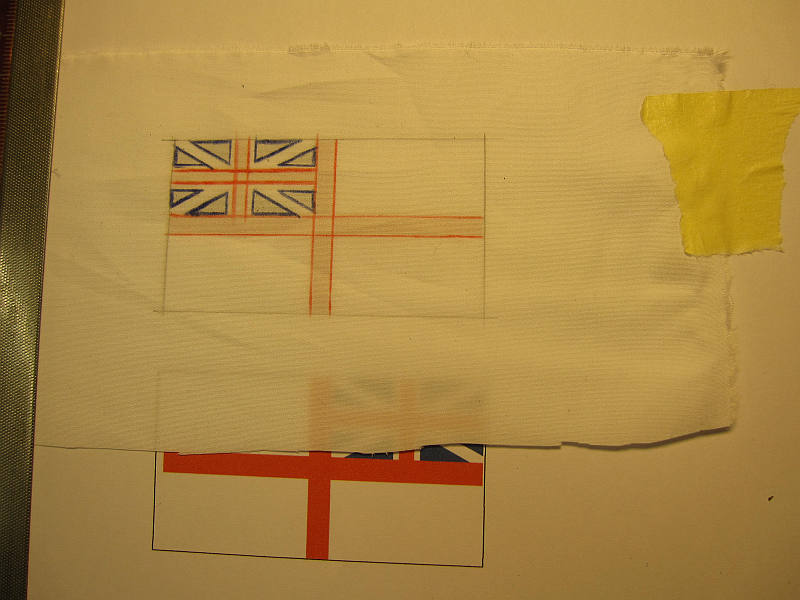
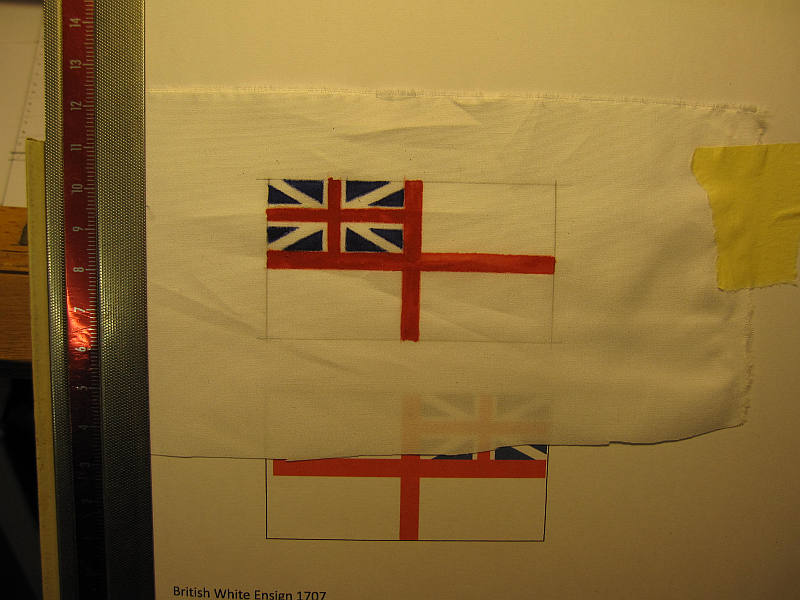
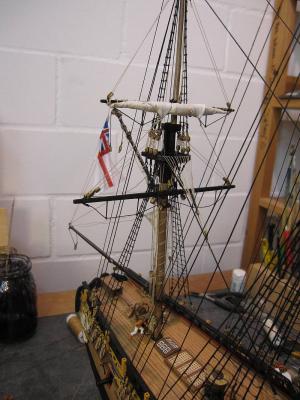
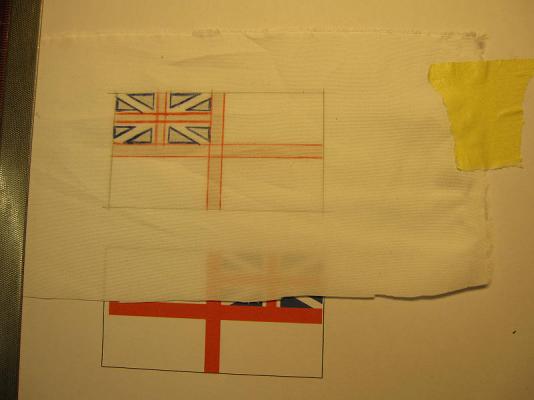
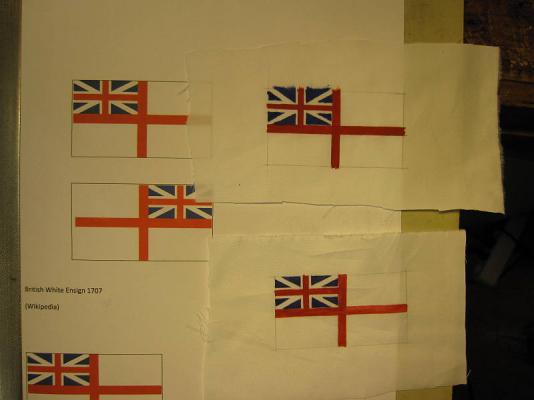
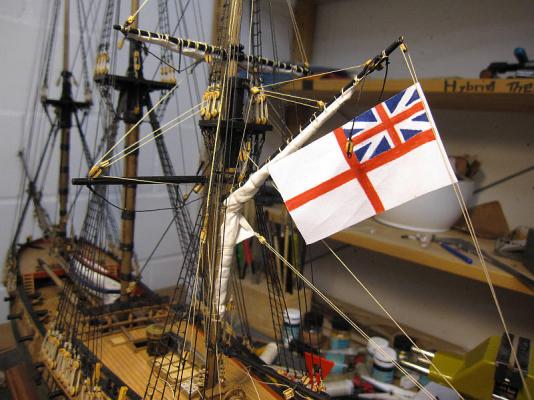
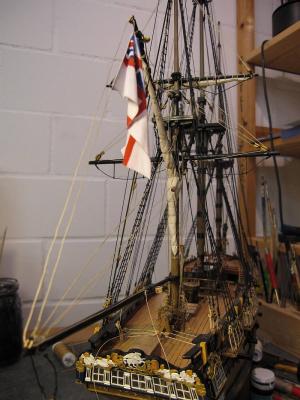
After mounting the yard, I started work on the flag. I tried two different hand painted versions and used the same light cotton as for the sails. First I tried to use masking tape but the textile colour (I know that expression is British but although it’s hard to understand when spoken, I’m used to read it, as aviation handbooks where obviously invented by the British (It seems, Americans concentrated on the practical aspect of flying, while the Brits did look after the bureaucracy – today it is completely different, of course. )) had a tendency to run under the tape. Then I marked the edges of the different colours with a crayon and painted careful between the lines. This gave the better result overall although the crayon colour later had a tendency to run when I wetted the finished flag to bring it in form. Both sides were painted and the edges of the flag where fixed with glue, the flag then glued to its line and all attached with two small blocks between gaff and boom. The end of the flag line was belayed on that small cleat on the boom. The flag looks OK but there is room for improvement and a flag2.0 is being considered. Outlines marked with crayons First side painted The upper flag was painted with the use of masking tape. Much more work and a less satisfying result. Rather stiff... ... and soaked with water and brought into a more natural form.

- 431 replies
-
- 6
-
-
- pegasus
- victory models
- (and 1 more)
-
Hi Mobbsie It seems travelling comes quite easy to you! I like it. Cheers Peter
- 1,279 replies
-
- 1
-
-
- agamemnon
- caldercraft
- (and 1 more)
-
Thank you, Scott and thanks everybody for those 'like's. It seems my sailmaking is useable. It's also quite simple. Try it! Cheers Peter
- 431 replies
-
- 1
-
-
- pegasus
- victory models
- (and 1 more)
-
Hi Mobbsie I’m just trying to fix parrel ropes around the mizzen topsail yard in scale 1/64. Well, that’s a rope asking for a different name! There is a book printed by W.W. Norton & Company Ltd.: The Frigate Surprise by B. Lavery and G. Hunt (ISBN 978-0-393-07009-5) It contains both versions; the historical correct one and an O’Brian version. The fictional ship has that 36-gun frigate mainmast and 9-pdr long guns instead of the 32-pdr carronades as main armament. Cheers Peter
- 1,279 replies
-
- 1
-
-
- agamemnon
- caldercraft
- (and 1 more)