flyer
-
Posts
1,016 -
Joined
-
Last visited
Content Type
Profiles
Forums
Gallery
Events
Everything posted by flyer
-
 Hi B.E. Thank you, for the compliments. I rechecked your Pegasus and saw the difference you built into those rails and bumkins. Sigh. Well, while working on the sails, I will have ample time to consider a rebuild. Did you bend the finished bumkins or work that form out of a bigger piece of wood? Cheers Peter
 -
Hi ZyXuz Thank You! Hi Martin Thank you. Yes, they seem a bit heavy. I will have time to consider a rebuild. That traveler really looks adequate for such a simple little addition. I ask myself why it isn’t provided with any kit. Cheers Peter
-
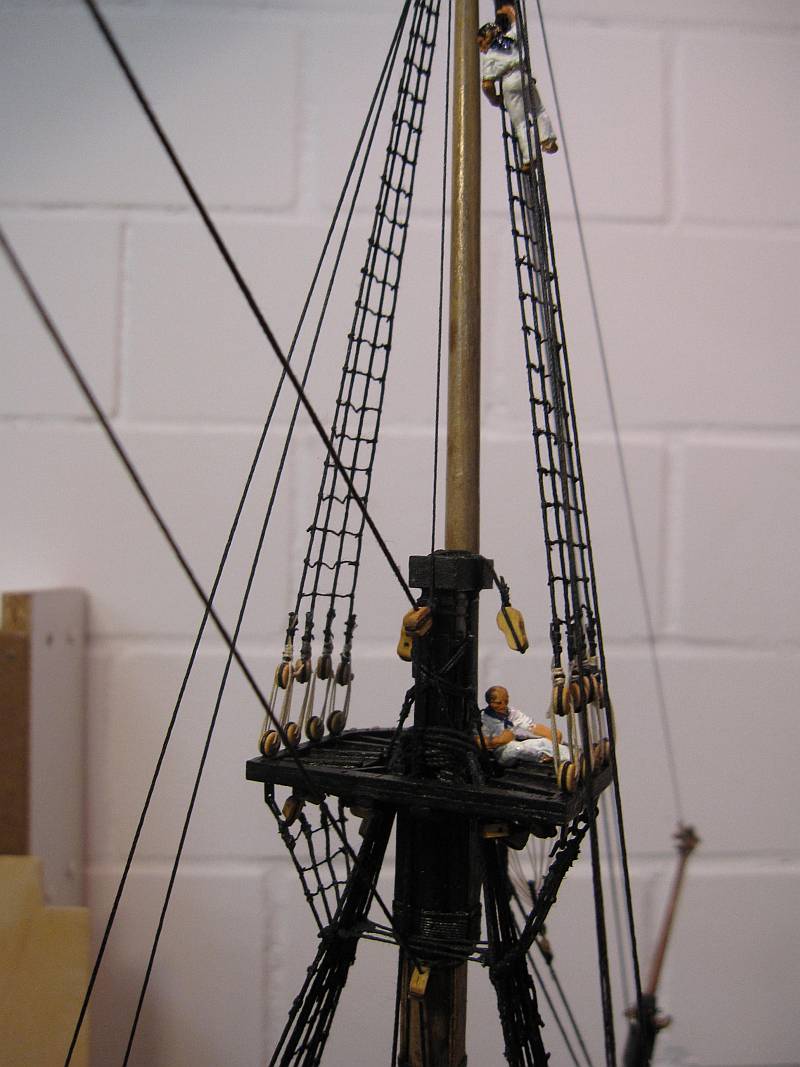
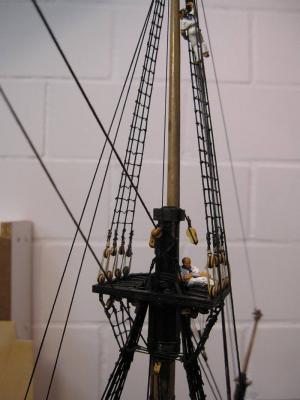
Hi Sailor123… Thanks. No, the bosun was just checking the top and the respective sailor claimed to be working. Well, I’m sure, you know them sailors… Cheers Peter
-
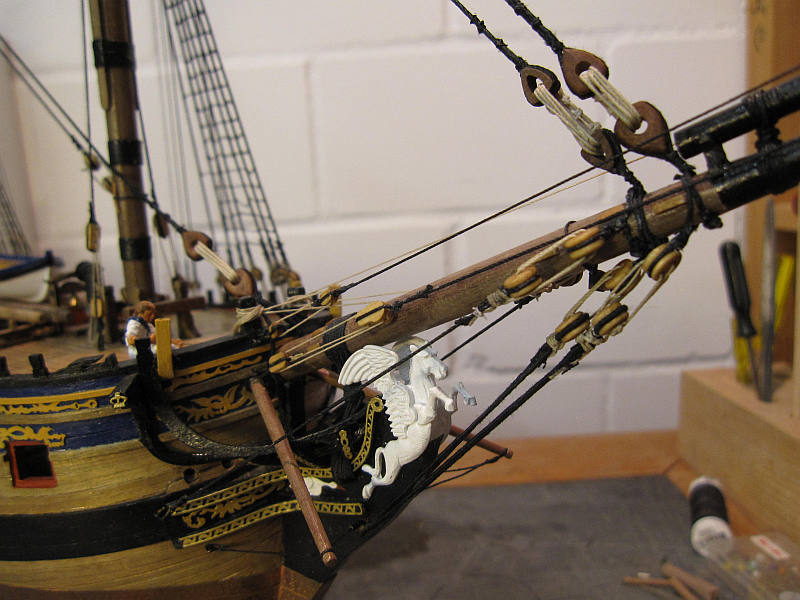
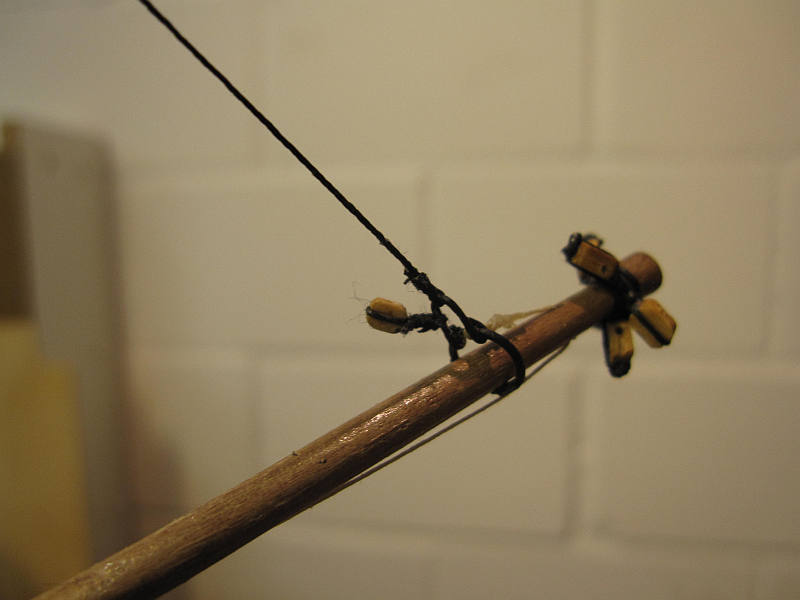
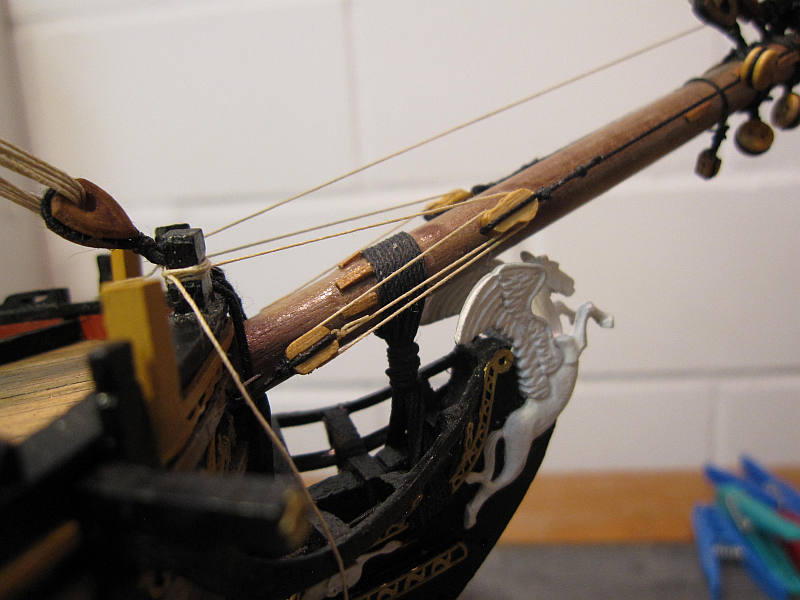
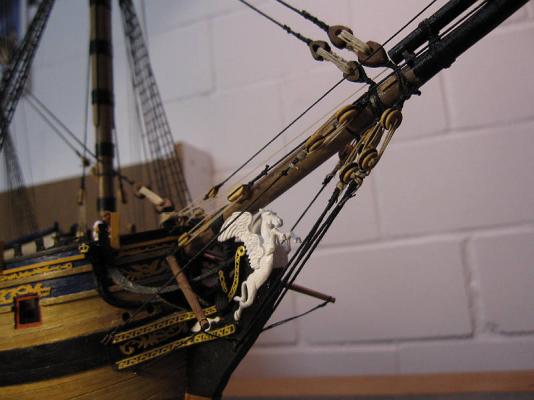
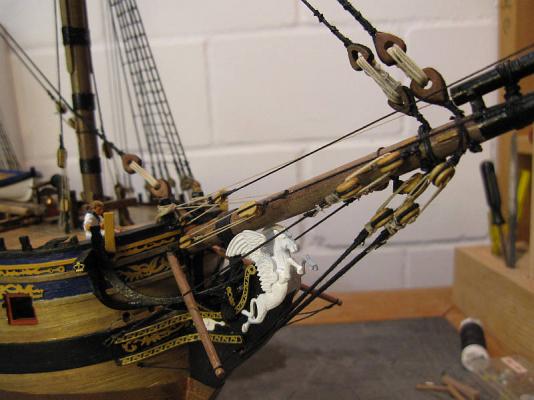
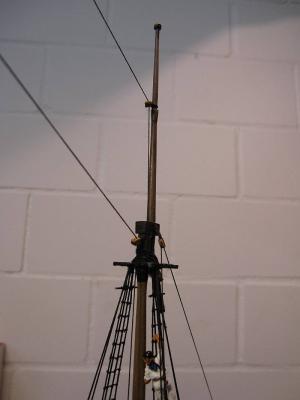
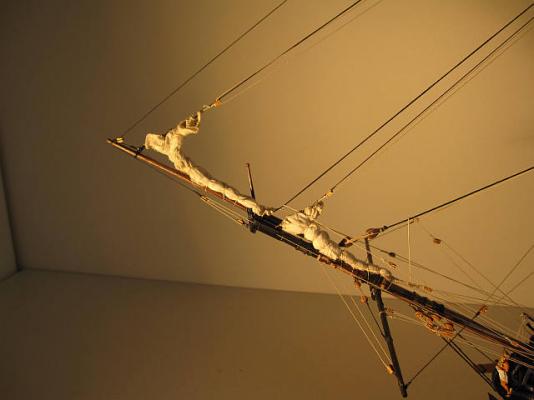
Finally the last part of the standing rigging was done. The fore topmast presented no special problems, except that I find it strange that the flagstaff- or royal stay has to be set up with an spliced eye at either end, leaving no easy way to tighten or loosen it.? The way to install the bumpkins presented a riddle again. I wanted to have them lying on the bow head rail (and still ask myself if I should fix them there with an iron band). After several tries I found the present position. They just seem to look a bit too much forward; the angle to the bowsprit being closer to 30° than the 40° I estimate on plans. Now I’m fixing some loose ends (ships boats, gun port lids etc.) while I think about how to make perfect sails with practically no hard work required... Fore topmast top Making one of the bobstays Jib boom tip I hope the position of those bumpkins is adequate


- 431 replies
-
- 7
-

-
- pegasus
- victory models
- (and 1 more)
-
Hi Mobbsie Very nice progress. I feel a bit dizzy again from watching you moving with that speed. Just a question about the ratlines: Wouldn’t you find it easier to dye them before installing? (I usually dye a meter or yard or so of the line at a time and make then the ratlines. That way I never have a drop of the stain staining my deck.) Cheers Peter
- 1,279 replies
-
- 1
-
-
- agamemnon
- caldercraft
- (and 1 more)
-
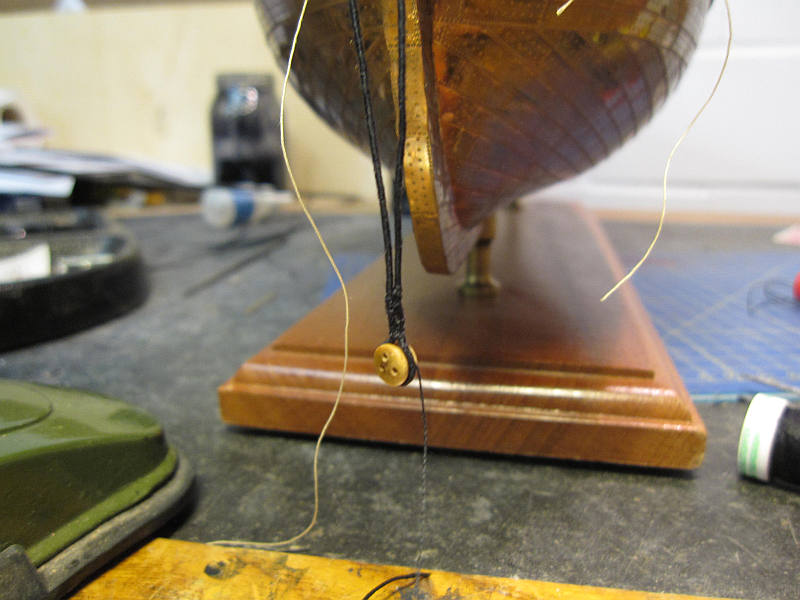
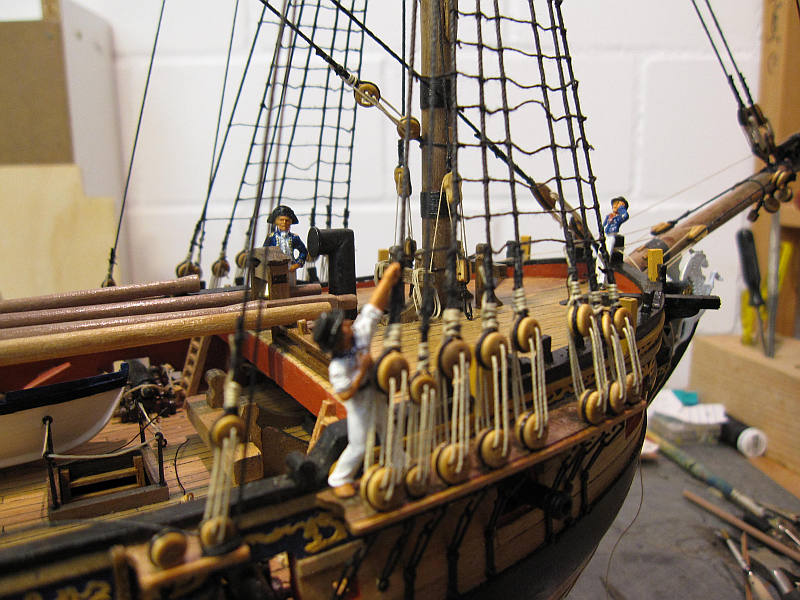
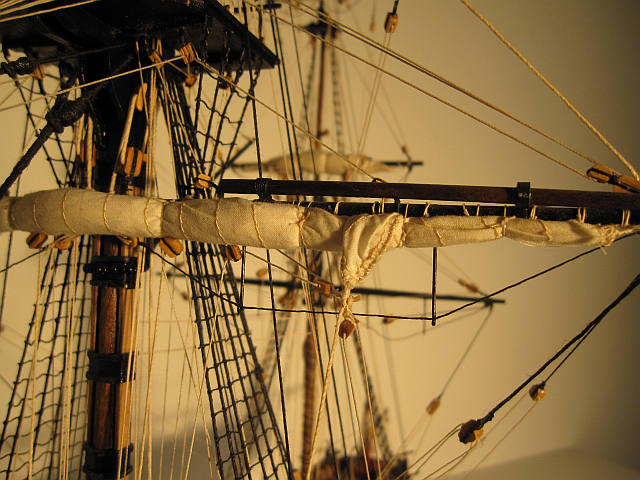
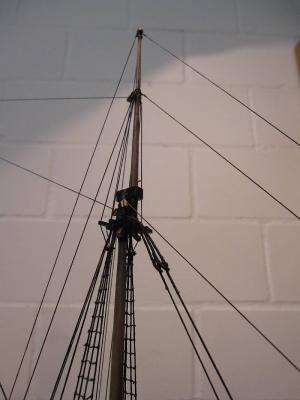
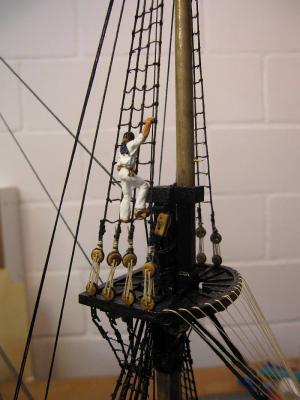
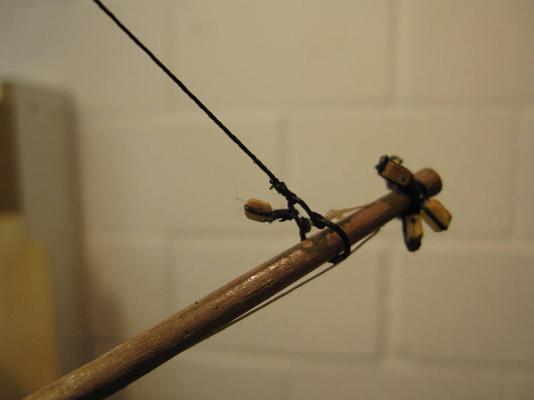
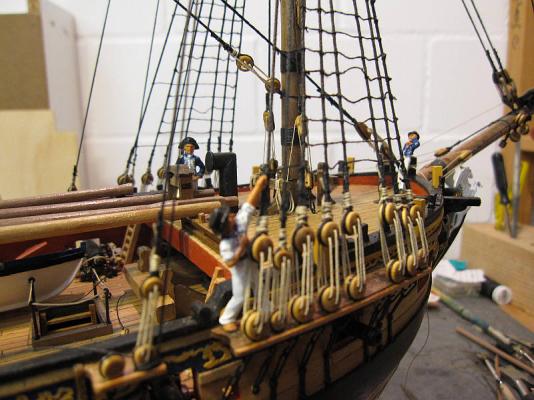
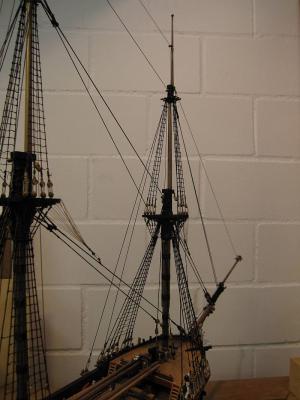
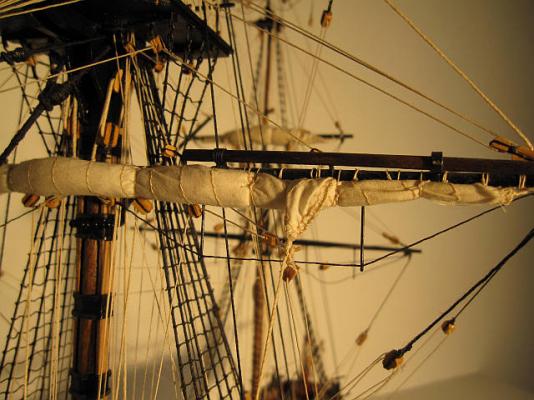
After a long break, work continued on the standing rigging of the foremast. The last of the ratlines (for this project) were put in place on the fore topmast. Stays and backstays were put in according to the kit’s drawings. A jib stay was added and put in according James Lees description ‘for smaller ships’. (No falls for the aft end of the stay and the outhauler – easier setup.) The work continues under the watchful eye of the captain Topmast stay tackle Fore top The block stropped to the starboard side of the fore topmast cap caries the jib stay Traveller with jib stay and out hauler. The single block on the traveller is for the downhauler of the jib. The standing rigging nears completion

- 431 replies
-
- 7
-
-
- pegasus
- victory models
- (and 1 more)
-
Hi Andy I’m sorry to hear about your loss. You sure know the saying that nobody is really dead as long as he lives in the memories of people close to him. And if one sees his time coming it certainly is easier to accept it, knowing that people like you will keep him alive. Take care Peter
-
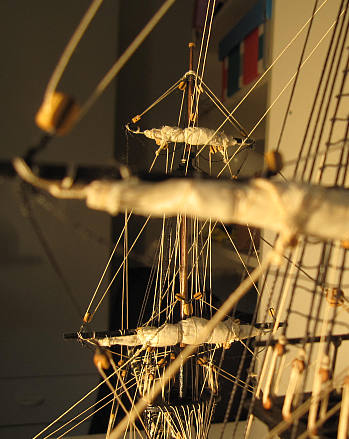
Hi Mike Your sails are looking nice. Nevertheless the promised answers to your questions: (I hope you don’t mind invading your blog with a few photos of Granado.) 1. My sails – especially the topsails - are still too bulky. Yours look better. 2. No. I think they would be covered by the furled sail anyway. 3. Yes, it must to work properly. 4. Yes, and they look much the same as yours. My main sources are: ‘The masting and rigging of English ships of war’ by James Lees and ‘Seamanship in the age of sail’ by John Harland and Mark Myers Cheers Peter


- 153 replies
-
- 2
-
-
- badger
- caldercraft
- (and 1 more)
-
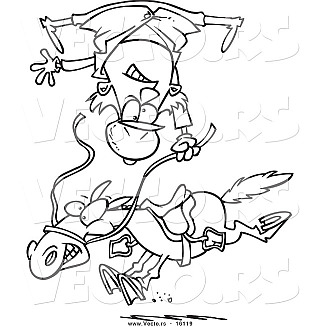
Hi Martin Thank you very much. My real craft is flying which of course helps a lot when I tackle that flying horse. Cheers Peter
-
Hi Mobbsie Thanks. Yes, this is the CC Granado. Somewhere I read that note about not having no boat at all as well and I cannot believe it. Would you go skydiving without a parachute? But that’s not the correct analogy – it’s not a lifeboat. But you would need it continuously for communication with the shore or to run all that little errands which come up all the time. If you put two boats on a vessel as tiny as Pickle you should allow at least a small one even when Granado is fitted out as bomb vessel. Cheers Peter
- 431 replies
-
- 1
-
-
- pegasus
- victory models
- (and 1 more)
-
Hi Frank Why am I not at surprised at all that your crew badly needs a washing day for their clothes? And are there really barnacles growing on some of the trousers? Love them – great job. Cheers Peter
- 389 replies
-
- 1
-
-
- supply
- caldercraft
- (and 1 more)
-
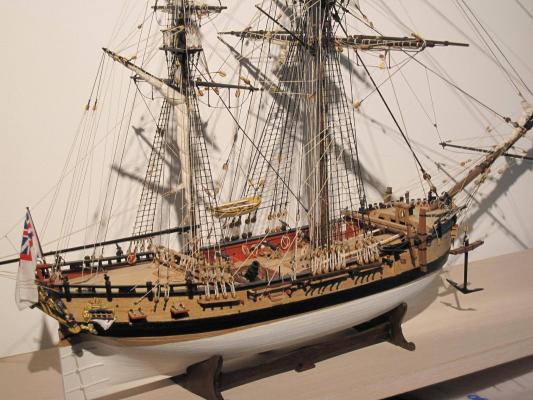
Hi B.E. Thank you for the compliment. After reestablishing normal disorder in my workshop (Now all my ship models are seeking shelter there because the complete reconstruction of our kitchen is not only affecting the eating habits but also the living room, where they usually berth. It has been transferred into’ living room – construction site – storage for kitchen utensils’.) I plan an thorough cleaning of Granado, to make some pictures and to put them into the gallery of finished ship models. Cheers Peter
-
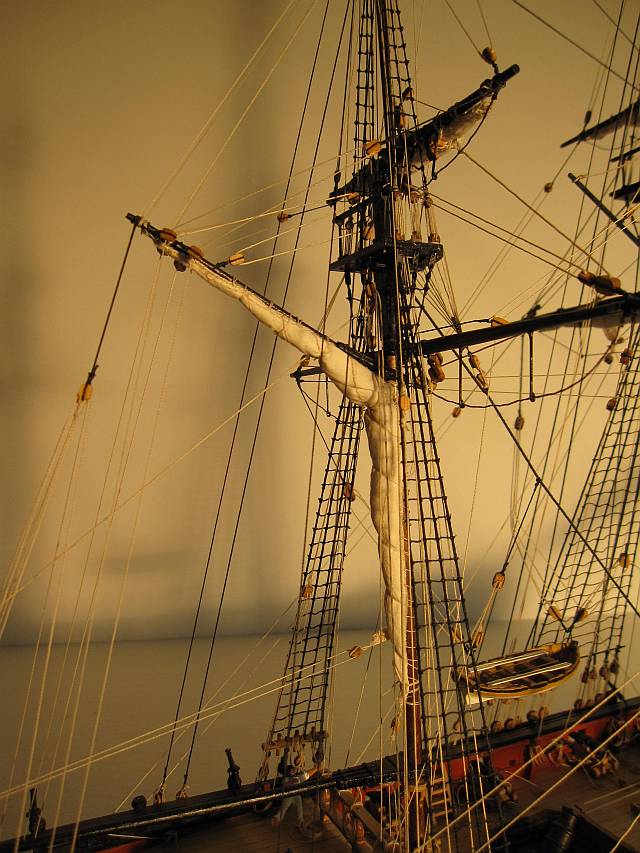
Hi Mike Thank you. As I’m presently abroad I will have to check the answers for some of your questions when back home in order not to tell you a lie. Also because of possible collateral damage of an extensive kitchen rebuild, which also affects the living room, my little workplace is cramped with ship models looking for shelter there. Anyhow I plan an extensive cleaning up of Granado (I like to show the models without display case and have to clean them every year or so) and plan to take some pictures afterwards to put them into the gallery of finished models. Well, I was simpleminded enough not to reduce any of the sails in size. That accounts for the still bulky look of most of them. Your idea about how to reduce the size seems fine. The most important point is to look again and again for some even finer cotton. I was lucky enough to find some I still like for the yarn count. But the seams (they were single seams, put on by a professional seamstress) still look out of scale. I found that furling the sails is best done when they are rather damp. This takes away any stiffness and they can be furled quite tight. On the other hand this forbids the use of glue for boltropes and the hem. I’m still undecided how to make the sails for Pegasus but the decision point approaches fast. I was thinking of making the seams by ‘pulling the threads` (described elsewhere in this forum) but this still leaves the question how to make the hem. Probably the boltrope will be hand seamed on again but only where needed. And where it is possible I shall reduce the size of the sails a bit. I’ll check for the other points later and will try to add a few pictures. Cheers Peter
- 153 replies
-
- 1
-
-
- badger
- caldercraft
- (and 1 more)
-
Hi Michael I really love the way your Vasa is growing into not only a beautiful ship but also a outstanding model which transports some of the feelings you have when visiting the awe inspiring original ship. I strongly support Grant’s and your comments on the unique experience a visit to the Vasa museum provides. I once took my family along and the Admiralty suddenly understood my fascination with old ships while the daughters still remember the sights, years after being there. The family had to endure other ships and museums but none created such a lasting impression. Cheers Peter
-
Hi Mike As I am an absolute fan of furled sails I love the way you provide your ship with them. I was wondering if you could possibly further improve the look of those sails with a few simple seams (perhaps just penciled on) down the sail and by gluing a piece of bolt rope to the top of it? Or do you think this wouldn’t make a noticeable difference making the additional trouble worthwhile? Cheers Peter
- 153 replies
-
- 1
-
-
- badger
- caldercraft
- (and 1 more)
-
Hi Mobbsie After a few busy weeks I’m trying to catch up on all the posts. Now I find it rather difficult to still find some standing space among the chorus of your admirers to add my tiny voice to theirs. I’ll try anyhow: Great work. I like those boats. Up to now I thought they would be difficult to build that way; but if you can do it in a few days even we mortals should be able to finish one in a month or so. Keep the good work up! Cheers Peter
- 1,279 replies
-
- 2
-
-
- agamemnon
- caldercraft
- (and 1 more)
-
Hi Andy As we are mere men we should have learned by now not to trust our feelings. No, no, you deserve all the praise – I can feel that! Cheers Peter
-
Hi Aldo Well, if you really were that lazy you’d have another hobby. And fiddling with boats is not worse than rigging cannons. And then you venture into scratch building and try to convice me that you are lazy!? Try again. Hi John Thank you! Hi Ray Thank you for the pictures. That’s a good trick but unfortunately I used it already on Granado and want to try something else. The boat was stowed upside down on the mortar housing and as the ship is shown being prepared for firing the boat is being hoisted out. Hi Frank Thank you. It was a hell of a work to scratch off all those barnacles and refresh the painting but now Pegasus is looking almost as good as new, isn’t she? Cheers Peter

- 431 replies
-
- 6
-
-
- pegasus
- victory models
- (and 1 more)
-
Hi Aldo Echoing mtaylors thoughts, I say you plunged very deep into the darkness but you are shining so bright there that you are actually in danger to become a star! Looking at your post #102 I notice something like a kink where the planks bend over the aftermost bulkhead, transferring from side to stern. I noticed a similar kink in kits and have, so far, always tried to eliminate it, by adjusting bulkheads and first planking. Now I’m asking myself if ships were built with such kinks – perhaps to get as much inside space as possible-, or if they happen if you have not enough bulkheads to build a smooth curve. Anyway, I think the original planks wouldn’t like to be bent into such kinks and would react with braking, or at least threaten to do so when you stretch and distort the wood fibers that much. What do you think? Greetings from the bright side Peter
-
Hi Mobbsie There I finally find time to visit MSW after a few weeks and what did you do in the meantime? You put at least a year of fabulous work into your Agamemnon. She really looks good. A pity that paint and ropes will cover a lot of that fine work on the catheads or won’t they? I wonder if the pulleys still are visible or if John’s excellent suggestion of simplified dummy sheaves would work almost as well. And not even Nelson could offer any critical comments on the color scheme as long as you shoot straight and handle bravely and without shipwreck such tricky pieces of navigation as 'the stairs’ (or that nasty piece of landscape called ‘door frame’ with a ship which will have a beam of 50cm and a height of 1 m!). Good luck on all the navigation mate, and keep up the fine work Peter
- 1,279 replies
-
- 4
-
-
- agamemnon
- caldercraft
- (and 1 more)
-
Hi Nils That copper is looking fine and you work really fast. That way you will finish your scratch built Pegasus long before I finish my kit. Cheers Peter
-
Hi Nils And still you prefer to do it the hard way… But those are very encouraging trials! Perhaps you could find a way to reduce the diameter of the ‘nail heads’. On the Amati sheets they are about 0,5mm and according to that link to "mini sail Switzerland" they should even be as small as 0,2mm. And I would use the flattened version as the shipbuilders were most probably looking for a smooth skin rather than something like a badly shaved hedgehog. That’s also the reason why I find Caldercraft’s copper sheets less convincing than Amati’s. Keep up the good work! Cheers Peter
-
Hallo Nils If you take the descriptions in Patrick O’Brian’s books where height between decks was often closer to 150cm than your 192cm then you seem a very generous shipbuilder. Somewhere he writes something like ‘…height between decks was sufficient for men of average build, but only if you cut their legs at the knees…’. The height between decks on USS Constitution is probably close to 180cm but on Rose/’Surprise’ its again somewhere near 160cm (except where the original structure was destroyed to make room for the film crew). On plans of HMS Pandora I read about 165cm and on Granado, which has an unusual internal structure, you find between 150 and 190cm. And shall we agree not to think about that smell? I know how an empty passenger aircraft smells when you switch off the air conditioning for a few hours. And those passengers are moderately civilized, clean, almost always use the modern toilets and even spoiled food is of good quality. No, let’s not think about the smell. Cheers Peter
-
Hi Nils You definitely do not believe in taking the easy way! Wonderful! I hope you don’t mind a remark about the treatment of the hull: I wouldn’t mix two different protection methods on the same build and only show the coppering of the prototype on one side. Otherwise you could overload your model. There is the saying “less is more” to consider. Oh and about dictionaries… I find www.leo.org helpful for most words and it contains some basic naval vocabulary as well. Keep up the fantastic work. Peter
-
Hi Nils Thank you. The exact date of keel laying is lost in the mists of time. As a guess it was about three years ago. I’m still looking forward to my retirement (do I?) and work only sporadic on Pegasus. The crew figures are Amati’s 25mm cast metal sailors, recommended for 1:64 to 1:76 scales. I get them via http://www.cornwallmodelboats.co.uk/acatalog/amati_crew.html Cheers Peter