


flyer
-
Posts
1,016 -
Joined
-
Last visited
Content Type
Profiles
Forums
Gallery
Events
Everything posted by flyer
-
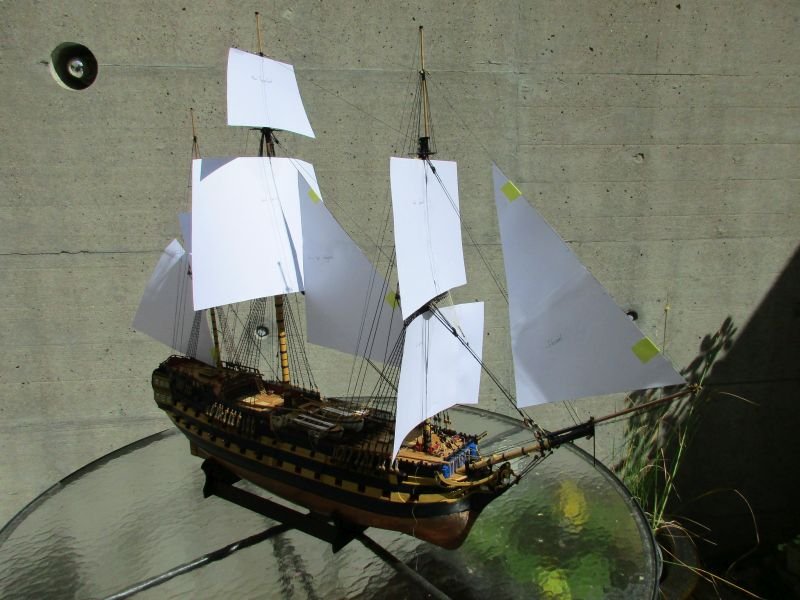
 Thank you all for the great feedback and all the likes. First of all I must apologize for the wrongly set spanker. I had it reversed and with the upper side (stay) against the mast. Put up correctly it is placed a bit lower and with the lower side more horizontal. But the distribution of the sails is about the same and thus the overall impression. I appreciate the inputs with the printed tissue / alu-foil flag and did check how Chuck does it. So far I used self painted flags, made from the same thin cotton I used for the sails, and I think I quite tolerably got the hang of hanging them. So I stay with that procedure but I could anyhow try to print them. As for sail material - I checked MSW for silkspan sails and the making of them and admire how they look. But I still hesitate to try that rather complicated process. On the other hand I found some cotton fabric which is lighter than what I used for Pickle and America and has an even higher thread count. After the initial washing it is half transparent and has a colour of light eggshell or ivory which does away with the necessity of additional dying. I believe I even could attempt brailed up sails with that stuff. A first try with the spanker will tell. The sails and yards on that Gardner painting are arranged in a way which seems to indicate that they came in with a following wind with yards squared and spanker brailed in (it wouldn't draw with a wind from dead astern) and now they seem to stop the ship by taking in more sails and then probably backing some. However I want to brace the yards to reduce the space used by the model and to create a dynamic impression. But then you would be on a course with a more quartering wind and the spanker would draw and should be used - probably also to balance the jib. The one topgallant sail I would like to set fully because it would emphasize the enormous height of the whole sailing machine. Hence the proposed changes to Gardener's painting. Again thanks Peter
- 366 replies
-
- 1
-

-
- bellerophon
- victory models
- (and 2 more)
-
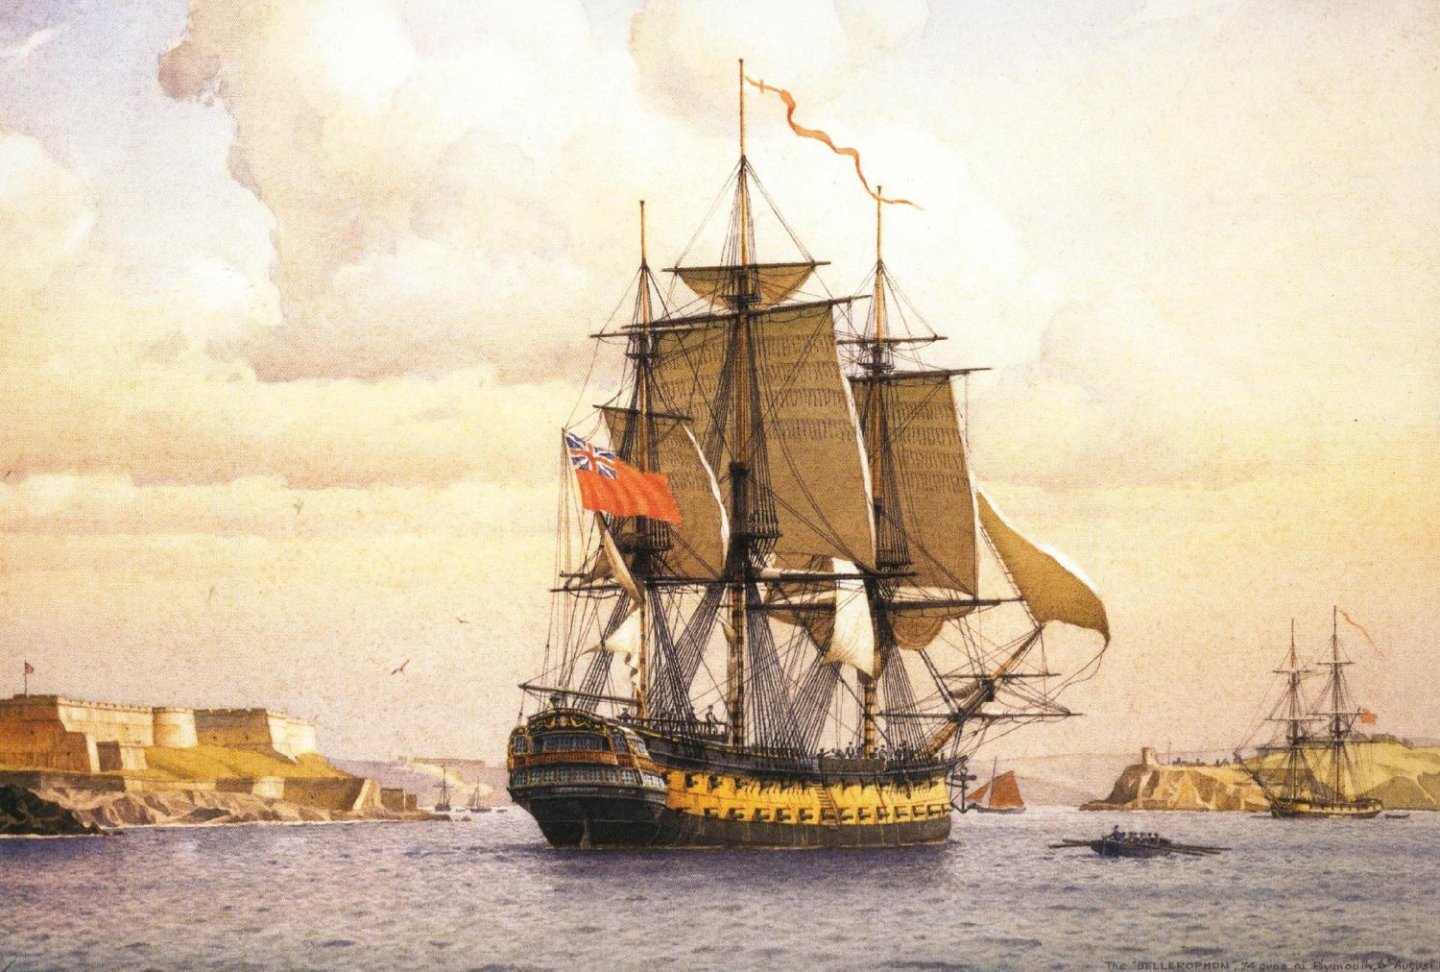
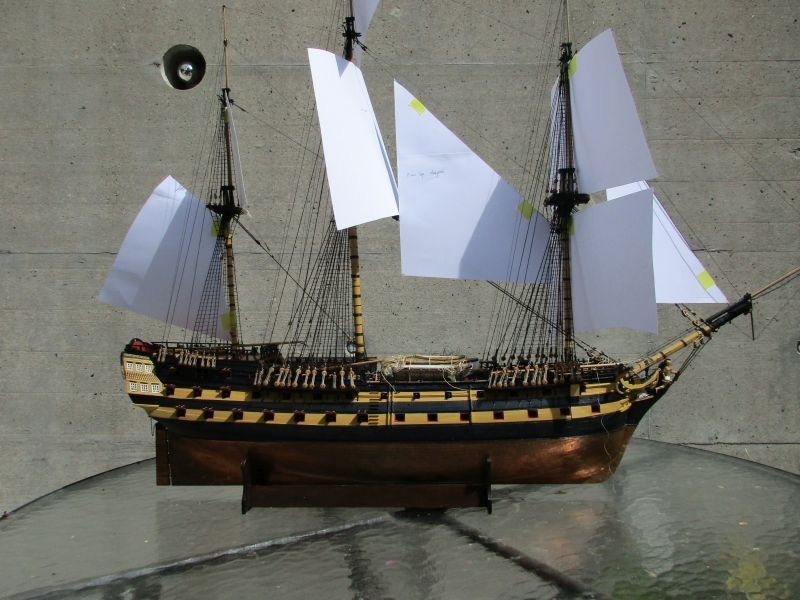
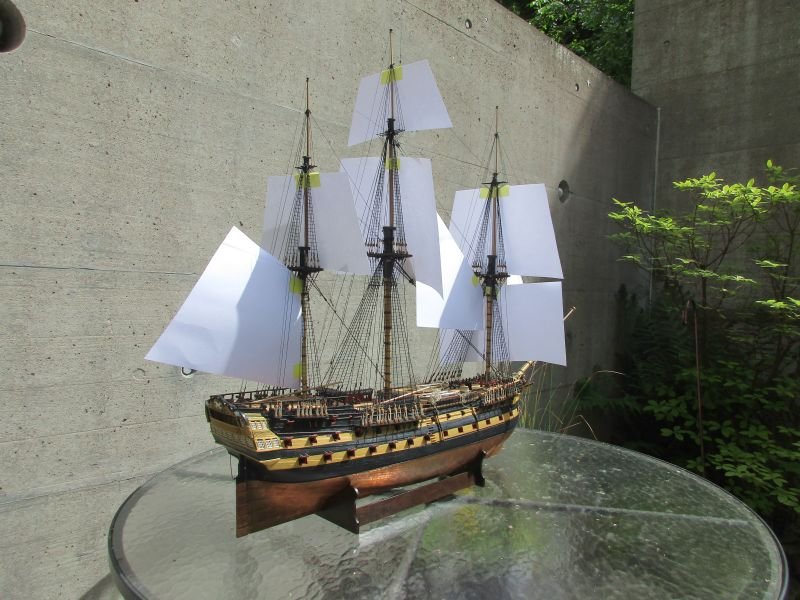
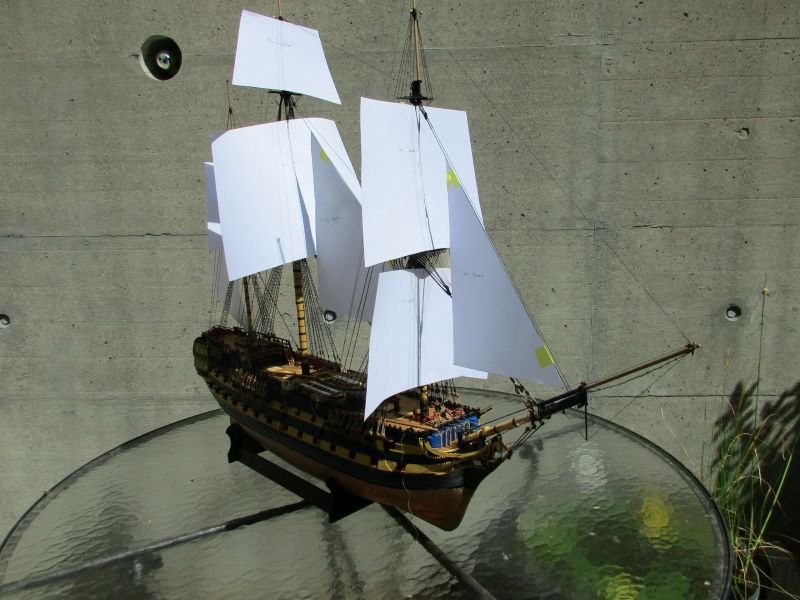
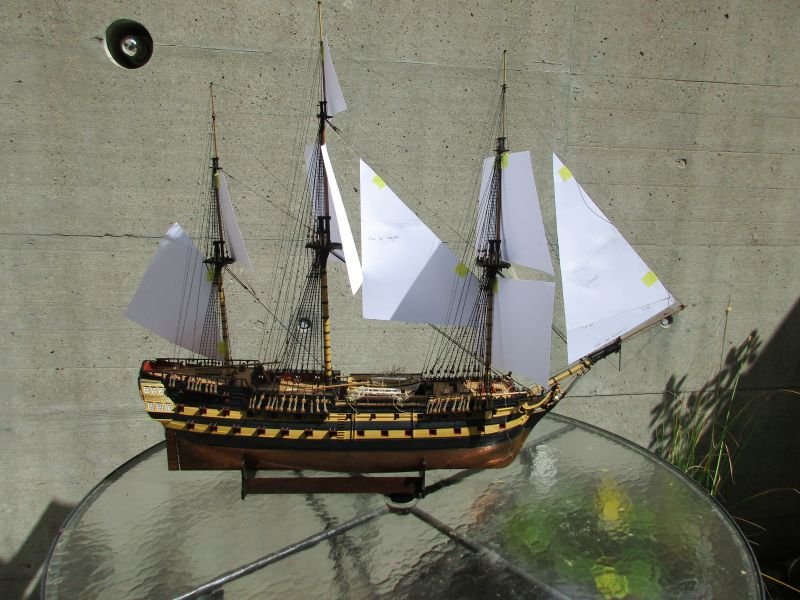
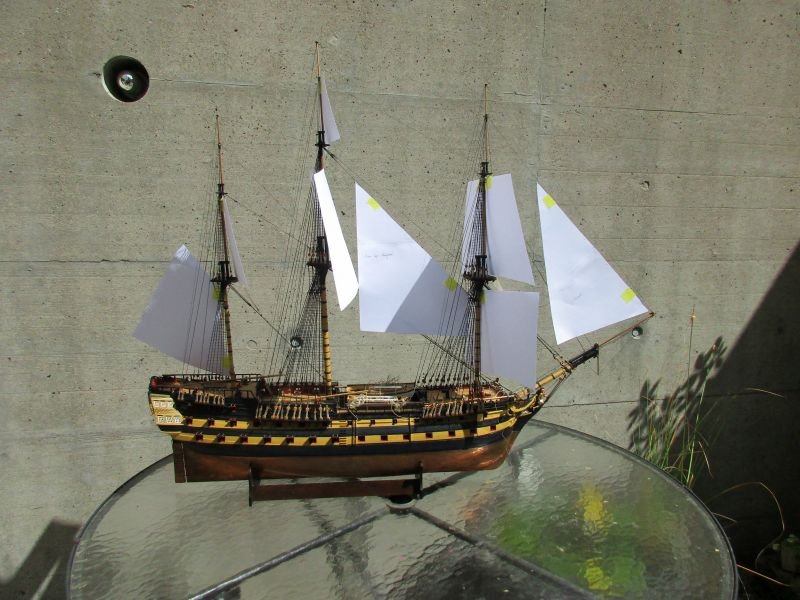
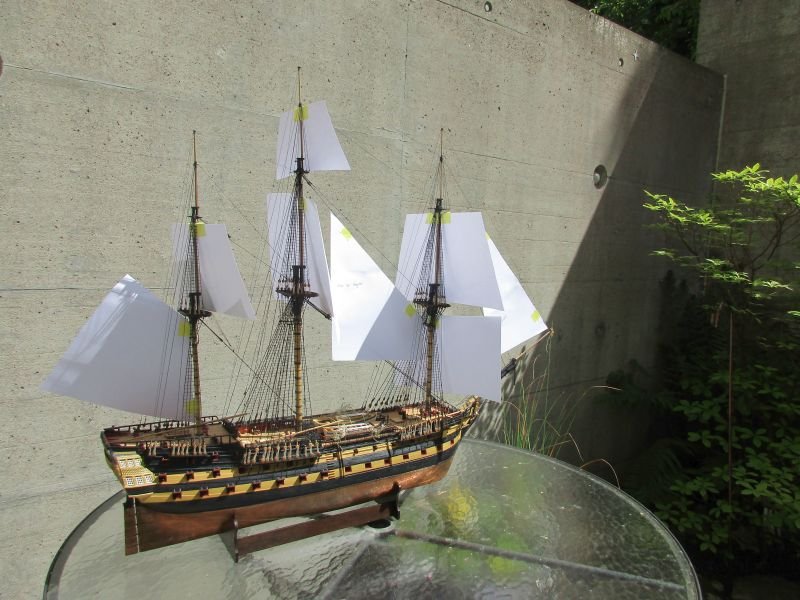
sail plan Browsing through my books and the net I was looking for inspirations in form of paintings of a three masted ship with not too much sails set. One painting which did catch my eye - for obvious reasons - was Derek Gardner's 'Bellerophon at Plymouth'. I noted that Gardner did several paintings of different ships with a similar perspective and sail arrangement. As he did serve in the royal navy - albeit more than 100 years too late - he should have his sails right. I guess Gardner's Bellerophon could have sailed in with a wind from her aft port quarter. Perhaps a short while before she still had her main topgallant and fore course fully set and also did use her mizzen course. Taking this as a possible scenario, I could set course and topsail on the mizzen, topsail and topgallant on the main, fore course and topsail and jib sail. On that painting she also carries her main top staysail. To decide if this would suit, I will check with dummy paper sails. Main course as well as mizzen and fore topgallants would be furled on the yards while spritsail and sprit topsail yard would be bare. This means 5 square sails, spanker, jib and 1 staysail - a total of 8 sails set and 3 square sails furled. The fore topmast staysail should most probably also be furled on the bowsprit. Bellerophon at Plymouth by Derek G. M. Gardner To check the look of the arrangement I did then cut paper sails. After attaching them to masts and stays I came to the following conclusions: - Checking a sail plan with simple paper sails is definitely worth the effort. - All the kit's sail plans must be rechecked with actual masts and yards. - The main top staysail looks good and helps to create a balanced look. - The chosen sail plan looks quite business-like and still leaves an unobstructed view onto the decks. - It guess it will look fine with those sails set and the others furled. I will omit to attempt clewed up sails. - Whether the jib or the fore topmast staysail will be set is still undecided - that's for later. - The jib has an odd size. Although it matches that in the book 'Bellona' in the AOTS series it is completely different from one constructed according to information from Lees. If I set the jib it will have the corrected form. - It would be nice if the making of the definite sails would be as fast and easy as the paper sails were. with fore topmast staysail jib according to kit's plans - a clear no go with jib according to Lees
- 366 replies
-
- 5
-
-
- bellerophon
- victory models
- (and 2 more)
-
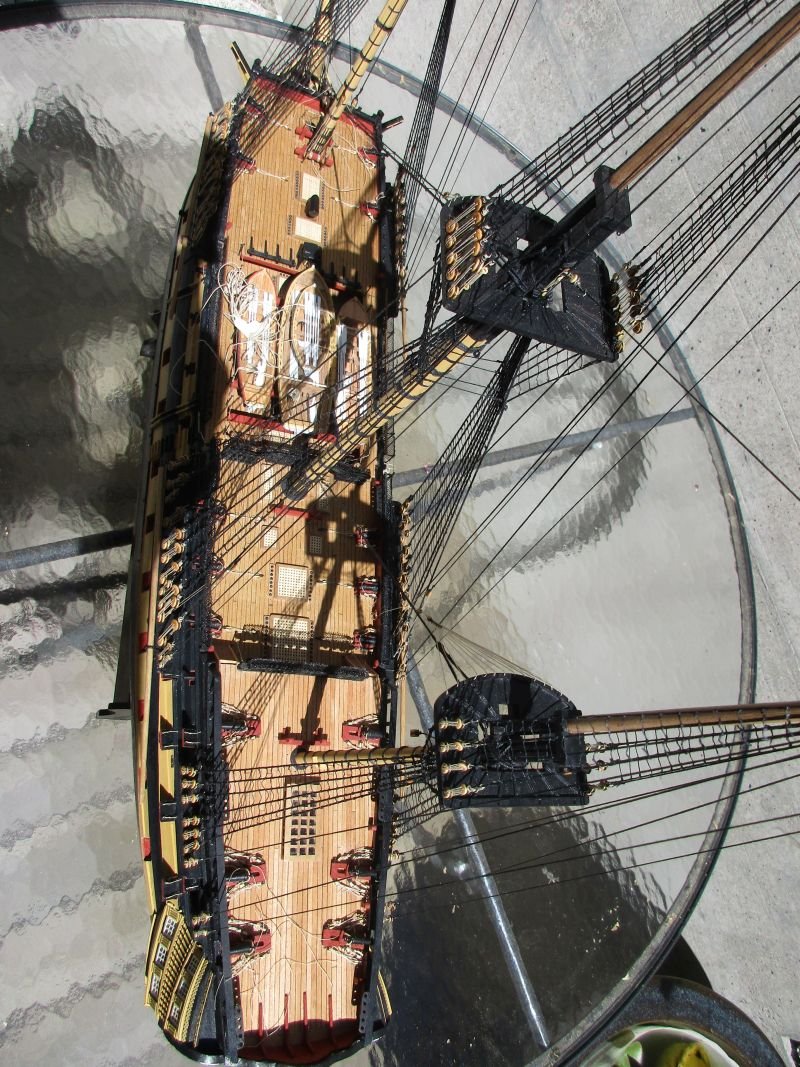
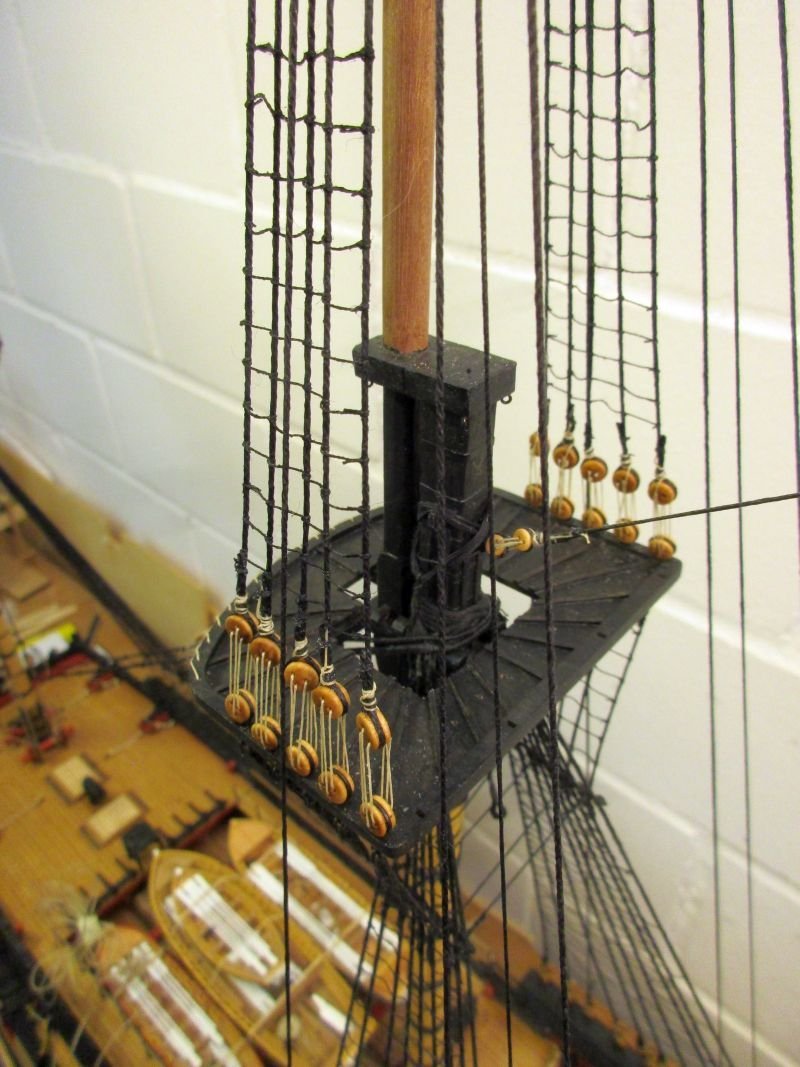
royal stays After finishing the topgallant stays, I started to rig royal stays on all 3 masts. To find out how, I mainly used information of Lees. The diameter of all stays is 0,25mm, half of that of the topgallant stays. The backstays are spliced around the mast tops and their lower ends are set up to eyebolts close to the lower deadeyes of the respective topgallant backstays, fixed with thimbles and a lanyard and hooked to the eyebolt. The fore royal stay is spliced around the masthead and the bowsprit while main and mizzen lower ends are fixed at the aft most fore topmast crosstree respective in the main top. Meanwhile I also started to arm the lower deck with the dummy gun barrels and glued the port lids in place. The standing rigging is now finished and it's about time to decide what sails she should carry and in which way. finished standing rigging with royal stays mizzen royal backstay inside of the topgallant backstay fore royal backstay main top with mizzen topgallant stay fixed with thimbles and lanyard to the collar of the main stay and mizzen royal stay, to the left of it, fixed with thimbles and lanyard and hooked to an eyebolt fore topmast head with main royal stay made fast to the crosstree with thimbles and lanyard the first guns appeared on the lower deck

- 366 replies
-
- 8
-
-
- bellerophon
- victory models
- (and 2 more)
-
mizzen topgallant stay 2.0 After deciding to set up royal stays, I tried to figure how. First I glued two small cleats on the sides of each royal mast, just below the caps. This is according to an information in Darcy Lever's Young Sea Officers Sheet Anchor. I recently acquired a copy and found that book full of useful information. Then I turned to Lees to see how the lower ends of the stays would be set up. While checking the run of the mizzen royal stay I noticed that it's topgallant stay changed several times the way it was run. The kit's plans showed a topgallant stay before royal stays were put onto the mizzen - before ca. 1810. So I reset it and led it from the mast top through a block below the cap of the main mast and fixed its end to the collar of the main stay with thimbles and a lanyard. topgallant mizzen stay 1.0 ...2.0 lower end in the main top
- 366 replies
-
- 5
-
-
- bellerophon
- victory models
- (and 2 more)
-
What has become of our generation! Today it's covid, drugs and no rock'n roll. Get well soon! Peter
-
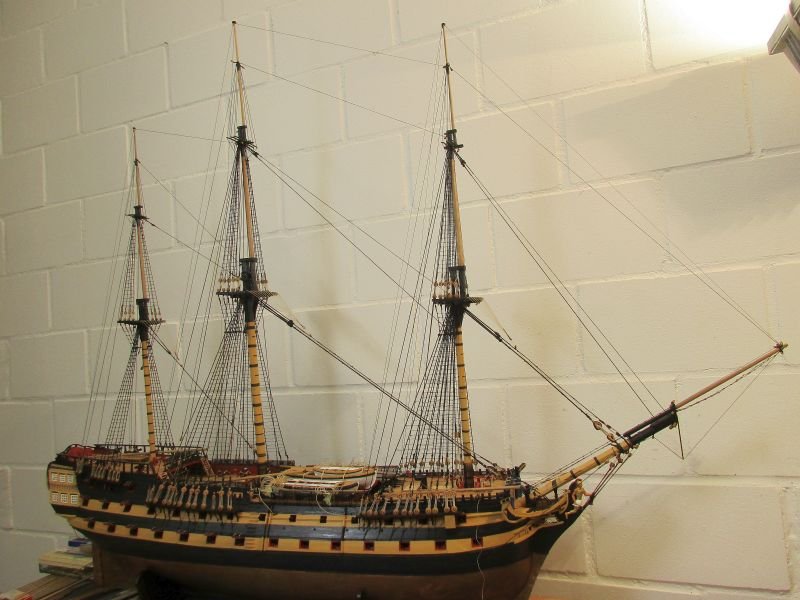
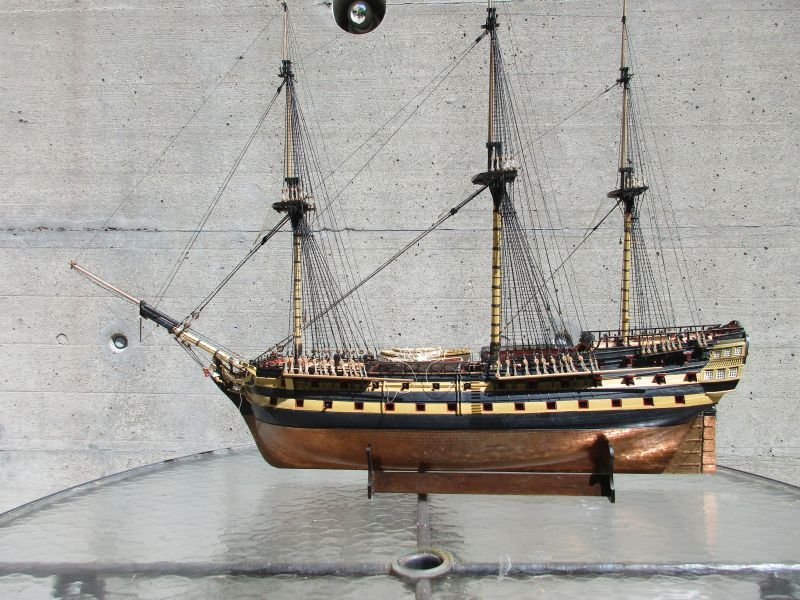
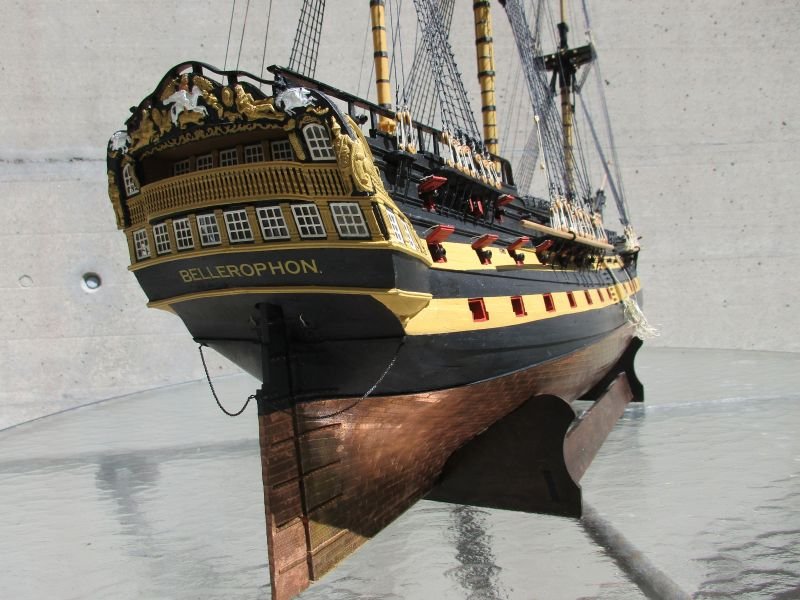
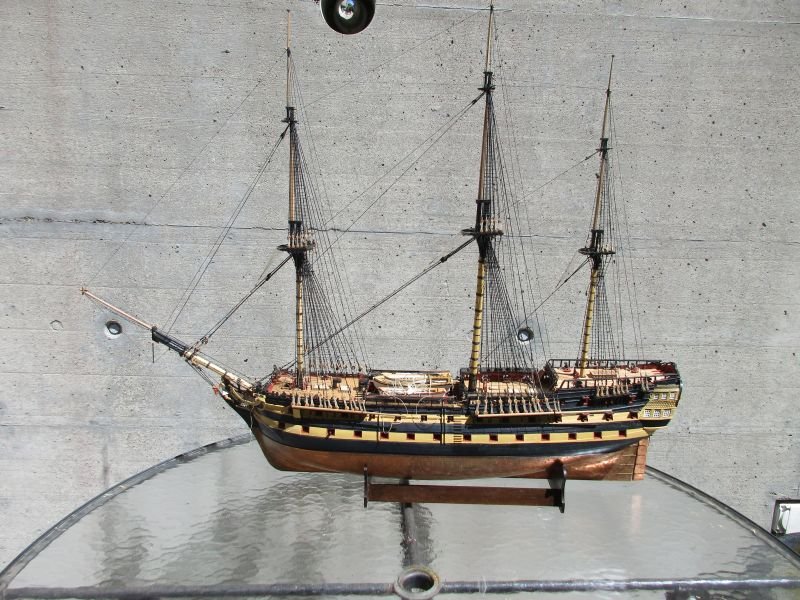
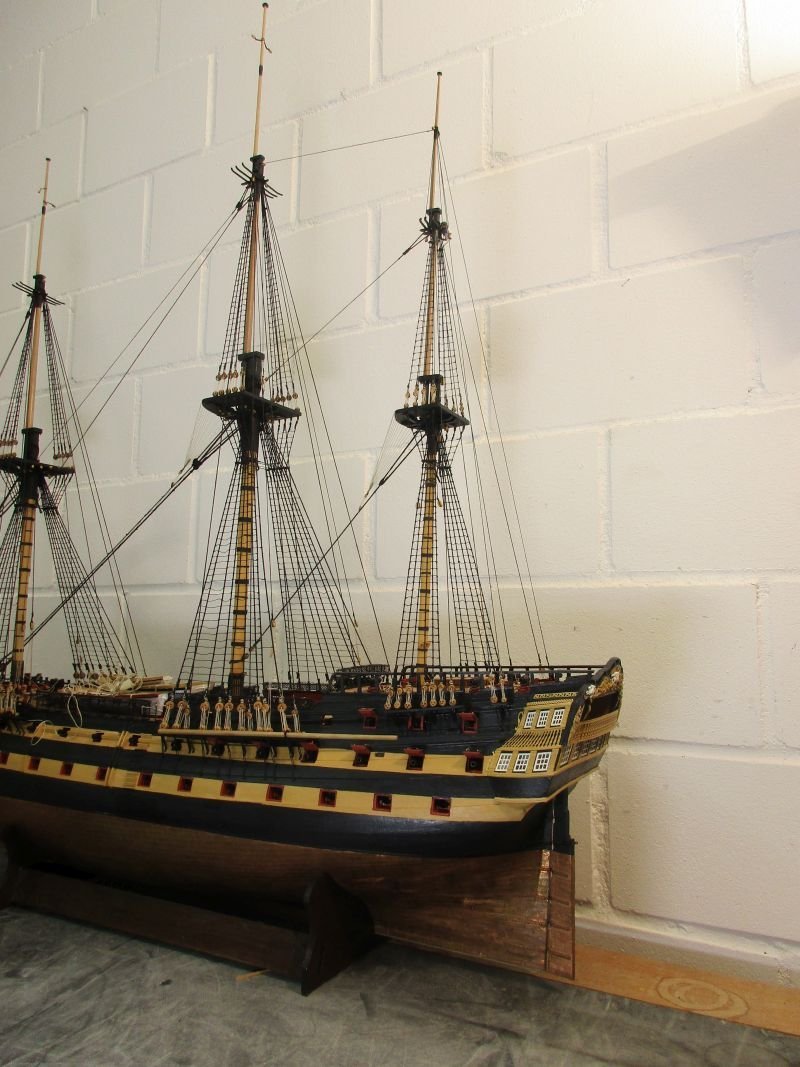
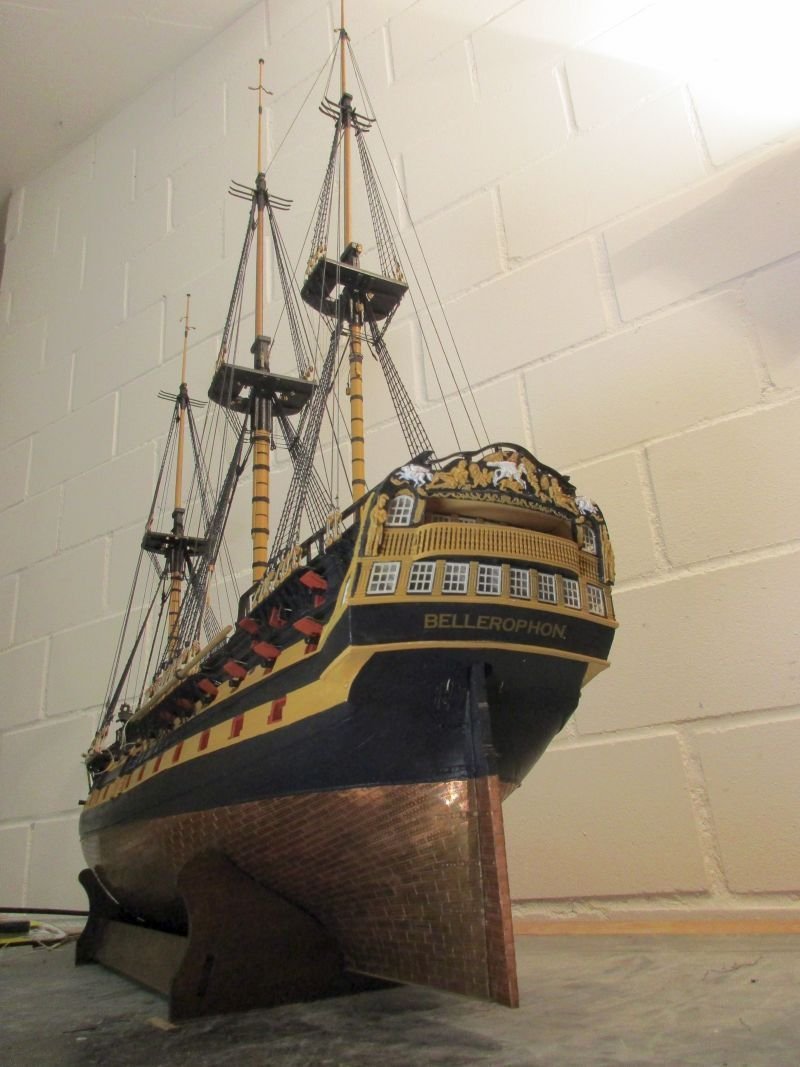
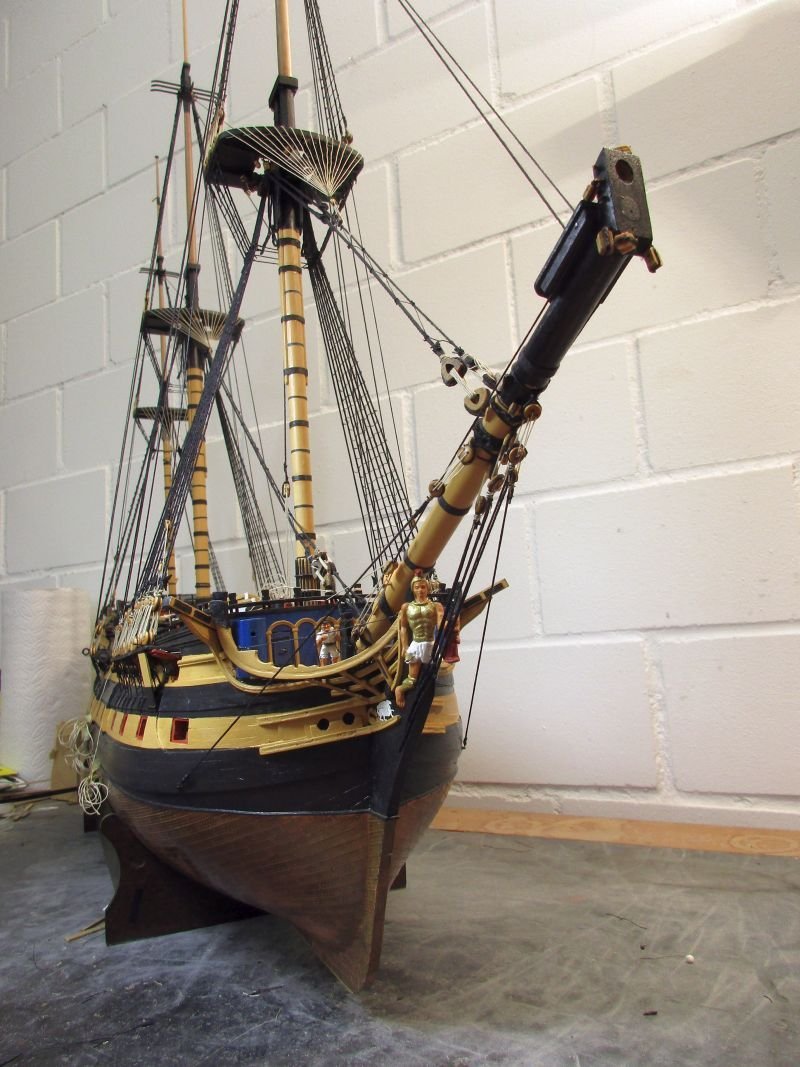
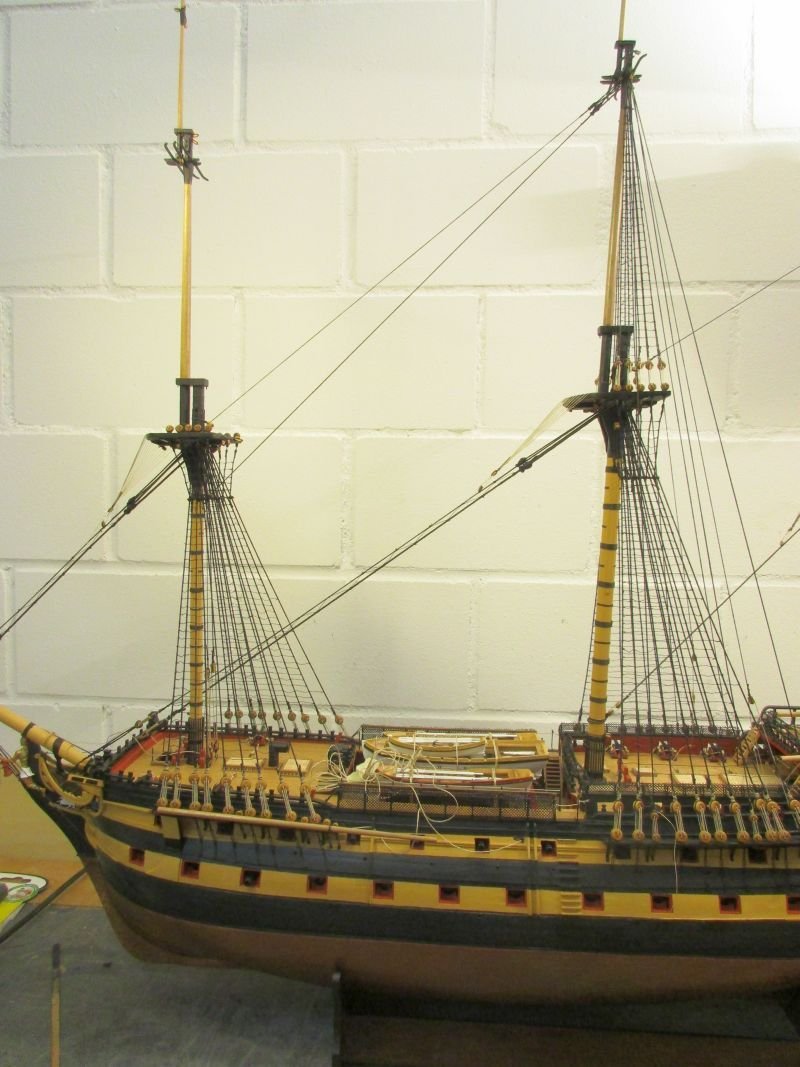
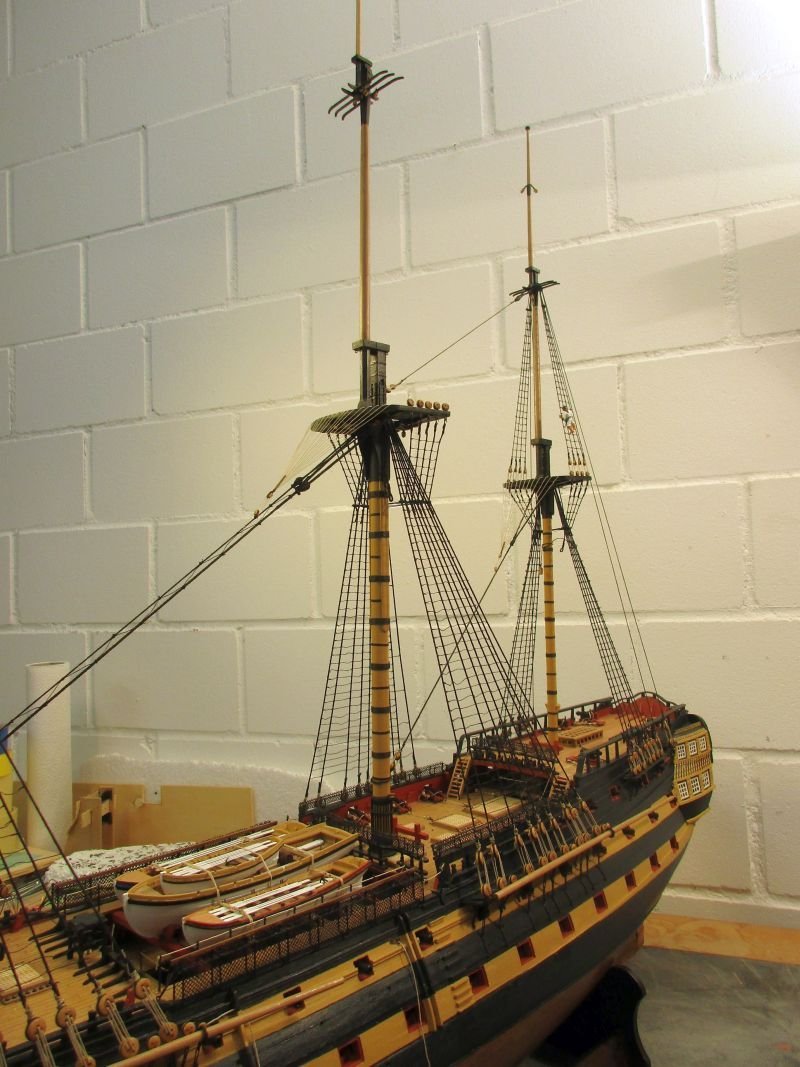
Now I have to decide whether to set up royal stays or not. They are omitted in the plans, however set on the picture on the kit's box. Bellona doesn't have them in the original configuration in Lavery's book. Lees sais they came into use 1719 for main and foremast and 1810 for the mizzen. Before that time I think at least flagstaff stays were set up on main and foremast. As far as I can make out on the works by Thomas Luny (1759 - 1837) he had them included in all his paintings of the Bellerophon. So, when Napoleon set foot on the deck of Bellerophon he certainly noticed royal stays and backstays on all 3 masts.🤔🤔 Taking advantage of the fine weather I had a photo shooting on the outside with Bellerophon's nearly completed standing rigging.

- 366 replies
-
- 9
-
-
- bellerophon
- victory models
- (and 2 more)
-
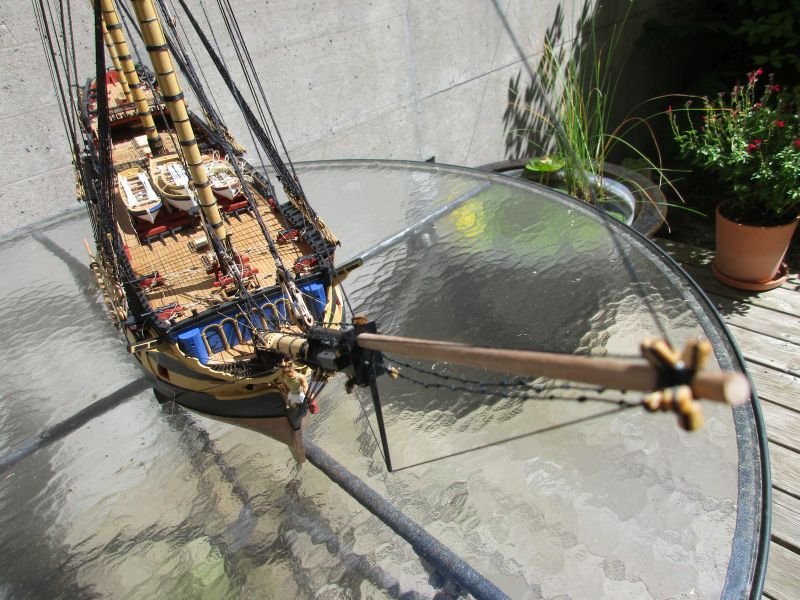
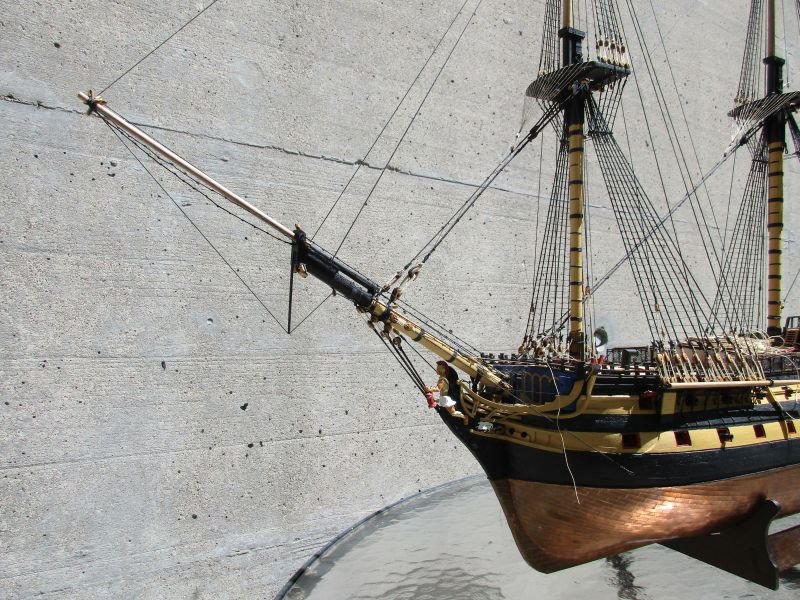
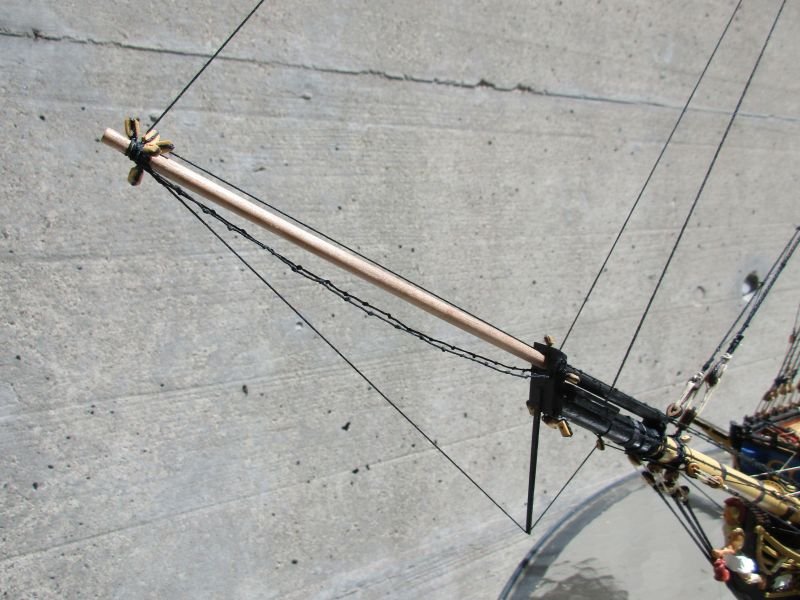
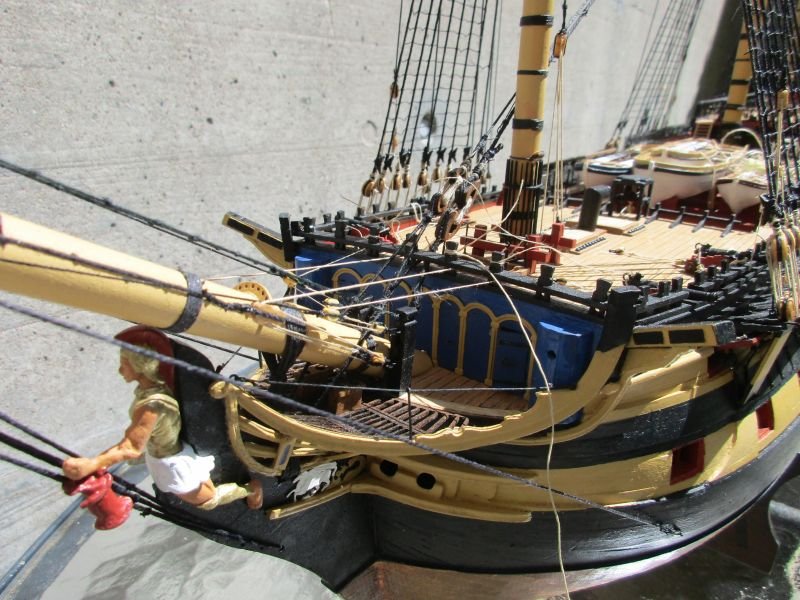
jibboom and fore topgallant mast Because I needed it for the topgallant stay, I had to put the jibboom in place. It was fixed with a lashing around the bowsprit in front of the saddle. The martingale stay was set up the way I discussed earlier. Stay and backstay are in one piece, leading over the dolphin striker(changing here from stay to backstay), through a block under the bowsprit behind the bees and towards the port knighthead where it is set up with a tackle. Horses are in place on bowsprit and jibboom. (How I feel with Stephen Maturin about those strange names mariners have for ships parts: a positive floating zoo!) Fore topgallant stays were set up according to the plans with the same changes I made on the other masts. bowsprit with jibboom jibboom port knighthead - upper tackle for martingale backstay, lower for fore topmast stay all topgallant stays in place
- 366 replies
-
- 5
-
-
- bellerophon
- victory models
- (and 2 more)
-
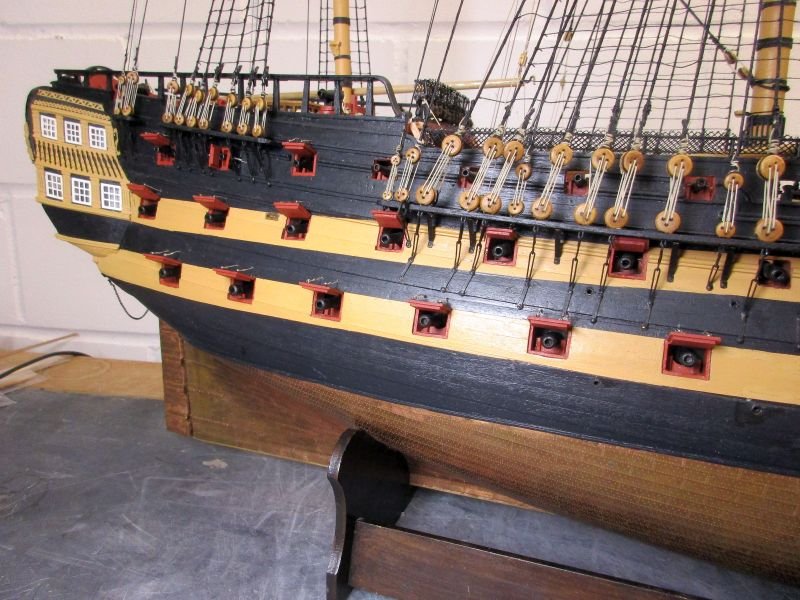
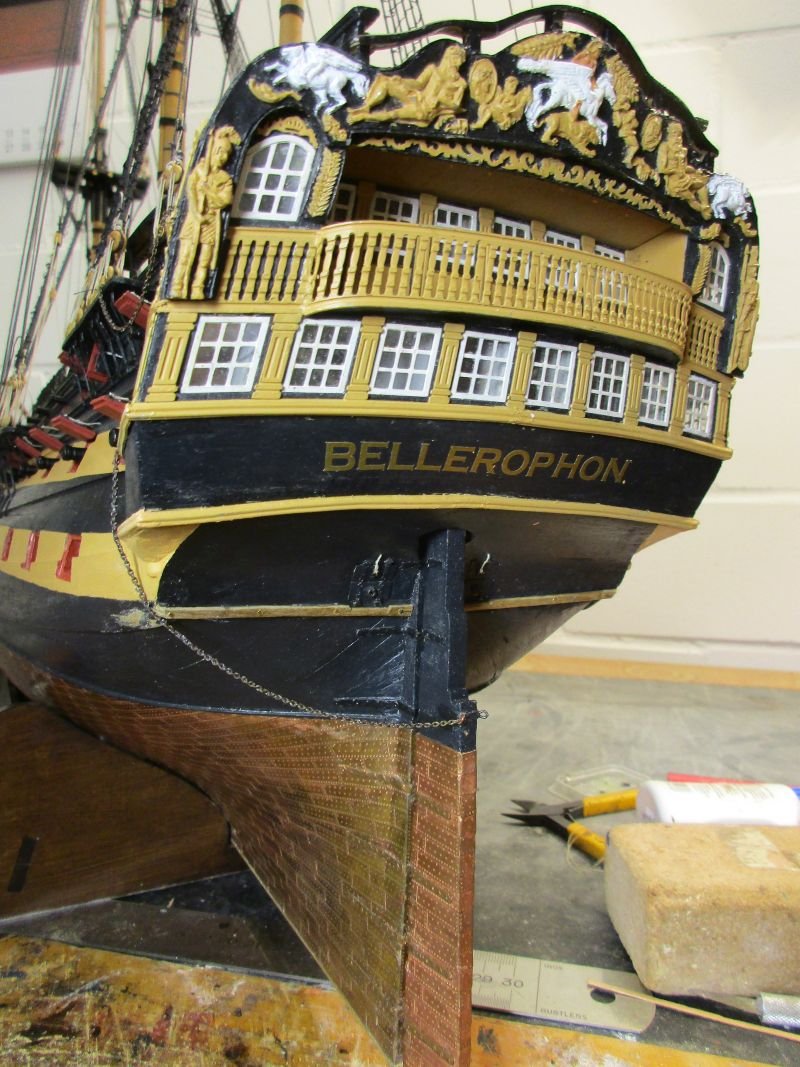
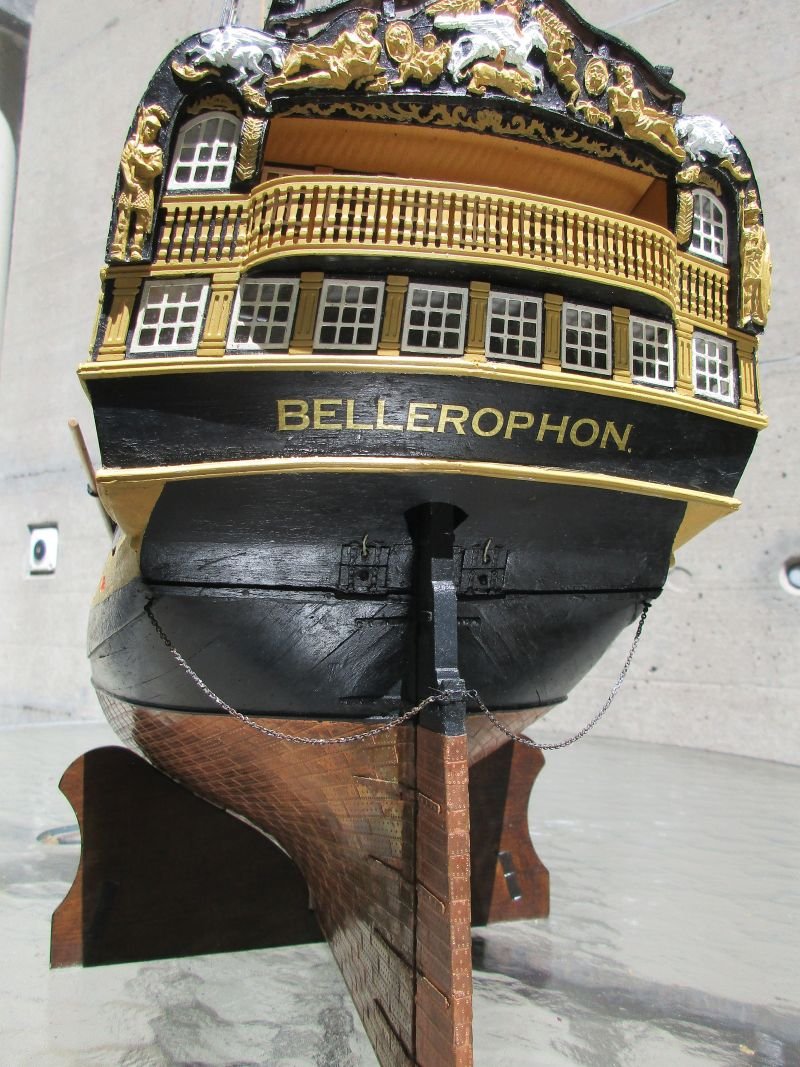
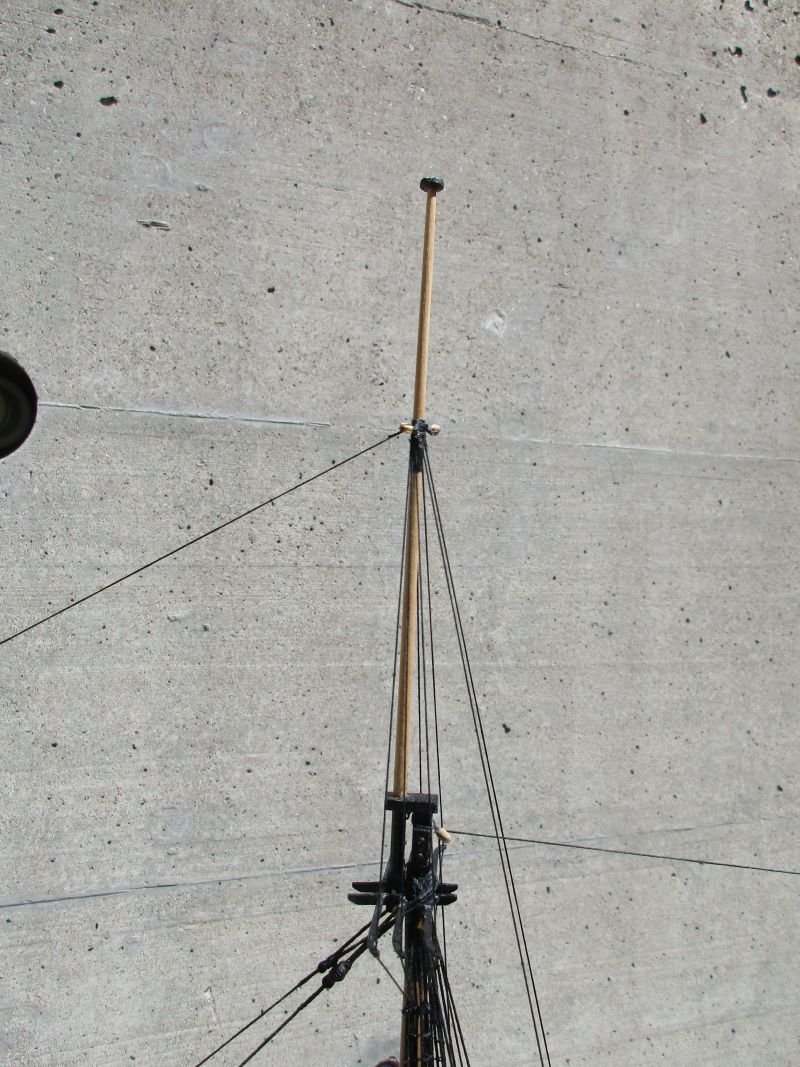
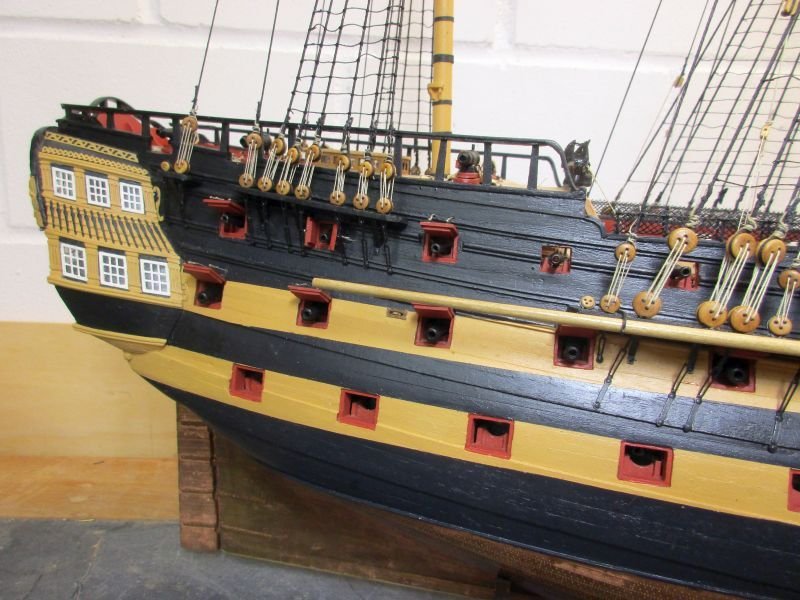
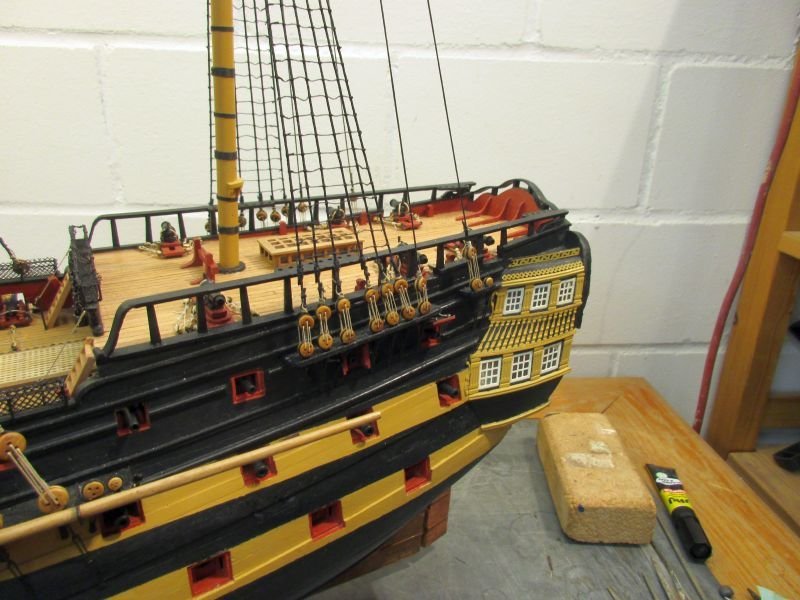
main topgallant mast Stay and backstays were rigged in a similar manner as on the mizzen. main topgallant mast rudder chains After pondering a while about which way to fix them I decided to follow the example of the well known contemporary Bellona model. Another possibility would have been the way it's done on today's Victory. However interesting it would have been to show the partly installed emergency steering it seems to me a strange configuration with the rudder pendants also in place and leading over the side of the ship. Albeit in Harland's 'Seamanship in the age of sail' this configuration seems to be mentioned as permanent installation with the ends of the pendants made fast in the mizzen channels I choose the simpler way. During work I noticed the missing strip of wood on marking the lower end of the lower counter, which gives the location where to fix the chains, and put it in place. missing strip of wood at the lower counter and an impression how it could look with rudder chains the Victory-way ruder chains in place - they seem to hang low but that length is needed to let the rudder play
- 366 replies
-
- 5
-
-
- bellerophon
- victory models
- (and 2 more)
-
Thank you all for that wealth of information. About to finish standing rigging I'm actually thinking about which sails to set and which will be furled. I shall use a mix of both, same as Ian B. Presently all topgallant sails shall be furled and all topsails set. The rest is undecided. Perhaps I will have Mizzen course and main sail hauled up, fore sail and jib set and perhaps one or two staysails added - at least that's the provisional plan, depending on my skill and nerves. Before I saw that excellent tutorial about silkspan I was determined to use glued sails made from fine cotton fabric with seams pencilled on. The same I used on Pickle and America. And now I also found Chris Watton's latest post about his newest sail sets. And I knew where I could get about the same fabric he uses... Time to think and decide... Techtonic, your Pegasus and her sails look wonderful and I'm a great fan of adding at least furled sails. However having all sails set on my last two projects - both schooners - give me some additional pleasure. Now I'd like to try a mix. An additional benefit of partly set sails is the possibility (or rather necessity) to brace the yards and thus need less space for the finished model. Ian, very nice details on your build. Especially that open grating above the galley stove is a nice touch. Do you see the stove at all? And BTW, did you rig royal stays and backstays? They are missing on the plans but installed in the pictures on the kit's box. Cheers Peter
- 366 replies
-
- 1
-
-
- bellerophon
- victory models
- (and 2 more)
-
Hi Techtonic First I wish you as much joy with the build of this monster as I have. My canons are the same. It seems, that the mistake happened when someone got copy-paste-itis and did paste some 18 ponders instead of the smaller 9 onto the fore deck when drawing the plan. Another point is, that possibly the guns aren't in the right scale at all. If I take Brian Lavery's 'The 74-gun ship Bellona' as reference the barrel of an 18 should have a length of 41mm compared to the 35 of the kit whereas a long 9 should have 39mm instead of 27. Even the short 9 pounder should still have a 34mm barrel. Possibly Amati did compromise a bit too much when weighting accuracy of the kit against its price. Nevertheless it's still an amazing kit and you always could substitute the guns. Perhaps you could have them printed somewhere. Vanguard model sells them in 1/64 but if you take the short 18 pounder it would be quite close to what you need. The difference would be about 10%. But one complete pair costs you 10,5 or 11,5 £ each... And I look forward to your build log.😉 Cheerio Peter
-
Thank you for a wonderful picture also of the rudder chains but unfortunately it confuses me. Actually I'm pondering how to fix the rudder chains. On a different Victory picture I noticed something like installed emergency steering gear which is here confirmed. However the situation with attached steering pendant but the rudder chains still fixed below the counter confuses me. The emergency steering would not work. For me it would be logical to free the rudder chains at the same time when installing the emergency steering gear. But perhaps this is the navy way of working on a ship which actually lies unmovable in dry dock...🤔 Peter
-
On the prototype the wales were just thicker planks used to build some parts of the hull - not a doubled up second layer. So the wales should run the same way and to the same ends as the neighbouring thinner planks. Peter
-
Perhaps they thought, that of course only enemy ships would eventually resemble the proverbial Swiss cheese. To be shot at, that's what enemy ships were there for after all. Own ships would never get harmed. Perhaps it started in the middle ages (Sovereign of the seas, Vasa) when kings wanted to intimidate their enemies with the sheer beauty and richness of their war machines to make them loose all confidence - not unlike the way the church in those times would try to impress poor countrymen with splendour and grandeur. (BTW - there is only one of the about 15 most common sorts of Swiss cheese which has those proverbial holes.) Peter
-
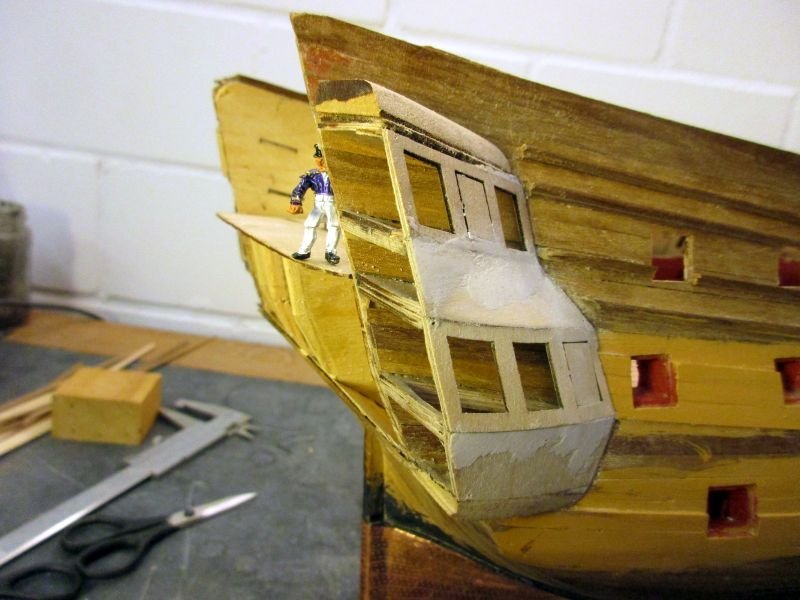
Your build is looking good. Those parts 27 and 28 are on the same 5mm sheet as the bulkheads 1 and 3. On my plan - Tavola 16 - they aren't numbered either. They are those 4 roughly triangle shaped items below parts 20. You definitely need them. Two on top of the galleries to give some headroom for the skipper when visiting his side gallery and below to round out the shape of the lower gallery. If I remember correctly the smaller 2 are numbers 27 and go on top - but you will see how they fit. Peter parts 27 and 28 installed and roughly shaped
- 21 replies
-
- 7
-
-
- Amati
- Victory Models
- (and 1 more)
-
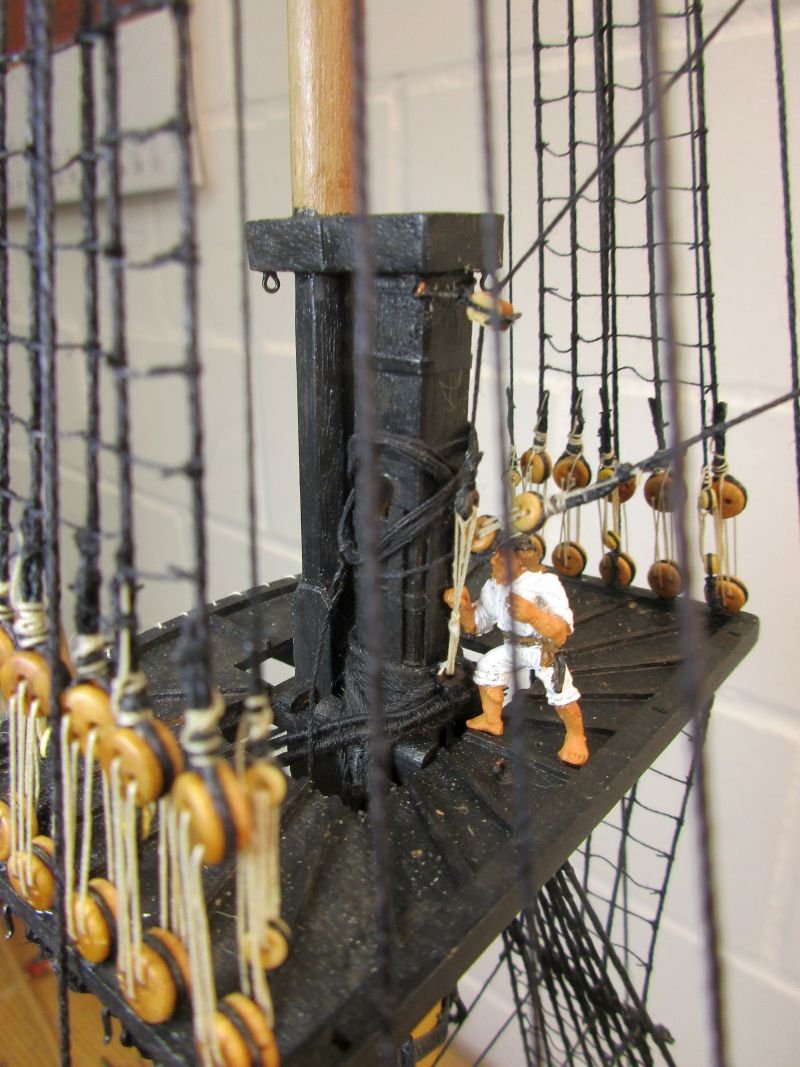
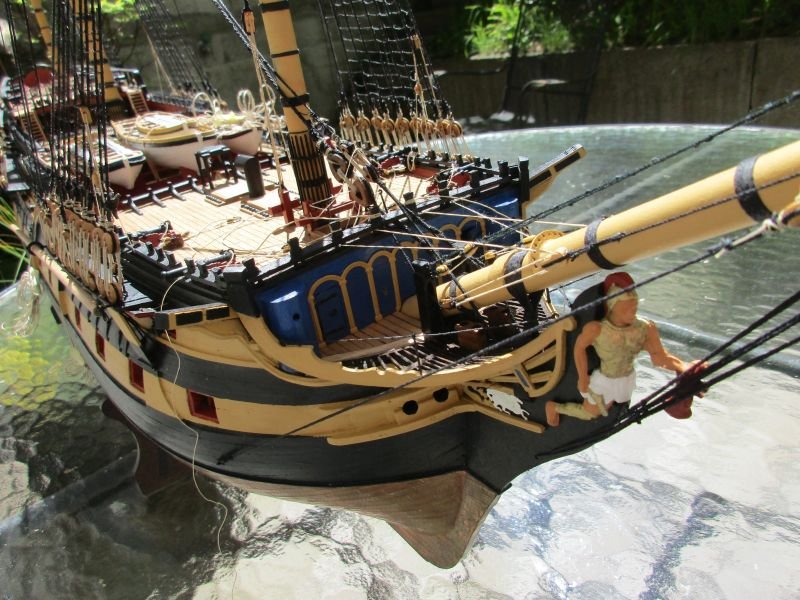
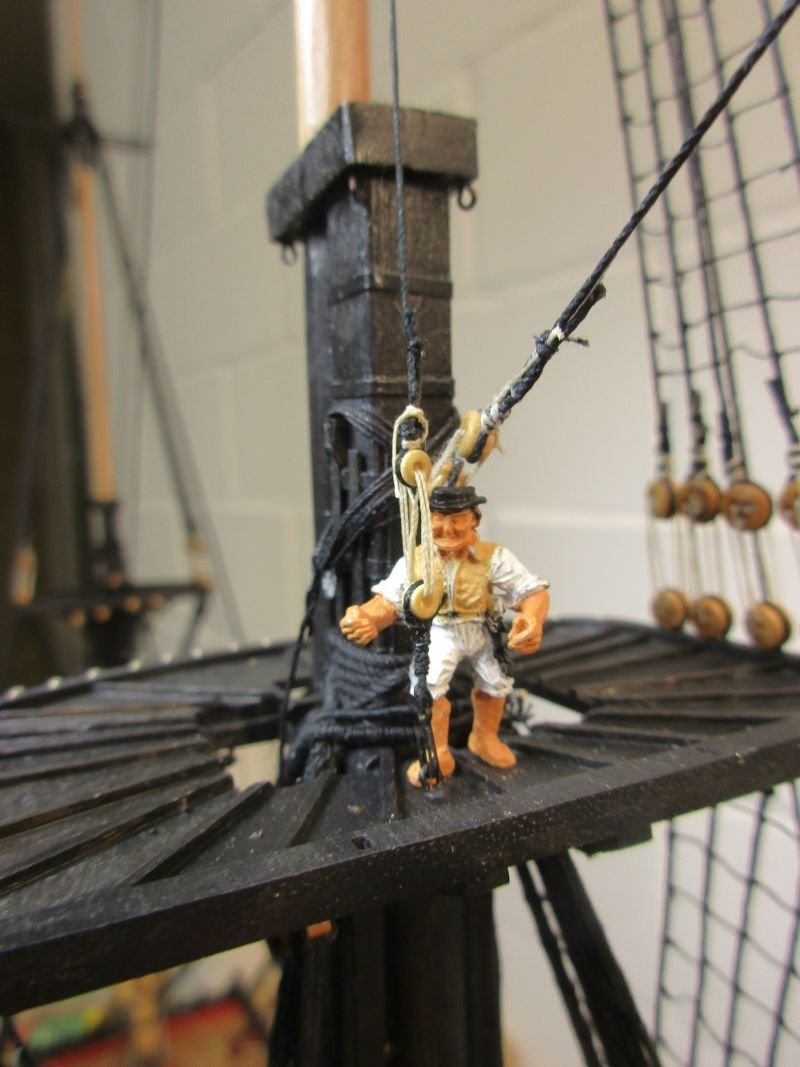
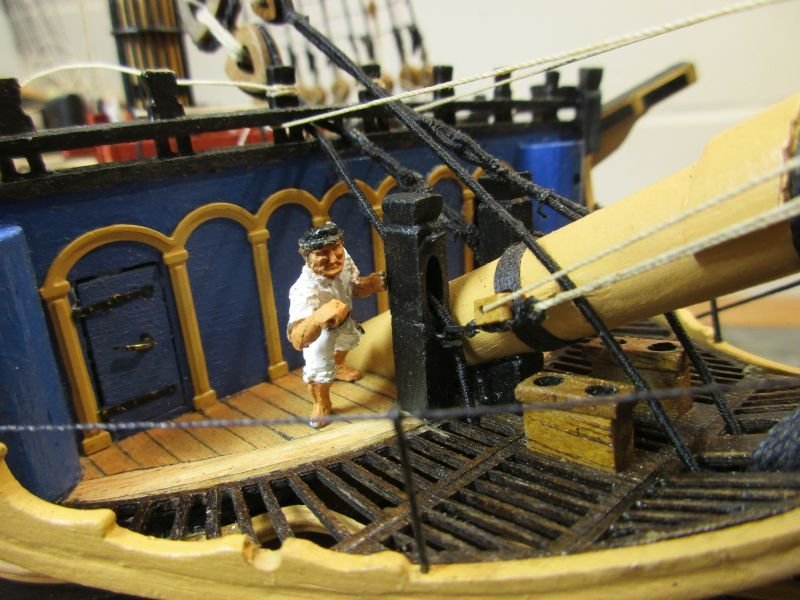
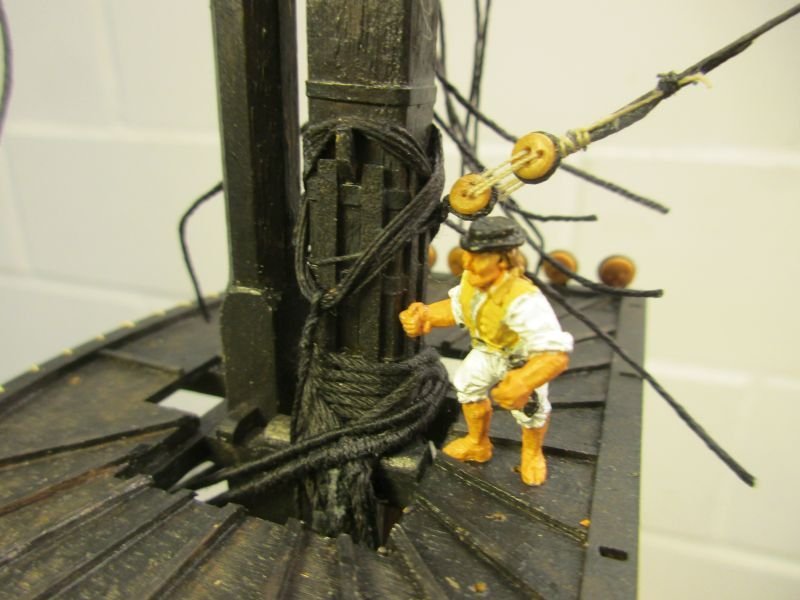
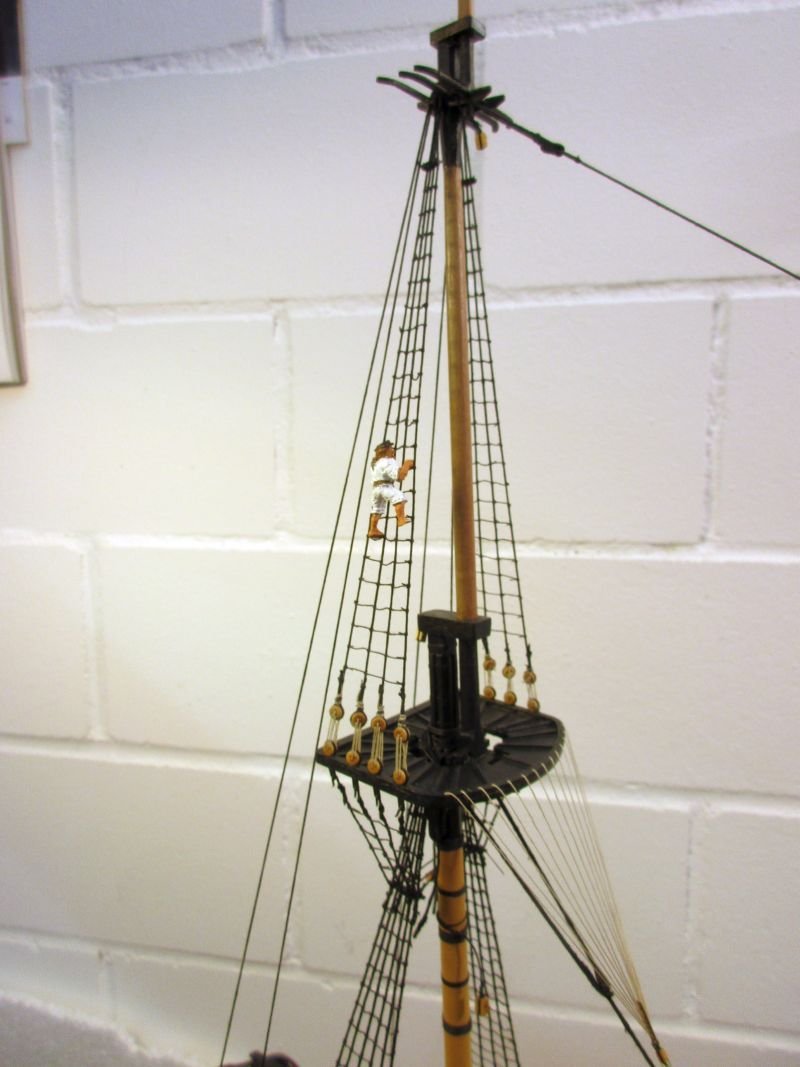
Oh yes, that sailor! It already was suspected that he was a hobgoblin (which could be a Klabauterman in German, I think) and now he is suspected of taking steroids. Trying to clarify his ethnic background, I checked him: no green teeth nor red hair, so he most probably is no ship's cobold. Officially our figure lived in the early 19th century. Steroids weren't forbidden then - so no contravention there. Perhaps he was just unlucky when choosing his parents.
- 366 replies
-
- 1
-

-
- bellerophon
- victory models
- (and 2 more)
-
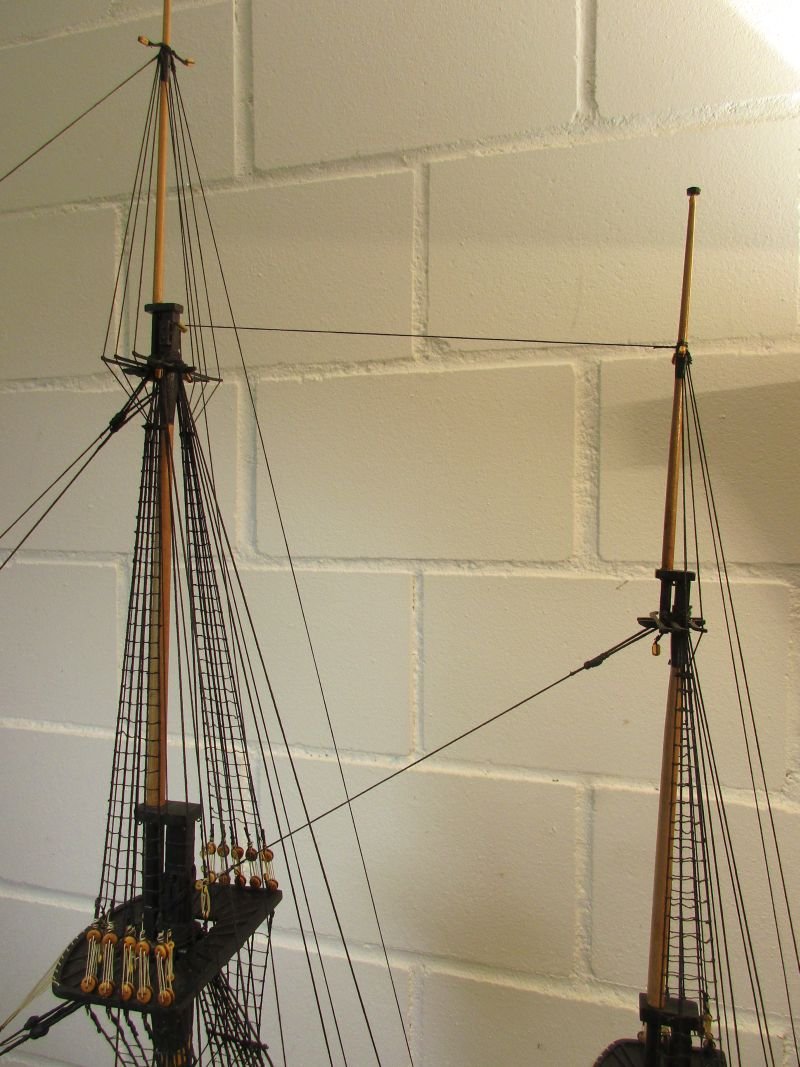
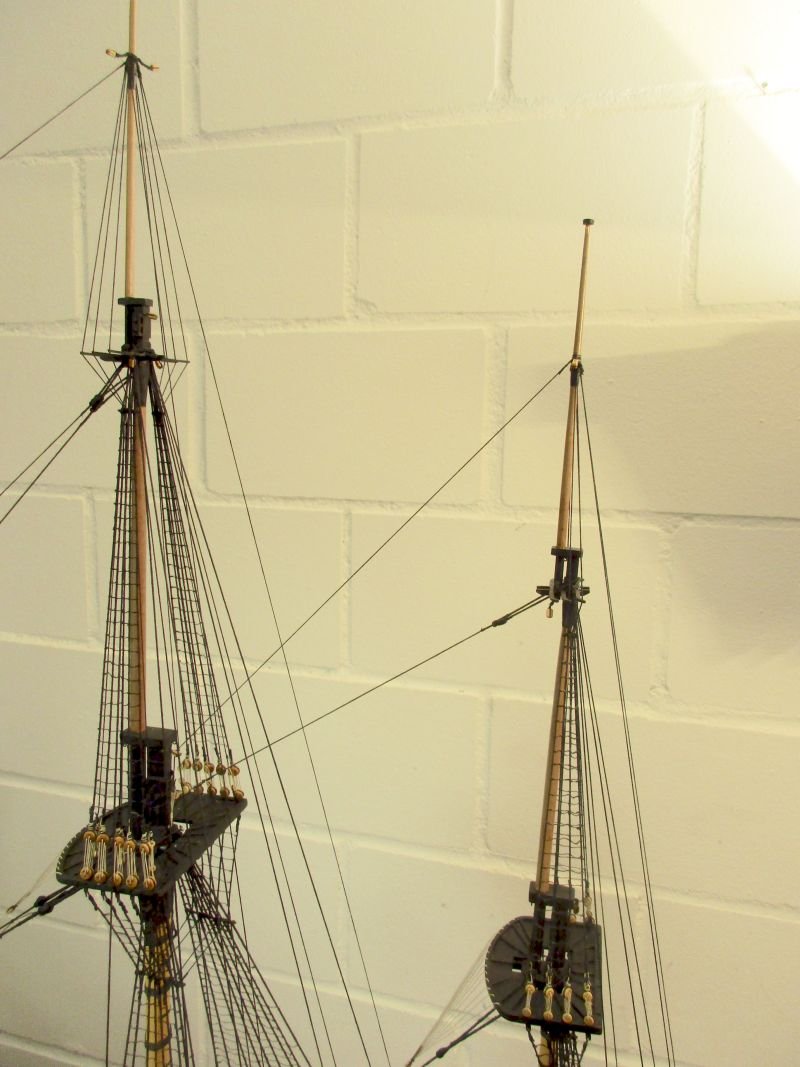
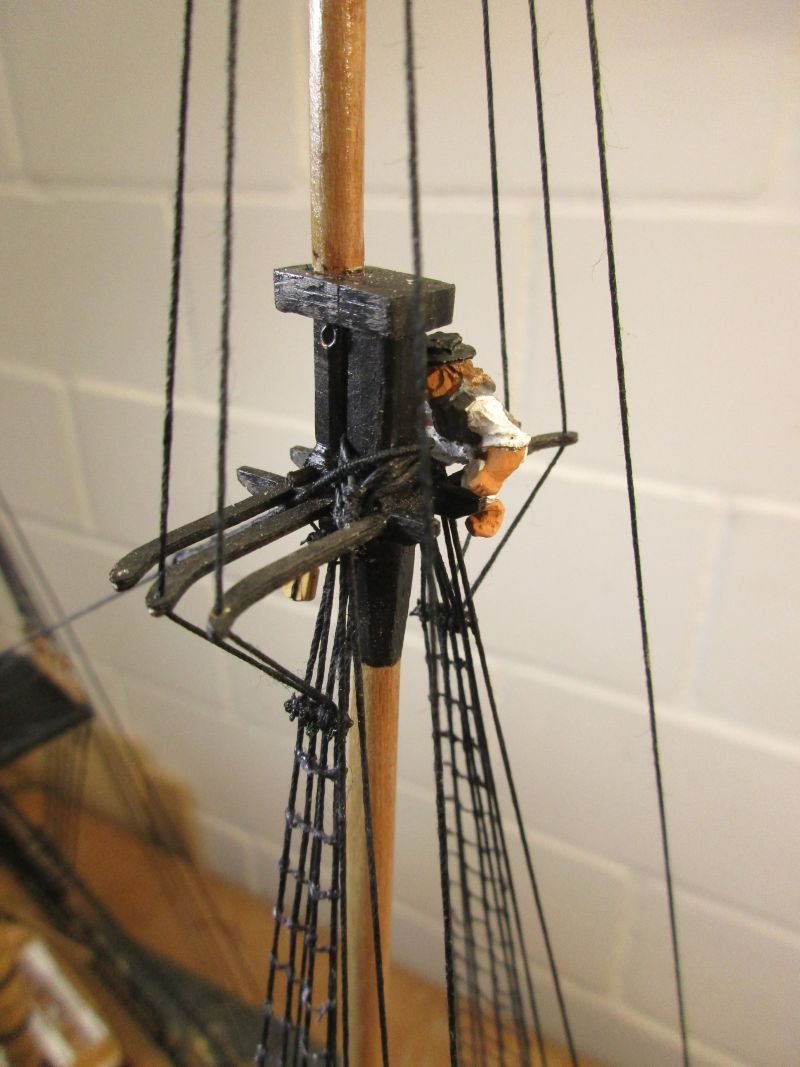
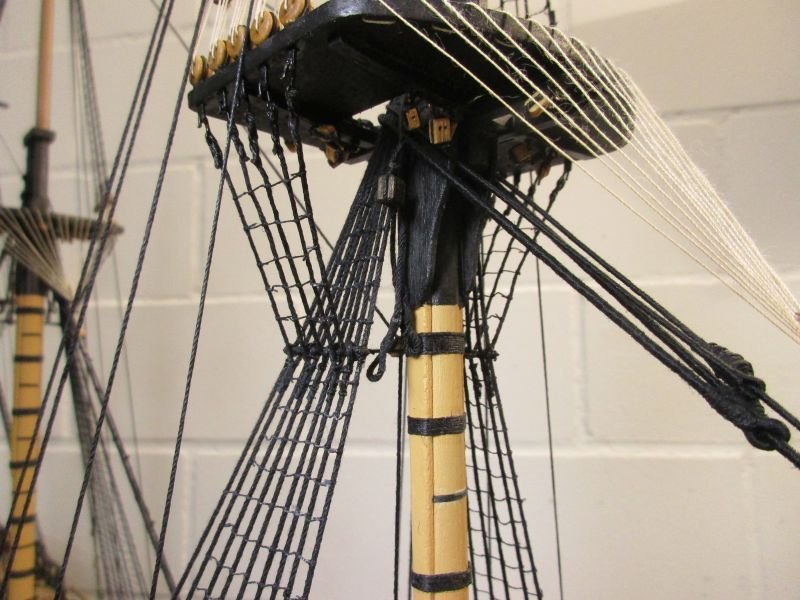
mizzen topgallant mast This was something I dreaded a bit. The crosstrees are quite flimsy, laser cut wooden parts, very much given to brake off. I did strengthen their joint with the trestletrees with epoxy after I broke the first but still didn't thrust them fully. In this scale etched metal crosstrees would perhaps be safer. Anyway I managed to rig the shrouds but puzzled about how to make fast the lower ends. The plan has them hitched around lower deadeyes of the topmast shrouds (after led around the futtock staves) but Lees says that they were made fast with a lashing to the deadeye, whatever that means. Finally I found an illustration in Zu Mondfeld's book where they are made fast to the lower deadeye with thimbles and a lanyard. That's what after some discussions between the skipper (me) and the bosun (also me) was used. Contrary to the kits plans backstays and stay were rigged with the same diameter thread (0,5mm) as the shrouds. This is according to Lees and steele's rigging tables. The backstays were rigged according to the plan. The stay however again asked for some thinking. On the plan it's lower end is just hooked into an eyebolt in the main top. After some searching I decided to use the same setup as for the shrouds. A little mistake must have happened somewhere while setting up my masts. The stay should lead horizontally to the block directly below the main topmast cap, from where it goes to the maintop. I found on my Bellerophon it ascends towards that block. Either the mizzen mast was served a bit short or the mainmast did grow. Mizzen topmast stay seems horizontal - unfortunately it isn't from 'Historische Schiffsmodelle: Das Handbuch für den Modellbauer' by Wolfram zu Mondfeld mizzen topmast top lower ends of topgallant shrouds in the mizzen top lower end of mizzen topgallant stay in main top

- 366 replies
-
- 5
-
-
- bellerophon
- victory models
- (and 2 more)
-
Hi B.E. Thanks. And yes, and I even managed to get a closer look at the creature in picture 5. Hobgoblin? Maybe we should ask Amati what kind of crew they are brokering. Peter
- 366 replies
-
- 2
-
-
- bellerophon
- victory models
- (and 2 more)
-
fore topmast The work here was quite similar to that on the main mast. Stay and preventer stay were changed to one step thinner thread than on the plans. Again the preventer stay was installed above the stay as the kit's plans show. In the meantime I found that not only Lees, but also Zu Mondfeld have it the other way around. But I stuck to the decision to follow the plans, wondering if the kit's designer (Chris Watton ?) perhaps had different information on this. A fellow sufferer once explained that he likes some tasks that much, that he repeats them several times. Same here with upper jeer blocks and mainstay. The plan had double blocks for the jeers, which I cheerfully installed only to find later in Lees that I would need triple blocks - I changed them. While I worked on the fore topmast stays, I wondered about those holes in the knightheads on the beakhead - and slowly realized that the main stay collar should lead through them! OK, I unrigged lashing and collar (some fixations were made with CA but I could cut and scratch that away), threaded the collar in the knighthead, the whole bow works and the other knighthead und set all up again with - would you believe it - hardly any swearwords. For relaxation I installed the missing gunport lids on the upper deck. standing rigging of topmasts done bow with rigged topmast stays maintop with triple jeer block mainstay collar wrongly rigged ...corrected and fore topmast stay in place upper deck gunport lids

- 366 replies
-
- 10
-
-
- bellerophon
- victory models
- (and 2 more)
-
Well, I'm doing it the same way as Richard: I make sure to have an extra length of about 2cm on the foot of the mast or one side of the yard. Then each section is filed first square then octagonal and the necessary taper is worked in at the same time. Some parts e.g. the centre of the yard or a mast top may stay octagonal. For sanding I put it by the extra length into the chuck of a simple hand drilling machine. Taking the sanding paper into my right hand I move it up and down the octagonal wile adjusting the pressure onto the wood, I vary the rpm's with my left. Starting with coarse sanding paper I put on the finish with a fine grain. Sometimes the dowel provided with the kit may be actually too small to work a required octagon or the square foot of a mast. Then after filing that section square I double it up to the required dimension by gluing wood strips onto the surface. Thereafter I work it into the required form. Peter
-
Hmm, interesting question. I didn't notice that and have no idea why. Checking my sources I find that the numbers of shrouds and backstays coincides with Brian Lavery's AOTS book Bellona. The number of deadeyes is similar to those on the well known temporary model. however he leaves one on the main and two on the foremast empty. Was having some spare deadeyes perhaps a used practise? Lavery should be a reliable source and Bellona is quite similar to the arrogant class. On the other hand, those body plans were perhaps drawn with just a hint at a general arrangement of the deadeyes for the rigging. The rigging details being determined by the shipwrights actually setting up masts and rigging according to the then valid establishment. Any thoughts from your side? And thanks for the compliments Peter
- 366 replies
-
- 1
-
-
- bellerophon
- victory models
- (and 2 more)
-
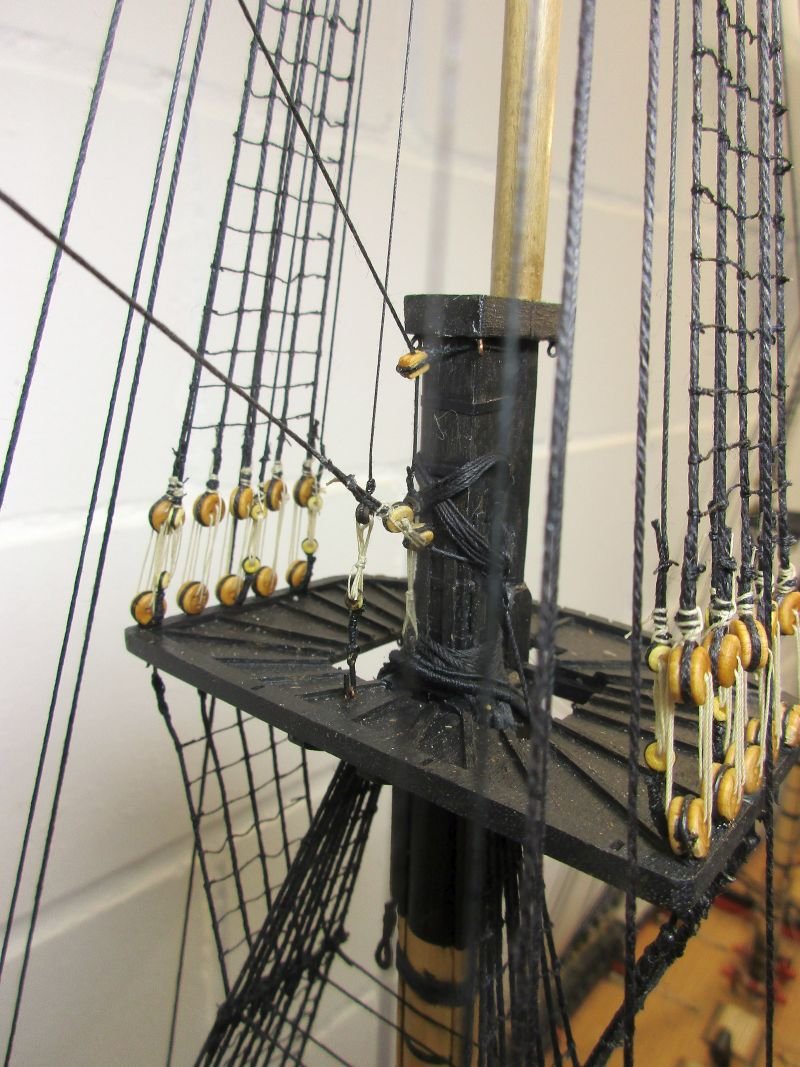
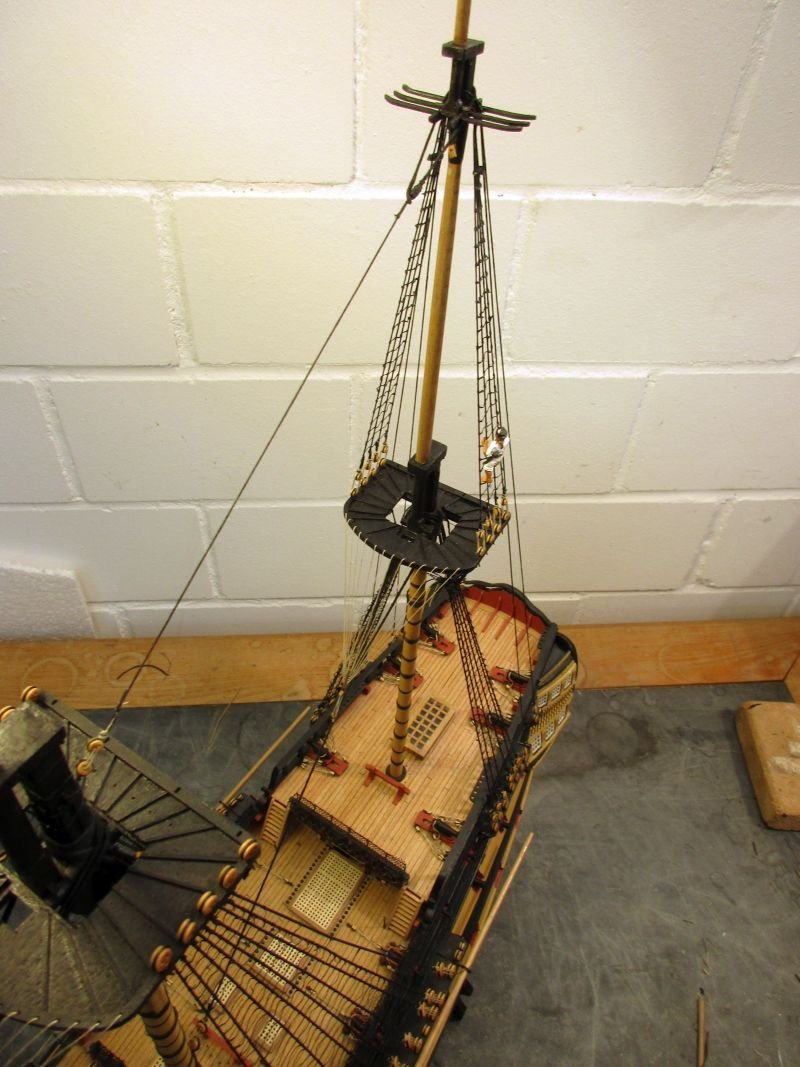
main topmast Just in time I remembered to place the lashings and hangers for the upper jeer blocks for the main yard. After setting up shrouds and ratlines it would have been kind of a keyhole surgery (again). Then shrouds, backstays and stays were set up and the ratlines rattled down. According to Lees and Steeles rigging tables I reduced the size of the stays to 1,0 respective 0,75 mm. One question was if the preventer stay should be above the stay (kit's instructions) or vice versa (Lees). The skipper and the bosun had a discussion and I finally went with the kit's version because this coincides with the lower stays and I didn't see a logical reason to put it up otherwise - going very reluctantly against Lees. One minor problem was presented by the foremost backstay. It was in the way when setting up the ratlines and I had to unship it again. It's still provisionally set up until the topgallant shrouds are in place. main top with hangers for the main yard jeers main topmast standing rigging mainmast stay (starboard) and preventer stay at the foot of the fore mast main top

- 366 replies
-
- 9
-
-
- bellerophon
- victory models
- (and 2 more)
-
Hi Tom As a great fan of O'Brian's books I admire your project. Perhaps you could find some additional information on your subject when checking wikipedia for HMS Vincejo (1799). As I understand the adventure was based on Speedy's capture of El Gamo. However HMS Sophie was supposed to be the former spanish Vincejo (or Vencejo) which could be this one. I think that at least the general description would fit. Keep up the good work Peter
- 346 replies
-
- 2
-
-
- Sophie
- Vanguard Models
- (and 1 more)
-
That's a fine looking fishing boat you're making there! 😉 I'm a bit late with this input about getting wire straight (for your skylight) but there is a simple trick I'd like to share. I learned it during my training as a mechanic: To straighten a wire you have to pull it hard enough to lengthen it just a little bit. Usually I take a wire of perhaps 50 cm length and fix one end real good in a vice. Then I grab the other end with a pair of tongs and pull really hard. If you use enough force, you observe that the wire gets a little bit longer - and perhaps a µ thinner - wile all the little bends disappear. I might be late for a further improvement of those bars but you should try it if you have further use for wires. Usually I use this technique also for wires I have to bend - e.g. into rings - to have smooth pieces to start with. Regards Peter
-
Hi Merry Of course. I was looking at the mast as a static system and totally leaving the forces on the sails out of the equation. So, even when tacking you always have forward thrust from the sails onto the masts (and also a considerable lateral force). Still you would have to watch out for not overloading the stays if you set a sail back and when using staysails. Your explanation sounds very logical. Thank you Peter (I also got some information from AON which confirms the relative sizes. Thanks Alan.)
- 366 replies
-
- 3
-
-
- bellerophon
- victory models
- (and 2 more)
-
mizzen topmast While setting up shrouds, stay and backstays and balancing their pull I noticed an error in the kit's plans. The rigging stages 2(stays) and 3(backstays) should be interchanged because of the normal sequence of the ropes at the masthead. The stay should go over all shrouds and backstays and therefore be the last to set up. I reduced the topmast stay to the same dimension as the shrouds. If I understand Lees rigging dimensions correctly on the topmast the shrouds, backstays and stays all hat the same diameter. This seems a bit illogical because one stay then balances 4 backstays all with the same diameter. Nevertheless I set it up that way. testing the new ratlines mizzen topmast top stay backstays mizzen topmast standing rigging finished

- 366 replies
-
- 9
-
-
- bellerophon
- victory models
- (and 2 more)

