flyer
-
Posts
1,016 -
Joined
-
Last visited
Content Type
Profiles
Forums
Gallery
Events
Everything posted by flyer
-
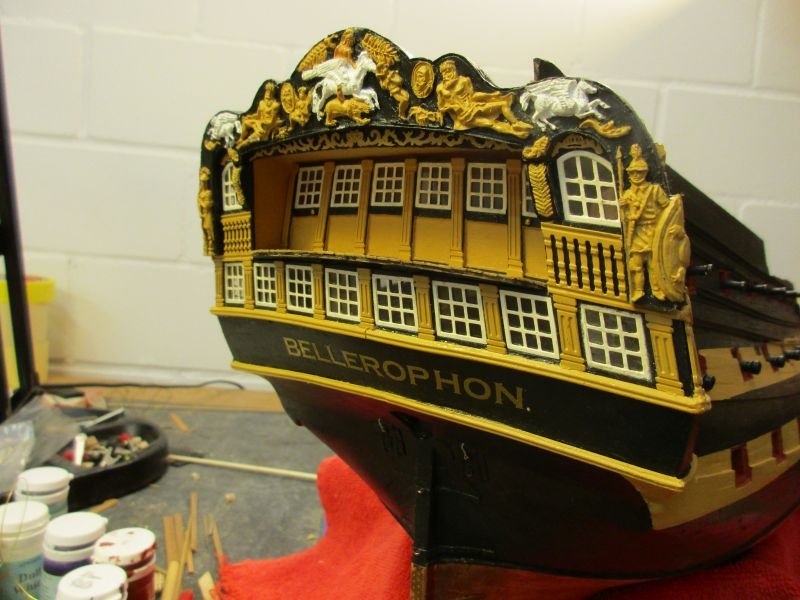
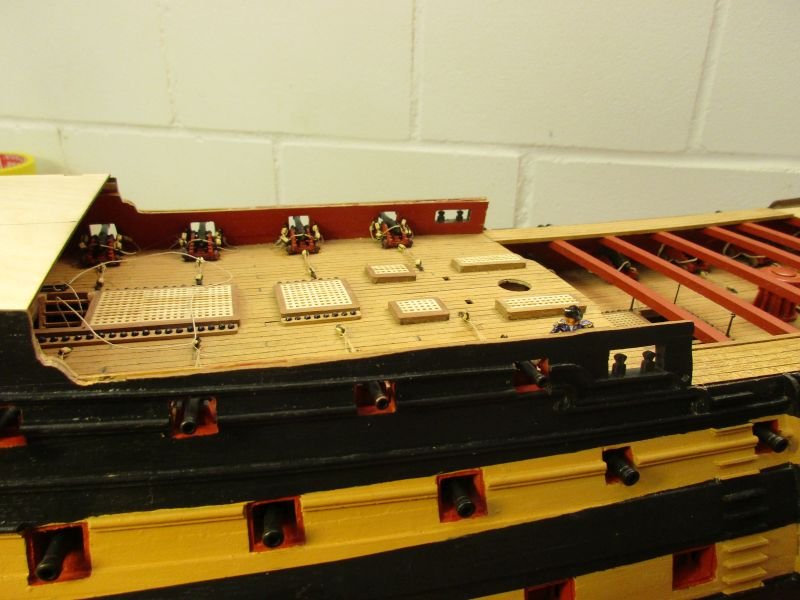
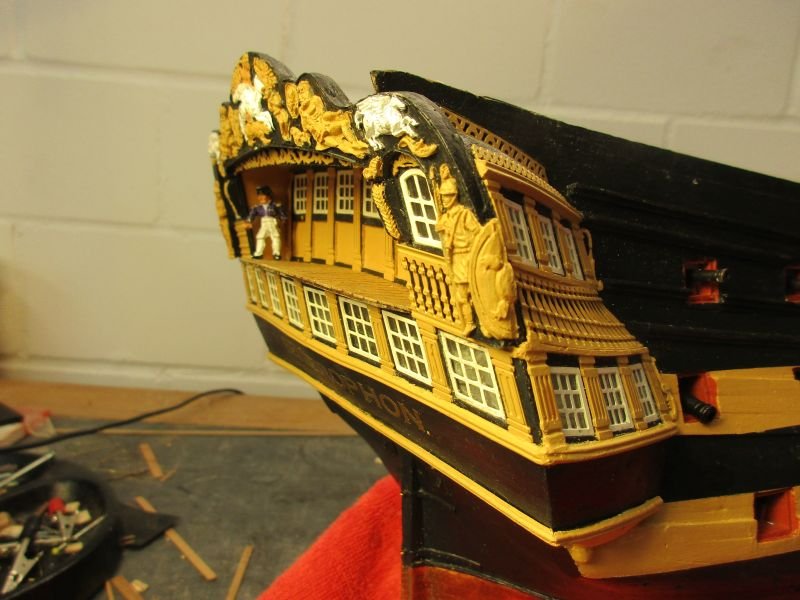
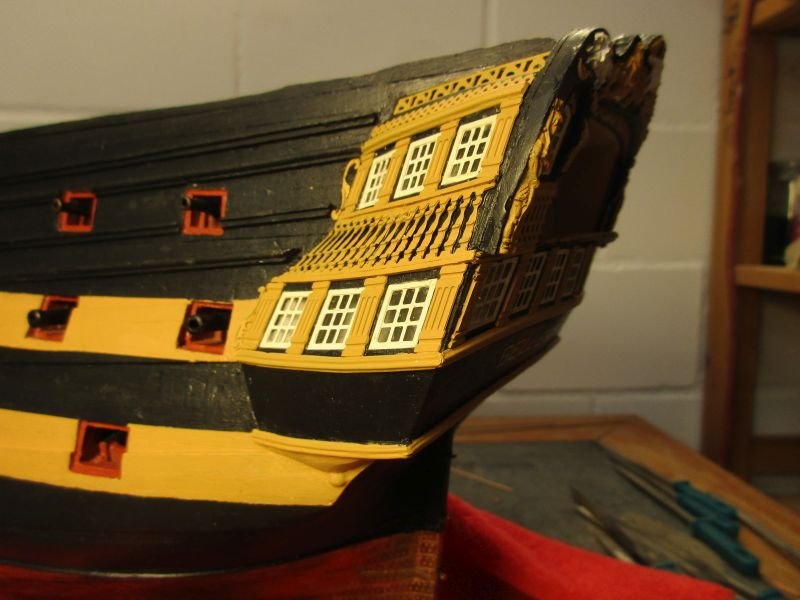
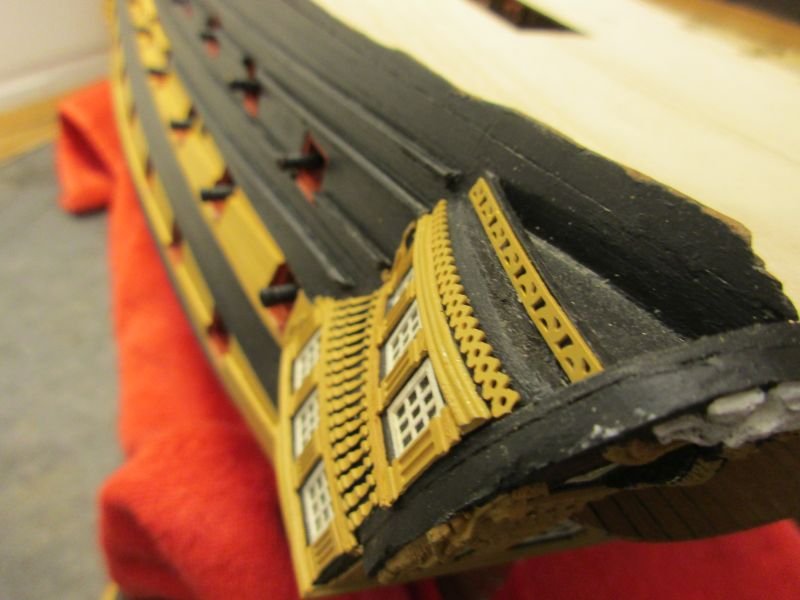
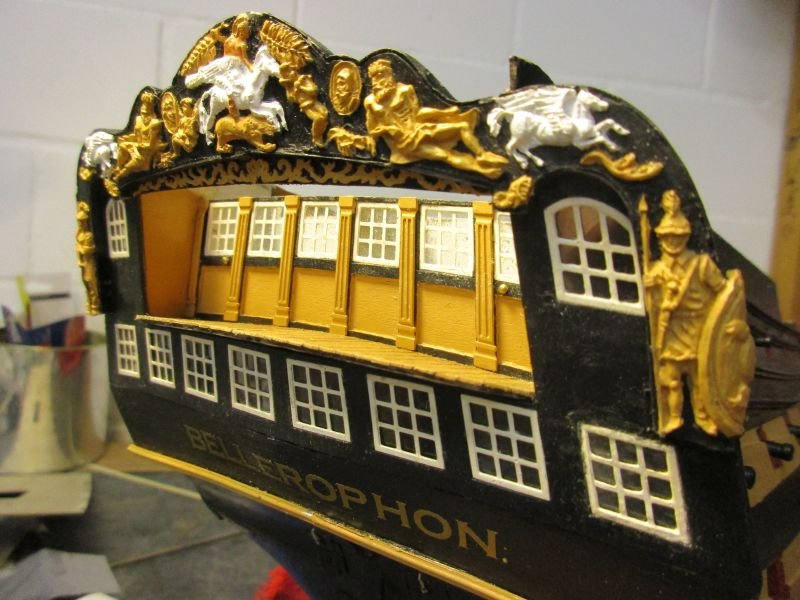
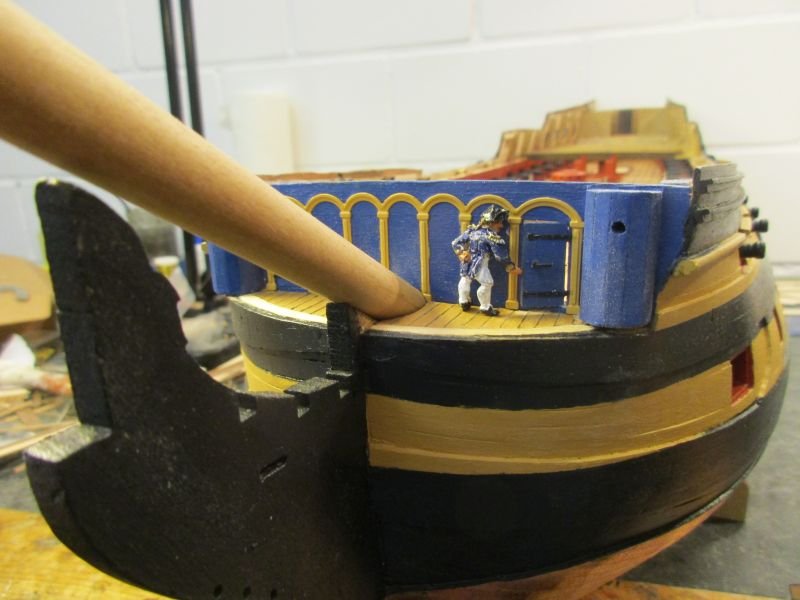
 Finally all of the quarterdeck guns are installed. While working on them I came to the decision to build the quarterdeck bulwark as per kit. Such a heightened bulwark was probably in place by the time Napoleon travelled on her (I'm trying to represent the status she probably had then), I was getting used to those proportions during the work on it and it's sensible to give the crew that additional protection. quarterdeck guns are in place the captain checks the guns... ...and he approves of the additional protection by the heightened bulwarks Also 2 more sheave blocks per side were worked into the hull. Next time I'll try to make them before closing the decks... sheave block for the main sheet sheaves for the fore sheet (left) and the main tack (right) In the meantime work on transom and side gallery decoration went on. First I finished the transom but left off the delicate balcony rail. The decorative strips above and below the name were spaced evenly and - as I realised later - a bit too wide apart. All the decoration parts on transom and side galleries as well as the decoration stripes on the hull and even the colour separating lines are connected to each other. Sometimes by luck it fit as I added part by part and sometimes I had to rework and repaint again and again to match a smooth transition from transom to side gallery to hull. I started with the parts adjacent to the balcony balustrade and the equivalent parts on the side galleries and worked downwards and upwards. This was a good decision and made all the fitting easier. Some decorative parts (parts #377 and #434) didn't fit into their place and were left off. Also the side decoration on parts #445 and #446 were filed flat as they seemed too elaborate and somehow didn't fit to the rest of the decoration around the side gallery stern window. On top of the side galleries cisterns as suggested earlier by paulsutcliffe were installed. Paul, the skipper will ever be grateful for his flushing toilet. Thanks. I'm quite happy with the appearance of the stern as it is now, with the few colours used and the slightly reduced decoration. I think it looks rather clean and elegant. transom finished part 446 with side palm leaf filed flat part of the decorative strip on the hull was replaced... ...to give a better fit with the side gallery decoration the lower ends of the side galleries needed some filling the captain likes the decorative work ...and the cistern for his flushing toilet
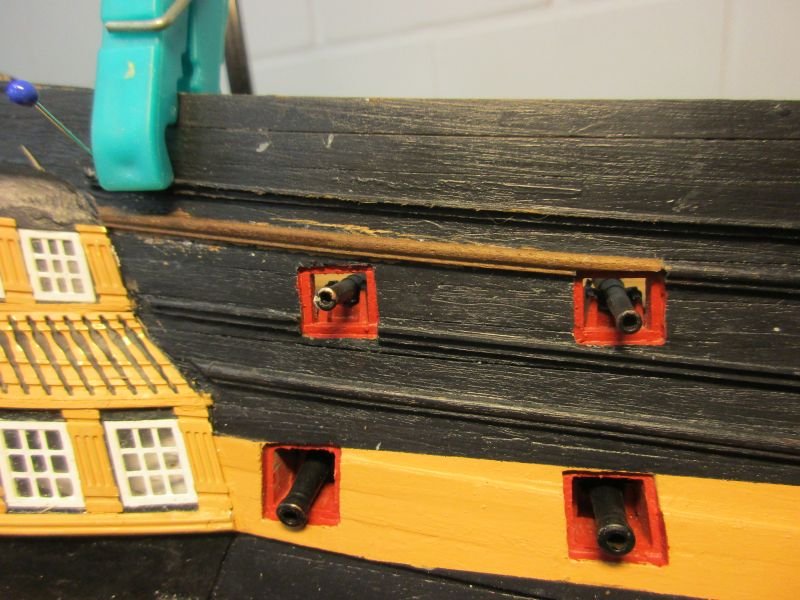

- 366 replies
-
- 13
-

-
- bellerophon
- victory models
- (and 2 more)
-
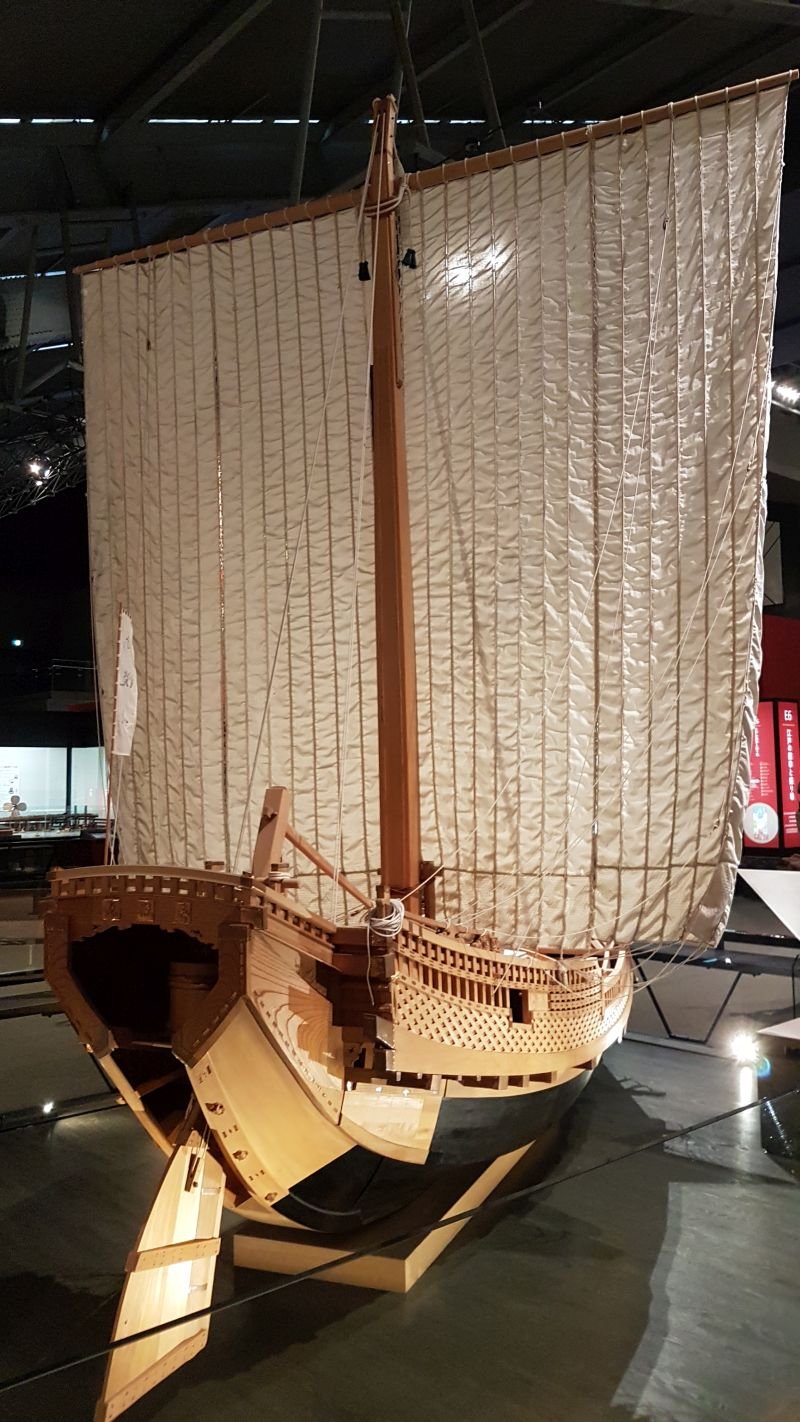
It has been quiet in the wharf lately, because I paid a lengthier visit to my daughter which was spending some time in Japan. It was a most interesting journey in a different, beautiful world. Shipbuilding was only of minor interest (but I might build a Woody Joe model of a Japanese vessel like I saw in the Edo museum). Visited woodworks were mainly temples and shrines and one very impressive visit was to Hiroshima - where you see what happens if generals are allowed to play unrestricted with their war machines... model of a Higaki-kaisen ship in the Edo Museum never again!


- 366 replies
-
- 5
-
-
- bellerophon
- victory models
- (and 2 more)
-
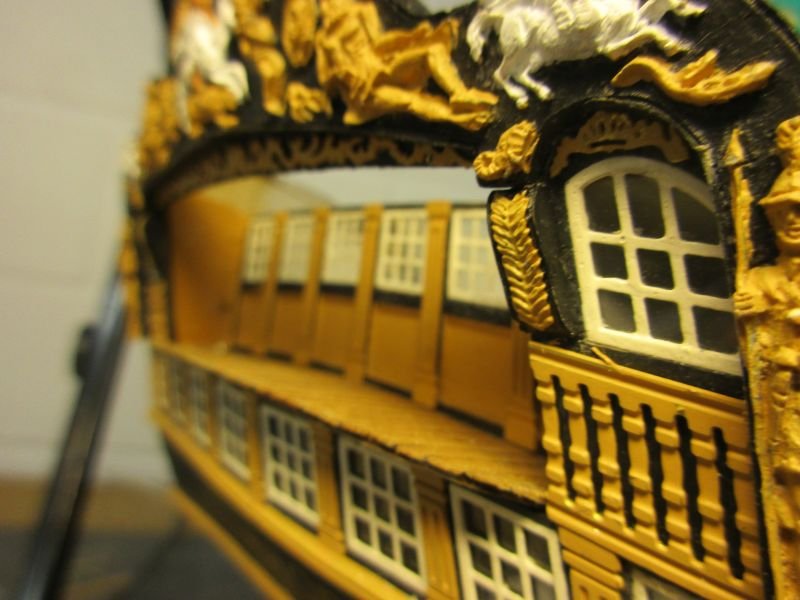
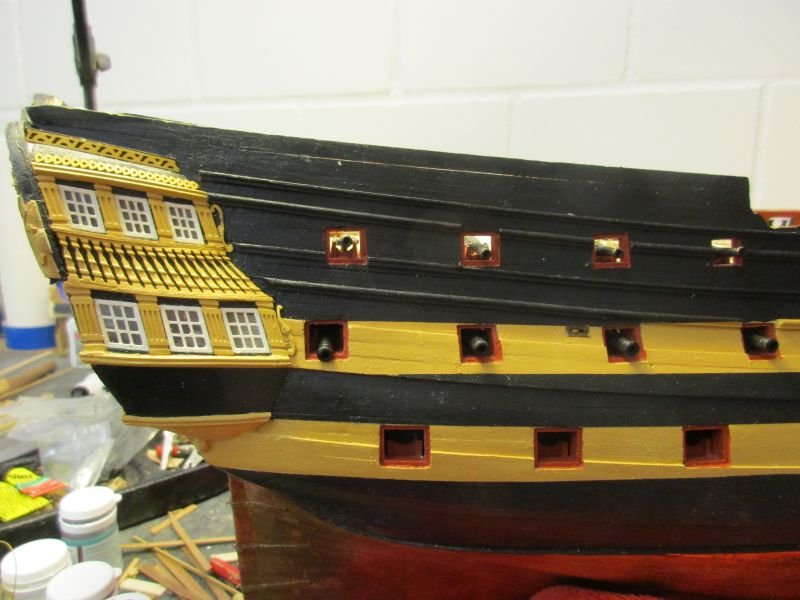
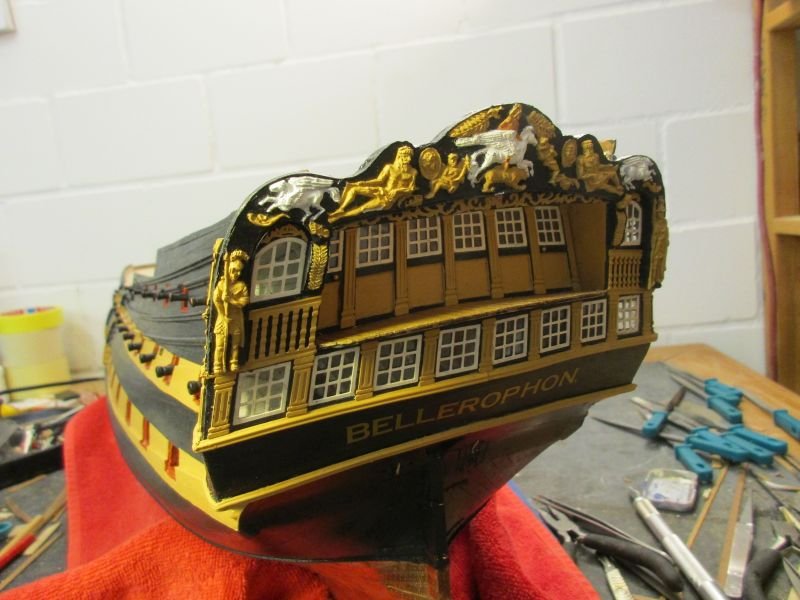
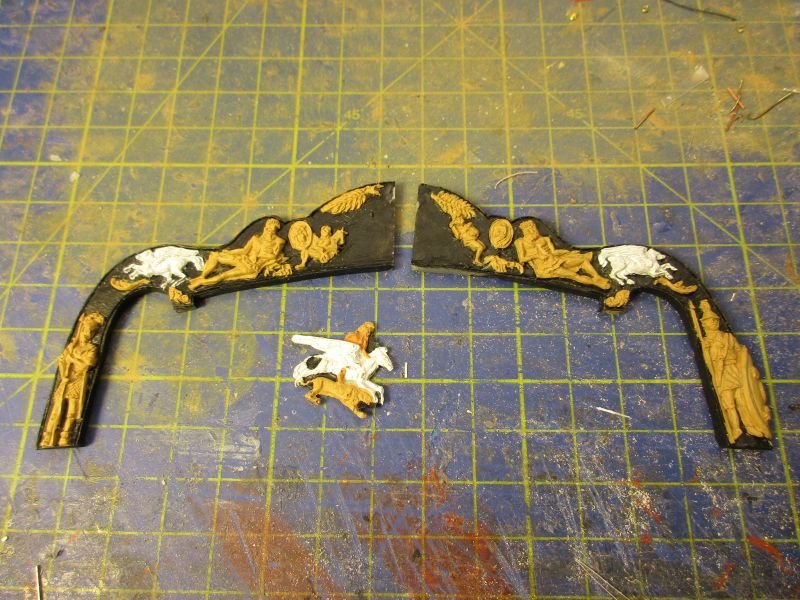
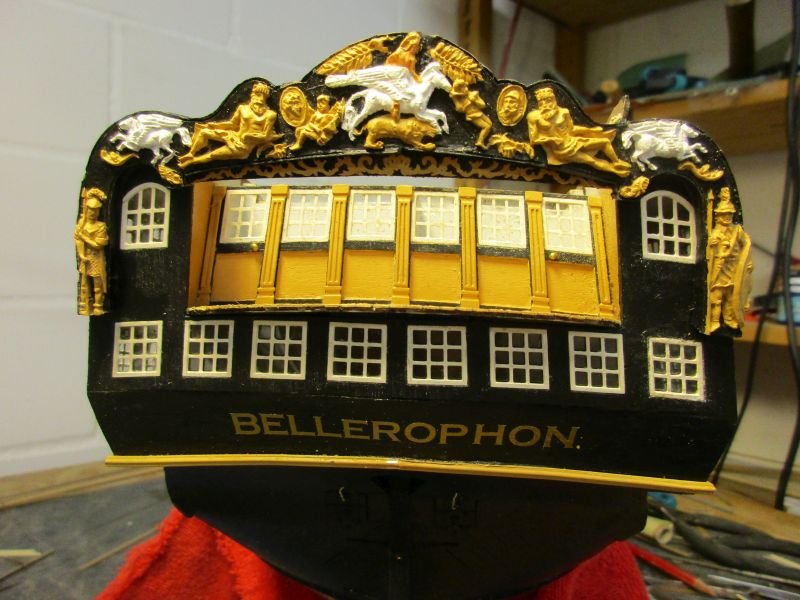
Because I still was reluctant to continue with gun rigging, I put the transom in place and started on its decoration. While trying to fit the flexible decoration part I found that it was too wide and would not fit around the quarter galleries stern windows. As it was already mutilated after scratching away the elephant I brought myself to cut it in half, taking out about 1,5 mm in the middle. (A similar operation had already worked for Pickles boat so I did it again.) The now 3 parts were painted and glued onto the transom. After much re-gluing, light sanding, touching up again and again with the 4 colours used (black, yellow ochre, white and flesh) and mending Pegasus' broken wing I achieved an acceptable result which even for once looks better on the pictures than in reality. Using only 3 basic colours and just a little more on the central image of Bellerophon on Pegasus looks right to me - not pretentious but with a simple elegance. Again, less seems to be more. After closing the side galleries I could see what benefit I gained from the extra work with hollowing out the gallery frames to give a view into the lower part of the side gallery: Well, not a big one, but I'm still glad I tried it. Next time I should radically cut away as much as possible of the part where it touches the hull. 3 parts of the transom decoration ready to be glued on the yellow ochre looks a bit more golden than in reality the transplantation of Bellerophon was quite successful
- 366 replies
-
- 15
-
-
- bellerophon
- victory models
- (and 2 more)
-
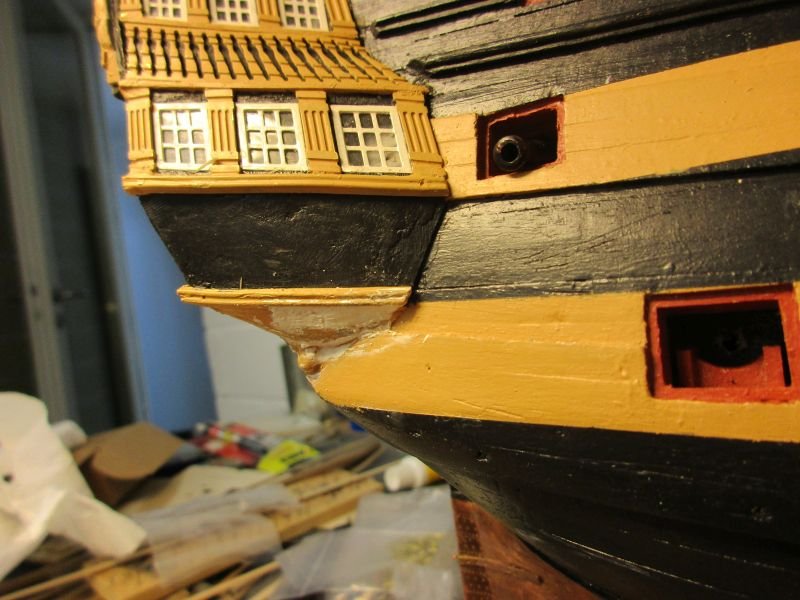
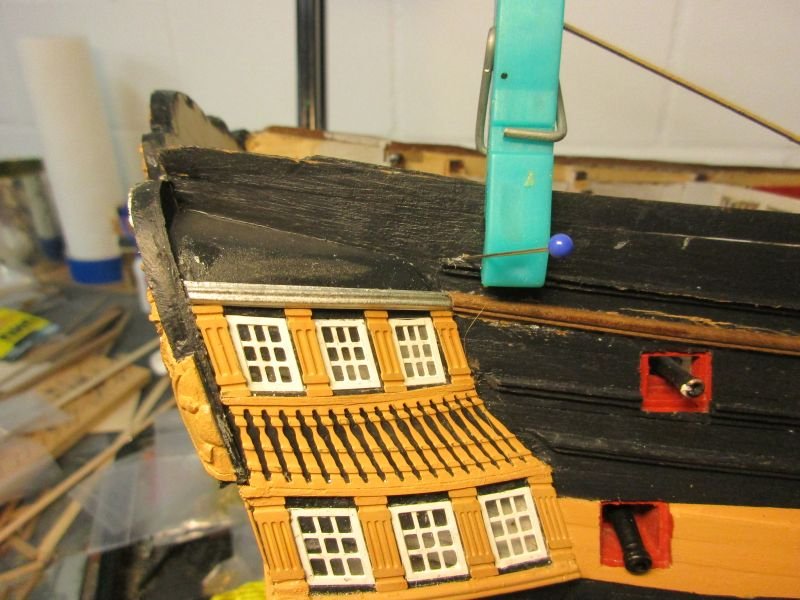
Hi Martin As far as I understand were those window openings in the hull constructed in a similar way to the gun ports - in this case about the size of the middle field of the 'glass case'. Wider openings would unnecessarily weaken the structure and deprive protection against enemy gun shots. To use the glass case for a view forward or aft you would have to put your head through the opening. For me, those openings visible in post 471 seem about right. On my models I try to open all windows through the hull. You may not always note the difference to a just black painted hull but for me a real opening just feels better. Cheers Peter
- 467 replies
-
- 1
-
-
- fly
- victory models
- (and 1 more)
-
kit review 1/72 HMS Vanguard 1787 - Victory Models/Amati
flyer replied to James H's topic in REVIEWS: Model kits
Hi Jose What a marvellous build! I love sail ships with sails and your presentation is a masterpiece. Would you mind telling me how you fixed that behemoth on those two small pillars? I'm planning to mount my Bellerophon on three but I still wonder if the PDF can take the strain although I doubled it up in the region where those 4mm woodscrews through the pillars should hold the ship. Cheers Peter- 18 replies
-
- 1
-
-
- victory models
- elephant
- (and 3 more)
-
Hi Martin Great work! I hate to say it but I would go with a rounded side badge. As I understand both versions exist in contemporary sources but for me the 3 windows panel setup only makes real sense if you build a small, conservatory like glass house to give the skipper some forward view from his cabin... Cheers Peter
- 467 replies
-
- 2
-
-
- fly
- victory models
- (and 1 more)
-
Hi Martin Thank you. Yes it is adhesive vinyl lettering with a thickness of 0,1 mm - stable but thin enough to still show the wood structure below the material (BECC made it). And I'm afraid lawyers are a plague in any language and every culture however simple it may seem... (Very sorry if I just trod on the toes of any lawyer in this forums - but if you are here, you are most probably an exceptional lawyer!) Cheers Peter
- 366 replies
-
- 1
-
-
- bellerophon
- victory models
- (and 2 more)
-
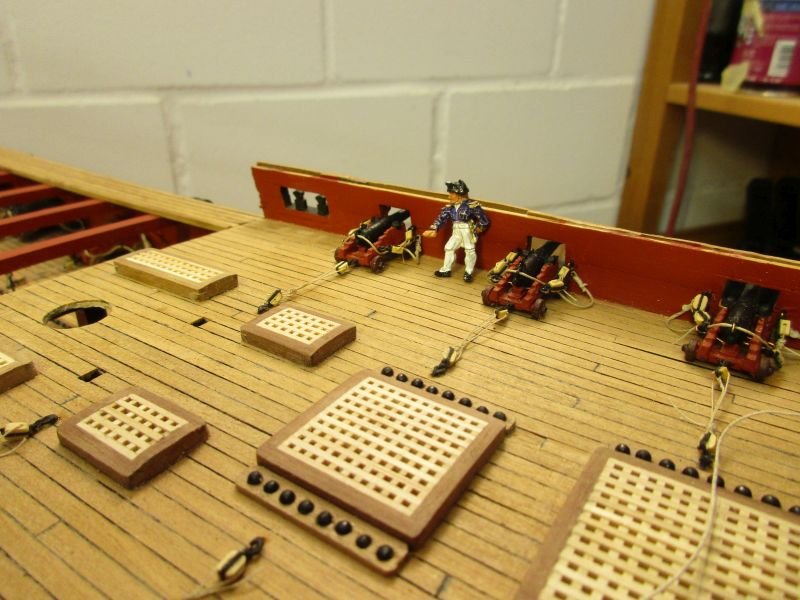
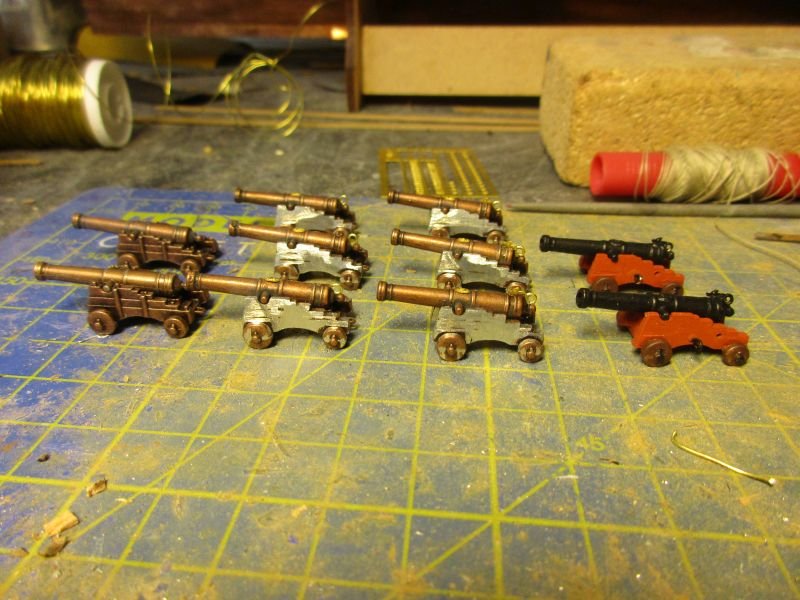
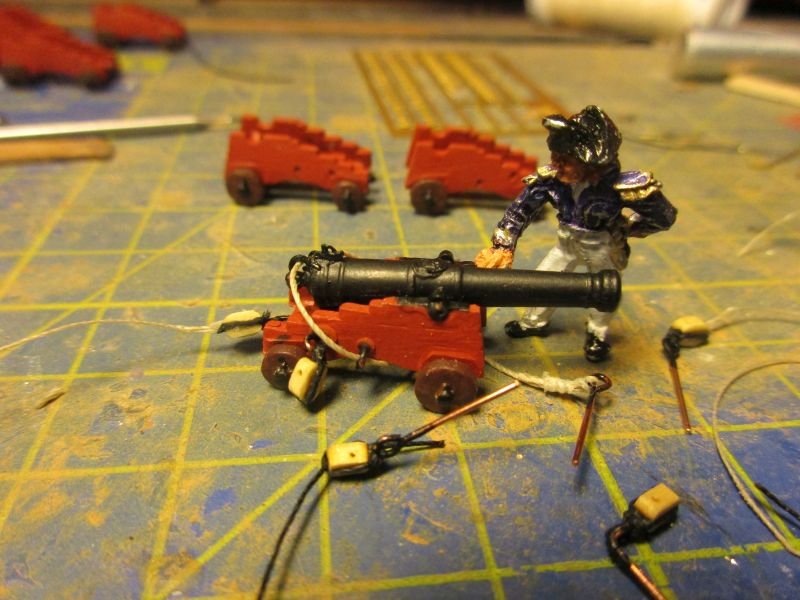
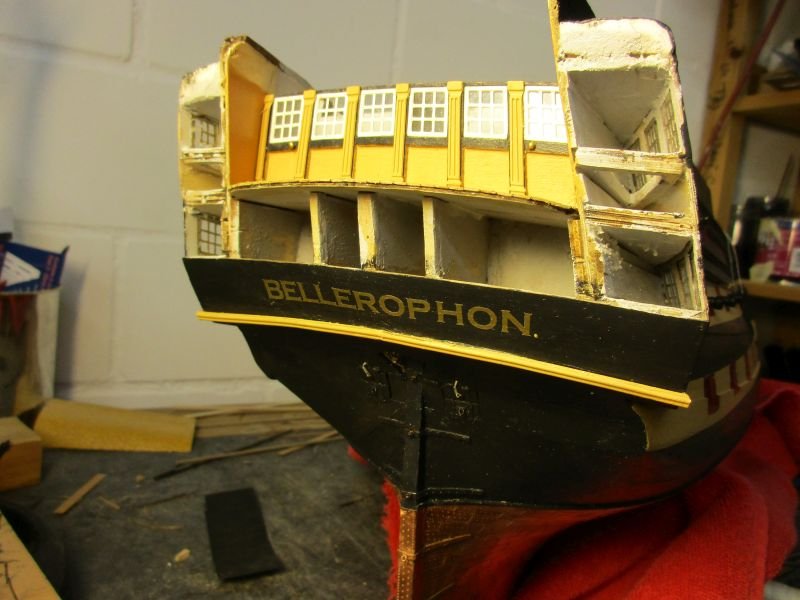
In the meantime the arming of the quarterdeck continued. The 9-pounder guns forward of the cabin bulkhead will be 'fully' rigged. To simplify the process the tackle blocks are directly attached to the eyebolts, bypassing the hooks. I use black thread which could be taken for iron binding and hook - considering the scale and my eyes. When I'm fed up with rigging the tiny blocks I work a bit on the stern. Bellerophon got her name (or is it his name? - a female ship with a male name - the English language can be confusing). Instead of the kit's photo etched letters I tried 6mm gold gothic font letters. A full stop was added with a dot of gold paint. (There was a discussion in this forum about how the ships were named and it seem the names ended with a full stop. ) I think the result looks quite acceptable. step by step reworking of guns and carriages the skipper checks a gun which is ready to be hoisted on board port side of the quarter deck although the name is already there, I didn't break a bottle of champagne on the bow (yet)

- 366 replies
-
- 12
-
-
- bellerophon
- victory models
- (and 2 more)
-
Congratulations B.E. Also the presentation with that group of blackened figures - showing quality but not drawing away attention from the main object - is another stroke of genius. Cheers Peter
- 574 replies
-
- 1
-
-
- cheerful
- Syren Ship Model Company
- (and 1 more)
-
Well, judging by my own experience, you will not have to search for those lost kg - unfortunately they'll usually find you again. 😉 Although I feel a certain unwillingness to repeat the exercise at least it provided you with a very interesting project... Cheers Peter
-
Hi Nils Great to hear from you. Again you showed your creativity already in choosing your new project. I'm looking forward to a very interesting build. BTW what is fast hiking - perhaps something similar to Nordic walking? Cheers Peter
-
Again compliments for a superb build. Regarding you two last kits: After building Granado a few years ago I'm now fiddling with Bellerophon/Vanguard. If you compare the prices 300 EUR versus 620 and the amount of material and plans included I think they are in the same price range. However either you were unlucky with the wood in your Granado kit or the quality has a bit deteriorated over the last few years. But the fact that Caldercraft practically has stopped to work on new kits and concentrates on selling what they have worries me a bit. This could well be a sign of making all the money you can while not investing in new projects and therefore of a downward trend. But I still hope for a future for Caldercraft, for prosperity with high quality and eventually perhaps even the launch of the Surprise kit.
-
Hi B.E. A truly wonderful little gem. (Completed with rigging and even sails in the same outstanding quality - I wonder how that would look... Room to place it? Damn the torpedoes, full speed ahead!) Cheers Peter
- 574 replies
-
- 2
-
-
- cheerful
- Syren Ship Model Company
- (and 1 more)
-
Well I do - I'm using my slide gauge all the time. On the other hand the eyesight fortunately develops such that it compensates more and more for inaccuracies.
- 366 replies
-
- 3
-
-
- bellerophon
- victory models
- (and 2 more)
-
Thank you very much. It seems that the sheave block should run parallel to the planks and only the sheave itself is angled. That mistake I will have to live with. While trying to work out the correct size of the fore sheet and its sheave block I stumbled about a point in Lees. He writes (page 185) that the lower stays are half the diameter of the appropriate lower mast!? However, if I take half the mast diameter as the circumference of the stay I get a stay with a diameter of a bit more than 1,6mm. Do you think it's meant this way? The kit uses 2mm rope for the fore stay and according Lees this would mean a 0,8mm rope for the sheet and 0,9mm sheave thickness according your figures. So by sheer luck my try for a sheave block seems to have about the right dimensions with a 1mm slit for the sheave and length of 5mm for the sheave hole. By the way - don't you use metric in Canada as well? Cheers Peter
- 366 replies
-
- 1
-
-
- bellerophon
- victory models
- (and 2 more)
-
Most kind, thank you. But what really could drive me nuts is how to belay the main sheet (through the second from aft of all these sheaves, I know, but how, oh how?) Anyway, I will tackle that problem after more important issues, such as installing the skippers flushing toilet! By the way, there is a part in the kit which resembles that 5th sheave block (minus the sheave) and which I believe is used for the main bowline.
- 366 replies
-
- 1
-
-
- bellerophon
- victory models
- (and 2 more)
-
Hi Alan Thanks very much for the help. I'll have to do 3 more pairs then. Sometimes I wonder if it makes sense to concentrate on such details on a moderately built build witch many imperfections, some from the kit manufacturer and most from myself. But if you are aware of something you could at least try to improve I guess you have to do it or else you would always just look at that specific detail, sticking out like a sore thumb. Cheers Peter
- 366 replies
-
- 2
-
-
- bellerophon
- victory models
- (and 2 more)
-
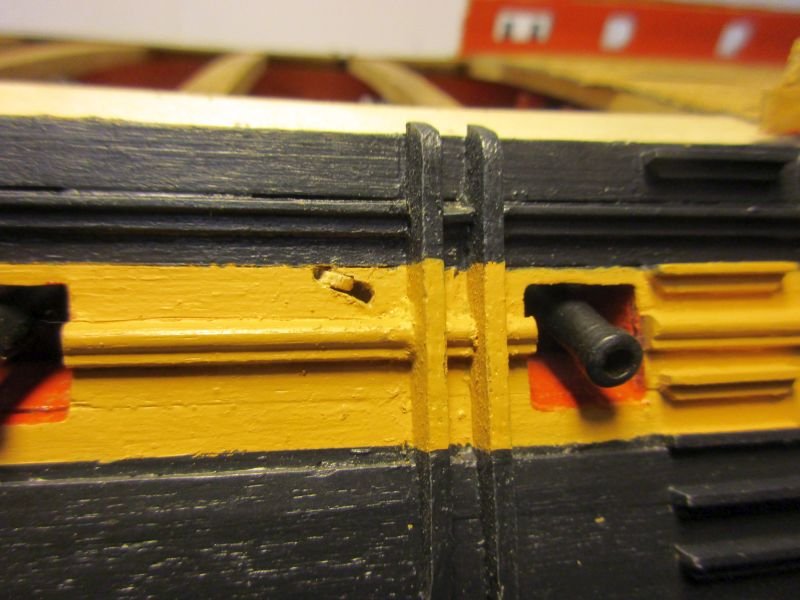
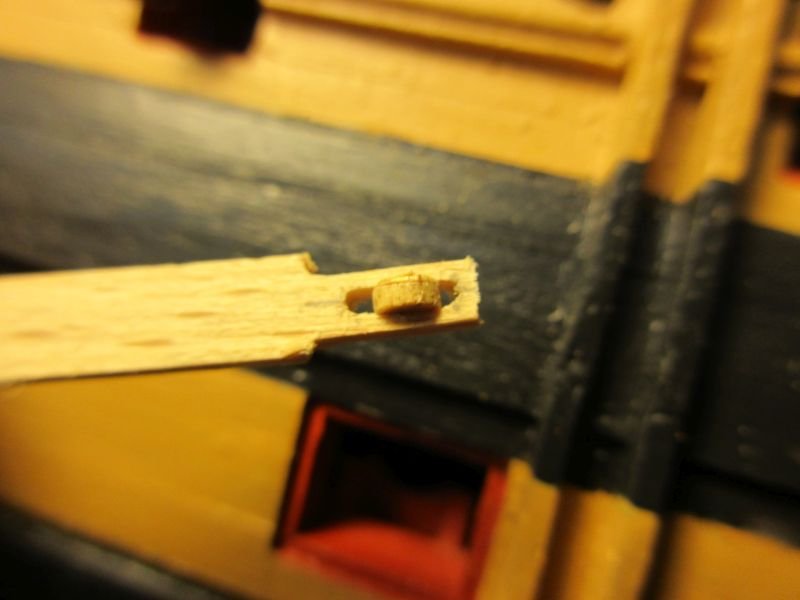
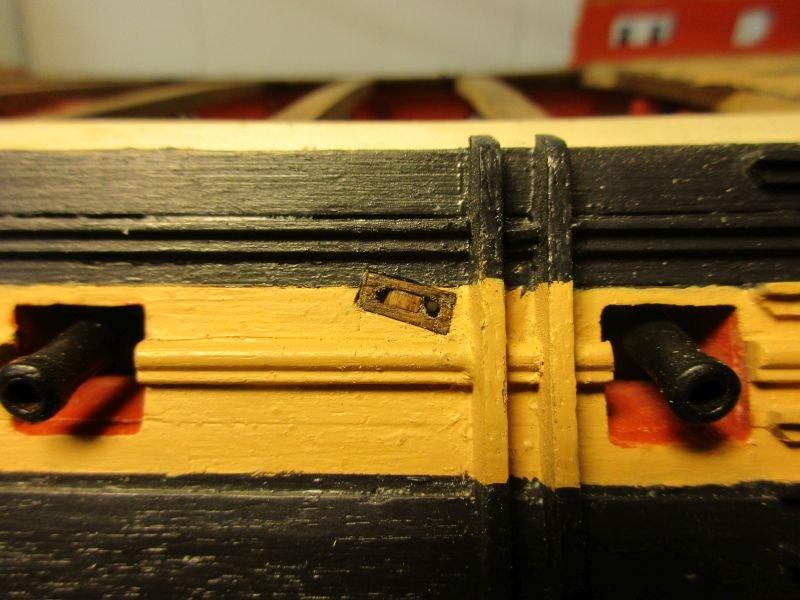
back to the upper deck... While working on the quarterdeck gun ports I realized that several details on the upper deck were missing. I forgot not only the cleats but also the sheave blocks for the sheets. The problem is that the respective information is not found in the manual, which is just covering most basic building steps, but hides scattered over all the plan sheets. Fortunately the missing cleats were all in the waist area and could be added rather easily. Then I tried to fabricate the quite prominent sheave blocks for the fore sheets. First version was a simple hole in the hull - naah, too simple. The second version was to cut a slit into the hull and insert a small disk cut from a 3mm dowel - still looked wrong. Finally I worked a slit into a piece of leftover boxwood, inserted a disk, stained it walnut, cut and filed a rectangular 3x5mm slit into the ships side and inserted the fake sheave block - acceptable. I think it's a pity that there is no step by step instruction booklet as in Caldercraft kits but on the other hand I'm supposed to be a moderately experienced kit builder by now and should have learned to check the depth of the water before plunging in head first... On the other hand again successfully correcting needless stupid mistakes gives a strange satisfaction, perhaps greater than what you feel doing it right from the beginning and not knowing how tricky the whole thing could be... So I will get on with the build and continue to make stupid mistakes. botched sheave block try tinkering a sheave block final solution
- 366 replies
-
- 6
-
-
- bellerophon
- victory models
- (and 2 more)
-
Hi B.E. Great precision and great details! The more it must be annoying if something as important as a whole gun doesn't fit properly. Couldn't you close the chase ports with something like 'plug in lids'? I'm pretty sure that such things were used to keep the sea on the right side of the bulwark when no permanent port lids were installed. Then you could place those two guns behind their regular ports and reserve the use of the chase ports for times when desperate measures are required. Perhaps Chuck or somebody else has an idea how those plug-in-lids were looking. Cheers Peter
- 574 replies
-
- 3
-
-
- cheerful
- Syren Ship Model Company
- (and 1 more)
-
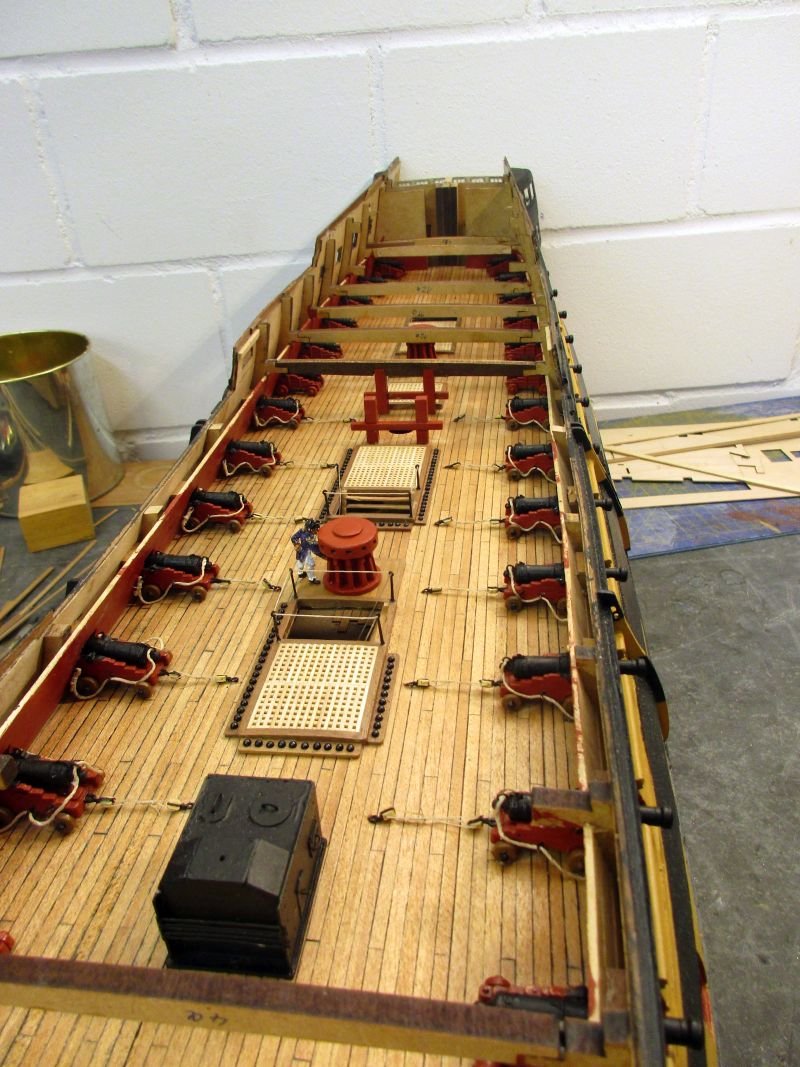
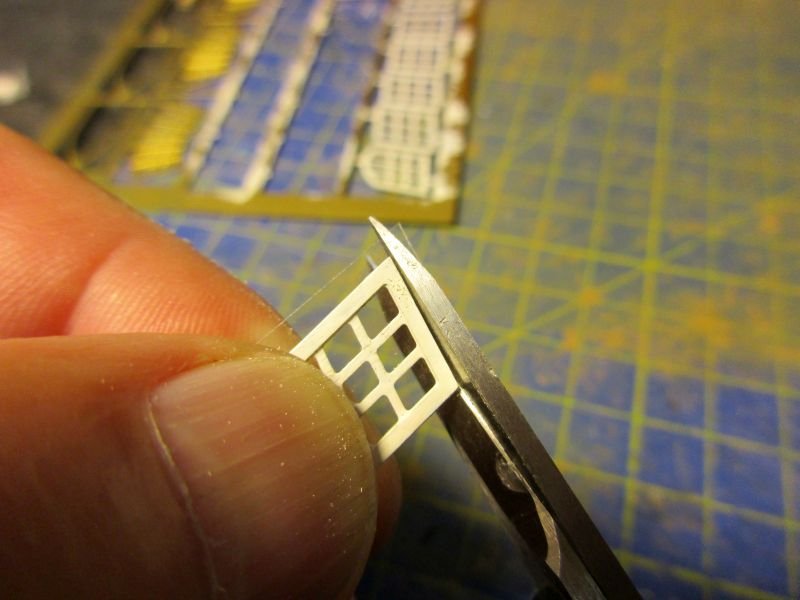
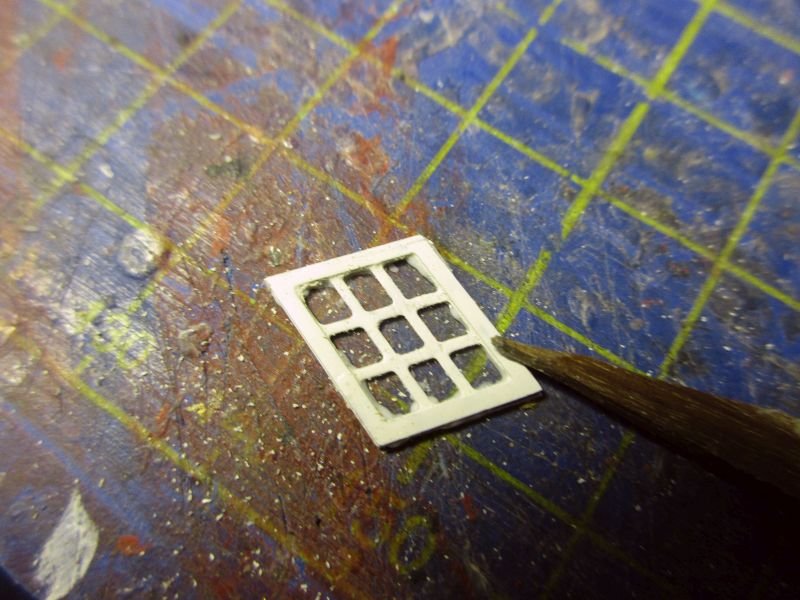
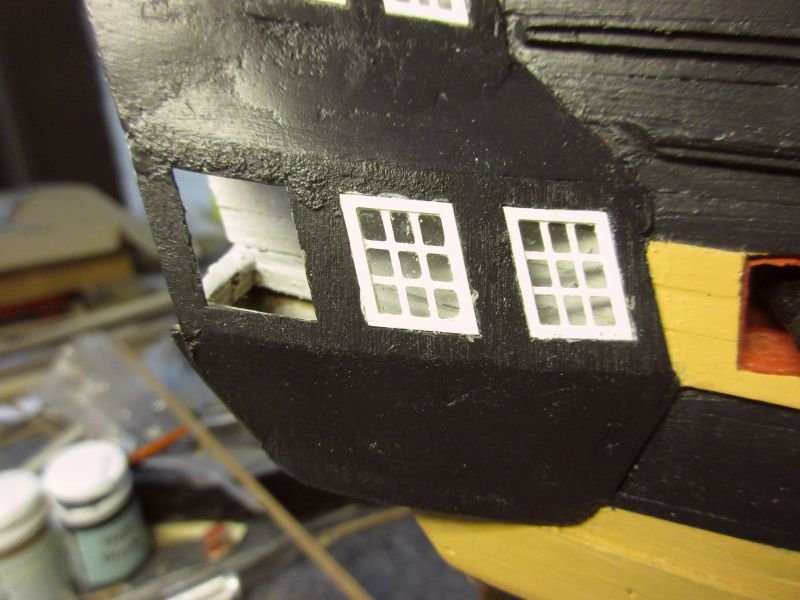
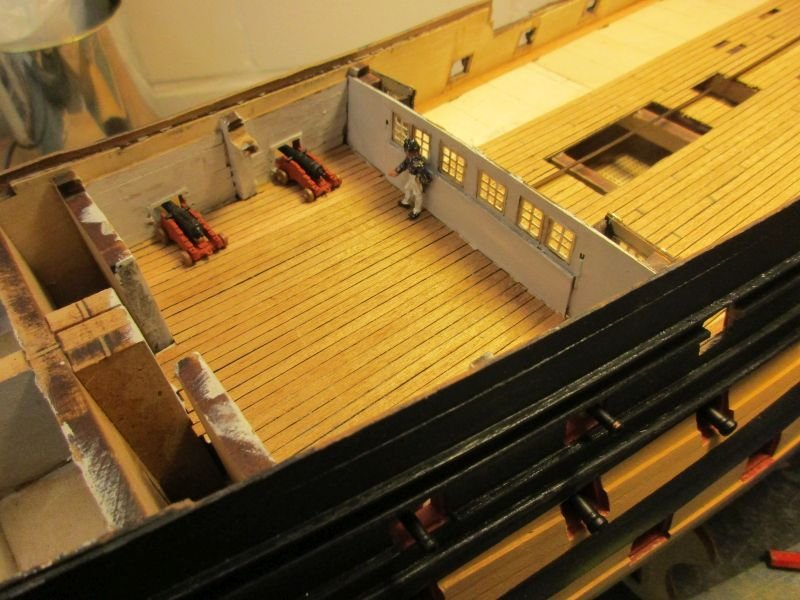
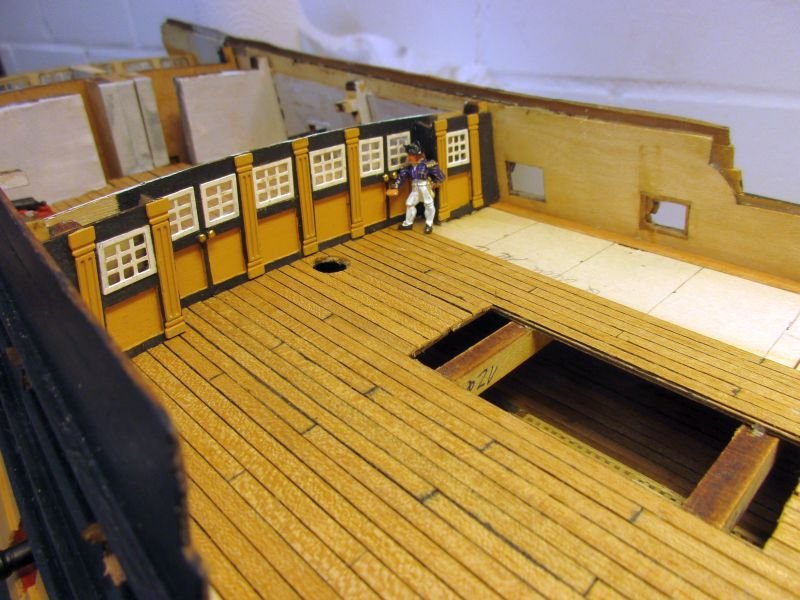
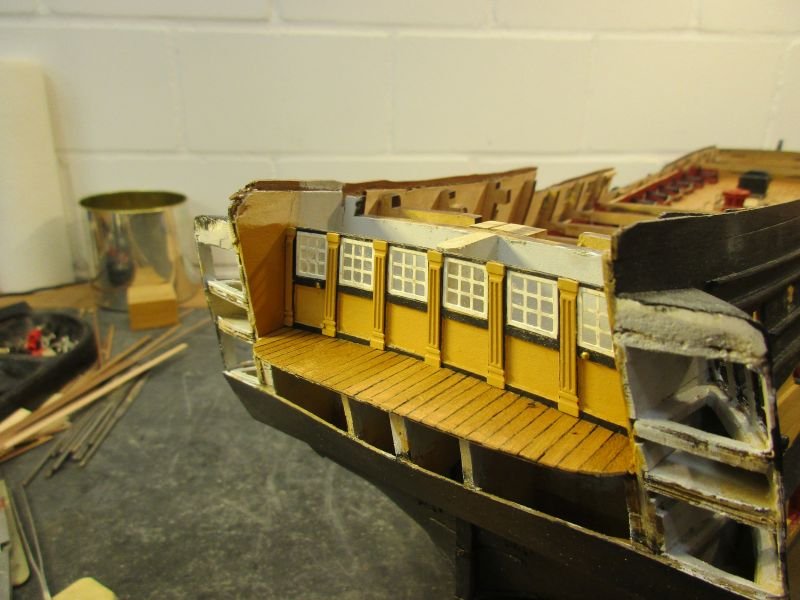
Quarterdeck and forecastle This deck was fixed in place with the waist beams glued in after fixing the deck to avoid conflicts with the exact latitudinal placing. Another of the very few mistakes in the kit construction became now obvious. Beam 12a lies across an opening in the quarter deck where a stairway down to the upper deck must be placed. Beam 13a already had to be left off as it conflicts with the mizzen mast. Checking RMC's marvellous Vanguard it seems that he had the same problem and hat to cut out the centre part of the beam 12a - which I will do as well. The cabin bulkhead details were painted and fixed and the bulkhead put in place. Again nail heads served as door knobs. I don't know if door handles would be the proper prototype solution but the shiny knobs look tidy. The deck within the cabin got its planks, the side walls were planked as well and the gun ports framed. The inside of the cabin was again white- or better light grey-washed and 4 of the 9 pounder guns were prepared (I just filed the front sides of the carriages flat and painted them, similar to the hidden guns on the gun deck) and put provisionally in place. In between I started the detail work on the side galleries and put the windows in. To glaze them I used some left over 0,2 mm cellophane which is easier to handle than the stiffer one in the kit. After painting the frames - here I used acrylic paint - they were cut out and the sides cleaned. Then a piece of cellophane was cut out along the edges of the window frame. Now the 'glass' was glued onto the frame with a little white glue. After putting on a small amount of CA glue with a toothpick into the window openings of the side galleries, I installed the glazed windows flush with the gallery surface. No haze occurred on the windows by this use of CA and I like its holding powers when I accidentally touch them. Planking of the quarter deck was started by installing a waterway using 0,6 x 4mm Tanganyika wood strips. The 1mm inner bulkhead planks will reduce its with to 3mm. The ends of the planks cutting into the waterway are gradually reduced to about 30% of their width, the exact form then pencilled onto the waterway and the excess waterway material carefully cut out with a knife. With a reasonable steady hand it works fine. cabin with provisionally placed guns the captain inspects the finished cabin bulkhead - the debated beam 12a is clearly visible cutting out the 'glass' removing excess white glue with a toothpick finished glazed windows glued in with CA
- 366 replies
-
- 9
-
-
- bellerophon
- victory models
- (and 2 more)
-
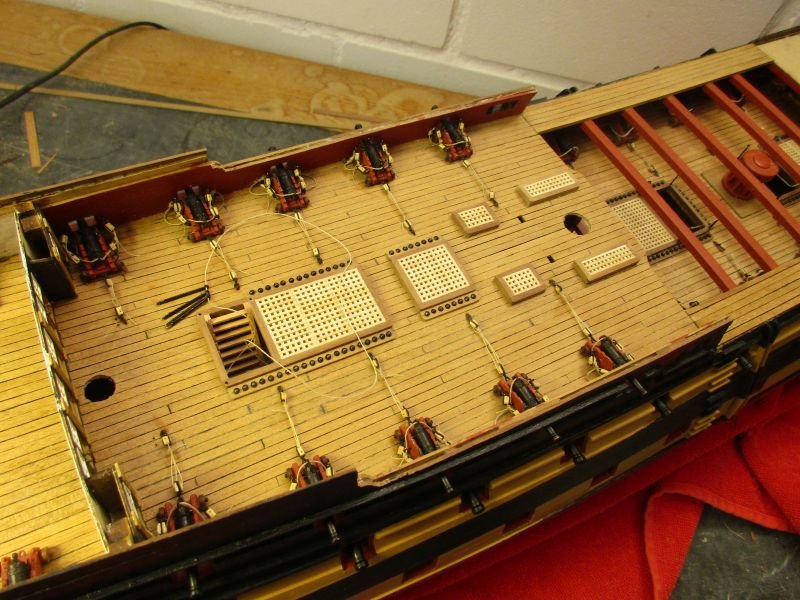
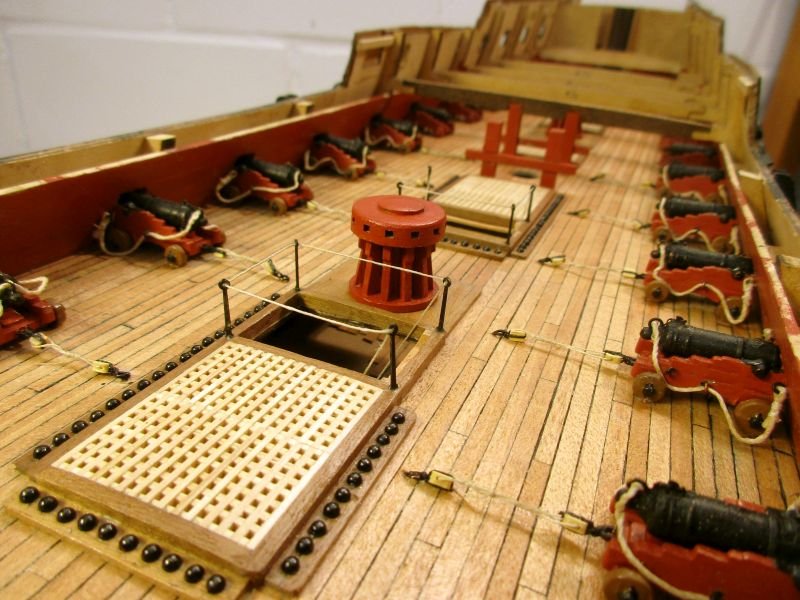
The balcony has been planked upper deck All the guns and furniture are now installed on the upper deck. After some browsing through MSW, web and several books about how to install the galley stove I finally decided to set it directly onto the deck because the most important thing would have been strengthening the beams below it, it seems unclear if those 'modern' stoves really were still installed on a brick base and it will hardly be visible after closing the forecastle and quarter deck anyhow. To check the openings for the bowsprit I had to provisionally fabricate itself. A small plane and the use of sandpaper and an electric drill as lathe reduced the 12mm dowel to 11mm and some work with nail files formed the seat for the cap and the bees. Installing the beams for the quarterdeck presented some problems because during careless handling of the build several stubs on the MDF bulkheads which should serve as seats for the beams were broken off. Fortunately fixing them with some splints and epoxy glue went well and the scars will be invisible below the quarter or forecastle deck. details of beakhead bulkhead added, provisional bowsprit in place deck details the stove sits directly on the planks and Bellerophon has got some teeth

- 366 replies
-
- 13
-
-
- bellerophon
- victory models
- (and 2 more)
-
Hi Martin So called heroes are reason for scepticism. Look at this one. Besides enslaving a perfectly innocent flying horse there were quite some rumours about his conduct among the ladies and in later life he was punished for his hubris. Nevertheless I kind of like that rogue - and yes, he definitely has more glamour than an elephant. Meanwhile, the skipper still has some work to do for a not only simple but also precise solution of the decoration problem. Hi Björn I bid you a 40% welcome to the ranks of the retired gentlemen! Thanks for the comment My quarter galleries just fit together more or less by themselves - or perhaps I was just lucky. But still the windows and the decoration have to be put in/on. I hope this will work as straightforward as the basic structure. Cheers Peter
- 366 replies
-
- 1
-
-
- bellerophon
- victory models
- (and 2 more)
-
Hi Chris A Bellona kit in Chris Watton quality would be great - however... Space for the finished model would be a big problem for many of us. My Bellerophon will be use a lot of it and she is 10% smaller (1/72) and I still don't know yet where to berth her. I think the price will not be the biggest problem. If you want spend 3 to 6 years to build a big, great model you could save a year longer for the kit. But how about a smaller frigate for your next kit? The only frigate kit available is Diana and nobody knows if Surprise will ever be launched. For example the graceful Lowestoffe (32) of 1761 had an interesting career, is well documented - including a contemporary model -, was a Slade design and would be rather unique in the range of available kits. Cheers Peter
-
Freely quoting Jack Aubrey: There are two ways to do it - the right way (or sensible one) and the navy way . On the other hand the sensible one could explain why the bomb vessel had 2 guns less. You found an elegant and ingenious solution to provide a perfect quarterdeck barricade. Me, I just nailed and glued it on, forcing it into the bend - the navy way. Cheers peter
-
Under the shower I was thinking about that space problem with Granado's guns and perhaps had an idea: She was used as a bomb vessel with 8 guns and a sloop with 10 guns. Now if you place the 8 guns on ports 1,3,5,9 and 2,4,6,10 and leave of those abeam the aft mortar you could serve them with only guns 3 and 4 being constricted on the forward side. For better working conditions for the guns 1 and 2 you would also have to shift the deck fixes for the fish davit but this should be possible. Serving the guns while leaning over the rail would be very cumbersome and expose you to enemy fire - it should be avoided. What do you think?
- 421 replies
-
- 1
-
-
- caldercraft
- granado
- (and 1 more)