


flyer
-
Posts
1,016 -
Joined
-
Last visited
Content Type
Profiles
Forums
Gallery
Events
Everything posted by flyer
-
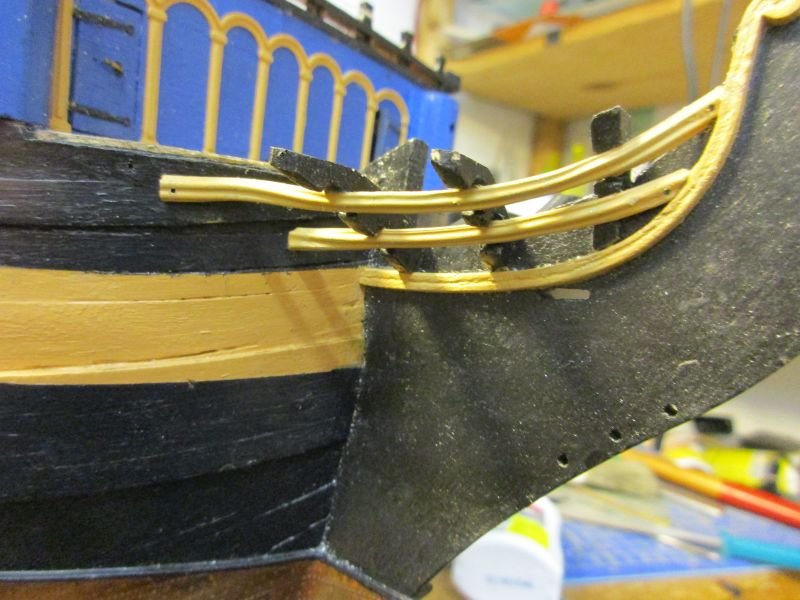
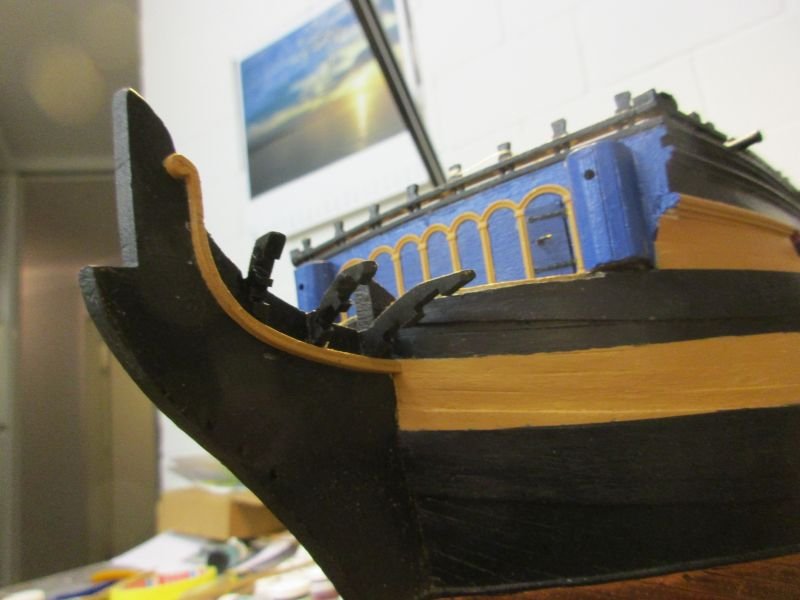
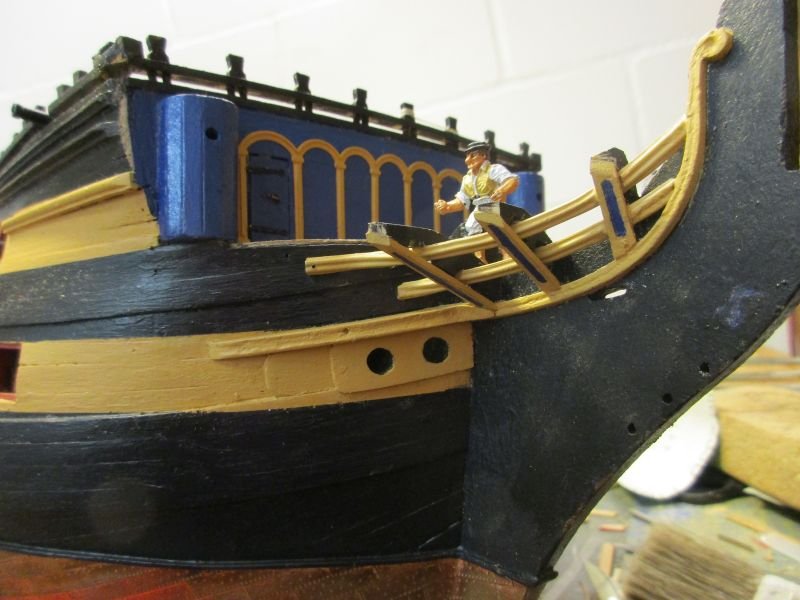
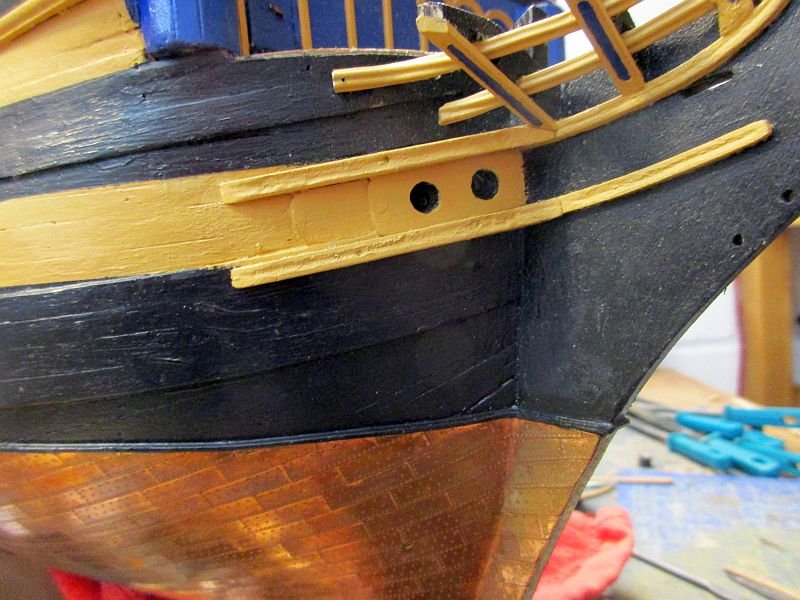
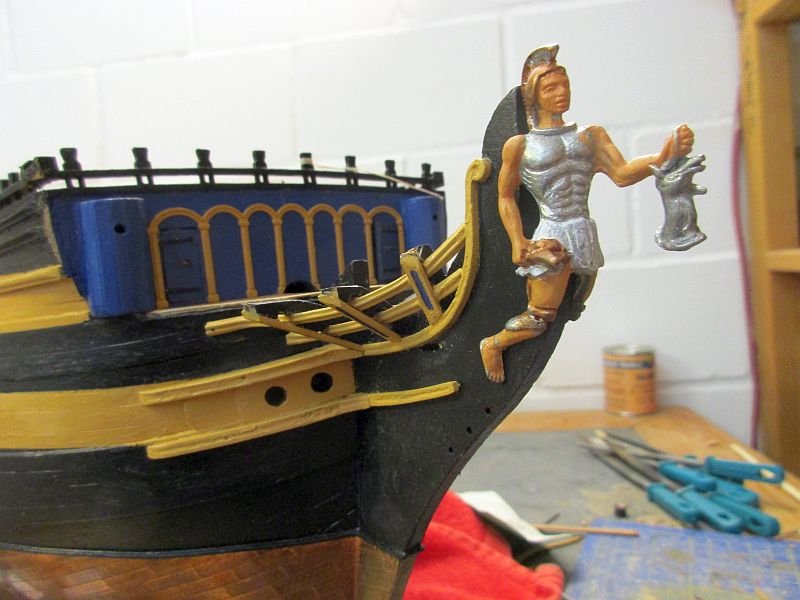
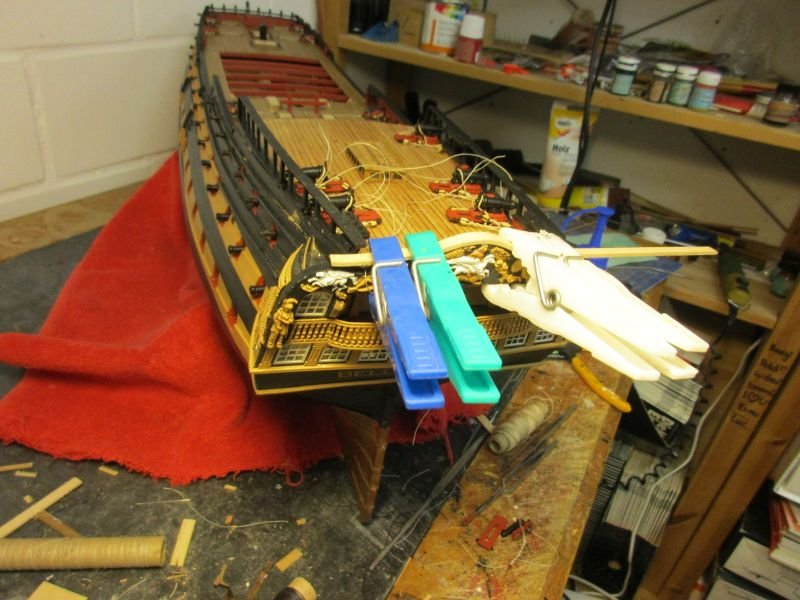
 Bow Others mentioned this to be the hardest part of the whole hull (in a way it has to be - it must withstand the whole force of the sea). Building it, even with that wonderful kit's parts, is certainly no easy thing. It is a 3-dimensional puzzle and depending on how accurate you built so far, all the parts need more or less adjustment to each other and the hull. I followed mainly the instruction manual but changed some details and sometimes the order of putting on part by part if I wanted to wait with delicate details. I started with the bow rail frames but setting the outermost a bit deeper to match the curvature of the upper head rails. After a dry run with the gratings I decided to put them aside, only using them as guidance. A groove was scratched lengthwise into the upper check rails to give a more realistic appearance. After painting them they were glued just below the frames. Now the cast railings were manipulated into the required forms, matching the plans, and glued into their slots. The walnut strips which cover the lower sides of the bow rail frames also got a groove, carved with the Dremel, and filled with blue paint. I had to scratch away a bit of the cast rails where they protruded out of the frames. The upper bow cheeks were added after carving grooves into the front edges. The hawse hole patterns were painted yellow instead of black as per kit instructions, adjusted and put in place. Then the lower bow cheeks - also grooved - were glued on. The cheeks are running in parallel with the wales and not the yellow / black colour dividing lines. In between those works I had to lower the seat for the figurehead on the bow in order to fit the hero's helmet below the bowsprit. After about half of the parts are in place the bow starts to look right. I wish I could offer better carved grooves but the general idea to overwork those flat surfaces seems right. dry run with gratings 'in the raw' bow rail frames and upper check rail cast railings added upper bow cheeks and hawse hole patterns in place lower bow cheeks added a trial run with the partly painted Bellerophon
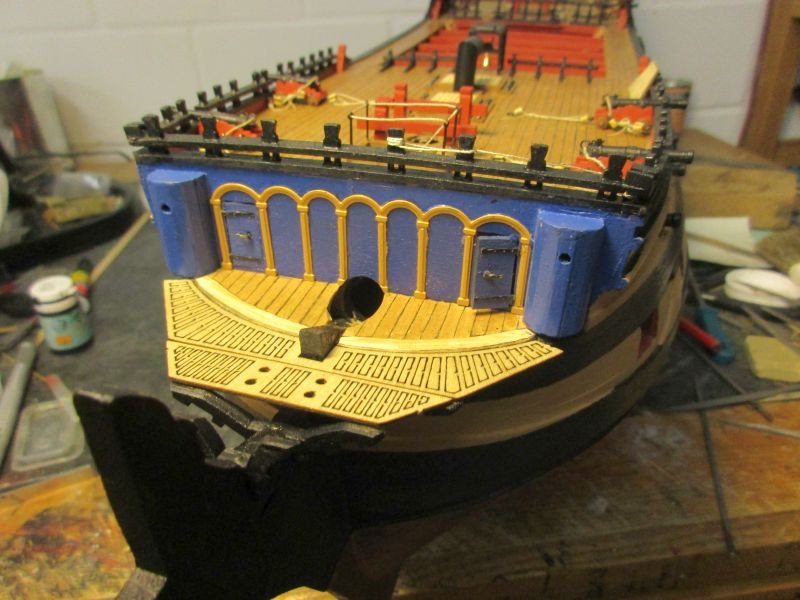
- 366 replies
-
- 9
-

-
- bellerophon
- victory models
- (and 2 more)
-
You could find out the actual scale of your full size plan by comparing it (e.g. overall length) with your actual build in 1/72. kit x 72 = y plan 1 should be your plan scale. y Now you can take any measurement out of your plan, multiply it by y and divide it trough 72 and find the actual value for your kit. Enjoy! Peter
-
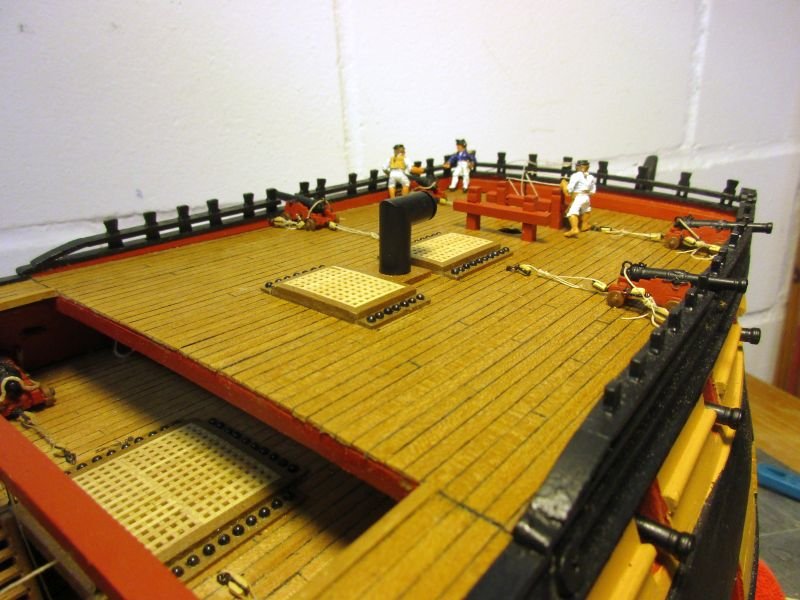
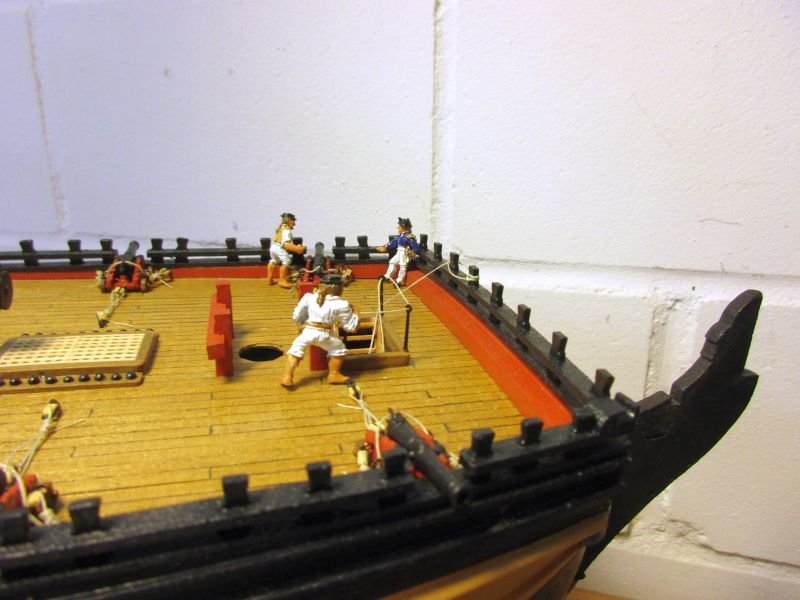
Right after posting the last pictures I started to clean up the taffrail a bit, took out the most offending support - and before I knew know - the whole taffrail was taken apart. Time for version 2.0: New, shorter supports with 3,5 instead of 5mm height were cut and adjusted to the curvature of the transom edge. Then I glued them with epoxy adhesive because there is quite some stress on them while fixing the rail. The rail itself was sanded thinner, smaller and smoother. Then I carefully drilled small holes through rail and supports into the taffrail for the nails. Even with pre-drilling the nails might split the supports. Now the rail was epoxy glued and nailed onto the supports, all cleaned and painted and voilà - rail mk2.0 looks much more shipshape than the first try. new rail the skipper is quite happy with the new rail, however that deck is a disgrace to the ship and must be cleaned the skipper definitely likes the new look
- 366 replies
-
- 14
-
-
- bellerophon
- victory models
- (and 2 more)
-
Hi Christian No, it wasn't in the box, it was a leftover piece from my Pickle transom. There I bought it from Cornwall Model Boats. However, browsing through their page, I found that I must have told a lie because they don't have boxwood strips. Most probably it is beech which bends easily as well. Hi Martin It is probably beech, 1x5mm, and I soaked it for 1hour in warm water. The picture shows only the first bending operation. I soaked it then a second time and clamped it again - this time with proper clamps - onto the transom. That was the step where I did some damage to the decoration in the lower counter. But it could be repaired and I think it was worth it. Of course it would be much easier to prepare the rail before attaching the transom but this would need some thinking in advance... Hi Mark The plans may be a bit misleading because the side rail is flush only with the highest point of the transom but not with its edges. That seems to be correct and in accordance with my plans and also the Bellona model. However this creates that gap which irritated me. I would really recommend my solution - but better pre-bend the taffrail before attaching the transom. Perhaps a well soaked lime strip would work but I think it would be better to get some beech. As I increased the convexity on my transom it actually is a 3dimensional bend which would need some arranging of the transom in its final form while using it as a mould. Thanks to all for the positive feedback and the likes - and by the way the rail is off again and I'm presently reworking it into version 2.0 with shorter supports (3,5 instead of 5 mm) which hopefully should stay vertical this time. Cheers Peter
- 366 replies
-
- 3
-
-
- bellerophon
- victory models
- (and 2 more)
-
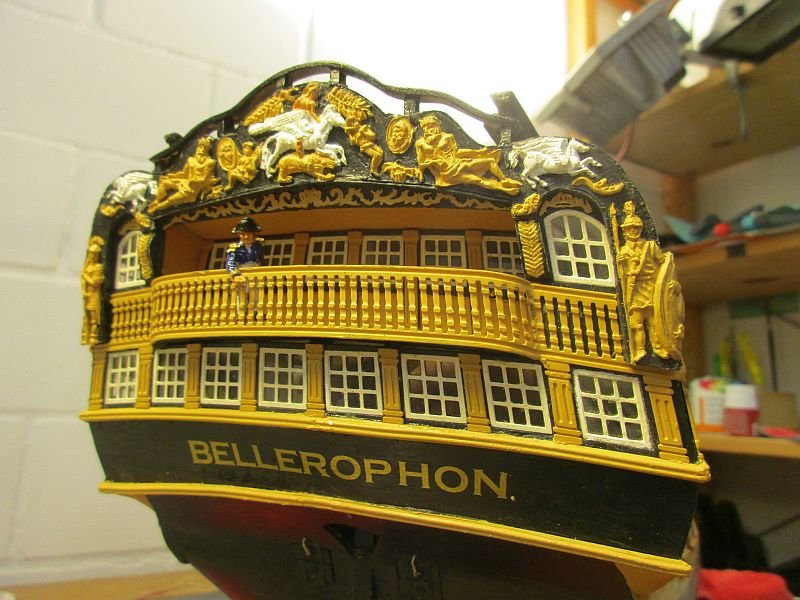
That illogical gap in the rail over the transom looks as strange as a missing front tooth. The well known Bellona model and even the Mamoli model do have a taffrail in this position. On various other models, contemporary and new, you find one as well. Therefore I tried to include such a taffrail. First I soaked a 5x1 mm strip of boxwood in warm water and clamped it onto the upper edge of the transom (not without damaging a few details in the process) and let it dry. Boxwood takes such a form quite well and holds it. Then I put some supports in place and glued and nailed the taffrail onto them. The rail ends are deliberately set onto the same height as the side bulwark tops, not the side rails. After some reworking, sanding and painting and doing the necessary repairs I had a rough rail. Basically the whole idea worked , but judging by the pictures (which again seem more impartial than the naked eye) the supports aren't vertical, the rail seems a bit too fat, needs some smoothening and maybe still sits to high above the transom. I'll think about reworking it. In the meantime the rest of the carronades were rigged and the foredeck completed with belfry and rail. forming the boxwood rough rail... ...placed on the supports reworked and painted taffrail in place and quarter deck armed fore deck finished
- 366 replies
-
- 14
-
-
- bellerophon
- victory models
- (and 2 more)
-
Hi Mark Nice progress. Had the same problem with the different thickness of gun port patterns and planks. However it disappeared rather quickly while sanding and filling (and sanding and filling and sanding) after the first planking. Initially I got a rather rough and uneven shape of the hull and while working on it to get smooth lines by visual judgement the difference just disappeared. In any case you will not have to sand the whole lower hull - only the transition area from planks to pattern. Cheers Peter
-
If you mean by inadequacies slightly different deadeye heights, then I would take this as better authenticity. The function of the shroud is to support the mast. To do this efficiently all shrouds must have the same tension. The ropes are working and therefore tensions must be frequently adjusted. This could result in different heights of the deadeyes. You could reset them at the same height for an Admiralty inspection but in everyday operation I think you would see slightly different heights. That's the educated guess of a landlubber or perhaps my personal excuse for imprecise work. Keep up your great work. Peter
- 421 replies
-
- 2
-
-
- caldercraft
- granado
- (and 1 more)
-
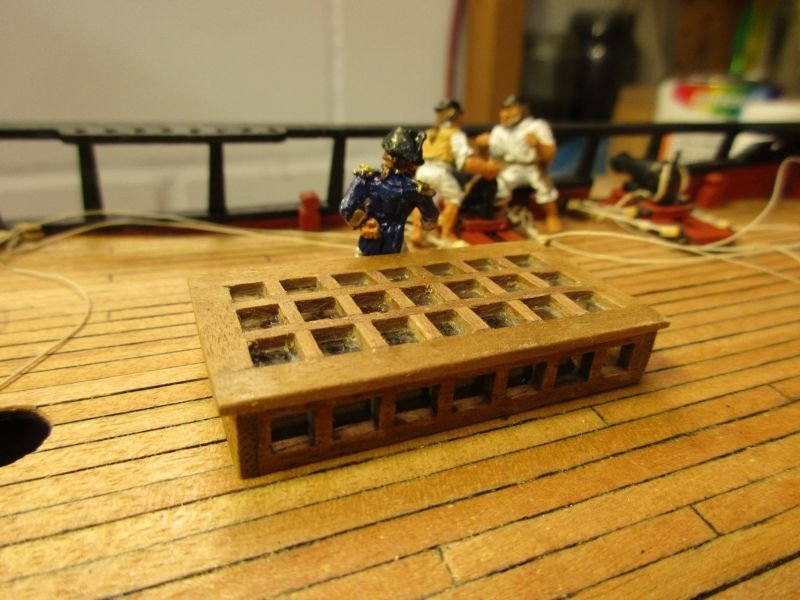
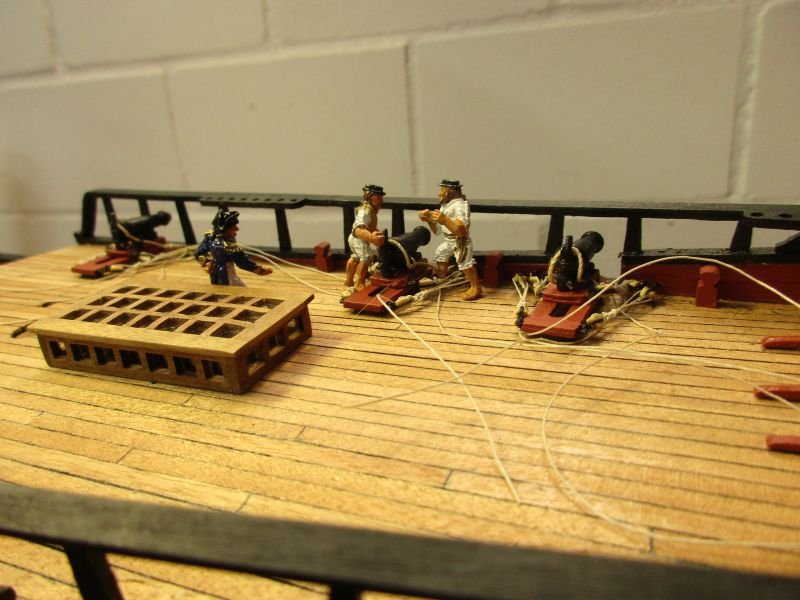
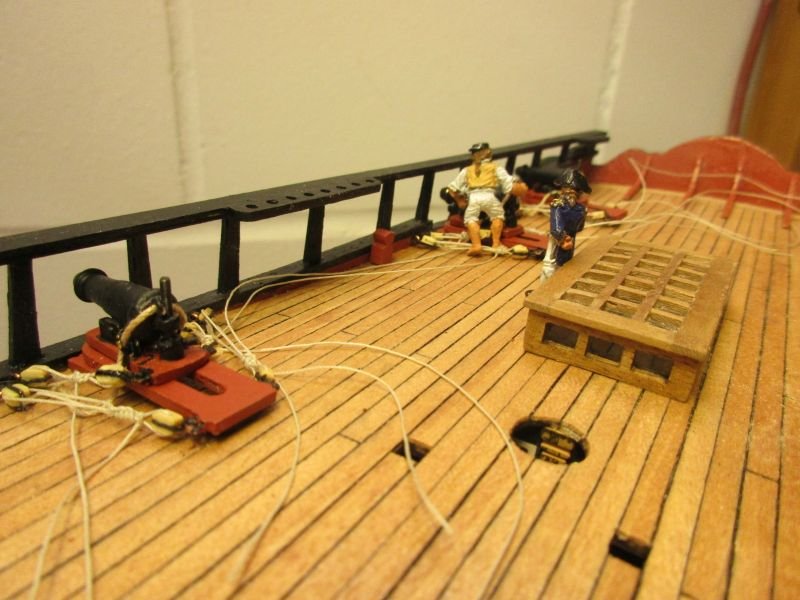
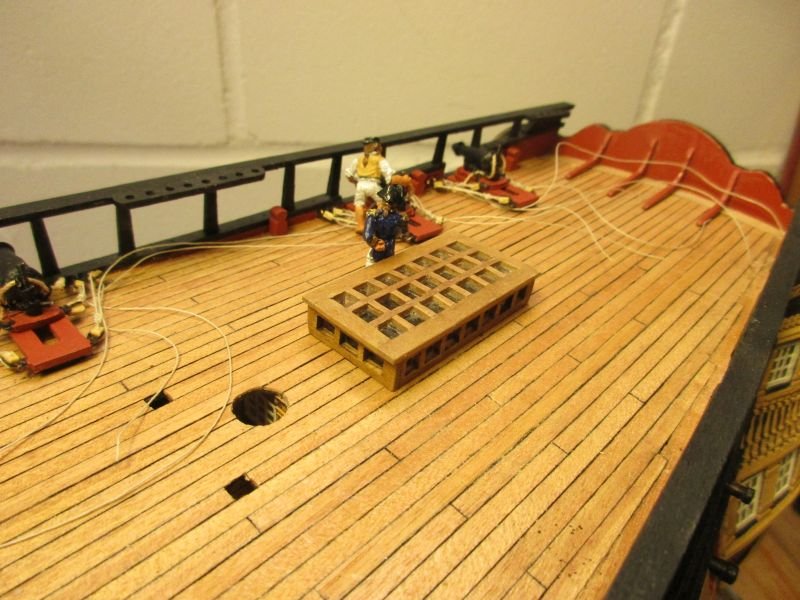
Hi Mark Very fine and precise work with those additional details. I might be an old nag but something irritates me when I look at your build: As far as I know those gratings were removable parts to permit access to the lower decks for bulky items. Thus for stability the gratings themselves should better have continuous bars on their edges and not gaps as on yours. Sorry for being a grinch. Cheers Peter
-
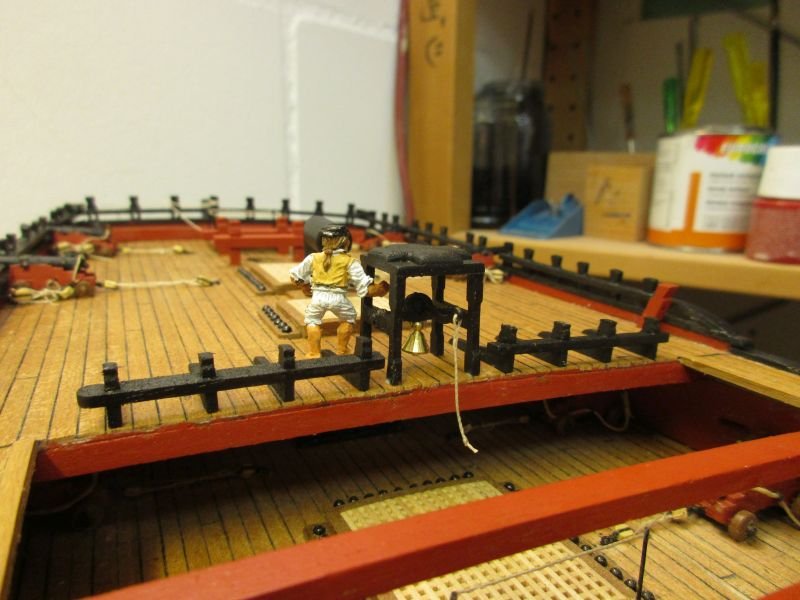
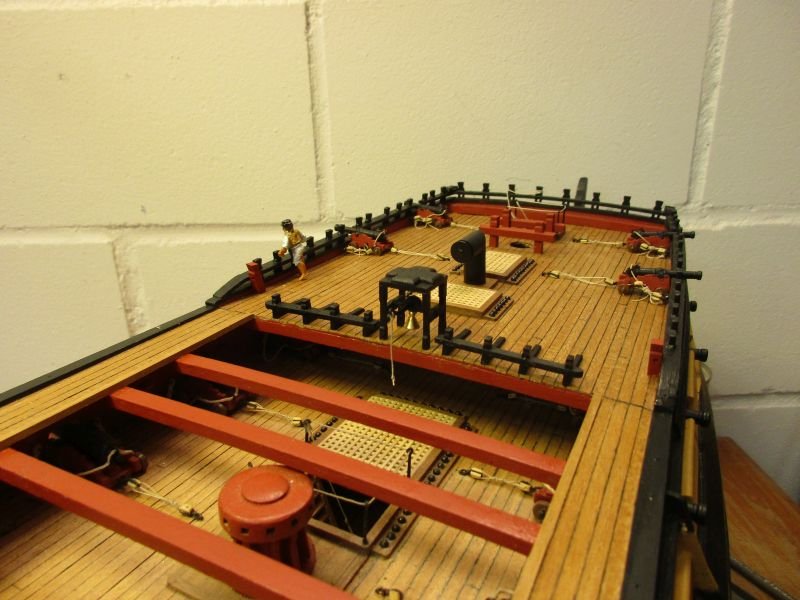
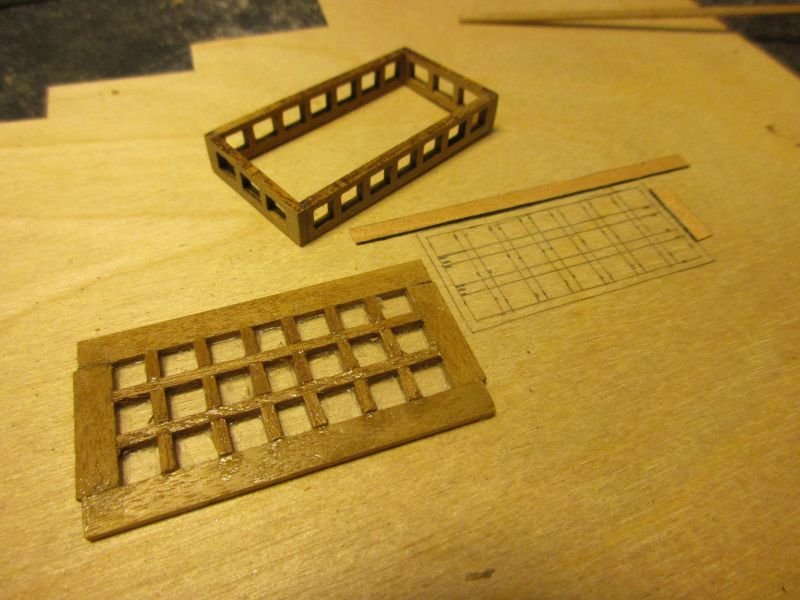
In the meantime the poop deck and its rail are finished and the first three carronades installed. I choose to rig them full with four tackles and a breach rope each. For variety I added several details, such as poop knees, timber heads and cavel cleats, some ladders or pin racks. However, while trying to install the skylight I couldn't find its canopy. Amati would have sold me an replacement but first I wanted to try a scratch built part. That way I could also correct a minor fault as on the plan a canopy with 4 rows of seven windows is shown. According to Bellona's plans it should have 3 rows of 7, corresponding to the sides of the skylight. First I draw a plan of the frames onto a piece of wood and added some edge guides to form a simple jig. Then I cut a piece of cellophane to the inside measurement of the skylight frame. The cellophane was placed onto the setting jig and pieces of 1,5x1,5 mm walnut strips glued on to form the inner frames. The outer frame was made up with 1x4 mm walnut strips. All was glued with white glue as this holds cellophane quite well. Then the canopy was carefully sanded to adjust the different thicknesses of the strips. Clear varnish sealed all and I think it looks even better than the lost piece. poop with rail added skylight frame, jig and raw canopy finished skylight new ladder, cavel cleat and pin rack rigged carronade (the tackles are not yet cut in length) poop deck starts to look busy

- 366 replies
-
- 15
-
-
- bellerophon
- victory models
- (and 2 more)
-
Hi Mark Great work. Just a small hint although I might be a bit late: Parts of the lower gun deck will be visible from above where in the waist the two open companionways will lead from the partly visible upper deck down to the gun deck. I would recommend to put in some small planked false deck parts of the gun deck (I mean the one with the dummy guns) as long as there still is some limited access. I forgot it on my Bellerophon and had to do some keyhole surgery to put the planks in place. Cheers Peter
-
Nobody offers 0,1mm black thread, don't know why. However if you stick to the principle that standing rigging was tarred and running not, then the lanyards probably should be natural. Today's historical ships show them usually black but I'm not altogether sure about that. Mine nevertheless are died black. Another point - which might come a bit late: Having the deadeyes all exactly on the same level looks nice and tidy but for an efficiently working support of the mast it's more important that all the shrouds have the right and an equal tension. So I put this in first priority and if after retying about two times a height different remains but the tension on all the shrouds is about right I leave it like that, hoping that on en efficiently run prototype it was done the same way. I guess if there was time in harbour the skipper would have the deadeyes levelled out again but while sailing there would be a continuous adjusting of the tension but no time for adjusting the deadeyes as well. The tension also helps when tying the ratlines and when you have to attach blocks for running rigging to the shrouds. Keep up the fantastic work! Peter
-
Hi Mort, Martin and Nils Thanks to the compliments and encouragement. Martin, this seems to be contradictory but by reducing superfluous details I hope in fact to get greater historical accuracy. And many thanks for all the 👍's. Peter
- 366 replies
-
- 4
-
-
- bellerophon
- victory models
- (and 2 more)
-
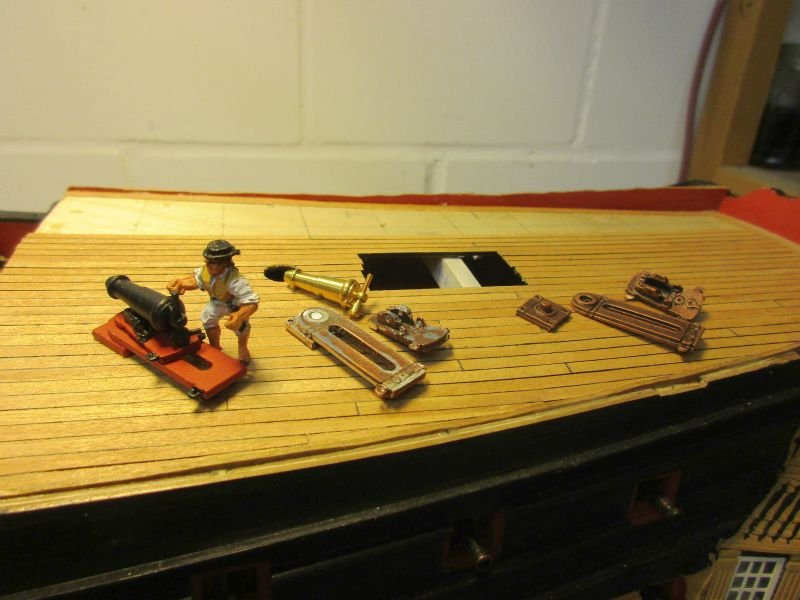
There are 6 carronades mounted on the poop deck. Again the kits pedestals and carriages were highly detailed cast but of a strange design and unusable. Replacing them with Caldercraft parts would have been rather expensive and (according to RMC's log) difficult also because of the scale difference 1/64 versus 1/72. Therefore I tried to rework the kits parts similar to the gun carriages. First I glued the pedestal onto the chock. Then I filed flat what was possible and filled unnecessary details with superglue. The forward ringbolts on the carriage came off as well as the forward guide pin below the carriage. Now it is possible to put the carriage into a realistic run out position. All the remaining cast ringbolts were drilled out and two rings put into the ringbolts beside the barrel mount. They will guide the breech rope. The barrel had a ring for the breech rope glued onto the pommel. There was not enough space in front of the elevation thread (the pommel is too short) and I had to glue it of centre, overlapping the thread. Everything was painted and I think it looks acceptable. 3 stages of carronade reworking (that seaman only showed up after the work was done!)
- 366 replies
-
- 11
-
-
- bellerophon
- victory models
- (and 2 more)
-
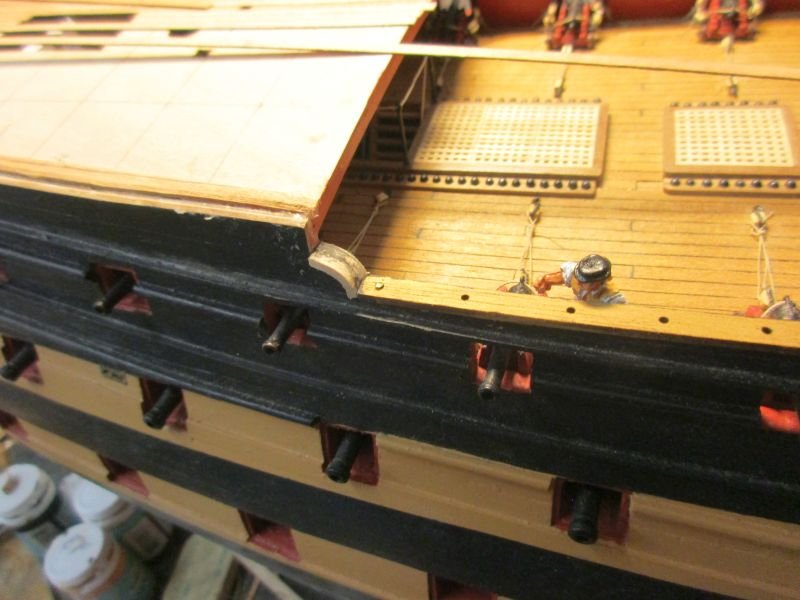
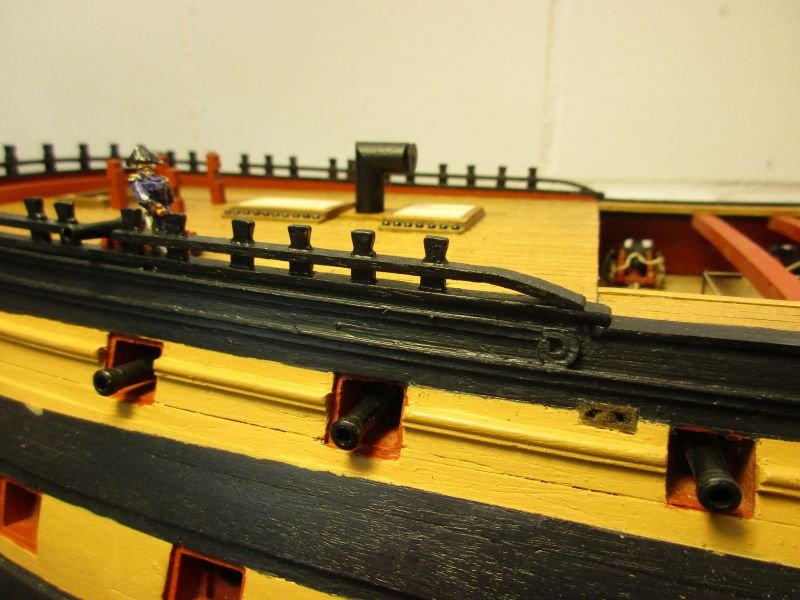
The quarterdeck rail was also completed. The rounded bit on the aftermost part is a piece of water soaked, bent, dried and adapted 5x1mm boxwood strip. There is also a length of 1x1mm strip on the outer hull in continuation of the upper, after end of the rounded rail. It's not mentioned anywhere in the instructions but visible on the overall plan. quarterdeck rail in place additional decorative strip on outer hull all painted
- 366 replies
-
- 12
-
-
- bellerophon
- victory models
- (and 2 more)
-
The decision about how to paint the ship mainly lies with the skipper, especially if you pay the paint out of your own pocket. Some Admiralty instructions existed and certain details seem quite clear, such as the Nelson chequer in its time, but others aren't - even if contemporary paintings or models exist. The artist may have used some artistic freedom. So may you and as skipper of your Pickle you may paint as seems logical or as you like. Of course you still have to respect eventual Admiralty wishes or instructions. I whitewashed the inside of the companionway too to reflect some more light into the dark interiors and because sources mention whitewashing. Additionally the skipper will keep his crew clean and proper for their health and that also reduces dirtying of the paintwork. And I liked it better that way. Cheers Peter
-
Hi Mark That's a very interesting build. I notice, that the kit is produced under Amati's licence with some changes. I'll be most interested to hear how the new guns look, the Amati gun carriages being a major weak point in their kit. I really like the Amati copper plates and hope you'll get an equally satisfying result with that tape. Question: Are the Bellerophon and Elephant variants also included? Enjoy your build! Peter
-
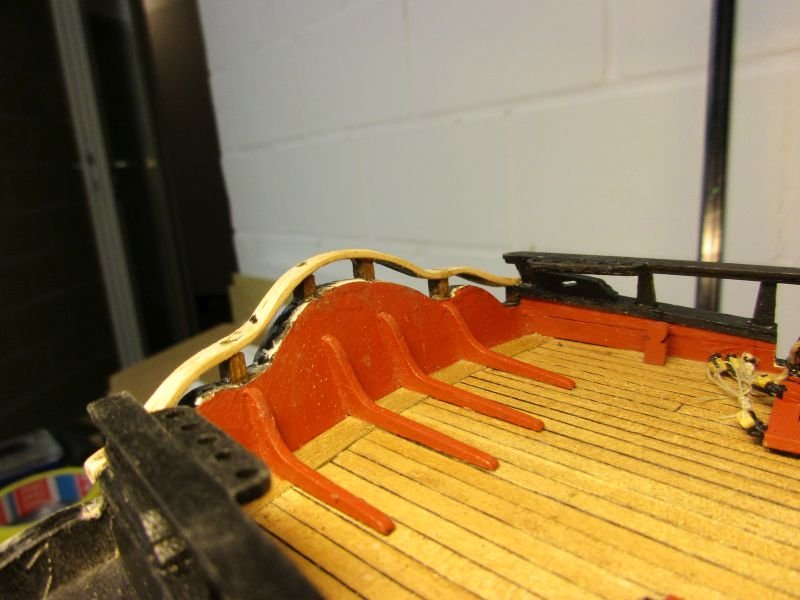
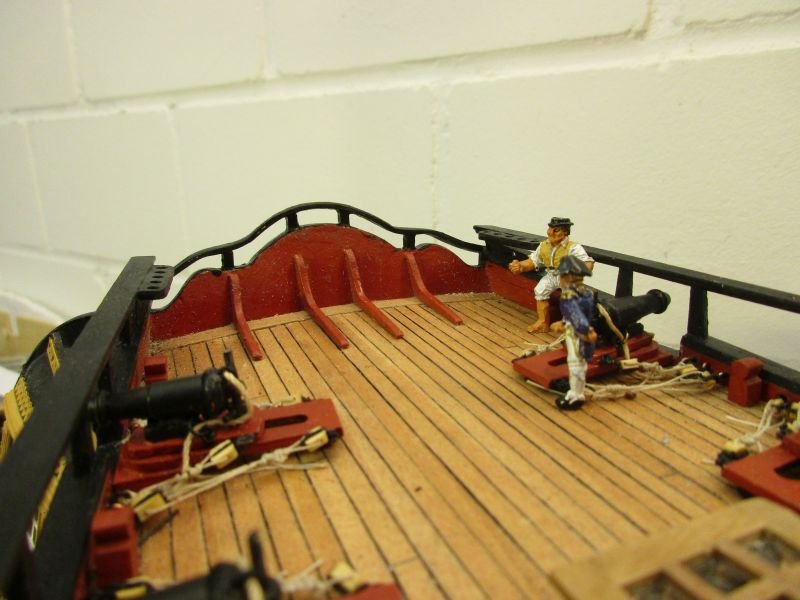
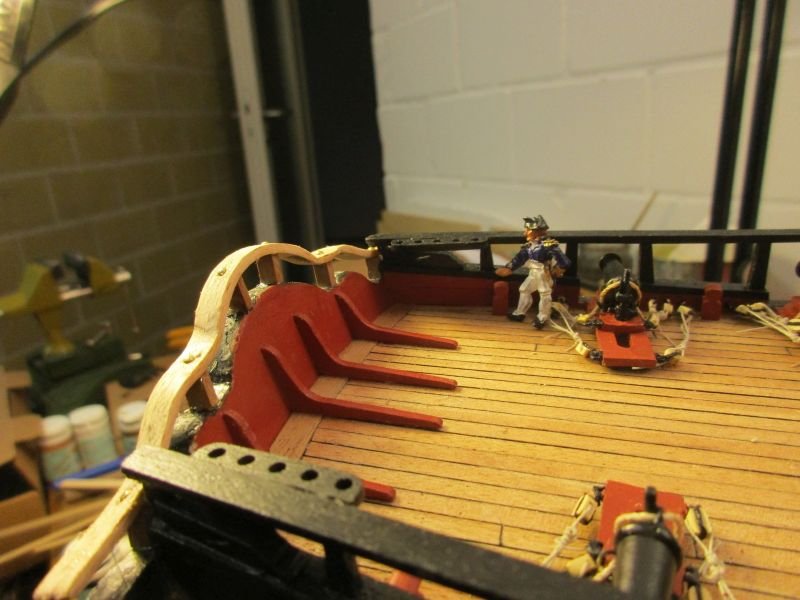
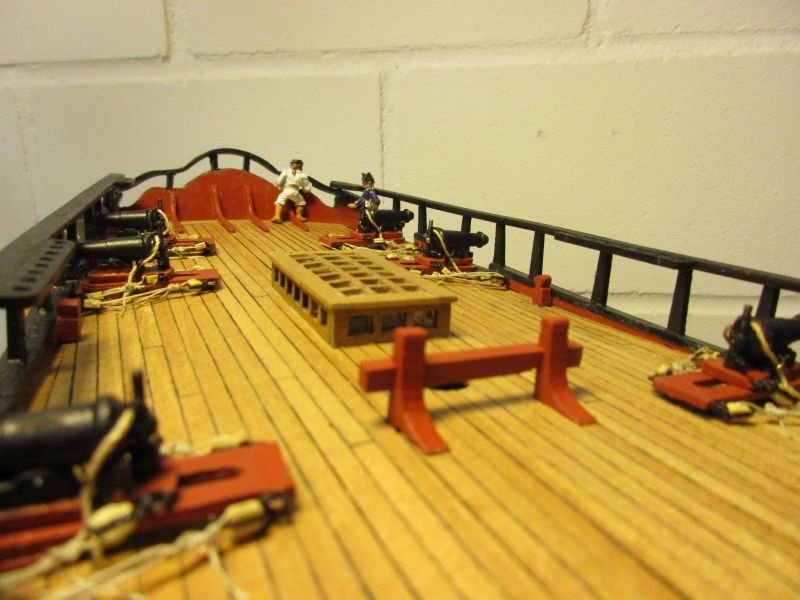
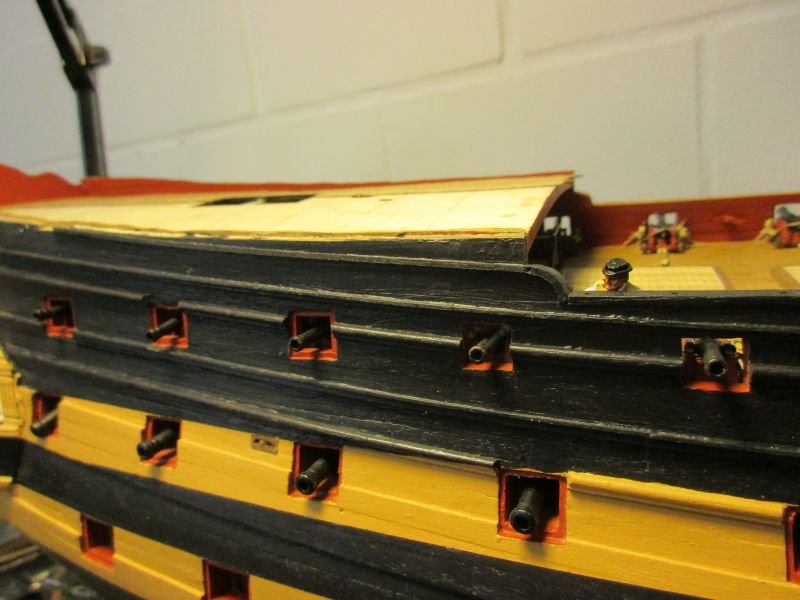
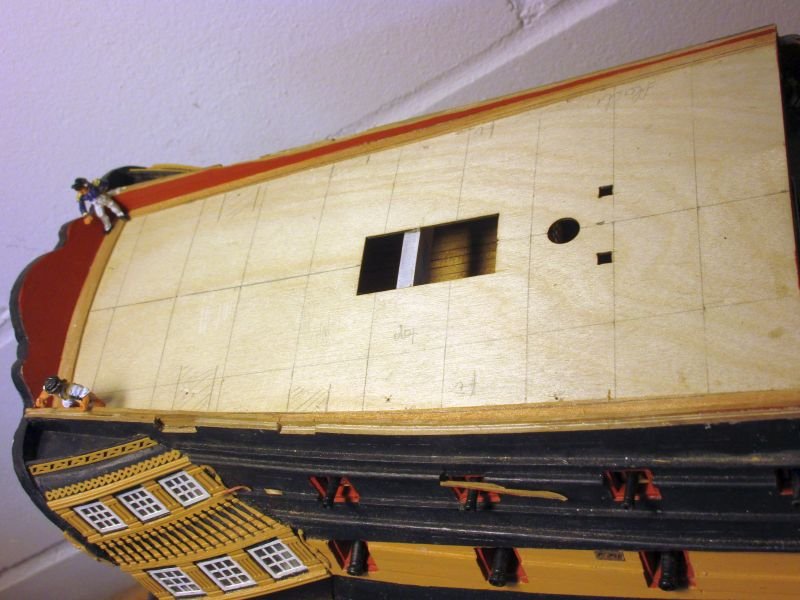
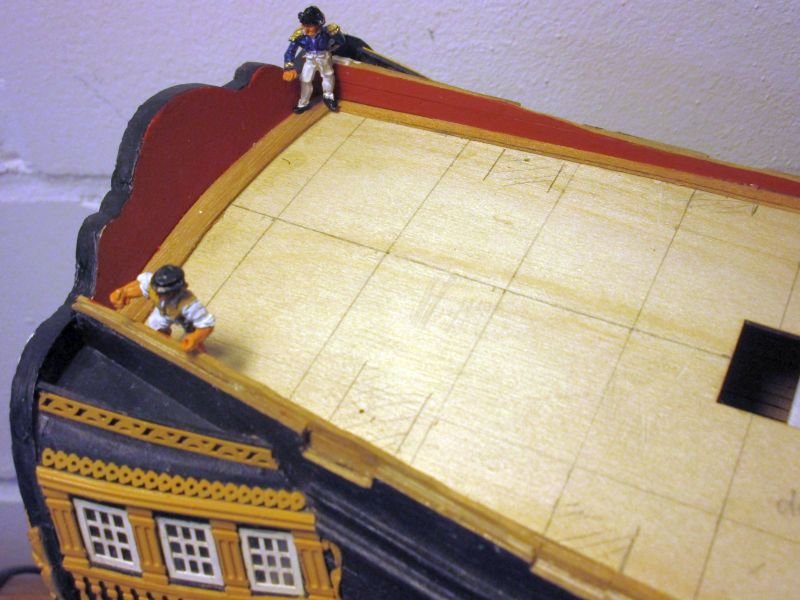
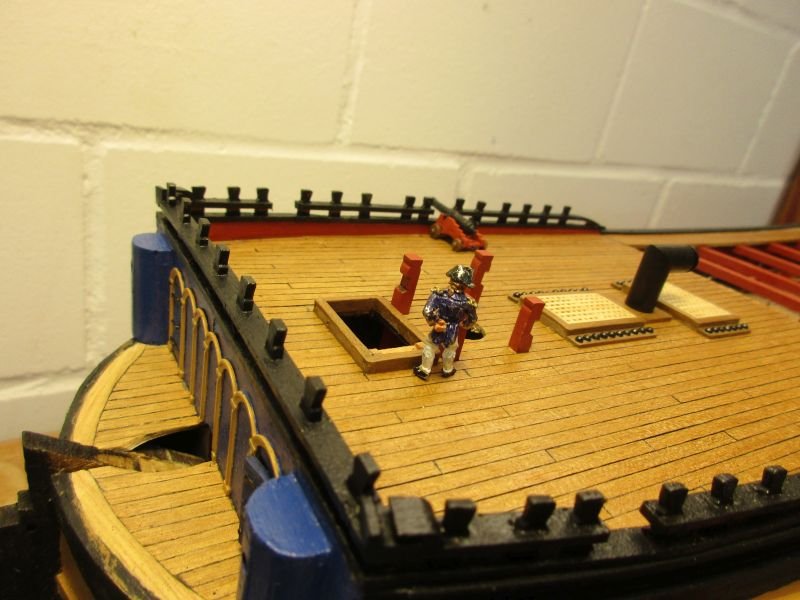
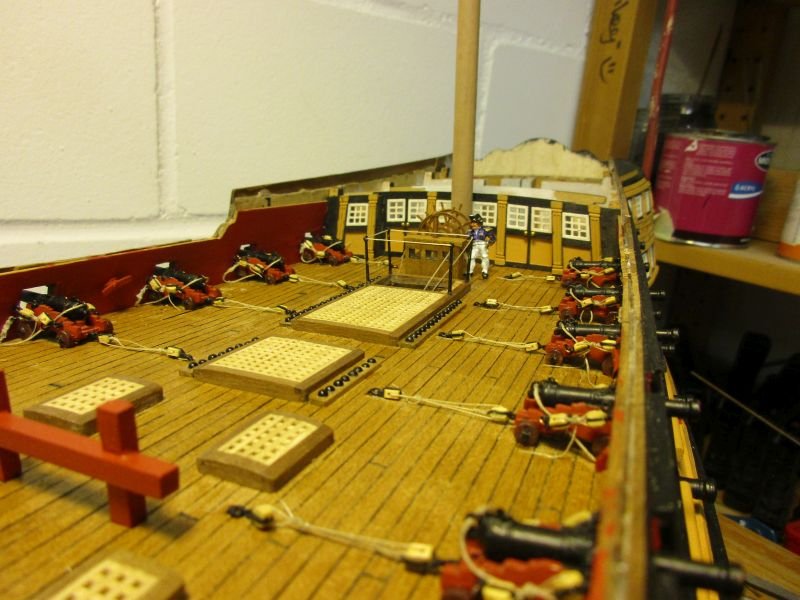
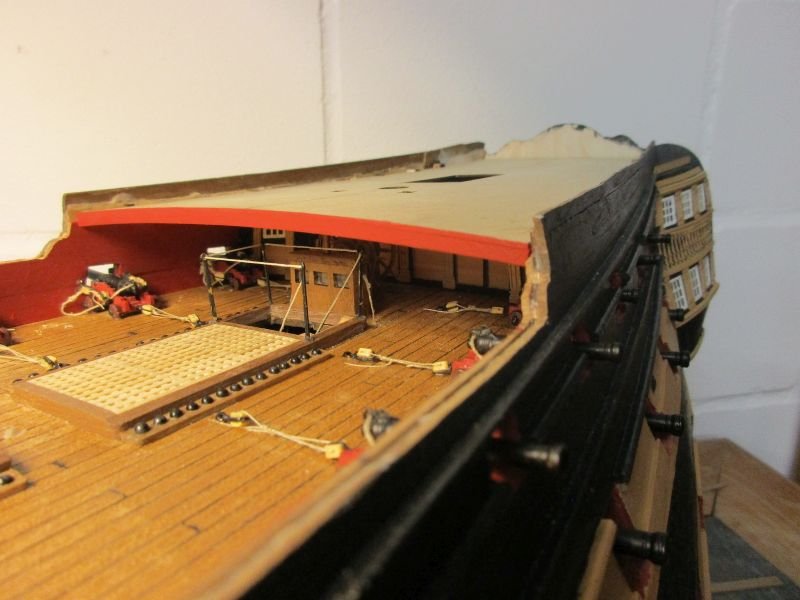
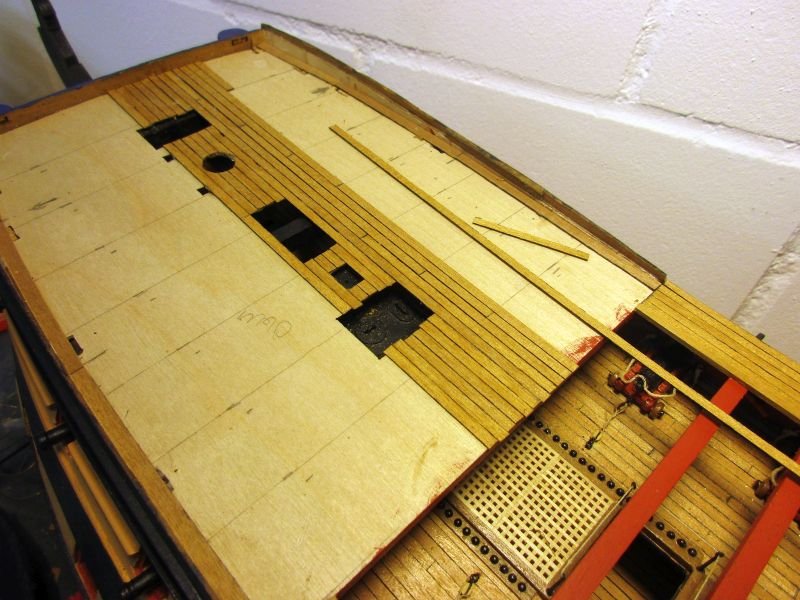
The forecastle is now finished with the guns installed and that treacherous ladder way has provisionally got a protective rope rail. The skipper visited the build quite often but didn't actually do much work. As a reinforcement of the actual workforce (me) I hired two additional crew. The might look tiny in scale 1/72 but they are nimble and able to go into the most constricted places - especially if you look for them to burden them with actual work. finished forecastle that ladder way needs the rope rail poop deck The deck was marked for planking and glued in place. Waterways from 5 x 0,5mm strips are installed. They will be trimmed to maximal 3mm with after putting the inner bulwark planking in place and while fitting the planks into it. The lowest inner bulwark planks were painted before attaching them, the others added, everything painted red and roughly trimmed to the right height. poop deck with roughly trimmed bulwarks waterways in place, planking will start now
- 366 replies
-
- 12
-
-
- bellerophon
- victory models
- (and 2 more)
-
Hi Mugje This is an excellent first build. I like the precision of your work, especially the painting. Just don't forget to paint the rudder hinges copper. Because of the electro-chemical reaction between copper and iron they were made in copper or bronze in those parts where the hull was coppered. Cheers Peter
-
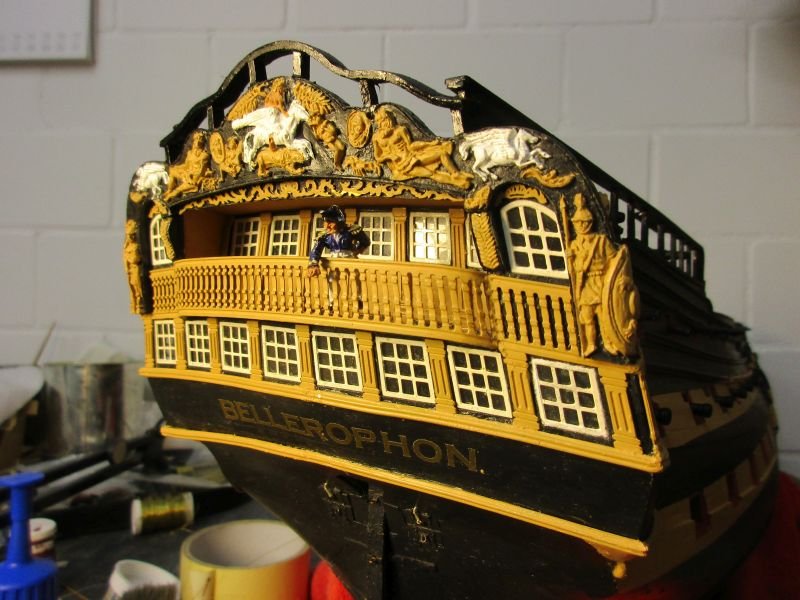
Hi Michael Thank you. I wish I had the patience to work all the details the way you do - but I'd like to finish Bellerophon before I turn ninety which means within the next 25 years. Your cross section is coming along nicely. I can't wait to see your next project: the entire Santisima Trinidad.😉 Hi Jason Thanks. The (mostly) great quality of the kit has much to do with the way the stern looks now. Hi Martin Oh yes, we are all mortals, aren't we. Also his uniform suffered a bit and looked threadbare. I asked able seaman Preserved Killick to mend it. Would you believe, he just took brush and paint for the task, the rogue? And thank you. I must confess I'm rather fond of the build myself, despite the flaws I built in. Cheers Peter
- 366 replies
-
- 3
-
-
- bellerophon
- victory models
- (and 2 more)
-
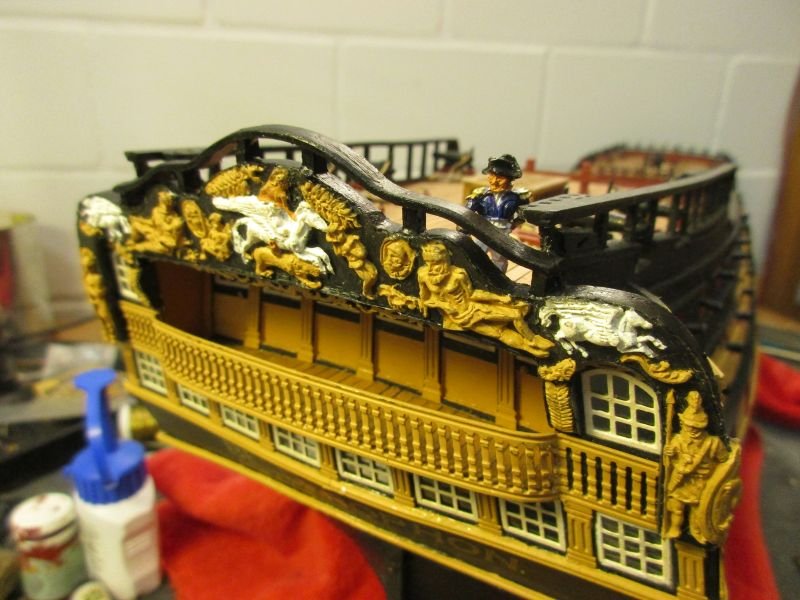
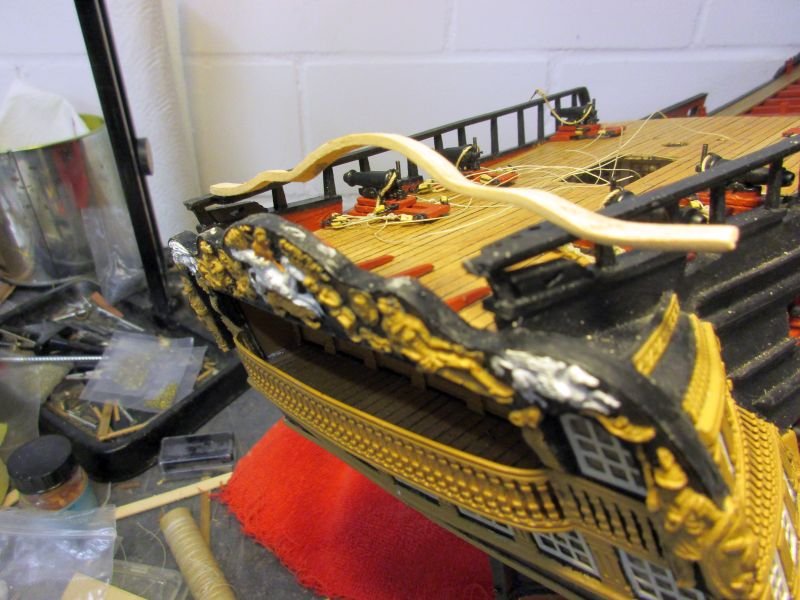
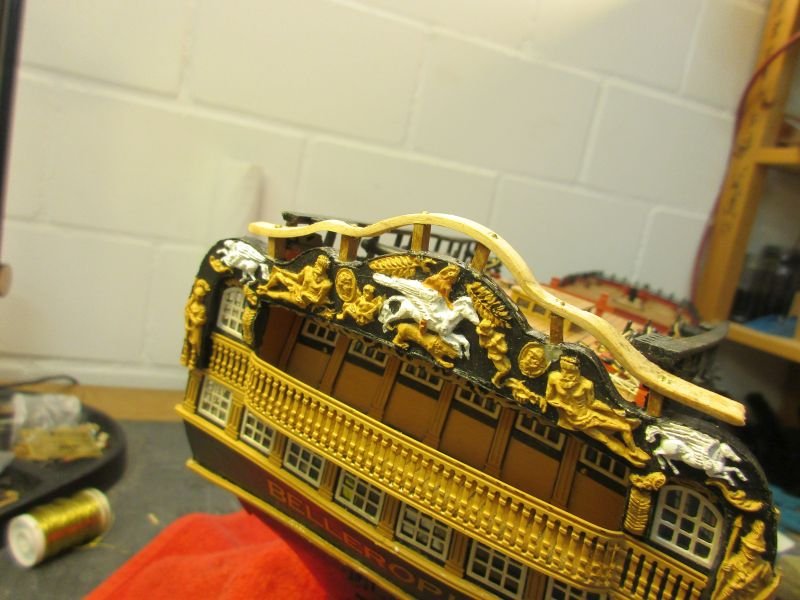
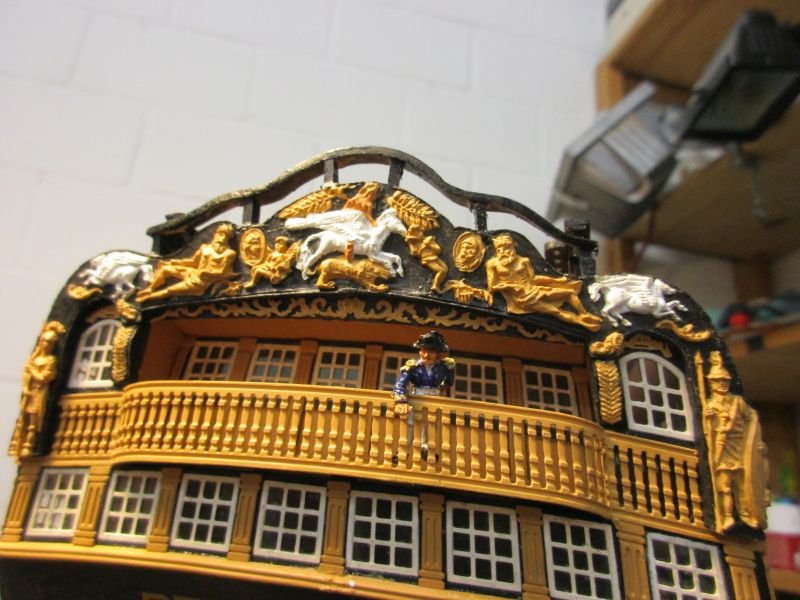
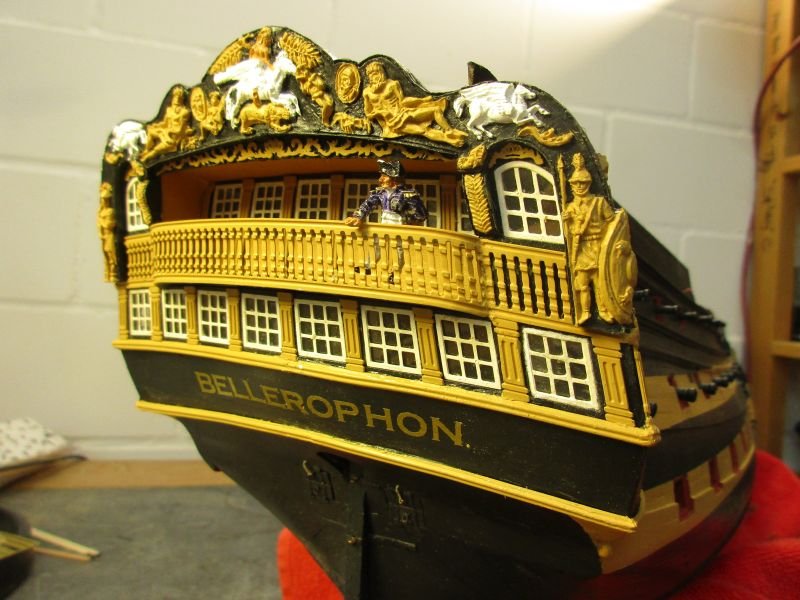
The fore castle deck is now fully planked and galley chimney, hatches and ladder ways are in place. The shot garlands were quickly done - experience starts to make tasks easier. A strange detail is, that there is no rail to protect landlubbers (and others) against falling down the forward ladder way. But the skipper agrees with me, that a rail probably should be added. The fore castle rails were glued on and the aft ends of the upper rails made with a pre-bent piece of boxwood strip. The gun carriages are reworked and I'm afraid I have to start gun rigging again. The balcony is finished and the skipper can now take some fresh air in relative privacy during his visits to the build. The skipper fell down this ladder way during his inspection tour. Only his dignity was hurt because he had to be extracted with the help of tweezers. Now he is thinking about adding a rail with some leftover stanchions and rope. aft end of upper forecastle rail the skipper takes some air on his finished balcony (and tries to regain his dignity)
- 366 replies
-
- 12
-
-
- bellerophon
- victory models
- (and 2 more)
-
Well Martin, it seems you definitely took another plunge - this time past the boundary separating 'normal' modellers from those practising the dark arts of scratch building. Wonderful work. Your Granado is going to be a unique piece of art. 👍 Cheers Peter
- 467 replies
-
- 2
-
-
- fly
- victory models
- (and 1 more)
-
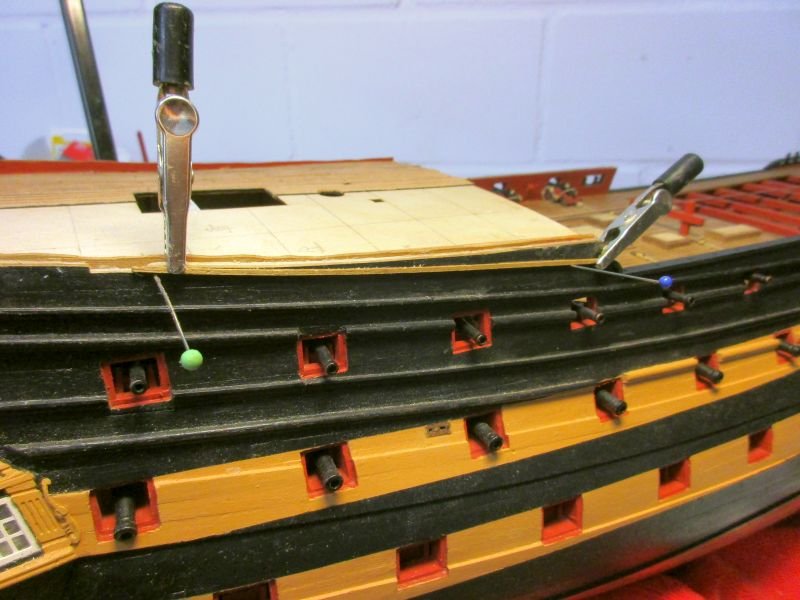
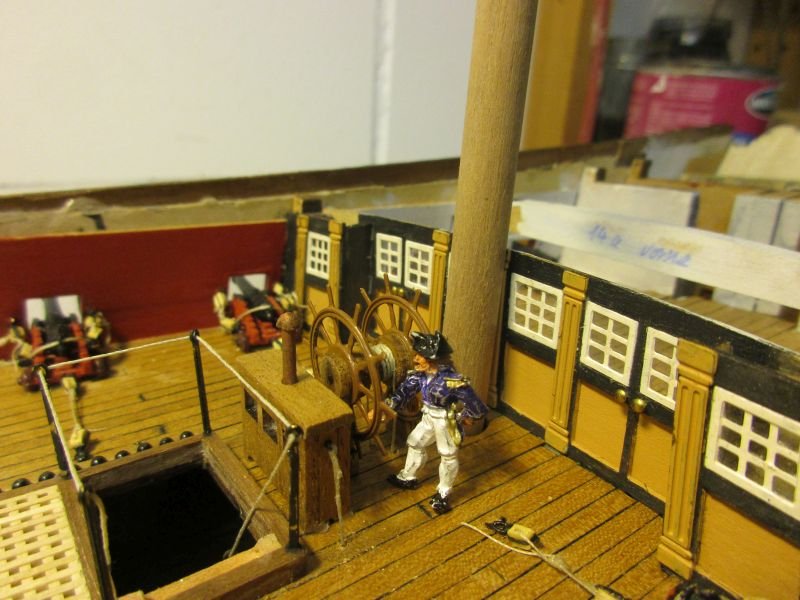
To complete the quarterdeck I installed rudder stand and binnacle. The rudder stand has a tiller rope and the binnacle got a chimney roughly made from wood and painted copper. The binnacle was tied to the deck. Planking of the fore castle was started. Waterways, made with 4mm strips, were installed first. I put the joints below the future gun positions. They will not be visible and are not detailed. The poop deck is prepared to be glued on. mast position marked with a dowel quarterdeck nearly finished not many details of the latest work will remain visible after installing the poop deck - however I must change the lower ends of the binnacle straps and fix them to eyebolts waterways installed and planking in progress
- 366 replies
-
- 10
-
-
- bellerophon
- victory models
- (and 2 more)
-
...or you could make your own, more realistic, stern fascia. Hey mugje, great work so far. I think that schooners and other small craft in Pickles time usually had a more elliptic stern, similar to what I tried with my Pickle. Have fun! Peter
-
Hi Nils You are really building an exquisite model. One would like to rent her for a holyday cruse but on second thought it might be a bit cramped - it probably is even on the prototype. BTW some crew bunks on long haul aircraft aren't much more spacious but at least have some standing room. Cheers Peter
-
Hi Alan It must have been terrible. There have been 'conventional' bombings of cities (Guernica, London, Dresden or the bombing of Tokyo march 9-10 1945 which left an estimated 100'000 civilians dead, more than in Hiroshima) but at least they had not those hidden long term effects. You probably heard also the story of Sadako Sasaki and her 1000 paper cranes. Only a very small minority of idiotic politicians, profiteers and soldiers really want to start a war but it happens again and again. Is mankind stupid? But let's go back to building pretty little models of machines for organized mass killings, aren't we shizos? Take care Peter
- 366 replies
-
- 2
-
-
- bellerophon
- victory models
- (and 2 more)