

vths
-
Posts
144 -
Joined
-
Last visited
Content Type
Profiles
Forums
Gallery
Events
Posts posted by vths
-
-
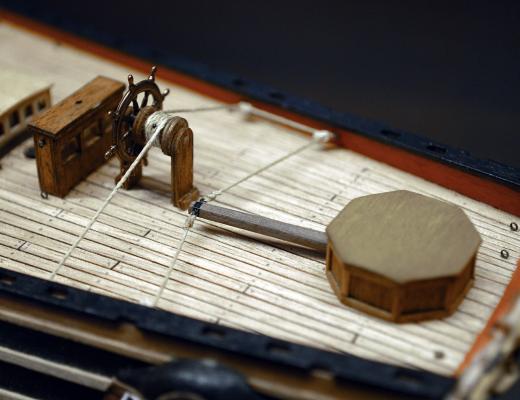
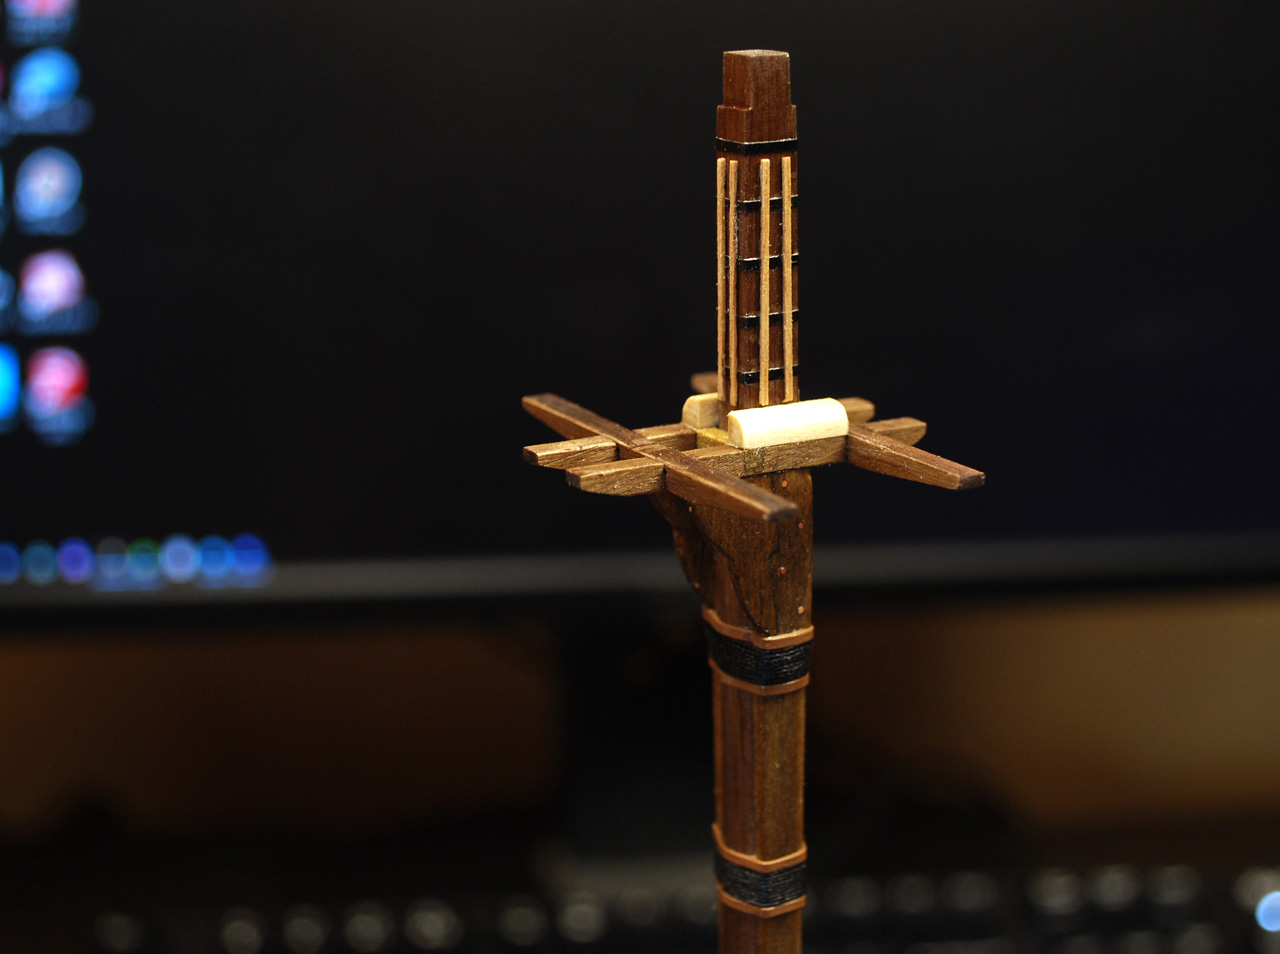
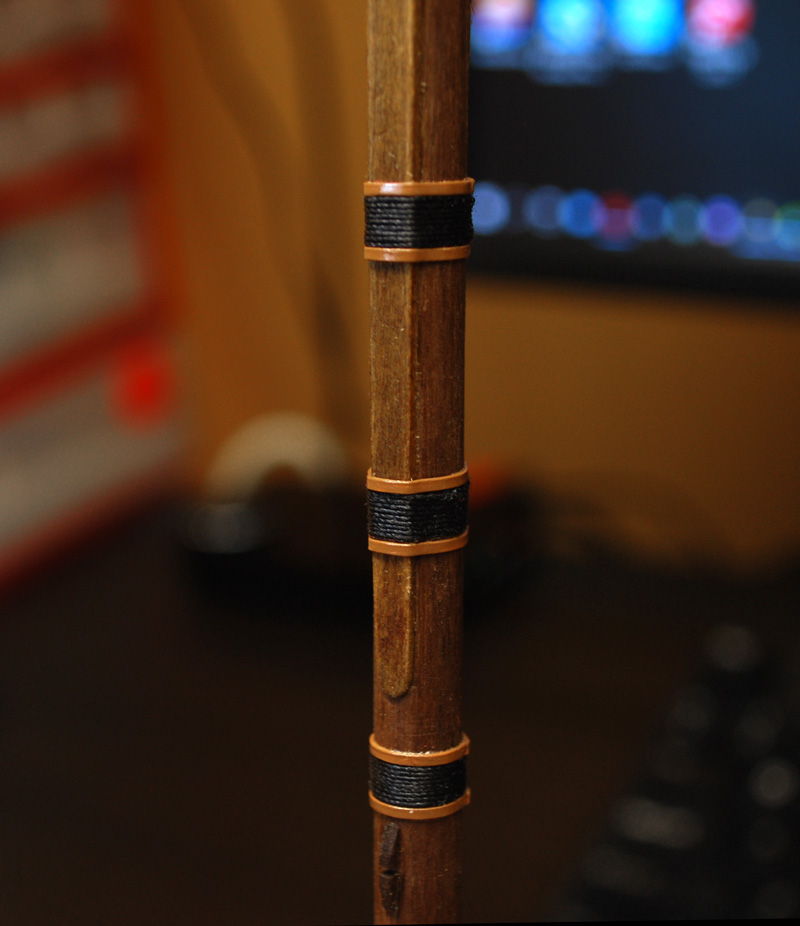
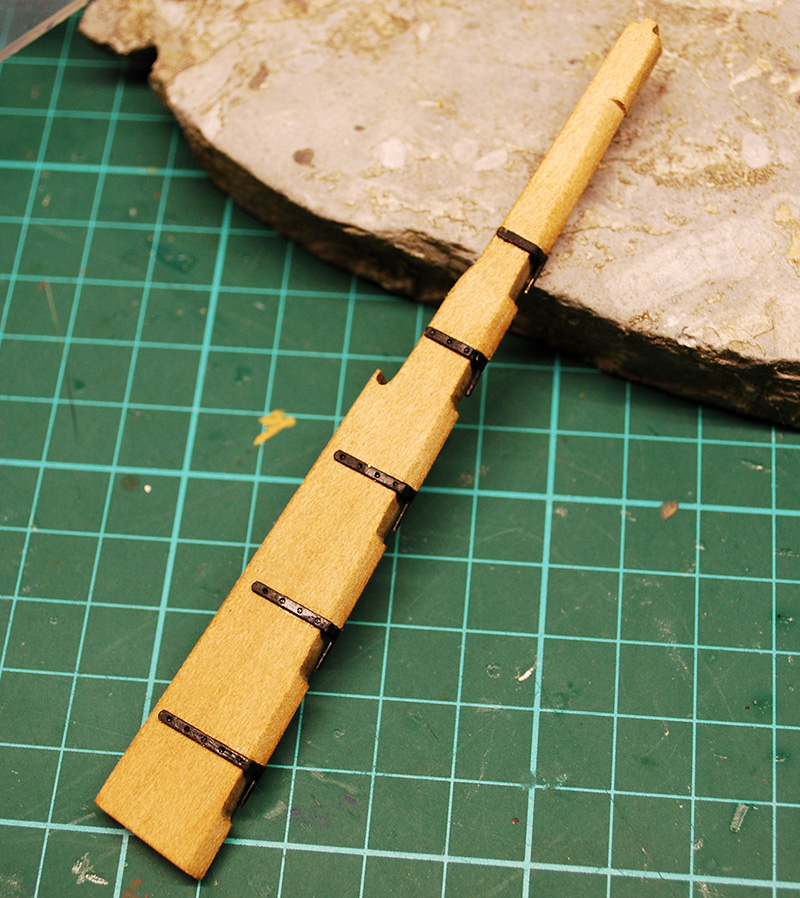
First two pieces of masts almosft finished and dry-fitted. Below you can see the completed set of deadeyes.


-
-
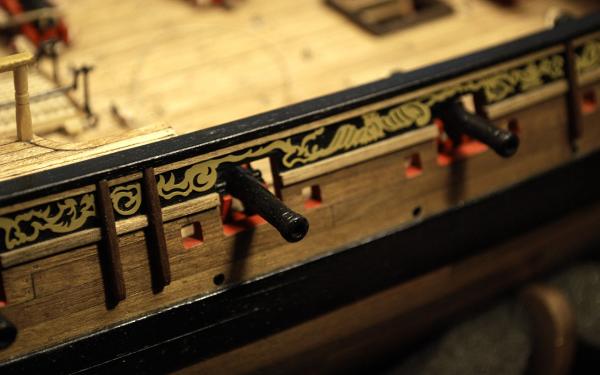
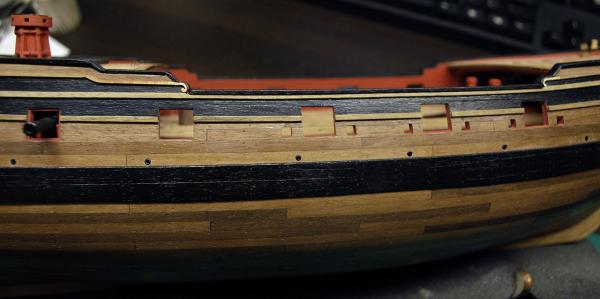
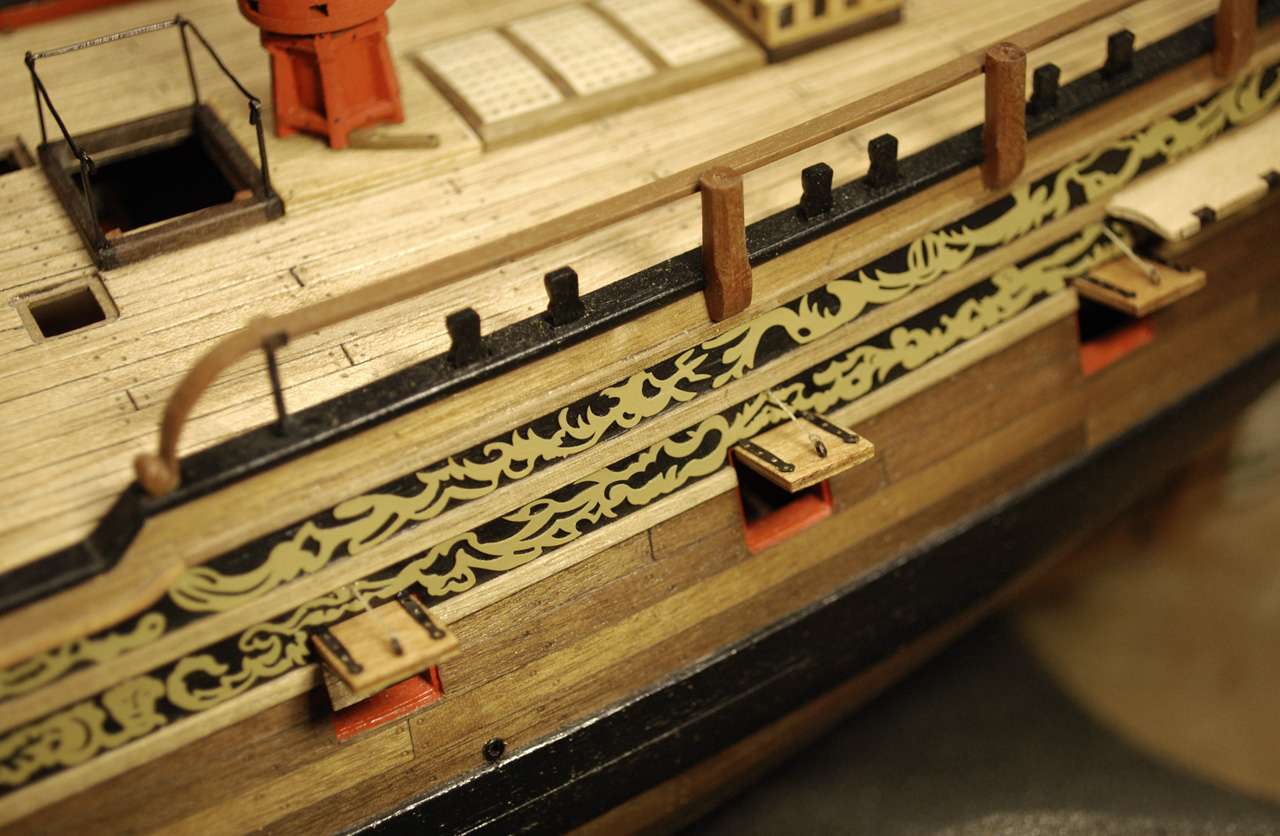
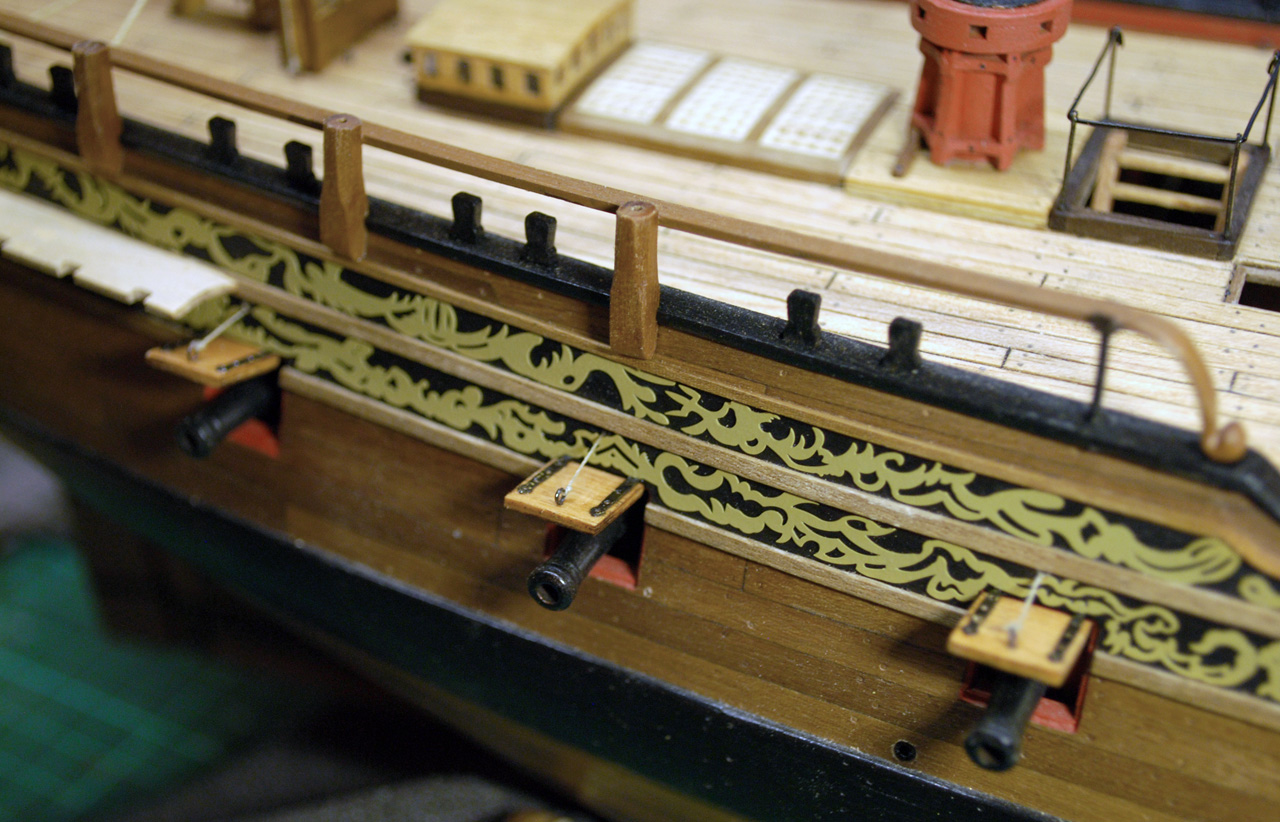
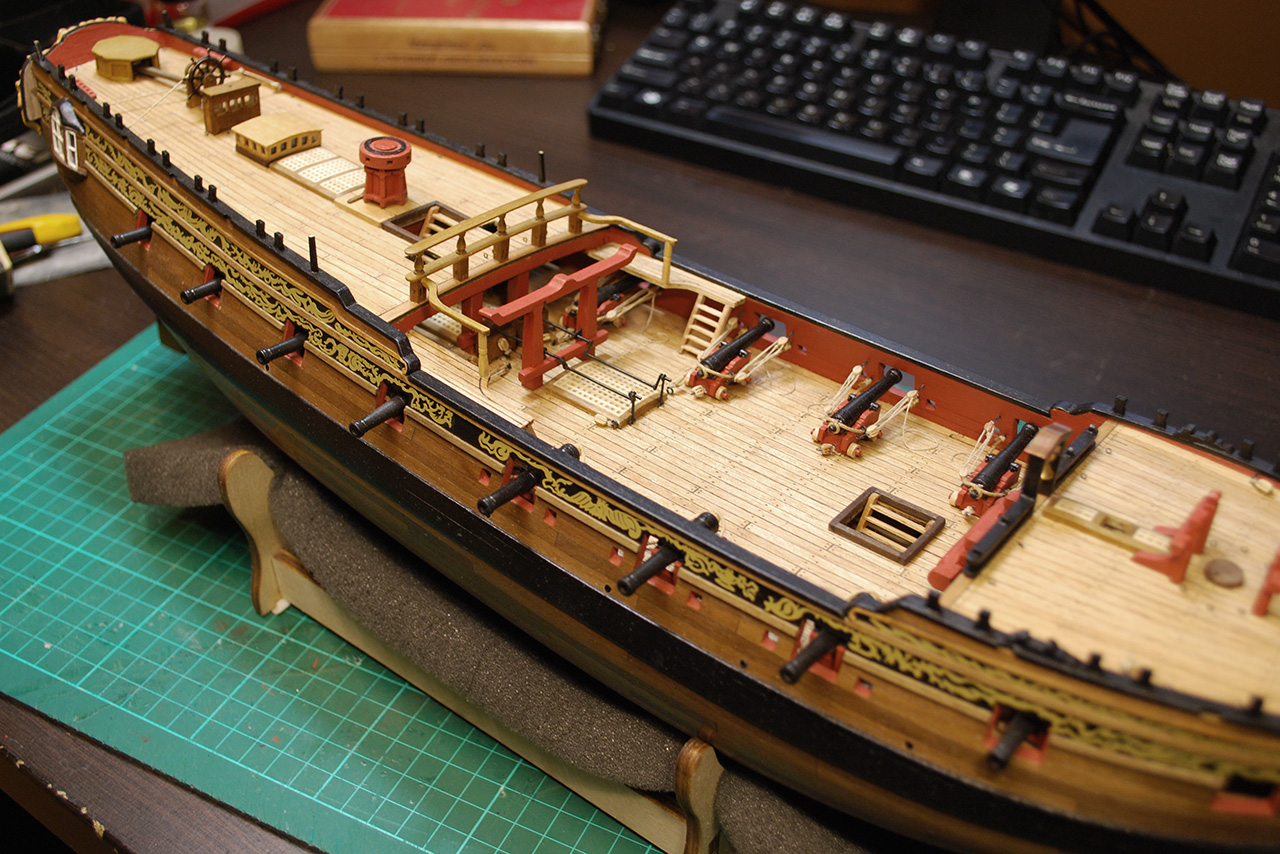
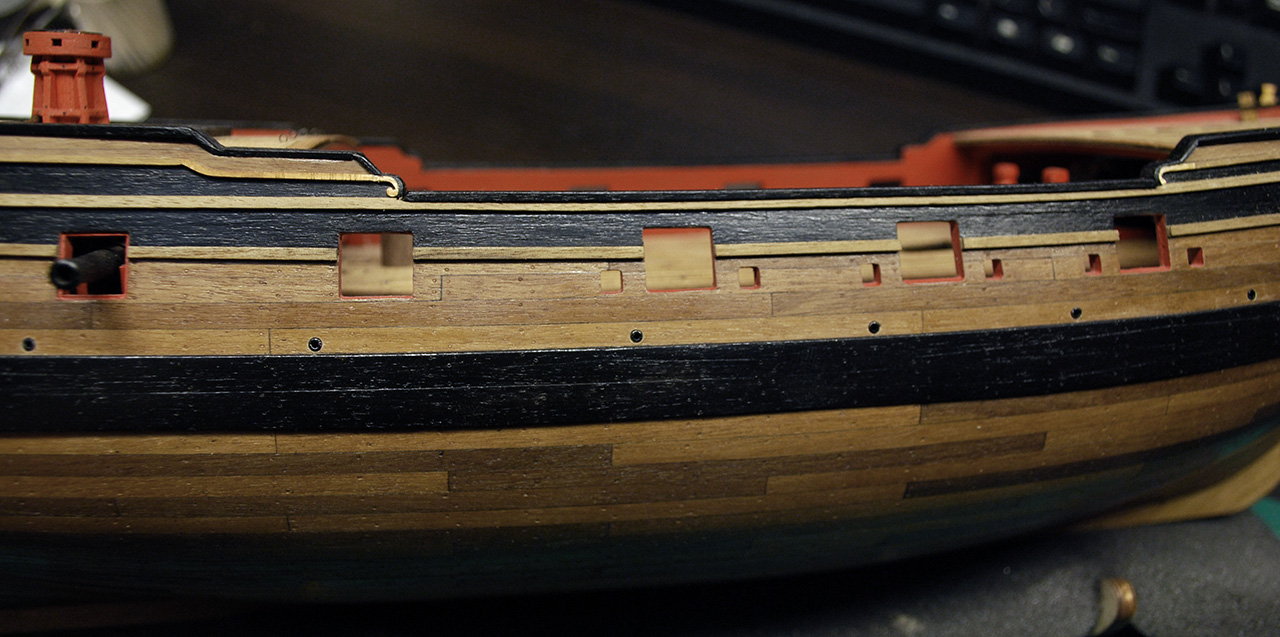
Thanks bug, here's another update. I've finished the gun ports, rails, boomkins are roughly done and she finally got her name at the stern. Sadly, cyano made the mirror windows hazy, but on the other hand, I can pretend that my Fly is cruising the northern seas.


- Barbossa, d.townsend, Bettina and 2 others
-
 5
5
-
That is a good idea, steel would be even more durable, but that would mean silver soldering which is still something that eludes me. Perhaps next time on a different model. Thanks guys.
-
Yep, that would be far better.
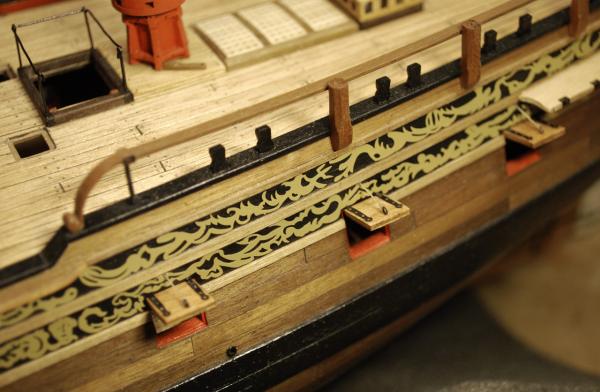
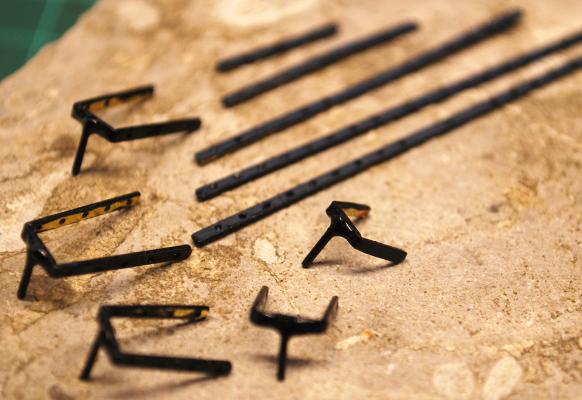
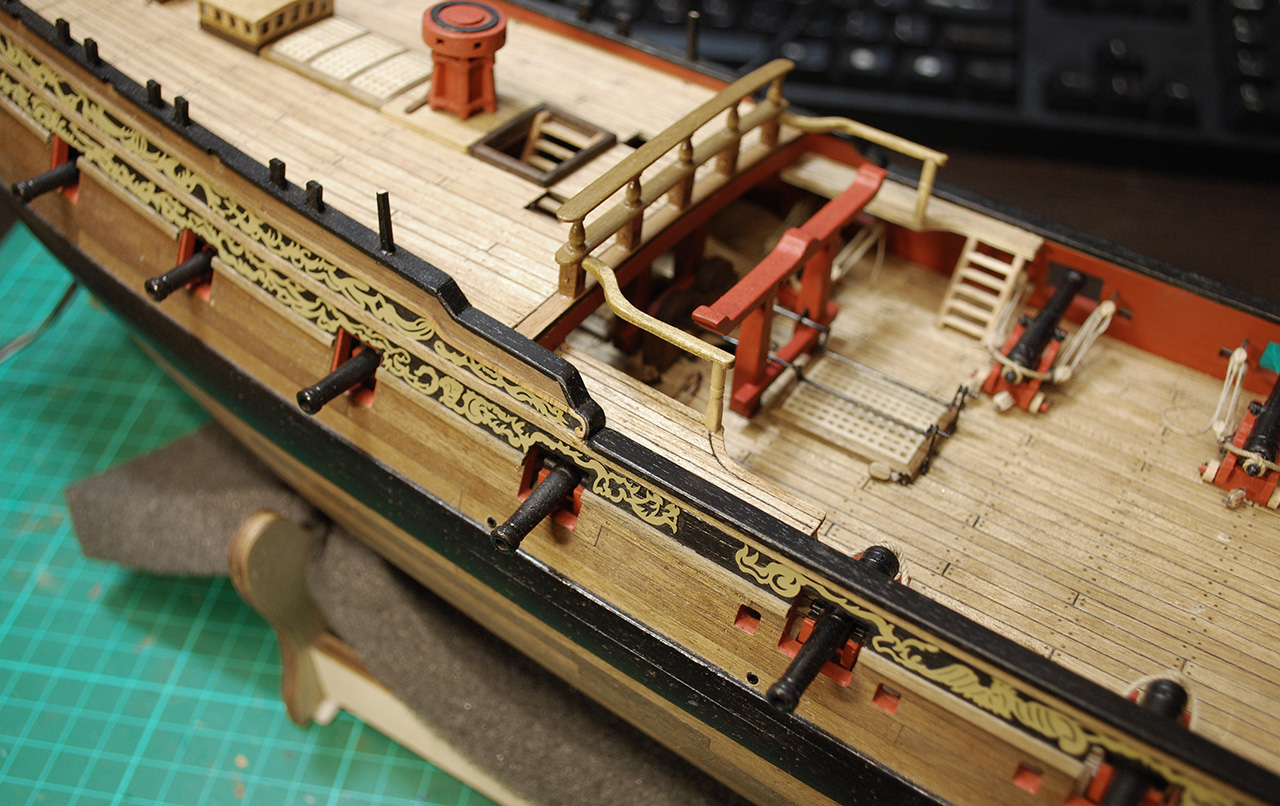
Now for the forecastle railings. Stanchions are made of 1mm brass wire grinded to about .6mm and brass tube. Unfortunately, I did not find any thinner.

- Barbossa, Bettina, riksgewijs and 1 other
-
4
-
Thanks guys.
SpyGlass: the wales are painted (dull black) and varnished. Plain parts are just varnished with Lord Nelson semi-matt. More and more I realise that for the next model I will need to buy proper wood of the same colour. Combination of tanganyika and differently toned walnut looks weird unpainted.
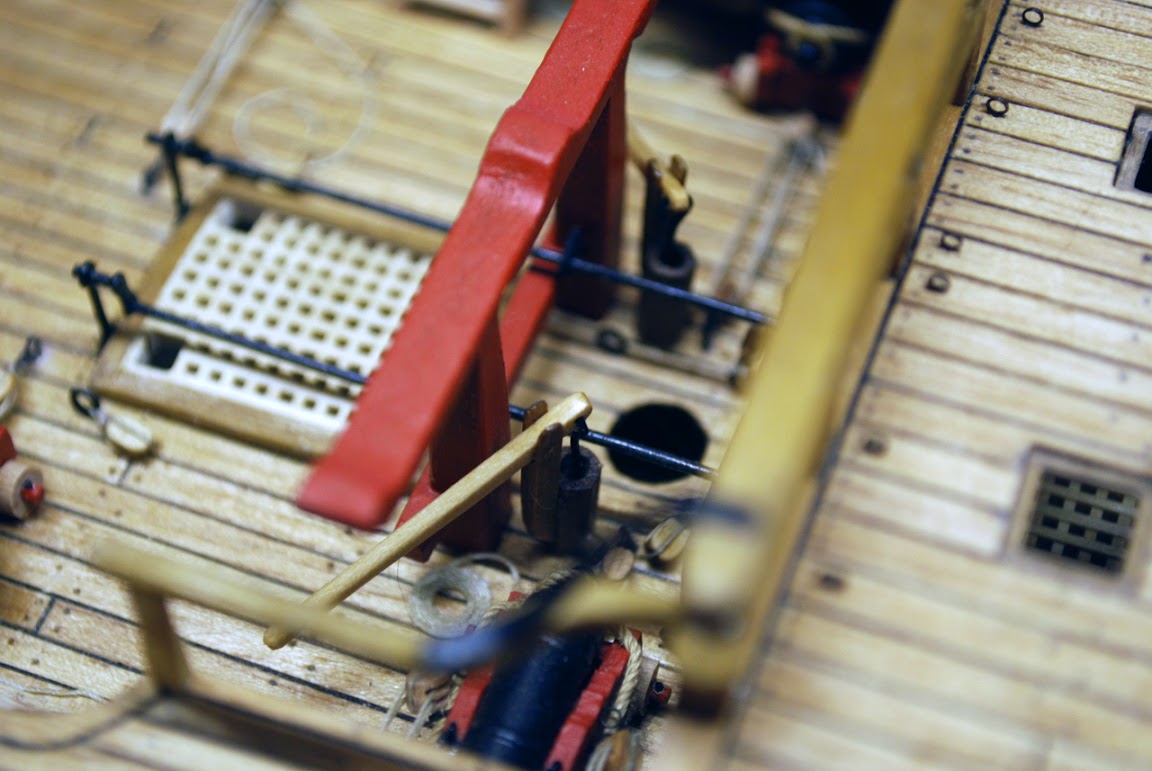
I've finally added the second pair of seats of ease as well as boards to give the crew some privacy. Again, Dan's suberb Vulture was the model.

- Bettina, Barbossa, Mirabell61 and 3 others
-
6
-
Thanks B.E. I'm watching your progress in creating cable stoppers, that will help me a lot, so thanks for that in advance

-
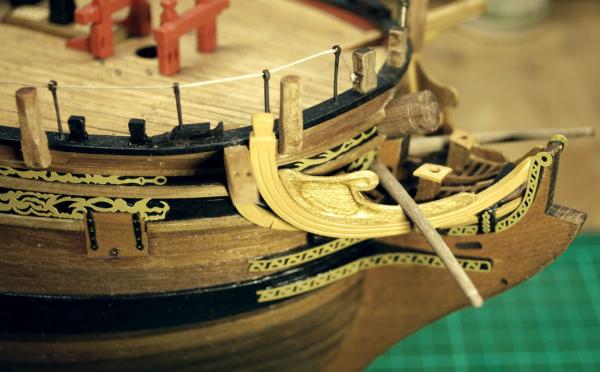
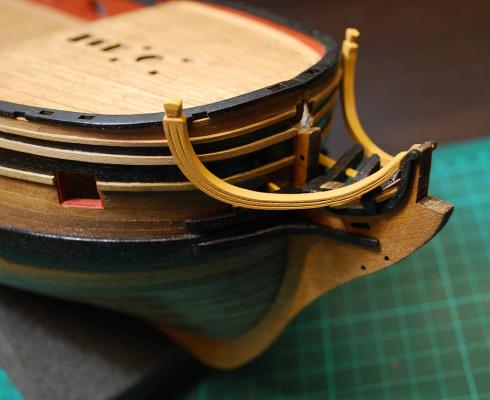
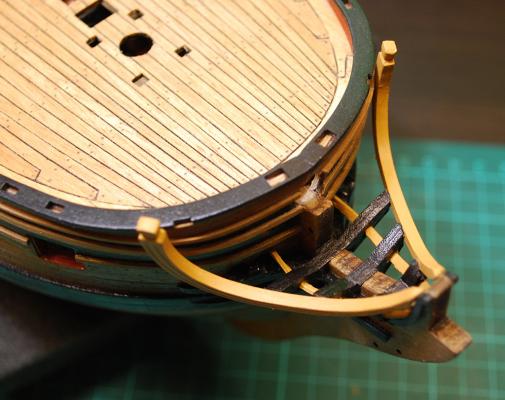
A few more details... especially quarter rails. The fore ends are carved from a single piece of walnut and bent with soldering iron.

- ccoyle, Mirabell61, Bettina and 7 others
-
10
-
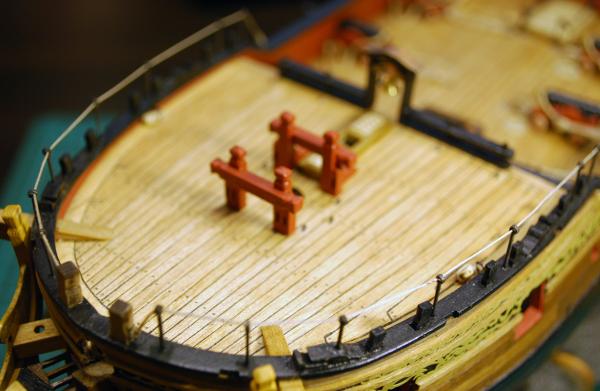
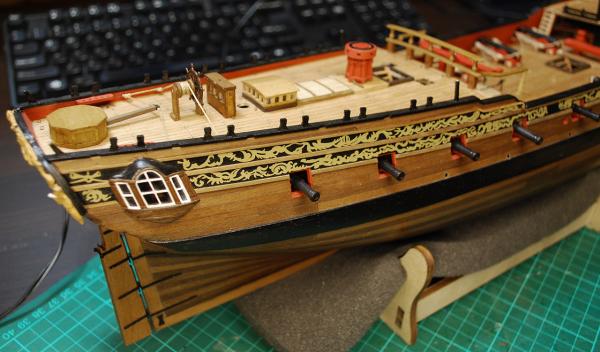
Ms. Fly just got new stairs (entry stairs will be fitted later), fish plate and also starboard decorations, yippee


- Bettina, Mirabell61, Dfell and 4 others
-
7
-
-
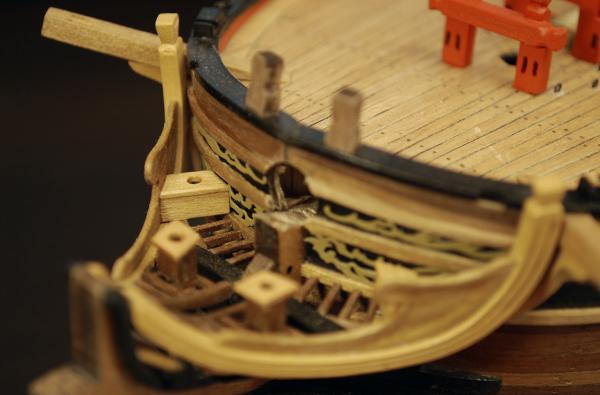
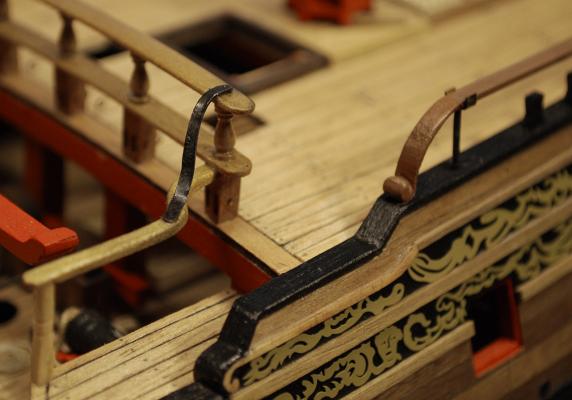
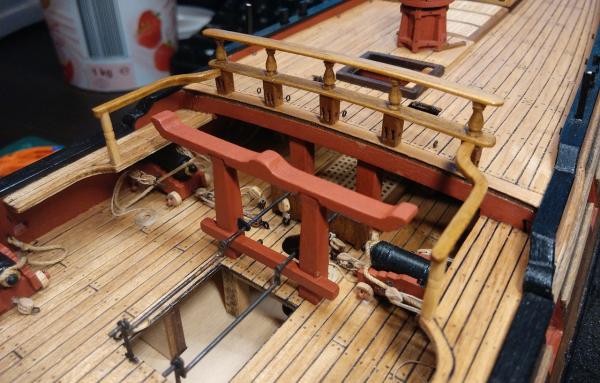
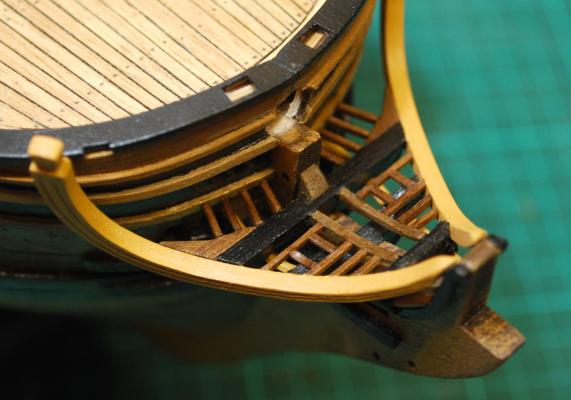
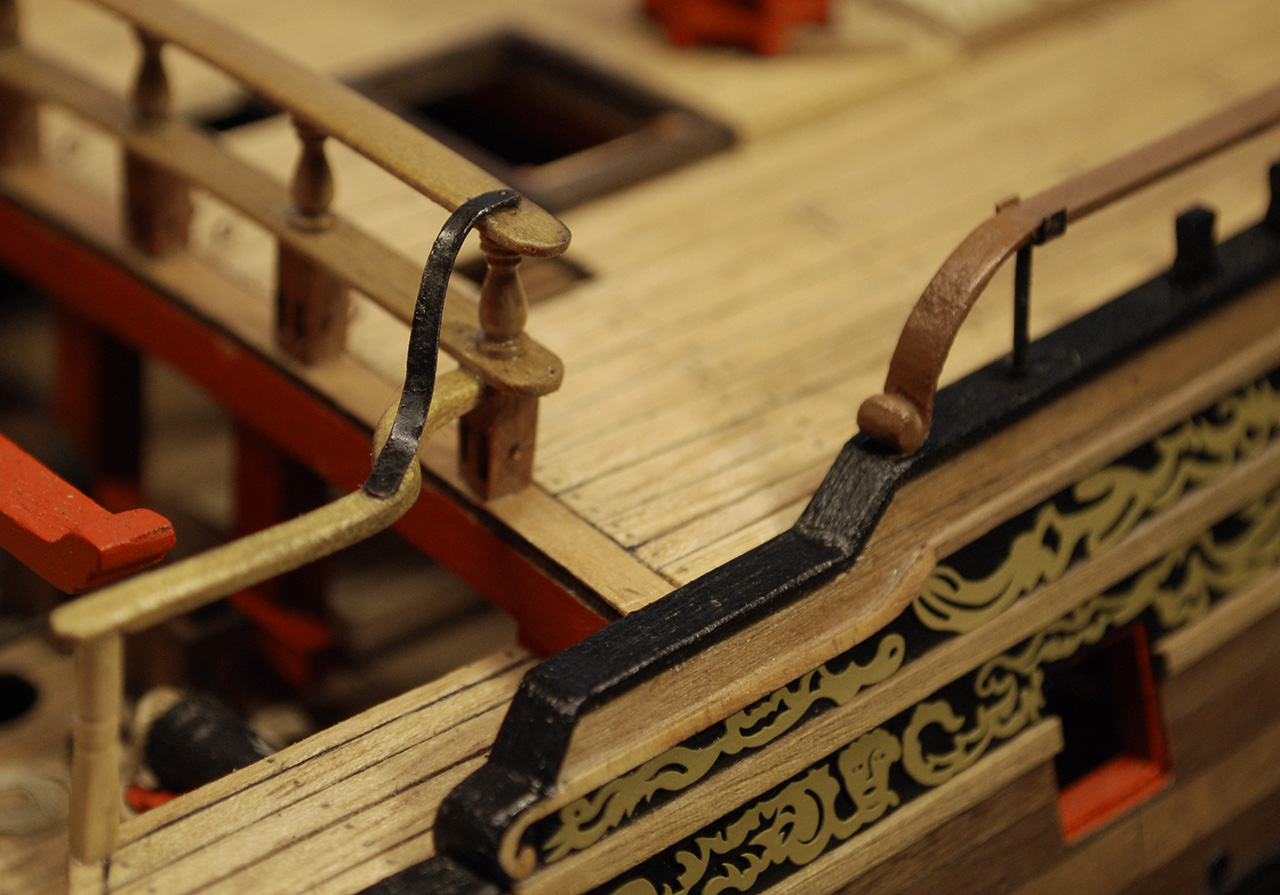
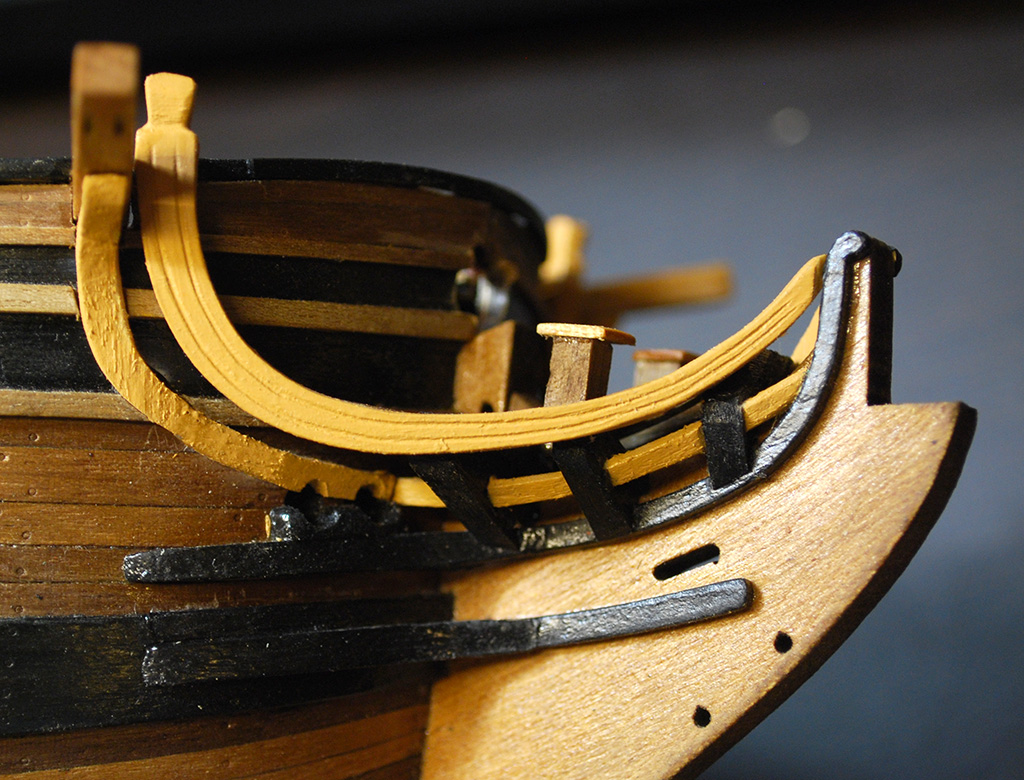
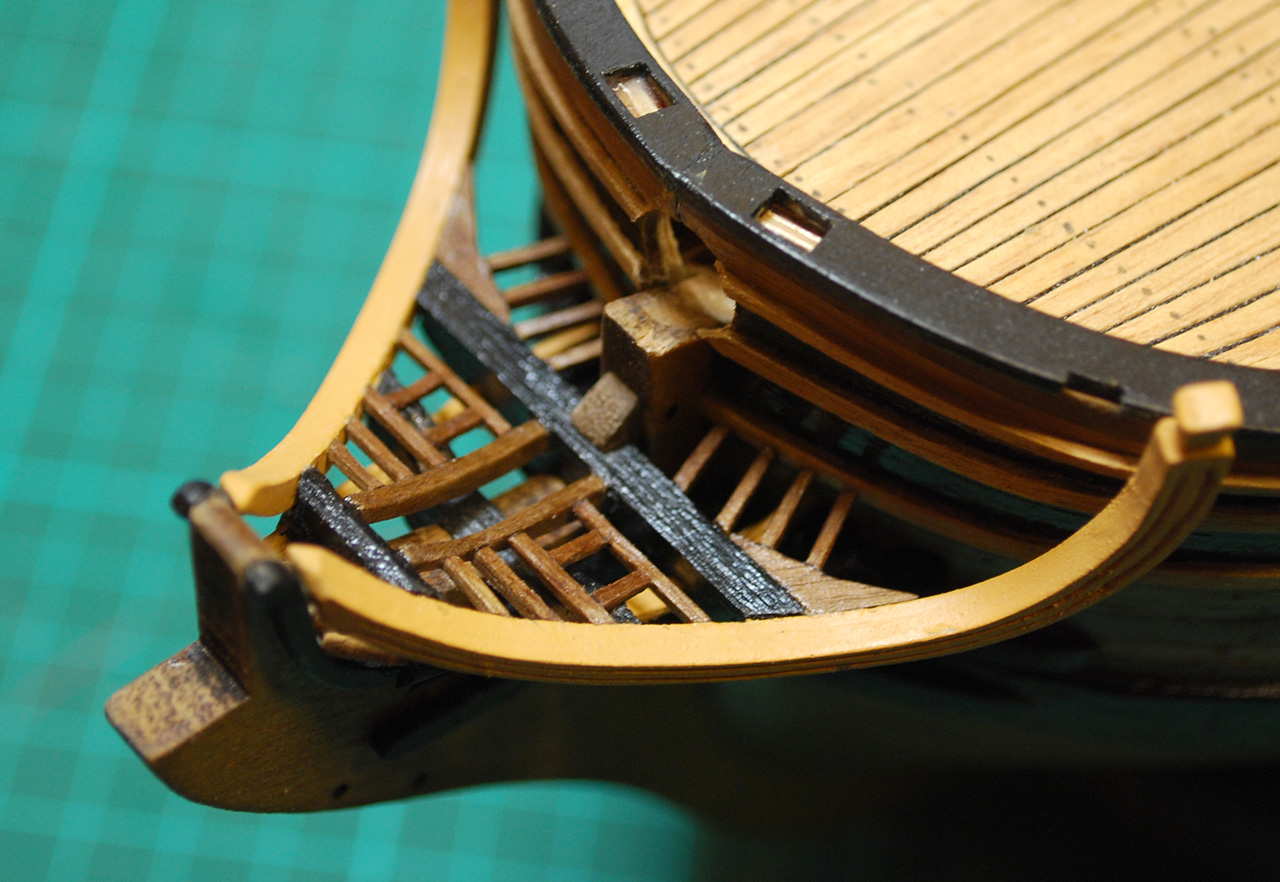
Gangway posts and railings.
The kit again provides only basic parts made of plywood, so it was an easy choice - walnut and carving.

- Mirabell61, Barbossa, Bettina and 3 others
-
6
-
Thanks guys, good to see you as well. Hope you'll find a way back to your Swans soon.
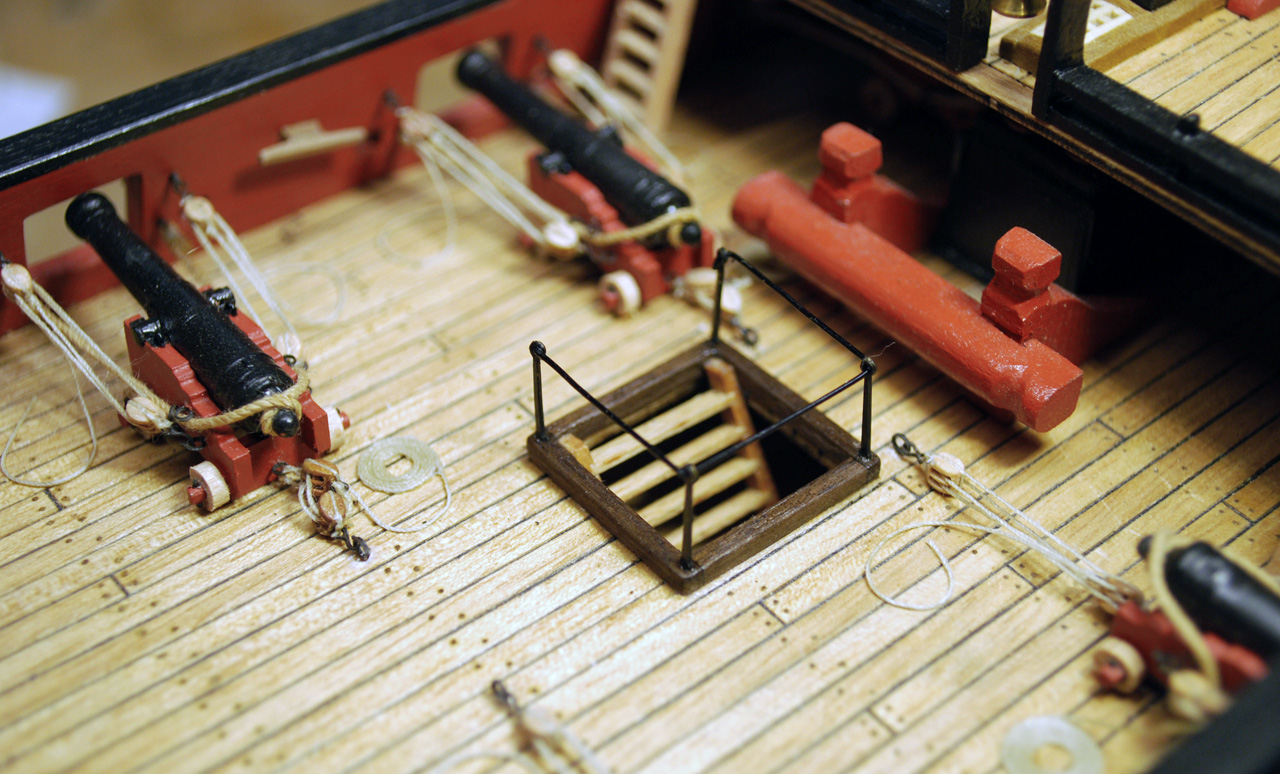
A small update. I did not want to alter the chain pumps, but simple bent 1mm wire handles looked just ridiculous, so I grabbed my solder torch and made these. Finally I blackended the parts.

-
-
Thanks, they are not on plans. I was inspired by Dan's Vulture.
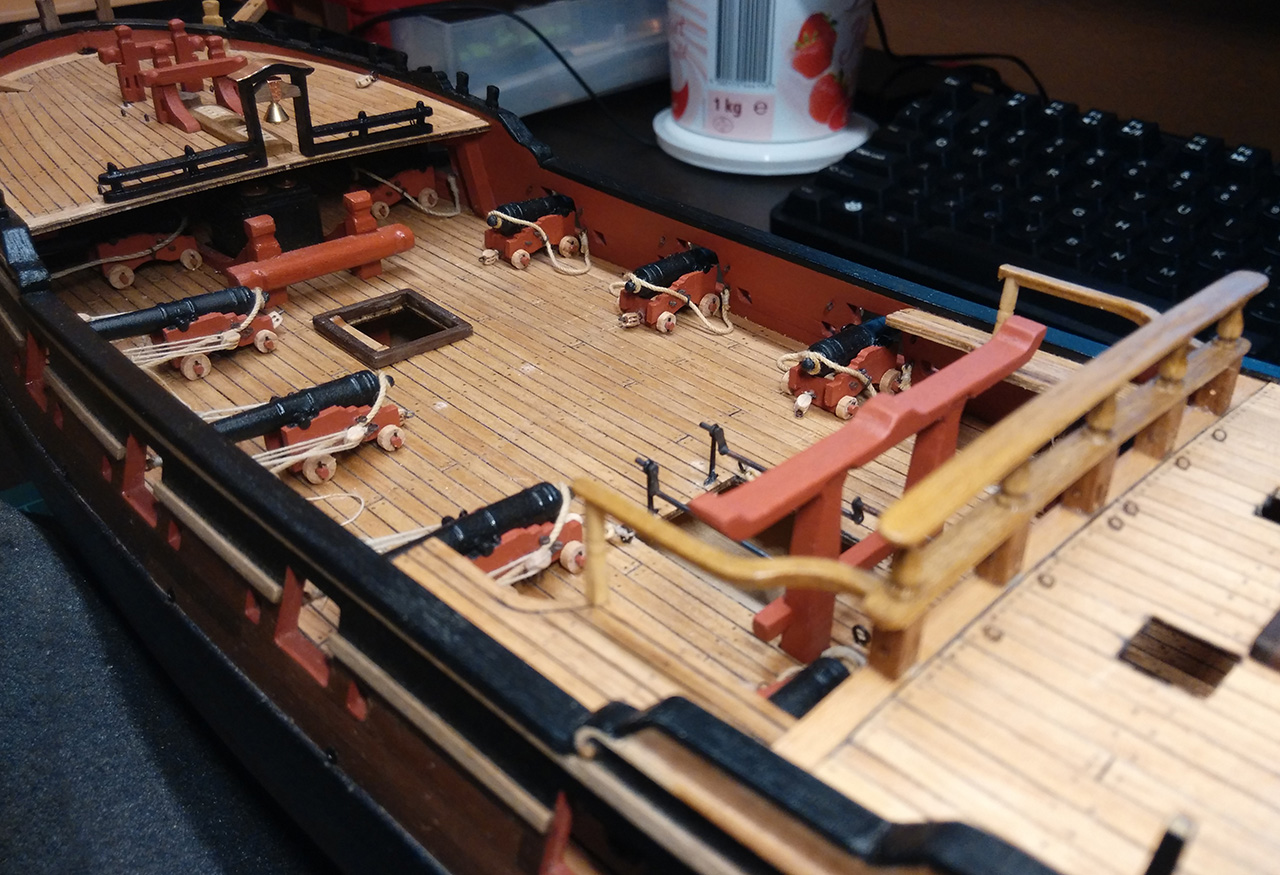
Now, I was not completely satisfied with the supplied blocks, so I've decided to create a small sanding jig. It is most useful attached to a high-speed grinder.
The result (original and sanded blocks):

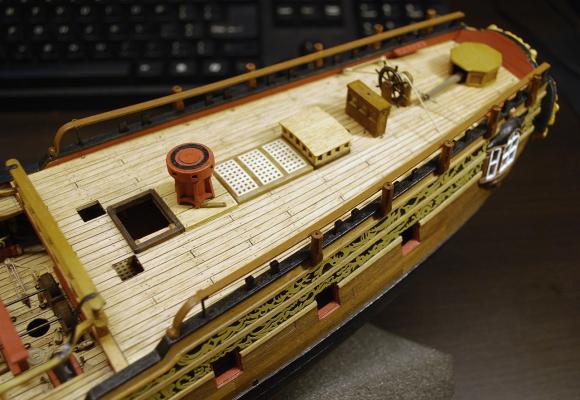
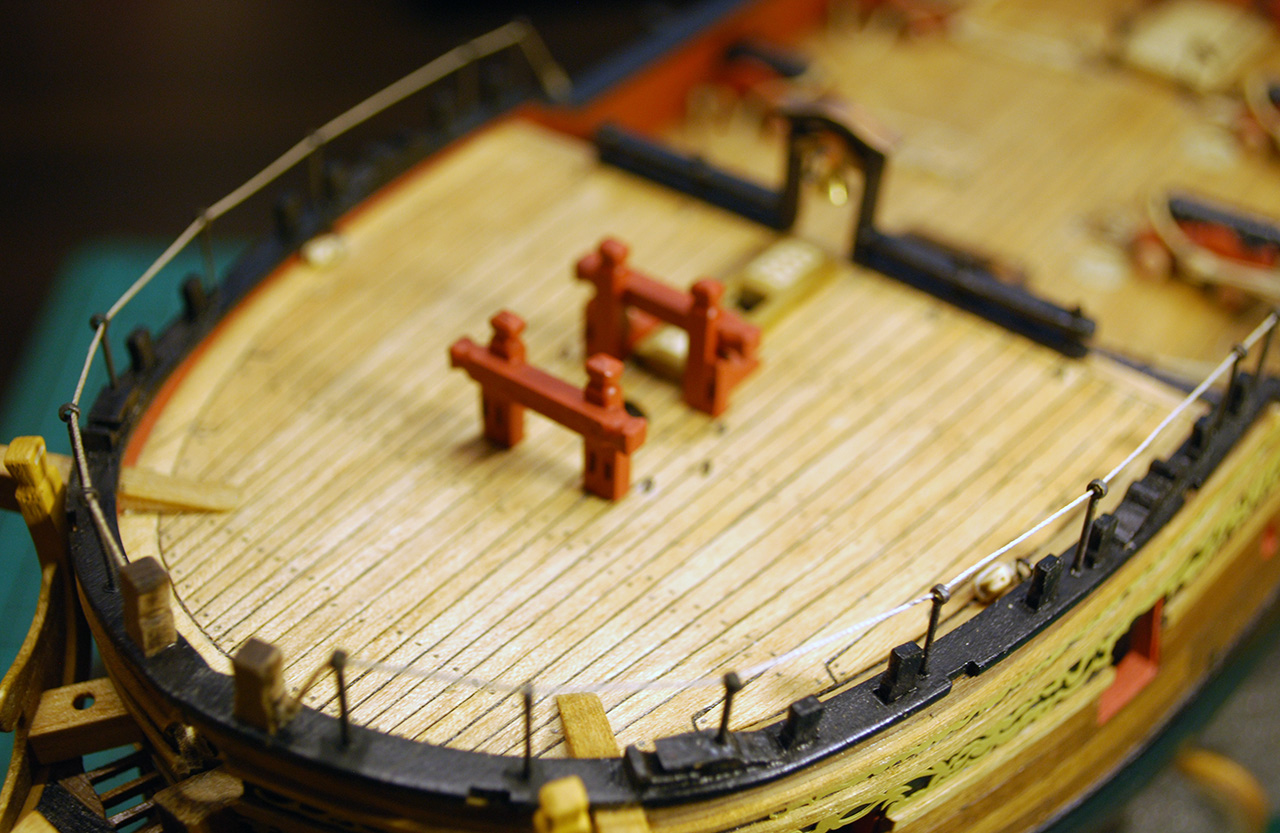
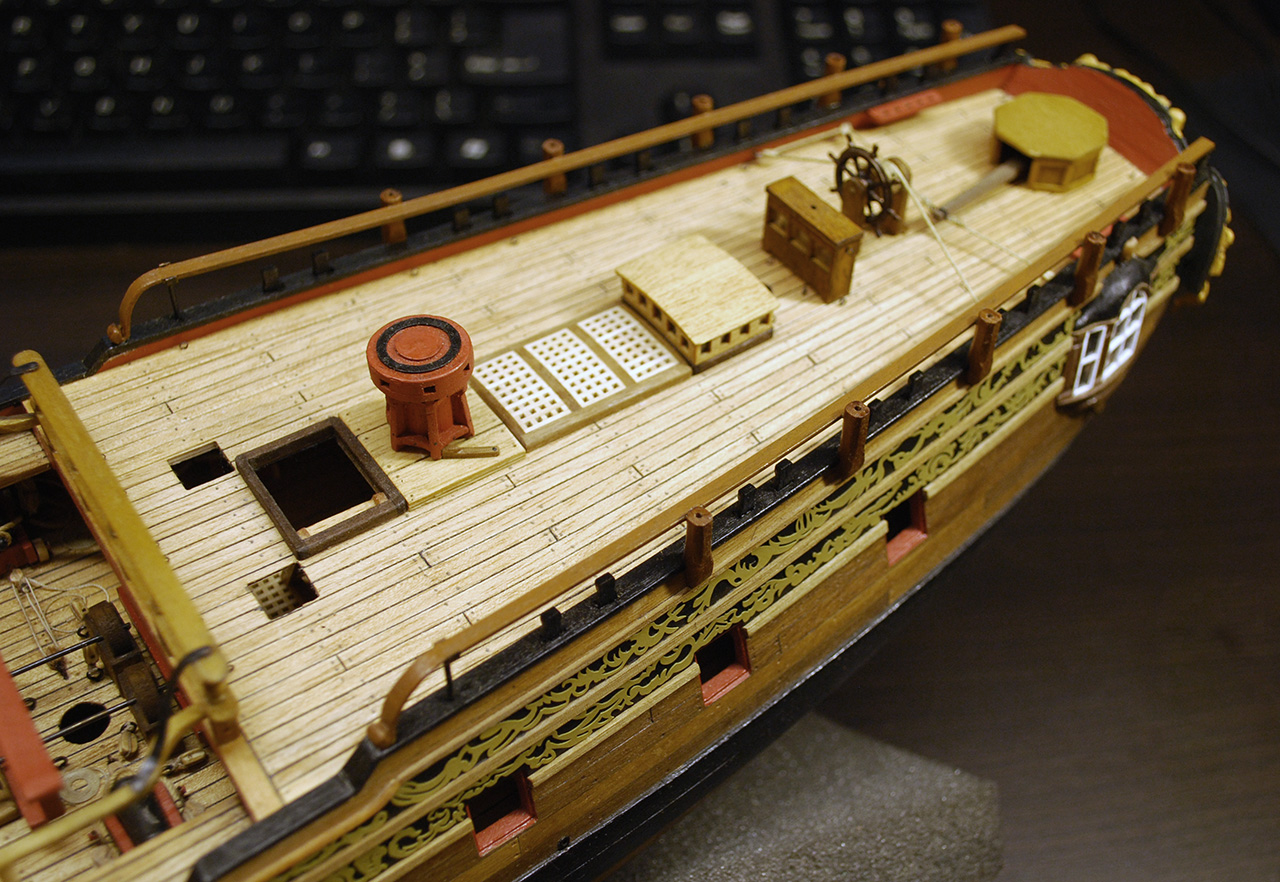
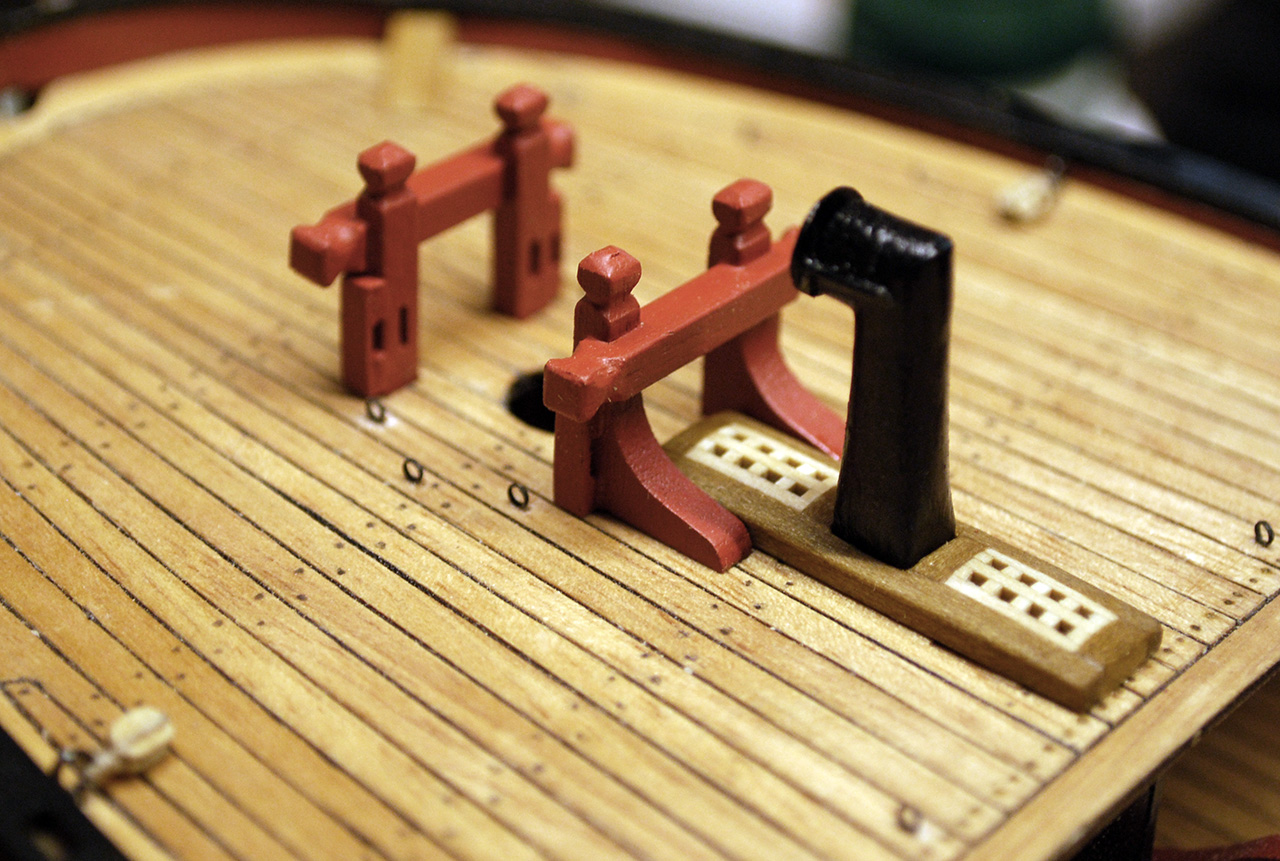
And finally the almost finished forecastle with funnel made of wood and its pot or flap or whatever it is called is made of metal.

-
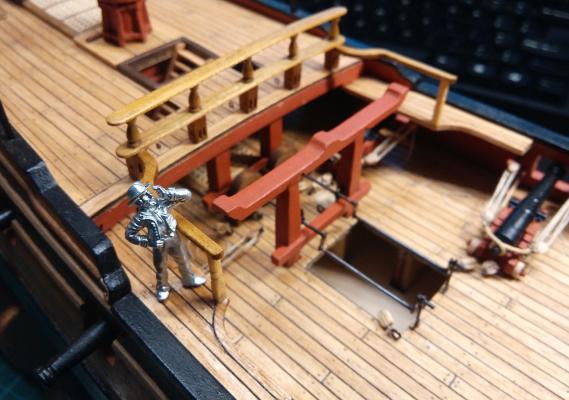
Hello folks, after a long time (I've rediscovered Baldur's Gate 2 and Throne of Bhaal
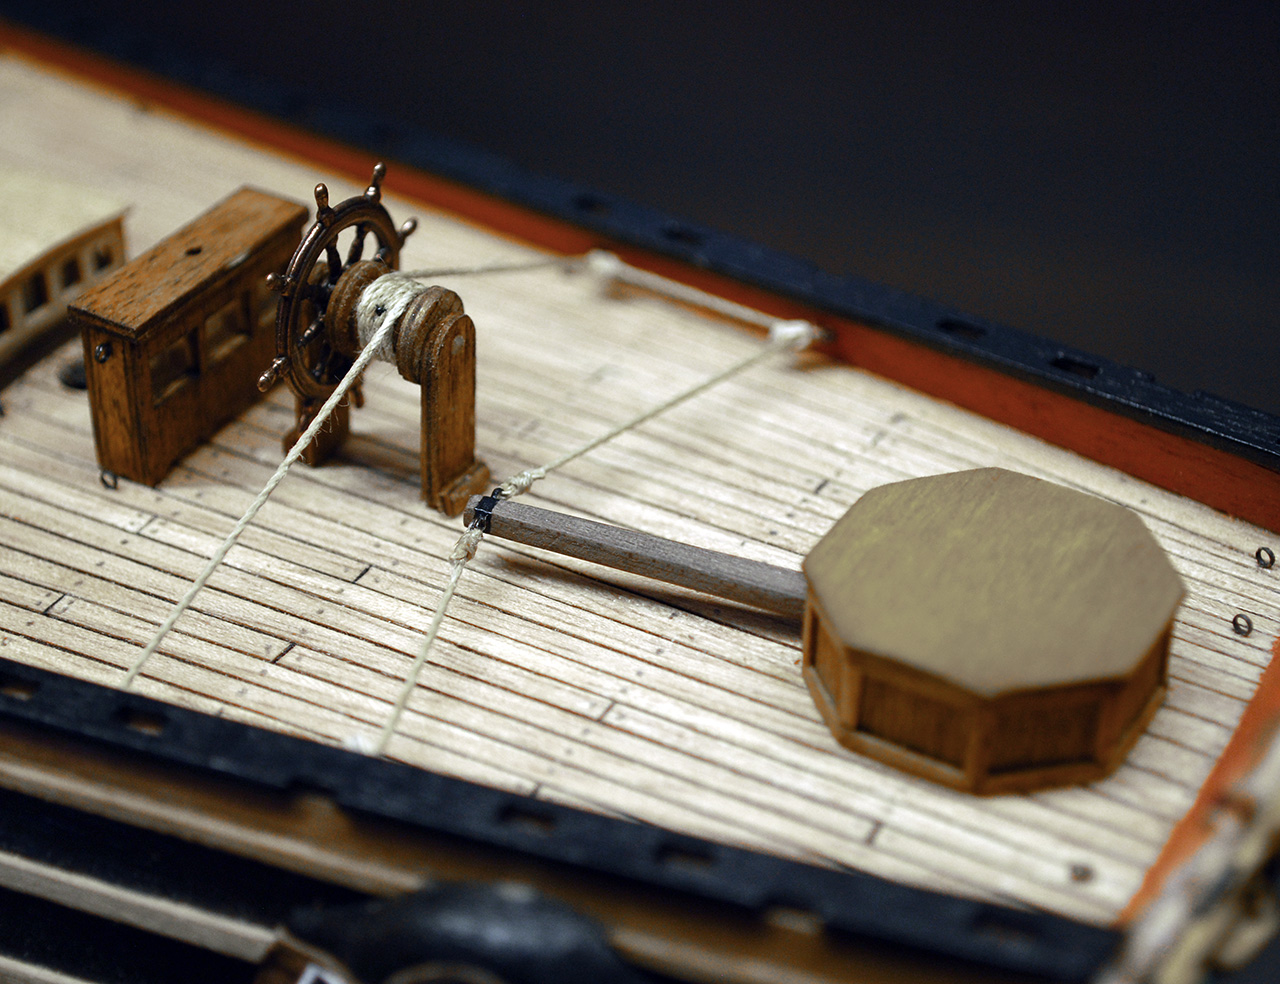
) a small update.The aft furniture is basically finished with rudder and helm in their places as well as their rigging.
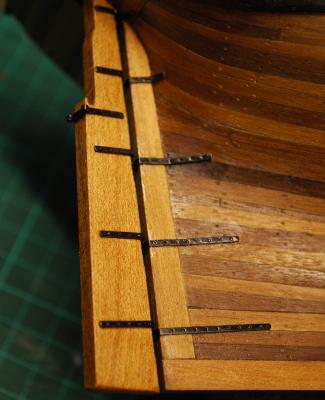
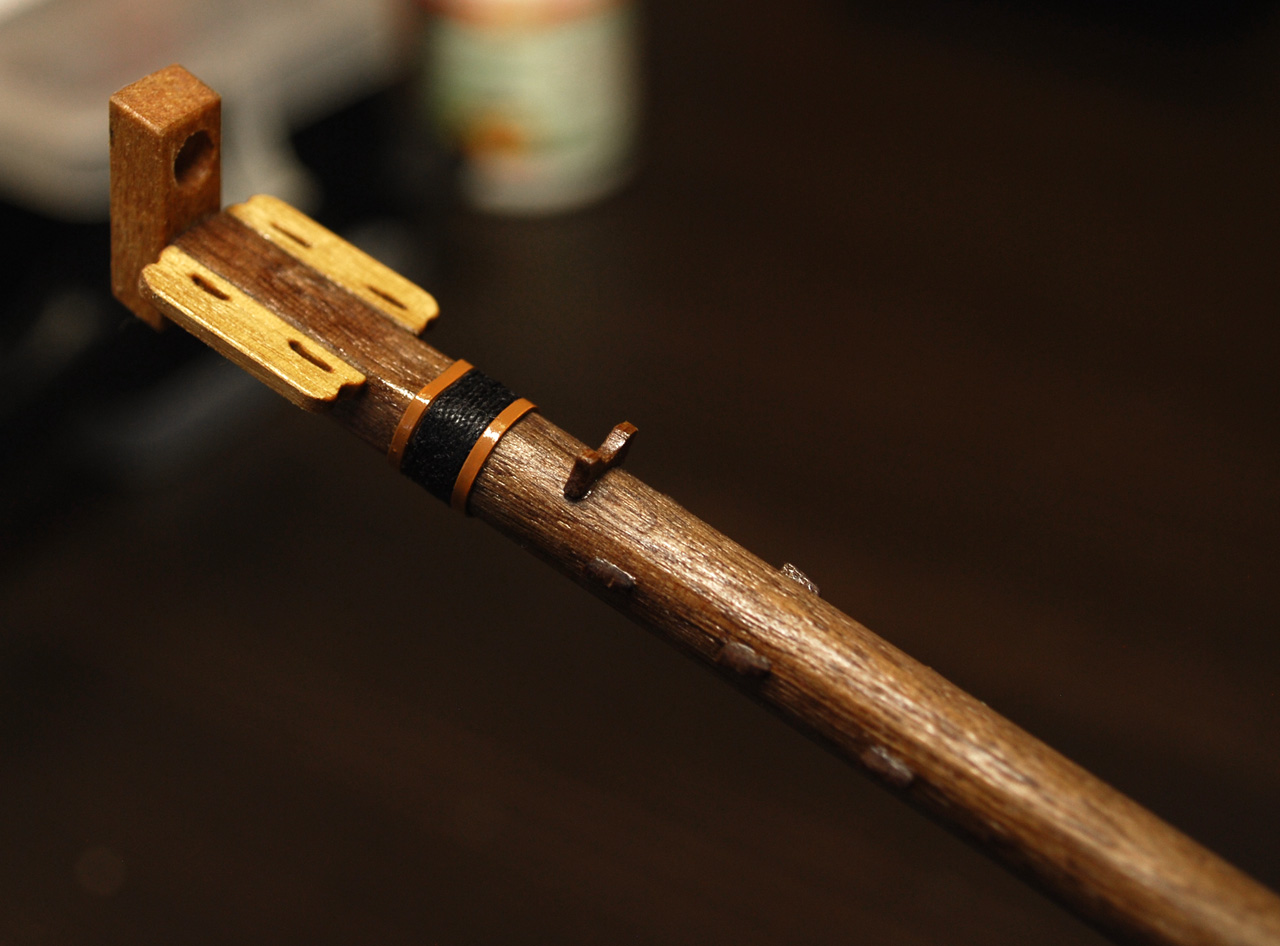
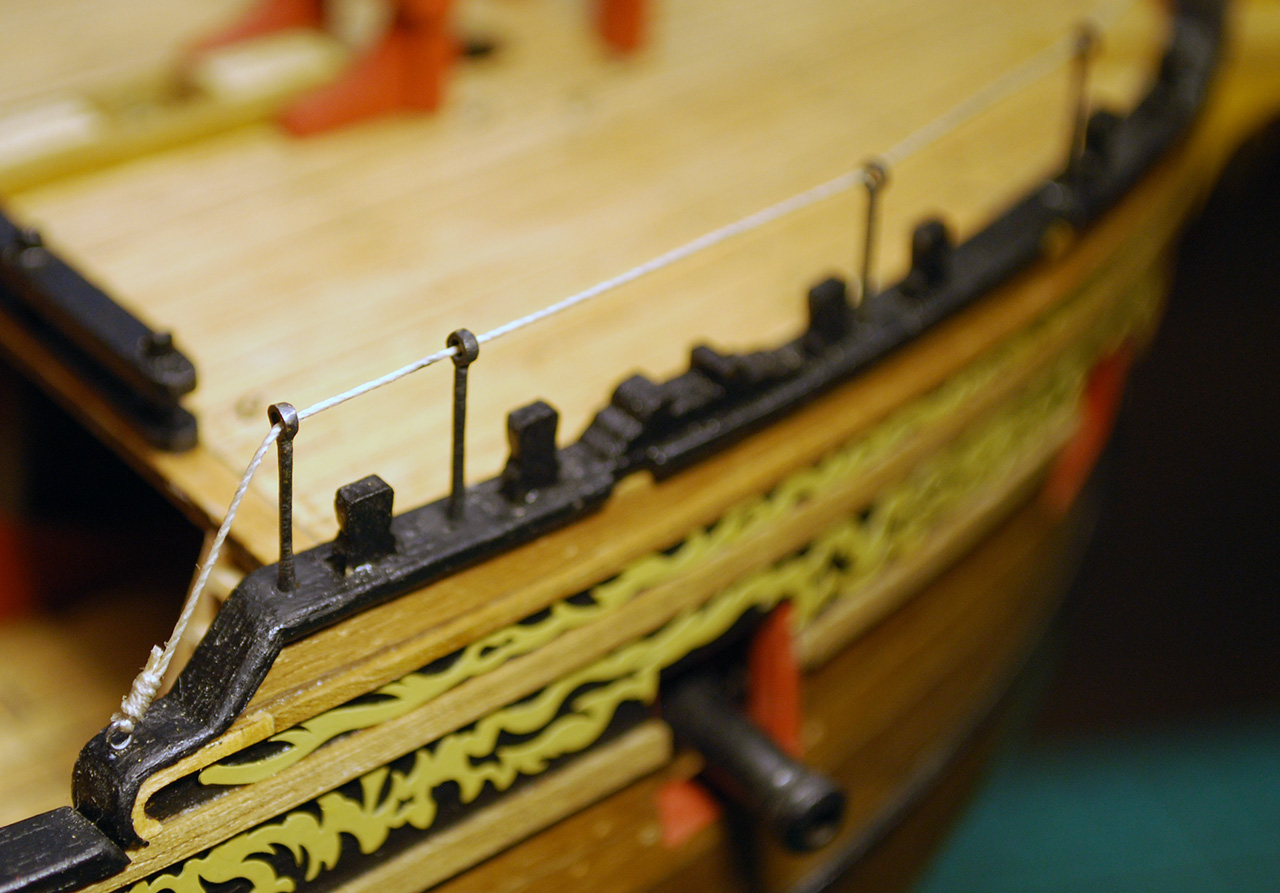
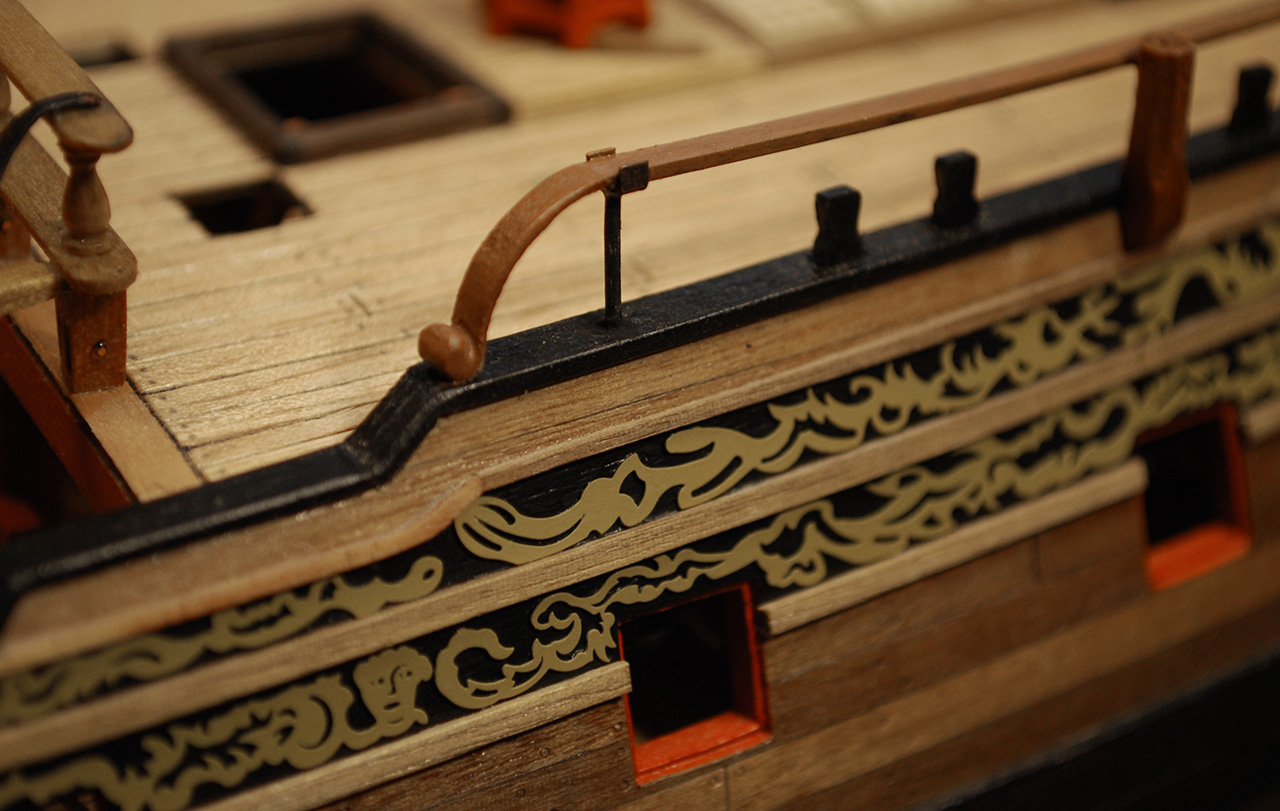
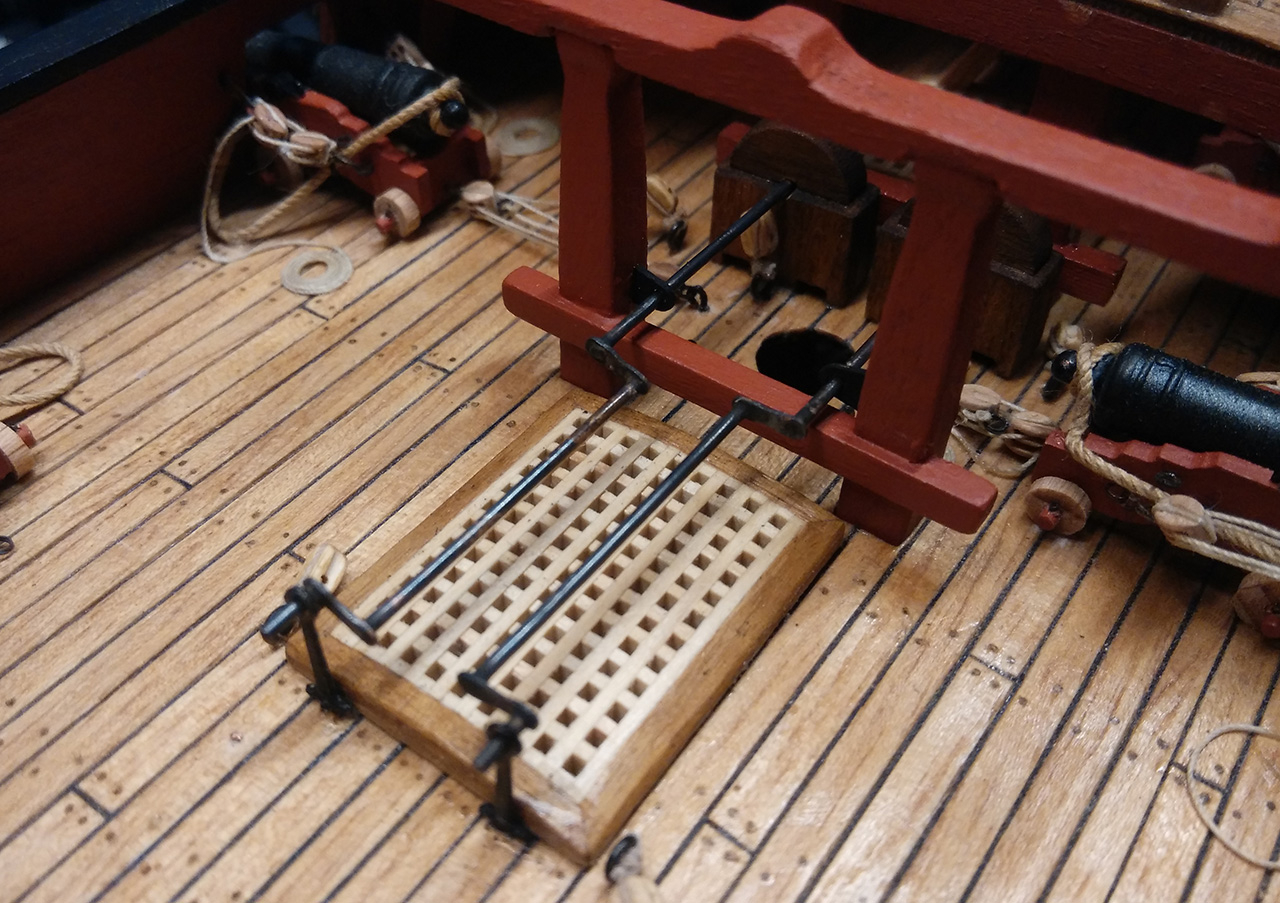
But then I remembered that I haven't created scuppers yet, well, more likely I've been postponing it for far too long. So I grabbed a 2mm brass tube, cut it into pieces, drilled holes above the wales and the rest was easy.
- WackoWolf, Dan Vadas, justsayrow and 4 others
-
7
-
Thanks for the kind words.
Martin, that is a misunderstanding, I didn't cast a new piece, I just used the supplied one and bent it using torch. But if I were to cast a new piece, then I would simply lubricate the stencil (=supplied piece) with oil or something, put it in a plaster, let it harden, put the stencil out and then use tin and lead solder to cast a new one. That would be also flat, but much softer and bendable.
-
-
Thanks Martin, much appreciated.
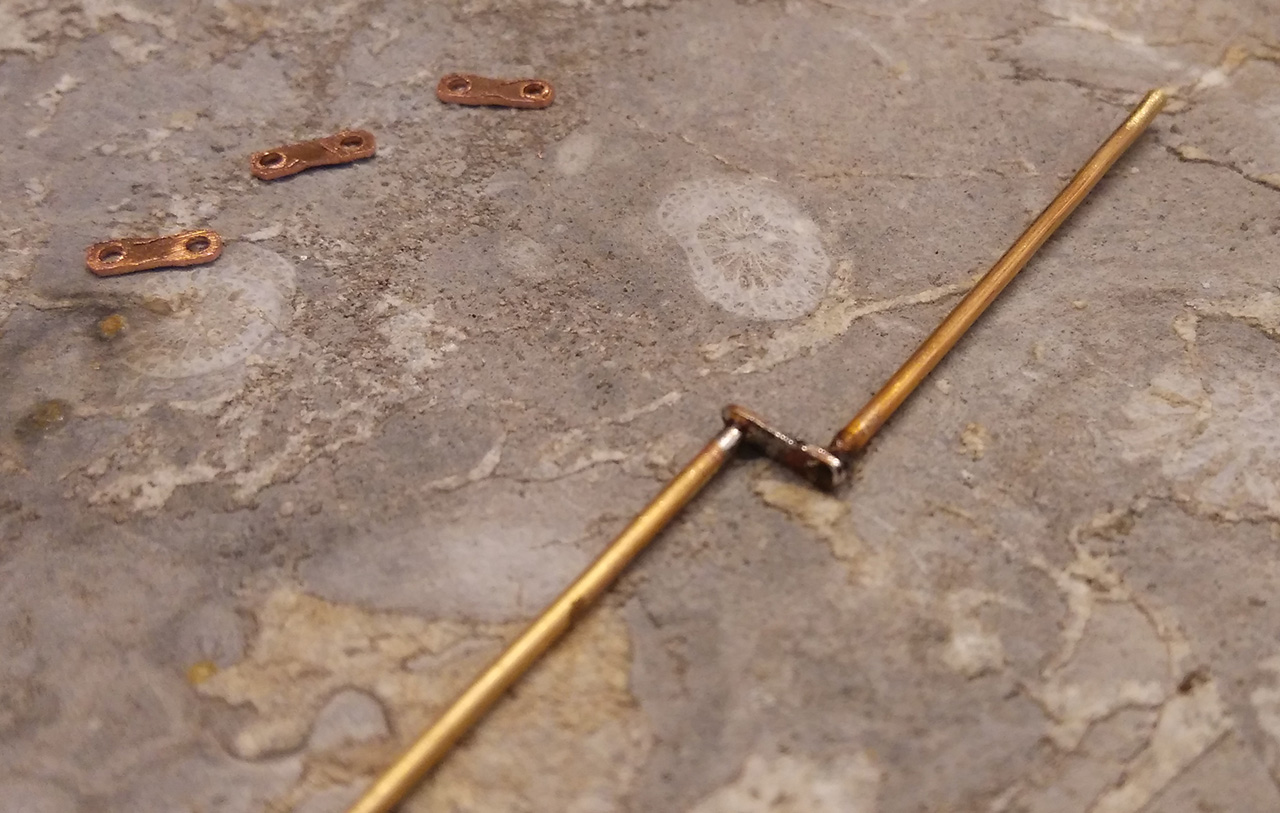
There was one more delicate piece to be made, the spectacle plate for the rudder chains. I used 1mm copper sheet and again solder.

Then I could finish the rudder and put in in place.
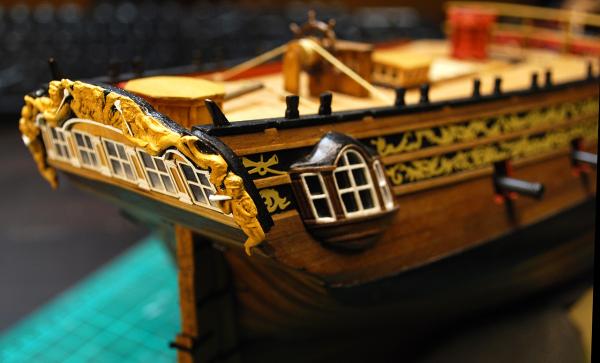
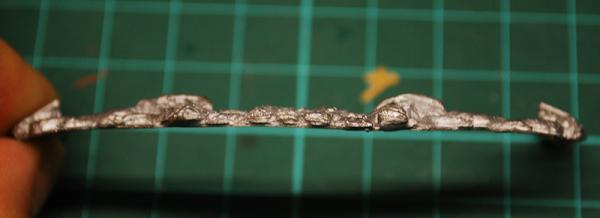
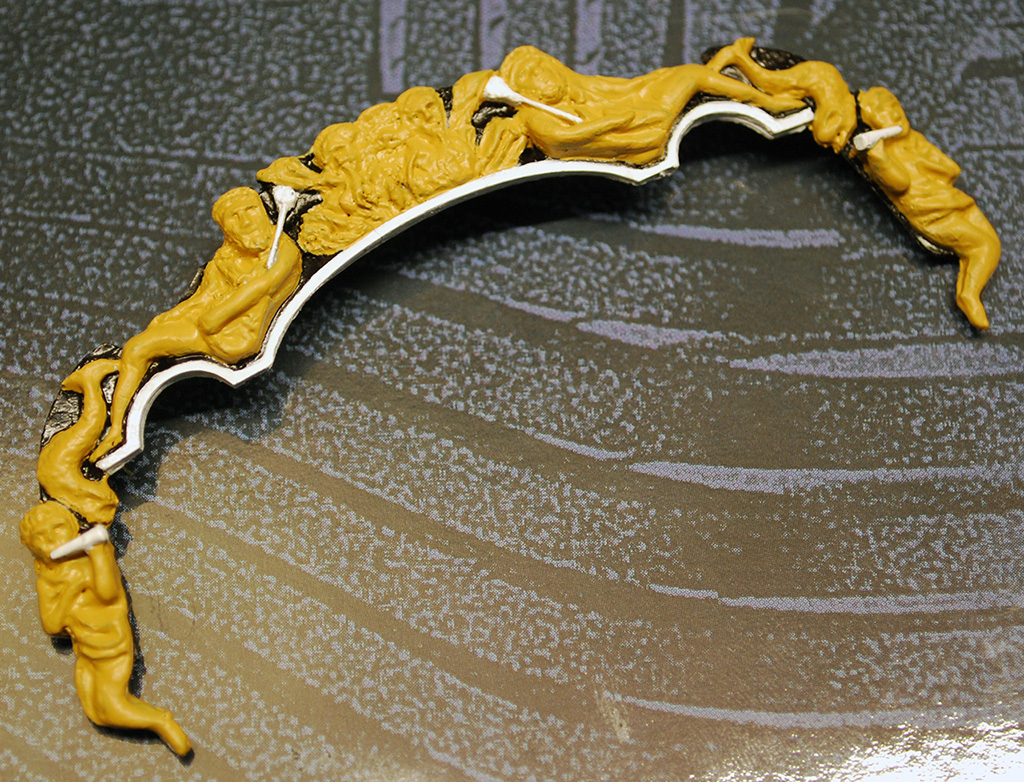
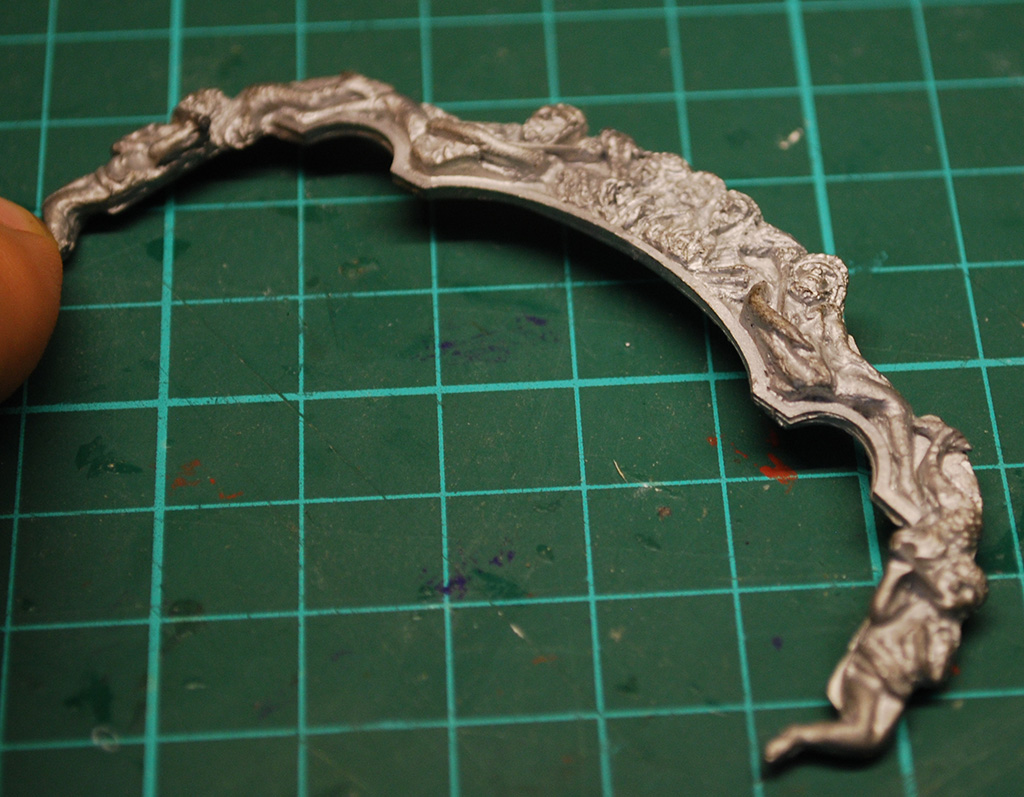
And then I was thinking about the way how to bend the stern decoration. Alistair chose to break it into a few parts and glue it together again, but I wanted to work with one single part. I aimed to create a plaster stencil and then cast a brand new piece made of tin. In the end I took the risky approach, grabbed a torch and the piece in tweezers, heated it and let it bend slowly part after part. It looks unharmed now and suprisingly well follows the stern of my Fly.

-
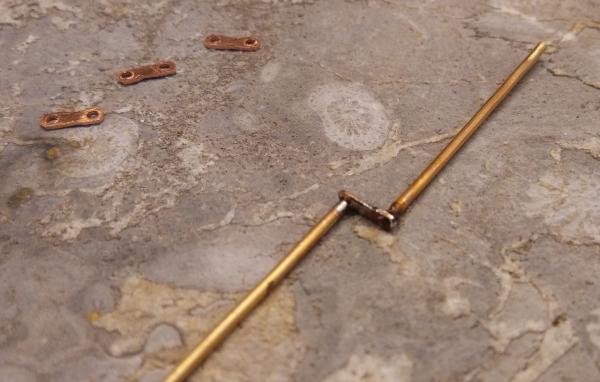
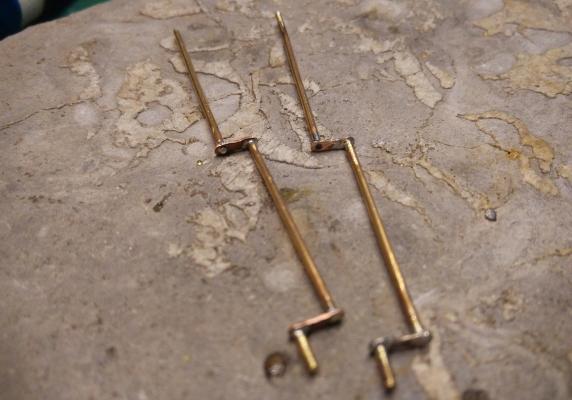
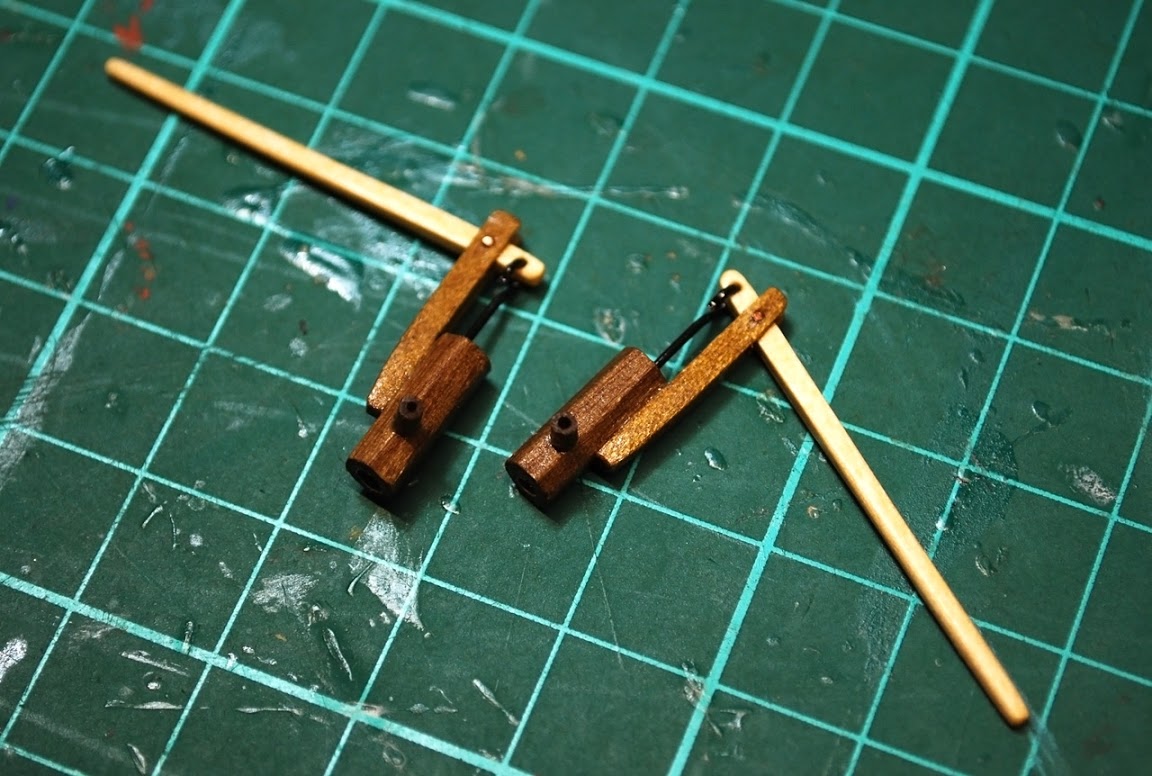
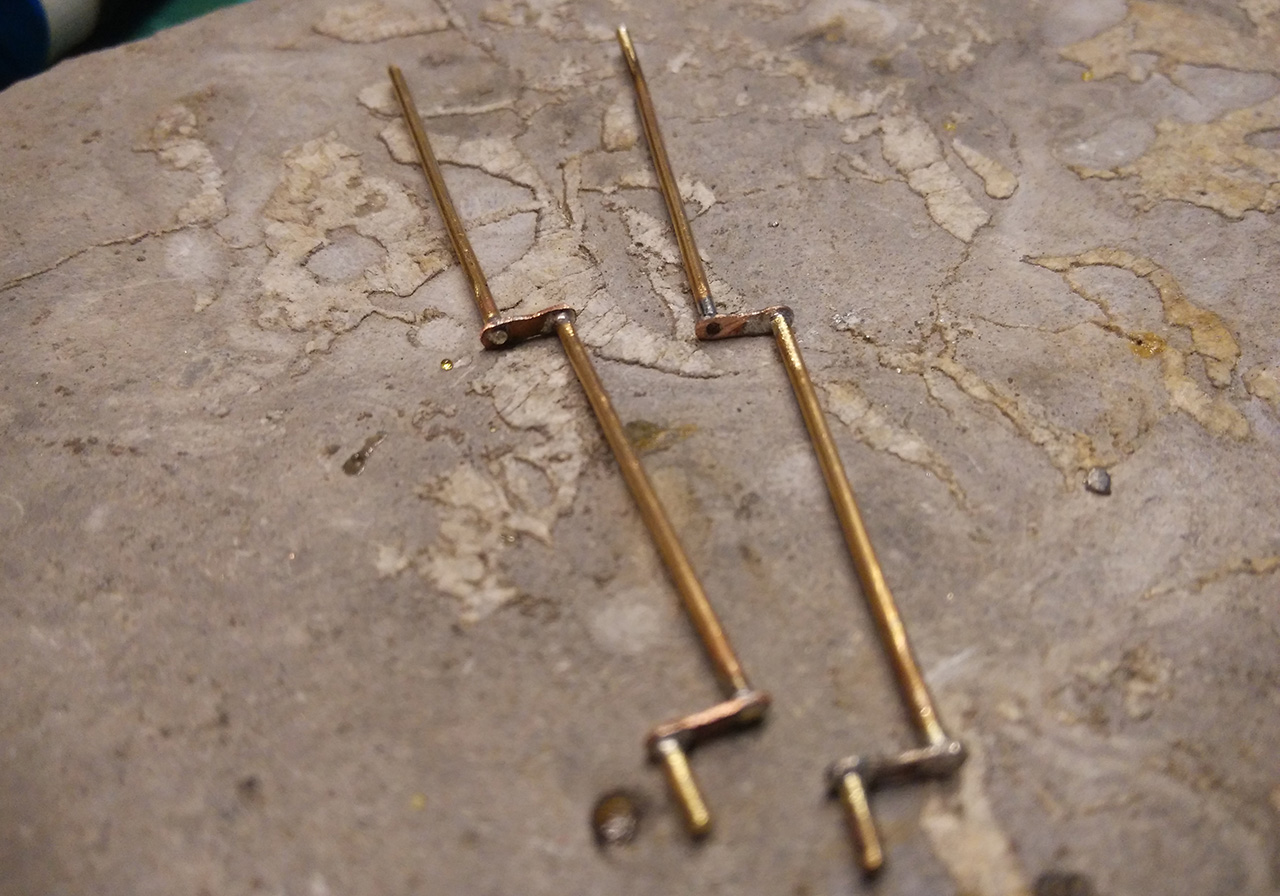
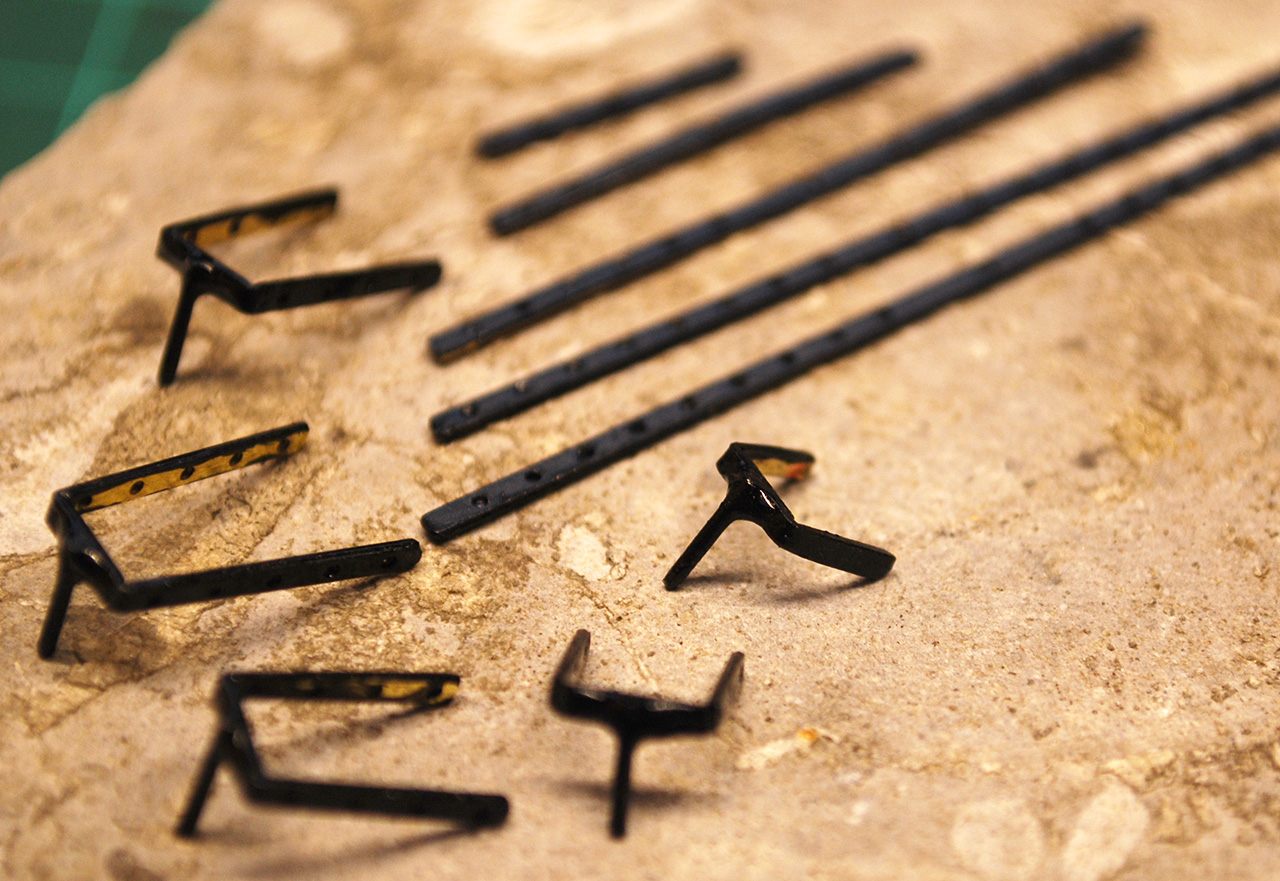
Time for rudder gudgeons. According to the kit plans, their pins should be created using 1mm wire drilled right into the rudder and bent 90 degrees. That would be hideous, so I decided to solder them to the outer side of the gudgeons creating a gentle toe like this (Proxxon butane torch rules)

But then the pin appeared to me too thick, so I replaced the 1mm wire with thin brass nails.
I don't have good experience with blackening brass, so I painted the parts using metal primer, tamyia acrylic and semi-matt Nelson varnish to protect the paint. There is a bit of silver paint to add the shiny metal effect, but not on the photo.
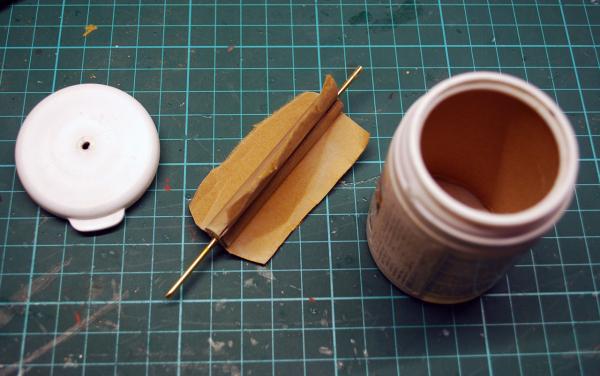
Almost finished rudder


- Landlubber Mike, Bettina, Barbossa and 7 others
-
10
-
Thanks, I'm sure you'll do a good job and I look forward to seeing the result, so get on with it
-
-
Hello Danny, I just wanted to thank you for this whole thread, it is the best resource that can be found regarding the Swan class (TFFM stands apart, of course). Your photodocumentation is impeccable and I find it most helpful. Wish you many happy days shaping your Vulture, it is a gem.
-
Thanks guys, much appreciated. A small update:

- Barbossa, shipcarpenter, Bettina and 6 others
-
9
-
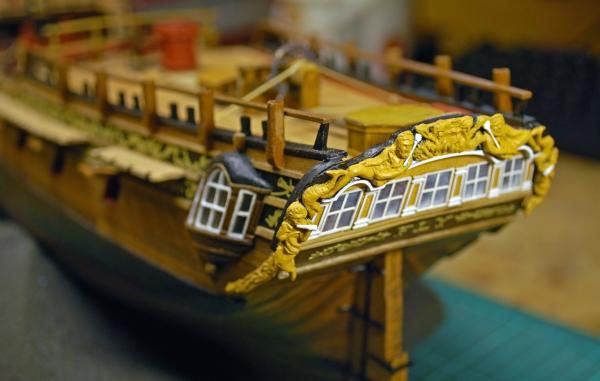
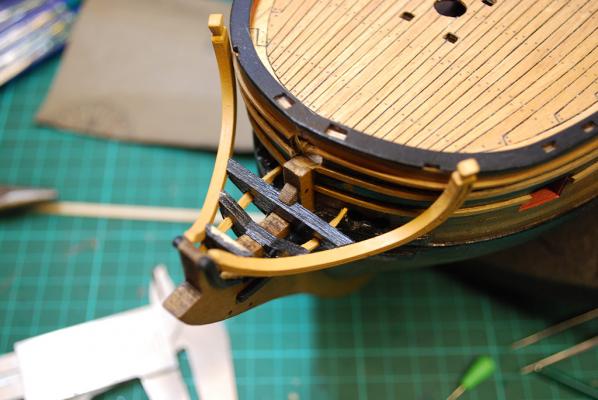
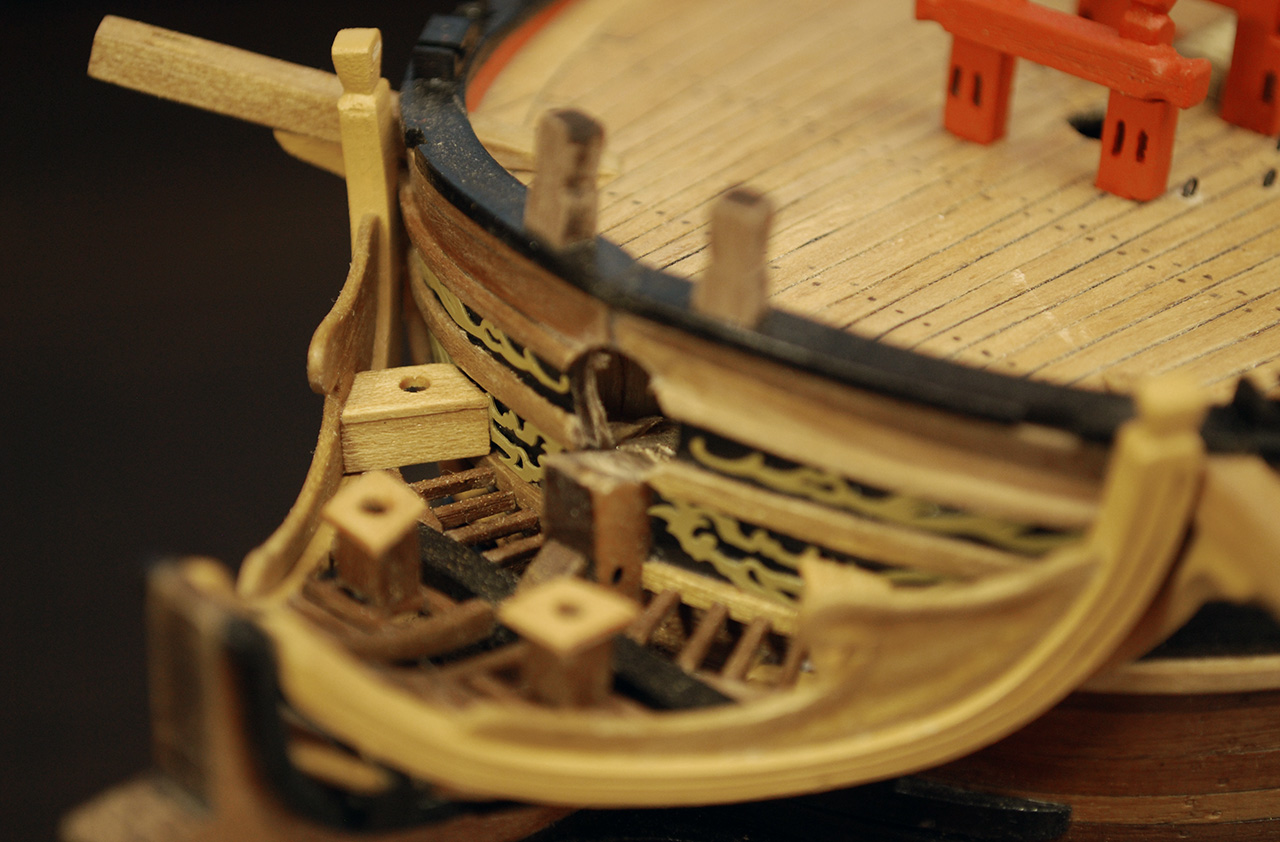
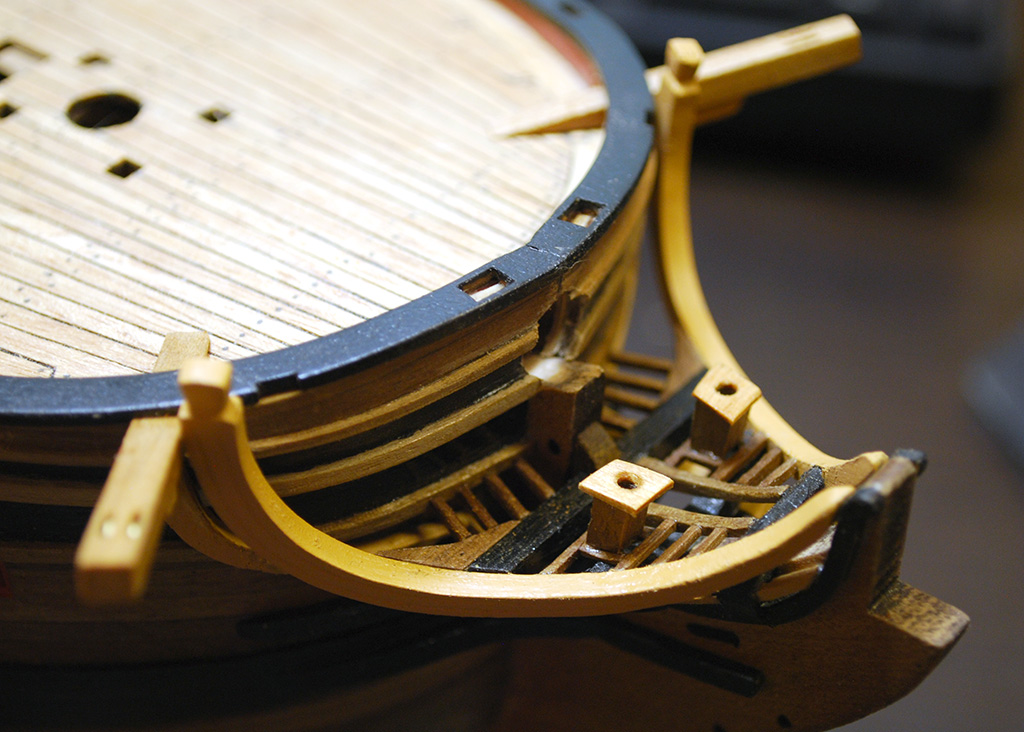
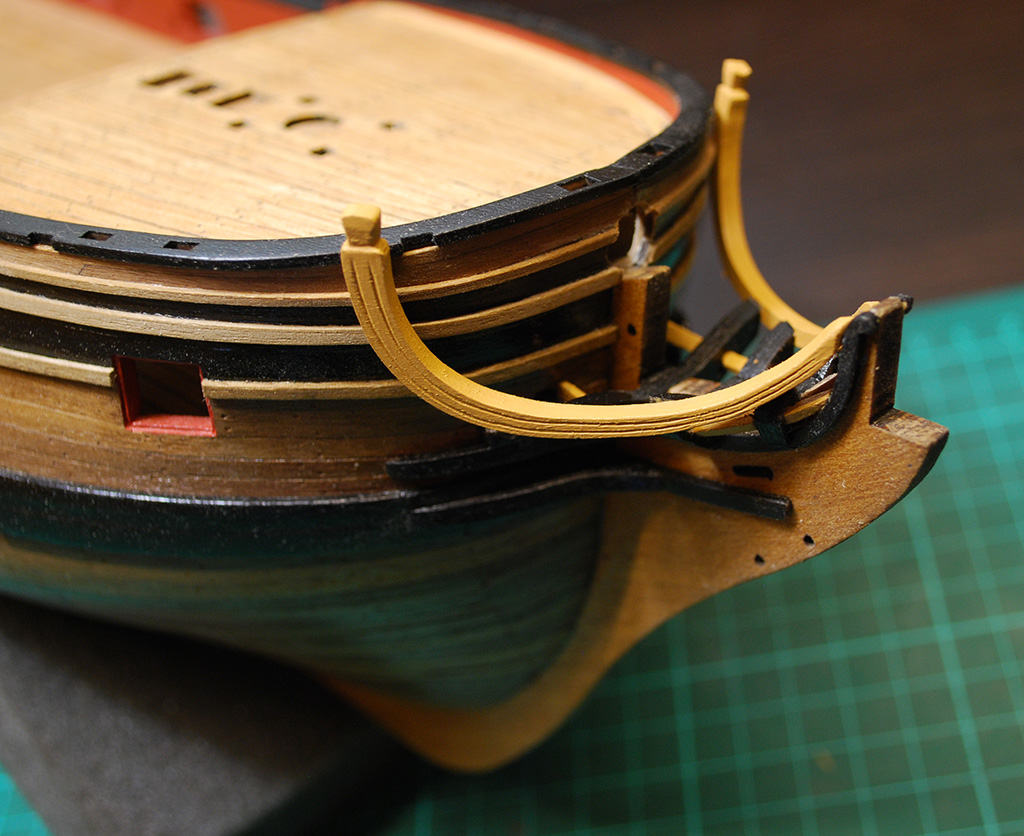
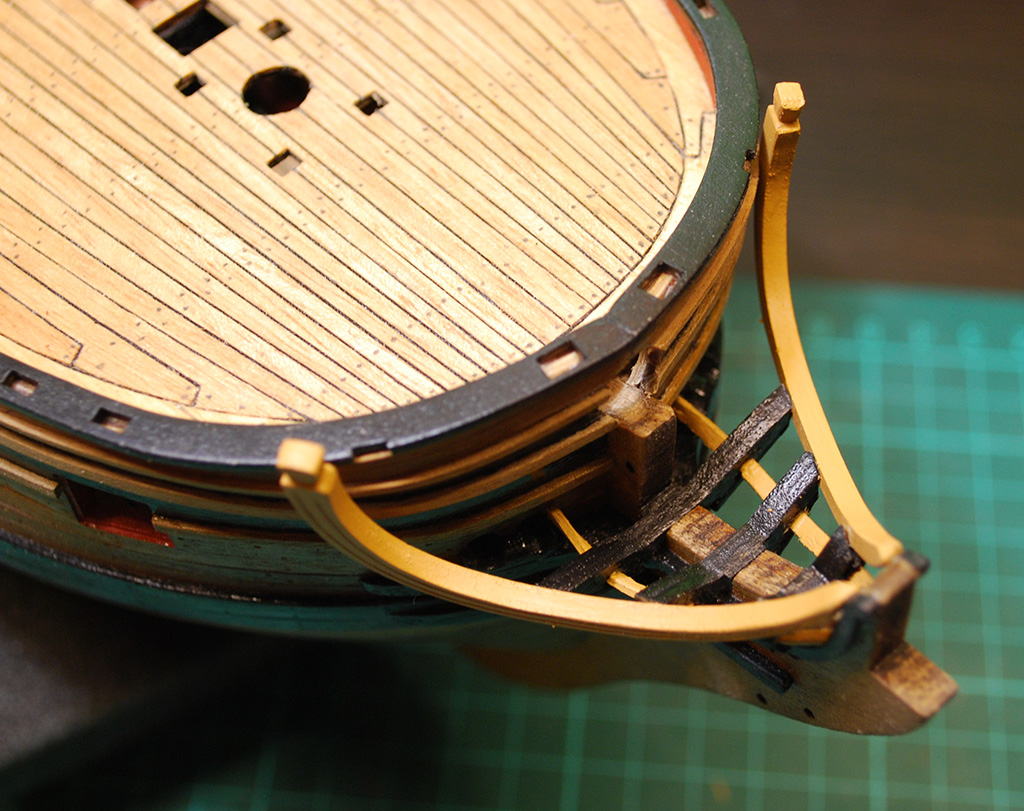
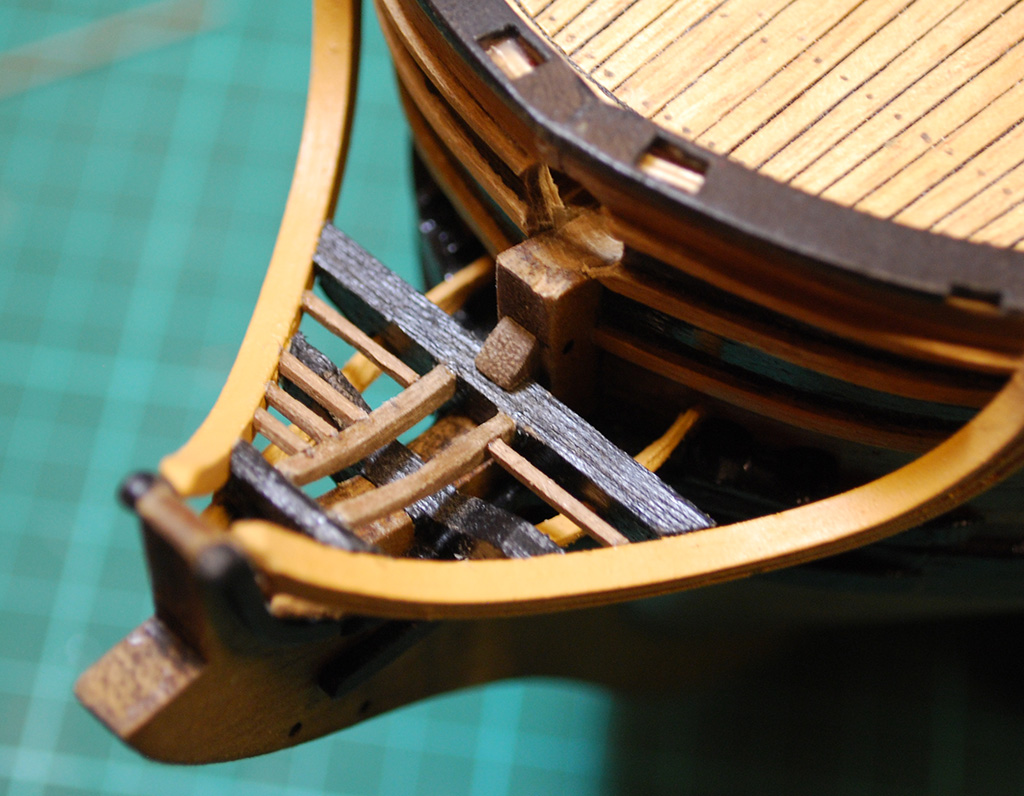
Now I'm trying to improve the head and since the parts from the kit are either unfit or missing, most of them were made from scratch. Still, the head is not as it should be, but it will do.

- Barbossa, d.townsend, Bettina and 4 others
-
7


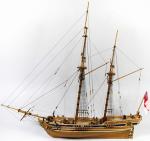
HMS Fly by vths - Victory Models - Scale 1:64 - Second wooden kit build
in - Kit build logs for subjects built from 1751 - 1800
Posted
Thank you guys.
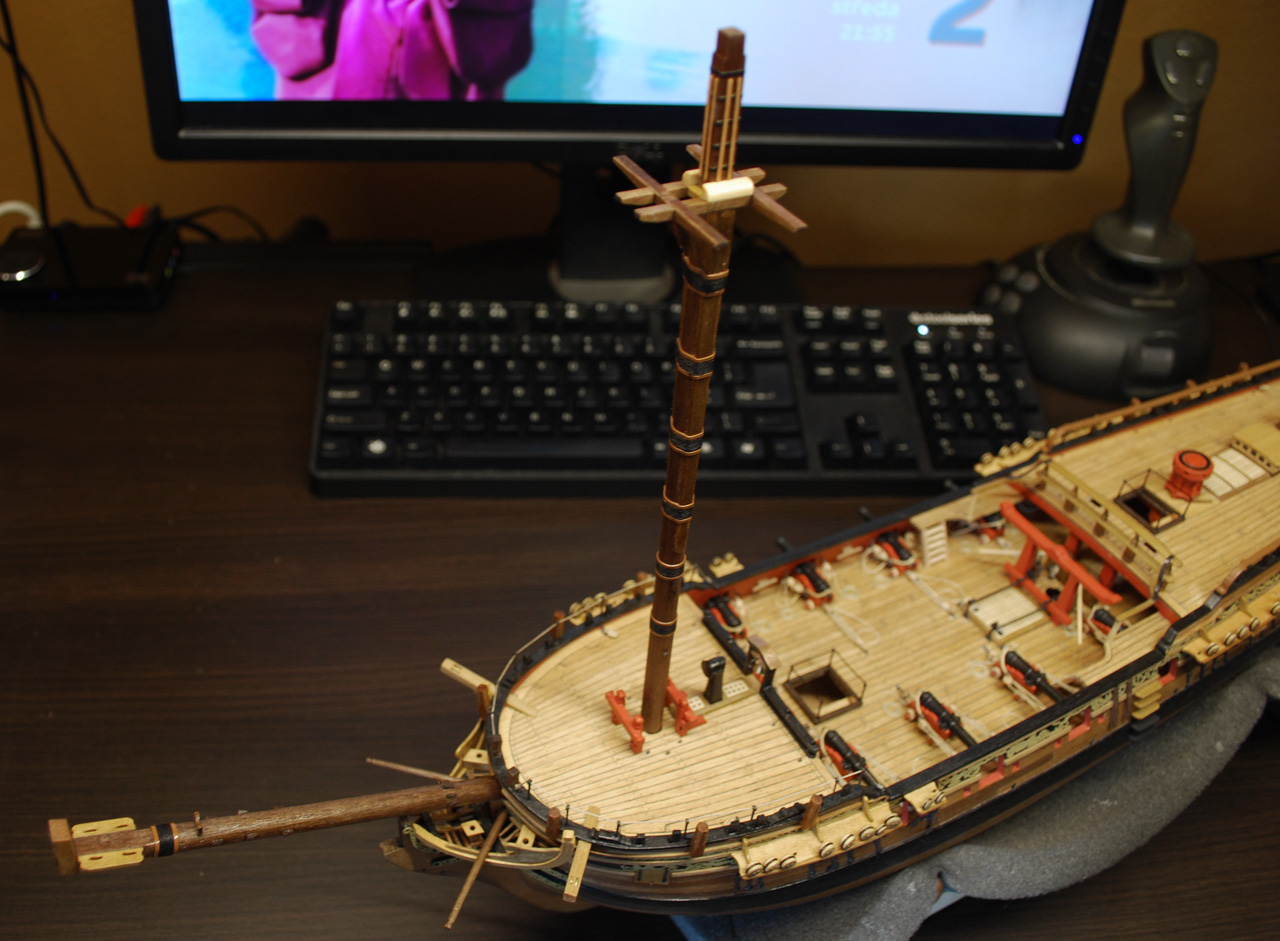
Just finished the bowsprit stem standing rigging as well as other stems, so I thought it would be nice to make a couple of photos of the whole ship.