

vths
-
Posts
144 -
Joined
-
Last visited
Content Type
Profiles
Forums
Gallery
Events
Posts posted by vths
-
-
Now that is superb, great level of detail and finish.
-
Cheers, ZyXuz.
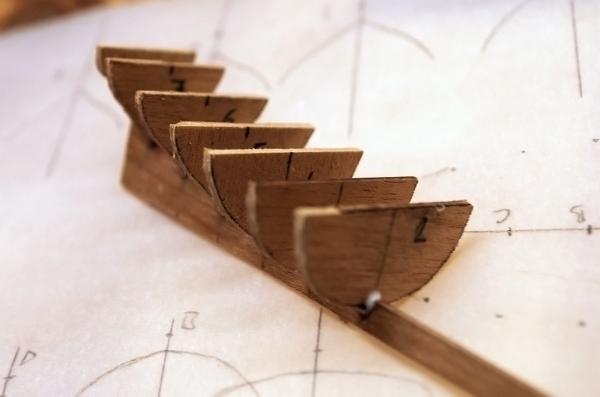
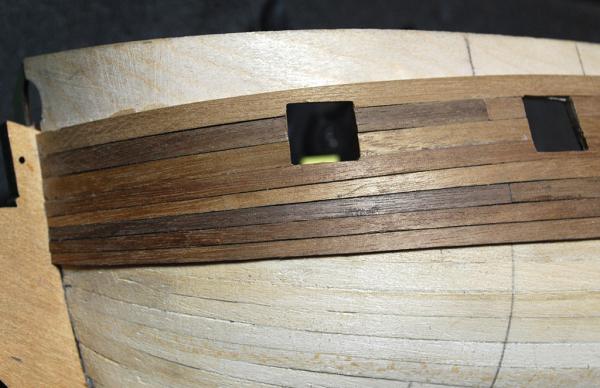
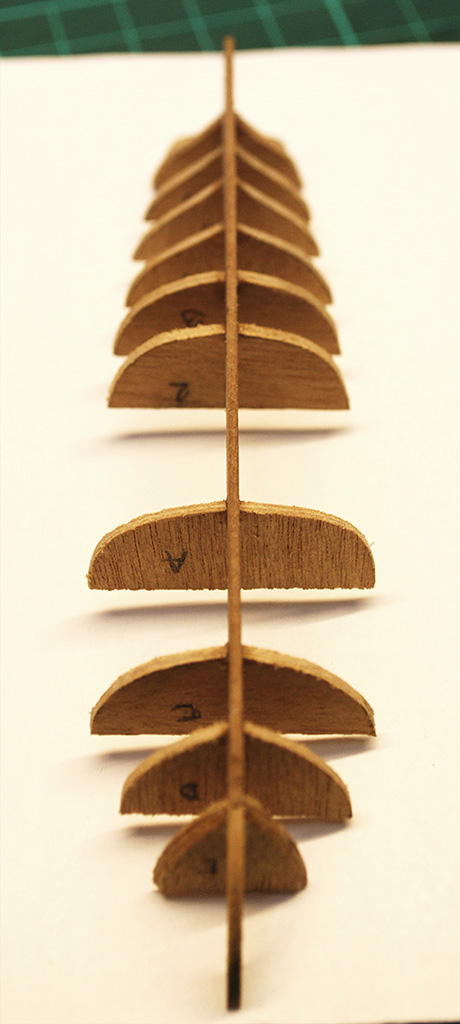
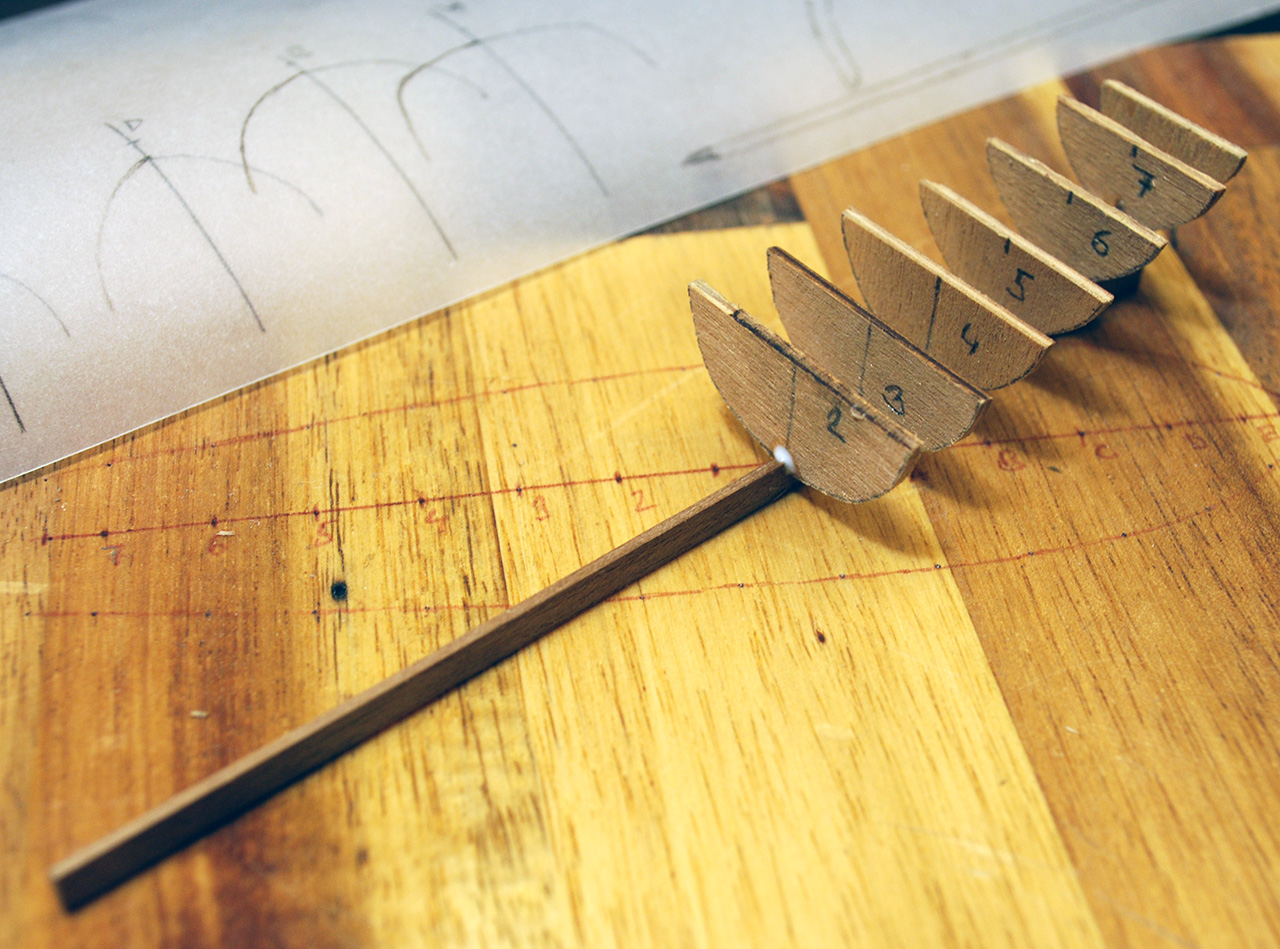
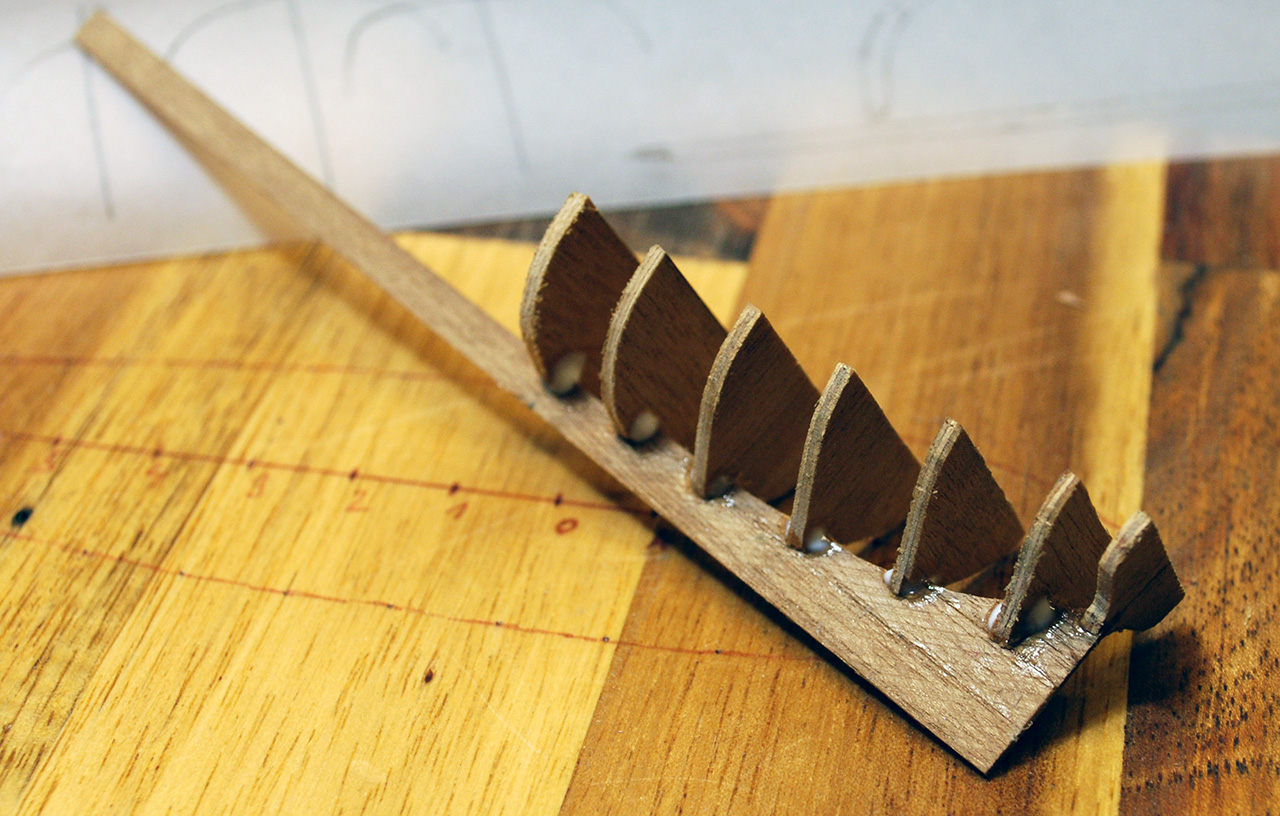
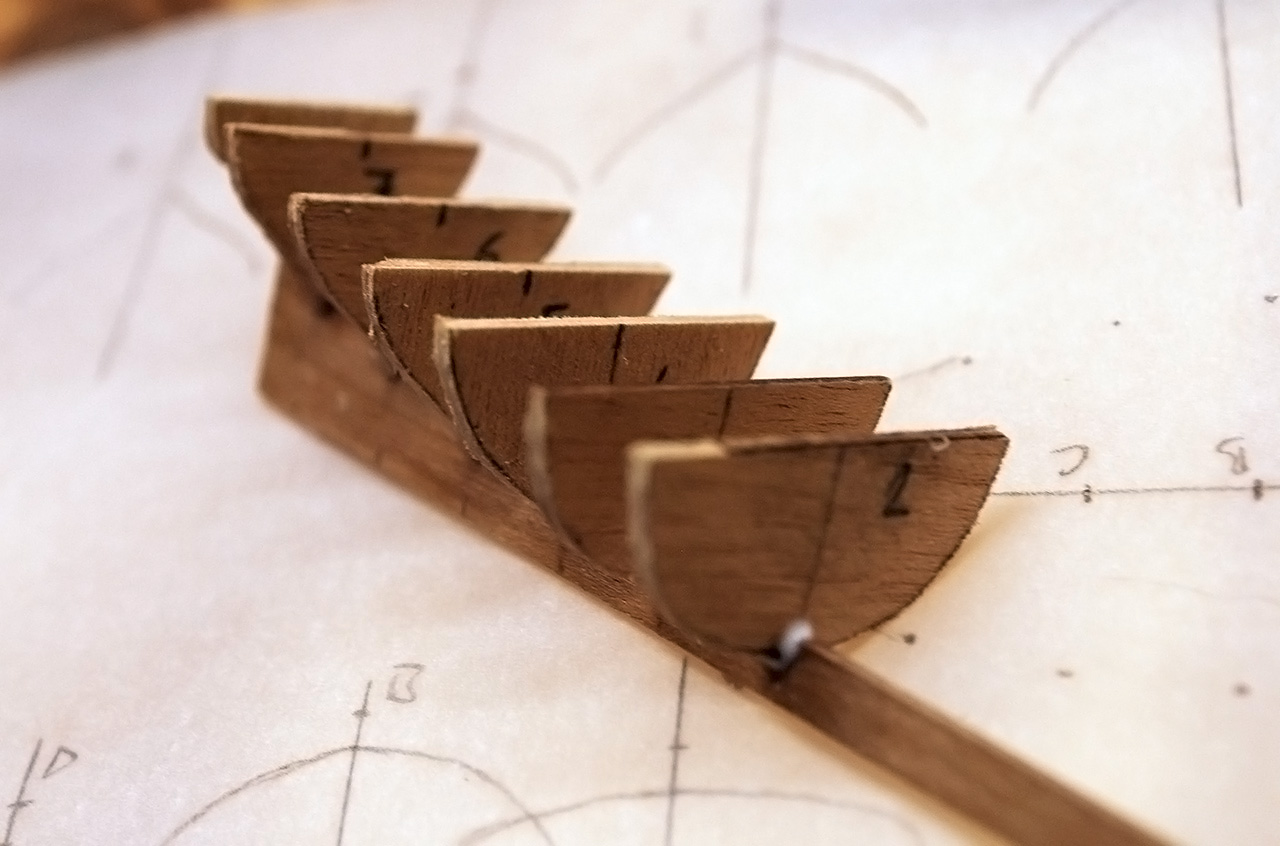
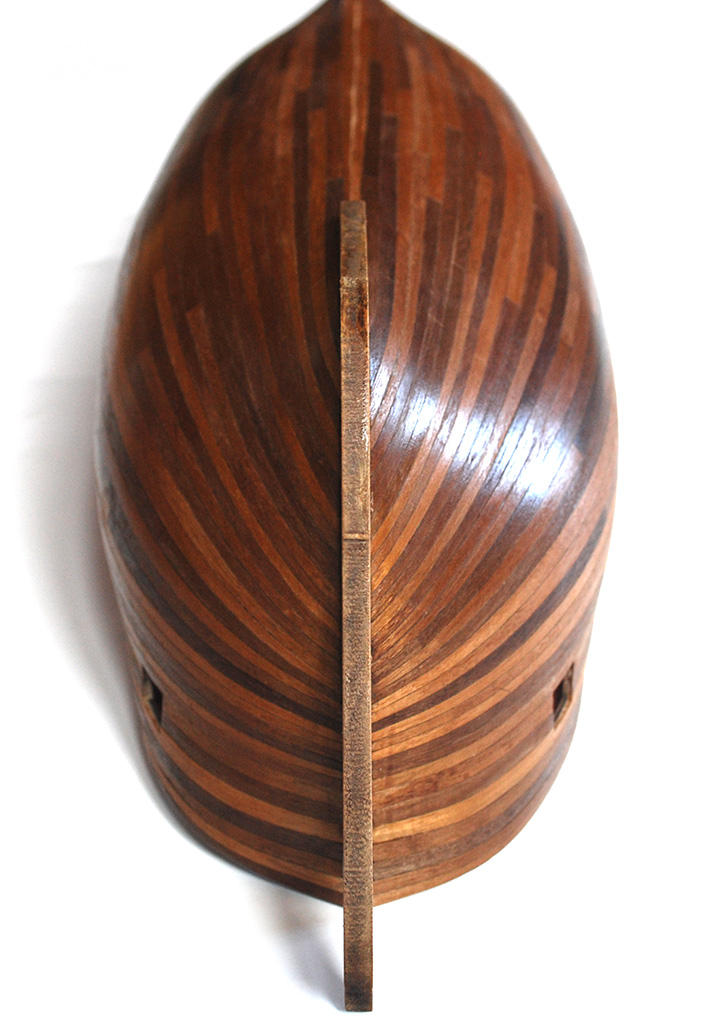
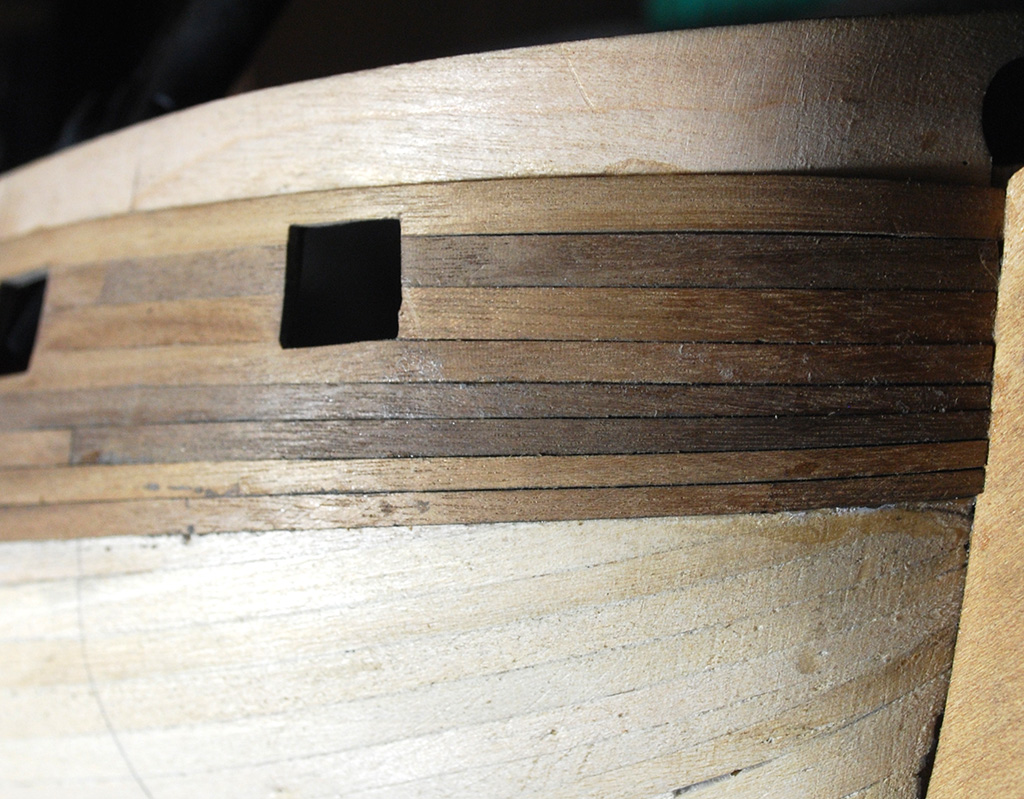
Now I'm creating the main wales using simple anchor stock planking. Planks are 110 mm long with full width in the middle and half at both ends and they are shifted like the rest of the hull planks. The wales will be painted black, but their pattern should show anyway.
- dafi, Blue Ensign, realworkingsailor and 1 other
-
 4
4
-
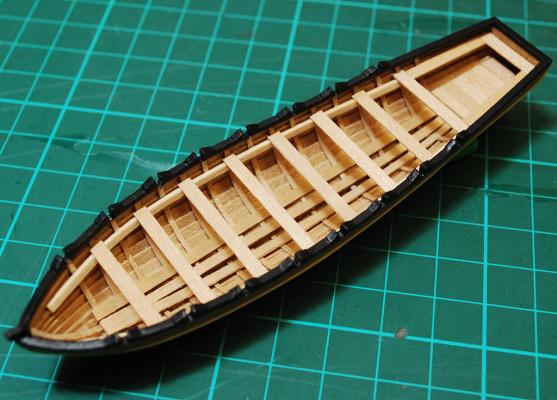
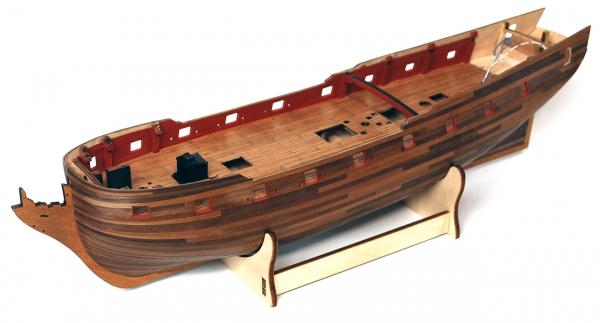
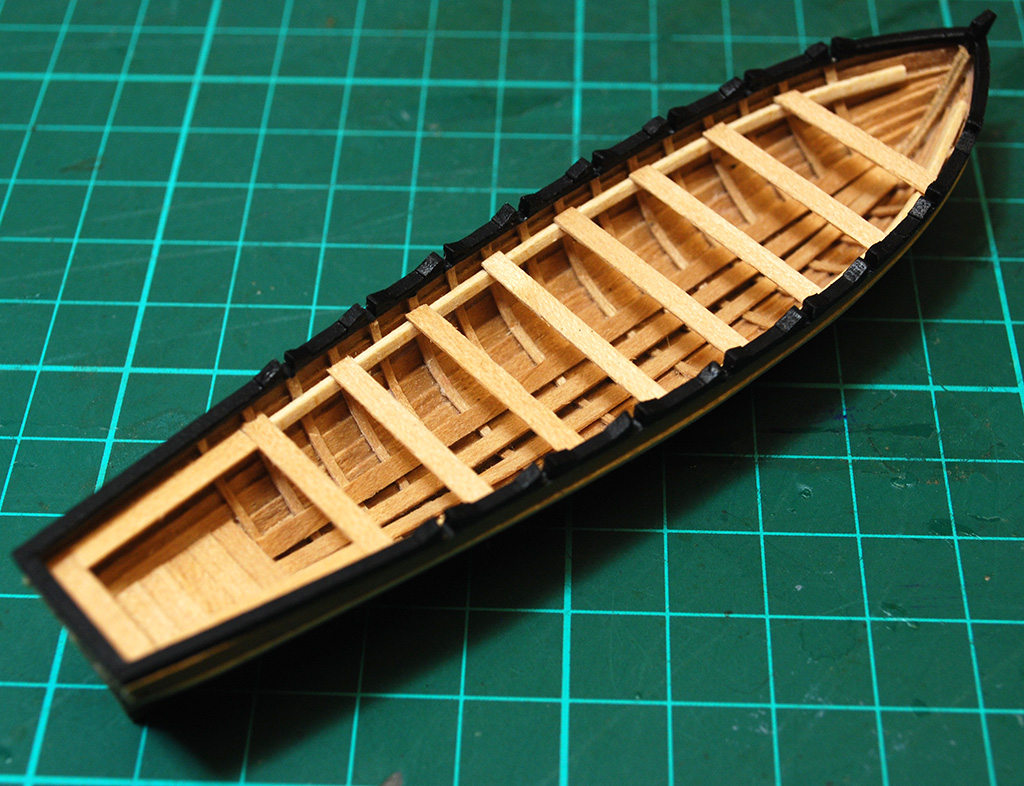
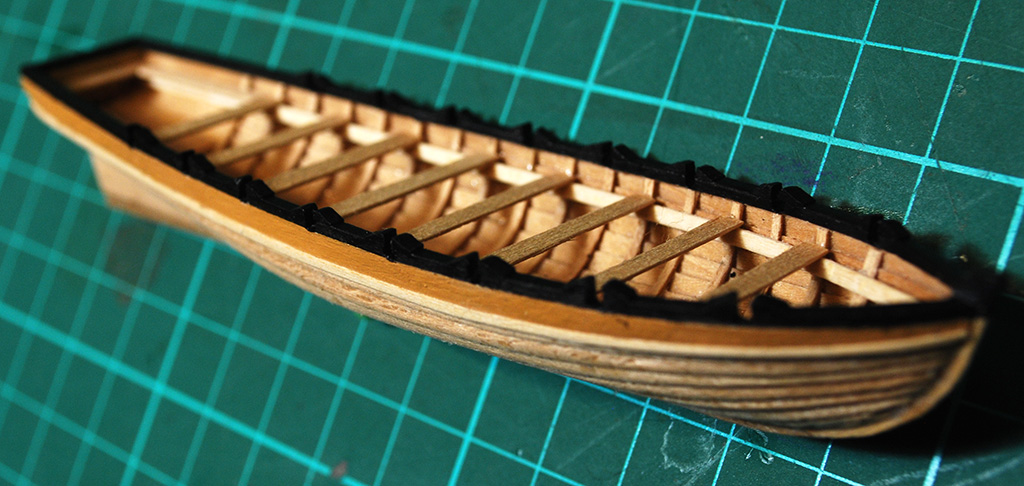
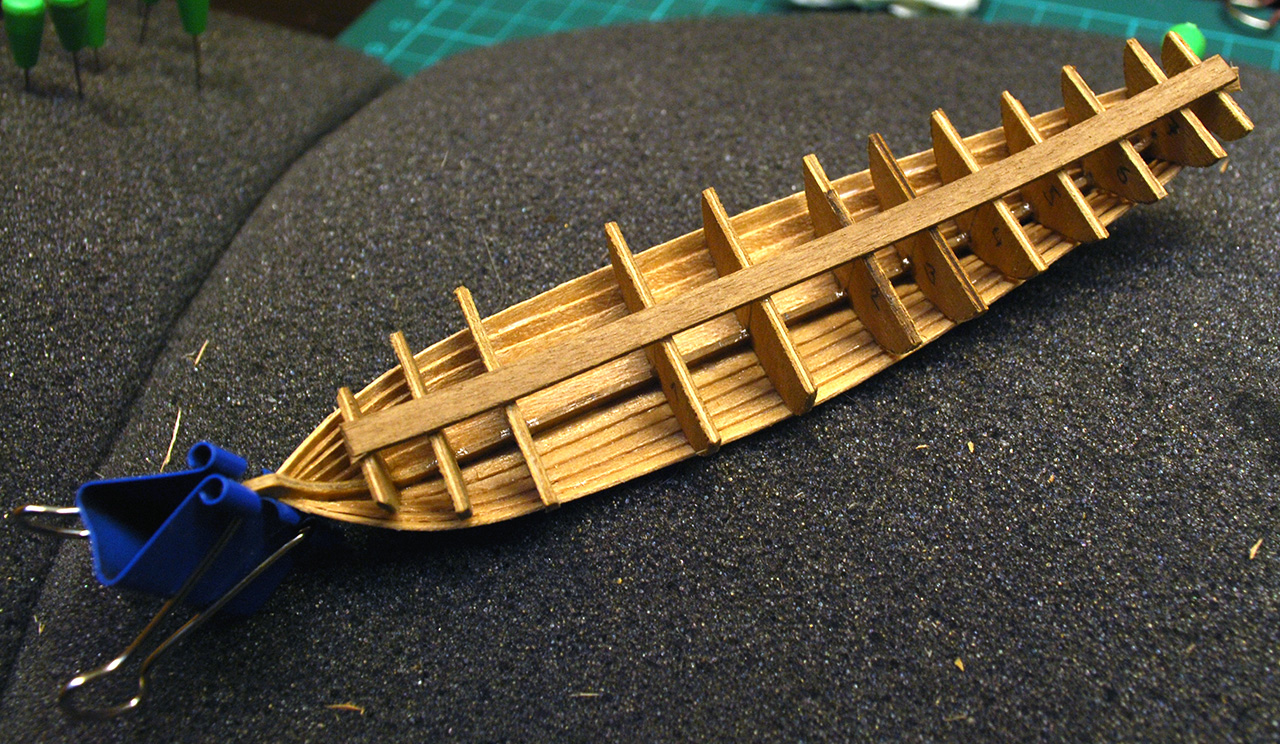
Thanks guys, you make me go further, so here's the almost finished boat. The bow is yet to be finished, as well as the oars, rudder, hook, etc. But these tiny thingies can wait, so now I can get back to the build.


- Mirabell61, Padeen, ZyXuz and 2 others
-
5
-
Cheers guys, I'll do just one layer, that should be just enough. I don't see how I would be able to make a layer on the inside.
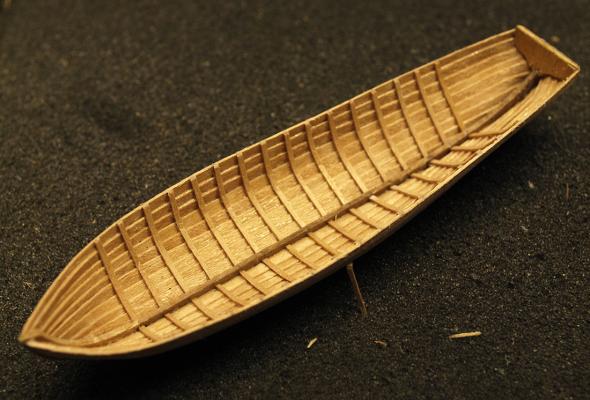
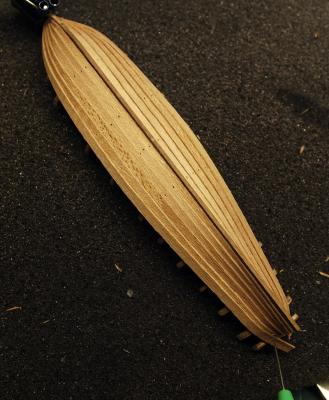
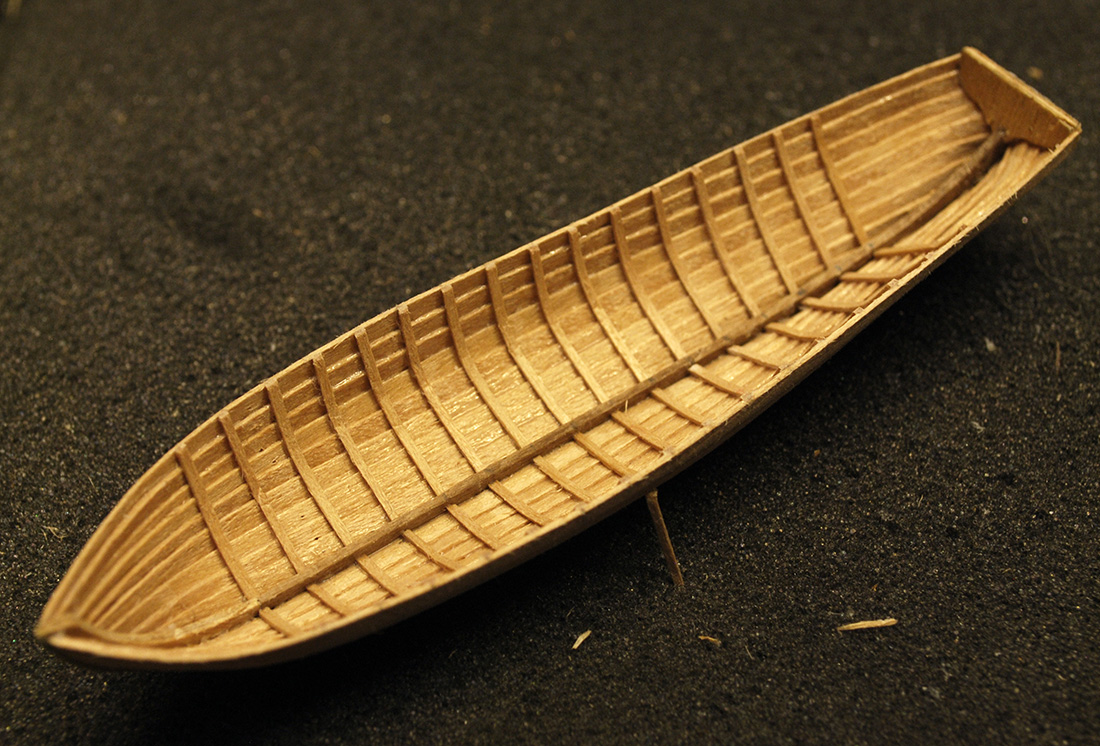
I think that the crude hull turned out quite good for my first attempt. Now it is time to sand it, cover the pin holes and finish the fittings

- Blue Ensign, Padeen and freewheelinguy
-
3
-
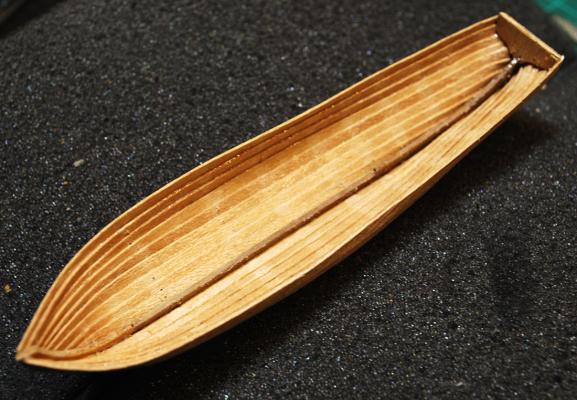
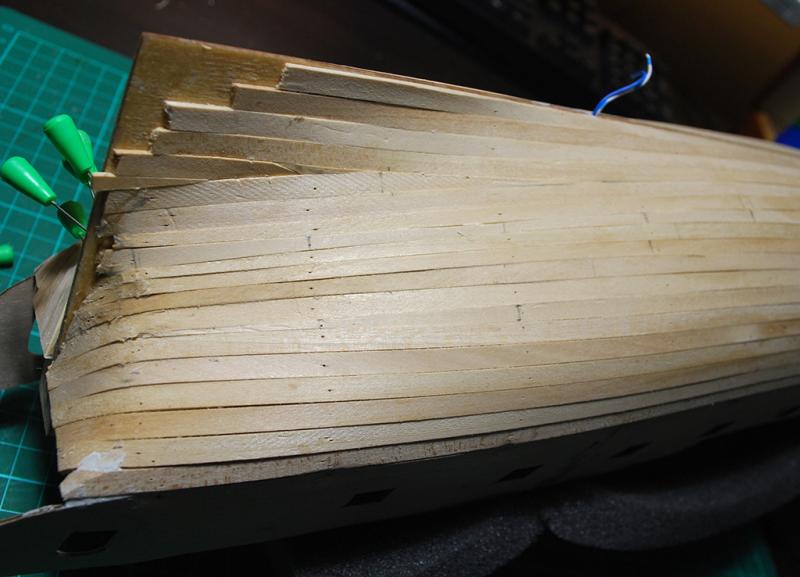
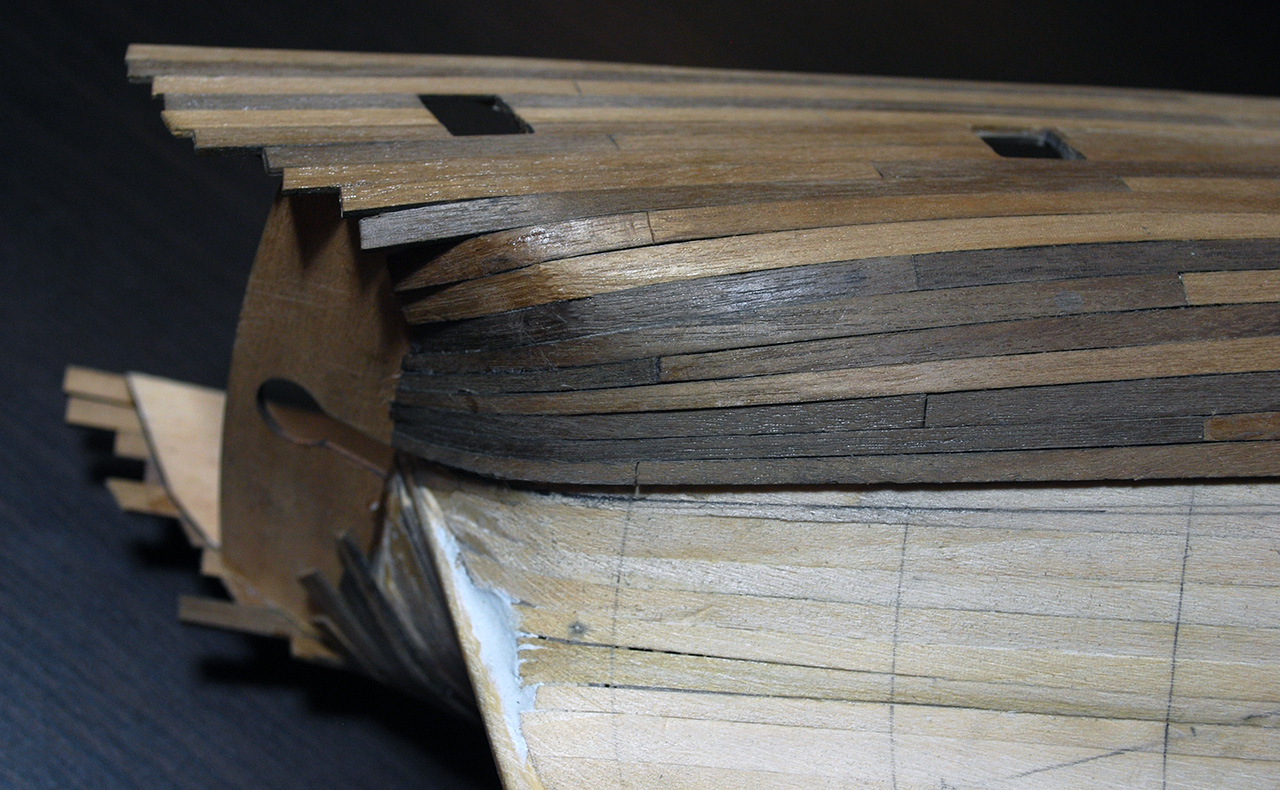
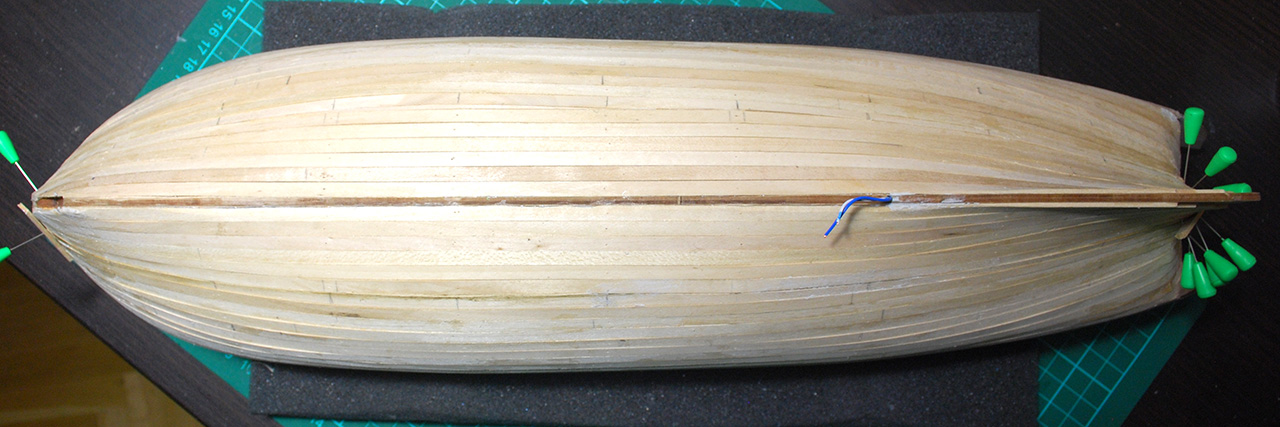
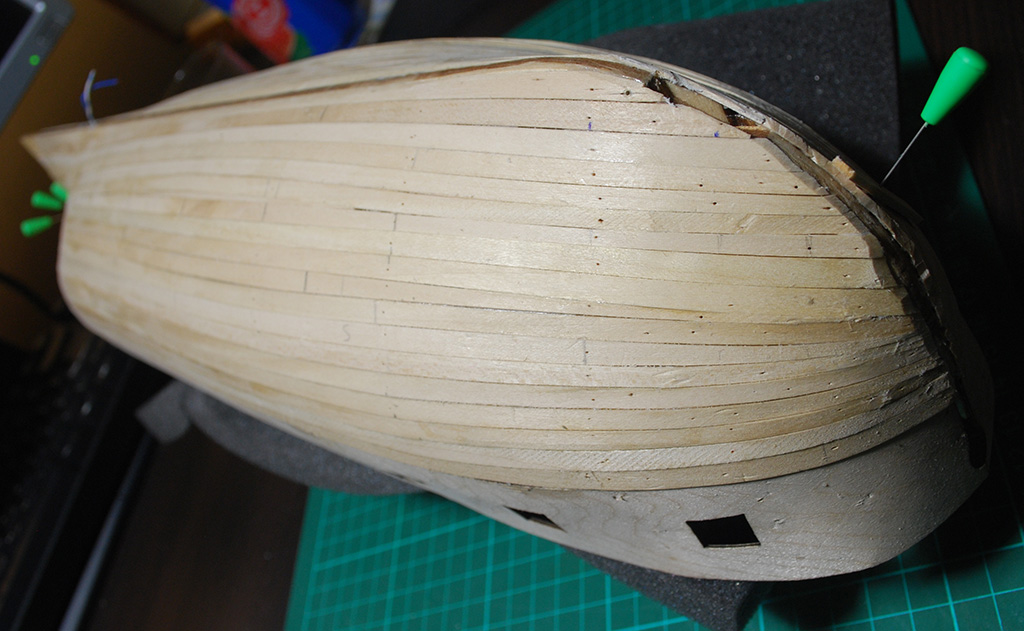
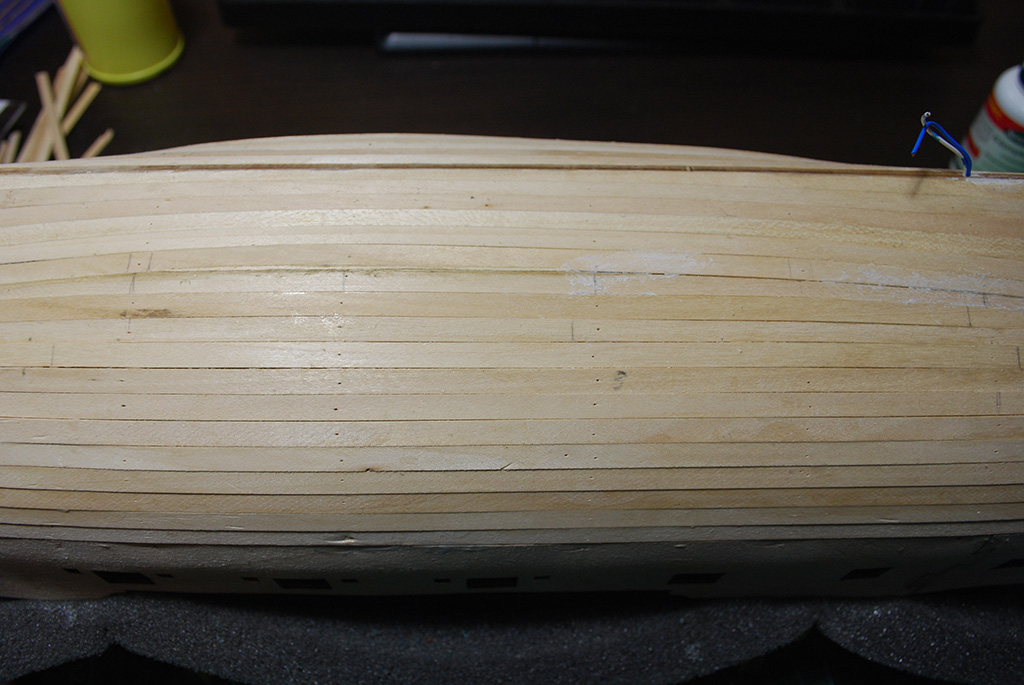
Started planking using 0,5 x 3 mm strips. Quite a delicate work, but the details are yet to come. Bulkheads are loose, so there should be no problem removing them and replacing them with frames.
-
-
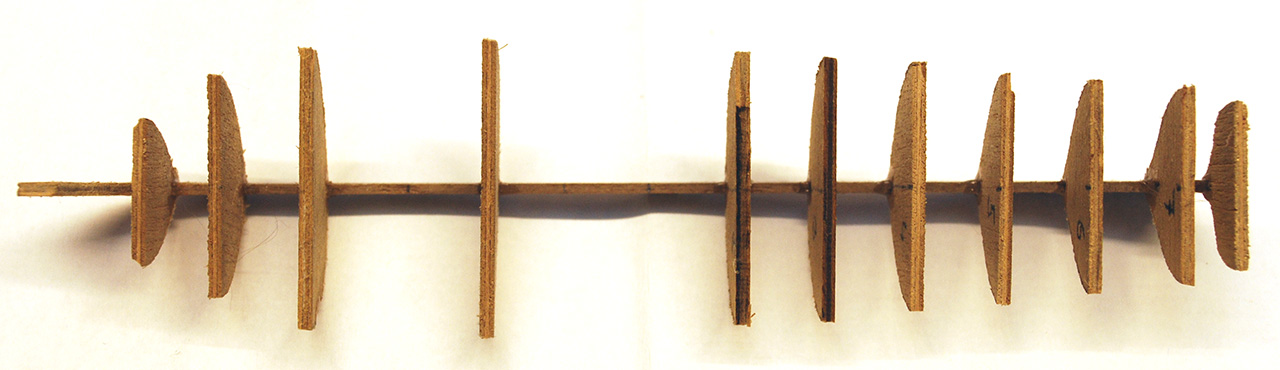
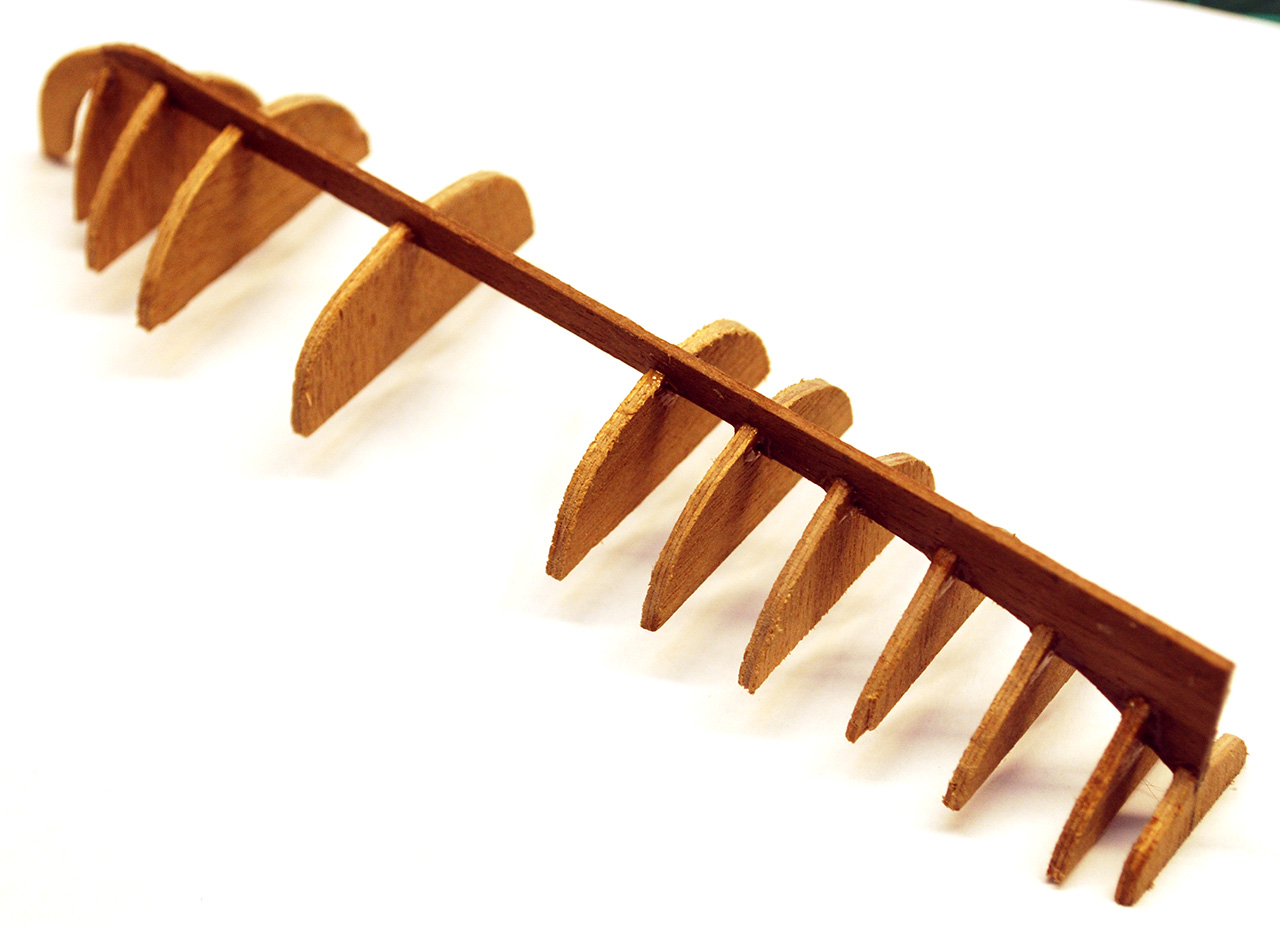
Cheers guys, much appreciated. Now I'm taking a little-big detour, because I decided to scratch-build a small pinnace, about 110 mm long. I'm using bulkheads on a keel. They will provide a foundation for planks and then they will be removed and substituted with "real" frames, or at least I hope that this will work.


-
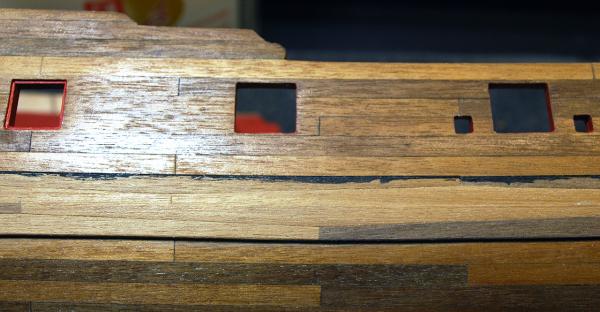
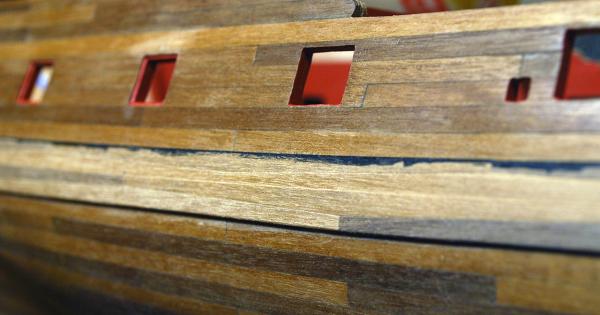
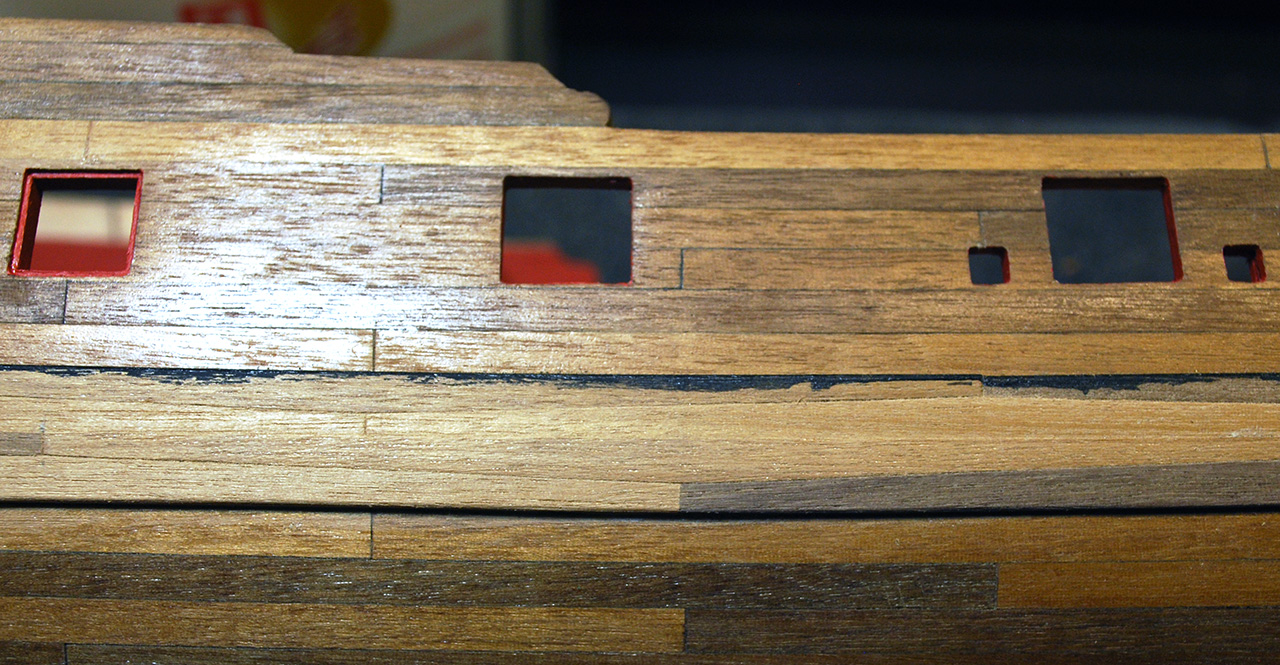
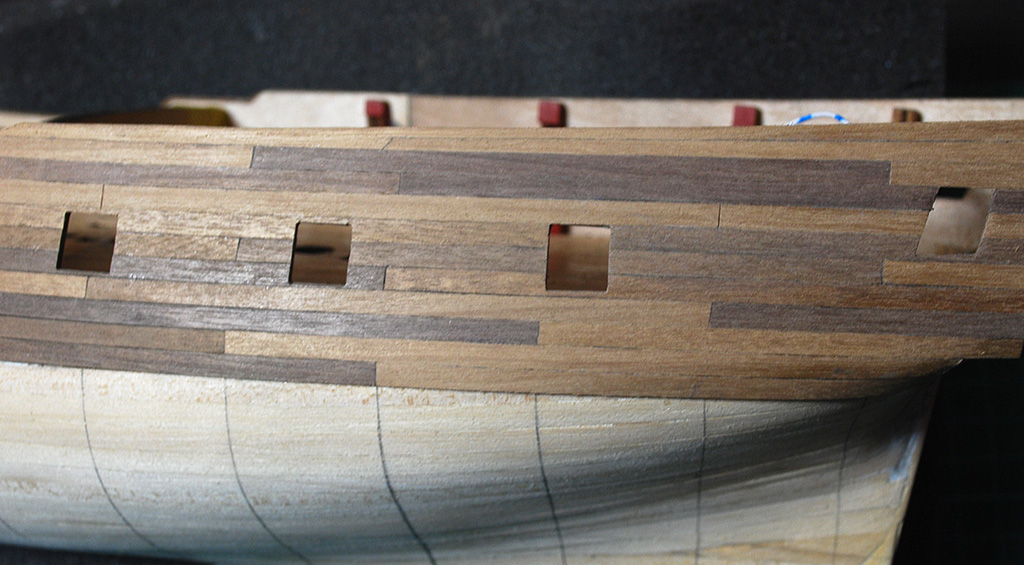
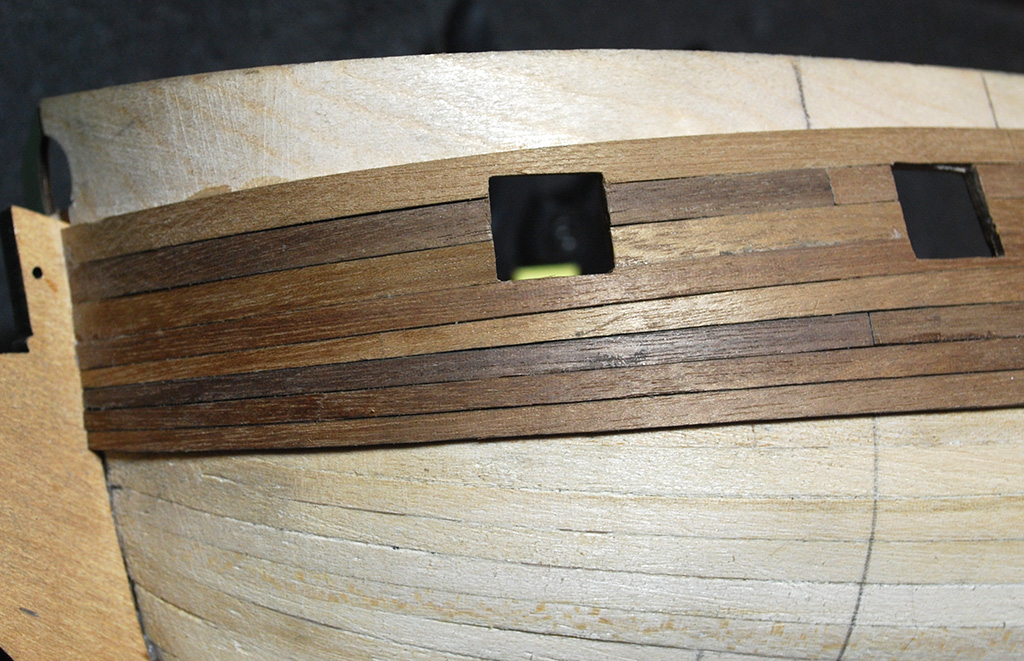
Finished inner planking, gun ports and the rest of the gun deck planking. I also tried to create the stove, but that did not work out so well (yes, it is the black spot on the deck), so I'm not gonna show the detail of it just yet.


- Blue Ensign, pnevrin, ZyXuz and 1 other
-
4
-
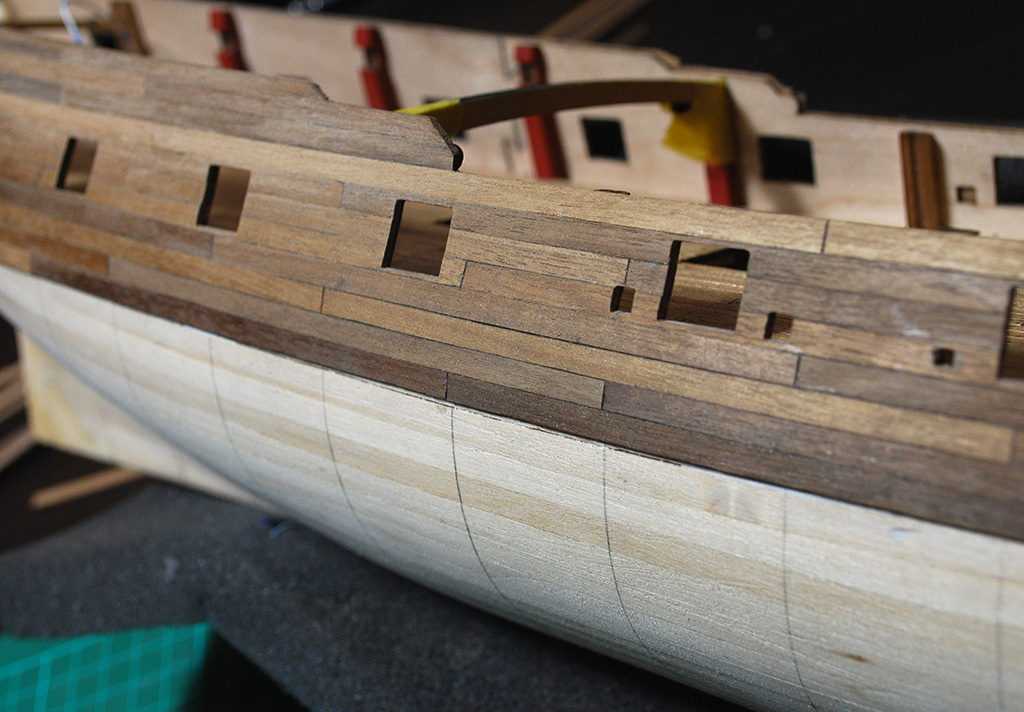
Another small update. Just finished inner planking, painted it red and now I'm doing lining (or whatever that is) inside gunports using ,5mm planks. Quite an easy job that makes the ports look much better, methinks.

- Blue Ensign and ZyXuz
-
2
-
-
Thanks guys for the kind words.
Alistair> Yes, the planks' color is different and the varnish only emphasised it, but on photos the contrast is even greater because the reflections are not diffused like before, but much more focused. This is also why there is a big contrast in overall lightness (esp. in the 1st photo) and now it is almost impossible to shoot the hull under artificial light. I will have to use some very fine abrasive material for the final finishing touch and I also plan to add wearing (that is a maybe). Now I chose to apply the first coat only to protect the planks. Well and also because I was curious about the whole look

Anyway now I'm not planning coppering the hull anymore, definitely not only on one side. Better watch out for shipworm now.
-
I could not resist applying first protective thin layer of semi-matt Nelson varnish after sanding the hull. There are still quite a few details to take care of and the first layer also revealed a few poorly finished spots, but the overall result is good, in my opinion. Looks like I will have to use those copper tapes elsewhere, treenails FTW


- lamarvalley, ZyXuz and Bettina
-
3
-
But, but... that would mean spending 20 bucks for nothing
I still don't know, but there's plenty of time to decide. -
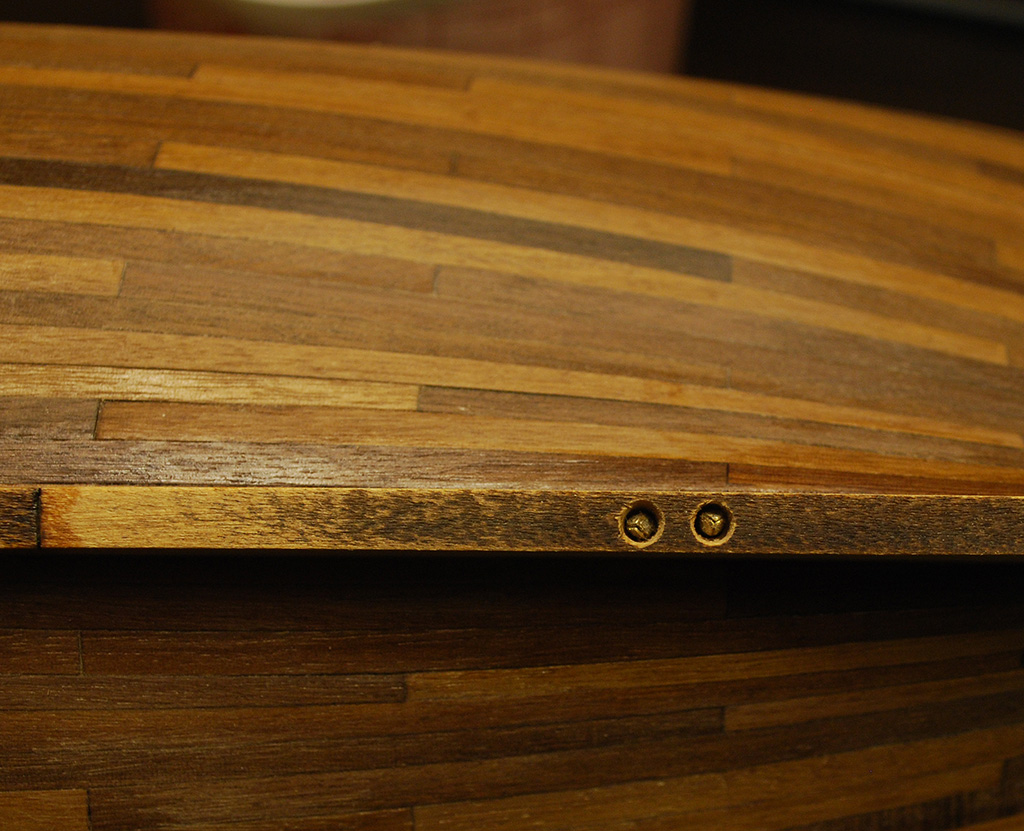
Thanks everyone, much appreciated. Paweł, treenails on the deck should be at this scale .4 mm, but that is rather hard to achieve, so mine are about .5 mm. Treenails in the hull planks are bigger. Anyway, the copper tapes just arrived, so now I'm thinking about a way to assemble 46 pins to make a stamp and "nail" the copper sheets with it. Sounds like a piece of cake
The copper tapes are very thin (about .03 mm), but once pierced, the marks won't disappear whatever I do, so I'll probably use them. Still, they don't look like they can take damage easily, so I will lay them once the heavy works are done and that will not happen any time soon.
-
Thank you. That depends, Brian. Either I will copper the hull, or treenail it. In any case those visible planks will be treenailed. I'll probably use something else than actual treenails (toothpicks). Probably a thin and cut injection needle that creates small circles that (using a bit of varnish) look rather good.
An example from a Czech board by klimi (http://www.modelforum.cz/viewtopic.php?f=177&t=73264&p=1452414&hilit=jehlu#p1452414)

-
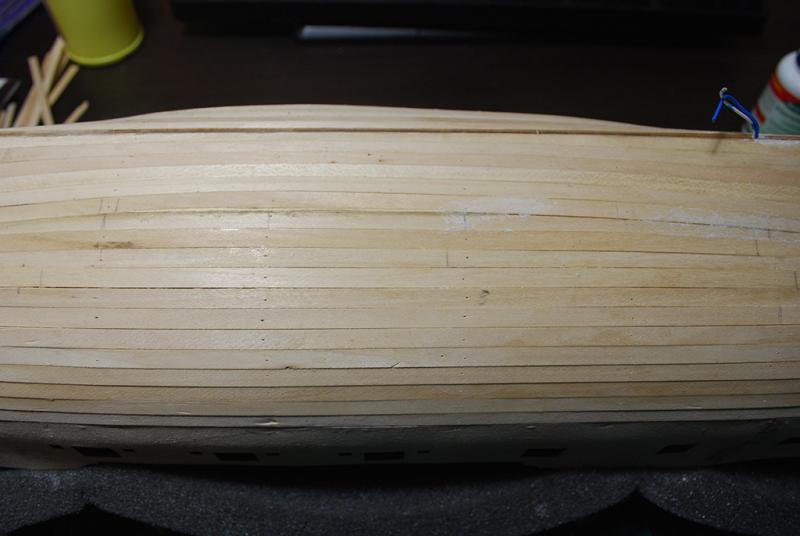
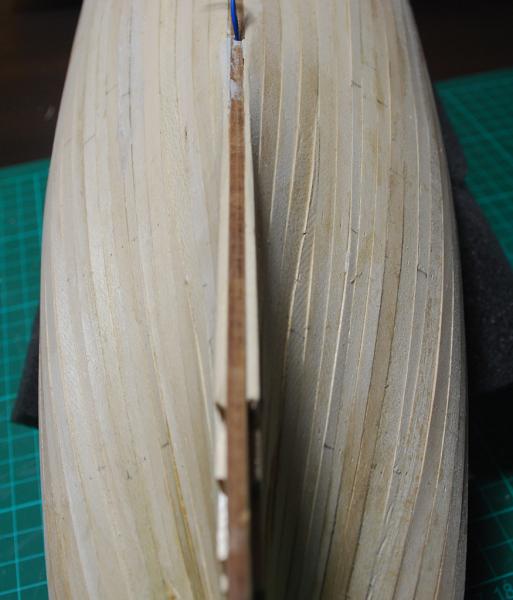
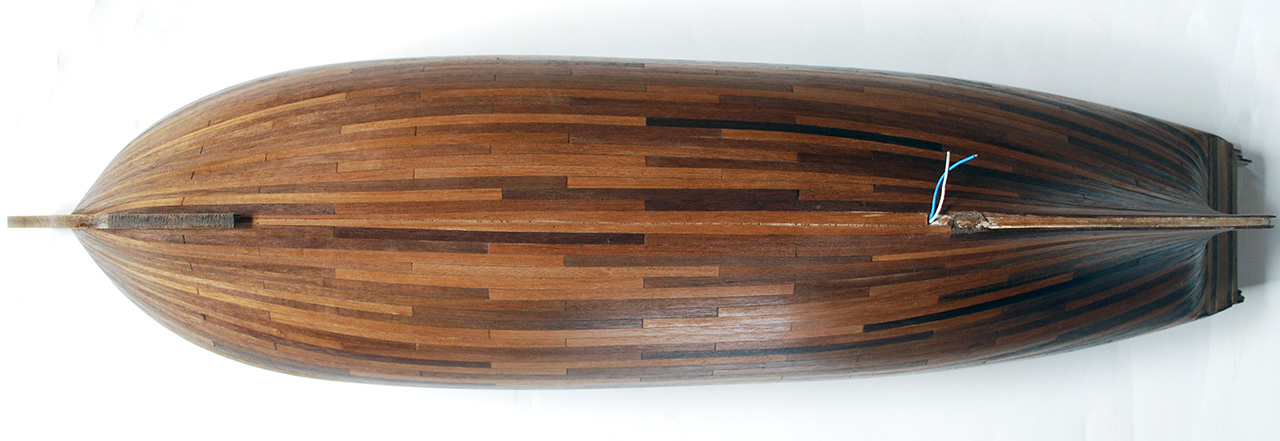
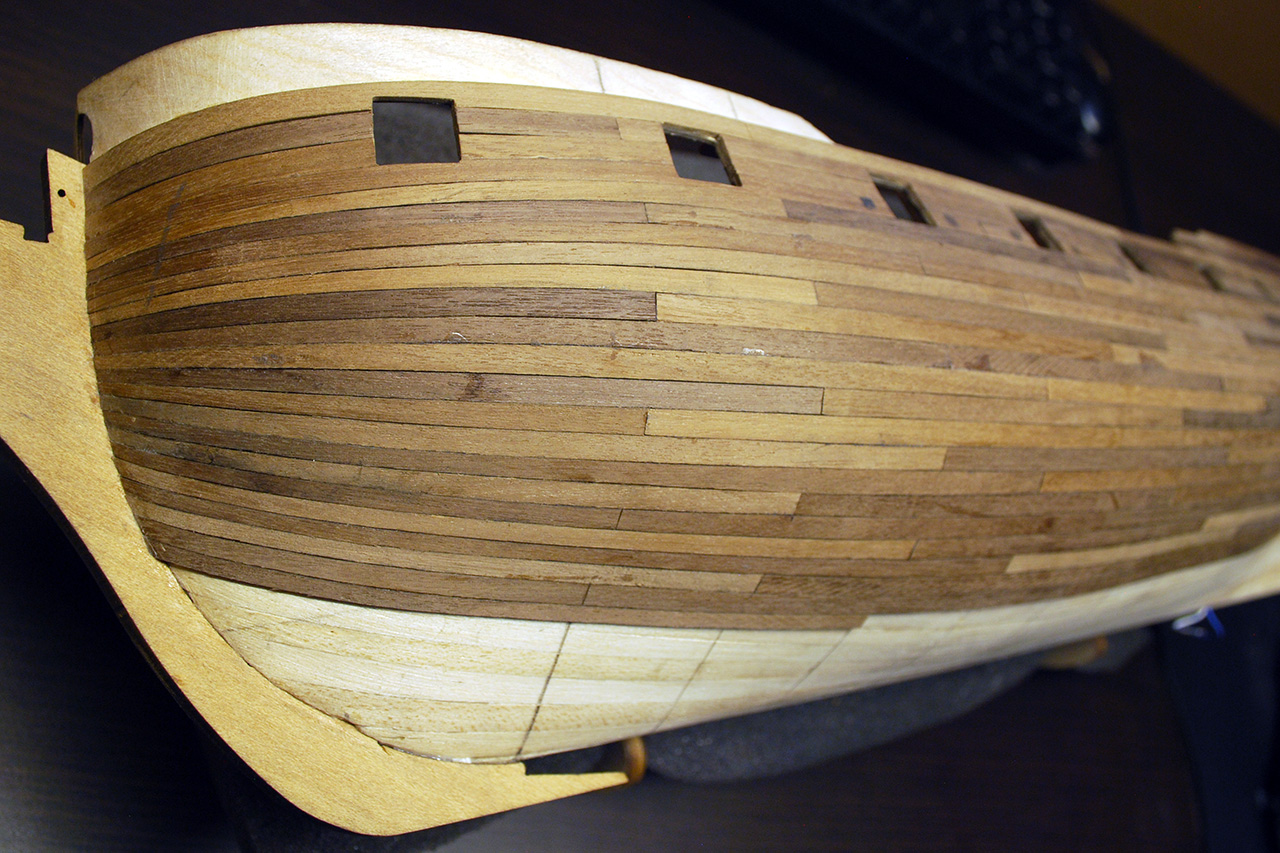
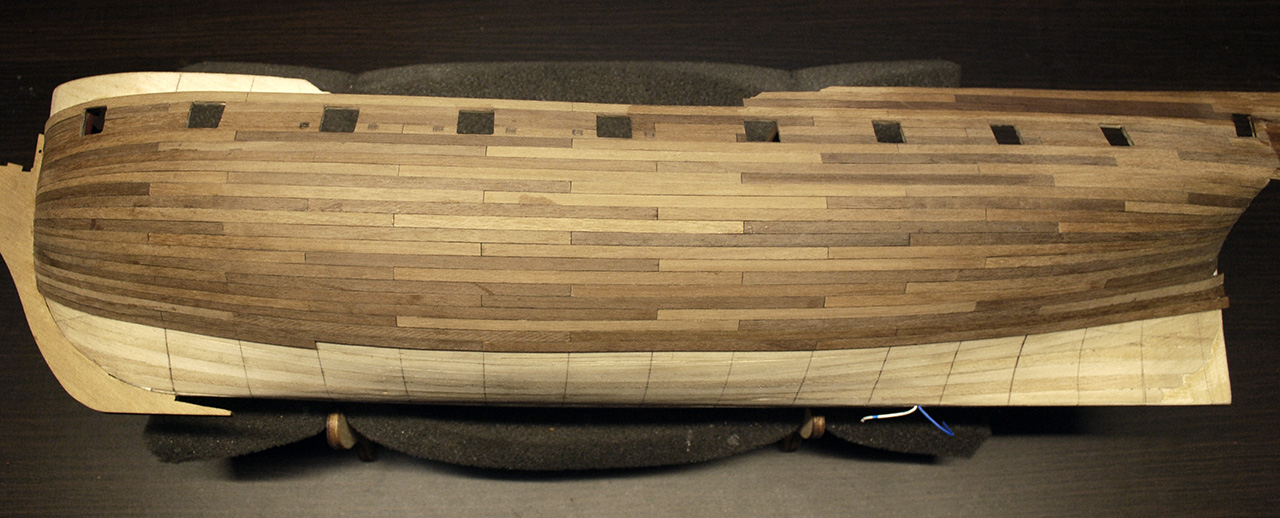
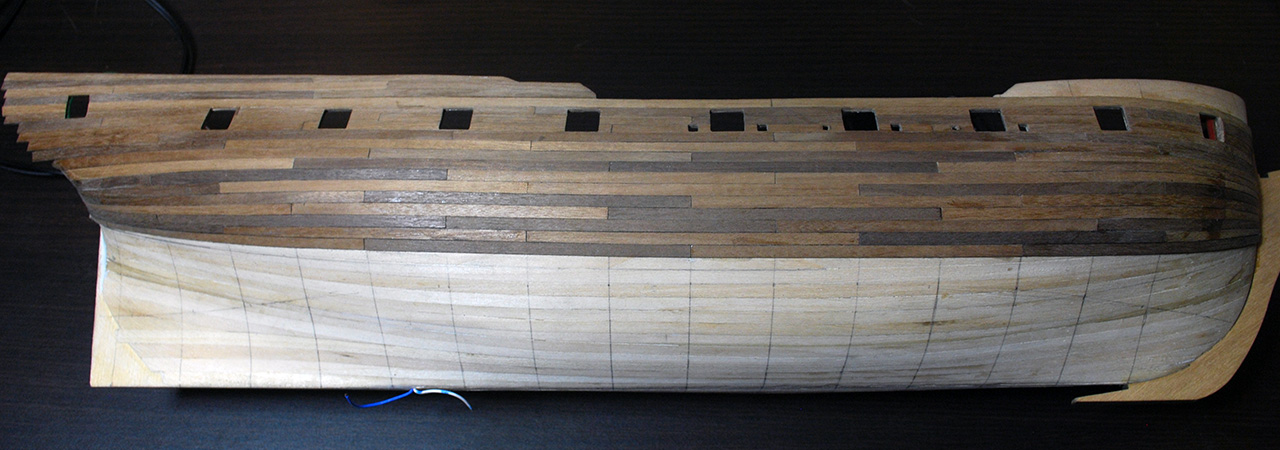
Second planking roughly done, well, the most difficult part of it. Now it is time to finish it, add a few stealers (fortunately not many) and sand and sand and then sand some more.


- Padeen, Blue Ensign and Barbossa
-
3
-
Thanks. I found out that Amati's are thicker than the self-adhesive foils. I ordered some in 6 mm wide tapes to try them out, as planking goes rather well.

- Mirabell61 and rdsaplala
-
2
-
Thank you... I'm seriously considering coppering the hull and from what I've learned, the plates' size should be at this scale 19 x 6 mm, but I'm not sure about the material. There are some self adhesive copper 6mm tapes on the market, but they are a bit pricey and I do not know whether their glue will suffice. Normal copper sheats and cyano would do, but what thickness should I choose that would be ideal to work with (incl. "printing the nails")?
-
-
Just found your build, very nice!
Love the staggered planking.I am at the point of deciding my next build and lately the Victory HMS Fly has interested me and your build has helped push me toward it even more.
Is the build still progressing??? It has been a while since your last post?
Hi Randy, the hull is still smiling at me from the nearest shelf, but after long winter there are many other things to do. I will get back to it when the sun, bike and all the other nasty things that keep me outside get annoying.
-
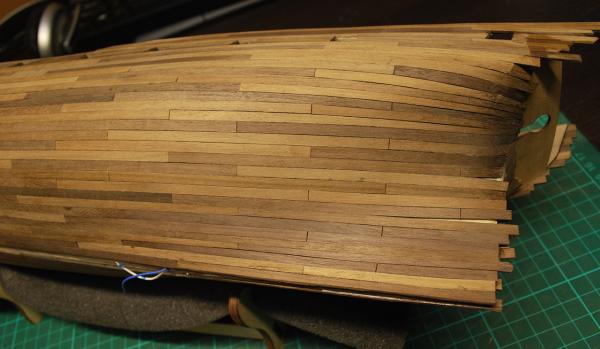
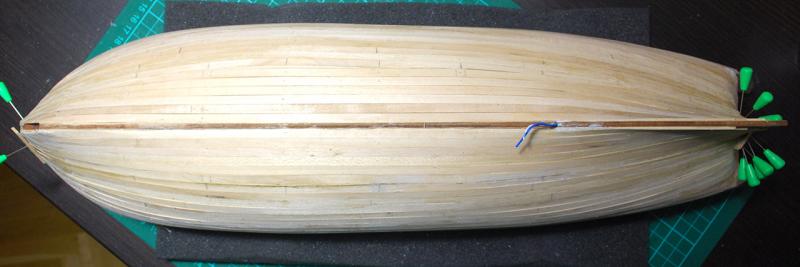
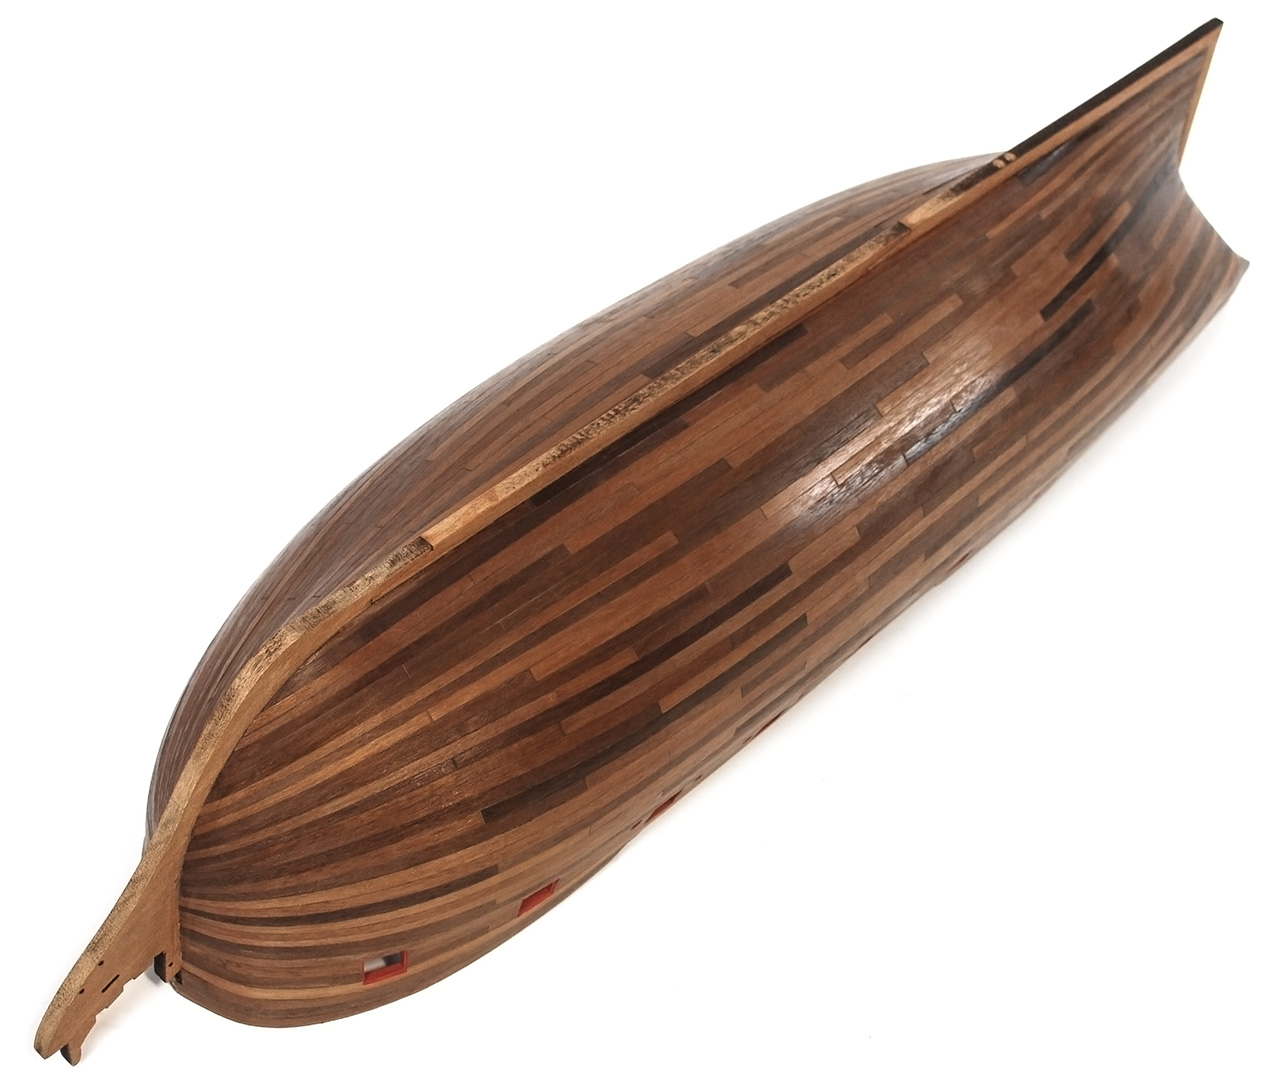
Started second planking using 11cm segments of 4 mm wide walnut and 4-butt shift. If it was doable, I glued the planks with universal glue, but in most cases I have to use cyano.
Now I'm looking forward to seeing the completed segmented and varnished hull (treenails pending).


-
-
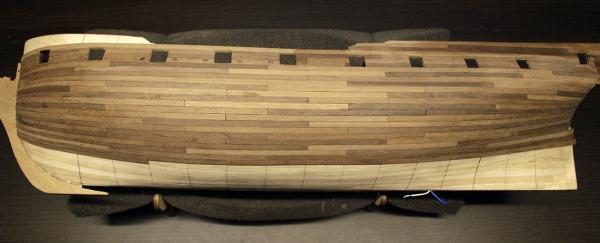
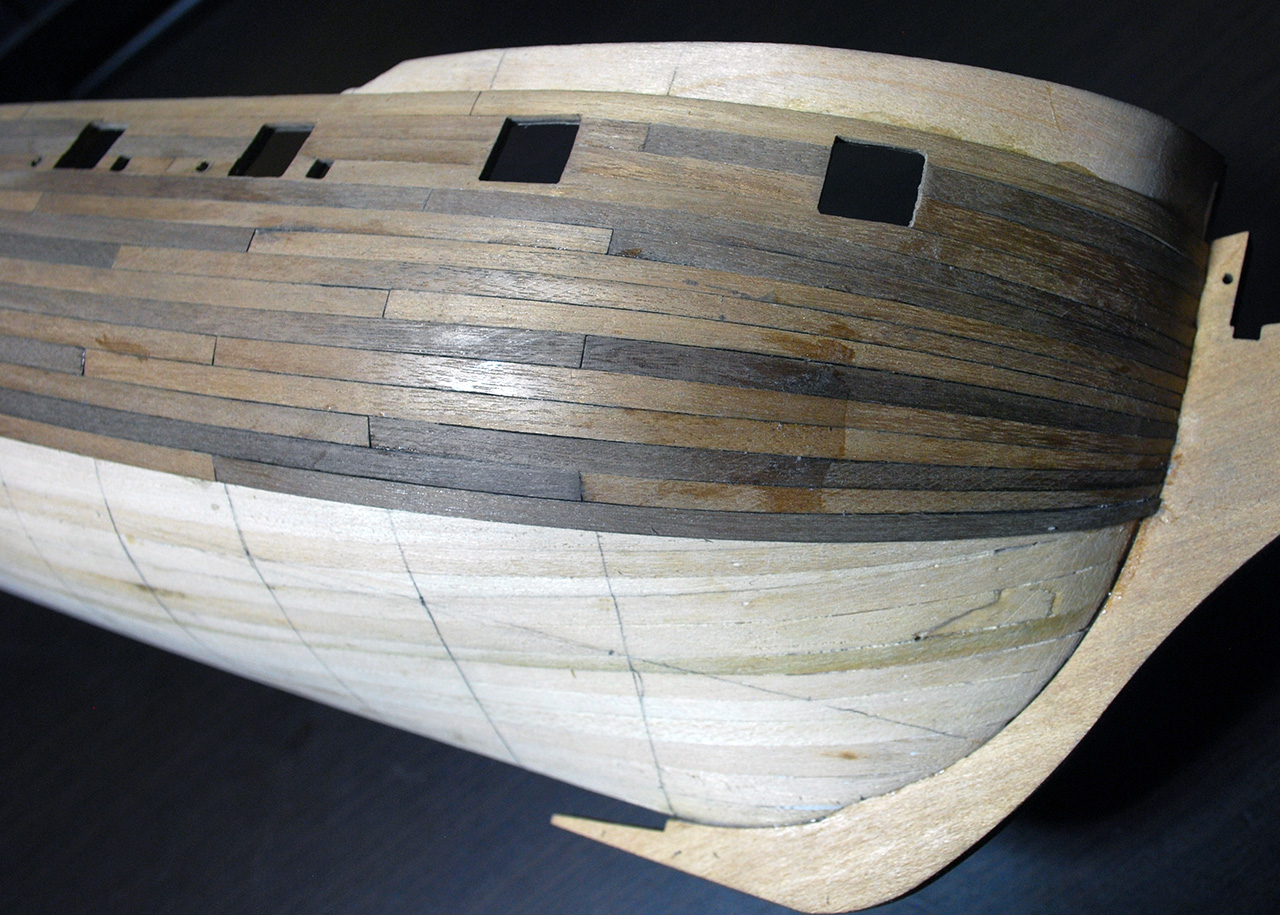
Finally finished 1st planking and now it is time for sanding. It was quite easy but I didn't use proper stealers and so on. Second planking will have to be a lot better, since I'm still planning to leave the hull in its natural colour, not white.

-
Glad to see you back, that is some great planking job.
I have one question, during the second planking, from below the gun ports, you used five planks which were in the front untapered, right? Would you do that again, or would you start tapering them sooner?


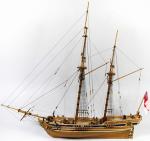
HMS Fly by vths - Victory Models - Scale 1:64 - Second wooden kit build
in - Kit build logs for subjects built from 1751 - 1800
Posted · Edited by vths
Hello everyone, I've got a small update. Just finished the main wales and painted them black, now it is time for the little ones above.
Doing this I realized my previous mistake. The main wales are just thick planks, not another layer, which means that I could not follow the plan precisely, because then they would be overlapping the planks below. So, note to self, next time begin the second planking layer with main wales and follow their lines correctly. Now I had to choose the lesser evil - slightly wrong shape, but no overlapping, which would look just terrible in my opinion.
It is also almost time to chose the colour for decorations' background. Ochre would create poor contrast, red is used in the interior, green is just ugly and blue is used too often. I'm thinking about plain white, is that possible (i.e. historically plausible)?