
HOLIDAY DONATION DRIVE - SUPPORT MSW - DO YOUR PART TO KEEP THIS GREAT FORUM GOING! (Only 75 donations so far out of 49,000 members - C'mon guys!)
×


popeye the sailor
-
Posts
16,007 -
Joined
-
Last visited
Content Type
Profiles
Forums
Gallery
Events
Everything posted by popeye the sailor
-

AVRO Lancaster by Papa - FINISHED - Airfix - 1/72
popeye the sailor replied to Papa's topic in Non-ship/categorised builds
there are also mold date stamps somewhere on the model.......usually on the underside {an indiscriminant place} on the parts. that also gives you an idea of when the model was produced and molds were tooled. I've used Scalemates a lot. -
think of this as a multi media kit.............it would be a challenging model to build
-
glad to hear that you were able to save the dio.........would be a shame indeed!
-
thanks gents the week end is coming.......three days of fun and frolic! I added the decal that was where the crease was......started out well, but then broke into three pieces. I managed to save it though. the sheet didn't show any micro cracking. the cracks didn't show up until the paper relaxed, after a minute or so of being wet. we'll see what happens when I get back to it. I have received both of the kits I ordered...the ones I mentioned in the Christine log. they are both similar to the Christine kit, molded in grey/tan plastic { a very odd color}. the Chrysler 300 is a very detailed model.......the engine detail is especially nice.
-
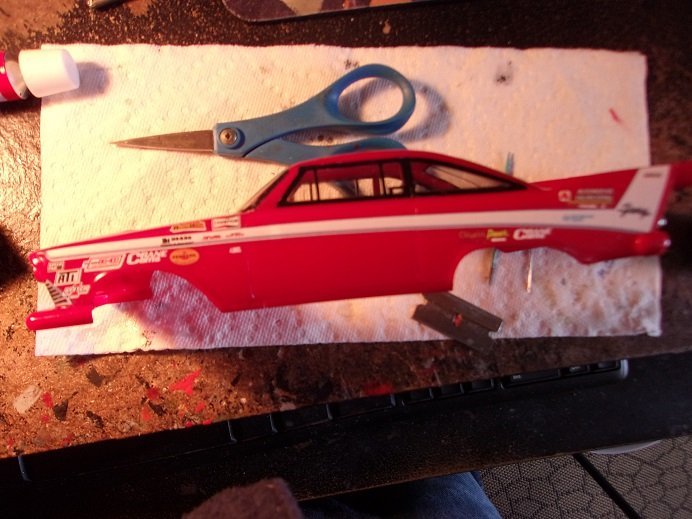
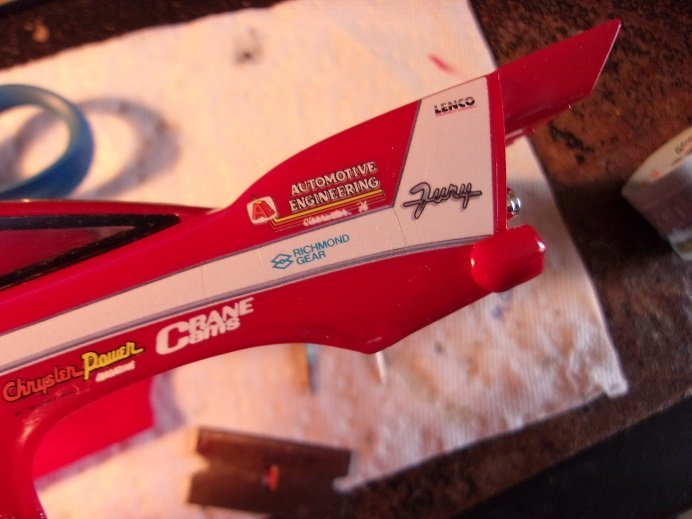
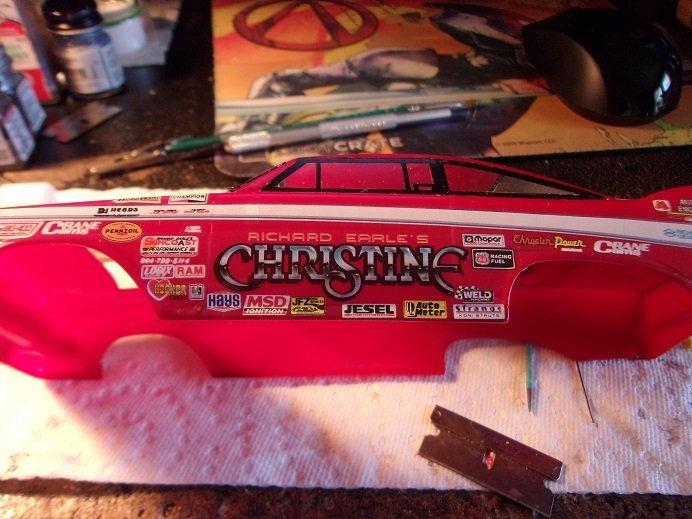
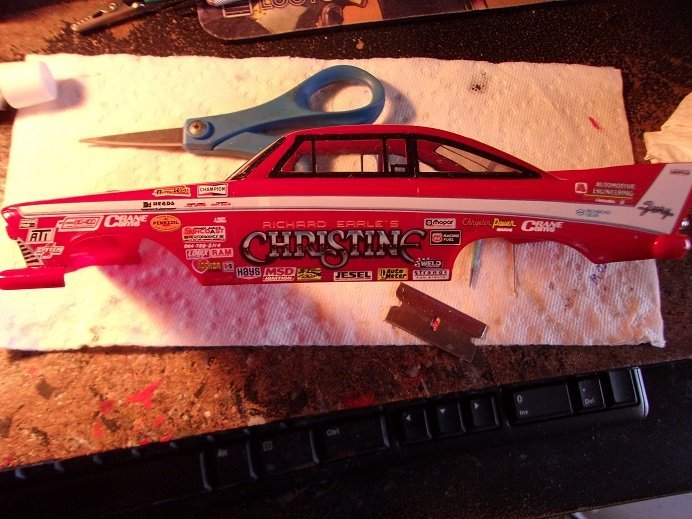
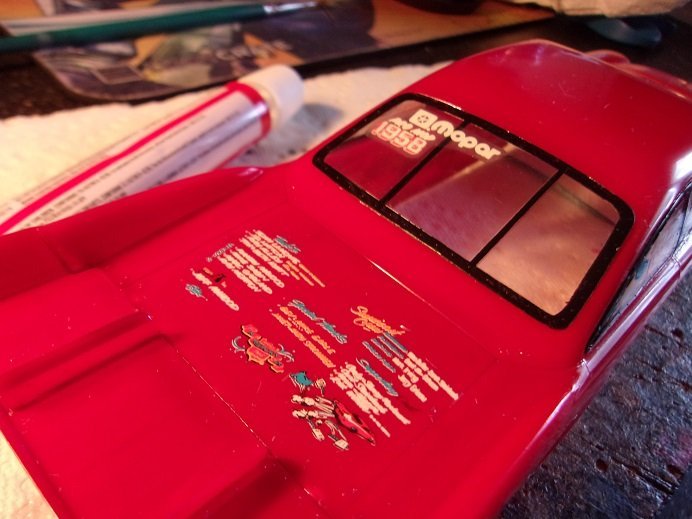
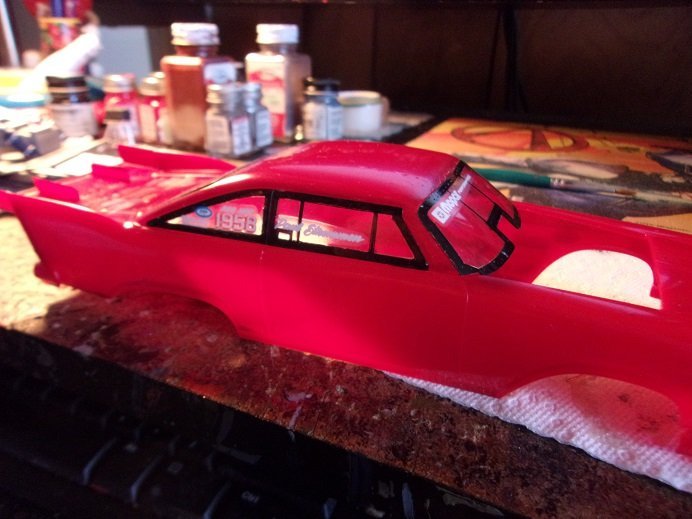
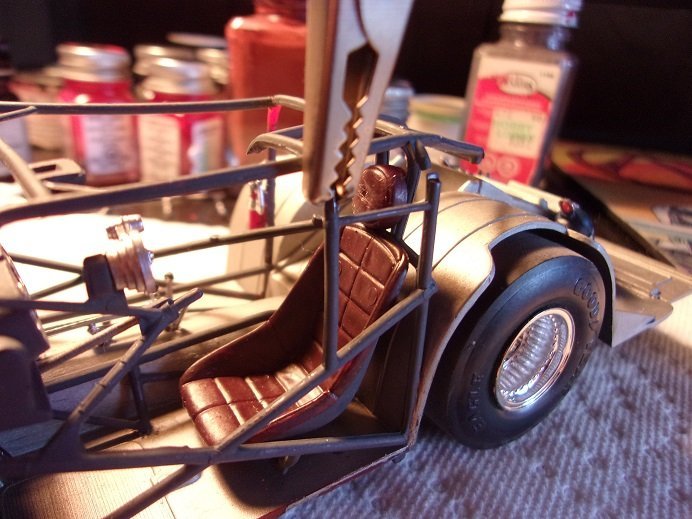
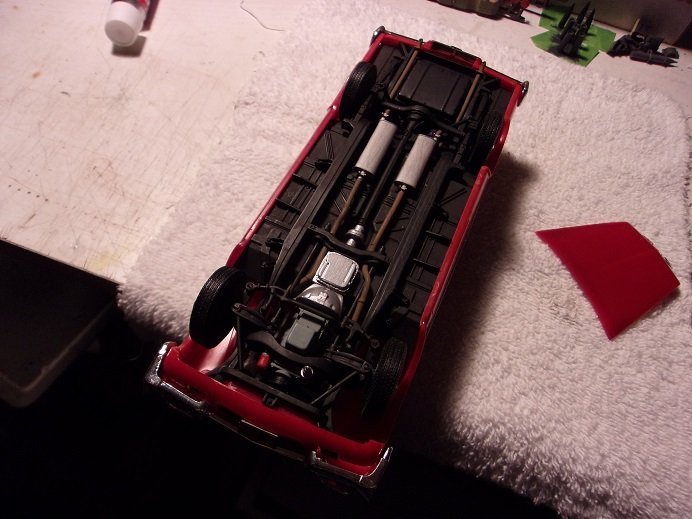
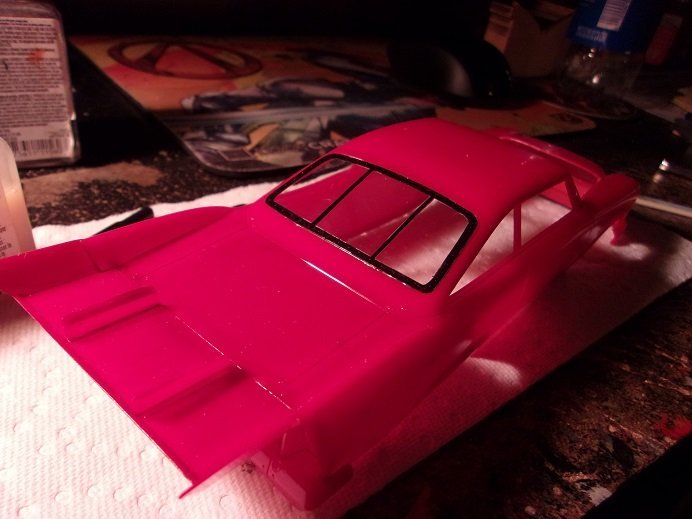
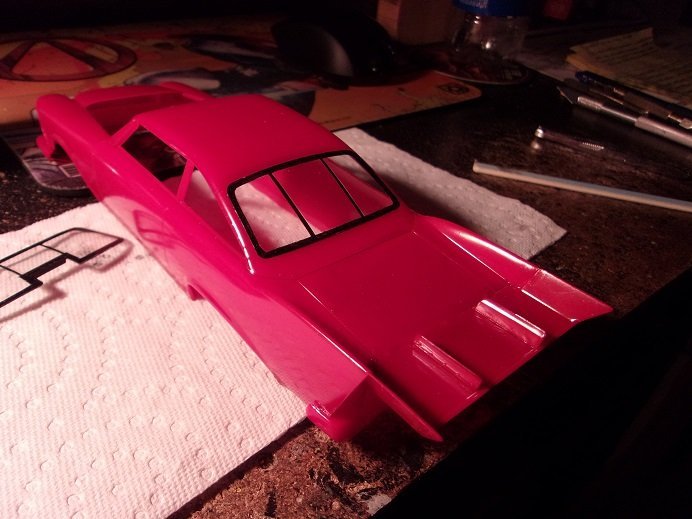
in the previous session, an alligator clip was attached to the front part of the driver's cage. I had glued it and used the clamp to keep it in place. the rear part was a lot more out of whack.......I broke the bar to put it into alignment, and glued it, after the front part had set long enough. that was left to set overnight and in the following morning, painted. the rest of the touch ups were also done. there are two more parts of the rool cage to be done.......the back section needs to be cut and relocated, and one last section needs to be added. the steering wheel also needs to be added, and that will finish the chassis assembly. the body still needs to have the spoiler braces added, and the chute assembly added. but I decided to do some of the decal work. these are the original decals, dated 1993. decals have come a long way since the early days. they were thicker, and utilized a pasty form of adhesive. todays decals are much thinner......changes in the printing and the types of adhesives they use. older decals usually have excess clear film that encircles the image, which can be trimmed off, for a more subtle fit in tight places. I was a little concerned with the decal sheet.......one was the small crease going through one of the decal images, but mostly, it appears that the sheet had been subjected to humidity. I started with the front grille decals.......if these were in tough shape, then I would need to locate another decal sheet. I did do some trimming here and there on these decals.......they went on without much trouble. next was the long molding graphics that run along the left side........not so good here. the decal broke in about four pieces........I had to add it in sections. the fellow that glued on the front and rear fascia didn't clean up the flash and mold lines....the rear 'fin' part of the decal couldn't slide under the bumper, so I trimmed it where it mated. this also caused the decal not to sit properly where it was supposed to, so the decal is slightly forward of where it was to locate. it still fit reasonably well, and I was able to mate the sections without any major gaps.........it did add to the guesswork of how it arched along the body. I'm happy with how it came out all these images are part of the decal........think if they were all separate. it would likely amount to two decal sheets.......and a lot more work! the second part of the side graphics is another mass of images........the car's name being the central image. the adhesive for these decals turns into a cloudy paste when wet......after the decal is set in place, a damp paper towel lightly washes away the residual adhesive. I will have to do it again when the decals are dry. luckily, the decal positioned as well as it did, with the initial decal being forward like it is. that little white decal in the upper left, almost got covered over. it can also be seen where I had to lap the front section of the molding decal over the other part to make it fit. I hope to be able to copy the positioning on the other side. I may try and fix the overlap. I also had to watch out for curling, where the decal narrowed, or protruded in odd ways. a pin was used to pull it back out from under itself. one of the decals was added to the trunk deck. ....and I added some to the windows. I will add more when these dry. finger's crossed when I continue..... more soon!
-
thanks Kevin..........the other day I got to see the box art for the Monogram kit. same kit, different box
-
thanks Alan........this is a new production of an older kit. it's all in the molds Round 2 acquired quite a few of the old AMT molds, and they are slowly bringing them back into production. I'll know more when I examine the kit that is currently in transit, which I should see tomorrow if the notification is true. I will know more then thanks for look'in in....appreciate it!
-
good to see you back...........looking very nice
-
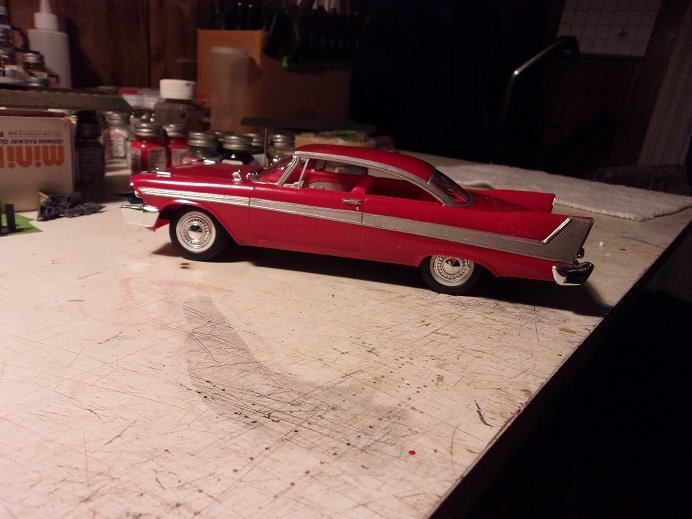
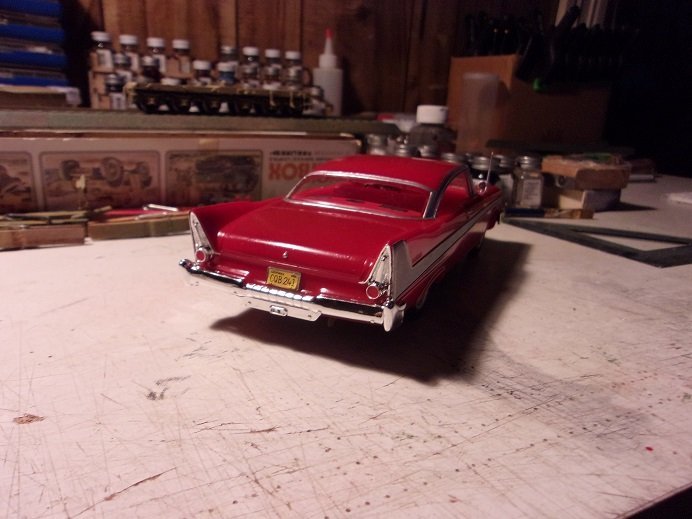
that's what I plan to do with the 57..........I think I will source some nails with the same axle diameter. the head will do well for the cap........and cut them long enough to fit the hole in the rim. I was at first thinking plastic, but the thought of breakage would be more possible. the major bad {sad} points with these 1:16 scale kits, is that so much of the detail is molded........like the starter, door handles, windshield wipers........etc.....etc......etc. there are so many older 1:25 scale kits that have all these detail points....and more. today's kits are so much more detailed....I know I shouldn't be surprised. I guess it's because that back in the day, I wasn't so detail minded as I am now. to revisit some of the kits I built as a youngster, really makes me think about what I 'settled for' back then, and the possibilities seen in these kits as they come before me. I was at the point of chopping and modifying kits, scratch building stuff when I stopped modeling for that stretch of time.........and when I picked it back up again, I was a bit surprised that I remembered some of it. when I purchased my Second Cutty Sark {Revell 1:96 kit}, it was my start up............and what led me to wooden ship kits. scratch building came back to me when I built the Nordkap........that model was so much fun! ------>I'll be right back<------ people! I just came in from picking up two large pieces of cardboard out of the middle of the street...........folks just driving over them, not slowing down or anything! most of the time now, our garbage pick ups are automated.......there are no guys on the truck anymore. one would think that by now, everyone would know this, and not leave loose things out at their pick up sites......but no! I took 'em and cut them up to fit in my recycling container ***what a novel idea***.....glad I'm the only one who thought of it!
-
looking very good OC..........your getting the hang of it I'm going to need to get into it as well.........watching what you do with great interest
-
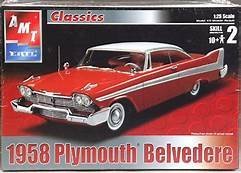
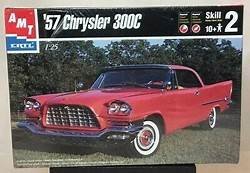
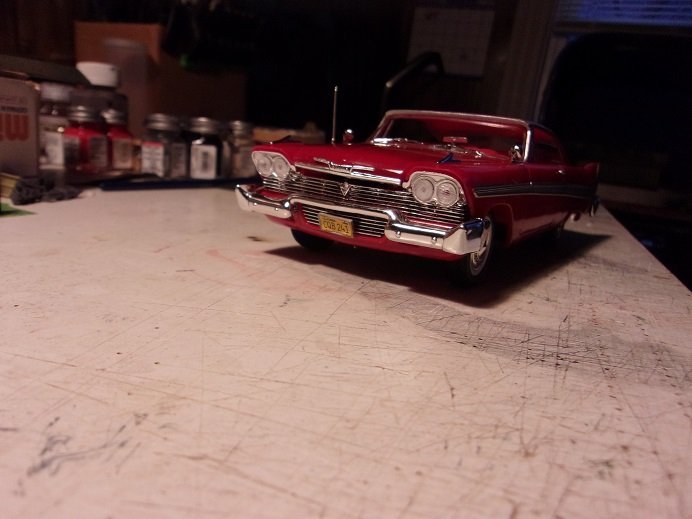
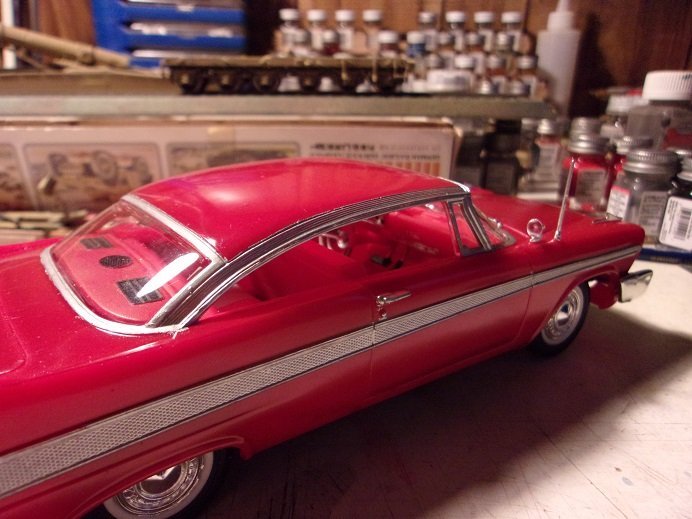
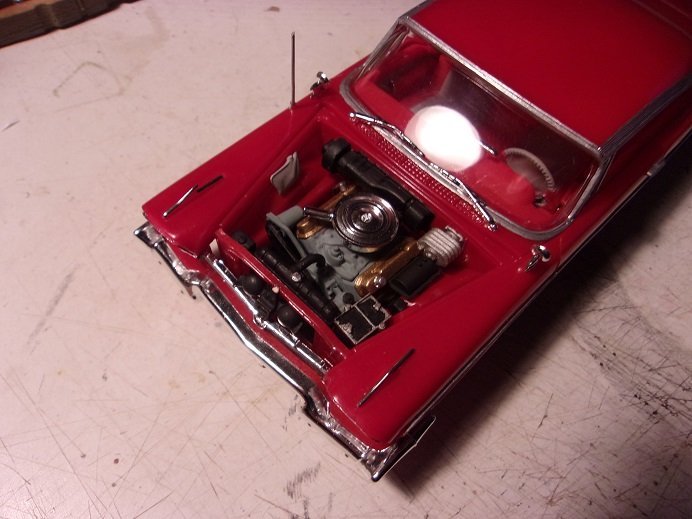
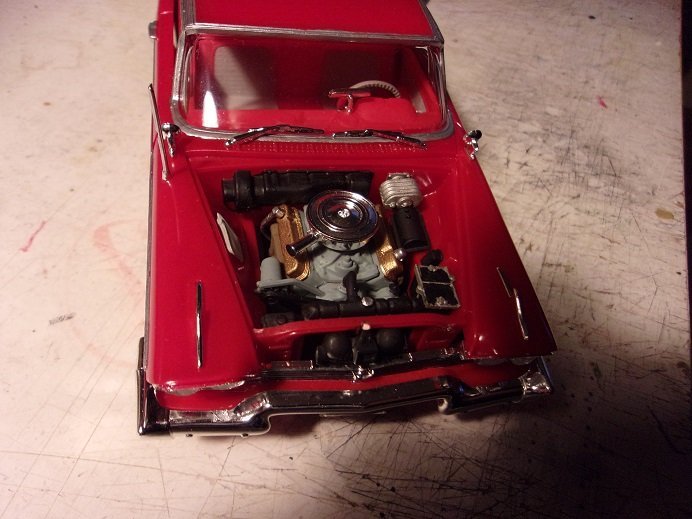
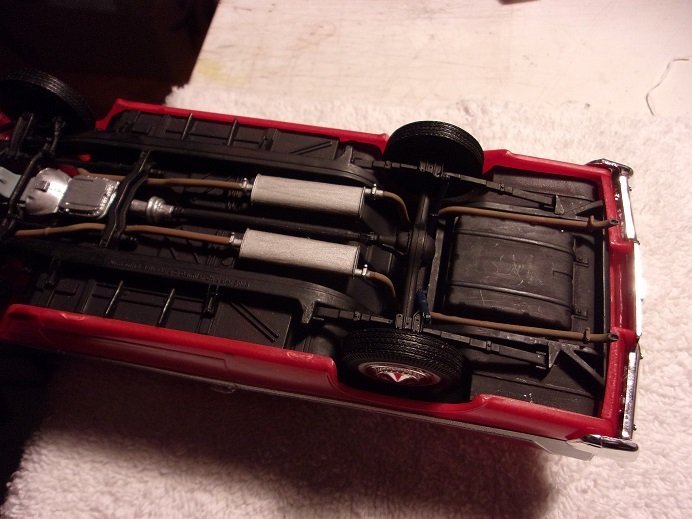
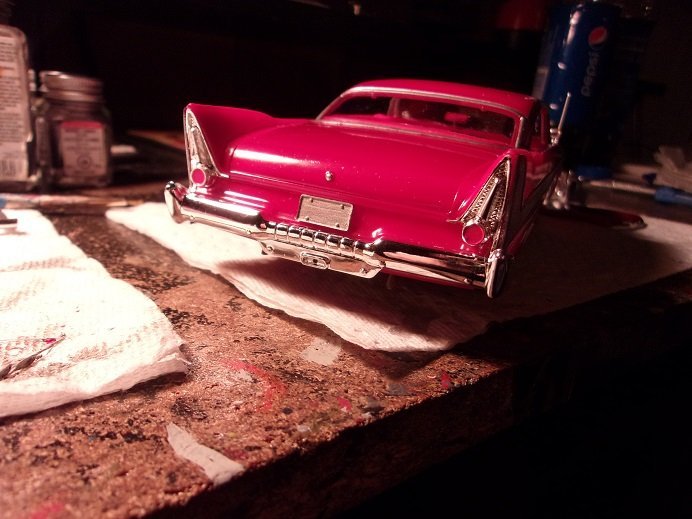
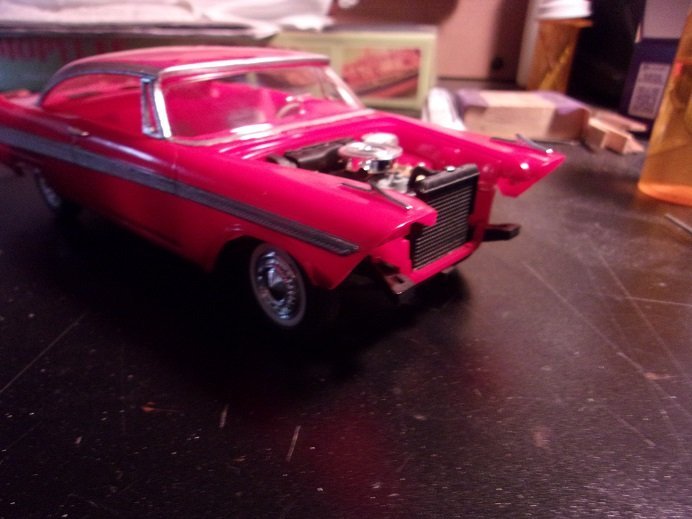
thanks gents looking at images on line, I've seen this model in many colors........some look really nice. I've even seen where folks did theirs in one of the many stages during the movie.........the burnt 'crispy' Christine looks interesting. pictures of junk yard.......smashed up cars can be seen too........some even did this to their models to replicate what that group of guys did in the garage {wrinkled fenders and such}. some had the white roof.......some didn't...........some even did a two tone version, which I think would be hard on this car seeing that the chrome along the sides doesn't go the entire length of the car. the two tone line would stick out like a sore thumb. AMT also put out a series of 1:16 scale models, in which I currently have two of them........the 1957 Chevy Bel Air convertible, and the 1957 Ford Thunderbird hardtop/convertible. I've done a little tinkering with them {not to the point of actually building them}, and it gave me an a closer inspection of the kits themselves. they have their share of missed opportunities in the detail department, which is a bit sad, but the 57 has one flaw that I can't ignore. that would be the fact that the metal axle passes right through the oil pan.......it is shaped to allow it. being in the engine mode, I built both engines for these models, and I filled the oil pan in on the Bel Air. I suspect that the 55 Chevy Nomad and the 55 Chevy Bel Air kits are the same way too. the Thunderbird is not {I'm happy to say}. there are videos on you tube as well. I have an idea to remedy the issue.......I'll flesh it out when I get to build it as I mentioned in the beginning of the log, the history of AMT is an interesting one. in 1983, ERTL bought AMT and was renamed AMT/ERTL. the company continued to release the original AMT line up, as well as some that were introduced by ERTL, which was making a name for their farm and construction toys and models. I was doing some surfing the other day, looking for the Christine kit molded in white. I found that there were quite a few out there....and I probably could have pulled the trigger on one of them, but I was still enamored with the pro modified. of course, finding one complete and at a more down to earth cost, is a bit harder to come by. giving up for the time being, I settled back working on the pro mod. the admiral was curious with what I was doing.....I told her what I found.........and that sparked her to do a search on her own. she misunderstood me though, because she later showed me a kit of the 58 Belvedere, produced by AMT/ERTL. I was unaware that these kits existed........I never saw them in my searches. she sent the link to my computer, telling me I could get it now..........any conniving husband could have blamed misinformation and ordered another Pro mod .........but I wasn't going to look a gift horse in the mouth, so I went to order the one she picked out. reading the description, I saw that it was an open kit, and the completeness wasn't guaranteed. I looked around and found one that was said to be a complete kit, and it was a few bucks cheaper while I was buying the kit, another one caught my eye.........and for around $20.00! WTH! did I go through a worm hole and end up back in the 50's? hideous........isn't she?!?!?! I did mention experiments......didn't I? ....and what is it with red? from what I saw, both kits are molded in white....the 300 is sort of a cream color {I think}. both kits seem to share the same molds as well {type-wise, I mean to say}. I'm working on a game plan for these two...........more on them when I get there thanks for look'in in.......it's not a bad kit, but it does have some nail biter moments. there are some mold lines that show up on the body, but they clean up fairly well. after all.......these are older molds
-
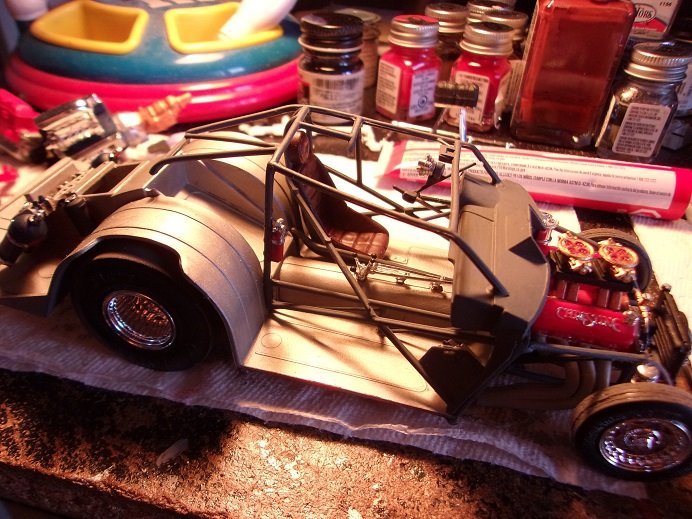
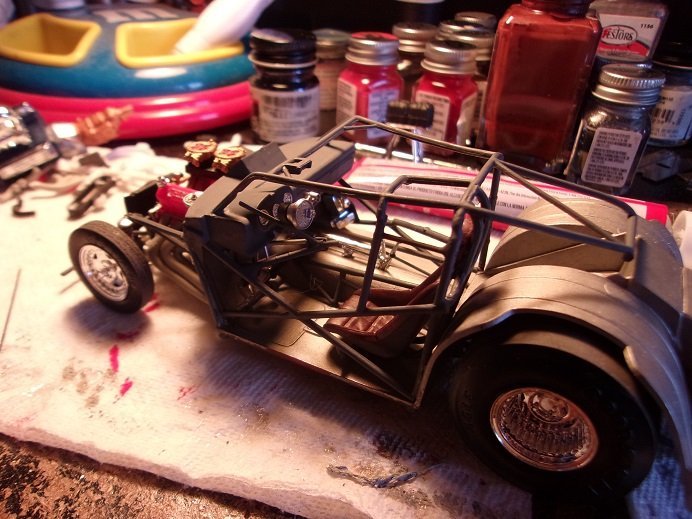
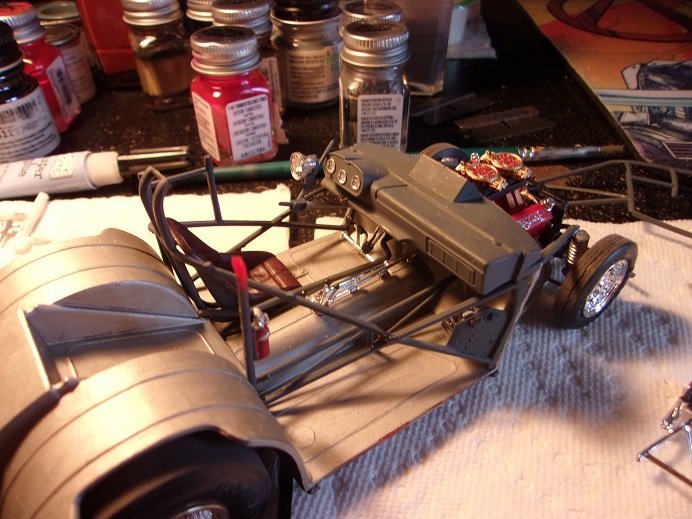
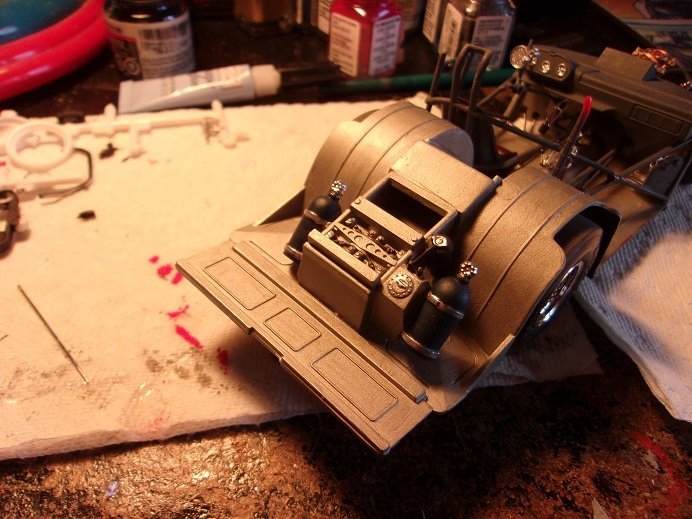
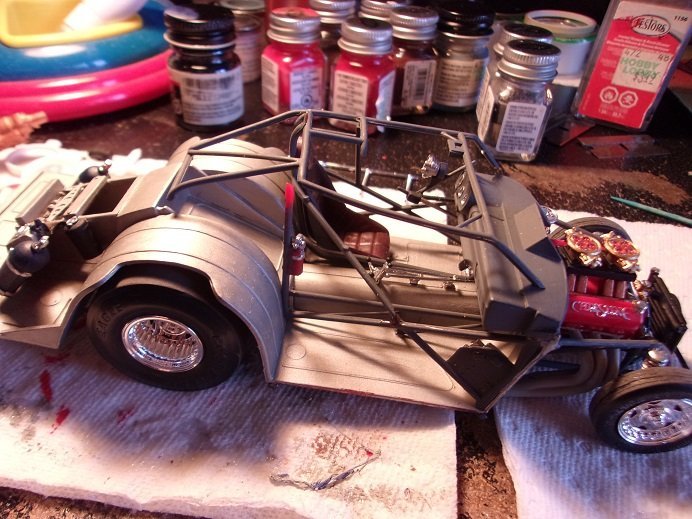
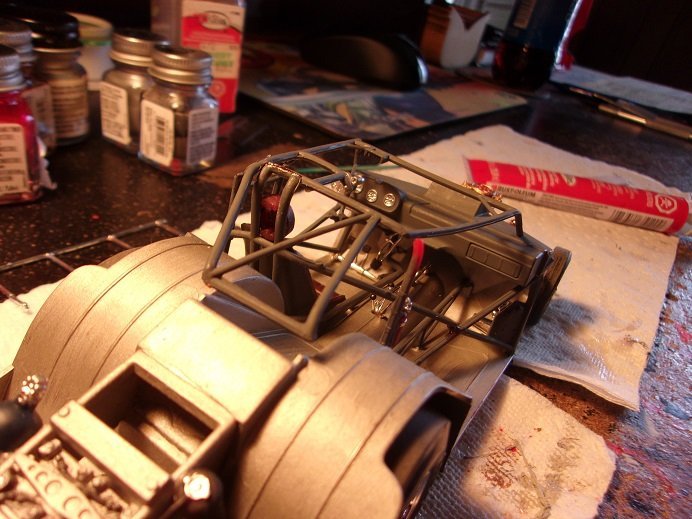
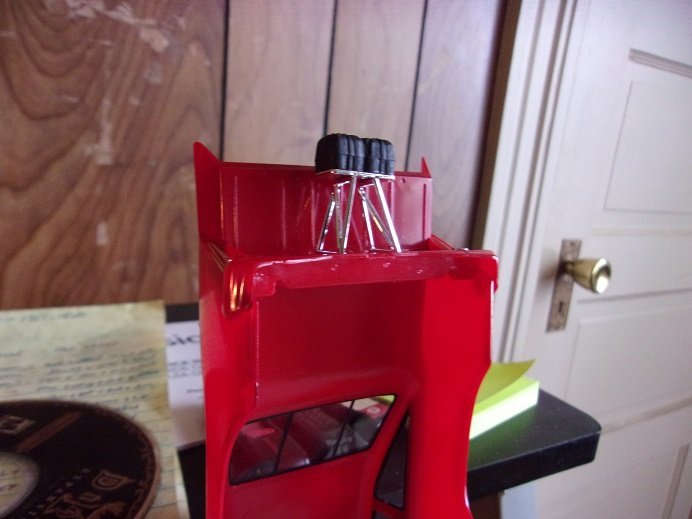
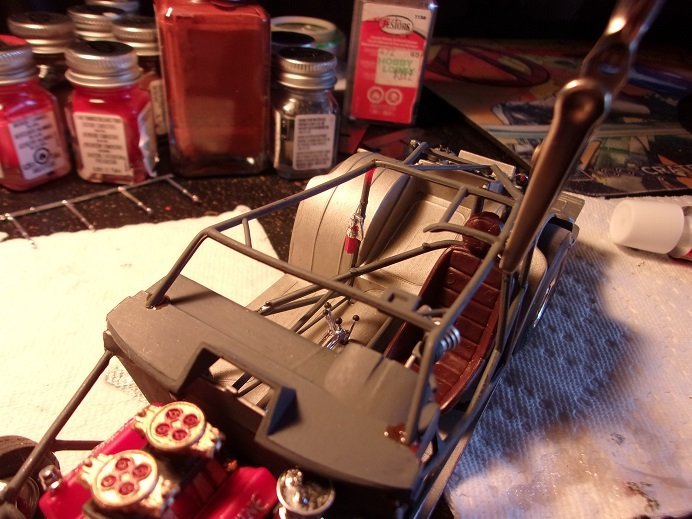
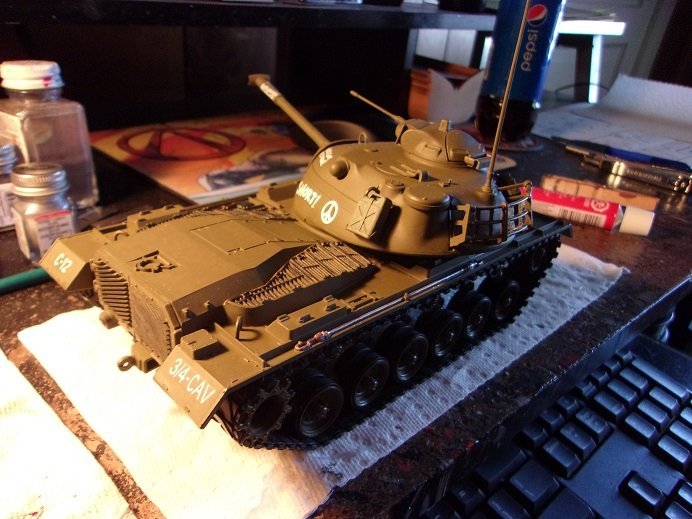
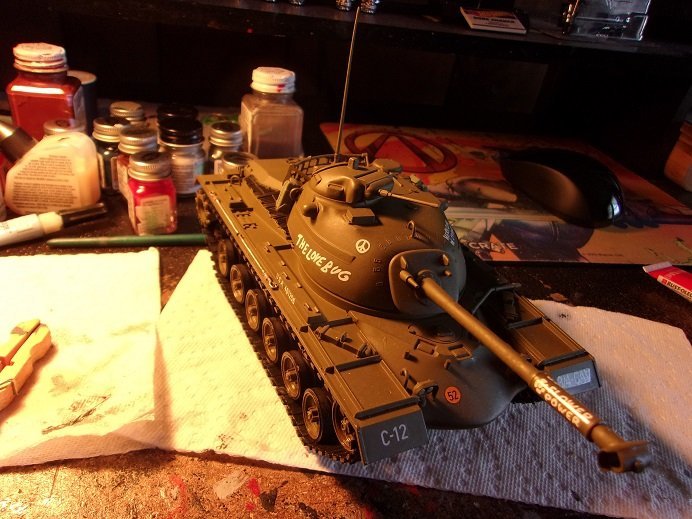
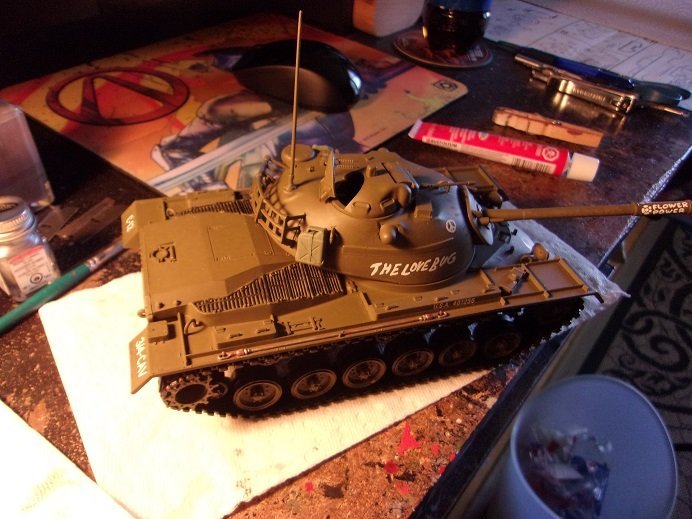
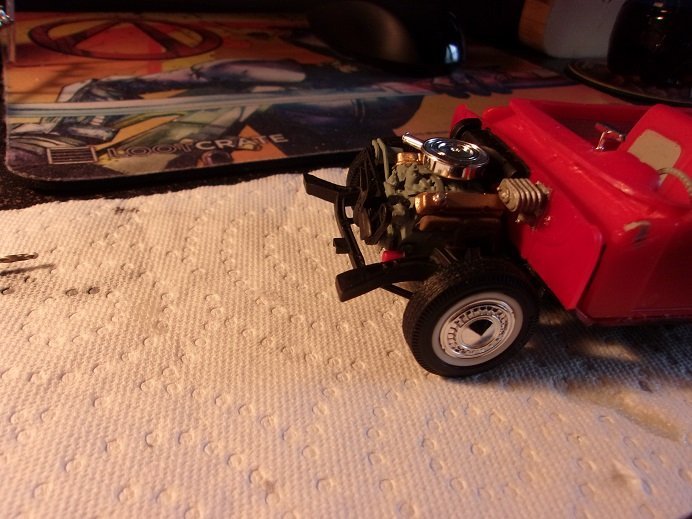
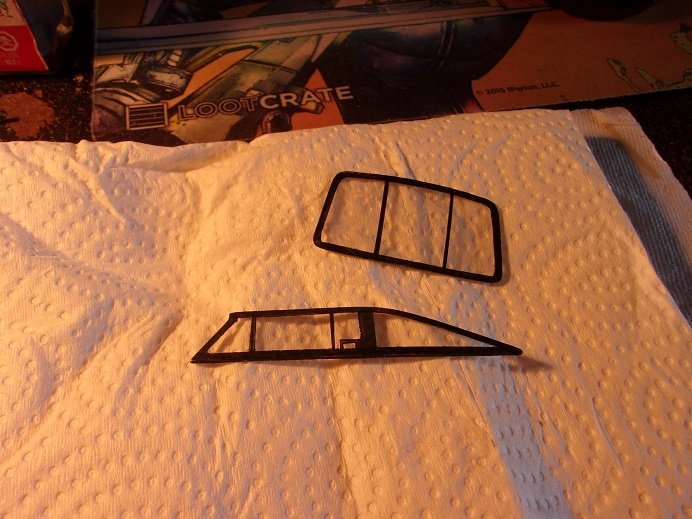
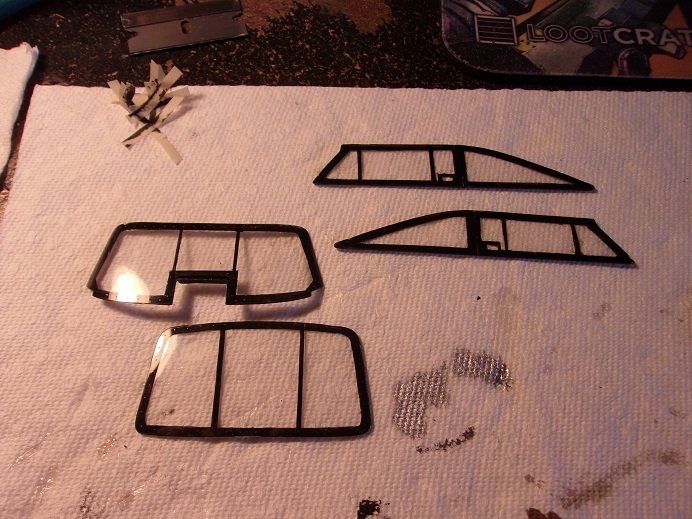
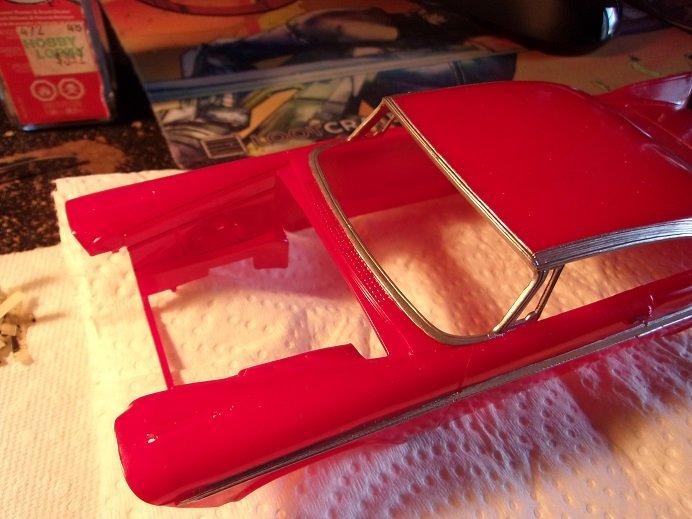
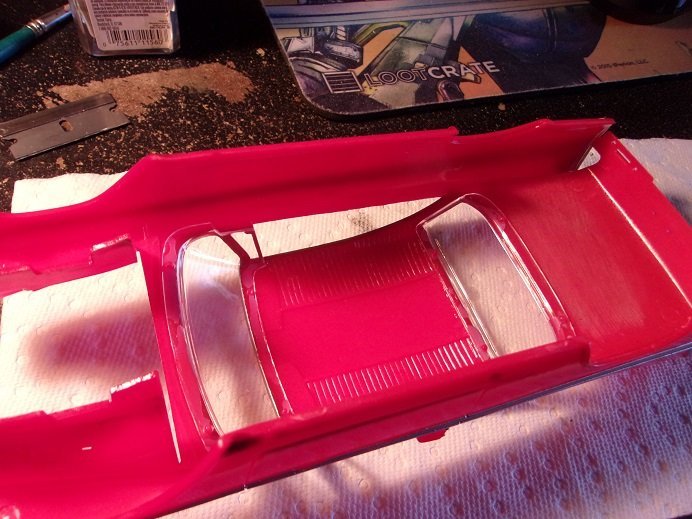
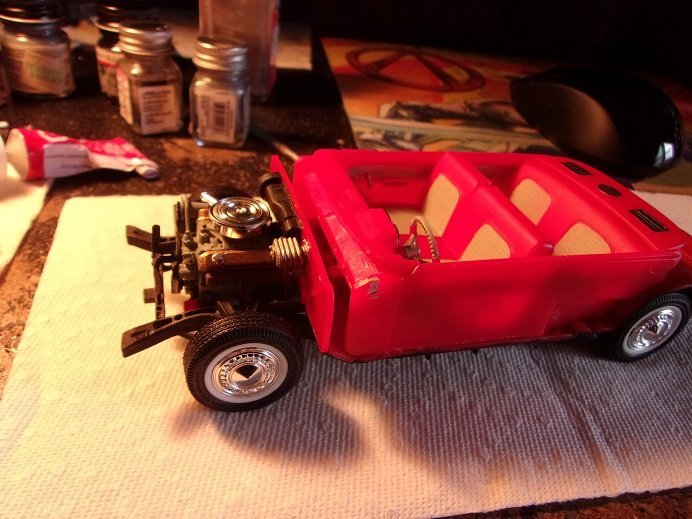
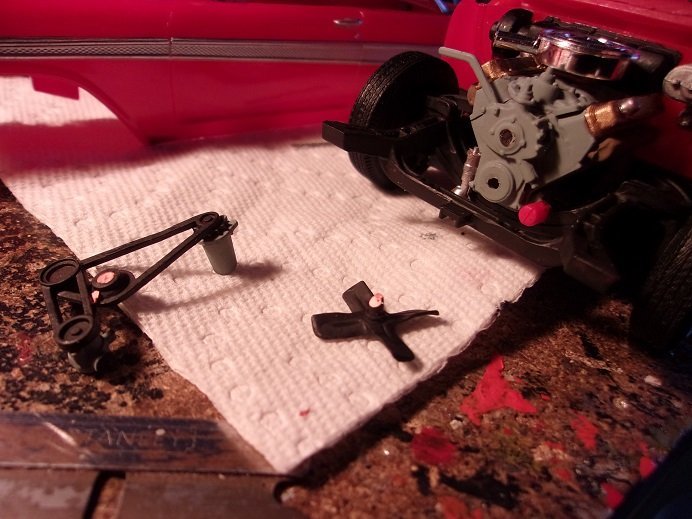
hey there folks.......work continues on this one. as mentioned earlier, the roll cage parts have some warp to them. they need to be cemented together slowly........gotta let the glue dry before moving on to the next section. to start off this session, the passenger side of the main cage needs to be added. the instrument panel was also added at this point as well. the computer is added to the inner side of that plate at the front floorboard, before the section was cemented in place {that's the little chrome thing you can barely see. the fuel oxidizer assembly is also cemented in place. now that the windows have all been rimmed with the flat black, they will be added to the body. this time, I used the window maker..........it does a super nice job, but the windshield turned out to be a bit of a nightmare. I started to add to the rear......starting with the tail lights. I still harbor this strange desire to paint the bumpers....if I do, I'll use flat steel to paint them {this is still up in the air}. on the chassis, the head rest was added just above the seat. next is the top part of the roll cage.....which was initially cemented to the bars above the seat to start it off. the wrap around bar {for the seat assembly} has already been cemented to the passenger section. there is a small section that will be added to complete the driver compartment of the roll cage. the section doesn't line up on the rear deck either........appears to fall short of it's target too. I'll have to figure out something for that, even if it means cutting the connection points and repairing the cage afterwards. the driver side of the compartment part of the cage has two bars that needs to be cemented next, but they are also out of alignment and will need to be adjusted to fit. the warpage can be seen in this picture {I have since straightened out that one bar that appears bent}. the two bars that rest on the dash also needs to be positioned and held in place to be cemented. yup......this will be a slow assembly.........I went through the same process with the Jukebox Ford. once I can get the roll cage completely together, I can touch up all the glue points........hopefully it will look better, and not like it was cobbled together by a four year old I'm liking this color combination better than when I did the Juke box. continuing with the body, the chute bracket was fitted after being cemented together, and set up in it's locator holes to dry. there are support bars that go to the spoiler, but they will be added once this has dried....or I get to that point, after heightening my frustration levels with the roll cage. later, after the right side support bar was cemented to the top section and has since dried, and the dash connections were also cemented in place. I turned to the driver's side front cage bar........this one had the better possibility of joining without much fuss. as I do this, it does set the others up in better positions toward being in alignment........some just fall short and they will need to be dealt with in a more aggressive manner.........I'll get the saw blade out so this is where I am so far. I hope to have more for you soon........
- 31 replies
-
- 11
-

-
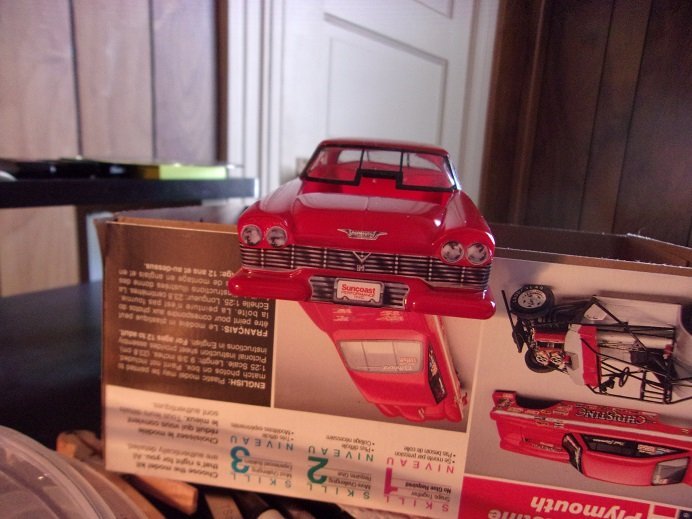
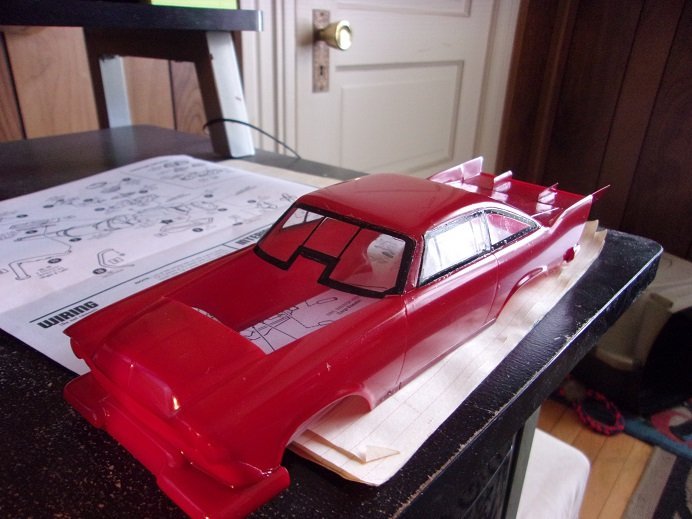
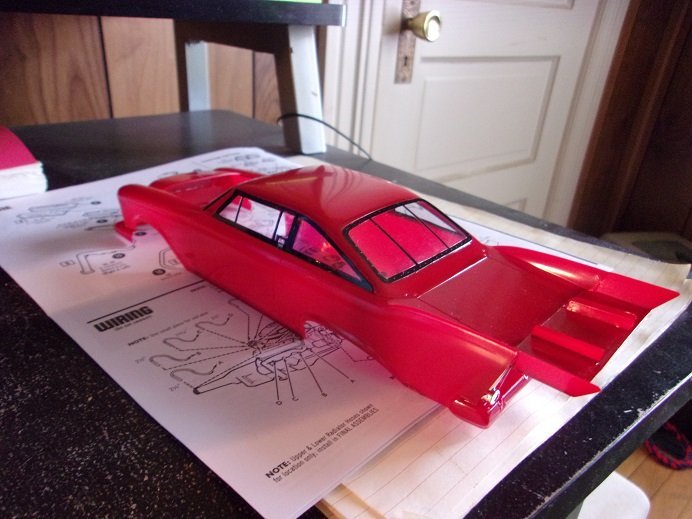
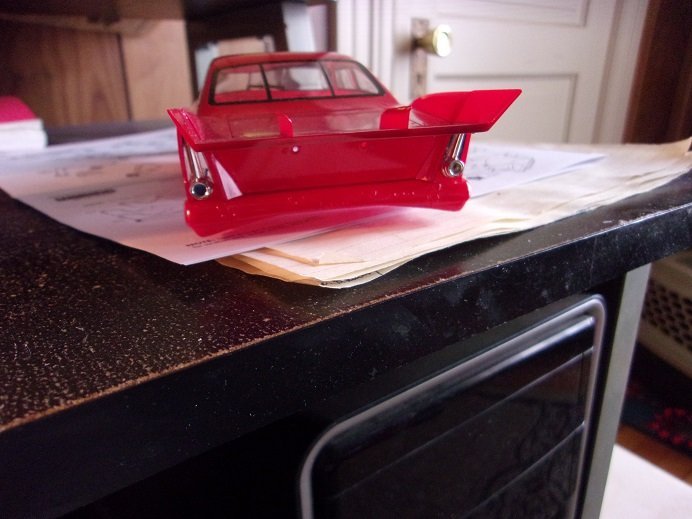
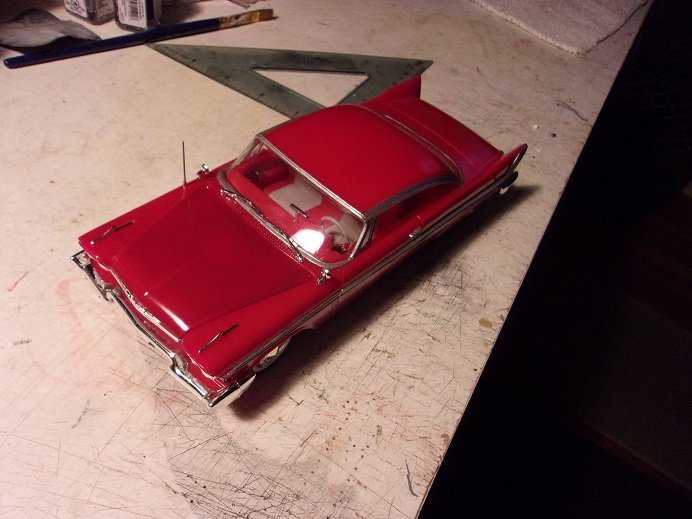
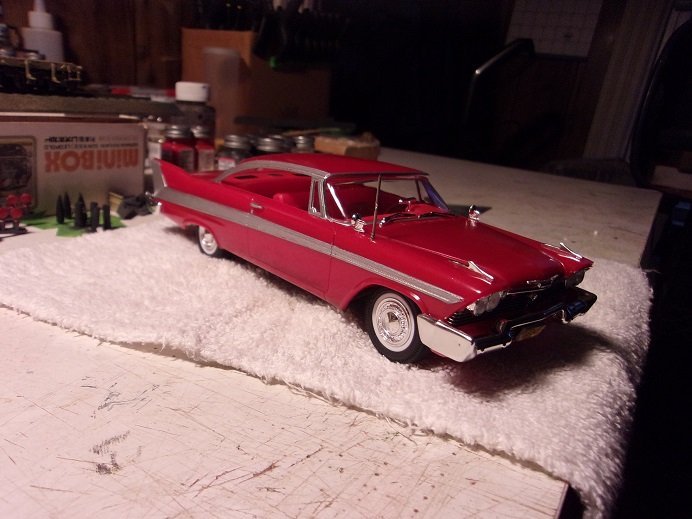
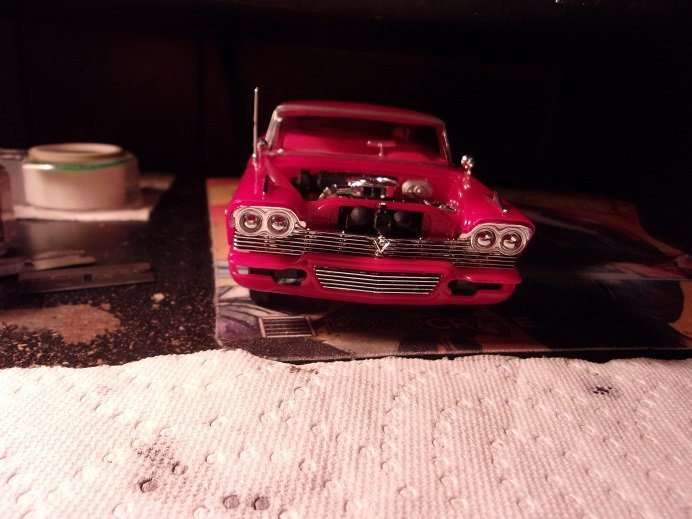
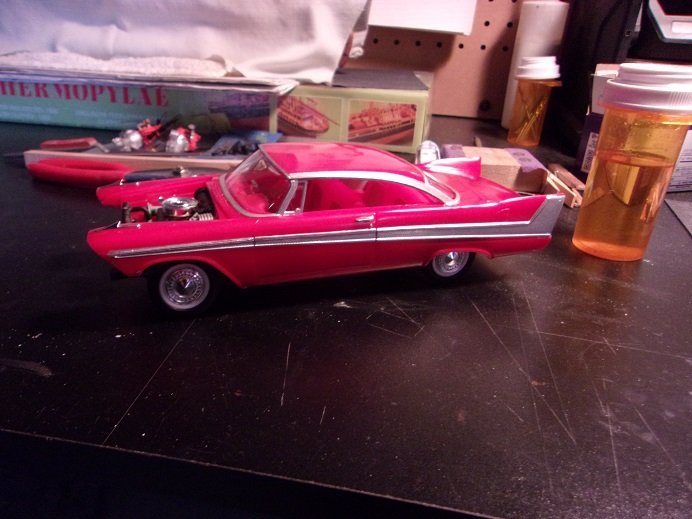
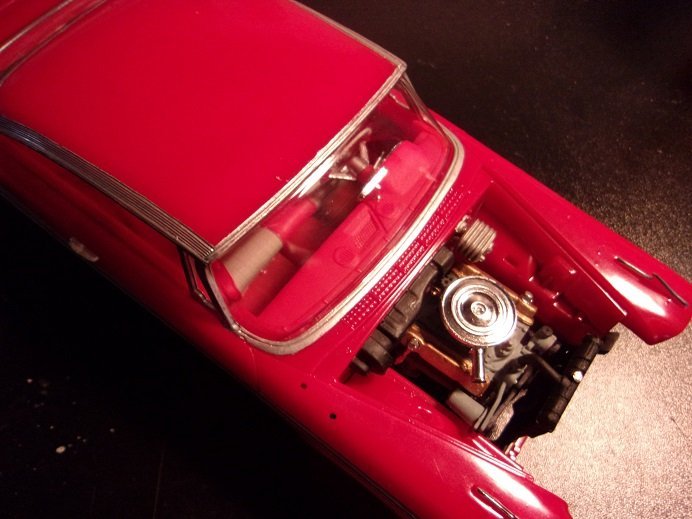
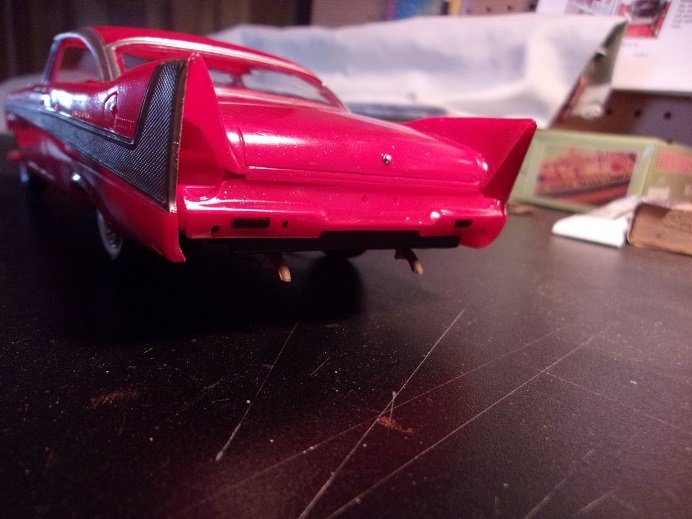
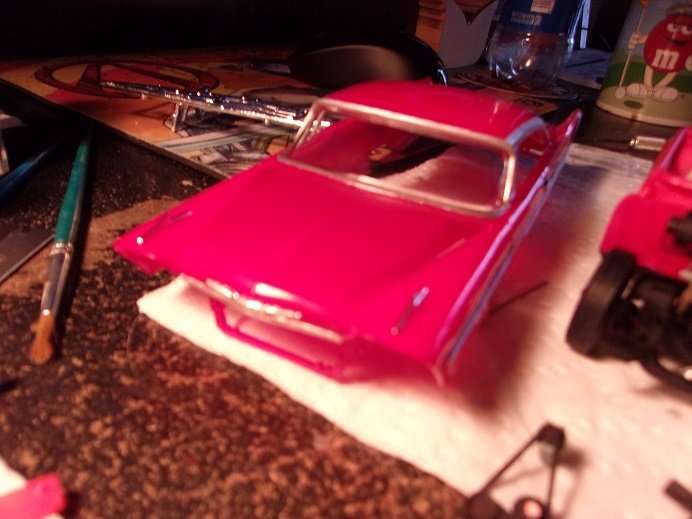
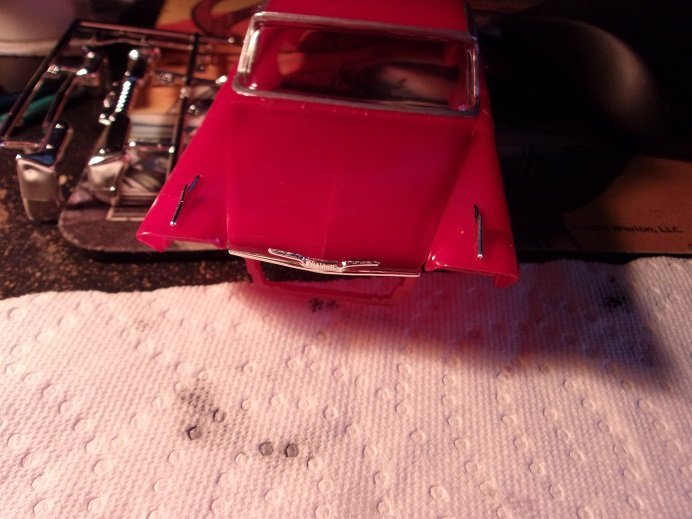
reminds me of the Cheech & Chong skit "Cheech & Chong at the drive in" of course, you gotta remember to let them out once you get through the gate I would think it's a pretty spacious trunk, but this kit doesn't even have hinges for the hood........let alone sport a trunk that opens. if there's one thing about models, they have a habit of making one thing of what should have been done, after the model is finished I decided to leave the side windows out......but I do wish I had thought of putting in the rear side portions......the glass could have been split into two sections very easily. I mentioned earlier that Christine had a white roof..........it slipped my mine painting the body. I'm debating if I could pull off doing the roof, but the silver trim might get damaged if I do........then there's the thought of the red ghosting through. it's a thought....... Christine is finished..........here are some pictures I promised......... I like the grilles........wonder why I don't do this more often........ in the second picture, you might notice the gap where the hood meets the grille........this is an additional problem with the kit. the radiator is too tall.......it juts just above the radiator bulkhead......the radiator cap raises it a bit more. the radiator locates on top of that cross frame........anyone who wants to build this model should cut the bottom off the radiator.......roughly 1/32nd or so, just enough to drop it down below the bulkhead line. there is not a lot of room in the engine area......... it does make me wonder if the original AMT kit assembles like this. it is a kit worthy of some experimentation. thanks for look'in in........always fun shar'in the ride with friends
-
coming along nicely OC............really looks great! the night time photo is really neat
-
awesome job ........it reflects very well in the sun don't count yourself short
-
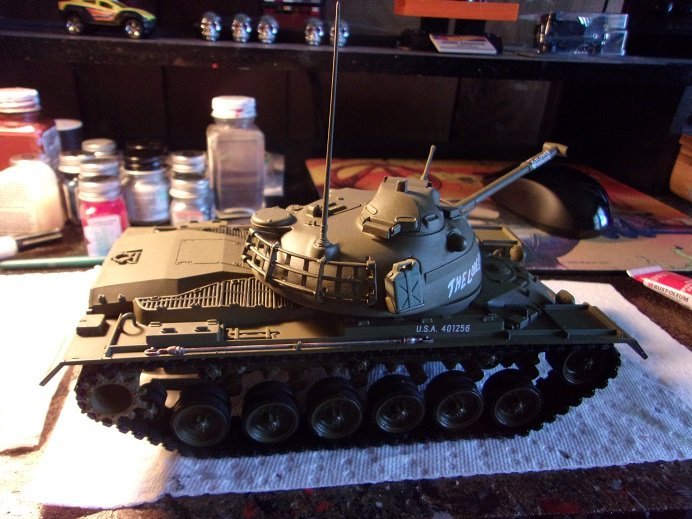
I was in the process of putting on the Jerry cans, when I though to do this. for now, I will put the finish on this one. the stain that I used a while ago is yech!.....all the darn stuff did was make the track sticky. to top it off, the admiral knocked the antenna off the other day. as luck would have it, this turns out to be a very weird plastic...........when she knocked it off, it came out of the hole undamaged...the pin was still on the end! she though I'd be angry about it.......but no......I've learned not to be too crazy when something breaks. I haven't had the time to look up add ons for it.......so until I do........or buy another kit trying ........I will put it away so it doesn't get damaged again. not only that........it gets the Jerry cans off my table thanks all for look'in in.....you've made it a fun log
-
that's not it........what I watched was about Russian war games and how they used the games to market the tank to lesser desirable countries. these would be countries that are in conflicts already and ones that even WE wouldn't sell anything to. yes, they are old Russian hardware, but they are still used today. kinda scary, seeing what's going on at the moment.
-
now that the initial trauma is over, the finish line isn't far away. I think the biggest change they can do to this model, would be the engine compartment. the inner fender wells could be separate parts, added after the fire wall is added. it's nuts with how much the body must be contorted to get in on. to get the tabs at the rear in place, the rear fascia is not connected to the sides {rear quarters}, so the fascia can be pulled outward to fit the chassis and allow the tabs to fall into place. so now.........it's bling time the front grilles and lower splash pan is now in place....still needs the bumper, but no place to add the license plate. there's more to the engine compartment too..........there really isn't much space under the hood. the rear is almost done. bumper's on.......license plate, and tail lights. there is a hole....likely for a trailer hitch, but there is nothing supplied for it. the car is finished, outside of a few small touch ups......end result soon gotta take Gibbs out..........

-
so the repair is done.......it was a success! I did cut back on the crank pulley pin, because it hit the lower frame when I went to put it back on. the fan now falls short of the cross frame and the radiator and upper hose is also installed. now come the big alert for anyone who wants to buy this model for this model, I was a good boy........I followed the instructions to the letter. usually, I will skip over steps that look as though problems may arise. the rear view mirror was cemented on the dash and allowed to dry..........I also decided not to use the side glass, for better interior visibility. for all that the instructions say.........they are out of their cotton pick'in minds! this body was the worst I have ever done. the Hydro boost was in the way of the inner fender wells........that became dislodged.........the fear of breaking something was ever so present! I slid the chassis forward to line up the windshield / glass....as well as the two pins for the inner fender well panels. there is a plate in the center of the frame that stops the front of the body from going any more {that I will look at further}, it stops the pins from fully inserting into their holes. these two tabs in the rear of the chassis must fit into these slots........the body must be pulled out to allow this to happen. lucky I didn't break anything else! outside of checking out the front........the body is on. I didn't even glue it.......it will never come off....it is firmly in place! more soon
-
I tried looking it up online........but couldn't find it. the tanks were painted in vivid colors and camo
-
I made a small bit of progress with the pro modified. I had settled for some paint work to finish up the last session........my most favorite things to paint.......the glass. there is frame work to paint....... fitting the back glass was rather easy.......sills are visible that support installation. I just put the side windows in.........they were a bit more difficult to fit in place. the body is slightly tweaked, which doesn't help matters........I used tape to hold them in place while the window maker dries. the windshield will be the worst of it. more soon
- 31 replies
-
- 10
-
-
that makes sense.........much like what Ramsey did with his forces in the Game of Thrones series. this strategy can also be seen in the Movie 'The 300', although a famous Roman move was the Shield Huddle, to deflect arrows.
-
Spanky and the gang......yup....watched them too! then it was the wonderful world of Disney........Davey Crocket, Daniel Boone, Scarecrow of Romney Marsh....loved all those mini series let's not forget Zoro! yea.......the colored plastic thing was a effort to appeal to a larger crowd.......those who didn't like, or were not able to paint their models. the trouble is.........once you were done trimming and sanding all the weird stuff off the parts, they were a disheveled mess. painting was always the logical solution I did make a little progress........and even in the process of correcting a pho-par with the kit. when I got back to it.......I decided to just go ahead and freehand the bottom windshield frame....I didn't do too badly with the back window........ there are tabs for the windows.......it almost seems like they snap into place. I used the window maker anyway. as can be seen, I removed the date stamp on the underside of the trunk deck. I was not going to see it showing through the body........the use of thinner will not remove it quickly.......sandpaper worked better the model shown on the box does not use the side windows........I'm debating whether to do the same. after the windows are in place, the body can be added to the chassis. the next step presents a problem. in some cars, a spacer had to be used on the radiator fan, to locate it close enough to do it's job....keeping the radiator cool. seen in the picture above, the fan is situated right over that piece of cross frame.........that is where the radiator is located. the fan, the belts, and everything associated with it, came off without too much of a fuss. I like to paint some of the parts individually.......what can be assembled that is to be the same color, is done as an assembly. I don't usually scrape the paint off, which can be a problem, or part of a solution. contrary to some beliefs, there is some adhesion that occurs.......considering that the finished model sits on the shelf afterwards, that's good enough for me. should something fall off, it usually breaks off cleanly and can be cemented back on without much issue. this helped me out here.......the fan assembly came off without a hitch. I initially wanted to just remove the fan, but the whole thing came off.........fine with me if it causes no damage the fan came off with a twist........I'll clean off the pulley, shorted the spacer, and glue the fan back on. no problem...........Bob's your Uncle! so.........while this was drying, I decided to add some of the bling on the body. one thing I've already done, is detail the grilles. there are two sections, and what I did was dab some flat black in the grooves, wiping the excess on the surface off with a cloth. I don't do it too often, so I can't wait to see how it will look. I hope to have more done today
-
quick glance at the picture...........line dancing.......square dancing........boy! those chaps did it all over there I certainly hope the figures were pre painted.............can you imagine how much time was invested in this dio?!?!?! what was the significance of the square formations? very well done!

