
HOLIDAY DONATION DRIVE - SUPPORT MSW - DO YOUR PART TO KEEP THIS GREAT FORUM GOING! (Only 75 donations so far out of 49,000 members - C'mon guys!)
×


popeye the sailor
-
Posts
16,007 -
Joined
-
Last visited
Content Type
Profiles
Forums
Gallery
Events
Everything posted by popeye the sailor
-
 it's not as rare as you might think........I've done it as well between you, me, and the lamp post, it looks great I get what your saying.........square pegs will fit in square holes some models will have tabs in places where this won't occur {or it makes it hard to do it}, but I've been known to cut them off, thinking that they are just products of sprue junk. right now, I've got a beef with a model I'm currently building.....I actually had to take part of it apart to fix it........so a percentage point goes to the model maker for some of the problems my rule of thumb is if the problem can be corrected without damage, then I'll do it.....if not, then it is a learning curve for the next one. I've also been know to purchase another kit....but that's rare......only if it benefits the spare parts bin I thought the same about the nose.......moveable parts look wonky if they won't stay in place. open it to expose the radar, and the cone drops down or falls out of alignment.....not my idea of a cool model. I've done planes where the canopy opens up and it looks terrible too. one fellow didn't like the slot to allow the canopy to open........same here. you lucked out.........that is a very clean canopy. it fits nicely too
 -
Sopwith Camel by Spiff - Model Airways - 1/16
popeye the sailor replied to Spiff's topic in Non-ship/categorised builds
a lot of folks don't paint brass.........bling is king, don'tcha know very nice start...the prop looks sweet! -
for sure........they make many colors of primer........more that they did back in the day ....and yes......colored plastics do make it hard. I should have used a primer, but didn't want the paint to become too thick and lose some of the detail. since I was painting red, I didn't feel I needed to.........so much for hindsight I haven't seen Happy Days for a number of years either...........I just finally got a complete collection of the three Stooges.........luv those guys! nyuck....nyuck!
-
i see good times ahead
-
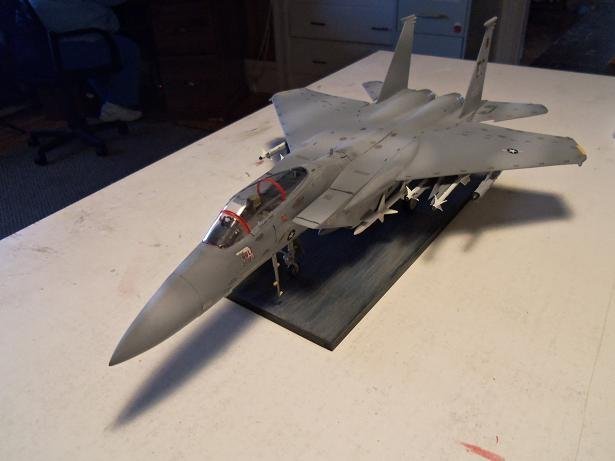
these can be hard models to do.......so many pros and cons. is there two ways to model the nose? the F 15 I did was like that....some sort of radar as opposed to the closed nose {I would have to look at the instructions for what the options were}. between Monogram and revell alone, there were many variants of this one subject....most used the original molds in their entirety for the kits. they are great model though........look very good when finished. small fo-par......I was unaware that the intake tops could be interchangeable.........I think that looking at the finished model, unless your an expert on these planes, it would be something that wouldn't be readily noticeable. I checked mine to see if I did the same closed cockpit........might help you decide
-
very nice indeed!
-
yipee.........opening up the next chapter! great start getting back into it!
-
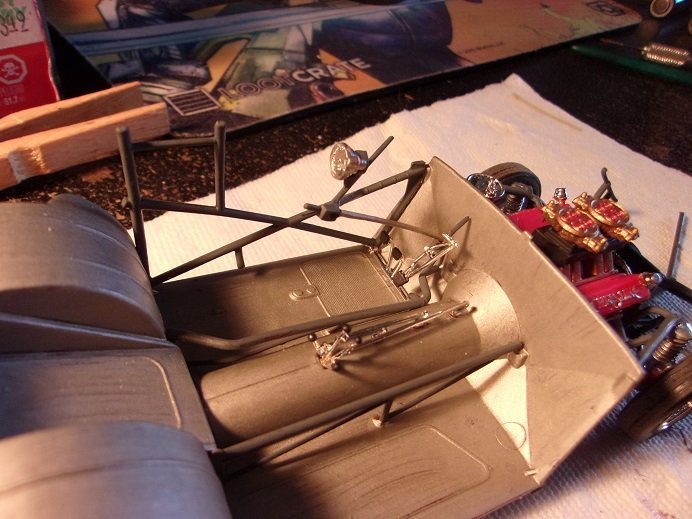
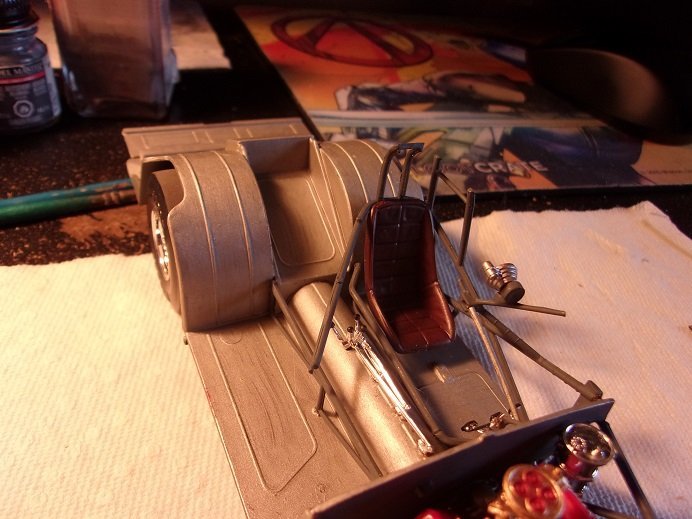
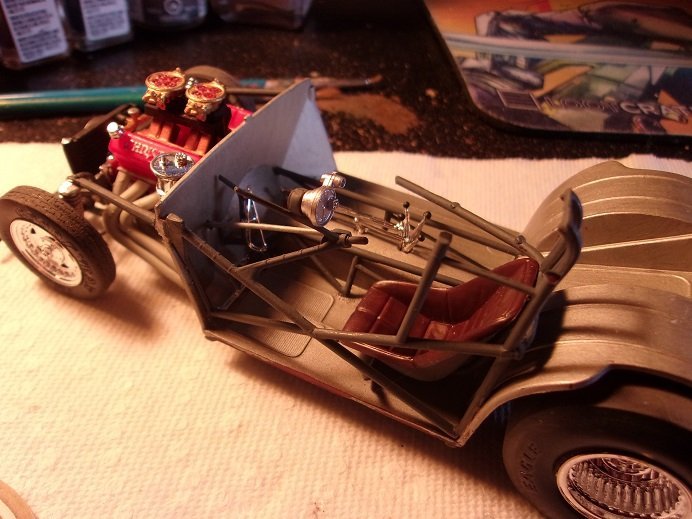
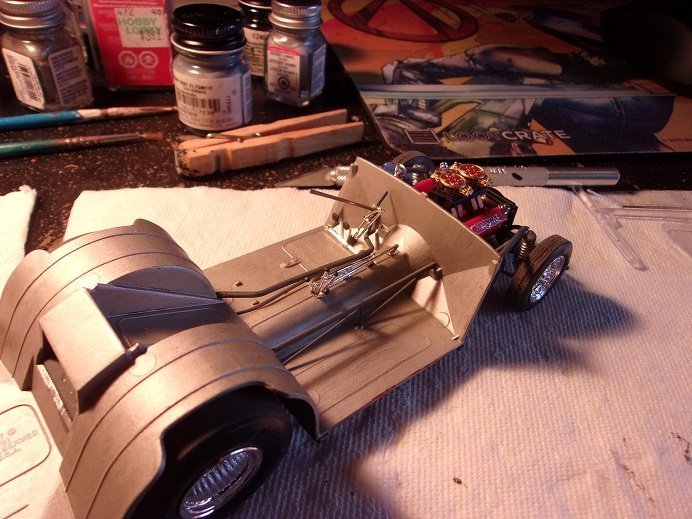
more done yesterday.....more of the roll cage added. the next big part of the roll cage, is where the seat locates. it's a tad slow assembling this, since in order to connect the offshoot sections of roll cage, the main areas need to dry to the point they won't come apart when you connect them {like the steering shaft to the knuckle}. more painting being done at the moment......errands soon, so that will slow things down a little


-
I was watching a sport show on HBO......{not Bryan Gumble}....they did a bit on Russian war games {that's what he called it}. they were showing off the T34 tank....pretty impressive. the Russians were holding them for two reasons.........to show might and to show the tanks to would be buyers. quite a few countries attended and participated in the games....some I don't think the US would sell to, due to their militaristic natures.
-
correct Ken on the Pinkie thing.........hard to wonder why they added her in.......it wasn't like the fonz had girl issues I believe she was a relative of the Fonz anyway
-
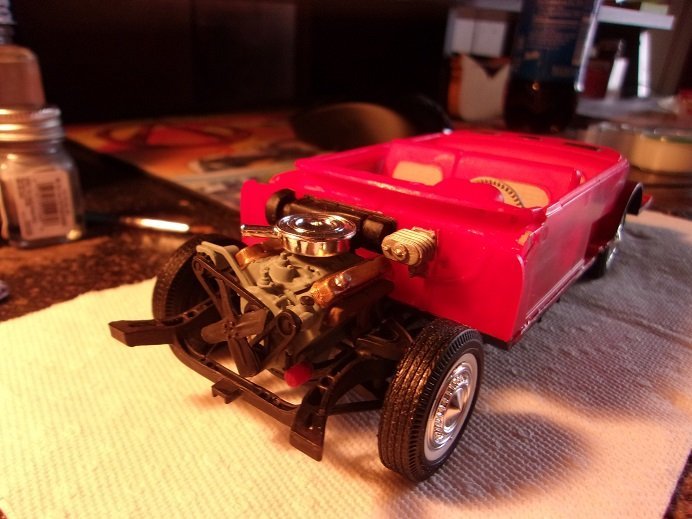
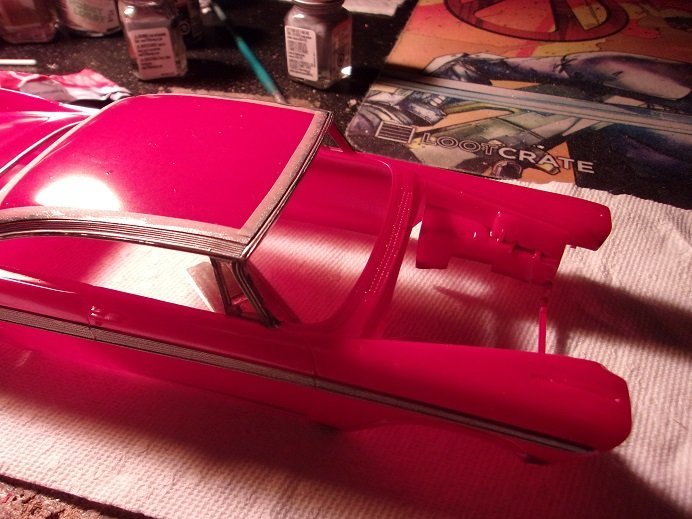
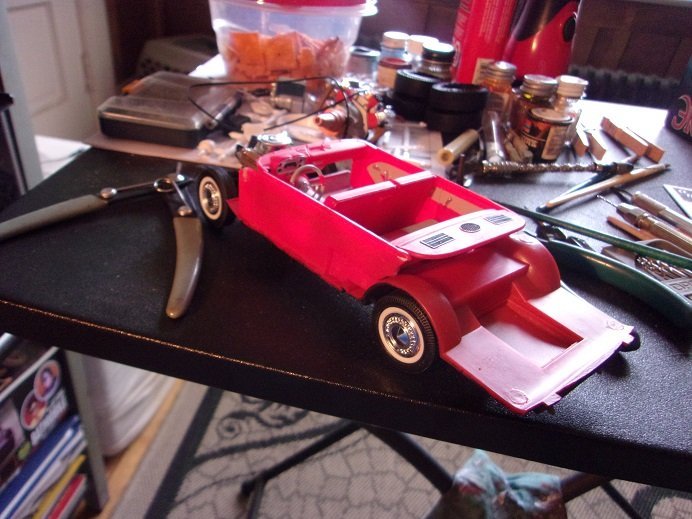
it drove like a tank too .........no......basically the roads up here can be a trial at times. the combination that it had a rather still suspension, and the road conditions, was a detriment to the car. it didn't belong up here I would never buy a new car and drive it around here....... I was browsing through some of the stuff I gathered on Christine, and I seem to have missed another big feature........she should have a white roof. I had just did the window trim when I though of it......bummer! I though I might have a rattle can of white, but I don't. I put a coat of red paint on the roof, and with my luck, if I go and airbrush the white {thinner into account}, it might cause the paint to wrinkle. looking around, I stumbled onto another forum where the gent did LED lighting {so cool}.......and he addressed the issue as so. he bought a kit molded in white plastic {another wonderment}. I'm getting even more curious about the kit offered by Southern Motorsports.....different box art.......different plastic? anyway.....his though about this was that red plastic is terrible to cover with white. I did wonder about primer, but he never mentioned it in his forum posts. I'm not going to chance it.....it is going to remain red. not only this........but most information points to the engine being dual carbs with matching air cleaners. I did see some screen shots from the movie, but nothing that shows this. I tend to doubt it anyway. coming off the line, it was a stock model, and likely wouldn't get any of the higher class equipment. it's like the two Chevy Bel Air kits I have.........the kits have them sporting V8 engines, when the stock models had L6 engines. now.....I'm not say'in that they never came with V8's......not sure if they still do, but there was a time when dealers allowed customers to chose what they wanted their new car to be equipped with. some were also produced in other plants as a higher model.......jeeze.......you could even order a muscle car! I've been doing some more in the way of painting.........detail and stuff. more to come soon thanx for look'in in!
-
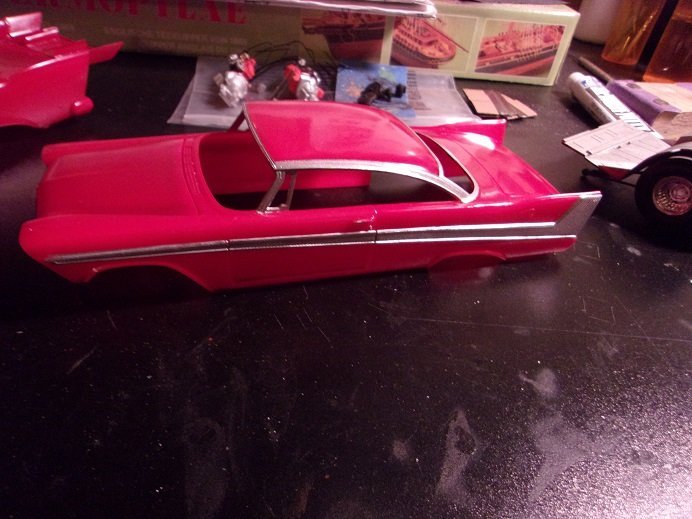
sweet job on the Abrams, my liege. the paint looks super! this goes with what I mentioned to Egilman in what he is trying to achieve. taking pictures of your tank with the pale green surroundings gave the sandy color a sort of greenish hue. photographing it again with the sandy color gave it a more neutral hue and brought out the sandy aspects you wanted. even with what I am trying to do........with the lighting and the surroundings, photographing Christine......both of them....is making them look pink. if you were to bring it outside....either on a cement slab of sorts, or even asphalt, you would see two things. the cement would give you the even color you would like to see, while the asphalt would darken it, but still give you the sandy look because of the natural lighting. it would also highlight the darker aspects, like the treads and the rubber parts of the bogies in any lighting though, you did a stellar job
-
fiberglass body too..........I recall a gent that owned a 77 stingray.........forever in the body shop due to cracking
-
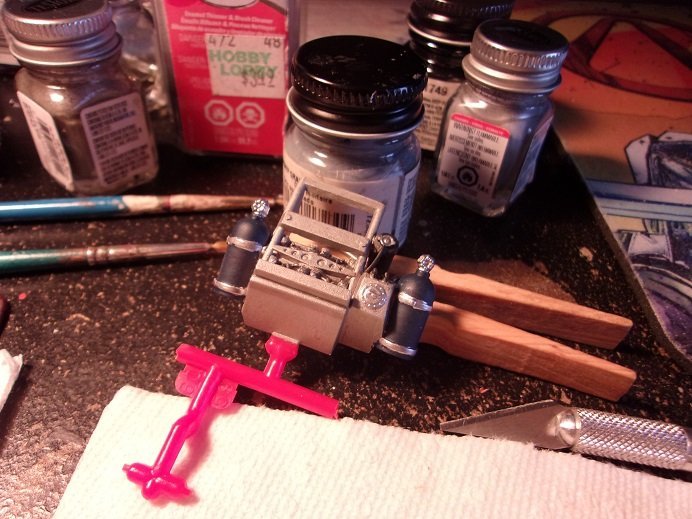
I began to assemble the roll cage and driver's compartment. it begins with the central framework and the pedals. the shifters and levers were also added at this time. I've also been painting the battery / oxidizer tanks rack more painting needed. I've added more.....which I will report soon

-
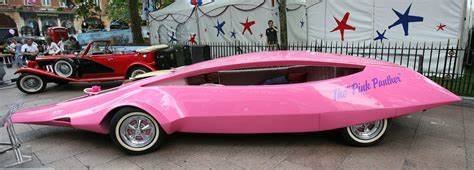
odd OC..........but I do believe there is a kit of one. that would take some research ok....research done....I came up with these: this one I couldn't find a kit for........would be interesting if there was one..... The Original Pink Panther Car

-
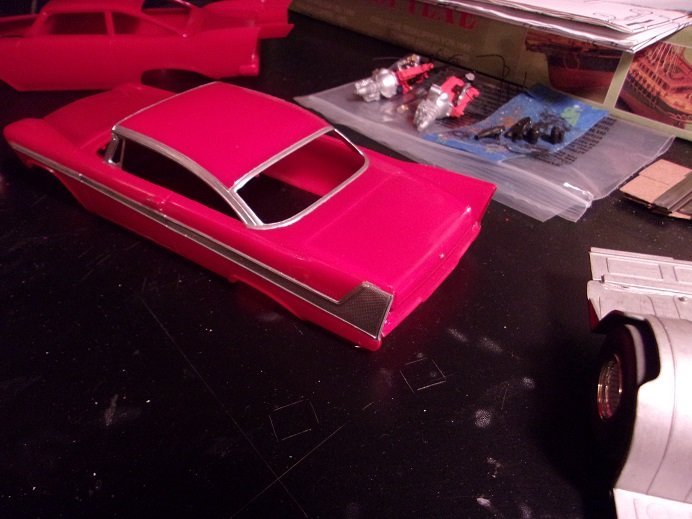
...Penelope Pitstop maybe??? wonders never cease I looked for the place I bought the Pro Mod Christine.......Southern Motorsports does have a website....here I found something that struck me funny. earlier I posted a picture of the 1983 'slammers' kit.....it shows a green car. I saw the 'slammers' kit on the site, and it is red......it looks like the original Christine. it has the AMT logo and everything......haven't compared it, but it looks like the same box art. a production date would tell a lot, but since I can't physically look at the kit, it will remain a mystery. the Chrysler 300 I posted earlier as well........there is a kit of it crazy to think........but it might be interesting you should build it Lou.......I want a front row seat!
-
your very close to Mariupol...has your city sustained any damage? so sad what's going on your ship is amazing! you've done so much since I last looked in!
-
Question About Glue for Plastic
popeye the sailor replied to Gregory's topic in Modeling tools and Workshop Equipment
I'm well aware of that..........I didn't even eat paste as a child a friend of mine in Canada was using it....he told me that at one time that it was banned from use due to the cancer thing. how he came by it .....he never told me. ever hear Lenny Bruce talk about the use of glue? funny skit -
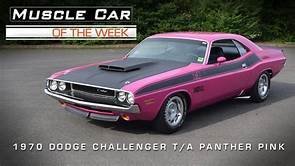
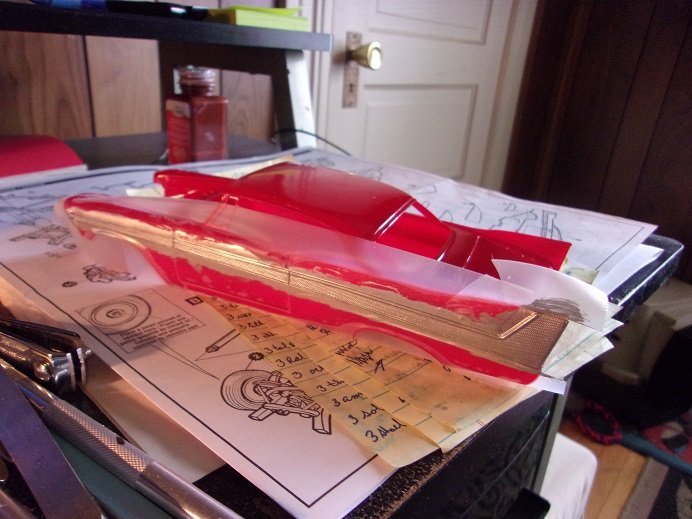
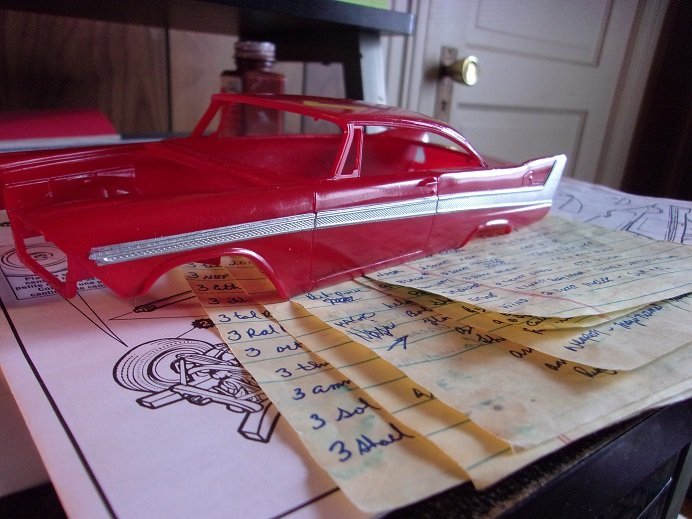
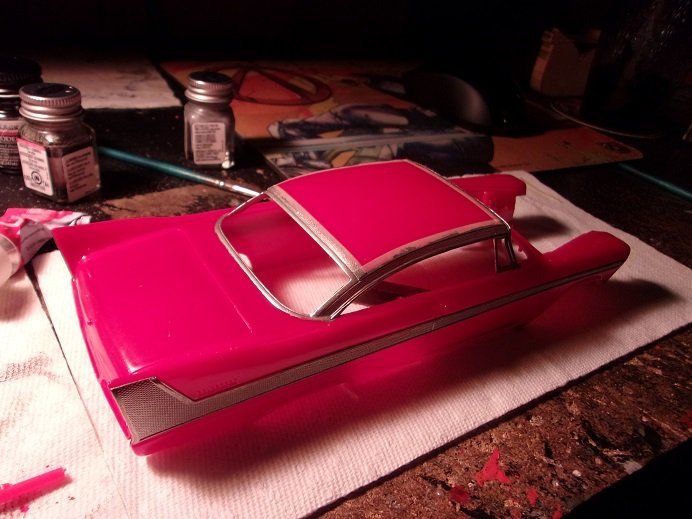
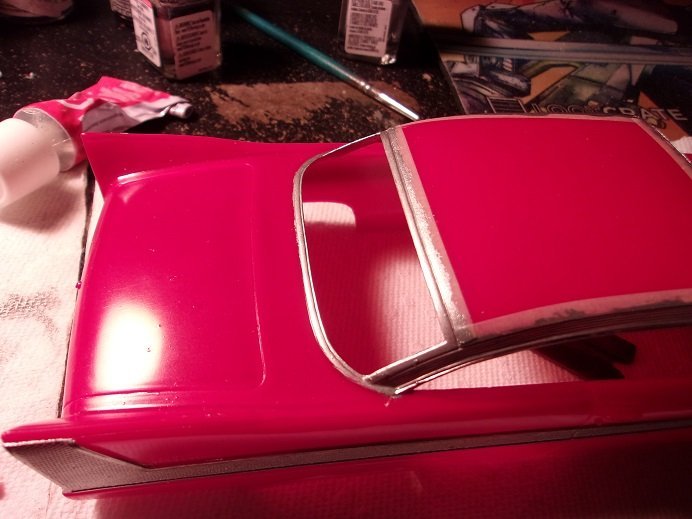
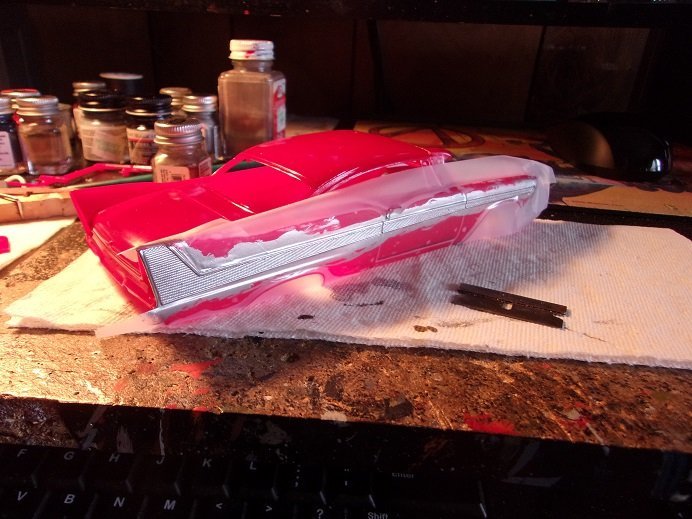
the firewall is now finished and I added it to the chassis....... everything depends on the body now.......it's the next part to be added. there is quite a bit of painting to go yet. the driver side was masked to paint the trim on that side. aside from a couple of really minor fo-pars......they came out fairly decent I masked up around the roof.........finger's crossed on this part.......this is where I don't do so well, and this is important for the model. I know that it's hard to look at a pink car........makes one think of Pinkie Tuskidero {what show was she from?}. I didn't paint the inner shell of the body, and I'm sure that accounts for it. the bottom portion of the rear deck was done freehand.......I may try and mask the front windshield apron. I don't think the Pro Modified version of Christine requires this bit of paint, so I may be spared from doing this a second time.....I'll have to look. here the body is in a more neutral setting....


-
moving on with this one........the rear tire have been added. I had an urge during the work week, so I got the firewall ready to add to the chassis. one aspect I thought about is the trim along the sides of the body. some of the image pictures seen online has them in white......but most of them have it in either flat steel or chrome. I used scotch tape to mask up one of the sides and painted it in chrome silver. we'll let this dry a bit before I remove the tape......doing trim work is not my forte'
-
Question About Glue for Plastic
popeye the sailor replied to Gregory's topic in Modeling tools and Workshop Equipment
wasn't that the glue that was known to cause cancer? really good cement, so I've read. -
well deserved my friend.........I love what you did here another story........I used to work at a nursing home in the neighboring town of Goffstown. I got home one day and was told to go right up to old Bill's house. Dad was already up there helping him work on a truck. I entered the garage to see these two milling up at the front of the truck.........then I looked down and saw a short round bar {of sorts} lying on the floor. I could see someone stepp'in on it and tak'in a ride, so I stooped to pick it up. Man!.....I couldn't let it go fast enough! it was a king pin, and they had just finished removing it from the front end! the king pin connects the spindle to the front bar { forget what you call it}.....they had to heat it up to take it out. my right hand had second degree burns.........I was one unhappy puppy!......an' all Bill could say was "heavy boda.........ya.....heavy! *chuckling to himself* he called everyone Boda.....heck, we even nicknamed him 'Boda Bill' nicest guy you'd want to meet though. another story involved the misses..........Dot {short for Dorothy} Heino was gruff but very savvy...hard to hide anything from her. one day, her {only} son Willie told her a fib, and when she found out the truth, put a skillet to his butt! they had five girls and one boy.......we had four girls and four boys... .....age appropriate, we both had the makings of a base ball team {we used to play each other}. anyway........we were playing 'tag' in the front area of their house.......resembled a parking lot, with all the cars parked every which way. this made for the perfect 'maze'. of course, we weren't allowed to play around the cars......someone could get hurt.......but we did it anyway. I was chasing Ruthie, passing by a stack of tires...........she bumped into the stack and let out a shriek! something in the tires had pierced her arm....puncturing a vein....blood was squirting out like a fountain! Dot came out and told Carol to go get some pitch from a pine tree, as she put a finger over the wound. applying the pitch stopped the bleeding and plugged the wound. this put her out of action for the afternoon and pretty much sent us home........oh.......the tongue lashing! sorry.........I gave ya a two-fer I have so many..........good times!
-
you better get Dave out of there.......if that turret turns for any reason, poor Dave is toast! look'in pretty cool!....very nice work
-
the use of food stuff in modeling has been around........the most common is using rice or long grain seed to simulate fish in netting. one household {byproduct mostly} is the clear plastic packaging that products come in these days. it comes in different thicknesses, and can be found pre molded to fit the purpose. you've added something else to my list..........thanx!
-
look'in good KP!


