
HOLIDAY DONATION DRIVE - SUPPORT MSW - DO YOUR PART TO KEEP THIS GREAT FORUM GOING! (Only 20 donations so far - C'mon guys!)
×


popeye the sailor
-
Posts
16,007 -
Joined
-
Last visited
Content Type
Profiles
Forums
Gallery
Events
Everything posted by popeye the sailor
-
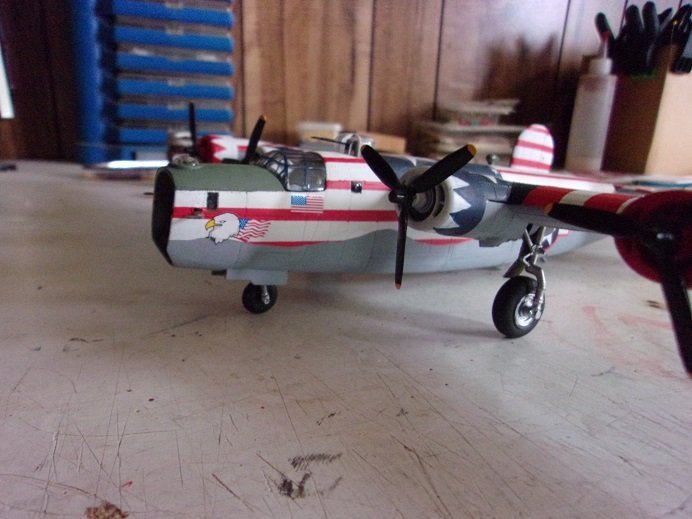
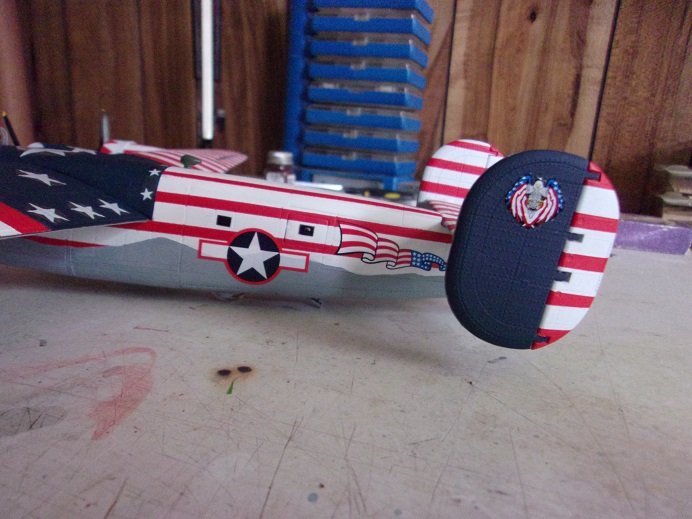
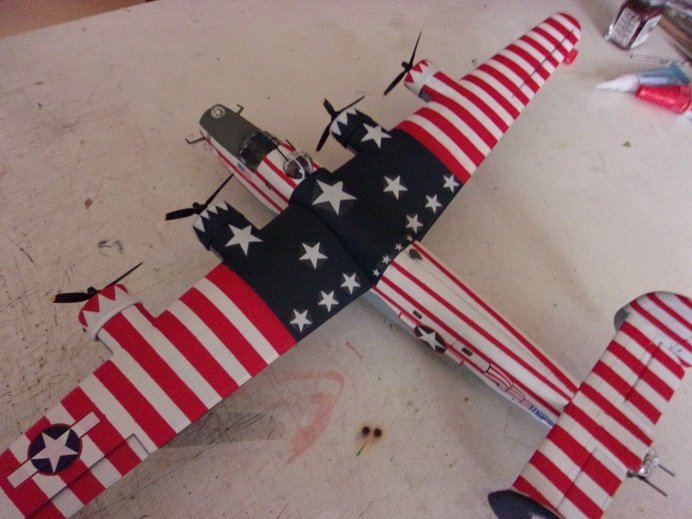
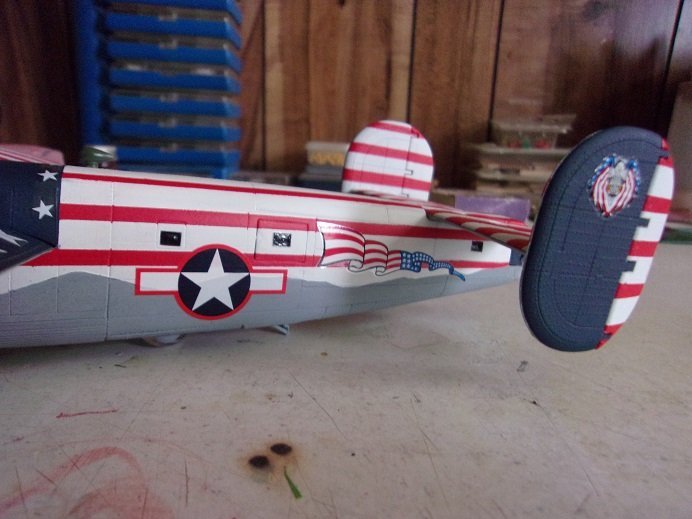
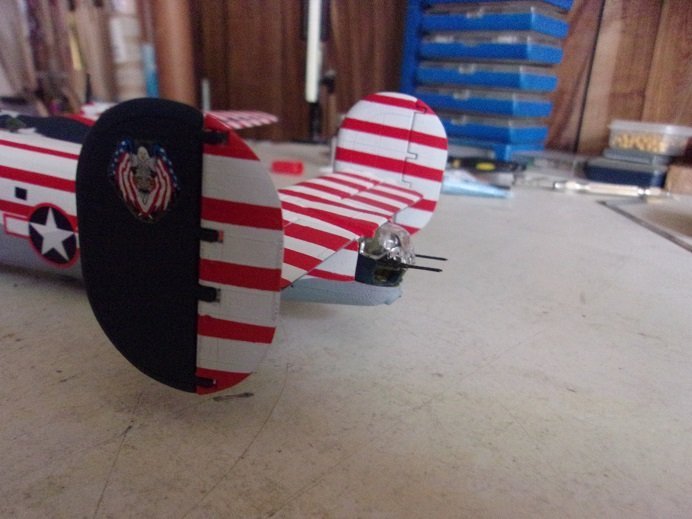
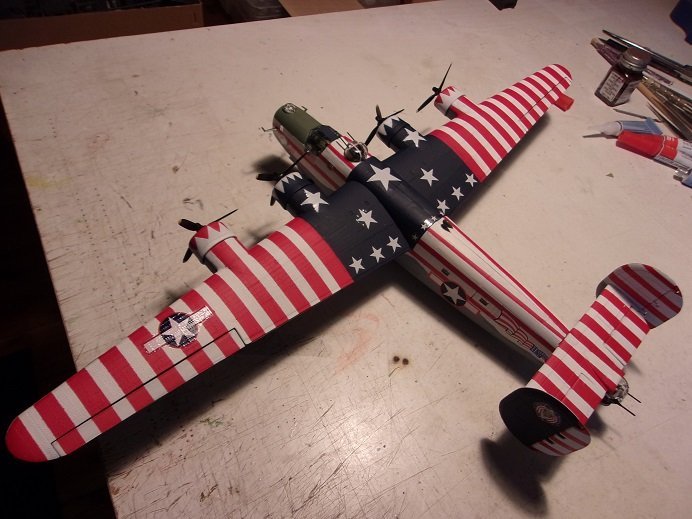
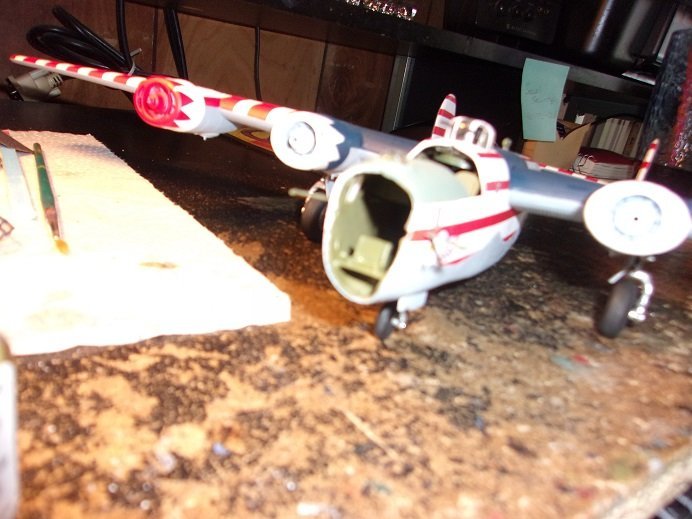
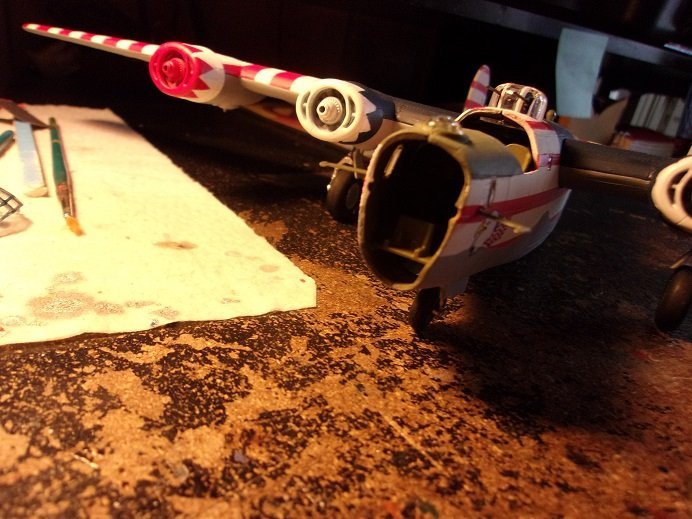
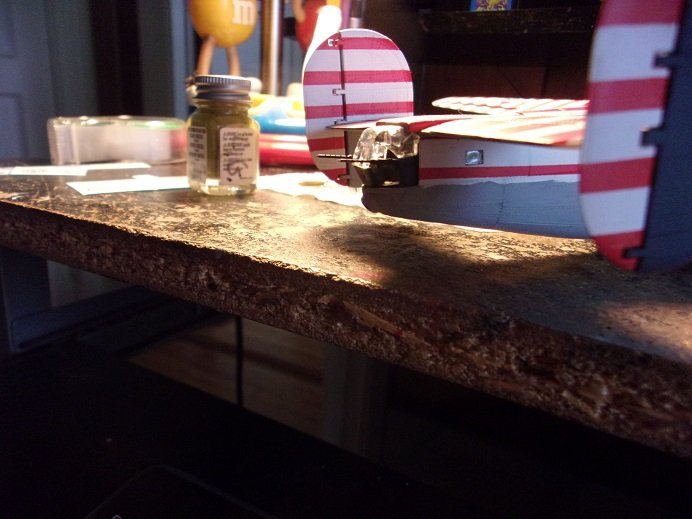
 as mentioned, the props went on next.......small problems arose. two of the decals broke in half........managed to get them back together enough to use. the pilot tubes and the radar bulb were added, but not painted yet. the Archer decals posed a problem of their own. I had no idea that the sheet was a sheet of film, with the stars embossed on them, so the first one {the largest one} has a rather large amount of film around it. depending on the light though, it can hardly be seen........I'll keep that in mind for the future I didn't put any numbers on her, nor lettering, since she's a fictitious plane and I didn't give any thought of where she belonged. one good thing is that she does appear to be sitting on all three wheels.........this is due to that skid plate that is located near the tail. so she won't need a stand or base. so basically.......all that is left is to finish the painting and add the nose glass. I thought I'd give you a preview of what she looks like.......... the starboard rudder decided to come loose.......of course, that decal was the one that split in two. it had dried and fell off and the Malay occurred when I went to put it back on. I removed it and reglued it.......it's all good now I was still undecided how I was going to arrange the stars......even more so when I found out about the type of decals they were. they are of different sizes, which would have made cutting them close near impossible. so, the smaller they got, the more I avoided doing it. I have a second set of banners........flames in the design of the flag. I was going to put them on the topside of each nacelle, but they are different designs.......banners and flames, so I opted not to put them there. instead, I just used the banners and put them on the fuselage. the tail gunner turret........ from the front......I don't know whether to salute or to cheer Evil Kenevil on! here are a couple of shots with the crane lamp on. I'll pop a few more off when she's totally finished
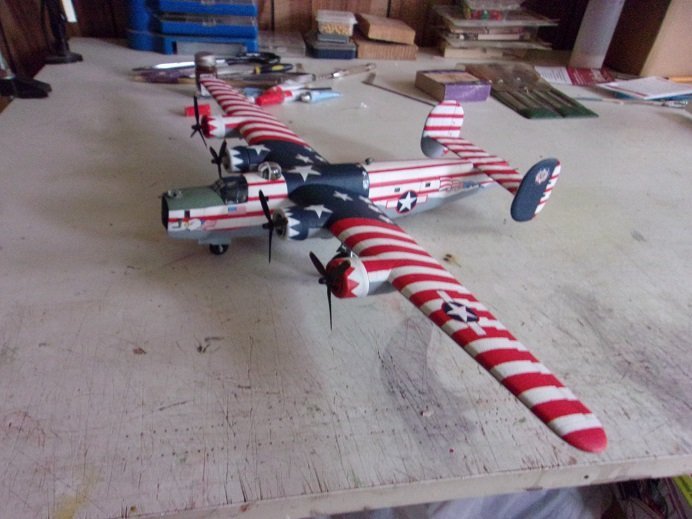
- 107 replies
-
- 11
-

-
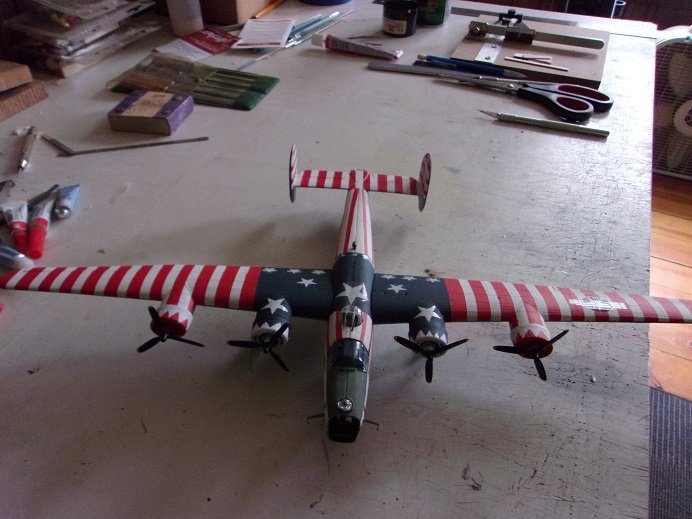
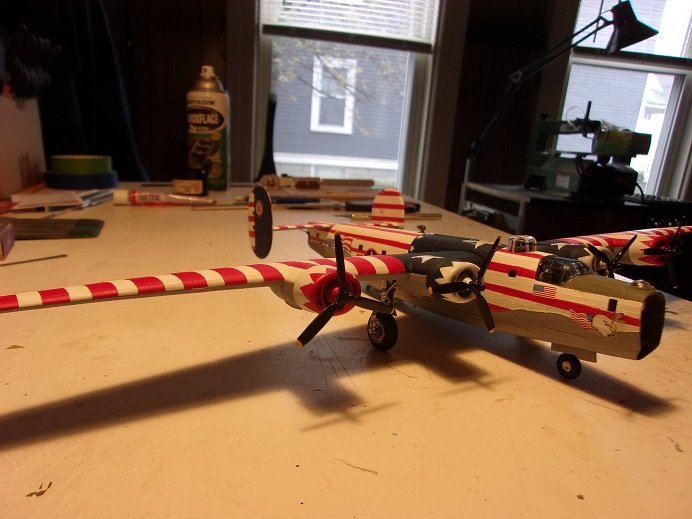
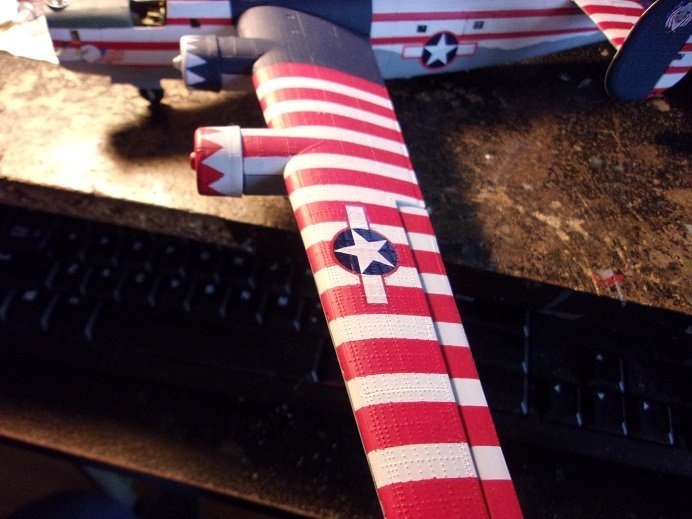
I got more done.......I'd say I'm as close to the finish line..... the only parts left is the nose glass, which is almost framed out.......handling is removing the paint as I go. this is producing a less than stella job, than the cockpit glass, but I'm not going to go back over it {just what appears to be rubbed off}. I put the bombardier / nose gunner seat in place and painted it. ...and without flash I did begin to add decals too.......you'll see more soon the wing decals were also put in place.....due to the crispness of the riveting, it split the top wing decal. I tried to fix it, but it is there to stay.....so I'll concede. due to the guns, the tail gunner's turret was put in close to the end as well. the props followed after that. the session continued........

-
she looks superb....very nicely done!
-
Cutty Sark by NenadM
popeye the sailor replied to NenadM's topic in - Build logs for subjects built 1851 - 1900
my Nenad........you've been busy..........you 'up' time, as well as your 'down' time her majesty is looking super......good to see you've begun to mast her! stay well my friend!- 4,152 replies
-
- 2
-
-
- cutty sark
- tehnodidakta
- (and 1 more)
-
hello John....saw some movement here and thought I'd take a peek to see if you done more to her........sad to see the museum is still locked up I hope that when the day comes you can go back........you'll bring 'er home!
-
it was so good to hear from you again....I had to see what you were up to good to see you've come back to the table.......you've certainly picked up where you left off! I hear you on the planking.........being accustomed to cloning hulls, I can attest to the fact that no two hulls will ever be the same..even if it's the same style hull. I have no doubt you'll do fine I've been in the same boat lately........everything else ....except ships {the admiral is getting mad at me} ........kits from at least a couple Christmas's ago, and I haven't touched them good to see your back........she's looking very good
- 419 replies
-
- 2
-
-
- Victory Models
- Pegasus
- (and 2 more)
-
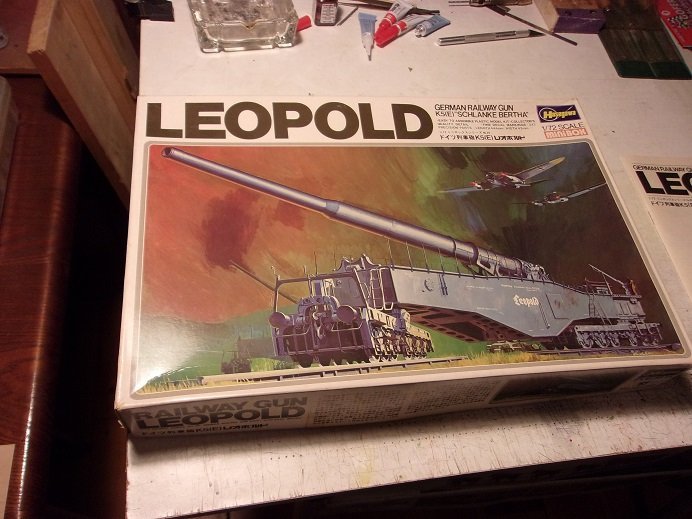
hello all! welcome to a log that I hope will be uneventful.......knowing me. I wanted to put this in the train log, but it's far removed from the normal trains one sees. I've seen quite a few pictures of the finished model, and it looks like I've got my work cut out for me. I think the display base will be harder than the model. I forgot the box art........I like the grays, but I also like the sand and rust {best description of the colors}. haven't decided which way I will go. I also had a look at the 1:35 kit.........what a monster! I'm hoping to see the decals this week, but they are coming from Germany......It's been about a week now since I ordered them. I did remove the decals from the bag they were in.......they weren't stuck to the point of ruination, but the yellowing is very prominent. keen to note that some of the variants were motorized and could move under their own power.......Leopold and Richard were not. at this time, I haven't done anything.....I just want to give you all a warm welcome big welcome to you Bug!.......it's so nice to see your look'in in
- 104 replies
-
- 13
-
-
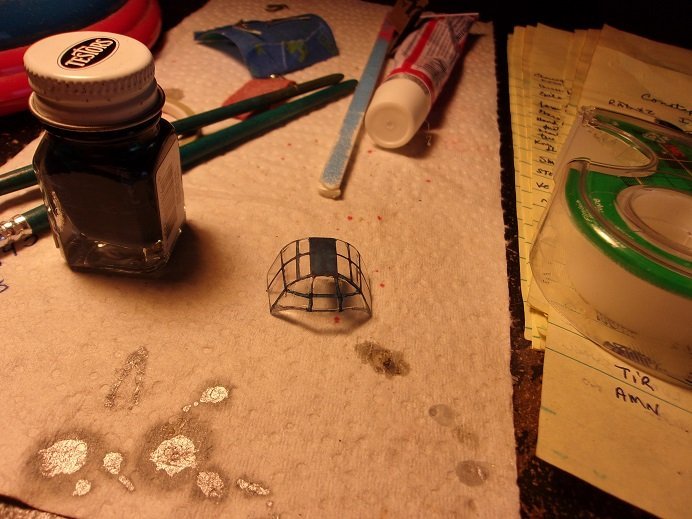
I did fix the frame and added the two........ the decals came in yesterday, so this morning I've begun to add the more delicate parts. I should have some pictures....or even the finish soon
-
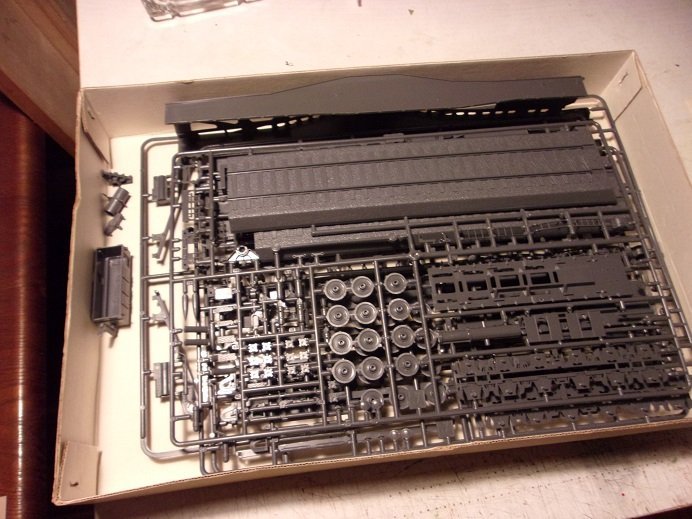
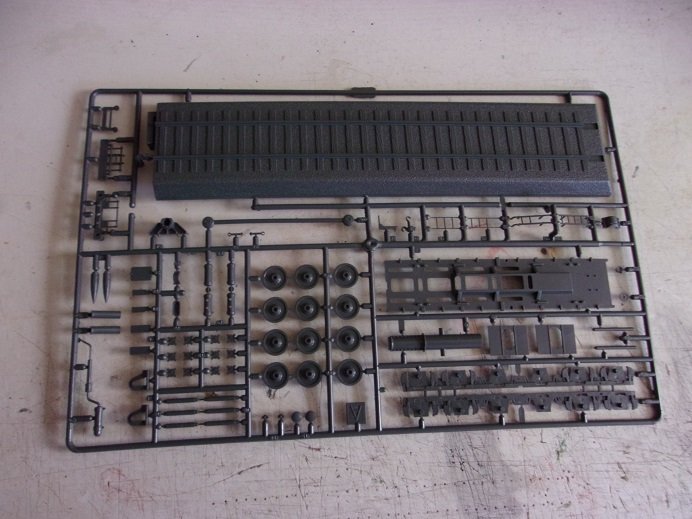
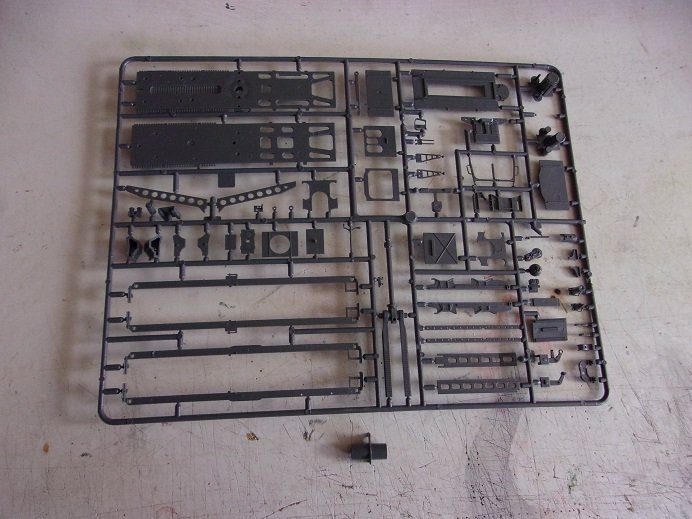
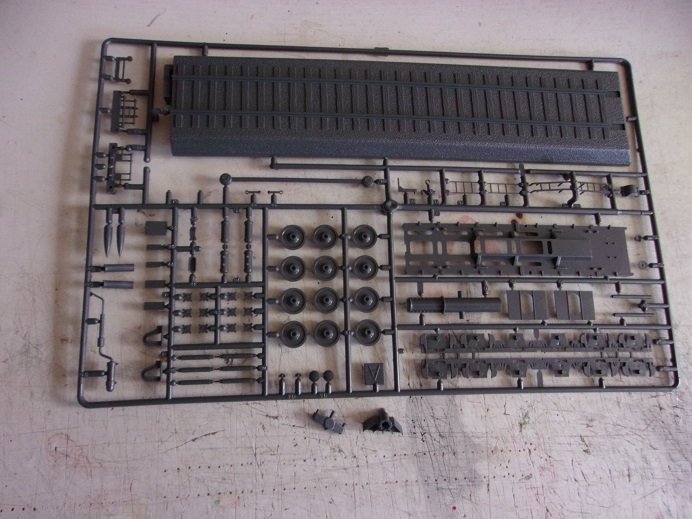
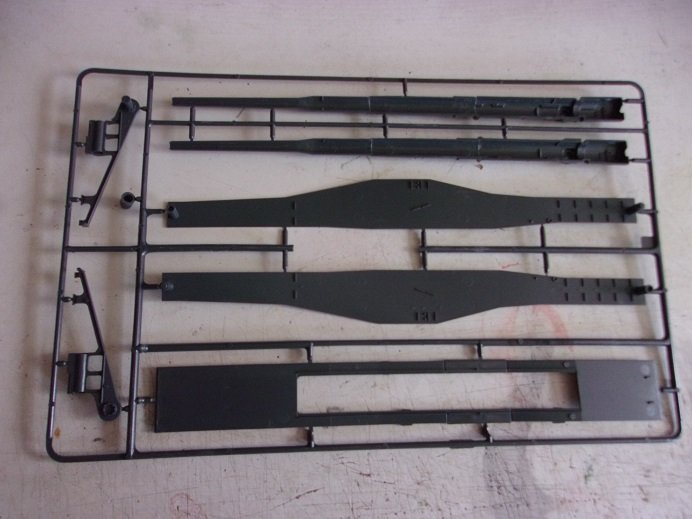
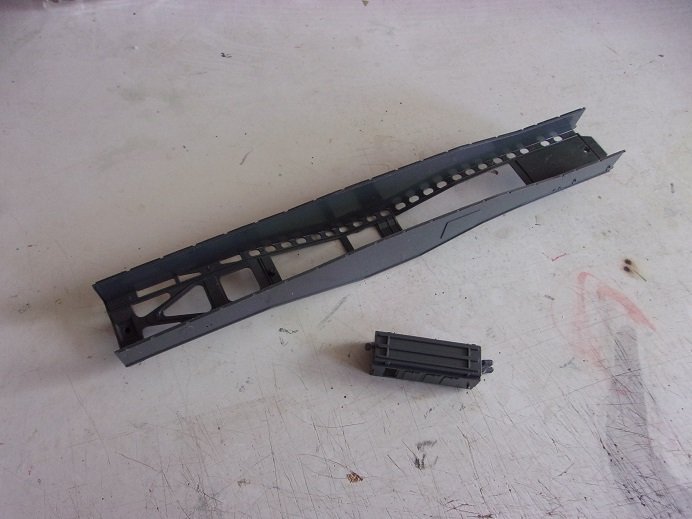
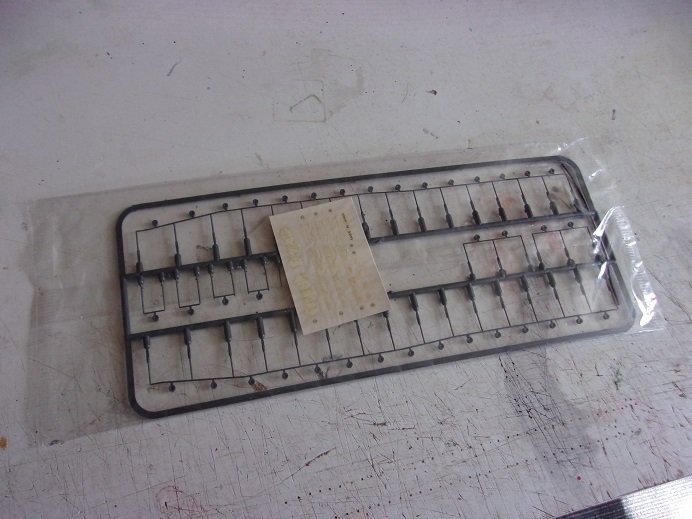
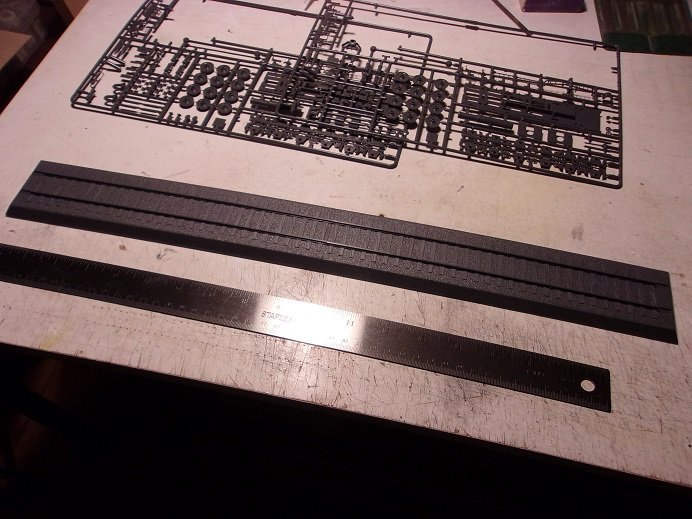
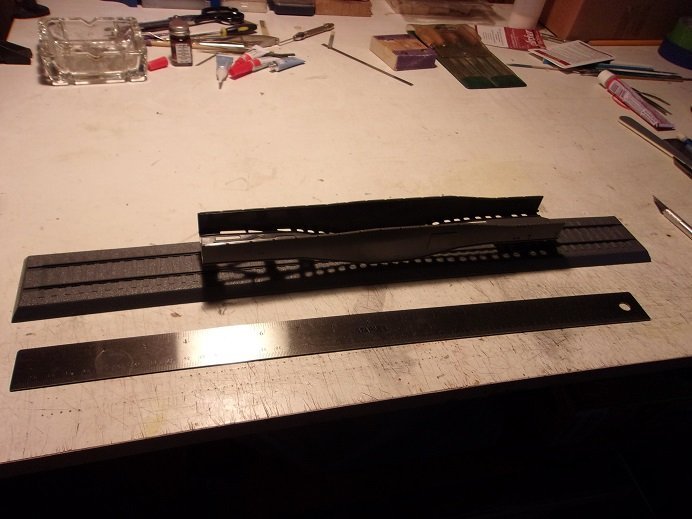
when I got the kit, I was happy to find that the kit was in very good shape. it was still in the packing bags, except for the main part of the body, which was tucked in with the contents. here, the bags are removed, since seeing that there were a few parts that were off the sprues, I searched the sprues to see where they go. they have a diagram off all the sprues on the back of the instructions, so it wasn't too hard to do. this is a really nice kit........only a trace of flash if any at all! these sprues are identical....mostly the truck parts. comes with a base {2 parts}. the housing {the larger loose part} juts off the right side of this panel....a bit of the tab can be seen. all parts accounted for and the railings with the decal sheet stuck to the plastic. it's a safe bet that this is an older kit.....the kit was produced as early as 1975. judging from the yellowing and condition of the decals, and that one of the bags literally crumbled as I handled it....yea.....it's an older kit. I'm really liking how large the kit is......one part of the base is 10 inches long. I put them together....... the ruler is 18 inches long. as an after thought, I put the body on to show the length. I've ordered the decals and they are in transit. once I get them, {not that I need them} I can start.

- 104 replies
-
- 13
-
-
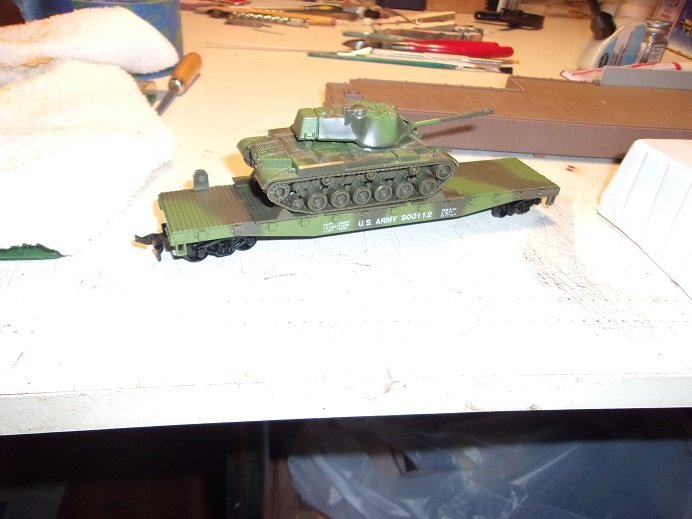
I had started the thread about trains...this medium is interesting. there are many different aspects that make up this hobby, from simply having a small layout, to a layout that spans a large area. to expand the thread {log}, I was going to purchase a few more pieces to build, whether it be train car or structure.....it didn't matter....I still feel that this medium deserves to be exposed to more light. there are many accomplished folks out there...and their work is extraordinary.! ....but I can do that in the other log.....here we can focus on the military......and the roll the railroad is and was used through history. model railroading has set of military trains....a few still on the market........but vintage sets can be found. my son gave me this one......he got it from a fellow who was selling his home. it's from an older set........produced later by another company. this wet my appetite.......I should have save some of the pictures from the research I did on them. the itch did calm down and I came back to earth.........but it would come back. looking through oldmodelkits, is when I saw the Hasegawa kit of Leopold, a German railway gun. it wasn't overly expensive either......but I gave it an honorable mention to the admiral as a joke....."Hey Honey.......there's Leopold again!" out of the blue one day, she asked me how Leopold was doing. my reply was, I didn't know...and I looked it up {not like I haven't been keeping tabs on it}. sure enough, it was still for sale and I was ok'd to order it........I was ecstatic! of course, with the kits I've been ordering, I had better get going and learn to read Japanese......the instructions are printed as such! looking into the history of the railway gun, it goes as far back as the civil war.....yes sir........the U.S. the Confederates mounted 32 pounders on simple rail cars....and I'm sure the union side had a few too. other countries had them too......during the first world war, the French had more than all other countries combined. the start of the war left France with little in the way of artillery, and this was a way they could get the heavy stuff there quickly. some credit the French for the railway gun......but the concept and the design was formulated by the Russians. early on, they were just mortars and short barreled cannons on rail cars........in the 19th century, they got bigger. naval calibers began use to get heavier firepower inland, in strategic positions, where battle ships couldn't reach. 4.7"........7.9"........9.2".......... big Bertha was a whooping 16.53"! there might be larger calibers, but any hole one can stick their heads in, is pretty big! Leopold {and Robert}was one of two railway guns to be sent to Italy, to counter the American landing at Anzio. the Americans nicknamed them Anzio Annie and Anzio express.......derived by the sound that the shells made. they were there from February to May of 1944, and after spending the last of their rounds, they were moved to the coast al town of Civitavecchia for evacuation. this failed, but by the time American forces closed in on them, Robert had been totally destroyed.....Leopold was only minimally damaged. it was moved to the states, to the Aberdeen proving grounds in Maryland for evaluation, later in 2011, to be moved to Fort Lee, Virginia. two challenges in the development of the rail gun was transverse effects and recoil. three types of rail guns were developed.....the non transverse mount, the car transverse mount, and the top carriage transverse mount. the non transverse mount relied on the curvature of the track to adjust direction, the car trans mount allowed the car bed to pivot on the trucks {but it was very limited}, and the carriage mount amounted to a turret mounted on the rail car. elevation wasn't too much of a problem........pistons raised and lowered the gun barrels to the telemetry required to hit the target. recoil was divided in four methods.... ...cradle, top carriage, sliding and rolling. cradle means that the gun recoils in it's carriage and retarded by hydraulic buffers. it is then brought back to firing position by springs or hydraulic means. Top Carriage is that the gun recoils in it's carriage, again being buffered by hydraulics, and brought back to firing position by the same means. sliding recoil is when the entire car recoils with the gun, with the trucks fixed in position; while rolling recoil is when the entire car itself rolls on the track to counter recoil. some rely on anchorage to arrest the recoil.......the platform anchoring is the car is jacked up and chocks of sorts are placed between the car and track for support. in some cases, a special platform is built into the track beforehand to base it on. ground anchorage is when the car is anchored to the ground by tethers attached to counter weights buried in the ground around the area. on some {I'm sure}, hydraulic driven legs {utilized by some construction equipment} were used to aide in leveling and anchorage. the size of the gun indicated what method was used. the Germans even had plans for a gun that could leave the track, by using two Tiger II tank chassis, but it was late in the war and was abandoned {don't think that this didn't get my gears turning }. more on Leopold soon
-
look'in really nice Chris........you'll come up with a working canopy.....I'm sure of that!
-
nice start.....I'm in too
-
WOW! love how you 'hazed' the camo...........that came out really sweet! good top and bottom side separations and all! not sure what you calling defects............great paint and nicely done!
-
fantastic looking loco Craig.....turned out to be very detailed. you sold it?!?!..........the vision you outlined won't be realized it would have looked really good with a rail gun.......though I haven't seen a rail gun molded in 1:35. I recently received the Hasegawa 1:72 Leopold kit.....should have a log going soon. I'm sure whoever bought it from you is really proud of his display
-
a sliver of plastic will fill the gap in, but if your going that route, cut off the antenna put it back after the repair. good to see her closed up......gull wings are so cool!
-
I think so too the cockpit canopy is done........there are two really small bits of frame that I'm not going to bother with. they're not noticeable. I'm working on the nose glass now. ........I just made myself feel bad........I added them in I guess I may as well fix that bit of frame that runs to the roof {copilot side}.
-
1/48 Italeri Hawk T.1A (On Hold)
popeye the sailor replied to Old Collingwood's topic in Non-ship/categorised builds
nice looking seats.......glad to see you remedied the problem you had -
super nice job on this one.........the camo looks especially good
-
Wooden Mallet by Elijah - FINISHED - 1:1
popeye the sailor replied to Elijah's topic in Non-ship/categorised builds
great looking mallet! -
once I get the roofs done, I'll look into that next thanks for look'in in gents! I laugh at danger Mark..........
-
you could try and sand the bulkhead down a tiny bit.......you'll win in the end........I'm sure look'in good!
-
nicely done! really coming to life
-
your really tempting me to build a tank.........you know that?!?!?! awesome piece........very well done!
-
she's look'in good Mike......a dio looking base is what I do with tail heavy aircraft {bombers mostly}. good to see you working on her again
-
I get theirs in duplicate!

