
HOLIDAY DONATION DRIVE - SUPPORT MSW - DO YOUR PART TO KEEP THIS GREAT FORUM GOING! (Only 20 donations so far - C'mon guys!)
×


popeye the sailor
-
Posts
16,007 -
Joined
-
Last visited
Content Type
Profiles
Forums
Gallery
Events
Everything posted by popeye the sailor
-

RFM 1/35 Panzerkampfwagen IV Ausf.G-Finished
popeye the sailor replied to Javlin's topic in Non-ship/categorised builds
you've done well.........sweet look'in tank -
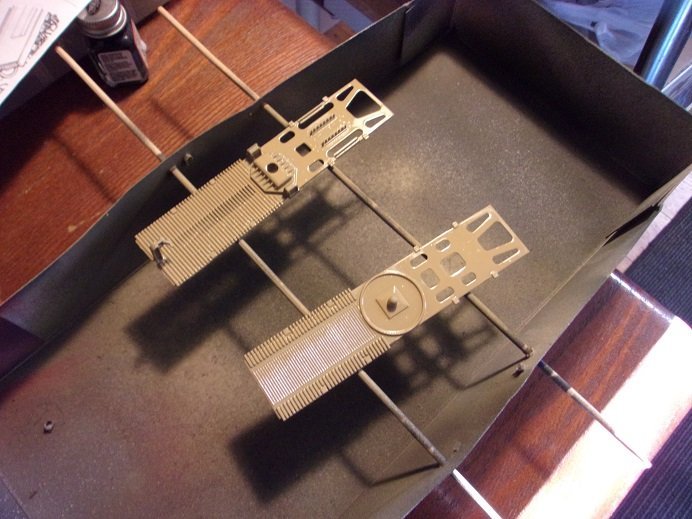
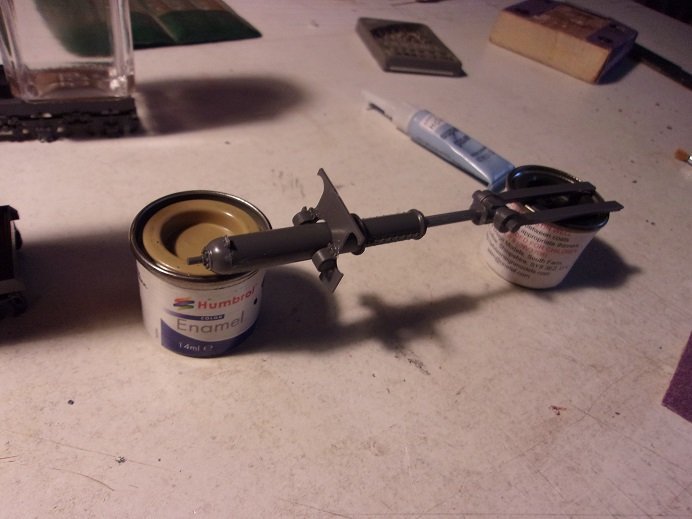
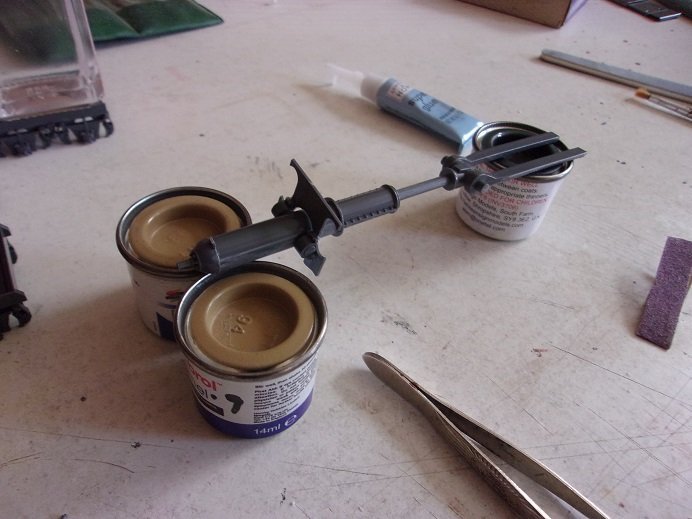
today I sprayed some brown yellow........one can tell that the paint has sat a while.........stirring the can, I thought for sure that it had solidified on the bottom! I did this with two tins of it.......using a stick, broke it up and stirred it for quite a while until most of it was gone. then periodically, it was shaken to further blend the pigment and suspension.........I've been shaking them off and on for a couple of days now........I think it's ready to use. I will likely have to do the same for all the other tins I have from this lot.......good to know that the paint is still viable. I'm sure I'll fair better than with the Billing's paints.... .....I'd open those bottles, to find that the paint either had a skin over the top, or was solid throughout {I was still satisfied with the ratio of paint that was useable}. I painted the bottom of the gondola, waiting since I painted the inside first...that is the Dunkel gray. the tops of the trucks were next....this is the base color they are still wet......still other colors to add. the truck bodies them selves were interesting to do....as mentioned, I wanted to be sure to 'shadow' the wheel bearing aspect of them. as for the ghosting I wanted to avoid.......I wish I had masked the inside of the truck bodies. I failed miserably. last was the gun barrel.......I'll give it second coat. the hoist mechanism parts will be the Dunkel gray.....whatever will remain below the gondola deck. ......and then I walked away.... story of my life.......I get an idea, and off I go. thinking of the second coat on the gun barrel, I went and did it. but.....I really need to move things I painted out of the booth.......the gondola was still in there!!! the bottom was speckled with the brown yellow so I had to repaint it.........to do it though, I had to prep more paint. I'll smarten up one of these days.....
-
I got some build time in on this session. I noticed that I was a little off on a couple of the front bulkheads for the inner assembly of the gondola....had to cut them free and reposition them. installed are the piston and the rest of the bulkheads for it. the actuation rods are not to be cemented. one of the caps for the piston pivot pin, interferes with the actuation rod.......I'll see how much of a problem it is when the guns is in place. before turning to the sand color, I added a few more parts to the trucks. the tops are just dry fitted....I don't want any ghosting from the sand paint {this is a Humbrol color #94 {AA1047) brown yellow}. the inner assembly was cemented together.....all this will be painted in the Dunkel gray these are the bulkheads I spoke of earlier.......there is a slight angle that I didn't take account of, which allowed them to become offset at the top deck line more to come


-
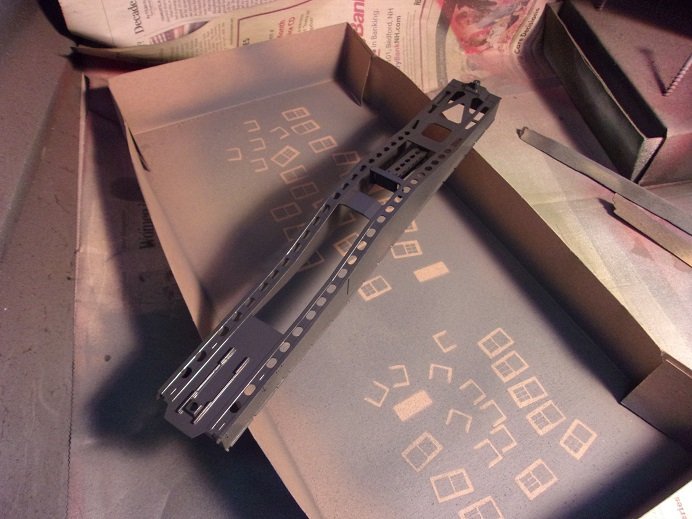
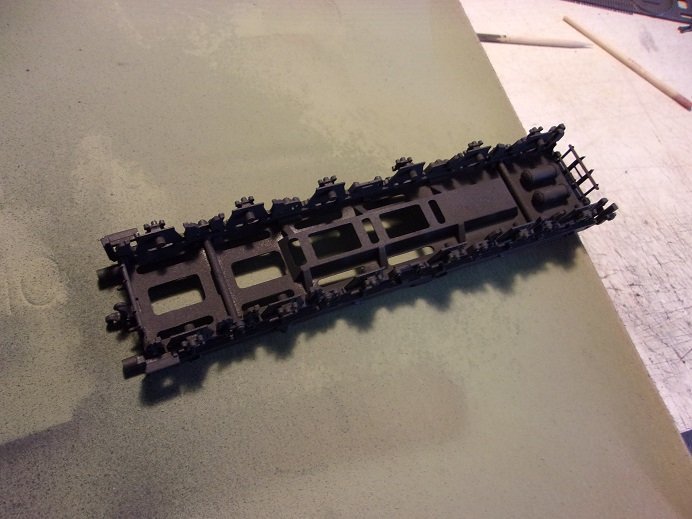
pardon for being such a ghost......it's been quite busy of late. Christmas is coming so fast it seems. I've managed to pick away at some of the painting though.......the colors I've chosen look to be pretty good. Hasegawa also produced a second 'box art' for this kit, calling it 'Anzio Annie', besides the Leopold kit...not sure which one came out first. I did express an desire for this kit......but I think I got shot down, right along another idea I had. I figured I'd better stop at this time, before the eye lasers came out so I started off with the flat black.......painting the wheels and the undersides of the trucks. with these dry, more can be done......move on to the gray. the wheels are done....may need touch ups, considering the way I have them here the outer surfaces are done in the Dunkel gray....the under side was done in the flat black, along with the wheels. more to follow


-
superb job on the paint.........wonderful progress
- 1,090 replies
-
- 5
-

-
- showcase models
- vendetta
- (and 2 more)
-
I have done little since I last worked on her.......as for an update with her progress. I left off thinking that the lighting I was using was too large and may be the factor in the deck fitting issue. as I was messing with fitting the deck, the guy wires that support the funnels began to come loose. I was surprised by it, seeing that I used CA to cement them in place. if I need to re rig the funnels, it will prove to be a huge task........I'll have to pull it out and see what I will need to do to proceed. in the meantime, I'll dig up the instructions and make copies.
-
glad to help, but mine is 1:400......his is 1:95..........I've not seen the kit in that scale. are they the same?
-
we've already seen snow here........just a little though but it means that it's right around the corner! a lot of the model company names that I'm used to are gone........I've had to adapt too
-
wow! looks superb..........really nice job on the paint work my complaint as well.......just because the model is a smaller scale, doesn't mean they can sluff off on the added detail back in the day, there wasn't much one could do with molded detail........now with the add-on kits out there, the molded stuff can be removed and enhanced....hand tools, grab handles and the like. you've done a super job with highlighting them.......
-
the tiger is coming along nicely Chris! perhaps you can adjust the pin on the wing to compensate. really like how cleanly done she looks what are those two protrusions back at the stabilizer wing? I've not built one of these......curious I know what you mean.......between Thanksgiving and Christmas......don't know which is worse. either I'm the cook's assistant, or the chief decorator. we just got our tree this afternoon. tomorrow.........the inflatables, and a jaunt for my oldest grandson's birthday
-
good info........but I think I covered that.......rail guns have been around since the civil war. naval guns were used due to most artillery not having the capability of firing shells over great distances. they were also used for 'pill box' installations along coastal battle fronts. only a few variants of the Rail gun ever left the tracks.......the Germans were in the process of developing one, but it was abandoned towards the end of the war. the rail gun was intimidating, but not very functional given their handicap. not much to report at the moment....turkey time folks.........have a Happy Thanksgiving
-
sweet look'in model........pull'in up a chair for this one
-
catching up on builds I follow. you've made some great progress........looks awesome!
-
I have adopted another orphaned kit
popeye the sailor replied to mtdoramike's topic in RC Kits & Scratch building
I did my Dumas PT boat hull with resin, but I left out the cloth. I always seem to get the cloth texture showing through. this is one thing I wish I would have done with my Nordie.......didn't know about it at the time. you probably saw the results of my initial paint job I freaked out! what I did was sand the hull down and give it multiple coats of diluted white glue. that sealed up all the cracks. I was new at it......didn't know that one needed to cement between the planks.. the second kit I have is going to be the progress. the research I came up with, is that this model was offered along with the Nordkap.......it is a clone. there is also a 'junior' kit that was sold around the same time. look'in forward in seeing more glad you like the blogs.....hope they come in handy. -
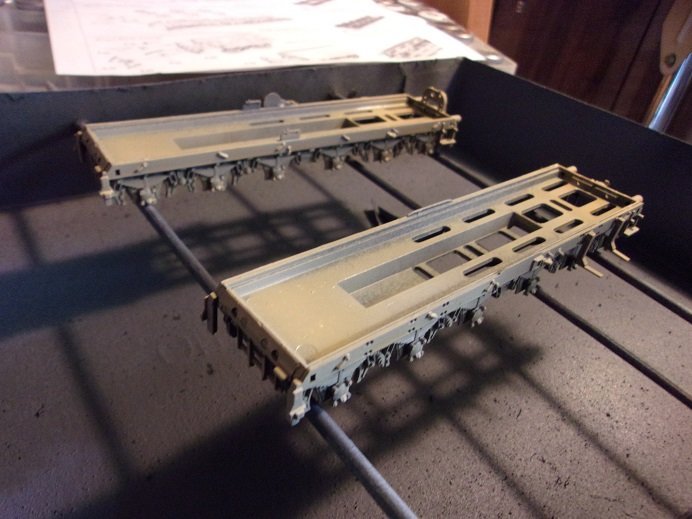
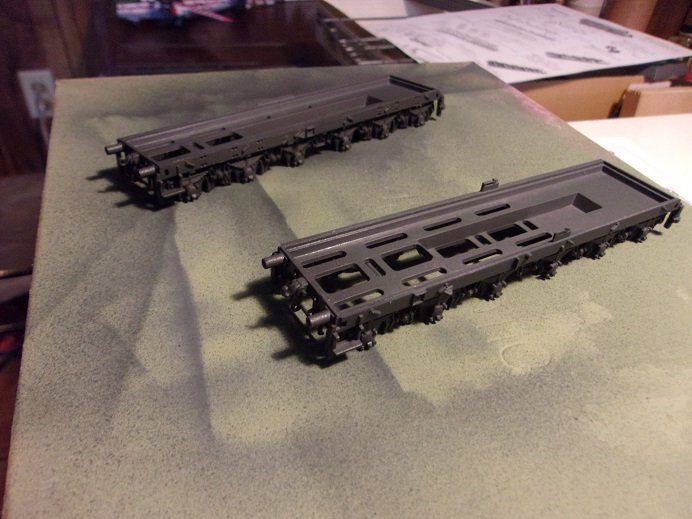
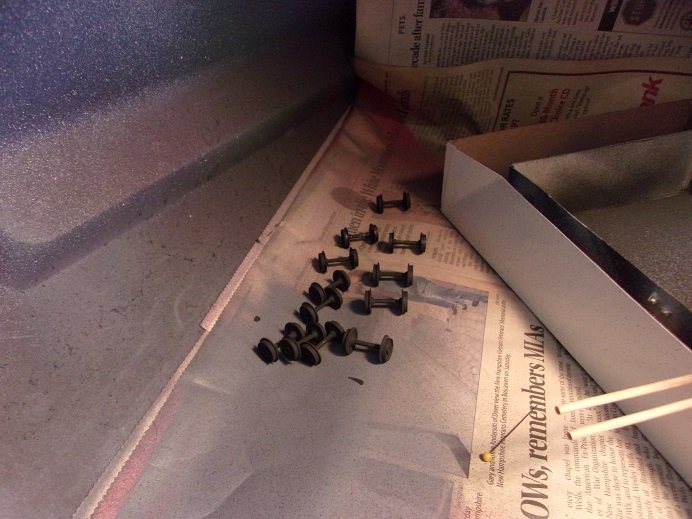
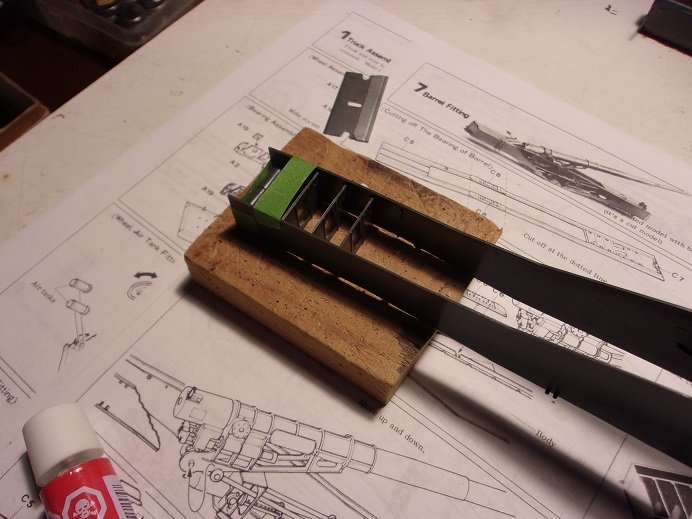
thanks for the info Patrick......is that a publication that Squadron put out? perhaps I can dredge it up on the internetoscope {here's a new word for ya Webster } I'm thinking that where Leopold started out in the gray color and was repainted, some parts were not painted, but passed over as part of the overall camo. the red/brown camo streaking wasn't added until a bit later, before it was shipped to Italy. this very well could have been done after it reached Italy. so......it spent time painted in the gray, then in the sandy yellow, and then sandy yellow with the red/brown streaking. the instructions give all three versions, but they are just drawings and in Black n white. there is a book......I'm going to try and get it. I did do a little painting today. the wheels gave me the most trouble, because of the way I had set them up. I had two Bamboo skewers pierced through a box close together and placed the axles on them in a long row. I started with flat black for the wheels and the underside. with the way I had them......getting the underside of the wheels could not be reached. so I grabbed a pair of tweezers and painted them one at a time. I added more to the trucks......the front and back panels and the side panels. the underside was painted flat black.......not getting any on the outer surfaces. in working with the Dunkelbrau gray.....I find that it is a variant of gray/blue. ....and yes, it is far from the Panzer gray { it's less blue tint}. I have a Schiffsbodenfarbe III grau1 that also possesses some tinting of blue........the number says it all KM 05 Kriegsmarine. all of White Ensign paint have this form of color numbers along with their name { Pactra was sold like this....I miss it}. after the underside of the trucks were painted in the flat black, the outer sides were painted in the German gray. this way, when the wheels are installed, they should blend right in. the next step is to take the sand yellow and spray it on an angle, so it doesn't totally paint over the bearing strips.......merely shadow them. anything that can't be seen from above....won't be painted the sand yellow. the gray is darker than the plastic.......in the beginning, I had my doubts. so this is where I am so far I also like the way the bearings are shadowed with the rust color.........food for thought thanks for look'in in gents.......I like the gray aspect too Ken it's not too late to change to a two camo gray........sadly, Leopold wasn't done like that.

- 104 replies
-
- 13
-
-
well done.........
-
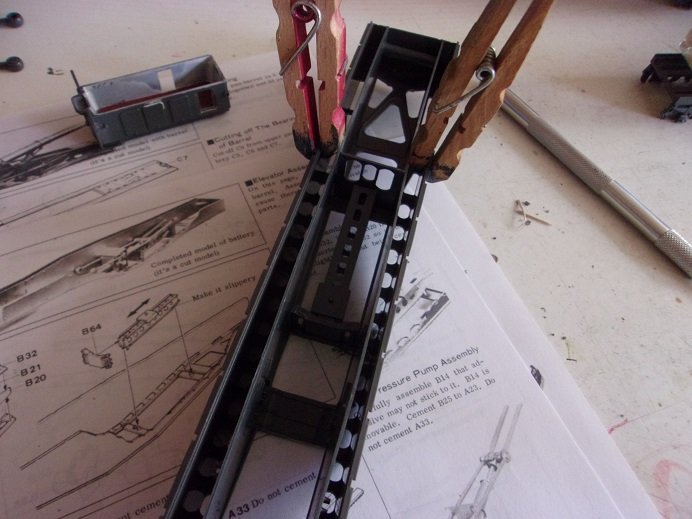
when the time come to put the top on, it must be cut, because it is done in sections. ...not yet though.......it begins like this. four inner walls are cemented to 'the' one side of the insert with the faint arrows. the two pins that hold this together were really tight, so I trimmed them a tiny bit. now I need to use tape to hold it together...can't win for losing I left the slide pad off of the track till it dried......it wasn't hard to slide it in place. should be fun putting all this together.........hopefully it works
- 104 replies
-
- 10
-
-
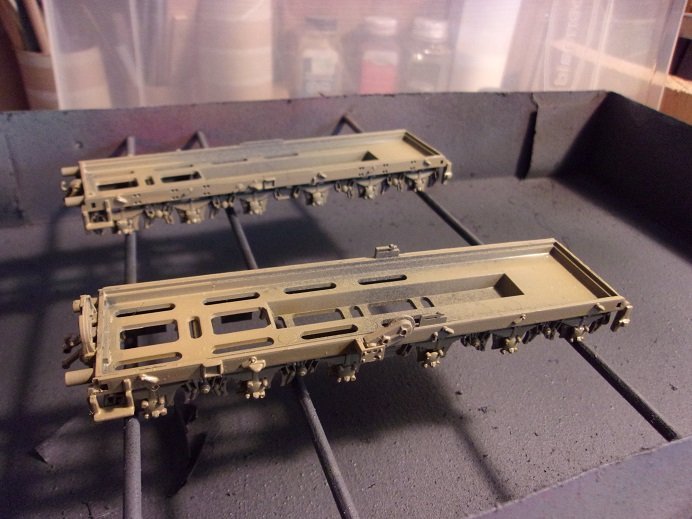
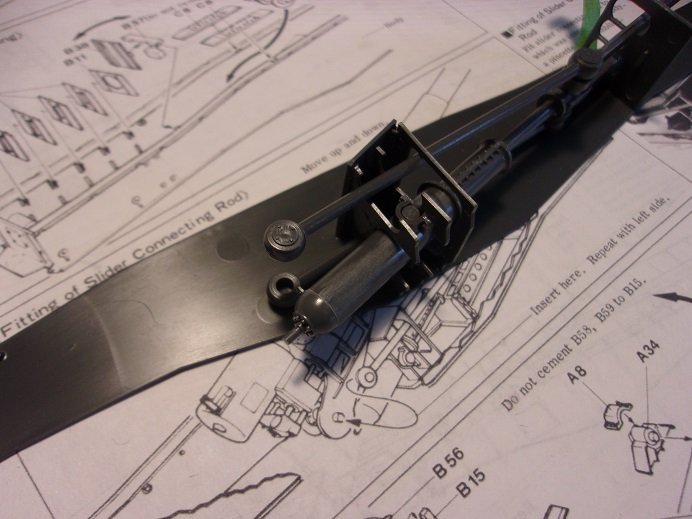
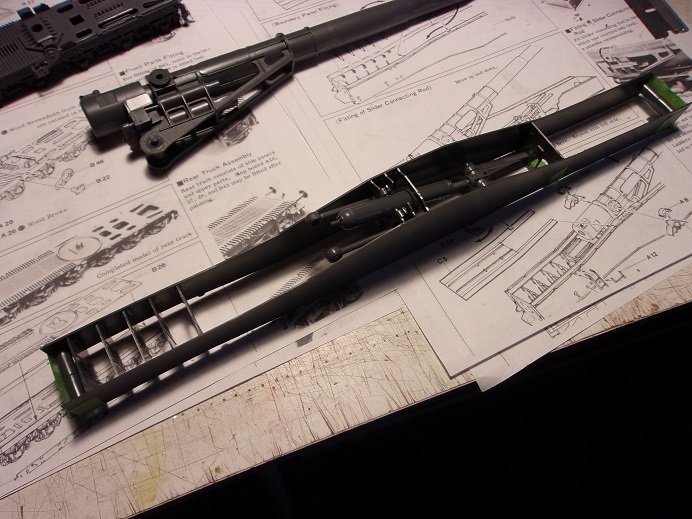
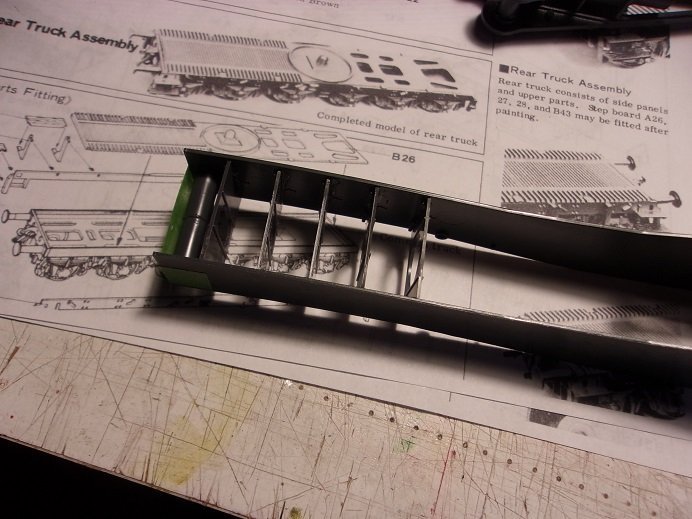
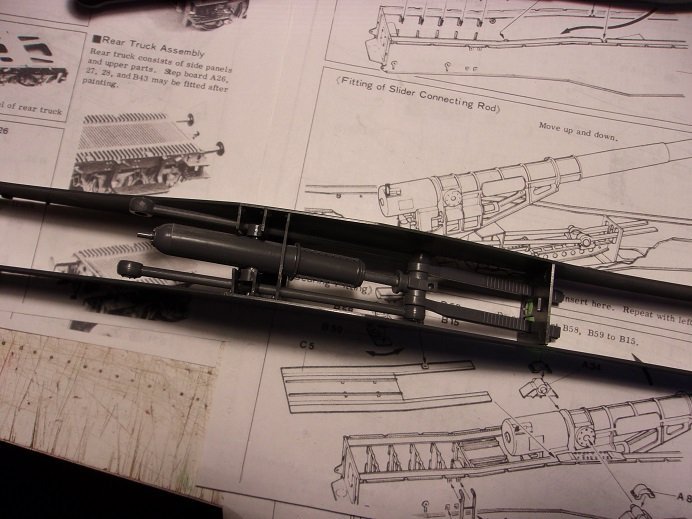
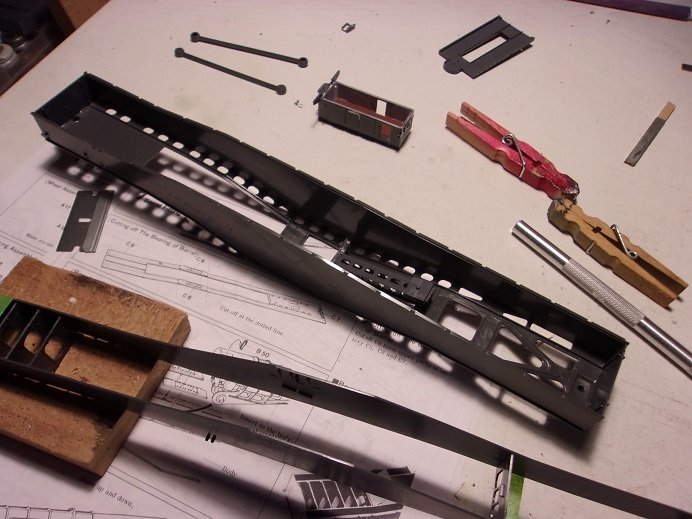
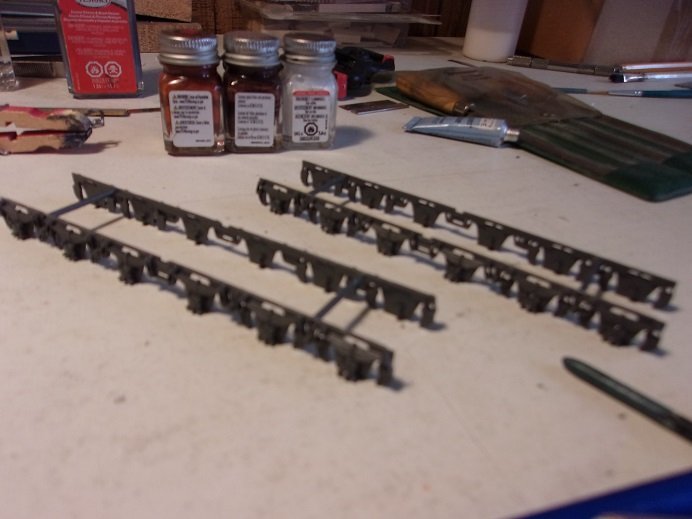
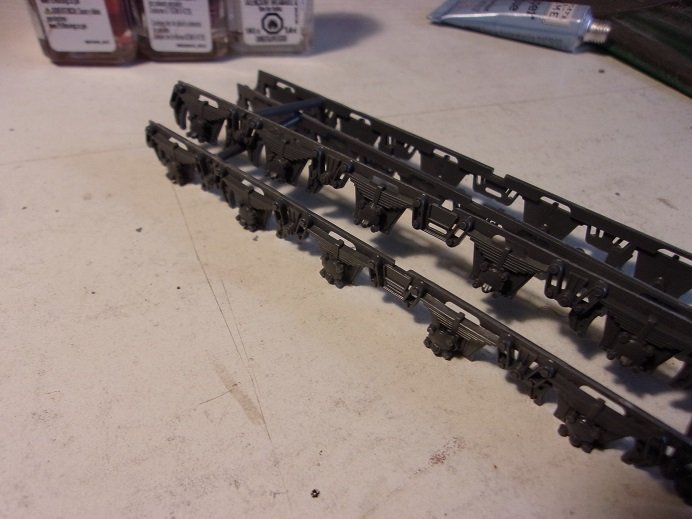
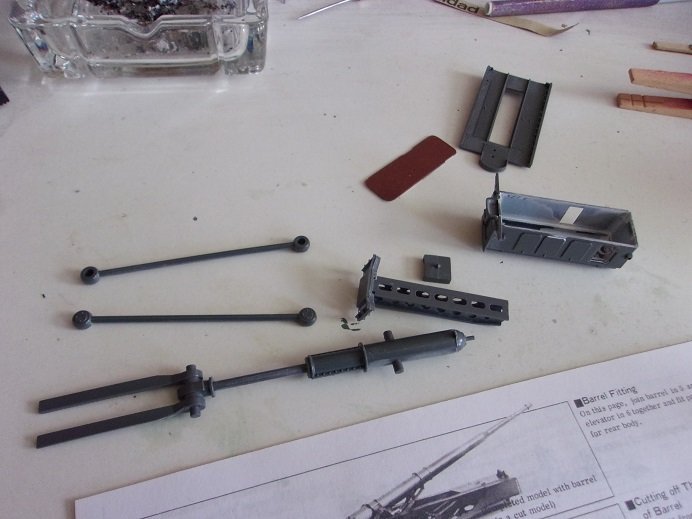
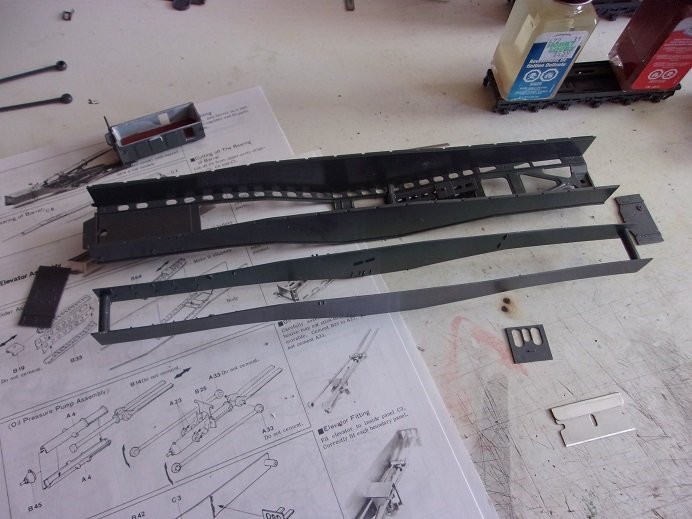
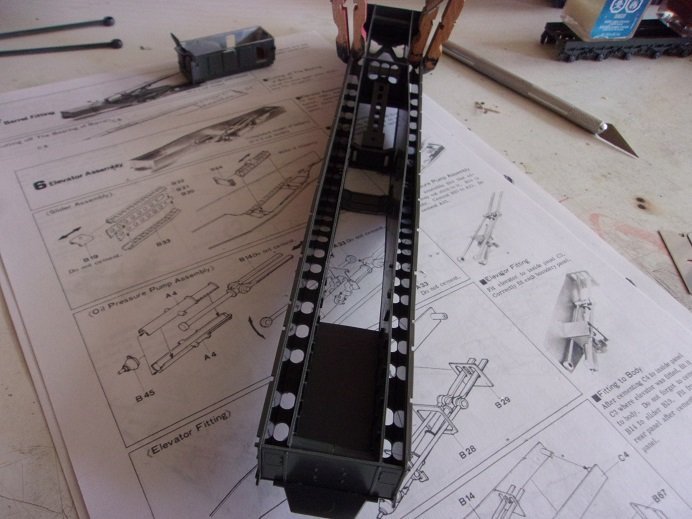
wait........helped with the turkey. still thinking of a direction to paint the trucks. now my thought is that they didn't paint the interior in the sand yellow, but left it in the gray {I'm using the Dunkelgrau 2...I have two tins}. best I have so far for the yellow, is Humbrol #119, which is light earth {I have the dark earth too}. I got some Model Master that might work too......I'll have to check. so in this light, there is a balance of color that I think should look pretty good. the undercarriage is another consideration too.......whether to do it in flat black, or in the German gray specified. while I played ping pong in my head, I trimmed up the 24 bearing caps and added them to the bearing assembly strips. next was the component assemblies that make up the elevator. the piston and slide track. it was pretty hard to glue this together, so the piston slides in and out. as it dried, I continued to move it in and out, until it move freely. I was going to paint the bearing assemblies separately from the truck bodies.......but it's beginning to frustrate me. in thinking what would be the best way, I said to myself......the heck with it and glued them to the bodies. I'll worry about it later. with these drying, I looked at the insert for the main body. funny.......at first, I thought that they had two different versions for the body........until I figured out that these fit inside the main housing and serve as the inner walls. the front and rear caps are shown with one of the inner walls of the insert. the floor has been added to the wagon the insert fits into grooves molded in the main part of the body. the front and rear caps were added to the main body......inside there are guides for the insert. for the top to fit on, there is no room for miscalculations. to make it easier, one half of the insert has faint arrows where the inner walls are to sit......there are 7 of them and three more along the bottom in the center for the piston assembly. the slide track was added to the main body. adding the wall that supports the piston was a pain........it too must be movable. thee underside of the fork has serrations.......they fit through holes in the forward wall. the paint tins you see might be the outer color....it's a good contender one side of the forward wall has been cemented....the other side will insure it's position until it is finally assembled with the piston assembly installed. I have one more small update.........
- 104 replies
-
- 11
-
-
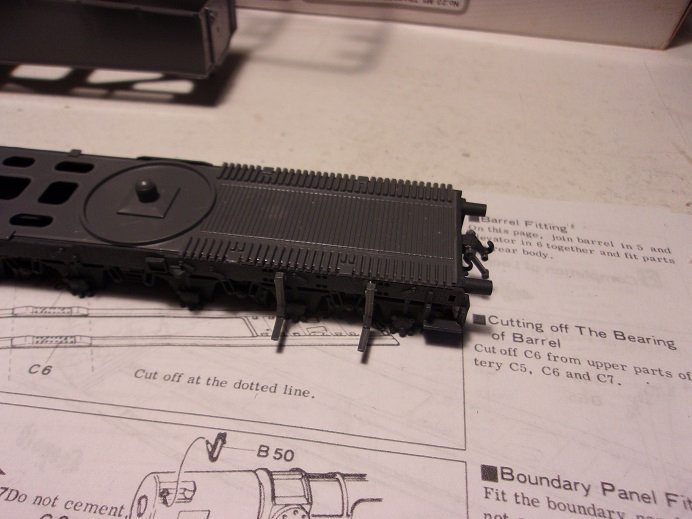
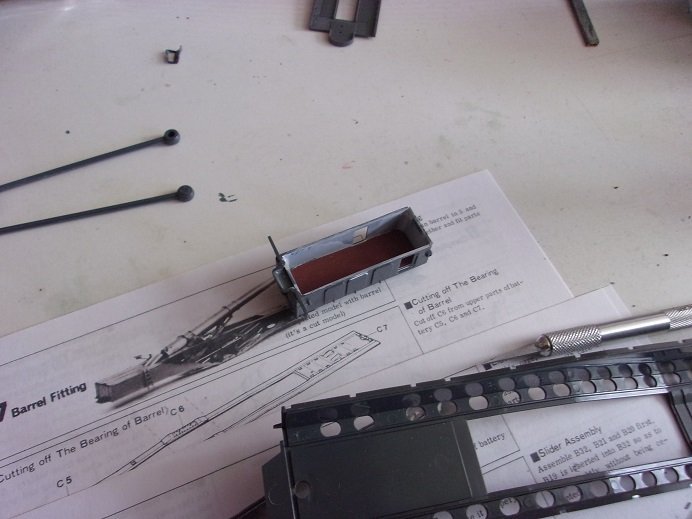
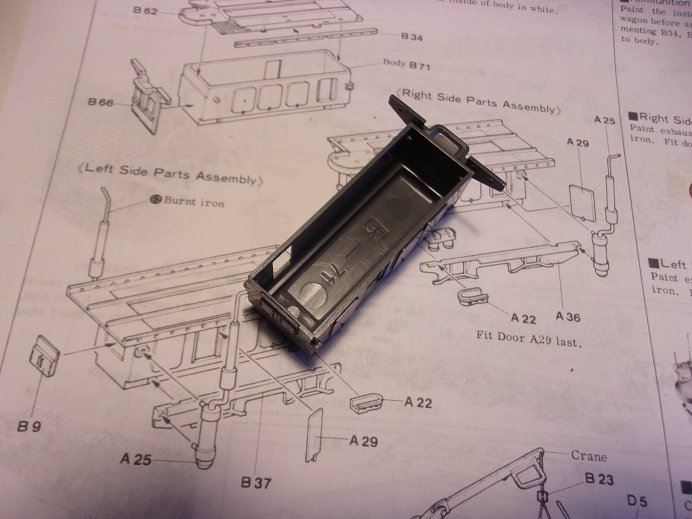
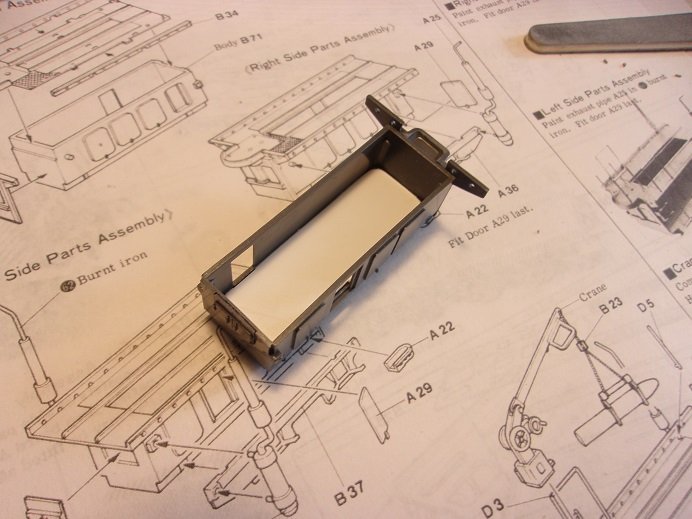
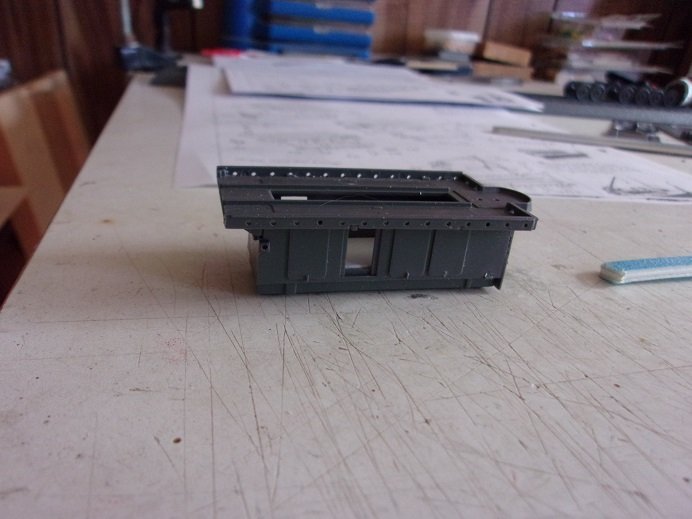
....in the coldest freezer I own.........you mean hotpoint was B.S.ing me all these years?!?!?! {sorry....the comedy bug bit me} hey gents.......been on edge the last week or so....not a whole lot of modeling going on. I've got an update since my last.........thought I'd better get it up here, before the admiral calls 'errand'. ..........Gibb's P call* ...back. she cleaning the chest freezer......I'm sure I'll come into play somewhere. to start this off, I decided to play with the ammunition and truck assembly. first thing I noticed, is that there is no floor....what can be seen is the part number stamped in the well. I began by making a floor to cover this over, but to stay flush with the door openings. I started to make it from wood.......but I didn't like the thickness. I had some sheet plastic that did though. ...seems odd that there wouldn't be one........there is a shelf for one to sit on I had to trim a little away to fit the door lips....inner walls are a flat white....the floor will be a rusty red color. I may make a rack to hold the extra munition........the kit comes with four, with one for the crane. speaking of the crane.......I must have done it, but the part that fits at the end of the crane is broken. I have glued it back together, but I got it backwards, so it looks opposite than what you see in the picture above....I have to fix it. with the deck on, it looks much better....looking inside....... I made a couple till I got it right....one of my attempts can be seen in the corner of the picture {the door openings is too deep and shows a gap}. .....update two coming up.......

-
gee.......sorry I missed this one cool look'in model! camo wasn't a big thing during WWI.......toss on some dirt and branches and you were good for the party sophistication came into play towards the end....likely a few 'Picassos' started the fad the use of camo was a gradual thing......unit markings was a big draw though..... ...as for the olive drab..........I have many shades of olive. it all depends on how worn you want to show her.......faded was the rage, as I recall....... very nice looking model
-
very nice so far....the cockpit looks awesome
-
great job so far Chris!......the skin must have been really something to cut out! really like the added detail on the underside......it will add to her overall looks. definitely following this one!
-
D9R by Kevin - Meng - 1/35 - PLASTIC - started 2015
popeye the sailor replied to Kevin's topic in Non-ship/categorised builds
look'in MY-T fine Kevin.......nice work with the painting as well the more you use the airbrush, the better your gonna get.......by the time your finished with this project, I think you'll have no trouble carrying what you've learned over to other projects keep it up.......your doing fine! interesting idea with tightening the track. it'll never be noticed!

