
HOLIDAY DONATION DRIVE - SUPPORT MSW - DO YOUR PART TO KEEP THIS GREAT FORUM GOING! (Only 20 donations so far - C'mon guys!)
×


popeye the sailor
-
Posts
16,007 -
Joined
-
Last visited
Content Type
Profiles
Forums
Gallery
Events
Everything posted by popeye the sailor
-
 really nice start........the engine looks great! I like building the larger scale kits as well.......added detail as well as parts. Revell used to have the 1:16 funny cars.........I built the English Leather Quite a while ago. I find that it's a fairly rare kit........after giving up the search, I settled on one that I had found. just recently, I did find the kit, but it had already been built and now sold as a parts kit >cry'in shame! Revell also had other 1:16 scale kits...at the moment, I have the '57 Chevy convertible {I'll digress if I keep this up}. hope to see more
 -
quite a bit of progress Chris.......looks superb! good save on the wing issue.
-
M29 Weasel family 1/72 (scratch) by Backer Finished
popeye the sailor replied to Baker's topic in Non-ship/categorised builds
fantastic job on them Patrick! the way you made the tracks must have ben a lot of work.........but worth it! they look so awesome! -
now that is down right cool! I grew up with legos..........my grand kids love them too I got a few models of various lego like kits in the past. this year I got two more....the ship in the bottle, and the Fender strat and amp.........both proved to be so awesomely fun to build. I have never seen such a collection of lego blocks in my lifetime! how long have you been collecting them? in the instruction books for the two kits I got, they did a short Bio on the folks who designed the kits. it must be a full time job!!!! sign me up ! awesome ship you've built!
-
VERY nicely done
-
FYI..........OMK had the trailer for the Bandit II movie....been there for a while now. I was tempted, but the admiral put the Ka-boch on it....so I guess that's leaves me out they also have the Budweiser tractor and trailer kit....but they want over $200.00...definite NO in her book
-
hey there bud! good to see the start of these kits....life can be a problem sometimes........I go thru it too. very nice start on the engines Revell put out two other kits on the subject of MASH......at one time, all of them were on the OMK site. I'm more into Batman though
-
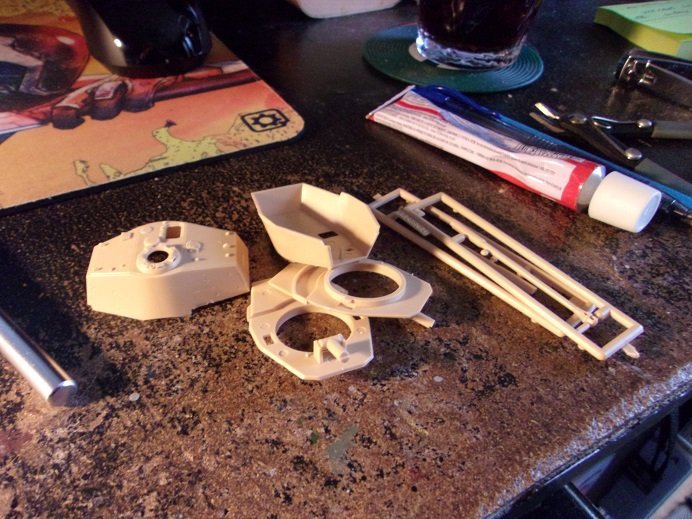
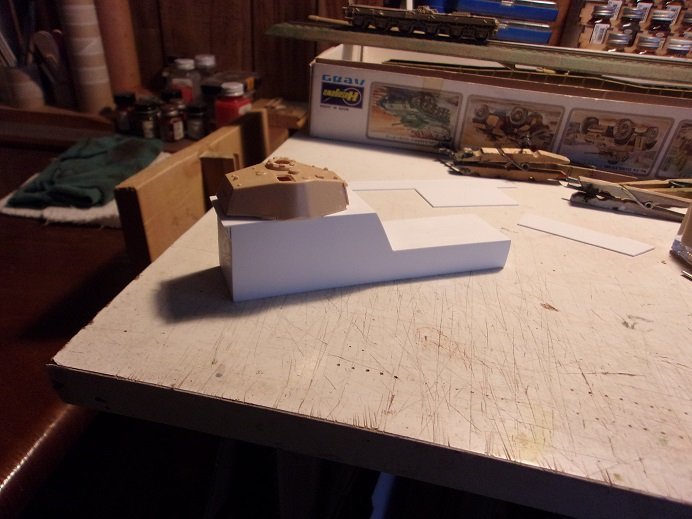
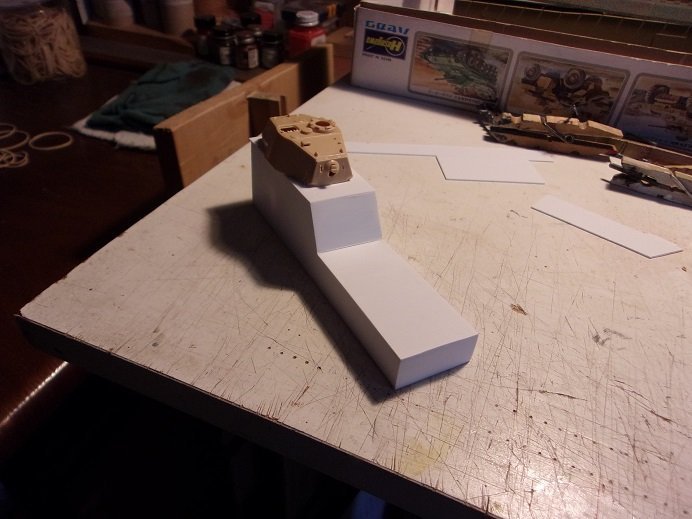
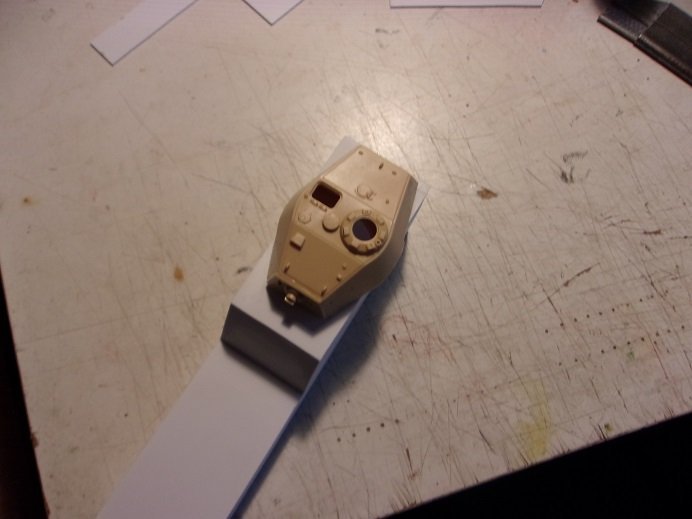
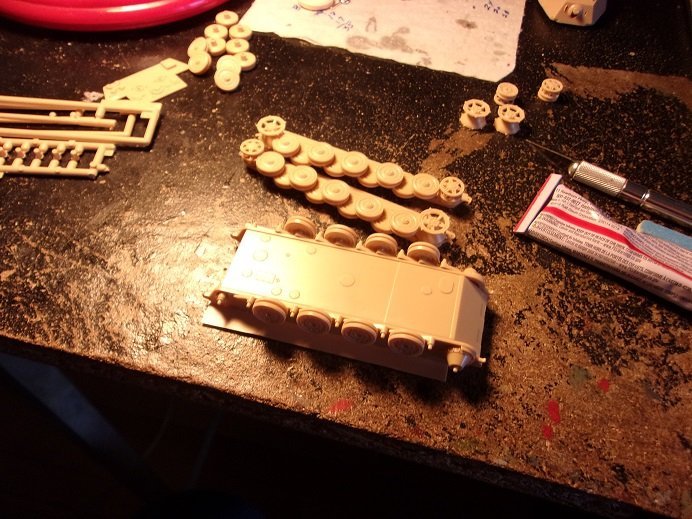
ohhhhhhh......but this isn't the end of the madness. the omitted pile got me wondering..........what am I to do with the turrets? these are only some of the parts....the kit is decently detailed. thinking back in the picture book in my mind........I recall seeing other ingenious instruments of war. here........sorry that I didn't take any pictures of the assembly process, but I was caught up in the moment. using the .075 sheet plastic was a lot easier to cut, in fashioning the car body. I'm a bit thick in the platform........and there are no 'bells and whistles' on it yet. I might not even stay with this design, but it's close to what I've seen. I even joked to myself that I could even do a decent AT walker....... the body is sanded and cleaned up........the turret hole was as easy as the plugs I made for the tank chassis. if I had the trucks, I could have it set on tracks #4 didn't show up......I'll have to read the thread on it......it has been reported. holefully this next one will come up........ it did!.......the one thing I was disappointed with, is that the tracks are plastic. I started to look to see if flexible track was available.......so far, a dry hole. as I've said........insanity has it's virtues!
- 104 replies
-
- 12
-

-
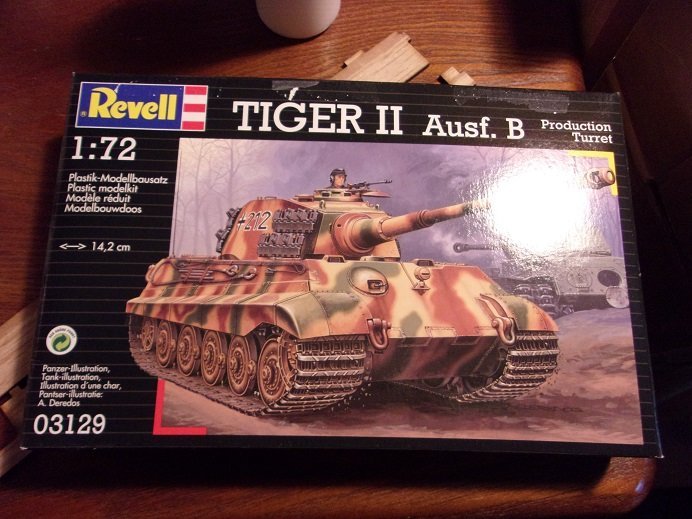
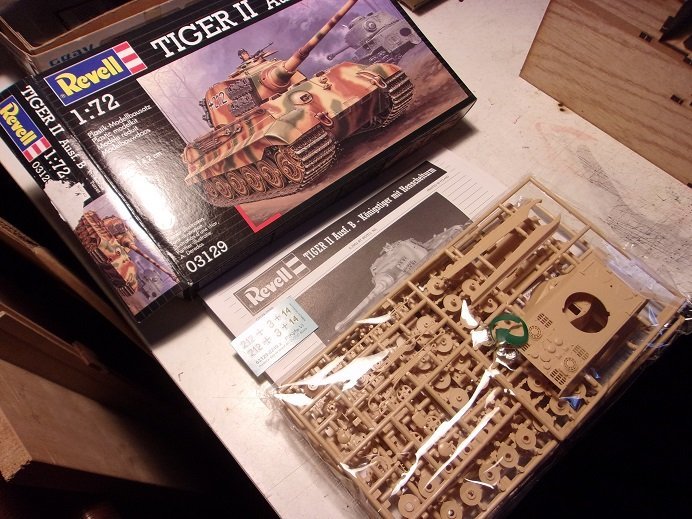
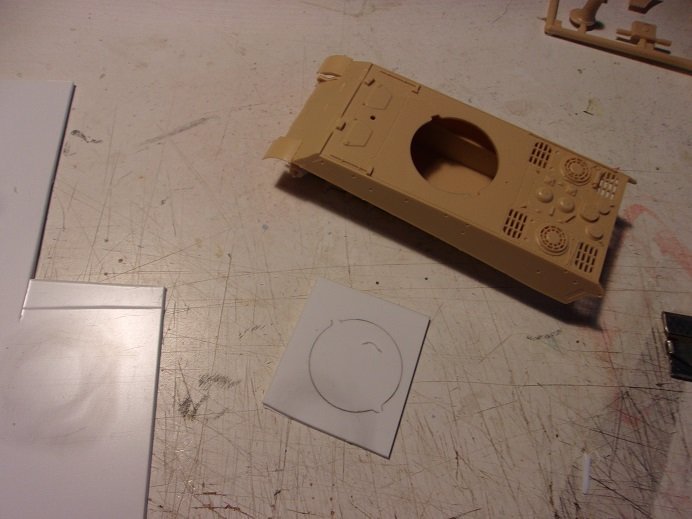
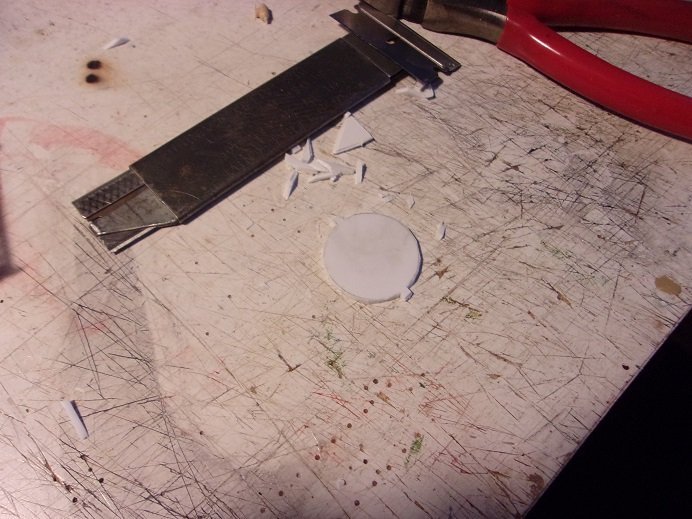
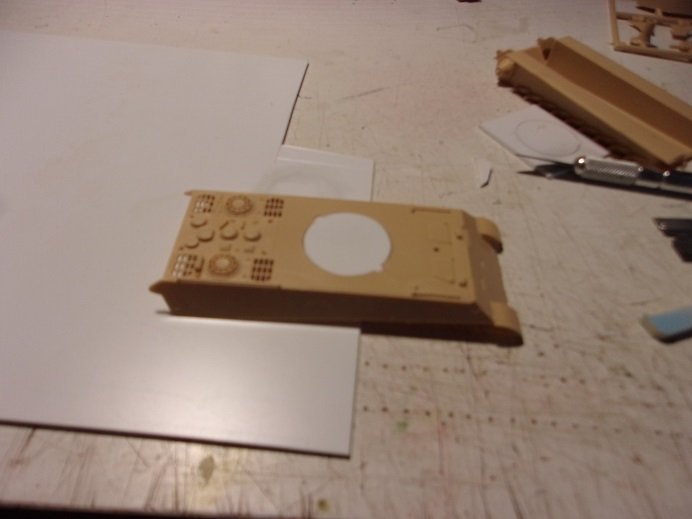
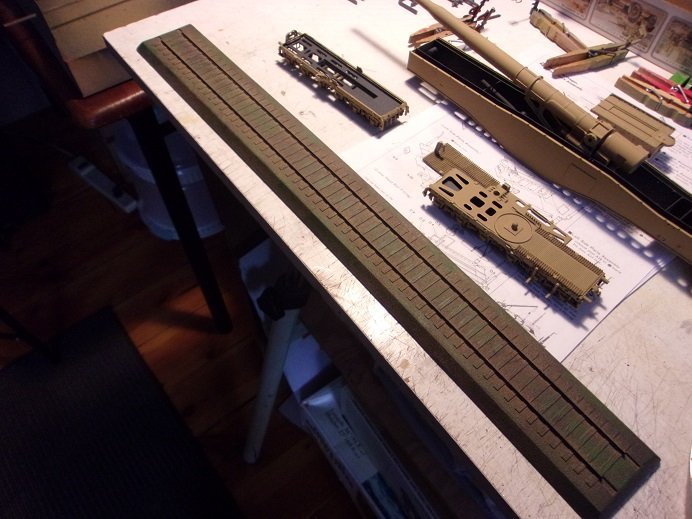
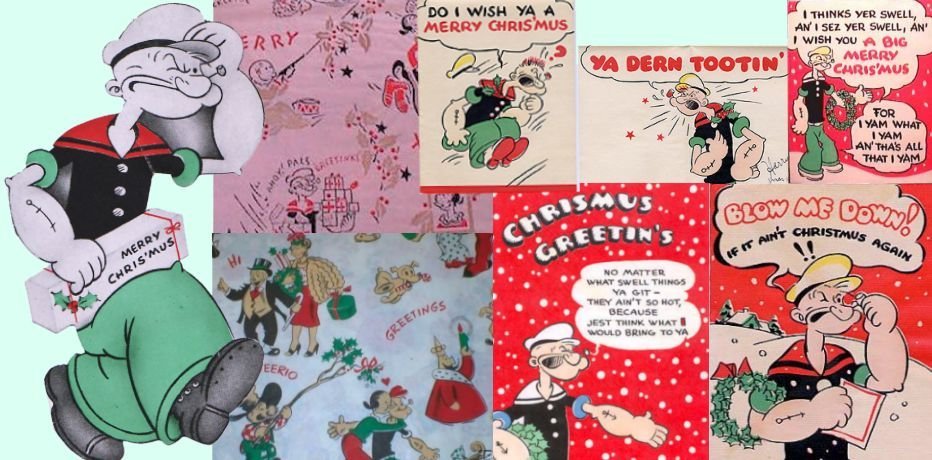
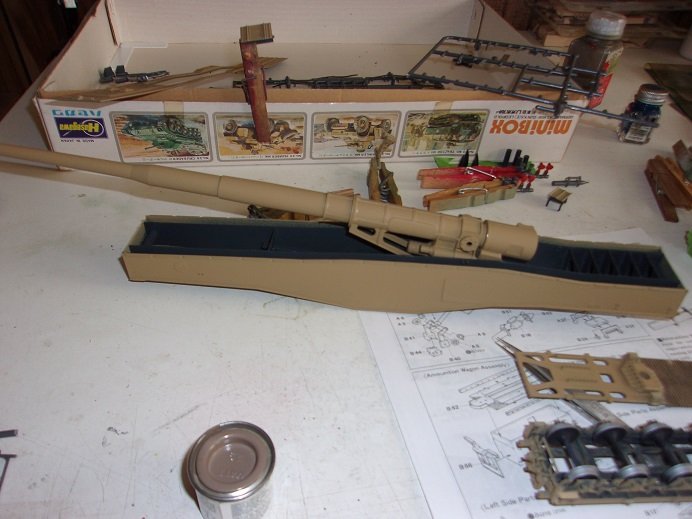
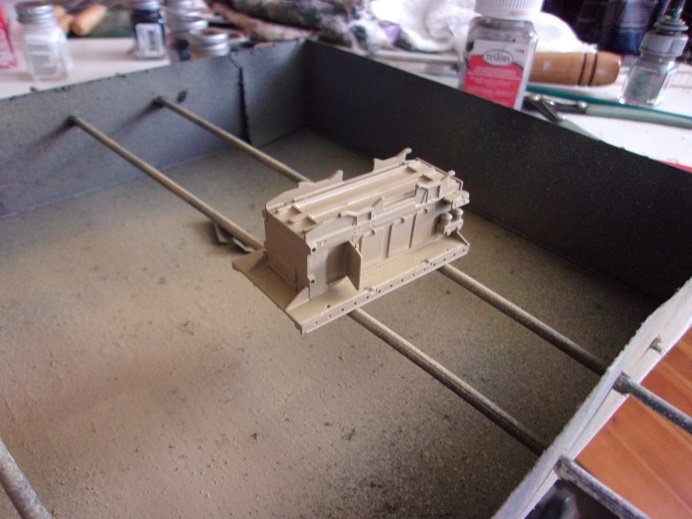
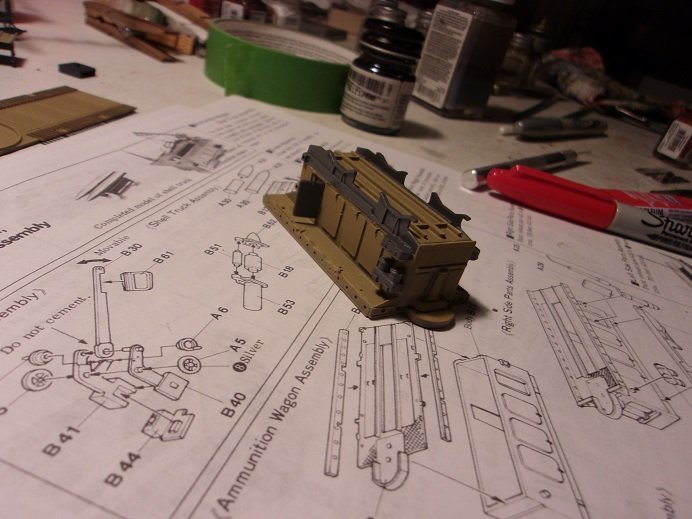
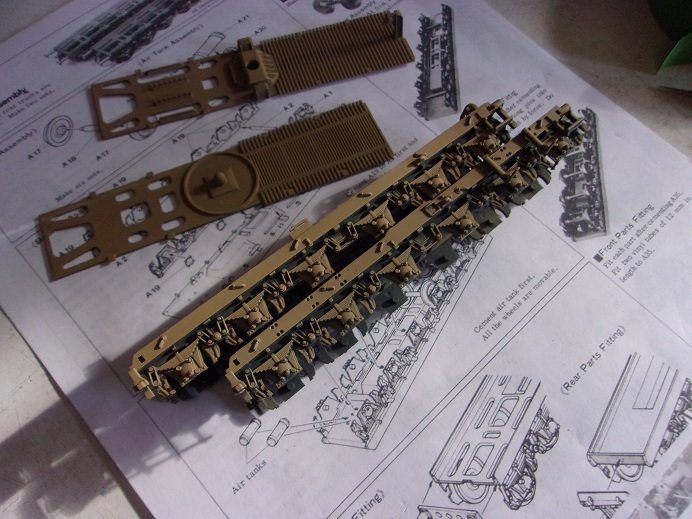
thanks OC.......and I hope all had a great holiday! I didn't score huge in the model area, but what I did score was essential to this log I haven't had time to devote to Leopold during these last few days........my mind has been elsewhere. one thing I love about modeling, is that the freedom is enormous.......to look at a model and see possibilities.........my past subjects prove that to look at one ship and see another.......any one subject is up for grabs! I was going to withhold this until the end, but this is too cool for that. I wish I had taken a few extra picture. after reading that the Germans were in the design stages of making the rail gun an all terrain piece, like they did with the smaller mortar variants, it got me thinking how they would have accomplished this. ........the modification of rail flat cars to support the gondola........the info that they were using Tiger II tanks in the design was a starting point. I did look at other tanks, but the Tiger had the broad flat top deck....made sense. my wish list for Christmas was for two 1:72 Tiger II tanks, and my wish was granted these kits are nice........good in the respect that the tools and cables that are usually molded, are separate parts in the kit. there is the freedom to put them in other places, or save them for other endeavors. looking at the top deck, I gotta get rid of the hole for the turret. cutting a piece of 1.5 mm plastic sheet, the hole was traced on it. cut out, the plug will look like this...... trimmed and fitted, it looks like this.... I wish I remembered that I also had some .075 thick styrene........I would have used it instead. #4 won't show up.......just the drive wheels and bogies, just that I have double to deal with. I'll show more as I proceed
- 104 replies
-
- 10
-
-
that's a nice piece you have there Roger I believe the name Rivarossi was tossed around when I did research on the origin of the Army piece I got from my older son. what I did was buy some EZ track form the local hobby store {Hobby Town}, when I decided to try to do the diorama for the snow plow. if you want to see if the loco runs, why not purchase a train set........it will come with everything you'll need to start off. you can always expand from there
-
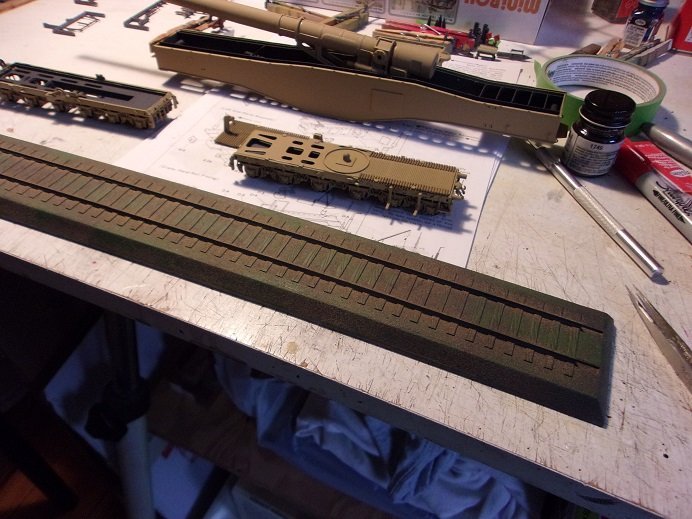
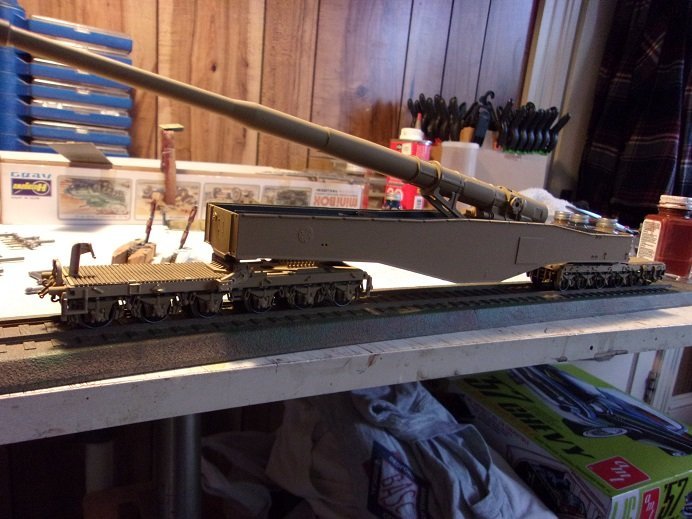
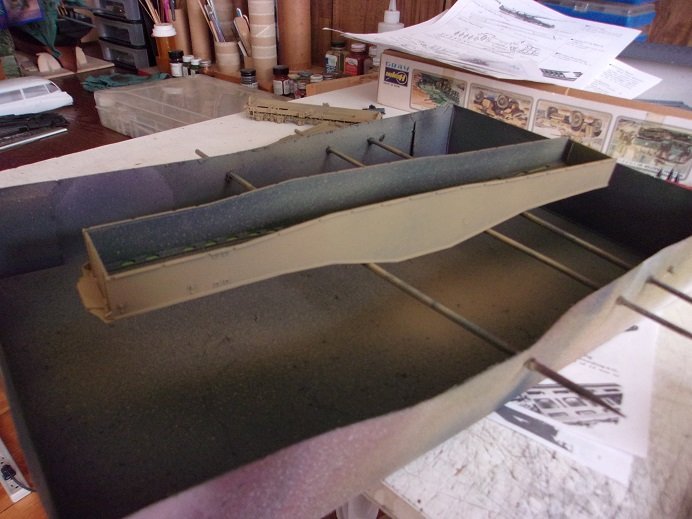
shots are done..........one in each arm......flu and covid. left arm is a bit sore, but I'm good I got back home and got a little more accomplished. I promised to show you the outcome on the base. a dry brush of raw umber and green for vegetation. still need to bring out the ties and rails, but that will be done after the big day I'm afraid. for now.... I'll see if I can bring up the lost picture........nope......it won't go Leopold was dry fitted.......assembled on the base I forgot to add the munition shed....... one thing I did notice is that the gondola seems lower on the rear truck.....I'll look into that. the admiral is on edge today.......so I'll likely be walking on some eggshells.........I do hope she mellows out. sucks I can't make her a drink, considering all the meds she takes gotta go help her make meatballs........and prep other things hope your festivities are joyous and super - T - duper!
- 104 replies
-
- 13
-
-
great job all around! there would be no real rust......but there would be tarnish. you copied that well for the cans the cake came out 'sweet' as well
-
holy cow Greg.........the airship came out awesome! how you painted it was really cool! the seydlitz looks awesome as well......superb job with torpedo nets
-
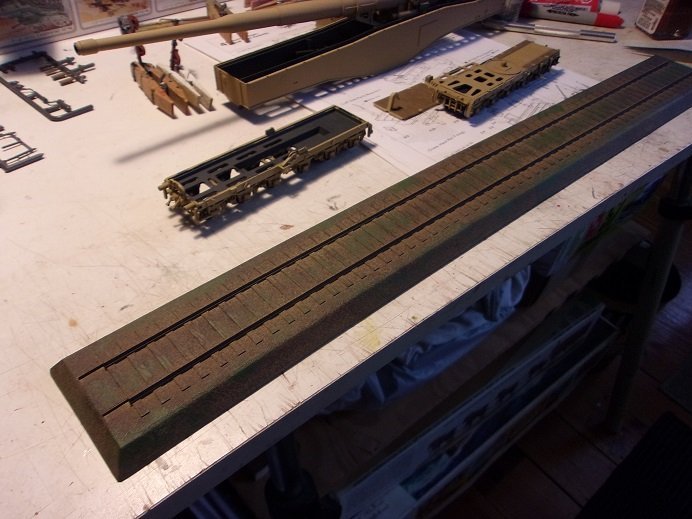
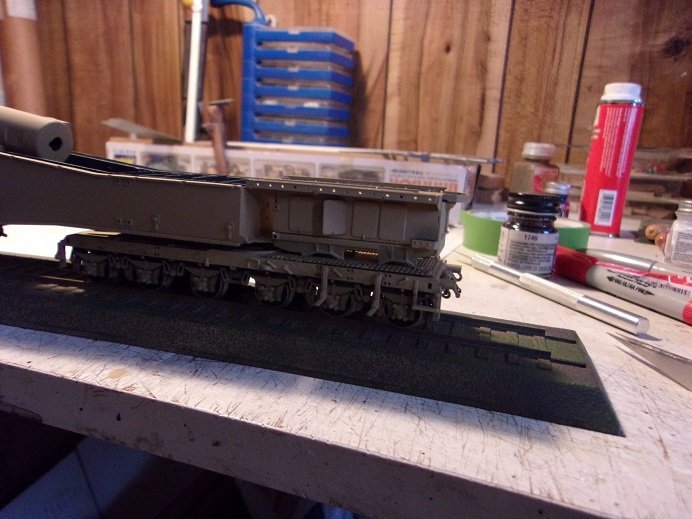
today is my appointment for the Covid booster. morning coffee........listening to news on google.....taking Gibbs out for his morning outing......got tired of doing that. I thought about the gun set up in the inner assembly for the gondola. I'd have to connect the lower pins in the rods for the hoist. after a bit of thought, I did just that......... the holes that are exposed are for the pivot pins, to be added after the top decking and pivot brackets are in place. when this insert is finally installed, as you see it here, the fork is to be cemented to the slide plate that sits inside. of course, you can't see it, but it's down there. I also was still think'in about the overspray on the inner surface of the truck body. I used a brush to paint the area that can be seen. I started to paint the base ....started out with the brown yellow.....left it as kinda blotchy, so some of the gray plastic can show through them I went over it sparsely with a darker brown, before another sparse coat of the D. gray the ties and rails will be different colors........more to add towards the finish. next was some flat umber and some green blotches. now it has to dry a bit........I'll show ya then the munitions wagon got some paint too. second coat and the parts I had added to it......still more to go with it. the error code prevents me from showing the last photo........ OK.......time to go hope I get a lolly
- 104 replies
-
- 12
-
-
resident junkfood junkie.........at your service! the admiral has cautioned me about continuing after I retire it's the box for'em...........the big day is almost here and besides, his brother is doing the job quite nicely on his own it startled the neighbors when they saw two ten foot snowmen out there this year. usually, I fasten the base to a large plywood square.......I put the second one out {new in the box}, and one the legs for the base broke! I folded another one of the legs out and it came off in my hand.........two others broke because it shifted on me! so I just tethered him up and he stood out there on his own just fine. I tried, but I can't get those parts, unless I want to buy the complete set of innards, for about the price of a new one. so I'm going to come up with a base to attach them {him especially} to........either that or make up a set of legs for the base, which is nothing more than the main blower. I forgot to report this, but last week Sunshine decided to take flight. I was doing something and I nicked him with my arm. he hit the floor, but surprisingly, only received minor damage. I'm almost done with his repairs, and he should be back on the shelf in no time tomorrow, I'm off to get my booster shot.......the admiral's is on Friday....we're both at different places. yesterday, I wrapped all the rest of the gifts........where the admiral left off. we went out in the afternoon, and finished shopping.........more gifts to wrap! we wrapped them today.......and now we are totally done. sadly......no time to model thanks for look'in in and your kind comments......I'm tempted to get the other one....... it's a fun model so far hope you all have a great Christmas........hope you all find what you wish for under the tree
-
hey there Dan! very nice progress you've done on the Mig............look'in so cool the canopy looks great and an interesting way to weather........shows the panel lines quite nicely. don't be concerned with the decaling.......some decals are based on white image backing and don't allow the surface color to show through. depending on how prominent the base is, the better it is. it's a lighter color over a darker color....your going to see some amount of tint change. looks great none the less have a very merry Christmas!
-
hi Chris.......count me in please! look'in forward seeing what you do with the spit........if she come out look'in like the moth, she will be spectacular!
-
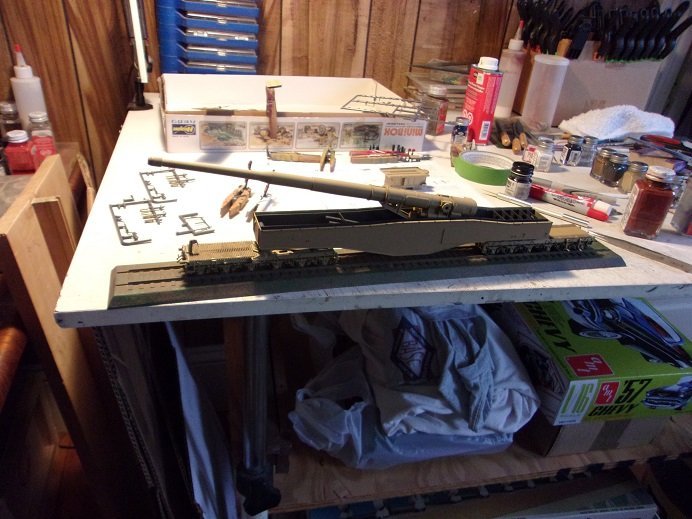
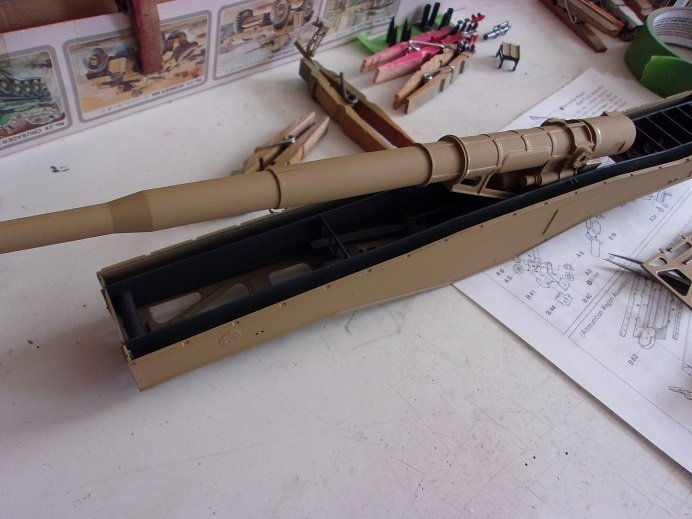
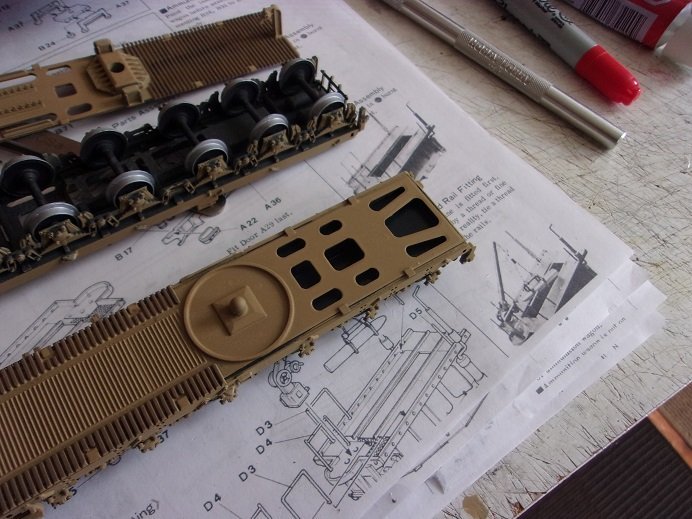
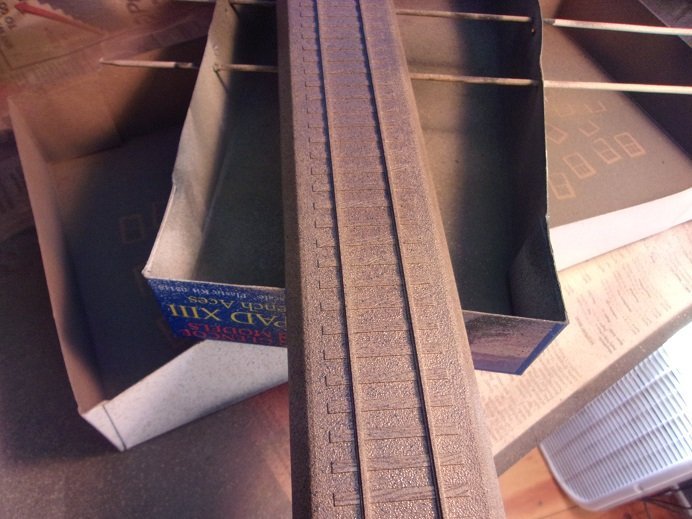
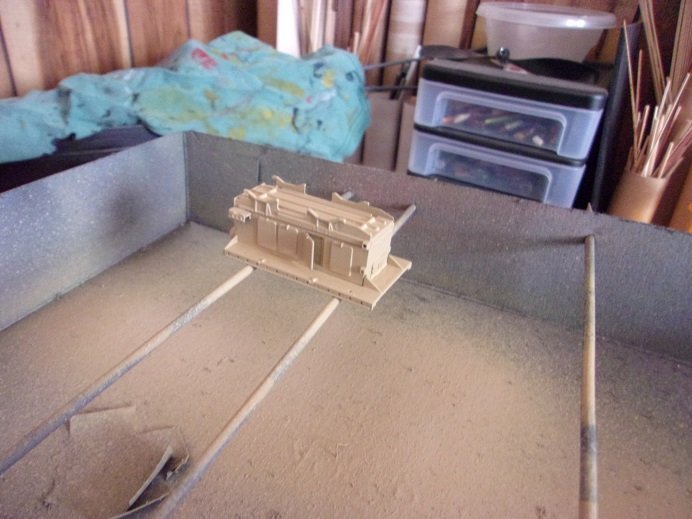
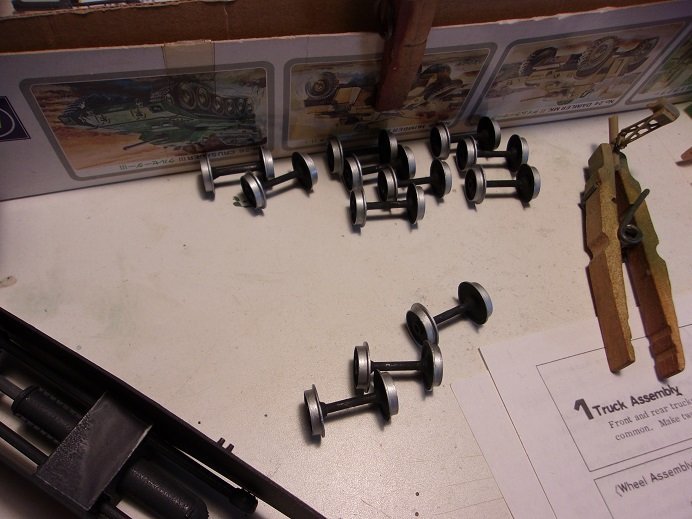
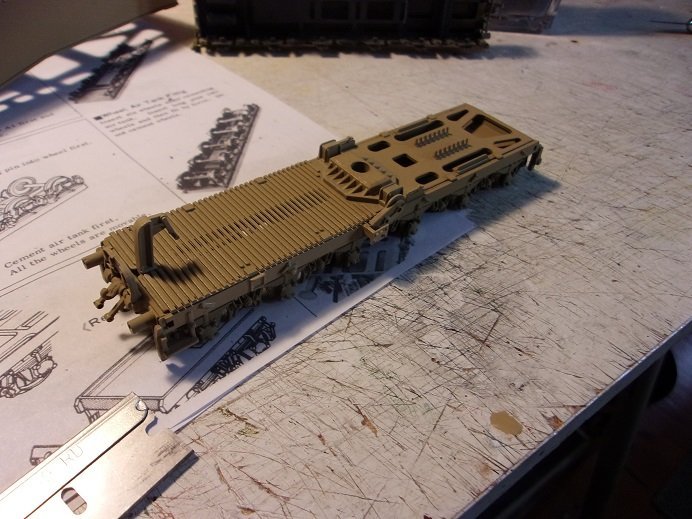
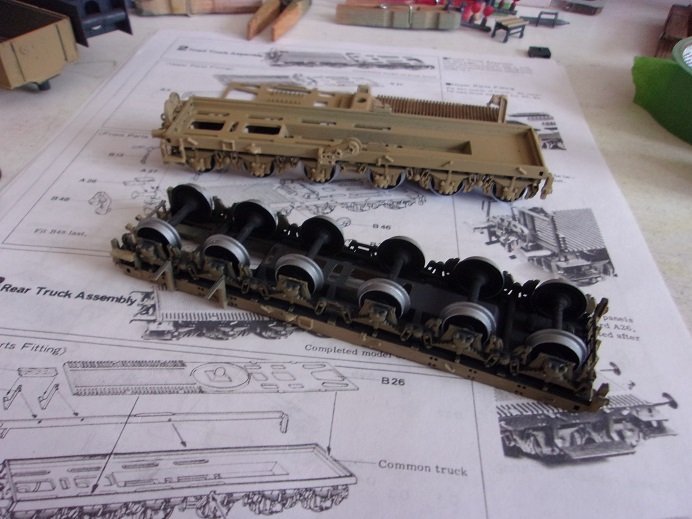
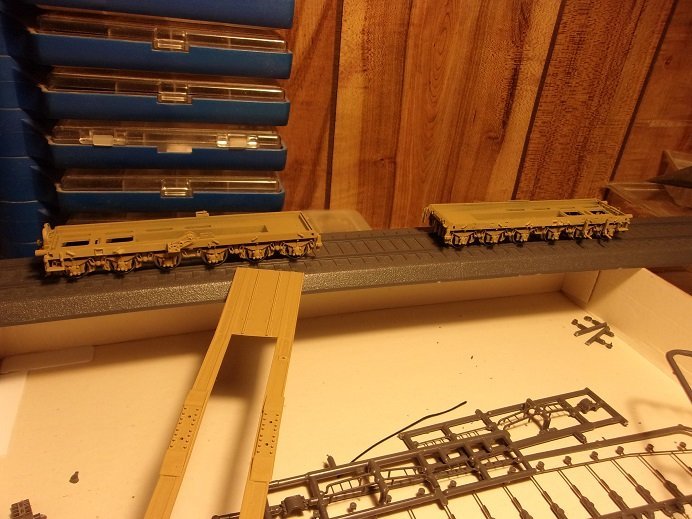
hello all.......the count down for the big day has commenced! I've taken tomorrow off for some last minute stuff. one of my inflatables ended up in the garage.......a giant snowman. I guess he decided to do the 'Frosty', and took off down the street after breaking free of his tethers. guess he forgot that the electrical supply was what kept him aloft we got our first snow......not what everyone was expecting........all it did really was make the roads really slippery. all is well here though. the elves wouldn't want me Ken.........they'd find my lust for elven chocolate disgusting I haven't said much about them Bug........my parent's cars each had six cylinder engines and the kit supplied V8's. I found the engines at a place in Australia.......they are on route here. my mother had the 1959, and my dad had the 1960 - both were Chevy Bel air models. the big joke here, was that my day told my mother, moving to the small town of Weare N.H., she would have to learn how to drive. dad was sort of brutish in telling her, which made her angry. she learned, and when she got the '59, she nicknamed it "Agnes", after his mother! the '60 has a story as well.......and I'll tell that one when I start the log. I've already done a few thing, picking at them here and there. they are a pair of Revell / Monogram kits.....one small quirk, but decent kits. you'll see them soon as usual, I did come up with a wish list this year. not too big, since my stash has grown from the last couple of years. mainly, just things that tie to other projects.......this one being one of them. really crossing my fingers on this particular wish......... I did do a bit more on Leopold. I also noticed another kit has appeared on the old model kit site.......I haven't done any research, but Hasegawa had another 1:72 kit of this rail gun, by the name 'Anzio Annie'. it's got the same box art, in which the name Leopold can be seen. so tempted to order it. the Scripto marker did a great job on the wheels. I will use it on the tracks for the display base later on.......the silver is not shiny, due to the combination of the flat black and likely the fact that it is a marker {not a paint marker}. very little touch up needed to be done on them. the deck of the front truck was dry fitted in place.......trying to get an idea on the camo for it. the wheels were installed on the trucks........hasn't happened to me before, but one of the pictures wouldn't upload. here is a shot of the rear truck sections of the truck decks are to be painted a wood brown. the munition shed was painted......needs another coat or so, but I added a few more parts I put the trucks on the display base to give you an idea of how they will look the gondola deck part got a second coat........other parts were painted as well. not sure if I can make any more progress till after Christmas. if I do, I'll be sure to post it if I don't see yuns..........have the merriest of the Holiday season! Merry Christmas!


- 104 replies
-
- 11
-
-
that's quite a squadron you have there Chris! you've done a masterful job on the Tiger...hat's off to you! awesome look'in plane! which one screams the loudest?
-
hey bud!........thanks it has a short life span though........my son called.......want to go Christmas shopping with me. we do it every year........share a few laughs........hard to believe the silly things we see I'm trying to hang here for a while.......but I feel like taffy.....I want to work on it, but I want to see all you gents too. oh...oh..........I opened a bag of gourmet caramel popcorn..........and I'm beginning to feel all peckish and giddy .....a sugar high!!! 😵
- 104 replies
-
- 11
-
-

-
but that's the beauty of it.......there are many aspects{of any war} that are looked over, overshadowed by the bigger picture. to think.......just one of these minor altercations may have been the true cause for the turn out of the entire war! to shed some light on these lesser known actions {or subjects} is refreshing........it's new.......and perhaps new insight on the war >subject< you wish to model. I get more enjoyment going off on these tangents, than I do buying a run of the mill kit. you mentioned the tires being different sizes? notice that they are on the front.....steering. larger tires rotate at a slower rate that smaller diameter tires, so it would greatly improve steering over sandy terrain. in one of the pictures, the tread looks to be ribbed. tires on early farm tractors were made that way to better navigate the furrows cut by the plows. did you figure out the problem with the rear tires and the running boards? just trim the boards away to clear the tires........it won't look bad and you have the freedom to do it {it will still look right}. super job....really like what you've done so far
-
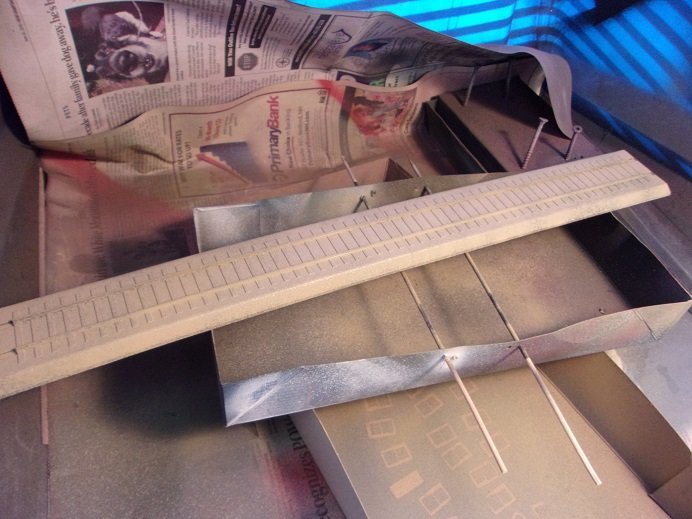
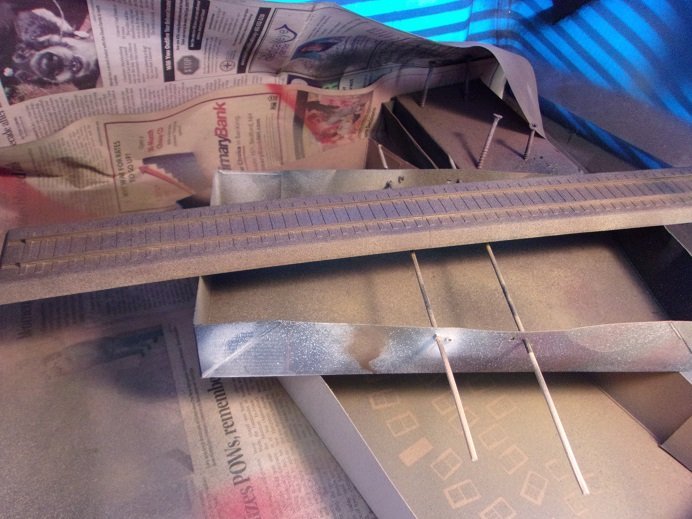
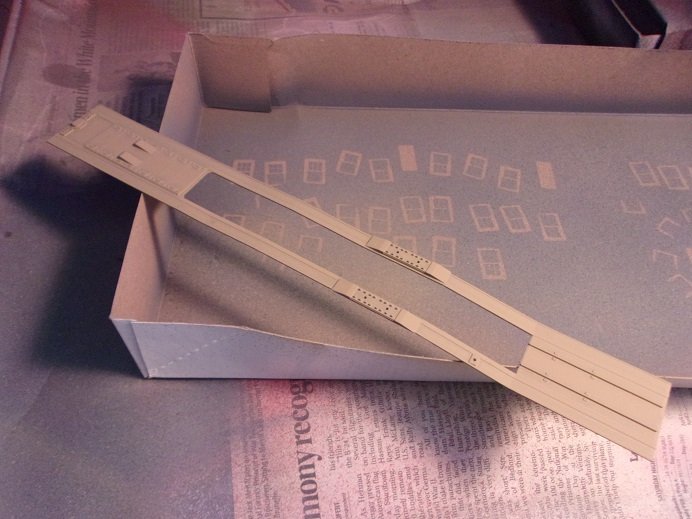
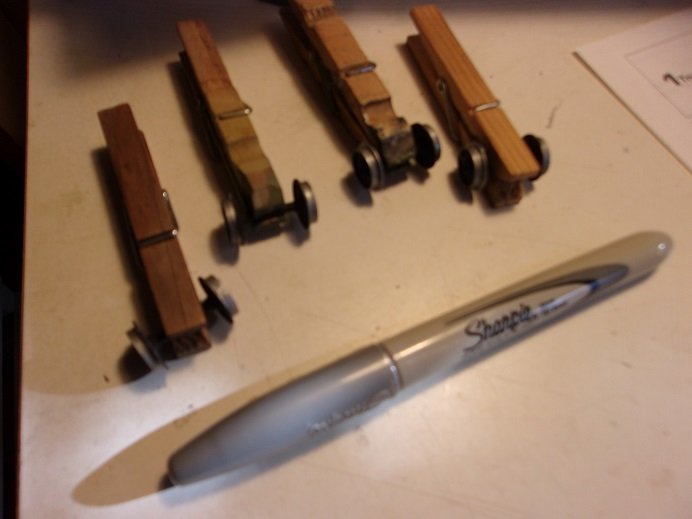
hi all......just your resident spook, in for a visit.....He...He.... we're getting closer to the holidays......the feeling of the red face rush is beginning to swell. you know........when you really begin to feel like there is just not enough time in the day to get everything done.... too much to tell here.... I have a couple of side projects that took a dramatic turn........I ordered the six cylinder engines for the '59 & '60 chevys. I showed the admiral again, just browsing through some of the past thing of this year..........and I was told that I was told to order them a while ago. say what!?!?!?! I guess I don't have enough brain cells to recall such things so, to quell any further negative discussion {and while the gett'in was good}.....I did so. nothing real special about the project, except that they were the cars my parents owned when I was a kid. the other involves the Ghostbuster duo I've been tinkering with since 2016. it only amounts to a couple of times, considering the amount of other projects I have ongoing. I was going to the Ecto 1 from the first movie, and the Ecto 1A from the second movie.......but the direction has changed due to a desire to hone my butchering skills. the initial attempt has been pretty good.......more on this soon. it's the same 'ole story Patrick.......the thing where you know it didn't work the first time, but the subliminal didn't get the memo like water on a dry sponge......it'll sink in sooner or later...... Hi Bug........I wish I did too.....I have enough of it I'm just glad that it's still good.......I'm really liking this paint, although it's not the White ensign....it's the Humbrol paint that I'm working with at the moment......the dunkel gray is the White Ensign. it's just that the paint has sat for so long. the Billing paint was an ordeal too.......but it was easy to tell if it was bad or good. I had the chance to do a little this morning......I had already given the deck and body of the gondola a shot of the brown yellow. I have to divide this into three sections.........the front deck, the gun's anchor brackets, and the rear deck. it needs a second coat, which I did this morning. the inner surfaces wont be seen once the internal part and the decks are in place, so I wasn't too fussy about masking. the underside was masked because it was painted in the dunkel gray. the trucks got their second coat and have had plenty of time to dry. a side view of the trucks give you a good example of what I mean about shadowing. it's a nice contrast this last picture stems from an idea I got the other day at work {of all places}. I was thinking of ways to paint the contact points of the truck wheels, where they meet the rails. a paint brush would have likely proved messy.......a lot of touch ups. I recalled having a metallic silver marker pen. I do have to wipe the tip off due to a combination of the tip getting dirty {from the paint} and from drying out, but it seems to be working out. it doesn't have much of a shine as it goes over the flat black. so far, there are only a couple of touch ups it doesn't need to be consistent......some ghosting from the flat black looks to be a nice touch I'm going to try and do some more........
- 104 replies
-
- 10
-
-
thanks.......the one nice thing about it, is that they disappear with just a spritz been in and out since posting......I am so far behind on what you all have been up to. I should do a redirect with the morning coffee. doing the re paint kinda blew my afternoon anyway....I wanted to get the brown yellow on the gondola. oh well....it is what it is, I suppose. I hope to have a more robust update for you next time thanks for look'in in gents........meanwhile, I'll try to catch up.
-
very nice work......coming together very well
-
looks futuristic........ a rare subject I've built a few Roden.....they build up pretty good with not a lot of fuss. you'll have fun.
