
HOLIDAY DONATION DRIVE - SUPPORT MSW - DO YOUR PART TO KEEP THIS GREAT FORUM GOING! (89 donations so far out of 49,000 members - C'mon guys!)
×


popeye the sailor
-
Posts
16,007 -
Joined
-
Last visited
Content Type
Profiles
Forums
Gallery
Events
Everything posted by popeye the sailor
-
 your latest group are fantastic OC........the Dio is getting a lot more populated.........looks so awesome!
 -
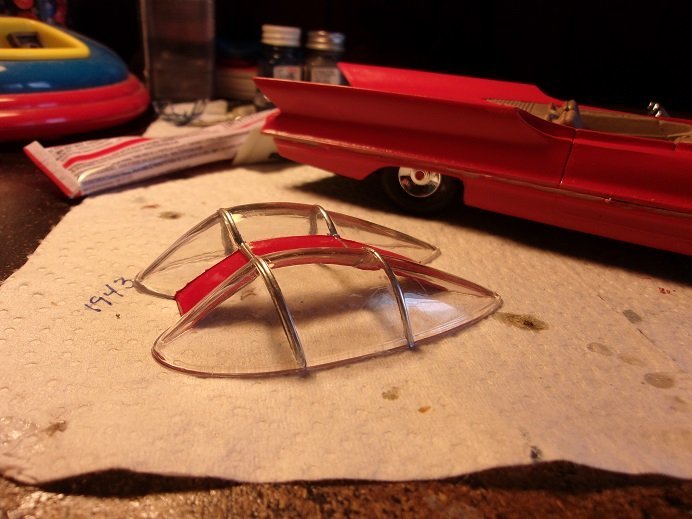
shame to see them go to the Kraken.......keep me in mind yea, the bling can be interesting....sometimes though, the bling can cost more than the kit. I tried the cello tape on the cockpit glass......this is where I'm at. at the moment. it's not perfect, done in the flat blue, but it is the final try.......I think it passes muster more soon. thanks for the good word Ken.
-
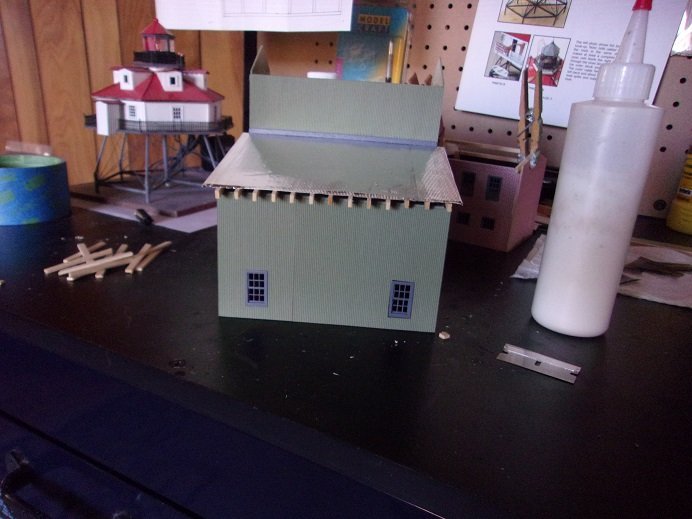
....as I pull myself in further to the wrath of my own demise........ I've not yet had to employ a taste tester........why?.......I've got Gibbs to help me with that?!?! through the turmoil, I'll press on..........."if your gonna go......go with a smile!" I did a bit more on the boiler house while play'in my video game the other night. the lower roof is on.......I added the windows and doors, almost forgetting to put in the glazing {window glass}. I nix the idea of the interior stuff, since the tinted material will not show that sort of detail. perhaps should I become more adept with this area of modeling, I will be emboldened the corrugated roofing was another thing that was left to be desired. I had one package of the smaller corrugation that was still unopened......it come in packages of two sheets. opening it up, the outer sheet stuck to the plastic covering, and that practically ruined it coming off. I'm thinking this is the result of it being old stock. the size of the sheets was not meant for this type of building.......roof surface being wider than the sheet itself, I had to patch in a smaller piece to make up for it. I used the supplied roof parts for the covering and scratched in the rafters........I'm in the process of closing up the roof edge. I took precautions in taking these photos.....glare would certainly be an issue. I'm trimming back the rafters, and then will cover them with a fascia. more as I go along.........
-
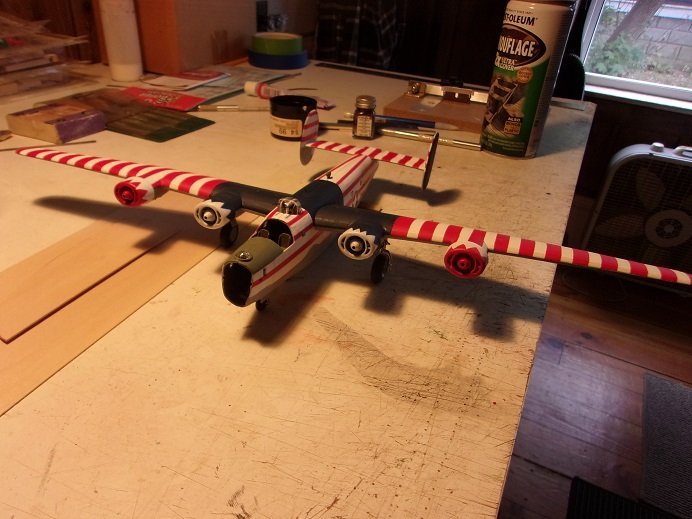
Holy Cow Ken.........I love it! I book marked the site.......might even become a new source for decals! so far Mega Hobby has been my go to place for decals. I'll have to read up on some of the subjects {missions}. thanks very much! that is another idea Craig...the only chigger would be the raised detail. air could develop beneath the edges as it dried. I got a reminder of an old tip of using cello tape to paint them on. I'm trying that at the moment.......slow going but when done, that's it, It's final. I do have a bit of an update......the props have been tipped with yellow, and as mentioned, I'm still working with the glass. the decals I had for the wings were a bust.......the decals were too damaged to use {all four of them}. I had sprayed them with decal bonder before cutting them out, and allowed them to totally dry before trying them. I let them soak longer than I normally would, but they would not release from the paper........they broke up under the strain of my fingers trying to move them so I had to order a sheet that had a set on them. I'm down to 11 parts to add to this bird...decal and finish. it is funny you send that link to me Ken.......if I do another B 24, I want it to be 1:48....1:32 would be the mother lode! I was tempted to get another one of those Lindberg 'nose art' kit of the B 17........they are cheaper, but I wish they had more detail. I know I could add some with all the add on stuff I've seen, but it would be certain to put me in hot water with the budget director.........I'm already there now as it is
-
nice! great job so far on the train car the trucks came out great!
-
good thing he won't get hurt with that rubber on the jaws! nice start on the figures....select 'no flash' on your camera.
-
very nice progress
-
good idea.......but I think I'll wait on that I'm in hot water at the moment........the decals kinda did it. looking at the kit decals, they appear to be stuck to the plastic {I guess they didn't age well}. I got notification that the decals have shipped.........'versendet'......I don't know much German, but that's what I think it means. I won't be starting this any time soon......I can wait.
-
thanks Ken.......the ones on the fuselage are fairly new. I haven't tried to put on the ones I sprayed with the bonder....I'm giving them a couple of days to cure, so that when I dip them, they might come off better. then I can start playing with the stars and other decals.
-
wow! for all the problems you've encountered, you sure came out on top! it's a very stunning model
-
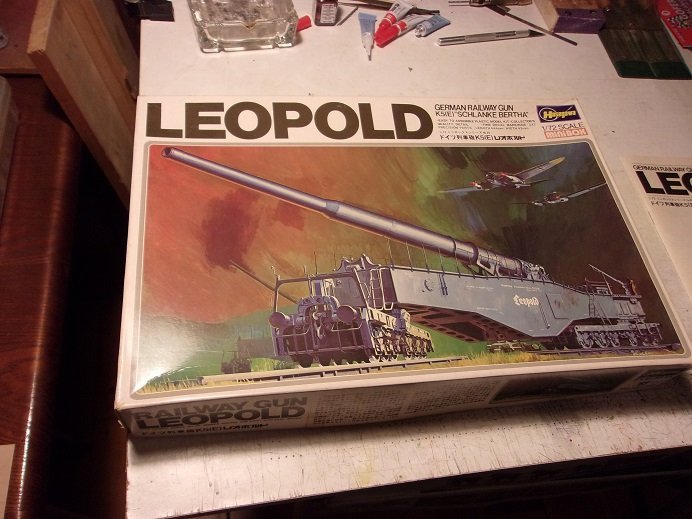
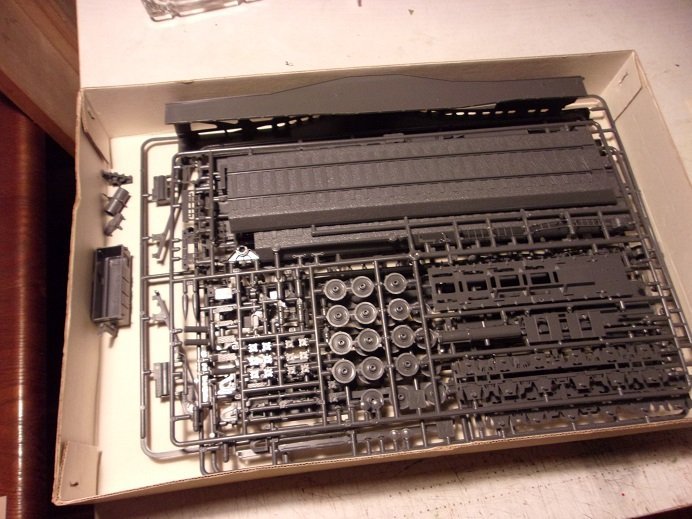
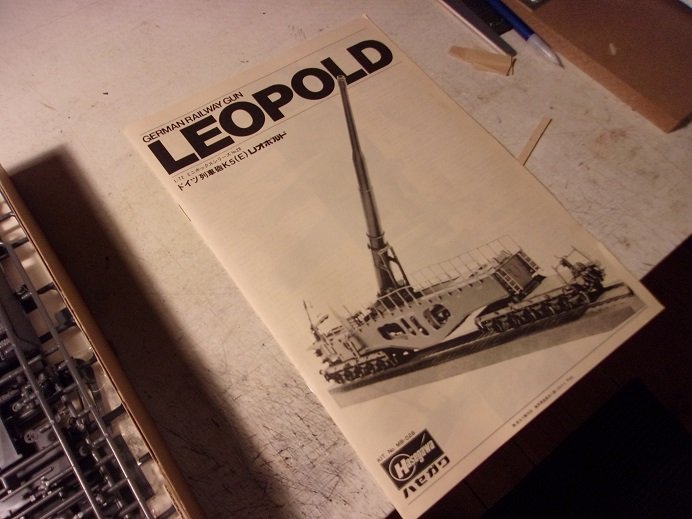
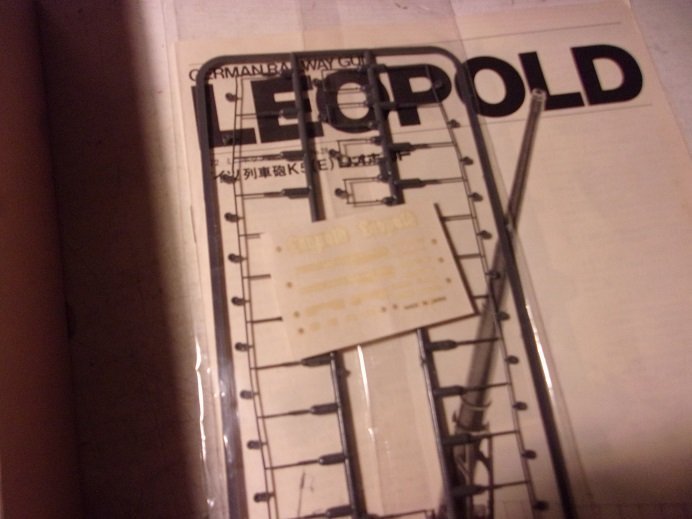
that's debatable OC.........it's a pretty deep hole according to the description in the beginning of the instructions, that's correct.......they used different things as a fuel source. they supplied the power house with steam, and they produced electricity.......quite a chain reaction I'll definitely check it out I went a bit further with the structures........started to add floors to the boiler house. also started to add the windows and doors to the boiler house... the power house has all the windows done.......now to work on the roof. didn't get much done today though.....errands.. I bought the tires for my car, but I couldn't do them because the guys are here residing the garage, so I hope to get them done next week {when I'm off again}. I'm happy to report that the order I had placed a while ago arrived this afternoon. for 1:72, it's a fairly large model. the sprues were still in their plastic bags......originally produced in 1975.........due to the yellowed decal sheet, it's likely that old. I did a check, since there were a few loose parts in the box. the bottom bag had totally disintegrated.........it was still there, but broke up when I picked up the bag. I saw where all the loose parts came from on the sprues, so it's safe to say that all the parts are here. as for the instructions......they are a booklet, and it's in Japanese. the decals are in the same bag as the railings that line the gun deck. the model is over 12 inches long. I ordered a set of decals from Peddinghaus deals.....Archer has them too, but I couldn't seem to find them on their site. I hope to start on this in the near future.
- 72 replies
-
- 10
-

-
hope you get the defects covered OK!
-
you've come a long way Chris.....and she looks great! looks even better with the chipping....they put in some nice detail. well done!
-
glad I didn't miss the whole build saw one of these on oldmodelkits........but at a larger scale. it's good to see more of your fine work
-
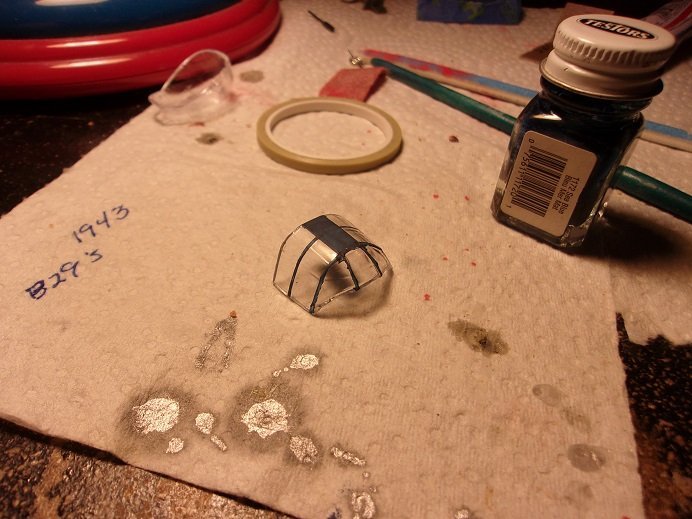
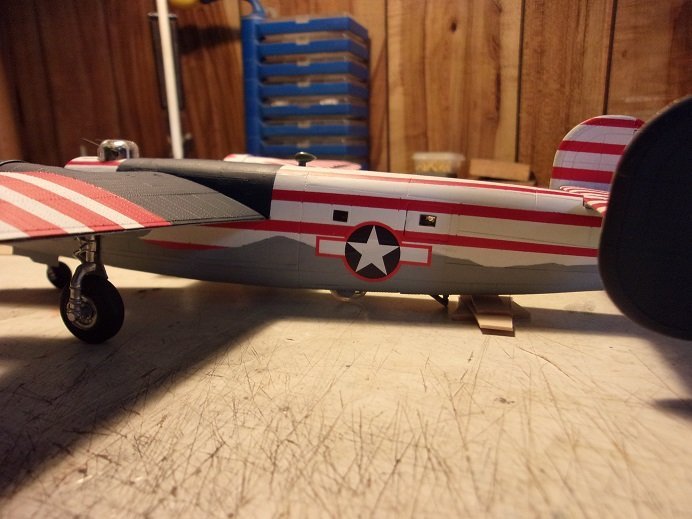
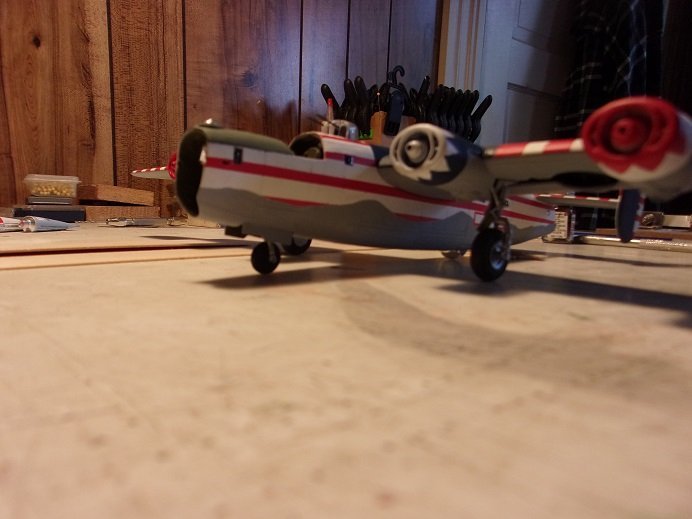
sorry for the delay, but the glass is proving to be more of a problem than I thought. I cleaned them off because I didn't like how they looked and did them again......but came out with the same results. ....just too much bleed under the tape. cleaning them up again, I tried to do them freehand with a fine brush......started out good, but the steady hand waned and ruined the job. a second try gave the same results. through all this, I've been using brake fluid to remove the paint.......so far so good that the parts haven't been affected. the third attempt I decided to try paint pens......bad thing is, I only have silver. it didn't go so well..........so I tossed them back in the brake fluid to remove the paint. for some reason, the paint would not come off. it took some doing to remove the paint.......a second try was just as bad. I was on the verge of giving up on it, but knowing the model wouldn't look right, I'm going to press on. I'll go back to the tape and hope for the best.........hard to understand.......it worked reasonably well on the other bombers. I started to play around with the decals.......I decided to go with the red outlined insignias, since they were used for short period in 1943. they would also work well with the color scheme. I have a set with the B 25 decals......but they are 1:48......I can only get away with using two for the fuselage. I have slammer ones for the wings from the Smithsonian kit by Lindberg { something about the sky......forget what the title of the kit was}. the decals looked funky, but I didn't put two and two together till I put one on the wing.........the sheet had been wet at one time and allowed to dry. the decals were so fragile, that lightly rubbing them would cause them to break up on the model!. after removing that mess, I took another pair and sprayed them with decal bonder.......see if that saves the day. I hate to tell the admiral that I need more decals. here are a few pictures of where I am on the model. thanks all for your interest

- 107 replies
-
- 10
-
-

-
that's quite a model your embarking on yea........with all that detail, your going to need to do something for display. best yet is to leave the top removable. ....a very sweet looking model indeed! keep it up, and you'll make me want to do another tank ........haven't done one in years!
-
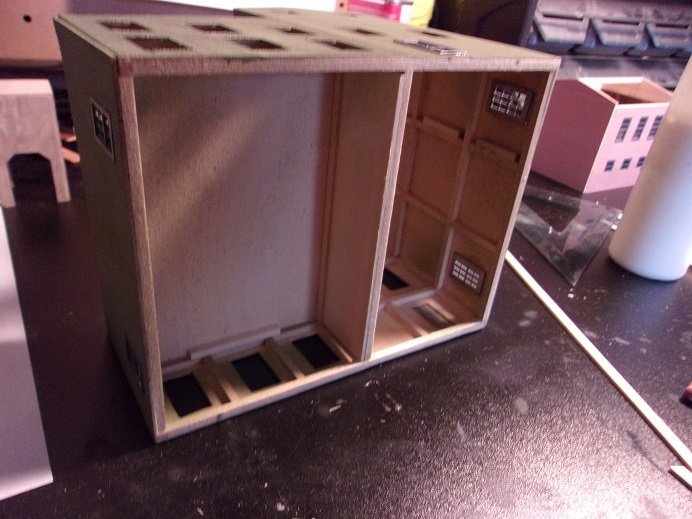
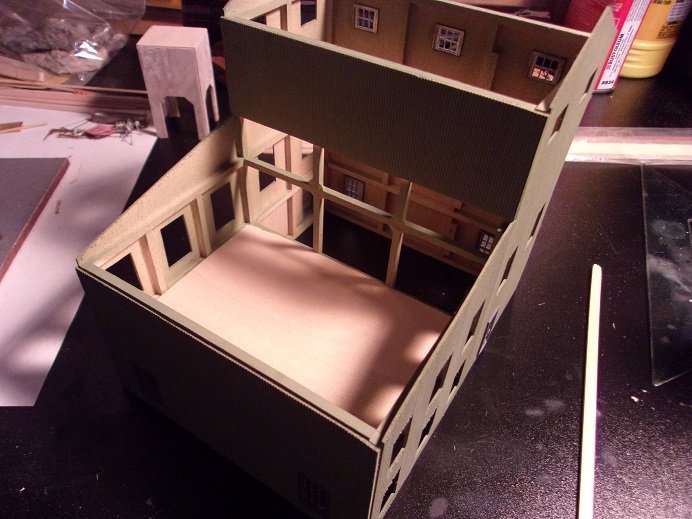
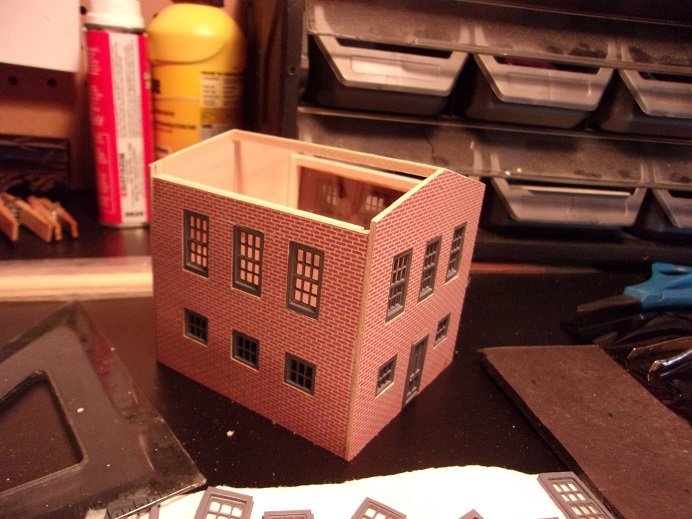
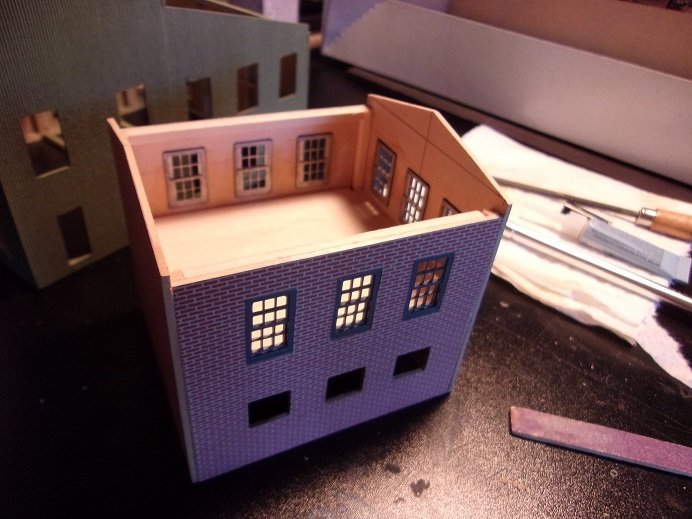
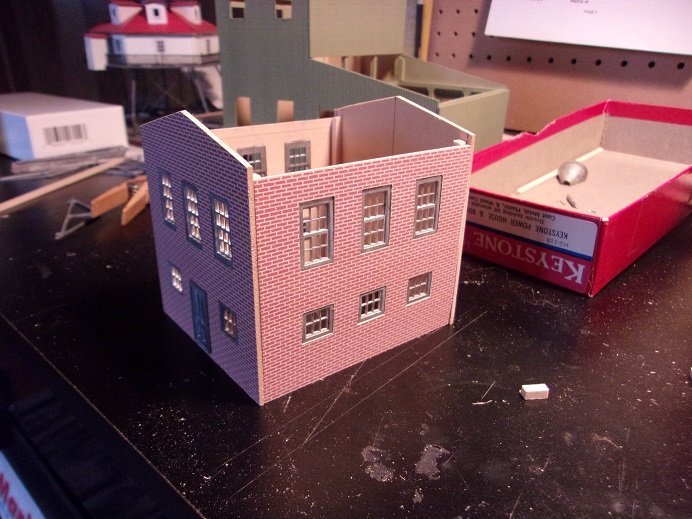
these are installed from the inside Ken........only the surrounding casing can be seen glad I was correct in deciding not to add frames I'm even happier that the window openings cut as well as they did! these are also the supplied windows.......I had already cut the openings for the metal ones......I'd probably have trouble getting the Tichy ones to fit. but as mentioned, it's OK......I'll certainly be able to use the Tichy windows for another project {which I do have one in the wings another thing I thought about was the corners.......this structure would really benefit from finding some of that brick overlayment. I could cut 2 mm strips and match up the pattern, covering the corners over.......ahhhh.....but then there's the color match problem...... ...my head hurts! the boilers were located on the second floor Ron, according to the back story at the beginning of the instructions. there were chutes that moved the ash to the first floor for easier removal.......likely had grates in the fire boxes. as is told, they had three boilers in this particular building. I've already thought of adding the boilers using large dowel that I have on hand. I will have to look into how the 'fuel' was brought to the second floor to feed the boilers..........I'll see if I can find pictures of the interior of one of these, and go from there. the premise of this structure was the production of steam, to power various aspects of the facility. the power house used it to produce electricity. to use one product to produce another, is a very interesting premise
-
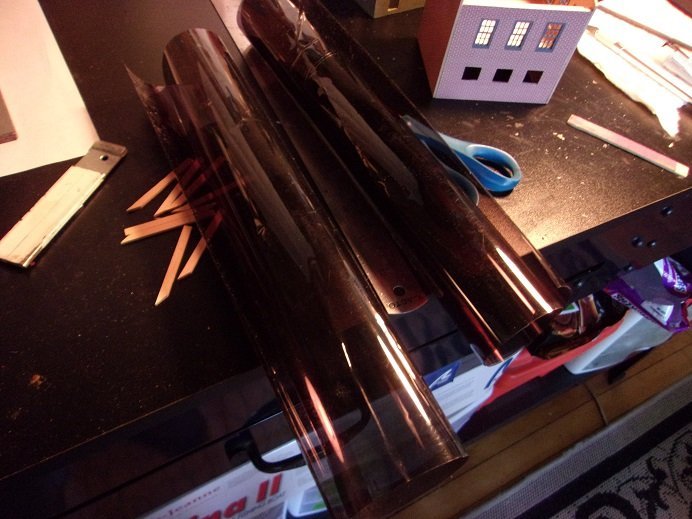
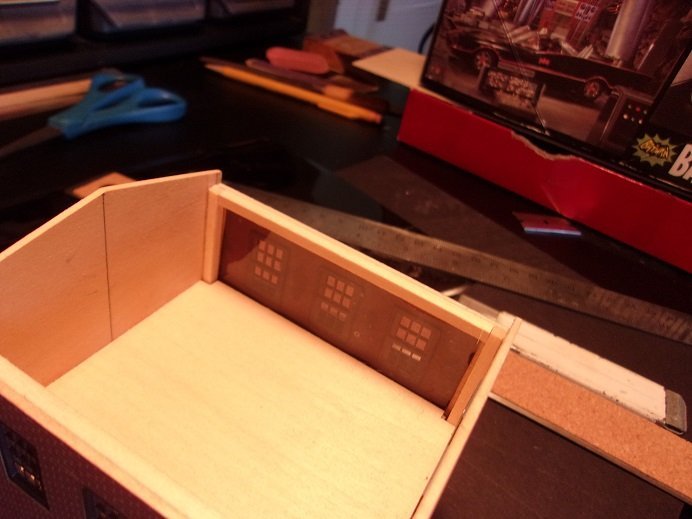
I think the tinted cello will work ........I had to show you! this stuff I found one day while taking Gibbs out for a walk in the field by our house. it's used for tint on automotive windows how it got there.......I have no idea, but I though I could find a use for it.....and I have. a simple test shows that it doesn't take too much away from the interior......not that I plan to add anything in there. I had just fitted the top windows in the power house, when I got the urge to check this out after cleaning the cello, the size was measured and strips were cut to fit the space. one strip was cemented in place......I used CA on it it looks pretty good.......but it will be darker when the roof is put on. lighting could be added, but that will mean that the interior would need to be fleshed out some. now.....how deep down the rabbit hole do I want to go?
-
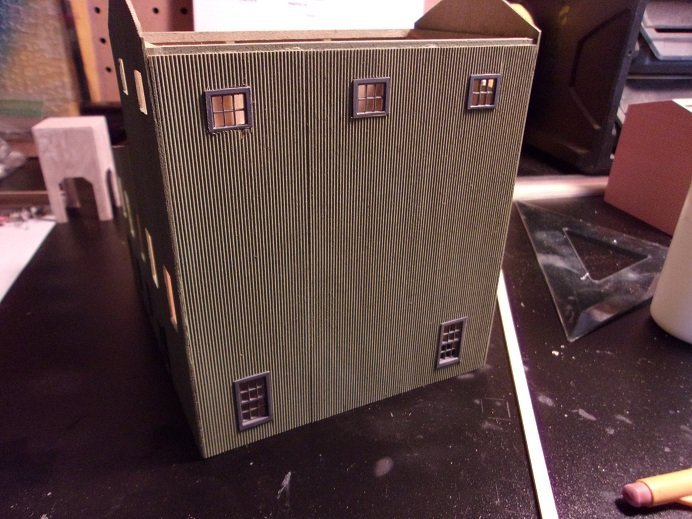
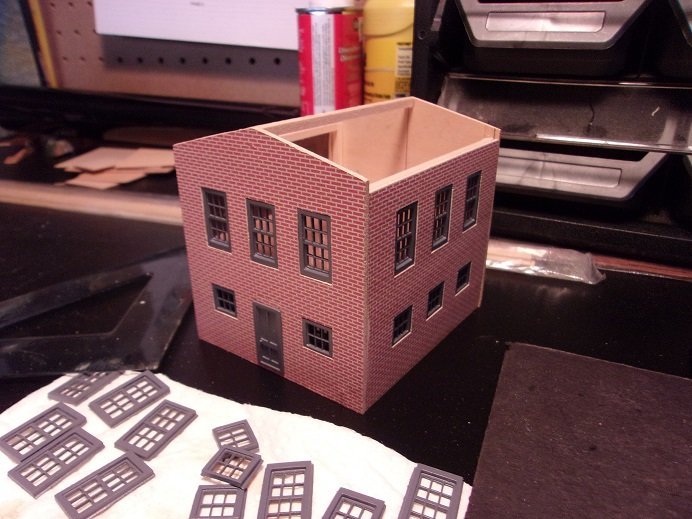
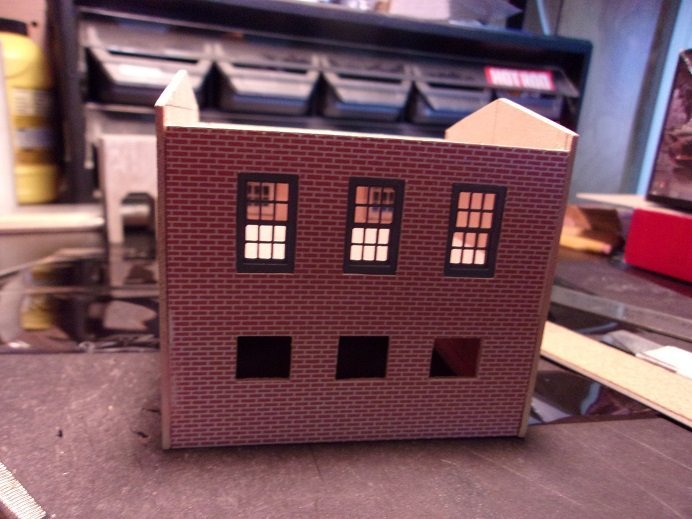
thanks all......so far this has been fun.......just like when I started to work on the snow plow. it was new.....something I had never tried before. this coming from a guy that felt daunted with wooden ships.......go figure now I can safely say and suggest to try thing you've never done before. sure you'll make mistakes.......but you get the same ups and downs with mediums your familiar with. don't you? I hear ya Ken.......I don't think there's a kit made, that some aspect or another isn't scratch built or changed to make things easier. I don't have to get too crazy with the roof framing.......as long as the roof sits well the metal windows seem clumsy.......lord knows how many times I dropped them, in trying to clean them up. yea......I dunno, white just seemed residential to me........darker colors means the cleaning lady doesn't have to fuss to much over the sills I did the front of the power house last night. I took a picture this morning, and I noticed right away that the door was sticking out at the bottom.......arg! I've adjusted it and now it fits flush. I filed around the casings before painting, to flatten the tabs along the sides. as I was fitting them in place, I did some finish sanding to make them fit better. to me......the templates were the biggest pain, but how else are you to mark and center the cut outs? you might not notice, but because of the template, the door opening was too tall and there was an 1/8 inch gap at the top. I could have been creative and added a transom, but you never see then on an exterior door. so, I added a piece to take up the space. these openings came out better than the Boiler house.........since the exterior is brick, there may not be a need for framing around the windows. the thickness of the wall panels is around 1/16.........around the equivalent of 2 mm. 3 mm might be a little too wide........I will have to go smaller for the window frames {I will have to do them on the Boiler house} I will try to get more done today, but I got three tires to mount for the Toyota......juggle them around, put on a new toilet seat, and finish what I was doing in the garage. the landlord's carpenters are back to reside the garage and put in a new window {I won't open that can 'o worms....I'm miffed enough about it}. I'm hoping that the Morano will fit in there, but I think it's too high.......might scrape the roof. beat that........a 1950's garage trying to house a 2010 automobile.......the shape of things to come { I hear that song in my head } oh.......before I forget.... the kit I ordered from oldmodelkits has shipped.......with any luck, I will see it by Friday. can't wait to show it to you
-
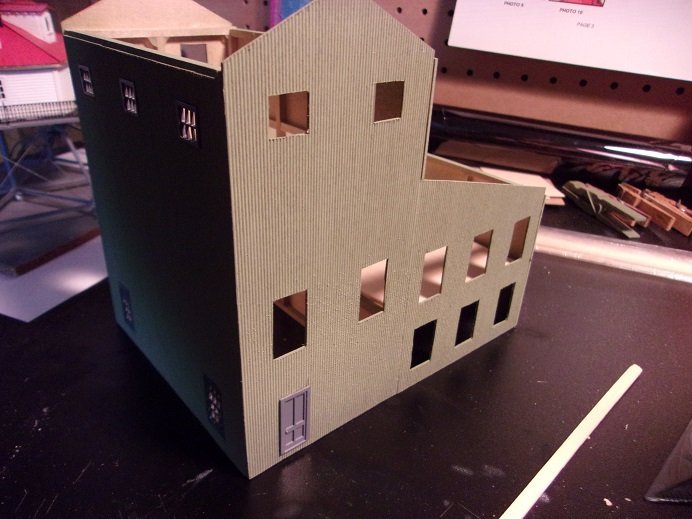
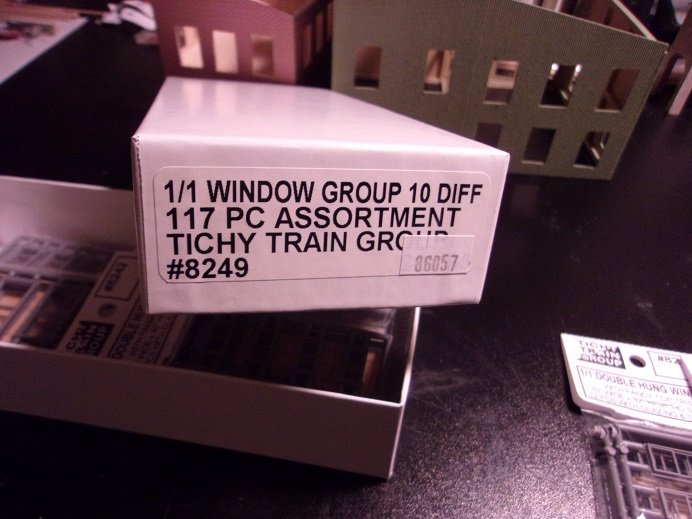
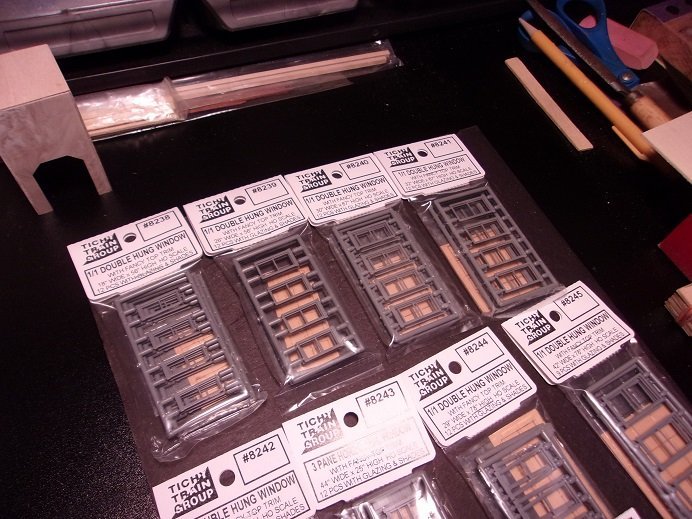
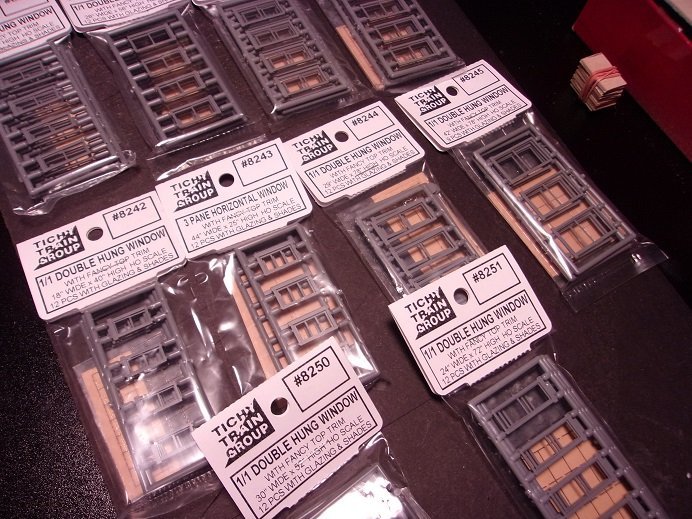
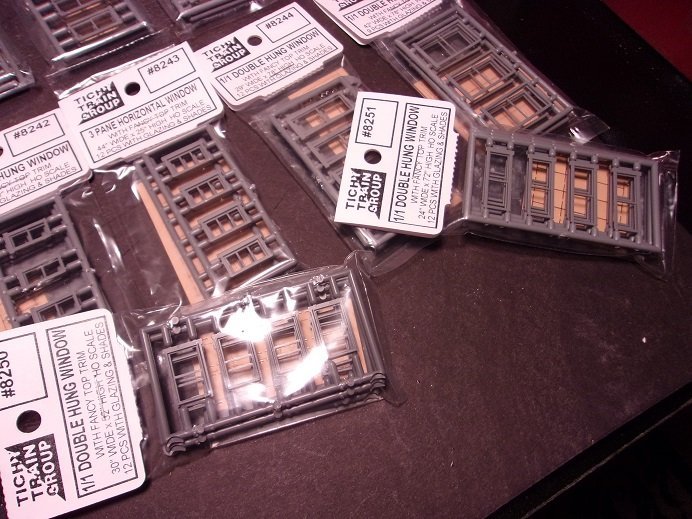
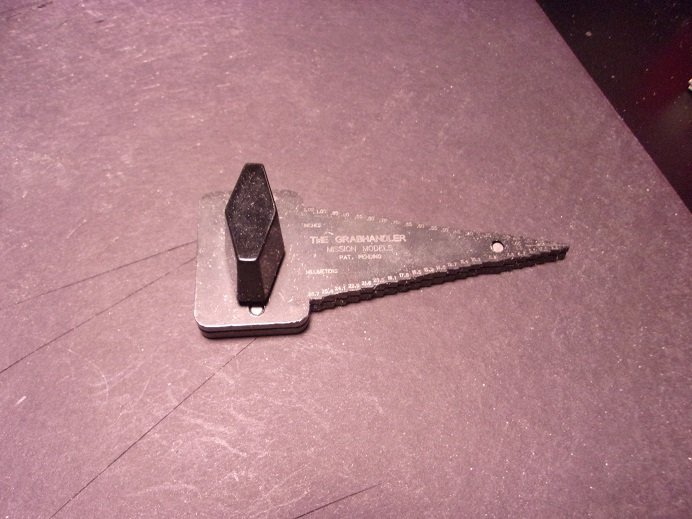
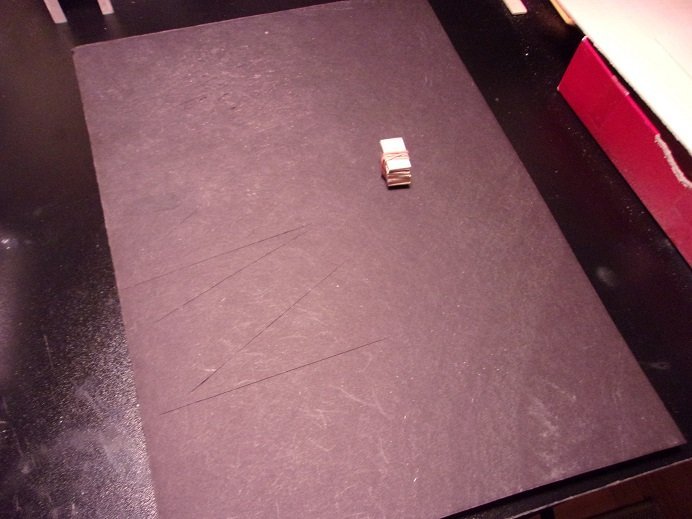
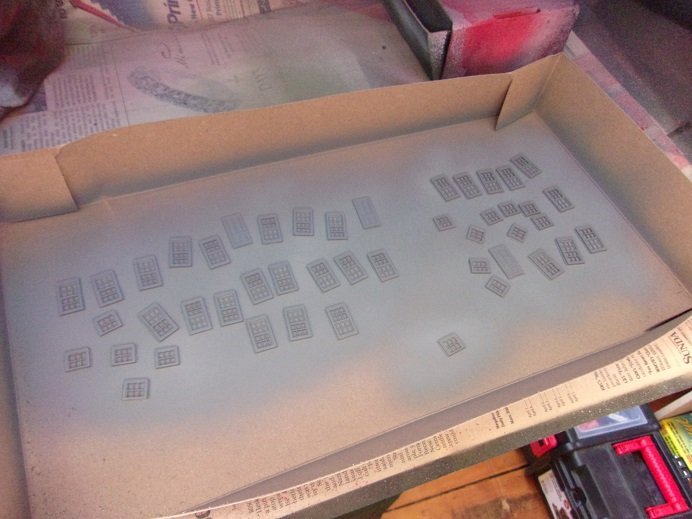
what the heck........no time like the present......right?!?!? after I logged off, I figured that it would take no time at all to take a few pictures.....I also have a picture of that tool I was tell'in you about. I bought this as an assortment........I was going to see if they would work with this project, but I've pulled the trigger on the supplied windows and doors. so I'll save these for other projects {the mind of a pack rat } the scary part is..........I DO have something in mind.........I just have to get started on it ***huge rabbit hole*** the assortment comes as ten packs of twelve......come complete with the clear glazing and shades { for all you Peter Noone fans } they have a larger set too.......I think over 200 pieces......but I think you have to order the glazing separately. heck......who knows......I may even build my OWN house we'll see what happens! about the tool........this was given to me a while back. I had no idea what the heck it was. when I started working on the PT boat, I used it to make a couple handles..........and that's when it hit me. it's use is to make the bends for grab Iron handles and brass railings. loosen the knob and position the brass to whatever step you need...tighten and bend away another thing to add to the project, is that I've saved all the cut outs from the larger windows. I figured they would make great chimneys. what the Grabhandler is sitting on, is a piece of artist's poster board.......to keep me from hacking up the table. I saw that was happening and I came up with this stuff that was in the closet gathering dust. forgot why I bought it....... I see a large mat in my future..........
-
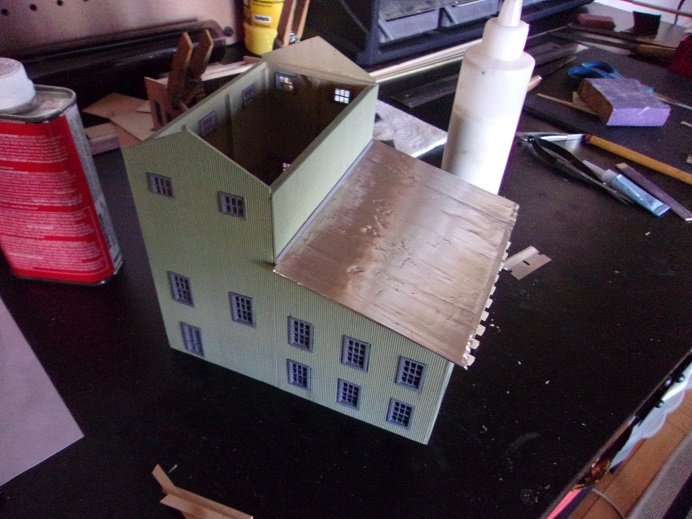
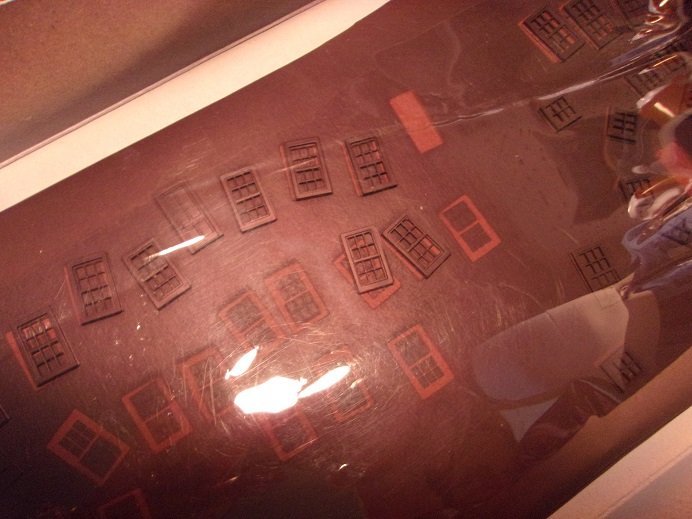
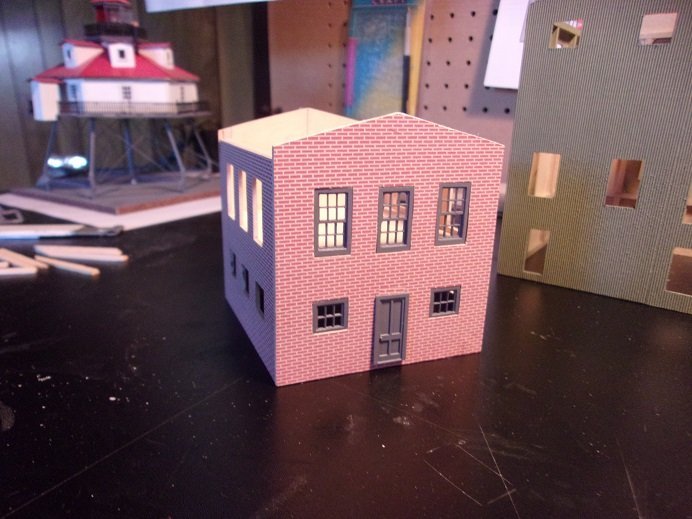
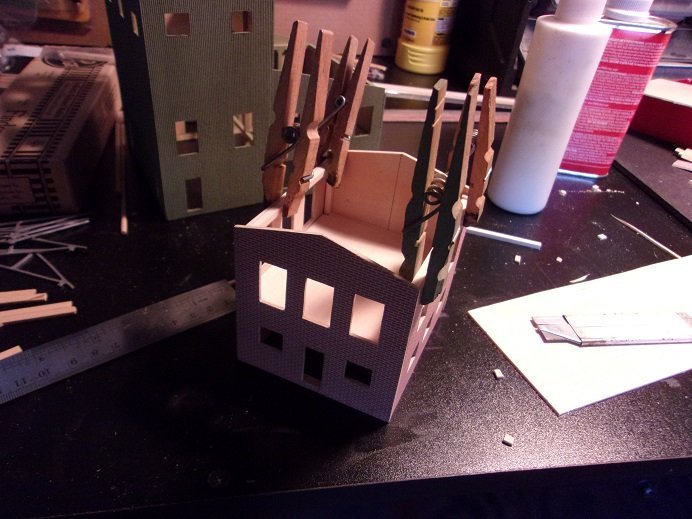
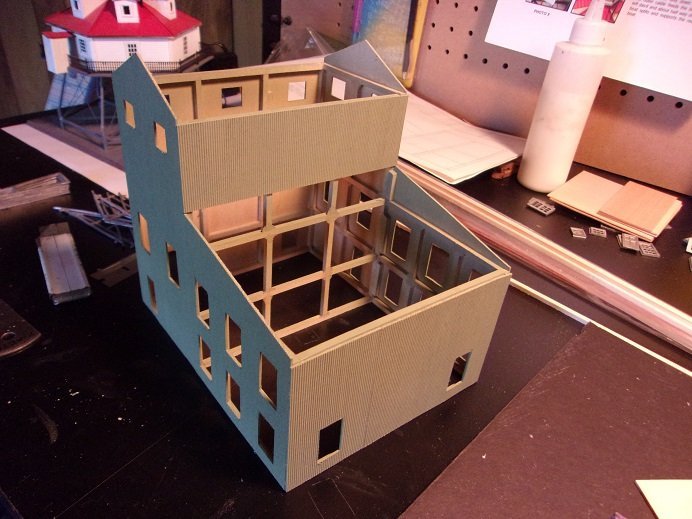
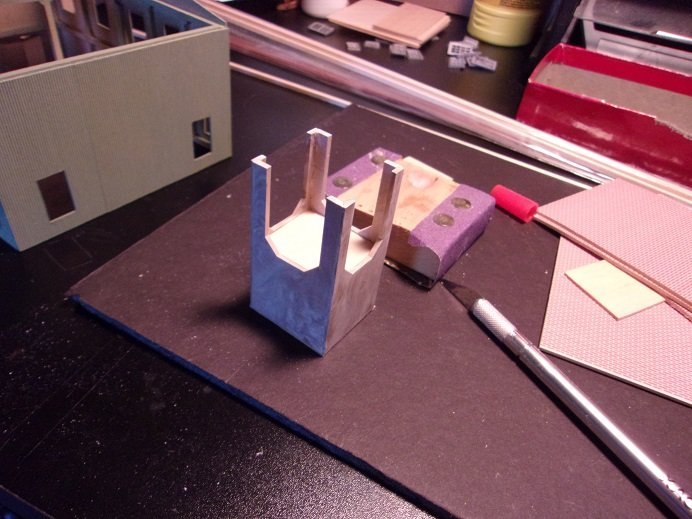
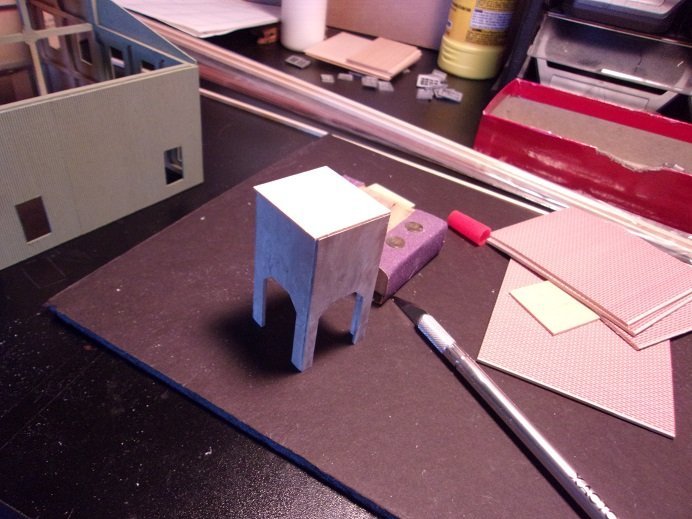
I did some work during my work week.........surprisingly {wonders never cease}. I need to fit the rest of the windows, so I can paint the entire lot. still flip flopp'in on the color, so while I was cutting the windows out of the powerhouse walls, I can bat it around in my head. the templates that I cut out don't match the size of the wall billets, which the outer wall is already done in a brick motif. I decided not to downsize the overall size of the building, but drop the height..........about 10 mm should be good. I was also going to leave the walls and scratch build the eaves and pitched roof, but I ended up pitching the roof using this 10 mm spec, leaving enough to box in the soffits. the back wall has no windows........the side walls are identical......only the front wall has a door {so much for fire codes}. I thought I had taken some pictures of the assembly.....but I thought wrong. the corners will have moldings to hide the bare wood.......I painted up some .5 x 3 mm strip stock to cover them. wish I had 2 mm, but this is all I got at this point in time. I added some form of framing inside to help strengthen the structure. with all the windows and doors cut and delegated, I can paint them........I went with a dark gray. the kit did not supply anything for the glass, so now the question is, whether to use that tinted cello I have on hand, or use clear stuff {which I also have plenty}. I find that today's clear product packaging does a great deed to keep me well stocked {and in different thicknesses too}. I also ordered an assortment of windows from Micro Mark, produced by Tichy.......I'll show you what they look like in the next update......they are pretty cool unlike the boiler house, I decided to drop a floor in there for the second level. this kinda forces my hand......now it is likely that I will do it for the boiler house. the last thing I did before we had to go out again, was to add the side sills for the rafters and A frames, which will be likely from scratch as well. hope to get more done.......I'm on the week end
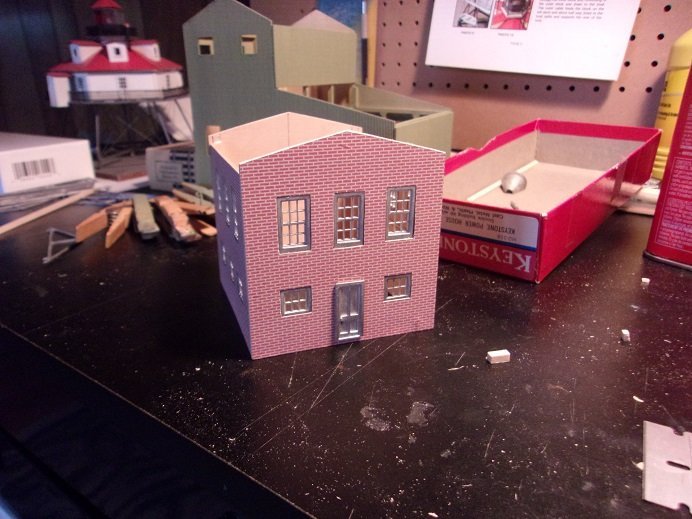
-
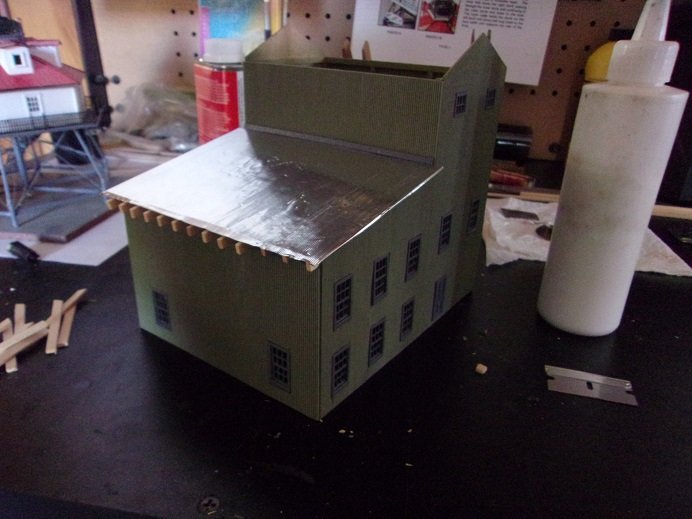
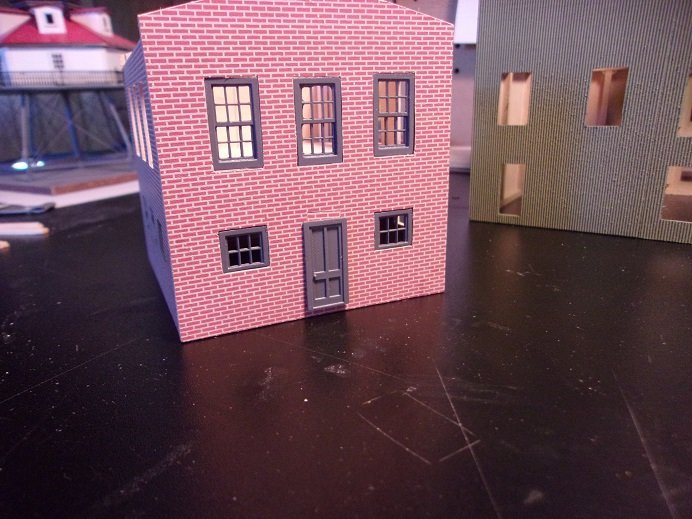
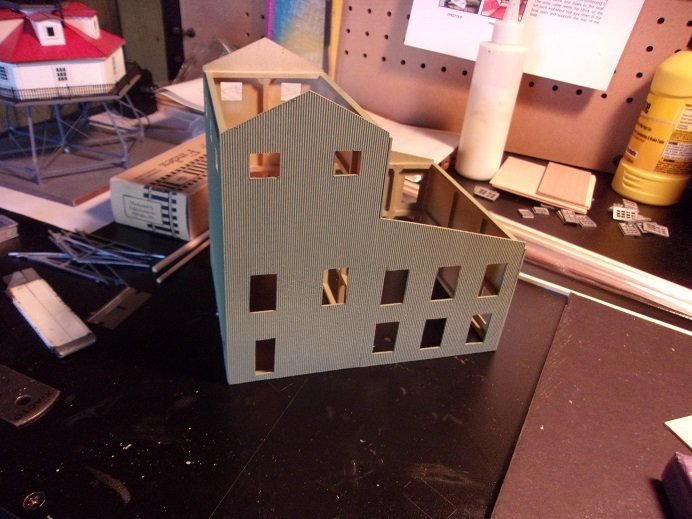
I got a chance during the past week to work on this project, but time wasn't on my side to present it. as mentioned, I got to paint the exterior of the boiler house. to clear this up { I was confused too} the larger structure is the boiler house......the smaller brick building is the power house. as said, I used the same green that I used on the PT boat. I'm kinda debating whether I want to do floors in it. I decided to do the single smoke stack .......glued the four sides together. I gave it a bottom.......cut them from scratch, since the supplied pieces didn't fit. the top wasn't flush, so I added another piece on the top. the windows took some time to clean up......I still need to paint them. debating what color to paint them..........white to me, seems kinda residential, don't you agree?!?! the smoke stack will fit on the back wall.....the one facing you in the above picture. the instructions are pretty vague on the piping, so research is under way.
-
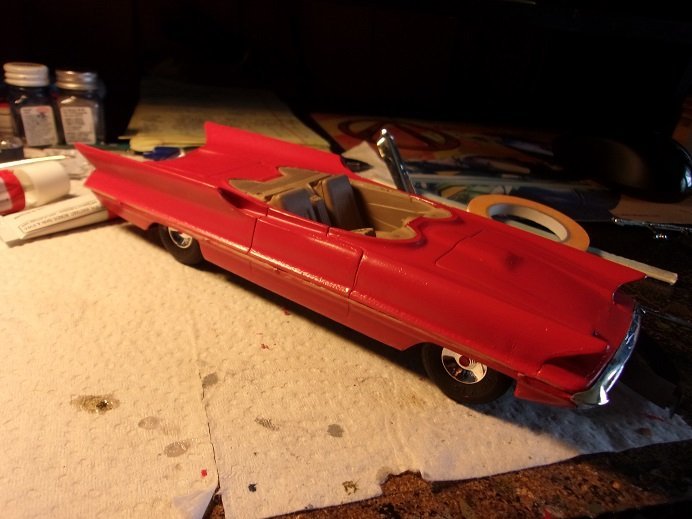
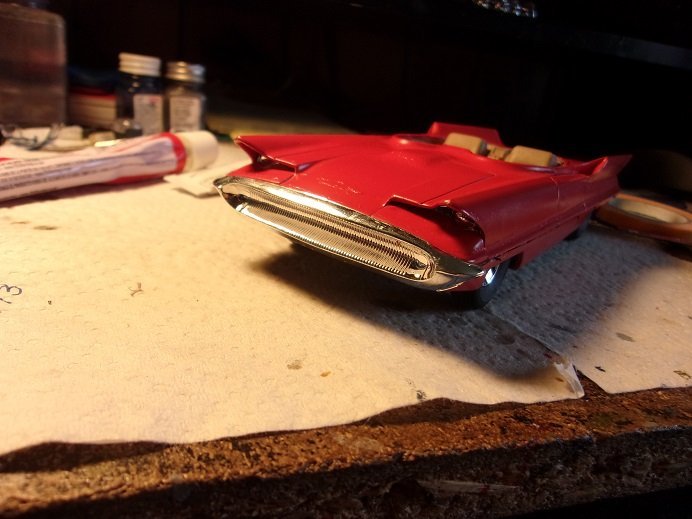
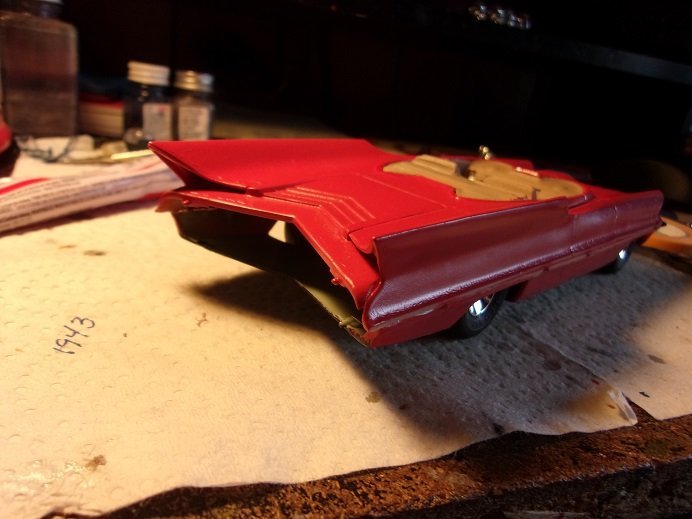
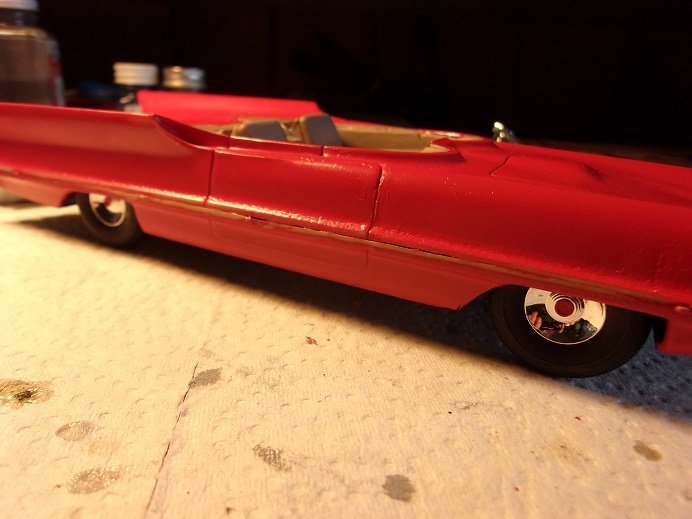
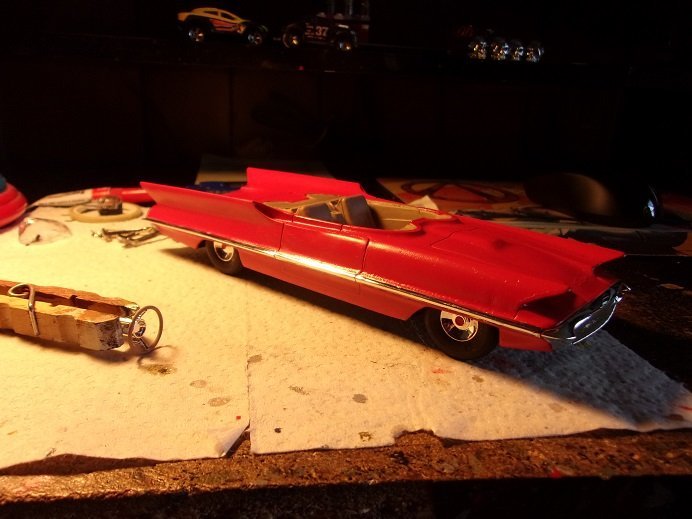
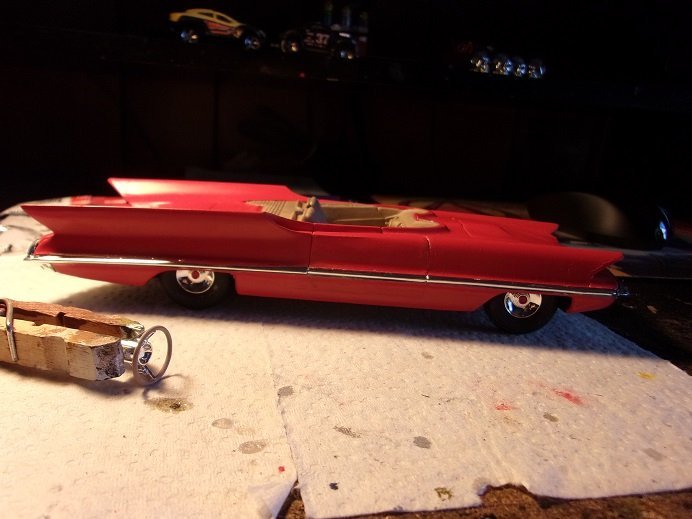
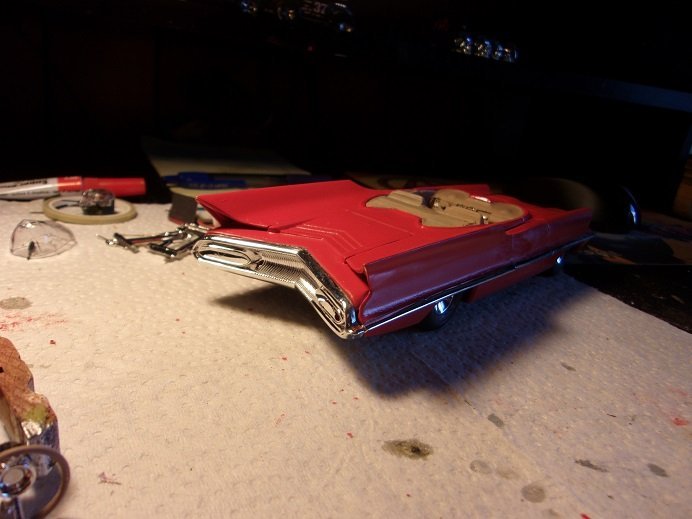
par-don yet again..........grilled supper, but got tied into a movie while I ate. blame it on Vin Diesel the guy doing the drum roll on this big reveal is very happy to see me.......ok.......you can stop now now......this starts out with the car showing her bad side. the body is back together, but when I went to fit the front bumper, I found that the halves weren't matched up correctly. so I had to split the halves apart again and refit them, so the bumper would line up. touch ups have been done. it looks terrible now, but along the sides, a long chrome strip goes on from front to back....both bumpers have to line up. as you can see, I have the front bumper in place already. I decanted some of the paint, to paint the undersides of the headlight tunnels. I focused on the gaps I saw when I did the last dry fit to the rear bumper. I found that the chrome strip will cover over it, so I need not be concerned. so that the chrome strips will fit flush to the body line, I sanded the mating line from front to back......made it look even worse. I did some chroming to the canopy........ I may go around the base of it.......still to be done. the chrome strips actually went on pretty well.......I used CA to cement them in place. this is one of the few times I've actually used CA on plastic. and the rear bumper is in place now. I was in the process of digging up some deeper red for the tail lights. not much more to go the steering wheel is nearby......I painted around the rim of it. more soon......
- 19 replies
-
- 12
-
-
apologize for the delay.......too much going on the admiral is having issues that we've been dealing with....finally getting good results. we bought another vehicle...a 2010 Nissan Marano..........barely a week and already in the shop. we brought it back to them because of a minor EVAP leak. these are the more prominent upheavals........ every time I turn around........we gotta go somewhere......... har-umph! I must have started this too late..........now I gotta go grill supper
-
good to see your making progress on her....... look'in really good

