


popeye the sailor
-
Posts
15,993 -
Joined
-
Last visited
Content Type
Profiles
Forums
Gallery
Events
Everything posted by popeye the sailor
-

P-51, LaGG-7, and Do-17 by Javlin
popeye the sailor replied to Javlin's topic in Completed non-ship models
hate to break it to you, but on the tenth of March 1944, the 2nd Staffel of the Versuchsverband OKL had one.......by the 30th of March, they had two. at the same time, respectively, one turned into two P 38 lightnings in the same time span. as time went on the numbers grew and shrunk, the list is somewhat long......Mosquitoes, P-47s, lightnings, Spitfires, Mustangs, Harvards, and Typhoons. they focused quite a bit though on bombers......at any time they kept no less than at least 20 in the air, and that was just the B 17s. there is a glossary in the back of the KG 200 book that timelines the existence of these planes and how many were airworthy. it's a good read -
yes...I'm aware that access into the ball turret was from the inside.......I didn't imply that it was done outside. worded it wrong....probably.......but there were other manufacturers for these turrets.....some were introduced later.
-
RFM 1/35 Panzerkampfwagen IV Ausf.G-Finished
popeye the sailor replied to Javlin's topic in Non-ship/categorised builds
surprised that being as detailed as it is, there wouldn't be molded detail. what was wrong with the supplied blocks for the ship? I've used the Revell supplied blocks on all my 1:96 scale ships, and they were fine. I have a method with rigging them, that doesn't put a lot of stress on the plastic eye bolts. I haven't resorted to filling the masts with metal rod either. -
I saw you were finished! I can't describe how good this looks............this look is harder than displaying her in a battle situation...... "it's everyday life aboard a carrier". populating her with the people and laundry is a seriously nice look you have done such a superb job with this one. as for the Jap flying boat........you were just playing........weren't you you certainly pulled it off with the other planes! I think though that she should be put on a higher shelf...........it's a 'top shelf' job
-
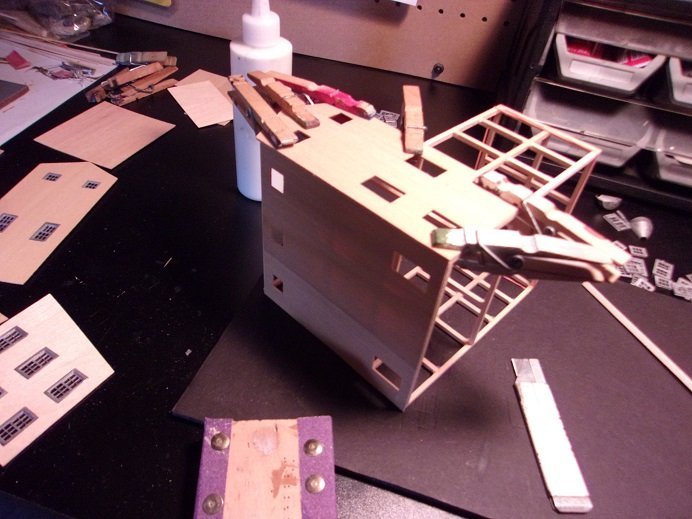
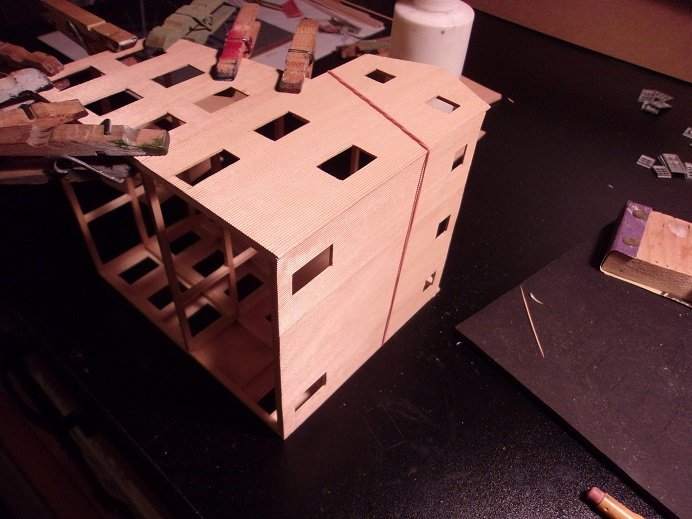
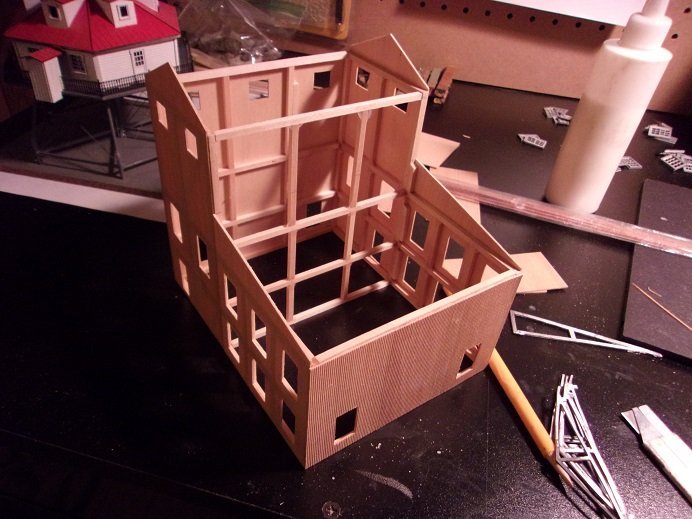
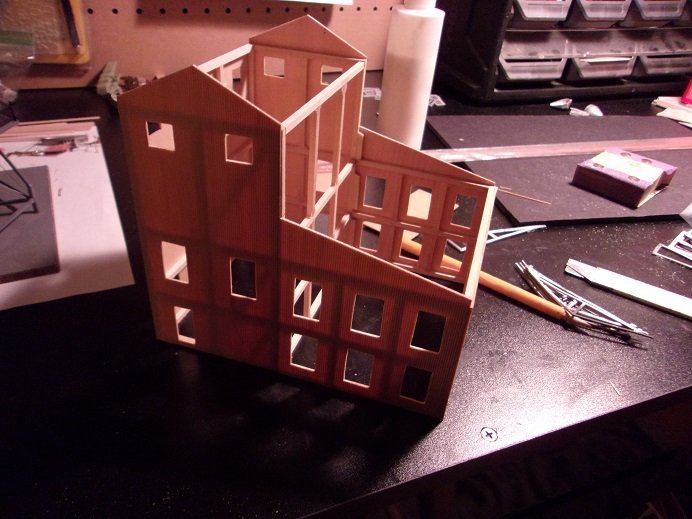
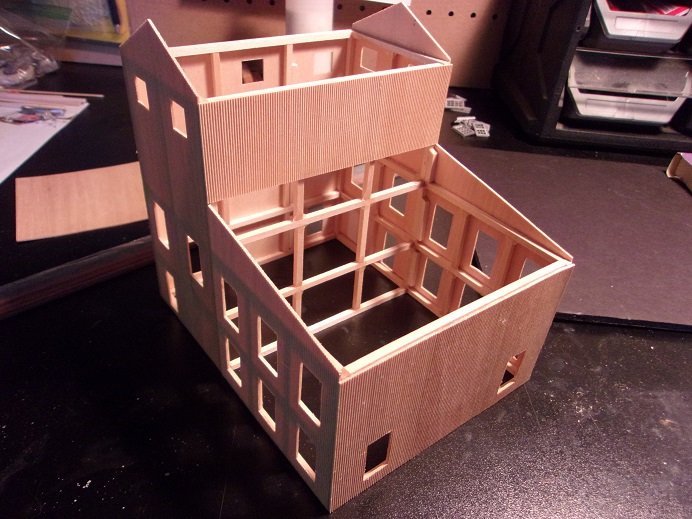
this is a push........the kind I like I think I made enough sense with the wood panels.......time to get them on the frame now that the windows and such are cut out. as mentioned, I made a few goofs, so I'll remedy this by making exterior frames. some of the sheets didn't go the full span of the wall, so I added some 1/8 pieces, so I'd have something to glue to. we start with the back wall. the pieces I added can be seen here......they won't impact the window installation. this side does not go all the way to the top.......they mention this in the instructions. the other piece was added to the back wall......now on to the side wall. this wall overlaps the back wall. personally, I thought the ground floor windows were a bit low, especially since I allowed the 1/8 for the doors.........but there are instances where the windows are lower {seen on more modern buildings}. foundation-wise.......they have stuff out there that will imitate stone, cement.........just about anything you want. I'm not sure of the future, but this is screaming dio ....we'll have to see. big jump here.......one side is done and the other side is getting the second half of it's exterior siding {I'm almost beside myself! } keeping the corners flush......very important. I have some of the small Plastruct angle stock I was going to use as corner molding, but I can't seem to find it..........this will make another pilgrimage to Hobby Lobby more important! I'll just couple it with a trip to Home Depot or Wal Mart and I can get it past the budget director. the front is on now........I started to look at the upper part. I like the metal trusses, but between the flash and that I noticed some deformities, I'd be more inclined to make them out of wood strip. another thing I see, is there is nothing to anchor them to the wall. the panels for the upper face drop down, but not all the way to the cross beams below the roof line.......you may see them, but I made marks there, where the face panels go down to. the skeletal in no way impacts the window placements. where I marked out the line........cross beams were added, and the upper fascia was put on. the construction so far has been great........I like how sturdy it is, and in spite of the vagueness of the instructions, not terribly tough to figure out. I think Gibbs is fuss'in to go out.........and I have a mission. the admiral is thumbing through bank stuff........we're getting another car {we don't want to, but I think it's time, before a house falls on it } more on this project soon
- 72 replies
-
- 10
-

-
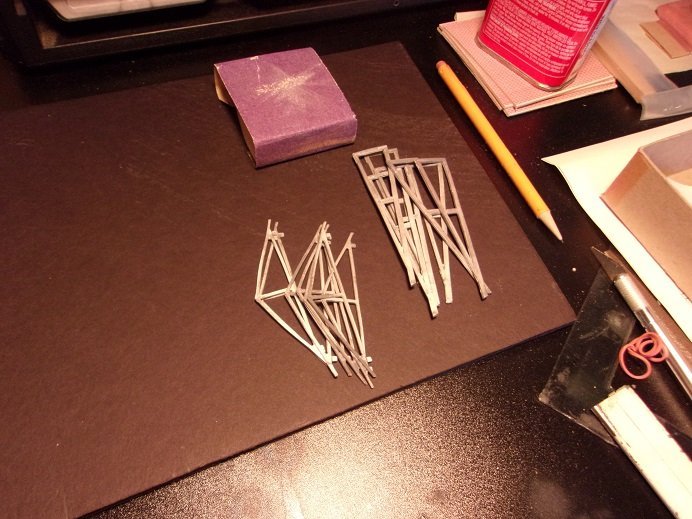
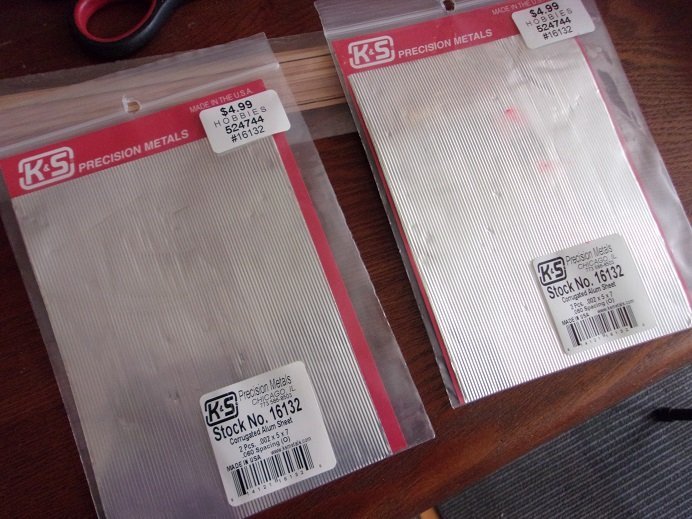
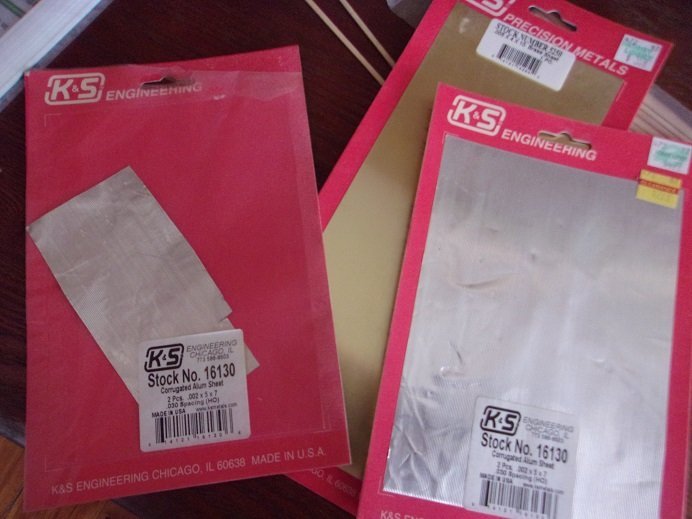
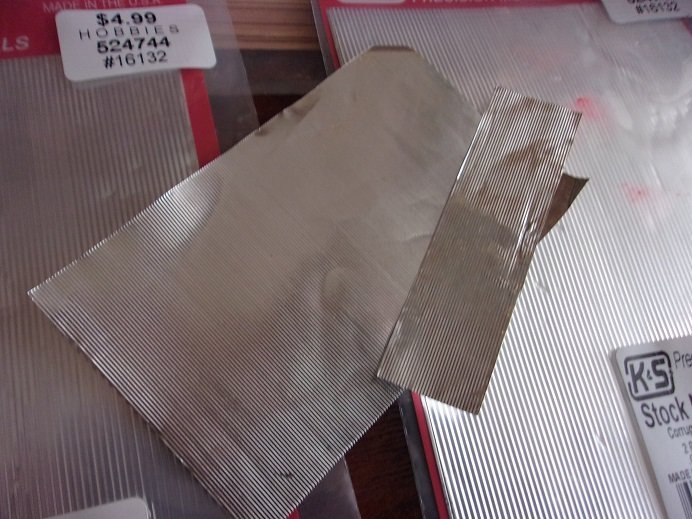
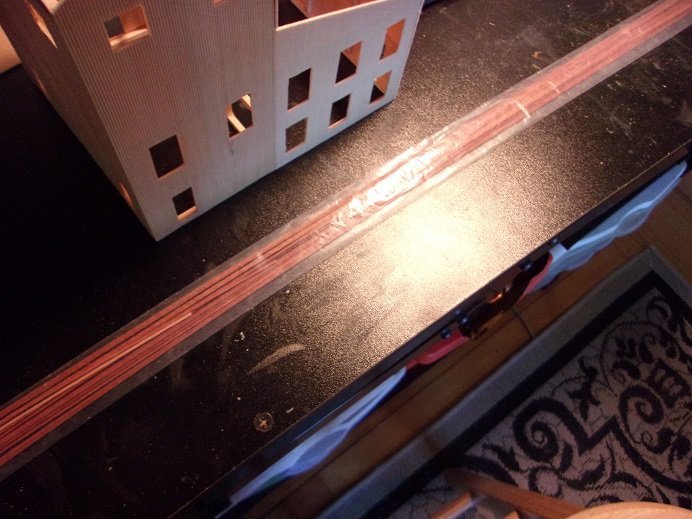
the left over wood is the roof........I was going to paint them aluminum and probably weather them......likely since the fresh paint will be shiny I was on the fence with the overall color.......I'm thinking green though. I have that can of flat green I used on the PT boat......I figure that with flat white window frames, that I will need to make. materials not supplied in the kit. here is the Green I was thinking of. darker I could go with a flat medium green......I've always like that color the metal siding your talking about...........well, I have two choices now this is the stuff I just bought.......it has wider ripples. you can see that there are some minor defects, but I can either try to scribe them out, or leave them, chalking it up to the building enduring occasional hail storms and such. I was going through my plastic sheeting, and found a package of aluminum siding with narrower ripples. that's a sheet of .005 brass behind it......I have other sizes that came with the brass assortment I got from Micro Mark. I have odd pieces too...... good picture showing the ripple indentation. I've got other stuff.......copper and such.......I am such a pack rat I hear you on the wood thickness, but I'm having some thoughts on the rafter parts.......this lead like metal is something to work with...probably Britannia, but not sure......all it says is that they contain lead {not for small children}. for the exterior window framing, I ran into a slight dilemma.........most of what I have is .5 X 3 mm strip and would be a bit out of scale. I did find my assortment of mahogany strip that is a mix of 1 and 2 mm widths. I think I have enough. another trip to Hobby Lobby might be in order......I believe they have 1/64 basswood sheet that might work better for the roof. the metal stuff is good, but I think a backing might give it some stability. I may even resort to card if all else fails. drat........I gave you folks a preview of my next update
-
dialing in the color spectrum......gotta be one of the hard parts
-
RFM 1/35 Panzerkampfwagen IV Ausf.G-Finished
popeye the sailor replied to Javlin's topic in Non-ship/categorised builds
my grandson asks me why I haven't built a tank.........one day perhaps so........where's that gluey smell I hear tell about? -
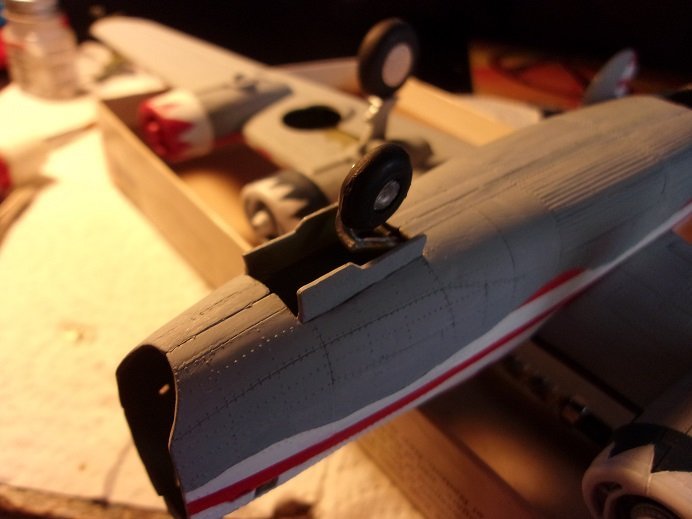
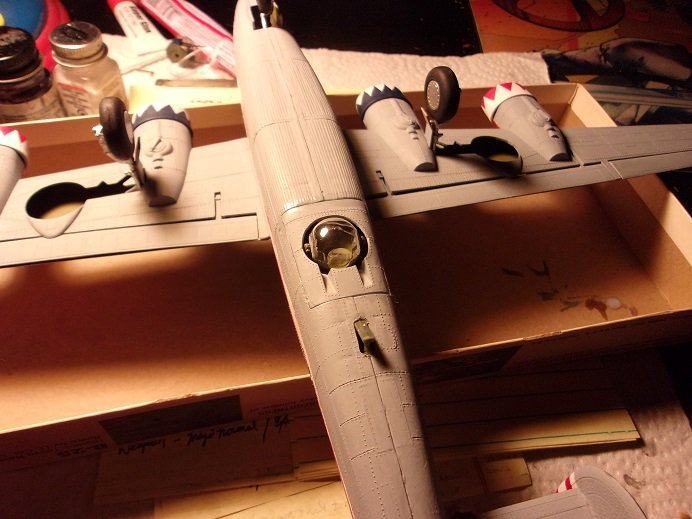
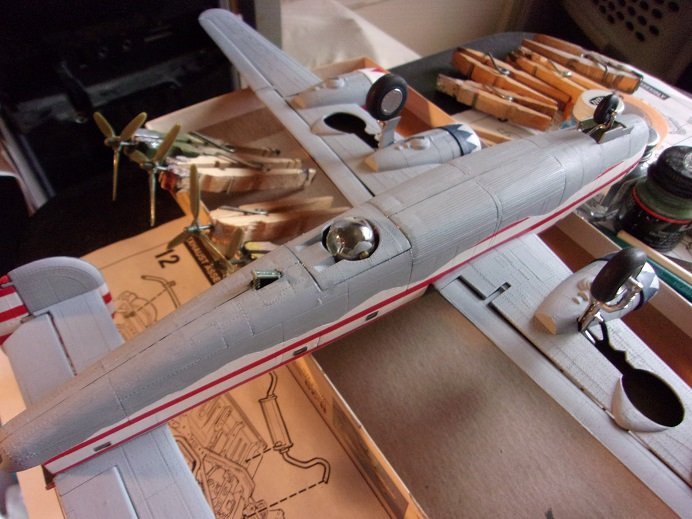
I'm fairly sure that I read that the ball on b 17's was retractable......that's how they could get in and out. the skid appears to be in a place that would give space to the ball........that's how I figured it. I kept the protrusion with the idea that the guns would fit into the slots...I did want to make it somewhat visible, since there are no guns in it. at least I was right in keeping the skid extended I would imagine that if anything was done that would alter the balance of the plane, they would erect a prop for the tail. I've seen other planes with tricycle gear propped up in this manner. I did do a little on her.......touched up the underside parts and painted the props. now to go through the task of framing the cockpit and nose glass
-
looks amazing OC.....the Dio is getting busy very nice work indeed!
-
I'm all eyes Chris.......looks like a fun model
-
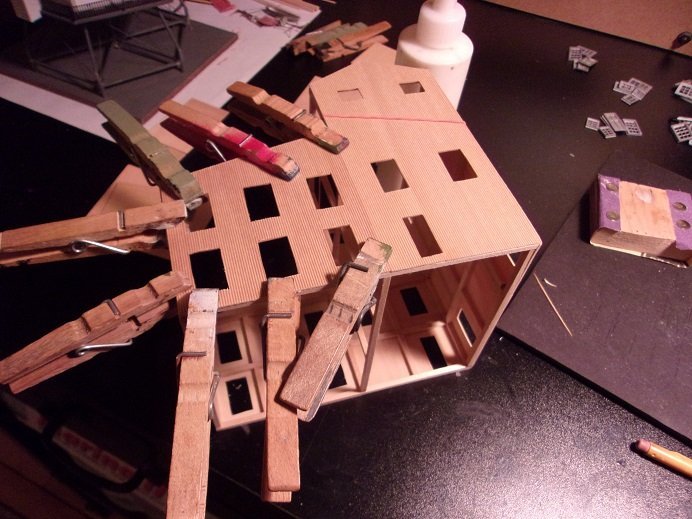
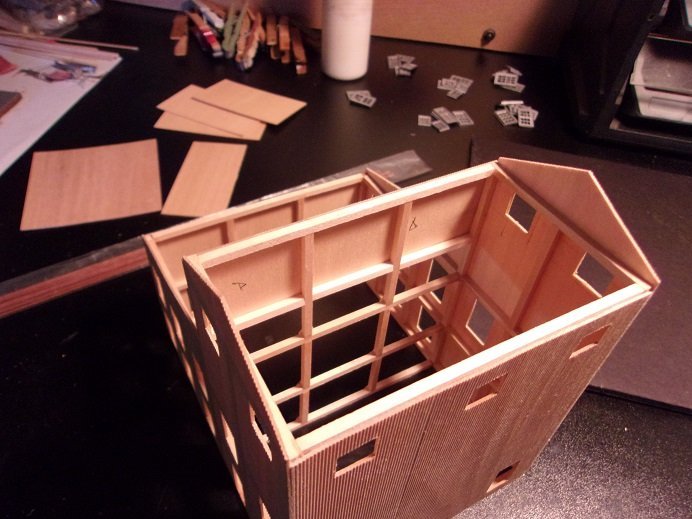
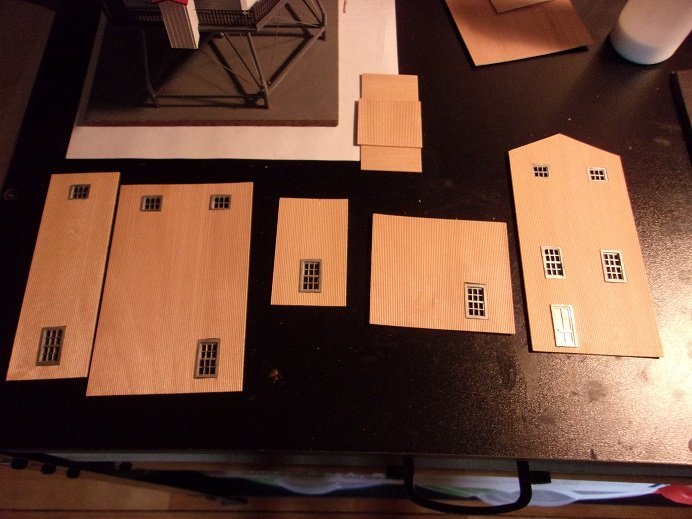
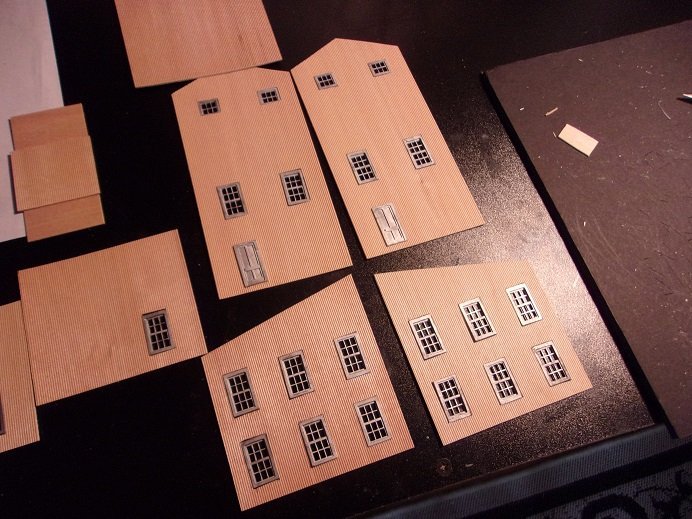
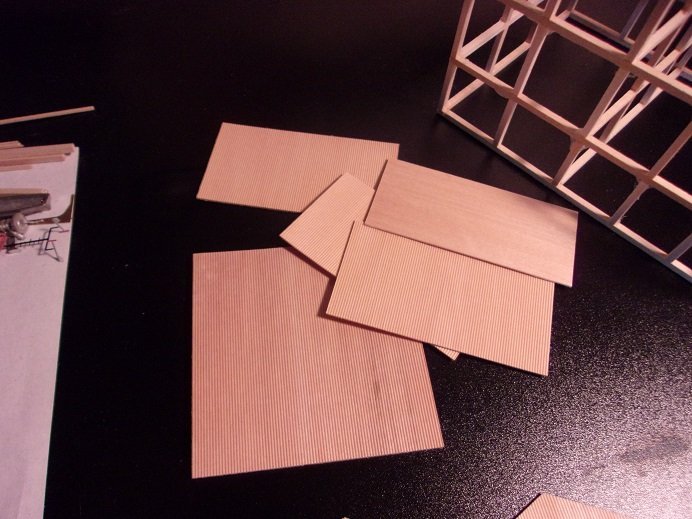
I started to cut out the windows and doors. the instructions are vague on the placement of these panels......even had to figure out how the frame pieces fit together. the foundation aspect may be what this model is missing Ken, but with the panels in place, one must have to cut out the small piece of frame where the door is located. I still raised up the openings for the doors........if steps are involved, I'll add one more step to remedy it the templates were OK........but there must be a better way. I'll need to add frames around the windows and doors.......couple of cuts are a tad off. these are the sides to the lower part of the structure.......I've lettered these as I identified them, per what there is in the instructions. I cut out the rest this morning........ what is left over must be roof parts....
-
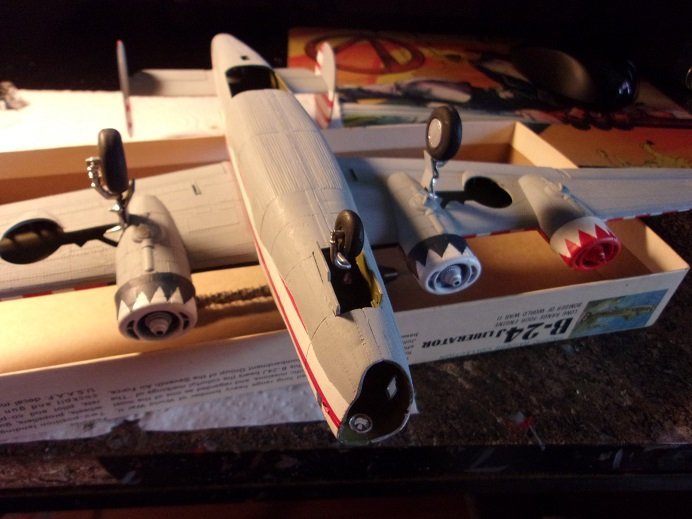
I completed the nose gear repair. this is probably the easiest repair I've made yet..........having that flat part that was so easy to drill through. all I had to insure was the angle that the gear protruded. I was hoping I could highlight the flat part in there....best I could do. other added parts are the belly turret and the skid plate. the skid plate is interesting.......I think they took note of the damage to the belly turret, that B 17's received in some of their less than perfect landings. I used window maker to fill in the critical gaps. when touched up, I want to keep these lines, barring these obvious gaps. more soon
-
superb job on the Yak.........great camo!
-
super nice..........
-
P-51, LaGG-7, and Do-17 by Javlin
popeye the sailor replied to Javlin's topic in Completed non-ship models
nice looking aircraft I've been thinking of doing a P 51 as my next captured German plane.........either that or a Spitfire -
yes........this shows the primative nature of the older model kit. the model enthusiasts of today has gained quite a few insights and details of the models we build........we've come to expect much more this is a good trait that stayed with the mediums as we evolved.....we've always wanted to add an aspect of detail, not found in the normal 'out of the box' kit. one person added this.........and another person added that......pretty soon we arrive to the idea that the kit really isn't as detailed as once thought. the model manufacturer sees this as well, and the model kit evolves along with the expectations of the modeler. the modeler CAN dictate the detail content in the models they buy! I guess this is one of the reasons why I look at when the kit was produced.......it gives you a fair idea of the research that went into it. digress if I may...........look at the example of the Revell 1:96 ship kits. they are a series that I hear so many touts about. I hear so much about the shortcomings with the plastic eye bolts, the hollow masts, and lack of critical detail..... ......one has to take into account, when these kits were produced. a couple were produces as early as 1956.......the year I was born! to make matters worse, these kits didn't go through any retooling as time went on. Revell flooded the market with these kits, and this added to the problem in updating the kits. even today.......on E-bay these older kit still surface. I love these kits......I think they are the some of Revell's best offerings. I've never run into the issues that some have complained about. the company in the U.S. has changed, leaving Revell / Germany as the prime holder of the name. Mindset has been changing as well.........model kits were model kits, made primarily of plastic. outside of the metal axles you get in car kits, very few used different materials in their kits {some kit even had plastic axle rods}. today, with detail reorientation and higher expectations, aftermarket parts like resin and P.E. have begun to be included in kits. for folks who are much better modelers that I, this is great news. it brings the challenge level back up to what they expect in their kits meanwhile.........back on earth...... I hope to do something on it this week custom work today has kinda gone back to the nostalgic, leaving the original patina on the cars they do....make.....build trucks seen to showcase the brunt of this styling some look really cool!
- 17 replies
-
- 10
-
-

-
hello Mike.......I see you've made some mighty fine progress! paint really makes what you've dons so far stand out nicely........the launchers came out especially well!
-
you don't do any masking? your a freehand freak.........aren't you? I'll send all my figures to you.......mine keep coming out look'in like circus clown
-
here is a small update on the progress of this model. the testing I did on that tape showed that unpainted, the glue did not transfer to the model. it peeled off as it normally would. so I would suspect that the thinner, and leaving it on the model a prolonged period of time, caused the adhesive to separate from the tape. I tried a couple of things, but without damaging the paint, I had no other choice than to scrape the adhesive off....including the paint {flat black}. going over it later with some sand paper smoothed the areas out good enough to repaint the underside. I have since removed the tape for the cockpit......this did not result in the same unsatisfactory result........and that came out reasonably well { a few touch ups}. one other sticky wicket that I know of is the rear bumper. there are serious gaps along the sides where they meet the body. I will need to fill these areas in with plastic strip and fit the bumper. I bought some Plastruct strips for the PT boat.......I can use some for this {only a little bit}. so this is where I'm at on it. I guess paint the affected areas and I can continue
-
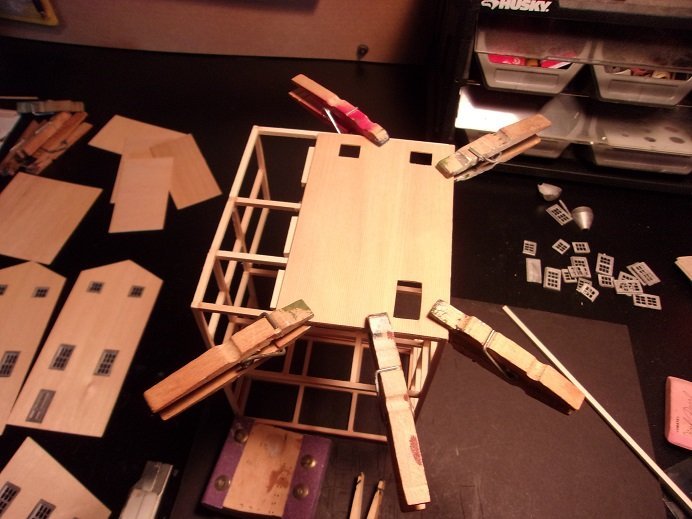
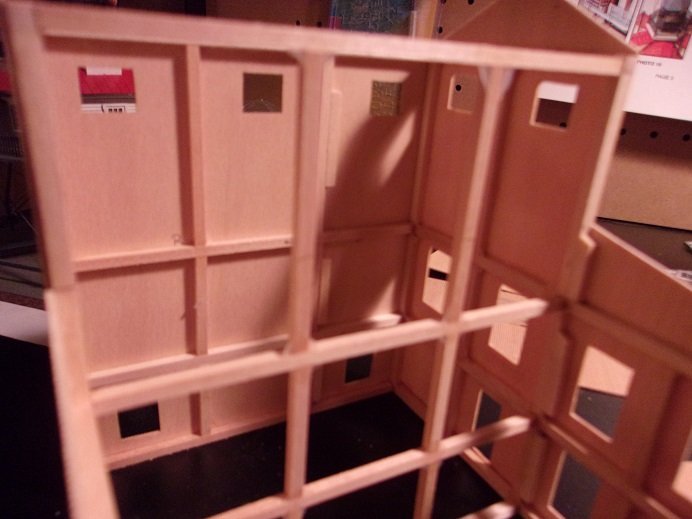
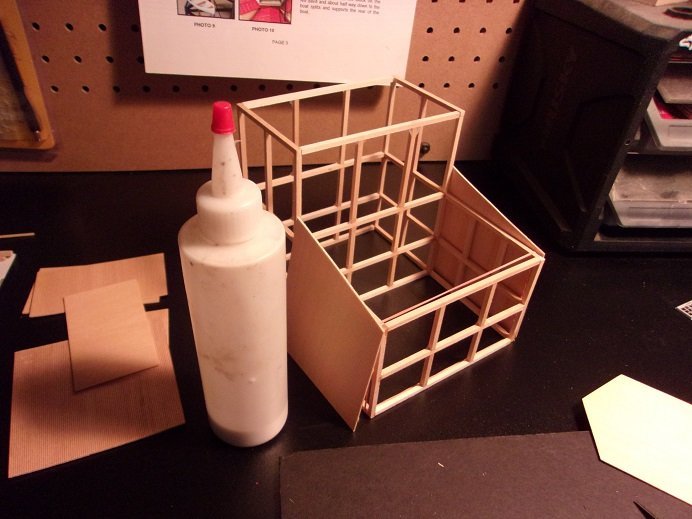
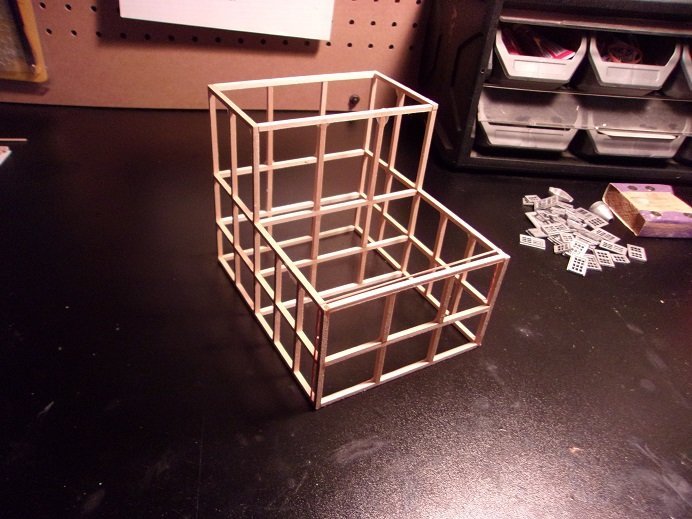
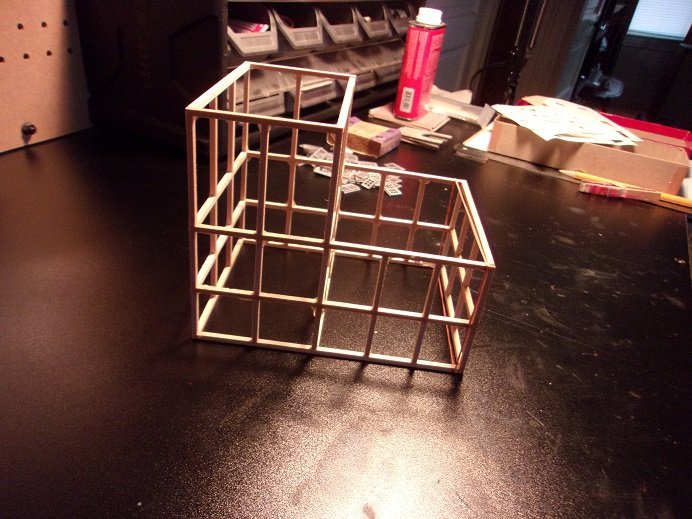
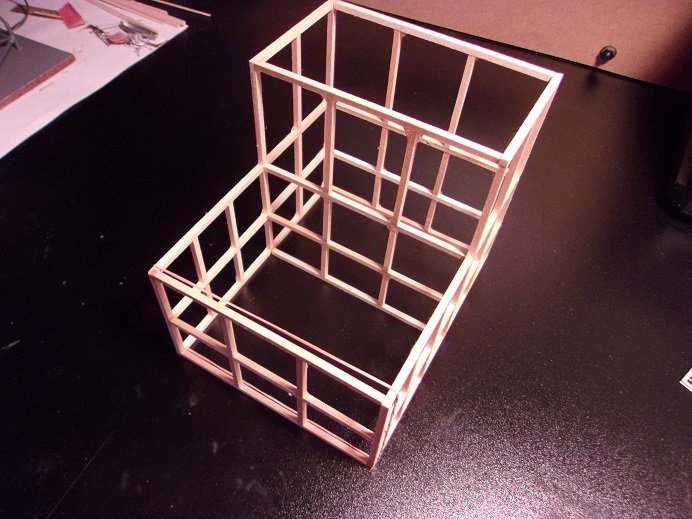
it took me a minute to figure which end was up, but the framework is now assembled. one thing I did notice are the doors......and the way they go all the way to the floor. the base for the frame is outlined in 1/8th strip. once the doors are cut out from the frame and put on the exterior of the building, the doors will not fit. I will need to raise the door openings 1/8....this way the doors will fit full height. it's nice to be able to try out the new crane light on table black. the admiral never got to ask me why it was so urgent to get one for it now to work on the outer panels for it.
-
I have them book marked Ron......thanks I listed a few earlier in the log......probably have some that I overlooked. gluing the frames together at the moment
-
WOW! I see nothing wrong with your skill set Greg...........I'd NEVER get a 1:350 plane to look like that! and your gonna have crew to boot!.......simply amazing......you've really set the bar VERY high! superb!
-
beautiful work OC........and you say MY paint is striking..........look whose call'in the kettle black
-
thanks OC........I saw that Oldmodelkits has another Warbirds kit available.........and another Pacific theater kit {which I still have}. I'd definitely get the warbirds kit, but I wouldn't get another of the other.......nice kit, but not worth the price very easy to come up with another subject.........I'm try'in very hard not to think of one!

