Charter33
Members-
Posts
455 -
Joined
-
Last visited
About Charter33
- Birthday 01/21/1956
Profile Information
-
Gender
Male
-
Location
Berkshire, UK
-
Interests
Model ships -especially HMS Victory (Caldercraft)
Live steam locomotives
R/C Aircraft
Classic motorcycles
-
 Charter33 reacted to a post in a topic:
HMS Victory By Mort Stoll by a Caldercraft Kit Embellished to show Lower Decks
-
 Charter33 reacted to a post in a topic:
HMS Victory 1805 by kiwiron - Caldercraft - 1:72
-
 Charter33 reacted to a post in a topic:
HMS Victory by Yabuhebi (Chris) - Caldercraft - 1:72
-
 Charter33 reacted to a post in a topic:
HMS Victory by Yabuhebi (Chris) - Caldercraft - 1:72
-
 Charter33 reacted to a post in a topic:
HMS Victory by Yabuhebi (Chris) - Caldercraft - 1:72
-
 Charter33 reacted to a post in a topic:
HMS Victory by Yabuhebi (Chris) - Caldercraft - 1:72
-
 Charter33 reacted to a post in a topic:
HMS Victory 1805 by kiwiron - Caldercraft - 1:72
-
 Charter33 reacted to a post in a topic:
HMS Victory 1805 by kiwiron - Caldercraft - 1:72
-
 Charter33 reacted to a post in a topic:
HMS Victory 1805 by kiwiron - Caldercraft - 1:72
-
 Charter33 reacted to a post in a topic:
HMS Victory by Yabuhebi (Chris) - Caldercraft - 1:72
-
 kiwiron reacted to a post in a topic:
Woodwork/Model making workshop by Charter33 - FINISHED - Scale 1:1
-
 kiwiron reacted to a post in a topic:
Woodwork/Model making workshop by Charter33 - FINISHED - Scale 1:1
-
 AJohnson reacted to a post in a topic:
May I introduce myself?
-
 Keith Black reacted to a post in a topic:
May I introduce myself?
-
 Willi reacted to a post in a topic:
May I introduce myself?
-
Welcome Willi. MSW is a great site to explore and enjoy this hobby, plenty of inspiration and advice to be found with like minded enthusiasts. Your models are superb! I also echo Dziadeczek's and Mike's enquiry about details relating to those big questions on waterproof finishes, ballasting and r/c sail control. Cheers, Graham.
-
 GrandpaPhil reacted to a post in a topic:
Woodwork/Model making workshop by Charter33 - FINISHED - Scale 1:1
-
 GrandpaPhil reacted to a post in a topic:
Woodwork/Model making workshop by Charter33 - FINISHED - Scale 1:1
-
Caldercraft Victory Replacement Parts
Charter33 replied to Jonathan_219's topic in Wood ship model kits
I fully agree with Julian, keep trying to contact John at Jotika. I did this when losing a piece of the stern decoration. Once I had explained the problem the part was quickly despatched. He did sound like he was working flat out at the time! A second suggestion that may help here - Cornwall Model Boats here in the UK do keep a stock of some of the fittings for many of the Caldercraft range (and other kit producers) including white metal castings and photo etched sheets. If a particular part is not in stock, or listed, I believe that they can often get them from the kits' manufacturer. Always had great service from CMB, and originally bought my Victory from them. Good luck. Graham. -
 Jorge_Goncalves reacted to a post in a topic:
Woodwork/Model making workshop by Charter33 - FINISHED - Scale 1:1
-
 Javlin reacted to a post in a topic:
Woodwork/Model making workshop by Charter33 - FINISHED - Scale 1:1
-
 Javlin reacted to a post in a topic:
Woodwork/Model making workshop by Charter33 - FINISHED - Scale 1:1
-
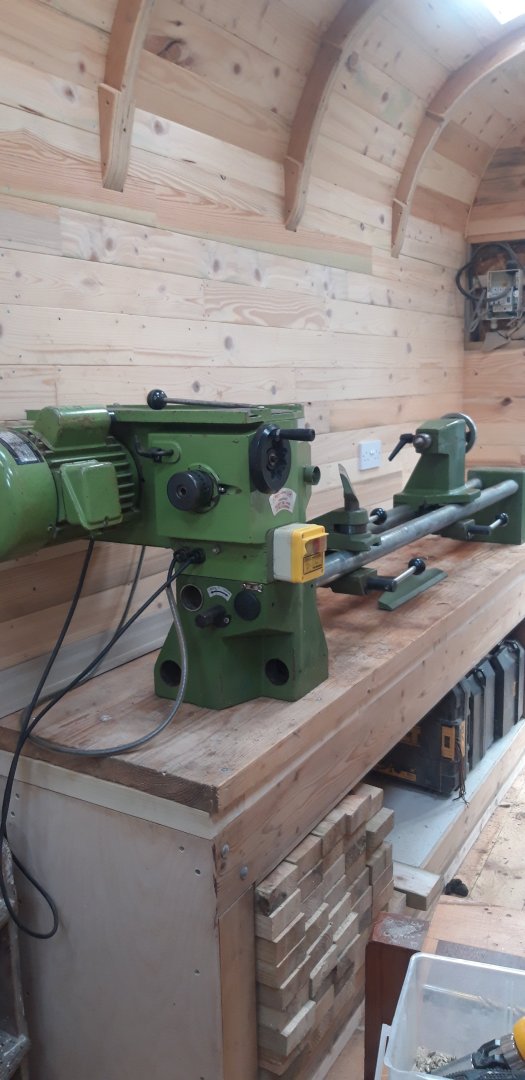
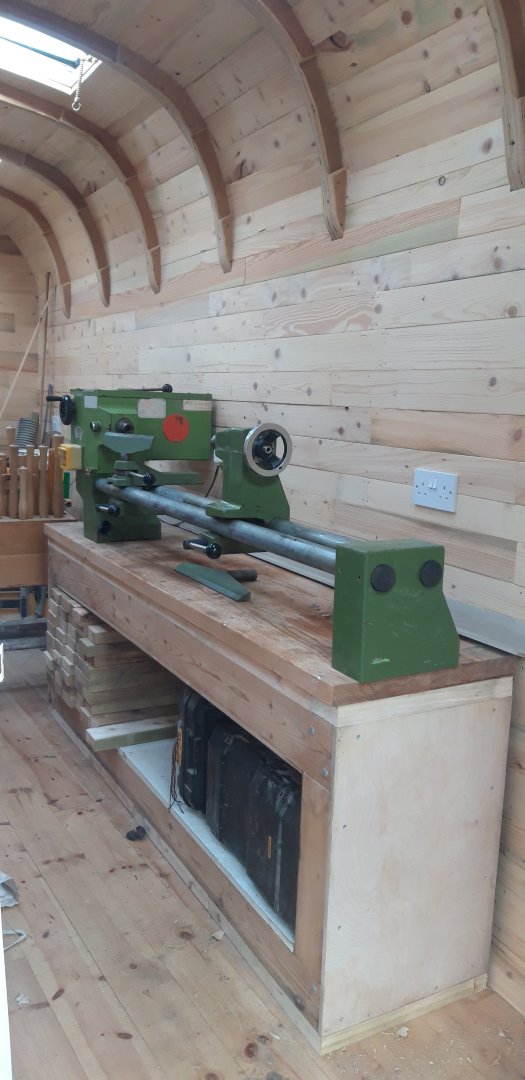
Thanks for all the positive feedback, and also for the sage advice offered throughout this project. To be honest the evidence of being a well organised workspace is often not the case when a project, especially non-model making one, is underway! I have to conscientiously discipline myself to ensure that it doesn't descend into chaos 😄. Dziadeczek - Those are all great machines but unfortunately for much of the wood turning I do I require a much longer bed than these offer. My lathe is a Poolewood 28-48. Belt and cone pulley variable speed, and I can comfortably mount up blanks of wood for Windsor chair legs and back spindles etc. as it will safely take wood up to 40 inches long. In standard configuration the swing on the chuck allows for bowl blanks of up to 12 inches diameter, even larger if the headstock is rotated 90 degrees. It does allow for finer turning too. I've produced ash dowelling down to 3 and 4 mm diameter and recently made Victorian style decorative porch supporting columns and balustrades in maple for a dolls house repair commission. I've used this lathe for over 30 years, she's a keeper... I also have my trusty Hobbymat MD65 which currently resides behind that metal cabinet on the right of the workshop for when the need arises, metal turning, smaller spars etc. It suffered in the same flooding incident as my workbench but still does a good job. More details of this machine are on post #90 of my Victory build log so I won't repeat the story here. Finally, thanks to the moderator who added FINISHED to the title of this thread, a task that eluded my feeble attempts to edit it last night. Much appreciated! Cheers, Graham.
-
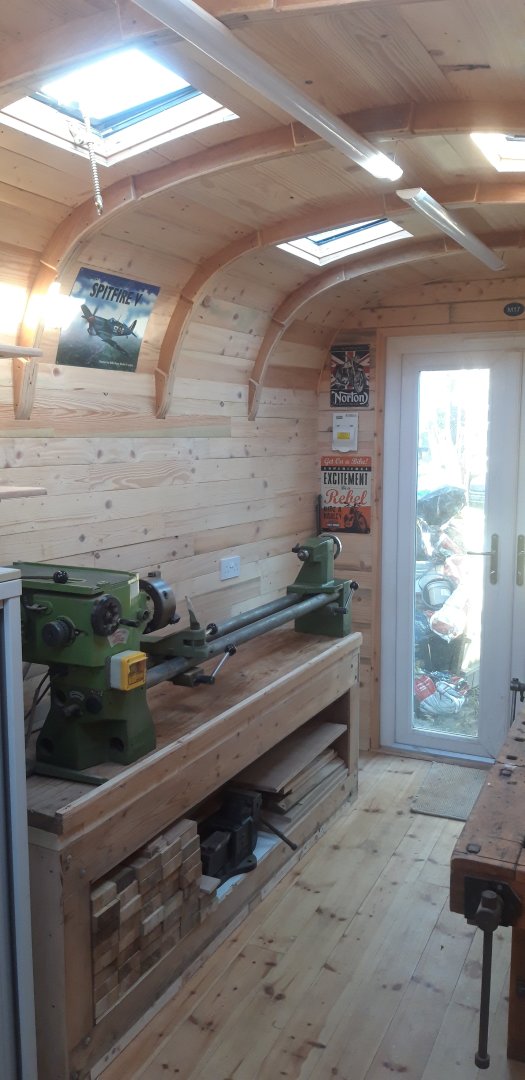
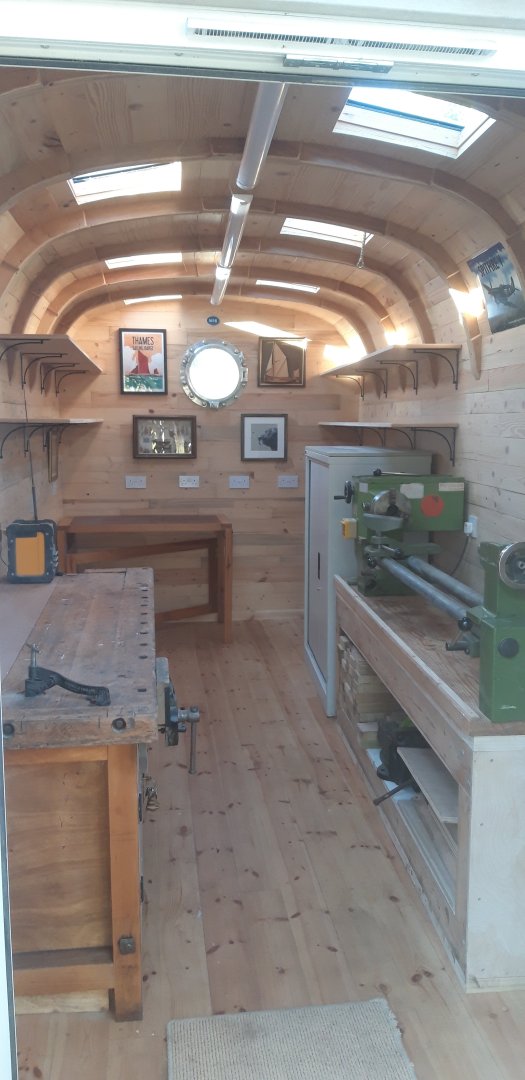
Time for a final update! A few modifications and fitting out have been completed so the workshop is now fully up and running. The underside of the end of the roof over the doors looked unfinished with the bare ply showing. I thought about painting this area, but came up with an alternative, finding inspiration in a beautiful little taverna on the island of Santorini recently. Fortunately our garden provides a good crop of bamboo...... One issue that came up when using the workshop to make, repair and renovate was the egress of dust into the model making area, even with the extractor in use. To minimise this I've added a pair of dust sheet curtains midway. In the picture above they can be seen in their unfurled state. Inside the wood turning tools have been racked up.... as have many of my hand tools..... The 'L' shaped model bench is now in place and the shelves store books, plans, other models and resources. My Victory is now in her new shipyard and building can continue. Those dust sheets are shown furled here. I'm still slowly working though boxes of tools, equipment and materials gathered throughout my teaching career and having to make some difficult decisions as to what to keep as space is at a premium in the man-cave. I've enjoyed this journey with all it's various challenges, hope you have too.... Cheers, Graham
-
Grommets for 1930 Pond Yacht Sails
Charter33 replied to Kimberly's topic in Masting, rigging and sails
Would something like this solve your problem? https://www.amazon.co.uk/dp/B016MMZGGM/ref=sspa_mw_detail_0?ie=UTF8&psc=1&sp_csd=d2lkZ2V0TmFtZT1zcF9waG9uZV9kZXRhaWw&aref=MOSAz5r8Yip13NParams Totally agree with Druxey, she's a real beauty..... Good luck with the restoration. Graham -
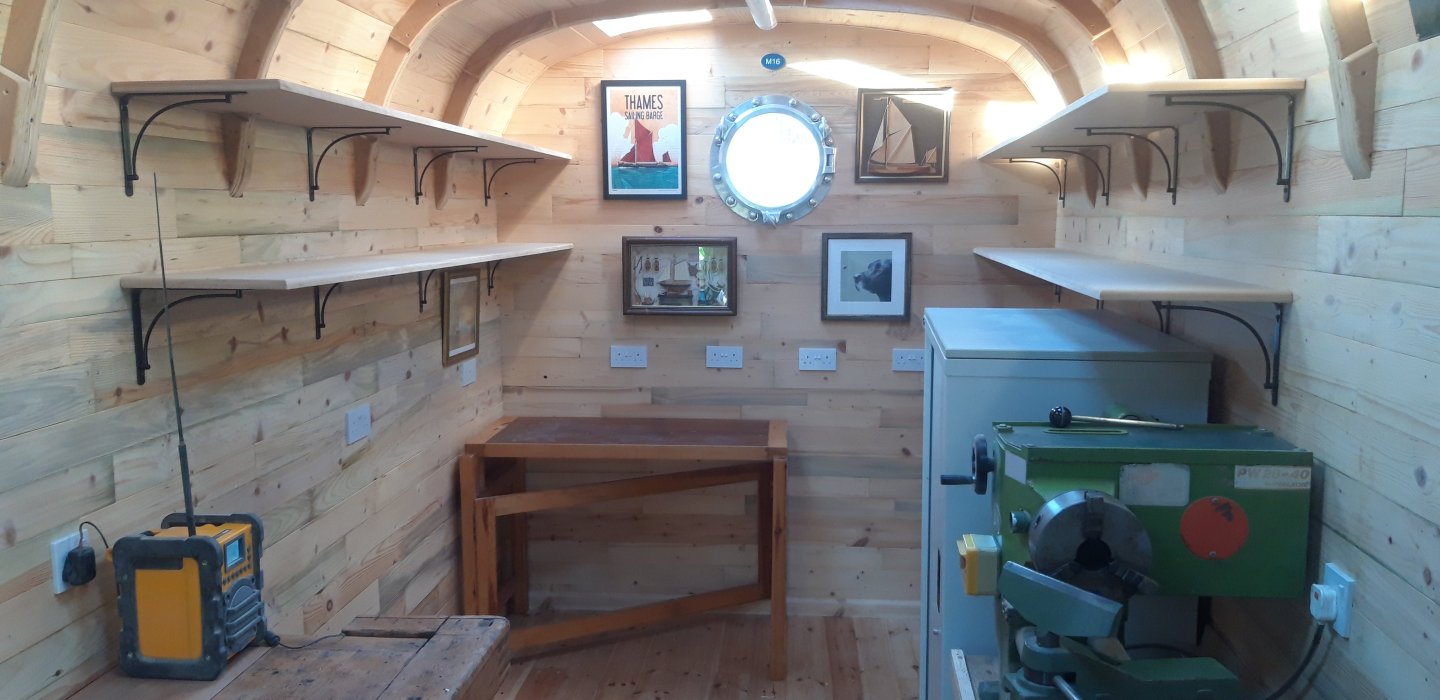
Time for an update.... The power supply is now in place and I no longer have to work in a spider's web of extension leads! I'm very pleased with the light levels the LED strip lights provide. I had a problem getting the metal storage cabinet from where it has been stored to the workshop. Sourced from the scrap metal pile at school were it had been discarded, it is an inch too wide to fit into my current car. This secure storage for my power tools etc. is in place thanks to a helpful and generous neighbour..... a man with a van 😄 Four 8' shelves have been installed either side of the model making end of the workshop but need sealing with paint before they can be used. The folding work bench is just a temporary measure and will be replaced soon. It has served me well over the years since I made it on a wood machining course at the start of my career but I need something larger now. It will be kept for occasional use, as the need arises, and it makes a great run-off table for my bench saw. My plan is to fit an L shaped work bench along the left hand side and the far end wall. I'll then be in a position to start moving the modelling gear down from the small bedroom I occupy at the moment. A few pictures and other decorative items are also in place. On the 'to do' list now are wall mounted storage for hand tools, wood turning tools etc. The space is already displaying a wonderful sence of timelessness. Once you enter the hours flow by unnoticed..... priceless.....😉 Cheers, Graham
-
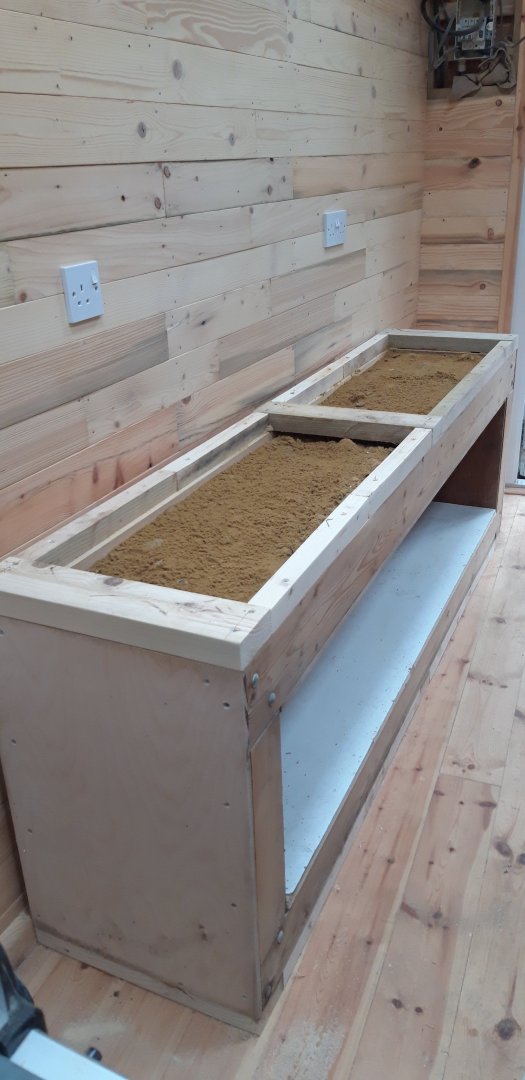
You've explained the purpose and benifits of the sand very succinctly Egilman. The legs are also hollow and sand filled. When wood is initially mounted it can run a bit eccentricly and cause vibrations until shaping begins. This is also why the lathe needs securing to the floor. Wood turning is very satisfying. Often you go in with a general idea of what you want to achieve and then the wood grain takes over and leads you, especially when turning bowls. I also turn legs and spindles for Windsor chairs, components for wooden toys, and various other items. Hours of fun to be had, Javlin. Have a go if you get the chance. A word of warning though, it can be addictive....😄 Cheers, Graham.
-
With the bench now finished the next task is the installation of my biggest piece of equipment. My wood turning lathe came into my life back when I was also running woodwork based evening Adult Education classes. The school had a couple of wood lathes which were so popular we had an informal rule that access was restricted to alternating weeks, with a second project being worked on in parallel. I received a letter from a friend of one of the course members offering her late husband's lathe, at a very reasonable price, that would certainly reduce the pressure on the existing equipment. Unfortunately the senior staff rejected my request for the funding. The lathe was too good to pass, and with the Admiral's consent, I scraped enough together to buy it myself. It graced my school workshop for the majority of my career, retiring when I did. When I collected the machine the previous owner's wife mentioned that her husband had been a pilot in the Battle of Britain and then went on the become chief test pilot for BEA. He was the Captain of the first ever fully automatic commercial airline flight landing. I found this story on-line: https://bbm.org.uk/airmen/Poole.htm A fascinating bit of history, and I do wonder if they would get away with not telling the paying passengers until after the event these days! The lathe came with a piece of branch from a Madagascan ebony tree, allegedly smuggled back in the cockpit of a Trident. I still have some of it in my material stash. There was also a half turned bowl mounted on the chuck and my first job once the lathe was set up at school was to hollow it out and finish it. Once completed I presented it to her. When originally purchased the lathe came with plans for a sand filled timber stand. While renovating it I added two layers of wood to raise the spindle height to a better height for me and my creeking back. Time stored in a damp garage had left some surface rust in places but elbow grease, oil and wire brushes soon restored it to it's former glory. It runs as smoothly as ever, but will need bolting down to the floor before I can use it in anger. Attention can now turn to tool storage, and benching out the model making area. Happy days! Cheers, Graham
-
A truly epic build Keith. Amazing detail, as we've come to expect from enjoying your 'other' build logs! I'm sure it will be treasured by the recipient. Just heard that my nearly 3 year old grandson is going to have a sister next year. One of my first thoughts on receiving the news...... at last, there's the excuse to start planning a dolls house! Grandpa has a new project on the back burner 😊 Seasons greetings, Graham
-
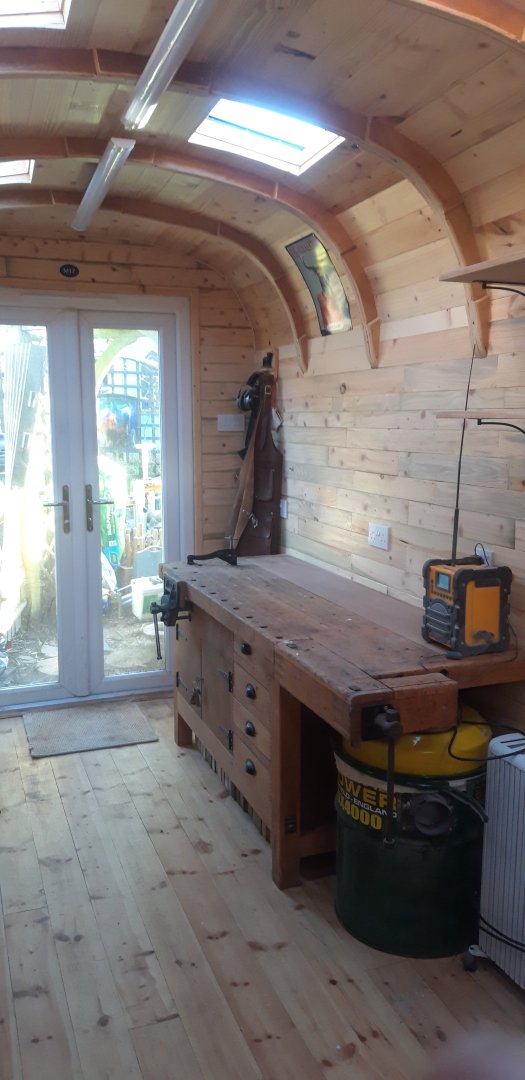
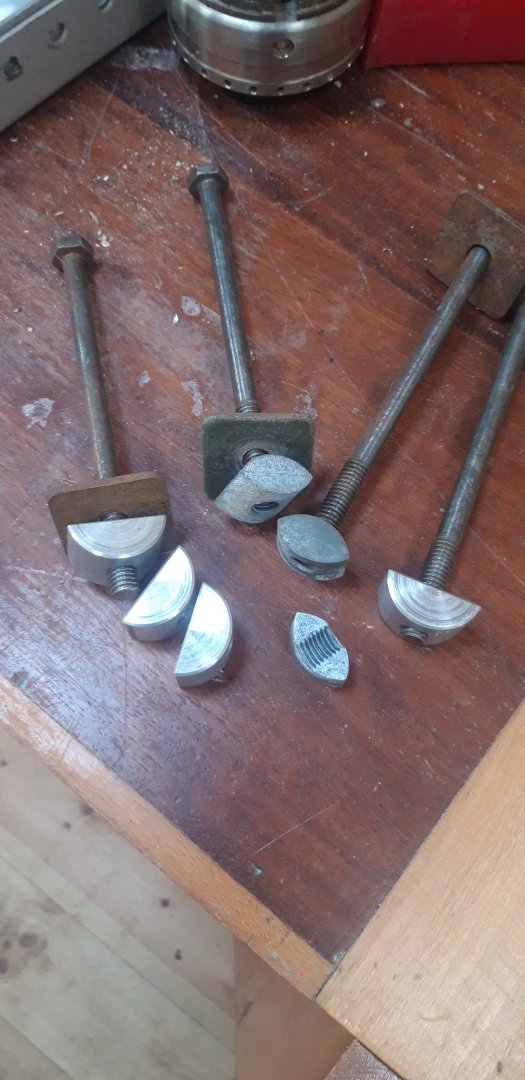
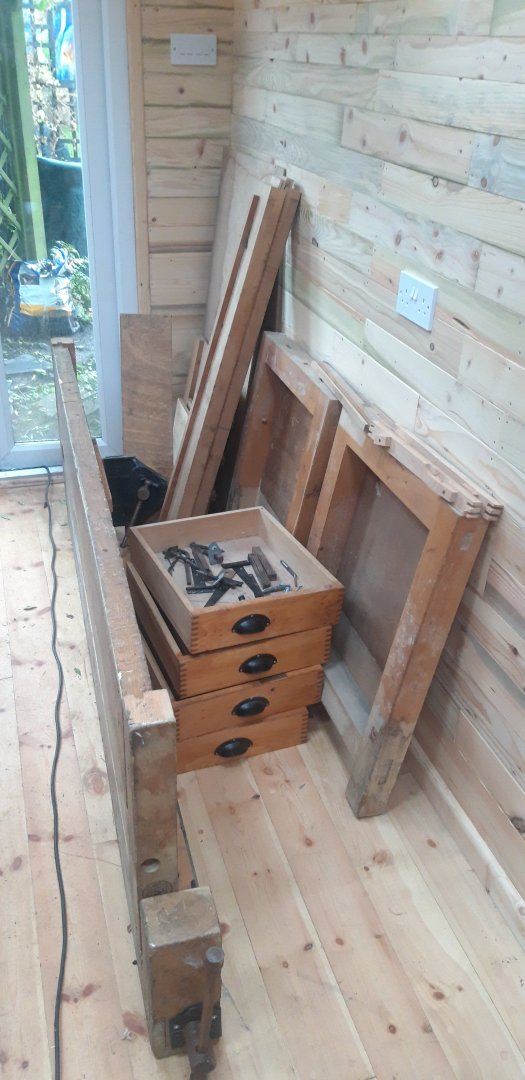
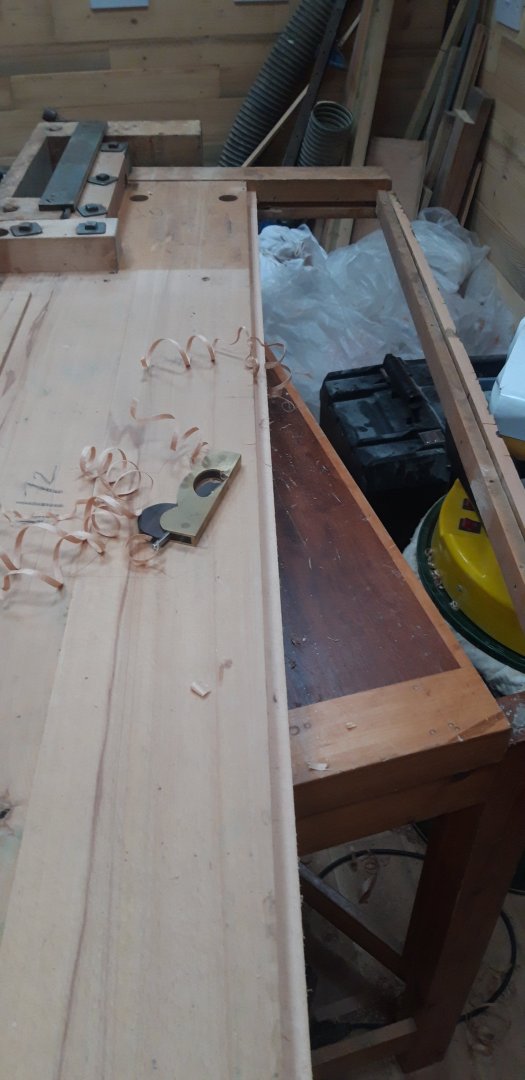
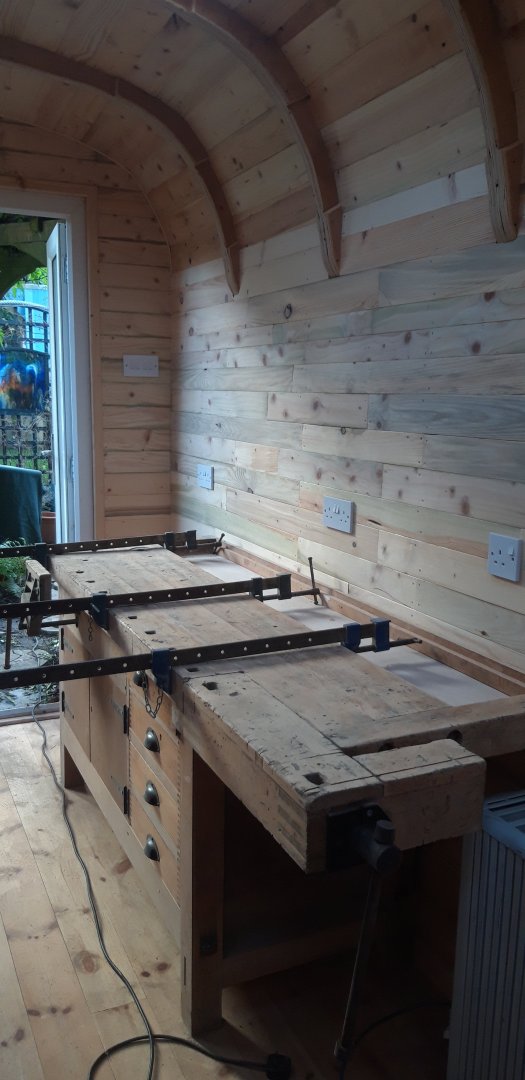
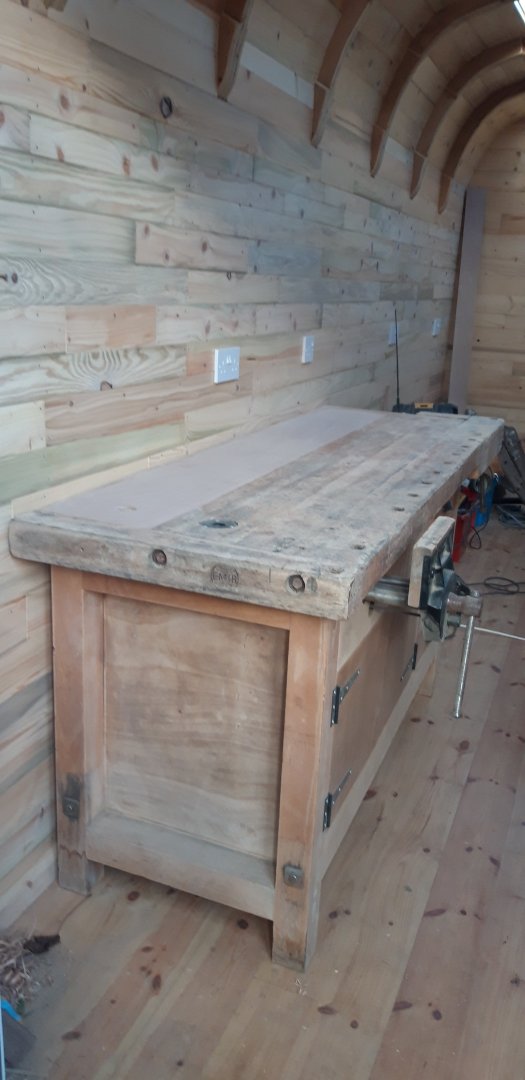
The first piece of equipment to be installed is my woodwork bench. It's had a very chequered history as I will explain. When I retired from teaching, this Emir cabinet makers bench came with me. I had saved it from a skip in the early 2000s when the department I was responsible for was being refurbished. This involved six workshops being gutted, extended and modernised. This would take the best part of a year. Resources were stored around the school in shipping containers, and much of my personal equipment went into one of the boiler houses. Seemed a good idea at the time...... Unfortunately the gas supply to the boilers was upgraded over the summer recess. They left the trench dug for the new pipes open for weeks, and a very severe summer downpour flooded the room to a depth of about 12". I had to disassemble the bench to get it home in my car. Judging from the black crayon date mark on the underside of the top this bench joined the school five years before I joined as newly qualified teacher of 'Metalwork and Technical Drawing'. The pieces, as carried through the house and into the workshop. If you look at the end pieces on the right the tide mark from the flood is still visible. Shame my Hobbymat MD65 was stored inside it at the time of the deluge.... Another problem that arose when taking the frame apart for transport, possibly related to the flood, was the snapping of two of the barrel nuts that hold the cross rails to the legs. Zinc based alloy casting cracked in half. It was a bit of a long shot bearing in mind the age of the bench, but I emailed the manufacturer and explained my predicament. At the time I was five days from retirement, liberating the bench my final task. The following day a package arrived, a note wishing me a happy retirement, and a set of barrel nuts with their compliments. Now that's customer care worthy of note! One of my colleagues had decided to do away with the well at the back of the bench-top at some time and infilled it with a piece of OSB board. My first task was to reinstate this feature. A piece of beech faced ply did the job although although a bit of modification was required fitting metric thickness sheet into an imperial bench. There was enough of the ply left to make a removable cover for the well. While in more recent storage some of the component parts of the top had moved a bit and had to be re-glued and clamped The bench has had a hard life and has the scars to prove it. I have started cleaning up the wood prior to applying an oil based finish to the top. The rest will be sealed with satin varnish. I'll also be replacing the vice cheeks, a task that will hopefully be made easier soon, as long as Santa has listened to a barrage of subtle and not so subtle hints..... and I have tried to be a good boy this year - honest😆🤞...watch this space... The bench and I have a long history together, and our journey can now continue. Seasons Greetings to one and all Cheers, Graham
About us
Modelshipworld - Advancing Ship Modeling through Research
SSL Secured
Your security is important for us so this Website is SSL-Secured
NRG Mailing Address
Nautical Research Guild
237 South Lincoln Street
Westmont IL, 60559-1917
Model Ship World ® and the MSW logo are Registered Trademarks, and belong to the Nautical Research Guild (United States Patent and Trademark Office: No. 6,929,264 & No. 6,929,274, registered Dec. 20, 2022)
Helpful Links
About the NRG
If you enjoy building ship models that are historically accurate as well as beautiful, then The Nautical Research Guild (NRG) is just right for you.
The Guild is a non-profit educational organization whose mission is to “Advance Ship Modeling Through Research”. We provide support to our members in their efforts to raise the quality of their model ships.
The Nautical Research Guild has published our world-renowned quarterly magazine, The Nautical Research Journal, since 1955. The pages of the Journal are full of articles by accomplished ship modelers who show you how they create those exquisite details on their models, and by maritime historians who show you the correct details to build. The Journal is available in both print and digital editions. Go to the NRG web site (www.thenrg.org) to download a complimentary digital copy of the Journal. The NRG also publishes plan sets, books and compilations of back issues of the Journal and the former Ships in Scale and Model Ship Builder magazines.


