DelF
-
Posts
1,409 -
Joined
-
Last visited
Content Type
Profiles
Forums
Gallery
Events
Everything posted by DelF
-
 Thanks Don! Glad you found it helpful. I’ve learned a great deal from this forum and I enjoy trying to put something back. There’s a selfish reason too - it might be a year or more before I rig guns again, and without a log I’d probably forget how I did it. Derek
- 725 replies
-
- 2
-

-
- vanguard models
- speedy
- (and 1 more)
-
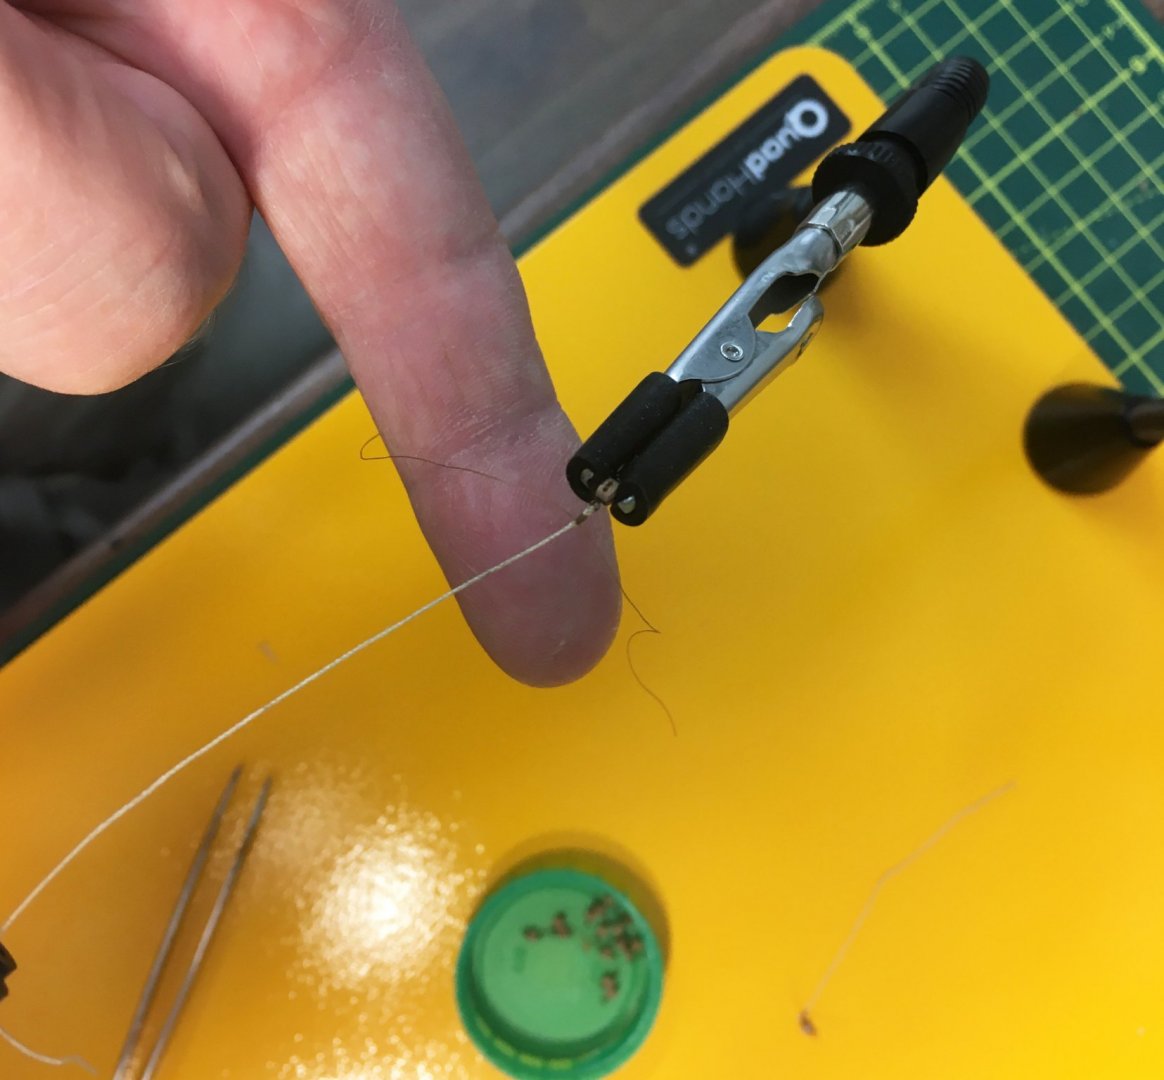
Apart from the fact that it doesn't earn you a clip round the ear from an irate spouse? It's just so fine Glenn. If you're seizing 0.10 mm line with 0.10 mm line it looks clunky to my eye. The fly tying stuff is just 0.04 mm - less than 2 thou in imperial. It's so thin it adds virtually no thickness to the rope you're seizing - hopefully you could see that in some of my recent shots? Fly tying thread comes in various types and diameters. 18/0 is the thinnest I've found - you may find it described as 30D (Denier). I don't know if my brand - Semperfli - is available in the States but if not a fisherman's supplier should be able to advise on an alternative. Or you could just continue with clunky seizings and sore ears 😁. And thank you for the very kind comments, by the way. Derek
- 725 replies
-
- 3
-
-
- vanguard models
- speedy
- (and 1 more)
-
Hi Herbert Welcome to the Speedy club! I'm looking forward to following your log and seeing the modifications you are planning. Best wishes Derek
-
Thanks everyone, for the kind comments and likes. SpyGlass - I didn't see your post until I did my second one on techniques, where you'll see great minds think alike!
- 725 replies
-
- 1
-
-
- vanguard models
- speedy
- (and 1 more)
-
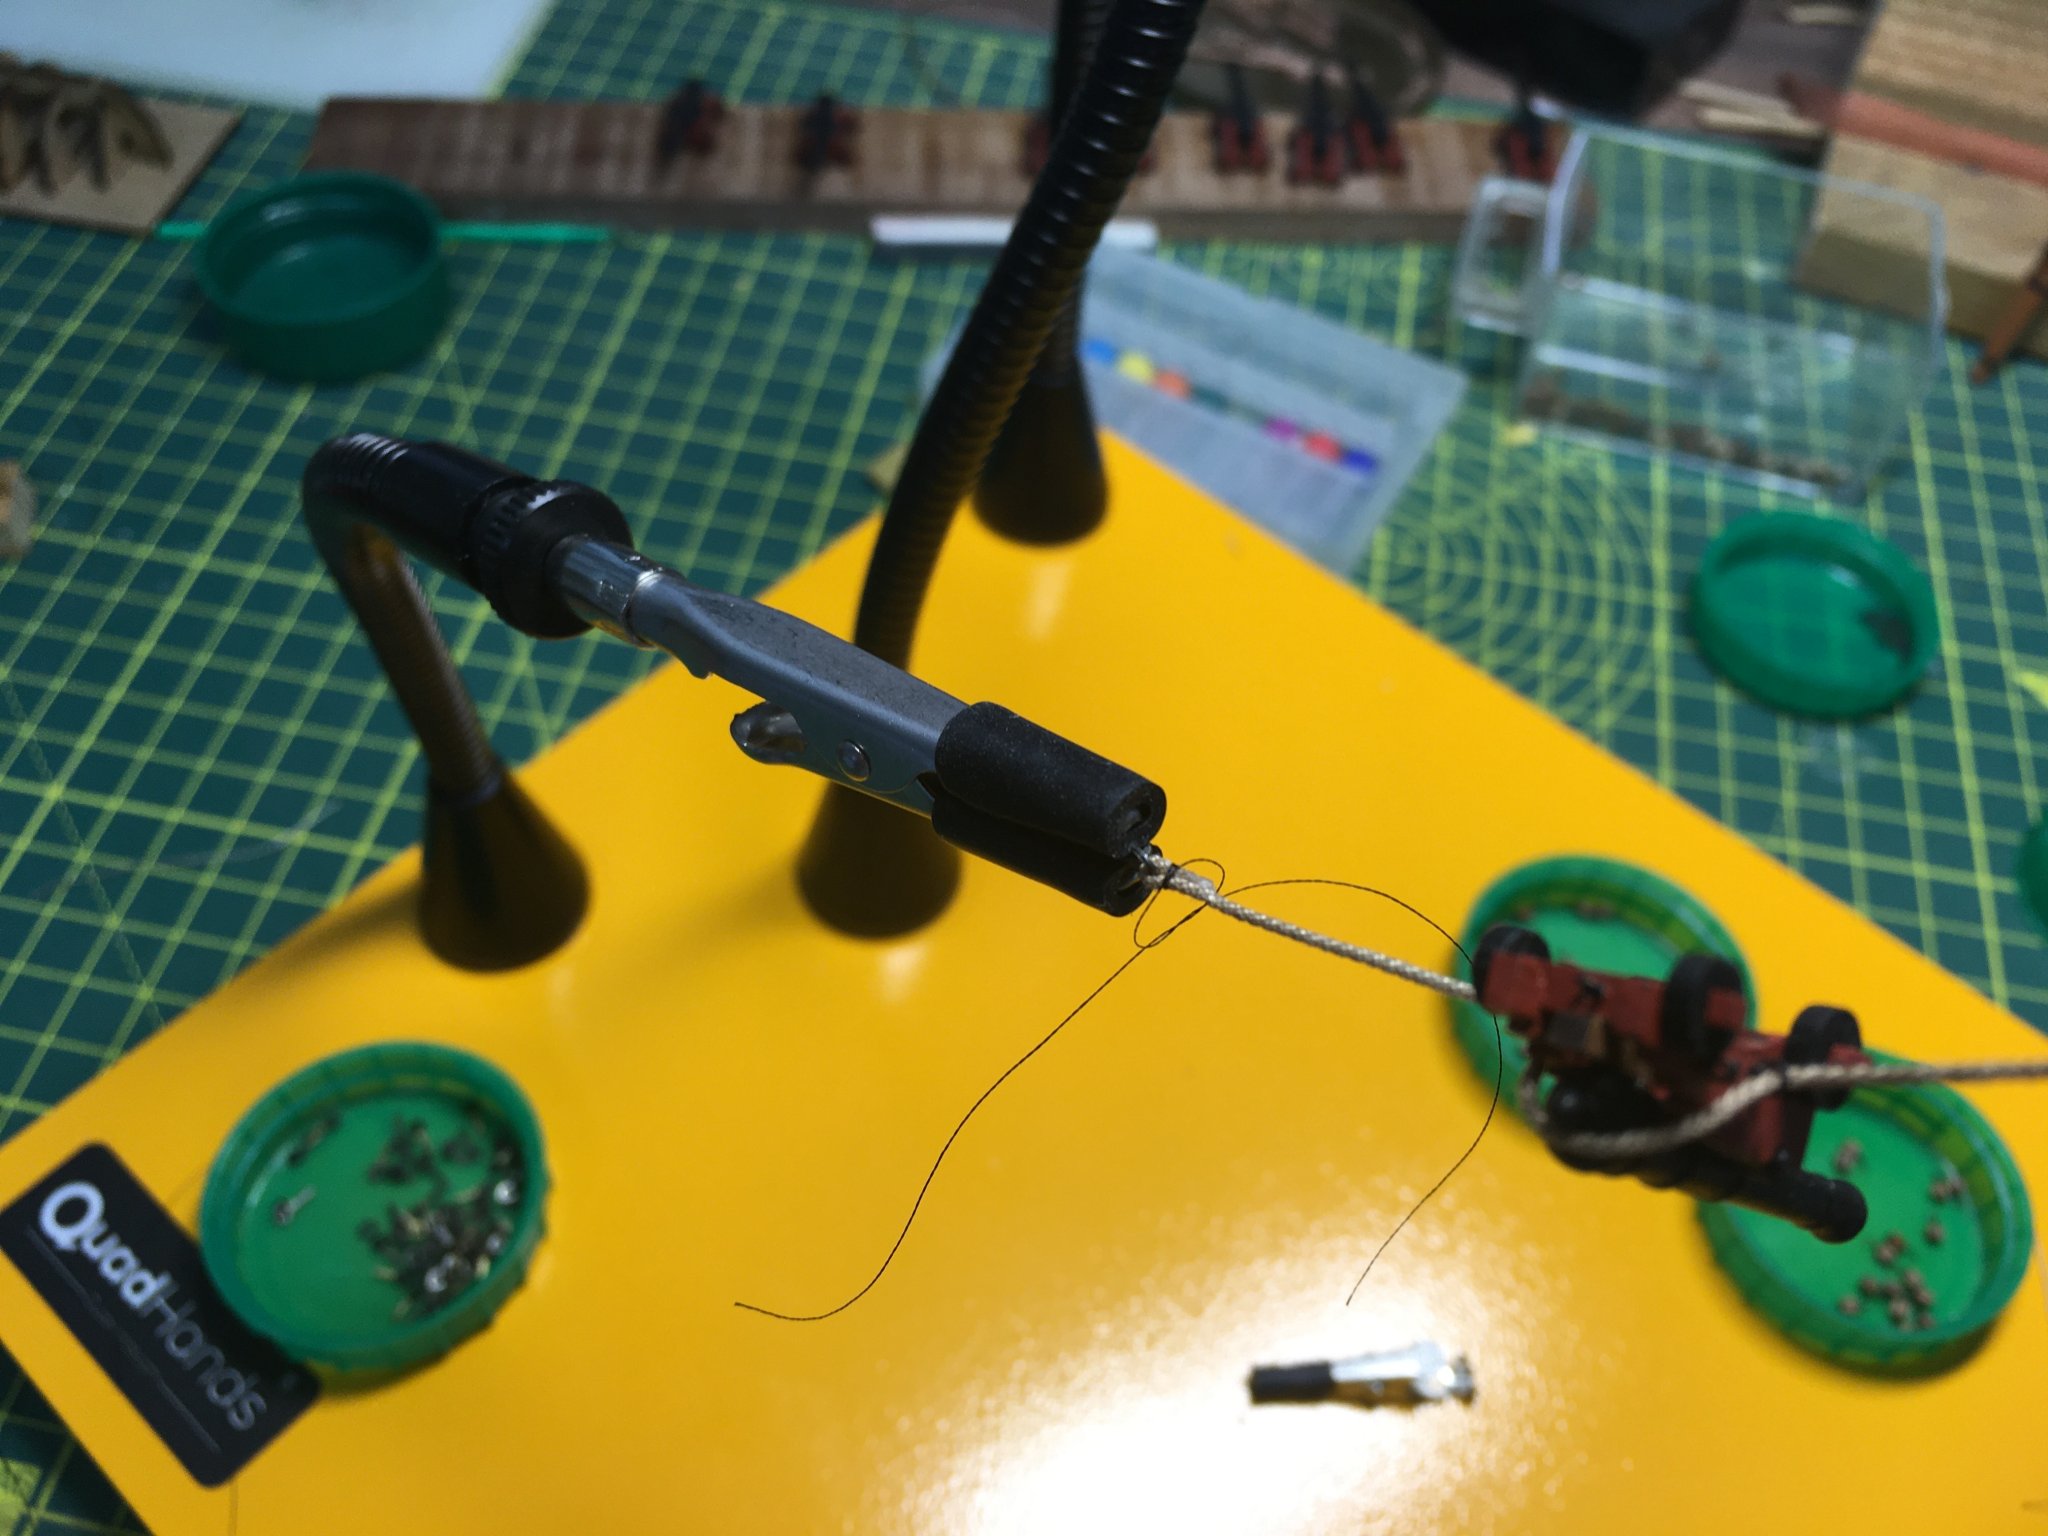
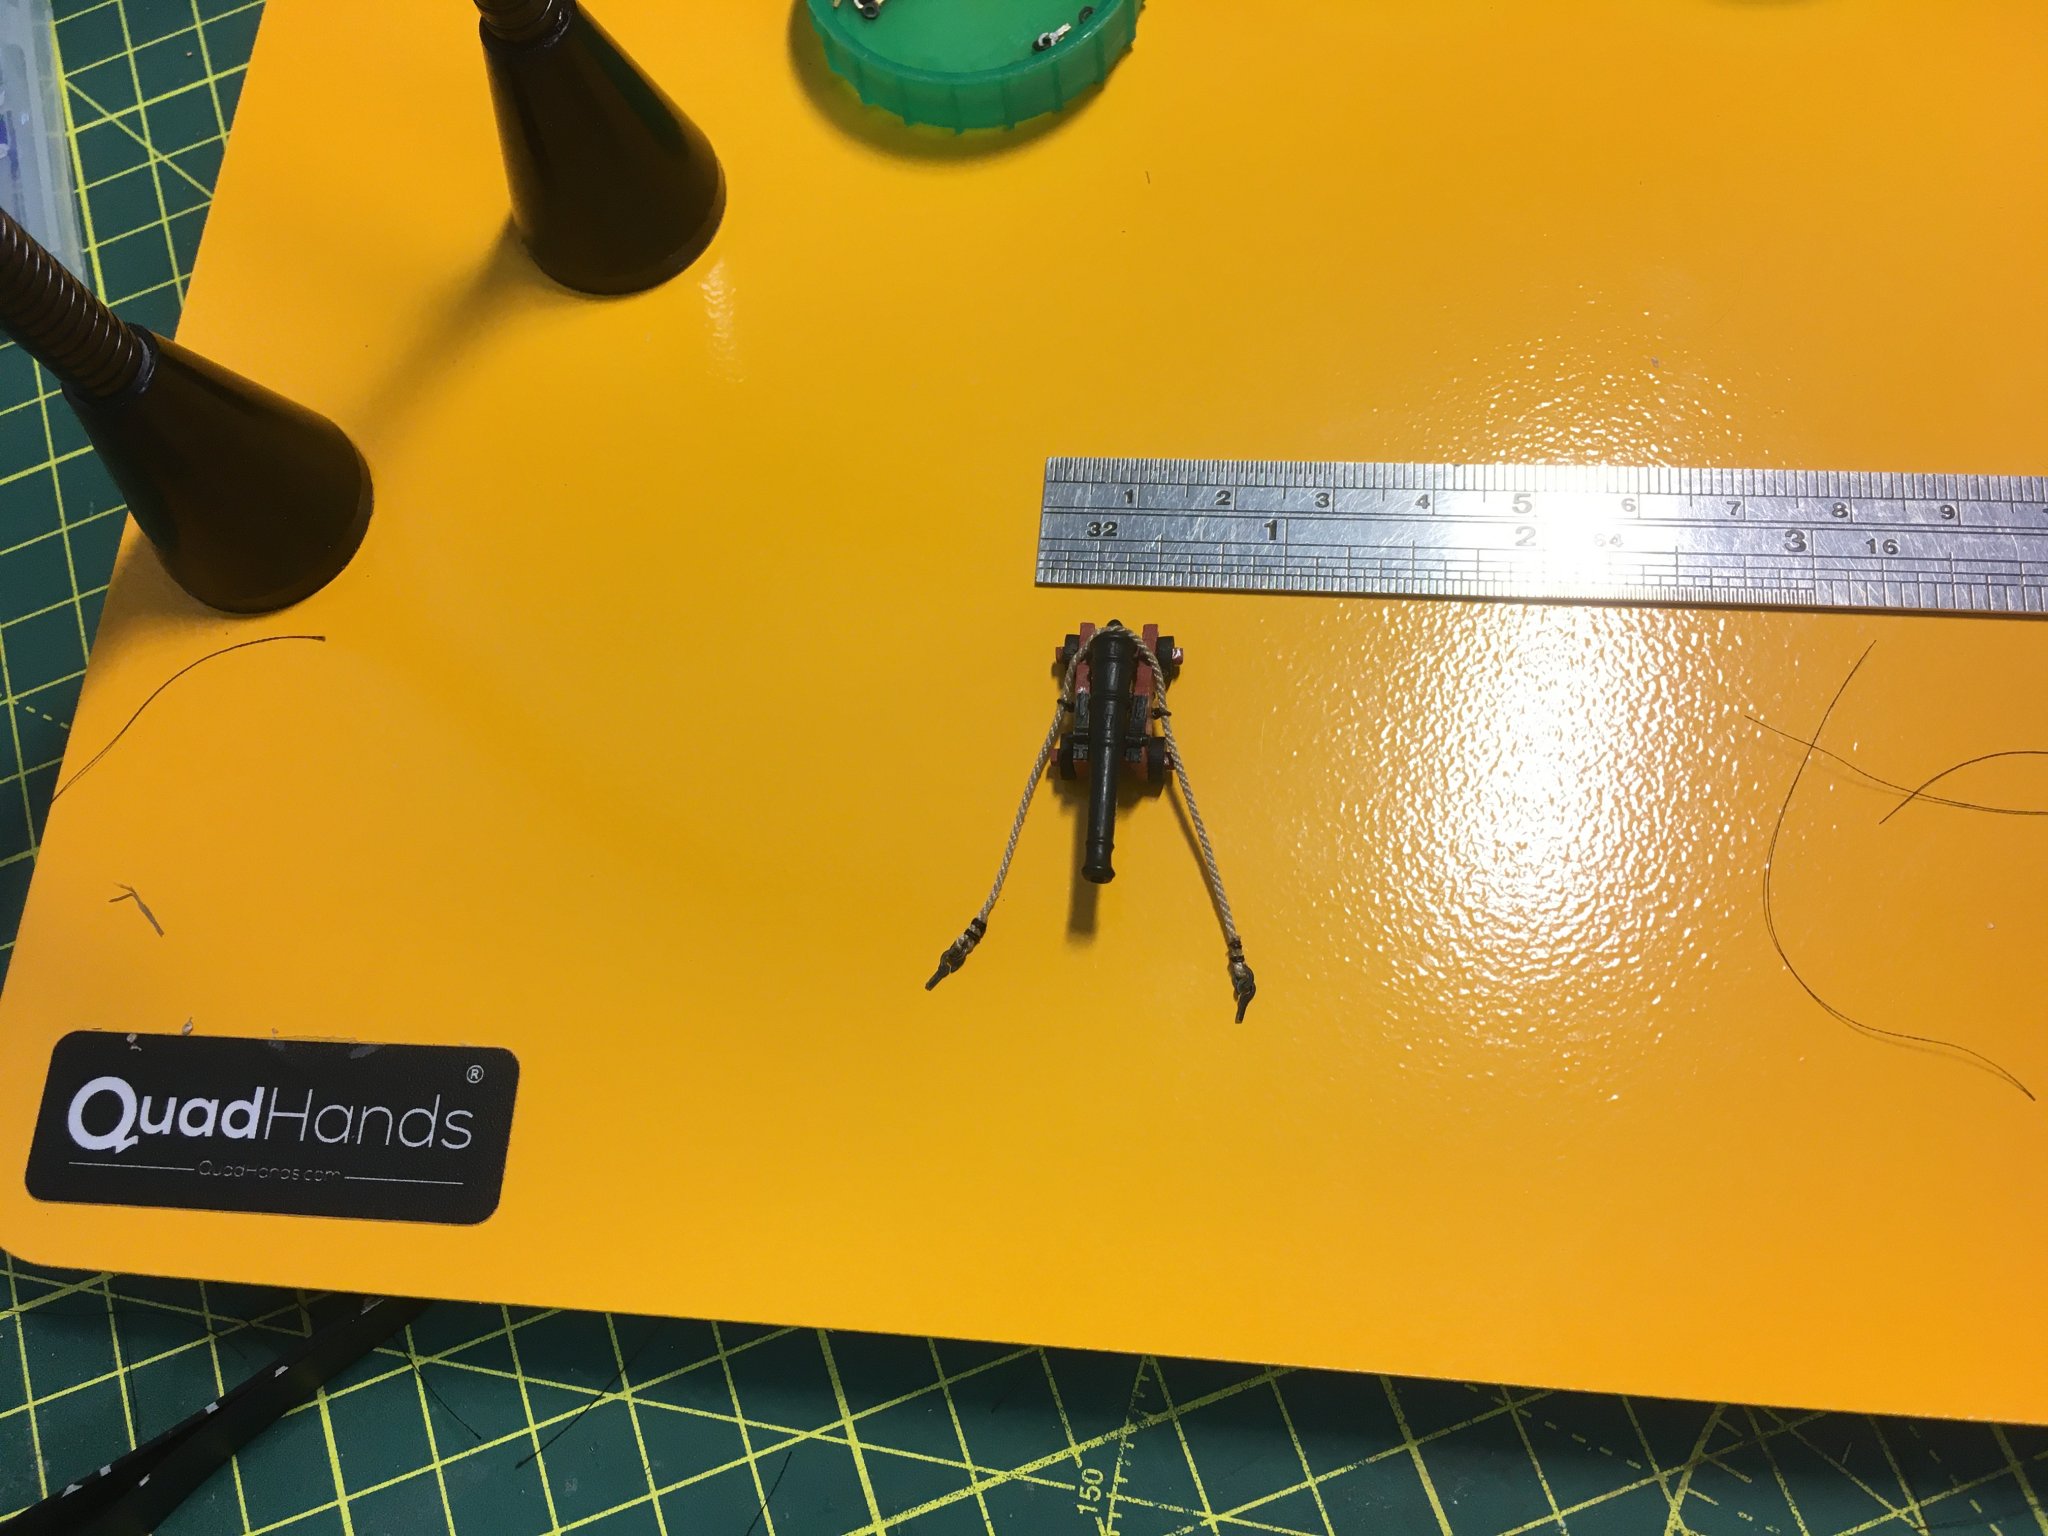
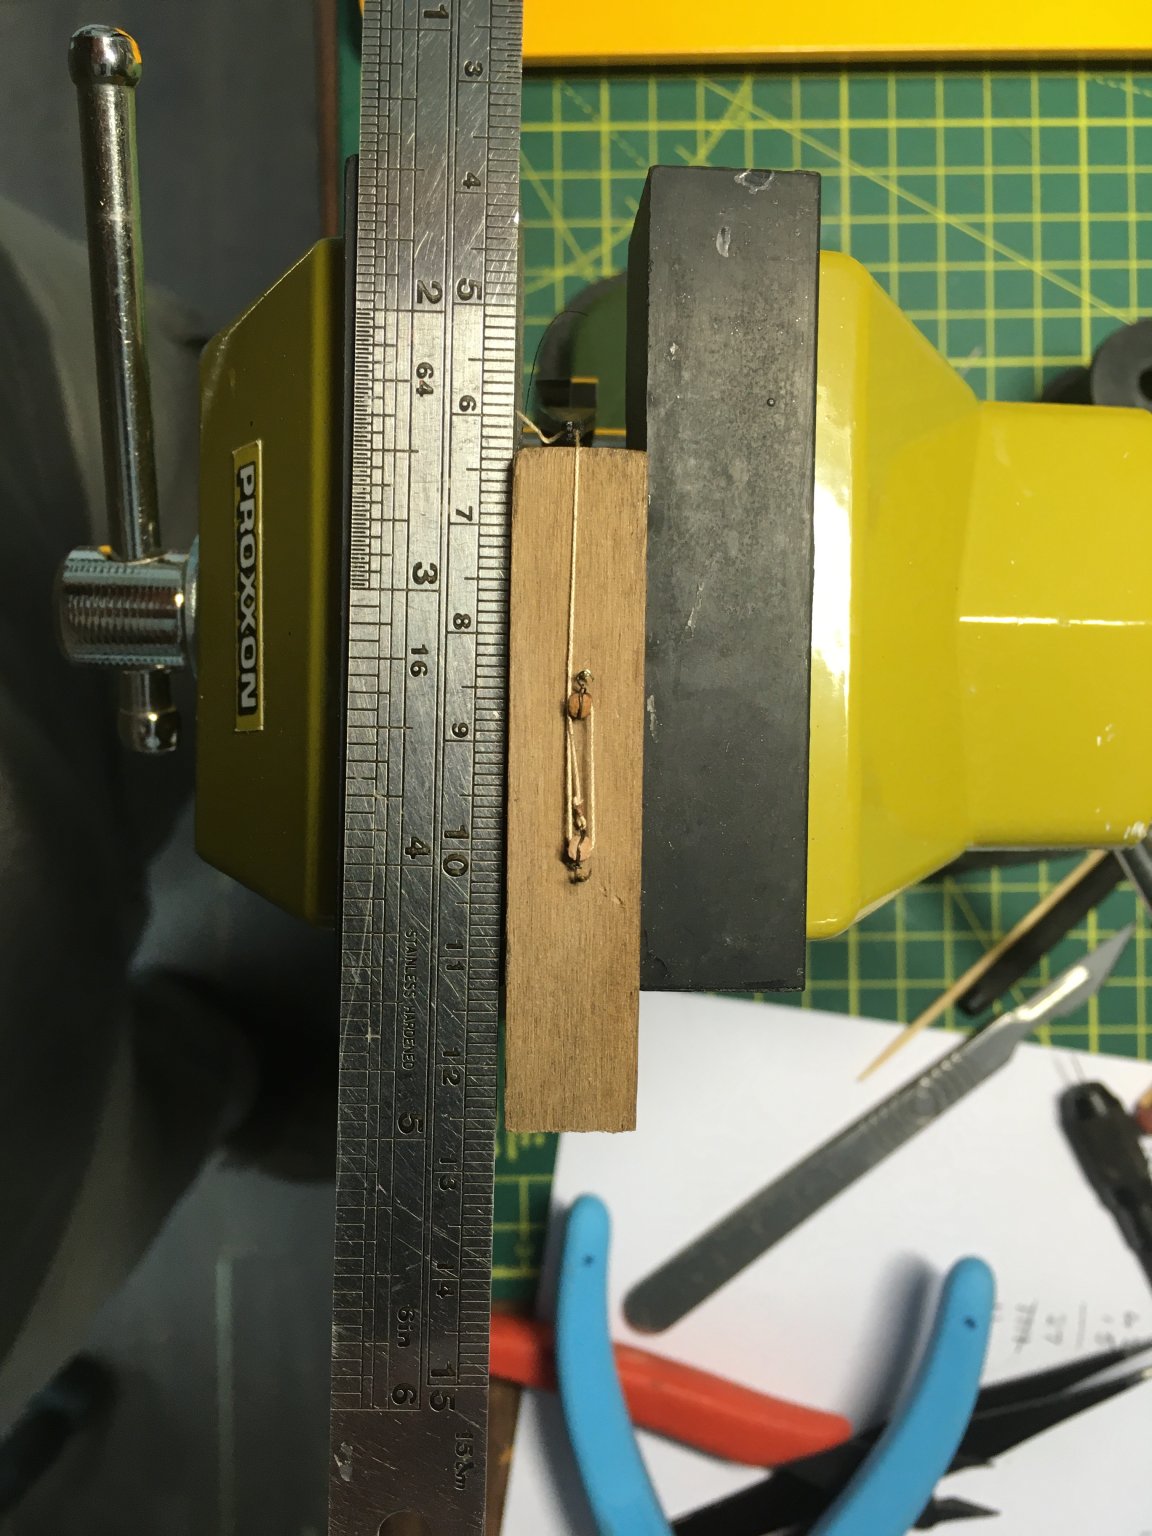
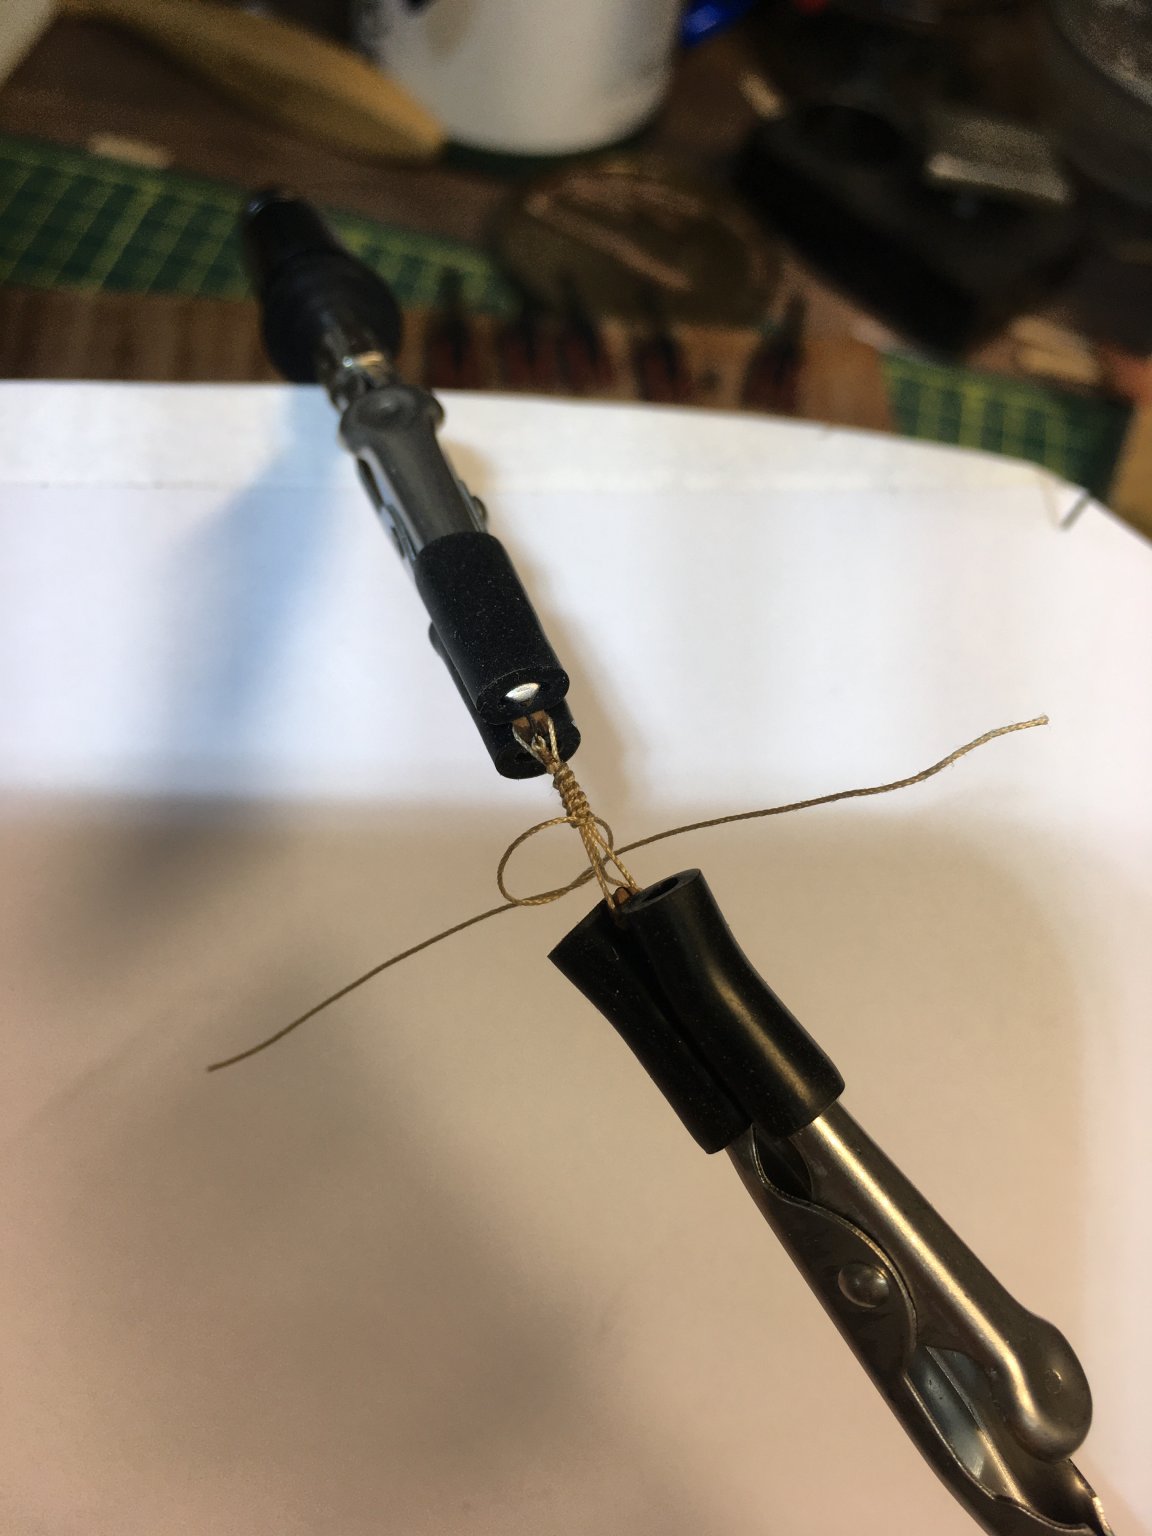
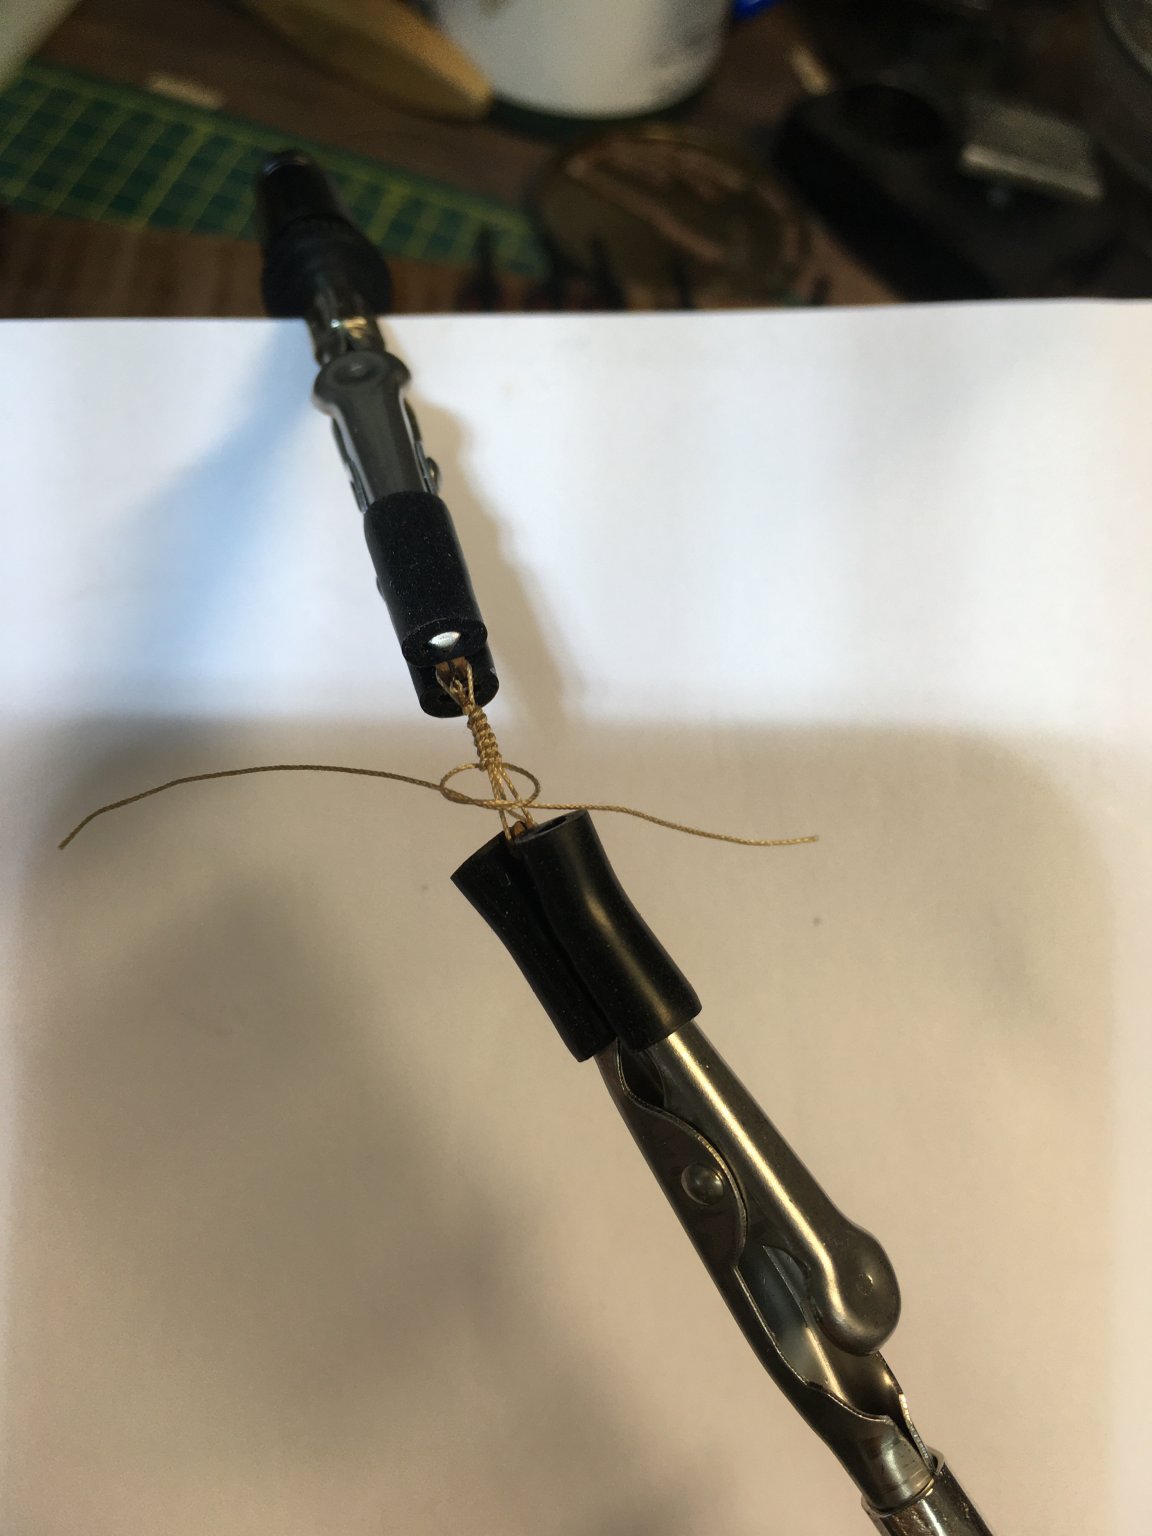
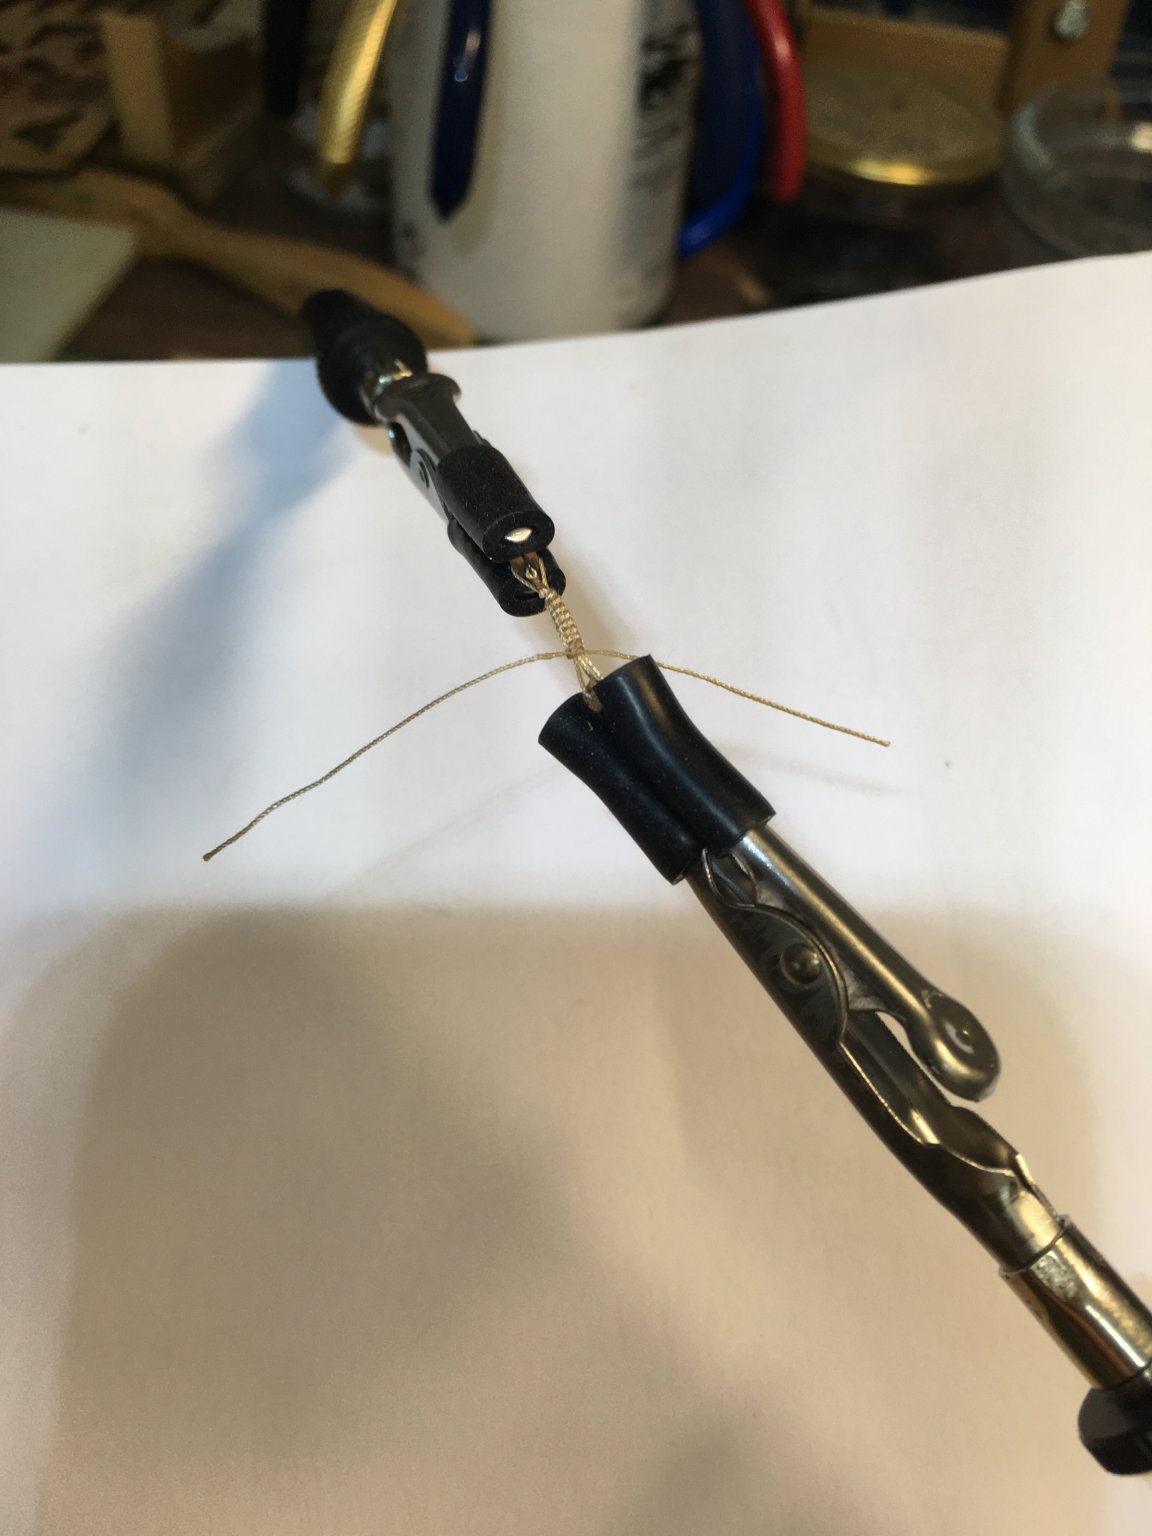
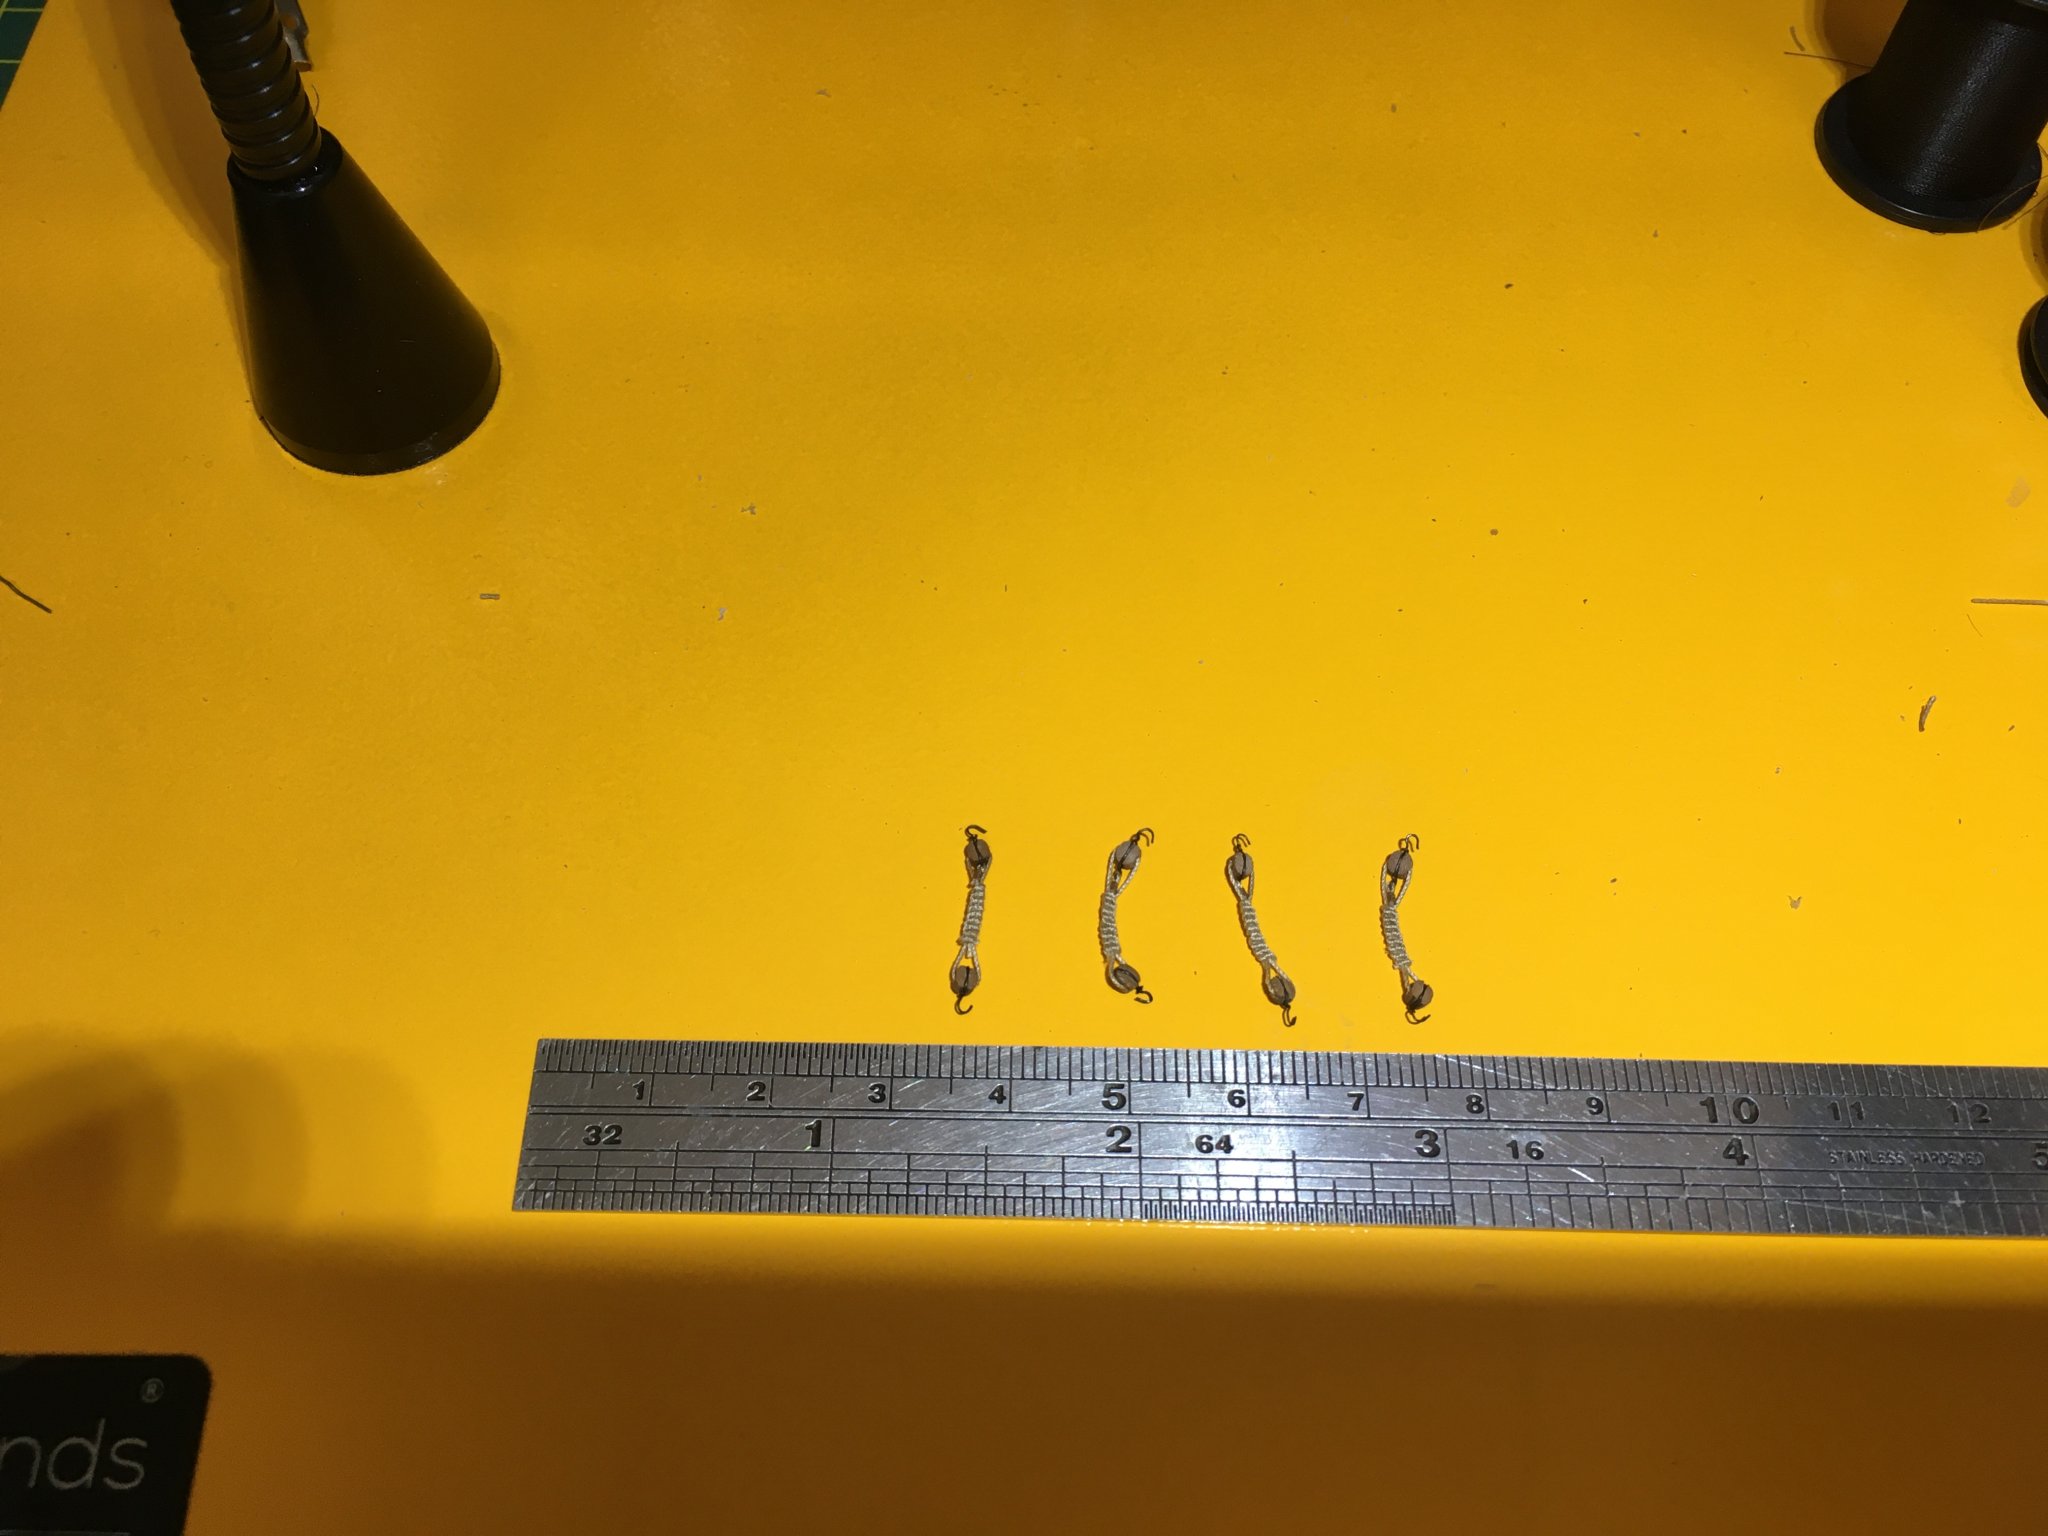
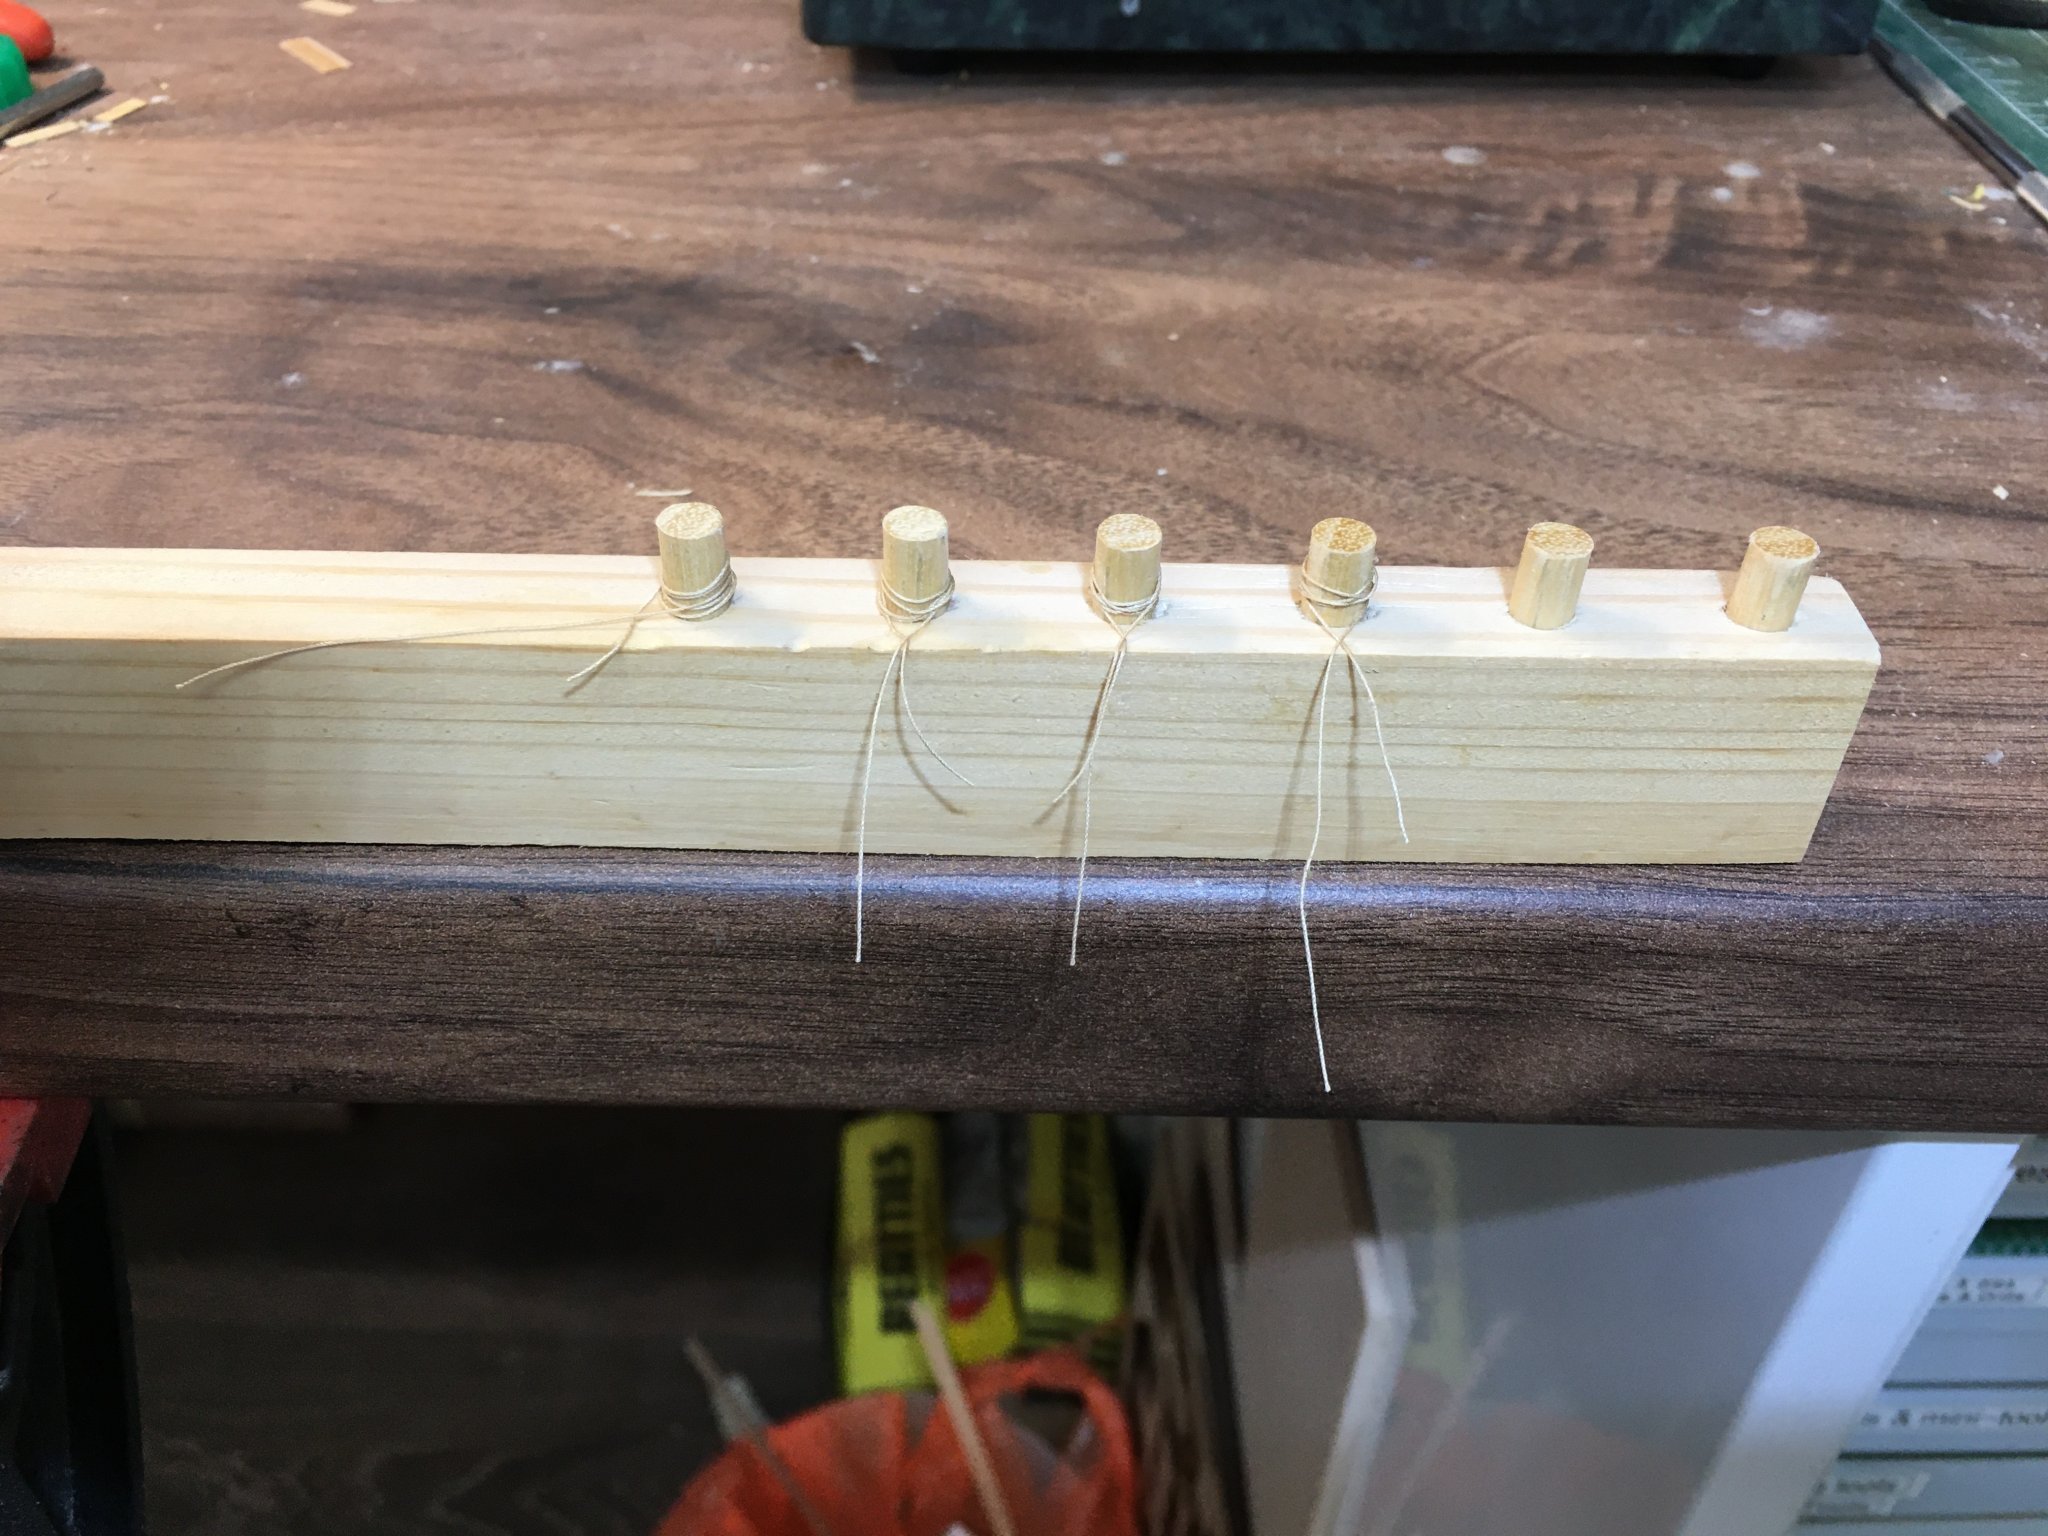
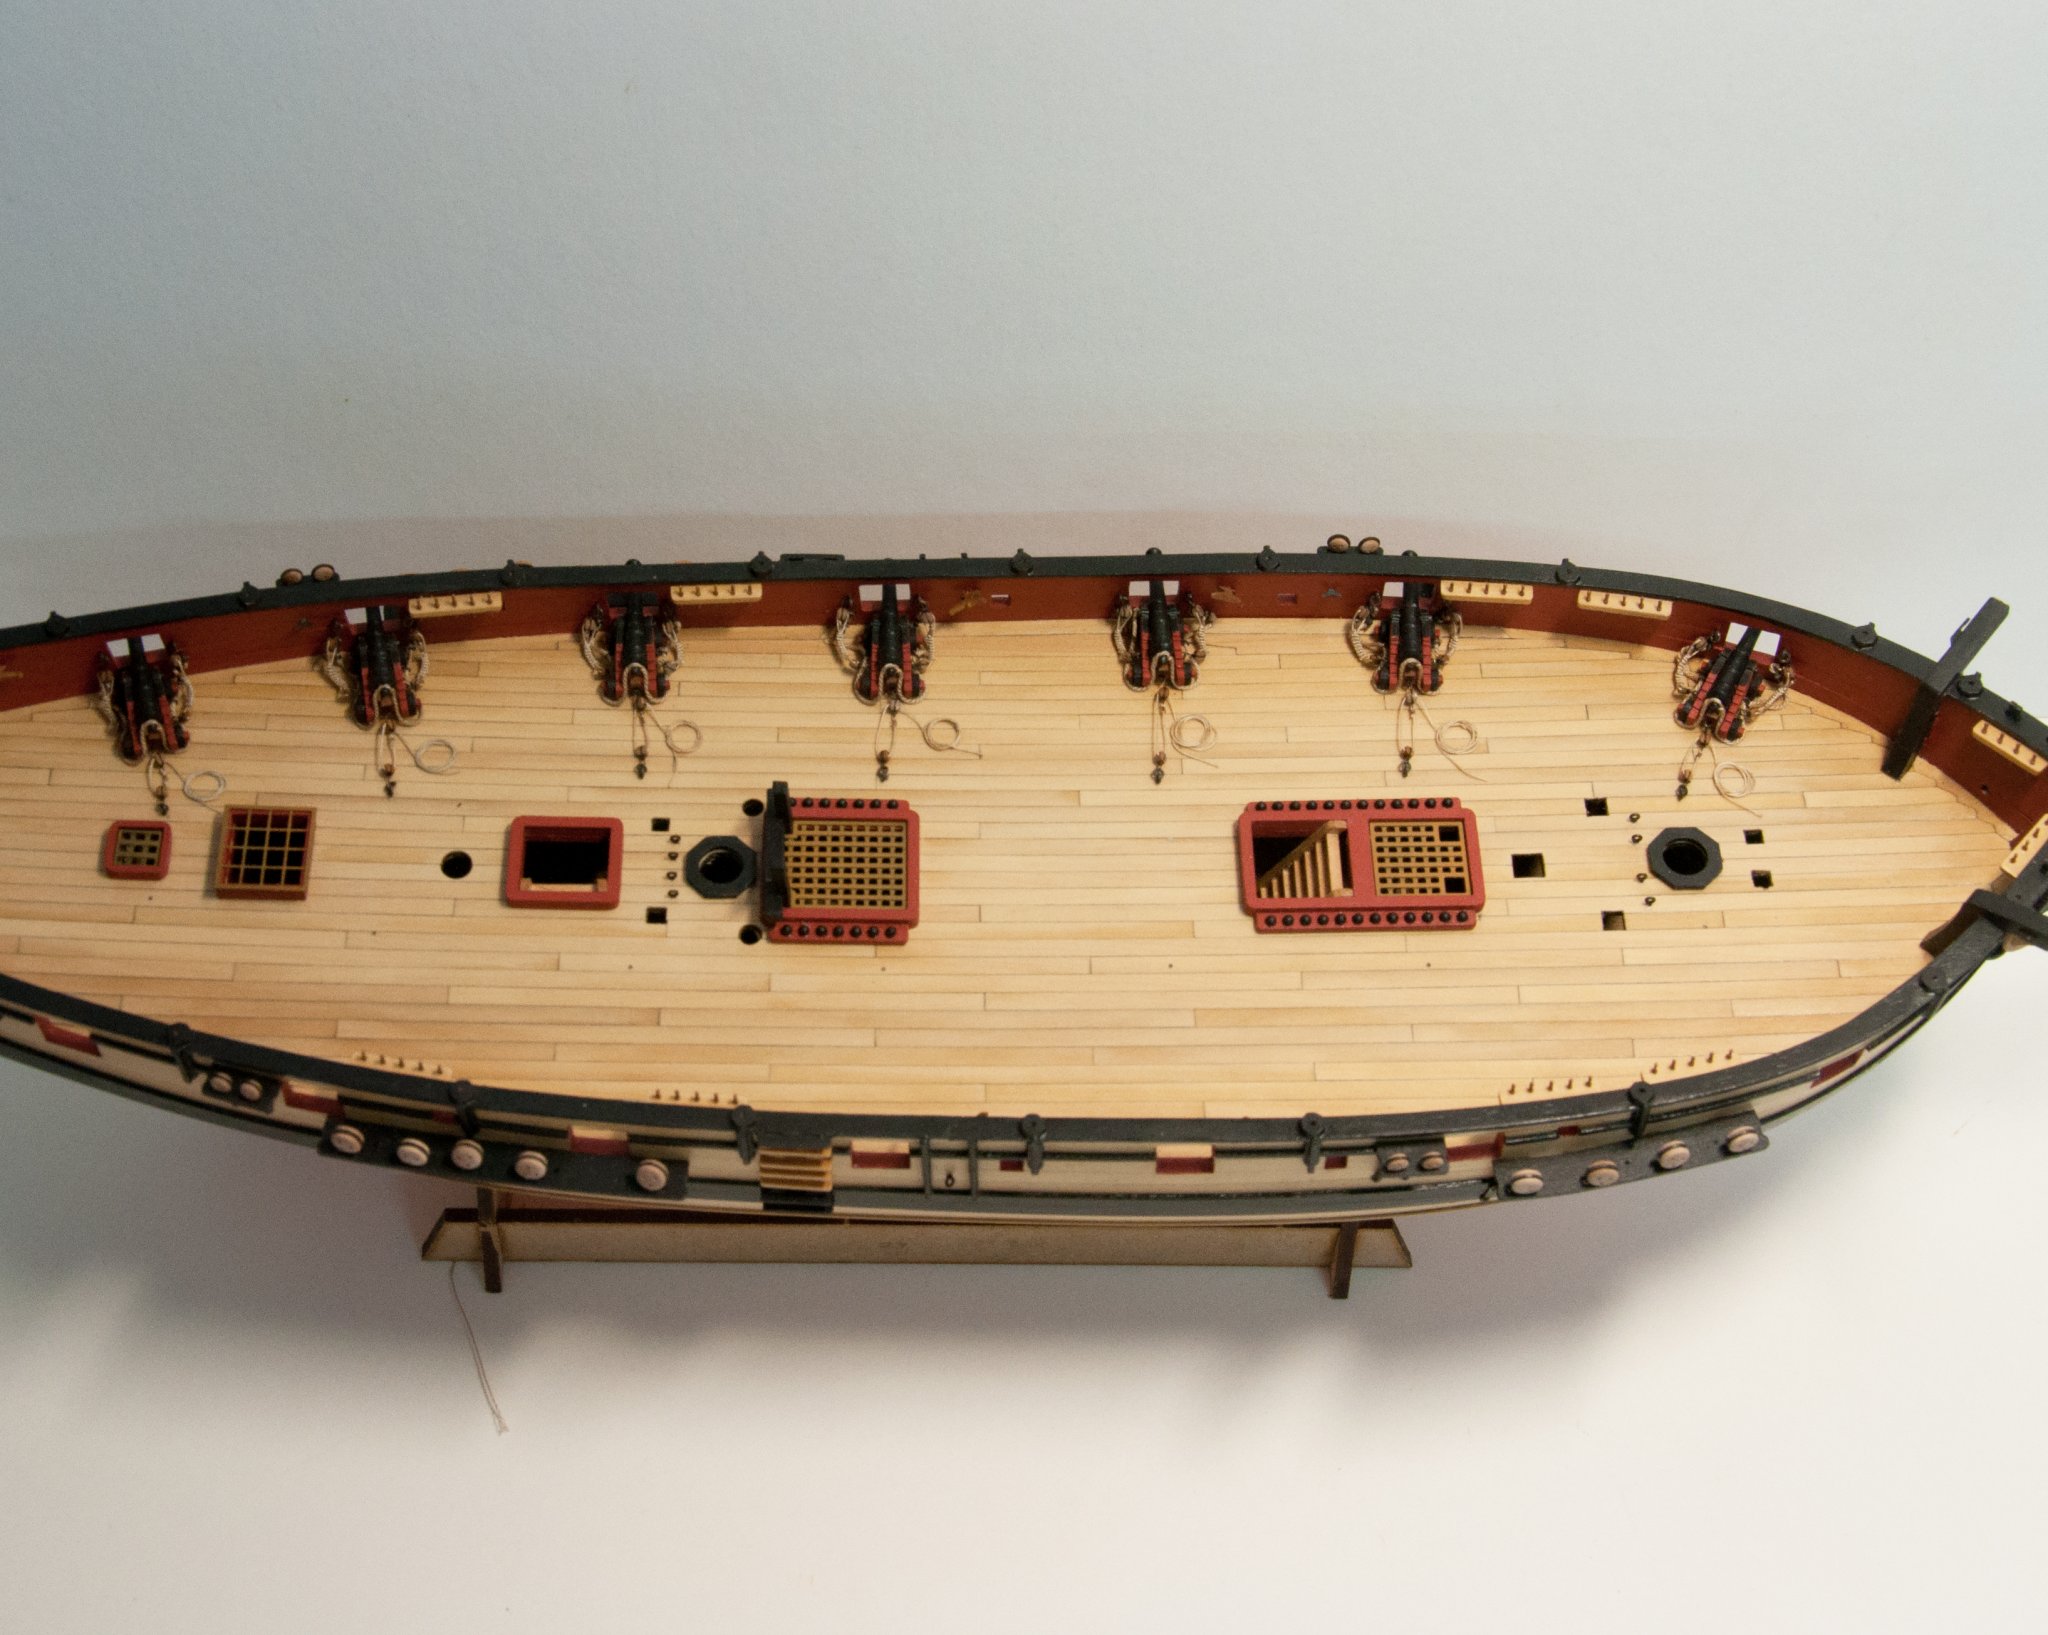
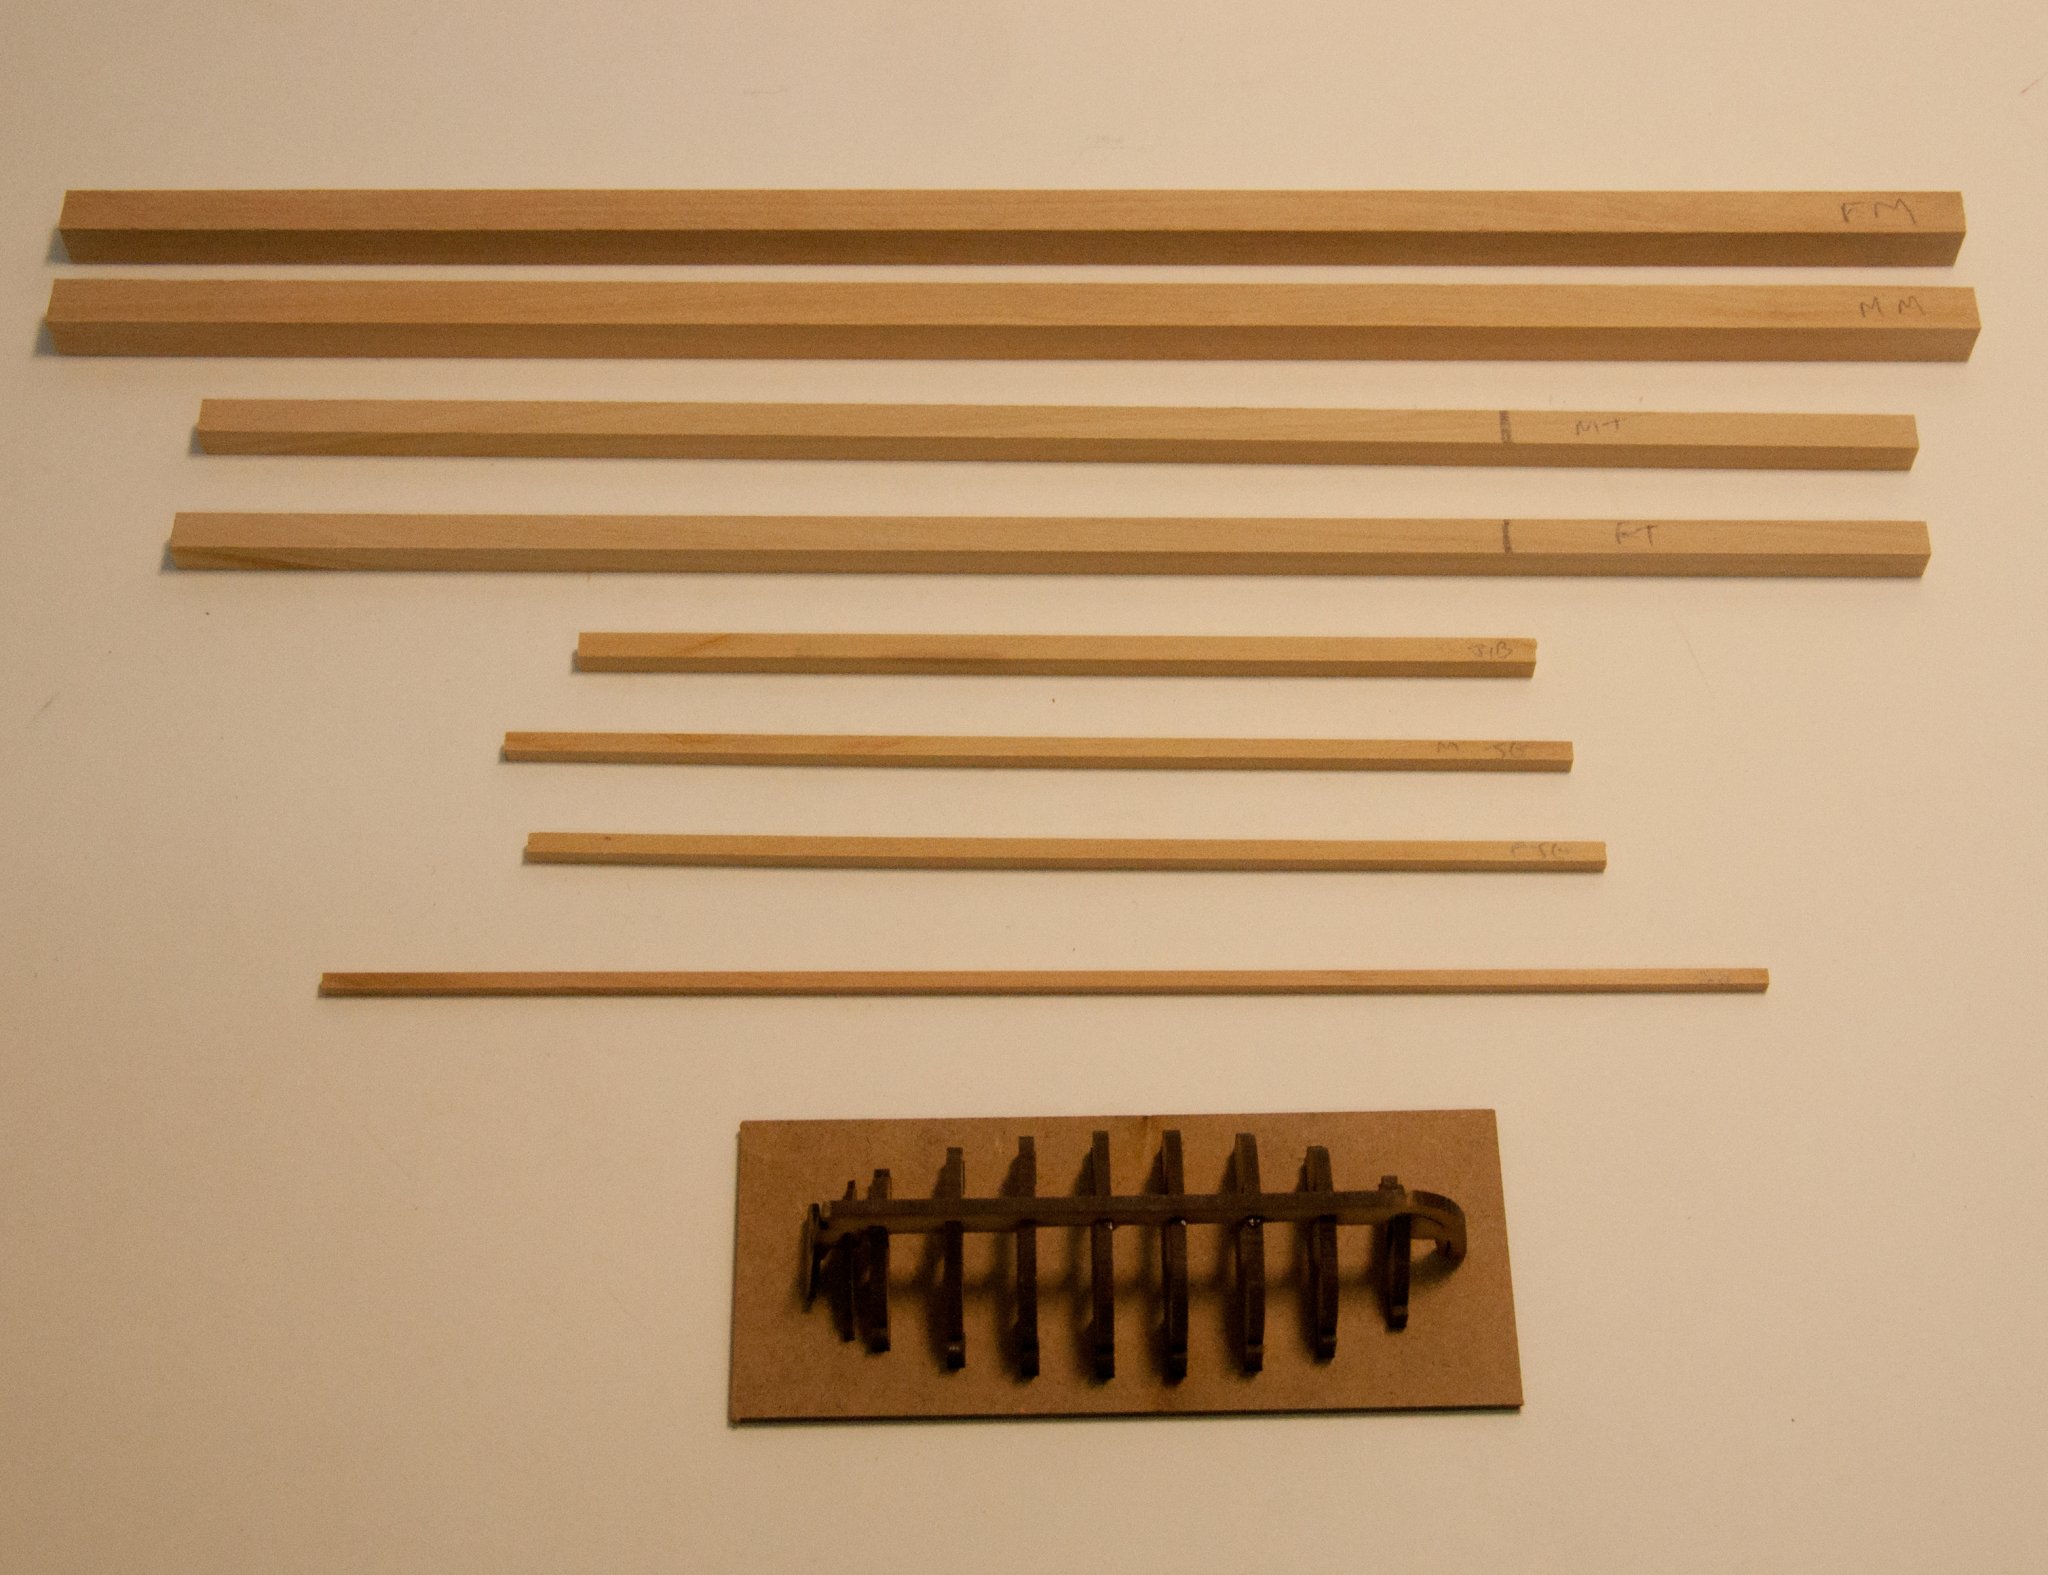
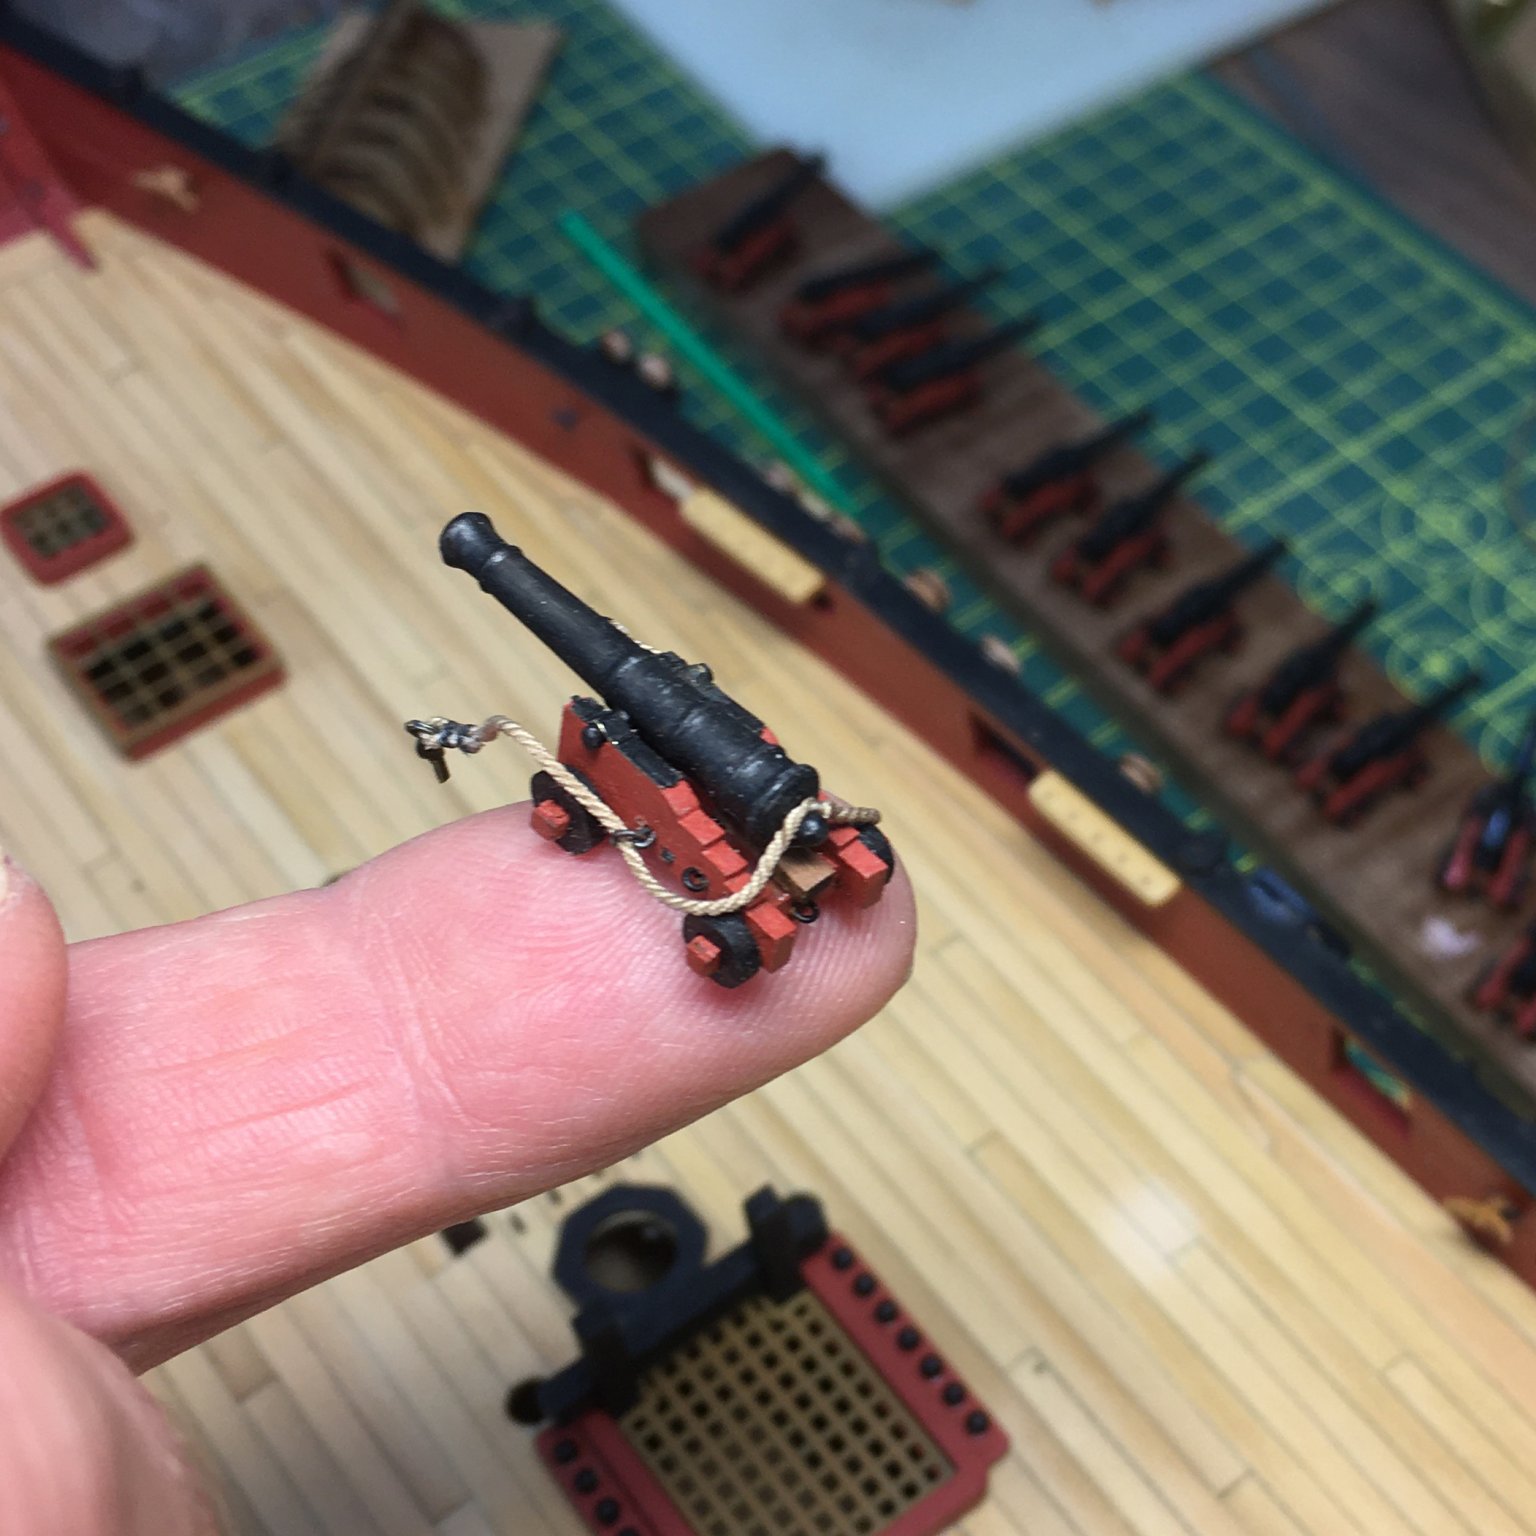
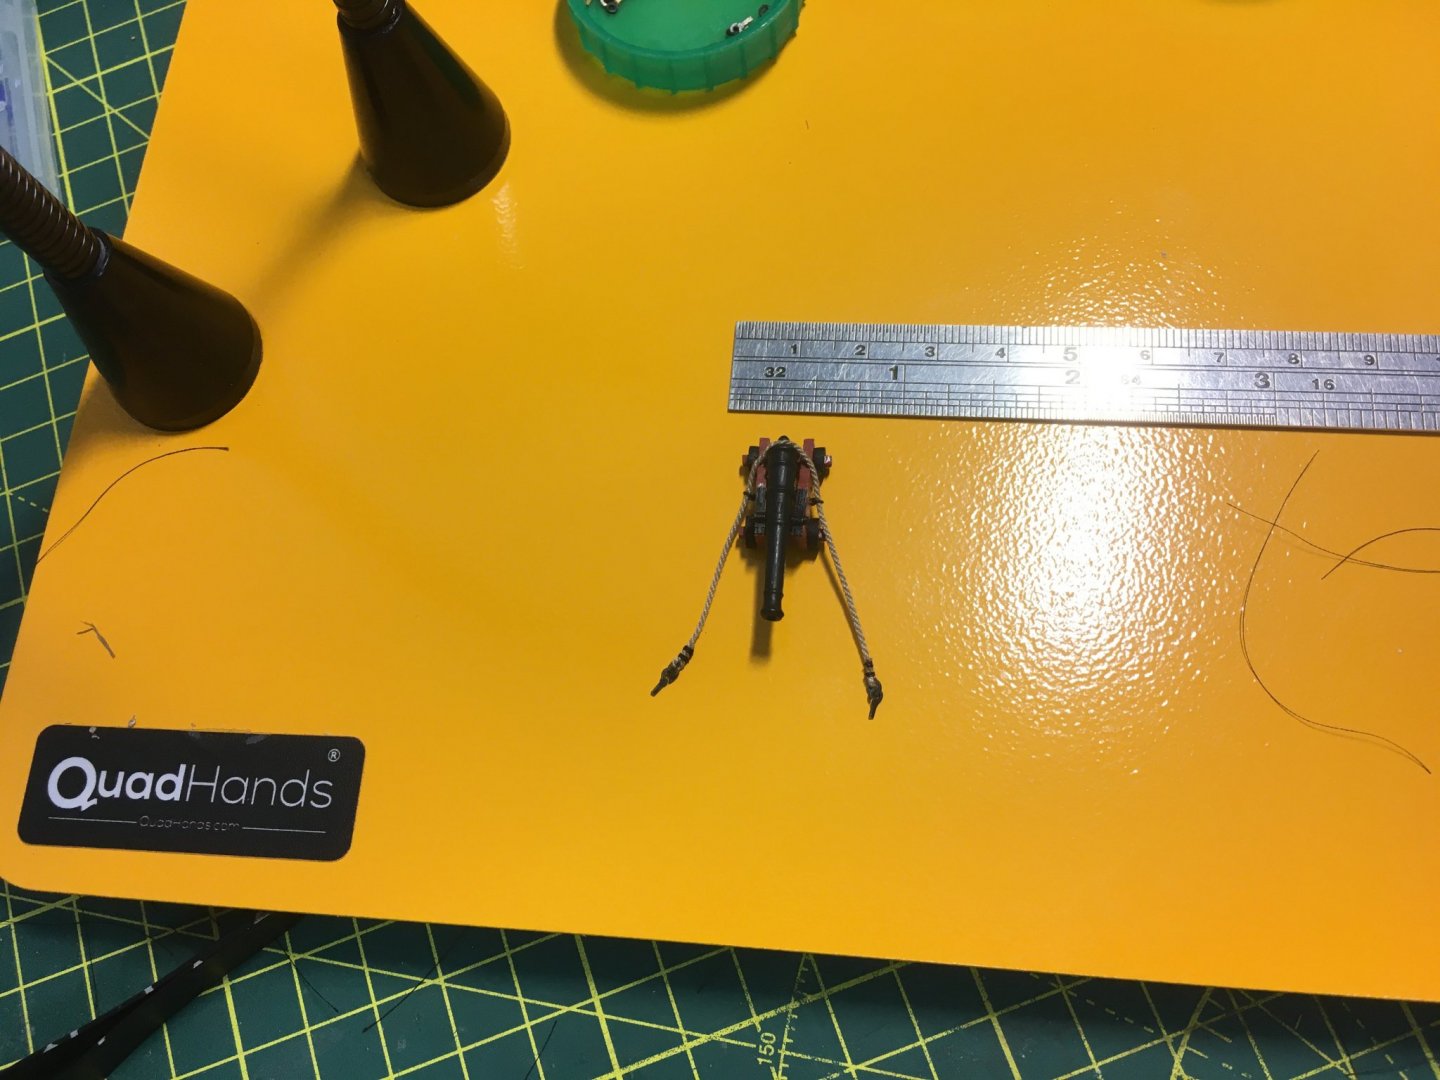
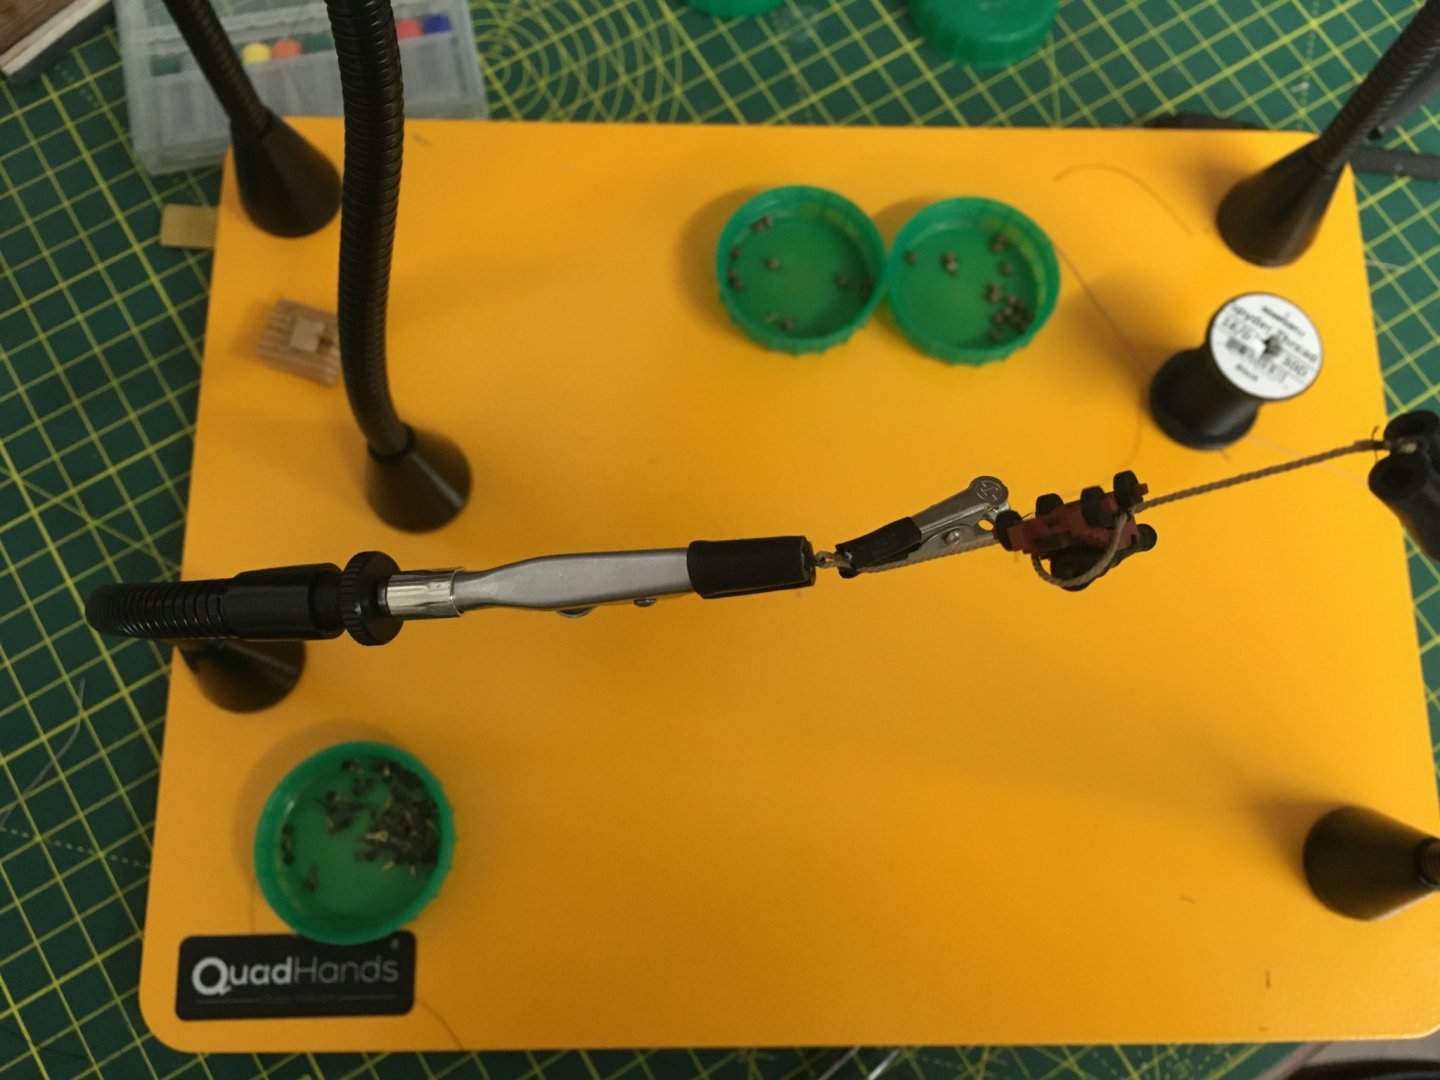
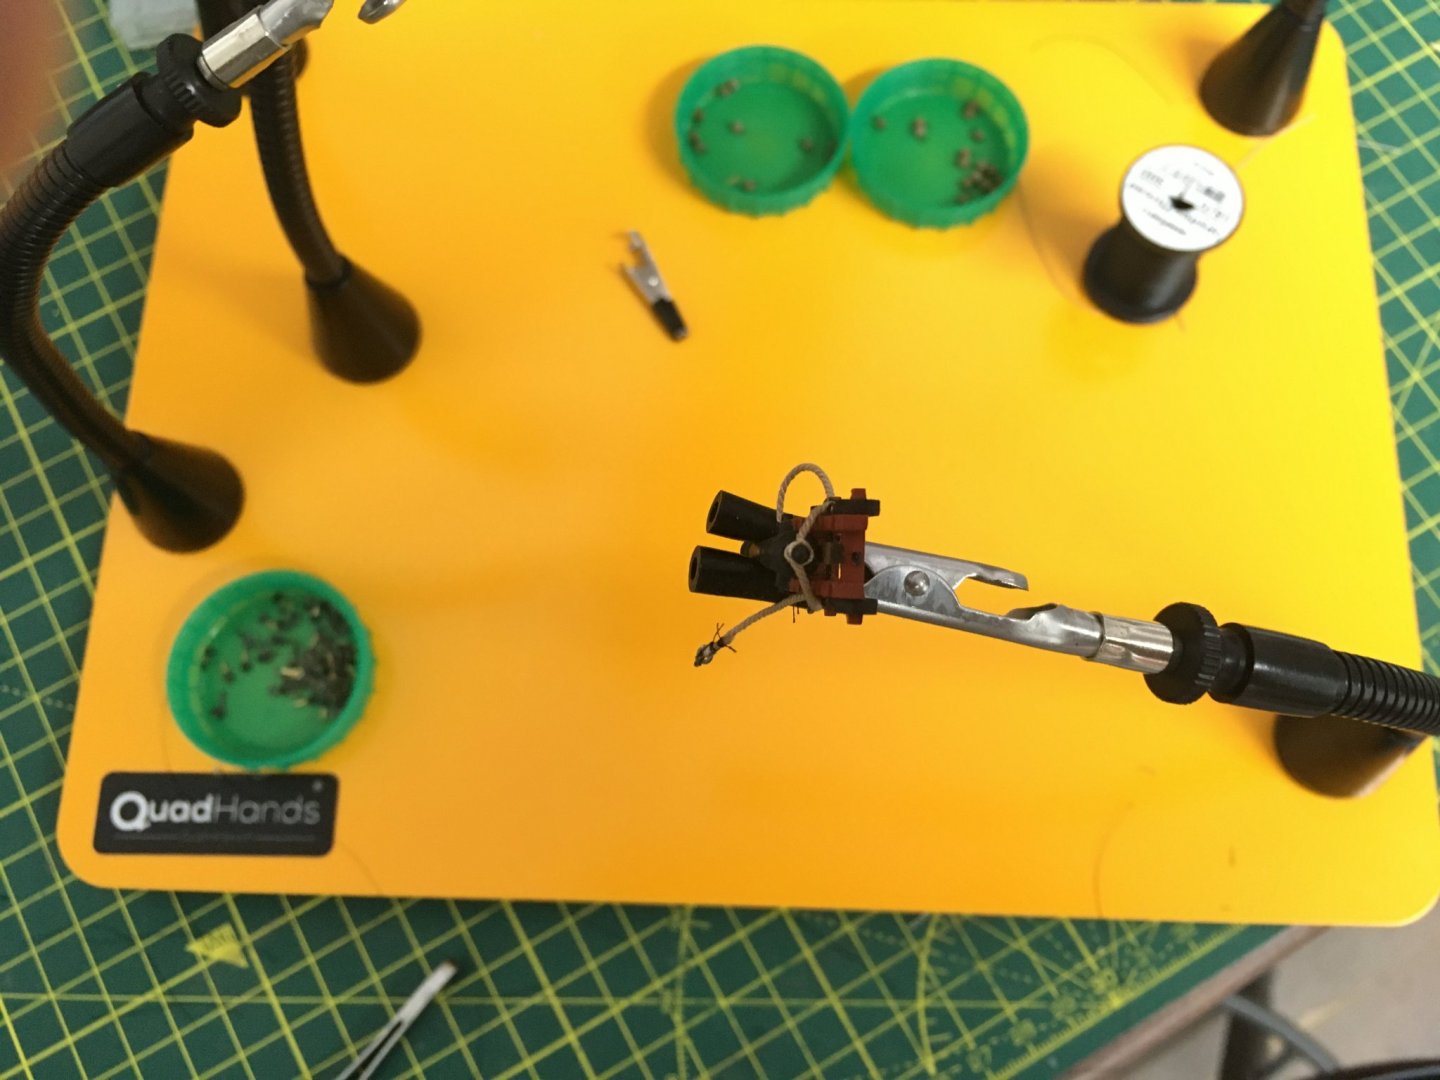
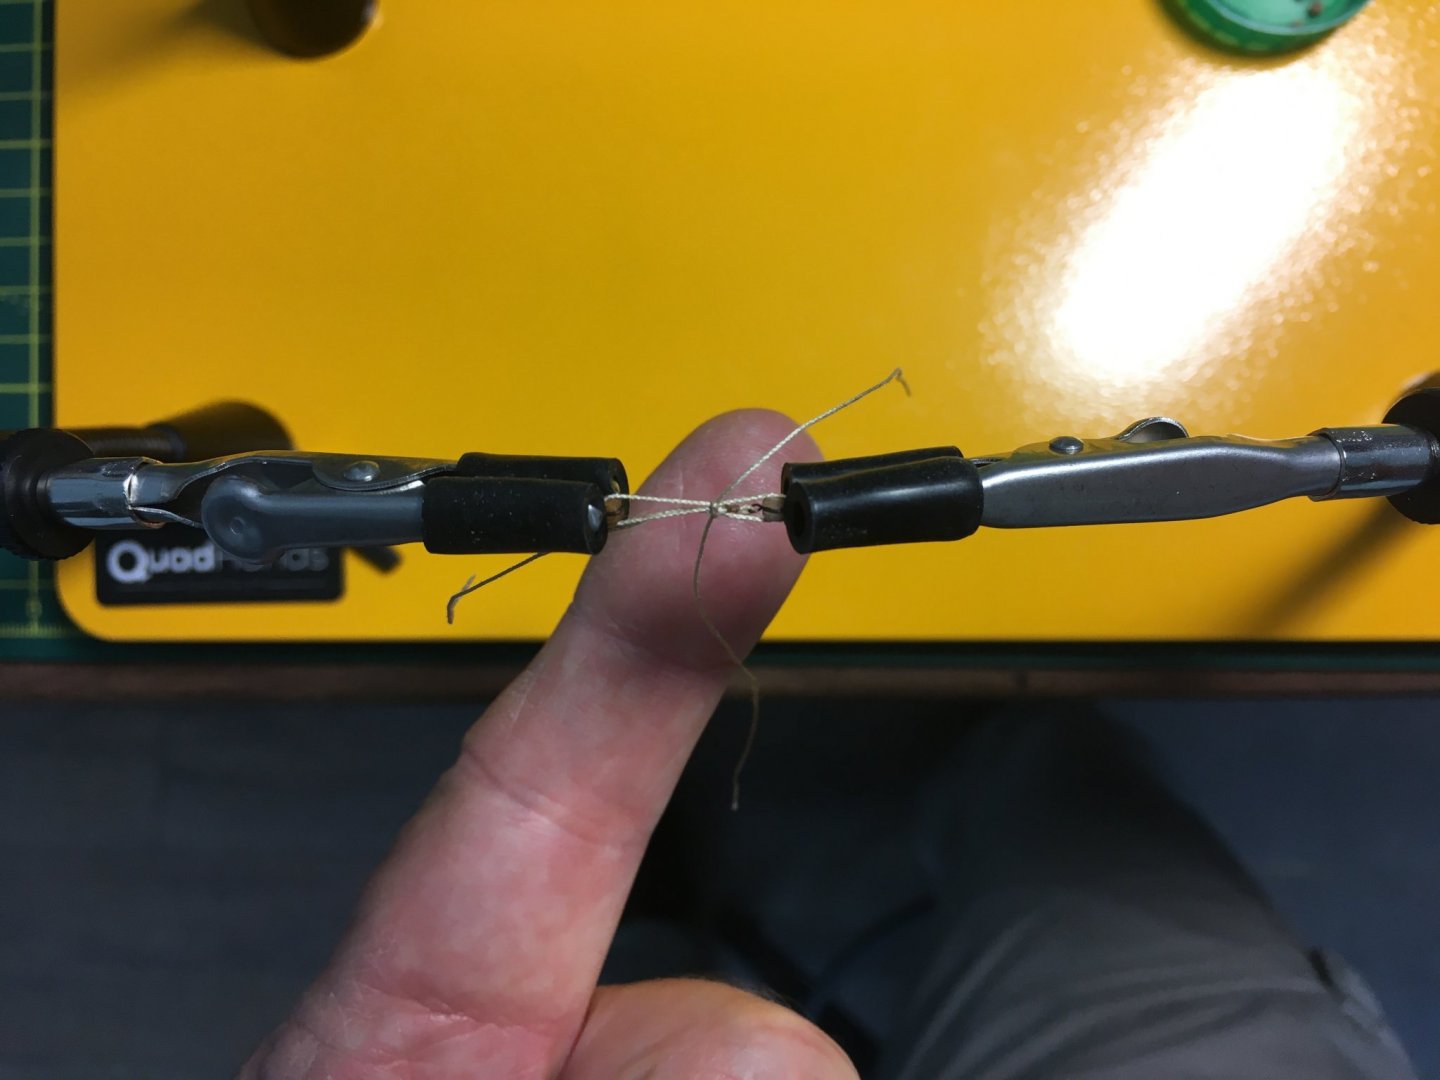
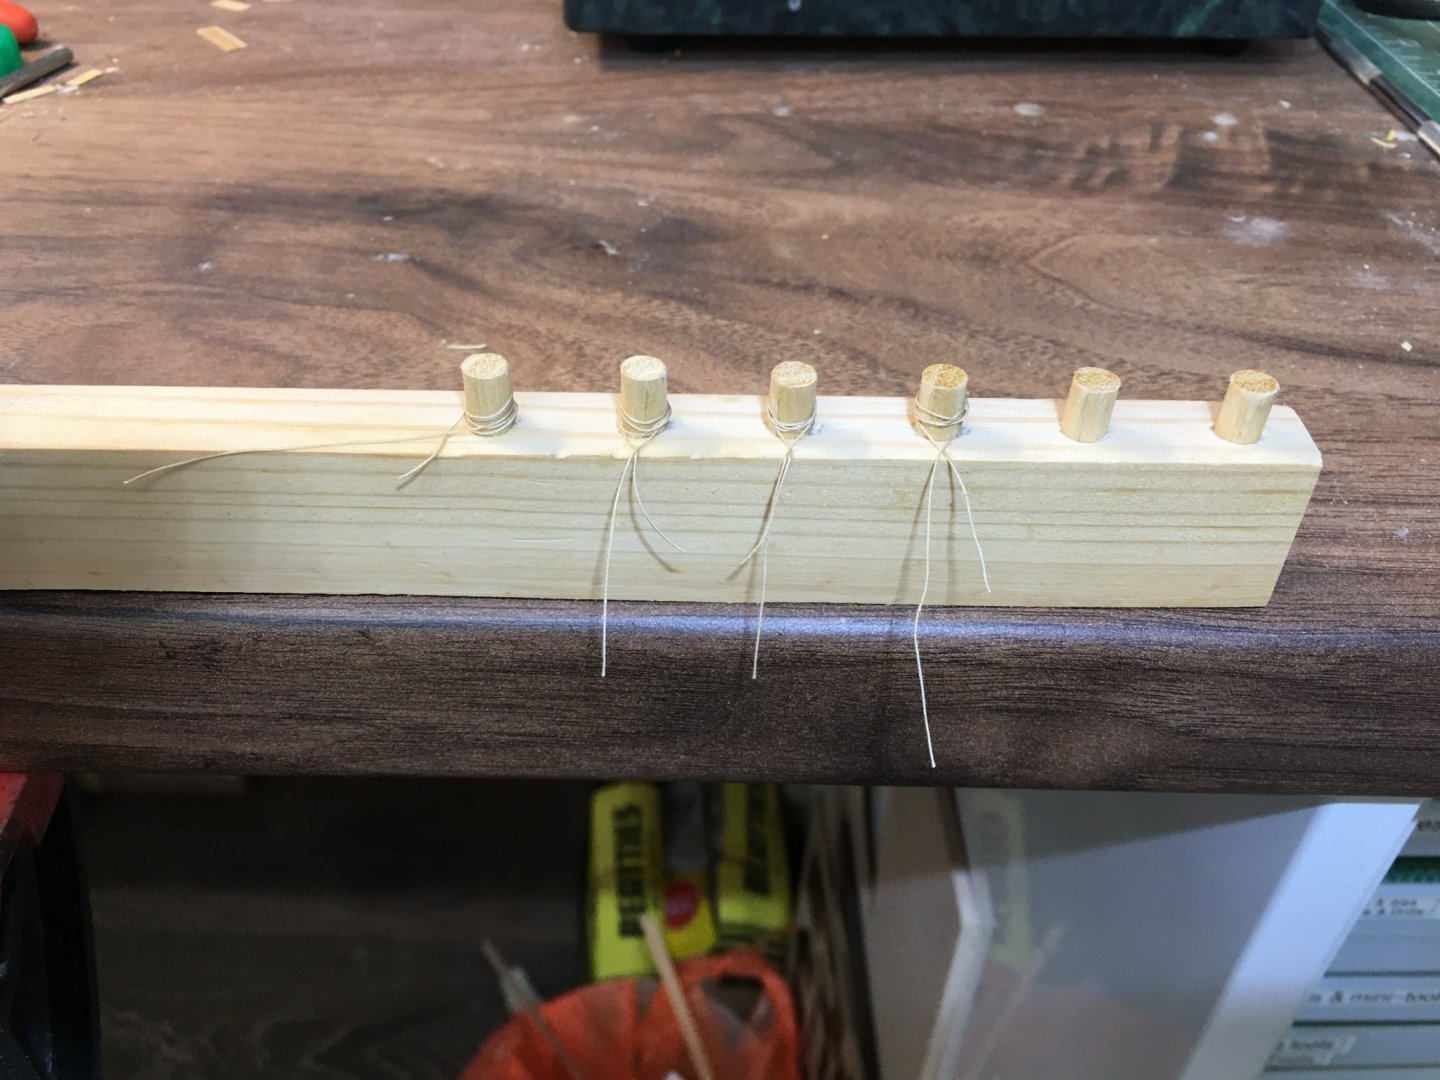
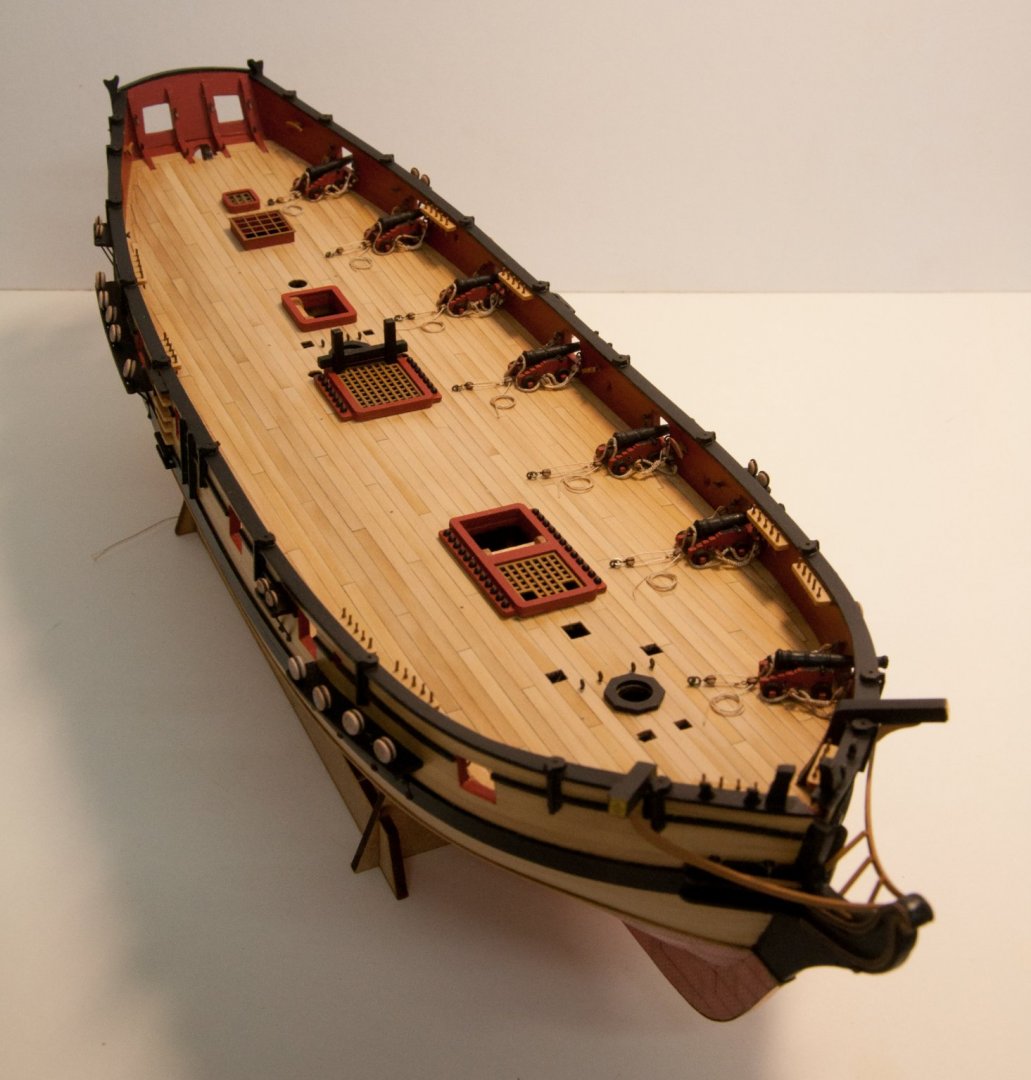
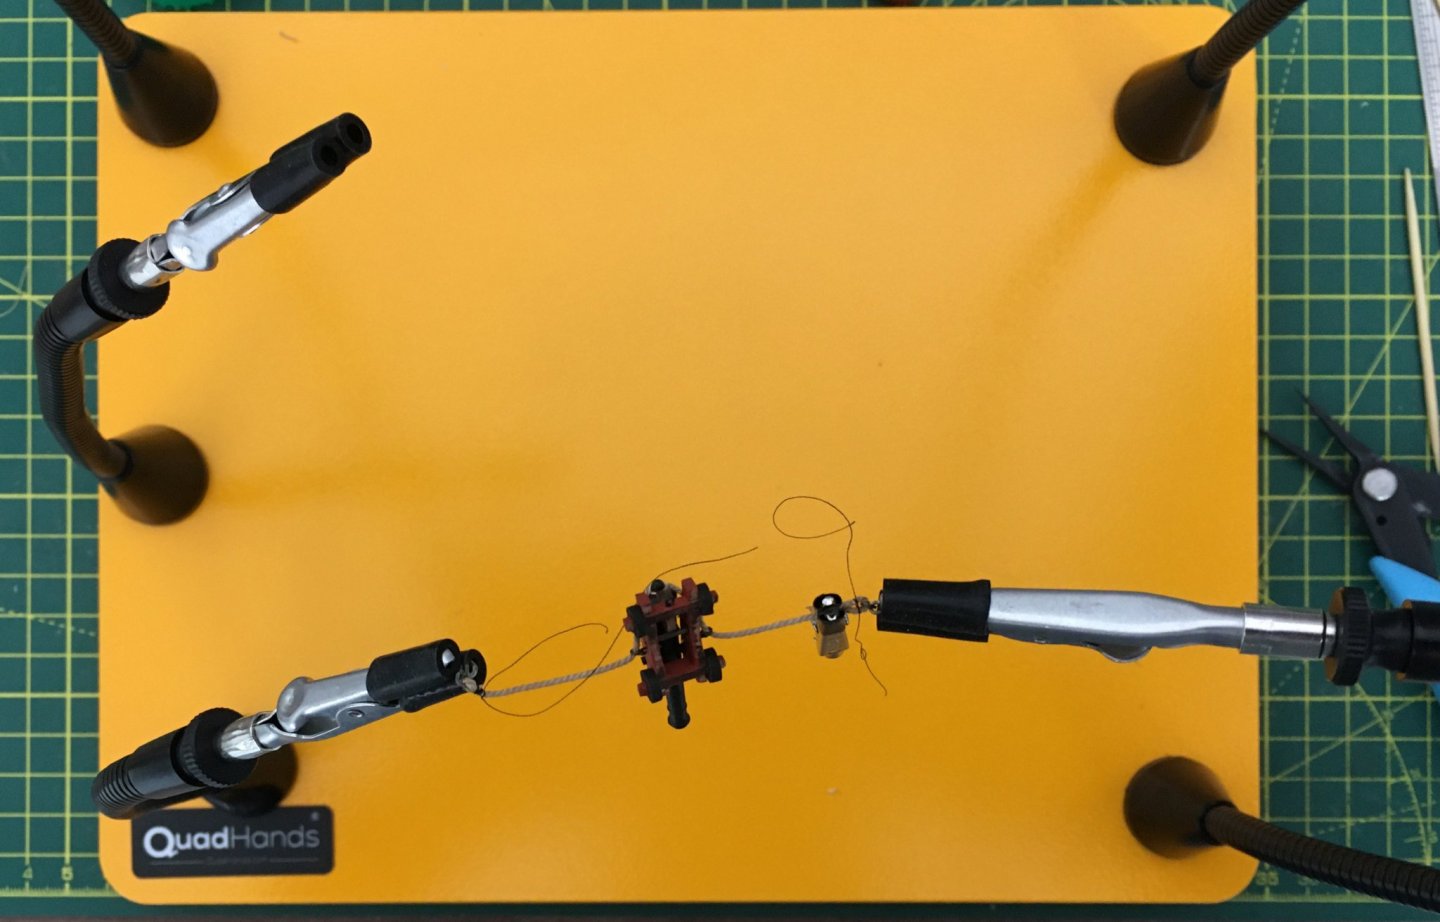
Gun rigging - the process As promised, here are a few notes on how I went about rigging the guns. None of these techniques are original, but if nothing else it'll remind me what to do for the starboard battery! The material I used was as follows: Blocks - 2mm single blocks from Vanguard Models. Superb quality. Larger guns would have a single and a double block for each tackle; two singles are acceptable for these tiddlers Breeching - I ran up a 0.75mm rope on my Syren Rope Rocket, using 3 strands of DMC 20 Cordonnet thread. This is ecru colour - better than pure white but I like to darken it slightly with a very weak solution of van dyke crystals. If you've not come across this, it's a traditional water based wood dye made from walnuts. I use it for most of my rigging - a strong solution will dye standing rigging to a brown that is almost black. Other ropes - DMC 100 thread, the finest they do, close to 0.10 mm Seizing - I use very fine fly fishing thread for small ropes at this scale (see post #301). For no particularly good reason I use black for standing and brown for running rigging. I covered the stropping of blocks and making ringbolts for the carriages in an earlier post so I won't repeat that (Update - see post #345 below for an updated version of the jig used to strop the blocks) Breech ropes are typically three times the length of the barrel, just over 80mm in this case. I cut mine to 85mm to give a little leeway. I started by seizing one end to a ringbolt then running the free end through the ringbolts in the carriage: It was a tight fit and I found I needed to put a bit of thin ca on the free end to make it stiff enough to thread through. This is all much easier to do off the model. Next, I shifted to the Quadhands to seize on to the second ringbolt. On the left hand side I'm using a small clip to hold the end of the seizing closed. Once I get the first couple of knots done I remove the clip, otherwise it just gets in the way: This shows the seizing technique more clearly. I do a series of half knots, alternatively above and below the rope being seized. With thin stuff like this you don't see it as knots. In fact without magnification you'd be hard pressed to see the individual strands. When I've done sufficient turns I finish with a reef knot then a dab of fly tying cement (see post #301). Then, with the barrel held in the Quadhands I gently persuade the breech rope over the cascabel: Seizings trimmed, and she's ready to be mounted on the deck (a blob of ca under each truck and one for each ringbolt - on previous builds I've put pins through the carriages into the deck, but you have to do that before mounting the barrel, and with Speedy I was too impatient). On to the side and train/inhaul tackles. The seizing technique is the same, just using brown thread this time: I think this gives a nice scale appearance. As with the breeching, I had to put thin ca on the running end of the rope and trim it to a point with a scalpel to get it to thread through the blocks: To frap, I found it much easier to use a separate piece of rope rather than trying to wind the running end around. To make the job easier and ensure consistent lengths I made up a little jig - just two pins in a piece of wood. I put a clip on the running end to hold the rope in tension while I started the frapping: I Next step was to take a 150mm/6" length and wrap it once round the tackle with a half knot. I didn't photograph this step, but the result is clear in the next picture, where I've lifted the tackle from the jig and mounted it in the Quadhands (simply to make it easier to handle): Then, it's back to the half knots, alternating above and below: Even with this thicker rope I think this technique gives an acceptable result, with the individual knots hard to see except under magnification. As before, I finished with a reef knot for added security and a blob of fly tying cement - I've found this works as well as other methods for securing knots prior to trimming. Here's two guns-worth of side tackle trimmed and ready for fitting: I made the inhaul tackle in the same way, the only difference being a rope coil instead of frapping. I made the coils in a standard way, putting a small amount of PVA glue on short lengths of rope by running them between my finger and thumb, then wrapping them round 5mm dowels mounted on a block. It's important to wrap the rope loosely so that when the glue is dry and you carefully pull the coils off the dowel, the results lie more naturally. In each case I trimmed the ends of the rope short, underneath the coil, then glued the coil on the deck over the running end of the tackle: I hope this is not too long-winded or simplistic. I am conscious there are some very experienced modellers watching this, but also relative newcomers who might find some useful tips. To complete the update, I've started one or two more jobs whilst fretting over the guns. I've cut the blanks for the remaining masts from boxwood - I'll use the kit material for yards as they'll be painted black. Before too long I'll start shaping the spars, using the technique I set out in post #187. I've also made a start on the little ship's boat - a mini project in itself: Finally, I took time out to paint and fit the belaying pins - I must say it's a real pleasure to find a model with proper scale pins and not the usual Christmas tree bulbs! Derek


- 725 replies
-
- 17
-
-
- vanguard models
- speedy
- (and 1 more)
-
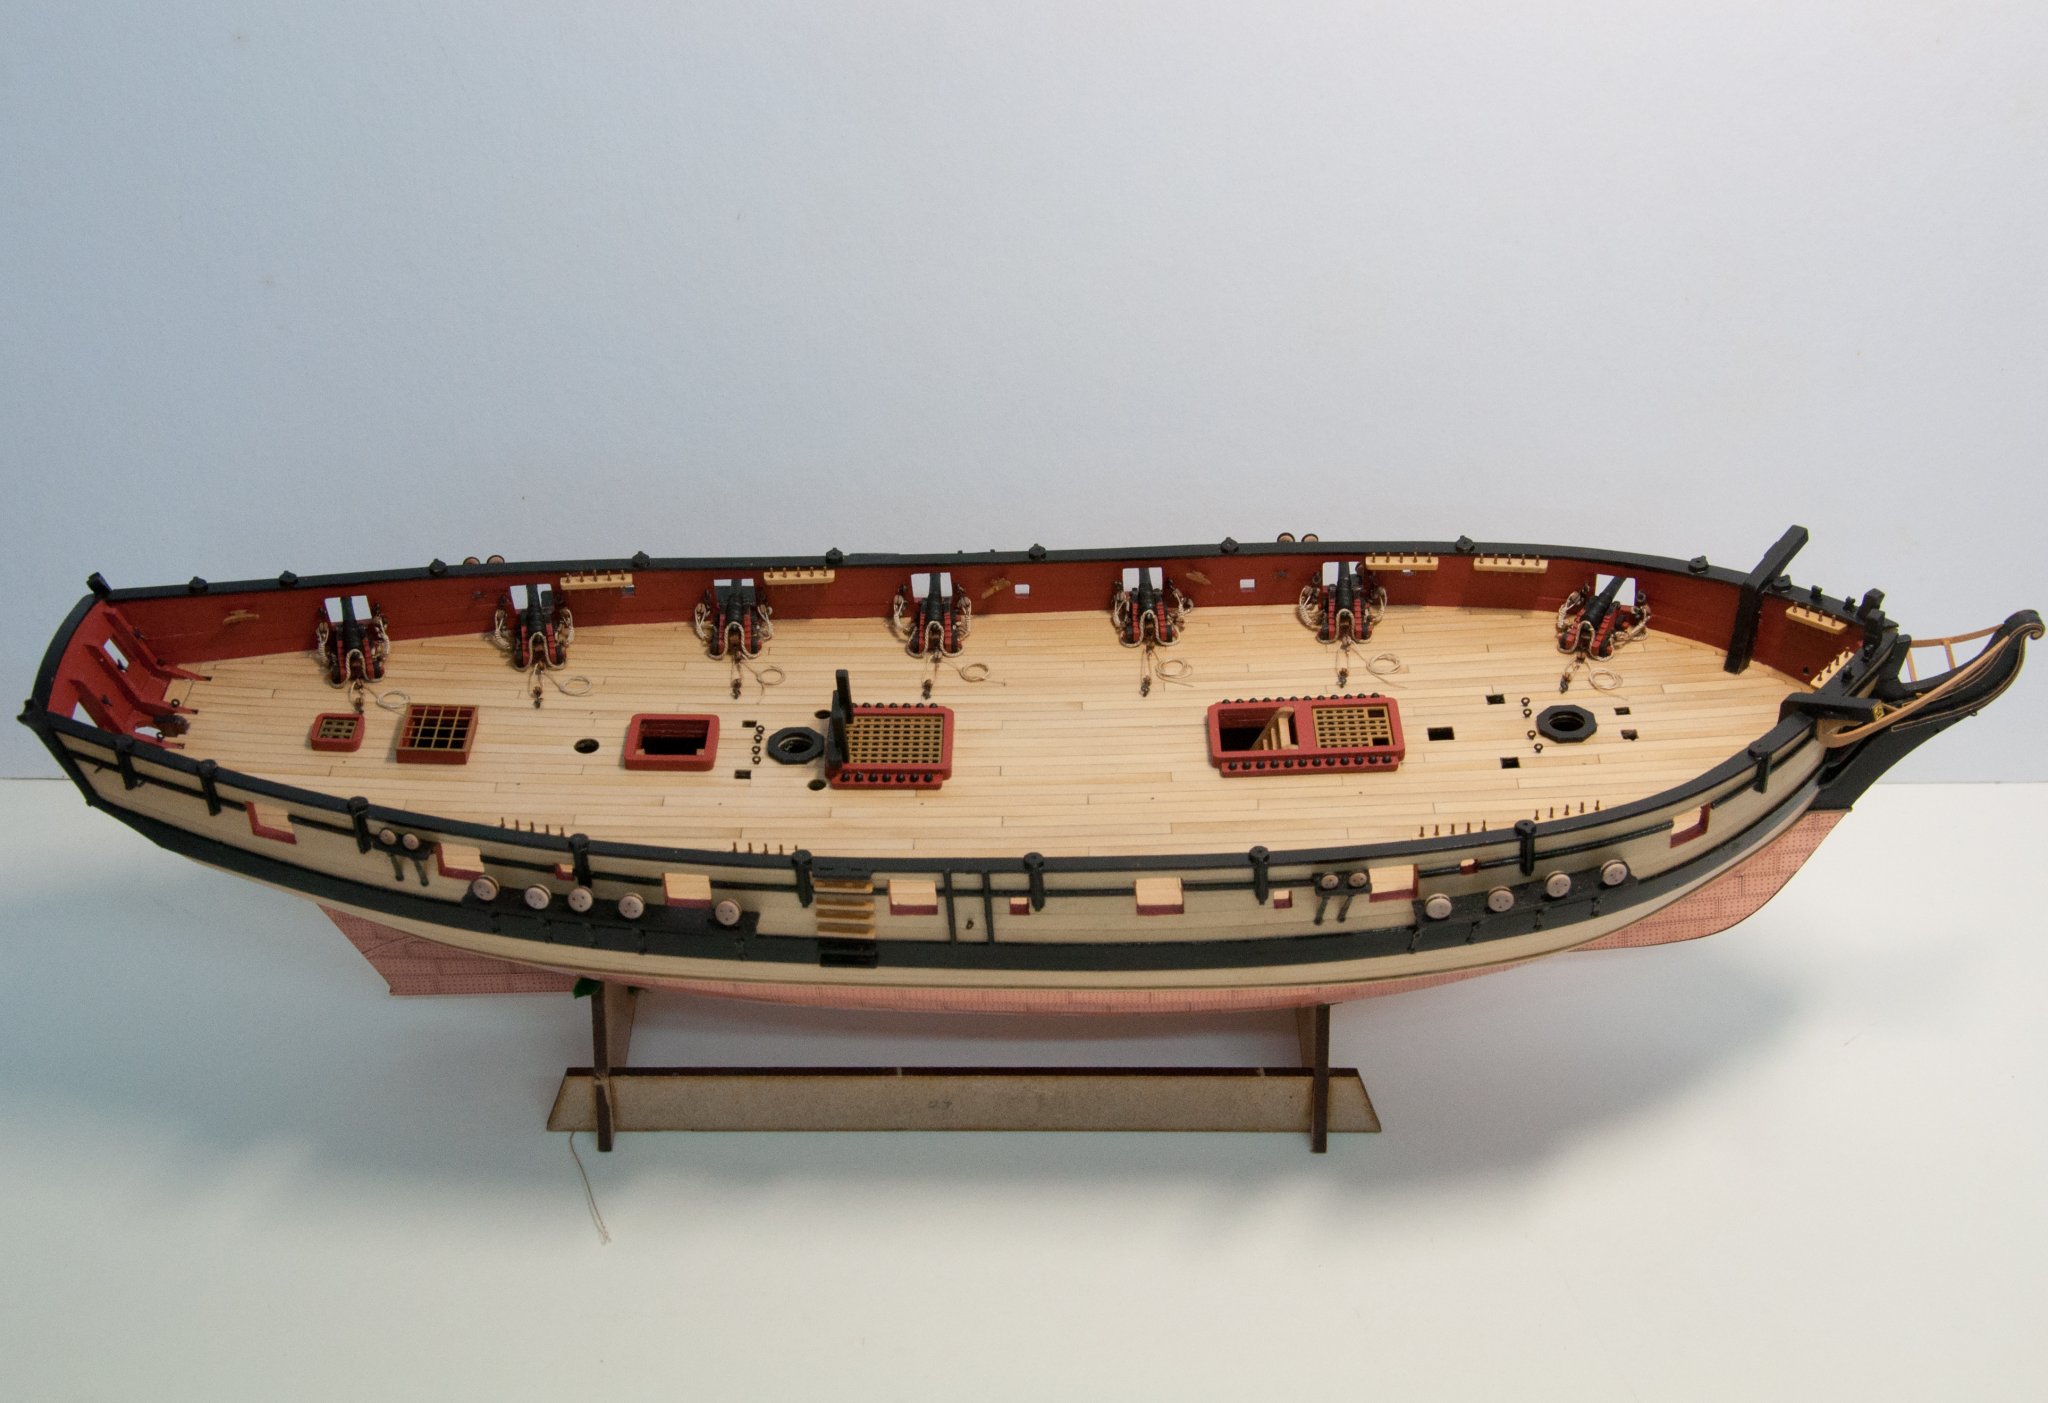
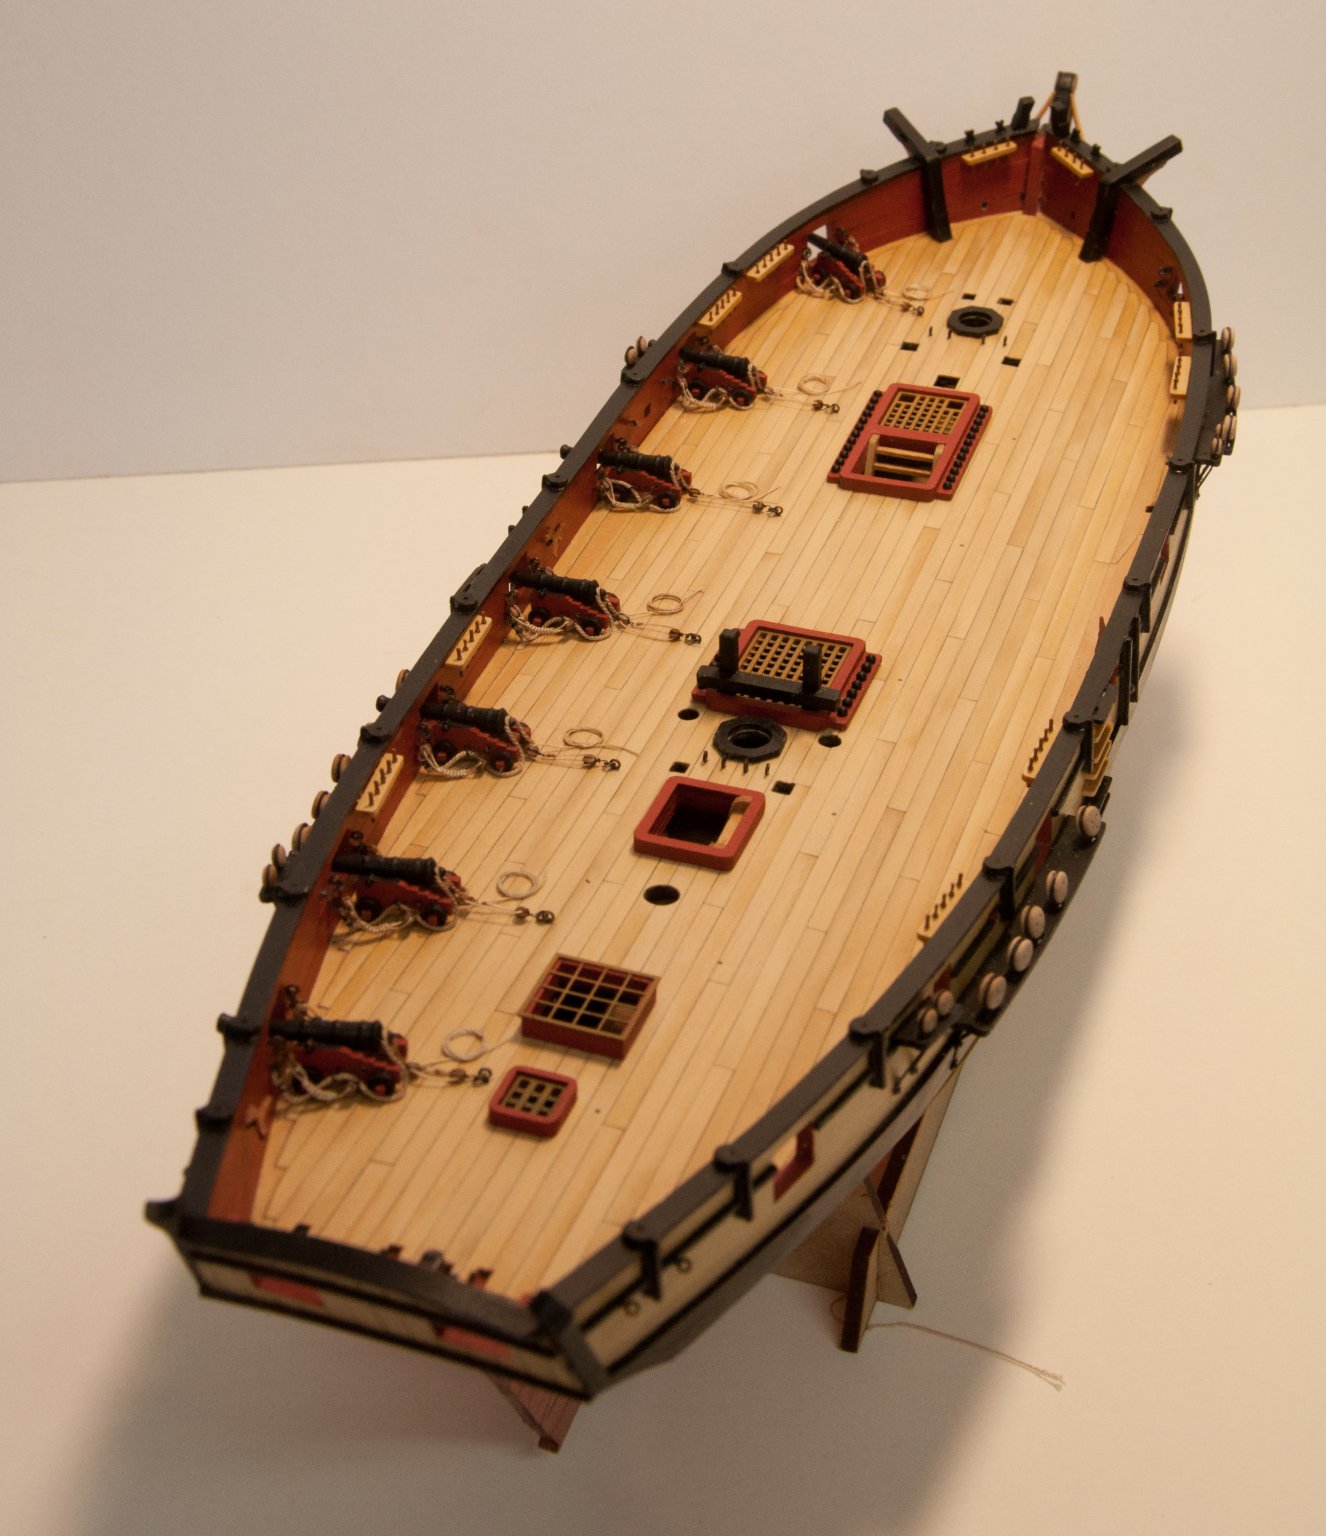
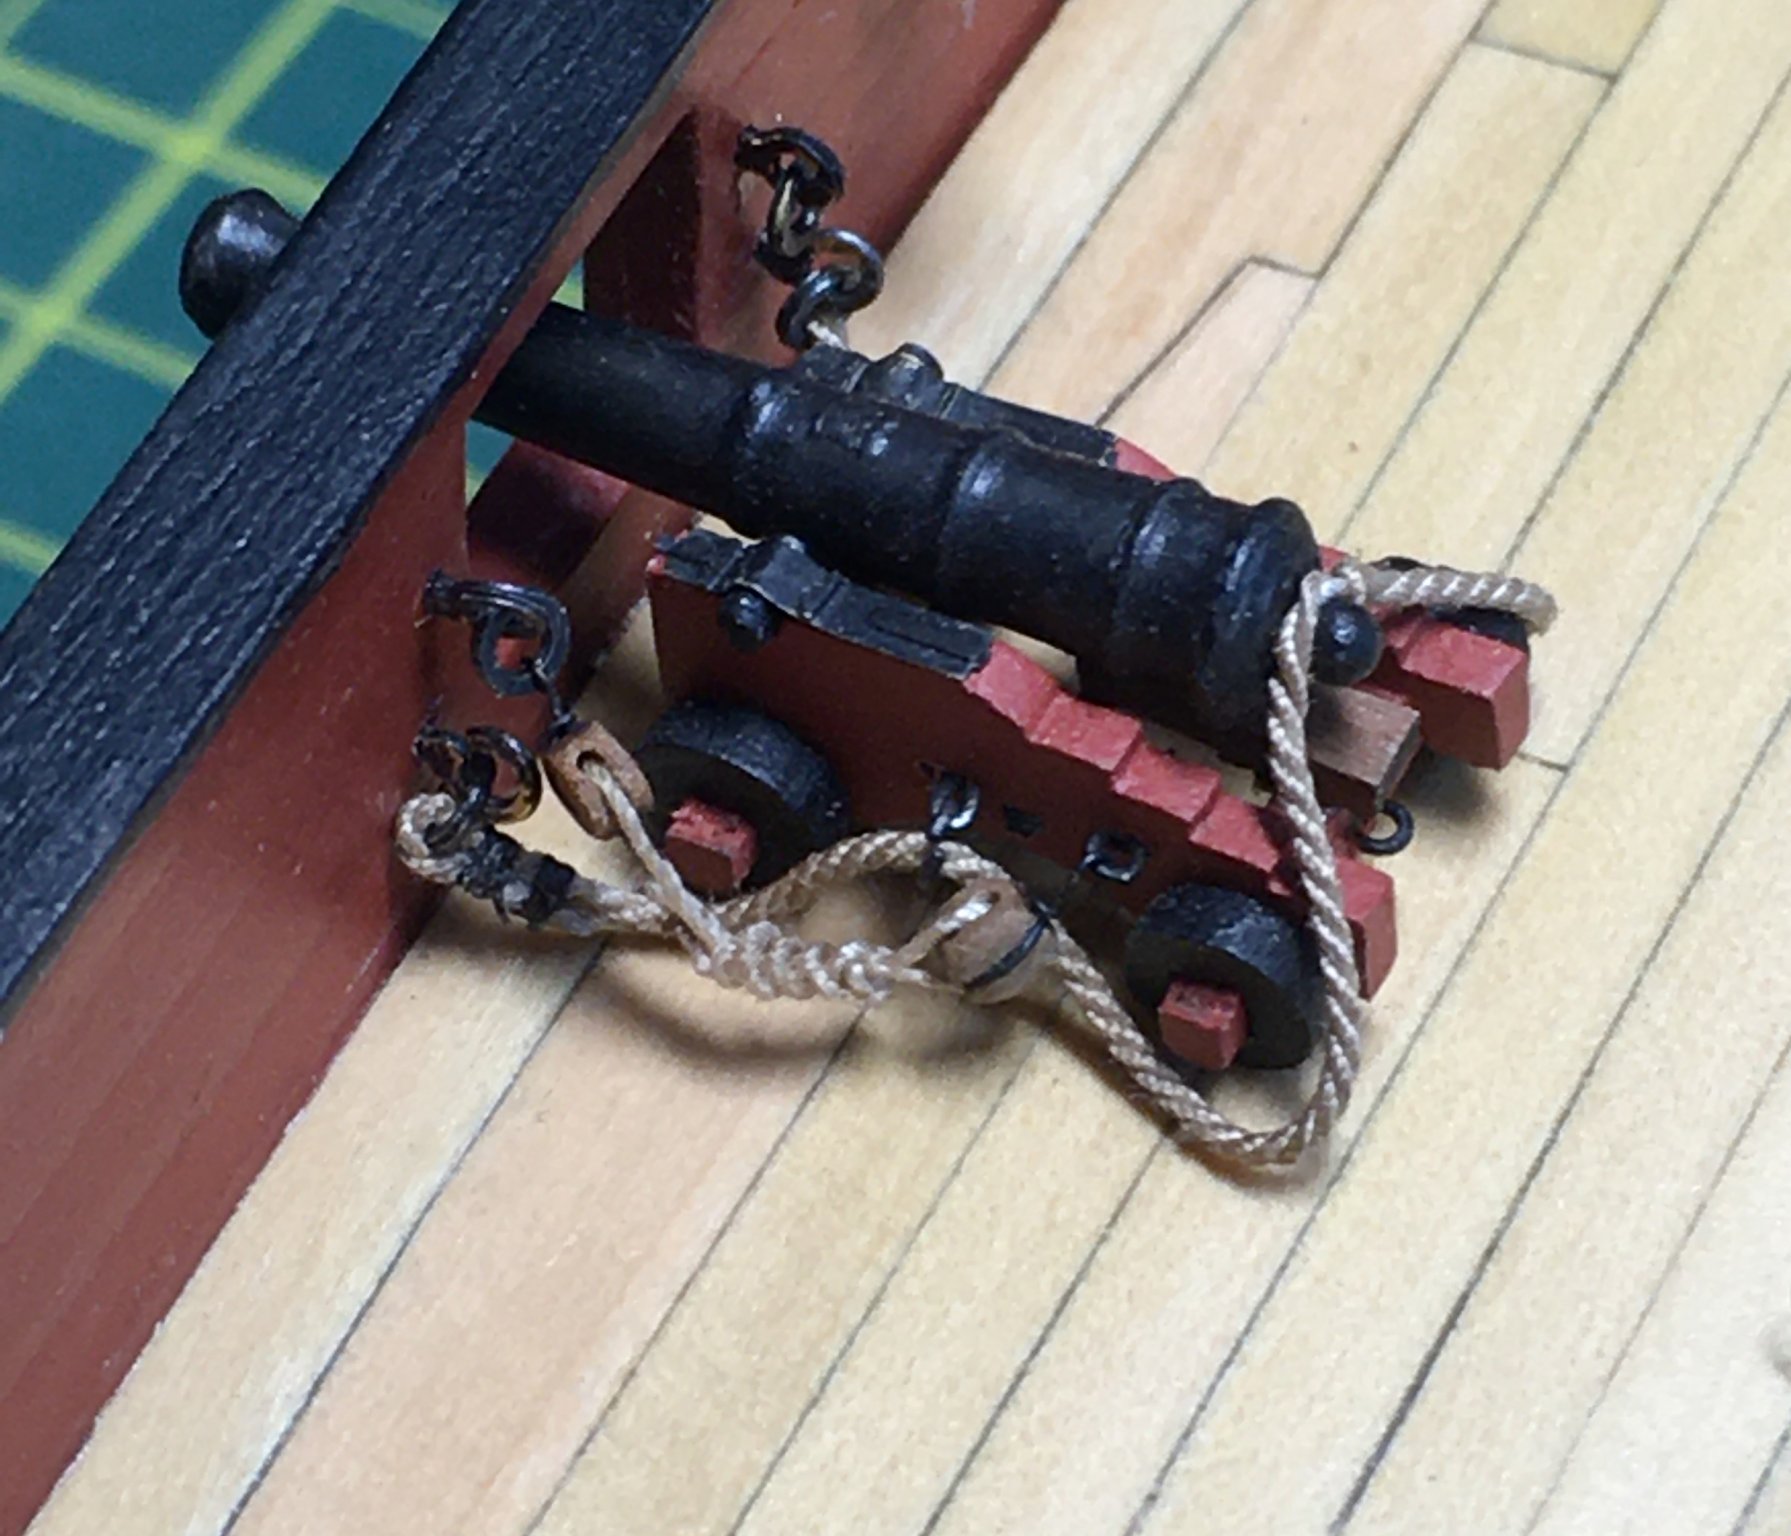
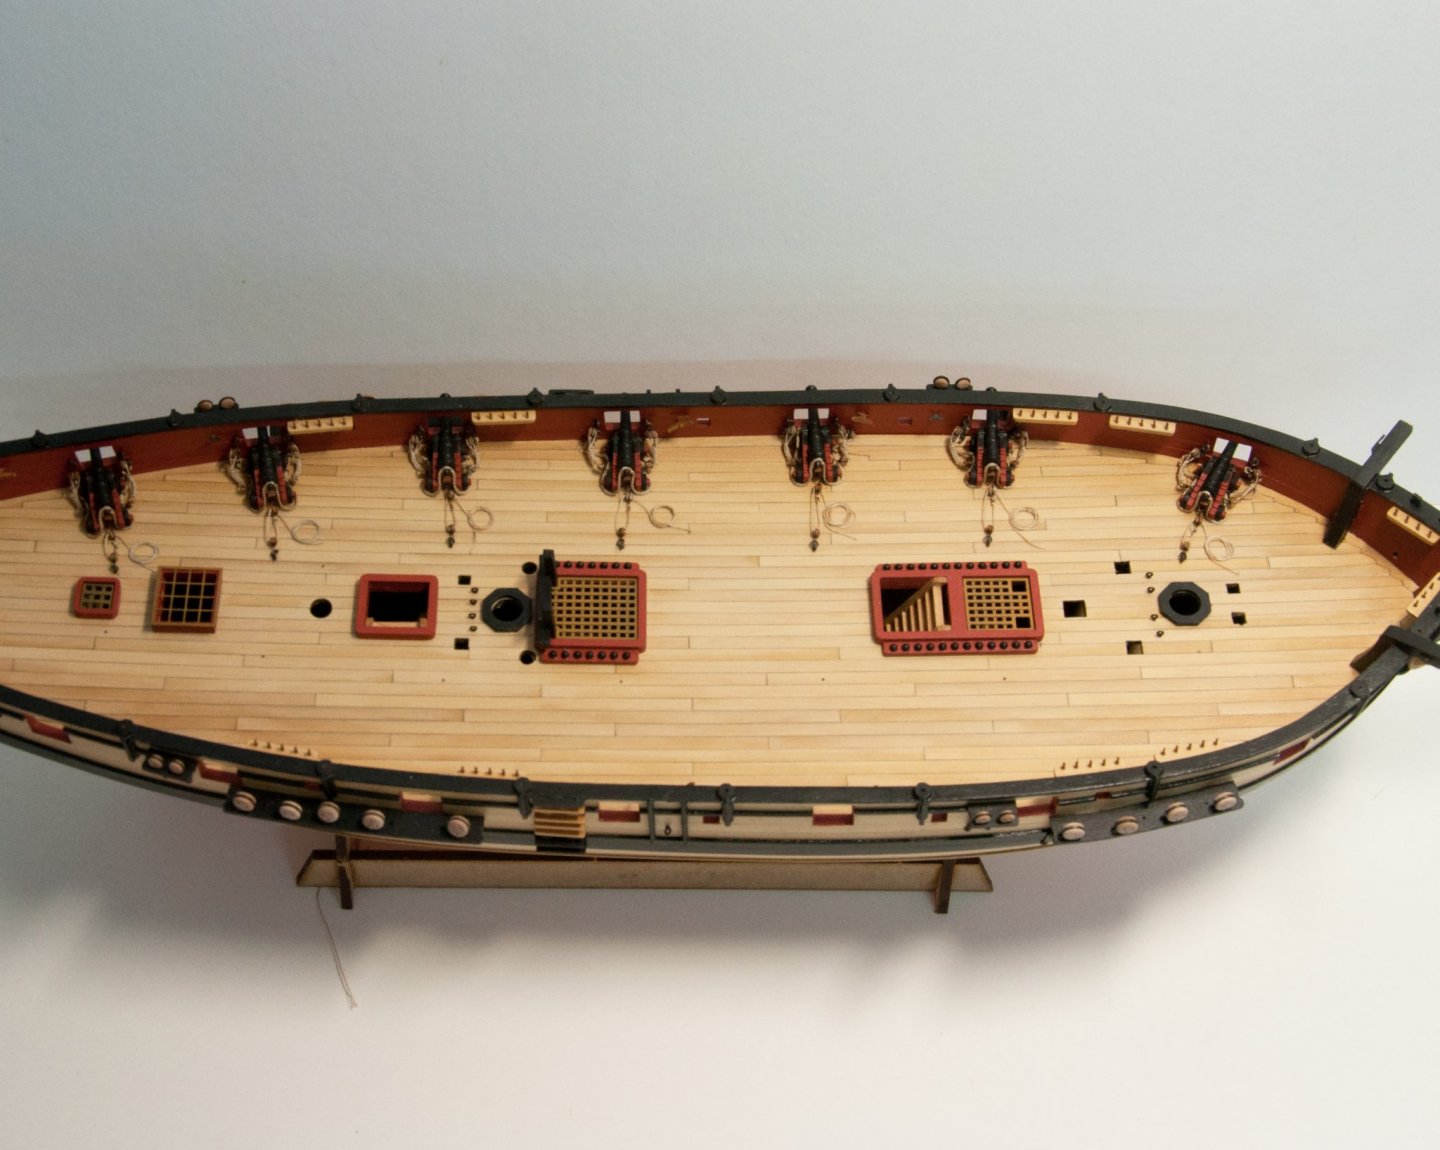
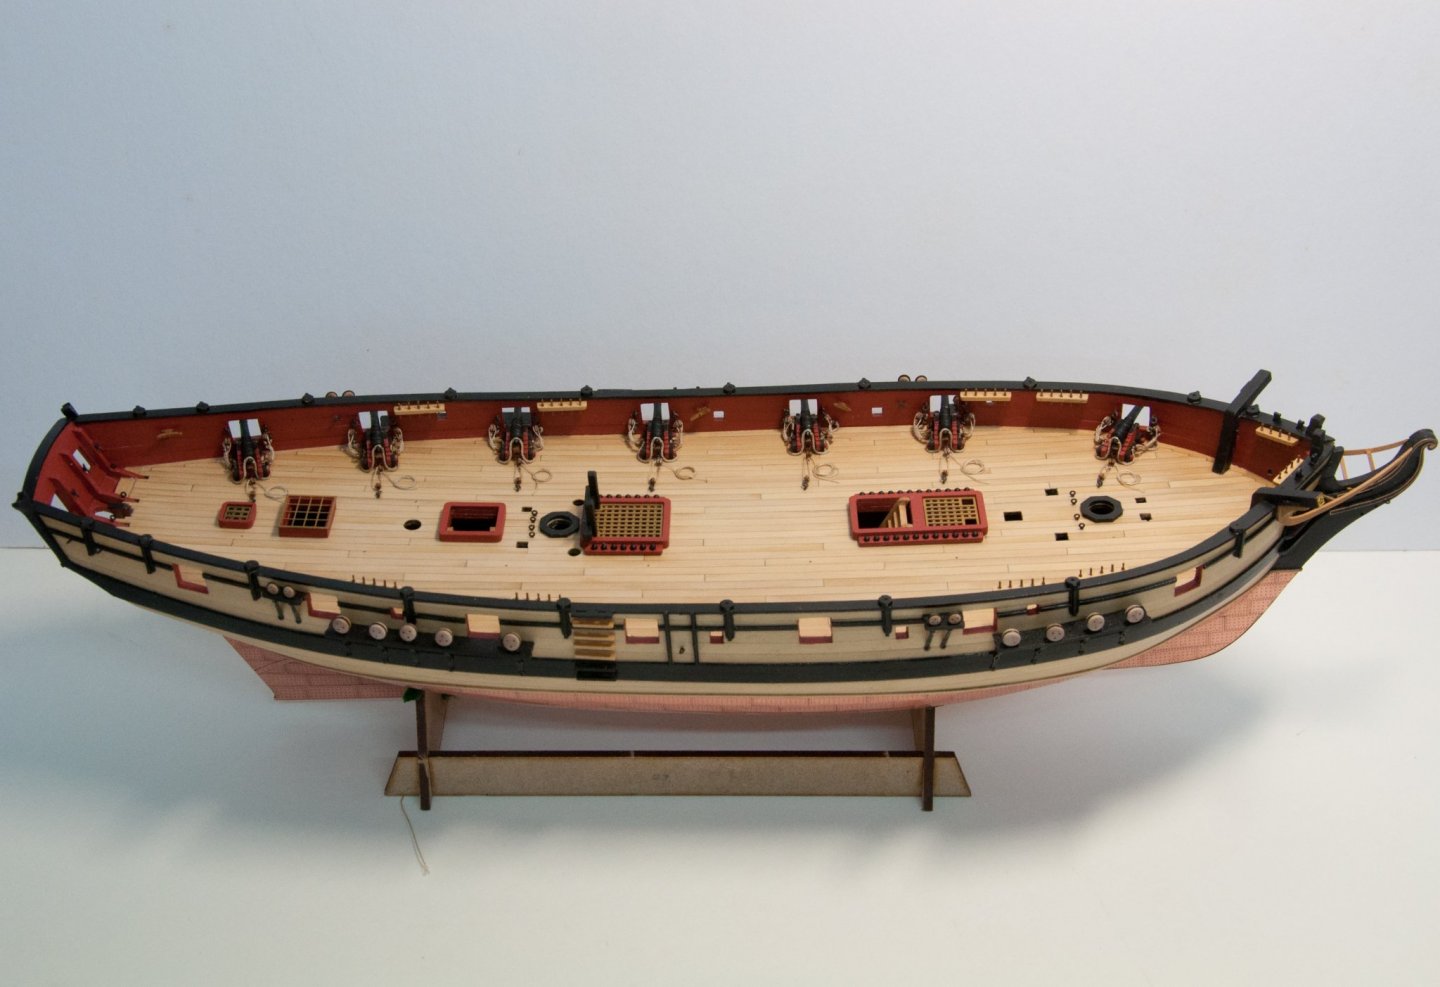
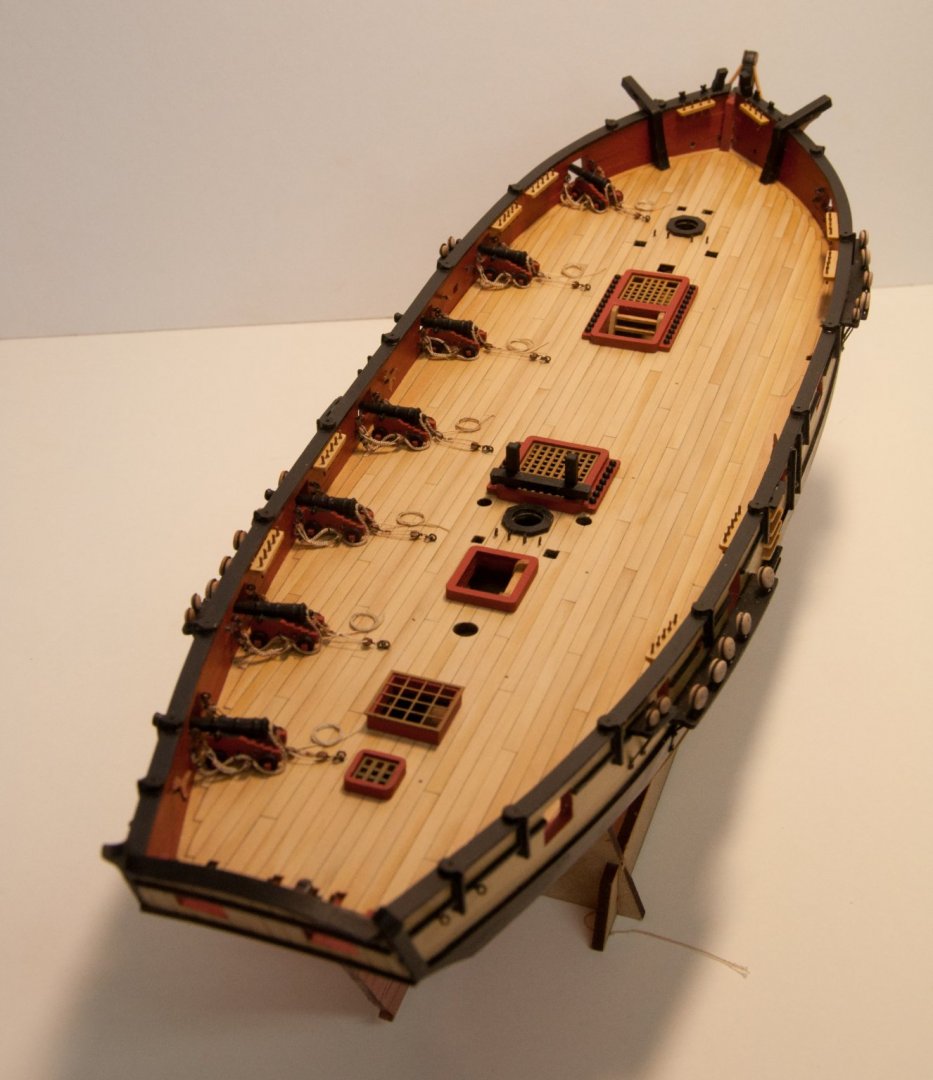
Gun Rigging - Port Broadside Phew! That took even longer than I anticipated, mainly because I kept havering about details like the length of the side tackle; redoing work then reverting to the original. I started with the tackle short, as per post #301, then after SpyGlass's helpful input I lengthened it (post #316). Looking at the two side-by-side on the model I was minded to revert to the short version, but was eventually persuaded by my wife, who usually has a better eye (she tells me), that she preferred the longer tackle (stop giggling on the back row!). Duly persuaded I lengthened it another 3mm, which I think makes the tackle hang better and show off more frapping. Anyway, here's the port broadside finished: Hopefully the starboard broadside won't take as long now I can stop chopping and changing. I've taken a few photos of the rigging process which I'll put in a separate post to avoid making this one overlong. Derek

- 725 replies
-
- 10
-
-
- vanguard models
- speedy
- (and 1 more)
-
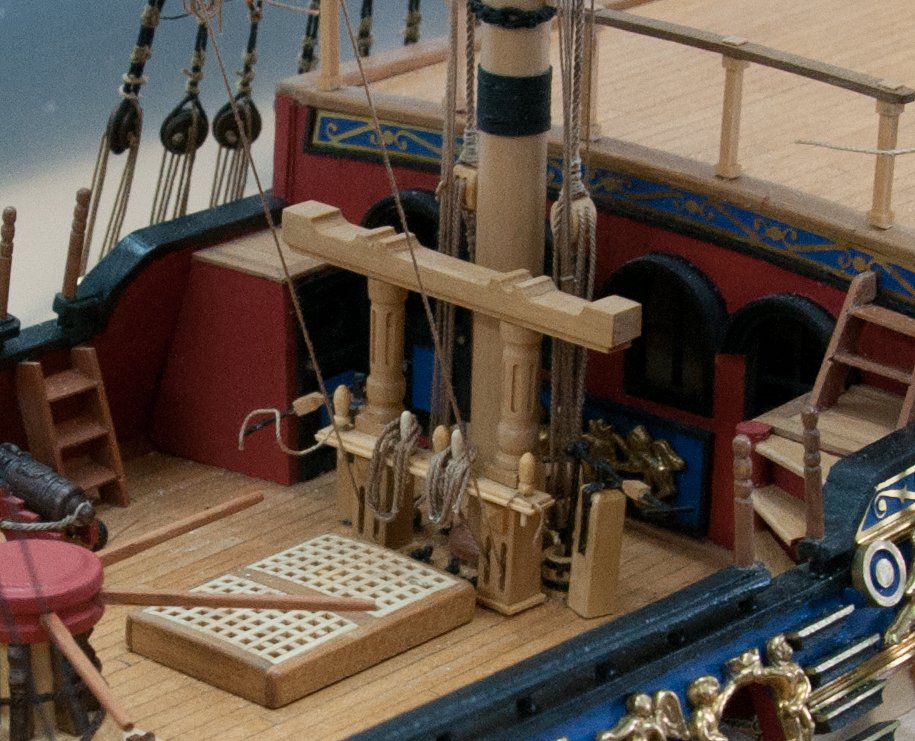
Hi Stuglo I wouldn't use the rotating table in the vertical mode to mill anything more than a centimetre or two in length for the reason you state. I tend to use it in the vertical position to do things like these columns. I turned them on a lathe, but then used the dividing head to mill the grooves to give a fluted effect. Basically, you lock the table in place, mill the first groove, then rotate the workpiece a set number of degrees ( for example 60 degrees if you want six grooves) and repeat. Most of the other elements of this boat support were made on the mill. I should point out that I eventually replaced the overscale belaying pins! It's difficult to see on this photo, but I also used the dividing head to mill the slots for the spiral steps just visible on the right. Similar principle. Derek August 2019_0034_edited-1.xmp
-
I wouldn't have realised the longboat was your first build - you made a superb job of it! Did you make the case as well?
-
Hi James I've just found your log - welcome to the Speedy club! Coincidentally, I've just bought the 18th Century longboat with a view to starting it when I've finished Speedy - your longboat gallery album caught my eye which led me in turn to this log. I really like those smaller vessels designed by Chuck Passaro, and having completed the English Pinnace just before I started Speedy I was keen to try another. Anyway you've made a good start, and thanks to me deciding to fully rig all the guns I expect you'll soon catch me up! Best wishes Derek
-
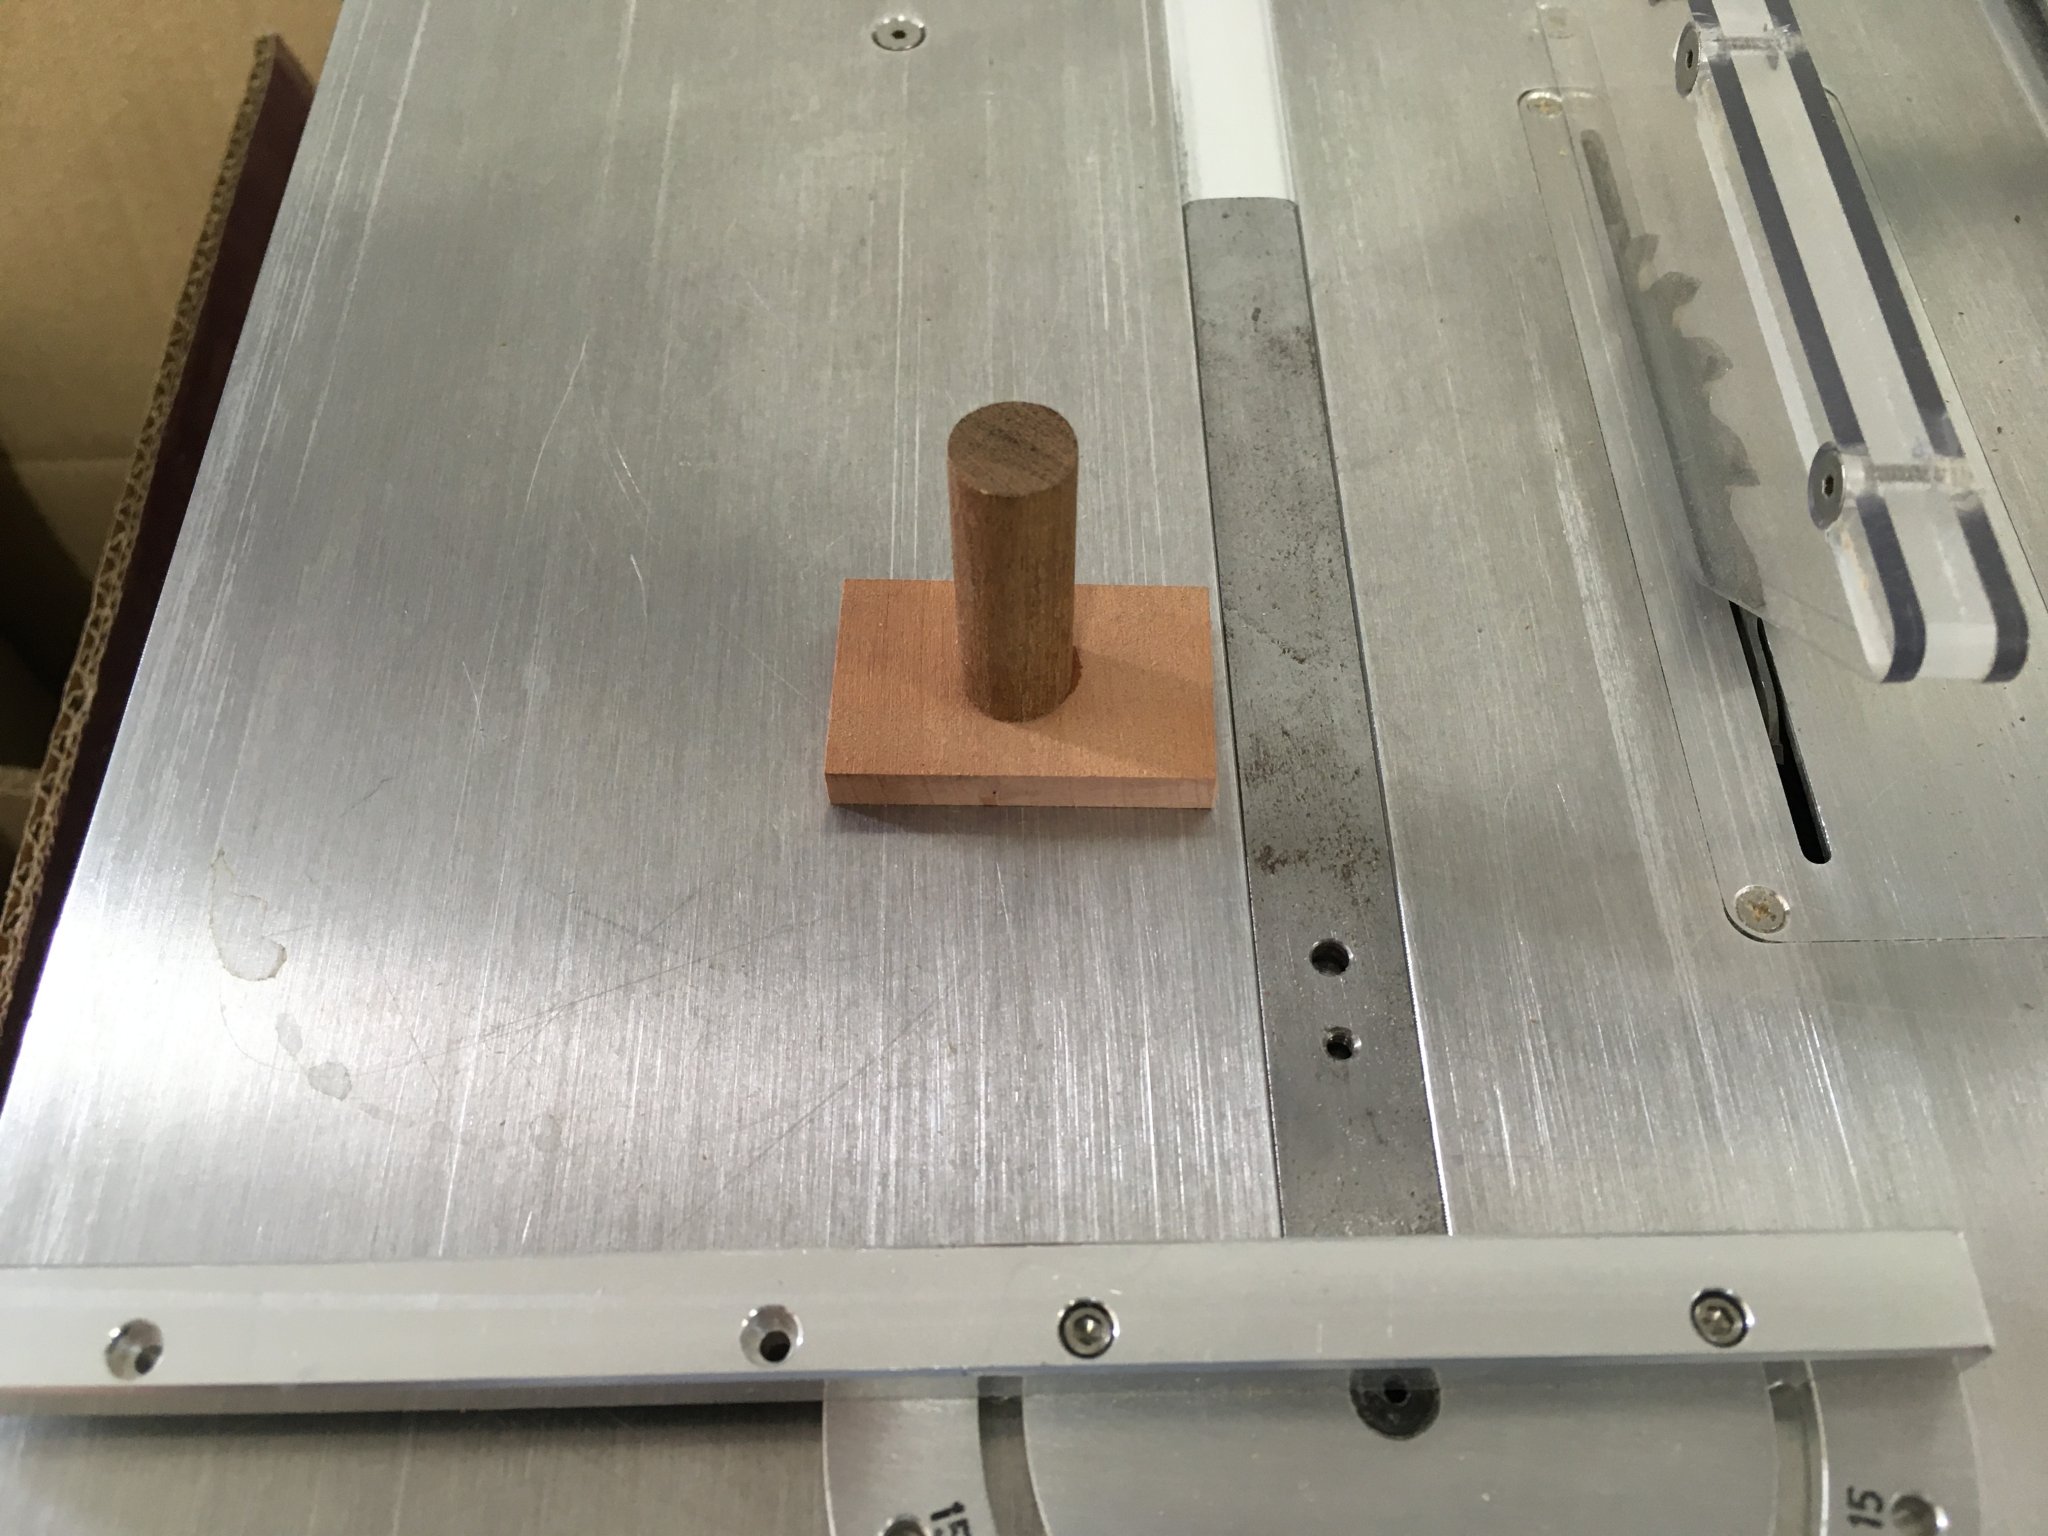
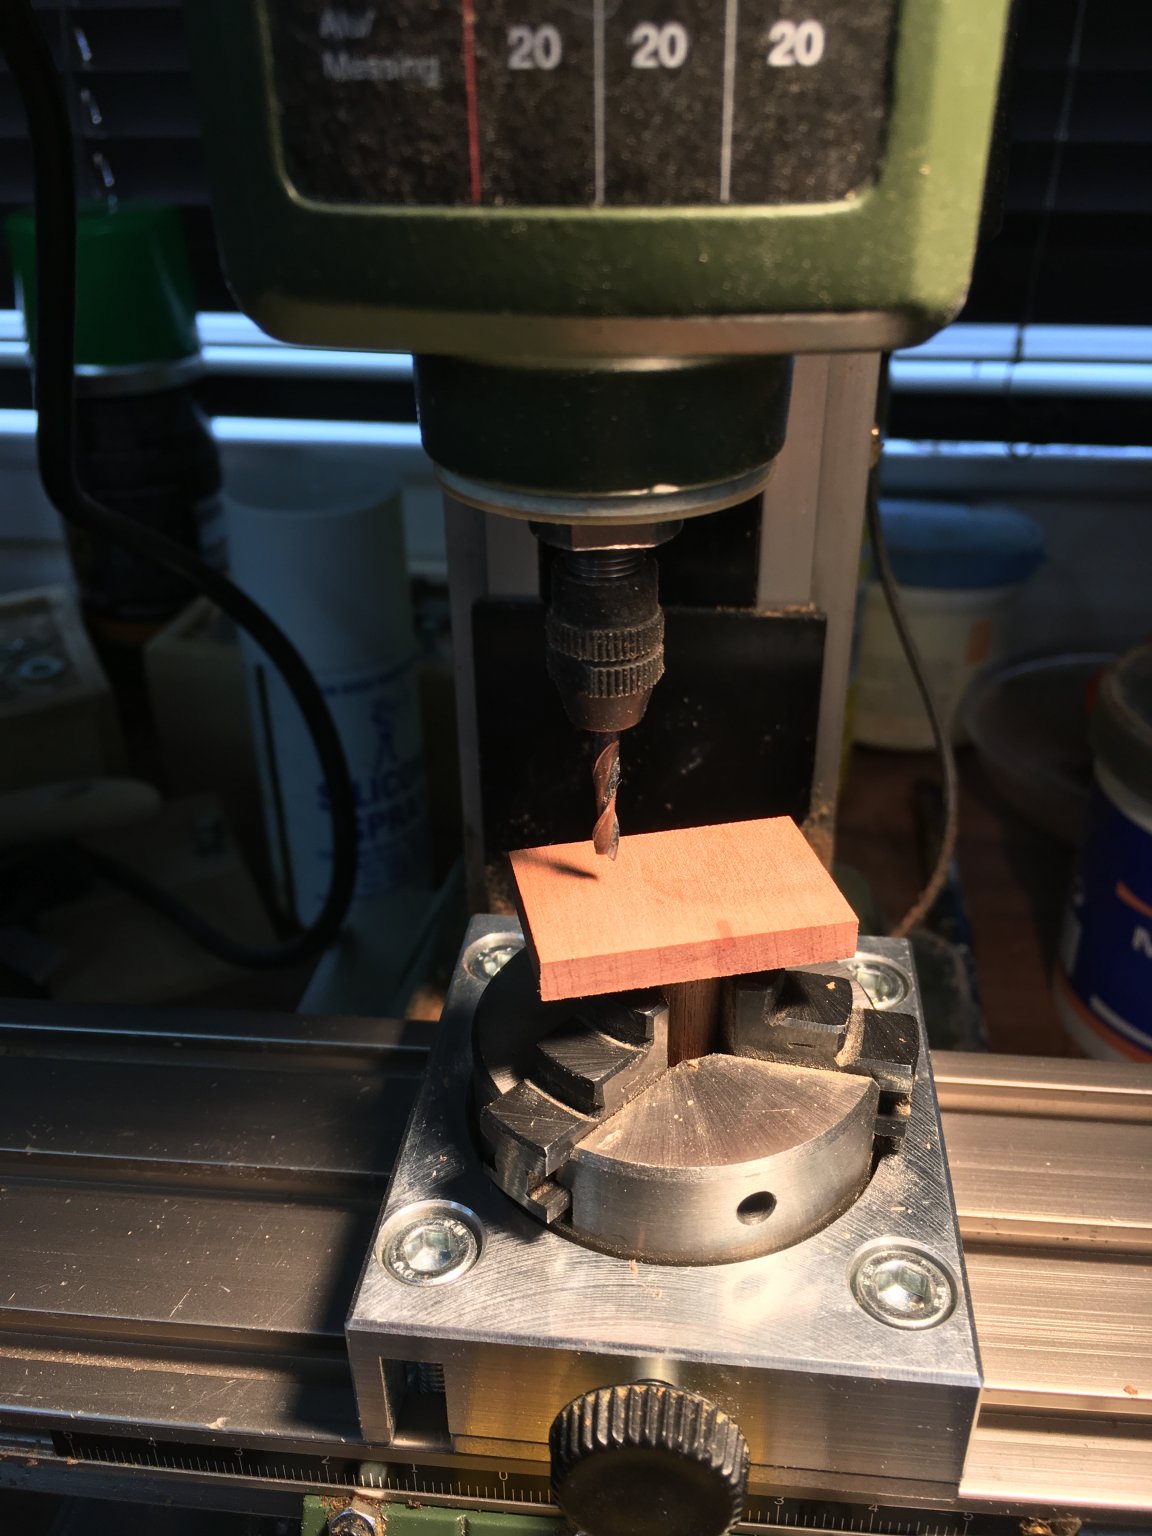
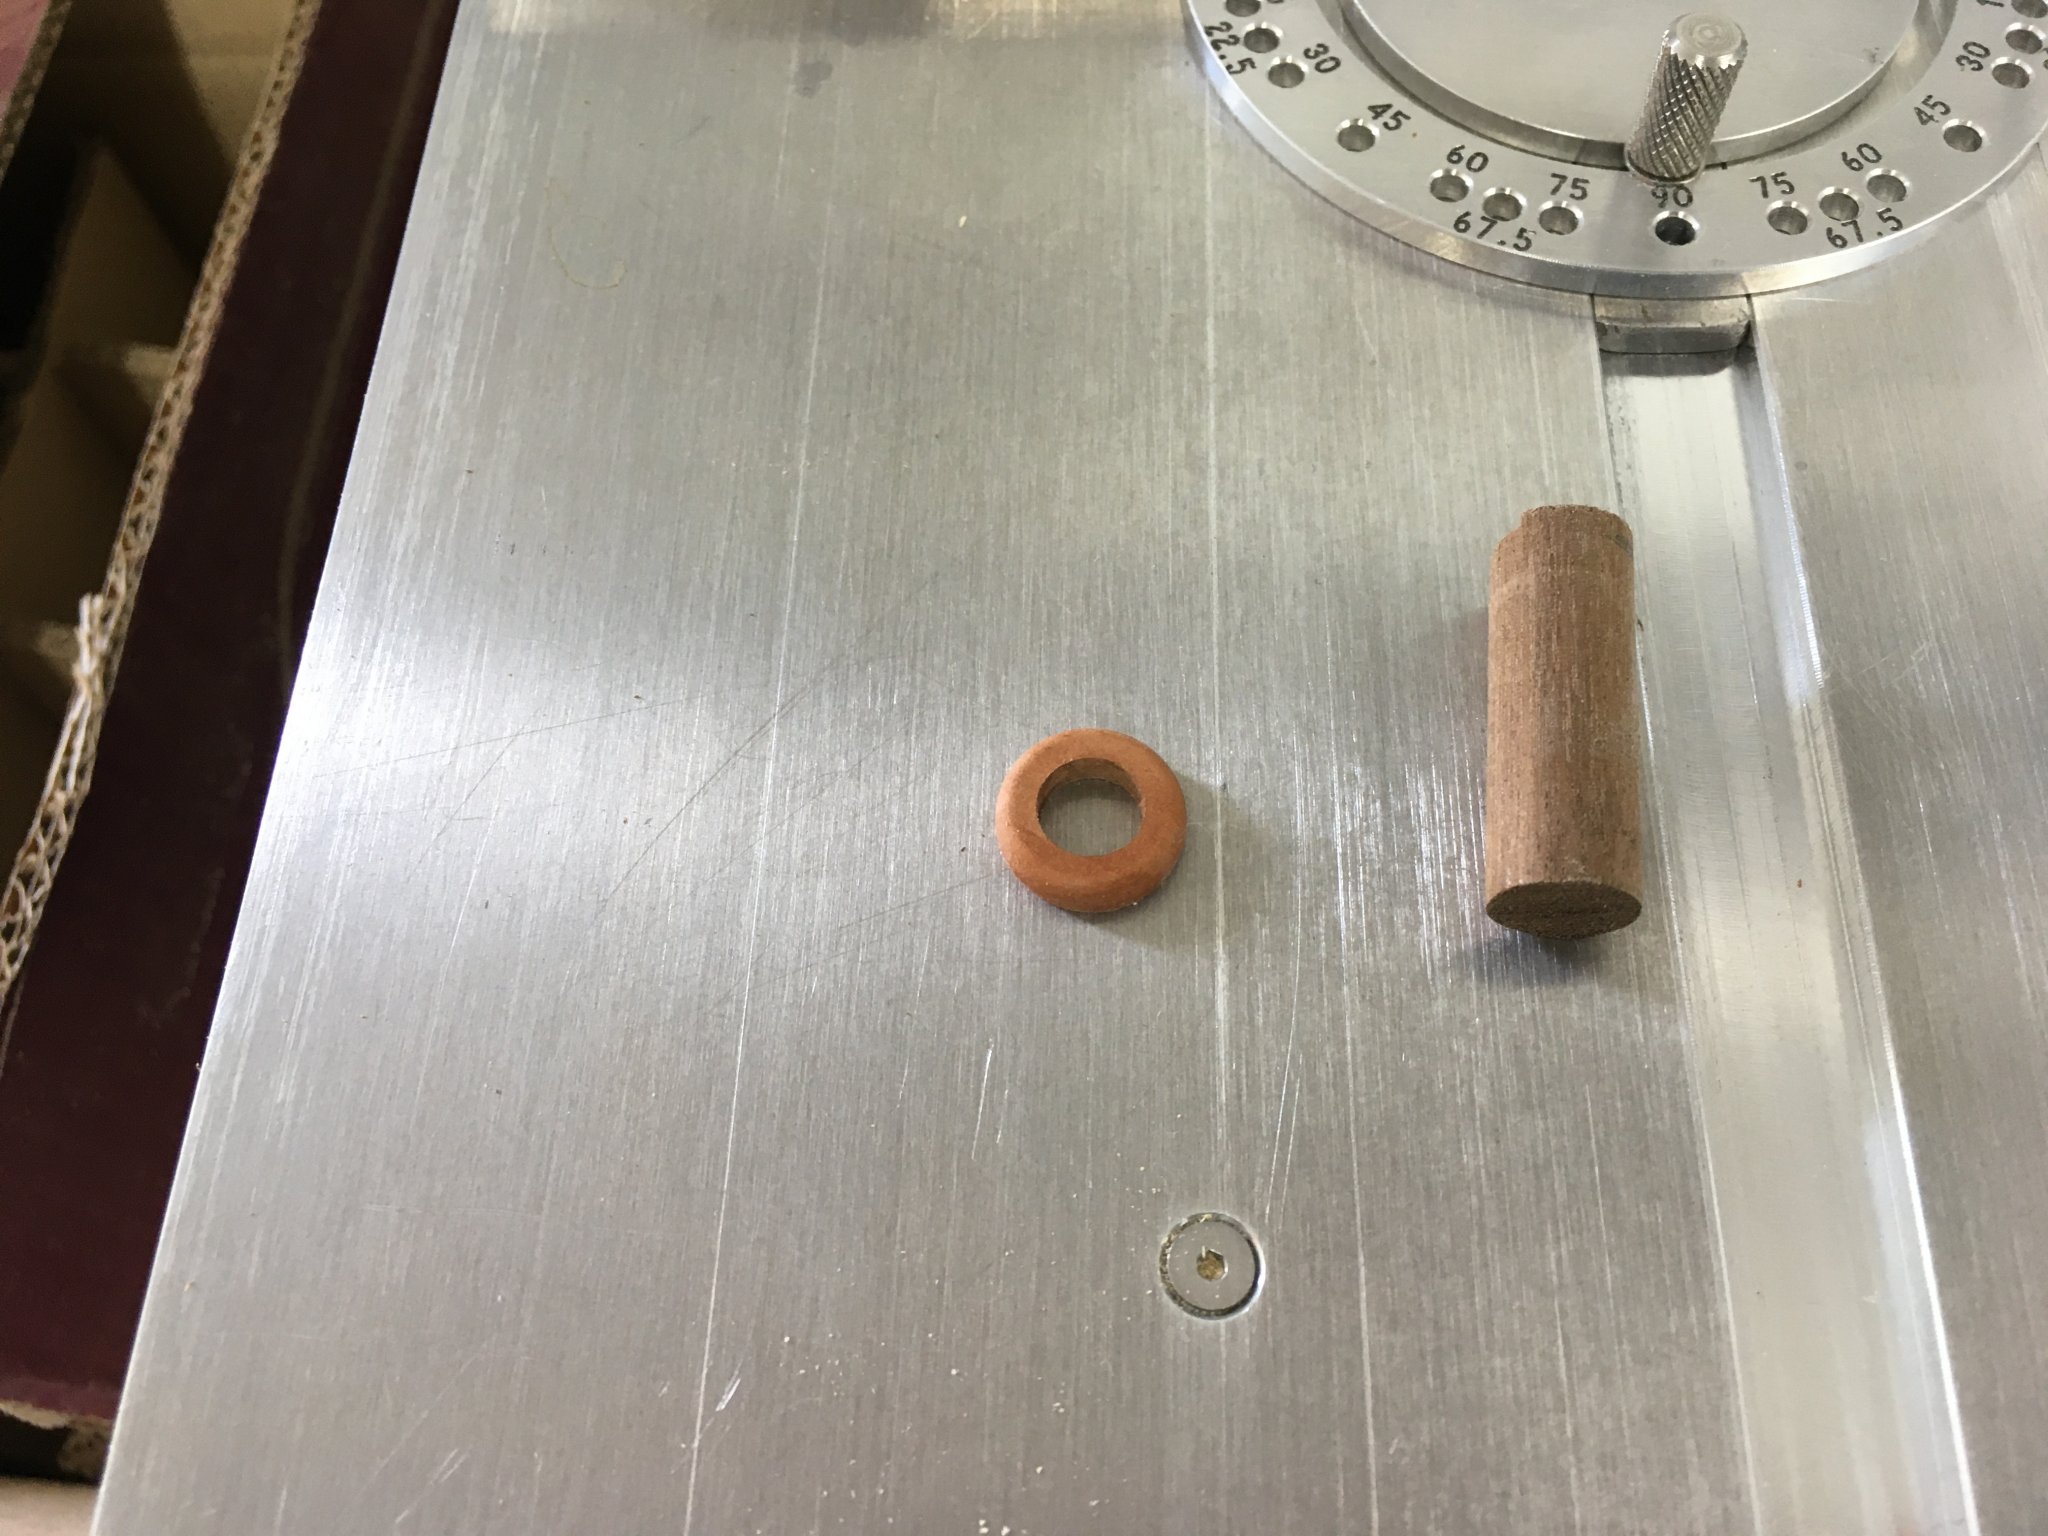
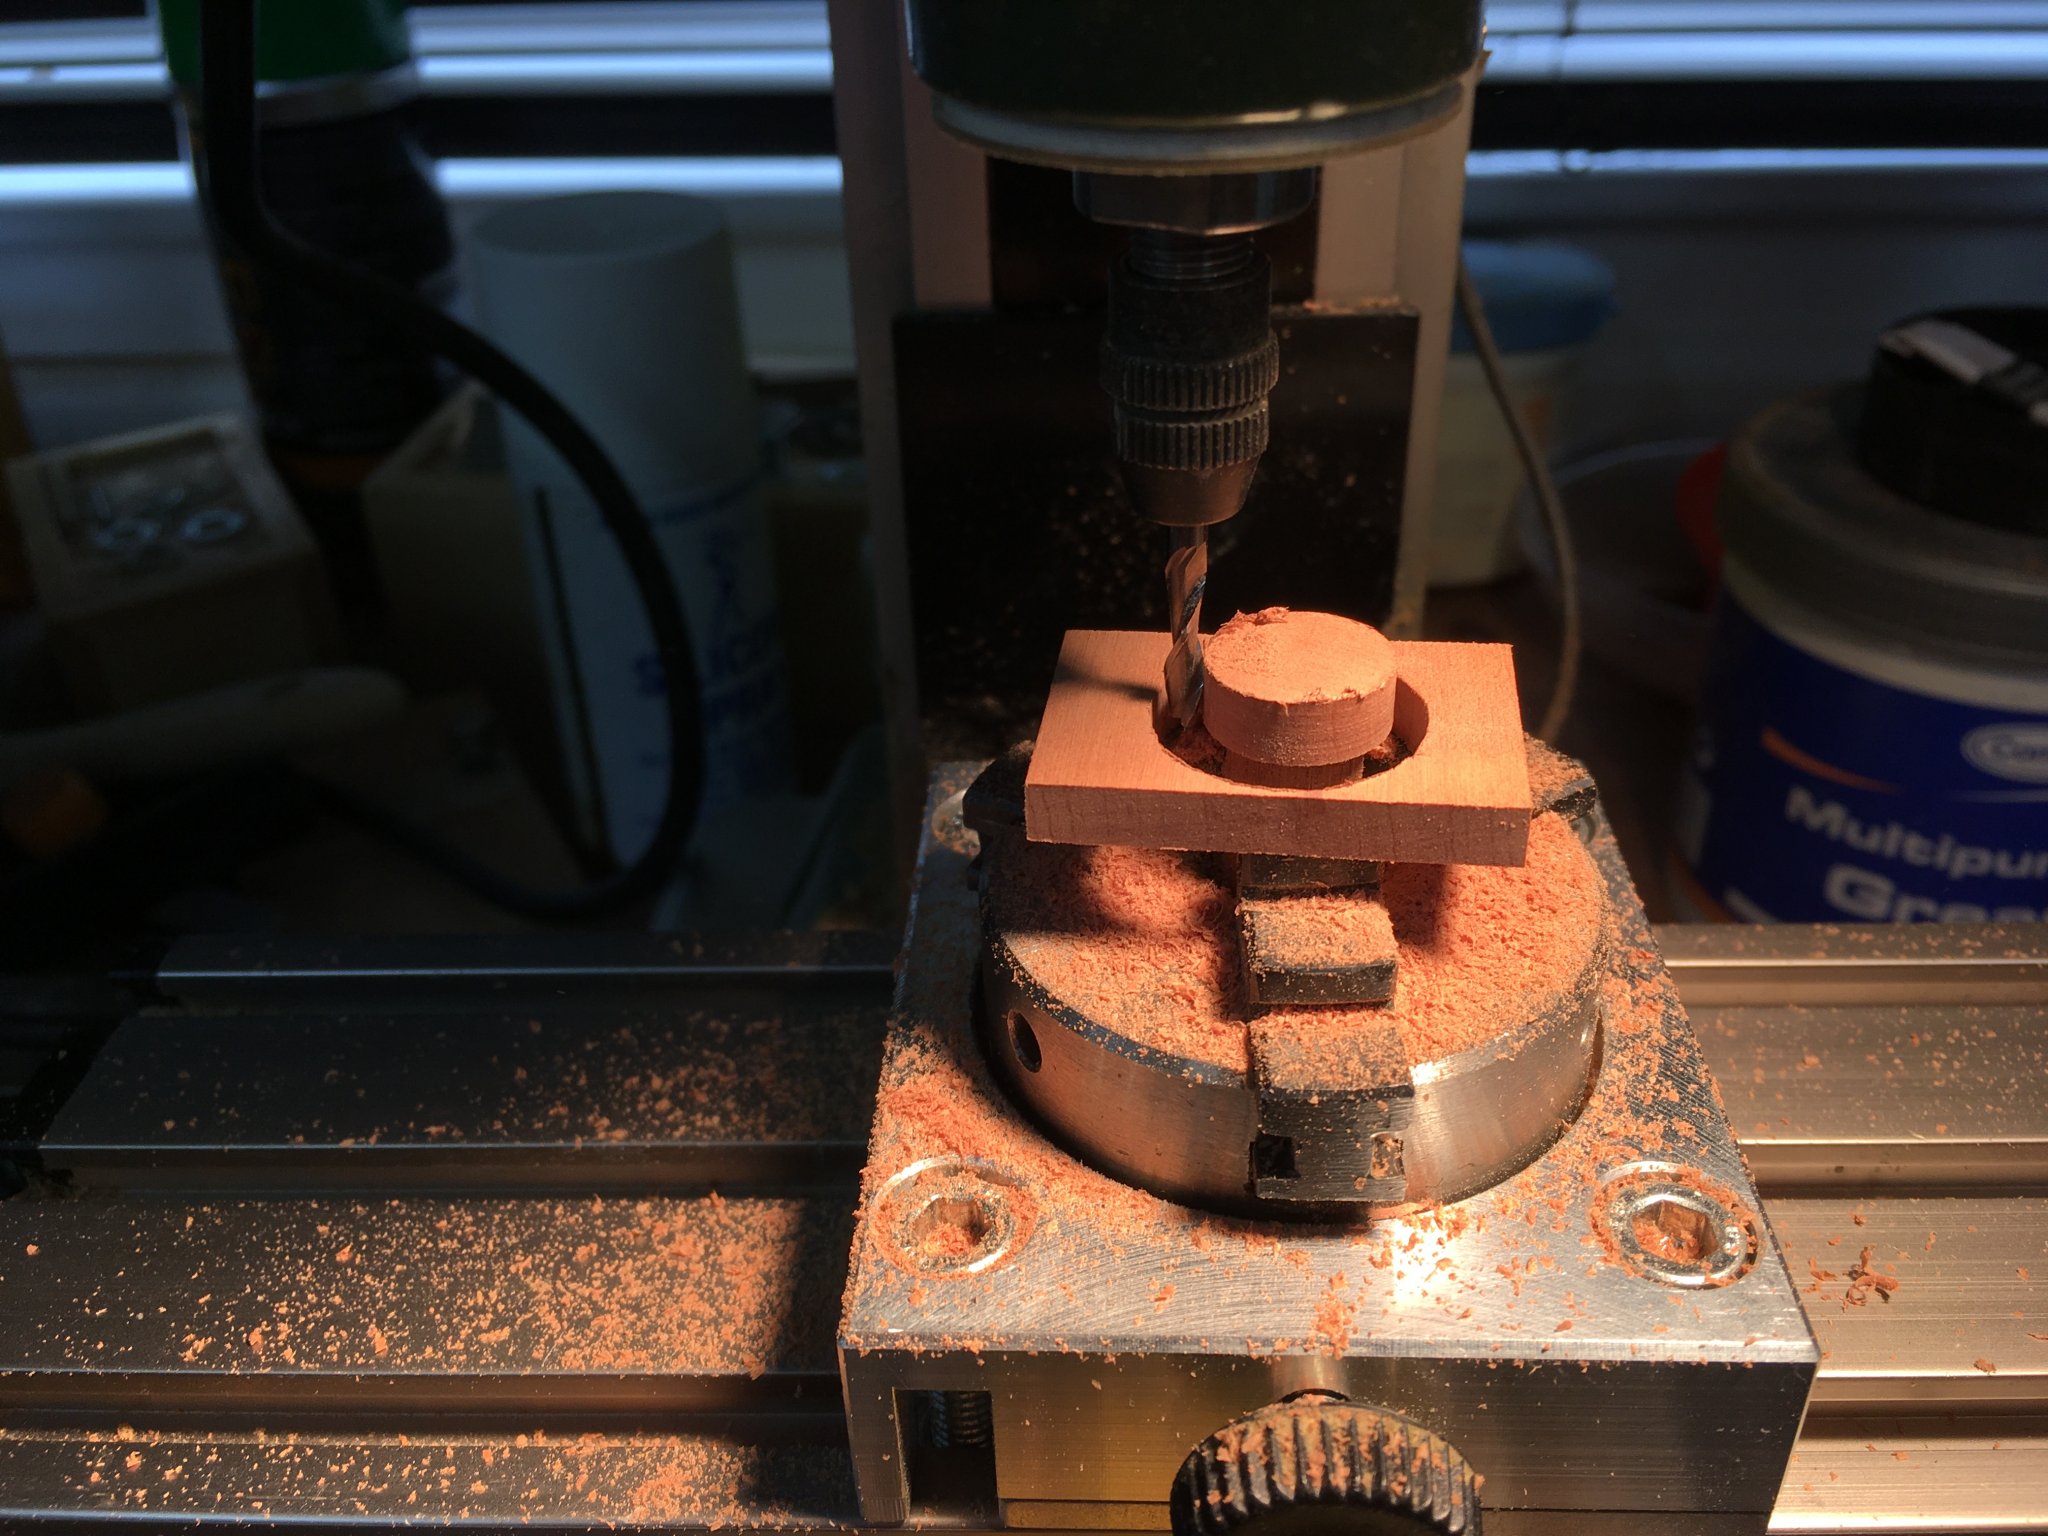
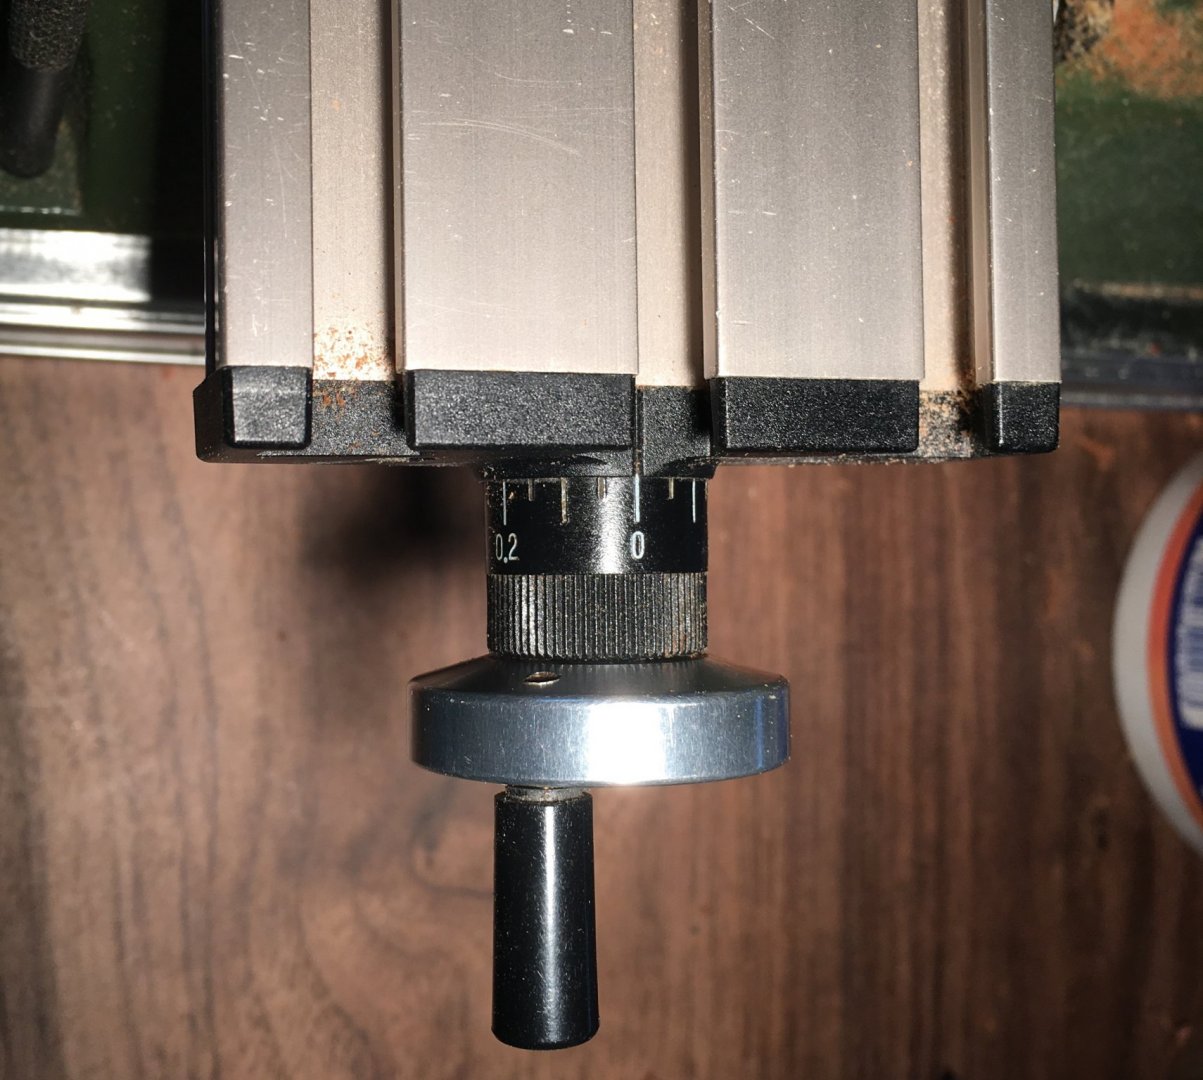
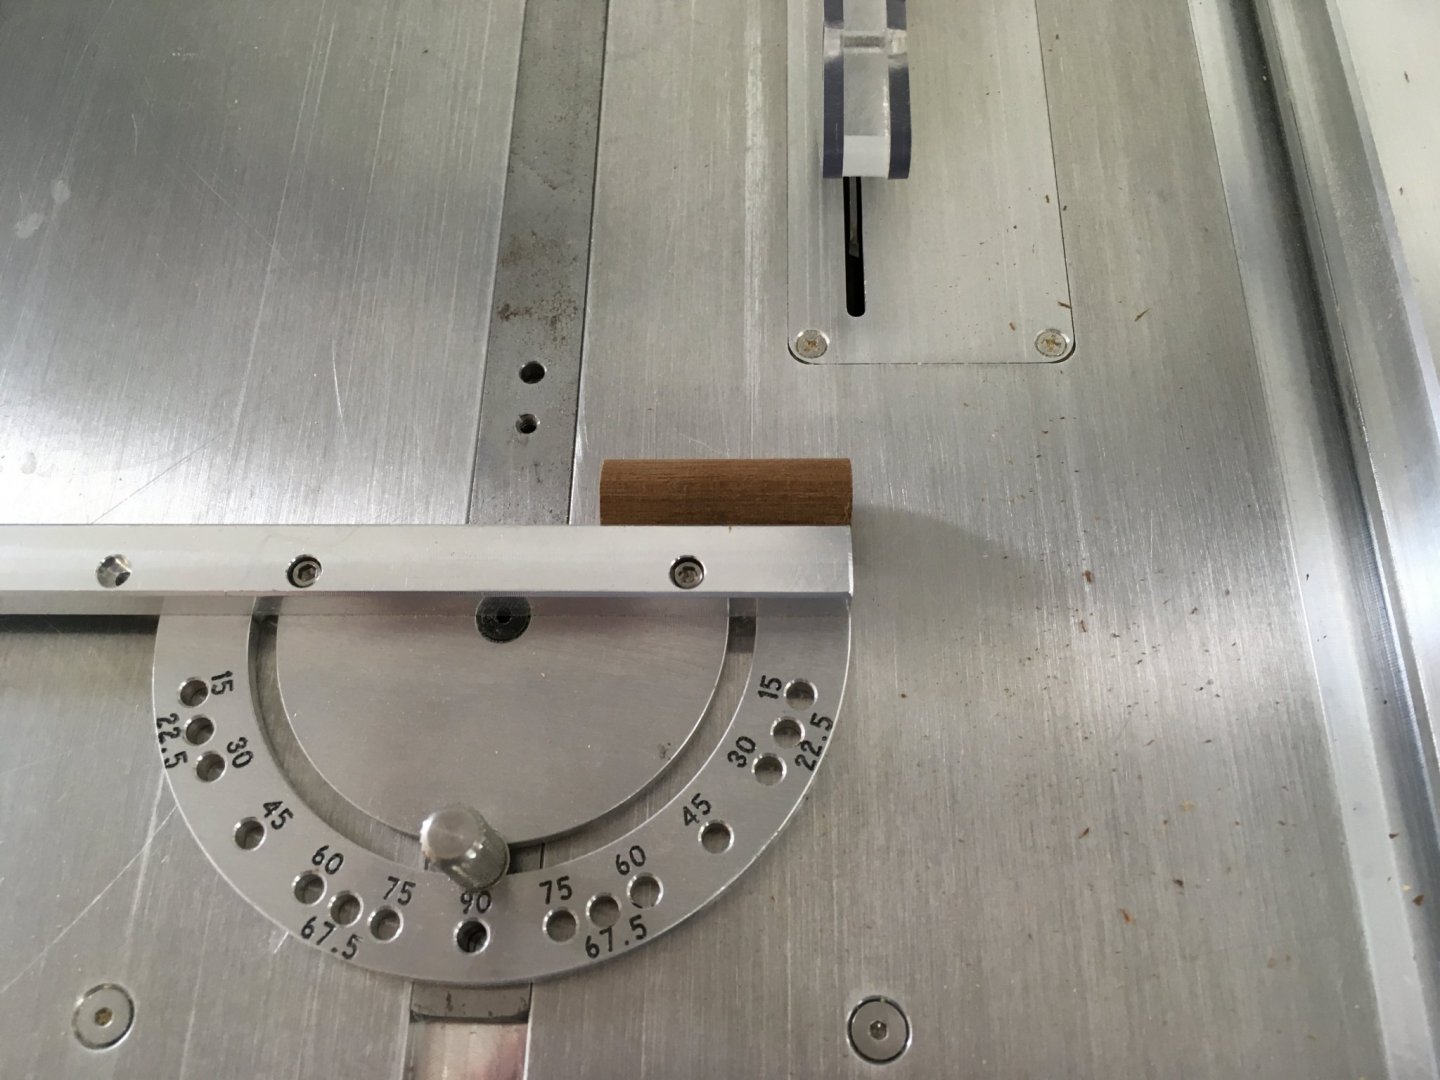
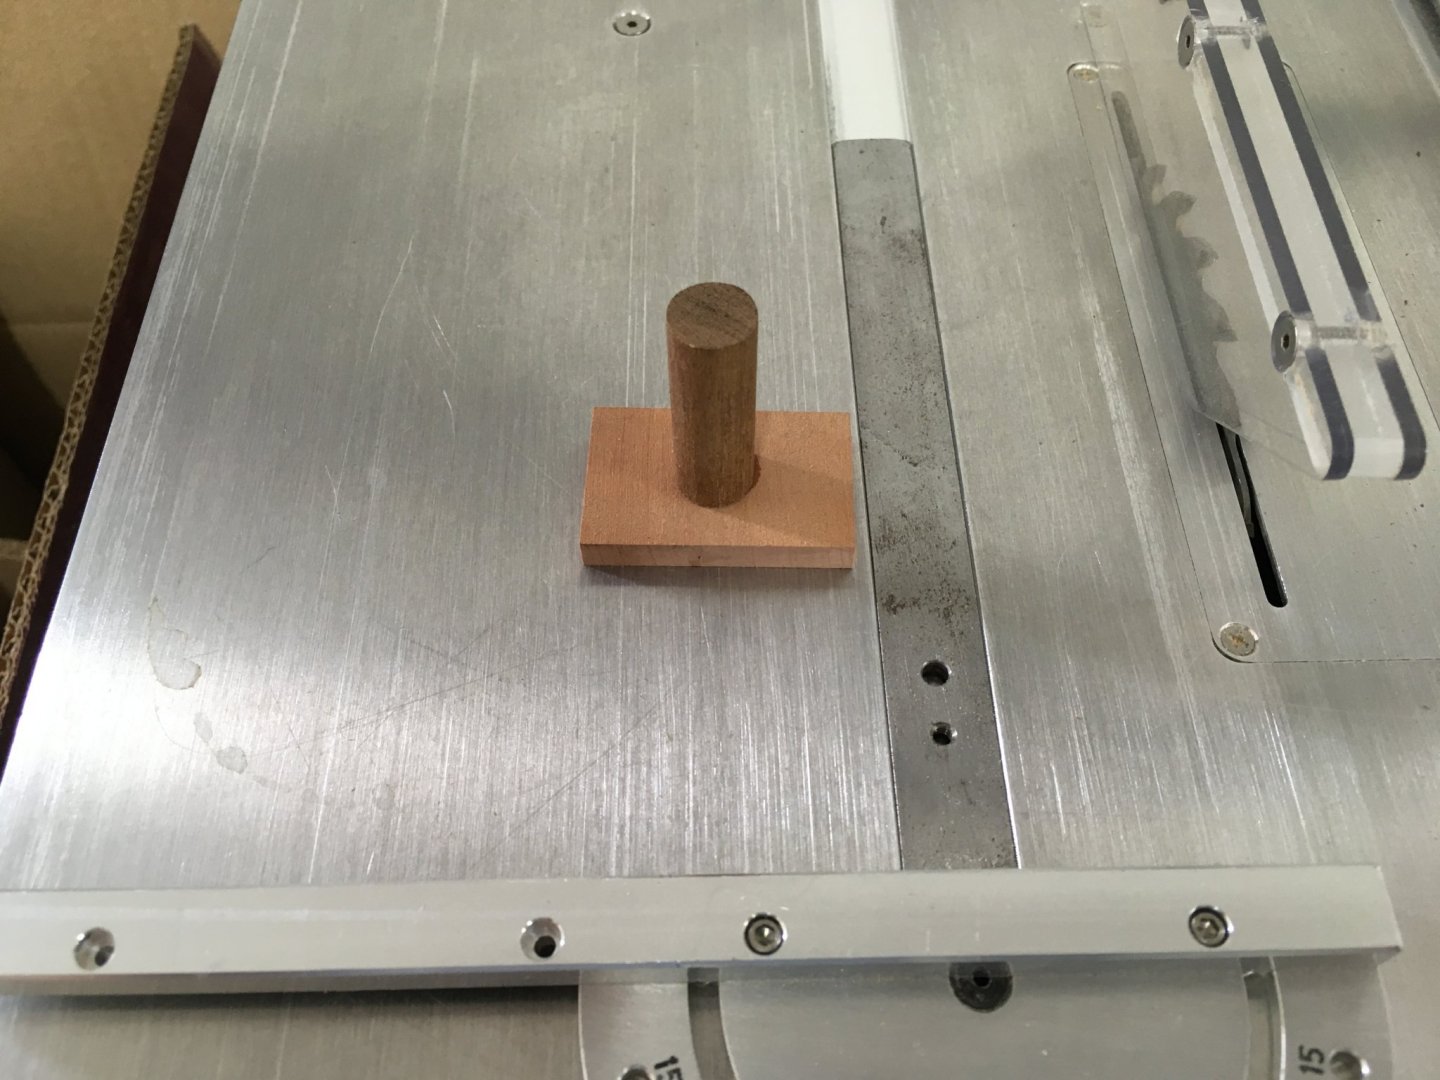
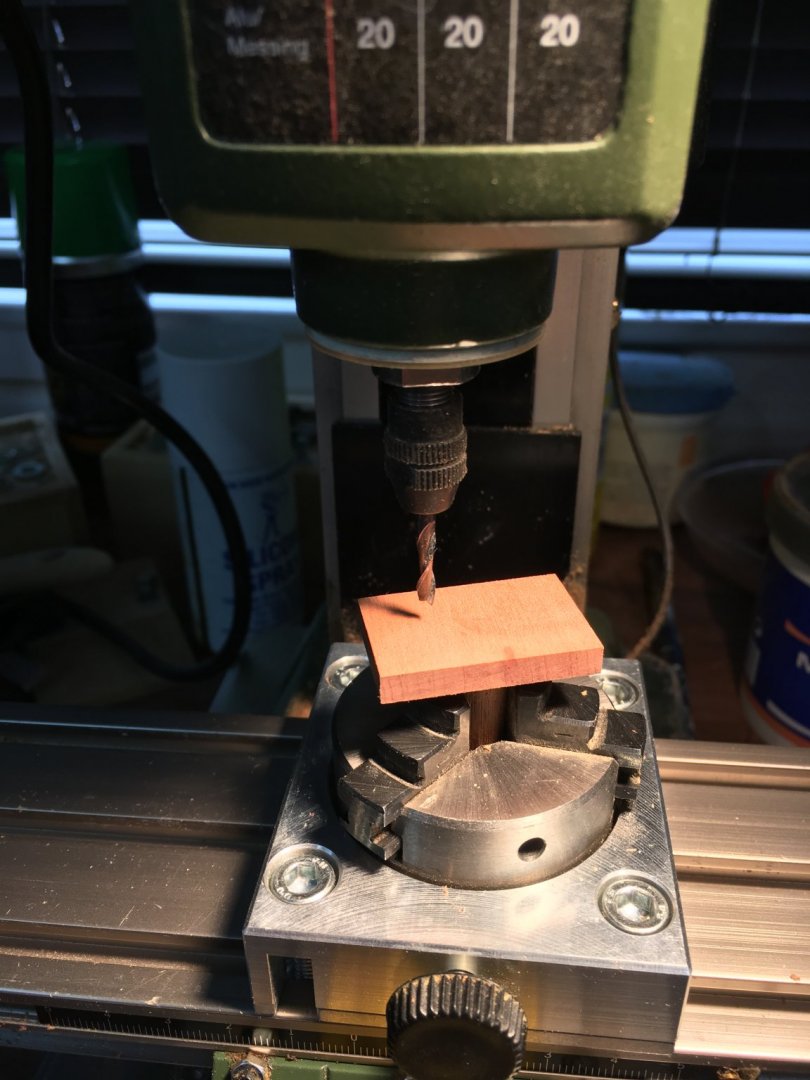
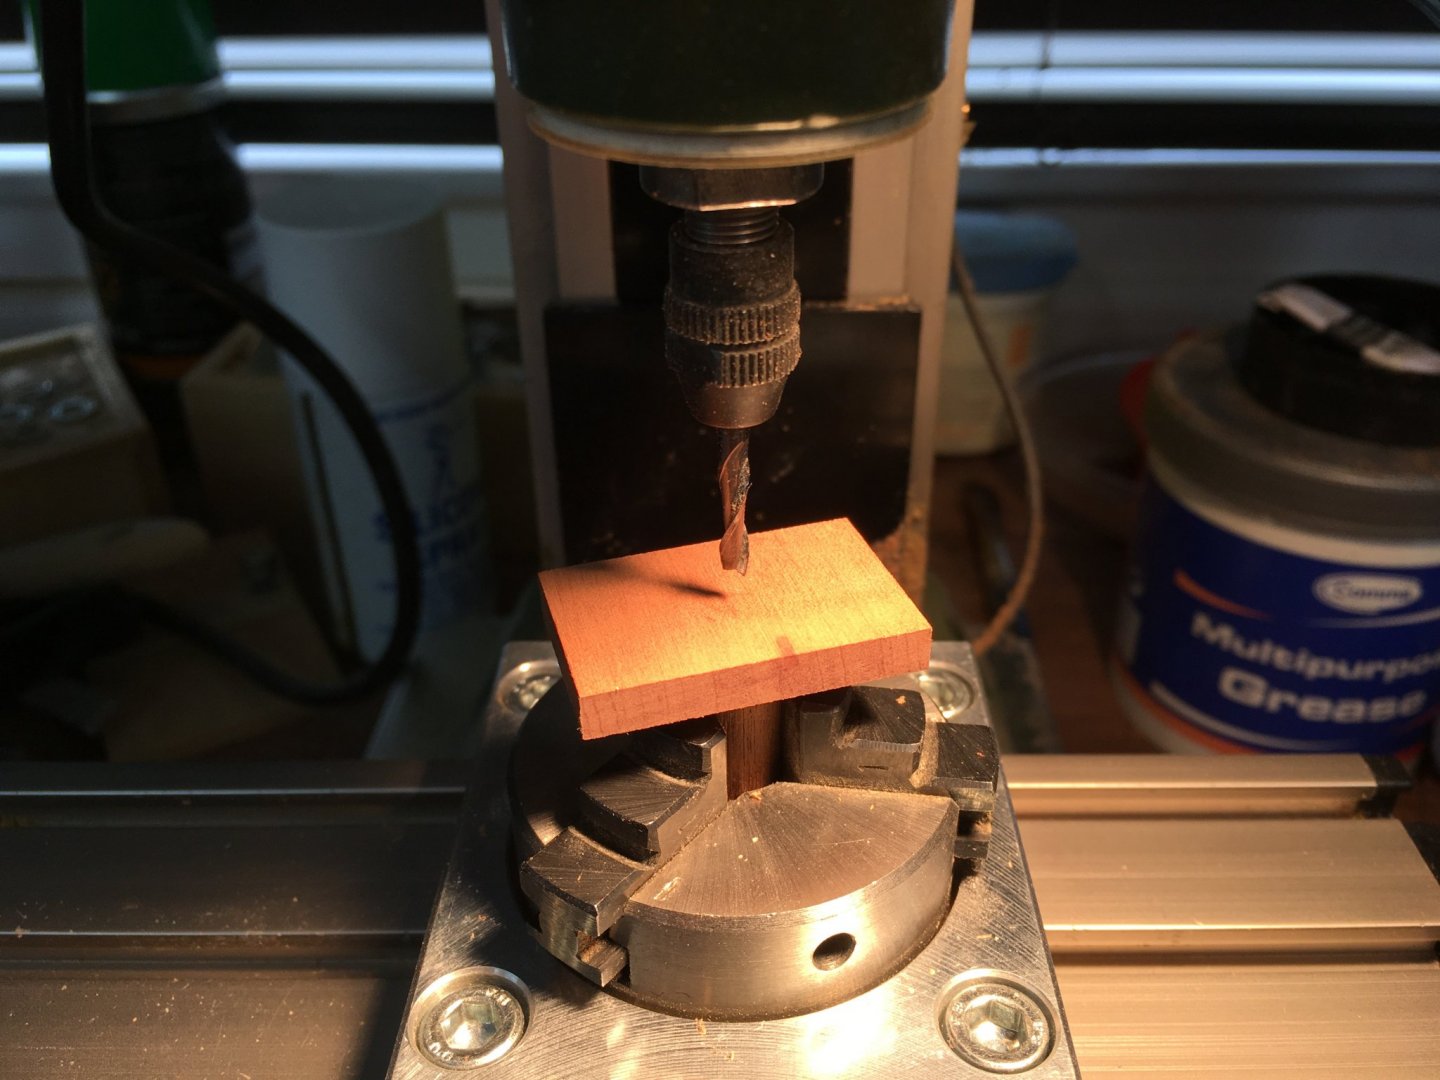
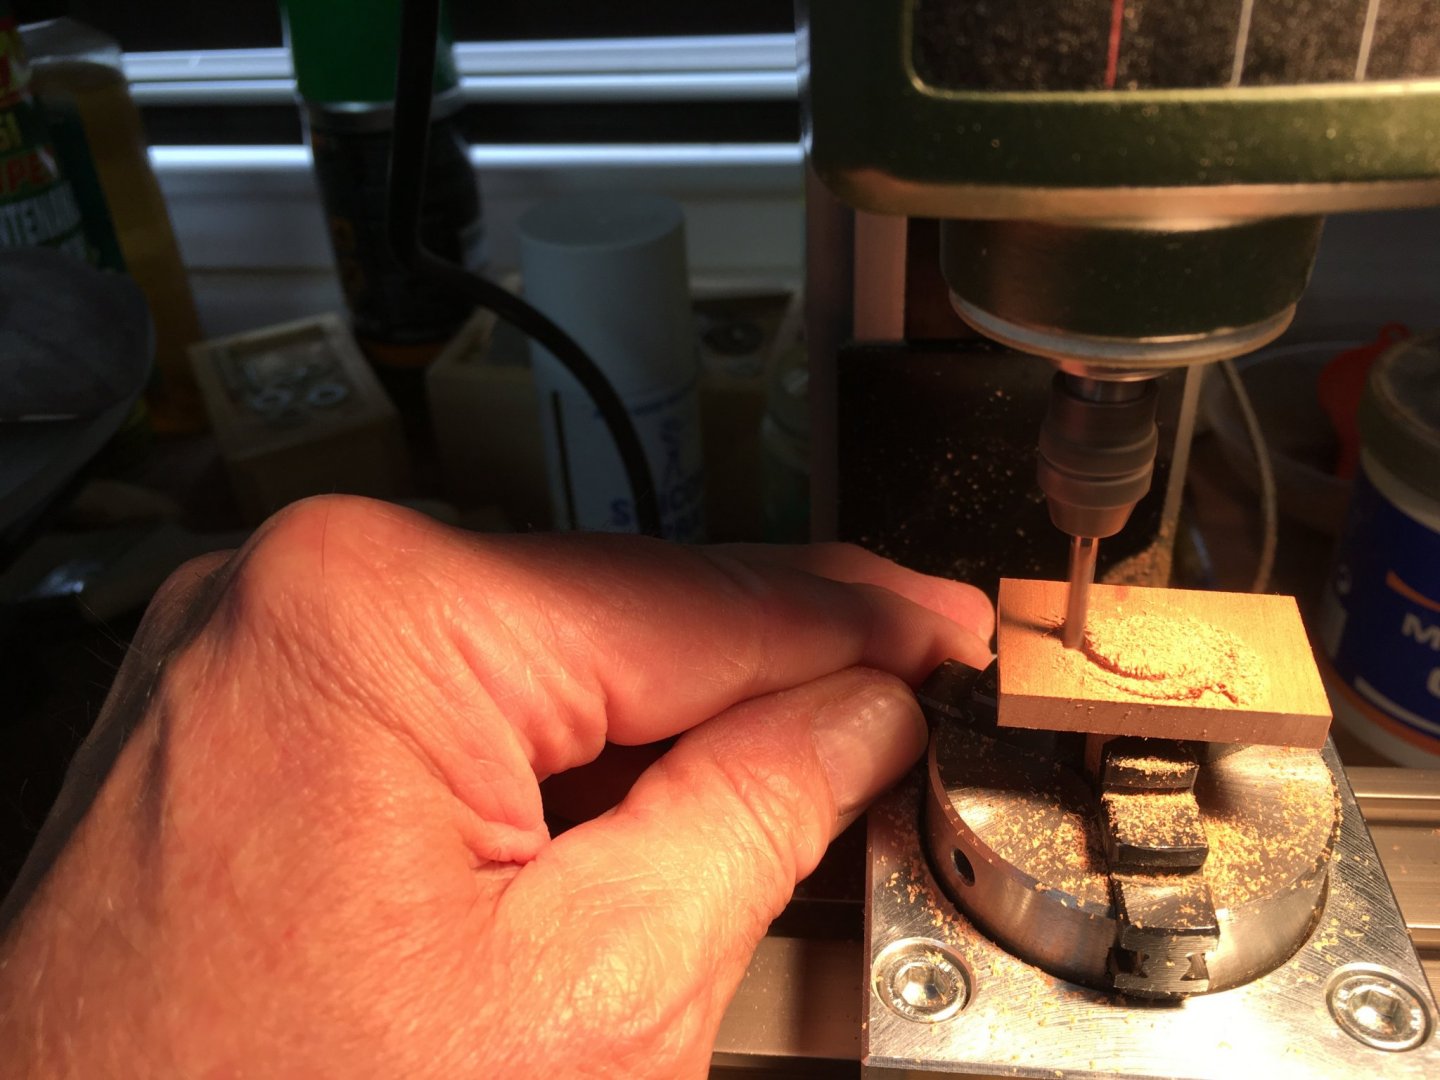
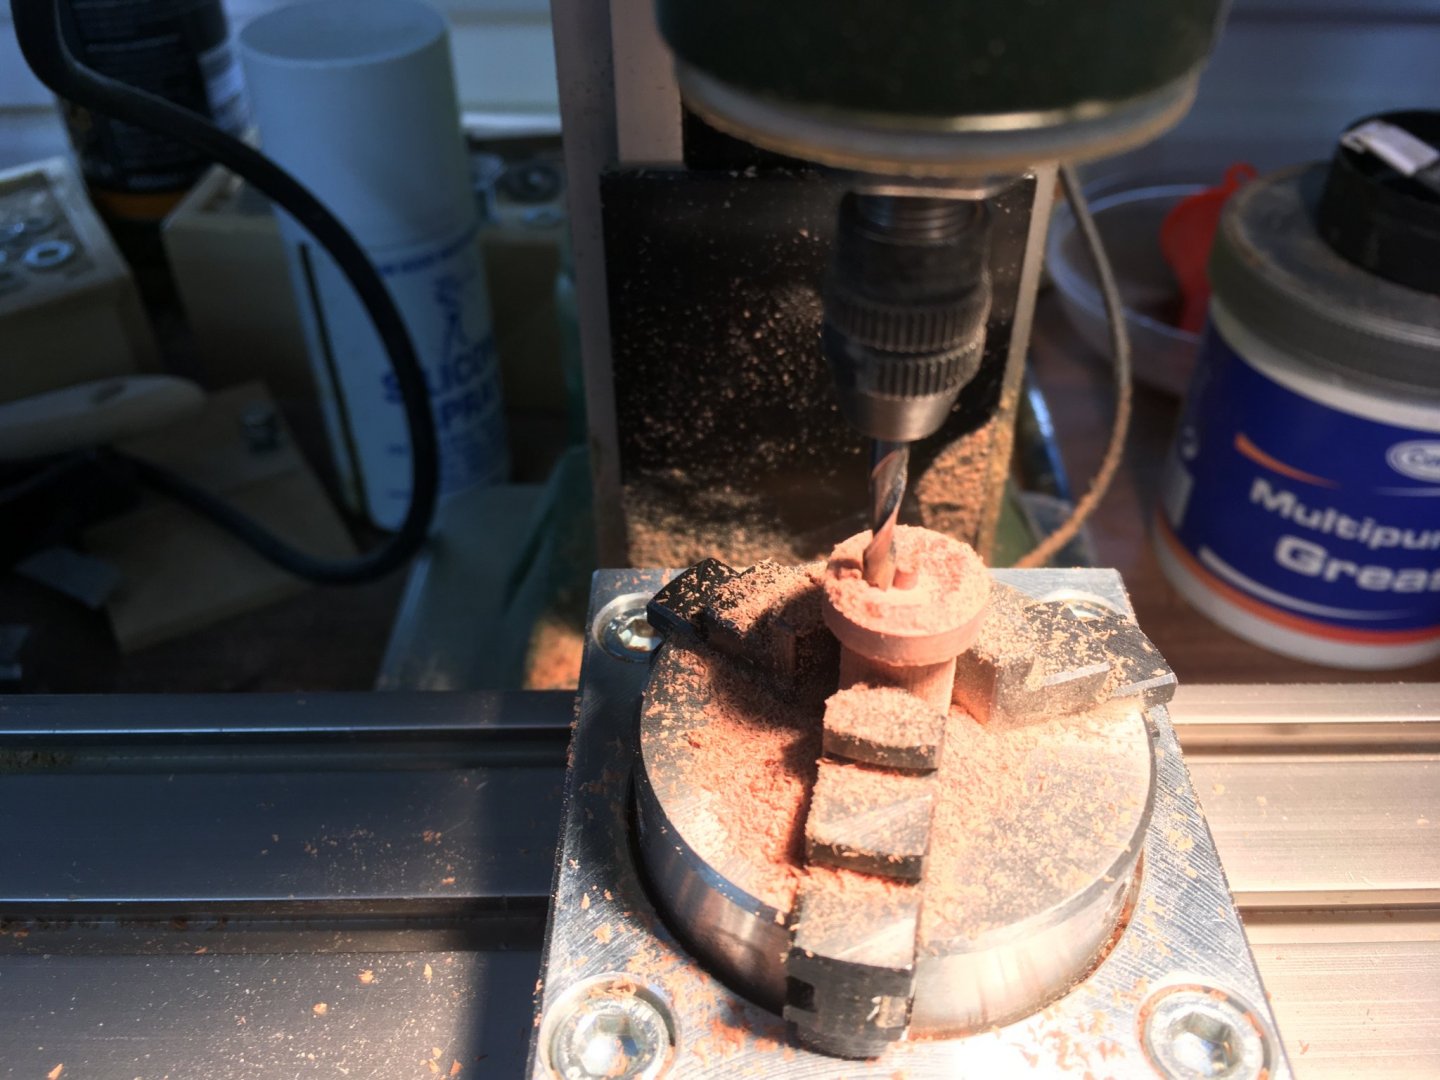
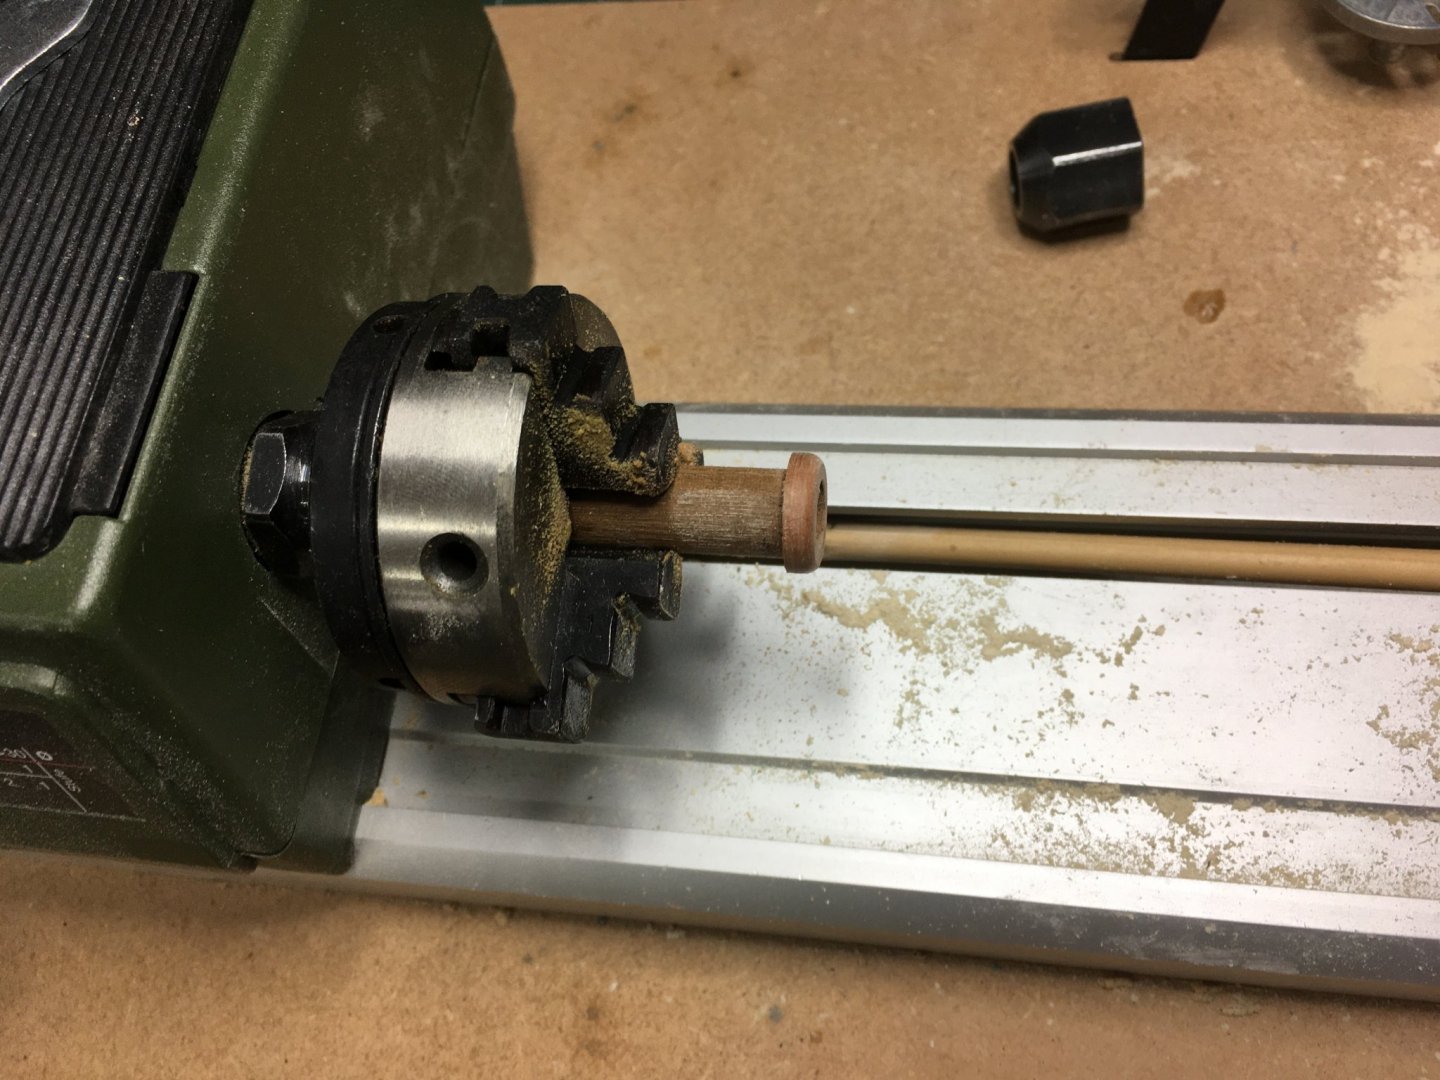
Here goes. I'm making a 14mm wide ring for an 8mm mast. It's an idea to make sure the dividing table and the mill are reasonably centered. I use two pointy things and eyeball them from different angles until they look lined up. Once that's done you won't touch the Y axis again. Zero the X axis by holding the wheel fixed (so the table doesn't move) with your right hand whilst rotating the numbered dial until it is set at '0'. Prepare a piece of dowel. It needs to be wide enough diameter for the sheet material to sit firmly on it, and long enough for it to be gripped well by the table. This piece is 10mm X 30mm. Also make sure the end is cut flat and square - not a problem on your Byrne's saw! Next get your sheet wood. It doesn't matter what size and shape it is so long as you can get your required diameter out of it, and of course it needs to be thick enough. I'm using a small scrap of pear - it's too thick but that'll be sorted on the mill. Just stick the dowel to the sheet with a blob of ca. Next, put the dowel in the table and lock the jaws. Remember to leave a gap between the sheet of pear and the jaws - you don't want to end up milling your table! I'm using a 3mm cutter here. I'm going to cut the outside of the ring first, and because my mill is at the centre at I need to move it 8.5mm before I can start, because 8.5 = the radius of the ring (7mm) plus half the diameter of the cutter. That puts the cutter just outside the required circle. So, that's 8 1/2 turns of the wheel on the X axis. To start cutting, unlock the table (using the little black knob on the front), switch on the mill and lower the cutter. I find it best to take 2 or 3 cuts rather than trying to do the whole thickness in one go. Now that the table is unlocked you can just rotate it carefully by hand: I normally use both hand to rotate the table evenly but I needed one for the camera for this shot. You'll know when you're right through as the outside piece will spin free - at that point stop the machine and break the scrap off. I didn't film the next bit, but all I did was raise the cutter, move it back in 3mm, and lower it again to thin the ring down to the thickness I wanted. The final milling operation is to cut the inner hole. If you've followed the measurements so far, you'll see that in order to get the 8mm hole the cutter has to move back in another 3mm. It's then just a case of milling down just like you did for the outside diameter. In this example I knew when I'd got through because the sawdust changed colour - I'd hit the dowel! Btw - this work creates a lot of dust - I really should have sorted out my dust extraction before I started. Please don't follow my example! I wasn't going to bother for this sample piece, but as the ring was still stuck to the dowel I decided to chuck it in the lathe (a drill would work equally well) to sand a slightly rounded profile. Finally, I parted it off in the Byrne's saw and here it is: I can assure you, it took a lot longer to photograph and describe this than to actually do it. I hope this helps - it would certainly be a good exercise to help you get familiar with your new machine. Derek


-
Glenn Making what you call mast caps with the mill worked very well for me, using the technique No Idea described. Here's a couple I made for Royal Caroline (not very good pictures, I'm afraid). I'll see if I can put some pictures together to illustrate the method more clearly. Derek
-
Bob Perhaps mast hoops wasn’t the best example I could have cited for the technique - your’s is clearly better. Nevertheless it works. No Idea’s example is more appropriate. The method works well for most situations where you need to mill a circle or part thereof.
-
This method works really well with the Proxxon dividing head. For example to create wooden rings for mast hoops or whatever, I superglue a piece of sheet material of the required thickness and size to a dowel (the sheet can be any shape so long as you can get the required outside diameter out of it). Once clamped in the dividing head you mill to the outside diameter then the inside and hey presto you've got a ring. If the outside of the ring needs to be chamfered you can do that before milling the inside diameter. If you're talking about the standard Proxxon vices I would agree. However the precision machine vices are more than adequate for milling purposes. This is the PM40: Derek
-
Glenn Thanks for taking the time to set out your planking work in such detail - I've bookmarked it for future reference under 'Planking Tutorials'. Derek
- 778 replies
-
- 5
-
-
- cheerful
- Syren Ship Model Company
- (and 1 more)
-
Only six guns? I envy you!
-
Thanks Glenn. I’m not on Facebook so I hadn’t seen that - I’ll have to find out how to look at the MSW page. I’m using Quadhands extensively for rigging the cannon. The magnets are very strong, and should be more than adequate for any rigging jobs. Derek
- 725 replies
-
- 1
-
-
- vanguard models
- speedy
- (and 1 more)
-
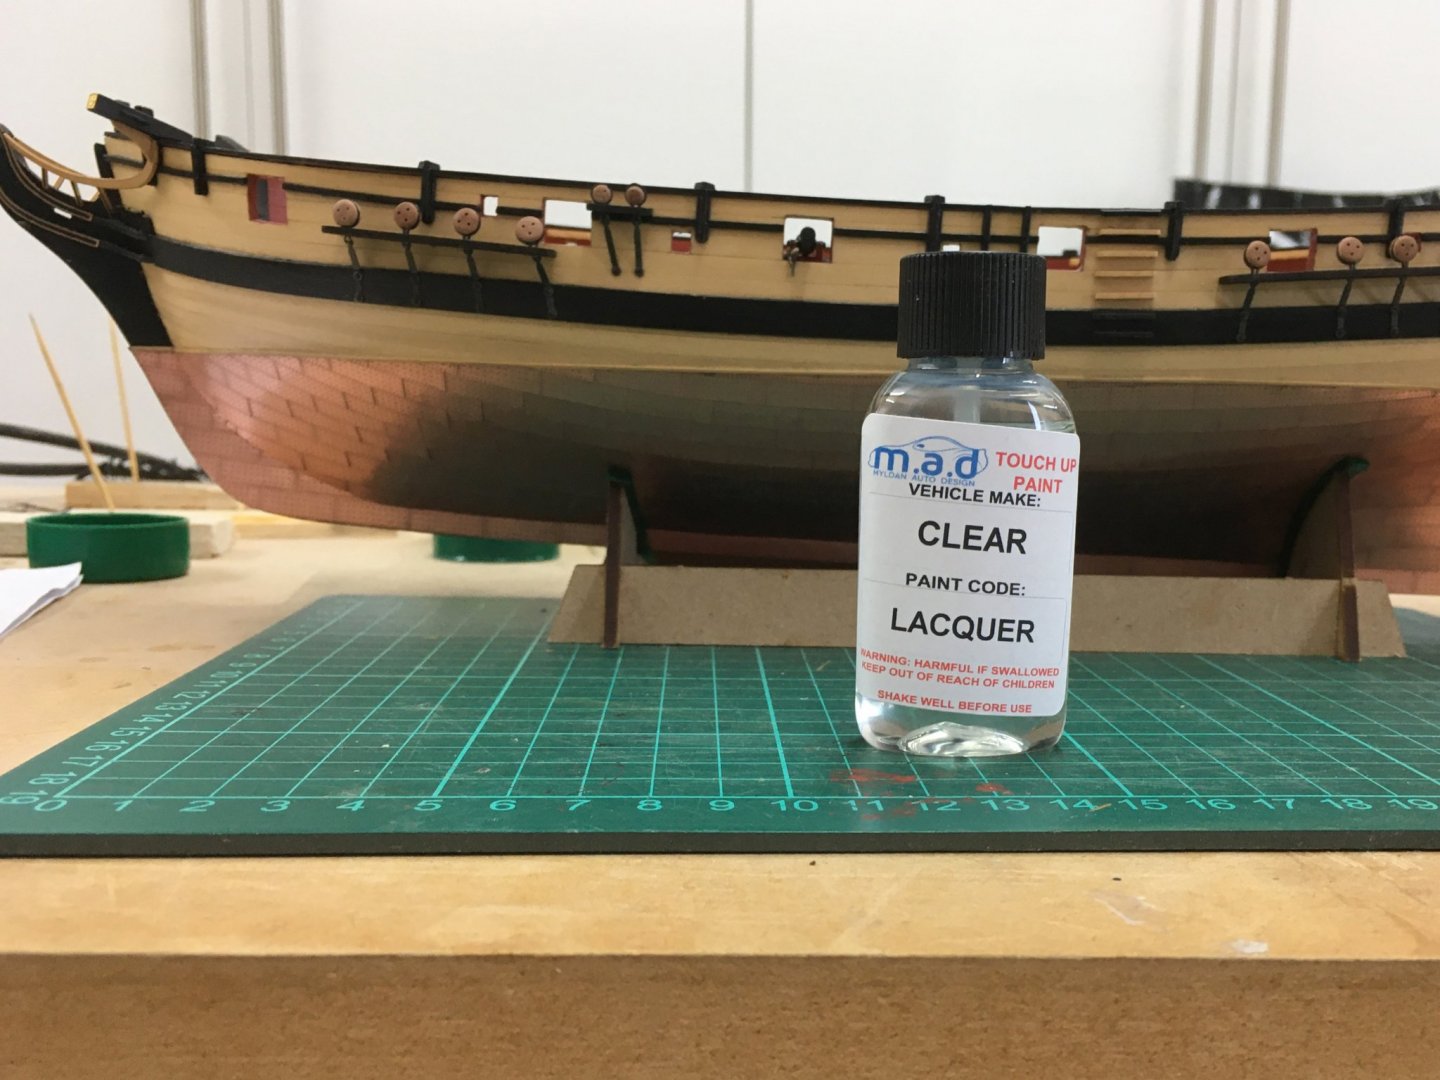
Interlude I'd decided I wasn't going to post an update until I'd completed rigging at least the port or starboard guns, but as that is likely to be some time I'll post a quick update on two tools/products I've just got. The first is Quadhands. I saw this in other people's build logs and persuaded myself I needed one. I'm glad I did - it's so much more substantial and versatile than other helping hands I've used, with a solid metal base and five (not 4?) flexible arms. These are magnetic and are therefore re-positionable. Great for rigging jobs: The second product I got for protecting Speedy's copper plates. I quickly decided not to leave the copper to weather naturally - I must have touched the hull with unprotected fingers in several places, because in a few days there were several unsightly smudges. Using spare plates I experimented with a number of varnishes, both water-based and polyurethane, but didn't like the results. Finally I tried clear lacquer. The one I bought was intended for protecting touch-up paint jobs on cars: I toyed with the idea of airbrushing the lacquer but after a test I found it brushed on really easily. It dried quickly and to my eye enhanced rather than masked the copper. From now on it'll be a relief not having to worry about touching the hull. Back to the guns! Derek

- 725 replies
-
- 9
-
-
- vanguard models
- speedy
- (and 1 more)
-
Beautiful. The time and care you're taking are really paying off.
- 778 replies
-
- 2
-
-
- cheerful
- Syren Ship Model Company
- (and 1 more)
-
Thanks Glenn. 'Talking' these things through with you guys has really helped me make up my mind on the cannon rigging and several other Speedy issues. I'm so glad I'm taking a more active part in this forum now - it adds a whole extra dimension to my enjoyment of the hobby. So do your typos: ...another beaut! 😁 I've read the one about Cochrane carrying a broadside around in his pockets - all I can say is that with seven balls each weighing four pounds and just over three inches in diameter, he must have had big strong pockets! Derek
- 725 replies
-
- 2
-
-
- vanguard models
- speedy
- (and 1 more)
-
Never mind the ingredients, what shape was it?!
-
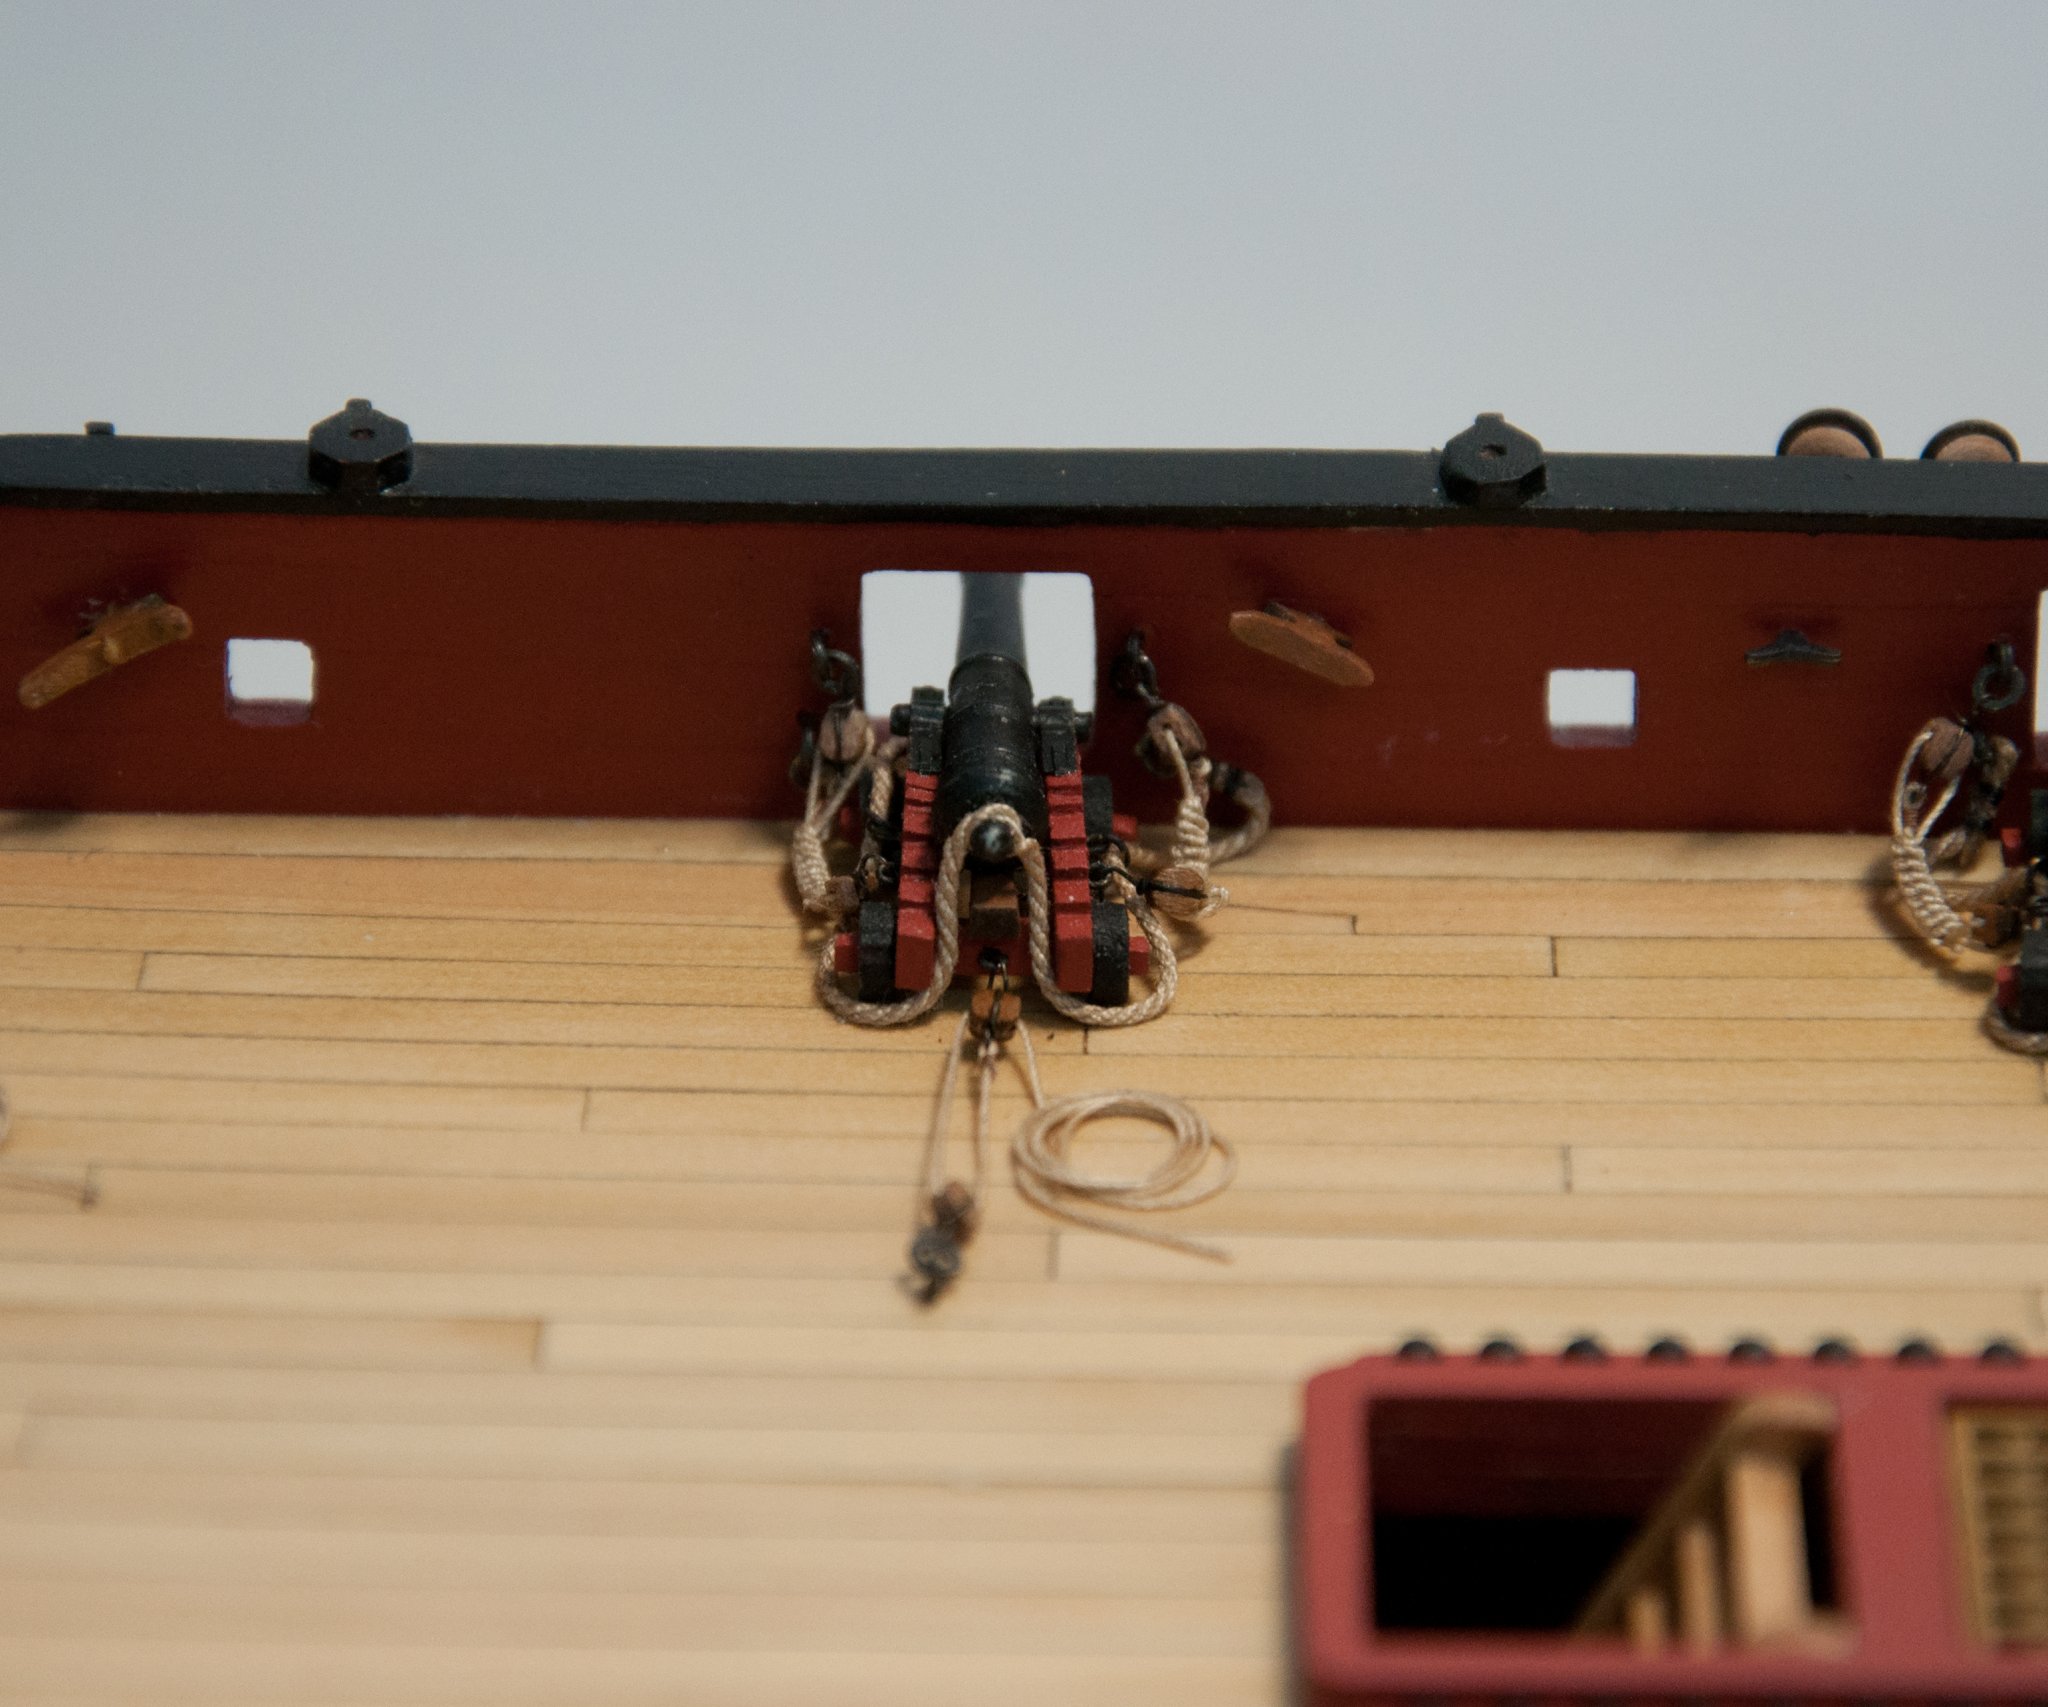
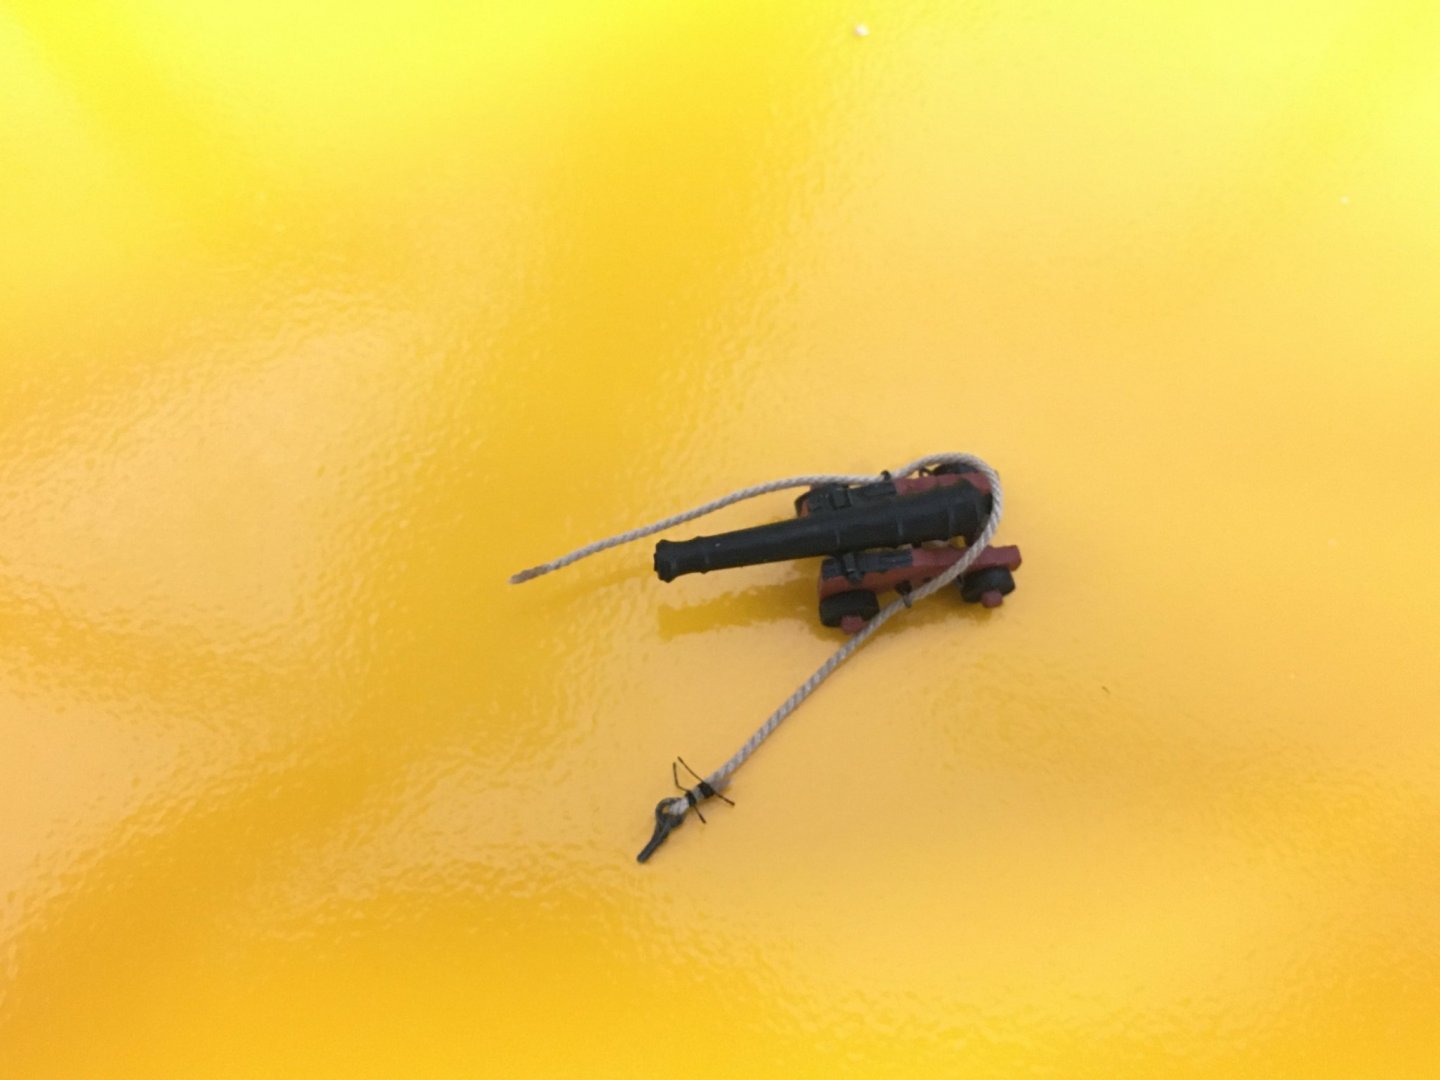
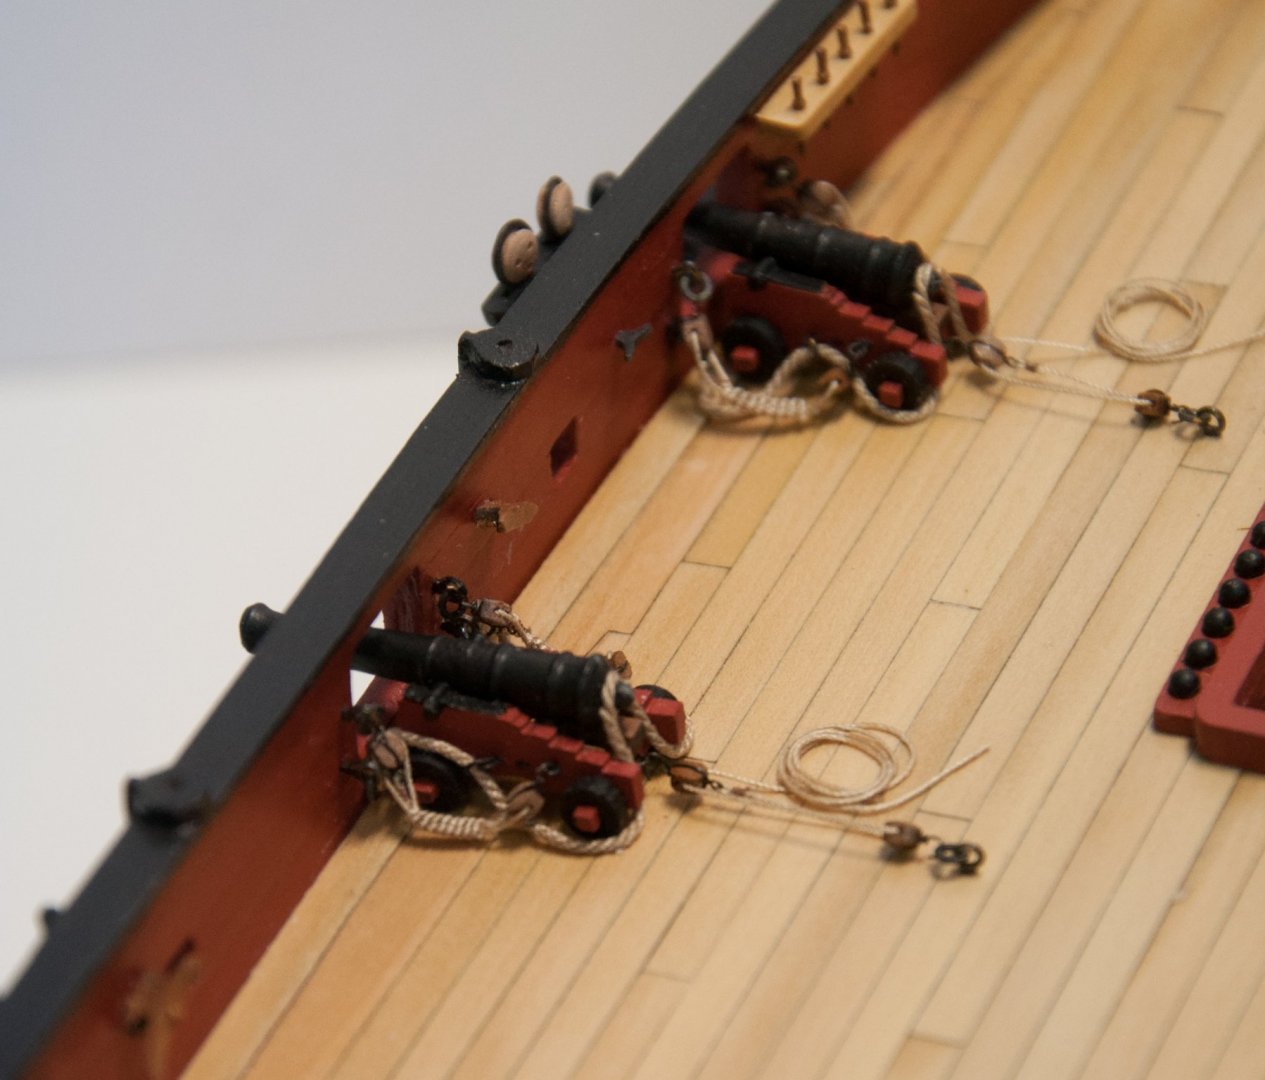
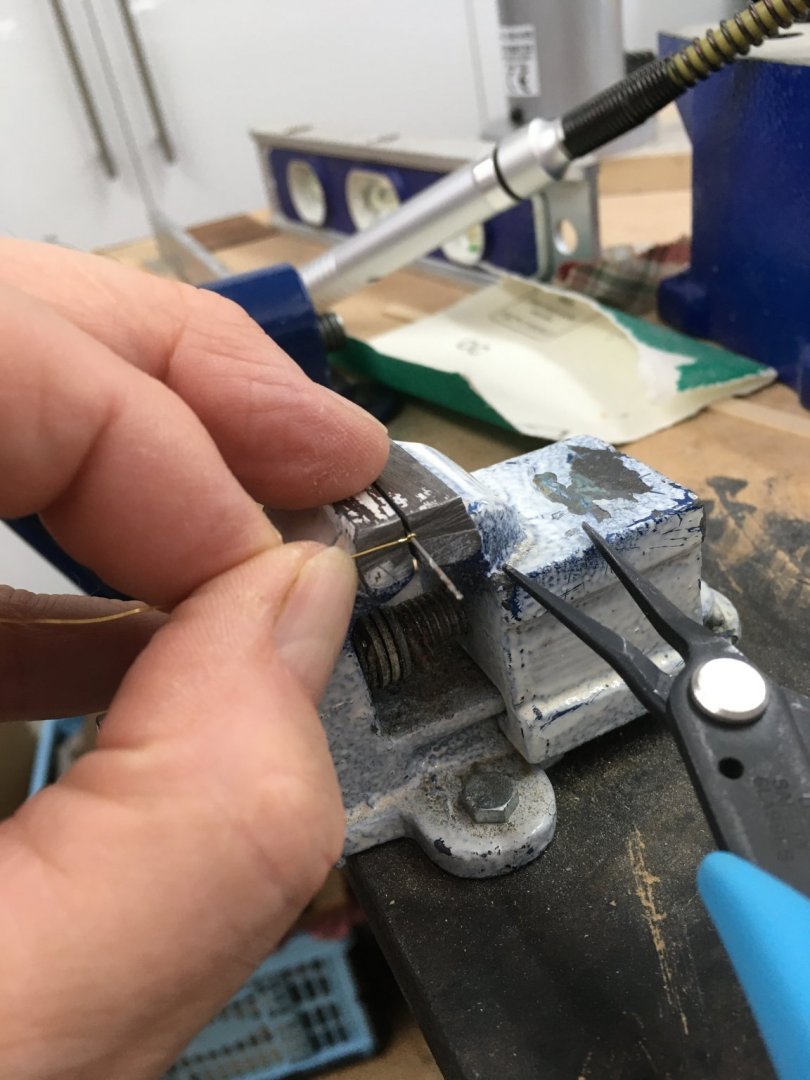
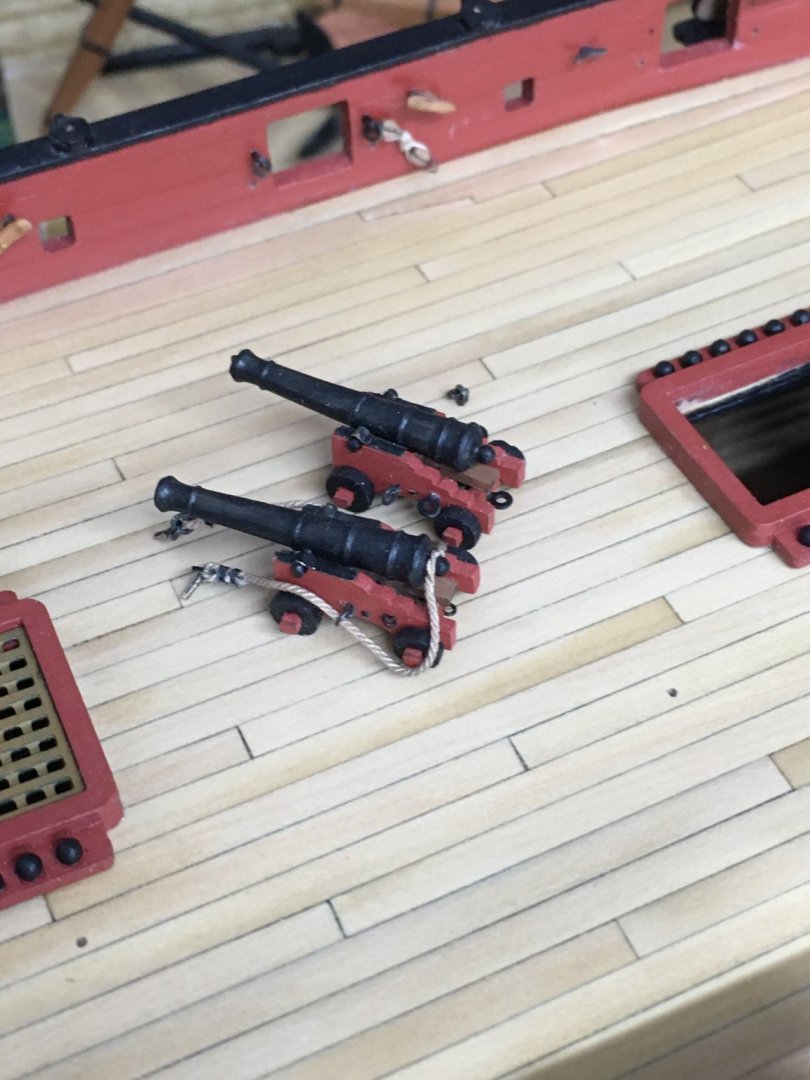
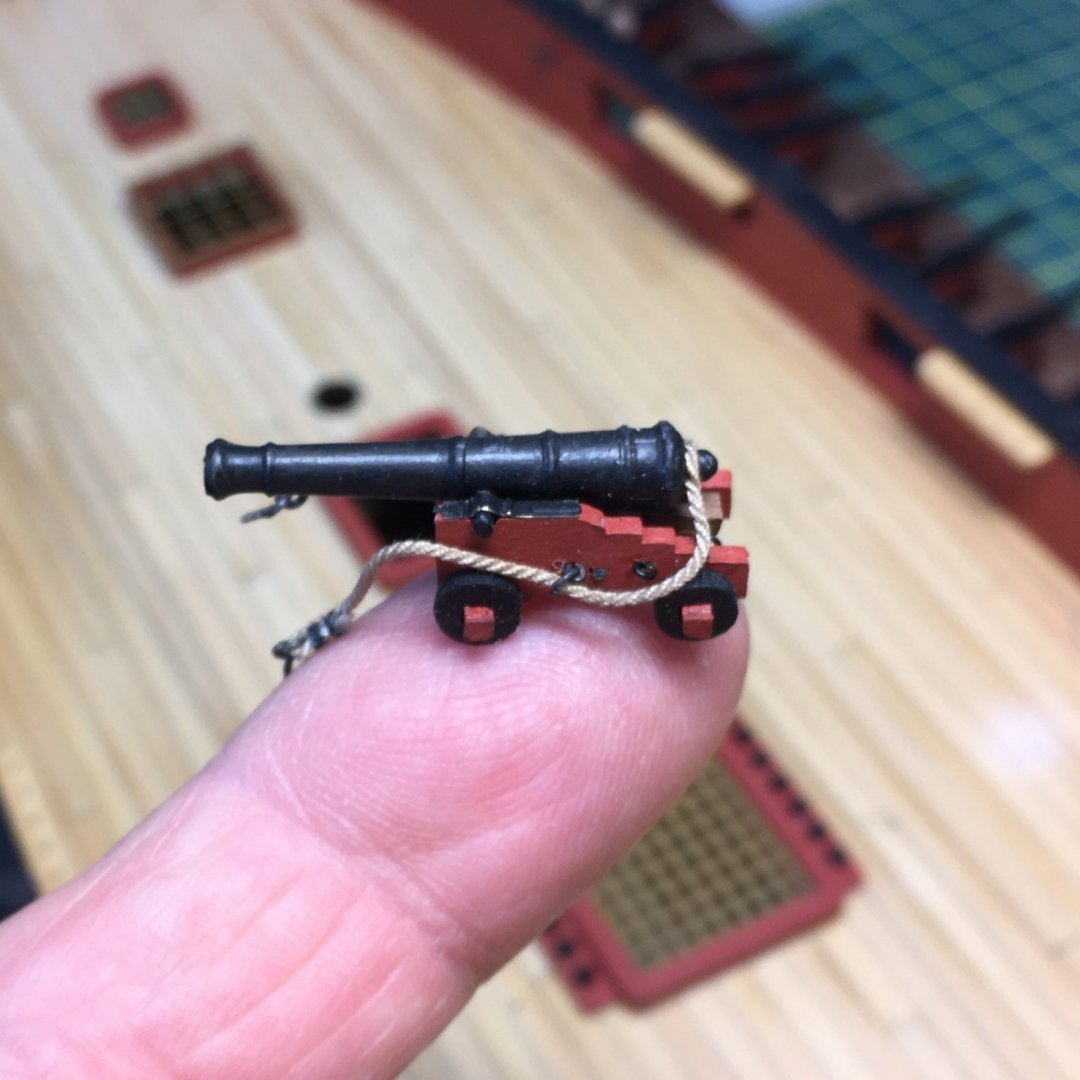
Cannon Rigging (again) OK. this may be my last post on cannon for some time. I think I've figured out how I'm going to rig them, so it just remains to actually crack on with the task. My last bit of experimentation has been around replacing the carriage ringbolts and trying to make the side tackle look more realistic. I tried forming new ringbolts from 0.3 mm brass wire, but even my finest needle-nose pliers were too big. I ended up wrapping the wire round a 0.5 mm drill bit and pinching the end round with some long-nose pliers: Once blackened, the new ringbolts look much better, to my eye: Side by side with the original ringbolts the difference is obvious: On side tackle, I've decided to stick with frapping. Ideally I'd probably want to show the tackle freed up for action, but I'm not sure I could get ropes and blocks this small to lay loose and look natural. I've also decided against coils. So, for the frapping I've just lengthened the distance between the blocks, allowing the tackle to hang lower and show more of the breeching. Here's what I've ended up with, minus the inhaul tackle which I'll fit when I eventually fix the carriages in place. Now it's nose to the grindstone to get a production line going on the remaining 13 guns. I may be gone some time, as Captain Oates said. Derek


- 725 replies
-
- 13
-
-
- vanguard models
- speedy
- (and 1 more)
-
I agree - you've made an excellent job of the first planking. Whilst I also agree with Glenn that the sternpost might be a little thin, I think you might also want to take a little more 'meat' out of the deadwood area in order to ensure you have a smooth taper into the sternpost. It's always difficult to judge from photos though, so you'll be best placed to decide once you've taken Glenn's advice with the strips of second planking.
-
Down-sizing rope ratio compared to the proper scale
DelF replied to Sandor Laza's topic in Masting, rigging and sails
I apologise in advance if this is a point you have already considered, but are you sure you are not confusing circumference and diameter? As I'm sure you know, historical sources tend to give rope sizes in circumference. Even on a first rate like HMS Victory at 1:48 scale, very few ropes would be 2mm in diameter - the main stay and a few others, but certainly not the shrouds and the running rigging. Derek -
Thanks for your kind comments guys No, but I will now I've started obsessing about it! I understand your point, but equally, I see no harm in striving for greater authenticity. Besides, you helped persuade me to rig the blasted things in the first place so I blame you for my current obsession 🤪 That's what I plan to do. An alternative would be to put pins through the front and/or rear axles to the deck, but that's not really an option once the barrels and cap squares have been fixed to the carriages. Derek
- 725 replies
-
- 1
-
-
- vanguard models
- speedy
- (and 1 more)