HOLIDAY DONATION DRIVE - SUPPORT MSW - DO YOUR PART TO KEEP THIS GREAT FORUM GOING! (83 donations so far out of 49,000 members - C'mon guys!)
×


DelF
-
Posts
1,409 -
Joined
-
Last visited
Content Type
Profiles
Forums
Gallery
Events
Everything posted by DelF
-
 Chris I will definitely go for the boxwood version. Derek
 -
Thanks Steve. I’ll Go for marking the frames. Derek
- 77 replies
-
- 1
-

-
- model shipways
- pinnace
- (and 1 more)
-
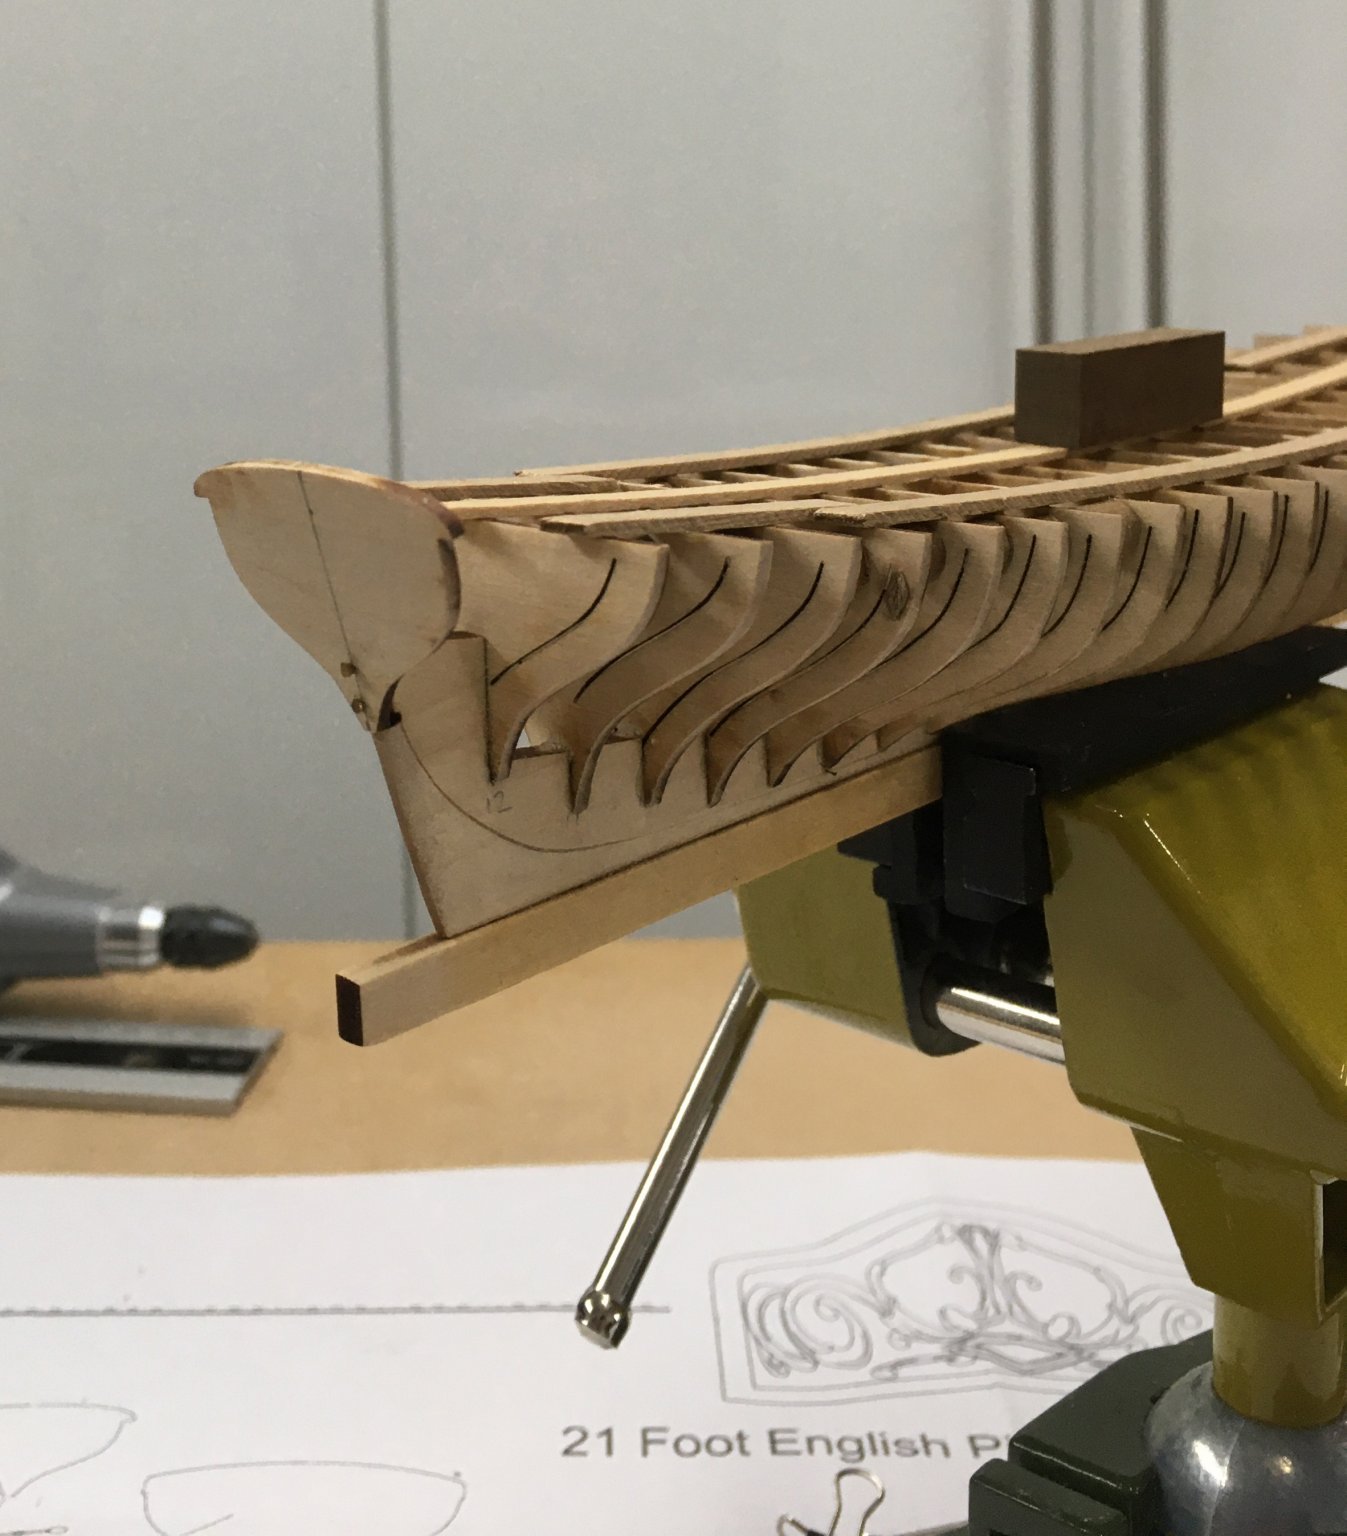
Thanks for the likes and comments - they're appreciated. I'm still faffing about with fairing and preparing for planking. I debated whether or not to fair the transom on the bench or after fitting on the boat. In the end I decided on the latter; although I knew it would be very delicate, I thought it would probably be more difficult getting the bevel right if it wasn't on the boat. So I glued and pinned it: I'm in two (or three) minds how to go about the planking. Having seen Chuck's videos I was raring to go - he makes it look positively easy! The first issue I came across was the width of the planks. The kit supplied wood is 3/16" wide, which equates to almost exactly 10 strakes midships. My timber is slightly narrower, simply because of the board I milled my strips from was 4.25mm thick. This equates to about 11.5 strakes midships. So I either include one or two wider planks or I trim a few thou off my strips and go for 12 strakes per side. I went for the second option. Next, I'm undecided on marking of the frames with the tick strip method. I've had a go but found it very fiddly given the small size of the frames and the sheer number of them. I'm reluctant to go to the effort of marking out all the frames if it's not worth it on such a small boat. My other main concern is around fitting the final planks on each side. From other people's logs and the kit instructions its clear that if you plank from the sheer down and from the garboard up, you're going to end up having to cut and fit a weird shaped final plank. Thinking about this, I wondered if it would make sense to work solely from the keel up, leaving a final plank at the sheer with hopefully just one awkward side to shape. Presumably any horribleness would be covered by the frieze and by internal planking. I'm probably over-thinking all this, and should probably just get on with it. After all I've already done the small version (although that was painted which covers a multitude of sins). Before I start though, I'd welcome any comments or advice on the points I've raised. Derek

- 77 replies
-
- 9
-
-
- model shipways
- pinnace
- (and 1 more)
-
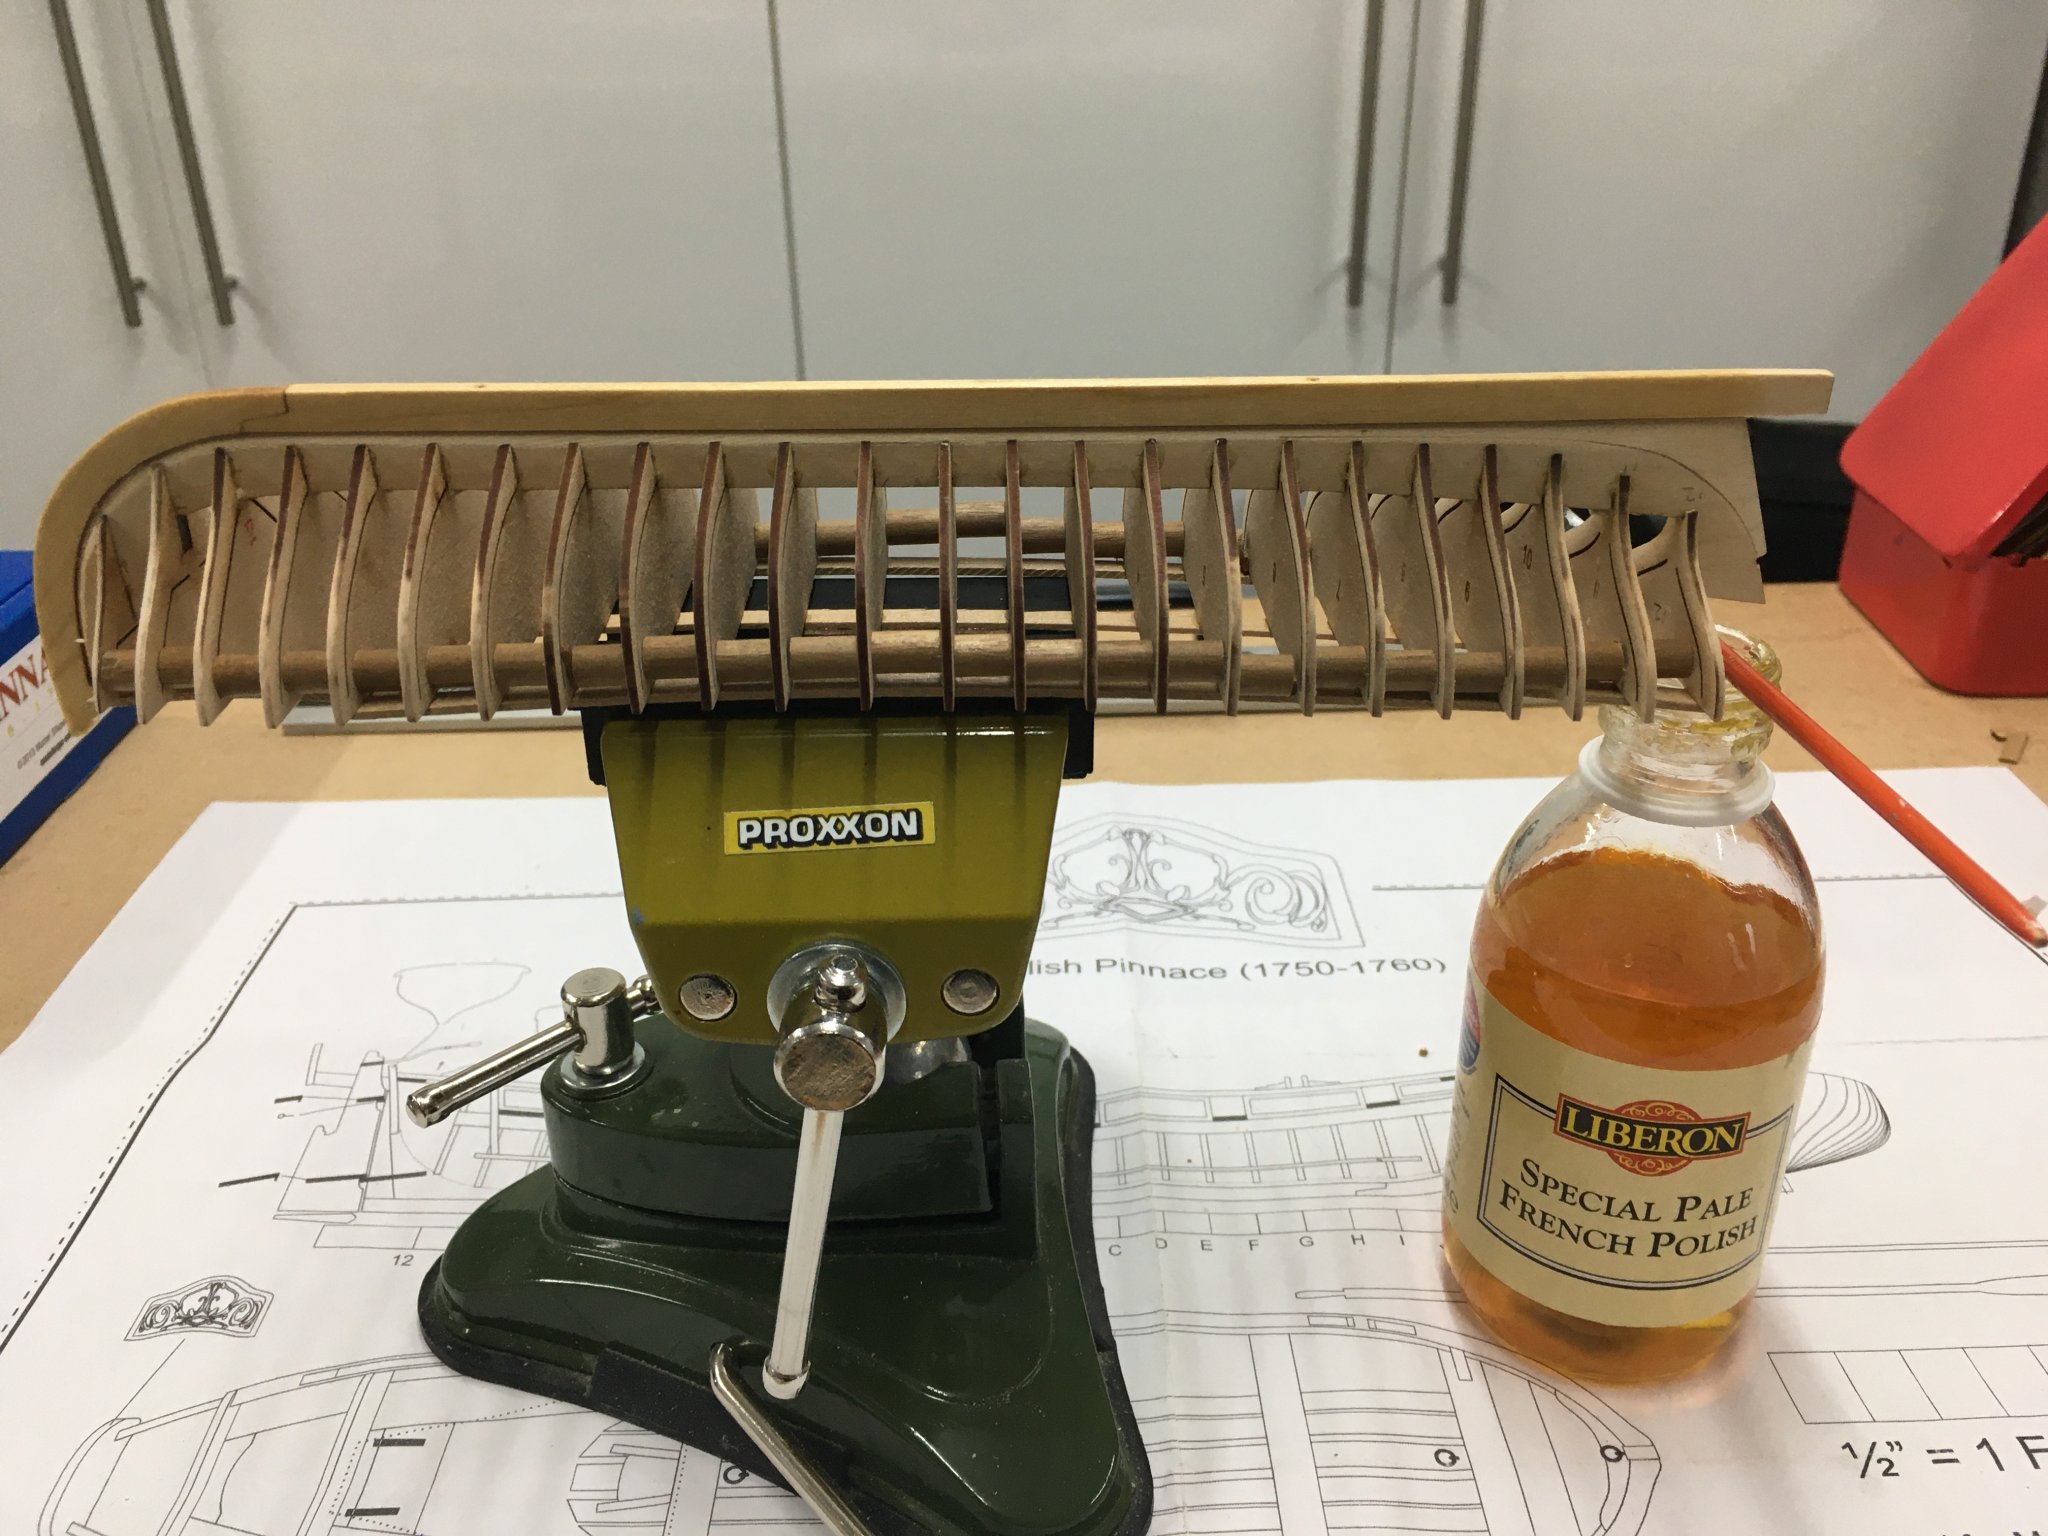
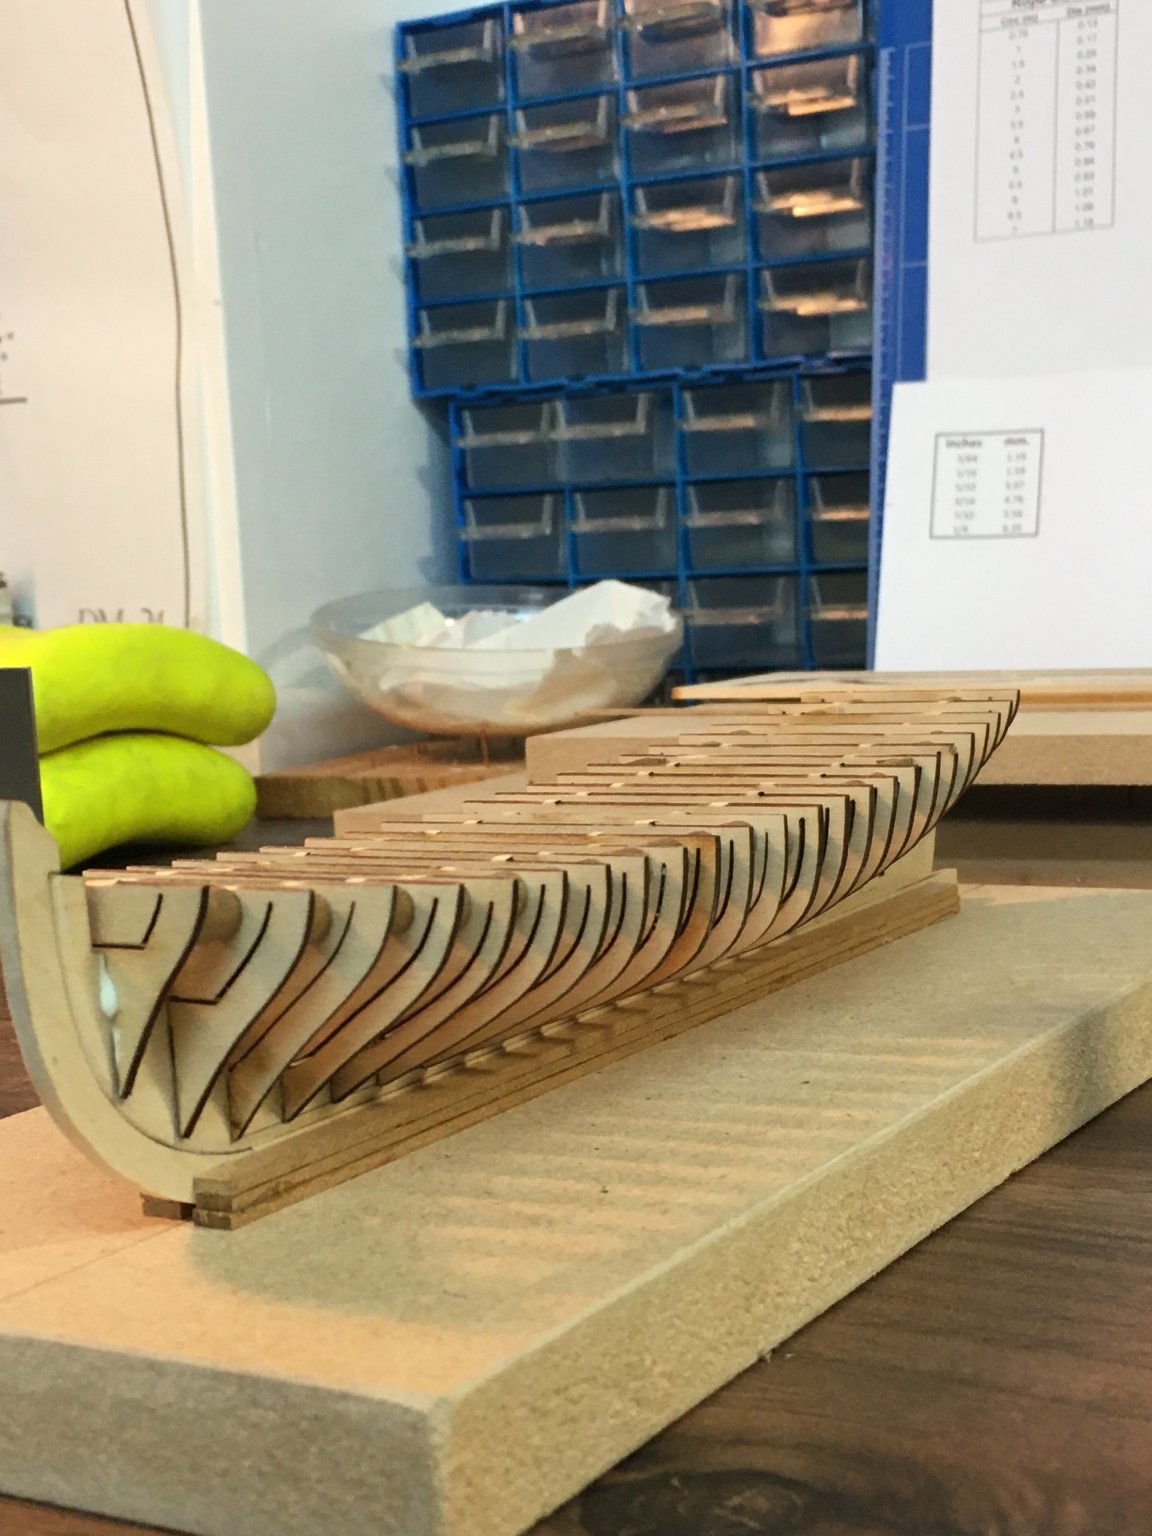
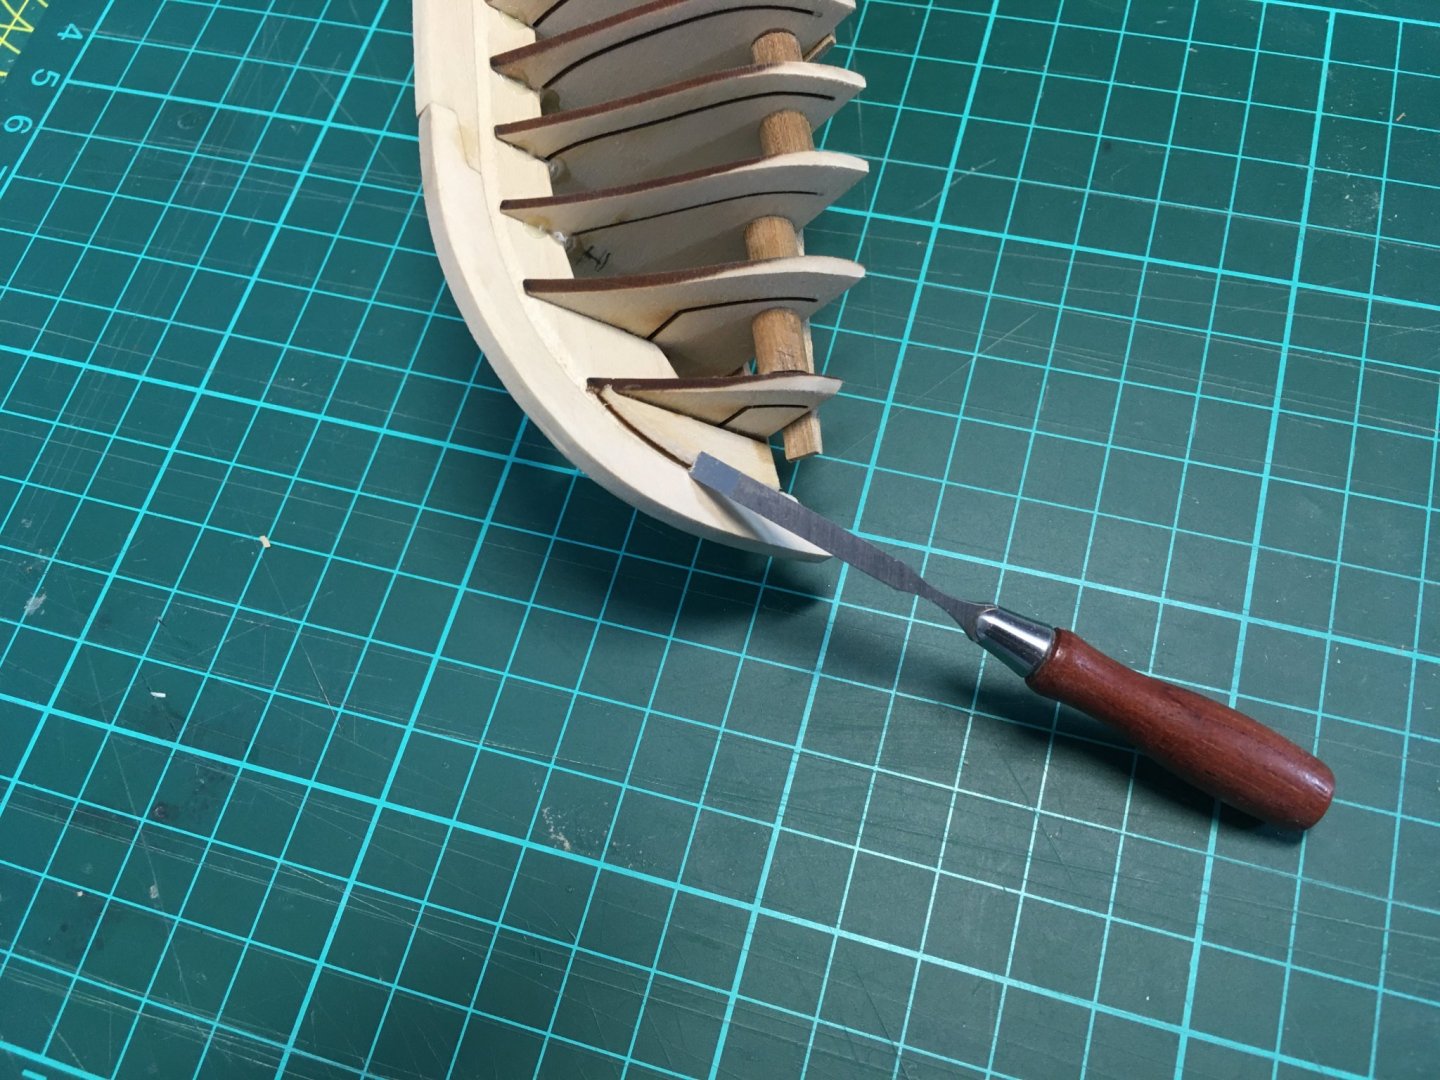
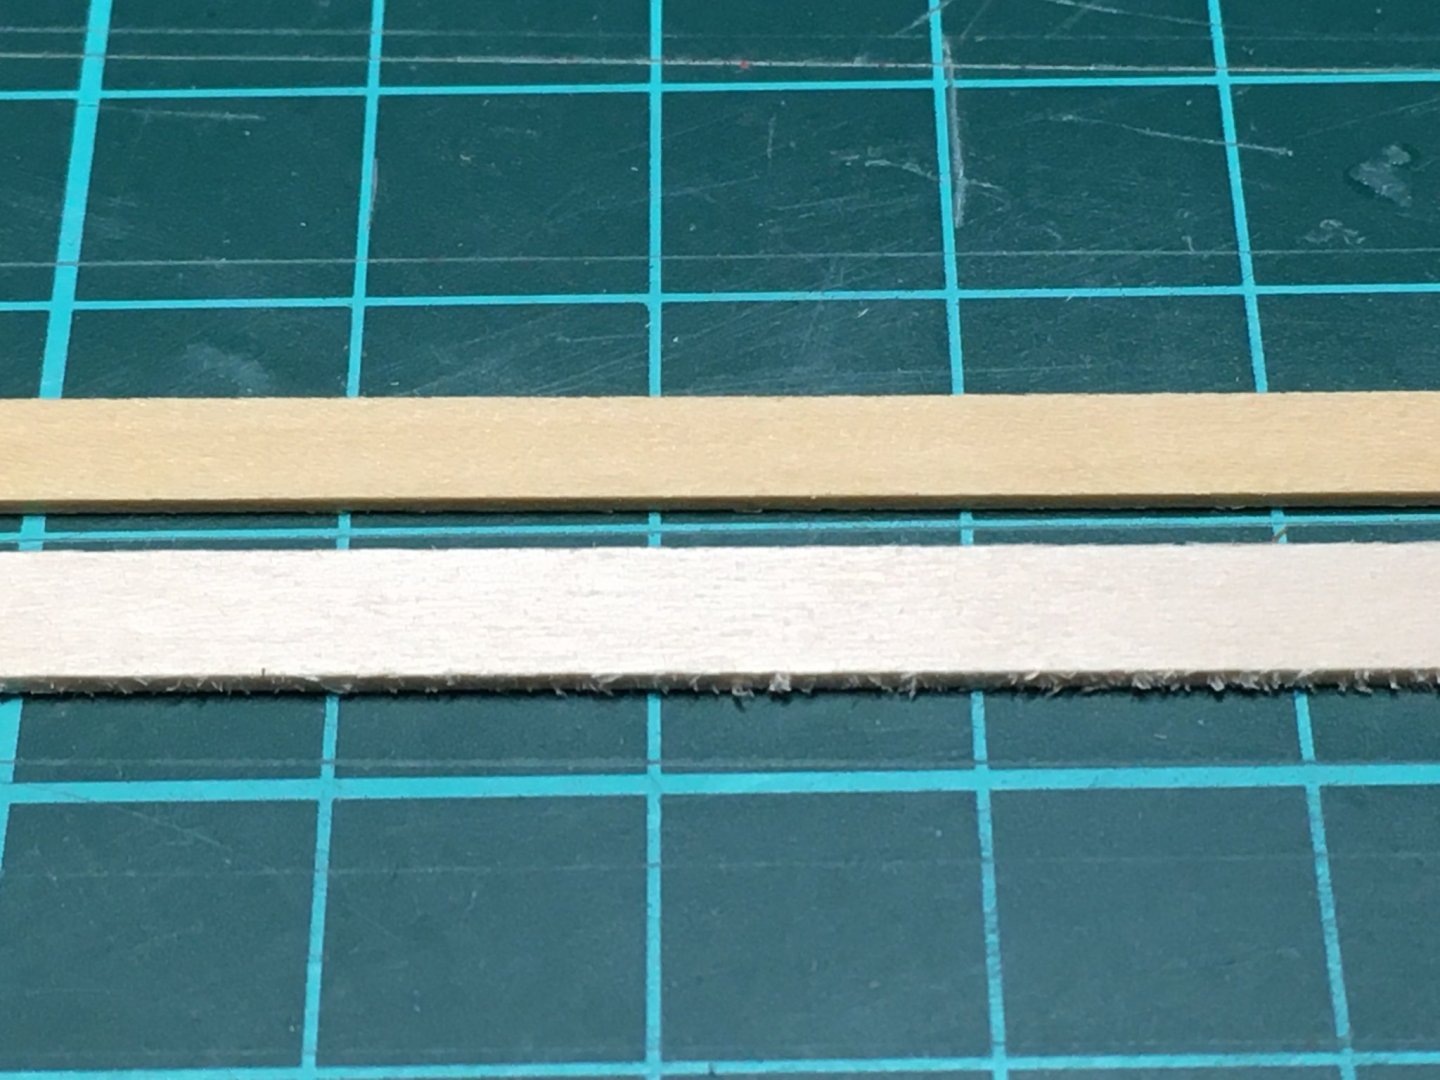
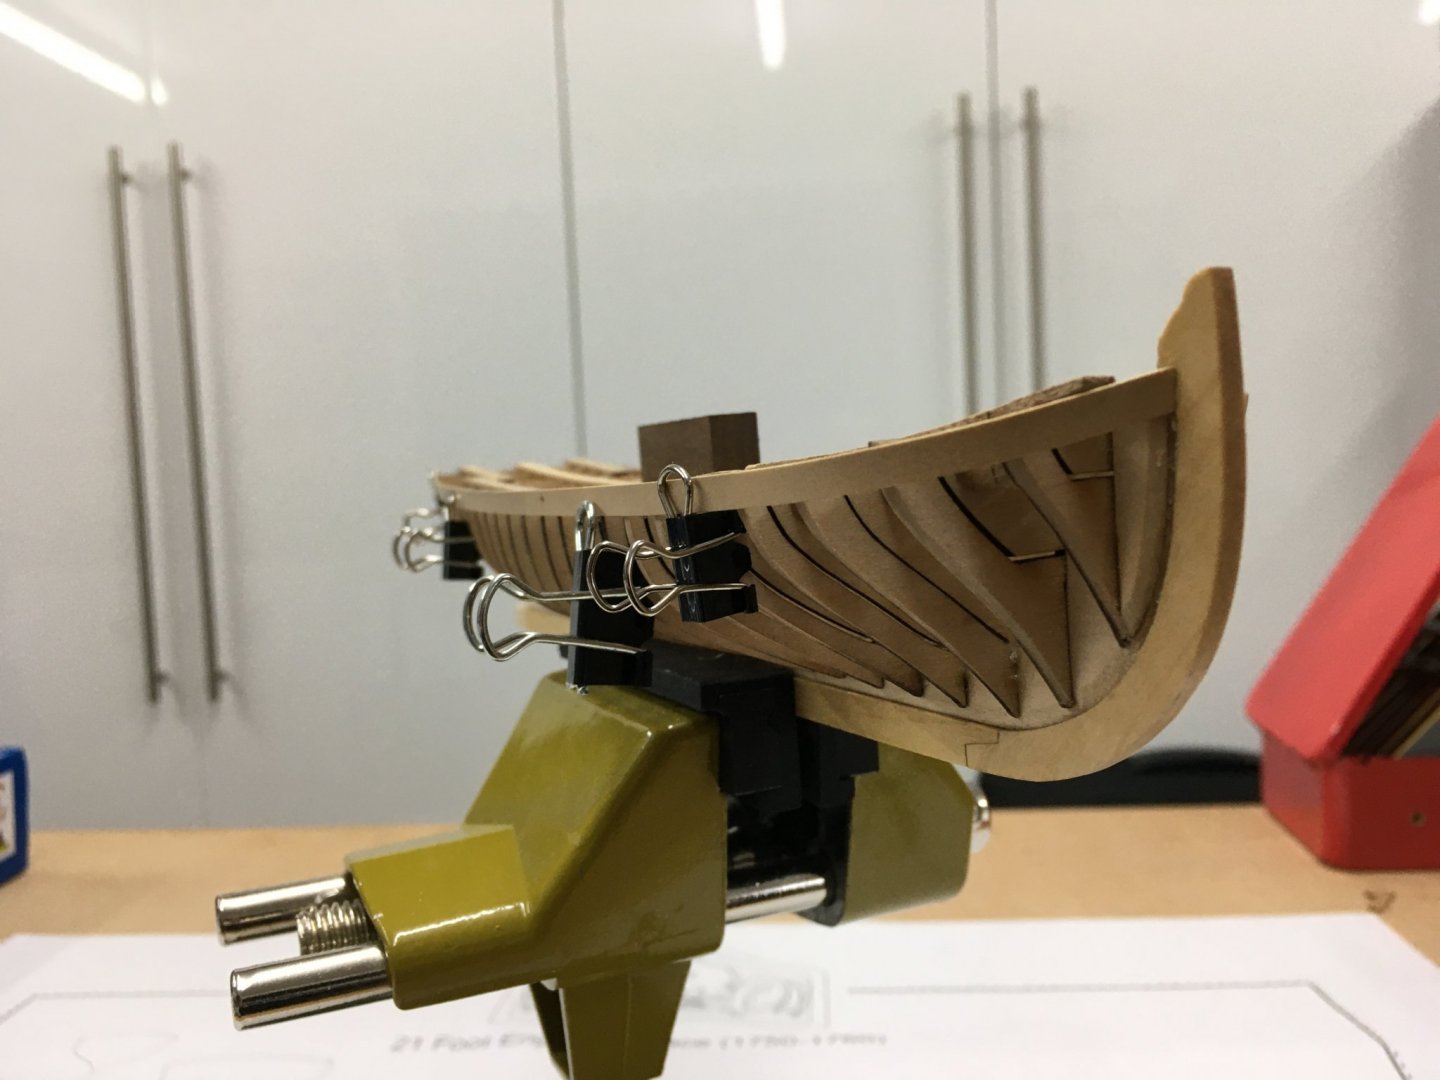
Started on the fairing. The miniature chisels from Veritas are ideal for getting into tight places. The one shown is 1/8". Before going much further I decided to try to harden the keel a bit with some coats of shellac. I just need to look at the basswood and I get dints in it. I'm glad I decided to go for boxwood for the planking and fittings. Not easy to see in the photo, but straight off the saw the boxwood has an almost mirror sheen compared to the timber supplied in the kit. Don't get me wrong, the kit timber is very good quality as far as it goes - straight, consistent colour and dimensions and no faults - but it is basswood. I know some people get great results with it 'cos I've seen their logs, but boxwood is more forgiving for someone at my skill level. Dry fitting to see how the fairing's going. Not bad so far, but shortly after this a 6mm section broke off the side of one of the frames. I was just holding the boat in one hand whilst fairing the other side, and applying very little pressure. Gluing it back in position was easy, but the breakage demonstrated just how fragile the frames are and what soft hands you need. I'll leave the dockyard now - enough excitement for one day! Derek

- 77 replies
-
- 8
-
-
- model shipways
- pinnace
- (and 1 more)
-
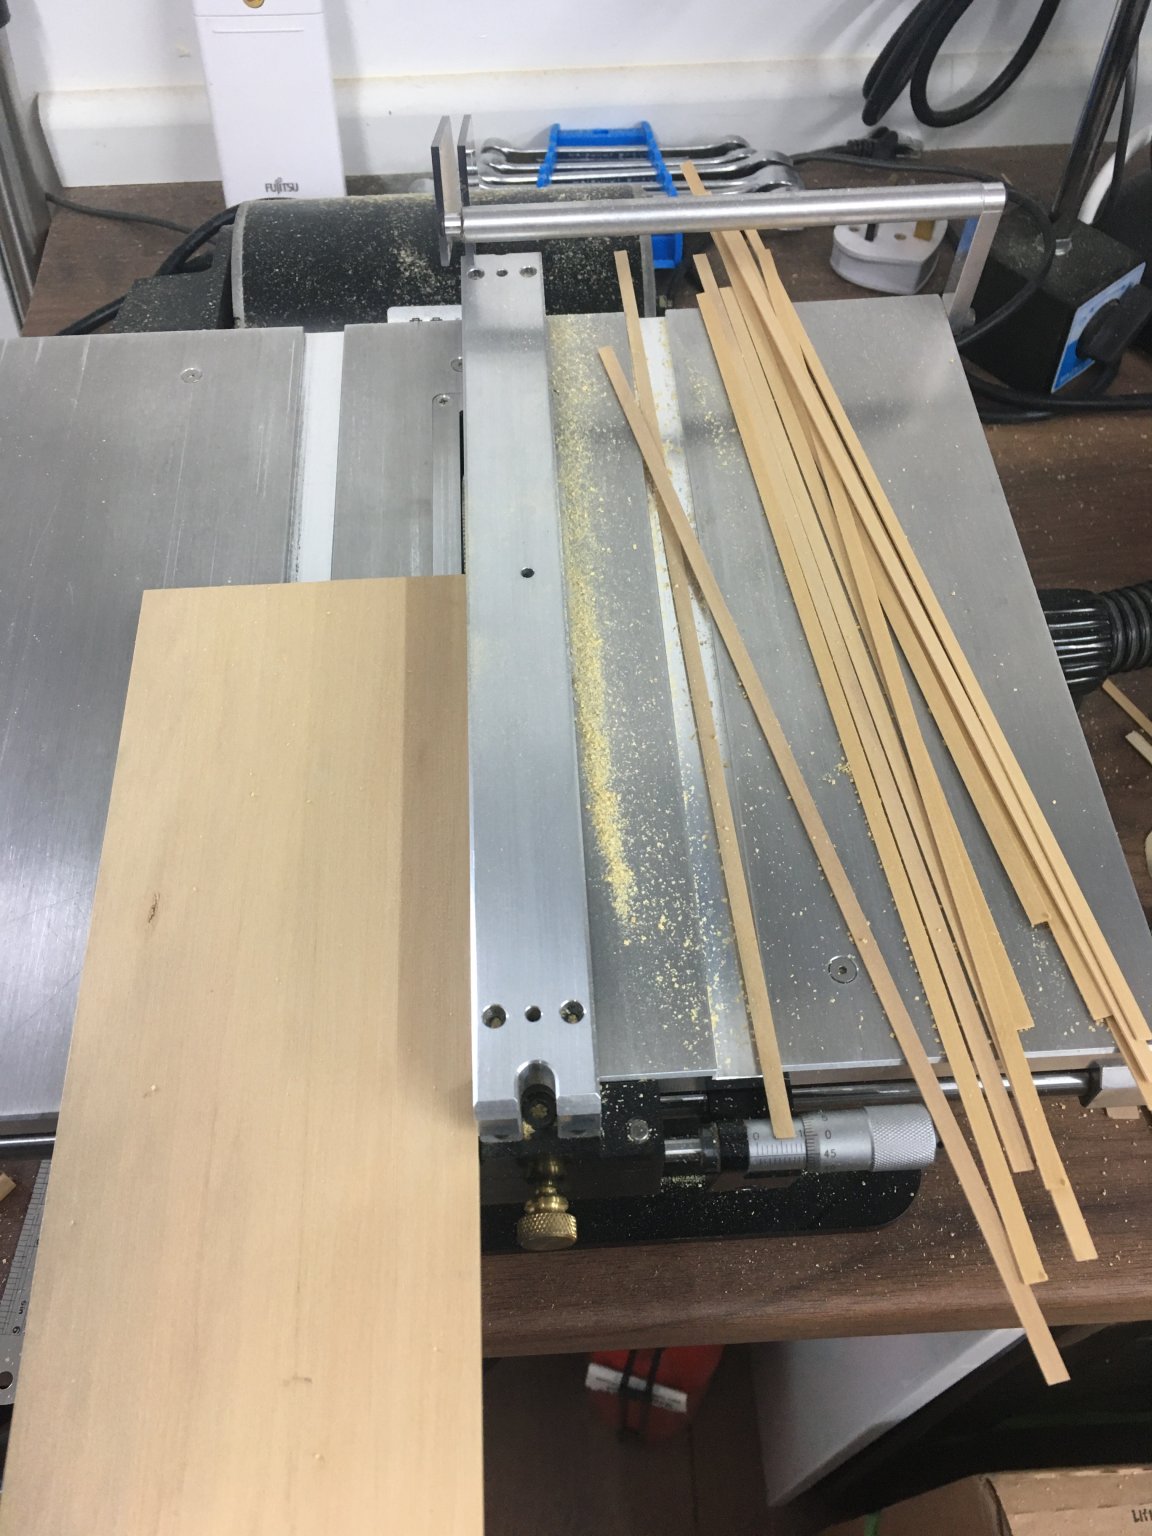
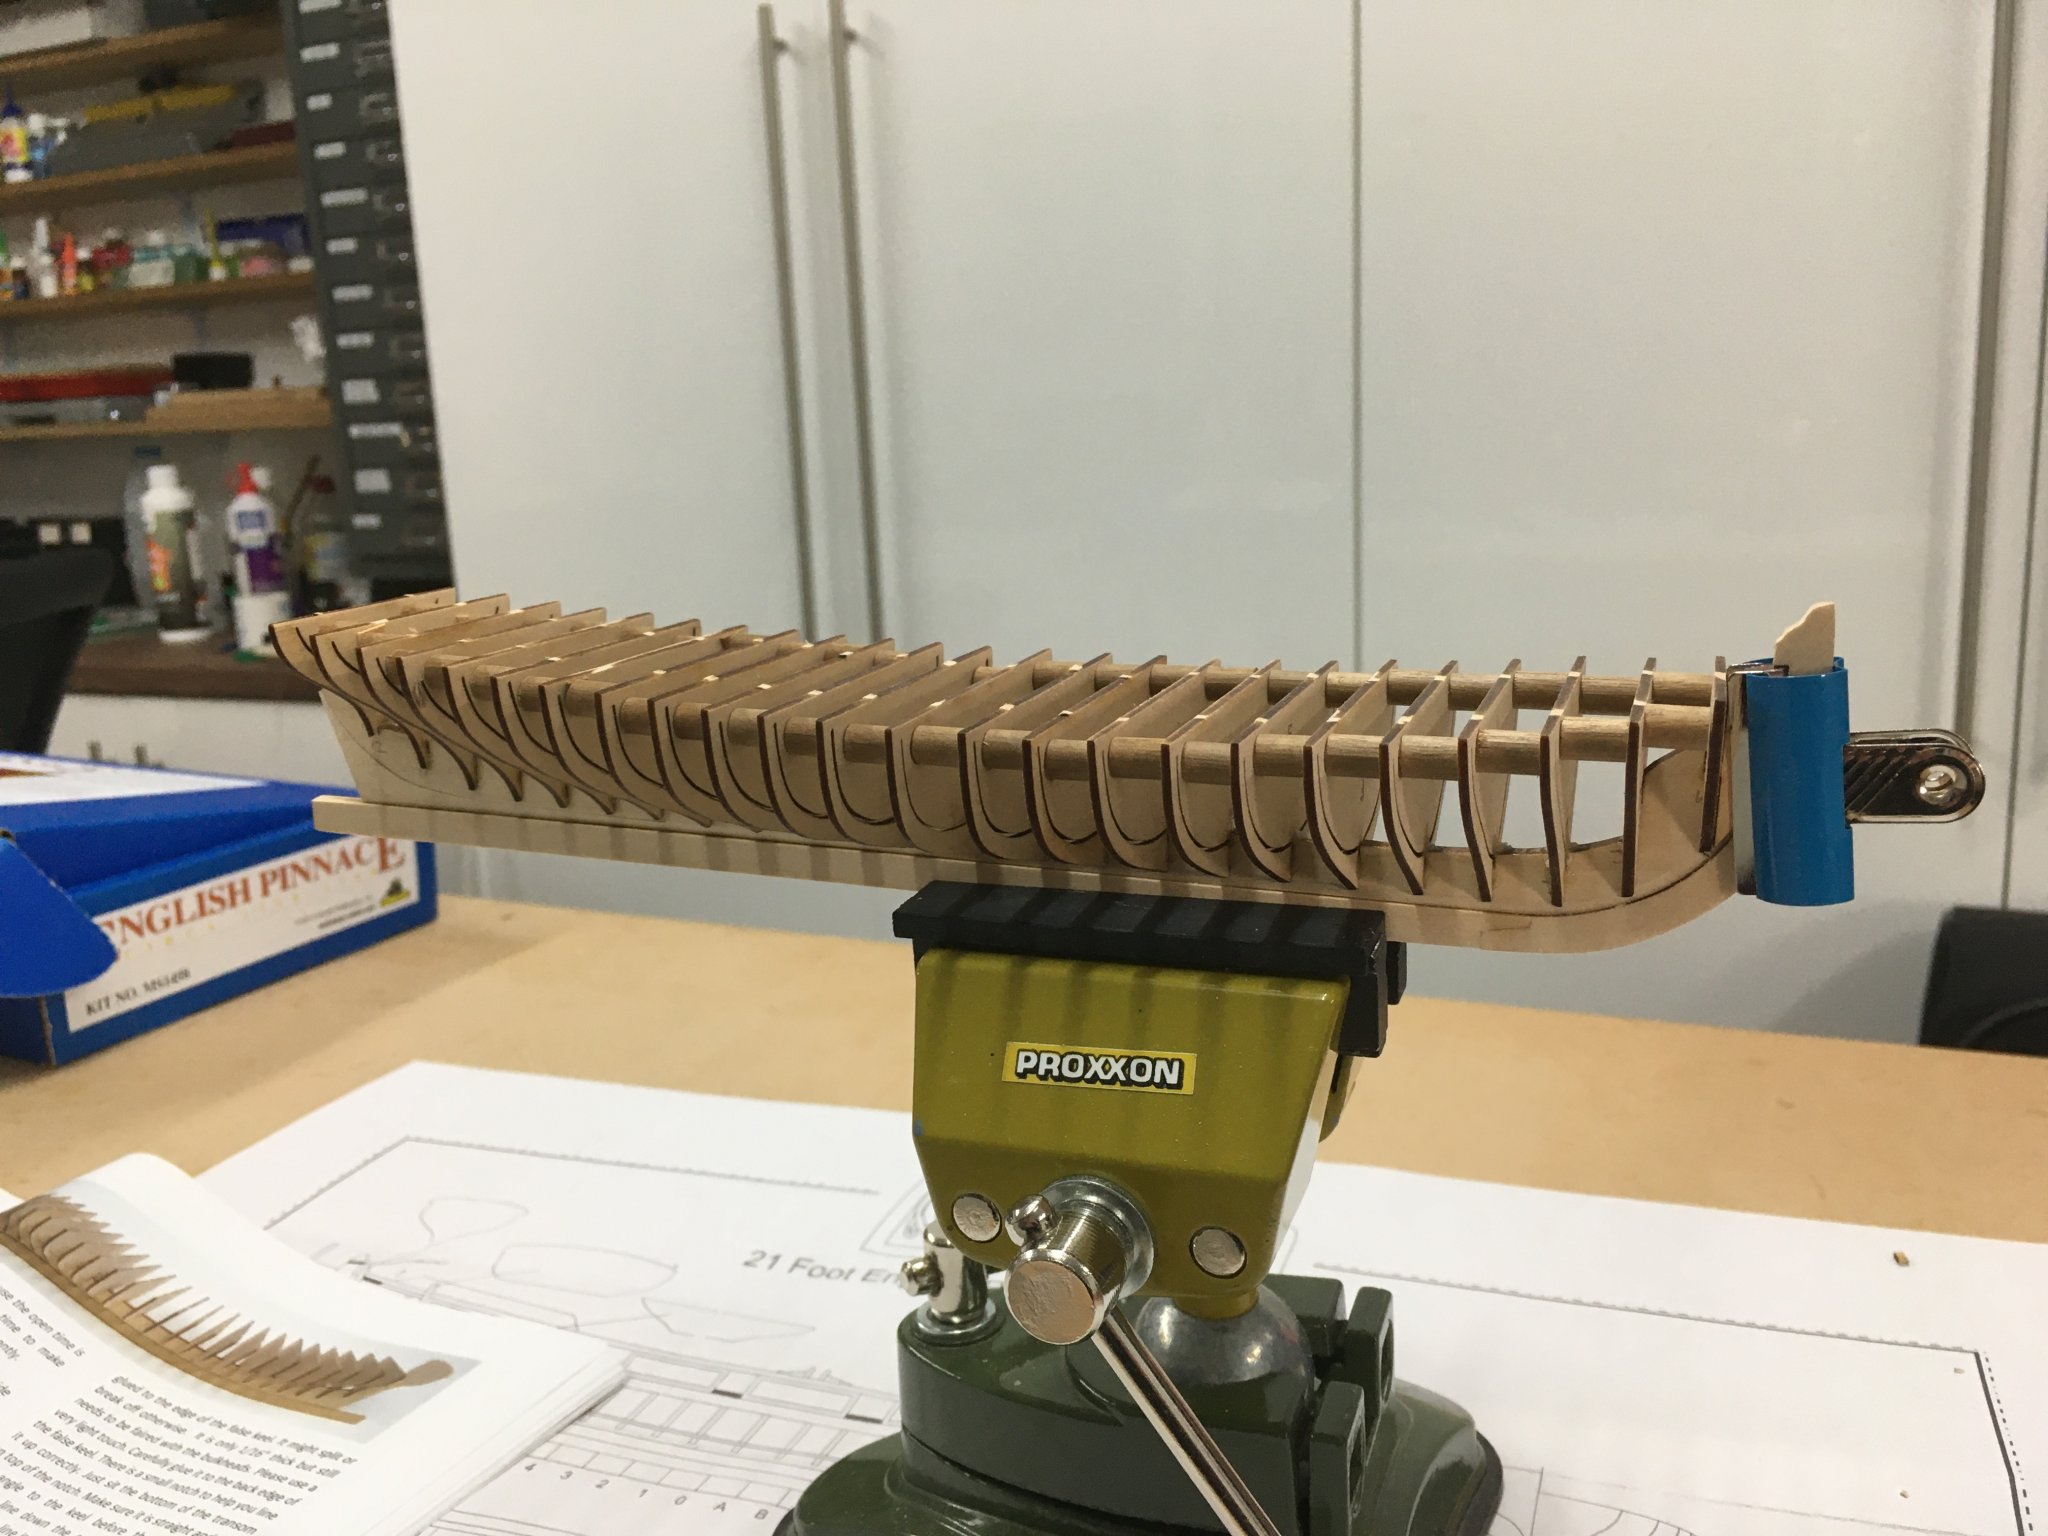
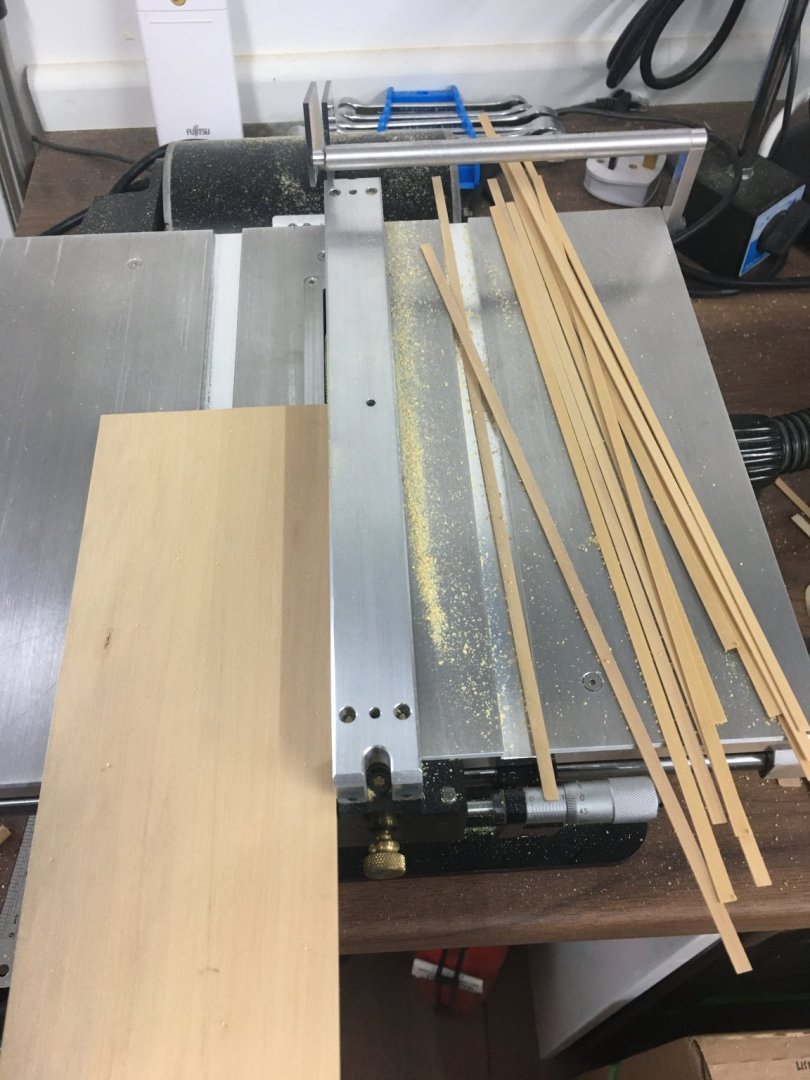
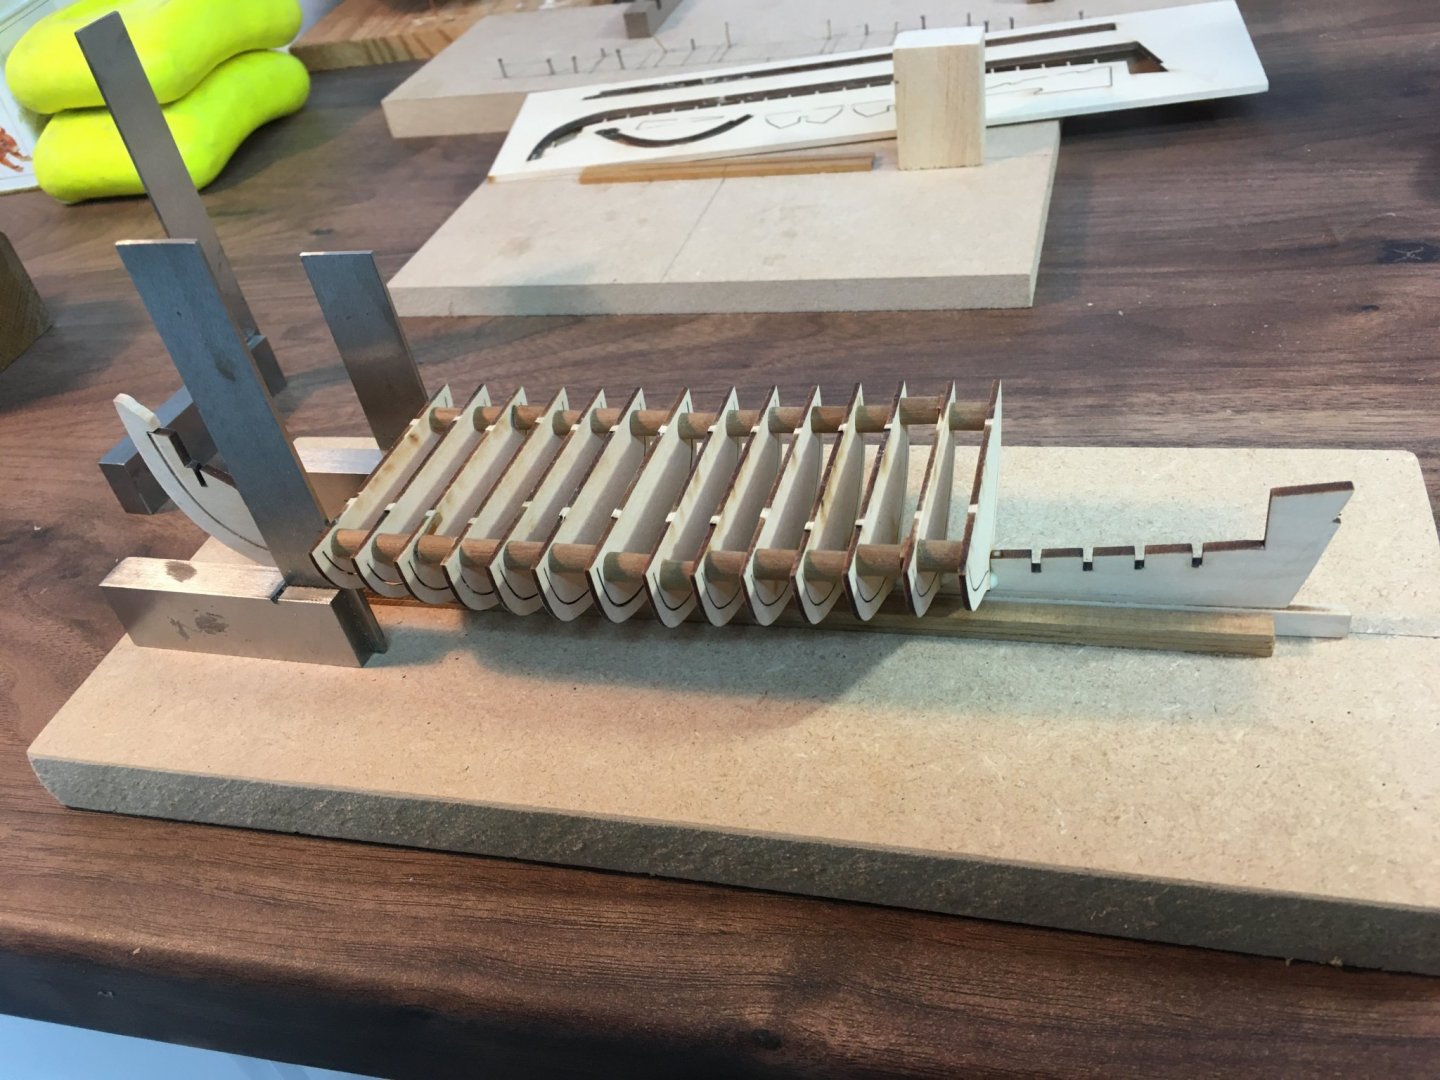
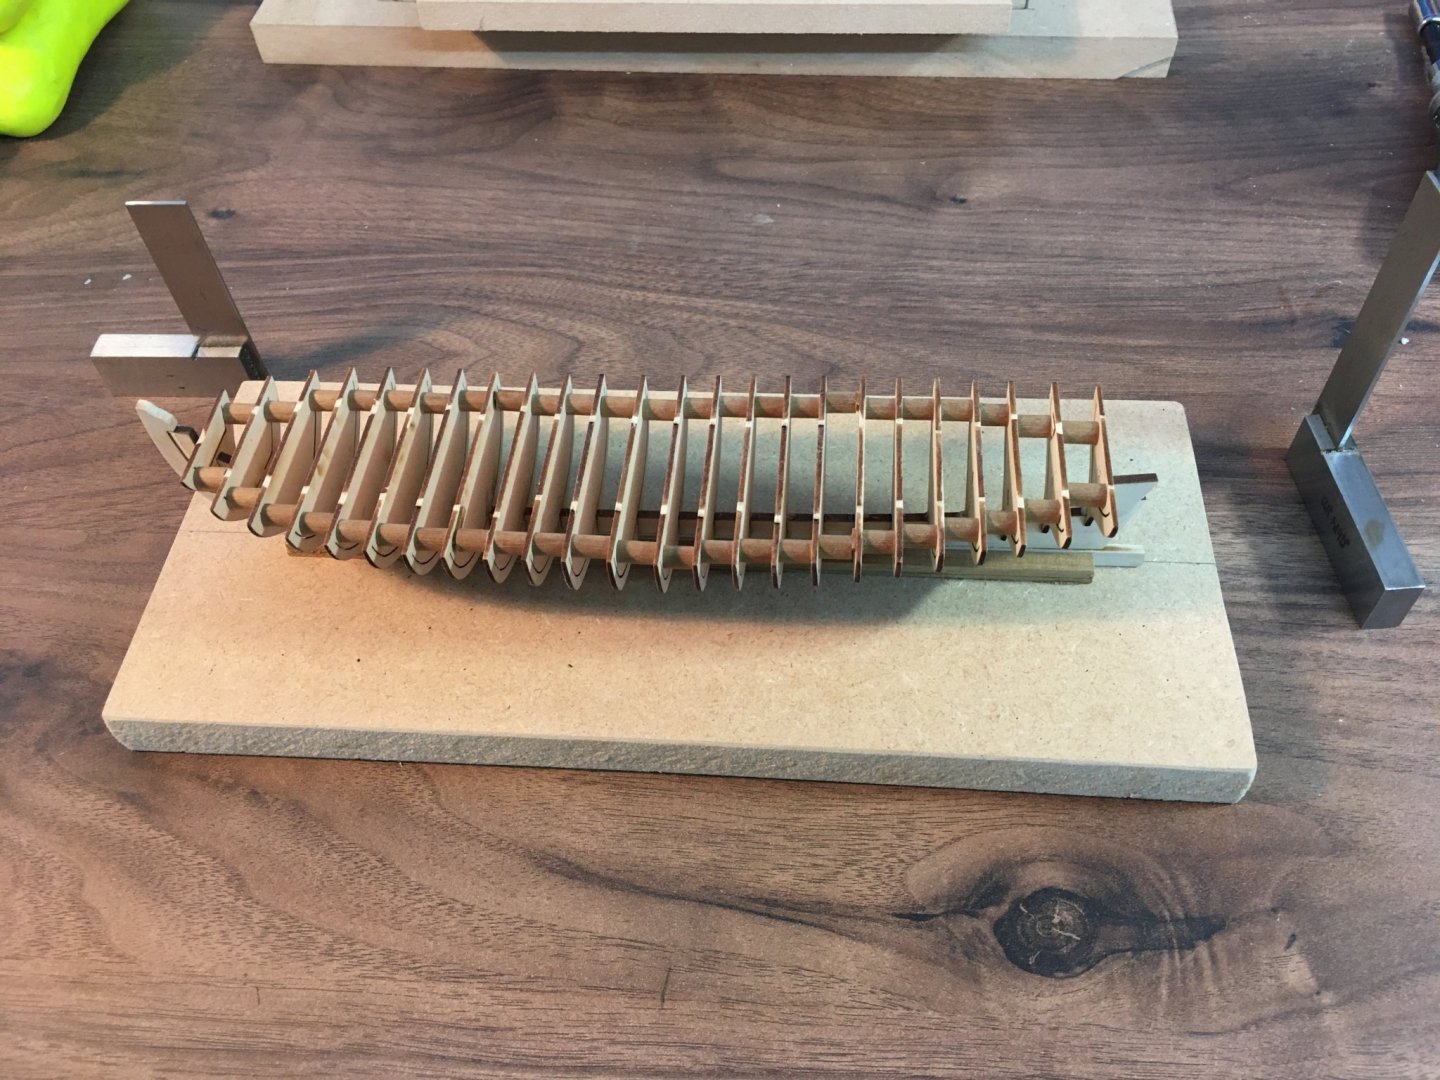
Although the spacers I've put between the frames have made the model fairly stiff, the fact that only one end of each spacer is glued (to aid eventual removal) means there is still some movement. So to help fairing I've added strengthening strips in line with other people's advice. I've stuck a block on top so that I can clamp the model upside down when needed. Next, I started ripping some castello boxwood strips - a doddle on my new Byrnes saw. I think this is what the psychologists call displacement behaviour - I'm looking for any job to do rather than getting to grips with fairing and planking! Derek

- 77 replies
-
- 7
-
-
- model shipways
- pinnace
- (and 1 more)
-
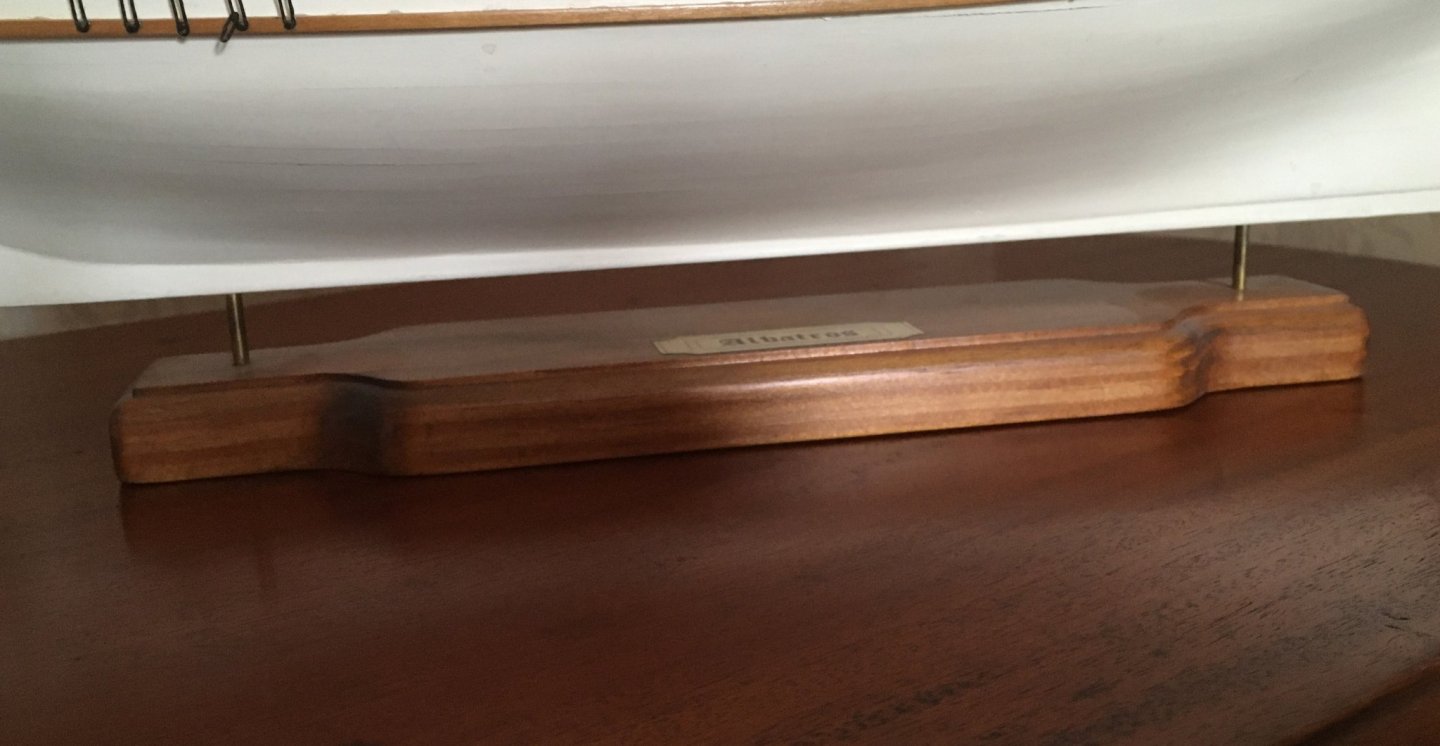
Steve, your model looks very elegant on the long thin tubes - I think you've convinced me to ditch the pedestals. Btw, how did you do the label - that adds a very fine touch? Derek
- 77 replies
-
- 1
-
-
- model shipways
- pinnace
- (and 1 more)
-
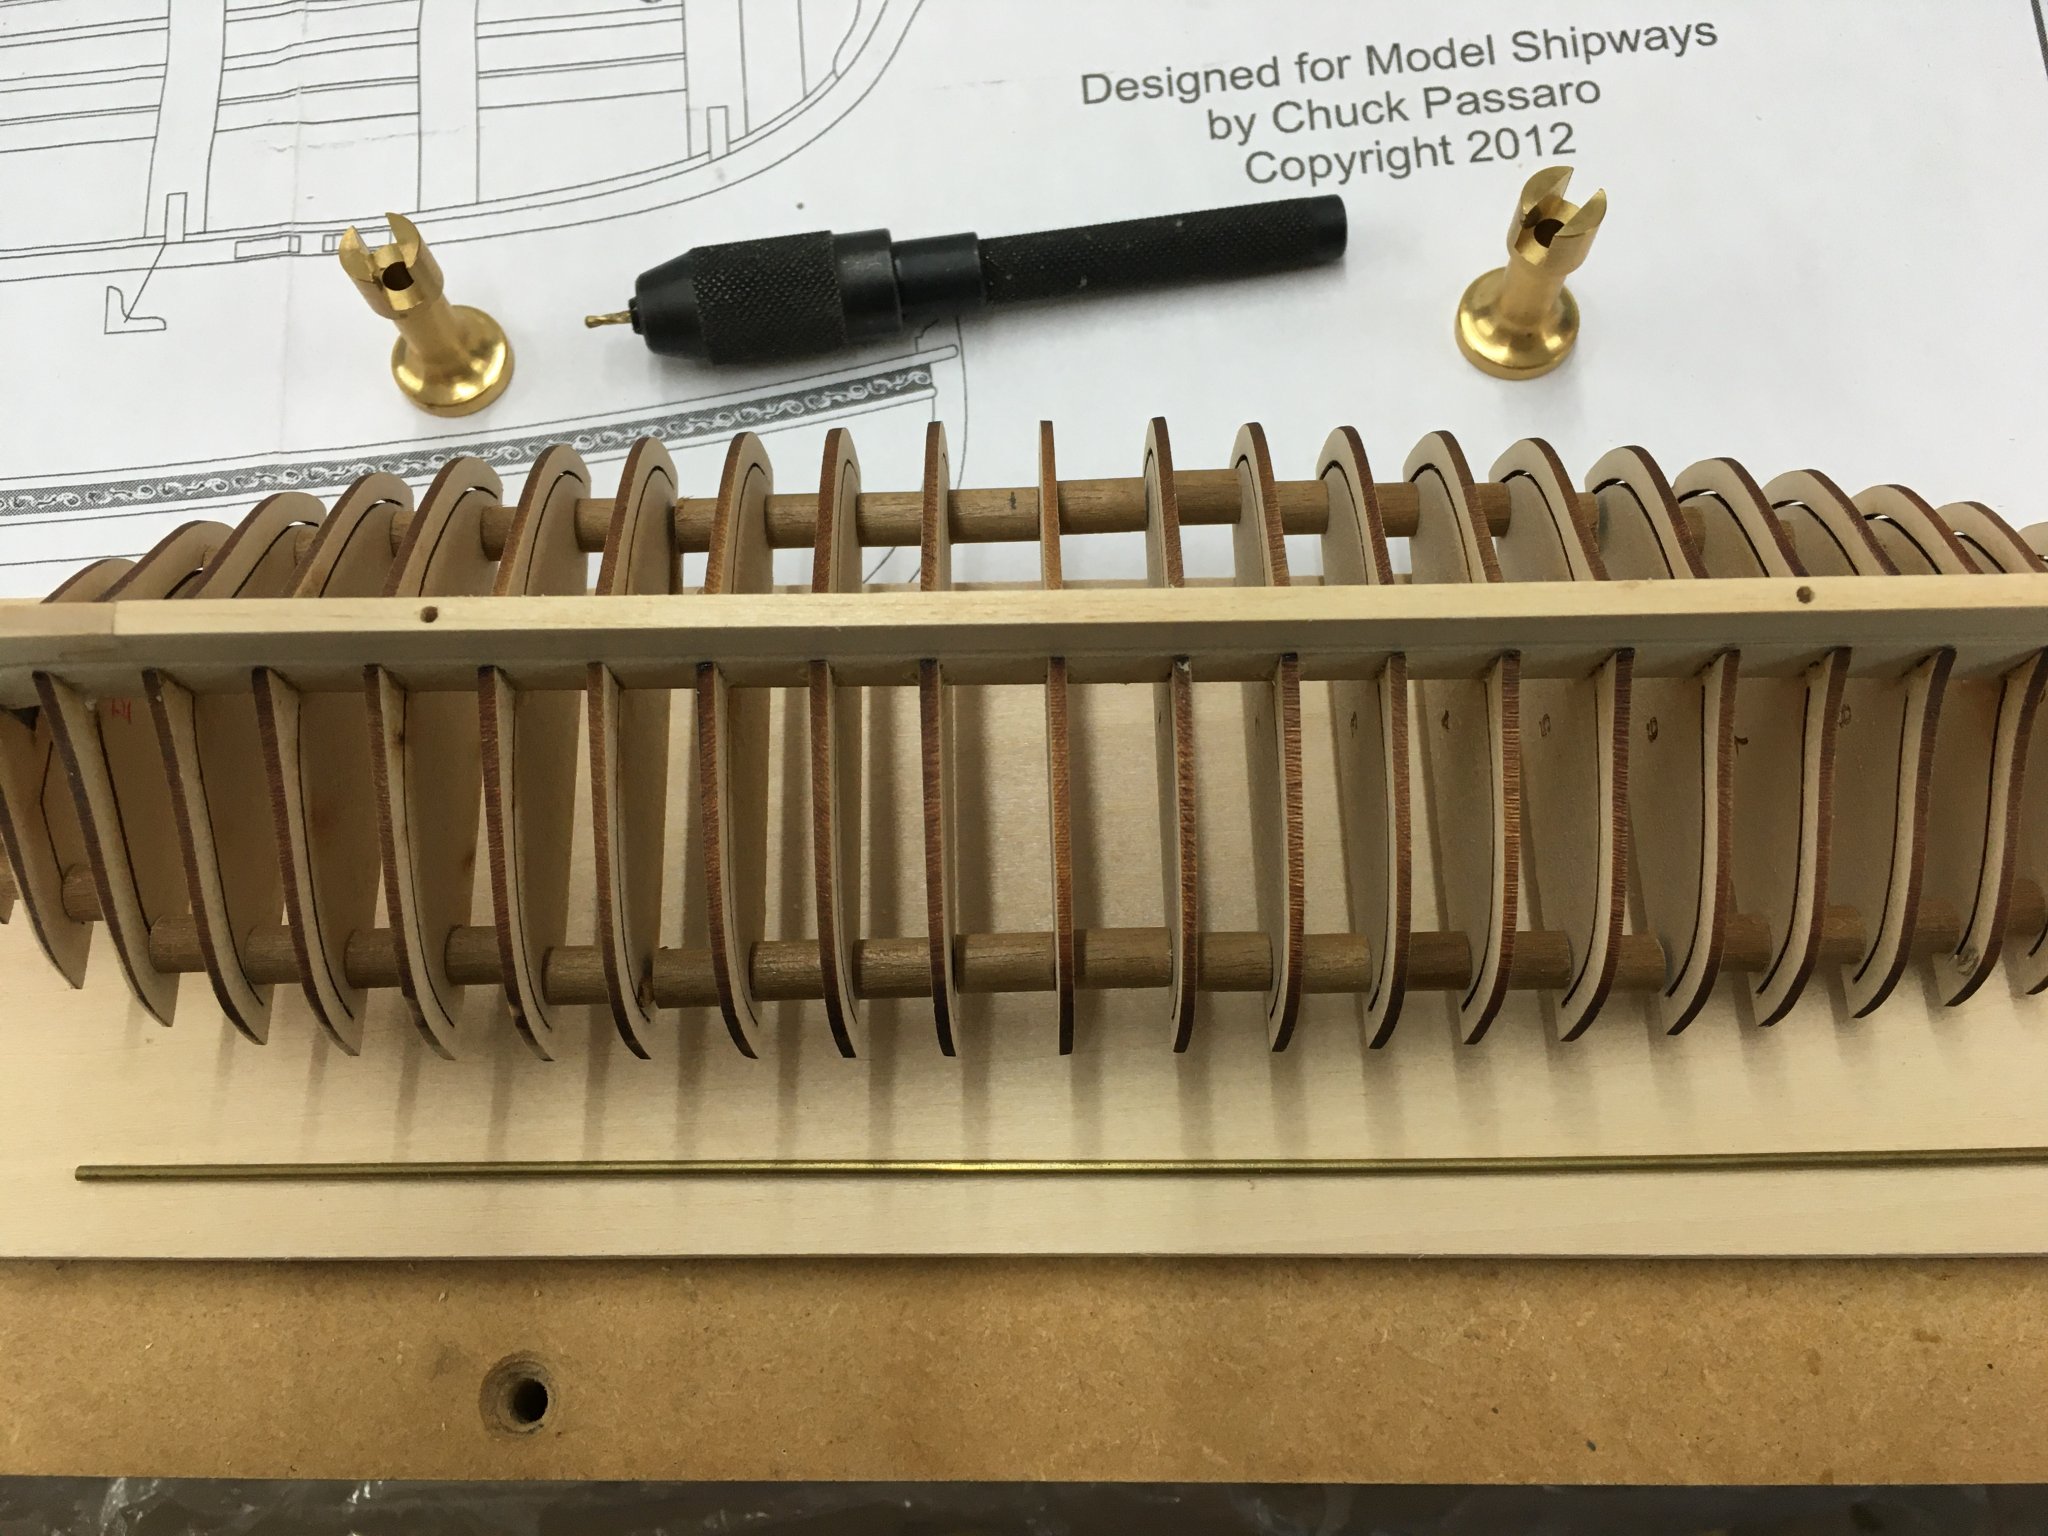
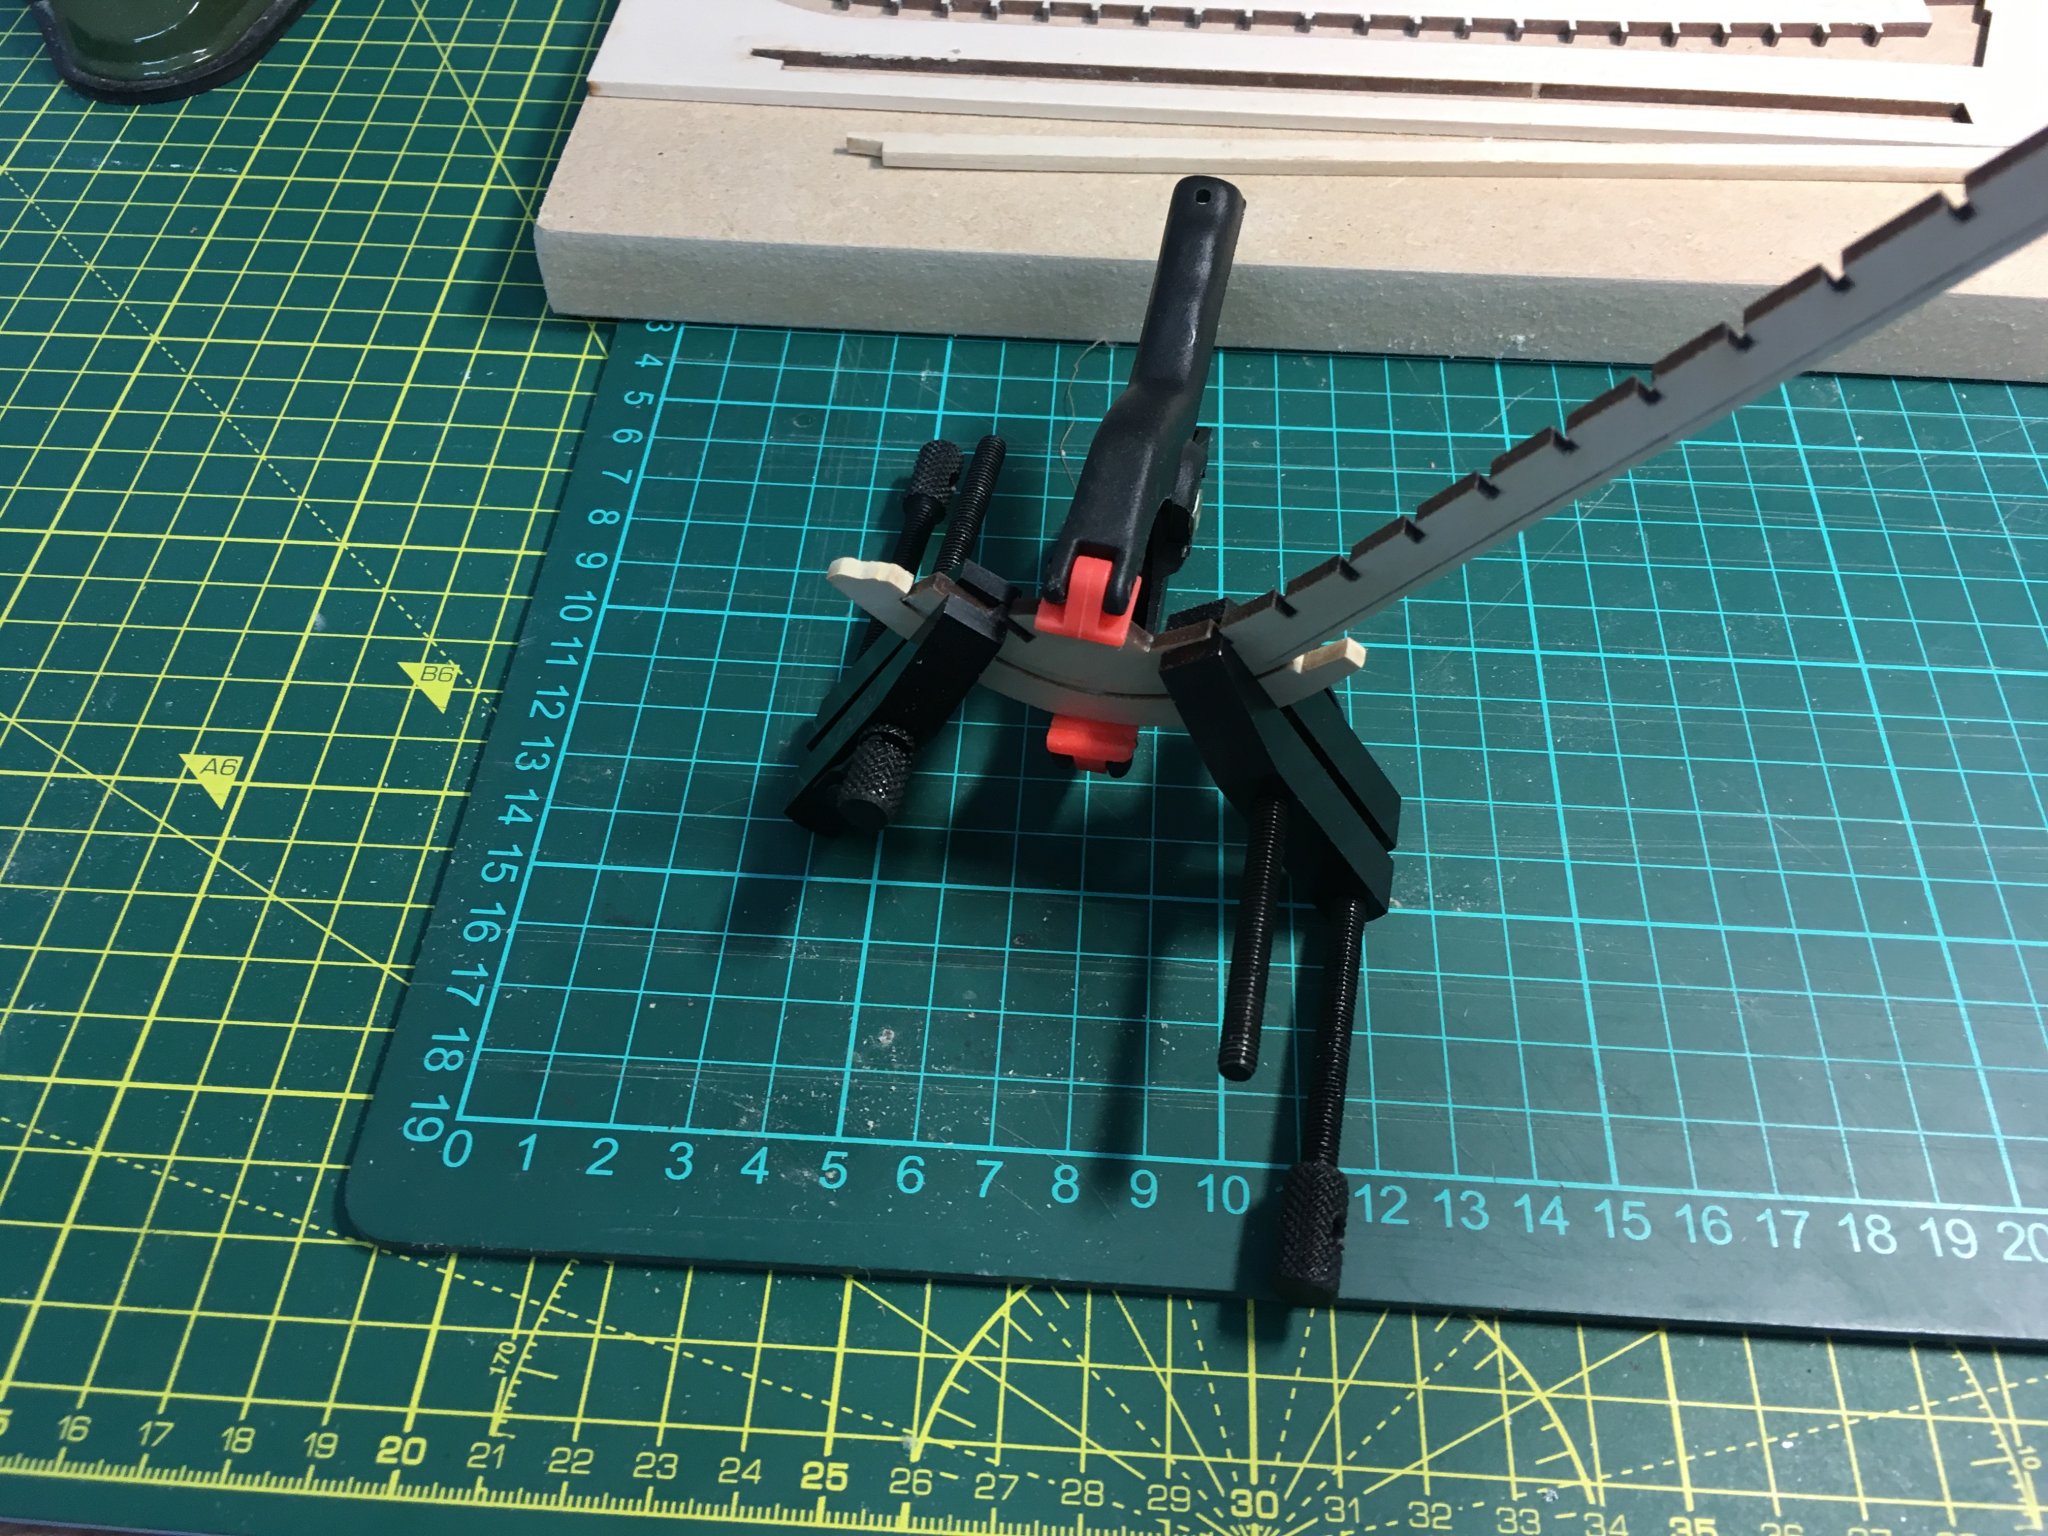
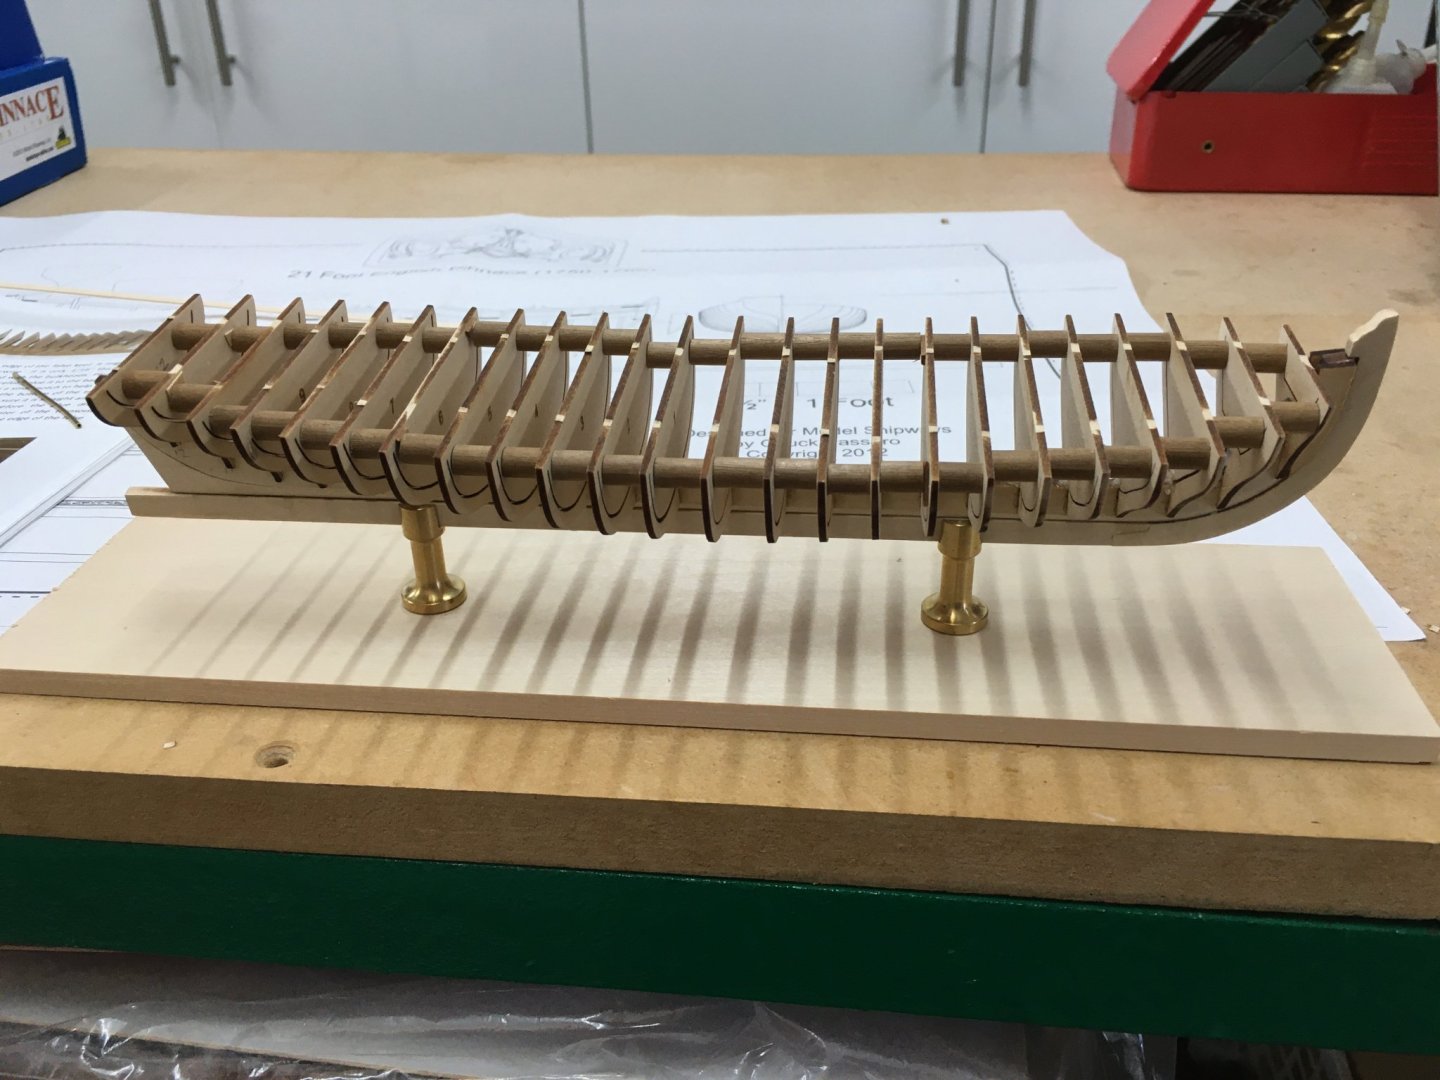
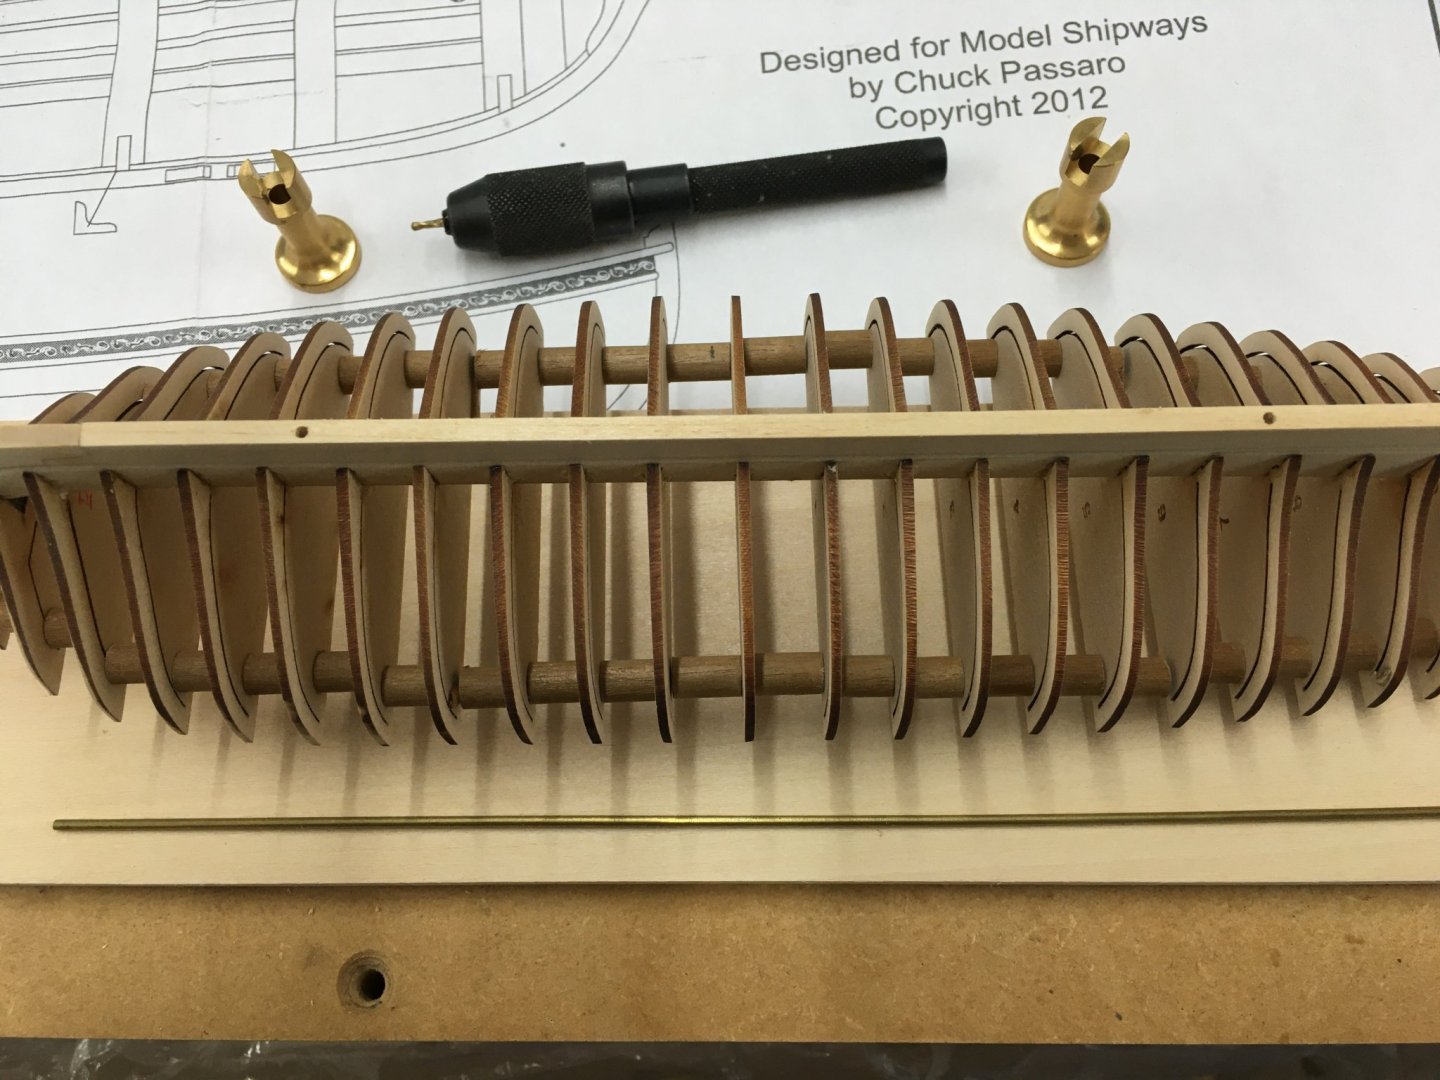
I want to sort out how I'm going to mount the model before I go too far - a mistake I've made in the past. I don't think a cradle would be best suited to a small model like this, but as the keel is so thin (about 1/8"/3.2mm) any fixing will have to be correspondingly thin. As the pinnace will be very light, this shouldn't be a problem, so I intend to use 1/16" brass tube (should be more rigid than rod). I'm not sure yet whether to fix the tube though a brass pedestal, or simply insert the tubes straight into holes drilled in the stand. The pedestals look a bit clunky to my eye, so I may go for the bare tubes. Either way, I need holes in the keel: I used tubes on a model I made nearly 20 years ago and its stood the test of time, so I may go down that route: Derek
- 77 replies
-
- 7
-
-
- model shipways
- pinnace
- (and 1 more)
-
Thanks Steve - I learned a lot from your log! Derek
-
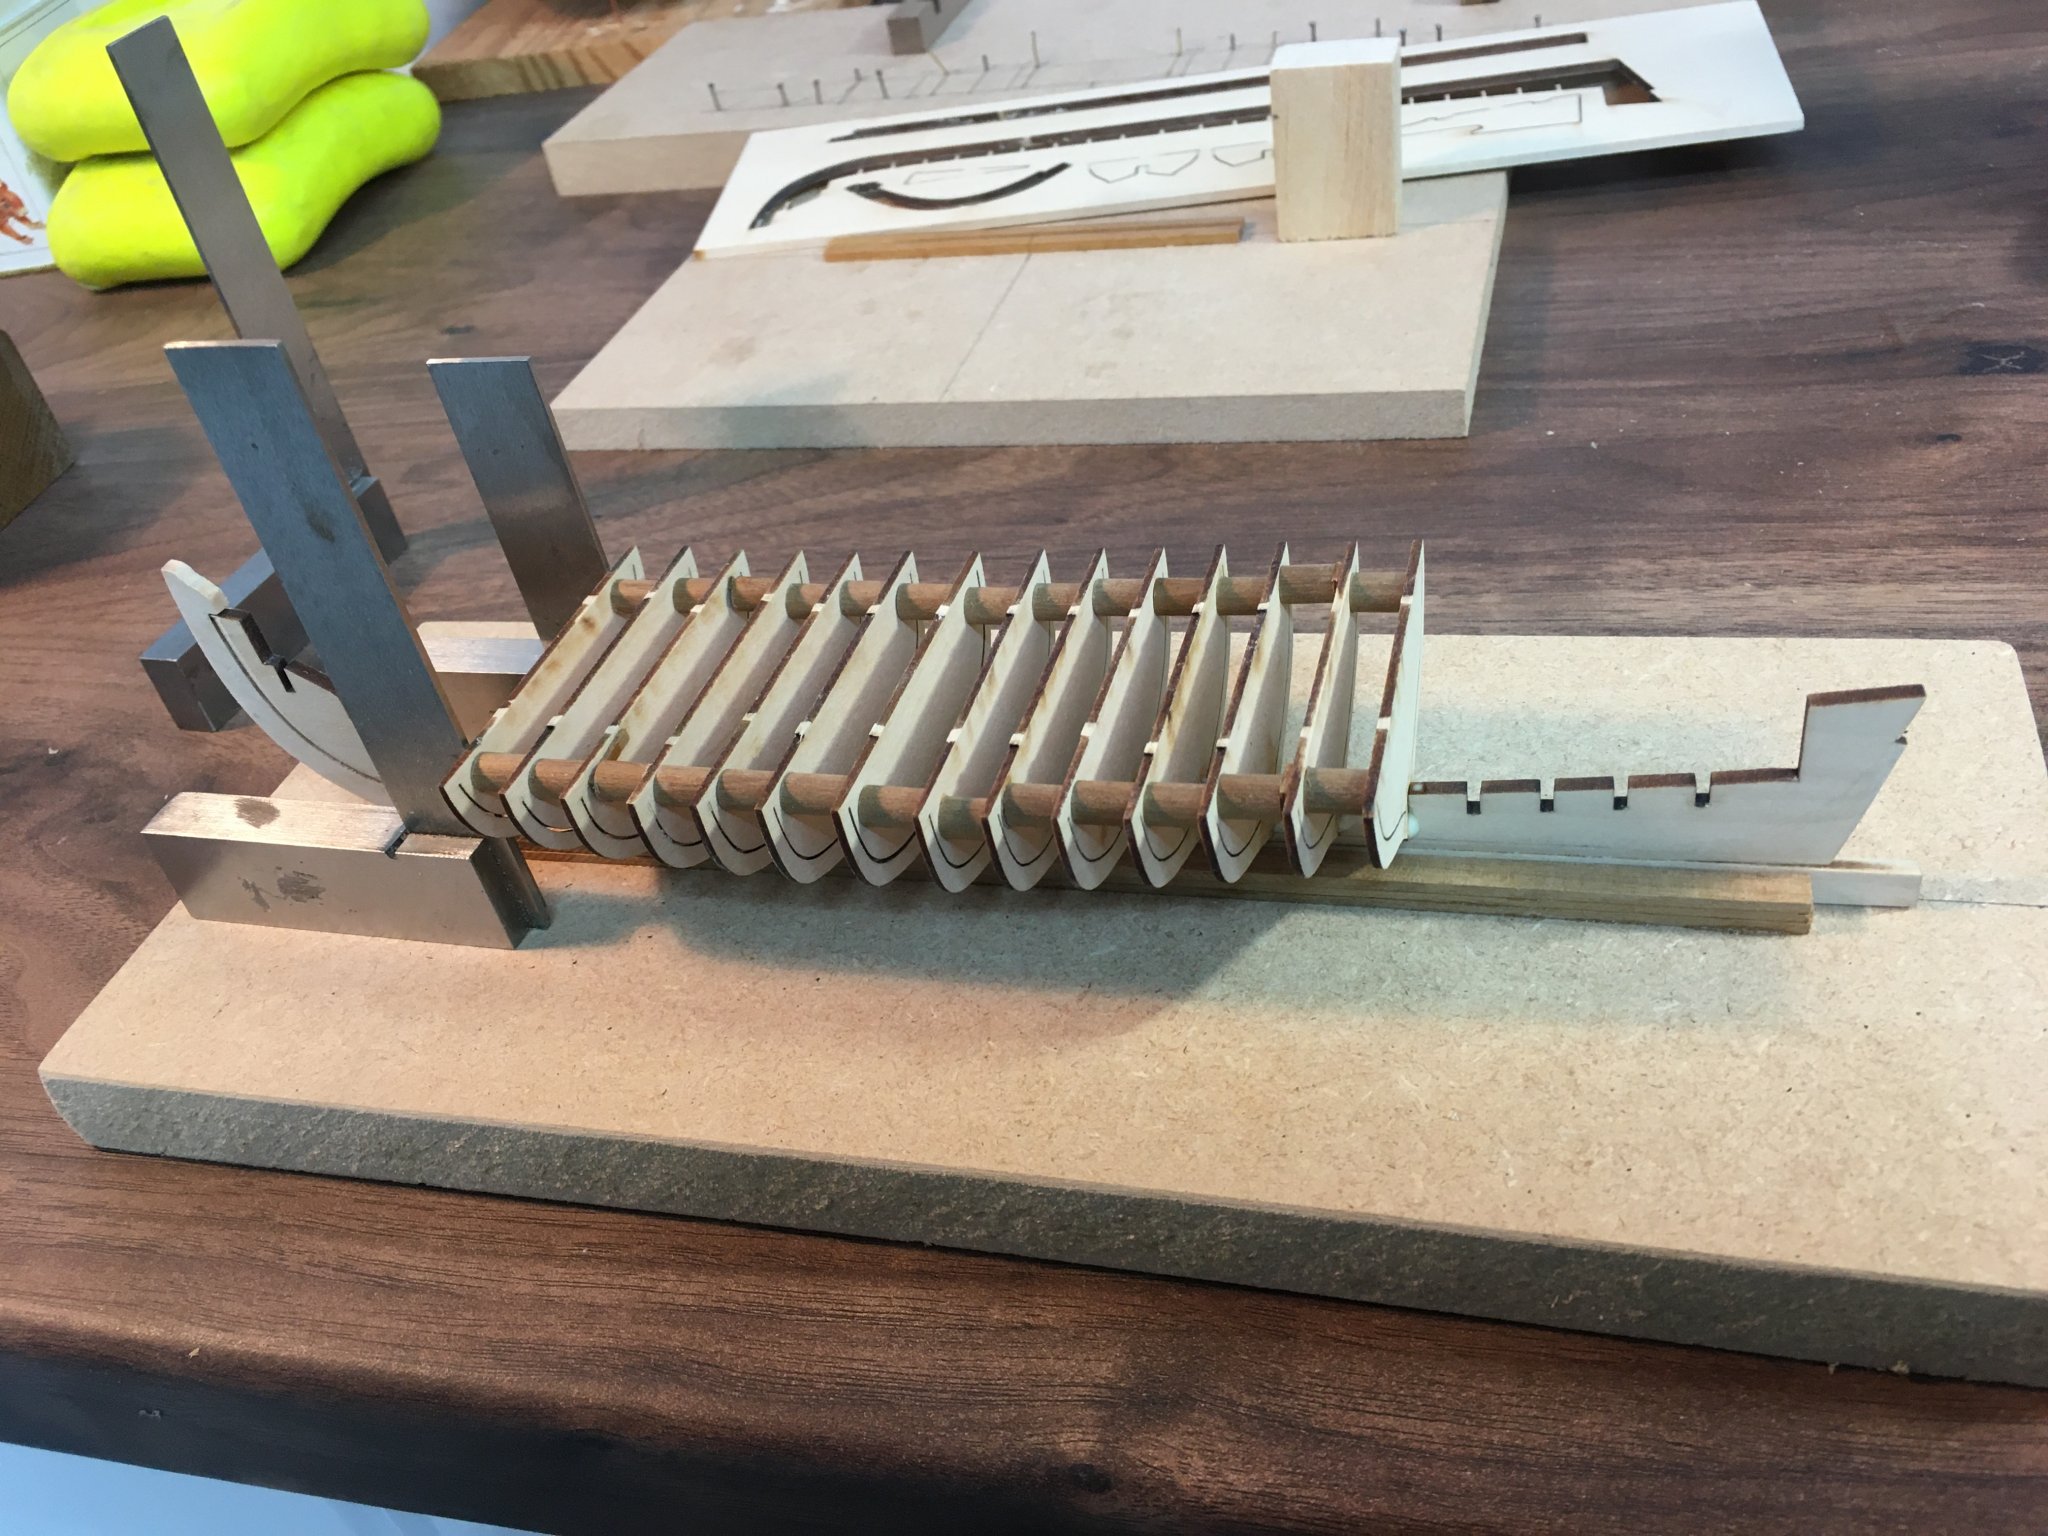
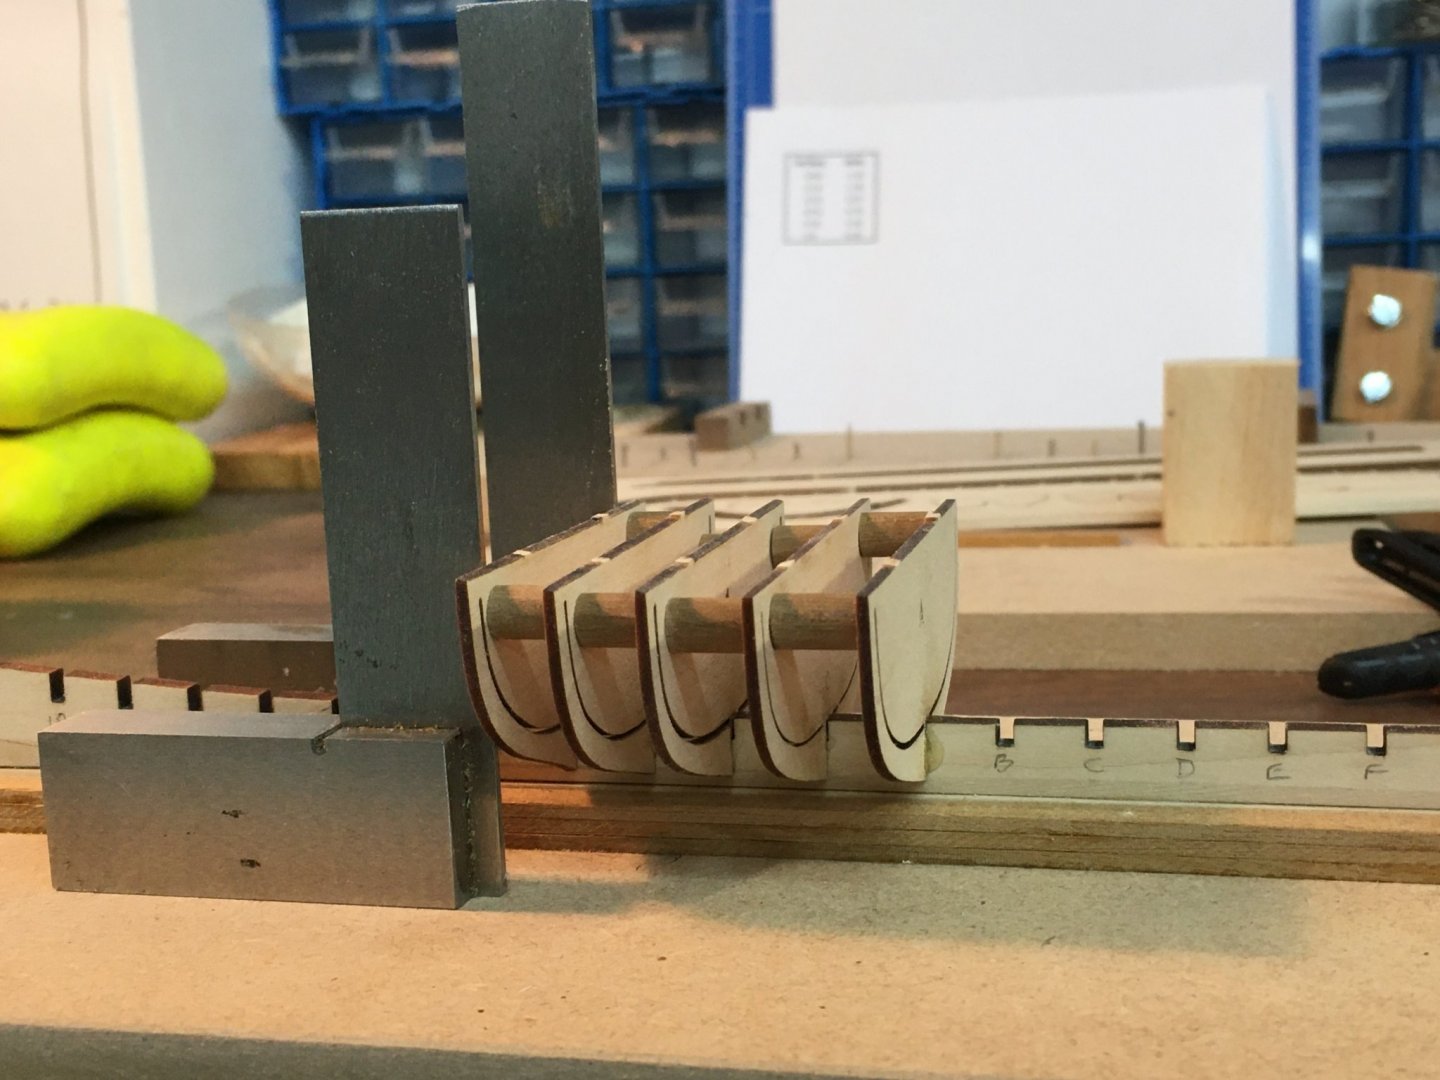
Thanks again Meddo. I hadn't realised you'd finished the pinnace - it's not marked 'finished' in the Quick-find Index - so I've only just now looked through your log. I'm very impressed - I especially like your deeper shade of red. Fitting the frames went quite smoothly. I think the fact that they were loose in the false keel wasn't a bad thing, as it made me take extra care to make sure everything was square as the glue dried. I'd read how fragile the frames can be during the fairing process so I decided to cut some spacers to fit between the frames - this also helped to keep everything square. I just glued one end of each spacer to make it easier to remove the central parts of each frame in due course. My thanks to MikeB4 for this tip. I've just spotted the smaller building board in the background of this shot - the one I used for the 1:48 version of the pinnace I mentioned in the first post. The last frames in place... ...and the lines are starting to look good. The last job today is gluing the filler pieces on either side at the bow. Four pieces are supplied in the kit but you only need two. Before I start fairing I'm going to sort out supports for the final model. If I have to drill into the keel I'd rather do it at this stage. That'll be tomorrow's job. Derek


- 77 replies
-
- 9
-
-
- model shipways
- pinnace
- (and 1 more)
-
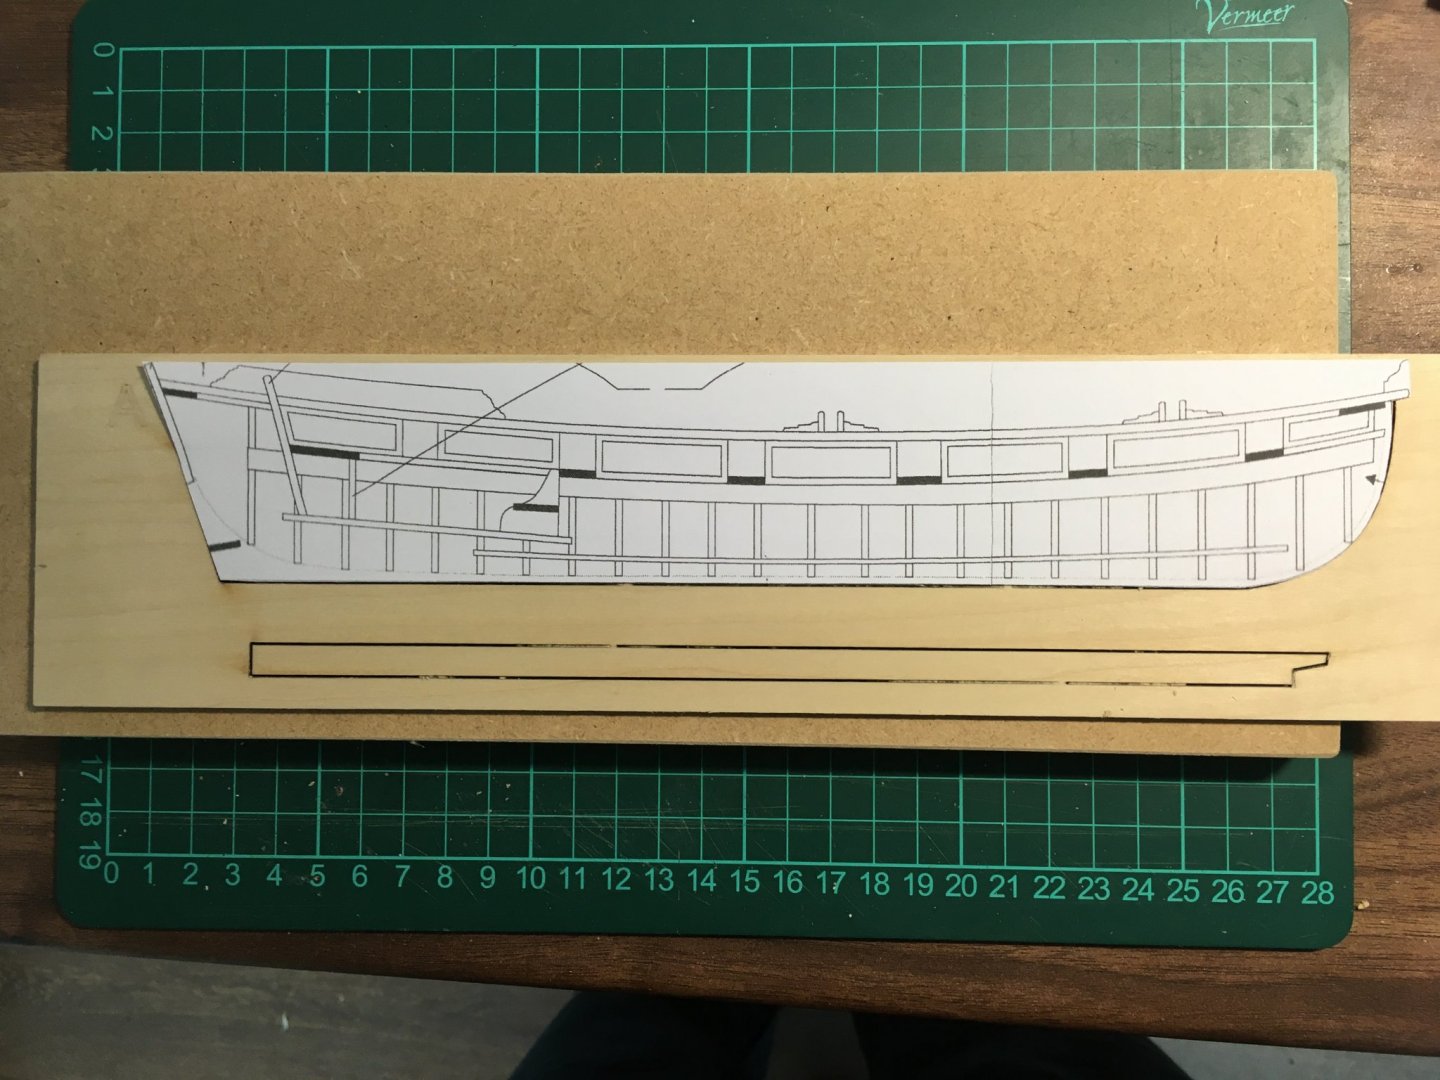
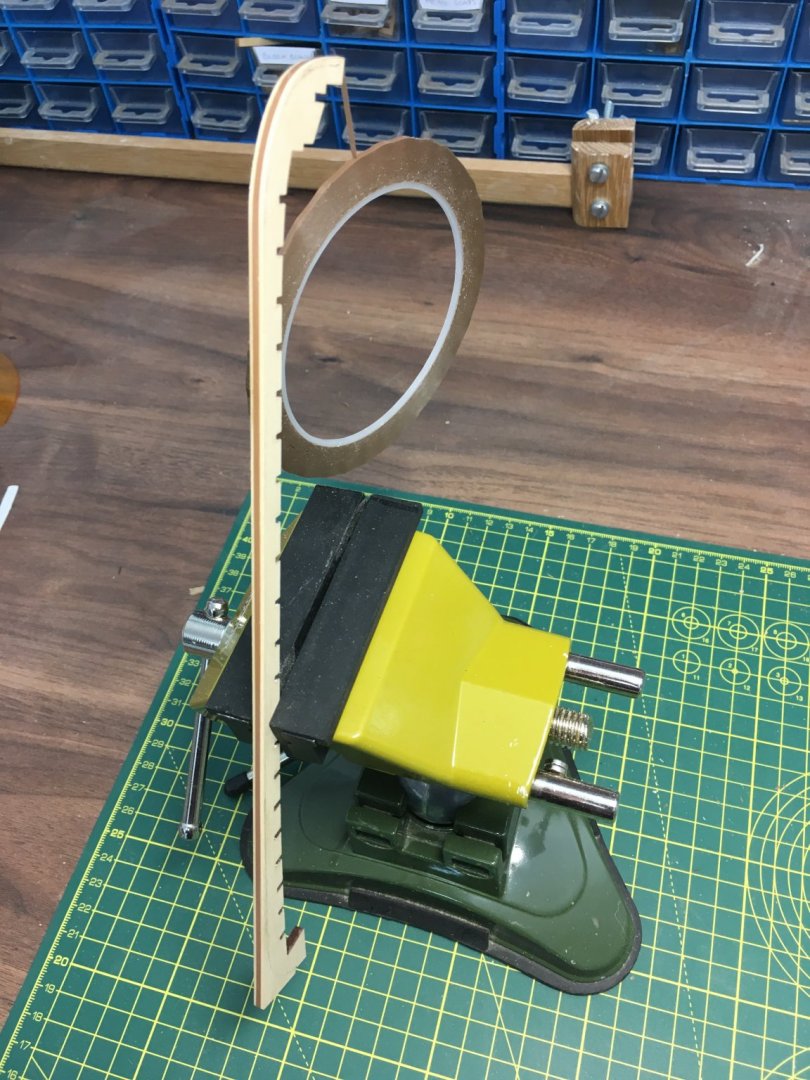
Thanks Meddo. As I start this build, I must say what a pleasure it is to see such clear, comprehensive and well-illustrated instructions, courtesy of Chuck Passaro. Having just completed two models by Panart and Corel I was struck by the contrast. I started by drawing the bearding line on the false keel. I laid a photocopy of the plan on the basswood sheet and used a pin to prick through the bearding line every few millimetres. I inverted the photocopy so I could use it on both sides of the keel. The next step was to taper the false keel below the bearding line. I followed the advice in the instruction manual and used a strip of 1/16" tape to act as a guide. This worked well, although I got a bit over-enthusiastic with the file in places! Hopefully this won't adversely impact the planking. The next step was gluing the stem and keel, both fairly straightforward operations provided you keep everything flat and in line. This is especially important as the edge of the false keel that you are gluing has been reduced to half its previous width. Next, I dry fitted the frames. To my surprise these were quite loose. Based on the instructions and other pinnace logs I had expected them to be tight. I hadn't sanded the slots and when I miked them they were slightly wider than the components meant to fit into them. I can only assume the manufacturer has slightly altered the slots in recent times. Just means I'll have to be extra careful in fitting the frames.


- 77 replies
-
- 8
-
-
- model shipways
- pinnace
- (and 1 more)
-
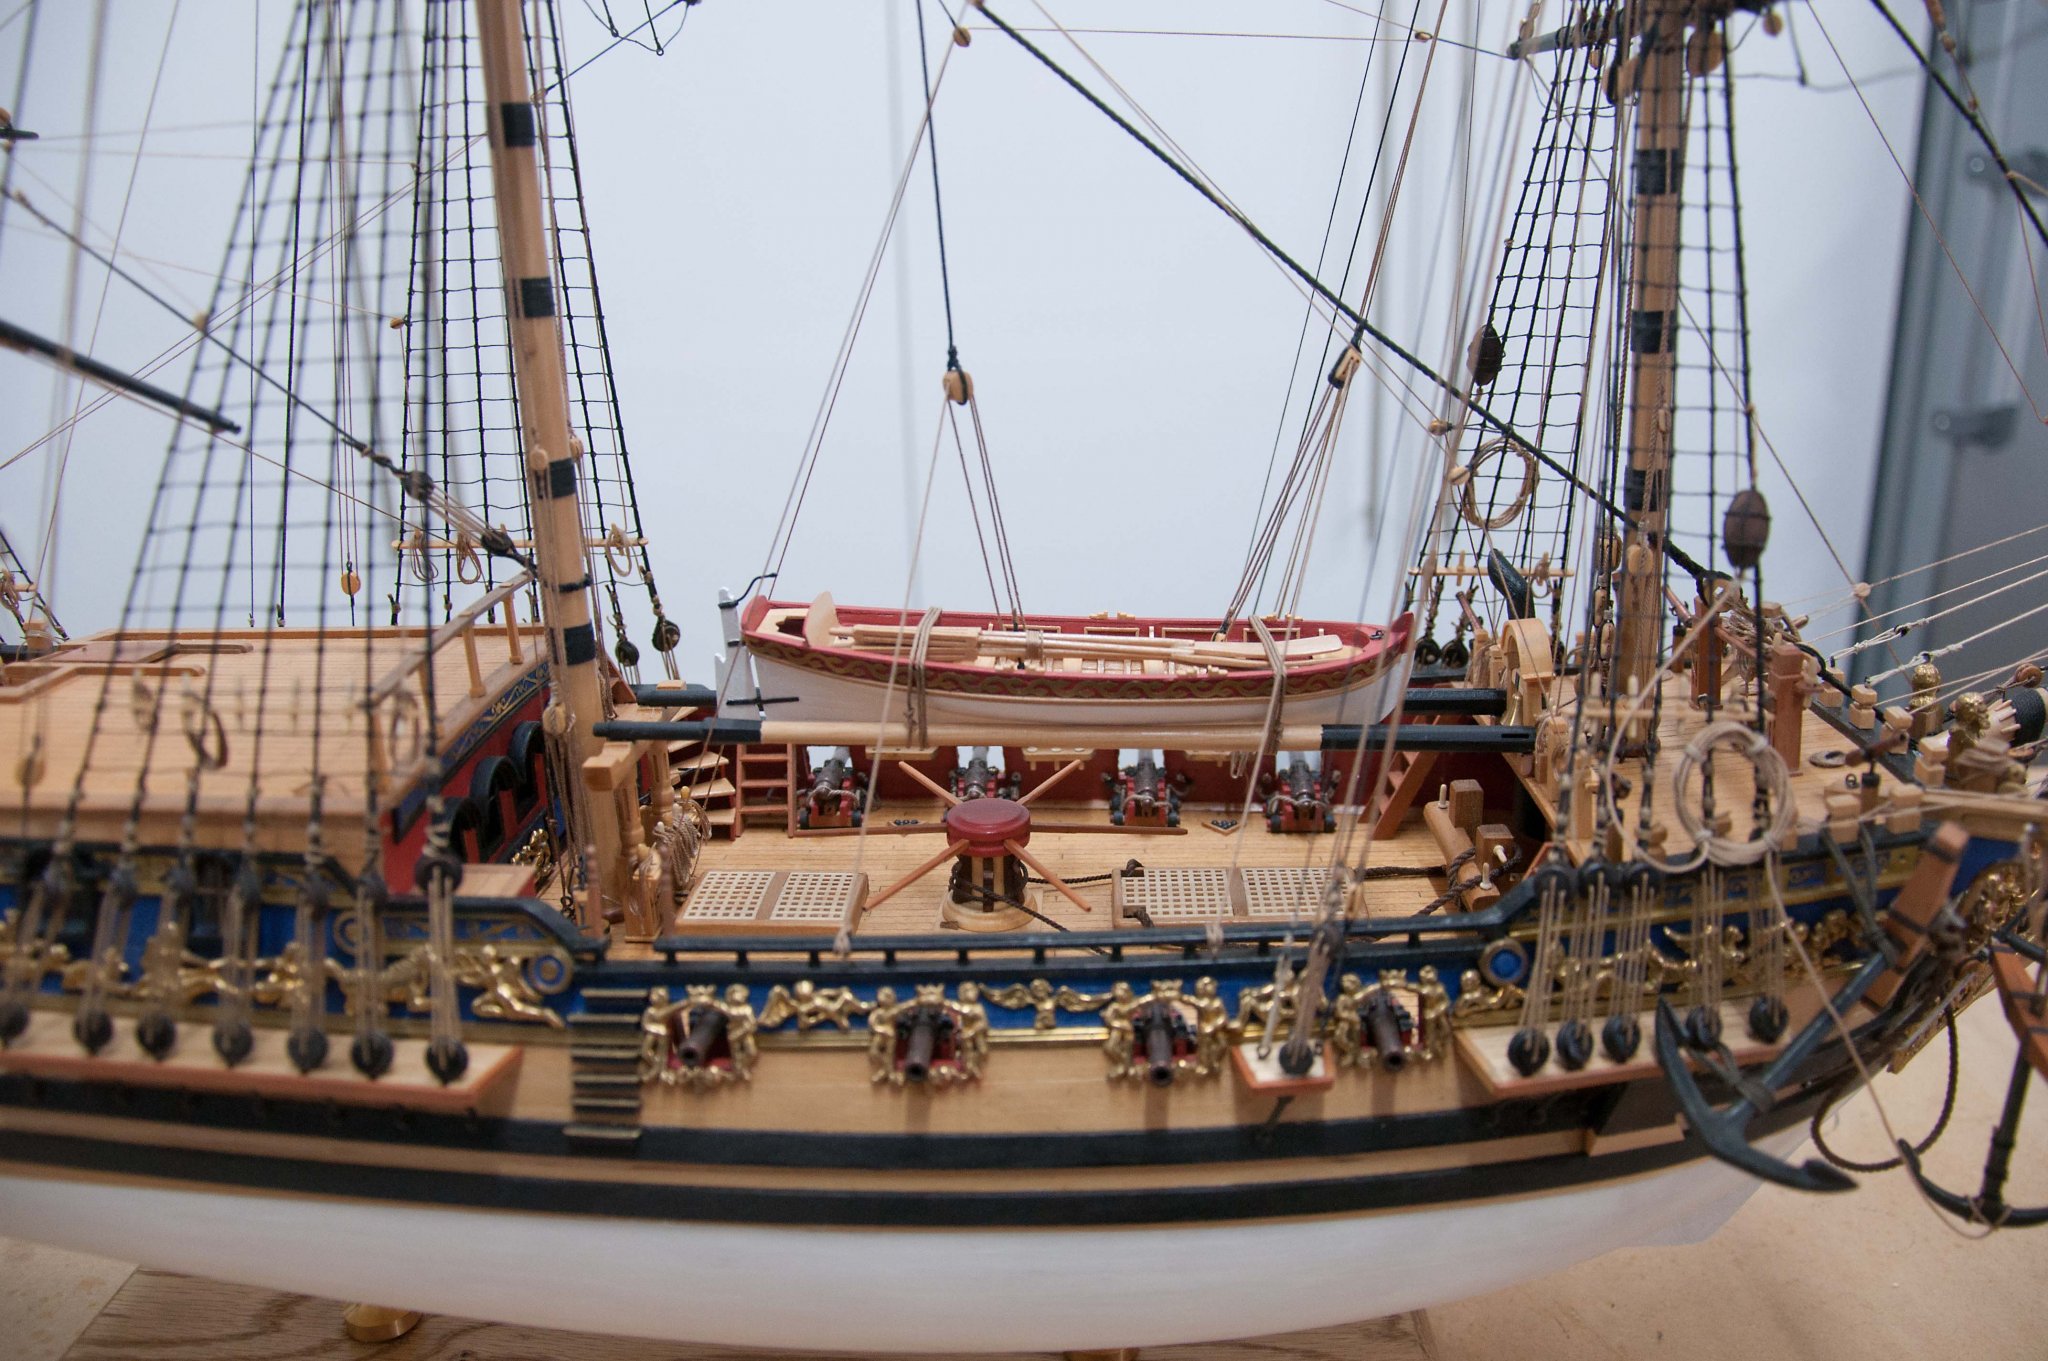
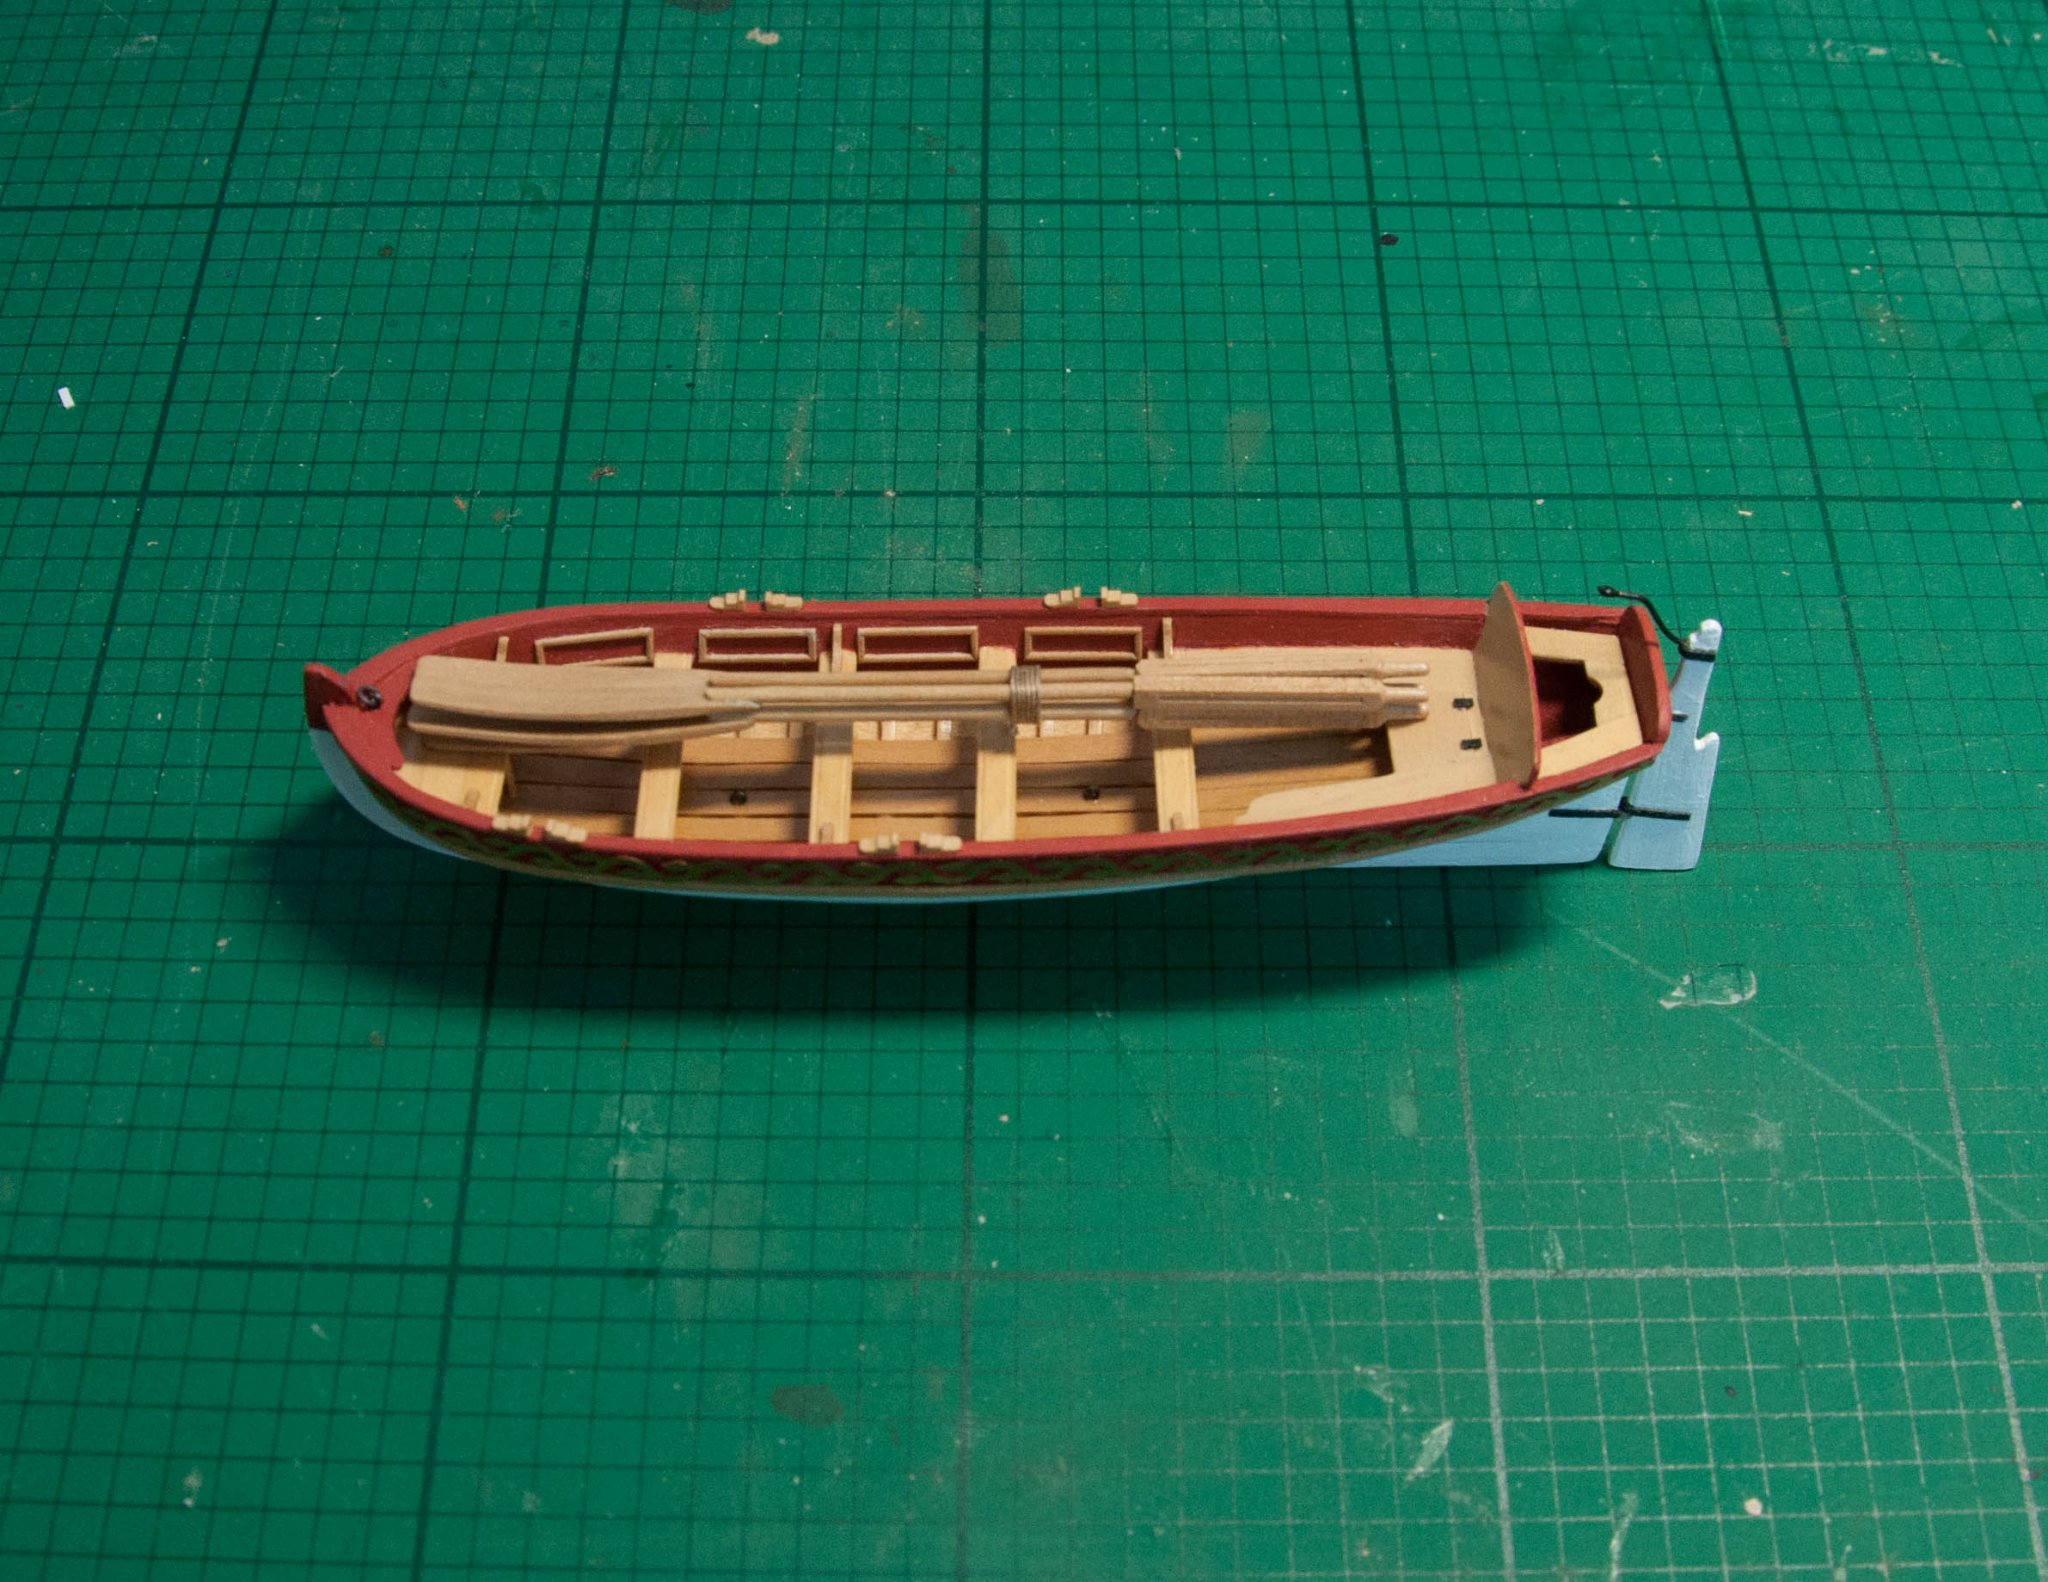
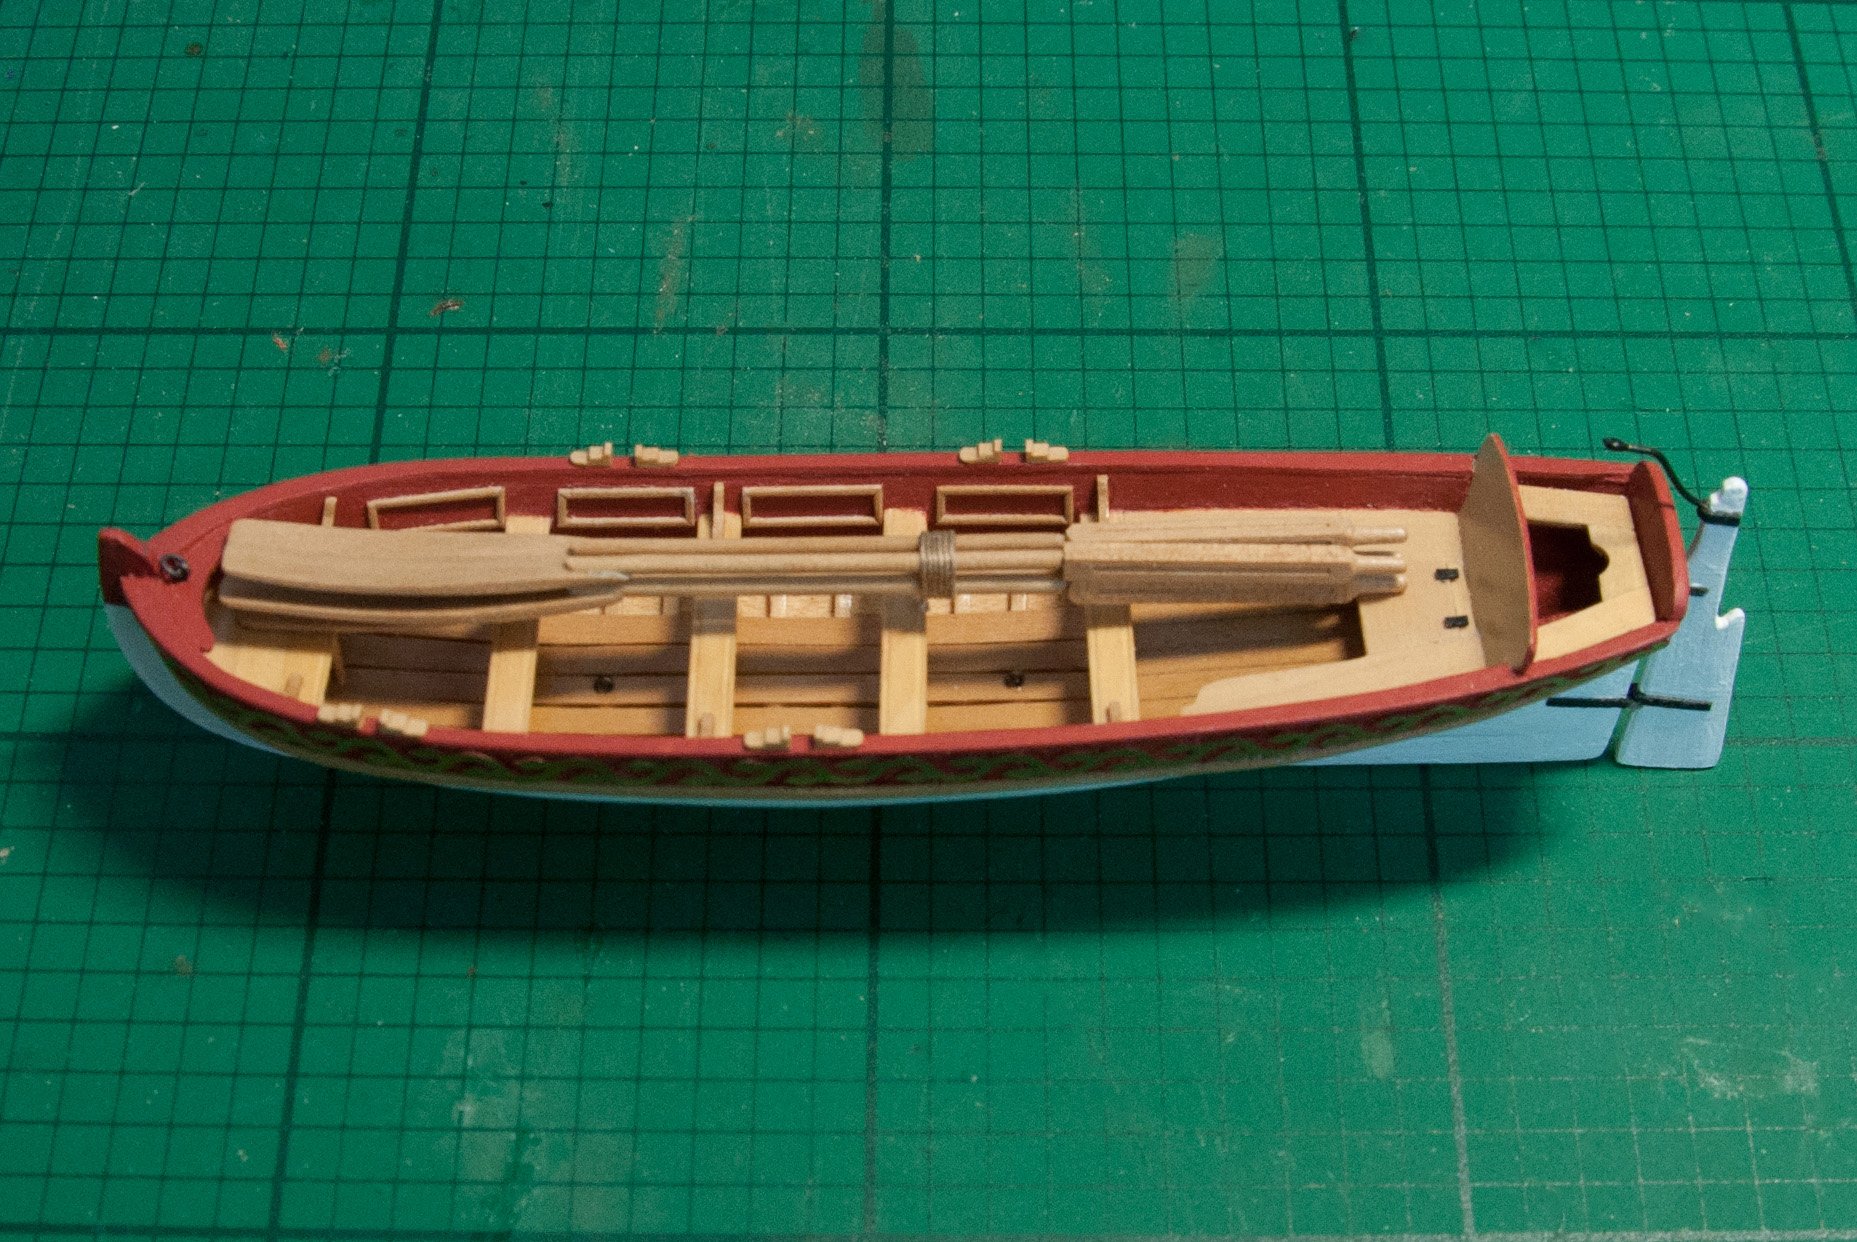
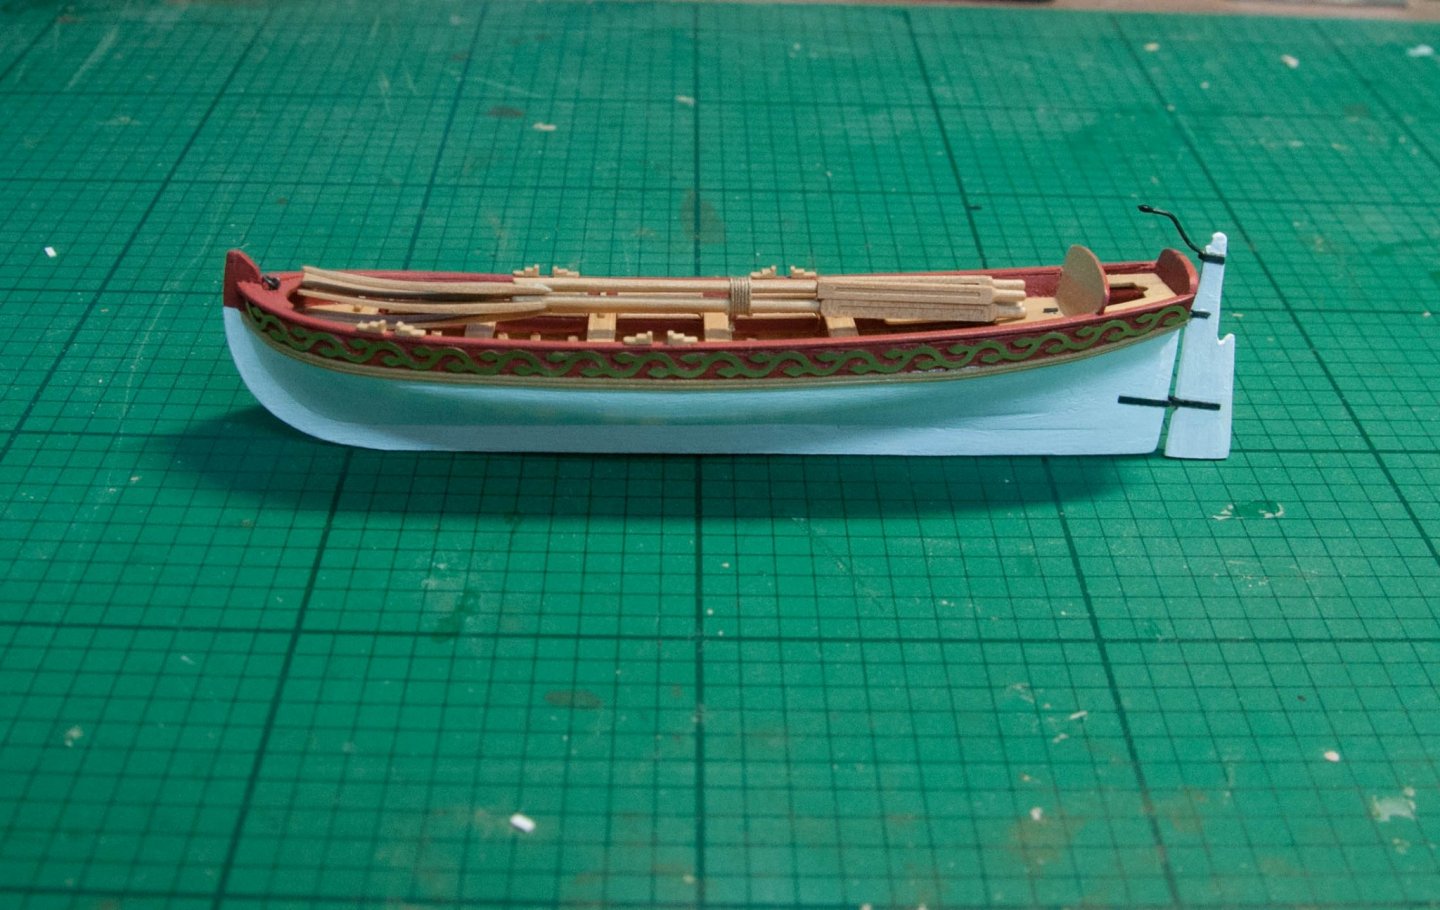
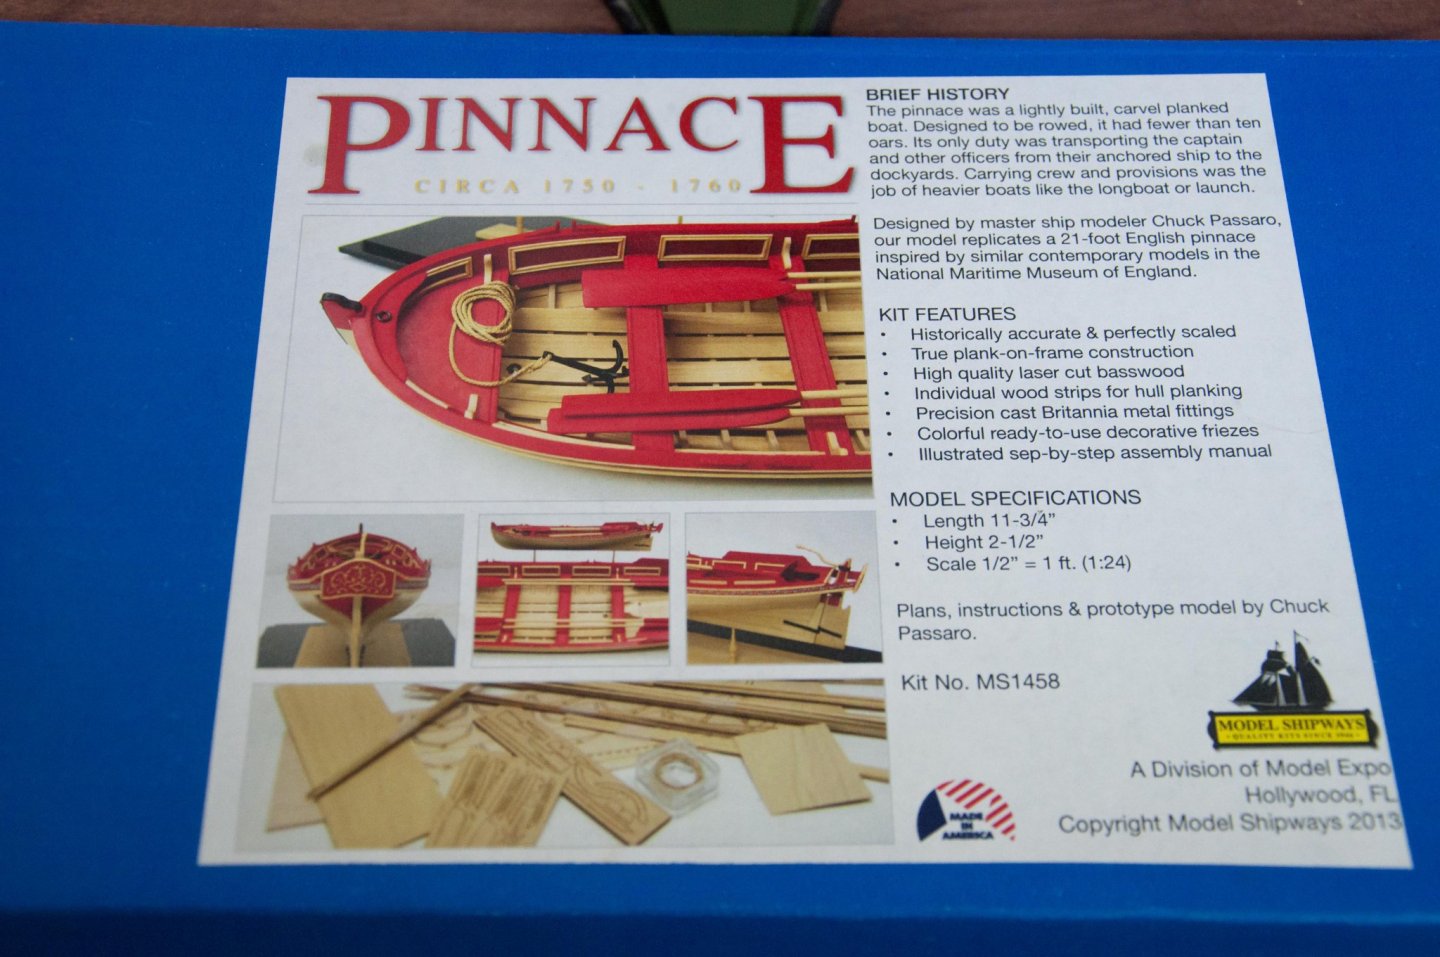
This kit wasn’t planned. I was struggling to find a suitable ship’s boat for my Royal Caroline when I came across Blue Ensign’s excellent Pegasus build log. B.E. based his boat on Model Shipway’s Pinnace, scaling down the plans to his smaller scale. I decided to do the same. I was pleased with the result, and am looking forward to completing the kit as intended. I debated whether or not to start a log – there are already several very good Pinnace logs on the forum and I wasn’t sure I would be able to add anything useful. However I decided that logs aren’t just about showcasing advanced skills, they’re also about those of us with more modest abilities learning as we go, and especially learning from our mistakes and sharing those experiences. I scratch built the small version from boxwood, but for this model I plan to use the supplied timber for the frames, keel, stem and stern post then mill my own planks and internal fittings. The other decision I've made in advance is to leave out the rather strange extension piece at the stern. As the original model and plans were by Chuck Passaro I'm sure this extension is historically accurate, however I just find it odd. I'm sure a practically-minded captain would have drawn the line at such a fragile and seemingly useless piece of decoration! I left it out on the Caroline build and I liked the result so I'll do the same here. Anyway, I'm looking forward to a comparatively short project and my first build log.


- 77 replies
-
- 10
-
-
- model shipways
- pinnace
- (and 1 more)
-
...and the preface on page 12, where the author thanks Captain Paasch for supplying the engravings. (Great find Bruce)
-
Thanks Chuck, great videos. Just out of curiosity, I wondered why you have switched from using hot air (which I saw you using to good effect in a previous video) to an iron? Derek
-
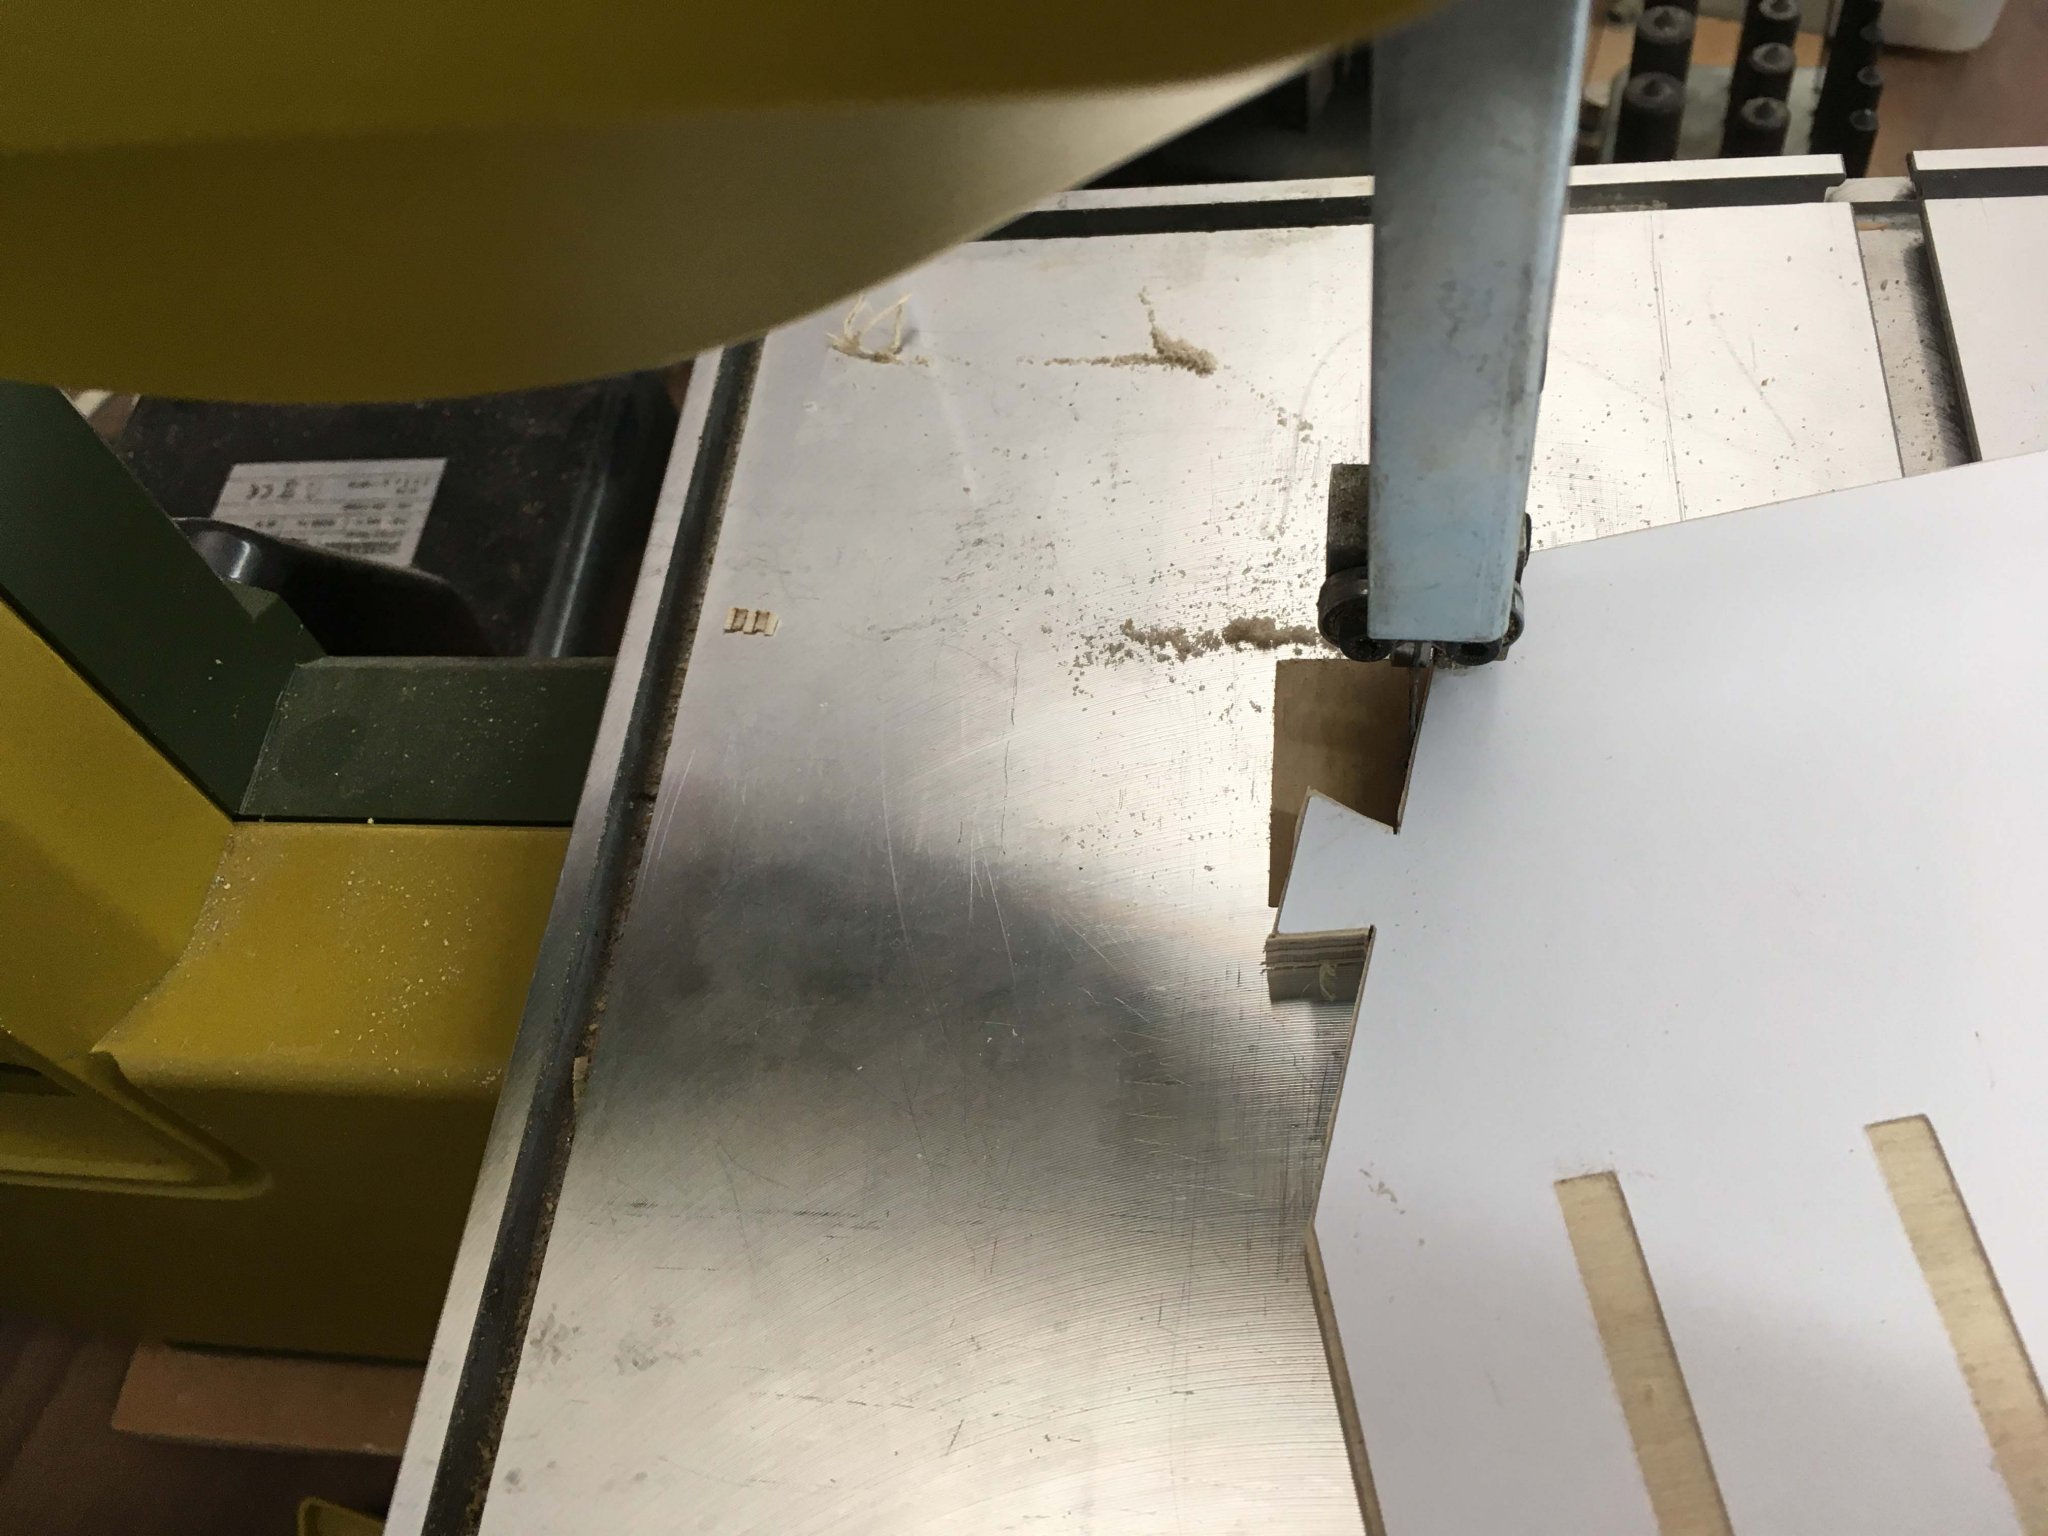
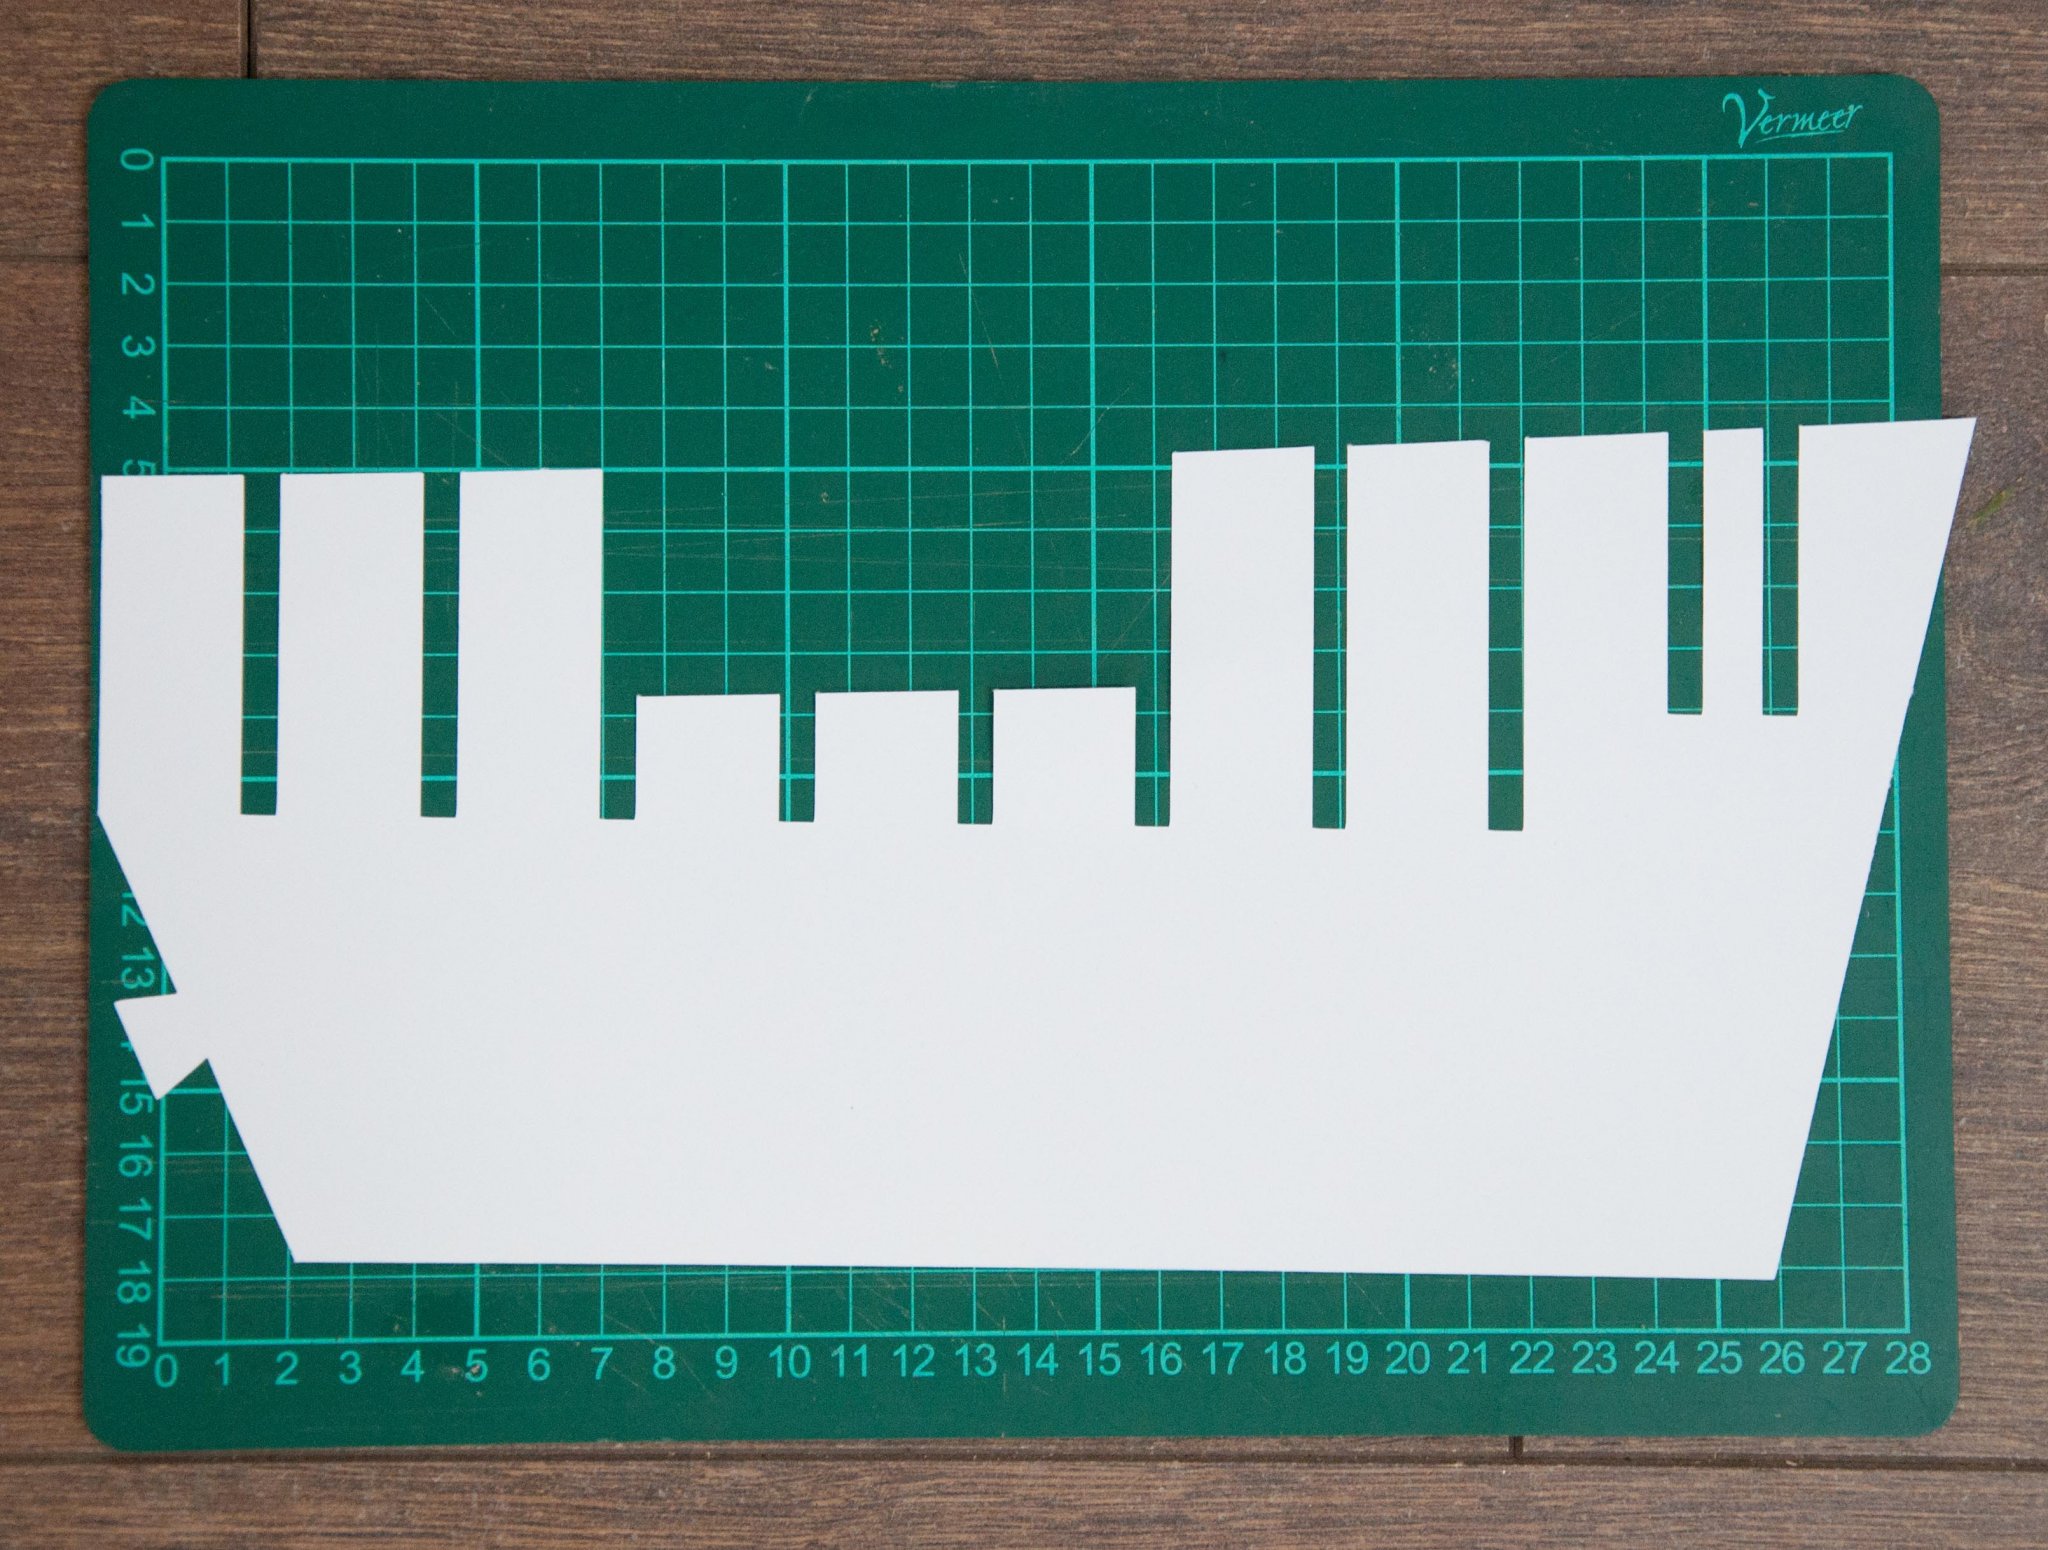
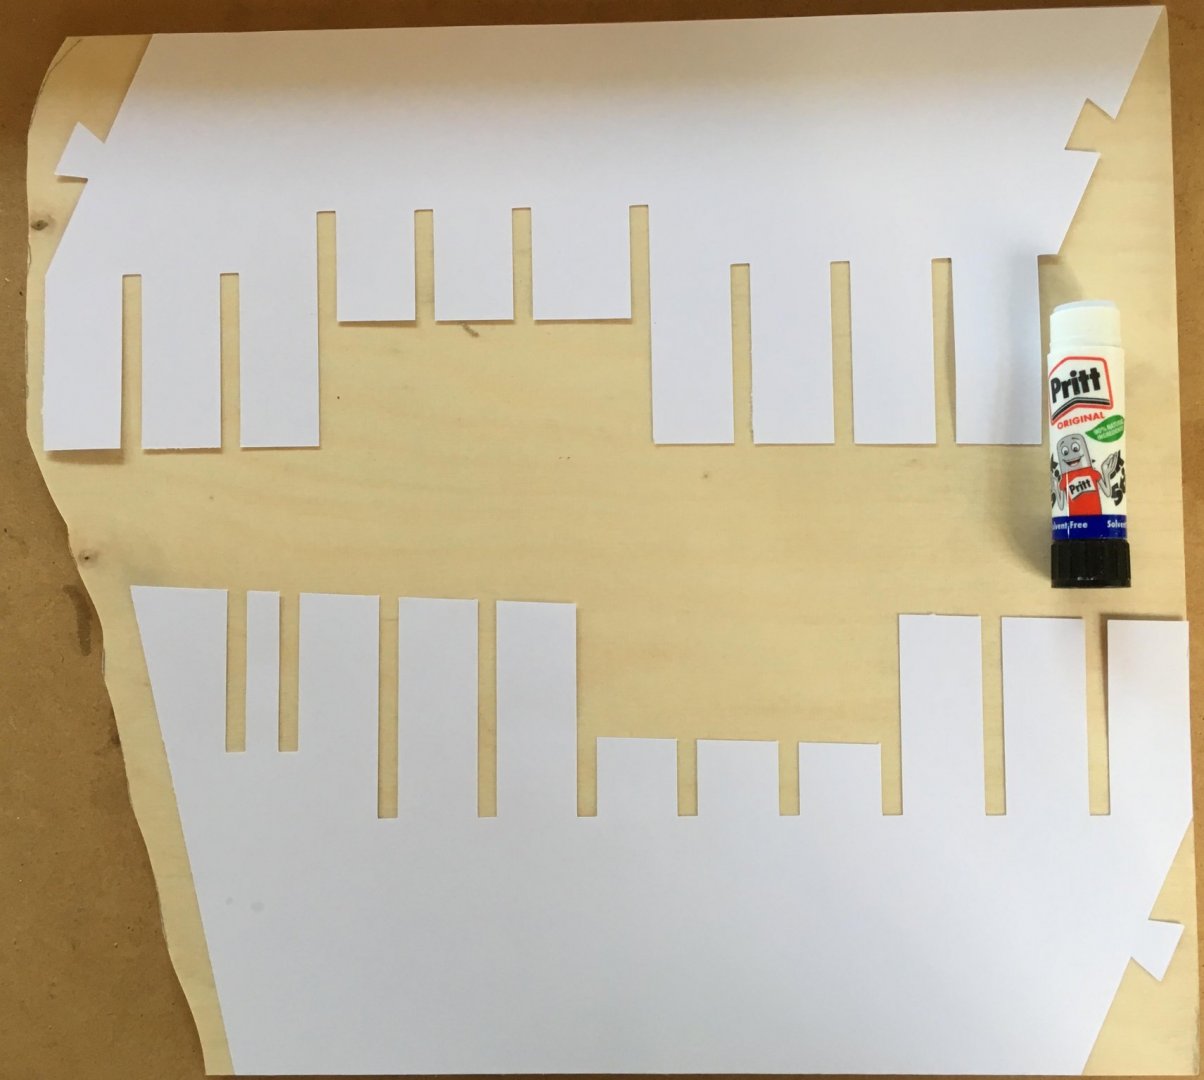
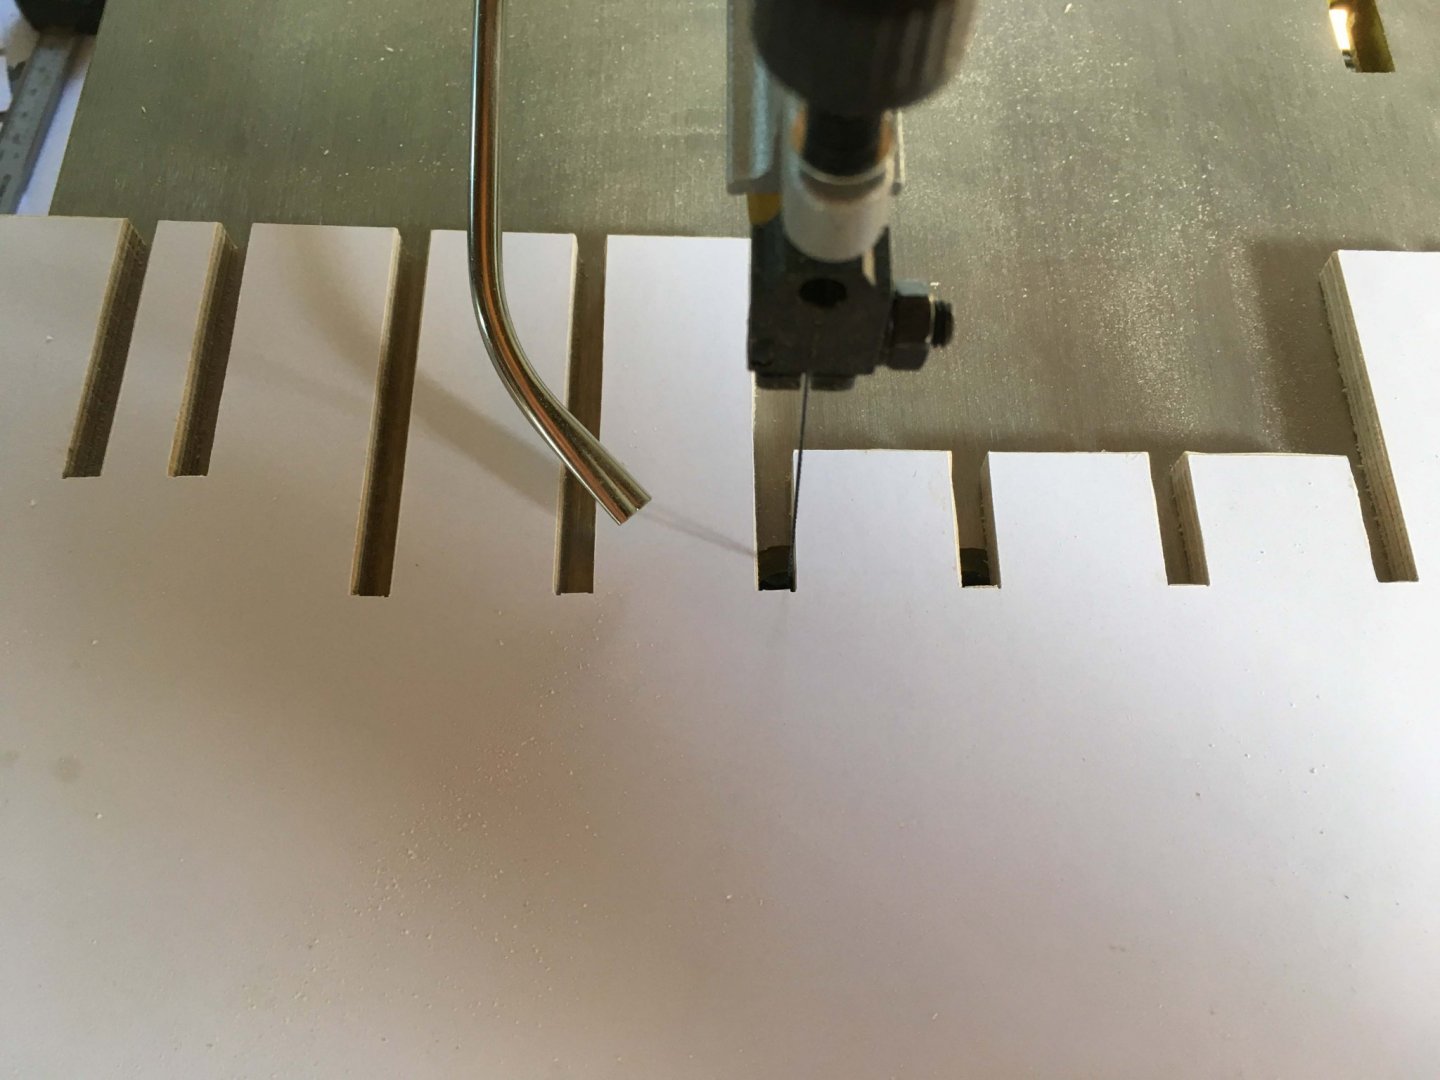
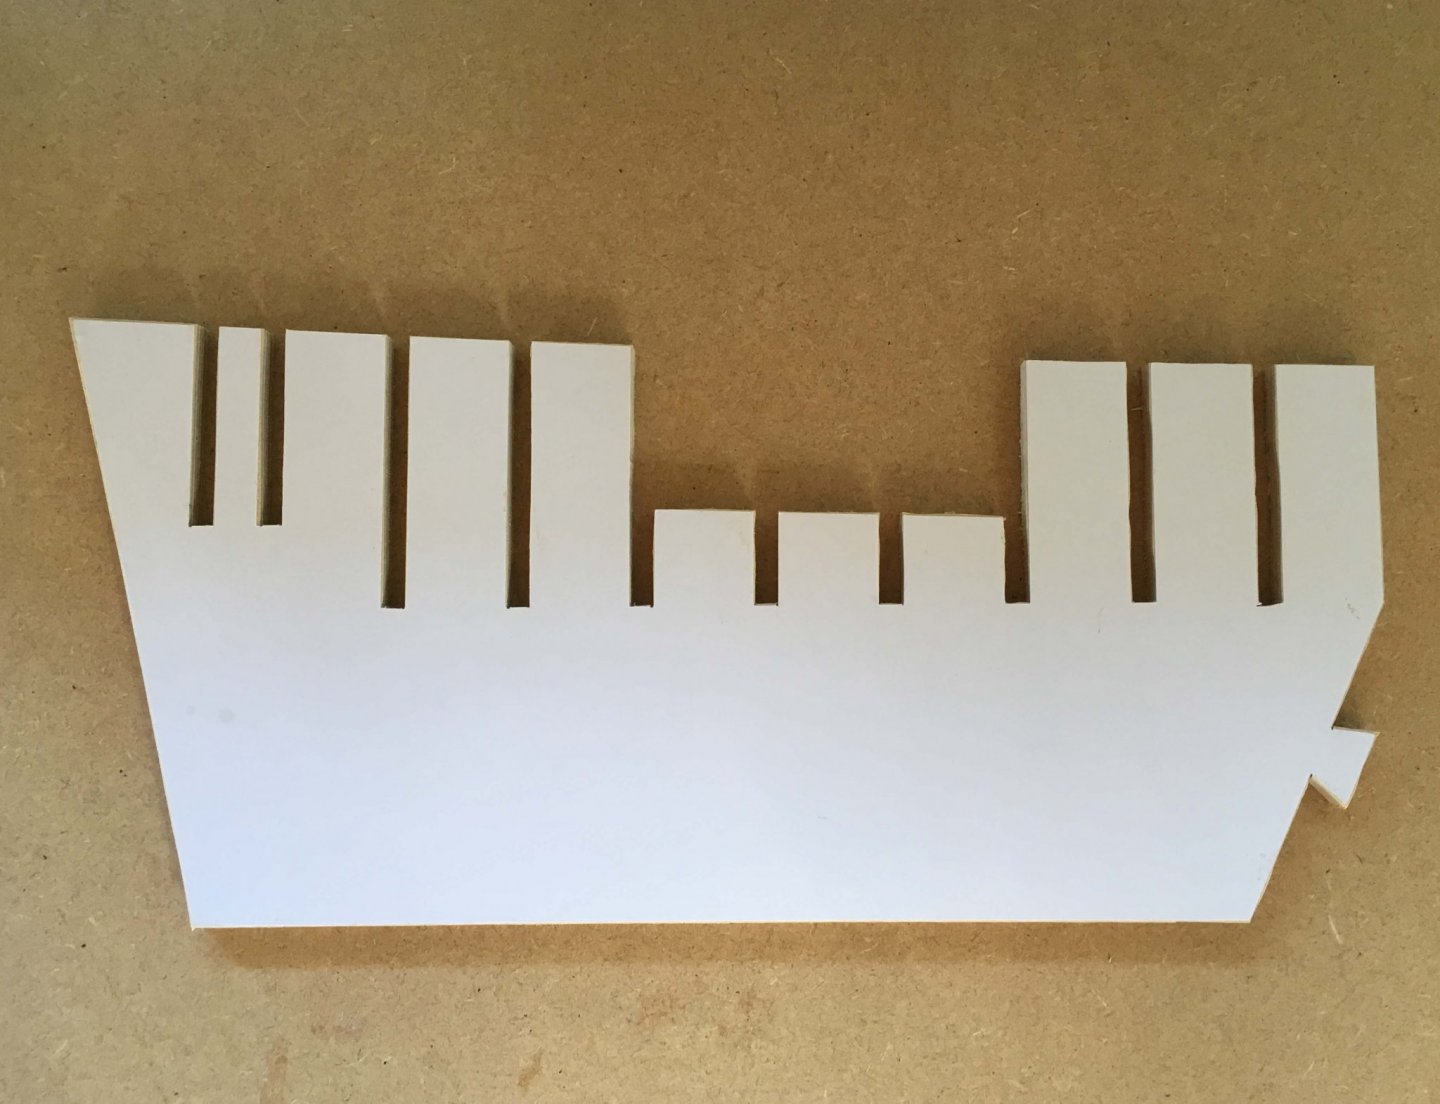
Couple of weeks off visiting family, so now I've finally taken the plunge and started making sawdust. My wife's help in cutting out the templates with her scan 'n cut machine certainly makes it easy to juggle the shapes around and minimise wastage. The pritt stick worked well in sticking the paper (I hadn't used it yet in this photo!). Rough cuts on the bandsaw followed by trickier work on the scroll saw: I haven't sanded the edges yet, and I won't finish the slots until I'm ready to fit the frames, but I'm quite pleased with this first attempt. It's given me the incentive to press on slowly with this preliminary work whilst I finish other projects. Derek

-
Proxxon jigsaw or a scroll saw
DelF replied to Edwardkenway's topic in Modeling tools and Workshop Equipment
Blue Ensign did a good review of the mid-range Proxxon scroll saw which you may find helpful: https://modelshipworld.com/topic/5865-proxxon-dsh-2-speed-scroll-saw-–-review/?do=reportComment&comment=168965 Derek -
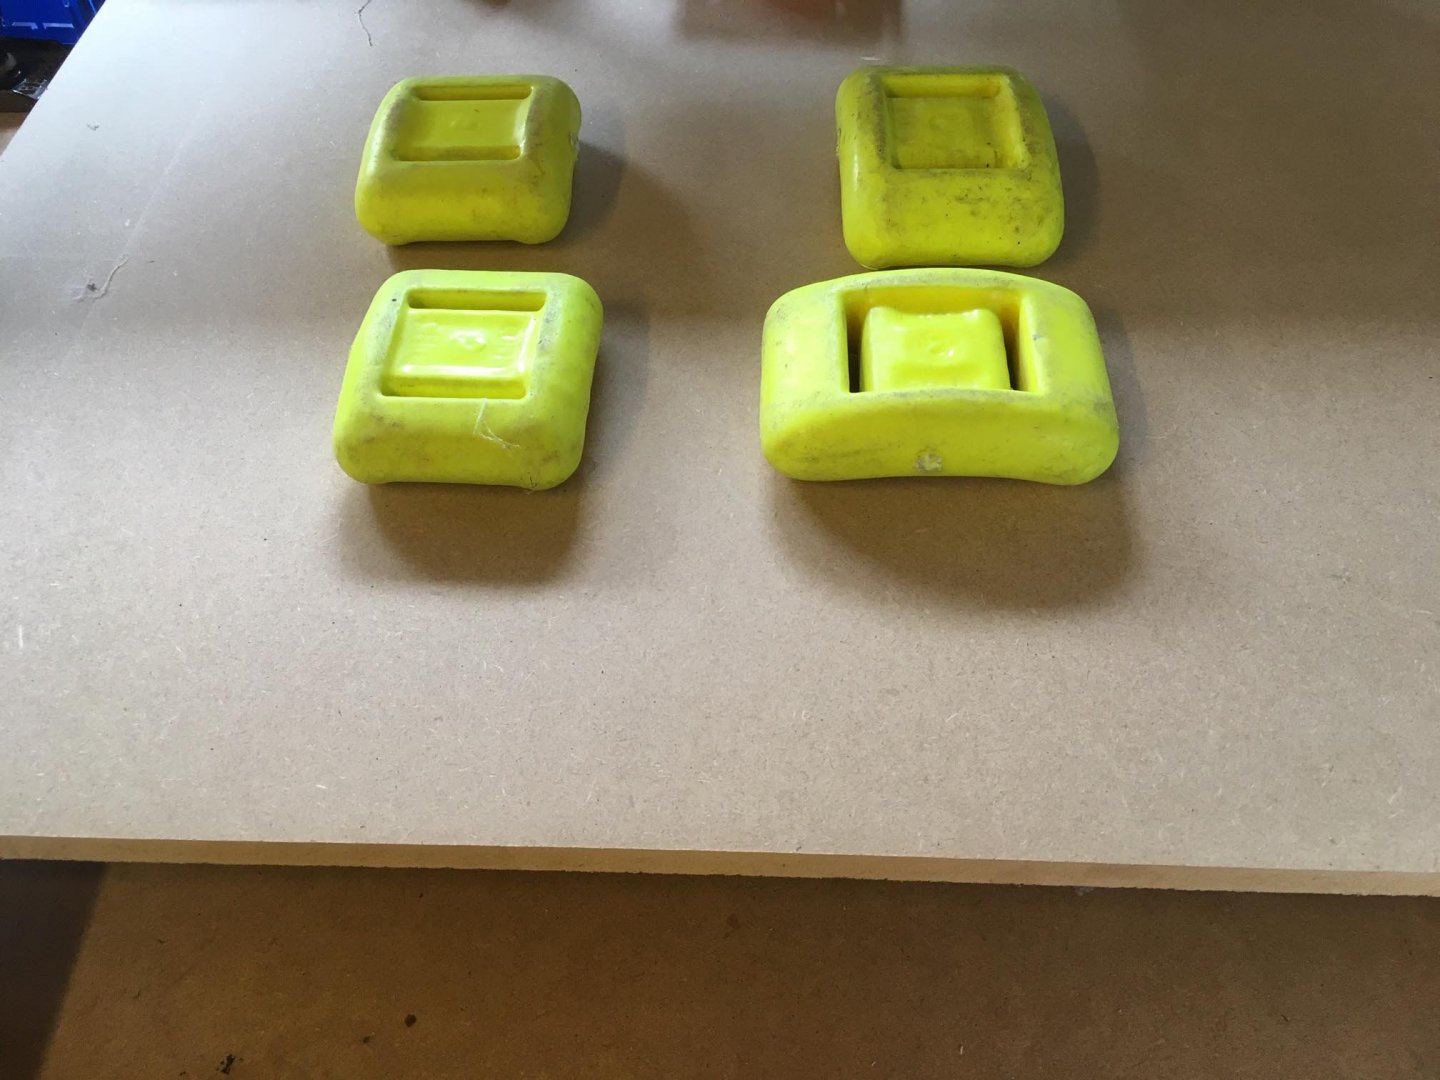
The plywood arrived today. Although it was well packaged, the light ply was warped. As a first step I've put it under a heavy MDF sheet with the weights off my dive belt on top. If that doesn't work I'll have to try for some advice from the forum: Fingers crossed☹️! The birch ply looks OK, so I'm going to have a go at cutting out the false keel with the new scroll saw. Derek
-
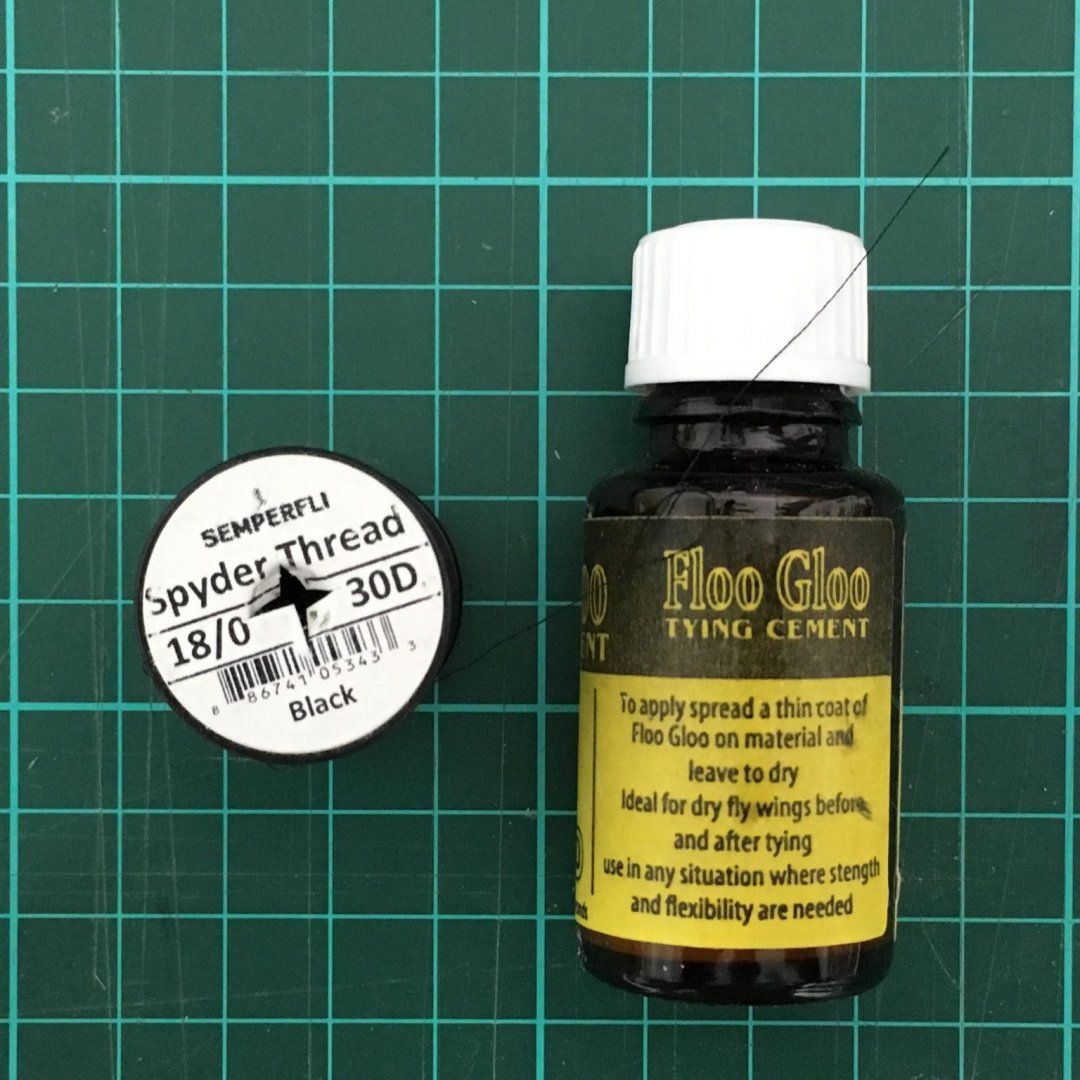
Here's the thread and glue I use, both from The Essential Fly: You can see a strand of the thread across the white bottle cap. According to my micrometer it's 0.03mm/.001" - roughly the diameter of thin human hair. Derek
-
I’ve found silk fly-tying thread works well. For clarity, that’s the stuff fly fishermen use to tie their lures and it can be obtained in a variety of gauges and colours including black and brown. The higher the gauge number, the finer the thread - 18/0 is the finest I’ve found. Fly fishing suppliers also sell a glue that sounds very similar to the jewellery product Dr PR mentioned in his earlier post. I’ve found this works well when used on seizings made with silk thread. Derek
-
I will go for the boxwood set, but probably not until I have finished other projects and can concentrate on the Winchelsea. Derek
-
The Proxxon scroll saw has arrived, and after setting it up and playing with it I've discovered it requires more skill than I'd realised! In between practising and watching assorted "Scroll sawing for Beginners" videos on Youtube I've decided not to wait until I've finished my other projects before starting on the Winchelsea. I figured if I start slowly, cutting out one or two frames per week, I'll build up my skills over time rather than trying to cut out all the components in one go. I've ordered a couple of spare sheets of plywood so if my early attempts are rubbish I can replace them. I've ordered birch ply for the false keel and light ply for the frames, as suggested by folk on the project - based on the rigidity and strength of the former and the easier sanding of the latter. As for timber, I've had to re-think using Alaskan yellow cedar. On further investigation (ie googling) it seems that most if not all sources in the UK are either boatyards or firms providing high-end cladding for buildings. In both cases the quantities and/or shipping charges are way too high for modelling. For example, the minimum delivery charge of £75 😲 quoted by one supplier would be OK if you were buying enough timber to build a full size boat, but not a three foot model! I was going to order a small sample piece from another boatyard until they tried to charge £21 for delivering a £9 plank. I suspect if I lived closer to a boatyard I might be able to explain my needs in person and negotiate something more sensible but I don't, so I've decided to fall back on boxwood. Exotic Hardwoods do a variety of sizes of sawn castello boxwood boards which I've found to be good quality in the past. For example I got all the masts and yards for my Caroline build out of a 13mm board and was very happy with the quality. Not quite as fine as English boxwood but a good substitute. I've ordered three boards in different sizes to get me started. Original Marquetry also do castello boxwood in a few thinner sizes. For example, I used their 1.5mm sawn veneer to make the frames for the pinnace I mentioned in an earlier post. I'm off to play practice with the scroll saw again! Derek
-
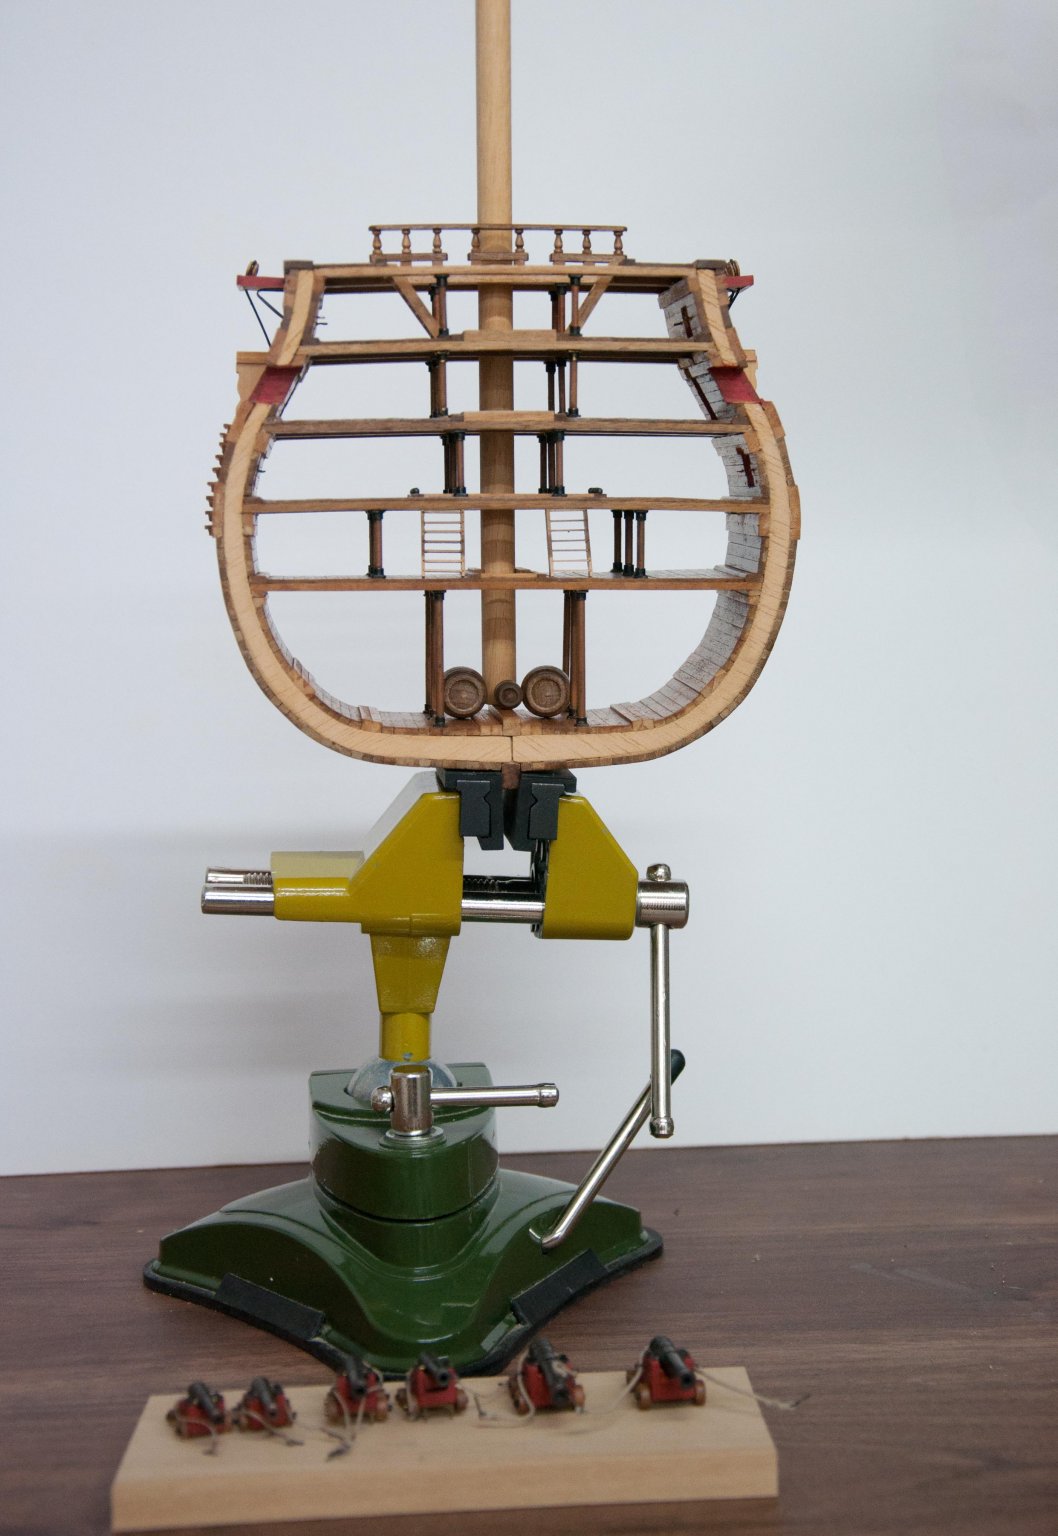
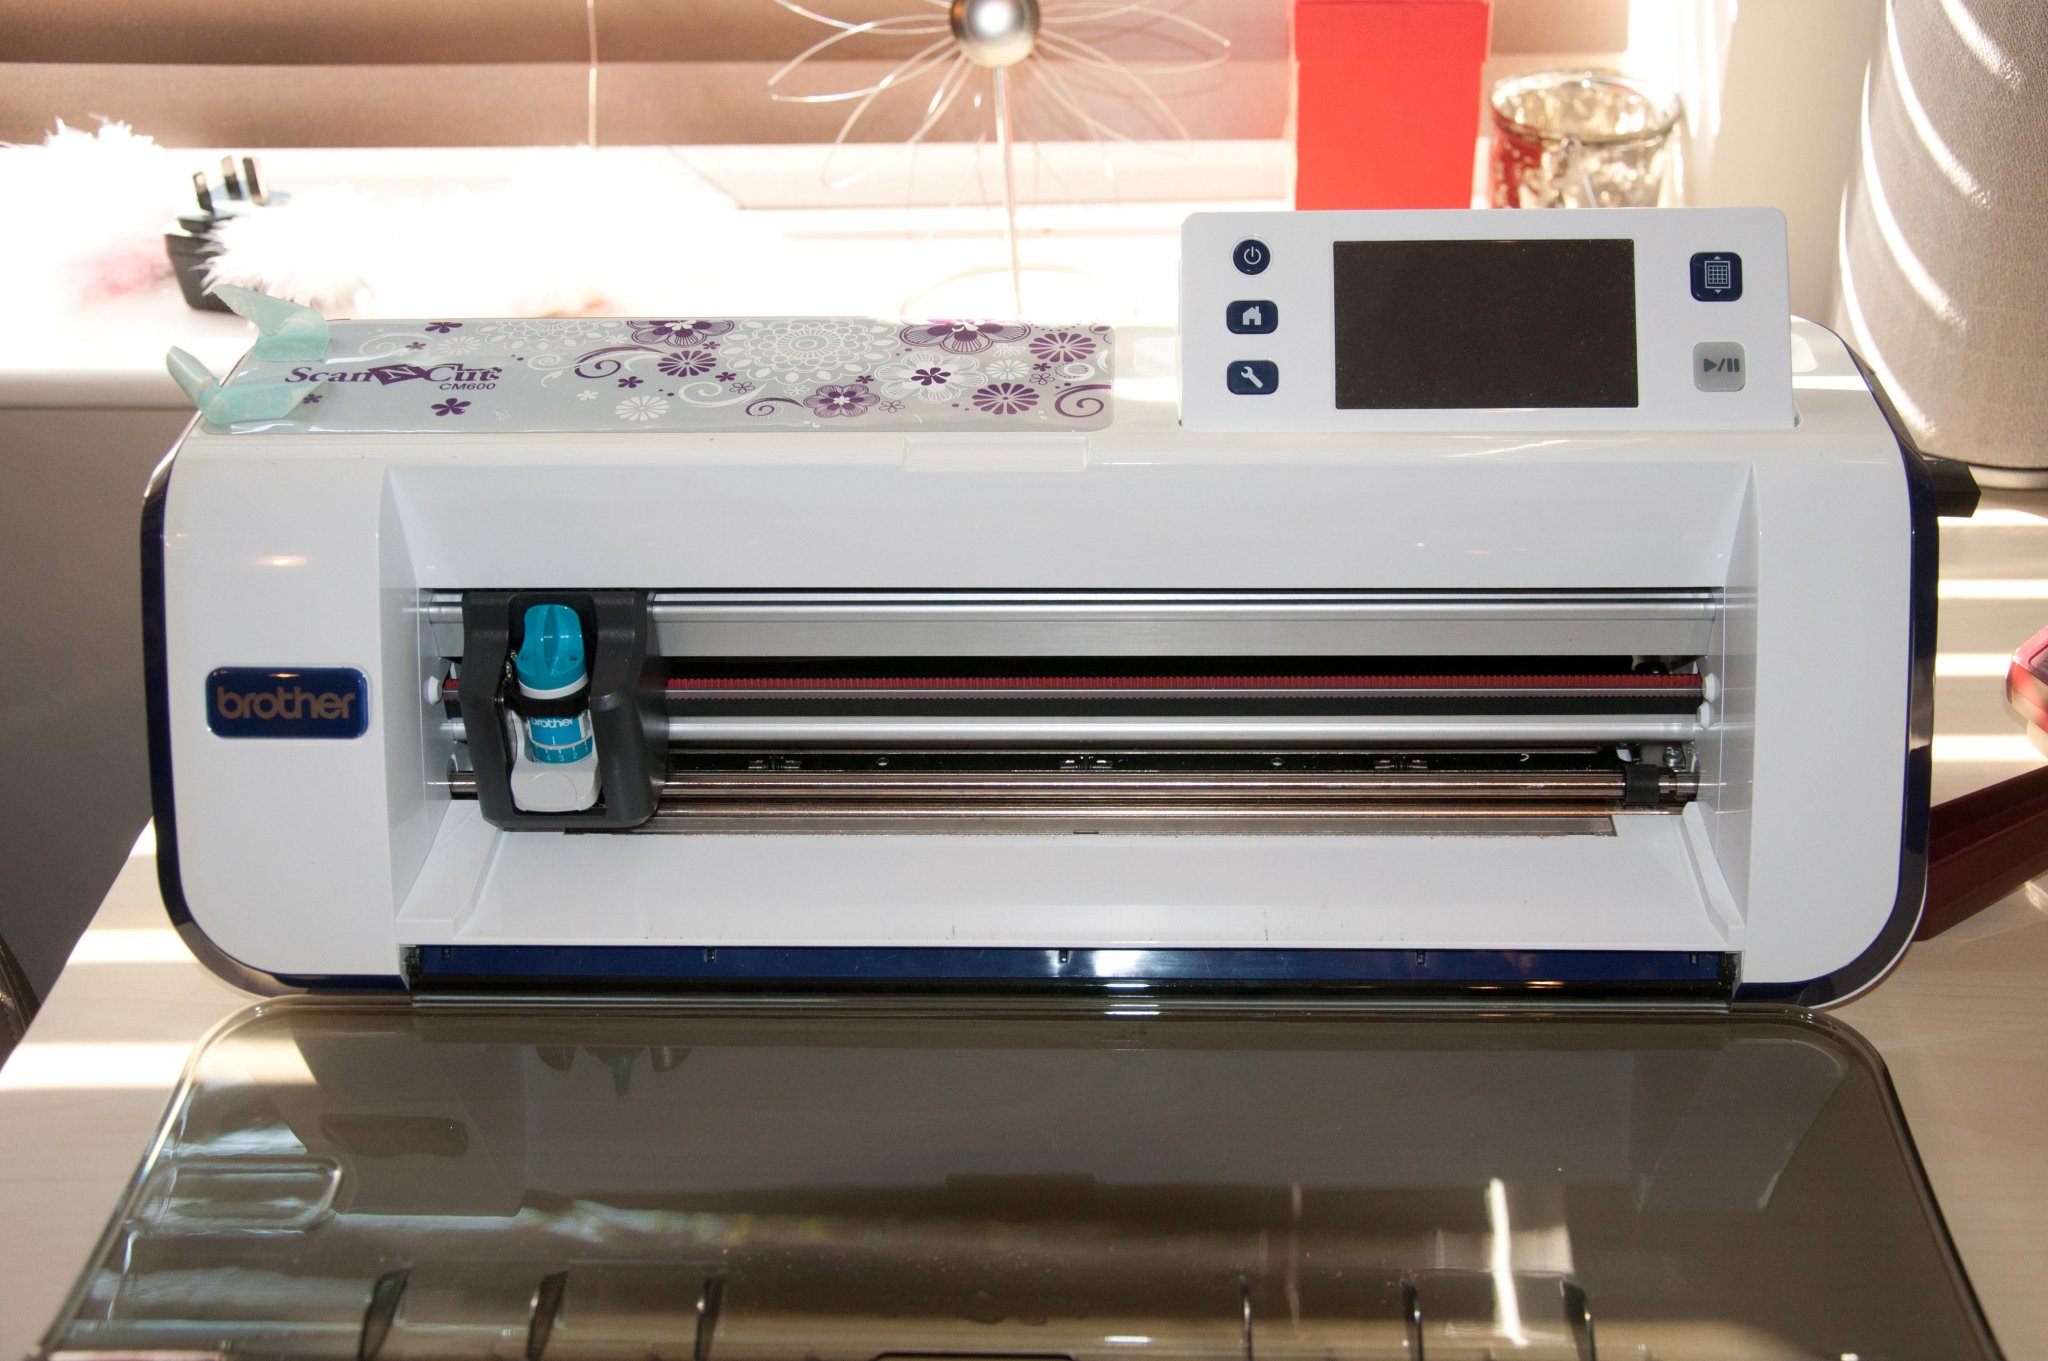
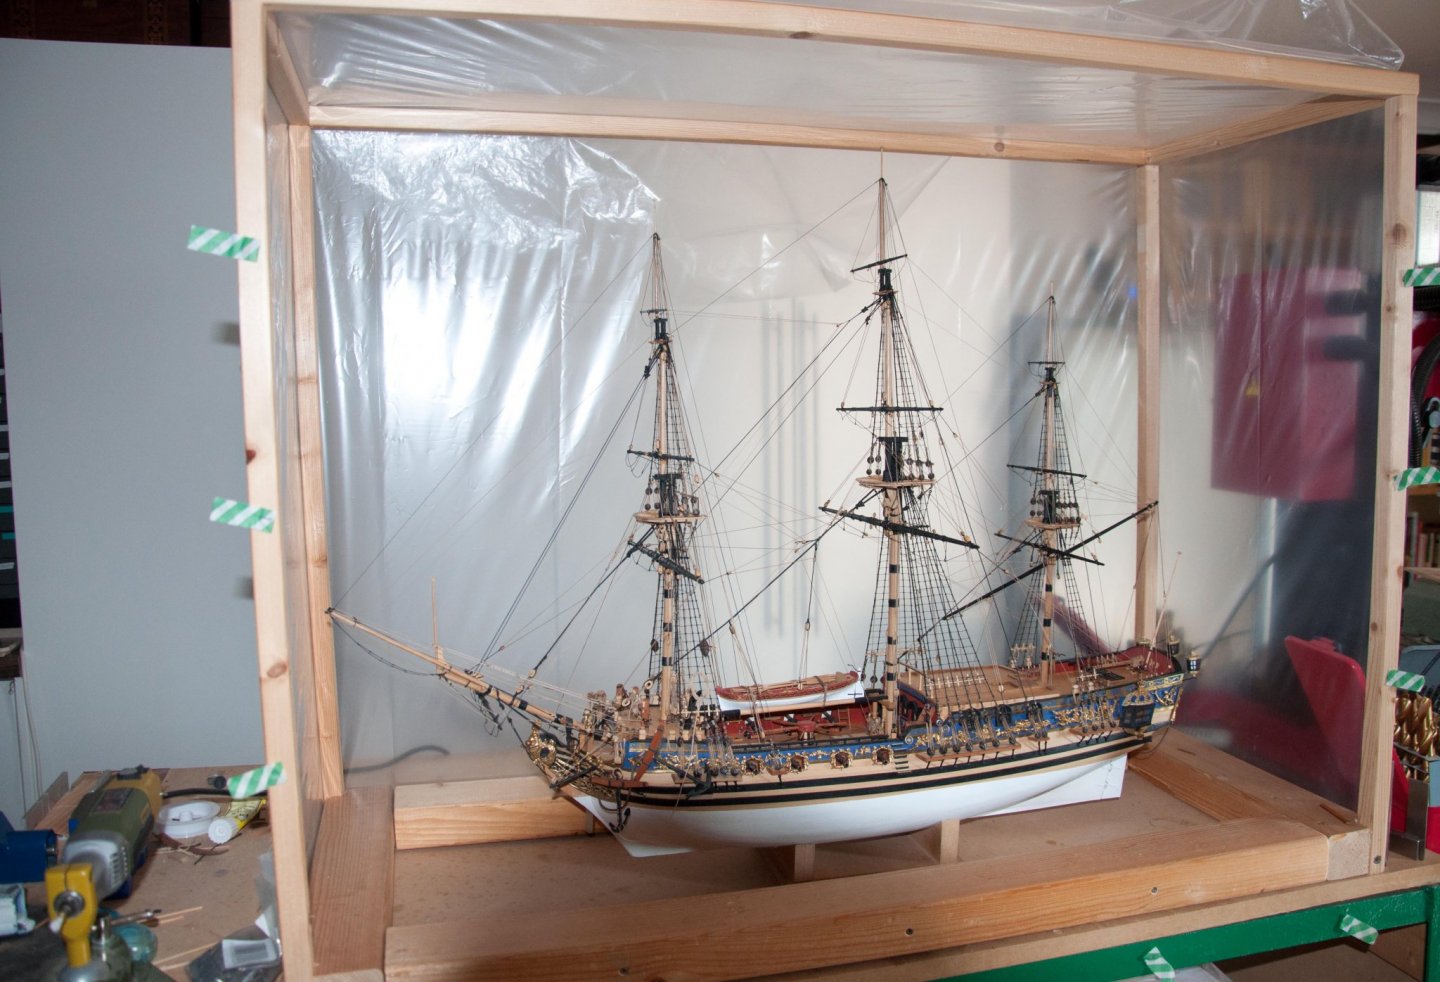
As I said in my first post I won't be starting serious work for some time as I have other projects I need to finish first. However I've done some initial prep work which I shall describe below. I mentioned using a jeweller's piercing saw on the pinnace for my Royal Caroline build - here's the result, built in boxwood: Although I am happy with the end product I can't imagine cutting out all the Winchelsea components by hand, so I've ordered a Proxxon scroll saw which should arrive from Germany in the next day or so. I should add that I got the idea for the pinnace from Blue Ensign's Pegasus build, where he used Model Shipways' pinnace kit as a starting point, reducing the scale from 1:24. Like Blue Ensign, I want to complete the Model Shipways kit in its own right so that's next on the stocks: An enjoyable and hopefully relatively short interlude. At the same time I need to complete the Royal Caroline, shown here in my homemade dust cabinet and just awaiting final tarting up: I started the Caroline before I discovered MSW so much of it is cruder than I would now be happy with, but in time to scratch build some of the later fittings and the rigging. Apart from the pinnace, you might notice Chuck's lanterns. I also made all my own rigging using Syren's rope rocket. Lastly, I have to finish off a Victory cross section I got as a present half way through the Caroline build: Again, much cruder than I'd now aspire to but at least I scrapped the out-of-scale kit ladders. Back to the Winchelsea. I've decided that I can at least get the plans and other materials together so that I can get off to a good start when the stocks are clear. I started by getting the larger, 40" X 30" plans printed by an online firm that specialises in architectural drawings as I described in a post elsewhere: UK Plan printing service. Next, I enlisted my wife's help in preparing the templates need to cut components out of sheet material. She has a machine she uses for her card making and other hobbies, called a Brother Scan n' Cut. As the name suggests, you can scan drawings in, scale and edit them, and the machine will cut out the resulting shapes from paper or card. You can replace the cutter with a pen and it will draw the pattern rather than cut it. Alternatively, .pdf files such as Chuck's for the Wichelsea can be sent to the machine which eliminates the scanning stage and thus reduces the scope for error creeping in. I've used the machine several times when I've needed paper templates for small, intricate components and it's worked a treat. This time, my wife kindly offered her help in cutting out all the Winchelsea's components - here's one example: Of course, it would be possible to stick the whole sheet of paper to the wood rather than cutting out the template, but I like the latter method for a number of reasons - you can shuffle individual templates around on the wood to minimise wastage, you use less glue, and I find it easier to cut to the paper line (where I can see the wood) rather than cutting through solid paper. Maybe that's just me - I'm sure others would be equally happy with the other method. Next step will be sourcing suitable plywood and timber. On plywood, I was relieved when Chuck confirmed that using metric sheets (i.e. 6mm rather than 1/4") is not a big deal - I'll just need to make sure the bulkheads are a snug fit in the keel. As for timber, I'm sorely tempted to go for Alaskan Yellow Cedar as used by Chuck. I've found a source in the UK, and I'll report back when I've received a sample. Meanwhile I'm enjoying following other folks' progress on the project. Derek


-
I should have thought of this before, but on this side of the pond we’ve gone metric. I can get 6mm ply and 6.5mm ply - one is slightly under 1/4” and the other slightly over. My question is, how big a deal is this? Can I, for example, just tweak the slots in the keel to accommodate slightly thinner/thicker bulkheads? Or are there other potential problems I’ve not considered? Grateful for any thoughts and advice. Derek
-
There’s a review of power tool options in the articles database that you might find helpful if you've not already read it. I’m afraid my personal approach is usually to get tempted into buying a tool then looking for a use for it. That said, I’ve found lots of uses for my table saw (Preac and latterly Byrnes), micro-mill, rotary tool, bandsaw and wood lathe (all Proxxon) and various larger tools I also use for DIY and other hobbies, such as a metal lathe and a mill. Next on the wish list is a scroll saw. I recently cut a set of frames by hand with a jeweller’s piercing saw - never again! Derek
-
I think Pete is talking about the timber rings that sit either side of the rope wooldings and which must necessarily fit tight to the mast, as opposed to mast hoops which must slide up and down the mast. One solution would be to try the shrink-fit tube electricians use - you can get a large pack of multiple sizes from Amazon or eBay for the price of a cup of coffee. Cut a thin slice of tube the next size up from the required diameter, slip it on the mast and gently heat with a hot air gun until it shrinks on, then paint as required. Alien material, I know, but it does the job. Also works well on square sections, such as mastheads and anchor stocks. Derek