Check out our new MSW Sponsor Innocraftsman
×


DelF
-
Posts
1,409 -
Joined
-
Last visited
Content Type
Profiles
Forums
Gallery
Events
Everything posted by DelF
-
 Great! Glad to help. I've gradually tried to replace my 'cheap & cheerful' tools with quality versions - the investment is always worth it. Like your paint job, btw. Derek
 -
Looking good. I've not seen the masking tape idea before - I found the youtube channel you mention but there's loads of videos. Any idea which one covers tape? As an alternative, I find shrink wrap tube useful for these sorts of jobs - cut a slice off an appropriately sized tube apply a heat gun and you're done. I got about 100 year's worth of black tube from Amazon for peanuts. Derek
-
Very neat! Apologies if you've answered this before, but what is your building slip? It certainly looks impressive - is it a good investment? Derek
- 436 replies
-
- 1
-

-
- vanguard models
- alert
- (and 1 more)
-
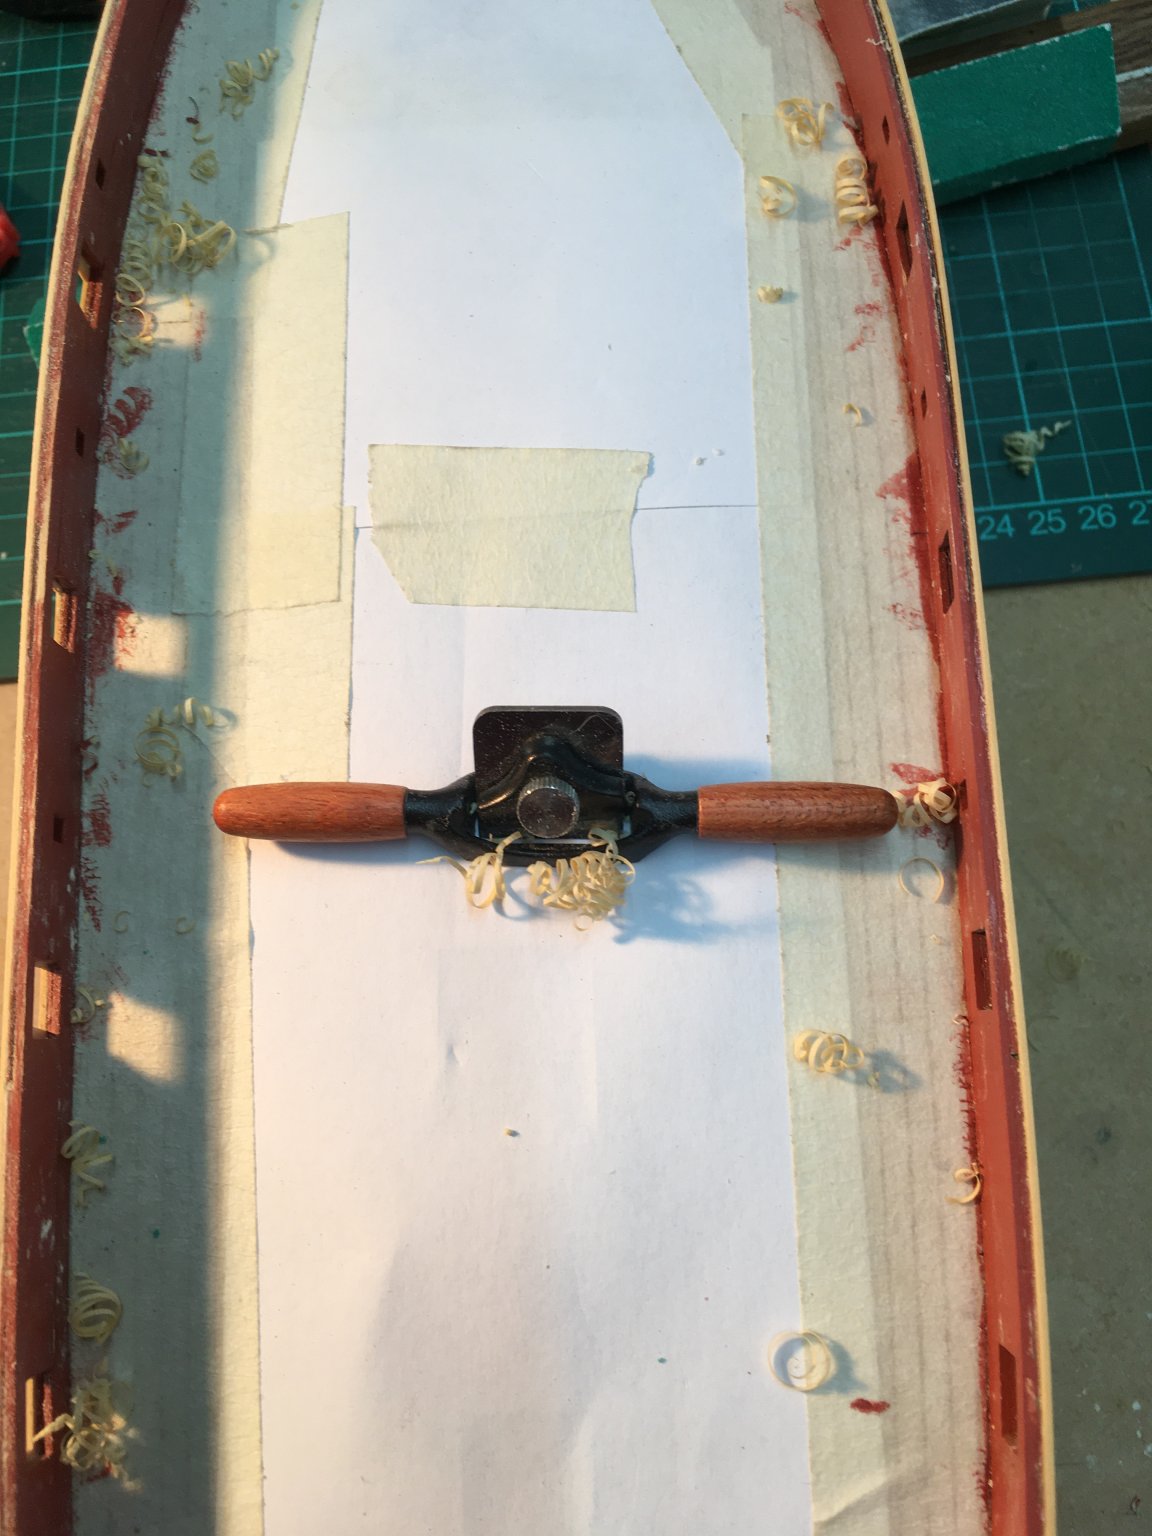
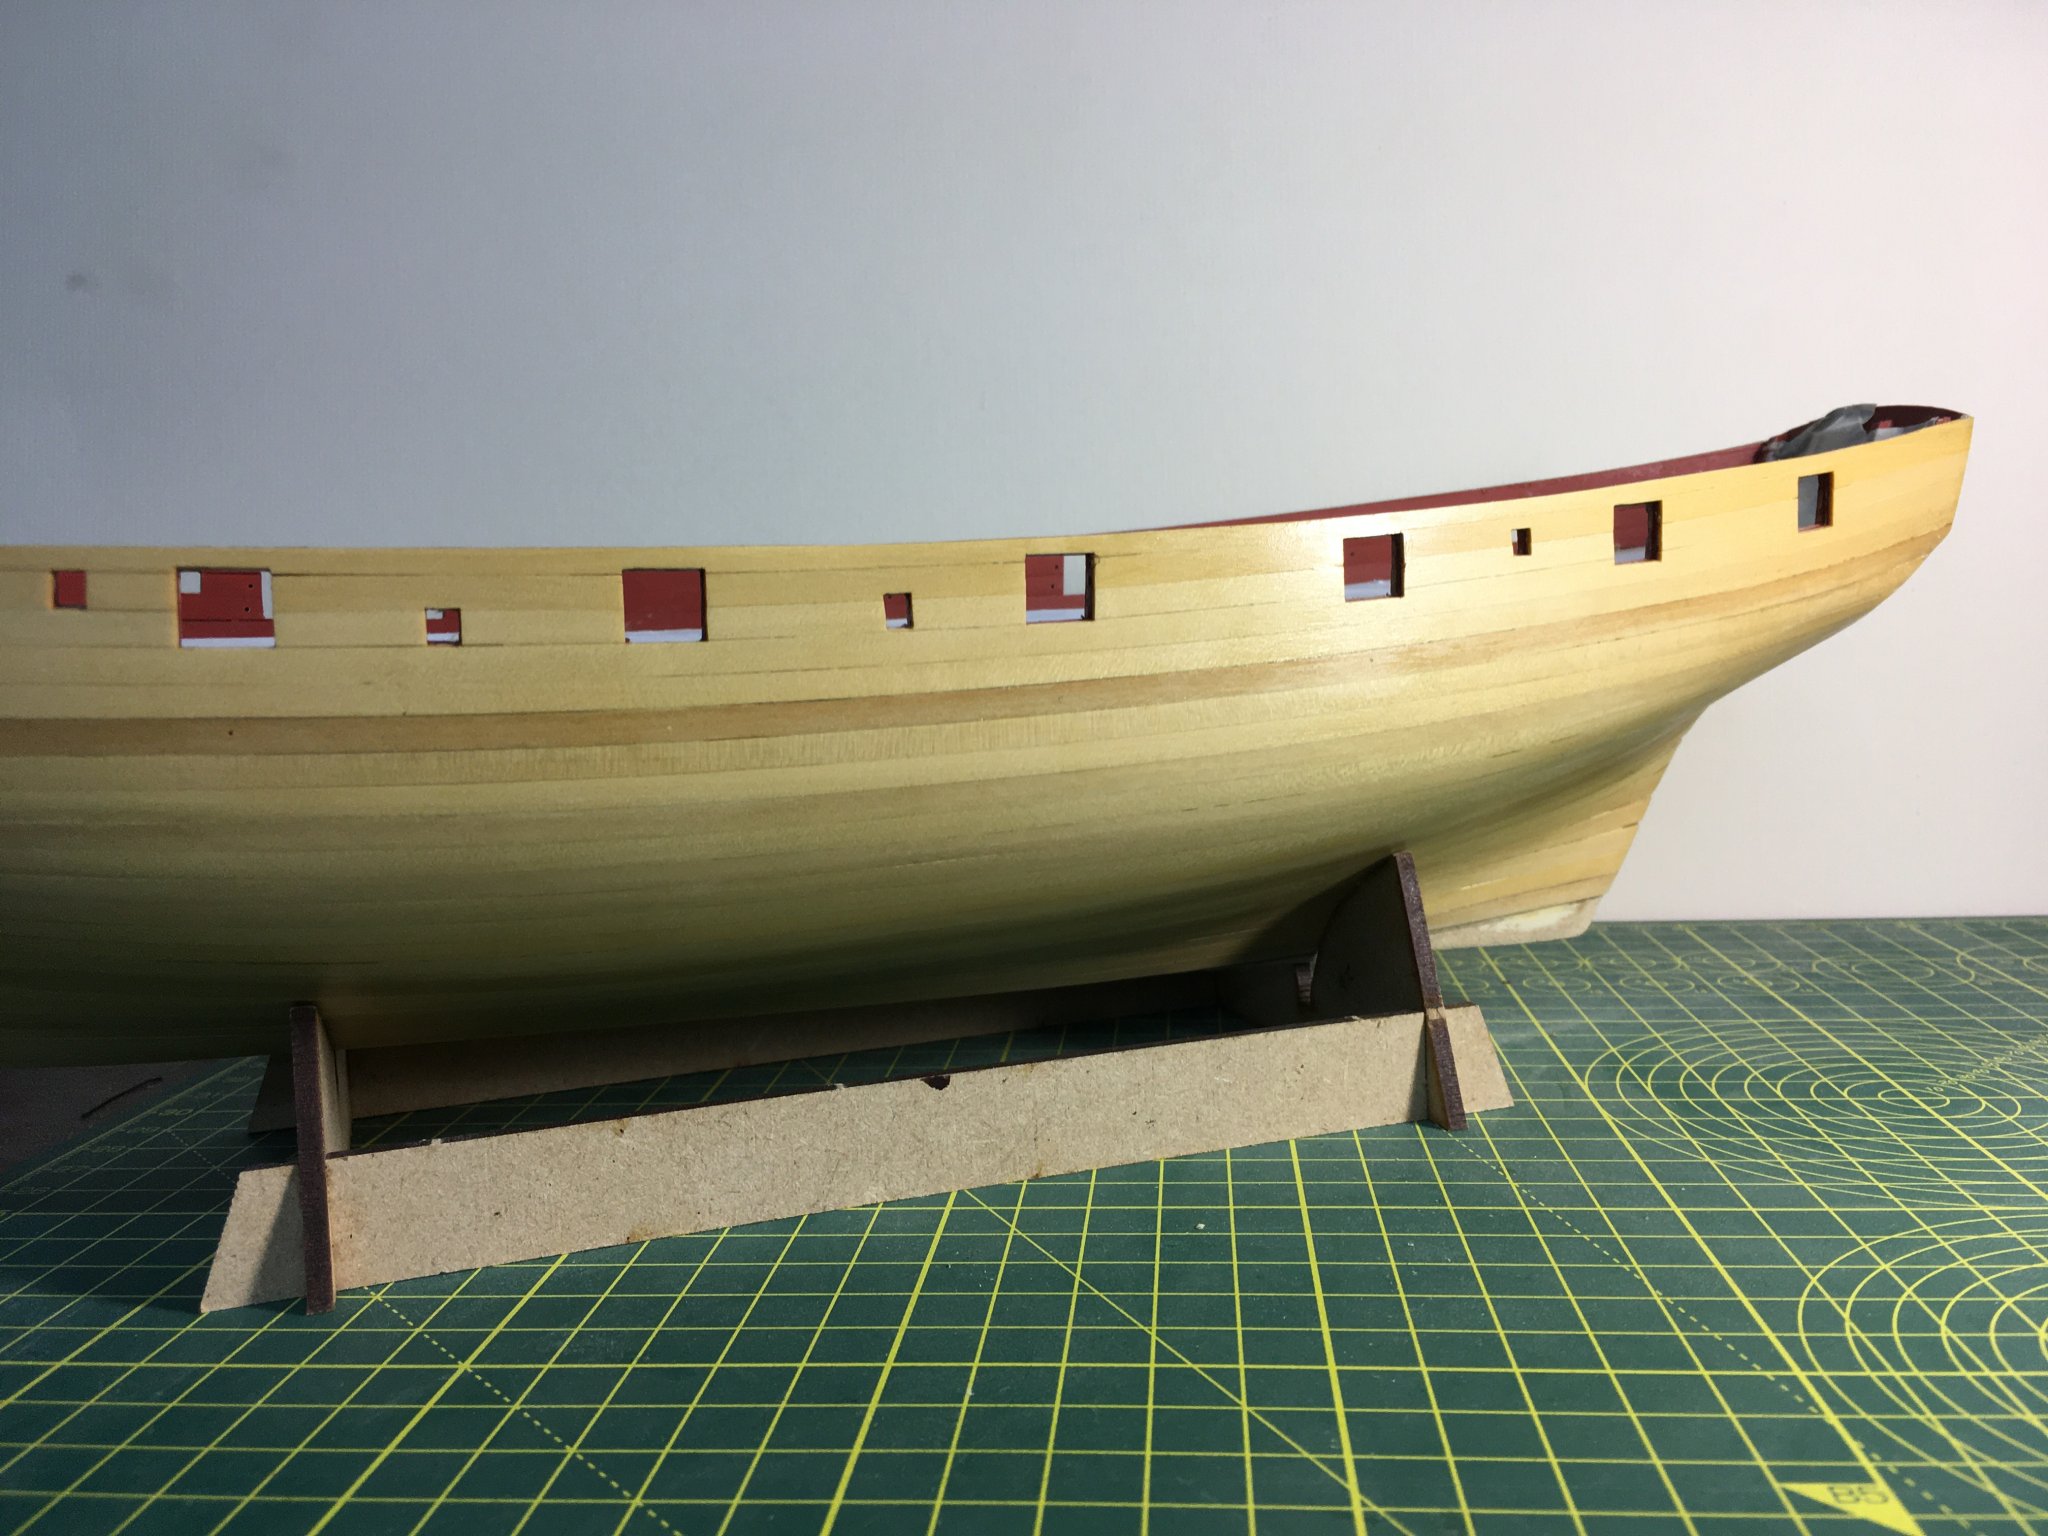
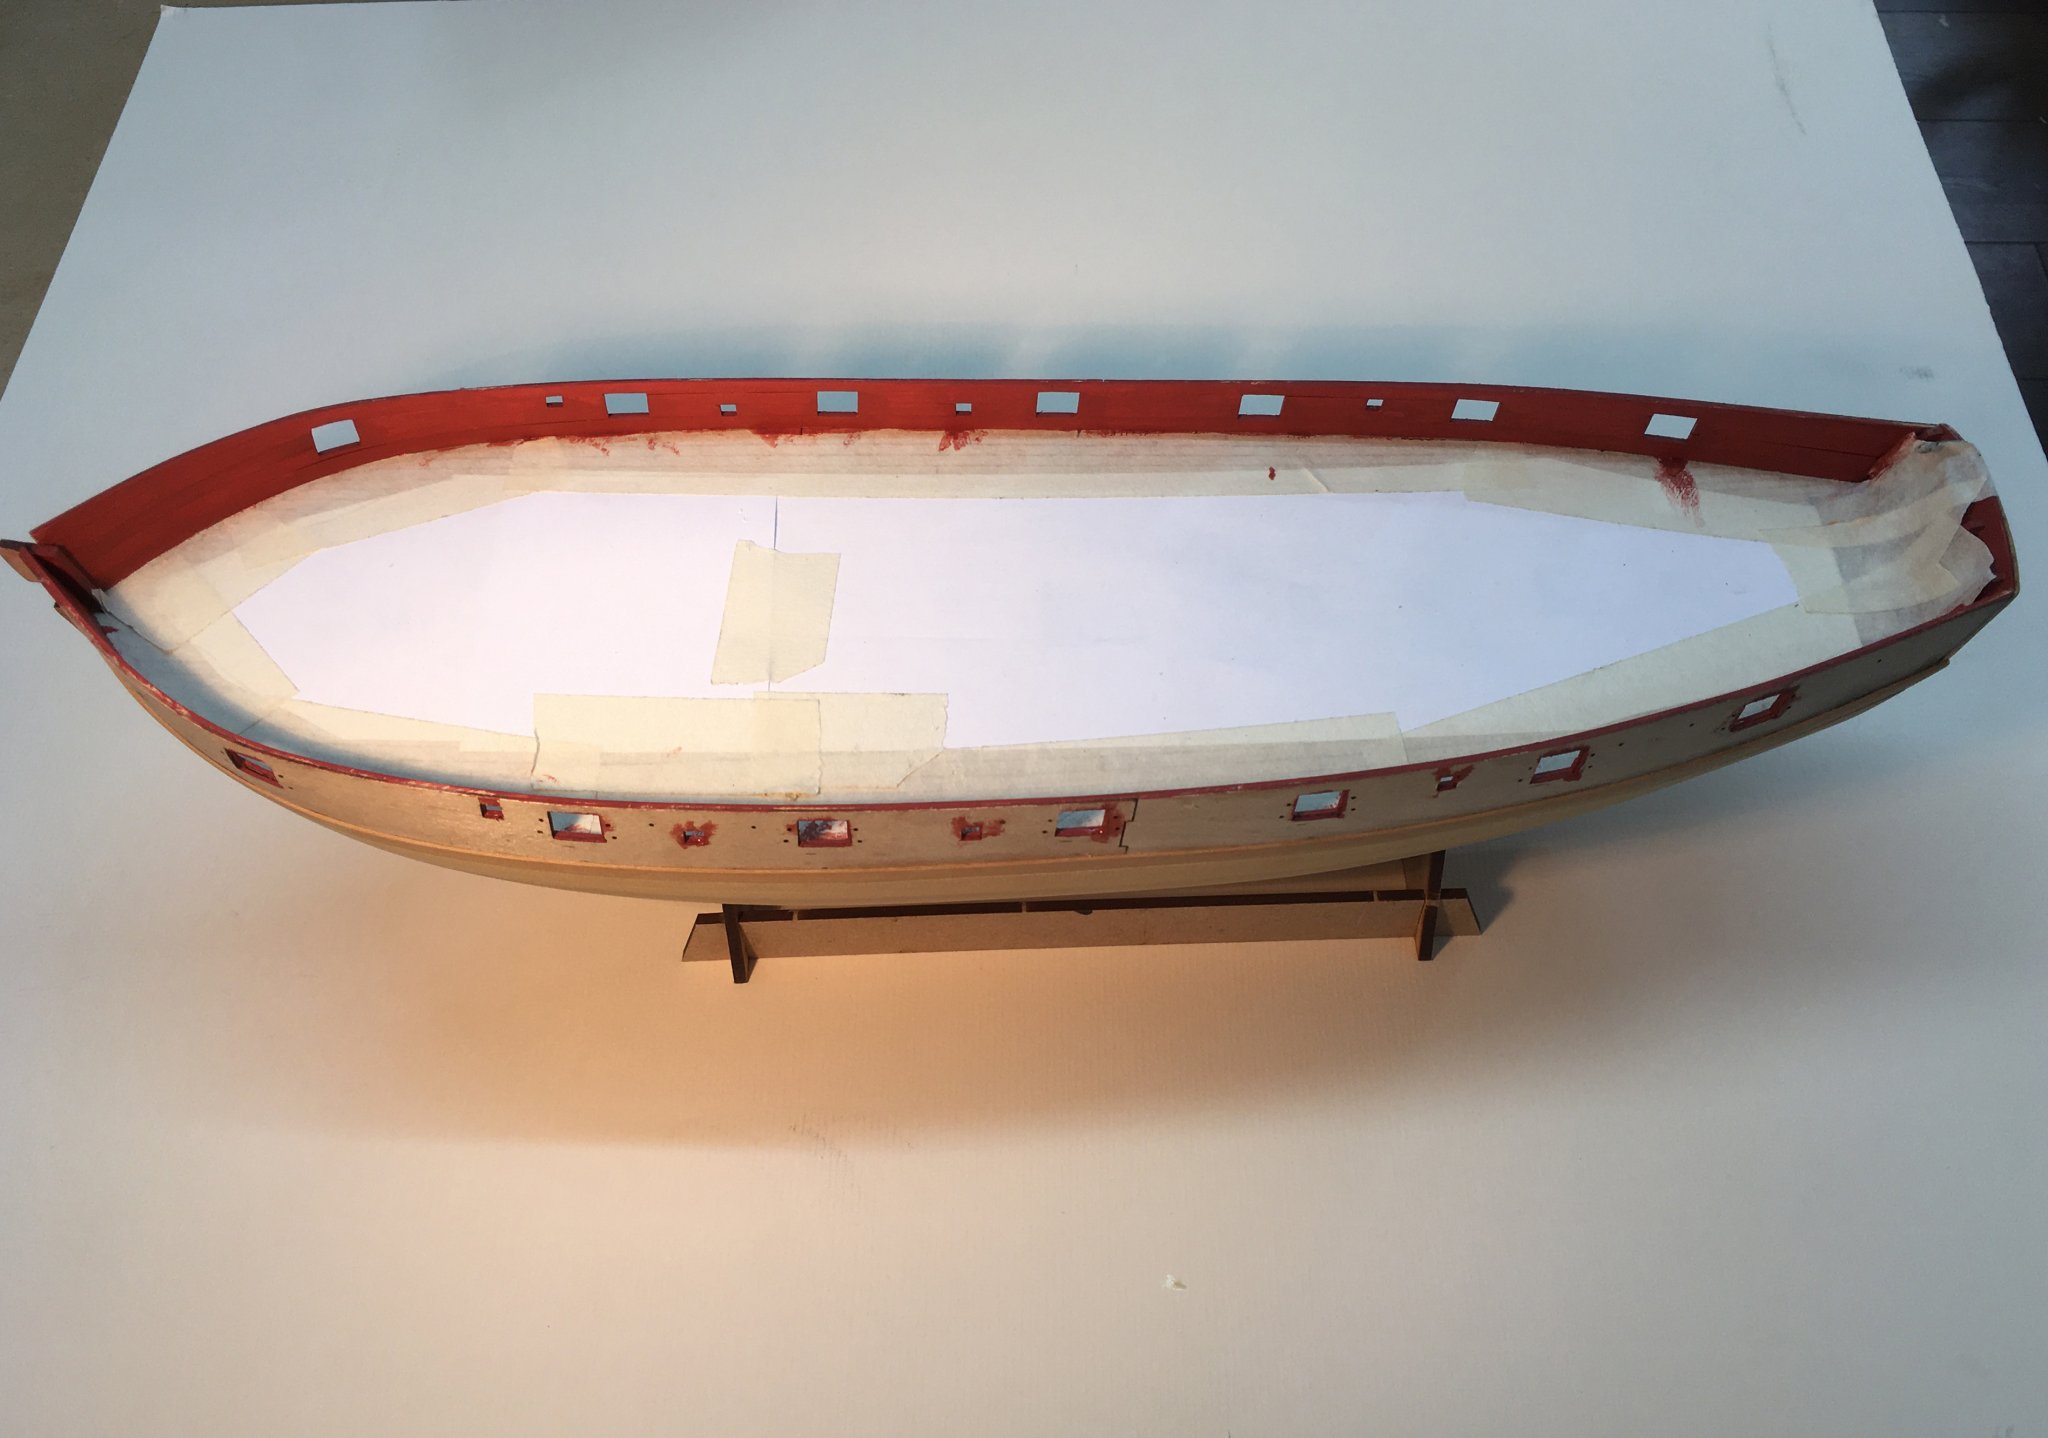
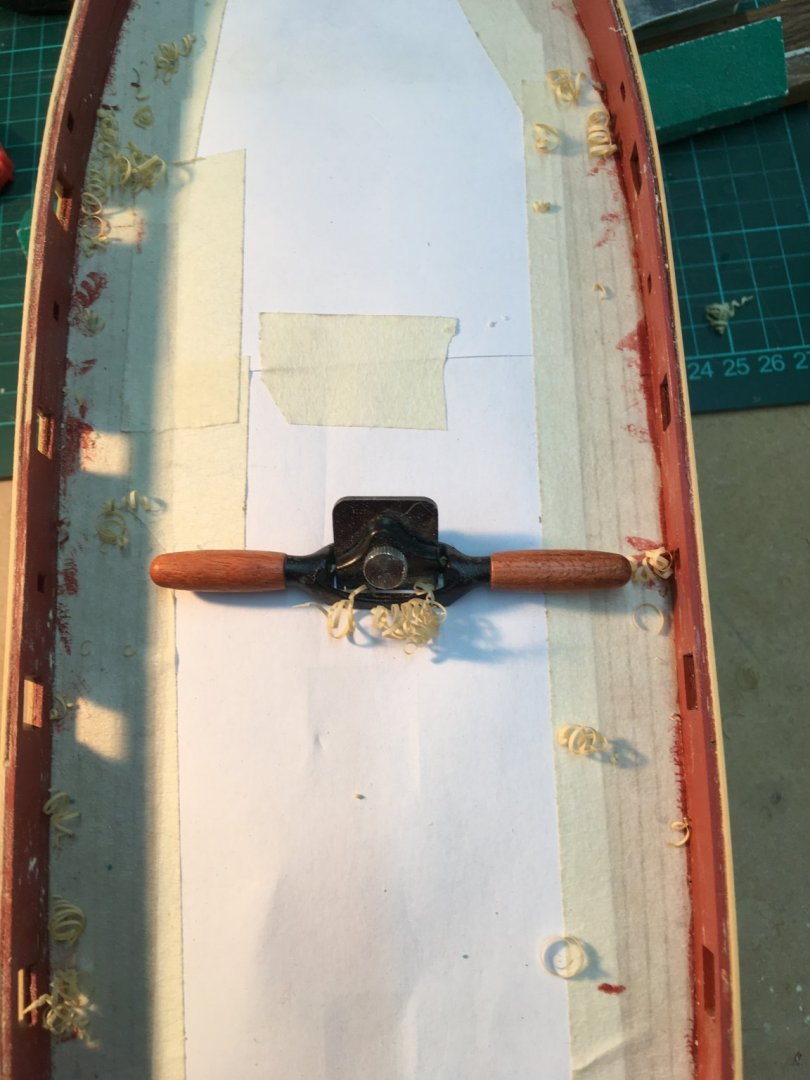
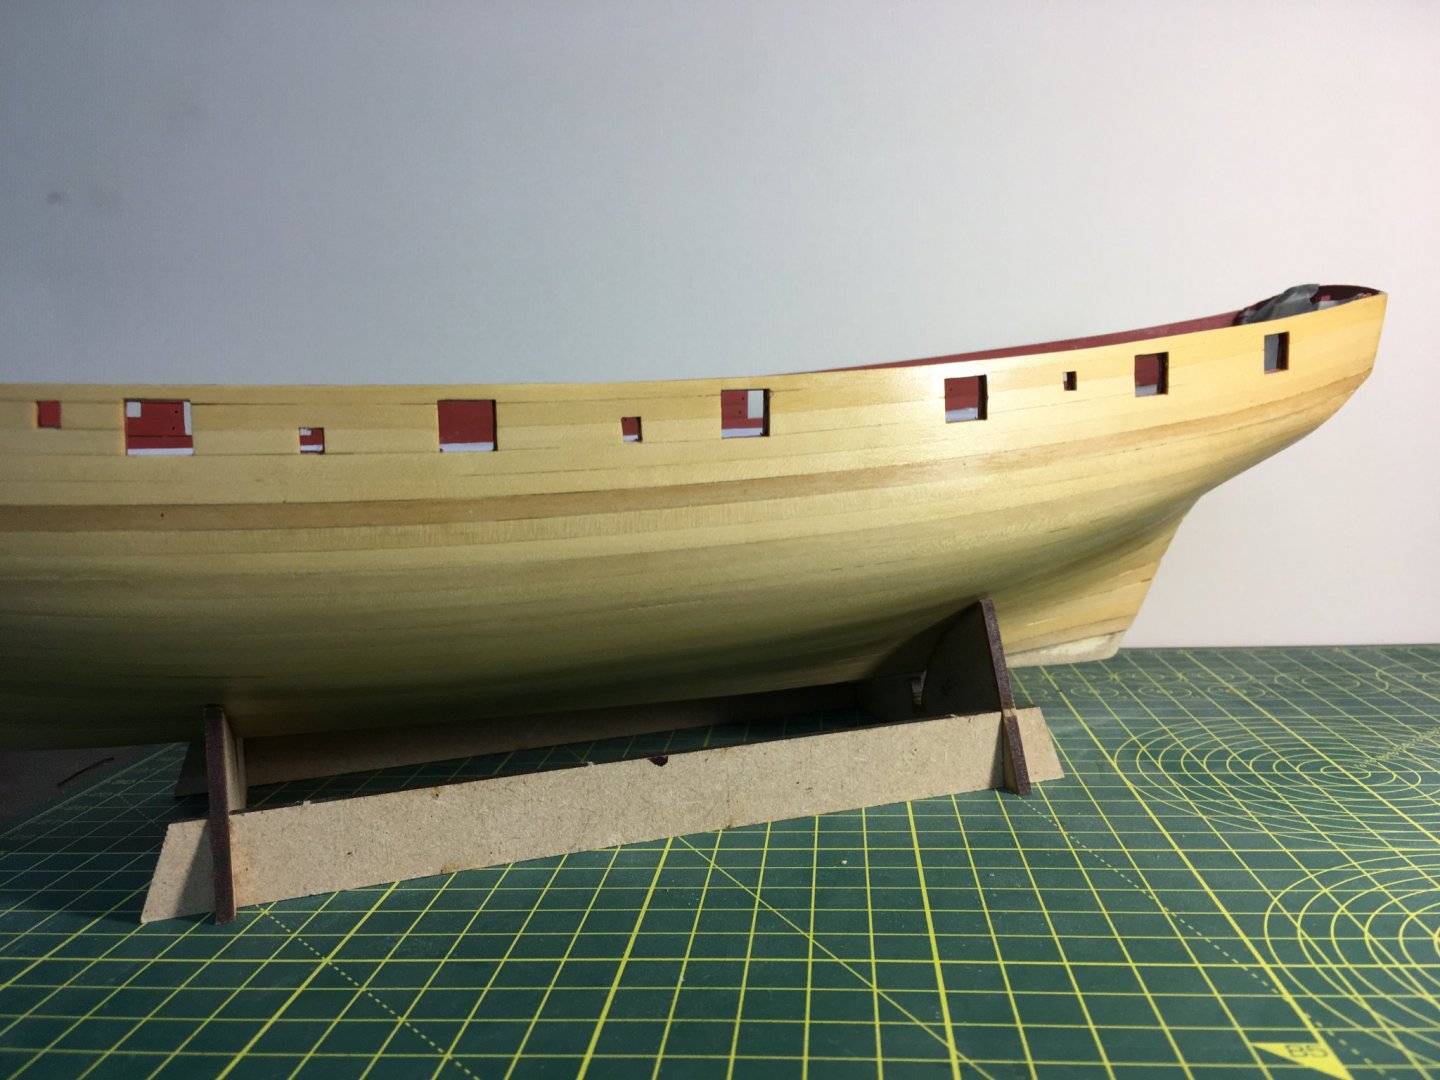
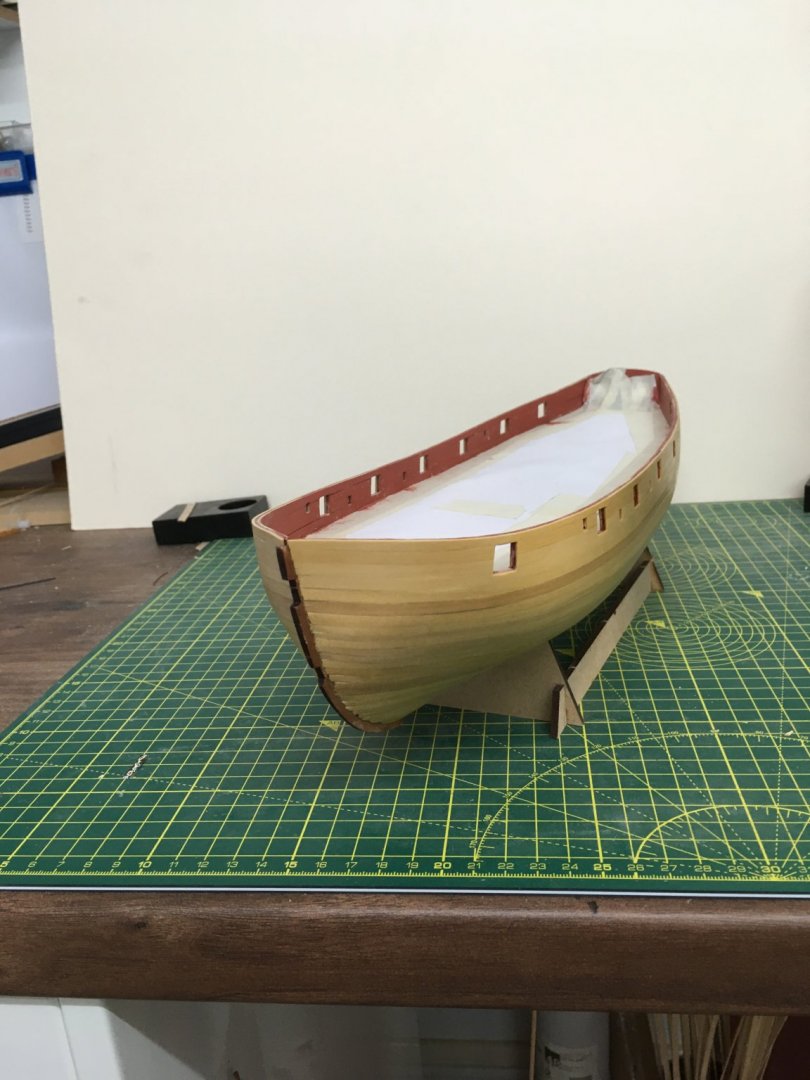
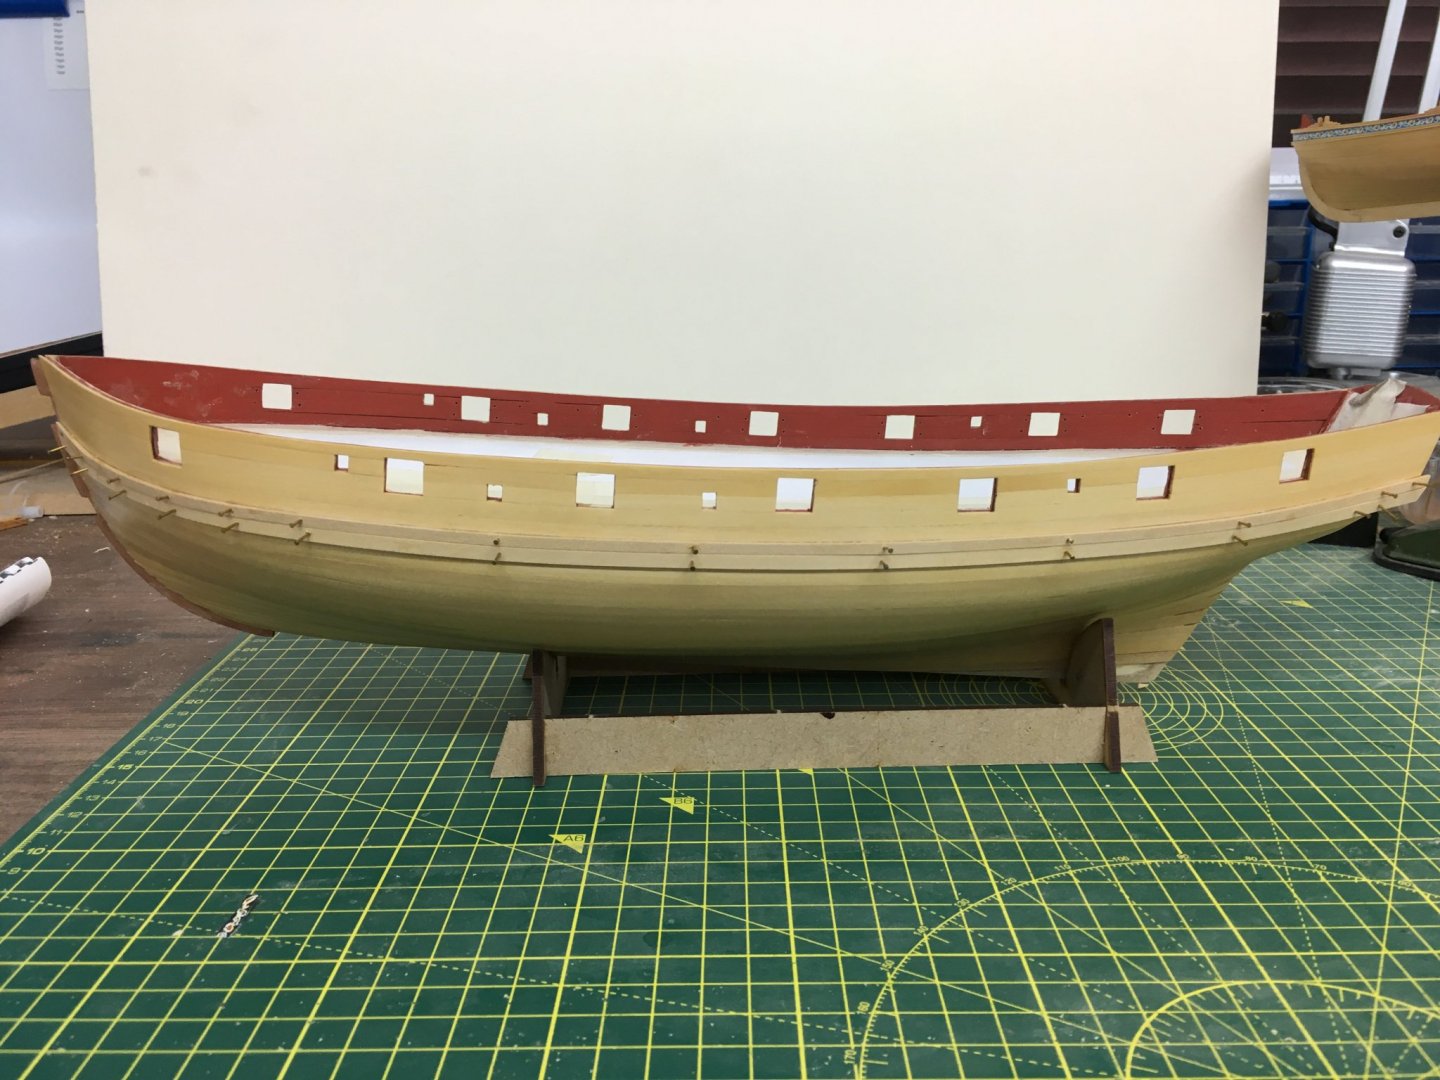
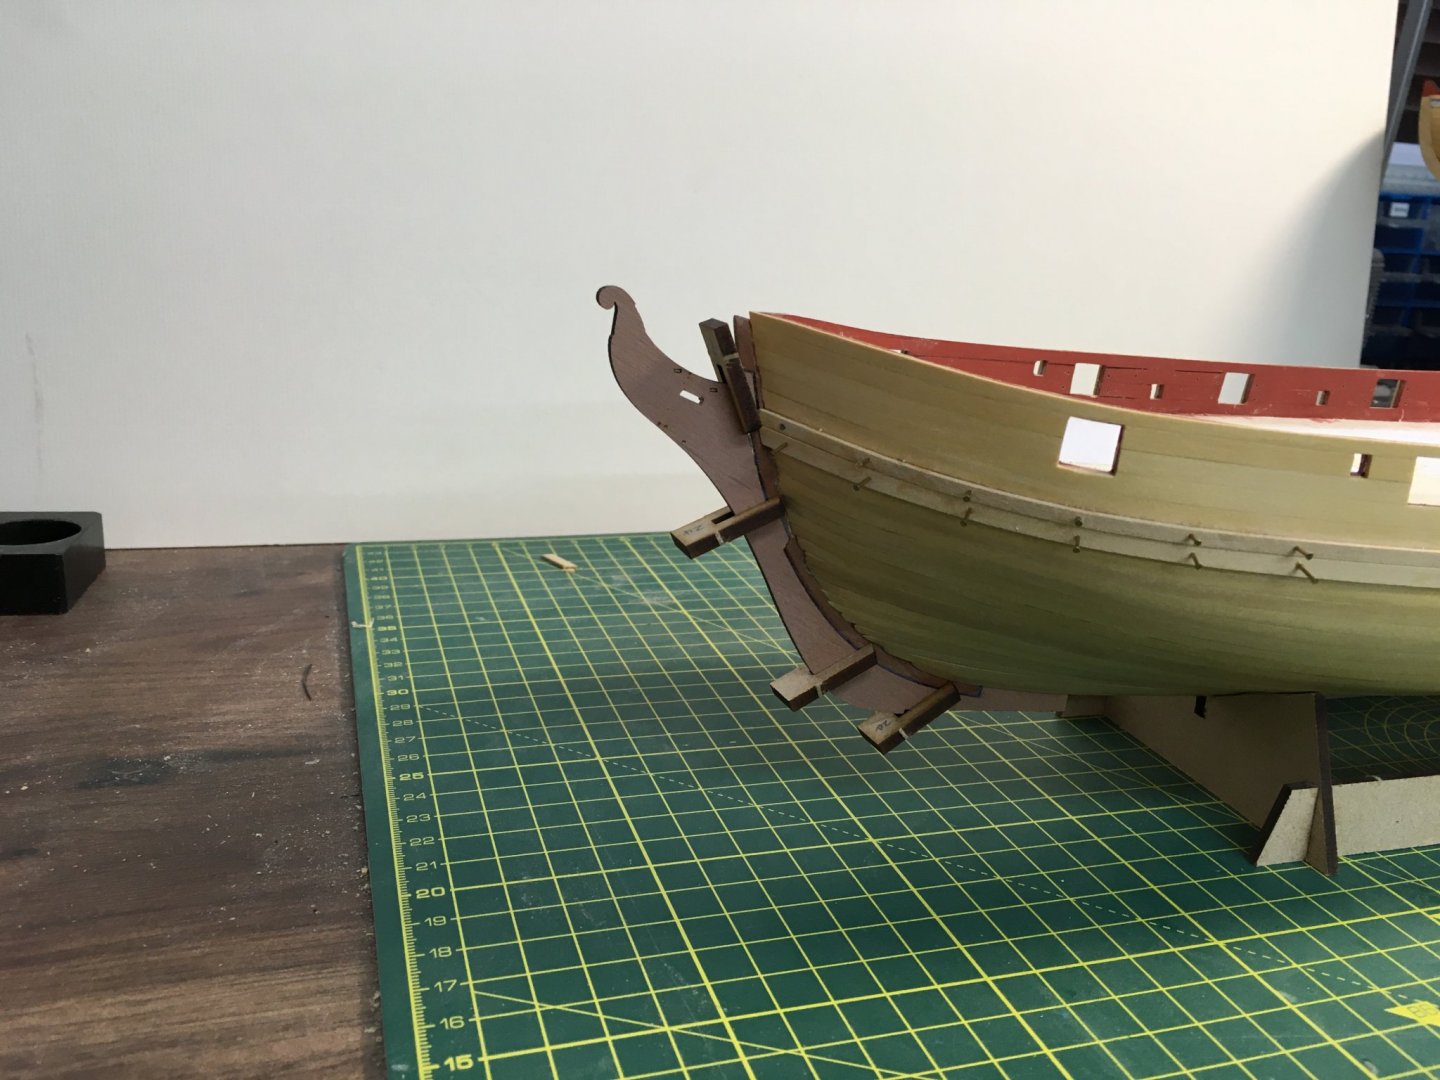
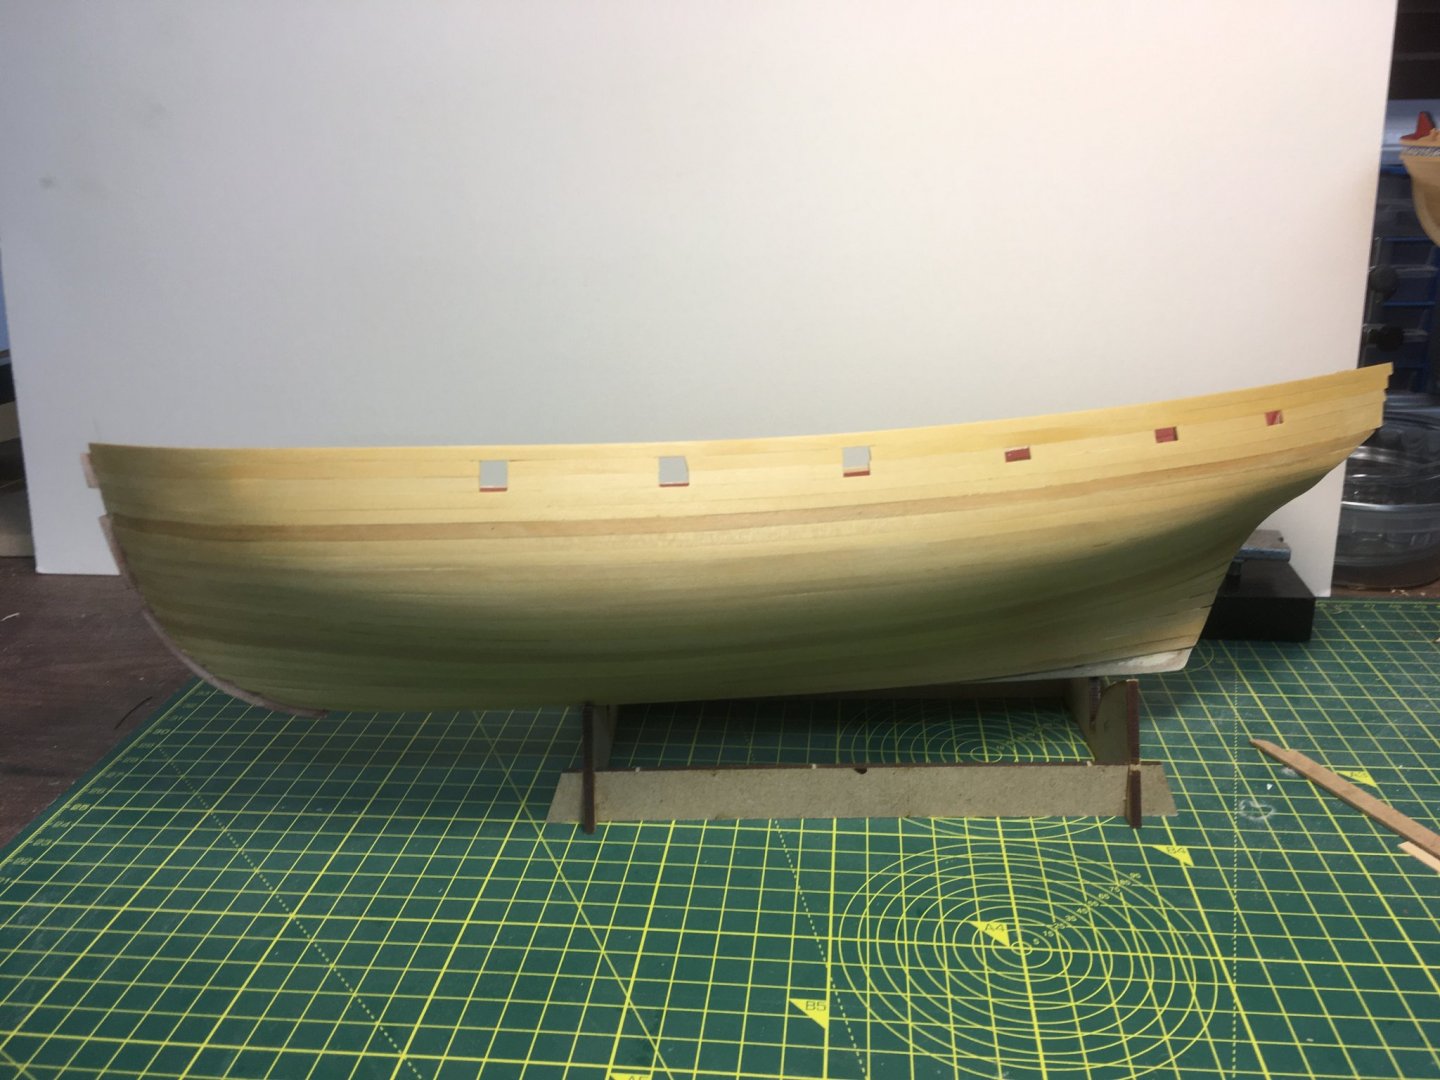
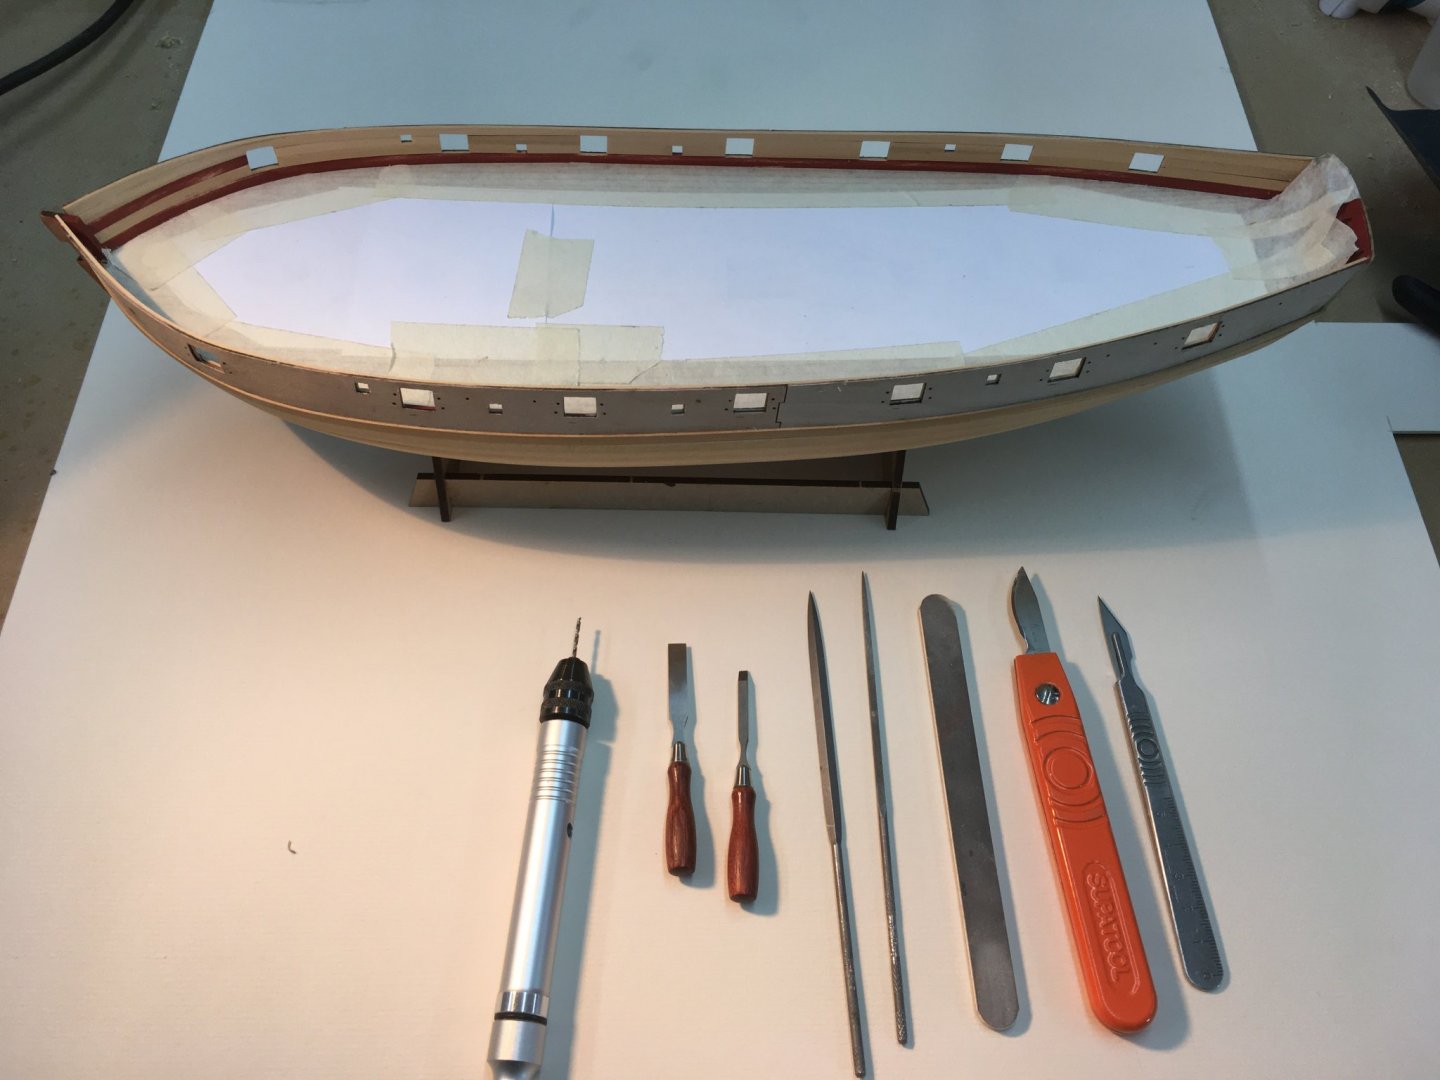
Thanks as always for the comments and likes. I'm still working on the outer bulwark planking, trimming the gun and oar ports. The miniature veritas spokeshave was ideal for trimming along the top of the bulwarks: Trimming the ports was an exercise in care. I used the same tools as for the inside planking, but the outside will show more and there are no fancy decorations to cover up rough edges. Once I'd trimmed the ports I gave the hull a quick coat of shellac to reveal any spots still needing sanding: On the whole I'm reasonably pleased. Probably some work still needed around the bows, but not too much when you consider the amount of coppoering. Next, I tackled the wales. I took Chris's advice and used PVA and pins for these strakes. I'll paint the wales so the pins are not a problem. However, although the pins supplied with the kit were good for the first planking, I found they weren't beefy enough for boxwood, even with pilot holes. I used slightly larger pins - 0.7mm as opposed to 0.5mm, and they were fine. I also used Super 'Phatic glue as recommended by Glenn (Scarborough Glenn, I think, not Texas Glenn) and that also seemed to work fine. It was certainly easy to apply with the supplied nozzle. Finally, I attached the prow, keel and sternpost. Here's the prow being glued: This is another good example of Chris Watton's attention to detail - the four pegs supplied in the kit make it easy to ensure the prow is perfectly aligned as it dries. The time for coppering approaches! All I need to do is mark the waterline and make sure the hull is smooth - I need to fill in some gaps around the keel and sternpost. I'm grateful to other folks' logs for showing me how careful I will need to be in marking the waterline accurately. Derek
- 725 replies
-
- 13
-
-
- vanguard models
- speedy
- (and 1 more)
-
This is helpful, thanks. Makes me realise I need to be very careful when I get round to coppering. Derek
-
Here's what I wrote in my Speedy log in response to the same question: "I've had a word with Chris, and he decided to go with vertical planking on Speedy based on his research which found many contemporary model pictures showing similar sized and period models with the stern planking running vertically, not horizontal or angled. Looking at my copy of the AOTS book on Alert I noticed that the transom had horizontal beams as well as vertical frames. The Alert book showed the transom planked horizontally, but depending on how the beams tied into the frames I imagine vertical planks would be just as possible as horizontal. I'm going to leave the planks as they are, mainly because of Chris's research, but also I quite like the alternating pattern of vertical-horizontal-vertical". Derek
-
I've finished planking the outside of the bulwarks, and decided to give them an initial sanding before trimming the gun and oar ports: Apologies for the picture quality. Derek
- 725 replies
-
- 12
-
-
- vanguard models
- speedy
- (and 1 more)
-
Looking good! The sanding shows how well you laid the second planking. Derek
-
She looks very neat Glenn. Derek
-
I like the idea of a strip along the edge of the copper. Another idea I’ll borrow! Derek
-
Bob Thanks for a great review. Amazon won't ship it to the UK but I've ordered a copy from ebay. The only downside is that shipping adds another $35. I still think it'll be worth it. I came across a description of Antonio's workshop some years ago in Milton Roth's book, Ship Modelling from Stem to Stern. I was greatly impressed by his use of mobile workstations, and although that's not practical in my workshop (which I'd already fitted out with fixed units) I've used the idea in the garage. There I have four mobile benches of various sizes for different machines, including two 6' benches that I can line up when using my Syren Rope Rocket. When not in use they fit neatly against the back wall behind the cars. Thanks again Derek
-
Thanks, that's helpful. I'll give evostick a go. Derek
-
Crikey, you're fast! I've been thinking ahead and wondering what glue would be best for coppering. CA makes me nervous at the best of times and I can just imagine it squeezing out of the plates and spoiling the surface. Does applying the CA to the hull help you avoid that, and are you using gel? Would Super Phatic work? Derek
-
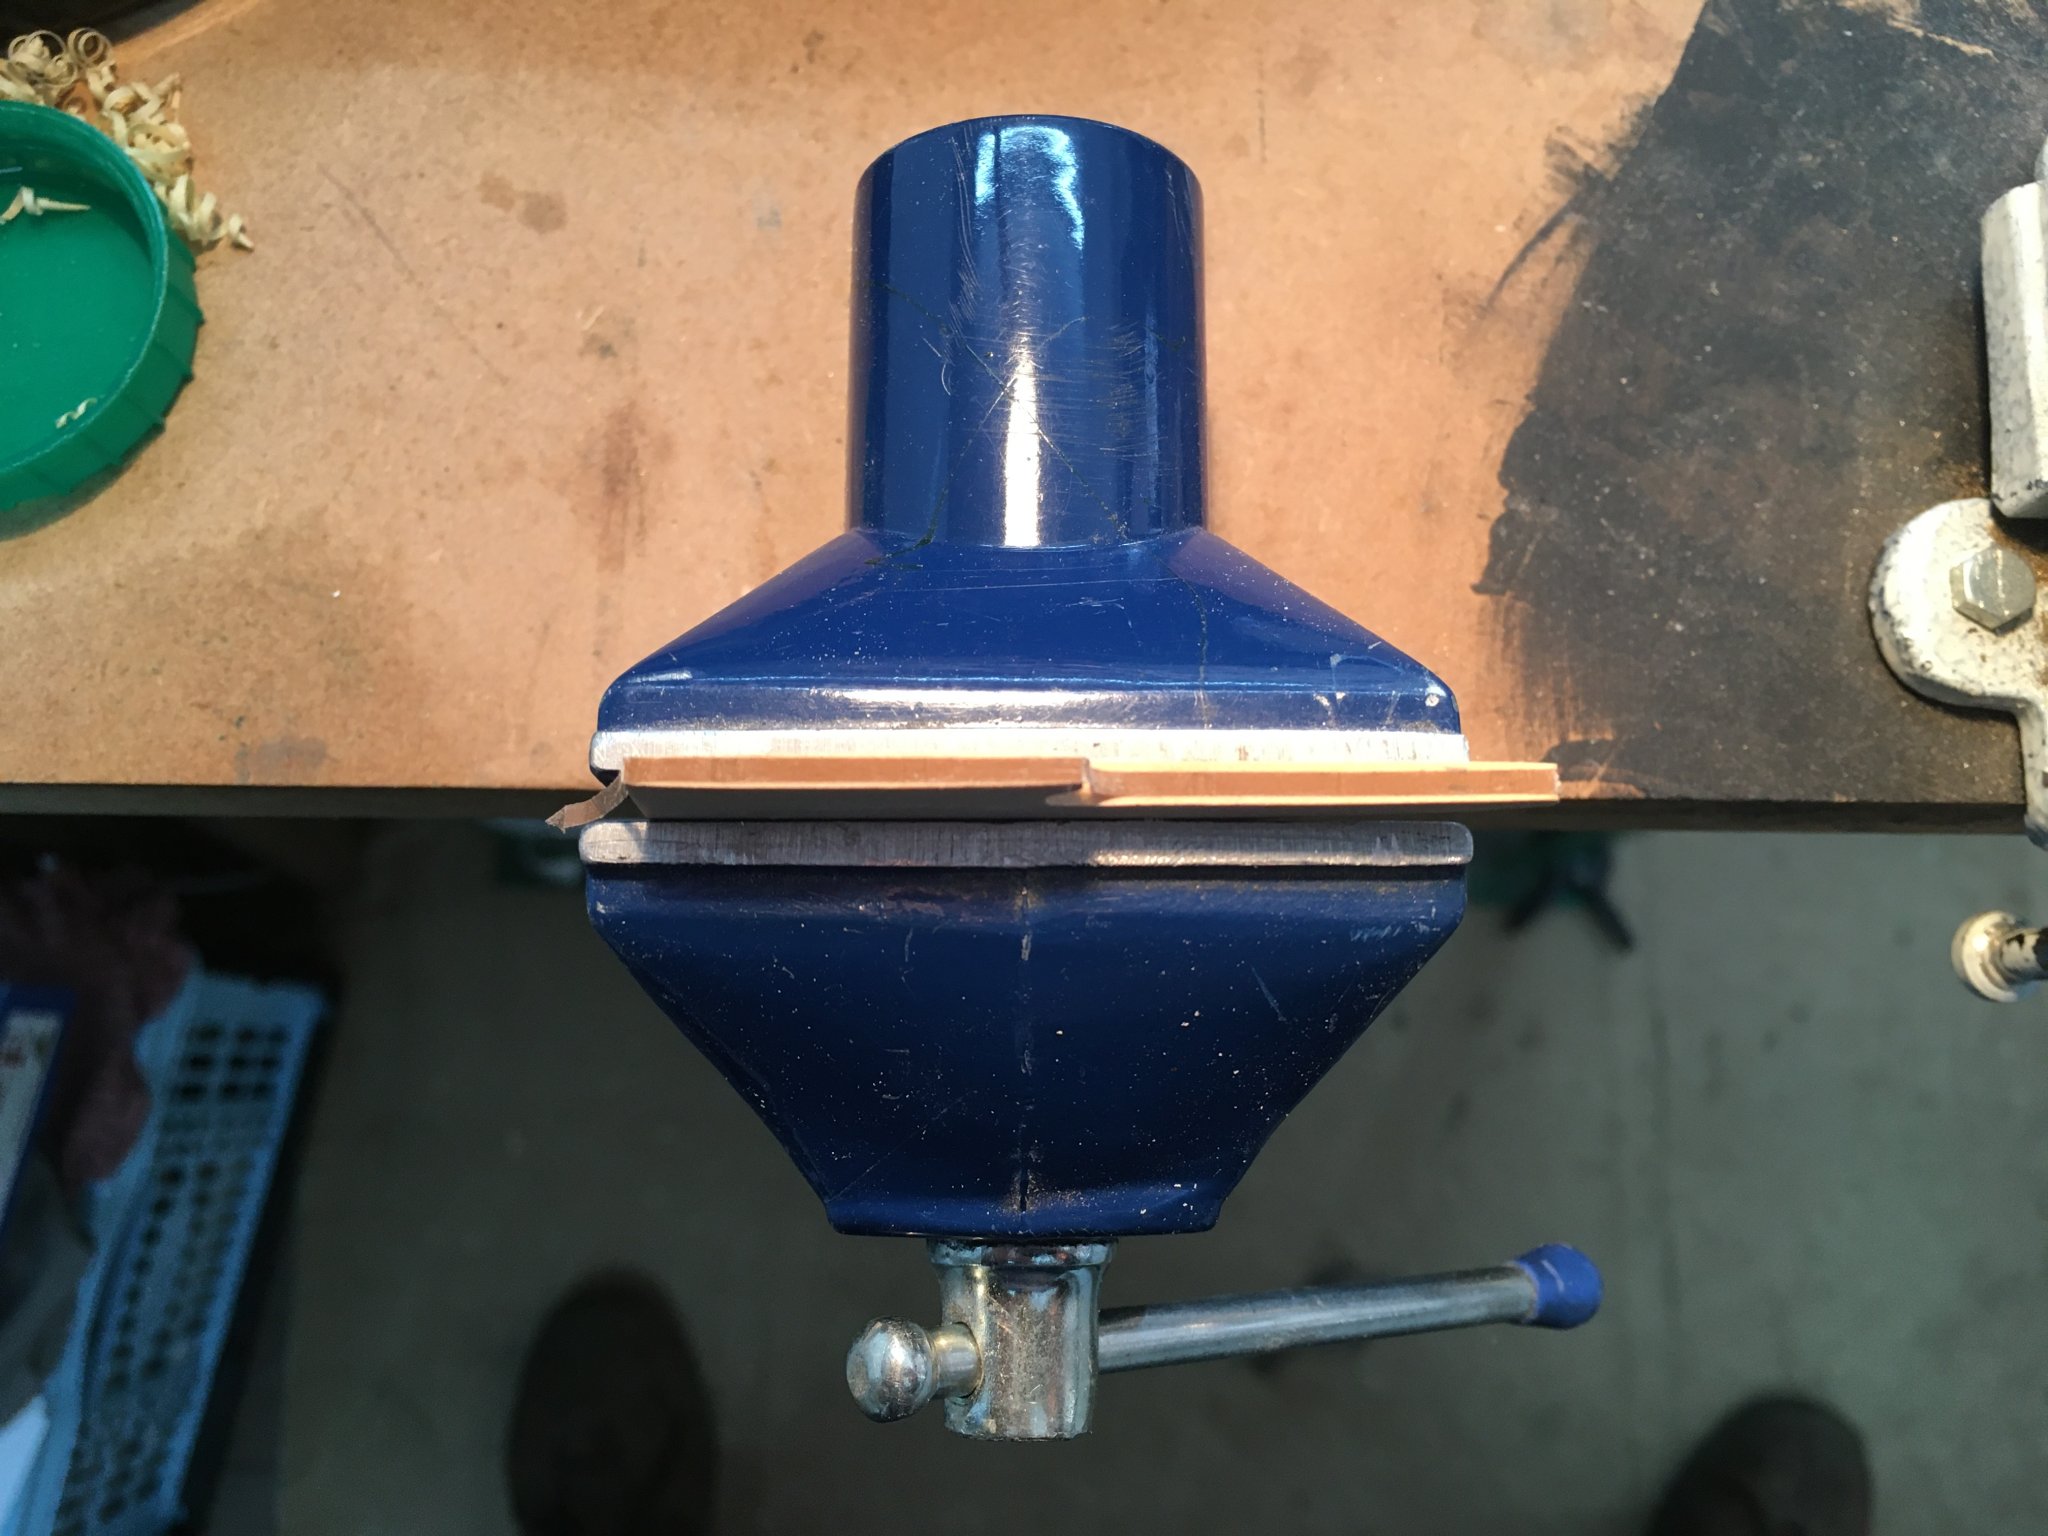
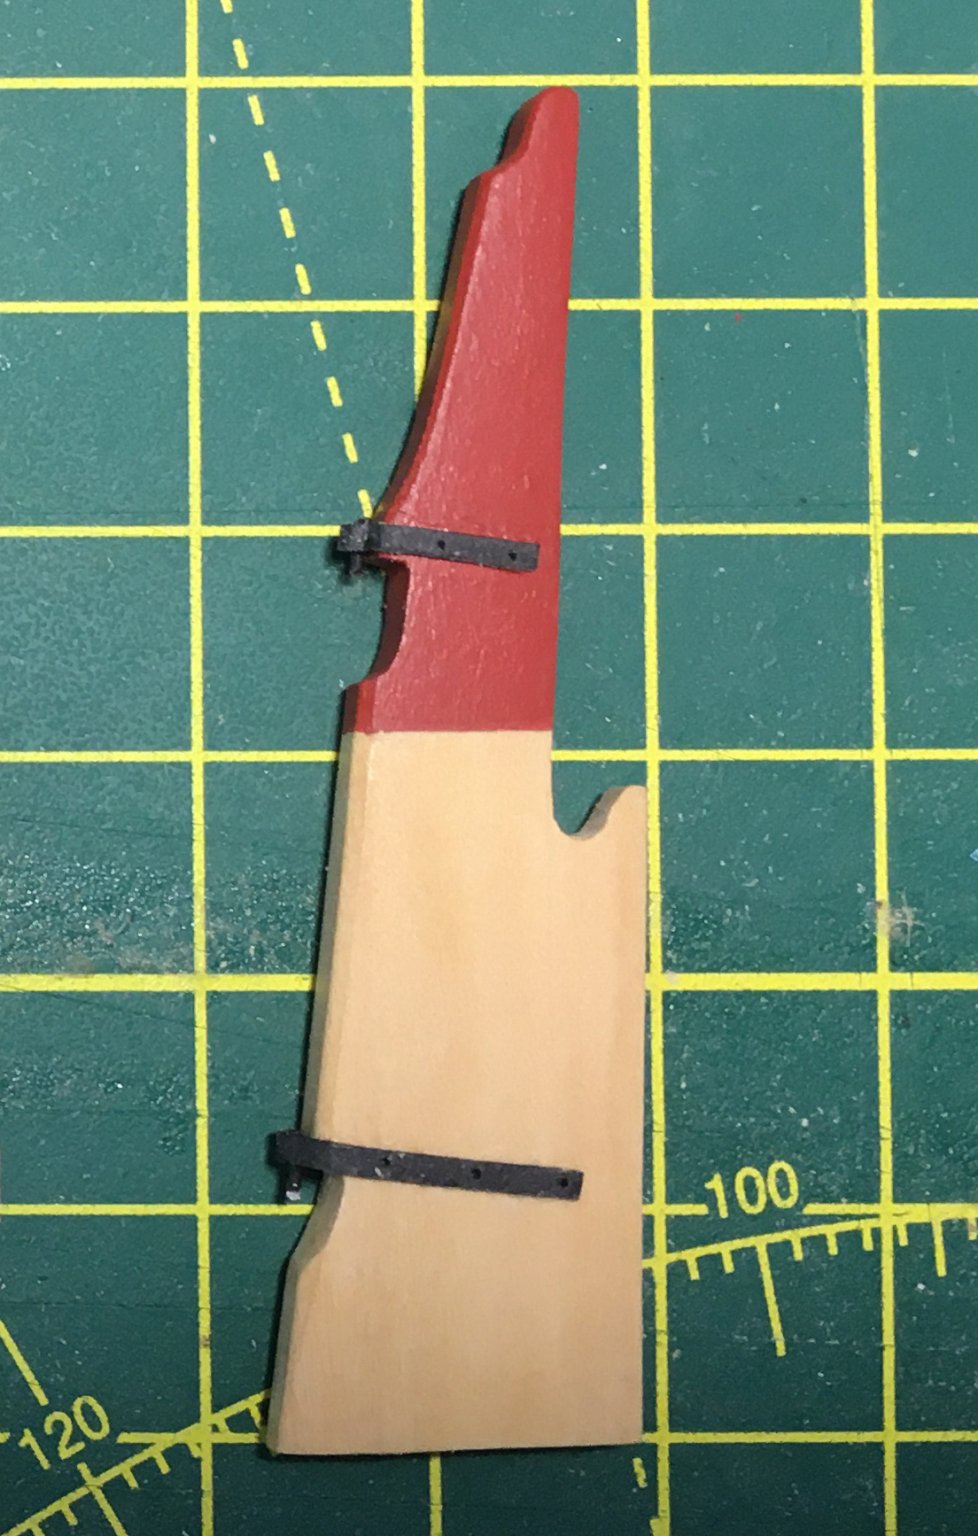
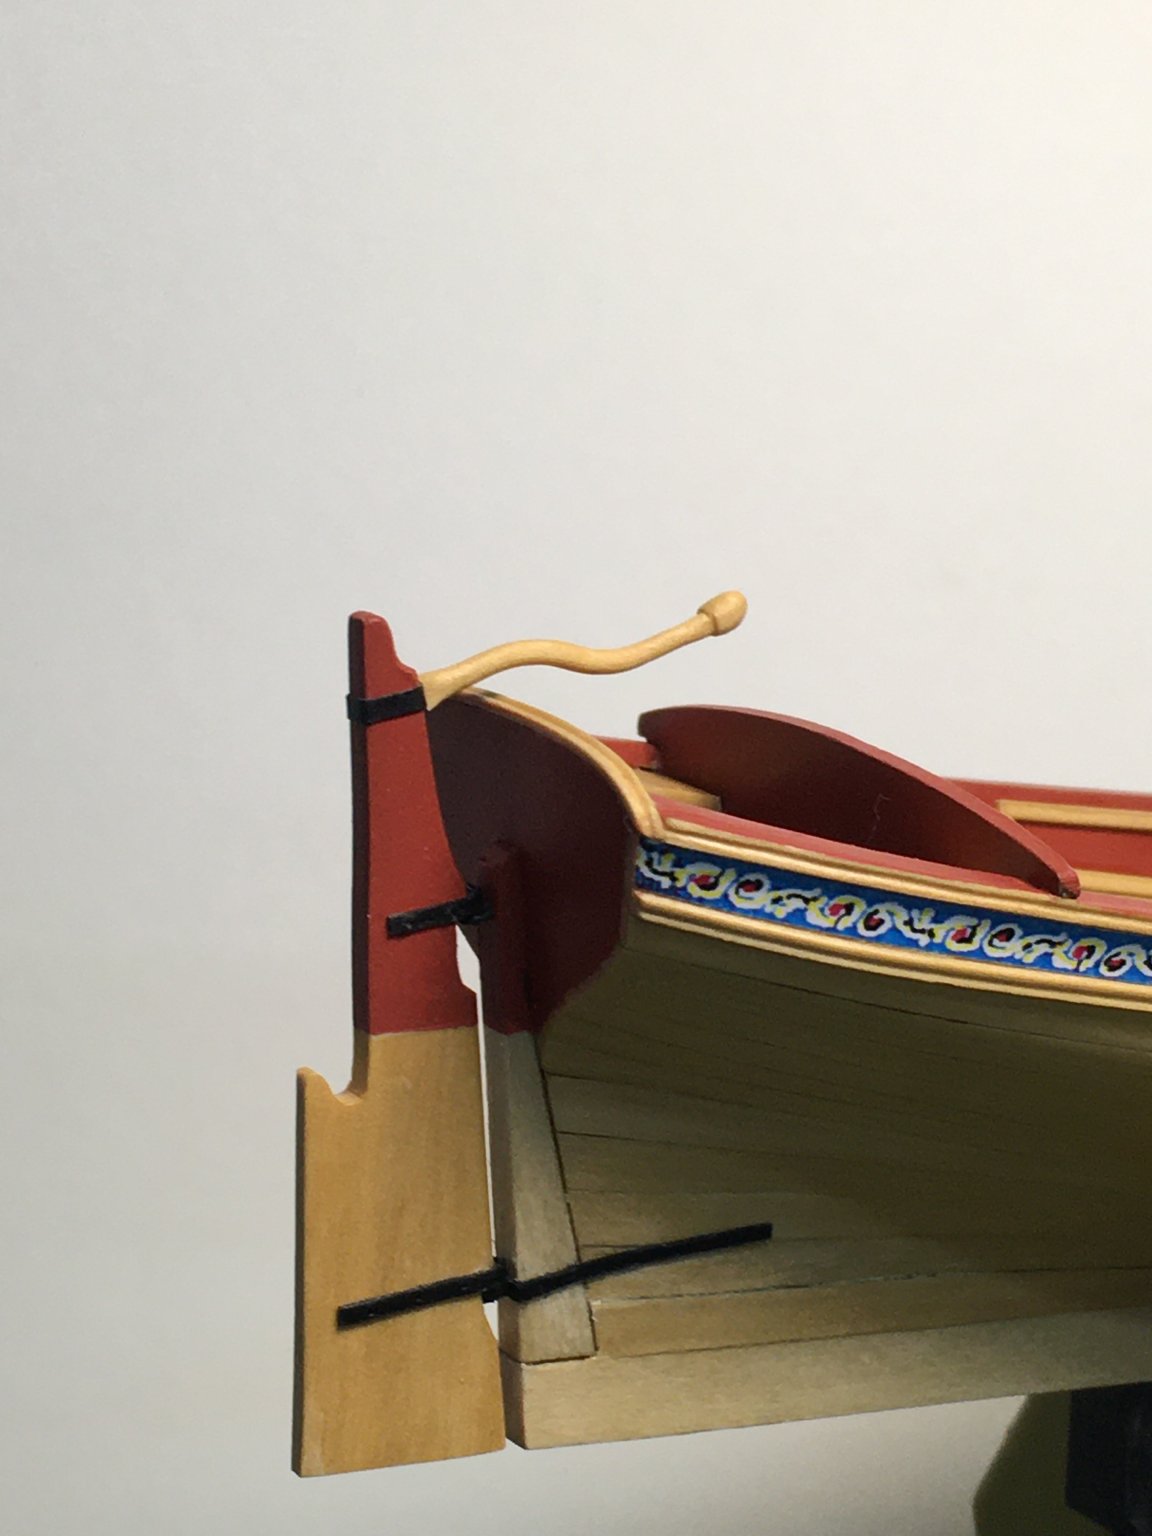
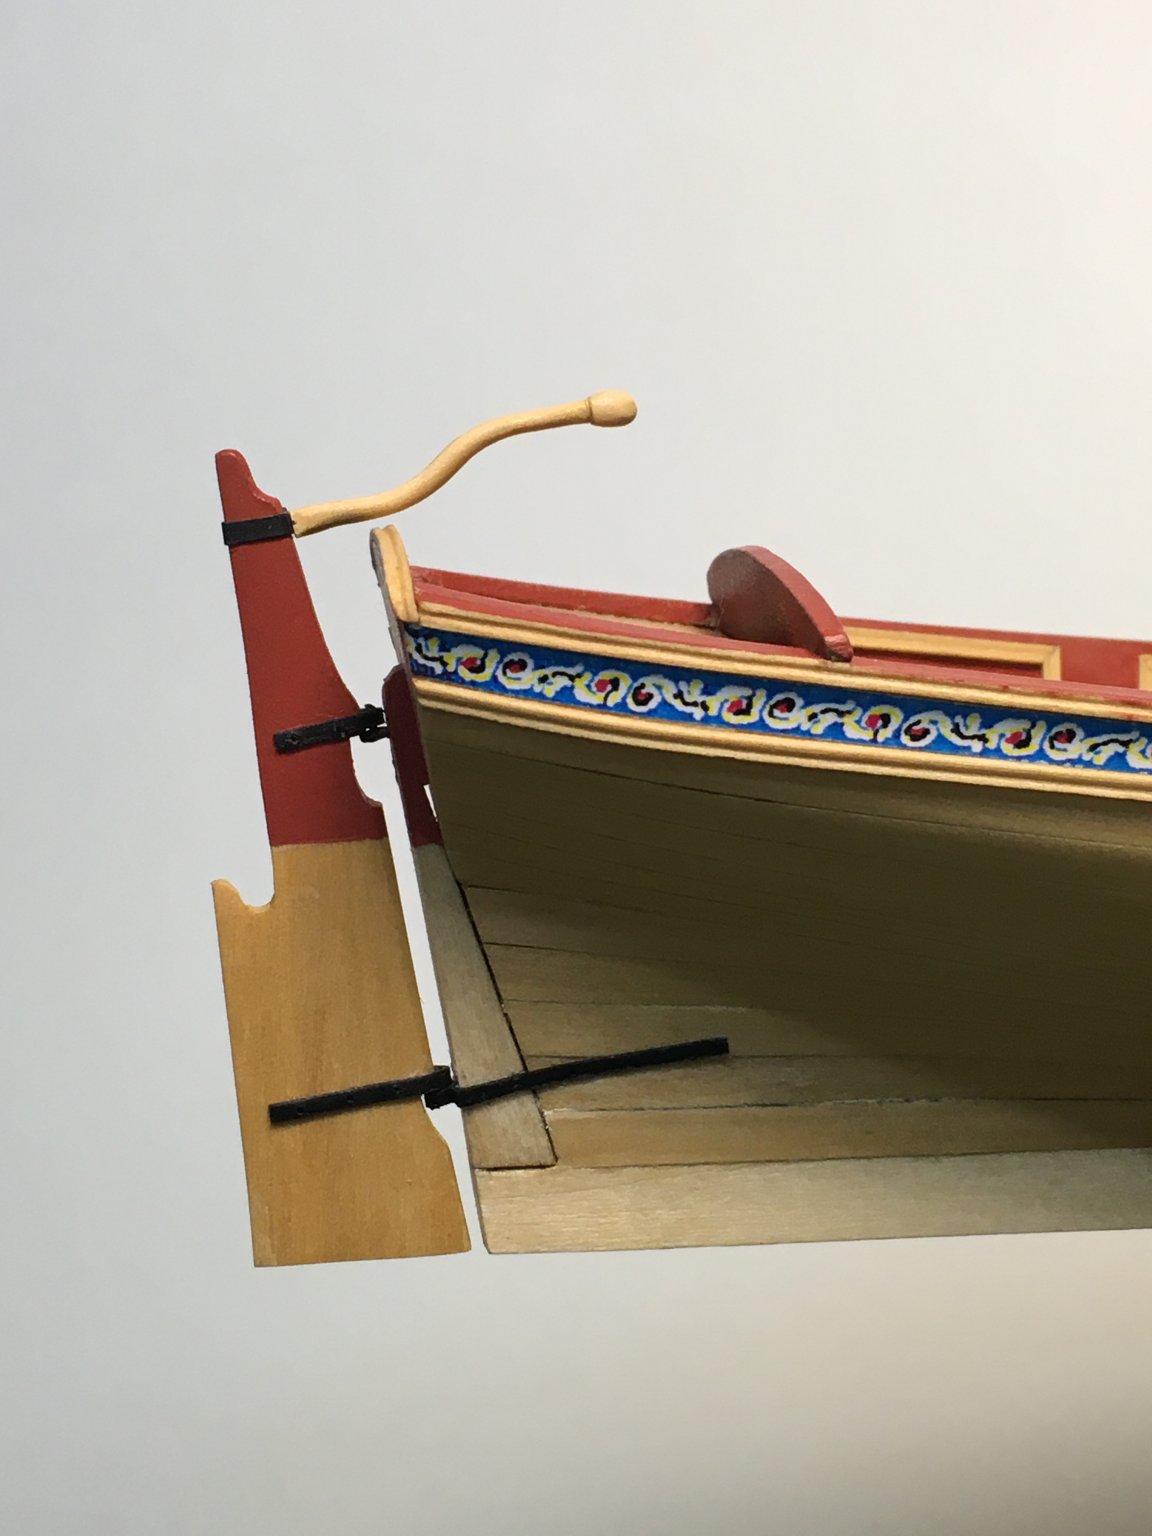
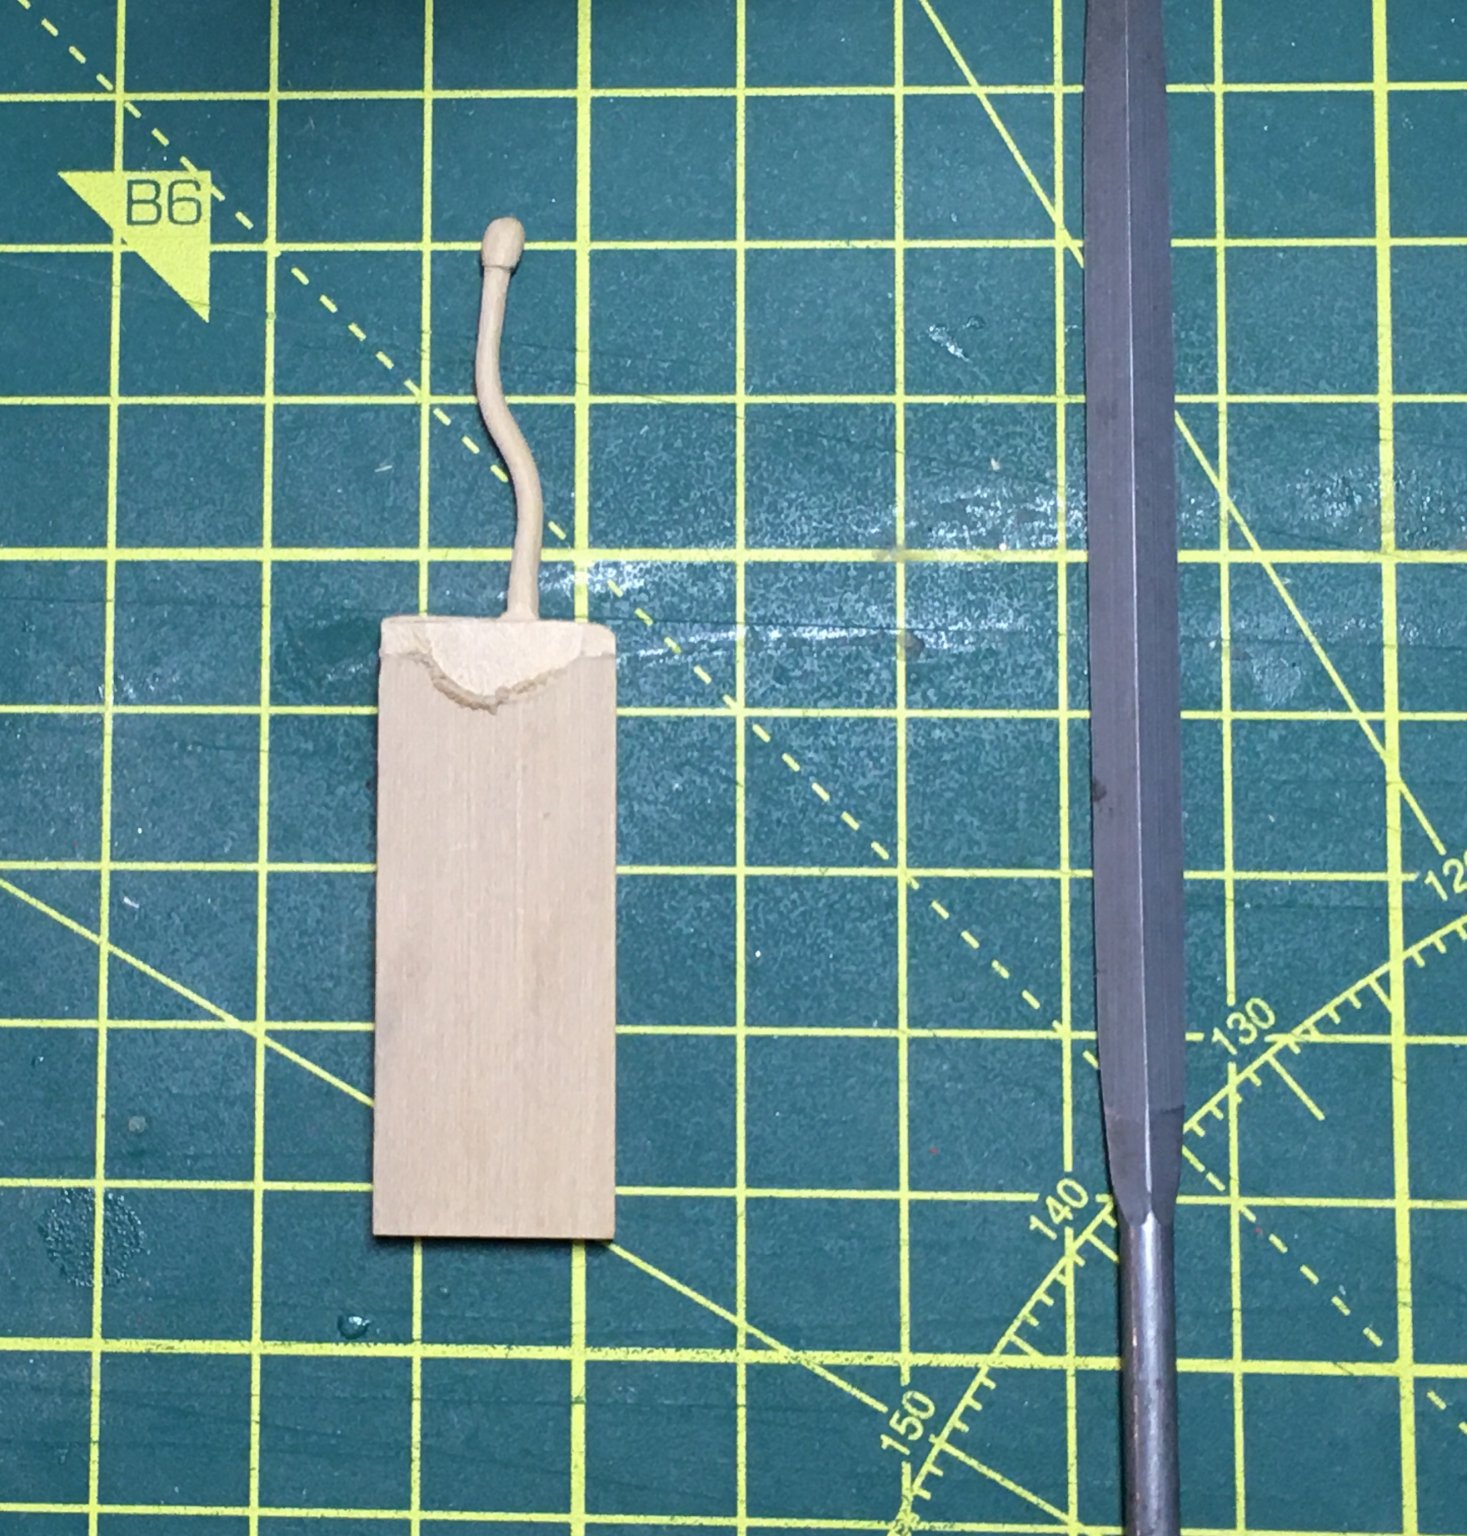
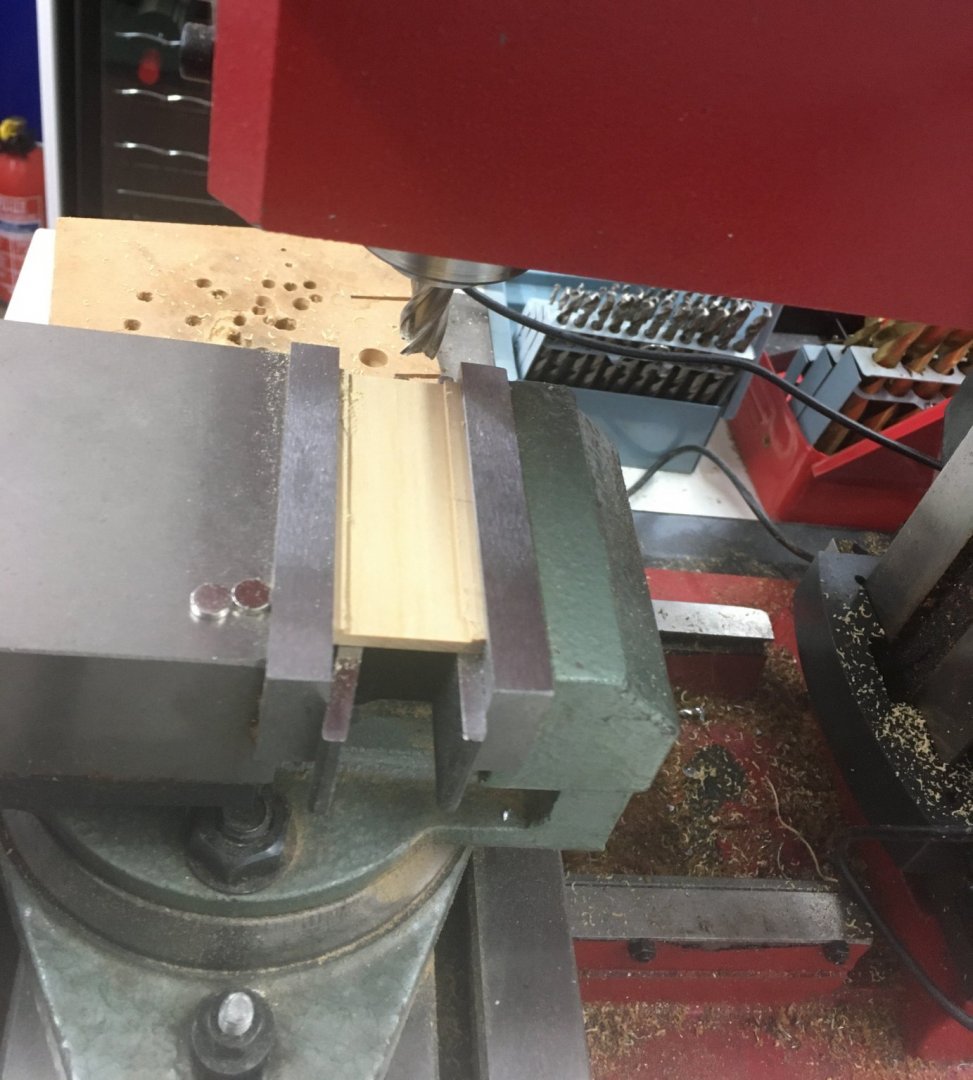
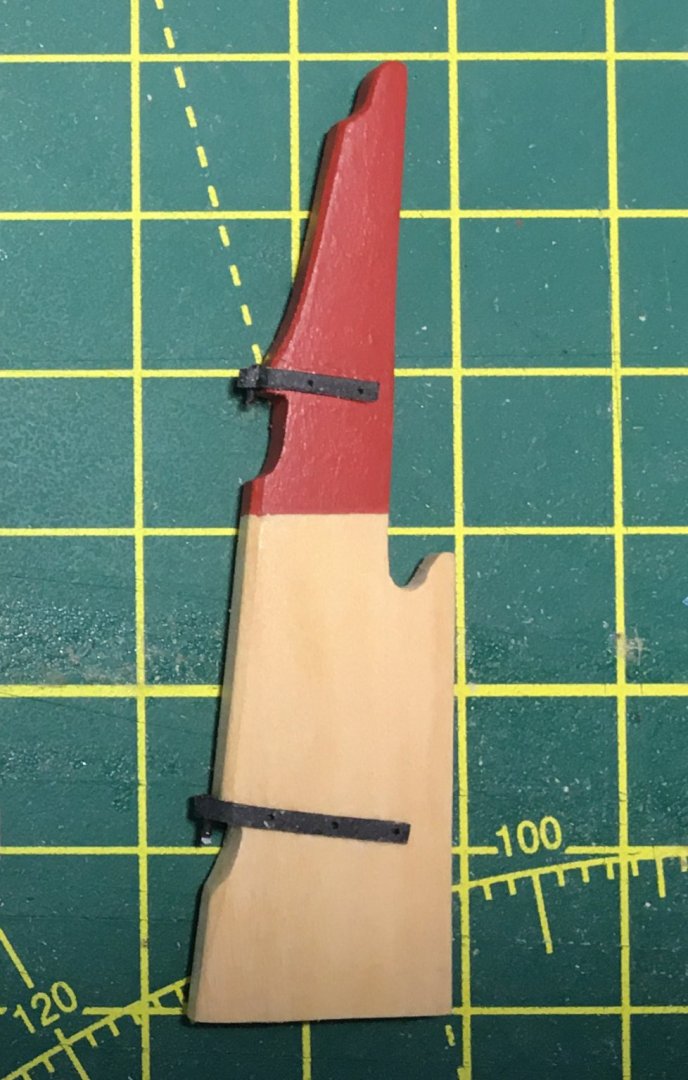
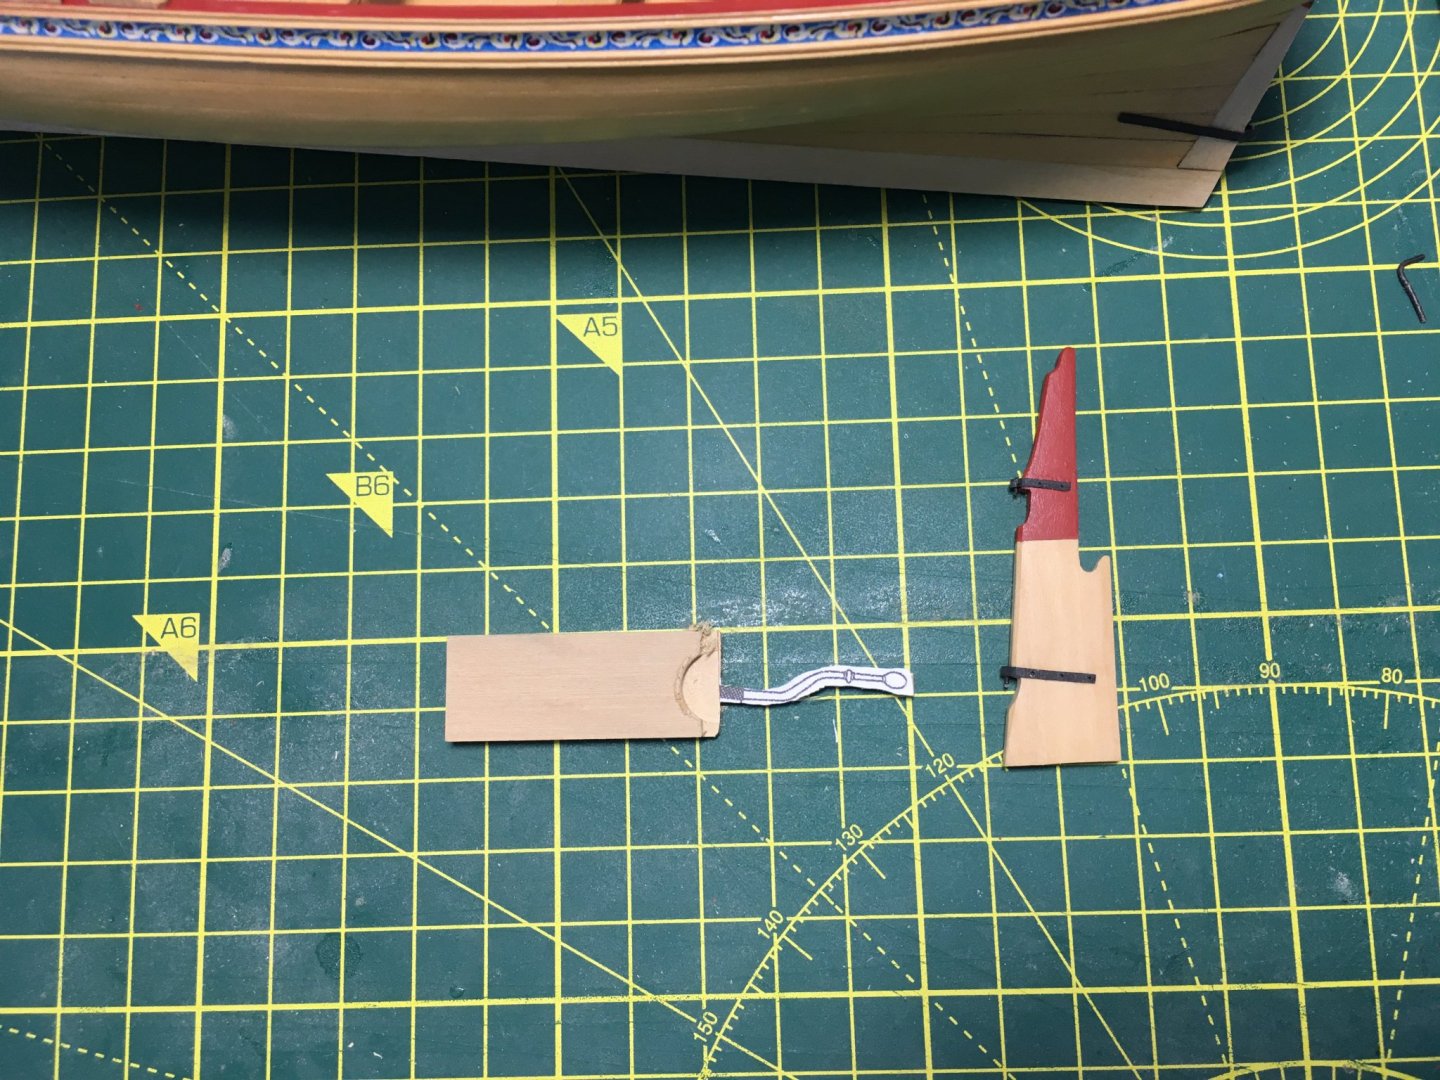
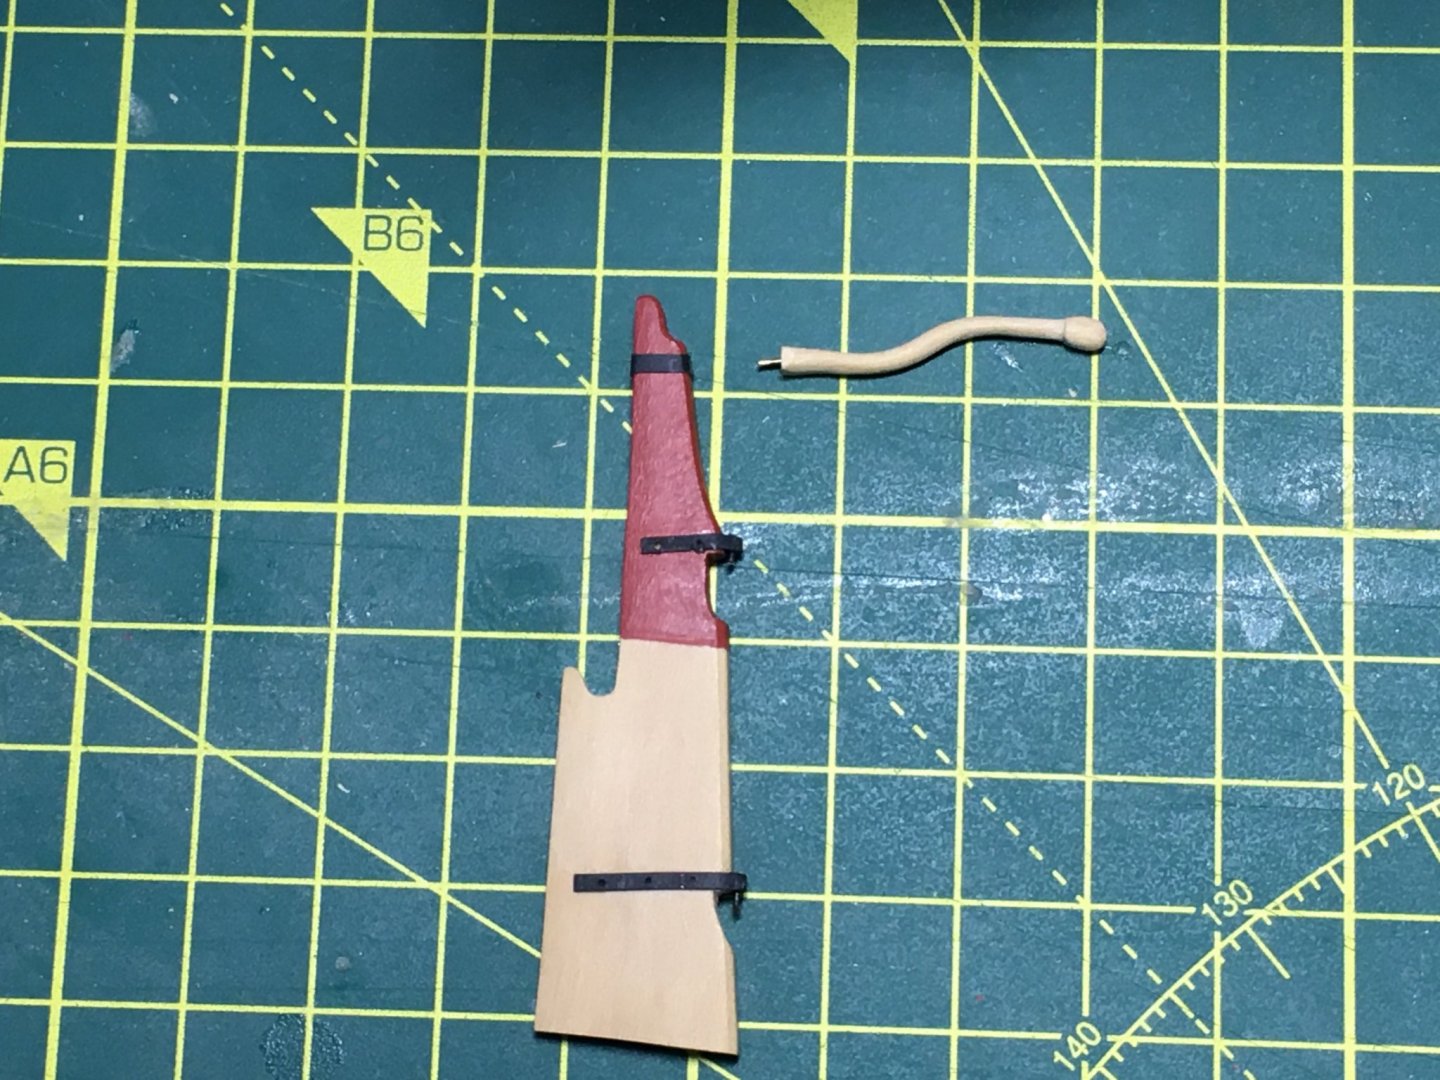
I've been concentrating on Speedy for a while, with just a little work on the rudder to report on. I started with a spare piece of boxwood which I milled to the right thickness: I traced the shape of the kit rudder on the sheet, cut it out on the bandsaw and shaped it with swiss files and sandpaper: The rudder tapers to around half its width towards the aft end. I used pinstripe tape along the edge as a guide when filing and sanding the profile: Strips of black paper and short lengths of wire for the pintles completed the rudder: I used the rest of the boxwood sheet to make the tiller. This was a new skill for me, and I wasn't sure I'd be able to make anything half-decent. I started by gluing a photocopy of the tiller to the boxwood sheet and cutting out the rough shape on the bandsaw: After that it was just a lot of care and perseverance with files and sandpaper. Again, the Vallorbe files proved their worth. As I said recently in my Speedy log, I'm glad I got a set of decent Swiss files a couple of years ago. I'd got by for years with a set of 12 files for £5 from a DIY supermarket, and it wasn't until I got the good set that I found just what a difference they make - beautifully crisp and precise. Leaving a large piece of sheet attached made the part much easier to handle. Once I was satisfied with the shape I separated the tiller and drilled the end for a 0.5mm pin to attach it to the rudder: The rudder fitted. Aaaargh! I realised as soon as I'd taken the photo that I'd fitted the tiller upside down. Fortunately the glue hadn't dried and I was able to retrieve the situation: Phew. Quite happy with the result, although looking at the two pictures above I think I might prefer the first! Indecisive? Me? I feel like I'm on the home straight now, although the oars may be tricky. Derek


- 77 replies
-
- 9
-
-
- model shipways
- pinnace
- (and 1 more)
-
Very smooth! I've ordered some of your Super Phatic glue - you should be on commission. Derek
-
Just catching up with your log. I admire your courage in redoing the first few planks - it was certainly worth the effort as your first planking looks great to me. Best wishes Derek
-
Is this what you remembered? This is a different issue - I think Chris is referring to the method he has used on other models whereby the gun port openings are pre-formed by frames within the bulwarks. This would not be practical for Speedy as the bulwarks are too thin. Our issue is about lining the inside of the gun ports to neaten the cut surfaces. Derek
-
More good progress. I notice earlier in your log you used pieces of cut-off planking below the waterline to save material - that might explain why you've got some strips left over. Like you, I've wondered about lining the ports. I can't find anything about that in the build instructions, but I think I'll line mine for a neater effect. Derek
-
Work is progressing well now second planking is done (apart from above the wales). Trimming the planks level with the tops of the bulwarks was straightforward. Unlike other colleagues in the Speedy club I didn't trim the planks round each port as I came to it, preferring to lay all the planks in one go then trim the ports after the glue had dried. I had to use off-cuts from 2nd planking the hull, otherwise I would have run out of strips, but it wasn't a problem as I was able to use the short lengths to fill in gaps between ports. I just left the planks slightly over-length so I could trim them to final size after they'd dried. I used the usual combination of drill, sharp tools and files to do the trimming: The oar ports were the trickiest, requiring a drilled hole followed by a square file. I drilled from the outside, holding a block of scrap wood against the inside of the bulwark to minimise the risk of breakout. Once again the boxwood proved its quality, being relatively easy to carve and file. The job also reminded me how glad I was that I'd got a set of decent Swiss files a couple of years ago - Vallorbe brand. Like many of us I'd got by for years with a set of 12 files for £5 from a DIY supermarket, and it wasn't until I got the good set that I found just what a difference they make - beautifully crisp and precise. I found the barrette file particularly useful on this job - that's the one on the left of the two above. It just cuts on one face, so I could get right into corners without damaging other faces. Next job was painting the inner bulwarks. Two coats of diluted red ochre - I may give it more later: I'm looking forward to finishing off the outer planking next. That'll feel like a milestone reached. Derek

- 725 replies
-
- 7
-
-
- vanguard models
- speedy
- (and 1 more)
-
As Glen says, good job on the bulwarks. Are you guys running short on 2nd planking strips? I ask because I've had to use off-cuts from the hull planking to complete the inner bulwarks. Not a problem as I was able to use the short off-cuts to fill the gaps between ports, but the build definitely requires more than the 60 strips of 2nd planking timber supplied. Or am I missing something? Derek
-
For the size of timbers we normally use for ship modelling I've found the Proxxon bandsaw more than adequate. I've also cut 6mm brass sheet and 25 mm aluminium rod with it. Like all their tools it is very well made, if somewhat pricey. Derek
-
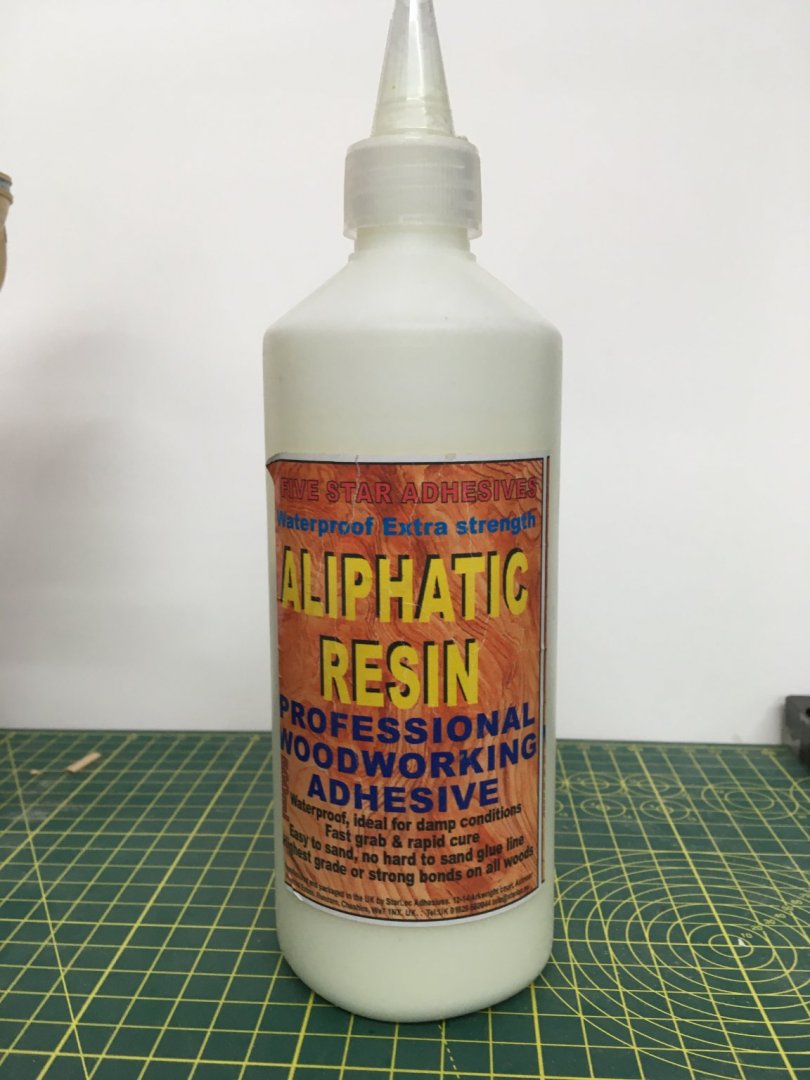
Hi SpyGlass Here's the one I use. I call it PVA but technically it's an aliphatic resin - chemically similar to PVA but stronger and sandable. It's described as fast grab, but don't let that put you off - there is plenty of time to position your work. It's fast in the sense that you should have a decent join in less than 30 minutes, although as with all glues of this type I leave critical joints such as frames overnight. I believe aliphatic resin is sometimes known as yellow glue, but mine looks white to me. I got it years ago - from memory at a model boat show - use it all the time and I've still got half left. The manufacturer is UK based Starloc Adhesives - here's their retail website shop-4-glue.com. You'll see they do a range of glues and applicators. Hope this helps. Derek
- 725 replies
-
- 3
-
-
- vanguard models
- speedy
- (and 1 more)
-
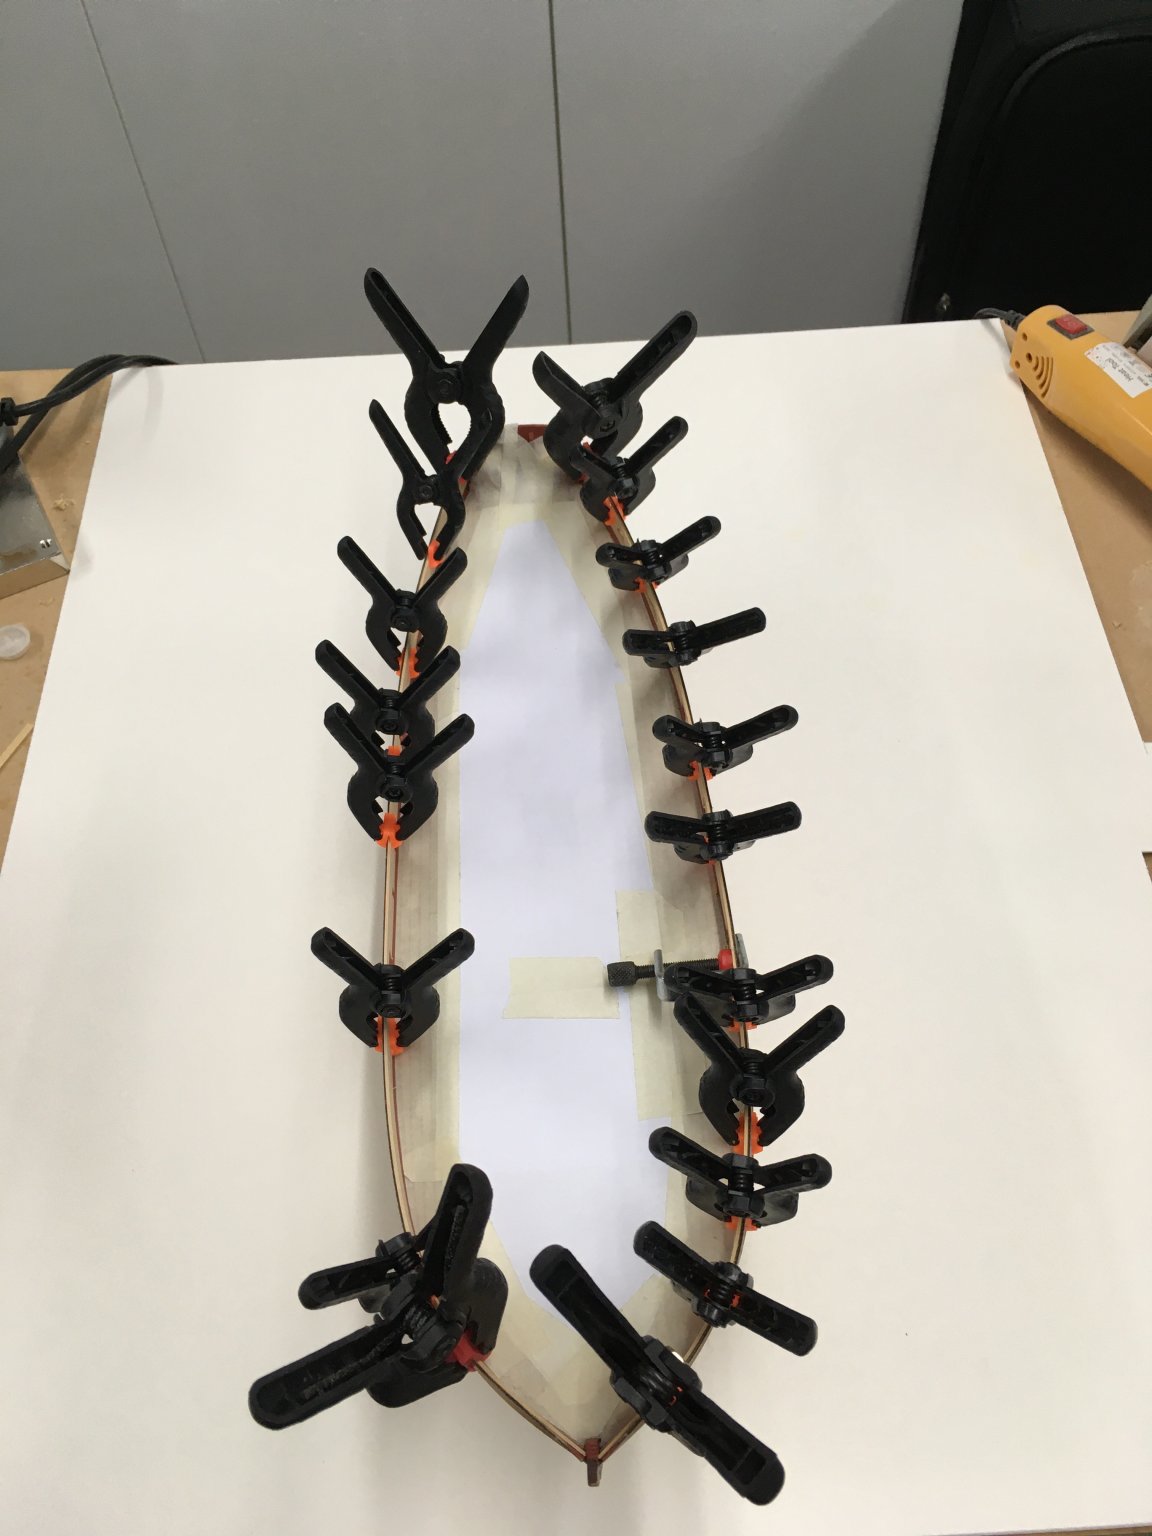
In the end I decided to go for a paper deck on which I'll draw my own planks. No, seriously, I've gone for version 1 . Here I'm protecting it with paper and masking tape whilst starting to plank the inner bulwarks. With some relief I've gone back to using PVA, hence the number of clamps. Derek

- 725 replies
-
- 4
-
-
- vanguard models
- speedy
- (and 1 more)
-
I think I’ll keep mine uncluttered 🤪, though it’s entertaining and enlightening to follow your thought processes and research! Derek
- 335 replies
-
- 3
-
-
- alert
- vanguard models
- (and 1 more)
-
Thanks everyone for your comments and advice. You all seem to be coming down in favour of the laser etched deck, and in particular version two. I think I'll take your advice and forego the pleasure (?) of making a fully accurate boxwood deck on this occasion. Another time, perhaps. However I'm not sure which version of the laser etched deck I prefer. I get the point about the clutter around the hatches and other openings in version 1, but won't a lot of that be covered by coamings and the like? On the other hand, the trunnels stand out a lot on version 2 and they will be visible regardless. Glenn, for me it would be tapering the planks and getting the joggling right that would put me off. As for boxwood, I cheat and use the castello variety. It may not be quite the same as English boxwood but it still works well and gives a good finish. I get it in 3' x 4" sheets in a variety of thicknesses from 3mm to 10mm and mill my own timber for planks, spars etc. I'll drop some off next time I'm in Texas . For really fine work, such as block making, I buy old boxwood folding rulers and they're guaranteed well-seasoned! Derek
- 725 replies
-
- 2
-
-
- vanguard models
- speedy
- (and 1 more)