DelF
-
Posts
1,409 -
Joined
-
Last visited
Content Type
Profiles
Forums
Gallery
Events
Everything posted by DelF
-
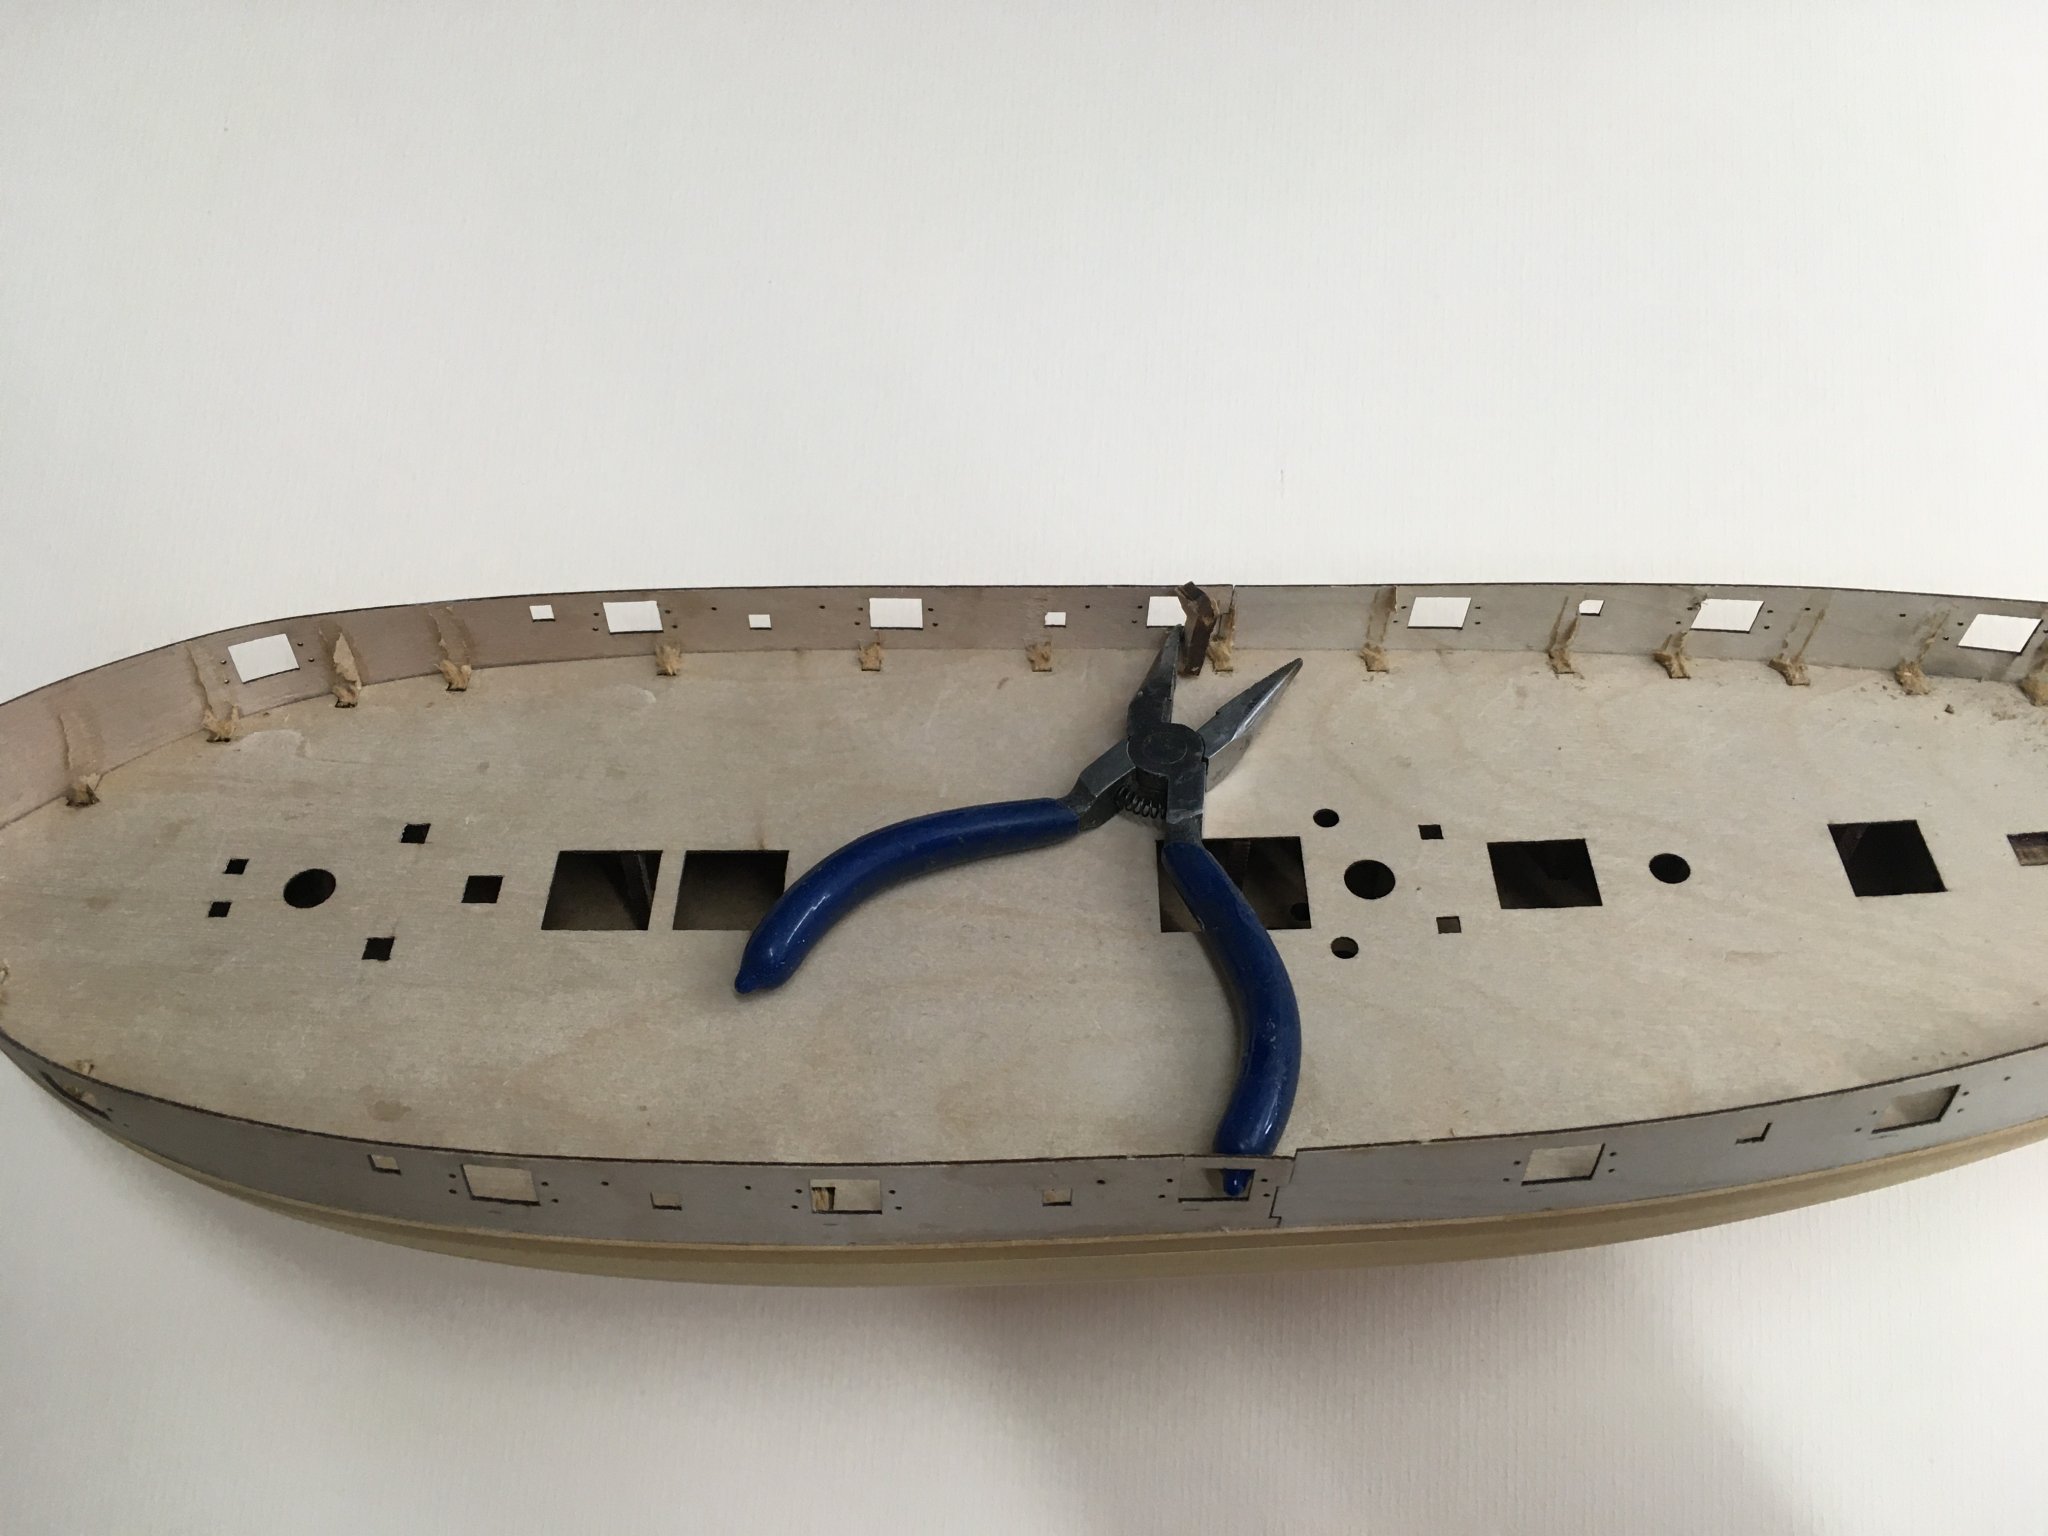
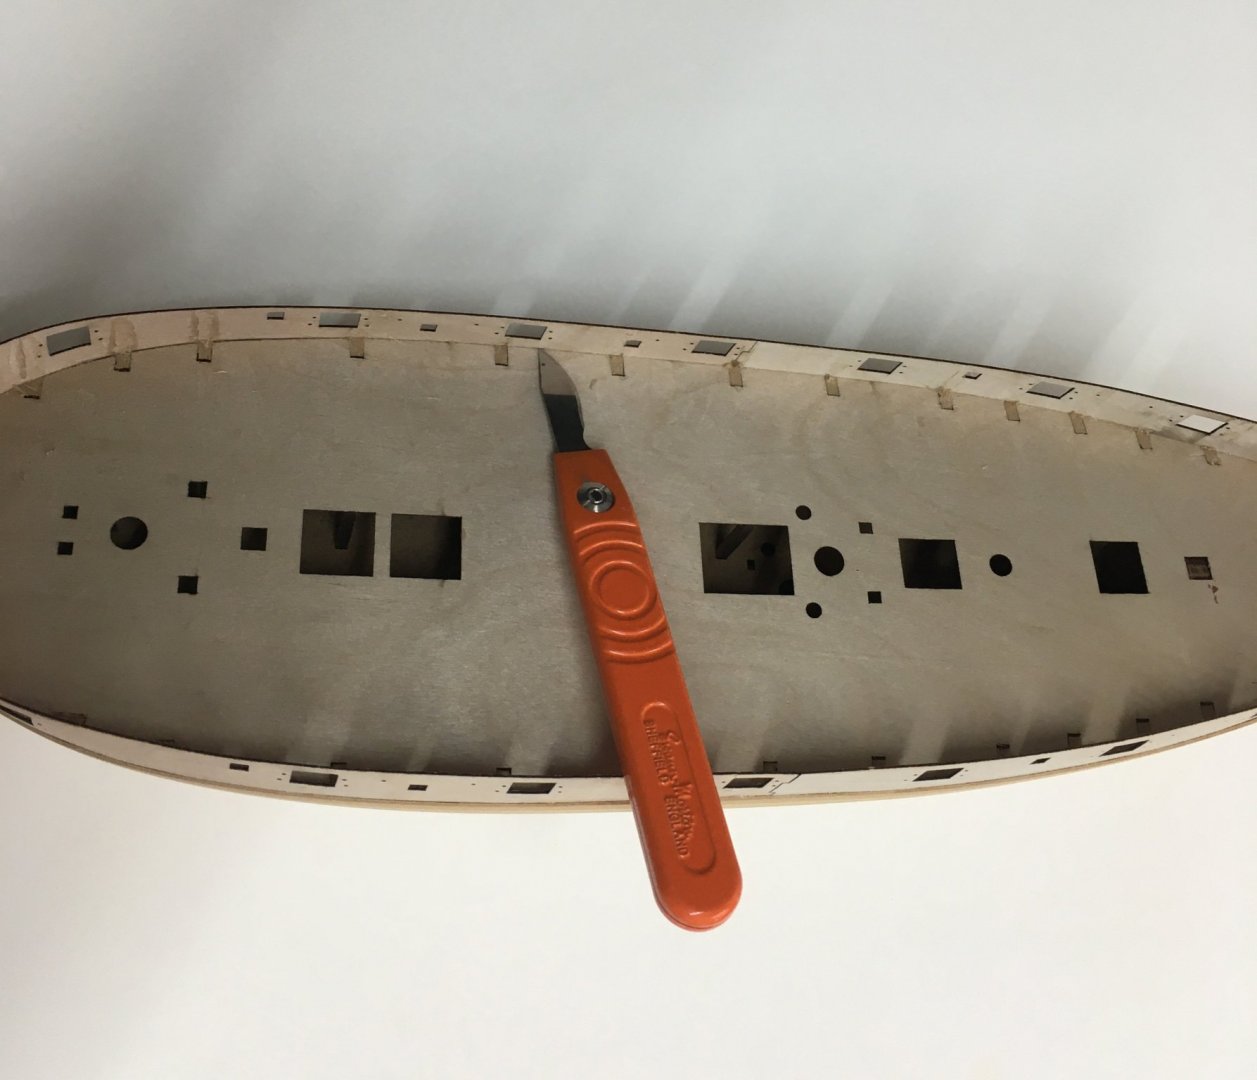
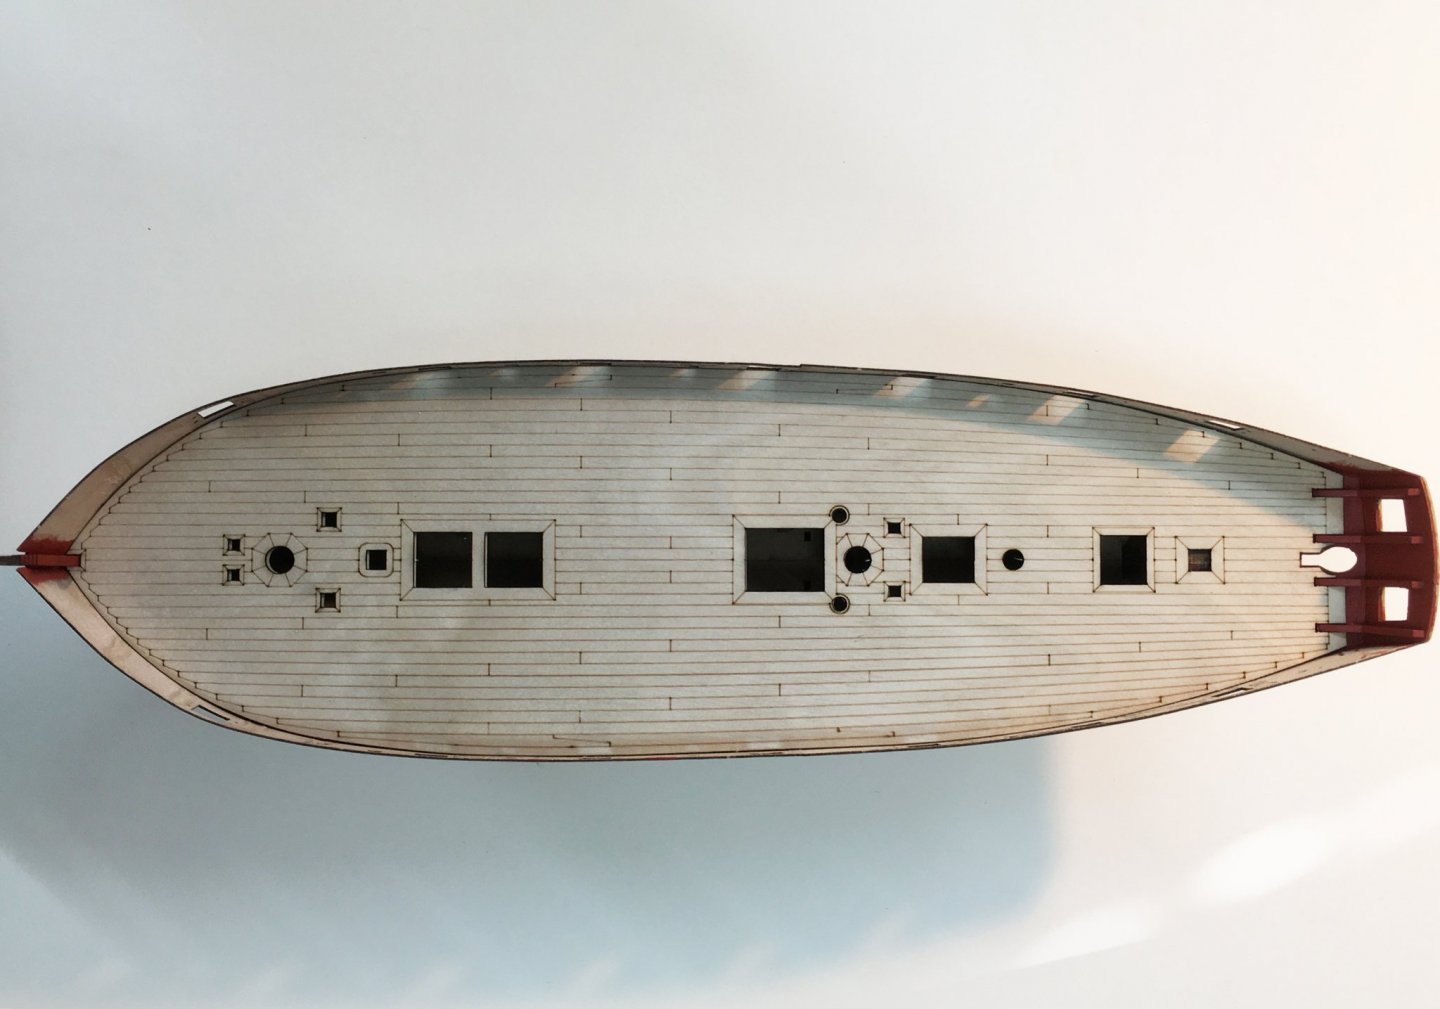
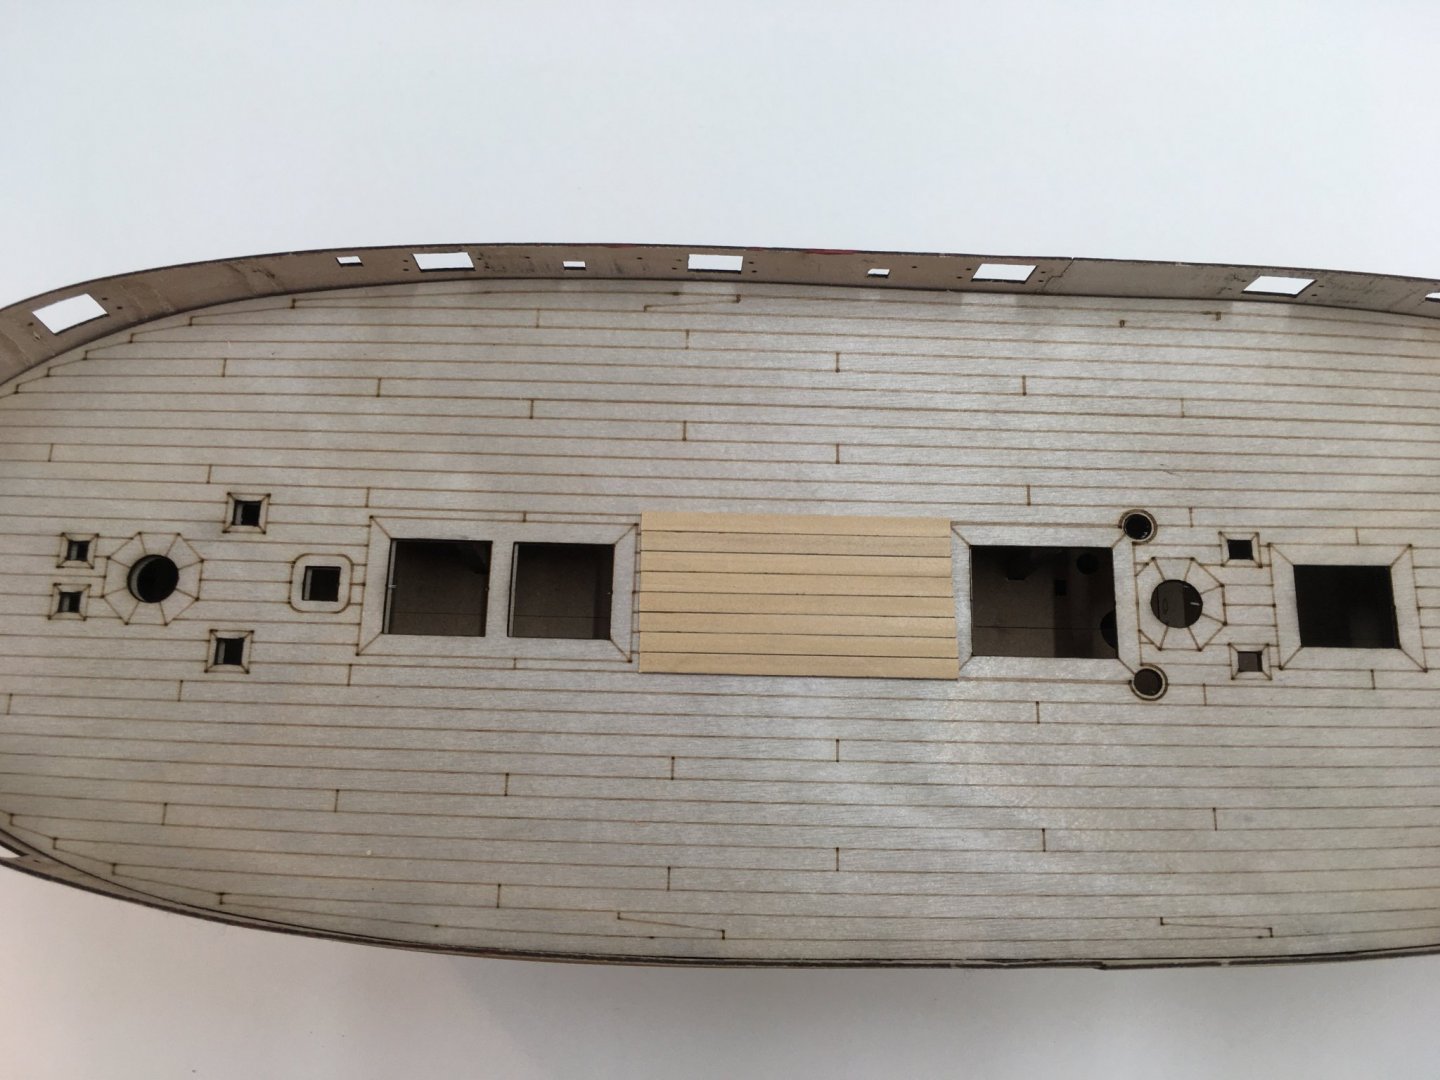
 Bit more progress today, in between gardening chores - brief spell of warm sunny weather here, so I'm making the most of it. Removing the frame tops was surprisingly easy. The MDF broke off well - you just need to go steady to make sure you don't damage the gunport pattern, which is only 0.8mm thick. Gentle twisting with pliers is all that's needed: Chris's instructions suggest using a file or sandpaper to clean up, but I found a new Swann Morton craft blade sliced through the remaining MDF and glue very neatly: Next, I painted the areas inside the bow and stern that'll be difficult to do once the deck's in place. Speaking of which, I couldn't resist test fitting the laser etched deck: Some unhelpful shadows here - I thought the deck actually looked pretty good. As a further test, I cut some boxwood planks and dry-laid them with a light pencil line to simulate caulking: I'm still in two minds. If the boxwood was properly varnished it would look stunning. However Chris's design will be hard to follow, as the deck planks are tapered towards the bow and stern and are shown joggled into the margin plank. Do I stick with the laser deck, which I think is acceptable, or go for a stunning boxwood version and risk making a mess of it? I don't think I'd be satisfied doing a 'plain' boxwood deck - ie without the tapering etc. . Even though the finish would look great I'd miss the detail in the laser-etched version. What do you guys think? Derek
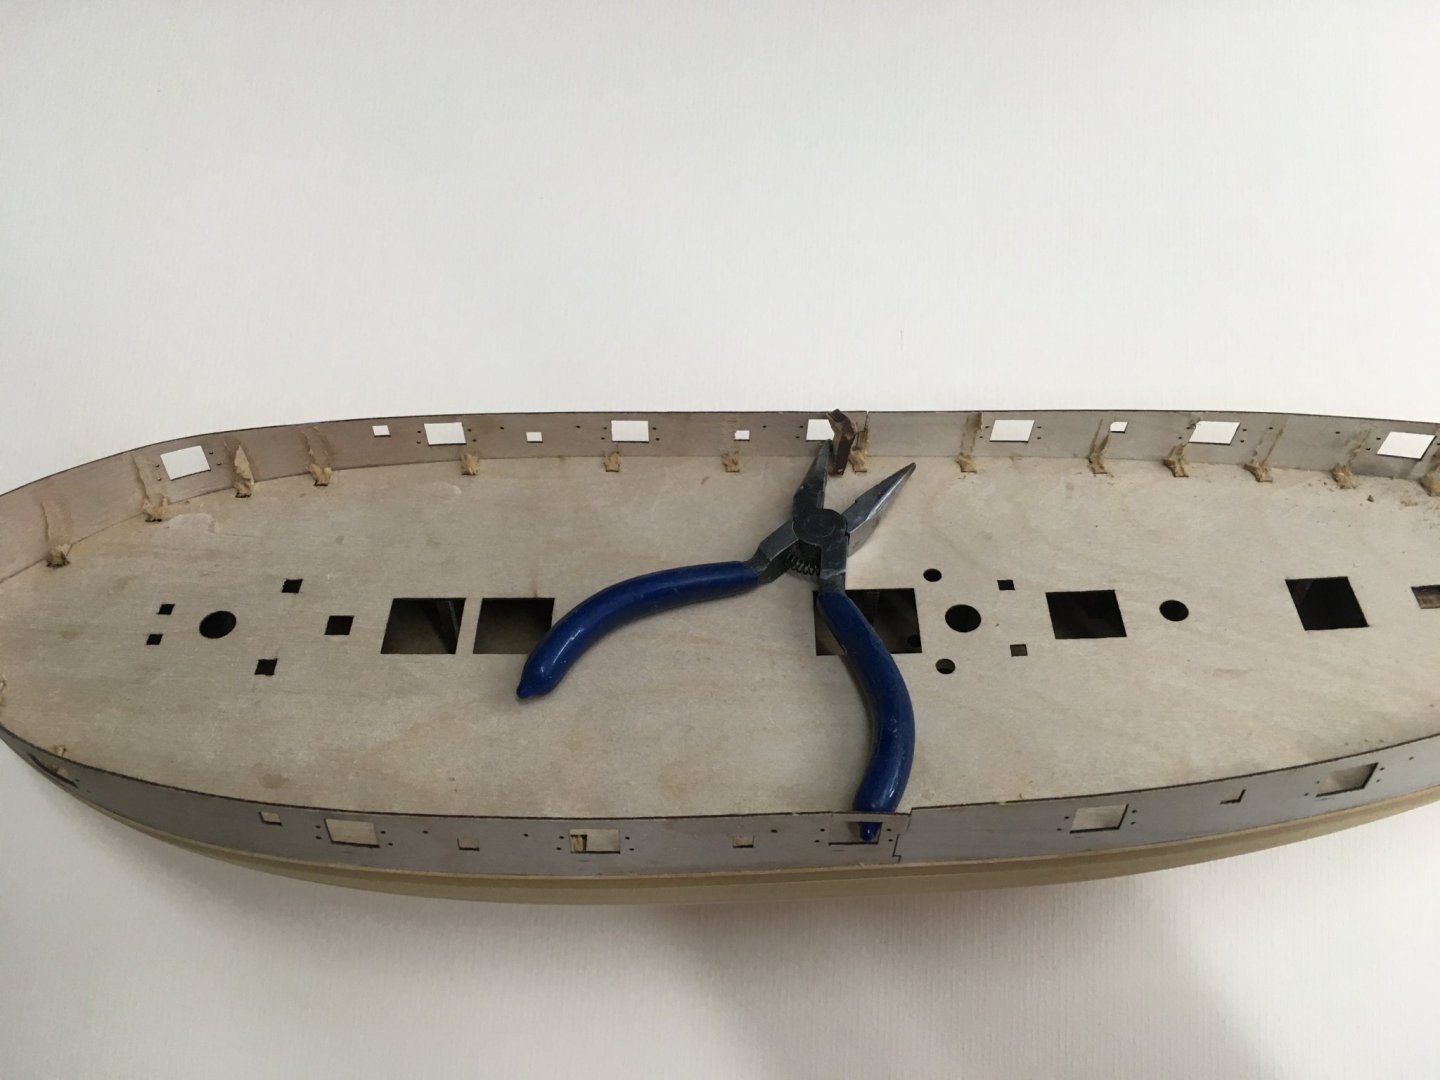
- 725 replies
-
- 6
-

-
- vanguard models
- speedy
- (and 1 more)
-
Thanks! Much appreciated. I just thought the line of some of the strakes looked a bit odd. Derek
-
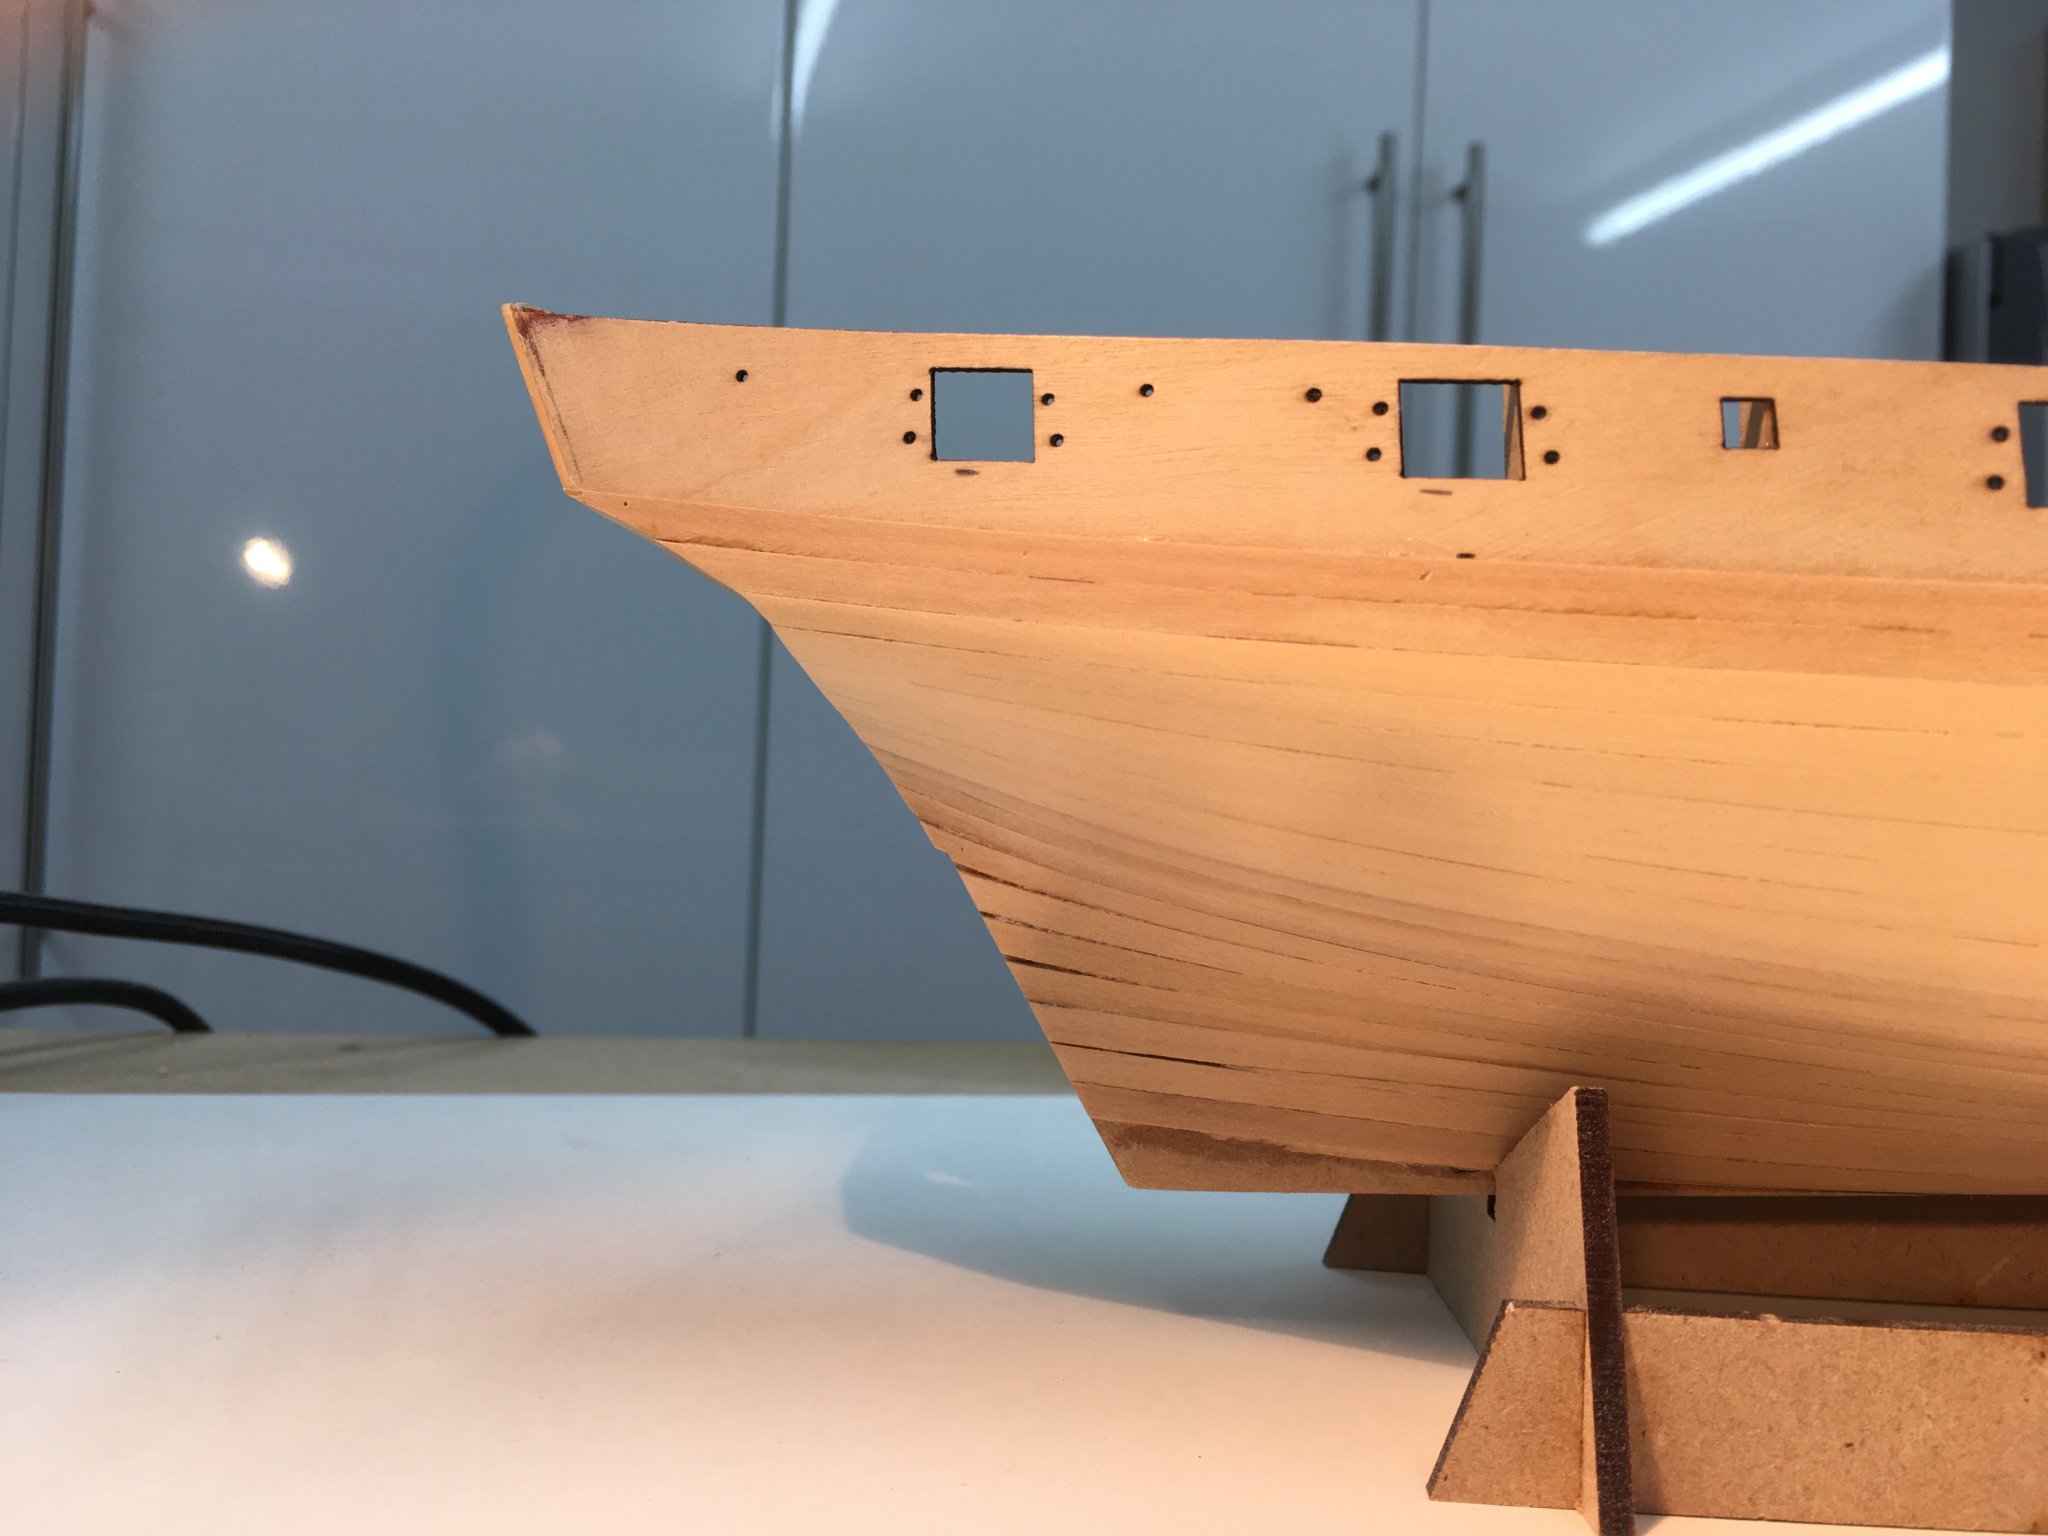
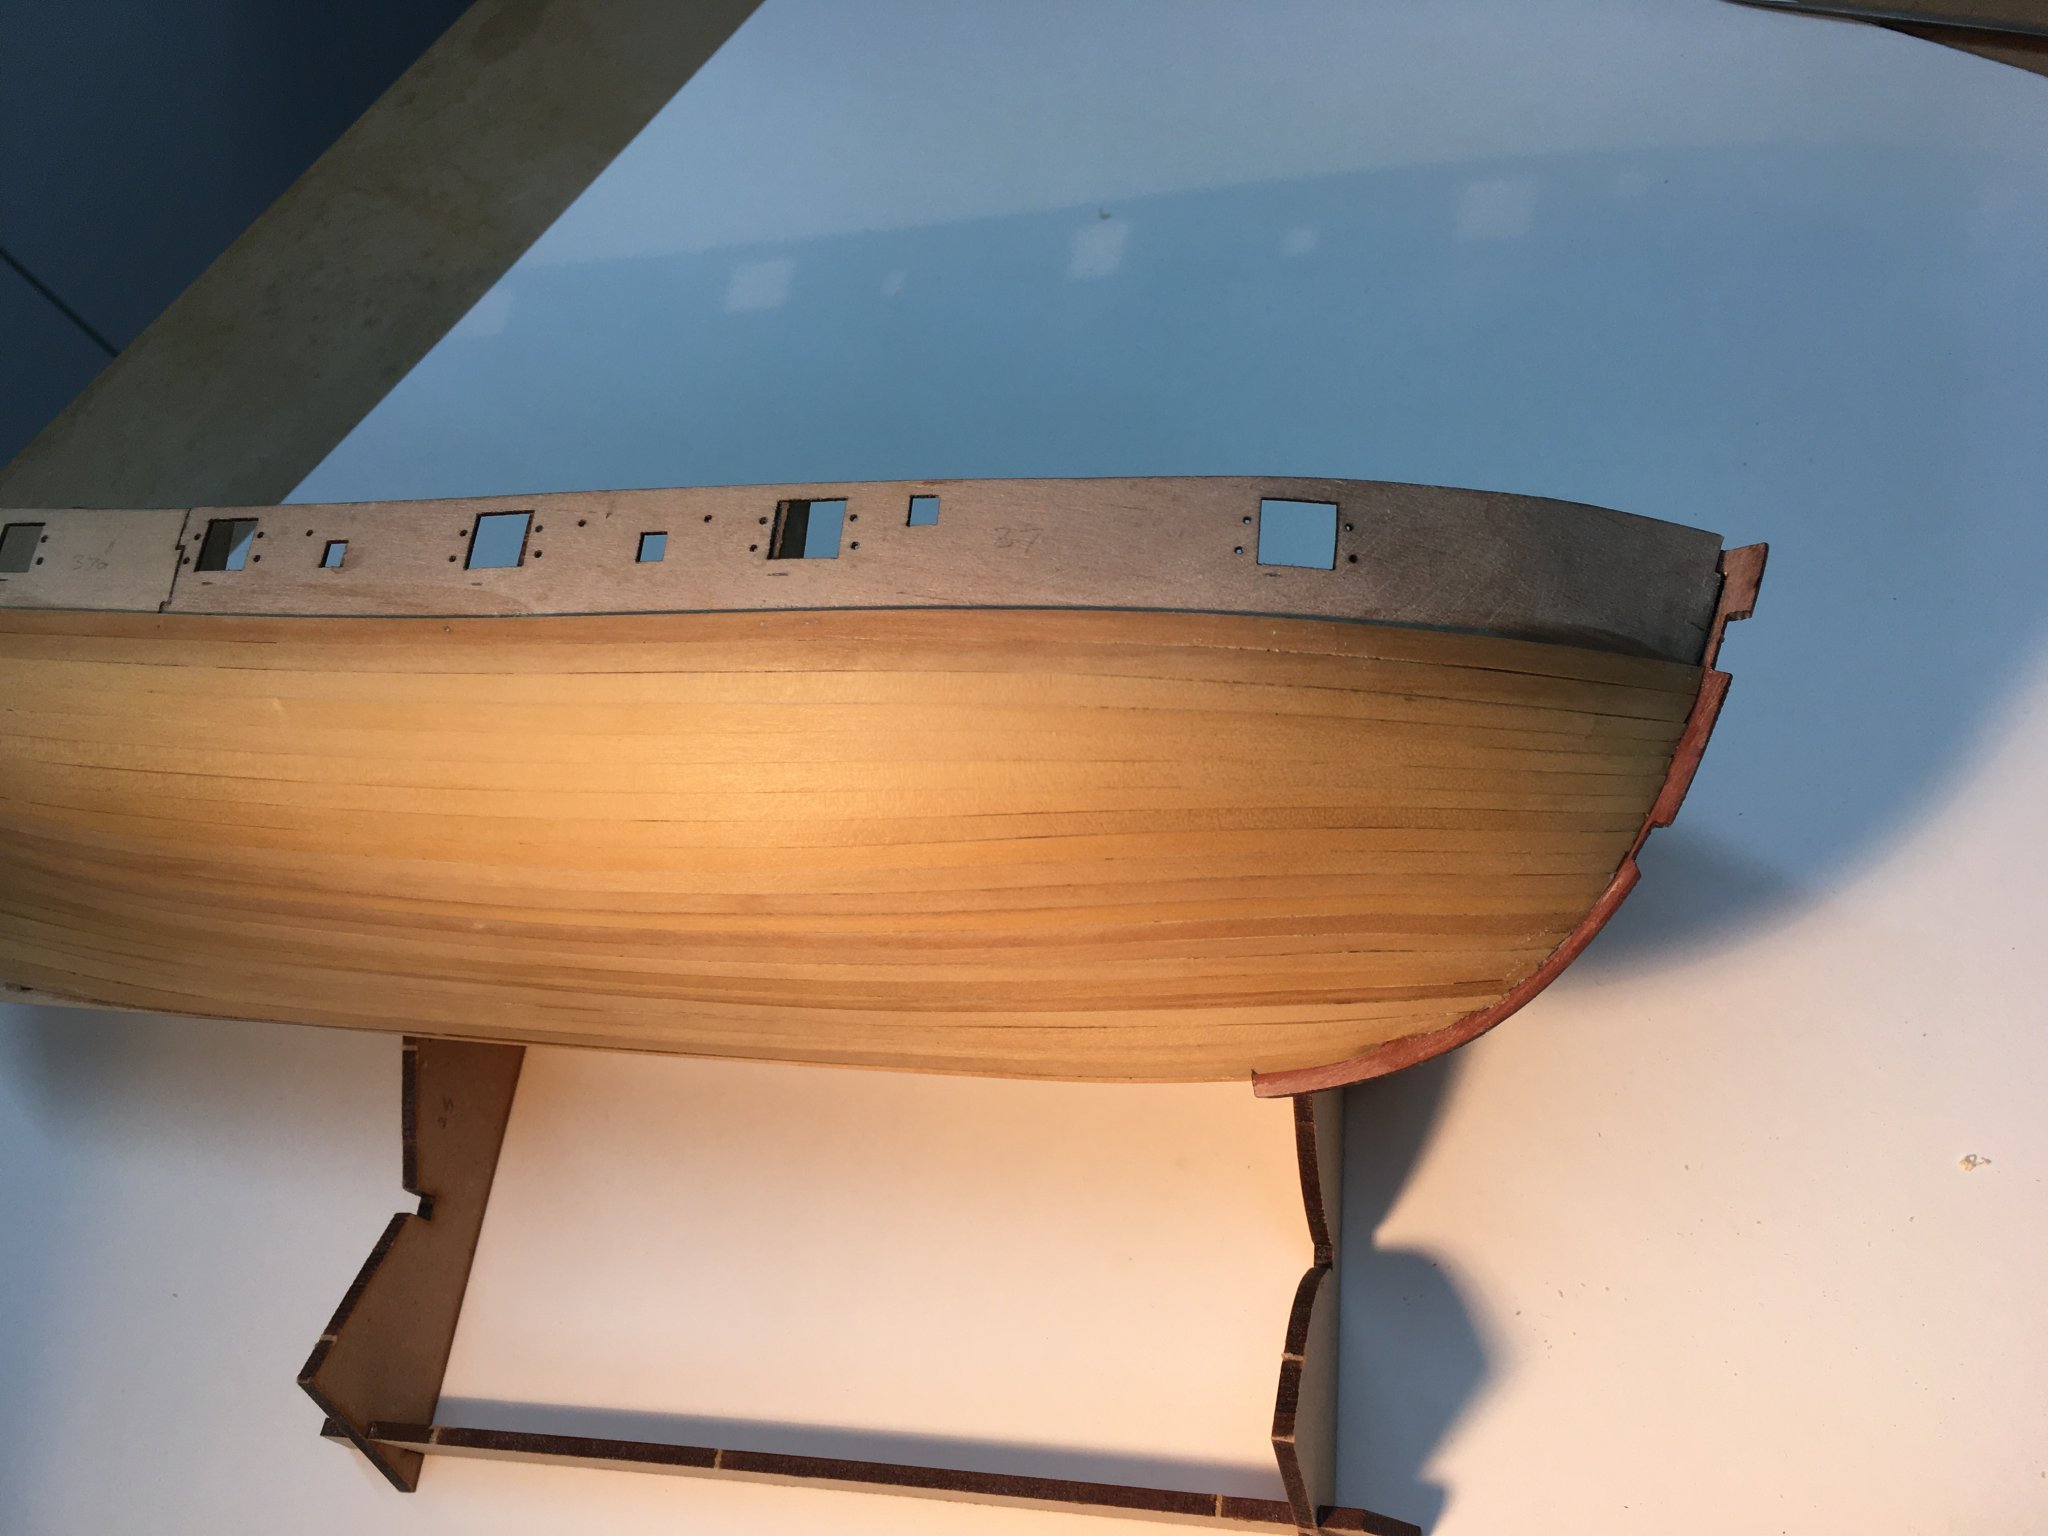
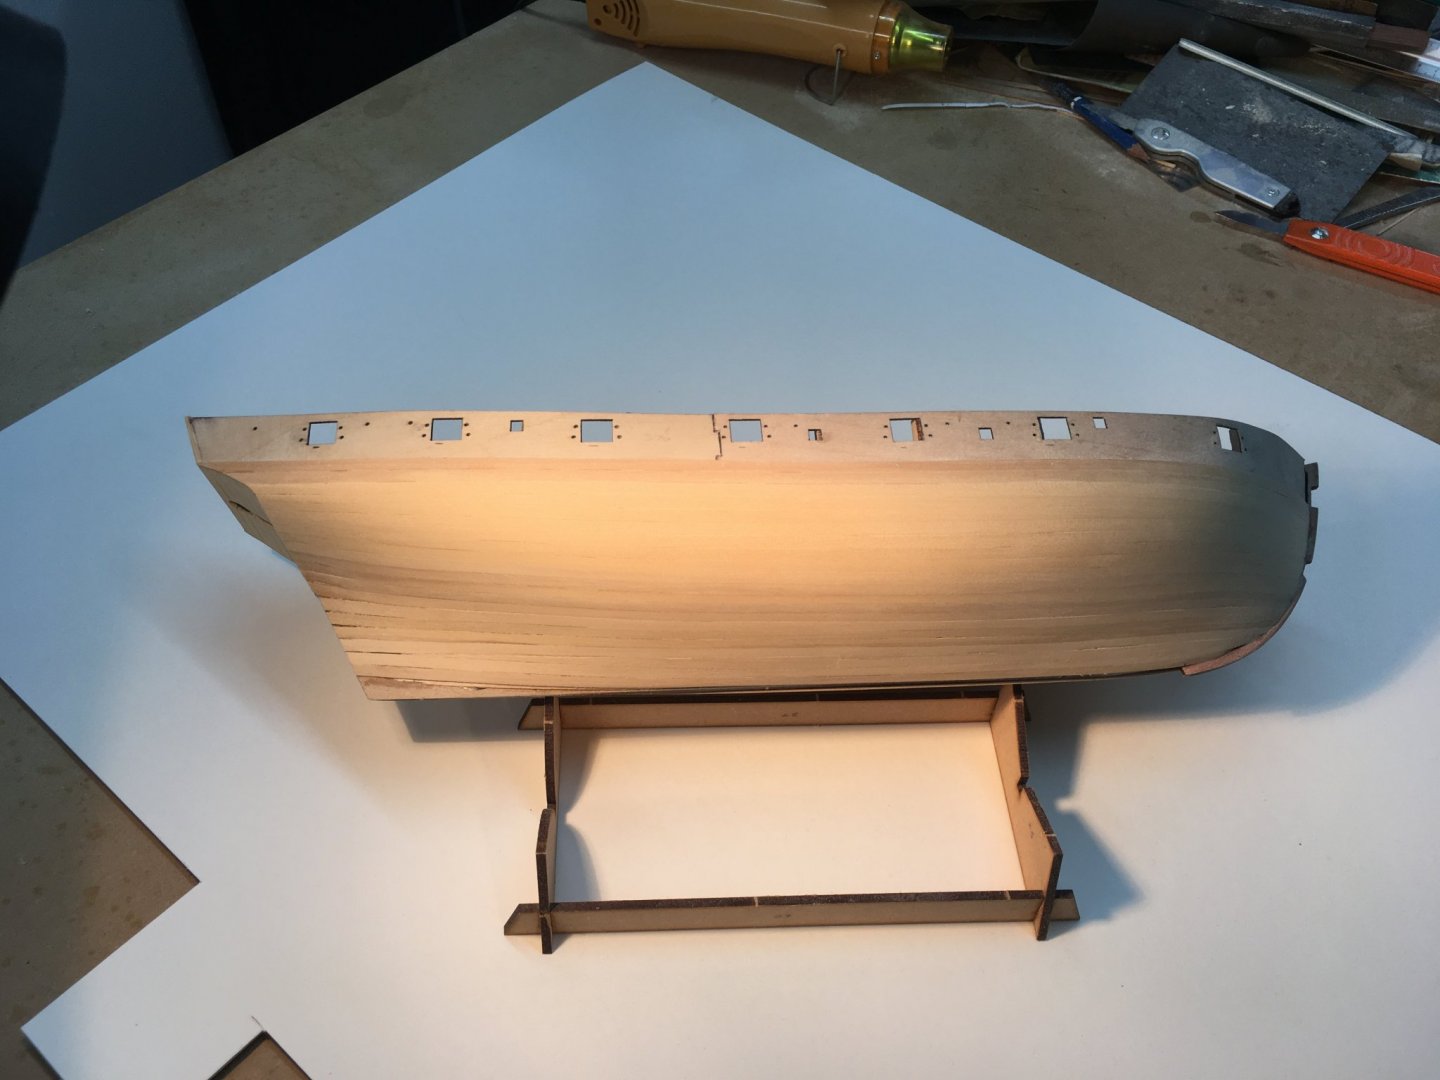
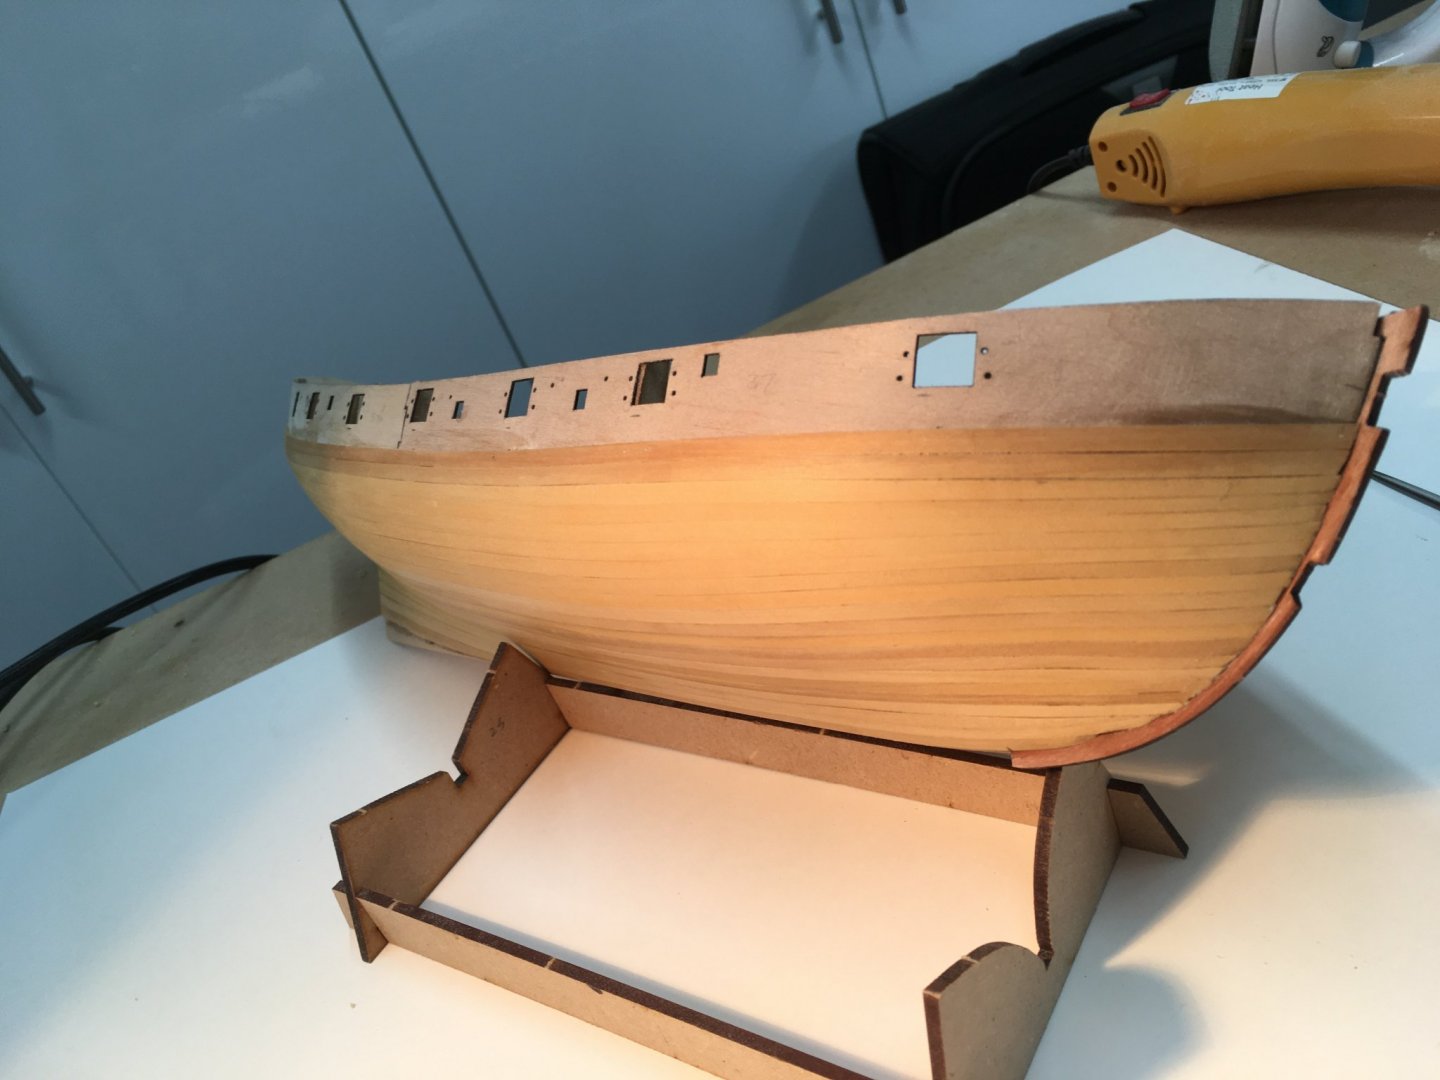
I've had a good go at initial sanding. I still need to thin down the area where the stern post will fit, but otherwise I'm quite pleased with the result so far. Edge bending went well. There is some variation in the wood colours, but that won't be as noticeable when the wale is painted and the hull coppered below the waterline (I think I've decided to go down that route). In the following pictures I've applied some sanding sealer as a reveal coat, in other words to show up any areas needing further sanding. The run of the strakes may offend purists - especially in the lower hull area just behind the bows - but that will be covered by plating and for me the pleasing thing is how flat all the planks are laying. Having said that, I'm keen to try the edge bending technique in conjunction with properly marking out the frames. For example as Chuck has done with the Winchelsea group build. I'm glad this part of the build is nearing completion - I'm relieved I've not made a total hash of the hull - and I'm looking forward to the next stage. I must say it's great to follow along with other people's logs now that there are several of us in the Speedy club, and I'm looking forward to seeing SpyGlass catching up now that he's got his accommodation sorted. Derek


- 725 replies
-
- 12
-
-
- vanguard models
- speedy
- (and 1 more)
-
You're cooking on gas now, as they say! Looking good - well done. On your question about the inner bulwark planks, it certainly makes sense to do each strip in shorter lengths, but I'm not sure the actual length matters too much. With all the gunports and other holes in the bulwarks I don't think your eye will notice the joins so long as they are staggered. I'm still in two minds about using the laser etched deck or using it as a template for my own planks. I'll be interested to see what yours looks like when you've applied a finish. Keep up the good work. Derek
-
Impressively neat second planking. I'm also keen to see how that filler looks after sanding. You're faster than me! Derek
-
I'll look out for that!
-
Dry ginger with good single malt? Sacrilege! I might join you in a Newky Brown though. I love the Islay malts but haven't visited the island. My favourite distillery was Highland Park in the Orkneys. My wife and I were the only visitors but we still got the full tour. Interesting idea Phil. I might wait for some other brave soul to try it! Derek
-
That's OK by me - I've just finished a very fine Lagavulin 🥃 🤪 Good suggestion - I might well do that. I generally prefer the beauty of wood, but on the other hand I've not coppered a hull and may decide to give it a go regardless. I won't rush into a decision. Another malt or two first, I think. Derek
- 725 replies
-
- 1
-
-
- vanguard models
- speedy
- (and 1 more)
-
Don't apologise gents! This debate is interesting and enlightening for the less experienced amongst us - and I include myself in that category. Your cutter looks great Glenn, besides being a good advert for edge bending. SpyGlass - during first planking I dried several planks on the MDF bulkheads. Ignorance on my part, as I wasn't aware of potential problems. However the bulkheads suffered no ill effects that I could see. That may be because I dried them with a hot air gun rather than leaving them wet on the bulkheads for any length of time. Equally, it might be because Chris has supplied quality MDF. Either way, rather than follow my example you might want to experiment on a spare piece of MDF from the kit first. Anyway - back to Speedy. I've finally finished the second planking. On the positive side, tapering and edge bending got every plank to sit flat on the hull and snug against its neighbours. Port and starboard sides ended up almost perfectly symmetrical - the final plank on one side was about 0.25mm wider than the other. On the negative side, I did not enjoy working with CA. Although it made the work go faster and removed the need for pins and clamps, I could not avoid getting it in places I didn't want it, including the front faces of planks and my fingers. Also, the knowledge that large areas of the hull will be coppered allows you to get away with stealers and other triangular fillers - OK for this build but probably a bad habit to get into. Having said that, I'm pleased with the result and am reasonably confident the hull will be fine after sanding. I'm not out to beat speed records on this build so I might take a short break now, and perhaps get on with the Pinnace. Derek

- 725 replies
-
- 5
-
-
- vanguard models
- speedy
- (and 1 more)
-
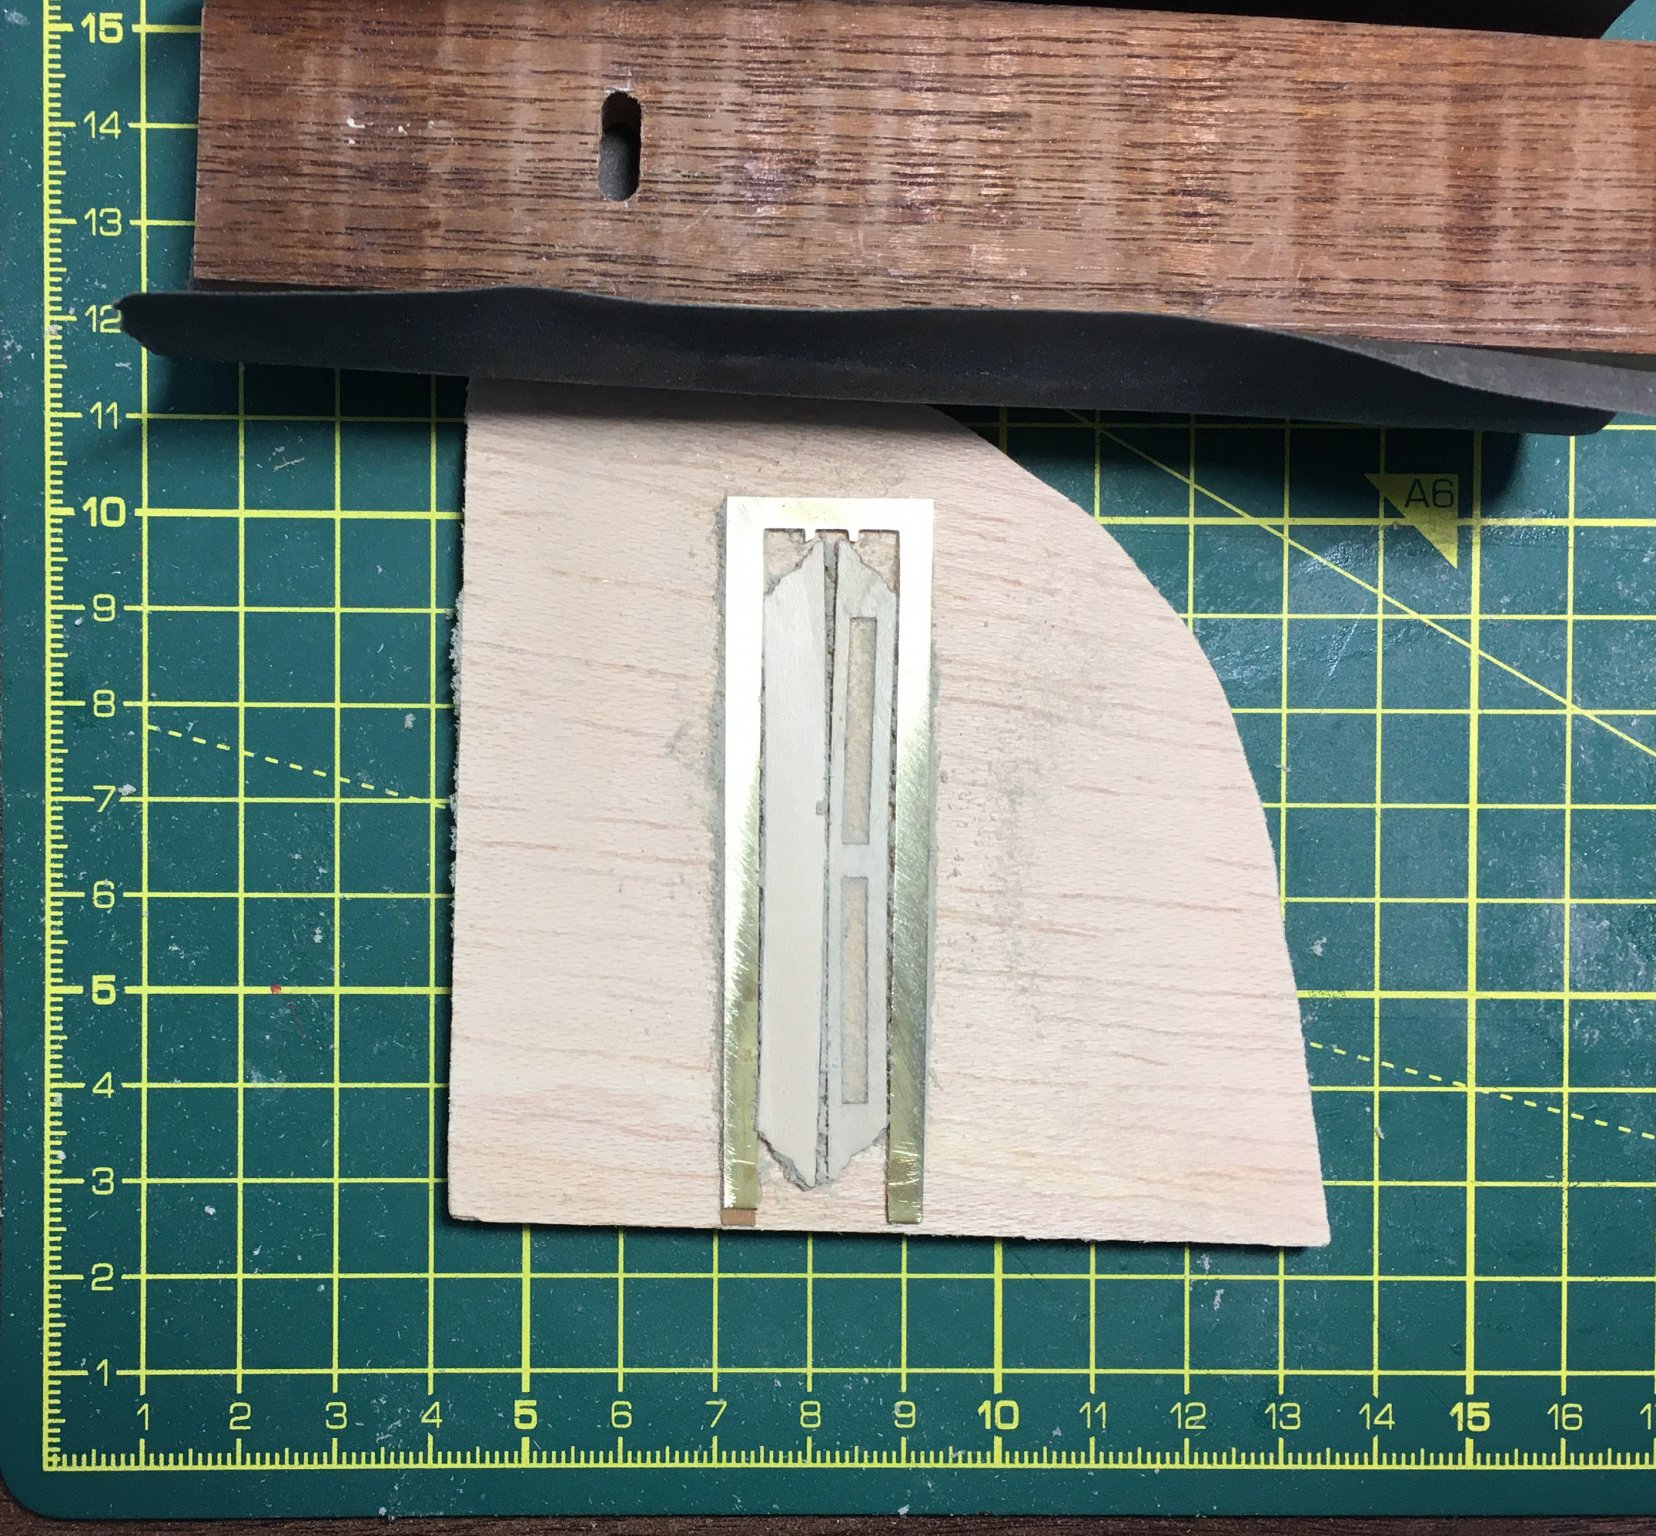
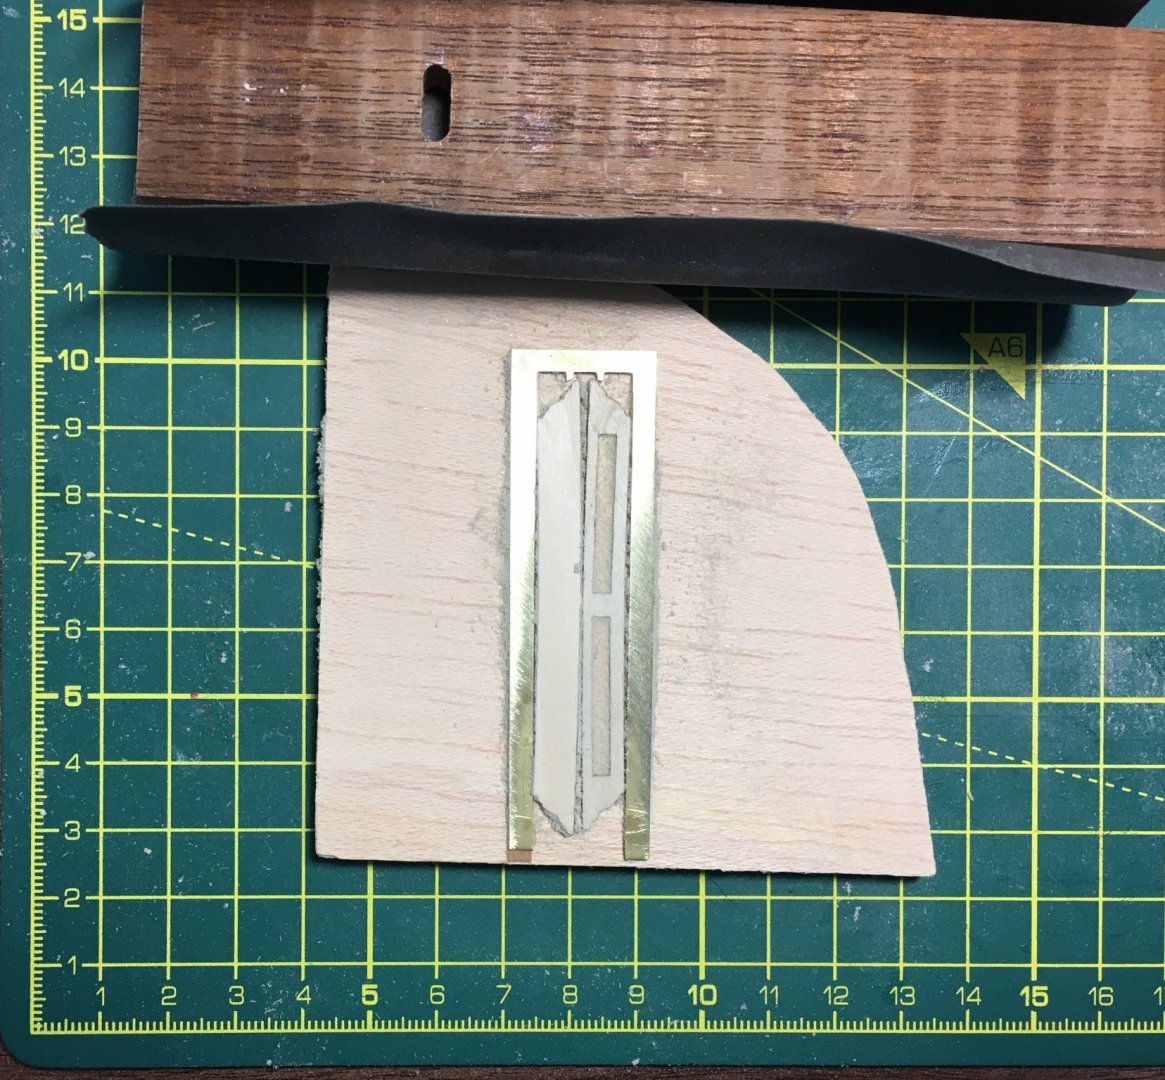
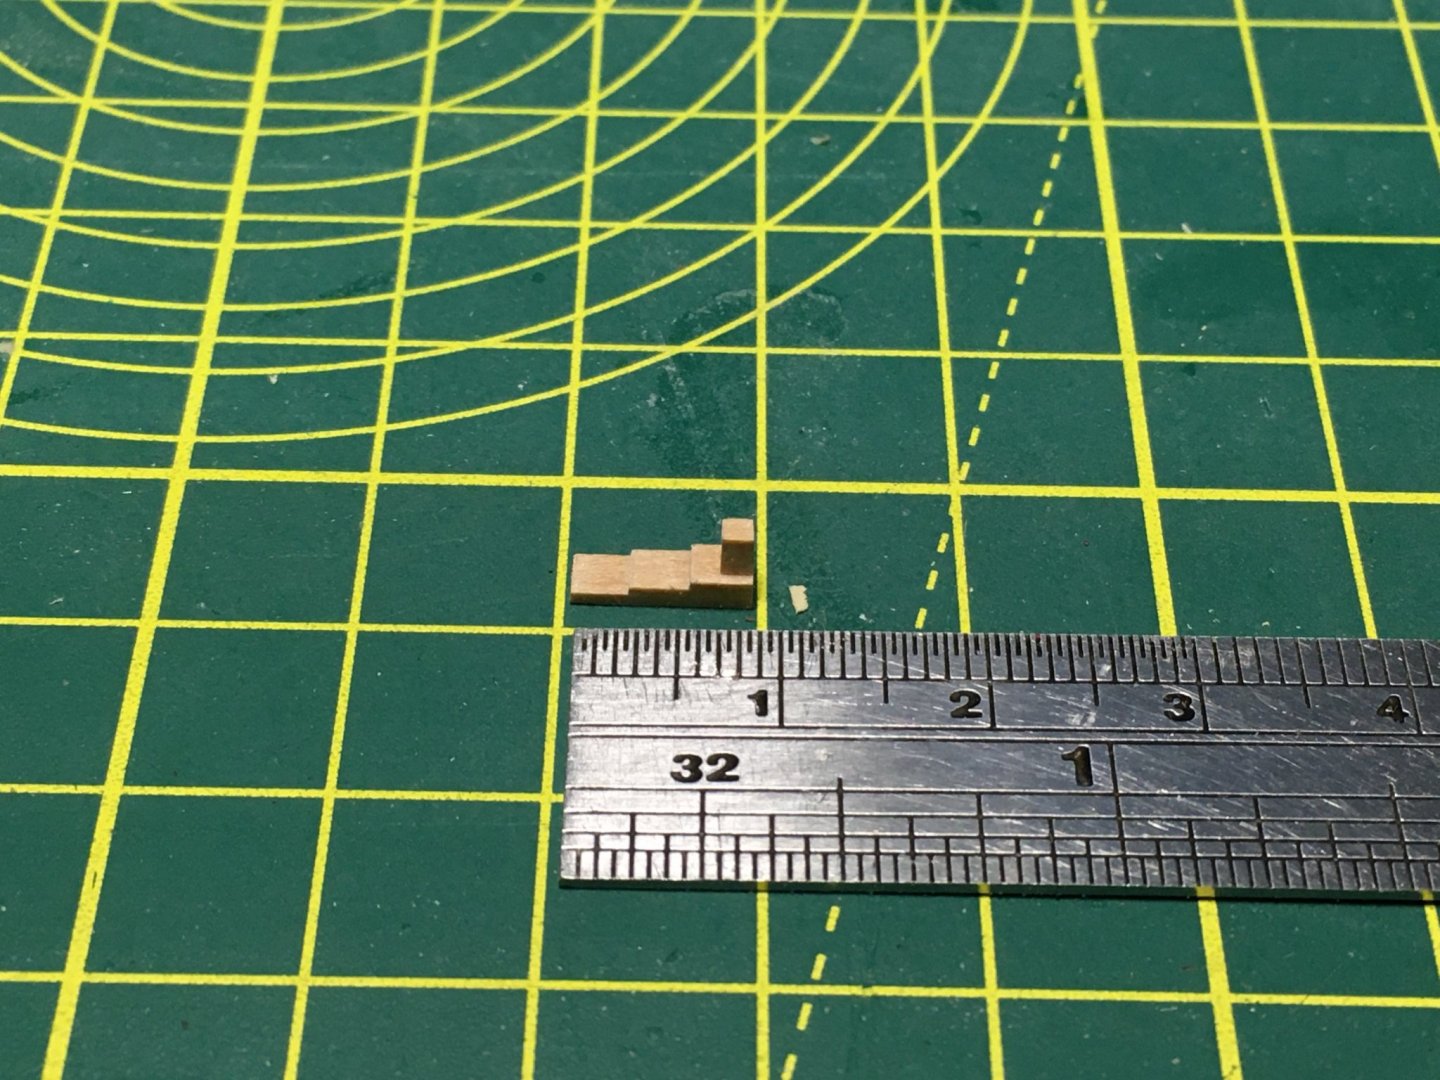
Thanks LS, and thanks everyone for the likes. Just a very quick note on the pinnace today as I'm keen to finish the second planking on Speedy. I'm currently in a dilemma over the splashguards. I started out with the best of intentions, gluing together the two components that make up each guard and making a little sanding jig to reduce them to about 0.8mm - half their original thickness: The jig was just some scrap brass of the right thickness, glued to a piece of ply. As the photo shows, I was able to sand both guards at the same time to a uniform thickness. My dilemma is I'm not sure I want to fit them! It should be clear by now that on this build I'm more concerned about appearance than historical accuracy - or the comfort of the cockpit passengers! So for example I left out the extended transom which I felt looked strange. Similarly, I'm not sure I like the look of the splashguards. To fit them I'd have to trim the sides of the seatback, but I like the way the seatback currently sits on top of the caprail. I also think the splashguard might detract from the clean lines of the caprail. Other modellers have taken both approaches - for example Blue Ensign went with the guards whilst Tigersteve left them off. Both models look great so that doesn't really help me decide. I think I'll leave the decision until later in the model. I should add that I left them off on the 1:48 version I built for the Royal Caroline, but that was because there were no guards shown on the latter's boat. Oh well, back to Speedy. Derek
- 77 replies
-
- 3
-
-
- model shipways
- pinnace
- (and 1 more)
-
Looks neater than my workbench! Good luck with the house move. Derek
-
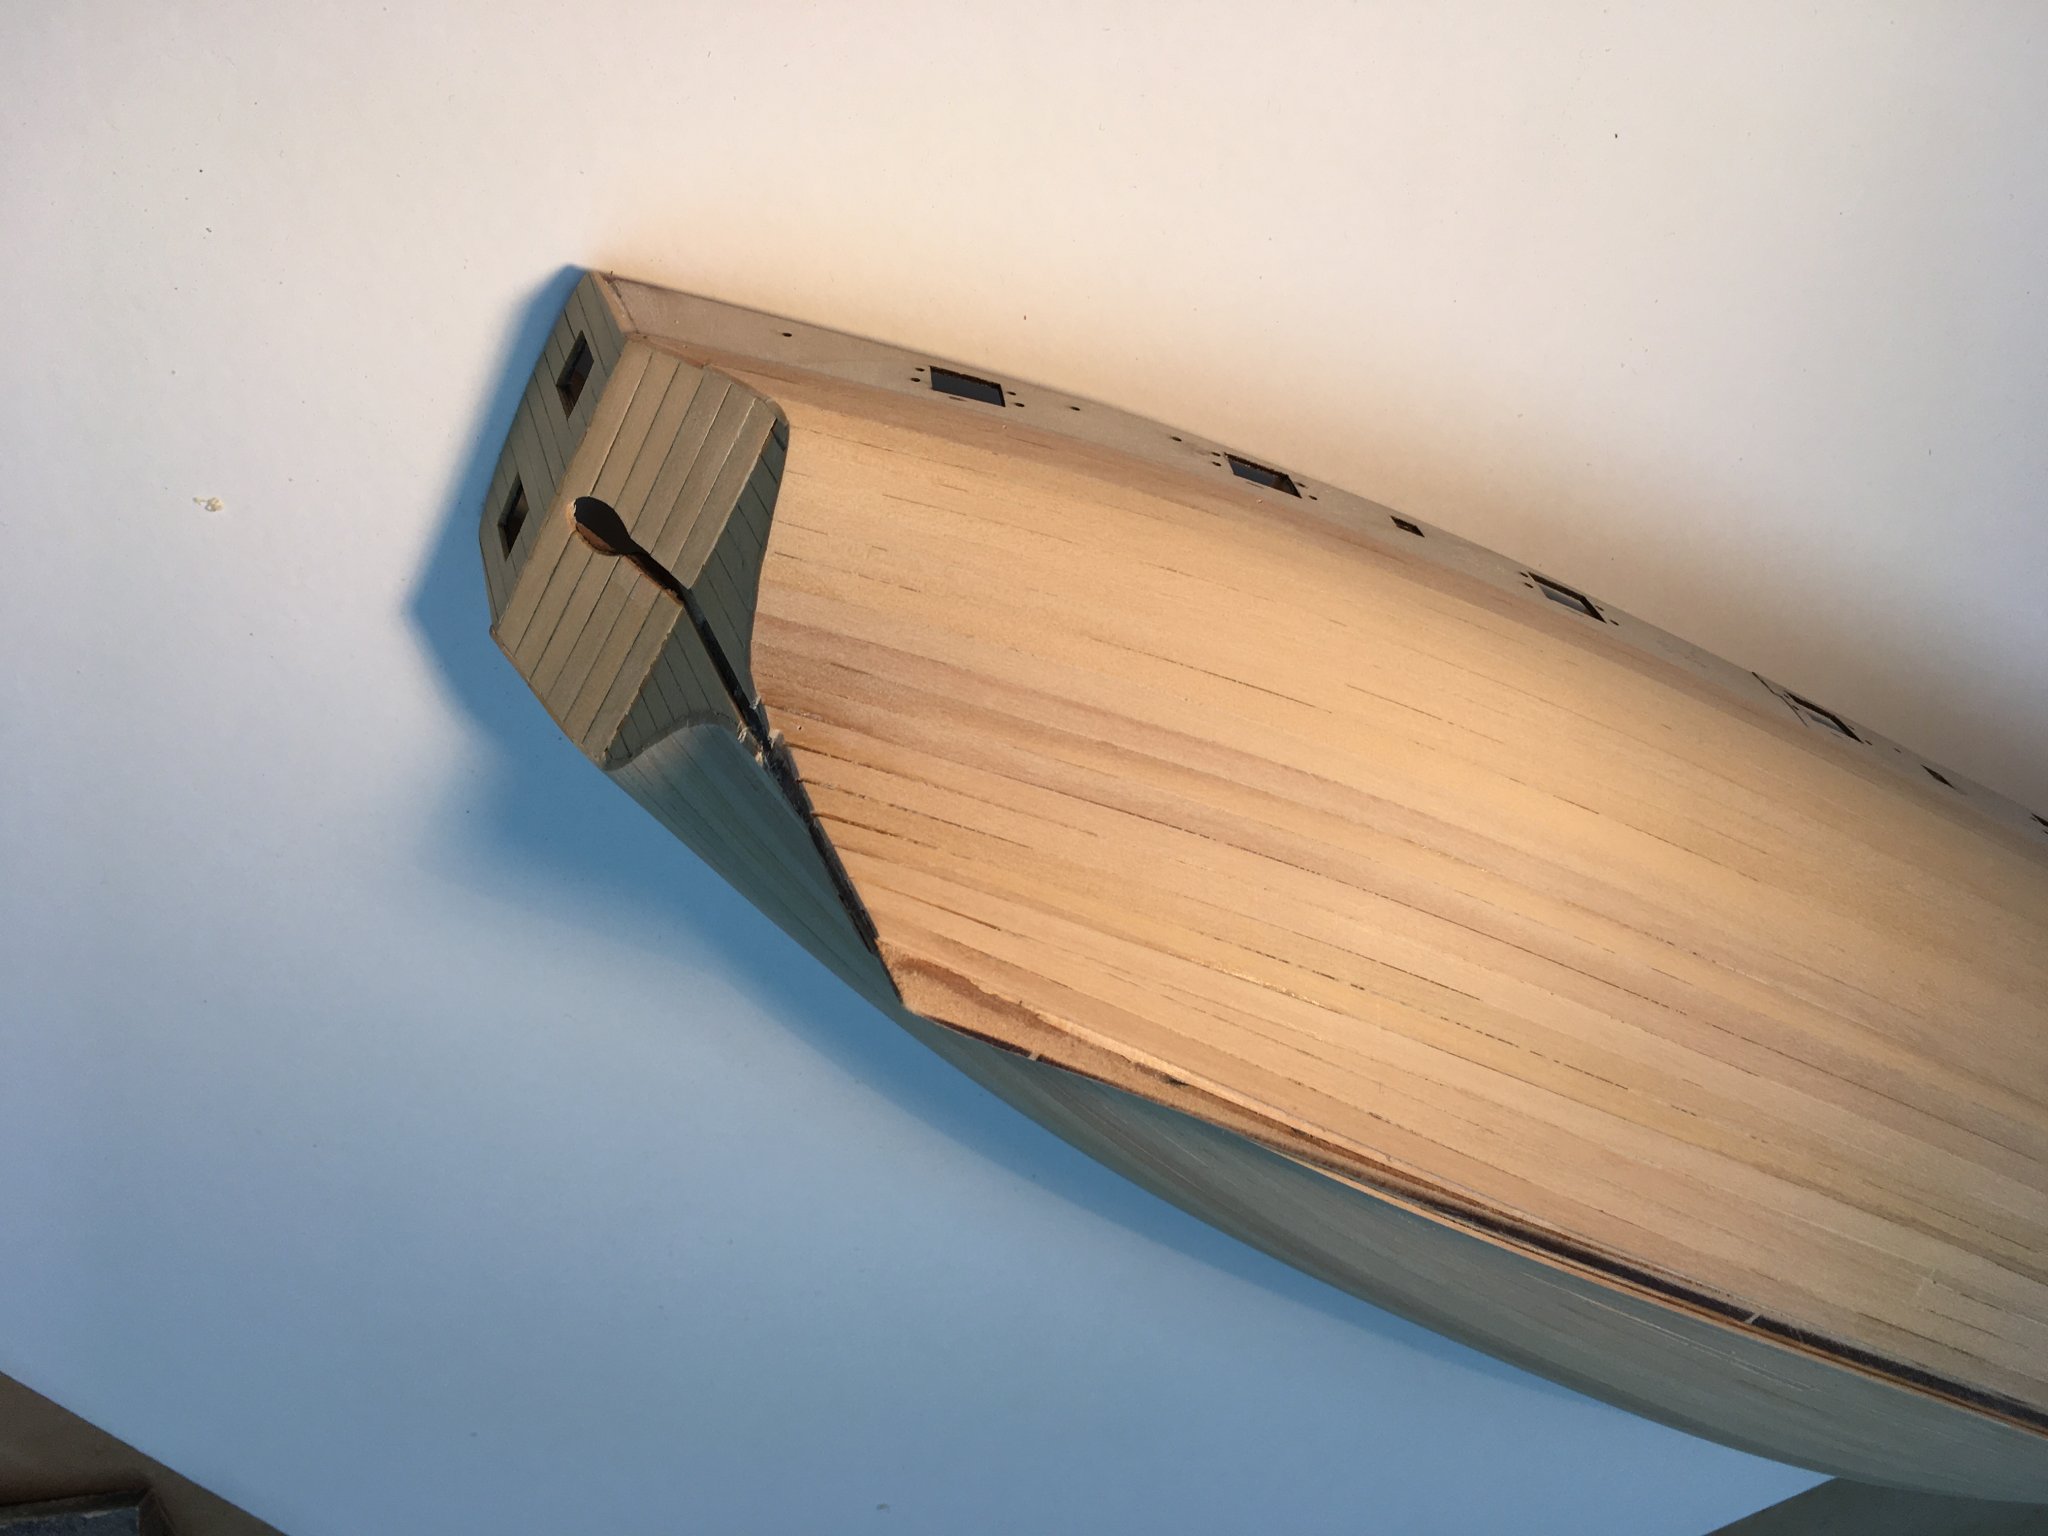
This photo shows the bow area where these planks go: Apart from the first two (wale) planks, the rest are all tapered and bent to the same degree. I know it probably doesn't look great, but this is actually neater than I've managed to achieve on other builds. The planks are all sitting flat to the hull and snug against their neighbours. Hopefully they'll sand well. This discussion just illustrates that there are different ways to achieve the same ends. I'm sure edge bending isn't the last word in planking, but I find it a relatively easy and quick way to achieve reasonable results. I think if I ever get to grips with the Winchelsea model with its single planking, I'll have to up my game and master all the necessary skills, including spiling. Derek

- 725 replies
-
- 4
-
-
- vanguard models
- speedy
- (and 1 more)
-
Famous last words! The next pair of planks after I wrote this I managed to bend the wrong way, despite drawing arrows on them pointing the right way. So much for slow and careful; at least it was easy to put right. Derek
-
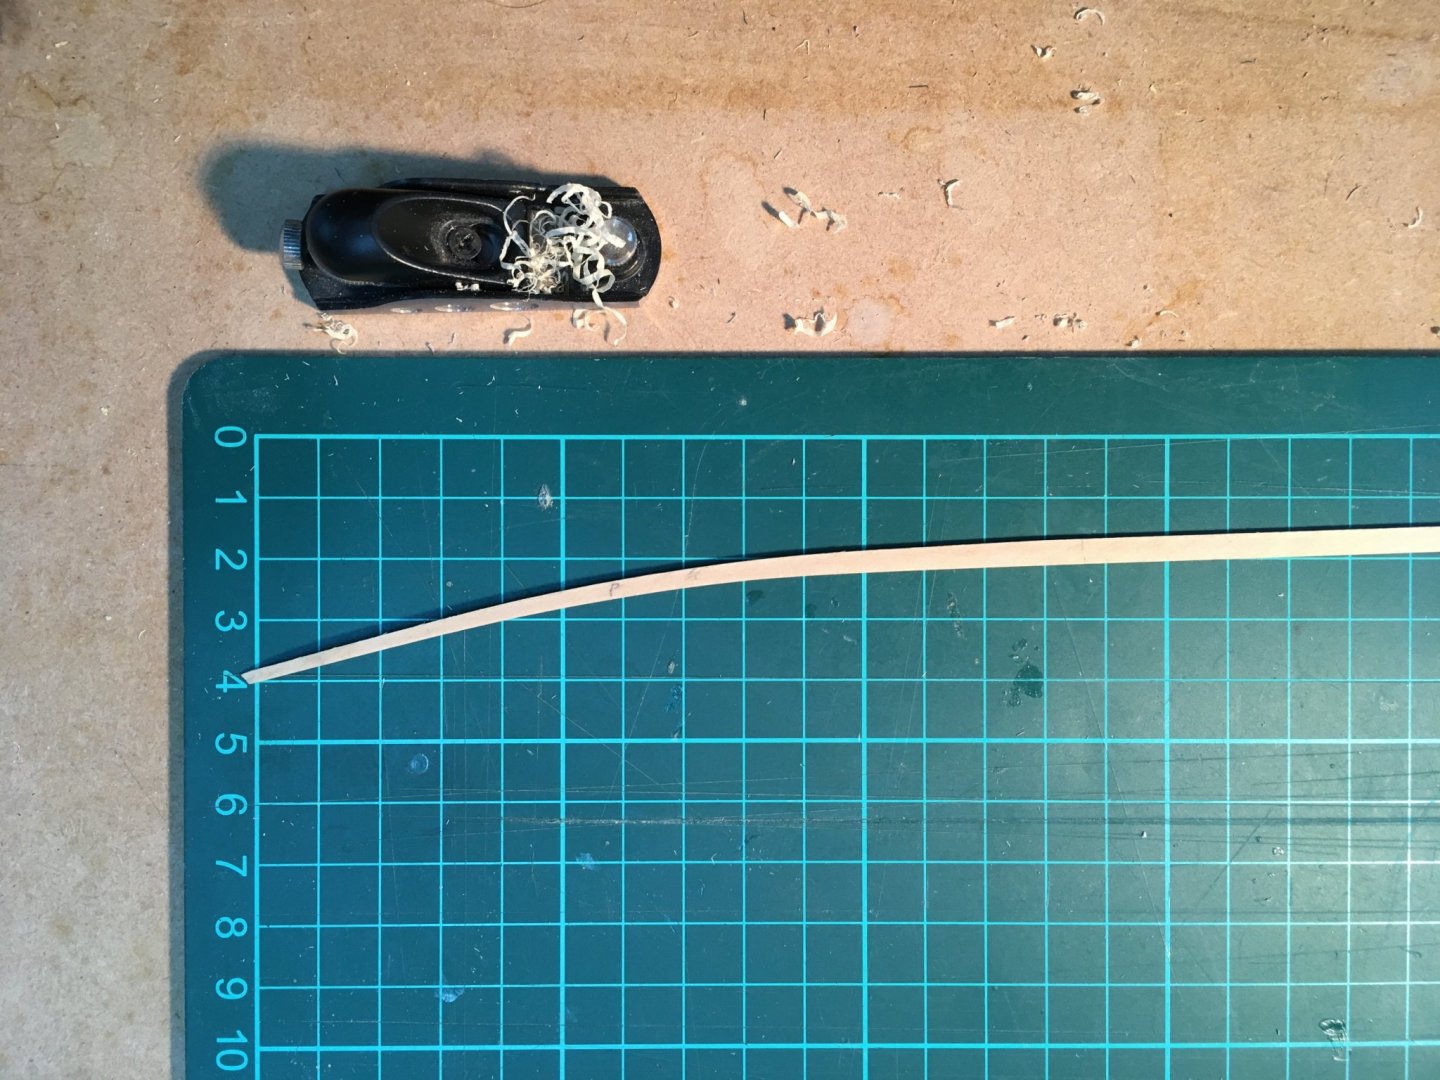
Hi Spyglass They’re for the bow area. They may look like severe curves but they fit well. The planks always ‘relax’ a bit when released from the jig, so the actual curve you end up with is slightly less: The important thing is to play around with the degree of bending until the plank sits flat on the hull and snug against the previous strake. I had to play around with the first couple of planks until I got it right, but it’s easy enough to re-bend a plank until it fits. Hope this helps. Derek
- 725 replies
-
- 1
-
-
- vanguard models
- speedy
- (and 1 more)
-
Thanks - I understand your points. I still think I’ll copper Speedy, if only because it’ll be a first for me and I’d like to try it at least once. Also because Chris has gone to the trouble of producing the copper it would seem a shame not to use it. Meanwhile the second planking proceeds. Slowly! Derek
-
Superb work, as always. That's one heck of a bowsprit B.E.! It almost looks out of proportion until you look at the Hawke model - the addition of the sails makes the whole set-up look just right. I don't suppose you're thinking of adding sails, are you? 😀 Derek
-
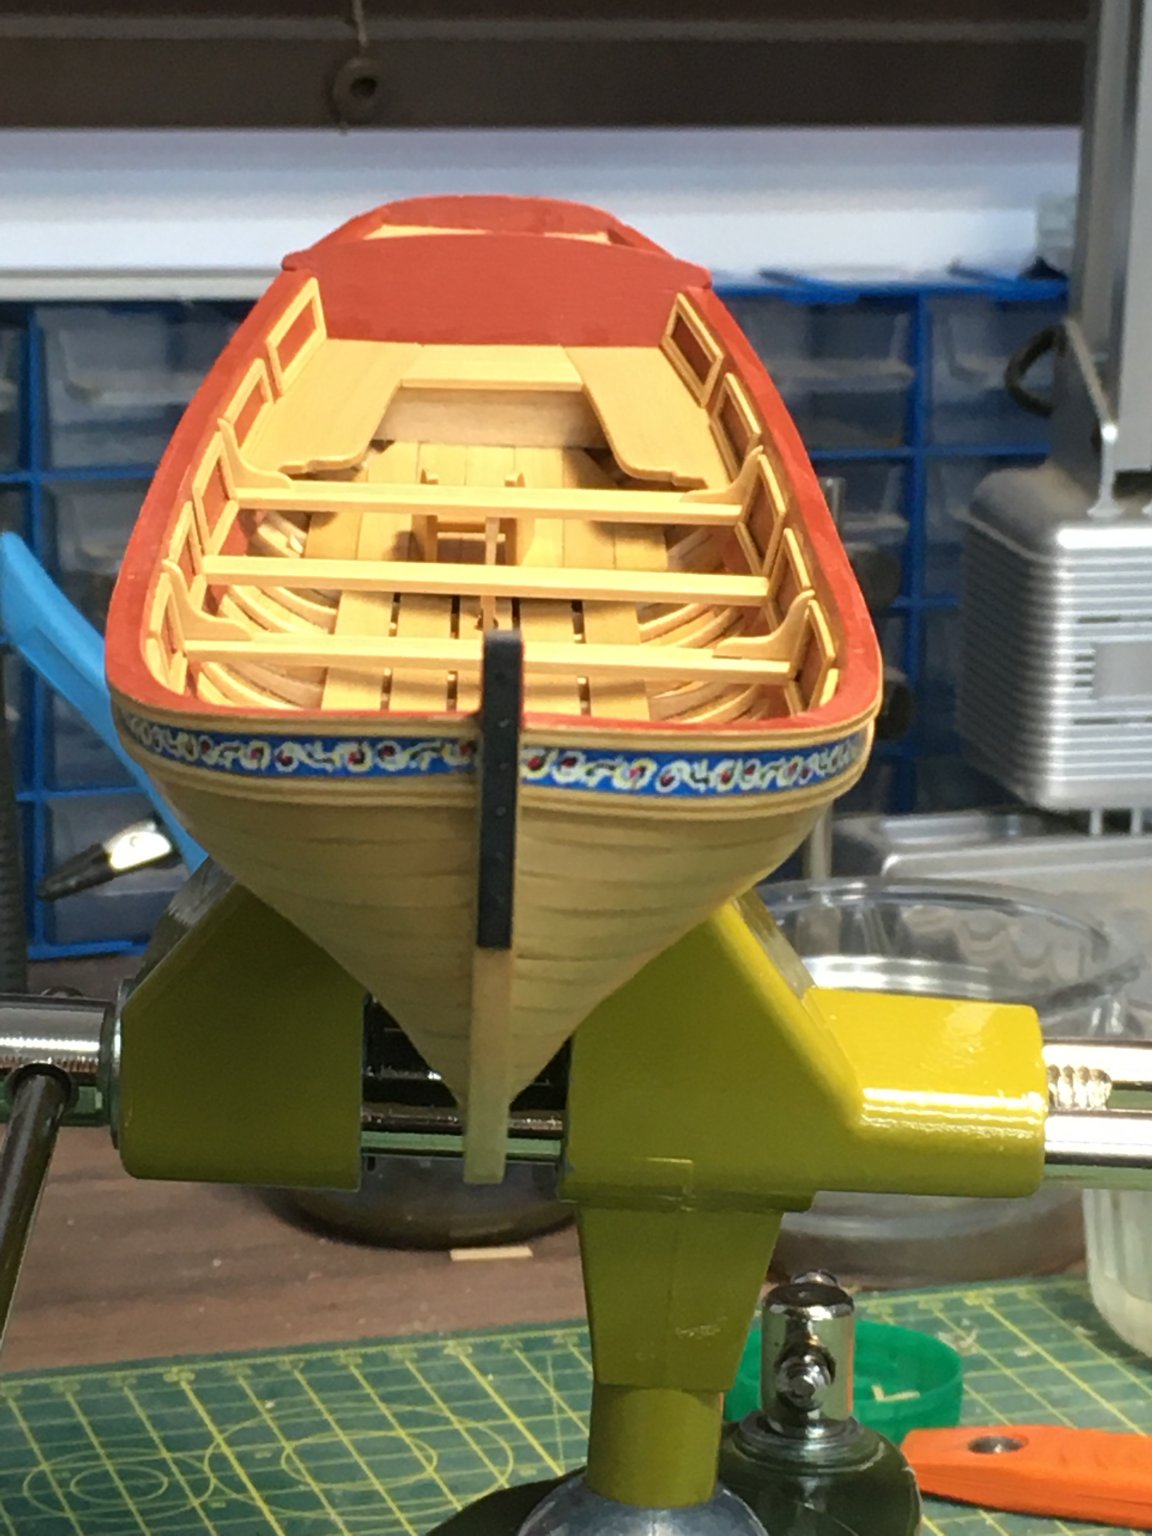
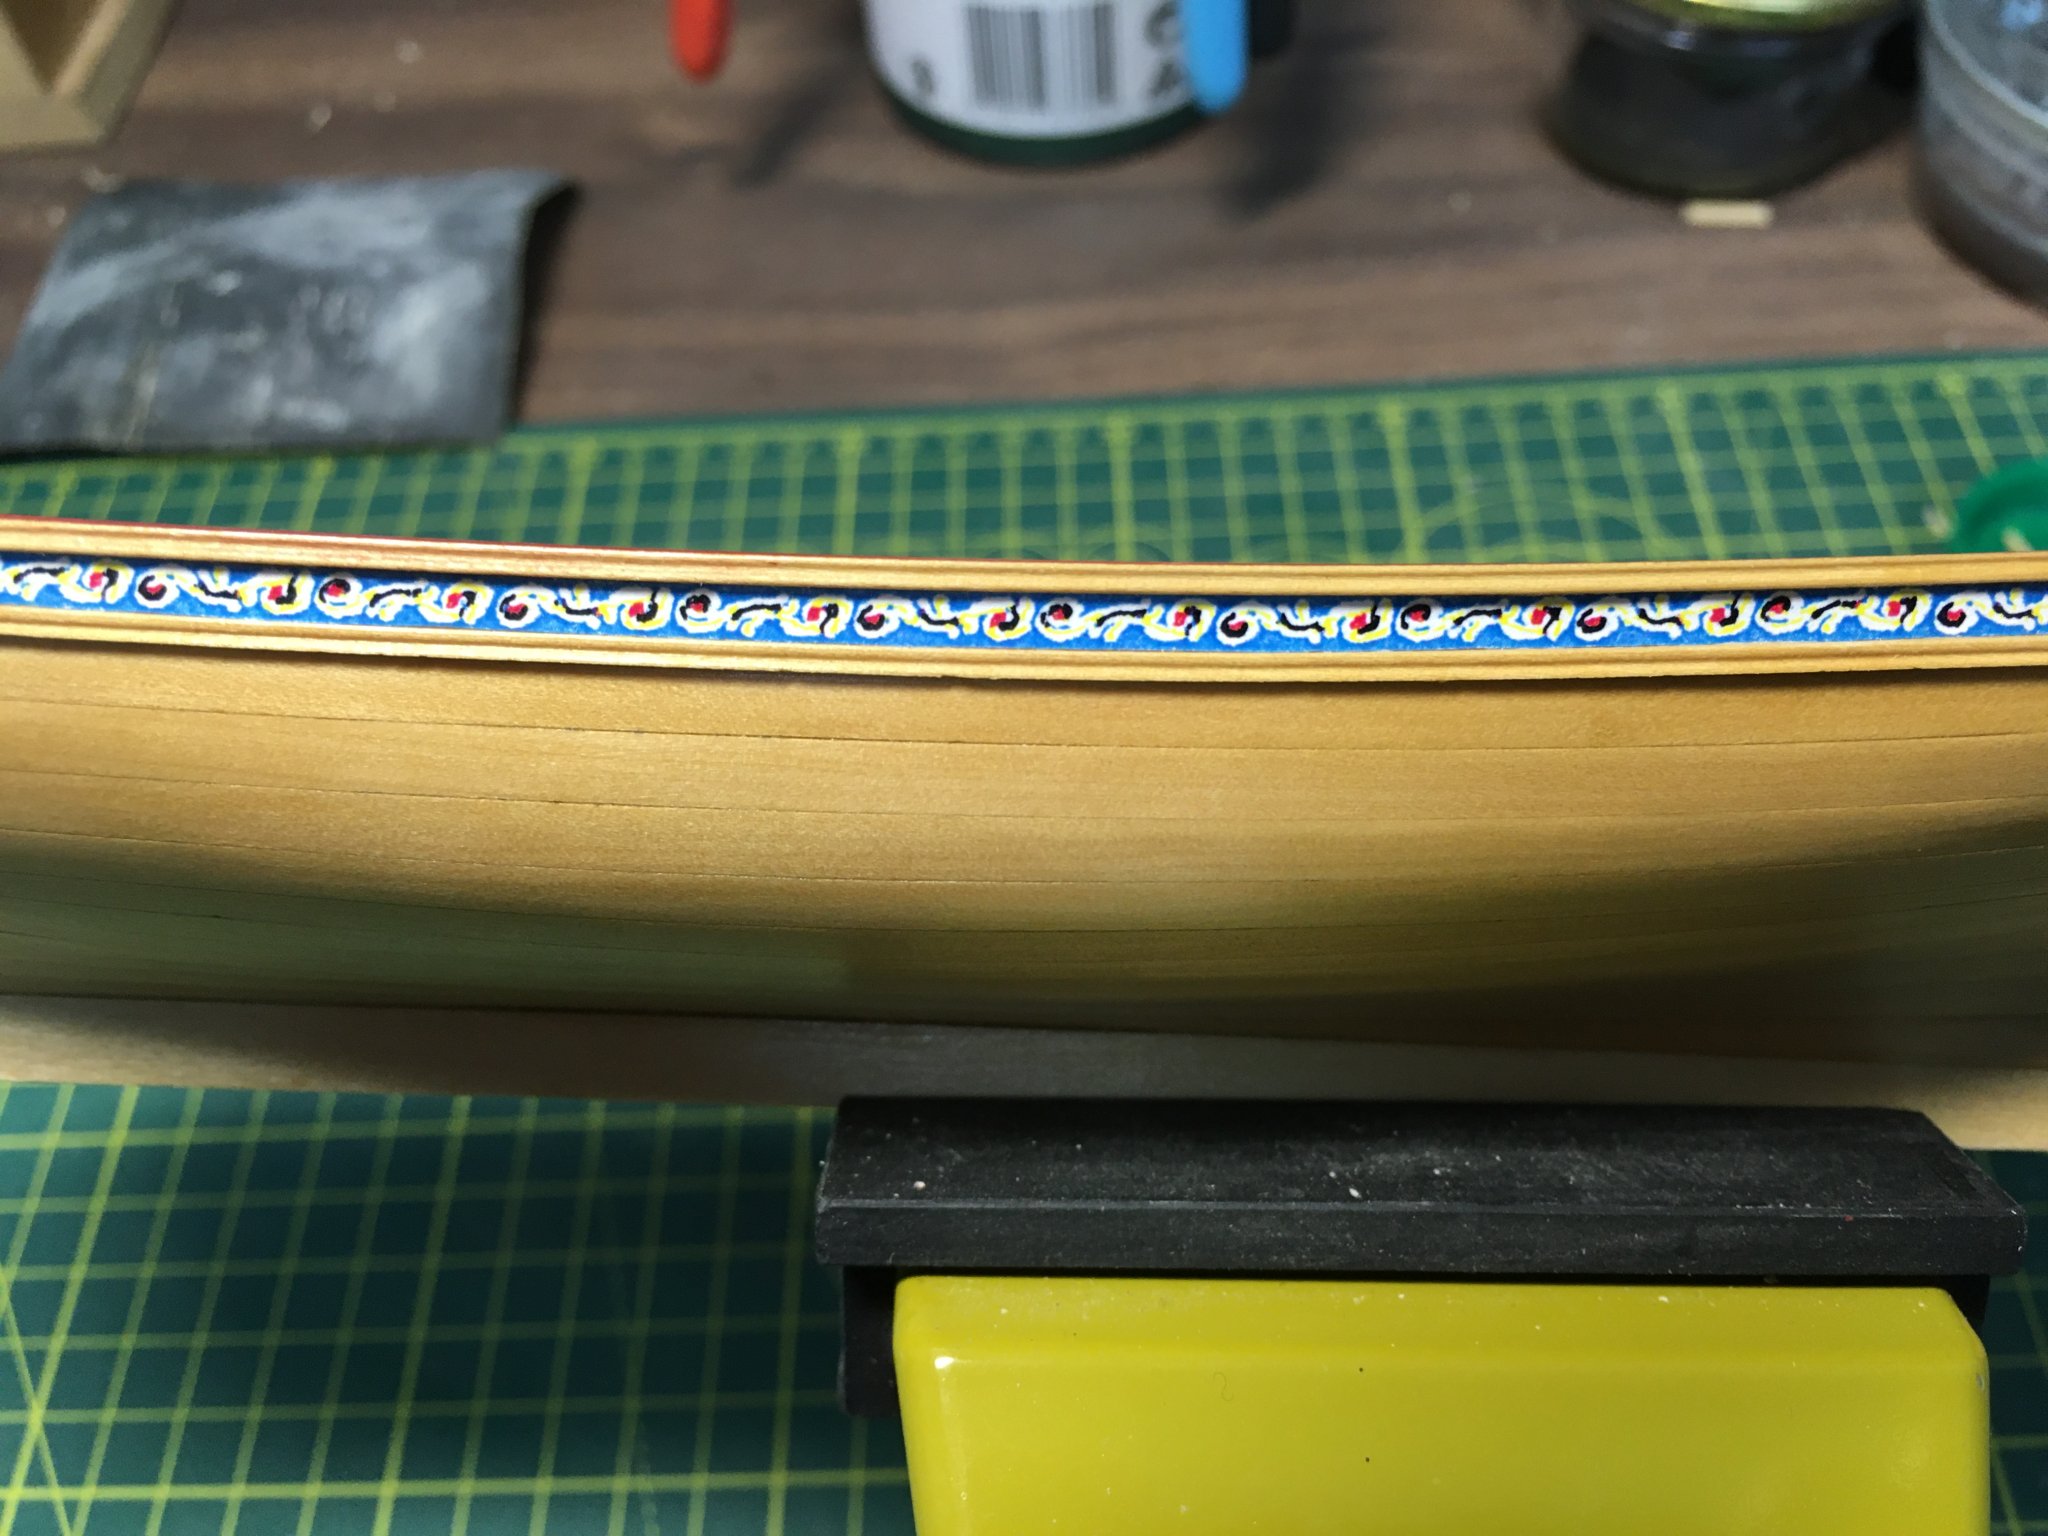
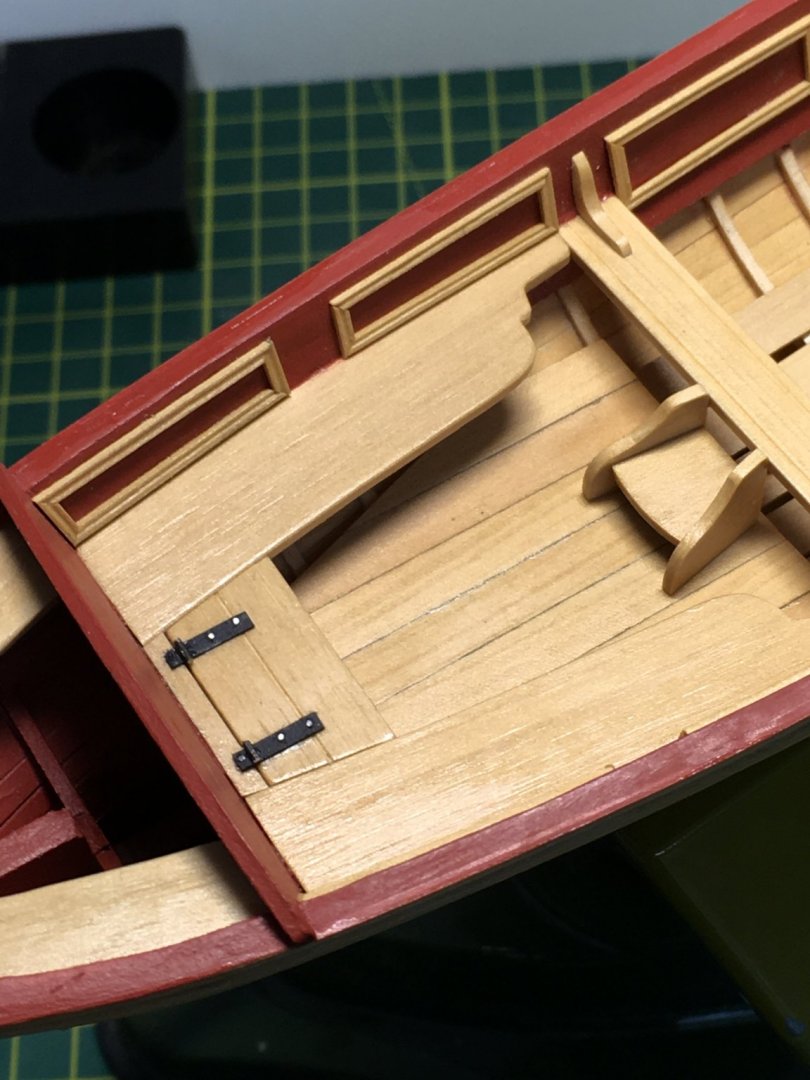
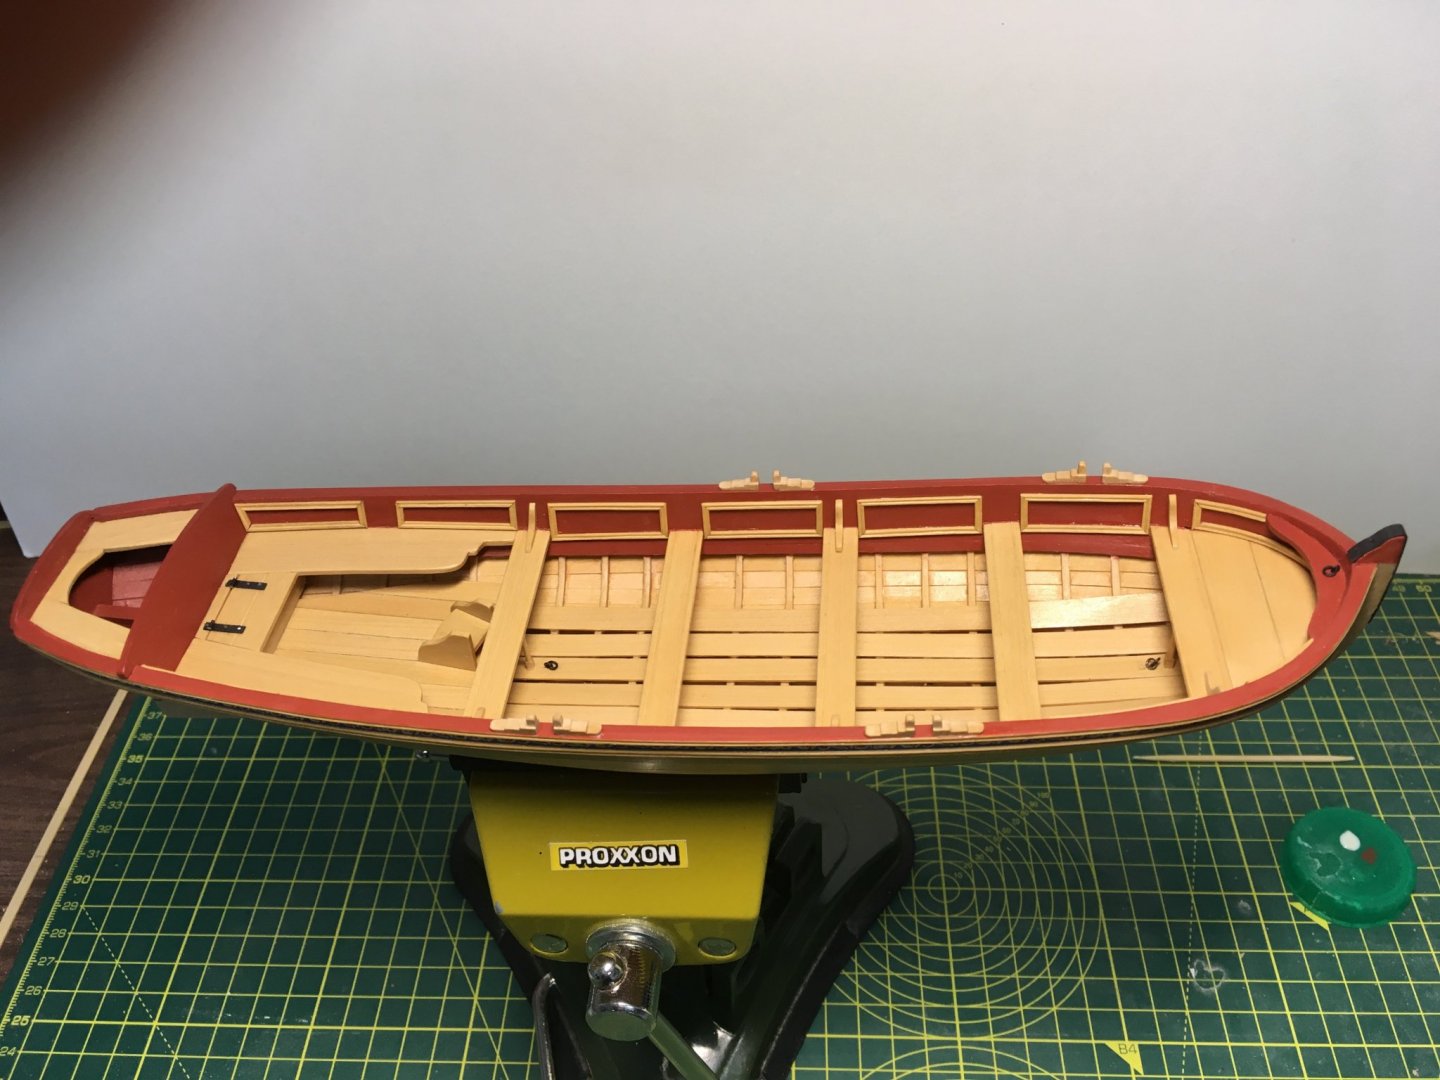
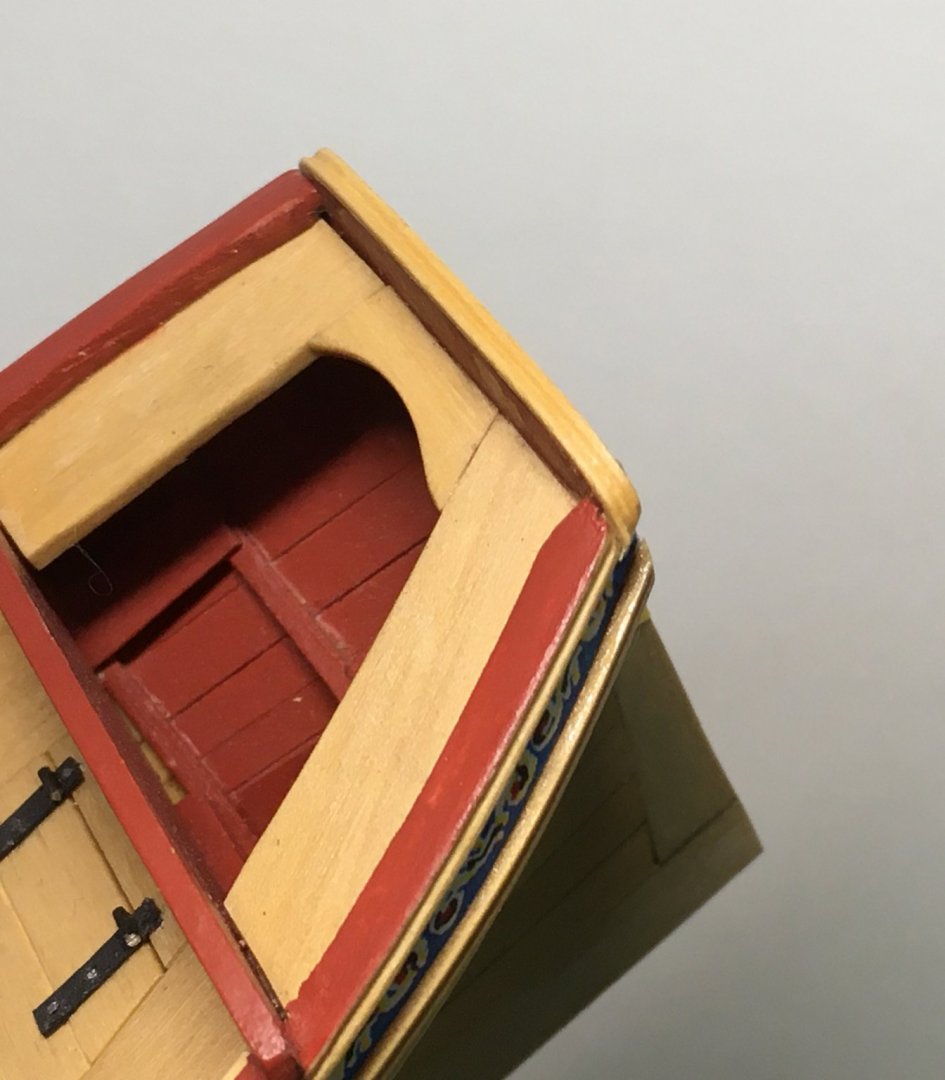
A few more internal and external details added. First, some ironwork: Ringbolts and front bumper: I thought the kit-supplied rings and bolts were over scale, so I made mine from brass wire that I blackened. I cut the bumper from black card, stuck it to the stem, drilled holes, and inserted short lengths of wire to simulate bolts. All as per the kit instructions. I also followed the kit instructions and used the same techniques for the hinges on the cockpit seat: The next job was the decorative frieze. The kit supplies two colourways for the frieze - red and blue. I chose blue as I felt the need for a bit of contrast with the red interior. Again, I followed Chuck's suggestions in the instruction manual and used hairspray as a fixative before cutting the friezes from the paper sheet they were printed on and using a glue stick to fix them to the hull. I finished them off with more strips of the moulding I made previously. I've got the starboard frieze slightly wonky in the bows. Fortunately there are spare so I'll replace that one before the model's finished. Next job was the rowlocks. The kit suggests each half of each rowlock should be made in two parts - a stepped 'body' and a narrower pin. I didn't like the look of that and decided to make each half in one piece. I started with a strip of boxwood milled to the right height and width, then cut the steps on the Proxxon micro-mill. I also ran the cutter down either side of the high front step to create the narrower pin: I finished with swiss files to round off the pin and base. In place, I quite like the bare wood and may just varnish them rather than go with the kit which paints them red. I'd also fitted the rear seats by this stage - another job for cardboard templates and a lot of tweaking before I cut the final three shapes from thin boxwood. The final job this morning was the transom. I'd intended to leave this all red, but managed to damage the top slightly when fixing the rear seats. I had to cover the damage with another length of boxwood moulding. To follow the top curve of the transom I put an over-length piece in boiling water for one minute then held it to the transom with my fingers whilst blasting it with a hot air gun. Not comfortable, but it worked! I used ca to fix the moulding and trimmed it to length when set. I quite like the end result, so I guess the damage was a blessing in disguise. Back to Speedy! Derek


- 77 replies
-
- 10
-
-
- model shipways
- pinnace
- (and 1 more)
-
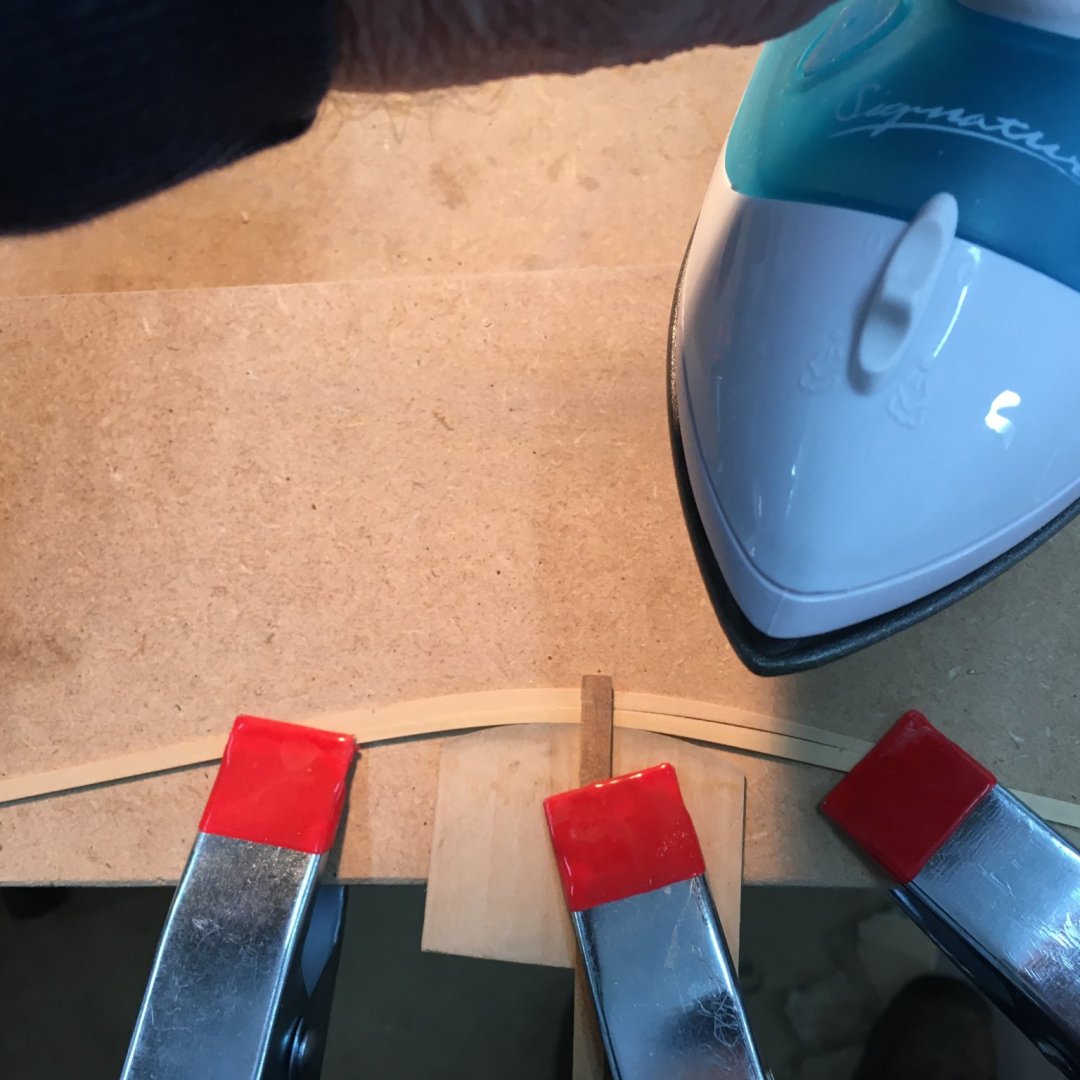
Not an update as such -second planking progresses slowly but steadily - but I thought I'd share my one aspect of my approach to plank bending: As you can see, I'm using Chuck's edge bending method, but instead of doing one plank at a time I'm doing two. I've been trying to work as symmetrically as possible, port and starboard, so the tapering, the point of maximum bend, and the amount of bending should be the same on both sides. Obviously the two planks have to point in opposite directions to bend correctly as they are mirror images of each other, but so long as you put a little arrow indicating the position and direction of bend on each plank (as per Chuck's videos) you can't go wrong. I like to leave the planks in the jig for some time to ensure the bend is 'set', so doing two at once saves considerable time. Equally important, the method seems to work just as well with two in the jig as with one. Derek
- 725 replies
-
- 2
-
-
- vanguard models
- speedy
- (and 1 more)
-
Looking good. Should be a sound base for the second planking. Derek
-
Hi I've never coppered a ship before, so I was wondering what put you off - the trickiness of applying the copper, the appearance, or perhaps a preference for natural wood? Derek
-
Great set of photos LS. Have you had any thoughts about how you’re going to display her long-term? She’d look magnificent in a lit display case. Derek
-
Just received my copy and it was well worth the short wait. I’ve just dipped into the files so far but their quality is amazing - the video tours in particular are simply stunning. I don’t know if I’ll ever scratch build a Swan class model, but this 3D collection is worth having for its own sake. Well done Greg & David for bringing these to the modelling community, and of course huge thanks to Denis for raising the bar so high. Derek
-
Wow, that must have been devastating. I'm enjoying modelling so much more now that I'm active on MSW and writing my own logs. I'll certainly learn from your experience and keep offline copies from now on. I'm off to help my wife prepare dinner (steak and fries with a nice red!) so I'll sign off for now. Derek
- 725 replies
-
- 1
-
-
- vanguard models
- speedy
- (and 1 more)
-
Take a look at Vane's Speedy log (here). He cleverly saved quite a few strips of boxwood by using a cheaper alternative where it won't show. Well done on the quoting by the way - you picked that up quick! Derek
- 725 replies
-
- 1
-
-
- vanguard models
- speedy
- (and 1 more)