No Idea
-
Posts
1,038 -
Joined
-
Last visited
Content Type
Profiles
Forums
Gallery
Events
Everything posted by No Idea
-

Byrnes 18" extended table saw table
No Idea replied to davec's topic in Modeling tools and Workshop Equipment
In that case I would magnetise the screws so that they stay onto the screwdriver. That should sort your problem. -
Byrnes 18" extended table saw table
No Idea replied to davec's topic in Modeling tools and Workshop Equipment
I too changed my saw to a 18" table and I support all of what you say. Another benefit is that you can use the cross cut sledge without having to remove the fence. Just slide it out of the way. To fit the belt cover - the screws only need loosening and the cover slides rearwards and comes off. So if you remove your cover firstly put all of the screws into their locations on the saw but only loosely. Then place the cover over the belt and push forward towards the front of the machine. This locates it onto the screws and then you can tighten them fully through the access holes. -
I think we need to use the machines that our pockets allow. wefalck's comments are spot on - however I have seen some great results using cheaper machines but the trade off is time and waste. Time is how long it takes to get it right and the cost of materials doing this is expensive. Afford what you can and maybe upgrade later
-
Jim Byrnes Thickness Sander Maintenance
No Idea replied to Billtoons's topic in Modeling tools and Workshop Equipment
Hi - This is a very simple machine with sealed bearings. The drum is driven by a belt straight off of the electric motor so I would start with that. Remove the belt guard and just make sure that everything spins freely. If either the drum or the motor doesn't that will be your problem.- 1 reply
-
- 3
-

-
L'Amarante by marsalv - 1:36 - POF
No Idea replied to marsalv's topic in - Build logs for subjects built 1501 - 1750
marsalv that is such lovely work especially the way you have fitted the planks into the rebate on the wing transom. That is as I have found difficult to get right so that they look square but you have it spot on. Very brave too with the amount of frames removed - I'm glad I've seen you do it as this is what I want to do with my next build. Happy Xmas and a very happy new year -
Nice work and actually I think you have quite a lot to report. Building ships - even small ships take time and patience to get right. Lovely work mate and if it helps I found the fashion pieces very very hard to get right with nice contact to all of the relevant parts. Keep the update coming!
-
Sandpaper Grit
No Idea replied to Malazan's topic in Painting, finishing and weathering products and techniques
First planking I use 120 grit which I think is rough enough for any model. Don't go any smoother for than that for the first planking as it gives a great key for the second planking. You are trying to get a shape and not a finish. Second planking - well thats a personal choice as it depends on how you want your model to look. Some modellers stop at 180 grit and others will go very fine to maybe 800 grit. Its really up to the builder and the finish they want or are going to apply. -
@vossiewulf Your knives are amazing and I think that knives like these are far superior to scalpels. They take commitment and skill though to make them effective - alas I don't have your skills and I have tried over a quite a period of time to learn. It's a skill I will never possess as I just don't have the patience. It's so easy just to load another blade into the handle.
-
Hi All I use something similar to these https://im3vet.co.uk/scalpel-blade-holder-round/ They are heavy in your hand and give great control using scalpel blades...........just my Pennys worth Mark
-
I think your approach to this build is fantastic with accuracy being foremost. The pictures are great too looking at the grain of the wood it's all just so in line with each piece. Lovely job and I hope that you are ok after your op. I'm looking forward to your updates.
-
The garboard plank on my current model is convex in shape along the wider frames. This gives it a really nice transition from the keel but is a bit tricky to make.
-
I wouldn’t run brass that thick through my saw. I would either cut it by hand or run it through my band saw
-
Hi Ah I see your problem now but I think it's easily sorted. You have the basis of a frame but it's the building of the parts that seem the issue. I too had this issue and threw all of my first frames away - so I get it. So - The joints and their angles are very important and it took me a while to work this out. Once I started assembling my frames over a frame drawing my efforts became far better. You are so close so don't be put off just keep going. If you do decide to change tack and use Underhill's methods then good luck my friend. I do think that it can be done but Gerard's plans are so precise that I stayed the course. My build is 1/24th which actually shows any defects in accuracy as much greater. If I can help in anyway just let me know Mark
-
Hi Jackson and welcome to MSW I have a simple story - many years ago I was in a stressful job and quite frankly it made me not the nicest of people to be around. My Uncle Ray who built model ships told me to chill out and build a ship. He suggested that a change of job and hobby would do me good. He suggested a kit and I bought it there and then - I also changed jobs. The rest is history. Probably the best advice I have ever had and it changed everything for me. I became absorbed in model ships and have been trying to better myself in this hobby ever since. If I'm not ship building I'm thinking about it - what more can I say apart from - cheers Ray
-
Hi What's the issue you are having as I think the pictures of your frames look very good? They follow the plans nicely and the final finished shape is not needed at this stage as that will be sanded once they are all in. I think that translating the plans that you have into an Underhill system may prove difficult. I know of another builder who has tried this on this model and ran into some difficult problems. Your skills are more than enough so maybe just keep at the frames as they are? If you don't have a copy - Adrian Sorrolla's book gives a step by step tutorial on how to assemble the frames on this ship. I followed his instruction pretty much to the letter and it helped me complete them Mark
-
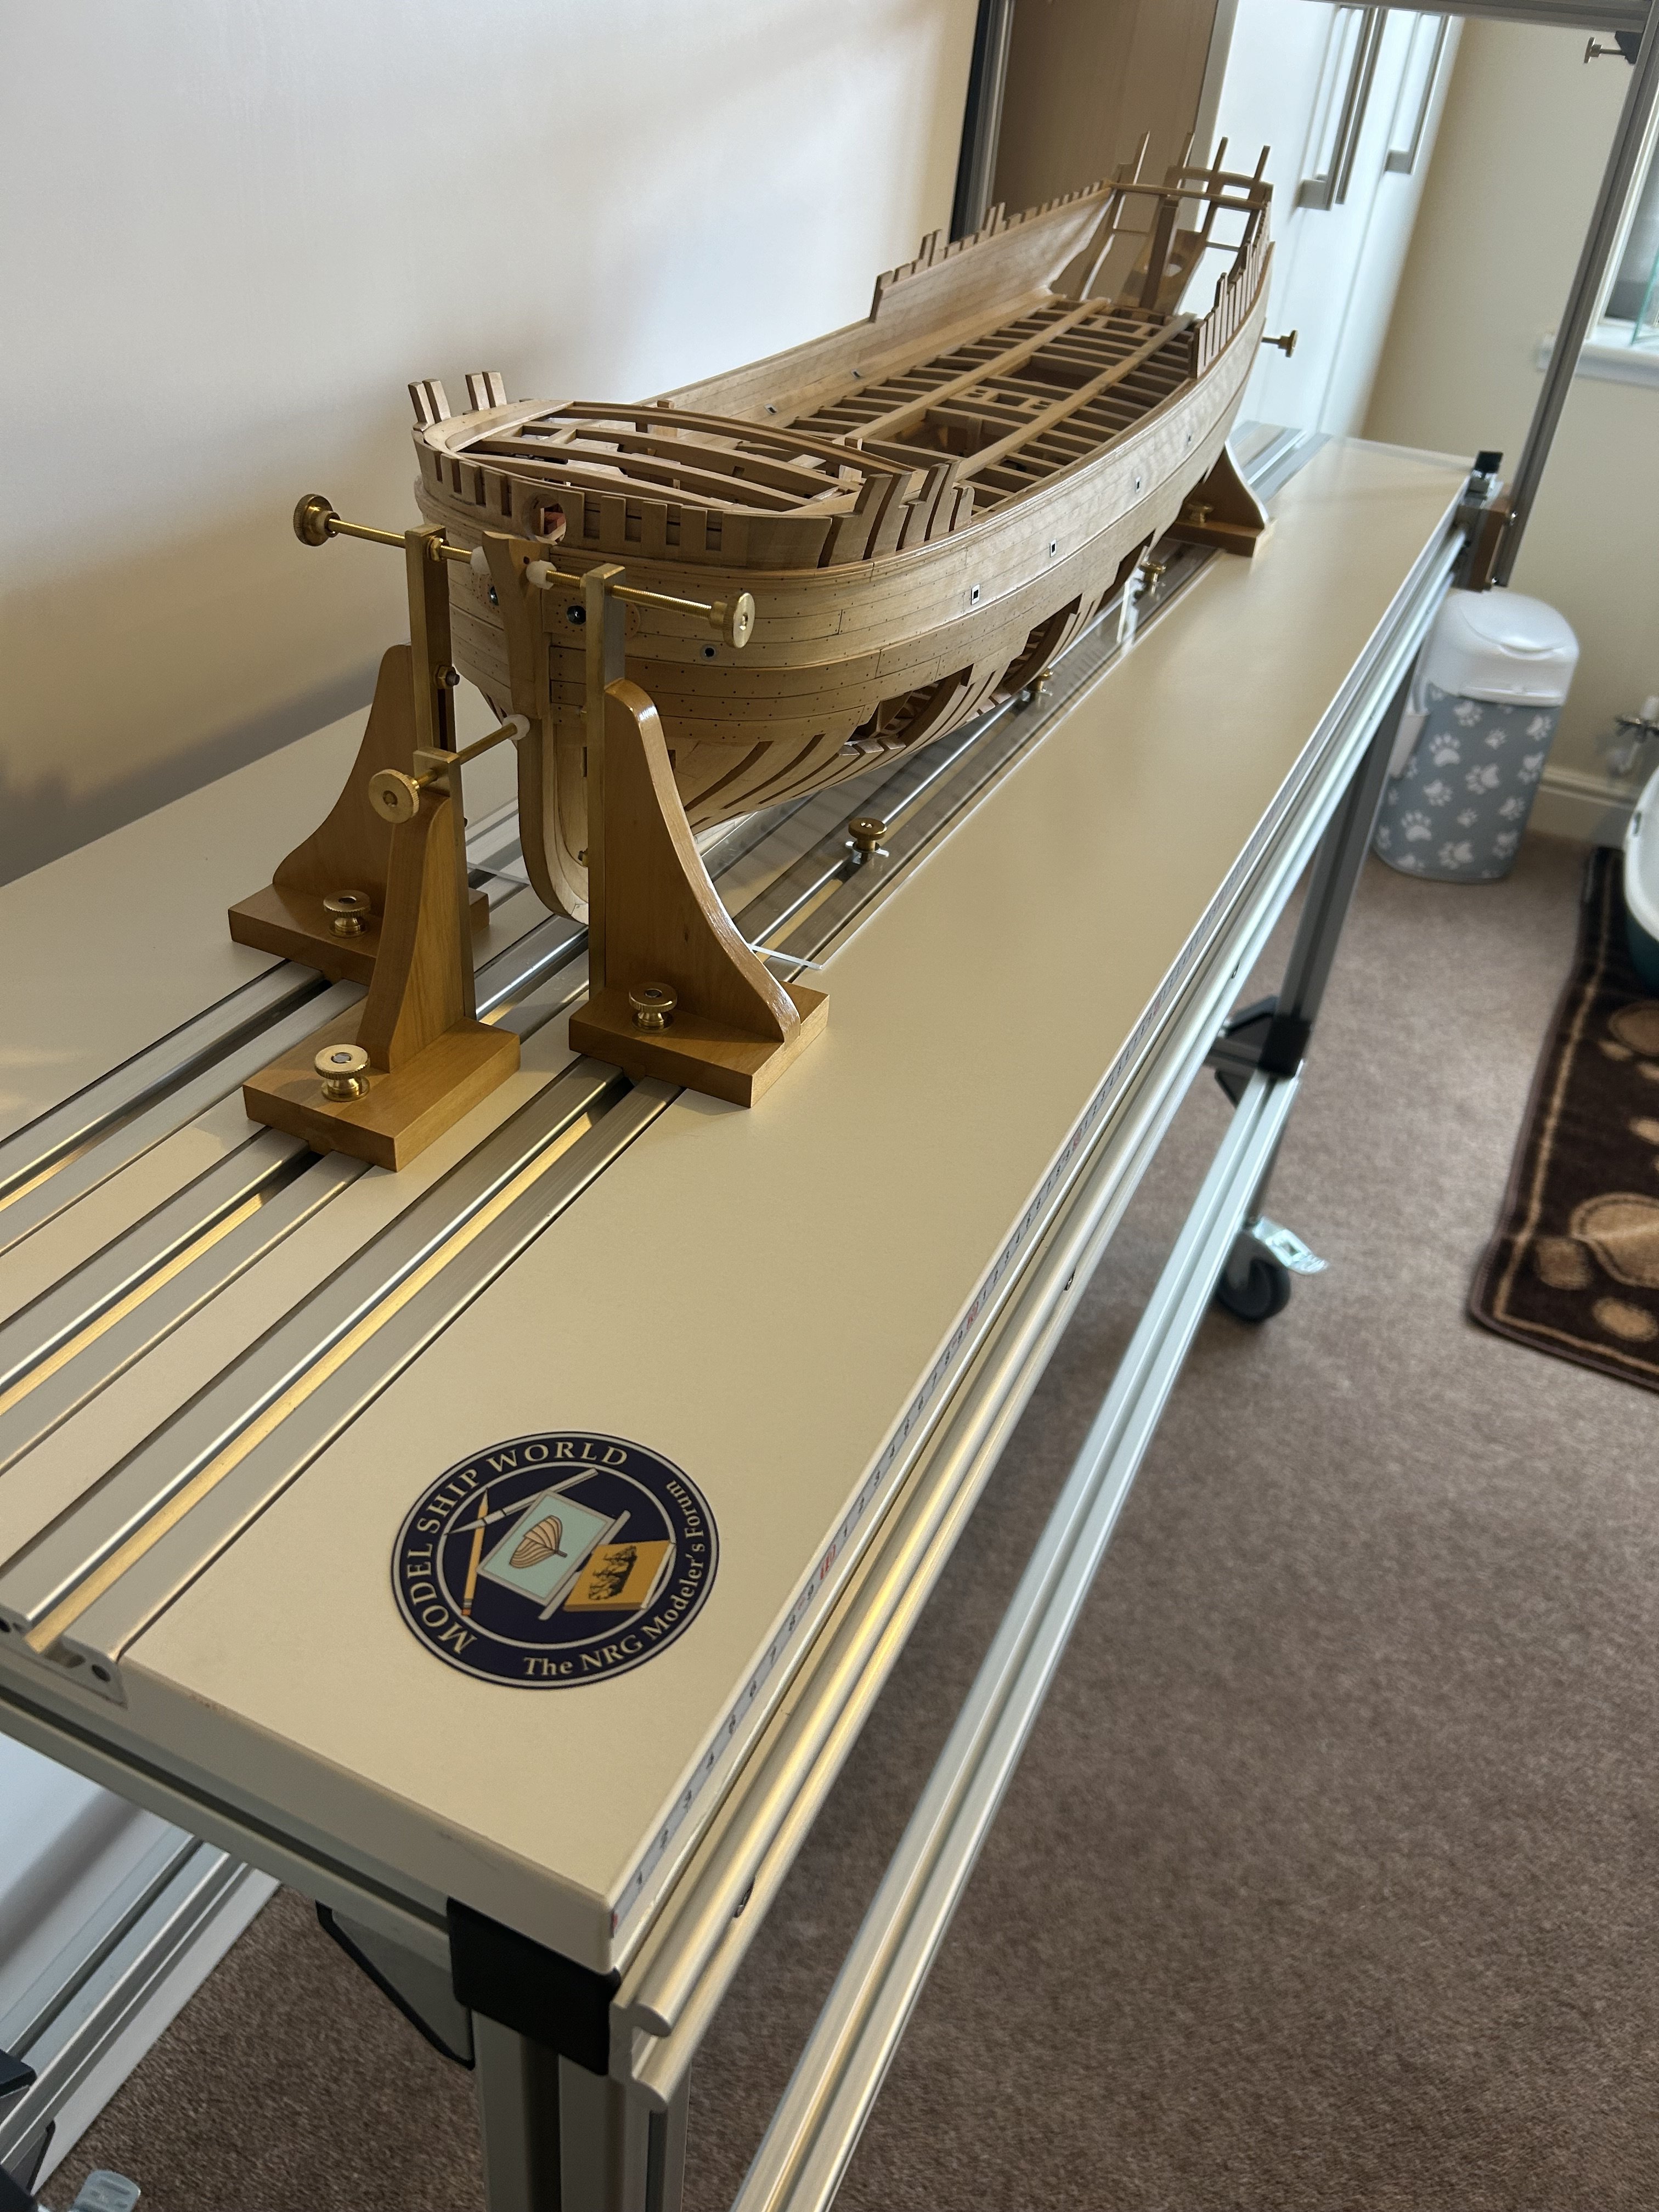
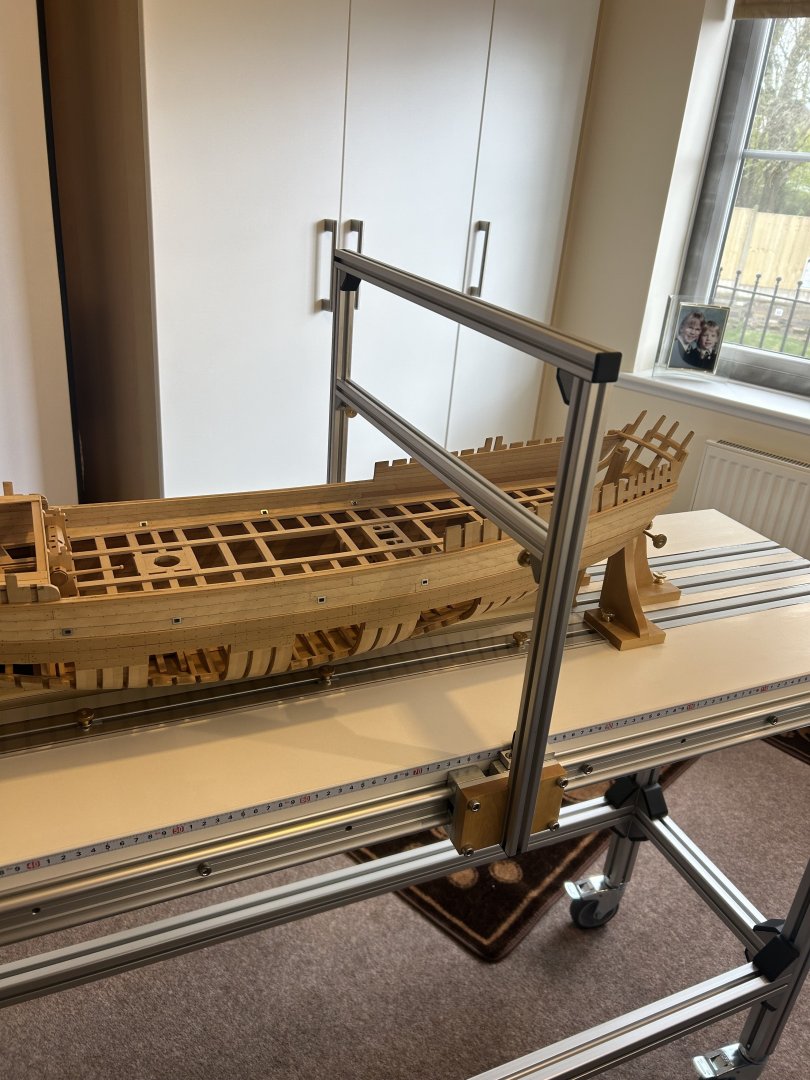
Gantry style building board dimensions advice
No Idea replied to davec's topic in Modeling tools and Workshop Equipment
This is my building table and I can let you know the dimensions when I get home sometime next week I’ve not actually had a chance to use it yet as my workshop has been completely taken over but that’s about to change 👍
-
Nice one 👍 You are literally going through the same learning curve that I did when making these parts. You worked it quicker than me looks great!
-
Sanding those timbers by hand is tricky and they look great. Keep one of your discarded wing transom’s as it will help you build the counter timbers off of the ship 👍
-
Hi Gerard Thank you very much for your offer as I have emailed them separately with the email address given above but heard nothing in reply. I will forward you the email that I sent to them. They may have a technical issue that they are unaware of. Thanks again Mark
-
Tried again and tried Tony's email address and yet again no reply - I'm not sure how to progress this now. I have spent years building my ship which is not yet complete and now I am weary of ordering again for my next build when I cannot get any response. Any advise at this point would be welcome.
-
The Foredom drill press is a very well made tool and its accuracy is fantastic. I bought one hoping it would justify the price and they certainly do. I also recommend the Starrett pin vices they are very good indeed and are well worth the money. They will last you a lifetime and then some. The comments about the drill bits are spot on - I buy cheap HSS jobber bits from RS in the UK and they last ages. They are also slightly flexible which helps when drilling in an awkward place say inside the hull with a 0.3mm bit.
-
Lovely work I used to worry about all of the little scratches and marks but I have found that as the ship progresses they disappear into the detail. When I cut my rabbets I did them too shallow - when I build me next ship I will have an actual plank ready to help me cut to the right depth. Keep the updates coming!
-
Hi yes I did receive an automatic reply - I sent the first message to them about a month ago hence my post. They have always replied in the past but I am going to try the email address that Tony supplied.
-
Thanks Tony I’ll give that a go 👍