No Idea
-
Posts
1,025 -
Joined
-
Last visited
Content Type
Profiles
Forums
Gallery
Events
Everything posted by No Idea
-
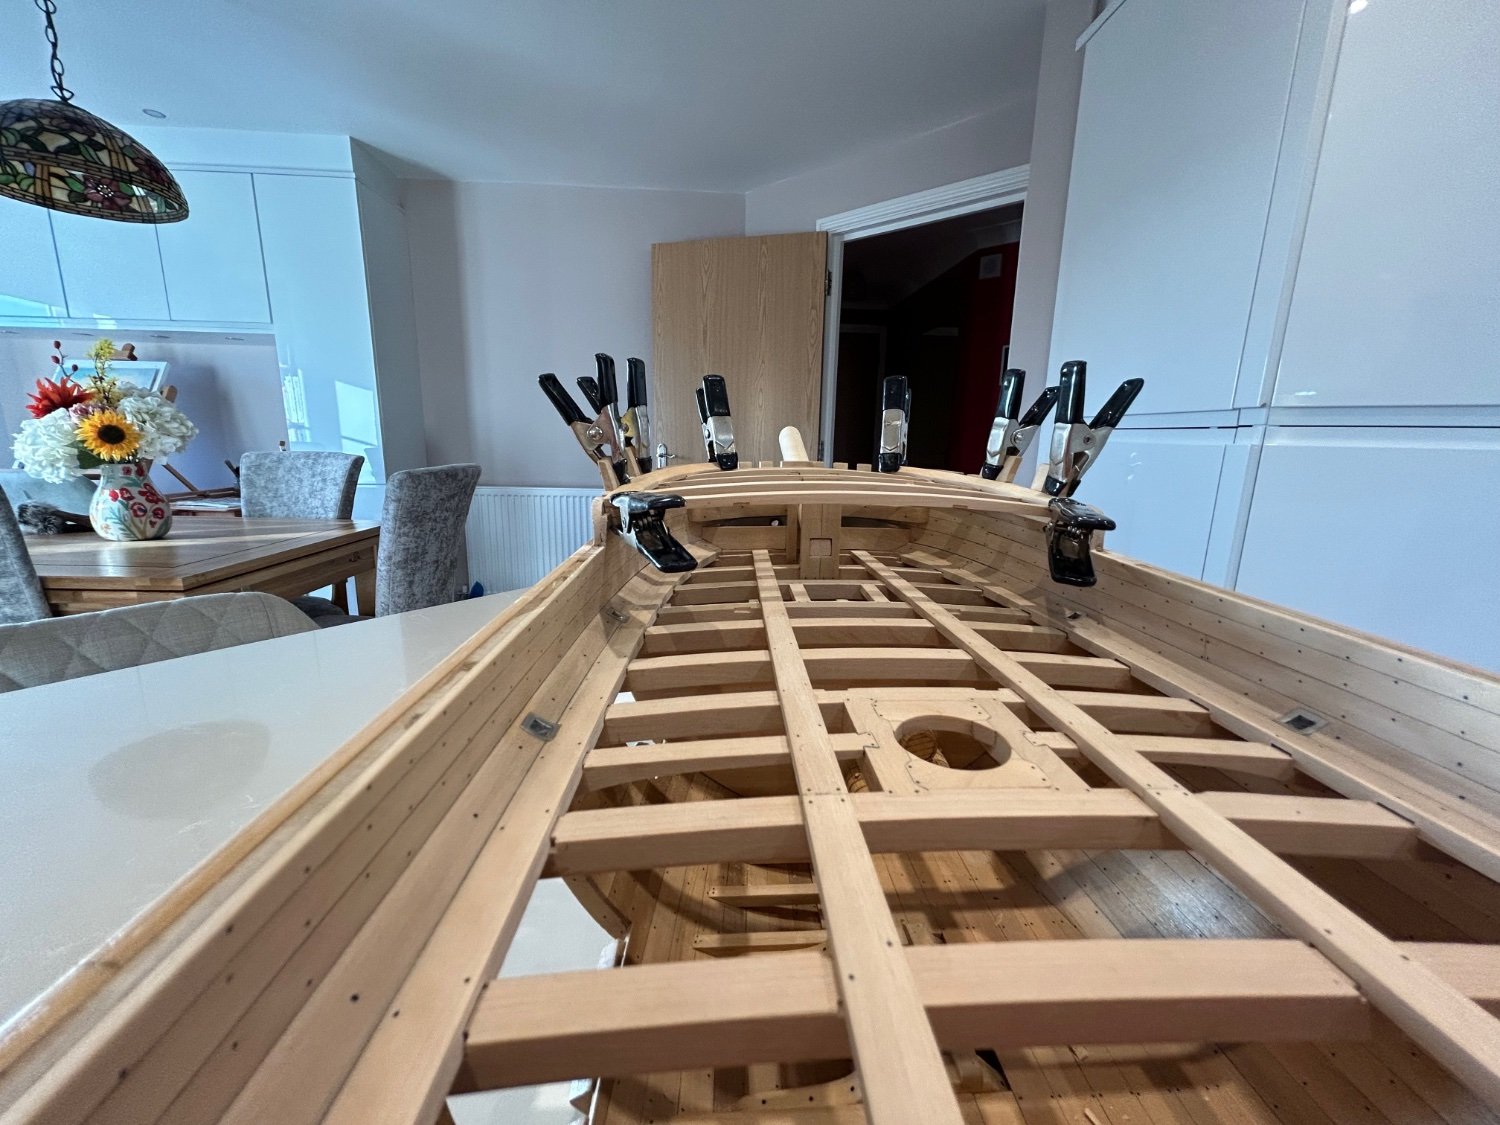
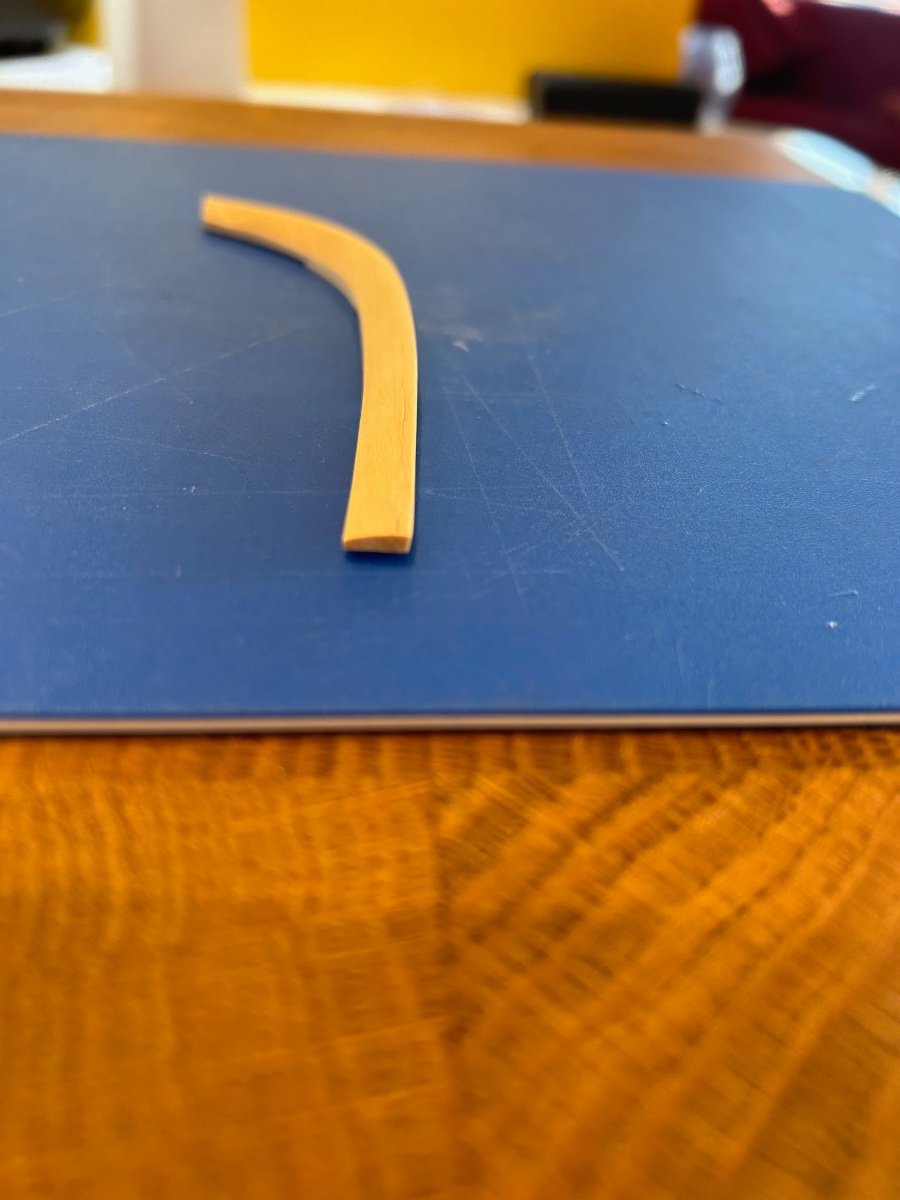
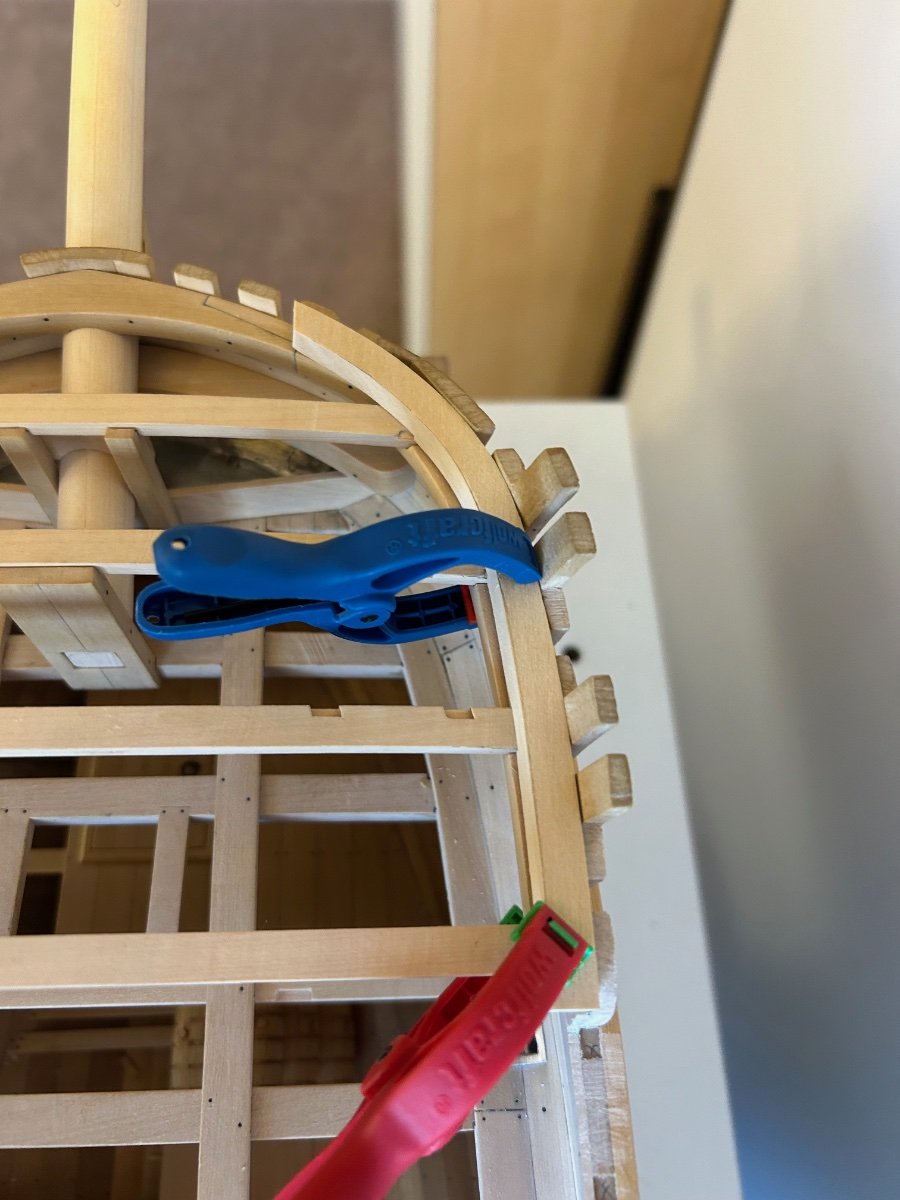
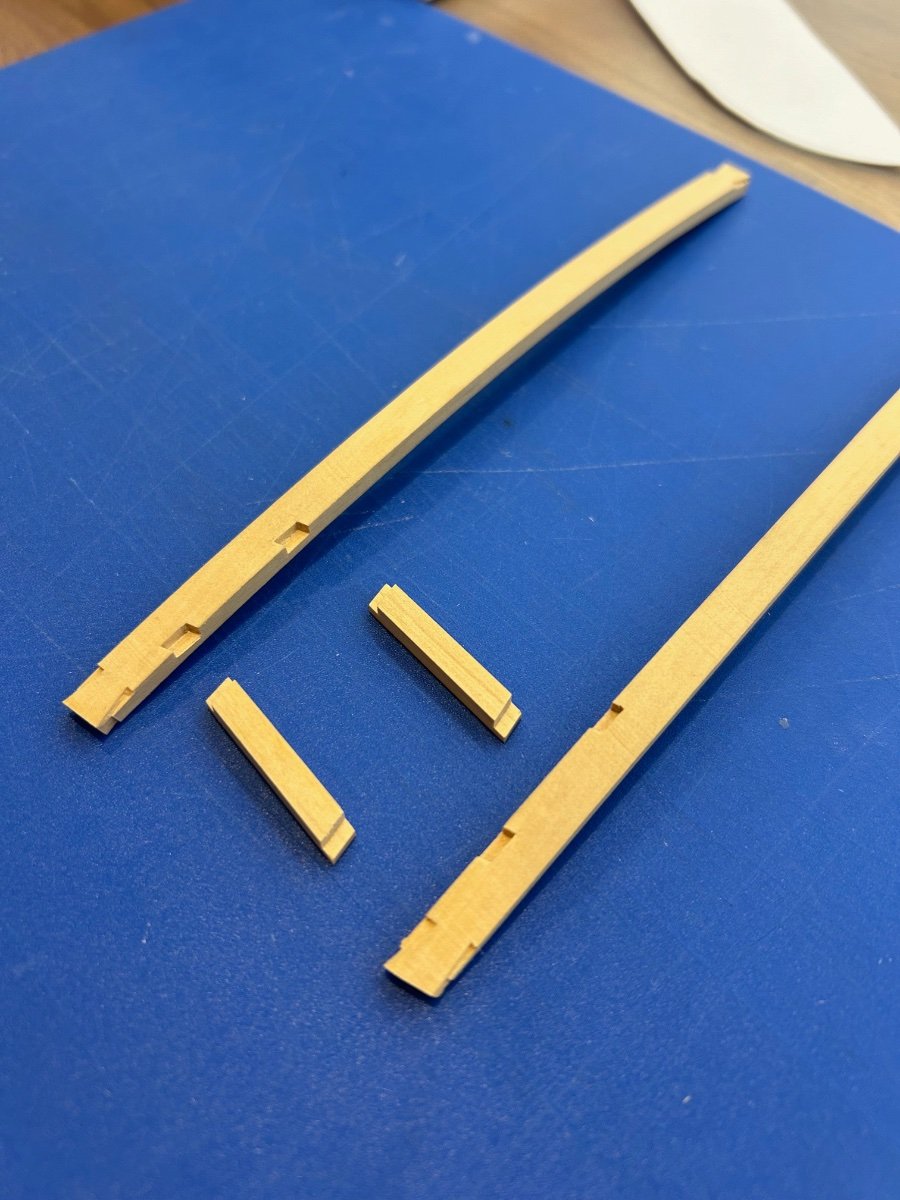
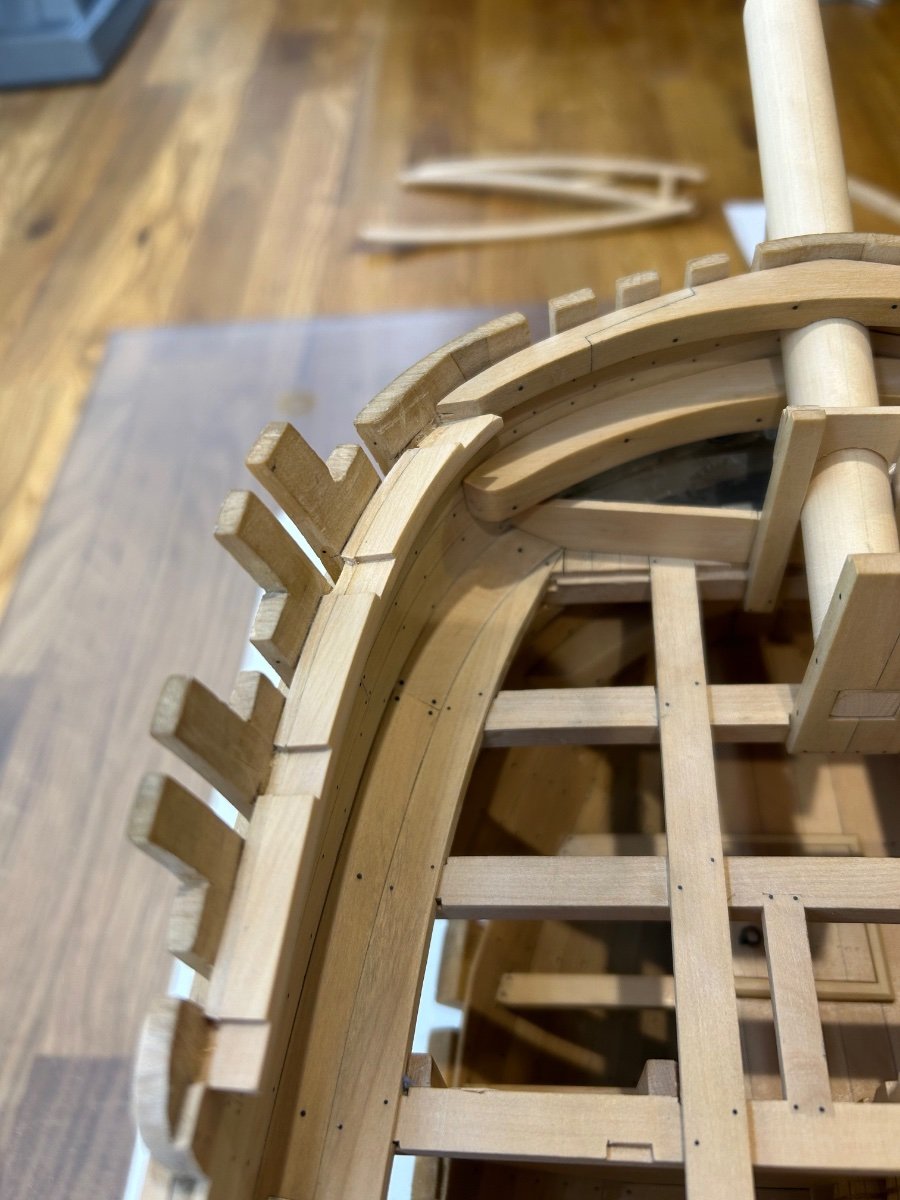
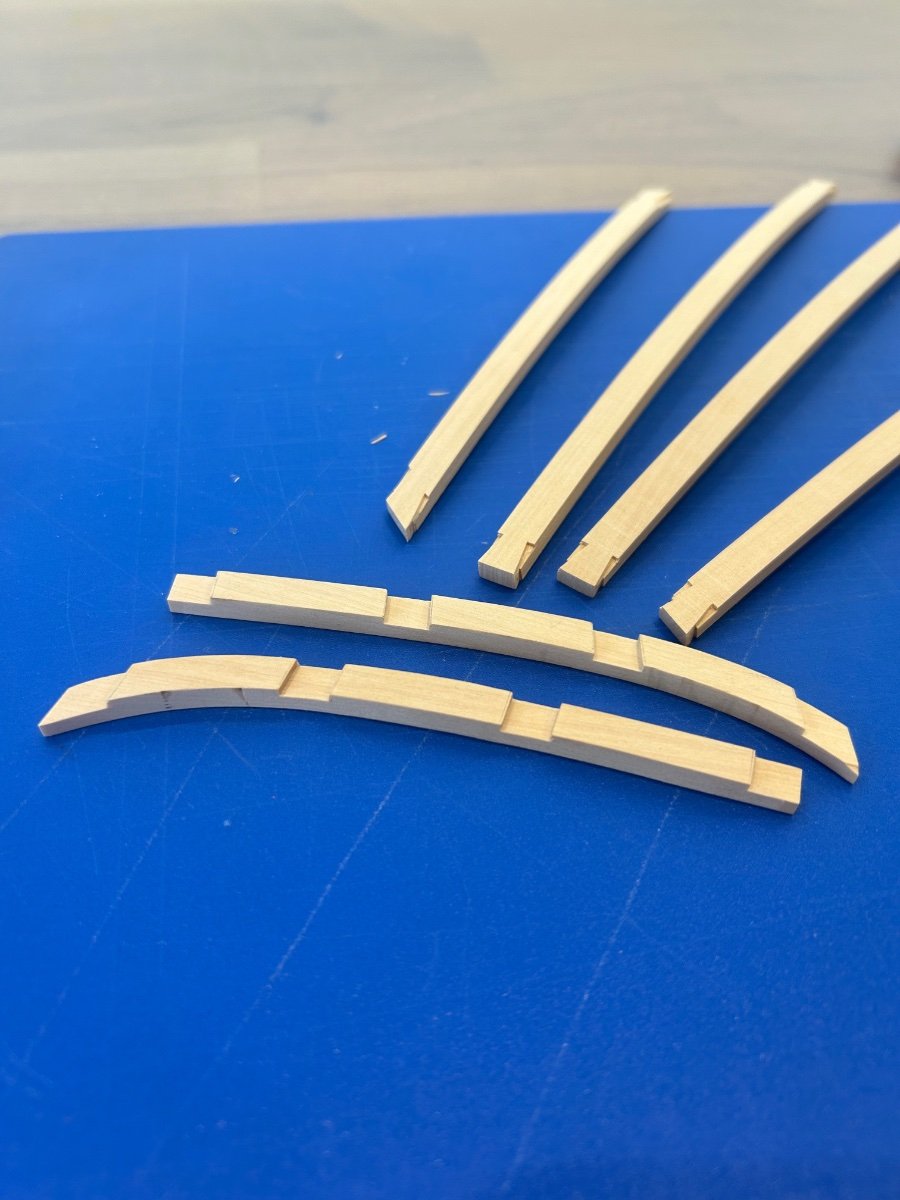
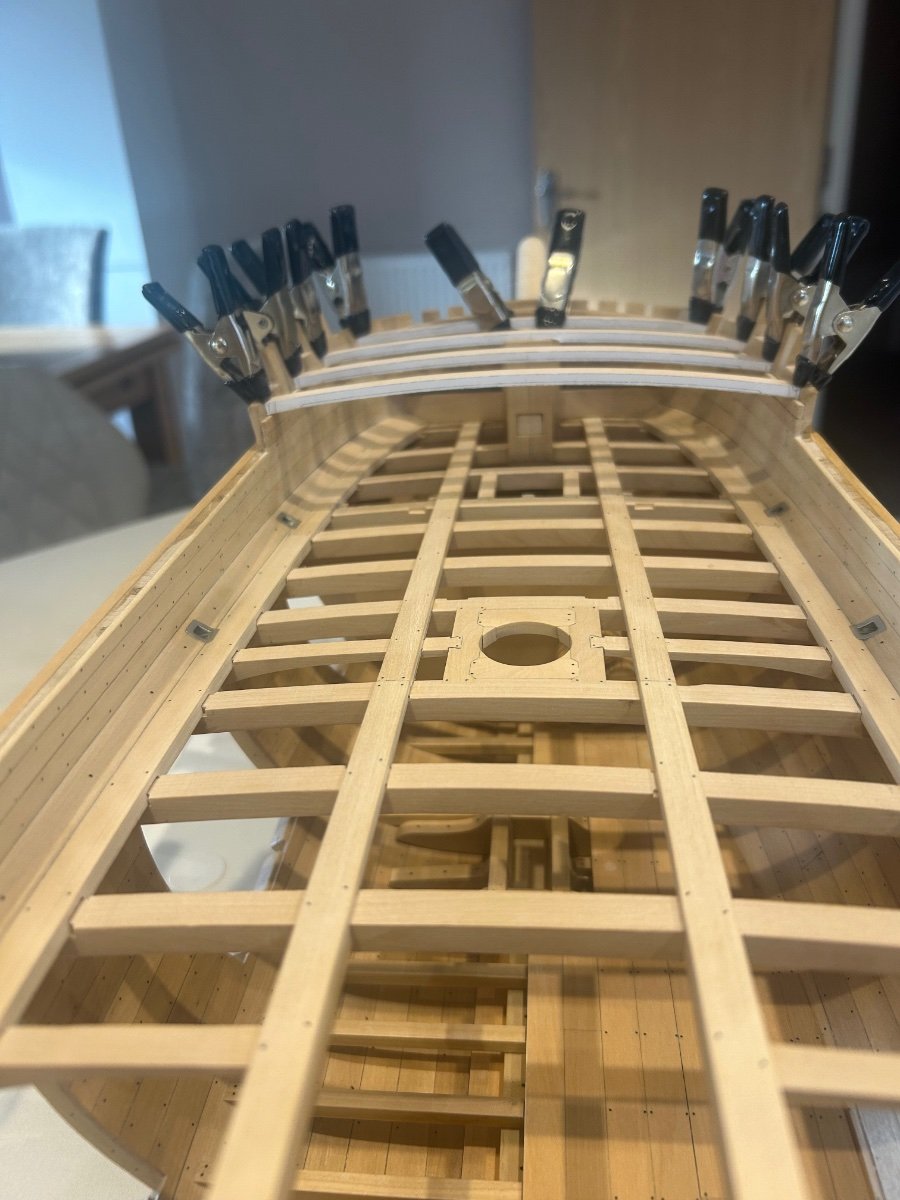
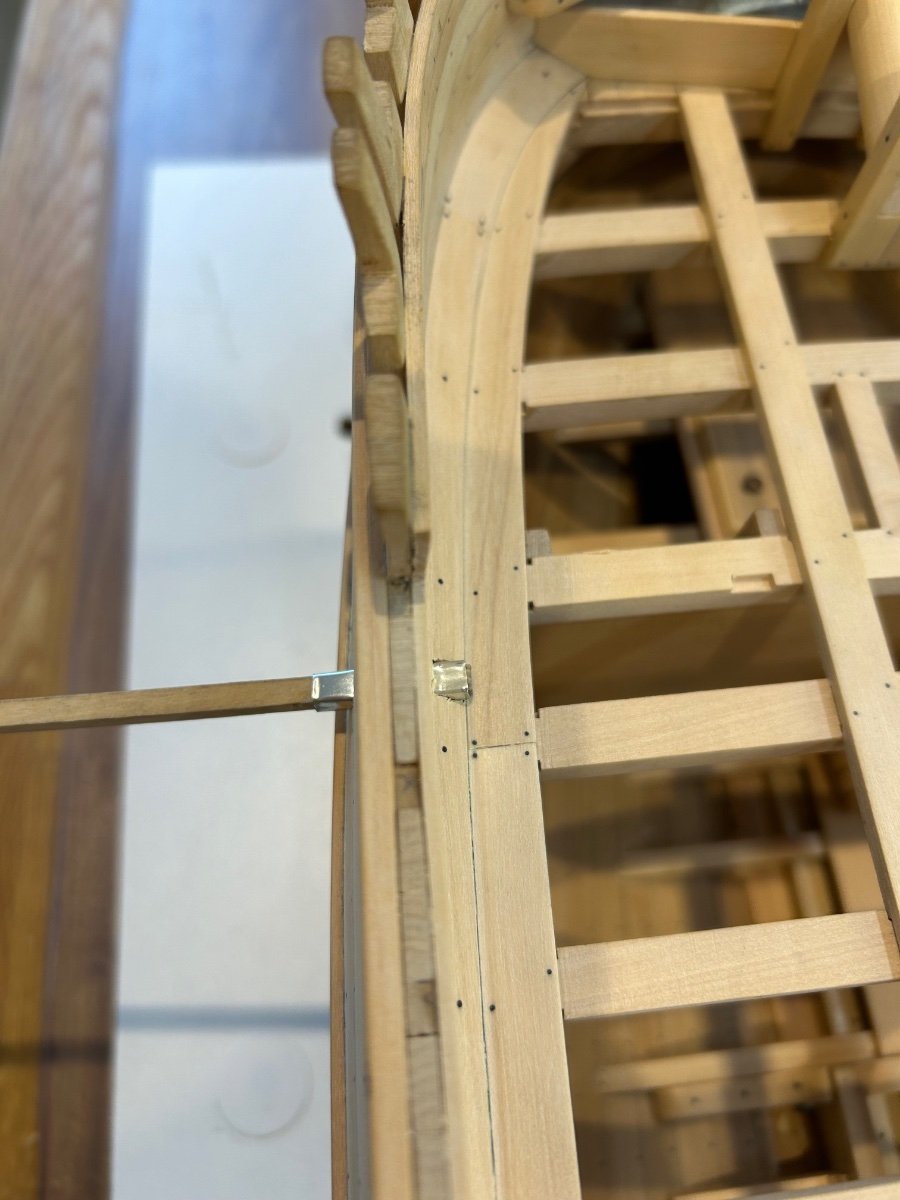
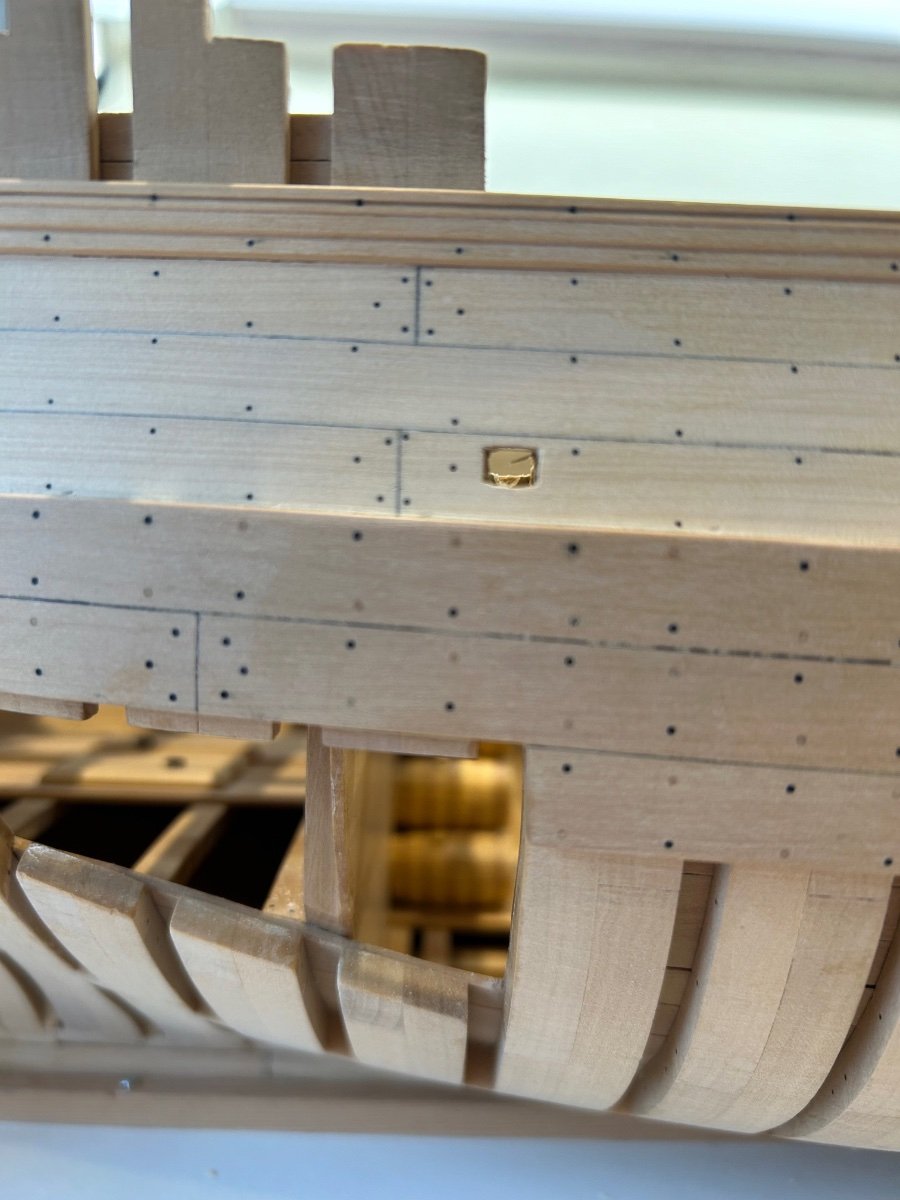
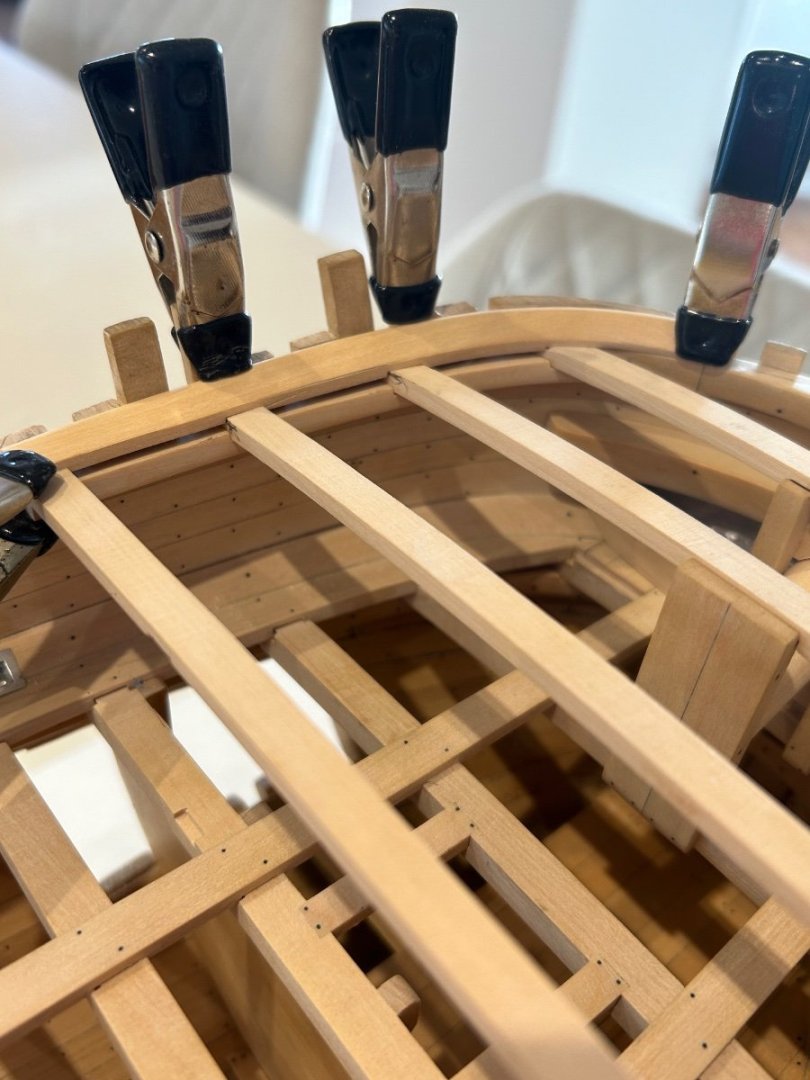
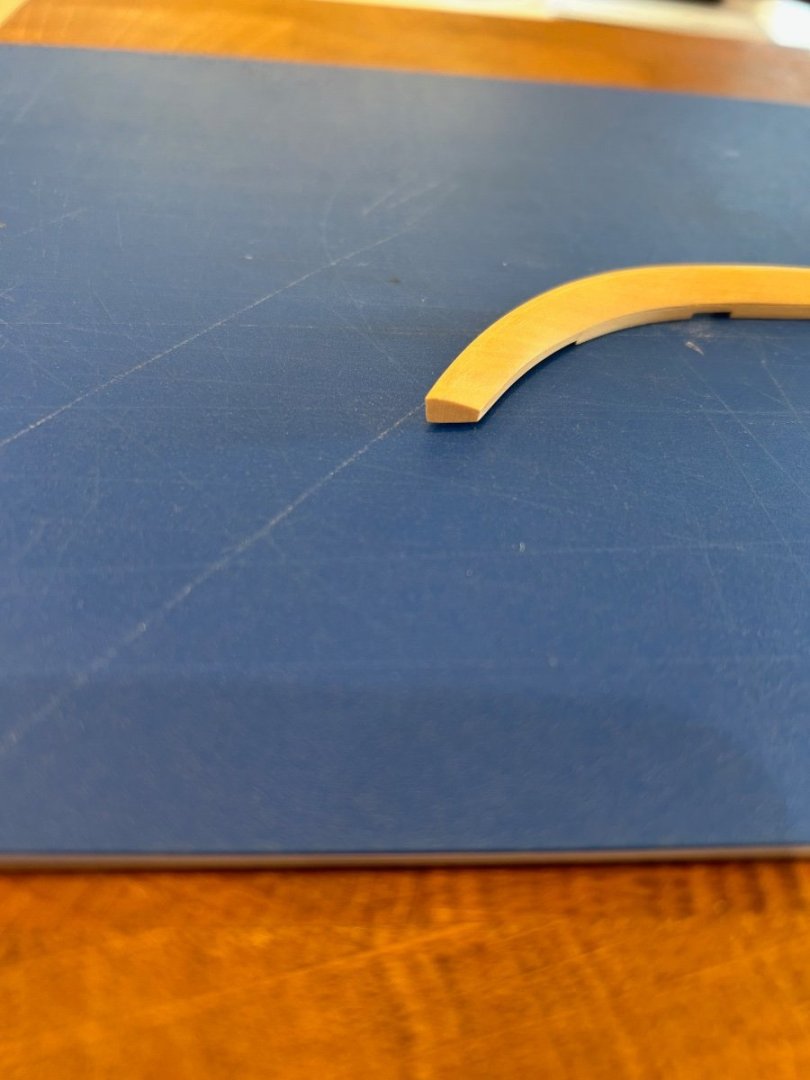
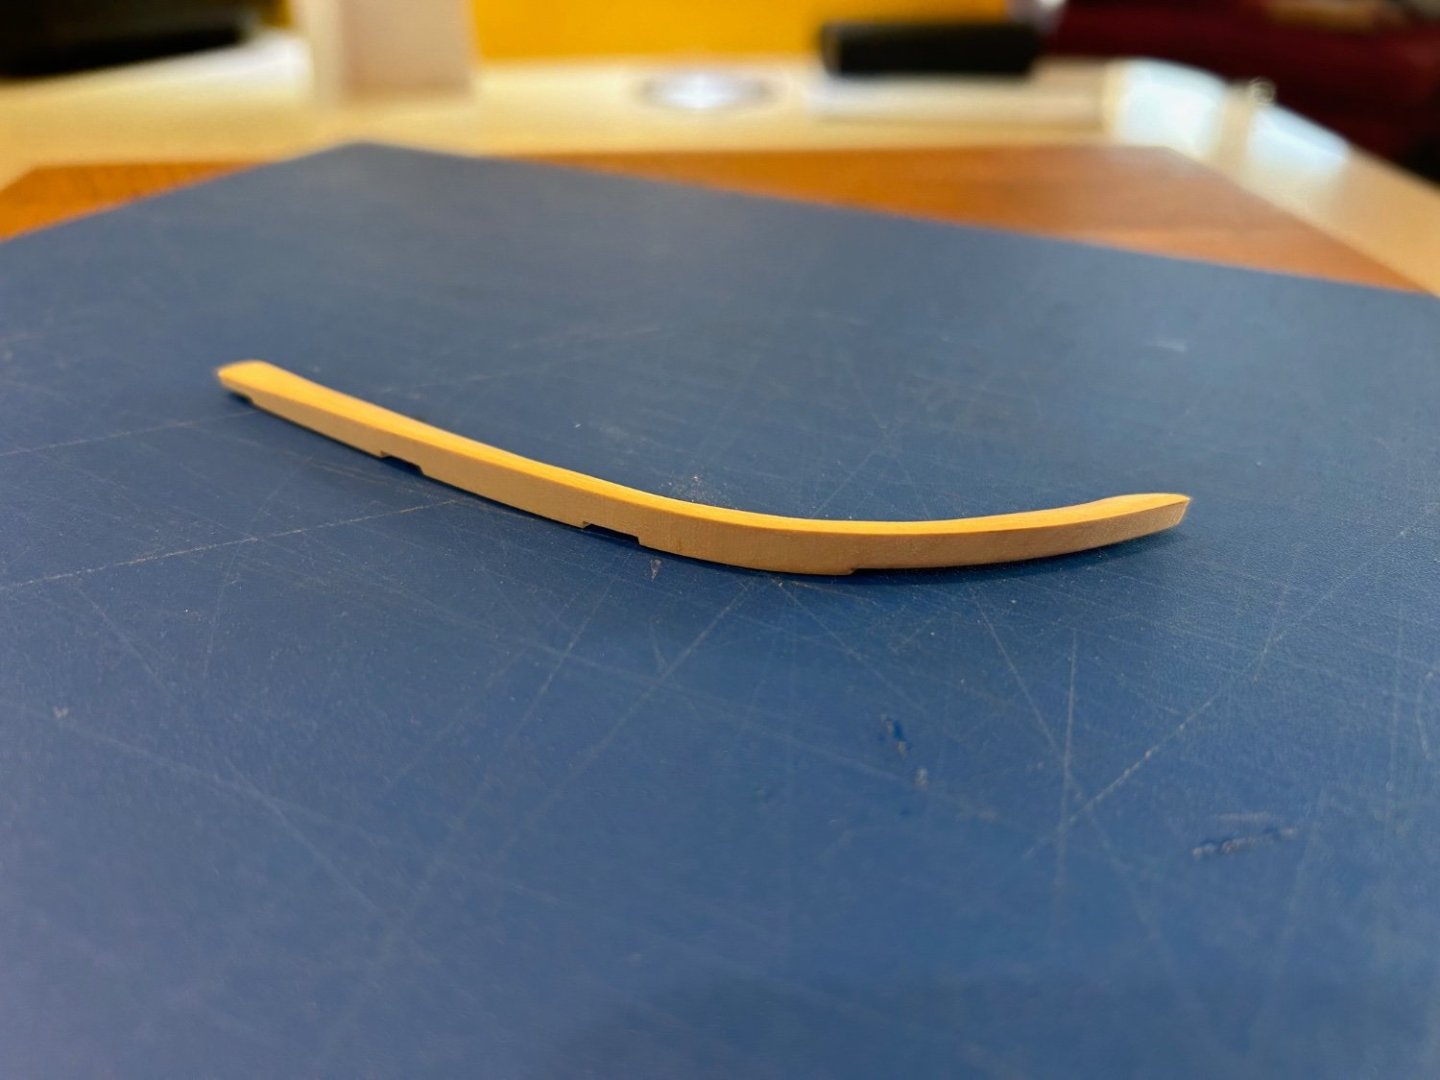
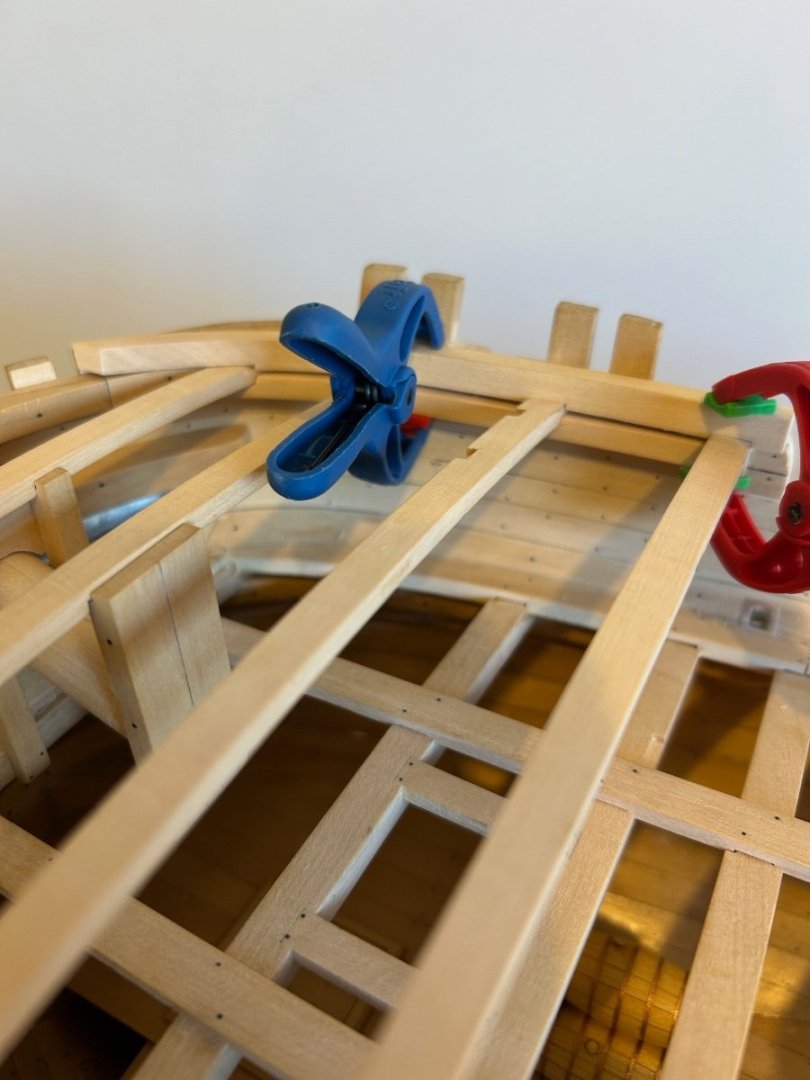
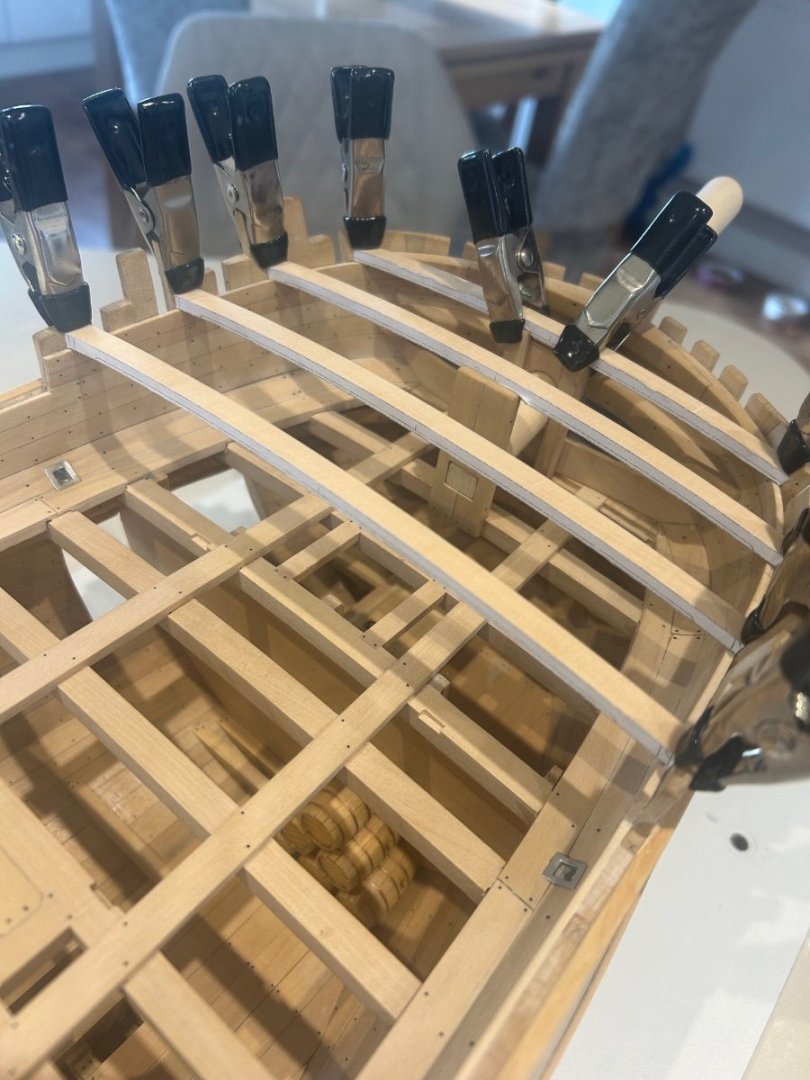
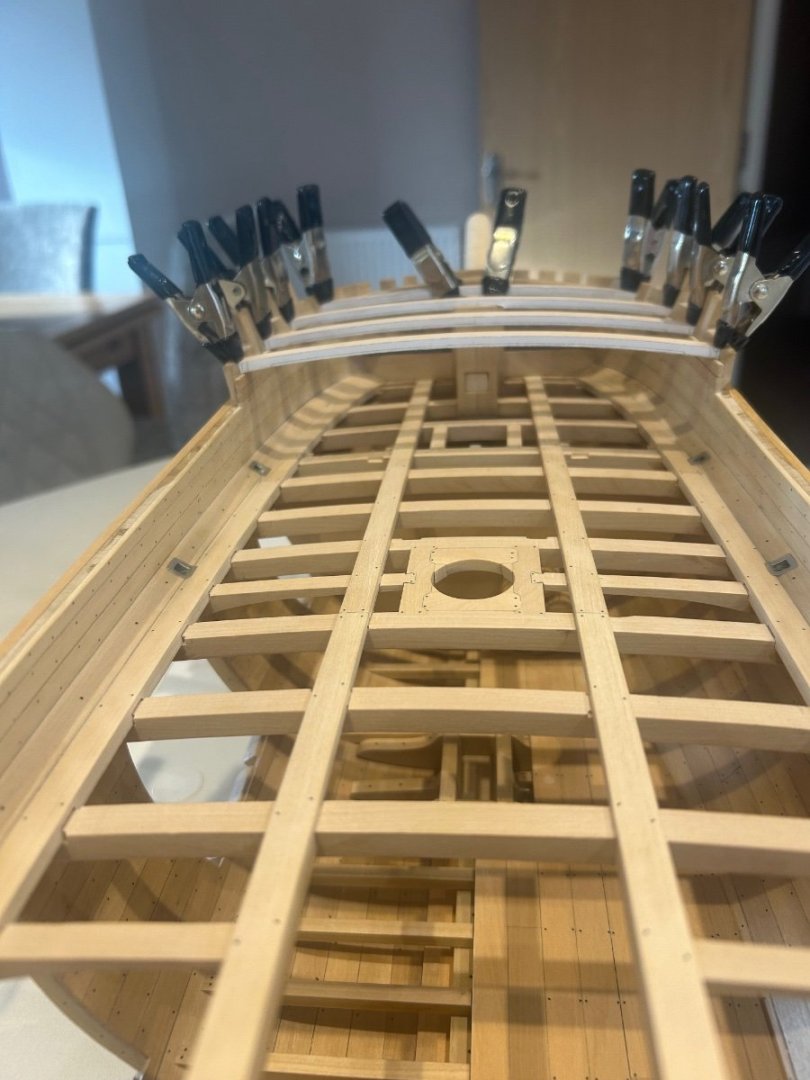
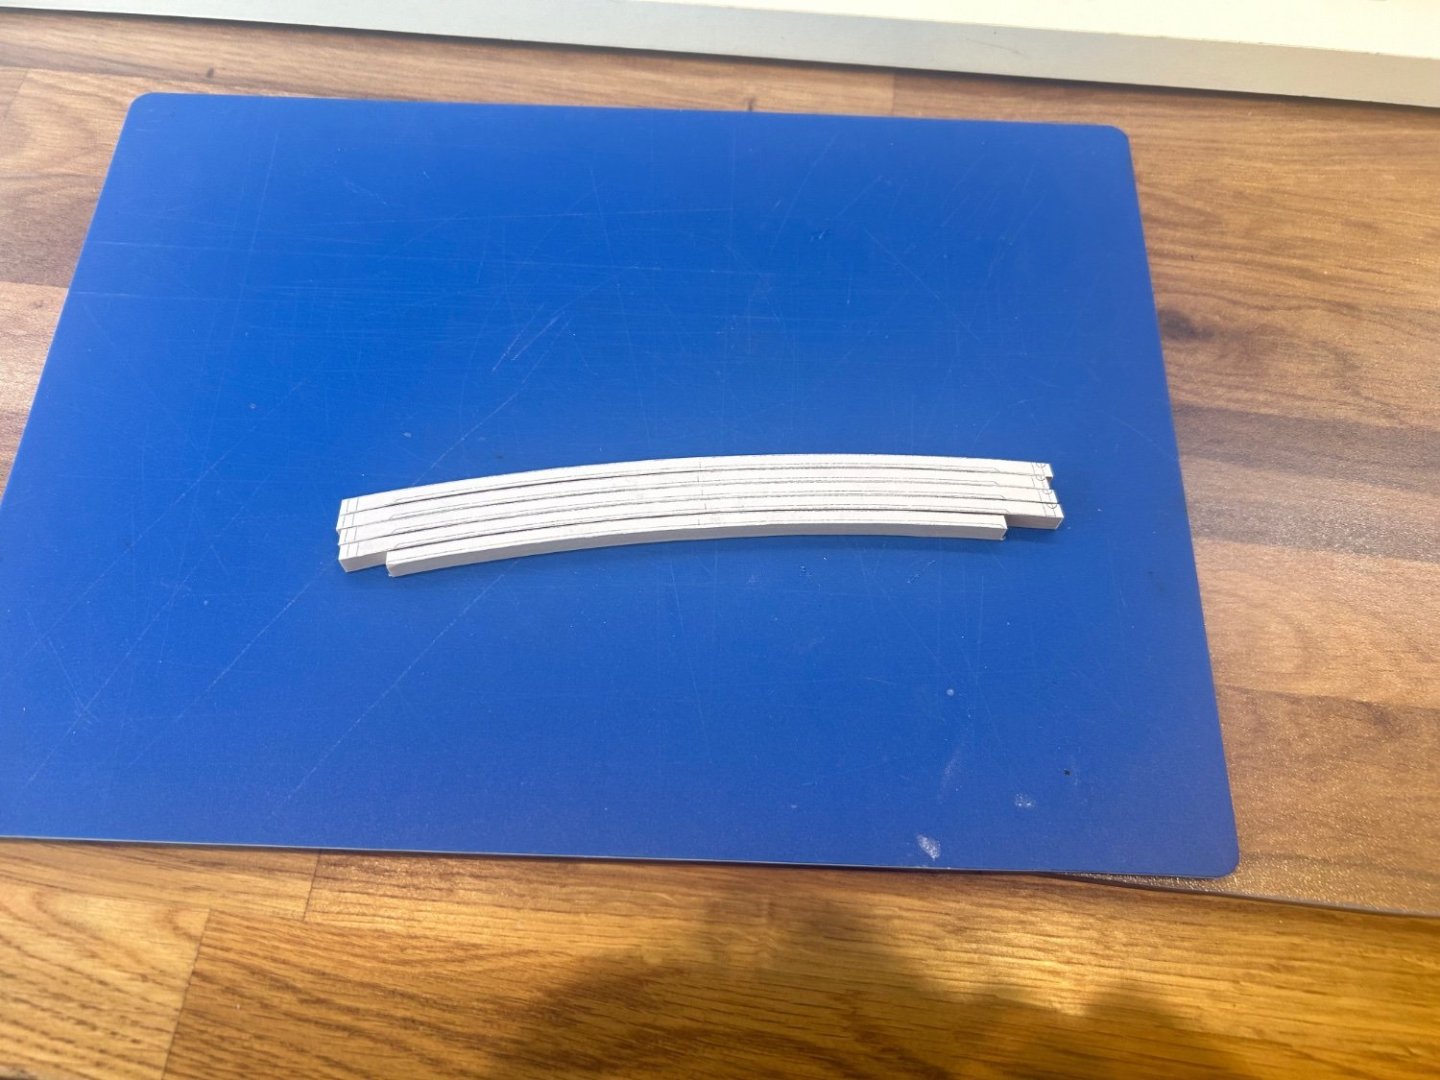
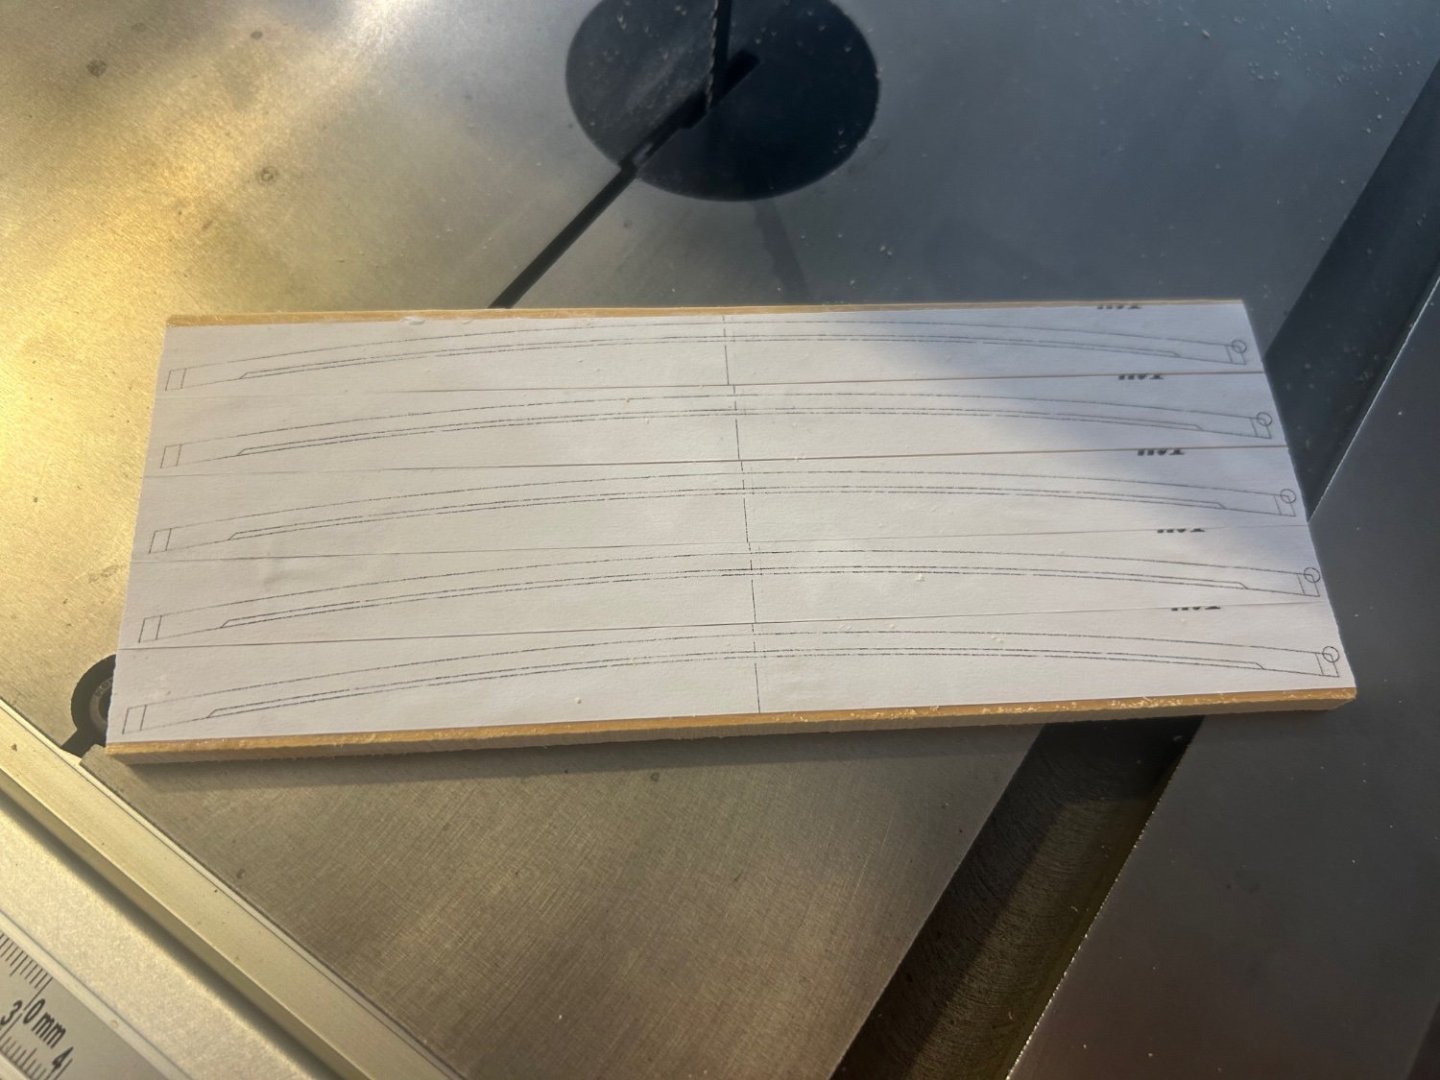
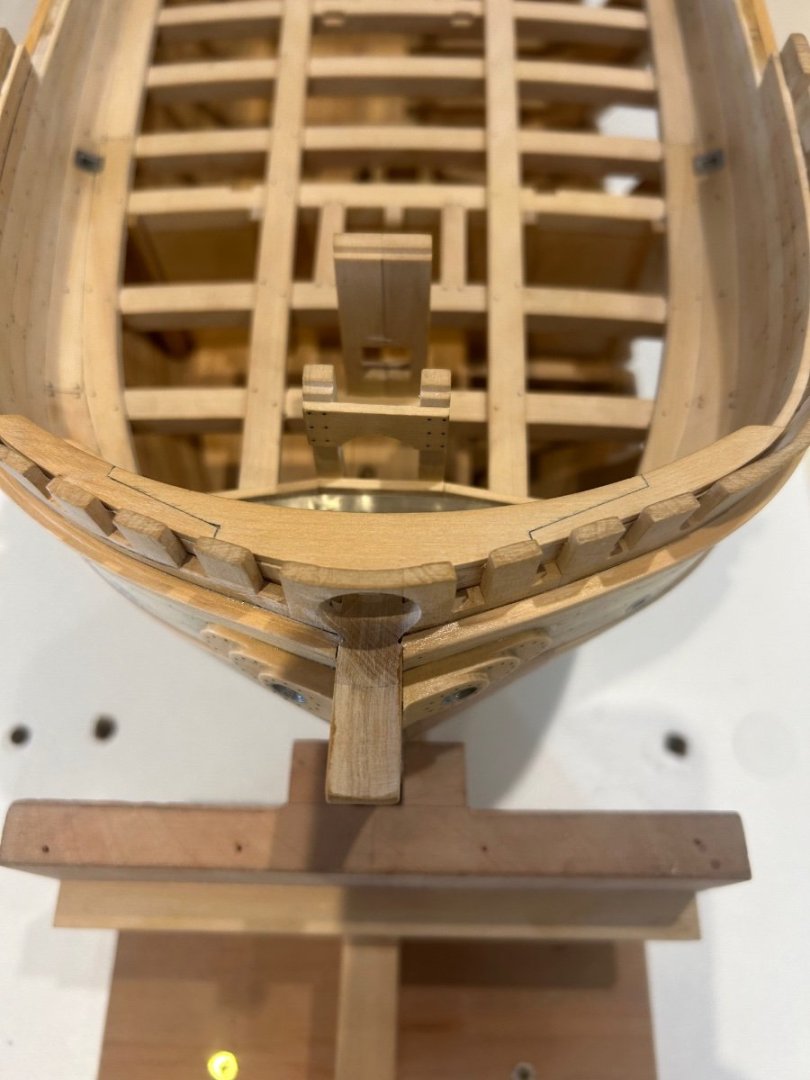
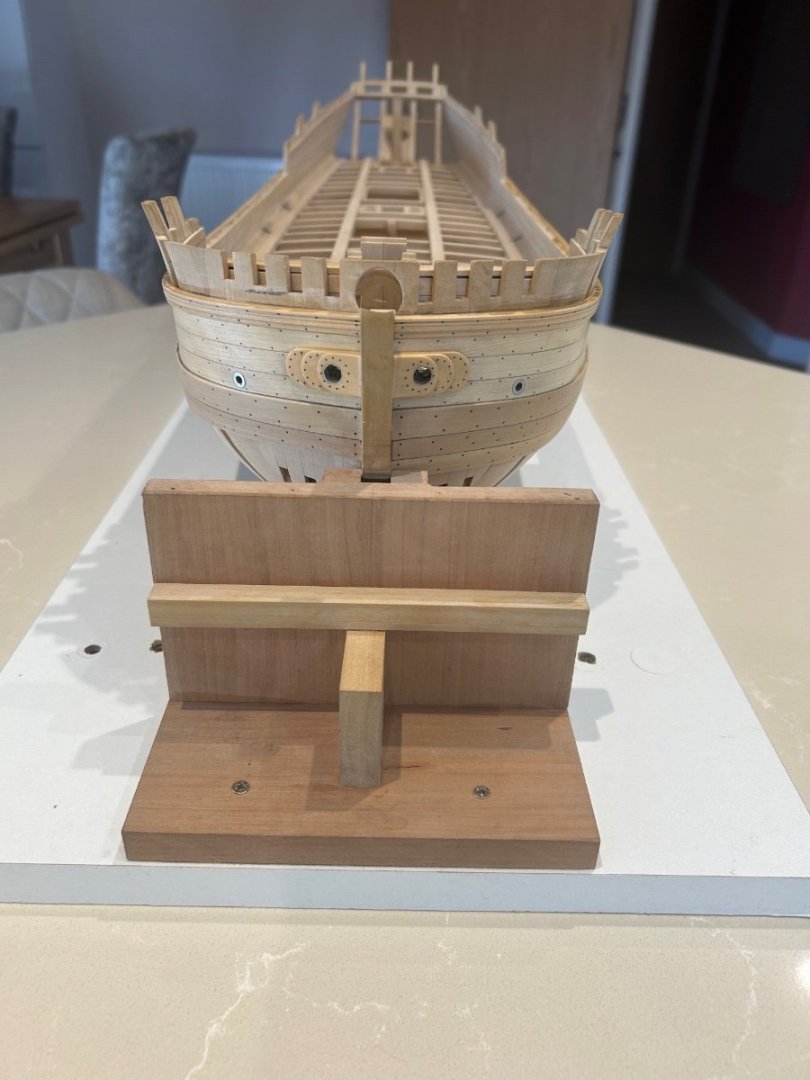
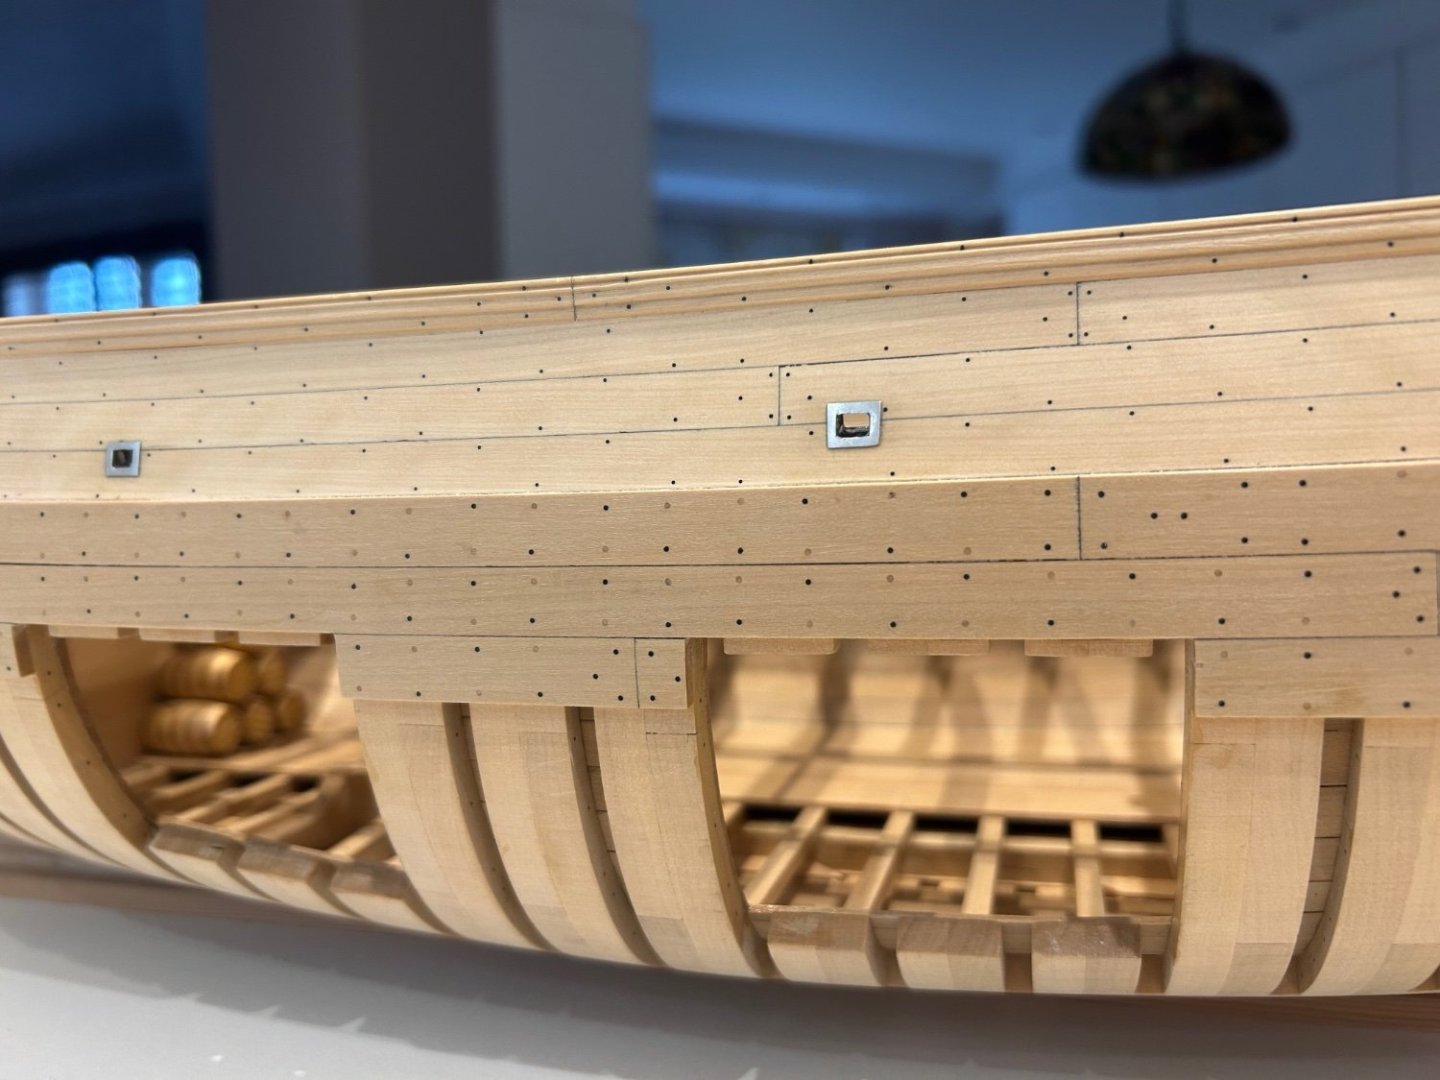
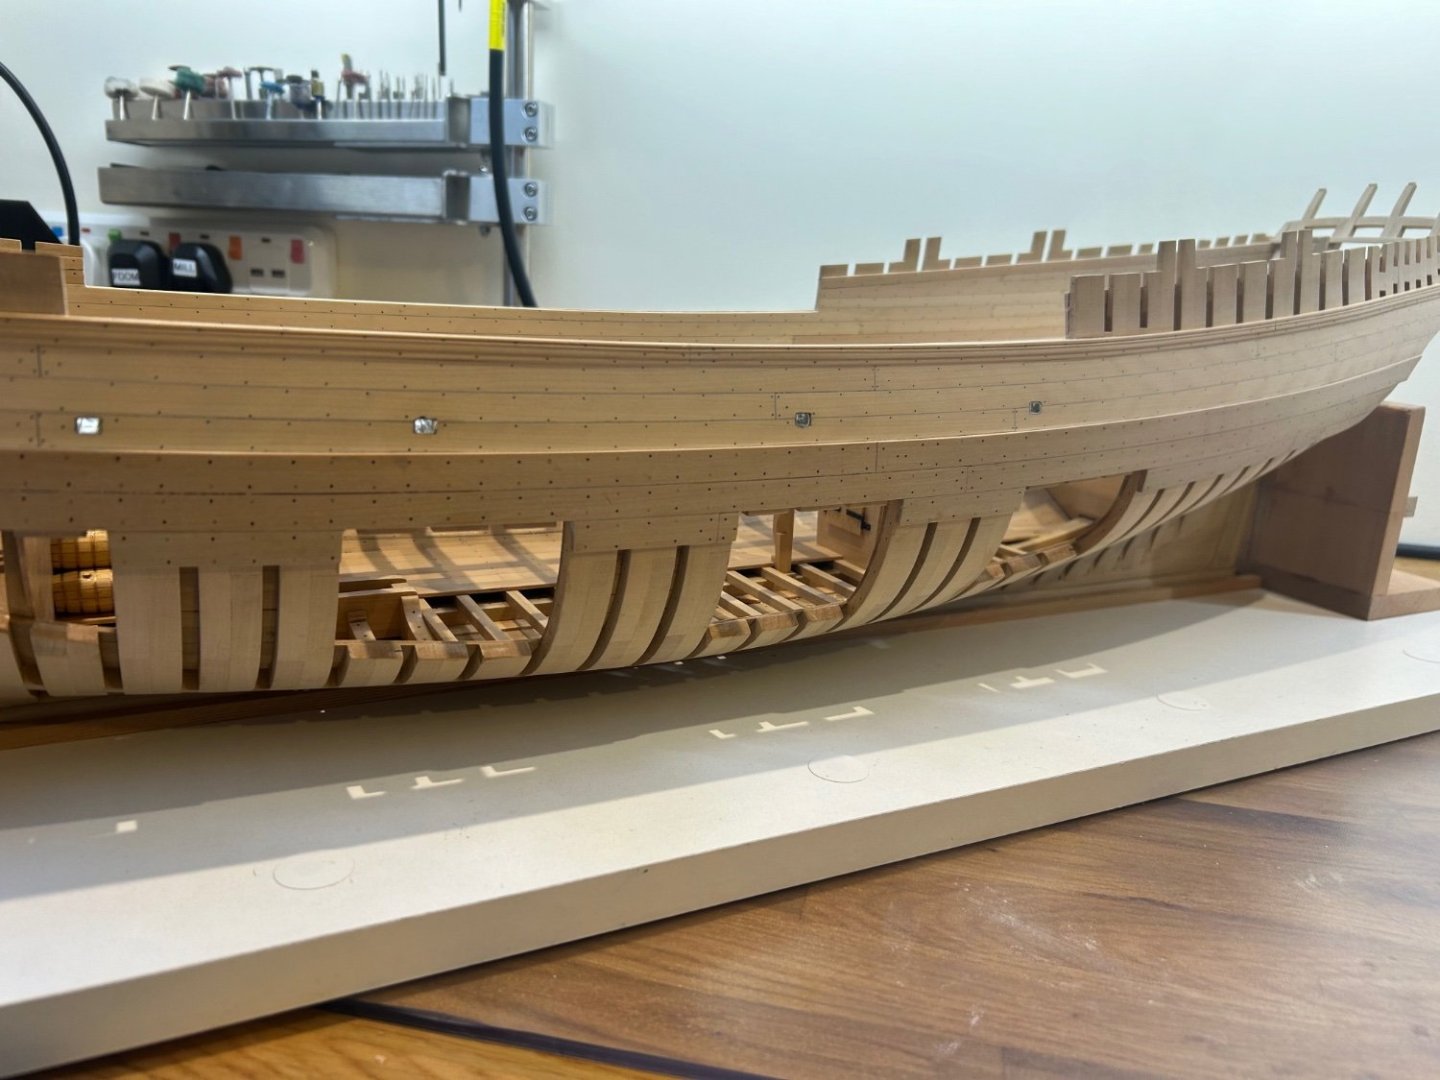
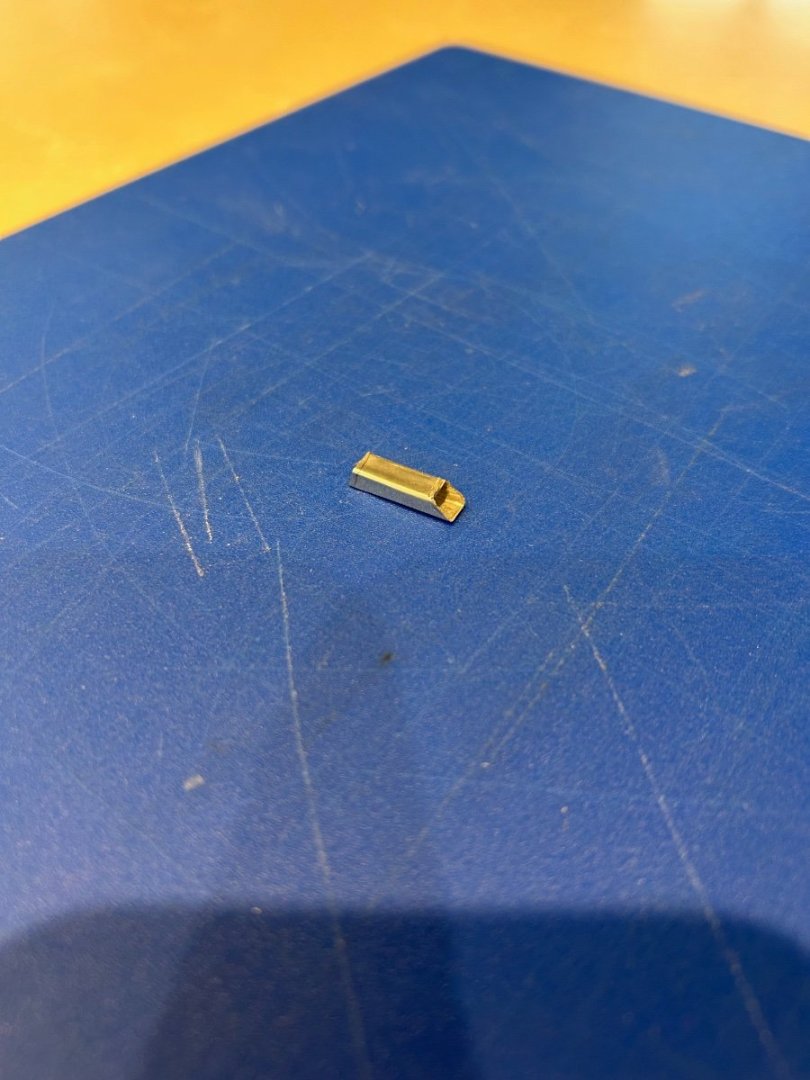
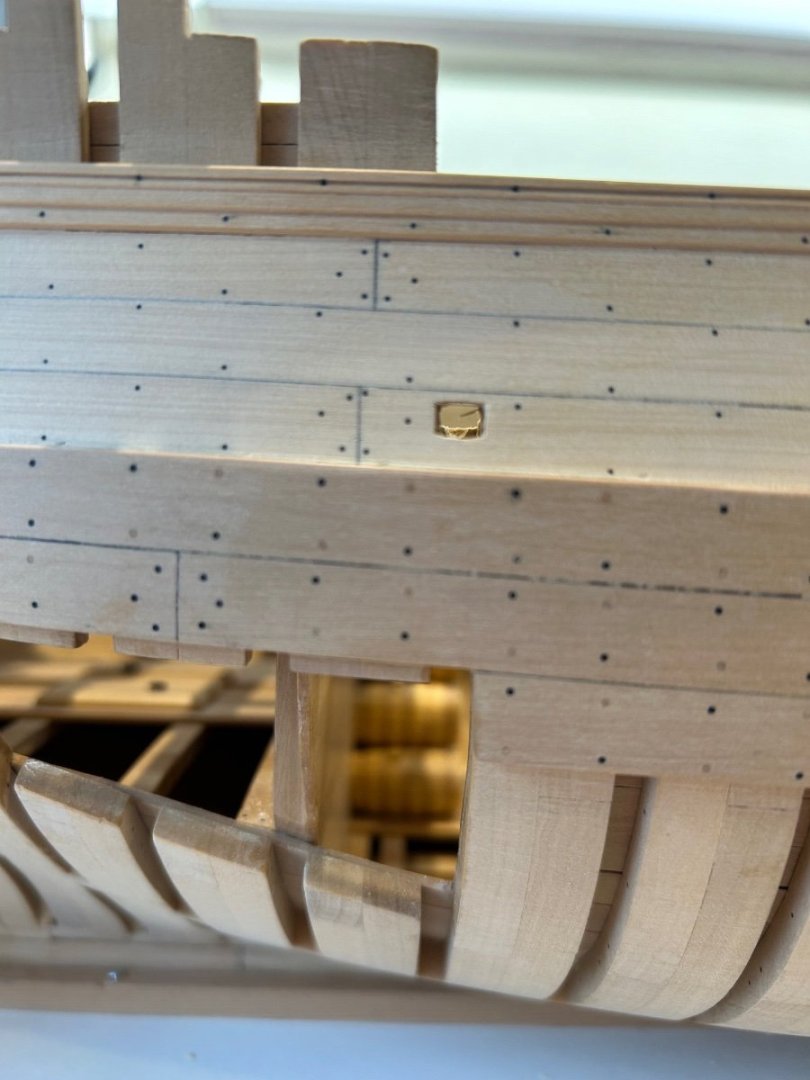
 More done this time it's the forecastle deck waterways. As with the main deck these are tricky to make and get a good fit. Here I'm just pretty much roughing out the shape to get a good fit on the hull and beams. I learn't from last time to leave loads of extra material on until the final shaping. This is what the final piece looks like - It varies in thickness, angle and profile. I haven't put any of the making pictures up as its a replica of the process that I followed before. Just dry clamped in place to check that all is ok. It's all still a bit scruffy and needs cleaning up and pencil marks removed but on the whole they fit nicely and now I know that everything lines up. So I can now put these parts away until later as I want to make the windlass, stove and office that sit between these decks. Once they are made and installed I'll finally fit all of these pieces too. Mark


-
Beautiful work Chuck!! - The beams are a part of the model that I can see a kit builder having issues. The beams have complicated compound angles to sit on the hull and line up with your marks - too short or the wrong angle and they are useless. Just a thought maybe a small inclusion on how to work them out using scrap before trying to cut the stock provided. I only say this because as a new builder I have wasted so much wood working this out before realising that scrap is a whole lot cheaper. I also discovered to cut the longest beams first. If I cut them too short I can move that piece forward to the next shorter beam. Mark
-
You really are making a fantastic job of this Vanguard model! You have got past the issues encountered very nicely and let's be honest if it was meant to be easy everyone would be making one. Lovely clean work mate 👍
-
Thanks druxey I found these joints so much easier this time and the beams actually go all of the way to the sides of the ship. This might sound strange but the more ship building I do the more I realise the importance of accuracy on every part. Everything is connected or has a knock on effect to everything else!
-
On a small scale a zero clearance insert gives the wood support all of the way up to the edge of the blade. This reduces tear out as the wood is fully supported but also reduces chip removal which can cause heat. Whilst a fine tooth blade will also reduce tear out it will also cause issues with chip removal and heat too. It’s a trade off that experience and practical hands on work resolves. I believe that there is no definitive answer but my best results are with a 4” 64 tooth blade running through a zero clearance insert. Other users find different results.
-
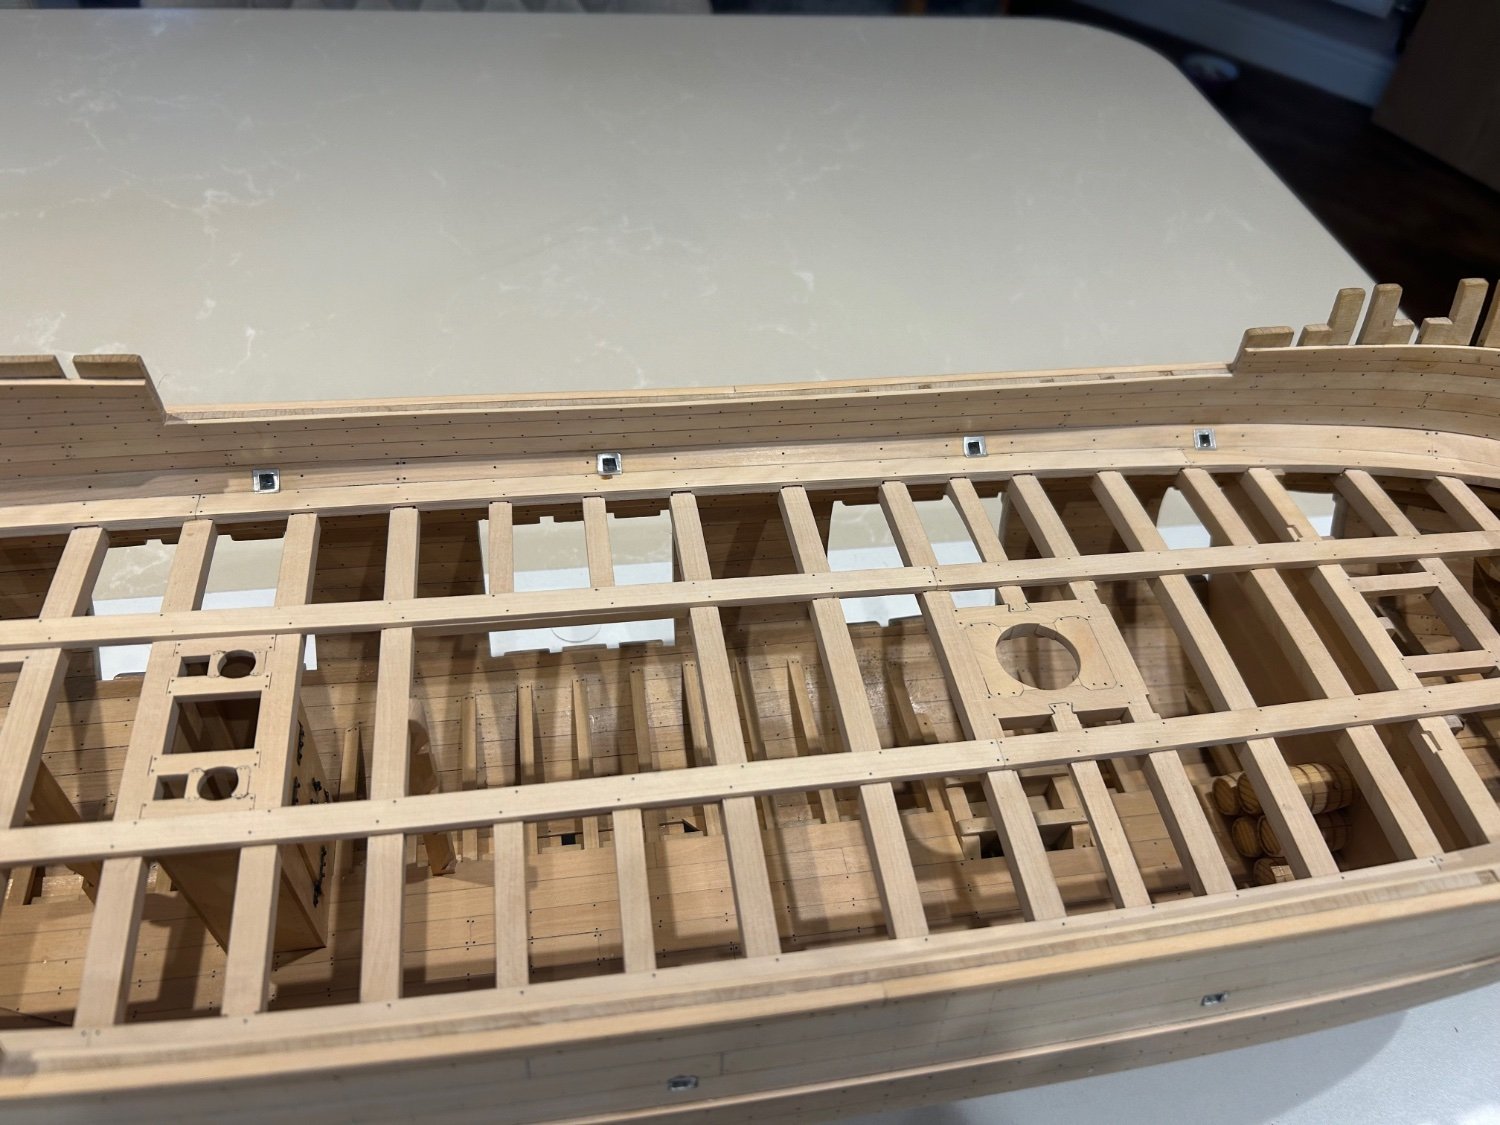
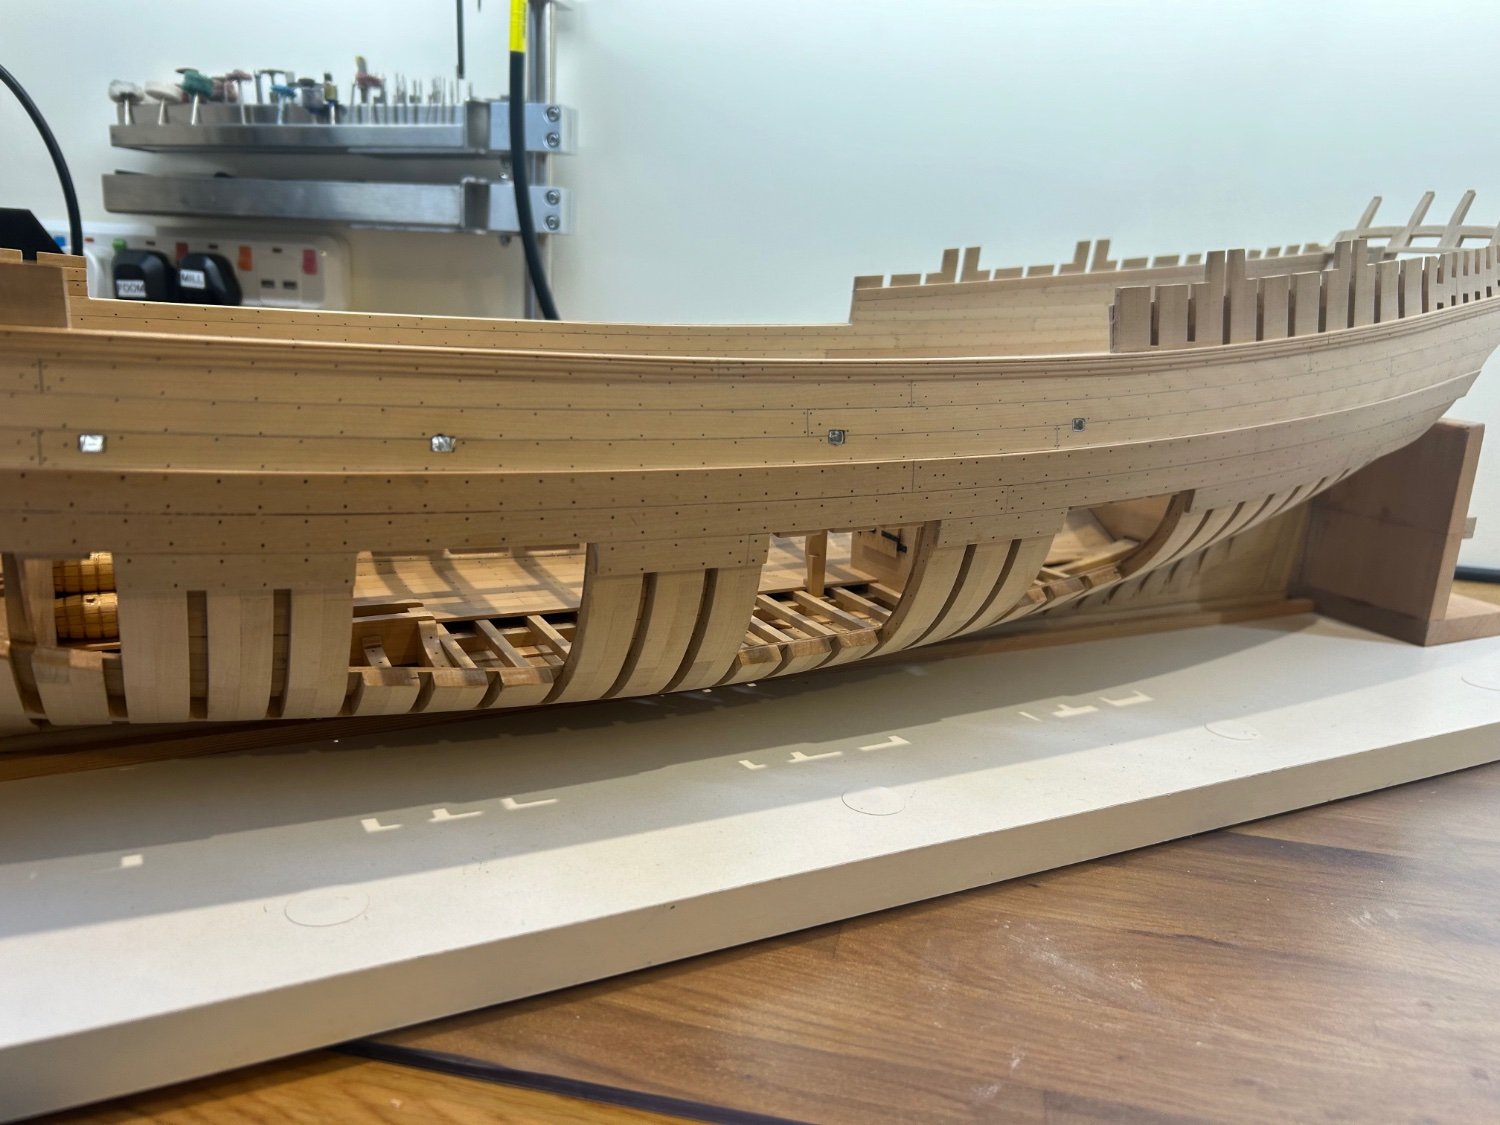
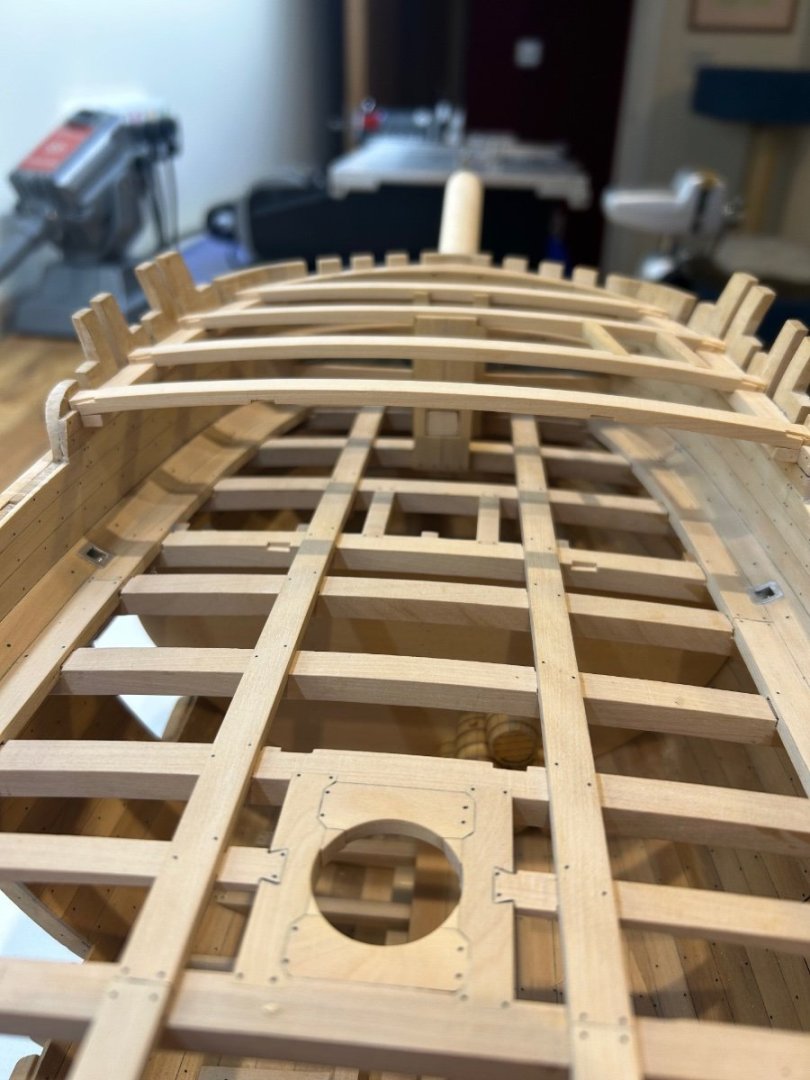
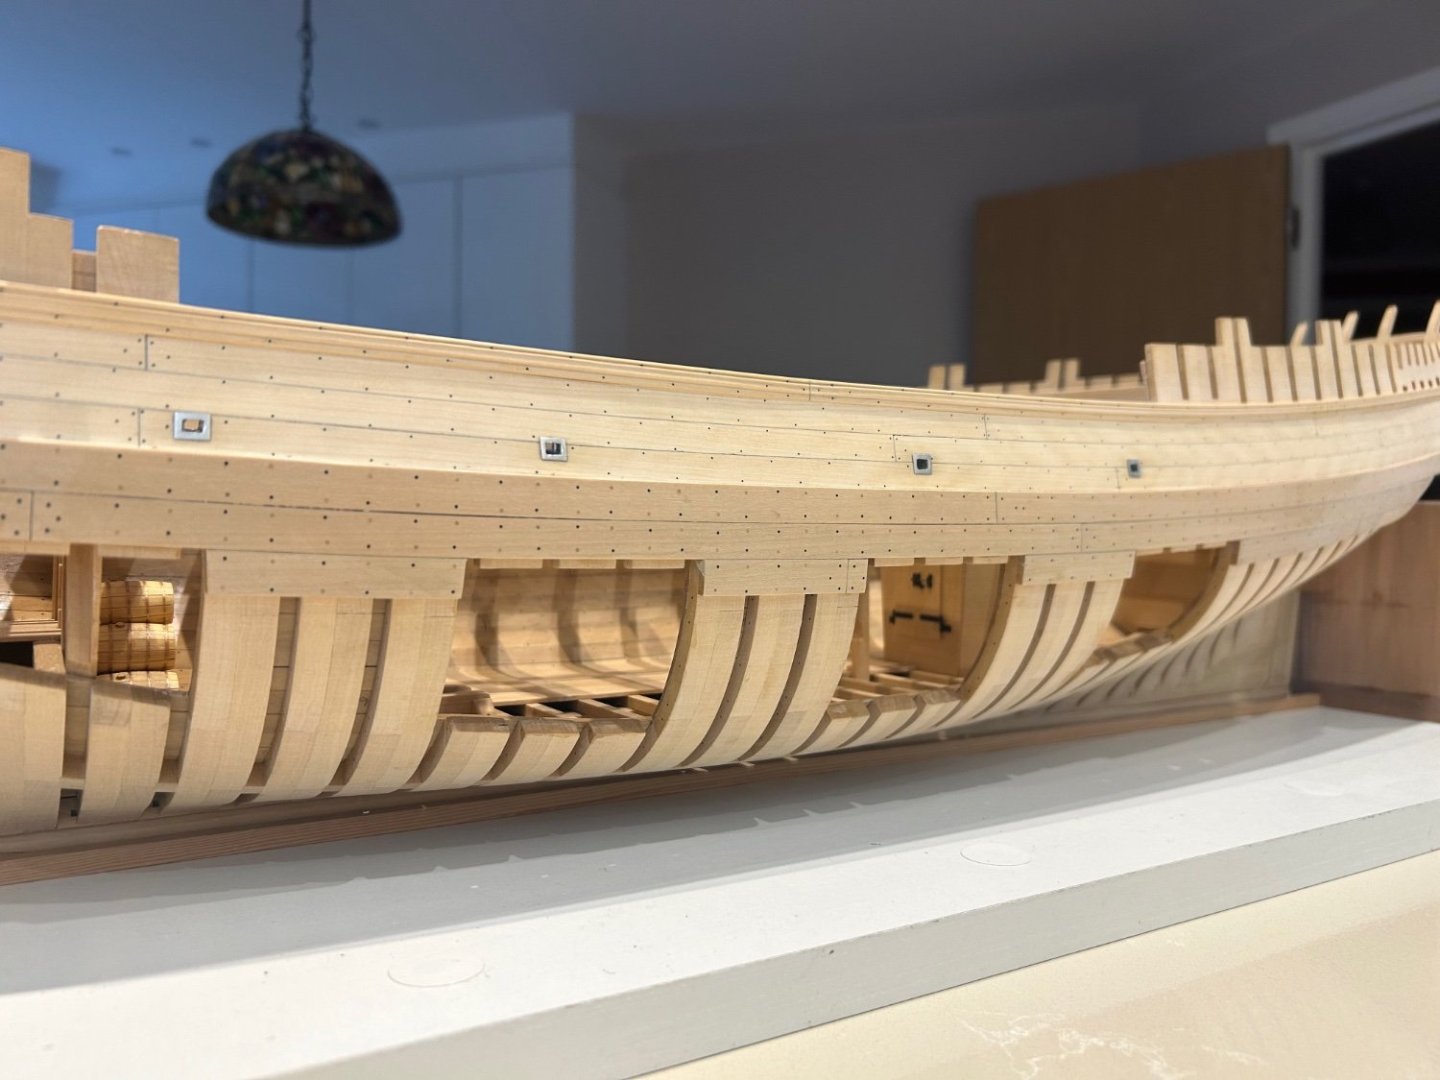
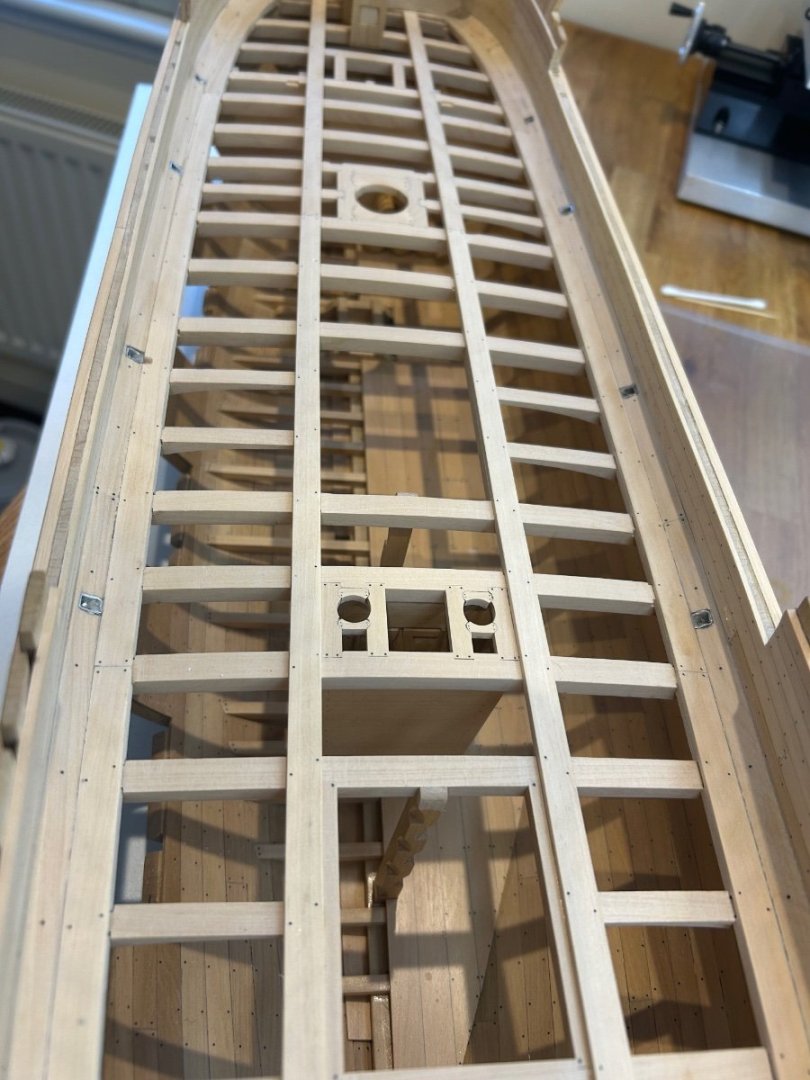
More done on the beams to get them just about completed. Firstly I made the deck shelves (this ship doesn't have knees under the ends of the beams) and also cut the dovetails in the clamps and beams. I actually got a nice fit this time on these parts. There were also a few more notches that needed to be cut into the beams and also a slanted hatch for above the kitchen stove. I couldn't quite see the details for the carlings in the drawings so I made them like the other hatches on the ship. This is pretty much a 50/50 notch into the beam and a similar one into the carling. The hatch sits at an angle of 74 degrees as best that I could measure it. The beams in place and also at the correct overall height. They sit flush with the highest breast hook for the planking to run over. So next I'm going to make the waterway for this deck. Its thickness and angles vary quite a lot so should be quite a challenge. I also want to make some detailed parts rather than just structural ones. So to shake my build up a bit I've decided to pretty much finish this end of the ship. I'll be making the stove, office and windlass along with several hatches. I just think it will be nice to add some details before getting on with the planking on the starboard side. Mark


-
I don’t get this - if a blade does not run true then it cannot have a zero clearance insert. Without a zero clearance insert you will get loads of tear out. I’m not saying that it can’t be done but I just need someone to explain how this can be a good thing. If I need a wide cut I use a sled. I still own all of my fingers so I know that this works. It’s one of those things that I need explaining. I’ve lost so much expensive timber through tear out hence my question.
-
I think it's worth saying that if you are lucky enough to have the 18" table on your Byrnes saw the fence does not have to be removed to use it. Without a doubt all of Jim's tools are the best that I own.
-
I get all of mine from Germany https://cnc-plus.de/en/End-Mills-266/2-flute-fish-tail/
- 90 replies
-
- 4
-

-

-
- ancre
- La Mahonesa
- (and 1 more)
-
That is really sweet work my friend 🙂 I would be very pleased to have made that. Just a small tip - Try using 2 flute milling parts on wood. They remove the chips far better and give a very crisp finish.
- 90 replies
-
- 4
-
-
- ancre
- La Mahonesa
- (and 1 more)
-
😜 - Cheers druxey I did have a big smile on my face when I took the measurements.
-
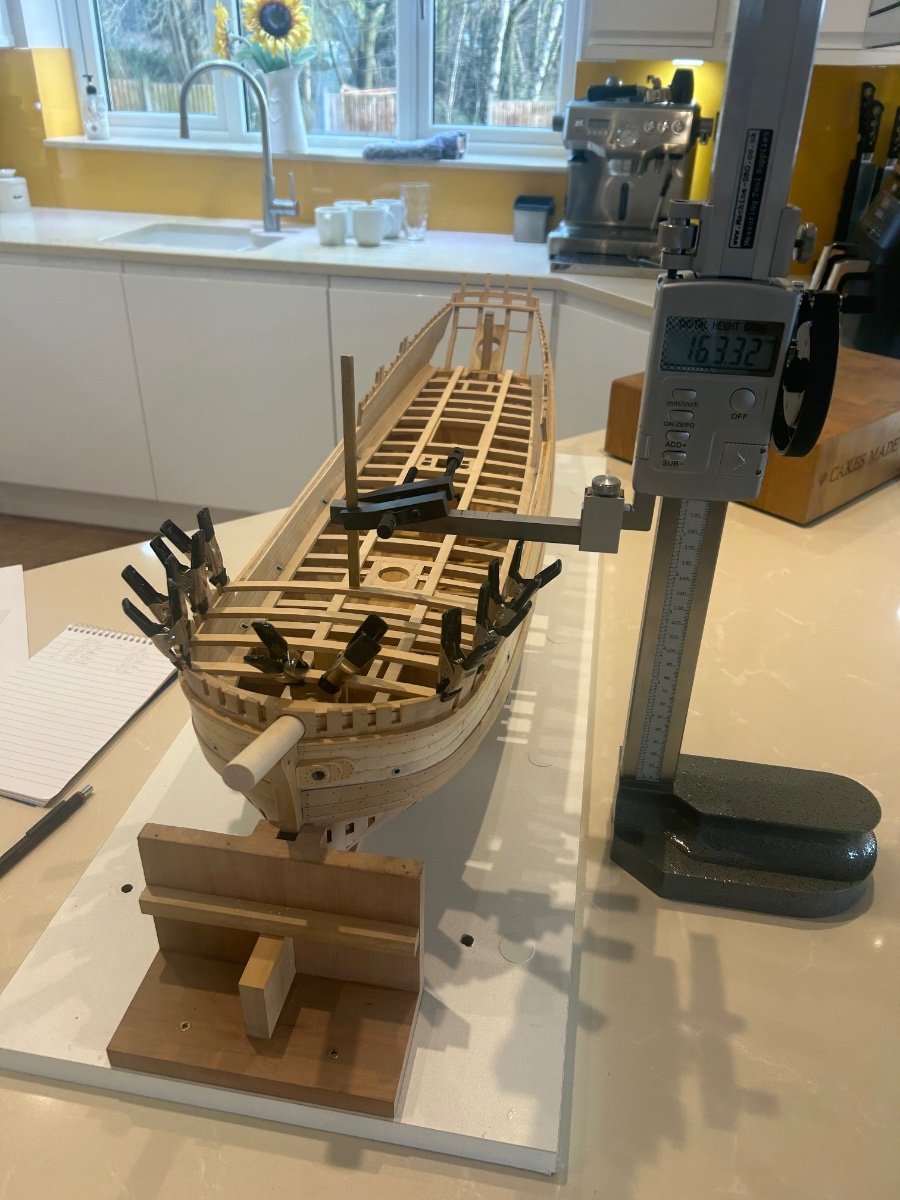
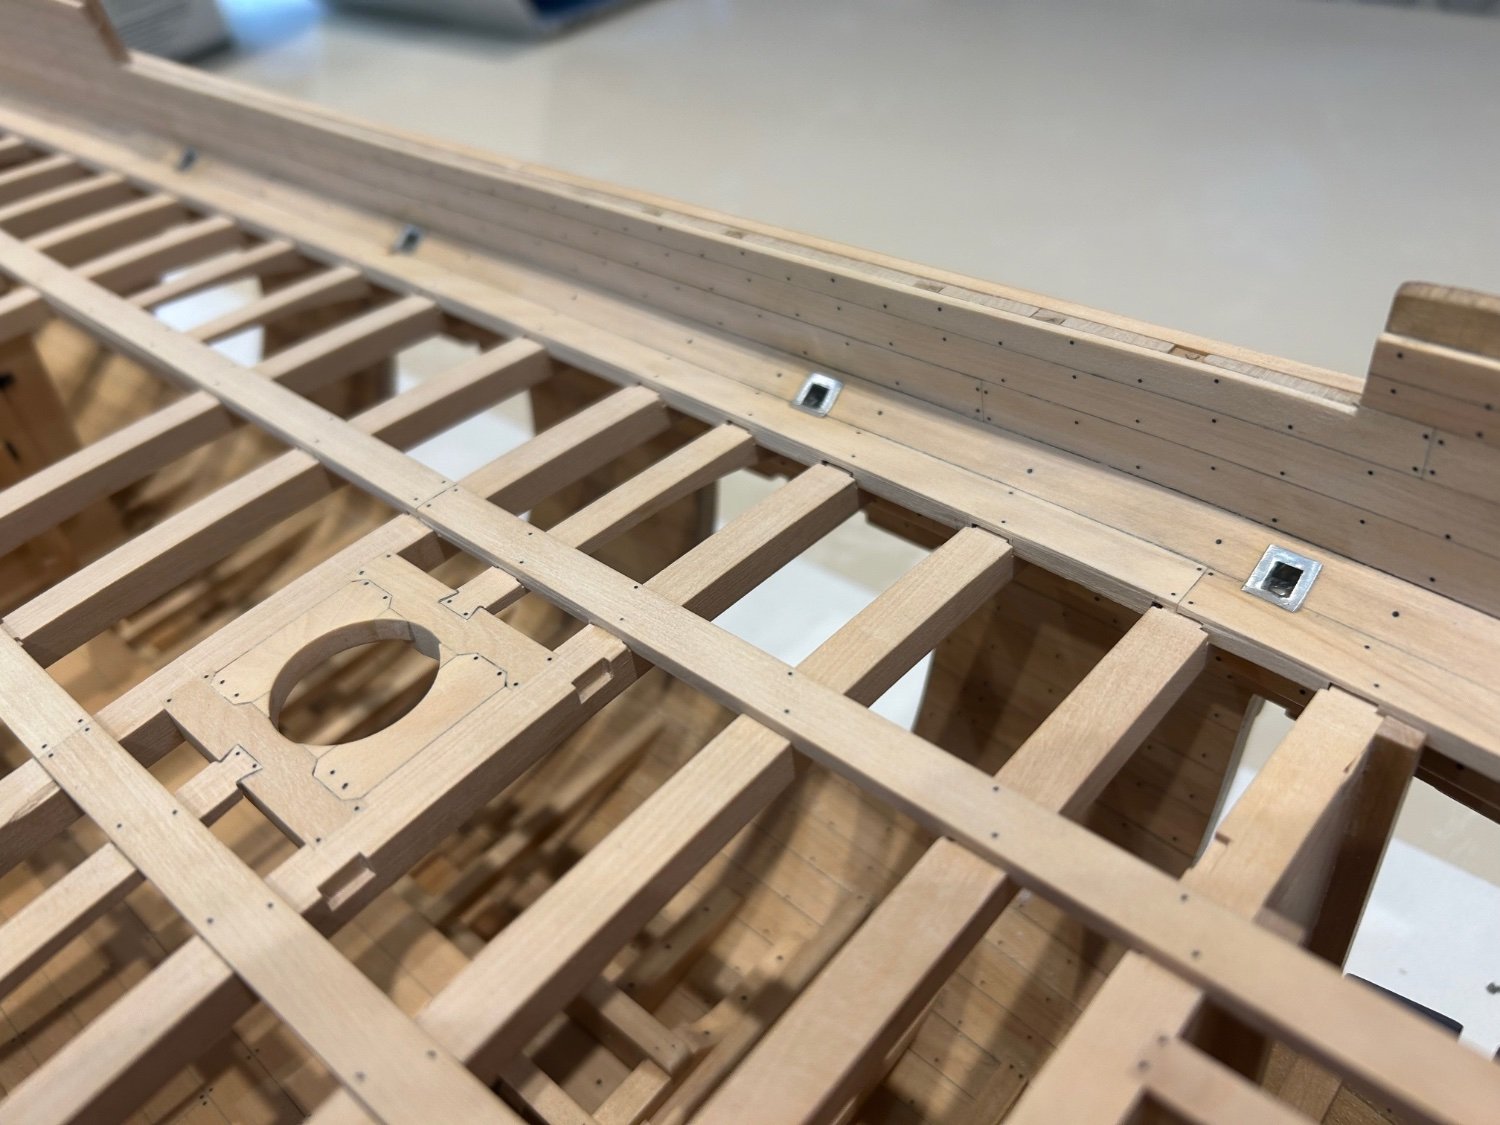
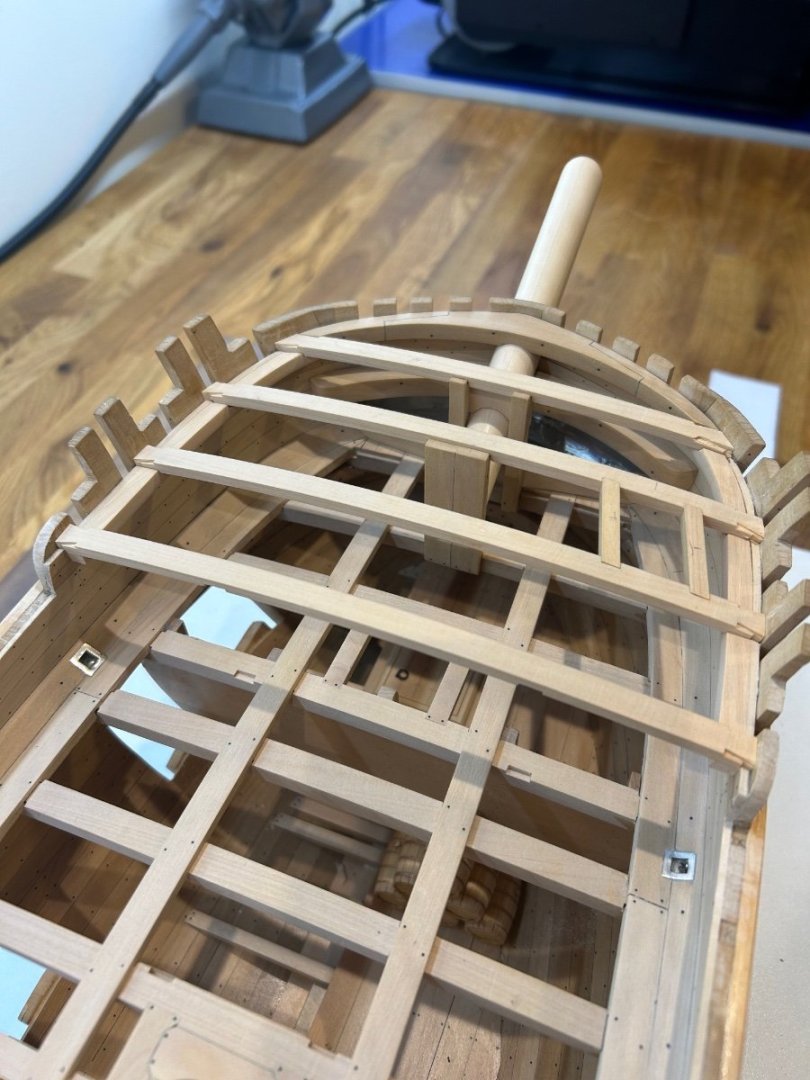
Making the beams for the forecastle deck - As always I made one extra as I always damage one; and I did! I then cut them to length and placed them into their correct positions. What I wanted to check was the crown height of each beam and also how they sat on the bowsprit partners. I'm happy to say that I'm actually on the money this time! Each beam sits between 1.7mm and 1.4mm too high and they locate nicely into the partners too. This now gives me the depth of each dovetail joint into the clamps to bring them down to the correct height. The actually depth should be 1.3mm so I'm pretty close. I'm now going to make and fit the deck shelf and cut the dovetails etc so that I have a good dry fit. They can then be put away until the time is right to install them permanently. Mark

-
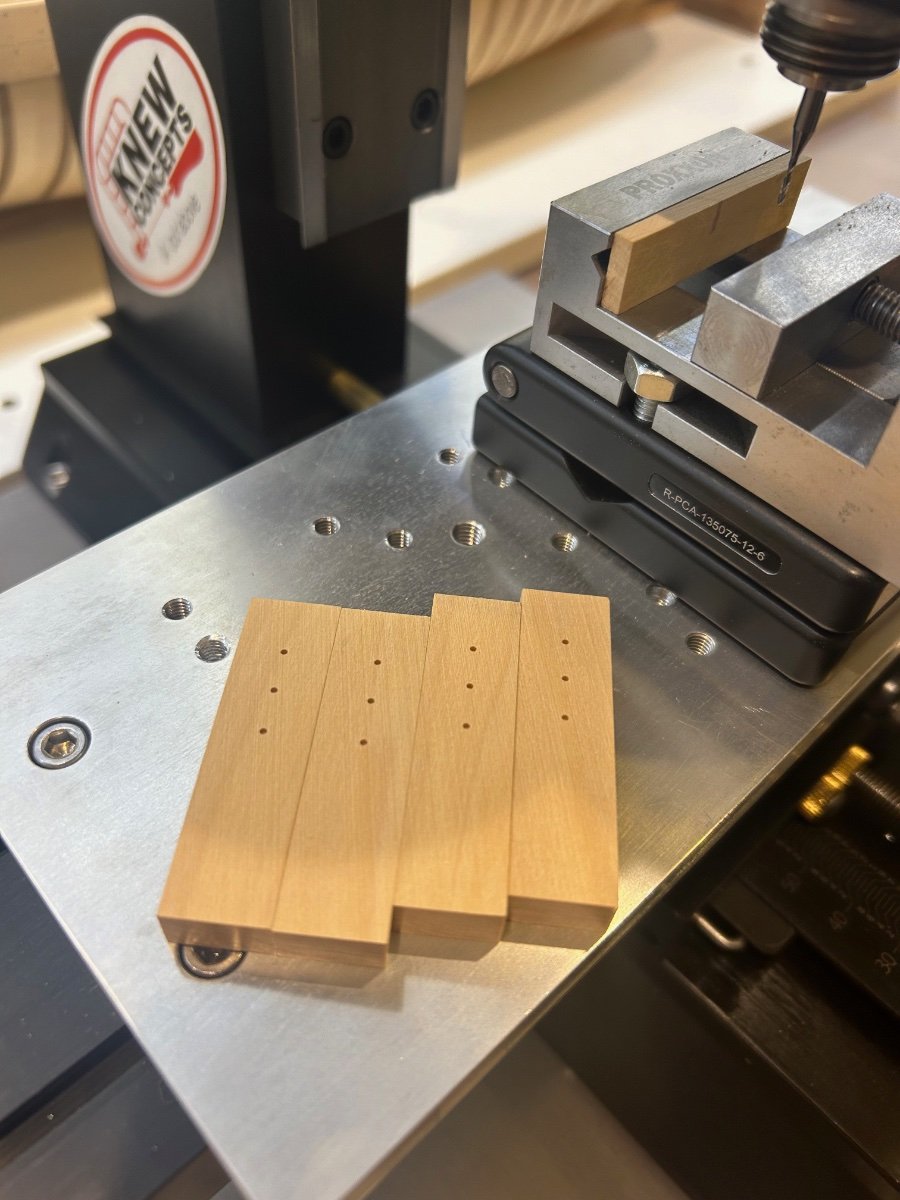
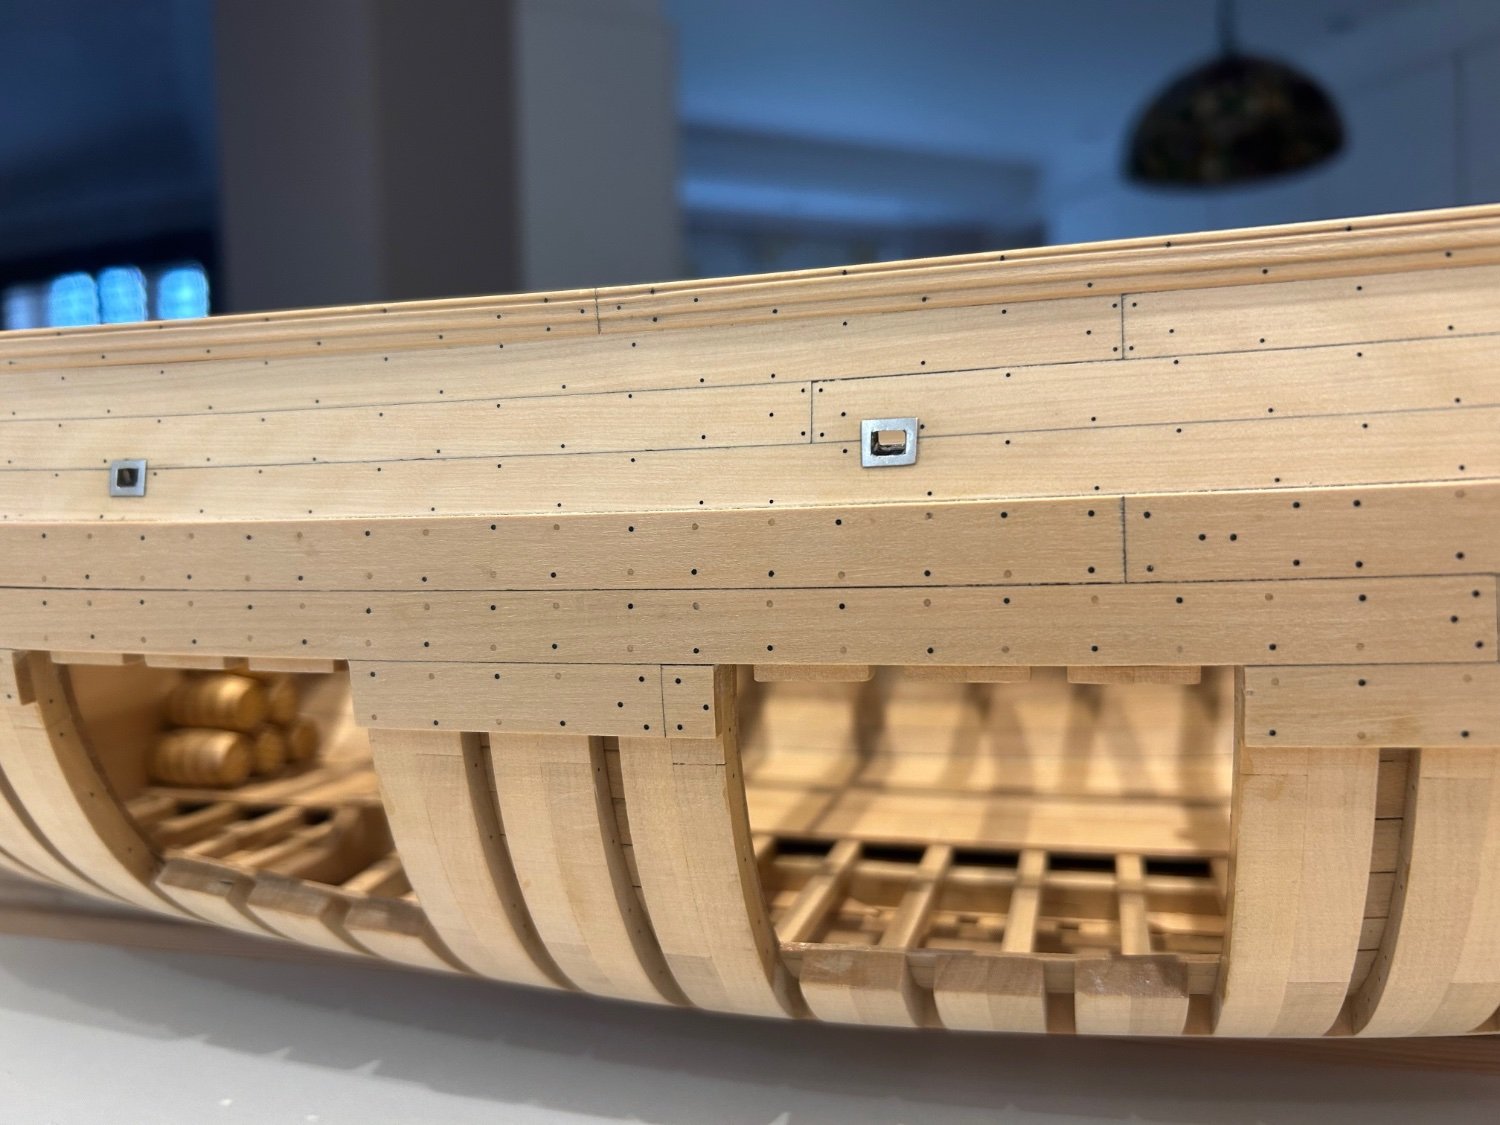
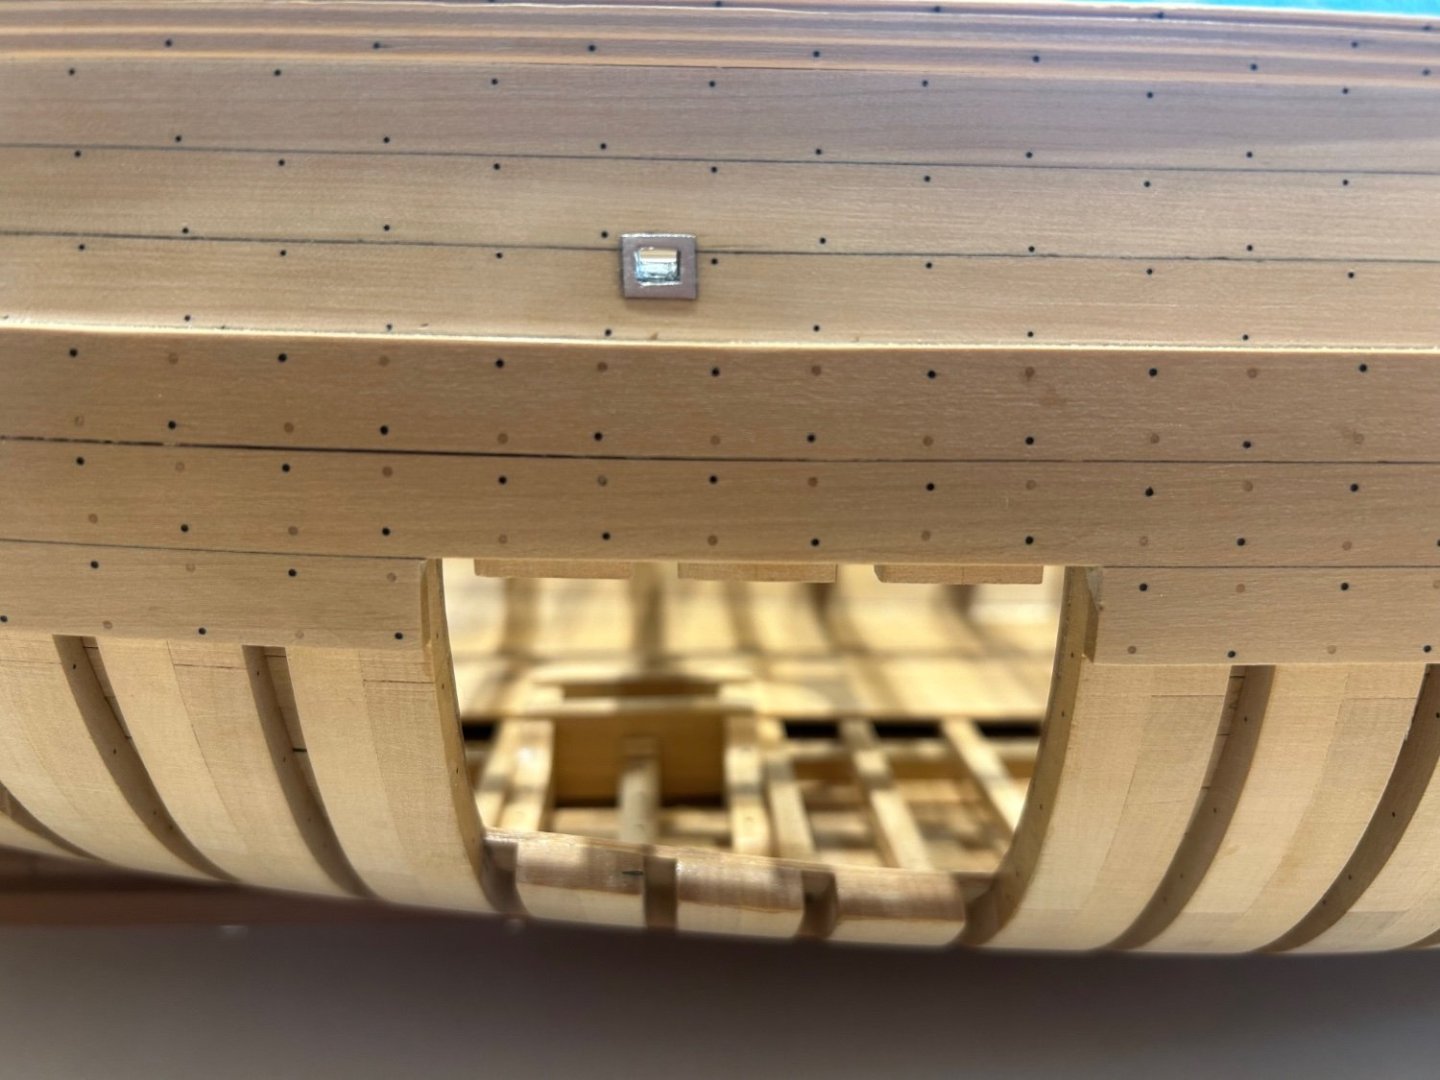
Some more done on these two parts. I made the final pieces and drilled all of the required holes into them both. The hawse holes are drilled at about 20 degrees. Unfortunately I drilled the nail holes around the hawse hole at 90 degrees or if you like straight in. So in these pictures they look correct but after milling the top to its final thickness it moved them off centre - Oh well these things happen. So I fitted them onto the ship and also finished the scuppers for the manger. I also thought it best that I protect the ship a bit at this stage so I gave the planking a light coat of shellac sanding sealer. My next job is going to be making the beams for the forecastle deck. I need to do this as I think my alignment of the bowsprit is slightly off. Making the beams above the bowsprit partners will help me to see this. Mark


-
Hi David - I have not built this model ship so I can only comment on my experience for what it's worth. I think that on a POB model I would bevel the bulkheads after installation. Otherwise how would you know how each bulkhead meets the next? If you do it before then surely its just a guess?
-
Looks great Dave - I think I would make the floor as you see fit in a thickness that makes the job easy. The reason I say that is because of the stoves location if it's too high you can reduce the height of the stove simply by sanding its base. No one would know but you and I don't think it would alter the finished article at all. I think there's plenty of alteration to suit your needs - keep the updates coming
-
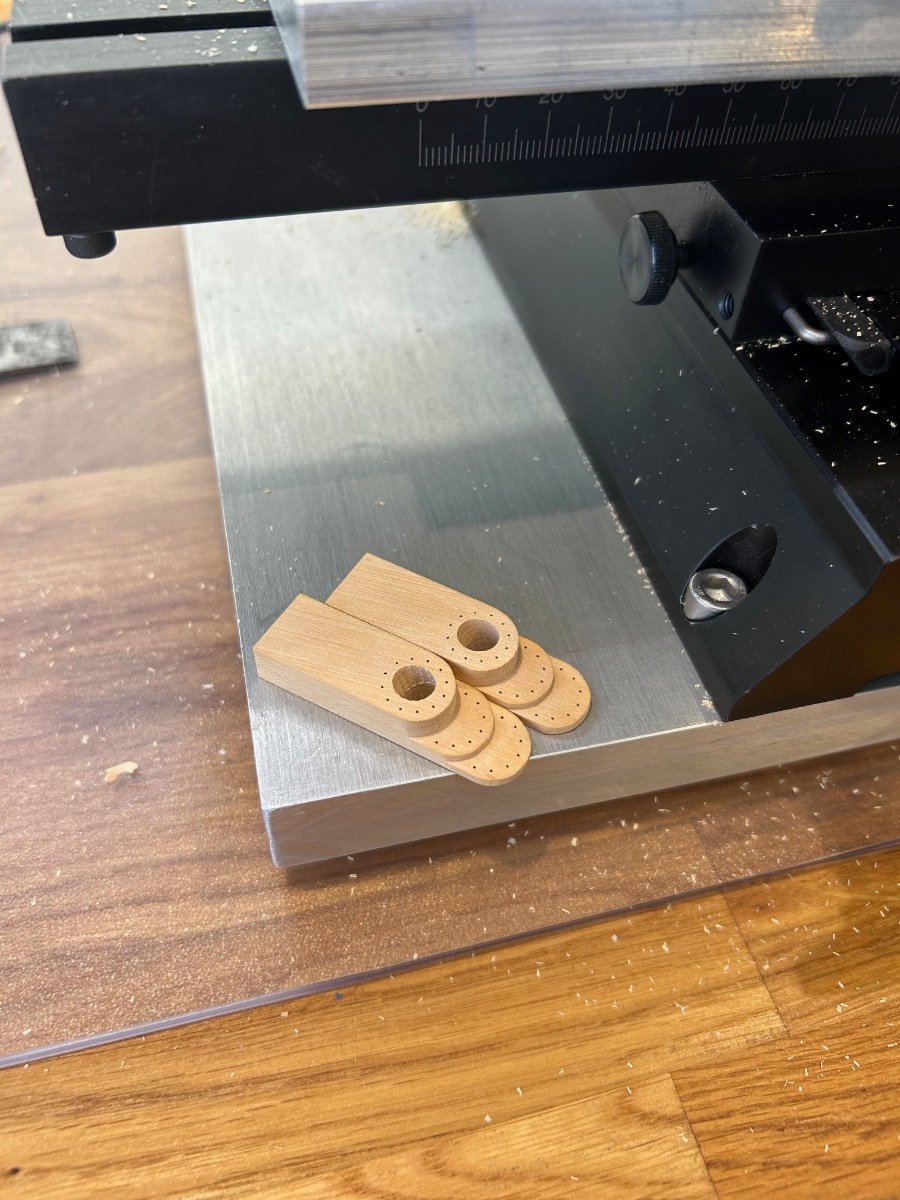
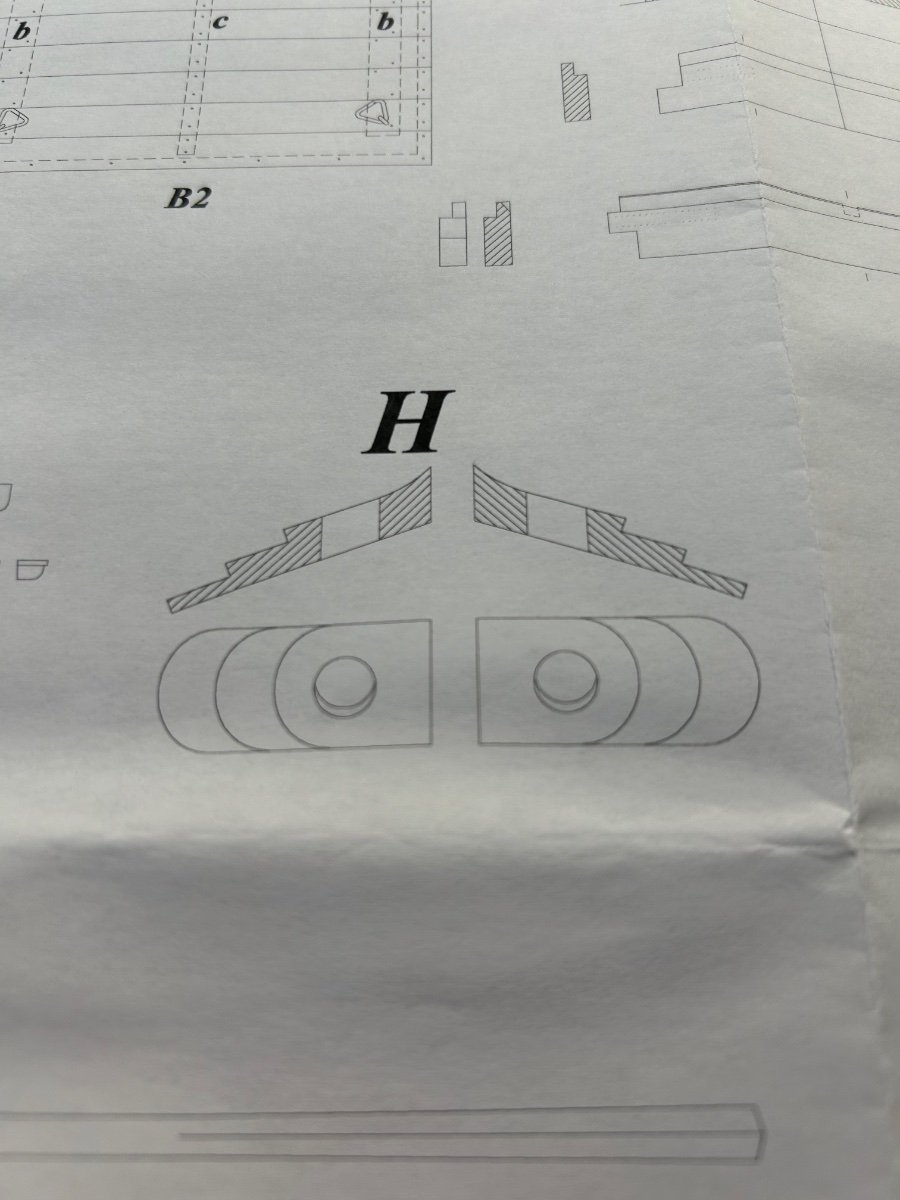
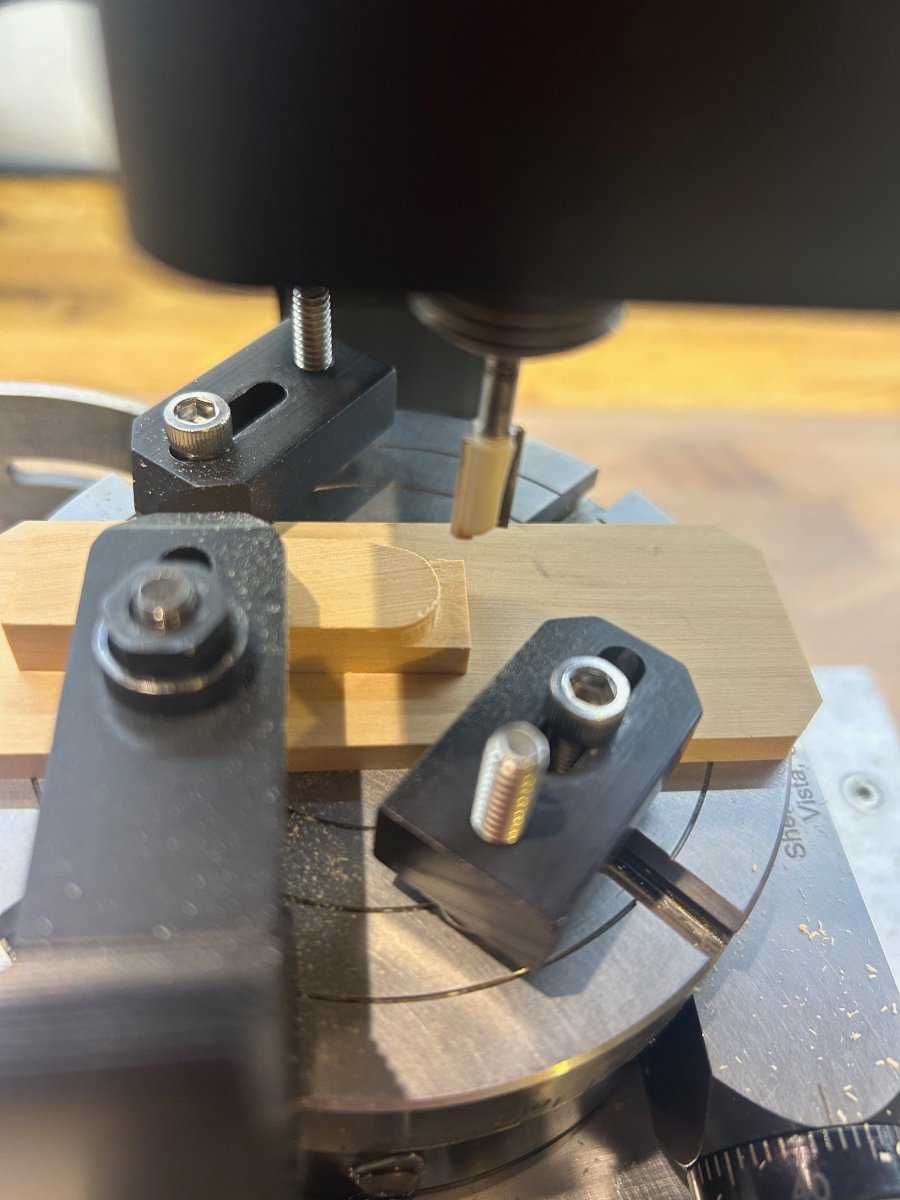
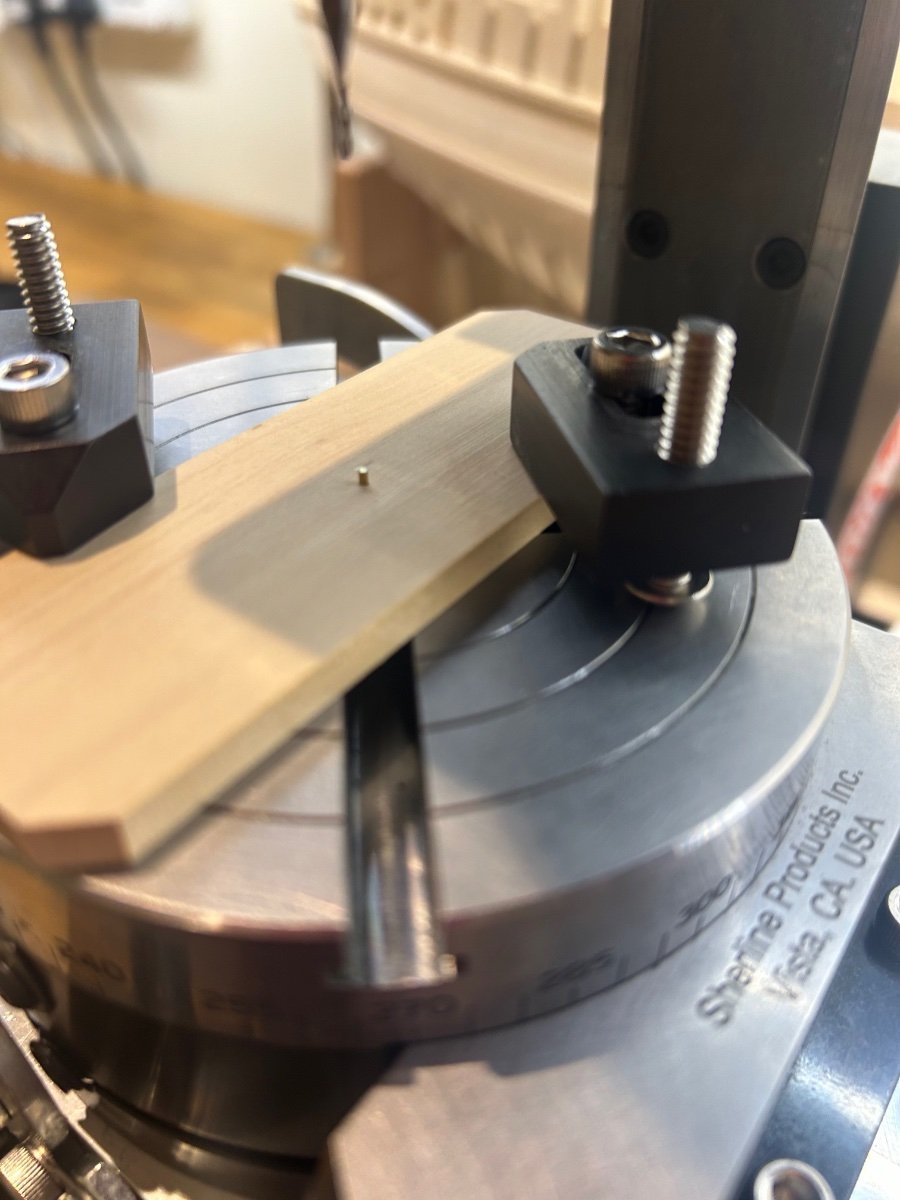
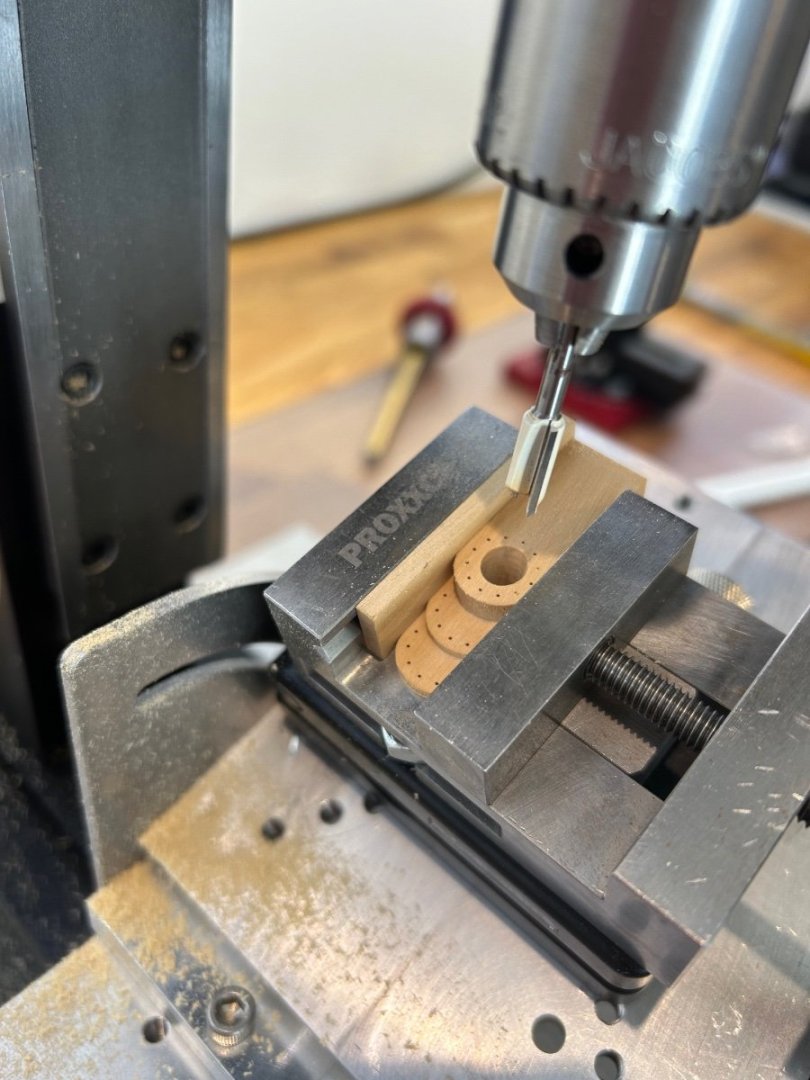
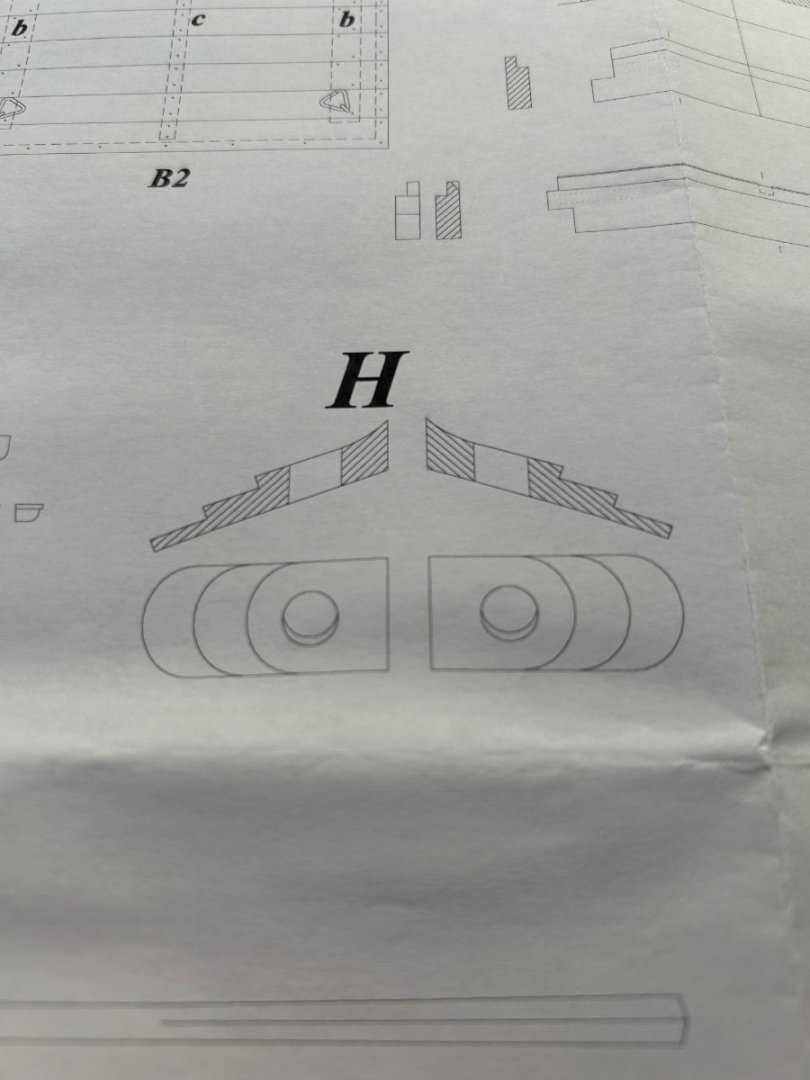
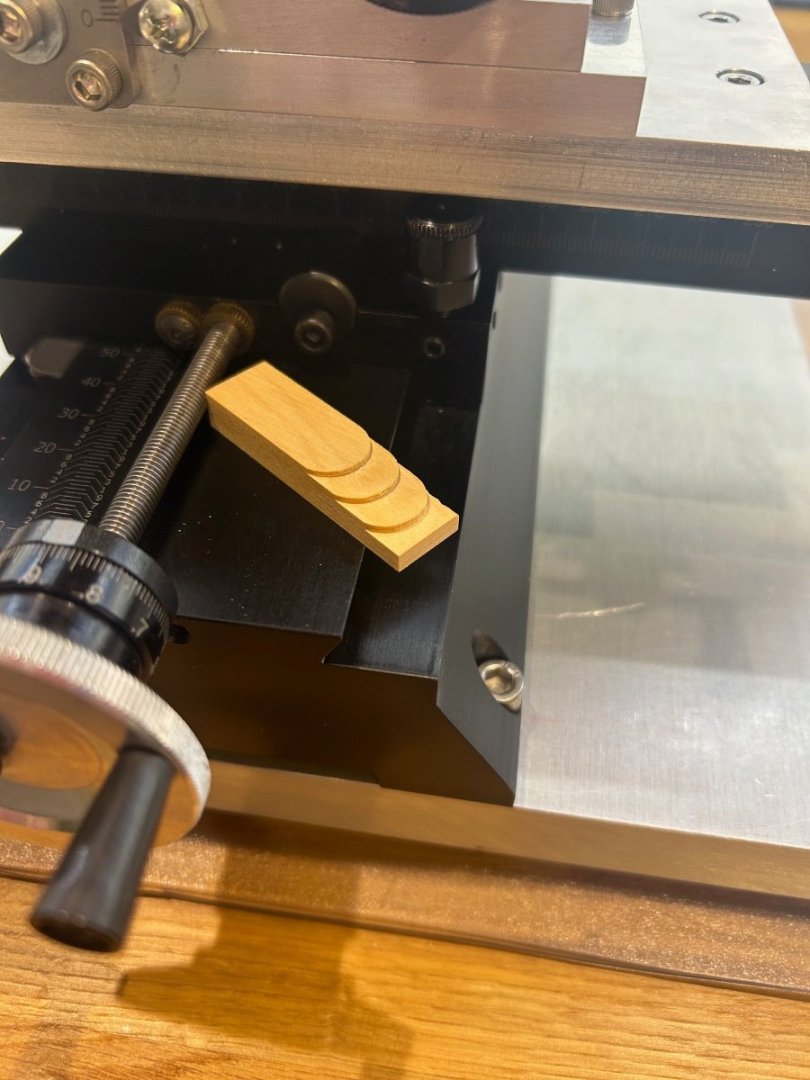
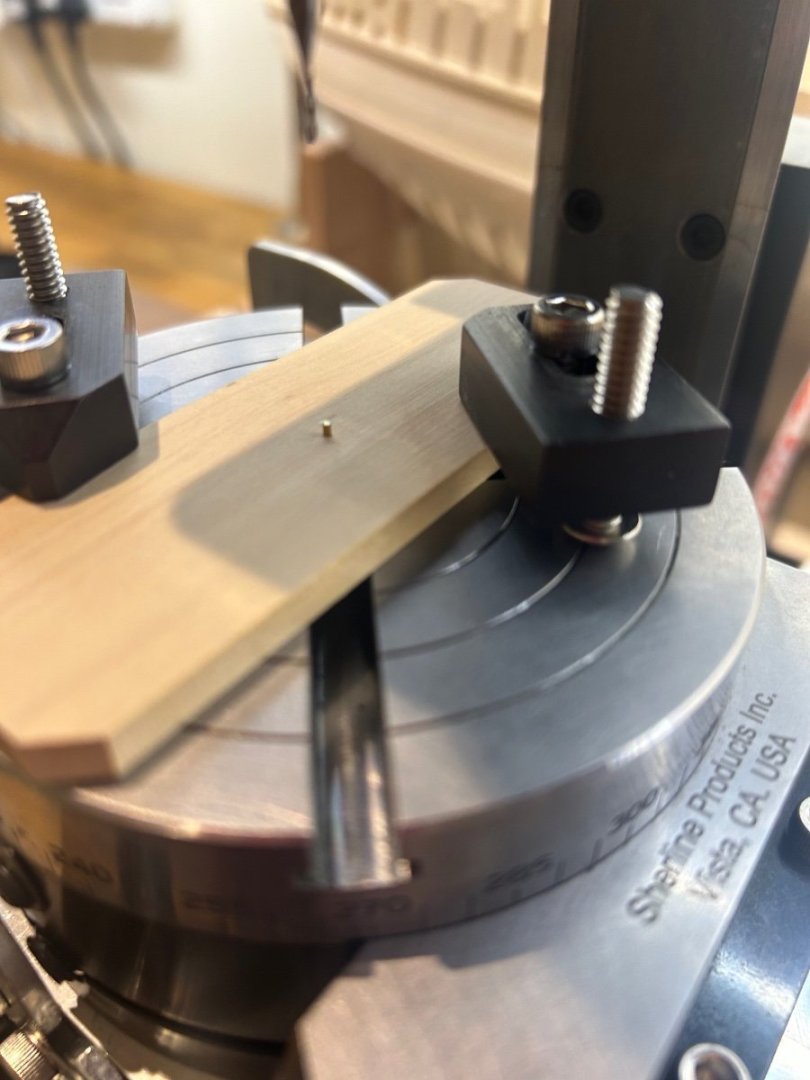
Hi Mike - thanks for the comments and good to have you along too. Cheers - Now that I've done them its one of those really nice features that adds a lot to the build. I've now (at last) nailed the starboard side and finished the scuppers on that side too. So my next part to make is going to be the hawse cushioning timbers as shown below as part H. I think the easiest way to make these parts would be to laminate 3 pieces together........however I'm going to try and make this out of 1 piece of wood as per the drawing. I really want these parts to look as good as possible as they are very prominent on the finished ship. So here's where I'm at so far with my experimenting. I worked out the centres of each half round and drilled a 1mmx1mm hole into pieces of wood as an index point for the cut. Next I found the centre of the rotary table and placed a corresponding 1mm brass location pin. Then I located the piece of wood to be cut onto this pin and set the radius of the cut by moving the X axis. Then made a cut to check for accuracy by only using the plunge cut and rotating table. After a little adjustment I have my first prototype which I think is accurate enough. To make the 2nd and 3rd cuts I simply moved the piece along to the next location hole onto the brass pin. So thats where I'm at for now - I'll have a go at making the final pieces this week but it's looking promising. Thanks to everyone for the continued support - Mark


-
Paul I'm with you on this but it's also personal choice. I pretty much only use aliphatic resin as its got good quick grip and can be disassembled using IPA. I have never had a good experience with CA and this was brought home to me last week when I was gluing some pewter together. For some reason in my own mind I always think (incorrectly) that CA is for builders in a rush. Then I see some of the amazing results that builders on this forum get using CA. I think they just have it better sussed than me as you would never guess that they had used CA.
-
Thanks Tobias but I can assure you that this build is far from perfect mate. I'm constantly having to make allowances for earlier errors but I guess thats ship building for you. The scuppers - The technique that druxey suggested to me works great for finding the line through the hull. On this scale though it's a long way through the hull to make each side meet. I guess you just have to be brave and get cracking with a chisel. So first of all I cut the holes through as best that I could - I did pick up a little damage but nothing really to worry about. I've also learnt that these small errors disappear in the long run as you simply stop seeing them. Next I made a rectangular tube out of pewter - easy to make and difficult to fit through the hull - it just takes time. Then I roughed the tube to the correct dimensions but left some on to sand down later. Its worth noting that that the tube dimensions are slightly different from the outside to the inside. Following on from my previous bad experience using cyano I glued these in using 20 minute epoxy resin. I really like this glue - it gives loads of time to jiggle things around and cleans up easily with IPA. Next was to make the end plates on the inside and outside. So thats one side complete and now onto the starboard side - which I still haven't finished nailing yet! Cheers Mark


-
I found that the counter timbers and dogs legs are not easy to do and take a lot of effort to get right. Looks like you are on the money there - nice work.
-
Fantastic start to a really nice ship; good luck with your build and it will be interesting to see the stern only build too.
- 90 replies
-
- 3
-
-
- ancre
- La Mahonesa
- (and 1 more)
-
La Palme by Tobias - 1:36 - POF
No Idea replied to Tobias's topic in - Build logs for subjects built 1501 - 1750
Lovely work Tobias 👍 -
For anything above 4mm thick I now use a 1mmx100mmx64T blade. It works great and gives a good finish.
-
No problem mate I’m glad you’ve got it sorted. I’ll put mine back together again now! Only joking these are old pictures that I took 😂. Good luck with your milling 👍
-
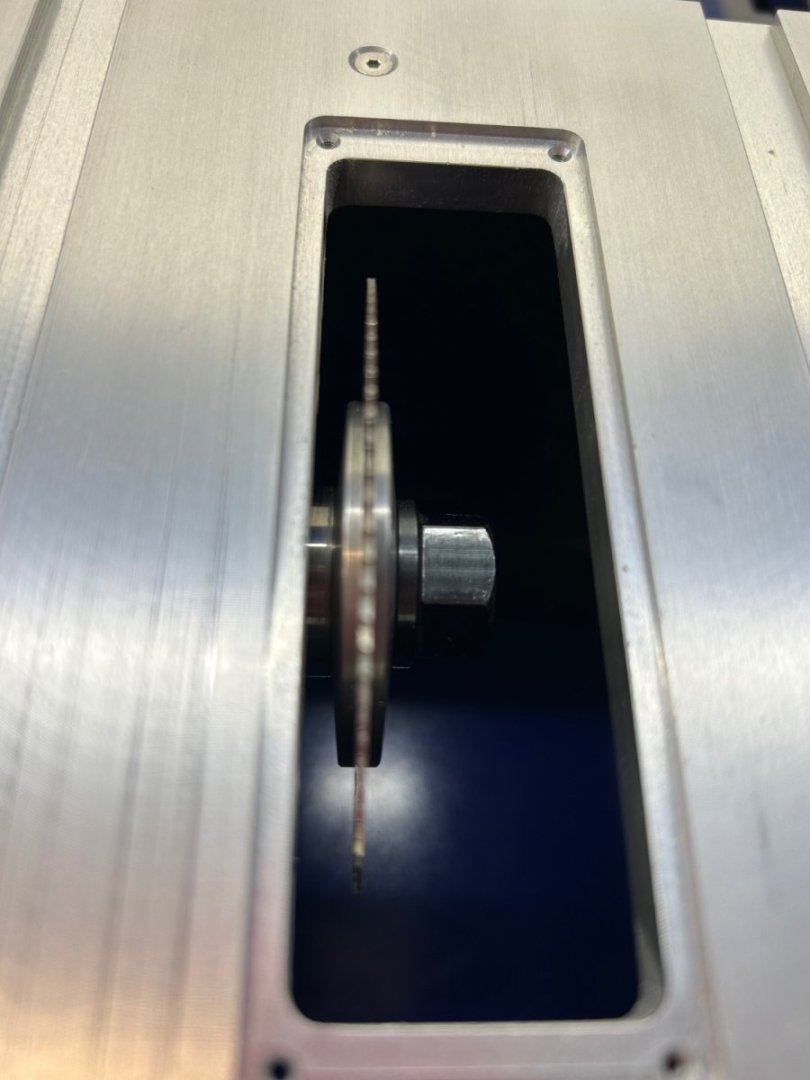
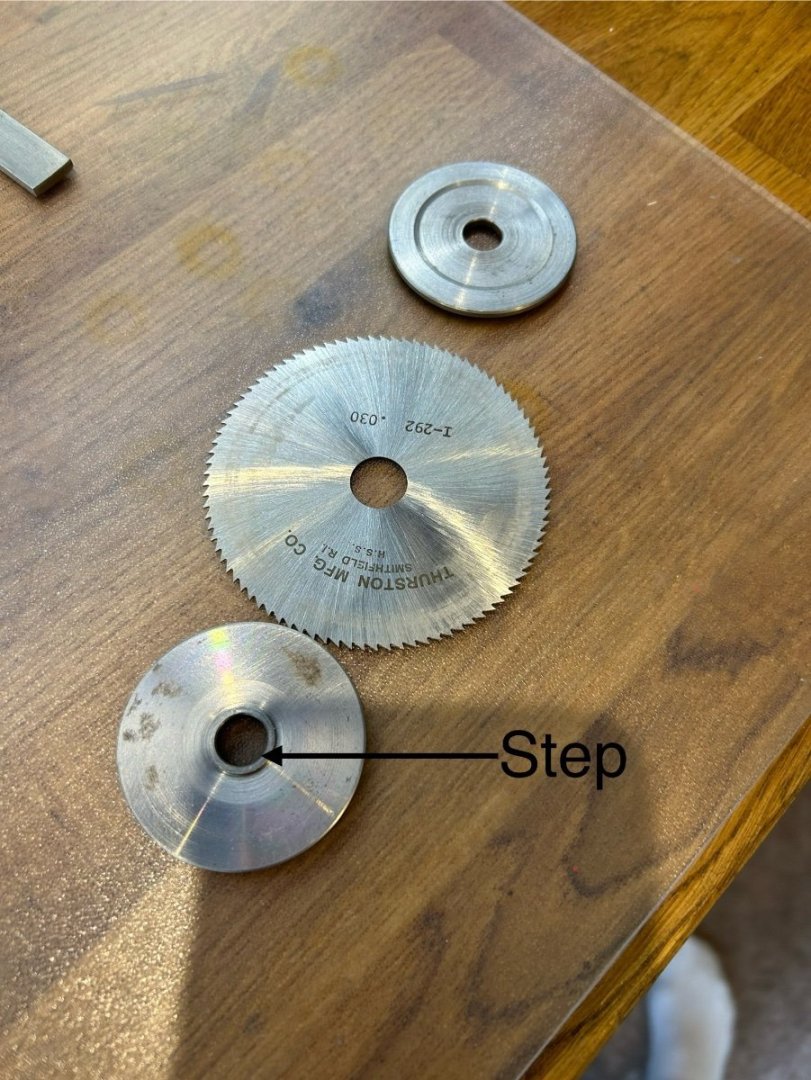
You are correct there is a large washer on either side of the blade. If you have a look one of them has a small step machined into it. The blade locates on the step which makes it central and run true. If the blade is not properly located on the step it will visibly not run straight.
-
Yes of course - they are what you describe as the washers that secure the blade. If installed correctly they look like this and the blade runs true with no vibration or wobble.