No Idea
-
Posts
1,036 -
Joined
-
Last visited
Content Type
Profiles
Forums
Gallery
Events
Everything posted by No Idea
-

L'Amarante by marsalv - 1:36 - POF
No Idea replied to marsalv's topic in - Build logs for subjects built 1501 - 1750
The way you solve both clamping and machining operations is inspirational - stunning -
Your attention to detail is simply mind blowing - wow
- 2,623 replies
-
- 2
-

-

-
- heller
- soleil royal
- (and 9 more)
-
Beautiful work - your joinery is spot on.
- 399 replies
-
- 1
-
-
- winchelsea
- Syren Ship Model Company
- (and 1 more)
-
The capacitor in our saws is a start and run. It doesn’t only help the initial kick it also runs the motor whilst using it
-
I built my axial parts twice on my build to get them right. It’s so important to get the spine of this lovely ship correct as every thing else follows. I admire your efforts to get this section correct well done mate 👍
-
Planking Method Name
No Idea replied to Thukydides's topic in Building, Framing, Planking and plating a ships hull and deck
That looks like a hooked scarf joint to me -
I use this glue exclusively - I have never found a better wood glue and it is extremely strong
-
I have found the switches to be a slightly weak point but are easily changed. The capacitors are start and go and are also easily changed too. If you do replace the switch you can go a bit top gun! I love my new switch on my sander - it adds nothing to the machine but makes me smile.
.thumb.jpeg.8ba7c8a47bafd4dc679c2898cfbb64ae.jpeg)
-
That really is lovely joinery - getting joints that tight is a real skill
-
Have a great holiday Tobias
-
L'Amarante by marsalv - 1:36 - POF
No Idea replied to marsalv's topic in - Build logs for subjects built 1501 - 1750
That really is beautiful work - I found planking the ceiling particularly difficult and your result is amazing -
If it helps this is my Le Rochefort build - I too am very much learning on the job but I have received much help on this forum to get me to this point. Also Gerard Delacroix is a member of this forum and always answers my questions regarding this lovely ship when I get stuck. Drop him a message I'm sure he will be more than happy to help.
-
Hi you are doing a great job here. These pictures may help
-
Help with tapering
No Idea replied to N1ckel's topic in Building, Framing, Planking and plating a ships hull and deck
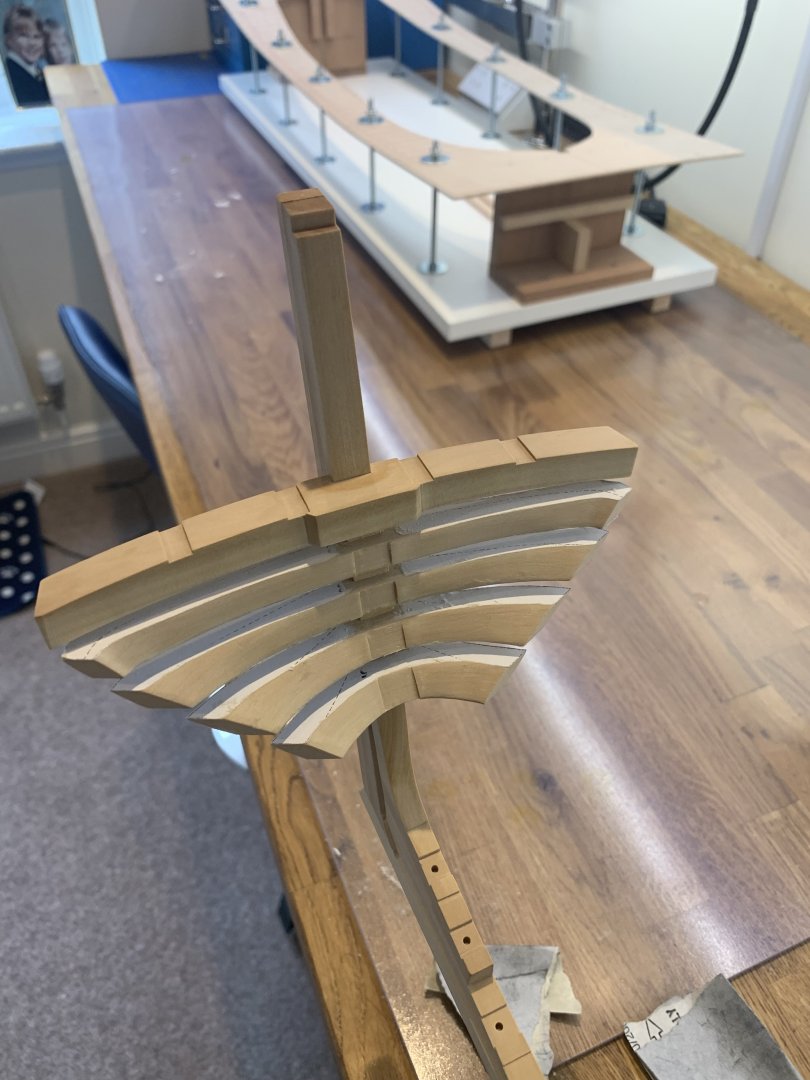
Hi Nick - Sorry I should have read this thread earlier. This is how I carry out the planking process which has always served me well. Firstly I firmly believe that if you can mark out and draw every single plank then you can make them too. I literally spend days marking out to get a good look with the correct spacings too. I use automotive tape so that I can see and adjust the runs of each strake and I like to do this after I have placed the garboard strake. Just for clarification a strake is simply a length of planks all joined up which run from stem to stern. Doing this work up front first makes seeing the individual planks easy when it comes to actually making them. There are very very few parallel planks on a ship and it's also very time consuming but so satisfying when you get it right. I also only bevel one edge of a plank which for me is always the top side of the plank. I leave the bottom of a plank square. That way the next strake meets a square edged plank and I cut the bevel to suit. I have put loads of words down so here's a picture that explains what I mean. If you don't plan it from the start you will be chasing each and every plank which is a nightmare.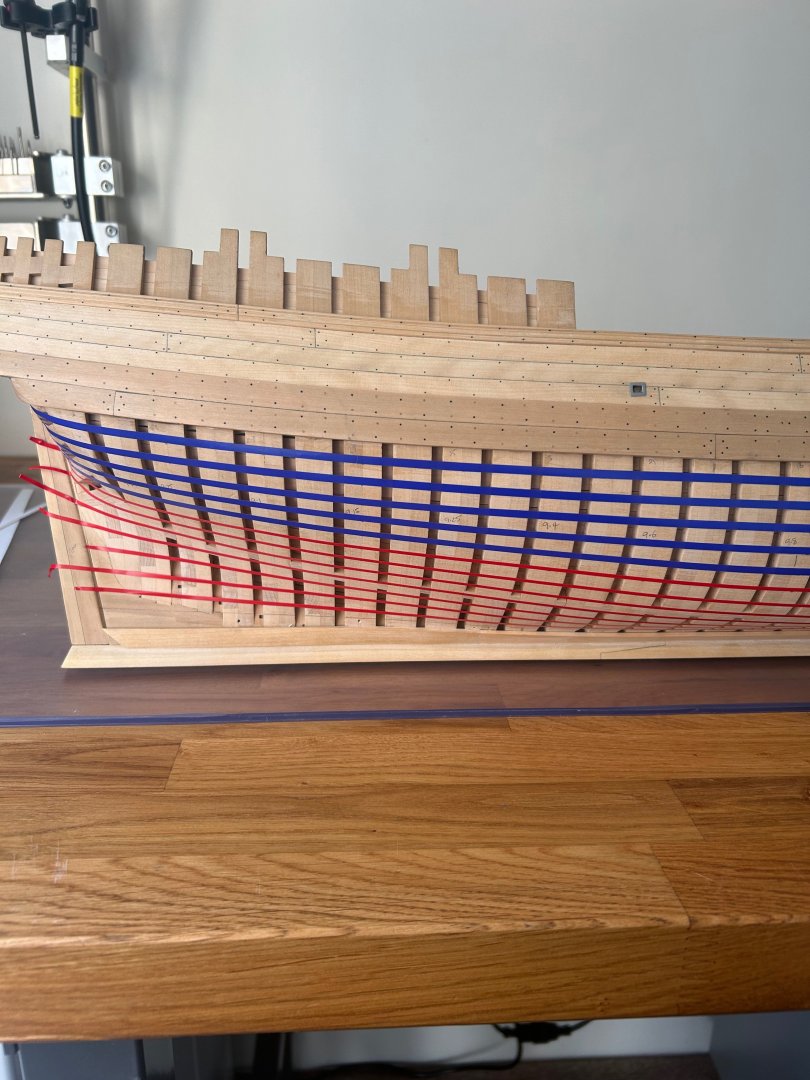
-
Stunning work Ben your attention to detail is fantastic
- 399 replies
-
- 2
-
-
- winchelsea
- Syren Ship Model Company
- (and 1 more)
-
I too would be very interested in Ed’s books
-
Thank you SeaWatch Books - I've bought my 2 books and look forward to hearing from you when I can get my printed copies shipped to the UK I'll get the plans from you at the same time too.
-
Fabulous work Tobias your ship is really taking shape
-
Byrnes table saw - belt tensioning
No Idea replied to Mr Pleasant's topic in Modeling tools and Workshop Equipment
Hi I've also had this issue and changing the belt made no difference either. I contacted Jim who advised me to place a couple of washers behind the tensioning spring. It's a little fiddly to do but it works great and is a permanent repair. It just pushes the motor back that little further which is what is required. Mark -
Mike I'm so glad that you are going to reprint these books. As soon as they are available I will be ordering a set from you and if you can let me know when they are available I would appreciate it. I'm not so good with ebooks but I think what you are doing is a great idea - I'll wait for the reprint. As I understand it with the original series it was possible to buy an encapsulated frame plan view. If so will this be available too.
-
L'Amarante by marsalv - 1:36 - POF
No Idea replied to marsalv's topic in - Build logs for subjects built 1501 - 1750
Hi marsalv I'm just catching up and how I missed this I do not know. Its another fantastic build and I'll be following along - Mark -
Hi Marc I'm just catching up on your amazing build. I have used Birchwood and I also had issues with it rubbing off when it was handled. I did exactly as you using acetone to clean the parts before dipping them in the solution. I then (after) read the instructions and they advise cleaning the part in alcohol (IPA) and then washing this away with water before dipping. After doing it this way the results were excellent. Keep the updates coming as this is such a fantastic build.
- 2,623 replies
-
- 2
-
-
-
- heller
- soleil royal
- (and 9 more)
-
Good luck with the move
-
You're right Greg - I could never leave it in the mess that it became but I'll sort it. On the positive side though the planks into the rabbit on the transom are spot on! Well so far!
-
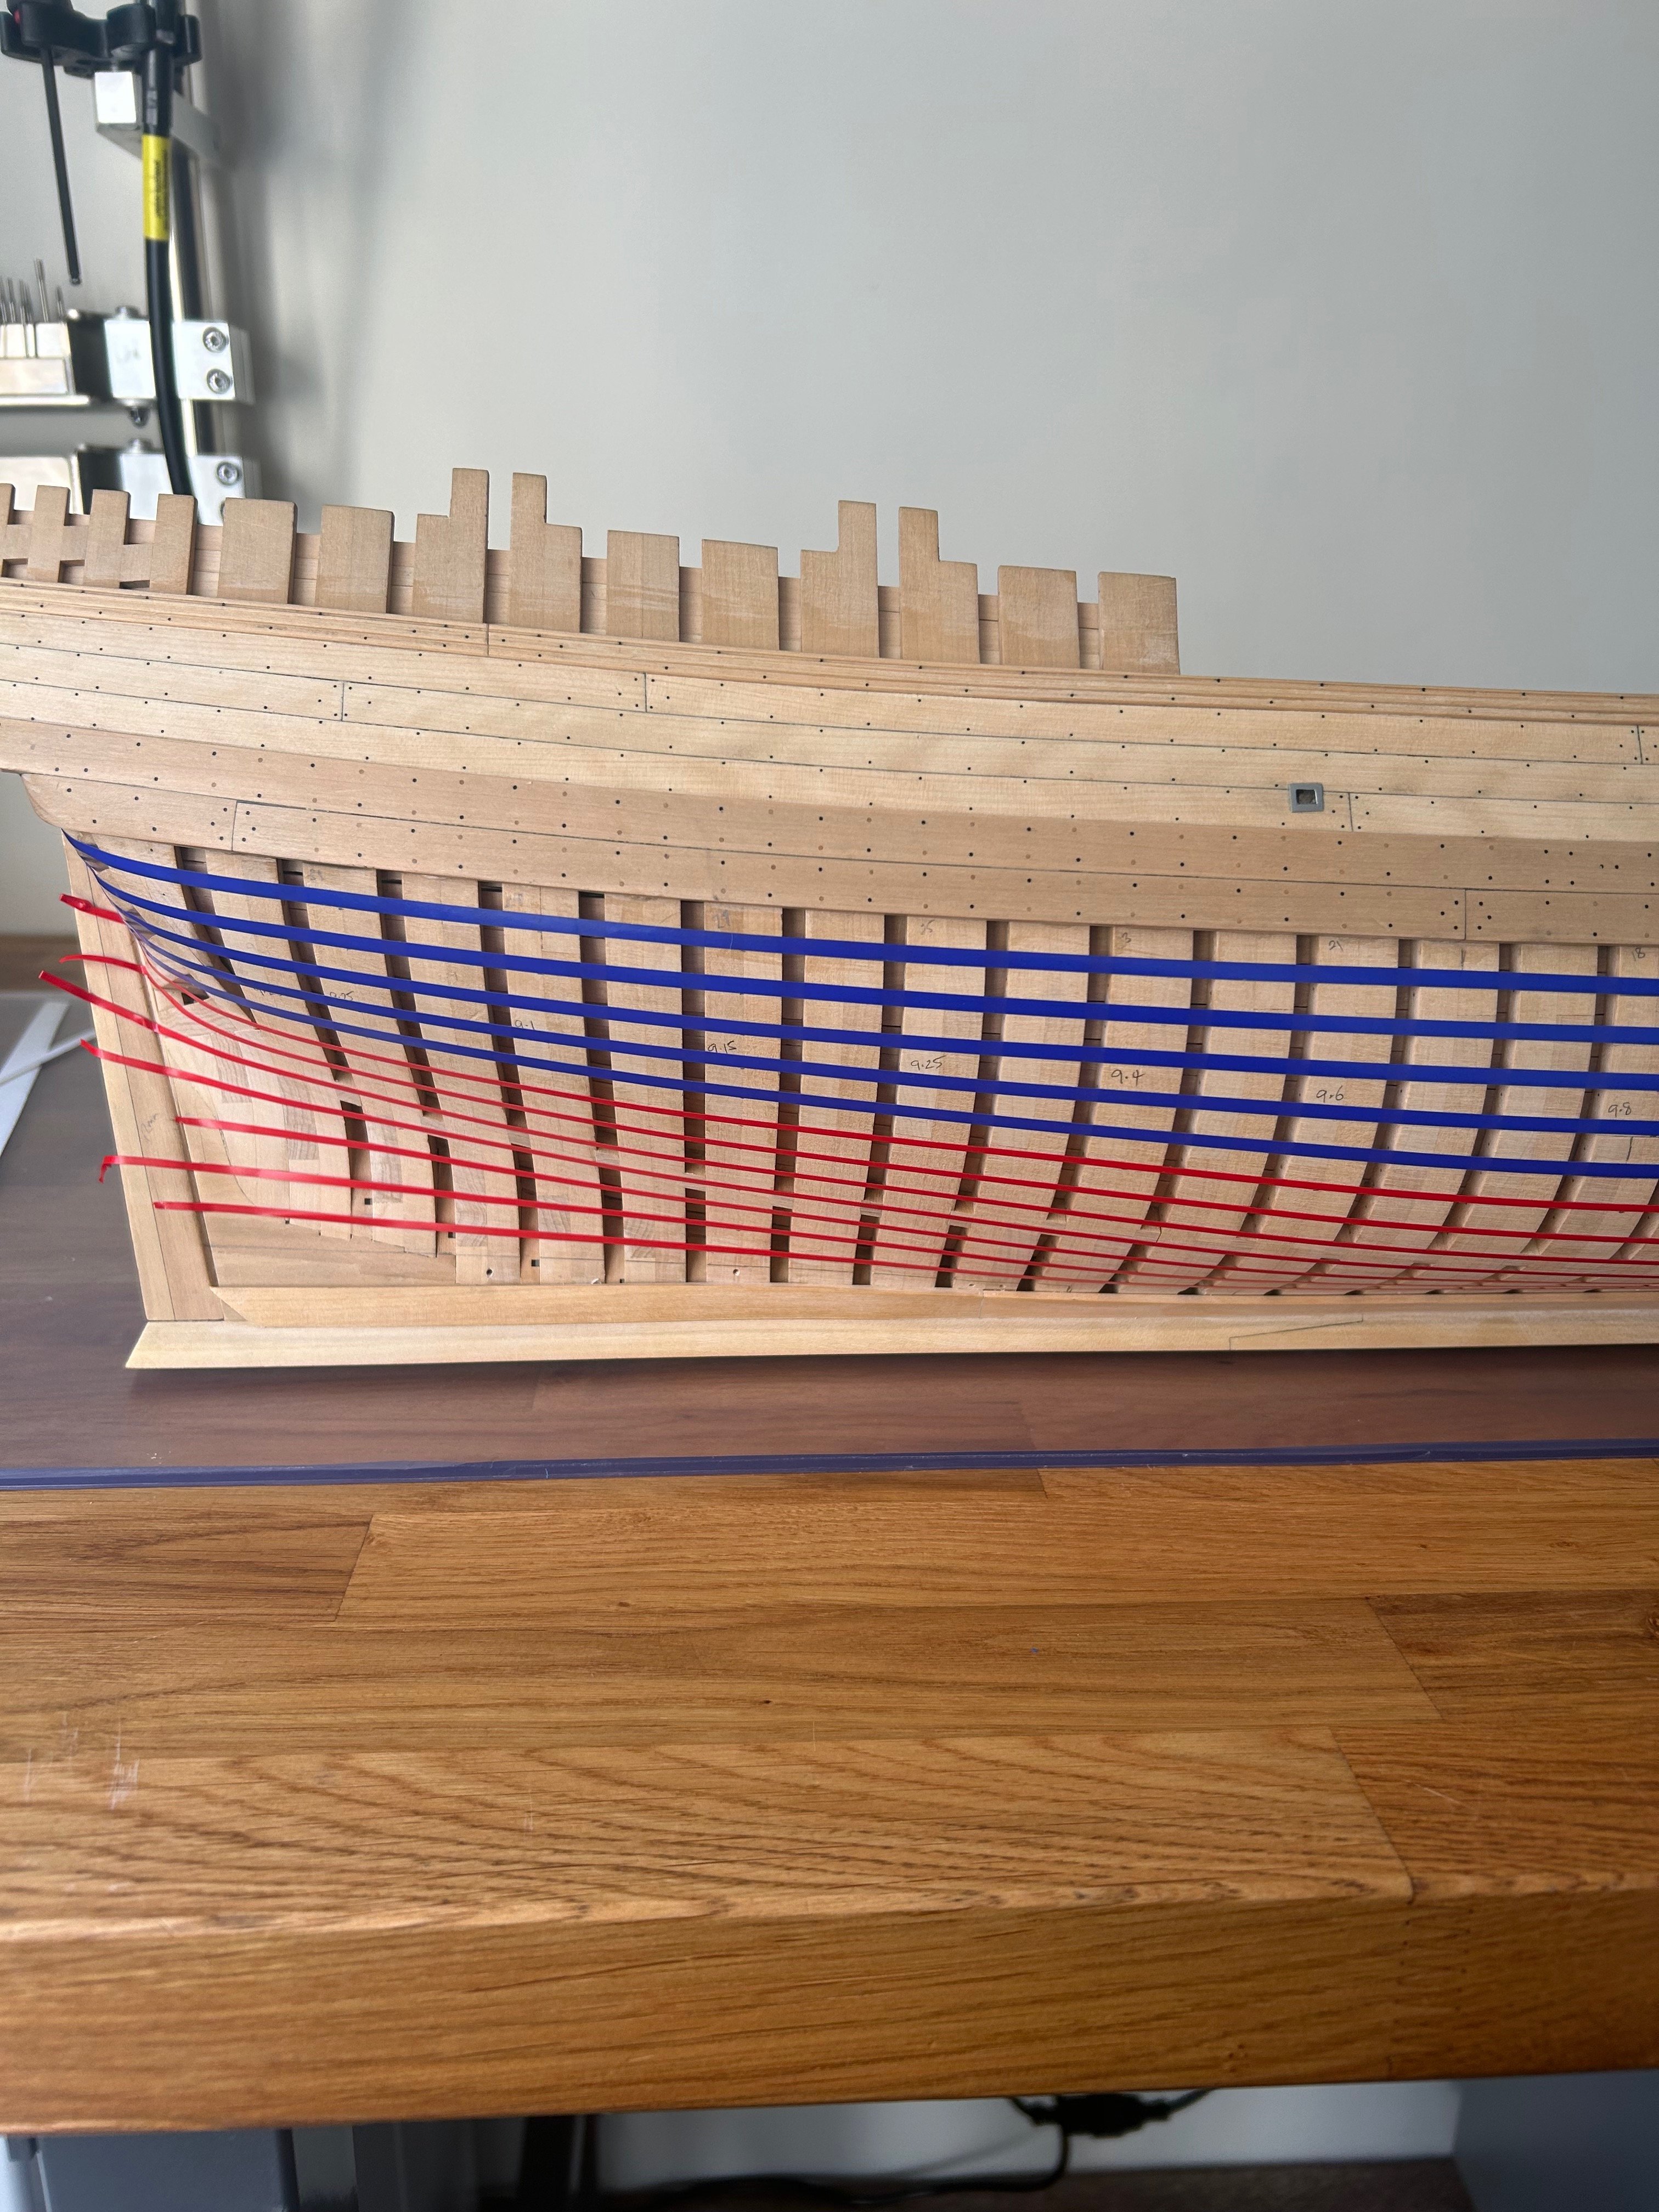
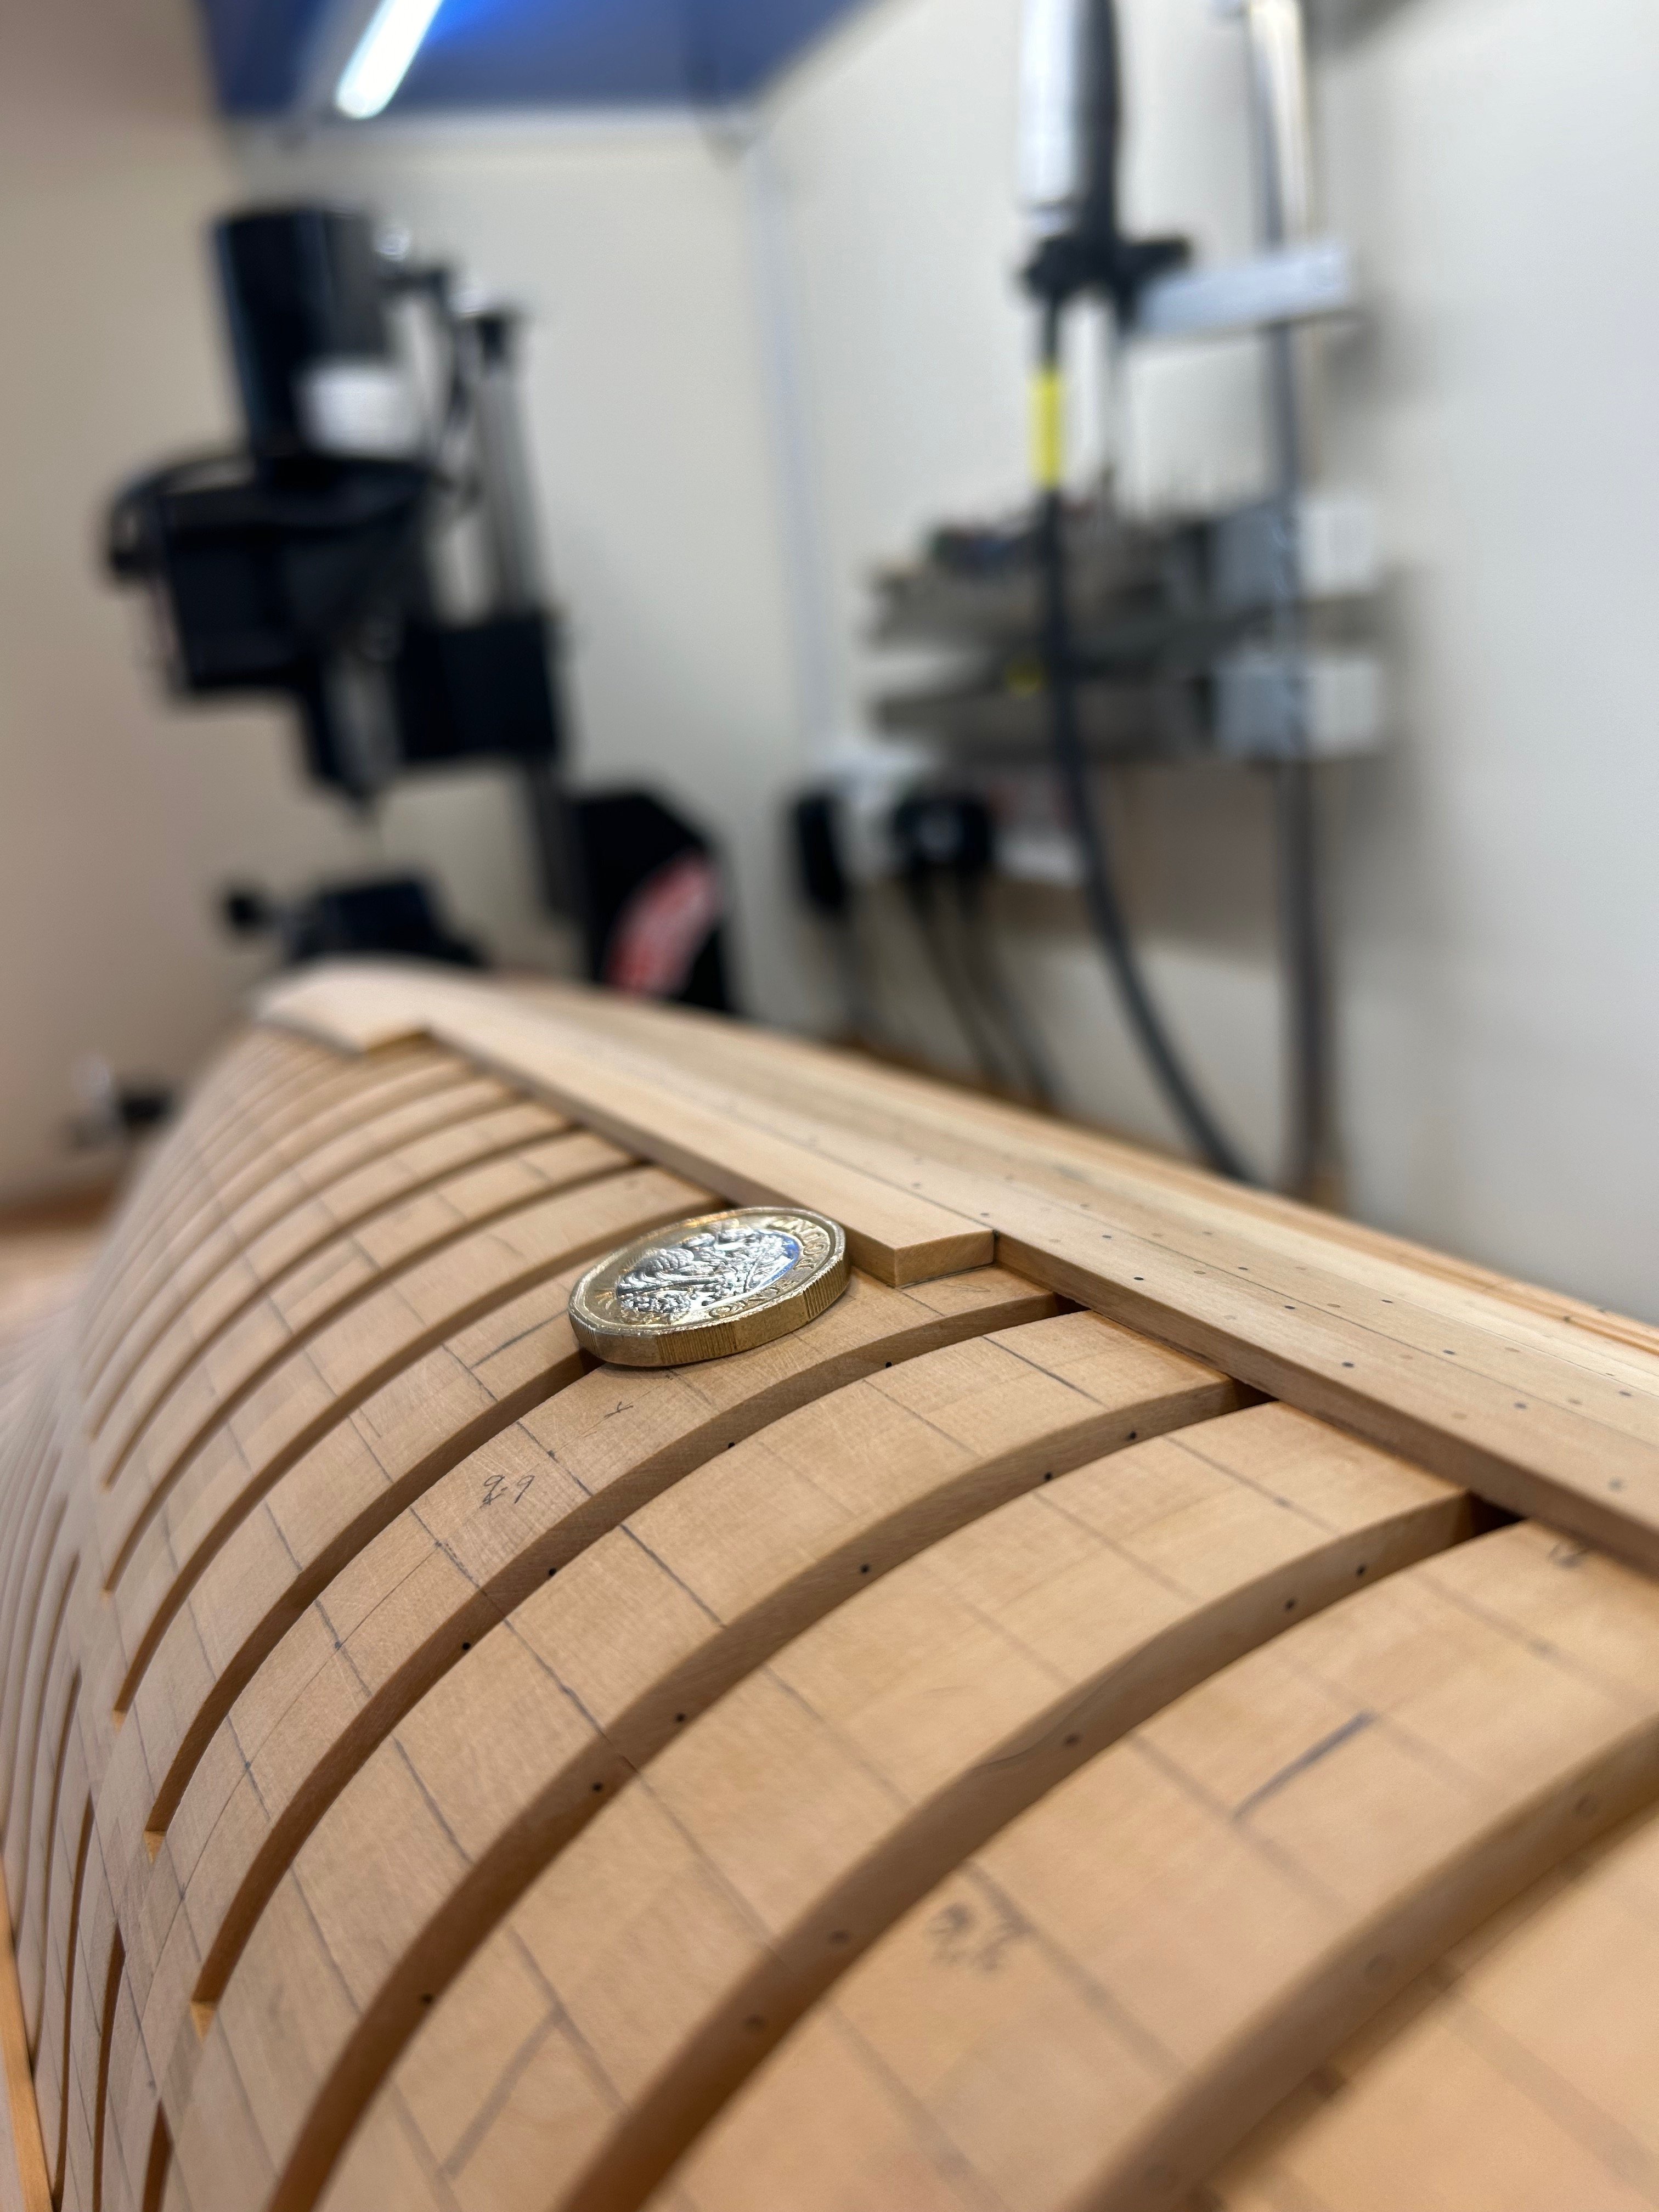
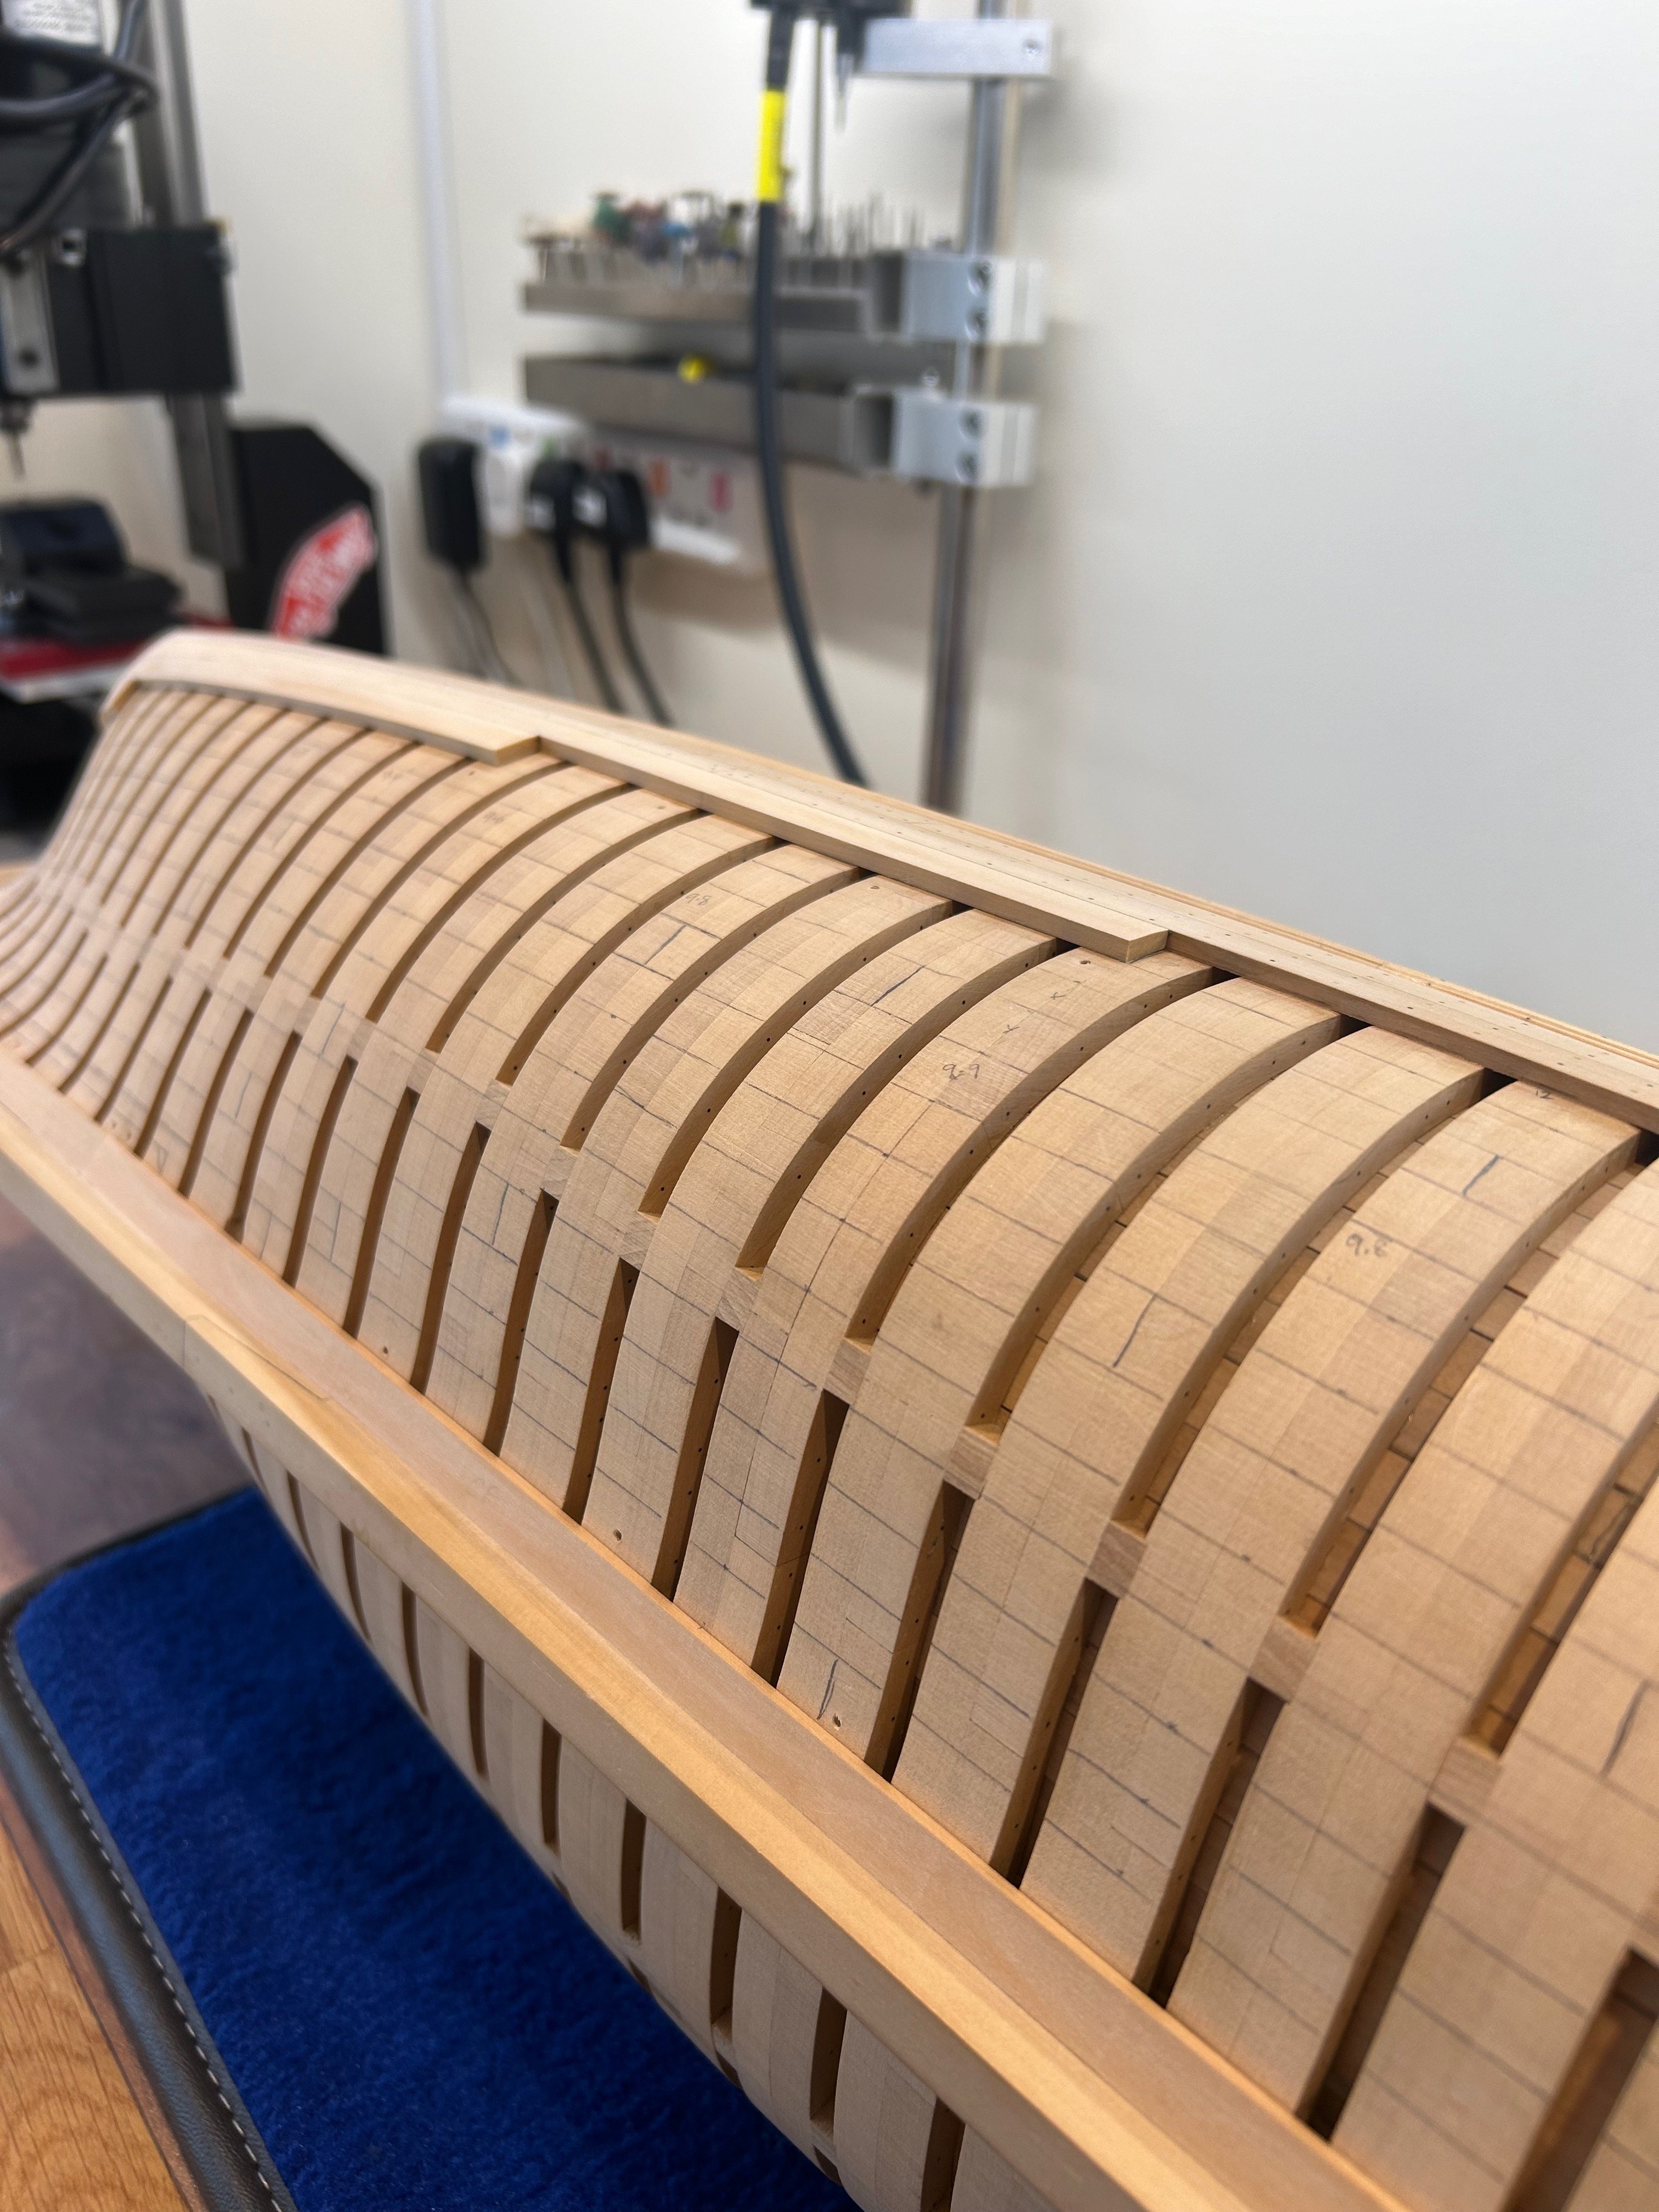
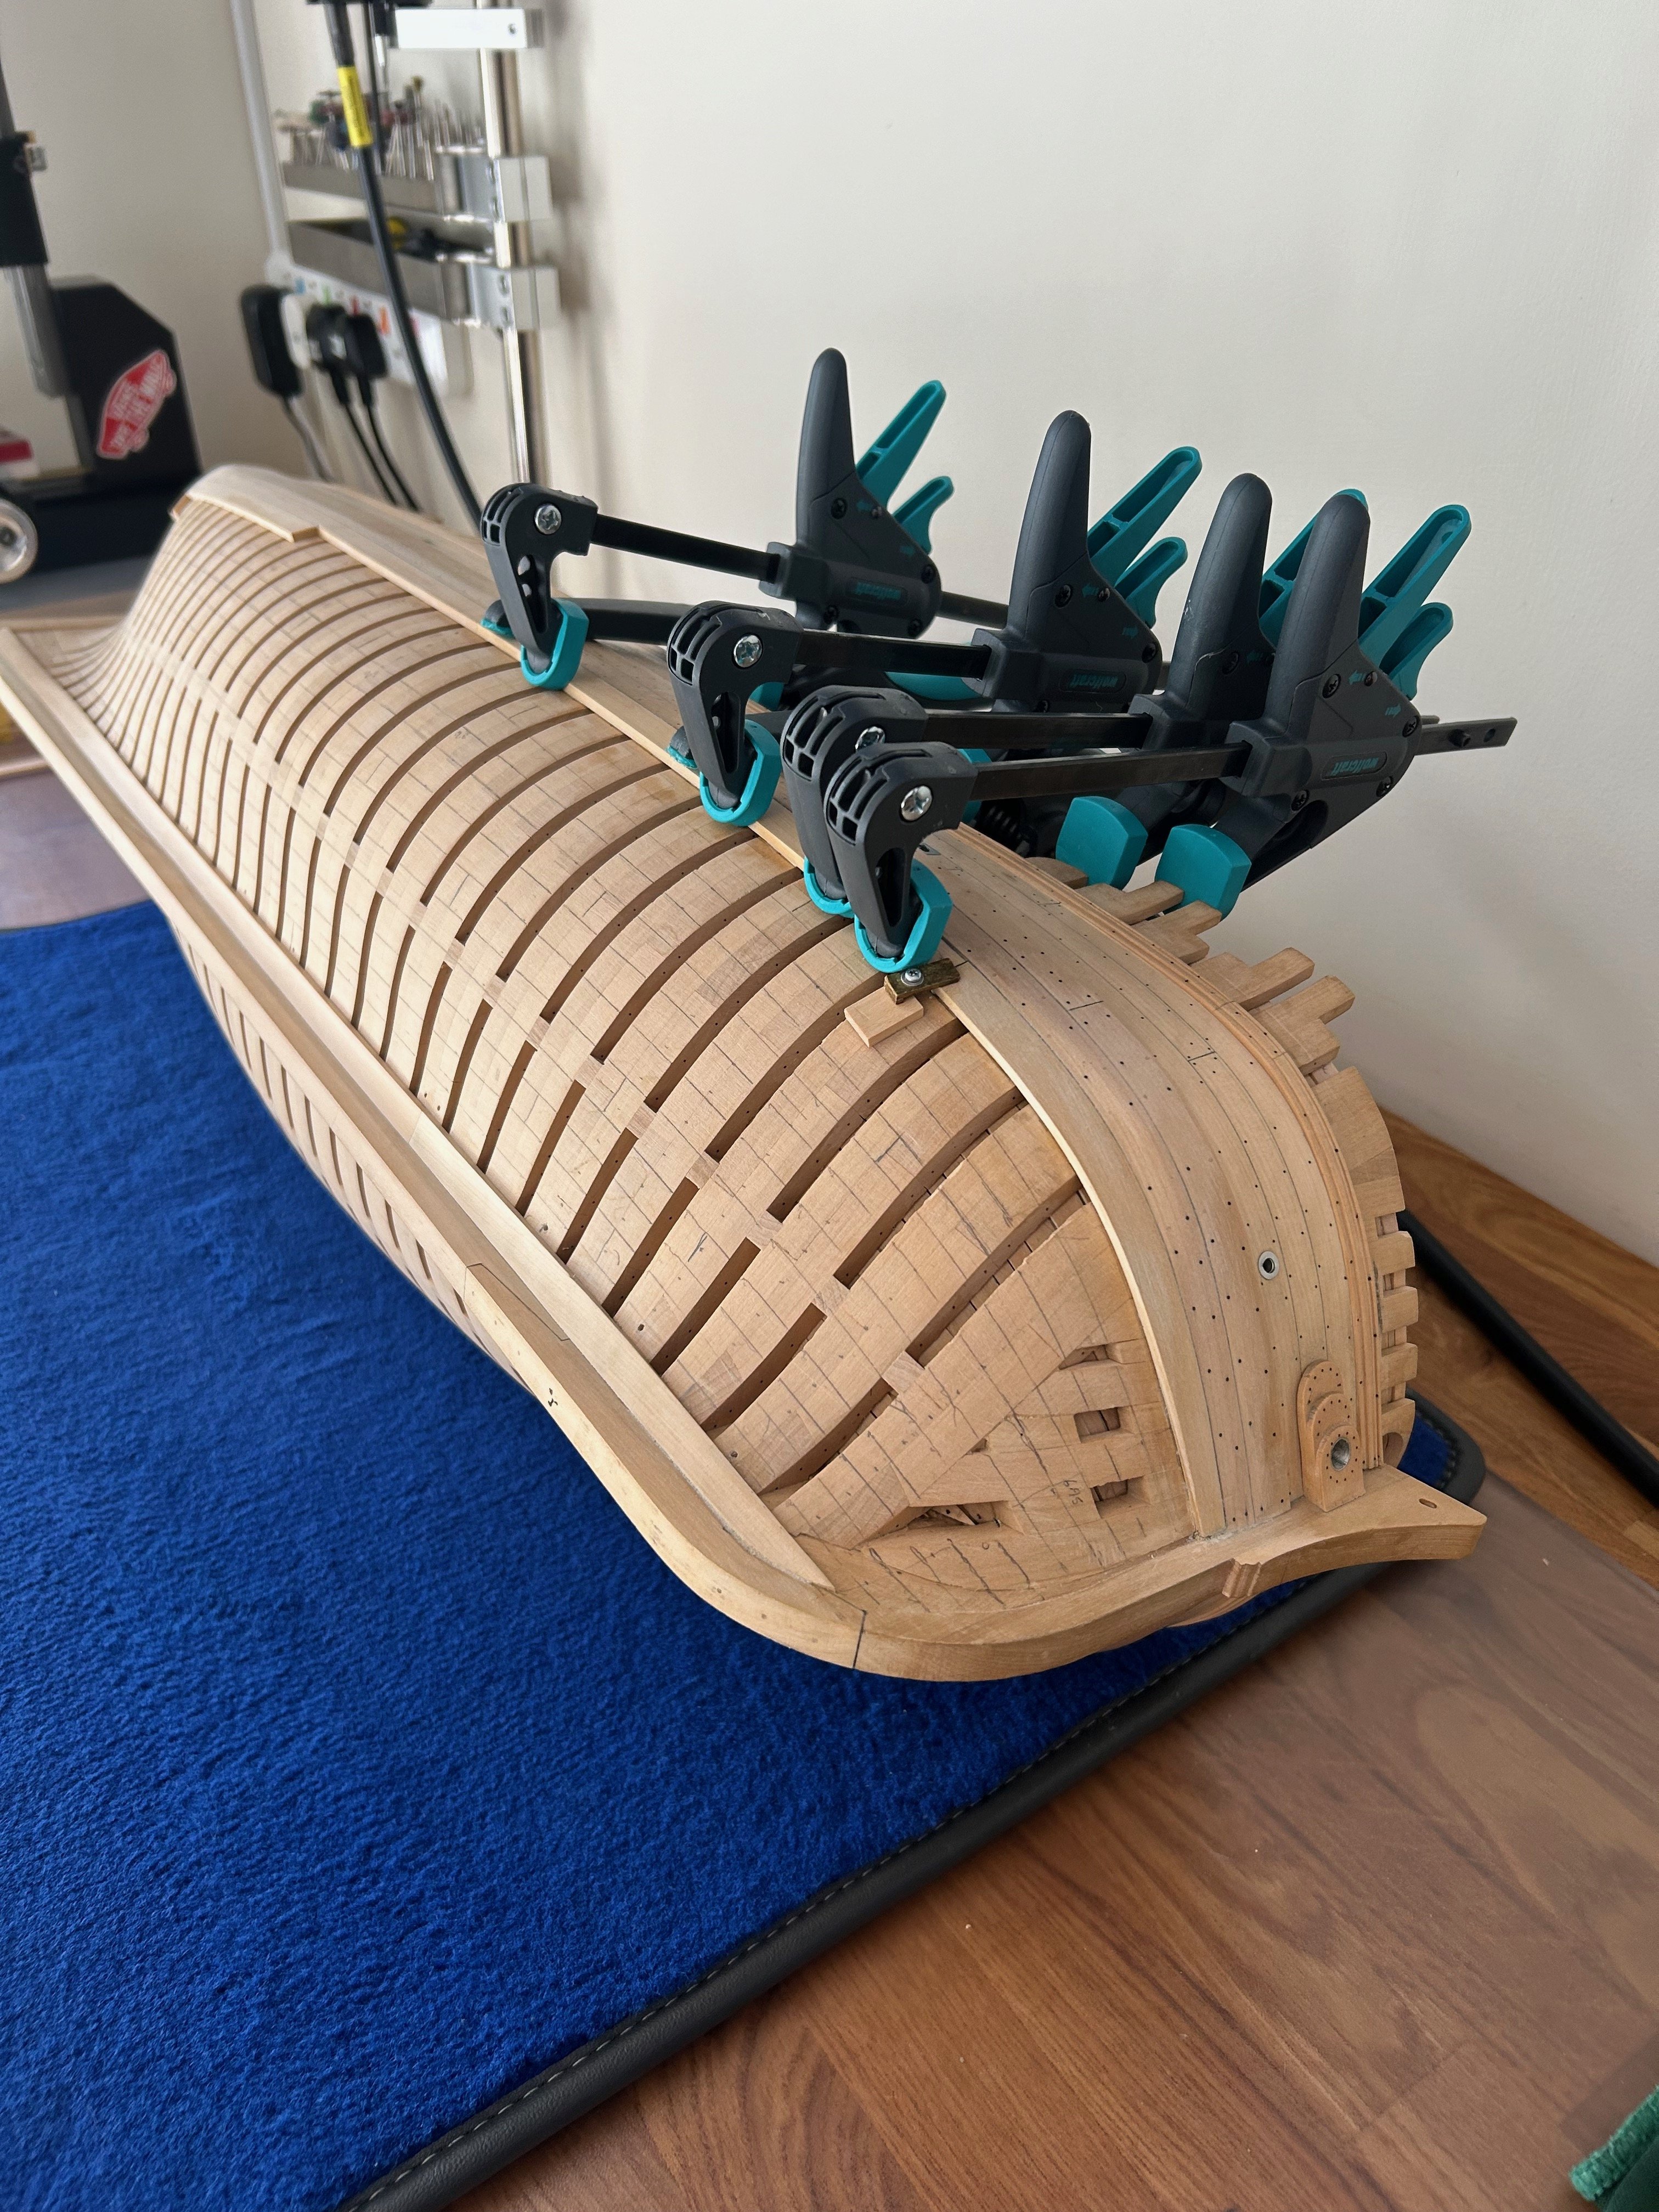
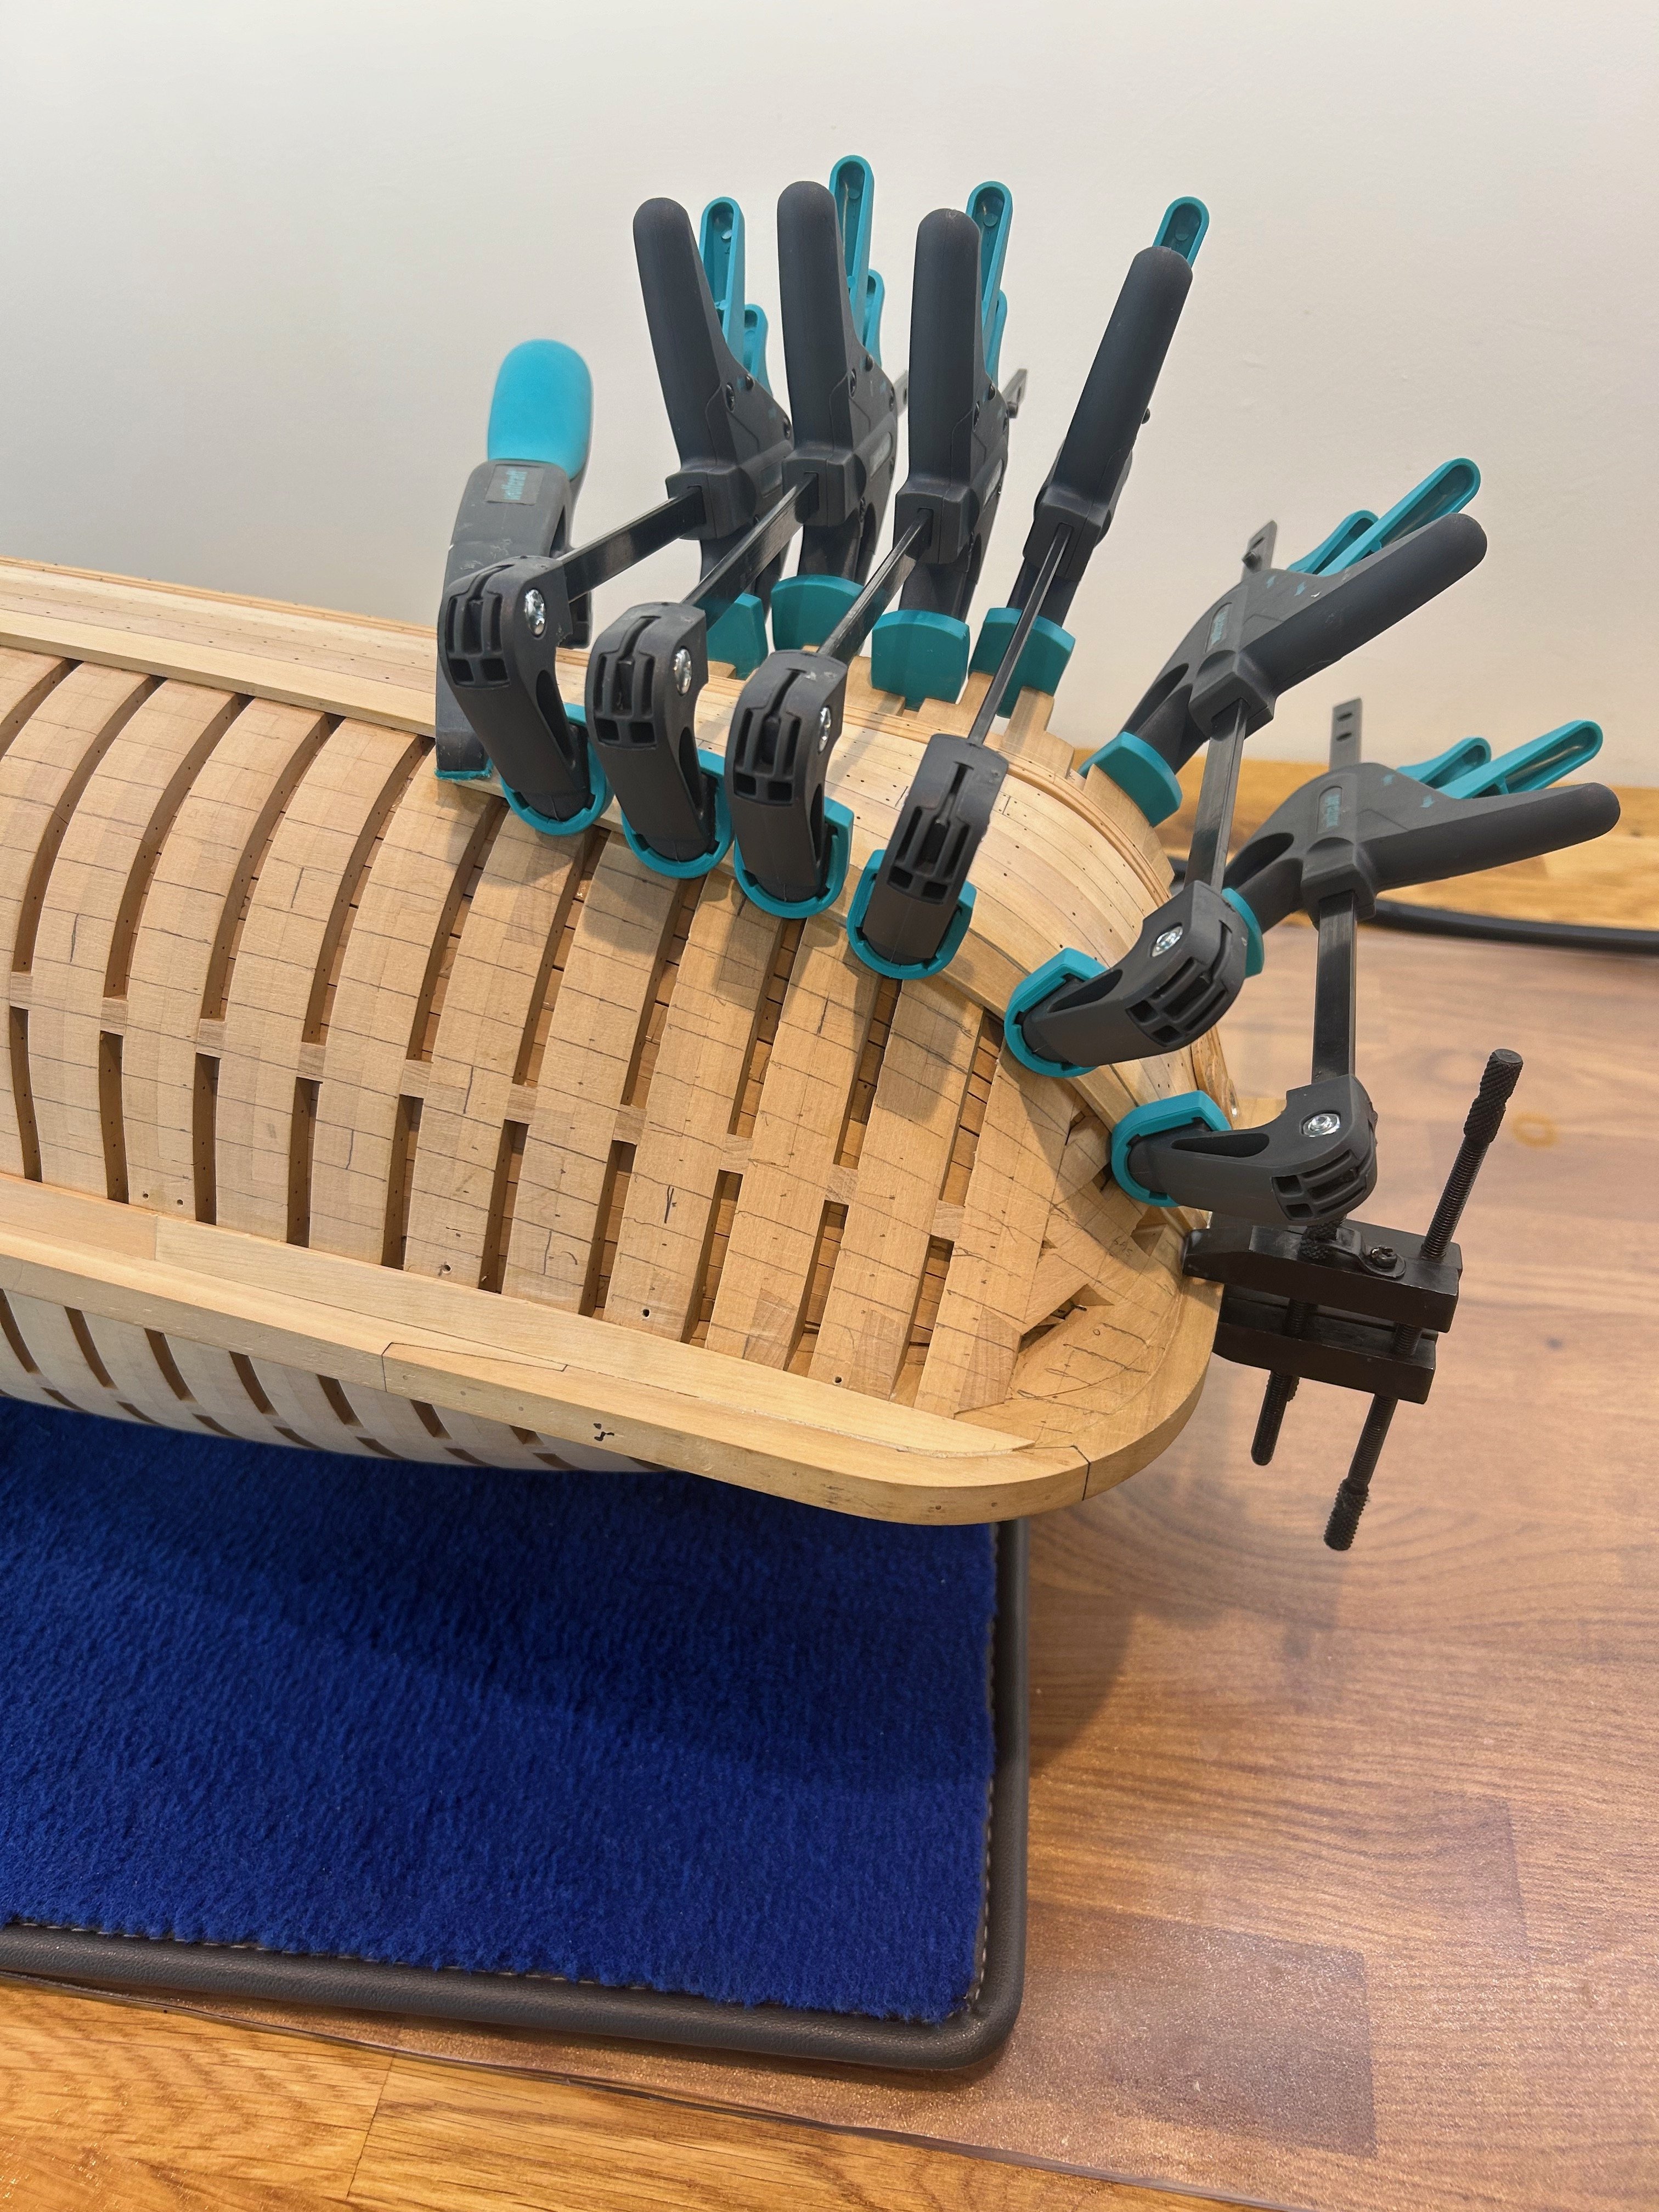
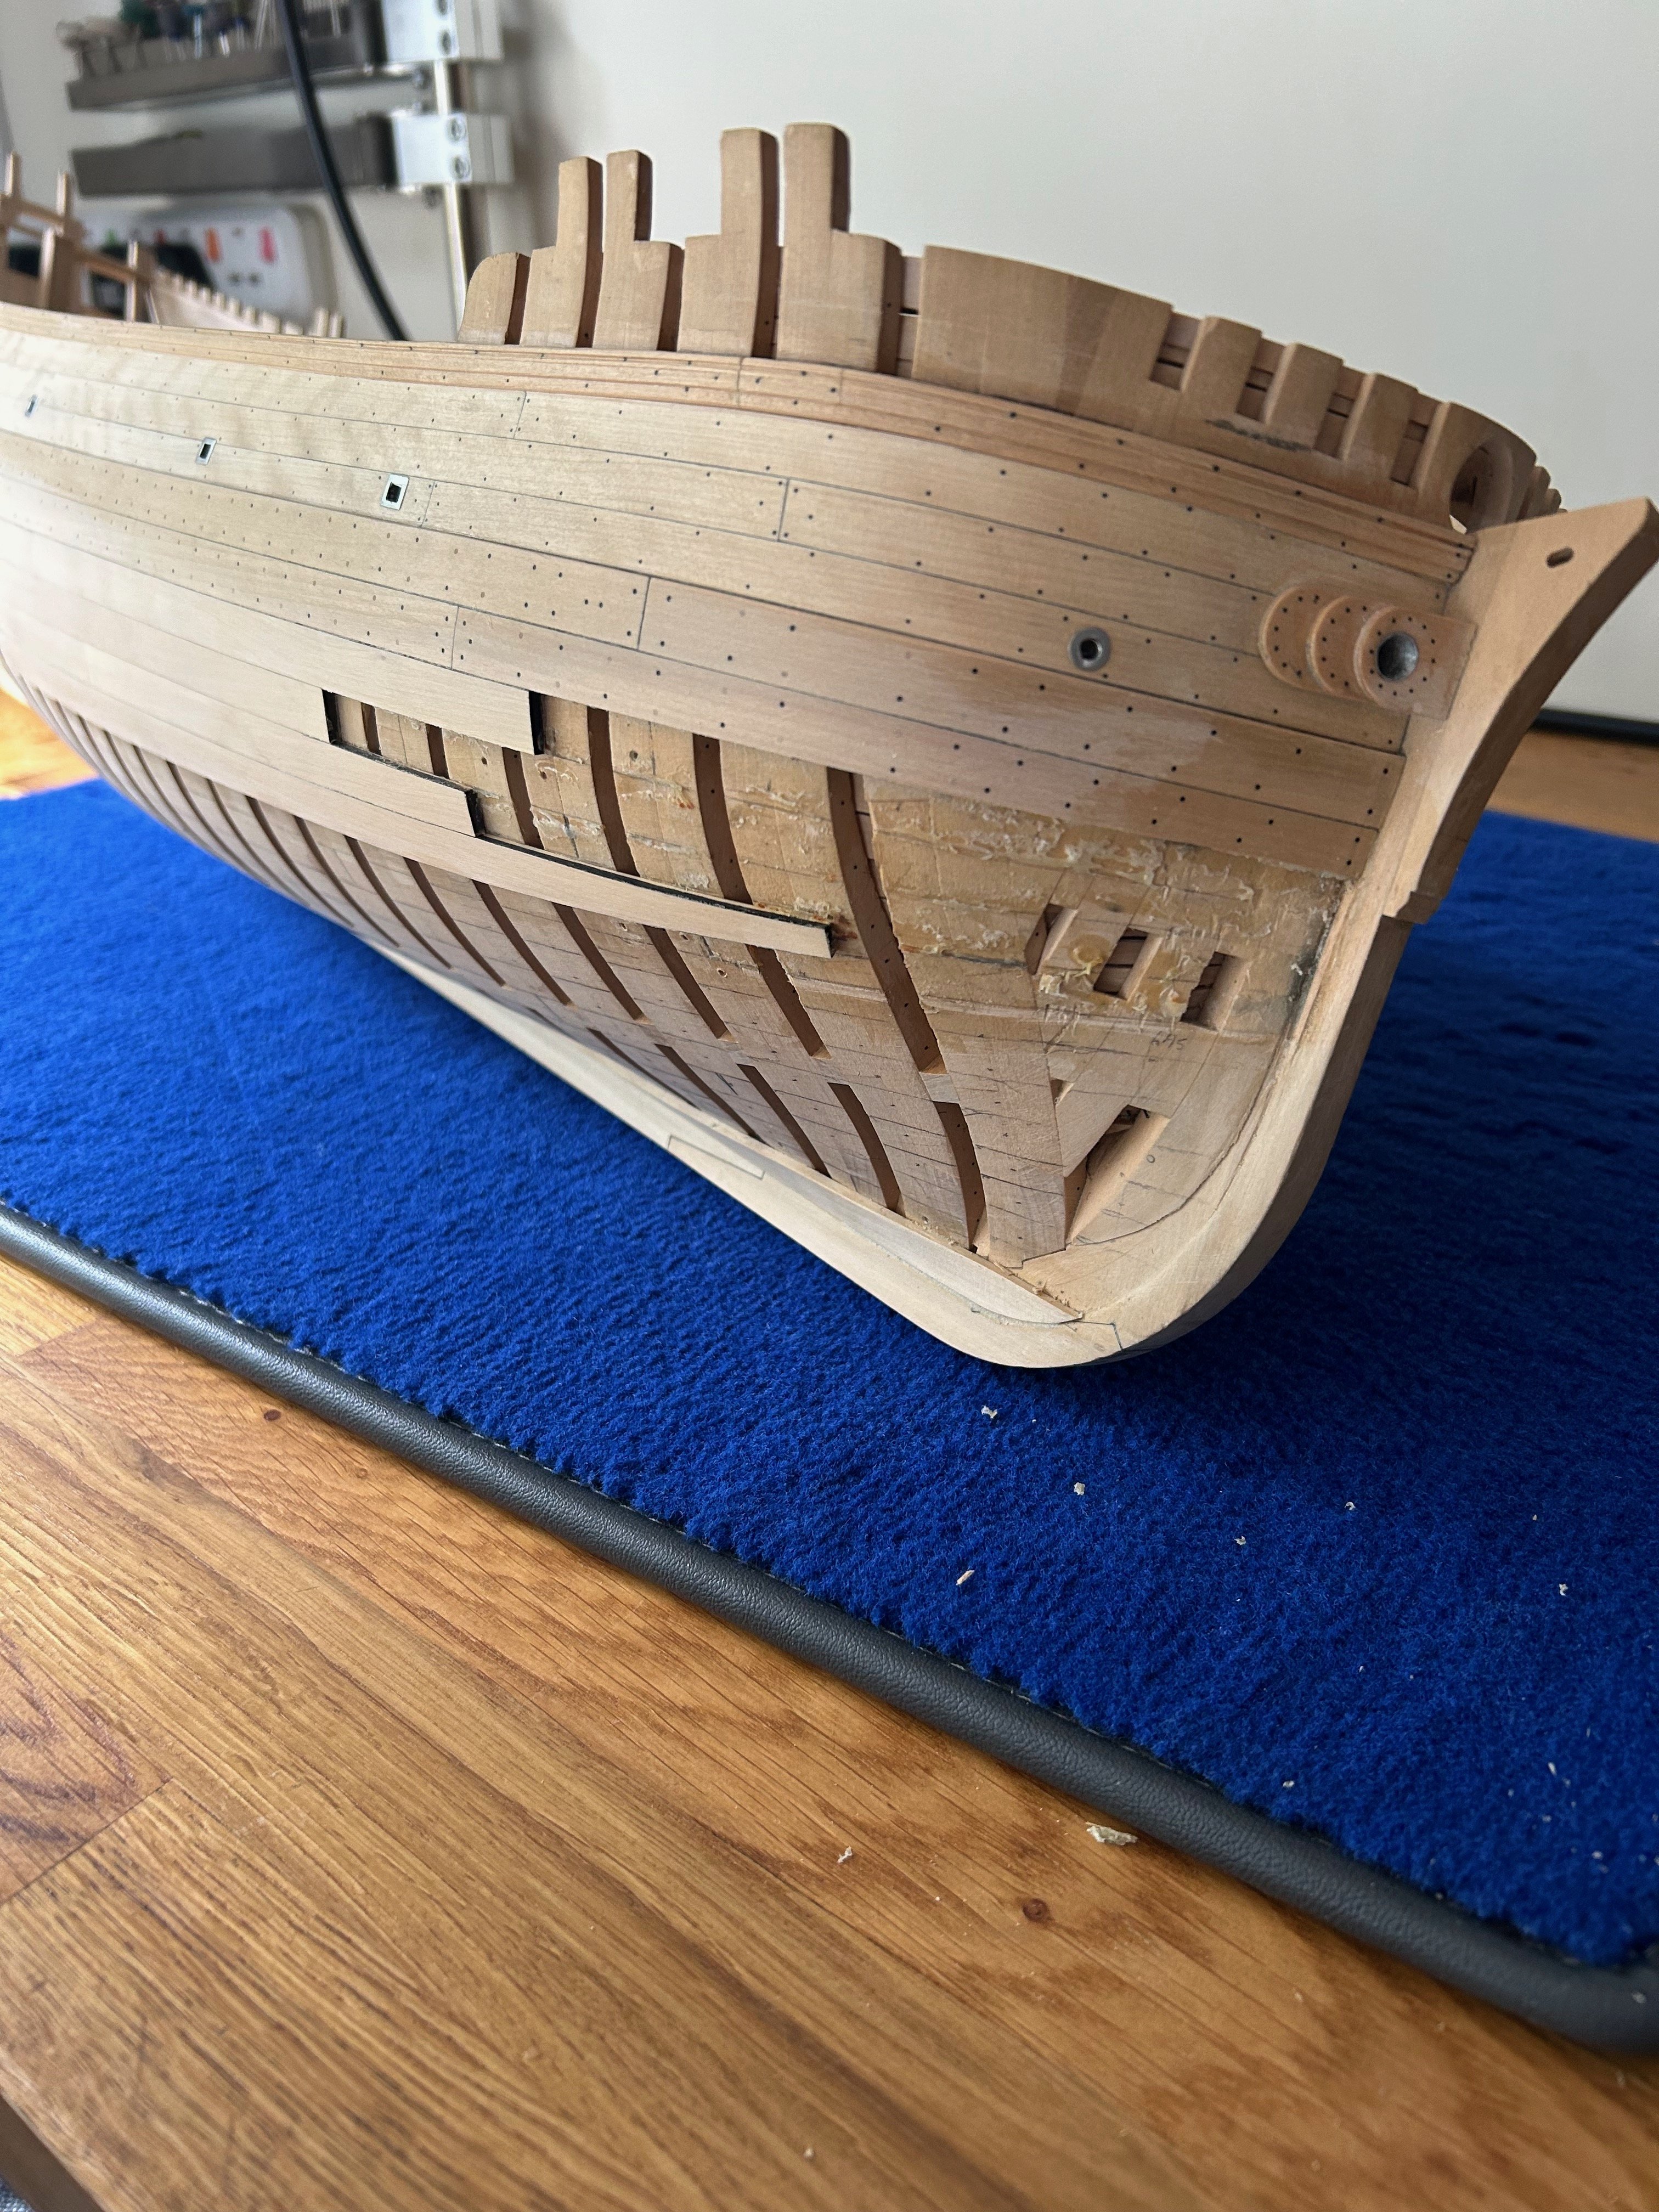
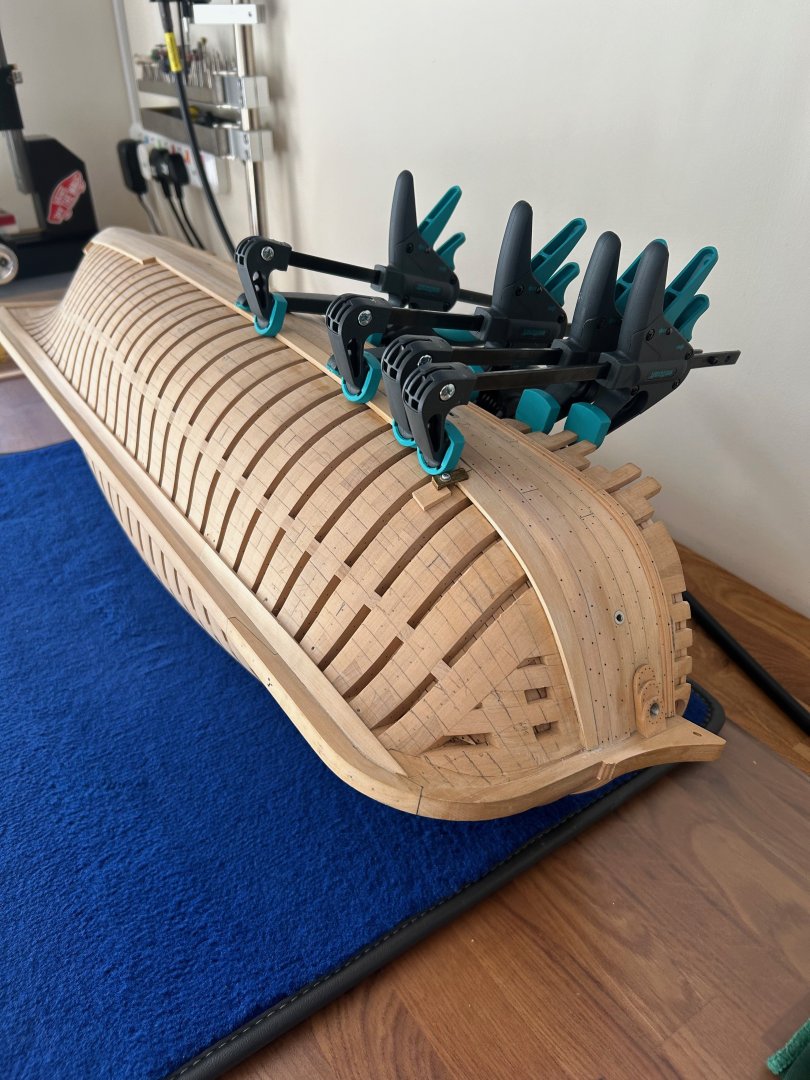
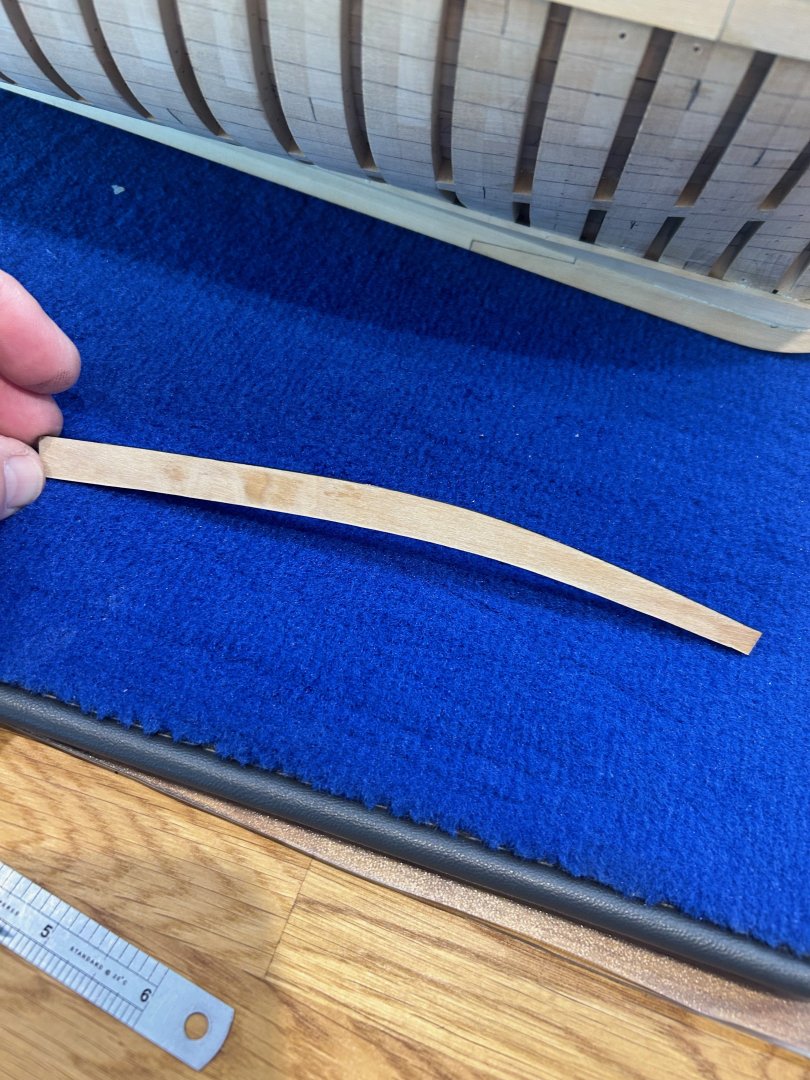
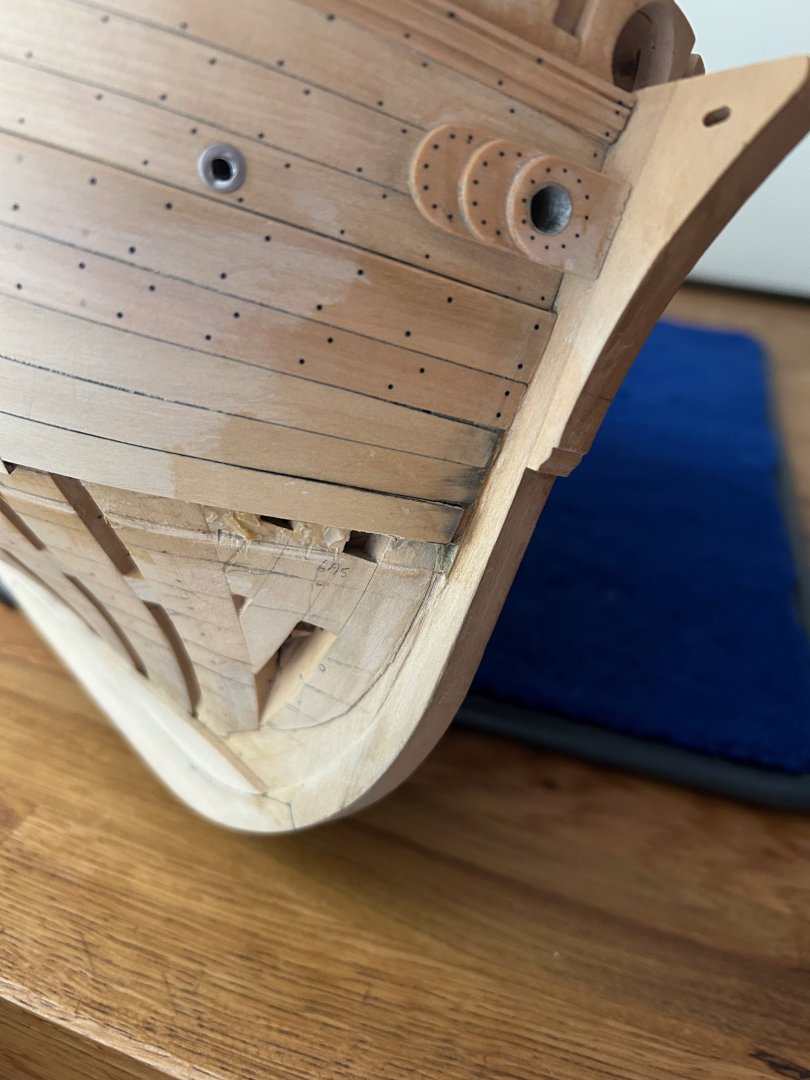
Hi All I've not checked in for a while as I cannot get any work done on my ship at the moment. My workshop has been turned into a storage room due to a contractor letting us down to fit a complete bathroom - The bathroom is in my workshop - such is life. It looks like it's going to be this way until October so I will have to be patient. I did start the planking and it was going on very nicely following my marking out. I did find it quite hard though as the planks are 3.2mm thick so require a lot of clamps. Here's a good indicator - the coin is a pound coin. The bow and stern required spiling as otherwise the planks just don't fit and will not sit flat on the frames. Now here is where I hit a really big problem. If you look at the above photo's you can see that I used a black toolmakers clamp. It was brand new and did the job great. Unfortunately what with the moisture and heat in the planks the black oil coating ran straight onto the ends of 4 planks. It didn't do this for the first 3 planks and then Boom! I tried every kind of solvent to try and remove the blackness - it was so bad at the tips that I tried to cut away part of the tips and replace them with small scraps. I even tried diluted bleach but the results were very bad - see below (I had already removed one plank). Basically at this point I was bodging it up! So I realised that I was trying to cut corners and I could not leave it looking like that. I removed the stained planks and that's where I'm at now. It's going to need a really good clean up but thats OK. I also have to damaged planks to use a templates too. I'll recut the rabbit and clean up the stem at the same time. As soon as I get my workshop back I'll be at it again and hopefully never make the same mistake again. If you've followed my build this sort of thing is pretty much on par for me Thanks Mark


.jpeg.59348659e610a93412bb6a278f9b2dbf.jpeg)