DONATION DRIVE - SUPPORT MSW - DO YOUR PART TO KEEP THIS GREAT FORUM GOING!
×


Dfell
-
Posts
251 -
Joined
-
Last visited
Content Type
Profiles
Forums
Gallery
Events
Everything posted by Dfell
-
Beef Wellington - Jason Hi - I had a warped keel for my Brig Supply and Caldercraft were happy to replace it. Good luck with your new build - will be watching with interest. Doug
-
geoff - hello. Have sent you a pm but not sure if it worked. So if you did not get the pm the answer to your question as where I got the case - sshardwoodworking.co.uk - and the guy's name is Simon. Doug
- 92 replies
-
- 2
-

-
- finished
- caldercraft
- (and 1 more)
-
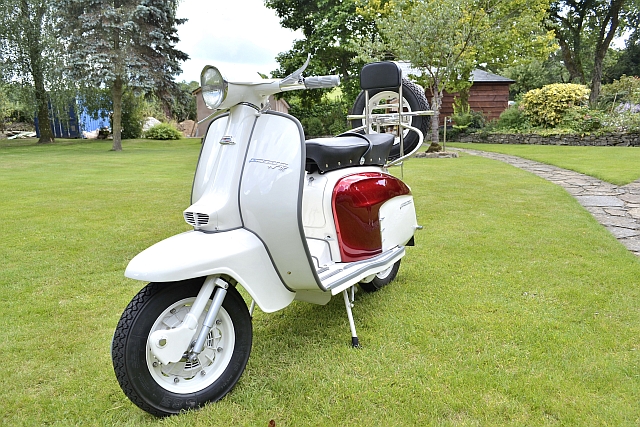
hornet - hamilton - and JesseLee Thanks for looking at my build and your lovely comments. hornet - I used Admiralty paints, diluted with some water - hand brushed several coats with sanding in between. Been building a balsa wood WW1 plane kit - but will get back to ship building. Also have another distraction - have just had a 1963 Lambretta TV175 series 3 scooter restored to play with.... Had a case built as well for HM Brig Supply - so a bit poor at the moment Regards Doug


- 92 replies
-
- 6
-
-
- finished
- caldercraft
- (and 1 more)
-
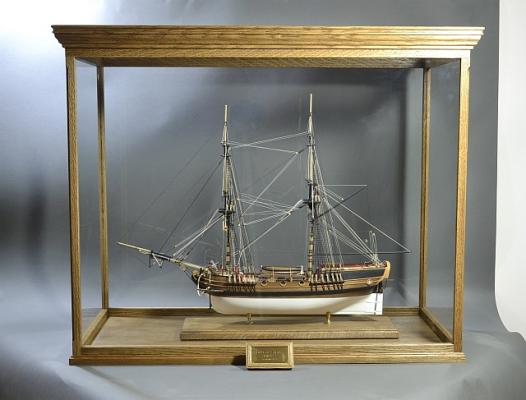
Thank you everyone for your comments - and Geoff will be looking out for your build - good luck. Been busy sorting out a glass case - very expensive but I guess it is needed Regards Doug
- 92 replies
-
- 1
-
-
- finished
- caldercraft
- (and 1 more)
-
Well done Frank - a lot of work and worth it - fantastic. Enjoyed watching your build Regards Doug
- 389 replies
-
- 1
-
-
- supply
- caldercraft
- (and 1 more)
-
The case looks good and it looks like a nice place you have chosen to put your Bounty. I am at the moment trying to sort a case - they all appear to be very expensive and you have made me think more about acrylic. It all looks very nice - you must be proud. Thanks for sharing your built , David Regards Doug
-
Thank you, Ron. How have you been - not seen you for a while? Might have a go at HMS Bounty (Amati) but not just yet, will have a break but still be keeping an eye on yours and everyone's builds...Again thanks for all your help - as you say the instruction aren't that brilliant but I guess that is the fun bit....
-
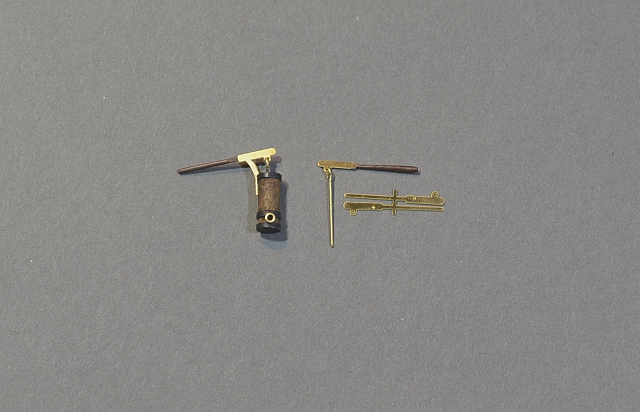
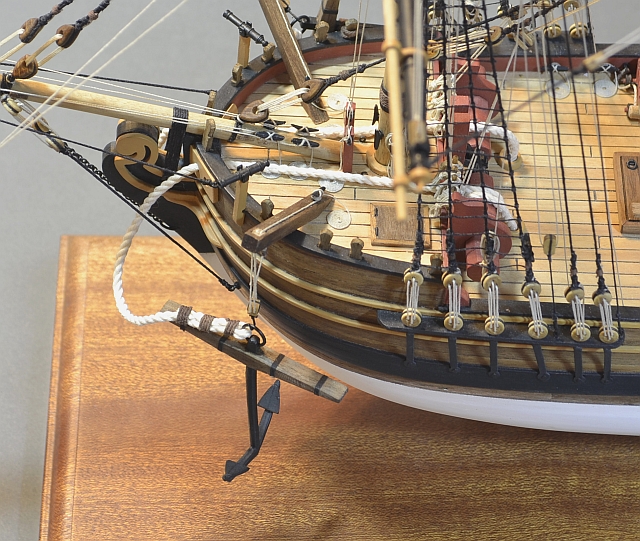
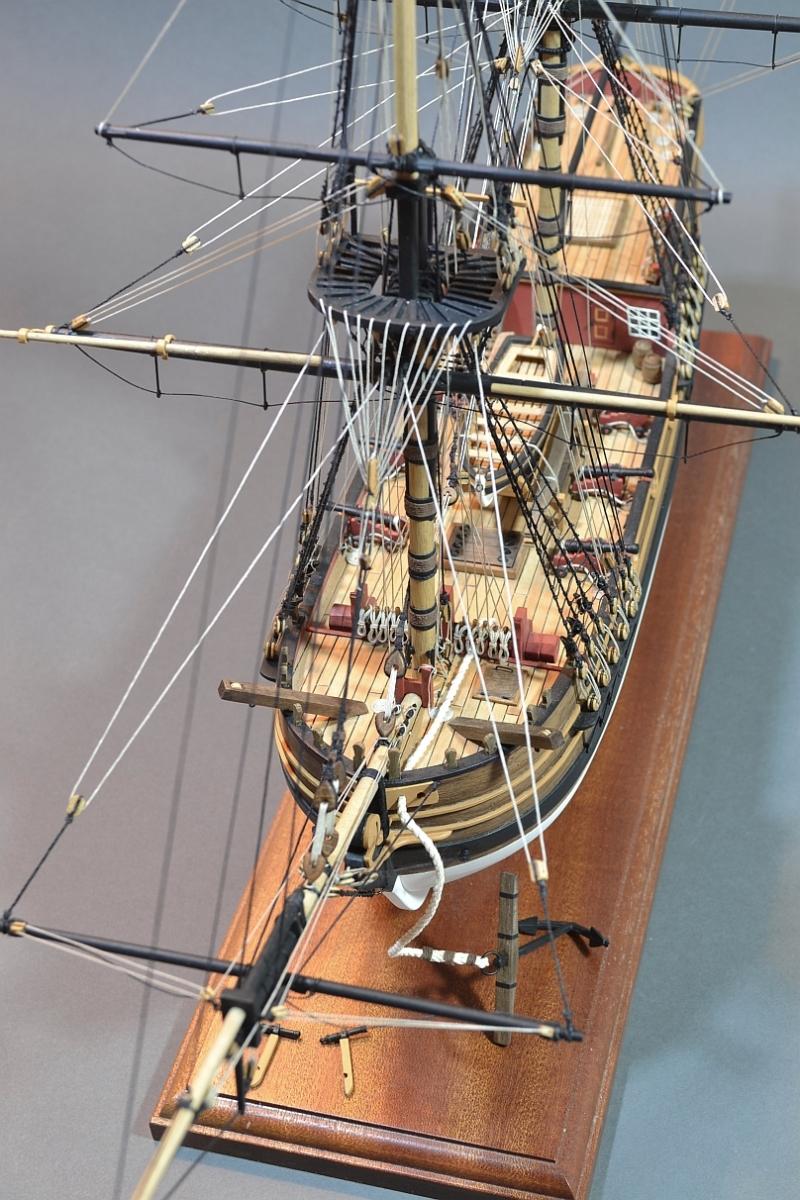
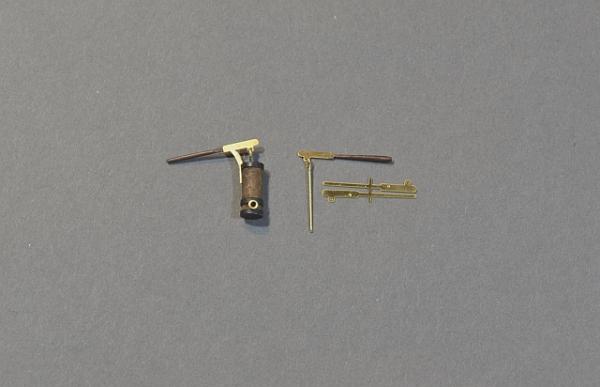
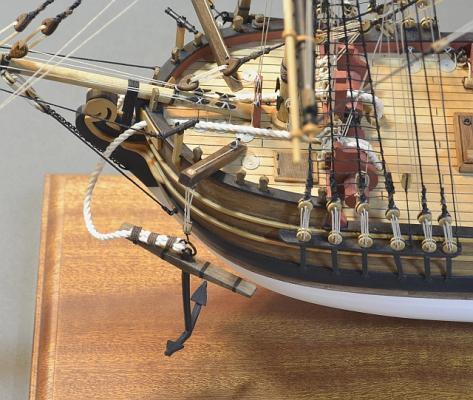
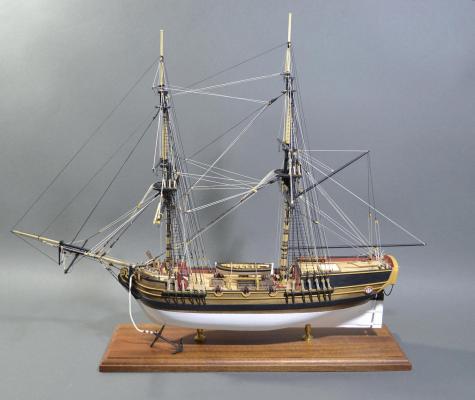
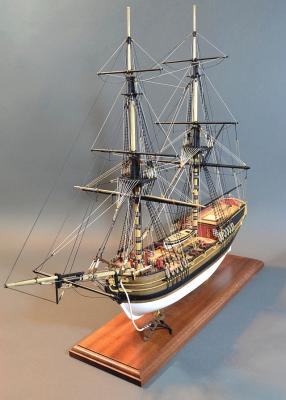
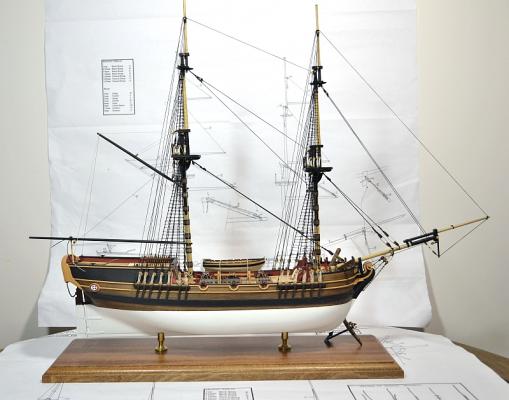
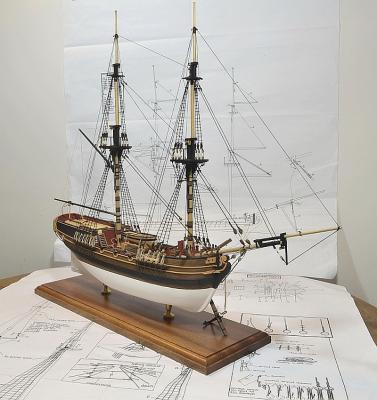
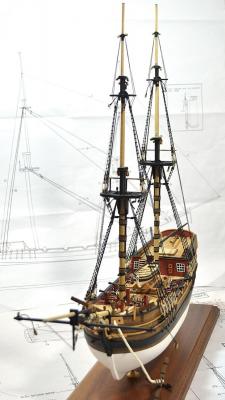
Thank you for looking in and your comments, Amfibius. I think I have finally finished !!! Have made up a deck pump from a combination of one from Caldercraft and an Amati one. Although I still have another one to do I may not fit them on the ship as there is really no space - gets a bit tight. The handle had a bit of walnut strip added both sides and sanded round otherwise it would have been flat brass. Anchors fitted. Rounded lump added for the sling to sit on - plus having been very impressed by Beef Wellington's (Jason) serving thought I'd have an attempt on the slings. Final photo Thank you for looking and and all the comments and those on the old site whose build of the Supply helped me get started. Hopefully I may have helped someone in return. Again thank you Regards Doug

- 92 replies
-
- 13
-
-
- finished
- caldercraft
- (and 1 more)
-
Navis Factorem - just come across your build or should I say rediscovered your build as I remember this from the old site - very impressive. It has inspired me to make this for my next build although you did a lot of improvements to the original kit especially the ship's two boats. Thank you for showing your work. Regards Doug
-
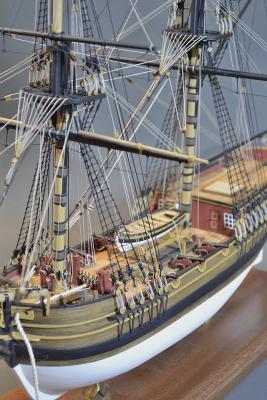
Hi bigcreekdad - thanks you very much for your comments and in answer to your questions - 1) the lower half of the hull was first sprayed with a grey undercoat onto the walnut and then using acrylic white from a spray can with light sanding in between. Finally a matt lacquer 2) all the dowel bits to make the masts and bowsprit were painted with a watered down white with a tiny touch of the yellow orchre from the kit - just enough to tone down the initial colour of the wood. Hopefully that has answered what you wanted to know - if not will try again . Thanks for looking and now will go and have a see at your build, John.
-
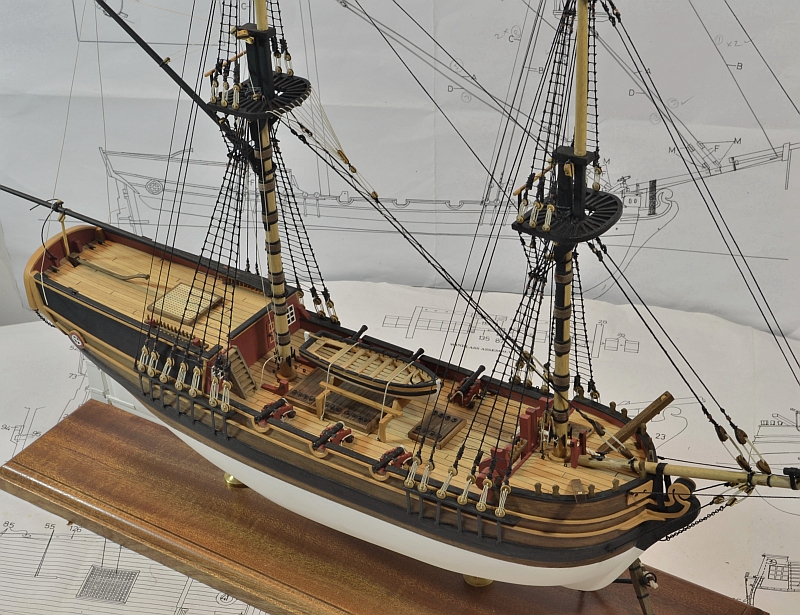
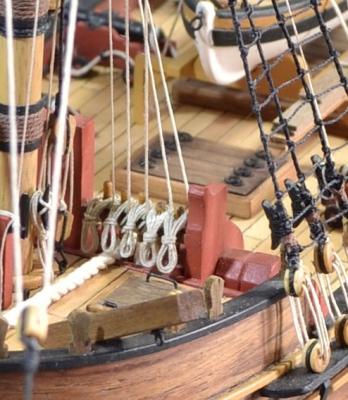
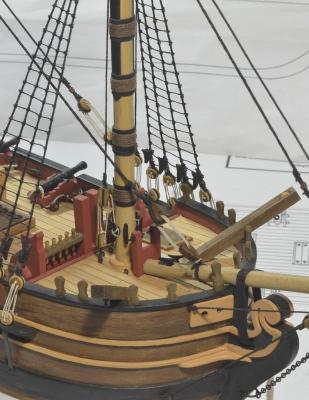
Hi Some rope coils around all belaying pins that require them - just some around cleats to do although these are being a bit difficult. Pictures showing some barrels installed plus some spare wood lashed to ship's boat frame - will probably add some more on the other side. Thank you for looking Regards Doug


- 92 replies
-
- 3
-
-
- finished
- caldercraft
- (and 1 more)
-
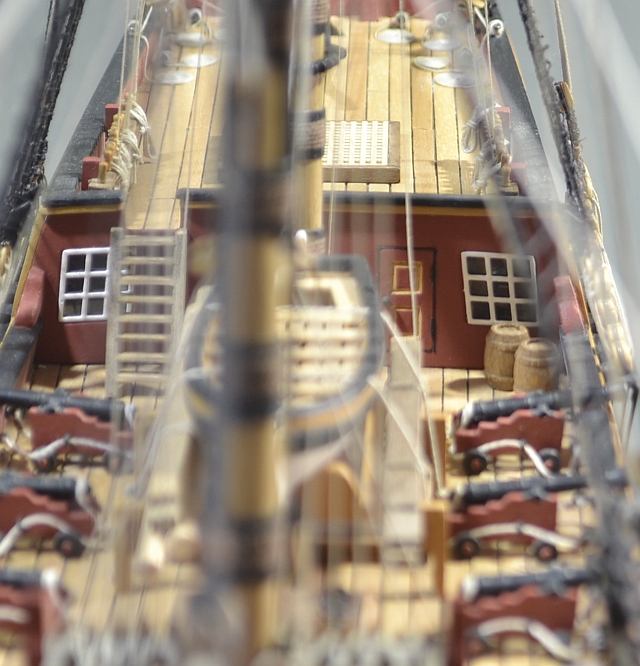
JesseLee - Sailor12345 - maggls_01 - Stockholm tar Thank you very much for your comments and thank you to all those with the 'like this'. Thought I would try a grey background as I have only seen photos with white or black. I did want a darker grey but was unable to source it. Used 2 free standing cool light reading lamps that I use to see when building the model and experimented with a wall light that was there which gave a warmer colour on one of the photos. Not sure if this is what you are referring to, Stockholm tar, as to the shading of deck planks? Did not mention on last post - where lines were tied off to belaying pins or cleats I changed what the instructions asked for. I liked the lines to be sort of parallel to each other and not crossing over or bending round obstacles - everything went straight from block on yard etc to cleat / belaying pin. Also on the Stays where 2 single blocks were asked for just put a double. Regards Doug
-
Getting there.... last page 6/6 now done. Need to do rope coils etc - oars and extra yards strapped to small boat frame plus anchors fixed to catheads,,,,,and then touch ups. Traveller

- 92 replies
-
- 10
-
-
- finished
- caldercraft
- (and 1 more)
-
Beef Wellington (Jason) - I enjoy looking at your build as it is quite inspirational and it is hard to believe it is your first build !! Your workmanship is exceptional !! Keep it coming..... Cheers Doug
- 800 replies
-
- 1
-
-
- snake
- caldercraft
- (and 1 more)
-
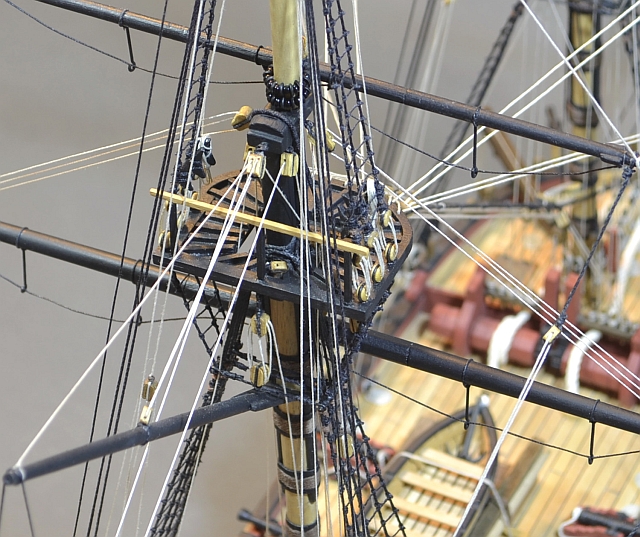
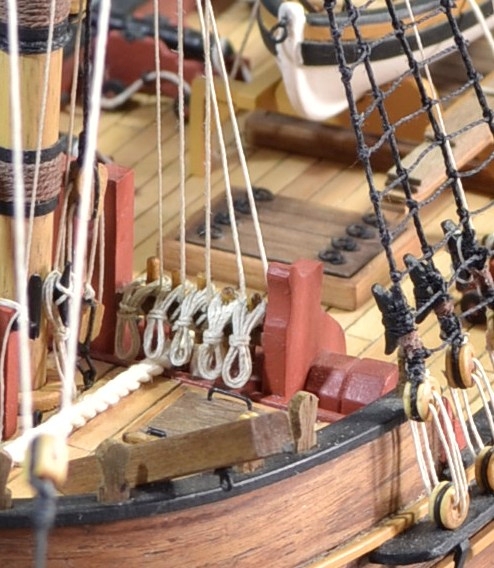
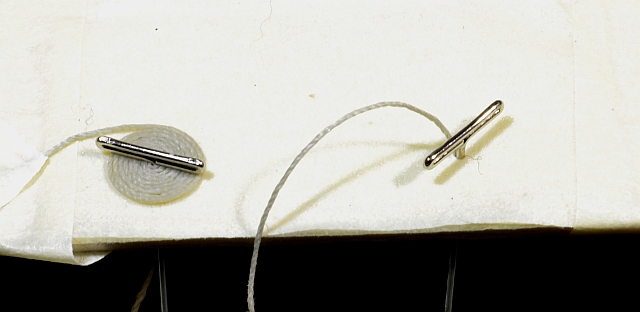
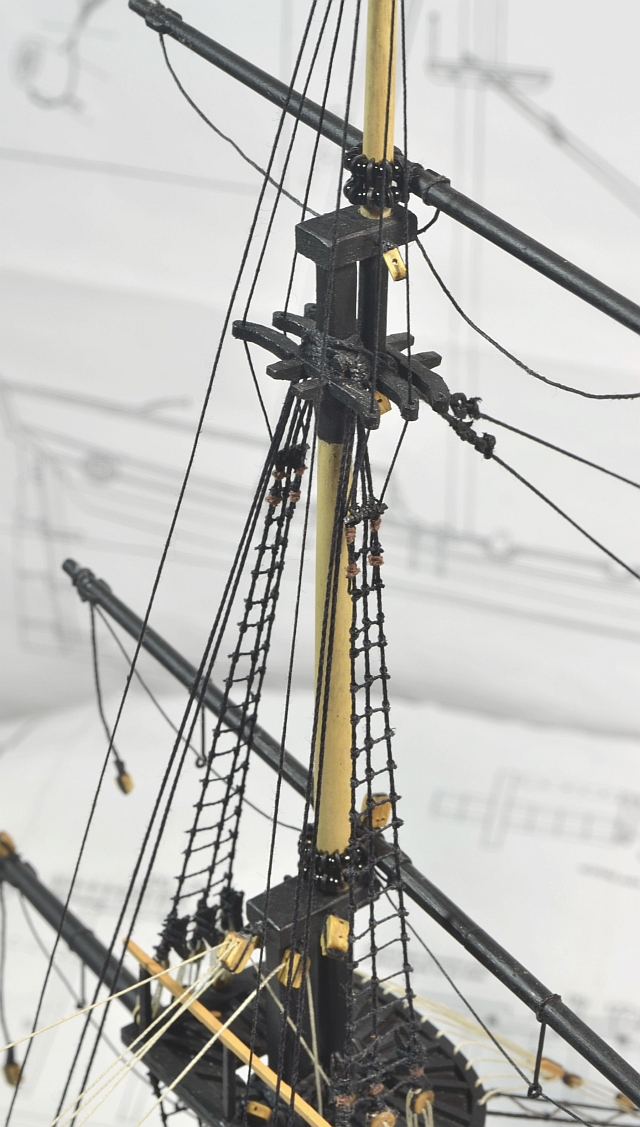
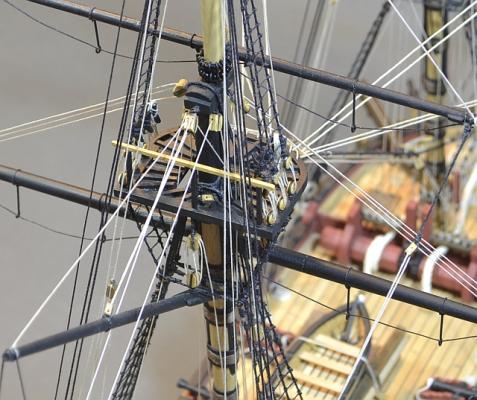
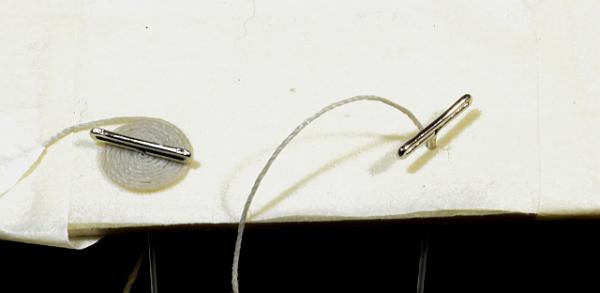
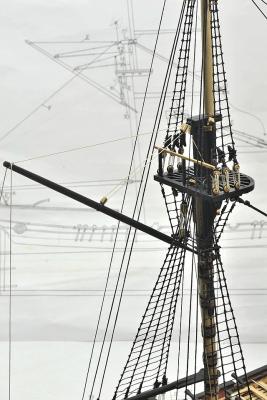
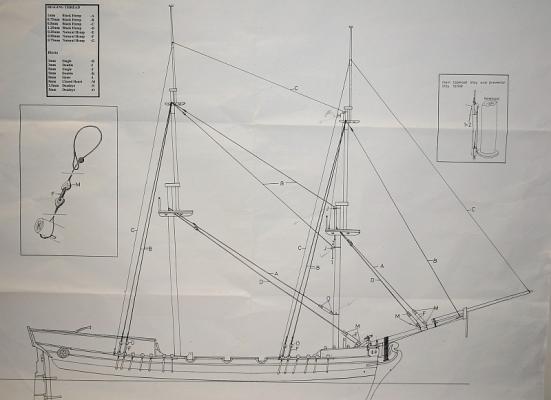
Some more updates and a query. The other Crowsfeet done. Had to make up the rigging at the stern as it was not very clear on the instruction sheet - so it is a bit of a mixture from various books / kit instructions / me. Some rope coils. These were done I guess the same way as everyone does - a photo showing how. Masking tape folded into a loop - stuck down onto a piece of balsa wood. The thread passed thro a hole with a T shaped pins that I have and wound around the pin - the sticky masking tape helps to hold things in place and glued. The instruction for Parral Beads and Ribs says - 'The topmast yards are tied to the masts with parral beads (96) and ribs (93) held together with 0.25 thread (the topmast yards are fixed using parrel beads (96) and 0.25 black thread only - no ribs)' ??? Written exactly as instructions whereas the drawings (2 of 6) shows the fore topgallant and fore topsail yards done with beads and ribs and the main two top yards with nothing...... may do the fore topgallant yards only with just beads, attachment=108188:_DSC0237.JPG]


- 92 replies
-
- 8
-
-
- finished
- caldercraft
- (and 1 more)
-
Hello hamilton - the blocks you referred to were scratch built and the snaking thread was Occre brown thread 0.15 which was not with the kit. Have used it elsewhere on the rigging to add some colour here and there. Thanks for your comments and looking at the build. Regards Doug
-
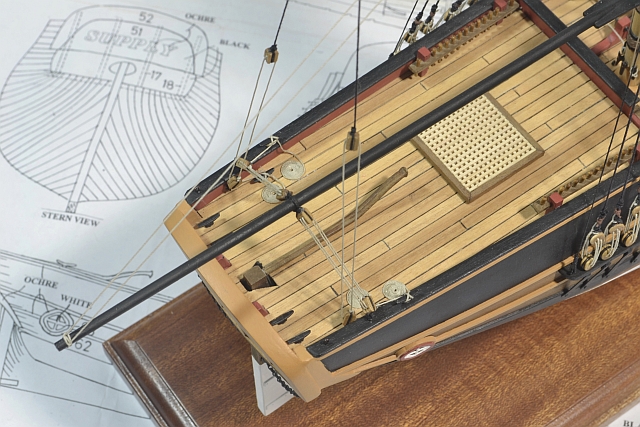
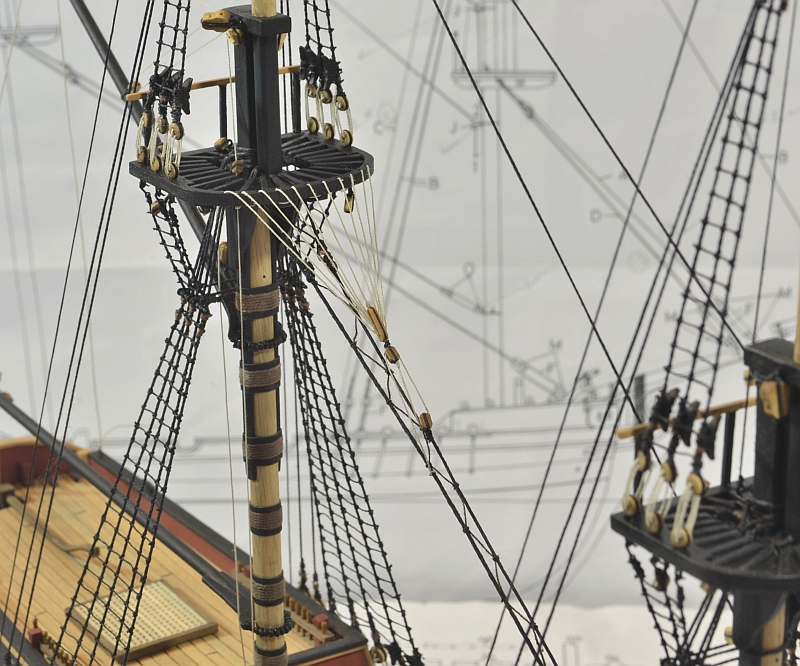
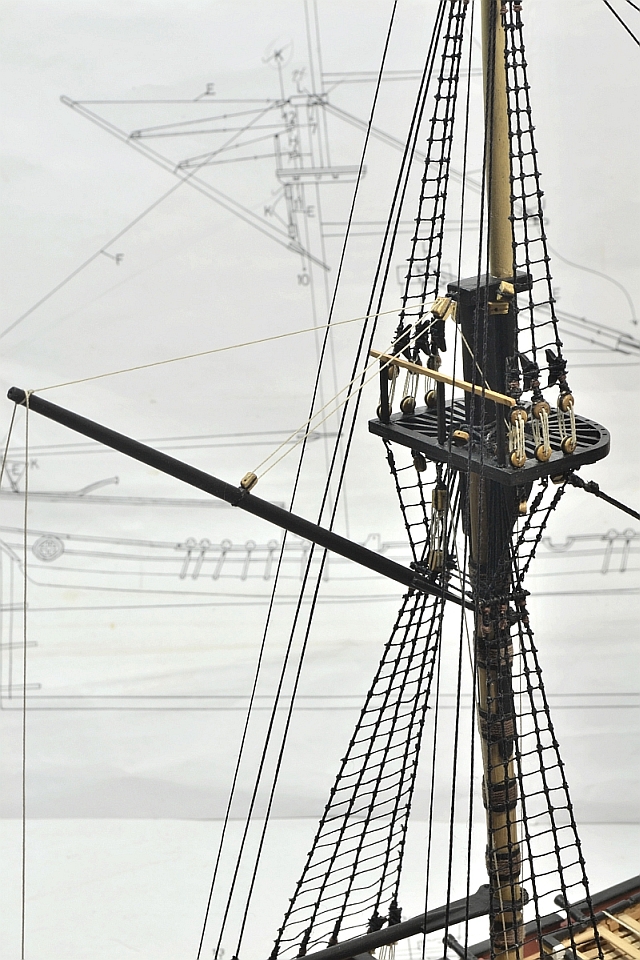
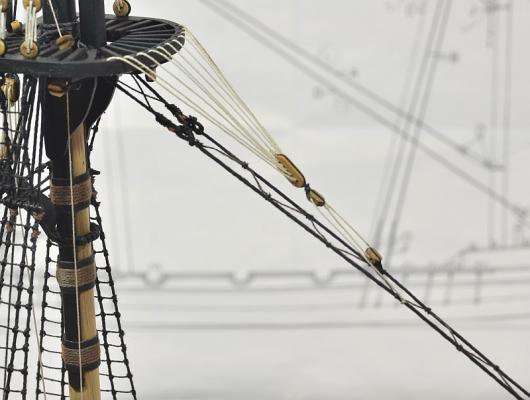
Hi - a small step forward - one crowsfoot done and some dodgy 'snaking and worming'..... My main concern was distorting the Stays when tensioning everything tight with the crowsfoot. So once the threading had been done through everything the end with the block was pulled tight and held in a clamp fixed to a stand and then the thread was sprayed with matt varnish and allowed to set. Once unclamped it remained taut so when tied to the Stay very little tension was needed. Well that's the theory - still got to do the other one to do...... Have been using diluted pva glue on all the thread running it between finger and thumb in one direction only - helps to flatten the fluff. Forgot to mention on last posting have been using ordinary sewing cotton to tie various things such as shroud cleats - found it better in certain situation for scale. attachment=105559:_DSC0218.JPG]

- 92 replies
-
- 6
-
-
- finished
- caldercraft
- (and 1 more)
-
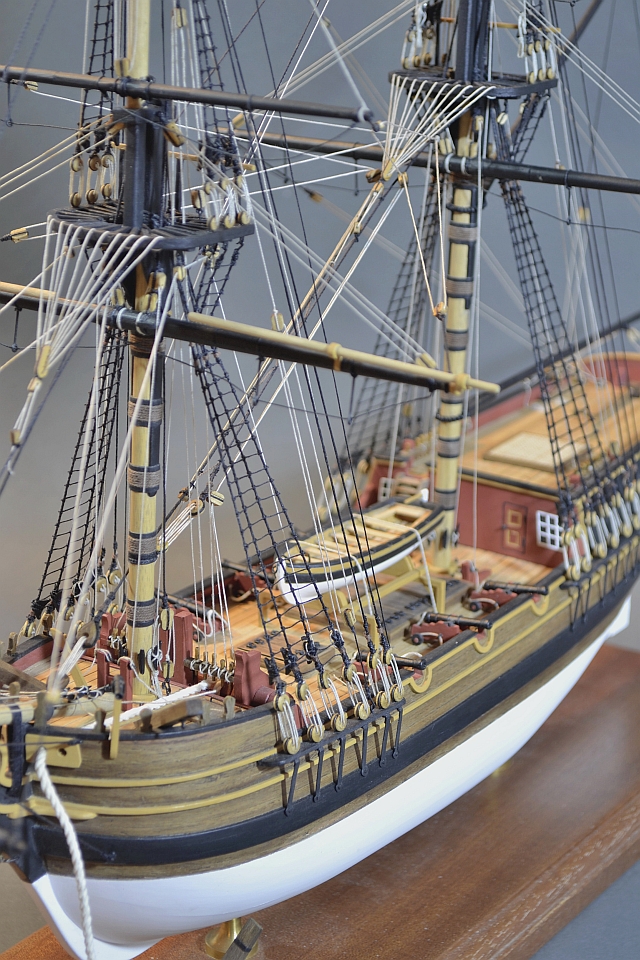
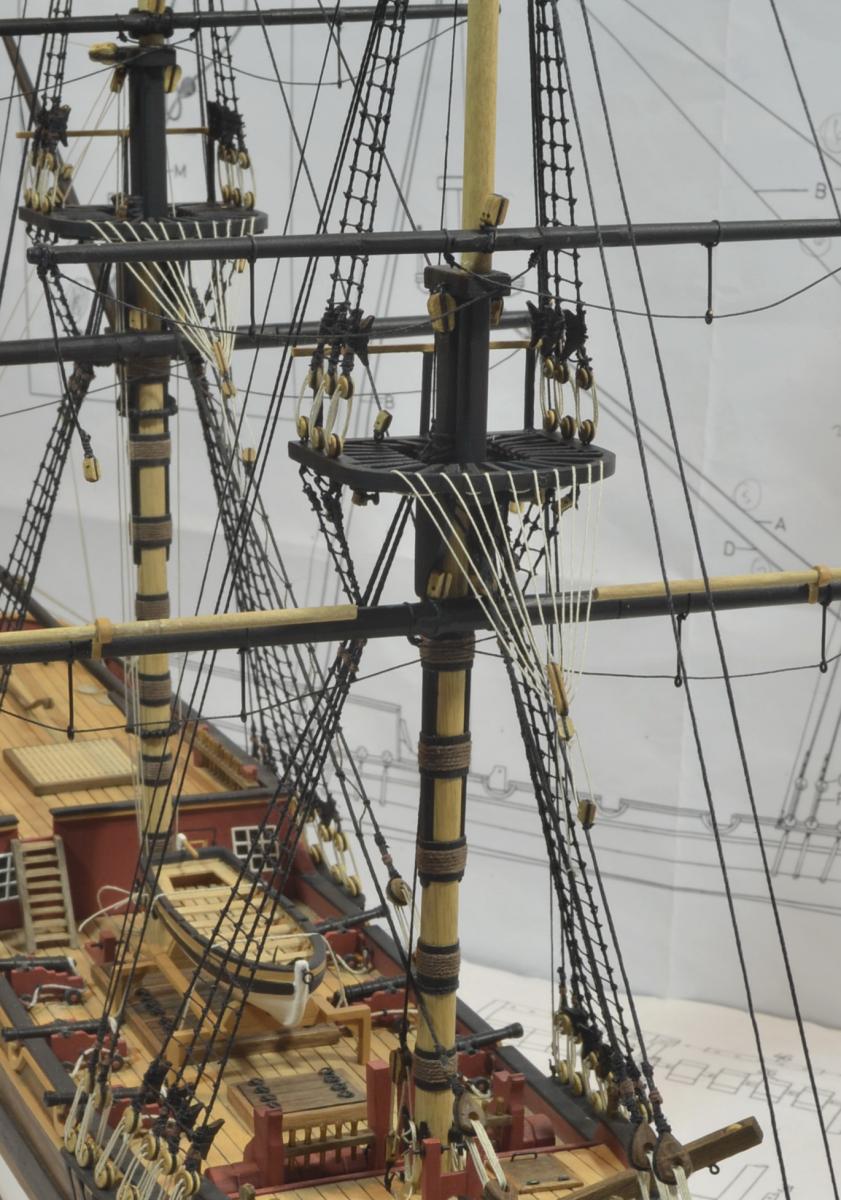
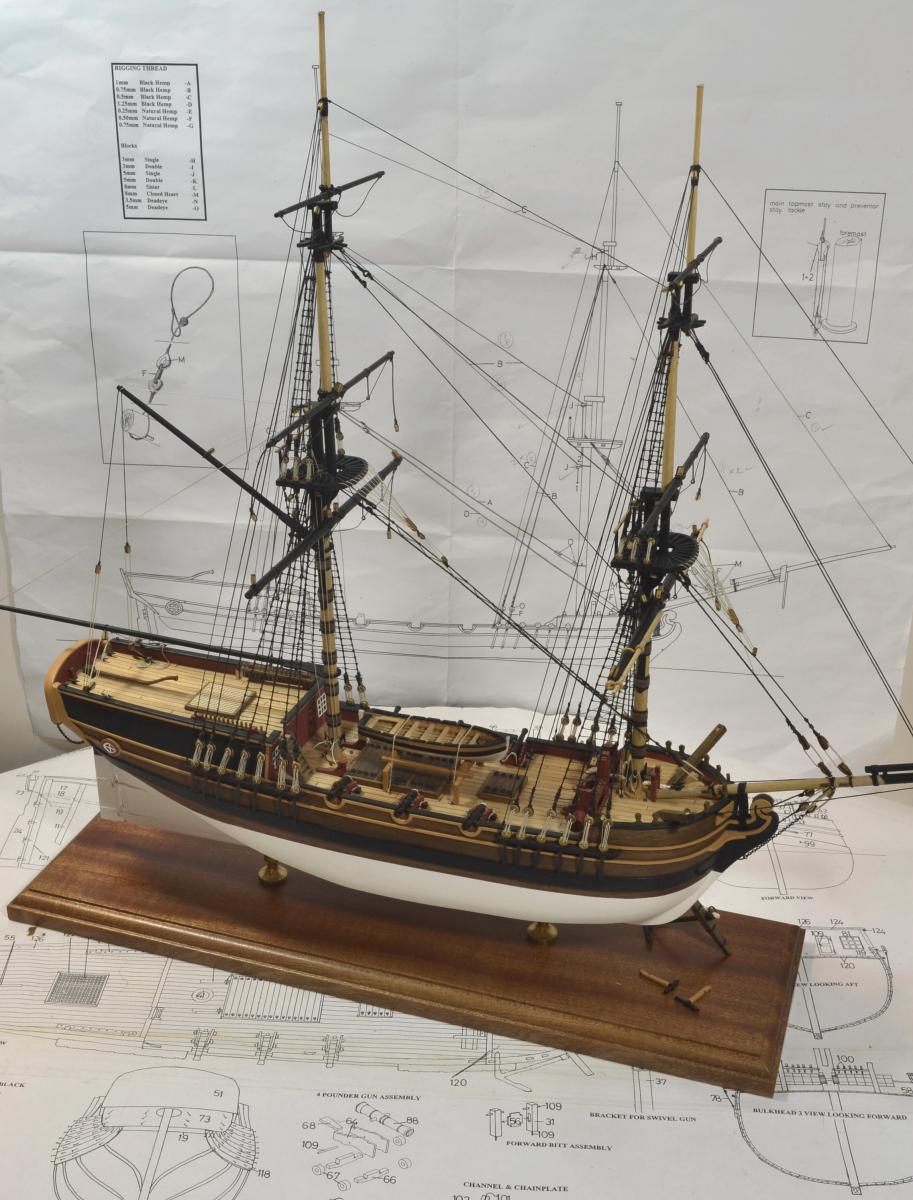
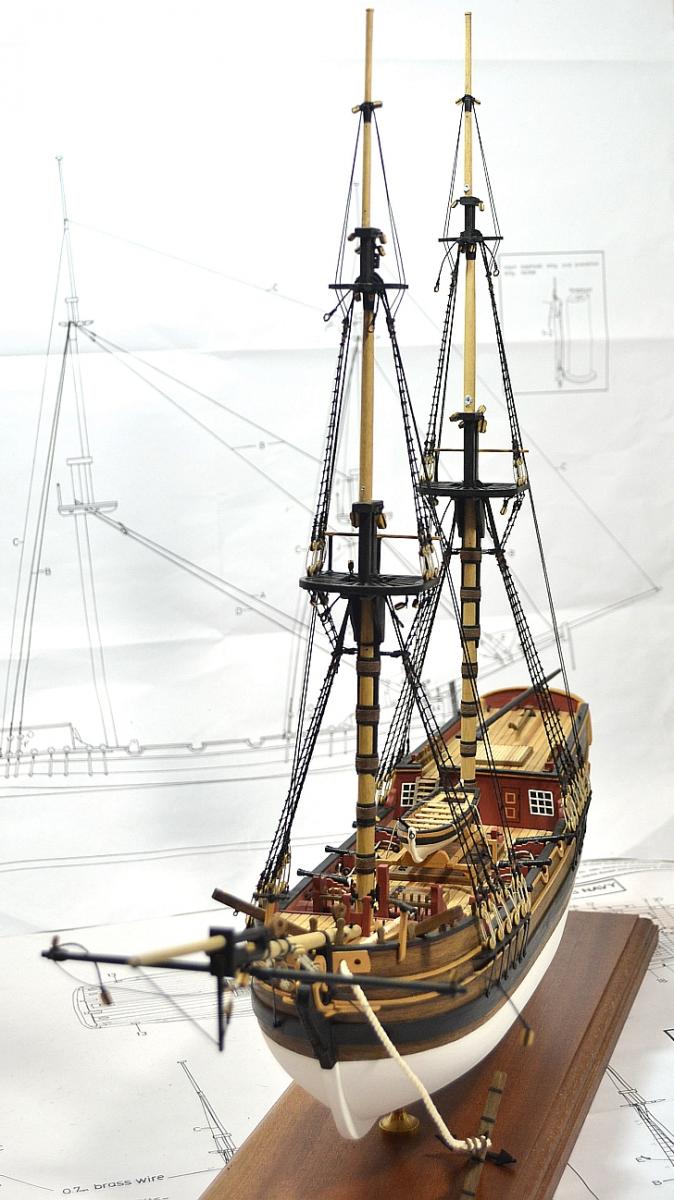
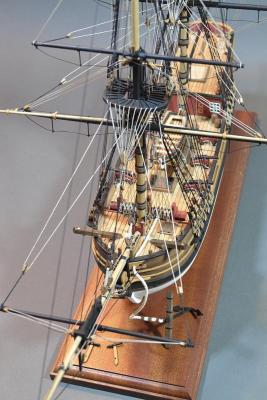
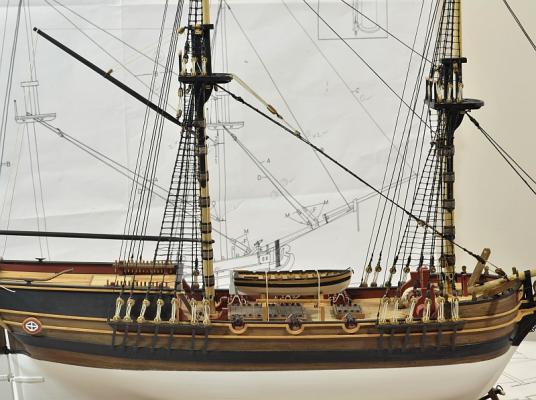
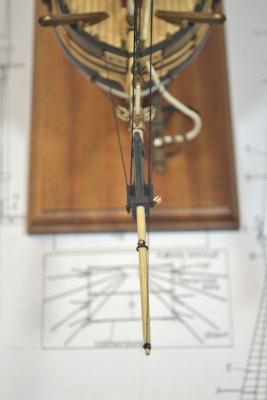
Now finished page 4 out of 6 and started page 5 with the Gaff Boom now attached. Have done Gaff Boom different to plans, thought it was less complicated and was following Petersson's Rigging Period Ships. Also have done Fore topmast stay plus preventer stay whereas kit only has the topmast stay so it required an additional piece on the bowsprit. When checking on Frank's (Riverboat) Supply on his making of the Traveller noticed he had done the same with the stays...... 'Great minds think alike...' or maybe it's the the other bit of the phrase which I can't quite remember...... The kit supplied 1.25 mm thread for the Main Stays I thought looked too thick compared to the 1.0 thread, so used 0.8 (Occre) natural thread dyed with black ink Where thread is tied off to cleats will at a later stage be adding coils. Overall view... Regards Doug
- 92 replies
-
- 8
-
-
- finished
- caldercraft
- (and 1 more)
-
Thanks Frank - will have another search around and look for this 1.25. Have kept all bits and pieces in a box so I will look more carefully. Thank you and glad other than the cold you are good. Regards Doug
- 92 replies
-
- 1
-
-
- finished
- caldercraft
- (and 1 more)
-
Ron - thanks for getting back to me. The last few sheet plans are getting harder ..... Have some good rigging reference books which have helped but not on this occasion Thought when buying the 1.3 thread it would be good but it turned out to be double the thickness to the 1.0 - so don't know what is going on there.... Did you sort another stand for you Supply? Looking forward to your next build. Doug Nils ( Mirabell61) - thanks for looking in and your nice words. Was wondering what are you building ? Just posted this when saw Frank 's reply so edited my reply - Hello Frank - the rope in a separate bag was for the anchor and yes have tried Cornwall and one other but they all deal with the same suppliers. What did you use on your Supply? Anyway how are you - well I hope.... Regards Doug
- 92 replies
-
- 1
-
-
- finished
- caldercraft
- (and 1 more)
-
I seem to have a silly dilemma and was wondering if there is anyone who can help, please. On plan 4 and it shows the Main Stay should be in 1.25 black rigging thread. Caldercraft / JoKita instructions say use 1.25 natural and stain black. Okay - but no 1.25 natural thread was supplied and Caldercraft etc do not do 1.25 natural thread as I can see......Bought 1.3 black but looks far too hefty so should I just use 1.0 black thread although I would like to use something a little heavier. In the meantime am awaiting on some brown 1.2 thread which if it seems okay will dye black. Was just wondering what others have done with the same silly problem. Thank you regards Doug
-
Ron - super job - next will be have to be the 'Victory'. You need to find a stand that compliments the colouring of your ship. Along with Cornwall Model Boats there is Model Dockyard and at times they are a bit cheaper ( also based in Cornwall, England ) You will probably need a glass case to keep the dust off - don't want to be glueing things back after dusting There is only Frank you and me building this ship - having lost the old site (shame) as that was a good source of help as it had some other builders of this ship. Anyway well done - excellent work Regards Doug
- 240 replies
-
- 1
-
-
- supply
- caldercraft
- (and 1 more)
-
Thanks Ron - already had to buy more of everything - especially 0.25 black thread.......and yes constantly glueing things back on or touching up with paint - probably built this boat a couple of times now... Regards Doug
-
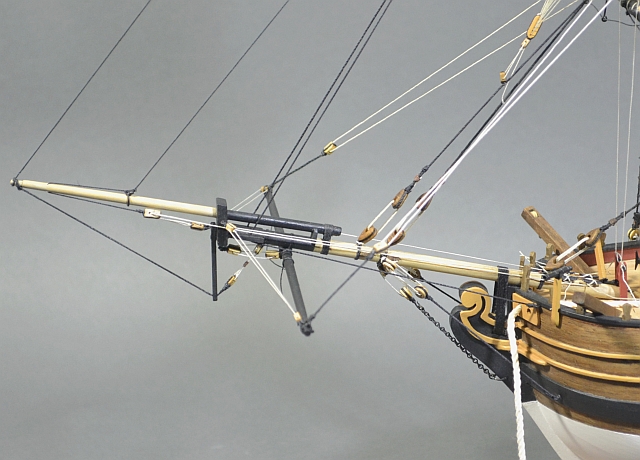
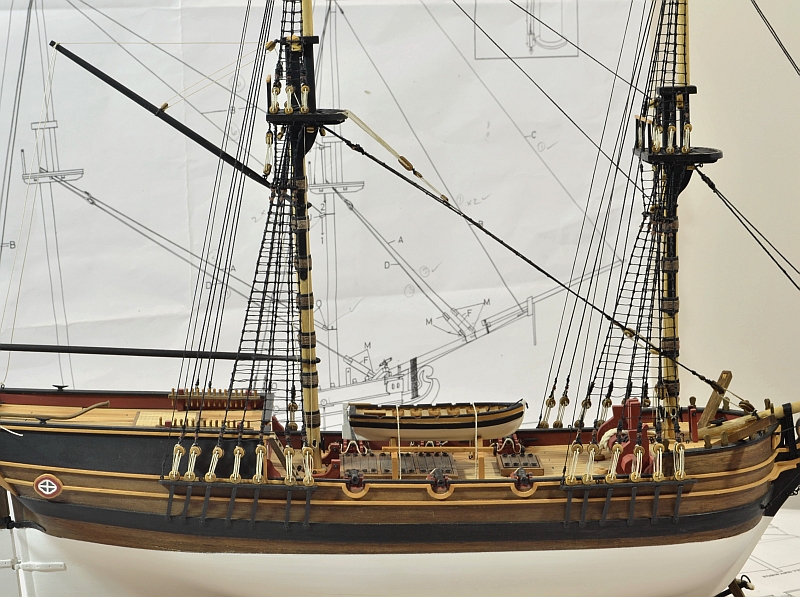
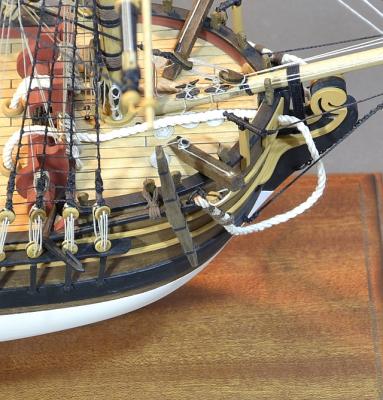
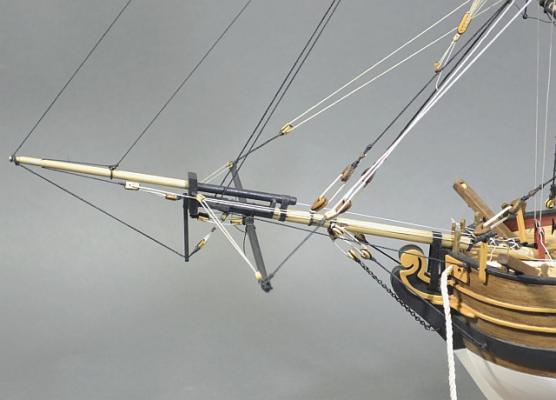
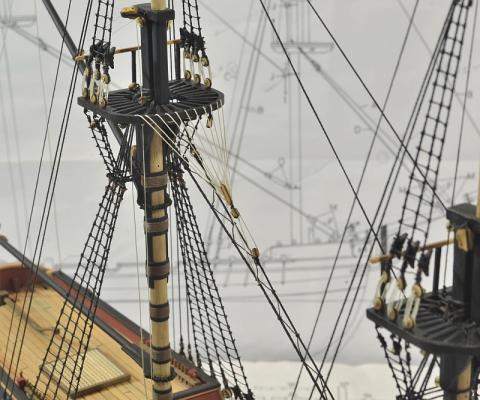
One more step forward - Ratlines complete along with the bowsprit attached - gammoning plus chain instead of thread. Yards temporary attached with a pin - helps to feel how much has been done although all the blocks hanging around it makes it obvious how much more there is to do


- 92 replies
-
- 6
-
-
- finished
- caldercraft
- (and 1 more)